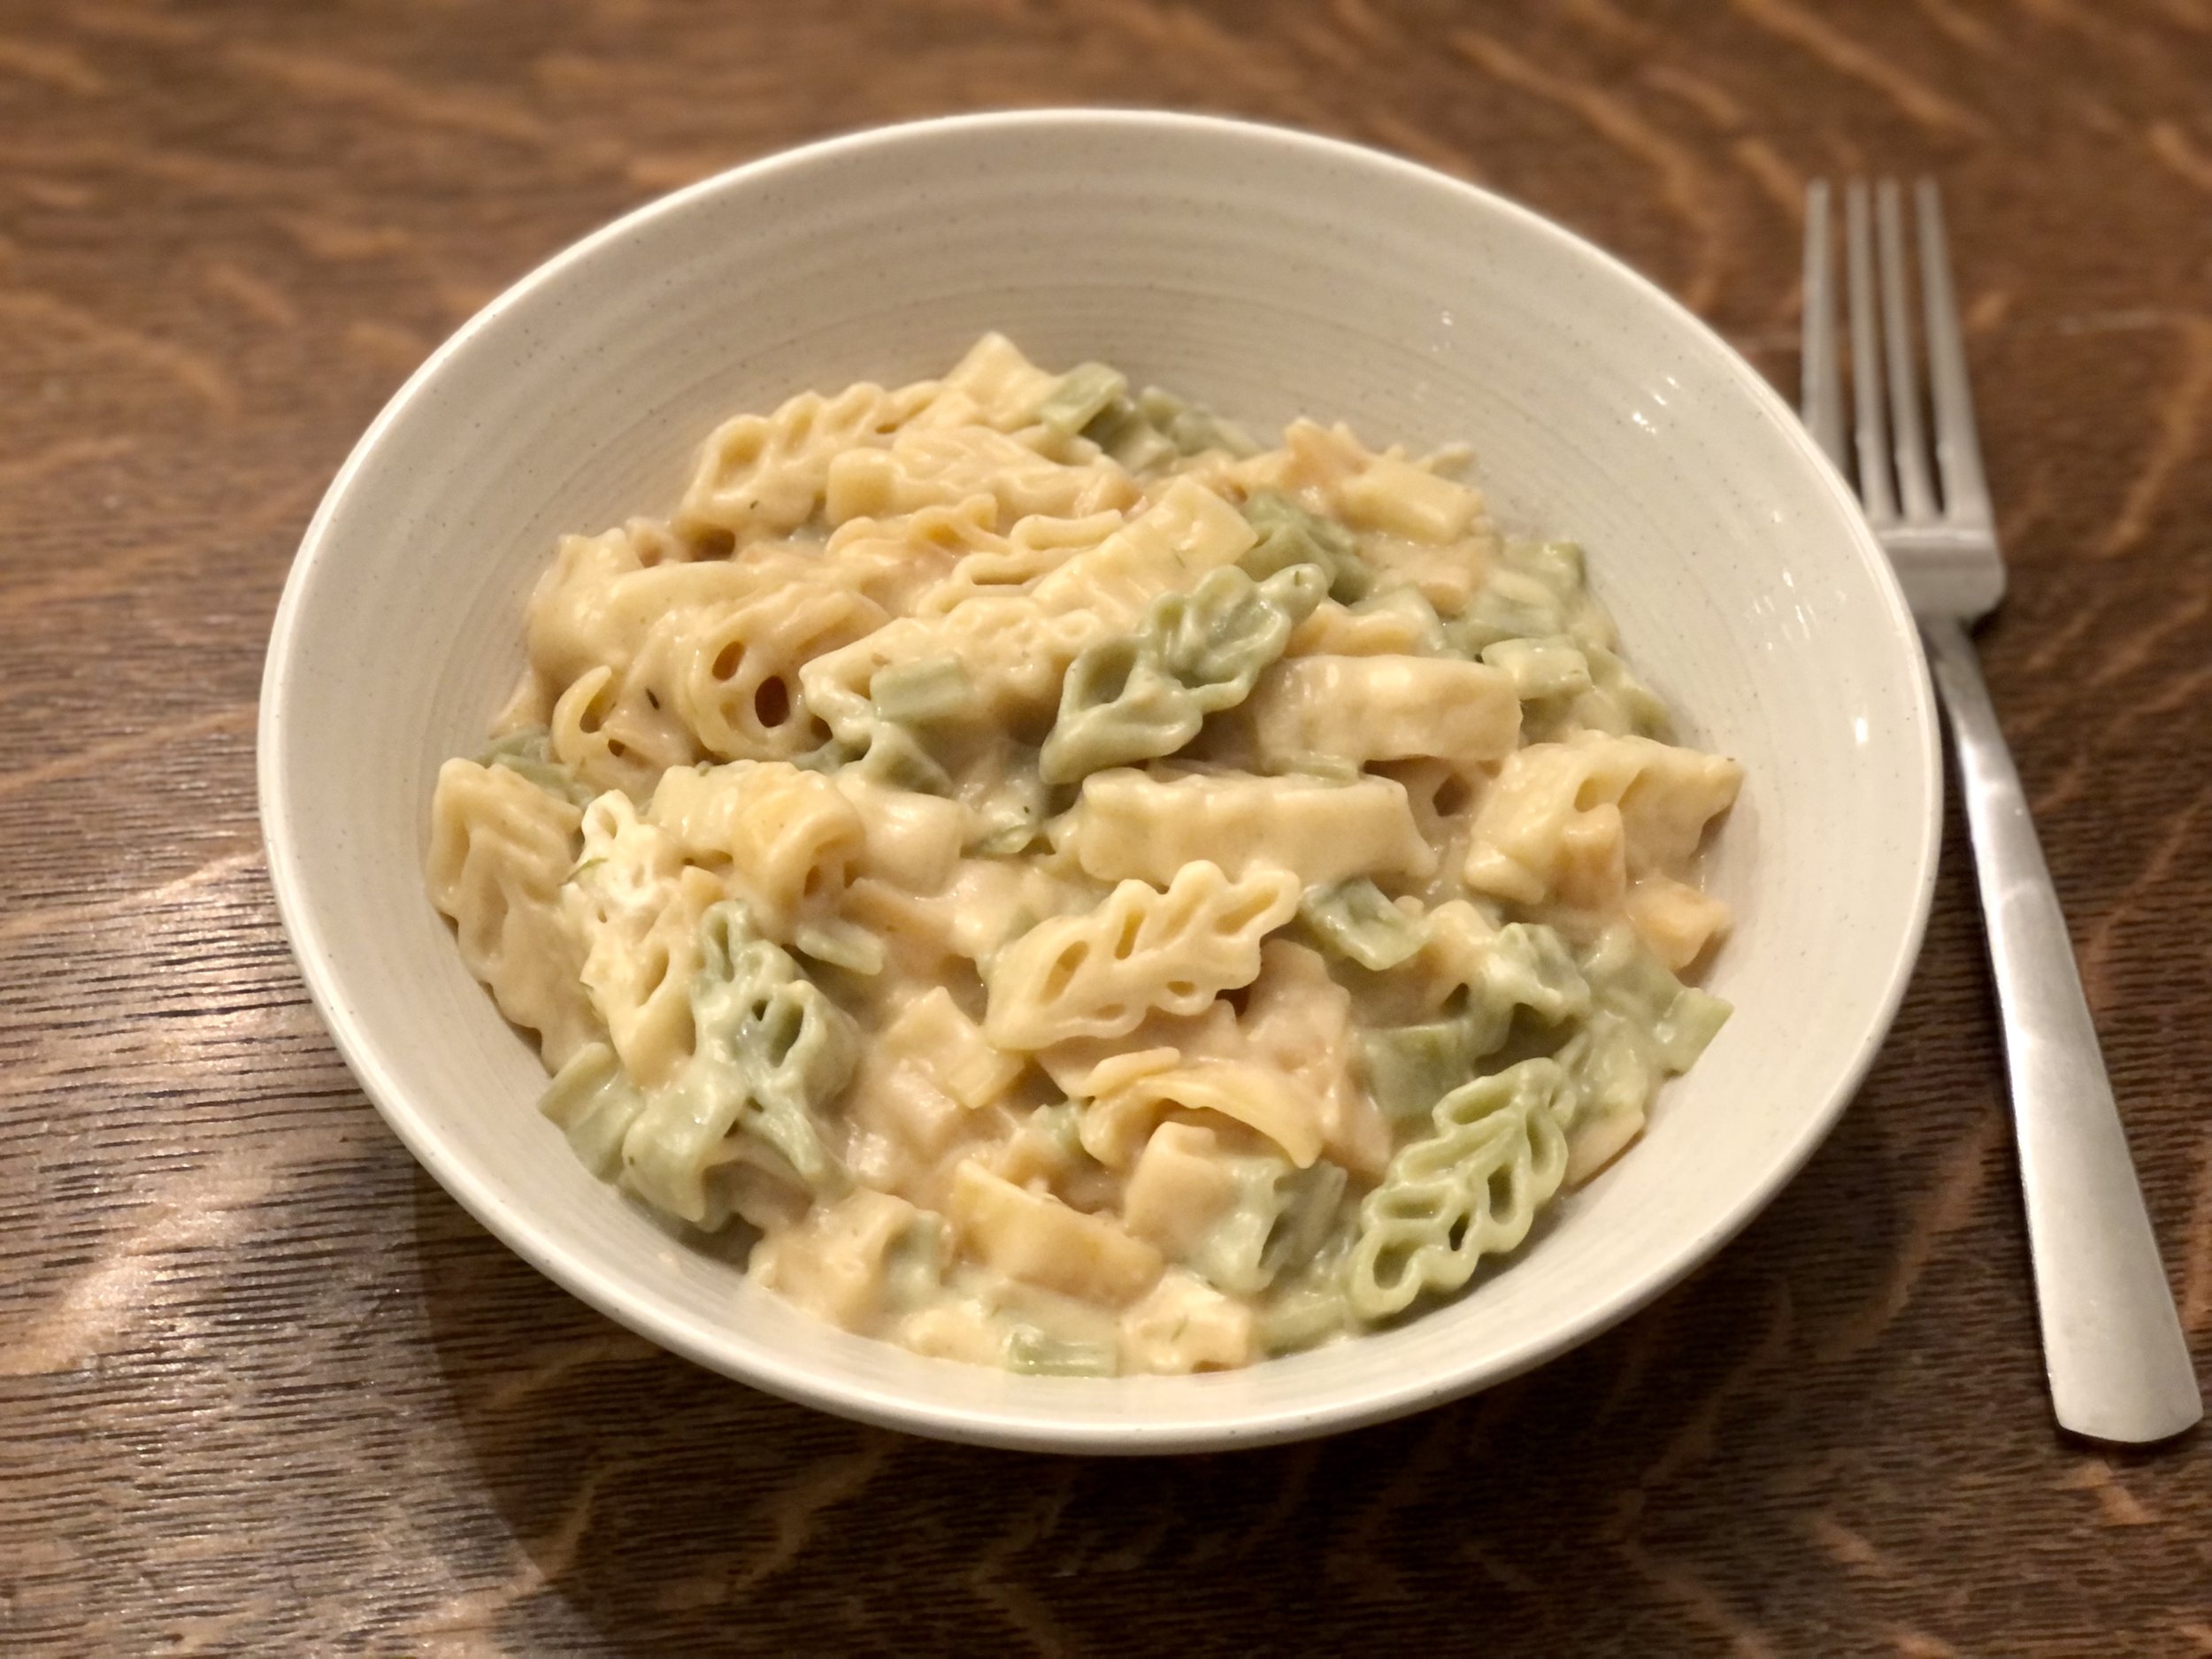
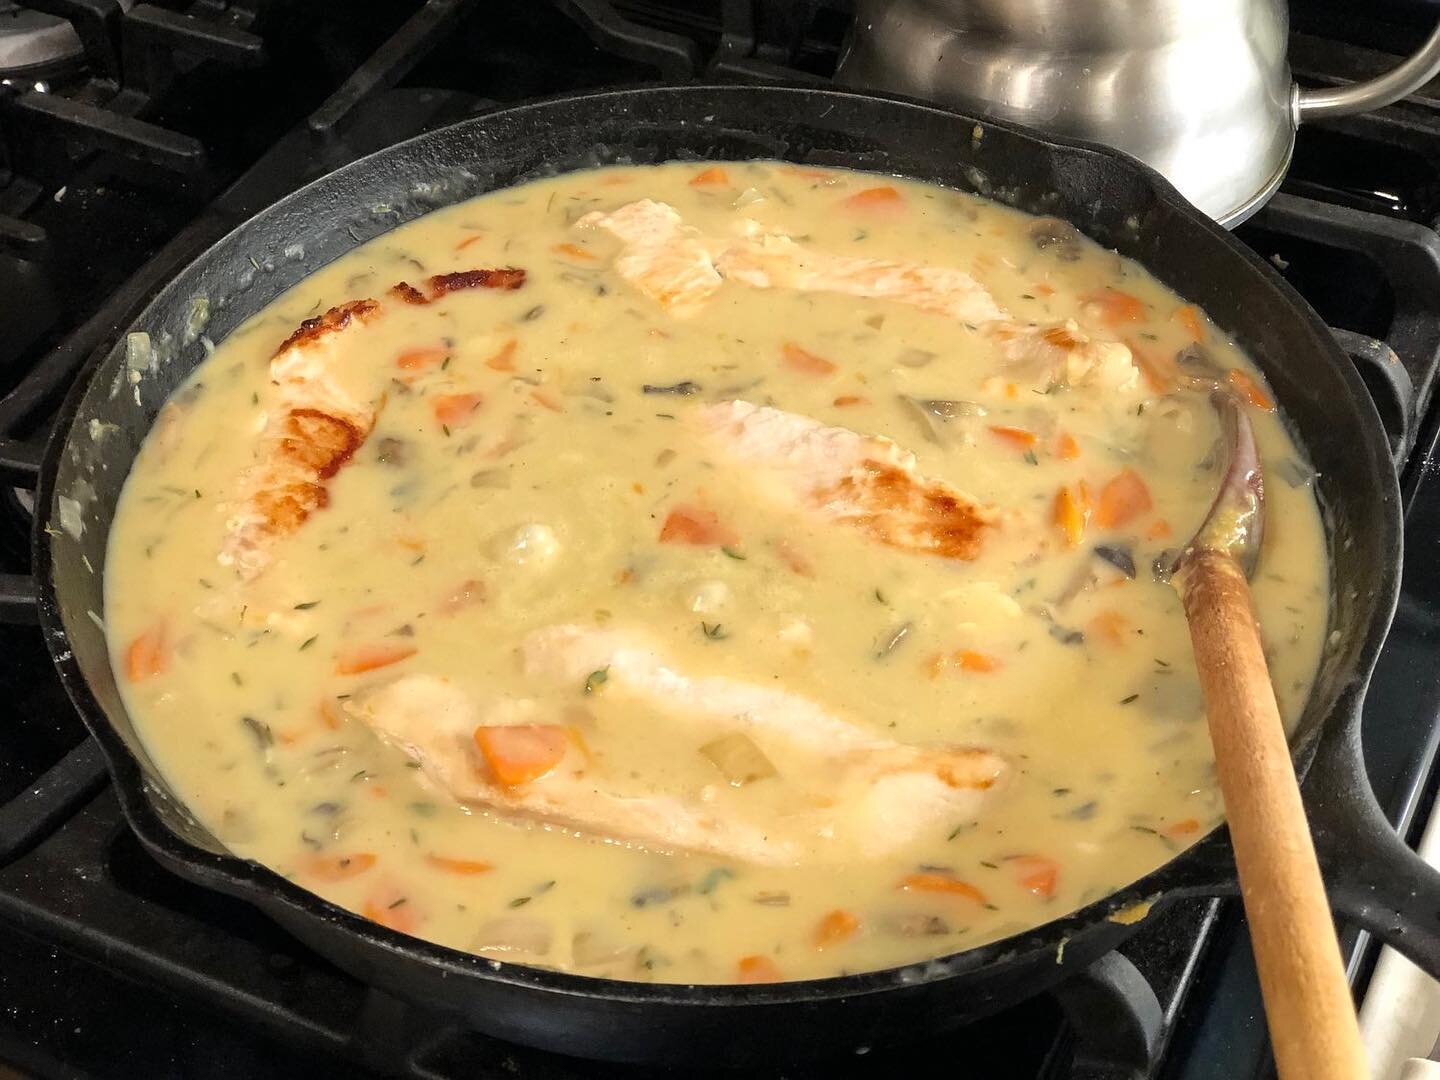
Chicken Fricassée

Chicken fricassée is a French chicken stew, consisting of browned chicken and vegetables in a creamy mushroom sauce.

It starts with a simple pan fry of chicken in a skillet with butter, until they’re nice and brown. The chicken is removed from the pan so you can cook onions, carrots, mushrooms, garlic, and a bit of thyme. Flour, chicken broth, and white wine are added to make a slightly thick, hearty sauce. Finally, cream (or milk if you prefer a lighter or less expensive version) and a splash of lemon juice are added at the end to turn the sauce into a creamy, velvety wonder, perfect for serving over mashed potatoes.

The whole thing can be cooked on the stove or it can also be finished in the oven. It goes a little quicker on the stove, my preferred version. My mom, on the other hand, prefers to finish hers in the oven. She likes the hands-free time while it’s in the oven to clean up the kitchen, which is also useful!

This makes for a convenient rotation to weeknight dinners since most of the ingredients I always have on hand, save for the mushrooms. This can be made without the mushrooms if you so prefer, but honestly it’s one of my favorite parts so I make sure to add mushrooms to my grocery list!

I’m not normally a meat, carrot, and potato kind of girl, but ever since I first made this a few years ago it’s become a part of our regular dinner rotation, it’s so delicious and satisfying.

This post may contain affiliate links. If you make a purchase using these links, Jennyblogs may receive a small commission, at no extra cost to you. This helps to support Jennyblogs. For further information see the privacy policy. Grazie!

Recipe adapted from The Toasty Kitchen


Chicken Fricassée

Serves about 4

Ingredients:

Chicken fricassée over mashed potatoes

  • 2 Tbsp / 28g butter

  • 1 lb / 454g uncooked chicken breasts

  • 2-3 carrots, sliced into half moons

  • 1 onion, diced medium

  • 8 oz / 227g white button mushrooms, sliced

  • 2 cloves garlic, minced

  • 1/2 tsp dried thyme

  • 2 Tbsp / 15g flour

  • 1/2 cup / 119g dry white wine

  • 1 cup / 237g chicken broth

  • 1/2 cup / 119g heavy cream, half & half, or milk

  • 2 Tbsp / 28g fresh lemon juice

  • salt and pepper

Directions:

  1. Take the chicken breasts and lay them on a cutting board. Slice each chicken breast horizontally into two thinner breasts, slicing parallel to the cutting board. It’s like butterflying, but cut all the way through so you have two separate pieces.

  2. Heat the butter in a large pan or cast iron skillet over medium heat. Add all the pieces of chicken, and cook for a few minutes on each side until internal temperature reaches 165° / 74°C. Remove chicken from pan and set aside.

  3. Add carrots and onion to hot pan and cook several minutes, until starting to soften.

  4. Add mushrooms and cook for another few minutes, until mushrooms are cooked and have mostly released their water.

  5. Add garlic and thyme, cook for just another minute.

  6. Add flour and stir to coat all vegetables, cook another minute or so.

  7. Add the white wine to deglaze the pan.

  8. When the wine is almost evaporated, add the chicken broth; stir until sauce is smooth and slightly thickened.

  9. Remove pan from heat and stir in cream and lemon juice; season with salt and pepper to taste.

  10. Add chicken breasts back into sauce; serve. Goes great with mashed potatoes.

Jenny’s Notes:

  • Step 1 could be optional, you can keep your chicken breasts whole if you wish. I like cutting my chicken breasts into thinner pieces before cooking since a whole chicken breast is usually much bigger than a serving, and it takes longer to cook. Our butcher in Italy always cut our chicken breasts like this and I loved it, thinner pieces of meat that are done cooking in a matter of minutes.

  • If you prefer, bone-in chicken (legs, thighs, etc.) can be used. Adjust cooking time accordingly to ensure chicken is cooked through (165°F / 74°C)

  • I have made this before without the wine, and it was still wonderful. So if you don’t have any on hand or just prefer to cook without it, omit the wine with no worries.

  • To finish this dish in the oven, you’ll want to make the whole thing in a pan that is able to go into the oven, such as a cast iron skillet. Follow recipe as written up through step 8. Add chicken back into the pan (without adding cream or lemon juice) and place in an oven preheated to 350°F / 177°C. Bake uncovered for 35-45 minutes, or until sauce is bubbly. Remove from oven and stir in cream and lemon juice.

  • If you choose to finish in the oven, you can focus more on browning the chicken in the pan in step 2 rather than cooking it through, since it will be baked in the oven. Just make sure the chicken is fully cooked before you take it out of the oven at the end!

chicken breasts, chicken stew, french chicken dish, chicken fricassée, carrots, onions, mushrooms, white wine sauce
Dinner
French
Yield: 4
Author:
Chicken Fricassée

Chicken Fricassée

French chicken stew with carrots, onion, and mushrooms in a creamy white wine sauce
Prep time: 15 MinCook time: 35 MinTotal time: 50 Min

Ingredients

Instructions

  1. Take the chicken breasts and lay them on a cutting board. Slice each chicken breast horizontally into two thinner breasts, slicing parallel to the cutting board. It’s like butterflying, but cut all the way through so you have two separate pieces.
  2. Heat the butter in a large pan or cast iron skillet over medium heat. Add all the pieces of chicken, and cook for a few minutes on each side until internal temperature reaches 165° / 74°C. Remove chicken from pan and set aside.
  3. Add carrots and onion to hot pan and cook several minutes, until starting to soften.
  4. Add mushrooms and cook for another few minutes, until mushrooms are cooked and have mostly released their water.
  5. Add garlic and thyme, cook for just another minute.
  6. Add flour and stir to coat all vegetables, cook another minute or so.
  7. Add the white wine to deglaze the pan.
  8. When the wine is almost evaporated, add the chicken broth; stir until sauce is smooth and slightly thickened.
  9. Remove pan from heat and stir in cream and lemon juice; season with salt and pepper to taste.
  10. Add chicken breasts back into sauce; serve. Goes great with mashed potatoes.

Notes

  • Step 1 could be optional, you can keep your chicken breasts whole if you wish. I like cutting my chicken breasts into thinner pieces before cooking since a whole chicken breast is usually much bigger than a serving, and it takes longer to cook. Our butcher in Italy always cut our chicken breasts like this and I loved it, thinner pieces of meat that are done cooking in a matter of minutes.
  • If you prefer, bone-in chicken (legs, thighs, etc.) can be used. Adjust cooking time accordingly to ensure chicken is cooked through (165°F / 74°C)
  • I have made this before without the wine, and it was still wonderful. So if you don’t have any on hand or just prefer to cook without it, omit the wine with no worries.
  • To finish this dish in the oven, you’ll want to make the whole thing in a pan that is able to go into the oven, such as a cast iron skillet. Follow recipe as written up through step 8. Add chicken back into the pan (without adding cream or lemon juice) and place in an oven preheated to 350°F / 177°C. Bake uncovered for 35-45 minutes, or until sauce is bubbly. Remove from oven and stir in cream and lemon juice.
  • If you choose to finish in the oven, you can focus more on browning the chicken in the pan in step 2 rather than cooking it through, since it will be baked in the oven. Just make sure the chicken is fully cooked before you take it out of the oven at the end!


Nutrition Facts

Calories

304.93

Fat

12.69

Sat. Fat

6.48

Carbs

14.38

Fiber

2.31

Net carbs

12.05

Sugar

6.12

Protein

28.4

Sodium

494.26

Cholesterol

99.61

Nutritional Information is approximate. Based on 4 servings, using heavy cream

Did you make this recipe?
Tag @jennyblogsandbakes on instagram and hashtag it # jennyblogs

Lemon Cream Tart

I've been on a French kick recently.  This past Christmas I was gifted "The Art of French Classics" by Jacquy Pfeiffer.  At first glance it seemed detailed, confusing, and lengthy.  Second glance didn't get much better.  This was not the type of book you would use to whip up a batch of cookies or bake a cake for dessert tonight.  No, this book was going to require time, diligence, patience, determination, and careful reading.  

I decided to dissect this book by my favorite method: list making.  Simple and efficient.  I started employing this method when I was 13.  My mom had bought me a cake mix cookbook by Betty Crocker, and I was thrilled to have my own cookbook to go through and cook all on my own.  Most of those recipes I would shudder at now (they're not completely from scratch, haha!!), but I wanted to make everything in there.  Well, almost.  Which is where the list came in.  I wrote down every recipe I wanted to make, referencing the page numbers. When I had made a recipe, I would put a check mark by it.  Much easier to glance at one page (or two or three, there were too many recipes I wanted to make!) than to go through the book every time.  And oh so satisfying to make that little check mark. But, I am a nerd when it comes to baking, so you can take this as more of an anecdote than a recommendation.  :)

After initially being intimidated from reading “The Art of French Pastry” and applying my list method, I realized it wouldn’t be so difficult to make a lot of these recipes, after all. Some recipes, yes, which include making puff pastry, choux pastry, and various pastry creams and caramel all for one magnificent cake, but if French cuisine was easy we would all be making cream puffs, croissants, and eclairs everyday now, wouldn’t we? But to my pleasant surprise many of the recipes were quite manageable. This book helps you master some basic techniques that then become easier because you use them often for many of the recipes.

One of the simpler, but nonetheless delicious recipes from the cookbook is this Lemon Cream Tart.  Everyone should have a good lemon tart in their repertoire.  Someone once asked me, after learning I liked to bake, if I could make a good lemon tart.  I had made good lemon tarts before, but sometimes I lack confidence that even if I like something, will it live up to other people's tastes buds?  Until I find the recipe, that is.  Then I know the search is over, although I will always be open to trying new things.  I hung on to my current lemon tart recipe, but I felt like I could do better.  A recipe that would be reliable, and deliver that over-the-top creamy, lemony zing.  I think I found it in this recipe, oh yes.  

You’ll notice in my photos that the lemon tart is decorated with meringues and candied orange peels. The recipe does not include those because I feel that for the time spent making them, they don’t add significantly to the eating experience and are more for the wow factor. Don’t get me wrong, they’re yummy, but meringues do require a certain technique (mine unfortunately cracked a bit) and candying orange peel requires 10 days. So. I more than encourage you to get the book and try out those recipes yourselves, and especially the others, like the croissants, palmiers (my absolute favorite recipe from the cookbook), the brioche variations, eclairs, and I could keep going! Or, if all this seems a bit ambitious to you, gift the book to your favorite baking enthusiast and have them make them for you. :)

This post may contain affiliate links. If you buy something using these links, Jennyblogs may receive a small commission, at no extra cost to you. This helps to support Jennyblogs. For further information see the privacy policy. Grazie!

Recipe adapted from “The Art of French Pastry” by Jacquy Pfeiffer.


*Note:  Make the pâte sablée at least one day ahead as it needs to rest overnight in the refrigerator; two nights is ideal.    

Lemon Cream Tart

Serves 8-12

Ingredients:

For the Pâte Sablée

  • 6 Tbsp / 97g butter

  • 1/4 tsp / 1g salt

  • 1 cup + 1 Tbsp / 145g all-purpose flour

  • 3 Tbsp / 18g almond flour

  • 1/2 cup / 55g powdered sugar

  • 1/4 tsp / 1g vanilla extract

  • 2 egg yolks

For the Lemon Cream

  • 1 cup / 200g sugar

  • 5/8 cup / 140g lemon juice

  • pinch of salt

  • 3 eggs + 1 yolk

  • zest of half a lemon

  • 14 Tbsp / 192g butter, softened and cut into cubes

  • candied lemon peel, toasted nuts, or meringues for decoration, optional

Directions:

Make the Pâte Sablée (2-3 Days Ahead of time)

  1. In the bowl of a stand mixer, add butter, sea salt, and all-purpose flour.  Mix on low until just crumbly.  Over-mixing will active gluten in flour and make for a tougher crust.  Add almond flour and powdered sugar, mixing until just combined.  Add vanilla and egg yolks on medium speed until just combined.  

  2. Scrape dough out onto a sheet of plastic wrap.  Press into a 1/2 inch rectangle and wrap airtight in the plastic.  Refrigerate overnight.  

The next day:

  1. Very lightly grease a tart pan with softened butter, just enough to keep it from sticking.  You should barely see the butter on the pan.  If it is over-greased the dough may slip down the side as it is baking.  

  2. Remove the dough from the fridge, unwrap from the plastic, and place on a lightly floured surface.  For easier transportation, you can roll it out on a floured silpat or piece of parchment paper.  

  3. Tap the dough with a rolling pin to make sure it's pliable.  If at any point the dough seems too stiff or cold, or cracks as you roll it out, let it rest at room temperature for a few minutes before continuing.  Roll the dough 3 times in one direction, then make a quarter turn. Periodically check to make sure your dough isn't sticking to the surface.  If it is, use a thin spatula to peel it off and re-flour the surface underneath.  Repeat rolling 3 times and making quarter turns until you have an evenly rolled out, 1/4" thick round of dough.

  4. At this point your dough should be larger than your tart pan.  Carefully transfer the dough to the pan.  You can do this by gently wrapping the dough around the rolling pin, then unrolling it over the pan.  Press the dough into the pan, paying careful attention to the corners and being careful not to stretch or tear the dough to do so.  Use a knife to trim away any extra dough.  Refrigerate the tart shell uncovered for at least one hour, or preferably overnight.  

An hour later or the next day:

  1. Preheat oven to 325°F / 160°C.  

  2. Remove the crust from the fridge and dock the bottom with a fork.  (Poke holes in it.)  This will allow steam to escape evenly during baking.  

  3. Line the shell with parchment paper or cheesecloth and pie weights, dry beans, or rice.

  4. Bake for 15 minutes, then remove the parchment paper and pie weights.  Bake for an additional 5-15 minutes, or until the crust begins to evenly color and turn golden.  Allow to cool.

Make the Lemon Cream

  1. In a small bowl, combine half of the sugar, lemon juice, and salt; whisk until sugar and salt have dissolved.  

  2. In a medium bowl, combine the remaining half of sugar with egg yolks and whisk for 30 seconds.  Whisk the first lemon juice mixture into this mixture and add the zest.  

  3. Create a water bath by simmering 1 inch of water in a medium saucepan over low heat.  Place the lemon mixture over the saucepan, making sure the bottom of the bowl isn't touching the water; whisk constantly so the eggs don't scramble.  Attach a digital thermometer to the bowl and continue to whisk until mixture reaches 176-179.6°F / 80-82°C.  

  4. Remove from the heat and strain into a bowl through a fine-meshed sieve.  Use a spatula to push mixture through the strainer, if necessary.  Transfer thermometer to the new bowl.  Allow mixture to cool to 140°F / 60°C, about 5 minutes.  

  5. At this point pour the mixture into a blender, or leave in the bowl if using an immersion blender.  Add half of the butter and blend, then add second half of the butter and blend for an additional 30 seconds or so, until mixture is completely smooth.  

  6. Pour the lemon cream into the baked crust and allow to set for at least 2 hours in the refrigerator.  Decorate as desired, dust with powdered sugar, or leave as is. 

Buon Appetit!

Jenny's Notes:

  • Although this recipe may seem lengthy and entailed, it's quite simple, especially if you separate it into a "crust" day and a "filling" day.  

  • The unbaked pâte sablée will keep well covered in the fridge for up to a week, or a month in the freezer.  

Jacquy Pfeiffer, The Art of French Pastry, French classics, lemon tart, Pâte Sablée, butter crust, French tart, French lemon
dessert, pie
French
Yield: 8-12
Author: Jennyblogs
Print
Lemon Cream Tart

Lemon Cream Tart

Lemony, creamy, zingy tart with a perfect butter tart crust from Jacquy Pfeiffer's "The Art of French Pastry."
Prep time: 1 H & 10 MCook time: 30 Mininactive time: 15 HourTotal time: 16 H & 40 M

Ingredients

For the Pâte Sablée
  • 6 Tbsp / 97g butter
  • 1/4 tsp / 1g salt
  • 1 cup + 1 Tbsp / 145g all-purpose flour
  • 3 Tbsp / 18g almond flour
  • 1/2 cup / 55g powdered sugar
  • 1/4 tsp / 1g vanilla extract
  • 2 egg yolks
For the Lemon Cream
  • 1 cup / 200g sugar
  • 5/8 cup / 140g lemon juice
  • pinch of salt
  • 3 eggs + 1 yolk
  • zest of half a lemon
  • 14 Tbsp / 192g butter, softened and cut into cubes
  • candied lemon peel, toasted nuts, or meringues for decoration, optional

Instructions

Make the Pâte Sablée (2-3 Days Ahead of time)
  1. In the bowl of a stand mixer, add butter, sea salt, and all-purpose flour. Mix on low until just crumbly. Over-mixing will active gluten in flour and make for a tougher crust. Add almond flour and powdered sugar, mixing until just combined. Add vanilla and egg yolks on medium speed until just combined.
  2. Scrape dough out onto a sheet of plastic wrap. Press into a 1/2 inch rectangle and wrap airtight in the plastic. Refrigerate overnight.
The next day:
  1. Very lightly grease a tart pan with softened butter, just enough to keep it from sticking. You should barely see the butter on the pan. If it is over-greased the dough may slip down the side as it is baking.
  2. Remove the dough from the fridge, unwrap from the plastic, and place on a lightly floured surface. For easier transportation, you can roll it out on a floured silpat or piece of parchment paper.
  3. Tap the dough with a rolling pin to make sure it's pliable. If at any point the dough seems too stiff or cold, or cracks as you roll it out, let it rest at room temperature for a few minutes before continuing. Roll the dough 3 times in one direction, then make a quarter turn. Periodically check to make sure your dough isn't sticking to the surface. If it is, use a thin spatula to peel it off and re-flour the surface underneath. Repeat rolling 3 times and making quarter turns until you have an evenly rolled out, 1/4" thick round of dough.
  4. At this point your dough should be larger than your tart pan. Carefully transfer the dough to the pan. You can do this by gently wrapping the dough around the rolling pin, then unrolling it over the pan. Press the dough into the pan, paying careful attention to the corners and being careful not to stretch or tear the dough to do so. Use a knife to trim away any extra dough. Refrigerate the tart shell uncovered for at least one hour, or preferably overnight.
An hour later or the next day:
  1. Preheat oven to 325°F / 160°C.
  2. Remove the crust from the fridge and dock the bottom with a fork. (Poke holes in it.) This will allow steam to escape evenly during baking.
  3. Line the shell with parchment paper or cheesecloth and pie weights, dry beans, or rice.
  4. Bake for 15 minutes, then remove the parchment paper and pie weights. Bake for an additional 5-15 minutes, or until the crust begins to evenly color and turn golden. Allow to cool.
Make the Lemon Cream
  1. In a small bowl, combine half of the sugar, lemon juice, and salt; whisk until sugar and salt have dissolved.
  2. In a medium bowl, combine the remaining half of sugar with egg yolks and whisk for 30 seconds. Whisk the first lemon juice mixture into this mixture and add the zest.
  3. Create a water bath by simmering 1 inch of water in a medium saucepan over low heat. Place the lemon mixture over the saucepan, making sure the bottom of the bowl isn't touching the water; whisk constantly so the eggs don't scramble. Attach a digital thermometer to the bowl and continue to whisk until mixture reaches 176-179.6°F / 80-82°C.
  4. Remove from the heat and strain into a bowl through a fine-meshed sieve. Use a spatula to push mixture through the strainer, if necessary. Transfer thermometer to the new bowl. Allow mixture to cool to 140°F / 60°C, about 5 minutes.
  5. At this point pour the mixture into a blender, or leave in the bowl if using an immersion blender. Add half of the butter and blend, then add second half of the butter and blend for an additional 30 seconds or so, until mixture is completely smooth.
  6. Pour the lemon cream into the baked crust and allow to set for at least 2 hours in the refrigerator. Decorate as desired, dust with powdered sugar, or leave as is.

Notes:

Although this recipe may seem lengthy and entailed, it's quite simple, especially if you separate it into a "crust" day and a "filling" day. The unbaked pâte sablée will keep well covered in the fridge for up to a week, or a month in the freezer.

Calories

511.91

Fat (grams)

34.15

Sat. Fat (grams)

19.79

Carbs (grams)

47.48

Fiber (grams)

0.89

Net carbs

46.58

Sugar (grams)

32.22

Protein (grams)

6.01

Sodium (milligrams)

331.90

Cholesterol (grams)

211.17
Nutritional information is approximate. Based on 8 servings and does not include toppings.
Did you make this recipe?
Tag @jennyblogsandbakes on instagram and hashtag it #jennyblogs
Created using The Recipes Generator
IMG_4714.jpg

Tourte Milanese

Tourte Milanese, also known as Tourte Milanaise.  No, the second version does not include mayonnaise.  Part of the family en croute, or encased in dough.  Who doesn't want to eat food, soup, and anything edible wrapped in flaky, buttery dough? In this case, roasted peppers, herbed scrambled eggs, cheese, spinach, and meat.

The green from the spinach, the white (ish) from the eggs, and the red from the roasted peppers is supposed to be an ode to the Italian flag. You can use whichever kind of sweet peppers you like, and as you can see from my photos, I used multi-colored peppers that time!

This tourte is a showstopper piece for sure. You will feel quite accomplished pulling this out of the oven, and taking your first bite into the explosion of hot, flaky layers, melty cheese, herbs, sweet peppers, smoky meat, and garlicky spinach. It may look intimidating, but you can adjust this recipe to how much time and effort you want to put into it. For example, you can make your own puff pastry, or you can pick it up at the store. You could roast your own peppers, or buy a jar of already roasted peppers. I enjoy making everything as home-made and from scratch as possible, but sometimes life just doesn’t allow that. 

I recommend reading through the recipe once or twice and taking a peek at my notes at the bottom to make your game plan.  For example, if you’re making your own puff pastry, that in and of itself can easily be a two day recipe, so you'll want to make that a day ahead, or way ahead, and freeze it until you have the urge to make a recipe like this.  

Want some inspiration?  Watch this fun video of Julia Child and Michel Richard making Puff Pastry and Tourte Milanese!

This post may contain affiliate links. If you buy something using these links, Jennyblogs may receive a small commission, at no extra cost to you. This helps to support Jennyblogs. For further information see the privacy policy. Grazie!


Tourte Milanese

Serves 8-12

Ingredients:

For the Crust

  • 1 lb. / 450g puff pastry, home-made or store bought

  • Egg wash made from 1 egg beaten with 1 Tbsp water

For the Eggs

  • 10 eggs

  • 1 Tbsp chopped fresh chives or green onion

  • 1 Tbsp chopped fresh parsley or basil

  • 2 tsp snipped fresh tarragon or fresh oregano

  • salt and ground pepper, to taste

  • 3 Tbsp / 42g butter

For the Rest of the Filling

  • 6 large red bell peppers (or use a 16oz jar or two of roasted red peppers)

  • 1 1/2 lbs / 680g spinach

  • 1 Tbsp / 14g olive oil

  • 1 Tbsp / 14g butter

  • 2 garlic cloves, peeled and minced

  • salt and pepper, to taste

  • 1/4 tsp grated nutmeg

  • 8 oz / 225g Swiss cheese

  • 8 oz / 225g smoked turkey or ham

  • about 1/2 cup each of bread crumbs and shredded parmesan cheese, optional

Directions:

Generously grease an 8in / 20cm springform pan.  

Make the Crust

  1. Cut off 1/4 of the puff pastry, cover, and set aside.

  2. Roll out the remaining pastry to roughly 1/8'‘. If working with store-bought, you may have two squares that you will have to press together at the edges as close to a square as you can for rolling out. Be sure to roll it thin enough so it will have a chance to be baked all the way through in the oven.  It should be big enough to cover the bottom and sides of your springform pan with an overhang.  Carefully press into pan, being sure to press all the way into the corners.  Cover and refrigerate.

  3. Roll out the remaining 1/4 of puff pastry until it is roughly 1/8" thick. Again, you may have to cut and press together to get as close to a square as you can before rolling out. Cut out an 8 in / 20cm circle, using an 8 in / 20cm pie plate or cake tin as a template.  Place on a plate or baking sheet, cover, and refrigerate.  

Make the Eggs

  1. Whisk eggs, herbs, salt and pepper together.  Melt butter in a skillet over low heat and pour in eggs.  Gently stir, continuously moving the setting eggs towards the center and allowing runny eggs to reach the bottom of the pan.  When the whole mixture has started to thicken, but still a bit runny, remove from heat and pour onto a plate. Cover and refrigerate and until ready to use.  

Roast the Peppers

Skip this step if you bought roasted red peppers.  

Method 1: Place peppers over an open flame on your stove top until blackened.  Flip and allow second side to roast.  Repeat until all peppers have been roasted.  

Method 2: Place all peppers onto a tinfoil lined sheet pan.  Place under broiler in your oven, checking every few minutes, until peppers are blackened.  Turn peppers over and roast second side.  

Once peppers have been roasted, place in an airtight container or ziploc bag for about 20 minutes.

Remove peppers and rub the skin off.  Cut out the stems and slice from top to bottom, laying them flat.  Remove seeds and trim away any inside veins.  

Place peppers on a plate lined with paper towels to absorb any excess liquid, cover, and refrigerate.

Blanch and Sauté the Spinach

  1. Bring a large amount of salted water to a boil.  Add spinach and blanch for 1 minute.  Drain in a colander and rinse in cold water to stop it from cooking.  Press the spinach to remove excess liquid.  

  2. Place oil, butter, and garlic in a large frying pan over medium heat.  When garlic starts to sizzle, add blanched spinach and sauté for 3 minutes.  Season with salt, pepper, and nutmeg.  Remove from heat and transfer spinach to a plate lined with paper towels.  Cover and refrigerate until needed.  

Assemble the Tourte

Preheat oven to 350°F / 177°C.  

Remove the pastry lined pan from the fridge, along with your eggs, peppers, spinach, cheese, and turkey/ham.  Layer your ingredients in this order, laying them flat and spreading to the edge:

  1. Bread crumbs and grated parmesan, optional

  2. Half of eggs

  3. Half of spinach

  4. Half of turkey/ham

  5. Half of cheese

  6. All the peppers

  7. Other half of cheese

  8. Other half of turkey/ham

  9. Other half of spinach

  10. Other half of eggs

Trim the pastry overhang to within 1 in / 2.5cm of the pan. Brush the inner side of with egg wash and fold over filling. Brush the other side with more egg wash. 

Remove the round pastry top from fridge, re-rolling if it has shrunk any. Place over the folded edges of the tourte, pressing down to seal. Brush with more egg wash. Cut a vent in the center of the dough, or use a knife to trace a design. Or, you can cut out shapes from the puff pastry scraps to decorate the top. Brush shapes with more egg wash.

Optional: Chill assembled tourte in fridge for 30 minutes or more prior to baking. It will require more baking time if chilled.

Place tourte on a tinfoil lined baking sheet and bake for 1 hour 10 minutes - 1 hour 30 minutes, or until pastry is puffed and a deep golden brown.  

Cool for 30 minutes before releasing from pan and serving.

To reheat leftovers, place in an oven preheated to 350°F / 177°C for 20-30 minutes. 

Jenny's Notes:

The recipe above is pretty traditional, however, it can easily be adjusted to your tastes.  

No soggy bottoms here!

No soggy bottoms here!

  • Can be assembled a day ahead.  

  • Store-bought puff pastry is usually pre-rolled quite thin, so as you roll it out it will get even thinner. When I made my own, and as you can see in the video of Julia Child and Michel Richard, homemade is more delicate to roll out and won’t get as thin, more like 1/4”.

  • Before layering in the filling, I suggest sprinkling the bottom with a grated hard cheese, such as parmesan, or bread crumbs, to avoid the soggy-bottom syndrome. I did a combo of cheese and bread crumbs.

  • For the herbed scrambled eggs, chives, parsley, and tarragon combo is more traditional, but I prefer green onion, basil, and oregano.

  • Feel free to use whichever color peppers you like! I roasted multi-colored mini sweet peppers in these photos.

  • Instead of using paper towels to absorb extra liquid from the spinach and peppers, you can also place them in a strainer over a bowl.

  • 1 1/2 lbs of spinach may seem outrageous, but it really cooks down. I have used a scant pound before when that’s all I had, but the spinach is surprisingly delicious and I wouldn’t modify the recipe down if I had a choice.

  • Play around with cheeses! You'll want softer cheeses, ones that melt well. Think cheddar, gruyère, havarti, gouda, brie...I enjoy half Swiss and half dill havarti, or another favorite is smoked gruyère.

  • When I made homemade puff pastry, this tourte required the longer bake time. With store-bought pastry it often only requires the lower end of the baking time. But again, this will also vary depending on your oven.

Tourte Milanese, Julia Child, Michel Richard, spinach, roasted red peppers, en croute, scrambled eggs, cheese, puff pastry,turkey, Italian flag
breakfast, dinner
Italian, French
Yield: 8-12 Servings
Author:
Tourte Milanese

Tourte Milanese

Layers of turkey, cheese, spinach, roasted red peppers, and eggs encased in flaky puff pastry.
Prep time: 1 H & 30 MCook time: 1 H & 30 MInactive time: 30 MinTotal time: 3 H & 30 M

Ingredients

For the Crust
For the Eggs
For the Rest of the Filling

Instructions

Make the Crust
  1. Generously grease an 8in / 20cm springform pan.
  2. Cut off 1/4 of the puff pastry, cover, and set aside.
  3. Roll out the remaining pastry to roughly 1/8'‘. If working with store-bought, you may have two squares that you will have to press together at the edges as close to a square as you can for rolling out. Be sure to roll it thin enough so it will have a chance to be baked all the way through in the oven. It should be big enough to cover the bottom and sides of your springform pan with an overhang. Carefully press into pan, being sure to press all the way into the corners. Cover and refrigerate.
  4. Roll out the remaining 1/4 of puff pastry until it is roughly 1/8" thick. Again, you may have to cut and press together to get as close to a square as you can before rolling out. Cut out an 8 in / 20cm circle, using an 8 in / 20cm pie plate or cake tin as a template. Place on a plate or baking sheet, cover, and refrigerate.
Make the Eggs
  1. Whisk eggs, herbs, salt and pepper together. Melt butter in a skillet over low heat and pour in eggs. Gently stir, continuously moving the setting eggs towards the center and allowing runny eggs to reach the bottom of the pan. When the whole mixture has started to thicken, but still a bit runny, remove from heat and pour onto a plate. Cover and refrigerate and until ready to use.
Roast the Peppers
  1. Skip this step if you bought roasted red peppers.
  2. Method 1: Place peppers over an open flame on your stove top until blackened. Flip and allow second side to roast. Repeat until all peppers have been roasted.
  3. Method 2: Place all peppers onto a tinfoil lined sheet pan. Place under broiler in your oven, checking every few minutes, until peppers are blackened. Turn peppers over and roast second side.
  4. Once peppers have been roasted, place in an airtight container or ziploc bag for about 20 minutes to steam.
  5. Remove peppers and rub the skin off. Cut out the stems and slice from top to bottom, laying them flat. Remove seeds and trim away any inside veins.
  6. Place peppers on a plate lined with paper towels to absorb any excess liquid, cover, and refrigerate.
Blanch and Sauté the Spinach
  1. Bring a large amount of salted water to a boil. Add spinach and blanch for 1 minute. Drain in a colander and rinse in cold water to stop it from cooking. Press the spinach to remove excess liquid.
  2. Place oil, butter, and garlic in a large frying pan over medium heat. When garlic starts to sizzle, add blanched spinach and sauté for 3 minutes. Season with salt, pepper, and nutmeg. Remove from heat and transfer spinach to a plate lined with paper towels. Cover and refrigerate until needed.
Assemble the Tourte
  1. Preheat oven to 350°F / 177°C.
  2. Remove the pastry lined pan from the fridge, along with your eggs, peppers, spinach, cheese, and turkey/ham. Layer your ingredients in this order, laying them flat and spreading to the edge:
  3. Bread crumbs and grated parmesan, optional
  4. Half of eggs
  5. Half of spinach
  6. Half of turkey/ham
  7. Half of cheese
  8. All the peppers
  9. Other half of cheese
  10. Other half of turkey/ham
  11. Other half of spinach
  12. Other half of eggs
  13. Trim the pastry overhang to within 1 in / 2.5cm of the pan. Brush the inner side with egg wash and fold over filling. Brush the other side with more egg wash.
  14. Remove the round pastry top from fridge, re-rolling if it has shrunk any. Place over the folded edges of the tourte, pressing down to seal it. Brush with more egg wash. Cut a vent in the center of the dough, or use a knife to trace a design. Or, you can cut out shapes form the puff pastry scraps and decorate the top. Brush shapes with more egg wash.
  15. Optional: Chill assembled tourte in fridge for 30 minutes or more prior to baking. It will require more baking time if chilled.
  16. Place tourte on a tinfoil lined baking sheet and bake for 1 hour 10 minutes - 1 hour 30 minutes, or until pastry is puffed and a deep golden brown.
  17. Cool for 30 minutes before releasing from pan and serving.
  18. Can be assembled a day ahead.
  19. To reheat leftovers, place in an oven preheated to 350°F / 177°C for 20-30 minutes.

Notes

The recipe above is pretty traditional, however, it can easily be adjusted to your tastes.  

  • Can be assembled a day ahead.  
  • Store-bought puff pastry is usually pre-rolled quite thin, so as you roll it out it will get even thinner. When I made my own, and as you can see in the video of Julia Child and Michel Richard, homemade is more delicate to roll out and won’t get as thin, more like 1/4”.
  • Before layering in the filling, I suggest sprinkling the bottom with a grated hard cheese, such as parmesan, or bread crumbs, to avoid the soggy-bottom syndrome. I did a combo of cheese and bread crumbs.
  • For the herbed scrambled eggs, chives, parsley, and tarragon combo is more traditional, but I prefer green onion, basil, and oregano.
  • Feel free to use whichever color peppers you like! I roasted multi-colored mini sweet peppers in these photos.
  • Instead of using paper towels to absorb extra liquid from the spinach and peppers, you can also place them in a strainer over a bowl.
  • 1 1/2 lbs of spinach may seem outrageous, but it really cooks down. I have used a scant pound before when that’s all I had, but the spinach is surprisingly delicious and I wouldn’t modify the recipe down if I had a choice.
  • Play around with cheeses! You'll want softer cheeses, ones that melt well. Think cheddar, gruyère, havarti, gouda, brie...I enjoy half Swiss and half dill havarti, or another favorite is smoked gruyère.
  • When I made homemade puff pastry, this tourte required the longer bake time. With store-bought pastry it often only requires the lower end of the baking time. But again, this will also vary depending on your oven.

Nutrition Facts

Calories

686.27

Fat

45.9 g

Sat. Fat

16.93 g

Carbs

42.33 g

Fiber

5.69 g

Net carbs

36.63 g

Sugar

6.64 g

Protein

28.54 g

Sodium

494.18 mg

Cholesterol

281.18 mg

Nutritional information is approximate and based on 8 servings, including bread crumbs and parmesan.

Did you make this recipe?
Tag @jennyblogsandbakes on instagram and hashtag it #jennyblogs

Ratatouille

Rat patootie.  Ratatouille.  Only one of my favorite Pixar films AND one of my favorite foods.  A cartoon that takes place in Paris, is all about cooking, French accents, chefs, crispy baguettes....ah yes.  Never fails to make me hungry for cheese, saffron (although let's be honest, I've never actually had saffron that I am aware of, even though I bought some in Florence for a steal - UPDATE: as of 2018 I’ve now had saffron and learned how to tell if it’s real!) bread, and maybe some wine.  From the day I first saw it, in the theatre in New York City with my mom back in 2008, I wanted to make ratatouille.  I didn't know what it was before the movie, but Pixar animation made it look delicious.  

After some research and googling, I soon learned that there were many different versions of ratatouille, originally a hearty peasant dish from the region of Provence, France.  (Remember Igor's flashback to his mother's cooking and country home when he firsts tastes the ratatouille?) One source likened it to stew in America.  What kind of stew you ask?  This is exactly the point, as every region and cook in America has their own version of stew, and it can vary widely.  Apparently this is also true of ratatouille.  

After making this many times over the years, I came down to two favorite recipes.  

One involved sautéing the eggplant first for 10 minutes with the spices, then adding it to the bottom of the baking dish. The remaining vegetables were then layered over the eggplant, with a sprinkling of parmesan cheese between each layer of vegetables.

The second involved spreading a seasoned tomato sauce in the bottom of the baking dish and then alternating the vegetables around the dish in a pretty spiral, like it’s served in the film.

I could never decide which version I wanted to make, so finally I combined the two for the best of both worlds.  I omitted sautéing the eggplant, kept the tomato sauce on the bottom, and kept the cheese and the pretty spiral.

That combination is what follows.

Looking for an oval baking dish? I use this Le Creuset pan and couldn’t love it more for casseroles and baking! It’s prettier than a 9x13 rectangular pan and is so easy to clean, even the baked on cheese from this dish!

This post may contain affiliate links. If you make a purchase using these links, Jennyblogs may receive a small commission, at no extra cost to you. This helps to support Jennyblogs. For further information see the privacy policy. Grazie!


Ratatouille

Serves 4-6

Ingredients:

IMG_4690.JPG
  • 1 1/2 cups / 355g tomato purée or sauce (unseasoned)

  • 1/2  onion, finely chopped

  • 2 garlic cloves, minced

  • 1 tsp fresh oregano or 1/4 tsp dried

  • 1/4 tsp. crushed red pepper flakes

  • 2 Tbsp / 28g olive oil

  • 8 oz / 240g mushrooms, thinly sliced

  • 1 medium eggplant

  • 1 medium zucchini

  • 1 medium yellow squash

  • 1 bell pepper, optional

  • 1 cup / 110g shredded parmesan cheese

  • fresh or dried thyme

  • salt and pepper, to taste

Directions:

Oven 375°F / 177°C.  Ungreased oval baking dish, about 10in / 25cm long, or 9x13in / 23x33cm pan. 

  1. Add tomato purée to a small bowl.  Stir in onion, garlic, oregano, red pepper flakes, 1 tablespoon of oil, salt, and pepper.  Spread in the bottom of the baking dish.

  2. Layer sliced mushrooms over tomato sauce.

  3. Using a mandolin or chopping by hand, slice eggplant, zucchini, yellow squash, and bell pepper into 1/4 inch slices.

  4. Working in concentric circles, alternate and arrange the vegetables over the mushrooms.  You may have a small handful of misfit vegetables left over.  Save for another use (stir fry!) or lift a layer of your vegetables in the pan and sneak the excess underneath where the eye can't see. 

  5. Drizzle vegetables with remaining tablespoon of oil, season with salt and pepper, and sprinkle cheese evenly over top.  Sprinkle thyme over cheese. 

  6. Bake for 45-55 minutes or until tomato sauce is bubbling around edges of the pan and vegetables are tender when pierced with a knife.  

  7. Eat as is, or served over quinoa, rice, couscous, or with some crusty French bread!

Jenny's Notes:

  • 1 6oz can / 170g tomato paste mixed with 3/4 cup / 170g water can be substituted for the tomato purée.

  • Sometimes I omit the red pepper flakes and use a spicy oil in place of the plain olive oil.

  • If you want to save time assembling the vegetables you can layer them instead of alternating and making circles.  i.e. layer all the eggplant slices, then squash, zucchini, etc.  

  • You could add an extra layer of cheese between the mushrooms and vegetables.  

  • Feel free to add or substitute vegetables! 

ratatouille, Pixar Ratatouille, thyme, eggplant, zucchini, yellow squash, vegetables, healthy, gluten-free, parmesan cheese, tomato, mushrooms, peasant dish
Lunch, Dinner, Side Dish
French
Yield: 4-6 servings
Author: Jennyblogs
Print
Ratatouille

Ratatouille

A classic French peasant dish made famous by the Pixar animated film "Ratatouille." This version has a tomato base, plenty of eggplant, zucchini, squash, and mushrooms, with thyme and parmesan cheese. Naturally gluten-free.
Prep time: 40 MinCook time: 55 MinTotal time: 1 H & 34 M

Ingredients

Instructions

  1. Oven 375°F / 177°C. Ungreased oval baking dish, about 10in / 25cm long, or 9x13in / 23x33cm pan.
  2. Add tomato purée to a small bowl. Stir in onion, garlic, oregano, red pepper flakes, 1 tablespoon of oil, salt, and pepper. Spread in the bottom of the baking dish.
  3. Layer sliced mushrooms over tomato sauce.
  4. Using a mandolin or chopping by hand, slice eggplant, zucchini, yellow squash, and bell pepper into 1/4 inch slices.
  5. Working in concentric circles, alternate and arrange the vegetables over the mushrooms. You may have a small handful of misfit vegetables left over. Save for another use (stir fry!) or lift a layer of your vegetables in the pan and sneak the excess underneath where the eye can't see.
  6. Drizzle vegetables with remaining tablespoon of oil, season with salt and pepper, and sprinkle cheese evenly over top. Sprinkle thyme over cheese.
  7. Bake for 45-55 minutes or until tomato sauce is bubbling around edges of the pan and vegetables are tender when pierced with a knife.
  8. Eat as is, or served over quinoa, rice, couscous, or with some crusty French bread!

Notes:

1 6oz can / 170g tomato paste mixed with 3/4 cup / 170g water can be substituted for the tomato purée. Sometimes I omit the red pepper flakes and use a spicy oil in place of the plain olive oil. If you want to save time assembling the vegetables you can layer them instead of alternating and making circles. i.e. layer all the eggplant slices, then squash, zucchini, etc. You could add an extra layer of cheese between the mushrooms and vegetables. Feel free to add or substitute vegetables!

Calories

319.11

Fat (grams)

15.92

Sat. Fat (grams)

6.00

Carbs (grams)

33.75

Fiber (grams)

9.15

Net carbs

24.60

Sugar (grams)

15.12

Protein (grams)

16.35

Sodium (milligrams)

571.85

Cholesterol (grams)

19.80
Nutritional information is approximate and based on 4 servings.
Did you make this recipe?
Tag @jennyblogsandbakes on instagram and hashtag it #jennyblogs
Created using The Recipes Generator
IMG_4693.JPG