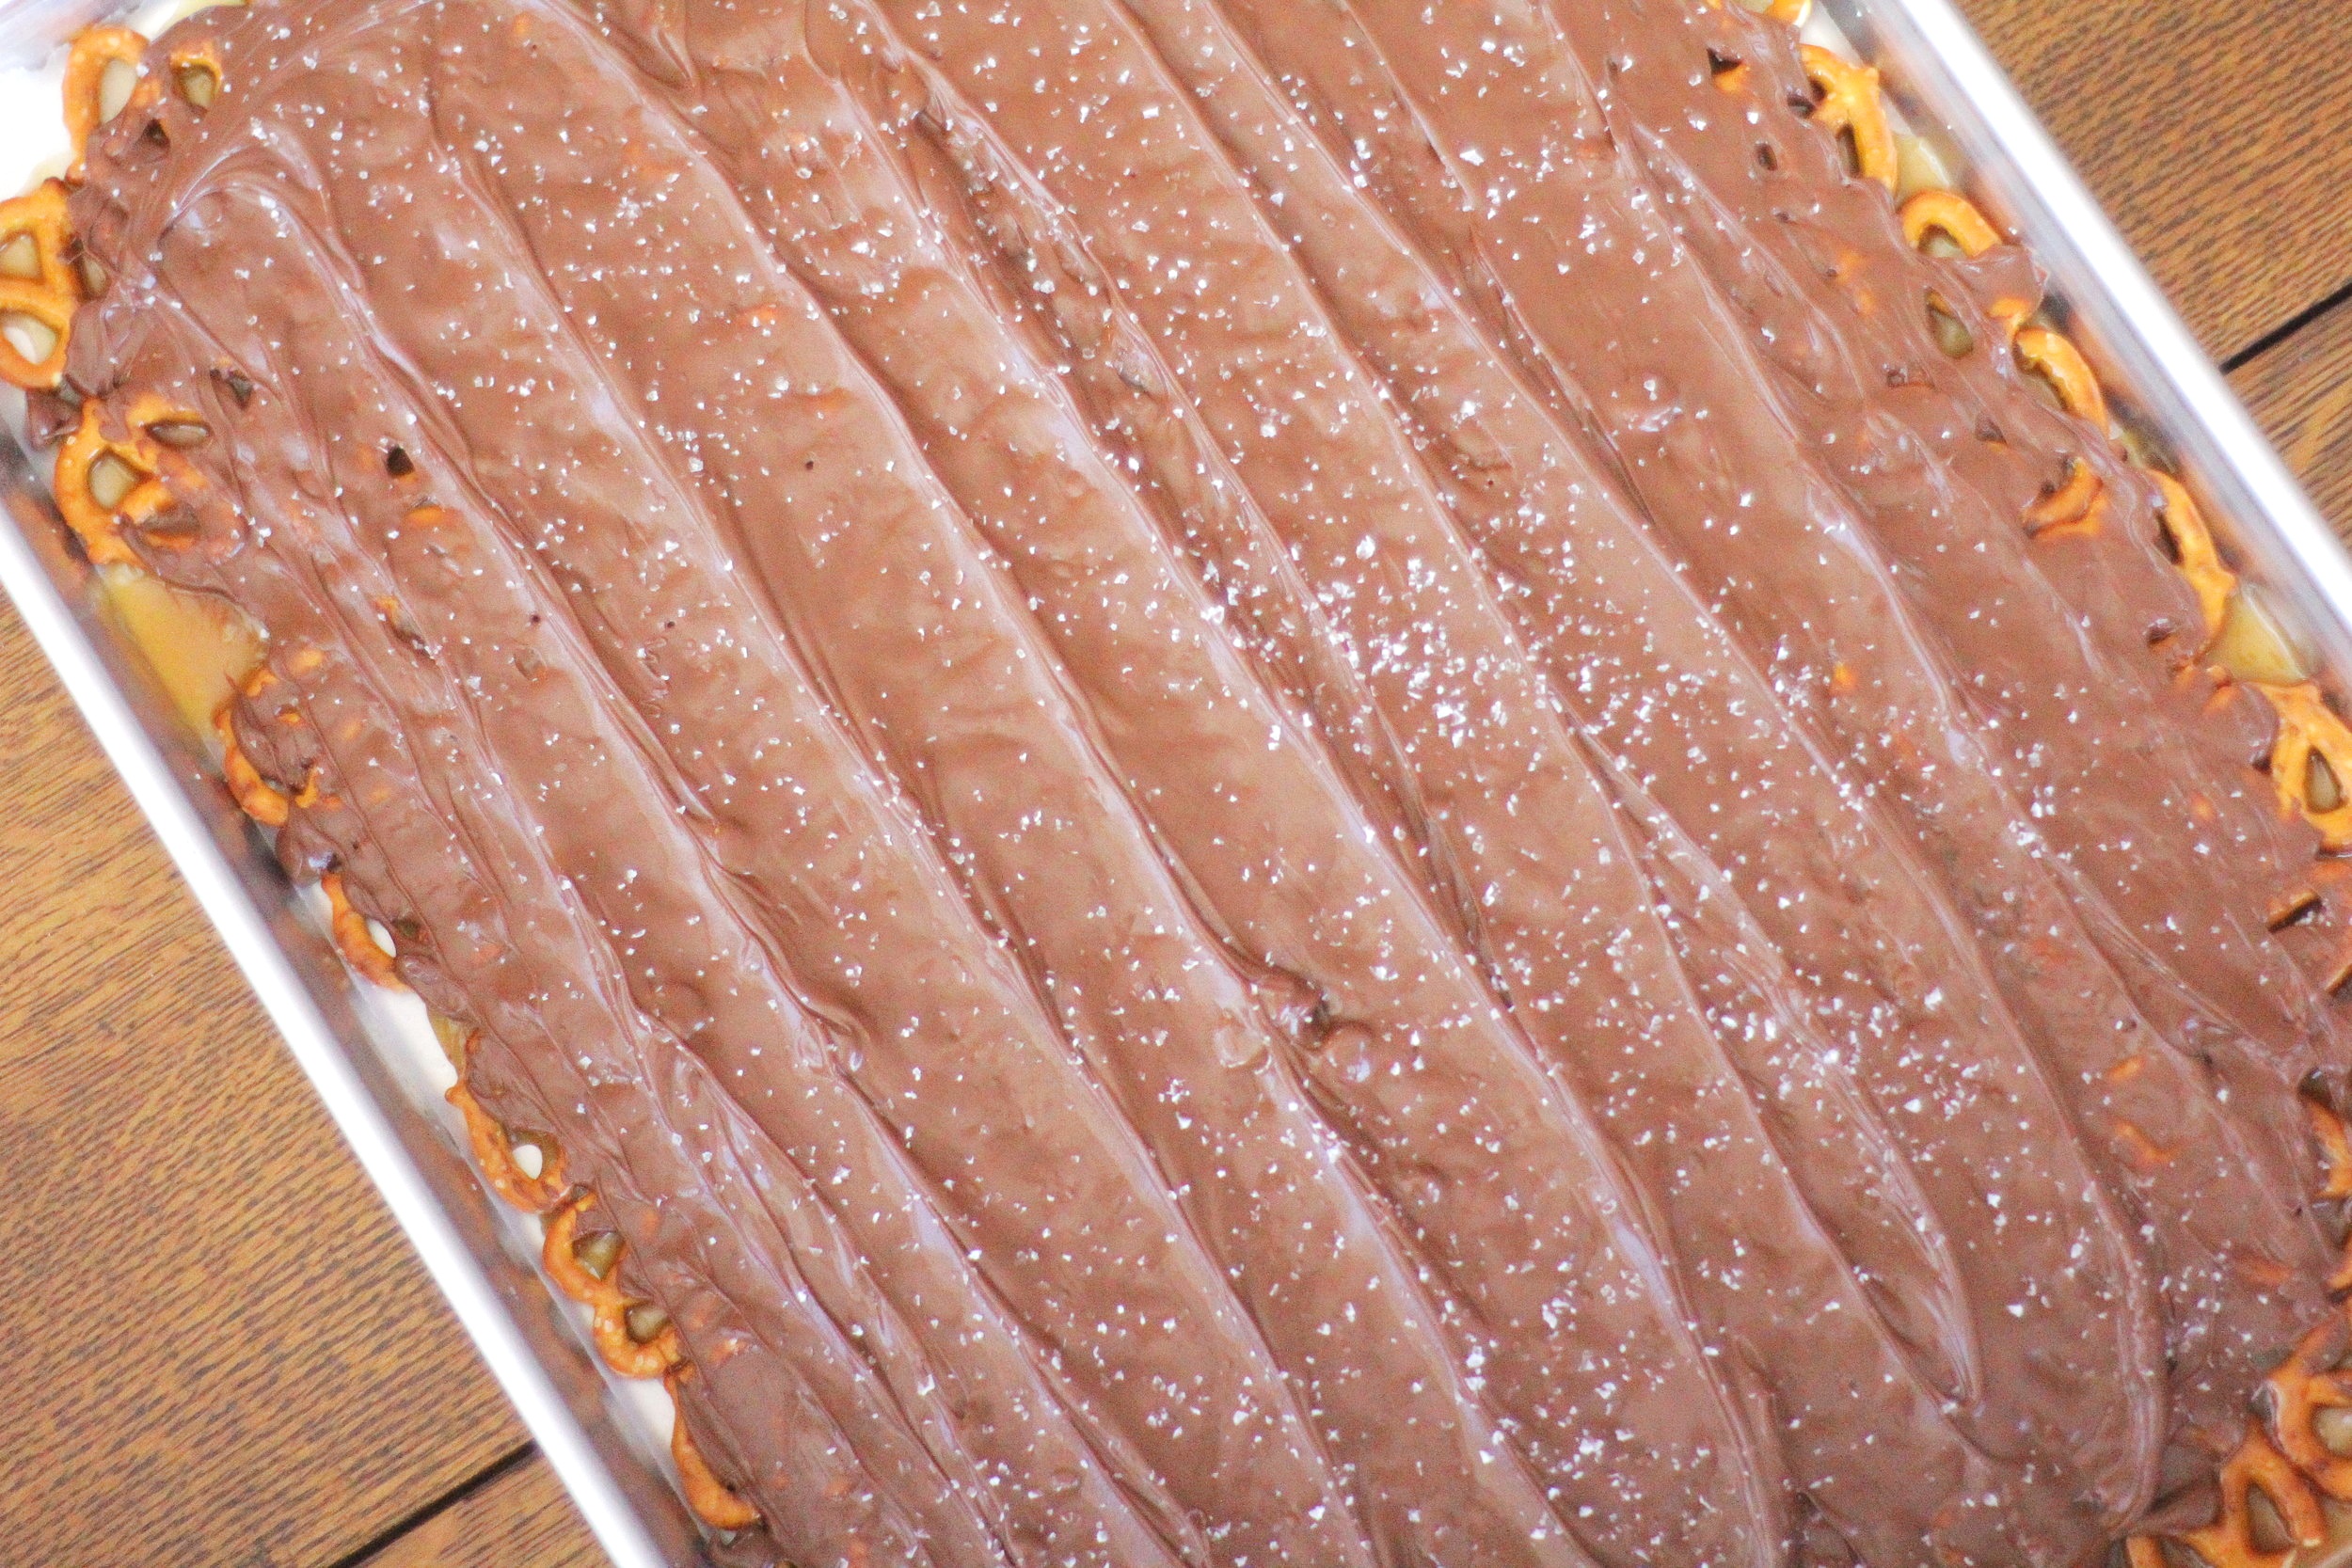
Salted Chocolate Caramel Pretzel Bark
/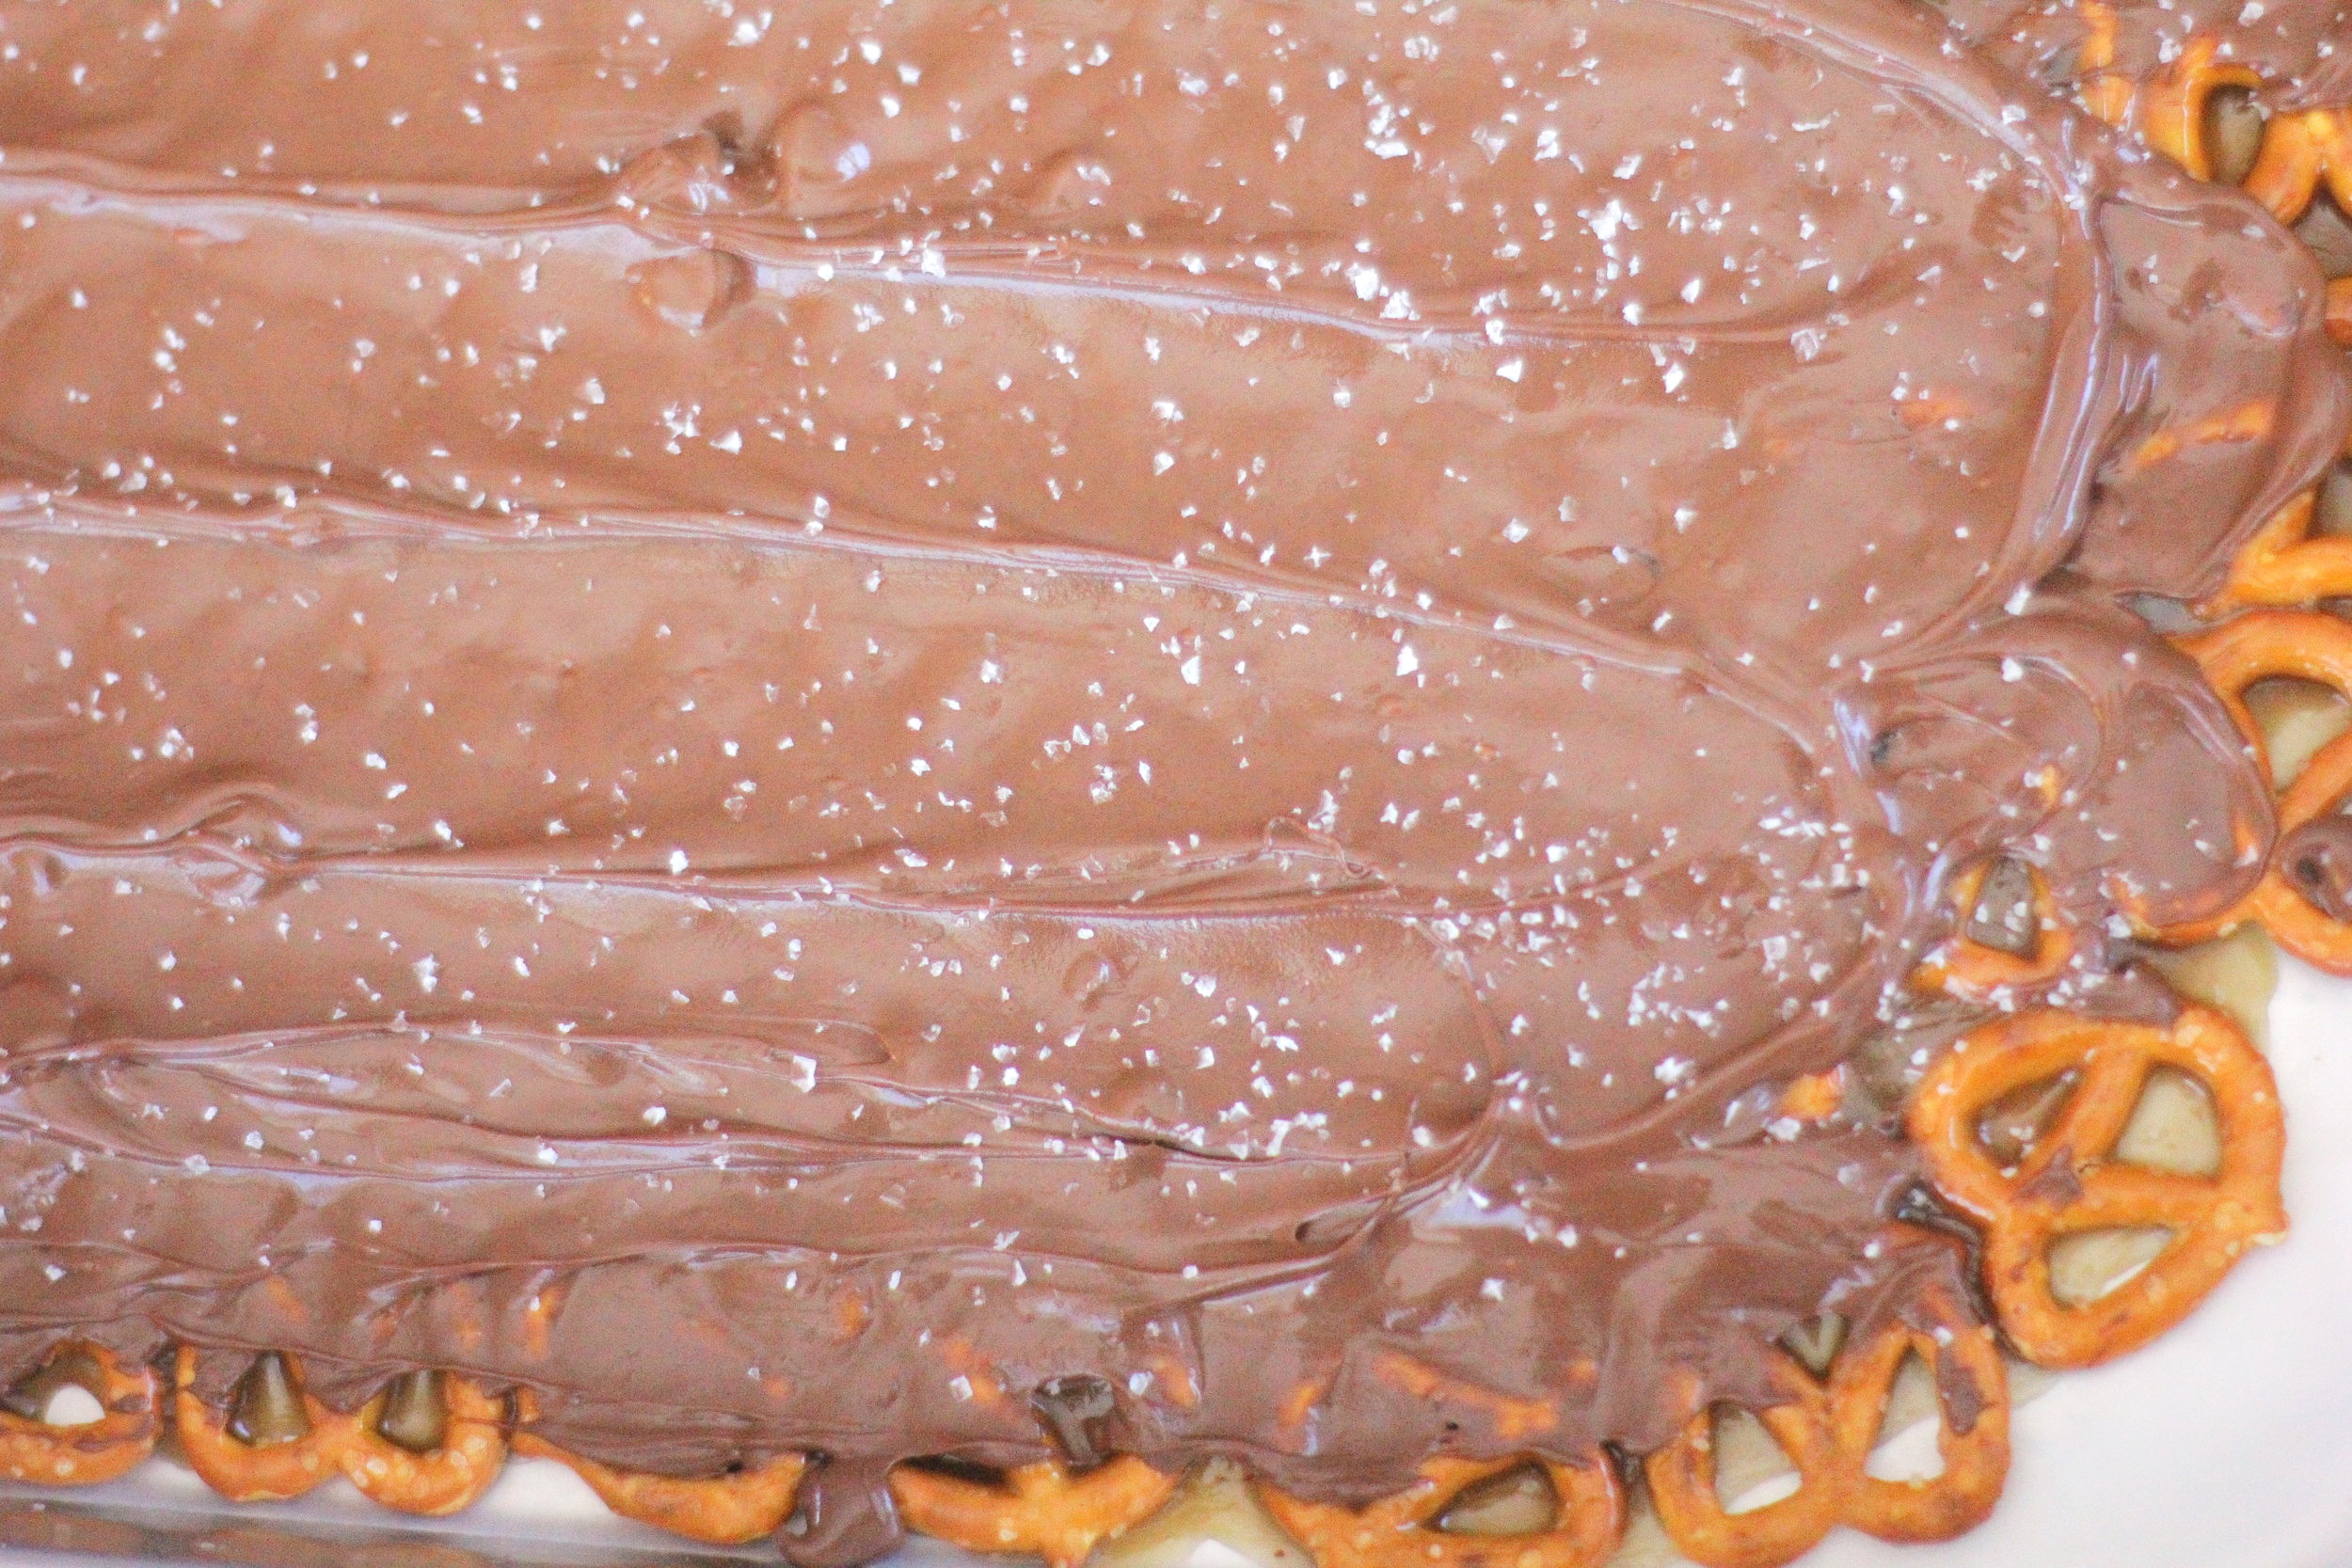
Pretzels. Homemade caramel. Chocolate. And salted. This bark has only 5 ingredients, it’s super easy to make, and you keep going back for more.
Oh yes. For the sugar lovers, sweets devotees, and when you want to whip up something delicious with precious little effort, this bark is it. Some people even refer to it as crack bark. Maybe because you break, or crack it, at the end? (Just kidding everyone, I know what they mean when they call it that.) Plus all 5 ingredients are pretty easy to have on hand.
Now, if this were Pinterest, you could call it "5 Ingredient Crack Bark." Remember my thing with Pinterest names? Yep. Still there. Keep it classy, people, keep it classy. It already bothers me that this recipe has as many words in its title as it does ingredients. If you have any better and more concise ideas for the title, please, let me know!
Slightly adapted from Where the Cookies Are
This post may contain affiliate links. If you buy something using these links, Jennyblogs may receive a small commission, at no extra cost to you. This helps to support Jennyblogs. For further information see the privacy policy. Grazie!
Salted Chocolate Caramel Pretzel Bark
Makes approximately one 11x17in / 28x43cm sheet of bark
Ingredients:
Enough mini pretzels to cover an approximately 11x17in / 28x43cm jelly roll pan, about half of a 15oz bag / 200g.
1 cup / 226g butter
1 cup / 200g brown sugar
2 cups / 340g semi-sweet chocolate chips
coarse salt
Directions:
Oven 375°F / 190°C. Line an approximately 11x17in / 28x43cm jelly roll pan with tinfoil.
Cover pan with an even layer of pretzels.
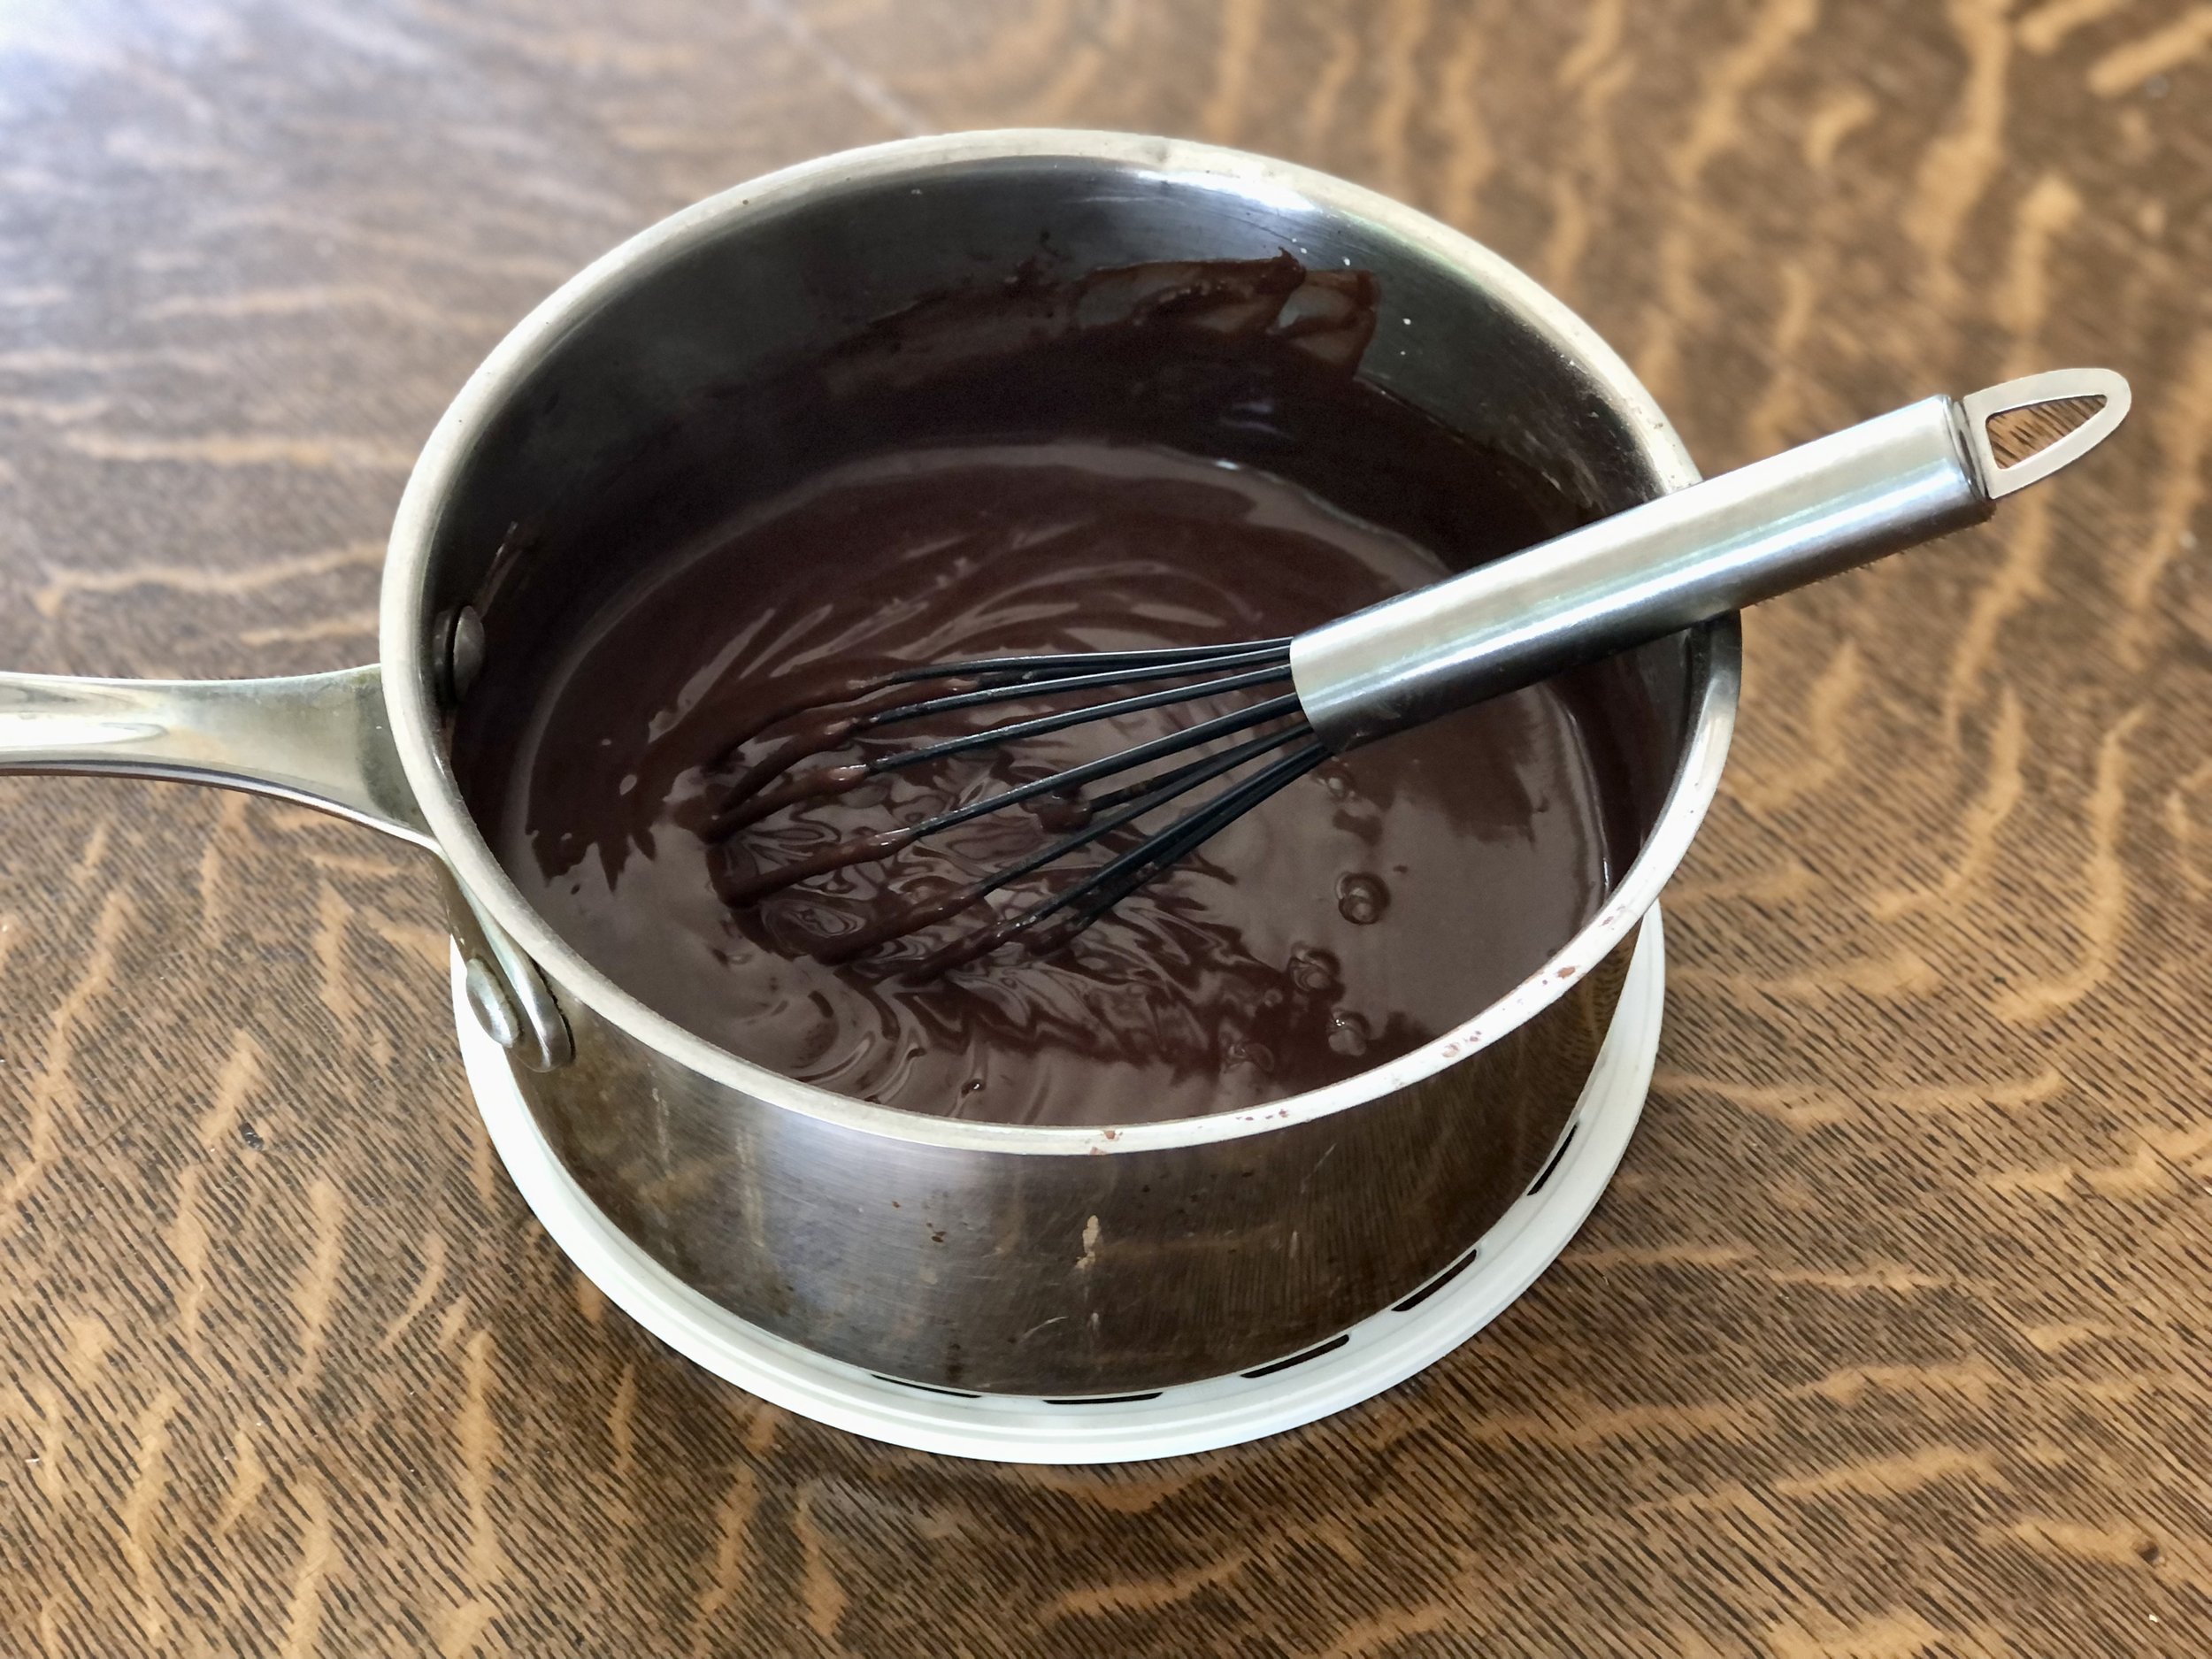
In a medium saucepan over medium-low heat, combine butter and brown sugar. Stir until mixture starts to simmer, then allow to cook, without stirring, until mixture turns a nice golden-brown. This should take 3-5 minutes after the mixture has started to simmer.
Remove mixture from heat and immediately pour evenly over pretzels.
Place in the oven and bake for 6 minutes.
Remove from oven and immediately sprinkle chocolate chips over pretzels and caramel.
Wait a few minutes, then use a spatula to spread now melted chocolate chips over pretzels. Sprinkle with salt.
Allow to cool completely before breaking into pieces. You can place your pan in the fridge or freezer to speed up the process.
Jenny's Notes:
If you’re wondering what a jelly-roll pan is, it’s merely a baking sheet with about a 1in side around it, which in this case keeps the bark contained. You can shop them on Amazon by clicking on the link to the right. —>
Don't have tinfoil? You can always use wax or parchment paper, but I would recommend greasing them beforehand as I have had the bark stick to both of those products.
Want to go crazy? Use any kind of chips in place of the semisweet chips, such as milk, peanut butter, bittersweet...or a combination!
Once you have spread the melted chocolate, feel free to add some extra toppings if you wish. Coconut, chopped peanuts, finely chopped coffee beans...


Salted Chocolate Caramel Pretzel Bark
ingredients:
- mini pretzels, enough to cover an approximately 11x17in / 28x43cm jelly roll pan, about half of a 15oz bag or 200g
- 1 cup / 226g butter
- 1 cup / 200g brown sugar
- 2 cups / 340g semi-sweet chocolate chips
- coarse salt
instructions:
How to cook Salted Chocolate Caramel Pretzel Bark
- Oven 375°F / 190°C. Line an approximately 11x17in / 28x43cm jelly roll pan with tinfoil.
- Cover pan with an even layer of pretzels.
- In a medium saucepan over medium-low heat, combine butter and brown sugar. Stir until mixture starts to simmer, then allow to cook, without stirring, until mixture turns a nice golden-brown. This should take 3-5 minutes after the mixture has started to simmer.
- Remove mixture from heat and immediately pour evenly over pretzels.
- Place in the oven and bake for 6 minutes.
- Remove from oven and immediately sprinkle chocolate chips over pretzels and caramel.
- Wait a few minutes, then use a spatula to spread now melted chocolate chips over pretzels. Sprinkle with salt.
- Allow to cool completely before breaking into pieces. You can place your pan in the fridge or freezer to speed up the process.
NOTES:
Calories
398.37Fat (grams)
24.26Sat. Fat (grams)
14.77Carbs (grams)
47.86Fiber (grams)
2.24Net carbs
45.63Sugar (grams)
31.99Protein (grams)
3.04Sodium (milligrams)
384.00Cholesterol (grams)
40.49