Almond Poppy Seed Rolls

Welcome back to quarantine snacks and meals!

Adjustments.jpg

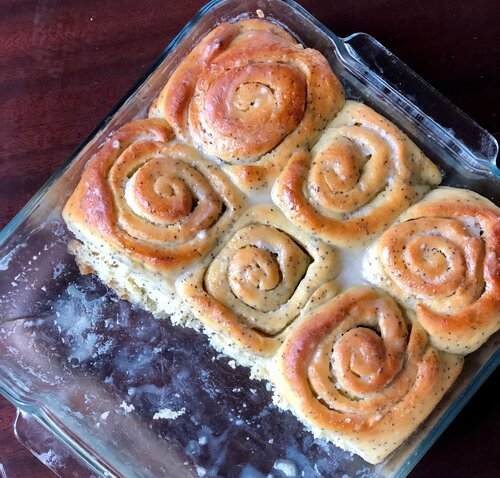
Today we are making Almond Poppy Seed Rolls! Think cinnamon rolls, but instead of cinnamon, a sweet almond dough with little crunchy poppyseeds and a sticky glaze. It’s like a cross between almond poppyseed bread and cinnamon rolls.

If there’s one thing we are forced to be during this time, it’s creative. Lack of resources, lack of schedule, lack of really anything that resembles our normal life has led us to come up with some really great ideas. Sometimes useless, but great nonetheless. Homemade obstacle courses are trending, memes are at the top of their game, and random skills you never before dreamed of having suddenly manifest themselves.

Another way we have had to get creative is in our cooking and baking. Not everything is readily available, and even if it is, a quick run to the store is no longer a quick run to the store. For my Michigan peeps, you are probably now feeling the effects of the latest lockdown measures. Only a certain number of people are allowed in the store at a time, creating long lines outside. Welcome, friends. That’s been normal life in Italy since uhh do I rememer how long? I think going on six weeks. Some stores require you to have a cart (helps you keep your distance) and some stores take your temperature before you enter. (In Italy.)

In general, most of my baking, unless for a special occasion or holiday, is spur of the moment. And what I want to bake often corresponds with what I want to eat, what do you know? The problem with this, as mentioned above, is that if I’m missing an ingredient, that means either waiting until the next store run, making something else, or improvising. The latter usually wins out.

Take the other day, for example, when I really wanted to make (and eat) these lemon raspberry rolls. I knew I didn’t have any raspberries, so I figured I would make just lemon rolls. Not to be, as I found my last lemon had gone moldy, and I didn’t even have any lemon extract. Well. Plain rolls weren’t going to cut it. I could’ve made cinnamon rolls, but my husband doesn’t much care for cinnamon (gasp) and I didn’t think that I should be eating a whole pan of cinnamon rolls by myself. While in quarantine. And am supposed to stay within 200m of my abode for exercise.

I took stock of my cupboards to see what I could possibly use to make some kind of flavored, delicious roll. While I didn’t have lemon extract, I did find almond extract! I love almond, and, and POPPY SEEDS. Yes. Done.

If you happen to have ingredients for both, I would highly suggest making both. They are also freezer friendly; stick in the freezer before baking or even after, once they’ve cooled.

This post may contain affiliate links. If you make a purchase using these links, Jennyblogs may receive a small commission, at no extra cost to you. This helps to support Jennyblogs. For further information see the privacy policy. Grazie!

Recipe adapted from Lemon Raspberry Rolls.


Almond Poppy Seed Rolls

Makes 9 rolls

Adjustments.jpeg

Ingredients:

For the Dough

  • 1/2 cup / 119g milk or water

  • 1/4 cup / 50g sugar

  • 2 1/4 tsp / 7g active dry yeast

  • 2 Tbsp / 28g oil

  • 1 egg

  • 3 Tbsp / 23g poppy seeds

  • 1/2 tsp almond extract

  • 1/4 tsp salt

  • 2 1/4 cups / 270g all-purpose flour + about 1/4 cup / 30g for kneading

For the Filling

  • 1/4 cup / 56g butter

  • 1/4 cup / 50g sugar

For the Glaze

  • 3/4 cup / 94g powdered sugar

  • 1-2 Tbsp / 14-28g milk

Directions:

Preheat oven to 400F / 205C. Grease an 8x8inch / 20x20cm square baking dish.

Make the Dough

  1. In a small saucepan over low heat, warm milk until it is about 100F / 38C.  Pour into a large bowl.  Add the sugar and yeast and allow to sit for 7-10 minutes.  The yeast should foam up a bit. 

  2. Add oil, eggs, poppy seeds, extract, and salt.  Add the 2 1/4 cups of flour and mix until combined. 

  3. Turn dough out onto a floured surface.  Knead for about 8-10 minutes, sprinkling more flour on your work surface as needed.   Dough should be soft and elastic by the end, so don't get too flour-happy. Alternately, you can use the bread hook on a stand mixer and knead for 8-10 minutes, adding in flour as needed. By the end the dough should stick only to the bottom of the pan, not the sides.

  4. Lightly grease or flour a large bowl (the bowl you mixed the dough in is fine) and place dough in the bowl.  Cover with a towel and place in a warm area to rise for about 1 1/2 hours or until doubled in size. 

Assemble the Rolls

  1. In a small saucepan melt butter for filling and let simmer until it starts to brown.  Remove from heat and cool.

  2. When the dough has risen, punch it down and turn out onto a lightly floured surface.  Knead for a minute, then roll into a generous rectangle, about 7x14inch / 18x36cm and roughly 1/4inch / 1/2cm thick.

  3. Spread cooled butter over dough almost to the edges, then sprinkle evenly with sugar.

  4. Starting from one of the longer sides, roll dough into a spiral, pinching the dough together at the end to seal it. 

  5. Cut the log into thirds, then each third into 3 slices.  Place the rolls in the prepared pan and cover lightly with plastic wrap or a damp towel.  Place in a warm area to rise for about an hour, or until puffed.

  6. Bake for 15-20 minutes, or until golden on top and centers no longer look doughy. Internal temperature should be about 195F / 90C.

Make the Glaze

  1. In a small bowl whisk together powdered sugar and1 Tbsp of milk.  It should be thin enough to drizzle but not too liquidy.  Add more milk as needed. 

  2. Drizzle warm rolls with glaze. 


Jenny's Notes:

  • If you don't have a thermometer handy to know what 100 degrees is, simply warm until the milk feels quite warm, but not hot.  It'll be fine!

  • You can freeze these rolls once you have sliced them and put them in the pan.  Once removed from the freezer allow to thaw and proceed as normal. 

  • When using a stand mixer to knead, I still recommend kneading it for a few minutes by hand afterwards. I find they are not always as thorough as kneading by hand and you want an even rise for your dough.  I often to do it all by hand just because it’s therapeutic!
almond poppy seed, breakfast rolls, yeast, yeasted breads, enriched dough,glaze
Breakfast,Breads, Dessert
American
Yield: 9 rolls
Author:
Almond Poppy Seed Rolls

Almond Poppy Seed Rolls

Soft, fluffy breakfast rolls reminiscent of cinnamon rolls but with an almond poppy seed dough, a sweet, gooey buttery filling, and a sweet glaze.
Prep time: 1 hourCook time: 20 MTotal time: 1 H & 20 M

Ingredients:

For the Dough
  • 1/2 cup / 119g milk or water
  • 1/4 cup / 50g sugar
  • 2 1/4 tsp / 7g active dry yeast
  • 2 Tbsp / 28g oil
  • 1 egg
  • 3 Tbsp / 23g poppy seeds
  • 1/2 tsp almond extract
  • 1/4 tsp salt
  • 2 1/4 cups / 270g all-purpose flour + about 1/4 cup / 30g for kneading
For the Filling
  • 1/4 cup / 56g butter
  • 1/4 cup / 50g sugar
For the Glaze
  • 3/4 cup / 94g powdered sugar
  • 1-2 Tbsp / 14-28g milk

Instructions:

How to cook Almond Poppy Seed Rolls

Make the Dough
  1. In a small saucepan over low heat, warm milk until it is about 100F / 38C. Pour into a large bowl. Add the sugar and yeast and allow to sit for 7-10 minutes. The yeast should foam up a bit.
  2. Add oil, eggs, poppy seeds, extract, and salt. Add the 2 1/4 cups of flour and mix until combined.
  3. Turn dough out onto a floured surface. Knead for about 8-10 minutes, sprinkling more flour on your work surface as needed. Dough should be soft and elastic by the end, so don't get too flour-happy. Alternately, you can use the bread hook on a stand mixer and knead for 8-10 minutes, adding in flour as needed. By the end the dough should stick only to the bottom of the pan, not the sides.
  4. Lightly grease or flour a large bowl (the bowl you mixed the dough in is fine) and place dough in the bowl. Cover with a towel and place in a warm area to rise for about 1 1/2 hours or until doubled in size.
Assemble the Rolls
  1. Preheat oven to 400F / 205C. Grease an 8x8inch / 20x20cm square baking dish.
  2. In a small saucepan melt butter for filling and let simmer until it starts to brown. Remove from heat and cool.
  3. When the dough has risen, punch it down and turn out onto a lightly floured surface. Knead for a minute, then roll into a generous rectangle, about 7x14inch / 18x36cm and roughly 1/4inch / 1/2cm thick.
  4. Spread cooled butter over dough almost to the edges, then sprinkle evenly with sugar.
  5. Starting from one of the longer sides, roll dough into a spiral, pinching the dough together at the end to seal it.
  6. Cut the log into thirds, then each third into 3 slices. Place the rolls in the prepared pan and cover lightly with plastic wrap or a damp towel. Place in a warm area to rise for about an hour, or until puffed.
  7. Bake for 15-20 minutes, or until golden on top and centers no longer look doughy. Internal temperature should be about 195F / 90C.
Make the Glaze
  1. In a small bowl whisk together powdered sugar and1 Tbsp of milk. It should be thin enough to drizzle but not too liquidy. Add more milk as needed.
  2. Drizzle warm rolls with glaze.

Notes:

If you don't have a thermometer handy to know what 100 degrees is, simply warm until the milk feels quite warm, but not hot. It'll be fine! You can freeze these rolls once you have sliced them and put them in the pan. Once removed from the freezer allow to thaw and proceed as normal. When using a stand mixer to knead, I still recommend kneading it for a few minutes by hand afterwards. I find they are not always as thorough as kneading by hand and you want an even rise for your dough.

Calories

276.34

Fat (grams)

10.42

Sat. Fat (grams)

3.94

Carbs (grams)

40.79

Fiber (grams)

1.52

Net carbs

39.27

Sugar (grams)

15.97

Protein (grams)

5.19

Sodium (milligrams)

122.93

Cholesterol (grams)

35.35
Nutritional information is approximate. Based on 1 roll.
Did you make this recipe?
Tag @jenevamorris on instagram and hashtag it #jennyblogs
Created using The Recipes Generator
Adjustments.jpg

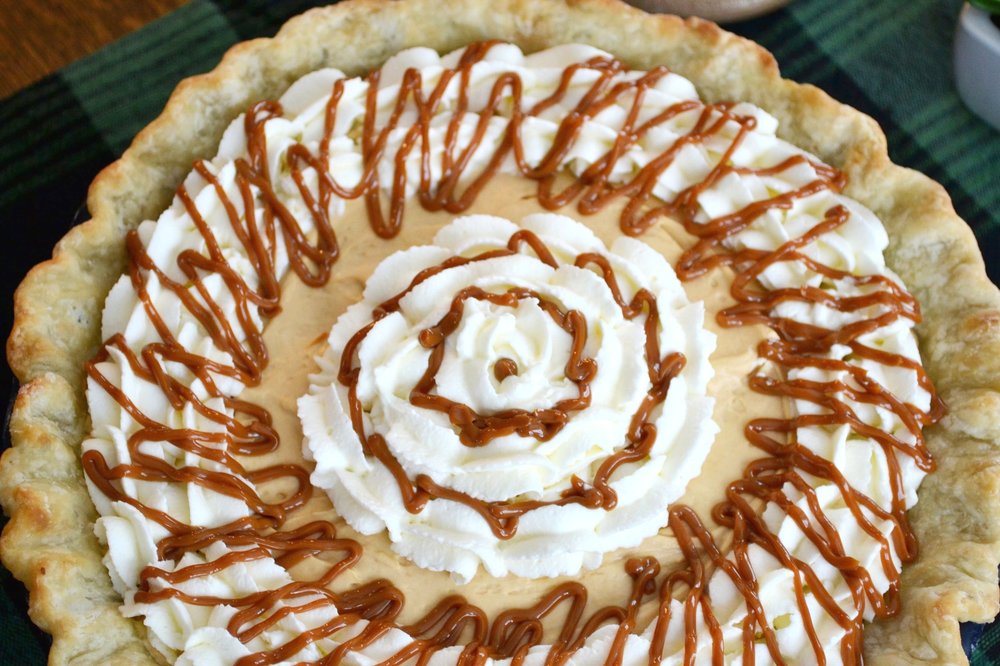
Caramel Cream Pie

2017-12-23+15.32.59.jpg

Fellow citizens of the webs, I've missed you!  It's been a dreadfully long time since I've posted a new recipe.  Not that I haven't been baking, oh no, but going home for Christmas, festivities, and general merry-making have kept me quite occupied.  It has been difficult to find the time to carve out a window of several hours not only to bake something blog-worthy, but photograph said something, upload photos, edit photos, write the nonsense that is what you are currently reading, type up the recipe, add finished photos, proof read, and post the now finished blog form. 

It's quite the process for something that is merely a hobby and even though I enjoy the blogging process, sometimes I don't feel that good at any of it.  Except the baking, that's the one thing I feel somewhat competent in.  And even then, there are definitely off days, off recipes, or off concentration.  And I think to myself, does the world need one more baking blog?  One that's, well, not fantastic?  (At least not yet, mwahaha.)  There are so many great ones out there.  But I think the blogs that inspire me the most, the ones that come across as fantastic, are the ones that are passionate about what they do.  Yes, they have picture-perfect photography, reliable recipes, and witty writing, (hey, look at all those alliterations!), but I don't think they all started that way.  How did they arrive there?  Passion, dedication, perseverance, and always looking for ways to improve, I think. 

The world has enough perceived perfection, what we need are those hungry to learn, with a little talent and a lot of humility, and who are then willing to share what they've learned.  I can only hope, in this tidbit of a clumsy blog, that you'd join me in this voyage of discovering and learning, average photography, and lots of good food.  Oh, and feedback and questions are always welcome, that’s what the comments are for below!

Here's to a bright and shiny new year! 

Now, back to that good food we were talking about...

This post may contain affiliate links. If you buy something using these links, Jennyblogs may receive a small commission, at no extra cost to you. This helps to support Jennyblogs. For further information see the privacy policy. Grazie!

Recipe adapted from Shugary Sweets


Caramel Cream Pie

2017-12-23+15.34.15.jpg

Serves 8-12

Ingredients:

For the Crust

  • 1 1/3 cup / 160g all-purpose flour

  • 1/2 tsp / 2.5g salt

  • 4 Tbsp / 56g butter, cold, cut into small pieces

  • 4-6 Tbsp / 59 - 89g ice water

For the Caramel Cream filling and topping

  • 1 14oz can / 380g dulche de leche, your favorite caramel, or 1/2 recipe of this Caramel Sauce

  • 8 oz / 225g cream cheese, room temperature

  • 2 1/2 cups / 605g heavy whipping cream

  • 1/4 cup / 50g sugar

Directions:

Make the Crust

Oven 425°F / 220°C. Ungreased 8 - 9in / 20 - 23cm pie dish. 

IMG_4555.JPG
  1. In a medium bowl whisk together flour and salt.  Blend in cold butter using a pastry cutter, fork, or your hands.  You want the butter to end up in small pieces, like peas. 

  2. Add the ice water, starting with 4 Tbsp / 59g, mixing as little as possible.  The dough should be able to hold together in a ball, without being too dry and shaggy or too wet.  Add more water if necessary, 1 tablespoon at a time.  

  3. Place dough on a piece of plastic wrap, shape into a disc, and wrap tightly.  Place in the fridge for 1 - 48 hours.  

  4. After the crust has rested, roll into a circle on a lightly floured surface or silpat.  Roll a few times with your rolling pin in one direction before turning the crust 45° (quarter turn) and continuing with a few more rolls.  Periodically check under the crust to make sure it isn’t sticking and sprinkling more flour if needed. Continue like this until your crust is nicely round and roughly 2in / 5cm larger than your pie dish.  

  5. Carefully transfer crust to pie dish (this is easier if using a silpat), trim the excess overhang if necessary, and fold the ends under. Crimp as desired, or press with a fork.  Prick the bottom of the crust with a fork.  The crust can also be refrigerated at this point, if needed.  

  6. Bake in preheated oven for 10-12 minutes, or until crust is lightly golden-brown.  Cool completely.  

Make the Caramel Cream filling and topping

  1. In the bowl of a stand mixer, beat cream cheese with 1/2 cup / 120g caramel.  Set aside.

  2. In the clean bowl of a stand mixer, beat whipping cream and sugar until stiff peaks form.  Reserve 1/2 cup for the topping.  Fold the remaining whipped cream into cream cheese mixture, about a quarter at a time.  

  3. Reserve 1-2 tablespoons of the remaining caramel for the topping.  Spread the rest into the bottom of the crust.  Spread cream cheese mixture over caramel.  

  4. Top pie with reserved 1/2 cup whipped cream and caramel, using a spoon or piping desired.

Jenny's Notes:

  • For the crust, you can also use a food processor, pulsing in the butter until it has the desired consistency.  Just be sure to remove the dough from the food processor and mix in the water with a fork or pastry cutter so you don't overwork the dough.  You want to work it as little as possible once you add the water. The liquid helps to awaken the gluten, and the more you work it and the gluten strands develop, the tougher your crust will be.  The minimum of 1 hour rest in the fridge allows what gluten inevitably developed to relax.  

  • If you are having problems with a shrinking crust, try using a metal or ceramic pie dish and allowing the crust more time to rest before baking.  

  • I have made this pie several times over the past year, and have always needed all 6 tablespoons of water, possibly because it was always during the dry winter.  If you live in a really dry climate, you might need up to 7.  Just be aware, an overly wet crust is more likely to glue itself to the pan during baking.   

caramel cream pie, butter crust, fresh whipped cream, dulche de leche
Dessert, Pie
American
Yield: 8-12 servings
Author: Jennyblogs
Print
Caramel Cream Pie

Caramel Cream Pie

Flaky, buttery crust, whipped caramel filling, and fresh whipped cream with caramel drizzled on top.
Prep time: 1 hourCook time: 12 MTotal time: 1 H & 12 M

Ingredients:

For the Crust
  • 1 1/3 cup / 160g all-purpose flour
  • 1/2 tsp / 2.5g salt
  • 4 Tbsp / 56g butter, cold, cut into small pieces
  • 4-6 Tbsp / 59 - 89g ice water
For the Caramel Cream filling and topping
  • 1 14oz can / 380g dulche de leche, your favorite caramel, or 1/2 recipe of this Caramel Sauce
  • 8 oz / 225g cream cheese, room temperature
  • 2 1/2 cups / 605g heavy whipping cream
  • 1/4 cup / 50g sugar

Instructions:

Make the Crust
  1. Oven 425°F / 220°C. Ungreased 8 - 9in / 20 - 23cm pie dish.
  2. In a medium bowl whisk together flour and salt. Blend in cold butter using a pastry cutter, fork, or your hands. You want the butter to end up in small pieces, like peas.
  3. Add the ice water, starting with 4 Tbsp / 59g, mixing as little as possible. The dough should be able to hold together in a ball, without being too dry and shaggy or too wet. Add more water if necessary, 1 tablespoon at a time.
  4. Place dough on a piece of plastic wrap, shape into a disc, and wrap tightly. Place in the fridge for 1 - 48 hours.
  5. After the crust has rested, roll into a circle on a lightly floured surface or silpat. Roll a few times with your rolling pin in one direction before turning the crust 45° (quarter turn) and continuing with a few more rolls. Periodically check under the crust to make sure it isn’t sticking and sprinkling more flour if needed. Continue like this until your crust is nicely round and roughly 2in / 5cm larger than your pie dish.
  6. Carefully transfer crust to pie dish (this is easier if using a silpat), trim the excess overhang if necessary, and fold the ends under. Crimp as desired, or press with a fork. Prick the bottom of the crust with a fork. The crust can also be refrigerated at this point, if needed.
  7. Bake in preheated oven for 10-12 minutes, or until crust is lightly golden-brown. Cool completely.
Make the Caramel Cream filling and topping
  1. In the bowl of a stand mixer, beat cream cheese with 1/2 cup / 120g caramel. Set aside.
  2. In the clean bowl of a stand mixer, beat whipping cream and sugar until stiff peaks form. Reserve 1/2 cup for the topping. Fold the remaining whipped cream into cream cheese mixture, about a quarter at a time.
  3. Reserve 1-2 tablespoons of the remaining caramel for the topping. Spread the rest into the bottom of the crust. Spread cream cheese mixture over caramel.
  4. Top pie with reserved 1/2 cup whipped cream and caramel, using a spoon or piping desired.

Notes:

For the crust, you can also use a food processor, pulsing in the butter until it has the desired consistency. Just be sure to remove the dough from the food processor and mix in the water with a fork or pastry cutter so you don't overwork the dough. You want to work it as little as possible once you add the water. The liquid helps to awaken the gluten, and the more you work it and the gluten strands develop, the tougher your crust will be. The minimum of 1 hour rest in the fridge allows what gluten inevitably developed to relax. If you are having problems with a shrinking crust, try using a metal or ceramic pie dish and allowing the crust more time to rest before baking. I have made this pie several times over the past year, and have always needed all 6 tablespoons of water, possibly because it was always during the dry winter. If you live in a really dry climate, you might need up to 7. Just be aware, an overly wet crust is more likely to glue itself to the pan during baking.

Calories

652.74

Fat (grams)

42.84

Sat. Fat (grams)

26.73

Carbs (grams)

56.39

Fiber (grams)

0.54

Net carbs

55.85

Sugar (grams)

40.81

Protein (grams)

6.75

Sodium (milligrams)

437.41

Cholesterol (grams)

128.91
Nutritional information is approximate. Based on 8 servings.
Did you make this recipe?
Tag @jenevamorris on instagram and hashtag it #jennyblogs
Created using The Recipes Generator
And yet, for as many times as I've made this pie, I've yet to get a photo of it sliced. Oh well, there's butter, caramel, and whipped cream, what more do you need to know?

And yet, for as many times as I've made this pie, I've yet to get a photo of it sliced. Oh well, there's butter, caramel, and whipped cream, what more do you need to know?


Chocolate Chip Brioche Rolls

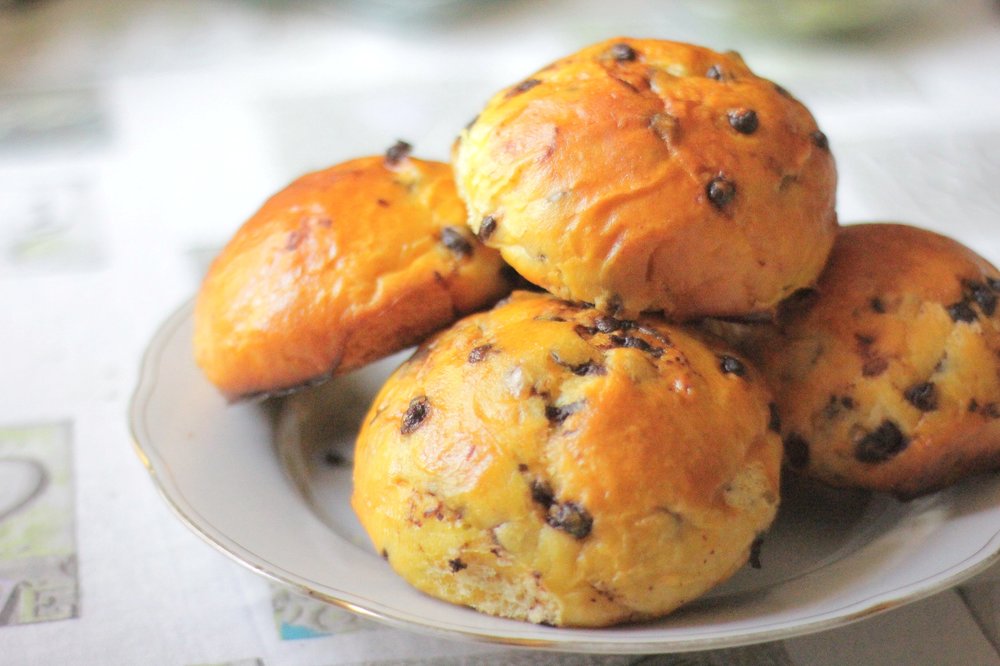
But why are they so golden? Many thanks to butter and egg wash.

But why are they so golden? Many thanks to butter and egg wash.

This post contains affiliate links. If you buy something using these links, Jennyblogs may receive a small commission, at no extra cost to you. This helps to support Jennyblogs. For further information see the privacy policy. Grazie!

I've been thinking about you a lot recently.  How sweet you are, how tender you are, how you like to butter me up. Yeah, you're a little soft, but I love that about you.  I wake up in the morning hoping you'll want to meet me for coffee.  Will you, brioche?  Please say yes.  Before life hardens you and you become like a rock.  But if not, how about your friend?  He looks yummy, too - Oh hey. Welcome to my blog!  Yep, I'm writing a recipe about brioche, mmm hmmm.  No, I was not talking to the brioche. Just eating. Nom nom nom.  See?  Delicious.  Yep.  Believe me and make these, and you'll be talking to your brioche, too.  

Brioche is a yeasted, enriched bread or bun.  By enriched I mean, rich in butter, with help from sugar and eggs.  The amount of butter in the recipe for brioche must be equal to or more than 20% of the flour weight, but can go up to 100%.  I like to think of brioche in three categories, as called by Peter Reinhart: 

  1. Poor man's brioche - consisting of at least 20% butter

  2. Middle-class brioche - consisting of around 50% butter

  3. Rich man's brioche - consisting of 50-80% butter, or on rare occasion, more!

To find the butter percentage, divide the weight of the butter by the weight of the flour and multiply by 100.  

Butter weight / flour weight x 100 = Butter percentage

For example, let's take the recipe below, which calls for 6 Tbsp butter or 85g by weight, divided by 2 1/2 cups flour or 300g by weight, which equals 0.28.  Multiply 0.28 by 100 and you get 28.  Thus the butter percentage is 28 percent in this recipe.  Poor man's brioche!  

85 / 300 x 100 = 28

If the words ratio, weight, percentage make you glaze over, stay with me.  It can be confusing at first, but understanding these concepts can really enhance your baking experience.  Think of it as the key that unlocks all recipes and links them together.  Instead of blindly following a recipe, always secretly wondering what will happen if you omit an egg, use baking soda instead of baking powder, add less flour or sugar than called for, formulas such as this can help you compare recipes across the board. start to notice similarities, how textures are affected by the ratio of liquids to flour, fat to flour, etc.  Ok, so baking soda vs. baking powder is more in the realm of science, but also helpful!  Science and math, who knew?  I know, it's a lot of work, with a scrunched up nose, calculator, and pencil eraser shavings everywhere as you figure out formulas, but it's worth it!  Of course, I'm not here to force you to do anything, so feel free to skip on down to the recipe and ignore all this fancy talk.  No shame or guilt.  

Trust me, I'm still new to this too, and figuring it out myself.  I feel like I've just discovered the tip of the iceberg, and I know, it's slippery along the way as you're calculating numbers, but at the end, you'll have a giant...iceberg...of...information?  Yeah, that.  My boat hit the er, iceberg, when I was gifted Peter Reinhart's bread book.  I had recently started my own levain, really wanting to learn how to make artisan breads.  I didn't really know what I was getting into when I mixed some flour and water together to make a levain.  Now I see there is so much to learn, and I hope to share some of the adventure with you.  I don't plan to become a master bread baker before I start to blog some recipes, so you can share in the discoveries with me.    

Are we done yet? No, on to the poor man's brioche!

Recipe adapted from Soup Addict


Chocolate Chip Brioche Rolls

Makes 12 rolls

Ingredients:

IMG_4887.jpg
  • 2 1/2 cups / 300g all-purpose flour

  • 2 tsp / 6g instant yeast

  • 1/3 / 67g cup sugar

  • 1 1/2 tsp / 11g salt

  • 1/2 cup / 118g milk

  • 1/2 cup / 118g buttermilk or sour milk

  • 6 Tbsp / 85g butter, room temperature

  • 2 eggs

  • 1 1/3 cup / 234g chocolate chips or chunks

Directions:

Oven 350°F / 177°C.  Line a baking sheet with parchment paper or silicone mat.

  1. In the bowl of a stand mixer fitted with the paddle, mix together flour, yeast, sugar, and salt.  

  2. In a small saucepan heat milk and buttermilk until about 105°F / 40°C.  Add to flour mixture and mix until well combined.  

  3. With the mixer running, add butter and allow to mix until fully immersed.  Add 1 egg.  

  4. Switch to the dough hook and knead on medium speed for 6-8 minutes, until the dough no longer sticks to the sides of the bowl and starts to make a slapping sound against the bowl.  If the dough is still clinging to the sides, add a touch more flour until it no longer sticks.  

  5. Mix in chocolate chips just long enough to incorporate.  

  6. Transfer dough to a large oiled bowl.  Flip the dough so that both sides are now oiled.  Cover with a towel or plastic wrap and allow to ferment in a warm place for about 1 1/2 hours, or until doubled in size.   

  7. Place dough on a lightly floured surface and divide into 12 equal pieces.  Roll each piece into a ball and place evenly spaced on the prepared baking sheet.  

  8. Beat the second egg with 1 tablespoon of water.  Use a pastry brush or your fingers to brush each dough well with egg wash.  Cover with a towel or plastic wrap and allow to rise for about 1 hour, or until puffed.  

  9. Bake for 25-30 minutes, or until golden brown and internal temperature reads about 180°F / 82°C.  

Jenny's Notes:

  • If you don’t have buttermilk or sour milk, you can make your own sour milk by adding 1 Tbsp lemon juice or vinegar per 1 cup milk.

  • After you've made the dough, you can place the dough in the fridge before the first or second ferment.  That way the ferment will happen slowly in the fridge, and you can shape or bake the rolls the next day.  Allow the dough to come to room temperature before rolling or baking, then continue as instructed.

  • Use any leftover egg wash for another baking venture or omelette!

brioche, brioche rolls, poor man's brioche, recipe, chocolate chip brioche, butter
Bread, Breakfast
French
Yield: 12
Author:

Chocolate Chip Brioche Rolls

Buttery, soft, sweet, enriched brioche rolls speckled with chocolate chips.
prep time: 55 Mcook time: 30 Mtotal time: 85 M

ingredients:

  • 2 1/2 cups / 300g all-purpose flour
  • 2 tsp / 6g instant yeast
  • 1/3 / 67g cup sugar
  • 1 1/2 tsp / 11g salt
  • 1/2 cup / 118g milk
  • 1/2 cup / 118g buttermilk or sour milk
  • 6 Tbsp / 85g butter, room temperature
  • 2 eggs
  • 1 1/3 cup / 234g chocolate chips or chunks

instructions:

How to cook Chocolate Chip Brioche Rolls

  1. Oven 350°F / 177°C. Line a baking sheet with parchment paper or silicone mat.
  2. In the bowl of a stand mixer fitted with the paddle, mix together flour, yeast, sugar, and salt.
  3. In a small saucepan heat milk and buttermilk until about 105°F / 40°C. Add to flour mixture and mix until well combined.
  4. With the mixer running, add butter and allow to mix until fully immersed. Add 1 egg.
  5. Switch to the dough hook and knead on medium speed for 6-8 minutes, until the dough no longer sticks to the sides of the bowl and starts to make a slapping sound against the bowl. If the dough is still clinging to the sides, add a touch more flour until it no longer sticks.
  6. Mix in chocolate chips just long enough to incorporate.
  7. Transfer dough to a large oiled bowl. Flip the dough so that both sides are now oiled. Cover with a towel or plastic wrap and allow to ferment in a warm place for about 1 1/2 hours, or until doubled in size.
  8. Place dough on a lightly floured surface and divide into 12 equal pieces. Roll each piece into a ball and place evenly spaced on the prepared baking sheet.
  9. Beat the second egg with 1 tablespoon of water. Use a pastry brush or your fingers to brush each dough well with egg wash. Cover with a towel or plastic wrap and allow to rise for about 1 hour, or until puffed.
  10. Bake for 25-30 minutes, or until golden brown and internal temperature reads about 180°F / 82°C.

NOTES:

If you don’t have buttermilk or sour milk, you can make your own sour milk by adding 1 Tbsp lemon juice or vinegar per 1 cup milk. After you've made the dough, you can place the dough in the fridge before the first or second ferment. That way the ferment will happen slowly in the fridge, and you can shape or bake the rolls the next day. Allow the dough to come to room temperature before rolling or baking, then continue as instructed. Use any leftover egg wash for another baking venture or omelette!

Calories

265.01

Fat (grams)

12.95

Sat. Fat (grams)

7.58

Carbs (grams)

34.61

Fiber (grams)

1.96

Net carbs

32.65

Sugar (grams)

13.04

Protein (grams)

5.38

Sodium (milligrams)

439.38

Cholesterol (grams)

47.41
Nutritional information is approximate.
Created using The Recipes Generator
IMG_4900.jpg

Buttermilk Bread

This post may contain affiliate links. If you make a purchase using these links, Jennyblogs may receive a small commission, at no extra cost to you. This helps to support Jennyblogs. For further information see the privacy policy. Grazie!

What’s the first thing that comes to mind when someone says, "Buttermilk"?  

For me, that would be buttermilk pancakes.  The lightest and fluffiest of all pancakes.  If you live in the south, maybe that's buttermilk biscuits.  Maybe your favorite cake recipe or scone recipe calls for buttermilk.  Whatever it may be, these delectable food items all have one thing in common:  Their light crumb, a.k.a. fluffiness.  The high acidity in the buttermilk reacts with the leavening agent, like baking soda, thus creating a beautiful rise, and a nice, light product.  

I don't often have buttermilk on hand; I find it much easier to make my own as I always have milk and lemon juice/vinegar on hand.  Lemon juice or vinegar are both very acidic and will have a similar effect on the leavening agent.  However, there is something so satisfying about using true buttermilk in a recipe.  After all, Milk and Lemon Juice Pancakes don't sound nearly as appealing as Buttermilk pancakes.   

So, a trip to the store, a carton of buttermilk bought, pancakes made and eaten.  Now, there is only 7/8 of a carton of buttermilk left in your fridge.  The likelihood of making 7 or more batches of buttermilk pancakes before the buttermilk goes bad is, well, not likely.  (But if you do, let me know, I’ll come live at your house!)  

The question remains, what I can do with the rest of this buttermilk without being wasteful?  Make buttermilk bread! (Another side note, if you like to drink buttermilk straight, well then.  You just can't relate with our buttermilk overload predicament, can you?)  The fluffiness factor we were talking about earlier still plays a role in this bread.  So fluffy.  Makes great toast.  And did I mention french toast?  Now you can serve buttermilk french toast! Oh yes.  Full circle, baby.  Actually, I don't really know where the circle started, so it's hard to tell if we actually came full circle...

On to the recipe! 

Recipe adapted from Jane's Sweets and Baking Journal


Buttermilk Bread

Makes 2 approx. 9x5 inch loaves

Ingredients:

  • 5-6 cups / 620-740g all-purpose flour

  • 1 Tbsp / 9g instant yeast

  • 2 tsp / 10g salt

  • 2 cups / 474g buttermilk

  • 1 Tbsp / 20g maple syrup or honey

  • 2 Tbsp / 28g oil or melted butter

Directions:

Oven 375°F / 190°C.  Grease two approx. 9x5in / 24x13cm loaf pans.

  1. In a large bowl or bowl of a stand mixer fitted with the paddle attachment, place 5 cups of flour, yeast, and salt.  Mix together.  Add buttermilk, maple syrup, and oil, mixing well.  Switch to the dough hook if using a stand mixer.  

  2. Knead in the stand mixer or by hand on a lightly floured surface, until a smooth dough is formed, adding more flour as needed.   This should take about 5-7 minutes with a stand mixer, 10 minutes by hand.  If using a stand mixer, still knead a few rounds on a lightly floured surface at the end.

  3. Lightly grease a bowl and place your dough in it, flipping once so that all the dough is lightly coated in oil.  Cover with a clean towel or plastic wrap and place in a warm place to rise until doubled in volume, about one hour.  

  4. When bread has risen, punch or press down to degas it.  Dump back onto your floured surface and divide the dough into two even pieces, using a scale for accuracy.  

  5. Starting with one half, form dough into a ball by flattening in a small square, then folding 3-4 times to create a ball, stretching as you do to create some tension. Move to a part of your work surface that has minimal flour.  Place the ball between your two floured hands, loosely cupped. Move the ball between your hands in a circular motion while gently pulling the dough in a downward action.  The bottom of the dough should stick to your surface a bit, and as you gently stretch it down in a circular motion you are creating surface tension.  If the dough starts to tear lighten up on the pressure; the dough should look taught and smooth.  The surface tension will create a nice crust for your dough.  This is called shaping a "Boule."  If you're as confused as I would be reading this for the first time, this demonstration from King Arthur Flour is very helpful, the technique we're going for is shown starting at about 0:30.  

  6. Repeat with other half of dough.  Place towel or plastic wrap over the two boules and let rest for 15 minutes.

  7. Shape each round into a loaf and place in prepared pans.  Place back in a warm place to double, about 1 hour.  Preheat your oven towards the end of this time.  

  8. When dough has risen for the second time and the oven is hot, spray the inside walls of your oven with water to create steam.  A spray bottle works well.  Place loaves in oven and bake for 25-30 minutes, or until internal temperature reads 200-210°F / 93-99°C.  Allow to cool in pans for 10 minutes, then remove and transfer to a wire rack.  

bread, white bread, carbs, buttermilk, toast, french toast bread
Bread
American
Yield: 20
Author:

Buttermilk Bread

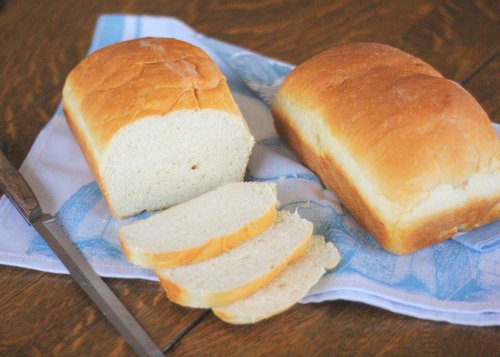
A soft white bread made extra fluffy with the use of buttermilk. Great for toast and french toast.
prep time: 40 Mcook time: 30 Mtotal time: 70 M

ingredients:

  • 5-6 cups / 620g-740g all-purpose flour
  • 1 Tbsp / 9g instant yeast
  • 2 tsp / 10g salt
  • 2 cups / 474g buttermilk
  • 1 Tbsp / 20g maple syrup or honey
  • 2 Tbsp / 28g oil or melted butter

instructions:

How to cook Buttermilk Bread

  1. Oven 375°F / 190°C. Grease two approx. 9x5in / 24x13cm loaf pans.
  2. In a large bowl or bowl of a stand mixer fitted with the paddle attachment, place 5 cups of flour, yeast, and salt. Mix together. Add buttermilk, maple syrup, and oil, mixing well. Switch to the dough hook if using a stand mixer.
  3. Knead in the stand mixer or by hand on a lightly floured surface, until a smooth dough is formed, adding more flour as needed. This should take about 5-7 minutes with a stand mixer, 10 minutes by hand. If using a stand mixer, still knead a few rounds on a lightly floured surface at the end.
  4. Lightly grease a bowl and place your dough in it, flipping once so that all the dough is lightly coated in oil. Cover with a clean towel or plastic wrap and place in a warm place to rise until doubled in volume, about one hour.
  5. When bread has risen, punch or press down to degas it. Dump back onto your floured surface and divide the dough into two even pieces, using a scale for accuracy.
  6. Starting with one half, form dough into a ball by flattening in a small square, then folding 3-4 times to create a ball, stretching as you do to create some tension. Move to a part of your work surface that has minimal flour. Place the ball between your two floured hands, loosely cupped. Move the ball between your hands in a circular motion while gently pulling the dough in a downward action. The bottom of the dough should stick to your surface a bit, and as you gently stretch it down in a circular motion you are creating surface tension. If the dough starts to tear lighten up on the pressure; the dough should look taught and smooth. The surface tension will create a nice crust for your dough. This is called shaping a "Boule." If you're as confused as I would be reading this for the first time, this demonstration from King Arthur Flour is very helpful, the technique we're going for is shown starting at about 0:30.
  7. Repeat with other half of dough. Place towel or plastic wrap over the two boules and let rest for 15 minutes.
  8. Shape each round into a loaf and place in prepared pans. Place back in a warm place to double, about 1 hour. Preheat your oven towards the end of this time.
  9. When dough has risen for the second time and the oven is hot, spray the inside walls of your oven with water to create steam. A spray bottle works well. Place loaves in oven and bake for 25-30 minutes, or until internal temperature reads 200-210°F / 93-99°C. Allow to cool in pans for 10 minutes, then remove and transfer to a wire rack.

Calories

161.19

Fat (grams)

2.00

Sat. Fat (grams)

0.28

Carbs (grams)

30.42

Fiber (grams)

1.12

Net carbs

29.30

Sugar (grams)

2.10

Protein (grams)

4.79

Sodium (milligrams)

239.83

Cholesterol (grams)

0.95
Nutritional information is approximate and based on 1 slice from 20 servings.
Created using The Recipes Generator

Whole Wheat Bread

This post may contain affiliate links. If you make a purchase using these links, Jennyblogs may receive a small commission, at no extra cost to you. This helps to support Jennyblogs. For further information see the privacy policy. Grazie!

Simple, delicious, whole wheat bread.  No batons, bread machines, or rocket scientists required.  Actually, if you have a bread machine your bread making life is probably a lot simpler than mine.  I enjoy working the bread with my own hands, though.  It's very therapeutic and gives you a nice upper body workout.   Which means you could then eat more bread, yes?

Anyway, this is a simple, versatile bread, good for sandwiches, toast, and...bread.  

Recipe adapted from The Frugal Girl


Whole Wheat Bread

Makes 2 approx. 9in / 23cm loaves

Ingredients:

  • 1 1/2 Tbsp / 14g instant yeast

  • 2 1/2 tsp / 13g salt

  • 3 cups / 384g whole wheat flour

  • 2 3/4 cups / 330g all-purpose flour

  • 2 1/3 cups / 552g warm water (about 110°F / 43°C)

  • 1/4 cup / 80g maple syrup or honey

  • 1/4 cup / 56g oil or melted butter

Directions:

Oven 350°F / 177°C.  Grease 2 approx. 9x5in / 23x13cm bread pans. 

  1. Combine yeast, salt, 1 cup / 128g whole wheat flour, and 1 cup / 120g all-purpose flour in the bowl of a stand mixer on low speed, or mix by hand.  

  2. Add warm water, maple syrup, and oil.  Mix until ingredients are combined, then increase speed to medium, beating for 3 minutes, or vigorously by hand.  

  3. Add remaining whole wheat flour and all-purpose flour until a soft but kneadable dough is formed.  

  4. Switch to dough hook and knead for 5-7 minutes, turning out on to a lightly floured surface to knead for 1-2 minutes more, until dough looks smooth and elastic. Or, knead by hand on a lightly floured surface for about 10 minutes.  

  5. Grease a large bowl and place dough in it.  Flip the dough over once so that both sides are lightly greased.  Cover bowl with a clean towel and place in a warm place to rise until doubled in volume, about 45-60 minutes.  

  6. When dough has risen, punch down and knead on a lightly floured surface for 4-5 minutes.  

  7. Separate dough into two equal pieces.  Roll or press one piece out into a small rectangle.  It does not have to be exact or very big, the width of it should be a touch smaller than your bread pan, or 9 inches.  Starting from the short end, roll the dough up and place in your prepared pan.  Repeat with second piece.  

  8. Place towel back over loaves and let rise until doubled, about 30-45 minutes.  

  9. When loaves have risen, bake for about 30 minutes.  They should sound hollow when tapped on the bottom or the internal temperature should read about 205°F / 96°C.  

  10. Cool in pans 10 minutes before removing and allowing to cool fully.  

Jenny's Notes:

  • If you use oil to make this bread, it will be dairy-free. If you use oil and maple syrup, it will also be vegan.

  • I have also made this bread with great success substituting part of the all-purpose flour with wheat germ.  Gives it an extra nutty flavor profile.  

  • The rolling step creates surface tension in the bread, and therefore a prettier loaf.  I only eat pretty loaves.  ;)

vegan, dairy-free, whole wheat bread, wheat germ, honey, maple syrup, toast, french toast, whole wheat sandwich bread, homemade bread, loaves
Bread
American
Yield: 20
Author:

Whole Wheat Bread

Classic everyday whole wheat bread, great for sandwiches, toast, or anyway you like to eat bread!
prep time: 35 Mcook time: 30 Mtotal time: 65 M

ingredients:

  • 1 1/2 Tbsp / 14g instant yeast
  • 2 1/2 tsp / 13g salt
  • 3 cups / 384g whole wheat flour
  • 2 3/4 cups / 330g all-purpose flour
  • 2 1/3 cups / 552g warm water (about 110°F / 43°C)
  • 1/4 cup / 80g maple syrup or honey
  • 1/4 cup / 56g oil or melted butter

instructions:

How to cook Whole Wheat Bread

  1. Oven 350°F / 177°C. Grease 2 approx. 9x5in / 23x13cm bread pans.
  2. Combine yeast, salt, 1 cup / 128g whole wheat flour, and 1 cup / 120g all-purpose flour in the bowl of a stand mixer on low speed, or mix by hand.
  3. Add warm water, maple syrup, and oil. Mix until ingredients are combined, then increase speed to medium, beating for 3 minutes, or vigorously by hand.
  4. Add remaining whole wheat flour and all-purpose flour until a soft but kneadable dough is formed.
  5. Switch to dough hook and knead for 5-7 minutes, turning out on to a lightly floured surface to knead for 1-2 minutes more, until dough looks smooth and elastic. Or, knead by hand on a lightly floured surface for about 10 minutes.
  6. Grease a large bowl and place dough in it. Flip the dough over once so that both sides are lightly greased. Cover bowl with a clean towel and place in a warm place to rise until doubled in volume, about 45-60 minutes.
  7. When dough has risen, punch down and knead on a lightly floured surface for 4-5 minutes.
  8. Separate dough into two equal pieces. Roll or press one piece out into a small rectangle. It does not have to be exact or very big, the width of it should be a touch smaller than your bread pan, or 9 inches. Starting from the short end, roll the dough up and place in your prepared pan. Repeat with second piece.
  9. Place towel back over loaves and let rise until doubled, about 30-45 minutes.
  10. When loaves have risen, bake for about 30 minutes. They should sound hollow when tapped on the bottom or the internal temperature should read about 205°F / 96°C.
  11. Cool in pans 10 minutes before removing and allowing to cool fully.

NOTES:

If you use oil to make this bread, it will be dairy-free. If you use oil and maple syrup, it will also be vegan. I have also made this bread with great success substituting part of the all-purpose flour with wheat germ. Gives it an extra nutty flavor profile. The rolling step creates surface tension in the bread, and therefore a prettier loaf.

Calories

162.77

Fat (grams)

3.50

Sat. Fat (grams)

0.30

Carbs (grams)

29.38

Fiber (grams)

2.69

Net carbs

26.69

Sugar (grams)

2.54

Protein (grams)

4.53

Sodium (milligrams)

254.58

Cholesterol (grams)

0.00
Nutritional information is approximate and based on 1 slice from a 10-slice loaf.
Created using The Recipes Generator

Cream Cheese Coffee Cake

This post contains affiliate links. If you buy something using these links, Jennyblogs may receive a small commission, at no extra cost to you. This helps to support Jennyblogs. For further information see the privacy policy. Grazie!

Cream Cheese Coffee Cake. Think a delicate crumb, super moist with swirls of cream cheese making the coffee cake even softer, and a sweet crumble on top.

Coffee cakes (and scones) often get a bad rap for being dry. No one likes to eat something that makes their mouth feel like it’s full of sawdust. There is no need to make dry baked goods when there are so many good recipes out there! A good example? This Cream Cheese Coffee Cake recipe. I already have a few favorite NOT dry recipes like this Cinnamon Streusel Coffee Cake, but today’s Cream Cheese Coffee Cake really uh, takes the cake on the moist scale. I apologize if you don’t like the word “moist”, but I struggle finding suitable synonyms that get the same point across. If you have any ideas, I’m open to suggestions so I don’t offend some people’s sensibilities. :)

Now, post Valentine's Day, or Galentine's Day, you may need to take a break from chocolate.  No wait, never mind, that's silly.  Chocolate is always necessary.  What was I thinking?  But I'm sure you already have plenty of chocolate on your hands (maybe literally, put that candy bar down and get busy making this coffee cake) in the form of heart boxes, Dove dark chocolate with those hidden messages, Hershey's kisses, or in my case, Toblerone.  So instead, let's make a very white dessert (or breakfast, hey) with a delicate crumb and cheesecake filling.  Yes? Yes.


Cream Cheese Coffee Cake

Serves 12-16

Ingredients:

For the Filling

  • 8 oz / 225g cream cheese, softened

  • 1/4 cup / 50g sugar

  • 1/2 tsp vanilla extract

  • 1 egg

For the Cake

  • 1 1/2 cups / 180g all-purpose flour

  • 1/2 tsp baking powder

  • 1/2 tsp baking soda

  • 1/2 tsp salt

  • 3 Tbsp / 42g oil

  • 1/2 cup / 100g sugar

  • 2 eggs

  • 1 tsp vanilla

  • 1/2 cup / 123g yogurt or sour cream

For the Streusel

  • 1/4 cup / 50g sugar

  • 1/4 cup / 30g all-purpose flour

  • 3 Tbsp / 42g cold butter, cubed

Directions:

Oven 350°F / 177°C.  Greased 8x8in / 20x20cm square baking pan.

For the Filling

  1. In the bowl of a stand mixer beat cream cheese until smooth, about 30 seconds. 

  2. Add sugar, vanilla, egg and beat on medium-low speed until combined.  Pour into another bowl and set aside. 

For the Cake

  1. In a medium bowl whisk together flour, baking powder, baking soda, and salt. 

  2. In the bowl of a stand mixer combine oil and sugar.  Beat in eggs one at a time.  Add vanilla. 

  3. Alternate adding the dry ingredients and yogurt to the oil and sugar mixture.  Dry, yogurt, dry, yogurt, dry.  Mix only until just combined after each addition. 

For the Streusel

  1. Combine sugar, flour, and butter in a small bowl with a pastry cutter, fork, or your hands until crumbles the size of pebbles appear.

Assembly

  1. Spread half of the cake batter in the bottom of prepared pan. 

  2. Pour and spread cream cheese filling evenly over batter; gently swirl.

  3. Spread remaining half of cake batter over cream cheese filling. 

  4. Evenly sprinkle streusel over the top.

  5. Bake for 20-25 minutes or until toothpick inserted near the center comes out mostly clean. 

Jenny's Notes:

  • Love coffee cake or serving at a party?  You can double this recipe and bake in a 9x13 inch pan.  Increase baking time to about 40 minutes.

cream cheese, coffee cake, streusel, cream cheese filling, swirl, moist
Breakfast, Dessert
American
Yield: 12-16 Servings
Author:

Cream Cheese Coffee Cake

Super moist coffee cake with a thick cream cheese swirl and delicate streusel topping.
prep time: 45 Mcook time: 25 Mtotal time: 70 M

ingredients:

For the Filling
  • 8 oz / 225g cream cheese, softened
  • 1/4 cup / 50g sugar
  • 1/2 tsp vanilla extract
  • 1 egg
For the Cake
  • 1 1/2 cups / 180g all-purpose flour
  • 1/2 tsp baking powder
  • 1/2 tsp baking soda
  • 1/2 tsp salt
  • 3 Tbsp / 42g oil
  • 1/2 cup / 100g sugar
  • 2 eggs
  • 1 tsp vanilla
  • 1/2 cup / 123g yogurt or sour cream
For the Streusel
  • 1/4 cup / 50g sugar
  • 1/4 cup / 30g all-purpose flour
  • 3 Tbsp / 42g cold butter, cubed

instructions:

How to cook Cream Cheese Coffee Cake

For the Filling
  1. In the bowl of a stand mixer beat cream cheese until smooth, about 30 seconds.
  2. Add sugar, vanilla, egg and beat on medium-low speed until combined. Pour into another bowl and set aside.
For the Cake
  1. In a medium bowl whisk together flour, baking powder, baking soda, and salt.
  2. In the bowl of a stand mixer combine oil and sugar. Beat in eggs one at a time. Add vanilla.
  3. Alternate adding the dry ingredients and yogurt to the oil and sugar mixture. Dry, yogurt, dry, yogurt, dry. Mix only until just combined after each addition.
For the Streusel
  1. Combine sugar, flour, and butter in a small bowl with a pastry cutter, fork, or your hands until crumbles the size of pebbles appear.
Assembly
  1. Oven 350°F / 177°C. Greased 8x8in / 20x20cm square baking pan.
  2. Spread half of the cake batter in the bottom of prepared pan.
  3. Pour and spread cream cheese filling evenly over batter; gently swirl.
  4. Spread remaining half of cake batter over cream cheese filling.
  5. Evenly sprinkle streusel over the top.
  6. Bake for 20-25 minutes or until toothpick inserted near the center comes out mostly clean.

NOTES:

Love coffee cake or serving at a party? You can double this recipe and bake in a 9x13 inch pan. Increase baking time to about 40 minutes.

Calories

269.85

Fat (grams)

13.92

Sat. Fat (grams)

6.21

Carbs (grams)

31.96

Fiber (grams)

0.47

Net carbs

31.48

Sugar (grams)

18.21

Protein (grams)

4.58

Sodium (milligrams)

270.60

Cholesterol (grams)

58.08
Nutritional information is approximate and based on 12 servings.
Created using The Recipes Generator

Salted Chocolate Caramel Pretzel Bark

Pretzels. Homemade caramel. Chocolate. And salted. This bark has only 5 ingredients, it’s super easy to make, and you keep going back for more.

Oh yes.  For the sugar lovers, sweets devotees, and when you want to whip up something delicious with precious little effort, this bark is it.  Some people even refer to it as crack bark. Maybe because you break, or crack it, at the end?  (Just kidding everyone, I know what they mean when they call it that.)  Plus all 5 ingredients are pretty easy to have on hand. 

Now, if this were Pinterest, you could call it "5 Ingredient Crack Bark."  Remember my thing with Pinterest names?  Yep.  Still there.  Keep it classy, people, keep it classy.  It already bothers me that this recipe has as many words in its title as it does ingredients.  If you have any better and more concise ideas for the title, please, let me know!

Slightly adapted from Where the Cookies Are

This post may contain affiliate links. If you buy something using these links, Jennyblogs may receive a small commission, at no extra cost to you. This helps to support Jennyblogs. For further information see the privacy policy. Grazie!


Salted Chocolate Caramel Pretzel Bark

Makes approximately one 11x17in / 28x43cm sheet of bark

Ingredients:

  • Enough mini pretzels to cover an approximately 11x17in / 28x43cm jelly roll pan, about half of a 15oz bag / 200g.

  • 1 cup / 226g butter

  • 1 cup / 200g brown sugar

  • 2 cups / 340g semi-sweet chocolate chips

  • coarse salt

Directions:

Oven 375°F / 190°C.  Line an approximately 11x17in / 28x43cm jelly roll pan with tinfoil. 

  1. Cover pan with an even layer of pretzels.

  2. In a medium saucepan over medium-low heat, combine butter and brown sugar.  Stir until mixture starts to simmer, then allow to cook, without stirring, until mixture turns a nice golden-brown.  This should take 3-5 minutes after the mixture has started to simmer. 

  3. Remove mixture from heat and immediately pour evenly over pretzels. 

  4. Place in the oven and bake for 6 minutes. 

  5. Remove from oven and immediately sprinkle chocolate chips over pretzels and caramel. 

  6. Wait a few minutes, then use a spatula to spread now melted chocolate chips over pretzels.  Sprinkle with salt. 

  7. Allow to cool completely before breaking into pieces.  You can place your pan in the fridge or freezer to speed up the process. 

Jenny's Notes:

  • If you’re wondering what a jelly-roll pan is, it’s merely a baking sheet with about a 1in side around it, which in this case keeps the bark contained. You can shop them on Amazon by clicking on the link to the right. —>

  • Don't have tinfoil?  You can always use wax or parchment paper, but I would recommend greasing them beforehand as I have had the bark stick to both of those products. 

  • Want to go crazy?  Use any kind of chips in place of the semisweet chips, such as milk, peanut butter, bittersweet...or a combination! 

  • Once you have spread the melted chocolate, feel free to add some extra toppings if you wish.  Coconut, chopped peanuts, finely chopped coffee beans...

salted caramel, salted chocolate, bark, butter, toffee, caramel, chocolate chips, crack bark
dessert, snack
American
Yield: 12-15 servings
Author:

Salted Chocolate Caramel Pretzel Bark

Salty, crunchy, chocolatey, caramelly, and only 5 ingredients to whip up this addicting bark!
prep time: 25 Mcook time: 6 Mtotal time: 31 M

ingredients:

  • mini pretzels, enough to cover an approximately 11x17in / 28x43cm jelly roll pan, about half of a 15oz bag or 200g
  • 1 cup / 226g butter
  • 1 cup / 200g brown sugar
  • 2 cups / 340g semi-sweet chocolate chips
  • coarse salt

instructions:

How to cook Salted Chocolate Caramel Pretzel Bark

  1. Oven 375°F / 190°C. Line an approximately 11x17in / 28x43cm jelly roll pan with tinfoil.
  2. Cover pan with an even layer of pretzels.
  3. In a medium saucepan over medium-low heat, combine butter and brown sugar. Stir until mixture starts to simmer, then allow to cook, without stirring, until mixture turns a nice golden-brown. This should take 3-5 minutes after the mixture has started to simmer.
  4. Remove mixture from heat and immediately pour evenly over pretzels.
  5. Place in the oven and bake for 6 minutes.
  6. Remove from oven and immediately sprinkle chocolate chips over pretzels and caramel.
  7. Wait a few minutes, then use a spatula to spread now melted chocolate chips over pretzels. Sprinkle with salt.
  8. Allow to cool completely before breaking into pieces. You can place your pan in the fridge or freezer to speed up the process.

NOTES:

If you’re wondering what a jelly-roll pan is, it’s merely a baking sheet with about a 1in side around it, which in this case keeps the bark contained. Don't have tinfoil? You can always use wax or parchment paper, but I would recommend greasing them beforehand as I have had the bark stick to both of those products. Want to go crazy? Use any kind of chips in place of the semisweet chips, such as milk, peanut butter, bittersweet...or a combination! Once you have spread the melted chocolate, feel free to add some extra toppings if you wish. Coconut, chopped peanuts, finely chopped coffee beans...

Calories

398.37

Fat (grams)

24.26

Sat. Fat (grams)

14.77

Carbs (grams)

47.86

Fiber (grams)

2.24

Net carbs

45.63

Sugar (grams)

31.99

Protein (grams)

3.04

Sodium (milligrams)

384.00

Cholesterol (grams)

40.49
Nutritional information is approximate and based on 12 servings.
Created using The Recipes Generator

Pumpkin Cinnamon Swirl Bread

Pumpkin Bread. No, not that wonderful, dense, quick-bread pumpkin bread, but a light, yeasted bread made with PUMPKIN and spiced with nutmeg and ginger!!! And a beautiful cinnamon swirl. It makes a-may-zing toast. I think I say that about all my bread recipes. But it’s the truth. And I love toast.

Do you want to know something really sad, though? (You’re maybe thinking, uh no, scrolllll.) I’m blogging about this bread, and I can’t even eat it. (By choice, I guess I like to punish my body??) I’m going to tell you about it.

Ever heard of Whole30?  Me neither, up until last year.  Actually, New Year's Eve.  (Yes, only 2 weeks ago.  I know, I know, those "last year" jokes are so old, but I still get SO much entertainment out of them.  Too much.)  Anyway, I read about the Whole30 in an email from this informative and entertaining fitness site called Greatist.   Like all normal people, my first thought when I see things like ice cream and strange diets is to say, "I WANT TO BE A PART OF THAT."  Actually, I prefer the ice cream to be a part of me, meaning I ate it. 

I am not normally a spontaneous person by any means, but two days later I had commenced my very own #Whole30January.  Without even reading all the way through the guidelines.  It's almost easier to list what you can eat than what you can't.  But I'll start with what you can't, just because it's fun and I like to complain about it.  It's not even all that hard.  Especially with a buddy.  Just ask my Mom, she just loves doing this with me.

Not allowed:

  1. grain (not even quinoa)

  2. dairy (guess that ice cream is not going to become a part of me after all)

  3. sugar (say no to stevia)

  4. soy (watch out for sneaky ingredients like soy lecithin)

  5. alcohol (put down the vanilla extract)

  6. legumes (think beans and peanuts)

  7. sketchy preservatives like carageenan

That leaves you with veggies, fruits, eggs, nuts, meat, and all the sadness you want.  But you may not take any of those approved items and combine them to create something in the "cheat" category.  For example, you cannot combine eggs and bananas and pour it onto a griddle because that would be a pancake.  The goal is to break you of unhealthy relationships with food.  So instead of replacing everything you normally eat with healthier versions (because at the end of the 30 days you will most likely go back to the exact same way you ate before, and then nothing has changed) the goal is to explore and create new delicious and nutritious (and sad) food.  Ha ok I'm done being sardonic.  If you want to read more about Whole30, click here.  

So in the midst of these January blues and food sadness, I will share with you this recipe for pumpkin cinnamon swirl bread so you can eat it in my stead.  While you're at it, would you also eat some cheese and every other kind of bread that exists for me?  Thanks. 

This post may contain affiliate links. If you buy something using these links, Jennyblogs may receive a small commission, at no extra cost to you. This helps to support Jennyblogs. For further information see the privacy policy. Grazie!

Recipe adapted from Cooking Classy


Pumpkin Cinnamon Swirl Bread

Makes 1 loaf

Ingredients:

For the Bread

  • 2 1/4 tsp / 7g active dry yeast

  • 1/4 cup / 60g warm water, 110°F / 43°F

  • 1/4 cup / 50g + 1/2 tsp sugar

  • 1/4 cup / 60g warm milk, 110°F / 43°C

  • 2 Tbsp / 42g molasses

  • 3/4 tsp salt

  • 1 Tbsp / 14g oil

  • 1/4 tsp nutmeg

  • 1/4 tsp ginger

  • 1 egg

  • 1 cup / 246g pumpkin puree

  • 3 1/2 - 4 cups / 420g - 480g all-purpose flour

For the Cinnamon Swirl

  • 1 1/2 Tbsp / 21g butter, melted

  • 1/3 cup / 67g brown sugar

  • 2 tsp cinnamon

Directions:

Make the Bread

Oven 375°F / 190°C.  1 greased bread pan, approximately 9x5in / 23x13cm.

  1. In the bowl of a stand mixer combine yeast, water, and 1/2 tsp of sugar.  Allow to sit until yeast starts to bubble, about 5 minutes.

  2. Stir in the milk, molasses, remaining sugar, salt, oil, nutmeg, ginger, egg, and pumpkin until combined. 

  3. Switch to a dough hook and slowly add flour.  Continue adding flour until a soft, but not too sticky dough is achieved. 

  4. Turn dough out onto a lightly floured surface and knead for 1-2 minutes. 

  5. Place in an oiled bowl, flip so that both sides are oiled, and cover with a towel. Allow to rise in a warm place until doubled in size, about 1 hour. 

  6. While the bread is rising, whisk together brown sugar and cinnamon in a small bowl.  Set aside.

  7. When the bread is doubled in size, punch down and turn out onto a lightly floured surface.  Roll out into a rectangle, about 22x8in / 56x20cm. 

  8. Spread melted butter over dough, going within 1/2in / 1cm of edge.  Sprinkle cinnamon sugar mixture evenly over butter.

  9. Starting from one of the short sides (the approximate 8in / 20cm) roll dough into a loaf.  Place in prepared loaf pan seam side down. 

  10. Cover with a towel and let rise again until doubled in size, about 45 minutes. 

  11. Bake in preheated oven for 35-40 minutes, or until bread sounds hollow to the tap and an internal temperature reaches about 190°F / 88°C. 

Jenny's Notes:

  • If using instant yeast instead of instant active dry yeast, you can skip step 1. and add all the ingredients from step 1. and 2. together, then proceed to step 3. The reason for this is because active dry yeast is dried and needs to be reactivated in some warm liquid and a bit of sugar before adding to the rest of the ingredients. Instant yeast is ready to be added in without any extra prep.

  • This bread is delicious toasted!  And if you're really a pumpkin fan, might I mention pumpkin butter?

yeasted bread, yeast, pumpkin puree, canned pumpkin, pumpkin bread, cinnamon swirl
bread, breakfast
American
Yield: 12-14
Author:

Pumpkin Cinnamon Swirl Bread

Light, yeasted pumpkin bread spiced with ginger and nutmeg with a beautiful cinnamon swirl.
prep time: 50 Mcook time: 40 Mtotal time: 90 M

ingredients:

For the Bread
  • 2 1/4 tsp / 7g active dry yeast
  • 1/4 cup / 60g warm water, 110°F / 43°F
  • 1/4 cup / 50g + 1/2 tsp sugar
  • 1/4 cup / 60g warm milk, 110°F / 43°C
  • 2 Tbsp / 42g molasses
  • 3/4 tsp salt
  • 1 Tbsp / 14g oil
  • 1/4 tsp nutmeg
  • 1/4 tsp ginger
  • 1 egg
  • 1 cup / 246g pumpkin puree
  • 3 1/2 - 4 cups / 420g - 480g all-purpose flour
For the Cinnamon Swirl
  • 1 1/2 Tbsp / 21g butter, melted
  • 1/3 cup / 67g brown sugar
  • 2 tsp cinnamon

instructions:

How to cook Pumpkin Cinnamon Swirl Bread

Make the Bread
  1. Oven 375°F / 190°C. 1 greased bread pan, approximately 9x5in / 23x13cm.
  2. In the bowl of a stand mixer combine yeast, water, and 1/2 tsp of sugar. Allow to sit until yeast starts to bubble, about 5 minutes.
  3. Stir in the milk, molasses, remaining sugar, salt, oil, nutmeg, ginger, egg, and pumpkin until combined.
  4. Switch to a dough hook and slowly add flour. Continue adding flour until a soft, but not too sticky dough is achieved.
  5. Turn dough out onto a lightly floured surface and knead for 1-2 minutes.
  6. Place in an oiled bowl, flip so that both sides are oiled, and cover with a towel. Allow to rise in a warm place until doubled in size, about 1 hour.
  7. While the bread is rising, whisk together brown sugar and cinnamon in a small bowl. Set aside.
  8. When the bread is doubled in size, punch down and turn out onto a lightly floured surface. Roll out into a rectangle, about 22x8in / 56x20cm.
  9. Spread melted butter over dough, going within 1/2in / 1cm of edge. Sprinkle cinnamon sugar mixture evenly over butter.
  10. Starting from one of the short sides (the approximate 8in / 20cm) roll dough into a loaf. Place in prepared loaf pan seam side down.
  11. Cover with a towel and let rise again until doubled in size, about 45 minutes.
  12. Bake in preheated oven for 35-40 minutes, or until bread sounds hollow to the tap and an internal temperature reaches about 190°F / 88°C.

NOTES:

If using instant yeast instead of instant active dry yeast, you can skip step 1. and add all the ingredients from step 1. and 2. together, then proceed to step 3. The reason for this is because active dry yeast is dried and needs to be reactivated in some warm liquid and a bit of sugar before adding to the rest of the ingredients. Instant yeast is ready to be added in without any extra prep.

Calories

219.22

Fat (grams)

3.60

Sat. Fat (grams)

1.28

Carbs (grams)

41.35

Fiber (grams)

2.07

Net carbs

39.28

Sugar (grams)

9.02

Protein (grams)

5.33

Sodium (milligrams)

170.35

Cholesterol (grams)

19.66
Nutritional information is approximate and based on 12 servings.
Created using The Recipes Generator
What lurks in the darkness...

What lurks in the darkness...


Cinnamon Streusel Coffee Cake

IMG_4443.jpg

Think of a delicately moist coffee cake with a cinnamon swirl and a crunchy, sweet streusel on top. That’s what we’re making today.

If the first thought that comes to your mind when you think of coffee cake is dry-crumbly-use-up-a-week's-worth-of-saliva-in-one-bite-cake, then think again.  No, no, no.  Coffee cake is supposed to be sweet, but not quite as sweet as regular cake, flavorful, and with a beautifully dense crumb.  That's fancy talk for moist.  But for the mental care of some readers who have an avid dislike for that term, I tried to avoid using it.  But I still did to explain myself.  Just can't win. 

Oh, and for some people who may be confused, there is (most often) no coffee involved in the batter.  The final product, however, pairs beautifully with a mug of coffee.  Hence the name.  (Speaking of words we don't like...mug?  No thanks.  It's like your mouth was too lazy to talk - "mmmm" - then made a huge effort and ended up with "ug."  Mmmmmmug.) 

On to more delicious sounding, looking, and tasting things!! 

This post may contain affiliate links. If you buy something using these links, Jennyblogs may receive a small commission, at no extra cost to you. This helps to support Jennyblogs. For further information see the privacy policy. Grazie!


Cinnamon Streusel Coffee Cake

Serves 9-12

Ingredients:

For the Cake

  • 1/2 cup / 112g oil

  • 1/2 cup / 100g sugar

  • 1/4 cup / 50g brown sugar

  • 1 1/4 tsp baking powder

  • 3/4 tsp salt

  • 1 tsp vanilla extract

  • 1 egg

  • 1/2 cup / 122g plain yogurt

  • 1/2 cup / 119g milk

  • 2 cups / 240g all-purpose flour

For the Cinnamon Swirl

  • 1/2 cup / 100g brown sugar

  • 2 1/2 tsp cinnamon

  • 1 tsp unsweetened cocoa powder

For the Streusel

  • 1/3 cup / 67g sugar

  • 1/4 cup / 30g all-purpose flour

  • 1/4 cup / 23g rolled oats

  • 1 tsp cinnamon

  • 2 Tbsp / 28g butter, melted

Directions:

Oven 350°F / 177°C.  Greased 8x8in / 20x20cm square baking pan, or 8in / 20cm round cake pan.

Make the Cake

  1. In the bowl of a stand mixer, beat oil, sugars, baking powder, salt, and vanilla until well combined.  Beat in egg. 

  2. In a separate small bowl mix together yogurt and milk. 

  3. Add a third of the flour to the oil mixture, mixing until almost combined.  Add half of the yogurt mixture.  Continue adding flour and yogurt mixture to oil mixture until everything is just combined. 

  4. Pour half of the batter into the prepared pan, spreading all the way to edges; set other half aside. 

Make the Cinnamon Swirl

  1. In a small bowl combine brown sugar, cinnamon, and cocoa powder. 

  2. Sprinkle evenly over batter in pan. 

  3. Pour remaining batter over cinnamon filling and use a spatula to gently spread to edges.

Make the Streusel

  1. In another small bowl, combine sugar, flour, oats, and cinnamon.  Add the melted butter and mix until crumbles form. 

  2. Evenly distribute crumble over batter in pan. 

  3. Bake for 40-45 minutes or until toothpick inserted in center comes out clean. 

Jenny's Notes:

  • Watch that bake time.  Toothpicks are your best friend.  I was testing this recipe using my Italian oven that didn't like to bake things on the bottom, so you may need less time.

  • REALLY like coffee cake?  Double this recipe and put in a 9x13 inch pan or two cake pans.  You can always freeze one pan!

  • Don't have plain yogurt on hand? You can also use sweetened yogurt and reduce sugar by 1/4 cup / 50g, or try Greek yogurt, fresh ricotta, sour cream, or mascarpone.  The dairy options are endless!!!!  I really liked fresh ricotta in this recipe. 

coffee cake, cinnamon swirl, brunch, streusel topping
breakfast, cake, dessert
American
Yield: 9-12 servings
Author:
Cinnamon Streusel Coffee Cake

Cinnamon Streusel Coffee Cake

Delicate, moist coffee cake with a cinnamon swirl and streusel to top it all off.
Prep time: 30 MinCook time: 45 MinTotal time: 1 H & 15 M

Ingredients

For the Cake
For the Cinnamon Swirl
For the Streusel

Instructions

Make the Cake
  1. Oven 350°F / 177°C. Greased 8x8in / 20x20cm square baking pan, or 8in / 20cm round cake pan.
  2. In the bowl of a stand mixer, beat oil, sugars, baking powder, salt, and vanilla until well combined. Beat in egg.
  3. In a separate small bowl mix together yogurt and milk.
  4. Add a third of the flour to the oil mixture, mixing until almost combined. Add half of the yogurt mixture. Continue adding flour and yogurt mixture to oil mixture until everything is just combined.
  5. Pour half of the batter into the prepared pan, spreading all the way to edges; set other half aside.
Make the Cinnamon Swirl
  1. In a small bowl combine brown sugar, cinnamon, and cocoa powder.
  2. Sprinkle evenly over batter in pan.
  3. Pour remaining batter over cinnamon filling and use a spatula to gently spread to edges.
Make the Streusel
  1. In another small bowl, combine sugar, flour, oats, and cinnamon. Add the melted butter and mix until crumbles form.
  2. Evenly distribute crumble over batter in pan.
  3. Bake for 40-45 minutes or until toothpick inserted in center comes out clean.

Notes:

Watch that bake time. Toothpicks are your best friend. I was testing this recipe using my Italian oven that didn't like to bake things on the bottom, so you may need less time. REALLY like coffee cake? Double this recipe and put in a 9x13 inch pan or two cake pans. You can always freeze one pan! Don't have plain yogurt on hand? You can also use sweetened yogurt and reduce sugar by 1/4 cup / 50g, or try Greek yogurt, fresh ricotta, sour cream, or mascarpone. The dairy options are endless!!!! I really liked fresh ricotta in this recipe.

Calories

402.38

Fat (grams)

16.42

Sat. Fat (grams)

2.95

Carbs (grams)

59.80

Fiber (grams)

1.55

Net carbs

58.24

Sugar (grams)

35.85

Protein (grams)

5.08

Sodium (milligrams)

311.45

Cholesterol (grams)

29.23

Nutritional information is approximate and based on 9 servings.

Did you make this recipe?
Tag @jennyblogsandbakes on instagram and hashtag it #jennyblogs
Created using The Recipes Generator

Blackberry Banana Bread with Cinnamon Streusel

Wild blackberries abound in Italy. 

Ok, that's a bit general, I have not been everywhere in Italy, but I can safely say that they are abundant in Florence and Cinque Terre.  I'm all for anything free and tasty, so I will always stop and pick a few when they are in reach. 

Most evenings I like to go for a "passeggiata," or stroll, usually along the Fiume (river) Arno, and there are lots of vines that grow down towards the river.  A fence conveniently kept me from clambering down and picking any, getting torn up by the thorns, and possibly dying in the pursuit, but that didn't stop a little nonna one evening from trying her best to reach through the fence and grab a few tasty morsels.  I admired her greatly. 

Along the hiking trails of Cinque Terre there was also a plethora, and they were perfectly placed along the trail for me to grab handfuls here and there, energy bursts for the 2 hour (solid uphill, both ways) trek!  Especially helpful since I had already eaten my packed lunch before we even started hiking...

Then there was that one time when a friend, who loves to do triathlon and ride his bike for millions of miles, said he had passed a huge group of blueberry bushes while riding up in the rolling hills of Tuscany.  So a group of us drove up to the spot, prepared with bags, open mouths, and welcoming stomachs.  A couple of us headed to the nearest loaded bush, and although my first thought was "those are strange looking blueberries", it didn't occur to me to stop and figure out what they were before picking or eating any.  They had been told to me as blueberries, therefore they must be.  So the first thing I do? Pop one in my mouth.  It was the single most sour/bitter thing I have ever had in my mouth.  And I like sour things, I like straight lemon juice and lemons.  But this had a pit and I was expecting a sweet blueberry.  I swiftly spit it out and we didn't pick or eat anymore.  For awhile after we were convinced it was nightshade, OH NO, and I thought I might die.  Not really, it wasn't.  But don't eat something in nature if you don't know what it is.  JENNY.  I'm looking at you.  

Another evening I took a different route for my passeggiata and passed tons of blackberry bushes.  They lined the road for quite a ways, and so I went back several times with friends to pick a couple bagfuls.  I gained a few battle scars from the prickers, some "ciao bella's" from people passing on the road probably wondering what is that weird girl doing climbing on the road guard half hidden/hanging from thorns in bushes, but most importantly, free berries.  And what do you do when you have too many blackberries to eat?  You bake with them, of course.  Delicious and tender banana bread with little bites of blackberries dispersed throughout topped with a sweet cinnamon streusel.  

*All photos in this post are credited to my friend, Bailey Shoemaker Guthrey. She’s a visual design natural, you can check out her site baileyshoemakerdesign.com for any of your graphic design needs!

This post may contain affiliate links. If you make a purchase using these links, Jennyblogs may receive a small commission, at no extra cost to you. This helps to support Jennyblogs. For further information see the privacy policy. Grazie!

A recipe by Jenny


Blackberry Banana Bread with Cinnamon Streusel

Ingredients:

For the Blackberry Banana Bread

  • 2 cups / 240g all-purpose flour

  • 1 tsp baking soda

  • 3/4 tsp salt

  • 3/4 cup / 150g sugar

  • 1/2 cup / 112g oil

  • 2 eggs

  • 2-3 large bananas, mashed, about 300g

  • 1 tsp vanilla

  • 1 1/4 cups / 181g blackberries

  For the Cinnamon Streusel

  • 3/4 cup / 90g all-purpose flour

  • 1/3 cup / 67g sugar

  • 1 tsp cinnamon

  • 3 Tbsp / 42g cold butter

Directions:

Oven 350°F / 177°C.  1 greased 9x5in / 23x13cm loaf pan.

Make the Blackberry Banana Bread

  1. In a medium bowl, whisk together flour, baking soda, and salt.

  2. In another large bowl, beat together sugar, oil, eggs, banana, and vanilla.  Add dry ingredients and stir until just combined.  Gently fold in blackberries. 

  3. Pour into prepared pan.

Make the Cinnamon Streusel

  1. In a medium bowl whisk together flour, sugar, and cinnamon.  Using a pastry cutter, a fork, or my preferred method, clean hands, add butter and mix until crumbles form, like coarse pebbles. 

  2. Sprinkle evenly over batter in pan and bake for 35-40 minutes, or until toothpick comes out almost clean.  

  3. Allow to cool in pan at least 10 minutes before removing to cool completely.

Jenny's Notes:

  • Feel free to substitute any type of berry for the blackberries!  Blueberries and raspberries are also delicious.   

  • This is a great recipe to use up sourdough discard. Use up to 100g and add in with the wet ingredients, proceed as instructed.

  • Bananas are always a bit of guess work to measure because recipes will give measurements without having any idea how big or small your bananas are. If you see a recipe with a measurement of 300g, like the one above, and that ended up being 2 + 7/16 of a banana, what are you going to do with the remaining 9/16 of that mushy banana? No worries, using a little more or less banana than called for shouldn’t yield anything other than delicious bread.  The more banana the more moist it will be, and also a touch heavier. Go too far and it will start becoming gummy.

Blackberry Banana Bread with Cinnamon Streusel
Yield 8-10
Author
Prep time
25 Min
Cook time
40 Min
Total time
1 H & 5 M

Blackberry Banana Bread with Cinnamon Streusel

Moist banana bread with little explosions of blackberries throughout and a sweet cinnamon streusel on top.

Ingredients

For the Blackberry Banana Bread
For the Cinnamon Streusel

Instructions

Make the Blackberry Banana Bread
  1. Oven 350°F / 177°C. 1 greased 9x5in / 23x13cm loaf pan.
  2. In a medium bowl, whisk together flour, baking soda, and salt.
  3. In another large bowl, beat together sugar, oil, eggs, banana, and vanilla. Add dry ingredients and stir until just combined. Gently fold in blackberries.
  4. Pour into prepared pan.
Make the Cinnamon Streusel
  1. In a medium bowl whisk together flour, sugar, and cinnamon. Using a pastry cutter, a fork, or my preferred method, clean hands, add butter and mix until crumbles form, like coarse pebbles.
  2. Sprinkle evenly over batter in pan and bake for 35-40 minutes, or until toothpick comes out almost clean.
  3. Allow to cool in pan at least 10 minutes before removing to cool completely.

Notes

Feel free to substitute any type of berry for the blackberries! Blueberries and raspberries are also delicious.

Nutrition Facts

Calories

474.54

Fat

20.00 g

Sat. Fat

4.11 g

Carbs

68.73 g

Fiber

2.39 g

Net carbs

66.34 g

Sugar

32.50 g

Protein

6.35 g

Sodium

428.44 mg

Cholesterol

57.79 mg

Nutritional information is approximate. Based on 8 servings.

banana bread, blackberry banana bread, cinnamon streusal, wild blackberries, blackberries in Italy, quick bread
Breads, breakfast
American
Did you make this recipe?
Tag @jennyblogsandbakes on instagram and hashtag it #jennyblogs