Almond Poppy Seed Rolls

Welcome back to quarantine snacks and meals!

Adjustments.jpg

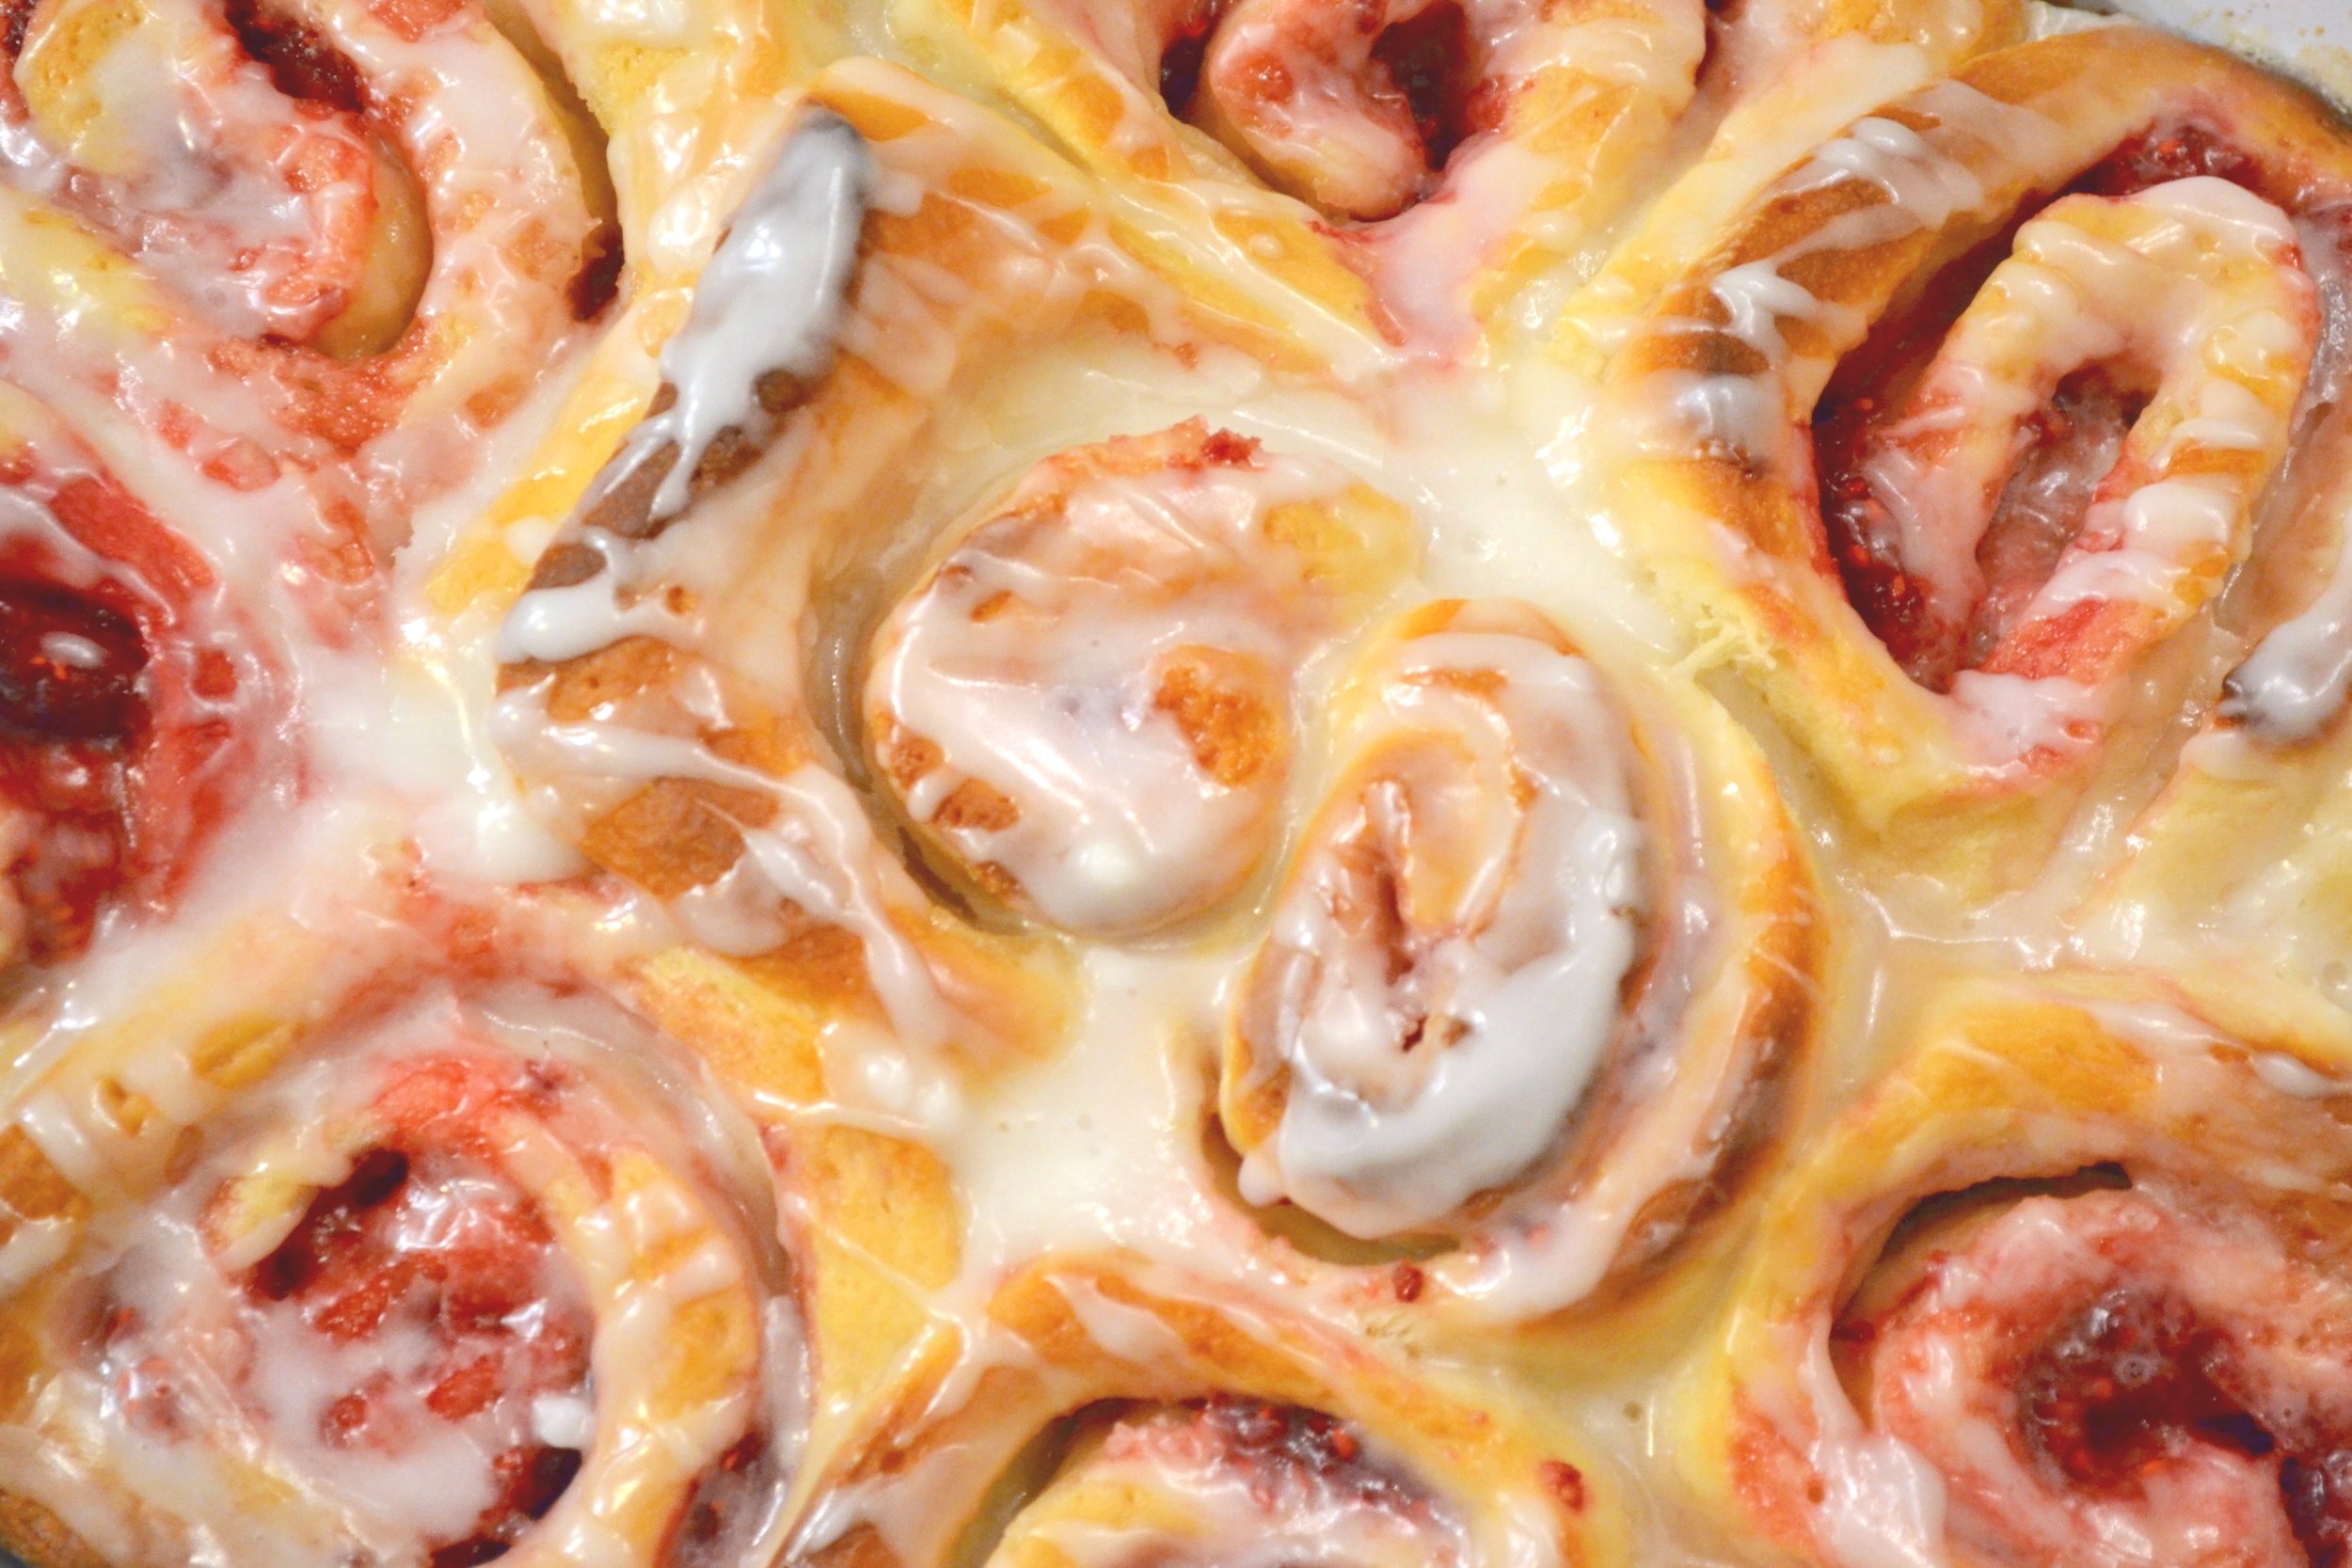
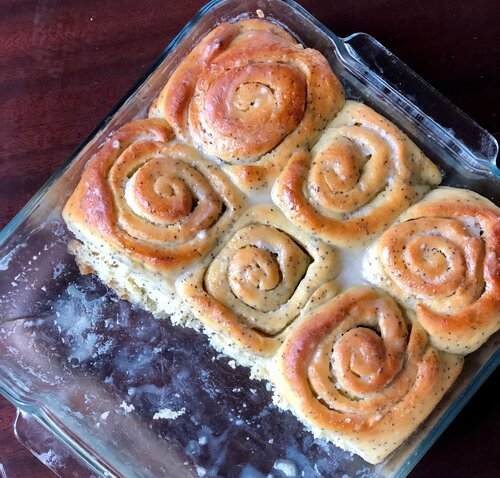
Today we are making Almond Poppy Seed Rolls! Think cinnamon rolls, but instead of cinnamon, a sweet almond dough with little crunchy poppyseeds and a sticky glaze. It’s like a cross between almond poppyseed bread and cinnamon rolls.

If there’s one thing we are forced to be during this time, it’s creative. Lack of resources, lack of schedule, lack of really anything that resembles our normal life has led us to come up with some really great ideas. Sometimes useless, but great nonetheless. Homemade obstacle courses are trending, memes are at the top of their game, and random skills you never before dreamed of having suddenly manifest themselves.

Another way we have had to get creative is in our cooking and baking. Not everything is readily available, and even if it is, a quick run to the store is no longer a quick run to the store. For my Michigan peeps, you are probably now feeling the effects of the latest lockdown measures. Only a certain number of people are allowed in the store at a time, creating long lines outside. Welcome, friends. That’s been normal life in Italy since uhh do I rememer how long? I think going on six weeks. Some stores require you to have a cart (helps you keep your distance) and some stores take your temperature before you enter. (In Italy.)

In general, most of my baking, unless for a special occasion or holiday, is spur of the moment. And what I want to bake often corresponds with what I want to eat, what do you know? The problem with this, as mentioned above, is that if I’m missing an ingredient, that means either waiting until the next store run, making something else, or improvising. The latter usually wins out.

Take the other day, for example, when I really wanted to make (and eat) these lemon raspberry rolls. I knew I didn’t have any raspberries, so I figured I would make just lemon rolls. Not to be, as I found my last lemon had gone moldy, and I didn’t even have any lemon extract. Well. Plain rolls weren’t going to cut it. I could’ve made cinnamon rolls, but my husband doesn’t much care for cinnamon (gasp) and I didn’t think that I should be eating a whole pan of cinnamon rolls by myself. While in quarantine. And am supposed to stay within 200m of my abode for exercise.

I took stock of my cupboards to see what I could possibly use to make some kind of flavored, delicious roll. While I didn’t have lemon extract, I did find almond extract! I love almond, and, and POPPY SEEDS. Yes. Done.

If you happen to have ingredients for both, I would highly suggest making both. They are also freezer friendly; stick in the freezer before baking or even after, once they’ve cooled.

This post may contain affiliate links. If you make a purchase using these links, Jennyblogs may receive a small commission, at no extra cost to you. This helps to support Jennyblogs. For further information see the privacy policy. Grazie!

Recipe adapted from Lemon Raspberry Rolls.


Almond Poppy Seed Rolls

Makes 9 rolls

Adjustments.jpeg

Ingredients:

For the Dough

  • 1/2 cup / 119g milk or water

  • 1/4 cup / 50g sugar

  • 2 1/4 tsp / 7g active dry yeast

  • 2 Tbsp / 28g oil

  • 1 egg

  • 3 Tbsp / 23g poppy seeds

  • 1/2 tsp almond extract

  • 1/4 tsp salt

  • 2 1/4 cups / 270g all-purpose flour + about 1/4 cup / 30g for kneading

For the Filling

  • 1/4 cup / 56g butter

  • 1/4 cup / 50g sugar

For the Glaze

  • 3/4 cup / 94g powdered sugar

  • 1-2 Tbsp / 14-28g milk

Directions:

Preheat oven to 400F / 205C. Grease an 8x8inch / 20x20cm square baking dish.

Make the Dough

  1. In a small saucepan over low heat, warm milk until it is about 100F / 38C.  Pour into a large bowl.  Add the sugar and yeast and allow to sit for 7-10 minutes.  The yeast should foam up a bit. 

  2. Add oil, eggs, poppy seeds, extract, and salt.  Add the 2 1/4 cups of flour and mix until combined. 

  3. Turn dough out onto a floured surface.  Knead for about 8-10 minutes, sprinkling more flour on your work surface as needed.   Dough should be soft and elastic by the end, so don't get too flour-happy. Alternately, you can use the bread hook on a stand mixer and knead for 8-10 minutes, adding in flour as needed. By the end the dough should stick only to the bottom of the pan, not the sides.

  4. Lightly grease or flour a large bowl (the bowl you mixed the dough in is fine) and place dough in the bowl.  Cover with a towel and place in a warm area to rise for about 1 1/2 hours or until doubled in size. 

Assemble the Rolls

  1. In a small saucepan melt butter for filling and let simmer until it starts to brown.  Remove from heat and cool.

  2. When the dough has risen, punch it down and turn out onto a lightly floured surface.  Knead for a minute, then roll into a generous rectangle, about 7x14inch / 18x36cm and roughly 1/4inch / 1/2cm thick.

  3. Spread cooled butter over dough almost to the edges, then sprinkle evenly with sugar.

  4. Starting from one of the longer sides, roll dough into a spiral, pinching the dough together at the end to seal it. 

  5. Cut the log into thirds, then each third into 3 slices.  Place the rolls in the prepared pan and cover lightly with plastic wrap or a damp towel.  Place in a warm area to rise for about an hour, or until puffed.

  6. Bake for 15-20 minutes, or until golden on top and centers no longer look doughy. Internal temperature should be about 195F / 90C.

Make the Glaze

  1. In a small bowl whisk together powdered sugar and1 Tbsp of milk.  It should be thin enough to drizzle but not too liquidy.  Add more milk as needed. 

  2. Drizzle warm rolls with glaze. 


Jenny's Notes:

  • If you don't have a thermometer handy to know what 100 degrees is, simply warm until the milk feels quite warm, but not hot.  It'll be fine!

  • You can freeze these rolls once you have sliced them and put them in the pan.  Once removed from the freezer allow to thaw and proceed as normal. 

  • When using a stand mixer to knead, I still recommend kneading it for a few minutes by hand afterwards. I find they are not always as thorough as kneading by hand and you want an even rise for your dough.  I often to do it all by hand just because it’s therapeutic!
almond poppy seed, breakfast rolls, yeast, yeasted breads, enriched dough,glaze
Breakfast,Breads, Dessert
American
Yield: 9 rolls
Author:
Almond Poppy Seed Rolls

Almond Poppy Seed Rolls

Soft, fluffy breakfast rolls reminiscent of cinnamon rolls but with an almond poppy seed dough, a sweet, gooey buttery filling, and a sweet glaze.
Prep time: 1 hourCook time: 20 MTotal time: 1 H & 20 M

Ingredients:

For the Dough
  • 1/2 cup / 119g milk or water
  • 1/4 cup / 50g sugar
  • 2 1/4 tsp / 7g active dry yeast
  • 2 Tbsp / 28g oil
  • 1 egg
  • 3 Tbsp / 23g poppy seeds
  • 1/2 tsp almond extract
  • 1/4 tsp salt
  • 2 1/4 cups / 270g all-purpose flour + about 1/4 cup / 30g for kneading
For the Filling
  • 1/4 cup / 56g butter
  • 1/4 cup / 50g sugar
For the Glaze
  • 3/4 cup / 94g powdered sugar
  • 1-2 Tbsp / 14-28g milk

Instructions:

How to cook Almond Poppy Seed Rolls

Make the Dough
  1. In a small saucepan over low heat, warm milk until it is about 100F / 38C. Pour into a large bowl. Add the sugar and yeast and allow to sit for 7-10 minutes. The yeast should foam up a bit.
  2. Add oil, eggs, poppy seeds, extract, and salt. Add the 2 1/4 cups of flour and mix until combined.
  3. Turn dough out onto a floured surface. Knead for about 8-10 minutes, sprinkling more flour on your work surface as needed. Dough should be soft and elastic by the end, so don't get too flour-happy. Alternately, you can use the bread hook on a stand mixer and knead for 8-10 minutes, adding in flour as needed. By the end the dough should stick only to the bottom of the pan, not the sides.
  4. Lightly grease or flour a large bowl (the bowl you mixed the dough in is fine) and place dough in the bowl. Cover with a towel and place in a warm area to rise for about 1 1/2 hours or until doubled in size.
Assemble the Rolls
  1. Preheat oven to 400F / 205C. Grease an 8x8inch / 20x20cm square baking dish.
  2. In a small saucepan melt butter for filling and let simmer until it starts to brown. Remove from heat and cool.
  3. When the dough has risen, punch it down and turn out onto a lightly floured surface. Knead for a minute, then roll into a generous rectangle, about 7x14inch / 18x36cm and roughly 1/4inch / 1/2cm thick.
  4. Spread cooled butter over dough almost to the edges, then sprinkle evenly with sugar.
  5. Starting from one of the longer sides, roll dough into a spiral, pinching the dough together at the end to seal it.
  6. Cut the log into thirds, then each third into 3 slices. Place the rolls in the prepared pan and cover lightly with plastic wrap or a damp towel. Place in a warm area to rise for about an hour, or until puffed.
  7. Bake for 15-20 minutes, or until golden on top and centers no longer look doughy. Internal temperature should be about 195F / 90C.
Make the Glaze
  1. In a small bowl whisk together powdered sugar and1 Tbsp of milk. It should be thin enough to drizzle but not too liquidy. Add more milk as needed.
  2. Drizzle warm rolls with glaze.

Notes:

If you don't have a thermometer handy to know what 100 degrees is, simply warm until the milk feels quite warm, but not hot. It'll be fine! You can freeze these rolls once you have sliced them and put them in the pan. Once removed from the freezer allow to thaw and proceed as normal. When using a stand mixer to knead, I still recommend kneading it for a few minutes by hand afterwards. I find they are not always as thorough as kneading by hand and you want an even rise for your dough.

Calories

276.34

Fat (grams)

10.42

Sat. Fat (grams)

3.94

Carbs (grams)

40.79

Fiber (grams)

1.52

Net carbs

39.27

Sugar (grams)

15.97

Protein (grams)

5.19

Sodium (milligrams)

122.93

Cholesterol (grams)

35.35
Nutritional information is approximate. Based on 1 roll.
Did you make this recipe?
Tag @jenevamorris on instagram and hashtag it #jennyblogs
Created using The Recipes Generator
Adjustments.jpg

Overnight Bagels

IMG_2103.jpg

Bagels. Who doesn’t love them? Especially toasted with cream cheese or butter melting on top. Everyone has their favorite bagel, where to get them and how to eat them, whether that’s the chewy and dense boiled variety or the slightly lighter and more modern steamed versions, plain or everything, toasted with cream cheese, eaten plain, or eaten as a sandwich.

One of my favorite bagel memories is from New York City where I spent two summers training with the American Ballet Theatre when I was a teenager. On the weekends my mom and I would go on adventures exploring the city, usually walking an average of 15 miles a day and thus needing sustenance. I remember particularly well one morning passing a bagel shop and a few minutes later exiting with a freshly toasted bagel smothered in cream cheese and wrapped in tinfoil. So simple, so inexpensive, and I still think of that bagel as one of the best I’ve ever had. So I guess you could say I’m a NYC bagel girl, but to be fair, I don’t think I’ve had any (at least not-from-a-hotel-breakfast-bar bagels) in any of the major cities famed for bagels, such as Philadelphia, Chicago, Boston, or Los Angeles. And I’ve been to all those cities! Too bad I didn’t know they had amazing bagels or I would’ve done a trial and comparison. Ah well, just have to go back I guess!

I am blogging this bagel recipe which involves an overnight ferment and boiling, because I think IT’S SO YUMMY. I’m not going to tout this recipe as the bagel recipe to end all bagel recipes, because frankly, I’m not into that kind of marketing and I believe there are other valid methods and types of bagel recipes out there. This recipe comes from Peter Reinhart’s book The Breadmaker’s Apprentice, and as he says, this is a bagel for the ages. And he knows what he’s talking about, so you should try this recipe. You can buy the cookbook by clinking on the link to the right!

Don’t let the overnight ferment or multi-step process scare you, it’s really quite fun and not nearly as tricky as I had always imagined making bagels to be. You will need to clear some space in your fridge and in your schedule, but if I can do it in my tiny Italian kitchen with my tiny toaster-sized oven, so can you, wherever you are baking! I recommend reading the recipe through once or twice before making a game plan. (As you should with every recipe!)

What follows is a slightly modified version of Peter Reinhart’s recipe. The ingredients are basically identical but the instructions I have rewritten in my own words and in places slightly changed or modified to accommodate tips and tricks that worked really well for me and might work for you, too!

parmesan, sesame, and everything bagels

parmesan, sesame, and everything bagels

Side note if you need bagels TODAY: While this recipe is called “Overnight Bagels”, it can also be made without the overnight ferment. I do recommend the overnight ferment for flavor and just because it’s nice to split up the multiple steps of bagel making, however…we might not always have the patience to wait that long for fresh, hot, chewy bagels…this has definitely happened to me during this 2020 quarantine. I wanted bagels today! Not tomorrow! And I hadn’t planned ahead.
So, instead of an overnight ferment, once the bagels are shaped, let them rise in a warm place for about an hour, or until noticeably swelled. Keep any eye on them as you don’t want them to overaise. This can cause them to deflate when they are boiled. Proceed with recipe as normal.

This post may contain affiliate links. If you buy something using these links, Jennyblogs may receive a small commission, at no extra cost to you. This helps to support Jennyblogs. For further information see the privacy policy. Grazie!


Overnight Bagels

Makes 12 big or 24 small bagels

Ingredients:

For the Sponge

  • 1 tsp / 3g instant yeast

  • 4 cups / 510g bread flour

  • 2 1/2 cups / 567g water

For the Dough

  • 1/2 tsp / 1.5g instant yeast

  • 3 3/4 cups / 482g bread flour

  • 2 3/4 tsp / 20g salt

  • 2 tsp / 9.5g malt powder OR flavoring of choice: 1 Tbsp / 14g dark or light malt syrup, honey, or dark or light brown sugar

For Boiling the Bagels

  • 1 Tbsp / 14g baking soda, optional, or malt syrup or honey

  • a large pot of water, the wider the pot the better

  • cornmeal or semolina, for dusting

Toppings, any or all of the following

  • sesame seeds

  • poppy seeds

  • salt flakes

  • rehydrated minced garlic

  • rehydrated minced onion

  • parmesan cheese

Directions:

DAY 1

Line 2 sheet pans with parchment paper and grease well.

Make the Sponge

  1. In the bowl of a stand mixer or large bowl, stir the yeast into the flour. Add the water and stir just until a sticky dough has formed, similar to pancake batter.

  2. Cover the bowl with a towel or plastic wrap and let sit at room temperature for about 2 hours, or until it becomes very bubbly and active. It should be about twice the size and collapse when the bowl is tapped on the countertop.

Make the Dough

  1. Once the sponge is ready, add the next measurement of yeast and mix on low speed with the dough hook or by hand with a spoon. Next, add 3 cups / 383g of the next measurement of flour, the salt, and malt powder / flavoring of choice. Stir on low speed for about 3 minutes, or with a spoon until you have a mostly homogeneous ball. Slowly add the remaining 3/4 cup / 99g flour to stiffen the dough a bit.

  2. Knead the dough on medium-low speed for about 6 minutes or turn the dough out onto a lightly floured surface and knead by hand for about 10 minutes. The dough should be smooth and firm yet pliable, not sticky, with all flour worked in. If it seems too dry or there is excess flour throughout, add a few drops of water until you reach the desired consistency. Likewise if it’s too sticky, add in a bit of flour until you reach the correct stiffness. At this point the dough should pass the windowpane test. (Stretch a small piece of dough between your thumbs and forefingers; if enough gluten has developed through kneading the dough should stretch thin where you can see light coming through. If it breaks before you can stretch it thin, knead another few minutes and try again. See photo.)

Weigh and Shape the Dough

IMG_2100.jpg
  1. Weigh your dough ball and divide the weight by the number of bagels you wish to make: If you’re making mini bagels, divide the weight by 24, or if you’re making regular bagels, divide the weight by 12. This will give you the goal weight for each dough ball you are about to make. For example, the weight of my dough ball the last time I made these bagels was 1,566g. 1,566g divided by 12 for regular bagels = about 130g each. Or, 1,566g divided by 24 for mini bagels = about 65g each.

  2. Once you have your goal weight for the dough balls, divide the dough ball in half, then keep dividing the halves and quarters until you have 12 or 24 dough chunks. Weigh each chunk and add or subtract a bit of dough until they are all within about 5g of the goal weight. Roll each dough chunk under your palm with a cupped hand in a circular motion, guiding with the outer edge of your palm, until you have a nice ball. It works best to roll them on a surface with little to no flour. This way the dough sticks slightly to the surface as you move in a circular motion and pulls and creates surface tension.

  3. Place the dough balls on a lightly floured surface and cover with a damp towel. Allow to rest for approximately 20 minutes.

  4. Shape each dough ball into bagel form by poking your thumb through the center of the ball and rotating your thumb around the inside of the hole or lassoing it a few times around your thumb, until the hole is about 2 1/2 in / 6 cm for regular bagels or 1 1/2 in / 4 cm for mini. Aim to stretch the bagel as evenly as possible, avoiding a thick and thin side so you won’t end up with lopsided bagels. Alternately, you can roll the doll ball into an 8 in / 20 cm long rope, wrap it around your knuckles with the seam on the under side, then rock the seam on the counter until sealed.

  5. Place the shaped bagels onto the greased baking sheets about 2 inches apart. Mist with spray oil or rub on oil, then slip each sheet into a clean, food-grade plastic bag or cover with plastic wrap.

  6. Place bagels in the fridge to rise overnight. They are best if used the next day, but can be kept up to three days in the fridge.

DAY 2

Boil the Bagels

  1. Test to see if the bagels are ready to be boiled by removing one carefully from the fridge and placing in a bowl of cool or tepid water. If the bagel floats within 10 seconds, it’s ready. Immediately return the bagel to the covered baking sheet in the fridge while you ready the water.

    If the bagel does not float within 10 seconds, either return it to the fridge and repeat the float test every couple hours until the bagels are ready, or remove both sheets of bagels from the fridge and let raise at room temperature, repeating the float test every 10 to 20 minutes until a bagel passes. Return them to the fridge once they are ready so they don’t over-rise. The stiffness of the dough, your house temperature, and your fridge temperature will all impact when the bagels are ready to be boiled.

    If your bagels have over-risen (you can tell if they collapse when you gently handle them or if they deflate significantly when boiled) or they have stuck to the pan, transfer them as carefully as you can to another better-oiled parchment lined baking sheet. Let rise at room temperature for another 15-20 minutes or until they pass the float test again. Return them to the fridge once they are ready.

  2. When the bagels are just about ready, place the large pot of water on the stove and bring it to a boil, then add baking soda, if using. Have a skimmer or slotted spoon ready nearby. Preheat the oven to 500F / 260C and place two racks in the middle of the oven.

  3. Remove one sheet of bagels from the fridge and gently slide 3-4 into the boiling water, or however many can fit comfortably side to side. Boil for 30 seconds to 1 minute on one side, then flip each bagel and boil for another 30 seconds to 1 minute. Bagels boiled for 1 minute on each side will be chewier than those boiled for only 30 seconds on each side.

    While the bagels are boiling, sprinkle the same parchment lined baking sheet with cornmeal or semolina.

  4. When it’s time to remove the bagels, use the slotted spoon and place them back on the baking sheet now sprinkled with cornmeal. Add toppings immediately while the bagels are still wet, if you choose to use toppings. Repeat with the second sheet of bagels.

Bake the Bagels

  1. Place both baking sheets of bagels in the preheated oven. Bake for 7 minutes, then switch the pans on the racks and rotate each 180 degrees to bake the bagels as evenly as possible.

    After you switch and rotate, lower the oven temperature to 450F / 232C and bake for another 7-8 minutes, or until light golden brown.

  2. Remove from the oven and allow bagels to cool for 15 minutes before devouring.


Jenny’s Notes:

  • To keep my scale clean while weighing the dough I place the now-empty bowl (don’t have to clean it, the dough was just in there) and press tare. You can also use a piece of plastic film wrap over the scale and tare if needed.

  • I like to make 6 regular bagels and 12 mini for variety. You can do this by weighing your dough ball and then dividing it in half. Weigh one half and divide this number by 6; then weigh the other half and divide by 12.

  • I love lassoing the bagels while shaping them! Fast, fun, and effective. Not as big a fan of the rope and seal version, I thought it took longer and the finishing ring was not as symmetrical. Try out both versions to find which works best for you!

  • I found it best to make the dough in the evening and boil and bake the bagels in the morning or they over-rose, but I believe this is mostly due to my fridge’s door that doesn’t seal well, keeping it warmer towards the front. If you have a cold and well functioning fridge, you should be fine to make and bake the bagels at your leisure!

  • I love chewy bagels, and thus boil my bagels for the full minute on each side. I have found, though, that beyond 1 minute on each side can cause the outside of the bagels to cook too much. This means when they are baked this outer baked “shell” doesn’t allow the bagels to reach their full rise and may result in flatter bagels.

  • When baking the bagels, know your oven. If you have hot spots or a small oven, you can choose to bake one sheet of bagels at a time. Since my oven is small, I baked the first sheet of bagels while I was boiling the second sheet, and simply rotated the pan 180 degrees after the first 7 minutes.

bagel, overnight bagels, everything, parmesan, sesame, poppyseed
bread, breakfast, brunch
Jewish-American
Yield: 12-24
Author:
Overnight Bagels

Overnight Bagels

A recipe from Peter Reinhart's "The Breadmaker's Apprentice." The bagels get an overnight ferment leading to increased umami flavor and are boiled for optimal chewiness.
Prep time: 1 H & 45 MCook time: 15 MTotal time: 1 H & 60 M

Ingredients:

For the Sponge
  • 1 tsp / 3g instant yeast
  • 4 cups / 510g bread flour
  • 2 1/2 cups / 567g water
For the Dough
  • 1/2 tsp / 1.5g instant yeast
  • 3 3/4 cups / 482g bread flour
  • 2 3/4 tsp / 20g salt
  • 2 tsp / 9.5g malt powder OR flavoring of choice: 1 Tbsp / 14g dark or light malt syrup, honey, or dark or light brown sugar
For Boiling the Bagels
  • 1 Tbsp / 14g baking soda, optional, or malt syrup or honey
  • a large pot of water, the wider the pot the better
  • cornmeal or semolina, for dusting
Toppings, any or all of the following
  • sesame seeds
  • poppy seeds
  • salt flakes
  • rehydrated minced garlic
  • rehydrated minced onion
  • parmesan cheese

Instructions:

DAY 1 Make the Sponge
  1. In the bowl of a stand mixer or large bowl, stir the yeast into the flour. Add the water and stir just until a sticky dough has formed, similar to pancake batter.
  2. Cover the bowl with a towel or plastic wrap and let sit at room temperature for about 2 hours, or until it becomes very bubbly and active. It should be about twice the size and collapse when the bowl is tapped on the countertop.
Make the Dough
  1. Once the sponge is ready, add the next measurement of yeast and mix on low speed with the dough hook or by hand with a spoon. Next, add 3 cups / 383g of the next measurement of flour, the salt, and malt powder / flavoring of choice. Stir on low speed for about 3 minutes, or with a spoon until you have a mostly homogeneous ball. Slowly add the remaining 3/4 cup / 99g flour to stiffen the dough a bit.
  2. Knead the dough on medium-low speed for about 6 minutes or turn the dough out onto a lightly floured surface and knead by hand for about 10 minutes. The dough should be smooth and firm yet pliable, not sticky, with all flour worked in. If it seems too dry or there is excess flour throughout, add a few drops of water until you reach the desired consistency. Likewise if it’s too sticky, add in a bit of flour until you reach the correct stiffness. At this point the dough should pass the windowpane test. (Stretch a small piece of dough between your thumbs and forefingers; if enough gluten has developed through kneading the dough should stretch thin where you can see light coming through. If it breaks before you can stretch it thin, knead another few minutes and try again.)
Weigh and Shape the Dough
  1. Line 2 sheet pans with parchment paper and grease well.
  2. Weigh your dough ball and divide the weight by the number of bagels you wish to make: If you’re making mini bagels, divide the weight by 24, or if you’re making regular bagels, divide the weight by 12. This will give you the goal weight for each dough ball you are about to make. For example, the weight of my dough ball the last time I made these bagels was 1,566g. 1,566g divided by 12 for regular bagels = about 130g each. Or, 1,566g divided by 24 for mini bagels = about 65g each.
  3. Once you have your goal weight for the dough balls, divide the dough ball in half, then keep dividing the halves and quarters until you have 12 or 24 dough chunks. Weigh each chunk and add or subtract a bit of dough until they are all within about 5g of the goal weight. Roll each dough chunk under your palm with a cupped hand in a circular motion, guiding with the outer edge of your palm, until you have a nice ball. It works best to roll them on a surface with little to no flour. This way the dough sticks slightly to the surface as you move in a circular motion and pulls and creates surface tension.
  4. Place the dough balls on a lightly floured surface and cover with a damp towel. Allow to rest for approximately 20 minutes.
  5. Shape each dough ball into bagel form by poking your thumb through the center of the ball and rotating your thumb around the inside of the hole or lassoing it a few times around your thumb, until the hole is about 2 1/2 in / 6 cm for regular bagels or 1 1/2 in / 4 cm for mini. Aim to stretch the bagel as evenly as possible, avoiding a thick and thin side so you won’t end up with lopsided bagels. Alternately, you can roll the doll ball into an 8 in / 20 cm long rope, wrap it around your knuckles with the seam on the under side, then rock the seam on the counter until sealed.
  6. Place the shaped bagels onto the greased baking sheets about 2 inches apart. Mist with spray oil or rub on oil, then slip each sheet into a clean, food-grade plastic bag or cover with plastic wrap.
  7. Place bagels in the fridge to rise overnight. They are best if used the next day, but can be kept up to three days in the fridge.
DAY 2 Boil the Bagels
  1. Test to see if the bagels are ready to be boiled by removing one carefully from the fridge and placing in a bowl of cool or tepid water. If the bagel floats within 10 seconds, it’s ready. Immediately return the bagel to the covered baking sheet in the fridge while you ready the water.
  2. If the bagel does not float within 10 seconds, either return it to the fridge and repeat the float test every couple hours until the bagels are ready, or remove both sheets of bagels from the fridge and let raise at room temperature, repeating the float test every 10 to 20 minutes until a bagel passes. Return them to the fridge once they are ready so they don’t over-rise. The stiffness of the dough, your house temperature, and your fridge temperature will all impact when the bagels are ready to be boiled.
  3. If your bagels have over-risen (you can tell if they collapse when you gently handle them or if they overly deflate when boiled) or they have stuck to the pan, transfer them as carefully as you can to another better-oiled parchment lined baking sheet. Let rise at room temperature for another 15-20 minutes or until they pass the float test again. Return them to the fridge once they are ready.
  4. When the bagels are just about ready, place the large pot of water on the stove and bring it to a boil, then add baking soda, if using. Have a skimmer or slotted spoon ready nearby. Preheat the oven to 500F / 260C and place two racks in the middle of the oven.
  5. Remove one sheet of bagels from the fridge and gently slide 3-4 into the boiling water, or however many can fit comfortably side to side. Boil for 30 seconds to 1 minute on one side, then flip each bagel and boil for another 30 seconds to 1 minute. Bagels boiled for 1 minute on each side will be chewier than those boiled for only 30 seconds on each side.
  6. While the bagels are boiling, sprinkle the same parchment lined baking sheet with cornmeal or semolina.
  7. When it’s time to remove the bagels, use the slotted spoon and place them back on the baking sheet now sprinkled with cornmeal. Add toppings immediately while the bagels are still wet, if you choose to use toppings. Repeat with the second sheet of bagels.
Bake the Bagels
  1. Place both baking sheets of bagels in the preheated oven. Bake for 7 minutes, then switch the pans on the racks and rotate each 180 degrees to bake the bagels as evenly as possible.
  2. After you switch and rotate, lower the oven temperature to 450F / 232C and bake for another 7-8 minutes, or until light golden brown.
  3. Remove from the oven and allow bagels to cool for 15 minutes before devouring.

Notes:

To keep my scale clean while weighing the dough I place the now-empty bowl (don’t have to clean it, the dough was just in there) and press tare. You can also use a piece of plastic film wrap over the scale and tare if needed. I like to make 6 regular bagels and 12 mini for variety. You can do this by weighing your dough ball and then dividing it in half. Weigh one half and divide this number by 6; then weigh the other half and divide by 12. I love lassoing the bagels while shaping them! Fast, fun, and effective. Not as big a fan of the rope and seal version, I thought it took longer and the finishing ring was not as symmetrical. Try out both versions to find which works best for you! I found it best to make the dough in the evening and boil and bake the bagels in the morning or they over-rose, but I believe this is mostly due to my not-cold-enough fridge. If you have a cold and well functioning fridge, you should be fine to make and bake the bagels at your leisure! I love chewy bagels, and thus boil my bagels for the full minute on each side. I have found, though, that beyond 1 minute on each side can cause the outside of the bagels to cook too much. This means when they are baked this outer baked “shell” doesn’t allow the bagels to reach their full rise and may result in flatter bagels. When baking the bagels, know your oven. If you have hot spots or a small oven, you can choose to bake one sheet of bagels at a time. Since my oven is small, I baked the first sheet of bagels while I was boiling the second sheet, and simply rotated the pan 180 degrees after the first 7 minutes.

Calories

303.74

Fat (grams)

1.50

Sat. Fat (grams)

0.22

Carbs (grams)

60.82

Fiber (grams)

2.14

Net carbs

58.68

Sugar (grams)

0.83

Protein (grams)

10.16

Sodium (milligrams)

1017.73

Cholesterol (grams)

0.00
Nutritional Info is Approximate. Based on 1 large bagel.
Did you make this recipe?
Tag @jenevamorris on instagram and hashtag it #jennyblogs
Created using The Recipes Generator


Cinnamon Raisin Swirl Bread

IMG_4773.jpg

Now that the festivities of Christmas are over, New Year's resolutions have begun, and the Christmas feasts are but a memory, (except for the reminder clinging to our hips), it's time to return to healthy eating.  Or at least, normal eating.  Some may go cold turkey on all foods that aren't celery, carrageenan-free almond milk, or sugar-free almond butter, but I prefer to go to all the warm, comforting foods.  Yes to breads, yes to soups, yes to cookies, yes to stir-frys. 

I'm all for trying new diets, not because I'm looking for a radical health-overthrow, but because I enjoy the challenge.  (And then the "forbidden" foods taste oh so marvelous after the fact.)  But I've also learned my lesson from Whole30January: This is not the time to try a restricting diet.  January can be long, cold, and sometimes a bit of a letdown after the holidays.  Add in the extra stress of not being able to eat just about anything you might fancy, and January just stretched into an eternity.  I'd rather get into the swing of normal routine and work before depriving my mind of body of certain foods.  Of course, this is just me.  And mostly the me that's still reeling from Whole30.  Find what works for you, without using that as an excuse to not give it your all.

Speaking of that bread earlier, how about a nice piece of Cinnamon Raisin Swirl toast??  

This post may contain affiliate links. If you buy something using these links, Jennyblogs may receive a small commission, at no extra cost to you. This helps to support Jennyblogs. For further information see the privacy policy. Grazie!

Recipe adapted from The Kitchn


Cinnamon Raisin Swirl Bread

Makes 2 9-inch loaves

IMG_4782.JPG

Ingredients:

  • 1 cup / 150g raisins

  • 1 cup / 237g hot water

  • 1 Tbsp / 10g active dry or instant yeast

  • 1 cup / 237g milk

  • 4 Tbsp / 56g melted butter or oil

  • 2 tsp / 9g salt

  • 5 1/2 - 6 cups / 660 - 720g all-purpose flour

  • 1/2 cup / 100g sugar

  • 1 1/2 Tbsp / 12g cinnamon

  • 1 egg

  • 2 tsp / 9g water

Directions:

Oven 375°F / 190°C.  2 greased loaf pans, approximately 9 x 5in / 23 x 13cm.  

IMG_4778.jpg
  1. Place raisins in a small bowl with the hot water and let plump for at least 10 minutes.  

  2. Drain water from raisins into the bowl of a stand mixer or large bowl.  Set raisins aside.  Sprinkle yeast over the water.  If you're using active dry, let the yeast sit for a few minutes until it starts to foam; if you're using instant, proceed to the next step. 

  3. Add milk, butter, and salt to yeast mixture and stir well.  Add 5 cups / 600g of flour, mixing to incorporate. 

  4. Switch to the dough hook or knead by hand on a lightly floured surface for 8 - 10 minutes, adding more flour as necessary.  At the end, test to see if your dough is ready by performing the window pane test (see notes.)  If not, continue to knead dough until it passes.  

  5. Toss raisins with a bit of flour to absorb any residual water.  Add to your dough, and knead until evenly distributed.  If using a stand mixer, you may find this easier to do by hand.  

  6. Place the dough in a large oiled bowl, cover, and place in a warm place to rise until doubled in size, about 1 hour.  

  7. Meanwhile, combine the sugar with the cinnamon in a small bowl.  

  8. Beat the egg with the 2 tsp water in another small bowl. 

  9. When the dough has risen, punch it down and divide into two equal pieces.  Starting with one half, roll dough into a rectangle about 9in / 23cm wide and at least 18in / 46cm long. 

  10. Brush the dough evenly with some of the egg wash, leaving one narrow end dry; sprinkle with half of the cinnamon sugar mixture.  Starting from the opposite short end, roll dough up and pinch the seam to seal. 

  11. Transfer to the loaf pan, placing seam side down.  Repeat with other half of dough.  

  12. Cover and let rise until doubled in size, about 30-45 minutes.   

  13. Bake in preheated oven for 30-40 minutes or until golden brown and internal temperature reads 185 - 190°F / 85-88°C. 

  14. Let bread cool 10 minutes before removing from pans and allowing to cool completely.

Jenny's Notes:

  • If the dough shrinks back on you as you're rolling it out, let it rest for a few minutes and try again.  

  • If you have leftover egg wash and cinnamon sugar, you can brush the top of the loaves with the egg wash and sprinkle with cinnamon sugar before baking.  

  • I used sourdough starter to make the loaves in the pictures.  I didn't leave enough time for rising, and thus you can see you the crumb is rather tight and dense.  Delicious nonetheless, but know that if you use instant yeast your loaves should be taller! 

  • Loaves can be frozen for later enjoyment.

  • If you really dig raisins, add more than 1 cup! Just be aware, though, if you start to add too many (I would imagine more than 2 cups) then they could start to weigh down your dough, not allowing for a full rise.  

cinnamon raisin bread, cinnamon raisin swirl bread, cinnamon toast,
Bread, Breakfast, Brunch
American
Yield: 24
Author: Jennyblogs
Print
Cinnamon Raisin Swirl Bread

Cinnamon Raisin Swirl Bread

Enriched white bread with swirls of cinnamon and plump raisins throughout.
Prep time: 1 hourCook time: 40 MTotal time: 1 H & 40 M

Ingredients:

  • 1 cup / 150g raisins
  • 1 cup / 237g hot water
  • 1 Tbsp / 10g active dry or instant yeast
  • 1 cup / 237g milk
  • 4 Tbsp / 56g melted butter or oil
  • 2 tsp salt
  • 5 1/2 - 6 cups / 660 - 720g all-purpose flour
  • 1/2 cup / 100g sugar
  • 1 1/2 Tbsp / 12g cinnamon
  • 1 egg
  • 2 tsp water

Instructions:

  1. Oven 375°F / 190°C. Grease 2 loaf pans, approximately 9 x 5in / 23 x 13cm.
  2. Place the raisins in a small bowl with the hot water and let plump for at least 10 minutes.
  3. Drain the water from the raisins into the bowl of a stand mixer or large bowl. Set the raisins aside. Sprinkle the yeast over the water. If you're using active dry, let the yeast sit for a few minutes until it starts to foam, if you're using instant, go ahead and proceed to the next step.
  4. Add the milk, butter, and salt to the yeast mixture and stir well. Add 5 cups / 600g of flour, mixing to incorporate. Switch to the dough hook or knead by hand on a lightly floured surface for 8 - 10 minutes, adding more flour as necessary. At the end, test to see if your dough is ready by performing the window pane test (see notes.) If not, continue to knead the dough until it passes.
  5. Toss the raisins with a bit of flour to absorb any residual water. Add to your dough, and knead until evenly distributed. If using a stand mixer, you may find this easier to do by hand.
  6. Place the dough in a large oiled bowl, cover, and place in a warm place to rise until doubled in size, about 1 hour.
  7. Meanwhile, combine the sugar with the cinnamon in a small bowl.
  8. Beat the egg with 2 tsp water in another small bowl.
  9. When the dough has risen, punch it down and divide into two equal pieces. Starting with one half, roll dough into a rectangle about 9in / 23cm wide and at least 18in / 46cm long.
  10. Brush the dough evenly with some of the egg wash, leaving one short end free, and sprinkle with half of the cinnamon sugar mixture. Starting from the opposite short end, roll the dough up and pinch the seam to seal.
  11. Transfer to the loaf pan, placing seam side down. Repeat with other half of dough.
  12. Cover and let rise until doubled in size, about 30-45 minutes.
  13. Bake in preheated oven for 30-40 minutes or until golden brown and internal temperature reads 185 - 190°F / 85-88°C.
  14. Let bread cool 10 minutes in pans before removing and allowing to cool completely.

Notes:

If the dough shrinks back on you as you're rolling it out, let it rest for a few minutes and try again. If you have leftover egg wash and cinnamon sugar, you can brush the top of the loaves with the egg wash and sprinkle with cinnamon sugar before baking. Loaves can be frozen for later enjoyment! If you really dig raisins, add more than 1 cup! Just be aware, though, if you start to add too many (I would imagine more than 2 cups) then they could start to weigh down your dough, not allowing for a full rise.

Calories

171.35

Fat (grams)

2.64

Sat. Fat (grams)

1.44

Carbs (grams)

33.09

Fiber (grams)

1.42

Net carbs

31.67

Sugar (grams)

7.96

Protein (grams)

4.10

Sodium (milligrams)

218.89

Cholesterol (grams)

13.56
Nutritional information is approximate. Based on 24 servings or 12 servings per loaf.
Did you make this recipe?
Tag @jenevamorris on instagram and hashtag it #jennyblogs
Created using The Recipes Generator
IMG_4777.jpg

Semlor (Swedish Cardamom Buns)

Shout out to all my Swedish friends, here's an ode to Semlor!  Do I even know any Swedish people? Do I even know any Swedish-Americans?  Hmmm.  Well, if you know one, or are one, let me know would ya?  I think the most I know about Sweden is what I learned from the American Girl doll Kirsten as a child, they have a pretty blue and yellow flag, and that these buns are delicious.  They take a bit of time to make, unless you have a bread machine, but honestly I love working food with my hands and would take the extra time to mix and knead over a bread machine any day.  However, sometimes practicality or time saving takes place over the therapeutic sensation of kneading bread.  Your call.  But if you choose the bread machine route, you're on your own because I've never operated one.  Sorry 'bout ya.  My roommate used to have one and she made it look so easy that I'm sure you could translate this recipe for a bread recipe easily without my help.  

These buns, as I've read, are traditionally associated with Lent and eaten on Shrove Tuesday, or Fat Tuesday.  You could think of them as the equivalent to Polish paczki.  If you're thinking, "Wow, thanks, that helps me so much - WHAT is a paczki??" It's similar to a jelly filled doughnut traditionally eaten on Shrove Tuesday and pronounced poonch-key.  Also delicious.  There is quite a large Polish population near where I grew up, including an annual Polka Fest!  Plenty of polka-ing and beer to go around.  Anyway, Semlor is also eaten in various forms and under other names in other Nordic countries such as Finland, Estonia, Norway, Denmark, Lithuania, Latvia, Iceland, and the Faroe Islands.  Let's stick to Swedish Semlor, shall we? 

This post may contain affiliate links. If you buy something using these links, Jennyblogs may receive a small commission, at no extra cost to you. This helps to support Jennyblogs. For further information see the privacy policy. Grazie!

Recipe adapted from LondonEats


Semlor

Makes 10 buns

Ingredients:

For the Cardamom Buns

  • 1 cup / 237g milk

  • 7 Tbsp / 100g butter

  • 2 tsp / 6.3g instant yeast

  • 1/4 tsp / 1g salt

  • 1/3 cup / 40g sugar

  • 1/2 tsp / 1g ground cardamom

  • 2 eggs

  • 3 1/2 cups / 450g all-purpose flour or bread flour

  • 1 tsp / 5g water, milk, or heavy cream

For the Marzipan Filling

  • insides of the buns

  • 7 oz / 200g marzipan (make your own marzipan here!)

  • generous 3/4 cup / 195g milk

  • generous 3/4 cup / 195g heavy whipping cream

  • powdered sugar, for dusting

Directions:

Make the Cardamom Buns

Oven 390°F / 200°C. 2 baking sheets lined with parchment paper or silpat.

  1. Place milk in a small saucepan and heat until milk just begins to simmer.  Remove from heat and add butter, stirring to melt.  Once butter is completely melted and integrated, allow mixture to sit until lukewarm.  

  2. Place milk mixture, yeast, salt, sugar, cardamom, and 1 egg in the bowl of a stand mixer fitted with a paddle.  Beat until all ingredients are incorporated.  Switch to the dough hook and add flour slowly on medium-low speed until a soft dough forms.  Continue to beat for several minutes on medium speed.  You should hear the dough slapping the sides of the bowl, sticking only to the bottom.  If the dough is sticking to the sides, add flour gradually until dough no longer sticks.  

  3. Turn out onto a lightly floured surface and knead 1-2 minutes more.  Divide dough into 10 equal portions and roll into balls.  Place evenly prepared baking sheets. Cover with a cloth and let rise in a warm place until doubled in size, about 1 hour.   

  4. Beat the second egg with the water and use a pastry brush or your hands to evenly brush the buns.

  5. Bake for about 15 minutes until golden brown or when internal temperature registers 185-190°F / 85-88°C.  

  6. Transfer buns to a cooling rack, cover with a towel, and allow to cool.  

Make the Marzipan Filling

Your filling may look like baby spit-up, too. And that's ok.

Your filling may look like baby spit-up, too. And that's ok.

  1. Once the buns are cool enough to handle, cut out a lid from the top using a small serrated knife. Set the lids aside.  Using a fork, scoop out the inside of each bun and place in a medium bowl.  Crumble/tear with your fingers as best you can.  Add marzipan and milk and work into a smooth paste using your hands or a fork.  

  2. In the bowl of a stand mixer fitted with the whisk attachment, whip the cream until stiff peaks from.  

Assembly

  1. Fill the buns evenly with the marzipan mixture. Pipe whipped cream over the filling using a large star tip (1M) or a spoon.  

  2. Place the tops on the whipped cream, then dust tops with powdered sugar using a small sieve.  

Jenny's Notes:

  • I always knead my dough by hand for a bit after kneading it in a machine. The machine doesn't always do a perfect job and I've had instances before where I kneaded solely in the machine and had a strange dough rise as a result. A few rounds of kneading by hand fixed the problem; the yeast hadn't been distributed evenly when kneaded only by machine.

  • If you have a scale you can ensure your buns will be all the same size. Weigh the dough mass, then divide this number by 10. This will give you an idea how much each of the 10 buns should weigh. You don't have to be exact down to the gram, of course, but I would stay within 5 or so grams of this number. Divide the dough mass in 2, then divide each half into 5 equal parts. Then weigh each piece to see how accurate your eye was.

  • When you "crumble" the filling into pieces you may notice the dough is moist and hard to crumble, but tear it as best you can into small chunks. When you add the milk and marzipan the pieces will absorb the liquid and eventually come together into a smoothish mass.

  • I made my own marzipan for this recipe and used rose water. Rose is a very strong flavor, so go light, but I thought it made for a very unique pairing with almond and cardamom and very "European" tasting. Or, leave out the rose if you're skeptical and you'll still have a lovely cardamom/almond combination.

  • "Semlor" is plural, so if you would like to eat only one bun, ask for a "Semla."

semla,semlor,cardamom buns,marzipan filling,swedish buns, yeasted bread, sweet buns
bread, breakfast, dessert
Nordic
Yield: 10
Author: Jennyblogs
Print
Semlor (Swedish Cardamom Buns)

Semlor (Swedish Cardamom Buns)

Sweet, yeasted cardamom buns with a creamy marzipan filling and whipped cream topping.
Prep time: 1 H & 20 MCook time: 15 Mininactive time: 1 HourTotal time: 2 H & 35 M
Ingredients:

For the Cardamom Buns
  • 1 cup / 237g milk
  • 7 Tbsp / 100g butter
  • 2 tsp / 6.3g instant yeast
  • 1/4 tsp / 1g salt
  • 1/3 cup / 40g sugar
  • 1/2 tsp / 1g ground cardamom
  • 2 eggs
  • 3 1/2 cups / 450g all-purpose flour or bread flour
  • 1 tsp / 5g water, milk, or heavy cream
For the Marzipan Filling
  • insides of the buns
  • 7 oz / 200g marzipan (make your own marzipan here!)
  • generous 3/4 cup / 195g milk
  • generous 3/4 cup / 195g heavy whipping cream
  • powdered sugar, for dusting

Instructions:

Make the Cardamom Buns
  1. Oven 390°F / 200°C. 2 baking sheets lined with parchment paper or silpat.
  2. Place milk in a small saucepan and heat until milk just begins to simmer. Remove from heat and add butter, stirring to melt. Once butter is completely melted and integrated, allow mixture to sit until lukewarm.
  3. Place milk mixture, yeast, salt, sugar, cardamom, and 1 egg in the bowl of a stand mixer fitted with a paddle. Beat until all ingredients are incorporated. Switch to the dough hook and add flour slowly on medium-low speed until a soft dough forms. Continue to beat for several minutes on medium speed. You should hear the dough slapping the sides of the bowl, sticking only to the bottom. If the dough is sticking to the sides, add flour gradually until dough no longer sticks.
  4. Turn out onto a lightly floured surface and knead 1-2 minutes more. Divide dough into 10 equal portions and roll into balls. Place evenly prepared baking sheets. Cover with a cloth and let rise in a warm place until doubled in size, about 1 hour.
  5. Beat the second egg with the water and use a pastry brush or your hands to evenly brush the buns.
  6. Bake for about 15 minutes until golden brown or when internal temperature registers 185-190°F / 85-88°C.
  7. Transfer buns to a cooling rack, cover with a towel, and allow to cool.
Make the Marzipan Filling
  1. Once the buns are cool enough to handle, cut out a lid from the top using a small serrated knife. Set the lids aside. Using a fork, scoop out the inside of each bun and place in a medium bowl. Crumble/tear with your fingers as best you can. Add marzipan and milk and work into a smooth paste using your hands or a fork.
  2. In the bowl of a stand mixer fitted with the whisk attachment, whip the cream until stiff peaks from.
Assembly
  1. Fill the buns evenly with the marzipan mixture. Pipe whipped cream over the filling using a large star tip (1M) or a spoon.
  2. Place the tops on the whipped cream, then dust tops with powdered sugar using a small sieve.

Notes:

I always knead my dough by hand for a bit after kneading it in a machine. The machine doesn't always do a perfect job and I've had instances before where I kneaded solely in the machine and had a strange dough rise as a result. A few rounds of kneading by hand fixed the problem; the yeast hadn't been distributed evenly when kneaded only by machine. If you have a scale you can ensure your buns will be all the same size. Weigh the dough mass, then divide this number by 10. This will give you an idea how much each of the 10 buns should weigh. You don't have to be exact down to the gram, of course, but I would stay within 5 or so grams of this number. Divide the dough mass in 2, then divide each half into 5 equal parts. Then weigh each piece to see how accurate your eye was. When you "crumble" the filling into pieces you may notice the dough is moist and hard to crumble, but tear it as best you can into small chunks. When you add the milk and marzipan the pieces will absorb the liquid and eventually come together into a smoothish mass. I made my own marzipan for this recipe and used rose water. Rose is a very strong flavor, so go light, but I thought it made for a very unique pairing with almond and cardamom and very "European" tasting. Or, leave out the rose if you're skeptical and you'll still have a lovely cardamom/almond combination.

Calories

436.24

Fat (grams)

19.78

Sat. Fat (grams)

10.76

Carbs (grams)

56.25

Fiber (grams)

1.82

Net carbs

54.43

Sugar (grams)

18.41

Protein (grams)

9.08

Sodium (milligrams)

149.19

Cholesterol (grams)

84.19
Nutritional information is approximate. Based on one semla.
Did you make this recipe?
Tag @jennyblogsandbakes on instagram and hashtag it #jennyblogs
Created using The Recipes Generator

Buttermilk Bread

This post may contain affiliate links. If you make a purchase using these links, Jennyblogs may receive a small commission, at no extra cost to you. This helps to support Jennyblogs. For further information see the privacy policy. Grazie!

What’s the first thing that comes to mind when someone says, "Buttermilk"?  

For me, that would be buttermilk pancakes.  The lightest and fluffiest of all pancakes.  If you live in the south, maybe that's buttermilk biscuits.  Maybe your favorite cake recipe or scone recipe calls for buttermilk.  Whatever it may be, these delectable food items all have one thing in common:  Their light crumb, a.k.a. fluffiness.  The high acidity in the buttermilk reacts with the leavening agent, like baking soda, thus creating a beautiful rise, and a nice, light product.  

I don't often have buttermilk on hand; I find it much easier to make my own as I always have milk and lemon juice/vinegar on hand.  Lemon juice or vinegar are both very acidic and will have a similar effect on the leavening agent.  However, there is something so satisfying about using true buttermilk in a recipe.  After all, Milk and Lemon Juice Pancakes don't sound nearly as appealing as Buttermilk pancakes.   

So, a trip to the store, a carton of buttermilk bought, pancakes made and eaten.  Now, there is only 7/8 of a carton of buttermilk left in your fridge.  The likelihood of making 7 or more batches of buttermilk pancakes before the buttermilk goes bad is, well, not likely.  (But if you do, let me know, I’ll come live at your house!)  

The question remains, what I can do with the rest of this buttermilk without being wasteful?  Make buttermilk bread! (Another side note, if you like to drink buttermilk straight, well then.  You just can't relate with our buttermilk overload predicament, can you?)  The fluffiness factor we were talking about earlier still plays a role in this bread.  So fluffy.  Makes great toast.  And did I mention french toast?  Now you can serve buttermilk french toast! Oh yes.  Full circle, baby.  Actually, I don't really know where the circle started, so it's hard to tell if we actually came full circle...

On to the recipe! 

Recipe adapted from Jane's Sweets and Baking Journal


Buttermilk Bread

Makes 2 approx. 9x5 inch loaves

Ingredients:

  • 5-6 cups / 620-740g all-purpose flour

  • 1 Tbsp / 9g instant yeast

  • 2 tsp / 10g salt

  • 2 cups / 474g buttermilk

  • 1 Tbsp / 20g maple syrup or honey

  • 2 Tbsp / 28g oil or melted butter

Directions:

Oven 375°F / 190°C.  Grease two approx. 9x5in / 24x13cm loaf pans.

  1. In a large bowl or bowl of a stand mixer fitted with the paddle attachment, place 5 cups of flour, yeast, and salt.  Mix together.  Add buttermilk, maple syrup, and oil, mixing well.  Switch to the dough hook if using a stand mixer.  

  2. Knead in the stand mixer or by hand on a lightly floured surface, until a smooth dough is formed, adding more flour as needed.   This should take about 5-7 minutes with a stand mixer, 10 minutes by hand.  If using a stand mixer, still knead a few rounds on a lightly floured surface at the end.

  3. Lightly grease a bowl and place your dough in it, flipping once so that all the dough is lightly coated in oil.  Cover with a clean towel or plastic wrap and place in a warm place to rise until doubled in volume, about one hour.  

  4. When bread has risen, punch or press down to degas it.  Dump back onto your floured surface and divide the dough into two even pieces, using a scale for accuracy.  

  5. Starting with one half, form dough into a ball by flattening in a small square, then folding 3-4 times to create a ball, stretching as you do to create some tension. Move to a part of your work surface that has minimal flour.  Place the ball between your two floured hands, loosely cupped. Move the ball between your hands in a circular motion while gently pulling the dough in a downward action.  The bottom of the dough should stick to your surface a bit, and as you gently stretch it down in a circular motion you are creating surface tension.  If the dough starts to tear lighten up on the pressure; the dough should look taught and smooth.  The surface tension will create a nice crust for your dough.  This is called shaping a "Boule."  If you're as confused as I would be reading this for the first time, this demonstration from King Arthur Flour is very helpful, the technique we're going for is shown starting at about 0:30.  

  6. Repeat with other half of dough.  Place towel or plastic wrap over the two boules and let rest for 15 minutes.

  7. Shape each round into a loaf and place in prepared pans.  Place back in a warm place to double, about 1 hour.  Preheat your oven towards the end of this time.  

  8. When dough has risen for the second time and the oven is hot, spray the inside walls of your oven with water to create steam.  A spray bottle works well.  Place loaves in oven and bake for 25-30 minutes, or until internal temperature reads 200-210°F / 93-99°C.  Allow to cool in pans for 10 minutes, then remove and transfer to a wire rack.  

bread, white bread, carbs, buttermilk, toast, french toast bread
Bread
American
Yield: 20
Author:

Buttermilk Bread

A soft white bread made extra fluffy with the use of buttermilk. Great for toast and french toast.
prep time: 40 Mcook time: 30 Mtotal time: 70 M

ingredients:

  • 5-6 cups / 620g-740g all-purpose flour
  • 1 Tbsp / 9g instant yeast
  • 2 tsp / 10g salt
  • 2 cups / 474g buttermilk
  • 1 Tbsp / 20g maple syrup or honey
  • 2 Tbsp / 28g oil or melted butter

instructions:

How to cook Buttermilk Bread

  1. Oven 375°F / 190°C. Grease two approx. 9x5in / 24x13cm loaf pans.
  2. In a large bowl or bowl of a stand mixer fitted with the paddle attachment, place 5 cups of flour, yeast, and salt. Mix together. Add buttermilk, maple syrup, and oil, mixing well. Switch to the dough hook if using a stand mixer.
  3. Knead in the stand mixer or by hand on a lightly floured surface, until a smooth dough is formed, adding more flour as needed. This should take about 5-7 minutes with a stand mixer, 10 minutes by hand. If using a stand mixer, still knead a few rounds on a lightly floured surface at the end.
  4. Lightly grease a bowl and place your dough in it, flipping once so that all the dough is lightly coated in oil. Cover with a clean towel or plastic wrap and place in a warm place to rise until doubled in volume, about one hour.
  5. When bread has risen, punch or press down to degas it. Dump back onto your floured surface and divide the dough into two even pieces, using a scale for accuracy.
  6. Starting with one half, form dough into a ball by flattening in a small square, then folding 3-4 times to create a ball, stretching as you do to create some tension. Move to a part of your work surface that has minimal flour. Place the ball between your two floured hands, loosely cupped. Move the ball between your hands in a circular motion while gently pulling the dough in a downward action. The bottom of the dough should stick to your surface a bit, and as you gently stretch it down in a circular motion you are creating surface tension. If the dough starts to tear lighten up on the pressure; the dough should look taught and smooth. The surface tension will create a nice crust for your dough. This is called shaping a "Boule." If you're as confused as I would be reading this for the first time, this demonstration from King Arthur Flour is very helpful, the technique we're going for is shown starting at about 0:30.
  7. Repeat with other half of dough. Place towel or plastic wrap over the two boules and let rest for 15 minutes.
  8. Shape each round into a loaf and place in prepared pans. Place back in a warm place to double, about 1 hour. Preheat your oven towards the end of this time.
  9. When dough has risen for the second time and the oven is hot, spray the inside walls of your oven with water to create steam. A spray bottle works well. Place loaves in oven and bake for 25-30 minutes, or until internal temperature reads 200-210°F / 93-99°C. Allow to cool in pans for 10 minutes, then remove and transfer to a wire rack.

Calories

161.19

Fat (grams)

2.00

Sat. Fat (grams)

0.28

Carbs (grams)

30.42

Fiber (grams)

1.12

Net carbs

29.30

Sugar (grams)

2.10

Protein (grams)

4.79

Sodium (milligrams)

239.83

Cholesterol (grams)

0.95
Nutritional information is approximate and based on 1 slice from 20 servings.
Created using The Recipes Generator

Whole Wheat Bread

This post may contain affiliate links. If you make a purchase using these links, Jennyblogs may receive a small commission, at no extra cost to you. This helps to support Jennyblogs. For further information see the privacy policy. Grazie!

Simple, delicious, whole wheat bread.  No batons, bread machines, or rocket scientists required.  Actually, if you have a bread machine your bread making life is probably a lot simpler than mine.  I enjoy working the bread with my own hands, though.  It's very therapeutic and gives you a nice upper body workout.   Which means you could then eat more bread, yes?

Anyway, this is a simple, versatile bread, good for sandwiches, toast, and...bread.  

Recipe adapted from The Frugal Girl


Whole Wheat Bread

Makes 2 approx. 9in / 23cm loaves

Ingredients:

  • 1 1/2 Tbsp / 14g instant yeast

  • 2 1/2 tsp / 13g salt

  • 3 cups / 384g whole wheat flour

  • 2 3/4 cups / 330g all-purpose flour

  • 2 1/3 cups / 552g warm water (about 110°F / 43°C)

  • 1/4 cup / 80g maple syrup or honey

  • 1/4 cup / 56g oil or melted butter

Directions:

Oven 350°F / 177°C.  Grease 2 approx. 9x5in / 23x13cm bread pans. 

  1. Combine yeast, salt, 1 cup / 128g whole wheat flour, and 1 cup / 120g all-purpose flour in the bowl of a stand mixer on low speed, or mix by hand.  

  2. Add warm water, maple syrup, and oil.  Mix until ingredients are combined, then increase speed to medium, beating for 3 minutes, or vigorously by hand.  

  3. Add remaining whole wheat flour and all-purpose flour until a soft but kneadable dough is formed.  

  4. Switch to dough hook and knead for 5-7 minutes, turning out on to a lightly floured surface to knead for 1-2 minutes more, until dough looks smooth and elastic. Or, knead by hand on a lightly floured surface for about 10 minutes.  

  5. Grease a large bowl and place dough in it.  Flip the dough over once so that both sides are lightly greased.  Cover bowl with a clean towel and place in a warm place to rise until doubled in volume, about 45-60 minutes.  

  6. When dough has risen, punch down and knead on a lightly floured surface for 4-5 minutes.  

  7. Separate dough into two equal pieces.  Roll or press one piece out into a small rectangle.  It does not have to be exact or very big, the width of it should be a touch smaller than your bread pan, or 9 inches.  Starting from the short end, roll the dough up and place in your prepared pan.  Repeat with second piece.  

  8. Place towel back over loaves and let rise until doubled, about 30-45 minutes.  

  9. When loaves have risen, bake for about 30 minutes.  They should sound hollow when tapped on the bottom or the internal temperature should read about 205°F / 96°C.  

  10. Cool in pans 10 minutes before removing and allowing to cool fully.  

Jenny's Notes:

  • If you use oil to make this bread, it will be dairy-free. If you use oil and maple syrup, it will also be vegan.

  • I have also made this bread with great success substituting part of the all-purpose flour with wheat germ.  Gives it an extra nutty flavor profile.  

  • The rolling step creates surface tension in the bread, and therefore a prettier loaf.  I only eat pretty loaves.  ;)

vegan, dairy-free, whole wheat bread, wheat germ, honey, maple syrup, toast, french toast, whole wheat sandwich bread, homemade bread, loaves
Bread
American
Yield: 20
Author:

Whole Wheat Bread

Classic everyday whole wheat bread, great for sandwiches, toast, or anyway you like to eat bread!
prep time: 35 Mcook time: 30 Mtotal time: 65 M

ingredients:

  • 1 1/2 Tbsp / 14g instant yeast
  • 2 1/2 tsp / 13g salt
  • 3 cups / 384g whole wheat flour
  • 2 3/4 cups / 330g all-purpose flour
  • 2 1/3 cups / 552g warm water (about 110°F / 43°C)
  • 1/4 cup / 80g maple syrup or honey
  • 1/4 cup / 56g oil or melted butter

instructions:

How to cook Whole Wheat Bread

  1. Oven 350°F / 177°C. Grease 2 approx. 9x5in / 23x13cm bread pans.
  2. Combine yeast, salt, 1 cup / 128g whole wheat flour, and 1 cup / 120g all-purpose flour in the bowl of a stand mixer on low speed, or mix by hand.
  3. Add warm water, maple syrup, and oil. Mix until ingredients are combined, then increase speed to medium, beating for 3 minutes, or vigorously by hand.
  4. Add remaining whole wheat flour and all-purpose flour until a soft but kneadable dough is formed.
  5. Switch to dough hook and knead for 5-7 minutes, turning out on to a lightly floured surface to knead for 1-2 minutes more, until dough looks smooth and elastic. Or, knead by hand on a lightly floured surface for about 10 minutes.
  6. Grease a large bowl and place dough in it. Flip the dough over once so that both sides are lightly greased. Cover bowl with a clean towel and place in a warm place to rise until doubled in volume, about 45-60 minutes.
  7. When dough has risen, punch down and knead on a lightly floured surface for 4-5 minutes.
  8. Separate dough into two equal pieces. Roll or press one piece out into a small rectangle. It does not have to be exact or very big, the width of it should be a touch smaller than your bread pan, or 9 inches. Starting from the short end, roll the dough up and place in your prepared pan. Repeat with second piece.
  9. Place towel back over loaves and let rise until doubled, about 30-45 minutes.
  10. When loaves have risen, bake for about 30 minutes. They should sound hollow when tapped on the bottom or the internal temperature should read about 205°F / 96°C.
  11. Cool in pans 10 minutes before removing and allowing to cool fully.

NOTES:

If you use oil to make this bread, it will be dairy-free. If you use oil and maple syrup, it will also be vegan. I have also made this bread with great success substituting part of the all-purpose flour with wheat germ. Gives it an extra nutty flavor profile. The rolling step creates surface tension in the bread, and therefore a prettier loaf.

Calories

162.77

Fat (grams)

3.50

Sat. Fat (grams)

0.30

Carbs (grams)

29.38

Fiber (grams)

2.69

Net carbs

26.69

Sugar (grams)

2.54

Protein (grams)

4.53

Sodium (milligrams)

254.58

Cholesterol (grams)

0.00
Nutritional information is approximate and based on 1 slice from a 10-slice loaf.
Created using The Recipes Generator

Pumpkin Cinnamon Swirl Bread

Pumpkin Bread. No, not that wonderful, dense, quick-bread pumpkin bread, but a light, yeasted bread made with PUMPKIN and spiced with nutmeg and ginger!!! And a beautiful cinnamon swirl. It makes a-may-zing toast. I think I say that about all my bread recipes. But it’s the truth. And I love toast.

Do you want to know something really sad, though? (You’re maybe thinking, uh no, scrolllll.) I’m blogging about this bread, and I can’t even eat it. (By choice, I guess I like to punish my body??) I’m going to tell you about it.

Ever heard of Whole30?  Me neither, up until last year.  Actually, New Year's Eve.  (Yes, only 2 weeks ago.  I know, I know, those "last year" jokes are so old, but I still get SO much entertainment out of them.  Too much.)  Anyway, I read about the Whole30 in an email from this informative and entertaining fitness site called Greatist.   Like all normal people, my first thought when I see things like ice cream and strange diets is to say, "I WANT TO BE A PART OF THAT."  Actually, I prefer the ice cream to be a part of me, meaning I ate it. 

I am not normally a spontaneous person by any means, but two days later I had commenced my very own #Whole30January.  Without even reading all the way through the guidelines.  It's almost easier to list what you can eat than what you can't.  But I'll start with what you can't, just because it's fun and I like to complain about it.  It's not even all that hard.  Especially with a buddy.  Just ask my Mom, she just loves doing this with me.

Not allowed:

  1. grain (not even quinoa)

  2. dairy (guess that ice cream is not going to become a part of me after all)

  3. sugar (say no to stevia)

  4. soy (watch out for sneaky ingredients like soy lecithin)

  5. alcohol (put down the vanilla extract)

  6. legumes (think beans and peanuts)

  7. sketchy preservatives like carageenan

That leaves you with veggies, fruits, eggs, nuts, meat, and all the sadness you want.  But you may not take any of those approved items and combine them to create something in the "cheat" category.  For example, you cannot combine eggs and bananas and pour it onto a griddle because that would be a pancake.  The goal is to break you of unhealthy relationships with food.  So instead of replacing everything you normally eat with healthier versions (because at the end of the 30 days you will most likely go back to the exact same way you ate before, and then nothing has changed) the goal is to explore and create new delicious and nutritious (and sad) food.  Ha ok I'm done being sardonic.  If you want to read more about Whole30, click here.  

So in the midst of these January blues and food sadness, I will share with you this recipe for pumpkin cinnamon swirl bread so you can eat it in my stead.  While you're at it, would you also eat some cheese and every other kind of bread that exists for me?  Thanks. 

This post may contain affiliate links. If you buy something using these links, Jennyblogs may receive a small commission, at no extra cost to you. This helps to support Jennyblogs. For further information see the privacy policy. Grazie!

Recipe adapted from Cooking Classy


Pumpkin Cinnamon Swirl Bread

Makes 1 loaf

Ingredients:

For the Bread

  • 2 1/4 tsp / 7g active dry yeast

  • 1/4 cup / 60g warm water, 110°F / 43°F

  • 1/4 cup / 50g + 1/2 tsp sugar

  • 1/4 cup / 60g warm milk, 110°F / 43°C

  • 2 Tbsp / 42g molasses

  • 3/4 tsp salt

  • 1 Tbsp / 14g oil

  • 1/4 tsp nutmeg

  • 1/4 tsp ginger

  • 1 egg

  • 1 cup / 246g pumpkin puree

  • 3 1/2 - 4 cups / 420g - 480g all-purpose flour

For the Cinnamon Swirl

  • 1 1/2 Tbsp / 21g butter, melted

  • 1/3 cup / 67g brown sugar

  • 2 tsp cinnamon

Directions:

Make the Bread

Oven 375°F / 190°C.  1 greased bread pan, approximately 9x5in / 23x13cm.

  1. In the bowl of a stand mixer combine yeast, water, and 1/2 tsp of sugar.  Allow to sit until yeast starts to bubble, about 5 minutes.

  2. Stir in the milk, molasses, remaining sugar, salt, oil, nutmeg, ginger, egg, and pumpkin until combined. 

  3. Switch to a dough hook and slowly add flour.  Continue adding flour until a soft, but not too sticky dough is achieved. 

  4. Turn dough out onto a lightly floured surface and knead for 1-2 minutes. 

  5. Place in an oiled bowl, flip so that both sides are oiled, and cover with a towel. Allow to rise in a warm place until doubled in size, about 1 hour. 

  6. While the bread is rising, whisk together brown sugar and cinnamon in a small bowl.  Set aside.

  7. When the bread is doubled in size, punch down and turn out onto a lightly floured surface.  Roll out into a rectangle, about 22x8in / 56x20cm. 

  8. Spread melted butter over dough, going within 1/2in / 1cm of edge.  Sprinkle cinnamon sugar mixture evenly over butter.

  9. Starting from one of the short sides (the approximate 8in / 20cm) roll dough into a loaf.  Place in prepared loaf pan seam side down. 

  10. Cover with a towel and let rise again until doubled in size, about 45 minutes. 

  11. Bake in preheated oven for 35-40 minutes, or until bread sounds hollow to the tap and an internal temperature reaches about 190°F / 88°C. 

Jenny's Notes:

  • If using instant yeast instead of instant active dry yeast, you can skip step 1. and add all the ingredients from step 1. and 2. together, then proceed to step 3. The reason for this is because active dry yeast is dried and needs to be reactivated in some warm liquid and a bit of sugar before adding to the rest of the ingredients. Instant yeast is ready to be added in without any extra prep.

  • This bread is delicious toasted!  And if you're really a pumpkin fan, might I mention pumpkin butter?

yeasted bread, yeast, pumpkin puree, canned pumpkin, pumpkin bread, cinnamon swirl
bread, breakfast
American
Yield: 12-14
Author:

Pumpkin Cinnamon Swirl Bread

Light, yeasted pumpkin bread spiced with ginger and nutmeg with a beautiful cinnamon swirl.
prep time: 50 Mcook time: 40 Mtotal time: 90 M

ingredients:

For the Bread
  • 2 1/4 tsp / 7g active dry yeast
  • 1/4 cup / 60g warm water, 110°F / 43°F
  • 1/4 cup / 50g + 1/2 tsp sugar
  • 1/4 cup / 60g warm milk, 110°F / 43°C
  • 2 Tbsp / 42g molasses
  • 3/4 tsp salt
  • 1 Tbsp / 14g oil
  • 1/4 tsp nutmeg
  • 1/4 tsp ginger
  • 1 egg
  • 1 cup / 246g pumpkin puree
  • 3 1/2 - 4 cups / 420g - 480g all-purpose flour
For the Cinnamon Swirl
  • 1 1/2 Tbsp / 21g butter, melted
  • 1/3 cup / 67g brown sugar
  • 2 tsp cinnamon

instructions:

How to cook Pumpkin Cinnamon Swirl Bread

Make the Bread
  1. Oven 375°F / 190°C. 1 greased bread pan, approximately 9x5in / 23x13cm.
  2. In the bowl of a stand mixer combine yeast, water, and 1/2 tsp of sugar. Allow to sit until yeast starts to bubble, about 5 minutes.
  3. Stir in the milk, molasses, remaining sugar, salt, oil, nutmeg, ginger, egg, and pumpkin until combined.
  4. Switch to a dough hook and slowly add flour. Continue adding flour until a soft, but not too sticky dough is achieved.
  5. Turn dough out onto a lightly floured surface and knead for 1-2 minutes.
  6. Place in an oiled bowl, flip so that both sides are oiled, and cover with a towel. Allow to rise in a warm place until doubled in size, about 1 hour.
  7. While the bread is rising, whisk together brown sugar and cinnamon in a small bowl. Set aside.
  8. When the bread is doubled in size, punch down and turn out onto a lightly floured surface. Roll out into a rectangle, about 22x8in / 56x20cm.
  9. Spread melted butter over dough, going within 1/2in / 1cm of edge. Sprinkle cinnamon sugar mixture evenly over butter.
  10. Starting from one of the short sides (the approximate 8in / 20cm) roll dough into a loaf. Place in prepared loaf pan seam side down.
  11. Cover with a towel and let rise again until doubled in size, about 45 minutes.
  12. Bake in preheated oven for 35-40 minutes, or until bread sounds hollow to the tap and an internal temperature reaches about 190°F / 88°C.

NOTES:

If using instant yeast instead of instant active dry yeast, you can skip step 1. and add all the ingredients from step 1. and 2. together, then proceed to step 3. The reason for this is because active dry yeast is dried and needs to be reactivated in some warm liquid and a bit of sugar before adding to the rest of the ingredients. Instant yeast is ready to be added in without any extra prep.

Calories

219.22

Fat (grams)

3.60

Sat. Fat (grams)

1.28

Carbs (grams)

41.35

Fiber (grams)

2.07

Net carbs

39.28

Sugar (grams)

9.02

Protein (grams)

5.33

Sodium (milligrams)

170.35

Cholesterol (grams)

19.66
Nutritional information is approximate and based on 12 servings.
Created using The Recipes Generator
What lurks in the darkness...

What lurks in the darkness...


Lemon Raspberry Rolls

We all love a good cinnamon roll.  The soft dough, warm-gooey-buttery-cinnamon filling, topped with a sweet glaze or cream cheese icing.  The smell of fresh baked breads wafting from the kitchen and the warmth of bread in our tummy are especially comforting as the months turn colder. 

Today, however, we are not making cinnamon rolls (that's old hat :) but lemon raspberry rolls.  The tang of the lemon and raspberry paired with the sweet glaze is a match made for breakfast.  Or anytime.  Pair it with a cup of tea or coffee and you have all the incentive you need to get out of bed in the morning!

This post may contain affiliate links. If you make a purchase using these links, Jennyblogs may receive a small commission, at no extra cost to you. This helps to support Jennyblogs. For further information see the privacy policy. Grazie!

Recipe adapted from Joy the Baker


Lemon Raspberry Rolls

Makes 12 Rolls

Ingredients:

For the Dough

  • 1 cup / 237g milk or water

  • 1/2 cup / 100g sugar

  • 4 1/2 tsp / 14g active dry yeast

  • 1/4 cup / 56g oil

  • 2 eggs

  • 1 tsp lemon zest

  • 1/2 tsp salt

  • 4 1/4 cups / 510g all-purpose flour + about 1/2 cup / 60g for kneading

For the Lemon Raspberry Filling

  • 1 1/4 cups / 157g fresh or frozen raspberries (if using frozen do not thaw)

  • 1/2 cup / 100g sugar

  • 1 tsp lemon zest

  • 1 tsp cornstarch

  • 1/4 cup / 56g butter

For the Glaze

  • 1 1/2 cups / 188g powdered sugar

  • 3 Tbsp / 42g lemon juice

Directions:

Preheat oven to 400F / 205C. Grease a 9x13inch / 23x33cm rectangular baking dish.

Make the Dough

  1. In a small saucepan over low heat, warm milk until it is about 100F / 38C.  Pour milk into a large bowl.  Add the sugar and yeast and allow to sit for 7-10 minutes.  The yeast should foam up a bit. 

  2. Add oil, eggs, zest, and salt.  Add the 4 1/4 cups of flour and mix until combined. 

  3. Flour a clean surface and turn out dough.  Knead for about 8-10 minutes, sprinkling more flour on your work surface as needed.   Dough should be soft and elastic by the end, so don't get too flour-happy. Alternately, you can use the bread hook on a stand mixer and knead for 8-10 minutes, adding in flour as needed. The dough should stick only to the bottom of the pan, not the sides.

  4. Lightly grease or flour a large bowl (the bowl you mixed the dough in is fine) and place dough in the bowl.  Cover with a towel and place in a warm area to rise for about 1 1/2 hours or until doubled in size. 

Make the Lemon Raspberry Filling

  1. In a small saucepan melt the butter and let simmer until it starts to brown.  Remove from heat and cool slightly. 

  2. In a medium bowl lightly mix raspberries with sugar, zest, and cornstarch.  It's okay if the raspberries get a little crushed. 

Assemble the Rolls

  1. When the dough has risen, punch it down and turn out onto a lightly floured surface.  Knead for about a minute, then roll into a large rectangle, about 10x20inch / 25x50cm.   

  2. Spread cooled butter over dough almost to the edges, then sprinkle evenly with raspberry mixture. 

  3. Starting from one of the longer sides, roll dough into a spiral, pinching the dough together at the end to seal it. 

  4. Cut the log in quarters, then each quarter into 3 slices.  Place the rolls in the prepared pan and cover lightly with plastic wrap or a damp towel.  Place in a warm area to rise for about an hour, or until puffed

  5. Bake for 20-22 minutes, until golden on top and centers no longer look doughy. Internal temperature should be about 195F / 90C.

Make the Glaze

  1. In a small bowl whisk together powdered sugar and lemon juice.  It should be thin enough to drizzle but not too liquidy.  Add more powdered sugar or lemon juice as needed. 

  2. Drizzle warm rolls with glaze. 

Jenny's Notes:

  • If you don't have a thermometer handy to know what 100 degrees is, simply warm until the milk feels quite warm, but not hot.  It'll be fine!

  • You can freeze these rolls once you have sliced them and put them in the pan.  Once removed from the freezer allow to thaw and proceed as normal. 

  • When using a stand mixer to knead, I still recommend kneading it for a few minutes by hand afterwards. I find they are not always as thorough as kneading by hand and you want an even rise for your dough.  I often to do it all by hand just because it’s therapeutic!

Breakfast rolls, lemon raspberry
Breakfast, Dessert
American
Yield: 12
Author:
Lemon Raspberry Rolls

Lemon Raspberry Rolls

These bright breakfast rolls are like cinnamon rolls, but made with fresh lemon zest and raspberries instead!
Prep time: 1 H & 10 MCook time: 22 MinTotal time: 1 H & 32 M

Ingredients

For the Dough
For the Lemon Raspberry Filling
For the Glaze

Instructions

Make the Dough
  1. In a small saucepan over low heat, warm milk until it is about 100F / 38C. Pour milk into a large bowl. Add the sugar and yeast and allow to sit for 7-10 minutes. The yeast should foam up a bit.
  2. Add oil, eggs, zest, and salt. Add the 4 1/4 cups of flour and mix until combined.
  3. Flour a clean surface and turn out dough. Knead for about 8-10 minutes, sprinkling more flour on your work surface as needed. Dough should be soft and elastic by the end, so don't get too flour-happy. Alternately, you can use the bread hook on a stand mixer and knead for 8-10 minutes, adding in flour as needed. The dough should stick only to the bottom of the pan, not the sides.
  4. Lightly grease or flour a large bowl (the bowl you mixed the dough in is fine) and place dough in the bowl. Cover with a towel and place in a warm area to rise for about 1 1/2 hours or until doubled in size.
Make the Lemon Raspberry Filling
  1. In a small saucepan melt the butter and let simmer until it starts to brown. Remove from heat and cool slightly.
  2. In a medium bowl lightly mix raspberries with sugar, zest, and cornstarch. It's okay if the raspberries get a little crushed.
Assemble and Bake the Rolls
  1. Preheat oven to 400F / 205C. Grease a 9x13inch / 23x33cm rectangular baking dish.
  2. When the dough has risen, punch it down and turn out onto a lightly floured surface. Knead for about a minute, then roll into a large rectangle, about 10x20inch / 25x50cm.
  3. Spread cooled butter over dough almost to the edges, then sprinkle evenly with raspberry mixture.
  4. Starting from one of the longer sides, roll dough into a spiral, pinching the dough together at the end to seal it.
  5. Cut the log in quarters, then each quarter into 3 slices. Place the rolls in the prepared pan and cover lightly with plastic wrap or a damp towel. Place in a warm area to rise for about an hour, or until puffed
  6. Bake for 20-22 minutes, until golden on top and centers no longer look doughy. Internal temperature should be about 195F / 90C.
Make the Glaze
  1. In a small bowl whisk together powdered sugar and lemon juice. It should be thin enough to drizzle but not too liquidy. Add more powdered sugar or lemon juice as needed.
  2. Drizzle warm rolls with glaze.

Notes

If you don't have a thermometer handy to know what 100 degrees is, simply warm until the milk feels quite warm, but not hot. It'll be fine!You can freeze these rolls once you have sliced them and put them in the pan. Once removed from the freezer allow to thaw and proceed as normal. When using a stand mixer to knead, I still recommend kneading it for a few minutes by hand afterwards. I find they are not always as thorough as kneading by hand and you want an even rise for your dough.

Nutrition Facts

Calories

355.58

Fat

6.43 g

Sat. Fat

0.88 g

Carbs

68.26 g

Fiber

2.37 g

Net carbs

65.89 g

Sugar

32.75 g

Protein

6.77 g

Sodium

121.93 mg

Cholesterol

32.58 mg

Nutritional information is approximate. Based on 1 roll.

Did you make this recipe?
Tag @jenevamorris on instagram and hashtag it #jennyblogs

IPA Pretzel Bread

IMG_4049.JPG
This post was written from the London Heathrow Airport!

This post was written from the London Heathrow Airport!

Bread is delicious. #FACT.

Then when you make pretzel bread and add beer to it, it becomes extra delicious. #FACTZ. And that’s exactly what this bread is, boiled beer bread.

Pretzel bread is made simply by boiling bread dough in baking soda water. This particular recipe adds a bit of beer to the boiling water, because if you’re going to make beer bread, you might as well go all out!

Beer in baking

Beer can be added to all kinds of desserts from cookies and brownies to cakes and breads, even caramels and candies! It creates tender baked goods, can help raise, and of course, adds wonderful flavor notes. One of the beauties of baking with beer (and wine!) is choosing from all the different varieties, as each will lend its own unique flavor.

If you’re new to baking with beer, you’ll probably want to start with the recipe’s suggested beer, an Indian Pale Ale if you decide to make this bread. Once you start to get an idea of how beer acts and tastes in recipes, you can begin to branch out and try your favorite beers to find matches with different baked goods. For example, stouts (think Guinness) are lovely in chocolate cake. A staple of a bakery I worked in was a Chocolate Guinness Cake with Cream Cheese Frosting. Actually, the photos of the bread you see in this post are made with an American Pale Ale from Short’s Brewery, not an Indian Pale Ale. But they’re similar, I don’t know I’d notice the difference between breads made with an IPA or an APA. Just stay away from light beers, those are watery and not good for baking.

If you don’t like beer, chances are you will still like desserts and breads made with beer. Most of the alcohol gets baked out as well, so if it’s more the alcohol you avoid that can be reassuring. However, you’ll probably want to make your own informed choice on that as there will still be trace amounts of alcohol even after baking/cooking. :)

This post may contain affiliate links. If you make a purchase using these links, Jennyblogs may receive a small commission, at no extra cost to you. This helps to support Jennyblogs. For further information see the privacy policy. Grazie!

Recipe adapted from Little Market Kitchen


IPA Pretzel Bread

Makes two loaves

Ingredients:


    •    1/2 cup / 119g warm water (about 105-110 Fahrenheit)
    •    2 1/4 tsp / 7g active dry yeast
    •    1 1/2 cups (12 oz) / 356g IPA or beer of choice, room temperature, divided into 1 cup and 1/2 cup
    •    4 cups / 480g bread flour or all-purpose flour
    •    1 Tbsp / 13g sugar
    •    1 tsp / 5g salt
    •    3 Tbsp / 42g oil
    •    10 cups / 2,370g water
    •    1/2 cup / 110g baking soda
    •    1 egg yolk beaten with 1 Tbsp / 15g water
    •    coarse or flaked salt, for sprinkling


Directions:

Oven preheated to 425°F / 218°C. Line a baking sheet with parchment paper or Silpat.

IMG_4056.JPG
  1. Pour warm water into the bowl of a stand mixer or large bowl.  Sprinkle yeast over the water and let sit for about 10 minutes, or until bubbly and frothy.

  2. In a separate bowl, whisk together flour, sugar, and salt. 

  3. Once the yeast is active, add the flour mixture, then the oil, then 1 cup / 237g of the beer.  Mix in a stand mixer with dough hook or knead by hand until a soft, but not sticky, dough forms, about 10 minutes.  If it's too soft, add more flour, or if it's too dry/stiff, you can steal a bit of beer from the reserved 1/2 cup / 119g. 

  4. Give the dough a few kneads by hand if a stand mixer was used and place in a large lightly oiled bowl. Flip dough once so both sides are oily. Cover with a clean towel or plastic wrap and place in a warm place to rise until doubled in size, about 1 hour.  

  5. In a large pot, combine water, remaining 1/2 cup / 119g beer, and baking soda.  Bring to a boil. 

  6. Once bread has doubled in size, punch down and divide in half.  Shape each half into a round loaf. 

  7. Working with one loaf at a time, lower into the boiling water using a large sieve or spatula, boil for 30 seconds and flip in the water once.  Remove and place on prepared baking sheet. Repeat with second loaf. 

  8. Brush the loaves with the egg yolk and water mixture, sprinkle with salt. 

  9. Bake in preheated oven for 20 minutes then place a piece of tinfoil on top to keep the bread from darkening too much.  Bake for an additional 3-8 minutes until a baking thermometer inserted near center reads at least 190°F / 88°C. 

  10. Allow to cool, slice, and enjoy!

Jenny’s Notes:

  • If the dough is too soft when trying to create a round and it won’t hold its shape, add flour a bit at a time until it will.  Dough that relaxes a little bit out of shape is ok, just keep in mind that adding too much flour will create a dry bread. It’s about finding the balance between creating a soft dough yet strong enough to hold it’s shape. Properly kneaded dough is also important in a free form loaf holding its shape.

  • This bread makes excellent toast. I think I say that about every bread recipe. Toast is so good.

beer bread, pretzel bread, IPA bread, baking with beer,
bread
American
Yield: 16
Author:
IPA Pretzel Bread

IPA Pretzel Bread

Pretzel bread and beer bread combine in this flavorful bread made with India Pale Ale.
Prep time: 35 MinCook time: 28 Mininactive time: 1 H & 10 MTotal time: 2 H & 12 M

Ingredients

Instructions

  1. Oven preheated to 425°F / 218°C. Line a baking sheet with parchment paper or Silpat.
  2. Pour warm water into the bowl of a stand mixer or large bowl. Sprinkle yeast over the water and let sit for about 10 minutes, or until bubbly and frothy.
  3. In a separate bowl, whisk together flour, sugar, and salt.
  4. Once the yeast is active, add the flour mixture, then the oil, then 1 cup / 237g of the beer. Mix in a stand mixer with dough hook or knead by hand until a soft, but not sticky, dough forms, about 10 minutes. If it's too soft, add more flour, or if it's too dry/stiff, you can steal a bit of beer from the reserved 1/2 cup / 119g.
  5. Give the dough a few kneads by hand if a stand mixer was used and place in a large lightly oiled bowl. Flip dough once so both sides are oily. Cover with a clean towel or plastic wrap and place in a warm place to rise until doubled in size, about 1 hour.
  6. In a large pot, combine water, remaining 1/2 cup / 119g beer, and baking soda. Bring to a boil.
  7. Once bread has doubled in size, punch down and divide in half. Shape each half into a round loaf.
  8. Working with one loaf at a time, lower into the boiling water using a large sieve or spatula, boil for 30 seconds and flip in the water once. Remove and place on prepared baking sheet. Repeat with second loaf.
  9. Brush the loaves with the egg yolk and water mixture, sprinkle with salt.
  10. Bake in preheated oven for 20 minutes then place a piece of tinfoil on top to keep the bread from darkening too much. Bake for an additional 3-8 minutes until a baking thermometer inserted near center reads at least 190°F / 88°C.
  11. Allow to cool, slice, and enjoy!

Notes:

If the dough is too soft when trying to create a round and it won’t hold its shape, add flour a bit at a time until it will.  Dough that relaxes a little bit out of shape is ok, just keep in mind that adding too much flour will create a dry bread. It’s about finding the balance between creating a soft dough yet strong enough to hold it’s shape. Properly kneaded dough is also important in a free form loaf holding its shape.

Calories

149.06

Fat (grams)

3.44

Sat. Fat (grams)

0.35

Carbs (grams)

23.58

Fiber (grams)

0.84

Net carbs

22.74

Sugar (grams)

0.91

Protein (grams)

4.04

Sodium (milligrams)

2046.95

Cholesterol (grams)

11.53
Nutritional information is approximate; based on 1 slice, if each loaf yields 8 slices.
Did you make this recipe?
Tag @jennyblogsandbakes on instagram and hashtag it #jennyblogs