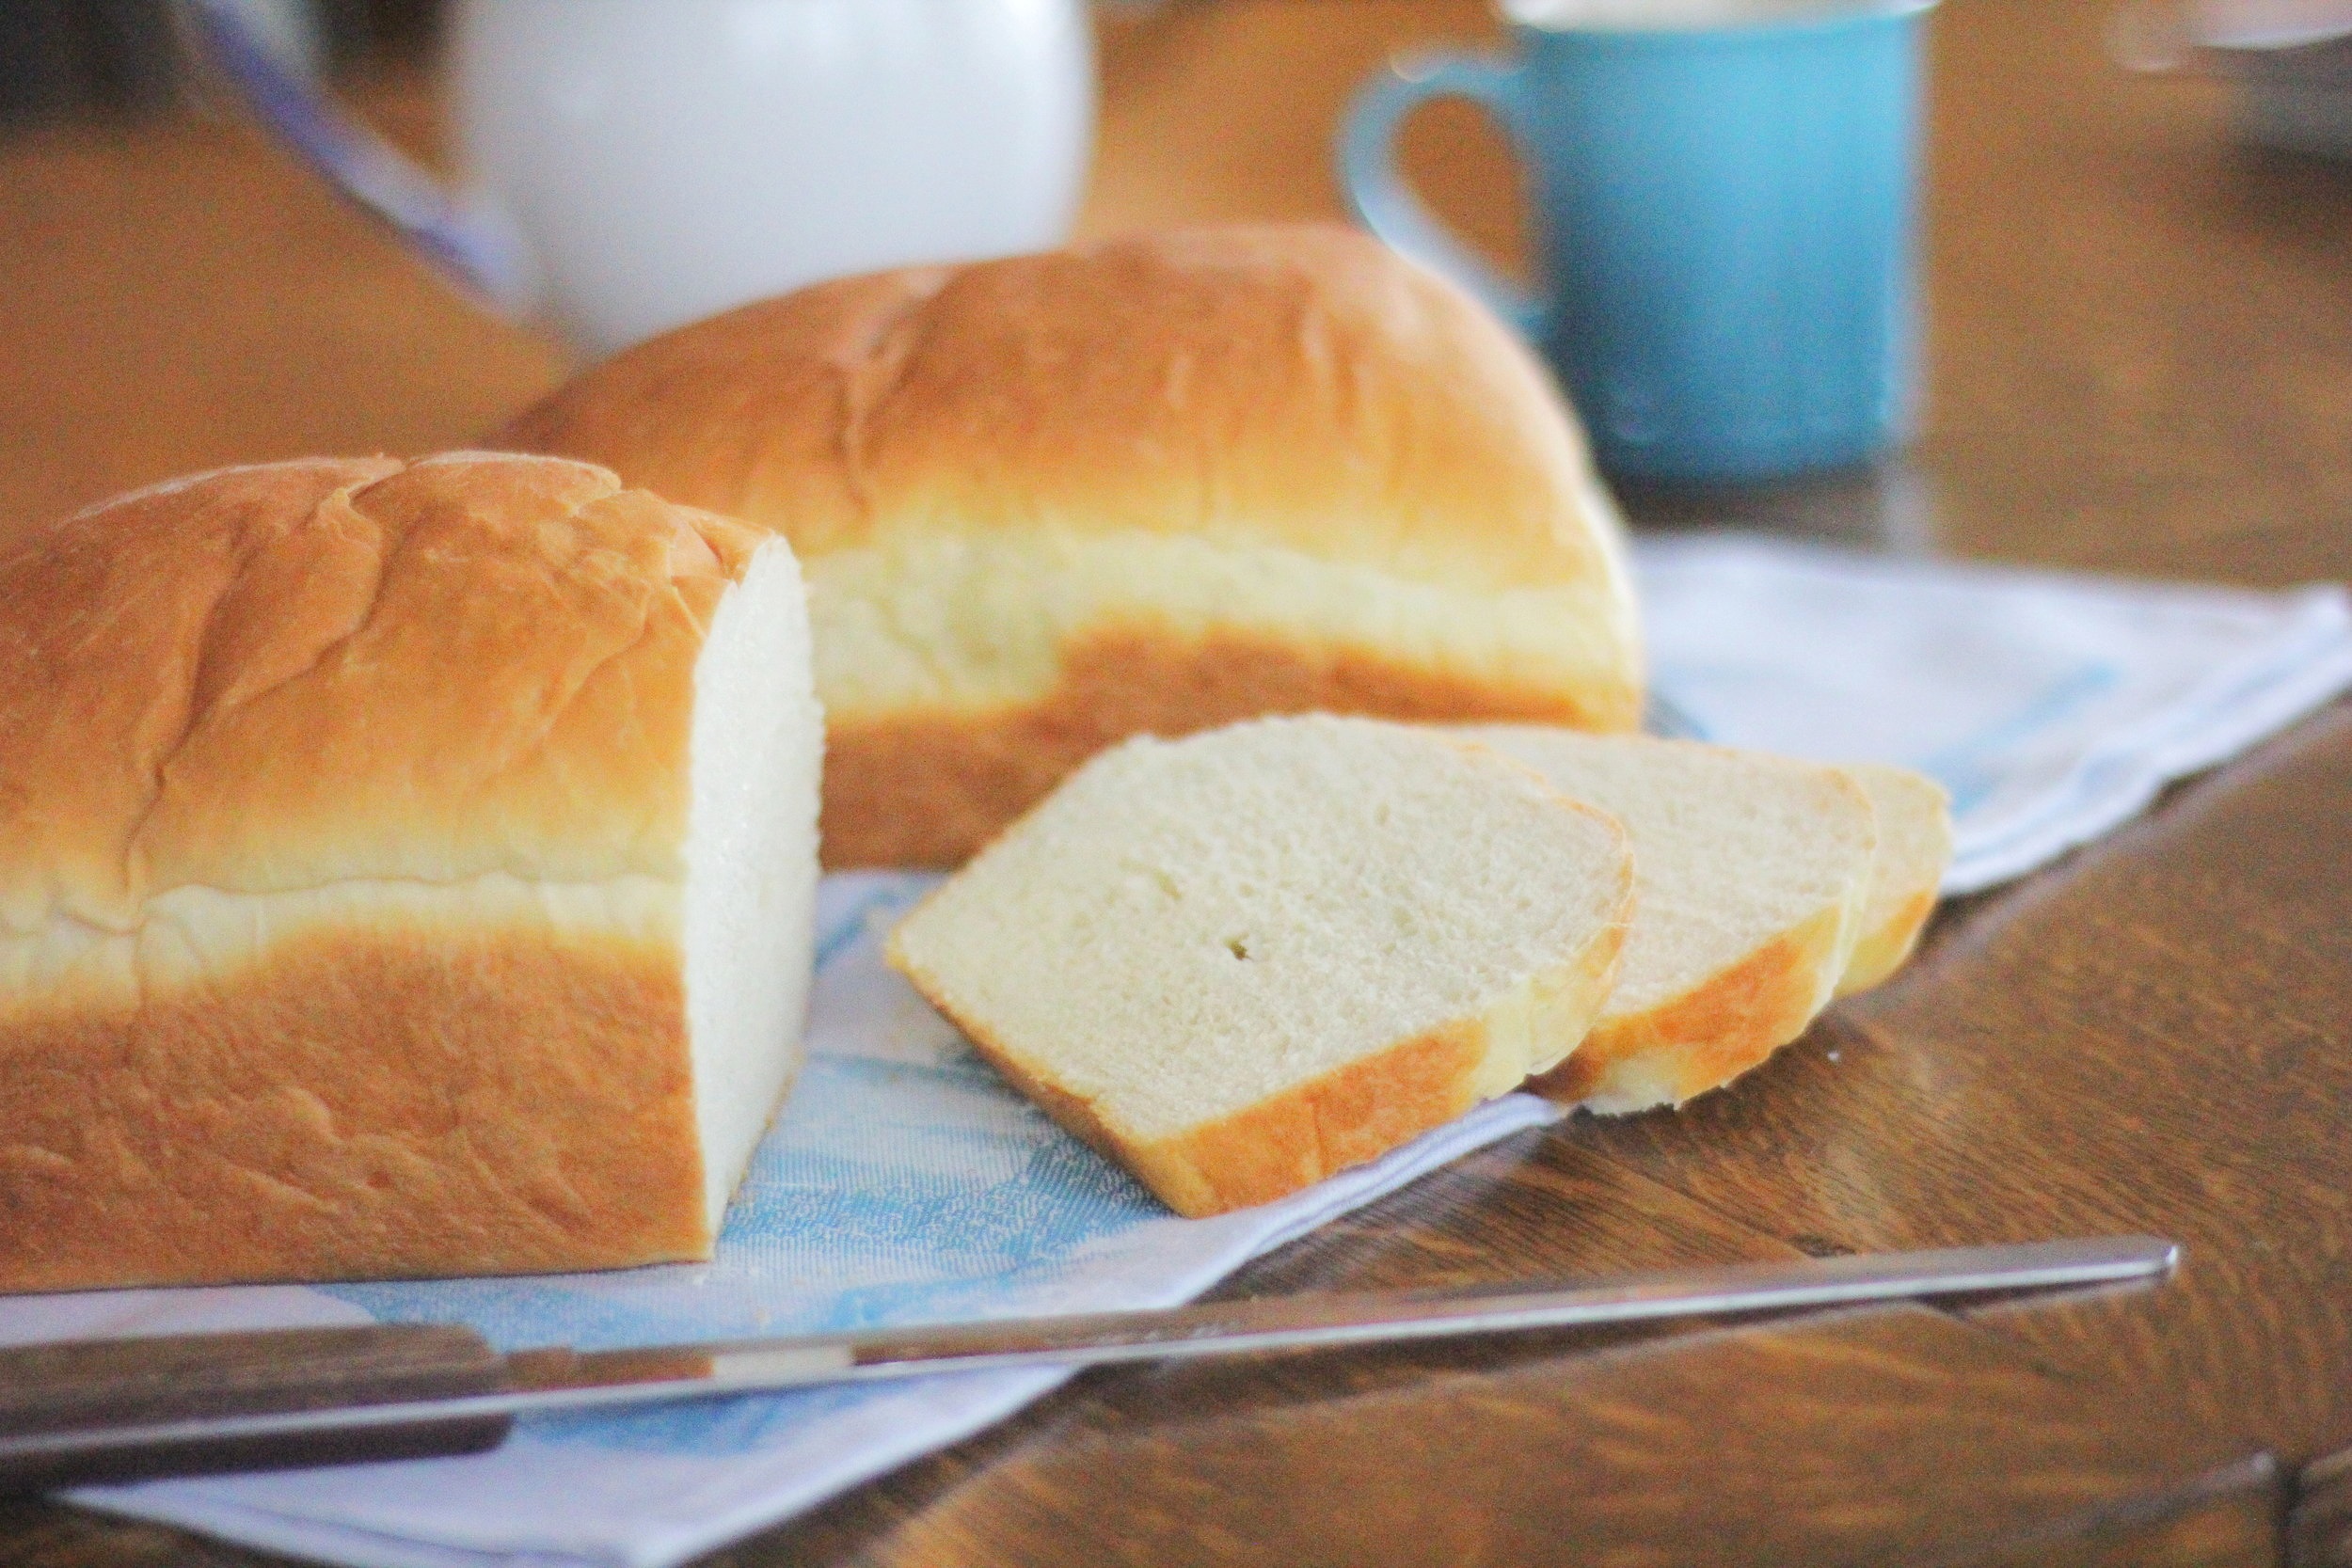
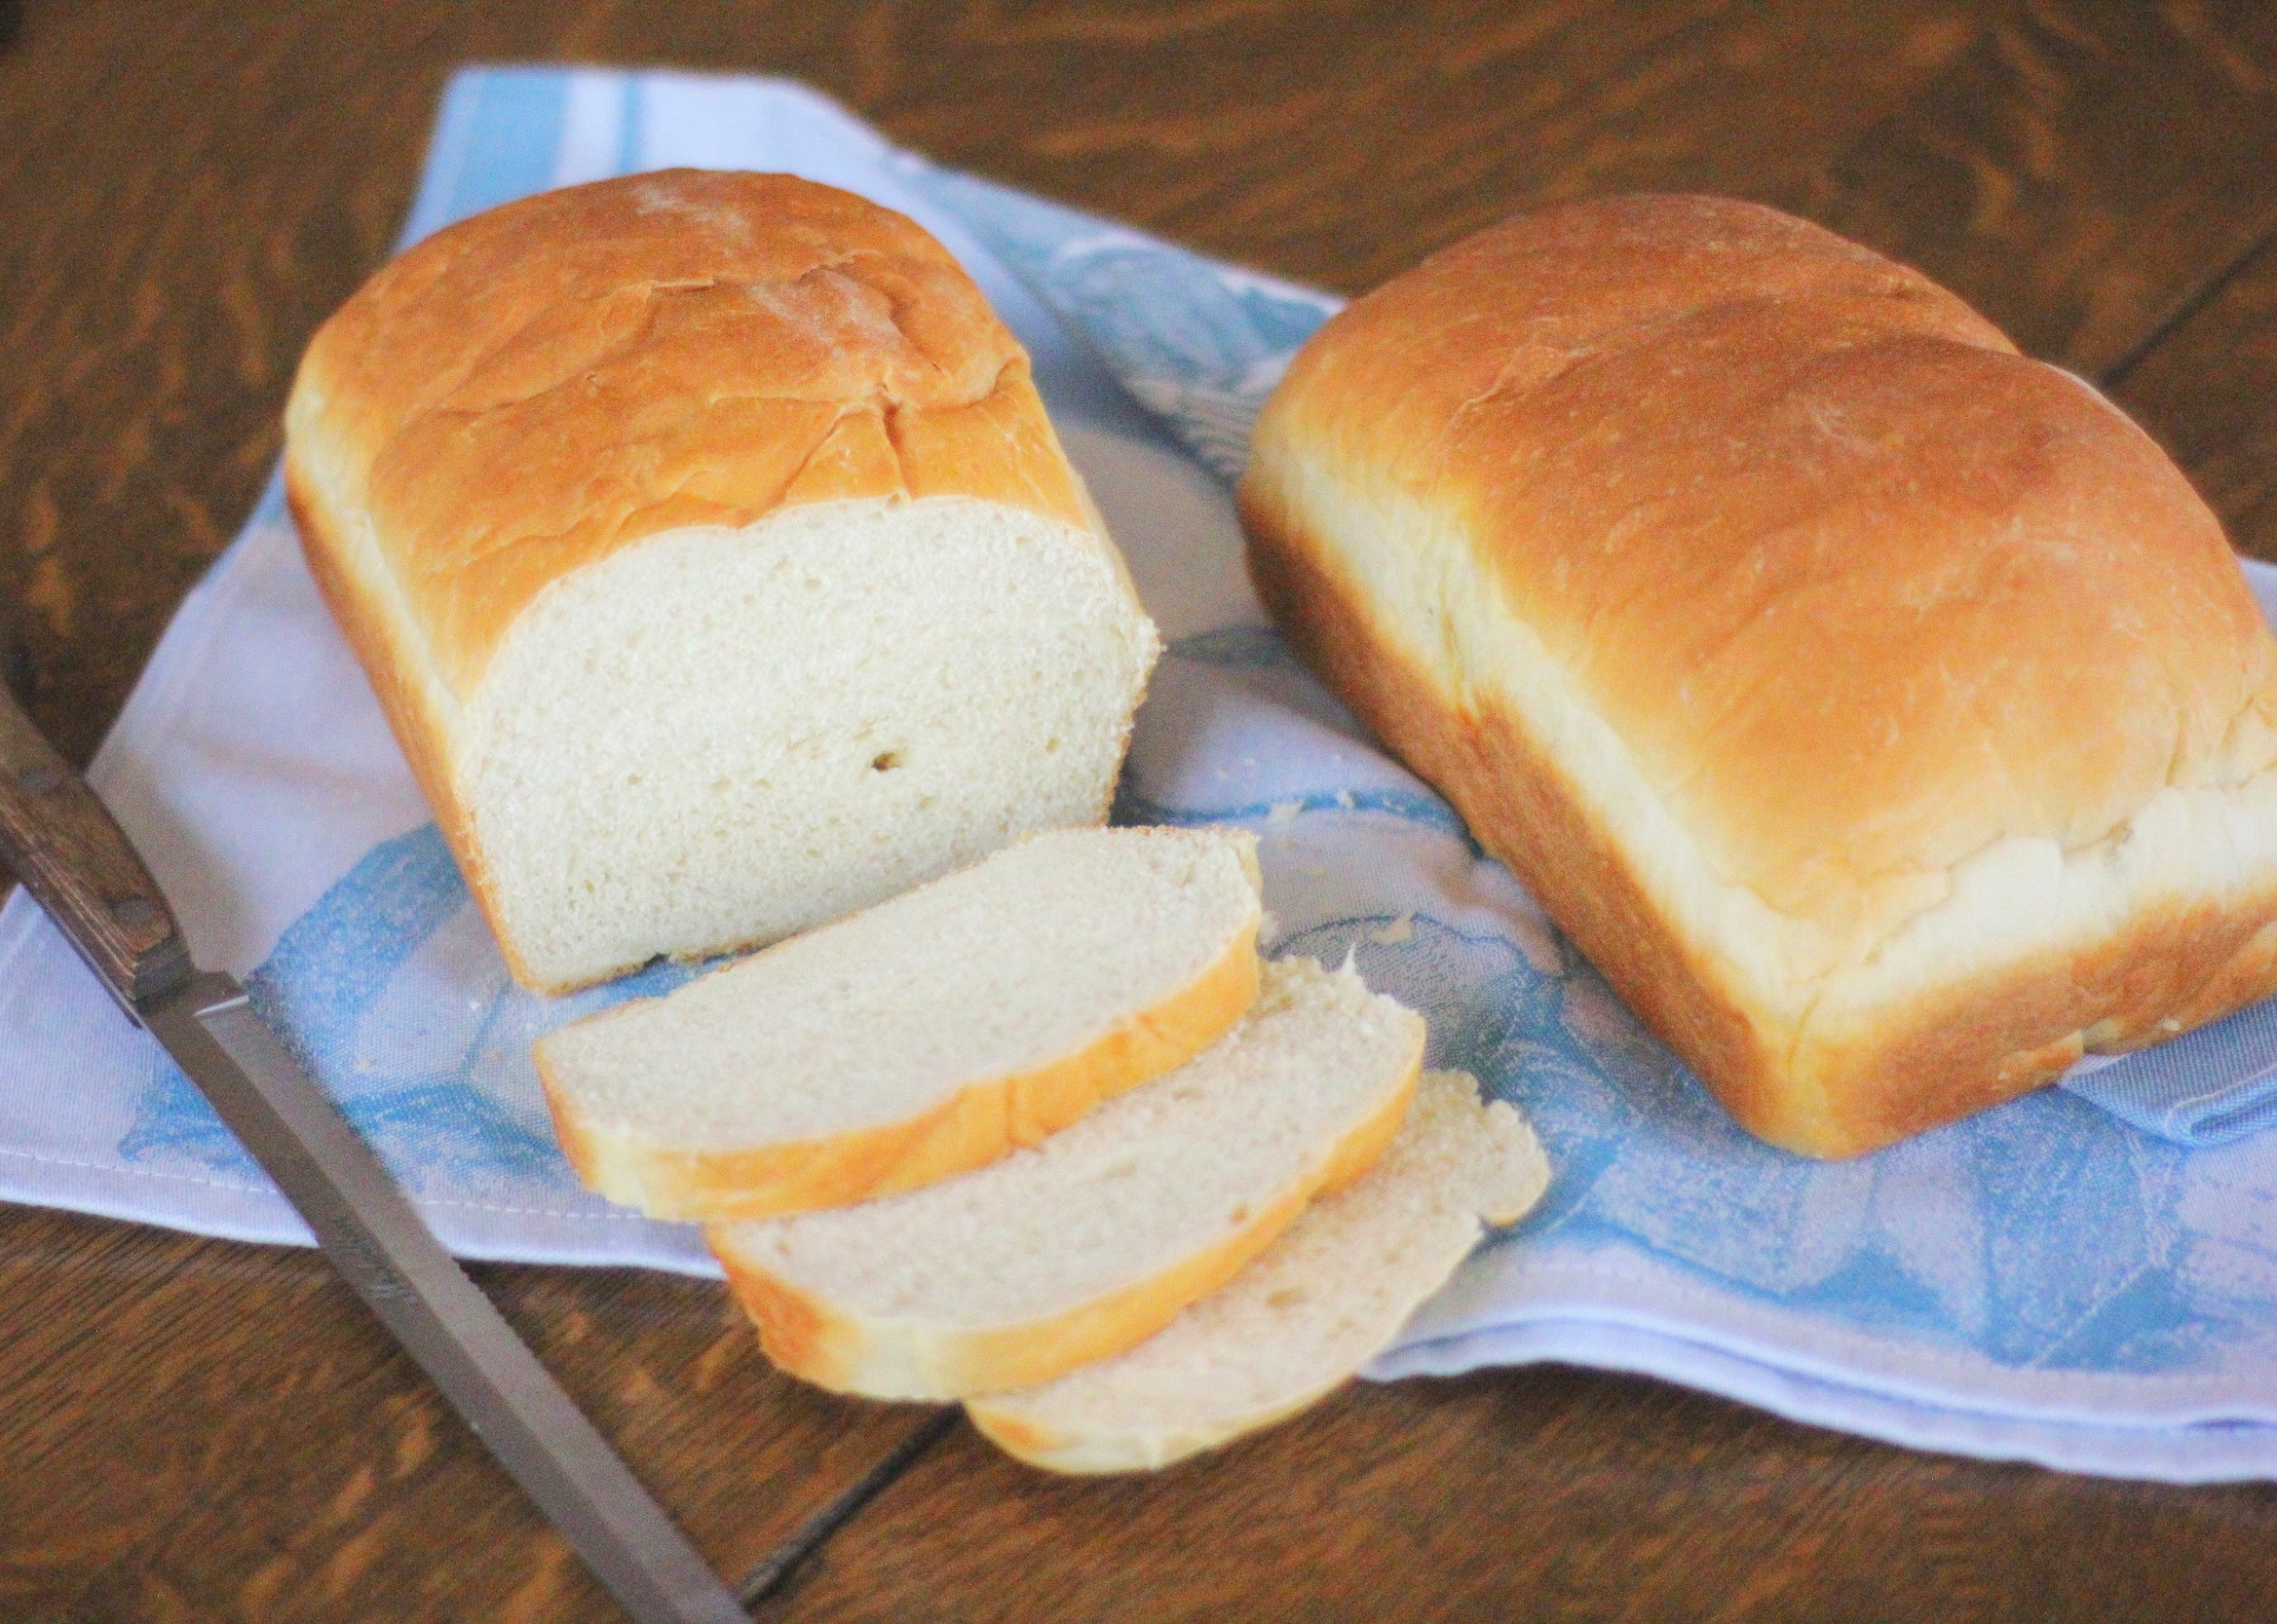
Buttermilk Bread
/Last Updated August 7, 2024
What’s the first thing that comes to mind when someone says, "Buttermilk"?
For me, that would be buttermilk pancakes. The lightest and fluffiest of all pancakes. If you live in the south, maybe that's buttermilk biscuits. Maybe your favorite cake recipe or scone recipe calls for buttermilk. Whatever it may be, these delectable food items all have one thing in common: Their light crumb, a.k.a. fluffiness. The high acidity in the buttermilk reacts with the leavening agent, like baking soda, thus creating a beautiful rise, and a nice, light product.
I don't often have buttermilk on hand; I find it much easier to make my own as I always have milk and lemon juice/vinegar on hand. Lemon juice or vinegar are both very acidic and will have a similar effect on the leavening agent. However, there is something so satisfying about using true buttermilk in a recipe. After all, Milk and Lemon Juice Pancakes don't sound nearly as appealing as Buttermilk pancakes.
So, a trip to the store, a carton of buttermilk bought, pancakes made and eaten. Now, there is only 7/8 of a carton of buttermilk left in your fridge. The likelihood of making 7 or more batches of buttermilk pancakes before the buttermilk goes bad is, well, not likely. (But if you do, let me know, I’ll come live at your house!)
The question remains, what I can do with the rest of this buttermilk without being wasteful? Make buttermilk bread! (Another side note, if you like to drink buttermilk straight, well then. You just can't relate with our buttermilk overload predicament, can you?) The fluffiness factor we were talking about earlier still plays a role in this bread. So fluffy. Makes great toast. And did I mention french toast? Now you can serve buttermilk french toast! Oh yes. Full circle, baby. Actually, I don't really know where the circle started, so it's hard to tell if we actually came full circle...
On to the recipe!
This post may contain affiliate links. If you make a purchase using these links, Jennyblogs may receive a small commission, at no extra cost to you. This helps to support Jennyblogs. Where possible, links are prioritized to small businesses and ethically and responsibly made items. For further information see the privacy policy. Grazie!
Recipe adapted from Jane's Sweets and Baking Journal


Buttermilk Bread
Makes 2 approx. 9x5 inch loaves
Ingredients:
5-6 cups / 620-740g all-purpose flour
1 Tbsp / 9g instant yeast
2 tsp / 10g salt
2 cups / 474g buttermilk
1 Tbsp / 20g maple syrup or honey
2 Tbsp / 28g oil or melted butter
Directions:
Oven 375°F / 190°C. Grease two approx. 9x5in / 24x13cm loaf pans.
In a large bowl or bowl of a stand mixer fitted with the paddle attachment, place 5 cups of flour, yeast, and salt. Mix together. Add buttermilk, maple syrup, and oil, mixing well. Switch to the dough hook if using a stand mixer.
Knead in the stand mixer or by hand on a lightly floured surface, until a smooth dough is formed, adding more flour as needed. This should take about 5-7 minutes with a stand mixer, 10 minutes by hand. If using a stand mixer, still knead a few rounds on a lightly floured surface at the end.
Lightly grease a bowl and place your dough in it, flipping once so that all the dough is lightly coated in oil. Cover with a clean towel or plastic wrap and place in a warm place to rise until doubled in volume, about one hour.
When bread has risen, punch or press down to degas it. Dump back onto your floured surface and divide the dough into two even pieces, using a scale for accuracy.
Starting with one half, form dough into a ball by flattening in a small square, then folding 3-4 times to create a ball, stretching as you do to create some tension. Move to a part of your work surface that has minimal flour. Place the ball between your two floured hands, loosely cupped. Move the ball between your hands in a circular motion while gently pulling the dough in a downward action. The bottom of the dough should stick to your surface a bit, and as you gently stretch it down in a circular motion you are creating surface tension. If the dough starts to tear lighten up on the pressure; the dough should look taught and smooth. The surface tension will create a nice crust for your dough. This is called shaping a "Boule." If you're as confused as I would be reading this for the first time, this demonstration from King Arthur Flour is very helpful, the technique we're going for is shown starting at about 0:30.
Repeat with other half of dough. Place towel or plastic wrap over the two boules and let rest for 15 minutes.
Shape each round into a loaf and place in prepared pans. Place back in a warm place to double, about 1 hour. Preheat your oven towards the end of this time.
When dough has risen for the second time and the oven is hot, spray the inside walls of your oven with water to create steam. A spray bottle works well. Place loaves in oven and bake for 25-30 minutes, or until internal temperature reads 200-210°F / 93-99°C. Allow to cool in pans for 10 minutes, then remove and transfer to a wire rack.

Buttermilk Bread
Ingredients
Instructions
- Oven 375°F / 190°C. Grease two approx. 9x5in / 24x13cm loaf pans.
- In a large bowl or bowl of a stand mixer fitted with the paddle attachment, place 5 cups of flour, yeast, and salt. Mix together. Add buttermilk, maple syrup, and oil, mixing well. Switch to the dough hook if using a stand mixer.
- Knead in the stand mixer or by hand on a lightly floured surface, until a smooth dough is formed, adding more flour as needed. This should take about 5-7 minutes with a stand mixer, 10 minutes by hand. If using a stand mixer, still knead a few rounds on a lightly floured surface at the end.
- Lightly grease a bowl and place your dough in it, flipping once so that all the dough is lightly coated in oil. Cover with a clean towel or plastic wrap and place in a warm place to rise until doubled in volume, about one hour.
- When bread has risen, punch or press down to degas it. Dump back onto your floured surface and divide the dough into two even pieces, using a scale for accuracy.
- Starting with one half, form dough into a ball by flattening in a small square, then folding 3-4 times to create a ball, stretching as you do to create some tension. Move to a part of your work surface that has minimal flour. Place the ball between your two floured hands, loosely cupped. Move the ball between your hands in a circular motion while gently pulling the dough in a downward action. The bottom of the dough should stick to your surface a bit, and as you gently stretch it down in a circular motion you are creating surface tension. If the dough starts to tear lighten up on the pressure; the dough should look taught and smooth. The surface tension will create a nice crust for your dough. This is called shaping a "Boule." If you're as confused as I would be reading this for the first time, this demonstration from King Arthur Flour is very helpful, the technique we're going for is shown starting at about 0:30.
- Repeat with other half of dough. Place towel or plastic wrap over the two boules and let rest for 15 minutes.
- Shape each round into a loaf and place in prepared pans. Place back in a warm place to double, about 1 hour. Preheat your oven towards the end of this time.
- When dough has risen for the second time and the oven is hot, spray the inside walls of your oven with water to create steam. A spray bottle works well. Place loaves in oven and bake for 25-30 minutes, or until internal temperature reads 200-210°F / 93-99°C. Allow to cool in pans for 10 minutes, then remove and transfer to a wire rack.
Nutrition Facts
Calories
161.19Fat
2.00 gSat. Fat
0.28 gCarbs
30.42 gFiber
1.12 gNet carbs
29.30 gSugar
2.10 gProtein
4.79 gSodium
239.83 mgCholesterol
0.95 mgNutritional information is approximate and based on 1 slice from 20 servings.