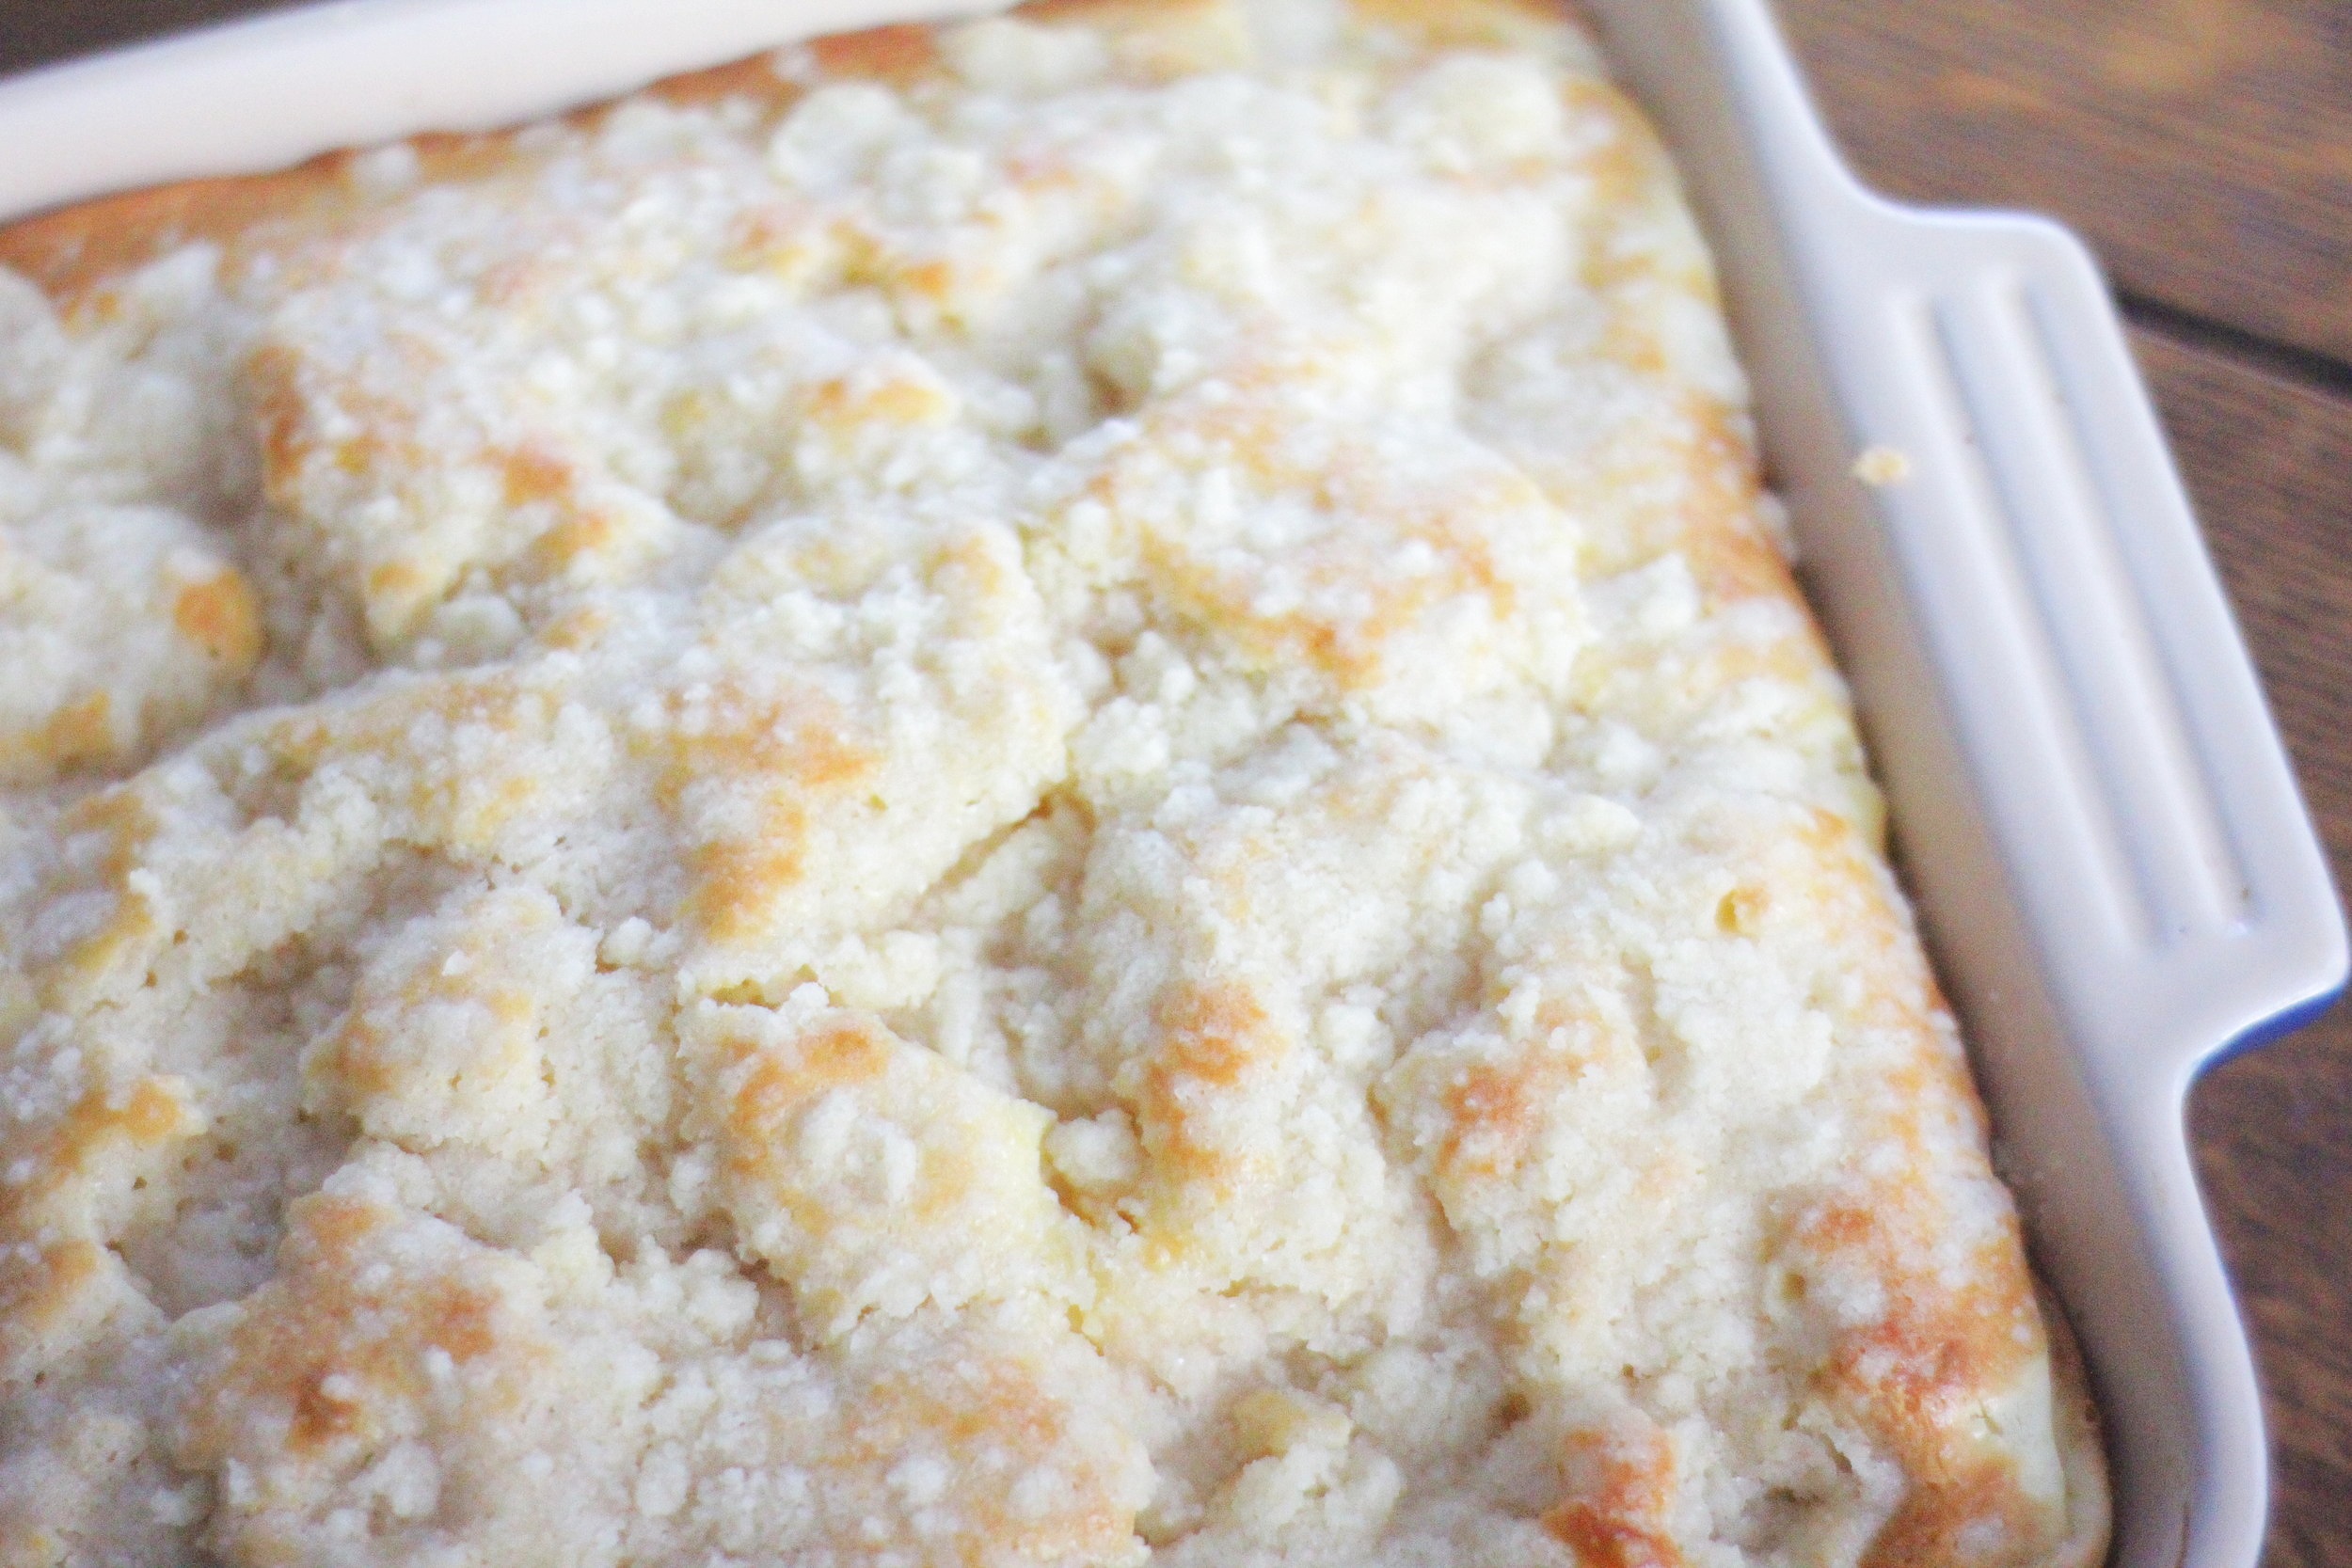
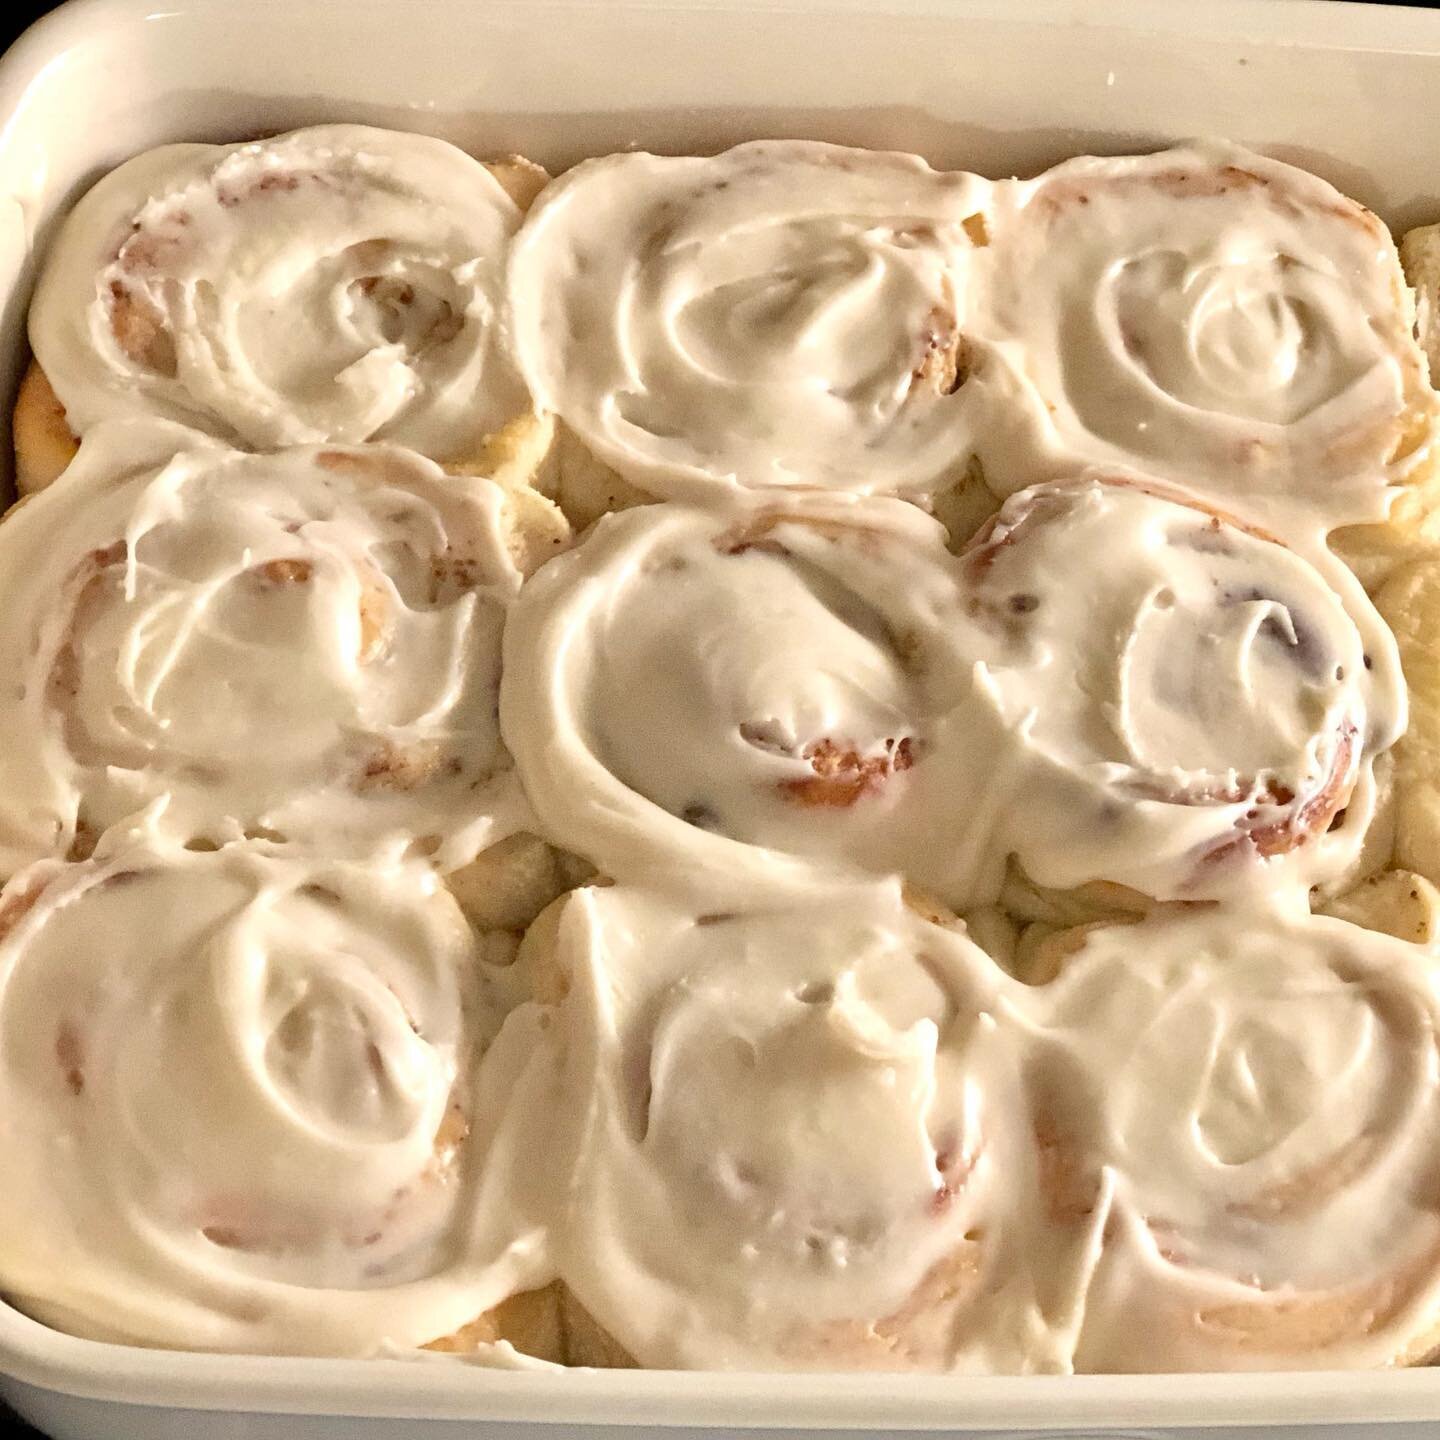
Almond Poppy Seed Rolls
/Welcome back to quarantine snacks and meals!

Today we are making Almond Poppy Seed Rolls! Think cinnamon rolls, but instead of cinnamon, a sweet almond dough with little crunchy poppyseeds and a sticky glaze. It’s like a cross between almond poppyseed bread and cinnamon rolls.
If there’s one thing we are forced to be during this time, it’s creative. Lack of resources, lack of schedule, lack of really anything that resembles our normal life has led us to come up with some really great ideas. Sometimes useless, but great nonetheless. Homemade obstacle courses are trending, memes are at the top of their game, and random skills you never before dreamed of having suddenly manifest themselves.
Another way we have had to get creative is in our cooking and baking. Not everything is readily available, and even if it is, a quick run to the store is no longer a quick run to the store. For my Michigan peeps, you are probably now feeling the effects of the latest lockdown measures. Only a certain number of people are allowed in the store at a time, creating long lines outside. Welcome, friends. That’s been normal life in Italy since uhh do I rememer how long? I think going on six weeks. Some stores require you to have a cart (helps you keep your distance) and some stores take your temperature before you enter. (In Italy.)
In general, most of my baking, unless for a special occasion or holiday, is spur of the moment. And what I want to bake often corresponds with what I want to eat, what do you know? The problem with this, as mentioned above, is that if I’m missing an ingredient, that means either waiting until the next store run, making something else, or improvising. The latter usually wins out.
Take the other day, for example, when I really wanted to make (and eat) these lemon raspberry rolls. I knew I didn’t have any raspberries, so I figured I would make just lemon rolls. Not to be, as I found my last lemon had gone moldy, and I didn’t even have any lemon extract. Well. Plain rolls weren’t going to cut it. I could’ve made cinnamon rolls, but my husband doesn’t much care for cinnamon (gasp) and I didn’t think that I should be eating a whole pan of cinnamon rolls by myself. While in quarantine. And am supposed to stay within 200m of my abode for exercise.
I took stock of my cupboards to see what I could possibly use to make some kind of flavored, delicious roll. While I didn’t have lemon extract, I did find almond extract! I love almond, and, and POPPY SEEDS. Yes. Done.
If you happen to have ingredients for both, I would highly suggest making both. They are also freezer friendly; stick in the freezer before baking or even after, once they’ve cooled.
This post may contain affiliate links. If you make a purchase using these links, Jennyblogs may receive a small commission, at no extra cost to you. This helps to support Jennyblogs. For further information see the privacy policy. Grazie!
Recipe adapted from Lemon Raspberry Rolls.
Almond Poppy Seed Rolls
Makes 9 rolls

Ingredients:
For the Dough
1/2 cup / 119g milk or water
1/4 cup / 50g sugar
2 1/4 tsp / 7g active dry yeast
2 Tbsp / 28g oil
1 egg
3 Tbsp / 23g poppy seeds
1/2 tsp almond extract
1/4 tsp salt
2 1/4 cups / 270g all-purpose flour + about 1/4 cup / 30g for kneading
For the Filling
1/4 cup / 56g butter
1/4 cup / 50g sugar
For the Glaze
3/4 cup / 94g powdered sugar
1-2 Tbsp / 14-28g milk
Directions:
Preheat oven to 400F / 205C. Grease an 8x8inch / 20x20cm square baking dish.
Make the Dough
In a small saucepan over low heat, warm milk until it is about 100F / 38C. Pour into a large bowl. Add the sugar and yeast and allow to sit for 7-10 minutes. The yeast should foam up a bit.
Add oil, eggs, poppy seeds, extract, and salt. Add the 2 1/4 cups of flour and mix until combined.
Turn dough out onto a floured surface. Knead for about 8-10 minutes, sprinkling more flour on your work surface as needed. Dough should be soft and elastic by the end, so don't get too flour-happy. Alternately, you can use the bread hook on a stand mixer and knead for 8-10 minutes, adding in flour as needed. By the end the dough should stick only to the bottom of the pan, not the sides.
Lightly grease or flour a large bowl (the bowl you mixed the dough in is fine) and place dough in the bowl. Cover with a towel and place in a warm area to rise for about 1 1/2 hours or until doubled in size.
Assemble the Rolls
In a small saucepan melt butter for filling and let simmer until it starts to brown. Remove from heat and cool.
When the dough has risen, punch it down and turn out onto a lightly floured surface. Knead for a minute, then roll into a generous rectangle, about 7x14inch / 18x36cm and roughly 1/4inch / 1/2cm thick.
Spread cooled butter over dough almost to the edges, then sprinkle evenly with sugar.
Starting from one of the longer sides, roll dough into a spiral, pinching the dough together at the end to seal it.
Cut the log into thirds, then each third into 3 slices. Place the rolls in the prepared pan and cover lightly with plastic wrap or a damp towel. Place in a warm area to rise for about an hour, or until puffed.
Bake for 15-20 minutes, or until golden on top and centers no longer look doughy. Internal temperature should be about 195F / 90C.
Make the Glaze
In a small bowl whisk together powdered sugar and1 Tbsp of milk. It should be thin enough to drizzle but not too liquidy. Add more milk as needed.
Drizzle warm rolls with glaze.
Jenny's Notes:
If you don't have a thermometer handy to know what 100 degrees is, simply warm until the milk feels quite warm, but not hot. It'll be fine!
You can freeze these rolls once you have sliced them and put them in the pan. Once removed from the freezer allow to thaw and proceed as normal.
When using a stand mixer to knead, I still recommend kneading it for a few minutes by hand afterwards. I find they are not always as thorough as kneading by hand and you want an even rise for your dough. I often to do it all by hand just because it’s therapeutic!


Almond Poppy Seed Rolls
Ingredients:
- 1/2 cup / 119g milk or water
- 1/4 cup / 50g sugar
- 2 1/4 tsp / 7g active dry yeast
- 2 Tbsp / 28g oil
- 1 egg
- 3 Tbsp / 23g poppy seeds
- 1/2 tsp almond extract
- 1/4 tsp salt
- 2 1/4 cups / 270g all-purpose flour + about 1/4 cup / 30g for kneading
- 1/4 cup / 56g butter
- 1/4 cup / 50g sugar
- 3/4 cup / 94g powdered sugar
- 1-2 Tbsp / 14-28g milk
Instructions:
How to cook Almond Poppy Seed Rolls
- In a small saucepan over low heat, warm milk until it is about 100F / 38C. Pour into a large bowl. Add the sugar and yeast and allow to sit for 7-10 minutes. The yeast should foam up a bit.
- Add oil, eggs, poppy seeds, extract, and salt. Add the 2 1/4 cups of flour and mix until combined.
- Turn dough out onto a floured surface. Knead for about 8-10 minutes, sprinkling more flour on your work surface as needed. Dough should be soft and elastic by the end, so don't get too flour-happy. Alternately, you can use the bread hook on a stand mixer and knead for 8-10 minutes, adding in flour as needed. By the end the dough should stick only to the bottom of the pan, not the sides.
- Lightly grease or flour a large bowl (the bowl you mixed the dough in is fine) and place dough in the bowl. Cover with a towel and place in a warm area to rise for about 1 1/2 hours or until doubled in size.
- Preheat oven to 400F / 205C. Grease an 8x8inch / 20x20cm square baking dish.
- In a small saucepan melt butter for filling and let simmer until it starts to brown. Remove from heat and cool.
- When the dough has risen, punch it down and turn out onto a lightly floured surface. Knead for a minute, then roll into a generous rectangle, about 7x14inch / 18x36cm and roughly 1/4inch / 1/2cm thick.
- Spread cooled butter over dough almost to the edges, then sprinkle evenly with sugar.
- Starting from one of the longer sides, roll dough into a spiral, pinching the dough together at the end to seal it.
- Cut the log into thirds, then each third into 3 slices. Place the rolls in the prepared pan and cover lightly with plastic wrap or a damp towel. Place in a warm area to rise for about an hour, or until puffed.
- Bake for 15-20 minutes, or until golden on top and centers no longer look doughy. Internal temperature should be about 195F / 90C.
- In a small bowl whisk together powdered sugar and1 Tbsp of milk. It should be thin enough to drizzle but not too liquidy. Add more milk as needed.
- Drizzle warm rolls with glaze.
Notes:
Calories
276.34Fat (grams)
10.42Sat. Fat (grams)
3.94Carbs (grams)
40.79Fiber (grams)
1.52Net carbs
39.27Sugar (grams)
15.97Protein (grams)
5.19Sodium (milligrams)
122.93Cholesterol (grams)
35.35