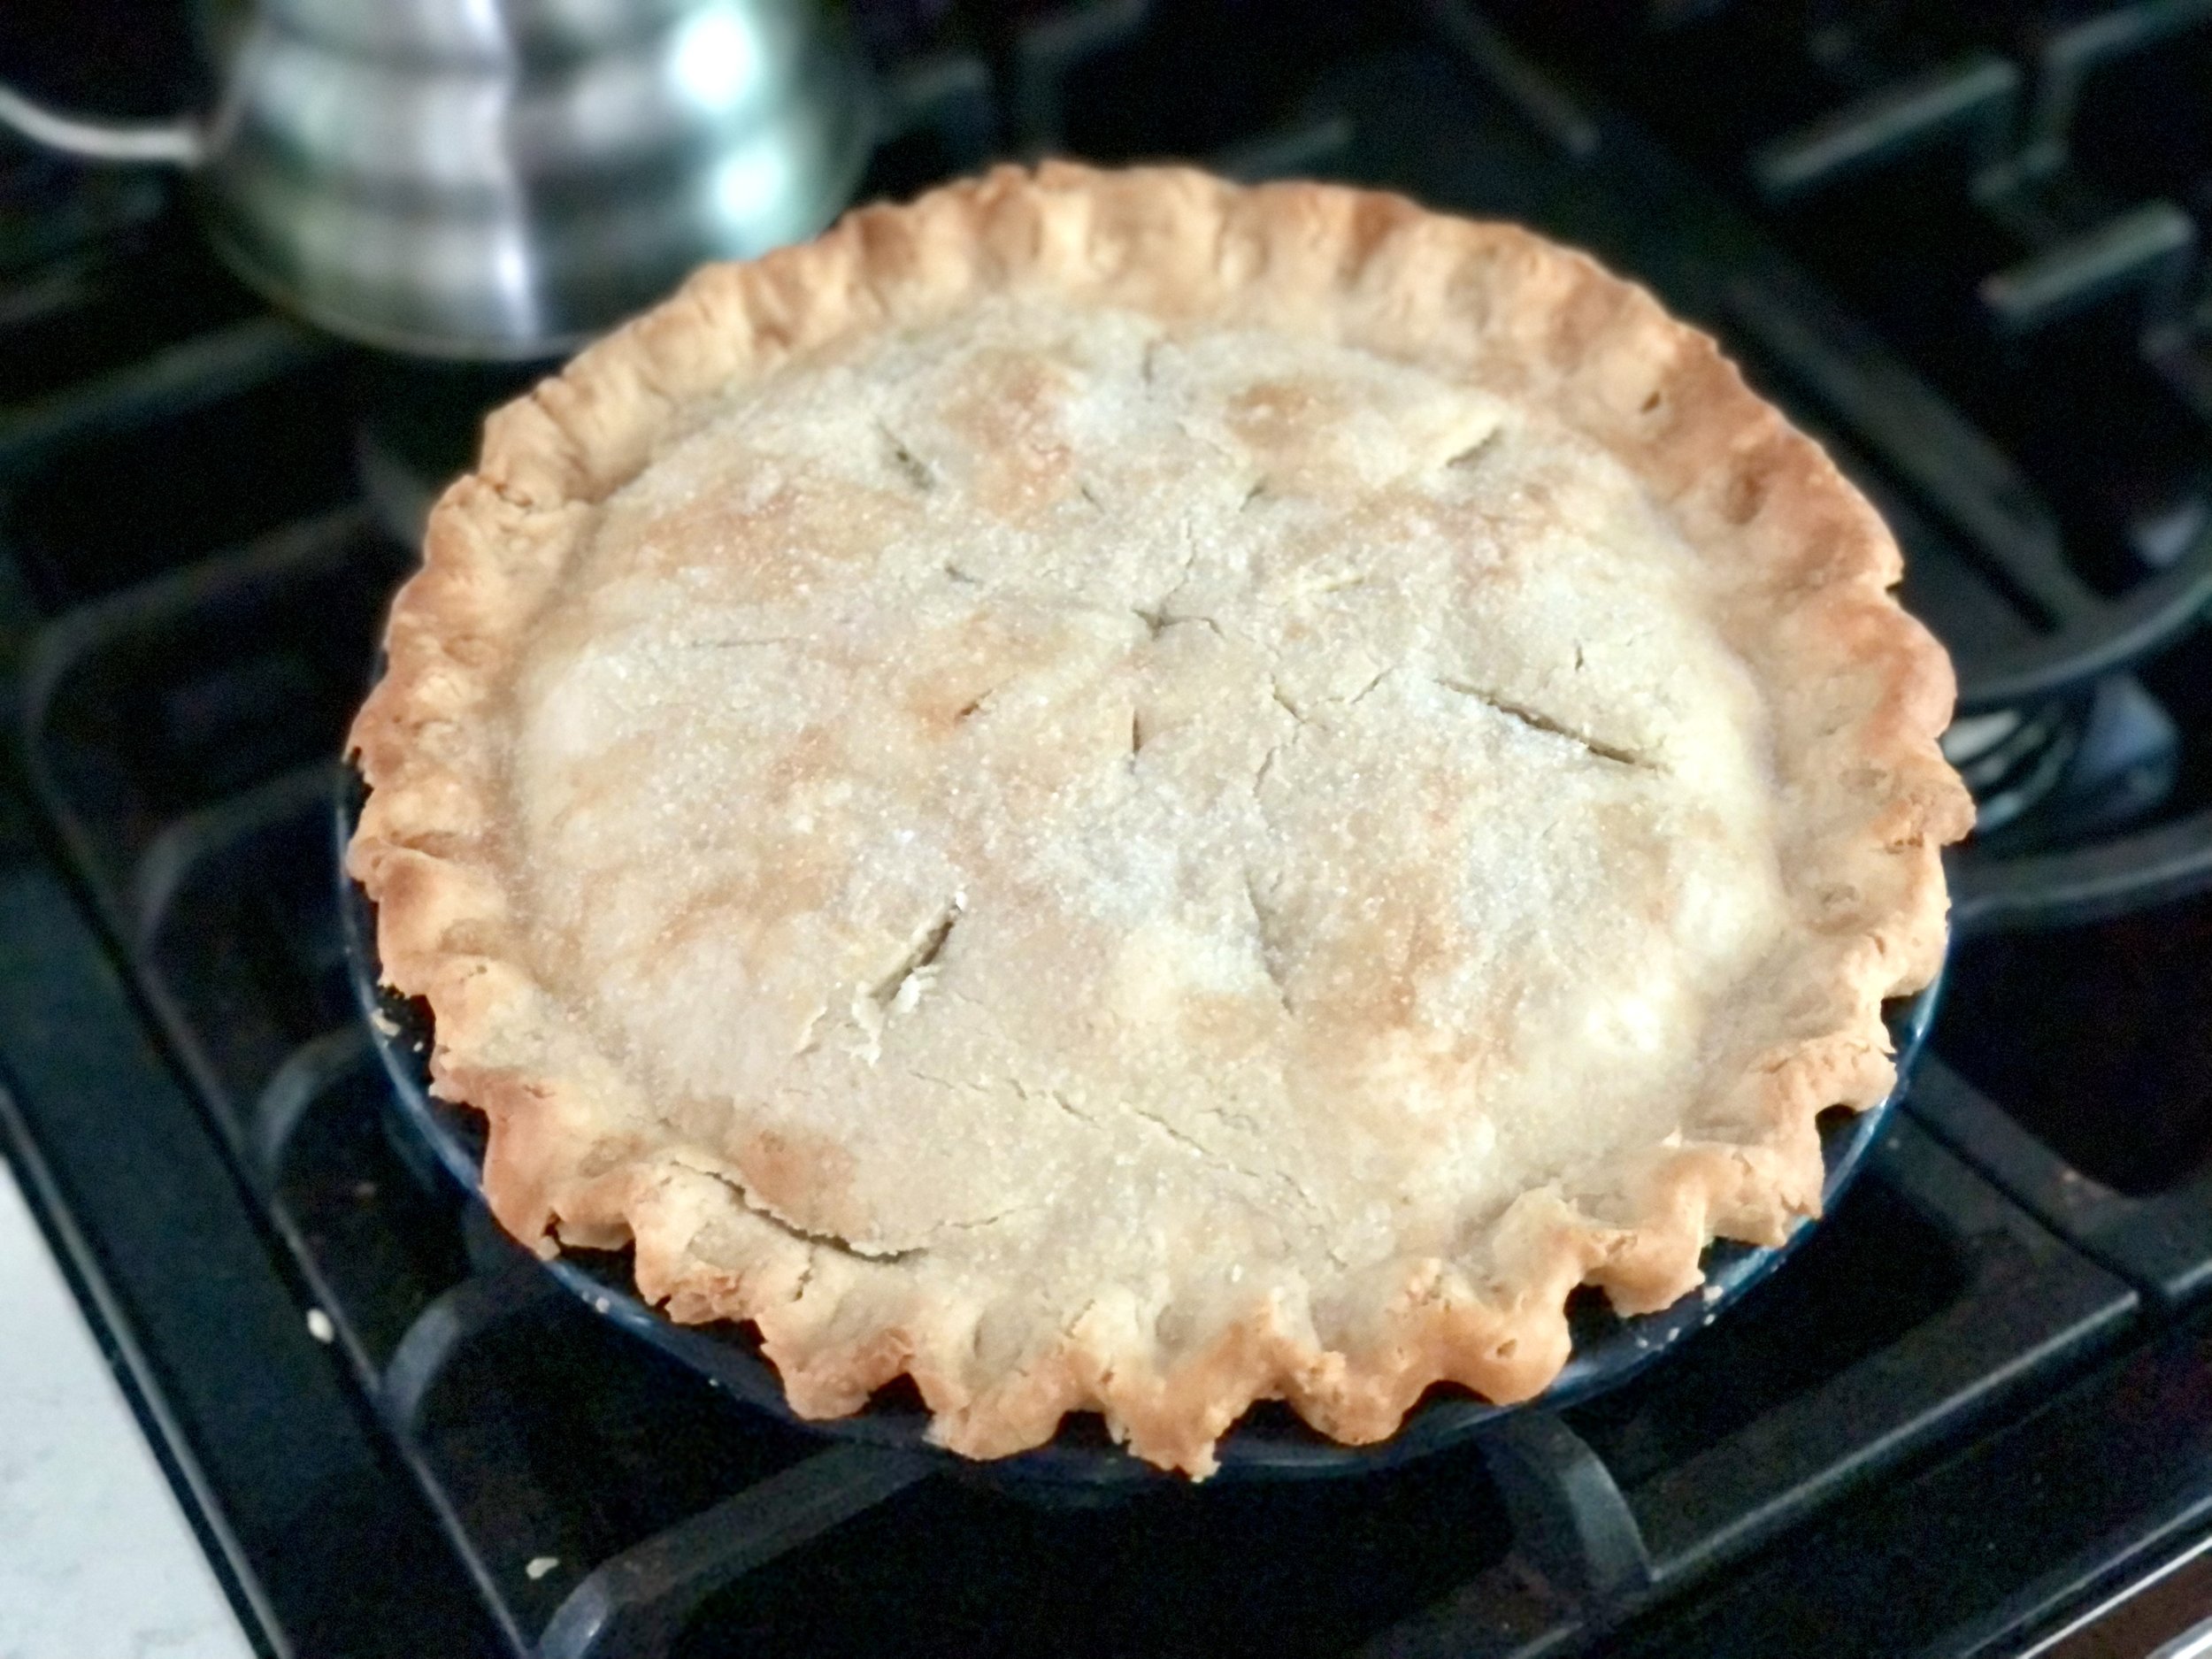
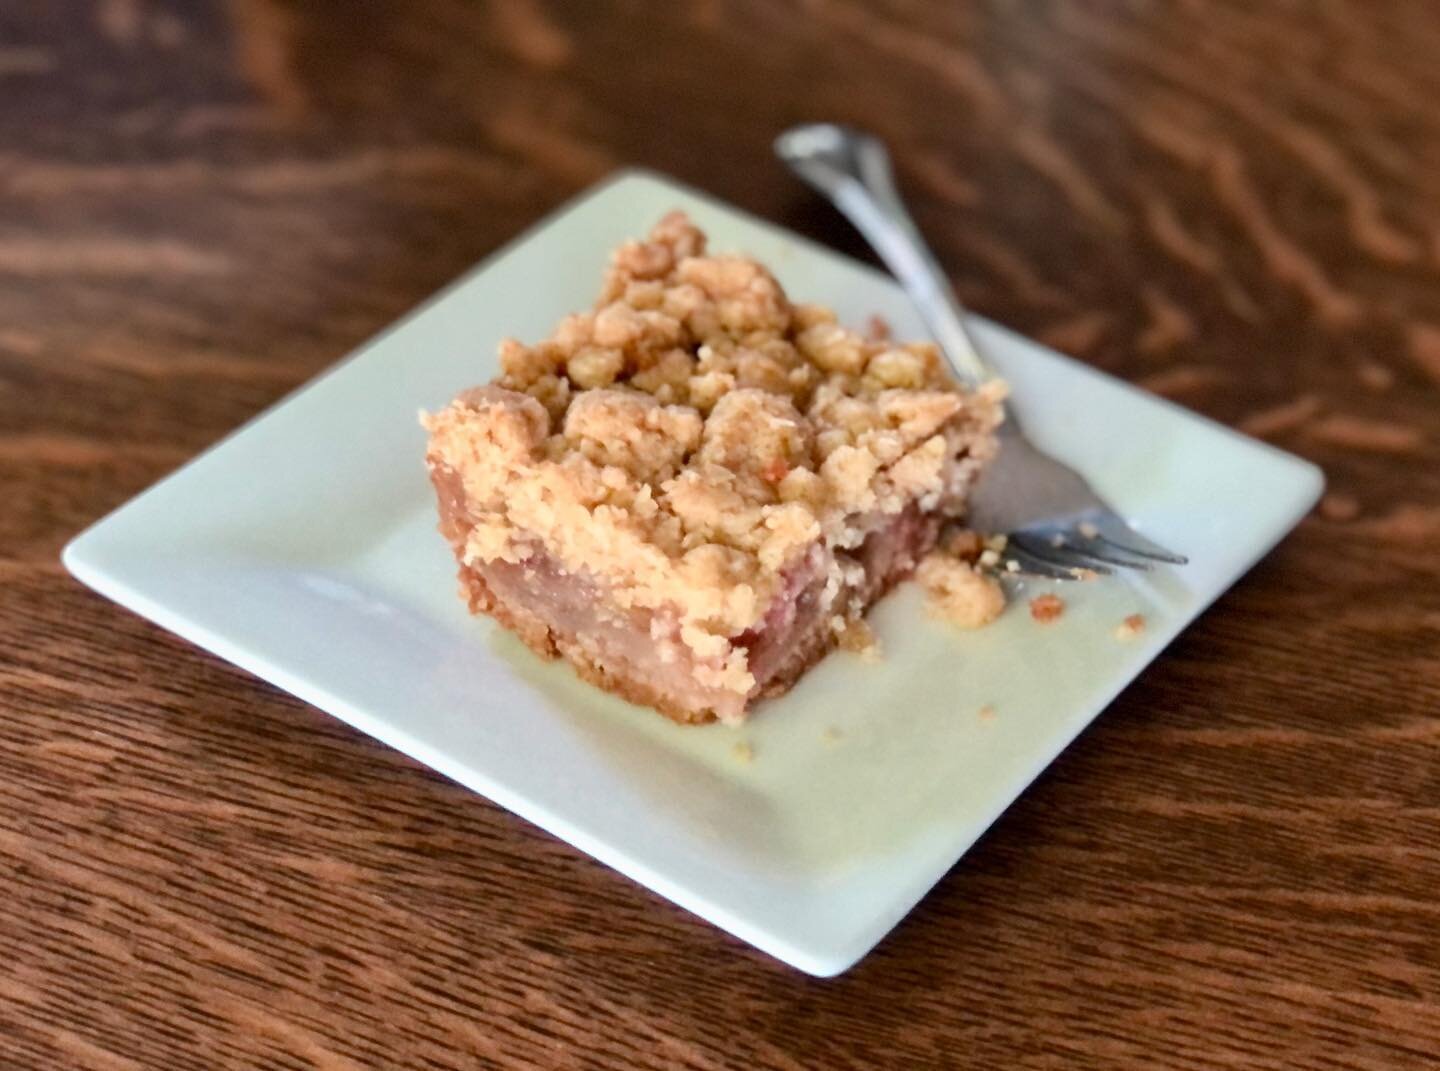
Tart Cherry Pie

Nothing speaks summer in Traverse City like cherry pie.

Or January, because of the beauty of things like frozen fruit. This recipe actually originally called for frozen cherries, but it all turns out about the same whether you use fresh or frozen, so feel free to use whichever you have available.

How do you know when you find the best cherry pie? Or the best anything? I don’t know, and I don’t love recipes that boast to be the best, but this is pretty darn good. This is my go-to cherry pie recipe, until such a time as I should come across a better one!

The beauty of fruit pies is that they don’t need much. A good recipe lets the fruit shine. This recipe does exactly that. It’s perfectly cherry; tart, sweet, and one of my favorite flavor combinations: cherry / almond.

It features a crumble topping and this recipe has an extra: amaretto. It takes it up a notch, but if you don’t happen to have any on hand, this recipe is still delicious.

Here’s to July, or summer in January!

This post may contain affiliate links. If you make a purchase using these links, Jennyblogs may receive a small commission, at no extra cost to you. This helps to support Jennyblogs. For further information see the privacy policy. Grazie!

Recipe adapted from Ambitious Kitchen


Tart Cherry Pie

Serves about 8

Ingredients:

For the Crust

For the Filling

  • 6 cups / roughly 24oz fresh or frozen tart cherries, pitted

  • 1 cup / 200g sugar

  • 2 Tbsp / 15g cornstarch

  • 2 Tbsp / 16g flour

  • 1/2 tsp almond extract

  • 1 Tbsp / 14g butter

  • 1 Tbsp amaretto liqueur, optional

For the Crumble Topping

  • 1 cup / 120g flour

  • 1/2 cup / 100g brown sugar

  • 1/4 cup / 20g rolled oats

  • 6 Tbsp / 84g butter, melted

Directions:

Oven preheated to 350°F / 177°C.

Make the crust

  1. Prepare pie crust; refrigerate until filling is ready

Make the Filling

  1. In a medium large pot, combine cherries, sugar, cornstarch, flour, and almond extract over medium heat. Stir frequently until sugar has melted and cherries begin to break down.

  2. Add butter and amaretto. Continue to stir occasionally until mixture begins to bubble and thickens enough to coat the back of a spoon.

  3. Remove from heat and allow to cool while you prepare topping

Make the Crumble Topping

  1. In a medium bowl, combine flour, brown sugar, and oats.

  2. Add melted butter and stir until mixture resembles clumpy wet sand.

Assemble and Bake

  1. Pour filling into prepared crust. Evenly sprinkle crumble topping over filling.

  2. Bake pie in preheated oven for 50-60 minutes, until edges are bubbling and crumble is golden brown. Place a cookie sheet lined with tinfoil under the pie plate to catch any filling that bubbles over.

  3. Allow to cool completely before slicing and serving. Serve with vanilla ice cream, if desired.

Jenny’s Notes:

  • For crumble topping, I use rolled oats and quick oats interchangeably.

  • If not using the amaretto, I recommend increasing the almond extract to 1 tsp

  • Check the pie halfway through baking to ensure it’s not browning too quickly. If it is, place some tinfoil on top to prevent it browning too quickly.

  • Fruit pies like this are best made in the morning or the day before you need them, since they need to cool completely before being sliced into. If it’s not completely cool, it won’t be completely set, and the filling will ooze out.

Cherry Pie, Best Tart Cherry Pie, Oat Crumble Topping, Sour Cherry Pie
dessert
American
Yield: 8
Author:
Tart Cherry Pie

Tart Cherry Pie

A classic summer pie bursting with juicy sour cherries, a touch of almond extract and amaretto liqueur, topped with a buttery oat crumble
Prep time: 40 MinCook time: 1 HourInactive time: 8 HourTotal time: 9 H & 40 M

Ingredients

For the Crust
For the Filling
For the Crumble Topping

Instructions

Make the crust
  1. Prepare pie crust; refrigerate until filling is ready
Make the Filling
  1. Oven preheated to 350°F / 177°C.
  2. In a medium large pot, combine cherries, sugar, cornstarch, flour, and almond extract over medium heat. Stir frequently until sugar has melted and cherries begin to break down.
  3. Add butter and amaretto. Continue to stir occasionally until mixture begins to bubble and thickens enough to coat the back of a spoon.
  4. Remove from heat and allow to cool while you prepare topping
Make the Crumble Topping
  1. In a medium bowl, combine flour, brown sugar, and oats.
  2. Add melted butter and stir until mixture resembles clumpy wet sand.
Assemble and Bake
  1. Pour filling into prepared crust. Evenly sprinkle crumble topping over filling.
  2. Bake pie in preheated oven for 50-60 minutes, until edges are bubbling and crumble is golden brown. Place a cookie sheet lined with tinfoil under the pie plate to catch any filling that bubbles over.
  3. Allow to cool completely before slicing and serving. Serve with vanilla ice cream, if desired.

Notes

  • For crumble topping, I use rolled oats and quick oats interchangeably.
  • If not using the amaretto, I recommend increasing the almond extract to 1 tsp
  • Check the pie halfway through baking to ensure it’s not browning too quickly. If it is, place some tinfoil on top to prevent it browning too quickly.
  • Fruit pies like this are best made in the morning or the day before you need them, since they need to cool completely before being sliced into. If it’s not completely cool, it won’t be completely set, and the filling will ooze out.


Nutrition Facts

Calories

487.73

Fat

16.18 g

Sat. Fat

8.2 g

Carbs

73.55 g

Fiber

3.45 g

Net carbs

70.09 g

Sugar

27.3 g

Protein

4.67 g

Sodium

171.5 mg

Cholesterol

26.72 mg

Nutritional information is approximate. Based on 8 servings.

Did you make this recipe?
Tag @jennyblogsandbakes on instagram and hashtag it #jennyblogs

Classic Rhubarb Custard Pie

IMG_1860.jpg

This post may contain affiliate links. If you buy something using these links, Jennyblogs may receive a small commission, at no extra cost to you. This helps to support Jennyblogs. For further information see the privacy policy. Grazie!

Nothings says summer like a rhubarb pie. Better yet, a rhubarb CUSTARD pie.

Rhubarb is always one of the first garden plants to grow each spring in Michigan, announcing that after a long, cold winter summer is indeed coming and didn’t get lost along the way after all. Rhubarb likes to grow so extensively in its short season that you don’t know what to do with all of it, until it withers in the approach of hotter weather and leaves you already looking forward to next year’s crop. Unless, of course, you planned ahead and froze some. But frozen rhubarb will never be like fresh, so make all the pie and hand pie, crisp, cake, syrup, and camel hair soup you can! I mean, er, rhubarb sauce…not camel hair soup. Hehe, who’d call it that??

IMG_1835.jpg

Do you want to know something really sad? I’ve never seen rhubarb in Italy, at least not in Florence. So for my international friends, I’m sorry if your area fails you and doesn’t grow rhubarb so you aren’t able to make this recipe. If there is rhubarb in Florence though, someone please tell me where to find it? So far everyone I’ve asked just said, “…what’s that?” This just goes to show my ignorance. Before moving to Italy I was trying to bake with all of the ingredients that aren’t readily available here, or at least what I figured wouldn’t be readily available. I should have been in a baking frenzy with rhubarb instead of things like Oreos. Because, no rhubarb and Oreos everywhere. There are even Oreo donuts in the grocery store bakery section…I’ve come so close to trying them during various weak moments.

Wherever you are in the world, be sure to bake or eat a rhubarb pie at the next chance. You won’t regret it and might inspire you to move to a part of the world where rhubarb is grown.

This recipe is the old-fashioned classic from my mama. The crust is one of my favorite traditional pie crust recipes, simple and can be made ahead of time if needed. It uses butter instead of shortening, which in my mind is a bit of a compromise between shortening or lard (which most people and bakeries use to make tender and flaky crusts but it’s also horrendous for your health and has no taste if it’s not artificially flavored.) and oil, which my mom has always used because oil can actually be good for you, although it makes for the trickiest to handle and often um, hardier pie crusts. So I use butter, which tastes wonderful and makes the crust easy enough to work with, even if it’s not as healthy as oil.


IMG_1862.jpg

Classic Rhubarb Custard Pie

Makes one 9in / 23cm pie, about 8 servings

Ingredients:

For the Crust

  • 2 2/3 cup / 320g all-purpose flour

  • 1 tsp salt

  • 8 Tbsp / 113g butter, cold

  • 1/2 -3/4 cup / 118 - 178g ice water

For the Rhubarb Custard Filling

  • 3 eggs

  • 3 Tbsp / 45g milk

  • 1 1/2 cups / 300g granulated sugar

  • 1/4 cup / 30g all-purpose flour

  • 3/4 tsp nutmeg

  • 4 cups fresh rhubarb, sliced into 1/2in / 1cm chunks

Directions:

Oven 400F / 205C. 8 or 9 inch pie dish. 

Make the Crust

IMG_4560.jpg
  1. In a medium bowl whisk together flour and salt.  Blend in cold butter using a pastry cutter, fork, or your hands.  You want the butter to end up in small pieces, like peas. 

  2. Add the ice water, starting with 1/2 cup / 118g, working with the dough as little as possible.  The dough should be able to hold together in a ball, without being too dry and shaggy or too wet and sticky.  Add more water if necessary, one Tbsp at a time.  

  3. Separate the dough into two halves, weighing for accuracy. Place each half on a piece of plastic wrap, shape into a disc, and wrap tightly.  Place in the fridge for 1 - 48 hours.  

  4. After the dough has rested, take one half out of the fridge and roll into a circle on a lightly floured surface or silpat.  Make a few rolls with your rolling pin in one direction before turning the crust 45 degrees (quarter turn) and continuing with a few more rolls.  Periodically check under your crust to make sure it isn’t sticking and sprinkle more flour if it does. Continue like this until your crust is nicely round and roughly 2in / 5cm larger than your pie plate.  

  5. Carefully transfer crust to the pie dish (this is easier using a silpat), trim the excess overhang where necessary, and fold the ends under to create a clean edge. Crimp as desired, or press with a fork.  Prick the bottom of the crust with a fork.  Place in fridge while you prepare the other crust and pie filling.  

  6. Repeat with second half of dough, rolling and turning until you achieve a circle a bit larger than the pie dish. For a classic top pie crust, transfer the rolled crust to the fridge while you prepare the filling. For a lattice top, transfer crust to a cutting board so you don’t ruin your counter or silpat and slice into 1/2in / 1cm strips or desired width. Transfer to fridge while you prepare the filling.

Make the Rhubarb Custard Filling

  1. Blend eggs and milk together in a large bowl.

  2. Add the flour and nutmeg to the sugar then add to the egg mixture and beat well.

  3. Add in the rhubarb and mix to coat well.

  4. Pour into prepared pie crust and add top crust.

    For a classic top pie crust, place crust on top, cut off overhang, and crimp together the edges of the top and bottom crust to seal.

    For the interwoven lattice, you are going to start in the center of the pie and work outward, then repeat with the other half. Arrange half of the strips evenly spaced over the pie all in one direction, then flip every other strip back over itself, so half are now only covering half of the pie. Take a new strip and place it perpendicularly just in front of the folded strips. Unfold the folded strips so these ones now cover the new strip. The new strip should be under and over every other one. Working on that same half of the pie, fold back every other strip, all the ones that were NOT just folded. Take another strip and place it evenly apart from the first perpendicular strip. Unfold the folded strips. You should now start to see and understand the pattern; repeat folding back, placing strip, and unfolding until you reach the edge of the pie. You may need to trim down the strips as you get closer to the edge. Repeat with other half of the pie.

  5. Sprinkle sugar on top, if desired.

  6. Bake pie in preheated oven for 50-60 minutes or until crust is golden brown and a knife inserted in center of pie confirms that the rhubarb is tender.

Jenny’s Notes:

  • If you make the crust and pie in the same day, you could make the filling while the crust is resting in the fridge for an hour or so before rolling out.

  • You can also use your favorite pie crust recipe, of course!

  • Instead of a traditional top pie crust or lattice you could add a streusel/crumble, delicious and definitely the easiest option of the three.

Rhubarb, custard, pie, all butter crust
Dessert, Pie
American
Yield: 8
Author:
Rhubarb Custard Pie

Rhubarb Custard Pie

Classic rhubarb custard pie recipe handed down from my mama. Homemade pie crust with the uniquely sweet and sour filling you can only get with rhubarb.
Prep time: 1 H & 10 MCook time: 1 HourTotal time: 2 H & 10 M

Ingredients

For the Crust
For the Rhubarb Custard Filling

Instructions

Make the Crust
  1. In a medium bowl whisk together flour and salt. Blend in cold butter using a pastry cutter, fork, or your hands. You want the butter to end up in small pieces, like peas.
  2. Add the ice water, starting with 1/2 cup / 118g, working with the dough as little as possible. The dough should be able to hold together in a ball, without being too dry and shaggy or too wet and sticky. Add more water if necessary, one Tbsp at a time.
  3. Separate the dough into two halves, weighing for accuracy. Place each half on a piece of plastic wrap, shape into a disc, and wrap tightly. Place in the fridge for 1 - 48 hours.
  4. After the dough has rested, take one half out of the fridge and roll into a circle on a lightly floured surface or silpat. Make a few rolls with your rolling pin in one direction before turning the crust 45 degrees (quarter turn) and continuing with a few more rolls. Periodically check under your crust to make sure it isn’t sticking and sprinkle more flour if it does. Continue like this until your crust is nicely round and roughly 2in / 5cm larger than your pie plate.
  5. Carefully transfer crust to the pie dish (this is easier using a silpat), trim the excess overhang where necessary, and fold the ends under to create a clean edge. Crimp as desired, or press with a fork. Prick the bottom of the crust with a fork. Place in fridge while you prepare the other crust and pie filling.
  6. Repeat with second half of dough, rolling and turning until you achieve a circle a bit larger than the pie dish. For a classic top pie crust, transfer the rolled crust to the fridge while you prepare the filling. For a lattice top, transfer crust to a cutting board so you don’t ruin your counter or silpat and slice into 1/2in / 1cm strips or desired width. Transfer to fridge while you prepare the filling.
Make the Rhubarb Custard Filling
  1. Oven 400F / 205C. 8 or 9 inch pie dish.
  2. Blend eggs and milk together in a large bowl.
  3. Add the flour and nutmeg to the sugar then add to the egg mixture and beat well.
  4. Add in the rhubarb and mix to coat well.
  5. Pour into prepared pie crust and add top crust.
  6. For a classic top pie crust, place crust on top, cut off overhang, and crimp together the edges of the top and bottom crust to seal.
  7. For the interwoven lattice, you are going to start in the center of the pie and work outward, then repeat with the other half. Arrange half of the strips evenly spaced over the pie all in one direction, then flip every other strip back over itself, so half are now only covering half of the pie. Take a new strip and place it perpendicularly just in front of the folded strips. Unfold the folded strips so these ones now cover the new strip. The new strip should be under and over every other one. Working on that same half of the pie, fold back every other strip, all the ones that were NOT just folded. Take another strip and place it evenly apart from the first perpendicular strip. Unfold the folded strips. You should now start to see and understand the pattern; repeat folding back, placing strip, and unfolding until you reach the edge of the pie. You may need to trim down the strips as you get closer to the edge. Repeat with other half of the pie.
  8. Sprinkle sugar on top, if desired.
  9. Bake pie in preheated oven for 50-60 minutes or until crust is golden brown and a knife inserted in center of pie confirms that the rhubarb is tender.

Notes

If you make the crust and pie in the same day, you could make the filling while the crust is resting in the fridge for an hour or so before rolling out. You can also use your favorite pie crust recipe, of course! Instead of a traditional top pie crust or lattice you could add a streusel/crumble, delicious and definitely the easiest option of the three.

Nutrition Facts

Calories

431.35

Fat

12.79

Sat. Fat

7.67

Carbs

74.08

Fiber

2.32

Net carbs

71.76

Sugar

38.25

Protein

6.18

Sodium

397.03

Cholesterol

54.07

Nutritional Information is approximate.

Did you make this recipe?
Tag @jennyblogsandbakes on instagram and hashtag it jennyblogs

Rhubarb Custard Pie made with an all oil crust


The Fluffiest Key Lime Pie with a Gingersnap Crust

2018-12-20 14.16.59.jpg

Fluffy? Isn’t key lime pie supposed to be creamy, custardy, silken? Yes! And this recipe is all of those things but with a special touch of fluffiness, thanks to our friends the egg whites. Whipped egg whites. It’s magical. And with Easter just around the corner, this is the perfect dessert to celebrate with! I even gave you two weeks time to plan ahead, aren't I nice?

I don’t know why I always want to make citrus desserts for Easter, maybe because it’s always in the spring. And in the spring everything is coming alive, the rebirth of nature, and calls for bright, happy citrus flavors. You can’t call citrus sad. And what is Easter but the celebration of the resurrection of Jesus, giving those who believe on Him new life? The celebration of rebirth. It all fits. Not to mention if you observe Lent, getting to eat what you gave up for 6 weeks is lovely.

And whether you have a big Easter meal planned or not, you’re going to want to make this pie. And if you’ve never made key lime pie before? This is not a bad place to start. Just be warned that other key lime pies after this one might be…tame.

This post may contain affiliate links. If you buy something using these links, Jennyblogs may receive a small commission, at no extra cost to you. This helps to support Jennyblogs. For further information see the privacy policy. Grazie!

Recipe adapted from the Williams-Sonoma cookbook Savoring America


The Fluffiest Key Lime Pie with a Gingersnap Crust

Serves 8-12

2018-12-20+14.27.07.jpg

Ingredients:

For the Gingersnap Crust

  • 28 gingersnaps broken into pieces, about 1 1/2in / 4cm in diameter (homemade or storebought)

  • 1/2 cup / 60g chopped pecans

  • 1 Tbsp / 15g chopped crystallized ginger

  • 1/8 tsp ground cinnamon

  • 1/4 cup / 57g butter, melted and cooled

For the Filling

  • 4 eggs, separated

  • 1/4 cup / 30g cornstarch

  • 1/2 cup / 100g sugar

  • 1 14oz can / 440g sweetened condensed milk, make it homemade here

  • 1/2 cup / 118g key lime juice

  • 2 Tbsp / 12g freshly grated key lime zest

  • 1/2 tsp cream of tartar

  • 1 tsp vanilla extract

For the Topping and Garnish

  • 1 cup / 237g heavy whipping cream

  • 1/3 cup / 42g confectioner’s sugar

  • 1/8 tsp almond extract

  • thin key lime slices or lime zest, optional

Directions:

Oven 350°F / 177°C. Lightly grease a 9in / 23cm pie dish.

Make the Gingersnap Crust

  1. In a food processor, combine the gingersnaps, pecans, ginger, and cinnamon. Pulse until everything is finely ground in crumbs. Add the butter and pulse briefly until the crumbs are evenly moistened.

  2. Press evenly into the bottom and up the sides of the prepared pie dish. Bake in the preheated oven for 10 minutes or until fragrant and lightly browned. (This can be hard to see because of the dark color of the gingersnaps.) Allow to cool.

Make the Filling

  1. In the bowl of a stand mixer fitted with the whisk attachment, beat 2 egg whites and the cream of tartar on high speed until soft peaks form and can hold their shape, about 1-2 minutes. Beat in the vanilla and scrape the egg whites into a small bowl; set aside.

  2. In the bowl of the stand mixer (no need to clean it), beat on medium-high speed the egg yolks, 2 remaining egg whites, cornstarch, sugar, and sweetened condensed milk until light and fluffy, about 5 minutes. Add lime juice and zest and beat until smooth.

  3. Gently fold 1/3 of the egg white mixture into the lime mixture to lighten. Add the rest of the egg whites and fold just until combined.

  4. Pour the filling into the cooled pie crust, smooth the top with a spatula. Bake until just firm, about 20 minutes. To test for firmness, jiggle the dish slightly. When the center jiggles just slightly, it’s ready.

  5. Cool completely, then cover and refrigerate for at least 4 hours or overnight.

Make the Topping

  1. In the bowl of a stand mixer, beat the heavy whipping cream on medium speed. As it starts to thicken (and will no longer splatter) increase the speed to high. Add the powdered sugar and almond extract. Continue beating until firm peaks form, about 2-4 minutes total.

  2. Spoon whipped cream over pie or use a piping bag and tips to decorate. Garnish with lime slices/and or zest. Serve immediately or refrigerate.

Jenny’s Notes:

  • The crust can be made without the pecans and/or ginger, if you’re like me and sometimes feel too lazy to chop things!

  • Freshly squeezed key lime juice is best, but if you’ve ever used real key limes you’ll know that getting half a cup can be a real labor of love. Those things can be tiny! Hand cramp hand cramp hand cramp. And just when you think you’re there, you realize you’ve only squeezed 1 Tbsp worth. So, I gladly buy bottled key lime juice.

  • If you can’t find fresh key limes or juice, use limes! And I suppose, lemons if you’re in a pinch. Lemon pies are good too! Same goes for the zest.

  • No food processor handy? Do it the old fashioned way and stick the cookies in a resealable plastic bag and whack and roll with a rolling pin. The pecans and ginger can be finely chopped by hand.

key lime pie, gingersnap crust, fluffy pie, whipped cream
Dessert, Pie
American
Yield: 8-12 servings
Author:
The Fluffiest Key Lime Pie with a Gingersnap Crust

The Fluffiest Key Lime Pie with a Gingersnap Crust

Classic key lime pie with a twist. Tart filling made extra light and fluffy by whipping the egg whites, a spicy gingersnap crust, and fresh whipped cream.
Prep time: 50 MinCook time: 30 MinTotal time: 1 H & 20 M

Ingredients

For the Gingersnap Crust
For the Filling
For the Topping and Garnish

Instructions

Make the Gingersnap Crust
  1. Oven 350°F / 177°C. Lightly greased 9in / 23cm pie dish.
  2. In a food processor, combine the gingersnaps, pecans, ginger, and cinnamon. Pulse until everything is finely ground in crumbs. Add the butter and pulse briefly until the crumbs are evenly moistened.
  3. Press evenly into the bottom and up the sides of the prepared pie dish. Bake in the preheated oven for 10 minutes or until fragrant and lightly browned. (This can be hard to see because of the dark color of the gingersnaps.) Allow to cool.
Make the Filling
  1. In the bowl of a stand mixer fitted with the whisk attachment, beat 2 egg whites and the cream of tartar on high speed until soft peaks form, about 1-2 minutes. Beat in the vanilla and scrape the egg whites into a small bowl; set aside.
  2. In the bowl of the stand mixer (don’t worry about cleaning it), beat on medium-high speed the egg yolks, 2 remaining egg whites, cornstarch, sugar, and sweetened condensed milk until light and fluffy, about 5 minutes. Add the lime juice and zest and beat until smooth.
  3. Gently fold 1/3 of the egg white mixture into the lime mixture to lighten. Add the rest of the egg whites and fold just until combined.
  4. Pour the filling into the cooled pie crust, smooth the top with a spatula. Bake until just firm, about 20 minutes. To test for firmness, jiggle the dish slightly. When the center jiggles just slightly, it’s ready.
  5. Cool completely, then cover and refrigerate for at least 4 hours or overnight.
Make the Topping
  1. In the bowl of a stand mixer, beat the heavy whipping cream on medium speed. As it starts to thicken (and will no longer splatter) increase the speed to high. Add the powdered sugar and almond extract. Continue beating until stiff peaks form, about 2-4 minutes total.
  2. Spoon whipped cream over pie or use a piping bag and tips to decorate. Garnish with lime slices/and or zest. Serve immediately or refrigerate.

Notes

The crust can be made without the pecans and/or ginger, if you’re like me and sometimes feel too lazy to chop things! Freshly squeezed key lime juice is best, but if you’ve ever used real key limes you’ll know that getting half a cup can be a real labor of love. Those things can be tiny! Hand cramp hand cramp hand cramp. And just when you think you’re there, you realize you’ve only squeezed 1 Tbsp worth. So, I gladly buy bottled key lime juice. If you can’t find fresh key limes or juice, use limes! And I suppose, lemons if you’re in a pinch. Lemon pies are good too! Same goes for the zest. No food processor handy? Do it the old fashioned way and stick the cookies in a resealable plastic bag and whack and roll with a rolling pin. The pecans and ginger can be finely chopped by hand.

Nutrition Facts

Calories

590.80

Fat

29.69 g

Sat. Fat

14.77 g

Carbs

76.33 g

Fiber

1.88 g

Net carbs

74.45 g

Sugar

55.81 g

Protein

8.28 g

Sodium

256.68 mg

Cholesterol

90.75 mg

Nutritional information is approximate. Based on 8 servings.

2018-12-20 14.14.52-2.jpg

Mascarpone Peanut Butter Pie with Chocolate Ganache

IMG_5063.jpg

Let me take a gander at what you're thinking, probably something like, "OH! PEANUT BUTTER PIE? I love peanut butter pie! So good! But I already have a recipe for peanut butter pie. Why do I need this recipe? Wait, don't YOU already have a recipe up on this blog for peanut butter pie??" Maybe? Well, you'd be right about one thing, this is not my first recipe up for a peanut butter pie.  But let me tell you, they each have their own merited place in your recipe box.  For example, the Peanut Butter Pie with Chocolate Whipped Cream has a shortbread crust, creamy peanut butter filling, topped with chocolate whipped cream.  Perfect for casual events, potlucks, birthdays, summer evenings, Sunday afternoons...but what happens if you need a peanut butter pie for a gala? The president is coming over?  You're presenting a peanut butter pie to the CEO of Godiva chocolate and want chocolate to be showcased more prominently?  Then you need a peanut butter pie with refinement, elegance, and classy chocolate utilized in more than one element of the pie.  How do you do this without compromising the stand-alone peanut butter filling of a peanut butter pie?  Why, you change out the shortbread crust for a chocolate crust, and top the pie with flowing chocolate ganache.  Elegance.  Refinement.  The chocolate ganache envelopes the peanut butter filling in a tender embrace...still with me?  Ok let's stop dreaming and comparing peanut butter pies and MAKE one!  

Not a fan of chocolate and peanut butter together? Neither is my mom.  That's ok, I still love you.  And because of that, why not head over to this Nutter Butter Pie instead? No chocolate there! 

This post may contain affiliate links. If you buy something using these links, Jennyblogs may receive a small commission, at no extra cost to you. This helps to support Jennyblogs. For further information see the privacy policy. Grazie!

Recipe adapted from what megan's making.


Mascarpone Peanut Butter Pie with Chocolate Ganache

Serves 8-12

Ingredients:

For the Chocolate Crust

  • 7.5 oz / 210g chocolate graham crackers, teddy grahams, or chocolate shortbread

  • 2 oz / 55g (1/3 cup) semi-sweet chocolate, finely chopped, or mini chips

  • 5 Tbsp / 65g butter, melted

For the Peanut Butter Filling

IMG_5030.JPG
  • 1 cup / 237g heavy whipping cream

  • 8 oz / 227g mascarpone or cream cheese, room temperature

  • 1 cup / 250g peanut butter

  • 1/2 cup / 100g sugar

  • 1 tsp / 5g vanilla extract

For the Chocolate Ganache

  • 4 oz / 110g (2/3 cup) semi-sweet chocolate, finely chopped, or chips

  • 1 Tbsp / 14g butter

  • 1/2 cup / 118g heavy whipping cream

Directions:

Oven 325°F / 163°C.  Ungreased 9in / 23cm pie dish.  

Make the Chocolate Crust

  1. In a food processor combine chocolate grahams, butter, and chocolate chips.  Pulse until the mixture is uniformly fine crumbs.  Or do it the "old fashioned" way and beat the crumbs to oblivion in a well sealed plastic bag with a rolling pin or other hard object, then mixing in the chocolate and butter in a bowl with a spoon. 

  2. Press evenly into the bottom and sides of pie dish and bake for 8 minutes or until fragrant.  Set aside to cool completely.

Make the Peanut Butter Filling

  1. In the bowl of a stand mixer or with a handheld mixer, beat the whipping cream until stiff peaks form.  Transfer to another bowl if using a stand mixer and set aside.

  2. Again in the bowl of a stand mixer or a separate bowl with a handheld mixer, beat the cream cheese, peanut butter, sugar, and vanilla until light and fluffy.  

  3. Carefully fold the whipped cream into the peanut butter mixture in three or four parts.  

  4. Spoon the filling over the cooled crust and smooth the top.  Refrigerate to set.  

IMG_5064.JPG

Make the Chocolate Ganache

  1. Place the chocolate and butter in a small bowl.  Heat the cream in a small saucepan over low heat, just until simmering.  The moment you see bubbles remove from heat and pour over chocolate and butter.  Let sit for 1 minute to melt the chocolate, then whisk briskly until smooth and shiny.  

  2. Pour over chilled pie.  If you don't desire chocolate running over the sides, you may have to wait a minute or two between pourings, or simply don't use all the ganache.  (The rest can be disposed of with a spoon and a mouth.  But I don't need to tell you that.)  

  3. Chill for 3-4 hours or overnight until set.  

Jenny's Notes:

  • If using a shallow pie dish you may have some leftover crust, and that's ok. Don't feel like you have to use all the crust mixture or you may have an impenetrable crust, especially in the corners.

  • I frequently substitute whole milk or coconut milk for all or part of the cream in ganache, but usually not when it's a topper as it can separate a bit if you don't use all cream. However, one time when making this I only had 1/4 cup cream left for the topping and so added 1/4 cup whole milk, and it made for a beautiful ganache, even as the topper.

  • Top with chocolate chips or chocolate shavings as desired!

peanut butter pie, PB pie, mascarpone peanut butter pie, chocolate ganache, cookie crust
Dessert, Pie
American
Yield: 8-12
Author: Jennyblogs
Print
Mascarpone Peanut Butter Pie with Chocolate Ganache

Mascarpone Peanut Butter Pie with Chocolate Ganache

Chocolate cookie crust, whipped mascarpone peanut butter filling, and chocolate ganache to top.
Prep time: 1 hourCook time: 8 MTotal time: 1 H & 8 M

Ingredients:

For the Chocolate Crust
  • 7.5 oz / 210g chocolate graham crackers, teddy grahams, or chocolate shortbread
  • 2 oz / 55g (1/3 cup) semi-sweet chocolate, finely chopped, or mini chips
  • 5 Tbsp / 65g butter, melted
For the Peanut Butter Filling
  • 1 cup / 237g heavy whipping cream
  • 8 oz / 227g mascarpone or cream cheese, room temperature
  • 1 cup / 250g peanut butter
  • 1/2 cup / 100g sugar
  • 1 tsp / 5g vanilla extract
For the Chocolate Ganache
  • 4 oz / 110g (2/3 cup) semi-sweet chocolate, finely chopped, or chips
  • 1 Tbsp / 14g butter
  • 1/2 cup / 118g heavy whipping cream

Instructions:

Make the Chocolate Crust
  1. Oven 325°F / 163°C. Ungreased 9in / 23cm pie dish.
  2. In a food processor combine chocolate grahams, butter, and chocolate chips. Pulse until the mixture is uniformly fine crumbs. Or do it the "old fashioned" way and beat the crumbs to oblivion in a well sealed plastic bag with a rolling pin or other hard object, then mixing in the chocolate and butter in a bowl with a spoon.
  3. Press evenly into the bottom and sides of pie dish and bake for 8 minutes or until fragrant. Set aside to cool completely.
Make the Peanut Butter Filling
  1. In the bowl of a stand mixer or with a handheld mixer, beat the whipping cream until stiff peaks form. Transfer to another bowl if using a stand mixer and set aside.
  2. Again in the bowl of a stand mixer or a separate bowl with a handheld mixer, beat the cream cheese, peanut butter, sugar, and vanilla until light and fluffy.
  3. Carefully fold the whipped cream into the peanut butter mixture in three or four parts.
  4. Spoon the filling over the cooled crust and smooth the top. Refrigerate to set.
Make the Chocolate Ganache
  1. Place the chocolate and butter in a small bowl. Heat the cream in a small saucepan over low heat, just until simmering. The moment you see bubbles remove from heat and pour over chocolate and butter. Let sit for 1 minute to melt the chocolate, then whisk briskly until smooth and shiny.
  2. Pour over chilled pie. If you don't desire chocolate running over the sides, you may have to wait a minute or two between pourings, or simply don't use all the ganache. (The rest can be disposed of with a spoon and a mouth. But I don't need to tell you that.)
  3. Chill for 3-4 hours or overnight until set.

Notes:

If using a shallow pie dish you may have some leftover crust, and that's ok. Don't feel like you have to use all the crust mixture or you may have an impenetrable crust, especially in the corners. I frequently substitute whole milk or coconut milk for all or part of the cream in ganache, but usually not when it's a topper as it can separate a bit if you don't use all cream. However, one time when making this I only had 1/4 cup cream left for the topping and so added 1/4 cup whole milk, and it made for a beautiful ganache, even as the topper. Top with chocolate chips or chocolate shavings as desired!

Calories

791.91

Fat (grams)

62.46

Sat. Fat (grams)

30.79

Carbs (grams)

54.43

Fiber (grams)

3.89

Net carbs

50.53

Sugar (grams)

37.64

Protein (grams)

12.12

Sodium (milligrams)

502.22

Cholesterol (grams)

110.56
Nutritional information is approximate. Based on 8 servings.
Did you make this recipe?
Tag @jenevamorris on instagram and hashtag it #jennyblogs
Created using The Recipes Generator
IMG_5066.JPG


Caramel Cream Pie

2017-12-23+15.32.59.jpg

Fellow citizens of the webs, I've missed you!  It's been a dreadfully long time since I've posted a new recipe.  Not that I haven't been baking, oh no, but going home for Christmas, festivities, and general merry-making have kept me quite occupied.  It has been difficult to find the time to carve out a window of several hours not only to bake something blog-worthy, but photograph said something, upload photos, edit photos, write the nonsense that is what you are currently reading, type up the recipe, add finished photos, proof read, and post the now finished blog form. 

It's quite the process for something that is merely a hobby and even though I enjoy the blogging process, sometimes I don't feel that good at any of it.  Except the baking, that's the one thing I feel somewhat competent in.  And even then, there are definitely off days, off recipes, or off concentration.  And I think to myself, does the world need one more baking blog?  One that's, well, not fantastic?  (At least not yet, mwahaha.)  There are so many great ones out there.  But I think the blogs that inspire me the most, the ones that come across as fantastic, are the ones that are passionate about what they do.  Yes, they have picture-perfect photography, reliable recipes, and witty writing, (hey, look at all those alliterations!), but I don't think they all started that way.  How did they arrive there?  Passion, dedication, perseverance, and always looking for ways to improve, I think. 

The world has enough perceived perfection, what we need are those hungry to learn, with a little talent and a lot of humility, and who are then willing to share what they've learned.  I can only hope, in this tidbit of a clumsy blog, that you'd join me in this voyage of discovering and learning, average photography, and lots of good food.  Oh, and feedback and questions are always welcome, that’s what the comments are for below!

Here's to a bright and shiny new year! 

Now, back to that good food we were talking about...

This post may contain affiliate links. If you buy something using these links, Jennyblogs may receive a small commission, at no extra cost to you. This helps to support Jennyblogs. For further information see the privacy policy. Grazie!

Recipe adapted from Shugary Sweets


Caramel Cream Pie

2017-12-23+15.34.15.jpg

Serves 8-12

Ingredients:

For the Crust

  • 1 1/3 cup / 160g all-purpose flour

  • 1/2 tsp / 2.5g salt

  • 4 Tbsp / 56g butter, cold, cut into small pieces

  • 4-6 Tbsp / 59 - 89g ice water

For the Caramel Cream filling and topping

  • 1 14oz can / 380g dulche de leche, your favorite caramel, or 1/2 recipe of this Caramel Sauce

  • 8 oz / 225g cream cheese, room temperature

  • 2 1/2 cups / 605g heavy whipping cream

  • 1/4 cup / 50g sugar

Directions:

Make the Crust

Oven 425°F / 220°C. Ungreased 8 - 9in / 20 - 23cm pie dish. 

IMG_4555.JPG
  1. In a medium bowl whisk together flour and salt.  Blend in cold butter using a pastry cutter, fork, or your hands.  You want the butter to end up in small pieces, like peas. 

  2. Add the ice water, starting with 4 Tbsp / 59g, mixing as little as possible.  The dough should be able to hold together in a ball, without being too dry and shaggy or too wet.  Add more water if necessary, 1 tablespoon at a time.  

  3. Place dough on a piece of plastic wrap, shape into a disc, and wrap tightly.  Place in the fridge for 1 - 48 hours.  

  4. After the crust has rested, roll into a circle on a lightly floured surface or silpat.  Roll a few times with your rolling pin in one direction before turning the crust 45° (quarter turn) and continuing with a few more rolls.  Periodically check under the crust to make sure it isn’t sticking and sprinkling more flour if needed. Continue like this until your crust is nicely round and roughly 2in / 5cm larger than your pie dish.  

  5. Carefully transfer crust to pie dish (this is easier if using a silpat), trim the excess overhang if necessary, and fold the ends under. Crimp as desired, or press with a fork.  Prick the bottom of the crust with a fork.  The crust can also be refrigerated at this point, if needed.  

  6. Bake in preheated oven for 10-12 minutes, or until crust is lightly golden-brown.  Cool completely.  

Make the Caramel Cream filling and topping

  1. In the bowl of a stand mixer, beat cream cheese with 1/2 cup / 120g caramel.  Set aside.

  2. In the clean bowl of a stand mixer, beat whipping cream and sugar until stiff peaks form.  Reserve 1/2 cup for the topping.  Fold the remaining whipped cream into cream cheese mixture, about a quarter at a time.  

  3. Reserve 1-2 tablespoons of the remaining caramel for the topping.  Spread the rest into the bottom of the crust.  Spread cream cheese mixture over caramel.  

  4. Top pie with reserved 1/2 cup whipped cream and caramel, using a spoon or piping desired.

Jenny's Notes:

  • For the crust, you can also use a food processor, pulsing in the butter until it has the desired consistency.  Just be sure to remove the dough from the food processor and mix in the water with a fork or pastry cutter so you don't overwork the dough.  You want to work it as little as possible once you add the water. The liquid helps to awaken the gluten, and the more you work it and the gluten strands develop, the tougher your crust will be.  The minimum of 1 hour rest in the fridge allows what gluten inevitably developed to relax.  

  • If you are having problems with a shrinking crust, try using a metal or ceramic pie dish and allowing the crust more time to rest before baking.  

  • I have made this pie several times over the past year, and have always needed all 6 tablespoons of water, possibly because it was always during the dry winter.  If you live in a really dry climate, you might need up to 7.  Just be aware, an overly wet crust is more likely to glue itself to the pan during baking.   

caramel cream pie, butter crust, fresh whipped cream, dulche de leche
Dessert, Pie
American
Yield: 8-12 servings
Author: Jennyblogs
Print
Caramel Cream Pie

Caramel Cream Pie

Flaky, buttery crust, whipped caramel filling, and fresh whipped cream with caramel drizzled on top.
Prep time: 1 hourCook time: 12 MTotal time: 1 H & 12 M

Ingredients:

For the Crust
  • 1 1/3 cup / 160g all-purpose flour
  • 1/2 tsp / 2.5g salt
  • 4 Tbsp / 56g butter, cold, cut into small pieces
  • 4-6 Tbsp / 59 - 89g ice water
For the Caramel Cream filling and topping
  • 1 14oz can / 380g dulche de leche, your favorite caramel, or 1/2 recipe of this Caramel Sauce
  • 8 oz / 225g cream cheese, room temperature
  • 2 1/2 cups / 605g heavy whipping cream
  • 1/4 cup / 50g sugar

Instructions:

Make the Crust
  1. Oven 425°F / 220°C. Ungreased 8 - 9in / 20 - 23cm pie dish.
  2. In a medium bowl whisk together flour and salt. Blend in cold butter using a pastry cutter, fork, or your hands. You want the butter to end up in small pieces, like peas.
  3. Add the ice water, starting with 4 Tbsp / 59g, mixing as little as possible. The dough should be able to hold together in a ball, without being too dry and shaggy or too wet. Add more water if necessary, 1 tablespoon at a time.
  4. Place dough on a piece of plastic wrap, shape into a disc, and wrap tightly. Place in the fridge for 1 - 48 hours.
  5. After the crust has rested, roll into a circle on a lightly floured surface or silpat. Roll a few times with your rolling pin in one direction before turning the crust 45° (quarter turn) and continuing with a few more rolls. Periodically check under the crust to make sure it isn’t sticking and sprinkling more flour if needed. Continue like this until your crust is nicely round and roughly 2in / 5cm larger than your pie dish.
  6. Carefully transfer crust to pie dish (this is easier if using a silpat), trim the excess overhang if necessary, and fold the ends under. Crimp as desired, or press with a fork. Prick the bottom of the crust with a fork. The crust can also be refrigerated at this point, if needed.
  7. Bake in preheated oven for 10-12 minutes, or until crust is lightly golden-brown. Cool completely.
Make the Caramel Cream filling and topping
  1. In the bowl of a stand mixer, beat cream cheese with 1/2 cup / 120g caramel. Set aside.
  2. In the clean bowl of a stand mixer, beat whipping cream and sugar until stiff peaks form. Reserve 1/2 cup for the topping. Fold the remaining whipped cream into cream cheese mixture, about a quarter at a time.
  3. Reserve 1-2 tablespoons of the remaining caramel for the topping. Spread the rest into the bottom of the crust. Spread cream cheese mixture over caramel.
  4. Top pie with reserved 1/2 cup whipped cream and caramel, using a spoon or piping desired.

Notes:

For the crust, you can also use a food processor, pulsing in the butter until it has the desired consistency. Just be sure to remove the dough from the food processor and mix in the water with a fork or pastry cutter so you don't overwork the dough. You want to work it as little as possible once you add the water. The liquid helps to awaken the gluten, and the more you work it and the gluten strands develop, the tougher your crust will be. The minimum of 1 hour rest in the fridge allows what gluten inevitably developed to relax. If you are having problems with a shrinking crust, try using a metal or ceramic pie dish and allowing the crust more time to rest before baking. I have made this pie several times over the past year, and have always needed all 6 tablespoons of water, possibly because it was always during the dry winter. If you live in a really dry climate, you might need up to 7. Just be aware, an overly wet crust is more likely to glue itself to the pan during baking.

Calories

652.74

Fat (grams)

42.84

Sat. Fat (grams)

26.73

Carbs (grams)

56.39

Fiber (grams)

0.54

Net carbs

55.85

Sugar (grams)

40.81

Protein (grams)

6.75

Sodium (milligrams)

437.41

Cholesterol (grams)

128.91
Nutritional information is approximate. Based on 8 servings.
Did you make this recipe?
Tag @jenevamorris on instagram and hashtag it #jennyblogs
Created using The Recipes Generator
And yet, for as many times as I've made this pie, I've yet to get a photo of it sliced. Oh well, there's butter, caramel, and whipped cream, what more do you need to know?

And yet, for as many times as I've made this pie, I've yet to get a photo of it sliced. Oh well, there's butter, caramel, and whipped cream, what more do you need to know?


Healthy Chocolate Chip Cookie Pie

image.jpg

Some people are adverse to the word healthy when it comes to desserts.  This recipe today is to help you see you don't need to be one of those people. 

Oh, but what I would give to have a little slice of this pie right now, healthy or not!  Actually, I wouldn't give much.  But that doesn't mean I don't want it.  Yes, Whole30January is still happening.  It has gotten easier in recent days...but you can ask my mom, who is doing it with me, if that's a true statement.  So here is yet another recipe you can make and eat in my stead.  Please, for my sanity.  Just don't tell me how delicious it is.  I like to ask the people around me who are eating delicious nonWhole30food to tell me how disgusting it is.  It almost makes me feel better.  Won't you be glad when Whole30January is over so you won't have to hear any more of my sardonic complaining? 

What do I mean when I say healthy? I mean, aside from the chocolate chips (which have some health benefits in and of themselves aside from the sugar), that you could eat this for breakfast, lunch, or dinner.

This recipe is naturally gluten-free, vegan, dairy-free, and nut free. Just keep in mind you may need to use certified ingredients, i.e. certified GF oats (even though oats are a gluten-free food, they are almost always processed in facilities that also process foods that contain gluten, and there is a high risk of cross-contamination) and check your other ingredients for stowaway unwanted allergens! Chocolate chips, as long as they are semi-sweet or dark chocolate, should not contain any dairy, yet I’ve seen brands that do contain dairy. Reading labels is very important for so many reasons!

Yes ok, on to this nutritious pie that somehow tastes like dessert!

This post may contain affiliate links. If you buy something using these links, Jennyblogs may receive a small commission, at no extra cost to you. This helps to support Jennyblogs. For further information see the privacy policy. Grazie!

Recipe adapted from Chocolate Covered Katie


Healthy Chocolate Chip Cookie Pie

12-16 servings

Ingredients:

  • 2 15oz cans / 500g cooked white beans (navy, great northern, cannellini) or garbanzo beans, drained and rinsed

  • 1 cup / 90g oats or 180g ground flax seeds

  • 1/4 cup / 63g applesauce

  • 3 Tbsp / 42g oil

  • 2 tsp vanilla extract

  • 1/2 tsp baking soda

  • 2 tsp baking powder

  • 1/2 tsp salt

  • 1/2 cup / 100g brown sugar

  • 3 tsp stevia powder

  • 1 cup / 170g chocolate chips or chunks, plus more for sprinkling

Directions:

image.jpg

Oven 350°F / 177°C.  Greased 8 - 9in / 20 - 23cm pie dish.

  1. Combine all ingredients except chocolate chips in a food processor and blend until smooth.  Stir in chocolate chips. 

  2. Scrape dough into prepared pan and sprinkle with additional chocolate chips. 

  3. Bake in oven for 30-35 minutes.  Allow to cool before slicing and serving. 

Jenny's Notes:

  • If you don’t have applesauce, you can use oil instead. That means you would be adding a total of 7 Tbsp / 98g oil, or a scant half cup.

  • I adapted this recipe from Chocolate Covered Katie.  She is very good about giving lots of options if you are gluten-free, vegan, have a nut allergy, etc.  I simply narrowed it down to my favorite combination of ingredients from her options, and preferred amount of sweetener so that it tastes like dessert without giving in to your sugar dragon too much. 

  • Feel free to add more sugar if you feel the need! 

  • If for whatever reason your batter comes out too thick or thin, (didn't drain the beans as much, the applesauce brand you use is soupier, etc.) you can add more oats or flax to thicken, or applesauce, maple syrup, or milk to thin. 

vegan, dairy-free, gluten-free, nut-free, healthy, cookie pie,
dessert
American
Yield: 12-16
Author:
Healthy Chocolate Chip Cookie Pie

Healthy Chocolate Chip Cookie Pie

A healthy and somehow still delicious cookie pie that is gluten-free, dairy-free, nut-free, and vegan.
prep time: 15 Mcook time: 35 Mtotal time: 50 M

ingredients:

  • 2 15oz cans / 500g cooked white beans (navy, great northern, cannellini) or garbanzo beans, drained and rinsed
  • 1 cup / 90g oats or 180g ground flax seeds
  • 1/4 cup / 63g applesauce
  • 3 Tbsp / 42g oil
  • 2 tsp vanilla extract
  • 1/2 tsp baking soda
  • 2 tsp baking powder
  • 1/2 tsp salt
  • 1/2 cup / 100g brown sugar
  • 3 tsp stevia powder
  • 1 cup / 170g chocolate chips or chunks, plus more for sprinkling

instructions:

How to cook Healthy Chocolate Chip Cookie Pie

  1. Oven 350°F / 177°C. Greased 8 - 9in / 20 - 23cm pie dish.
  2. Combine all ingredients except chocolate chips in a food processor and blend until smooth. Stir in chocolate chips.
  3. Scrape dough into prepared pan and sprinkle with additional chocolate chips.
  4. Bake in oven for 30-35 minutes. Allow to cool before slicing and serving.

NOTES:

If you don’t have applesauce, you can use oil instead. That means you would be adding a total of 7 Tbsp / 98g oil, or a scant half cup. I adapted this recipe from Chocolate Covered Katie. She is very good about giving lots of options if you are gluten-free, vegan, have a nut allergy, etc. I simply narrowed it down to my favorite combination of ingredients from her options, and preferred amount of sweetener so that it tastes like dessert without giving in to your sugar dragon too much. Feel free to add more sugar if you feel the need! If for whatever reason your batter comes out too thick or thin, (didn't drain the beans as much, the applesauce brand you use is soupier, etc.) you can add more oats or flax to thicken, or applesauce, maple syrup, or milk to thin.

Calories

280.72

Fat (grams)

10.08

Sat. Fat (grams)

3.02

Carbs (grams)

44.03

Fiber (grams)

7.02

Net carbs

37.01

Sugar (grams)

20.13

Protein (grams)

7.85

Sodium (milligrams)

533.19

Cholesterol (grams)

0.00
Nutritional information is approximate. Based on 12 servings.
Did you make this recipe?
Tag @jenevamorris on instagram and hashtag it #jennyblogs
Created using The Recipes Generator
image.jpg

Nutter Butter Pie

image.jpg

Who doesn't love Nutter Butter cookies?  They remind me of chocolate fondue and my Aunt Cathy.  My mom didn't buy them growing up so I never really knew what I was missing out on.  Except when we would go over my aunt's house and on the special occasion when a fondue was involved for a holiday or bonfire, she always had Nutter Butters as one of the dipping tools.  And they were my favorite.  #inmyeyesyoudonowrong.  I don't even think we had fondue that much, but there must have been one glorious time with Nutter Butters, and the rest is history. 

This pie really lets them shine through, with most of the flavor and sweetness coming from the cookies themselves. There’s a fluffy (thanks to marshmallow fluff) peanut butter cream cheese filling with Nutter Butters chunks and its all topped with a whipped cream topping and peanut butter drizzle.

This post may contain affiliate links. If you make a purchase using these links, Jennyblogs may receive a small commission, at no extra cost to you. This helps to support Jennyblogs. For further information see the privacy policy. Grazie!

Recipe adapted from Cookies & Cups


Nutter Butter Pie

image.jpg

Ingredients:

For the crust

  • 20 / 280g Nutter Butter cookies

  • 5 Tbsp / 70g butter, melted

For the filling

  • 8 oz / 225g cream cheese, room temperature

  • 1 cup / 85g marshmallow fluff

  • 1/3 cup / 87g creamy peanut butter

  • 1 cup / 237g heavy whipping cream

  • 12 / 168g Nutter Butter cookies, crushed

For the topping

  • 1 cup / 237g heavy whipping cream

  • 2 Tbsp / 16g powdered sugar

For the drizzle

  • 1/4 cup / 65g creamy peanut butter

Directions:

Make the crust

Oven preheated to 350°F / 177°C. Ungreased 9in / 23cm pie dish.

  1. In a food processor, pulse the Nutter Butter cookies until mostly fine crumbs.  Add the butter and pulse until thoroughly combined.  Press firmly into the bottom and up the sides of the pie dish. 

  2. Bake for 10-12 minutes or until edges start to turn golden.  Allow to cool completely.

Make the filling

  1. In the bowl of a stand mixer or by hand, beat cream cheese for about one minute.  Add marshmallow fluff and peanut butter and beat until smooth.  If using a stand mixer, transfer to another bowl and set aside.

  2. In the bowl of a stand mixer fitted with the whisk attachment or with a hand beater, beat heavy whipping cream until stiff peaks form. 

  3. Gently fold 1/3 of whipped cream into the cream cheese mixture, repeat two more times. 

  4. Fold in Nutter Butter cookies.  Spread over cooled crust.

Make the topping

  1. In the bowl of a stand mixer fitted with the whisk attachment, beat the heavy whipping cream and powdered sugar until stiff peaks form.   Gently spread over cream cheese filling.

Make the drizzle

  1. In a small pan, heat peanut butter on low heat for about a minute or until it is thin enough to drizzle. 

  2. Use a spoon or piping bag to drizzle over pie.

  3. Cover and chill pie in fridge for at least two hours before serving, ideally.  But we don't live in an ideal world, and if you can't wait that long, it will hold together if you cut into it immediately.  But I always follow directions and chill for the recommended time, so how would I know that? heh. heh. heh.

Jenny's Notes:

  • Which is better, natural soupy peanut butter or the stiff peanut butter, like Jif?  Most recipes will tell you to use the stiff kind, because it emulsifies better (in other words, doesn't separate as easily.)  I like to use natural because it doesn't have the added sugar or hydrogenated or partially hydrogenated fats.  I find that subbing the natural almost always turns out fine, just be careful not to beat more than necessary, as that can sometimes cause the separation. 

  • This recipe as is uses exactly one container of Nutter Butters.  If you're feeling generous, you could buy 2 packages and use more Nutter Butters crushed in the filling, and some crushed on top.  And have some left over for snacking...or fondue...

Nutter Butter Pie
Yield 12
Author
Prep time
50 Min
Cook time
13 Min
Inactive time
2 Hour
Total time
3 H & 3 M

Nutter Butter Pie

Nutter Butter crust, fluffy peanut butter filling with Nutter Butter chunks and a whipped cream topping make up this peanut butter pie.

Ingredients

For the Crust
For the Filling
For the topping
For the drizzle

Instructions

Make the crust
  1. Oven preheated to 350°F / 177°C. Ungreased 9in / 23cm pie dish.
  2. In a food processor, pulse the Nutter Butter cookies until mostly fine crumbs. Add the butter and pulse until thoroughly combined. Press firmly into the bottom and up the sides of the pie dish.
  3. Bake for 10-12 minutes or until edges start to turn golden. Allow to cool completely.
Make the filling
  1. In the bowl of a stand mixer or by hand, beat cream cheese for about one minute. Add marshmallow fluff and peanut butter and beat until smooth. If using a stand mixer, transfer to another bowl and set aside.
  2. In the bowl of a stand mixer fitted with the whisk attachment or with a hand beater, beat heavy whipping cream until stiff peaks form.
  3. Gently fold 1/3 of whipped cream into the cream cheese mixture, repeat two more times.
  4. Fold in Nutter Butter cookies. Spread over cooled crust.
Make the topping
  1. In the bowl of a stand mixer fitted with the whisk attachment, beat the heavy whipping cream and powdered sugar until stiff peaks form. Gently spread over cream cheese filling.
Make the drizzle
  1. In a small pan, heat peanut butter on low heat for about a minute or until it is thin enough to drizzle.
  2. Use a spoon or piping bag to drizzle over pie.
  3. Cover and chill pie in fridge for at least two hours before serving, ideally. But we don't live in an ideal world, and if you can't wait that long, it will hold together if you cut into it immediately. But I always follow directions and chill for the recommended time, so how would I know that?

Notes

  • Which is better, natural soupy peanut butter or the stiff peanut butter, like Jif?  Most recipes will tell you to use the stiff kind, because it emulsifies better (in other words, doesn't separate as easily.)  I like to use natural because it doesn't have the added sugar or hydrogenated or partially hydrogenated fats.  I find that subbing the natural almost always turns out fine, just be careful not to beat more than necessary, as that can sometimes cause the separation. 
  • This recipe as is uses exactly one container of Nutter Butters.  If you're feeling generous, you could buy 2 packages and use more Nutter Butters crushed in the filling, and some crushed on top.  And have some left over for snacking...or fondue...


Nutrition Facts

Calories

513.10

Fat

38.75 g

Sat. Fat

21.22 g

Carbs

36.64 g

Fiber

1.03 g

Net carbs

35.61 g

Sugar

14.32 g

Protein

7.51 g

Sodium

278.29 mg

Cholesterol

119.79 mg

Nutritional information is approximate. Based on 1 slice, if pie is cut into 12 slices.

pie, Nutter Butter cookies, Nutter Butter crust, peanut butter pie, whipped cream
dessert, pie
American
Did you make this recipe?
Tag @jennyblogsandbakes on instagram and hashtag it #jennyblogs
image.jpg


Blueberry Icebox Pie

Serves 10-12

A day late and a dollar short on pi day, I know.  But hear me out! If 3/14 is pi day, do you know what comes after the .14? That's right.  .1415.  Emphasis on the 15, because that's today.  Pie the food is so great it should get two days of recognition anyway. There, there, pie, I didn't forget about you.  But you didn't come here to listen to me ramble, you're probably here because you love pie, or blueberries, or math, or all of the above.  Moving on, before this post accidentally ends up on 3/16.

This is a simple recipe, fairly quick and delicious to eat!  The only baking required is for the crust.  Great for summer time, especially when blueberries are in season.

Blueberry Icebox Pie

Ingredients:

  • 1 sleeve graham crackers
  • 4 Tbsp butter, melted
  • 2 cups fresh blueberries (or frozen and thawed)
  • 2 Tbsp lemon juice
  • 2 tsp unflavored powdered gelatin, or 1 1/4-oz packet
  • 16 oz. cream cheese (2 blocks), room temperature
  • 14 oz can sweetened condensed milk

Directions:

Preheat oven to 350 F.

In a food processor, process graham crackers until fine.  Alternately, you can always crush them with a rolling pin on a cutting board or in a seal-able plastic bag. Add melted butter and pulse until graham cracker crumbs hold together some.  Press into a 9 in. spring form pan or pie plate.

Bake for 10 minutes.

Purée 1 1/2 cups of the blueberries in a food processor or blender.  Add lemon juice. 

Transfer to a small saucepan and sprinkle gelatin over the surface.  Let sit for 10 minutes.

Place blueberry mixture on the stove over medium-low, heating until gelatin has just dissolved. Remove from heat.

In a bowl with electric beaters or with a stand mixer, beat cream cheese for about a minute.  Add condensed milk.  On low speed, slowly add blueberry mixture.  Increase speed and beat until smooth.

Pour over baked crust, top with remaining blueberries, and chill until set. 

To serve, garnish with fresh mint, if desired.

Jenny's Note:  This can also be frozen, perfect for the hottest of summer days.  Just let set at room temperature for about 10 minutes before slicing.
Disclaimer on the ahem, er, photography.  It can only get better from here, right?

Disclaimer on the ahem, er, photography.  It can only get better from here, right?

And do you know what number comes after 3.1415? Yep. 926.  And guess what? I was writing this post at 9:26.  Oh yes, I went there.  Enjoy your pi. I mean, pie.

And here is a pie chart to go with your pie on the day after pi.  Sincerely, Jenny Leslie Knope Morris.

Recipes Currently Waiting to be Made

Recipe adapted from Self