Strawberry Nutella Coconut Milkshake

This post may contain affiliate links. If you make a purchase using these links, Jennyblogs may receive a small commission, at no extra cost to you. This helps to support Jennyblogs. For further information see the privacy policy. Grazie!

IMG_0952.jpg

Buon Ferragosto!

Also known as the day where everything is closed and I feel slightly trapped. Hmmm the gelato place is closed so I’ll just run to the store and pick up some…oh wait, all the grocery stores are closed. Ok, well maybe I’ll go browse some shops, oh wait, all closed. I’ll go walk around in the center for a bit…nope, hardly any buses running today to get to the center. Even if I could find a bus, all the places I could buy a ticket are closed. Ok, so I’ll walk to the gym to work out and enjoy some air conditioning. Ah, closed. So, I hunker down and eat whatever food is in the house, try to stay cool. Actually we’ve come to a bit of a cool spell, today only has a high of 90°F. I’ll take it!

I actually planned ahead this year and went grocery shopping last night. I got fruit and veggies for lunch and dinner today, but why didn’t I get better snackies? But then I remembered that I have a good stash of gelato in the freezer, and made me think of this delectable milkshake I made a few weeks ago.

So with all this time on my hands, I shall be milkshaking and sharing this milkshake with you! What’s so great about this milkshake?

It’s a Strawberry Nutella Coconut Milkshake. That’s such a long name, and kinda going against my own rule of not listing every ingredient in the title, but otherwise I didn’t quite know how to get the dream across, ya know?

How about this: Strawnutelloco Milkshake. Stranucoco Milkshake. Conuterry. Strawconutella. Regardless, this milkshake tastes like a chocolate covered strawberry rolled in coconut with a hint of hazelnut.

I have a confession to make. I originally made this milkshake to try and hide this not-awesome gelato I bought. There was a sale on a brand I had never tried before at the grocery store, and they had coconut and I love coconut but it just did not end well. Icy and so much coconut it was chewy. I didn’t want to waste it, but I also didn’t necessarily want to force myself to eat gelato?

Enter the milkshake idea. I had strawberries, Nutella, and milk, and this beautiful combo was born. The copious amounts of coconut from the gelato still rendered my milkshake a bit chewy, but if you have a GOOD brand of coconut ice cream, or even vanilla ice cream with a bit of flaked coconut and maybe a drop of coconut extract or two thrown in, you’ve got yourself the perfect summer day’s treat.

So thank you, gelato brand that shall remain unnamed, for the not delicious gelato that prompted me to create a delicious milkshake.


Strawberry Nutella Coconut Milkshake

Serves 2

IMG_0947.jpg

Ingredients:

  • 2 cups coconut ice cream, slightly softened

  • 1/2 cup milk, any variety

  • 1/2 cup hulled strawberries, fresh or frozen

  • 2 heaping Tbsp Nutella

  • Dash of vanilla extract, optional

  • Whipped cream, optional

Directions:

  1. Add all ingredients except whipped cream to a blender and blend until smooth. Check consistency and add more milk if desired.

  2. Spoon into 2 glasses and top with whipped cream. Serve immediately.


Jenny’s Notes:

  • Don’t have coconut ice cream but still want that coconut taste? Substitute chocolate or vanilla ice cream and add a bit of flaked coconut and a drop or two of coconut extract.

  • For creamier shakes, use whole milk.

  • For thinner shakes you can sip, add more milk. For thicker, spoonable shakes, add less milk. Some blenders don’t blend thicker shakes well, so if yours is having problems, either wait a minute or two for the ice cream to soften a bit more before continuing to blend, or add a touch more milk.

  • To make fresh whipped cream, whip about 1/4 cup / 60g heavy whipping cream with 1 Tbsp / 14g sugar in the bowl of a stand mixer fitted with whisk attachment, or with a handheld mixer. This makes about 1/2 cup fresh whipped cream. Store in fridge, best if used within a few days.

milkshake, milk, strawberry, Nutella, coconut, ice cream, vanilla, fresh whipped cream, dessert, summer
Dessert, Beverage
American
Yield: 2 Servings
Author:

Strawberry Nutella Coconut Milkshake

Thick and creamy milkshake with coconut ice cream, Nutella, strawberries and whipped cream on top.
prep time: 5 Mcook time: total time: 5 M

ingredients:

  • 2 cups coconut ice cream, slightly softened
  • 1/2 cup milk, any variety
  • 1/2 cup hulled strawberries, fresh or frozen
  • 2 heaping Tbsp Nutella
  • Dash of vanilla extract, optional
  • Whipped cream, optional

instructions:

How to cook Strawberry Nutella Coconut Milkshake

  1. Add all ingredients except whipped cream to a blender and blend until smooth. Check consistency and add more milk if desired.
  2. Spoon into 2 glasses and top with whipped cream. Serve immediately.

NOTES:

Don’t have coconut ice cream but still want that coconut taste? Substitute chocolate or vanilla ice cream and add a bit of flaked coconut and a drop or two of coconut extract. For creamier shakes, use whole milk. For thinner shakes you can sip, add more milk. For thicker, spoonable shakes, add less milk. Some blenders don’t blend thicker shakes well, so if yours is having problems, either wait a minute or two for the ice cream to soften a bit more before continuing to blend, or add a touch more milk. To make fresh whipped cream, whip about 1/4 cup / 60g heavy whipping cream with 1 Tbsp / 14g sugar in the bowl of a stand mixer fitted with whisk attachment, or with a handheld mixer. This makes about 1/2 cup fresh whipped cream. Store in fridge, best if used within a few days.

Calories

440.85

Fat (grams)

23.21

Sat. Fat (grams)

19.31

Carbs (grams)

54.51

Fiber (grams)

3.87

Net carbs

50.64

Sugar (grams)

40.58

Protein (grams)

6.95

Sodium (milligrams)

49.23

Cholesterol (grams)

9.42
Nutritional information is approximate and based on 2 servings and includes whipped cream.
Created using The Recipes Generator
IMG_0943.jpg

Triple Dark Chocolate Cheesecake

2019-05-26+17.58.07-2.jpg

This post contains affiliate links. If you buy something using these links, Jennyblogs may receive a small commission, at no extra cost to you. This helps to support Jennyblogs. For further information see the privacy policy. Grazie!

After more than two years in Italy, I have finally made a cheesecake.

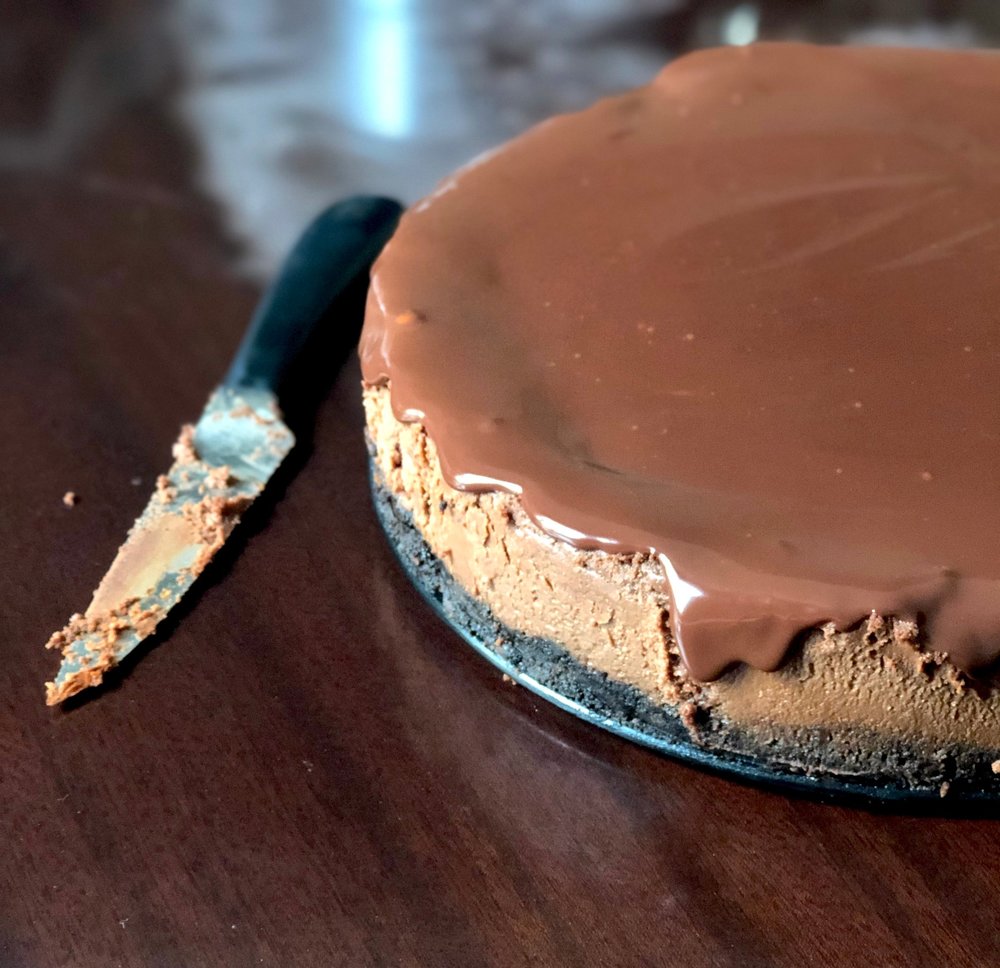
Proof that you don’t need a springform pan to bake a cheesecake

Proof that you don’t need a springform pan to bake a cheesecake

Cheesecakes are not hard to make, but the baking is important, probably the most important part, and has always been tricky for me. Cheesecakes are usually baked at a slightly lower temperature, usually around 325F, and just until the sides are set but the center is still jiggly. If the center sets, the cheesecake is over done, but if the center is too jiggly, then your cheesecake won’t set up in the fridge and you’ll end up with soup when you cut into it. You don’t want the cheesecake to crack, and some recipes will tell you to add a bain-marie (a hot water bath) to the oven to keep the atmosphere humid or to crack the oven door after you’ve turned it off so your cheesecake won’t cool down too quickly and yes, crack.

So when you live in Italy with strange ovens, you think twice before baking things when you can’t perfectly control the heat in your oven or where the heat is coming from. IF you’re able to tell the temperature of your oven at all. (I’m thinking of you, my oven two apartments ago. I DO NOT miss you!) Or if your oven is small and cooks things a lot quicker. Add on top of that the cream cheese here, “formaggio fresco” or literally translated fresh cheese, is…different. I’m not even sure what it is, it tastes similar to cream cheese in the States, but when you whip it it doesn’t become soupy like the American stuff, it becomes super creamy. Sometimes I think the American stuff is stickier too, maybe? The only brand here I’ve ever seen is Philadelphia, and it has had great success in Italy. But the cheesecakes I’ve eaten in restaurants or pastry shops? Always weird. They taste and look more like semi-freddo or a mousse. I therefore assumed when I made a cheesecake it would be weird like the other ones I’ve eaten here. So I never made one.

Along came Easter and I wanted to make a cheesecake. I didn’t even have a springform pan but found that pie dishes work pretty great as substitutes. And you know what? The cheesecake turned out delicious and not weird. And my husband and colleagues liked it so well I made the same one again and bought a springform pan. And if you know me, you know I rarely bake the same thing twice in a row. I’m always on to the next new recipe or at least something I haven’t made in a while. But this recipe asked to be made again. And so I did. And now you can make it, too, weird cream cheese or normal cream cheese!

Recipe adapted from omgchocolatedesserts


Triple Dark Chocolate Cheesecake

Serves about 12

Ingredients:

For the Oreo Crust

Crushing Oreos the old-fashioned way…

Crushing Oreos the old-fashioned way…

  • 24 Oreos

  • 1/4 cup / 56g butter, melted

For the Filling

  • 7.5 oz / 225g dark chocolate, broken into small chunks

  • 24 oz (3 8 oz packages) / 675g cream cheese, room temperature

  • 1/2 cup + 2 Tbsp / 125g granulated sugar

  • 2 Tbsp / 14 g cocoa powder

  • 3 eggs

For the Ganache Topping

  • 3/4 cup / 175g heavy whipping cream

  • 6 oz / 180g dark chocolate, broken into small chunks

Directions:

Oven 350F / 177C. Grease an 8in - 9in / 20cm - 24cm springform pan.

Make the Oreo Crust

  1. Chop the Oreos finely, either in a food processor, by crushing with a rolling pin on a clean surface or cutting board, or by putting in a resealable plastic bag and crushing with a rolling pin or meat tenderizer.

  2. If using a food processor, pulse in the melted butter until crumbs are evenly moistened. If crushing the Oreos by hand, transfer to a bowl and stir in the butter.

  3. Press mixture evenly into the bottom of the prepared springform pan and bake for 8 minutes.

  4. Remove from oven and let cool while you prepare the filling.

Make the Filling

Spreading cream cheese mixture over baked crust

Spreading cream cheese mixture over baked crust

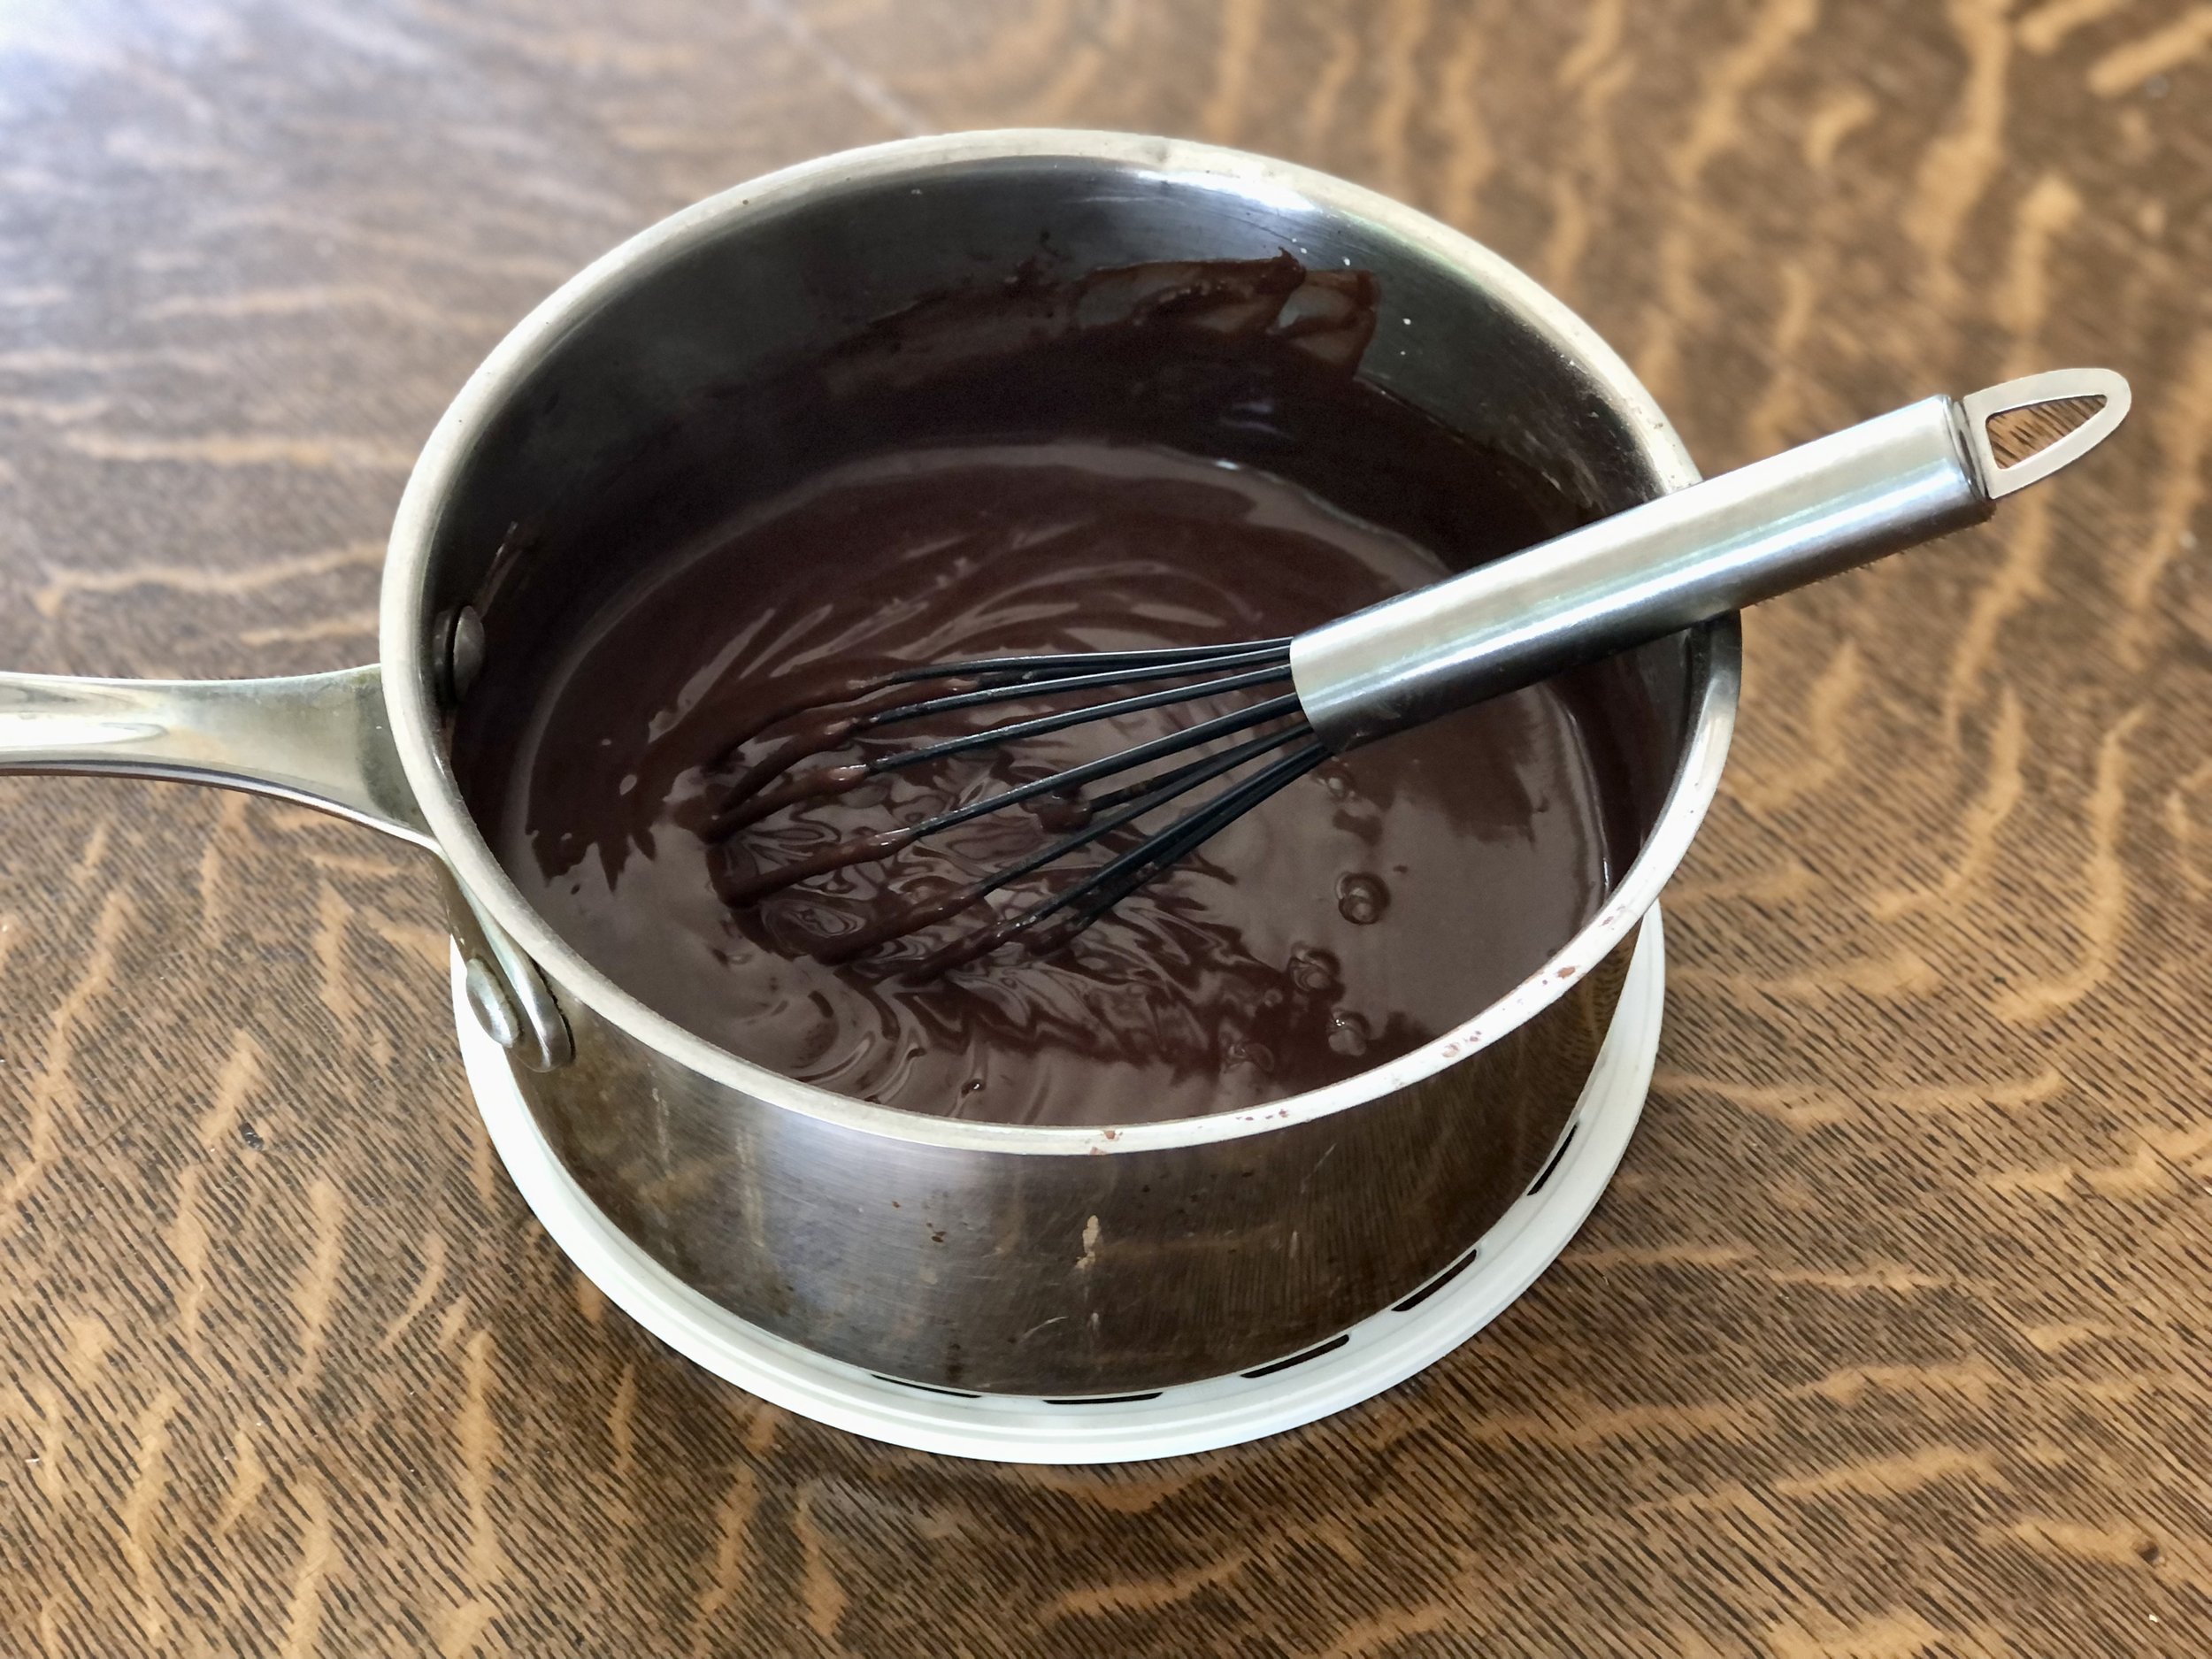
  1. In a double boiler or pan over low heat, melt the chocolate, stirring constantly. Remove from heat when there are still small chunks of chocolate, and continue to stir until completely melted. In this way the chocolate won’t overheat or burn. Let chocolate cool.

  2. In the bowl of a stand mixer or a large bowl with a handheld mixer, beat cream cheese and sugar on medium speed until smooth. Changing to low speed, carefully beat in cocoa powder so that it doesn’t “poof” everywhere. Every so often stop beating and scrape down the sides of the bowl well.

  3. Beat in the eggs, one at a time, until smooth.

  4. Beat in melted and cooled chocolate.

  5. Pour mixture over the crust, smoothing the top.

  6. Bake for 45 - 60 minutes, or until center is still slightly wiggly and the top looks dry.

  7. Turn the oven off and crack open the door for about 10 minutes. Remove cheesecake from oven and place in fridge until completely cooled, 8 hours or overnight.

Make the Ganache Topping

  1. In a small pan place heavy cream and chocolate over low heat. Stir constantly until the mixture is smooth and melted. Allow to cool slightly.

  2. Remove cheesecake from fridge and pour ganache evenly over the top. Allow to set before running a dull knife around the edge of cheesecake and releasing from springform pan. Alternately, if you don’t need to transport the cheesecake anywhere, you can remove the ring of the springform first and then pour the ganache over, using a spoon to guide the ganache toward the edges and allowing some to dribble down the sides.

Jenny’s Notes:

  • Not a dark chocolate fan? Try it out with milk chocolate or a mixture of milk and dark to create your preferred bitterness!

  • If you don’t own a double boiler, you can make a makeshift one by placing a small pan with an inch or so of water in the bottom and bring to a simmer. Place the chocolate in a bowl big enough that it can sit on top of the pan without touching the water. Stir constantly and proceed as in the recipe. This might take a touch more effort than just melting the chocolate in a pan, but it’s safer if you’re not used to melting chocolate so as not to burn it.

  • Powdered sugar can be substituted for the granulated, use 1 cup / 110g.

  • For cleaner slicing, try running your knife under hot water for a few seconds between slices.

American
Yield: 12
Author:

Triple Dark Chocolate Cheesecake

Oreo crust, creamy dark chocolate cheesecake filling, and a decadent dark chocolate ganache.
prep time: 1 hourcook time: 1 H & 8 Mtotal time: 2 H & 8 M

ingredients:

For the Oreo Crust
  • 24 Oreos
  • 1/4 cup / 56g butter, melted
For the Filling
  • 7.5 oz / 225g dark chocolate, broken into small chunks
  • 24 oz (3 8 oz packages) / 675g cream cheese, room temperature
  • 1/2 cup + 2 Tbsp / 125g granulated sugar
  • 2 Tbsp / 14 g cocoa powder
  • 3 eggs
For the Ganache Topping
  • 3/4 cup / 175g heavy whipping cream
  • 6 oz / 180g dark chocolate, broken into small chunks

instructions:

How to cook Triple Dark Chocolate Cheesecake

Make the Oreo Crust
  1. Preheat oven to 350F / 177C. Grease an 8in - 9in / 20cm - 24cm springform pan.
  2. Chop the Oreos finely, either in a food processor, by crushing with a rolling pin on a clean surface or cutting board, or by putting in a resealable plastic bag and crushing with a rolling pin or meat tenderizer.
  3. If using a food processor, pulse in the melted butter until crumbs are evenly moistened. If crushing the Oreos by hand, transfer to a bowl and stir in the butter.
  4. Press mixture evenly into the bottom of the prepared springform pan and bake for 8 minutes.
  5. Remove from oven and let cool while you prepare the filling.
Make the Filling
  1. In a double boiler or pan over low heat, melt the chocolate, stirring constantly. Remove from heat when there are still small chunks of chocolate, and continue to stir until completely melted. In this way the chocolate won’t overheat or burn. Let chocolate cool.
  2. In the bowl of a stand mixer or a large bowl with a handheld mixer, beat cream cheese and sugar on medium speed until smooth. Changing to low speed, carefully beat in cocoa powder so that it doesn’t “poof” everywhere. Every so often stop beating and scrape down the sides of the bowl well.
  3. Beat in the eggs, one at a time, until smooth.
  4. Beat in melted and cooled chocolate.
  5. Pour mixture over the crust, smoothing the top.
  6. Bake for 45 - 60 minutes, or until center is still slightly wiggly and the top looks dry.
  7. Turn the oven off and crack open the door for about 10 minutes. Remove cheesecake from oven and place in fridge until completely cooled, 8 hours or overnight.
Make the Ganache Topping
  1. In a small pan place heavy cream and chocolate over low heat. Stir constantly until the mixture is smooth and melted. Allow to cool slightly.
  2. Remove cheesecake from fridge and pour ganache evenly over the top. Allow to set before running a dull knife around the edge of cheesecake and releasing from springform pan. Alternately, if you don’t need to transport the cheesecake anywhere, you can remove the ring of the springform first and then pour the ganache over, using a spoon to guide the ganache toward the edges and allowing some to dribble down the sides.

NOTES:

Not a dark chocolate fan? Try it out with milk chocolate or a mixture of milk and dark to create your preferred bitterness! If you don’t own a double boiler, you can make a makeshift one by placing a small pan with an inch or so of water in the bottom and bring to a simmer. Place the chocolate in a bowl big enough that it can sit on top of the pan without touching the water. Stir constantly and proceed as in the recipe. This might take a touch more effort than just melting the chocolate in a pan, but it’s safer if you’re not used to melting chocolate so as not to burn it. Powdered sugar can be substituted for the granulated, use 1 cup / 110g. For cleaner slicing, try running your knife under hot water for a few seconds between slices.

Calories

715.12

Fat (grams)

54.28

Sat. Fat (grams)

31.43

Carbs (grams)

52.73

Fiber (grams)

3.26

Net carbs

49.47

Sugar (grams)

39.29

Protein (grams)

7.29

Sodium (milligrams)

316.65

Cholesterol (grams)

118.98
Nutritional Information is Approximate.
Created using The Recipes Generator
2019-04-24+19.00.29.jpg

Mascarpone Peanut Butter Pie with Chocolate Ganache

IMG_5063.jpg

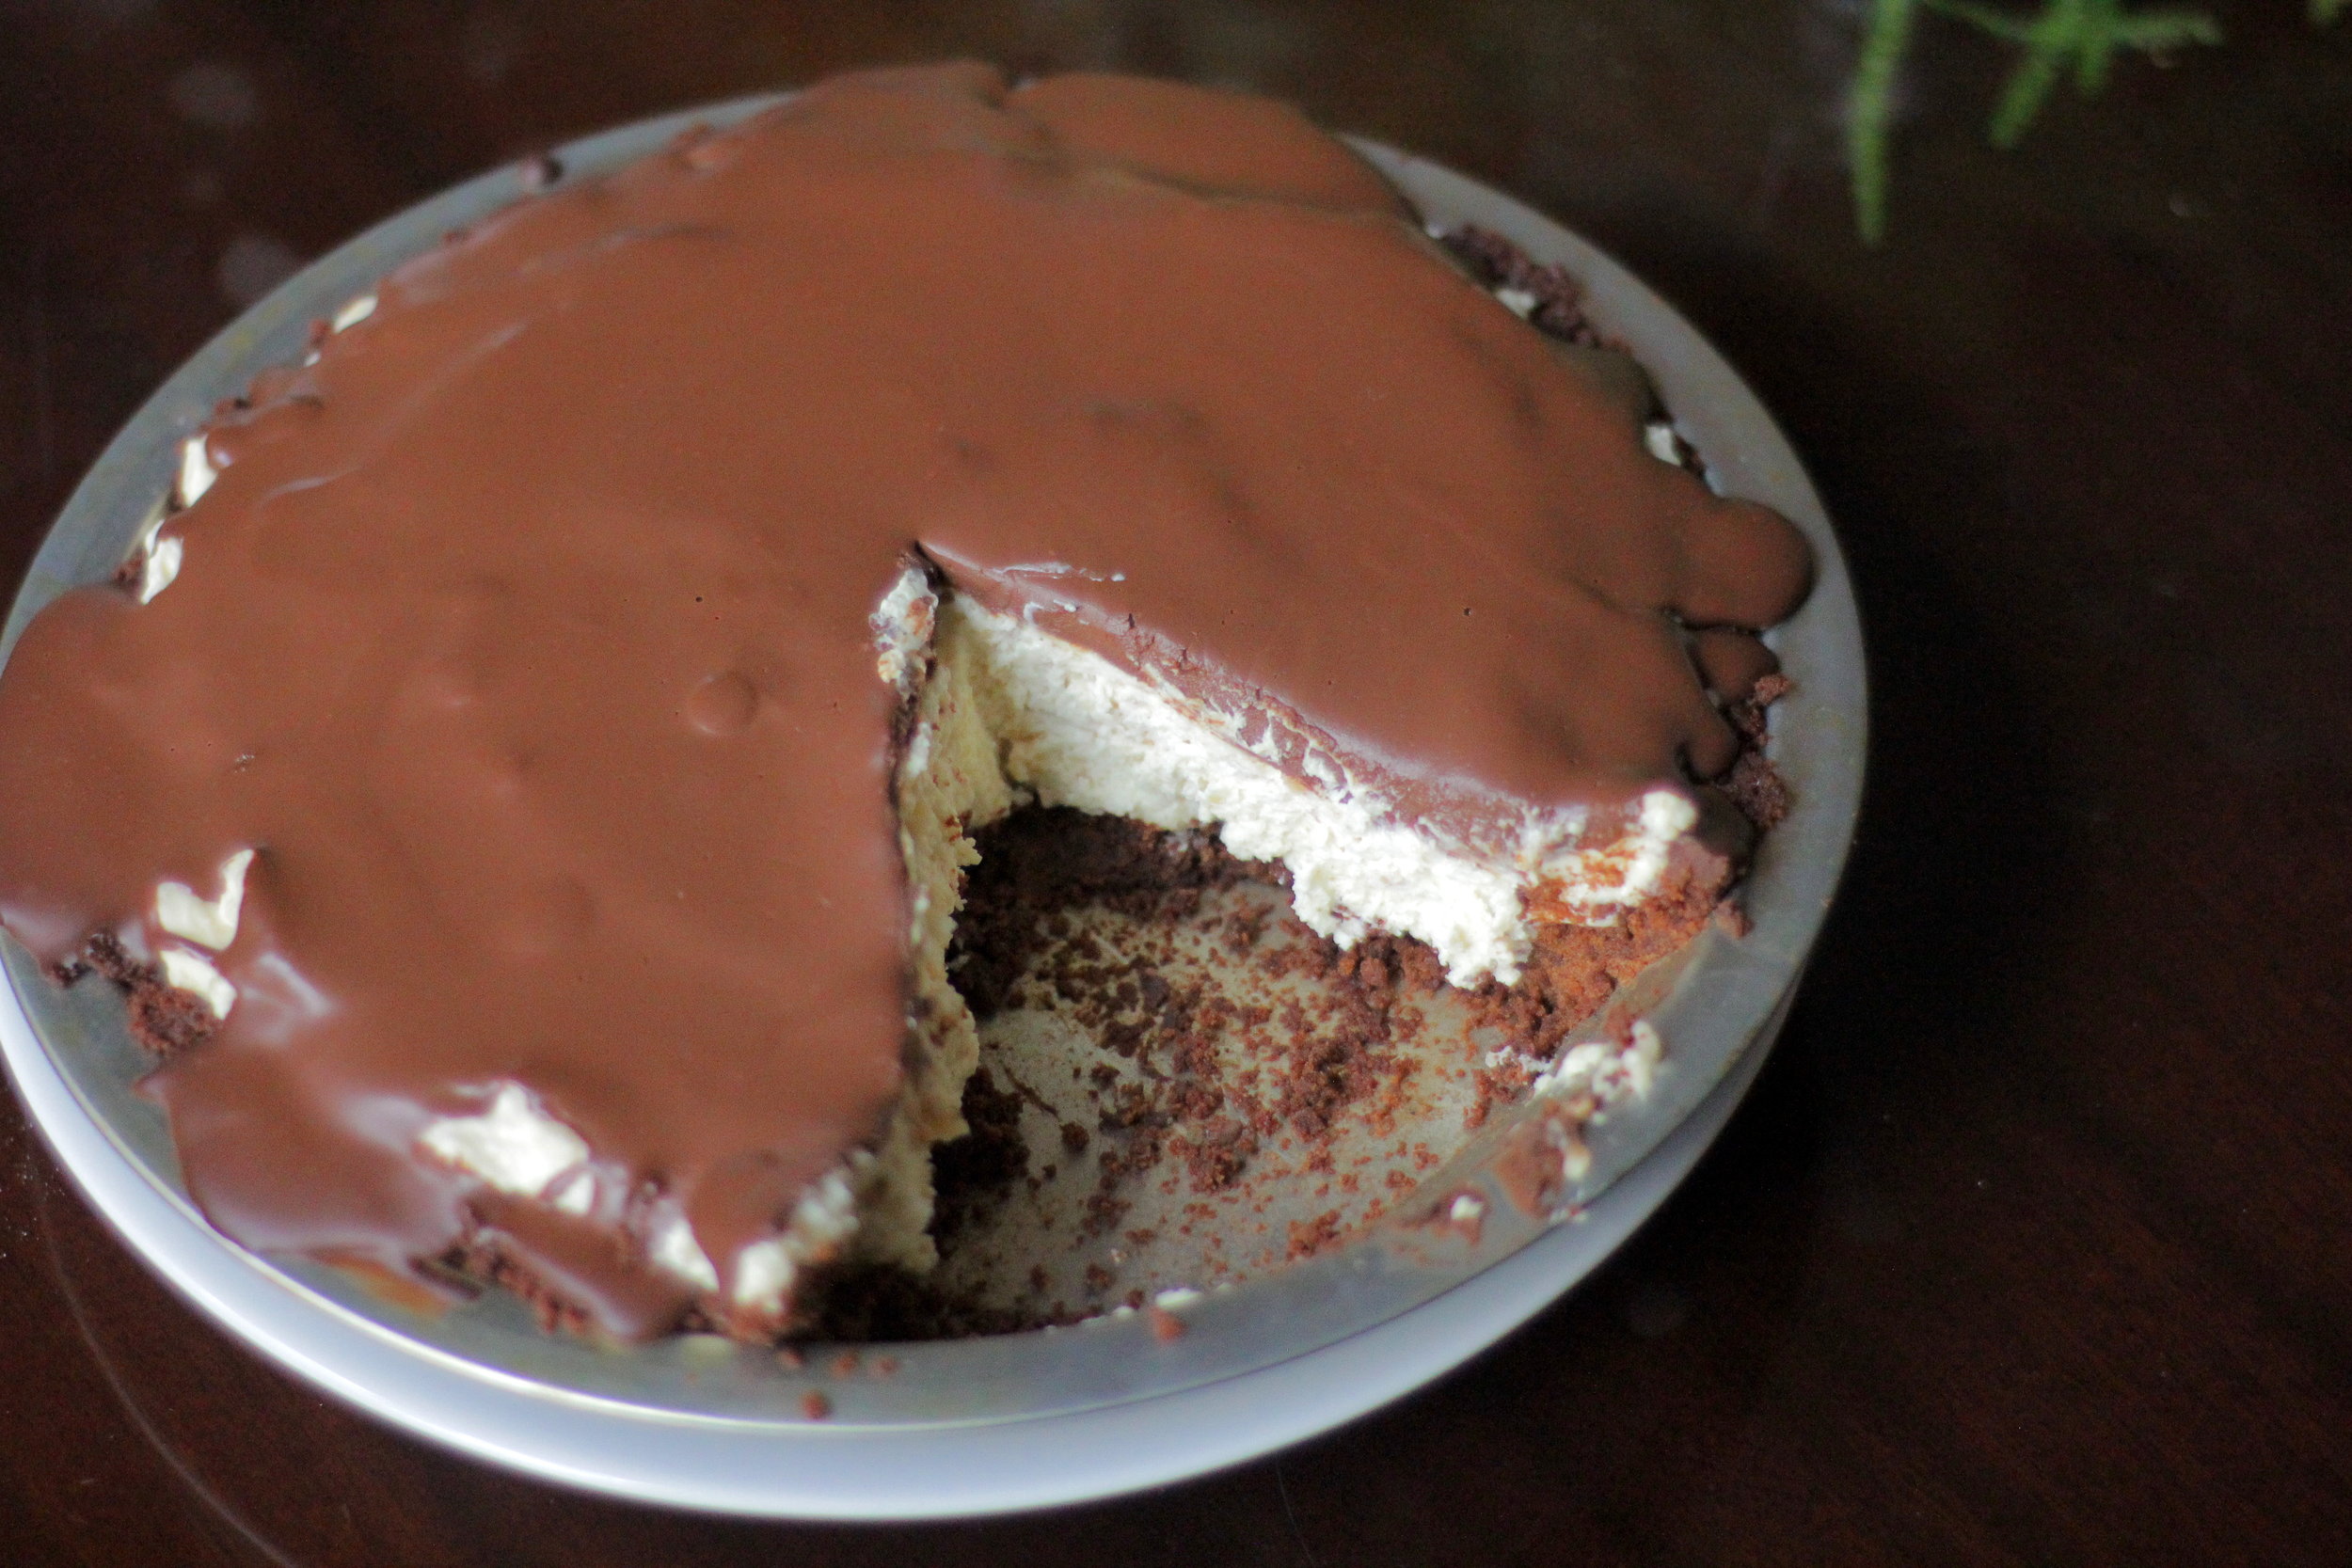
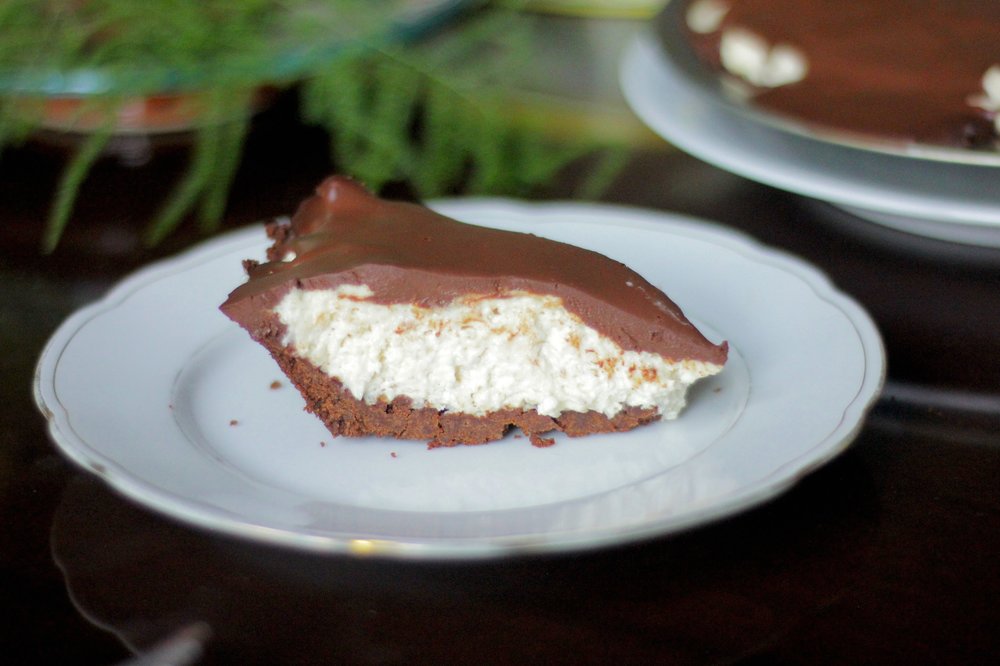
Let me take a gander at what you're thinking, probably something like, "OH! PEANUT BUTTER PIE? I love peanut butter pie! So good! But I already have a recipe for peanut butter pie. Why do I need this recipe? Wait, don't YOU already have a recipe up on this blog for peanut butter pie??" Maybe? Well, you'd be right about one thing, this is not my first recipe up for a peanut butter pie.  But let me tell you, they each have their own merited place in your recipe box.  For example, the Peanut Butter Pie with Chocolate Whipped Cream has a shortbread crust, creamy peanut butter filling, topped with chocolate whipped cream.  Perfect for casual events, potlucks, birthdays, summer evenings, Sunday afternoons...but what happens if you need a peanut butter pie for a gala? The president is coming over?  You're presenting a peanut butter pie to the CEO of Godiva chocolate and want chocolate to be showcased more prominently?  Then you need a peanut butter pie with refinement, elegance, and classy chocolate utilized in more than one element of the pie.  How do you do this without compromising the stand-alone peanut butter filling of a peanut butter pie?  Why, you change out the shortbread crust for a chocolate crust, and top the pie with flowing chocolate ganache.  Elegance.  Refinement.  The chocolate ganache envelopes the peanut butter filling in a tender embrace...still with me?  Ok let's stop dreaming and comparing peanut butter pies and MAKE one!  

Not a fan of chocolate and peanut butter together? Neither is my mom.  That's ok, I still love you.  And because of that, why not head over to this Nutter Butter Pie instead? No chocolate there! 

This post may contain affiliate links. If you buy something using these links, Jennyblogs may receive a small commission, at no extra cost to you. This helps to support Jennyblogs. For further information see the privacy policy. Grazie!

Recipe adapted from what megan's making.


Mascarpone Peanut Butter Pie with Chocolate Ganache

Serves 8-12

Ingredients:

For the Chocolate Crust

  • 7.5 oz / 210g chocolate graham crackers, teddy grahams, or chocolate shortbread

  • 2 oz / 55g (1/3 cup) semi-sweet chocolate, finely chopped, or mini chips

  • 5 Tbsp / 65g butter, melted

For the Peanut Butter Filling

IMG_5030.JPG
  • 1 cup / 237g heavy whipping cream

  • 8 oz / 227g mascarpone or cream cheese, room temperature

  • 1 cup / 250g peanut butter

  • 1/2 cup / 100g sugar

  • 1 tsp / 5g vanilla extract

For the Chocolate Ganache

  • 4 oz / 110g (2/3 cup) semi-sweet chocolate, finely chopped, or chips

  • 1 Tbsp / 14g butter

  • 1/2 cup / 118g heavy whipping cream

Directions:

Oven 325°F / 163°C.  Ungreased 9in / 23cm pie dish.  

Make the Chocolate Crust

  1. In a food processor combine chocolate grahams, butter, and chocolate chips.  Pulse until the mixture is uniformly fine crumbs.  Or do it the "old fashioned" way and beat the crumbs to oblivion in a well sealed plastic bag with a rolling pin or other hard object, then mixing in the chocolate and butter in a bowl with a spoon. 

  2. Press evenly into the bottom and sides of pie dish and bake for 8 minutes or until fragrant.  Set aside to cool completely.

Make the Peanut Butter Filling

  1. In the bowl of a stand mixer or with a handheld mixer, beat the whipping cream until stiff peaks form.  Transfer to another bowl if using a stand mixer and set aside.

  2. Again in the bowl of a stand mixer or a separate bowl with a handheld mixer, beat the cream cheese, peanut butter, sugar, and vanilla until light and fluffy.  

  3. Carefully fold the whipped cream into the peanut butter mixture in three or four parts.  

  4. Spoon the filling over the cooled crust and smooth the top.  Refrigerate to set.  

IMG_5064.JPG

Make the Chocolate Ganache

  1. Place the chocolate and butter in a small bowl.  Heat the cream in a small saucepan over low heat, just until simmering.  The moment you see bubbles remove from heat and pour over chocolate and butter.  Let sit for 1 minute to melt the chocolate, then whisk briskly until smooth and shiny.  

  2. Pour over chilled pie.  If you don't desire chocolate running over the sides, you may have to wait a minute or two between pourings, or simply don't use all the ganache.  (The rest can be disposed of with a spoon and a mouth.  But I don't need to tell you that.)  

  3. Chill for 3-4 hours or overnight until set.  

Jenny's Notes:

  • If using a shallow pie dish you may have some leftover crust, and that's ok. Don't feel like you have to use all the crust mixture or you may have an impenetrable crust, especially in the corners.

  • I frequently substitute whole milk or coconut milk for all or part of the cream in ganache, but usually not when it's a topper as it can separate a bit if you don't use all cream. However, one time when making this I only had 1/4 cup cream left for the topping and so added 1/4 cup whole milk, and it made for a beautiful ganache, even as the topper.

  • Top with chocolate chips or chocolate shavings as desired!

peanut butter pie, PB pie, mascarpone peanut butter pie, chocolate ganache, cookie crust
Dessert, Pie
American
Yield: 8-12
Author: Jennyblogs
Print
Mascarpone Peanut Butter Pie with Chocolate Ganache

Mascarpone Peanut Butter Pie with Chocolate Ganache

Chocolate cookie crust, whipped mascarpone peanut butter filling, and chocolate ganache to top.
Prep time: 1 hourCook time: 8 MTotal time: 1 H & 8 M

Ingredients:

For the Chocolate Crust
  • 7.5 oz / 210g chocolate graham crackers, teddy grahams, or chocolate shortbread
  • 2 oz / 55g (1/3 cup) semi-sweet chocolate, finely chopped, or mini chips
  • 5 Tbsp / 65g butter, melted
For the Peanut Butter Filling
  • 1 cup / 237g heavy whipping cream
  • 8 oz / 227g mascarpone or cream cheese, room temperature
  • 1 cup / 250g peanut butter
  • 1/2 cup / 100g sugar
  • 1 tsp / 5g vanilla extract
For the Chocolate Ganache
  • 4 oz / 110g (2/3 cup) semi-sweet chocolate, finely chopped, or chips
  • 1 Tbsp / 14g butter
  • 1/2 cup / 118g heavy whipping cream

Instructions:

Make the Chocolate Crust
  1. Oven 325°F / 163°C. Ungreased 9in / 23cm pie dish.
  2. In a food processor combine chocolate grahams, butter, and chocolate chips. Pulse until the mixture is uniformly fine crumbs. Or do it the "old fashioned" way and beat the crumbs to oblivion in a well sealed plastic bag with a rolling pin or other hard object, then mixing in the chocolate and butter in a bowl with a spoon.
  3. Press evenly into the bottom and sides of pie dish and bake for 8 minutes or until fragrant. Set aside to cool completely.
Make the Peanut Butter Filling
  1. In the bowl of a stand mixer or with a handheld mixer, beat the whipping cream until stiff peaks form. Transfer to another bowl if using a stand mixer and set aside.
  2. Again in the bowl of a stand mixer or a separate bowl with a handheld mixer, beat the cream cheese, peanut butter, sugar, and vanilla until light and fluffy.
  3. Carefully fold the whipped cream into the peanut butter mixture in three or four parts.
  4. Spoon the filling over the cooled crust and smooth the top. Refrigerate to set.
Make the Chocolate Ganache
  1. Place the chocolate and butter in a small bowl. Heat the cream in a small saucepan over low heat, just until simmering. The moment you see bubbles remove from heat and pour over chocolate and butter. Let sit for 1 minute to melt the chocolate, then whisk briskly until smooth and shiny.
  2. Pour over chilled pie. If you don't desire chocolate running over the sides, you may have to wait a minute or two between pourings, or simply don't use all the ganache. (The rest can be disposed of with a spoon and a mouth. But I don't need to tell you that.)
  3. Chill for 3-4 hours or overnight until set.

Notes:

If using a shallow pie dish you may have some leftover crust, and that's ok. Don't feel like you have to use all the crust mixture or you may have an impenetrable crust, especially in the corners. I frequently substitute whole milk or coconut milk for all or part of the cream in ganache, but usually not when it's a topper as it can separate a bit if you don't use all cream. However, one time when making this I only had 1/4 cup cream left for the topping and so added 1/4 cup whole milk, and it made for a beautiful ganache, even as the topper. Top with chocolate chips or chocolate shavings as desired!

Calories

791.91

Fat (grams)

62.46

Sat. Fat (grams)

30.79

Carbs (grams)

54.43

Fiber (grams)

3.89

Net carbs

50.53

Sugar (grams)

37.64

Protein (grams)

12.12

Sodium (milligrams)

502.22

Cholesterol (grams)

110.56
Nutritional information is approximate. Based on 8 servings.
Did you make this recipe?
Tag @jenevamorris on instagram and hashtag it #jennyblogs
Created using The Recipes Generator
IMG_5066.JPG


Ganache Coconut Cream Pie Bars

Not mashed potatoes...:)

Not mashed potatoes...:)

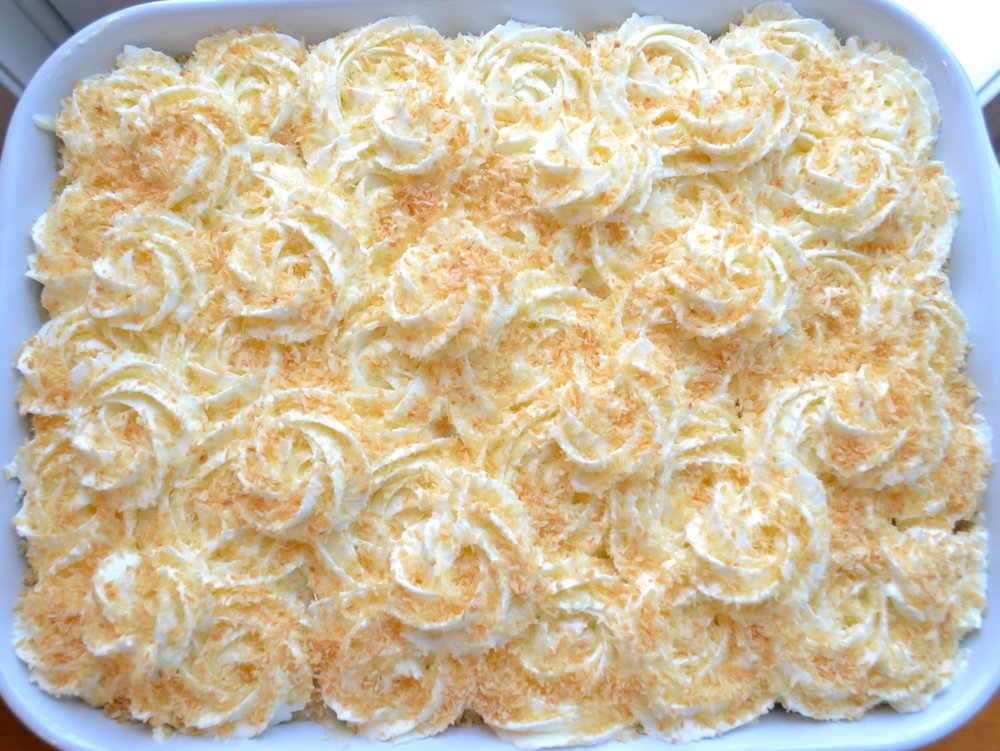
Oh my gosh! Ganache. Yes, coconut cream pie is delicious.  So are Almond Joys and Mounds.  So why not put them together, add a shortbread crust, put them in the slightly less formidable to cut bar form instead of pie, and voila: Ganache Coconut Cream Pie Bars. 

These bars are slightly involved, but the end product is very worthwhile.  Not to mention, you can make an 8x8 pan worth of bars, or 9x13!  I almost always go the 9x13 route.  This has become a favorite for Christmas, my mom's birthday, and just about any occasion that a little creamy coconut and chocolate is welcome.  As what seems to be turning into a trend, I failed to get any kind of decent photo of the inside, so for now, (or maybe forever...once these are cut into you'll understand why photos never get taken) please enjoy the photos of the whipped cream and toasted coconut topping.  If you'd like an idea of what bliss you're getting in to, take a peak over at Willow Bird Baking, from whom I adapted the recipe, and see her beautiful photos! 


Ganache Coconut Cream Pie Bars

Makes about 20 servings

Ingredients:

For the Shortbread Crust

  • 1 cup (2 sticks) / 226g cold butter

  • 2 cups / 240g all-purpose flour

  • 1/2 cup / 100g sugar

For the Ganache

  • 1/4 cup + 2 Tbsp / 87g heavy whipping cream

  • 6 oz (1 cup) / 175g bittersweet or semisweet chocolate, chopped, or chips

For the Coconut Cream Filling

  • 6 cups / 1,422g unsweetened coconut milk or milk of choice

  • 4 eggs

  • 1 1/2 cups / 300g sugar

  • 2/3 cup / 73g cornstarch

  • 1/2 tsp / 2.5g salt

  • 1 1/2 cups / 150g flaked unsweetened coconut

  • 1/2 tsp / 2.5g coconut extract

  • 1/2 tsp / 2.5g vanilla extract

For the Whipped Cream Topping

  • 2 cups / 464g heavy whipping cream

  • 1/2 cup / 100g sugar

  • 1 tsp / 5g vanilla extract

  • 1/2 cup / 50g flaked unsweetened coconut, toasted (see below)

Directions:

Oven 350°F / 177°C.  Ungreased 9x13in / 23x33cm baking dish.

Make the Shortbread Crust

  1. Cut the butter into flour and sugar using a fork, pastry cutter, or in a food processor.  Once the mixture resembles coarse sand and the butter chunks are no larger than small peas, press mixture evenly into bottom prepared pan. 

  2. Bake for 18-22 minutes until lightly golden-brown.  Set aside to cool.  Leave oven on for toasting the coconut.

Make the Ganache

  1. While the crust is baking, prepare the ganache.  Place the chocolate in a medium bowl and the cream in a small saucepan.  Over medium-low heat, bring the cream to a simmer.  You can also use the microwave, 30 seconds-1 minute or until cream is just simmering, but not boiling.  

  2. Pour the cream over the chocolate and let sit for 1-2 minutes to melt the chocolate.  Whisk until completely smooth.  

  3. Once the crust is finished and partly cooled, pour ganache evenly over crust.  Place in fridge to set.   

Toast the Coconut

Place the 1/2 cup coconut for the topping in a shallow baking dish.  Place in oven and stir every 1-2 minutes, making sure it doesn't over-brown, for a total of 5-10 minutes.  Remove and let cool.

Make the Coconut Cream Filling

2017-12-23 15.25.34.jpg
  1. Combine milk, eggs, sugar, cornstarch, and salt in a large saucepan. 

  2. Place over medium heat, whisking constantly, until mixture begins to thicken and comes to a boil.  This can take anywhere from 15-35 minutes, depending on your stove.

  3. Once thickened, remove from heat and stir in coconut and vanilla extracts.  

  4. Remove crust from fridge and pour filling over crust.  Place back in fridge to set, 2-4 hours.  

Make the Whipped Cream Topping

  1. Whip the cream and sugar in the bowl of a stand mixer or with a handheld mixer until stiff peaks form.

  2. Spoon over chilled bars, or pipe.  Finish with toasted coconut.  Store in fridge.  

Jenny's Notes:

  • Because the ganache in this recipe is not decorative, you can easily substitute coconut milk or another kind for the heavy whipping cream. I prefer using coconut milk, reducing the amount of fat/calories. Save those for when you need the high-shine perfect ganache!

  • If you only have sweetened coconut milk or sweetened flaked coconut on hand, go ahead and use those. Simply reduce the sugar by about 1/4-1/2 cup / 50-100g in the filling, if you wish. I prefer to have unsweetened coconut on hand so I can control how much sugar I'm adding to breakfasts, desserts, etc., plus I like the smaller size of flaked and grated coconut vs. shredded.

  • For toasting coconut, and every use really, I highly recommend Le Creuset pans. My toasted coconut used to always come out in various shades, but since using Le Creuset it always turns out a beautiful even, golden-brown. They conduct heat evenly and beautifully.

  • If a 9x13 pan of cream coconut heaven seems daunting to you, it's super easy to halve this recipe for a 8x8 or 9x9in pan!

  • These bars should ideally be eaten within 3-4 days. Otherwise the whipped cream starts to separate and the crust gets soggy.

Coconut Cream pie, bars, shortbread, chocolate ganache, fresh whipped cream, toasted coconut
Dessert, Pie, bars
American
Yield: 20
Author: Jennyblogs
Print
Ganache Coconut Cream Pie Bars

Ganache Coconut Cream Pie Bars

Shortbread crust, a thin layer of ganache, classic coconut cream pie filling, all topped with fresh whipped cream and toasted coconut.
Prep time: 1 H & 45 MCook time: 32 MTotal time: 1 H & 77 M

Ingredients:

For the Shortbread Crust
  • 1 cup (2 sticks) / 226g cold butter
  • 2 cups / 240g all-purpose flour
  • 1/2 cup / 100g sugar
For the Ganache
  • 1/4 cup + 2 Tbsp / 87g heavy whipping cream
  • 6 oz (1 cup) / 175g bittersweet or semisweet chocolate, chopped, or chips
For the Coconut Cream Filling
  • 6 cups / 1,422g unsweetened coconut milk or milk of choice
  • 4 eggs
  • 1 1/2 cups / 300g sugar
  • 2/3 cup / 73g cornstarch
  • 1/2 tsp / 2.5g salt
  • 1 1/2 cups / 150g flaked unsweetened coconut
  • 1/2 tsp / 2.5g coconut extract
  • 1/2 tsp / 2.5g vanilla extract
For the Whipped Cream Topping
  • 2 cups / 464g heavy whipping cream
  • 1/2 cup / 100g sugar
  • 1 tsp / 5g vanilla extract
  • 1/2 cup / 50g flaked unsweetened coconut, toasted (see below)

Instructions:

Make the Shortbread Crust
  1. Oven 350°F / 177°C. Ungreased 9x13in / 23x33cm baking dish.
  2. Cut the butter into flour and sugar using a fork, pastry cutter, or in a food processor. Once the mixture resembles coarse sand and the butter chunks are no larger than small peas, press mixture evenly into bottom prepared pan.
  3. Bake for 18-22 minutes until lightly golden-brown. Set aside to cool. Leave oven on for toasting the coconut.
Make the Ganache
  1. While the crust is baking, prepare the ganache. Place the chocolate in a medium bowl and the cream in a small saucepan. Over medium-low heat, bring the cream to a simmer. You can also use the microwave, 30 seconds-1 minute or until cream is just simmering, but not boiling.
  2. Pour the cream over the chocolate and let sit for 1-2 minutes to melt the chocolate. Whisk until completely smooth.
  3. Once the crust is finished and partly cooled, pour ganache evenly over crust. Place in fridge to set.
Toast the Coconut
  1. Place the 1/2 cup coconut for the topping in a shallow baking dish. Place in oven and stir every 1-2 minutes, making sure it doesn't over-brown, for a total of 5-10 minutes. Remove and let cool.
Make the Coconut Cream Filling
  1. Combine milk, eggs, sugar, cornstarch, and salt in a large saucepan.
  2. Place over medium heat, whisking constantly, until mixture begins to thicken and comes to a boil. This can take anywhere from 15-35 minutes, depending on your stove.
  3. Once thickened, remove from heat and stir in coconut and vanilla extracts.
  4. Remove crust from fridge and pour filling over crust. Place back in fridge to set, 2-4 hours.
Make the Whipped Cream Topping
  1. Whip the cream and sugar in the bowl of a stand mixer or with a handheld mixer until stiff peaks form.
  2. Spoon over chilled bars, or pipe. Finish with toasted coconut. Store in fridge.

Notes:

Because the ganache in this recipe is not decorative, you can easily substitute coconut milk or another kind for the heavy whipping cream. I prefer using coconut milk, reducing the amount of fat/calories. Save those for when you need the high-shine perfect ganache! If you only have sweetened coconut milk or sweetened flaked coconut on hand, go ahead and use those. Simply reduce the sugar by about 1/4-1/2 cup / 50-100g in the filling, if you wish. I prefer to have unsweetened coconut on hand so I can control how much sugar I'm adding to breakfasts, desserts, etc., plus I like the smaller size of flaked and grated coconut vs. shredded. For toasting coconut, and every use really, I highly recommend Le Creuset pans. My toasted coconut used to always come out in various shades, but since using Le Creuset it always turns out a beautiful even, golden-brown. They conduct heat evenly and beautifully. If a 9x13 pan of cream coconut heaven seems daunting to you, it's super easy to halve this recipe for an 8x8 or 9x9in pan! These bars should ideally be eaten within 3-4 days. Otherwise the whipped cream starts to separate and the crust gets soggy.

Calories

446.04

Fat (grams)

30.59

Sat. Fat (grams)

21.07

Carbs (grams)

41.54

Fiber (grams)

2.52

Net carbs

39.02

Sugar (grams)

26.41

Protein (grams)

4.58

Sodium (milligrams)

152.00

Cholesterol (grams)

92.63
Nutritional information is approximate. Based on 20 servings.
Did you make this recipe?
Tag @jenevamorris on instagram and hashtag it #jennyblogs
Created using The Recipes Generator
2017-12-23 15.25.10.jpg

Caramel Cream Pie

2017-12-23+15.32.59.jpg

Fellow citizens of the webs, I've missed you!  It's been a dreadfully long time since I've posted a new recipe.  Not that I haven't been baking, oh no, but going home for Christmas, festivities, and general merry-making have kept me quite occupied.  It has been difficult to find the time to carve out a window of several hours not only to bake something blog-worthy, but photograph said something, upload photos, edit photos, write the nonsense that is what you are currently reading, type up the recipe, add finished photos, proof read, and post the now finished blog form. 

It's quite the process for something that is merely a hobby and even though I enjoy the blogging process, sometimes I don't feel that good at any of it.  Except the baking, that's the one thing I feel somewhat competent in.  And even then, there are definitely off days, off recipes, or off concentration.  And I think to myself, does the world need one more baking blog?  One that's, well, not fantastic?  (At least not yet, mwahaha.)  There are so many great ones out there.  But I think the blogs that inspire me the most, the ones that come across as fantastic, are the ones that are passionate about what they do.  Yes, they have picture-perfect photography, reliable recipes, and witty writing, (hey, look at all those alliterations!), but I don't think they all started that way.  How did they arrive there?  Passion, dedication, perseverance, and always looking for ways to improve, I think. 

The world has enough perceived perfection, what we need are those hungry to learn, with a little talent and a lot of humility, and who are then willing to share what they've learned.  I can only hope, in this tidbit of a clumsy blog, that you'd join me in this voyage of discovering and learning, average photography, and lots of good food.  Oh, and feedback and questions are always welcome, that’s what the comments are for below!

Here's to a bright and shiny new year! 

Now, back to that good food we were talking about...

This post may contain affiliate links. If you buy something using these links, Jennyblogs may receive a small commission, at no extra cost to you. This helps to support Jennyblogs. For further information see the privacy policy. Grazie!

Recipe adapted from Shugary Sweets


Caramel Cream Pie

2017-12-23+15.34.15.jpg

Serves 8-12

Ingredients:

For the Crust

  • 1 1/3 cup / 160g all-purpose flour

  • 1/2 tsp / 2.5g salt

  • 4 Tbsp / 56g butter, cold, cut into small pieces

  • 4-6 Tbsp / 59 - 89g ice water

For the Caramel Cream filling and topping

  • 1 14oz can / 380g dulche de leche, your favorite caramel, or 1/2 recipe of this Caramel Sauce

  • 8 oz / 225g cream cheese, room temperature

  • 2 1/2 cups / 605g heavy whipping cream

  • 1/4 cup / 50g sugar

Directions:

Make the Crust

Oven 425°F / 220°C. Ungreased 8 - 9in / 20 - 23cm pie dish. 

IMG_4555.JPG
  1. In a medium bowl whisk together flour and salt.  Blend in cold butter using a pastry cutter, fork, or your hands.  You want the butter to end up in small pieces, like peas. 

  2. Add the ice water, starting with 4 Tbsp / 59g, mixing as little as possible.  The dough should be able to hold together in a ball, without being too dry and shaggy or too wet.  Add more water if necessary, 1 tablespoon at a time.  

  3. Place dough on a piece of plastic wrap, shape into a disc, and wrap tightly.  Place in the fridge for 1 - 48 hours.  

  4. After the crust has rested, roll into a circle on a lightly floured surface or silpat.  Roll a few times with your rolling pin in one direction before turning the crust 45° (quarter turn) and continuing with a few more rolls.  Periodically check under the crust to make sure it isn’t sticking and sprinkling more flour if needed. Continue like this until your crust is nicely round and roughly 2in / 5cm larger than your pie dish.  

  5. Carefully transfer crust to pie dish (this is easier if using a silpat), trim the excess overhang if necessary, and fold the ends under. Crimp as desired, or press with a fork.  Prick the bottom of the crust with a fork.  The crust can also be refrigerated at this point, if needed.  

  6. Bake in preheated oven for 10-12 minutes, or until crust is lightly golden-brown.  Cool completely.  

Make the Caramel Cream filling and topping

  1. In the bowl of a stand mixer, beat cream cheese with 1/2 cup / 120g caramel.  Set aside.

  2. In the clean bowl of a stand mixer, beat whipping cream and sugar until stiff peaks form.  Reserve 1/2 cup for the topping.  Fold the remaining whipped cream into cream cheese mixture, about a quarter at a time.  

  3. Reserve 1-2 tablespoons of the remaining caramel for the topping.  Spread the rest into the bottom of the crust.  Spread cream cheese mixture over caramel.  

  4. Top pie with reserved 1/2 cup whipped cream and caramel, using a spoon or piping desired.

Jenny's Notes:

  • For the crust, you can also use a food processor, pulsing in the butter until it has the desired consistency.  Just be sure to remove the dough from the food processor and mix in the water with a fork or pastry cutter so you don't overwork the dough.  You want to work it as little as possible once you add the water. The liquid helps to awaken the gluten, and the more you work it and the gluten strands develop, the tougher your crust will be.  The minimum of 1 hour rest in the fridge allows what gluten inevitably developed to relax.  

  • If you are having problems with a shrinking crust, try using a metal or ceramic pie dish and allowing the crust more time to rest before baking.  

  • I have made this pie several times over the past year, and have always needed all 6 tablespoons of water, possibly because it was always during the dry winter.  If you live in a really dry climate, you might need up to 7.  Just be aware, an overly wet crust is more likely to glue itself to the pan during baking.   

caramel cream pie, butter crust, fresh whipped cream, dulche de leche
Dessert, Pie
American
Yield: 8-12 servings
Author: Jennyblogs
Print
Caramel Cream Pie

Caramel Cream Pie

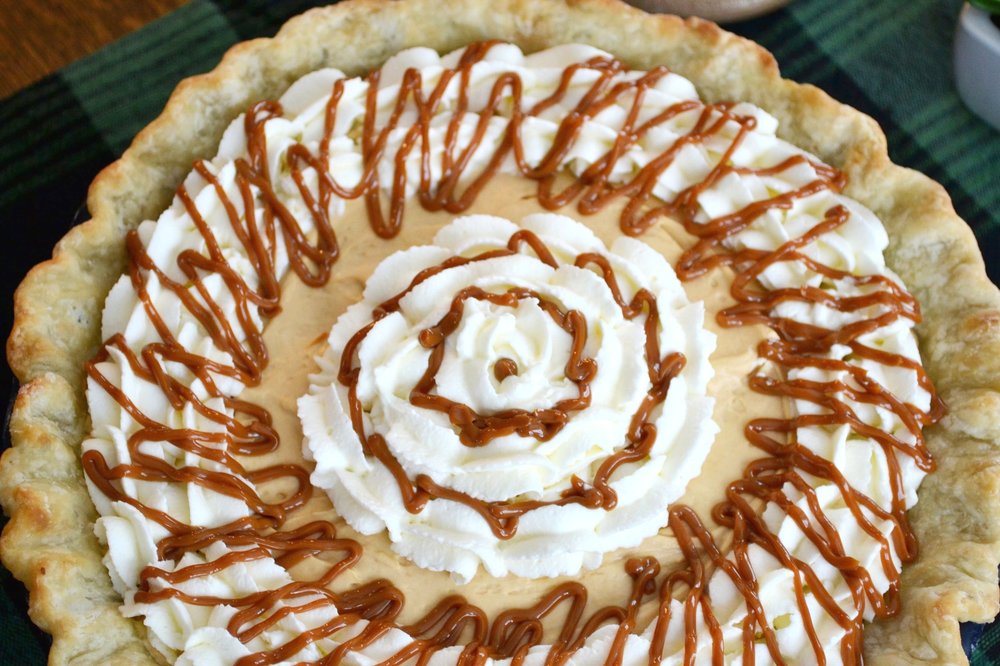
Flaky, buttery crust, whipped caramel filling, and fresh whipped cream with caramel drizzled on top.
Prep time: 1 hourCook time: 12 MTotal time: 1 H & 12 M

Ingredients:

For the Crust
  • 1 1/3 cup / 160g all-purpose flour
  • 1/2 tsp / 2.5g salt
  • 4 Tbsp / 56g butter, cold, cut into small pieces
  • 4-6 Tbsp / 59 - 89g ice water
For the Caramel Cream filling and topping
  • 1 14oz can / 380g dulche de leche, your favorite caramel, or 1/2 recipe of this Caramel Sauce
  • 8 oz / 225g cream cheese, room temperature
  • 2 1/2 cups / 605g heavy whipping cream
  • 1/4 cup / 50g sugar

Instructions:

Make the Crust
  1. Oven 425°F / 220°C. Ungreased 8 - 9in / 20 - 23cm pie dish.
  2. In a medium bowl whisk together flour and salt. Blend in cold butter using a pastry cutter, fork, or your hands. You want the butter to end up in small pieces, like peas.
  3. Add the ice water, starting with 4 Tbsp / 59g, mixing as little as possible. The dough should be able to hold together in a ball, without being too dry and shaggy or too wet. Add more water if necessary, 1 tablespoon at a time.
  4. Place dough on a piece of plastic wrap, shape into a disc, and wrap tightly. Place in the fridge for 1 - 48 hours.
  5. After the crust has rested, roll into a circle on a lightly floured surface or silpat. Roll a few times with your rolling pin in one direction before turning the crust 45° (quarter turn) and continuing with a few more rolls. Periodically check under the crust to make sure it isn’t sticking and sprinkling more flour if needed. Continue like this until your crust is nicely round and roughly 2in / 5cm larger than your pie dish.
  6. Carefully transfer crust to pie dish (this is easier if using a silpat), trim the excess overhang if necessary, and fold the ends under. Crimp as desired, or press with a fork. Prick the bottom of the crust with a fork. The crust can also be refrigerated at this point, if needed.
  7. Bake in preheated oven for 10-12 minutes, or until crust is lightly golden-brown. Cool completely.
Make the Caramel Cream filling and topping
  1. In the bowl of a stand mixer, beat cream cheese with 1/2 cup / 120g caramel. Set aside.
  2. In the clean bowl of a stand mixer, beat whipping cream and sugar until stiff peaks form. Reserve 1/2 cup for the topping. Fold the remaining whipped cream into cream cheese mixture, about a quarter at a time.
  3. Reserve 1-2 tablespoons of the remaining caramel for the topping. Spread the rest into the bottom of the crust. Spread cream cheese mixture over caramel.
  4. Top pie with reserved 1/2 cup whipped cream and caramel, using a spoon or piping desired.

Notes:

For the crust, you can also use a food processor, pulsing in the butter until it has the desired consistency. Just be sure to remove the dough from the food processor and mix in the water with a fork or pastry cutter so you don't overwork the dough. You want to work it as little as possible once you add the water. The liquid helps to awaken the gluten, and the more you work it and the gluten strands develop, the tougher your crust will be. The minimum of 1 hour rest in the fridge allows what gluten inevitably developed to relax. If you are having problems with a shrinking crust, try using a metal or ceramic pie dish and allowing the crust more time to rest before baking. I have made this pie several times over the past year, and have always needed all 6 tablespoons of water, possibly because it was always during the dry winter. If you live in a really dry climate, you might need up to 7. Just be aware, an overly wet crust is more likely to glue itself to the pan during baking.

Calories

652.74

Fat (grams)

42.84

Sat. Fat (grams)

26.73

Carbs (grams)

56.39

Fiber (grams)

0.54

Net carbs

55.85

Sugar (grams)

40.81

Protein (grams)

6.75

Sodium (milligrams)

437.41

Cholesterol (grams)

128.91
Nutritional information is approximate. Based on 8 servings.
Did you make this recipe?
Tag @jenevamorris on instagram and hashtag it #jennyblogs
Created using The Recipes Generator
And yet, for as many times as I've made this pie, I've yet to get a photo of it sliced. Oh well, there's butter, caramel, and whipped cream, what more do you need to know?

And yet, for as many times as I've made this pie, I've yet to get a photo of it sliced. Oh well, there's butter, caramel, and whipped cream, what more do you need to know?