
Jenny's Favorite Cinnamon Rolls
/Last updated: June 4, 2024
With all the cinnamon roll recipes out there, how do you pick which one to make? Which one do you adopt as your cinnamon roll recipe?
I’ve made my fair share of cinnamon roll recipes, and I’ve yet to meet a bad one. Some are better than others, but I’ve been waiting to meet the recipe that stood out from the rest.
Lightning struck when I tried this recipe from King Arthur, “Perfectly Pillowy Cinnamon Rolls”. I had met the one! As the title suggests, these rolls are pillowy, luxurious, and everything you could want from a cinnamon roll.
What makes a good cinnamon roll recipe?
The thing that really makes one cinnamon roll stand out from another is the actual dough.
Filling and frosting are easily adjusted, so once you find a cinnamon roll with a soft, fluffy, and luscious dough, you can always adjust filling and frosting according to your taste.
What makes this recipe so special?
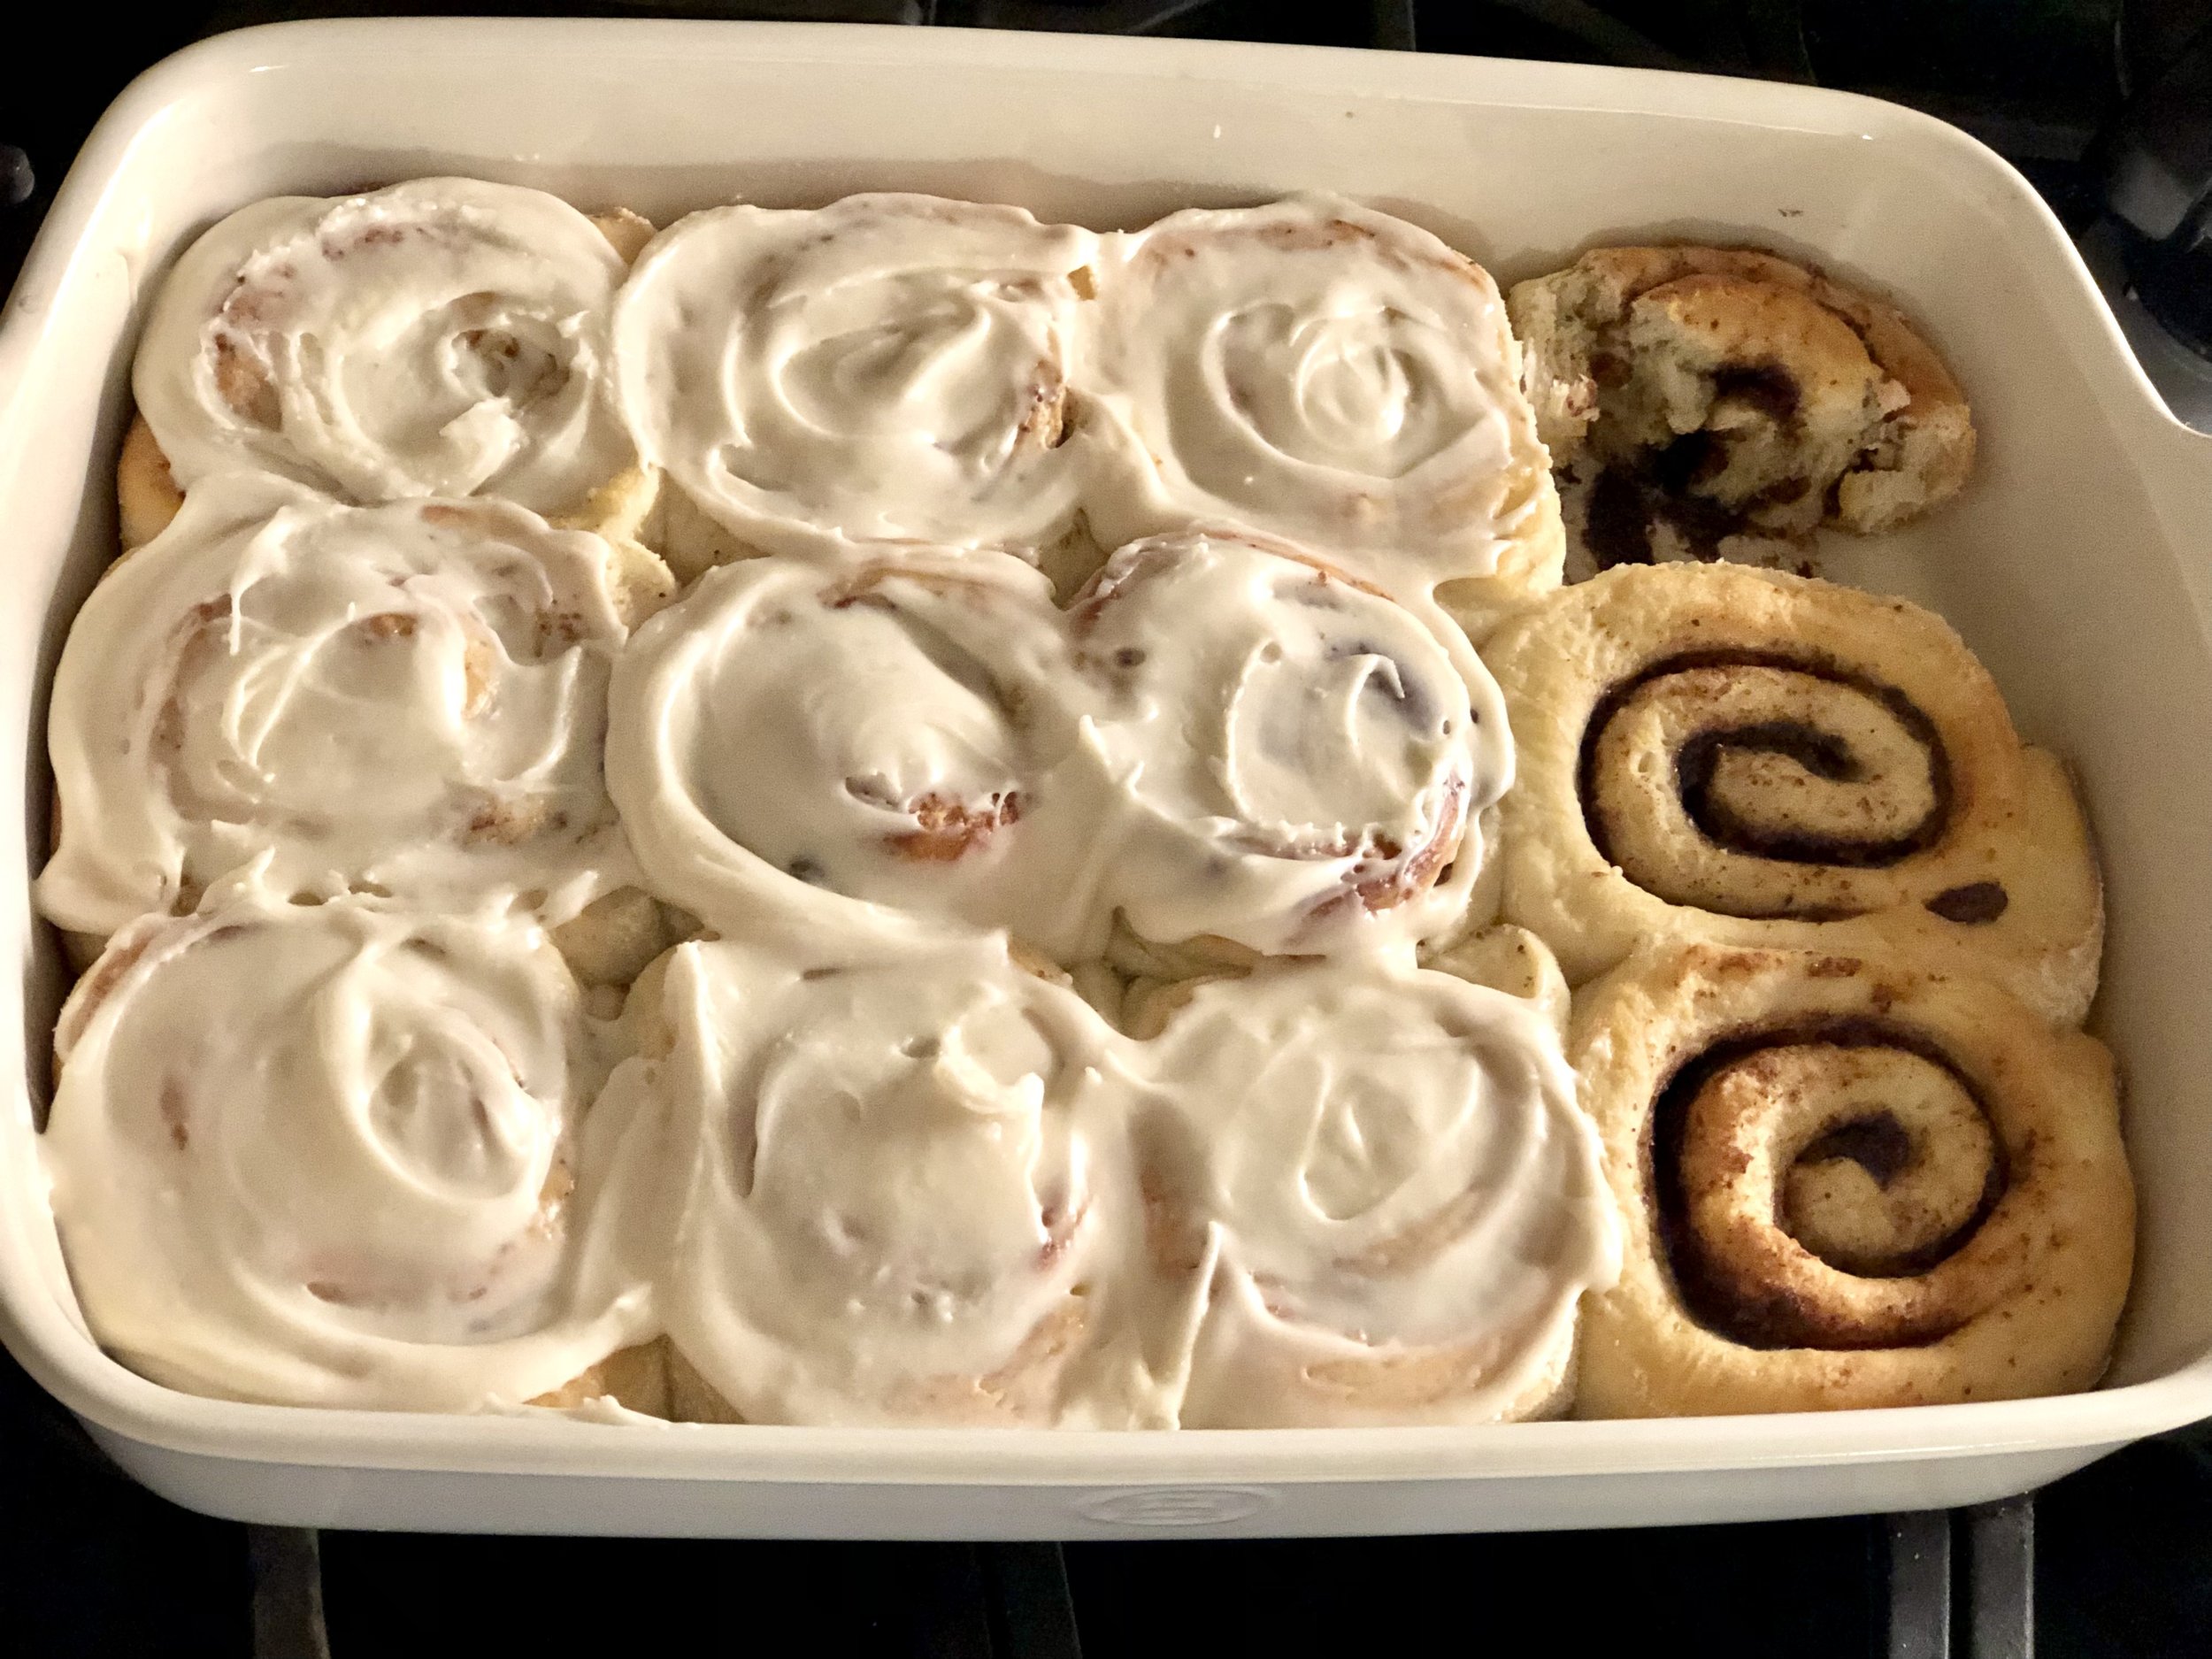
Speaking of customizing, how about for those who do and do not want frosting? And those who can’t wait to dig in. :)
This cinnamon roll dough is just the best. Why? It utilizes the tangzhong technique (see below). This creates softer, pillowy bread that stays fresher for longer!
This recipe also allows you to customize your icing: do your prefer plain icing or cream cheese icing? This recipe gives an easy access to either one. Plus, if you use buttermilk in the frosting, it’s the touch that sweet icing has been missing.
You can customize the richness of these rolls!
For richer rolls:
Add extra cinnamon to the filling
Drizzle each roll with 1 tsp of milk or heavy cream before baking for extra gooey rolls
Cover rolls with tinfoil for the first half of baking (baking time may need to be adjusted)
brush the rolls with melted butter when they come out of the oven, before icing
What is Tangzhong?
This recipe utilizes tangzhong in the dough, an Asian bread method that involves cooking some of the milk and flour to create a thick paste before adding it in with the rest of the ingredients. In essence, it creates a softer bread that retains its moisture for longer. Cinnamon rolls are usually best consumed the same day they are baked, but when you use this simple tangzhong method, they are still pretty darn soft and luscious even a day or two later! If you’re interested in learning more of the science-y stuff behind how and why tangzhong works, King Arthur themselves wrote this handy article on it.
While you might be thinking that cinnamon rolls are already a multi-step process and don’t need another one, may I say, what’s one more? Tangzhong DOES create an extra step, but it’s very simple. It involves 2 ingredients and takes less than 5 minutes for cinnamon rolls that stay fresh for hours, even days longer than standard cinnamon rolls. I think it’s totally worth it!
I heart King Arthur, now you heart King Arthur, we all heart King Arthur!
I originally kept this recipe largely the same with just a few minor tweaks to King Arthur’s recipe, but I’ve continued to make adjustments to streamline the recipe. Beyond that, there are a few customizable elements depending on just how rich and luscious you like your cinnamon rolls. Some of these are things I gathered from cinnamon roll recipes I’ve made in the past; others are little tricks I’ve seen bakeries use. Put them all together to make your ultimate cinnamon roll.
Create New Flavors

Lime Rolls: Trying to take photos on my laundry rack outside…our apartment in Incisa Valdarno had very poor lighting for any kind of photography.
This recipe is also a wonderful base to change up the flavors, you don’t always have to stick with cinnamon rolls. I’ve used this recipe to make Lime Rolls (think lime dough with a sweet lime filling and zingy lime icing), and they were WONDERFUL. I’ve also made Lemon Rolls, and am thinking about making Orange Rolls next time. Yum!
Enough about the tangzhong and how wonderful this recipe is and how many different things you can do with it, I like the recipe to speak for itself. :)
This post may contain affiliate links. If you make a purchase using these links, Jennyblogs may receive a small commission, at no extra cost to you. This helps to support Jennyblogs. Where possible, links are prioritized to small businesses and ethically and responsibly made items. For further information see the privacy policy. Grazie!


Favorite Cinnamon Rolls
Makes 12 large cinnamon rolls
Ingredients
For the Tangzhong:
3/4 cup / 170g milk
5 Tbsp / 40g bread flour
For the Dough:
1 cup / 237g milk
3 3/4 cup / 450g bread flour
1 1/2 tsp / 9g salt
3 Tbsp / 37g sugar
1 Tbsp / 9g instant yeast
6 Tbsp / 85g softened butter
1/2 cup / about 100g sourdough discard, optional
For the Filling:
2 Tbsp / 28g softened butter
3/4 cup / 150g brown sugar
4 1/2 tsp / 12g cinnamon
For the Icing:
1 1/4 cup / 155g powdered sugar
4 oz / 113g cream cheese, softened, optional
2 Tbsp / 28g butter, melted
1 tsp / 5g vanilla extract
2-3 Tbsp milk, heavy cream, or buttermilk
Directions
Oven 375°F / 190°C 9x13inch / 23x33cm rectangle baking dish, lightly greased, OR jelly roll pan or cookie sheet lined with parchment paper or silicone baking mat
Make the Tangzhong:
In a small pan, whisk flour and milk together until no lumps remain. Place over medium heat and cook, stirring often, until thickened into a paste-like texture. This could take just a couple minutes or more, depending on your burner.
Set aside for a moment to cool.
Make the Dough:
Add all dough ingredients to the bowl of a stand mixer or other large bowl. Add in the warm (but not too hot) tangzhong. If using sourdough discard, you may find you need a small additional amount of flour to make the dough not overly sticky.
Knead with the dough attachment in the stand mixer for about 10 minutes or longer by hand, until dough is elastic and passes the window pane test.
Shape dough into a ball and place in a lightly oiled bowl and cover. Let rise in a warm place for 1 - 1.5 hours, or until roughly doubled in size.
Make the Filling:
When the dough has risen, punch down and dump out onto a floured surface. Roll the dough into a roughly 10x12in / 25x30cm rectangle, about 0.5in / 1.25cm thick. Do your best to roll or pat into a rectangle and not an oval.
Evenly spread butter over dough, leaving about 0.5in / 1.25cm uncovered along the edge of one of the long sides. Sprinkle brown sugar and cinnamon evenly over butter. Press gently into dough. Carefully roll the dough up, starting with the opposite long side. Use the uncovered edge to help seal the roll; you can gently roll it back and forth with the seam down to help seal it.
Using a sharp serrated knife or dental floss, cut the roll into 12 pieces. Place each piece in prepared baking dish, or free standing on a cookie sheet or jelly roll pan, spaced evenly apart.
Lightly cover the rolls and let rise in a warm place until risen and puffy, about 30-60 minutes. Partway through this time, preheat your oven to 375°/190°C.
Bake rolls for about 14-18 minutes or until internal temperature of an outer roll reads 185°F / 85°C.
Allow rolls to cool for at least 10 minutes before icing.

Make the Icing:
In a medium bowl or the bowl of a stand mixer fitted with the paddle, mix all icing ingredients together except milk until smooth. Add milk, 1 Tbsp at a time, until desired icing consistency is reached.
Spread icing evenly over rolls.
Jenny’s Notes
When making bread, you are often instructed to add warm (about 110°F / 43°C) liquids to your dough. This helps to activate the yeast and thus rise your dough. If you add cold liquids your yeast may remain dormant and not do much. In this recipe, the milk doesn’t have to be warm, you can add it cold since it will offset the heat from the tangzhong that was cooked. Don’t add the tangzhong straight from the hot stove into the bowl with your yeast and other ingredients, as the heat could kill the yeast, but the time it takes to assemble the other dough ingredients in the bowl should be sufficient time for the tangzhong to cool down. Then the cold milk helps, too.
The best way to ensure properly cooked cinnamon rolls (or anything!) is by taking an internal temperature. One of top used kitchen tools is my Thermapen, and I highly recommend one to you. You can find similar on Amazon.
My favorite icing for cinnamon rolls is cream cheese. Either way you go, I highly recommend using buttermilk in the icing rather than milk. The tang offsets the very sweet icing really, really well.
The window pane test, which is my go-to for kneaded doughs, is essentially taking a small chunk of dough and stretching it into an even little square, then stretching the dough until it is very thin. If the dough begins to break, not enough gluten has developed and needs to be kneaded more. A dough that has been sufficiently kneaded will stretch very thin, thin enough you could almost see through it, and, if held up to a window, can see light through it, hence the name of this technique.
To facilitate cutting the rolls evenly, I like to use a knife or the floss to make marks in the dough before actually cutting. I start by making a mark in the middle, then another mark in the middle of each half, then marking each quarter into 3. If you want to be really precise, use a measuring tape in front of your roll. :)
If you saw dental floss as a choice for cutting the roll and think that’s crazy, trust! It gives you a clean cut and is satisfying to use. Slide the floss under the roll where you want to cut, then pull the ends of the floss up and around the roll, pulling in opposite directions to slice the roll.
If you don’t have dental floss or a sharp enough knife to cut the rolls without squishing them, you can put the rolls in the freezer for about 30 minutes until the dough is firmed up. This makes the cutting process neater and easier if you don’t have ideal tools at hand. You will then have to give a little more time in the rising process since the dough is cold.
Inevitably your cut rolls with will vary slightly in size, the ones from the middle being more generous than the ones from the end. To ensure the most even baking, place the larger rolls on the outside or corners of your pan, the smaller ones toward the center.
If making free standing cinnamon rolls, you’ll want to tuck the ends of the rolls underneath themselves, so you don’t have tails when they rise and are baked.
I had never made free standing cinnamon rolls or any kind of roll like this until I found this recipe. It gives a little more freedom in what you can use in the baking process and I love that. You will have more perfectly shaped rolls, but baking together in a rectangle dish is easier if you want to freeze or transport the rolls.
How to tell if your dough is risen enough, but not over risen? When gently pressed with a finger, the dough should slowly spring back. If it springs back immediately, it hasn’t risen enough. If it doesn’t spring back at all, it could be over-risen.
These rolls freeze well! You have two options:
Freeze once rolls are sliced and in their rectangle pan. Cover tightly and freeze. When ready to use, allow to come to room temperature and rise until puffy, continuing from step 5 in the “Make the Filling” section.
Freeze once rolls are baked and cooled. Frosting is best done once rolls have come to room temperature (or even been warmed in the oven for a bit)

Jenny's Favorite Cinnamon Rolls
Ingredients
Instructions
- In a small pan, whisk flour and milk together until no lumps remain. Place over medium heat and cook, stirring often, until thickened into a paste-like texture. This could take just a couple minutes or more, depending on your burner.
- Set aside for a moment to cool.
- Add all dough ingredients to the bowl of a stand mixer or other large bowl. Add in the warm (but not too hot) tangzhong.
- Knead with the dough attachment in the stand mixer for about 10 minutes or longer by hand, until dough is elastic and passes the window pane test.
- Shape dough into a ball and place in a lightly oiled bowl and cover. Let rise in a warm place for 1 - 1.5 hours, or until roughly doubled in size.
- Oven 375°F / 190°C 9x13inch / 23x33cm rectangle baking dish, lightly greased, OR jelly roll pan or cookie sheet lined with parchment paper or silicone baking mat
- Combine all filling ingredients together in a small bowl, until a wet sand texture is achieved.
- When the dough has risen, punch down and dump out onto a floured surface. Roll the dough into a roughly 10x12in / 25x30cm rectangle, about 0.5in / 1.25cm thick. Do your best to roll or pat into a rectangle and not an oval.
- Evenly sprinkle filling over dough, leaving about 0.5in / 1.25cm uncovered along the edge of one of the long sides. Carefully roll the dough up, starting with the opposite long side. Use the uncovered edge to help seal the roll; you can gently roll it back and forth with the seam down to help seal it.
- Using a sharp serrated knife or dental floss, cut the roll into 12 pieces. Place each piece in the prepared pan, or free standing on a cookie sheet, spaced evenly apart.
- Lightly cover the rolls and let rise in a warm place until risen and puffy, about 30-60 minutes. Partway through this time you’ll want to preheat your oven to 375°/190°C.
- Bake rolls for about 14-18 minutes or until internal temperature of an outer roll reads 190°F / 88°C.
- Allow rolls to cool for about 10 minutes before icing.
- In a medium bowl or the bowl of a stand mixer fitted with the paddle, mix all icing ingredients together except milk until smooth. Add milk, 1 Tbsp at a time, until desired icing consistency is reached.
- Spread icing evenly over rolls.
Notes
- When making bread, you are often instructed to add warm (about 110°F / 43°C) liquids to your dough. This helps to activate the yeast and thus rise your dough. If you add cold liquids your yeast may remain dormant and not do much. In this recipe, you may notice the milk doesn’t have to be warm. In fact, you can add it cold since it will offset the heat from the tangzhong that was cooked. I wouldn’t add the tangzhong straight from the hot stove into the bowl with your yeast and other ingredients, as the heat could kill the yeast, but the time it takes to assemble the other dough ingredients in the bowl should be sufficient time for the tangzhong to cool down. Then the cold milk helps, too.
- The best way to ensure properly cooked cinnamon rolls (or anything!) is by taking an internal temperature. One of top used kitchen tools is my Thermapen, and I highly recommend one to you. You can find similar on Amazon.
- My favorite icing for cinnamon rolls is cream cheese, however this makes them that much richer and heavier, so I tend to go back and forth between making the icing with and without the cream cheese. Either way you go, I highly recommend using buttermilk in the icing rather than milk. The tang offsets the very sweet icing really, really well.
- The window pane test, which is my go-to for kneaded doughs, is essentially taking a small chunk of dough and stretching it into an even little square, then stretching the dough until it is very thin. If the dough begins to break, not enough gluten has developed and needs to be kneaded more. A dough that has been sufficiently kneaded will stretch very thin, thin enough you could almost see through it, and, if held up to a window, can see light through it, hence the name of this technique.
- To facilitate cutting the rolls evenly, I like to use a knife or the floss to make marks in the dough before actually cutting. I start by making a mark in the middle, then another mark in the middle of each half, then marking each quarter into 3. If you want to be really precise, use a measuring tape in front of your roll. :)
- If you saw dental floss as a choice for cutting the roll and think that’s crazy, trust! It actually gives you the cleanest cut and is satisfying to use. Slide the floss under the roll where you want to cut, then pull the ends of the floss up and around the roll, pulling in opposite directions to slice the roll.
- If you don’t have dental floss or a sharp enough knife to cut the rolls without squishing them, you can put the rolls in to the freezer for about 30 minutes until the dough is firmed up. This makes the cutting process neater and easier if you don’t have ideal tools at hand. You will then have to give a little more time in the rising process since the dough is cold.
- If you want extra gooey, rich cinnamon rolls:
- Before baking, pour about 1 tsp of heavy cream over each roll.
- After baking, brush rolls with 2 Tbsp of melted butter immediately after they come out of the oven. Then continue with cooling and icing.
- Inevitably your cut rolls with will vary slightly in size, the ones from the middle being more generous than the ones from the end. To ensure the most even baking, place the larger rolls on the outside or corners of your pan, the smaller ones toward the center.
- If making free standing cinnamon rolls, you’ll want to tuck the ends of the rolls underneath themselves, so you don’t have tails when they rise and are baked.
- I had never made free standing cinnamon rolls or any kind of roll like this until I found this recipe. It gives a little more freedom in what you can use in the baking process and I love that. You will have more perfectly shaped rolls, but baking together in a rectangle dish is easier if you want to freeze or transport the rolls.
- How to tell if your dough is risen enough, but not over risen? When gently pressed with a finger, the dough should slowly spring back. If it springs back immediately, it hasn’t risen enough. If it doesn’t spring back at all, it could be over-risen.
- These rolls freeze well! You have two options:
- Freeze once rolls are sliced and in their rectangle pan. Cover tightly and freeze. When ready to use, allow to come to room temperature and rise until puffy, continuing from step 5 in the “Make the Filling” section.
- Freeze once rolls are baked and cooled. Frosting is best done once rolls have come to room temperature (or even been warmed in the oven for a bit)
Nutrition Facts
Calories
459.97Fat
15.91 gSat. Fat
9.5 gCarbs
71.85 gFiber
1.8 gNet carbs
70.06 gSugar
37.68 gProtein
7.43 gSodium
416.6 mgCholesterol
42.79 mgNutritional information is approximate, based on 1 cinnamon roll with cream cheese frosting.

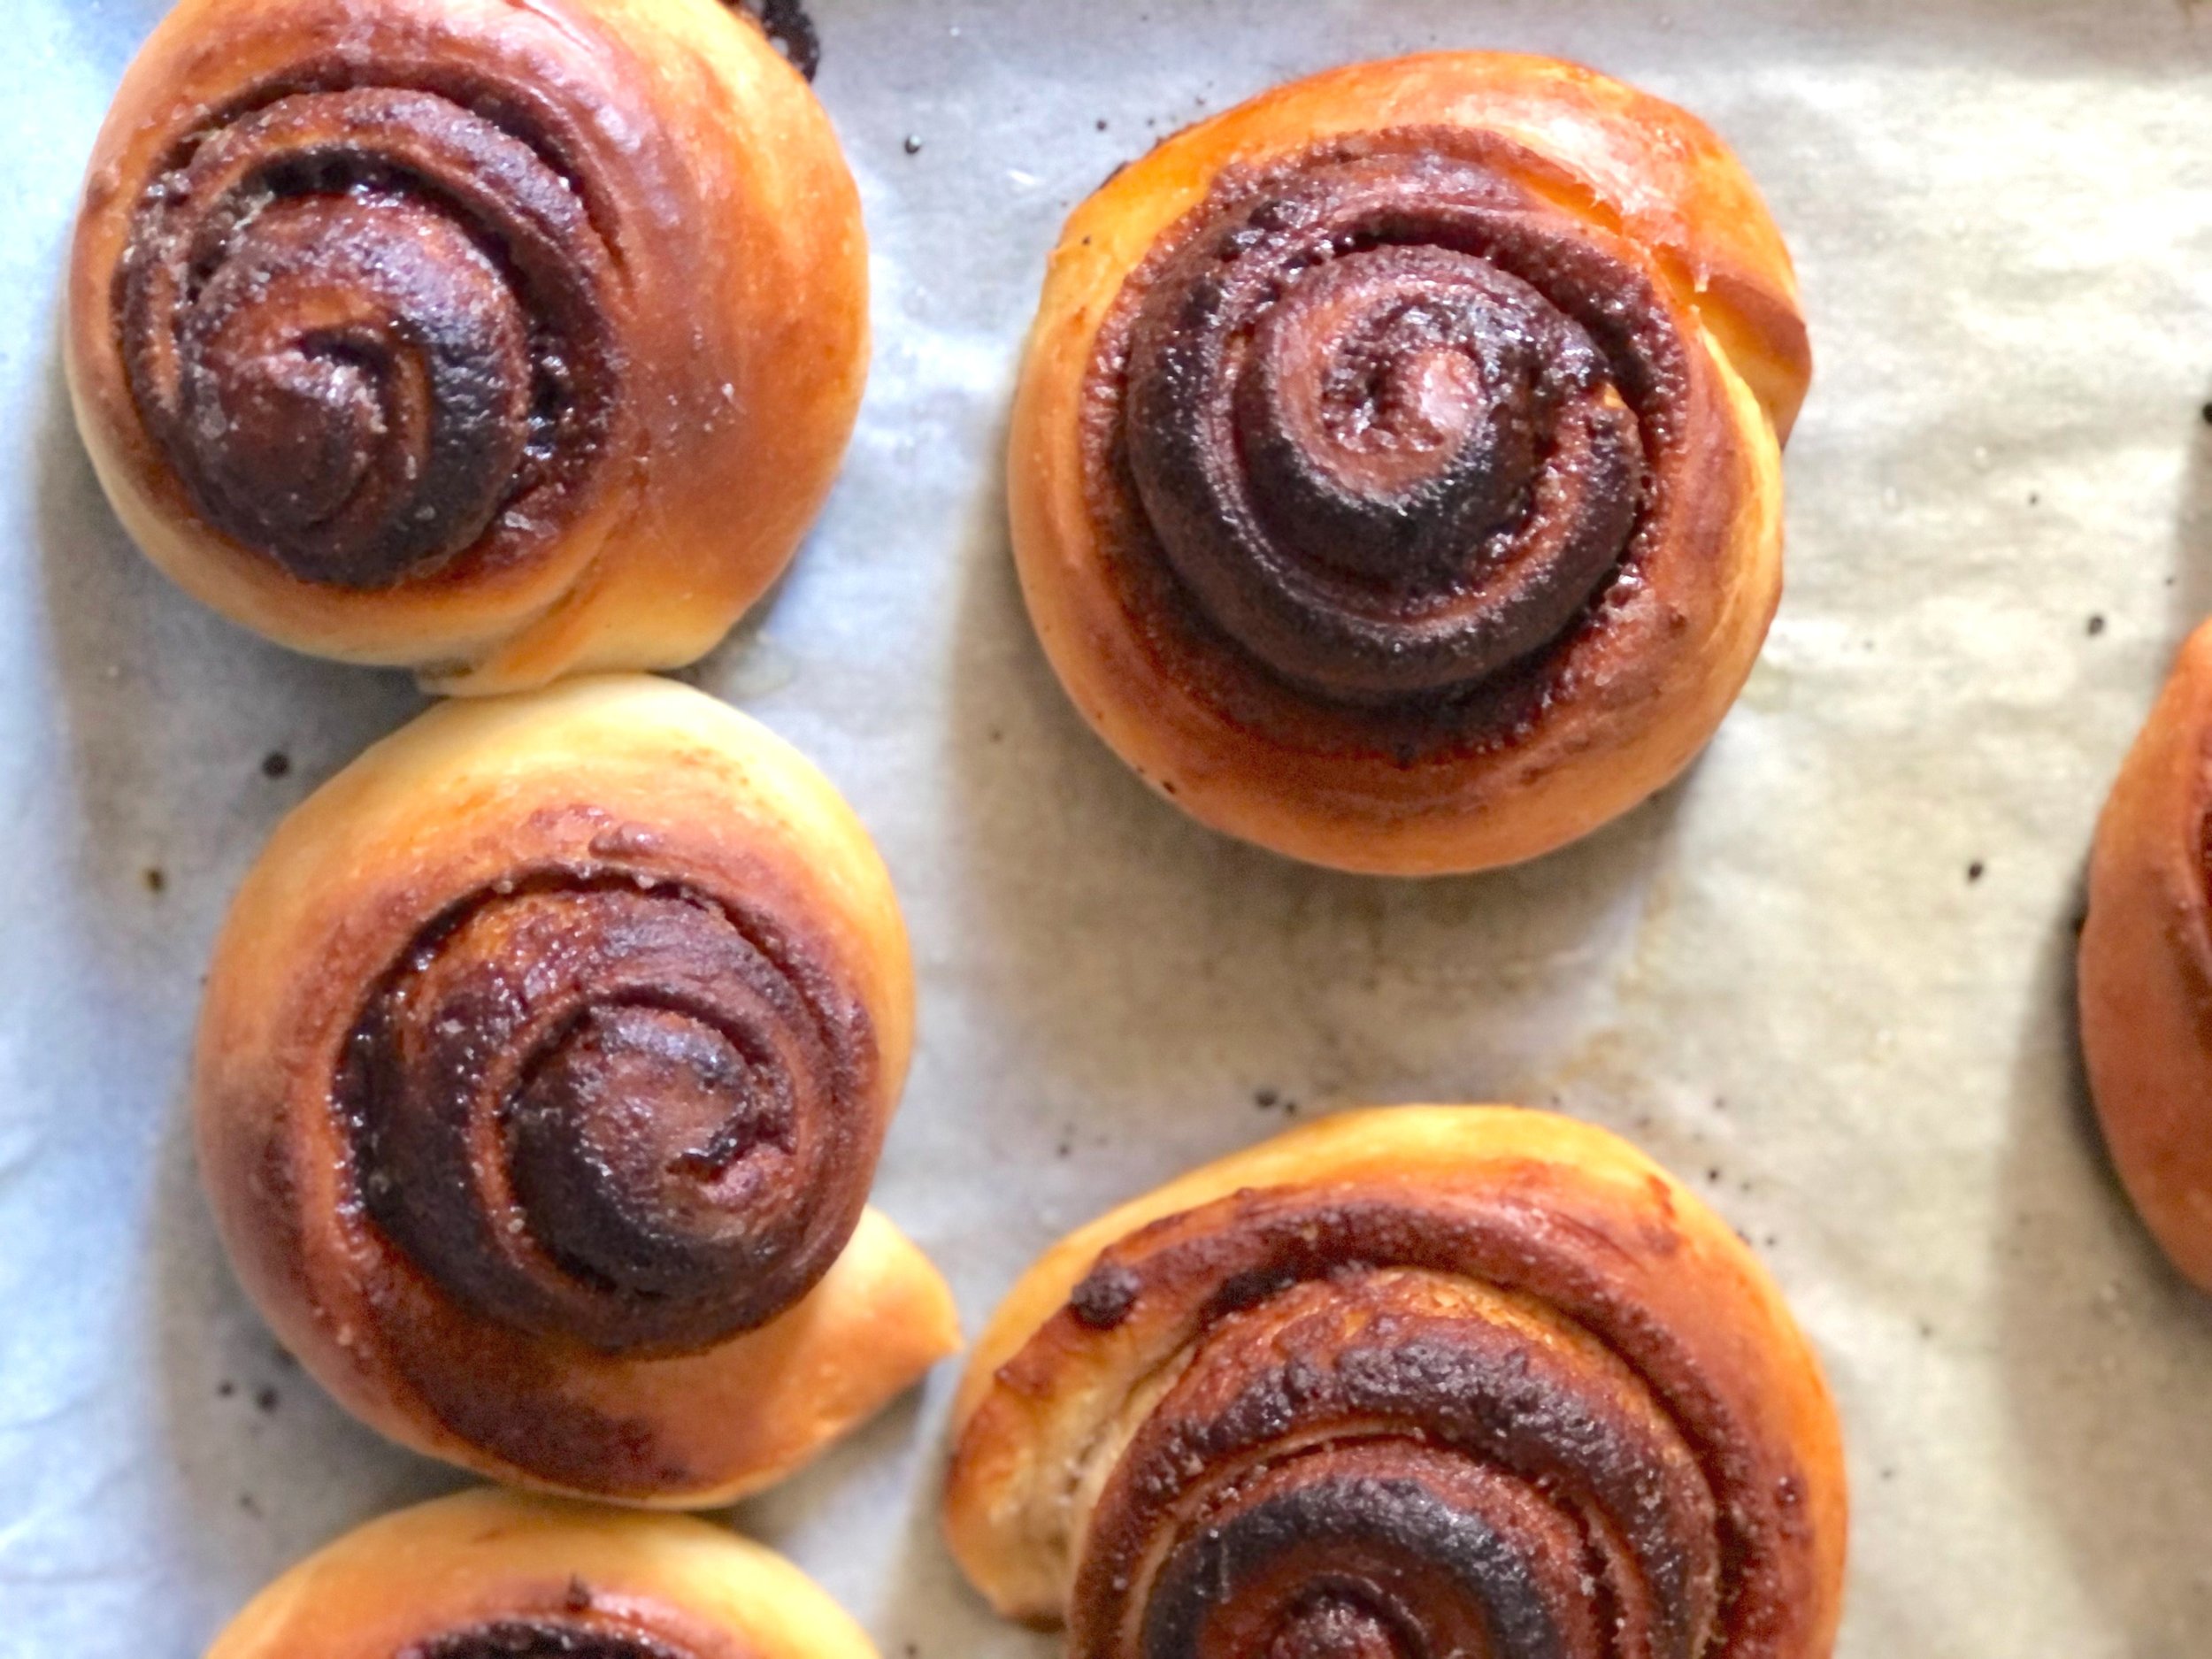
Cinnamon Rolls Pre-Icing


