Morris House Rolls (Parker House Rolls)

Soft and fluffy, these rolls have become a staple for holiday dinners and everyday dinners. There are hardly ever any leftovers, no matter how many batches we make! It’s hard to resist delicious, buttery, homemade bread.

Originally called Parker House Rolls, we’ve since changed the name of these to Morris House Rolls since, well, we make them so pretty and slightly changed the method of Parker House Rolls. Their origin has something to do with some rolls made at a hotel, where any angry baker threw some unfinished rolls into the oven. Apparently these were the rather delicious result that stuck and became famous. The method nowadays involves rolls that are dipped in butter and folded in half before they’re baked. This all seems rather fussy and messy, so we’ve adapted these into a more classic dinner roll shape. Just as delicious without all the fuss.

These are wonderful as is, or sliced and used for sliders or other small sandwiches. These freeze beautifully, so you can always pull some out for an impromptu dinner side!

Sourdough Discard Friendly

This is a great recipe to use up some sourdough discard. Add up to 100g of discard and a bit more flour as needed.

Why Heat the Milk First?

Heating milk, often known as “scalding”, is a technique often found in older recipes. It involves heating the milk to at least 181°F / 83°C. It has a few different purposes, depending on what you’re making.

  • Kill Bacteria: Before milk was widely pasteurized, scalding milk helped to kill bacteria.

  • Enhance Flavor: Milk takes on flavors really well when heated, so scalding works well with recipes that use vanilla, spices, herbs, etc., such as ice creams and custards.

  • Help Bread Rise: Milk contains whey protein, which can weaken gluten. If gluten isn’t strong, bread won’t rise properly. Scalding milk deactivates the whey protein, for an optimal rise.

The final reason is the reason why milk is scalded in this recipe.

This post may contain affiliate links. If you make a purchase using these links, Jennyblogs may receive a small commission, at no extra cost to you. This helps to support Jennyblogs. For further information see the privacy policy. Grazie!

Recipe adapted from Food Network


Morris House Rolls

Ingredients:

  • 1 1/2 cups / 356g milk

  • 1/2 cup / 113g butter, plus more for brushing

  • 1/2 cup / 100g sugar

  • 2 1/4 tsp / 7g instant yeast

  • 1/2 cup / 119g warm water

  • 3 eggs

  • 1 1/2 tsp salt

  • 6 cups / 720g all-purpose flour

Directions:

Oven 350°F / 177°C. 1 baking sheet lined with parchment paper or silpat.

  1. In a small pan, bring milk to a simmer. Remove from heat and stir in butter and sugar until melted. Allow to cool.

  2. In a large mixing bowl or bowl of a stand mixer fitted with the dough hook, combine yeast, water, eggs, salt, half of the flour, and cooled milk mixture until smooth. Add remaining flour, 1/2 cup at a time, until a soft, smooth dough forms. Knead for a few minutes with the dough hook.

  3. Transfer dough to floured surface and knead about 5 more minutes by hand.

  4. Place dough in a lightly oiled bowl, flip once to coat in oil, cover, and let rest for about 1 hour at room temperature, or until doubled in size.

  5. Punch dough down and divide dough into about 30 pieces. This will work out to be about 55g per piece if you have a scale to weigh them. Roll each piece into a tight ball and place on prepared baking sheet.

  6. Cover and let rest at room temperature for about 30-45 minutes, or until dough balls are puffed and almost doubled in size.

  7. Bake in preheated oven for 18-20 minutes or until golden brown. Remove from oven and brush with melted butter, if desired.

Jenny’s Notes:

  • If using instant dry yeast, you will want to active it before adding it in with the other dough ingredients. Add active dry yeast and the warm water to a small bowl and let sit for 5-10 minutes or until bubbly and active, before proceeding by adding them in with the rest of the dough ingredients.

  • This is a great recipe to use up some sourdough discard. Add up to 100g of discard and a bit more flour as needed.

  • These are so good, we don’t usually brush them with the extra butter!


Avalanche Bark - Rocky Mountain Chocolate Factory Copycat

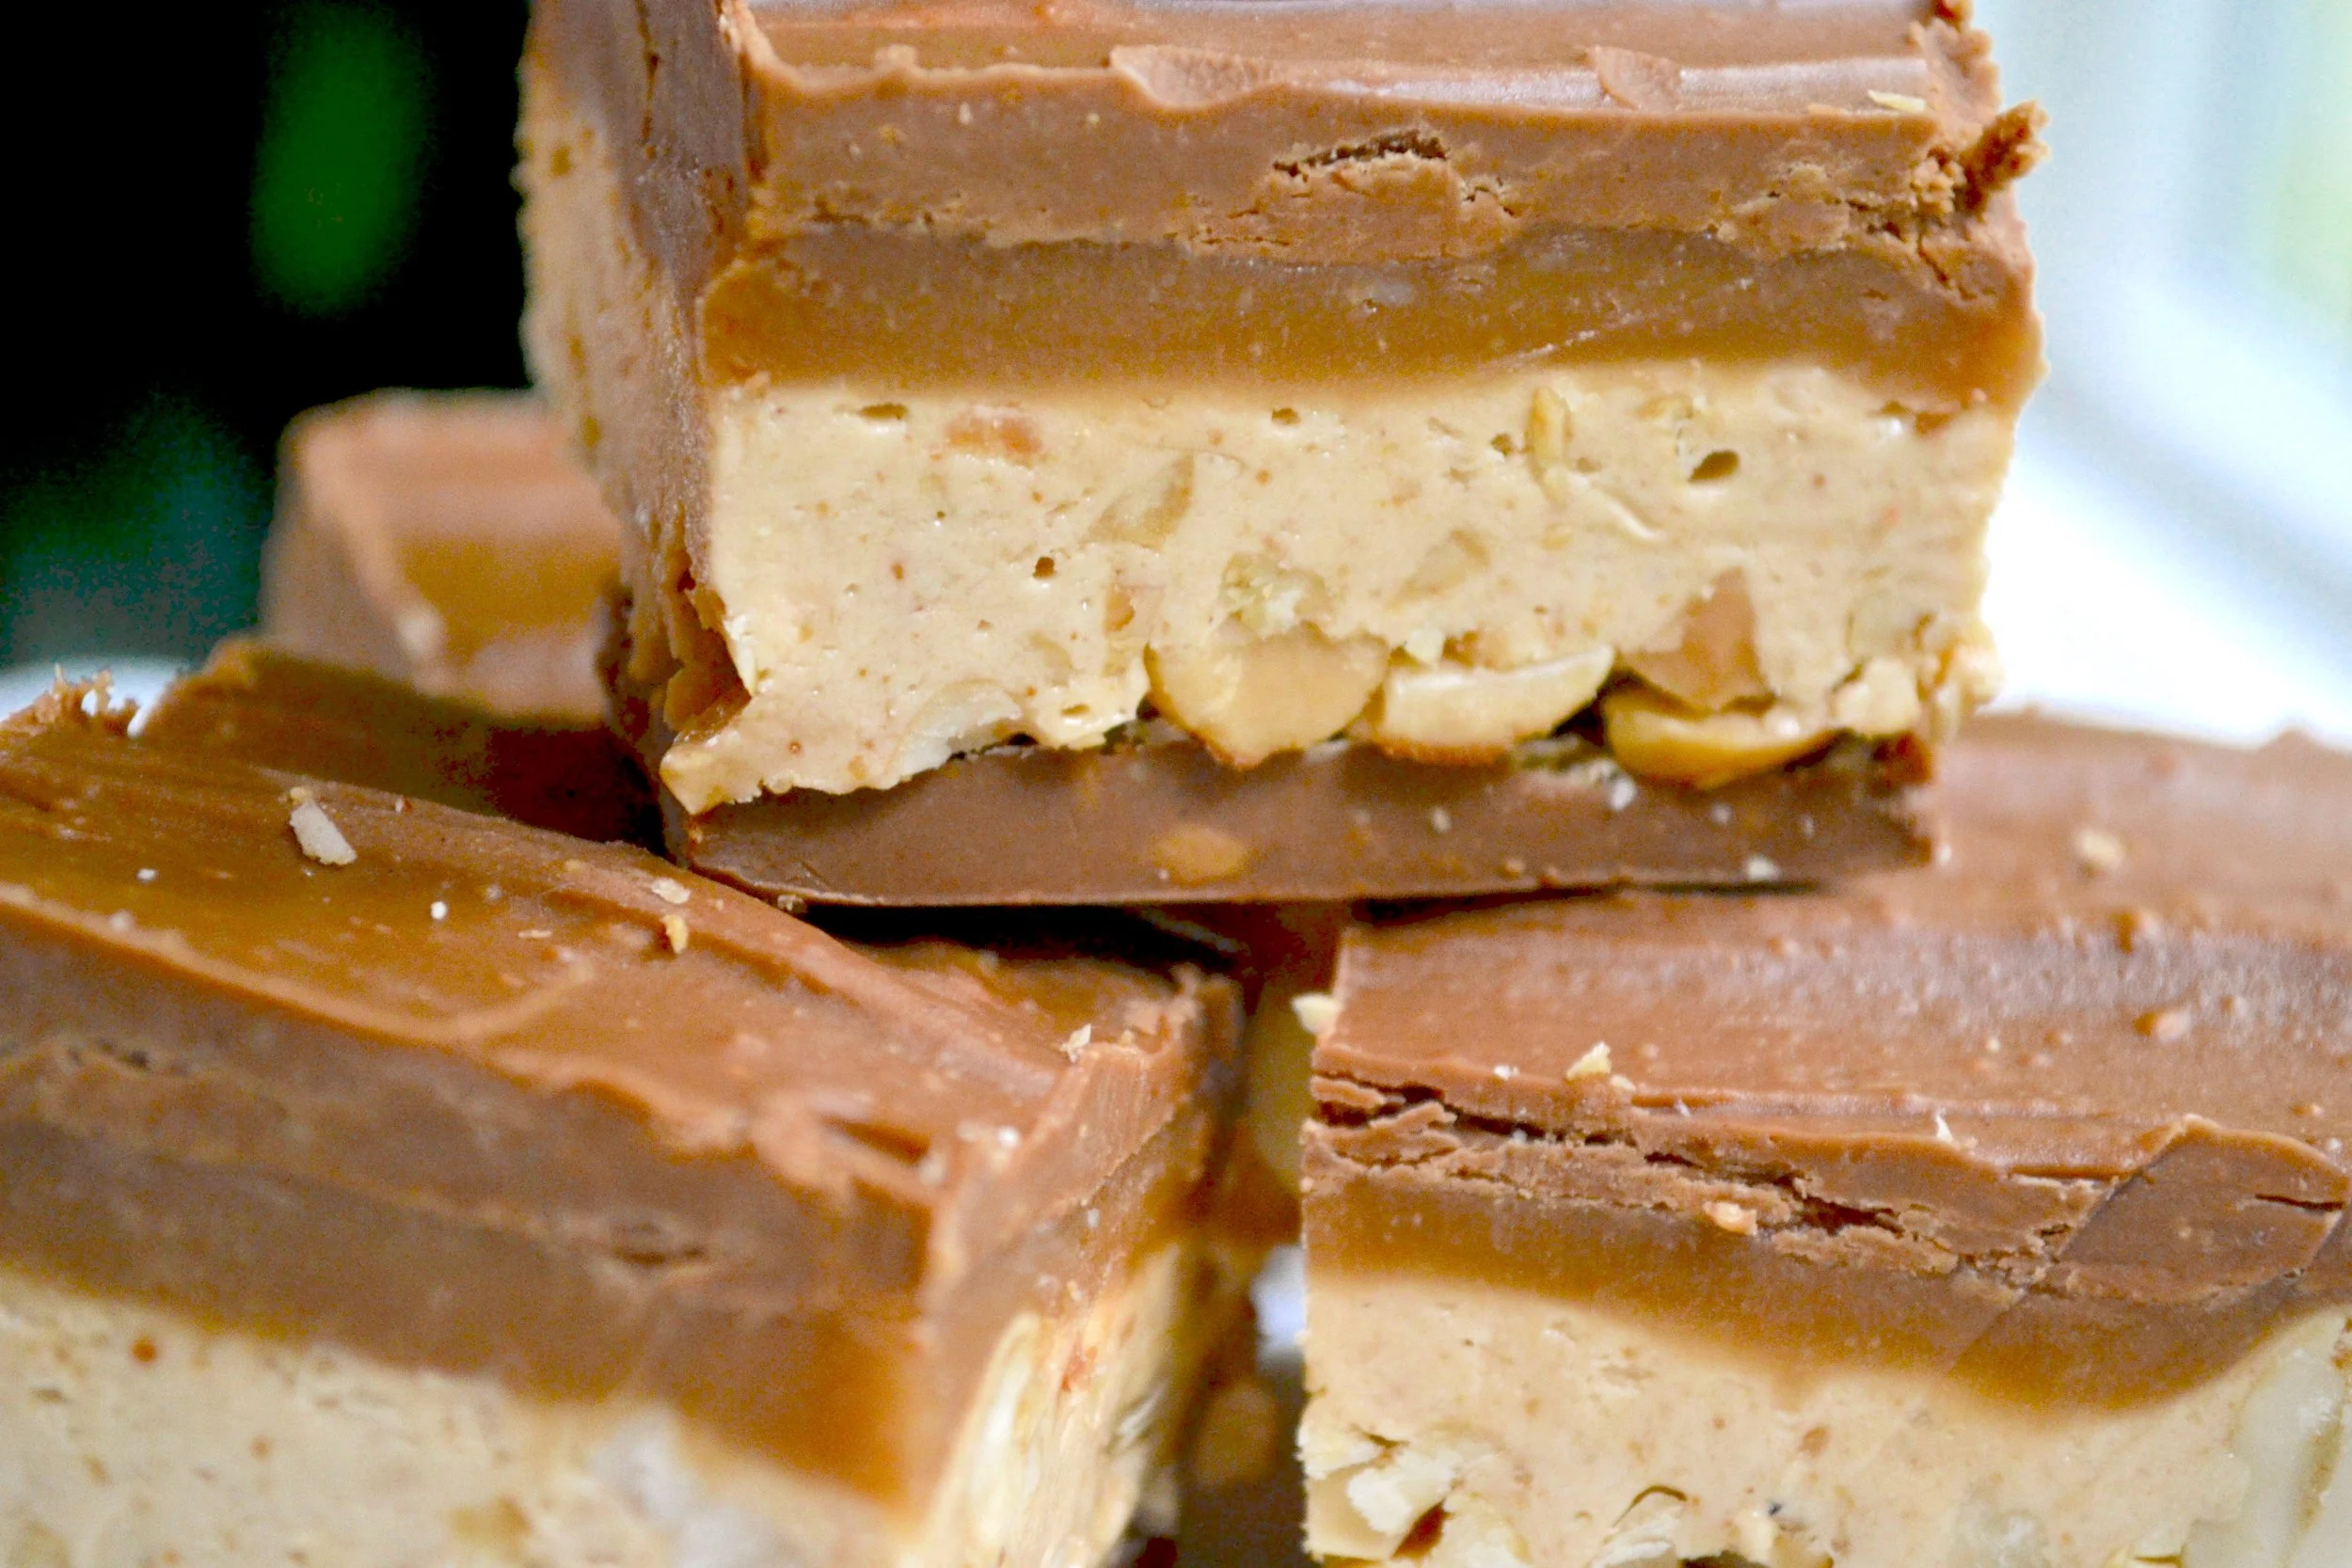
White chocolate peanut butter coated Rice Krispie treats with mini marshmallows and chocolate chips.

These are so delicious and simple to make, needing only about 10 minutes and 5 ingredients. Pop it in the fridge and you’ve got yourself a tasty treat for yourself or for that party you forgot you were supposed to bring something to!

I always have people asking for this recipe when I take it places, and it’s an easy one to give because it’s so simple. Even once when I had made this in Italy, and only had some older overly-chewy marshmallows, (marshmallows aren’t a big thing there and different than US ones to begin with) it was still a hit. In fact, a friend, after asking for the recipe, asked what the chewy bits were, and when I embarrassingly told him about the stale marshmallows, he laughed and said, “they’re my favorite part!” These are so good, they’ll even make chewy marshmallows shine.

The shameless blogger backstory

I once worked at a Rocky Mountain Chocolate Factory, and honestly it was one of the most fun jobs I ever had. I enjoyed working with chocolate, making the caramel apples, fudge, barks, etc., I liked my colleagues, had a good boss, and yes, also enjoyed eating some chocolate. It was very low-stress and not overly physical, at least compared to having spent 6+ hours at the ballet studio during the day before going to RMCF.

This recipe is a copycat of the Rocky Mountain Chocolate Factory’s Avalanche Bark. While legally I can’t give you the exact recipe, I would like to note that it would be completely impractical for me to even try. Everything there is made in much larger batches than a home baker would need to make, and by the time the recipe would be reduced down to a manageable quantity, you would have awful measurements like 0.1625 lbs of this or 2/3 tsp of that.

What I can tell you, is that this recipe is probably the closest you can get. But all of that could actually be irrelevant, as some of the other copycat recipes probably adjusted the recipe according to their tastes, and you can too! It wouldn’t take a rocket scientist to look at a slice of authentic Rocky Mountain Avalanche Bark and compare it to some of the other copycat recipes to realize that hey, Rocky Mountain’s has more Krispies. Because really, if you like a lighter, crunchier version, add more Krispies (it would also be crumblier, by the way). If you want more of a true “bark”, add less Krispies. Or, add more marshmallows and less Krispies, for a chewier version. Maybe you want more chocolate chips on top. Maybe you want to mix chocolate chips into these instead of just sprinkling on top. As you can see, for only having 5 ingredients, this recipe has quite a few possibilities for customization.


Avalanche Bark

Makes about 9 generous squares

Ingredients:

  • 12 oz white chocolate chips

  • 1/2 cup / 130g peanut butter

  • 1 1/2 cups / 86g mini marshmallows

  • 3 1/2 cups / 98g rice krispies

  • 1/4 cup / 43g mini chocolate chips

Directions:

  1. Line bottom of an 8x8in / 20x20cm square pan with wax paper.

  2. In a medium large pot, melt white chocolate chips and peanut butter together over low heat, stirring often.

  3. When white chocolate has just melted, remove from heat and stir in mini marshmallows. Gently fold in Rice Krispies until evenly coated.

  4. Spoon and spread into prepared pan, being careful not to flatten too much.

  5. Sprinkle with mini chocolate chips and press lightly.

  6. Allow to set at room temperature or in fridge before slicing.

Jenny’s Notes:

  • While this recipe is very similar to Rocky Mountain’s, feel free to customize as you wish. Add more or less Krispies, more or less Mini marshmallows, more chocolate chips or even mix them in, etc.

Avalanche Bark - Rocky Mountain Chocolate Factory Copycat
Yield 9
Author
Prep time
10 Min
Inactive time
20 Min
Total time
30 Min

Avalanche Bark - Rocky Mountain Chocolate Factory Copycat

White chocolate and peanut butter coated rice krispies with chewy mini marshmallows and mini chocolate chips make up this simple, no-bake dessert that tastes just like Rocky Mountain Chocolate Factory's

Ingredients

Instructions

  1. Line bottom of an 8x8in / 20x20cm square pan with wax paper.
  2. In a medium large pot, melt white chocolate chips and peanut butter together over low heat, stirring often.
  3. When white chocolate has just melted, remove from heat and stir in mini marshmallows. Gently fold in Rice Krispies until evenly coated.
  4. Spoon and spread into prepared pan, being careful not to flatten too much.
  5. Sprinkle with mini chocolate chips and press lightly.
  6. Allow to set at room temperature or in fridge before slicing.

Notes

  • While this recipe is very similar to Rocky Mountain’s, feel free to customize as you wish. Add more or less Krispies, more or less Mini marshmallows, more chocolate chips or even mix them in, etc.

Nutrition Facts

Calories

382.4

Fat

20.86 g

Sat. Fat

9.55 g

Carbs

45.03 g

Fiber

0.96 g

Net carbs

44.08 g

Sugar

32.81 g

Protein

6.56 g

Sodium

162.96 mg

Cholesterol

8.69 mg

Nutritional information is approximate. Based on 1 square if cut into 9 slices.

Rocky Mountain Chocolate Factory, Avalanche Bark, no bake dessert
dessert
American
Did you make this recipe?
Tag @jennyblogsandbakes on instagram and hashtag it #jennyblogs

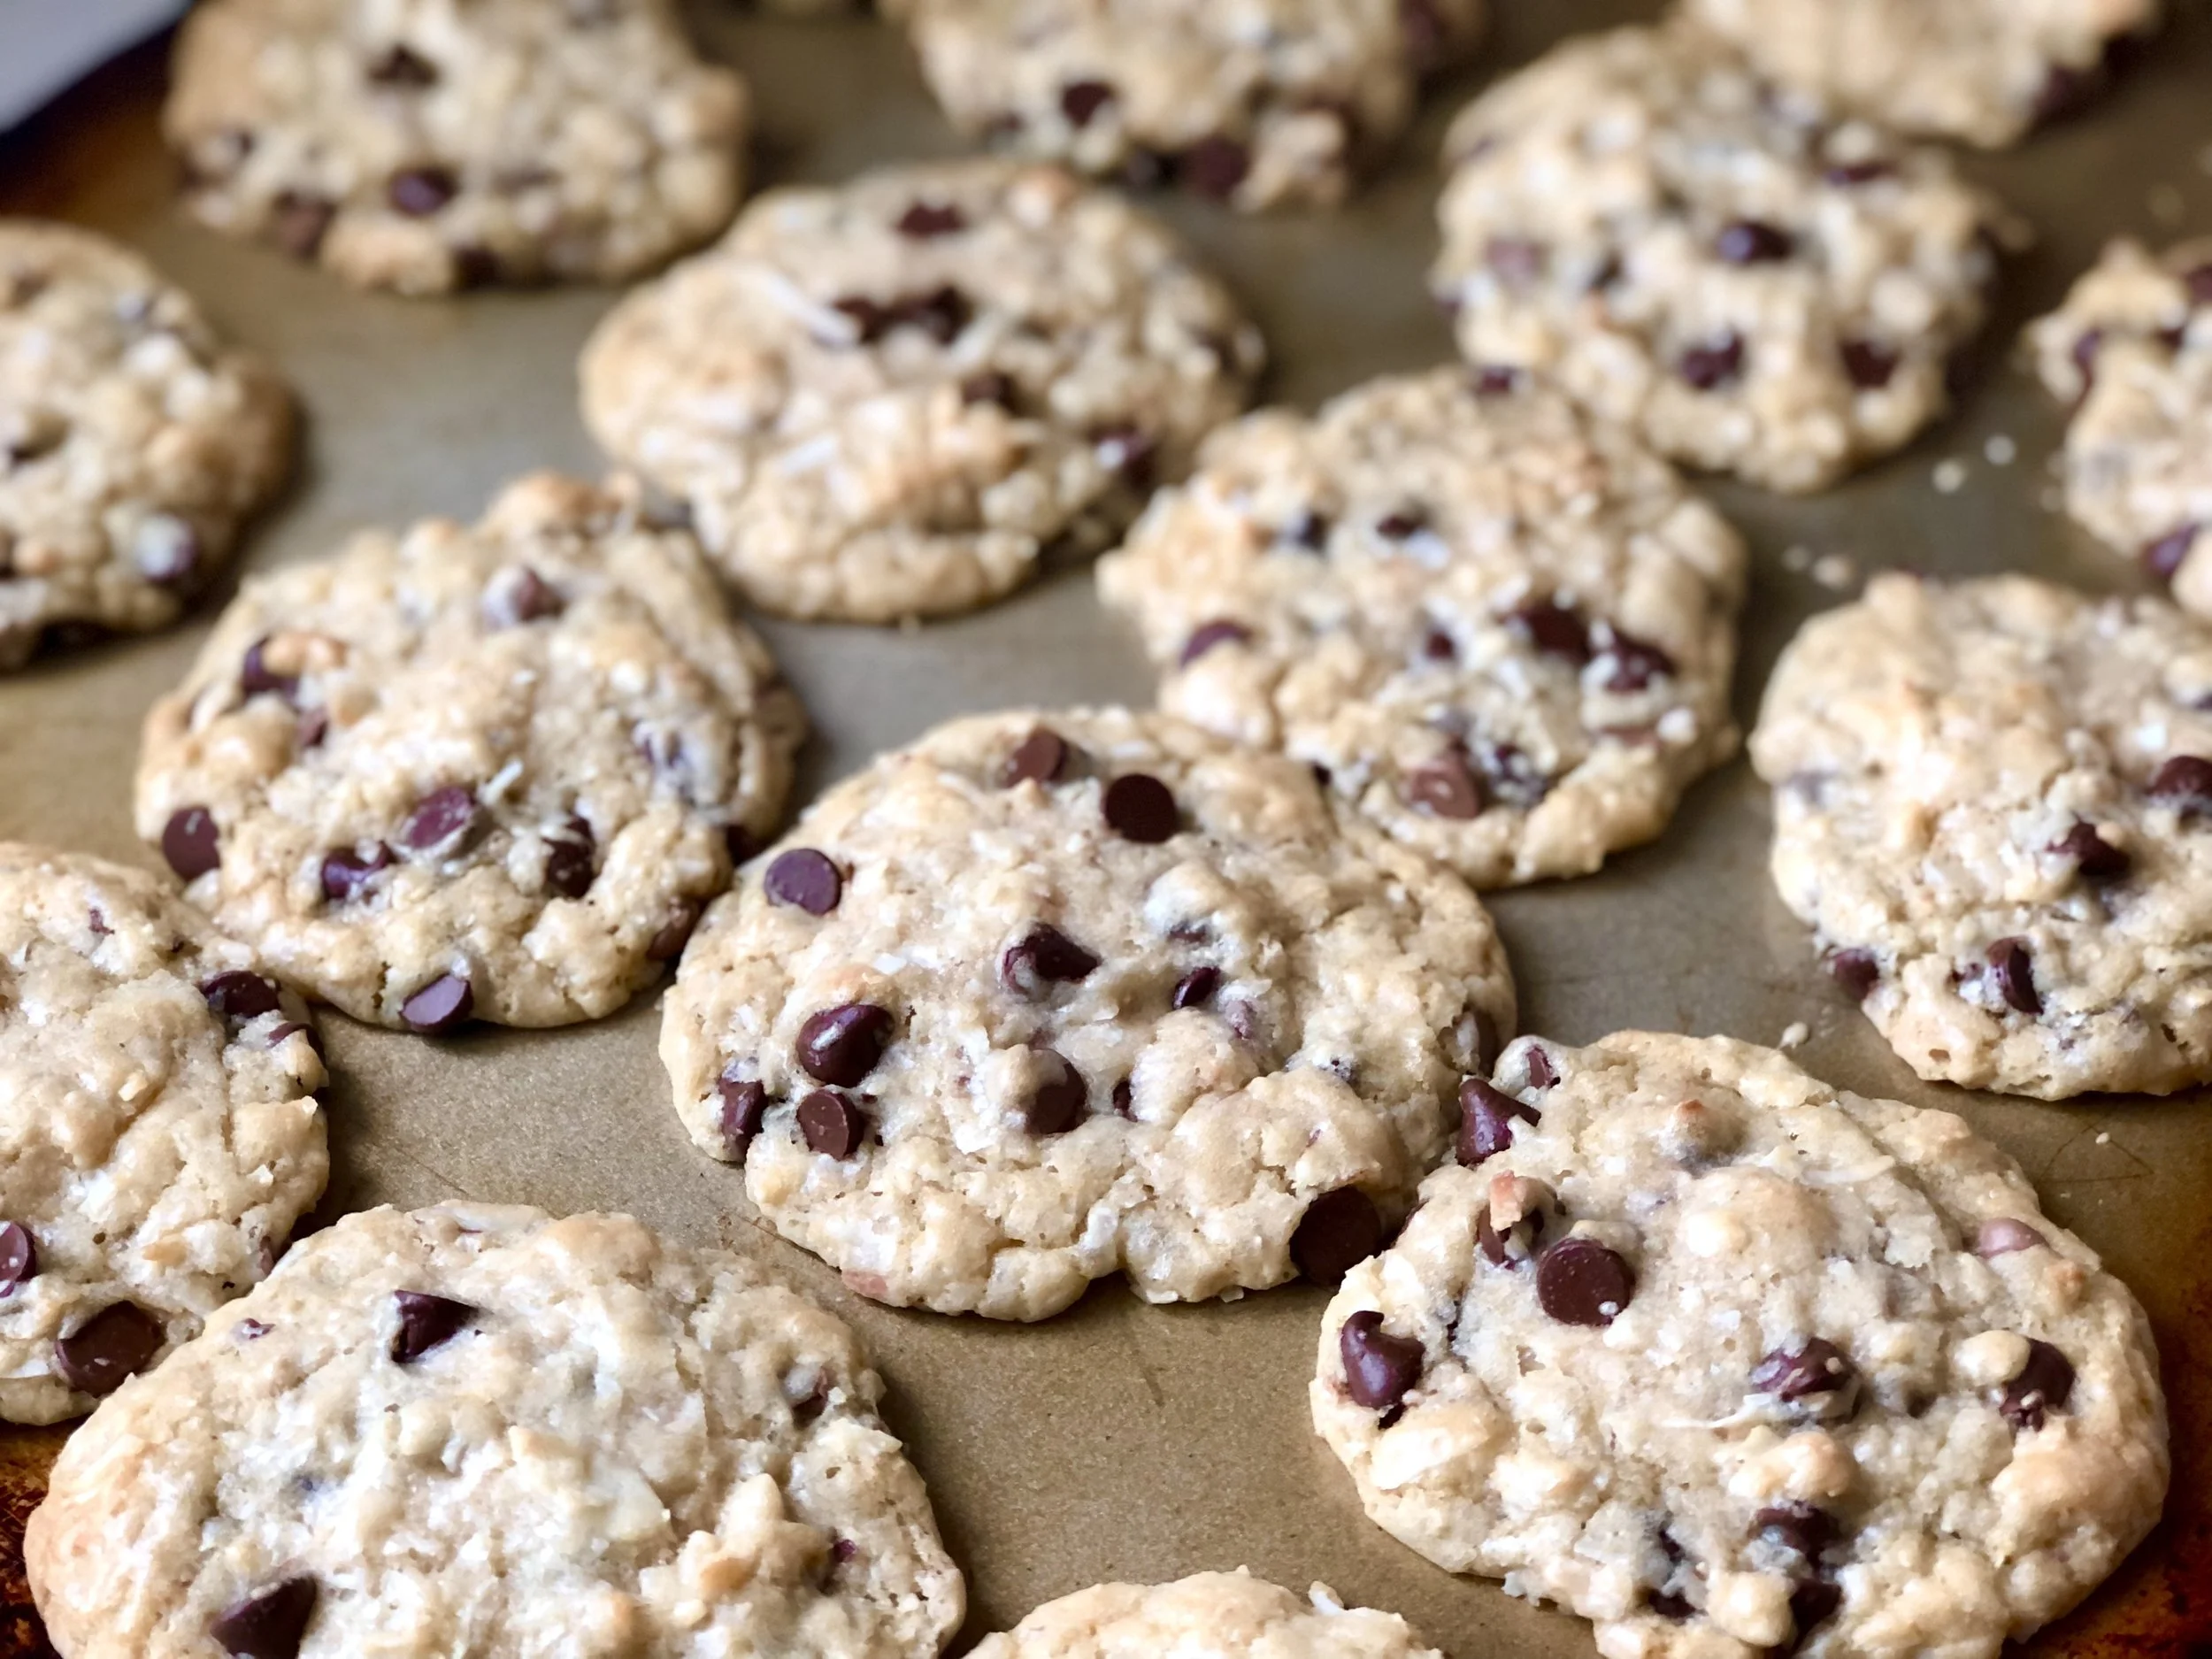
Almond Joy Cookies

Almond Joy candy bars in an easy to make, homemade cookie form.

These cookies are loaded with chocolate chips, coconut, and sliced almonds, bursting with that coconut and almond flavor. They’re sweet, chewy, and pure joy to eat. (Heh heh.)

Make these with toasted coconut!

While I’ve written the recipe as a quick and easy to whip up recipe with regular, unsweetened coconut, these are DELICIOUS if you have a few extra minutes to toast your coconut.

To toast coconut:

  1. Preheat oven to 350°F / 177°C.

  2. Spread 2 cups coconut into an even layer onto an ungreased baking sheet or dish.

  3. Bake in oven for 8-10* minutes, or until golden and fragrant. Check every 2 minutes or so to ensure it doesn’t burn. Stir as necessary.

* Baking time will vary depending on oven and type of baking dish used.

I used to always use a baking sheet or cookie sheet to toast coconut, until I tried using a Le Creuset baking dish, and I’ve never used anything else since. The coconut toasts so evenly I rarely have to stir it anymore, and burning it is a distant memory.

Le Creuset is made of enameled stoneware which creates even baking, and easy clean up! One more amazing use for Le Creuset. They’re an investment and can be very expensive, but certain pieces are more affordable, or even if you can find them on occasion at Home Goods or Le Creuset’s outlet stores, you can get some pretty good deals.


Almond Joy Cookies

Makes about 2 dozen cookies

Ingredients:

  • 3/4 cup / 168g neutral-flavored cooking oil

  • 3/4 cup / 150g sugar

  • 3/4 cup / 150g brown sugar

  • 2 eggs

  • 1 tsp vanilla extract

  • 1 tsp coconut extract

  • 1 tsp almond extract

  • 2 cups / 160g unsweetened shredded coconut

  • 2 1/4 cups / 270g all-purpose flour

  • 1 tsp baking soda

  • 1 tsp salt

  • 2 cups (12 oz bag) / 350g semi-sweet or milk chocolate chocolate chips

  • 1/2 cup / 42g sliced almonds

Directions:

  1. In a large bowl or bowl of a stand mixer, mix together oil, and sugars.

  2. Beat in eggs and extracts. Stir in coconut.

  3. In another medium bowl, whisk together flour, baking soda, and salt.

  4. Stir dry ingredients into wet ingredients.

  5. Stir in chocolate chips and almonds by hand, just until evenly distributed.

  6. Drop by generous tablespoonfuls onto ungreased cookie sheets. Bake in preheated oven for 8-10 minutes or until cookies look puffed, slightly golden, and center no longer looks gooey.

  7. Allow to cool for about 5 minutes on cookies sheets before removing to cool completely.

Jenny’s Notes:

  • Try these cookies using toasted coconut! (Toast coconut by spreading into an even layer on a baking sheet or dish, and bake at 350°F / 177°C for 5-10 minutes or until golden brown, check every 2 minutes or so to ensure it doesn’t burn, stirring if necessary.)

  • I like to use a mix of both semi-sweet and milk chocolate chips in these!

  • For nut lovers, you can increase the amount of sliced almonds in this recipe!

Almond Joy Cookies
Yield 24 cookies
Author
Prep time
20 Min
Cook time
10 Min
Total time
30 Min

Almond Joy Cookies

Chewy cookies loaded with coconut, chocolate, and almonds, just like the Almond Joy candy bar.

Ingredients

Instructions

  1. In a large bowl or bowl of a stand mixer, mix together oil, and sugars.
  2. Beat in eggs and extracts. Stir in coconut.
  3. In another medium bowl, whisk together flour, baking soda, and salt.
  4. Stir dry ingredients into wet ingredients.
  5. Stir in chocolate chips and almonds by hand, just until evenly distributed.
  6. Drop by generous tablespoonfuls onto ungreased cookie sheets. Bake in preheated oven for 8-10 minutes or until cookies look puffed, slightly golden, and center no longer looks gooey.
  7. Allow to cool for about 5 minutes on cookies sheets before removing to cool completely.

Notes

  • Try these cookies using toasted coconut! (Toast coconut by spreading into an even layer on a baking sheet or dish, and bake at 350°F / 177°C for 5-10 minutes or until golden brown, check every 2 minutes or so to ensure it doesn’t burn, stirring if necessary.)
  • I like to use a mix of both semi-sweet and milk chocolate chips in these!
  • For nut lovers, you can increase the amount of sliced almonds in this recipe!

Nutrition Facts

Calories

298.91

Fat

17.71 g

Sat. Fat

7.83 g

Carbs

31.57 g

Fiber

1.82 g

Net carbs

29.76 g

Sugar

16 g

Protein

2.62 g

Sodium

159.65 mg

Cholesterol

13.64 mg

Nutritional information is approximate and based on 1 cookie.

no chill cookie dough, chocolate chip cookies, Almond Joy
dessert
American
Did you make this recipe?
Tag @jennyblogsandbakes on instagram and hashtag it #jennyblogs

Smooth Potato and Veggie Soup

This soup couldn’t be simpler to make, simply chop up vegetables, boil them, and purée them. Tada! Dinner. It’s high on my list for easy meals that require little hands on prep, think 10 minutes or less. Feasible even with a newborn and other little kids demanding all your time!

It’s all vegetables, which makes it hearty and very nutritious. Once it’s puréed you can’t tell what’s in it which makes it easy to sneak in maybe some of those vegetables that your family isn’t so fond of. If I’m going to be really honest, veggie soups aren’t overly exciting, but I really enjoy this one. It’s difficult to ruin, even if you swap out different kinds of veggies. Make as written at first if you feel more comfortable, rather than branching out on your own right away. After the first time or two making this, you’ll quickly learn what you want more of or less of in the veggie department to suit you and your family’s tastes.

And, being all vegetables, this soup is vegetarian and vegan, gluten and dairy free. Friendly for many diets and dietary needs!

This post may contain affiliate links. If you make a purchase using these links, Jennyblogs may receive a small commission, at no extra cost to you. This helps to support Jennyblogs. For further information see the privacy policy. Grazie!


Smooth Potato and Veggie Soup

Serves about 4-6

Ingredients:

  • 1 quart / 1 liter chicken or vegetable broth

  • 2 cloves of garlic, peeled

  • 3 medium potatoes

  • 2 medium carrots

  • 2 stalks of celery

  • 1 small-medium broccoli crown

  • 1/2 medium onion

  • 2 fresh artichoke hearts, or 1 14 oz can, drained

  • salt and pepper, to taste

  • extra virgin olive oil, for drizzling, and crusty bread, optional

Directions:

  1. Rinse vegetables and chop all into chunks.

  2. Add all ingredients to a large pot over medium-high heat and brig to a boil.

  3. Allow to simmer for 30-45 minutes, or until all vegetables are tender when checked with a sharp knife. Check periodically to ensure it doesn’t boil dry, adding more water if necessary. Total time will depend on how large or small your vegetable chunks are.

  4. Once the vegetables are tender, transfer to a blender with enough broth to cover or almost cover them in the blender, or use an immersion blender to blend until smooth. If you desire a thinner soup, add more broth or water.

  5. Serve immediately with bread and a drizzle of olive oil, if desired. Store in the refrigerator or freeze.

Jenny’s Notes:

  1. You’ll notice the recipe is a bit vague, and I did that on purpose. If I wrote all the options or different ways I’ve made this soup, it would be quite confusing to read. So, you can find some variations down here.

  2. What kind of broth? Completely up to you. I prefer vegetable as this is a vegetable soup, but you could just as easily use chicken, beef, a combo, or your own homemade broth.

  3. Try using sweet potatoes for part or all of the potatoes.

  4. I don’t even bother to remove the skin from any of the potatoes or carrots. It all gets blended anyway, and it saves a lot of time while adding nutrition!

  5. The first time I made this with artichokes I hadn’t ever worked with a fresh artichoke before. I thought the center was bigger than it was, and thus ended up with some strands of fiber throughout the soup from the leaves. Not a deal breaker, but beware of those fibrous artichoke outer leaves. If you aren’t sure what exactly is the “center”, simply try biting the leaves. If it’s too fibrous and hard to chew, don’t blend it. The center will be small, as in, I-bought-that-whole-artichoke-just-for-that-tiny-thing? and yellow and almost melt in your mouth tender.

  6. Feel free to play with some spices to change things up! I like to add a Tbsp of turmeric, and sometimes some thyme or sage.

  7. Finally, add or subtract any vegetables you want! Basically as long as you have the same volume of vegetables to liquid, ish, you’ll end up with a vegetable soup. Ha. I love how simple it is. It’s just playing with flavors and textures!

Smooth Potato and Veggie Soup
Yield 4-6
Author
Prep time
15 Min
Cook time
30 Min
Total time
45 Min

Smooth Potato and Veggie Soup

Simple and nutritious purèed potato and vegetable soup

Ingredients

Instructions

  1. Rinse vegetables and chop all into chunks.
  2. Add all ingredients to a large pot over medium-high heat and brig to a boil.
  3. Allow to simmer for 30-45 minutes, or until all vegetables are tender when checked with a sharp knife. Check periodically to ensure it doesn’t boil dry, adding more water if necessary. Total time will depend on how large or small your vegetable chunks are.
  4. Once the vegetables are tender, transfer to a blender with enough broth to cover or almost cover them in the blender, or use an immersion blender to blend until smooth. If you desire a thinner soup, add more broth or water.
  5. Serve immediately with bread and a drizzle of olive oil, if desired. Store in the refrigerator or freeze.

Notes

  1. You’ll notice the recipe is a bit vague, and I did that on purpose. If I wrote all the options or different ways I’ve made this soup, it would be quite confusing to read. So, you can find some variations down here.
  2. What kind of broth? Completely up to you. I prefer vegetable as this is a vegetable soup, but you could just as easily use chicken, beef, a combo, or your own homemade broth.
  3. Try using sweet potatoes for part or all of the potatoes.
  4. I don’t even bother to remove the skin from any of the potatoes or carrots. It all gets blended anyway, and it saves a lot of time while adding nutrition!
  5. The first time I made this with artichokes I hadn’t ever worked with a fresh artichoke before. I thought the center was bigger than it was, and thus ended up with some strands of fiber throughout the soup from the leaves. Not a deal breaker, but beware of those fibrous artichoke outer leaves. If you aren’t sure what exactly is the “center”, simply try biting the leaves. If it’s too fibrous and hard to chew, don’t blend it. The center will be small, as in, I-bought-that-whole-artichoke-just-for-that-tiny-thing? and yellow and almost melt in your mouth tender.
  6. Feel free to play with some spices to change things up! I like to add a Tbsp of turmeric, and sometimes some thyme or sage.
  7. Finally, add or subtract any vegetables you want! Basically as long as you have the same volume of vegetables to liquid, ish, you’ll end up with a vegetable soup. Ha. I love how simple it is. It’s just playing with flavors and textures!


Nutrition Facts

Calories

240.61

Fat

4.33 g

Sat. Fat

0.72 g

Carbs

46.34 g

Fiber

8.9 g

Net carbs

37.42 g

Sugar

8.16 g

Protein

8.2 g

Sodium

1094.33 mg

Cholesterol

0 mg

Nutritional information is approximate, based on 1 serving if recipe serves 4, including olive oil drizzle.

potato soup, Armenian vegetable soup, vegan, vegetarian
dinner
American
Did you make this recipe?
Tag @jennyblogsandbakes on instagram and hashtag it #jennyblogs


Sticky Lemon Tofu

Crispy tofu with a zingy, sweet, and super flavorful sticky sauce over rice makes for a quick and easy weeknight dinner.

Serve with your favorite garnishes and you’ll feel like you’re eating takeout, but it’s actually much healthier!

Inspired by Chinese takeout “lemon chicken” but made with tofu instead. Meatless, nutritious, and you can choose to add veggies, as you wish.

The tofu can be baked or fried, depending on your preference, either way resulting in delicious, crispy bites of tofu that are just asking to be covered in a sticky lemon sauce. I prefer baking them, it’s healthier and the oven does the work while I work on the sauce. Either way is delicious and simple, though!


Sticky Lemon Tofu

Serves 2-3

Ingredients:

For the Crispy Tofu

  • 1 14oz / 400g block of firm or extra-firm tofu

  • 1 Tbsp / 14g oil

  • 1 Tbsp / 17g soy sauce

  • 1/4 cup / 40g cornstarch

For the Lemon Sauce

  • 1/2 cup / 119g chicken broth or water

  • 1/4 cup / 56g lemon juice

  • 2 Tbsp / 34g soy sauce

  • 3 Tbsp / 60g maple syrup

  • zest of 1 lemon

To sautè

  • 1 Tbsp / 14g oil

  • 2-3 green onions, sliced

  • 1 Tbsp grated or minced fresh ginger

  • 4 cloves of garlic, minced

For Serving

  • Rice

  • Garnishes such as sliced green onions, sesame seeds, red chili flakes, and/or lemon slices

Directions:

Make the Crispy Tofu

  1. Place tofu block between some paper towels and press to absorb extra water. Repeat until tofu feels dry and no more water comes out. You can also do this ahead of time by placing something heavy over the tofu and paper towels, such as a bowl or pot, and leave it for several minutes.

  2. Slice tofu into squares and toss together with the oil, soy sauce, and corn starch until evenly coated.

    Pan fry:

  3. Heat a large fry pan and add tofu. Fry for a few minutes until golden, then flip tofu over. Add more oil to pan as needed to get a nice golden crust on the tofu. Remove from heat when done.

    OR Bake:

  4. Disperse tofu cubes evenly onto a parchment paper or silpat lined baking sheet. Bake in a preheated oven at 400°F / 205°C for about 30 minutes, or until light golden and crispy. Ideally, flip tofu halfway through baking.

Make the sauce

  1. Whisk together all ingredients for the sauce; set aside.

Sauté

  1. Heat oil in a large fry pan over medium heat. (Can be the pan you used for the tofu if you pan-fried it).

  2. Add green onions, ginger, and garlic and sauté for 1-2 minutes, or until fragrant.

  3. Add lemon sauce ingredients to pan and bring to a simmer.

  4. Add in tofu, carefully stir to evenly coat tofu in sauce. Allow to simmer, stirring occasionally, until sauce thickens.

  5. Serve with rice and garnishes, as desired.

Jenny’s Notes:

  • Veggies can be added to this dish if desired. I like snow peas and broccoli, which can be added at the very end with the tofu into the sauce. Put a lid on and let the veggies steam for a few minutes, or until desired tenderness is achieved.

  • If pan frying the tofu, you can flip the tofu with tongs, or simply sauté/flip the tofu using the pan. The second way is faster, but requires a bit more skill and you have less control over which sides of the tofu land down.

  • Use whichever kind of cooking oil you prefer. I simply write “oil” since specifying often gets people thinking they must use a specific oil, when really you can use any high-heat cooking oil (peanut oil, avocado oil, some use olive oil, etc.)

  • Instead of maple syrup you can also use 1/4 cup / 50g of sugar or brown sugar. Or, 3 Tbsp / 63g of honey, which lends a slightly different flavor.

Sticky Lemon Tofu
Yield 2-3
Author
Prep time
15 Min
Cook time
40 Min
Total time
55 Min

Sticky Lemon Tofu

Crispy tofu nuggets tossed in a super flavorful sticky lemon sauce inspired by Chinese takeout Lemon Chicken, served over rice.

Ingredients

For the Crispy Tofu
For the Lemon Sauce
To sautè
For Serving

Instructions

Make the Crispy Tofu
  1. Place tofu block between some paper towels and press to absorb extra water. Repeat until tofu feels dry and no more water comes out. You can also do this ahead of time by placing something heavy over the tofu and paper towels, such as a bowl or pot, and leave it for several minutes.
  2. Slice tofu into squares and toss together with the oil, soy sauce, and corn starch until evenly coated.
  3. Pan fry:
  4. Heat a large fry pan and add tofu. Fry for a few minutes until golden, then flip tofu over. Add more oil to pan as needed to get a nice golden crust on the tofu. Remove from heat when done.
  5. OR Bake:
  6. Disperse tofu cubes evenly onto a parchment paper or silpat lined baking sheet. Bake in a preheated 400°F / 205°C for about 30 minutes, or until light golden and crispy. Ideally, flip tofu halfway through baking.
Make the sauce
  1. Whisk together all ingredients for the sauce; set aside.
Sauté
  1. Heat oil in a large fry pan over medium heat. (Can be the pan you used for the tofu if you pan-fried it).
  2. Add green onions, ginger, and garlic and sauté for 1-2 minutes, or until fragrant.
  3. Add lemon sauce ingredients to pan and bring to a simmer.
  4. Add in tofu, carefully stir to evenly coat tofu in sauce. Allow to simmer, stirring occasionally, until sauce thickens.
  5. Serve with rice and garnishes, as desired.

Notes

  • Veggies can be added to this dish if desired. I like snow peas and broccoli, which can be added at the very end with the tofu into the sauce. Put a lid on and let the veggies steam for a few minutes, or until desired tenderness is achieved.
  • If pan frying the tofu, you can flip the tofu with tongs, or simply sauté/flip the tofu using the pan. The second way is faster, but requires a bit more skill and you have less control over which sides of the tofu land down.
  • Use whichever kind of cooking oil you prefer. I simply write “oil” since specifying often gets people thinking they must use a specific oil, when really you can use any high-heat cooking oil (peanut oil, avocado oil, some use olive oil, etc.)
  • Instead of maple syrup you can also use 1/4 cup / 50g of sugar or brown sugar. Or, 3 Tbsp / 63g of honey, which lends a slightly different flavor.


Nutrition Facts

Calories

476.8

Fat

23.04 g

Sat. Fat

2.04 g

Carbs

47.45 g

Fiber

2.93 g

Net carbs

44.51 g

Sugar

20.62 g

Protein

21.78 g

Sodium

1742.63 mg

Cholesterol

1.18 mg

Nutritional information is approximate, based on 1 serving if recipe serves 2. Does not include rice or garnishes.

Sticky lemon tofu, chinese takeout lemon chicken
dinner
Asian
Did you make this recipe?
Tag @jennyblogsandbakes on instagram and hashtag it #jennyblogs

Tart Cherry Pie

Nothing speaks summer in Traverse City like cherry pie.

Or January, because of the beauty of things like frozen fruit. This recipe actually originally called for frozen cherries, but it all turns out about the same whether you use fresh or frozen, so feel free to use whichever you have available.

How do you know when you find the best cherry pie? Or the best anything? I don’t know, and I don’t love recipes that boast to be the best, but this is pretty darn good. This is my go-to cherry pie recipe, until such a time as I should come across a better one!

The beauty of fruit pies is that they don’t need much. A good recipe lets the fruit shine. This recipe does exactly that. It’s perfectly cherry; tart, sweet, and one of my favorite flavor combinations: cherry / almond.

It features a crumble topping and this recipe has an extra: amaretto. It takes it up a notch, but if you don’t happen to have any on hand, this recipe is still delicious.

Here’s to July, or summer in January!

This post may contain affiliate links. If you make a purchase using these links, Jennyblogs may receive a small commission, at no extra cost to you. This helps to support Jennyblogs. For further information see the privacy policy. Grazie!

Recipe adapted from Ambitious Kitchen


Tart Cherry Pie

Serves about 8

Ingredients:

For the Crust

For the Filling

  • 6 cups / roughly 24oz fresh or frozen tart cherries, pitted

  • 1 cup / 200g sugar

  • 2 Tbsp / 15g cornstarch

  • 2 Tbsp / 16g flour

  • 1/2 tsp almond extract

  • 1 Tbsp / 14g butter

  • 1 Tbsp amaretto liqueur, optional

For the Crumble Topping

  • 1 cup / 120g flour

  • 1/2 cup / 100g brown sugar

  • 1/4 cup / 20g rolled oats

  • 6 Tbsp / 84g butter, melted

Directions:

Oven preheated to 350°F / 177°C.

Make the crust

  1. Prepare pie crust; refrigerate until filling is ready

Make the Filling

  1. In a medium large pot, combine cherries, sugar, cornstarch, flour, and almond extract over medium heat. Stir frequently until sugar has melted and cherries begin to break down.

  2. Add butter and amaretto. Continue to stir occasionally until mixture begins to bubble and thickens enough to coat the back of a spoon.

  3. Remove from heat and allow to cool while you prepare topping

Make the Crumble Topping

  1. In a medium bowl, combine flour, brown sugar, and oats.

  2. Add melted butter and stir until mixture resembles clumpy wet sand.

Assemble and Bake

  1. Pour filling into prepared crust. Evenly sprinkle crumble topping over filling.

  2. Bake pie in preheated oven for 50-60 minutes, until edges are bubbling and crumble is golden brown. Place a cookie sheet lined with tinfoil under the pie plate to catch any filling that bubbles over.

  3. Allow to cool completely before slicing and serving. Serve with vanilla ice cream, if desired.

Jenny’s Notes:

  • For crumble topping, I use rolled oats and quick oats interchangeably.

  • If not using the amaretto, I recommend increasing the almond extract to 1 tsp

  • Check the pie halfway through baking to ensure it’s not browning too quickly. If it is, place some tinfoil on top to prevent it browning too quickly.

  • Fruit pies like this are best made in the morning or the day before you need them, since they need to cool completely before being sliced into. If it’s not completely cool, it won’t be completely set, and the filling will ooze out.

Cherry Pie, Best Tart Cherry Pie, Oat Crumble Topping, Sour Cherry Pie
dessert
American
Yield: 8
Author:
Tart Cherry Pie

Tart Cherry Pie

A classic summer pie bursting with juicy sour cherries, a touch of almond extract and amaretto liqueur, topped with a buttery oat crumble
Prep time: 40 MinCook time: 1 HourInactive time: 8 HourTotal time: 9 H & 40 M

Ingredients

For the Crust
For the Filling
For the Crumble Topping

Instructions

Make the crust
  1. Prepare pie crust; refrigerate until filling is ready
Make the Filling
  1. Oven preheated to 350°F / 177°C.
  2. In a medium large pot, combine cherries, sugar, cornstarch, flour, and almond extract over medium heat. Stir frequently until sugar has melted and cherries begin to break down.
  3. Add butter and amaretto. Continue to stir occasionally until mixture begins to bubble and thickens enough to coat the back of a spoon.
  4. Remove from heat and allow to cool while you prepare topping
Make the Crumble Topping
  1. In a medium bowl, combine flour, brown sugar, and oats.
  2. Add melted butter and stir until mixture resembles clumpy wet sand.
Assemble and Bake
  1. Pour filling into prepared crust. Evenly sprinkle crumble topping over filling.
  2. Bake pie in preheated oven for 50-60 minutes, until edges are bubbling and crumble is golden brown. Place a cookie sheet lined with tinfoil under the pie plate to catch any filling that bubbles over.
  3. Allow to cool completely before slicing and serving. Serve with vanilla ice cream, if desired.

Notes

  • For crumble topping, I use rolled oats and quick oats interchangeably.
  • If not using the amaretto, I recommend increasing the almond extract to 1 tsp
  • Check the pie halfway through baking to ensure it’s not browning too quickly. If it is, place some tinfoil on top to prevent it browning too quickly.
  • Fruit pies like this are best made in the morning or the day before you need them, since they need to cool completely before being sliced into. If it’s not completely cool, it won’t be completely set, and the filling will ooze out.


Nutrition Facts

Calories

487.73

Fat

16.18 g

Sat. Fat

8.2 g

Carbs

73.55 g

Fiber

3.45 g

Net carbs

70.09 g

Sugar

27.3 g

Protein

4.67 g

Sodium

171.5 mg

Cholesterol

26.72 mg

Nutritional information is approximate. Based on 8 servings.

Did you make this recipe?
Tag @jennyblogsandbakes on instagram and hashtag it #jennyblogs

Homemade Thousand Island Dressing

Thousand Island Dressing - you know it as the pinkish, sweet and salty dressing for salads, hamburgers, and various other creative uses.

What you might not know is what this salad dressing is made of, and that it is super simple to whip up at home with only 7 ingredients you very possibly already have on hand!

Essentially, Thousand Island Dressing is a mayonnaise and ketchup based dressing. Beyond that, there are many variations, although my favorite below features sweet relish and onions.

Where did Thousand Island Dressing come from?

Its origin is disputed, but two main tales originate in the Thousand Islands region, between northern New York and Canada.

One tale starts at Boldt Castle when George Boldt (Waldorf-Astoria billionaire) and his wife Louise were out on their yacht. Their chef forgot to bring a dressing for some greens and had to scrounge something up, which turned into Thousand Island Dressing.

Another tale stems from a recipe found in a restaurant in the same Thousand Islands area. The recipe appears to be what we know now as Thousand Island Dressing, but is simply called “Sophia’s Sauce”. Sophia and George Lelonde used to own the restaurant.

Wherever it came from, it blossomed in popularity, although honestly I never understood why.

Why Make Thousand Island Dressing? One Reason: Taco Salad

Thousand Island has always been a bit mysterious to me, I never much cared for it and I never gave much thought to what it was actually made of. I usually saw it in a bottle, and per usual with store-bought salad dressings, many of the ingredients weren’t ones I cared overly to be eating.

my tiny photo stager :)

However, despite having no strong feelings for Thousand Island dressing, there is one dish that I and my family love that Thousand Island is crucial to: Taco Salad. Yep, that’s right. I don’t even know how Thousand Island came to be “the” dressing for Taco Salad, as I’ve never heard of anyone putting it on their tacos. I’m not sure where the Taco Salad recipe in my family came from originally, but whoever made it up decided, oh let’s make a salad with all the components of tacos in it…what kind of dressing should we use? I know, Thousand Island Dressing, naturally!

Due to our love for Taco Salad and also our desire to eat healthier and make things homemade, we decided to look in to making our own Thousand Island Dressing, especially since we don’t use it for anything else. I came across this recipe and we haven’t bought a bottle of Thousand Island since.

Recipe Adapted from Simply Recipes


Homemade Thousand Island Dressing

Makes about 1 1/2 cups of dressing

Ingredients:

  • 1 cup / 230g mayonnaise

  • 1/4 of an onion or 1 shallot, minced

  • 2 Tbsp / 30g ketchup

  • 2-3 Tbsp / 30g sweet pickle relish

  • 1 tsp / 5g lemon juice

  • 1/2 tsp sweet paprika

  • 1/4 tsp salt

Directions:

  1. Combine all ingredients together in a bowl, mix well.

  2. Place in a jar or sealed container and store in the fridge.

Jenny’s Notes:

  • Letting the dressing sit for a few hours or ideally a day or two really lets the flavors meld. It also can help to tame the onion or shallot a bit.

  • Use more sweet relish if you like a sweeter and tangier Thousand Island, use less if you don’t want it as sweet.

  • Mason jars make great storage containers!

Thousand Island Dressing, homemade, Sofia's Sauce, Salad Dressing
Condiment,
American
Yield: 12 servings. about 1 1/2 cups
Author:
Homemade Thousand Island Dressing

Homemade Thousand Island Dressing

Sweet and tangy homemade Thousand Island Dressing comes together in minutes with just 7 ingredients. It's tastier, healthier, and cheaper than its store-bought counterpart!
Prep time: 10 MinTotal time: 10 Min

Ingredients

Instructions

  1. Combine all ingredients together in a bowl, mix well.
  2. Place in a jar or sealed container and store in the fridge.

Notes

  • Letting the dressing sit for a few hours or ideally a day or two really lets the flavors meld. It also can help to tame the onion or shallot a bit.
  • Use more sweet relish if you like a sweeter and tangier Thousand Island, use less if you don’t want it as sweet.

Nutrition Facts

Calories

134.56

Fat

13.99 g

Sat. Fat

2.18 g

Carbs

2.15 g

Fiber

0.09 g

Net carbs

2.06 g

Sugar

1.68 g

Protein

0.24 g

Sodium

218.14 mg

Cholesterol

7.84 mg

Nutritional information is approximate. Based on a serving of 2Tbsp.

Did you make this recipe?
Tag @jennyblogsandbakes on instagram and hashtag it #jennyblogs

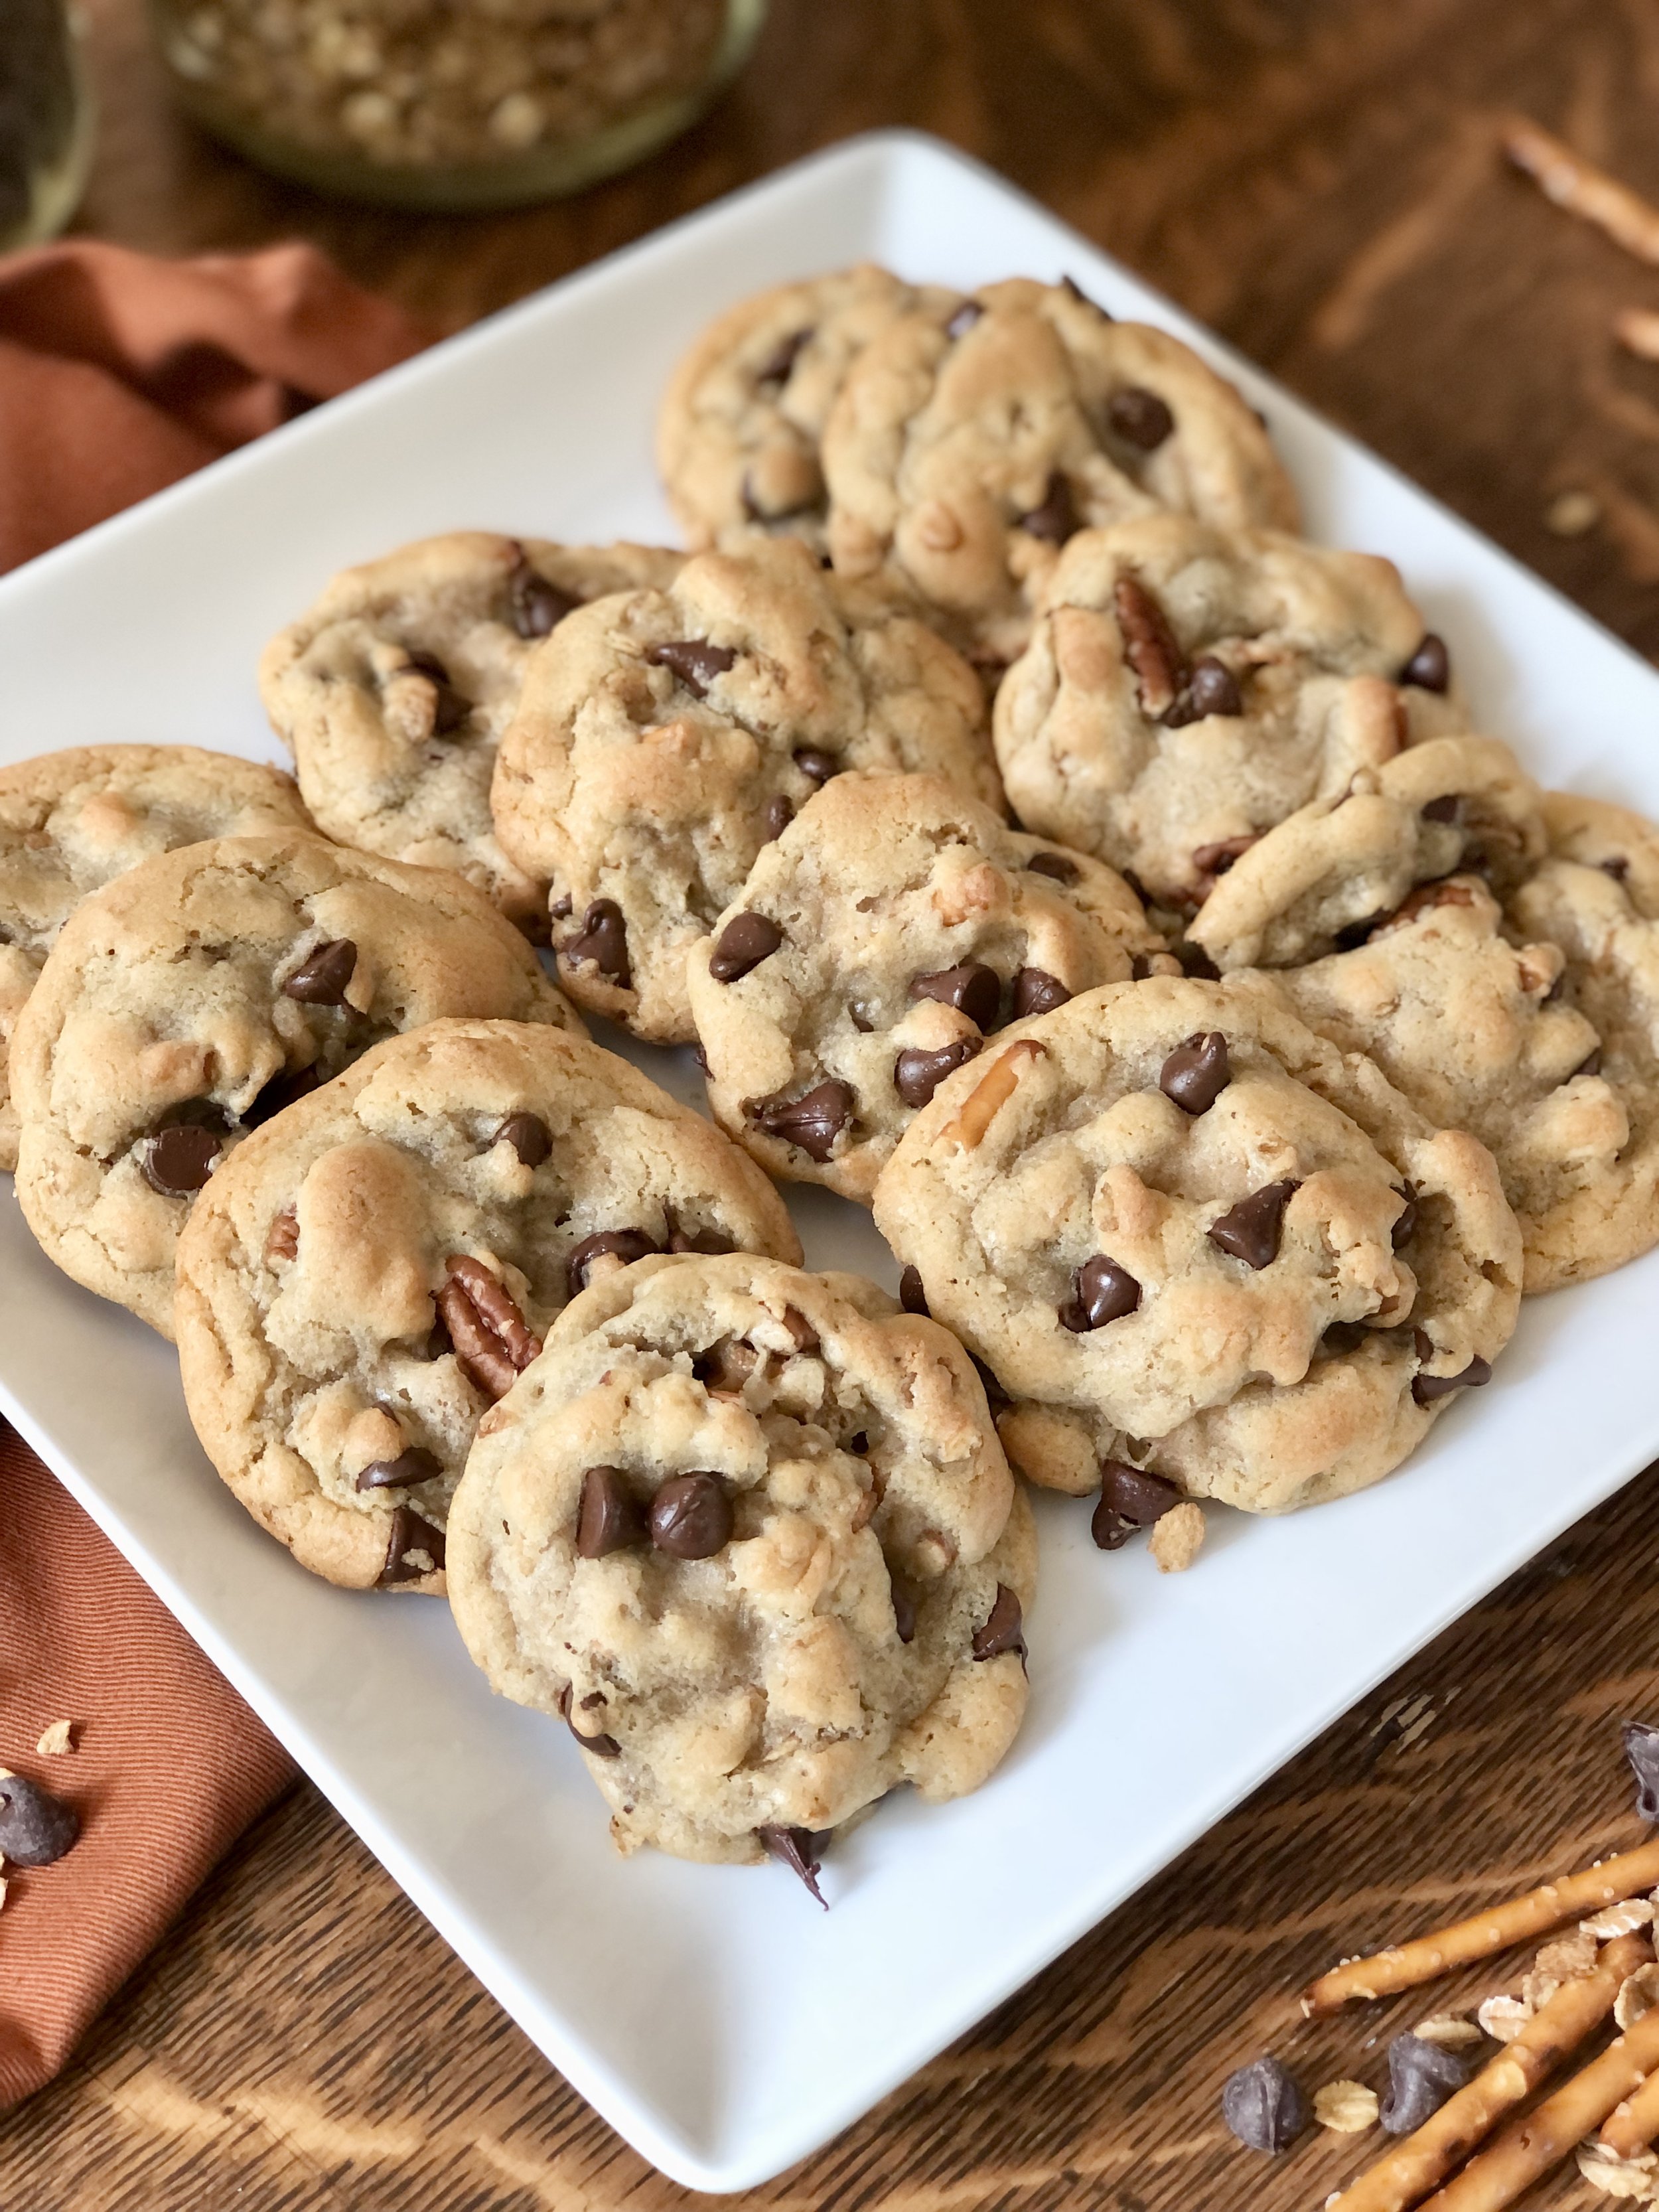
Whole Wheat Oat Chocolate Chip Cookies

One bowl chocolate chip cookies featuring whole wheat flour and oats.

While the whole wheat flour and oats may trick you into thinking these cookies are trying to be healthy, that’s really not what they’re here for! Sure, an added bonus is that these cookies do have added nutrition, but the whole wheat flour and oats serve to add a more complex flavor profile.

Whole wheat flour adds a nutty flavor while the oats add, ahem, “oatiness” and that beloved chew from an oatmeal cookie. You can use your favorite kind of chocolate chips in this recipe, but I really love the bitterness of dark chocolate chips in these. On the flip side, I also think using white, or even white and dark (!) would be a really beautiful combo.

Chocolate chip cookies are a timeless American staple, and I love all the endless variations! Here is yet another for you to try and add to your baking repertoire!!

This post may contain affiliate links. If you make a purchase using these links, Jennyblogs may receive a small commission, at no extra cost to you. This helps to support Jennyblogs. For further information see the privacy policy. Grazie!


Whole Wheat Oat Chocolate Chip Cookies

Makes about 14-18 medium cookies

Ingredients:

  • 1/2 cup / 113g oil

  • 1/2 cup / 100g brown sugar

  • 1/4 cup / 50g sugar

  • 1/2 tsp salt

  • 1 egg

  • 1 tsp / 5g vanilla extract

  • 3/4 tsp baking powder

  • 1/2 tsp baking soda

  • 1 1/2 cups / 135g rolled or quick oats

  • 3/4 cup / 96g whole wheat flour

  • 1/4 cup / 25g oat bran, wheat germ, or wheat bran

  • 1 cup / 175g semi-sweet or dark chocolate chips

Directions:

Oven preheated to 350°F / 177°C. 1 ungreased baking sheet

  1. In a large bowl or the bowl of a stand mixer, combine oil, both sugars, and salt. Beat in the egg and vanilla.

  2. Mix in baking powder and baking soda until thoroughly combined.

  3. Stir in oats, flour, oat bran, and chips until combined.

  4. Drop by generous tablespoonfuls onto baking sheet. Bake for 8-12 minutes or until lightly golden and no longer look wet.

  5. Allow to cool for several minutes before removing from cookie sheets to cool completely.

Jenny’s Notes:

  • If you don’t have oat bran, wheat bran, or wheat germ on hand, you could add in extra flour or oats, instead. In fact, I’ve even used baby cereal with great success!

  • While you can really use any kind of chocolate chips you wish, I really enjoy dark chocolate chips or chunks in these cookies; it really compliments the nutty whole wheat flour!

cookies, chocolate chip cookies, oatmeal cookies, whole grain, whole wheat flour
dessert, cookies
American
Yield: 14-18 cookies
Author:
Whole Wheat Oat Chocolate Chip Cookies

Whole Wheat Oat Chocolate Chip Cookies

Prep time: 15 MinCook time: 12 MinTotal time: 27 Min

Ingredients

Instructions

  1. Oven preheated to 350°F / 177°C. 1 ungreased baking sheet
  2. In a large bowl or the bowl of a stand mixer, combine oil, both sugars, and salt. Beat in the egg and vanilla.
  3. Mix in baking powder and baking soda until thoroughly combined.
  4. Stir in oats, flour, oat bran, and chips until combined.
  5. Drop by generous tablespoonfuls onto baking sheet. Bake for 8-12 minutes or until lightly golden and no longer look wet.
  6. Allow to cool for several minutes before removing from cookie sheets to cool completely.

Notes

  • If you don’t have oat bran, wheat bran, or wheat germ on hand, you could add in extra flour or oats, instead. In fact, I’ve even used baby cereal with great success!
  • While you can really use any kind of chocolate chips you wish, I really enjoy dark chocolate chips or chunks in these cookies; it really compliments the nutty whole wheat flour!

Nutrition Facts

Calories

231.82

Fat

13.14 g

Sat. Fat

4.56 g

Carbs

28.53 g

Fiber

2.44 g

Net carbs

26.1 g

Sugar

12.2 g

Protein

3.66 g

Sodium

174.98 mg

Cholesterol

11.82 mg

Nutritional information is approximate and based on 14 servings.

Did you make this recipe?
Tag @jennyblogsandbakes on instagram and hashtag it #jennyblogs

Nutella-Filled Pillow Cookies

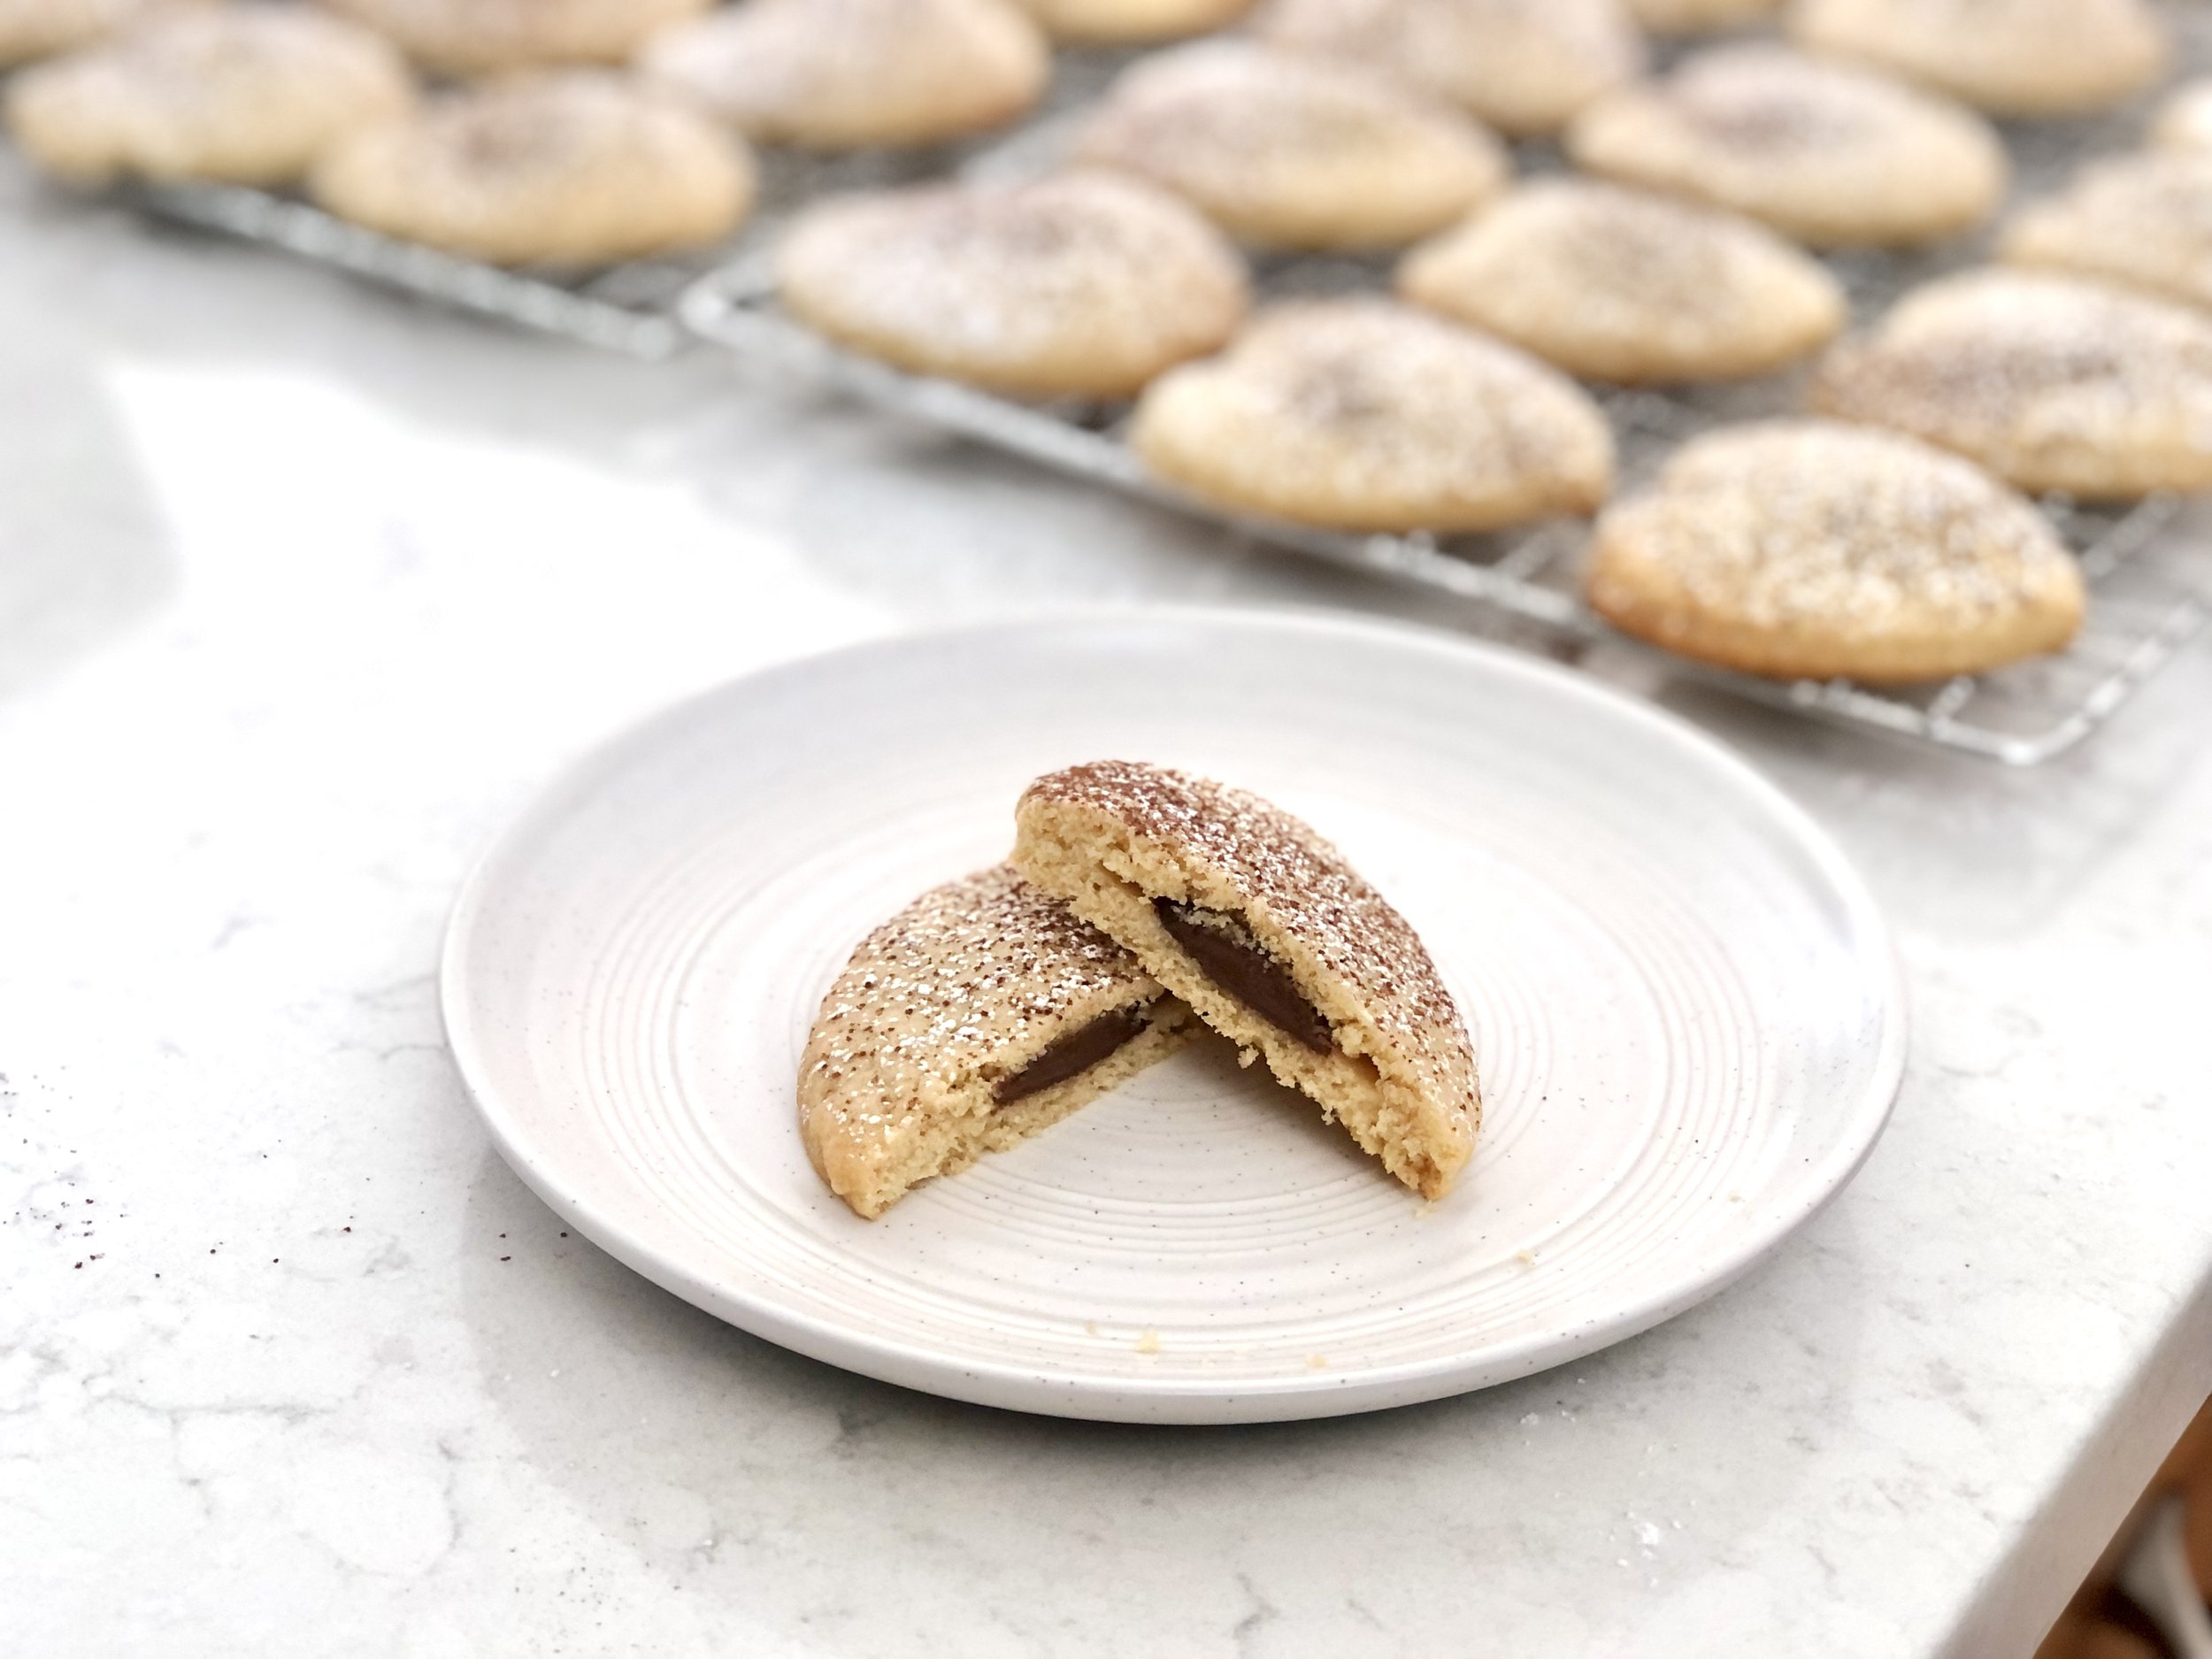
These are buttery sugar cookies with hints of almond and vanilla, stuffed with Nutella. The almond really compliments the Nutella! I guess hazelnuts and almonds make good company.

I first made these cookies over 10 years ago and they’re still a cookie I love to make. Because they’re cutouts, I tend to save them for special occasions, but the extra time is so worth it!

These cookies melt in your mouth and keep you going back for more, despite being a generous size to begin with! They’re also pretty little things, which makes them suitable for nice occasions, especially with a little dusting of powdered sugar or cocoa powder on top. You can use different shapes for different occasions, which makes these not only delicious and beautiful, but also versatile! These are always a winner.

This post may contain affiliate links. If you make a purchase using these links, Jennyblogs may receive a small commission, at no extra cost to you. This helps to support Jennyblogs. For further information see the privacy policy. Grazie!


Nutella-Filled Pillow Cookies

Makes about 12 large cookies

Ingredients:

  • 1 cup / 225g butter

  • 1/2 cup / 100g sugar

  • 1/2 cup / 100g brown sugar

  • 2 eggs

  • 1 Tbsp / 15g vanilla

  • 1/2 tsp almond extract

  • 3 cups / 360g flour

  • 1 Tbsp baking powder

  • 1/2 tsp salt

  • about 2/3 cup / 200g Nutella

  • powdered sugar and/or cocoa powder for dusting, optional

Directions:

Oven preheated to 375°F / 190°C. Ungreased cookie sheets.

  1. In the bowl of a stand mixer or with a handheld mixer, cream butter and sugar together until light and fluffy, about 5 minutes.

  2. Beat in eggs, one at a time. Stir in extracts.

  3. In a medium bowl, combine flour, baking powder, and salt with a whisk.

  4. Add dry ingredients to butter mixture, mix until thoroughly combined. If dough seems too wet, add a bit more flour until a thicker consistency is reached.

  5. Cover and place dough in refrigerator until chilled, at least 1 hour.

  6. Remove dough from fridge. Roll dough out onto a lightly floured surface to a thickness of about 1/4in / 1/2cm. Use a 3in / 7.5cm cookie cutter to cut the cookie dough. Re-roll and cut more.

  7. Place half of the cut out cookies onto a cookie sheet. Spoon or pipe about 2 tsp of Nutella onto the middle of the cookie. Place a second cookie on top, using fingers or a fork to seal edges together.

  8. Bake in preheated oven for 9-11 minutes, or until edges just barely start to turn golden. Allow cookies to cool for several minutes on the cookie sheet before transferring to cooling racks or the counter.

  9. When cookies are completely cool, dust with powdered sugar, if desired.

Jenny’s Notes:

  • Round or square cookie cutters work best for these pillow cookies, but any shape will do, as long as it has a large enough center area for the Nutella to be able to be sealed in. I like to do heart shapes for Valentine’s day, as pictured!

  • While these may have Nutella in the name, I’ve stuffed these with other things before that were also delicious! Small chocolates like Reese’s, Dove chocolates, etc. could be used. I once used these hazelnut chocolates that are common in Italy, Gianduja, and they were wondeful in these!

  • Don’t over bake! Not only can this lead to dry cookies, but it can affect the filling, as well.

Cookies, Nutella, Pillow Cookies, Cutout Cookies, Rolled Cookies, Sugar Cookies
dessert, cookies
American
Yield: 12 Large Cookies
Author:
Nutella-Filled Pillow Cookies

Nutella-Filled Pillow Cookies

Buttery, melt-in-your-mouth sugar cookies with hint of vanilla and almond, stuffed with Nutella, and topped with a dusting of powdered sugar and cocoa powder.
Prep time: 45 MinCook time: 11 MinInactive time: 1 HourTotal time: 1 H & 56 M

Ingredients

Instructions

  1. Oven preheated to 375°F / 190°C. Ungreased cookie sheets.
  2. In the bowl of a stand mixer or with a handheld mixer, cream butter and sugar together until light and fluffy, about 5 minutes.
  3. Beat in eggs, one at a time. Stir in extracts.
  4. In a medium bowl, combine flour, baking powder, and salt with a whisk.
  5. Add dry ingredients to butter mixture, mix until thoroughly combined. If dough seems too wet, add a bit more flour until a thicker consistency is reached.
  6. Cover and place dough in refrigerator until chilled, at least 1 hour.
  7. Remove dough from fridge. Roll dough out onto a lightly floured surface to a thickness of about 1/4in / 1/2cm. Use a 3in / 7.5cm cookie cutter to cut the cookie dough. Re-roll and cut more.
  8. Place half of the cut out cookies onto a cookie sheet. Spoon or pipe about 2 tsp of Nutella onto the middle of the cookie. Place a second cookie on top, using fingers or a fork to seal edges together.
  9. Bake in preheated oven for 9-11 minutes, or until edges just barely start to turn golden. Allow cookies to cool for several minutes on the cookie sheet before transferring to cooling racks or the counter.
  10. When cookies are completely cool, dust with powdered sugar, if desired.

Notes

  • Round or square cookie cutters work best for these pillow cookies, but any shape will do, as long as it has a large enough center area for the Nutella to be able to be sealed in. I like to do heart shapes for Valentine’s day, as pictured!
  • While these may have Nutella in the name, I’ve stuffed these with other things before that were also delicious! Small chocolates like Reese’s, Dove chocolates, etc. could be used. I once used these hazelnut chocolates that are common in Italy, Gianduja, and they were wondeful in these!
  • Don’t over bake! Not only can this lead to dry cookies, but it can affect the filling, as well.

Nutrition Facts

Calories

388.68

Fat

21.3 g

Sat. Fat

14.73 g

Carbs

48.95 g

Fiber

1.74 g

Net carbs

47.2 g

Sugar

18.17 g

Protein

5.22 g

Sodium

345.08 mg

Cholesterol

67.95 mg

Nutritional info is approximate, based on 1 cookie

Did you make this recipe?
Tag @jennyblogsandbakes on instagram and hashtag it #jennyblogs

Homemade Evaporated Milk

Making evaporated milk at home is very simple to do. You only need one ingredient: milk!

The evaporated milk you buy from the store is simply milk that has had 60% of its water evaporated.You can make your own by simmering it on the stove until reduced by 60%, or a bit more than half. It takes a bit of time and diligence, half hour or so of simmering, and remembering it’s there so it doesn’t boil dry. And no. of course I’ve never done either of those things, nope. But really, it’s so simple to make you can hardly call this a “recipe”!

Now, knowing how to make evaporated milk is wonderful for various occasions, but it does have its cons. The most obvious being it takes time and is easy to forget simmering on the stove. Second, even when made correctly the milk can cook onto the bottom of the pan over the simmering period and is not the most fun to clean. Because of these drawbacks, I still do buy cans of evaporated milk at times!

On the flip side, the beauty of making your own evaporated milk is that you can personalize to your tastes or dietary needs. To make the closest to store-bought evaporated milk, use whole milk. Otherwise, you can use lower fat varieties or even any plant or nut milks you prefer!

The recipe as written below will give you the equivalent of 1 can of evaporated milk, or 1 1/2 cups. Adjust the recipe depending on how much you need!

Do you want to learn how to make homemade sweetened condensed milk, also? Click here for the recipe!

This post may contain affiliate links. If you make a purchase using these links, Jennyblogs may receive a small commission, at no extra cost to you. This helps to support Jennyblogs. For further information see the privacy policy. Grazie!

Recipe by Jenny


Homemade Evaporated Milk

simmering milk

Makes 1 1/2 cups / 12 oz (355ml) of evaporated milk

Ingredients:

  • 3 1/4 cups / 770g milk

Directions:

  1. Place milk in wide pan over medium heat. When it starts to simmer, reduce heat to low.

  2. Simmer until reduced by just more than half, this can take anywhere from half an hour to an hour, all depending on the stove. Remove from heat and cool.

  3. Strain and store in refrigerator.

Jenny’s Notes:

Lightly golden, evaporated milk

  • Whole milk will get you the closest to store-bought evaporated milk, but the beauty of making your own is that you can use whatever kind of milk you please, whether a lower fat milk or a plant-based milk.

  • While eyeballing may be the easiest way to judge if it the milk has reduced by half, it’s not the most exact. Instead, try dipping a toothpick in the milk before simmering and making a mark on the toothpick where the milk comes up to. That way, as the milk simmers down, you can periodically dip the toothpick back in to see how close to half it is.

  • When milk is almost ready, it will take on a very light golden color as it reduces and caramelizes.

  • Mason jars make great storage containers!

evaporated milk, dairy free evaporated milk, unsweetened condensed milk
beverage, baking
American
Yield: 12 oz
Author:
Homemade Evaporated Milk

Homemade Evaporated Milk

Making evaporated milk at home is as easy as simmering milk on the stove!
Prep time: 2 MinCook time: 45 MinTotal time: 47 Min

Ingredients

Instructions

  1. Place milk in wide pan over medium heat. When it starts to simmer, reduce heat to low.
  2. Simmer until reduced by just more than half, this can take anywhere from half an hour to an hour, all depending on the stove. Remove from heat and cool.
  3. Strain and store in refrigerator.

Notes

  • Whole milk will get you the closest to store-bought evaporated milk, but the beauty of making your own is that you can use whatever kind of milk you please, whether a lower fat milk or a plant-based milk.
  • While eyeballing may be the easiest way to judge if it the milk has reduced by half, it’s not the most exact. Instead, try dipping a toothpick in the milk before simmering and making a mark on the toothpick where the milk comes up to. That way, as the milk simmers down, you can periodically dip the toothpick back in to see how close to half it is.
  • When milk is almost ready, it will take on a very light golden color as it reduces and caramelizes.


Nutrition Facts

Calories

39.65

Fat

2.11 g

Sat. Fat

1.23 g

Carbs

3.09 g

Fiber

0 g

Net carbs

3.09 g

Sugar

3.18 g

Protein

2.17 g

Sodium

25.11 mg

Cholesterol

7.93 mg

Nutritional info is approximate, based on 1 serving size of 2 Tbsp.

Did you make this recipe?
Tag @jennyblogsandbakes on instagram and hashtag it #jennyblogs

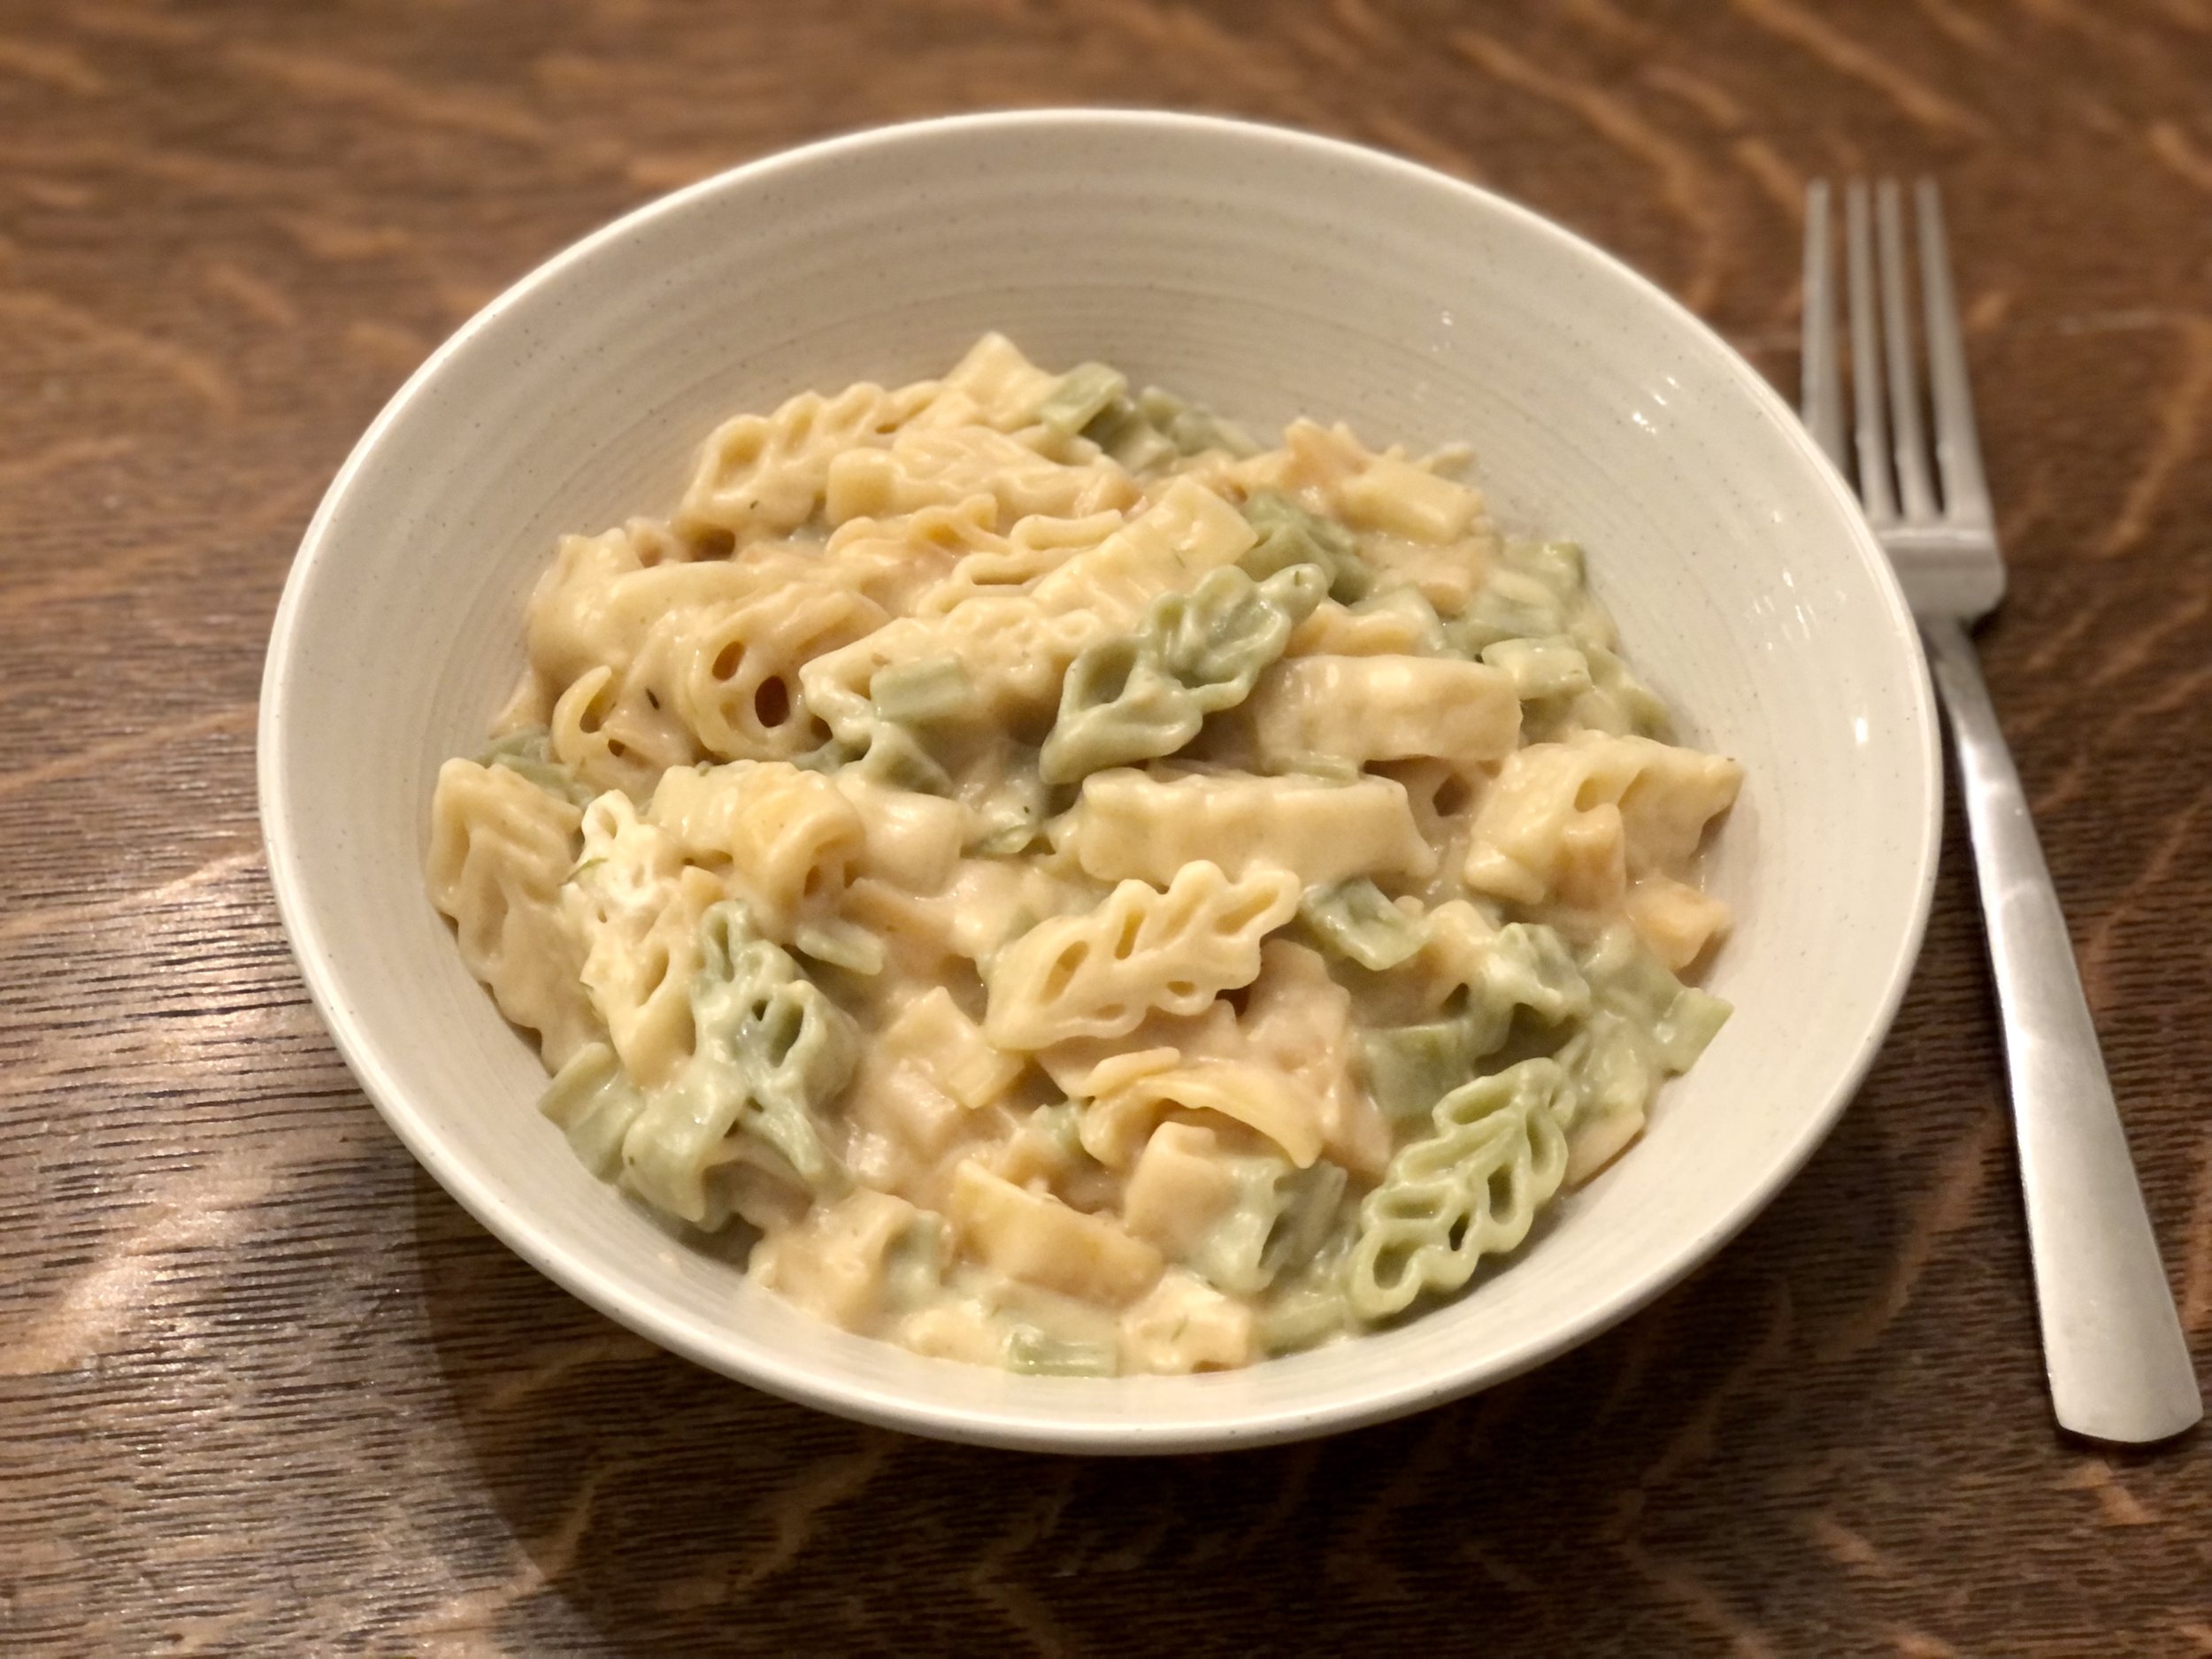
Herbed Six Cheese Pasta

Why, when we make macaroni and cheese, do we usually just add one cheese? Because it’s easy, yes. But have you ever added 2, 3 or even 6 different cheeses to your pasta? Because it’s wonderful and the flavor profile explodes. In a good way.

Here is one of my cheesy pasta recipes, made with yes, 6 different cheeses! You can easily mix up which cheeses you use, with whatever you have on hand. It creates a unique but divine pasta every time. The herbs I added in with the inspiration from herb cream cheese that I sometimes like to put on my toasted bagels. MMMMMMmmmmmmmm.

Now, one of my first thoughts when I see a number of cheeses (especially 6!!) in a dish is that it’s probably a really rich, high fat dish. Good for special occasions, not so much a weeknight dinner. The best thing about this pasta, is that it doesn’t use any more cheese than a regular, homemade, stove top macaroni and cheese. Actually, it uses less than some recipes! I like to use about 2 cups of shredded cheese (equal to about 8oz of cheese) for 1lb of pasta. This recipe also uses a total of 2 cups of shredded cheese. No heavy whipping cream, no half & half, just milk. It’s not overly indulgent, like so many recipes can be, while still tasting indulgent!

This pasta is cheesy, creamy, smoky, and should be cooking on your stove and in your tummy ASAP! :)

This post may contain affiliate links. If you make a purchase using these links, Jennyblogs may receive a small commission, at no extra cost to you. This helps to support Jennyblogs. For further information see the privacy policy. Grazie!

Recipe by Jenny. Inspired by Inspired with a Twist


Herbed Six Cheese Pasta

Serves 4-6

Ingredients:

  • 1 lb. / 500g pasta of your choice

  • 4 Tbsp / 56g oil or butter

  • 2 cloves garlic, minced

  • 1/4 cup / 30g all-purpose flour

  • 2 cups / 474g milk

  • 1/2 tsp smoked paprika

  • 1/2 tsp chopped fresh basil

  • 1/2 tsp chopped fresh oregano

  • 1/4 tsp chopped fresh thyme

  • 1/4 tsp chopped fresh rosemary

  • 1/8 tsp nutmeg

  • 1/2 cup / 56g shredded sharp cheddar cheese

  • 1/2 cup / 56g shredded mozzarella cheese

  • 1/4 cup / 25g shredded asiago cheese

  • 1/4 cup / 25g shredded parmesan cheese

  • 1/4 cup / 28g shredded smoked gruyère cheese

  • 2 oz / 57g cream cheese

Directions:

  1. In a large pot bring a good quantity of water to boil. Just before the water boils, salt the water. Stir to dissolve salt, then add in pasta. Cook pasta to al dente according to package directions. Drain, reserving about 2 cups of pasta water.

  2. While pasta is cooking, heat oil or butter in a large pot over medium-low heat. Add garlic and stir, for about 1 minute, until fragrant.

  3. Add flour and stir with a whisk, until all the oil or butter has been absorbed by the flour. Stir for an extra few seconds, to toast the flour.

  4. Slowly add in milk, a bit at a time, stirring constantly. The mixture will thicken, then slowly thin out as you add more milk.

  5. When all the milk has been added and the mixture comes to a simmer, add in all the spices and herbs.

  6. Add in all of the cheese and stir until melted and smooth. Turn off heat. Salt and pepper to taste.

  7. Add cooked pasta to the sauce, along with 1 cup of reserved pasta water. Stir well. Add in more pasta water until desired consistency is reached. Sauce will continue to thicken as it cools and sits. Serve.

Jenny’s Notes:

  • The cheese options for this pasta really are endless, no need to feel confined by the exact cheeses I have written here. I use different ones all the time! Cheddars, mozzarellas, Monterey or Colby Jack, gruyere, gouda, smoked cheeses, havarti, provolone, taleggio, Swiss…think of your favorites! Another I love to add? A blue cheese, like Gorgonzola. Mmmmm. It’s like one of my favorite Italian pizzas, quattro formaggi, a pizza with four cheeses, one of which is Gorgonzola.

  • If you don’t have fresh herbs available to you, you can easily sub in dried. As a general rule of thumb, use 1/3 the amount of dried in place of fresh. In this recipe, because the measurements are already quite small, I usually end up going with “generous 1/8th teaspoon”, or “pinch of this”, and it turns out wonderful!

  • If you enjoy especially rich pasta, you can use half & half or some cream in with the milk. I usually use 2% milk, still creates a luscious, cheesy, pasta, but without being overly indulgent!

Deluxe macaroni and cheese, best macaroni and cheese, six cheese pasta
Dinner, Pasta
American
Yield: 6-8
Author:
Herbed Six Cheese Pasta

Herbed Six Cheese Pasta

Creamy, smokey, cheesy pasta featuring 6 different cheeses with a sprinkling of fresh herbs and spices
Prep time: 10 MinCook time: 20 MinTotal time: 30 Min

Ingredients

Instructions

  1. In a large pot bring a good quantity of water to boil. Just before the water boils, salt the water. Stir to dissolve salt, then add in pasta. Cook pasta to al dente according to package directions. Drain, reserving about 2 cups of pasta water.
  2. While pasta is cooking, heat oil or butter in a large pot over medium-low heat. Add garlic and stir, for about 1 minute, until fragrant.
  3. Add flour and stir with a whisk, until all the oil or butter has been absorbed by the flour. Stir for an extra few seconds, to toast the flour.
  4. Slowly add in milk, a bit at a time, stirring constantly. The mixture will thicken, then slowly thin out as you add more milk.
  5. When all the milk has been added and the mixture comes to a simmer, add in all the spices and herbs.
  6. Add in all of the cheese and stir until melted and smooth. Turn off heat. Salt and pepper to taste.
  7. Add cooked pasta to the sauce, along with 1 cup of reserved pasta water. Stir well. Add in more pasta water until desired consistency is reached. Sauce will continue to thicken as it cools and sits. Serve.

Notes

  • The cheese options for this pasta really are endless, no need to feel confined by the exact cheeses I have written here. I use different ones all the time! Cheddars, mozzarellas, Monterey or Colby Jack, gruyere, gouda, smoked cheeses, havarti, provolone, taleggio, Swiss…think of your favorites! Another I love to add? A blue cheese, like Gorgonzola. Mmmmm. It’s like one of my favorite Italian pizzas, quattro formaggi, a pizza with four cheeses, one of which is Gorgonzola.
  • If you don’t have fresh herbs available to you, you can easily sub in dried. As a general rule of thumb, use 1/3 the amount of dried in place of fresh. In this recipe, because the measurements are already quite small, I usually end up going with “generous 1/8th teaspoon”, or “pinch of this”, and it turns out wonderful!
  • If you enjoy especially rich pasta, you can use half & half or some cream in with the milk. I usually use 2% milk, still creates a luscious, cheesy, pasta, but without being overly indulgent!


Nutrition Facts

Calories

574

Fat

24 g

Sat. Fat

14 g

Carbs

66 g

Fiber

3 g

Net carbs

63 g

Sugar

7 g

Protein

23 g

Sodium

419 mg

Cholesterol

68 mg

Nutritional information is approximate, based on 6 servings.

Did you make this recipe?
Tag @jennyblogsandbakes on instagram and hashtag it #jennyblogs

Tofu and Broccoli Stir Fry

This Tofu and Broccoli Stir Fry is deliciously salty, satisfying, and nutritious.

My family makes this recipe quite a bit, it’s quick and easy, providing protein and vegetables and a carb, if you serve it over rice.

If you’re watching your salt intake, you might prefer to use a low-sodium soy sauce and broth. Using low-sodium ingredients allows you to have more control over how salty your dish is, whether or not you actually may need low-sodium for health reasons.

This dish is also delicious meat-ified…by that I mean, with chicken instead of tofu. I’m not a vegetarian, and I love this recipe both ways. If making with chicken, you’ll want to cut it into cubes or bite-sized pieces. You can still coat the chicken in the cornstarch, and proceed with recipe as written. You’ll simply want to cook the chicken thoroughly, before adding in the garlic and ginger and finishing the stir fry. Voila! Meat-ified.

This post may contain affiliate links. If you make a purchase using these links, Jennyblogs may receive a small commission, at no extra cost to you. This helps to support Jennyblogs. For further information see the privacy policy. Grazie!


Tofu and Broccoli Stir Fry

Serves about 3-4

Ingredients:

  • 1 14oz / 400g container of extra-firm tofu

  • 2 Tbsp / 15g cornstarch

  • 1 cup / 237g vegetable or chicken broth

  • 3 Tbsp / 42g soy sauce

  • 2 tsp / 10g sugar

  • oil, for pan

  • 2 teaspoons grated fresh ginger

  • 2 garlic cloves, minced

  • 2 cups broccoli florets

Directions:

  1. Open and drain tofu. Wrap tightly in paper towels, place on a plate or cutting board, and place a weighted object on it, such as a bowl. Once the paper towel is soaked through, change them out for fresh paper towels. Repeat until paper towels remain mostly dry. Slice tofu into approx. 1/2” / 1cm cubes. Toss in a medium bowl with the cornstarch.

  2. Combine broth, soy sauce, and sugar; set aside.

  3. Generously drizzle an iron skillet or other non-stick pan with oil; place over medium-high heat.

  4. Fry tofu until golden brown and crispy, about 3-5 minutes. Flip the tofu, and fry other side until golden brown, another 3-5ish minutes.

  5. Lower heat to low; Add ginger and garlic and stir, until fragrant and sizzling, about a minute.

  6. Add in broth mixture and stir occasionally, until it starts to simmer.

  7. Add in broccoli, cover, and let sit for 2 minutes for “al dente” broccoli, or a couple more minutes for softer broccoli.

  8. Turn off heat and serve over rice.

Suggested toppings: red pepper flakes, sesame seeds, sliced green onions, etc.

Jenny’s Notes:

oven baked tofu

  • In an ideal world the tofu is prepared a bit in advance, so it has ample time to release as much water as possible. However, you can also wrap the tofu just 2x in paper towels. It only takes a couple minutes and still gets a good amount of water out. You may need more cornstarch in this case since the tofu will be moister, and that’s perfectly fine. Frying time may also take a few minutes longer, for the water to evaporate and get a proper crisp on the tofu.

  • If you prefer to bake tofu instead of frying: Prepare tofu as in step 1, than transfer onto a silpat or parchment paper lined cooking sheet. Bake in an oven preheated to 400°F / 205°C for 25-30 minutes, or until crisp and golden. Stir tofu once or twice during baking time. Add tofu into simmering sauce, let simmer for a few minutes, then add in broccoli to finish.

  • This is wonderful with red pepper flakes, sesame seeds, cilantro, and green onions sprinkled on top for garnish.

stir fry, tofu, broccoli, takeout, Chinese takeout, vegetarian dinner
dinner
Asian
Yield: 3-4
Author:
Tofu and Broccoli Stir Fry

Tofu and Broccoli Stir Fry

Crispy tofu with lightly crunchy broccoli in a salty stir fry sauce makes for a quick and satisfying dinner that is as good as take-out!
Prep time: 20 MinCook time: 15 MinTotal time: 35 Min

Ingredients

Instructions

  1. Open and drain tofu. Wrap tightly in paper towels, place on a plate or cutting board, and place a weighted object on it, such as a bowl. Once the paper towel is soaked through, change them out for fresh paper towels. Repeat until paper towels remain mostly dry. Slice tofu into approx. 1/2” / 1cm cubes. Toss in a medium bowl with the cornstarch.
  2. Combine broth, soy sauce, and sugar; set aside.
  3. Generously drizzle an iron skillet or other non-stick pan with oil; place over medium-high heat.
  4. Fry tofu until golden brown and crispy, about 3-5 minutes. Flip the tofu, and fry other side until golden brown, another 3-5ish minutes.
  5. Lower heat to low; Add ginger and garlic and stir, until fragrant and sizzling, about a minute.
  6. Add in broth mixture and stir occasionally, until it starts to simmer.
  7. Add in broccoli, cover, and let sit for 2 minutes for “al dente” broccoli, or a couple more minutes for softer broccoli.
  8. Turn off heat and serve over rice.
  9. Suggested toppings: red pepper flakes, sesame seeds, sliced green onions, etc

Notes

  • In an ideal world the tofu is prepared a bit in advance, so it has ample time to release as much water as possible. However, you can also wrap the tofu just 2x in paper towels. It only takes a couple minutes and still gets a good amount of water out. You may need more cornstarch in this case since the tofu will be moister, and that’s perfectly fine. Frying time may also take a few minutes longer, for the water to evaporate and get a proper crisp on the tofu.
  • If you prefer to bake tofu instead of frying: Prepare tofu as in step 1, than transfer onto a silpat or parchment paper lined cooking sheet. Bake in an oven preheated to 400°F / 205°C for 25-30 minutes, or until crisp and golden. Stir tofu once or twice during baking time. Add tofu into simmering sauce, let simmer for a few minutes, then add in broccoli to finish.
  • This is wonderful with red pepper flakes, sesame seeds, cilantro, and green onions sprinkled on top for garnish.


Nutrition Facts

Calories

223

Fat

11 g

Sat. Fat

1 g

Carbs

16 g

Fiber

3 g

Net carbs

13 g

Sugar

2 g

Protein

16 g

Sodium

1322 mg

Cholesterol

2 mg

Nutritional information is approximate, based on 3 servings, not including rice or garnishes.

Did you make this recipe?
Tag @jennyblogsandbakes on instagram and hashtag it #jennyblogs

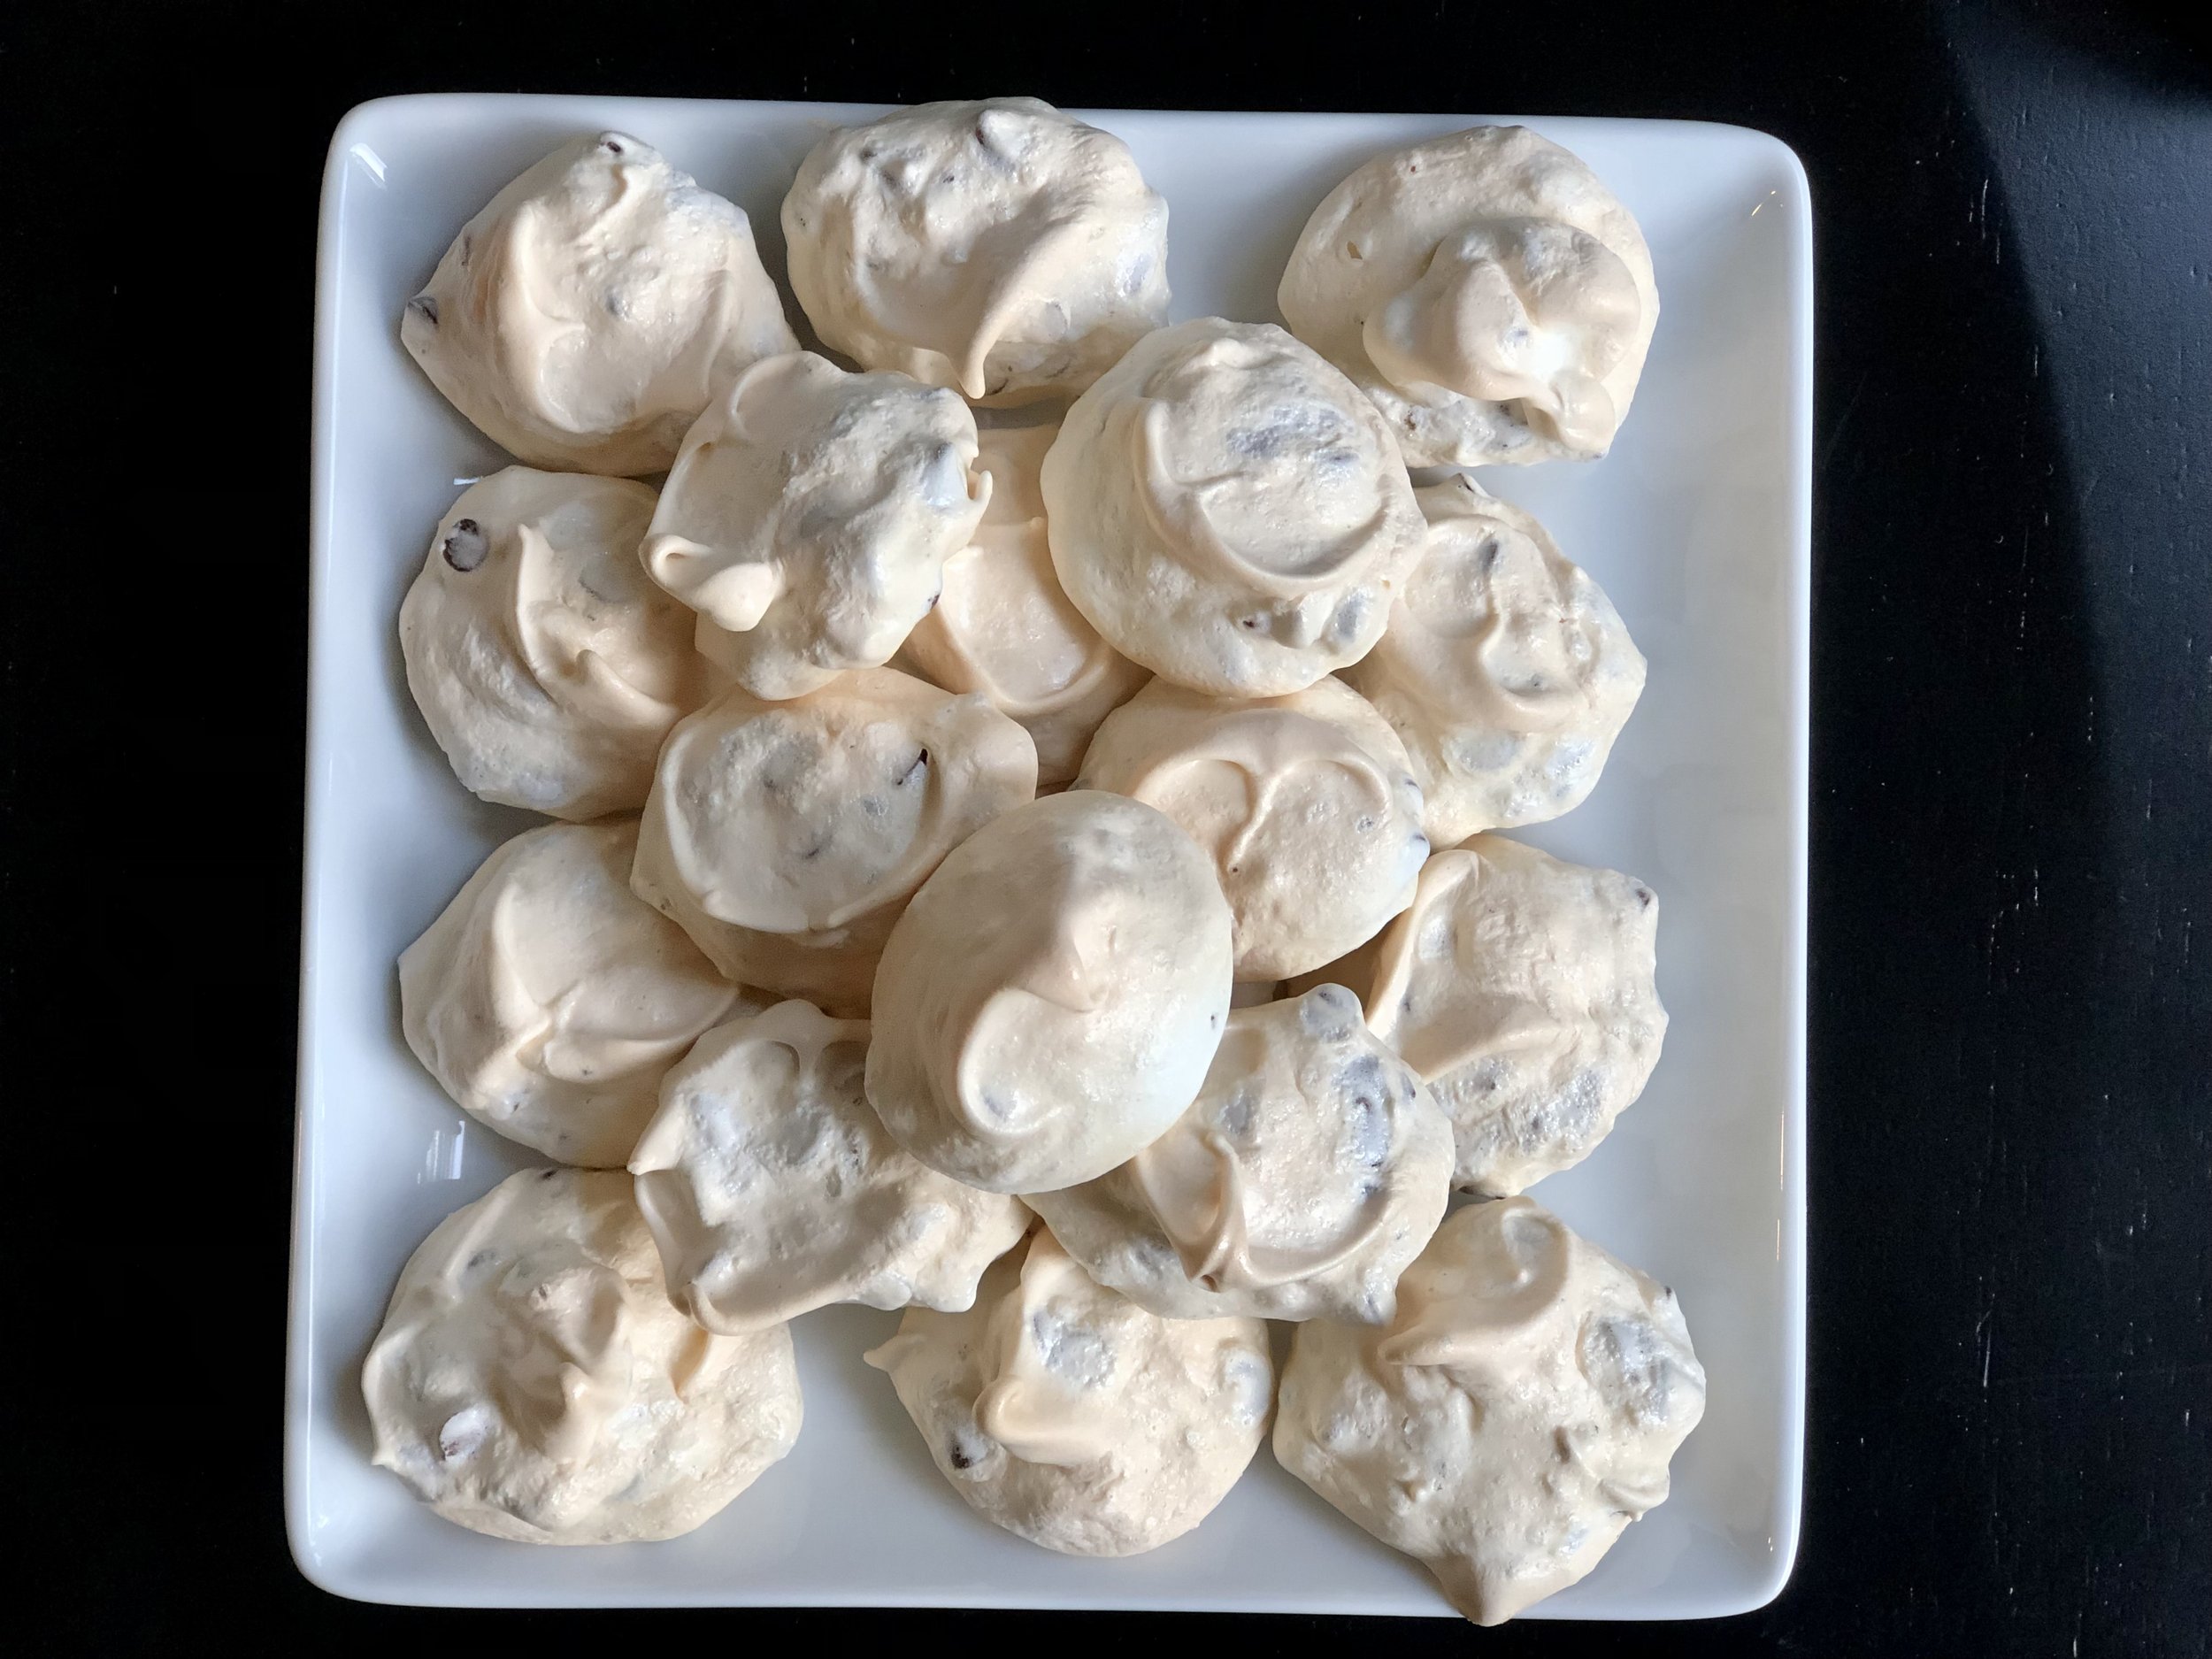
Chocolate Chip Meringue Cookies

As far as simple and delicious cookie recipes go, this is a good one to have on hand.

These cookies have only 4 ingredients, and are gluten-free, dairy-free (as long as your chocolate chips don’t contain dairy), and many other allergen and dietary needs friendly.

This is a recipe I’ve had around for ages, since I was a kid! I believe I originally got it from my cousin. I recently re-discovered these, they’re almost too easy to make, and a great way to use up extra egg whites. They’re easy enough kids can help or even make them by themselves, and with the chocolate chips, M&M’s, or other add ins, also very appealing to kids!

Are you ready for some of the easiest cookies you’ve made yet? Yeah, let’s go!

This post may contain affiliate links. If you make a purchase using these links, Jennyblogs may receive a small commission, at no extra cost to you. This helps to support Jennyblogs. For further information see the privacy policy. Grazie!

Recipe from my cousin


Chocolate Chip Meringue Cookies

M&M Meringue Cookies

Makes about 24 (about 1 1/2inch / 3cm) cookies

Ingredients:

  • 2 egg whites

  • 1 pinch of cream of tartar

  • 1/2 cup / 100g granulated sugar

  • 3/4 cup / 128g mini chocolate chips or other add-in of choice

Directions:

Oven preheated to 250°F / 121°C. Line a cookie sheet with a silpat or lightly grease.

  1. In the bowl of a stand mixer or with a hand-held electric mixer, beat egg whites and cream of tartar with whisk attachment until foamy.

  2. Add sugar and beat until stiff peaks form.

  3. Fold in chocolate chips with a spatula.

  4. Drop onto prepared cookie sheet and bake for about 30 minutes, or until set and just starting to turn a light golden color. Allow to cool slightly before removing from cookie sheet.

Jenny’s Notes:

  • Mini M&M’s are also a hit in these cookies! You can get creative, any kind of crushed candy or cookie like Oreo’s, or nuts, sprinkles, etc.

  • These cookies are best enjoyed within a day or two. They can be stored loosely covered at room temperature, but if you cover too tightly they turn soft and sticky even quicker.

meringue, egg whites, cookies, gluten-free, dairy-free
dessert, cookies
American
Yield: 24
Author:
Chocolate Chip Meringue Cookies

Chocolate Chip Meringue Cookies

4 ingredient meringue cookies with a slightly crunchy exterior and a soft, chewy inside, speckled with chocolate chips.
Prep time: 20 MinCook time: 30 MinTotal time: 50 Min

Ingredients

Instructions

  1. Oven preheated to 250°F / 121°C. Line a cookie sheet with a silpat or lightly grease.
  2. In the bowl of a stand mixer or with a hand-held electric mixer, beat egg whites and cream of tartar with whisk attachment until foamy.
  3. Add sugar and beat until stiff peaks form.
  4. Fold in chocolate chips with a spatula.
  5. Drop onto prepared cookie sheet and bake for about 30 minutes, or until set and just starting to turn a light golden color. Allow to cool slightly before removing from cookie sheet.

Notes

  • Mini M&M’s are also a hit in these cookies! You can get creative, any kind of crushed candy or cookie like Oreo’s, or nuts, sprinkles, etc.
  • These cookies are best enjoyed within a day or two. They can be stored loosely covered at room temperature, but if you cover too tightly they turn soft and sticky even quicker.

Nutrition Facts

Calories

45.69

Fat

1.32 g

Sat. Fat

0.81 g

Carbs

8.05 g

Fiber

0.15 g

Net carbs

7.9 g

Sugar

7.7 g

Protein

0.54 g

Sodium

8.04 mg

Cholesterol

0.84 mg

Nutritional information is approximate. Based on 1 cookie from a 24-cookie batch.

Did you make this recipe?
Tag @jennyblogsandbakes on instagram and hashtag it #jennyblogs

Oil Pie Crust

Pie crusts are a baking staple, but one that can be intimidating, even if you’ve made them before. Once you master how to make crust, however, a whole world of baking and cooking opens up to you: sweet pies, savory pies, quiches, galettes, home-made pop tarts, etc.

The ingredients for pie crusts couldn’t be more simple. Flour, salt, fat, and water for a basic crust. They differ mostly in what kind of fat is used. Top choices are:

  • Lard - tends to be a more traditional choice, many family recipes handed down include lard. It’s supposed to make a very tender, melt-in-your mouth crust. I prefer to avoid it because of its health value, or lack thereof.

  • Shortening - one of the cheaper options, and is easier to work with, making it a good choice for those that want their crust to hold up and make designs or cutouts. Another I prefer to avoid because it is a very unhealthy fat.

  • Butter - usually touted for having the best flavor. Since butter easily melts while it’s being worked with, it can be slightly more finicky than the previous two to keep tender, and less reliable for designs and cutouts.

  • Oil - the trickiest to work with by far, few are the people I know who make oil crusts. Actually, my mom may be the only one I know who only makes oil crusts. It’s the healthiest option, as most oils tend to have good fats and you can choose which oil you want to use. I tend to go for a neutral flavored oil, like peanut oil, but you could even go for extra virgin olive oil, especially if used for a savory pie! You can taste olive oil, but yum! Oil crusts are almost useless when it comes to making designs and cutouts. My experienced mom can get a lattice crust out of it, but if you go this route know it may not turn out and will look lovely and rustic.

Today we’re talking about oil crusts, the most fearful, yet arguably healthiest, of them all. While they can be notoriously tricky in my family to get a consistently tender crust, I’ve been working on them a lot over the past 2 years especially and have discovered a few tricks. I feel the recipe is just about foolproof, so I’ve decided to finally share it with you!

I’ll warn you, it is still not an “easy” pie crust to work with, but with a little patience can yield a wonderful and very tender, melt-in-your-mouth crust. I’ll give you all the tricks and knowledge that I know of!

Use Enough Oil

The single biggest difference between a potentially hard/crunchy crust, and a tender, melt-in-your-mouth crust? Making sure you are using sufficient fat, in this instance, oil. Once you add the oil, practically all the flour should be saturated. Like wet sand. Not some wet, a little dry. Not mostly dry. Well saturated. Which also means you may need less water. Adding less water can mean less mixing, which is another important aspect.

Don’t Over Mix

Never over-mix a pie crust once the water is added. Just a few turns with a spoon or spatula should suffice.

If Time, Let it Rest

Another trick is to let the dough rest before rolling it out. I’ve found success with actually two rests, if time allows. When you first add the water, let the mixture sit for a few minutes. Don’t mix the water in, just let it sit. Then gently mix. This gives the water more time to penetrate deep into the flour/oil, thus reducing the amount of time you may need to mix it.

A second rest, once you’ve gently mixed the dough, can be helpful. Form the dough into a ball, press into a disc, and wrap in plastic wrap. Let rest for anywhere from 10 minutes to overnight. The more time you give it, the more time the gluten has to relax and again, the water to absorb evenly throughout the dough. When you mix flour with water, gluten starts to form. This is good if you are making bread, helps give it a strong structure so it can rise, but bad if you are making crust. It will be tough. Neither of these rests are essential, but can be helpful, especially if you struggle with tough crusts.

How Do I Know How Much Water to Use?

The more you make this recipe the more you will become familiar with just how much water you need. The brand of flour you use, your kitchen, the temperature, humidity, elevation, season, etc. can all affect how much water you need. For example, in my kitchen, I almost always use exactly 5 Tbsp of water when I make this. However, in your kitchen, you may need 7. Somewhere else, maybe only 4. Each time you make your crust it becomes easier, knowing better how much water to add, what the consistency should look/feel like. Sometimes it can be hard to tell in the mixing stage, and despite your best guess, you may find your crust is too dry or too wet. That’s ok, just roll with it (haha literally), and make a note for next time. Once you’ve started rolling out your dough it’s too late to be adding more water, but you CAN add more flour while rolling it out if it’s too wet. Carefully. Just enough at a time so that the dough isn’t sticking to the surface or the rolling pin. The first time making a recipe, especially a more technical one like a crust, is always the trickiest.

How Do You Transfer the Rolled Out Pie Dough into the Pie Plate?

It’s true, this step is more challenging when dealing with a more delicate oil pie crust, but certainly doable.

Option 1: First, I recommend rolling out the dough on a silpat, or even a large cutting board. Once it’s rolled to size, carefully slide a thin spatula under the edges of the dough, to ensure it hasn’t glued itself to the surface you rolled it out on. Place the pie plate upside down directly onto the crust, centered. Slide one hand under the silpat or cutting board, place the other hand on the bottom of the pie plate, and quickly flip all. Then gently peel off the silpat, or remove the cutting board. Some flour may go flying, but this is the way I’ve had most consistent success keeping an intact oil pie crust.

Option 2: Fold the dough in half once it’s been rolled out, then transfer it to one side of the pie plate. Unfold the crust, and adjust/repair as needed. With an oil crust, it’s common for it to “crack” where you folded it, but that’s easily repaired if it’s a bottom crust.

Option 3: Starting at one end of the rolled out dough, carefully and loosely roll the dough around the rolling pin. Slide it over to the pie plate, and unroll.

Some of these tips are repeated in the “Jenny’s Notes” section immediately following the recipe, so you can reference them should you choose to print the recipe. :)

This post may contain affiliate links. If you make a purchase using these links, Jennyblogs may receive a small commission, at no extra cost to you. This helps to support Jennyblogs. For further information see the privacy policy. Grazie!

Recipe from my mom


Oil Pie Crust

Makes 1 top and 1 bottom crust for a standard 8 inch / 20cm pie

Ingredients:

  • 3 3/4 cup / 450g all-purpose flour

  • 1 tsp / 5g salt

  • 3/4 cup / 168g oil

  • 5-7 Tbsp / 70-98g ice water

Directions:

  1. In a large bowl, whisk together flour and salt.

  2. Stir in oil until flour is evenly moistened. It should look like wet sand with very little to no dry flour in the bottom of the bowl.

  3. Take your ice water and start by measuring 5 Tbsp / 70g evenly over flour mixture. Gently stir until just moistened. Be very careful not to over mix. If there is still a lot of drier oil mixture at the bottom of the bowl and it can’t be formed into a ball without crumbling, add more water, 1 Tbsp at a time, mixing until just combined.

  4. Divide dough into two equal pieces.

  5. On a generously floured surface, (a silpat makes for easy transfer to pie plate) roll out one half of the dough into a circle about 2 inches / 5cm larger than your pie plate.

  6. Carefully transfer dough to pie plate and press in.

  7. Repeat the rolling out process for the other half of dough. Add your pie filling and transfer top crust over pie. Trim any excess overhang from top and bottom crusts.

  8. Fold edge of top crust under edge of bottom crust, pressing and sealing together. Crimp with fingers or press with a fork. Use a knife or fork to poke some vent holes into the top.

  9. Bake according to pie recipe.

Jenny’s Notes:

  • To help ensure you don’t over-mix the dough when you add the water, you can allow the crust to sit for a few minutes after you sprinkle over the 5 Tbsp of water, BEFORE mixing. Optional, but helpful.

  • Another optional, but helpful tip to ensure a tender crust: After the water has been gently mixed in, gently form dough into a ball, then flatten into a disc and wrap in plastic film. Place in refrigerator for anywhere from 10-30+ minutes, even overnight. The more time it sits the more the moisture from the water will evenly distribute throughout the dough, simultaneously allowing any gluten that formed while mixing the dough a chance to “relax”, thus creating a more tender crust.

  • While rolling out the dough, occasionally turn it OR run a thin spatula underneath the dough, to ensure it is not glueing itself to the surface you are rolling it out on. If needed, sprinkle more flour underneath.

  • To easily see if you’ve rolled the pie crust out into a large enough circle, flip your pie plate upside down and hover it over the dough. You should be able to see about 2 inches / 5cm extending beyond the edges of your pie plate in all directions.

homemade oil pie crust recipe
Dessert, Dinner, Breakfast
American
Yield: 8
Author:
Oil Pie Crust

Oil Pie Crust

A 100% oil pie crust that is flaky, tender, and simple to make. Learn how to make one of the trickiest, yet healthiest pie crusts out there with this recipe, following the tips and tricks!
Prep time: 15 MinTotal time: 15 Min

Ingredients

Instructions

  1. In a large bowl, whisk together flour and salt.
  2. Stir in oil until flour is evenly moistened. It should look like wet sand with very little to no dry flour in the bottom of the bowl.
  3. Take your ice water and start by measuring 5 Tbsp / 70g evenly over flour mixture. Gently stir until just moistened. Be very careful not to over mix. If there is still a lot of drier oil mixture at the bottom of the bowl and it can’t be formed into a ball without crumbling, add more water, 1 Tbsp at a time, mixing until just combined.
  4. Divide dough into two equal pieces.
  5. On a generously floured surface, (a silpat makes for easy transfer to pie plate) roll out one half of the dough into a circle about 2 inches / 5cm larger than your pie plate.
  6. Carefully transfer dough to pie plate and press in.
  7. Repeat the rolling out process for the other half of dough. Add your pie filling and transfer top crust over pie. Trim any excess overhang from top and bottom crusts.
  8. Fold edge of top crust under edge of bottom crust, pressing and sealing together. Crimp with fingers or press with a fork. Use a knife or fork to poke some vent holes into the top.
  9. Bake according to pie recipe.

Notes

  • To help ensure you don’t over-mix the dough when you add the water, you can allow the crust to sit for a few minutes after you sprinkle over the 5 Tbsp of water, BEFORE mixing. Optional, but helpful.
  • Another optional, but helpful tip to ensure a tender crust: After the water has been gently mixed in, gently form dough into a ball, then flatten into a disc and wrap in plastic film. Place in refrigerator for anywhere from 10-30+ minutes, even overnight. The more time it sits the more the moisture from the water will evenly distribute throughout the dough, simultaneously allowing any gluten that formed while mixing the dough a chance to “relax”, thus creating a more tender crust.
  • While rolling out the dough, occasionally turn it OR run a thin spatula underneath the dough, to ensure it is not glueing itself to the surface you are rolling it out on. If needed, sprinkle more flour underneath.
  • To easily see if you’ve rolled the pie crust out into a large enough circle, flip your pie plate upside down and hover it over the dough. You should be able to see about 2 inches / 5cm extending beyond the edges of your pie plate in all directions.


Nutrition Facts

Calories

398.92

Fat

21.57 g

Sat. Fat

1.64 g

Carbs

44.71 g

Fiber

1.58 g

Net carbs

43.13 g

Sugar

0.16 g

Protein

6.05 g

Sodium

292.42 mg

Cholesterol

0 mg

Nutritional information is approximate. Based on 8 servings.

Did you make this recipe?
Tag @jennyblogsandbakes on instagram and hashtag it #jennyblogs

Homemade Chocolate Pudding

Everybody needs a good, quick, chocolate pudding recipe!

This recipe is almost as fast as the instant box kind, but much healthier! Well, as healthy as chocolate pudding can be. :) All it requires is a few ingredients whisked together, heated on the stove, then left to set up in the fridge. Easy peasy!

Because it’s so quick and easy, the original name of this recipe is “Hasty Chocolate Pudding”. I use this recipe in place of instant chocolate pudding when called for in recipes, in popsicles, as a filling for cupcakes, and when anyone just wants a bowl of chocolate pudding!

This post may contain affiliate links. If you make a purchase using these links, Jennyblogs may receive a small commission, at no extra cost to you. This helps to support Jennyblogs. For further information see the privacy policy. Grazie!

Recipe adapted from All Recipes


Homemade Chocolate Pudding

Makes about 2 cups of pudding

Ingredients:

  • 1/2 cup / 100g granulated sugar

  • 1/3 cup / 33g unsweetened cocoa powder

  • 3 Tbsp / 27g corn starch

  • 2 cups / 474g milk

  • 2 tsp / 10g vanilla extract

Directions:

  1. In a medium pot, whisk together sugar, cocoa powder, and corn starch until no lumps remain.

  2. Slowly add in milk, whisking well to get a smooth mixture.

  3. Place mixture over medium heat and whisk constantly, until mixture thickens and begins to simmer.

  4. Remove from heat and stir in vanilla extract

  5. Transfer pudding to a heat-proof bowl, and allow to cool slightly, whisking now and then to avoid the “skin” forming. When pudding is cooler, place a piece of plastic wrap directly onto pudding.

  6. Refrigerate until set.

Jenny’s Notes:

  • “heat-proof” just means a bowl that is safe to handle hot food; one that won’t break (certain glass bowls), or won’t leak dangerous chemicals into your food (plastic), or in any other way form a peril if you pour hot liquid into it. :)

  • Placing the plastic wrap directly onto the pudding prevents that “skin” from forming as the pudding cools. Because I don’t enjoy using plastic in general and especially when coming into contact with hot food, I try to wait for the pudding to cool before placing it on. This also ensures the plastic wrap won’t melt, as it could if you put it on immediately after taking it off the heat.

The plastic wrap placed directly on the pudding to prevent a skin from forming

chocolate pudding, chocolate cream, no bake
dessert
American
Yield: 4
Author:
Homemade Chocolate Pudding

Homemade Chocolate Pudding

Chocolate pudding can be made at home with just 5 ingredients and a stovetop. It couldn't be easier and it's all natural!
Prep time: 5 MinCook time: 10 MinInactive time: 1 HourTotal time: 1 H & 15 M

Ingredients

Instructions

  1. In a medium pot, whisk together sugar, cocoa powder, and corn starch until no lumps remain.
  2. Slowly add in milk, whisking well to get a smooth mixture.
  3. Place mixture over medium heat and whisk constantly, until mixture thickens and begins to simmer.
  4. Remove from heat and stir in vanilla extract
  5. Transfer pudding to a heat-proof bowl, and allow to cool slightly, whisking now and then to avoid the “skin” forming. When pudding is cooler, place a piece of plastic wrap directly onto pudding.
  6. Refrigerate until set.

Notes

  • “heat-proof” just means a bowl that is safe to handle hot food; one that won’t break (certain glass bowls), or won’t leak dangerous chemicals into your food (plastic), or in any other way form a peril if you pour hot liquid into it. :)
  • Placing the plastic wrap directly onto the pudding prevents that “skin” from forming as the pudding cools. Because I don’t enjoy using plastic in general and especially when coming into contact with hot food, I try to wait for the pudding to cool before placing it on. This also ensures the plastic wrap won’t melt, as it could if you put it on immediately after taking it off the heat.


Nutrition Facts

Calories

214.7

Fat

4.96 g

Sat. Fat

2.85 g

Carbs

40.48 g

Fiber

2.71 g

Net carbs

37.79 g

Sugar

31.21 g

Protein

5.42 g

Sodium

48.84 mg

Cholesterol

14.64 mg

Nutritional information is approximate; based on four 1/2 cup servings.

Did you make this recipe?
Tag @jennyblogsandbakes on instagram and hashtag it #jennyblogs

Chicken Fricassée

Chicken fricassée is a French chicken stew, consisting of browned chicken and vegetables in a creamy mushroom sauce.

It starts with a simple pan fry of chicken in a skillet with butter, until they’re nice and brown. The chicken is removed from the pan so you can cook onions, carrots, mushrooms, garlic, and a bit of thyme. Flour, chicken broth, and white wine are added to make a slightly thick, hearty sauce. Finally, cream (or milk if you prefer a lighter or less expensive version) and a splash of lemon juice are added at the end to turn the sauce into a creamy, velvety wonder, perfect for serving over mashed potatoes.

The whole thing can be cooked on the stove or it can also be finished in the oven. It goes a little quicker on the stove, my preferred version. My mom, on the other hand, prefers to finish hers in the oven. She likes the hands-free time while it’s in the oven to clean up the kitchen, which is also useful!

This makes for a convenient rotation to weeknight dinners since most of the ingredients I always have on hand, save for the mushrooms. This can be made without the mushrooms if you so prefer, but honestly it’s one of my favorite parts so I make sure to add mushrooms to my grocery list!

I’m not normally a meat, carrot, and potato kind of girl, but ever since I first made this a few years ago it’s become a part of our regular dinner rotation, it’s so delicious and satisfying.

This post may contain affiliate links. If you make a purchase using these links, Jennyblogs may receive a small commission, at no extra cost to you. This helps to support Jennyblogs. For further information see the privacy policy. Grazie!

Recipe adapted from The Toasty Kitchen


Chicken Fricassée

Serves about 4

Ingredients:

Chicken fricassée over mashed potatoes

  • 2 Tbsp / 28g butter

  • 1 lb / 454g uncooked chicken breasts

  • 2-3 carrots, sliced into half moons

  • 1 onion, diced medium

  • 8 oz / 227g white button mushrooms, sliced

  • 2 cloves garlic, minced

  • 1/2 tsp dried thyme

  • 2 Tbsp / 15g flour

  • 1/2 cup / 119g dry white wine

  • 1 cup / 237g chicken broth

  • 1/2 cup / 119g heavy cream, half & half, or milk

  • 2 Tbsp / 28g fresh lemon juice

  • salt and pepper

Directions:

  1. Take the chicken breasts and lay them on a cutting board. Slice each chicken breast horizontally into two thinner breasts, slicing parallel to the cutting board. It’s like butterflying, but cut all the way through so you have two separate pieces.

  2. Heat the butter in a large pan or cast iron skillet over medium heat. Add all the pieces of chicken, and cook for a few minutes on each side until internal temperature reaches 165° / 74°C. Remove chicken from pan and set aside.

  3. Add carrots and onion to hot pan and cook several minutes, until starting to soften.

  4. Add mushrooms and cook for another few minutes, until mushrooms are cooked and have mostly released their water.

  5. Add garlic and thyme, cook for just another minute.

  6. Add flour and stir to coat all vegetables, cook another minute or so.

  7. Add the white wine to deglaze the pan.

  8. When the wine is almost evaporated, add the chicken broth; stir until sauce is smooth and slightly thickened.

  9. Remove pan from heat and stir in cream and lemon juice; season with salt and pepper to taste.

  10. Add chicken breasts back into sauce; serve. Goes great with mashed potatoes.

Jenny’s Notes:

  • Step 1 could be optional, you can keep your chicken breasts whole if you wish. I like cutting my chicken breasts into thinner pieces before cooking since a whole chicken breast is usually much bigger than a serving, and it takes longer to cook. Our butcher in Italy always cut our chicken breasts like this and I loved it, thinner pieces of meat that are done cooking in a matter of minutes.

  • If you prefer, bone-in chicken (legs, thighs, etc.) can be used. Adjust cooking time accordingly to ensure chicken is cooked through (165°F / 74°C)

  • I have made this before without the wine, and it was still wonderful. So if you don’t have any on hand or just prefer to cook without it, omit the wine with no worries.

  • To finish this dish in the oven, you’ll want to make the whole thing in a pan that is able to go into the oven, such as a cast iron skillet. Follow recipe as written up through step 8. Add chicken back into the pan (without adding cream or lemon juice) and place in an oven preheated to 350°F / 177°C. Bake uncovered for 35-45 minutes, or until sauce is bubbly. Remove from oven and stir in cream and lemon juice.

  • If you choose to finish in the oven, you can focus more on browning the chicken in the pan in step 2 rather than cooking it through, since it will be baked in the oven. Just make sure the chicken is fully cooked before you take it out of the oven at the end!

chicken breasts, chicken stew, french chicken dish, chicken fricassée, carrots, onions, mushrooms, white wine sauce
Dinner
French
Yield: 4
Author:
Chicken Fricassée

Chicken Fricassée

French chicken stew with carrots, onion, and mushrooms in a creamy white wine sauce
Prep time: 15 MinCook time: 35 MinTotal time: 50 Min

Ingredients

Instructions

  1. Take the chicken breasts and lay them on a cutting board. Slice each chicken breast horizontally into two thinner breasts, slicing parallel to the cutting board. It’s like butterflying, but cut all the way through so you have two separate pieces.
  2. Heat the butter in a large pan or cast iron skillet over medium heat. Add all the pieces of chicken, and cook for a few minutes on each side until internal temperature reaches 165° / 74°C. Remove chicken from pan and set aside.
  3. Add carrots and onion to hot pan and cook several minutes, until starting to soften.
  4. Add mushrooms and cook for another few minutes, until mushrooms are cooked and have mostly released their water.
  5. Add garlic and thyme, cook for just another minute.
  6. Add flour and stir to coat all vegetables, cook another minute or so.
  7. Add the white wine to deglaze the pan.
  8. When the wine is almost evaporated, add the chicken broth; stir until sauce is smooth and slightly thickened.
  9. Remove pan from heat and stir in cream and lemon juice; season with salt and pepper to taste.
  10. Add chicken breasts back into sauce; serve. Goes great with mashed potatoes.

Notes

  • Step 1 could be optional, you can keep your chicken breasts whole if you wish. I like cutting my chicken breasts into thinner pieces before cooking since a whole chicken breast is usually much bigger than a serving, and it takes longer to cook. Our butcher in Italy always cut our chicken breasts like this and I loved it, thinner pieces of meat that are done cooking in a matter of minutes.
  • If you prefer, bone-in chicken (legs, thighs, etc.) can be used. Adjust cooking time accordingly to ensure chicken is cooked through (165°F / 74°C)
  • I have made this before without the wine, and it was still wonderful. So if you don’t have any on hand or just prefer to cook without it, omit the wine with no worries.
  • To finish this dish in the oven, you’ll want to make the whole thing in a pan that is able to go into the oven, such as a cast iron skillet. Follow recipe as written up through step 8. Add chicken back into the pan (without adding cream or lemon juice) and place in an oven preheated to 350°F / 177°C. Bake uncovered for 35-45 minutes, or until sauce is bubbly. Remove from oven and stir in cream and lemon juice.
  • If you choose to finish in the oven, you can focus more on browning the chicken in the pan in step 2 rather than cooking it through, since it will be baked in the oven. Just make sure the chicken is fully cooked before you take it out of the oven at the end!


Nutrition Facts

Calories

304.93

Fat

12.69

Sat. Fat

6.48

Carbs

14.38

Fiber

2.31

Net carbs

12.05

Sugar

6.12

Protein

28.4

Sodium

494.26

Cholesterol

99.61

Nutritional Information is approximate. Based on 4 servings, using heavy cream

Did you make this recipe?
Tag @jennyblogsandbakes on instagram and hashtag it # jennyblogs

Rhubarb Oat Bars

Are you taking advantage of this rhubarb season? I hope you are, I know I am, more so than ever, as I’ve missed living in a country where people use, let alone have heard of, rhubarb.

I don’t know about you, but when rhubarb season starts I usually think of pies as the first thing to make. Then, after a few rhubarb and rhubarb custard pies, I might want to make some ahem…I’m not sure what normal people call it, maybe rhubarb soup? I grew up calling it camel hair soup. (We’re so normal you can’t stand it.) After camel hair soup, then maybe some rhubarb hand pies made with puff pastry.

All of those things are delicious, but sometimes with rhubarb season being so short I don’t end up getting beyond the “classics.” This year I’ve been expanding my horizons a bit, and if you’d like to go beyond the rhubarb pies and crisps, here are some buttery rhubarb oat bars to try!

It’s a buttery crust, sticky and gooey strawberry rhubarb filling with a hint of nutmeg, and a buttery oat crumble on top.

Yes please.

I don’t think I need to go on much further, so here’s the recipe! Anyway, I better stop writing before rhubarb season is over, haha.

This post may contain affiliate links. If you make a purchase using these links, Jennyblogs may receive a small commission, at no extra cost to you. This helps to support Jennyblogs. For further information see the privacy policy. Grazie!

Recipe adapted from Curly Girl Kitchen


Rhubarb Oat Bars

Serves about 9-12

Ingredients

For the Crust and Topping

  • 1 1/2 cups / 180g flour

  • 1 cup / 90g rolled oats

  • 1 cup / 226g cold butter, cubed

  • 1/2 cup / 100g brown sugar

  • 1 tsp baking powder

  • 1/2 tsp salt

For the Rhubarb Filling

  • 1 lb / 454g (about 3 1/2 cups) rhubarb, cut into approx. 1/2” slices

  • 1/2 cup / 100g sugar

  • 6 Tbsp / 45g flour

  • 1/2 cup / 160g strawberry jam

  • 1 Tbsp / 15g lemon juice

  • 1 tsp / 5g vanilla extract

  • 1/4 tsp nutmeg

  • 1/4 tsp baking soda

Directions:

Oven preheated to 350F / 177C. Lightly grease an 8x8in / 20x20cm square baking dish.

Make the Crust and Topping

  1. In a food processor, blend all crust/topping ingredients together until the texture is like coarse pebbles. Alternately, you can mix by hand or with a fork or pastry cutter.

  2. Take half the mixture and press into the prepared baking dish. Reserve other half for topping.

  3. Bake for 15 minutes.

Meanwhile, Make the Rhubarb Filling

  1. In a large bowl, combine all filling ingredients. Mix together well.

  2. When the crust is done baking, pour filling over crust.

  3. Bake for 30 minutes.

  4. When the filling is done baking, crumble the remaining topping over filling and bake for another 20-25 minutes, or until top is light golden-brown.

  5. Allow to cool completely before cutting and serving. (The refrigerator can help speed up this process.)

Jenny’s Notes:

  • If you don’t have rolled oats, instant oats can be used.

  • The strawberry jam could be switched out for a different flavor of jam!

  • If you can’t wait to dig into your freshly baked bars, you can always go at it with a spoon! It will be more like a crumble when it’s still warm, but hey, is that a bad thing?

rhubarb, oat bars, oaty bars, crumble
dessert
American
Yield: 9-12
Author:
Rhubarb Oat Bars

Rhubarb Oat Bars

Buttery, crumbly oat bars with a sweet rhubarb and strawberry filling
Prep time: 20 MinCook time: 1 H & 5 MTotal time: 1 H & 25 M

Ingredients

For the Crust and Topping
For the Rhubarb Filling

Instructions

Make the Crust and Topping
  1. Oven preheated to 350F / 177C. Lightly grease an 8x8in / 20x20cm square baking dish.
  2. In a food processor, blend all crust/topping ingredients together until the texture is like coarse pebbles. Alternately, you can mix by hand or with a fork or pastry cutter.
  3. Take half the mixture and press into the prepared baking dish. Reserve other half for topping.
  4. Bake for 15 minutes.
Meanwhile, Make the Rhubarb Filling
  1. In a large bowl, combine all filling ingredients. Mix together well.
  2. When the crust is done baking, pour filling over crust.
  3. Bake for 30 minutes.
  4. When the filling is done baking, crumble the remaining topping over filling and bake for another 20-25 minutes, or until top is light golden-brown.
  5. Allow to cool completely before cutting and serving. (The refrigerator can help speed up this process.)

Notes

  • If you don’t have rolled oats, instant oats can be used.
  • The strawberry jam could be switched out for a different flavor of jam!
  • If you can’t wait to dig into your freshly baked bars, you can always go at it with a spoon! It will be more like a crumble when it’s still warm, but hey, is that a bad thing?

Nutrition Facts

Calories

463.59

Fat

21.47

Sat. Fat

13.15

Carbs

64.53

Fiber

2.75

Net carbs

61.8

Sugar

32.96

Protein

4.61

Sodium

393.23

Cholesterol

54.23

Nutritional Information is approximate.

Did you make this recipe?
Tag @jennyblogsandbakes on instagram and hashtag it # jennyblogs

Slata Tounsia - Tunisian Salad

Slata Tounsia, or Tunisian Salad, also called Salade Tunisienne, is a summertime classic in Tunisia.

Unlike most American salads that involve lettuce, there is no lettuce to be seen here, just tomato, cucumber, onion, apple, jalapeno peppers and a bright dressing that brings it all together and makes it irresistible. It’s simple, yet delicious.

It can be served as is as a side dish, or as it would be served traditionally, with tuna and hard boiled eggs, and olives, making it a well-rounded meal. I’m partial to the full-meal version, although my mom would probably be making fun of me since every time I call her and she asks what we’re having for dinner tuna, eggs, or both are probably involved. Hey, they’re good for you! Very mediterranean, you find lots of eggs and tuna in Italy as well.

The most classic version of the salad doesn’t include apple, even though many in Tunisia add it. We always add it because it gives such a happy and sweet element to the salad. I thought it sounded a bit strange at first, but it works really well.

Onion breath and how to avoid the worst of it

If you, like me, love onion but are hesitant to eat it raw if you have to go out in public anytime after, you know….”heyyyyyy guysssss I just ate onion!” you’ll be happy to hear that the dressing helps to cut the strength of the onion. Yes, you’ll still have some onion breath afterwards, but the vinegar and lemon in the dressing do wonders. If you really can’t deal with the onion breath, you can try soaking the onions for a few hours or overnight in the dressing (essentially making pickled onions) to cut their oniony strength even more. This salad I probably ate several times a week last summer when I was pregnant. I craved it but couldn’t deal with the onion breath afterwards, made me gag, haha, so we would leave the onions in the dressing for at least a few hours before finishing the salad.

To further reduce the after effects, I’m just going to go ahead and share some other ideas that I gathered off the internets and found to help. Nothing is foolproof, but it does help.

  1. Brush your teeth. This might seem obvious, but the sooner you can brush your teeth after eating onions or other insulting foods the better.

  2. Floss your teeth. Yep, just like brushing, get out all the stuff from the cracks for the cleanest and best chance at a fresh tasting mouth.

  3. Swish mouthwash.

  4. Chew gum.

  5. Eat other fruits, vegetables, and bread afterwards.

  6. Drink lots of water. I find lemon water to be especially pleasant and offsets the onion taste nicely.

  7. Drink milk. Kinda like when you eat spicy food, drinking milk can help flush out the taste/spice faster.

While it might be overkill to do all, my comfy little routine became brushing and flossing immediately after, drinking lemon water a few times, and chewing gum and rebrushing teeth as needed.

Anyway where were we? Oh yes, making slata tounsia. Enough villainizing the onions, who are friends.

Recipe from the husband


Slata Tounsia - Tunisian Salad

Serves 2 as a main dish or 3-4 as a side

Ingredients:

  • 2 tsp / 10g apple cider vinegar

  • juice from 1/2 a lemon

  • 1 tsp dried mint

  • 1 red onion, diced small

  • 2 cucumbers, diced small

  • 2 tomatoes, diced small

  • 1 apple, peeled if desired and diced small, optional

  • 8 jalapeño peppers, seeds removed and diced small

  • salt to taste

  • extra virgin olive oil, for drizzling

  • tuna, hard-boiled eggs, olives, for serving, optional

Directions:

IMG_3408.jpeg
  1. In a large bowl combine vinegar, lemon, and dried mint. Add the onion and mix to coat evenly. Allow to sit while you chop the rest of the vegetables and fruit.

  2. Add cucumbers, tomatoes, apple, jalapeño peppers, and salt to taste to the bowl with the onions. Taste, adding more salt as needed.

  3. To serve, drizzle with olive oil and arrange tuna and sliced hard-boiled eggs on top.

Jenny’s Notes:

  • While red onion is the best in this salad (and the prettiest!), other types of onions work as well.

  • red wine vinegar, white wine vinegar, or your favorite vinegar could be used in place of apple cider vinegar.

  • 8 jalapeño peppers might seem like a lot, but as long as you’re careful to remove all the seeds the salad will have a light kick but should not be overly spicy. Since peppers can vary in spiciness even if they’re the same variety, it’s always smart to have tasted/used the peppers before consuming them raw so you know what you’re getting yourself into. That said, you could use other types of peppers, spicier varieties if you’re brave or milder if spicy isn’t your thing.

Mediterranean cuisine, Tunisian dish, summer salad, slata tounsia, salade tunisienne
salad, side dish, main dish
Tunisian, Mediterranean
Yield: 2-4
Author:
Slata Tounsia

Slata Tounsia

A classic Tunisian summer salad made of cucumber, tomato, hot peppers, onion, and sometimes apple with a bright and simple dressing served with hard boiled eggs, tuna, and olives.
Prep time: 30 MinTotal time: 30 Min

Ingredients

Instructions

  1. In a large bowl combine vinegar, lemon, and dried mint. Add the onion and mix to coat evenly. Allow to sit while you chop the rest of the vegetables and fruit.
  2. Add cucumber, tomatoes, apple, jalapeño peppers, and salt to taste to the bowl with the onions. Taste, adding more salt as needed.
  3. To serve, drizzle with olive oil and arrange tuna and sliced hard-boiled eggs on top.

Notes

  • While red onion is the best in this salad (and the prettiest!), other types of onions work as well.
  • red wine vinegar, white wine vinegar, or your favorite vinegar could be used in place of apple cider vinegar.
  • 8 jalapeño peppers might seem like a lot, but as long as you’re careful to remove all the seeds the salad will have a light kick but should not be overly spicy. Since peppers can vary in spiciness even if they’re the same variety, it’s always smart to have tasted/used the peppers before consuming them raw so you know what you’re getting yourself into. That said, you could use other types of peppers, spicier varieties if you’re brave or milder if spicy isn’t your thing.

Nutrition Facts

Calories

183.34

Fat

7.96 g

Sat. Fat

1.13 g

Carbs

28.25 g

Fiber

6.65 g

Net carbs

21.61 g

Sugar

17.75 g

Protein

3.27 g

Sodium

111.39 mg

Cholesterol

1.86 mg

Nutritional info is approximate. Based on 2 servings that includes apple. Not including tuna, eggs, and olives.

Did you make this recipe?
Tag @jennyblogsandbakes on instagram and hashtag it #jennyblogs

Flax Bread

Recently I was determined to find a palatable bread for my husband who was eating a very restricted diet for a few months. The bread couldn’t contain gluten, yeast, sugar of any kind, or dairy. It’s already challenging to make a good gluten-free bread. But a bread without yeast? That’s tricky. Then throw in the dairy and sugar part and whew. Slim pickings. I tried a few recipes that I immediately discarded, but in the end I found this flax bread winner which contains none of the above.

Keep in mind with the above restrictions, you’re not going to get a bread thats crusty and artisanal and really anything like what you might imagine when you think of typical bread. But when your diet is restricted, and you come across a recipe like this, it tastes heavenly.

The original recipe was called Focaccia Flax Bread but I couldn’t quite bring myself to call it focaccia, since it’s so far from the real thing. It’s low, so similar in height to focaccia, but it’s also not really a flat bread. Maybe we can just call it a low bread?? Needless to say, I went with simple “flax bread”.

It also happens to be fabulously easy, which is a bonus. In less than 30 minutes you can have this bread hot out of the oven!

The flour in this bread is flax meal, although you can mix it up and use other GF flours, as well; the leavening is baking powder, the fat is coconut oil or really any non-dairy fat you choose. There’s also optional xylitol as a sweetener, which before this recipe I had never used. Sometimes I add it, sometimes I don’t, but I’ve found I rather enjoy using xylitol. It wasn’t as expensive as I had anticipated, it looks very similar to granulated sugar, it doesn’t have a weird taste to it like some sugar substitutes can, and it doesn’t feel as evil as say, aspartame.

If you’re a normal carb-ivore, I won’t try and sell this bread to you as “OMG you’ll never eat real bread again!” because that’s just silly. If you can eat real bread, eat real bread! I’m a normal carb-ivore and I find this bread tasty, but it certainly won’t replace my love of baguettes. But if you’re not able to eat normal bread, whether for a short time or indefinitely, I really hope this recipe brings some tastiness into your life!

This post may contain affiliate links. If you make a purchase using these links, Jennyblogs may receive a small commission, at no extra cost to you. This helps to support Jennyblogs. For further information see the privacy policy. Grazie!

Recipe adapted from whole new mom


Flax Bread

Serves 8

Ingredients:

  • 1 cup / 180g flax meal

  • 1 1/2 tsp baking powder

  • 1 tsp - 1 Tbsp / 5-15g xylitol, optional

  • 2 eggs

  • 1/2 cup / 119g water

  • 1/3 cup / 74g coconut oil, melted

Directions:

Preheat oven to 350°F / 177°C. Grease an 8x8in / 20x20cm square pan or 8in / 20cm round cake pan.

  1. In a medium bowl, combine flax meal, baking powder, and xylitol, if using.

  2. In a small bowl, lightly beat eggs. Add eggs to dry mixture along with water and coconut oil; mix until well combined.

  3. Let sit for a few minutes to thicken up slightly, then pour and spread into prepared pan.

  4. Bake for about 20 minutes or until turning golden-brown and bread is springy to the touch.

Jenny’s Notes:

  • You can make your own flax meal by grinding flax seeds in a food processor or coffee/spice grinder. Quick and easy! I do this every time.

  • Other GF flours can be substituted for part of the flaxmeal. I like to substitute about 25% (so 1/4 cup in this recipe) of the flax meal for buckwheat flour.

  • Really any fat can be used instead of coconut oil, choose your preference!

gluten free, dairy free, flaxmeal bread, candida diet friendly, sugar free, yeast free, flatbread
bread, special diets
American
Yield: 8
Author:
Flax Bread

Flax Bread

A versatile flatbread made with ground flax seeds that suits a variety of special dietary needs, including gluten-free, dairy-free, sugar-free, yeast-free and candida diet friendly.
Prep time: 7 MinCook time: 20 Mininactive time: 3 MinTotal time: 30 Min

Ingredients

Instructions

  1. Preheat oven to 350°F / 177°C. Grease an 8x8in / 20x20cm square pan or 8in / 20cm round cake pan.
  2. In a medium bowl, combine flax meal, baking powder, and xylitol, if using.
  3. In a small bowl, lightly beat eggs. Add eggs to dry mixture along with water and coconut oil; mix until well combined.
  4. Let sit for a few minutes to thicken up slightly, then pour and spread into prepared pan.
  5. Bake for about 20 minutes or until turning golden-brown and bread is springy to the touch.

Notes:

  • You can make your own flax meal by grinding flax seeds in a food processor or coffee/spice grinder. Quick and easy! I do this every time.
  • Other GF flours can be substituted for part of the flaxmeal. I like to substitute about 25% (so 1/4 cup in this recipe) of the flax meal for buckwheat flour.
  • Really any fat can be used instead of coconut oil, choose your preference!

Nutrition Facts

Calories

228.14

Fat (grams)

19.84

Sat. Fat (grams)

8.84

Carbs (grams)

8.54

Fiber (grams)

6.16

Net carbs

2.38

Sugar (grams)

0.40

Protein (grams)

5.69

Sodium (milligrams)

116.69

Cholesterol (grams)

46.50

Nutritional info is approximate. Based on 1 serving if recipe is made with 1 Tbsp of xylitol.

Did you make this recipe?
Tag @jennyblogsandbakes on instagram and hashtag it #jennyblogs
Created using The Recipes Generator

Paste di Pistacchio Siciliane - Sicilian Pistachio Cookies

Paste di Pistacchio, or Pistachio cookies, hail from the beautiful island of Sicily. They have a delightfully crisp outer shell and a chewy, soft center.

Two years ago I put up the recipe for Paste di Mandorle, or Sicilian Almond Cookies, and it has become one of the top recipes on this site.

It’s not hard to figure out why…with only 4 ingredients that get mixed together in a bowl with a spoon, rolled in powdered sugar and baked, it really doesn’t get much easier than this. No fancy equipment. Not to mention with the almonds there are more nutritional benefits to these than your average cookie. Or at least, that’s what I tell myself when I’m going for my fifth cookie. They’re also gluten-free and dairy-free friendly.

Sometimes great ideas pop into my head. Sometimes really awful ones, too, but I try to only filter the good ones here onto this blog, k? One day, I saw a half bag of pistachios in my cupboard. The first half had been ground into pistachio flour to make this Pistachio Cake with Honey Vanilla Buttercream for Christmas. Then I had an idea, what if I take the Paste di Mandorle recipe and replace part of the almond flour with pistachio flour?? So I did. And this recipe was born.

After the fact when all the cookies had been gobbled up within a couple hours, I wondered if maybe this recipe wasn’t original to me? It seemed too easy for no one else to have thought of this. Turns out these are definitely already a thing. Sicily is known not just for their almonds but also for their pistachios, especially the area of Bronte. Naturally, these pistachio cookies are a classic right alongside the almond ones.

The original Paste di Pistacchio Siciliane

The original recipe itself has a few variations, as I will list below. You can choose to implement any of the following as per your taste, or just follow the main recipe below, which is my favorite way of making it. Any way you go, you will have a scrumptious cookie that is not only unbelievably easy, but also an authentic Italian sweet!

  • Grind your own flour vs storebought flour. Some will instruct to grind your own almonds and pistachios. This not only gives you fresh nut flour, but it allows you to control how fine you grind it. Some advise against buying almond flour or pistachio flour from the store because it’s too thin. However, if you don’t have a food processor, spice grinder, coffee grinder or any other tool that will get the job done, I have used store bought flour and it turned out fine. No pun intended. ;)

  • Honey. I’d say most of the recipes claiming to be the original I’ve seen call for adding a bit of honey, anywhere from 10-20g. Honestly I don’t, but it would be easy to add if you truly want as close to the original as possible. If adding honey, use a bit less of the cane sugar.

  • Powdered sugar. Some recipes call for using powdered, others granulated. Others call for granulated but have you grind the sugar with the nuts, so you end up with powdered sugar anyway. I generally use granulated sugar and don’t grind, because I grind the nuts in a small electric coffee grinder and there isn’t room for the sugar. Either way you will have great results.

  • Cookie shape. The cookies can be shaped into the classic S shape (Roll dough into logs about the width of a finger, then slice into pieces about the length of half of an index finger, roll in powdered sugar, and use your fingers to shape into the S), ovals, or simply round cookies. I chose the round shape for the recipe below, as it’s the simplest. If you’d like to see the S shape, check out the pictures in this recipe.

  • Dough resting/refrigeration. Some will instruct to let the dough rest after you’ve shaped it so it will be less sticky. As with the almond cookies, if you’ve glanced or made that recipe, the refrigeration or resting is not strictly necessary. It allows the dough to dry out a bit, which means they retain their shapes better when baked. But if you’re going for the round or oval shape, there’s not much need.

This post may contain affiliate links. If you make a purchase using these links, Jennyblogs may receive a small commission, at no extra cost to you. This helps to support Jennyblogs. For further information see the privacy policy. Grazie!

Here is one of the recipes I referenced in Italian and also gives a good visual of the “S” shaped cookie.


Paste di Pistacchio Siciliane - Sicilian Pistachio Cookies

Makes about 2 dozen cookies

Ingredients:

  • 125g whole unsalted almonds or almond flour

  • 125g whole unsalted pistachios or pistachio flour

  • 250g granulated sugar (or 230g granulated sugar and 20g honey)

  • 2 / 60g egg whites

  • pinch of salt

  • powdered sugar, for rolling, optional

Directions:

Preheat oven to 350°F / 180°C.

  1. Using a food processor, spice grinder, or coffee grinder, grind the nuts until coarse. Small chunks are ok.

  2. Mix all ingredients together, and form into balls or desired shape. Roll in powder sugar, if desired.

  3. Place evenly spaced on ungreased cookie sheets. At this point cookies can be covered and refrigerated overnight or baked immediately.

  4. Bake in preheated oven for about 8-12 minutes, or until cookies just start to turn golden.

Jenny’s Notes:

  • If working with a food processor or other tool large enough, you can grind the nuts with the sugar, creating powdered sugar in the process, as some recipes call for.

  • If the dough is too sticky, you can let it sit for an hour or refrigerate for several hours to let it thicken/dry out a bit.

  • This recipe is also delicious using all pistachio flour!

Italian dessert, Italian cookie, Sicilian dessert, Sicilian recipe, authentic Italian recipe, original Sicilian dessert recipe, pistachio, almond, gluten free, dairy free
dessert, cookies
Italian
Yield: 24
Author:
Paste di Pistacchio Siciliane - Sicilian Pistachio Cookies

Paste di Pistacchio Siciliane - Sicilian Pistachio Cookies

Traditional Sicilian sweets with a delightfully crunchy outside and chewy inside. Made with just 4-5 ingredients and naturally gluten-free and dairy-free.
Prep time: 15 MinCook time: 12 MinTotal time: 27 Min

Ingredients

Instructions

  1. Preheat oven to 350°F / 180°C.
  2. Using a food processor, spice grinder, or coffee grinder, grind the nuts until coarse. Small chunks are ok.
  3. Mix all ingredients together, and form into balls or desired shape. Roll in powder sugar, if desired.
  4. Place evenly spaced on ungreased cookie sheets. At this point cookies can be covered and refrigerated overnight or baked immediately.
  5. Bake in preheated oven for about 8-12 minutes, or until cookies just start to turn golden.

Notes:

  • If working with a food processor or other tool large enough, you can grind the nuts with the sugar, creating powdered sugar in the process, as some Italian versions call for.
  • If the dough is too sticky, you can let it sit for an hour or refrigerate for several hours to let it thicken/dry out a bit.
  • This recipe is also delicious using all pistachio flour!


Calories

108.15

Fat (grams)

5.13

Sat. Fat (grams)

0.51

Carbs (grams)

14.12

Fiber (grams)

1.10

Net carbs

13.02

Sugar (grams)

12.21

Protein (grams)

2.73

Sodium (milligrams)

36.38

Cholesterol (grams)

0.00

Nutritional information is approximate. Based on 1 cookie rolled in powdered sugar.

Did you make this recipe?
Tag @jennyblogsandbakes on instagram and hashtag it #jennyblogs
Created using The Recipes Generator