
Overnight Sourdough Pizza Dough
/Last Updated: November 4, 2025
Sourdough pizza!
My absolute favorite pizza dough recipe, and definitely worth the time to plan a day (or 2) ahead. At first glance the recipe might seem complicated (it is a 2 day recipe, after all), but it really is very simple, with no more than 1-2 minutes of kneading involved. With sourdough, time is your friend and does most of the work for you.
If you’ve ever made homemade pizza dough and wondered why it’s “good” but missing out on that chewy, wonderful crust texture that you get from the best pizzerias, this recipe will have you wondering no more. It’s chewy and flavorful and will have you whipping pizzas out of your home oven that taste about as close to your Italian vacation as can be possible! Which leads me to ask…
How’s it going? With your sourdough starter, I mean.

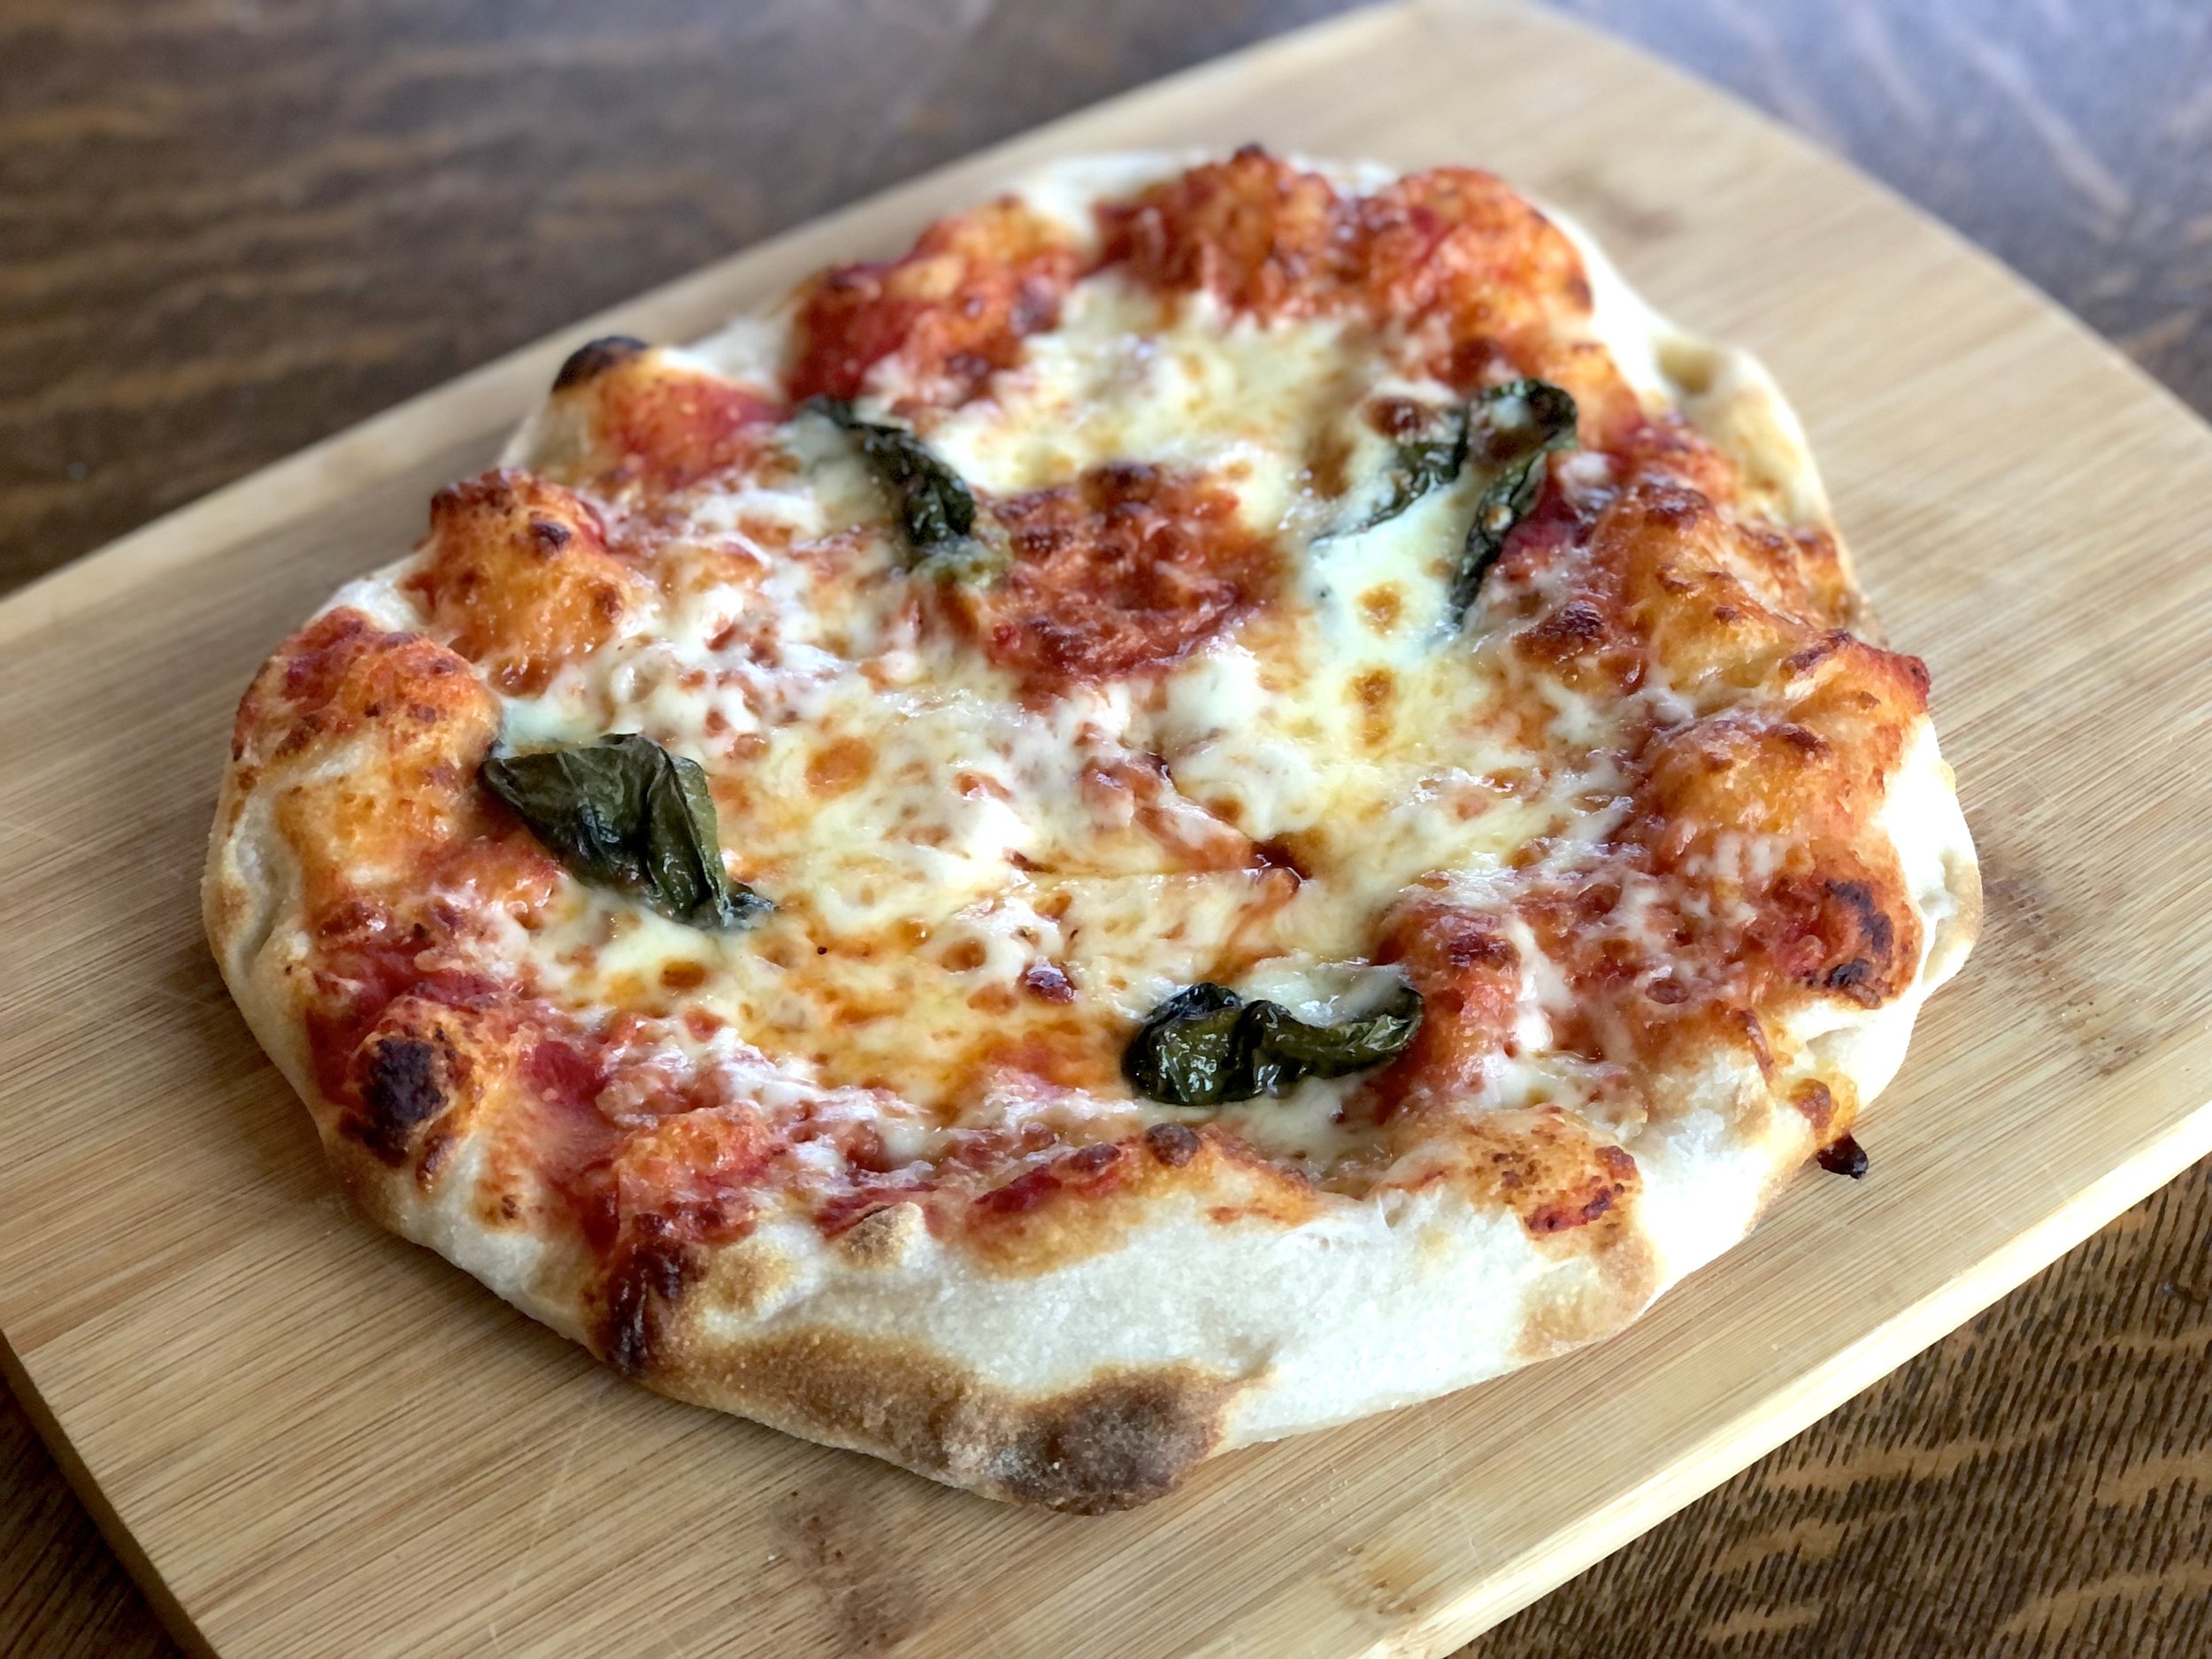
Margherita Pizza
If you weren’t already dabbling in sourdough before 2020, everyone and their brother started a sourdough starter during all of the stay-home business and many varying lockdowns, ammiright?
Did your starter get off to success, or did it dwindle, never making it to its full, goopy, bubbly glory? Perhaps it’s sitting, forgotten, in the back of your fridge. Perhaps you’re a sourdough baking fiend, whipping out the loaves and baguettes like nobody’s business.
Or, just maybe, you’re like me, your friendly sourdough-user-but-not-an-expert, keeping the starter alive and using it occasionally but mostly as discard to flavor/boost other recipes. If this sounds familiar, then this recipe is perfect for you. Not too hard, I’ll try not to give you too much theory (yes, I do know some!), and, as long as you have a not-dead starter, basically foolproof.
Not convinced yet? This is the single pizza recipe I make most, by far, even though it takes 24+ hours, because it is that good and that simple. Actually, if I make pizza, I don’t even think about which crust I should make. I just make this one. Day 1 is really just stirring 3 ingredients together. That’s it.
Some Sourdough Tips
Did I mention I have experience but am not an expert on sourdough? Yes, so what follows is my experience and some of the most helpful sourdough tips I’ve learned over the past 5 years dabbling, that may help you too.

master of disguise: Arugula Pizza
Keep in mind that sourdough is highly individual. Meaning, the time you give it, how active it is, the temperature of your house, types of flour you use, etc. will all affect your starter and your end product. For example, I’ve started sourdough starter on two separate continents with results that varied quite a bit. I’ve made this recipe several times with both my Italian and American starter. To be honest I always had more success with my American starter, it feels invincible where my Italian one always needed some tender care and coaxing. But maybe I subconsciously gave my Italian starter too much free reign thinking that it ought to know what to do, being Italian in the land of pizza, after all. Anyway, here goes nothing:
When making sourdough breads, most recipes will assume or instruct you to have an active/ripe (freshly fed) starter. This means you probably fed your starter at least once the day before starting the recipe, and you’re not just taking your starter straight out of the fridge to start the recipe. Recipes that use NOT refreshed starters will often call themselves discard this or discard that.
I USUALLY use my starter straight out of the fridge for this recipe. In fact, there may be a note somewhere with this recipe that says you can use your starter straight out of the fridge, making this not such a guilty confession. That’s another great thing about this recipe. And it turns out great. I will mention, though, that sometimes my Italian starter would yield a less fluffy crust, and I found more success if it was recently refreshed.
I once read that it’s actually very hard to kill a (well-established) sourdough starter if it’s kept in the fridge. This relieved a great amount of guilt for me, as, if more than 1 week passed since I had last fed my starter, I had this constant nagging that every day more that passed my starter was dying and suffering. And while the sourdough starters of one person (me) are hardly a vast study, I would say this has turned out true. Even 1 month+ in the fridge and after just one feed it bounced back and was lively. Nice.
Keep in mind the word “recipe” when associated with “sourdough” should be used loosely. Formula might be a better word. The beauty, and frustrating part of sourdough is that it IS so variable. If something isn’t going right, in this recipe or any other with sourdough, go back to your starter, your little living friend. My two biggest mistakes with sourdough starter have been not giving a new starter enough time to get established, and not giving the dough enough time to rise/proof. It can feel strange to let dough rise for so many hours rather than the typical 1-2 hours with instant yeast if that’s what you’re used to!

While the following recipe uses both volume and weight measurements as is usual on this blog, I would encourage you in all baking but especially with sourdough to use a scale. It makes everything easier, creates less dishes to wash, and is quicker and more accurate. When you’re working with sourdough it really does make most sense to use a scale. Scales are not expensive and you don’t need a top of the line one to do the job! You can get a handy little one for as little as $9.99 on Amazon.

If you’re wanting to get more serious about your baking and invest in a slightly larger scale, this is the one I just started using, and am really liking it so far. It’s very similar to the type of scale I would use when working at bakeries or La Pasta Fresca in Florence.
The Difference between “Sourdough Starter” and “Levain”
If these two terms confuse you, hopefully this explanation will help you.
Sourdough starter is your flour and water mixture that you keep in the fridge and feed.
Levain refers to the usually first part of a sourdough recipe where you add sourdough starter with more flour and water, that will end up as part of your bread product. Another way you can think of it, the levain is built from the starter and will always end up baked.
This post may contain affiliate links. If you make a purchase using these links, Jennyblogs may receive a small commission, at no extra cost to you. This helps to support Jennyblogs. Where possible, links are prioritized to small businesses and ethically and responsibly made items. For further information see the privacy policy. Grazie!
Recipe lightly adapted from Ken Forkish’s “The Elements of Pizza”


Overnight Levain Pizza Dough
Makes 2 large, 3 medium, or 5 small pizzas
Ingredients:
Day 1
50g (2 Tbsp + 1 tsp) sourdough starter
100g (1/3 cup + 4 tsp) water
100g (3/4 cup + 2 tsp) bread flour or all-purpose flour
Day 2
225g (scant 1 cup) water
14g (2 1/2 tsp) salt
250g (All of the levain [sourdough]) from day 1
375g (scant 3 cups) all-purpose flour
Directions:
Day 1
The evening before you intend to make pizzas, mix together in a medium bowl the sourdough starter, warm (100°F / 38°C) water, and flour.
Cover the bowl and let it sit out on the countertop overnight.
Day 2
Roughly 12 hours later, your starter from the day before should be bubbly, goopy, and active.
Pour warm (90-95°F / 32°-38°C) water into a large bowl, add salt, and stir until salt has dissolved.
Mix in all of the levain started the previous evening; it may not completely mix in, that’s ok. You can use a spoon or your hand with a “pincer” like motion, like a crab, helping the levain to break up into the water.
Add flour and stir, with a spoon or by hand, just until dough forms into a mostly uniform mass. Continue for about 30 seconds, a shaggy looking dough ball is ok. Target dough temperature is 80°F / 27°C.
Let dough rest for 20 minutes.
Knead dough for 30 seconds - 1 minute on a lightly floured surface, dough should become very smooth and uniform. Shape into a ball and place seam side down into a lightly greased bowl; cover.
Let dough rest at room temperature for about 3 hours.
Turn dough out onto lightly floured surface and shape into desired number of balls (2 for larger pizzas, 3 for medium, or 5 for small), using a scale for consistency. Place shaped dough balls seam side down onto a lightly floured sheet tray, parchment paper, or silpat, keeping space between. Lightly flour tops and cover with plastic wrap; let rest for another 5 hours.
After the 5 hours, the dough balls can either be refrigerated and used to make pizzas the next day (day 3), or continue and make pizzas!
Make Pizzas
If you have a pizza stone, place it on the middle rack of your oven before preheating.
Preheat oven to 550°F / 288°C or the max of your oven.
Roll with a rolling pin or toss a pizza dough ball to desired size, using lightly floured or oiled hands. Place dough round on parchment paper to easily transfer on and off the pizza stone.
Bake about 5-7 minutes for small pizzas, 6-9 for medium, or 8-12 for large pizzas, using your eyes to test for readiness more than time.
Jenny’s Notes:
While I include the original temperature notes for ingredients from Ken Forkish’s original recipe, I will confess I don’t always take the time to measure or check them as I make this often enough in roughly the same environment/temperature house that I just go with it. It’s very educational to do so with new recipes and in new environments, and helps when sharing a sourdough recipe to keep the recipe as consistent as possible, keeping some of the factors (like temperature) the same.
The 8 hour rise time on day 2 as a mass, then as dough balls, (steps 7 and 8) doesn’t have to be precise, if you need to shape the dough after 2 hours, that’s perfectly fine, you just want a total time of about 8 hours, so you could rest the dough for 2 hours, shape, then rest for 6 hours.
If you refrigerate your dough and use it to make pizzas on what would be day 3, take dough out of the fridge about an hour before making/baking pizzas. In a pinch I’ve used the dough straight out of the fridge, but the dough will rise better and be fluffier if you don’t go cold turkey, heh.
If you’ve never used your oven at its maximum temperature and think that’s crazy, just keep in mind that pizzas made in wood burning pizza ovens like they are in Italy, are baked at temperatures of up to 900°F / 485°C, so your home oven at its max isn’t even going to get near the burst of heat that make the best pizzas!

24 Hour Levain Pizza Dough
Ingredients
Instructions
- The evening before you intend to make pizzas, mix together in a medium bowl the sourdough starter, warm (100°F / 38°C) water, and flour.
- Cover the bowl and let it sit out on the countertop overnight.
- Roughly 12 hours later, your starter from the day before should be bubbly, goopy, and active.
- Pour warm (90-95°F / 32°-38°C) water into a large bowl, add salt, and stir until salt has dissolved.
- Mix in all of the levain started the previous evening; it may not completely mix in, that’s ok. You can use a spoon or your hand with a “pincer” like motion, like a crab, helping the levain to break up into the water.
- Add flour and stir, with a spoon or by hand, just until dough forms into a mostly uniform mass. Continue for about 30 seconds, a shaggy looking dough ball is ok. Target dough temperature is 80°F / 27°C.
- Let dough rest for 20 minutes.
- Knead dough for 30 seconds - 1 minute on a lightly floured surface, dough should become very smooth and uniform. Shape into a ball and place seam side down into a lightly greased bowl; cover.
- Let dough rest at room temperature for about 3 hours.
- Turn dough out onto lightly floured surface and shape into desired number of balls (2 for larger pizzas, 3 for medium, or 5 for small), using a scale for consistency. Place shaped dough balls seam side down onto a lightly floured sheet tray, parchment paper, or silpat, keeping space between. Lightly flour tops and cover with plastic wrap; let rest for another 5 hours.
- After the 5 hours, the dough balls can either be refrigerated and used to make pizzas the next day (day 3), or continue and make pizzas!
- If you have a pizza stone, place it on the middle rack of your oven before preheating oven.
- Preheat oven to 550°F / 288°C or the max of your oven.
- Roll with a rolling pin or toss a pizza dough ball to desired size, using lightly floured hands. Place dough round on parchment paper to easily transfer on and off the pizza stone.
- Bake about 5-7 minutes for small pizzas, 6-9 for medium, or 8-12 for large pizzas, using your eyes to test for readiness more than time.
Notes
- While I include the original temperature notes for ingredients from Ken Forkish’s original recipe, I will confess I don’t always take the time to measure or check them as I make this often enough in roughly the same environment/temperature house that I just go with it. It’s very educational to do so with new recipes and in new environments, and helps when sharing a sourdough recipe to keep the recipe as consistent as possible, keeping some of the factors (like temperature) the same.
- The 8 hour rise time on day 2 as a mass, then as dough balls, (steps 7 and 8) doesn’t have to be precise, if you need to shape the dough after 2 hours, that’s perfectly fine, you just want a total time of about 8 hours, so you could rest the dough for 2 hours, shape, then rest for 6 hours.
- If you refrigerate your dough and use it to make pizzas on what would be day 3, take dough out of the fridge about an hour before making/baking pizzas. In a pinch I’ve used the dough straight out of the fridge, but the dough will rise better and be fluffier if you don’t go cold turkey, heh.
- If you’ve never used your oven at its maximum temperature and think that’s crazy, just keep in mind that pizzas made in wood burning pizza ovens like they are in Italy, are baked at temperatures of up to 900°F / 485°C, so your home oven at its max isn’t even going to get near the burst of heat that make the best pizzas!
Nutrition Facts
Calories
591.5Fat
1.59 gSat. Fat
0.24 gCarbs
124.01 gFiber
4.39 gNet carbs
119.62 gSugar
0.43 gProtein
16.78 gSodium
1817.54 mgCholesterol
0 mgNutritional information is approximate. Based on 1 pizza dough ball if you make 3 medium sized dough balls.


