Jenny's Favorite Cinnamon Rolls

Last updated: June 4, 2024

With all the cinnamon roll recipes out there, how do you pick which one to make? Which one do you adopt as your cinnamon roll recipe?

I’ve made my fair share of cinnamon roll recipes, and I’ve yet to meet a bad one. Some are better than others, but I’ve been waiting to meet the recipe that stood out from the rest.

Lightning struck when I tried this recipe from King Arthur, “Perfectly Pillowy Cinnamon Rolls”. I had met the one! As the title suggests, these rolls are pillowy, luxurious, and everything you could want from a cinnamon roll.

What makes a good cinnamon roll recipe?

The thing that really makes one cinnamon roll stand out from another is the actual dough.

Filling and frosting are easily adjusted, so once you find a cinnamon roll with a soft, fluffy, and luscious dough, you can always adjust filling and frosting according to your taste.

What makes this recipe so special?

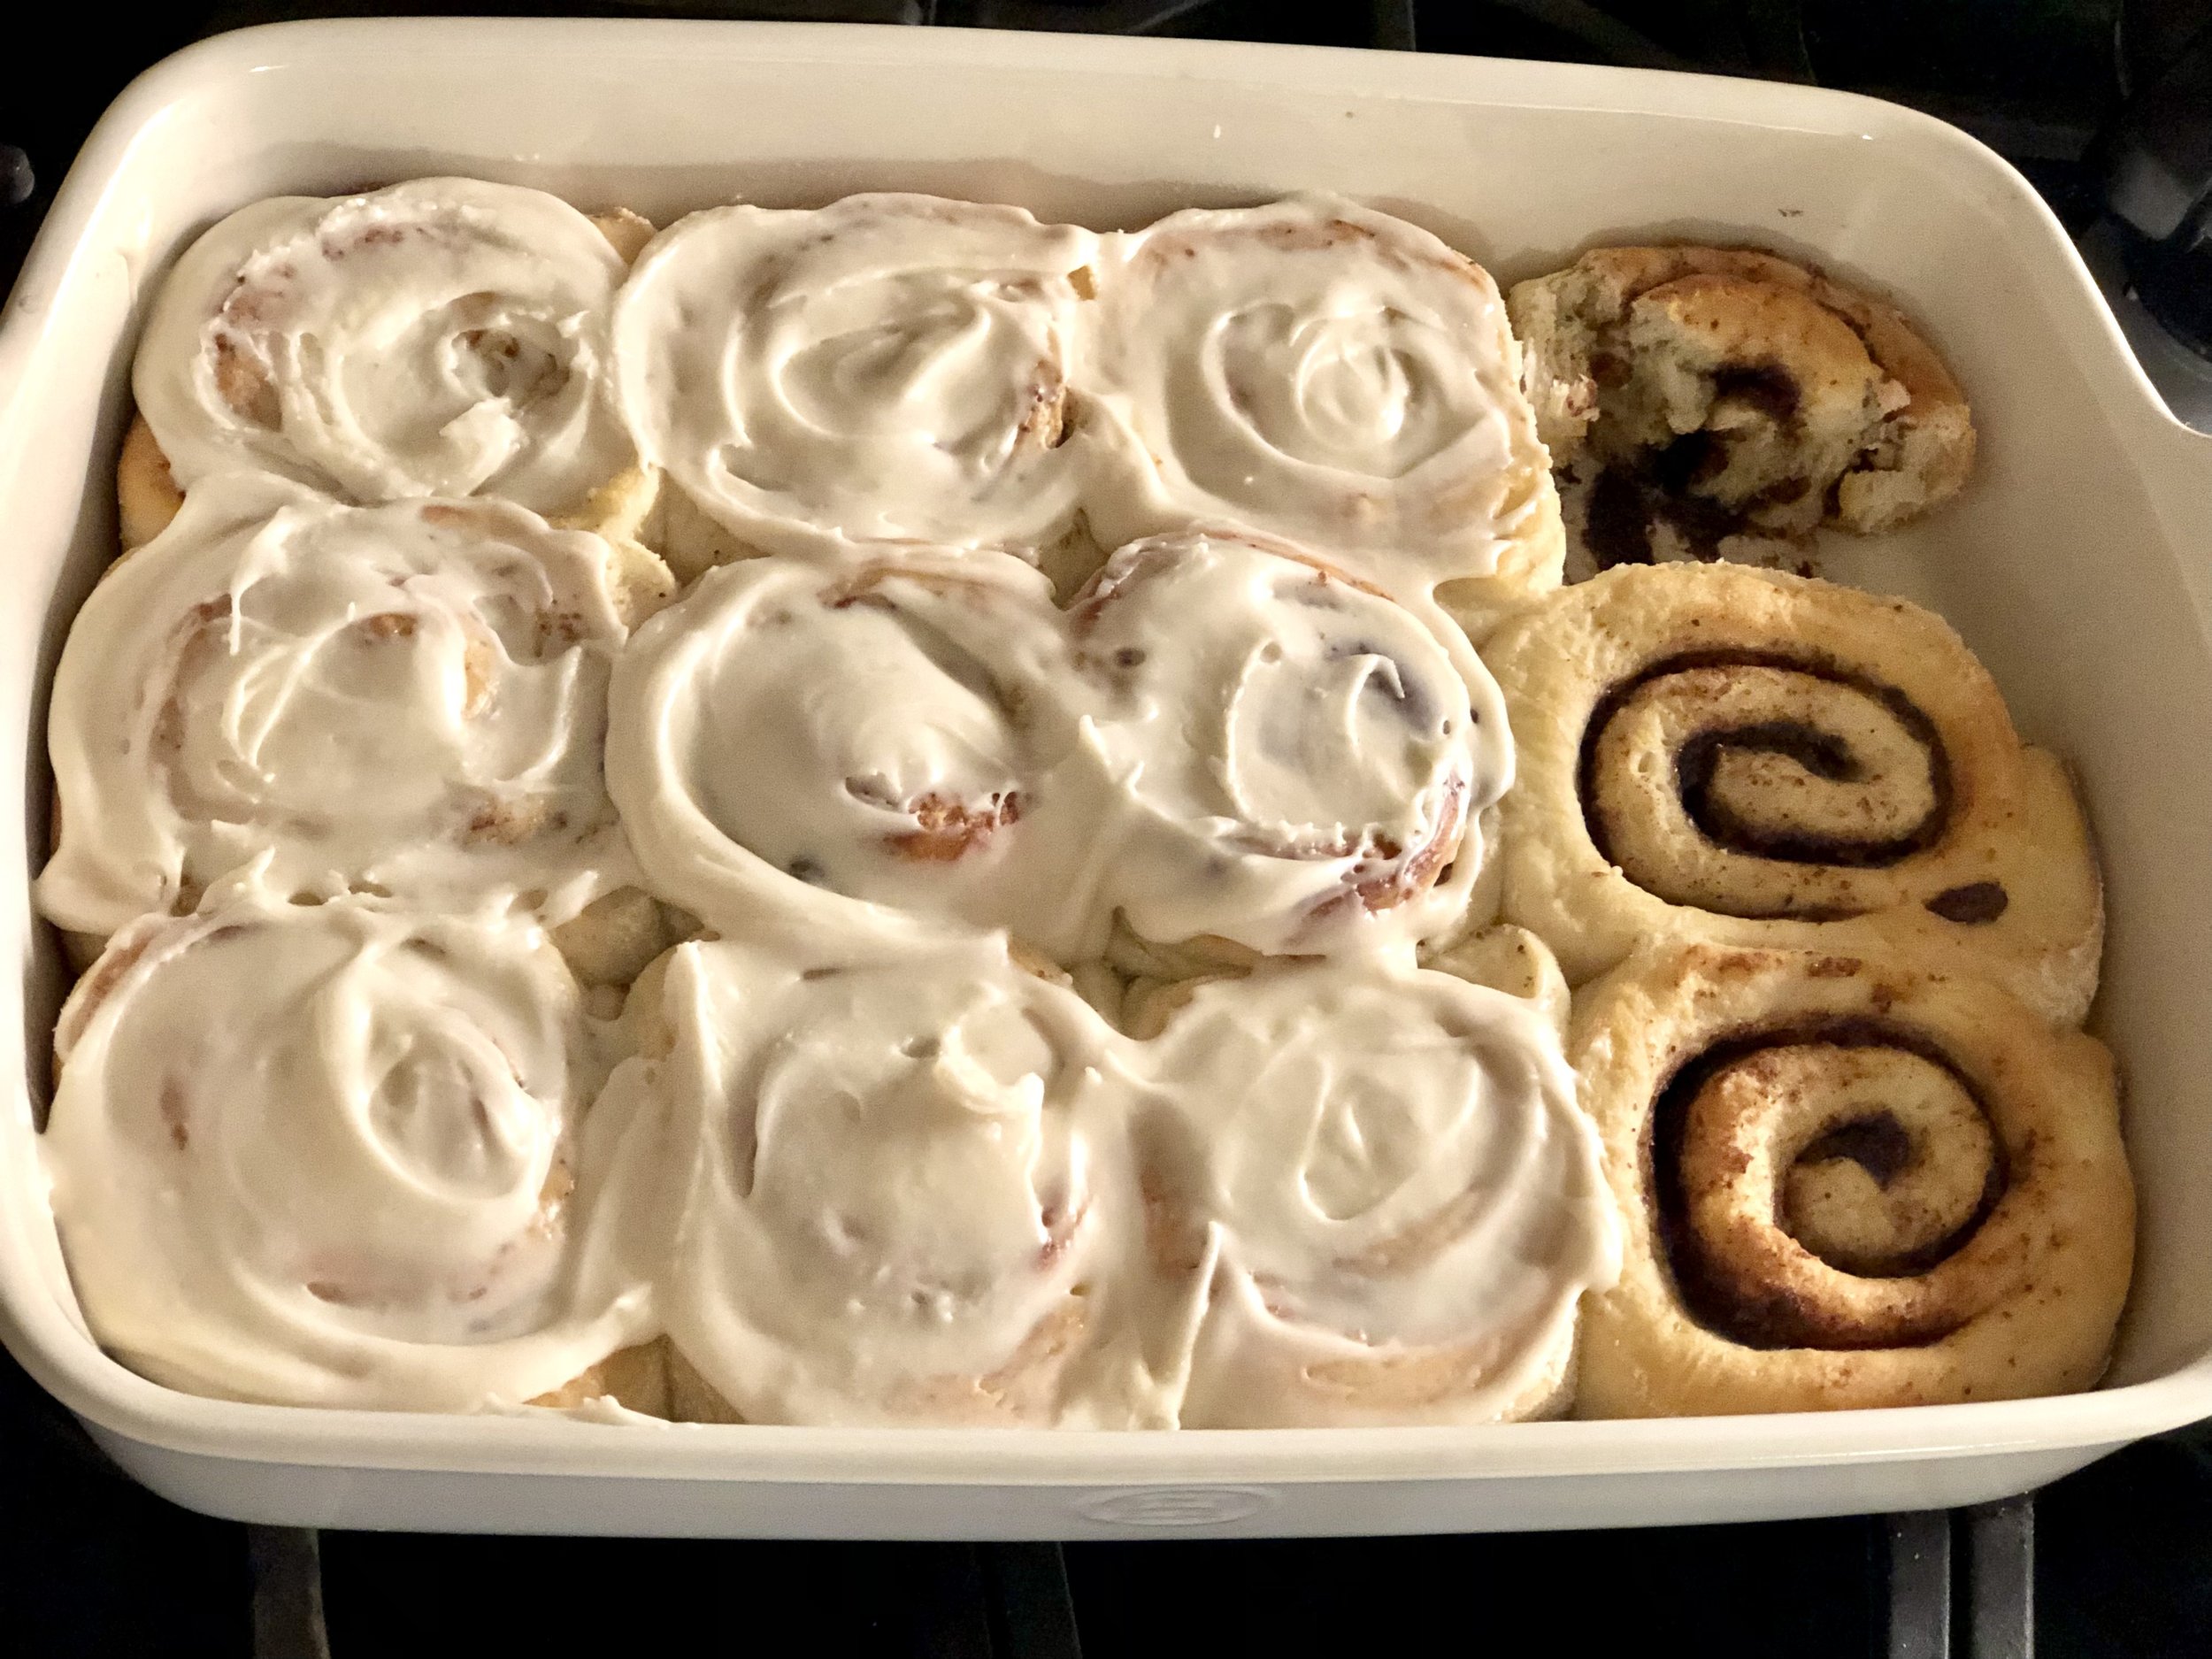
Speaking of customizing, how about for those who do and do not want frosting? And those who can’t wait to dig in. :)

  1. This cinnamon roll dough is just the best. Why? It utilizes the tangzhong technique (see below). This creates softer, pillowy bread that stays fresher for longer!

  2. This recipe also allows you to customize your icing: do your prefer plain icing or cream cheese icing? This recipe gives an easy access to either one. Plus, if you use buttermilk in the frosting, it’s the touch that sweet icing has been missing.

  3. You can customize the richness of these rolls!

    For richer rolls:

    • Add extra cinnamon to the filling

    • Drizzle each roll with 1 tsp of milk or heavy cream before baking for extra gooey rolls

    • Cover rolls with tinfoil for the first half of baking (baking time may need to be adjusted)

    • brush the rolls with melted butter when they come out of the oven, before icing

What is Tangzhong?

This recipe utilizes tangzhong in the dough, an Asian bread method that involves cooking some of the milk and flour to create a thick paste before adding it in with the rest of the ingredients. In essence, it creates a softer bread that retains its moisture for longer. Cinnamon rolls are usually best consumed the same day they are baked, but when you use this simple tangzhong method, they are still pretty darn soft and luscious even a day or two later! If you’re interested in learning more of the science-y stuff behind how and why tangzhong works, King Arthur themselves wrote this handy article on it.

While you might be thinking that cinnamon rolls are already a multi-step process and don’t need another one, may I say, what’s one more? Tangzhong DOES create an extra step, but it’s very simple. It involves 2 ingredients and takes less than 5 minutes for cinnamon rolls that stay fresh for hours, even days longer than standard cinnamon rolls. I think it’s totally worth it!

I heart King Arthur, now you heart King Arthur, we all heart King Arthur!

I originally kept this recipe largely the same with just a few minor tweaks to King Arthur’s recipe, but I’ve continued to make adjustments to streamline the recipe. Beyond that, there are a few customizable elements depending on just how rich and luscious you like your cinnamon rolls. Some of these are things I gathered from cinnamon roll recipes I’ve made in the past; others are little tricks I’ve seen bakeries use. Put them all together to make your ultimate cinnamon roll.

Create New Flavors

Lime Rolls: Trying to take photos on my laundry rack outside…our apartment in Incisa Valdarno had very poor lighting for any kind of photography.

This recipe is also a wonderful base to change up the flavors, you don’t always have to stick with cinnamon rolls. I’ve used this recipe to make Lime Rolls (think lime dough with a sweet lime filling and zingy lime icing), and they were WONDERFUL. I’ve also made Lemon Rolls, and am thinking about making Orange Rolls next time. Yum!

Enough about the tangzhong and how wonderful this recipe is and how many different things you can do with it, I like the recipe to speak for itself. :)

This post may contain affiliate links. If you make a purchase using these links, Jennyblogs may receive a small commission, at no extra cost to you. This helps to support Jennyblogs. For further information see the privacy policy. Grazie!

Recipe adapted from King Arthur


Cinnamon Rolls

Makes 12 large cinnamon rolls

Ingredients

For the Tangzhong:

  • 3/4 cup / 170g milk

  • 5 Tbsp / 40g bread flour

For the Dough:

  • 1 cup / 237g milk

  • 3 3/4 cup / 450g bread flour

  • 1 1/2 tsp / 9g salt

  • 3 Tbsp / 37g sugar

  • 1 Tbsp / 9g instant yeast

  • 6 Tbsp / 85g softened butter

  • 1/2 cup / about 100g sourdough discard, optional

For the Filling:

  • 2 Tbsp / 28g softened butter

  • 3/4 cup / 150g brown sugar

  • 4 1/2 tsp / 12g cinnamon

For the Icing:

  • 2 1/4 cup / 280g powdered sugar

  • 4 oz / 113g cream cheese, softened, optional

  • 2 Tbsp / 28g butter, melted

  • 1 tsp / 5g vanilla extract

  • 2-3 Tbsp milk, heavy cream, or buttermilk

Directions

Oven 375°F / 190°C 9x13inch / 23x33cm rectangle baking dish, lightly greased, OR jelly roll pan or cookie sheet lined with parchment paper or silicone baking mat

Make the Tangzhong:

  1. In a small pan, whisk flour and milk together until no lumps remain. Place over medium heat and cook, stirring often, until thickened into a paste-like texture. This could take just a couple minutes or more, depending on your burner.

  2. Set aside for a moment to cool.

Make the Dough:

  1. Add all dough ingredients to the bowl of a stand mixer or other large bowl. Add in the warm (but not too hot) tangzhong. If using sourdough discard, you may find you need a small additional amount of flour to make the dough not overly sticky.

  2. Knead with the dough attachment in the stand mixer for about 10 minutes or longer by hand, until dough is elastic and passes the window pane test.

  3. Shape dough into a ball and place in a lightly oiled bowl and cover. Let rise in a warm place for 1 - 1.5 hours, or until roughly doubled in size.

Make the Filling:

  1. When the dough has risen, punch down and dump out onto a floured surface. Roll the dough into a roughly 10x12in / 25x30cm rectangle, about 0.5in / 1.25cm thick. Do your best to roll or pat into a rectangle and not an oval.

  2. Evenly spread butter over dough, leaving about 0.5in / 1.25cm uncovered along the edge of one of the long sides. Sprinkle brown sugar and cinnamon evenly over butter. Press gently into dough. Carefully roll the dough up, starting with the opposite long side. Use the uncovered edge to help seal the roll; you can gently roll it back and forth with the seam down to help seal it.

  3. Using a sharp serrated knife or dental floss, cut the roll into 12 pieces. Place each piece in prepared baking dish, or free standing on a cookie sheet or jelly roll pan, spaced evenly apart.

  4. Lightly cover the rolls and let rise in a warm place until risen and puffy, about 30-60 minutes. Partway through this time, preheat your oven to 375°/190°C.

  5. Bake rolls for about 14-18 minutes or until internal temperature of an outer roll reads 185°F / 85°C.

  6. Allow rolls to cool for at least 10 minutes before icing.

Make the Icing:

  1. In a medium bowl or the bowl of a stand mixer fitted with the paddle, mix all icing ingredients together except milk until smooth. Add milk, 1 Tbsp at a time, until desired icing consistency is reached.

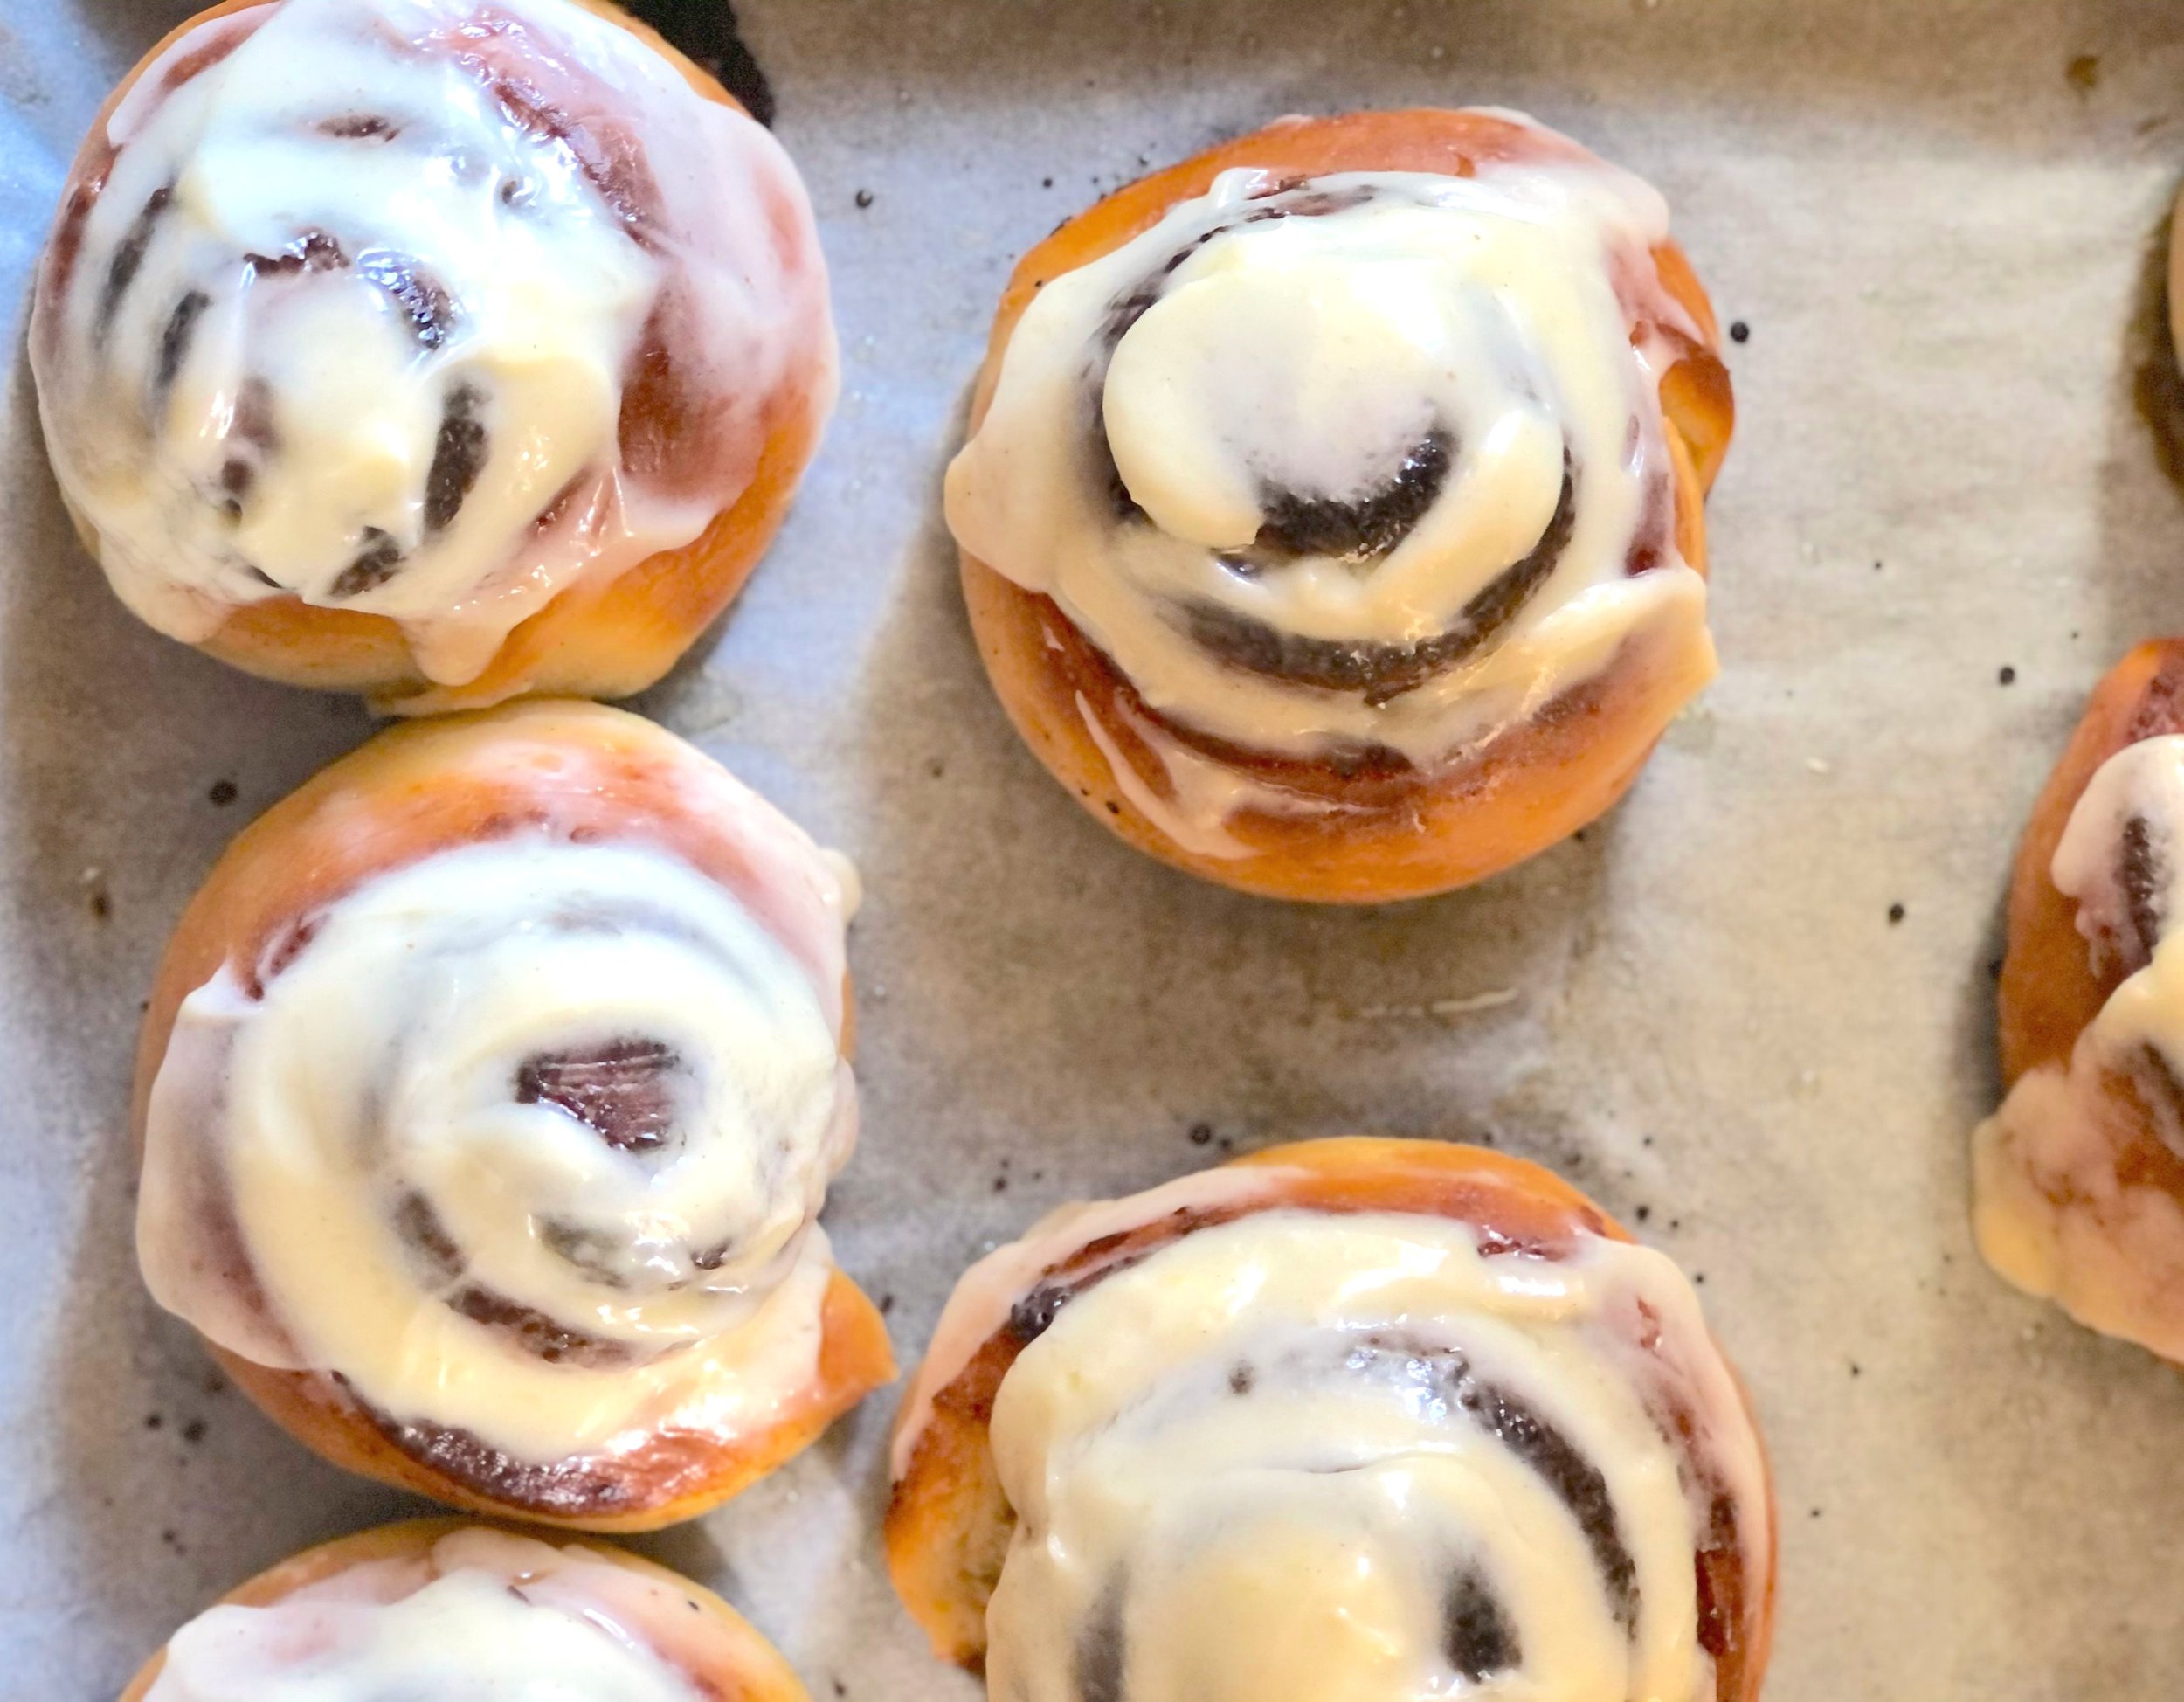
  2. Spread icing evenly over rolls.

Jenny’s Notes

  1. When making bread, you are often instructed to add warm (about 110°F / 43°C) liquids to your dough. This helps to activate the yeast and thus rise your dough. If you add cold liquids your yeast may remain dormant and not do much. In this recipe, the milk doesn’t have to be warm, you can add it cold since it will offset the heat from the tangzhong that was cooked. Don’t add the tangzhong straight from the hot stove into the bowl with your yeast and other ingredients, as the heat could kill the yeast, but the time it takes to assemble the other dough ingredients in the bowl should be sufficient time for the tangzhong to cool down. Then the cold milk helps, too.

  2. The best way to ensure properly cooked cinnamon rolls (or anything!) is by taking an internal temperature. One of top used kitchen tools is my Thermapen, and I highly recommend one to you. You can find similar on Amazon.

  3. My favorite icing for cinnamon rolls is cream cheese. Either way you go, I highly recommend using buttermilk in the icing rather than milk. The tang offsets the very sweet icing really, really well.

  4. The window pane test, which is my go-to for kneaded doughs, is essentially taking a small chunk of dough and stretching it into an even little square, then stretching the dough until it is very thin. If the dough begins to break, not enough gluten has developed and needs to be kneaded more. A dough that has been sufficiently kneaded will stretch very thin, thin enough you could almost see through it, and, if held up to a window, can see light through it, hence the name of this technique.

  5. To facilitate cutting the rolls evenly, I like to use a knife or the floss to make marks in the dough before actually cutting. I start by making a mark in the middle, then another mark in the middle of each half, then marking each quarter into 3. If you want to be really precise, use a measuring tape in front of your roll. :)

  6. If you saw dental floss as a choice for cutting the roll and think that’s crazy, trust! It gives you a clean cut and is satisfying to use. Slide the floss under the roll where you want to cut, then pull the ends of the floss up and around the roll, pulling in opposite directions to slice the roll.

  7. If you don’t have dental floss or a sharp enough knife to cut the rolls without squishing them, you can put the rolls in the freezer for about 30 minutes until the dough is firmed up. This makes the cutting process neater and easier if you don’t have ideal tools at hand. You will then have to give a little more time in the rising process since the dough is cold.

  8. Inevitably your cut rolls with will vary slightly in size, the ones from the middle being more generous than the ones from the end. To ensure the most even baking, place the larger rolls on the outside or corners of your pan, the smaller ones toward the center.

  9. If making free standing cinnamon rolls, you’ll want to tuck the ends of the rolls underneath themselves, so you don’t have tails when they rise and are baked.

  10. I had never made free standing cinnamon rolls or any kind of roll like this until I found this recipe. It gives a little more freedom in what you can use in the baking process and I love that. You will have more perfectly shaped rolls, but baking together in a rectangle dish is easier if you want to freeze or transport the rolls.

  11. How to tell if your dough is risen enough, but not over risen? When gently pressed with a finger, the dough should slowly spring back. If it springs back immediately, it hasn’t risen enough. If it doesn’t spring back at all, it could be over-risen.

  12. These rolls freeze well! You have two options:

    1. Freeze once rolls are sliced and in their rectangle pan. Cover tightly and freeze. When ready to use, allow to come to room temperature and rise until puffy, continuing from step 5 in the “Make the Filling” section.

    2. Freeze once rolls are baked and cooled. Frosting is best done once rolls have come to room temperature (or even been warmed in the oven for a bit)

Jenny's Favorite Cinnamon Rolls
Yield 12
Author
Prep time
50 Min
Cook time
18 Min
Inactive time
2 H & 30 M
Total time
3 H & 38 M

Jenny's Favorite Cinnamon Rolls

Classic cinnamon rolls are taken to the next level with the use of the tangzhong technique. This creates extra fluffy, pillowy soft rolls that stay softer for longer. With a traditional cinnamon filling and customizable frosting, these too can become your favorite cinnamon rolls!

Ingredients

For the Tangzhong:
For the Dough:
For the Filling:
For the Icing:

Instructions

Make the Tangzhong:
  1. In a small pan, whisk flour and milk together until no lumps remain. Place over medium heat and cook, stirring often, until thickened into a paste-like texture. This could take just a couple minutes or more, depending on your burner.
  2. Set aside for a moment to cool.
Make the Dough:
  1. Add all dough ingredients to the bowl of a stand mixer or other large bowl. Add in the warm (but not too hot) tangzhong.
  2. Knead with the dough attachment in the stand mixer for about 10 minutes or longer by hand, until dough is elastic and passes the window pane test.
  3. Shape dough into a ball and place in a lightly oiled bowl and cover. Let rise in a warm place for 1 - 1.5 hours, or until roughly doubled in size.
Make the Filling:
  1. Oven 375°F / 190°C 9x13inch / 23x33cm rectangle baking dish, lightly greased, OR jelly roll pan or cookie sheet lined with parchment paper or silicone baking mat
  2. Combine all filling ingredients together in a small bowl, until a wet sand texture is achieved.
  3. When the dough has risen, punch down and dump out onto a floured surface. Roll the dough into a roughly 10x12in / 25x30cm rectangle, about 0.5in / 1.25cm thick. Do your best to roll or pat into a rectangle and not an oval.
  4. Evenly sprinkle filling over dough, leaving about 0.5in / 1.25cm uncovered along the edge of one of the long sides. Carefully roll the dough up, starting with the opposite long side. Use the uncovered edge to help seal the roll; you can gently roll it back and forth with the seam down to help seal it.
  5. Using a sharp serrated knife or dental floss, cut the roll into 12 pieces. Place each piece in the prepared pan, or free standing on a cookie sheet, spaced evenly apart.
  6. Lightly cover the rolls and let rise in a warm place until risen and puffy, about 30-60 minutes. Partway through this time you’ll want to preheat your oven to 375°/190°C.
  7. Bake rolls for about 14-18 minutes or until internal temperature of an outer roll reads 190°F / 88°C.
  8. Allow rolls to cool for about 10 minutes before icing.
Make the Icing:
  1. In a medium bowl or the bowl of a stand mixer fitted with the paddle, mix all icing ingredients together except milk until smooth. Add milk, 1 Tbsp at a time, until desired icing consistency is reached.
  2. Spread icing evenly over rolls.

Notes

  1. When making bread, you are often instructed to add warm (about 110°F / 43°C) liquids to your dough. This helps to activate the yeast and thus rise your dough. If you add cold liquids your yeast may remain dormant and not do much. In this recipe, you may notice the milk doesn’t have to be warm. In fact, you can add it cold since it will offset the heat from the tangzhong that was cooked. I wouldn’t add the tangzhong straight from the hot stove into the bowl with your yeast and other ingredients, as the heat could kill the yeast, but the time it takes to assemble the other dough ingredients in the bowl should be sufficient time for the tangzhong to cool down. Then the cold milk helps, too.
  2. The best way to ensure properly cooked cinnamon rolls (or anything!) is by taking an internal temperature. One of top used kitchen tools is my Thermapen, and I highly recommend one to you. You can find similar on Amazon.
  3. My favorite icing for cinnamon rolls is cream cheese, however this makes them that much richer and heavier, so I tend to go back and forth between making the icing with and without the cream cheese. Either way you go, I highly recommend using buttermilk in the icing rather than milk. The tang offsets the very sweet icing really, really well.
  4. The window pane test, which is my go-to for kneaded doughs, is essentially taking a small chunk of dough and stretching it into an even little square, then stretching the dough until it is very thin. If the dough begins to break, not enough gluten has developed and needs to be kneaded more. A dough that has been sufficiently kneaded will stretch very thin, thin enough you could almost see through it, and, if held up to a window, can see light through it, hence the name of this technique.
  5. To facilitate cutting the rolls evenly, I like to use a knife or the floss to make marks in the dough before actually cutting. I start by making a mark in the middle, then another mark in the middle of each half, then marking each quarter into 3. If you want to be really precise, use a measuring tape in front of your roll. :)
  6. If you saw dental floss as a choice for cutting the roll and think that’s crazy, trust! It actually gives you the cleanest cut and is satisfying to use. Slide the floss under the roll where you want to cut, then pull the ends of the floss up and around the roll, pulling in opposite directions to slice the roll.
  7. If you don’t have dental floss or a sharp enough knife to cut the rolls without squishing them, you can put the rolls in to the freezer for about 30 minutes until the dough is firmed up. This makes the cutting process neater and easier if you don’t have ideal tools at hand. You will then have to give a little more time in the rising process since the dough is cold.
  8. If you want extra gooey, rich cinnamon rolls:
  • Before baking, pour about 1 tsp of heavy cream over each roll.
  • After baking, brush rolls with 2 Tbsp of melted butter immediately after they come out of the oven. Then continue with cooling and icing.
  1. Inevitably your cut rolls with will vary slightly in size, the ones from the middle being more generous than the ones from the end. To ensure the most even baking, place the larger rolls on the outside or corners of your pan, the smaller ones toward the center.
  2. If making free standing cinnamon rolls, you’ll want to tuck the ends of the rolls underneath themselves, so you don’t have tails when they rise and are baked.
  3. I had never made free standing cinnamon rolls or any kind of roll like this until I found this recipe. It gives a little more freedom in what you can use in the baking process and I love that. You will have more perfectly shaped rolls, but baking together in a rectangle dish is easier if you want to freeze or transport the rolls.
  4. How to tell if your dough is risen enough, but not over risen? When gently pressed with a finger, the dough should slowly spring back. If it springs back immediately, it hasn’t risen enough. If it doesn’t spring back at all, it could be over-risen.
  5. These rolls freeze well! You have two options:
  6. Freeze once rolls are sliced and in their rectangle pan. Cover tightly and freeze. When ready to use, allow to come to room temperature and rise until puffy, continuing from step 5 in the “Make the Filling” section.
  7. Freeze once rolls are baked and cooled. Frosting is best done once rolls have come to room temperature (or even been warmed in the oven for a bit)


Nutrition Facts

Calories

459.97

Fat

15.91 g

Sat. Fat

9.5 g

Carbs

71.85 g

Fiber

1.8 g

Net carbs

70.06 g

Sugar

37.68 g

Protein

7.43 g

Sodium

416.6 mg

Cholesterol

42.79 mg

Nutritional information is approximate, based on 1 cinnamon roll with cream cheese frosting.

best ever cinnamon rolls, king arthur, cream cheese frosting, sourdough discard recipe
breakfast, bread
American
Did you make this recipe?
Tag @jennyblogsandbakes on instagram and hashtag it #jennyblogs

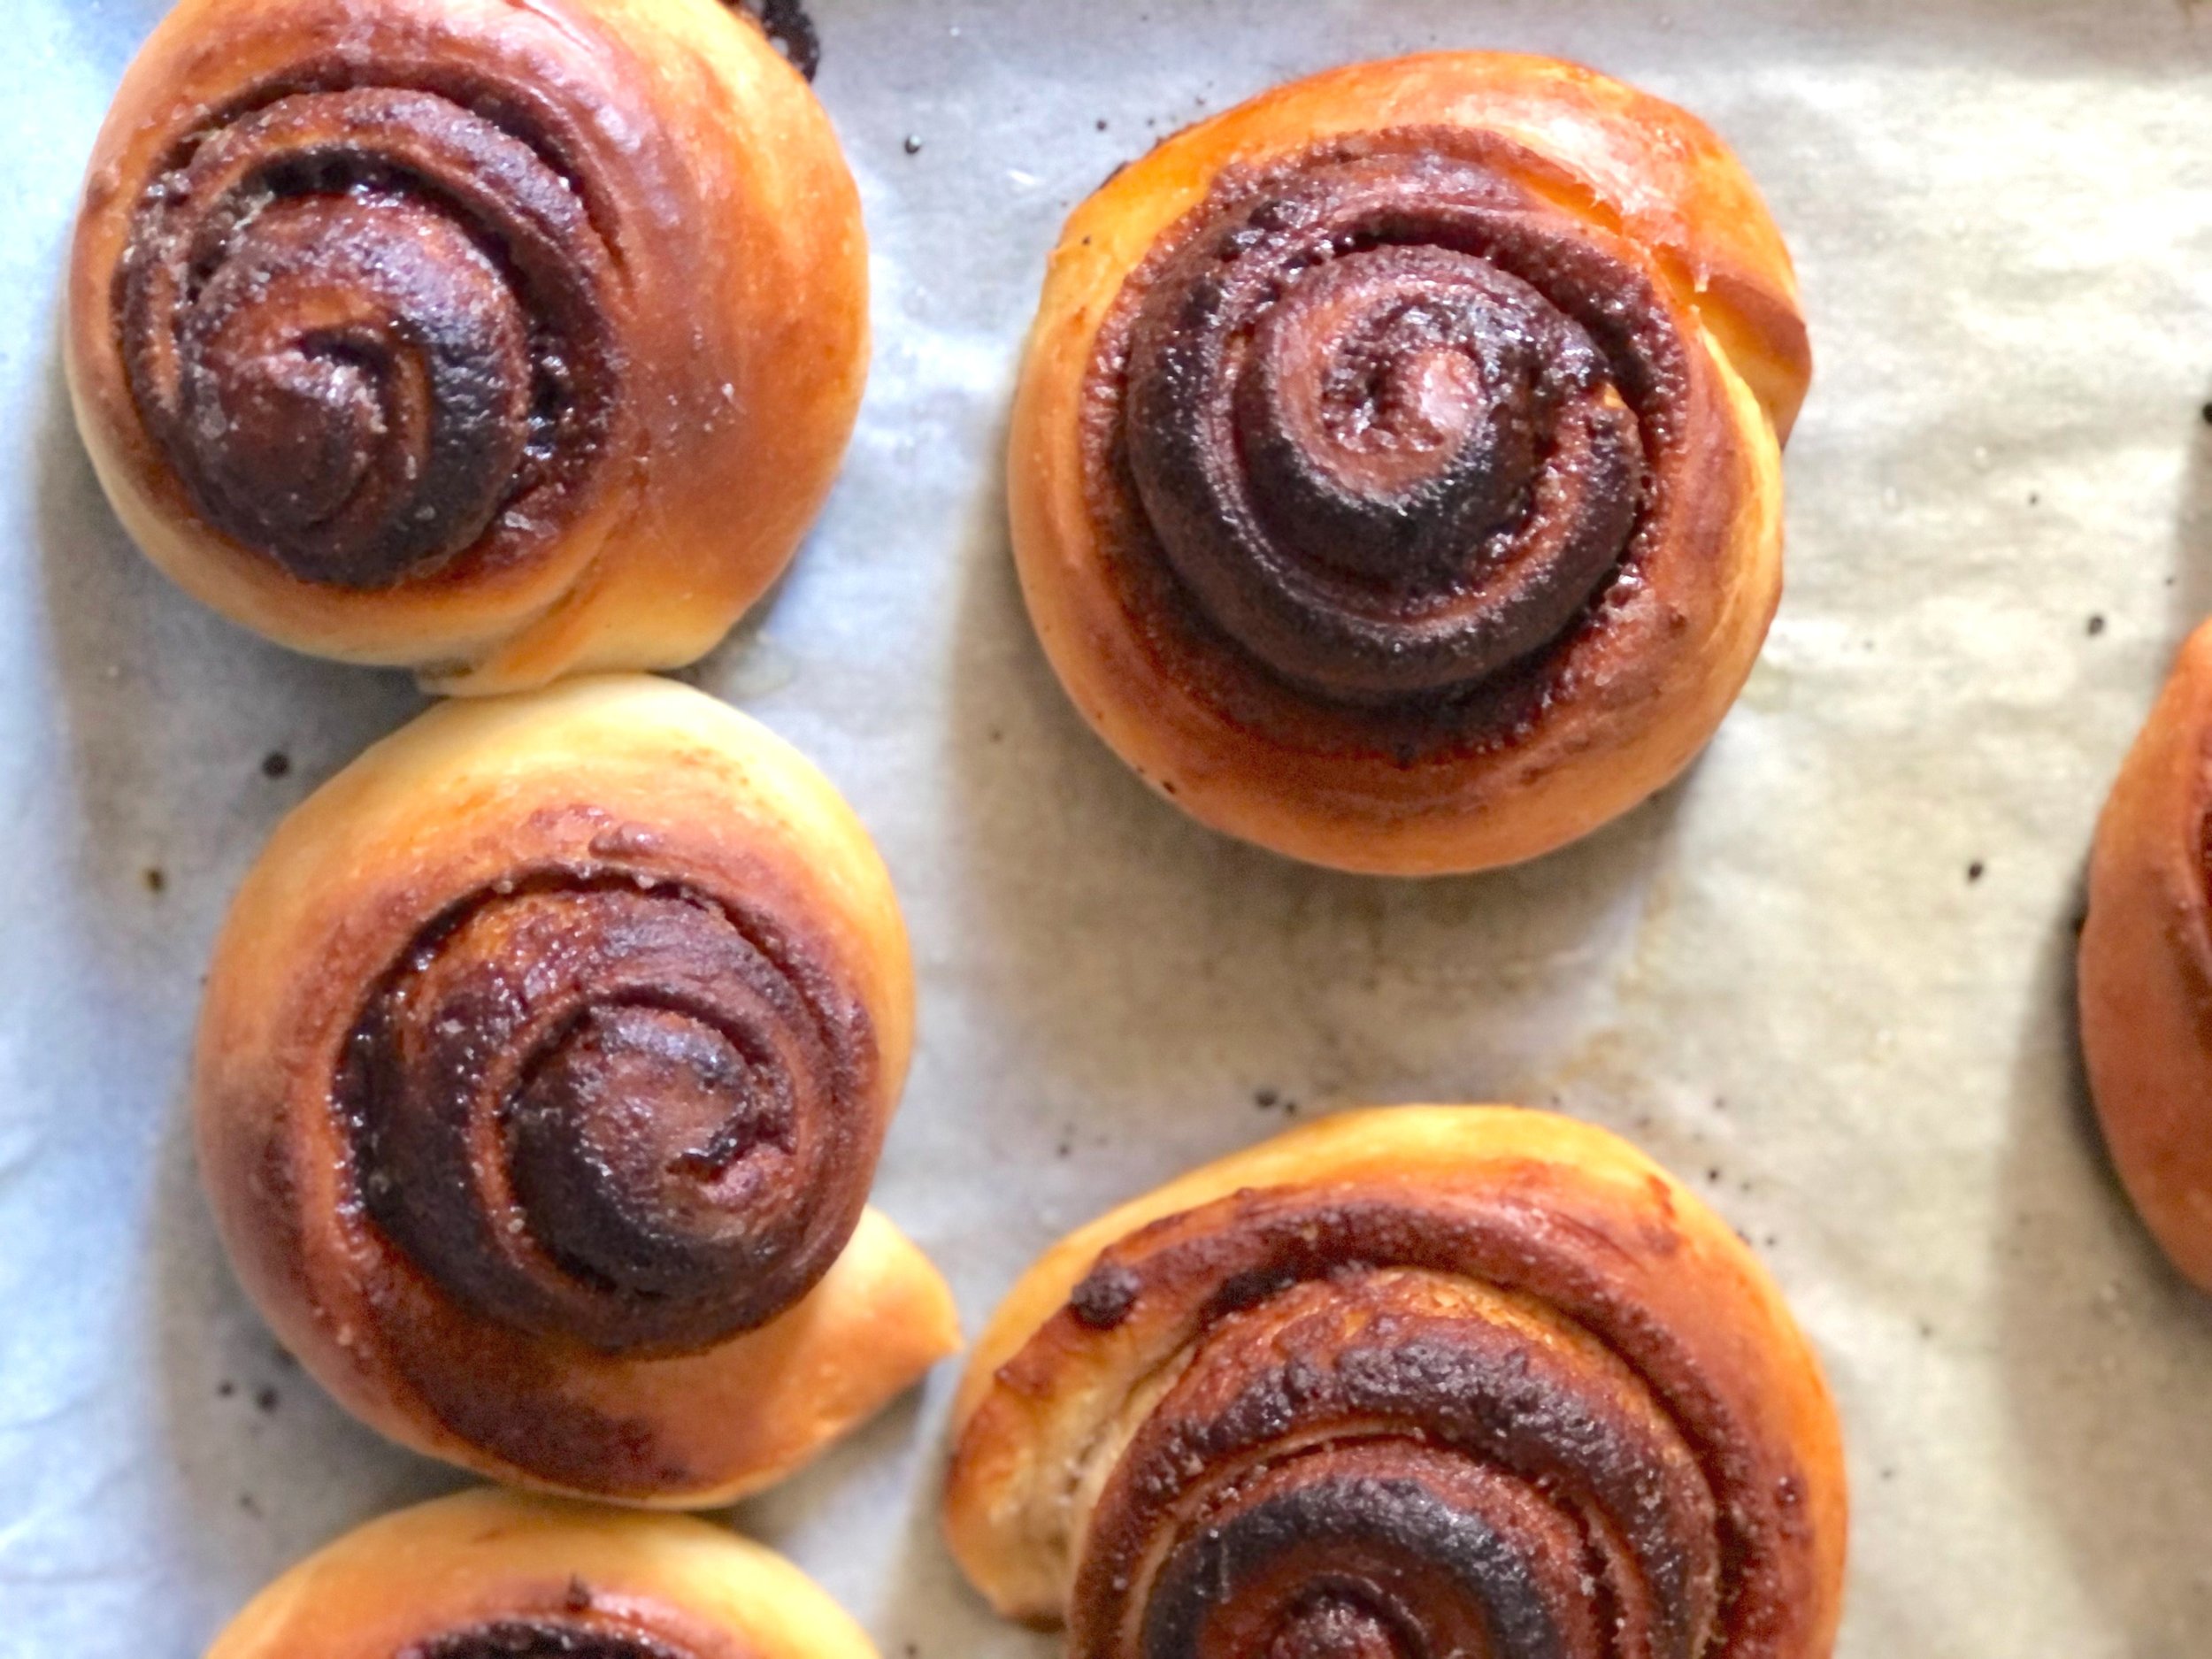
Cinnamon Rolls Pre-Icing


Cinnamon Raisin Swirl Bread

IMG_4773.jpg

Last Updated August 13, 2024

Nothing is quite as satisfying to make as homemade bread. From the relaxing kneading of the dough, to the mouth-watering aroma that fills the house as the bread bakes, to slicing into a fresh loaf, it’s one of the simple pleasures of life.

Add in a cinnamon raisin swirl and it can be hard to imagine it getting much better. This bread makes for wonderful eating plain, and even better toast. Use it for French Toast or however you best like to use bread!

Note: I used sourdough starter to make the loaves in the pictures. I didn't leave enough time for rising, and thus you can see you the crumb is rather tight and dense. Delicious nonetheless, but know that if you use instant yeast (or sourdough and allow for proper proofing) your loaves should be taller! 

This post may contain affiliate links. If you buy something using these links, Jennyblogs may receive a small commission, at no extra cost to you. This helps to support Jennyblogs. For further information see the privacy policy. Grazie!

Recipe adapted from The Kitchn


Cinnamon Raisin Swirl Bread

Makes 2 9-inch loaves

IMG_4782.JPG

Ingredients:

  • 1 cup / 150g raisins

  • 1 cup / 237g hot water

  • 1 Tbsp / 10g active dry or instant yeast

  • 1 cup / 237g milk

  • 4 Tbsp / 56g melted butter or oil

  • 2 tsp / 9g salt

  • 5 1/2 - 6 cups / 660 - 720g all-purpose flour

  • 1/2 cup / 100g sugar

  • 1 1/2 Tbsp / 12g cinnamon

  • 1 egg

  • 2 tsp / 9g water

Directions:

Oven 375°F / 190°C.  2 greased loaf pans, approximately 9 x 5in / 23 x 13cm.  

IMG_4778.jpg
  1. Place raisins in a small bowl with the hot water and let plump for at least 10 minutes.  

  2. Drain water from raisins into the bowl of a stand mixer or large bowl.  Set raisins aside.  Sprinkle yeast over the water.  If you're using active dry, let the yeast sit for a few minutes until it starts to foam; if you're using instant, proceed to the next step. 

  3. Add milk, butter, and salt to yeast mixture and stir well.  Add 5 cups / 600g of flour, mixing to incorporate. 

  4. Switch to the dough hook or knead by hand on a lightly floured surface for 8 - 10 minutes, adding more flour as necessary.  At the end, test to see if your dough is ready by performing the window pane test (see notes.)  If not, continue to knead dough until it passes.  

  5. Toss raisins with a bit of flour to absorb any residual water.  Add to your dough, and knead until evenly distributed.  If using a stand mixer, you may find this easier to do by hand.  

  6. Place the dough in a large oiled bowl, cover, and place in a warm place to rise until doubled in size, about 1 hour.  

  7. Meanwhile, combine the sugar with the cinnamon in a small bowl.  

  8. Beat the egg with the 2 tsp water in another small bowl. 

  9. When the dough has risen, punch it down and divide into two equal pieces.  Starting with one half, roll dough into a rectangle about 9in / 23cm wide and at least 18in / 46cm long. 

  10. Brush the dough evenly with some of the egg wash, leaving one narrow end dry; sprinkle with half of the cinnamon sugar mixture.  Starting from the opposite short end, roll dough up and pinch the seam to seal. 

  11. Transfer to the loaf pan, placing seam side down.  Repeat with other half of dough.  

  12. Cover and let rise until doubled in size, about 30-45 minutes.   

  13. Bake in preheated oven for 30-40 minutes or until golden brown and internal temperature reads 185 - 190°F / 85-88°C. 

  14. Let bread cool 10 minutes before removing from pans and allowing to cool completely.

Jenny's Notes:

  • If the dough shrinks back on you as you're rolling it out, let it rest for a few minutes and try again.  

  • If you have leftover egg wash and cinnamon sugar, you can brush the top of the loaves with the egg wash and sprinkle with cinnamon sugar before baking.  

  • Loaves can be frozen for later enjoyment.

Cinnamon Raisin Swirl Bread
Yield 24
Author
Prep time
1 Hour
Cook time
40 Min
Total time
1 H & 40 M

Cinnamon Raisin Swirl Bread

Enriched white bread with swirls of cinnamon and plump raisins throughout.
Cook modePrevent screen from turning off

Ingredients

Instructions

  1. Oven 375°F / 190°C. Grease 2 loaf pans, approximately 9 x 5in / 23 x 13cm.
  2. Place the raisins in a small bowl with the hot water and let plump for at least 10 minutes.
  3. Drain the water from the raisins into the bowl of a stand mixer or large bowl. Set the raisins aside. Sprinkle the yeast over the water. If you're using active dry, let the yeast sit for a few minutes until it starts to foam, if you're using instant, go ahead and proceed to the next step.
  4. Add the milk, butter, and salt to the yeast mixture and stir well. Add 5 cups / 600g of flour, mixing to incorporate. Switch to the dough hook or knead by hand on a lightly floured surface for 8 - 10 minutes, adding more flour as necessary. At the end, test to see if your dough is ready by performing the window pane test (see notes.) If not, continue to knead the dough until it passes.
  5. Toss the raisins with a bit of flour to absorb any residual water. Add to your dough, and knead until evenly distributed. If using a stand mixer, you may find this easier to do by hand.
  6. Place the dough in a large oiled bowl, cover, and place in a warm place to rise until doubled in size, about 1 hour.
  7. Meanwhile, combine the sugar with the cinnamon in a small bowl.
  8. Beat the egg with 2 tsp water in another small bowl.
  9. When the dough has risen, punch it down and divide into two equal pieces. Starting with one half, roll dough into a rectangle about 9in / 23cm wide and at least 18in / 46cm long.
  10. Brush the dough evenly with some of the egg wash, leaving one short end free, and sprinkle with half of the cinnamon sugar mixture. Starting from the opposite short end, roll the dough up and pinch the seam to seal.
  11. Transfer to the loaf pan, placing seam side down. Repeat with other half of dough.
  12. Cover and let rise until doubled in size, about 30-45 minutes.
  13. Bake in preheated oven for 30-40 minutes or until golden brown and internal temperature reads 185 - 190°F / 85-88°C.
  14. Let bread cool 10 minutes in pans before removing and allowing to cool completely.

Notes

If the dough shrinks back on you as you're rolling it out, let it rest for a few minutes and try again. If you have leftover egg wash and cinnamon sugar, you can brush the top of the loaves with the egg wash and sprinkle with cinnamon sugar before baking. Loaves can be frozen for later enjoyment! If you really dig raisins, add more than 1 cup! Just be aware, though, if you start to add too many (I would imagine more than 2 cups) then they could start to weigh down your dough, not allowing for a full rise.

Nutrition Facts

Calories

171.35

Fat

2.64 g

Sat. Fat

1.44 g

Carbs

33.09 g

Fiber

1.42 g

Net carbs

31.67 g

Sugar

7.96 g

Protein

4.10 g

Sodium

218.89 mg

Cholesterol

13.56 mg

Nutritional information is approximate. Based on 24 servings or 12 servings per loaf.

cinnamon raisin bread, cinnamon raisin swirl bread, cinnamon toast,
Bread, Breakfast, Brunch
American
Did you make this recipe?
Tag @jennyblogsandbakes on instagram and hashtag it #jennyblogs
IMG_4777.jpg

Pumpkin Cinnamon Swirl Bread

Last Updated August 5, 2024

Pumpkin Bread. No, not that wonderful, dense, quick-bread pumpkin bread, but a light, yeasted bread made with PUMPKIN and spiced with nutmeg and ginger!!! And a beautiful cinnamon swirl. It makes a-may-zing toast. I think I say that about all my bread recipes. But it’s the truth. And I love toast.

Do you want to know something really sad, though? (You’re maybe thinking, uh no, scrolllll.) I’m blogging about this bread, and I can’t even eat it. (By choice, I guess I like to punish my body??) I’m going to tell you about it.

Ever heard of Whole30? Me neither, up until last year. Actually, New Year's Eve. (Yes, only 2 weeks ago. I know, I know, those "last year" jokes are so old, but I still get SO much entertainment out of them. Too much.)  Anyway, I read about the Whole30 in an email from this informative and entertaining fitness site called Greatist.   Like all normal people, my first thought when I see things like ice cream and strange diets is to say, "I WANT TO BE A PART OF THAT."  Actually, I prefer the ice cream to be a part of me, meaning I ate it. 

I am not normally a spontaneous person by any means, but two days later I had commenced my very own #Whole30January. Without even reading all the way through the guidelines.  It's almost easier to list what you can eat than what you can't. But I'll start with what you can't, just because it's fun and I like to complain about it.  It's not even all that hard.  Especially with a buddy.  Just ask my Mom, she just loves doing this with me.

Not allowed:

  1. grain (not even quinoa)

  2. dairy (guess that ice cream is not going to become a part of me after all)

  3. sugar (say no to stevia)

  4. soy (watch out for sneaky ingredients like soy lecithin)

  5. alcohol (put down the vanilla extract)

  6. legumes (think beans and peanuts)

  7. sketchy preservatives like carageenan

That leaves you with veggies, fruits, eggs, nuts, meat, and all the sadness you want.  But you may not take any of those approved items and combine them to create something in the "cheat" category.  For example, you cannot combine eggs and bananas and pour it onto a griddle because that would be a pancake.  The goal is to break you of unhealthy relationships with food.  So instead of replacing everything you normally eat with healthier versions (because at the end of the 30 days you will most likely go back to the exact same way you ate before, and then nothing has changed) the goal is to explore and create new delicious and nutritious (and sad) food.  Ha ok I'm done being sardonic.  If you want to read more about Whole30, click here.  

So in the midst of these January blues and food sadness, I will share with you this recipe for pumpkin cinnamon swirl bread so you can eat it in my stead.  While you're at it, would you also eat some cheese and every other kind of bread that exists for me?  Thanks. 

This post may contain affiliate links. If you buy something using these links, Jennyblogs may receive a small commission, at no extra cost to you. This helps to support Jennyblogs. For further information see the privacy policy. Grazie!

Recipe adapted from Cooking Classy


Pumpkin Cinnamon Swirl Bread

Makes 1 loaf

Ingredients:

For the Bread

  • 2 1/4 tsp / 7g active dry yeast

  • 1/4 cup / 60g warm water, 110°F / 43°F

  • 1/4 cup / 50g + 1/2 tsp sugar

  • 1/4 cup / 60g warm milk, 110°F / 43°C

  • 2 Tbsp / 42g molasses

  • 3/4 tsp salt

  • 1 Tbsp / 14g oil

  • 1/4 tsp nutmeg

  • 1/4 tsp ginger

  • 1 egg

  • 1 cup / 246g pumpkin puree

  • 3 1/2 - 4 cups / 420g - 480g all-purpose flour

For the Cinnamon Swirl

  • 1 1/2 Tbsp / 21g butter, melted

  • 1/3 cup / 67g brown sugar

  • 2 tsp cinnamon

Directions:

Make the Bread

Oven 375°F / 190°C.  1 greased bread pan, approximately 9x5in / 23x13cm.

  1. In the bowl of a stand mixer combine yeast, water, and 1/2 tsp of sugar.  Allow to sit until yeast starts to bubble, about 5 minutes.

  2. Stir in the milk, molasses, remaining sugar, salt, oil, nutmeg, ginger, egg, and pumpkin until combined. 

  3. Switch to a dough hook and slowly add flour.  Continue adding flour until a soft, but not too sticky dough is achieved. 

  4. Turn dough out onto a lightly floured surface and knead for 1-2 minutes. 

  5. Place in an oiled bowl, flip so that both sides are oiled, and cover with a towel. Allow to rise in a warm place until doubled in size, about 1 hour. 

  6. While the bread is rising, whisk together brown sugar and cinnamon in a small bowl.  Set aside.

  7. When the bread is doubled in size, punch down and turn out onto a lightly floured surface.  Roll out into a rectangle, about 22x8in / 56x20cm. 

  8. Spread melted butter over dough, going within 1/2in / 1cm of edge.  Sprinkle cinnamon sugar mixture evenly over butter.

  9. Starting from one of the short sides (the approximate 8in / 20cm) roll dough into a loaf.  Place in prepared loaf pan seam side down. 

  10. Cover with a towel and let rise again until doubled in size, about 45 minutes. 

  11. Bake in preheated oven for 35-40 minutes, or until bread sounds hollow to the tap and an internal temperature reaches about 190°F / 88°C. 

Jenny's Notes:

  • If using instant yeast instead of instant active dry yeast, you can skip step 1. and add all the ingredients from step 1. and 2. together, then proceed to step 3. The reason for this is because active dry yeast is dried and needs to be reactivated in some warm liquid and a bit of sugar before adding to the rest of the ingredients. Instant yeast is ready to be added in without any extra prep.

  • This bread is delicious toasted!  And if you're really a pumpkin fan, might I mention pumpkin butter?

Pumpkin Cinnamon Swirl Bread
Yield 12-14
Author
Prep time
50 Min
Cook time
40 Min
Total time
1 H & 30 M

Pumpkin Cinnamon Swirl Bread

Light, yeasted pumpkin bread spiced with ginger and nutmeg with a beautiful cinnamon swirl.
Cook modePrevent screen from turning off

Ingredients

For the Bread
For the Cinnamon Swirl

Instructions

Make the Bread
  1. Oven 375°F / 190°C. 1 greased bread pan, approximately 9x5in / 23x13cm.
  2. In the bowl of a stand mixer combine yeast, water, and 1/2 tsp of sugar. Allow to sit until yeast starts to bubble, about 5 minutes.
  3. Stir in the milk, molasses, remaining sugar, salt, oil, nutmeg, ginger, egg, and pumpkin until combined.
  4. Switch to a dough hook and slowly add flour. Continue adding flour until a soft, but not too sticky dough is achieved.
  5. Turn dough out onto a lightly floured surface and knead for 1-2 minutes.
  6. Place in an oiled bowl, flip so that both sides are oiled, and cover with a towel. Allow to rise in a warm place until doubled in size, about 1 hour.
  7. While the bread is rising, whisk together brown sugar and cinnamon in a small bowl. Set aside.
  8. When the bread is doubled in size, punch down and turn out onto a lightly floured surface. Roll out into a rectangle, about 22x8in / 56x20cm.
  9. Spread melted butter over dough, going within 1/2in / 1cm of edge. Sprinkle cinnamon sugar mixture evenly over butter.
  10. Starting from one of the short sides (the approximate 8in / 20cm) roll dough into a loaf. Place in prepared loaf pan seam side down.
  11. Cover with a towel and let rise again until doubled in size, about 45 minutes.
  12. Bake in preheated oven for 35-40 minutes, or until bread sounds hollow to the tap and an internal temperature reaches about 190°F / 88°C.

Notes

If using instant yeast instead of instant active dry yeast, you can skip step 1. and add all the ingredients from step 1. and 2. together, then proceed to step 3. The reason for this is because active dry yeast is dried and needs to be reactivated in some warm liquid and a bit of sugar before adding to the rest of the ingredients. Instant yeast is ready to be added in without any extra prep.

Nutrition Facts

Calories

219.22

Fat

3.60 g

Sat. Fat

1.28 g

Carbs

41.35 g

Fiber

2.07 g

Net carbs

39.28 g

Sugar

9.02 g

Protein

5.33 g

Sodium

170.35 mg

Cholesterol

19.66 mg

Nutritional information is approximate and based on 12 servings.

yeasted bread, yeast, pumpkin puree, canned pumpkin, pumpkin bread, cinnamon swirl
bread, breakfast
American
Did you make this recipe?
Tag @jennyblogsandbakes on instagram and hashtag it #jennyblogs
What lurks in the darkness...

What lurks in the darkness...


Cinnamon Streusel Coffee Cake

Last Updated Septemer 6, 2024

IMG_4443.jpg

Last Updated August 4, 2024

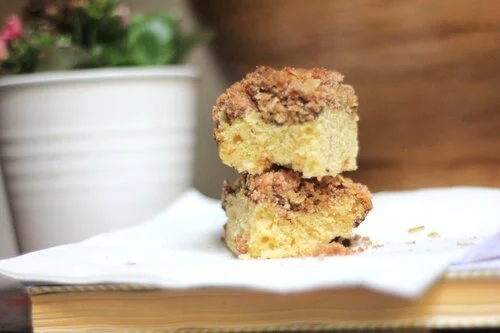
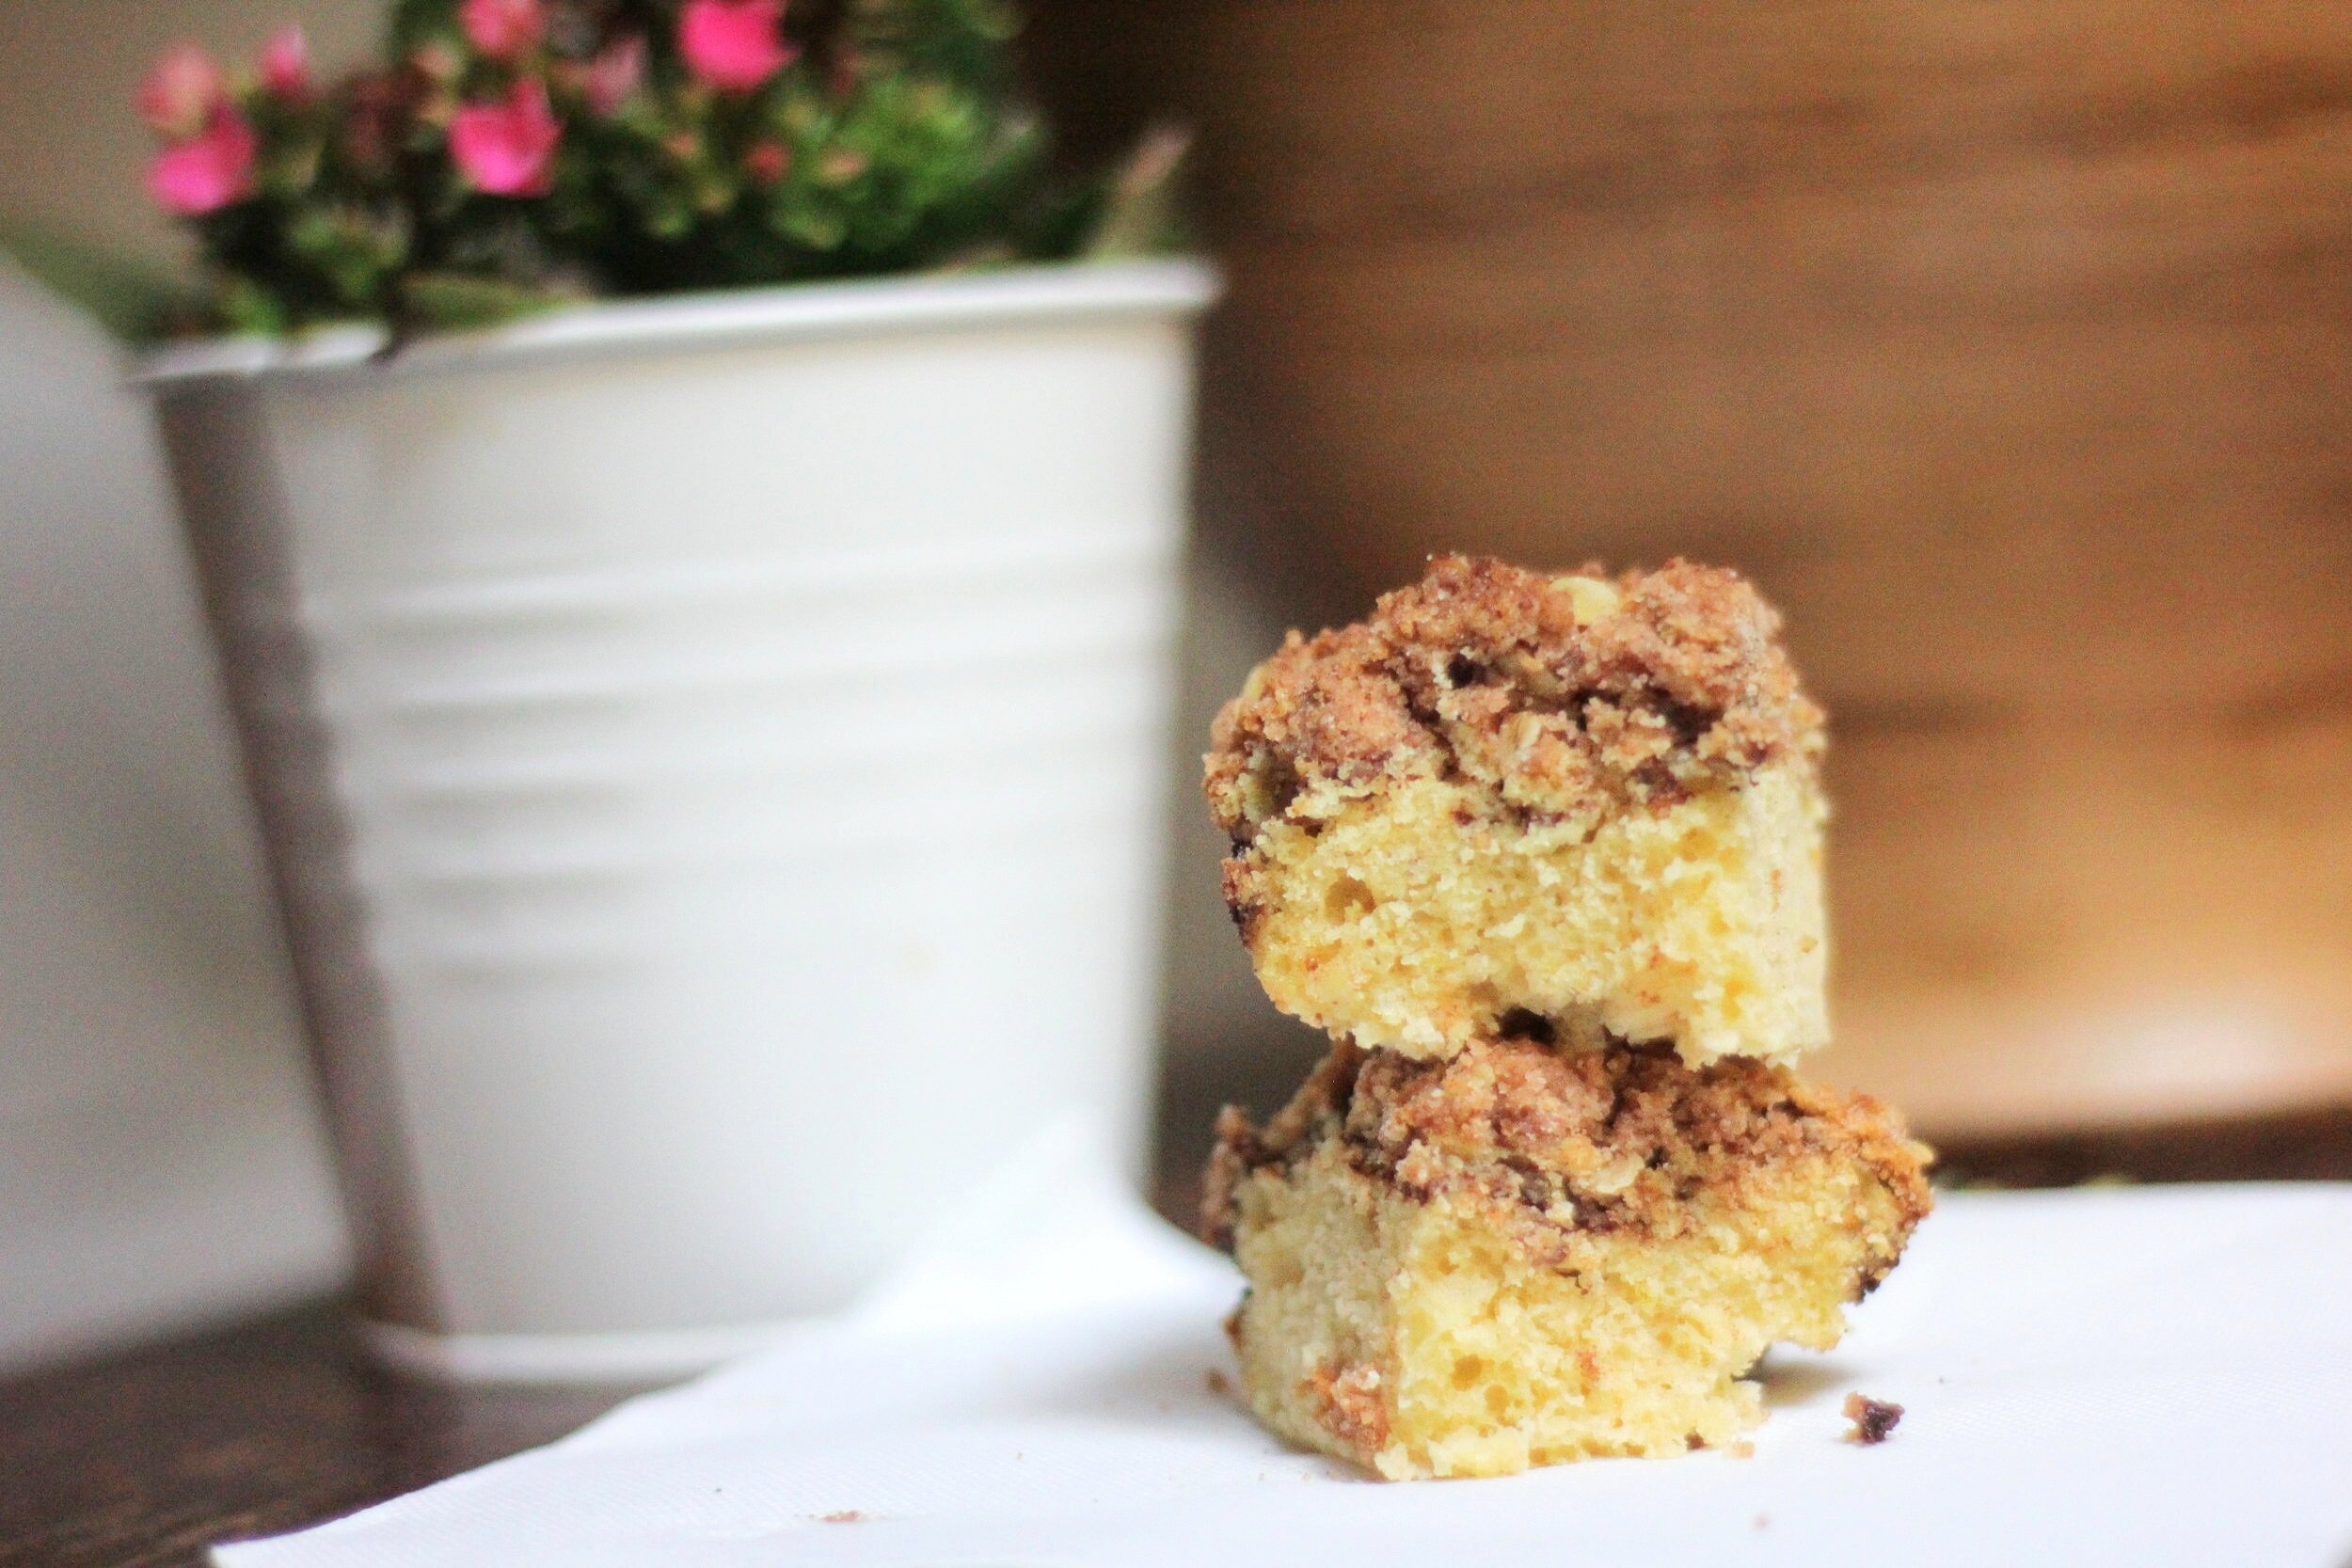
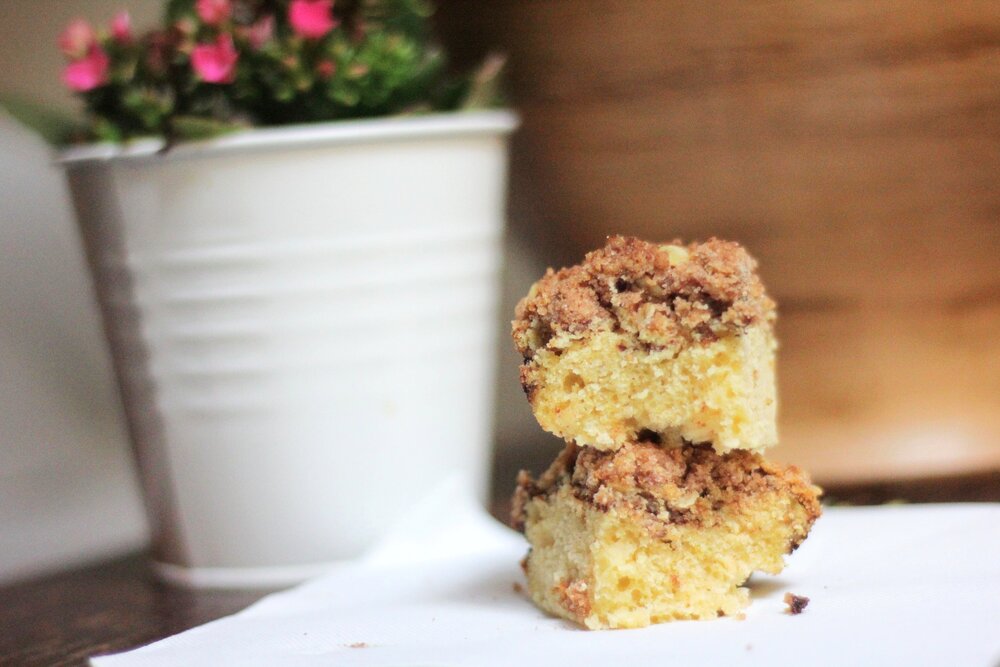
Think of a delicately moist coffee cake with a cinnamon swirl and a crunchy, sweet streusel on top. That’s what we’re making today.

If the first thought that comes to your mind when you think of coffee cake is dry-crumbly-use-up-a-week's-worth-of-saliva-in-one-bite-cake, then think again.  No, no, no.  Coffee cake is supposed to be sweet, but not quite as sweet as regular cake, flavorful, and with a beautifully dense crumb.  That's fancy talk for moist.  But for the mental care of some readers who have an avid dislike for that term, I tried to avoid using it.  But I still did to explain myself.  Just can't win. 

Oh, and for some people who may be confused, there is (most often) no coffee involved in the batter.  The final product, however, pairs beautifully with a mug of coffee.  Hence the name.  (Speaking of words we don't like...mug?  No thanks.  It's like your mouth was too lazy to talk - "mmmm" - then made a huge effort and ended up with "ug."  Mmmmmmug.) 

On to more delicious sounding, looking, and tasting things!! 

This post may contain affiliate links. If you buy something using these links, Jennyblogs may receive a small commission, at no extra cost to you. This helps to support Jennyblogs. For further information see the privacy policy. Grazie!


Cinnamon Streusel Coffee Cake

Serves 9-12

Ingredients:

For the Cake

  • 1/2 cup / 112g oil

  • 1/2 cup / 100g sugar

  • 1/4 cup / 50g brown sugar

  • 1 1/4 tsp baking powder

  • 3/4 tsp salt

  • 1 tsp vanilla extract

  • 1 egg

  • 1/2 cup / 122g plain yogurt

  • 1/2 cup / 119g milk

  • 2 cups / 240g all-purpose flour

For the Cinnamon Swirl

  • 1/2 cup / 100g brown sugar

  • 2 1/2 tsp cinnamon

  • 1 tsp unsweetened cocoa powder

For the Streusel

  • 1/3 cup / 67g sugar

  • 1/4 cup / 30g all-purpose flour

  • 1/4 cup / 23g rolled oats

  • 1 tsp cinnamon

  • 2 Tbsp / 28g butter, melted

Directions:

Oven 350°F / 177°C.  Greased 8x8in / 20x20cm square baking pan, or 8in / 20cm round cake pan.

Make the Cake

  1. In the bowl of a stand mixer, beat oil, sugars, baking powder, salt, and vanilla until well combined.  Beat in egg. 

  2. In a separate small bowl mix together yogurt and milk. 

  3. Add a third of the flour to the oil mixture, mixing until almost combined.  Add half of the yogurt mixture.  Continue adding flour and yogurt mixture to oil mixture until everything is just combined. 

  4. Pour half of the batter into the prepared pan, spreading all the way to edges; set other half aside. 

Make the Cinnamon Swirl

  1. In a small bowl combine brown sugar, cinnamon, and cocoa powder. 

  2. Sprinkle evenly over batter in pan. 

  3. Pour remaining batter over cinnamon filling and use a spatula to gently spread to edges.

Make the Streusel

  1. In another small bowl, combine sugar, flour, oats, and cinnamon.  Add the melted butter and mix until crumbles form. 

  2. Evenly distribute crumble over batter in pan. 

  3. Bake for 40-45 minutes or until toothpick inserted in center comes out clean. 

Jenny's Notes:

  • Watch that bake time.  Toothpicks are your best friend.  I was testing this recipe using my Italian oven that didn't like to bake things on the bottom, so you may need less time.

  • REALLY like coffee cake?  Double this recipe and put in a 9x13 inch pan or two cake pans.  You can always freeze one pan!

  • Don't have plain yogurt on hand? You can also use sweetened yogurt and reduce sugar by 1/4 cup / 50g, or try Greek yogurt, fresh ricotta, sour cream, or mascarpone.  The dairy options are endless!!!!  I really liked fresh ricotta in this recipe. 

Cinnamon Streusel Coffee Cake
Yield 9-12 servings
Author
Prep time
30 Min
Cook time
45 Min
Total time
1 H & 15 M

Cinnamon Streusel Coffee Cake

Delicate, moist coffee cake with a cinnamon swirl and streusel to top it all off.
Cook modePrevent screen from turning off

Ingredients

For the Cake
For the Cinnamon Swirl
For the Streusel

Instructions

Make the Cake
  1. Oven 350°F / 177°C. Greased 8x8in / 20x20cm square baking pan, or 8in / 20cm round cake pan.
  2. In the bowl of a stand mixer, beat oil, sugars, baking powder, salt, and vanilla until well combined. Beat in egg.
  3. In a separate small bowl mix together yogurt and milk.
  4. Add a third of the flour to the oil mixture, mixing until almost combined. Add half of the yogurt mixture. Continue adding flour and yogurt mixture to oil mixture until everything is just combined.
  5. Pour half of the batter into the prepared pan, spreading all the way to edges; set other half aside.
Make the Cinnamon Swirl
  1. In a small bowl combine brown sugar, cinnamon, and cocoa powder.
  2. Sprinkle evenly over batter in pan.
  3. Pour remaining batter over cinnamon filling and use a spatula to gently spread to edges.
Make the Streusel
  1. In another small bowl, combine sugar, flour, oats, and cinnamon. Add the melted butter and mix until crumbles form.
  2. Evenly distribute crumble over batter in pan.
  3. Bake for 40-45 minutes or until toothpick inserted in center comes out clean.

Notes

  • Watch that bake time. Toothpicks are your best friend. I was testing this recipe using my Italian oven that didn't like to bake things on the bottom, so you may need less time.
  • REALLY like coffee cake? Double this recipe and put in a 9x13 inch pan or two cake pans. You can always freeze one pan!
  • Don't have plain yogurt on hand? You can also use sweetened yogurt and reduce sugar by 1/4 cup / 50g, or try Greek yogurt, fresh ricotta, sour cream, or mascarpone. The dairy options are endless!!!! I really liked fresh ricotta in this recipe.

Nutrition Facts

Calories

402.38

Fat

16.42 g

Sat. Fat

2.95 g

Carbs

59.80 g

Fiber

1.55 g

Net carbs

58.24 g

Sugar

35.85 g

Protein

5.08 g

Cholesterol

29.23 mg

Sodium

311.45 mg

Nutritional information is approximate and based on 9 servings.

coffee cake, cinnamon swirl, brunch, streusel topping
breakfast, cake, dessert
American
Did you make this recipe?
Tag @jennyblogsandbakes on instagram and hashtag it #jennyblogs

Banana Chocolate Chip Cake with Peanut Butter Frosting

Last Updated August 4, 2024

It's almost Christmas!!!  The most wonderful time of the year, filled with family, friends, delicious food, and cheery music.  Wasn't that a wonderfully cliché sentence?  Yes, but we hope it's true.  I am fortunate enough to say that it is for me.  I love all my family, I love Christmas music (I can't always vouch for it all being "good" music, but it lifts your spirit and you can mindlessly sing along while wearing a Santa hat and elf socks without anyone thinking twice), and we have an abundance of delicious food.  So much food. 

What is one to do when they have been indundated with rich holiday food?  Take a break?  No fun.  Stand by the vegetable tray all night?  Nah, I hear the conversation can get a little heated with those peppers.  Chew gum?  No, you need a compromise.  Something that will satisfy, but not put you over like your great-aunt's cousin-once-removed on your dad's side triple chocolate cake with chocolate buttercream, ganache, whipped cream, sprinkles, drizzled with caramel and bonbons on top.  Something more like a fruit based cake.  Banana.  With chocolate chips, because it is Christmas, and peanut butter because that makes the whole thing.  The bow on top of the present.  The icing on the cake...so very literally. Plus protein. It’s basically a health food, you guys.

This post may contain affiliate links. If you buy something using these links, Jennyblogs may receive a small commission, at no extra cost to you. This helps to support Jennyblogs. For further information see the privacy policy. Grazie!

Recipe adapted from Handle the Heat


Banana Chocolate Chip Cake with Peanut Butter Frosting

Makes 12-16 servings

Ingredients:

For the Banana Chocolate Chip Cake

  • 2 1/2 cups / 300g all-purpose flour

  • 1 1/2 tsp baking powder

  • 3/4 baking soda

  • 1 tsp cinnamon

  • 1/2 tsp salt

  • 3/4 cup / 168g oil

  • 3/4 cup / 150g sugar

  • 1/2 cup / 100g brown sugar

  • 2 eggs

  • 1 tsp vanilla extract

  • 1/2 cup / 123g plain yogurt or sour cream

  • 4 overripe bananas, mashed, to get roughly 1 1/3 cups / 400g mashed banana

  • 1 cup / 170g mini chocolate chips

For the Peanut Butter Frosting

  • 1 cup / 226g unsalted butter (2 sticks, 8 oz), room temperature

  • 1 cup / 260g creamy peanut butter

  • 1 tsp vanilla extract

  • pinch of salt

  • 2 - 2 1/2 cups / 250-313g powdered sugar

Directions:

Oven preheated to 350°F / 177°C.  Grease and flour two 8 or 9in / 20 or 23cm round cake pans.

Make the Banana Chocolate Chip Cake

  1. In a medium bowl, whisk together flour, baking powder, baking soda, cinnamon, and salt.  Set aside.

  2. In the bowl of a stand mixer, beat together oil and sugars.  Add vanilla and eggs; beat well.

  3. Add 1/3 of the flour mixture to the egg mixture.  Mix in yogurt.  Add another third of flour mixture.  Add bananas.  Add final third of flour mixture.  Fold in chocolate chips.

  4. Pour and divide batter evenly between the two prepared pans. 

  5. Bake for 35-40 minutes, or until toothpick inserted in the center comes out clean.   Allow to cool for about 10 minutes in the pans before flipping out onto cooling racks to cool completely. 

Make the Peanut Butter Frosting

  1. In the bowl of a stand mixer, beat butter and peanut butter together until light and fluffy.  Add vanilla and salt.  Add 2 cups of powdered sugar; add more as needed until frosting is thick enough to spread. 

Assembly

  1. Center one cake layer upside down on a cake stand or plate.  Frost this layer within 1/4 inch of edge of cake. 

  2. Place second layer on top, and frost cake with remaining frosting.  Sprinkle with additional chocolate chips, if desired. 

Jenny's Notes:

  • I prefer to use organic yogurt instead of sour cream in recipes simply because it's healthier.  I don’t always have plain yogurt on hand, so in those cases I use vanilla yogurt and reduce the sugar in the recipe by 1/3-1/2 cup, depending on the amount of yogurt called for.  Feel free to use whatever you have on hand! 

Banana Chocolate Chip Cake with Peanut Butter Frosting
Yield 12-16
Author
Prep time
1 Hour
Cook time
40 Min
Total time
1 H & 40 M

Banana Chocolate Chip Cake with Peanut Butter Frosting

A tender banana cake speckled with chocolate chips topped with a creamy peanut butter frosting.
Cook modePrevent screen from turning off

Ingredients

For the Banana Chocolate Chip Cake
For the Peanut Butter Frosting

Instructions

Make the Banana Chocolate Chip Cake
  1. Oven preheated to 350°F / 177°C. Grease and flour two 8 or 9in / 20 or 23cm round cake pans.
  2. In a medium bowl, whisk together flour, baking powder, baking soda, cinnamon, and salt. Set aside.
  3. In the bowl of a stand mixer, beat together oil and sugars. Add vanilla and eggs; beat well.
  4. Add 1/3 of the flour mixture to the egg mixture. Mix in yogurt. Add another third of flour mixture. Add bananas. Add final third of flour mixture. Fold in chocolate chips.
  5. Pour and divide batter evenly between the two prepared pans.
  6. Bake for 35-40 minutes, or until toothpick inserted in the center comes out clean. Allow to cool for about 10 minutes in the pans before flipping out onto cooling racks to cool completely.
Make the Peanut Butter Frosting
  1. In the bowl of a stand mixer, beat butter and peanut butter together until light and fluffy. Add vanilla and salt. Add 2 cups of powdered sugar; add more as needed until frosting is thick enough to spread.
Assembly
  1. Center one cake layer upside down on a cake stand or plate. Frost this layer within 1/4 inch of edge of cake.
  2. Place second layer on top, and frost cake with remaining frosting. Sprinkle with additional chocolate chips, if desired.

Notes

I prefer to use organic yogurt instead of sour cream in recipes simply because it's healthier. I don’t always have plain yogurt on hand, so in those cases I use vanilla yogurt and reduce the sugar in the recipe by 1/3-1/2 cup, depending on the amount of yogurt called for. Feel free to use whatever you have on hand!

Nutrition Facts

Calories

785.39

Fat

45.52 g

Sat. Fat

15.55 g

Carbs

88.21 g

Fiber

3.37 g

Net carbs

84.84 g

Sugar

59.78 g

Protein

10.55 g

Sodium

386.82 mg

Cholesterol

75.36 mg

Nutritional information is approximate. Based on 12 servings using the full 2 1/2 cups of powdered sugar for the frosting.

Banana, cake, banana chocolate chip, chocolate chip cake, peanut butter, peanut butter frosting, banana cake, ripe banana recipe
Dessert, Cake
American
Did you make this recipe?
Tag @jennyblogsandbakes on instagram and hashtag it #jennyblogs