Favorite Blueberry Muffins

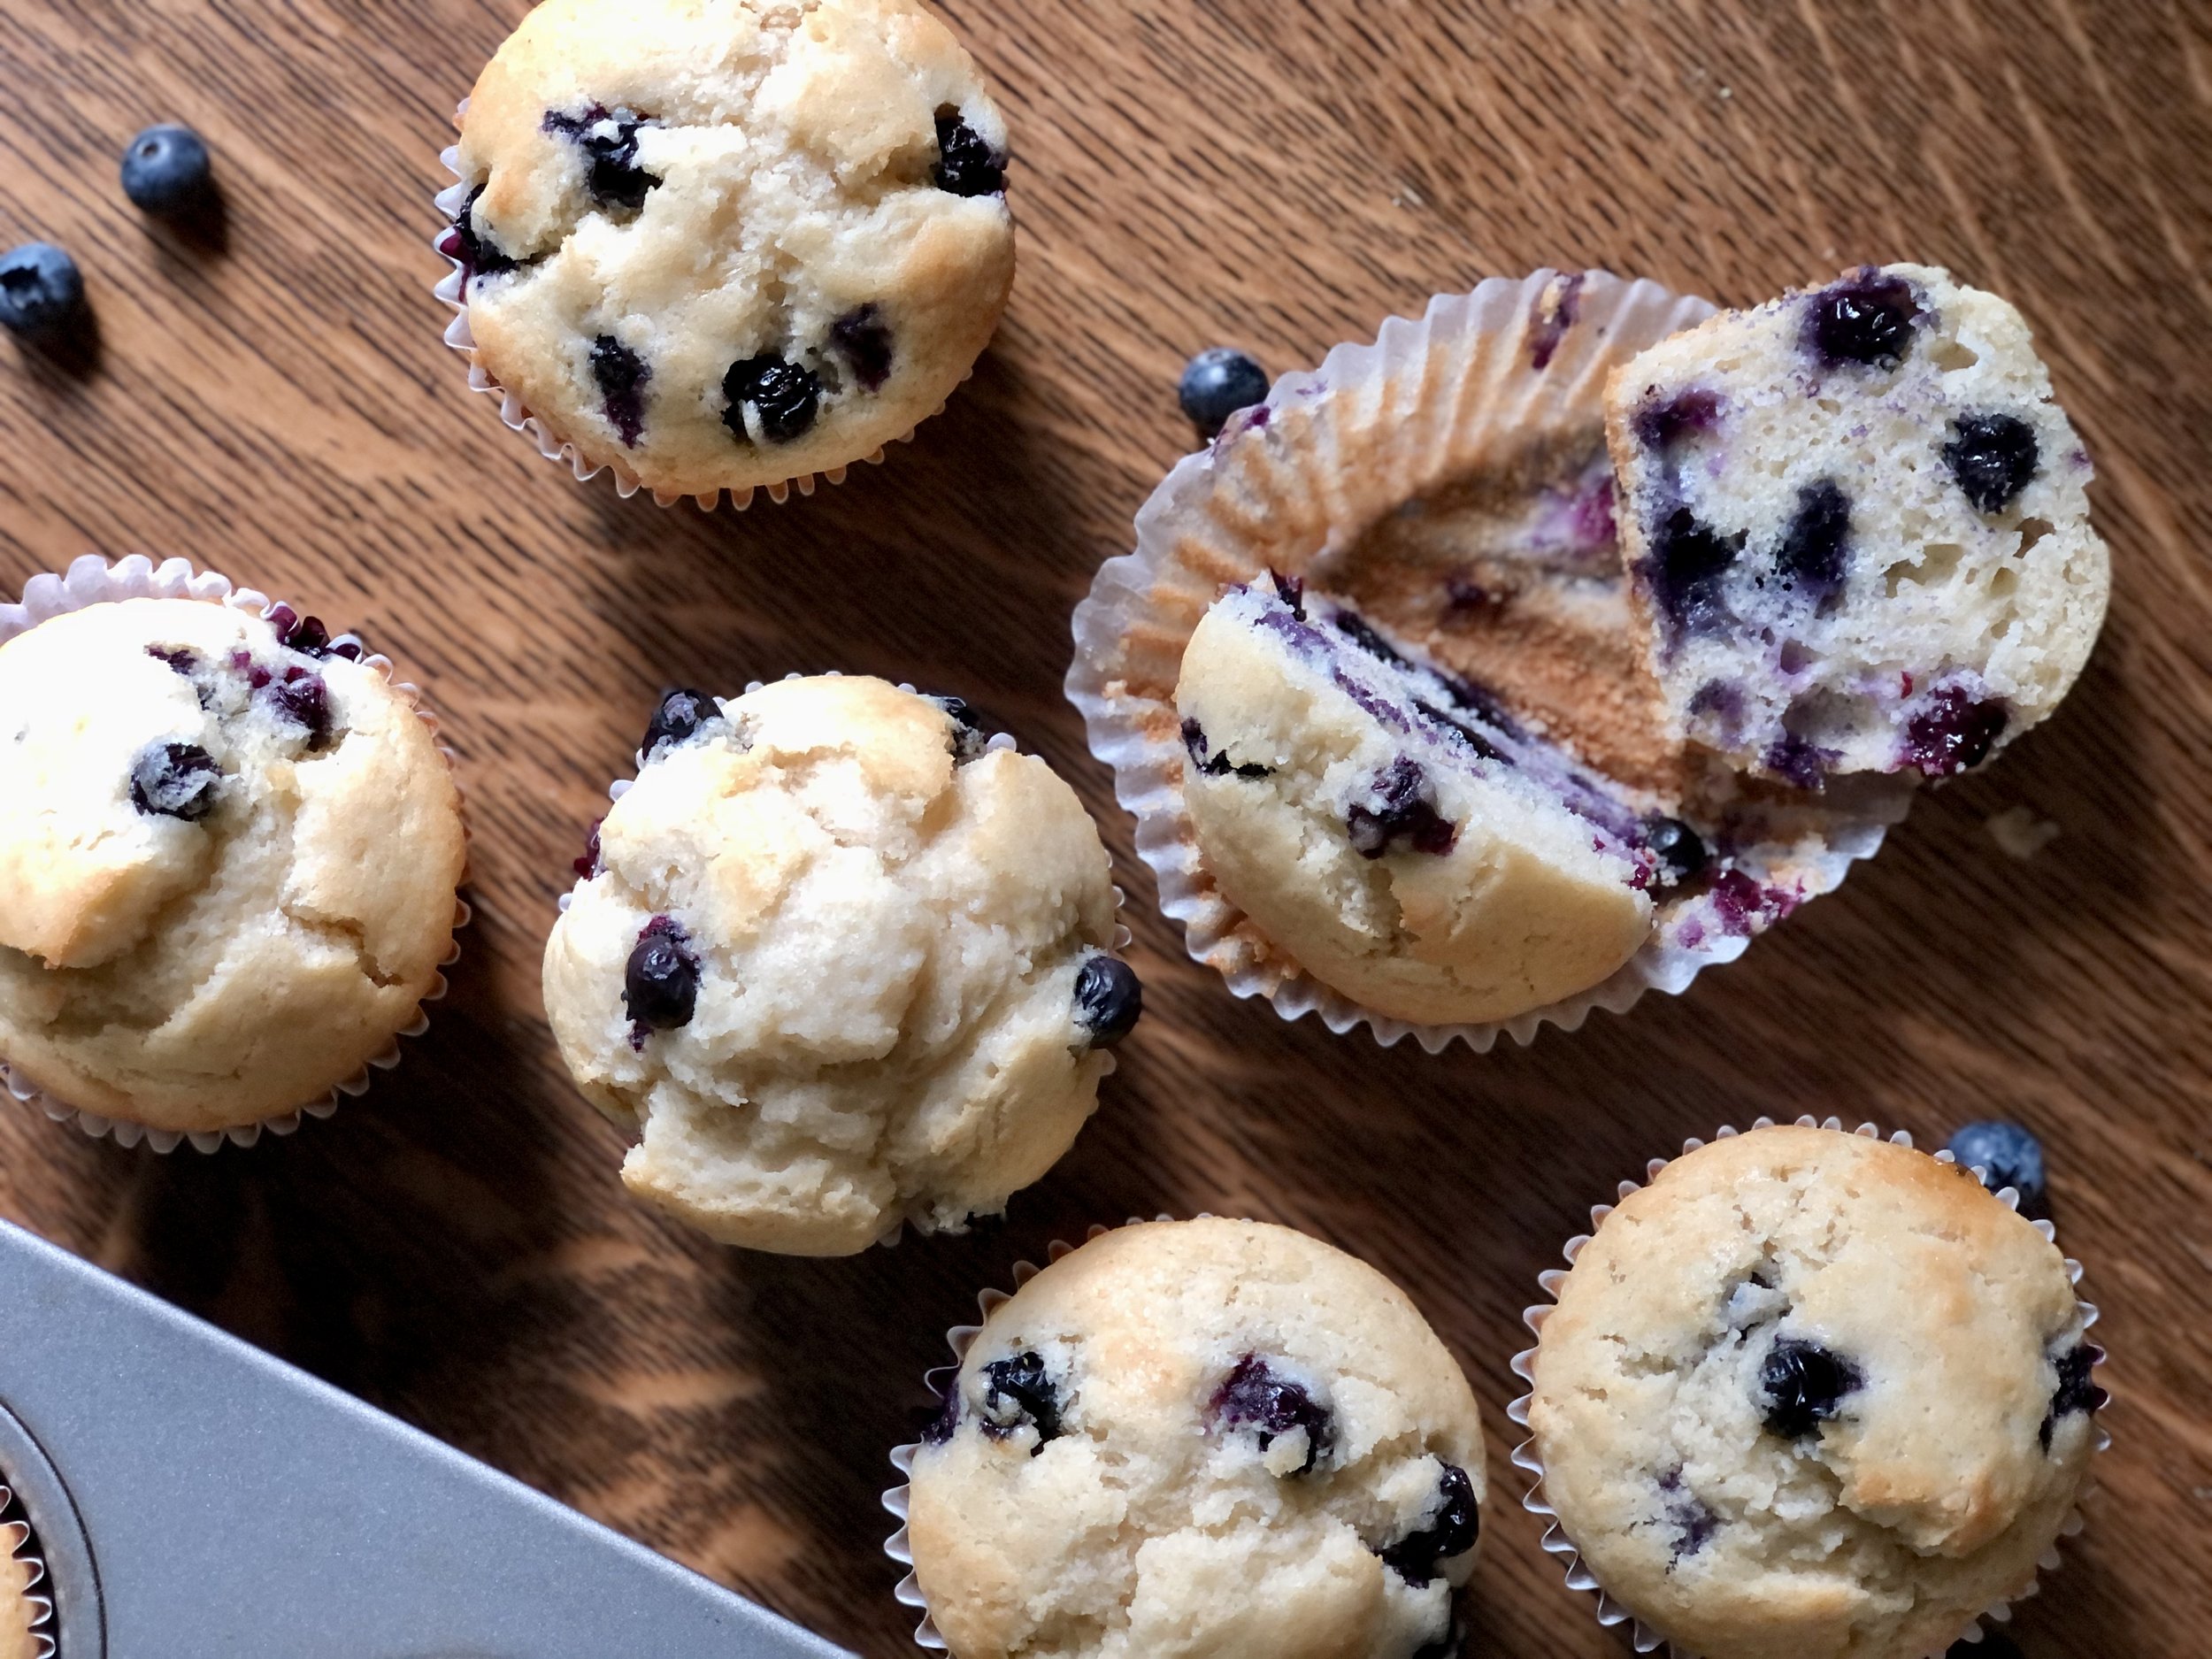
My favorite blueberry muffin recipe, right here! It is my go to, super easy recipe.

I love these because they only dirty one bowl and one measuring cup. In fact, even though I primarily use a scale for baking, this is one recipe I always use a measuring cup for some of the liquids because it’s so simple, and takes into consideration that eggs can vary in size while keeping liquids consistent. If you’re wondering what I mean, you’re just going to have to read the recipe below. :)

Read: Why You Should Use a Baking Scale

These muffins are also very versatile for making different kinds of muffins, chocolate chip, raspberry, almond poppyseed, and on and on. I really only use different muffin base recipes when they have elements that change the composition, like banana, pumpkin, peanut butter, etc.

My kids are little and muffins make for great snacks, breakfasts, lunches, or whenever! This recipe is also easy and quick enough for when they want to help, which tends to slow the process wayyyy down. Ah, I love my eager little helpers.

Use up some sourdough discard

These muffins are also fabulous for using up some sourdough discard. In fact, with my sourdough habit and my children’s love for muffins, I’ve probably been making this recipe 1-2 times per week recently! A blueberry muffin for you, and a lemon poppyseed muffin for you!

This post may contain affiliate links. If you make a purchase using these links, Jennyblogs may receive a small commission, at no extra cost to you. This helps to support Jennyblogs. Where possible, links are prioritized to small businesses and ethically and responsibly made items. For further information see the privacy policy. Grazie!

Recipe inspired by Inspired Taste


Favorite Blueberry Muffins

Makes about 12 muffins

Ingredients:

  • 2 cups / 240g all-purpose or pastry flour

  • 1/2 cup / 100g sugar

  • 1 Tbsp baking powder

  • 1/2 tsp salt

  • 1/2 cup / 113g oil

  • 1 egg

  • 2 tsp / 10g vanilla extract

  • about 1/2 cup / 119g milk

  • generous 1 cup fresh or frozen blueberries

  • up to 1/2 cup / about 100g sourdough discard, optional

Directions:

Oven 400°F / 205°C. Grease a 12 cup muffin pan or line with muffin liners.

  1. In a large bowl, whisk together flour, sugar, baking powder, and salt.

  2. In an at least 2 cup measuring cup, add oil, egg, and vanilla. Add milk until mixture reaches the 1 1/4 cups measure line, this should be around 1/2 cup of milk.

  3. Add milk mixture to dry ingredients along with sourdough discard if using, stirring until just combined. Gently fold in blueberries.

  4. Fill muffin cups almost all the way full. Bake in preheated oven for 15-20 minutes or until tops are springy, no longer wet looking, and/or a toothpick inserted into the center comes out clean.

Jenny’s notes:

  • If using frozen fruit, add to batter frozen, don’t thaw first. Muffins made with frozen fruit may need a couple minutes more in the oven than muffins made with fresh fruit.

  • If weighing ingredients or you don’t have a measuring cup handy, you can add the wet ingredients to another bowl instead, just add 1/2 cup / 119g milk.

  • Muffins make a great vessel for sourdough discard! I like using about 1/2 cup for a recipe this size, it’s a decent chunk out of my ever-growing discard jar, without the sourdough flavor being too strong. I’ve added 1 cup before, but at that point the sourdough flavor starts becoming more pronounced and you may start getting more than a dozen muffins.

  • Buttermilk can be substituted for the milk. Batter will be slightly thicker.

  • To jazz up the muffins, you can sprinkle the tops with coarse or granulated sugar before baking, if desired.

Favorite Blueberry Muffins
Yield 12
Author
Prep time
15 Min
Cook time
20 Min
Total time
35 Min

Favorite Blueberry Muffins

My favorite easy blueberry muffin recipe: Soft, tender muffins with pops of blueberry.
Cook modePrevent screen from turning off

Ingredients

Instructions

  1. Oven 400°F / 205°C. Grease a 12 cup muffin pan or line with muffin liners.
  2. In a large bowl, whisk together flour, sugar, baking powder, and salt.
  3. In an at least 2 cup measuring cup, add oil, egg, and vanilla. Add milk until mixture reaches the 1 1/4 cups measure line, this should be around 1/2 cup of milk.
  4. Add milk mixture to dry ingredients along with sourdough discard if using, stirring until just combined. Gently fold in blueberries.
  5. Fill muffin cups almost all the way full. Bake in preheated oven for 15-20 minutes or until tops are springy, no longer wet looking, and/or a toothpick inserted into the center comes out clean.

Notes

  • If using frozen fruit, add to batter frozen, don’t thaw first. Muffins made with frozen fruit may need a couple minutes more in the oven than muffins made with fresh fruit.
  • If weighing ingredients or you don’t have a measuring cup handy, you can add the wet ingredients to another bowl instead, just add 1/2 cup / 119g milk.
  • Muffins make a great vessel for sourdough discard! I like using about 1/2 cup for a recipe this size, it’s a decent chunk out of my ever-growing discard jar, without the sourdough flavor being too strong. I’ve added 1 cup before, but at that point the sourdough flavor starts becoming more pronounced and you may start getting more than a dozen muffins.
  • Buttermilk can be substituted for the milk. Batter will be slightly thicker.
  • To jazz up the muffins, you can sprinkle the tops with coarse or granulated  sugar before baking, if desired.

Nutrition Facts

Calories

224.88

Fat

10.62 g

Sat. Fat

1.09 g

Carbs

26.35 g

Fiber

2.6 g

Net carbs

23.74 g

Sugar

1.9 g

Protein

4.34 g

Sodium

251.77 mg

Cholesterol

14.86 mg

Nutritional information is approximate. Based on 1 muffin, including sourdough discard.

sourdough discard recipe, best ever blueberry muffins, favorite muffin base recipe
breakfast, dessert, bread
American
Did you make this recipe?
Tag @jennyblogsandbakes on instagram and hashtag it #jennyblogs

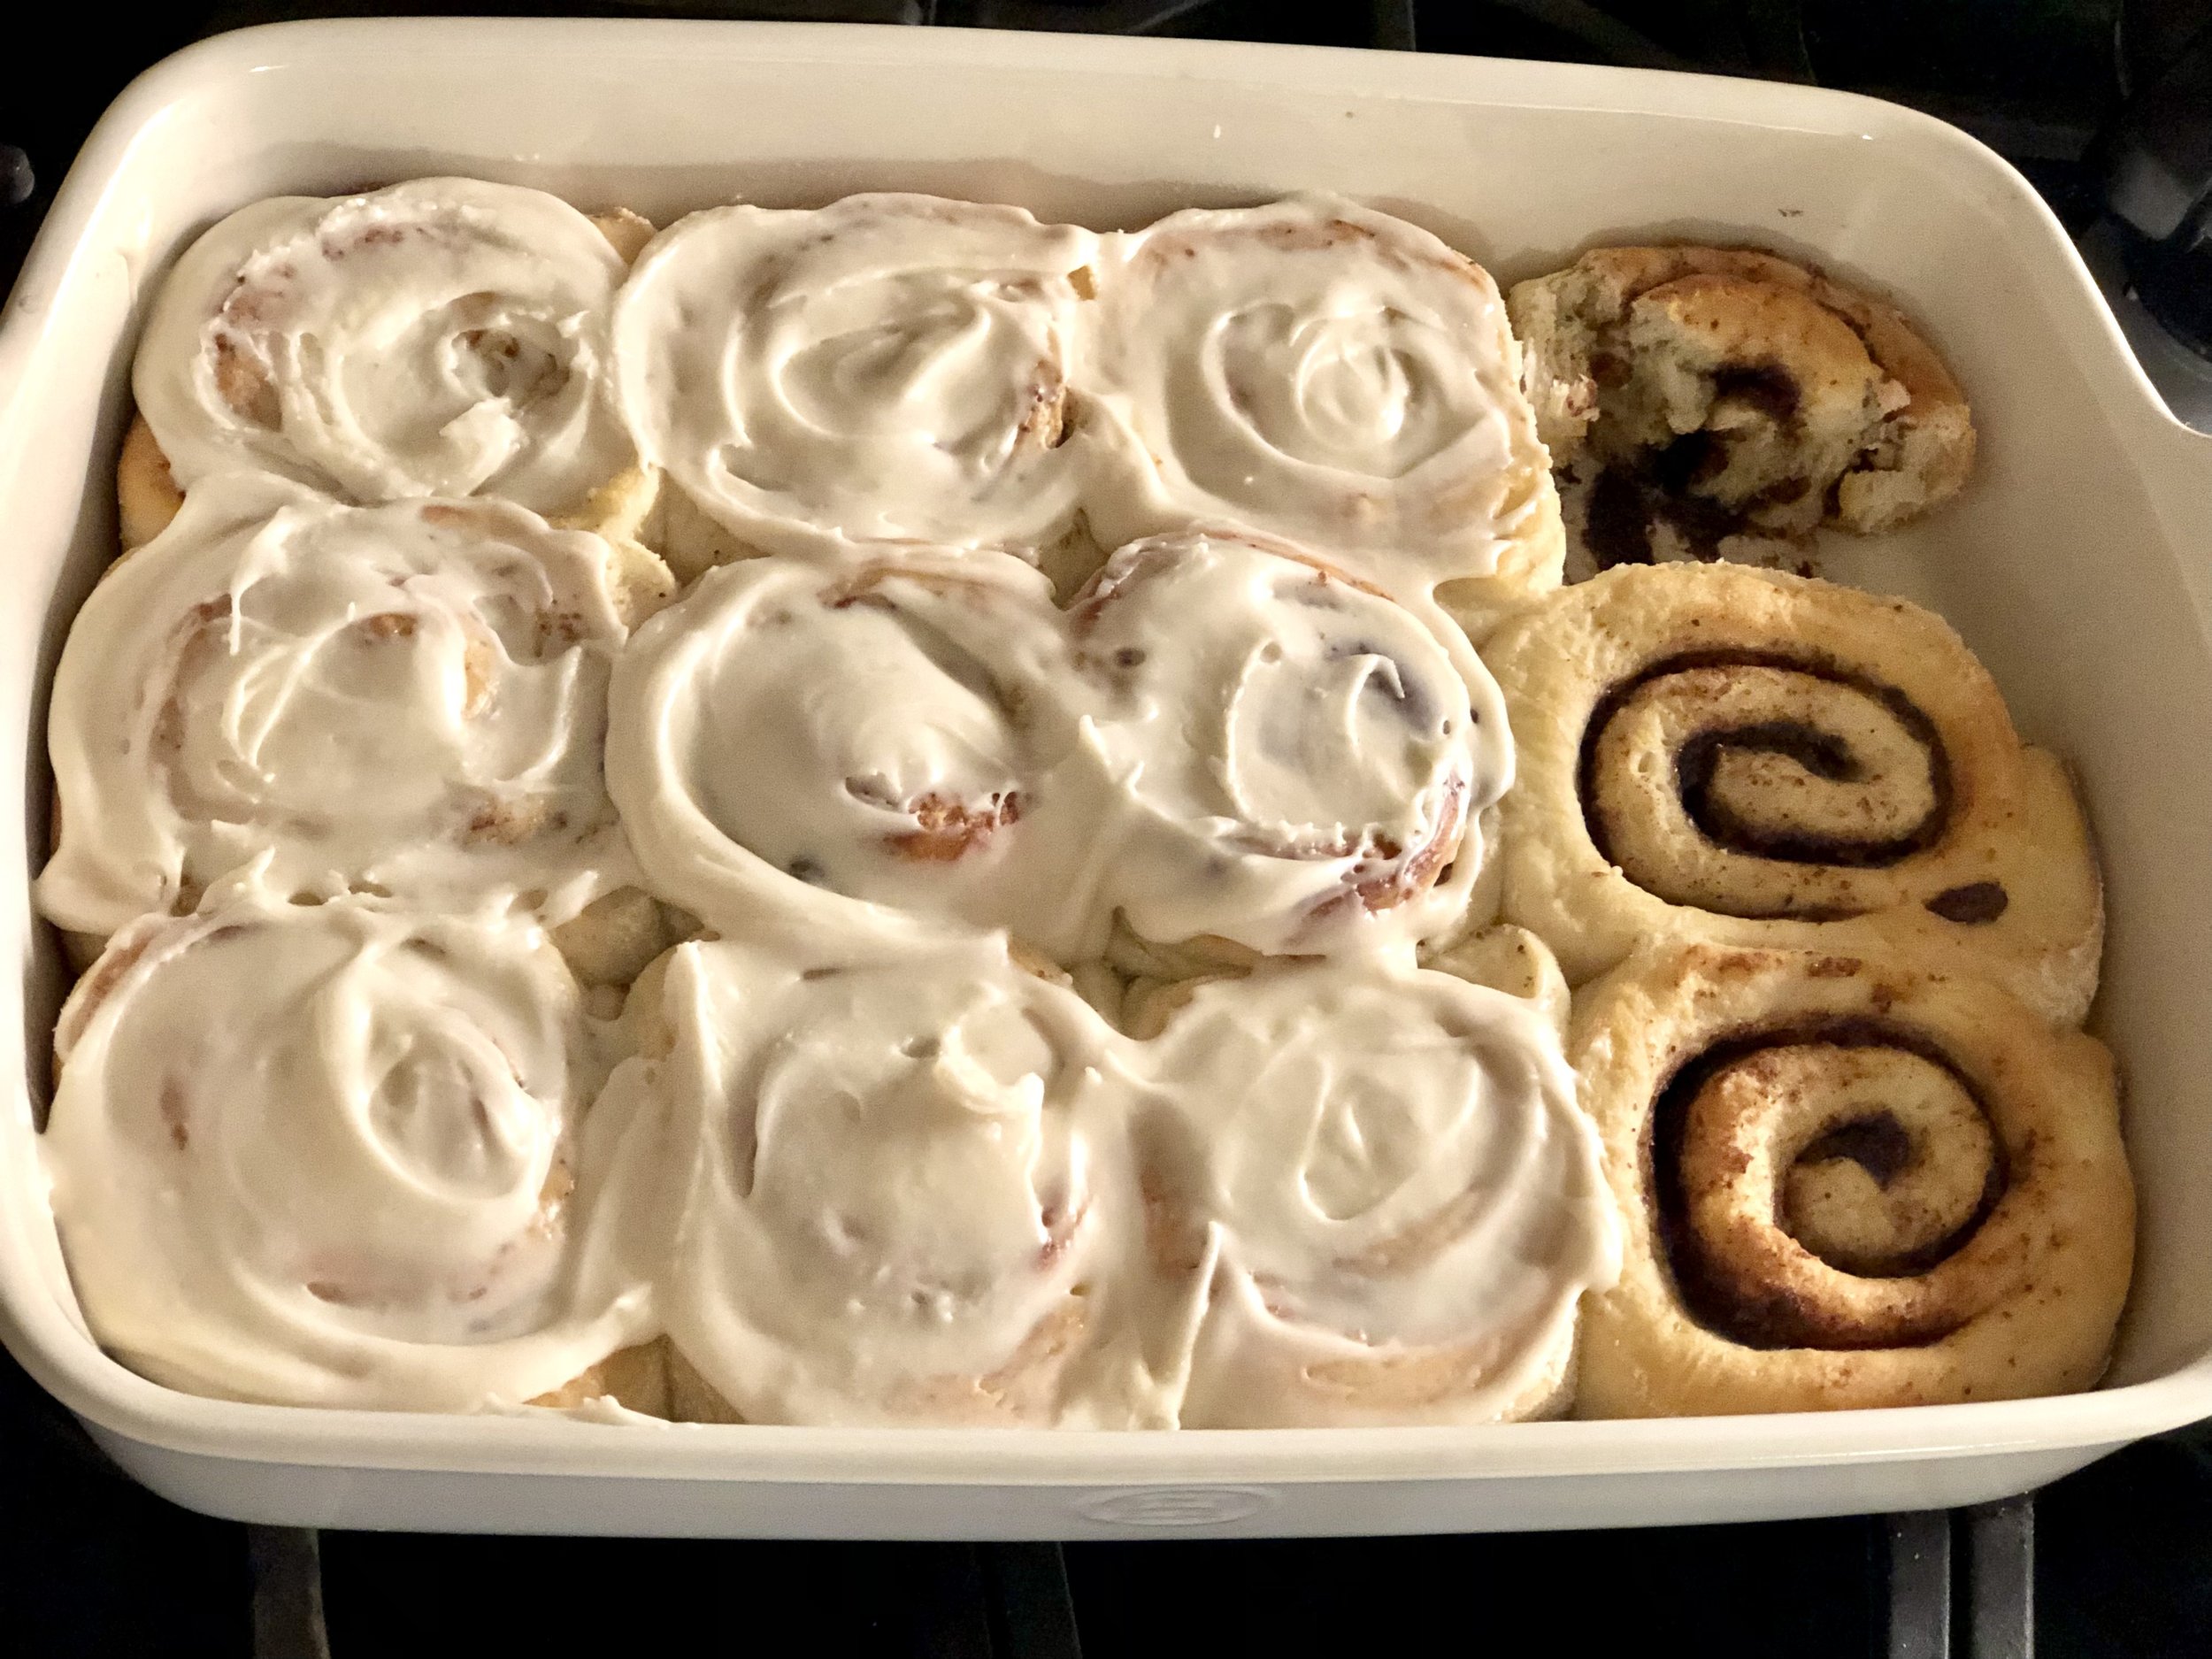
Jenny's Favorite Cinnamon Rolls

Last updated: June 4, 2024

With all the cinnamon roll recipes out there, how do you pick which one to make? Which one do you adopt as your cinnamon roll recipe?

I’ve made my fair share of cinnamon roll recipes, and I’ve yet to meet a bad one. Some are better than others, but I’ve been waiting to meet the recipe that stood out from the rest.

Lightning struck when I tried this recipe from King Arthur, “Perfectly Pillowy Cinnamon Rolls”. I had met the one! As the title suggests, these rolls are pillowy, luxurious, and everything you could want from a cinnamon roll.

What makes a good cinnamon roll recipe?

The thing that really makes one cinnamon roll stand out from another is the actual dough.

Filling and frosting are easily adjusted, so once you find a cinnamon roll with a soft, fluffy, and luscious dough, you can always adjust filling and frosting according to your taste.

What makes this recipe so special?

Speaking of customizing, how about for those who do and do not want frosting? And those who can’t wait to dig in. :)

  1. This cinnamon roll dough is just the best. Why? It utilizes the tangzhong technique (see below). This creates softer, pillowy bread that stays fresher for longer!

  2. This recipe also allows you to customize your icing: do your prefer plain icing or cream cheese icing? This recipe gives an easy access to either one. Plus, if you use buttermilk in the frosting, it’s the touch that sweet icing has been missing.

  3. You can customize the richness of these rolls!

    For richer rolls:

    • Add extra cinnamon to the filling

    • Drizzle each roll with 1 tsp of milk or heavy cream before baking for extra gooey rolls

    • Cover rolls with tinfoil for the first half of baking (baking time may need to be adjusted)

    • brush the rolls with melted butter when they come out of the oven, before icing

What is Tangzhong?

This recipe utilizes tangzhong in the dough, an Asian bread method that involves cooking some of the milk and flour to create a thick paste before adding it in with the rest of the ingredients. In essence, it creates a softer bread that retains its moisture for longer. Cinnamon rolls are usually best consumed the same day they are baked, but when you use this simple tangzhong method, they are still pretty darn soft and luscious even a day or two later! If you’re interested in learning more of the science-y stuff behind how and why tangzhong works, King Arthur themselves wrote this handy article on it.

While you might be thinking that cinnamon rolls are already a multi-step process and don’t need another one, may I say, what’s one more? Tangzhong DOES create an extra step, but it’s very simple. It involves 2 ingredients and takes less than 5 minutes for cinnamon rolls that stay fresh for hours, even days longer than standard cinnamon rolls. I think it’s totally worth it!

I heart King Arthur, now you heart King Arthur, we all heart King Arthur!

I originally kept this recipe largely the same with just a few minor tweaks to King Arthur’s recipe, but I’ve continued to make adjustments to streamline the recipe. Beyond that, there are a few customizable elements depending on just how rich and luscious you like your cinnamon rolls. Some of these are things I gathered from cinnamon roll recipes I’ve made in the past; others are little tricks I’ve seen bakeries use. Put them all together to make your ultimate cinnamon roll.

Create New Flavors

Lime Rolls: Trying to take photos on my laundry rack outside…our apartment in Incisa Valdarno had very poor lighting for any kind of photography.

This recipe is also a wonderful base to change up the flavors, you don’t always have to stick with cinnamon rolls. I’ve used this recipe to make Lime Rolls (think lime dough with a sweet lime filling and zingy lime icing), and they were WONDERFUL. I’ve also made Lemon Rolls, and am thinking about making Orange Rolls next time. Yum!

Enough about the tangzhong and how wonderful this recipe is and how many different things you can do with it, I like the recipe to speak for itself. :)

This post may contain affiliate links. If you make a purchase using these links, Jennyblogs may receive a small commission, at no extra cost to you. This helps to support Jennyblogs. For further information see the privacy policy. Grazie!

Recipe adapted from King Arthur


Cinnamon Rolls

Makes 12 large cinnamon rolls

Ingredients

For the Tangzhong:

  • 3/4 cup / 170g milk

  • 5 Tbsp / 40g bread flour

For the Dough:

  • 1 cup / 237g milk

  • 3 3/4 cup / 450g bread flour

  • 1 1/2 tsp / 9g salt

  • 3 Tbsp / 37g sugar

  • 1 Tbsp / 9g instant yeast

  • 6 Tbsp / 85g softened butter

  • 1/2 cup / about 100g sourdough discard, optional

For the Filling:

  • 2 Tbsp / 28g softened butter

  • 3/4 cup / 150g brown sugar

  • 4 1/2 tsp / 12g cinnamon

For the Icing:

  • 2 1/4 cup / 280g powdered sugar

  • 4 oz / 113g cream cheese, softened, optional

  • 2 Tbsp / 28g butter, melted

  • 1 tsp / 5g vanilla extract

  • 2-3 Tbsp milk, heavy cream, or buttermilk

Directions

Oven 375°F / 190°C 9x13inch / 23x33cm rectangle baking dish, lightly greased, OR jelly roll pan or cookie sheet lined with parchment paper or silicone baking mat

Make the Tangzhong:

  1. In a small pan, whisk flour and milk together until no lumps remain. Place over medium heat and cook, stirring often, until thickened into a paste-like texture. This could take just a couple minutes or more, depending on your burner.

  2. Set aside for a moment to cool.

Make the Dough:

  1. Add all dough ingredients to the bowl of a stand mixer or other large bowl. Add in the warm (but not too hot) tangzhong. If using sourdough discard, you may find you need a small additional amount of flour to make the dough not overly sticky.

  2. Knead with the dough attachment in the stand mixer for about 10 minutes or longer by hand, until dough is elastic and passes the window pane test.

  3. Shape dough into a ball and place in a lightly oiled bowl and cover. Let rise in a warm place for 1 - 1.5 hours, or until roughly doubled in size.

Make the Filling:

  1. When the dough has risen, punch down and dump out onto a floured surface. Roll the dough into a roughly 10x12in / 25x30cm rectangle, about 0.5in / 1.25cm thick. Do your best to roll or pat into a rectangle and not an oval.

  2. Evenly spread butter over dough, leaving about 0.5in / 1.25cm uncovered along the edge of one of the long sides. Sprinkle brown sugar and cinnamon evenly over butter. Press gently into dough. Carefully roll the dough up, starting with the opposite long side. Use the uncovered edge to help seal the roll; you can gently roll it back and forth with the seam down to help seal it.

  3. Using a sharp serrated knife or dental floss, cut the roll into 12 pieces. Place each piece in prepared baking dish, or free standing on a cookie sheet or jelly roll pan, spaced evenly apart.

  4. Lightly cover the rolls and let rise in a warm place until risen and puffy, about 30-60 minutes. Partway through this time, preheat your oven to 375°/190°C.

  5. Bake rolls for about 14-18 minutes or until internal temperature of an outer roll reads 185°F / 85°C.

  6. Allow rolls to cool for at least 10 minutes before icing.

Make the Icing:

  1. In a medium bowl or the bowl of a stand mixer fitted with the paddle, mix all icing ingredients together except milk until smooth. Add milk, 1 Tbsp at a time, until desired icing consistency is reached.

  2. Spread icing evenly over rolls.

Jenny’s Notes

  1. When making bread, you are often instructed to add warm (about 110°F / 43°C) liquids to your dough. This helps to activate the yeast and thus rise your dough. If you add cold liquids your yeast may remain dormant and not do much. In this recipe, the milk doesn’t have to be warm, you can add it cold since it will offset the heat from the tangzhong that was cooked. Don’t add the tangzhong straight from the hot stove into the bowl with your yeast and other ingredients, as the heat could kill the yeast, but the time it takes to assemble the other dough ingredients in the bowl should be sufficient time for the tangzhong to cool down. Then the cold milk helps, too.

  2. The best way to ensure properly cooked cinnamon rolls (or anything!) is by taking an internal temperature. One of top used kitchen tools is my Thermapen, and I highly recommend one to you. You can find similar on Amazon.

  3. My favorite icing for cinnamon rolls is cream cheese. Either way you go, I highly recommend using buttermilk in the icing rather than milk. The tang offsets the very sweet icing really, really well.

  4. The window pane test, which is my go-to for kneaded doughs, is essentially taking a small chunk of dough and stretching it into an even little square, then stretching the dough until it is very thin. If the dough begins to break, not enough gluten has developed and needs to be kneaded more. A dough that has been sufficiently kneaded will stretch very thin, thin enough you could almost see through it, and, if held up to a window, can see light through it, hence the name of this technique.

  5. To facilitate cutting the rolls evenly, I like to use a knife or the floss to make marks in the dough before actually cutting. I start by making a mark in the middle, then another mark in the middle of each half, then marking each quarter into 3. If you want to be really precise, use a measuring tape in front of your roll. :)

  6. If you saw dental floss as a choice for cutting the roll and think that’s crazy, trust! It gives you a clean cut and is satisfying to use. Slide the floss under the roll where you want to cut, then pull the ends of the floss up and around the roll, pulling in opposite directions to slice the roll.

  7. If you don’t have dental floss or a sharp enough knife to cut the rolls without squishing them, you can put the rolls in the freezer for about 30 minutes until the dough is firmed up. This makes the cutting process neater and easier if you don’t have ideal tools at hand. You will then have to give a little more time in the rising process since the dough is cold.

  8. Inevitably your cut rolls with will vary slightly in size, the ones from the middle being more generous than the ones from the end. To ensure the most even baking, place the larger rolls on the outside or corners of your pan, the smaller ones toward the center.

  9. If making free standing cinnamon rolls, you’ll want to tuck the ends of the rolls underneath themselves, so you don’t have tails when they rise and are baked.

  10. I had never made free standing cinnamon rolls or any kind of roll like this until I found this recipe. It gives a little more freedom in what you can use in the baking process and I love that. You will have more perfectly shaped rolls, but baking together in a rectangle dish is easier if you want to freeze or transport the rolls.

  11. How to tell if your dough is risen enough, but not over risen? When gently pressed with a finger, the dough should slowly spring back. If it springs back immediately, it hasn’t risen enough. If it doesn’t spring back at all, it could be over-risen.

  12. These rolls freeze well! You have two options:

    1. Freeze once rolls are sliced and in their rectangle pan. Cover tightly and freeze. When ready to use, allow to come to room temperature and rise until puffy, continuing from step 5 in the “Make the Filling” section.

    2. Freeze once rolls are baked and cooled. Frosting is best done once rolls have come to room temperature (or even been warmed in the oven for a bit)

Jenny's Favorite Cinnamon Rolls
Yield 12
Author
Prep time
50 Min
Cook time
18 Min
Inactive time
2 H & 30 M
Total time
3 H & 38 M

Jenny's Favorite Cinnamon Rolls

Classic cinnamon rolls are taken to the next level with the use of the tangzhong technique. This creates extra fluffy, pillowy soft rolls that stay softer for longer. With a traditional cinnamon filling and customizable frosting, these too can become your favorite cinnamon rolls!

Ingredients

For the Tangzhong:
For the Dough:
For the Filling:
For the Icing:

Instructions

Make the Tangzhong:
  1. In a small pan, whisk flour and milk together until no lumps remain. Place over medium heat and cook, stirring often, until thickened into a paste-like texture. This could take just a couple minutes or more, depending on your burner.
  2. Set aside for a moment to cool.
Make the Dough:
  1. Add all dough ingredients to the bowl of a stand mixer or other large bowl. Add in the warm (but not too hot) tangzhong.
  2. Knead with the dough attachment in the stand mixer for about 10 minutes or longer by hand, until dough is elastic and passes the window pane test.
  3. Shape dough into a ball and place in a lightly oiled bowl and cover. Let rise in a warm place for 1 - 1.5 hours, or until roughly doubled in size.
Make the Filling:
  1. Oven 375°F / 190°C 9x13inch / 23x33cm rectangle baking dish, lightly greased, OR jelly roll pan or cookie sheet lined with parchment paper or silicone baking mat
  2. Combine all filling ingredients together in a small bowl, until a wet sand texture is achieved.
  3. When the dough has risen, punch down and dump out onto a floured surface. Roll the dough into a roughly 10x12in / 25x30cm rectangle, about 0.5in / 1.25cm thick. Do your best to roll or pat into a rectangle and not an oval.
  4. Evenly sprinkle filling over dough, leaving about 0.5in / 1.25cm uncovered along the edge of one of the long sides. Carefully roll the dough up, starting with the opposite long side. Use the uncovered edge to help seal the roll; you can gently roll it back and forth with the seam down to help seal it.
  5. Using a sharp serrated knife or dental floss, cut the roll into 12 pieces. Place each piece in the prepared pan, or free standing on a cookie sheet, spaced evenly apart.
  6. Lightly cover the rolls and let rise in a warm place until risen and puffy, about 30-60 minutes. Partway through this time you’ll want to preheat your oven to 375°/190°C.
  7. Bake rolls for about 14-18 minutes or until internal temperature of an outer roll reads 190°F / 88°C.
  8. Allow rolls to cool for about 10 minutes before icing.
Make the Icing:
  1. In a medium bowl or the bowl of a stand mixer fitted with the paddle, mix all icing ingredients together except milk until smooth. Add milk, 1 Tbsp at a time, until desired icing consistency is reached.
  2. Spread icing evenly over rolls.

Notes

  1. When making bread, you are often instructed to add warm (about 110°F / 43°C) liquids to your dough. This helps to activate the yeast and thus rise your dough. If you add cold liquids your yeast may remain dormant and not do much. In this recipe, you may notice the milk doesn’t have to be warm. In fact, you can add it cold since it will offset the heat from the tangzhong that was cooked. I wouldn’t add the tangzhong straight from the hot stove into the bowl with your yeast and other ingredients, as the heat could kill the yeast, but the time it takes to assemble the other dough ingredients in the bowl should be sufficient time for the tangzhong to cool down. Then the cold milk helps, too.
  2. The best way to ensure properly cooked cinnamon rolls (or anything!) is by taking an internal temperature. One of top used kitchen tools is my Thermapen, and I highly recommend one to you. You can find similar on Amazon.
  3. My favorite icing for cinnamon rolls is cream cheese, however this makes them that much richer and heavier, so I tend to go back and forth between making the icing with and without the cream cheese. Either way you go, I highly recommend using buttermilk in the icing rather than milk. The tang offsets the very sweet icing really, really well.
  4. The window pane test, which is my go-to for kneaded doughs, is essentially taking a small chunk of dough and stretching it into an even little square, then stretching the dough until it is very thin. If the dough begins to break, not enough gluten has developed and needs to be kneaded more. A dough that has been sufficiently kneaded will stretch very thin, thin enough you could almost see through it, and, if held up to a window, can see light through it, hence the name of this technique.
  5. To facilitate cutting the rolls evenly, I like to use a knife or the floss to make marks in the dough before actually cutting. I start by making a mark in the middle, then another mark in the middle of each half, then marking each quarter into 3. If you want to be really precise, use a measuring tape in front of your roll. :)
  6. If you saw dental floss as a choice for cutting the roll and think that’s crazy, trust! It actually gives you the cleanest cut and is satisfying to use. Slide the floss under the roll where you want to cut, then pull the ends of the floss up and around the roll, pulling in opposite directions to slice the roll.
  7. If you don’t have dental floss or a sharp enough knife to cut the rolls without squishing them, you can put the rolls in to the freezer for about 30 minutes until the dough is firmed up. This makes the cutting process neater and easier if you don’t have ideal tools at hand. You will then have to give a little more time in the rising process since the dough is cold.
  8. If you want extra gooey, rich cinnamon rolls:
  • Before baking, pour about 1 tsp of heavy cream over each roll.
  • After baking, brush rolls with 2 Tbsp of melted butter immediately after they come out of the oven. Then continue with cooling and icing.
  1. Inevitably your cut rolls with will vary slightly in size, the ones from the middle being more generous than the ones from the end. To ensure the most even baking, place the larger rolls on the outside or corners of your pan, the smaller ones toward the center.
  2. If making free standing cinnamon rolls, you’ll want to tuck the ends of the rolls underneath themselves, so you don’t have tails when they rise and are baked.
  3. I had never made free standing cinnamon rolls or any kind of roll like this until I found this recipe. It gives a little more freedom in what you can use in the baking process and I love that. You will have more perfectly shaped rolls, but baking together in a rectangle dish is easier if you want to freeze or transport the rolls.
  4. How to tell if your dough is risen enough, but not over risen? When gently pressed with a finger, the dough should slowly spring back. If it springs back immediately, it hasn’t risen enough. If it doesn’t spring back at all, it could be over-risen.
  5. These rolls freeze well! You have two options:
  6. Freeze once rolls are sliced and in their rectangle pan. Cover tightly and freeze. When ready to use, allow to come to room temperature and rise until puffy, continuing from step 5 in the “Make the Filling” section.
  7. Freeze once rolls are baked and cooled. Frosting is best done once rolls have come to room temperature (or even been warmed in the oven for a bit)


Nutrition Facts

Calories

459.97

Fat

15.91 g

Sat. Fat

9.5 g

Carbs

71.85 g

Fiber

1.8 g

Net carbs

70.06 g

Sugar

37.68 g

Protein

7.43 g

Sodium

416.6 mg

Cholesterol

42.79 mg

Nutritional information is approximate, based on 1 cinnamon roll with cream cheese frosting.

best ever cinnamon rolls, king arthur, cream cheese frosting, sourdough discard recipe
breakfast, bread
American
Did you make this recipe?
Tag @jennyblogsandbakes on instagram and hashtag it #jennyblogs

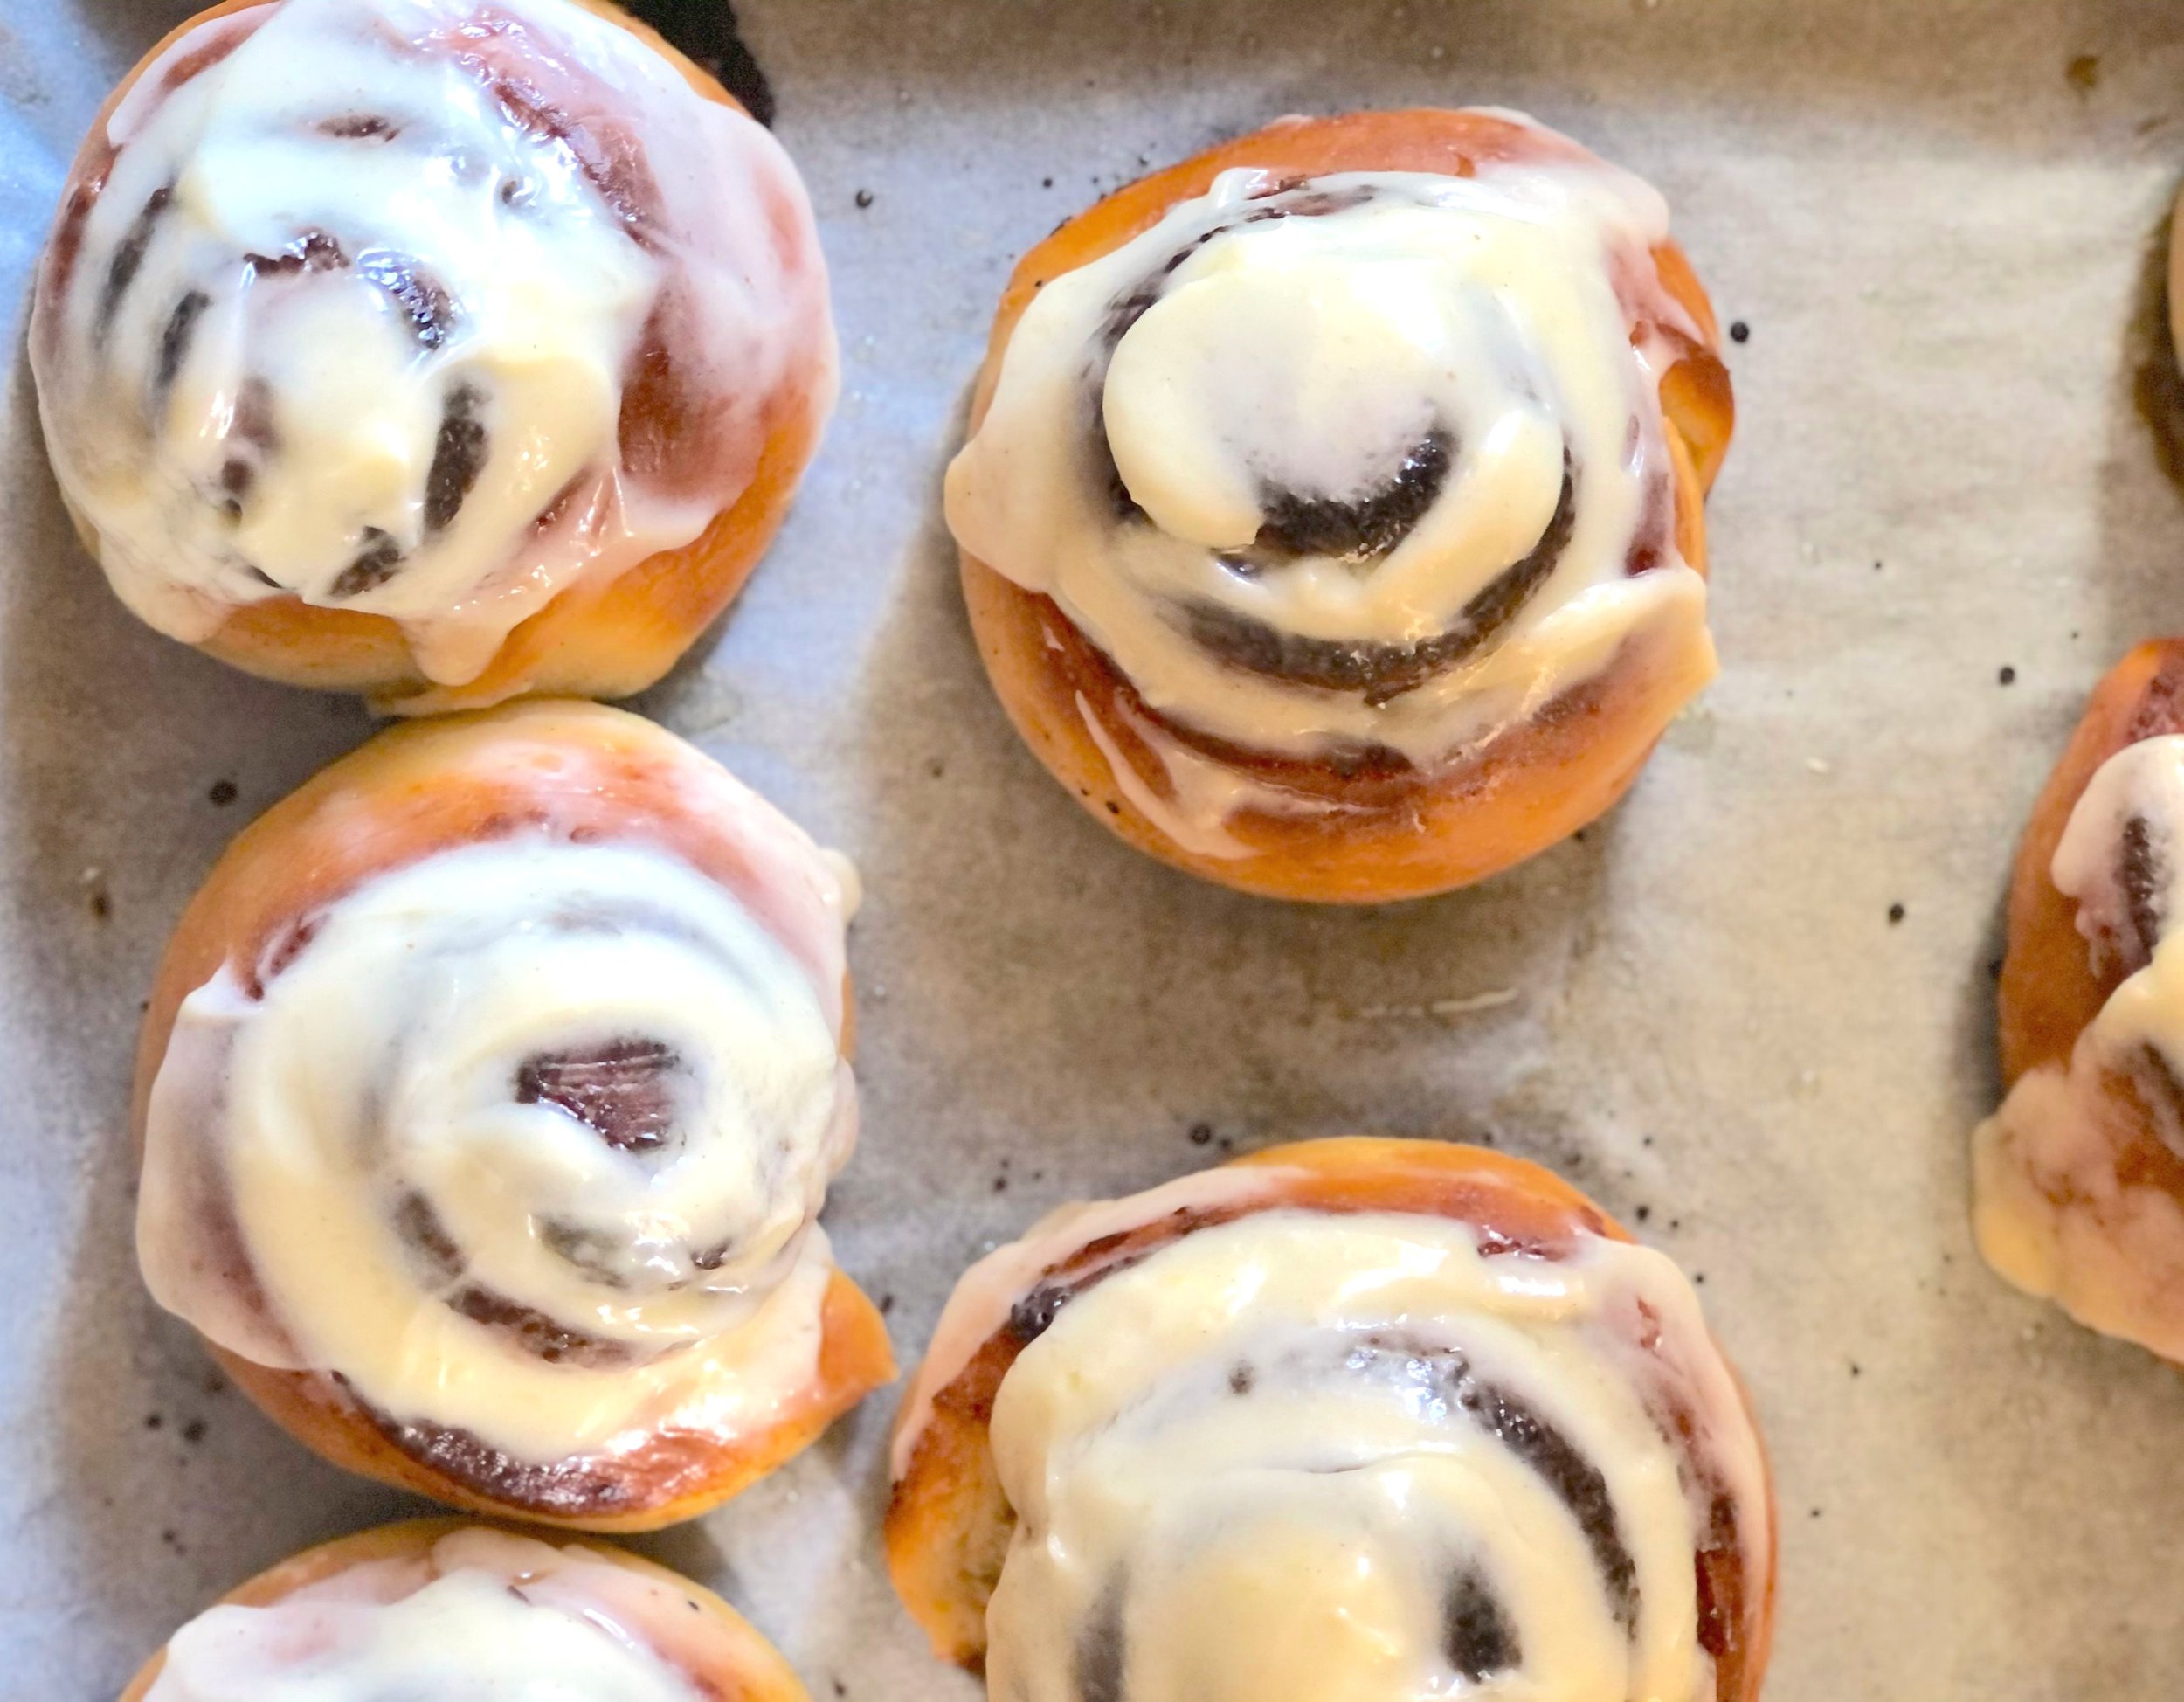
Cinnamon Rolls Pre-Icing


Homemade Pancake Mix

Updated May 23, 2024

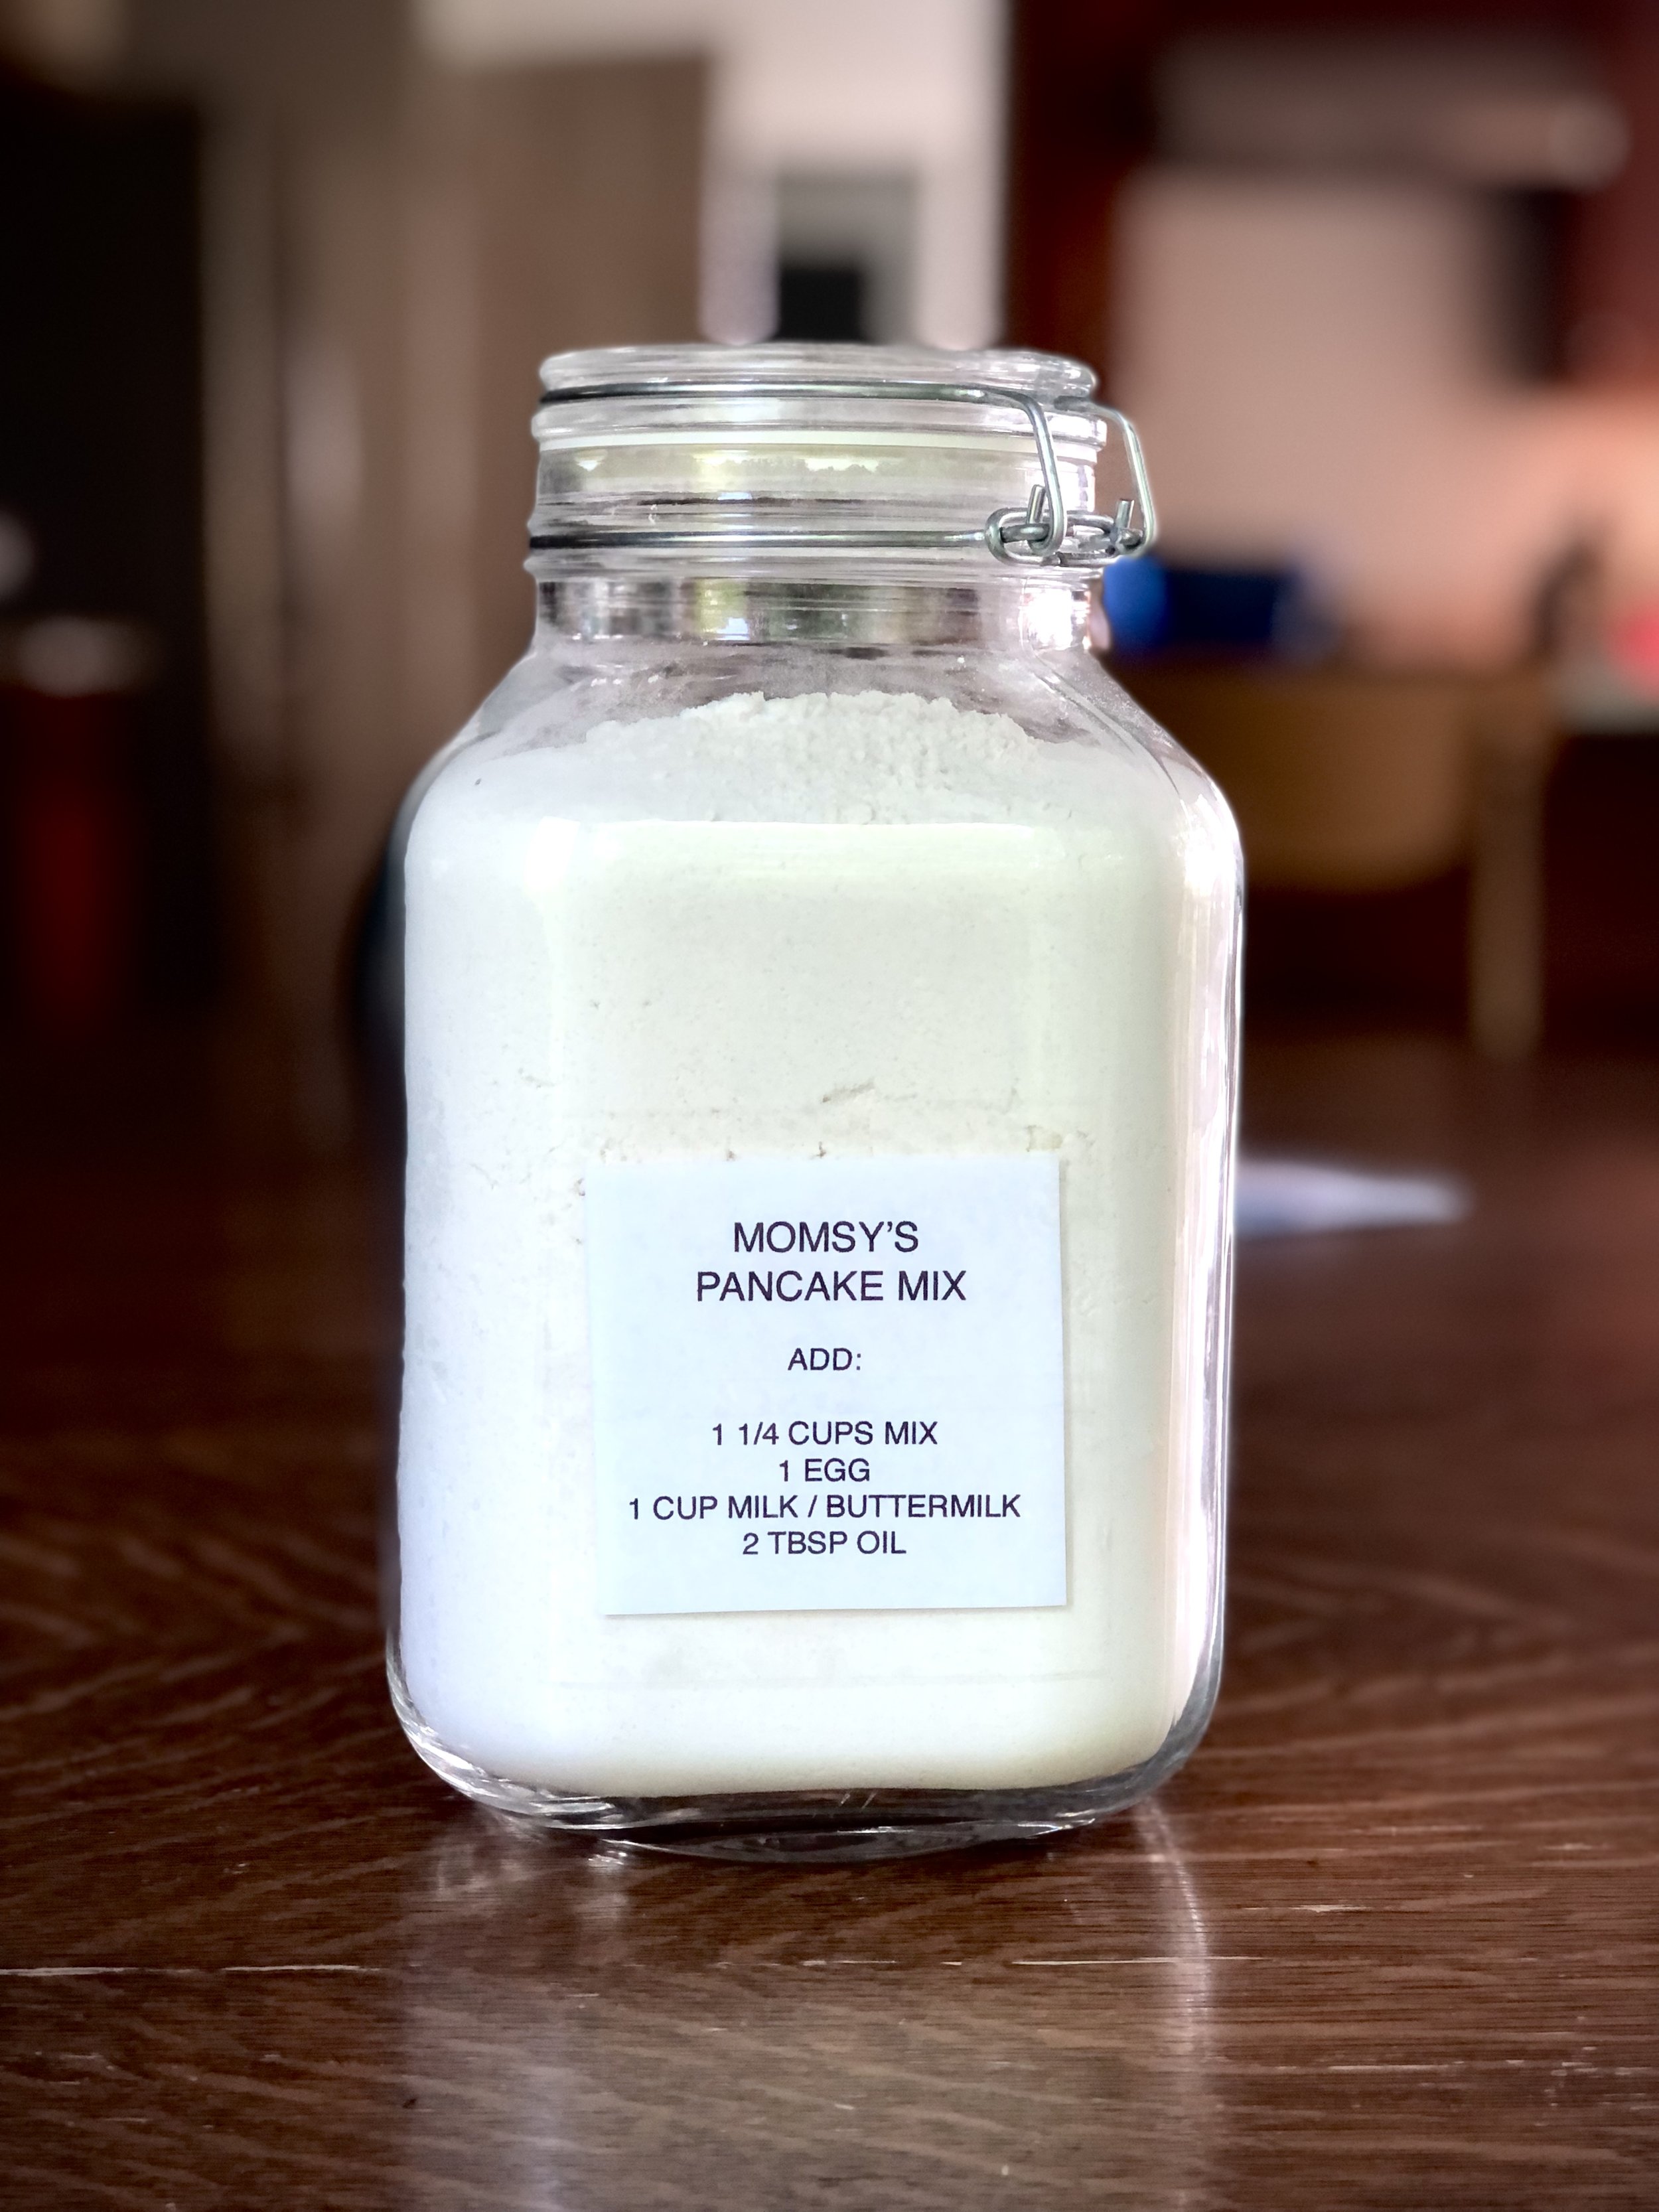
Last week I shared with you my favorite buttermilk pancake recipe: my mom’s, of course! Today I’ll share with you the dry pancake mix that is always sitting in a large glass jar in the pantry, ready to be made into fluffy golden pancakes just as easy as a store-bought mix.

IMG_3216.jpg

For the pancake recipe, click here!

Pancakes are always a good idea. Lazy Saturday mornings, brunch with friends, dinner when you desperately need to go grocery shopping…brinner, anyone? Pancakes can be whipped up at a moment’s notice, and my children are never sad about this decision. With this mix, pancakes become even easier to make, as half the work is already done for you.

Making homemade pancake mix is as simple as whisking together 5 dry ingredients, putting them in a jar, then taping on some instructions. You’ll walk by the pancake mixes in the store from now on and cackle because you have something better and healthier at home! Mwahaha.

This post may contain affiliate links. If you make a purchase using these links, Jennyblogs may receive a small commission, at no extra cost to you. This helps to support Jennyblogs. For further information see the privacy policy. Grazie!

Recipe from my mama


Homemade Pancake Mix

Makes enough for about 10 batches of pancakes

Ingredients:

  • 10 cups / 1,200g all-purpose flour

  • 8 Tbsp (1/2 cup) / 112g baking powder

  • 1/2 cup / 100g sugar

  • 4 tsp / 20g salt

  • 2 cups / 250g powdered instant milk

Directions:

  1. In a large bowl, whisk together all ingredients until thoroughly combined. Transfer to a large jar or container with lid.

  2. Tape to the jar the following instructions:

    Combine 1 1/4 cups dry mix with:

    1 cup water or milk

    2 Tbsp oil

    1 egg

  3. When preparing a batch of pancakes, preheat a lightly greased griddle or pan to 375°F / 190°C. Combine the wet ingredients with the dry ingredients until just combined, little lumps are ok. Pour desired amount onto griddle and cook until the bubbles in the batter don’t immediately fill in when they pop and edges look dry; flip and cook second side until golden.

Jenny’s Notes:

  • If you don’t have or prefer not to use powdered milk, simply leave it out and make sure to use buttermilk or milk of choice instead of water when making up a batch. The powdered milk makes for richer pancakes, but it is not strictly necessary. I like using buttermilk/milk when making pancakes even if there’s already powdered milk! Extra delicious.

  • If your pancakes are getting beyond golden before they’re cooked through, lower the heat of your pan.

Homemade Pancake Mix
Yield 10 batches
Author
Prep time
10 Min
Total time
10 Min

Homemade Pancake Mix

Homemade dry pancake mix to make pancakes even easier and quicker to whip up at a moment's notice

Ingredients

Instructions

  1. In a large bowl, whisk together all ingredients until thoroughly combined. Transfer to a large jar or container with lid.
  2. Tape to the jar the following instructions: Combine 1 1/4 cups dry mix with: 1 cup water or milk - 2 Tbsp oil - 1 egg
  3. When preparing a batch of pancakes, preheat a lightly greased griddle or pan to 375°F / 190°C. Combine the wet ingredients with the dry ingredients until just combined, little lumps are ok. Pour desired amount onto griddle and cook until the bubbles in the batter don’t immediately fill in when they pop and edges look dry; flip and cook second side until golden.

Notes

  • If you don’t have or prefer not to use powdered milk, simply leave it out and make sure to use buttermilk or milk of choice instead of water when making up a batch. The powdered milk makes for richer pancakes, but it is not strictly necessary. I like using buttermilk/milk when making pancakes even if there’s already powdered milk! Extra delicious.
  • If your pancakes are getting beyond golden before they’re cooked through, lower the heat of your pan.


Nutrition Facts

Calories

494.19

Fat

1.66 g

Sat. Fat

0.49 g

Carbs

105.92 g

Fiber

3.26 g

Net carbs

102.65 g

Sugar

10.30 g

Protein

13.27 g

Sodium

1977.86 mg

Cholesterol

2.00 mg

Nutritional information is approximate. Based on one batch of dry pancake mix.

pancakes, American breakfast, fluffy pancakes, best buttermilk pancakes, recipe
breakfast
American
Did you make this recipe?
Tag @jennyblogsandbakes on instagram and hashtag it #jennyblogs

Momsy's Pancakes

7CCA3EAB-FC24-468B-AC50-AD97ADBD242E.jpg

Last Updated September 8, 2024

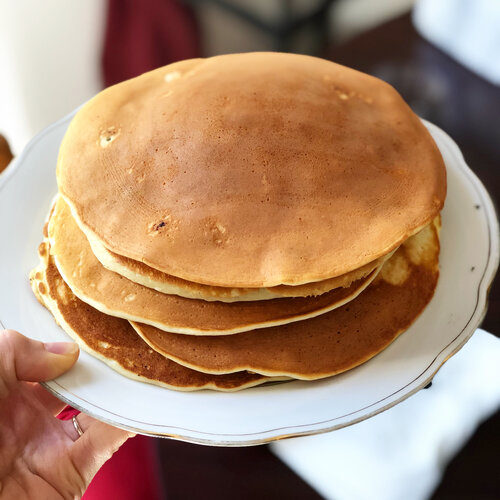
As the weather cools down, what could possibly be better than flipping some fresh, hot pancakes off the griddle?

Well, let’s be honest, whether the weather is heating up, cooling down, stagnant, or generally doing its weather-pattern-season thingy, are pancakes ever not a good idea?

Thought not.

Breakfast, lunch, dinner. Summer. Winter. Inside. Outside. Buttermilk. Pumpkin. Lemon poppyseed. There is always room for a plate of pancakes at the table!

Growing up I can’t say we had a family tradition of eating pancakes on a specific day of the week. It was more of a, whenever the fancy hits you. My mom would make a up a large batch of homemade dry pancake mix (you can get that recipe here), then tape instructions to the jar of how much wet ingredients to add, to be whipped up at a moment’s notice. My dad makes maple syrup every spring and there are always quarts of the liquid gold in the pantry, so we were always pancake ready.
When my nieces and nephews were younger they spent a lot of time at our house, and pancakes were a regular deal. Especially my oldest niece, Gwen, could pack them away! From the time she was a toddler she would eat more than anyone, a stack of 4 or more. It was actually amazing she could fit that many in her tiny body. Realize that we make big pancakes, the size of your face or a large dinner plate. I usually eat 2. The first time I ate pancakes at a friend’s house when I was little the mom seemed surprised I only wanted two. I realized why when two itty bitty pancakes arrived in front of me. Oh. I’ll take 8 more, please. Plus, my friend’s mom made them with chocolate chips and my mom usually didn’t let us, too much sugar. ;)

The pancake recipe below is my mom’s basic recipe, it’s wonderful as-is for a buttermilk pancake, or a base for any add-ins you want, whether that be chocolate chip, raspberry, gingerbread, apple-cinnamon, or whatever your taste-buds can dream up!

This post may contain affiliate links. If you make a purchase using these links, Jennyblogs may receive a small commission, at no extra cost to you. This helps to support Jennyblogs. For further information see the privacy policy. Grazie!

Recipe from my mama


Buttermilk Pancakes

Serves 1-2

Ingredients:

  • 1 cup / 120g flour

  • 2 1/2 tsp baking powder

  • 2 1/2 tsp sugar

  • 1/2 tsp salt

  • 1 cup / 237g buttermilk

  • 1 egg

  • 2 Tbsp / 28g oil

  • up to 1 cup / 250g sourdough discard, optional

Directions:

Preheat a lightly greased griddle or large pan over medium heat (375°F / 290°C if using an electric griddle.)

  1. In a medium bowl whisk together flour, baking powder, sugar, and salt.

  2. In another bowl, combine buttermilk, egg, oil, and sourdough discard, if using. Add to dry ingredients and mix until just moistened. Lumps are ok as long as they’re not too big.

  3. Pour pancake batter to desired size (or shape!) on hot griddle, repeat as you have room, but making sure to leave about an inch / 2cm between pancakes. Flip after a couple minutes or a when the edges look dry and the bubbles towards the middle pop but don’t immediately fill in. Cook for a few minutes on the second side, until golden. Repeat until batter is gone.

  4. Serve hot with butter and maple syrup, or your favorite toppings such as peanut butter, honey, powdered sugar, jams, fruit, Nutella, etc.

Jenny’s Notes:

IMG_3216.jpg
  • Pancakes are easy, quick, and delicious, and also very easy to fit to your dietary needs and choices. With the exception of the baking powder, every ingredient can be substituted or even omitted at times. Even then, some use baking soda instead of baking powder or a combo of the two. Just don’t do more than one, maybe two substitutions at a time without risking the quality of your pancakes. So don’t be frying’ up flour, water and baking powder, okayyyy?

    - Replace flour with a gluten-free flour or flour of your choice. My mom likes grinding oats in a food processor to make oat flour pancakes. I also like substituting part of the flour with buckwheat.
    - Omit sugar if desired. I used to not eat sugar during the week and simply left out the sugar so I could still enjoy pancakes. I recommend leaving it in, though, as it rounds out the flavor of the pancake, especially if you use toppings that aren’t as sweet as maple syrup.
    - If you don’t have buttermilk, you can make it at home by adding 1 Tbsp / 14g vinegar or lemon juice to a 1 cup measure and filling up to the 1 cup mark (223g) with milk. You can also use plain ol’ water in a pinch, or alternative milks as desired!
    - If you don’t have or don’t eat eggs, try using a flax egg, or you can also leave the egg out.
    - For the oil, use whichever oil you prefer. A neutral baking oil is best for a classic pancake taste, but that doesn’t mean you can’t use olive or coconut oil if that’s what you prefer. Or even melted butter. Also, the oil can be left out if need be.

Fluffy Buttermilk Pancakes
Yield 1-2
Author
Prep time
5 Min
Cook time
10 Min
Total time
15 Min

Fluffy Buttermilk Pancakes

Classic, fluffy, buttermilk pancakes hot off the griddle in 15 minutes! Plus substitutions to make delicious pancakes for your dietary needs.
Cook modePrevent screen from turning off

Ingredients

Instructions

  1. Preheat a lightly greased griddle or large pan over medium heat (375°F / 290°C if using an electric griddle.)
  2. In a medium bowl whisk together flour, baking powder, sugar, and salt.
  3. In another bowl, combine buttermilk, egg, and oil. Add to dry ingredients and mix until just moistened. Lumps are ok as long as they’re not too big.
  4. Pour pancake batter to desired size (or shape!) on hot griddle, repeat as you have room, but making sure to leave about an inch / 2cm between pancakes. Flip after a couple minutes or a when the edges look dry and the bubbles towards the middle pop but don’t immediately fill in. Cook for a few minutes on the second side, until golden. Repeat until batter is gone.
  5. Serve hot with butter and maple syrup, or your favorite toppings such as peanut butter, honey, powdered sugar, jams, fruit, Nutella, etc.

Notes

  • Pancakes are easy, quick, and delicious, and also very easy to fit to your dietary needs and choices. With the exception of the baking powder, every ingredient can be substituted or even omitted at times. Even then, some use baking soda instead of baking powder or a combo of the two. Just don’t do more than one, maybe two substitutions at a time without risking the quality of your pancakes. So don’t be frying’ up flour, water and baking powder, okayyyy?

- Replace flour with a gluten-free flour or flour of your choice. My mom likes grinding oats in a food processor to make oat flour pancakes. I also like substituting part of the flour with buckwheat.

- Omit sugar if desired. I used to not eat sugar during the week and simply left out the sugar so I could still enjoy pancakes. I recommend leaving it in, though, as it rounds out the flavor of the pancake, especially if you use toppings that aren’t as sweet as maple syrup.

- If you don’t have buttermilk, you can make it at home by adding 1 Tbsp / 14g vinegar or lemon juice to a 1 cup measure and filling up to the 1 cup mark (223g) with milk. You can also use plain ol’ water in a pinch, or alternative milks as desired!

- If you don’t have or don’t eat eggs, try using a flax egg, or you can also leave the egg out.

- For the oil, use whichever oil you prefer. A neutral baking oil is best for a classic pancake taste, but that doesn’t mean you can’t use olive or coconut oil if that’s what you prefer. Or even melted butter. Also, the oil can be left out if need be.

Nutrition Facts

Calories

448.68

Fat

18.02 g

Sat. Fat

2.44 g

Carbs

58.48 g

Fiber

1.63 g

Net carbs

56.85 g

Sugar

11.17 g

Protein

13.26 g

Cholesterol

97.74 mg

Sodium

1452.78 mg

Nutritional information is approximate, based on 2 servings.

buttermilk pancakes, homemade pancakes recipe, hot cakes, griddle cakes, best
breakfast
American
Did you make this recipe?
Tag @jennyblogsandbakes on instagram and hashtag it #jennyblogs

Almond Poppy Seed Sweet Rolls

Last Updated October 27, 2024

Welcome back to quarantine snacks and meals!

Adjustments.jpg

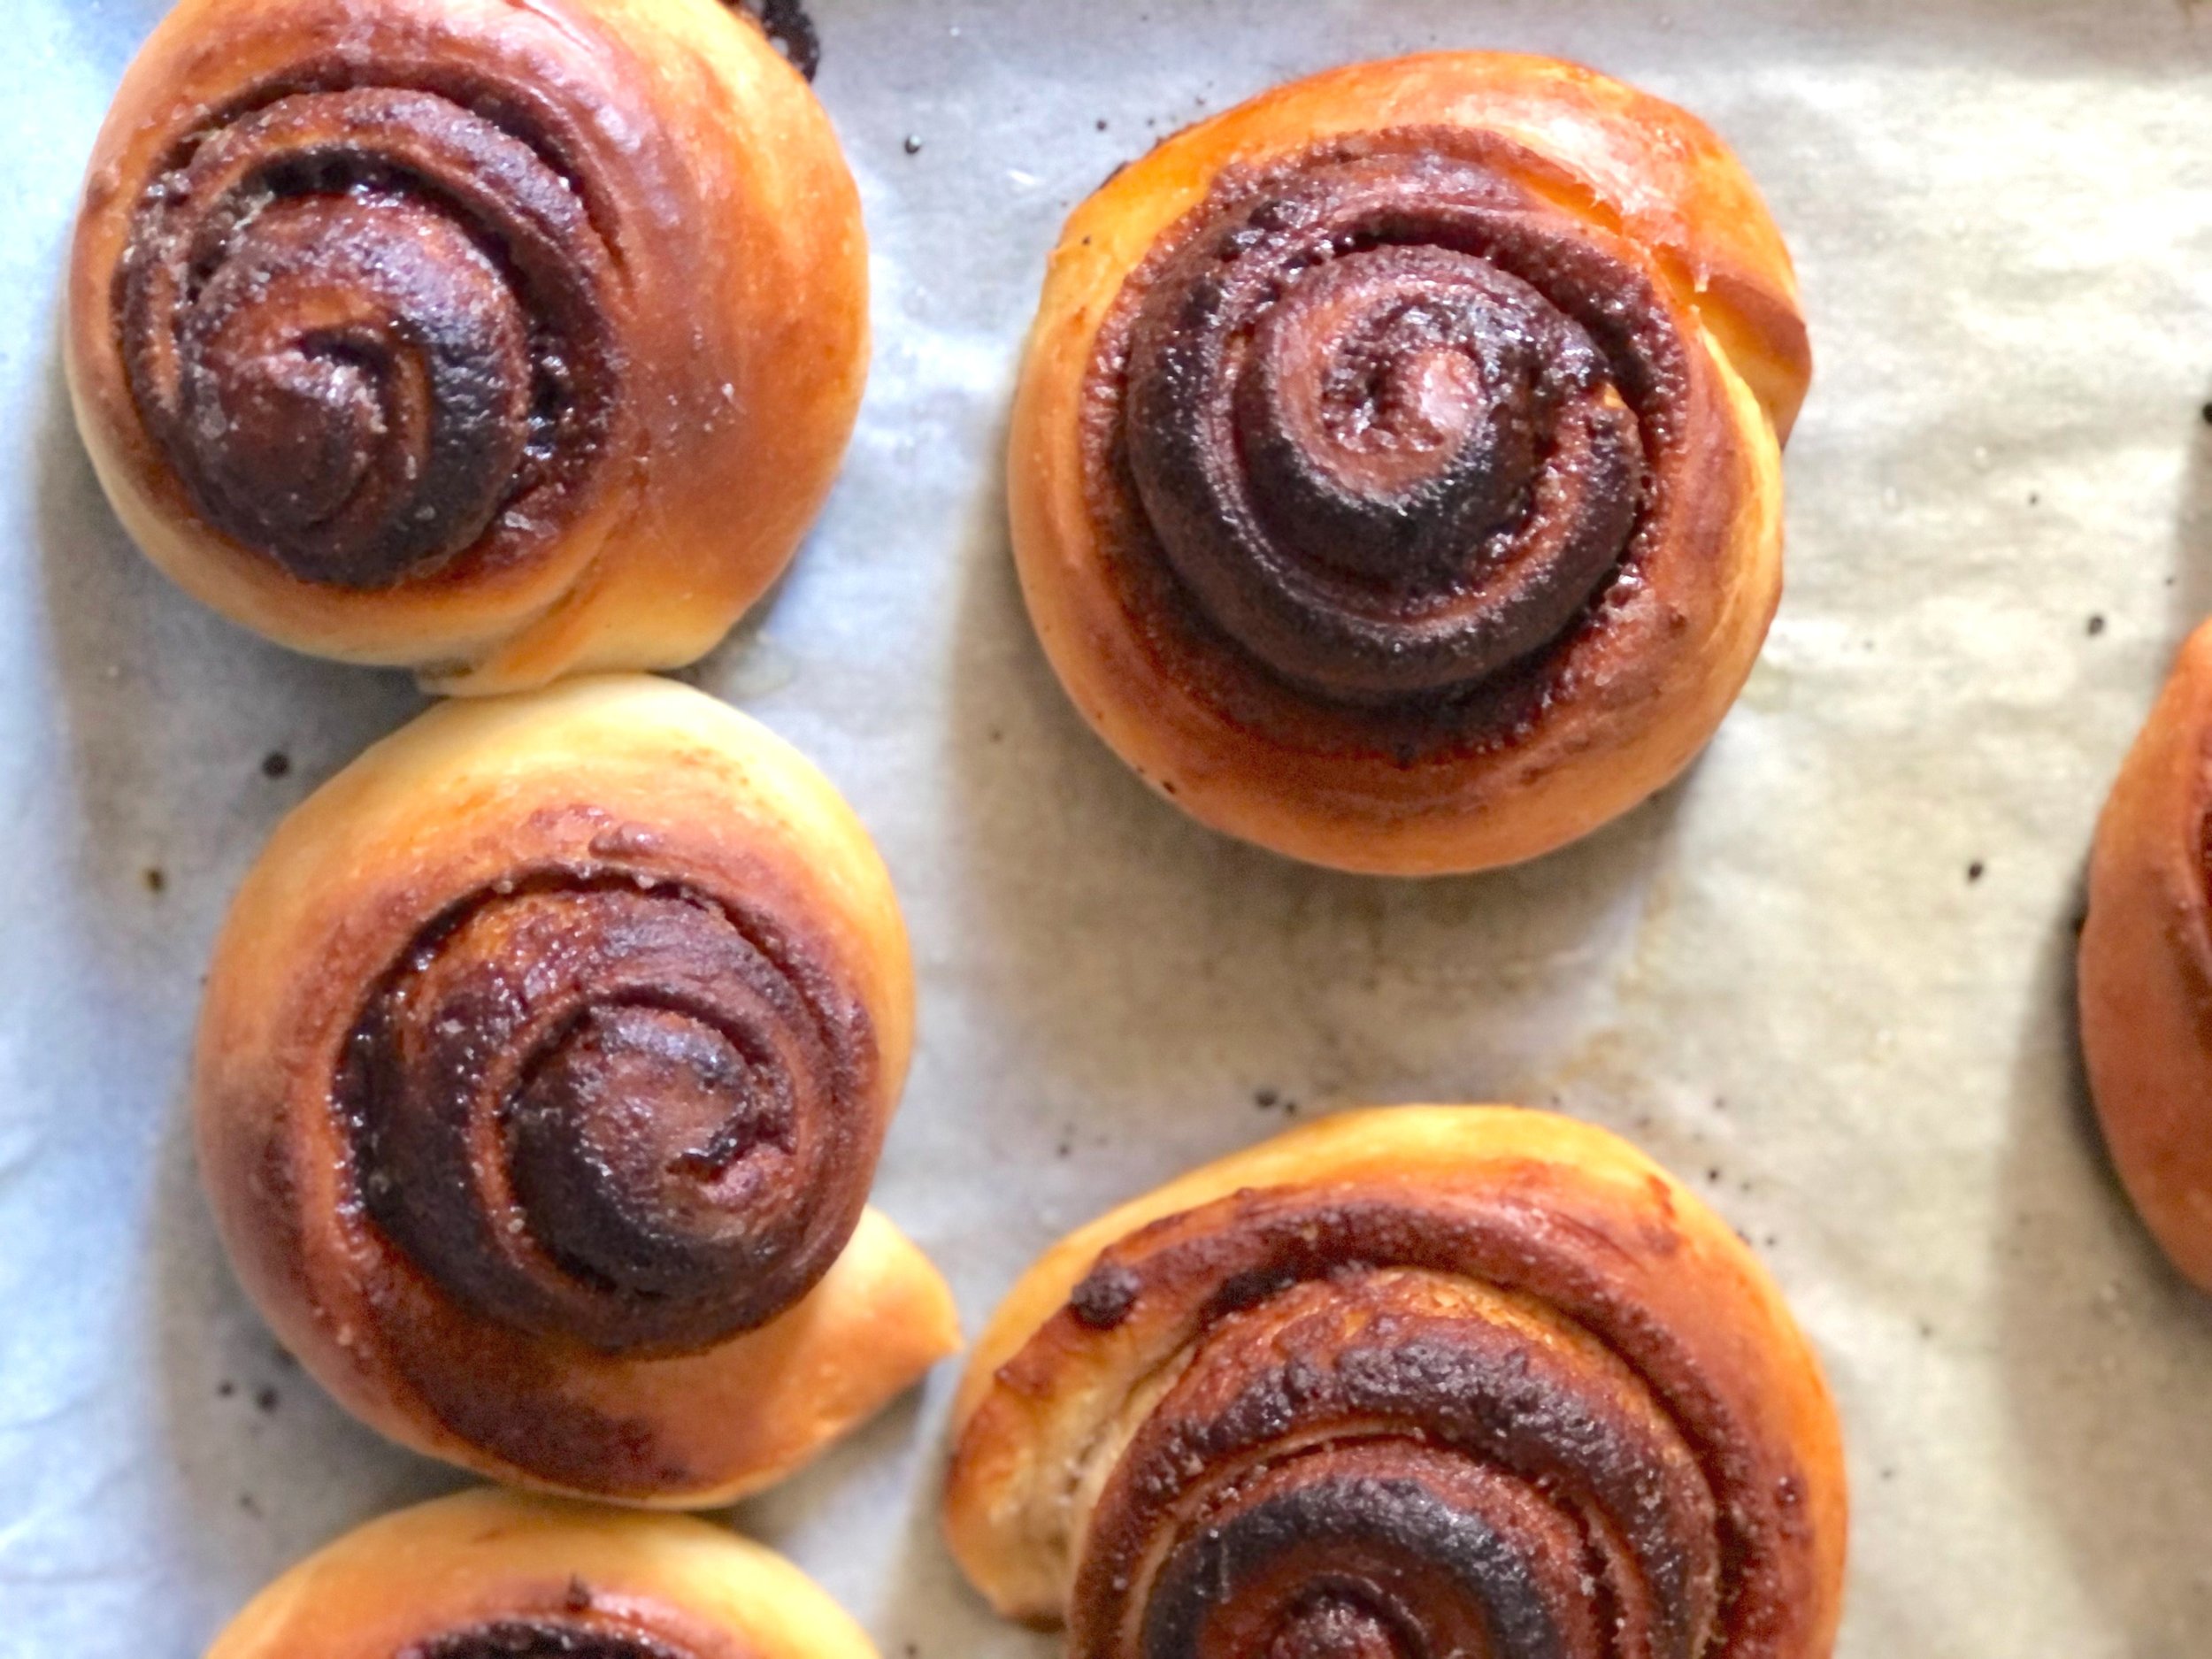
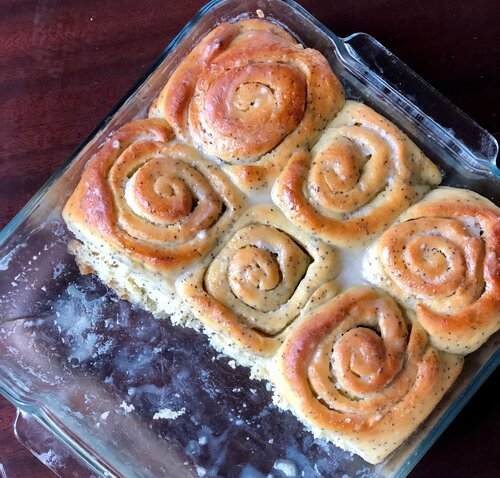
Today we are making Almond Poppy Seed Rolls! Think cinnamon rolls, but instead of cinnamon, a sweet almond dough with little crunchy poppyseeds and a sticky glaze. It’s like a cross between almond poppyseed bread and cinnamon rolls.

If there’s one thing we are forced to be during this time, it’s creative. Lack of resources, lack of schedule, lack of really anything that resembles our normal life has led us to come up with some really great ideas. Sometimes useless, but great nonetheless. Homemade obstacle courses are trending, memes are at the top of their game, and random skills you never before dreamed of having suddenly manifest themselves.

Another way we have had to get creative is in our cooking and baking. Not everything is readily available, and even if it is, a quick run to the store is no longer a quick run to the store. For my Michigan peeps, you are probably now feeling the effects of the latest lockdown measures. Only a certain number of people are allowed in the store at a time, creating long lines outside. Welcome, friends. That’s been normal life in Italy since uhh do I rememer how long? I think going on six weeks. Some stores require you to have a cart (helps you keep your distance) and some stores take your temperature before you enter. (In Italy.)

In general, most of my baking, unless for a special occasion or holiday, is spur of the moment. And what I want to bake often corresponds with what I want to eat, what do you know? The problem with this, as mentioned above, is that if I’m missing an ingredient, that means either waiting until the next store run, making something else, or improvising. The latter usually wins out.

Take the other day, for example, when I really wanted to make (and eat) these lemon raspberry rolls. I knew I didn’t have any raspberries, so I figured I would make just lemon rolls. Not to be, as I found my last lemon had gone moldy, and I didn’t even have any lemon extract. Well. Plain rolls weren’t going to cut it. I could’ve made cinnamon rolls, but my husband doesn’t much care for cinnamon (gasp) and I didn’t think that I should be eating a whole pan of cinnamon rolls by myself. While in quarantine. And am supposed to stay within 200m of my abode for exercise.

I took stock of my cupboards to see what I could possibly use to make some kind of flavored, delicious roll. While I didn’t have lemon extract, I did find almond extract! I love almond, and, and POPPY SEEDS. Yes. Done.

If you happen to have ingredients for both, I would highly suggest making both. They are also freezer friendly; stick in the freezer before baking or even after, once they’ve cooled.

This post may contain affiliate links. If you make a purchase using these links, Jennyblogs may receive a small commission, at no extra cost to you. This helps to support Jennyblogs. For further information see the privacy policy. Grazie!

Recipe by Jenny


Almond Poppy Seed Sweet Rolls

Makes 9 rolls

Adjustments.jpeg

Ingredients:

For the Dough

  • 1/2 cup / 119g milk or water

  • 1/4 cup / 50g sugar

  • 2 1/4 tsp / 7g active dry yeast

  • 2 Tbsp / 28g oil

  • 1 egg

  • 3 Tbsp / 23g poppy seeds

  • 1/2 tsp almond extract

  • 1/4 tsp salt

  • 2 1/4 cups / 270g all-purpose flour + about 1/4 cup / 30g for kneading

For the Filling

  • 1/4 cup / 56g butter

  • 1/4 cup / 50g sugar

For the Glaze

  • 3/4 cup / 94g powdered sugar

  • 1-2 Tbsp / 14-28g milk

Directions:

Preheat oven to 400F / 205C. Grease an 8x8inch / 20x20cm square baking dish.

Make the Dough

  1. In a small saucepan over low heat, warm milk until it is about 100F / 38C.  Pour into a large bowl.  Add the sugar and yeast and allow to sit for 7-10 minutes.  The yeast should foam up a bit. 

  2. Add oil, eggs, poppy seeds, extract, and salt.  Add the 2 1/4 cups of flour and mix until combined. 

  3. Turn dough out onto a floured surface.  Knead for about 8-10 minutes, sprinkling more flour on your work surface as needed.   Dough should be soft and elastic by the end, so don't get too flour-happy. Alternately, you can use the bread hook on a stand mixer and knead for 8-10 minutes, adding in flour as needed. By the end the dough should stick only to the bottom of the pan, not the sides.

  4. Lightly grease or flour a large bowl (the bowl you mixed the dough in is fine) and place dough in the bowl.  Cover with a towel and place in a warm area to rise for about 1 1/2 hours or until doubled in size. 

Assemble the Rolls

  1. In a small saucepan melt butter for filling and let simmer until it starts to brown.  Remove from heat and cool.

  2. When the dough has risen, punch it down and turn out onto a lightly floured surface.  Knead for a minute, then roll into a generous rectangle, about 7x14inch / 18x36cm and roughly 1/4inch / 1/2cm thick.

  3. Spread cooled butter over dough almost to the edges, then sprinkle evenly with sugar.

  4. Starting from one of the longer sides, roll dough into a spiral, pinching the dough together at the end to seal it. 

  5. Cut the log into thirds, then each third into 3 slices.  Place the rolls in the prepared pan and cover lightly with plastic wrap or a damp towel.  Place in a warm area to rise for about an hour, or until puffed.

  6. Bake for 15-20 minutes, or until golden on top and centers no longer look doughy. Internal temperature should be about 195F / 90C.

Make the Glaze

  1. In a small bowl whisk together powdered sugar and1 Tbsp of milk.  It should be thin enough to drizzle but not too liquidy.  Add more milk as needed. 

  2. Drizzle warm rolls with glaze. 

Jenny's Notes:

  • If you don't have a thermometer handy to know what 100 degrees is, simply warm until the milk feels quite warm, but not hot.

  • You can freeze these rolls once you have sliced them and put them in the pan.  Once removed from the freezer allow to thaw and proceed as normal. 

  • When using a stand mixer to knead, I still recommend kneading it for a few minutes by hand afterwards. I find they are not always as thorough as kneading by hand and you want an even rise for your dough.  I often to do it all by hand just because it’s therapeutic!

Almond Poppy Seed Rolls
Yield 9 rolls
Author
Prep time
1 Hour
Cook time
20 Min
Total time
1 H & 20 M

Almond Poppy Seed Rolls

Soft, fluffy breakfast rolls reminiscent of cinnamon rolls but with an almond poppy seed dough, a sweet, gooey buttery filling, and a sweet glaze.
Cook modePrevent screen from turning off

Ingredients

For the Dough
For the Filling
For the Glaze

Instructions

Make the Dough
  1. In a small saucepan over low heat, warm milk until it is about 100F / 38C. Pour into a large bowl. Add the sugar and yeast and allow to sit for 7-10 minutes. The yeast should foam up a bit.
  2. Add oil, eggs, poppy seeds, extract, and salt. Add the 2 1/4 cups of flour and mix until combined.
  3. Turn dough out onto a floured surface. Knead for about 8-10 minutes, sprinkling more flour on your work surface as needed. Dough should be soft and elastic by the end, so don't get too flour-happy. Alternately, you can use the bread hook on a stand mixer and knead for 8-10 minutes, adding in flour as needed. By the end the dough should stick only to the bottom of the pan, not the sides.
  4. Lightly grease or flour a large bowl (the bowl you mixed the dough in is fine) and place dough in the bowl. Cover with a towel and place in a warm area to rise for about 1 1/2 hours or until doubled in size.
Assemble the Rolls
  1. Preheat oven to 400F / 205C. Grease an 8x8inch / 20x20cm square baking dish.
  2. In a small saucepan melt butter for filling and let simmer until it starts to brown. Remove from heat and cool.
  3. When the dough has risen, punch it down and turn out onto a lightly floured surface. Knead for a minute, then roll into a generous rectangle, about 7x14inch / 18x36cm and roughly 1/4inch / 1/2cm thick.
  4. Spread cooled butter over dough almost to the edges, then sprinkle evenly with sugar.
  5. Starting from one of the longer sides, roll dough into a spiral, pinching the dough together at the end to seal it.
  6. Cut the log into thirds, then each third into 3 slices. Place the rolls in the prepared pan and cover lightly with plastic wrap or a damp towel. Place in a warm area to rise for about an hour, or until puffed.
  7. Bake for 15-20 minutes, or until golden on top and centers no longer look doughy. Internal temperature should be about 195F / 90C.
Make the Glaze
  1. In a small bowl whisk together powdered sugar and1 Tbsp of milk. It should be thin enough to drizzle but not too liquidy. Add more milk as needed.
  2. Drizzle warm rolls with glaze.

Notes

If you don't have a thermometer handy to know what 100 degrees is, simply warm until the milk feels quite warm, but not hot. It'll be fine!You can freeze these rolls once you have sliced them and put them in the pan. Once removed from the freezer allow to thaw and proceed as normal. When using a stand mixer to knead, I still recommend kneading it for a few minutes by hand afterwards. I find they are not always as thorough as kneading by hand and you want an even rise for your dough.

Nutrition Facts

Calories

276.34

Fat

10.42 g

Sat. Fat

3.94 g

Carbs

40.79 g

Fiber

1.52 g

Net carbs

39.27 g

Sugar

15.97 g

Protein

5.19 g

Sodium

122.93 mg

Cholesterol

35.35 mg

Nutritional information is approximate. Based on 1 roll.

almond poppy seed, breakfast rolls, yeast, yeasted breads, enriched dough,glaze
Breakfast,Breads, Dessert
American
Did you make this recipe?
Tag @jennyblogsandbakes on instagram and hashtag it #jennyblogs
Adjustments.jpg

My Favorite Scones

Last Updated August 30, 2024

Adjustments.jpeg

Happy 2020!
Once again heading into the Christmas season I went MIA from the blog, there’s just too much to be done, eaten, seen, and experienced!

I closed out 2019 by getting to show my husband America for the first time ever, and more importantly, my hometown! It was a blast traveling home for Christmas, and busy. Every year it seems to get a little bit harder to say goodbye.

2020 started out completely uneventful, we were flying somewhere over the Atlantic Ocean and we don’t know when or where we were when the new year happened. It just did. I think 2020 is going to be a good year, though, if nothing else, it’s a great number, right? Oh. Goodness. Ah, little did I know what a WILD year 2020 was going to be. LOLOLOLOL.

I was a bit nonplussed at the seeming coincidence of seeing photos of not one, not two, but several 20’s or Gatsby themed New Year’s parties. The movie came out several years ago, guys, why the big comeback? … It took seeing someone’s post on fb about entering the roaring 20’s again for it to click for me. I can’t help it, guys, I’m just not always the brightest bulb in the case.

However, our vision is 2020 and it is roaring and all those good things, so let’s get rolling. Rolling scones. I mean, these scones don’t have to be rolled, it just sounds like the band…;)

Now. This scone recipe is not just any recipe I am about to share with you, no no no. This is my favorite scone recipe, and I like/use several different scone recipes, so this is saying something.

Like these coconut scones, which are pretty darn delicious.
And these Orange Chocolate Chip Scones. YUM.

But. This scone recipe to beat all scone recipes (opinion) is so versatile, you can make just about any flavor you can think up! It’s also quite forgiving, which makes your scones turn out great every single time. Pictured are cranberry orange scones, but I will give you more flavor ideas and a launch pad to create your own flavors after the basic recipe!

I know, I know, calm down, this is all a lot to take in. The best scone recipe ever PLUS so many different flavors?? What is it, Christmas or something? No, but I decided to start the year off right with one of my favorites recipes (and I’m not even talking just in the scone category! Gasp.) and extending an olive branch for having ignored the inter webs for a bit longer than intended. (It was the eggnog, you guys!)

Ok, scones, let’s go!

This post may contain affiliate links. If you make a purchase using these links, Jennyblogs may receive a small commission, at no extra cost to you. This helps to support Jennyblogs. For further information see the privacy policy. Grazie!

Recipe adapted from allrecipes


My Favorite Scones

Makes 12 scones

Adjustments.jpeg

Ingredients:

For the Scones

  • 1 cup / 225g plain yogurt

  • 1 tsp baking soda

  • 4 cups / 480g all-purpose flour

  • 1 cup / 200g sugar

  • 2 tsp baking powder

  • 1 tsp salt

  • 3/4 cup / 169g oil

  • 1 egg

  • 1 cup flavorings, 1 tsp extract, 1 Tbsp zest, etc. (see below)

For the Glaze

  • 1 cup / 120g powdered sugar

  • 1-2 Tbsp / 15-30g milk

Directions:

Make the Scones

Oven 350°F / 177°C. Baking sheet lined with parchment paper or silpat.

  1. In a small bowl, combine yogurt and baking soda; set aside.

  2. In a large bowl, whisk together flour, sugar, baking powder, and salt.

  3. Add oil to flour mixture, mixing until coarse crumbs form.

  4. Stir in egg, yogurt mixture, and any add-ins just until barely moistened.

  5. Turn the dough out onto a generously floured surface. Knead briefly, about 4-8 turns, then press into an even 1-inch thick circle.

  6. Cut the circle into 12 triangular shaped scones, and place on prepared baking sheet.

  7. Bake for 12-15 minutes or until the centers look set, the scones have cracked slightly, and/or the bottoms or a light golden brown.

Make the Glaze

  1. Stir together powdered sugar and 1 Tbsp milk. Continue adding milk, a tsp at a time, until a thick but drizzleable glaze is achieved. Drizzle over cooled scones.

Scone Flavors:

Use one of these ideas (they’re all tried and true!) or create your own!

Adjustments.jpeg
  • Lemon Scones: 1 tsp lemon extract, 1 Tbsp lemon zest; use lemon juice to make the glaze. Use lemon yogurt if available.

  • Orange Coconut Scones: 1 tsp orange extract, 1 Tbsp orange zest, optional 1/2 tsp coconut extract, 3/4 cup coconut; use orange juice to make the glaze. Use orange or coconut yogurt if available.

  • Chocolate Chip Scones: 1 cup mini chocolate chips, 1 tsp vanilla extract. Make the simple glaze as in the basic recipe or melt more chocolate chips and drizzle over scones.

  • Chestnut Chocolate Chip Scones: 1 cup mini chocolate chips, 1 tsp vanilla extract, replace 1/4 cup of the yogurt with 1/4 cup chestnut purée. Glaze as in basic recipe.

  • Cherry Maple Scones: 1 cup dried cherries; use maple syrup to make the glaze.

  • Strawberry Scones: 1/2 cup diced fresh strawberries; use strawberry yogurt. Use basic glaze, sprinkle with demarara sugar before baking, or spread strawberry jam over the top while the scones are still warm.

  • Cranberry Orange Scones: 1 tsp orange extract, 1 Tbsp orange zest, 1 cup fresh (or frozen and thawed/drained) cranberries; use orange juice to make the glaze. Use orange yogurt if available.

  • Gingerbread Scones: replace 1/4 cup of the oil with 1/4 cup molasses, add 1 tsp cinnamon, 1 tsp ginger, 1/2 tsp cloves; use basic glaze or make a cream cheese drizzle by beating 4oz softened cream cheese with 1/4 cup powdered sugar until smooth, then adding milk 1 Tbsp at a time until mixture is thin enough to be drizzled.

Jenny’s Notes

  • In place of the plain yogurt you can also use sour cream or even mascarpone if you have leftovers from say, making tiramisu. You can also easily use Greek yogurt, or sweetened vanilla yogurt. If you use a sweetened yogurt, cut sugar in the recipe by 1/3 cup / 67g. You can also use a flavored yogurt to boost the scones flavor. For example, in the cranberry orange recipe above you could use orange yogurt.

  • If you accidentally make your glaze too thick or too thin, it’s a super easy fix. For a too-thick glaze, keep adding more milk (or whichever liquid you are using) gradually until desired consistency is achieved. Likewise, for a too-thin glaze, keeping adding a bit more powdered sugar until thick enough.

Favorite Scones
Yield 12
Author
Prep time
25 Min
Cook time
15 Min
Total time
40 Min

Favorite Scones

If I had to make one scone recipe for the rest of my life this, would be it: the perfect base to add any fill-ins and flavorings you wish. Perfectly moist, a sweet glaze, and pairs perfectly with a good book and a cup of tea!
Cook modePrevent screen from turning off

Ingredients

For the Scones
For the Glaze
Scone Flavor Ideas

Instructions

Make the Scones
  1. Oven 350°F / 177°C. Baking sheet lined with parchment paper or silpat.
  2. In a small bowl, combine yogurt and baking soda; set aside.
  3. In a large bowl, whisk together flour, sugar, baking powder, and salt.
  4. Add oil to flour mixture, mixing until coarse crumbs form.
  5. Stir in egg, yogurt mixture, and any add-ins just until barely moistened.
  6. Turn the dough out onto a generously floured surface. Knead briefly, about 4-8 turns, then press into an even 1-inch thick circle.
  7. Cut the circle into 12 triangular shaped scones, and place on prepared baking sheet.
  8. Bake for 12-15 minutes or until the centers look set, the scones have cracked slightly, and/or the bottoms or a light golden brown.
Make the Glaze
  1. Stir together powdered sugar and 1 Tbsp milk. Continue adding milk, a tsp at a time, until a thick but drizzleable glaze is achieved. Drizzle over cooled scones.

Notes

In place of the plain yogurt you can also use sour cream or even mascarpone if you have leftovers from say, making tiramisu. You can also easily use Greek yogurt, or sweetened vanilla yogurt. If you use a sweetened yogurt, cut sugar in the recipe by 1/3 cup / 67g. You can also use a flavored yogurt to boost the scones flavor. For example, in the cranberry orange recipe above you could use orange yogurt. If you accidentally make your glaze too thick or too thin, it’s a super easy fix. For a too-thick glaze, keep adding more milk (or whichever liquid you are using) gradually until desired consistency is achieved. Likewise, for a too-thin glaze, keeping adding a bit more powdered sugar until thick enough.

Nutrition Facts

Calories

397.79

Fat

15.22 g

Sat. Fat

1.33 g

Carbs

60.11 g

Fiber

1.47 g

Net carbs

58.64 g

Sugar

28.27 g

Protein

5.78 g

Sodium

401.65 mg

Cholesterol

16.82 mg

Nutritional information is approximate. Based on 12 servings of cranberry orange scones.

Best scone recipe, Scone base,
Breakfast, Brunch
British
Did you make this recipe?
Tag @jennyblogsandbakes on instagram and hashtag it #jennyblogs

Jeannie's Healthy Breakfast Cookies

Last Updated August 28, 2024

2019-02-17+15.32.23.jpg

What could be better than a cookie? How about a cookie that’s packed with nutrients and can be eaten anytime, especially for breakfast, guilt free?

I love cookies. They are my go-to when I want to whip up something with limited time, or don’t have much energy for other more entailed desserts. I’m sure this has NOTHING to do with the fact that cookies are also one of my favorite things to eat. It ends up turning into a win-win-win situation because I’m having fun, being productive, get to eat some of the ingredients while baking, get to eat some dough while baking, and BONUS if there is enough dough to actually be baked into cookies! So many wins.

I have to bring up the negative, however, to classic cookie baking. They’re kinda calorific and not very good for you. I’m all for eating cookies for breakfast, but that usually goes along with a sugar crash later on. What to do?

Bake healthy cookies! They have to be delicious of course, and not gross. I have just the recipe for you, made up by my mom many years ago when we needed a portable nutritious breakfast for a trip. This recipe has been in my recipe box ever since as “Jean’s breakfast cookies”, made with many adjustments because the add ins are very versatile depending on your tastes. My mom likes to be called Jeannie (not by her kids of course) so I adapted the title accordingly.

One thing this recipe is not is a taste-alike recipe to say, chocolate chip cookies with a surprise twist that it’s healthy. Nope, these cookies have a satisfyingly healthy look and taste and are upfront about it from the get go. They get positive feedback and recipe requests wherever they go!

The recipe that follows is just one version of many, many possibilities. Just keep in mind that major adjustments may need other adjustments. For example, if you don’t have any honey or maple syrup on hand for the sweetener, you could use raw or regular cane sugar. Substituting a liquid for a dry ingredient, however, will mean you may need more liquid from elsewhere. Maybe add another egg, a bit more oil, or even water until you get a cookie dough consistency once again. Other ideas to make the recipe your own:

  • Use any kind of flour you wish instead of wheat flour. Oat flour, almond flour, coconut flour…I often use wheat germ in place of part of the flour or flaxmeal, usually 1/4 cup.

  • If you want these cookies to be gluten-free, ensure that your oats are gluten-free, and use a gluten-free flour.

  • Change up the spices. Sometimes towards fall I also add a bit of ginger, nutmeg, and cloves. Cardamom is also nice.

  • Beyond dried fruit and walnuts, get creative with your add-ins! Just try not to go too far beyond 1 cup, otherwise there might not be enough dough to hold everything together. In the photos on this post I used dried apples, dried cranberries, and walnuts. I’ve also added various combinations of dried cherries, prunes, dried apricots, raisins, dates, dried figs, dried pears, fresh apples, grated coconut, pecans, hazelnuts, dark chocolate, crystallized ginger, and anything else I had on hand!

This post may contain affiliate links. If you make a purchase using these links, Jennyblogs may receive a small commission, at no extra cost to you. This helps to support Jennyblogs. For further information see the privacy policy. Grazie!

Recipe adapted from my mama


Jeannie’s Healthy Breakfast Cookies

Makes about 18-22 cookies

Ingredients:

2019-02-17 14.45.17.jpg
  • 1/2 cup / 112g olive or coconut oil

  • generous 1/3 cup / 120g maple syrup or honey

  • 2 eggs

  • 1 tsp vanilla extract

  • 1 cup / 120g all-purpose or whole wheat flour

  • 1 1/2 cups / 135g rolled oats

  • 1/2 cup / 90g flaxmeal

  • 1/2 tsp baking soda

  • 1/2 tsp salt

  • 1/8 tsp cinnamon

  • 3/4 cup / 105g nuts, roughly chopped

  • 1/2 apple, diced

  • 1/4 cup / 50g dried fruit, chopped if necessary

Directions:

Oven 375°F / 190°C. Baking sheet lined with silpat or parchment paper.

  1. In a large bowl combine wet ingredients: oil, maple syrup, eggs, and vanilla; beat with a spoon until smooth.

  2. In another medium bowl whisk together dry ingredients: flour, oats, flaxmeal, baking soda, salt, and cinnamon.

  3. Add dry ingredients, nuts, apple, and dried fruit to wet ingredients, mix until well combined.

  4. Spoon generous tablespoons of dough onto prepared baking sheet and flatten slightly as they won’t spread much, leaving at least 1 inch between cookies. Bake for 8-10 minutes or until edges turn lightly golden brown and centers are no longer doughy.

Jenny’s Notes:

  • you can make flaxmeal at home by simply processing some flaxseeds in a coffee or spice grinder.

  • olive oil has a rather strong taste so if you prefer to avoid that, try going with the coconut oil option or even a neutral oil like peanut oil.

  • 3 egg whites can be substituted for the 2 eggs for cholesterol-conscience people.

Jeannie's Breakfast Cookies
Yield 12-16 cookies
Author
Prep time
20 Min
Cook time
10 Min
Total time
30 Min

Jeannie's Breakfast Cookies

Healthy cookies packed with nutritious ingredients that make for a great breakfast or anytime snack. Dairy-free, refined sugar-free, and can easily be made gluten-free.
Cook modePrevent screen from turning off

Ingredients

Instructions

  1. Oven 375°F / 190°C. Baking sheet lined with silpat or parchment paper.
  2. In a large bowl combine wet ingredients: oil, maple syrup, eggs, and vanilla; beat with a spoon until smooth.
  3. In another medium bowl whisk together dry ingredients: flour, oats, flaxmeal, baking soda, salt, and cinnamon.
  4. Add dry ingredients, nuts, apple, and dried fruit to wet ingredients, mix until well combined.
  5. Spoon generous tablespoons of dough onto prepared baking sheet and flatten slightly as they won’t spread much, leaving at least 1 inch between cookies. Bake for 8-10 minutes or until edges turn lightly golden brown and centers are no longer doughy.

Notes

you can make flaxmeal at home by simply processing some flaxseeds in a coffee or spice grinder.olive oil has a rather strong taste so if you prefer to avoid that, try going with the coconut oil option or even a neutral oil like peanut oil. 3 egg whites can be substituted for the 2 eggs for cholesterol-conscience people.

Nutrition Facts

Calories

265.40

Fat

15.87 g

Sat. Fat

2.49 g

Carbs

27.23 g

Fiber

3.34 g

Net carbs

23.89 g

Sugar

9.53 g

Protein

5.72 g

Sodium

188.36 mg

Cholesterol

31.00 mg

Nutritional information is approximate and based on 12 servings.

healthy, nutritious, cookies, gluten-free, dairy-free, refined sugar-free, dried fruit, apple, fall spices, oats, nuts, coconut, portable
breakfast, dessert, snack
American
Did you make this recipe?
Tag @jennyblogsandbakes on instagram and hashtag it #jennyblogs
2019-02-17+15.36.02.jpg

Food in Florence: Where to Eat the Most Scrumptious Breakfasts

This post contains affiliate links. If you buy something using these links, Jennyblogs may receive a small commission, at no extra cost to you. This helps to support Jennyblogs. For further information see the privacy policy. Grazie!

Starting off a new Italy series all about Food in Florence that I’m calling…wait for it…Food in Florence! Yay, you guessed it!

Esselunga+Cappuccino.jpg

I’ve been getting enough requests this past year from friends and friends for friends visiting Florence that I think it’s time to start compiling some helpful and easily accessible lists and tips of what to do/where to eat in this adopted city of mine, Florence. Creating custom “to do” and “to eat” lists is not very time efficient I find…or maybe I just give an overwhelming amount of information…nah, that couldn’t possibly be it. :)

It’s great fun to create lists that help people get the most out of their time in Florence. My favorite way to see a new city is exploring and wandering without any tour guides (with certain exceptions), while having read up a ton beforehand and bookmarked things to see, places to shop, and foods to try and where to try them. The biggest problem I always run into while preparing for a trip is knowing which lists are authentic and whose opinion I should trust. The lists in this new “Food in Florence” series would have saved me quite a bit of time before I came to Florence for the first time. I hope they will be useful to you and help you decide where you want to dine around Florence without falling for the tourist traps, specifically in this list where you can find the most scrumptious breakfasts.

As a disclaimer, these lists will probably be ever evolving because 1. Florence has a million and one places to try, 2. New places are always opening, 3. I’ve only lived here just over 2 consecutive years and 4. I probably don’t eat out nearly as much as you would expect for someone who lives in Italy. (Whaaat I don’t eat pasta for lunch and pizza for dinner everyday?! Lame.) Just remember, I’m a real person with a real budget. :)

What is a typical Italian breakfast?

You’re going out to breakfast, but what can you expect to find on the menu? What do Italians typically eat for breakfast?

Italians don’t go to a sit-down type restaurant for breakfast, which is usually what entails if you go out to breakfast in America. Instead, most Italians have their favorite local bar that they go to several, if not every, morning of the week. A cappuccino is usually eaten with a pastry, and just as often eaten standing and chatting as it is sitting down and reading the morning newspaper. At just over 2euro for a cappuccino and pastry, it makes for a very affordable breakfast out. If there is a menu, it’s probably a coffee menu on the wall. The pastries are chosen through the display case. It’s common to ask what they’re filled with, if one is unsure. You can expect varying croissants and sugary puff pastries filled with the classics: cream, chocolate, Nutella, jam (usually apricot or blackberry) and apple, along with more specialty fillings that will vary by place, such as cream and orange, whole wheat with honey, pistachio, etc.

What is the best time to go out for breakfast?

The famed hot chocolate at Caffè Gilli

The famed hot chocolate at Caffè Gilli

Whatever time you want. Really. Most pasticcerie and bars open between 5:30-7:00am, but pastries will be served until they’re gone, which is often into the afternoon. Of course, some busy places will run out by noon, so my only word of advice would be to go before then. You can manage that, right?

Or, if you’re like me and like to eat right away, have some fruit and snacks to eat first thing in the morning, and then eat a leisurely second breakfast or elevensies at a caffè once you’re out and about.

You’ll find people eating breakfast anywhere from the early morning hours to late morning, and it is socially acceptable to eat a pastry and a cappuccino in the afternoon as a snack, or a cappuccino by itself, contrary to popular American belief. See #12 on this blog post if you want to know why. So have at it! Just don’t drink a cappuccino with any food item other than pastries/cookies, k? Cappuccino and pizza taste gross together anyway.

Breakfast Etiquette

Bottega di Pasticceria

Bottega di Pasticceria

As a general rule, it’s best to pay at the cash register before ordering your pastry and drink at the bar. Many places don’t care if you eat or pay first, even if they have signs up asking you to pay first, however…some places DO care and if you’re not familiar with that particular locale, pay first to be safe.

It’s also advisable to ask before you sit down as some places up-charge for the “sit-down service.” Ya know, paying up to twice the price for your drink for the luxury of sitting down and usually them bringing you your order. Don’t think that carrying your own drink to your table is going to get you any discounts. You’re really paying for occupying the table, the service I like to think of as bonus so you might as well enjoy it!

The only place on the list below that should have an up-charge is Gilli and possibly Bottega di Pasticceria. Since they are classy and all about the experience anyway, I think we can forgive them.


Where to Eat the Most Scrumptious Breakfasts

  1. La Ménagère

    Via de’ Neri, 8, right in the center by San Lorenzo and the Mercato Centrale

    Open 8:00am - 2:30am every day

    Large and uniquely beautiful space, each room is a little different. Very cool atmosphere. There is even an area where you can buy some merchandise and flowers. Lots of pretty plants! Indoor and outdoor seating. Great coffee. A bit on the pricier side.

  2. Santarosa Bistrot

    Lungarno di Santa Rosa, on the south side of the river.

    Open 8:00am - Midnight weekdays, 10:00am - Midnight Saturday and Sunday

    Beautiful outdoor caffe where you can choose to sit outside among the greenery or in the main area with the roof if it rains. So cozy. I love this place when I want to get away from the hectic city life for a moment.

  3. Caffetteria delle Oblate

    Via dell’Oriuolo, 26, in the center not far from the Duomo.

    Open 2:00pm - 7:00pm Monday, 9:00am - Midnight Tuesday through Friday, 10:00am - Midnight Saturday, closed on Sunday.

    An old convent turned library with a third story caffè, this place is super cool and has spectacular views of the Duomo to boot. You can sit in the caffetteria or take your food to any of the 4 sided terrace overlooking in the inner open courtyard. There are seats and tables on most sides, but they are often occupied with studying students. When this happens I usually just sit on the floor, no one will mind. Note, the caffetteria will charge you 10 cents per person who eats outside of the caffetteria area. I find this ironically humorous as most bars will charge you if you sit down IN their area, not if you take away. Italy, the land of inconsistency.

  4. Melaleuca

    Lungarno delle Grazie, 18, right along the river not too far from Santa Croce

    Open 8:00am - 4:00pm Monday through Friday, 9:00am - 4:00pm Saturday and Sunday.

    A newer (established 2019) American/Australian Bistro Bakery right in the heart of Florence with beautiful views. It’s airy, it’s bright, and has a lovely ambiance. While you won’t find typical Italian food here, you will find some of the best croissants and pastries in town (they have an in-house French baker), along with some other maybe more familiar desserts and brunch items. Think cinnamon rolls, banana bread, pumpkin bread, carrot cake, Guinness chocolate cake, and on and on. They have pancakes, they have eggs, and if you’re familiar with Australian cuisine, you might see some familiar items on their menu as well. Anything that can be house made IS house made, from buttermilk to kombucha, pickled vegetables, dips and spreads, drinks, almond milk, and almost literally everything else. It’s a comfortable space if you just want a break from some of the Italian eating culture/rules you may have been running in to! Everyone speaks English and sometimes you just miss being able to communicate easily. I worked here before having my son, the owners are friends of mine and lovely people! You may also notice they’re on my list for best coffee, too!

  5. Bottega di Pasticceria

    Lungarno Francesco Ferrucci, 9c, south of the river on the edge of the city center

    Open 7:00am - 10:00pm Tuesday through Sunday, closed Monday

    This is a lovely open two story caffe that has an elegant feel to it, although don’t feel as though you need to dress up! Certain parts of the second story floor are made of glass, a warning to those who are wearing dresses and skirts! ;)

  6. Caffetteria La Loggia

    Via Pietrapiana, 12, not far from the church of Santa Croce

    Open 7:00am - 8:30pm every day

    A small little place but popular with the locals and me! A good variety of pastries and coffee, they even have some specialty drinks such as Hazelnut or Pistachio Coffee, very sweet but interesting to try! If there are no available places to sit, you can always drink your coffee and eat your pastry standing up at the bar, like the Italians do, or go and sit in the nearby Piazza della Loggia which the city of Florence recently redid.

  7. Caffè Libertà

    Piazza della Libertà, 27r, at the top tip of the city center in Piazza della Libertà

    Open 5:00am - 9:30pm every day

    This caffe is home to probably some of my favorite pastries in all of Florence, and that’s just talking about the pastries. The desserts are mouth-watering as well. I personally recommend the apple filled pastry, but I know others who rave about the pistachio filled pastry. Indoor or outdoor seating.

  8. Caffè Pasticceria Serafini

    Via Gioberti, 168r, just outside the city center on the east side

    Open 7:00am - 9:00am Monday through Saturday, closed Sunday

    Serafini is located in a very local area and has wonderful pastries and desserts. It can get busy, but there is indoor and outdoor seating and always the option to eat at the bar or take away. They have a great chocolate and pear pastry.

  9. Caffè Michelangelo

    Via Ghibellina, 116r, in the center near to Santa Croce

    Open 6:00am - 8:00pm Monday through Saturday, closed Sunday

    Another great local caffè with yummy pastries and coffee. There are a couple of baristas here who can make a mean cappuccino.

  10. Caffè Gilli

    Via Roma, 1r, on Piazza della Repubblica

    Open 7:30am - Midnight every day

    Gilli is the oldest caffè in Florence, established more than 270 years ago by a Swiss family. Their hot chocolate is renowned and their sweets and chocolate beloved by many. Situated in a beautiful building with a large covered outdoor sitting area right on Piazza della Repubblica, this is the place to go if you’re looking for a high class and historic experience. Just remember you’ll be paying higher prices, i.e., a normal hot chocolate costs 3-3.50euro, Gilli will charge you somewhere around 7euro.


Caffetteria delle Oblate

Caffetteria delle Oblate

Buon Appetito!

Want to see some of your favorite spots added to the list? Let me know in the comments below!

Mocha Punch

2018-12-29+15.42.50.jpg

Last Updated August 16, 2024

This post may contain affiliate links. If you buy something using these links, Jennyblogs may receive a small commission, at no extra cost to you. This helps to support Jennyblogs. For further information see the privacy policy. Grazie!

Mocha punch is exactly what it sounds like. Cold, creamy, sweet, chocolatey coffee served in a punch bowl with dollops of vanilla ice cream slowly melting into a dreamy, creamy puddle.

Punch might seem a thing do the past, but I really love punch. Classic punch to me is a bottle of cranberry raspberry juice combined with Sprite and some fruit-flavored sherbet dolloped in the lunch bowl. And I love it. It reminds me of Christmas time as a kid because that’s really the only time we’d make it. Then I was introduced to this Mocha Punch as a teenager, and the fruity punch got left behind. Everyone loves this coffee punch. It’s hard to put the ladle down.

It’s simple to make but it can steal the show, which makes it ideal for parties. Think holidays, birthday parties, baby showers, bridal showers, and on and on! Keep some empty milk jugs to store it in, and you have one easy and delicious thing done for your next gathering!

No mocha in Italy?

On entering any coffee shop in America, you’ll easily find mocha on the menu.

This is not the case in Italy. Italy may be the birthplace of coffee as we know it today, but that doesn’t mean that they own ALL the copyrights to the best coffee drinks. Cappuccino, espresso, macchiato….but Vanilla Latte and Mocha are not on the menu here, unless you go to one of the few “American” coffee shops, such as Arnold. First of all, if you order a latte you will get….milk. And if you order a mocha you will get…a withering stare. Not the end of the world, especially with all of the other types of coffee you can order, but sometimes I just want a mocha, ya know? I usually order my cappuccino with cocoa powder on top, but that’s not quite the same.

If I’ve learned anything living away from my home country, it’s that I will suddenly miss all the creature comforts of home, whether or not I appreciated or even liked them before. I do really like a good mocha. And somehow missing mochas has me thinking about this mocha punch, so here you go. The recipe for the best punch, that really keeps the party going!

Recipe adapted from a friend’s mama. :)


Mocha Punch

Serves about 20

Ingredients:

  • 3 quarts / 3 L freshly brewed strong coffee

  • 1 1/2 cups / 300g sugar

  • 2 quarts / 2 L milk

  • 3/4 cup / 240g chocolate syrup, try this homemade recipe!

  • 3 tsp vanilla extract

  • 1/2 gallon (8 cups) / 1 kg vanilla ice cream

Directions:

  1. Pour brewed coffee into a large pot, bowl, or other large container. Stir sugar into hot coffee until dissolved. Cool in fridge.

  2. Remove coffee from fridge and add milk, chocolate syrup, and vanilla and stir until well combined.

  3. Chill until cold or overnight.

  4. Just before serving, pour into serving container, mix briefly, and scoop ice cream into the punch, allowing the ice cream to melt for a few minutes before serving. (Skip this step if not serving as a punch.)

  5. Store in fridge.

Jenny’s Notes:

  • For an everyday mocha I reduce the sugar and milk, sometimes by up to half, as I usually drink my coffee black, and it makes it less indulgent.

  • You can substitute store-bought chocolate syrup for the homemade and use instant coffee instead of brewing, if you wish! I think the flavor will always be superior when you make things from scratch, or in this instance, use good, fresh coffee instead of instant!

  • Of course, you don’t have to use vanilla ice cream, you could use chocolate or moose tracks or hey, coffee ice cream!

  • When serving, you can choose to pour the whole recipe’s worth of punch into a punch bowl with ice cream, or, for smaller or longer parties, start with just a portion of the punch and ice cream, keeping the remainder in the fridge and freezer, respectively, so by the end the punch isn’t warm and the ice cream long melted.

  • This punch is easily stored in pitchers or empty milk jugs!

Mocha Punch
Yield 20
Author
Prep time
25 Min
Total time
25 Min

Mocha Punch

Sweet and creamy cold coffee punch with dollops of ice cream is great for gatherings and parties!
Cook modePrevent screen from turning off

Ingredients

Instructions

  1. Pour brewed coffee into a large pot, bowl, or other large container. Stir sugar into hot coffee until dissolved. Cool in fridge.
  2. Remove coffee from fridge and add milk, chocolate syrup, and vanilla and stir until well combined.
  3. Chill until cold or overnight.
  4. Just before serving, pour into serving container, mix briefly, and scoop ice cream into punch, allowing ice cream to melt for a few minutes before serving.
  5. Store in fridge.

Notes


  • You don’t have to use vanilla ice cream, you could use chocolate or moose tracks or heck, coffee ice cream! Whatever you like.
  • When serving, you can choose to pour the whole recipe’s worth of punch into a punch bowl with ice cream, or, for smaller or longer parties, start with just a portion of the punch and ice cream, keeping the remainder in the fridge and freezer, respectively, so by the end the punch isn’t warm and the ice cream long melted.
  • This punch is easily stored in pitchers or empty milk jugs!


Nutrition Facts

Calories

202.41

Fat

4.98 g

Sat. Fat

3.02 g

Carbs

33.94 g

Fiber

0.49 g

Net carbs

33.45 g

Sugar

26.31 g

Protein

5.27 g

Sodium

91.66 mg

Cholesterol

19.30 mg

Nutritional information is approximate. Calculated including vanilla ice cream

mocha, mocha punch, party coffee chocolate punch, iced coffee drink
drink
American
Did you make this recipe?
Tag @jennyblogsandbakes on instagram and hashtag it #jennyblogs
2018-12-29+15.44.21-2.jpg

Chocolate Chip Brioche Rolls

But why are they so golden? Many thanks to butter and egg wash.

But why are they so golden? Many thanks to butter and egg wash.

Last Updated August 11, 2024

I've been thinking about you a lot recently.  How sweet you are, how tender you are, how you like to butter me up. Yeah, you're a little soft, but I love that about you. I wake up in the morning hoping you'll want to meet me for coffee. Will you, brioche? Please say yes. Before life hardens you and you become like a rock. But if not, how about your friend? He looks yummy, too - Oh hey. Welcome to my blog! Yep, I'm writing a recipe about brioche, mmm hmmm. No, I was not talking to the brioche. Just eating. Nom nom nom. See? Delicious. Yep. Believe me and make these, and you'll be talking to your brioche, too.  

Brioche is a yeasted, enriched bread or bun. By enriched I mean, rich in butter, with help from sugar and eggs.  The amount of butter in the recipe for brioche must be equal to or more than 20% of the flour weight, but can go up to 100%.  I like to think of brioche in three categories, as called by Peter Reinhart: 

  1. Poor man's brioche - consisting of at least 20% butter

  2. Middle-class brioche - consisting of around 50% butter

  3. Rich man's brioche - consisting of 50-80% butter, or on rare occasion, more!

To find the butter percentage, divide the weight of the butter by the weight of the flour and multiply by 100.  

Butter weight / flour weight x 100 = Butter percentage

For example, let's take the recipe below, which calls for 6 Tbsp butter or 85g by weight, divided by 2 1/2 cups flour or 300g by weight, which equals 0.28.  Multiply 0.28 by 100 and you get 28.  Thus the butter percentage is 28 percent in this recipe.  Poor man's brioche!  

85 / 300 x 100 = 28

If the words ratio, weight, percentage make you glaze over, stay with me. It can be confusing at first, but understanding these concepts can really enhance your baking experience. Think of it as the key that unlocks all recipes and links them together. Instead of blindly following a recipe, always secretly wondering what will happen if you omit an egg, use baking soda instead of baking powder, add less flour or sugar than called for, formulas such as this can help you compare recipes across the board. You’ll start to notice similarities, how textures are affected by the ratio of liquids to flour, fat to flour, etc. Ok, so baking soda vs. baking powder is more in the realm of science, but also helpful! Science and math, who knew?

Are we done yet? No, on to the poor man's brioche!

This post may contain affiliate links. If you make a purchase using these links, Jennyblogs may receive a small commission, at no extra cost to you. This helps to support Jennyblogs. Where possible, links are prioritized to small businesses and ethically and responsibly made items. For further information see the privacy policy. Grazie!

Recipe adapted from Soup Addict


Chocolate Chip Brioche Rolls

Makes 12 rolls

Ingredients:

IMG_4887.jpg
  • 2 1/2 cups / 300g all-purpose flour

  • 2 tsp / 6g instant yeast

  • 1/3 / 67g cup sugar

  • 1 1/2 tsp / 11g salt

  • 1/2 cup / 118g milk

  • 1/2 cup / 118g buttermilk or sour milk

  • 6 Tbsp / 85g butter, room temperature

  • 2 eggs

  • 1 1/3 cup / 234g chocolate chips or chunks

Directions:

Oven 350°F / 177°C.  Line a baking sheet with parchment paper or silicone mat.

  1. In the bowl of a stand mixer fitted with the paddle, mix together flour, yeast, sugar, and salt.  

  2. In a small saucepan heat milk and buttermilk until about 105°F / 40°C.  Add to flour mixture and mix until well combined.  

  3. With the mixer running, add butter and allow to mix until fully immersed.  Add 1 egg.  

  4. Switch to the dough hook and knead on medium speed for 6-8 minutes, until the dough no longer sticks to the sides of the bowl and starts to make a slapping sound against the bowl.  If the dough is still clinging to the sides, add a touch more flour until it no longer sticks.  

  5. Mix in chocolate chips just long enough to incorporate.  

  6. Transfer dough to a large oiled bowl.  Flip dough so that both sides are now oiled.  Cover with a towel or plastic wrap and allow to ferment in a warm place for about 1 1/2 hours, or until doubled in size.   

  7. Place dough on a lightly floured surface and divide into 12 equal pieces.  Roll each piece into a ball and place evenly spaced on the prepared baking sheet.  

  8. Beat second egg with 1 tablespoon of water. Use a pastry brush or your fingers to brush each dough well with egg wash. Cover with a towel or plastic wrap and allow to rise for about 1 hour, or until puffed.  

  9. Bake for 25-30 minutes, or until golden brown and internal temperature reads about 180°F / 82°C.  

Jenny's Notes:

  • If you don’t have buttermilk or sour milk, you can make your own sour milk by adding 1 Tbsp lemon juice or vinegar per 1 cup milk.

  • After you've made the dough, you can place the dough in the fridge before the first or second ferment. That way the ferment will happen slowly in the fridge, and you can shape or bake the rolls the next day.  Allow the dough to come to room temperature before rolling or baking, then continue as instructed.

  • Use any leftover egg wash for another baking venture or omelette!

Chocolate Chip Brioche Rolls
Yield 12
Author
Prep time
55 Min
Cook time
30 Min
Total time
1 H & 25 M

Chocolate Chip Brioche Rolls

Buttery, soft, sweet, enriched brioche rolls speckled with chocolate chips.
Cook modePrevent screen from turning off

Ingredients

Instructions

  1. Oven 350°F / 177°C. Line a baking sheet with parchment paper or silicone mat.
  2. In the bowl of a stand mixer fitted with the paddle, mix together flour, yeast, sugar, and salt.
  3. In a small saucepan heat milk and buttermilk until about 105°F / 40°C. Add to flour mixture and mix until well combined.
  4. With the mixer running, add butter and allow to mix until fully immersed. Add 1 egg.
  5. Switch to the dough hook and knead on medium speed for 6-8 minutes, until the dough no longer sticks to the sides of the bowl and starts to make a slapping sound against the bowl. If the dough is still clinging to the sides, add a touch more flour until it no longer sticks.
  6. Mix in chocolate chips just long enough to incorporate.
  7. Transfer dough to a large oiled bowl. Flip the dough so that both sides are now oiled. Cover with a towel or plastic wrap and allow to ferment in a warm place for about 1 1/2 hours, or until doubled in size.
  8. Place dough on a lightly floured surface and divide into 12 equal pieces. Roll each piece into a ball and place evenly spaced on the prepared baking sheet.
  9. Beat the second egg with 1 tablespoon of water. Use a pastry brush or your fingers to brush each dough well with egg wash. Cover with a towel or plastic wrap and allow to rise for about 1 hour, or until puffed.
  10. Bake for 25-30 minutes, or until golden brown and internal temperature reads about 180°F / 82°C.

Notes

If you don’t have buttermilk or sour milk, you can make your own sour milk by adding 1 Tbsp lemon juice or vinegar per 1 cup milk. After you've made the dough, you can place the dough in the fridge before the first or second ferment. That way the ferment will happen slowly in the fridge, and you can shape or bake the rolls the next day. Allow the dough to come to room temperature before rolling or baking, then continue as instructed.Use any leftover egg wash for another baking venture or omelette!

Nutrition Facts

Calories

265.01

Fat

12.95 g

Sat. Fat

7.58 g

Carbs

34.61 g

Fiber

1.96 g

Net carbs

32.65 g

Sugar

13.04 g

Protein

5.38 g

Sodium

439.38 mg

Cholesterol

47.41 mg

Nutritional information is approximate.

brioche, brioche rolls, poor man's brioche, recipe, chocolate chip brioche, butter
Bread, Breakfast
French
Did you make this recipe?
Tag @jennyblogsandbakes on instagram and hashtag it #jennyblogs
IMG_4900.jpg

Semlor (Swedish Cardamom Buns)

Last Updated August 11, 2024

Semlor are yeasted Swedish sweet buns filled with marzipan and whipped cream with hints of cardamom.

These buns, as I've read, are traditionally associated with Lent and eaten on Shrove Tuesday, or Fat Tuesday. You could think of them as the equivalent to Polish paczki. If you're thinking, "Wow, thanks, that helps me so much - WHAT is a paczki??" It's similar to a jelly filled doughnut (but better!!) traditionally eaten on Shrove Tuesday and pronounced poonch-key or pawnch-key (it’s much debated). There is quite a large Polish population near where I grew up, including an annual Polka Fest! Plenty of polka-ing and beer to go around. Anyway, Semlor are also eaten in various forms and under other names in other Nordic countries such as Finland, Estonia, Norway, Denmark, Lithuania, Latvia, Iceland, and the Faroe Islands.

This post may contain affiliate links. If you buy something using these links, Jennyblogs may receive a small commission, at no extra cost to you. This helps to support Jennyblogs. For further information see the privacy policy. Grazie!

Recipe adapted from LondonEats


Semlor

Makes 10 buns

Ingredients:

For the Cardamom Buns

  • 1 cup / 237g milk

  • 7 Tbsp / 100g butter

  • 2 tsp / 6.3g instant yeast

  • 1/4 tsp / 1g salt

  • 1/3 cup / 40g sugar

  • 1/2 tsp / 1g ground cardamom

  • 2 eggs

  • 3 1/2 cups / 450g all-purpose flour or bread flour

  • 1 tsp / 5g water, milk, or heavy cream

For the Marzipan Filling

  • insides of the buns

  • 7 oz / 200g marzipan (make your own marzipan here!)

  • generous 3/4 cup / 195g milk

  • generous 3/4 cup / 195g heavy whipping cream

  • powdered sugar, for dusting

Directions:

Make the Cardamom Buns

Oven 390°F / 200°C. 2 baking sheets lined with parchment paper or silpat.

  1. Place milk in a small saucepan and heat until milk just begins to simmer.  Remove from heat and add butter, stirring to melt.  Once butter is completely melted and integrated, allow mixture to sit until lukewarm.  

  2. Place milk mixture, yeast, salt, sugar, cardamom, and 1 egg in the bowl of a stand mixer fitted with a paddle.  Beat until all ingredients are incorporated.  Switch to the dough hook and add flour slowly on medium-low speed until a soft dough forms.  Continue to beat for several minutes on medium speed.  You should hear the dough slapping the sides of the bowl, sticking only to the bottom.  If the dough is sticking to the sides, add flour gradually until dough no longer sticks.  

  3. Turn out onto a lightly floured surface and knead 1-2 minutes more.  Divide dough into 10 equal portions and roll into balls.  Place evenly prepared baking sheets. Cover with a cloth and let rise in a warm place until doubled in size, about 1 hour.   

  4. Beat the second egg with the water and use a pastry brush or your hands to evenly brush the buns.

  5. Bake for about 15 minutes until golden brown or when internal temperature registers 185-190°F / 85-88°C.  

  6. Transfer buns to a cooling rack, cover with a towel, and allow to cool.  

Make the Marzipan Filling

Your filling may look like baby spit-up, too. And that's ok.

Your filling may look like baby spit-up, too. And that's ok.

  1. Once the buns are cool enough to handle, cut out a lid from the top using a small serrated knife. Set the lids aside.  Using a fork, scoop out the inside of each bun and place in a medium bowl.  Crumble/tear with your fingers as best you can.  Add marzipan and milk and work into a smooth paste using your hands or a fork.  

  2. In the bowl of a stand mixer fitted with the whisk attachment, whip the cream until stiff peaks from.  

Assembly

  1. Fill the buns evenly with the marzipan mixture. Pipe whipped cream over the filling using a large star tip (1M) or a spoon.  

  2. Place the tops on the whipped cream, then dust tops with powdered sugar using a small sieve.  

Jenny's Notes:

  • I always knead my dough by hand for a bit after kneading it in a machine. The machine doesn't always do a perfect job and I've had instances before where I kneaded solely in the machine and had a strange dough rise as a result. A few rounds of kneading by hand fixed the problem; the yeast hadn't been distributed evenly when kneaded only by machine.

  • If you have a scale you can ensure your buns will be all the same size. Weigh the dough mass, then divide this number by 10. This will give you an idea how much each of the 10 buns should weigh. You don't have to be exact down to the gram, of course, but I would stay within 5 or so grams of this number. Divide the dough mass in 2, then divide each half into 5 equal parts. Then weigh each piece to see how accurate your eye was.

  • When you "crumble" the filling into pieces you may notice the dough is moist and hard to crumble, but tear it as best you can into small chunks. When you add the milk and marzipan the pieces will absorb the liquid and eventually come together into a smoothish mass.

  • I made my own marzipan for this recipe and used rose water. Rose is a very strong flavor, so go light, but I thought it made for a very unique pairing with almond and cardamom and very "European" tasting. Or, leave out the rose if you're skeptical and you'll still have a lovely cardamom/almond combination.

  • "Semlor" is plural, so if you would like to eat only one bun, ask for a "Semla."

Semlor (Swedish Cardamom Buns)
Yield 10
Author
Prep time
1 H & 20 M
Cook time
15 Min
Inactive time
1 Hour
Total time
2 H & 35 M

Semlor (Swedish Cardamom Buns)

Sweet, yeasted cardamom buns with a creamy marzipan filling and whipped cream topping.
Cook modePrevent screen from turning off

Ingredients

For the Cardamom Buns
For the Marzipan Filling

Instructions

Make the Cardamom Buns
  1. Oven 390°F / 200°C. 2 baking sheets lined with parchment paper or silpat.
  2. Place milk in a small saucepan and heat until milk just begins to simmer. Remove from heat and add butter, stirring to melt. Once butter is completely melted and integrated, allow mixture to sit until lukewarm.
  3. Place milk mixture, yeast, salt, sugar, cardamom, and 1 egg in the bowl of a stand mixer fitted with a paddle. Beat until all ingredients are incorporated. Switch to the dough hook and add flour slowly on medium-low speed until a soft dough forms. Continue to beat for several minutes on medium speed. You should hear the dough slapping the sides of the bowl, sticking only to the bottom. If the dough is sticking to the sides, add flour gradually until dough no longer sticks.
  4. Turn out onto a lightly floured surface and knead 1-2 minutes more. Divide dough into 10 equal portions and roll into balls. Place evenly prepared baking sheets. Cover with a cloth and let rise in a warm place until doubled in size, about 1 hour.
  5. Beat the second egg with the water and use a pastry brush or your hands to evenly brush the buns.
  6. Bake for about 15 minutes until golden brown or when internal temperature registers 185-190°F / 85-88°C.
  7. Transfer buns to a cooling rack, cover with a towel, and allow to cool.
Make the Marzipan Filling
  1. Once the buns are cool enough to handle, cut out a lid from the top using a small serrated knife. Set the lids aside. Using a fork, scoop out the inside of each bun and place in a medium bowl. Crumble/tear with your fingers as best you can. Add marzipan and milk and work into a smooth paste using your hands or a fork.
  2. In the bowl of a stand mixer fitted with the whisk attachment, whip the cream until stiff peaks from.
Assembly
  1. Fill the buns evenly with the marzipan mixture. Pipe whipped cream over the filling using a large star tip (1M) or a spoon.
  2. Place the tops on the whipped cream, then dust tops with powdered sugar using a small sieve.

Notes

I always knead my dough by hand for a bit after kneading it in a machine. The machine doesn't always do a perfect job and I've had instances before where I kneaded solely in the machine and had a strange dough rise as a result. A few rounds of kneading by hand fixed the problem; the yeast hadn't been distributed evenly when kneaded only by machine.If you have a scale you can ensure your buns will be all the same size. Weigh the dough mass, then divide this number by 10. This will give you an idea how much each of the 10 buns should weigh. You don't have to be exact down to the gram, of course, but I would stay within 5 or so grams of this number. Divide the dough mass in 2, then divide each half into 5 equal parts. Then weigh each piece to see how accurate your eye was.When you "crumble" the filling into pieces you may notice the dough is moist and hard to crumble, but tear it as best you can into small chunks. When you add the milk and marzipan the pieces will absorb the liquid and eventually come together into a smoothish mass.I made my own marzipan for this recipe and used rose water. Rose is a very strong flavor, so go light, but I thought it made for a very unique pairing with almond and cardamom and very "European" tasting. Or, leave out the rose if you're skeptical and you'll still have a lovely cardamom/almond combination.

Nutrition Facts

Calories

436.24

Fat

19.78 g

Sat. Fat

10.76 g

Carbs

56.25 g

Fiber

1.82 g

Net carbs

54.43 g

Sugar

18.41 g

Protein

9.08 g

Sodium

149.19 mg

Cholesterol

84.19 mg

Nutritional information is approximate. Based on one semla.

semla,semlor,cardamom buns,marzipan filling,swedish buns, yeasted bread, sweet buns
bread, breakfast, dessert
Nordic
Did you make this recipe?
Tag @jennyblogsandbakes on instagram and hashtag it #jennyblogs

Coconut Scones

Last Updated August 9, 2024

This post may contain affiliate links. If you buy something using these links, Jennyblogs may receive a small commission, at no extra cost to you. This helps to support Jennyblogs. For further information see the privacy policy. Grazie!

Scones come in all different shapes and sizes.  Whether they're flat or fluffy, dry or moist, sweet or savory, round, square, or triangular.  I've never had the honor to eat a real British or Scottish scone, but I have a few favorite recipes that I only hope the real thing could live up to.  

This particular recipe is not too sweet, with only a 1/4 cup sugar aside from the glaze, and lovely with a cup of tea or coffee, although drinking liquids with them isn’t necessary because they are moist enough by themselves.  I always think bright citrus flavors are marvelous in scones, but you can never go wrong with coconut.

If you’re familiar with making biscuits, this recipe is very similar to a biscuit recipe. In fact, you may be wondering what the difference is between a biscuit and a scone. The main differences that I’ve understood, is that scones are a bit drier than biscuits, and biscuits have more acidity and are considered “flaky” where scones might be more described as “crumbly.” This also appears to be much debated, with everyone having their own opinion. I, for one, want my scones to be just as moist and flaky/crumbly as my biscuits. Plus, biscuits are usually just buttery, maybe flavored with some cheese or herbs, or with a touch of sugar to be served as stawberry shortcakes. Scones? So many flavors!

Recipe adapted from Food Network.


Coconut Scones

Makes about 20

Ingredients:

For the Scones

  • 4 1/4 cups / 510g all-purpose flour

  • 2 Tbsp / 30g baking powder

  • 1 tsp / 5g salt

  • 1/4 cup / 50g sugar, plus more for sprinkling

  • 2 cups / 160g shredded unsweetened coconut

  • 1 1/2 cups / 339g butter, cubed, or 1 1/4 cups / 277g oil

  • 1 cup / 237g unsweetened coconut milk

  • 4 eggs, lightly beaten

  • 1 tsp / 5g coconut extract

  • 2 cups / 250g pecans, finely chopped, plus more for sprinkling, optional

For the Glaze

  • 1 cup / 125g powdered sugar

  • 2-3 Tbsp / 30-45g unsweetened coconut milk

  • 1/4 tsp / 1g coconut extract

  • 1/4 tsp / 1g vanilla extract

Directions:

Oven 400°F / 205°C.  Line 2 baking sheets with parchment paper.

Make the Scones

  1. In the bowl of a stand mixer, combine flour, baking powder, salt, sugar, and coconut.  Add the butter or oil, and beat until mixture is coarse and crumbly.  

  2. In another bowl, whisk together milk, eggs, and coconut extract.  Stir into dry ingredients just until moistened.  Do not over mix.  Gently stir in pecans.  

  3. Scoop dough onto prepared baking pans into approximately 3 in / 7cm mounds, leaving enough space between scones so that they can brown evenly, about 2 in / 5cm.  Sprinkle with extra sugar and pecans, if desired.   

  4. Bake for 13-16 minutes, until starting to turn golden and the center no longer feels doughy to the touch.  

Make the Glaze

  1. In a small bowl whisk together powdered sugar, extracts, and 2 tablespoons of milk.  Add more milk to get a drizzling consistency, if needed.  

  2. Drizzle over scones while they are still warm.  

Jenny's Notes:

  • When you first add the liquid into the flour mixture, you may notice the dough seems too wet/soupy. Let it sit just for a minute or two (great time to prepare your pans), and it will magically thicken. My biscuit recipe is like this too. I always think it’s too wet when I first stop mixing, but then it ends up being fine.

  • You might notice I don't always give the weight for measurements less than 1 tsp and never for eggs.  Unless a recipe needs to be very exact (such as plenty of French classics), I find eggs don't need to be weighed.  A little less or extra egg in a recipe like this one is not going to make a world of difference, and the 1/4 of an egg you had to remove to get an exact weight would probably go to waste.  That’s a shame, so I always round the egg measurements or weight to the nearest whole egg.  As far as the teaspoon measurements, I find scales tend to be less precise than an actual teaspoon, unless you have one of those smaller and more precise (to the nearest .001g) scales.

  • Some family members of mine don't appreciate nuts in their baked goods, so I omit the nuts in the batter and sprinkle some on half of the scones.  

  • An ice cream/cupcake scoop works great to transfer the dough onto the baking sheets.  

  • Don't have coconut milk?  Use any kind of milk you have on hand! 

Coconut Scones
Yield about 20 scones
Author
Prep time
25 Min
Cook time
16 Min
Total time
41 Min

Coconut Scones

Moist coconut scones with a coconut glaze and pecans.
Cook modePrevent screen from turning off

Ingredients

For the Scones
For the Glaze

Instructions

Make the Scones
  1. Oven 400°F / 205°C. Line 2 baking sheets with parchment paper.
  2. In the bowl of a stand mixer, combine flour, baking powder, salt, sugar, and coconut. Add the butter or oil, and beat until mixture is coarse and crumbly.
  3. In another bowl, whisk together milk, eggs, and coconut extract. Stir into dry ingredients just until moistened. Do not over mix. Gently stir in pecans.
  4. Scoop dough onto prepared baking pans into approximately 3 in / 7cm mounds, leaving enough space between scones so that they can brown evenly, about 2 in / 5cm. Sprinkle with extra sugar and pecans, if desired.
  5. Bake for 13-16 minutes, until starting to turn golden and the center no longer feels doughy to the touch.
Make the Glaze
  1. In a small bowl whisk together powdered sugar, extracts, and 2 tablespoons of milk. Add more milk to get a drizzling consistency, if needed.
  2. Drizzle over scones while they are still warm.

Notes

When you first add the liquid into the flour mixture, you may notice the dough seems too wet/soupy. Let it sit just for a minute or two (great time to prepare your pans), and it should thicken.


Some family members of mine don't appreciate nuts in their baked goods, so I omit the nuts in the batter and sprinkle some on half of the scones. An ice cream scoop works great to transfer the dough onto the baking sheets. Don't have coconut milk? Use any kind of milk you have on hand!

Nutrition Facts

Calories

410.68

Fat

29.69 g

Sat. Fat

14.90 g

Carbs

33.36 g

Fiber

3.25 g

Net carbs

30.11 g

Sugar

9.93 g

Protein

5.89 g

Sodium

384.66 mg

Cholesterol

73.64 mg

Nutritional information is approximate. Based on 20 servings and includes pecans.

coconut scones, moist scones, pecan, coconut, coconut glaze, scones,
breakfast, bread
American
Did you make this recipe?
Tag @jennyblogsandbakes on instagram and hashtag it #jennyblogs

Tourte Milanese

Last Updated August 8, 2024

Tourte Milanese, also known as Tourte Milanaise.  No, the second version does not include mayonnaise.  Part of the family en croute, or encased in dough.  Who doesn't want to eat food, soup, and anything edible wrapped in flaky, buttery dough? In this case, roasted peppers, herbed scrambled eggs, cheese, spinach, and meat.

The green from the spinach, the white (ish) from the eggs, and the red from the roasted peppers is supposed to be an ode to the Italian flag. You can use whichever kind of sweet peppers you like, and as you can see from my photos, I used multi-colored peppers that time!

This tourte is a showstopper piece for sure. You will feel quite accomplished pulling this out of the oven, and taking your first bite into the explosion of hot, flaky layers, melty cheese, herbs, sweet peppers, smoky meat, and garlicky spinach. It may look intimidating, but you can adjust this recipe to how much time and effort you want to put into it. For example, you can make your own puff pastry, or you can pick it up at the store. You could roast your own peppers, or buy a jar of already roasted peppers. I enjoy making everything as home-made and from scratch as possible, but sometimes life just doesn’t allow that. 

I recommend reading through the recipe once or twice and taking a peek at my notes at the bottom to make your game plan.  For example, if you’re making your own puff pastry, that in and of itself can easily be a two day recipe, so you'll want to make that a day ahead, or way ahead, and freeze it until you have the urge to make a recipe like this.  

Want some inspiration?  Watch this fun video of Julia Child and Michel Richard making Puff Pastry and Tourte Milanese!

This post may contain affiliate links. If you buy something using these links, Jennyblogs may receive a small commission, at no extra cost to you. This helps to support Jennyblogs. For further information see the privacy policy. Grazie!


Tourte Milanese

Serves 8-12

Ingredients:

For the Crust

  • 1 lb. / 450g puff pastry, home-made or store bought

  • Egg wash made from 1 egg beaten with 1 Tbsp water

For the Eggs

  • 10 eggs

  • 1 Tbsp chopped fresh chives or green onion

  • 1 Tbsp chopped fresh parsley or basil

  • 2 tsp snipped fresh tarragon or fresh oregano

  • salt and ground pepper, to taste

  • 3 Tbsp / 42g butter

For the Rest of the Filling

  • 6 large red bell peppers (or use a 16oz jar or two of roasted red peppers)

  • 1 1/2 lbs / 680g spinach

  • 1 Tbsp / 14g olive oil

  • 1 Tbsp / 14g butter

  • 2 garlic cloves, peeled and minced

  • salt and pepper, to taste

  • 1/4 tsp grated nutmeg

  • 8 oz / 225g Swiss cheese

  • 8 oz / 225g smoked turkey or ham

  • about 1/2 cup each of bread crumbs and shredded parmesan cheese, optional

Directions:

Generously grease an 8in / 20cm springform pan.  

Make the Crust

  1. Cut off 1/4 of the puff pastry, cover, and set aside.

  2. Roll out the remaining pastry to roughly 1/8'‘. If working with store-bought, you may have two squares that you will have to press together at the edges as close to a square as you can for rolling out. Be sure to roll it thin enough so it will have a chance to be baked all the way through in the oven.  It should be big enough to cover the bottom and sides of your springform pan with an overhang.  Carefully press into pan, being sure to press all the way into the corners.  Cover and refrigerate.

  3. Roll out the remaining 1/4 of puff pastry until it is roughly 1/8" thick. Again, you may have to cut and press together to get as close to a square as you can before rolling out. Cut out an 8 in / 20cm circle, using an 8 in / 20cm pie plate or cake tin as a template.  Place on a plate or baking sheet, cover, and refrigerate.  

Make the Eggs

  1. Whisk eggs, herbs, salt and pepper together.  Melt butter in a skillet over low heat and pour in eggs.  Gently stir, continuously moving the setting eggs towards the center and allowing runny eggs to reach the bottom of the pan.  When the whole mixture has started to thicken, but still a bit runny, remove from heat and pour onto a plate. Cover and refrigerate and until ready to use.  

Roast the Peppers

Skip this step if you bought roasted red peppers.  

Method 1: Place peppers over an open flame on your stove top until blackened.  Flip and allow second side to roast.  Repeat until all peppers have been roasted.  

Method 2: Place all peppers onto a tinfoil lined sheet pan.  Place under broiler in your oven, checking every few minutes, until peppers are blackened.  Turn peppers over and roast second side.  

Once peppers have been roasted, place in an airtight container or ziploc bag for about 20 minutes.

Remove peppers and rub the skin off.  Cut out the stems and slice from top to bottom, laying them flat.  Remove seeds and trim away any inside veins.  

Place peppers on a plate lined with paper towels to absorb any excess liquid, cover, and refrigerate.

Blanch and Sauté the Spinach

  1. Bring a large amount of salted water to a boil.  Add spinach and blanch for 1 minute.  Drain in a colander and rinse in cold water to stop it from cooking.  Press the spinach to remove excess liquid.  

  2. Place oil, butter, and garlic in a large frying pan over medium heat.  When garlic starts to sizzle, add blanched spinach and sauté for 3 minutes.  Season with salt, pepper, and nutmeg.  Remove from heat and transfer spinach to a plate lined with paper towels.  Cover and refrigerate until needed.  

Assemble the Tourte

Preheat oven to 350°F / 177°C.  

Remove the pastry lined pan from the fridge, along with your eggs, peppers, spinach, cheese, and turkey/ham.  Layer your ingredients in this order, laying them flat and spreading to the edge:

  1. Bread crumbs and grated parmesan, optional

  2. Half of eggs

  3. Half of spinach

  4. Half of turkey/ham

  5. Half of cheese

  6. All the peppers

  7. Other half of cheese

  8. Other half of turkey/ham

  9. Other half of spinach

  10. Other half of eggs

Trim the pastry overhang to within 1 in / 2.5cm of the pan. Brush the inner side of with egg wash and fold over filling. Brush the other side with more egg wash. 

Remove the round pastry top from fridge, re-rolling if it has shrunk any. Place over the folded edges of the tourte, pressing down to seal. Brush with more egg wash. Cut a vent in the center of the dough, or use a knife to trace a design. Or, you can cut out shapes from the puff pastry scraps to decorate the top. Brush shapes with more egg wash.

Optional: Chill assembled tourte in fridge for 30 minutes or more prior to baking. It will require more baking time if chilled.

Place tourte on a tinfoil lined baking sheet and bake for 1 hour 10 minutes - 1 hour 30 minutes, or until pastry is puffed and a deep golden brown.  

Cool for 30 minutes before releasing from pan and serving.

To reheat leftovers, place in an oven preheated to 350°F / 177°C for 20-30 minutes. 

Jenny's Notes:

The recipe above is pretty traditional, however, it can easily be adjusted to your tastes.  

No soggy bottoms here!

No soggy bottoms here!

  • Can be assembled a day ahead.  

  • Store-bought puff pastry is usually pre-rolled quite thin, so as you roll it out it will get even thinner. When I made my own, and as you can see in the video of Julia Child and Michel Richard, homemade is more delicate to roll out and won’t get as thin, more like 1/4”.

  • Before layering in the filling, I suggest sprinkling the bottom with a grated hard cheese, such as parmesan, or bread crumbs, to avoid the soggy-bottom syndrome. I did a combo of cheese and bread crumbs.

  • For the herbed scrambled eggs, chives, parsley, and tarragon combo is more traditional, but I prefer green onion, basil, and oregano.

  • Feel free to use whichever color peppers you like! I roasted multi-colored mini sweet peppers in these photos.

  • Instead of using paper towels to absorb extra liquid from the spinach and peppers, you can also place them in a strainer over a bowl.

  • 1 1/2 lbs of spinach may seem outrageous, but it really cooks down. I have used a scant pound before when that’s all I had, but the spinach is surprisingly delicious and I wouldn’t modify the recipe down if I had a choice.

  • Play around with cheeses! You'll want softer cheeses, ones that melt well. Think cheddar, gruyère, havarti, gouda, brie...I enjoy half Swiss and half dill havarti, or another favorite is smoked gruyère.

  • When I made homemade puff pastry, this tourte required the longer bake time. With store-bought pastry it often only requires the lower end of the baking time. But again, this will also vary depending on your oven.

Tourte Milanese
Yield 8-12 Servings
Author
Prep time
1 H & 30 M
Cook time
1 H & 30 M
Inactive time
30 Min
Total time
3 H & 30 M

Tourte Milanese

Layers of turkey, cheese, spinach, roasted red peppers, and eggs encased in flaky puff pastry.
Cook modePrevent screen from turning off

Ingredients

For the Crust
For the Eggs
For the Rest of the Filling

Instructions

Make the Crust
  1. Generously grease an 8in / 20cm springform pan.
  2. Cut off 1/4 of the puff pastry, cover, and set aside.
  3. Roll out the remaining pastry to roughly 1/8'‘. If working with store-bought, you may have two squares that you will have to press together at the edges as close to a square as you can for rolling out. Be sure to roll it thin enough so it will have a chance to be baked all the way through in the oven. It should be big enough to cover the bottom and sides of your springform pan with an overhang. Carefully press into pan, being sure to press all the way into the corners. Cover and refrigerate.
  4. Roll out the remaining 1/4 of puff pastry until it is roughly 1/8" thick. Again, you may have to cut and press together to get as close to a square as you can before rolling out. Cut out an 8 in / 20cm circle, using an 8 in / 20cm pie plate or cake tin as a template. Place on a plate or baking sheet, cover, and refrigerate.
Make the Eggs
  1. Whisk eggs, herbs, salt and pepper together. Melt butter in a skillet over low heat and pour in eggs. Gently stir, continuously moving the setting eggs towards the center and allowing runny eggs to reach the bottom of the pan. When the whole mixture has started to thicken, but still a bit runny, remove from heat and pour onto a plate. Cover and refrigerate and until ready to use.
Roast the Peppers
  1. Skip this step if you bought roasted red peppers.
  2. Method 1: Place peppers over an open flame on your stove top until blackened. Flip and allow second side to roast. Repeat until all peppers have been roasted.
  3. Method 2: Place all peppers onto a tinfoil lined sheet pan. Place under broiler in your oven, checking every few minutes, until peppers are blackened. Turn peppers over and roast second side.
  4. Once peppers have been roasted, place in an airtight container or ziploc bag for about 20 minutes to steam.
  5. Remove peppers and rub the skin off. Cut out the stems and slice from top to bottom, laying them flat. Remove seeds and trim away any inside veins.
  6. Place peppers on a plate lined with paper towels to absorb any excess liquid, cover, and refrigerate.
Blanch and Sauté the Spinach
  1. Bring a large amount of salted water to a boil. Add spinach and blanch for 1 minute. Drain in a colander and rinse in cold water to stop it from cooking. Press the spinach to remove excess liquid.
  2. Place oil, butter, and garlic in a large frying pan over medium heat. When garlic starts to sizzle, add blanched spinach and sauté for 3 minutes. Season with salt, pepper, and nutmeg. Remove from heat and transfer spinach to a plate lined with paper towels. Cover and refrigerate until needed.
Assemble the Tourte
  1. Preheat oven to 350°F / 177°C.
  2. Remove the pastry lined pan from the fridge, along with your eggs, peppers, spinach, cheese, and turkey/ham. Layer your ingredients in this order, laying them flat and spreading to the edge:
  3. Bread crumbs and grated parmesan, optional
  4. Half of eggs
  5. Half of spinach
  6. Half of turkey/ham
  7. Half of cheese
  8. All the peppers
  9. Other half of cheese
  10. Other half of turkey/ham
  11. Other half of spinach
  12. Other half of eggs
  13. Trim the pastry overhang to within 1 in / 2.5cm of the pan. Brush the inner side with egg wash and fold over filling. Brush the other side with more egg wash.
  14. Remove the round pastry top from fridge, re-rolling if it has shrunk any. Place over the folded edges of the tourte, pressing down to seal it. Brush with more egg wash. Cut a vent in the center of the dough, or use a knife to trace a design. Or, you can cut out shapes form the puff pastry scraps and decorate the top. Brush shapes with more egg wash.
  15. Optional: Chill assembled tourte in fridge for 30 minutes or more prior to baking. It will require more baking time if chilled.
  16. Place tourte on a tinfoil lined baking sheet and bake for 1 hour 10 minutes - 1 hour 30 minutes, or until pastry is puffed and a deep golden brown.
  17. Cool for 30 minutes before releasing from pan and serving.
  18. Can be assembled a day ahead.
  19. To reheat leftovers, place in an oven preheated to 350°F / 177°C for 20-30 minutes.

Notes

The recipe above is pretty traditional, however, it can easily be adjusted to your tastes.  

  • Can be assembled a day ahead.  
  • Store-bought puff pastry is usually pre-rolled quite thin, so as you roll it out it will get even thinner. When I made my own, and as you can see in the video of Julia Child and Michel Richard, homemade is more delicate to roll out and won’t get as thin, more like 1/4”.
  • Before layering in the filling, I suggest sprinkling the bottom with a grated hard cheese, such as parmesan, or bread crumbs, to avoid the soggy-bottom syndrome. I did a combo of cheese and bread crumbs.
  • For the herbed scrambled eggs, chives, parsley, and tarragon combo is more traditional, but I prefer green onion, basil, and oregano.
  • Feel free to use whichever color peppers you like! I roasted multi-colored mini sweet peppers in these photos.
  • Instead of using paper towels to absorb extra liquid from the spinach and peppers, you can also place them in a strainer over a bowl.
  • 1 1/2 lbs of spinach may seem outrageous, but it really cooks down. I have used a scant pound before when that’s all I had, but the spinach is surprisingly delicious and I wouldn’t modify the recipe down if I had a choice.
  • Play around with cheeses! You'll want softer cheeses, ones that melt well. Think cheddar, gruyère, havarti, gouda, brie...I enjoy half Swiss and half dill havarti, or another favorite is smoked gruyère.
  • When I made homemade puff pastry, this tourte required the longer bake time. With store-bought pastry it often only requires the lower end of the baking time. But again, this will also vary depending on your oven.

Nutrition Facts

Calories

686.27

Fat

45.9 g

Sat. Fat

16.93 g

Carbs

42.33 g

Fiber

5.69 g

Net carbs

36.63 g

Sugar

6.64 g

Protein

28.54 g

Sodium

494.18 mg

Cholesterol

281.18 mg

Nutritional information is approximate and based on 8 servings, including bread crumbs and parmesan.

Tourte Milanese, Julia Child, Michel Richard, spinach, roasted red peppers, en croute, scrambled eggs, cheese, puff pastry,turkey, Italian flag
breakfast, dinner
Italian, French
Did you make this recipe?
Tag @jennyblogsandbakes on instagram and hashtag it #jennyblogs

Cream Cheese Coffee Cake

Last Updated August 6, 2024

Cream Cheese Coffee Cake. Think a delicate crumb, super moist with swirls of cream cheese making the coffee cake even softer, and a sweet crumble on top.

Coffee cakes (and scones) often get a bad rap for being dry. No one likes to eat something that makes their mouth feel like it’s full of sawdust. There is no need to make dry baked goods when there are so many good recipes out there! A good example? This Cream Cheese Coffee Cake recipe. I already have a few favorite NOT dry recipes like this Cinnamon Streusel Coffee Cake, but today’s Cream Cheese Coffee Cake really uh, takes the cake on the moist scale. I apologize if you don’t like the word “moist”, but I struggle finding suitable synonyms that get the same point across. If you have any ideas, I’m open to suggestions so I don’t offend some people’s sensibilities. :)

Now, post Valentine's Day, or Galentine's Day, you may need to take a break from chocolate.  No wait, never mind, that's silly.  Chocolate is always necessary.  What was I thinking?  But I'm sure you already have plenty of chocolate on your hands (maybe literally, put that candy bar down and get busy making this coffee cake) in the form of heart boxes, Dove dark chocolate with those hidden messages, Hershey's kisses, or in my case, Toblerone.  So instead, let's make a very white dessert (or breakfast, hey) with a delicate crumb and cheesecake filling. Yes? Yes.

This post may contain affiliate links. If you make a purchase using these links, Jennyblogs may receive a small commission, at no extra cost to you. This helps to support Jennyblogs. Where possible, links are prioritized to mall businesses and ethically and responsibly made items. For further information see the privacy policy. Grazie!


Cream Cheese Coffee Cake

Serves 12-16

Ingredients:

For the Filling

  • 8 oz / 225g cream cheese, softened

  • 1/4 cup / 50g sugar

  • 1/2 tsp vanilla extract

  • 1 egg

For the Cake

  • 1 1/2 cups / 180g all-purpose flour

  • 1/2 tsp baking powder

  • 1/2 tsp baking soda

  • 1/2 tsp salt

  • 3 Tbsp / 42g oil

  • 1/2 cup / 100g sugar

  • 2 eggs

  • 1 tsp vanilla

  • 1/2 cup / 123g yogurt or sour cream

For the Streusel

  • 1/4 cup / 50g sugar

  • 1/4 cup / 30g all-purpose flour

  • 3 Tbsp / 42g cold butter, cubed

Directions:

Oven 350°F / 177°C.  Greased 8x8in / 20x20cm square baking pan.

For the Filling

  1. In the bowl of a stand mixer beat cream cheese until smooth, about 30 seconds. 

  2. Add sugar, vanilla, egg and beat on medium-low speed until combined.  Pour into another bowl and set aside. 

For the Cake

  1. In a medium bowl whisk together flour, baking powder, baking soda, and salt. 

  2. In the bowl of a stand mixer combine oil and sugar.  Beat in eggs one at a time.  Add vanilla. 

  3. Alternate adding the dry ingredients and yogurt to the oil and sugar mixture.  Dry, yogurt, dry, yogurt, dry.  Mix only until just combined after each addition. 

For the Streusel

  1. Combine sugar, flour, and butter in a small bowl with a pastry cutter, fork, or your hands until crumbles the size of pebbles appear.

Assembly

  1. Spread half of the cake batter in the bottom of prepared pan. 

  2. Pour and spread cream cheese filling evenly over batter; gently swirl.

  3. Spread remaining half of cake batter over cream cheese filling. 

  4. Evenly sprinkle streusel over the top.

  5. Bake for 20-25 minutes or until toothpick inserted near the center comes out mostly clean. 

Jenny's Notes:

  • Love coffee cake or serving at a party?  You can double this recipe and bake in a 9x13 inch pan.  Increase baking time to about 40 minutes.

Cream Cheese Coffee Cake
Yield 12-16 Servings
Author
Prep time
45 Min
Cook time
25 Min
Total time
1 H & 10 M

Cream Cheese Coffee Cake

Super moist coffee cake with a thick cream cheese swirl and delicate streusel topping.
Cook modePrevent screen from turning off

Ingredients

For the Filling
For the Cake
For the Streusel

Instructions

For the Filling
  1. In the bowl of a stand mixer beat cream cheese until smooth, about 30 seconds.
  2. Add sugar, vanilla, egg and beat on medium-low speed until combined. Pour into another bowl and set aside.
For the Cake
  1. In a medium bowl whisk together flour, baking powder, baking soda, and salt.
  2. In the bowl of a stand mixer combine oil and sugar. Beat in eggs one at a time. Add vanilla.
  3. Alternate adding the dry ingredients and yogurt to the oil and sugar mixture. Dry, yogurt, dry, yogurt, dry. Mix only until just combined after each addition.
For the Streusel
  1. Combine sugar, flour, and butter in a small bowl with a pastry cutter, fork, or your hands until crumbles the size of pebbles appear.
Assembly
  1. Oven 350°F / 177°C. Greased 8x8in / 20x20cm square baking pan.
  2. Spread half of the cake batter in the bottom of prepared pan.
  3. Pour and spread cream cheese filling evenly over batter; gently swirl.
  4. Spread remaining half of cake batter over cream cheese filling.
  5. Evenly sprinkle streusel over the top.
  6. Bake for 20-25 minutes or until toothpick inserted near the center comes out mostly clean.

Notes

Love coffee cake or serving at a party? You can double this recipe and bake in a 9x13 inch pan. Increase baking time to about 40 minutes.

Nutrition Facts

Calories

269.85

Fat

13.92 g

Sat. Fat

6.21 g

Carbs

31.96 g

Fiber

0.47 g

Net carbs

31.48 g

Sugar

18.21 g

Protein

4.58 g

Sodium

270.60 mg

Cholesterol

58.08 mg

Nutritional information is approximate and based on 12 servings.

cream cheese, coffee cake, streusel, cream cheese filling, swirl, moist
Breakfast, Dessert
American
Did you make this recipe?
Tag @jennyblogsandbakes on instagram and hashtag it #jennyblogs

Orange Chocolate Chip Scones

Last Updated August 5, 2024

Do you know what goes great with cold weather?  Hot beverages, like tea and coffee. 

And do you know which carbs goes best with tea and coffee? Scones. 

That's not to say that scones are dry and should only be served with hot liquids to help re-salivate your mouth. If that's your past experience, then you need to find a new scone recipe or scone baker. I like the sound of that. Scone baker. Sconed baker.  The scorned baker. Maybe not. Moving on. These scones are wonderful!! Light and flaky. Not too sweet, with a nice burst of citrusy orange that pairs beautifully with the bitterness of the chocolate.

January is for baking.  Not dieting.  (Whole30 I'm looking at you.  In a very kind way.  Maybe not.)  Particularly breads, scones, cookies...winter and carbs are good buddies.  Love handles are an awkward third wheel.  But we get to wear big cozy sweaters and sit by fireplaces if we want to. I love winter. I love baking. I love these scones. Without further ado….

This post may contain affiliate links. If you buy something using these links, Jennyblogs may receive a small commission, at no extra cost to you. This helps to support Jennyblogs. For further information see the privacy policy. Grazie!

Recipe adapted from Joy the Baker


Orange Chocolate Chip Scones

Makes about 12 scones

Ingredients:

  • 3 cups / 360g all-purpose flour

  • 1/4 cup / 50g sugar

  • 4 tsp orange zest

  • 4 1/2 tsp baking powder

  • 1/2 tsp baking soda

  • 1 tsp salt

  • scant 3/4 cup / 150g oil

  • 1 egg

  • 3/4 cup / 180g buttermilk

  • 1 cup / 170g chocolate chips or chunks

Directions:

Oven 425°F / 218°C.  Baking sheet lined with parchment paper.

2019-05-18%2B10.08.01-2.jpg
  1. In a large bowl whisk together flour, sugar, zest, baking powder, baking soda, and salt.  Add oil and mix until texture resembles coarse crumbs.

  2. Whisk together egg and buttermilk.  Add to dry mixture until evenly moistened but being careful not to overmix.  Fold in chocolate chips. 

  3. Turn dough out onto a lightly floured surface and knead for a few rounds, 12-14 times.  Roll or pat out into a rectangle of about 1-inch thickness.  Cut into 12 squares.

  4. Place on prepared baking sheet and bake for 12-15 minutes, until scones no longer look doughy in the center and the bottoms are a light golden brown.  

  5. Best served same day, with tea and coffee and butter and jam, if you wish.   


Jenny's Notes:

  • In place of chocolate chips you can also break up a chocolate bar. Last time I used a chocolate bar with hazelnuts in it for Orange Hazelnut Chocolate Chip Scones and it was scrumptious.

  • Scones are so great, and there are many different varieties and recipes for them.  As long as they aren't too dry, I think they all have merit.  In fact, I have several different scone recipes, this is just one of them.  They are similar, but with slight differences that make each one valuable.

Orange Chocolate Chip Scones
Yield 12 servings
Author
Prep time
25 Min
Cook time
15 Min
Total time
40 Min

Orange Chocolate Chip Scones

Light, moist, orange and chocolate chip scones.
Cook modePrevent screen from turning off

Ingredients

Instructions

  1. Oven 425°F / 218°C. Baking sheet lined with parchment paper.
  2. In a large bowl whisk together flour, sugar, zest, baking powder, baking soda, and salt. Add oil and mix until texture resembles coarse crumbs.
  3. Whisk together egg and buttermilk. Add to dry mixture until evenly moistened but being careful not to overmix. Fold in chocolate chips.
  4. Turn dough out onto a lightly floured surface and knead for a few rounds, 12-14 times. Roll or pat out into a rectangle of about 1-inch thickness. Cut into 12 squares.
  5. Place on prepared baking sheet and bake for 12-15 minutes, until scones no longer look doughy in the center and the bottoms are a light golden brown.
  6. Best served same day, with tea and coffee and butter and jam, if you wish.

Notes

In place of chocolate chips you can also break up a chocolate bar. Last time I used a chocolate bar with hazelnuts in it for Orange Hazelnut Chocolate Chip Scones and it was scrumptious.

Nutrition Facts

Calories

317.34

Fat

17.57 g

Sat. Fat

3.59 g

Carbs

37.50 g

Fiber

1.72 g

Net carbs

35.78 g

Sugar

12.69 g

Protein

4.72 g

Sodium

465.72 mg

Cholesterol

16.10 mg

Nutritional information is approximate and based on 12 servings.

Scones, quick bread, orange, chocolate
bread, breakfast
American, British
Did you make this recipe?
Tag @jennyblogsandbakes on instagram and hashtag it #jennyblogs

Lemon Raspberry Sweet Rolls

Last Updated August 18, 2024

We all love a good cinnamon roll.  The soft dough, warm-gooey-buttery-cinnamon filling, topped with a sweet glaze or cream cheese icing.  The smell of fresh baked breads wafting from the kitchen and the warmth of bread in our tummy are especially comforting as the months turn colder. 

Today, however, we are not making cinnamon rolls (that's old hat :) but lemon raspberry rolls.  The tang of the lemon and raspberry paired with the sweet glaze is a match made for breakfast.  Or anytime. Pair it with a cup of tea or coffee and you have all the incentive you need to get out of bed in the morning!

This post may contain affiliate links. If you make a purchase using these links, Jennyblogs may receive a small commission, at no extra cost to you. This helps to support Jennyblogs. For further information see the privacy policy. Grazie!

Recipe adapted from Joy the Baker


Lemon Raspberry Sweet Rolls

Makes 12 regular rolls or 8 jumbo

Ingredients:

For the Dough

  • 1 cup / 237g warm milk (about 100°F / 38°C)

  • 1/2 cup / 100g sugar

  • 4 1/2 tsp / 14g active dry yeast

  • 1/4 cup / 56g oil

  • 2 eggs

  • Zest of 1 lemon

  • 1/2 tsp salt

  • 4 1/4 cups / 510g all-purpose flour + about 1/2 cup / 60g for kneading

For the Lemon Raspberry Filling

  • Generous 1 1/4 cups / 170g (1 6oz container) fresh or frozen raspberries (if using frozen do not thaw)

  • 1/2 cup / 100g sugar

  • Zest of 1 lemon

  • 1 tsp cornstarch

  • 1/4 cup / 56g butter

For the Glaze

  • 1 1/2 cups / 188g powdered sugar

  • 3 Tbsp / 42g lemon juice

Directions:

Preheat oven to 400°F / 205°C. Grease a 9x13inch / 23x33cm rectangular baking dish.

Make the Dough

  1. Pour milk into a large bowl. Add sugar and yeast and allow to sit for 7-10 minutes. Yeast should foam up a bit. 

  2. Add oil, eggs, zest, and salt. Add 4 1/4 cups of flour and mix until combined. 

  3. Flour a clean surface and turn out dough. Knead for about 8-10 minutes, sprinkling more flour on your work surface as needed. Dough should be soft and elastic by the end, so don't get too flour-happy. Alternately, knead in a stand mixer with dough hook attachment for 8-10 minutes, adding in flour as needed. The dough should stick only to bottom of bowl, not much to the sides.

  4. Lightly grease or flour a large bowl (the bowl you mixed the dough in is fine) and place dough in bowl. Cover and place in a warm area to rise for about 1 1/2 hours or until doubled in size. 

Make the Lemon Raspberry Filling

  1. In a small saucepan melt butter and let simmer until it starts to brown. Remove from heat and cool slightly. 

  2. In a medium bowl lightly mix raspberries with sugar, zest, and cornstarch.  It's okay if raspberries get a little crushed. 

Assemble the Rolls

  1. When dough has risen, punch it down and turn out onto a lightly floured surface. Knead for about a minute, then roll into a large rectangle, about 10x20inch / 25x50cm.   

  2. Spread cooled butter over dough almost to edges; sprinkle evenly with raspberry mixture. 

  3. Starting from one of the longer sides, roll dough up, pinching dough together at the end to seal it. 

  4. Slice into 12 even pieces, or 8 for jumbo sized. Place rolls in prepared pan and cover with plastic wrap. Place in a warm area to rise for about an hour, or until puffed.

  5. Bake for 20-22 minutes, until golden on top and centers no longer look doughy. Internal temperature should be about 185°F / 90°C of an outside roll.

Make the Glaze

  1. In a small bowl whisk together powdered sugar and lemon juice.  It should be thin enough to drizzle but not too liquidy. Add more powdered sugar or lemon juice as needed. 

  2. Drizzle warm rolls with glaze. 

Jenny's Notes:

  • If you don't have a thermometer handy to know what 100 degrees is, simply warm until milk feels quite warm, but not hot. 

  • You can freeze these rolls once you have sliced them and put them in the pan. Once removed from the freezer allow to thaw and proceed as normal. 

  • When using a stand mixer to knead, I still recommend kneading it for a few minutes by hand afterwards. I find they are not always as thorough as kneading by hand and you want an even rise for your dough.  I often to do it all by hand just because it’s therapeutic!

Lemon Raspberry Rolls
Yield 12
Author
Prep time
1 H & 10 M
Cook time
22 Min
Total time
1 H & 32 M

Lemon Raspberry Rolls

These bright breakfast rolls are like cinnamon rolls, but made with fresh lemon zest and raspberries instead!
Cook modePrevent screen from turning off

Ingredients

For the Dough
For the Lemon Raspberry Filling
For the Glaze

Instructions

Make the Dough
  1. In a small saucepan over low heat, warm milk until it is about 100F / 38C. Pour milk into a large bowl. Add the sugar and yeast and allow to sit for 7-10 minutes. The yeast should foam up a bit.
  2. Add oil, eggs, zest, and salt. Add the 4 1/4 cups of flour and mix until combined.
  3. Flour a clean surface and turn out dough. Knead for about 8-10 minutes, sprinkling more flour on your work surface as needed. Dough should be soft and elastic by the end, so don't get too flour-happy. Alternately, you can use the bread hook on a stand mixer and knead for 8-10 minutes, adding in flour as needed. The dough should stick only to the bottom of the pan, not the sides.
  4. Lightly grease or flour a large bowl (the bowl you mixed the dough in is fine) and place dough in the bowl. Cover with a towel and place in a warm area to rise for about 1 1/2 hours or until doubled in size.
Make the Lemon Raspberry Filling
  1. In a small saucepan melt the butter and let simmer until it starts to brown. Remove from heat and cool slightly.
  2. In a medium bowl lightly mix raspberries with sugar, zest, and cornstarch. It's okay if the raspberries get a little crushed.
Assemble and Bake the Rolls
  1. Preheat oven to 400F / 205C. Grease a 9x13inch / 23x33cm rectangular baking dish.
  2. When the dough has risen, punch it down and turn out onto a lightly floured surface. Knead for about a minute, then roll into a large rectangle, about 10x20inch / 25x50cm.
  3. Spread cooled butter over dough almost to the edges, then sprinkle evenly with raspberry mixture.
  4. Starting from one of the longer sides, roll dough into a spiral, pinching the dough together at the end to seal it.
  5. Cut the log in quarters, then each quarter into 3 slices. Place the rolls in the prepared pan and cover lightly with plastic wrap or a damp towel. Place in a warm area to rise for about an hour, or until puffed
  6. Bake for 20-22 minutes, until golden on top and centers no longer look doughy. Internal temperature should be about 195F / 90C.
Make the Glaze
  1. In a small bowl whisk together powdered sugar and lemon juice. It should be thin enough to drizzle but not too liquidy. Add more powdered sugar or lemon juice as needed.
  2. Drizzle warm rolls with glaze.

Notes

If you don't have a thermometer handy to know what 100 degrees is, simply warm until the milk feels quite warm, but not hot. It'll be fine!You can freeze these rolls once you have sliced them and put them in the pan. Once removed from the freezer allow to thaw and proceed as normal. When using a stand mixer to knead, I still recommend kneading it for a few minutes by hand afterwards. I find they are not always as thorough as kneading by hand and you want an even rise for your dough.

Nutrition Facts

Calories

355.58

Fat

6.43 g

Sat. Fat

0.88 g

Carbs

68.26 g

Fiber

2.37 g

Net carbs

65.89 g

Sugar

32.75 g

Protein

6.77 g

Sodium

121.93 mg

Cholesterol

32.58 mg

Nutritional information is approximate. Based on 1 roll.

Breakfast rolls, lemon raspberry
Breakfast, Dessert
American
Did you make this recipe?
Tag @jennyblogsandbakes on instagram and hashtag it #jennyblogs

Healthy Chocolate Chip Banana Cookies

Last updated September 27, 2024

image.jpg

What has chocolate and oats in it, tastes like a cookie, but is sneakily nutritious for you?  These cookies!  Yay for things that taste good and are healthy simultaneously.  And don't forget fun to make!  So many wins, I want to make these all over again.  Instead, I shall have just as much fun writing out the recipe for you.

These cookies make an excellent on the go snack or breakfast. They’re easily gluten-free if you use certified GF oats, dairy-free (just make sure your chocolate chips don’t have any dairy hiding in them), and vegan if you use a flax or chia seed egg! See recipe notes for how to make a flax egg.

All of the sweetness in these cookies comes from dates and banana, with a boost from the chocolate chips.

This post may contain affiliate links. If you make a purchase using these links, Jennyblogs may receive a small commission, at no extra cost to you. This helps to support Jennyblogs. For further information see the privacy policy. Grazie!

Recipe adapted from Veggies Don't Bite


Chocolate Chip Banana Cookies

Makes about 30 cookies

Ingredients:

image.jpg
  • 1 1/3 cups / 215g pitted dates (about 15 regular dates or 12 medjool)

  • 1/4 cup / 60g almond milk (or milk of choice)

  • 1/2 cup / 130g peanut butter

  • 1 small / 80g very ripe banana, mashed

  • 1 egg

  • 1 1/2 tsp / 7g vanilla extract

  • 1 cup / 80g rolled oats

  • 1/2 tsp baking soda

  • 1/2 tsp salt

  • 2 cups / 340g semi-sweet chocolate chips

  • 1/2 cup / 62g chopped pecans (optional)

Directions:

Preheat oven to 350°F / 177°C. Prepare 1 or 2 cookie sheets lined with parchment paper or silpat.

  1. In a food processor, blend dates until very finely chopped.  Slowly add milk and continue to blend until a smooth paste forms.  (Be careful adding the milk as it may splatter; food processors aren’t always splatter proof.) 

  2. Add peanut butter, banana, egg, and vanilla to the date paste and mix well. 

  3. In a separate bowl whisk together oats, baking soda, and salt.  Add to date mixture.

  4. Stir in chocolate chips and pecans just until combined.  Refrigerate dough for 15 minutes. 

  5. Drop by spoonful onto prepared cookie sheets and bake for 12-15 minutes until edges start to turn lightly golden.  Allow cookies to cool and set a bit before removing from pan. 

Jenny's Notes:

  • These can easily be made vegan, dairy and/or gluten-free: Make a flax egg instead of a normal egg by adding 1 Tbsp ground flax seeds to 3 Tbsp water, use vegan chocolate chips (usually this means just making sure there is no dairy), use certified GF oats and vanilla extract.  Voila!  Now anyone can eat these delicious morsels. 

Healthy Chocolate Chip Banana Cookies
Yield 30
Author
Prep time
15 Min
Cook time
15 Min
Inactive time
15 Min
Total time
45 Min

Healthy Chocolate Chip Banana Cookies

Chocolate Chip Banana Cookies loaded with oats, peanut butter, chocolate chips, and pecans are easily made vegan, gluten-free, dairy-free, egg-free! Most of the sweetness comes from dates and banana.
Cook modePrevent screen from turning off

Ingredients

Instructions

  1. Preheat oven to 350°F / 177°C. Prepare 1 or 2 cookie sheets lined with parchment paper or silpat.
  2. In a food processor, blend dates until very finely chopped. Slowly add milk and continue to blend until a smooth paste forms. (Be careful adding the milk as it may splatter; food processors aren’t always splatter proof.)
  3. Add peanut butter, banana, egg, and vanilla to the date paste and mix well.
  4. In a separate bowl whisk together oats, baking soda, and salt. Add to date mixture.
  5. Stir in chocolate chips and pecans just until combined. Refrigerate dough for 15 minutes.
  6. Drop by spoonful onto prepared cookie sheets and bake for 12-15 minutes until edges start to turn lightly golden. Allow cookies to cool and set a bit before removing from pan.

Notes

These can easily be made vegan, dairy and/or gluten-free: Make a flax egg instead of a normal egg by adding 1 Tbsp ground flax seeds to 3 Tbsp water, use vegan chocolate chips (usually this means just making sure there is no dairy), use certified GF oats and vanilla extract.  Voila!  Now anyone can eat these delicious morsels. 

Nutrition Facts

Calories

130.36

Fat

7.42 g

Sat. Fat

2.64 g

Carbs

16.47 g

Fiber

2.03 g

Net carbs

14.43 g

Sugar

11.53 g

Protein

2.39 g

Sodium

84.40 mg

Cholesterol

6.20 mg

Nutritional information is approximate; based on 30 serving, includes pecans.

chunky monkey cookies, vegan, dairy free, gluten free, egg free, refined sugar free, chocolate chip banana cookies, healthy
dessert, cookies
American
Did you make this recipe?
Tag @jennyblogsandbakes on instagram and hashtag it #jennyblogs
image.jpg

Baked Egg Baguettes

Last Updated September 15, 2024

Happiness is, a good piece of bread and a stairway in Paris.

"How can you tell how good bread is without tasting it? Not the smell, not the look, but the sound of the crust. Listen. [bread crackles] Oh, symphony of crackle. Only great bread sound this way."             - Colette, Ratatouille

Disclaimer: This is not a bread recipe, but it involves using your favorite crusty bread...think baguettes, with their wonderful crisp outside, soft and chewy inside...oh yes. I have not been everywhere in the world or tried all the bread, not even close, but of the places I have been, France has the best bread.  And pastries.  And butter.  And lots of other things.  The best part?  You can go to just about any bakery, even the world renowned, and never pay more than 1.50 euro.  That's less than $2 for the world's best bread.  Unfortunately I'm not in France right now, so a package of demi-baguettes will have to do for this recipe. 

This post may contain affiliate links. If you make a purchase using these links, Jennyblogs may receive a small commission, at no extra cost to you. This helps to support Jennyblogs. For further information see the privacy policy. Grazie!

Recipe adapted from Spoon Fork Bacon


Baked Egg Baguettes

Serves 4-8 (depending on if you want to eat a whole mini baguette or cut them in half)

Ingredients:

  • 4 demi-baguettes

  • 5 eggs

  • 1/3 cup / 79g milk

  • 1/4 small white onion, diced

  • 2-3 green onions, chopped

  • 3 oz / 85g smoked Gouda cheese, shredded

  • salt and pepper, to taste

Directions:

Oven preheated to 350°F / 177°C

  1. Cut out the middle of each baguette, making a V shape, like a canoe shape. 

  2. Whisk together eggs and milk, beating lightly.  Add in onion, green onion, and half of the cheese.  Lightly salt and pepper.  Divide evenly among the baguettes.  Top each with the remaining cheese. 

  3. Place on a baking sheet or dish and bake for 20-25 minutes, until golden and the center is set and slightly puffed up.  Allow to cool for a few minutes, then slice and serve. 

Jenny's Notes:

  • This is a very quick and easy recipe to execute!  You can add or adjust the add-ins as you wish.  I also enjoy adding chopped spinach, mushrooms, diced red or green onion, or sun-dried tomatoes. 

  • Substitute the smoked gouda with any of your favorite cheeses!

Baked Egg Baguettes
Yield 4-8
Author
Prep time
20 Min
Cook time
25 Min
Total time
45 Min

Baked Egg Baguettes

Hollowed out baguettes filled and baked with cheesy eggs and onions, easy to make and delicious for breakfast or anytime!
Cook modePrevent screen from turning off

Ingredients

Instructions

  1. Oven preheated to 350°F / 177°C
  2. Cut out the middle of each baguette, making a V shape, like a canoe shape.
  3. Whisk together eggs and milk, beating lightly. Add in onion, green onion, and half of the cheese. Lightly salt and pepper. Divide evenly among the baguettes. Top each with the remaining cheese.
  4. Place on a baking sheet or dish and bake for 20-25 minutes, until golden and the center is set and slightly puffed up. Allow to cool for a few minutes, then slice and serve.

Notes

  • This is a very quick and easy recipe to execute!  You can add or adjust the add-ins as you wish.  I also enjoy adding chopped spinach, mushrooms, diced red or green onion, or sun-dried tomatoes. 
  • Substitute the smoked gouda with any of your favorite cheeses!

Nutrition Facts

Calories

730.69

Fat

18.57 g

Sat. Fat

7.2 g

Carbs

123.02 g

Fiber

5.53 g

Net carbs

117.5 g

Sugar

13.74 g

Protein

36.81 g

Sodium

1854.79 mg

Cholesterol

231.28 mg

Nutritional information is approximate, based on eating 1 whole demi-baguette.

baked egg boats, egg bake, make ahead breakfast
breakfast, brunch
American
Did you make this recipe?
Tag @jennyblogsandbakes on instagram and hashtag it #jennyblogs

Banana Coconut Breakfast Cookies

Last Updated July 23, 2024

Do you like cookies? Would you like to eat cookies for breakfast, or anytime? Then these cookies are for you, because they’re delicious and also healthy!

These Coconut Banana Breakfast Cookies have no refined sugar. Think bananas, coconut, pecans, and apricots with a light touch of maple syrup and oats. Of course, I practically just gave you the whole ingredient list so let's just get baking, shall we?? 

This post may contain affiliate links. If you make a purchase using these links, Jennyblogs may receive a small commission, at no extra cost to you. This helps to support Jennyblogs. Where possible, links are prioritized to ethically and responsibly made items, small businesses, and where applicable, American companies and products made in the USA for American readers. For further information see the privacy policy. Grazie!


Banana Coconut Breakfast Cookies

Makes about 15 cookies

Ingredients:

  • 1 1/2 cups / 135g quick oats

  • 1 cup / 80g unsweetened flaked or shredded coconut

  • 2/3 cup / 66g pecan halves, coarsely chopped

  • 1/4 cup / 35g almonds, coarsely chopped

  • 1 Tbsp / 10g flax seeds

  • 1/2 tsp salt

  • 1/2 cup / 65g dried apricots, chopped

  • 3 / 300g very ripe bananas, mashed

  • 1/4 cup / 56g coconut oil, melted

  • 1 Tbsp / 20g maple syrup

  • 1 tsp / 5g vanilla extract

Directions:

Oven 350°F / 177°C

  1. In a medium bowl, stir together oats, coconut, pecans, flax, salt, and apricots. Add bananas, coconut oil, maple syrup, and vanilla until combined. 

  2. Spoon generous mounds onto a baking sheet lined with parchment paper or silpat

  3. Bake 23-25 minutes, until lightly golden. 

Jenny's Notes:

  • Recipes like this are great because they can be so easily adapted to your tastes, or simply to change it up.  Feel free to use any kind of nuts you wish, or a combination of several, change up the dried fruit, or use honey instead of maple syrup.  I recommend also trying dried blueberries and dried cherries!

  • You can use rolled oats for these cookies in place of the quick oats. I've found that in most recipes the different kind of oats can be interchanged without affecting the quality of your product. Just keep in mind that rolled oats are slightly less absorbent than quick oats, so you may need to add slightly more.

Banana Coconut Breakfast Cookies
Yield 15
Author
Prep time
20 Min
Cook time
25 Min
Total time
45 Min

Banana Coconut Breakfast Cookies

Healthy cookies made with bananas, coconut, nuts, seeds, and fruit, and sweetened with maple syrup. Excellent for breakfast, dessert, or anytime snack! Gluten free, dairy free, vegan, and refined sugar free.
Cook modePrevent screen from turning off

Ingredients

Instructions

  1. Oven 350°F / 177°C
  2. In a medium bowl, stir together oats, coconut, pecans, flax, salt, and apricots. Add bananas, coconut oil, maple syrup, and vanilla until combined.
  3. Spoon generous mounds onto a baking sheet lined with parchment paper or silpat.
  4. Bake 23-25 minutes, until lightly golden.

Notes

  • Recipes like this are great because they can be so easily adapted to your tastes, or simply to change it up.  Feel free to use any kind of nuts you wish, or a combination of several, change up the dried fruit, or use honey instead of maple syrup.  I recommend also trying dried blueberries and dried cherries!
  • You can use either quick oats or rolled oats for these cookies. I've found that in most recipes the different kind of oats can be interchanged without affecting the quality of your product. Just keep in mind that rolled oats are slightly less absorbent than quick oats, so if using rolled oats, you may need to add slightly more.

Nutrition Facts

Calories

145.27

Fat

8.24 g

Sat. Fat

3.68 g

Carbs

17.02 g

Fiber

2.36 g

Net carbs

14.68 g

Sugar

6.6 g

Protein

3.19 g

Sodium

79.49 mg

Cholesterol

0 mg

Nutritional information is approximate and based on 1 cookie if recipe makes 15 cookies.

healthy cookies, vegan, gluten free, dairy free, refined sugar free, breakfast cookies
dessert, breakfast
American
Did you make this recipe?
Tag @jennyblogsandbakes on instagram and hashtag it #jennyblogs

Some raisins snuck into these ones


Coffee Pancakes with Mocha Syrup

I got a little chocolate drizzle happy.  Not to mention this was a time sensitive photo, the first whipped cream mound melted and slipped off the back due to the hot and delicious nature of the pancakes.  Pictured here, whipped cream mound…

I got a little chocolate drizzle happy.  Not to mention this was a time sensitive photo, the first whipped cream mound melted and slipped off the back due to the hot and delicious nature of the pancakes.  Pictured here, whipped cream mound take 2. 

Some mornings just call for pancakes, and not just any pancakes: pancakes that involve coffee, chocolate, and whipped cream.

Enter, these pancakes. They’re made with some espresso powder and served with a homemade mocha syrup and freshly whipped cream. They’re delicious and decadent and more like dessert posing as breakfast!

These are the pancakes you turn to when it’s your birthday, when you want to make someone breakfast in bed, or you just want an excuse to have dessert for breakfast. Breakfast and dessert are my favorite meals, so why not combine them??

Americans are big on oatmeal, cereal, or starting your day with a big protein like eggs and sausage or bacon. While I often eat oatmeal for breakfast, I really love the Italian rhythm of waking up to a fresh pastry and a cappuccino, no guilt. As someone who really loves their sweets, I appreciate the excitement of waking up to a breakfast I’m looking forward to. A sweet breakfast also tends to help me eat less sweet things throughout the day.

Are you convinced yet of the beauty of starting your day with something sweet? Alright! Chocolate and coffee in pancakes, let’s go!

Coffee Pancakes with Mocha Syrup

Makes 2-3 servings (6-8 pancakes)

Ingredients:

Mocha Syrup

Make this first so it has time to cool and your pancakes don't get cold!

  • 1/4 cup sugar

  • 2 Tbsp cocoa powder

  • 1 tsp corn starch

  • 2 Tbsp strong brewed coffee

  • 1 tsp vanilla extract

Combine all ingredients except vanilla in small saucepan.  Cook over medium heat, stirring constantly, until boiling.  Reduce heat to low and boil for 5 minutes.

Remove from heat and add vanilla.  Allow to cool while you make the pancakes.  Store leftovers in the fridge for up to 1 month.  Sugar is a wonderful preservative.  I'm going to live so long. 

Whipped Cream

  • 1/2 cup heavy whipping cream

  • 2 Tbsp granulated sugar

  • 1/2 tsp vanilla extract

In the bowl of a stand mixer or with a hand held mixer, beat cream until soft peaks form.  Add sugar and vanilla, beat until stiff peaks appear.

Coffee Pancakes

Make these last so they will be nice and hot when you serve them!

  • 1 1/4 cups all-purpose flour

  • 1 Tbsp baking powder

  • 1 Tbsp sugar

  • 1/2 tsp salt

  • 2 tsp ground espresso, or freshly ground coffee (sometimes I use the contents of a Nespresso capsule)

  • 1 egg

  • 1 cup milk of choice, or water

  • 2 Tbsp oil of choice, or melted butter or coconut oil

  • 1 tsp vanilla extract

Directions:

Preheat lightly greased griddle or pan to 350 Fahrenheit.

In a medium bowl whisk together flour, baking powder, sugar, salt, and ground espresso. 

Make a well in the center of the dry ingredients and add the egg, milk, oil, and vanilla.  Stir until just moistened, some lumps will remain.  If you prefer thinner pancakes, you may add more milk.  Allow to sit for a few minutes.

Pour about 1/4 cup of batter onto hot griddle, allow to cook 1-2 minutes on each side, either until light golden-brown or when the air bubbles pop, but don't fill in immediately.  If the first pancakes seem too thick or too thin, add more milk or flour, respectively, until desired consistency is reached.  Repeat with remaining batter. 

Any leftover batter or pancakes can be stored in the refrigerator for about 1-2 days.  They can be reheated on the griddle or pan, microwave (boo), or my favorite way, the toaster. 

Assembly:

Place pancakes on a plate.  If desired, butter each pancake.  Drizzle generously with mocha syrup and top with copious amounts of whipped cream. And maybe drizzle with more syrup.  Don't forgot a complementary cup of coffee.  Complementary as in it goes with it nicely, not I'm giving you a complimentary cup of coffee.  I would totally give you a free cup of coffee, but, you're reading a blog right now, and this is only 2016.  Maybe by 2038 when Leslie Knope is President, I can send you coffee over the interwebs. 

Adapted from Pastry Affair

And Happy Good Friday.  This morning I kept thinking to myself "Black Friday" but that is quite the opposite of what today is.  No consumerism today.  A day to reflect on Jesus as He took our place on the cross.  The least deserving and only perfect man to walk the earth, bearing the wrath and punishment of separation from God the Father so that we might never have to.  Instead, He cloaks us in His righteousness so that we might receive the love of the Father freely.  Hallelujah, what a Savior.