Cozy Lentil Curry

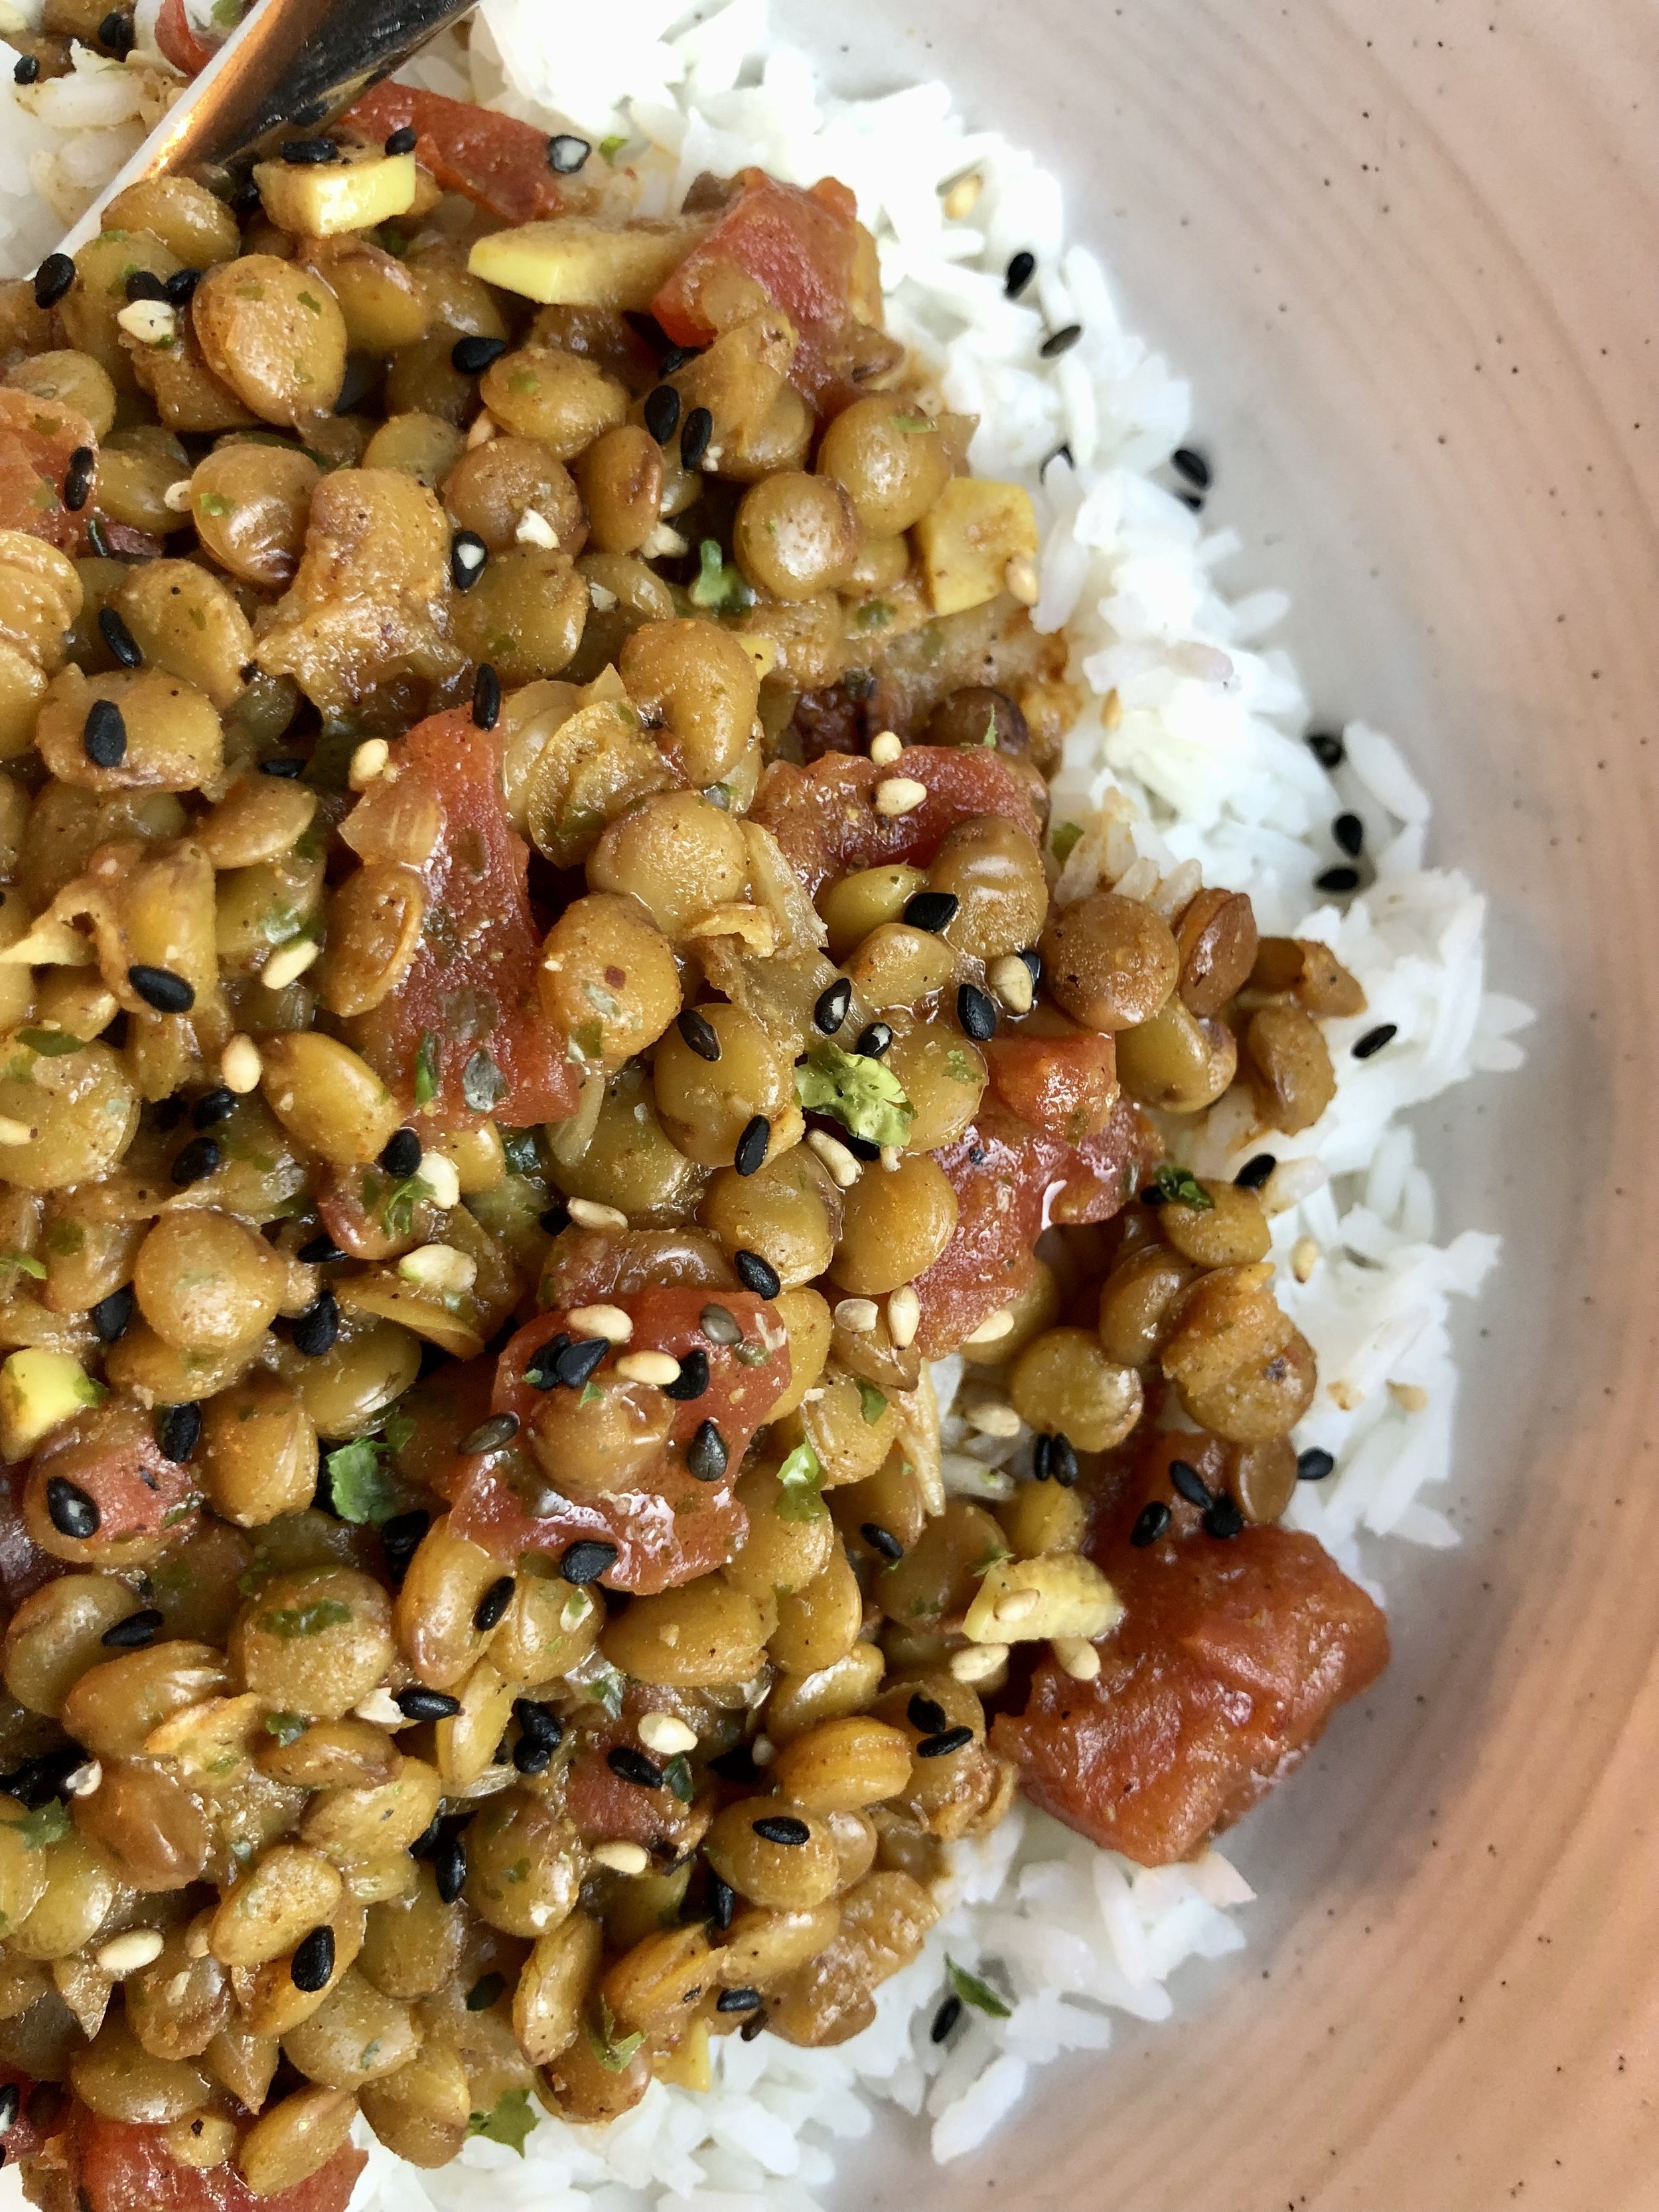
Cozy lentils cooked to perfection with flavors of ginger, garlic, and curry, served over rice. Easy, nutritious, and filling for when you want a comforting meal.

Something about August sits different. It’s still summer, yet somehow, inexplicably, you can feel that maybe before you’re ready, fall will be here. School starting, shorter evenings, cooler weather. Curries are one of my favorite cozy weather dishes. They’re easy to make and there are so many! While I love summer and all the summer no-cook or grilled dishes that go along with the season, I do start to miss cooking and hearty dishes. Those hot days where it’s too hot to turn on the oven are hard on me! Michigan summers are mild compared to Florentine summers, but I was still excited that this week held some cooler days that felt perfect for this lentil curry with rice.

I first started making this curry in Florence, I think it was during 2020 and have been making it regularly ever since. I love to add spinach to get in some vegetables, and I would often make it in a crockpot while also adding rice and more water straight to the crockpot; curried lentils and rice all cooked up together!

A note about ground coriander

While most of the ingredients in this recipe would be considered pantry staples, the biggest exception for me would be ground coriander. (Coconut milk might not be a staple for everyone, but if you make Asian dishes frequently it is!!) Now, a little pet peeve of mine is recipes that sound wonderful but call for one or more obscure ingredients that are “essential”, but also ones you’ll never use again. You know what I’m talking about, right? Well, normally I would be tempted to skip or find a substitute for ground coriander since that has never been a spice I’ve really used. The first time I made this recipe I somehow had coriander seeds in a spice grinder. It was a labor of love to hand grind 1 1/2 tsps, but I was surprised at how good it was! It’s not that you can taste the coriander itself, but the one time I didn’t have enough I could actually tell and missed the depth of flavor it lended. Bottom line, you can make this curry without it, but if you plan on making this again I would get yourself a bottle of ground coriander!

This post may contain affiliate links. If you make a purchase using these links, Jennyblogs may receive a small commission, at no extra cost to you. This helps to support Jennyblogs. Where possible, links are prioritized to small businesses and ethically and responsibly made items. For further information see the privacy policy. Grazie!

Recipe adapted from Janet’s Munch Meals


Cozy Lentil Curry

Serves 4-6

Ingredients:

  • 1 Tbsp oil

  • 1 onion or shallot, diced small

  • 4 garlic cloves, minced

  • 1 Tbsp grated fresh ginger

  • 1 Tbsp curry powder

  • 1 Tbsp cumin

  • 2 tsp chili powder or paprika

  • 1 1/2 tsp ground coriander

  • 1 cup / 210g dry lentils

  • 1 (15 oz) can diced or crushed tomatoes

  • 1 (14 oz) can coconut milk

  • 2 cups / 474g vegetable broth or water

  • salt and pepper to taste

  • Several handfuls of spinach, 100-200g spinach, finely chopped, optional

  • Rice, cilantro, red pepper flakes, sesame seeds, for serving, optional

Directions:

  1. Heat oil in a large pot over medium heat. Add onion and cook for several minutes, until translucent.

  2. Add garlic, ginger, curry, cumin, chili powder, and coriander and cook for about 3 minutes, until toasted and fragrant.

  3. Add lentils, tomatoes, coconut milk, broth, salt and pepper, and bring to a boil.

  4. Lower heat, cover, and allow to simmer for 25-30 minutes or until lentils are tender, stirring occasionally. Add more liquid at any point, if necessary.

  5. Stir in spinach and cook for another minute or two.

  6. Serve over rice with cilantro and red pepper flakes, as desired.

Jenny’s Notes:

  • This lentil curry can also be made in a crockpot: Place all ingredients in crockpot and stir. Cook on high for 4 hours or low for 8 hours, or until lentils are tender, stirring occasionally and adding any extra liquid as necessary.

Cozy Lentil Curry
Yield 4-6
Author
Prep time
5 Min
Cook time
45 Min
Total time
50 Min

Cozy Lentil Curry

Cozy lentils cooked to perfection with flavors of curry, ginger, and garlic, served over rice for a meal that is quick, nutritious, filling, and easy on the budget!
Cook modePrevent screen from turning off

Ingredients

Instructions

  1. Heat oil in a large pot over medium heat. Add onion and cook for several minutes, until translucent.
  2. Add garlic, ginger, curry, cumin, chili powder, and coriander and cook for about 3 minutes, until toasted and fragrant.
  3. Add lentils, tomatoes, coconut milk, broth, salt and pepper, and bring to a boil.
  4. Lower heat, cover, and allow to simmer for 25-30 minutes or until lentils are tender, stirring occasionally. Add more liquid at any point, if necessary.
  5. Stir in spinach and cook for another minute or two.
  6. Serve over rice with cilantro and red pepper flakes, as desired.

Notes

  • This lentil curry can also be made in a crockpot: Place all ingredients in crockpot and stir. Cook on high for 4 hours or low for 8 hours, or until lentils are tender, stirring occasionally and adding any extra liquid as necessary.

Nutrition Facts

Calories

497.79

Fat

29.02 g

Sat. Fat

21.57 g

Carbs

48.62 g

Fiber

20.69 g

Net carbs

27.95 g

Sugar

10.59 g

Protein

17.68 g

Sodium

705.08 mg

Cholesterol

0 mg

Nutritional information is approximate. Based on 4 servings, not including rice.

curried lentils, vegetarian, vegan, cheap meals, budget meals, curry
dinner
Asian
Did you make this recipe?
Tag @jennyblogsandbakes on instagram and hashtag it #jennyblogs

Jenny's Favorite Cinnamon Rolls

Last updated: June 4, 2024

With all the cinnamon roll recipes out there, how do you pick which one to make? Which one do you adopt as your cinnamon roll recipe?

I’ve made my fair share of cinnamon roll recipes, and I’ve yet to meet a bad one. Some are better than others, but I’ve been waiting to meet the recipe that stood out from the rest.

Lightning struck when I tried this recipe from King Arthur, “Perfectly Pillowy Cinnamon Rolls”. I had met the one! As the title suggests, these rolls are pillowy, luxurious, and everything you could want from a cinnamon roll.

What makes a good cinnamon roll recipe?

The thing that really makes one cinnamon roll stand out from another is the actual dough.

Filling and frosting are easily adjusted, so once you find a cinnamon roll with a soft, fluffy, and luscious dough, you can always adjust filling and frosting according to your taste.

What makes this recipe so special?

Speaking of customizing, how about for those who do and do not want frosting? And those who can’t wait to dig in. :)

  1. This cinnamon roll dough is just the best. Why? It utilizes the tangzhong technique (see below). This creates softer, pillowy bread that stays fresher for longer!
  2. This recipe also allows you to customize your icing: do your prefer plain icing or cream cheese icing? This recipe gives an easy access to either one. Plus, if you use buttermilk in the frosting, it’s the touch that sweet icing has been missing.

  3. You can customize the richness of these rolls!

    For richer rolls:

    • Add extra cinnamon to the filling

    • Drizzle each roll with 1 tsp of milk or heavy cream before baking for extra gooey rolls

    • Cover rolls with tinfoil for the first half of baking (baking time may need to be adjusted)

    • brush the rolls with melted butter when they come out of the oven, before icing

What is Tangzhong?

This recipe utilizes tangzhong in the dough, an Asian bread method that involves cooking some of the milk and flour to create a thick paste before adding it in with the rest of the ingredients. In essence, it creates a softer bread that retains its moisture for longer. Cinnamon rolls are usually best consumed the same day they are baked, but when you use this simple tangzhong method, they are still pretty darn soft and luscious even a day or two later! If you’re interested in learning more of the science-y stuff behind how and why tangzhong works, King Arthur themselves wrote this handy article on it.

While you might be thinking that cinnamon rolls are already a multi-step process and don’t need another one, may I say, what’s one more? Tangzhong DOES create an extra step, but it’s very simple. It involves 2 ingredients and takes less than 5 minutes for cinnamon rolls that stay fresh for hours, even days longer than standard cinnamon rolls. I think it’s totally worth it!

I heart King Arthur, now you heart King Arthur, we all heart King Arthur!

I originally kept this recipe largely the same with just a few minor tweaks to King Arthur’s recipe, but I’ve continued to make adjustments to streamline the recipe. Beyond that, there are a few customizable elements depending on just how rich and luscious you like your cinnamon rolls. Some of these are things I gathered from cinnamon roll recipes I’ve made in the past; others are little tricks I’ve seen bakeries use. Put them all together to make your ultimate cinnamon roll.

Create New Flavors

Lime Rolls: Trying to take photos on my laundry rack outside…our apartment in Incisa Valdarno had very poor lighting for any kind of photography.

This recipe is also a wonderful base to change up the flavors, you don’t always have to stick with cinnamon rolls. I’ve used this recipe to make Lime Rolls (think lime dough with a sweet lime filling and zingy lime icing), and they were WONDERFUL. I’ve also made Lemon Rolls, and am thinking about making Orange Rolls next time. Yum!

Enough about the tangzhong and how wonderful this recipe is and how many different things you can do with it, I like the recipe to speak for itself. :)

This post may contain affiliate links. If you make a purchase using these links, Jennyblogs may receive a small commission, at no extra cost to you. This helps to support Jennyblogs. For further information see the privacy policy. Grazie!

Recipe adapted from King Arthur


Cinnamon Rolls

Makes 12 large cinnamon rolls

Ingredients

For the Tangzhong:

  • 3/4 cup / 170g milk

  • 5 Tbsp / 40g bread flour

For the Dough:

  • 1 cup / 237g milk

  • 3 3/4 cup / 450g bread flour

  • 1 1/2 tsp / 9g salt

  • 3 Tbsp / 37g sugar

  • 1 Tbsp / 9g instant yeast

  • 6 Tbsp / 85g softened butter

  • 1/2 cup / about 100g sourdough discard, optional

For the Filling:

  • 2 Tbsp / 28g softened butter

  • 3/4 cup / 150g brown sugar

  • 4 1/2 tsp / 12g cinnamon

For the Icing:

  • 2 1/4 cup / 280g powdered sugar

  • 4 oz / 113g cream cheese, softened, optional

  • 2 Tbsp / 28g butter, melted

  • 1 tsp / 5g vanilla extract

  • 2-3 Tbsp milk, heavy cream, or buttermilk

Directions

Oven 375°F / 190°C 9x13inch / 23x33cm rectangle baking dish, lightly greased, OR jelly roll pan or cookie sheet lined with parchment paper or silicone baking mat

Make the Tangzhong:

  1. In a small pan, whisk flour and milk together until no lumps remain. Place over medium heat and cook, stirring often, until thickened into a paste-like texture. This could take just a couple minutes or more, depending on your burner.

  2. Set aside for a moment to cool.

Make the Dough:

  1. Add all dough ingredients to the bowl of a stand mixer or other large bowl. Add in the warm (but not too hot) tangzhong. If using sourdough discard, you may find you need a small additional amount of flour to make the dough not overly sticky.

  2. Knead with the dough attachment in the stand mixer for about 10 minutes or longer by hand, until dough is elastic and passes the window pane test.

  3. Shape dough into a ball and place in a lightly oiled bowl and cover. Let rise in a warm place for 1 - 1.5 hours, or until roughly doubled in size.

Make the Filling:

  1. When the dough has risen, punch down and dump out onto a floured surface. Roll the dough into a roughly 10x12in / 25x30cm rectangle, about 0.5in / 1.25cm thick. Do your best to roll or pat into a rectangle and not an oval.

  2. Evenly spread butter over dough, leaving about 0.5in / 1.25cm uncovered along the edge of one of the long sides. Sprinkle brown sugar and cinnamon evenly over butter. Press gently into dough. Carefully roll the dough up, starting with the opposite long side. Use the uncovered edge to help seal the roll; you can gently roll it back and forth with the seam down to help seal it.

  3. Using a sharp serrated knife or dental floss, cut the roll into 12 pieces. Place each piece in prepared baking dish, or free standing on a cookie sheet or jelly roll pan, spaced evenly apart.

  4. Lightly cover the rolls and let rise in a warm place until risen and puffy, about 30-60 minutes. Partway through this time, preheat your oven to 375°/190°C.

  5. Bake rolls for about 14-18 minutes or until internal temperature of an outer roll reads 185°F / 85°C.

  6. Allow rolls to cool for at least 10 minutes before icing.

Make the Icing:

  1. In a medium bowl or the bowl of a stand mixer fitted with the paddle, mix all icing ingredients together except milk until smooth. Add milk, 1 Tbsp at a time, until desired icing consistency is reached.

  2. Spread icing evenly over rolls.

Jenny’s Notes

  1. When making bread, you are often instructed to add warm (about 110°F / 43°C) liquids to your dough. This helps to activate the yeast and thus rise your dough. If you add cold liquids your yeast may remain dormant and not do much. In this recipe, the milk doesn’t have to be warm, you can add it cold since it will offset the heat from the tangzhong that was cooked. Don’t add the tangzhong straight from the hot stove into the bowl with your yeast and other ingredients, as the heat could kill the yeast, but the time it takes to assemble the other dough ingredients in the bowl should be sufficient time for the tangzhong to cool down. Then the cold milk helps, too.

  2. The best way to ensure properly cooked cinnamon rolls (or anything!) is by taking an internal temperature. One of top used kitchen tools is my Thermapen, and I highly recommend one to you. You can find similar on Amazon.

  3. My favorite icing for cinnamon rolls is cream cheese. Either way you go, I highly recommend using buttermilk in the icing rather than milk. The tang offsets the very sweet icing really, really well.

  4. The window pane test, which is my go-to for kneaded doughs, is essentially taking a small chunk of dough and stretching it into an even little square, then stretching the dough until it is very thin. If the dough begins to break, not enough gluten has developed and needs to be kneaded more. A dough that has been sufficiently kneaded will stretch very thin, thin enough you could almost see through it, and, if held up to a window, can see light through it, hence the name of this technique.

  5. To facilitate cutting the rolls evenly, I like to use a knife or the floss to make marks in the dough before actually cutting. I start by making a mark in the middle, then another mark in the middle of each half, then marking each quarter into 3. If you want to be really precise, use a measuring tape in front of your roll. :)

  6. If you saw dental floss as a choice for cutting the roll and think that’s crazy, trust! It gives you a clean cut and is satisfying to use. Slide the floss under the roll where you want to cut, then pull the ends of the floss up and around the roll, pulling in opposite directions to slice the roll.

  7. If you don’t have dental floss or a sharp enough knife to cut the rolls without squishing them, you can put the rolls in the freezer for about 30 minutes until the dough is firmed up. This makes the cutting process neater and easier if you don’t have ideal tools at hand. You will then have to give a little more time in the rising process since the dough is cold.

  8. Inevitably your cut rolls with will vary slightly in size, the ones from the middle being more generous than the ones from the end. To ensure the most even baking, place the larger rolls on the outside or corners of your pan, the smaller ones toward the center.

  9. If making free standing cinnamon rolls, you’ll want to tuck the ends of the rolls underneath themselves, so you don’t have tails when they rise and are baked.

  10. I had never made free standing cinnamon rolls or any kind of roll like this until I found this recipe. It gives a little more freedom in what you can use in the baking process and I love that. You will have more perfectly shaped rolls, but baking together in a rectangle dish is easier if you want to freeze or transport the rolls.

  11. How to tell if your dough is risen enough, but not over risen? When gently pressed with a finger, the dough should slowly spring back. If it springs back immediately, it hasn’t risen enough. If it doesn’t spring back at all, it could be over-risen.

  12. These rolls freeze well! You have two options:

    1. Freeze once rolls are sliced and in their rectangle pan. Cover tightly and freeze. When ready to use, allow to come to room temperature and rise until puffy, continuing from step 5 in the “Make the Filling” section.

    2. Freeze once rolls are baked and cooled. Frosting is best done once rolls have come to room temperature (or even been warmed in the oven for a bit)

Jenny's Favorite Cinnamon Rolls
Yield 12
Author
Prep time
50 Min
Cook time
18 Min
Inactive time
2 H & 30 M
Total time
3 H & 38 M

Jenny's Favorite Cinnamon Rolls

Classic cinnamon rolls are taken to the next level with the use of the tangzhong technique. This creates extra fluffy, pillowy soft rolls that stay softer for longer. With a traditional cinnamon filling and customizable frosting, these too can become your favorite cinnamon rolls!

Ingredients

For the Tangzhong:
For the Dough:
For the Filling:
For the Icing:

Instructions

Make the Tangzhong:
  1. In a small pan, whisk flour and milk together until no lumps remain. Place over medium heat and cook, stirring often, until thickened into a paste-like texture. This could take just a couple minutes or more, depending on your burner.
  2. Set aside for a moment to cool.
Make the Dough:
  1. Add all dough ingredients to the bowl of a stand mixer or other large bowl. Add in the warm (but not too hot) tangzhong.
  2. Knead with the dough attachment in the stand mixer for about 10 minutes or longer by hand, until dough is elastic and passes the window pane test.
  3. Shape dough into a ball and place in a lightly oiled bowl and cover. Let rise in a warm place for 1 - 1.5 hours, or until roughly doubled in size.
Make the Filling:
  1. Oven 375°F / 190°C 9x13inch / 23x33cm rectangle baking dish, lightly greased, OR jelly roll pan or cookie sheet lined with parchment paper or silicone baking mat
  2. Combine all filling ingredients together in a small bowl, until a wet sand texture is achieved.
  3. When the dough has risen, punch down and dump out onto a floured surface. Roll the dough into a roughly 10x12in / 25x30cm rectangle, about 0.5in / 1.25cm thick. Do your best to roll or pat into a rectangle and not an oval.
  4. Evenly sprinkle filling over dough, leaving about 0.5in / 1.25cm uncovered along the edge of one of the long sides. Carefully roll the dough up, starting with the opposite long side. Use the uncovered edge to help seal the roll; you can gently roll it back and forth with the seam down to help seal it.
  5. Using a sharp serrated knife or dental floss, cut the roll into 12 pieces. Place each piece in the prepared pan, or free standing on a cookie sheet, spaced evenly apart.
  6. Lightly cover the rolls and let rise in a warm place until risen and puffy, about 30-60 minutes. Partway through this time you’ll want to preheat your oven to 375°/190°C.
  7. Bake rolls for about 14-18 minutes or until internal temperature of an outer roll reads 190°F / 88°C.
  8. Allow rolls to cool for about 10 minutes before icing.
Make the Icing:
  1. In a medium bowl or the bowl of a stand mixer fitted with the paddle, mix all icing ingredients together except milk until smooth. Add milk, 1 Tbsp at a time, until desired icing consistency is reached.
  2. Spread icing evenly over rolls.

Notes

  1. When making bread, you are often instructed to add warm (about 110°F / 43°C) liquids to your dough. This helps to activate the yeast and thus rise your dough. If you add cold liquids your yeast may remain dormant and not do much. In this recipe, you may notice the milk doesn’t have to be warm. In fact, you can add it cold since it will offset the heat from the tangzhong that was cooked. I wouldn’t add the tangzhong straight from the hot stove into the bowl with your yeast and other ingredients, as the heat could kill the yeast, but the time it takes to assemble the other dough ingredients in the bowl should be sufficient time for the tangzhong to cool down. Then the cold milk helps, too.
  2. The best way to ensure properly cooked cinnamon rolls (or anything!) is by taking an internal temperature. One of top used kitchen tools is my Thermapen, and I highly recommend one to you. You can find similar on Amazon.
  3. My favorite icing for cinnamon rolls is cream cheese, however this makes them that much richer and heavier, so I tend to go back and forth between making the icing with and without the cream cheese. Either way you go, I highly recommend using buttermilk in the icing rather than milk. The tang offsets the very sweet icing really, really well.
  4. The window pane test, which is my go-to for kneaded doughs, is essentially taking a small chunk of dough and stretching it into an even little square, then stretching the dough until it is very thin. If the dough begins to break, not enough gluten has developed and needs to be kneaded more. A dough that has been sufficiently kneaded will stretch very thin, thin enough you could almost see through it, and, if held up to a window, can see light through it, hence the name of this technique.
  5. To facilitate cutting the rolls evenly, I like to use a knife or the floss to make marks in the dough before actually cutting. I start by making a mark in the middle, then another mark in the middle of each half, then marking each quarter into 3. If you want to be really precise, use a measuring tape in front of your roll. :)
  6. If you saw dental floss as a choice for cutting the roll and think that’s crazy, trust! It actually gives you the cleanest cut and is satisfying to use. Slide the floss under the roll where you want to cut, then pull the ends of the floss up and around the roll, pulling in opposite directions to slice the roll.
  7. If you don’t have dental floss or a sharp enough knife to cut the rolls without squishing them, you can put the rolls in to the freezer for about 30 minutes until the dough is firmed up. This makes the cutting process neater and easier if you don’t have ideal tools at hand. You will then have to give a little more time in the rising process since the dough is cold.
  8. If you want extra gooey, rich cinnamon rolls:
  • Before baking, pour about 1 tsp of heavy cream over each roll.
  • After baking, brush rolls with 2 Tbsp of melted butter immediately after they come out of the oven. Then continue with cooling and icing.
  1. Inevitably your cut rolls with will vary slightly in size, the ones from the middle being more generous than the ones from the end. To ensure the most even baking, place the larger rolls on the outside or corners of your pan, the smaller ones toward the center.
  2. If making free standing cinnamon rolls, you’ll want to tuck the ends of the rolls underneath themselves, so you don’t have tails when they rise and are baked.
  3. I had never made free standing cinnamon rolls or any kind of roll like this until I found this recipe. It gives a little more freedom in what you can use in the baking process and I love that. You will have more perfectly shaped rolls, but baking together in a rectangle dish is easier if you want to freeze or transport the rolls.
  4. How to tell if your dough is risen enough, but not over risen? When gently pressed with a finger, the dough should slowly spring back. If it springs back immediately, it hasn’t risen enough. If it doesn’t spring back at all, it could be over-risen.
  5. These rolls freeze well! You have two options:
  6. Freeze once rolls are sliced and in their rectangle pan. Cover tightly and freeze. When ready to use, allow to come to room temperature and rise until puffy, continuing from step 5 in the “Make the Filling” section.
  7. Freeze once rolls are baked and cooled. Frosting is best done once rolls have come to room temperature (or even been warmed in the oven for a bit)


Nutrition Facts

Calories

459.97

Fat

15.91 g

Sat. Fat

9.5 g

Carbs

71.85 g

Fiber

1.8 g

Net carbs

70.06 g

Sugar

37.68 g

Protein

7.43 g

Sodium

416.6 mg

Cholesterol

42.79 mg

Nutritional information is approximate, based on 1 cinnamon roll with cream cheese frosting.

best ever cinnamon rolls, king arthur, cream cheese frosting, sourdough discard recipe
breakfast, bread
American
Did you make this recipe?
Tag @jennyblogsandbakes on instagram and hashtag it #jennyblogs

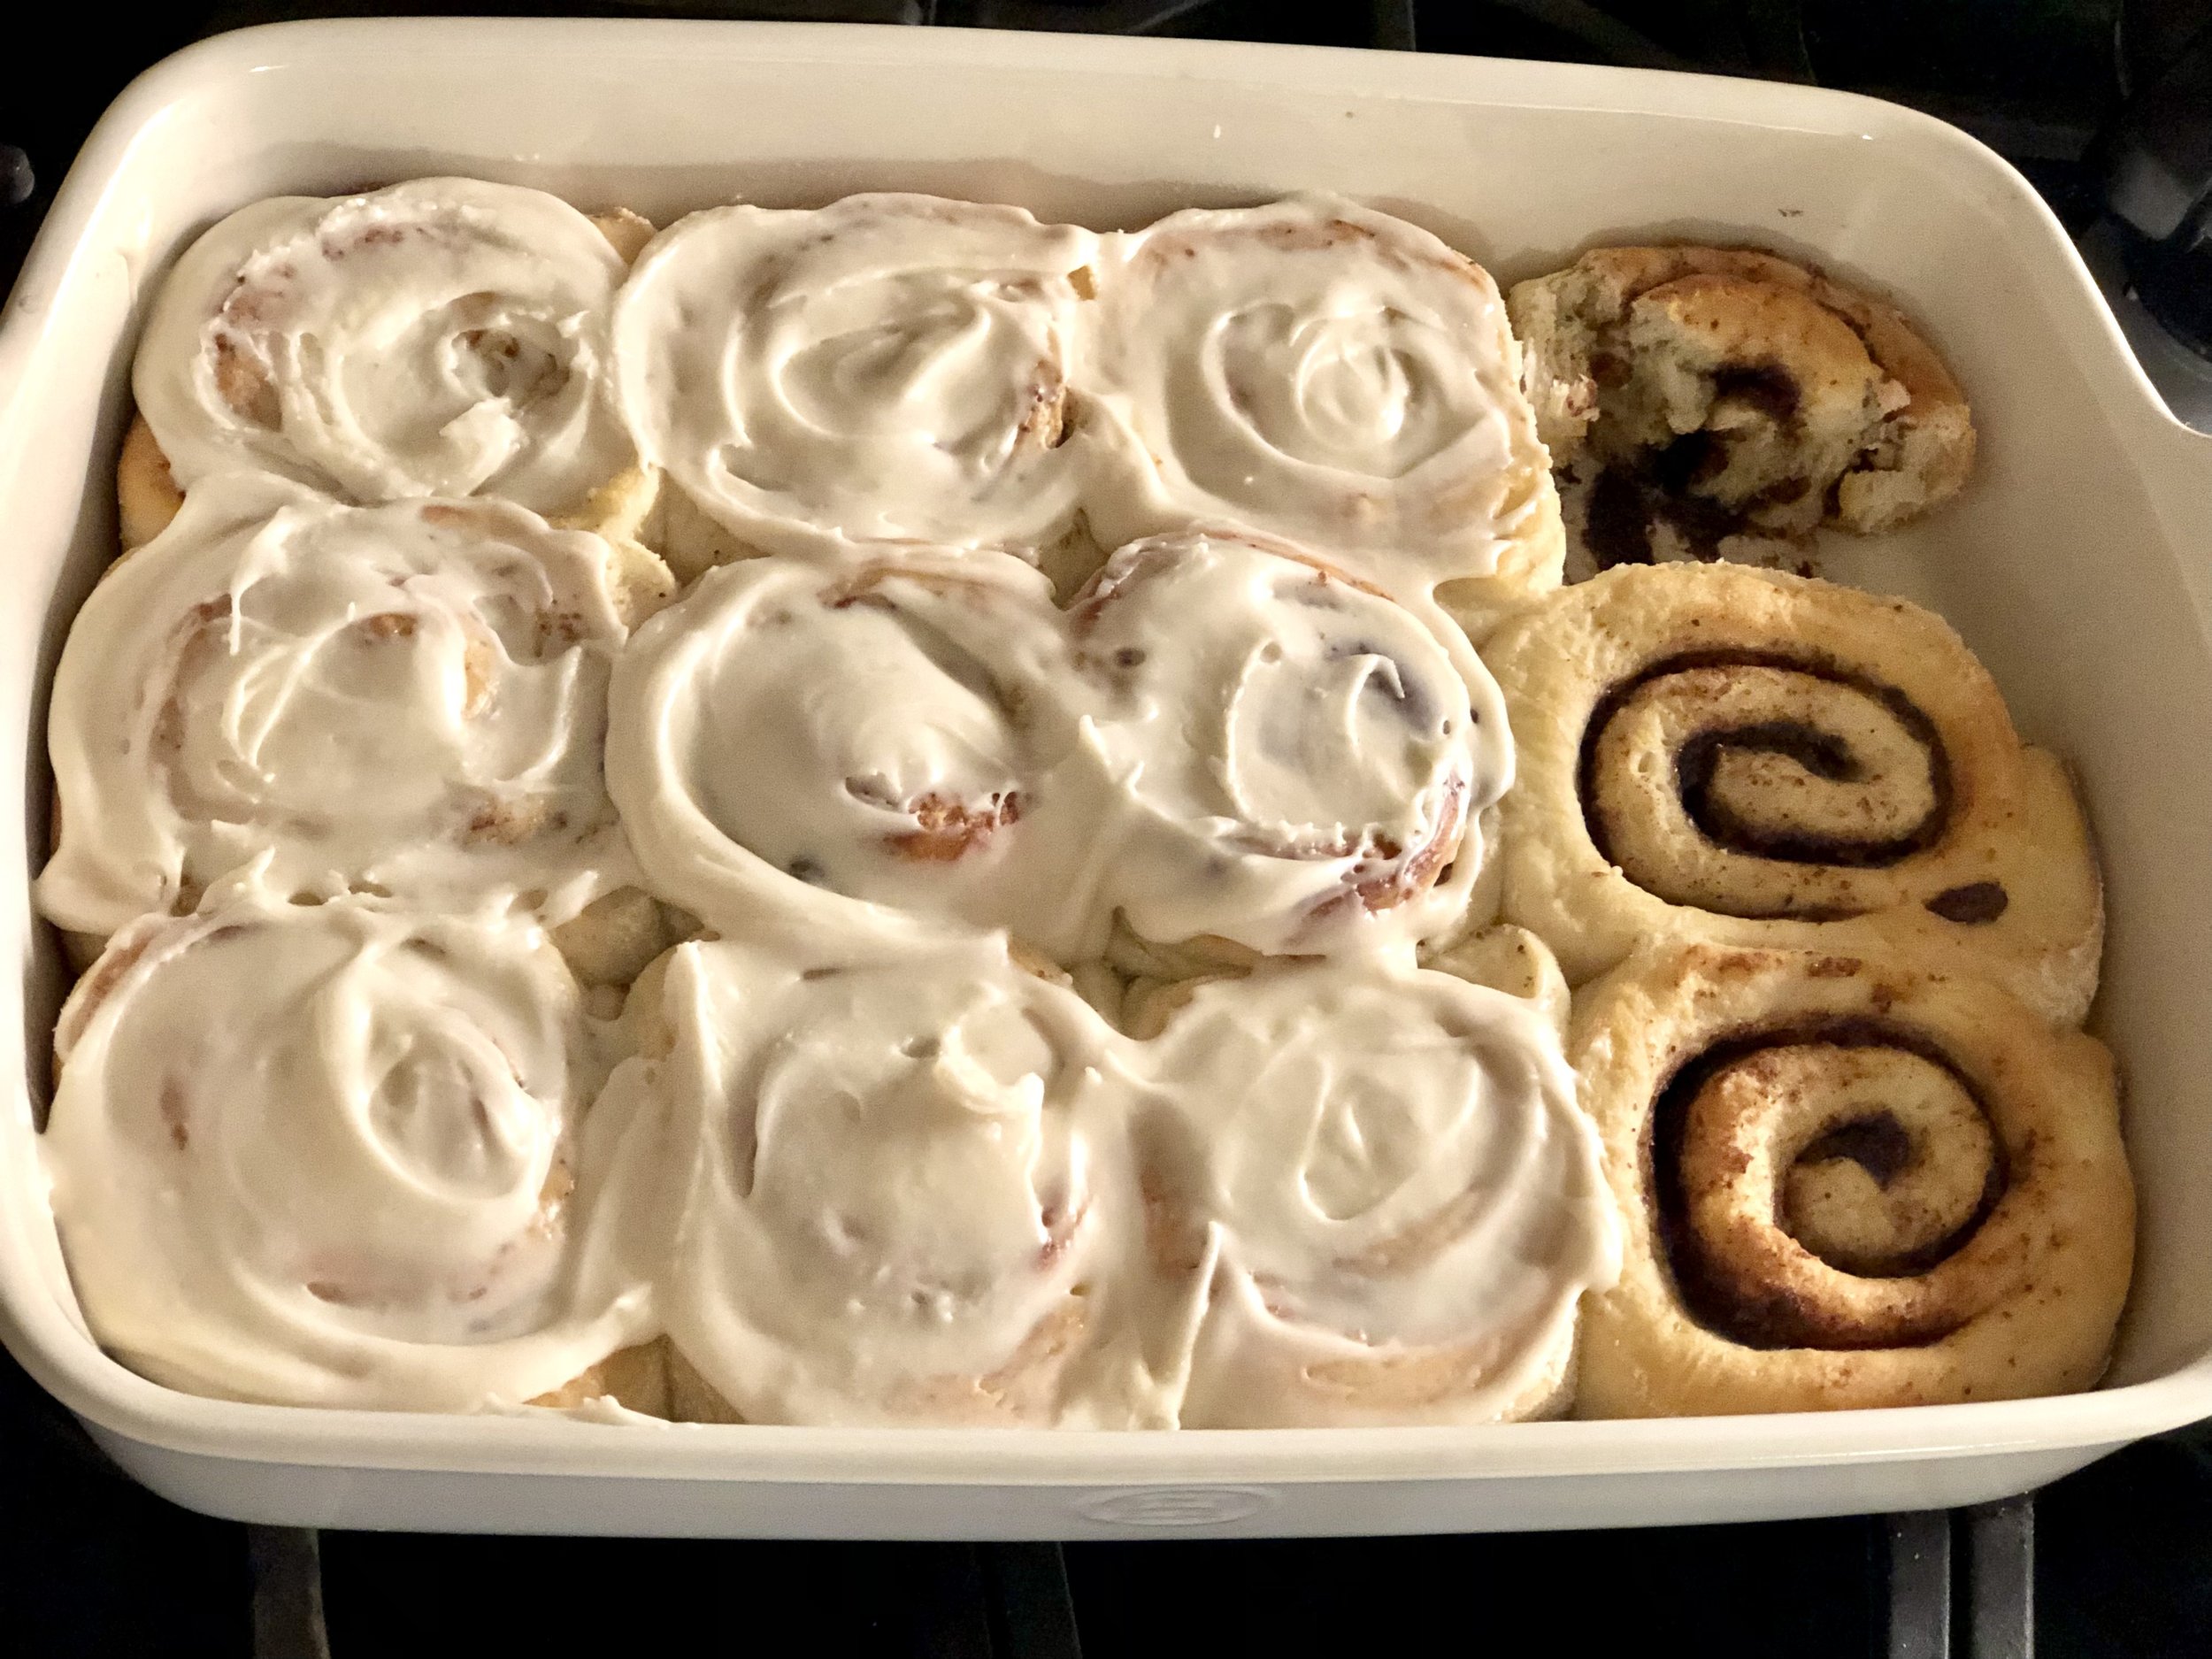
Cinnamon Rolls Pre-Icing


Coconut Curry Lentil Soup

Last Updated September 6, 2024

Adjustments.jpeg

I was never a big fan of lentils growing up, but the past couple of years I’ve really been appreciating their nutritious versatility. So when I saw a recipe called “Best Lentil Soup” I wanted to try it. At the same time I was very skeptical. Best? In the whole wide world? I kinda doubt it. But now I want to try it to see just how good it is, because it probably is good. But best is a really big word.

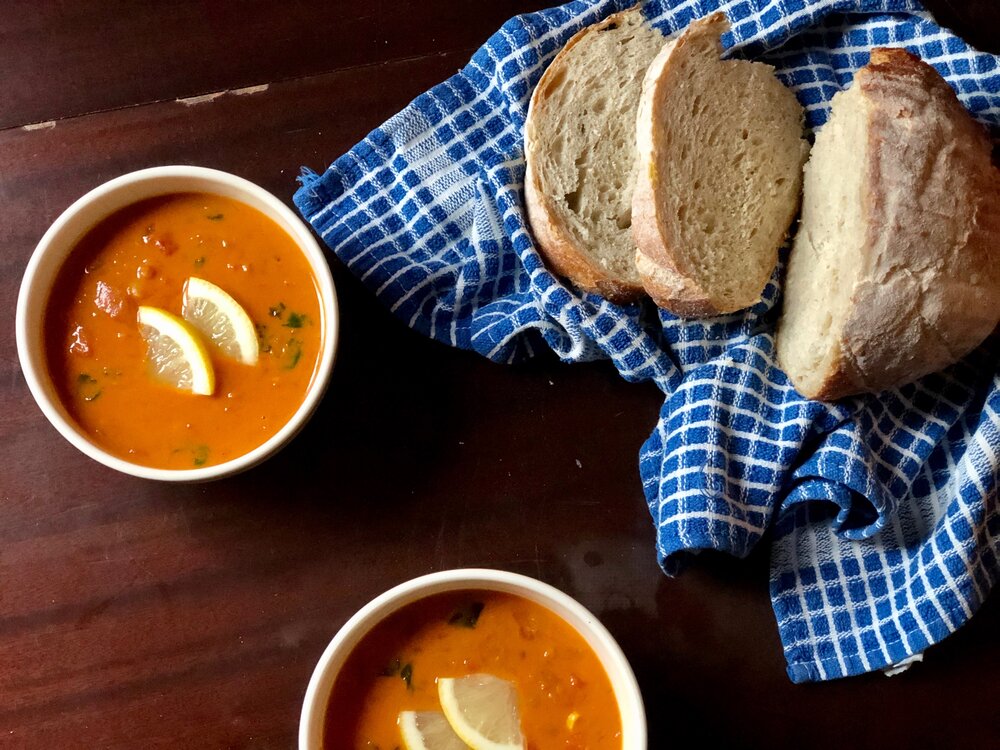
Do you know what? This is a really good lentil soup. I’m taking out that word “best” because I certainly have not tried all the lentil soups in the world, and don’t feel that this soup could accurately make that claim without trying hundreds more lentil soups. But it IS delicious. It’s creamy, comforting, and leaves your tummy feeling all warm and fuzzy and satisfied. It has a bit of zing from ginger and curry, and a bit of acidity from fresh lemon to round off the creamy coconut base. Plus it comes together quickly and is freezer friendly.

So if you, like me, are craving and enjoying all the comforting food and clothes and activities that come with fall, then you should try out this soup!

This post may contain affiliate links. If you make a purchase using these links, Jennyblogs may receive a small commission, at no extra cost to you. This helps to support Jennyblogs. For further information see the privacy policy. Grazie!

Recipe lightly adapted from Love and Lemons


Coconut Curry Lentil Soup

Serves 4-6

Ingredients:

Adjustments.jpeg
  • 2 Tbsp / 28g oil

  • 1 medium onion, finely chopped

  • 4 garlic cloves, minced

  • 3 Tbsp fresh ginger, grated

  • 1 Tbsp mild curry powder

  • 1/4 tsp crushed red pepper flakes

  • 28oz / 800g canned fire-roasted or regular diced tomatoes

  • 1 cup dry lentils

  • 2 1/2 cups / 593g water

  • 1 14oz / 400g can coconut milk

  • Salt and pepper to taste

  • Generous handful of cilantro, roughly chopped

  • Lemon or lime wedges, for serving

Directions:

  1. Heat oil in a large pot over medium heat. Add onion and cook until translucent and soft, about 5 minutes, stirring occasionally.

  2. Add garlic, ginger, curry powder, and red pepper flakes. Cook until fragrant, 1-2 minutes, stirring frequently.

  3. Add in the tomatoes, lentils, water, coconut milk, a generous pinch of salt and pepper. Bring to a boil then turn down heat. Cover and simmer for 25-35 minutes, or until lentils are tender, stirring occasionally. Taste and adjust salt and pepper, as desired.

  4. Turn off heat and stir in cilantro. Serve with lemon wedges and crusty bread, rice, or your choice of side.

Jenny’s Notes:

  • This can also be made in the crockpot! Simply add all ingredients except for cilantro and lemon to a slowcooker and cook on low 6-8 hours or on high 3-4 hours, until lentils are tender. Stir in cilantro just before serving.

  • The length of time until lentils are tender will depend on the type you are using, whether brown, green, red, etc., and all work just fine in this recipe.

  • If soup becomes too thick, add more water as needed to thin it out.

Coconut Curry Lentil Soup
Yield 4-6
Author
Prep time
15 Min
Cook time
35 Min
Total time
50 Min

Coconut Curry Lentil Soup

Creamy coconut curry lentil soup with lemon and cilantro
Cook modePrevent screen from turning off

Ingredients

Instructions

  1. Heat oil in a large pot over medium heat. Add onion and cook until translucent and soft, about 5 minutes, stirring occasionally.
  2. Add garlic, ginger, curry powder, and red pepper flakes. Cook until fragrant, 1-2 minutes, stirring frequently.
  3. Add in the tomatoes, lentils, water, coconut milk, a generous pinch of salt and pepper. Bring to a boil then turn down heat. Cover and simmer for 25-35 minutes, or until lentils are tender, stirring occasionally. Taste and adjust salt and pepper, as desired.
  4. Turn off heat and stir in cilantro. Serve with lemon wedges and crusty bread, rice, or your choice of side.

Notes

  • This can also be made in the crockpot! Simply add all ingredients except for cilantro and lemon to a slowcooker and cook on low 6-8 hours or on high 3-4 hours, until lentils are tender. Stir in cilantro just before serving.
  • The length of time until lentils are tender will depend on the type you are using, whether brown, green, red, etc., and all work just fine in this recipe.
  • If soup becomes too thick, add more water as needed to thin it out.


Nutrition Facts

Calories

470.36

Fat

29.45 g

Sat. Fat

19.52 g

Carbs

42.84 g

Fiber

8.43 g

Net carbs

34.41 g

Sugar

4.14 g

Protein

15.62 g

Cholesterol

0.00 mg

Sodium

160.15 mg

Nutritional information is approximate. Based on 4 servings.

Vegan, gluten-free, curry, best lentil soup
Dinner, soup
American
Did you make this recipe?
Tag @jennyblogsandbakes on instagram and hashtag it #jennyblogs
Adjustments.jpeg

White Bean Potato Soup

Last Updated August 30, 2024

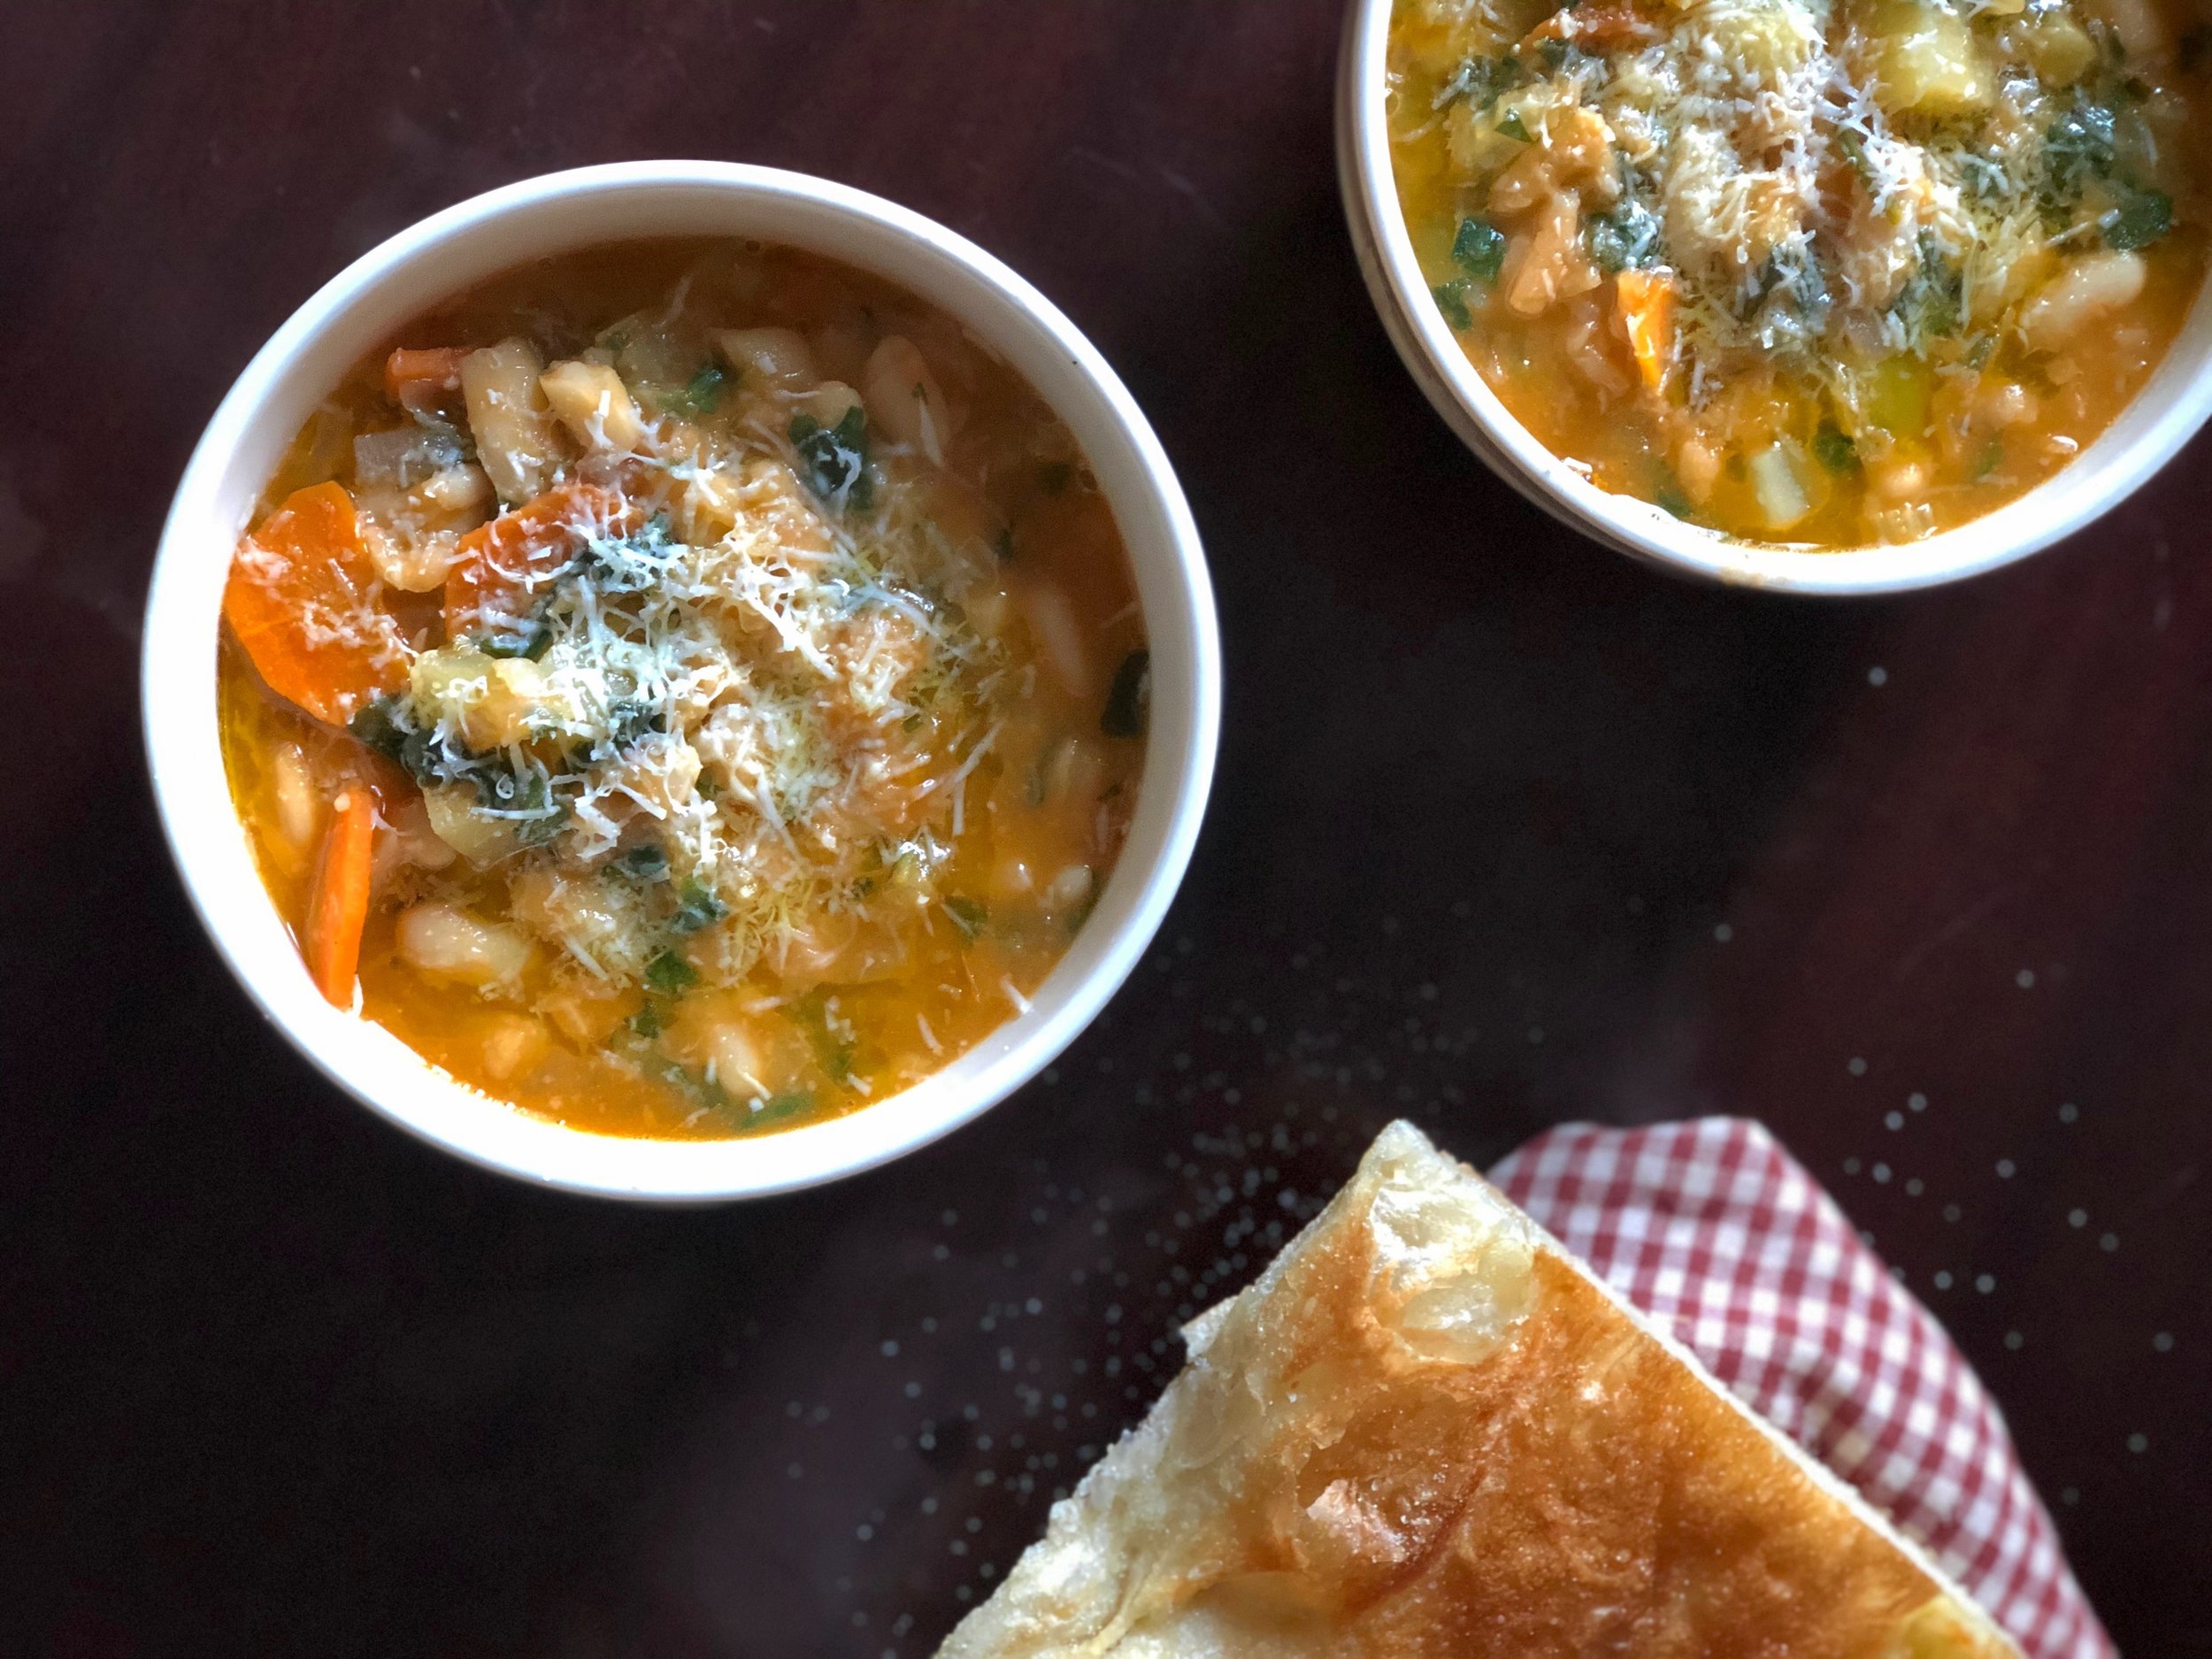
This soup is packed full. Packed full of flavor, packed full of vegetables and good stuff, and therefore packed full of nutrients. Did I mention it’s also vegan? Because it is, at least if you don’t sprinkle any of that wonderful cheese over the soup at the end.

Adjustments.jpeg

While I love beans, and I love potatoes, and just about everything else in this soup, I honestly wasn’t expecting it to be as good as it was. It is so full of flavor and so satisfying, and I didn’t even have any wine on hand to add!

This soup boasts, besides beans and potatoes, onions, carrots, garlic, kale, with a hint of rosemary, spice, and white wine to tie it all together.

While the main soup season might be coming to an end, I decided to finally post this recipe because

1. during these crazy coronavirus times it seems everyone and their brother are baking bread up the wazoo and revving their sourdough starters, at least judging by social media and the shortage of flours and yeast in the stores…and this soup pairs wonderfully with some good homebaked bread!!

2. this soup has many ingredients, but most are pantry staples which makes this ideal to whip up for dinner without having to go to the store. Even if you’re missing one or two things, this soup is so flavorful you can easily swap out vegetables or omit one with a still tasty result.

3. many of these ingredients are also cheap, which means you get a hardy meal for just a few dollars, which is helpful in these uncertain financial times

4. we’ve had an unusually cold few nights and days for April here in Florence, which made me think of this soup..

5. soups are so easy, and recipes like this are rewarding for my friends who may be deciding to expand their cooking skills with all the newfound time on their hands.

This post may contain affiliate links. If you make a purchase using these links, Jennyblogs may receive a small commission, at no extra cost to you. This helps to support Jennyblogs. For further information see the privacy policy. Grazie!

Recipe slightly adapted from Clever Eats


White Bean Potato Soup

Serves 4-6

Ingredients:

  • 1 Tbsp oil

  • 1 medium onion, diced

  • 1 stalk of celery, diced

  • 1 carrot, diced

  • 2 garlic cloves, minced

  • 2 15oz / 400g cans of white beans, drained (any kind, such as cannellini or navy)

  • 2 potatoes, cut into small chunks

  • 1 Tbsp / 16g tomato paste

  • 1/2 tsp dried rosemary or 1 Tbsp chopped fresh

  • 1/2 tsp sweet paprika

  • 1/4 tsp cayenne pepper, optional

  • 1/2 cup / 119g white wine, or more broth or water

  • 7oz / 200g fresh or frozen spinach or kale, lightly chopped

  • 2 cups / 474g vegetable broth

  • salt and pepper, to taste

  • extra virgin olive oil and parmesan or pecorino cheese, for finishing

Directions:

  1. In a large stockpot or dutch oven, heat oil over medium heat. Add onion, celery, and carrot and cook, stirring occasionaly, until onion begins to turn translucent.

  2. Add the garlic, then add the beans, potatoes, tomato paste, rosemary, paprika, and cayenne pepper. Cook for a minute or two, stirring frequently.

  3. Add the wine and stir until it is almost evaporated.

  4. Add kale, broth, and salt and pepper to taste.

  5. Raise heat and bring soup to a boil, then cover and reduce heat to low. Cook for about 15 minutes, or until potatoes are tender.

  6. Ladle soup into serving bowls, top with parmesan or pecorino cheese and drizzle with olive oil. Serve with warm, crusty bread. Buon appetito!

Adjustments.jpeg

Jenny’s Notes:

  • If you prefer to cook dry beans instead of using canned, as I do, a good rule of thumb is to take half the weight of called for canned beans and cook that amount of dry beans. Different dry beans absorb slightly different amounts of water, but generally speaking they double in weight when cooked. So if you need 800g as in this recipe, I would cook 400g of dry beans.

  • You can choose to peel your potatoes before chopping or leave skin on, either way is fine if you ask me! Leaving skin on is easier and more nutritious (more fiber!), just be sure to wash them well before using.

  • If you have a rosemary plant, you can also add a clean sprig straight to the soup, then remove when you are ready to serve the soup.

  • In a pinch, you can always just use water instead of broth, although you will lose some flavor depth. If you have any bouillon cubes, you can also dissolve those into the soup following the bouillon dosing instructions.

White Bean Potato Soup
Yield 4-6
Author
Prep time
15 Min
Cook time
35 Min
Total time
50 Min

White Bean Potato Soup

A hearty and nutritious soup bursting with flavor, featuring white beans, potato, kale, onion, garlic, carrots, and celery with a touch of rosemary and a splash of white wine.
Cook modePrevent screen from turning off

Ingredients

Instructions

  1. In a large stockpot or dutch oven, heat oil over medium heat. Add onion, celery, and carrot and cook, stirring occasionaly, until onion begins to turn translucent.
  2. Add the garlic, then add the beans, potatoes, tomato paste, rosemary, paprika, and cayenne pepper. Cook for a minute or two, stirring frequently.
  3. Add the wine and stir until it is almost evaporated.
  4. Add kale, broth, and salt and pepper to taste.
  5. Raise heat and bring soup to a boil, then cover and reduce heat to low. Cook for about 15 minutes, or until potatoes are tender.
  6. Ladle soup into serving bowls, top with parmesan or pecorino cheese and drizzle with olive oil. Serve with warm, crusty bread. Buon appetito!

Notes

If you prefer to cook dry beans instead of using canned, as I do, a good rule of thumb is to take half the weight of called for canned beans and cook that amount of dry beans. Different dry beans absorb slightly different amounts of water, but generally speaking they double in weight when cooked. So if you need 800g as in this recipe, I would cook 400g of dry beans. You can choose to peel your potatoes before chopping or leave skin on, either way is fine if you ask me! Leaving skin on is easier and more nutritious (more fiber!), just be sure to wash them well before using. If you have a rosemary plant, you can also add a clean sprig straight to the soup, then remove when you are ready to serve the soup.In a pinch, you can always just use water instead of broth, although you will lose some flavor depth. If you have any bouillon cubes, you can also dissolve those into the soup following the bouillon dosing instructions.

Nutrition Facts

Calories

426.89

Fat

8.57 g

Sat. Fat

1.21 g

Carbs

65.80 g

Fiber

14.44 g

Net carbs

51.36 g

Sugar

5.02 g

Protein

20.23 g

Sodium

542.01 mg

Cholesterol

1.07 mg

Nutritional information is approximate. Based on 4 servings and includes using wine and toppings.

white bean soup, potatoes, kale, spinach, vegan, healthy, vegetarian, carrots, white wine, spinach, celery, onion, garlic
Soup, Dinner
American
Did you make this recipe?
Tag @jennyblogsandbakes on instagram and hashtag it #jennyblogs

Orange Chocolate Chip Scones

Last Updated August 5, 2024

Do you know what goes great with cold weather?  Hot beverages, like tea and coffee. 

And do you know which carbs goes best with tea and coffee? Scones. 

That's not to say that scones are dry and should only be served with hot liquids to help re-salivate your mouth. If that's your past experience, then you need to find a new scone recipe or scone baker. I like the sound of that. Scone baker. Sconed baker.  The scorned baker. Maybe not. Moving on. These scones are wonderful!! Light and flaky. Not too sweet, with a nice burst of citrusy orange that pairs beautifully with the bitterness of the chocolate.

January is for baking.  Not dieting.  (Whole30 I'm looking at you.  In a very kind way.  Maybe not.)  Particularly breads, scones, cookies...winter and carbs are good buddies.  Love handles are an awkward third wheel.  But we get to wear big cozy sweaters and sit by fireplaces if we want to. I love winter. I love baking. I love these scones. Without further ado….

This post may contain affiliate links. If you buy something using these links, Jennyblogs may receive a small commission, at no extra cost to you. This helps to support Jennyblogs. For further information see the privacy policy. Grazie!

Recipe adapted from Joy the Baker


Orange Chocolate Chip Scones

Makes about 12 scones

Ingredients:

  • 3 cups / 360g all-purpose flour

  • 1/4 cup / 50g sugar

  • 4 tsp orange zest

  • 4 1/2 tsp baking powder

  • 1/2 tsp baking soda

  • 1 tsp salt

  • scant 3/4 cup / 150g oil

  • 1 egg

  • 3/4 cup / 180g buttermilk

  • 1 cup / 170g chocolate chips or chunks

Directions:

Oven 425°F / 218°C.  Baking sheet lined with parchment paper.

2019-05-18%2B10.08.01-2.jpg
  1. In a large bowl whisk together flour, sugar, zest, baking powder, baking soda, and salt.  Add oil and mix until texture resembles coarse crumbs.

  2. Whisk together egg and buttermilk.  Add to dry mixture until evenly moistened but being careful not to overmix.  Fold in chocolate chips. 

  3. Turn dough out onto a lightly floured surface and knead for a few rounds, 12-14 times.  Roll or pat out into a rectangle of about 1-inch thickness.  Cut into 12 squares.

  4. Place on prepared baking sheet and bake for 12-15 minutes, until scones no longer look doughy in the center and the bottoms are a light golden brown.  

  5. Best served same day, with tea and coffee and butter and jam, if you wish.   


Jenny's Notes:

  • In place of chocolate chips you can also break up a chocolate bar. Last time I used a chocolate bar with hazelnuts in it for Orange Hazelnut Chocolate Chip Scones and it was scrumptious.

  • Scones are so great, and there are many different varieties and recipes for them.  As long as they aren't too dry, I think they all have merit.  In fact, I have several different scone recipes, this is just one of them.  They are similar, but with slight differences that make each one valuable.

Orange Chocolate Chip Scones
Yield 12 servings
Author
Prep time
25 Min
Cook time
15 Min
Total time
40 Min

Orange Chocolate Chip Scones

Light, moist, orange and chocolate chip scones.
Cook modePrevent screen from turning off

Ingredients

Instructions

  1. Oven 425°F / 218°C. Baking sheet lined with parchment paper.
  2. In a large bowl whisk together flour, sugar, zest, baking powder, baking soda, and salt. Add oil and mix until texture resembles coarse crumbs.
  3. Whisk together egg and buttermilk. Add to dry mixture until evenly moistened but being careful not to overmix. Fold in chocolate chips.
  4. Turn dough out onto a lightly floured surface and knead for a few rounds, 12-14 times. Roll or pat out into a rectangle of about 1-inch thickness. Cut into 12 squares.
  5. Place on prepared baking sheet and bake for 12-15 minutes, until scones no longer look doughy in the center and the bottoms are a light golden brown.
  6. Best served same day, with tea and coffee and butter and jam, if you wish.

Notes

In place of chocolate chips you can also break up a chocolate bar. Last time I used a chocolate bar with hazelnuts in it for Orange Hazelnut Chocolate Chip Scones and it was scrumptious.

Nutrition Facts

Calories

317.34

Fat

17.57 g

Sat. Fat

3.59 g

Carbs

37.50 g

Fiber

1.72 g

Net carbs

35.78 g

Sugar

12.69 g

Protein

4.72 g

Sodium

465.72 mg

Cholesterol

16.10 mg

Nutritional information is approximate and based on 12 servings.

Scones, quick bread, orange, chocolate
bread, breakfast
American, British
Did you make this recipe?
Tag @jennyblogsandbakes on instagram and hashtag it #jennyblogs

Homemade Eggnog

Last Updated July 16, 2024

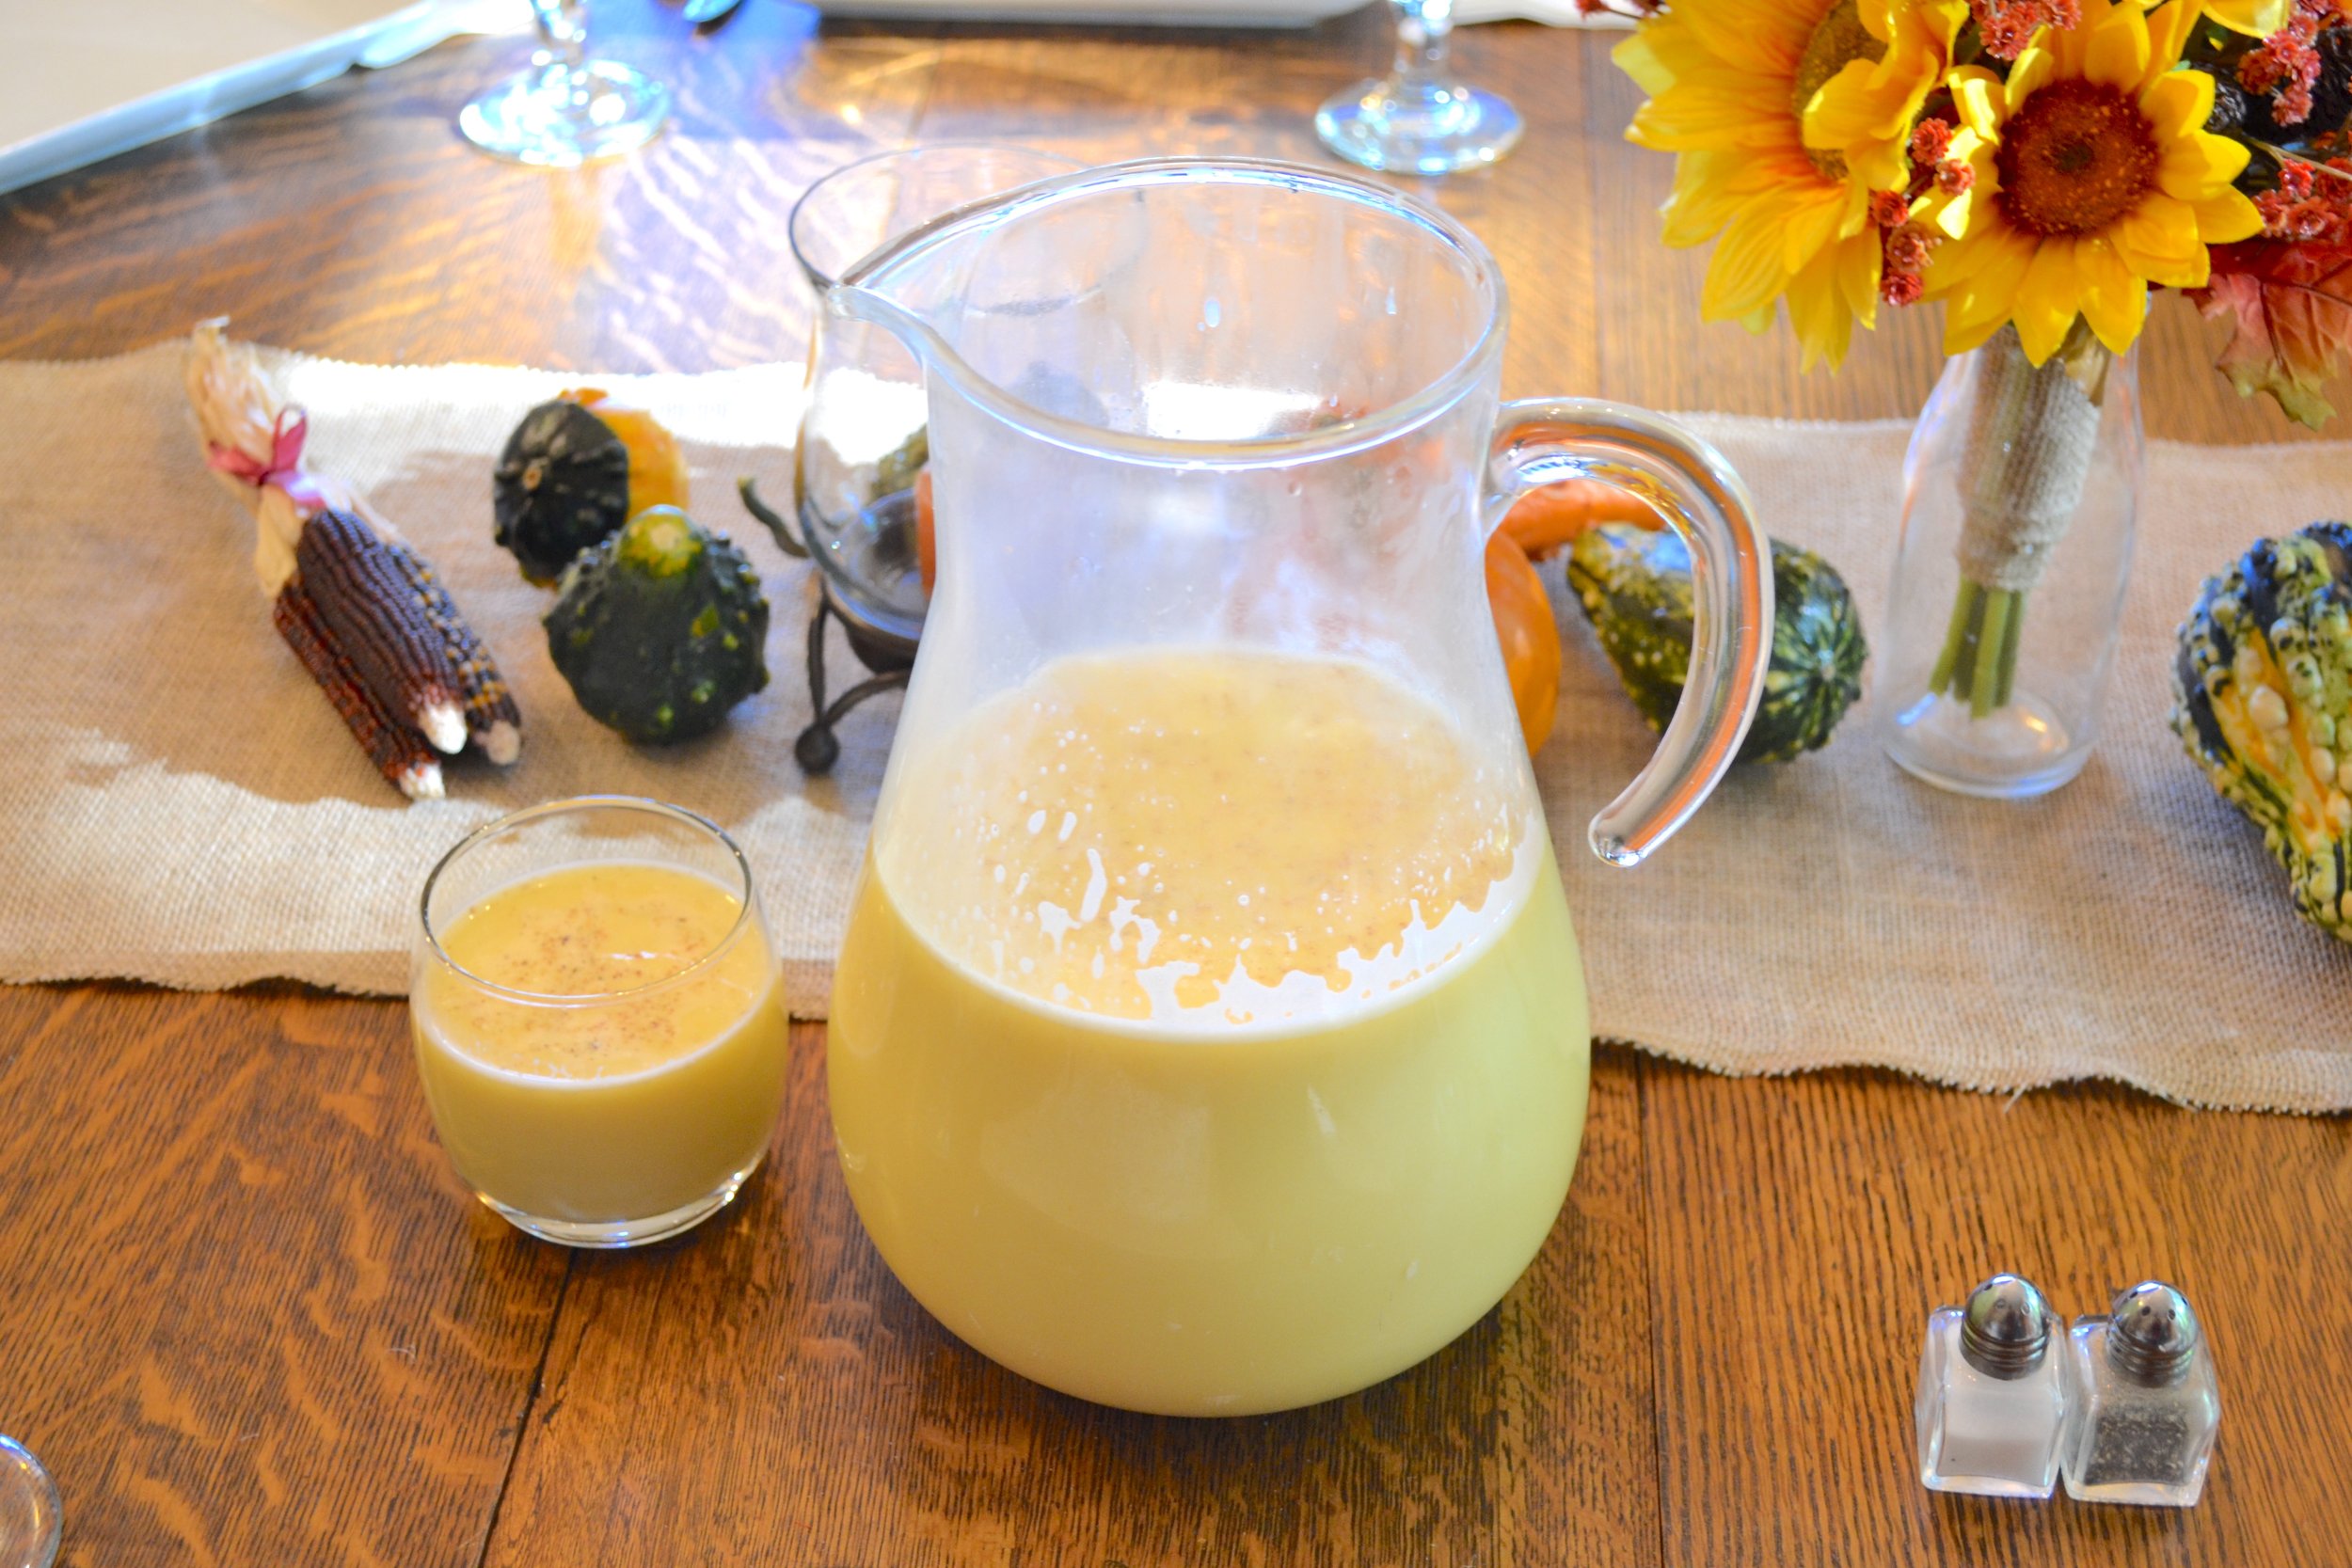
Do you know what 2 weeks from today is?  Yes, Thanksgiving!  A big feast requires lots of food, lots of planning, and of course lots of shopping, preparing, and cooking.  There are of course all the traditional dishes to make, but sometimes you want to throw in something new and delicious.  Since many of you, my smart friends, break out the eggnog for the first time on Thanksgiving, why not try making it homemade this year?  No high fructose corn syrup, artificial flavor, or "Holly"-ness about it. It's very simple to make, and can easily be doubled, tripled, or quadrupled (Hello, Morris family) to fit your needs. 'Tis the season to be jolly, not drink Hollynog.  

This post may contain affiliate links. If you make a purchase using these links, Jennyblogs may receive a small commission, at no extra cost to you. This helps to support Jennyblogs. Where possible, links are prioritized to small businesses, and American companies and products made in the USA for American readers. For further information see the privacy policy. Grazie!


Homemade Eggnog

Makes 8 Servings

Ingredients:

  • 4 eggs

  • 1/2 cup / 100g sugar

  • 2 tsp / 10g vanilla extract

  • 4 cups / 948g milk

  • 1/2 tsp nutmeg, plus more for sprinkling

  • 1/4 cup / 56g brandy, bourbon, or rum, optional

Directions: 

  1. In a large bowl, whisk together eggs and sugar until light in color and the sugar has dissolved. 

  2. Whisk in vanilla, nutmeg, milk, and alcohol.  Strain into a pitcher or serving dish of choice and chill until ready to serve. Sprinkle with additional nutmeg. 

Jenny's Notes:

  • Halve, double, or triple this recipe as needed.

  • So easy and delicious!  If you are worried about the raw eggs in this, simply use pasteurized eggs. 

  • If you are serving this to children and/or people who don't drink, obviously don't add any alcohol. What I like to do is add the alcohol to only half so everyone is happy, or let people add their own. But not the children.

  • Serve in a punch bowl with dollops of vanilla ice cream for an extra decadent treat! 


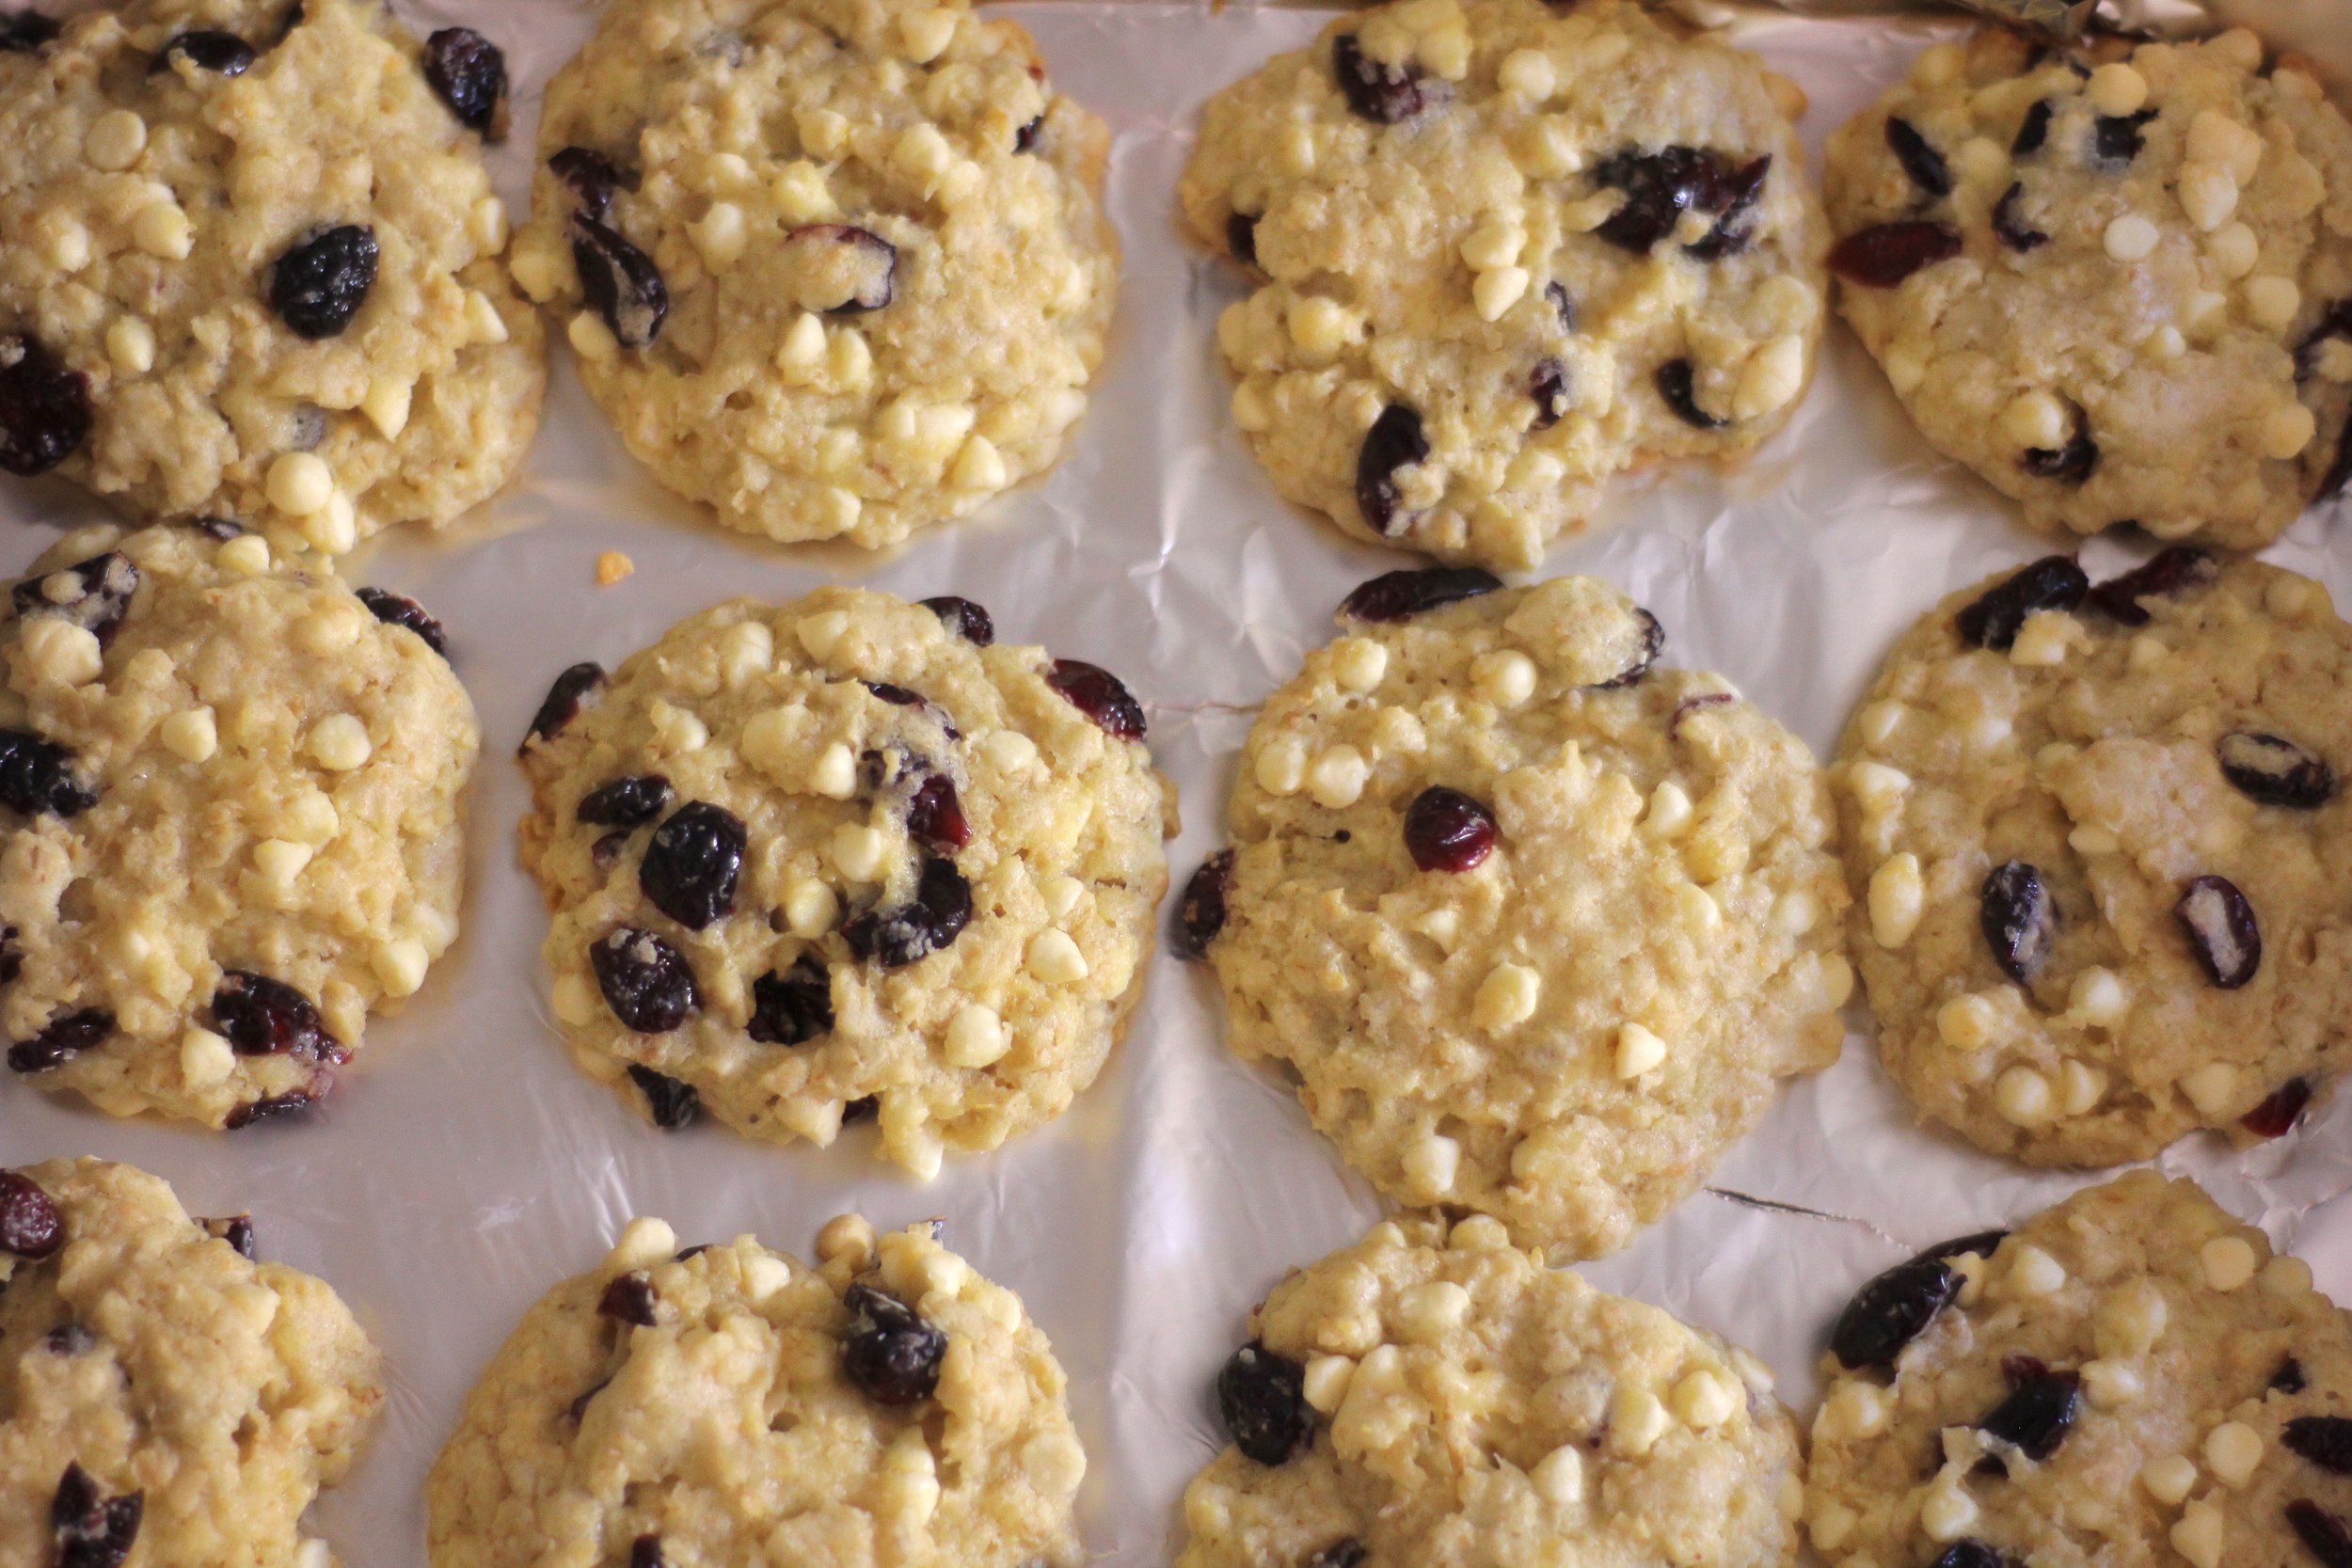
White Chocolate Cranberry Oatmeal Cookies

"Delicious Oats.  Sweet Oats.  Lovely, crunchy oats!  Splendid Oats."  If you've ever seen the live-action talking horse Black Beauty, you'll know what I'm talking about.  If you haven't, then you probably think I'm crazy and really like oats. I'm not denying that. But if you fall into the latter category and have never seen Black Beauty, the I suggest you make these cookies, pop a large bowl of popcorn, and do yourself a favor and enjoy this classic. The stuff of childhood.   

We all love oatmeal cookies, yes? Probably also oatmeal cranberry cookies, those little tart chunks of cranberry amidst the chewy sweet oat cookie. Add white chocolate chips and you just took a classic to a whole new level!

This post may contain affiliate links. If you make a purchase using these links, Jennyblogs may receive a small commission, at no extra cost to you. This helps to support Jennyblogs. For further information see the privacy policy. Grazie!

A recipe by Jenny


White Chocolate Cranberry Oatmeal Cookies

Makes about 2 dozen cookies

Ingredients:

  • 1 3/4 cup / 210g all-purpose flour

  • 1 tsp salt

  • 1 tsp baking soda

  • 3/4 cup / 169g oil

  • 1 1/4 cups / 250g sugar

  • 2 eggs

  • 1 tsp vanilla extract

  • 3 cups / 270g rolled oats

  • 1 1/2 cups / 255g white chocolate chips

  • 1 1/2 cups / 225g dried cranberries

Directions:

Oven 350°F / 177°C. Ungreased or silpat lined baking sheet.

  1. In a medium bowl whisk together flour, salt, and baking soda. 

  2. In another large bowl combine oil, sugar, eggs and vanilla; mix well. 

  3. Add dry ingredients to wet ingredients and stir to combine.  Stir in oats, chips, and cranberries until evenly distributed. 

  4. Drop by spoonfuls onto baking sheet and bake for 7-9 minutes, until edges are set but centers are still soft and wet looking.  Allow to cool for a few minutes before removing from baking sheet.

Jenny's Notes:

  • Dried cherries are also a delicious combination with white chocolate.  And if you live in Traverse City, Michigan, it may be obligatory for you to try it at least once...;)

  • In Italy only mini chocolate chips exist, so although you may see mini in the photos feel free to use normal sized chips! Actually, I don’t know that I’ve seen mini white chocolate chips readily available in the States…?

White Chocolate Cranberry Oatmeal Cookies
Yield 24
Author
Prep time
20 Min
Cook time
9 Min
Total time
29 Min

White Chocolate Cranberry Oatmeal Cookies

Chewy oatmeal cookies with tart cranberries and sweet white chocolate chips.
Cook modePrevent screen from turning off

Ingredients

Instructions

  1. Oven 350°F / 177°C. Ungreased or silpat lined baking sheet.
  2. In a medium bowl whisk together flour, salt, and baking soda.
  3. In another large bowl combine oil, sugar, eggs and vanilla; mix well.
  4. Add dry ingredients to wet ingredients and stir to combine. Stir in oats, chips, and cranberries until evenly distributed.
  5. Drop by spoonfuls onto baking sheet and bake for 7-9 minutes, until edges are set but centers are still soft and wet looking. Allow to cool for a few minutes before removing from baking sheet.

Notes

Dried cherries are also a delicious combination with white chocolate.

Nutrition Facts

Calories

269.65

Fat

11.77 g

Sat. Fat

2.80 g

Carbs

38.82 g

Fiber

1.89 g

Net carbs

36.93 g

Sugar

23.64 g

Protein

3.55 g

Sodium

166.25 mg

Cholesterol

17.73 mg

Nutritional information is approximate and based on 24 servings of 1 cookie each.

oatmeal cookies, cranberry, white chocolate
dessert
American
Did you make this recipe?
Tag @jennyblogsandbakes on instagram and hashtag it #jennyblogs