Double Chocolate Zucchini Bread

IMG_3532.jpg

It’s zucchini season!

Don’t ask me why, but I am always surprised when summer rolls around and so do all the mountains of ripe zucchini…I associate zucchini with fall and winter dishes. Why? No idea. Especially when I look back over my childhood, and my mom almost always had zucchini growing in her garden (they would get huge and there would be so many, who wants zucchini???) Ah, the things we take for granted! Summer dinners would often see zucchini battered in flour and fried up over the griddle.

Now that I live in Italy, I always see the zucchini blossoms battered and fried. It’s a favorite appetizer in restaurants come summer. In fact, more often than not zucchini are sold with the blossoms still attached. Or you can buy just the blossoms. I rarely batter and fry things at home and haven’t bothered to discover other ways of using them, so I have to be careful because the blossoms go moldy much quicker than the zucchini itself! The zucchini are also quite small and light in color, at least compared to the monster dark green baseball bats that used to grow in my mom’s garden.

With the abundance of zucchini around, or any produce, I tend to start looking for new ways to cook them or improving current recipes. While I love zucchini in a stir-fry, with pasta, in risotto, pan-fried like my mama’s, etc., I wanted something different. Zucchini bread came to mind. But not just classic zucchini bread. I wanted chocolate zucchini bread. Double chocolate zucchini bread.

Thus this recipe was born, and if you’re at the point where you’re getting sick of all the zucchini, this is the recipe for you. You won’t even know there is zucchini in it. It’s chocolatey, fudgy, not overly sweet, and just exactly what I was wanting.

Aside from having vegetables in it, it doesn’t have much oil, using half yogurt or applesauce instead, keeping the calories and fat content down. If you’re concerned about cholesterol, you can also use egg whites instead of the whole egg! See notes below recipe for more ideas to customize this bread to your tastes and needs.

Use up sourdough discard

Another great thing about this recipe? You can use up some sourdough discard that may be lurking in your fridge. No need to feed it or for it to be active at all, just make sure it hasn’t gone bad! Sometimes my discard sits up to 2-3 weeks in my fridge before I get to it. The longer it sits the more sour it will taste/smell, but even using a 3 week old discard I couldn’t have told you there was any in this zucchini bread! It can help bulk up recipes like this and add a little fermented nutrition!

This post may contain affiliate links. If you make a purchase using these links, Jennyblogs may receive a small commission, at no extra cost to you. This helps to support Jennyblogs. For further information see the privacy policy. Grazie!

Recipe adapted from my mama’s classic zucchini bread


Double Chocolate Zucchini Bread

Makes 1 loaf

IMG_3541.jpg

Ingredients:

  • 1/2 cup / 100g sugar

  • 1/4 cup / 56g oil

  • 1/4 cup / 60g plain yogurt or applesauce

  • 1 egg or 2 egg whites

  • 1 tsp / 5g vanilla extract

  • about 1/2 cup / 100g sourdough discard, optional

  • 1 1/2 cups / 250g grated zucchini (about 2 medium)

  • 1 cup / 120g all-purpose flour

  • 1/2 cup / 50g cocoa powder

  • 1 tsp baking soda

  • 1/2 tsp salt

  • 1/4 tsp baking powder

  • 1 cup / 170g chocolate chips

Directions:

Preheat oven to 350°F / 177°C. Grease 1 9x5inch / 23x13cm bread pan or line with parchment paper.

  1. In a large bowl, beat together sugar, oil, yogurt, egg, vanilla, and sourdough discard, if using. Stir in zucchini.

  2. In a separate bowl, whisk together flour, cocoa, baking soda, salt, and baking powder.

  3. Fold dry ingredients and chocolate chips into wet ingredients until just combined. Reserve a handful of chocolate chips for sprinkling on top, if you wish.

  4. Pour into prepared bread pan, sprinkle with remaining chocolate chips, and bake in preheated oven for 40-45 minutes or until toothpick inserted in the center comes out mostly clean. A few moist crumbs clinging to the toothpick is a good sign the bread is done but still moist! Allow to bread to cool before removing from pan and serving.

Jenny’s Notes:

  • If you desire a sweeter bread, you can up the sugar to 1 cup / 200g.

  • I know not everyone has plain yogurt on hand, so if you have French Vanilla or another flavor you wouldn’t mind mixing with chocolate, use that! Flavored yogurt has added sugar, so if that is important to you to keep the sugar down, simply reduce the sugar from 1/2 cup / 100g to a scant 1/2 cup / 80-90g.

  • Zucchini quantity can be played with! My mom’s original recipe calls for 1 cup, but here I’ve increased it to 1 1/2 cups. If you can’t detect the veggies, why not add more so you get maximum nutrition? On that note, measuring grated, sliced, or cubed veggies by weight is always a bit tricky. From my research, the average medium zucchini weighs about 5oz or 140g, so if you’re buying zucchini specifically for this recipe, you’ll probably want to get 2, making a bit more than 1 1/2 cups, but that’s ok! I would use it all. Or just get one zucchini that’s a bit bigger. However you please, as I said it’s flexible! And I just way over-analyzed that for you. You’re welcome.

zucchini bread, quick bread, sourdough discard, low fat recipe, double chocolate zucchini bread
bread, dessert
American
Yield: 1 loaf
Author:
Double Chocolate Zucchini Bread

Double Chocolate Zucchini Bread

Fudgy, chocolatey zucchini bread loaded with chocolate chips. A sneaky way to get in more vegetables and you can even use up some sourdough discard with this recipe!
Prep time: 20 MinCook time: 45 MinTotal time: 1 H & 4 M

Ingredients

Instructions

  1. Preheat oven to 350°F / 177°C. Grease 1 9x5inch / 23x13cm bread pan or line with parchment paper.
  2. In a large bowl, beat together sugar, oil, yogurt, egg, vanilla, and sourdough discard, if using. Stir in zucchini.
  3. In a separate bowl, whisk together flour, cocoa, baking soda, salt, and baking powder.
  4. Fold dry ingredients and chocolate chips into wet ingredients until just combined. Reserve a handful of chocolate chips for sprinkling on top, if you wish.
  5. Pour into prepared bread pan, sprinkle with remaining chocolate chips, and bake in preheated oven for 40-45 minutes or until toothpick inserted in the center comes out mostly clean. A few moist crumbs clinging to the toothpick is a good sign the bread is done but still moist! Allow to bread to cool before removing from pan and serving.

Notes:

If you desire a sweeter bread, you can up the sugar to 1 cup / 200g. I know not everyone has plain yogurt on hand, so if you have French Vanilla or another flavor you wouldn’t mind mixing with chocolate, use that! Flavored yogurt has added sugar, so if that is important to you to keep the sugar down, simply reduce the sugar from 1/2 cup / 100g to a scant 1/2 cup / 80-90g. Zucchini quantity can be played with! My mom’s original recipe calls for 1 cup, but here I’ve increased it to 1 1/2 cups. If you can’t detect the veggies, why not add more so you get maximum nutrition? On that note, measuring grated, sliced, or cubed veggies by weight is always a bit tricky. From my research, the average medium zucchini weighs about 5oz or 140g, so if you’re buying zucchini specifically for this recipe, you’ll probably want to get 2, making a bit more than 1 1/2 cups, but that’s ok! I would use it all. Or just get one zucchini that’s a bit bigger. However you please, as I said it’s flexible! And I just way over-analyzed that for you. You’re welcome.

Calories

277.93

Fat (grams)

13.31

Sat. Fat (grams)

4.04

Carbs (grams)

38.03

Fiber (grams)

2.86

Net carbs

35.17

Sugar (grams)

22.45

Protein (grams)

4.65

Sodium (milligrams)

291.43

Cholesterol (grams)

21.07
Nutritional information is approximate; based on roughly 9 slices from 1 loaf. Does not include using sourdough discard.
Did you make this recipe?
Tag @jennyblogsandbakes on instagram and hashtag it #jennyblogs
A zucchini lurking in the background, for proof there truly is zucchini in this bread

A zucchini lurking in the background, for proof there truly is zucchini in this bread


My Favorite Scones

Adjustments.jpeg

Happy 2020!
Once again heading into the Christmas season I went MIA from the blog, there’s just too much to be done, eaten, seen, and experienced!

I closed out 2019 by getting to show my husband America for the first time ever, and more importantly, my hometown! It was a blast traveling home for Christmas, and busy. Every year it seems to get a little bit harder to say goodbye.

2020 started out completely uneventful, we were flying somewhere over the Atlantic Ocean and we don’t know when or where we were when the new year happened. It just did. I think 2020 is going to be a good year, though, if nothing else, it’s a great number, right?

I must confess, I was a bit nonplussed at the seeming coincidence of seeing photos of not one, not two, but several 20’s or Gatsby themed New Year’s parties. The movie came out several years ago, guys, why the big comeback? … It took seeing someone’s post on fb about entering the roaring 20’s again for it to click for me. I can’t help it, guys, I’m just not always the brightest bulb in the case.

However, our vision is 2020 and it is roaring and all those good things, so let’s get rolling. Rolling scones. I mean, these scones don’t have to be rolled, it just sounds like the band…;)

Now. This scone recipe is not just any recipe I am about to share with you, no no no. This is my favorite scone recipe, and I like/use several different scone recipes, so this is saying something.

Like these coconut scones, which are pretty darn delicious.
And these Orange Chocolate Chip Scones. YUM.

But. This scone recipe to beat all scone recipes (opinion) is so versatile, you can make just about any flavor you can think up! It’s also quite forgiving, which makes your scones turn out great every single time. Pictured are cranberry orange scones, but I will give you more flavor ideas and a launch pad to create your own flavors after the basic recipe!

I know, I know, calm down, this is all a lot to take in. The best scone recipe ever PLUS so many different flavors?? What is it, Christmas or something? No, but I decided to start the year off right with one of my favorites recipes (and I’m not even talking just in the scone category! Gasp.) and extending an olive branch for having ignored the inter webs for a bit longer than intended. (It was the eggnog, you guys!)

Ok, scones, let’s go!

This post may contain affiliate links. If you make a purchase using these links, Jennyblogs may receive a small commission, at no extra cost to you. This helps to support Jennyblogs. For further information see the privacy policy. Grazie!

Recipe adapted from allrecipes


My Favorite Scones

Makes 12 scones

Adjustments.jpeg

Ingredients:

For the Scones

  • 1 cup / 225g plain yogurt

  • 1 tsp baking soda

  • 4 cups / 480g all-purpose flour

  • 1 cup / 200g sugar

  • 2 tsp baking powder

  • 1 tsp salt

  • 3/4 cup / 169g oil

  • 1 egg

  • 1 cup flavorings, 1 tsp extract, 1 Tbsp zest, etc. (see below)

For the Glaze

  • 1 cup / 120g powdered sugar

  • 1-2 Tbsp / 15-30g milk

Directions:

Make the Scones

Oven 350°F / 177°C. Baking sheet lined with parchment paper or silpat.

  1. In a small bowl, combine yogurt and baking soda; set aside.

  2. In a large bowl, whisk together flour, sugar, baking powder, and salt.

  3. Add oil to flour mixture, mixing until coarse crumbs form.

  4. Stir in egg, yogurt mixture, and any add-ins just until barely moistened.

  5. Turn the dough out onto a generously floured surface. Knead briefly, about 4-8 turns, then press into an even 1-inch thick circle.

  6. Cut the circle into 12 triangular shaped scones, and place on prepared baking sheet.

  7. Bake for 12-15 minutes or until the centers look set, the scones have cracked slightly, and/or the bottoms or a light golden brown.

Make the Glaze

  1. Stir together powdered sugar and 1 Tbsp milk. Continue adding milk, a tsp at a time, until a thick but drizzleable glaze is achieved. Drizzle over cooled scones.

Scone Flavors:

Use one of these ideas (they’re all tried and true!) or create your own!

Adjustments.jpeg
  • Lemon Scones: 1 tsp lemon extract, 1 Tbsp lemon zest; use lemon juice to make the glaze. Use lemon yogurt if available.

  • Orange Coconut Scones: 1 tsp orange extract, 1 Tbsp orange zest, optional 1/2 tsp coconut extract, 3/4 cup coconut; use orange juice to make the glaze. Use orange or coconut yogurt if available.

  • Chocolate Chip Scones: 1 cup mini chocolate chips, 1 tsp vanilla extract. Make the simple glaze as in the basic recipe or melt more chocolate chips and drizzle over scones.

  • Chestnut Chocolate Chip Scones: 1 cup mini chocolate chips, 1 tsp vanilla extract, replace 1/4 cup of the yogurt with 1/4 cup chestnut purée. Glaze as in basic recipe.

  • Cherry Maple Scones: 1 cup dried cherries; use maple syrup to make the glaze.

  • Strawberry Scones: 1/2 cup diced fresh strawberries; use strawberry yogurt. Use basic glaze, sprinkle with demarara sugar before baking, or spread strawberry jam over the top while the scones are still warm.

  • Cranberry Orange Scones: 1 tsp orange extract, 1 Tbsp orange zest, 1 cup fresh (or frozen and thawed/drained) cranberries; use orange juice to make the glaze. Use orange yogurt if available.

  • Gingerbread Scones: replace 1/4 cup of the oil with 1/4 cup molasses, add 1 tsp cinnamon, 1 tsp ginger, 1/2 tsp cloves; use basic glaze or make a cream cheese drizzle by beating 4oz softened cream cheese with 1/4 cup powdered sugar until smooth, then adding milk 1 Tbsp at a time until mixture is thin enough to be drizzled.

Jenny’s Notes

  • In place of the plain yogurt you can also use sour cream or even mascarpone if you have leftovers from say, making tiramisu. You can also easily use Greek yogurt, or sweetened vanilla yogurt. If you use a sweetened yogurt, cut sugar in the recipe by 1/3 cup / 67g. You can also use a flavored yogurt to boost the scones flavor. For example, in the cranberry orange recipe above you could use orange yogurt.

  • If you accidentally make your glaze too thick or too thin, it’s a super easy fix. For a too-thick glaze, keep adding more milk (or whichever liquid you are using) gradually until desired consistency is achieved. Likewise, for a too-thin glaze, keeping adding a bit more powdered sugar until thick enough.

Best scone recipe, Scone base, teatime
Breakfast, Brunch
British
Yield: 12
Author:
Jenny

Jenny's Favorite Scones

If I had to make one scone recipe for the rest of my life this, would be it: the perfect base to add any fill-ins and flavorings you wish. Perfectly moist, a sweet glaze, and pairs perfectly with a good book and a cup of tea!
prep time: 25 Mcook time: 15 Mtotal time: 40 M

ingredients:

For the Scones
  • 1 cup / 225g plain yogurt
  • 1 tsp baking soda
  • 4 cups / 480g all-purpose flour
  • 1 cup / 200g sugar
  • 2 tsp baking powder
  • 1 tsp salt
  • 3/4 cup / 169g oil
  • 1 egg
  • 1 cup flavorings, 1 tsp extract, 1 Tbsp zest, etc. (see below)
For the Glaze
  • 1 cup / 120g powdered sugar
  • 1-2 Tbsp / 15-30g milk
Scone Flavor Ideas
  • Lemon Scones: 1 tsp lemon extract, 1 Tbsp lemon zest; use lemon juice to make the glaze. Use lemon yogurt if available.
  • Orange Coconut Scones: 1 tsp orange extract, 1 Tbsp orange zest, optional 1/2 tsp coconut extract, 3/4 cup coconut; use orange juice to make the glaze. Use orange or coconut yogurt if available.
  • Chocolate Chip Scones: 1 cup mini chocolate chips, 1 tsp vanilla extract. Make the simple glaze as in the basic recipe or melt more chocolate chips and drizzle over scones.
  • Chestnut Chocolate Chip Scones: 1 cup mini chocolate chips, 1 tsp vanilla extract, replace 1/4 cup of the yogurt with 1/4 cup chestnut purée. Glaze as in basic recipe.
  • Cherry Maple Scones: 1 cup dried cherries; use maple syrup to make the glaze.
  • Strawberry Scones: 1/2 cup diced fresh strawberries; use strawberry yogurt. Use basic glaze, sprinkle with demarara sugar before baking, or spread strawberry jam over the top while the scones are still warm.
  • Cranberry Orange Scones: 1 tsp orange extract, 1 Tbsp orange zest, 1 cup fresh (or frozen and thawed/drained) cranberries; use orange juice to make the glaze. Use orange yogurt if available.
  • Gingerbread Scones: replace 1/4 cup of the oil with 1/4 cup molasses, add 1 tsp cinnamon, 1 tsp ginger, 1/2 tsp cloves; use basic glaze or make a cream cheese drizzle by beating 4oz softened cream cheese with 1/4 cup powdered sugar until smooth, then adding milk 1 Tbsp at a time until mixture is thin enough to be drizzled.

instructions:

How to cook Jenny's Favorite Scones

Make the Scones
  1. Oven 350°F / 177°C. Baking sheet lined with parchment paper or silpat.
  2. In a small bowl, combine yogurt and baking soda; set aside.
  3. In a large bowl, whisk together flour, sugar, baking powder, and salt.
  4. Add oil to flour mixture, mixing until coarse crumbs form.
  5. Stir in egg, yogurt mixture, and any add-ins just until barely moistened.
  6. Turn the dough out onto a generously floured surface. Knead briefly, about 4-8 turns, then press into an even 1-inch thick circle.
  7. Cut the circle into 12 triangular shaped scones, and place on prepared baking sheet.
  8. Bake for 12-15 minutes or until the centers look set, the scones have cracked slightly, and/or the bottoms or a light golden brown.
Make the Glaze
  1. Stir together powdered sugar and 1 Tbsp milk. Continue adding milk, a tsp at a time, until a thick but drizzleable glaze is achieved. Drizzle over cooled scones.

NOTES:

In place of the plain yogurt you can also use sour cream or even mascarpone if you have leftovers from say, making tiramisu. You can also easily use Greek yogurt, or sweetened vanilla yogurt. If you use a sweetened yogurt, cut sugar in the recipe by 1/3 cup / 67g. You can also use a flavored yogurt to boost the scones flavor. For example, in the cranberry orange recipe above you could use orange yogurt. If you accidentally make your glaze too thick or too thin, it’s a super easy fix. For a too-thick glaze, keep adding more milk (or whichever liquid you are using) gradually until desired consistency is achieved. Likewise, for a too-thin glaze, keeping adding a bit more powdered sugar until thick enough.

Calories

397.79

Fat (grams)

15.22

Sat. Fat (grams)

1.33

Carbs (grams)

60.11

Fiber (grams)

1.47

Net carbs

58.64

Sugar (grams)

28.27

Protein (grams)

5.78

Sodium (milligrams)

401.65

Cholesterol (grams)

16.82
Nutritional information is approximate. Based on 12 servings of cranberry orange scones.
Did you make this recipe?
Tag @jenevamorris on instagram and hashtag it #jennyblogs
Created using The Recipes Generator

Tzatziki Cucumber Salad

IMG_0863.jpg

This post may contain affiliate links. If you make a purchase using these links, Jennyblogs may receive a small commission, at no extra cost to you. This helps to support Jennyblogs. For further information see the privacy policy. Grazie!

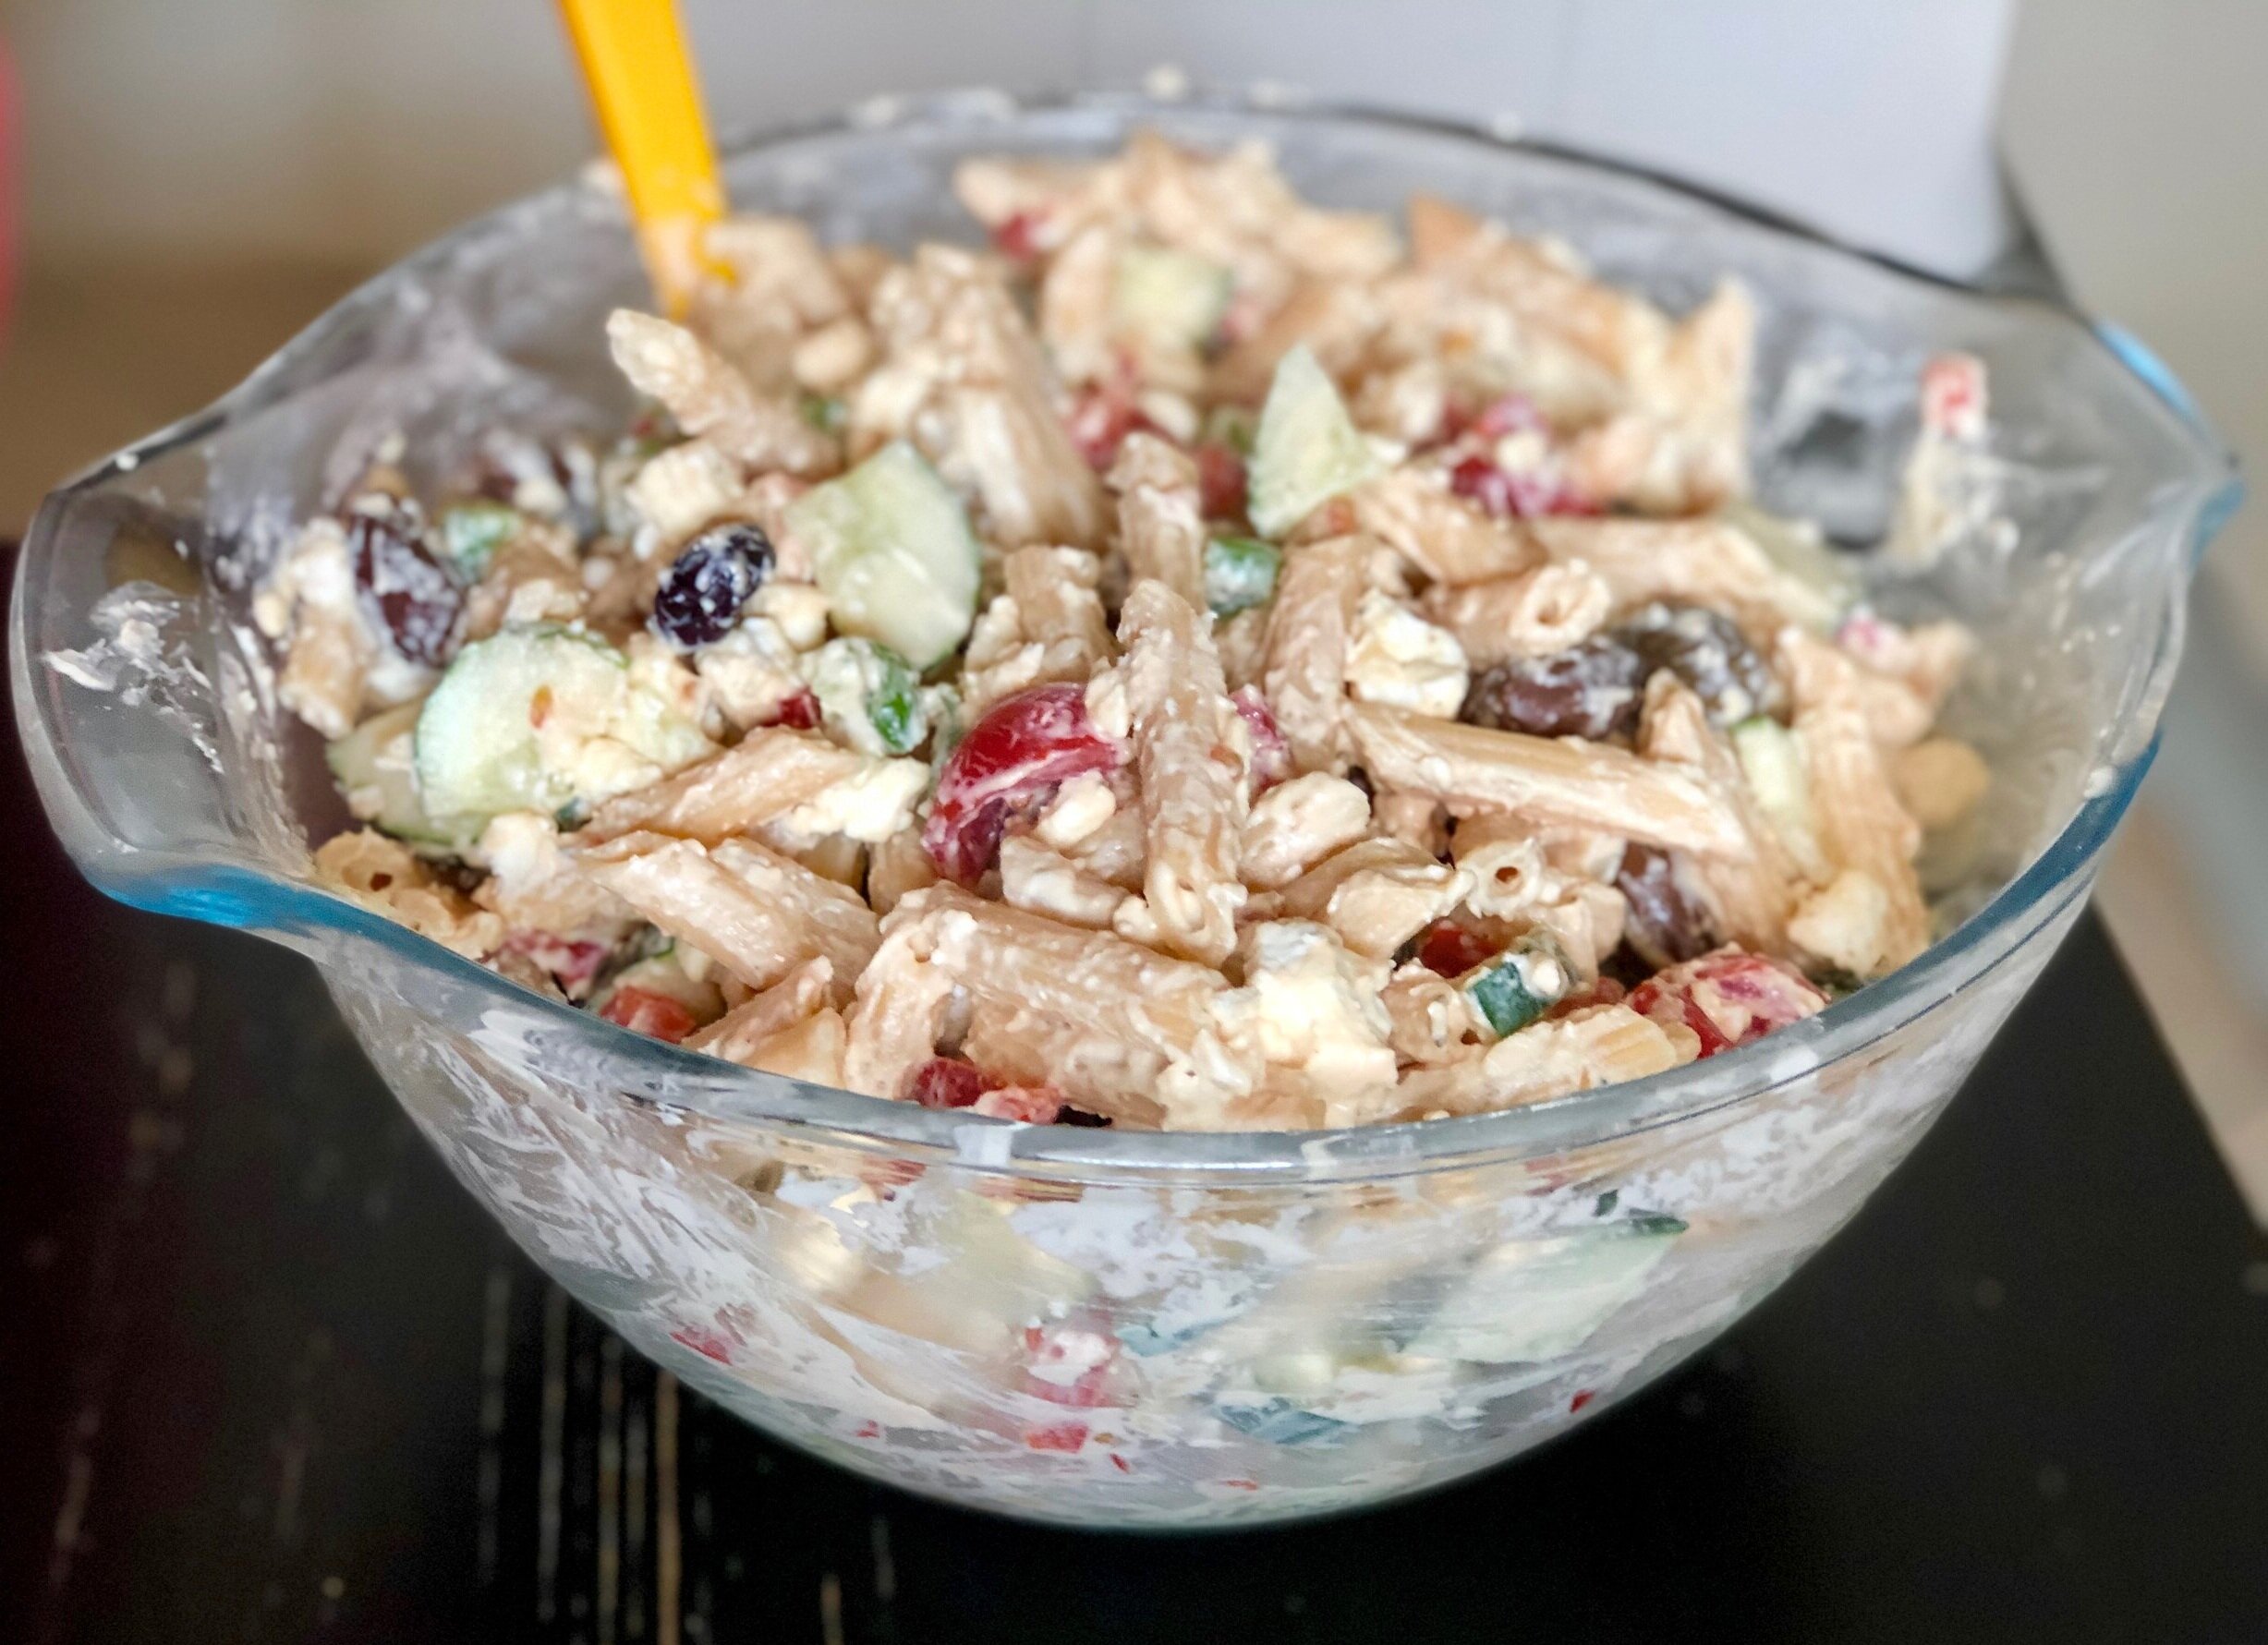
Fresh, cool, crunchy, creamy, and delicious Tzatziki, which is basically a Greek cucumber salad made with thick, strained yogurt, and seasoned with dill and garlic. Uh, yum, right? If you’ve ever had tzatziki, you know what I’m talking about!

It’s funny because I’ve known about tzatziki for a long time, enjoying it at restaurants and such, that wonderful Greek yogurt sauce dip wonder. I’ve seen several cucumber salad recipes around this summer on some of my favorite recipe sites like foodgawker; German cucumber salads, normal cucumber salads, and others. It got me hungry, so I decided to make my own. And let me tell you, I got right on it because zero cooking or baking in a recipe is a wonderful thing when the summer here in Florence has been between 90-106°F / 32-41°C since June.

I noticed most of the recipes I came across used sour cream, but I used plain greek yogurt because it’s more nutritious. Once I found a nice balance between the flavors, I wrote down the recipe and decided to share it with you guys! Then I recalled that tzatziki has very similar flavors, and although I’ve never made it nor even looked up a recipe, my curiosity got the best of me to see just how similar they would be. What do you know, I basically made tzatziki and didn’t even know it! So much for making an original recipe, haha!

So what I’m sharing with you today is my accidental take on tzatziki, similarly enough to be called so, but not THE original. If you make the changes listed below, however, you can have yourself a delicious and authentic Greek tzatziki!

What are the differences from a traditional tzatziki and the one you see below?

  • The cucumber is usually grated and drained (either by squeezing or letting sit in cheese cloth over a bowl overnight) instead of sliced. I also use more cucumber to make a creamy salad rather than a dip that features cucumber. if you want to make real tzatziki, use a half of a large cucumber or a smallish one.

  • Traditional would have more yogurt so again, more of a sauce or dip rather than a salad. For real tzatziki, double the yogurt to 1 1/2 cups / 340g.

  • For the acidic element, I used lemon juice, but vinegar of some sort is usually called for. I’ve read in Greece they most often use red wine vinegar.

  • I added more fresh dill! Because I love dill. If you think about it, this is like a creamy dill pickle dip. It has the cucumbers, the garlic, the dill….no wonder I like it so well! For original tzatziki, use about 1 Tbsp chopped.

If you eliminate the cucumbers (or shred them like the traditional way), it makes an excellent and much healthier alternative to most veggie dips. I might even like it better than Ranch!


Tzatziki Cucumber Salad

Serves about 2

IMG_0852.jpg

Ingredients:

  • 3/4 cup / 170g plain greek yogurt or vegan yogurt

  • generous 2 Tbsp chopped fresh dill

  • 2 tsp / 10g lemon juice

  • 2 garlic cloves, minced, or 1/4 tsp garlic powder

  • salt and pepper, to taste

  • 1 large cucumber, chopped with skin/seeds removed as desired

  • extra virgin olive oil, for drizzling, optional

Directions:

  1. In a medium bowl combine yogurt, dill, lemon juice, garlic powder, salt and pepper.

  2. If serving immediately, add cucumber and stir to coat; drizzle with olive oil. Otherwise, refrigerate until ready to serve, adding cucumber and drizzling with oil at the last minute.

Jenny’s Notes:

  • For optimal creaminess, I would use full fat greek yogurt. If you are vegan or dairy-free, use a thick/Greek dairy-free yogurt alternative!

  • In an ideal world the dressing would be made a day ahead of time and the cucumber added just before serving. This helps the flavors meld together and cuts the sharpness of the garlic a bit, without the cucumber sitting in the dressing for a day and losing its liquid. However, this makes a great last minute dish and it tastes just fine if eaten right away!

vegan, vegetarian, dairy-free, gluten-free, veggie dip, cucumber, garlic, fresh dill, Greek yogurt, Ranch substitute
Side dish, lunch, sauces and condiments
Greek
Yield: 2
Author:

Tzatziki Cucumber Salad

Creamy salad form of the classic Tzatziki sauce: Cucumbers, Greek yogurt, lemon juice, garlic, and fresh dill.
prep time: 10 Mcook time: total time: 10 M

ingredients:

  • 3/4 cup / 170g plain greek yogurt or vegan yogurt
  • generous 2 Tbsp chopped fresh dill
  • 2 tsp / 10g lemon juice
  • 2 garlic cloves, minced, or 1/4 tsp garlic powder
  • salt and pepper, to taste
  • 1 large cucumber, chopped with skin/seeds removed as desired
  • extra virgin olive oil, for drizzling, optional

instructions:

How to cook Tzatziki Cucumber Salad

  1. In a medium bowl combine yogurt, dill, lemon juice, garlic powder, salt and pepper.
  2. If serving immediately, add cucumber and stir to coat; drizzle with olive oil. Otherwise, refrigerate until ready to serve, adding cucumber and drizzling with oil at the last minute.

NOTES:

For optimal creaminess, I would use full fat greek yogurt. If you are vegan or dairy-free, use a thick/Greek dairy-free yogurt alternative! In an ideal world the dressing would be made a day ahead of time and the cucumber added just before serving. This helps the flavors meld together and cuts the sharpness of the garlic a bit, without the cucumber sitting in the dressing for a day and losing its liquid. However, this makes a great last minute dish and it tastes just fine if eaten right away!

Calories

123.72

Fat (grams)

7.21

Sat. Fat (grams)

1.05

Carbs (grams)

5.89

Fiber (grams)

0.61

Net carbs

5.28

Sugar (grams)

3.78

Protein (grams)

9.30

Sodium (milligrams)

181.86

Cholesterol (grams)

4.25
Nutritional information is approximate.
Created using The Recipes Generator
IMG_0856.jpg

Cream Cheese Coffee Cake

This post contains affiliate links. If you buy something using these links, Jennyblogs may receive a small commission, at no extra cost to you. This helps to support Jennyblogs. For further information see the privacy policy. Grazie!

Cream Cheese Coffee Cake. Think a delicate crumb, super moist with swirls of cream cheese making the coffee cake even softer, and a sweet crumble on top.

Coffee cakes (and scones) often get a bad rap for being dry. No one likes to eat something that makes their mouth feel like it’s full of sawdust. There is no need to make dry baked goods when there are so many good recipes out there! A good example? This Cream Cheese Coffee Cake recipe. I already have a few favorite NOT dry recipes like this Cinnamon Streusel Coffee Cake, but today’s Cream Cheese Coffee Cake really uh, takes the cake on the moist scale. I apologize if you don’t like the word “moist”, but I struggle finding suitable synonyms that get the same point across. If you have any ideas, I’m open to suggestions so I don’t offend some people’s sensibilities. :)

Now, post Valentine's Day, or Galentine's Day, you may need to take a break from chocolate.  No wait, never mind, that's silly.  Chocolate is always necessary.  What was I thinking?  But I'm sure you already have plenty of chocolate on your hands (maybe literally, put that candy bar down and get busy making this coffee cake) in the form of heart boxes, Dove dark chocolate with those hidden messages, Hershey's kisses, or in my case, Toblerone.  So instead, let's make a very white dessert (or breakfast, hey) with a delicate crumb and cheesecake filling.  Yes? Yes.


Cream Cheese Coffee Cake

Serves 12-16

Ingredients:

For the Filling

  • 8 oz / 225g cream cheese, softened

  • 1/4 cup / 50g sugar

  • 1/2 tsp vanilla extract

  • 1 egg

For the Cake

  • 1 1/2 cups / 180g all-purpose flour

  • 1/2 tsp baking powder

  • 1/2 tsp baking soda

  • 1/2 tsp salt

  • 3 Tbsp / 42g oil

  • 1/2 cup / 100g sugar

  • 2 eggs

  • 1 tsp vanilla

  • 1/2 cup / 123g yogurt or sour cream

For the Streusel

  • 1/4 cup / 50g sugar

  • 1/4 cup / 30g all-purpose flour

  • 3 Tbsp / 42g cold butter, cubed

Directions:

Oven 350°F / 177°C.  Greased 8x8in / 20x20cm square baking pan.

For the Filling

  1. In the bowl of a stand mixer beat cream cheese until smooth, about 30 seconds. 

  2. Add sugar, vanilla, egg and beat on medium-low speed until combined.  Pour into another bowl and set aside. 

For the Cake

  1. In a medium bowl whisk together flour, baking powder, baking soda, and salt. 

  2. In the bowl of a stand mixer combine oil and sugar.  Beat in eggs one at a time.  Add vanilla. 

  3. Alternate adding the dry ingredients and yogurt to the oil and sugar mixture.  Dry, yogurt, dry, yogurt, dry.  Mix only until just combined after each addition. 

For the Streusel

  1. Combine sugar, flour, and butter in a small bowl with a pastry cutter, fork, or your hands until crumbles the size of pebbles appear.

Assembly

  1. Spread half of the cake batter in the bottom of prepared pan. 

  2. Pour and spread cream cheese filling evenly over batter; gently swirl.

  3. Spread remaining half of cake batter over cream cheese filling. 

  4. Evenly sprinkle streusel over the top.

  5. Bake for 20-25 minutes or until toothpick inserted near the center comes out mostly clean. 

Jenny's Notes:

  • Love coffee cake or serving at a party?  You can double this recipe and bake in a 9x13 inch pan.  Increase baking time to about 40 minutes.

cream cheese, coffee cake, streusel, cream cheese filling, swirl, moist
Breakfast, Dessert
American
Yield: 12-16 Servings
Author:

Cream Cheese Coffee Cake

Super moist coffee cake with a thick cream cheese swirl and delicate streusel topping.
prep time: 45 Mcook time: 25 Mtotal time: 70 M

ingredients:

For the Filling
  • 8 oz / 225g cream cheese, softened
  • 1/4 cup / 50g sugar
  • 1/2 tsp vanilla extract
  • 1 egg
For the Cake
  • 1 1/2 cups / 180g all-purpose flour
  • 1/2 tsp baking powder
  • 1/2 tsp baking soda
  • 1/2 tsp salt
  • 3 Tbsp / 42g oil
  • 1/2 cup / 100g sugar
  • 2 eggs
  • 1 tsp vanilla
  • 1/2 cup / 123g yogurt or sour cream
For the Streusel
  • 1/4 cup / 50g sugar
  • 1/4 cup / 30g all-purpose flour
  • 3 Tbsp / 42g cold butter, cubed

instructions:

How to cook Cream Cheese Coffee Cake

For the Filling
  1. In the bowl of a stand mixer beat cream cheese until smooth, about 30 seconds.
  2. Add sugar, vanilla, egg and beat on medium-low speed until combined. Pour into another bowl and set aside.
For the Cake
  1. In a medium bowl whisk together flour, baking powder, baking soda, and salt.
  2. In the bowl of a stand mixer combine oil and sugar. Beat in eggs one at a time. Add vanilla.
  3. Alternate adding the dry ingredients and yogurt to the oil and sugar mixture. Dry, yogurt, dry, yogurt, dry. Mix only until just combined after each addition.
For the Streusel
  1. Combine sugar, flour, and butter in a small bowl with a pastry cutter, fork, or your hands until crumbles the size of pebbles appear.
Assembly
  1. Oven 350°F / 177°C. Greased 8x8in / 20x20cm square baking pan.
  2. Spread half of the cake batter in the bottom of prepared pan.
  3. Pour and spread cream cheese filling evenly over batter; gently swirl.
  4. Spread remaining half of cake batter over cream cheese filling.
  5. Evenly sprinkle streusel over the top.
  6. Bake for 20-25 minutes or until toothpick inserted near the center comes out mostly clean.

NOTES:

Love coffee cake or serving at a party? You can double this recipe and bake in a 9x13 inch pan. Increase baking time to about 40 minutes.

Calories

269.85

Fat (grams)

13.92

Sat. Fat (grams)

6.21

Carbs (grams)

31.96

Fiber (grams)

0.47

Net carbs

31.48

Sugar (grams)

18.21

Protein (grams)

4.58

Sodium (milligrams)

270.60

Cholesterol (grams)

58.08
Nutritional information is approximate and based on 12 servings.
Created using The Recipes Generator

Whole Wheat Peanut Butter Muffins

Do you like my snowman liners? :)

Do you like my snowman liners? :)

This post may contain affiliate links. If you buy something using these links, Jennyblogs may receive a small commission, at no extra cost to you. This helps to support Jennyblogs. For further information see the privacy policy. Grazie!

Muffins are great, aren’t they? So American and so versatile. They can be savory or sweet and just about any flavor you could desire. They can be calorie bombs or nutrition bombs. These Whole Wheat Peanut Butter Muffins are actually pretty good for you, considering how delicious they are.

The sugar content is low, only whole wheat flour is used, and they’re rich in peanut butter and chocolate!

Sometimes I think muffins don’t get the recognition they deserve. Each country has its specialty and maybe of all the things that my country could’ve invented I would’ve chosen croissants or pastries, but muffins have their place on the table for sure! I am not ashamed.

The world is a beautiful place full of diverse people, traditions, and food.  The beauty of the age we live in is how accessible it has become to travel.  You no longer have to rely on magazines and other people's experience, or weigh the cost of time it takes to get places and the chance of death as you voyage on a ship or whatnot.  Even if you remain right where you are, chances are the other people around you are coming and going.  The world is opening up more and more, we are no longer isolated from each other.  We are exposed to different ways of thinking, culture, languages, ideals.  Sometimes we agree, and sometimes we don't, and as long as we know how to do those two things humbly and lovingly, it can be a beautiful thing.  Even when it seems the disagreements outweigh the agreements, there will always be one thing we have in common: Food. 

Never underestimate the power of food.  We can thank France for flaky, buttery pastries, crepes, chocolate mousse, and baguettes, Italy for pizza, pasta, gelato, and panettone, Germany for pretzels and bratwurst, Greece for Gyros and tzatziki, the middle east for hummus, falafel, tabbouleh, baba ganoush, pita, and shawarma, Turkey for Turkish delight and baklava, Japan for sushi, China for wontons, spring rolls, and dumplings, Ireland for Shepherd's pie, Mexico for tacos, burritos, and enchiladas, Canada for Poutine, U.S. for macaroni and cheese, apple pie, s'mores, buffalo wings, jambalaya, annnnnnd muffins. 

Basically, while the French are making pastries, Americans are making muffins.  Hm.  That's fine.  Taking two days to make something does not necessarily mean it will be automatically better.  (In this case, however, I think it does.)  But we don't always have the luxury of taking two days to make pastries when the fancy strikes.  Life and work happens.  Enter the humble muffin.  Simple, humble, delicious, and quick to whip up.  It has its place in the kitchen.

They tend to get a bad rap for being high in calories, unhealthy, and associated with muffin tops.  I promise, their sole intent in life is not give you a muffin top.  Poor muffins.  I am here today to show you that muffins can be nutritious, not 500 calories a pop, and enjoyable to make.  I hope I don't have to tell you they are also enjoyable to eat.  Especially these ones. :)

Recipe adapted from Culinary Adventures in the Kitchen


Whole Wheat Peanut Butter Muffins

12-14 muffins

Ingredients:

  • 2 1/4 cups / 270g whole wheat or white whole wheat flour

  • 1 tsp baking soda

  • 1 tsp baking powder

  • 1/4 tsp salt

  • 3 Tbsp / 42g oil

  • 1/4 cup / 61g yogurt

  • 1/2 cup / 100g brown sugar

  • 3/4 cup / 195g peanut butter

  • 2 tsp vanilla extract

  • 2 eggs

  • 1 cup / 237g buttermilk

  • 1 cup / 175g chocolate chips

Directions:

Oven 375°F / 190°C.  Muffin tin lined with cupcake liners or greased.  You may need two pans.

  1. In a medium bowl, whisk together flour, baking soda, baking powder, and salt. 

  2. In the bowl of a stand mixer, combine oil, yogurt, and brown sugar.  Add peanut butter and mix until incorporated.  Add the eggs one at a time, scraping down sides of bowl as needed. 

  3. Add 1/3 of flour mixture to the stand mixer, mixing just until combined.  Add half of the buttermilk, again mixing until just combined.  Repeat with another third of the flour, the remaining half of the buttermilk, and finally the last third of flour.  Gently stir in 3/4 cup / 130g chocolate chips with a spoon or spatula. 

  4. Fill muffin cups 3/4 full, and sprinkle remaining 1/4 cup / 44g chocolate chips over the tops. 

  5. Bake until lightly golden around the edges and/or a toothpick inserted near the center comes out clean, about 16-18 minutes. 

Jenny's Notes:

  • Whole wheat flour is not necessarily healthier than white whole wheat flour, they are simply different kinds of wheat.  Whole wheat flour is a red wheat, which gives it the darker color and slightly heavier texture.  Think of it like a Granny Smith apple and a Macintosh Apple, they are different varieties of apple but equally nutritious for you. 

  • Using either plain yogurt or a sweetened yogurt like vanilla is fine in this recipe. 

  • These muffins are not overly sweet, (I think they're perfect for breakfast so you don't start your day with a sugar coma) so feel free to up the sugar if you prefer sweeter muffins. 

muffins,snack,nutritious, chocolate chips, whole wheat, dark chocolate, peanut butter, buttermilk,yogurt
Breakfast, Bread
American
Yield: 12-14 Muffins
Author:

Whole Wheat Peanut Butter Muffins

Lightly sweet, whole wheat peanut butter muffins with a healthy sprinkling of chocolate chips.
prep time: 30 Mcook time: 18 Mtotal time: 48 M

ingredients:

  • 2 1/4 cups / 270g whole wheat or white whole wheat flour
  • 1 tsp baking soda
  • 1 tsp baking powder
  • 1/4 tsp salt
  • 3 Tbsp / 42g oil
  • 1/4 cup / 61g yogurt
  • 1/2 cup / 100g brown sugar
  • 3/4 cup / 195g peanut butter
  • 2 tsp vanilla extract
  • 2 eggs
  • 1 cup / 237g buttermilk
  • 1 cup / 175g chocolate chips

instructions:

How to cook Whole Wheat Peanut Butter Muffins

  1. Oven 375°F / 190°C. Muffin tin lined with cupcake liners or greased. You may need two pans.
  2. In a medium bowl, whisk together flour, baking soda, baking powder, and salt.
  3. In the bowl of a stand mixer, combine oil, yogurt, and brown sugar. Add peanut butter and mix until incorporated. Add the eggs one at a time, scraping down sides of bowl as needed.
  4. Add 1/3 of flour mixture to the stand mixer, mixing just until combined. Add half of the buttermilk, again mixing until just combined. Repeat with another third of the flour, the remaining half of the buttermilk, and finally the last third of flour. Gently stir in 3/4 cup / 130g chocolate chips with a spoon or spatula.
  5. Fill muffin cups 3/4 full, and sprinkle remaining 1/4 cup / 44g chocolate chips over the tops.
  6. Bake until lightly golden around the edges and/or a toothpick inserted near the center comes out clean, about 16-18 minutes.

NOTES:

Whole wheat flour is not necessarily healthier than white whole wheat flour, they are simply different kinds of wheat. Whole wheat flour is a red wheat, which gives it the darker color and slightly heavier texture. Think of it like a Granny Smith apple and a Macintosh Apple, they are different varieties of apple but equally nutritious for you. Using either plain yogurt or a sweetened yogurt like vanilla is fine in this recipe. These muffins are not overly sweet, (I think they're perfect for breakfast so you don't start your day with a sugar coma) so feel free to up the sugar if you prefer sweeter muffins.

Calories

329.90

Fat (grams)

17.53

Sat. Fat (grams)

4.88

Carbs (grams)

39.14

Fiber (grams)

4.20

Net carbs

34.95

Sugar (grams)

18.61

Protein (grams)

9.13

Sodium (milligrams)

328.68

Cholesterol (grams)

32.10
Nutritional information is approximate and based on 12 servings.
Created using The Recipes Generator

Cinnamon Streusel Coffee Cake

IMG_4443.jpg

Think of a delicately moist coffee cake with a cinnamon swirl and a crunchy, sweet streusel on top. That’s what we’re making today.

If the first thought that comes to your mind when you think of coffee cake is dry-crumbly-use-up-a-week's-worth-of-saliva-in-one-bite-cake, then think again.  No, no, no.  Coffee cake is supposed to be sweet, but not quite as sweet as regular cake, flavorful, and with a beautifully dense crumb.  That's fancy talk for moist.  But for the mental care of some readers who have an avid dislike for that term, I tried to avoid using it.  But I still did to explain myself.  Just can't win. 

Oh, and for some people who may be confused, there is (most often) no coffee involved in the batter.  The final product, however, pairs beautifully with a mug of coffee.  Hence the name.  (Speaking of words we don't like...mug?  No thanks.  It's like your mouth was too lazy to talk - "mmmm" - then made a huge effort and ended up with "ug."  Mmmmmmug.) 

On to more delicious sounding, looking, and tasting things!! 

This post may contain affiliate links. If you buy something using these links, Jennyblogs may receive a small commission, at no extra cost to you. This helps to support Jennyblogs. For further information see the privacy policy. Grazie!


Cinnamon Streusel Coffee Cake

Serves 9-12

Ingredients:

For the Cake

  • 1/2 cup / 112g oil

  • 1/2 cup / 100g sugar

  • 1/4 cup / 50g brown sugar

  • 1 1/4 tsp baking powder

  • 3/4 tsp salt

  • 1 tsp vanilla extract

  • 1 egg

  • 1/2 cup / 122g plain yogurt

  • 1/2 cup / 119g milk

  • 2 cups / 240g all-purpose flour

For the Cinnamon Swirl

  • 1/2 cup / 100g brown sugar

  • 2 1/2 tsp cinnamon

  • 1 tsp unsweetened cocoa powder

For the Streusel

  • 1/3 cup / 67g sugar

  • 1/4 cup / 30g all-purpose flour

  • 1/4 cup / 23g rolled oats

  • 1 tsp cinnamon

  • 2 Tbsp / 28g butter, melted

Directions:

Oven 350°F / 177°C.  Greased 8x8in / 20x20cm square baking pan, or 8in / 20cm round cake pan.

Make the Cake

  1. In the bowl of a stand mixer, beat oil, sugars, baking powder, salt, and vanilla until well combined.  Beat in egg. 

  2. In a separate small bowl mix together yogurt and milk. 

  3. Add a third of the flour to the oil mixture, mixing until almost combined.  Add half of the yogurt mixture.  Continue adding flour and yogurt mixture to oil mixture until everything is just combined. 

  4. Pour half of the batter into the prepared pan, spreading all the way to edges; set other half aside. 

Make the Cinnamon Swirl

  1. In a small bowl combine brown sugar, cinnamon, and cocoa powder. 

  2. Sprinkle evenly over batter in pan. 

  3. Pour remaining batter over cinnamon filling and use a spatula to gently spread to edges.

Make the Streusel

  1. In another small bowl, combine sugar, flour, oats, and cinnamon.  Add the melted butter and mix until crumbles form. 

  2. Evenly distribute crumble over batter in pan. 

  3. Bake for 40-45 minutes or until toothpick inserted in center comes out clean. 

Jenny's Notes:

  • Watch that bake time.  Toothpicks are your best friend.  I was testing this recipe using my Italian oven that didn't like to bake things on the bottom, so you may need less time.

  • REALLY like coffee cake?  Double this recipe and put in a 9x13 inch pan or two cake pans.  You can always freeze one pan!

  • Don't have plain yogurt on hand? You can also use sweetened yogurt and reduce sugar by 1/4 cup / 50g, or try Greek yogurt, fresh ricotta, sour cream, or mascarpone.  The dairy options are endless!!!!  I really liked fresh ricotta in this recipe. 

coffee cake, cinnamon swirl, brunch, streusel topping
breakfast, cake, dessert
American
Yield: 9-12 servings
Author:
Cinnamon Streusel Coffee Cake

Cinnamon Streusel Coffee Cake

Delicate, moist coffee cake with a cinnamon swirl and streusel to top it all off.
Prep time: 30 MinCook time: 45 MinTotal time: 1 H & 15 M

Ingredients

For the Cake
For the Cinnamon Swirl
For the Streusel

Instructions

Make the Cake
  1. Oven 350°F / 177°C. Greased 8x8in / 20x20cm square baking pan, or 8in / 20cm round cake pan.
  2. In the bowl of a stand mixer, beat oil, sugars, baking powder, salt, and vanilla until well combined. Beat in egg.
  3. In a separate small bowl mix together yogurt and milk.
  4. Add a third of the flour to the oil mixture, mixing until almost combined. Add half of the yogurt mixture. Continue adding flour and yogurt mixture to oil mixture until everything is just combined.
  5. Pour half of the batter into the prepared pan, spreading all the way to edges; set other half aside.
Make the Cinnamon Swirl
  1. In a small bowl combine brown sugar, cinnamon, and cocoa powder.
  2. Sprinkle evenly over batter in pan.
  3. Pour remaining batter over cinnamon filling and use a spatula to gently spread to edges.
Make the Streusel
  1. In another small bowl, combine sugar, flour, oats, and cinnamon. Add the melted butter and mix until crumbles form.
  2. Evenly distribute crumble over batter in pan.
  3. Bake for 40-45 minutes or until toothpick inserted in center comes out clean.

Notes:

Watch that bake time. Toothpicks are your best friend. I was testing this recipe using my Italian oven that didn't like to bake things on the bottom, so you may need less time. REALLY like coffee cake? Double this recipe and put in a 9x13 inch pan or two cake pans. You can always freeze one pan! Don't have plain yogurt on hand? You can also use sweetened yogurt and reduce sugar by 1/4 cup / 50g, or try Greek yogurt, fresh ricotta, sour cream, or mascarpone. The dairy options are endless!!!! I really liked fresh ricotta in this recipe.

Calories

402.38

Fat (grams)

16.42

Sat. Fat (grams)

2.95

Carbs (grams)

59.80

Fiber (grams)

1.55

Net carbs

58.24

Sugar (grams)

35.85

Protein (grams)

5.08

Sodium (milligrams)

311.45

Cholesterol (grams)

29.23

Nutritional information is approximate and based on 9 servings.

Did you make this recipe?
Tag @jennyblogsandbakes on instagram and hashtag it #jennyblogs
Created using The Recipes Generator