Avalanche Bark - Rocky Mountain Chocolate Factory Copycat

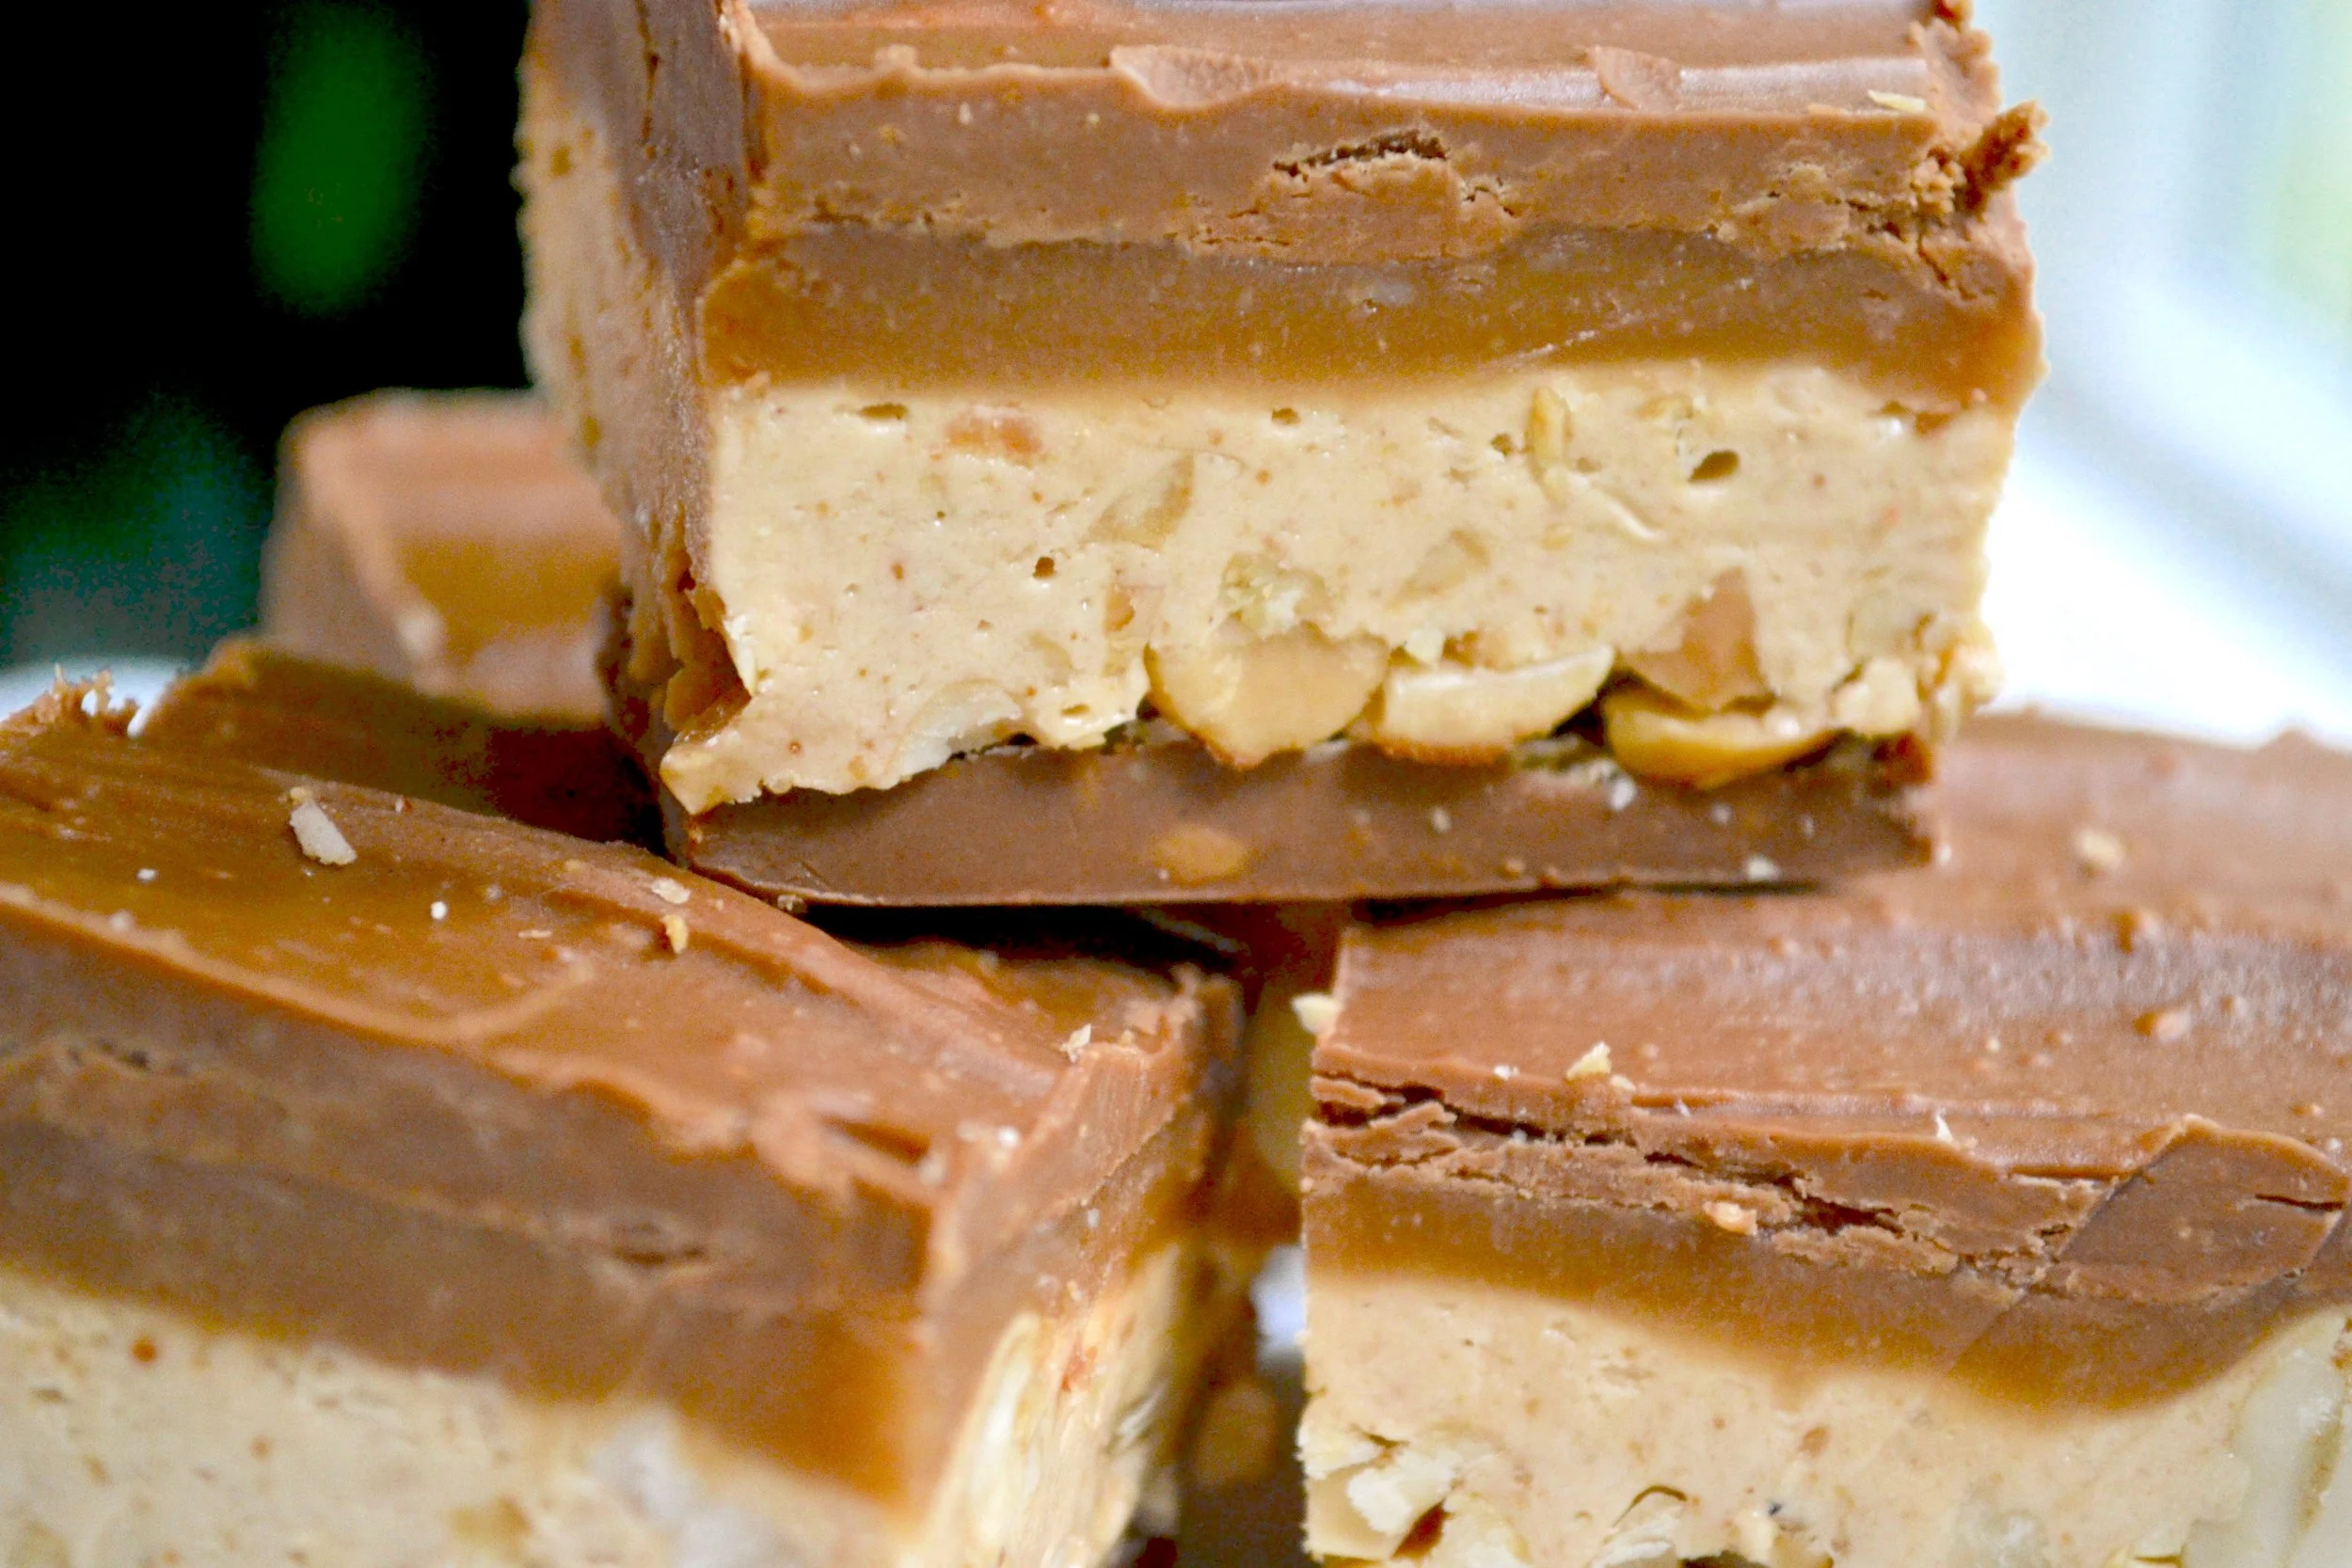
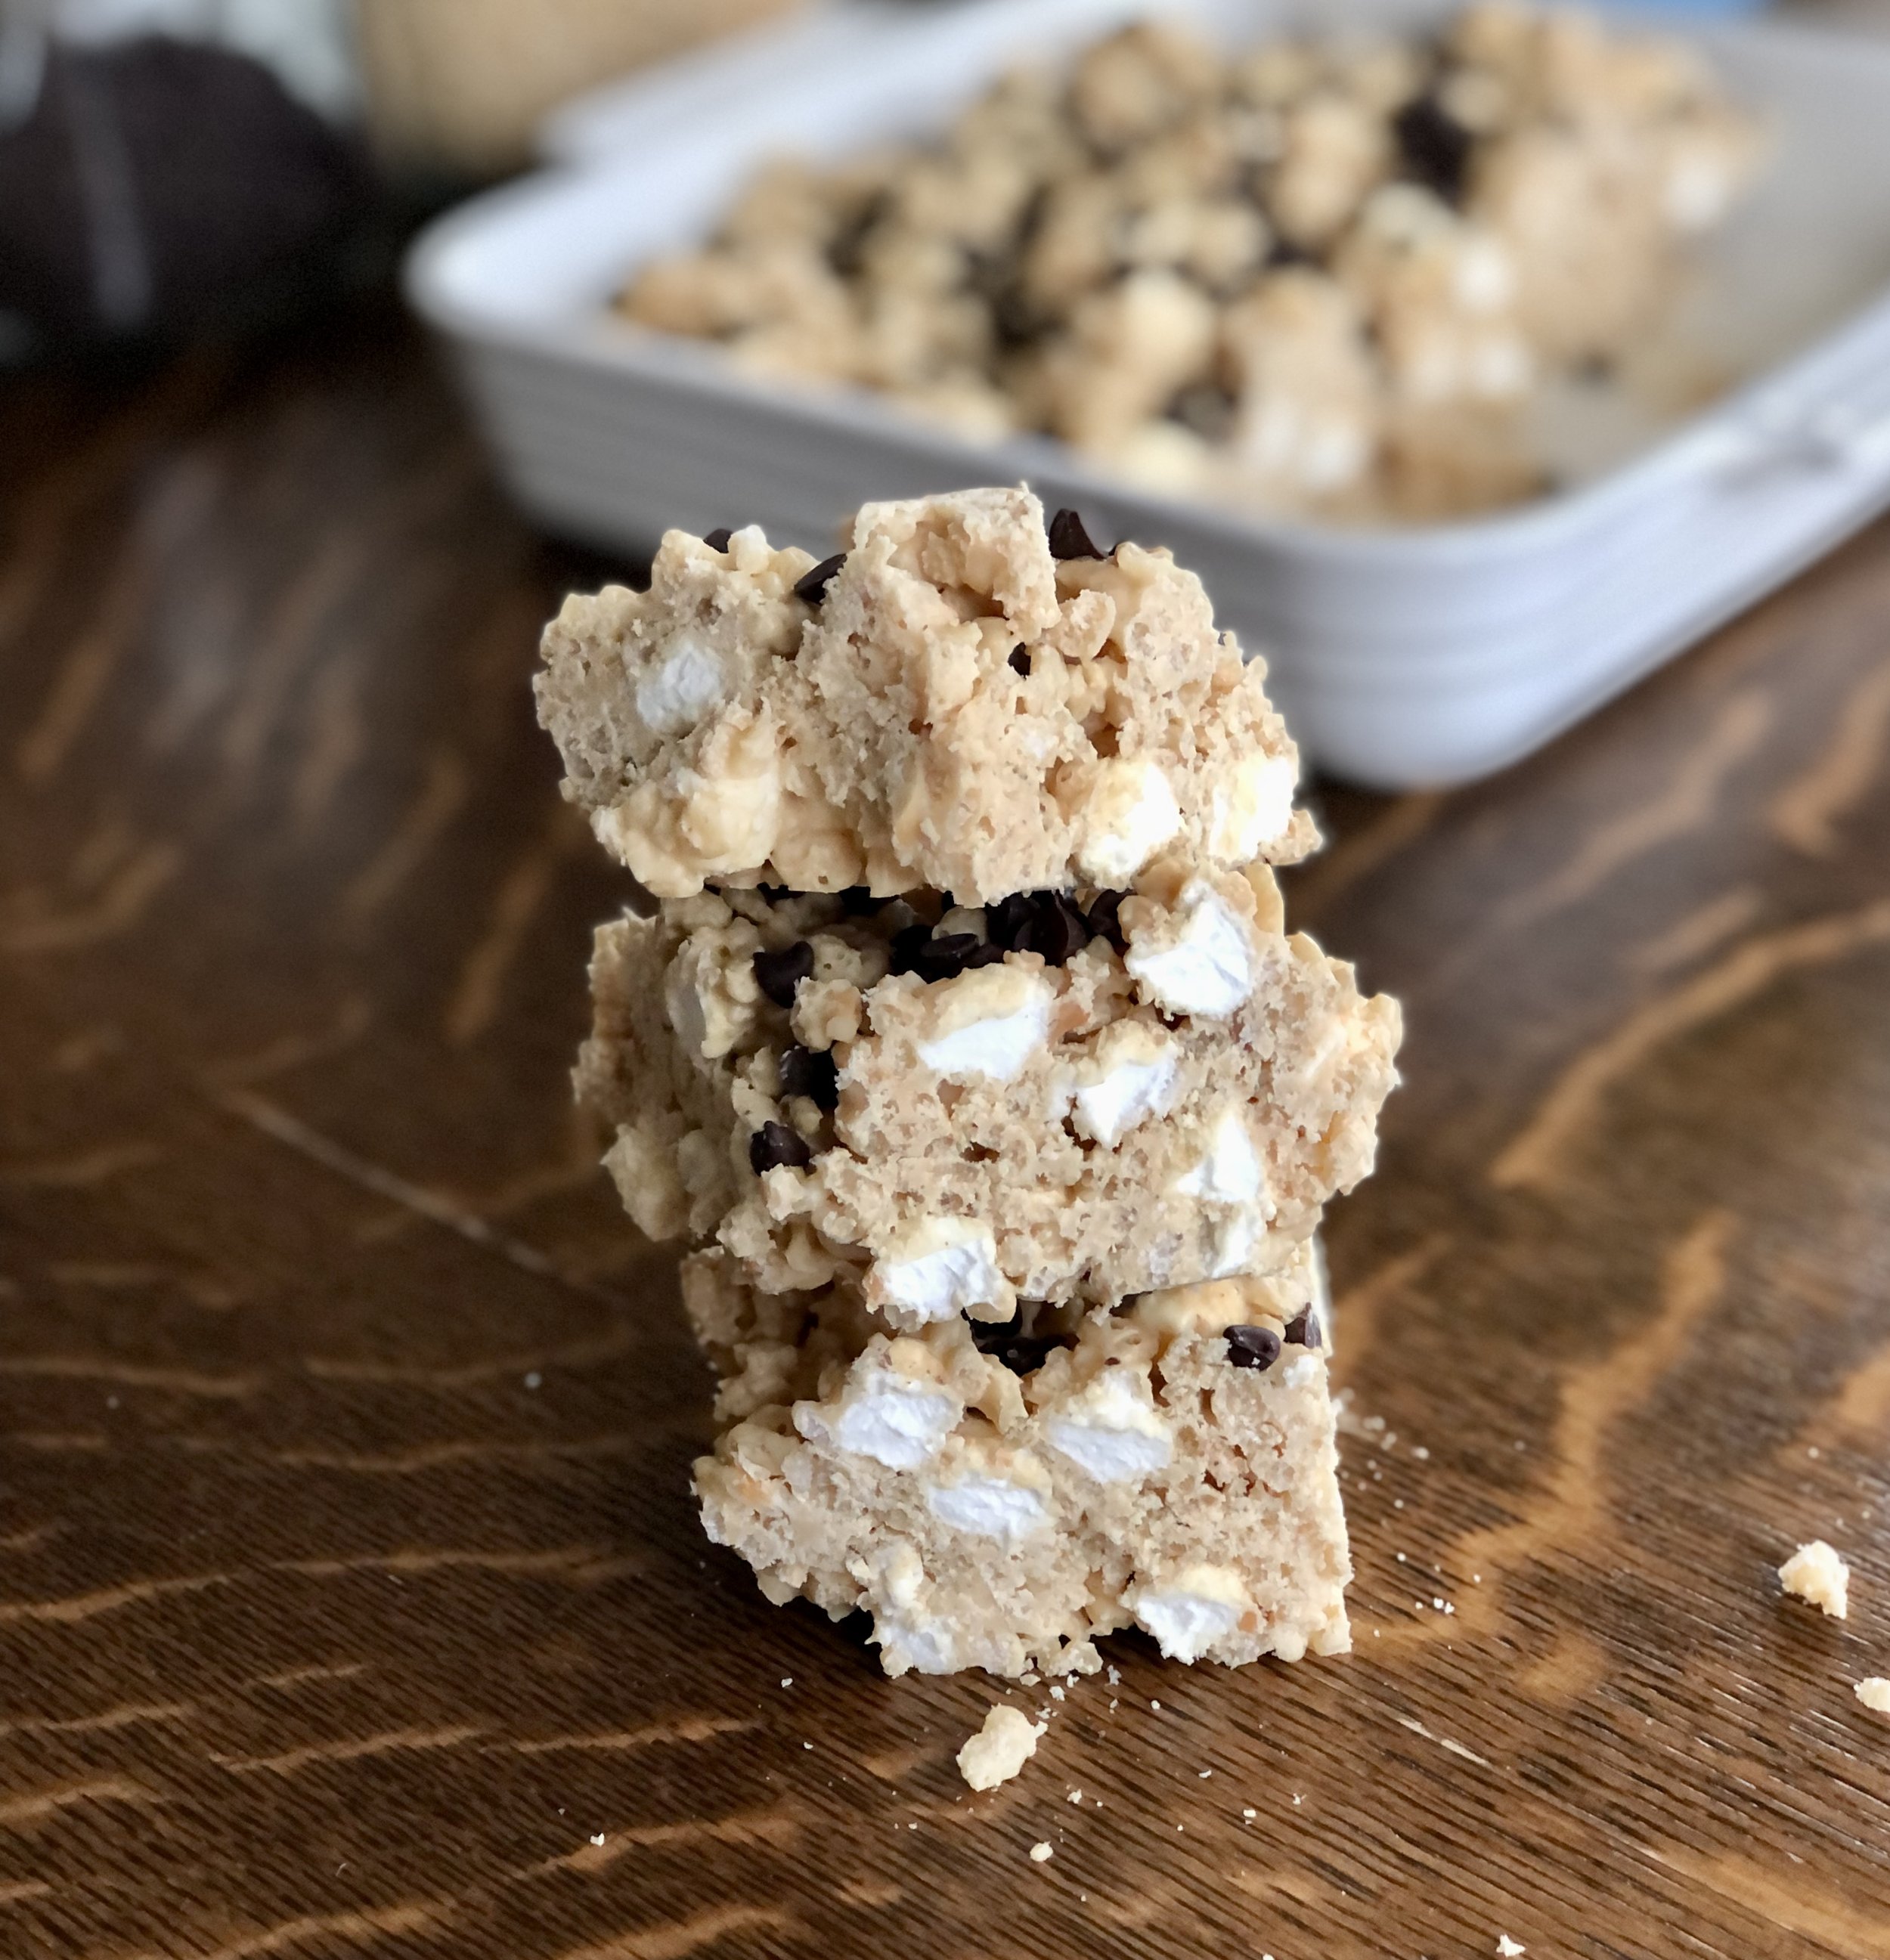
White chocolate peanut butter coated Rice Krispie treats with mini marshmallows and chocolate chips.

These are so delicious and simple to make, needing only about 10 minutes and 5 ingredients. Pop it in the fridge and you’ve got yourself a tasty treat for yourself or for that party you forgot you were supposed to bring something to!

I always have people asking for this recipe when I take it places, and it’s an easy one to give because it’s so simple. Even once when I had made this in Italy, and only had some older overly-chewy marshmallows, (marshmallows aren’t a big thing there and different than US ones to begin with) it was still a hit. In fact, a friend, after asking for the recipe, asked what the chewy bits were, and when I embarrassingly told him about the stale marshmallows, he laughed and said, “they’re my favorite part!” These are so good, they’ll even make chewy marshmallows shine.

The shameless blogger backstory

I once worked at a Rocky Mountain Chocolate Factory, and honestly it was one of the most fun jobs I ever had. I enjoyed working with chocolate, making the caramel apples, fudge, barks, etc., I liked my colleagues, had a good boss, and yes, also enjoyed eating some chocolate. It was very low-stress and not overly physical, at least compared to having spent 6+ hours at the ballet studio during the day before going to RMCF.

This recipe is a copycat of the Rocky Mountain Chocolate Factory’s Avalanche Bark. While legally I can’t give you the exact recipe, I would like to note that it would be completely impractical for me to even try. Everything there is made in much larger batches than a home baker would need to make, and by the time the recipe would be reduced down to a manageable quantity, you would have awful measurements like 0.1625 lbs of this or 2/3 tsp of that.

What I can tell you, is that this recipe is probably the closest you can get. But all of that could actually be irrelevant, as some of the other copycat recipes probably adjusted the recipe according to their tastes, and you can too! It wouldn’t take a rocket scientist to look at a slice of authentic Rocky Mountain Avalanche Bark and compare it to some of the other copycat recipes to realize that hey, Rocky Mountain’s has more Krispies. Because really, if you like a lighter, crunchier version, add more Krispies (it would also be crumblier, by the way). If you want more of a true “bark”, add less Krispies. Or, add more marshmallows and less Krispies, for a chewier version. Maybe you want more chocolate chips on top. Maybe you want to mix chocolate chips into these instead of just sprinkling on top. As you can see, for only having 5 ingredients, this recipe has quite a few possibilities for customization.


Avalanche Bark

Makes about 9 generous squares

Ingredients:

  • 12 oz white chocolate chips

  • 1/2 cup / 130g peanut butter

  • 1 1/2 cups / 86g mini marshmallows

  • 3 1/2 cups / 98g rice krispies

  • 1/4 cup / 43g mini chocolate chips

Directions:

  1. Line bottom of an 8x8in / 20x20cm square pan with wax paper.

  2. In a medium large pot, melt white chocolate chips and peanut butter together over low heat, stirring often.

  3. When white chocolate has just melted, remove from heat and stir in mini marshmallows. Gently fold in Rice Krispies until evenly coated.

  4. Spoon and spread into prepared pan, being careful not to flatten too much.

  5. Sprinkle with mini chocolate chips and press lightly.

  6. Allow to set at room temperature or in fridge before slicing.

Jenny’s Notes:

  • While this recipe is very similar to Rocky Mountain’s, feel free to customize as you wish. Add more or less Krispies, more or less Mini marshmallows, more chocolate chips or even mix them in, etc.

Avalanche Bark - Rocky Mountain Chocolate Factory Copycat
Yield 9
Author
Prep time
10 Min
Inactive time
20 Min
Total time
30 Min

Avalanche Bark - Rocky Mountain Chocolate Factory Copycat

White chocolate and peanut butter coated rice krispies with chewy mini marshmallows and mini chocolate chips make up this simple, no-bake dessert that tastes just like Rocky Mountain Chocolate Factory's

Ingredients

Instructions

  1. Line bottom of an 8x8in / 20x20cm square pan with wax paper.
  2. In a medium large pot, melt white chocolate chips and peanut butter together over low heat, stirring often.
  3. When white chocolate has just melted, remove from heat and stir in mini marshmallows. Gently fold in Rice Krispies until evenly coated.
  4. Spoon and spread into prepared pan, being careful not to flatten too much.
  5. Sprinkle with mini chocolate chips and press lightly.
  6. Allow to set at room temperature or in fridge before slicing.

Notes

  • While this recipe is very similar to Rocky Mountain’s, feel free to customize as you wish. Add more or less Krispies, more or less Mini marshmallows, more chocolate chips or even mix them in, etc.

Nutrition Facts

Calories

382.4

Fat

20.86 g

Sat. Fat

9.55 g

Carbs

45.03 g

Fiber

0.96 g

Net carbs

44.08 g

Sugar

32.81 g

Protein

6.56 g

Sodium

162.96 mg

Cholesterol

8.69 mg

Nutritional information is approximate. Based on 1 square if cut into 9 slices.

Rocky Mountain Chocolate Factory, Avalanche Bark, no bake dessert
dessert
American
Did you make this recipe?
Tag @jennyblogsandbakes on instagram and hashtag it #jennyblogs

Almond Joy Cookies

Almond Joy candy bars in an easy to make, homemade cookie form.

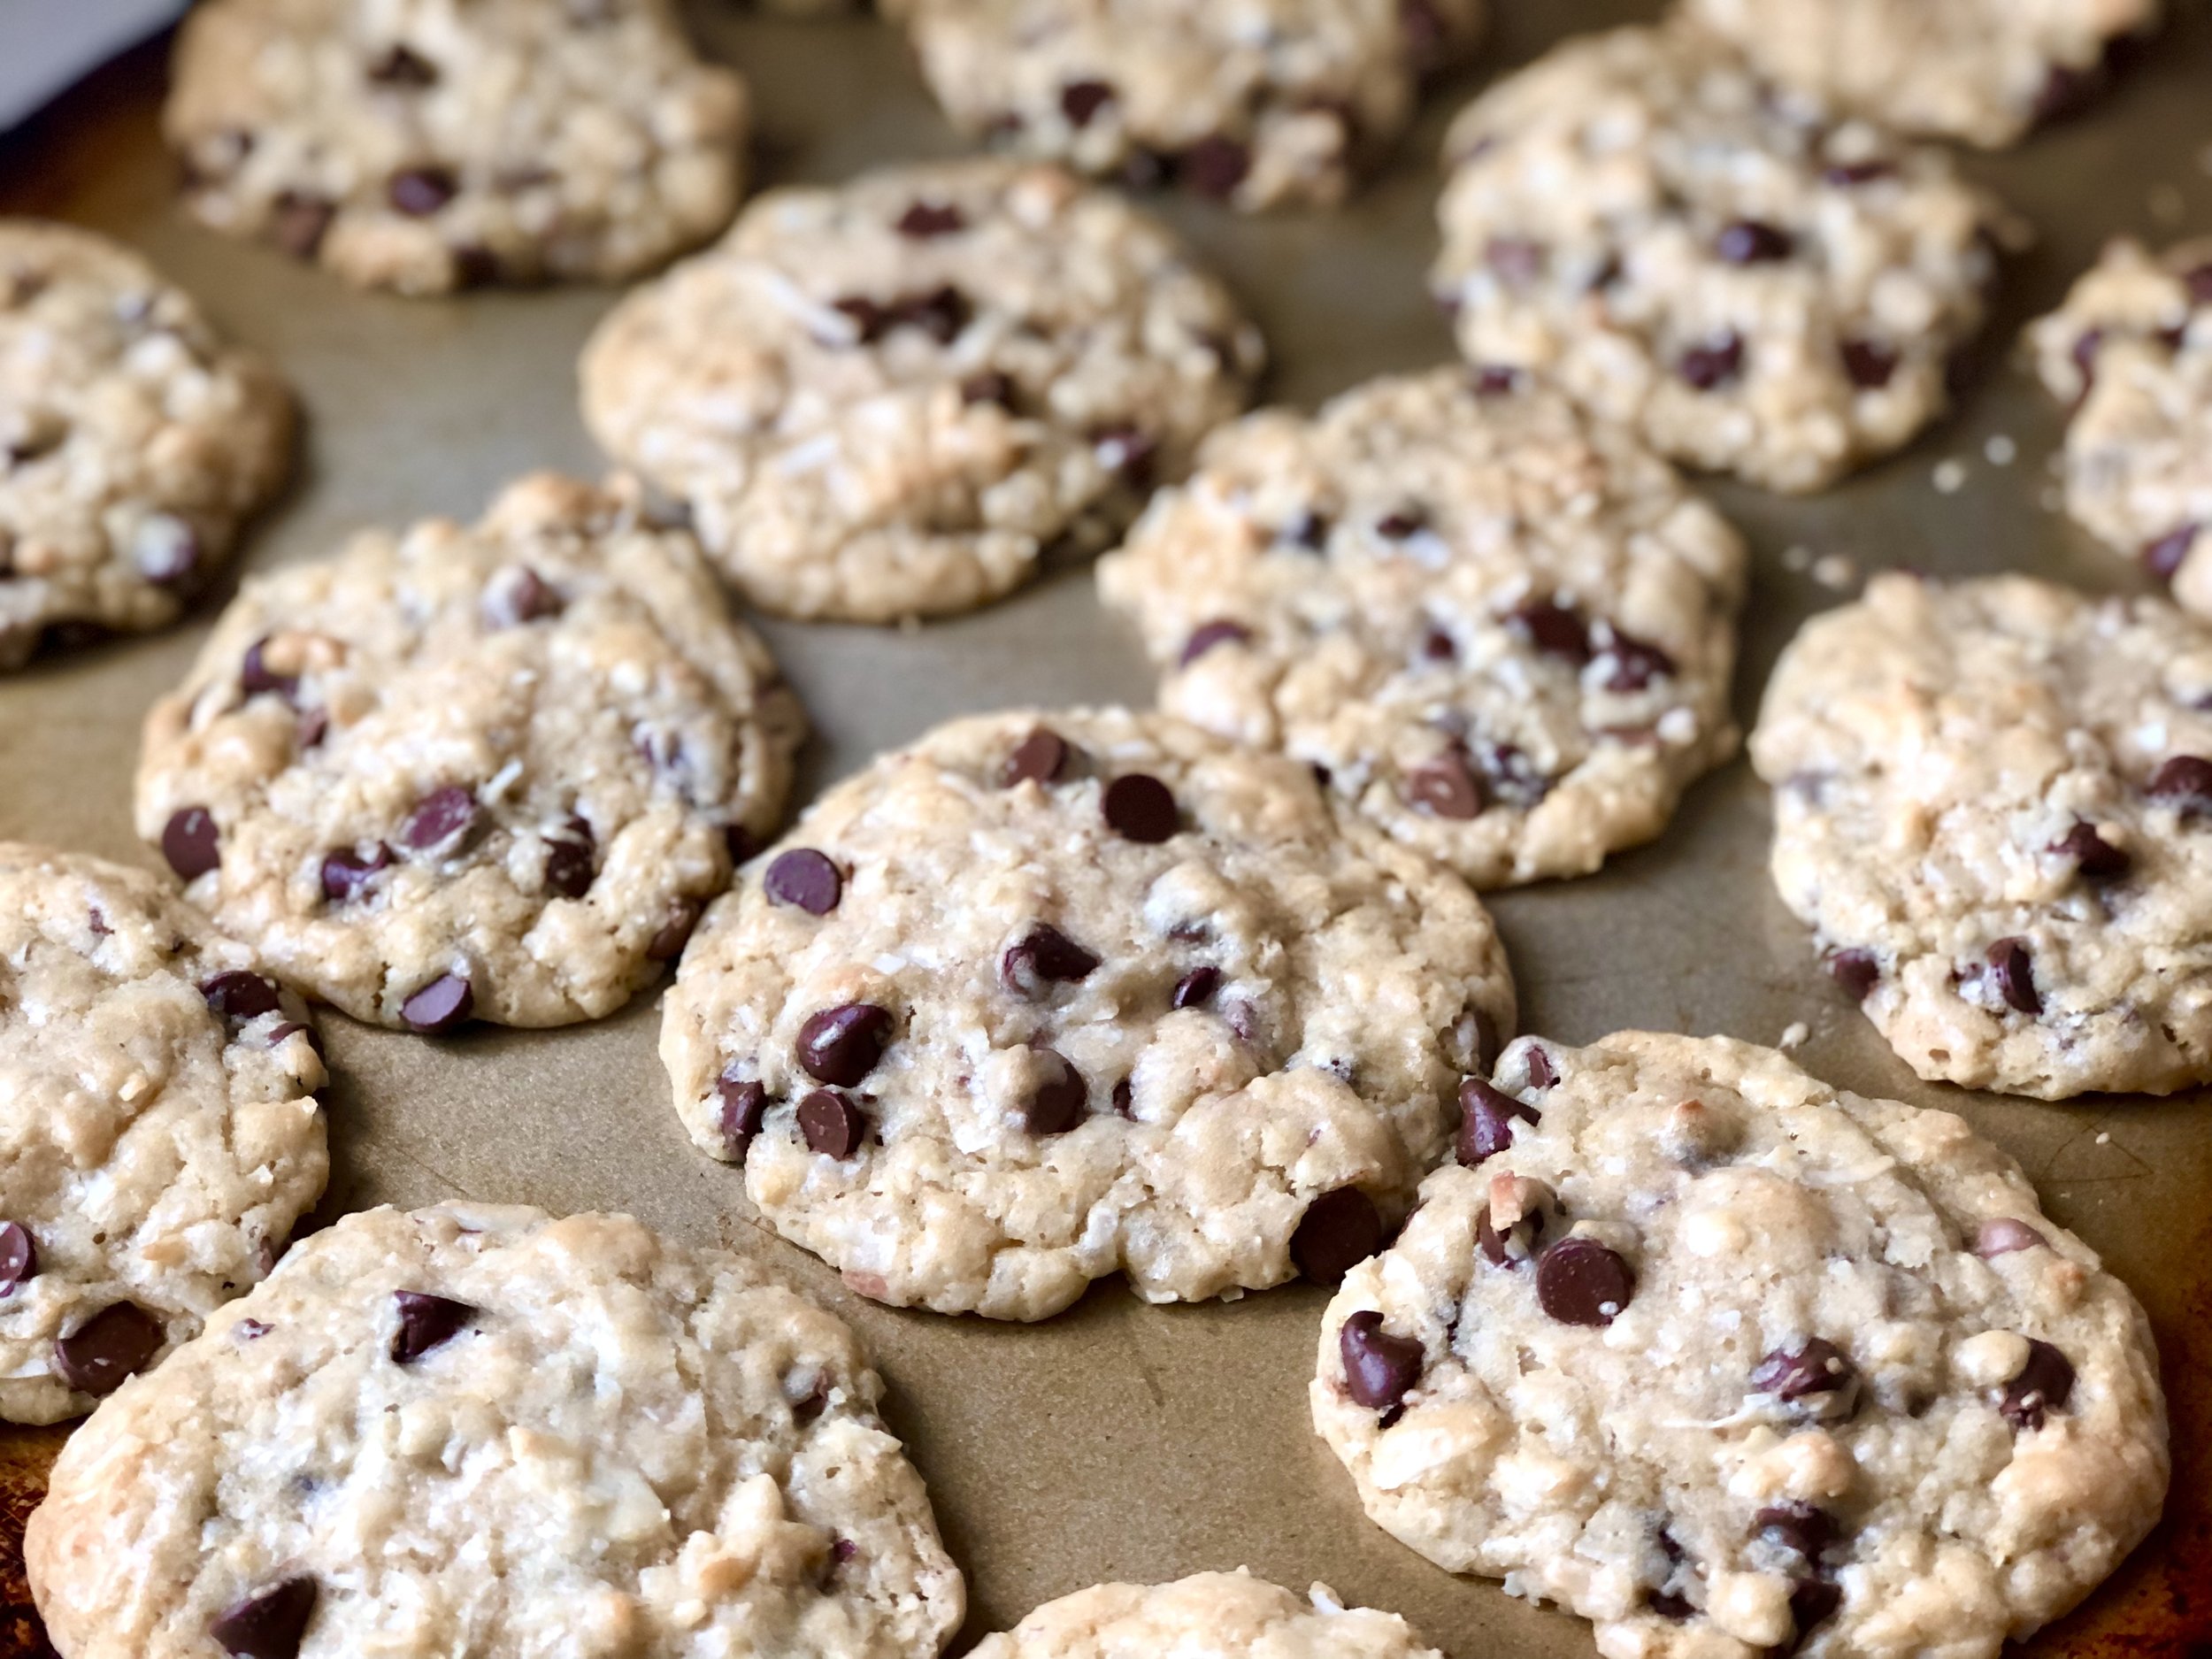
These cookies are loaded with chocolate chips, coconut, and sliced almonds, bursting with that coconut and almond flavor. They’re sweet, chewy, and pure joy to eat. (Heh heh.)

Make these with toasted coconut!

While I’ve written the recipe as a quick and easy to whip up recipe with regular, unsweetened coconut, these are DELICIOUS if you have a few extra minutes to toast your coconut.

To toast coconut:

  1. Preheat oven to 350°F / 177°C.

  2. Spread 2 cups coconut into an even layer onto an ungreased baking sheet or dish.

  3. Bake in oven for 8-10* minutes, or until golden and fragrant. Check every 2 minutes or so to ensure it doesn’t burn. Stir as necessary.

* Baking time will vary depending on oven and type of baking dish used.

I used to always use a baking sheet or cookie sheet to toast coconut, until I tried using a Le Creuset baking dish, and I’ve never used anything else since. The coconut toasts so evenly I rarely have to stir it anymore, and burning it is a distant memory.

Le Creuset is made of enameled stoneware which creates even baking, and easy clean up! One more amazing use for Le Creuset. They’re an investment and can be very expensive, but certain pieces are more affordable, or even if you can find them on occasion at Home Goods or Le Creuset’s outlet stores, you can get some pretty good deals.


Almond Joy Cookies

Makes about 2 dozen cookies

Ingredients:

  • 3/4 cup / 168g neutral-flavored cooking oil

  • 3/4 cup / 150g sugar

  • 3/4 cup / 150g brown sugar

  • 2 eggs

  • 1 tsp vanilla extract

  • 1 tsp coconut extract

  • 1 tsp almond extract

  • 2 cups / 160g unsweetened shredded coconut

  • 2 1/4 cups / 270g all-purpose flour

  • 1 tsp baking soda

  • 1 tsp salt

  • 2 cups (12 oz bag) / 350g semi-sweet or milk chocolate chocolate chips

  • 1/2 cup / 42g sliced almonds

Directions:

  1. In a large bowl or bowl of a stand mixer, mix together oil, and sugars.

  2. Beat in eggs and extracts. Stir in coconut.

  3. In another medium bowl, whisk together flour, baking soda, and salt.

  4. Stir dry ingredients into wet ingredients.

  5. Stir in chocolate chips and almonds by hand, just until evenly distributed.

  6. Drop by generous tablespoonfuls onto ungreased cookie sheets. Bake in preheated oven for 8-10 minutes or until cookies look puffed, slightly golden, and center no longer looks gooey.

  7. Allow to cool for about 5 minutes on cookies sheets before removing to cool completely.

Jenny’s Notes:

  • Try these cookies using toasted coconut! (Toast coconut by spreading into an even layer on a baking sheet or dish, and bake at 350°F / 177°C for 5-10 minutes or until golden brown, check every 2 minutes or so to ensure it doesn’t burn, stirring if necessary.)

  • I like to use a mix of both semi-sweet and milk chocolate chips in these!

  • For nut lovers, you can increase the amount of sliced almonds in this recipe!

Almond Joy Cookies
Yield 24 cookies
Author
Prep time
20 Min
Cook time
10 Min
Total time
30 Min

Almond Joy Cookies

Chewy cookies loaded with coconut, chocolate, and almonds, just like the Almond Joy candy bar.

Ingredients

Instructions

  1. In a large bowl or bowl of a stand mixer, mix together oil, and sugars.
  2. Beat in eggs and extracts. Stir in coconut.
  3. In another medium bowl, whisk together flour, baking soda, and salt.
  4. Stir dry ingredients into wet ingredients.
  5. Stir in chocolate chips and almonds by hand, just until evenly distributed.
  6. Drop by generous tablespoonfuls onto ungreased cookie sheets. Bake in preheated oven for 8-10 minutes or until cookies look puffed, slightly golden, and center no longer looks gooey.
  7. Allow to cool for about 5 minutes on cookies sheets before removing to cool completely.

Notes

  • Try these cookies using toasted coconut! (Toast coconut by spreading into an even layer on a baking sheet or dish, and bake at 350°F / 177°C for 5-10 minutes or until golden brown, check every 2 minutes or so to ensure it doesn’t burn, stirring if necessary.)
  • I like to use a mix of both semi-sweet and milk chocolate chips in these!
  • For nut lovers, you can increase the amount of sliced almonds in this recipe!

Nutrition Facts

Calories

298.91

Fat

17.71 g

Sat. Fat

7.83 g

Carbs

31.57 g

Fiber

1.82 g

Net carbs

29.76 g

Sugar

16 g

Protein

2.62 g

Sodium

159.65 mg

Cholesterol

13.64 mg

Nutritional information is approximate and based on 1 cookie.

no chill cookie dough, chocolate chip cookies, Almond Joy
dessert
American
Did you make this recipe?
Tag @jennyblogsandbakes on instagram and hashtag it #jennyblogs

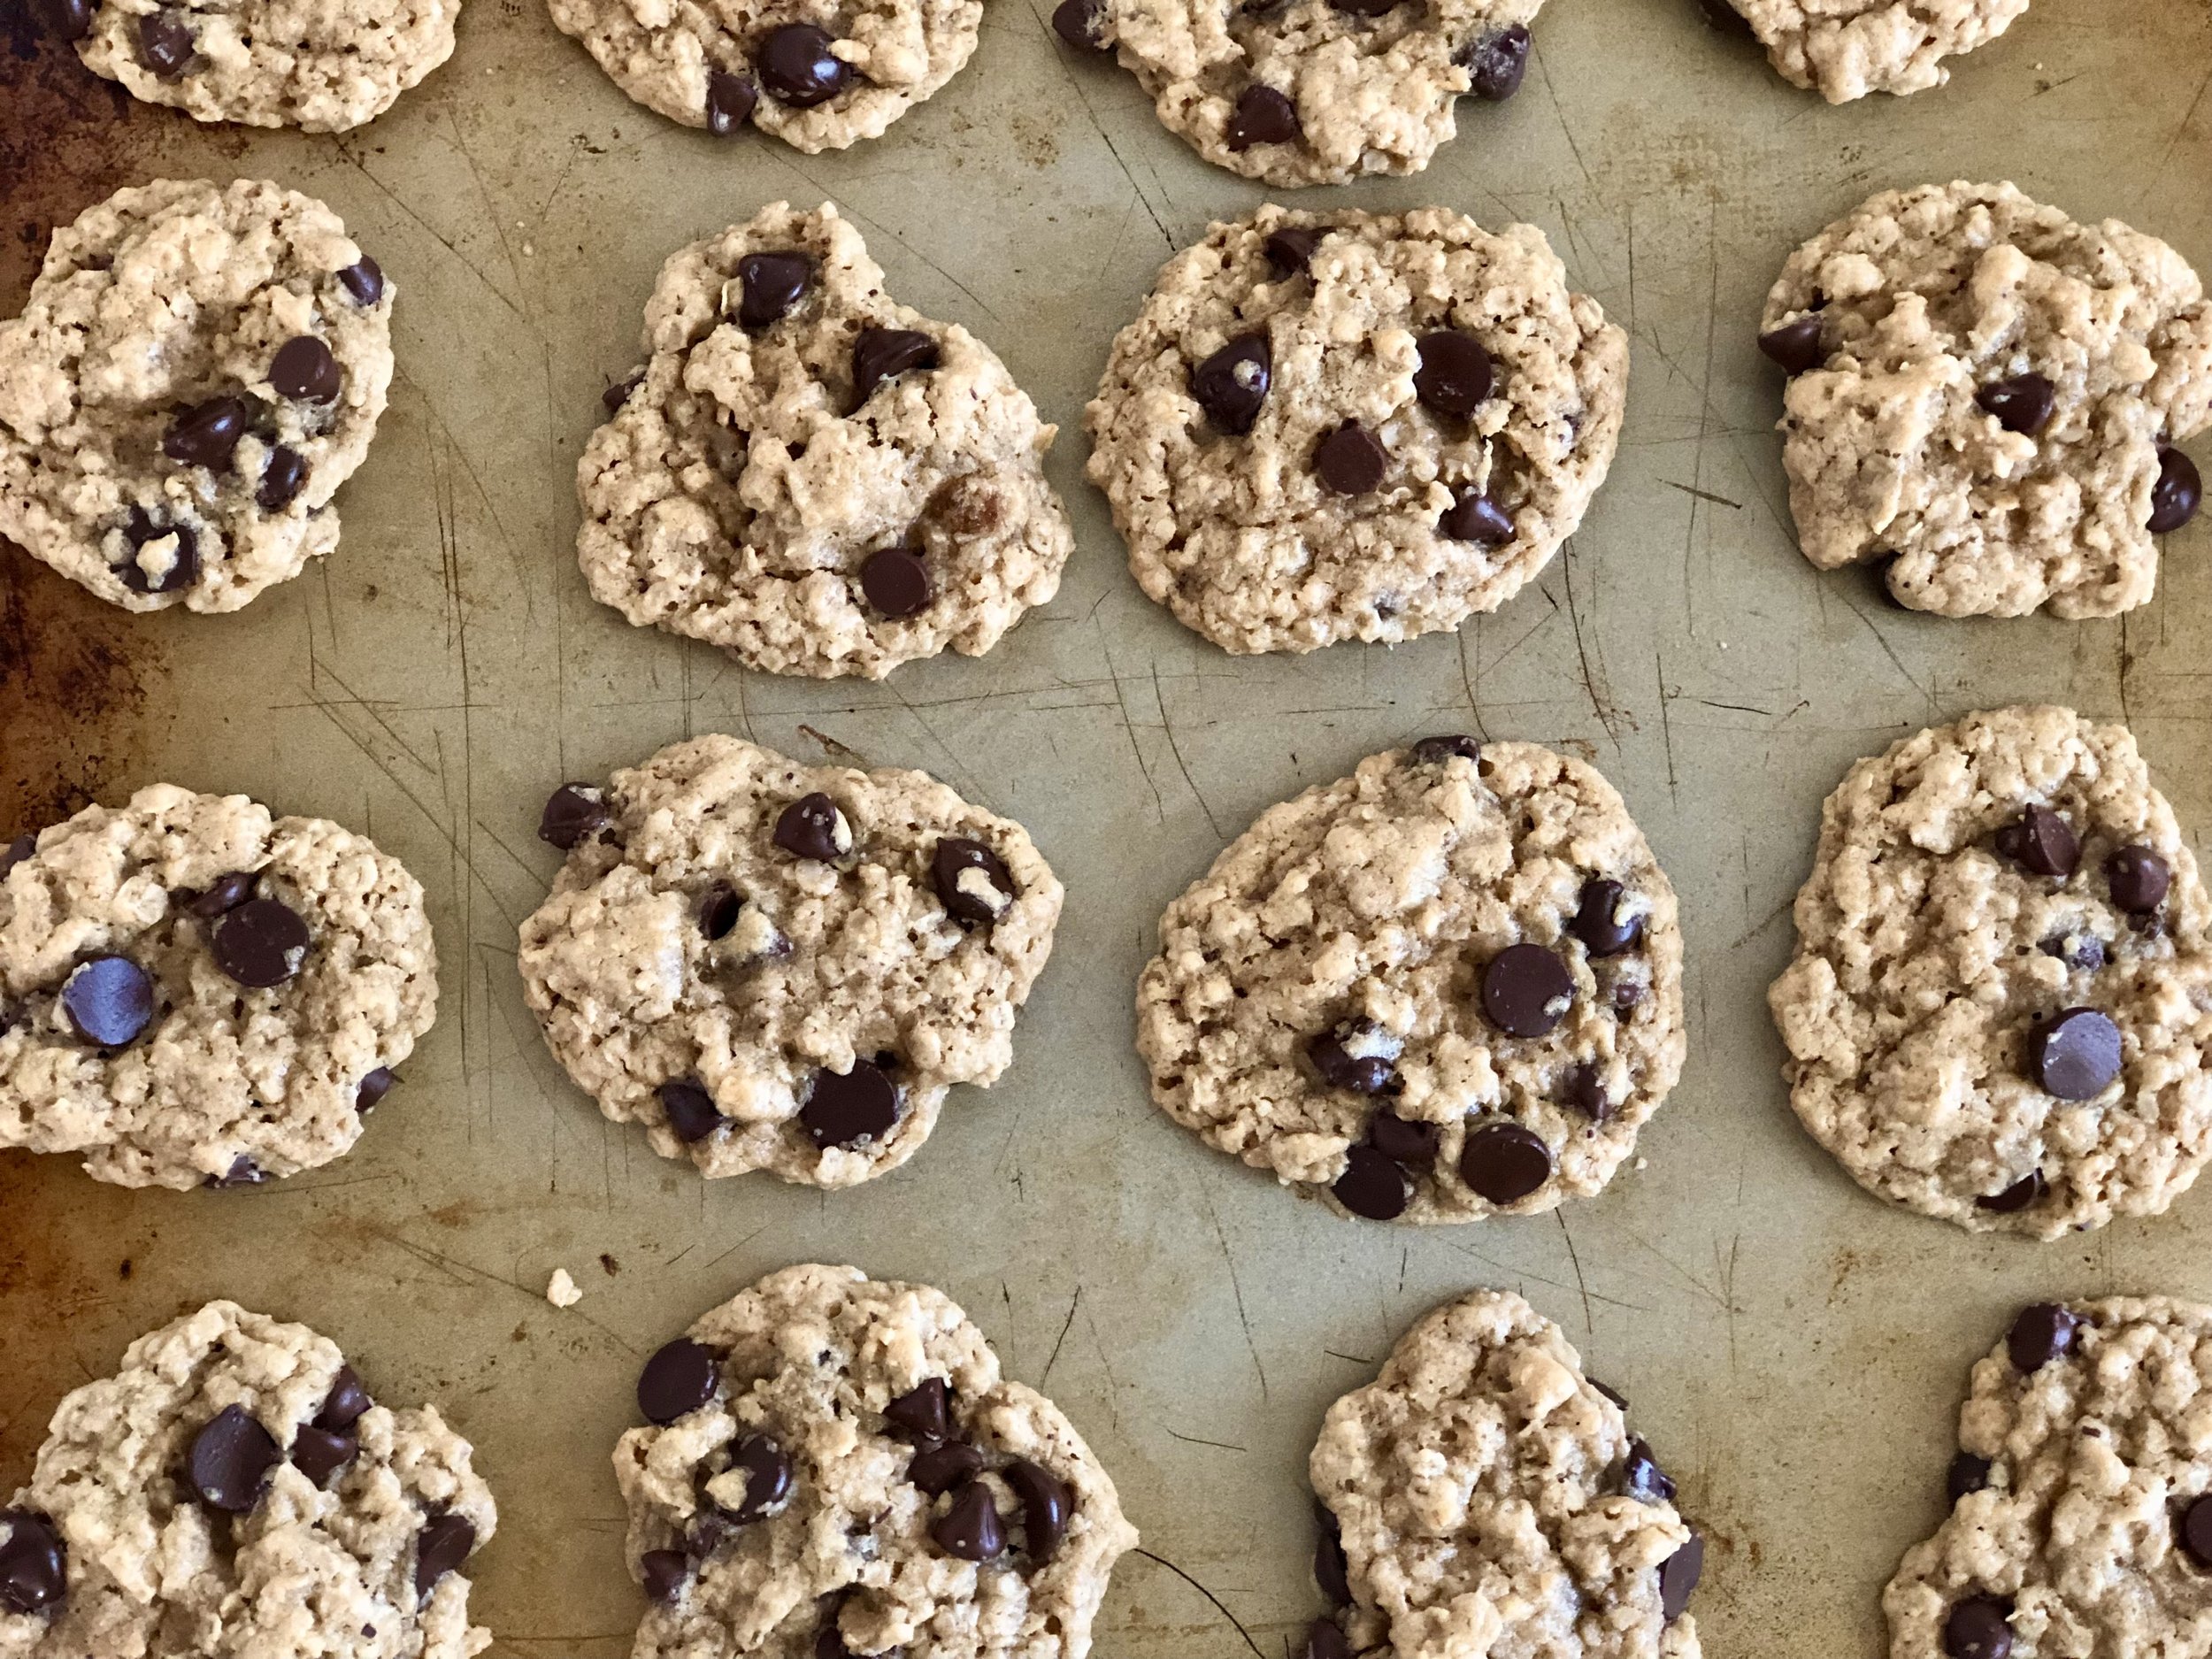
Whole Wheat Oat Chocolate Chip Cookies

One bowl chocolate chip cookies featuring whole wheat flour and oats.

While the whole wheat flour and oats may trick you into thinking these cookies are trying to be healthy, that’s really not what they’re here for! Sure, an added bonus is that these cookies do have added nutrition, but the whole wheat flour and oats serve to add a more complex flavor profile.

Whole wheat flour adds a nutty flavor while the oats add, ahem, “oatiness” and that beloved chew from an oatmeal cookie. You can use your favorite kind of chocolate chips in this recipe, but I really love the bitterness of dark chocolate chips in these. On the flip side, I also think using white, or even white and dark (!) would be a really beautiful combo.

Chocolate chip cookies are a timeless American staple, and I love all the endless variations! Here is yet another for you to try and add to your baking repertoire!!

This post may contain affiliate links. If you make a purchase using these links, Jennyblogs may receive a small commission, at no extra cost to you. This helps to support Jennyblogs. For further information see the privacy policy. Grazie!


Whole Wheat Oat Chocolate Chip Cookies

Makes about 14-18 medium cookies

Ingredients:

  • 1/2 cup / 113g oil

  • 1/2 cup / 100g brown sugar

  • 1/4 cup / 50g sugar

  • 1/2 tsp salt

  • 1 egg

  • 1 tsp / 5g vanilla extract

  • 3/4 tsp baking powder

  • 1/2 tsp baking soda

  • 1 1/2 cups / 135g rolled or quick oats

  • 3/4 cup / 96g whole wheat flour

  • 1/4 cup / 25g oat bran, wheat germ, or wheat bran

  • 1 cup / 175g semi-sweet or dark chocolate chips

Directions:

Oven preheated to 350°F / 177°C. 1 ungreased baking sheet

  1. In a large bowl or the bowl of a stand mixer, combine oil, both sugars, and salt. Beat in the egg and vanilla.

  2. Mix in baking powder and baking soda until thoroughly combined.

  3. Stir in oats, flour, oat bran, and chips until combined.

  4. Drop by generous tablespoonfuls onto baking sheet. Bake for 8-12 minutes or until lightly golden and no longer look wet.

  5. Allow to cool for several minutes before removing from cookie sheets to cool completely.

Jenny’s Notes:

  • If you don’t have oat bran, wheat bran, or wheat germ on hand, you could add in extra flour or oats, instead. In fact, I’ve even used baby cereal with great success!

  • While you can really use any kind of chocolate chips you wish, I really enjoy dark chocolate chips or chunks in these cookies; it really compliments the nutty whole wheat flour!

cookies, chocolate chip cookies, oatmeal cookies, whole grain, whole wheat flour
dessert, cookies
American
Yield: 14-18 cookies
Author:
Whole Wheat Oat Chocolate Chip Cookies

Whole Wheat Oat Chocolate Chip Cookies

Prep time: 15 MinCook time: 12 MinTotal time: 27 Min

Ingredients

Instructions

  1. Oven preheated to 350°F / 177°C. 1 ungreased baking sheet
  2. In a large bowl or the bowl of a stand mixer, combine oil, both sugars, and salt. Beat in the egg and vanilla.
  3. Mix in baking powder and baking soda until thoroughly combined.
  4. Stir in oats, flour, oat bran, and chips until combined.
  5. Drop by generous tablespoonfuls onto baking sheet. Bake for 8-12 minutes or until lightly golden and no longer look wet.
  6. Allow to cool for several minutes before removing from cookie sheets to cool completely.

Notes

  • If you don’t have oat bran, wheat bran, or wheat germ on hand, you could add in extra flour or oats, instead. In fact, I’ve even used baby cereal with great success!
  • While you can really use any kind of chocolate chips you wish, I really enjoy dark chocolate chips or chunks in these cookies; it really compliments the nutty whole wheat flour!

Nutrition Facts

Calories

231.82

Fat

13.14 g

Sat. Fat

4.56 g

Carbs

28.53 g

Fiber

2.44 g

Net carbs

26.1 g

Sugar

12.2 g

Protein

3.66 g

Sodium

174.98 mg

Cholesterol

11.82 mg

Nutritional information is approximate and based on 14 servings.

Did you make this recipe?
Tag @jennyblogsandbakes on instagram and hashtag it #jennyblogs

Nutella-Filled Pillow Cookies

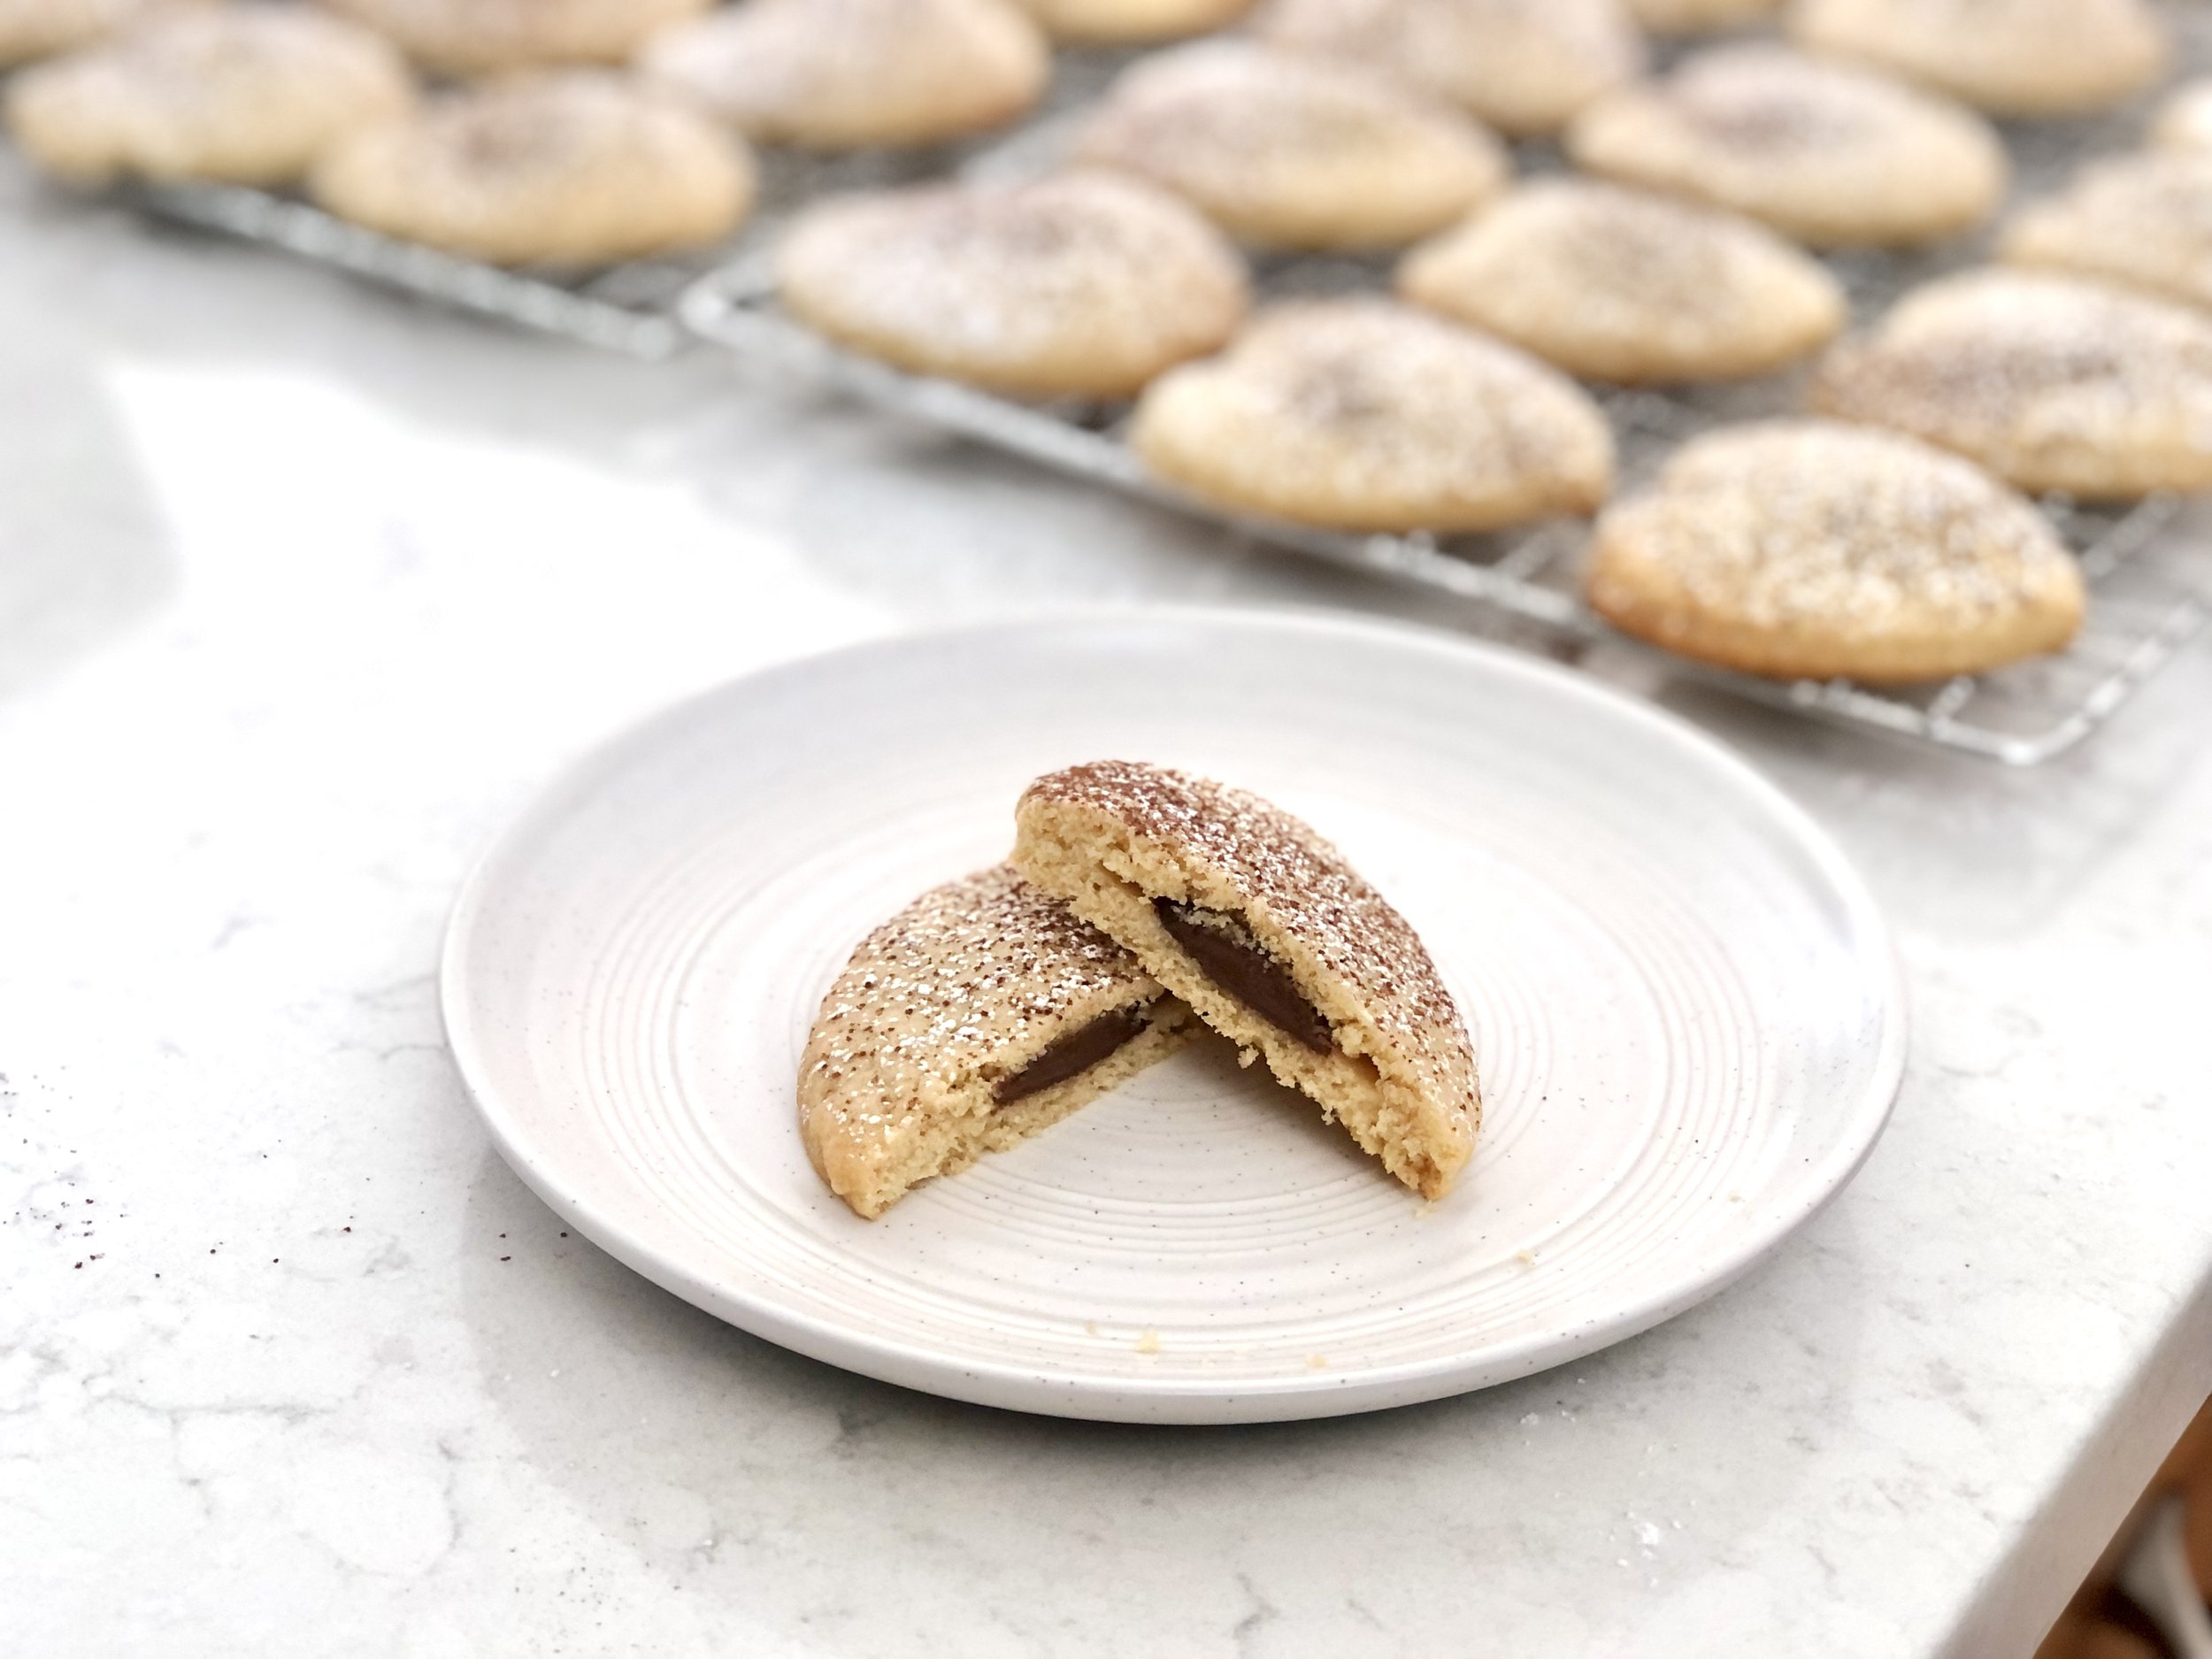
These are buttery sugar cookies with hints of almond and vanilla, stuffed with Nutella. The almond really compliments the Nutella! I guess hazelnuts and almonds make good company.

I first made these cookies over 10 years ago and they’re still a cookie I love to make. Because they’re cutouts, I tend to save them for special occasions, but the extra time is so worth it!

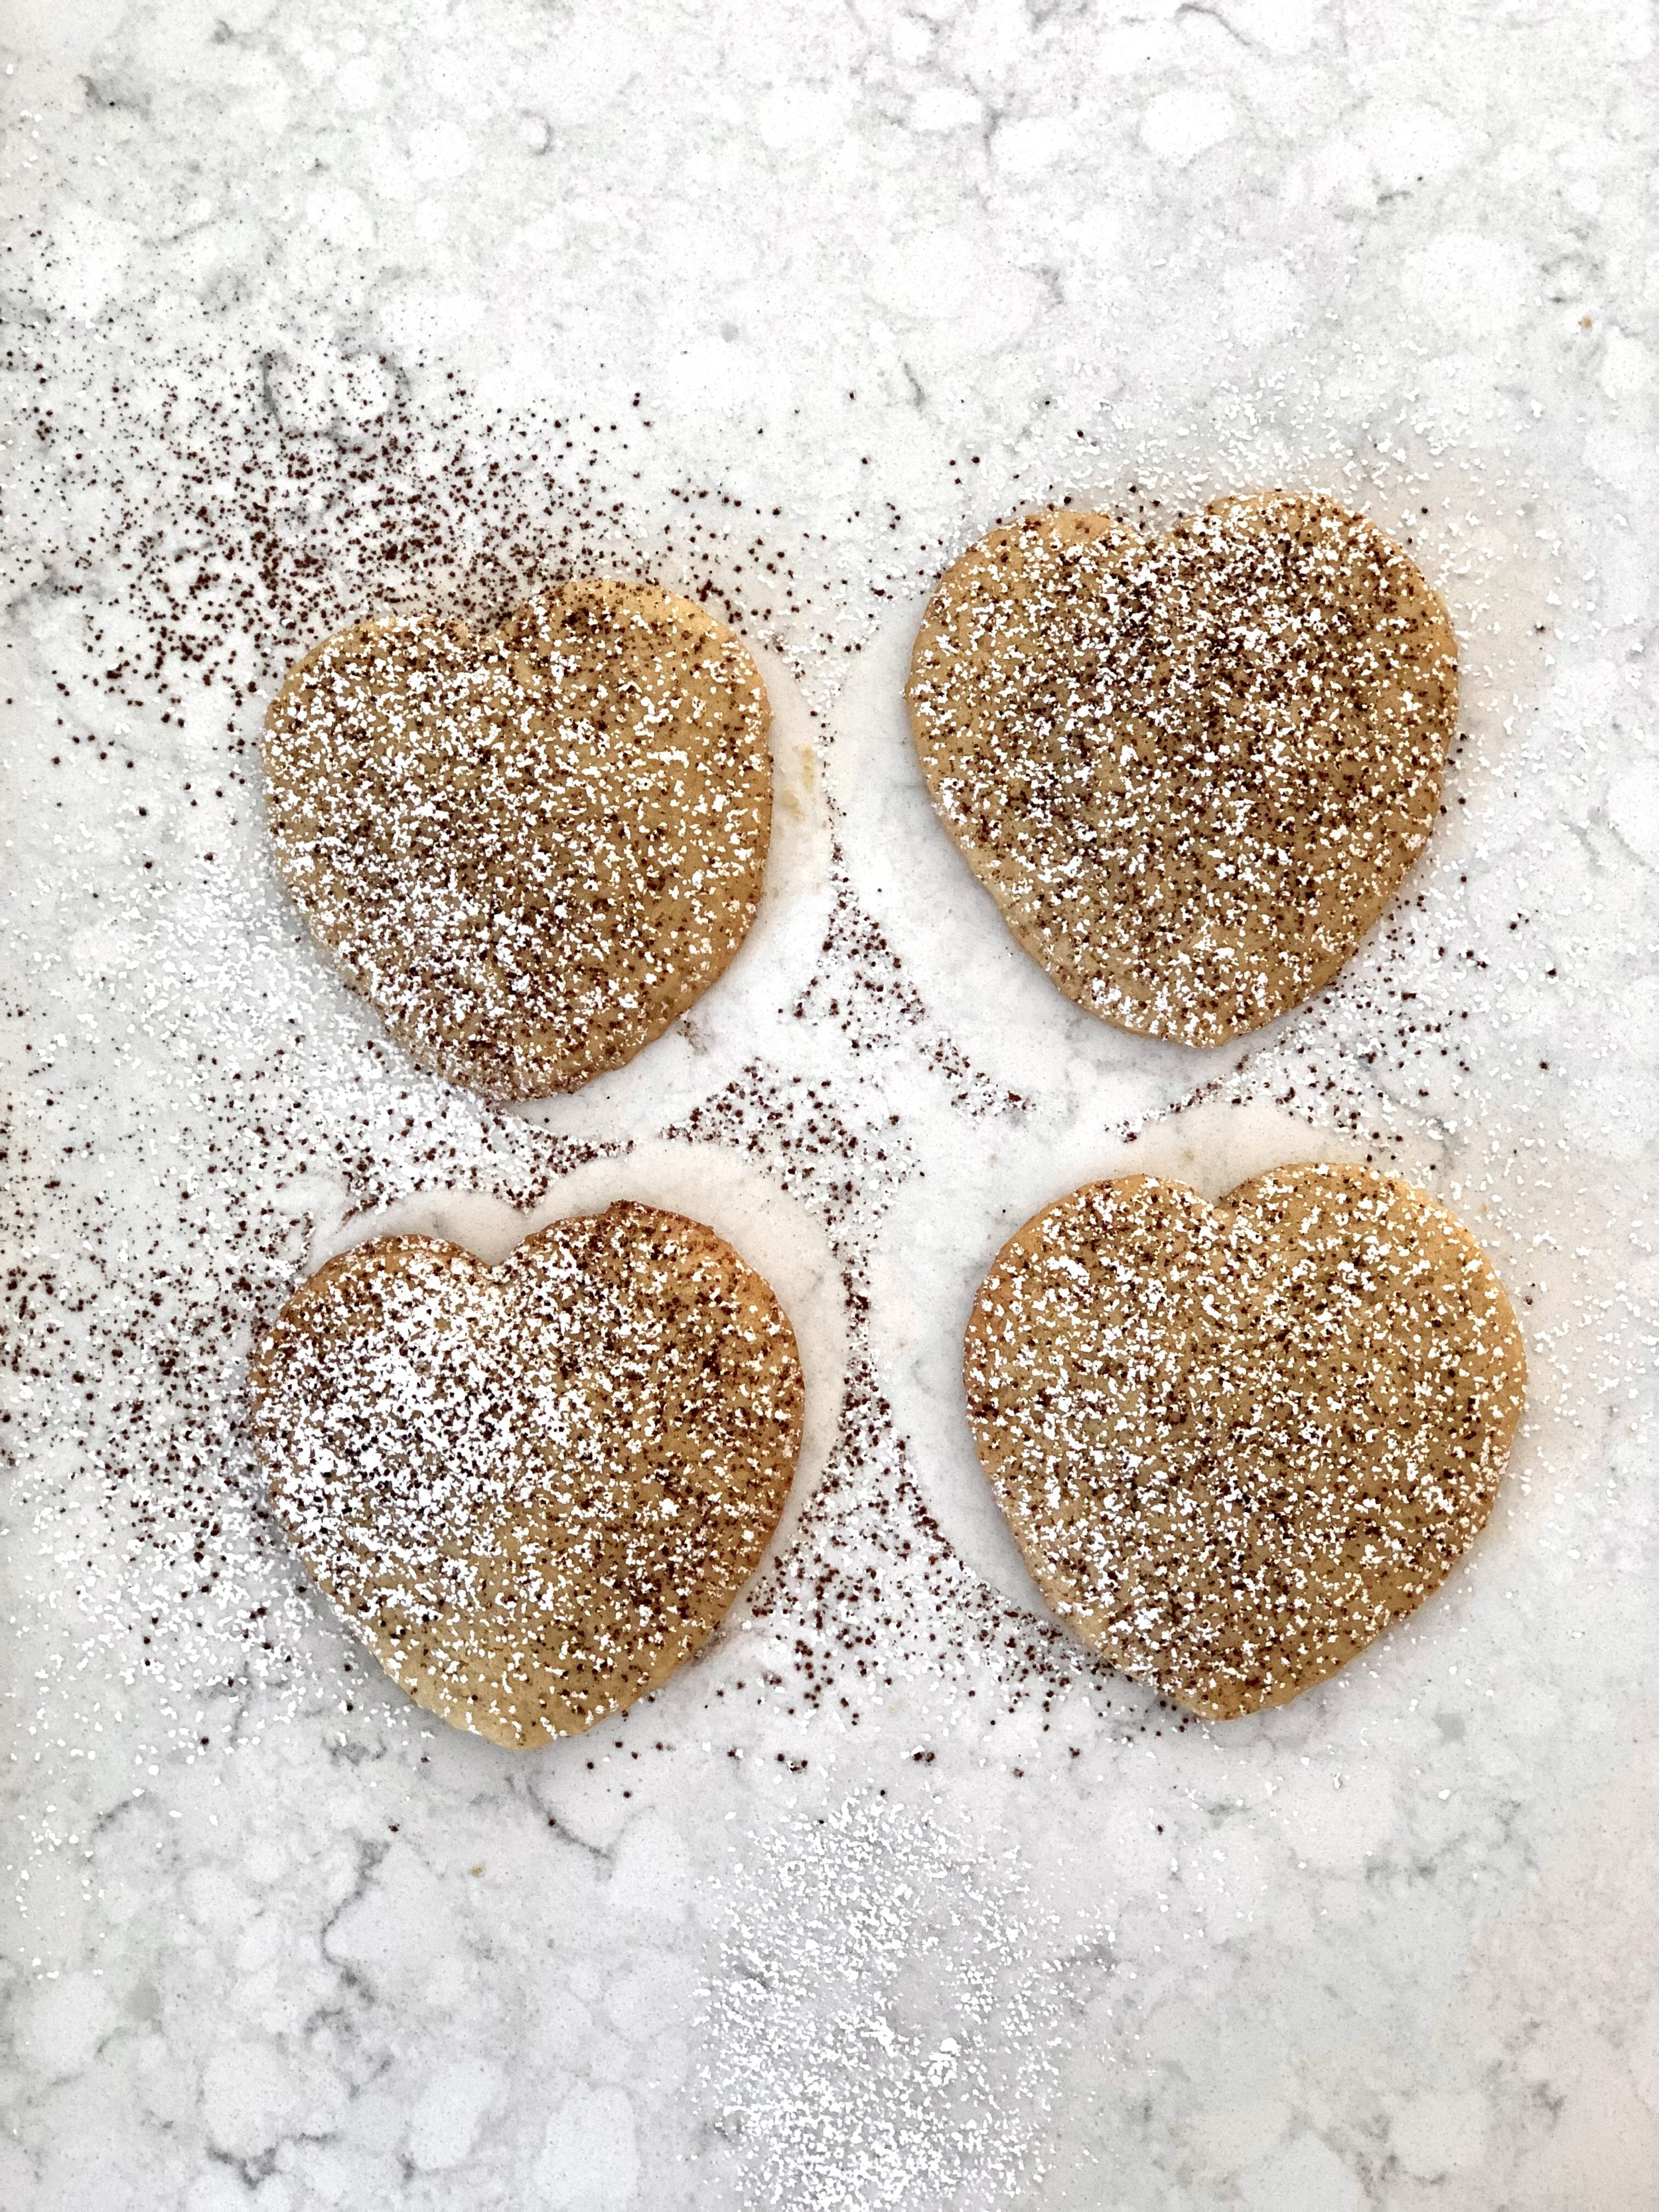
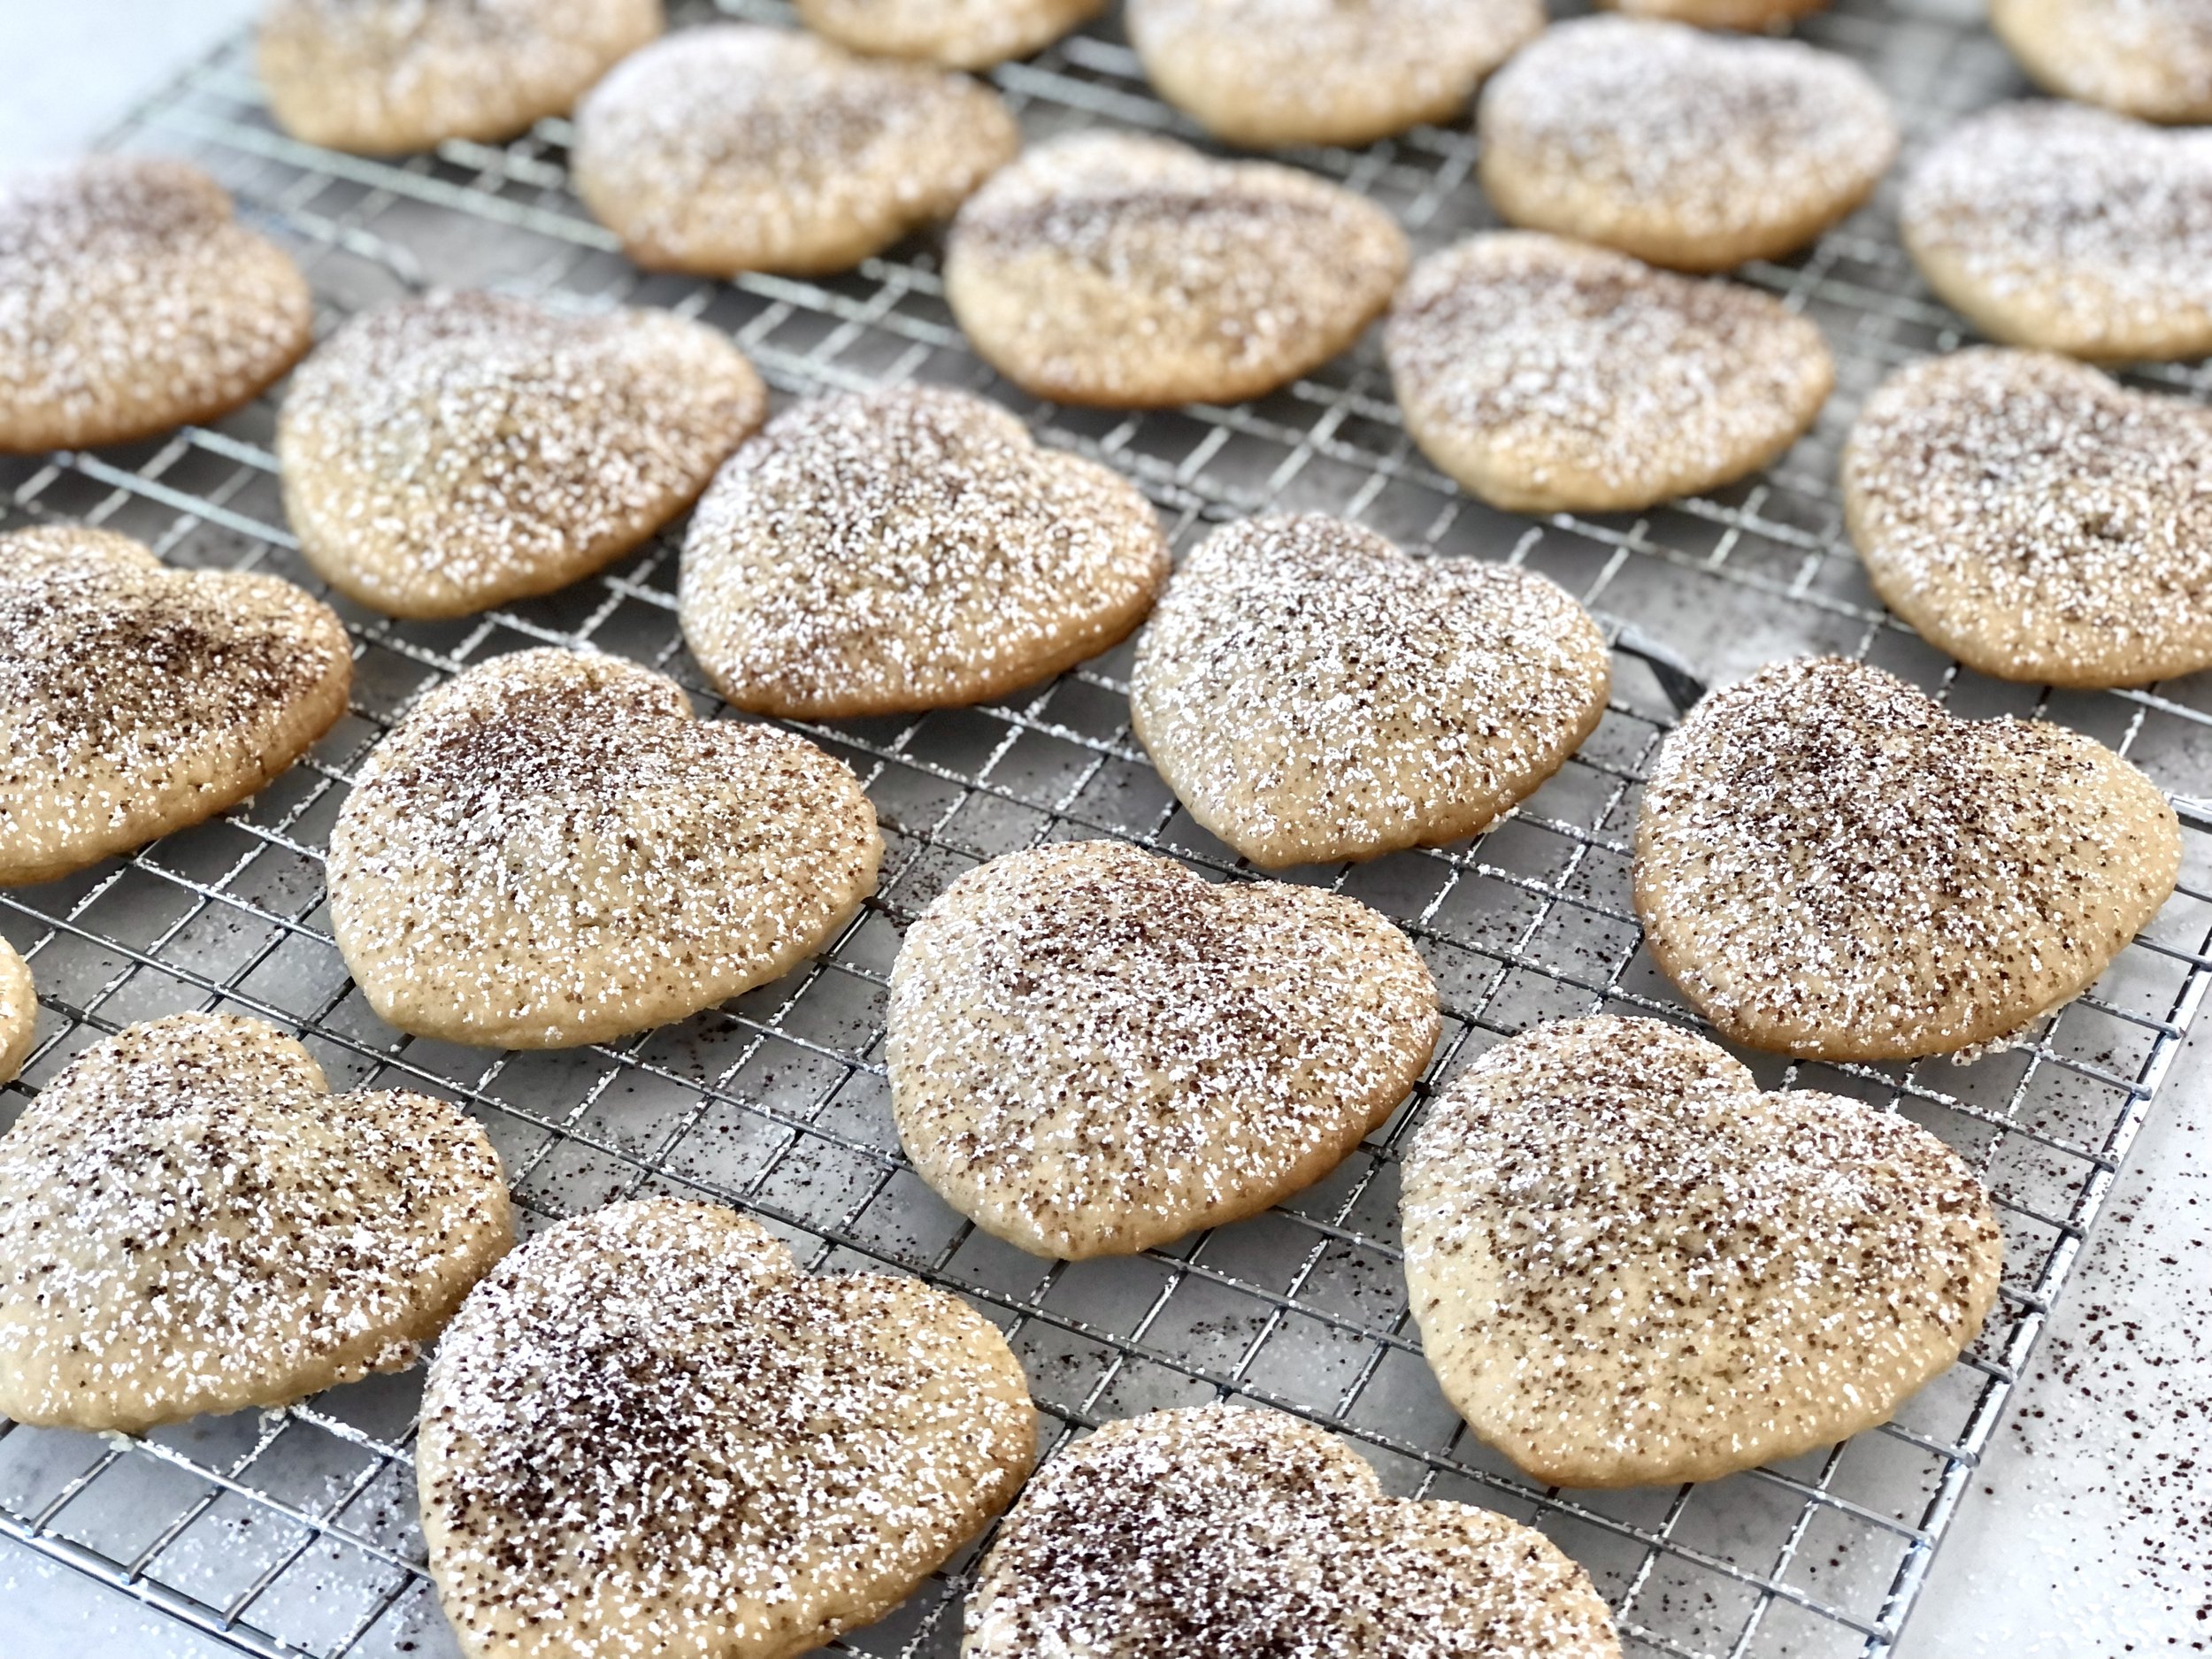
These cookies melt in your mouth and keep you going back for more, despite being a generous size to begin with! They’re also pretty little things, which makes them suitable for nice occasions, especially with a little dusting of powdered sugar or cocoa powder on top. You can use different shapes for different occasions, which makes these not only delicious and beautiful, but also versatile! These are always a winner.

This post may contain affiliate links. If you make a purchase using these links, Jennyblogs may receive a small commission, at no extra cost to you. This helps to support Jennyblogs. For further information see the privacy policy. Grazie!


Nutella-Filled Pillow Cookies

Makes about 12 large cookies

Ingredients:

  • 1 cup / 225g butter

  • 1/2 cup / 100g sugar

  • 1/2 cup / 100g brown sugar

  • 2 eggs

  • 1 Tbsp / 15g vanilla

  • 1/2 tsp almond extract

  • 3 cups / 360g flour

  • 1 Tbsp baking powder

  • 1/2 tsp salt

  • about 2/3 cup / 200g Nutella

  • powdered sugar and/or cocoa powder for dusting, optional

Directions:

Oven preheated to 375°F / 190°C. Ungreased cookie sheets.

  1. In the bowl of a stand mixer or with a handheld mixer, cream butter and sugar together until light and fluffy, about 5 minutes.

  2. Beat in eggs, one at a time. Stir in extracts.

  3. In a medium bowl, combine flour, baking powder, and salt with a whisk.

  4. Add dry ingredients to butter mixture, mix until thoroughly combined. If dough seems too wet, add a bit more flour until a thicker consistency is reached.

  5. Cover and place dough in refrigerator until chilled, at least 1 hour.

  6. Remove dough from fridge. Roll dough out onto a lightly floured surface to a thickness of about 1/4in / 1/2cm. Use a 3in / 7.5cm cookie cutter to cut the cookie dough. Re-roll and cut more.

  7. Place half of the cut out cookies onto a cookie sheet. Spoon or pipe about 2 tsp of Nutella onto the middle of the cookie. Place a second cookie on top, using fingers or a fork to seal edges together.

  8. Bake in preheated oven for 9-11 minutes, or until edges just barely start to turn golden. Allow cookies to cool for several minutes on the cookie sheet before transferring to cooling racks or the counter.

  9. When cookies are completely cool, dust with powdered sugar, if desired.

Jenny’s Notes:

  • Round or square cookie cutters work best for these pillow cookies, but any shape will do, as long as it has a large enough center area for the Nutella to be able to be sealed in. I like to do heart shapes for Valentine’s day, as pictured!

  • While these may have Nutella in the name, I’ve stuffed these with other things before that were also delicious! Small chocolates like Reese’s, Dove chocolates, etc. could be used. I once used these hazelnut chocolates that are common in Italy, Gianduja, and they were wondeful in these!

  • Don’t over bake! Not only can this lead to dry cookies, but it can affect the filling, as well.

Cookies, Nutella, Pillow Cookies, Cutout Cookies, Rolled Cookies, Sugar Cookies
dessert, cookies
American
Yield: 12 Large Cookies
Author:
Nutella-Filled Pillow Cookies

Nutella-Filled Pillow Cookies

Buttery, melt-in-your-mouth sugar cookies with hint of vanilla and almond, stuffed with Nutella, and topped with a dusting of powdered sugar and cocoa powder.
Prep time: 45 MinCook time: 11 MinInactive time: 1 HourTotal time: 1 H & 56 M

Ingredients

Instructions

  1. Oven preheated to 375°F / 190°C. Ungreased cookie sheets.
  2. In the bowl of a stand mixer or with a handheld mixer, cream butter and sugar together until light and fluffy, about 5 minutes.
  3. Beat in eggs, one at a time. Stir in extracts.
  4. In a medium bowl, combine flour, baking powder, and salt with a whisk.
  5. Add dry ingredients to butter mixture, mix until thoroughly combined. If dough seems too wet, add a bit more flour until a thicker consistency is reached.
  6. Cover and place dough in refrigerator until chilled, at least 1 hour.
  7. Remove dough from fridge. Roll dough out onto a lightly floured surface to a thickness of about 1/4in / 1/2cm. Use a 3in / 7.5cm cookie cutter to cut the cookie dough. Re-roll and cut more.
  8. Place half of the cut out cookies onto a cookie sheet. Spoon or pipe about 2 tsp of Nutella onto the middle of the cookie. Place a second cookie on top, using fingers or a fork to seal edges together.
  9. Bake in preheated oven for 9-11 minutes, or until edges just barely start to turn golden. Allow cookies to cool for several minutes on the cookie sheet before transferring to cooling racks or the counter.
  10. When cookies are completely cool, dust with powdered sugar, if desired.

Notes

  • Round or square cookie cutters work best for these pillow cookies, but any shape will do, as long as it has a large enough center area for the Nutella to be able to be sealed in. I like to do heart shapes for Valentine’s day, as pictured!
  • While these may have Nutella in the name, I’ve stuffed these with other things before that were also delicious! Small chocolates like Reese’s, Dove chocolates, etc. could be used. I once used these hazelnut chocolates that are common in Italy, Gianduja, and they were wondeful in these!
  • Don’t over bake! Not only can this lead to dry cookies, but it can affect the filling, as well.

Nutrition Facts

Calories

388.68

Fat

21.3 g

Sat. Fat

14.73 g

Carbs

48.95 g

Fiber

1.74 g

Net carbs

47.2 g

Sugar

18.17 g

Protein

5.22 g

Sodium

345.08 mg

Cholesterol

67.95 mg

Nutritional info is approximate, based on 1 cookie

Did you make this recipe?
Tag @jennyblogsandbakes on instagram and hashtag it #jennyblogs

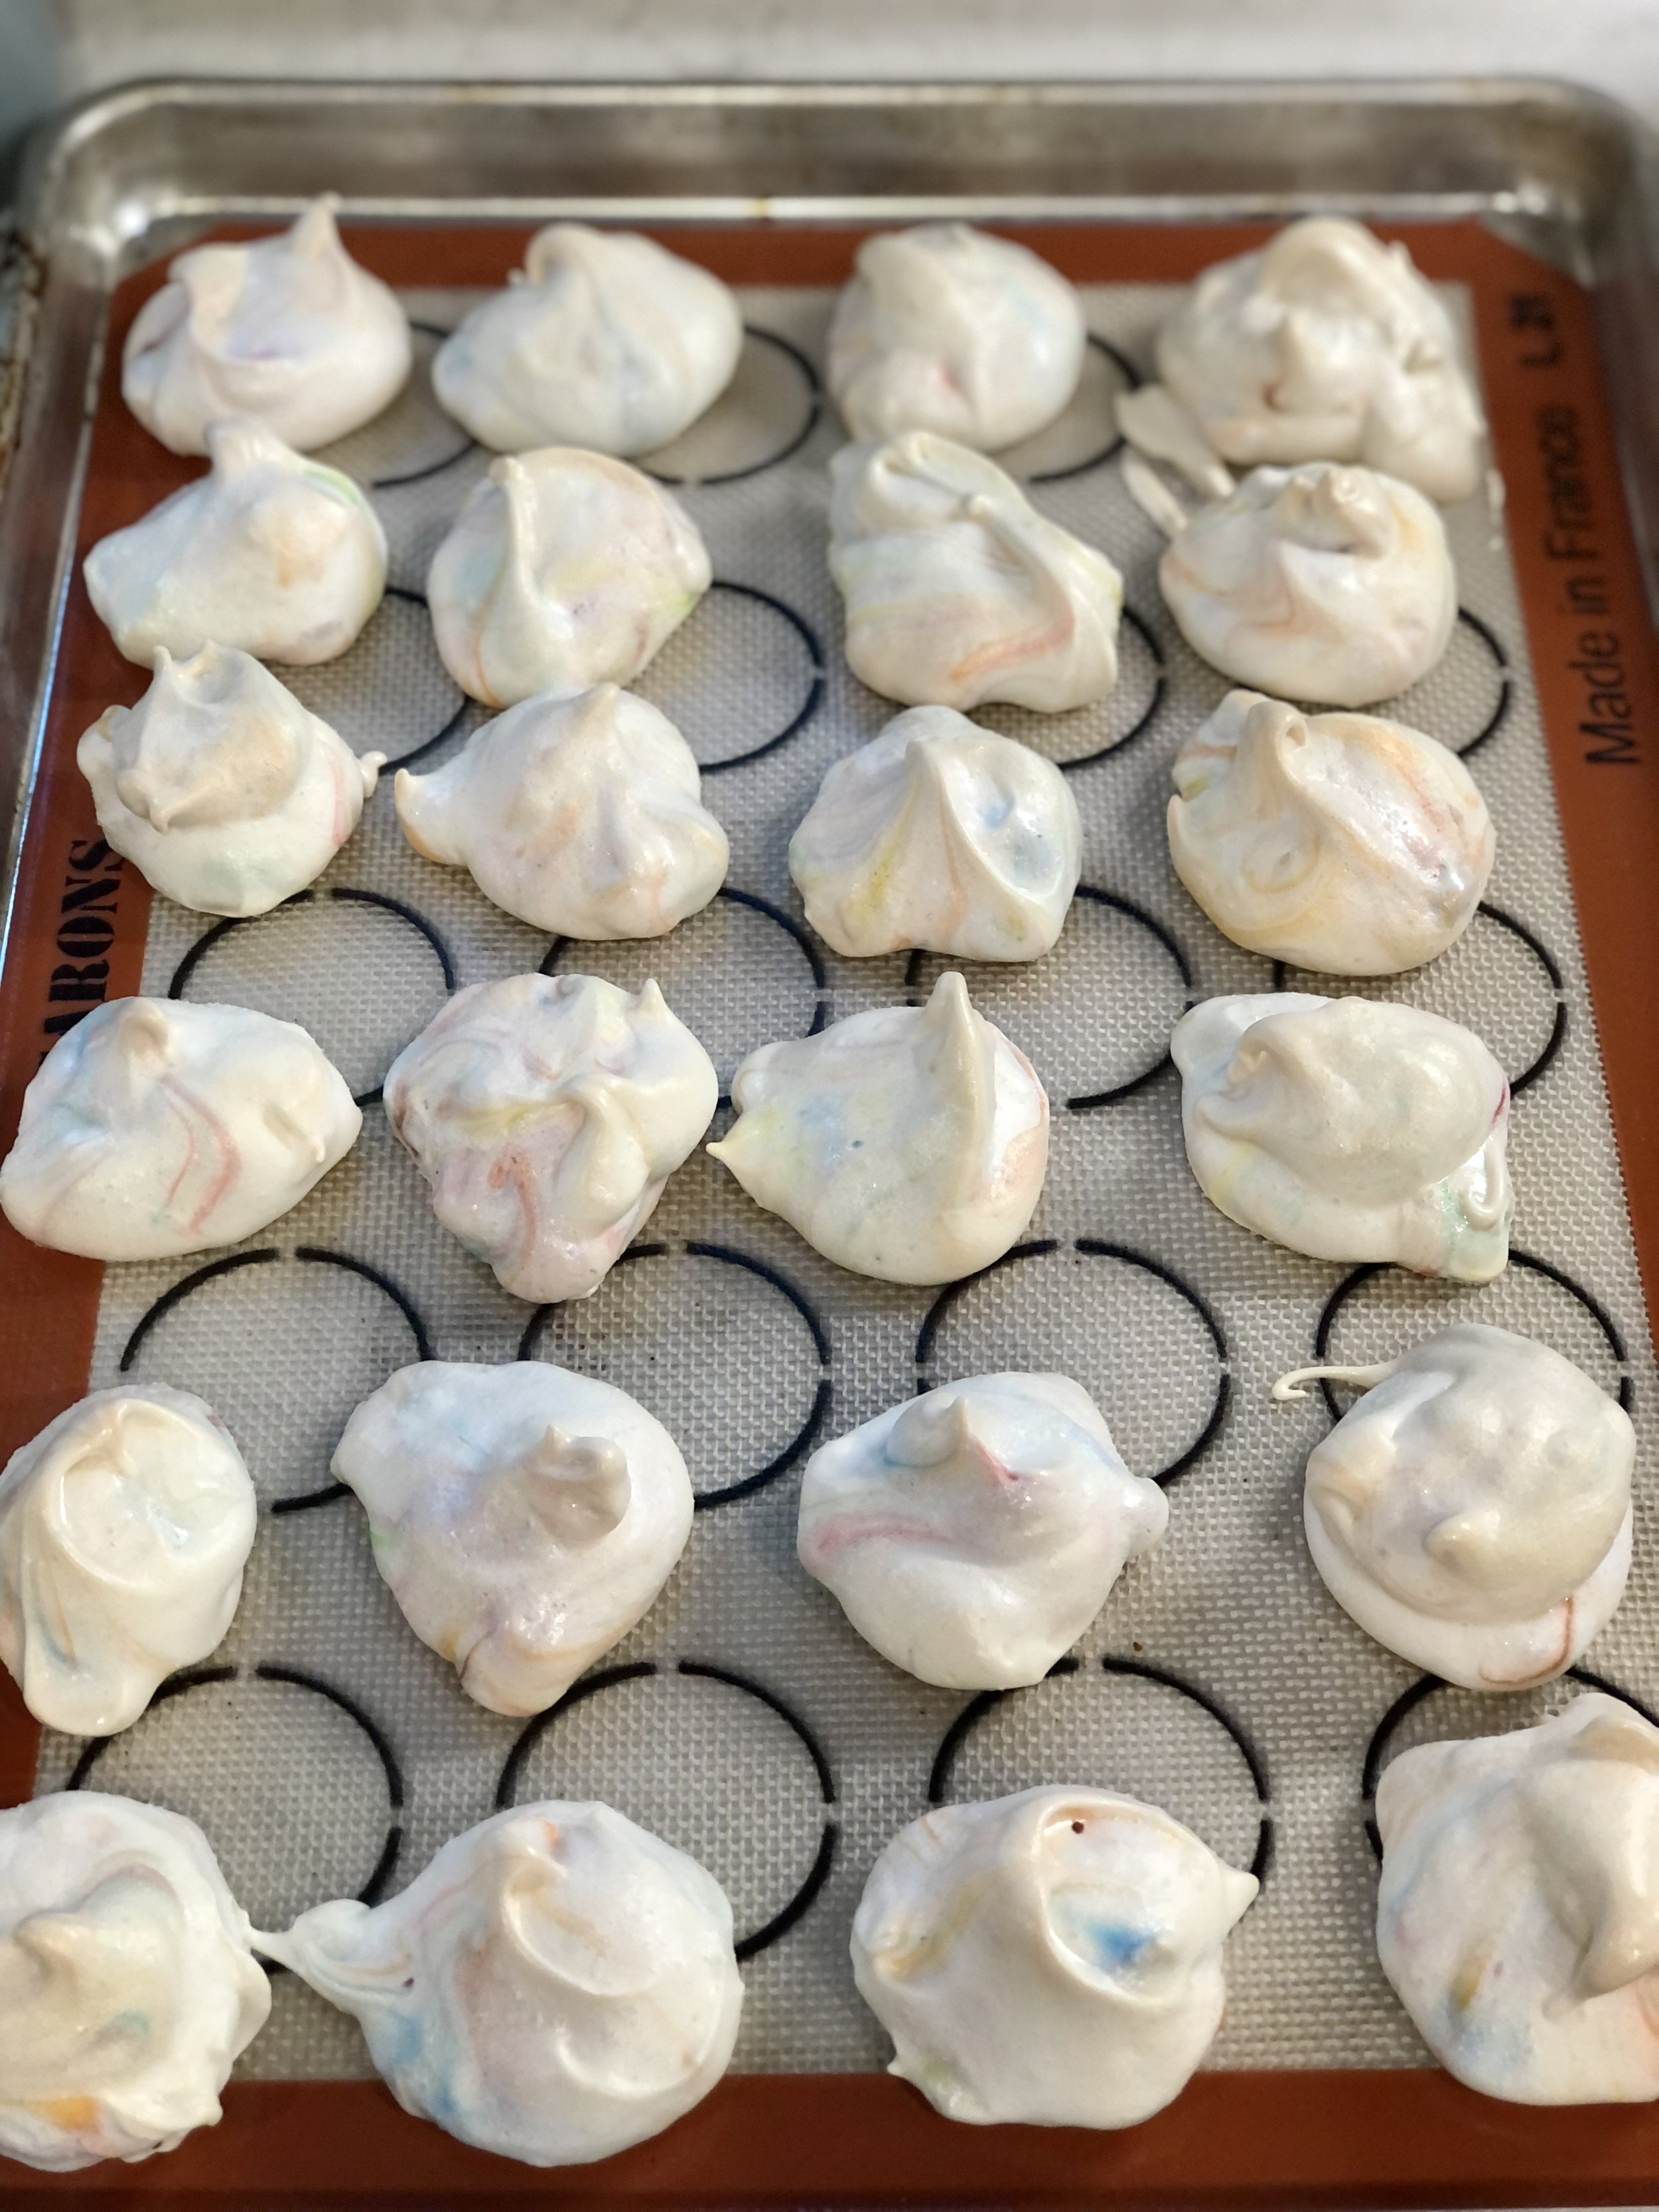
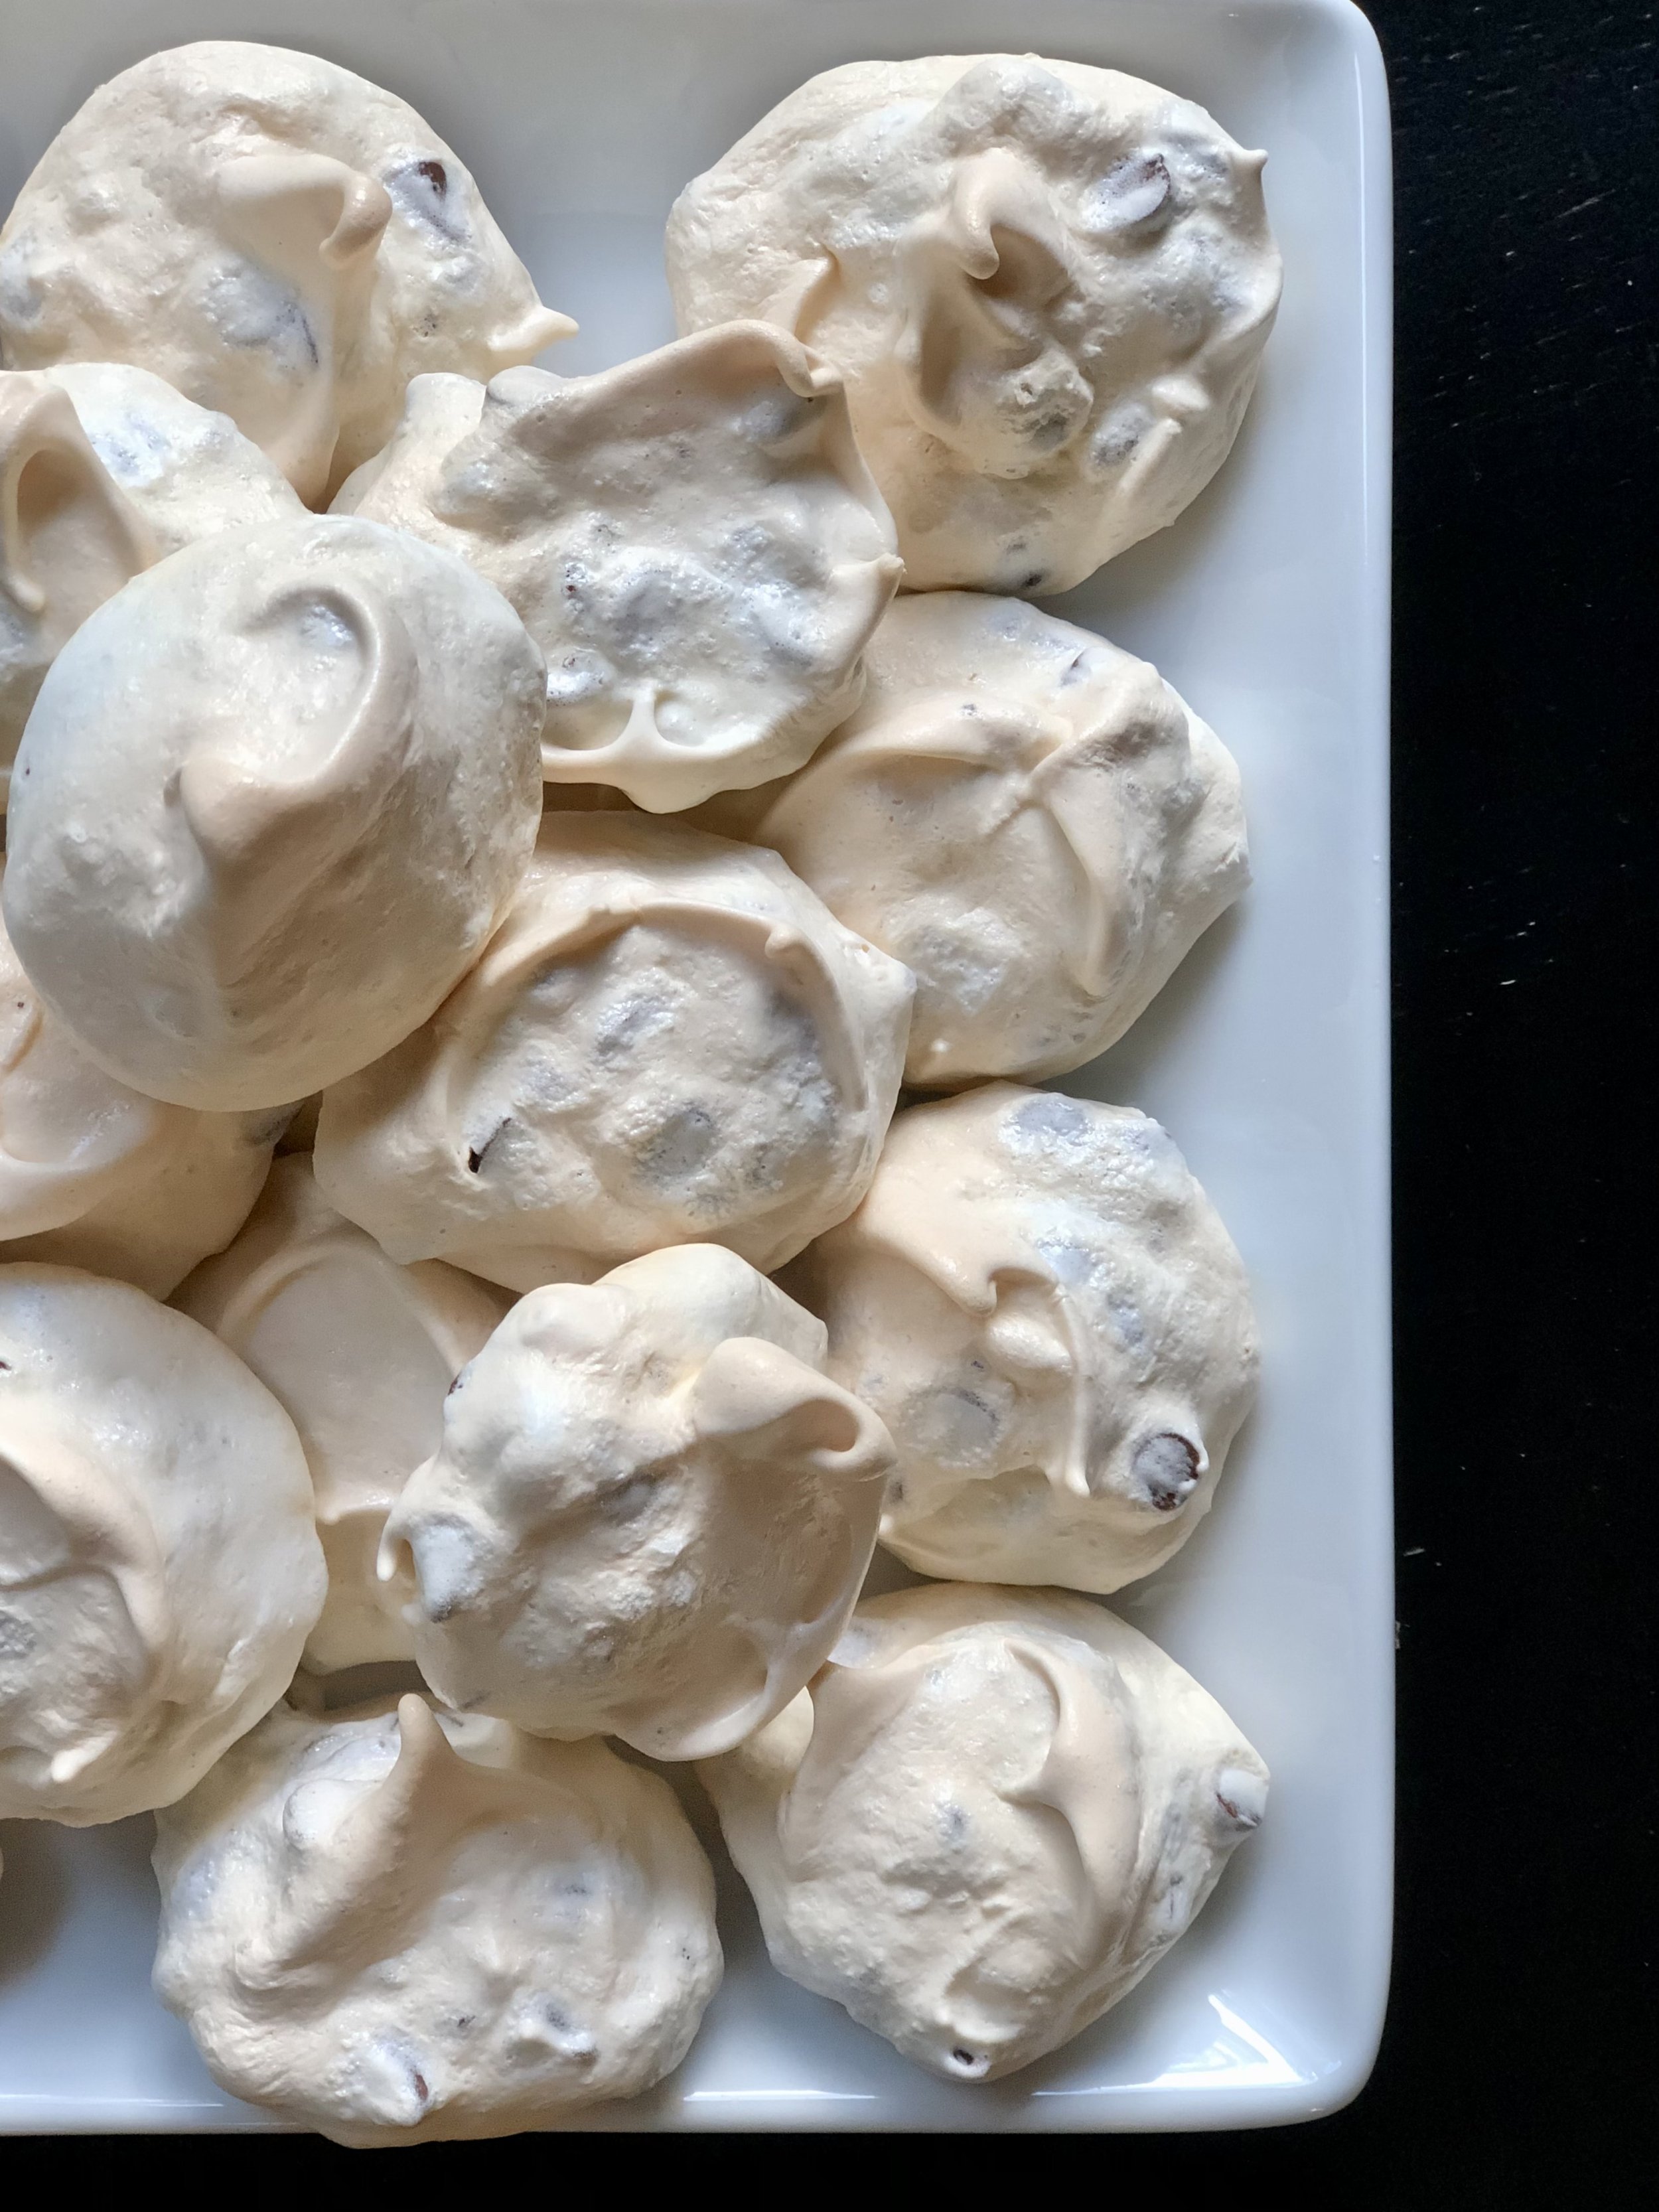
Chocolate Chip Meringue Cookies

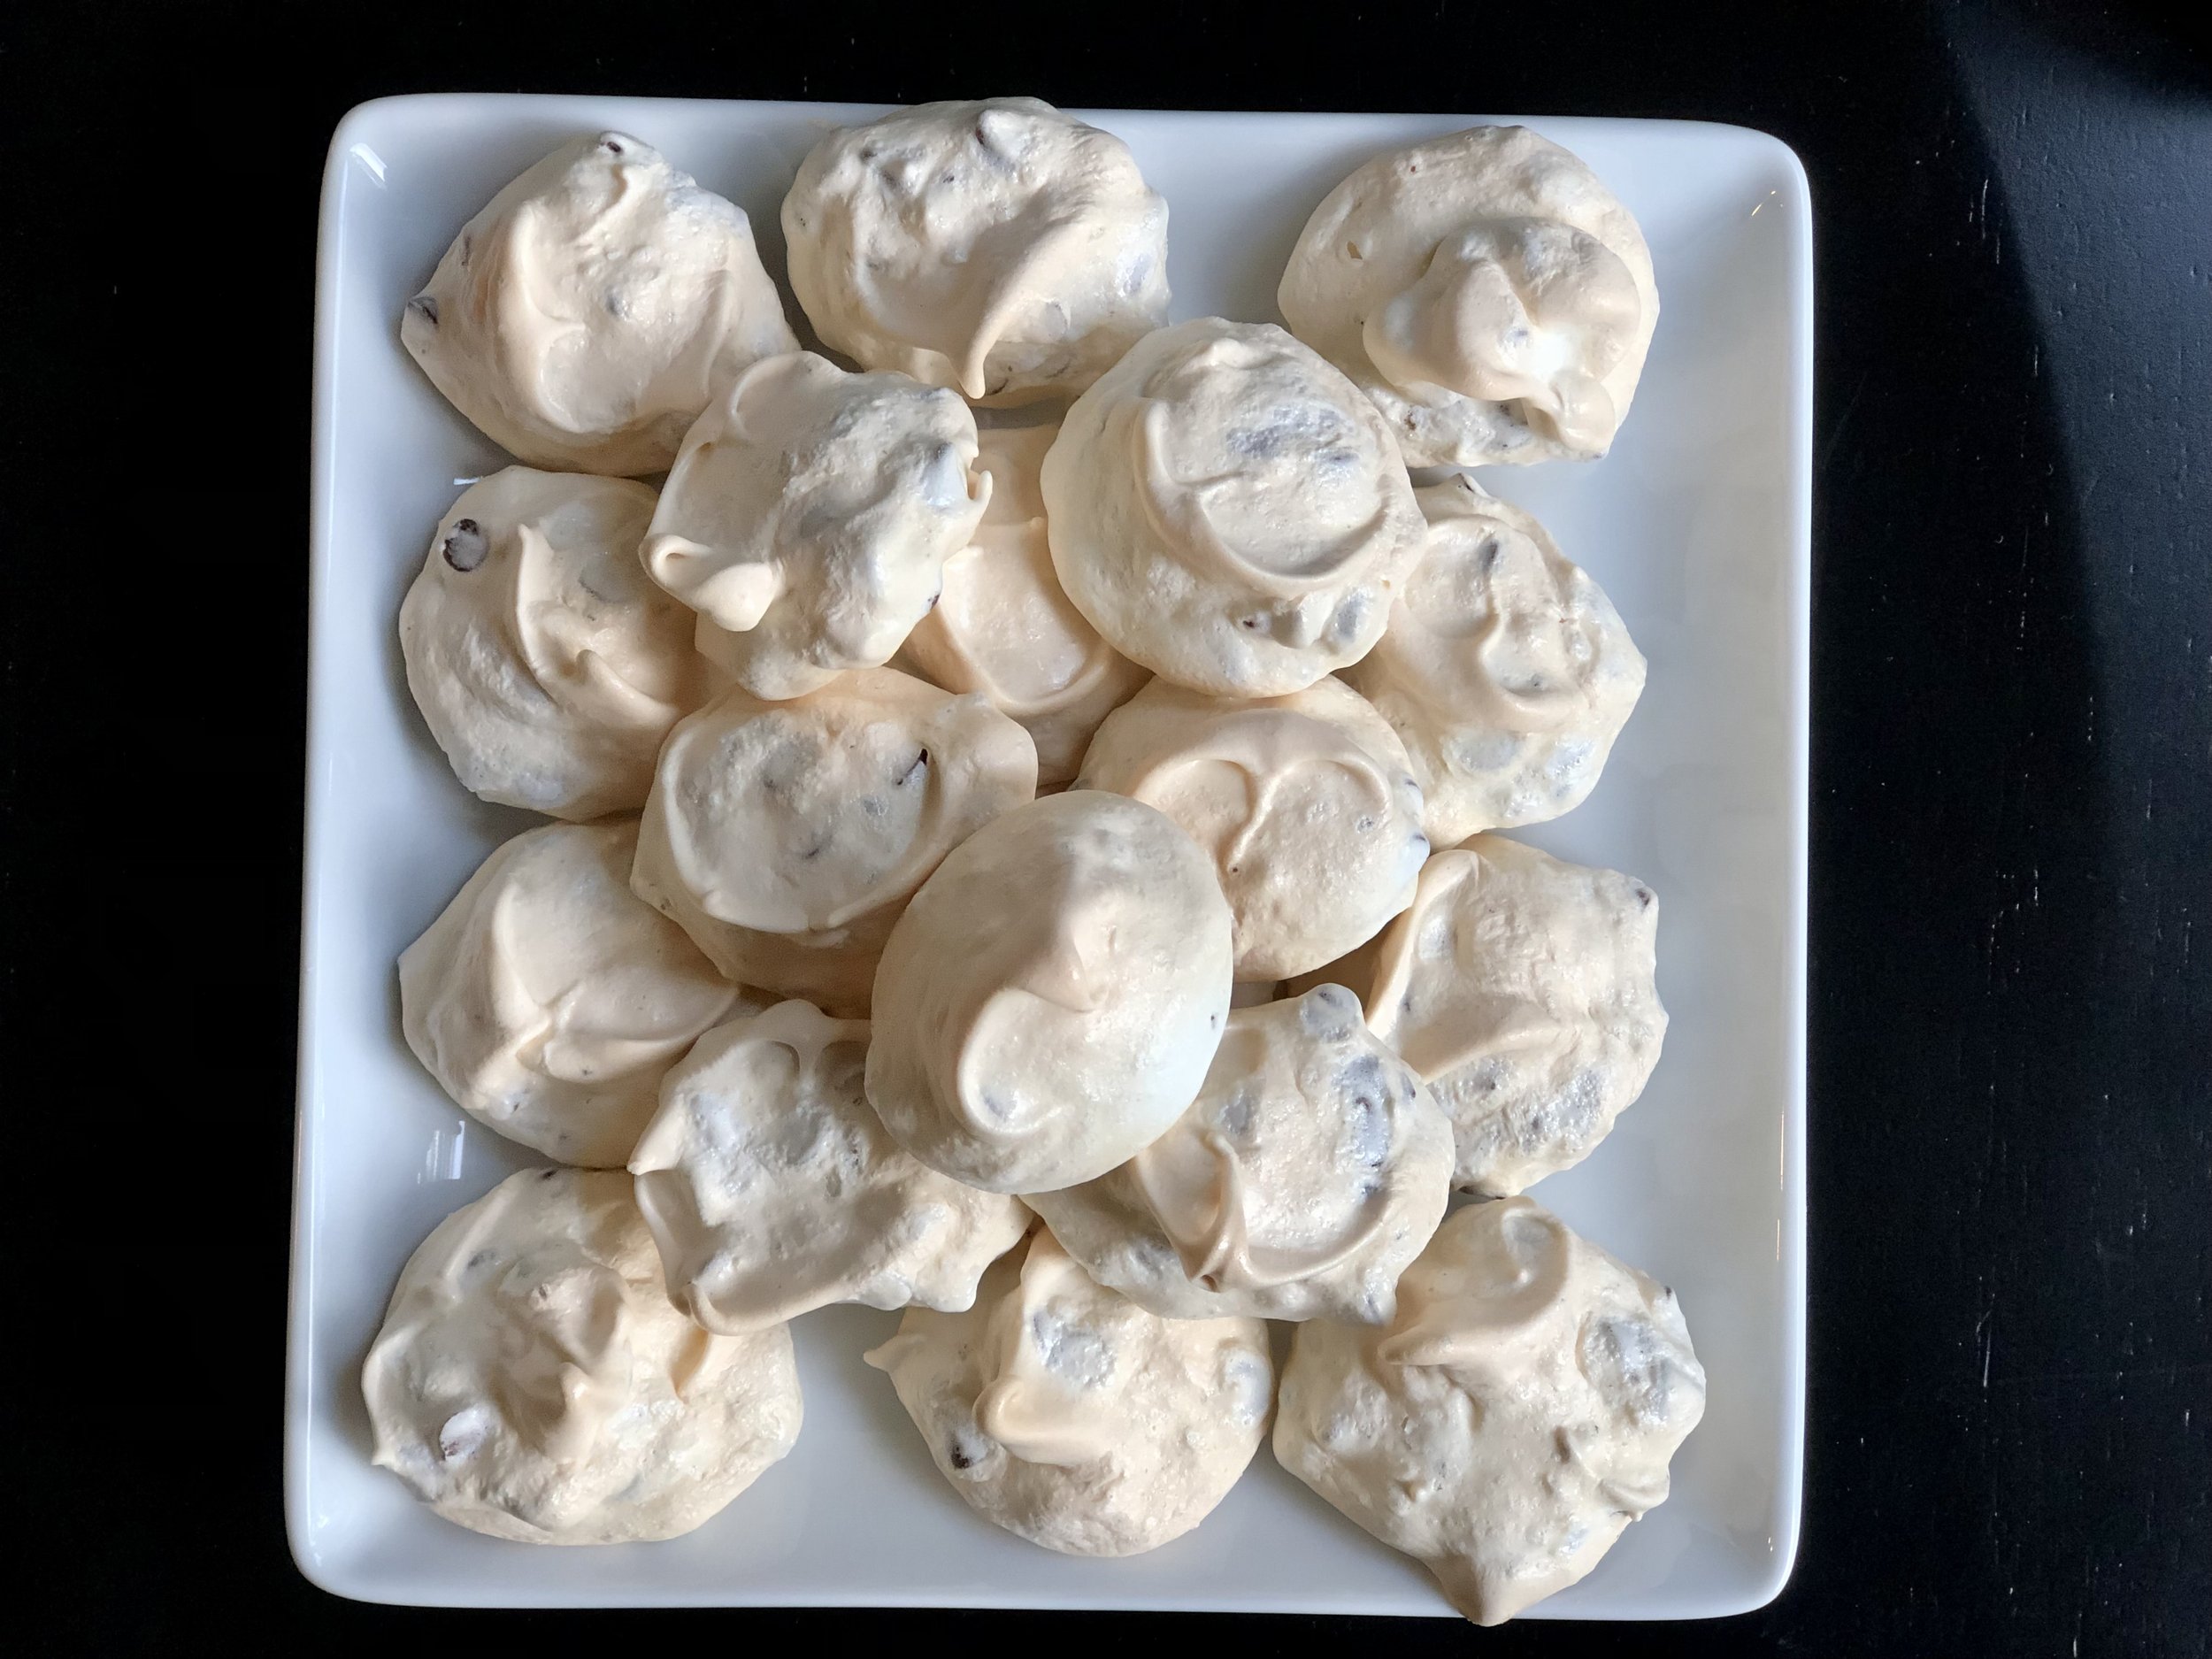
As far as simple and delicious cookie recipes go, this is a good one to have on hand.

These cookies have only 4 ingredients, and are gluten-free, dairy-free (as long as your chocolate chips don’t contain dairy), and many other allergen and dietary needs friendly.

This is a recipe I’ve had around for ages, since I was a kid! I believe I originally got it from my cousin. I recently re-discovered these, they’re almost too easy to make, and a great way to use up extra egg whites. They’re easy enough kids can help or even make them by themselves, and with the chocolate chips, M&M’s, or other add ins, also very appealing to kids!

Are you ready for some of the easiest cookies you’ve made yet? Yeah, let’s go!

This post may contain affiliate links. If you make a purchase using these links, Jennyblogs may receive a small commission, at no extra cost to you. This helps to support Jennyblogs. For further information see the privacy policy. Grazie!

Recipe from my cousin


Chocolate Chip Meringue Cookies

M&M Meringue Cookies

Makes about 24 (about 1 1/2inch / 3cm) cookies

Ingredients:

  • 2 egg whites

  • 1 pinch of cream of tartar

  • 1/2 cup / 100g granulated sugar

  • 3/4 cup / 128g mini chocolate chips or other add-in of choice

Directions:

Oven preheated to 250°F / 121°C. Line a cookie sheet with a silpat or lightly grease.

  1. In the bowl of a stand mixer or with a hand-held electric mixer, beat egg whites and cream of tartar with whisk attachment until foamy.

  2. Add sugar and beat until stiff peaks form.

  3. Fold in chocolate chips with a spatula.

  4. Drop onto prepared cookie sheet and bake for about 30 minutes, or until set and just starting to turn a light golden color. Allow to cool slightly before removing from cookie sheet.

Jenny’s Notes:

  • Mini M&M’s are also a hit in these cookies! You can get creative, any kind of crushed candy or cookie like Oreo’s, or nuts, sprinkles, etc.

  • These cookies are best enjoyed within a day or two. They can be stored loosely covered at room temperature, but if you cover too tightly they turn soft and sticky even quicker.

meringue, egg whites, cookies, gluten-free, dairy-free
dessert, cookies
American
Yield: 24
Author:
Chocolate Chip Meringue Cookies

Chocolate Chip Meringue Cookies

4 ingredient meringue cookies with a slightly crunchy exterior and a soft, chewy inside, speckled with chocolate chips.
Prep time: 20 MinCook time: 30 MinTotal time: 50 Min

Ingredients

Instructions

  1. Oven preheated to 250°F / 121°C. Line a cookie sheet with a silpat or lightly grease.
  2. In the bowl of a stand mixer or with a hand-held electric mixer, beat egg whites and cream of tartar with whisk attachment until foamy.
  3. Add sugar and beat until stiff peaks form.
  4. Fold in chocolate chips with a spatula.
  5. Drop onto prepared cookie sheet and bake for about 30 minutes, or until set and just starting to turn a light golden color. Allow to cool slightly before removing from cookie sheet.

Notes

  • Mini M&M’s are also a hit in these cookies! You can get creative, any kind of crushed candy or cookie like Oreo’s, or nuts, sprinkles, etc.
  • These cookies are best enjoyed within a day or two. They can be stored loosely covered at room temperature, but if you cover too tightly they turn soft and sticky even quicker.

Nutrition Facts

Calories

45.69

Fat

1.32 g

Sat. Fat

0.81 g

Carbs

8.05 g

Fiber

0.15 g

Net carbs

7.9 g

Sugar

7.7 g

Protein

0.54 g

Sodium

8.04 mg

Cholesterol

0.84 mg

Nutritional information is approximate. Based on 1 cookie from a 24-cookie batch.

Did you make this recipe?
Tag @jennyblogsandbakes on instagram and hashtag it #jennyblogs

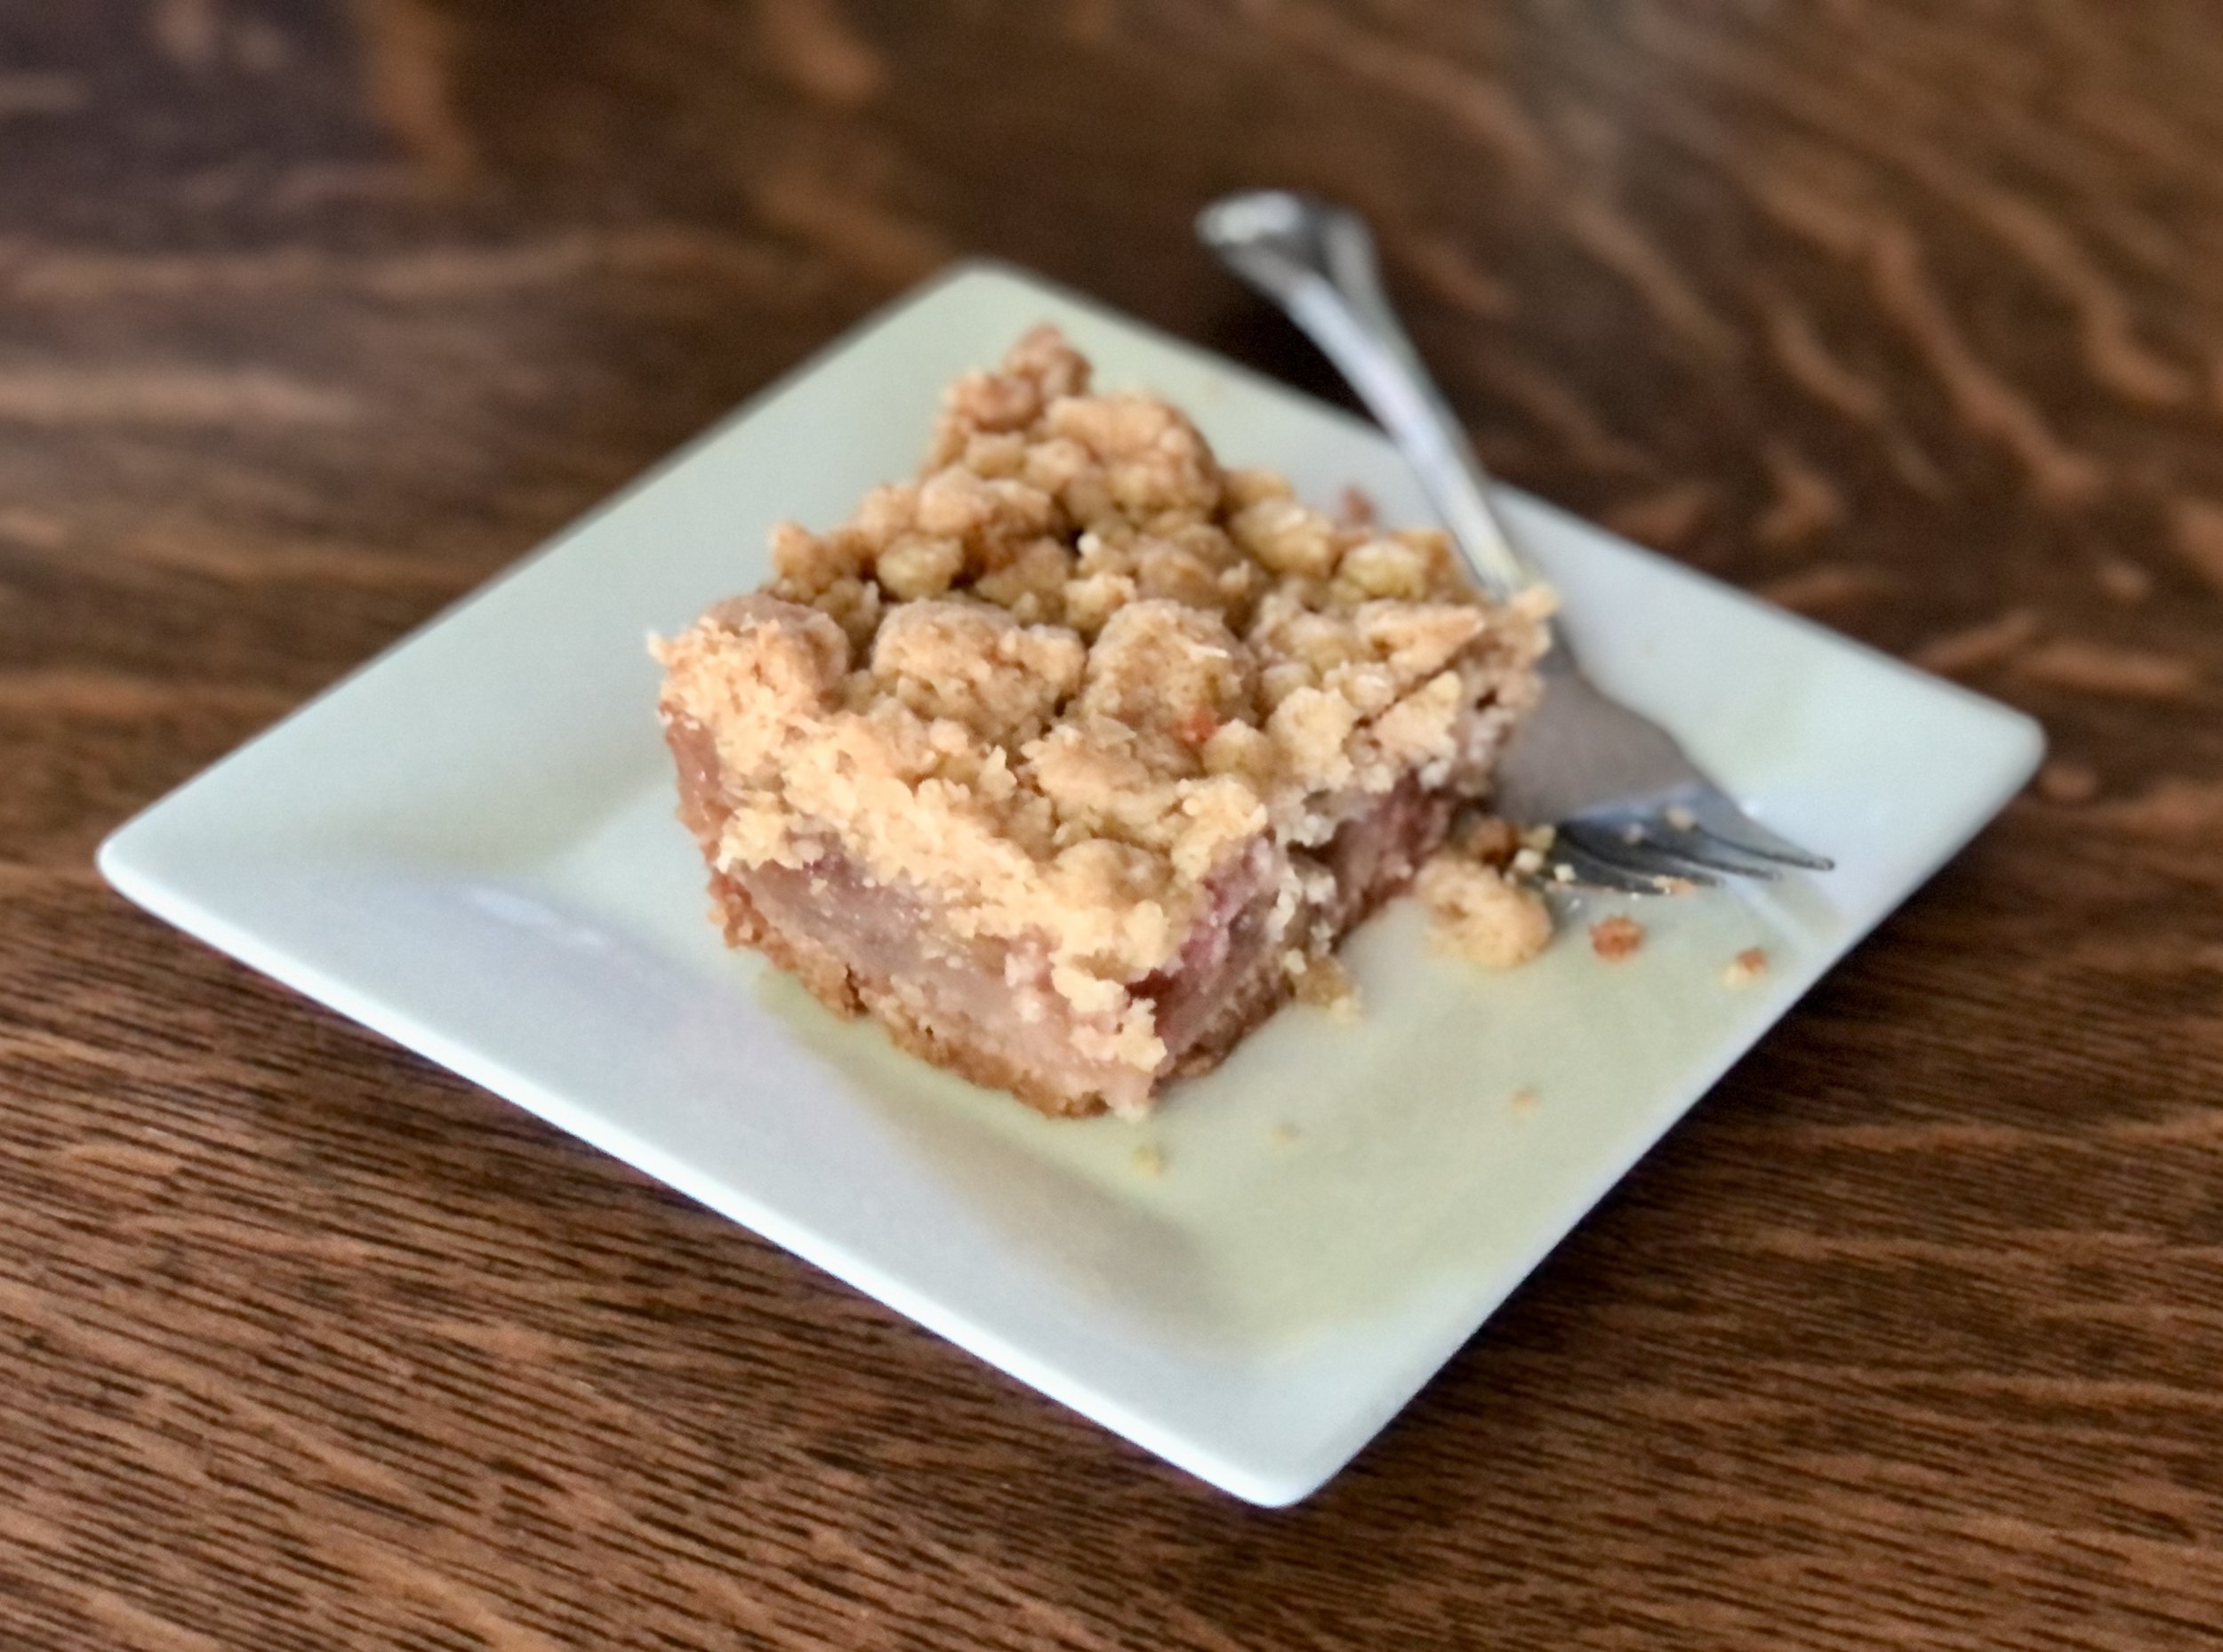
Rhubarb Oat Bars

Are you taking advantage of this rhubarb season? I hope you are, I know I am, more so than ever, as I’ve missed living in a country where people use, let alone have heard of, rhubarb.

I don’t know about you, but when rhubarb season starts I usually think of pies as the first thing to make. Then, after a few rhubarb and rhubarb custard pies, I might want to make some ahem…I’m not sure what normal people call it, maybe rhubarb soup? I grew up calling it camel hair soup. (We’re so normal you can’t stand it.) After camel hair soup, then maybe some rhubarb hand pies made with puff pastry.

All of those things are delicious, but sometimes with rhubarb season being so short I don’t end up getting beyond the “classics.” This year I’ve been expanding my horizons a bit, and if you’d like to go beyond the rhubarb pies and crisps, here are some buttery rhubarb oat bars to try!

It’s a buttery crust, sticky and gooey strawberry rhubarb filling with a hint of nutmeg, and a buttery oat crumble on top.

Yes please.

I don’t think I need to go on much further, so here’s the recipe! Anyway, I better stop writing before rhubarb season is over, haha.

This post may contain affiliate links. If you make a purchase using these links, Jennyblogs may receive a small commission, at no extra cost to you. This helps to support Jennyblogs. For further information see the privacy policy. Grazie!

Recipe adapted from Curly Girl Kitchen


Rhubarb Oat Bars

Serves about 9-12

Ingredients

For the Crust and Topping

  • 1 1/2 cups / 180g flour

  • 1 cup / 90g rolled oats

  • 1 cup / 226g cold butter, cubed

  • 1/2 cup / 100g brown sugar

  • 1 tsp baking powder

  • 1/2 tsp salt

For the Rhubarb Filling

  • 1 lb / 454g (about 3 1/2 cups) rhubarb, cut into approx. 1/2” slices

  • 1/2 cup / 100g sugar

  • 6 Tbsp / 45g flour

  • 1/2 cup / 160g strawberry jam

  • 1 Tbsp / 15g lemon juice

  • 1 tsp / 5g vanilla extract

  • 1/4 tsp nutmeg

  • 1/4 tsp baking soda

Directions:

Oven preheated to 350F / 177C. Lightly grease an 8x8in / 20x20cm square baking dish.

Make the Crust and Topping

  1. In a food processor, blend all crust/topping ingredients together until the texture is like coarse pebbles. Alternately, you can mix by hand or with a fork or pastry cutter.

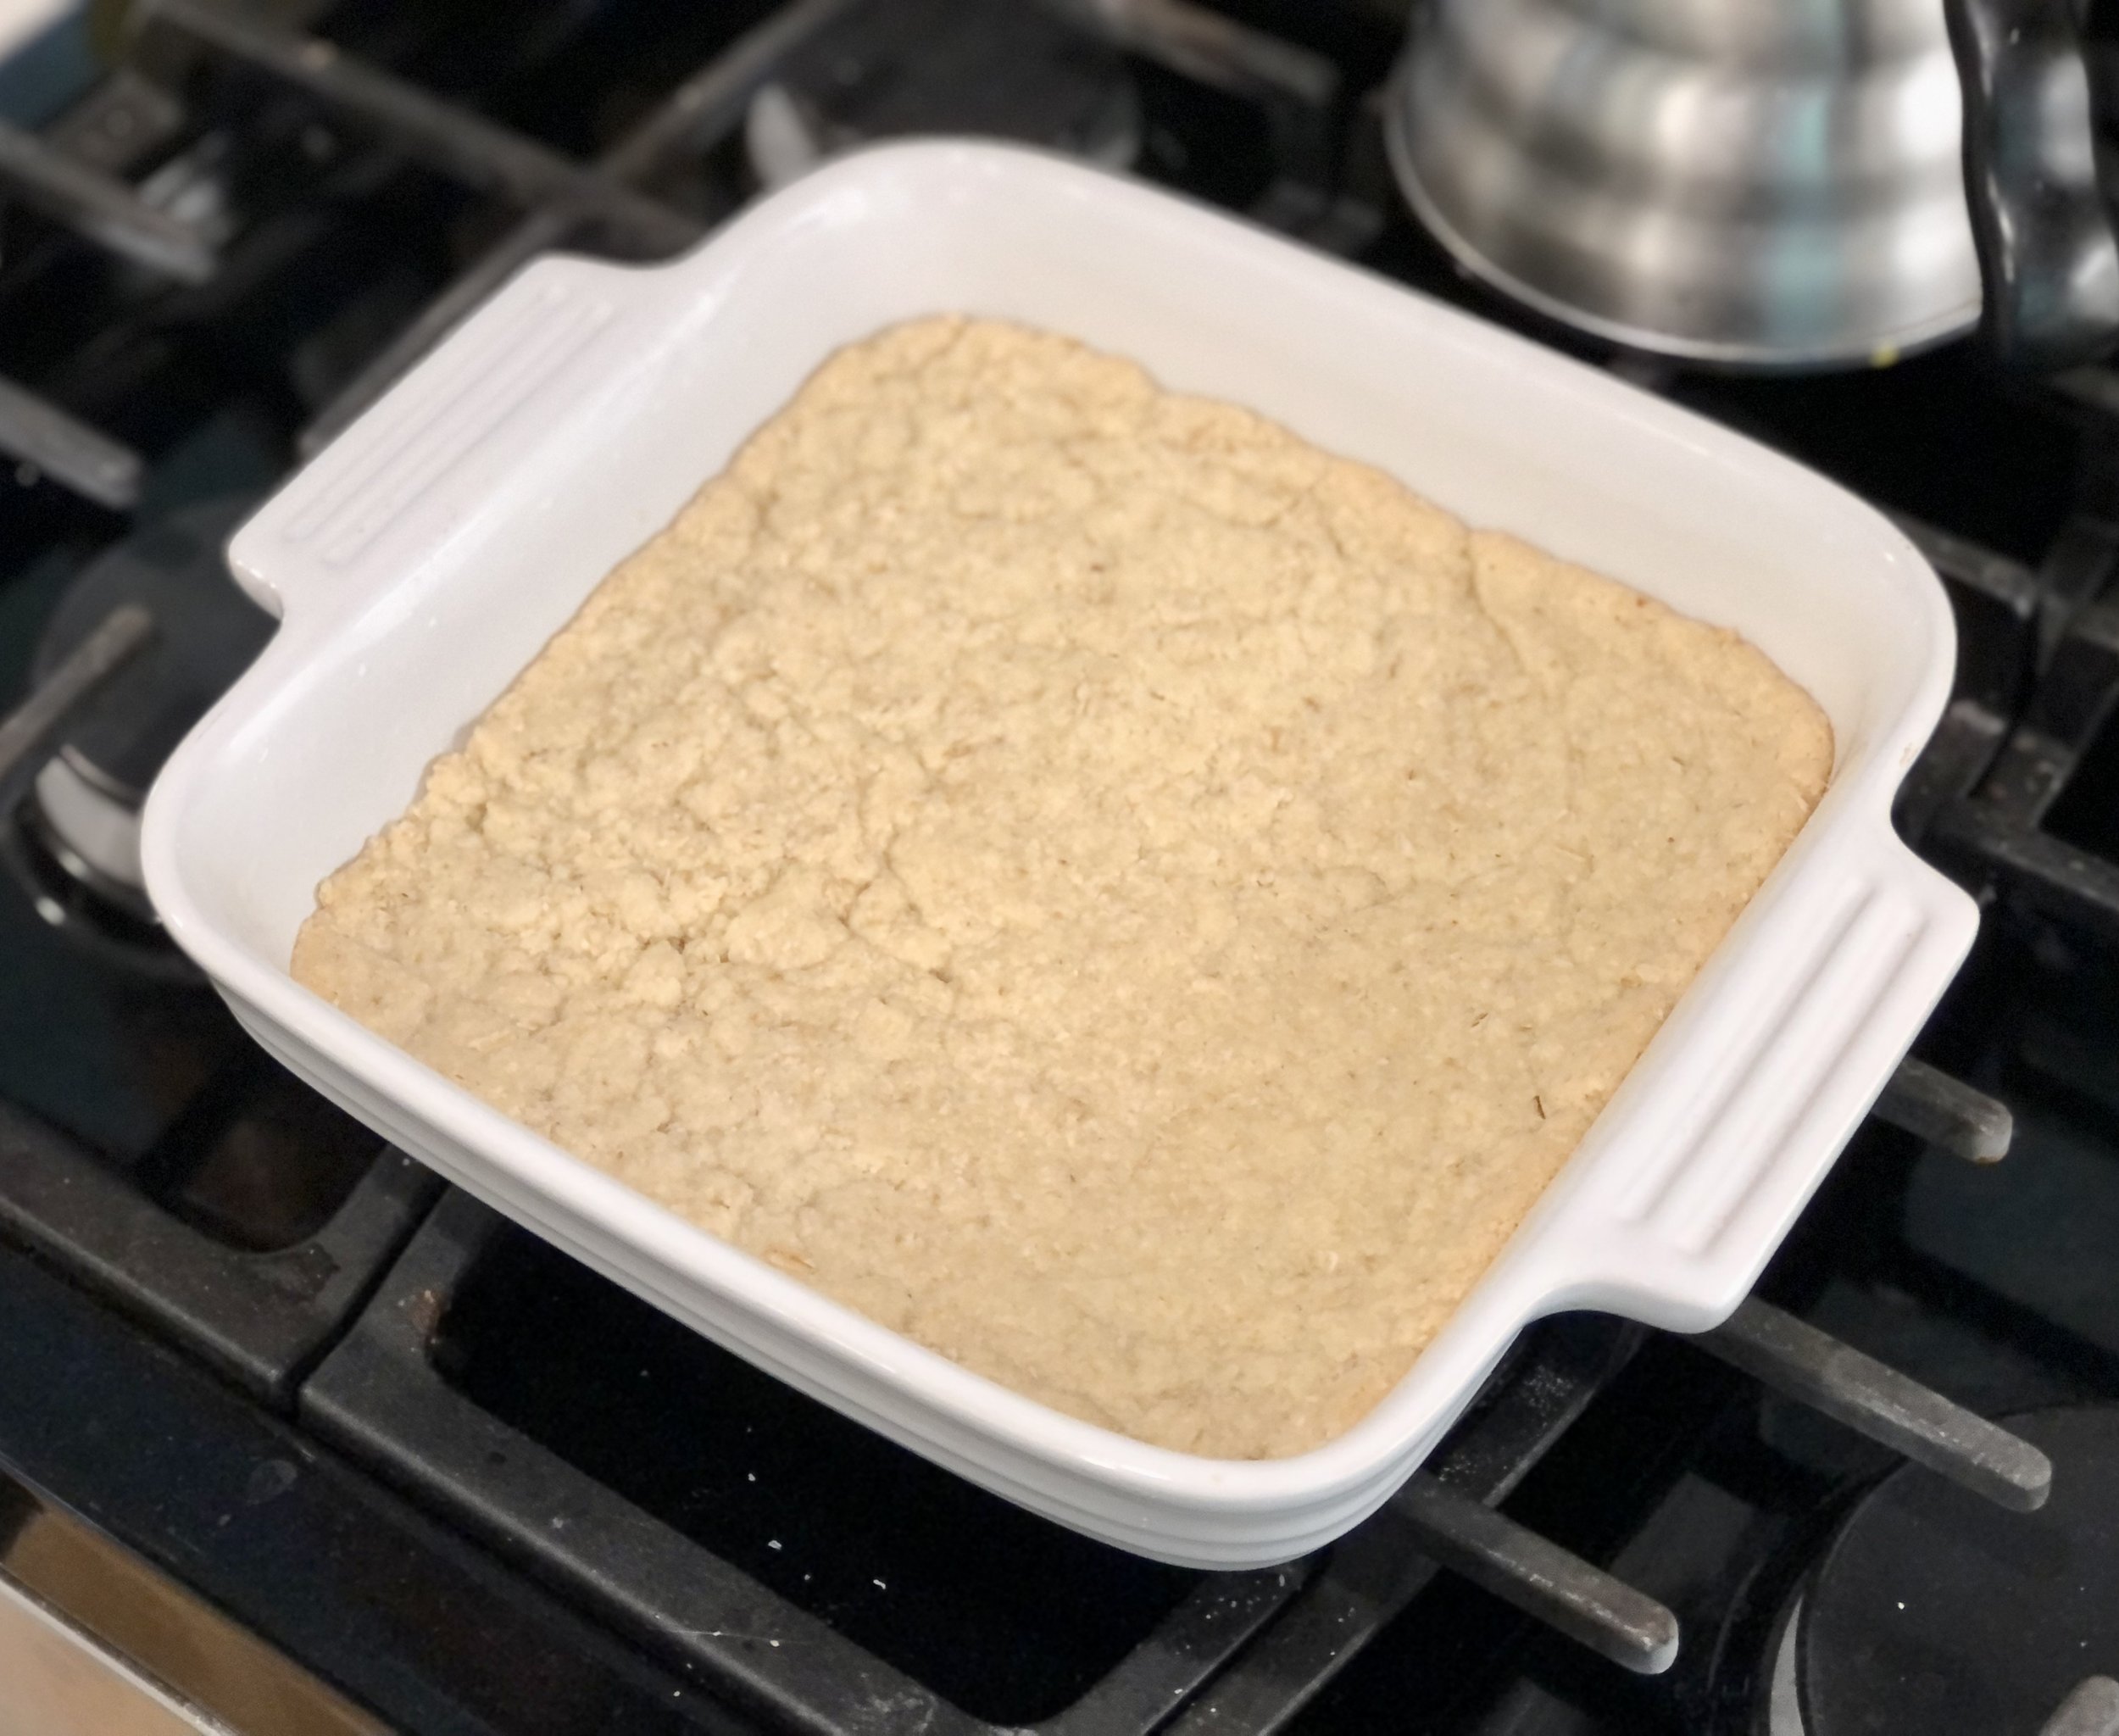
  2. Take half the mixture and press into the prepared baking dish. Reserve other half for topping.

  3. Bake for 15 minutes.

Meanwhile, Make the Rhubarb Filling

  1. In a large bowl, combine all filling ingredients. Mix together well.

  2. When the crust is done baking, pour filling over crust.

  3. Bake for 30 minutes.

  4. When the filling is done baking, crumble the remaining topping over filling and bake for another 20-25 minutes, or until top is light golden-brown.

  5. Allow to cool completely before cutting and serving. (The refrigerator can help speed up this process.)

Jenny’s Notes:

  • If you don’t have rolled oats, instant oats can be used.

  • The strawberry jam could be switched out for a different flavor of jam!

  • If you can’t wait to dig into your freshly baked bars, you can always go at it with a spoon! It will be more like a crumble when it’s still warm, but hey, is that a bad thing?

rhubarb, oat bars, oaty bars, crumble
dessert
American
Yield: 9-12
Author:
Rhubarb Oat Bars

Rhubarb Oat Bars

Buttery, crumbly oat bars with a sweet rhubarb and strawberry filling
Prep time: 20 MinCook time: 1 H & 5 MTotal time: 1 H & 25 M

Ingredients

For the Crust and Topping
For the Rhubarb Filling

Instructions

Make the Crust and Topping
  1. Oven preheated to 350F / 177C. Lightly grease an 8x8in / 20x20cm square baking dish.
  2. In a food processor, blend all crust/topping ingredients together until the texture is like coarse pebbles. Alternately, you can mix by hand or with a fork or pastry cutter.
  3. Take half the mixture and press into the prepared baking dish. Reserve other half for topping.
  4. Bake for 15 minutes.
Meanwhile, Make the Rhubarb Filling
  1. In a large bowl, combine all filling ingredients. Mix together well.
  2. When the crust is done baking, pour filling over crust.
  3. Bake for 30 minutes.
  4. When the filling is done baking, crumble the remaining topping over filling and bake for another 20-25 minutes, or until top is light golden-brown.
  5. Allow to cool completely before cutting and serving. (The refrigerator can help speed up this process.)

Notes

  • If you don’t have rolled oats, instant oats can be used.
  • The strawberry jam could be switched out for a different flavor of jam!
  • If you can’t wait to dig into your freshly baked bars, you can always go at it with a spoon! It will be more like a crumble when it’s still warm, but hey, is that a bad thing?

Nutrition Facts

Calories

463.59

Fat

21.47

Sat. Fat

13.15

Carbs

64.53

Fiber

2.75

Net carbs

61.8

Sugar

32.96

Protein

4.61

Sodium

393.23

Cholesterol

54.23

Nutritional Information is approximate.

Did you make this recipe?
Tag @jennyblogsandbakes on instagram and hashtag it # jennyblogs

Paste di Pistacchio Siciliane - Sicilian Pistachio Cookies

Paste di Pistacchio, or Pistachio cookies, hail from the beautiful island of Sicily. They have a delightfully crisp outer shell and a chewy, soft center.

Two years ago I put up the recipe for Paste di Mandorle, or Sicilian Almond Cookies, and it has become one of the top recipes on this site.

It’s not hard to figure out why…with only 4 ingredients that get mixed together in a bowl with a spoon, rolled in powdered sugar and baked, it really doesn’t get much easier than this. No fancy equipment. Not to mention with the almonds there are more nutritional benefits to these than your average cookie. Or at least, that’s what I tell myself when I’m going for my fifth cookie. They’re also gluten-free and dairy-free friendly.

Sometimes great ideas pop into my head. Sometimes really awful ones, too, but I try to only filter the good ones here onto this blog, k? One day, I saw a half bag of pistachios in my cupboard. The first half had been ground into pistachio flour to make this Pistachio Cake with Honey Vanilla Buttercream for Christmas. Then I had an idea, what if I take the Paste di Mandorle recipe and replace part of the almond flour with pistachio flour?? So I did. And this recipe was born.

After the fact when all the cookies had been gobbled up within a couple hours, I wondered if maybe this recipe wasn’t original to me? It seemed too easy for no one else to have thought of this. Turns out these are definitely already a thing. Sicily is known not just for their almonds but also for their pistachios, especially the area of Bronte. Naturally, these pistachio cookies are a classic right alongside the almond ones.

The original Paste di Pistacchio Siciliane

The original recipe itself has a few variations, as I will list below. You can choose to implement any of the following as per your taste, or just follow the main recipe below, which is my favorite way of making it. Any way you go, you will have a scrumptious cookie that is not only unbelievably easy, but also an authentic Italian sweet!

  • Grind your own flour vs storebought flour. Some will instruct to grind your own almonds and pistachios. This not only gives you fresh nut flour, but it allows you to control how fine you grind it. Some advise against buying almond flour or pistachio flour from the store because it’s too thin. However, if you don’t have a food processor, spice grinder, coffee grinder or any other tool that will get the job done, I have used store bought flour and it turned out fine. No pun intended. ;)

  • Honey. I’d say most of the recipes claiming to be the original I’ve seen call for adding a bit of honey, anywhere from 10-20g. Honestly I don’t, but it would be easy to add if you truly want as close to the original as possible. If adding honey, use a bit less of the cane sugar.

  • Powdered sugar. Some recipes call for using powdered, others granulated. Others call for granulated but have you grind the sugar with the nuts, so you end up with powdered sugar anyway. I generally use granulated sugar and don’t grind, because I grind the nuts in a small electric coffee grinder and there isn’t room for the sugar. Either way you will have great results.

  • Cookie shape. The cookies can be shaped into the classic S shape (Roll dough into logs about the width of a finger, then slice into pieces about the length of half of an index finger, roll in powdered sugar, and use your fingers to shape into the S), ovals, or simply round cookies. I chose the round shape for the recipe below, as it’s the simplest. If you’d like to see the S shape, check out the pictures in this recipe.

  • Dough resting/refrigeration. Some will instruct to let the dough rest after you’ve shaped it so it will be less sticky. As with the almond cookies, if you’ve glanced or made that recipe, the refrigeration or resting is not strictly necessary. It allows the dough to dry out a bit, which means they retain their shapes better when baked. But if you’re going for the round or oval shape, there’s not much need.

This post may contain affiliate links. If you make a purchase using these links, Jennyblogs may receive a small commission, at no extra cost to you. This helps to support Jennyblogs. For further information see the privacy policy. Grazie!

Here is one of the recipes I referenced in Italian and also gives a good visual of the “S” shaped cookie.


Paste di Pistacchio Siciliane - Sicilian Pistachio Cookies

Makes about 2 dozen cookies

Ingredients:

  • 125g whole unsalted almonds or almond flour

  • 125g whole unsalted pistachios or pistachio flour

  • 250g granulated sugar (or 230g granulated sugar and 20g honey)

  • 2 / 60g egg whites

  • pinch of salt

  • powdered sugar, for rolling, optional

Directions:

Preheat oven to 350°F / 180°C.

  1. Using a food processor, spice grinder, or coffee grinder, grind the nuts until coarse. Small chunks are ok.

  2. Mix all ingredients together, and form into balls or desired shape. Roll in powder sugar, if desired.

  3. Place evenly spaced on ungreased cookie sheets. At this point cookies can be covered and refrigerated overnight or baked immediately.

  4. Bake in preheated oven for about 8-12 minutes, or until cookies just start to turn golden.

Jenny’s Notes:

  • If working with a food processor or other tool large enough, you can grind the nuts with the sugar, creating powdered sugar in the process, as some recipes call for.

  • If the dough is too sticky, you can let it sit for an hour or refrigerate for several hours to let it thicken/dry out a bit.

  • This recipe is also delicious using all pistachio flour!

Italian dessert, Italian cookie, Sicilian dessert, Sicilian recipe, authentic Italian recipe, original Sicilian dessert recipe, pistachio, almond, gluten free, dairy free
dessert, cookies
Italian
Yield: 24
Author:
Paste di Pistacchio Siciliane - Sicilian Pistachio Cookies

Paste di Pistacchio Siciliane - Sicilian Pistachio Cookies

Traditional Sicilian sweets with a delightfully crunchy outside and chewy inside. Made with just 4-5 ingredients and naturally gluten-free and dairy-free.
Prep time: 15 MinCook time: 12 MinTotal time: 27 Min

Ingredients

Instructions

  1. Preheat oven to 350°F / 180°C.
  2. Using a food processor, spice grinder, or coffee grinder, grind the nuts until coarse. Small chunks are ok.
  3. Mix all ingredients together, and form into balls or desired shape. Roll in powder sugar, if desired.
  4. Place evenly spaced on ungreased cookie sheets. At this point cookies can be covered and refrigerated overnight or baked immediately.
  5. Bake in preheated oven for about 8-12 minutes, or until cookies just start to turn golden.

Notes:

  • If working with a food processor or other tool large enough, you can grind the nuts with the sugar, creating powdered sugar in the process, as some Italian versions call for.
  • If the dough is too sticky, you can let it sit for an hour or refrigerate for several hours to let it thicken/dry out a bit.
  • This recipe is also delicious using all pistachio flour!


Calories

108.15

Fat (grams)

5.13

Sat. Fat (grams)

0.51

Carbs (grams)

14.12

Fiber (grams)

1.10

Net carbs

13.02

Sugar (grams)

12.21

Protein (grams)

2.73

Sodium (milligrams)

36.38

Cholesterol (grams)

0.00

Nutritional information is approximate. Based on 1 cookie rolled in powdered sugar.

Did you make this recipe?
Tag @jennyblogsandbakes on instagram and hashtag it #jennyblogs
Created using The Recipes Generator

Lemon Blondies

These bars are like brownies but LEMON.

IMG_3410.jpg

Chewy, sugary, zingy and bright lemony bar goodness. With a lemony glaze to boot! Some people call these lemon brownies, others lemon blondies. I couldn’t bring myself to say lemon brownies because they’re not chocolatey nor brown, so using the word “brownie” seemed to be sending the wrong signals. Blondie is much more accurate, although if you consider a blondie as having chocolate chips, you must take the notion out of your brain for a moment to fully understand and appreciate these beauties.

It’s really just a blondie recipe with lemon juice and zest added to it, with a wonderfully simple but tart lemon glaze! You can also add lemon extract for extra lemon flavor, but I don’t think they need it. I add more lemon juice than some, which has a more authentic lemon flavor anyway, yeah?

This post may contain affiliate links. If you make a purchase using these links, Jennyblogs may receive a small commission, at no extra cost to you. This helps to support Jennyblogs. For further information see the privacy policy. Grazie!

Recipe adapted from Sugar Spun Run


Lemon Blondies

Serves about 9

Adjustments.jpeg

Ingredients:

For the Lemon Blondies

  • 3/4 cup / 168g oil

  • 1 1/2 cups / 300g sugar

  • 1 egg + 1 egg yolk

  • 2 Tbsp lemon zest

  • 3 Tbsp / 42g lemon juice

  • 1/2 tsp vanilla extract

  • 2 1/2 cups / 300g all-purpose flour

  • 1 tsp / 3g cornstarch

  • 3/4 tsp salt

  • 1/4 tsp baking soda

For the Lemon Glaze

  • 3/4 cup / 94g powdered sugar

  • 1-2 Tbsp / 14-28g lemon juice

  • 1-2 tsp lemon zest, optional

Directions:

Make the Lemon Blondies

Preheat oven to 350°F / 177°C. Grease an 8x8 or 9x9inch / 20x20 or 23x23cm square baking pan.

  1. In a large bowl, mix together oil, sugar, egg and egg yolk, lemon zest, lemon juice, and vanilla.

  2. In another medium bowl, whisk together flour, cornstarch, salt, and baking soda.

  3. Add flour to lemon mixture and mix until combined. Dough will be thick.

  4. Scrape batter into prepared pan and spread in an even layer to the edges.

  5. Bake for 25-30 minutes, or until toothpick inserted near the center comes out mostly clean.

Adjustments.jpg

Make the Lemon Glaze

  1. In a small bowl, whisk together powdered sugar and enough lemon juice to make a drizzleable glaze. Pour over lemon blondies, spreading to edges with spatula, if necessary. Sprinkle lemon zest over top, if desired.

  2. Allow lemon blondies to cool completely before slicing and serving.

Jenny’s Notes:

  • I know it may be hard to resist cutting into these lemon blondies right away, but it’s best to wait until they are cooled to avoid them crumbling on you.

Lemon Blondies, Lemon Brownies, Lemon bars
dessert
American
Yield: 9
Author:
Print
Lemon Blondies

Lemon Blondies

Chewy and dense like brownies, but lemon instead of chocolate with a zesty glaze!
Prep time: 20 MCook time: 30 MTotal time: 50 M

Ingredients:

For the Lemon Blondies
  • 3/4 cup / 168g oil
  • 1 1/2 cups / 300g sugar
  • 1 egg + 1 egg yolk
  • 2 Tbsp lemon zest
  • 3 Tbsp / 42g lemon juice
  • 1/2 tsp vanilla extract
  • 2 1/2 cups / 300g all-purpose flour
  • 1 tsp / 3g cornstarch
  • 3/4 tsp salt
  • 1/4 tsp baking soda
For the Lemon Glaze
  • 3/4 cup / 94g powdered sugar
  • 1-2 Tbsp / 14-28g lemon juice
  • 1-2 tsp lemon zest, optional

Instructions:

Make the Lemon Blondies
  1. Preheat oven to 350°F / 177°C. Grease an 8x8 or 9x9inch / 20x20 or 23x23cm square baking pan.
  2. In a large bowl, mix together oil, sugar, egg and egg yolk, lemon zest, lemon juice, and vanilla.
  3. In another medium bowl, whisk together flour, cornstarch, salt, and baking soda.
  4. Add flour to lemon mixture and mix until combined. Dough will be thick.
  5. Scrape batter into prepared pan and spread in an even layer to the edges.
  6. Bake for 25-30 minutes, or until toothpick inserted near the center comes out mostly clean.
Make the Lemon Glaze
  1. In a small bowl, whisk together powdered sugar and enough lemon juice to make a drizzleable glaze. Pour over lemon blondies, spreading to edges with spatula, if necessary. Sprinkle lemon zest over top, if desired.
  2. Allow lemon blondies to cool completely before slicing and serving.

Notes:

I know it may be hard to resist cutting into these lemon blondies right away, but it’s best to wait until they are cooled to avoid them crumbling on you.

Calories

474.05

Fat (grams)

20.03

Sat. Fat (grams)

1.62

Carbs (grams)

70.33

Fiber (grams)

1.13

Net carbs

69.19

Sugar (grams)

43.82

Protein (grams)

4.50

Sodium (milligrams)

205.81

Cholesterol (grams)

41.16
Nutritional information is approximate. Based on 1 bar if sliced into 9 servings.
Did you make this recipe?
Tag @jenevamorris on instagram and hashtag it #jennyblogs
Created using The Recipes Generator

Chocolate No-Bake Cookies

IMG_3299.jpg

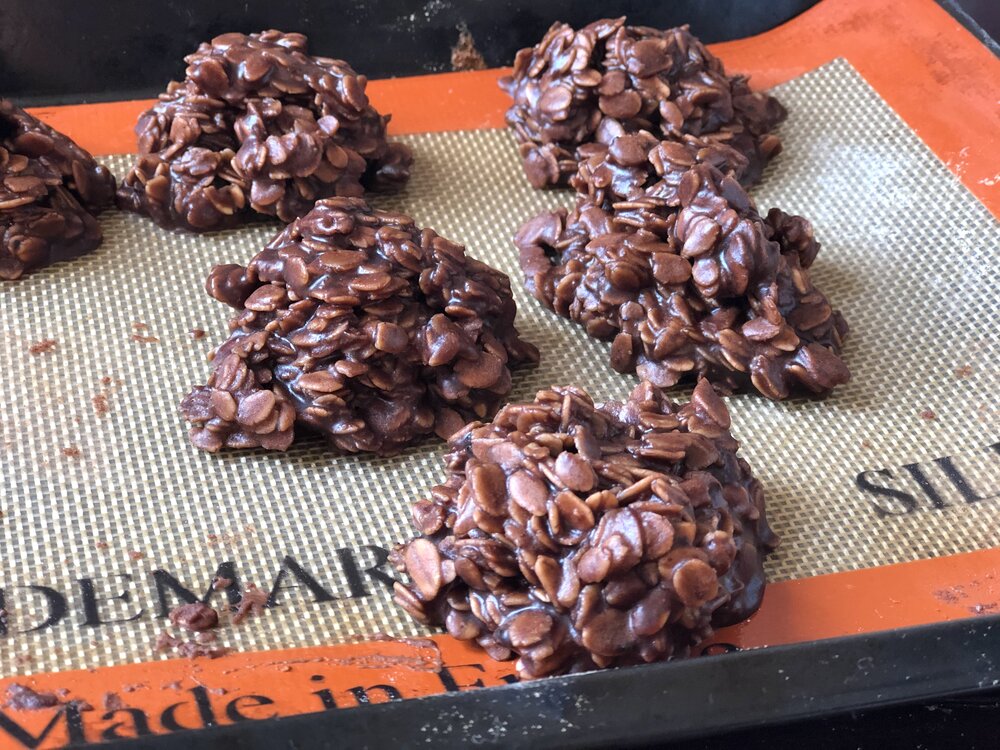
Actually known as chocolate sand dune cookies around the Morris household, because no-bakes is just not as descriptive, ya know? They’re well enough known that probably doesn’t matter, but as I grew up near the famous Sleeping Bear Sand Dunes, you will understand when, many years ago, my older brother decided to call these mounds of cookies “sand dunes” or rather “chocolate sand dunes” because these cookies are not the color of sand. The name stuck, and well, here we are today.

Chocolate sand dune cookies a.k.a. chocolate no-bake cookies, no matter what you call them, are delicious and just a little too easy to make.

They’re also made without any flour, so if you use certified GF oats, they are easily gluten-free. These cookies made a come back during the quarantine and the flour shortage! They can also be made with a milk-alternative and butter-alternative if you wish to have dairy-free cookies. They’re naturally egg-free!

What follows is the classic recipe I grew up making with my mom. Little did I know until I was a teenager and making no-bake cookies with a friend that the actual “original” recipe includes peanut butter. What?! You don’t put peanut butter into chocolate sand dune cookies! Actually you can, and it’s delicious. Peanut butter and chocolate together, hello. Of course it’s delicious.

However, this is not to disregard my mom’s classic recipe. While she loves chocolate and peanut butter, she doesn’t prefer them together. So she omitted the peanut butter and never looked back from making this pure chocolatey, fudgy version of no-bake cookies. Some of my family members still prefer them without the peanut butter, others prefer with. So if you or someone you know doesn’t like peanut butter with chocolate, or has a nut allergy, know you can omit the peanut butter and have an equally delicious cookie.

This post may contain affiliate links. If you make a purchase using these links, Jennyblogs may receive a small commission, at no extra cost to you. This helps to support Jennyblogs. For further information see the privacy policy. Grazie!

A recipe from my mama


Chocolate Sand Dune Cookies

Makes about 36 cookies

The pan was full at one point…

The pan was full at one point…

Ingredients:

  • 4 cups / 800g sugar

  • 1/2 cup / 50g cocoa powder

  • 1 cup / 237g milk

  • dash of salt

  • 1 cup / 225g butter (2 sticks)

  • 1/4-1 cup / 65g - 260g peanut butter, optional

  • 2 tsp / 10g vanilla extract

  • 5 1/2 cups / 495g quick oats

Directions

  1. In a large pot, stir together sugar, cocoa, milk, and salt; bring to a boil over medium heat. Boil for 2 minutes then remove from heat.

  2. Add butter, peanut butter, and vanilla; stir well.

  3. Add the oats and stir until all oats are coated. Let mixture sit for 8-10 minutes to thicken, stirring occasionally to check consistency.

  4. When mixture has thickened enough, spoon mounds onto wax paper or a clean counter. Allow to set and enjoy!

Jenny’s Notes:

  • Brown sugar can be used instead of white sugar, if you prefer.

  • I grew up baking with salted butter and this recipe reflects that with the dash of salt. Here in Europe and in most bakeries unsalted butter is used, so if that’s what you are using, simply add two dashes of salt if you wish!

  • You may notice the variance in the peanut butter measurement; use up to 1 cup for peanut butter lovers, or as little as 1/4 cup for just a hint.

  • Regular or crunchy peanut butter can be used, and it’s also fine to use natural peanut butter. People often don’t recommend using natural in recipes, but as I prefer not to buy the kinds with added sugars and hydrogenated oils, I usually use it anyway and have hardly met a recipe where you can’t successfully use the natural kind.

  • Quick or instant oats are my preferred kind of oats to use for chocolate sand dunes, but as you will notice from my photos that regular or rolled oats can also be used. Rolled oats give more of a bite to your cookies, and you will probably need to let the mixture sit a bit longer before spooning out the cookies so the oats have time to thicken up the mixture. If after 10-15 minutes your mixture still isn’t thickening up satisfactorily, you may need to add additional oats.

  • The above recipe makes about 36 cookies, great for sharing, large families, and parties. It can also easily be halved to make about 18 cookies, or even quartered to make 9. The photos on this post are from the 2 month lockdown in Italy when I decided that a quarter batch should suffice for 2 people who can’t leave the house.

no-bake cookies, chocolate, oats, no bake dessert, summer dessert, fudgy chocolate cookies, oat cookies, peanut butter
dessert
American
Yield: 36
Author:
Print
Chocolate No-Bake Cookies

Chocolate No-Bake Cookies

Chocolate No-bakes are decadent mounds of chocolatey oat cookies made without flour, eggs, or an oven, which makes them ideal for summer baking and people with gluten or egg allergies.
Prep time: 20 MCook time: 5 MTotal time: 25 M

Ingredients:

  • 4 cups / 800g sugar
  • 1/2 cup / 50g cocoa powder
  • 1 cup / 237g milk
  • dash of salt
  • 1 cup / 225g butter (2 sticks)
  • 1/4-1 cup / 65g - 260g peanut butter, optional
  • 2 tsp / 10g vanilla extract
  • 5 1/2 cups / 495g quick oats

Instructions:

  1. In a large pot, stir together sugar, cocoa, milk, and salt; bring to a boil over medium heat. Boil for 2 minutes then remove from heat.
  2. Add butter, peanut butter, and vanilla; stir well.
  3. Add the oats and stir until all oats are coated. Let mixture sit for 8-10 minutes to thicken, stirring occasionally to check consistency.
  4. When mixture has thickened enough, spoon mounds onto wax paper or a clean counter. Allow to set and enjoy!

Notes:

Brown sugar can be used instead of white sugar, if you prefer. I grew up baking with salted butter and this recipe reflects that with the dash of salt. Here in Europe and in most bakeries unsalted butter is used, so if that’s what you are using, simply add two dashes of salt if you wish! You may notice the variance in the peanut butter measurement; use up to 1 cup for peanut butter lovers, or as little as 1/4 cup for just a hint. Regular or crunchy peanut butter can be used, and it’s also fine to use natural peanut butter. People often don’t recommend using natural in recipes, but as I prefer not to buy the kinds with added sugars and hydrogenated oils, I usually use it anyway and have hardly met a recipe where you can’t successfully use the natural kind. Quick or instant oats are my preferred kind of oats to use for chocolate sand dunes, but as you will notice from my photos that regular or rolled oats can also be used. Rolled oats give more of a bite to your cookies, and you will probably need to let the mixture sit a bit longer before spooning out the cookies so the oats have time to thicken up the mixture. If after 10-15 minutes your mixture still isn’t thickening up satisfactorily, you may need to add additional oats. The above recipe makes about 36 cookies, great for sharing, large families, and parties. It can also easily be halved to make about 18 cookies, or even quartered to make 9. The photos on this post are from the 2 month lockdown in Italy when I decided that a quarter batch should suffice for 2 people who can’t leave the house.

Calories

192.48

Fat (grams)

9.10

Sat. Fat (grams)

4.01

Carbs (grams)

26.75

Fiber (grams)

0.92

Net carbs

25.83

Sugar (grams)

22.75

Protein (grams)

2.47

Sodium (milligrams)

89.28

Cholesterol (grams)

13.96
Nutritional information is approximate. Based on 1 cookie if using the full cup of peanut butter in the recipe.
Did you make this recipe?
Tag @jenevamorris on instagram and hashtag it #jennyblogs
Created using The Recipes Generator
IMG_3302.jpg

Beurre Noisette (browned butter) Congo Bars

With oats.

Adjustments.jpg

One of the best things to happen to the cookie world is browned butter, or beurre noisette as the French call it. It not only ups the baked cookie game, but it takes cookie dough to a whole new level.

Will someone please get browned butter cookie dough ice cream on the market? Thanks.

You can find my original recipe for Beurre Noisette Chocolate Chip Cookies right here, but you might want to stick around a little longer for today’s recipe because it’s essentially the same thing, just a different form and a little quicker to make. And cookies are already quick to make, so imagine that!

Why the name congo bars? I really have no idea. They’re just chocolate chip cookies in bar form. Therefore quicker to make but not necessarily superior to the classic cookie form. It’s really down to whatever tickles your fancy in that moment.

This recipe was born under full Italian lockdown. Ironically, you think I wouldn’t want to short cut a recipe with all the time I had on my hands, but you see, I have a very small oven. I can bake a max of 5-6 cookies a time, so that’s a long time to be waiting around to take cookies out of the oven, reload the tray, and repeat. Not to mention a higher electric bill.

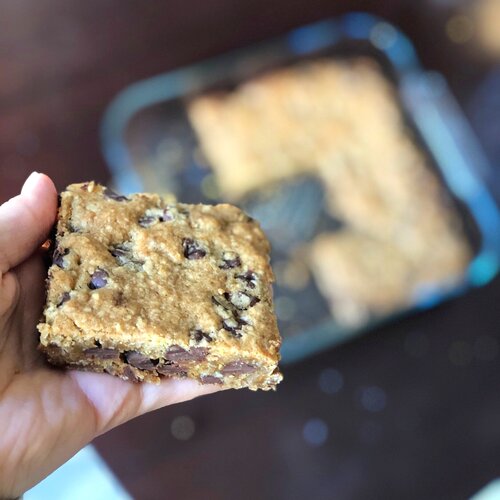
So what did I do? I took my handy dandy Beurre Noisette Chocolate Chip Cookie recipe and adjusted it to fit in an 8x8in / 20x20cm square pan. So great. So delicious. And the timer only goes off once! A square baking dish is also a bit easier to wash than a large and cumbersome cookie sheet.

This recipe also features oats, and you can use the browned butter while it’s still melted if you want one more time-saving trick. While I do think it’s worth the time/planning ahead to brown the butter, allow it to cool, then whip it up as you normally would in a cookie recipe (so fluffy and so delicious), it’s not essential and can save you a lot of time if you don’t.

To learn how to make browned butter, see the original Beurre Noisette Chocolate Chip Cookie recipe.

This post may contain affiliate links. If you make a purchase using these links, Jennyblogs may receive a small commission, at no extra cost to you. This helps to support Jennyblogs. For further information see the privacy policy. Grazie!

A recipe by Jenny.


Beurre Noisette (browned butter) Congo Bars

Makes about 9 bars

Adjustments.jpg

Ingredients:

  • 1/2 cup / 113g butter, melted, browned, and cooled

  • 3/4 cup / brown sugar

  • 1 egg

  • 1 1/2 tsp vanilla extract

  • 1 cup / 120g all-purpose flour

  • 1/2 cup / 45g oats

  • 1/2 tsp baking powder

  • 1/2 tsp baking soda

  • 1/2 tsp salt

  • 6 oz / 170g (half a bag) chocolate chips

Directions:

Oven preheated to 350°F / 177°C. 8x8in / 20x20cm pan, greased.

  1. In a medium bowl, mix together melted and cooled browned butter, brown sugar, egg, and vanilla and smooth.

  2. Add in flour, oats, baking powder, baking soda, salt, and chocolate chips. Mix until well combined.

  3. Scrape dough into an even layer in the prepared pan and bake for 18-22 minutes, or until set and center no longer looks doughy.

Jenny’s Notes:

  • This recipe can easily be doubled and baked in a 9x13in / 23x33cm pan.

  • If you choose to whip your butter, cream first just the butter and sugar until light and fluffy, about 4-5 minutes. Then add in the rest of the wet ingredients and continue with recipe.

  • Before baking you can also sprinkle some flaked sea salt on top if you’re craving the sweet and salty!

browned butter, chocolate chip cookies, congo bars, cookies
cookies, dessert
American
Yield: 9
Author:
Beurre Noisette (browned butter) Congo Bars

Beurre Noisette (browned butter) Congo Bars

All the goodness of browned butter chocolate chip cookies in a bar form!
Prep time: 25 MCook time: 22 MTotal time: 47 M

Ingredients:

  • 1/2 cup / 113g butter, melted, browned, and cooled
  • 3/4 cup / brown sugar
  • 1 egg
  • 1 1/2 tsp vanilla extract
  • 1 cup / 120g all-purpose flour
  • 1/2 cup / 45g oats
  • 1/2 tsp baking powder
  • 1/2 tsp baking soda
  • 1/2 tsp salt
  • 6 oz / 170g (half a bag) chocolate chips

Instructions:

  1. Oven preheated to 350°F / 177°C. 8x8in / 20x20cm pan, greased.
  2. In a medium bowl, mix together melted and cooled browned butter, brown sugar, egg, and vanilla and smooth.
  3. Add in flour, oats, baking powder, baking soda, salt, and chocolate chips. Mix until well combined.
  4. Scrape dough into an even layer in the prepared pan and bake for 18-22 minutes, or until set and center no longer looks doughy.

Notes:

This recipe can easily be doubled and baked in a 9x13in / 23x33cm pan. If you choose to whip your butter, cream first just the butter and sugar until light and fluffy, about 4-5 minutes. Then add in the rest of the wet ingredients and continue with recipe. Before baking you can also sprinkle some flaked sea salt on top if you’re craving the sweet and salty!

Calories

316.06

Fat (grams)

16.84

Sat. Fat (grams)

10.05

Carbs (grams)

40.76

Fiber (grams)

1.98

Net carbs

38.78

Sugar (grams)

25.25

Protein (grams)

3.65

Sodium (milligrams)

321.79

Cholesterol (grams)

47.66
Nutritional information is approximate. Based on 9 servings.
Did you make this recipe?
Tag @jenevamorris on instagram and hashtag it #jennyblogs
Created using The Recipes Generator

Pumpkin Cheesecake Swirled Brownies

IMG_1331.jpg

Happy October!

I realize I’m a tad bit late as it’s almost November, but I’ve been MIA here on the blog for the past 3 weeks. I flew to meet some of my family in Paris and IT WAS A DREAM. All the hugs and jokes, pastries, sight-seeing, adventures, and everything else that happens when in Paris with some Morris family. We fit right in, people kept mistaking us for Parisians with our striped shirts, berets, and flawless French while taking photos constantly. I should probably write a blog about it when I get back.

Just kidding, just kidding.

I already miss my family so much. Nothing like watching your family fly away and suddenly feeling like my 18-year-old self again watching my parents drive away after having helped me move to Mississippi. I miss Paris too. Another thing I really enjoyed was the real fall weather there. Paris weather is actually quite similar to my hometown in Traverse City, Michigan. Except that Paris isn’t under 2+ feet of snow for 4+ months…meanwhile I left Florence still reaching into the high 70’s and 80’s (Fahrenheit), and returned to the same temperatures. In Paris I actually needed the sweaters, coats, boots, and hot beverages and it felt so right. C’mon Firenze, you can do it! Chilly temperatures for some serious fall-ing.

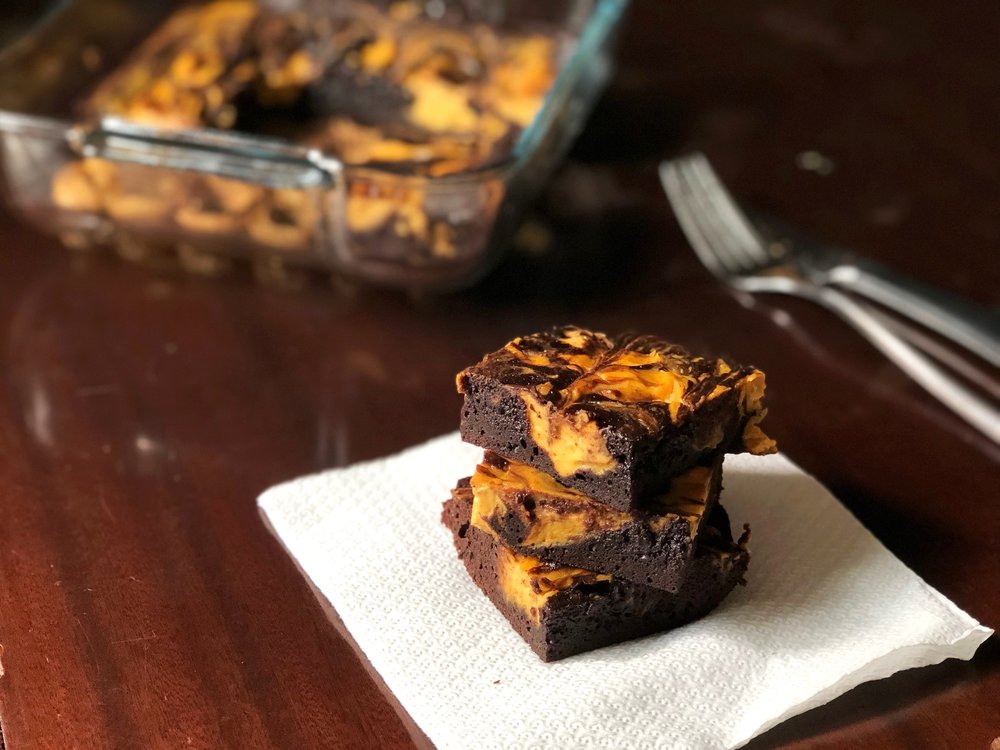
Until Firenze decides to get its act together, these rich chocolate brownies with a spiced pumpkin cream cheese swirl can help out.

While I didn’t bake or blog in Paris (why would I bake when world-class pastries are so cheap and at my doorstep??) I did whip up some autumn and pumpkin goodies and took photos of the blog-worthy ones before coming because I planned ahead! One catch though, I meant to post this WHILE I was in Paris, but that just didn’t happen and I’m ok with it. I was eating pain au chocolat, chaussons aux pommes, and macarons.

This post may contain affiliate links. If you make a purchase using these links, Jennyblogs may receive a small commission, at no extra cost to you. This helps to support Jennyblogs. For further information see the privacy policy. Grazie!

A recipe by Jenny.


Pumpkin Cheesecake Swirled Brownies

Serves 9-12

Ingredients:

IMG_1341.jpg

For the Brownies

  • scant 1/2 cup / 85g oil

  • 1 cup / 200g sugar

  • 1 egg

  • 1 1/2 tsp vanilla extract

  • 1/3 cup / 33g unsweetened cocoa powder

  • 1/4 tsp salt

  • 1/2 cup / 60g all-purpose flour

For the Pumpkin Cheesecake Swirl

  • 4 oz / 115g cream cheese, softened

  • 1/4 cup / 60g pumpkin purée

  • 2 Tbsp / 25g sugar

  • 1/4 tsp cinnamon

  • dash of ginger

  • dash of nutmeg

  • dash of cloves

Directions

Make the Brownies

Oven 350°F / 177°C.  Lightly greased 8x8in / 20x20cm pan.

  1. In a large mixing bowl, combine oil and sugar.  Beat in egg and vanilla.  Add cocoa powder and salt.  Mix in flour until just combined. 

  2. Pour into prepared pan and smooth with a spatula.

Make the Pumpkin Cheesecake Swirl

  1. In a medium bowl, beat together cream cheese, pumpkin, sugar, and spices until smooth and creamy. This can be done with a spoon or in a stand mixer.

  2. Dollop pumpkin cheesecake by spoonful over brownie batter. Use a a knife or the edge of a spatula to smooth and swirl pumpkin cheesecake into brownie batter.

  3. Bake for 20-25 minutes or until toothpick inserted near the center comes out mostly clean.  Allow to cool.


Jenny’s Notes:

  • The brownie batter and cream cheese will be thick and may stick up in places where it has been swirled, that’s ok, just do your best to smooth it down so everything is mostly level.

brownies, pumpkin spice, pumpkin cream cheese, fall recipe
dessert
American
Yield: 9
Author:
Pumpkin Cheesecake Swirled Brownies

Pumpkin Cheesecake Swirled Brownies

Fudgy chocolate brownies with a spiced cream cheese swirl.
prep time: 20 Mcook time: 25 Mtotal time: 45 M

ingredients:

For the Brownies
  • scant 1/2 cup / 85g oil
  • 1 cup / 200g sugar
  • 1 egg
  • 1 1/2 tsp vanilla extract
  • 1/3 cup / 33g unsweetened cocoa powder
  • 1/4 tsp salt
  • 1/2 cup / 60g all-purpose flour
For the Pumpkin Cheesecake Swirl
  • 4 oz / 115g cream cheese, softened
  • 1/4 cup / 60g pumpkin purée
  • 2 Tbsp / 25g sugar
  • 1/4 tsp cinnamon
  • dash of ginger
  • dash of nutmeg
  • dash of cloves

instructions:

How to cook Pumpkin Cheesecake Swirled Brownies

Make the Brownies
  1. Oven 350°F / 177°C. Lightly greased 8x8in / 20x20cm pan.
  2. In a large mixing bowl, combine oil and sugar. Beat in egg and vanilla. Add cocoa powder and salt. Mix in flour until just combined.
  3. Pour into prepared pan and smooth with a spatula.
Make the Pumpkin Cheesecake Swirl
  1. In a medium bowl, beat together cream cheese, pumpkin, sugar, and spices until smooth and creamy. This can be done with a spoon or in a stand mixer.
  2. Dollop pumpkin cheesecake by spoonful over brownie batter. Use a a knife or the edge of a spatula to smooth and swirl pumpkin cheesecake into brownie batter.
  3. Bake for 20-25 minutes or until toothpick inserted near the center comes out mostly clean. Allow to cool.

NOTES:

The brownie batter and cream cheese will be thick and may stick up in places where it has been swirled, that’s ok, just do your best to smooth it down so everything is mostly level.

Calories

277.12

Fat (grams)

14.78

Sat. Fat (grams)

3.39

Carbs (grams)

28.67

Fiber (grams)

0.98

Net carbs

27.68

Sugar (grams)

25.76

Protein (grams)

2.30

Sodium (milligrams)

113.35

Cholesterol (grams)

33.57
Nutritional information is approximate. Based on 9 servings.
Did you make this recipe?
Tag @jenevamorris on instagram and hashtag it #jennyblogs
Created using The Recipes Generator
IMG_1326.jpg

White Chocolate Cranberry Pumpkin Cookies

public.jpg

Happy official fall and pumpkin season!!!

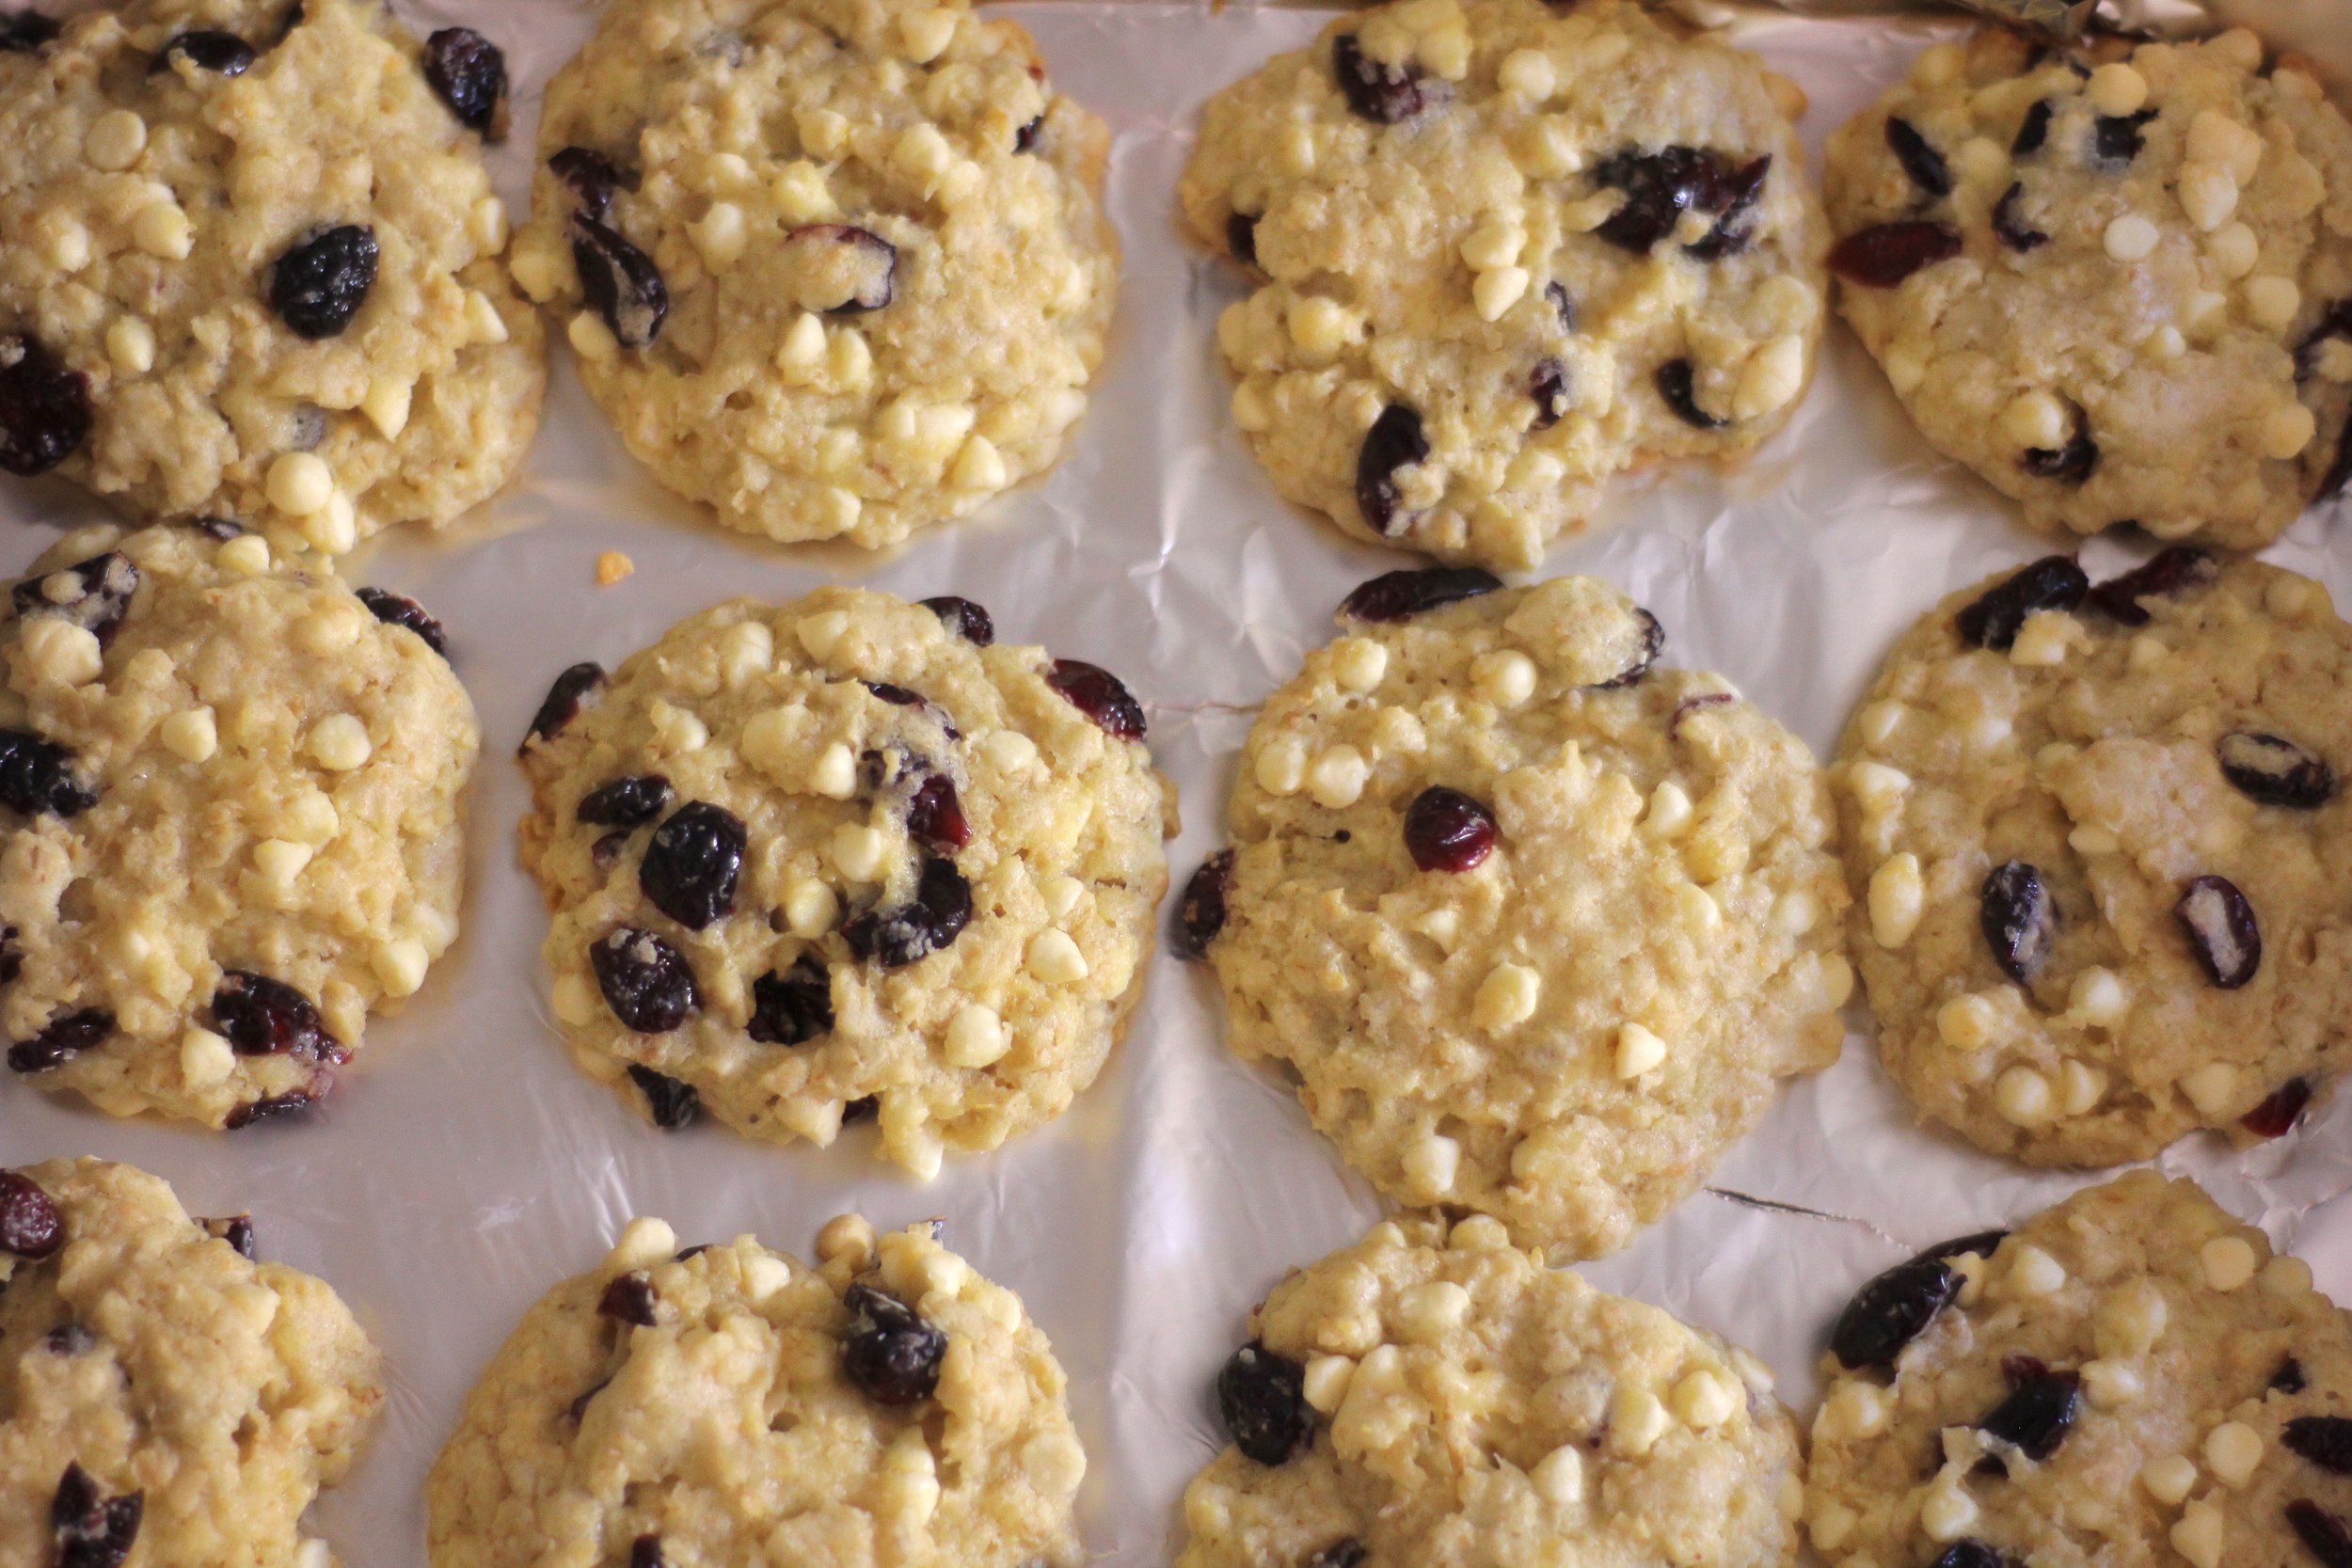
Starting off the season with soft, fluffy pumpkin cookies stuffed with white chocolate and cranberries with a hint of orange. These are lightly sweet which helps the white chocolate shine and offset the tartness of the cranberries. A bit of orange extract makes the whole combo into this deliciously bright fall offering.

Aside from the orange, these cookies are similar to my White Chocolate Cranberry Oatmeal Cookies. Same condiments, different cookie. One a light and fluffy ode to fall, another a chewy classic oatmeal cookie. Both scrumptious.

Before writing up this recipe I felt a twinge of pumpkin guilt. You know, the I’m making and sharing so many pumpkin recipes and desserts that maybe everyone is already sick of them except me? Then I remembered that I actually haven’t shared any truly fall recipes on the blog yet this year! I somehow managed to hold myself off until after the autumn solstice. That doesn’t mean I haven’t been baking fally things, uh uh no. I’ve already opened one of my precious cans of pumpkin from the States (what I did with the extra room in my baggage because a small can of pumpkin costs almost 5euro in Florence) and squeaked out a batch of these pumpkin cookies, brownies with a spiced pumpkin cream cheese swirl, and pumpkin streusel coffee cake. Fall, I welcome thee with open arms.

So, I hope wherever you are in the world, you share my love for autumnal things, and enjoy baking up these White Chocolate Cranberry Pumpkin Cookies, don a sweater and some cozy socks, and read a book with a nice mug of tea. Hopefully your weather allows for that.

This post may contain affiliate links. If you make a purchase using these links, Jennyblogs may receive a small commission, at no extra cost to you. This helps to support Jennyblogs. For further information see the privacy policy. Grazie!

Recipe adapted from Some the Wiser


White Chocolate Cranberry Pumpkin Cookies

Makes about 2 dozen cookies

public.jpg

Ingredients:

  • 1 cup / 240g pumpkin purée

  • 1 1/4 cups / 250g sugar

  • 1 egg

  • scant 1/2 cup / 90g oil

  • 1 tsp vanilla extract

  • 1/4 tsp orange extract

  • 2 1/2 cups / 300g all-purpose flour

  • 1 tsp cinnamon

  • 1 tsp baking powder

  • 1 tsp baking soda

  • 1/2 tsp salt

  • 3/4 cup / 105g dried cranberries

  • 3/4 cup / 127g white chocolate chips

Directions:

Oven 350°F / 177°C. Baking sheet lined with parchment paper, silpat, or greased.

  1. Combine pumpkin, sugar, egg, oil, and extracts in a large bowl.

  2. In another medium bowl, whisk together flour, cinnamon, baking powder, baking soda, salt.

  3. Add dry ingredients, cranberries, and white chocolate chips to wet ingredients, stirring until evenly moistened.

  4. Drop by generous spoonful onto prepared baking sheet and bake for 9-12 minutes, or until bottom of cookies are golden brown and the center still looks a bit wet.


Jenny’s Notes:

  • I used half goji berries half cranberries last time and really liked it. Dried cranberries usually have loads of sugar and I liked that the goji berries were unsweetened.

cookies, pumpkin, white chocolate chips, cinnamon, orange, cranberry, goji berry, fall recipe
dessert
American
Yield: 24-26
Author:

White Chocolate Cranberry Pumpkin Cookies

Soft and fluffy pumpkin cookies loaded with mini white chocolate chips, dried cranberries, and goji berries with a hint of orange and cinnamon.
prep time: 25 Mcook time: 12 Mtotal time: 37 M

ingredients:

  • 1 cup / 240g pumpkin purée
  • 1 1/4 cups / 250g sugar
  • 1 egg
  • scant 1/2 cup / 90g oil
  • 1 tsp vanilla extract
  • 1/4 tsp orange extract
  • 2 1/2 cups / 300g all-purpose flour
  • 1 tsp cinnamon
  • 1 tsp baking powder
  • 1 tsp baking soda
  • 1/2 tsp salt
  • 3/4 cup / 105g dried cranberries
  • 3/4 cup / 127g white chocolate chips

instructions:

How to cook White Chocolate Cranberry Pumpkin Cookies

  1. Oven 350°F / 177°C. Baking sheet lined with parchment paper, silpat, or greased.
  2. Combine pumpkin, sugar, egg, oil, and extracts in a large bowl.
  3. In another medium bowl, whisk together flour, cinnamon, baking powder, baking soda, salt.
  4. Add dry ingredients, cranberries, and white chocolate chips to wet ingredients, stirring until evenly moistened.
  5. Drop by generous spoonful onto prepared baking sheet and bake for 9-12 minutes, or until bottom of cookies are golden brown and the center still looks a bit wet.

NOTES:

I used half goji berries half cranberries last time and really liked it. Dried cranberries usually have loads of sugar and I liked that the goji berries were unsweetened.

Calories

168.23

Fat (grams)

5.85

Sat. Fat (grams)

1.37

Carbs (grams)

27.70

Fiber (grams)

0.93

Net carbs

26.77

Sugar (grams)

17.09

Protein (grams)

1.99

Sodium (milligrams)

130.03

Cholesterol (grams)

8.86
Nutritional information is approximate. Based on 24 servings.
Created using The Recipes Generator
public.jpg

Jeannie's Healthy Breakfast Cookies

2019-02-17+15.32.23.jpg

What could be better than a cookie? How about a cookie that’s packed with nutrients and can be eaten anytime, especially for breakfast, guilt free?

I love cookies. They are my go-to when I want to whip up something with limited time, or don’t have much energy for other more entailed desserts. I’m sure this has NOTHING to do with the fact that cookies are also one of my favorite things to eat. It ends up turning into a win-win-win situation because I’m having fun, being productive, get to eat some of the ingredients while baking, get to eat some dough while baking, and BONUS if there is enough dough to actually be baked into cookies! So many wins.

I have to bring up the negative, however, to classic cookie baking. They’re kinda calorific and not very good for you. I’m all for eating cookies for breakfast, but that usually goes along with a sugar crash later on. What to do?

Bake healthy cookies! They have to be delicious of course, and not gross. I have just the recipe for you, made up by my mom many years ago when we needed a portable nutritious breakfast for a trip. This recipe has been in my recipe box ever since as “Jean’s breakfast cookies”, made with many adjustments because the add ins are very versatile depending on your tastes. My mom likes to be called Jeannie (not by her kids of course) so I adapted the title accordingly.

One thing this recipe is not is a taste-alike recipe to say, chocolate chip cookies with a surprise twist that it’s healthy. Nope, these cookies have a satisfyingly healthy look and taste and are upfront about it from the get go. They get positive feedback and recipe requests wherever they go!

The recipe that follows is just one version of many, many possibilities. Just keep in mind that major adjustments may need other adjustments. For example, if you don’t have any honey or maple syrup on hand for the sweetener, you could use raw or regular cane sugar. Substituting a liquid for a dry ingredient, however, will mean you may need more liquid from elsewhere. Maybe add another egg, a bit more oil, or even water until you get a cookie dough consistency once again. Other ideas to make the recipe your own:

  • Use any kind of flour you wish instead of wheat flour. Oat flour, almond flour, coconut flour…I often use wheat germ in place of part of the flour or flaxmeal, usually 1/4 cup.

  • If you want these cookies to be gluten-free, ensure that your oats are gluten-free, and use a gluten-free flour.

  • Change up the spices. Sometimes towards fall I also add a bit of ginger, nutmeg, and cloves. Cardamom is also nice.

  • Beyond dried fruit and walnuts, get creative with your add-ins! Just try not to go too far beyond 1 cup, otherwise there might not be enough dough to hold everything together. In the photos on this post I used dried apples, dried cranberries, and walnuts. I’ve also added various combinations of dried cherries, prunes, dried apricots, raisins, dates, dried figs, dried pears, fresh apples, grated coconut, pecans, hazelnuts, dark chocolate, crystallized ginger, and anything else I had on hand!

This post may contain affiliate links. If you make a purchase using these links, Jennyblogs may receive a small commission, at no extra cost to you. This helps to support Jennyblogs. For further information see the privacy policy. Grazie!

Recipe adapted from my mama


Jeannie’s Healthy Breakfast Cookies

Makes about 18-22 cookies

Ingredients:

2019-02-17 14.45.17.jpg
  • 1/2 cup / 112g olive or coconut oil

  • generous 1/3 cup / 120g maple syrup or honey

  • 2 eggs

  • 1 tsp vanilla extract

  • 1 cup / 120g all-purpose or whole wheat flour

  • 1 1/2 cups / 135g rolled oats

  • 1/2 cup / 90g flaxmeal

  • 1/2 tsp baking soda

  • 1/2 tsp salt

  • 1/8 tsp cinnamon

  • 3/4 cup / 105g nuts, roughly chopped

  • 1/2 apple, diced

  • 1/4 cup / 50g dried fruit, chopped if necessary

Directions:

Oven 375°F / 190°C. Baking sheet lined with silpat or parchment paper.

  1. In a large bowl combine wet ingredients: oil, maple syrup, eggs, and vanilla; beat with a spoon until smooth.

  2. In another medium bowl whisk together dry ingredients: flour, oats, flaxmeal, baking soda, salt, and cinnamon.

  3. Add dry ingredients, nuts, apple, and dried fruit to wet ingredients, mix until well combined.

  4. Spoon generous tablespoons of dough onto prepared baking sheet and flatten slightly as they won’t spread much, leaving at least 1 inch between cookies. Bake for 8-10 minutes or until edges turn lightly golden brown and centers are no longer doughy.

Jenny’s Notes:

  • you can make flaxmeal at home by simply processing some flaxseeds in a coffee or spice grinder.

  • olive oil has a rather strong taste so if you prefer to avoid that, try going with the coconut oil option or even a neutral oil like peanut oil.

  • 3 egg whites can be substituted for the 2 eggs for cholesterol-conscience people.

healthy, nutritious, cookies, gluten-free, dairy-free, refined sugar-free, dried fruit, apple, fall spices, oats, nuts, coconut, portable
breakfast, dessert, snack
American
Yield: 12-16 cookies
Author:

Jeannie's Breakfast Cookies

Healthy cookies packed with nutritious ingredients that make for a great breakfast or anytime snack. Dairy-free, refined sugar-free, and can easily be made gluten-free.
prep time: 20 Mcook time: 10 Mtotal time: 30 M

ingredients:

  • 1/2 cup / 112g olive oil or coconut oil
  • generous 1/3 cup / 120g maple syrup or honey
  • 2 eggs
  • 1 tsp vanilla extract
  • 1 cup / 120g all-purpose or whole wheat flour
  • 1 1/2 cups / 135g rolled oats
  • 1/2 cup / 90g flaxmeal
  • 1/2 tsp baking soda
  • 1/2 tsp salt
  • 1/8 tsp cinnamon
  • 3/4 cup / 105g nuts, roughly chopped
  • 1/2 apple, diced
  • 1/4 cup / 50g dried fruit, chopped if necessary

instructions:

How to cook Jeannie's Breakfast Cookies

  1. Oven 375°F / 190°C. Baking sheet lined with silpat or parchment paper.
  2. In a large bowl combine wet ingredients: oil, maple syrup, eggs, and vanilla; beat with a spoon until smooth.
  3. In another medium bowl whisk together dry ingredients: flour, oats, flaxmeal, baking soda, salt, and cinnamon.
  4. Add dry ingredients, nuts, apple, and dried fruit to wet ingredients, mix until well combined.
  5. Spoon generous tablespoons of dough onto prepared baking sheet and flatten slightly as they won’t spread much, leaving at least 1 inch between cookies. Bake for 8-10 minutes or until edges turn lightly golden brown and centers are no longer doughy.

NOTES:

you can make flaxmeal at home by simply processing some flaxseeds in a coffee or spice grinder. olive oil has a rather strong taste so if you prefer to avoid that, try going with the coconut oil option or even a neutral oil like peanut oil. 3 egg whites can be substituted for the 2 eggs for cholesterol-conscience people.

Calories

265.40

Fat (grams)

15.87

Sat. Fat (grams)

2.49

Carbs (grams)

27.23

Fiber (grams)

3.34

Net carbs

23.89

Sugar (grams)

9.53

Protein (grams)

5.72

Sodium (milligrams)

188.36

Cholesterol (grams)

31.00
Nutritional information is approximate and based on 12 servings.
Created using The Recipes Generator
2019-02-17+15.36.02.jpg

Sicilian Almond Cookies - Paste di Mandorle

2019-05-13+15.18.28.jpg

Paste di mandorle, or almond cookies, are one of the simplest and most delicious cookie recipes you could ask for, requiring only 4 ingredients and an overnight refrigeration (and even that is optional), so you can make the dough one day and bake the next. And because they only use almond flour, they are gluten-free friendly!

These cookies and many variations of them hail from Sicily, where the land is full of sunshine and Mediterranean breezes, charming towns, and has the perfect climate for some of the most succulent citrus fruits and almonds. Or so I’ve heard, I have yet to actually go there! The first time I found a bag of Sicilian almonds in Italy I snatched them up, hoping for a taste experience like never before. Basically setting myself up for disappointment. They were good, yes, but I think it would be best to eat them fresh, in Sicily. Until that day when I go to Sicily, I will content myself with tastes of their culture, like the occasional good arancini (fried balls of rice stuffed with cheese and veggies or meat) that you can find around Florence, granita (a slushy type drink), brioche stuffed with gelato, and cannoli. And of course, these almond cookies. And they’re so simple to make. Dangerous.

*Note: The original name of this post I had named as “Paste alle mandorle” but I believe that is used more to denote almond paste, or marzipan, so I’ve updated it to Paste di Mandorle. While most translating apps will tell you “cookie/cookies” translates to “biscotto/biscotti”, it’s not a catch-all. For as often as I talk about, bake, and eat cookies, this word has always given me grief. If you want to get technical, and you know I do, “biscotti” can be broken down into two root words: “bis” meaning two or twice, and “cotti” meaning baked or cooked. Thus, biscotti actually refers to cookies that have been baked twice. In America, you probably are familiar with the word biscotti, meaning those long hard cookies often sold at coffee shops. Those are truly biscotti, because they’re twice baked. The whole dough is baked, then they’re sliced and baked again. So if you want to talk about cookies in Italian but you don’t want to talk about the twice-baked ones, what do you call them? There is no catch-all, but you have some options. You could simply call them “dolci” (sweets) or dolcetti (little sweets) which is always safe, or cookies made with butter, similar to what we know as shortbread, you could call “frolli”. Or, you can call them “paste” as I did in this post, which in the most general translation of the word means "doughs” or “pasticcini” which is similar. Just looking up this recipe in Italian, on the first page you will probably find them called paste, pasticcini, and biscotti.

Then don’t get me started on the Italian word for “cake” which is “torta”. That one IS a catch-all, but in a bad way, because then I’m calling desserts “cake” in Italian that are definitely not cake in English. They have no word for pie, so then if someone comes to your Thanksgiving dinner and asks what the pumpkin pie is, you might say “torta di zucca” or, pumpkin cake. Sigh. Pie, like Americans think of pie (apple pie, cherry pie) doesn’t exist in their traditional cuisine so it makes sense. But confusing for an American who wants to talk about it in Italian. Some desserts, like apple, are known enough now in Italy that you can refer to them by their English name, apple pie.

This post may contain affiliate links. If you buy something using these links, Jennyblogs may receive a small commission, at no extra cost to you. This helps to support Jennyblogs. For further information see the privacy policy. Grazie!

Original recipe adapted and translated from GialloZafferano


Sicilian Almond Cookies - Paste di Mandorle

Makes about 2 dozen cookies

2018-12-22 12.26.58.jpg

Ingredients:

  • 2 1/2 cups / 250g almond flour

  • 1 1/4 cups / 250g granulated sugar

  • 2 / 60g egg whites

  • 1/2 tsp almond extract

Garnishes (optional)

  • powdered sugar

  • whole, sliced, or slivered almonds

Directions:

Oven 350F / 180C

  1. In a medium bowl, combine the almond flour and the sugar.

  2. Mix in the egg whites and the almond extract until thoroughly combined. This can be done with a spoon, a hand mixer, stand mixer, or even in a food processor.

  3. Cover dough and place in fridge overnight or for at least 7 hours.

  4. Remove dough from fridge and roll into balls, then roll in powdered sugar. Flatten cookies a bit, as they will not spread much in the oven. Press in a few almond slices on top. Alternately, shape them as you wish, as they hold their shape well after the overnight refrigeration.

  5. Place cookies on a silpat or parchment covered baking sheet, leaving about 1” between cookies.

  6. Bake in preheated oven for 8-12 minutes, until just lightly golden. Be careful no to overbake, cookies should be crunchy on the outside and soft on the inside.

Jenny’s Notes:

  • If you have almonds and a method to grind them, such as a food processor, go ahead and make fresh almond flour! Be careful not to overgrind, you don’t want the almonds to heat up and the oil to start to escape, resulting in almond butter.

  • If you prefer other extracts, go ahead and play around with other flavors; vanilla, orange, lemon, coconut, etc.

  • This recipe, if you go by weight instead of imperial measurements, is very easy to modify or double, triple, halve, etc.! You can see that the ratio of almond flour to sugar is 1:1: essentially all you have to do is mix together equal weights of almond flour and sugar, with just enough egg whites to bind them together easily and a touch of extract for flavor. Voila.

  • These cookies have many variants and shapes and are often piped with candied cherries on top. I’m not a huge candied fruit person, and so I found a simple recipe and omitted the piping for one of the simpler almond cookie methods, rolling in powdered sugar and decorating with almonds.

gluten-free, Sicilian almond cookies, Paste alle Mandorle
dessert, cookies
Italian
Yield: 24
Author:
Sicilian Almond Cookies - Paste alle Mandorle

Sicilian Almond Cookies - Paste alle Mandorle

A classic Italian cookie originating in Sicily with a soft center and crunchy exterior. 4 ingredients and gluten-free.
Prep time: 30 MinCook time: 12 Mininactive time: 7 HourTotal time: 7 H & 42 M

Ingredients

Garnishes (optional)

Instructions

  1. In a medium bowl, combine the almond flour and the sugar.
  2. Mix in the egg whites and the almond extract until thoroughly combined. This can be done with a spoon, a hand mixer, stand mixer, or even in a food processor.
  3. Cover dough and place in fridge overnight or for at least 7 hours.
  4. Remove dough from fridge and roll into balls, then roll in powdered sugar. Flatten cookies a bit, as they will not spread much in the oven. Press in a few almond slices on top. Alternately, shape them as you wish, as they hold their shape well after the overnight refrigeration.
  5. Place cookies on a silpat or parchment covered baking sheet, leaving about 1” between cookies.
  6. Bake in preheated oven for 8-12 minutes, until just lightly golden. Be careful no to overbake, cookies should be crunchy on the outside and soft on the inside.

Notes:

If you have almonds and a method to grind them, such as a food processor, you can make fresh almond flour! Be careful not to over-grind, you don’t want the almonds to heat up and the oil to start to escape, resulting in almond butter. If you prefer other extracts, play around with other flavors; vanilla, orange, lemon, coconut, etc. This recipe, if you go by weight instead of imperial measurements, is very easy to modify or double, triple, halve, etc.! You can see that the ratio of almond flour to sugar is 1:1: essentially all you have to do is mix together equal weights of almond flour and sugar, with just enough egg whites to bind them together easily and a touch of extract for flavor. Voila. These cookies have many variants and shapes and are often piped with candied cherries on top. I’m not a huge candied fruit person, and so I found a simple recipe and omitted the piping for one of the simpler almond cookie methods, rolling in powdered sugar and decorating with almonds.

Calories

110.04

Fat (grams)

5.24

Sat. Fat (grams)

0.40

Carbs (grams)

14.38

Fiber (grams)

1.31

Net carbs

13.07

Sugar (grams)

12.51

Protein (grams)

2.76

Cholesterol (grams)

0.00

Nutritional information is approximate, based on 1 cookie.

Did you make this recipe?
Tag @jennyblogsandbakes on instagram and hashtag it #jennyblogs
2019-05-13+15.17.27-2.jpg

Chocolate Thumbprint Cheesecake Cookies

2017-12-19+13.08.33.jpg

This post contains affiliate links. If you buy something using these links, Jennyblogs may receive a small commission, at no extra cost to you. This helps to support Jennyblogs. For further information see the privacy policy. Grazie!

I like cookies.  I like cheesecake.  What happens when you put them together?  These Cheesecake Cookies!  And you know what's great about this recipe?  Besides being delicious, of course, is that it calls for one sleeve of graham crackers.  Perfect for all those times you buy a box of graham crackers to make a crust or similar recipe that usually call for two sleeves of graham crackers and leave you hanging with just one lonely sleeve.  Cheesecake Cookies to the rescue!  They look more time consuming to make than they really are, it's pretty straightforward.  So let's get to it! 

Recipe adapted from Kitchme


Chocolate Cheesecake Cookies

Makes about 24 cookies

Ingredients:

2017-12-19 13.12.33.jpg
  • 1 1/4 cups / 135g (1 sleeve) finely crushed chocolate graham crackers

  • 3/4 cup / 90g all-purpose flour

  • 1 1/2 teaspoons baking powder

  • 1/2 cup / 113g butter, softened

  • 1/2 cup / 100g brown sugar

  • 1 egg, separated

  • 3 ounces / 85g cream cheese, softened

  • 1/4 cup / 50g sugar

  • 1 teaspoon vanilla extract

  • 2 teaspoons lemon zest, optional

Directions:

Oven 350°F / 177°C.  Line 2 cookies sheets with parchment or silicone mats.  

  1. In a large bowl, whisk together graham cracker crumbs, flour, and baking powder.  

  2. In the bowl of a stand mixer beat the butter with the brown sugar.  Beat in the egg white.  Add the mixture to the graham cracker mixture and mix until combined.  

  3. Again, in the clean bowl of a stand mixer, beat the cream cheese until smooth and creamy.  Add the sugar, egg yolk, zest, and vanilla and beat until smooth.  Set aside.

  4. Using a spoon or small ice cream scoop, scoop a very generous tablespoon worth of dough onto the prepared cookie sheet.  (If your graham cracker dough seems too soft to easily hold its shape, add a bit more flour.)  Repeat until all the dough has been scooped onto the cookies sheets, evenly spaced, leaving room for them to spread.  

  5. Press your thumb into the cookies to make a deep well; fill with the cream cheese mixture. 

  6. Bake 8-11 minutes or until the filling is just set.  

Can't do anything around here.

Can't do anything around here.

Jenny's Notes:

  • Use any flavor graham crackers, regular, cinnamon, chocolate! You could also experiment with similar cookies, such as teddy grahams.

  • Regular sugar can be substituted for the brown sugar with a slightly different texture for the cookie. Not bad, just slightly different. Or add a teaspoon or two of molasses to 1/2 cup regular sugar and mix before adding to the recipe.

  • You can fill the cookies right to the top with the cream cheese as the filling shouldn't do more than puff a bit in the oven.

  • Feel free to add different extracts and zests to your cream cheese filling, if you wish, or even cocoa to make it ALL chocolate! I'm thinking cinnamon graham crackers with a touch of orange extract and orange zest for a fall treat!

thumbprint cookies, cheesecake cookies, cheesecake, graham cracker cookies
dessert, cookies
American
Yield: 24
Author: Jennyblogs
Print
Chocolate Cheesecake Cookies

Chocolate Cheesecake Cookies

Chocolate graham cracker thumbprint cookies filled with a cream cheese filling.
Prep time: 50 MCook time: 11 MTotal time: 61 M

Ingredients:

  • 1 1/4 cups / 135g (1 sleeve) finely crushed chocolate graham crackers
  • 3/4 cup / 90g all-purpose flour
  • 1 1/2 teaspoons baking powder
  • 1/2 cup / 113g butter, softened
  • 1/2 cup / 100g brown sugar
  • 1 egg, separated
  • 3 ounces / 85g cream cheese, softened
  • 1/4 cup / 50g sugar
  • 1 teaspoon vanilla extract
  • 2 teaspoons lemon zest, optional

Instructions:

  1. Oven 350°F / 177°C.  Line 2 cookies sheets with parchment or silicone mats.
  2. In a large bowl, whisk together graham cracker crumbs, flour, and baking powder.
  3. In the bowl of a stand mixer beat the butter with the brown sugar. Beat in the egg white. Add the mixture to the graham cracker mixture and mix until combined.
  4. Again, in the clean bowl of a stand mixer, beat the cream cheese until smooth and creamy. Add the sugar, egg yolk, zest, and vanilla and beat until smooth. Set aside.
  5. Using a spoon or small ice cream scoop, scoop a very generous tablespoon worth of dough onto the prepared cookie sheet. (If your graham cracker dough seems too soft to easily hold its shape, add a bit more flour.) Repeat until all the dough has been scooped onto the cookies sheets, evenly spaced, leaving room for them to spread.
  6. Press your thumb into the cookies to make a deep well; fill with the cream cheese mixture.
  7. Bake 8-11 minutes or until the filling is just set.

Notes:

Use any flavor graham crackers, regular, cinnamon, chocolate! You could also experiment with similar cookies, such as teddy grahams. Regular sugar can be substituted for the brown sugar with a slightly different texture for the cookie. Not bad, just slightly different. Or add a teaspoon or two of molasses to 1/2 cup regular sugar and mix before adding to the recipe. You can fill the cookies right to the top with the cream cheese as the filling shouldn't do more than puff a bit in the oven. Feel free to add different extracts and zests to your cream cheese filling, if you wish, or even cocoa to make it ALL chocolate! I'm thinking cinnamon graham crackers with a touch of orange extract and orange zest for a fall treat!

Calories

111.78

Fat (grams)

6.07

Sat. Fat (grams)

3.44

Carbs (grams)

13.46

Fiber (grams)

0.31

Net carbs

13.15

Sugar (grams)

8.41

Protein (grams)

1.29

Sodium (milligrams)

108.74

Cholesterol (grams)

21.56
Nutritional information is approximate.
Created using The Recipes Generator
2017-12-19+13.04.04.jpg

Very Chocolate Cherry Brownies

This post contains affiliate links. If you buy something using these links, Jennyblogs may receive a small commission, at no extra cost to you. This helps to support Jennyblogs. For further information see the privacy policy. Grazie!

We bakers like to stick to the four main food groups: Chocolate, chooooocolate, chocolat, and cioccolato.  Although we no longer believe, as the Aztecs did, that chocolate is a gift from the gods nor do we throw away the golden goblet once the chocolate drink has been consumed (haven't you heard about recycling?! Sheesh), we'll take it for its taste and possible health properties.  I say possible because it hasn't been scientifically proven yet.  But we know in our hearts, right?  So, let's make some Very Chooooocolate brownies.  And throw in some cherries because it's just about cherry season and I grew up in a cherry town.  National Cherry Festival, anyone?  


Very Chocolate Cherry Brownies

Makes about 9-12 brownies

Ingredients:

  • 6 Tbsp / 85g butter

  • 1 1/3 cup / 225g chopped bittersweet or semisweet chocolate bar, or chips

  • 3/4 cup / 150g sugar

  • 1 tsp / 5g vanilla extract

  • 2 eggs

  • 1/3 cup / 40g all-purpose flour

  • 2/3 cup / 115g bittersweet or semisweet chocolate chips

  • generous 1/2 cup / 110g dried cherries

Directions:

Oven 350°F / 177°C.  Grease an 8x8in / 20x20cm square pan.

  1. Melt the butter in a medium saucepan over low heat.  Add the chocolate and stir continuously until the chocolate is melted and the mixture is smooth. 

  2. Remove from the heat and add sugar and vanilla.  Beat in the eggs, one at a time.  

  3. Add the flour and stir vigorously for about a minute, until the batter turns from grainy to glossy, and starts to pull away from the edges of the pan.  Add chocolate chips and cherries.

  4. Pour into prepared pan and bake for 25-30 minutes, or until center isn't quite set or a toothpick inserted near the center comes out mostly clean.  

Jenny's Notes:

  • If using semisweet chocolate I prefer to reduce the sugar to 125g or about a generous 1/2 cup. 

  • Don't over-bake brownies!  In my opinion, brownies are always better off on the dense, slightly under-baked side than dry or crispy.  

  • Nut fan?  Add 1/2 cup walnut, pecans, or your nut of choice! 

American
Yield: 9-12 servings
Author:

Very Chocolate Cherry Brownies

Dense, fudgy, double chocolate brownies loaded with chocolate chunks and tart dried cherries.
prep time: 20 Mcook time: 30 Mtotal time: 50 M

ingredients:

  • 6 Tbsp / 85g butter
  • 1 1/3 cup / 225g chopped bittersweet or semisweet chocolate bar, or chips
  • 3/4 cup / 150g sugar
  • 1 tsp / 5g vanilla extract
  • 2 eggs
  • 1/3 cup / 40g all-purpose flour
  • 2/3 cup / 115g bittersweet or semisweet chocolate chips
  • generous 1/2 cup / 110g dried cherries

instructions:

How to cook Very Chocolate Cherry Brownies

  1. Oven 350°F / 177°C. Grease an 8x8in / 20x20cm square pan.
  2. Melt the butter in a medium saucepan over low heat. Add the chocolate and stir continuously until the chocolate is melted and the mixture is smooth.
  3. Remove from the heat and add sugar and vanilla. Beat in the eggs, one at a time.
  4. Add the flour and stir vigorously for about a minute, until the batter turns from grainy to glossy, and starts to pull away from the edges of the pan. Add chocolate chips and cherries.
  5. Pour into prepared pan and bake for 25-30 minutes, or until center isn't quite set or a toothpick inserted near the center comes out mostly clean.

NOTES:

If using semisweet chocolate I prefer to reduce the sugar to 125g or about a generous 1/2 cup. Don't over-bake brownies! In my opinion, brownies are always better off on the dense, slightly under-baked side than dry or crispy. Nut fan? Add 1/2 cup walnut, pecans, or your nut of choice!

Calories

387.92

Fat (grams)

20.18

Sat. Fat (grams)

11.93

Carbs (grams)

54.18

Fiber (grams)

2.66

Net carbs

51.53

Sugar (grams)

45.56

Protein (grams)

3.67

Sodium (milligrams)

82.56

Cholesterol (grams)

61.64
Nutritional information is approximate. Based on 9 servings.
Created using The Recipes Generator

How to Blog - By Someone Who Doesn't Know How

Photo Credit: Hannah Kelsey

Photo Credit: Hannah Kelsey

This post contains affiliate links. If you buy something using these links, Jennyblogs may receive a small commission, at no extra cost to you. This helps to support Jennyblogs. For further information see the privacy policy. Grazie!

Oh hey there.  It's nice to see you here.  Looks like someone is curious about how to become a STAR blogger.  Beyond viral.  Basically means you're in the hall of fame for bloggers.  I can assure you, you have come to the right place.  In this humble post I will show you how to:

  1. Create interesting content

  2. Improve your writing

  3. Up the game on humor

  4. Get Your Point Across, Be Understood Really Well, Be Clear

  5. Take super-awesome-stunning-great photos

  6. Edit photos and choose filters

  7. Increase your intelligence

Don't have a blog?  No worries, number 7 still applies.  If you are thinking about starting a blog, I can help you.  

First, you'll need a blog.  We could make really extensive pro and con lists about all of the pros and cons about where to get a website, but hey, time is precious, right?  I'll save you the trouble: Get Squarespace.  There, no time wasted, no stress in having to make a decision, no taking into consideration what some of your specific needs might be.  Next, you'll want to pick out a name for your blog and get a domain to match.  Just like you wouldn't go out the door with your cell phone cover not matching your pillowcase, you need a good name and domain to match.  What's a domain? Idunnaknow.  Probably means you have dominion over your blog, and no one else.  Mwahahaha.  Because if they don't match, your name might lose syncretism with your domain, and the domain might decide it wants dominion and take over.  Thankfully it hasn't happened to me yet, but I thought I should warn you.  

So now you have a website and your domain.  Now what?  I'll be using a new baking post, a recipe and photos for Malted Chocolate Chip Cookies, to help demonstrate some of the techniques and strategies listed below. 

Create Interesting Content

To have a star blog, you need to have interesting stuff to write about.  For example, if you collect baseball cards, like animals, try the samples at Sam's Club on a regular basis, watch a ton of movies...There's also an appalling lack of political opinions out there.  Especially long rants, judgy articles, and arguments.  So you might want to consider putting yours out there, fill the gap, ya know.  Oh, and I almost forgot, baking blogs.  There aren't very many of those, either, that's why I decided to blog n' bake.  That and the baking/cooking section on Pinterest is a little lackluster.

Once you've found your niche, it's time to let the pen fly!  Or fingers, as you'd say in this day and age.  Always, always, ALWAYS start your blog out with a personal story or anecdote.  Make it at least 7 paragraphs long (the number of completion), and if you can start to weave in your actual content or recipe towards the end, that's toooootally cool.  Bonus if you can include an anecdote within the anecdote, or tie in 3 other stories during your main content.  The more the merrier!  This would also be a great spot to include your dog/cat's cute behavior for the last two weeks.  Keep your main content to a minimum, people's attention spans are rather short these days, and this is your blog, so you need to make sure you get your moment.  Include your opinion, your take, and advice on everything.  And be super transparent about everything, no walls.  Why else would people be reading your blog?  

Improve You're writing

Whilst blogging, you got to be ready to let your ideas fly.  Don't let grammer, spelling; and punk-you-a-shun get in you"re way.  There more like guidelines anyways.  If your bad at spelling or grammar doesn't come naturalmenty to you, don't use spell check and be like all those spelling bee medalists out there; no! You be you.  You do you.  If you spelled environment enviermant, leave it.  Empowerment to bad spellers everywhere.  Chances are people won't notice.  And time is money, people!  

Up the Game on Humor

Tell jokes.  Even if no one laughs in real life, or you forget the punch line.  Quote Parks and Rec and SNL constantly.  Give it the Girl Scout try.  No one was ever born funny, after all.  

Get Your Point Across, Be Understood Really Well, Be Clear

Don't be afraid to repeat yourself, be redundant, quote multiple sources to make just one point, or say the same thing twice. USE ALL CAPS FOR EMPHASIS as OFTEN as you WANT, and/or use BOLD or italic font.  Then you can step back and enjoy your blog for what it is, a piece of art, rather than just blah, blah, blah.  

Don't be afraid of clichés, catch-phrases, and idioms.  They always help to make your writing really clear and concise.  Otherwise your point might be like looking for a needle in a haystack.  Stay away from euphemisms.  

Avoid big words.  Lots of little words make so much more sense.  The extraneity of lengthy words then becomes superfluous.

Take Super-awesome-stunning-great Photos

Now.  I know all your blogging friends have fancy-smchancy cameras that you're not allowed to touch, but I'm here to tell you that you can do better.  Why spend thousands of dollars when your iPhone 4 takes photos?  No reason, that's why.  No need to lug around a camera bag, buy and change out lens', or learn what all those little black buttons mean when you have everything you need in an iPhone.  Not to mention Beyonce's latest album and Snapchat.  

When your friends get to talking, you can just bring out your IDK to their ISO, your amateur to their aperture, your Boca Burger to their Bokeh.  

Multiple shots were taken in this exhibit to be examples, and show the transition from "follow camera techniques boring" to "create your own inspired masterpieces."

Multiple shots were taken in this exhibit to be examples, and show the transition from "follow camera techniques boring" to "create your own inspired masterpieces."

For lighting, direct sunlight or a bare bulb lit directly overhead your subject is fine.  A dark, rainy day works well, or better yet, night.  When working with humans or animals, you can best light their face by shining a light straight on, directly in front of their face.  Gently remind them to keep their eyes open.  A spray bottle can be used to gently mist their face and keep their eyes from drying out.  If no light source is available, flash is always a viable option.

Trying to find a "studio." Up against a wall, tight, uninspired...

Trying to find a "studio." Up against a wall, tight, uninspired...

When choosing a location, the messier the better.  Some may choose to have a special window, area, or even studio where they take their photos and do "sessions," but I believe this natural lighting and set-up area produces, stiff, unnatural, and  sterile photos.  You and your subject need inspiration, room to breathe.  In a corner, on the floor, or the front seat of your car is fine.  When the inspiration hits, you need to be ready with your phone held high, face close to the screen, and finger poised to snap the moment, soon to be forever encapsulated on your blog.  I recommend keeping your phone out at all times, taking photos at will.  Even if you don't remember the moment because you were so busy "capturing" it, you'll always have the photo.  And we all know that's more important than the actual experience in the long run.   

Blurry hand, bodies...this photo speaks of movement and life.

Blurry hand, bodies...this photo speaks of movement and life.

Having a background and props is essential.  What that background is and what those props are, less so.  No need for a plain wall behind.  To have chaos in your photo is to have life.  To create an au naturel photo that doesn't look "staged" or "set up" I like to grab the 12-56 objects in closest range to me and set them up haphazardly around the subject.  I then choose my angle, and snap.  Yes, one snap.  No multiple shots, re-angling, re-staging.  It is what it is, and that's how it's meant to be.  Animals, babies, blurry hands, and half-eaten pizza all help to liven up the photo.  

In the culmination of this art spread, please notice the parallelism, rhythm, and flow within. The echoes of the greens, connections between the browns, the cylinders. The keys seem to say, "choose your path" while though the pile of succulent cooki…

In the culmination of this art spread, please notice the parallelism, rhythm, and flow within. The echoes of the greens, connections between the browns, the cylinders. The keys seem to say, "choose your path" while though the pile of succulent cookies seems to beckon and say, "we offer life, sweet life, and money" you see the healthy apple is also saying, "eat of me!" Meanwhile, the beano reminds us that the remedy lies within, that life is time, take of yourself, and keep a dream journal.

Everyone will be jealous.

Edit Photos and Choose Filters  

Here's how to take your photos to the next level.  You'll first need a photo editing program.  Higher end programs like PaintShop Pro, Final Cut, and Photo are ideal.  Then, modify away.  As a general rule, I think photos always look pro when you really crank the structure, saturation, and ombre.  If you have a ton of photos to share with the world and are short on time, filters are your friends.  X-Pro II, Lo-Fi, and Nashville are go to's.  

Increase Your Intelligence.

If you have made it this far, you have already acquired much intelligence along the way, all that stated above.  I have so much more I wish to impart to you, my young padowan, but I must first see how you bear up under this already great load.  So be free, conquer the world, and let your dreams take flight.  Remember as you soar high, to take others with you under your wing.  

Two more things before we part ways: One, this blog is completely facetious.  Happy April Fool's Day!  Don't take a word of it seriously.  Don't believe me?  Ask any of my seven followers.  Second, the cookies in the photos exhibited above are, despite the photos, really yummy.  Recipe below!

Malted Chocolate Chip Cookies

Makes 24-36 cookies

Ingredients:

  • 2 1/2 cups all-purpose flour

  • 1/2 cup malted milk powder, regular or chocolate

  • 1 tsp baking powder

  • 1 tsp salt

  • 2 tsp cornstarch

  • 3/4 cup oil or 1 cup butter, room temperature

  • 1 1/2 cups brown sugar

  • 2 eggs

  • 1 Tbsp vanilla extract

  • 2 cups/12 oz semi-sweet chocolate chips

Directions:

Whisk together flour, malted milk powder, baking powder, salt, and cornstarch in a medium bowl.  Set aside.

Beat together oil and sugar in the bowl of a stand mixer.  If using butter, beat mixture until light and fluffy, about 5 minutes.  Add eggs, one at a time, mixing well after each addition.  Add vanilla.  

Stir in dry ingredients until just combined.  Switch to a spoon and stir in chocolate chips.

Chill dough for 2 hours or up to 72 hours.  

When ready to bake the dough, preheat oven to 350 Fahrenheit.  Place the dough by rounded spoonfuls onto cookie sheets. 

Bake for 8-10 minutes, or until edges begin to turn golden-brown.  

Jenny's Notes:

For reasons why chilling dough helps create beautiful cookies, see my notes on this chocolate chip cookie recipe.

To create a truly malted experience, replace chocolate chips with a package of chopped Whoppers.  Even milk chocolate chips are delicious.  

Recipe adapted from Cookies and Cups.

NY Times Chocolate Chip Cookies

IMG_4755.jpg

This post may contain affiliate links. If you make a purchase using these links, Jennyblogs may receive a small commission, at no extra cost to you. This helps to support Jennyblogs. For further information see the privacy policy. Grazie!

Going back to the classics.  American classics.  Chocolate chip cookies.  And not just any chocolate chip cookies, chocolate chip cookies the NY Times way.  Want me to say chocolate chip cookies one more time?  Chocolate. Chip. Cookies.  

Why do we need one more chocolate chip cookie recipe floating around?  

When it comes to the kitchen, I'm not one much for routine.  I like to explore, to try and constantly better what it is in my power to improve.  And as I am constantly learning about foods and why ingredients act the way they do, the more I can apply that to recipes.  When you have a classic such as chocolate chip cookies (yes, chocolate chip cookies) it may seem unnecessary to improve upon it.  Chances are, even if your recipe isn't that great, they probably will taste great anyway.  They're pretty hard to mess up.  That's also why there are so many chocolate chip cookie recipes out there.  People are satisfied with "good" when they don't know they're missing out on "great".  

I have three recipes for chocolate chip cookies that I love, including the one I am about to share with you.  The other two include a classic recipe a.k.a. my mom’s famous chocolate chip cookies, and one with browned butter. You can find that one here.  I'm sure there are more out there that are wonderful.  But for now, I share with you another truly good recipe.  Courtesy of the NY Times, they knew what they were doing with this one.

The recipe includes bread flour and cake flour, lending a wonderful chew and delicate crumb, respectively.

Then there is the long refrigeration, which allows all the ingredients to marry and the flavor to concentrate as the dough dries out every so slightly.

When the cookies are finally baked, the sugar is able to crystallize easier resulting in beautiful golden edges with a center still soft, and an extra caramel nutty flavor.

Even if the refrigeration has to be skipped due to a time constraint, the cookies will still turn out delicious, although I would urge you to try the refrigeration for yourself to taste that extra special result!

Recipe adapted from the NY Times


NY Times Chocolate Chip Cookies

Makes about 40-70 cookies, depending on size.

Ingredients:

  • 220g / 2 cups cake flour

  • 200g / 1 2/3 cup bread flour

  • 6g / 1 1/4 tsp baking soda

  • 6g / 1 1/4 tsp baking powder

  • 5g / 1 tsp salt

  • 283g / 1 1/4 cups unsalted butter

  • 250g / 1 1/4 cups light brown sugar

  • 225g / 1 generous cup granulated sugar

  • 2 eggs

  • 9g / 2 tsp vanilla extract

  • 566g / 20 oz. 60% bittersweet chocolate chips or chunks

Directions:

  1. Whisk together cake flour, bread flour, baking soda, baking powder, and salt.  

  2. In the bowl of a stand mixer, cream butter and sugars together until light and fluffy, about 5 minutes.  Add eggs one at a time, beating well after each addition.  Add vanilla.  

  3. Add dry ingredients, mixing until just combined.  Carefully incorporate chocolate chips.  You may want to use a spoon as a stand mixer can crush the chocolate chips.  

  4. Cover with plastic wrap and refrigerate dough for 24-72 hours. 

  5. When ready to bake, preheat oven to 350°F / 177°C.  Scoop cold dough out onto cookie sheets in 1" balls, or desired size.  Sprinkle with a touch of sea salt, if you like.  Bake for 8-10 minutes, or until edges turn a nice golden brown and centers still look a bit soft.  

Jenny's Notes:

  • Why bread and cake flour?  Bread flour has a higher gluten content and lends more crisp and chew to the cookies.  Cake flour is finer and lends a delicate crumb.  

  • If you need these cookies the same day you are making the cookies, the refrigeration is not absolutely essential.  When you place a dough in the fridge, the moisture in the dough is able to be evenly absorbed, then after a time begins to dry out, concentrating the flavors.  Then, when you bake the cookies, the sugar is able to caramelize better.  That is the beautiful golden brown color you see, and nutty flavor you taste.  Also, a cold or refrigerated dough won't spread as much.    

chocolate chips, bread flour, cake flour, NY Times, cookies
Dessert
American
Yield: 40-70 cookies
Author:
NY Times Chocolate Chip Cookies

NY Times Chocolate Chip Cookies

Chocolate Chip Cookies get a remix with bread flour, cake flour, and the magic trick of refrigeration, resulting in nothing short of amazing cookies.
Prep time: 30 MinCook time: 20 MinInactive time: 24 HourTotal time: 24 H & 50 M

Ingredients

Instructions

  1. Whisk together cake flour, bread flour, baking soda, baking powder, and salt.
  2. In the bowl of a stand mixer, cream butter and sugars together until light and fluffy, about 5 minutes. Add eggs one at a time, beating well after each addition. Add vanilla.
  3. Add dry ingredients, mixing until just combined. Carefully incorporate chocolate chips. You may want to use a spoon as a stand mixer can crush the chocolate chips.
  4. Cover with plastic wrap and refrigerate dough for 24-72 hours.
  5. When ready to bake, preheat oven to 350°F / 177°C. Scoop cold dough out onto cookie sheets in 1" balls, or desired size. Sprinkle with a touch of sea salt, if you like. Bake for 8-10 minutes, or until edges turn a nice golden brown and centers still look a bit soft.

Notes

Why bread and cake flour? Bread flour has a higher gluten content and lends more crisp and chew to the cookies. Cake flour is finer and lends a delicate crumb. If you need these cookies the same day you are making the cookies, the refrigeration is not absolutely essential. When you place a dough in the fridge, the moisture in the dough is able to be evenly absorbed, then after a time begins to dry out, concentrating the flavors. Then, when you bake the cookies, the sugar is able to caramelize better. That is the beautiful golden brown color you see, and nutty flavor you taste. Also, a cold or refrigerated dough won't spread as much.

Nutrition Facts

Calories

235.01

Fat

13.56 g

Sat. Fat

8.26 g

Carbs

24.83 g

Fiber

2.61 g

Net carbs

22.22 g

Sugar

11.36 g

Protein

3.66 g

Sodium

122.36 mg

Cholesterol

24.84 mg

Nutritional information is approximate. Based on 1 cookie from a 40-cookie batch.

Did you make this recipe?
Tag @jennyblogsandbakes on instagram and hashtag it #jennyblogs

Snickers Bars

Happy New Year's Eve!  Whether your plans include watching a movie, going to a party, throwing a party, watching the ball drop, or going to bed early, I hope you get to spend your evening ringing in the New Year in your favorite way.  I'm not entirely sure what that means, "Ringing in the New Year."  Did people used to use bells?  Oh!  Well, my evening is planned.  I'm getting out all the bells and ringing in the New Year.  Literally.  This is going to be so great. 

But first, (don't take a selfie) make Snickers!  If you just thought, "Why would I want to make Snickers when I can just buy them and save a whole lot of time?" I'm with you on that one.  I'm not normally the first one to jump on making things homemade that have already been perfected.  Homemade Reese's?  Samoas?  Oreos?  I'll let Nabisco and the Girl Scout Foundation of America do that.  I did make homemade Oreos once, but after a couple hours of work and ending up with less cookies than a package of Oreos that didn't even taste like an Oreo, I decided to be more discerning with such recipes in the future.  They tasted good...but nah.  The exception is, if you can make something that tastes like the original or better, even if it takes longer, because homemade means less chemicals and preservatives!  Yay. 

That's where these Snickers come in.  Delicious layers of milk chocolate, homemade nougat with marshmallow fluff, salty peanuts, and that decadent caramel layer.

And you know what? They’re not even as hard to make as you might think.

You can melt some chocolate in a pan? Yes you can. Boil a few ingredients together for a few minutes, without even needing a candy thermometer? Sure. Chop up some peanuts? Yep, just watch your fingers! And for the caramel layer, you have your pick between making a homemade caramel (recipe provided at the link in the recipe!), or simply unwrapping a bag of caramel squares and melting them with a bit of heavy cream. Then melt more chocolate, at which you will already be a pro. There you have it, homemade, can’t-keep-your-hands-off-of-them, Snickers bars.

This post may contain affiliate links. If you buy something using these links, Jennyblogs may receive a small commission, at no extra cost to you. This helps to support Jennyblogs. For further information see the privacy policy. Grazie!

Recipe adapted from Brown Eyed Baker


Snickers Bars

Makes 42-48 small bars

Ingredients:

For the Top and Bottom Chocolate Layer

  • 2 1/2 cups / 425g milk chocolate chips (about 1 1/4 bags or 15oz)

For the Nougat Layer

  • 1/4 cup / 56g butter

  • 3/4 cup / 150g sugar

  • 1/4 cup / 59g milk

  • 1 1/2 cups / 128g marshmallow fluff

  • 1/4 cup / 65g creamy peanut butter

  • 1 tsp vanilla extract

  • 1 1/2 cups / 233g salted peanuts, roughly chopped

For the Caramel Layer

  • 1/2 batch caramel sauce, recipe found here

or

  • 14 oz / 396g caramel squares, unwrapped

  • 1/4 cup / 59g heavy whipping cream

Directions:

Lightly grease a 9x13in / 23x33cm pan and line with parchment paper.  Grease the parchment paper. 

Make the Bottom Chocolate Layer

  1. Place 1 1/4 cups / 213g of the milk chocolate chips in a small saucepan over low heat, stirring until melted.  Spread evenly in the bottom of the 9x13 pan.  Place in fridge or freezer to set until next layer is ready.

Make the Nougat Layer

  1. Melt butter in a medium saucepan over medium-low heat.  Add sugar and milk, stirring until dissolved.  Bring to a boil.  Reduce heat to low and simmer for 5 minutes, stirring occasionally. 

  2. Remove from heat and stir in marshmallow fluff, peanut butter, and vanilla until smooth.  Fold in peanuts.  Spread evenly over cooled chocolate in pan and return to fridge or freezer. 

Make the Caramel Layer

  1. Make a half batch of the caramel sauce as directed. 

or

  1. Melt caramel squares with heavy cream in a medium saucepan over low heat, stirring occasionally, until melted and smooth.  Once melted, cook for 4 more minutes, stirring frequently. 

  2. Pour caramel over cooled nougat layer and return to fridge or freezer.

Make the Top Chocolate Layer

  1. Melt the remaining 1 1/4 cups / 212g of milk chocolate chips in a small saucepan over low heat, stirring often.  Spread evenly over cooled caramel layer. 

  2. Place back in fridge or freezer until completely set, 10-30 minutes.

  3. Keep in pan or remove using parchment paper; slice and serve.

  4. Can be stored at room temperature for up to a week, two weeks in the fridge, or three months in the freezer. 

Jenny's Notes:

  • Really like peanut butter?  You can add 1/4 cup / 65g smooth peanut butter to each the top and bottom chocolate layer after melting the chocolate.  Or, use part peanut butter chips instead of all milk chocolate chips.  

  • Don't need a whole 9x13 pan of Snickers?  You can always halve this recipe and put everything in an 8x8 pan.  But since you're putting the time in, I would recommend making the whole 9x13 pan and simply freezing whatever you won't eat right away.   

  • The first greasing of the pan before you put in the parchment paper may seem redundant, but it helps the paper to stick to the pan and not move all over while you are trying to spread chocolate and such.  Ironic, though, isn't it?  Usually you grease something to help it move, not keep it in place.

homemade Snickers bars, nougat, homemade caramel, peanuts, Snickers
dessert, cookies and bars
American
Yield: 42-48 small bars
Author:
Snickers Bars

Snickers Bars

Possibly better than the real thing, these homemade Snickers Bars are made with glorious layers of caramel, marshmallow-y nougat, and salty peanuts sandwiched between two layers of milk chocolate.
Prep time: 30 MCook time: 45 MTotal time: 75 M

Ingredients:

For the Top and Bottom Chocolate Layer
  • 2 1/2 cups / 425g milk chocolate chips (about 1 1/4 bags or 15oz)
For the Nougat Layer
  • 1/4 cup / 56g butter
  • 3/4 cup / 150g sugar
  • 1/4 cup / 59g milk
  • 1 1/2 cups / 128g marshmallow fluff
  • 1/4 cup / 65g creamy peanut butter
  • 1 tsp vanilla extract
  • 1 1/2 cups / 233g salted peanuts, roughly chopped
For the Caramel Layer
  • 1 cups sugar
  • 1 Tbsp light corn syrup
  • 1 Tbsp water
  • 1/2 cup heavy cream
  • 1/8 tsp coarse salt
  • 1/4 cup cold, unsalted butter cut into tablespoons
  • OR
  • 14 oz / 396g caramel squares, unwrapped
  • 1/4 cup / 59g heavy whipping cream

Instructions:

Make the Bottom Chocolate Layer
  1. Lightly grease a 9x13in / 23x33cm pan and line with parchment paper. Grease the parchment paper.
  2. Place 1 1/4 cups / 213g of the milk chocolate chips in a small saucepan over low heat, stirring until melted. Spread evenly in the bottom of the 9x13 pan. Place in fridge or freezer to set until next layer is ready.
Make the Nougat Layer
  1. Melt butter in a medium saucepan over medium-low heat. Add sugar and milk, stirring until dissolved. Bring to a boil. Reduce heat to low and simmer for 5 minutes, stirring occasionally.
  2. Remove from heat and stir in marshmallow fluff, peanut butter, and vanilla until smooth. Fold in peanuts. Spread evenly over cooled chocolate in pan and return to fridge or freezer.
Make the Caramel Layer
  1. Combine sugar, corn syrup, and water in a medium sauce over high heat. Allow to cook without stirring until the mixture turns a beautiful amber color. (If it turns an ugly amber color, I can't help ya. Just kidding. Proceed.) This could take anywhere from 10-20 minutes, depending on how hot your stove top cooks. Keep a watchful eye on it, as it goes fast from light golden, perfectly amber, to burnt.
  2. Remove from heat and carefully pour in cream, a little at a time, as it will bubble up and spatter at you. Stir until all the cream is mixed in.
  3. Attach a candy thermometer to the pan and return to the heat. Cook until mixture reaches 238 degrees Fahrenheit, about 2-5 minutes.
  4. Remove from heat and stir in salt. Stir in butter, one tablespoon at a time, until completely smooth. Transfer to a bowl and allow to cool completely before using. Spread over cooled nougat layer and return to fridge or freezer.
  5. OR
  6. Melt caramel squares with heavy cream in a medium saucepan over low heat, stirring occasionally, until melted and smooth. Once melted, cook for 4 more minutes, stirring frequently.
  7. Pour caramel over cooled nougat layer and return to fridge or freezer.
Make the Top Chocolate Layer
  1. Melt the remaining 1 1/4 cups / 212g of milk chocolate chips in a small saucepan over low heat, stirring often. Spread evenly over cooled caramel layer.
  2. Place back in fridge or freezer until completely set, 10-30 minutes.
  3. Keep in pan or remove using parchment paper; slice and serve.
  4. Can be stored at room temperature for up to a week, two weeks in the fridge, or three months in the freezer.

Notes:

Really like peanut butter? You can add 1/4 cup / 65g smooth peanut butter to each the top and bottom chocolate layer after melting the chocolate. Or, use part peanut butter chips instead of all milk chocolate chips. Don't need a whole 9x13 pan of Snickers? You can always halve this recipe and put everything in an 8x8 pan. But since you're putting the time in, I would recommend making the whole 9x13 pan and simply freezing whatever you won't eat right away. The first greasing of the pan before you put in the parchment paper may seem redundant, but it helps the paper to stick to the pan and not move all over while you are trying to spread chocolate and such. Ironic, though, isn't it? Usually you grease something to help it move, not keep it in place.

Calories

169.11

Fat (grams)

9.76

Sat. Fat (grams)

4.49

Carbs (grams)

18.93

Fiber (grams)

0.90

Net carbs

18.03

Sugar (grams)

16.15

Protein (grams)

2.67

Sodium (milligrams)

57.84

Cholesterol (grams)

11.41
Nutritional information is approximate. Based on 42 servings using the homemade caramel recipe.
Did you make this recipe?
Tag @jenevamorris on instagram and hashtag it #jennyblogs
Created using The Recipes Generator

Peanut Butter Rice Krispie Treats

What's peanut buttery, sweet, chewy, crispy, (aren't you so glad I didn't just spell that "krispy"?) easy to make, and makes you want more? 

This. Peanut Butter Rice Krispie Treats DELUXE.  Or....Reese's Loaf, as JohnPaul, my brother, called it the first time I made it. 

As if Rice Krispie Treats weren't delicious enough, we added peanut butter, Reese's, and mini marshmallows.  Oh yes.  OH YES.

This post may contain affiliate links. If you buy something using these links, Jennyblogs may receive a small commission, at no extra cost to you. This helps to support Jennyblogs. For further information see the privacy policy. Grazie!

Recipe adapted from Shugary Sweets


Peanut Butter Rice Krispie Treats

Makes about 16 squares, but hey, that all depends on who's slicing, doesn't it?

Ingredients:

  • 1/4 cup / 56g butter

  • 10 oz / 283g bag of marshmallows, regular or mini

  • 1/2 cup / 130g peanut butter

  • 5 cups / 140g Rice Krispie cereal

  • 1 1/4 cups / 70g mini marshmallows

  • 1 8 oz / 227g bag mini Reese's, miniatures, or regular, chopped

Directions:

  1. Prepare an 8 or 9in / 20 or 23cm square baking dish by greasing or lining with parchment paper.

  2. In a large pot over medium-low heat, melt butter and marshmallows.  Stir until melted and smooth. 
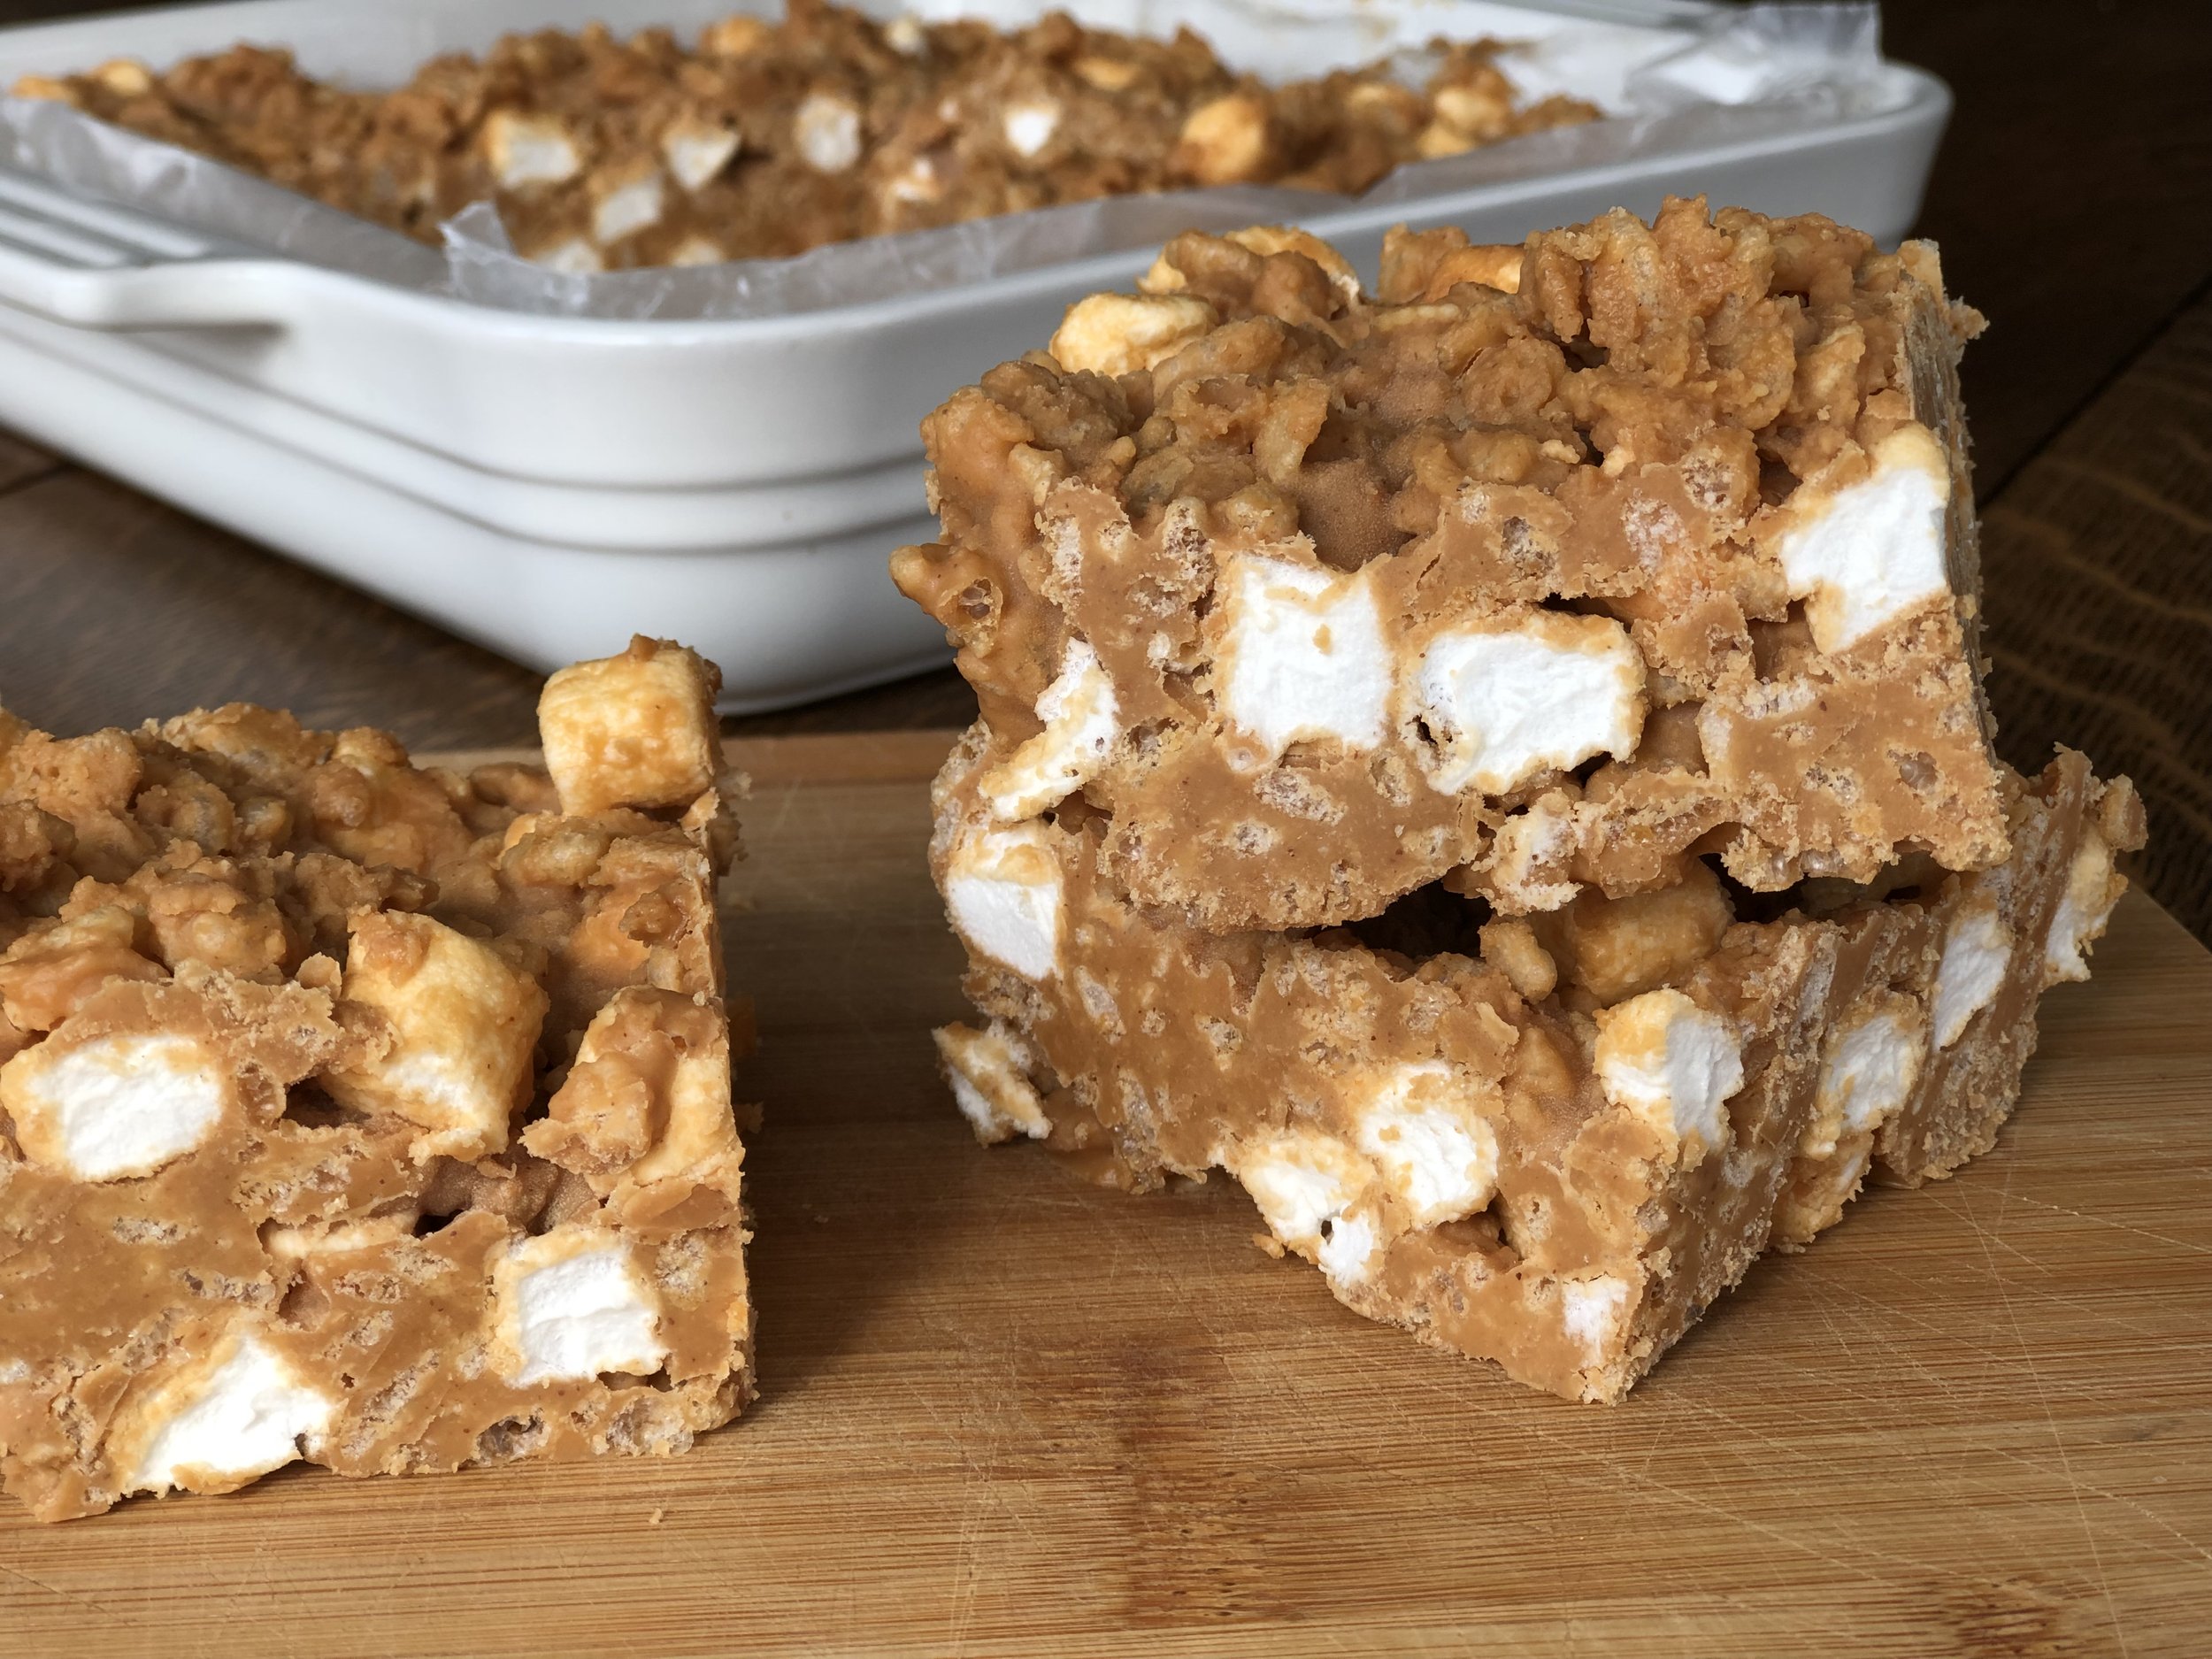
  3. Working quickly, remove from heat and stir in peanut butter, then Rice Krispies.  Gently fold in mini marshmallows. 

  4. Using a well greased hand or spatula, scrape Krispies out of the pan and into the baking dish, gently pressing into an even layer. 

  5. Top with mini Reese's and (try to) allow to set before slicing. 

Jenny's Notes:

  • Optional: For an even loafier loaf of Peanut Butter Rice Krispie Treats, melt a bag (about 10 oz) of peanut butter chips and spread on top of the Rice Krispies, right before adding the Mini Reese's on top.

  • Like super chewy Rice Krispie treats?  Increase the amount of marshmallows you use!

Rice Krispies, Rice Krispie Treats, peanut butter, deluxe rice krispies, Reeses, Reeses rice krispie treats, Fluffernutter rice krispie treats, peanut butter bars, marshmallows, peanut butter desserts
dessert, bars
American
Yield: 16
Author:
Peanut Butter Rice Krispie Treats

Peanut Butter Rice Krispie Treats

Deluxe peanut butter Rice Krispies treats amped up with Reese's peanut butter cups and chewy chunks of marshmallow.
Prep time: 10 MCook time: 5 MTotal time: 15 M

Ingredients:

  • 1/4 cup / 56g butter
  • 10 oz / 283g bag of marshmallows, regular or mini
  • 1/2 cup / 130g peanut butter
  • 5 cups / 140g Rice Krispie cereal
  • 1 1/4 cups / 70g mini marshmallows
  • 1 8 oz / 227g bag mini Reese's, miniatures, or regular, chopped

Instructions:

  1. Prepare an 8 or 9in / 20 or 23cm square baking dish by greasing or lining with parchment paper.
  2. In a large pot over medium-low heat, melt butter and marshmallows. Stir until melted and smooth.
  3. Working quickly, remove from heat and stir in peanut butter, then Rice Krispies. Gently fold in mini marshmallows.
  4. Using a well greased hand or spatula, scrape Krispies out of the pan and into the baking dish, gently pressing into an even layer.
  5. Top with mini Reese's and (try to) allow to set before slicing.

Notes:

Optional: For an even loafier loaf of Peanut Butter Rice Krispie Treats, melt a bag (about 10 oz) of peanut butter chips and spread on top of the Rice Krispies, right before adding the Mini Reese's on top. Like super chewy Rice Krispie treats? Increase the amount of marshmallows you use!

Calories

249.37

Fat (grams)

11.42

Sat. Fat (grams)

4.14

Carbs (grams)

35.18

Fiber (grams)

1.03

Net carbs

34.15

Sugar (grams)

20.78

Protein (grams)

4.25

Sodium (milligrams)

175.55

Cholesterol (grams)

8.38
Nutritional information is approximate. Based on 16 servings.
Did you make this recipe?
Tag @jenevamorris on instagram and hashtag it #jennyblogs
Created using The Recipes Generator