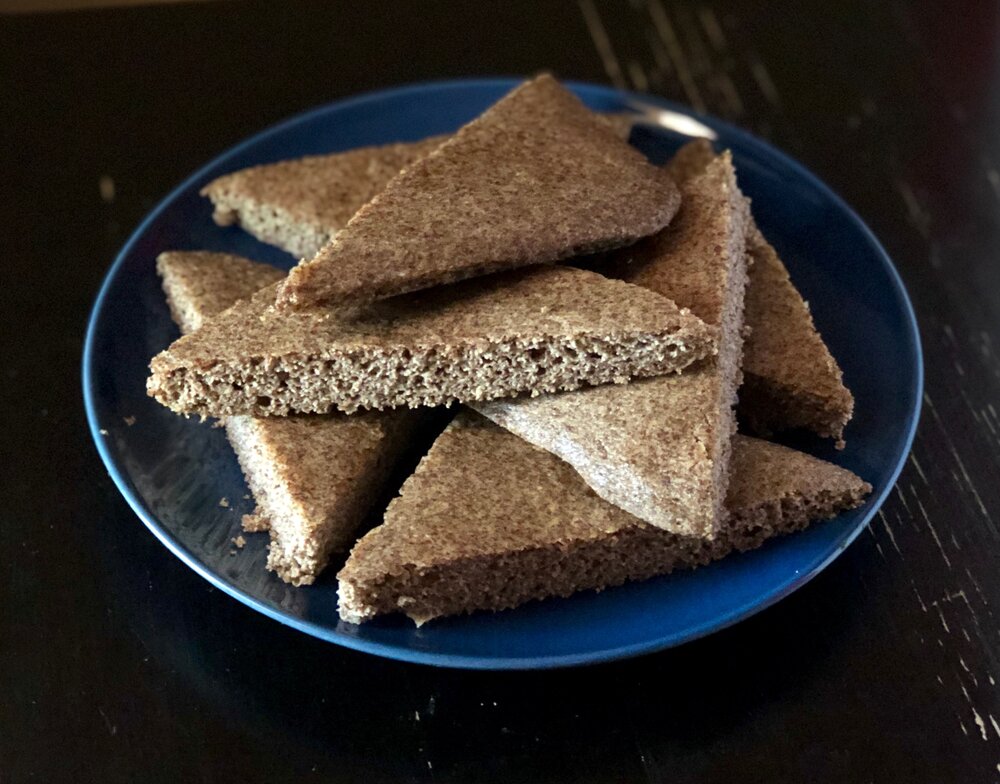
Flax Bread

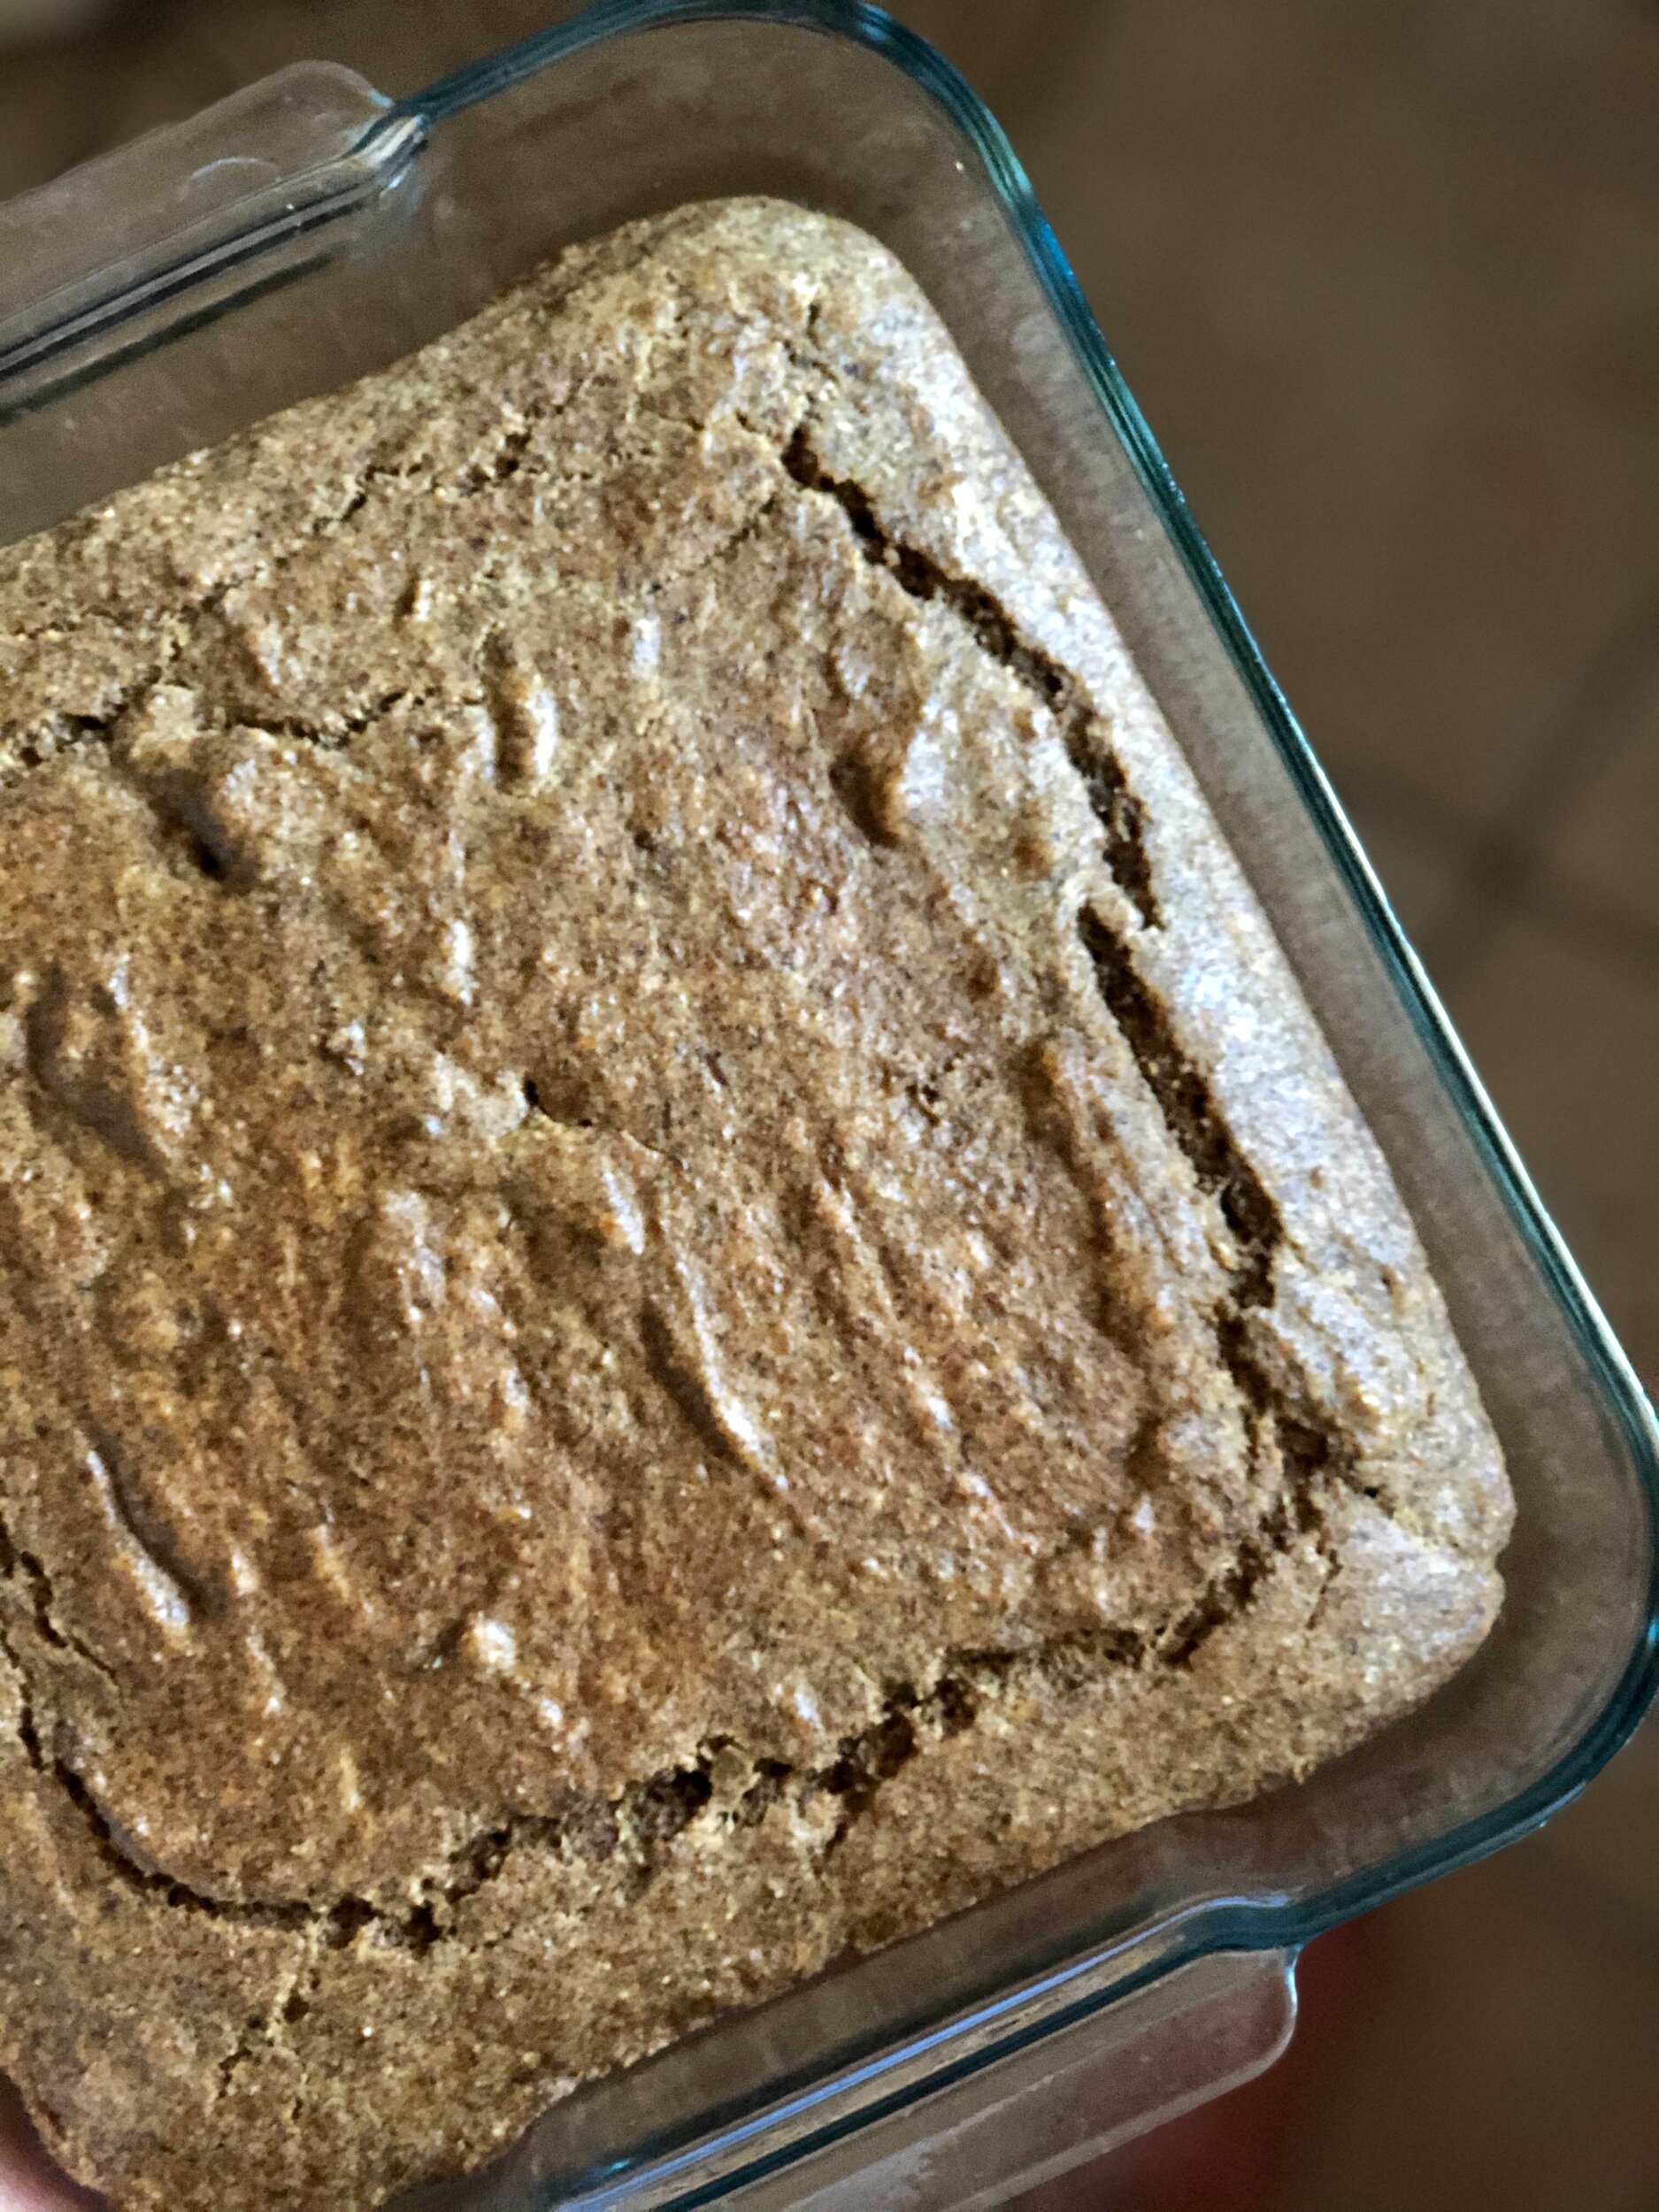
Recently I was determined to find a palatable bread for my husband who was eating a very restricted diet for a few months. The bread couldn’t contain gluten, yeast, sugar of any kind, or dairy. It’s already challenging to make a good gluten-free bread. But a bread without yeast? That’s tricky. Then throw in the dairy and sugar part and whew. Slim pickings. I tried a few recipes that I immediately discarded, but in the end I found this flax bread winner which contains none of the above.

Keep in mind with the above restrictions, you’re not going to get a bread thats crusty and artisanal and really anything like what you might imagine when you think of typical bread. But when your diet is restricted, and you come across a recipe like this, it tastes heavenly.

The original recipe was called Focaccia Flax Bread but I couldn’t quite bring myself to call it focaccia, since it’s so far from the real thing. It’s low, so similar in height to focaccia, but it’s also not really a flat bread. Maybe we can just call it a low bread?? Needless to say, I went with simple “flax bread”.

It also happens to be fabulously easy, which is a bonus. In less than 30 minutes you can have this bread hot out of the oven!

The flour in this bread is flax meal, although you can mix it up and use other GF flours, as well; the leavening is baking powder, the fat is coconut oil or really any non-dairy fat you choose. There’s also optional xylitol as a sweetener, which before this recipe I had never used. Sometimes I add it, sometimes I don’t, but I’ve found I rather enjoy using xylitol. It wasn’t as expensive as I had anticipated, it looks very similar to granulated sugar, it doesn’t have a weird taste to it like some sugar substitutes can, and it doesn’t feel as evil as say, aspartame.

If you’re a normal carb-ivore, I won’t try and sell this bread to you as “OMG you’ll never eat real bread again!” because that’s just silly. If you can eat real bread, eat real bread! I’m a normal carb-ivore and I find this bread tasty, but it certainly won’t replace my love of baguettes. But if you’re not able to eat normal bread, whether for a short time or indefinitely, I really hope this recipe brings some tastiness into your life!

This post may contain affiliate links. If you make a purchase using these links, Jennyblogs may receive a small commission, at no extra cost to you. This helps to support Jennyblogs. For further information see the privacy policy. Grazie!

Recipe adapted from whole new mom


Flax Bread

Serves 8

Ingredients:

  • 1 cup / 180g flax meal

  • 1 1/2 tsp baking powder

  • 1 tsp - 1 Tbsp / 5-15g xylitol, optional

  • 2 eggs

  • 1/2 cup / 119g water

  • 1/3 cup / 74g coconut oil, melted

Directions:

Preheat oven to 350°F / 177°C. Grease an 8x8in / 20x20cm square pan or 8in / 20cm round cake pan.

  1. In a medium bowl, combine flax meal, baking powder, and xylitol, if using.

  2. In a small bowl, lightly beat eggs. Add eggs to dry mixture along with water and coconut oil; mix until well combined.

  3. Let sit for a few minutes to thicken up slightly, then pour and spread into prepared pan.

  4. Bake for about 20 minutes or until turning golden-brown and bread is springy to the touch.

Jenny’s Notes:

  • You can make your own flax meal by grinding flax seeds in a food processor or coffee/spice grinder. Quick and easy! I do this every time.

  • Other GF flours can be substituted for part of the flaxmeal. I like to substitute about 25% (so 1/4 cup in this recipe) of the flax meal for buckwheat flour.

  • Really any fat can be used instead of coconut oil, choose your preference!

gluten free, dairy free, flaxmeal bread, candida diet friendly, sugar free, yeast free, flatbread
bread, special diets
American
Yield: 8
Author:
Flax Bread

Flax Bread

A versatile flatbread made with ground flax seeds that suits a variety of special dietary needs, including gluten-free, dairy-free, sugar-free, yeast-free and candida diet friendly.
Prep time: 7 MinCook time: 20 Mininactive time: 3 MinTotal time: 30 Min

Ingredients

Instructions

  1. Preheat oven to 350°F / 177°C. Grease an 8x8in / 20x20cm square pan or 8in / 20cm round cake pan.
  2. In a medium bowl, combine flax meal, baking powder, and xylitol, if using.
  3. In a small bowl, lightly beat eggs. Add eggs to dry mixture along with water and coconut oil; mix until well combined.
  4. Let sit for a few minutes to thicken up slightly, then pour and spread into prepared pan.
  5. Bake for about 20 minutes or until turning golden-brown and bread is springy to the touch.

Notes:

  • You can make your own flax meal by grinding flax seeds in a food processor or coffee/spice grinder. Quick and easy! I do this every time.
  • Other GF flours can be substituted for part of the flaxmeal. I like to substitute about 25% (so 1/4 cup in this recipe) of the flax meal for buckwheat flour.
  • Really any fat can be used instead of coconut oil, choose your preference!

Nutrition Facts

Calories

228.14

Fat (grams)

19.84

Sat. Fat (grams)

8.84

Carbs (grams)

8.54

Fiber (grams)

6.16

Net carbs

2.38

Sugar (grams)

0.40

Protein (grams)

5.69

Sodium (milligrams)

116.69

Cholesterol (grams)

46.50

Nutritional info is approximate. Based on 1 serving if recipe is made with 1 Tbsp of xylitol.

Did you make this recipe?
Tag @jennyblogsandbakes on instagram and hashtag it #jennyblogs
Created using The Recipes Generator

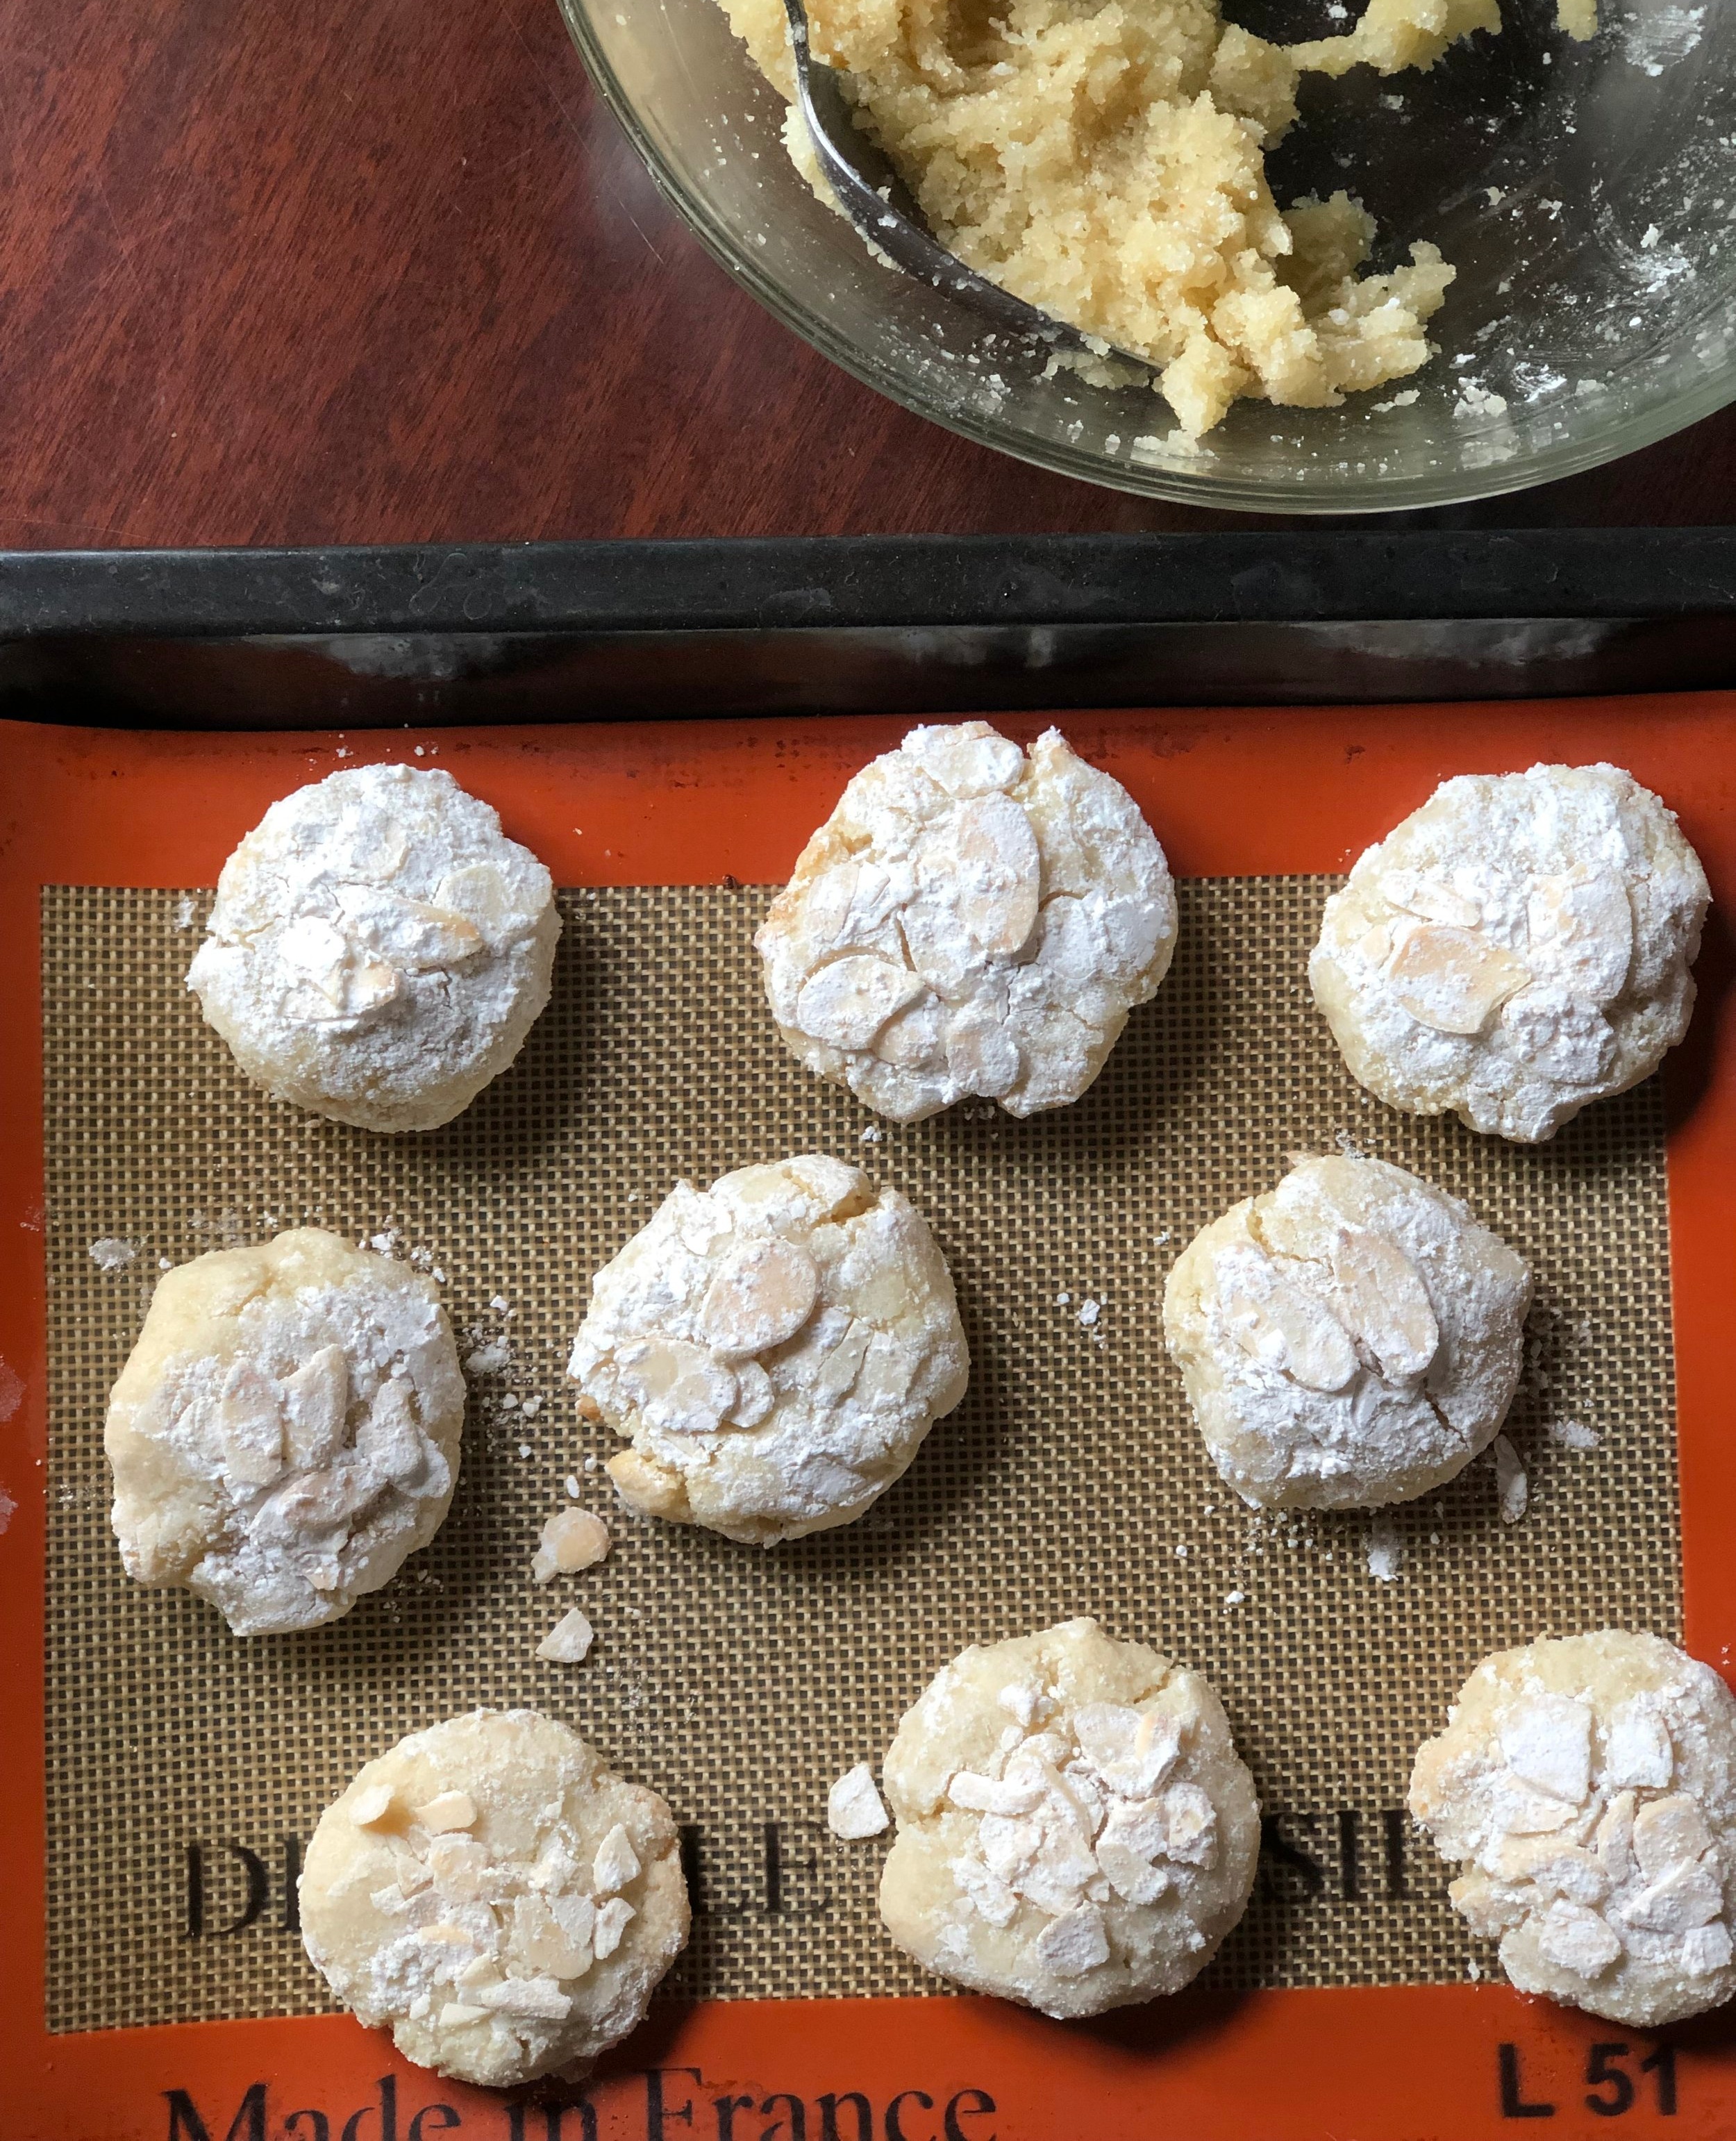
Paste di Pistacchio Siciliane - Sicilian Pistachio Cookies

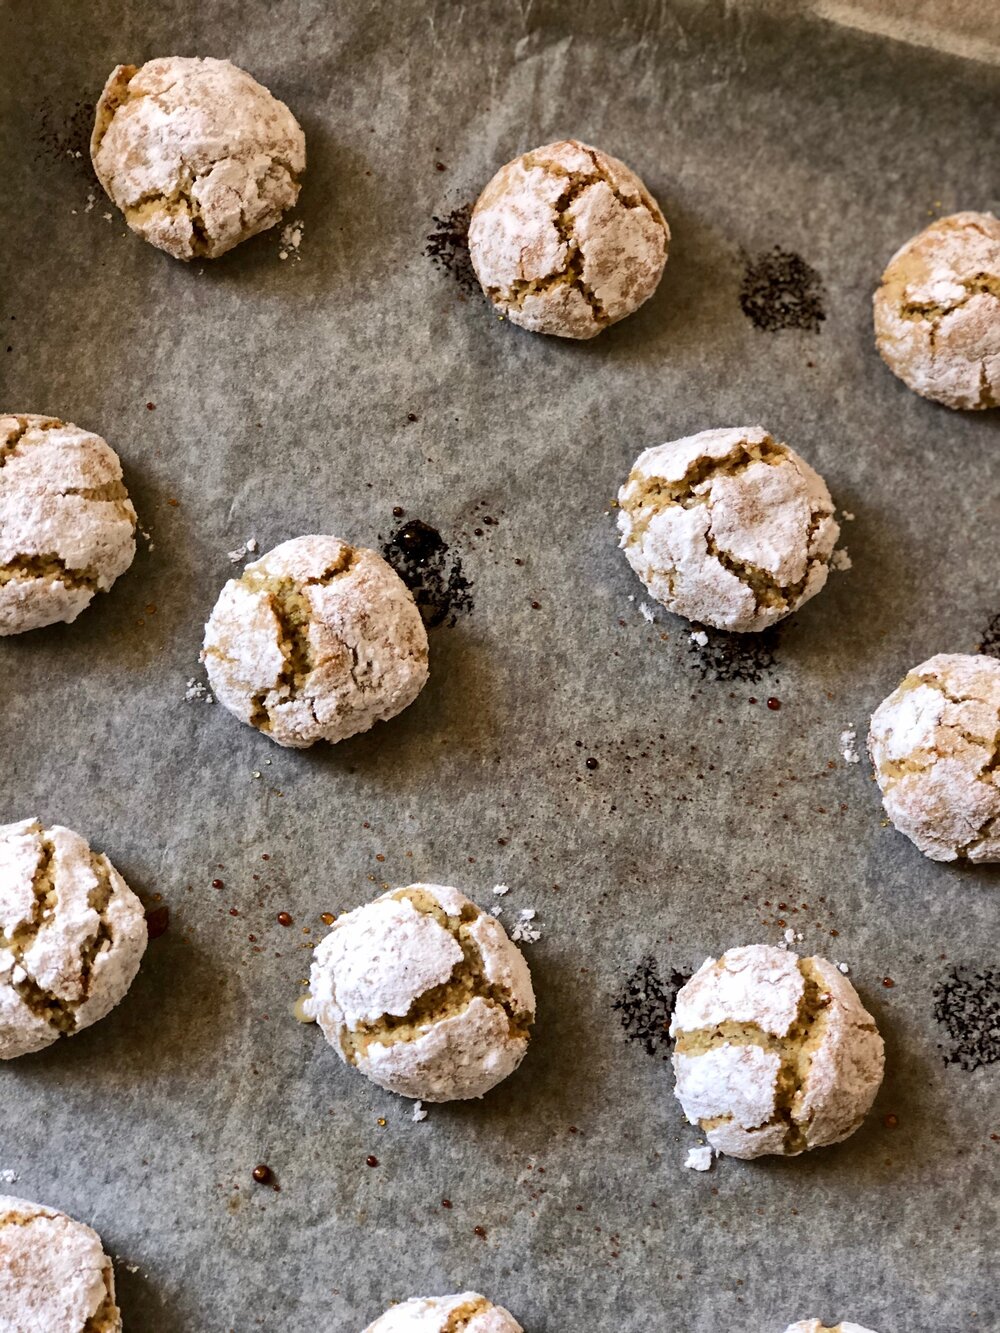
Paste di Pistacchio, or Pistachio cookies, hail from the beautiful island of Sicily. They have a delightfully crisp outer shell and a chewy, soft center.

Two years ago I put up the recipe for Paste di Mandorle, or Sicilian Almond Cookies, and it has become one of the top recipes on this site.

It’s not hard to figure out why…with only 4 ingredients that get mixed together in a bowl with a spoon, rolled in powdered sugar and baked, it really doesn’t get much easier than this. No fancy equipment. Not to mention with the almonds there are more nutritional benefits to these than your average cookie. Or at least, that’s what I tell myself when I’m going for my fifth cookie. They’re also gluten-free and dairy-free friendly.

Sometimes great ideas pop into my head. Sometimes really awful ones, too, but I try to only filter the good ones here onto this blog, k? One day, I saw a half bag of pistachios in my cupboard. The first half had been ground into pistachio flour to make this Pistachio Cake with Honey Vanilla Buttercream for Christmas. Then I had an idea, what if I take the Paste di Mandorle recipe and replace part of the almond flour with pistachio flour?? So I did. And this recipe was born.

After the fact when all the cookies had been gobbled up within a couple hours, I wondered if maybe this recipe wasn’t original to me? It seemed too easy for no one else to have thought of this. Turns out these are definitely already a thing. Sicily is known not just for their almonds but also for their pistachios, especially the area of Bronte. Naturally, these pistachio cookies are a classic right alongside the almond ones.

The original Paste di Pistacchio Siciliane

The original recipe itself has a few variations, as I will list below. You can choose to implement any of the following as per your taste, or just follow the main recipe below, which is my favorite way of making it. Any way you go, you will have a scrumptious cookie that is not only unbelievably easy, but also an authentic Italian sweet!

  • Grind your own flour vs storebought flour. Some will instruct to grind your own almonds and pistachios. This not only gives you fresh nut flour, but it allows you to control how fine you grind it. Some advise against buying almond flour or pistachio flour from the store because it’s too thin. However, if you don’t have a food processor, spice grinder, coffee grinder or any other tool that will get the job done, I have used store bought flour and it turned out fine. No pun intended. ;)

  • Honey. I’d say most of the recipes claiming to be the original I’ve seen call for adding a bit of honey, anywhere from 10-20g. Honestly I don’t, but it would be easy to add if you truly want as close to the original as possible. If adding honey, use a bit less of the cane sugar.

  • Powdered sugar. Some recipes call for using powdered, others granulated. Others call for granulated but have you grind the sugar with the nuts, so you end up with powdered sugar anyway. I generally use granulated sugar and don’t grind, because I grind the nuts in a small electric coffee grinder and there isn’t room for the sugar. Either way you will have great results.

  • Cookie shape. The cookies can be shaped into the classic S shape (Roll dough into logs about the width of a finger, then slice into pieces about the length of half of an index finger, roll in powdered sugar, and use your fingers to shape into the S), ovals, or simply round cookies. I chose the round shape for the recipe below, as it’s the simplest. If you’d like to see the S shape, check out the pictures in this recipe.

  • Dough resting/refrigeration. Some will instruct to let the dough rest after you’ve shaped it so it will be less sticky. As with the almond cookies, if you’ve glanced or made that recipe, the refrigeration or resting is not strictly necessary. It allows the dough to dry out a bit, which means they retain their shapes better when baked. But if you’re going for the round or oval shape, there’s not much need.

This post may contain affiliate links. If you make a purchase using these links, Jennyblogs may receive a small commission, at no extra cost to you. This helps to support Jennyblogs. For further information see the privacy policy. Grazie!

Here is one of the recipes I referenced in Italian and also gives a good visual of the “S” shaped cookie.


Paste di Pistacchio Siciliane - Sicilian Pistachio Cookies

Makes about 2 dozen cookies

Ingredients:

  • 125g whole unsalted almonds or almond flour

  • 125g whole unsalted pistachios or pistachio flour

  • 250g granulated sugar (or 230g granulated sugar and 20g honey)

  • 2 / 60g egg whites

  • pinch of salt

  • powdered sugar, for rolling, optional

Directions:

Preheat oven to 350°F / 180°C.

  1. Using a food processor, spice grinder, or coffee grinder, grind the nuts until coarse. Small chunks are ok.

  2. Mix all ingredients together, and form into balls or desired shape. Roll in powder sugar, if desired.

  3. Place evenly spaced on ungreased cookie sheets. At this point cookies can be covered and refrigerated overnight or baked immediately.

  4. Bake in preheated oven for about 8-12 minutes, or until cookies just start to turn golden.

Jenny’s Notes:

  • If working with a food processor or other tool large enough, you can grind the nuts with the sugar, creating powdered sugar in the process, as some recipes call for.

  • If the dough is too sticky, you can let it sit for an hour or refrigerate for several hours to let it thicken/dry out a bit.

  • This recipe is also delicious using all pistachio flour!

Italian dessert, Italian cookie, Sicilian dessert, Sicilian recipe, authentic Italian recipe, original Sicilian dessert recipe, pistachio, almond, gluten free, dairy free
dessert, cookies
Italian
Yield: 24
Author:
Paste di Pistacchio Siciliane - Sicilian Pistachio Cookies

Paste di Pistacchio Siciliane - Sicilian Pistachio Cookies

Traditional Sicilian sweets with a delightfully crunchy outside and chewy inside. Made with just 4-5 ingredients and naturally gluten-free and dairy-free.
Prep time: 15 MinCook time: 12 MinTotal time: 27 Min

Ingredients

Instructions

  1. Preheat oven to 350°F / 180°C.
  2. Using a food processor, spice grinder, or coffee grinder, grind the nuts until coarse. Small chunks are ok.
  3. Mix all ingredients together, and form into balls or desired shape. Roll in powder sugar, if desired.
  4. Place evenly spaced on ungreased cookie sheets. At this point cookies can be covered and refrigerated overnight or baked immediately.
  5. Bake in preheated oven for about 8-12 minutes, or until cookies just start to turn golden.

Notes:

  • If working with a food processor or other tool large enough, you can grind the nuts with the sugar, creating powdered sugar in the process, as some Italian versions call for.
  • If the dough is too sticky, you can let it sit for an hour or refrigerate for several hours to let it thicken/dry out a bit.
  • This recipe is also delicious using all pistachio flour!


Calories

108.15

Fat (grams)

5.13

Sat. Fat (grams)

0.51

Carbs (grams)

14.12

Fiber (grams)

1.10

Net carbs

13.02

Sugar (grams)

12.21

Protein (grams)

2.73

Sodium (milligrams)

36.38

Cholesterol (grams)

0.00

Nutritional information is approximate. Based on 1 cookie rolled in powdered sugar.

Did you make this recipe?
Tag @jennyblogsandbakes on instagram and hashtag it #jennyblogs
Created using The Recipes Generator

Homemade Pancake Mix

Last week I shared with you my favorite buttermilk pancake recipe: my mom’s, of course! Today I’ll share with you the dry pancake mix that is always sitting in a gallon glass jar in the pantry, ready to be made into fluffy golden pancakes just as easy as a store-bought mix.

IMG_3216.jpg

For the pancake recipe, click here!

Using pantry/baking staples, pancakes are always a good idea. Lazy Saturday mornings, brunch with friends, dinner when you desperately need to go grocery shopping…brinner, anyone? Pancakes are great to whip up at a moment’s notice, and don’t require much skill. Unless you want to get fancy with your flipping, then by all means. If you’re not a pro flipper, maybe make more than just a single batch, just in case…no shame in using a spatula!

I’m not here to show you how to flip pancakes, couldn’t if I wanted to, but instead share with you a delightfully handy dry pancake mix, so you can whip up pancakes even faster.

It’s as simple as whisking together a few dry ingredients, putting them in a jar, then taping on some instructions. You’ll walk by the pancake mixes in the store from now on and cackle because you have something better and healthier at home! Mwahaha.

This post may contain affiliate links. If you make a purchase using these links, Jennyblogs may receive a small commission, at no extra cost to you. This helps to support Jennyblogs. For further information see the privacy policy. Grazie!

Recipe from my mama


Homemade Pancake Mix

Makes about 10 batches of pancakes

Ingredients:

  • 10 cups / 1,200g all-purpose flour

  • 8 Tbsp (1/2 cup) / 112g baking powder

  • 1/2 cup / 100g sugar

  • 4 tsp / 20g salt

  • 2 cups / 250g powdered instant milk

Directions:

  1. In a large bowl, whisk together all ingredients until thoroughly combined. Transfer to a large jar or container with lid.

  2. Tape to the jar the following instructions:

    Combine 1 1/4 cups dry mix with:

    1 cup water or milk

    2 Tbsp oil

    1 egg

  3. When preparing a batch of pancakes, preheat a lightly greased griddle or pan to 375F / 190C. Combine the wet ingredients with the dry ingredients until just combined, little lumps are ok. Pour desired amount onto griddle and cook until the bubbles in the batter don’t immediately fill in when they pop; flip and cook second side until golden.

Jenny’s Notes:

  • If you don’t have or prefer not to use powdered milk, simply leave it out and make sure to use buttermilk or milk of choice instead of water when making up a batch. The powdered milk makes for richer pancakes, but it is not strictly necessary. I like using buttermilk/milk when making pancakes even if there’s already powdered milk! Extra delicious.

  • If your pancakes are getting beyond golden before they’re cooked through, lower the heat of your pan.

pancakes, American breakfast, fluffy pancakes, best buttermilk pancakes, recipe
breakfast
American
Yield: 10 batches
Author: Jennyblogs
Print
Homemade Pancake Mix

Homemade Pancake Mix

Homemade dry pancake mix to make pancakes even easier and quicker to whip up at a moment's notice
Prep time: 10 MinTotal time: 10 Min

Ingredients

  • 10 cups / 1,200g all-purpose flour
  • 8 Tbsp (1/2 cup) / 112g baking powder
  • 1/2 cup / 100g sugar
  • 4 tsp / 20g salt
  • 2 cups / 250g powdered instant milk

Instructions

  1. In a large bowl, whisk together all ingredients until thoroughly combined. Transfer to a large jar or container with lid.
  2. Tape to the jar the following instructions: Combine 1 1/4 cups dry mix with: 1 cup water or milk - 2 Tbsp oil - 1 egg
  3. When preparing a batch of pancakes, preheat a lightly greased griddle or pan to 375F / 190C. Combine the wet ingredients with the dry ingredients until just combined, little lumps are ok. Pour desired amount onto griddle and cook until the bubbles in the batter don’t immediately fill in when they pop; flip and cook second side until golden.

Notes:

  • If you don’t have or prefer not to use powdered milk, simply leave it out and make sure to use buttermilk or milk of choice instead of water when making up a batch. The powdered milk makes for richer pancakes, but it is not strictly necessary. I like using buttermilk/milk when making pancakes even if there’s already powdered milk! Extra delicious.
  • If your pancakes are getting beyond golden before they’re cooked through, lower the heat of your pan.


Calories

494.19

Fat (grams)

1.66

Sat. Fat (grams)

0.49

Carbs (grams)

105.92

Fiber (grams)

3.26

Net carbs

102.65

Sugar (grams)

10.30

Protein (grams)

13.27

Sodium (milligrams)

1977.86

Cholesterol (grams)

2.00
Nutritional information is approximate. Based on one batch of dry pancake mix.
Did you make this recipe?
Tag @jennyblogsandbakes on instagram and hashtag it #jennyblogs
Created using The Recipes Generator

Chocolate No-Bake Cookies

IMG_3299.jpg

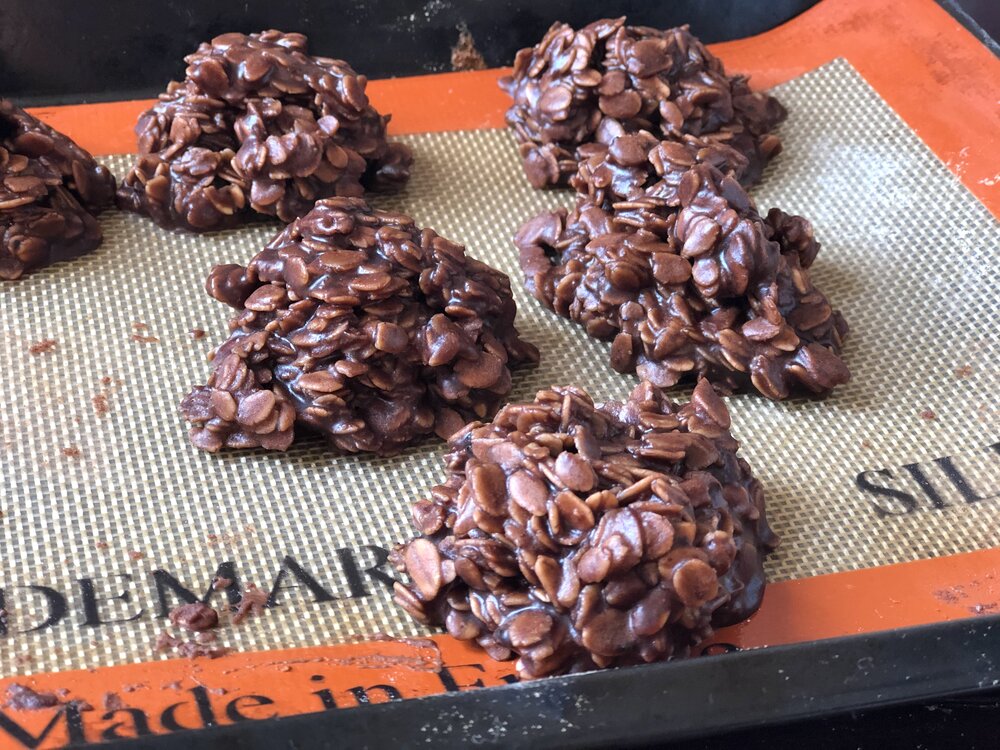
Actually known as chocolate sand dune cookies around the Morris household, because no-bakes is just not as descriptive, ya know? They’re well enough known that probably doesn’t matter, but as I grew up near the famous Sleeping Bear Sand Dunes, you will understand when, many years ago, my older brother decided to call these mounds of cookies “sand dunes” or rather “chocolate sand dunes” because these cookies are not the color of sand. The name stuck, and well, here we are today.

Chocolate sand dune cookies a.k.a. chocolate no-bake cookies, no matter what you call them, are delicious and just a little too easy to make.

They’re also made without any flour, so if you use certified GF oats, they are easily gluten-free. These cookies made a come back during the quarantine and the flour shortage! They can also be made with a milk-alternative and butter-alternative if you wish to have dairy-free cookies. They’re naturally egg-free!

What follows is the classic recipe I grew up making with my mom. Little did I know until I was a teenager and making no-bake cookies with a friend that the actual “original” recipe includes peanut butter. What?! You don’t put peanut butter into chocolate sand dune cookies! Actually you can, and it’s delicious. Peanut butter and chocolate together, hello. Of course it’s delicious.

However, this is not to disregard my mom’s classic recipe. While she loves chocolate and peanut butter, she doesn’t prefer them together. So she omitted the peanut butter and never looked back from making this pure chocolatey, fudgy version of no-bake cookies. Some of my family members still prefer them without the peanut butter, others prefer with. So if you or someone you know doesn’t like peanut butter with chocolate, or has a nut allergy, know you can omit the peanut butter and have an equally delicious cookie.

This post may contain affiliate links. If you make a purchase using these links, Jennyblogs may receive a small commission, at no extra cost to you. This helps to support Jennyblogs. For further information see the privacy policy. Grazie!

A recipe from my mama


Chocolate Sand Dune Cookies

Makes about 36 cookies

The pan was full at one point…

The pan was full at one point…

Ingredients:

  • 4 cups / 800g sugar

  • 1/2 cup / 50g cocoa powder

  • 1 cup / 237g milk

  • dash of salt

  • 1 cup / 225g butter (2 sticks)

  • 1/4-1 cup / 65g - 260g peanut butter, optional

  • 2 tsp / 10g vanilla extract

  • 5 1/2 cups / 495g quick oats

Directions

  1. In a large pot, stir together sugar, cocoa, milk, and salt; bring to a boil over medium heat. Boil for 2 minutes then remove from heat.

  2. Add butter, peanut butter, and vanilla; stir well.

  3. Add the oats and stir until all oats are coated. Let mixture sit for 8-10 minutes to thicken, stirring occasionally to check consistency.

  4. When mixture has thickened enough, spoon mounds onto wax paper or a clean counter. Allow to set and enjoy!

Jenny’s Notes:

  • Brown sugar can be used instead of white sugar, if you prefer.

  • I grew up baking with salted butter and this recipe reflects that with the dash of salt. Here in Europe and in most bakeries unsalted butter is used, so if that’s what you are using, simply add two dashes of salt if you wish!

  • You may notice the variance in the peanut butter measurement; use up to 1 cup for peanut butter lovers, or as little as 1/4 cup for just a hint.

  • Regular or crunchy peanut butter can be used, and it’s also fine to use natural peanut butter. People often don’t recommend using natural in recipes, but as I prefer not to buy the kinds with added sugars and hydrogenated oils, I usually use it anyway and have hardly met a recipe where you can’t successfully use the natural kind.

  • Quick or instant oats are my preferred kind of oats to use for chocolate sand dunes, but as you will notice from my photos that regular or rolled oats can also be used. Rolled oats give more of a bite to your cookies, and you will probably need to let the mixture sit a bit longer before spooning out the cookies so the oats have time to thicken up the mixture. If after 10-15 minutes your mixture still isn’t thickening up satisfactorily, you may need to add additional oats.

  • The above recipe makes about 36 cookies, great for sharing, large families, and parties. It can also easily be halved to make about 18 cookies, or even quartered to make 9. The photos on this post are from the 2 month lockdown in Italy when I decided that a quarter batch should suffice for 2 people who can’t leave the house.

no-bake cookies, chocolate, oats, no bake dessert, summer dessert, fudgy chocolate cookies, oat cookies, peanut butter
dessert
American
Yield: 36
Author:
Print
Chocolate No-Bake Cookies

Chocolate No-Bake Cookies

Chocolate No-bakes are decadent mounds of chocolatey oat cookies made without flour, eggs, or an oven, which makes them ideal for summer baking and people with gluten or egg allergies.
Prep time: 20 MCook time: 5 MTotal time: 25 M

Ingredients:

  • 4 cups / 800g sugar
  • 1/2 cup / 50g cocoa powder
  • 1 cup / 237g milk
  • dash of salt
  • 1 cup / 225g butter (2 sticks)
  • 1/4-1 cup / 65g - 260g peanut butter, optional
  • 2 tsp / 10g vanilla extract
  • 5 1/2 cups / 495g quick oats

Instructions:

  1. In a large pot, stir together sugar, cocoa, milk, and salt; bring to a boil over medium heat. Boil for 2 minutes then remove from heat.
  2. Add butter, peanut butter, and vanilla; stir well.
  3. Add the oats and stir until all oats are coated. Let mixture sit for 8-10 minutes to thicken, stirring occasionally to check consistency.
  4. When mixture has thickened enough, spoon mounds onto wax paper or a clean counter. Allow to set and enjoy!

Notes:

Brown sugar can be used instead of white sugar, if you prefer. I grew up baking with salted butter and this recipe reflects that with the dash of salt. Here in Europe and in most bakeries unsalted butter is used, so if that’s what you are using, simply add two dashes of salt if you wish! You may notice the variance in the peanut butter measurement; use up to 1 cup for peanut butter lovers, or as little as 1/4 cup for just a hint. Regular or crunchy peanut butter can be used, and it’s also fine to use natural peanut butter. People often don’t recommend using natural in recipes, but as I prefer not to buy the kinds with added sugars and hydrogenated oils, I usually use it anyway and have hardly met a recipe where you can’t successfully use the natural kind. Quick or instant oats are my preferred kind of oats to use for chocolate sand dunes, but as you will notice from my photos that regular or rolled oats can also be used. Rolled oats give more of a bite to your cookies, and you will probably need to let the mixture sit a bit longer before spooning out the cookies so the oats have time to thicken up the mixture. If after 10-15 minutes your mixture still isn’t thickening up satisfactorily, you may need to add additional oats. The above recipe makes about 36 cookies, great for sharing, large families, and parties. It can also easily be halved to make about 18 cookies, or even quartered to make 9. The photos on this post are from the 2 month lockdown in Italy when I decided that a quarter batch should suffice for 2 people who can’t leave the house.

Calories

192.48

Fat (grams)

9.10

Sat. Fat (grams)

4.01

Carbs (grams)

26.75

Fiber (grams)

0.92

Net carbs

25.83

Sugar (grams)

22.75

Protein (grams)

2.47

Sodium (milligrams)

89.28

Cholesterol (grams)

13.96
Nutritional information is approximate. Based on 1 cookie if using the full cup of peanut butter in the recipe.
Did you make this recipe?
Tag @jenevamorris on instagram and hashtag it #jennyblogs
Created using The Recipes Generator
IMG_3302.jpg

Jeannie's Healthy Breakfast Cookies

2019-02-17+15.32.23.jpg

What could be better than a cookie? How about a cookie that’s packed with nutrients and can be eaten anytime, especially for breakfast, guilt free?

I love cookies. They are my go-to when I want to whip up something with limited time, or don’t have much energy for other more entailed desserts. I’m sure this has NOTHING to do with the fact that cookies are also one of my favorite things to eat. It ends up turning into a win-win-win situation because I’m having fun, being productive, get to eat some of the ingredients while baking, get to eat some dough while baking, and BONUS if there is enough dough to actually be baked into cookies! So many wins.

I have to bring up the negative, however, to classic cookie baking. They’re kinda calorific and not very good for you. I’m all for eating cookies for breakfast, but that usually goes along with a sugar crash later on. What to do?

Bake healthy cookies! They have to be delicious of course, and not gross. I have just the recipe for you, made up by my mom many years ago when we needed a portable nutritious breakfast for a trip. This recipe has been in my recipe box ever since as “Jean’s breakfast cookies”, made with many adjustments because the add ins are very versatile depending on your tastes. My mom likes to be called Jeannie (not by her kids of course) so I adapted the title accordingly.

One thing this recipe is not is a taste-alike recipe to say, chocolate chip cookies with a surprise twist that it’s healthy. Nope, these cookies have a satisfyingly healthy look and taste and are upfront about it from the get go. They get positive feedback and recipe requests wherever they go!

The recipe that follows is just one version of many, many possibilities. Just keep in mind that major adjustments may need other adjustments. For example, if you don’t have any honey or maple syrup on hand for the sweetener, you could use raw or regular cane sugar. Substituting a liquid for a dry ingredient, however, will mean you may need more liquid from elsewhere. Maybe add another egg, a bit more oil, or even water until you get a cookie dough consistency once again. Other ideas to make the recipe your own:

  • Use any kind of flour you wish instead of wheat flour. Oat flour, almond flour, coconut flour…I often use wheat germ in place of part of the flour or flaxmeal, usually 1/4 cup.

  • If you want these cookies to be gluten-free, ensure that your oats are gluten-free, and use a gluten-free flour.

  • Change up the spices. Sometimes towards fall I also add a bit of ginger, nutmeg, and cloves. Cardamom is also nice.

  • Beyond dried fruit and walnuts, get creative with your add-ins! Just try not to go too far beyond 1 cup, otherwise there might not be enough dough to hold everything together. In the photos on this post I used dried apples, dried cranberries, and walnuts. I’ve also added various combinations of dried cherries, prunes, dried apricots, raisins, dates, dried figs, dried pears, fresh apples, grated coconut, pecans, hazelnuts, dark chocolate, crystallized ginger, and anything else I had on hand!

This post may contain affiliate links. If you make a purchase using these links, Jennyblogs may receive a small commission, at no extra cost to you. This helps to support Jennyblogs. For further information see the privacy policy. Grazie!

Recipe adapted from my mama


Jeannie’s Healthy Breakfast Cookies

Makes about 18-22 cookies

Ingredients:

2019-02-17 14.45.17.jpg
  • 1/2 cup / 112g olive or coconut oil

  • generous 1/3 cup / 120g maple syrup or honey

  • 2 eggs

  • 1 tsp vanilla extract

  • 1 cup / 120g all-purpose or whole wheat flour

  • 1 1/2 cups / 135g rolled oats

  • 1/2 cup / 90g flaxmeal

  • 1/2 tsp baking soda

  • 1/2 tsp salt

  • 1/8 tsp cinnamon

  • 3/4 cup / 105g nuts, roughly chopped

  • 1/2 apple, diced

  • 1/4 cup / 50g dried fruit, chopped if necessary

Directions:

Oven 375°F / 190°C. Baking sheet lined with silpat or parchment paper.

  1. In a large bowl combine wet ingredients: oil, maple syrup, eggs, and vanilla; beat with a spoon until smooth.

  2. In another medium bowl whisk together dry ingredients: flour, oats, flaxmeal, baking soda, salt, and cinnamon.

  3. Add dry ingredients, nuts, apple, and dried fruit to wet ingredients, mix until well combined.

  4. Spoon generous tablespoons of dough onto prepared baking sheet and flatten slightly as they won’t spread much, leaving at least 1 inch between cookies. Bake for 8-10 minutes or until edges turn lightly golden brown and centers are no longer doughy.

Jenny’s Notes:

  • you can make flaxmeal at home by simply processing some flaxseeds in a coffee or spice grinder.

  • olive oil has a rather strong taste so if you prefer to avoid that, try going with the coconut oil option or even a neutral oil like peanut oil.

  • 3 egg whites can be substituted for the 2 eggs for cholesterol-conscience people.

healthy, nutritious, cookies, gluten-free, dairy-free, refined sugar-free, dried fruit, apple, fall spices, oats, nuts, coconut, portable
breakfast, dessert, snack
American
Yield: 12-16 cookies
Author:

Jeannie's Breakfast Cookies

Healthy cookies packed with nutritious ingredients that make for a great breakfast or anytime snack. Dairy-free, refined sugar-free, and can easily be made gluten-free.
prep time: 20 Mcook time: 10 Mtotal time: 30 M

ingredients:

  • 1/2 cup / 112g olive oil or coconut oil
  • generous 1/3 cup / 120g maple syrup or honey
  • 2 eggs
  • 1 tsp vanilla extract
  • 1 cup / 120g all-purpose or whole wheat flour
  • 1 1/2 cups / 135g rolled oats
  • 1/2 cup / 90g flaxmeal
  • 1/2 tsp baking soda
  • 1/2 tsp salt
  • 1/8 tsp cinnamon
  • 3/4 cup / 105g nuts, roughly chopped
  • 1/2 apple, diced
  • 1/4 cup / 50g dried fruit, chopped if necessary

instructions:

How to cook Jeannie's Breakfast Cookies

  1. Oven 375°F / 190°C. Baking sheet lined with silpat or parchment paper.
  2. In a large bowl combine wet ingredients: oil, maple syrup, eggs, and vanilla; beat with a spoon until smooth.
  3. In another medium bowl whisk together dry ingredients: flour, oats, flaxmeal, baking soda, salt, and cinnamon.
  4. Add dry ingredients, nuts, apple, and dried fruit to wet ingredients, mix until well combined.
  5. Spoon generous tablespoons of dough onto prepared baking sheet and flatten slightly as they won’t spread much, leaving at least 1 inch between cookies. Bake for 8-10 minutes or until edges turn lightly golden brown and centers are no longer doughy.

NOTES:

you can make flaxmeal at home by simply processing some flaxseeds in a coffee or spice grinder. olive oil has a rather strong taste so if you prefer to avoid that, try going with the coconut oil option or even a neutral oil like peanut oil. 3 egg whites can be substituted for the 2 eggs for cholesterol-conscience people.

Calories

265.40

Fat (grams)

15.87

Sat. Fat (grams)

2.49

Carbs (grams)

27.23

Fiber (grams)

3.34

Net carbs

23.89

Sugar (grams)

9.53

Protein (grams)

5.72

Sodium (milligrams)

188.36

Cholesterol (grams)

31.00
Nutritional information is approximate and based on 12 servings.
Created using The Recipes Generator
2019-02-17+15.36.02.jpg

Tzatziki Cucumber Salad

IMG_0863.jpg

This post may contain affiliate links. If you make a purchase using these links, Jennyblogs may receive a small commission, at no extra cost to you. This helps to support Jennyblogs. For further information see the privacy policy. Grazie!

Fresh, cool, crunchy, creamy, and delicious Tzatziki, which is basically a Greek cucumber salad made with thick, strained yogurt, and seasoned with dill and garlic. Uh, yum, right? If you’ve ever had tzatziki, you know what I’m talking about!

It’s funny because I’ve known about tzatziki for a long time, enjoying it at restaurants and such, that wonderful Greek yogurt sauce dip wonder. I’ve seen several cucumber salad recipes around this summer on some of my favorite recipe sites like foodgawker; German cucumber salads, normal cucumber salads, and others. It got me hungry, so I decided to make my own. And let me tell you, I got right on it because zero cooking or baking in a recipe is a wonderful thing when the summer here in Florence has been between 90-106°F / 32-41°C since June.

I noticed most of the recipes I came across used sour cream, but I used plain greek yogurt because it’s more nutritious. Once I found a nice balance between the flavors, I wrote down the recipe and decided to share it with you guys! Then I recalled that tzatziki has very similar flavors, and although I’ve never made it nor even looked up a recipe, my curiosity got the best of me to see just how similar they would be. What do you know, I basically made tzatziki and didn’t even know it! So much for making an original recipe, haha!

So what I’m sharing with you today is my accidental take on tzatziki, similarly enough to be called so, but not THE original. If you make the changes listed below, however, you can have yourself a delicious and authentic Greek tzatziki!

What are the differences from a traditional tzatziki and the one you see below?

  • The cucumber is usually grated and drained (either by squeezing or letting sit in cheese cloth over a bowl overnight) instead of sliced. I also use more cucumber to make a creamy salad rather than a dip that features cucumber. if you want to make real tzatziki, use a half of a large cucumber or a smallish one.

  • Traditional would have more yogurt so again, more of a sauce or dip rather than a salad. For real tzatziki, double the yogurt to 1 1/2 cups / 340g.

  • For the acidic element, I used lemon juice, but vinegar of some sort is usually called for. I’ve read in Greece they most often use red wine vinegar.

  • I added more fresh dill! Because I love dill. If you think about it, this is like a creamy dill pickle dip. It has the cucumbers, the garlic, the dill….no wonder I like it so well! For original tzatziki, use about 1 Tbsp chopped.

If you eliminate the cucumbers (or shred them like the traditional way), it makes an excellent and much healthier alternative to most veggie dips. I might even like it better than Ranch!


Tzatziki Cucumber Salad

Serves about 2

IMG_0852.jpg

Ingredients:

  • 3/4 cup / 170g plain greek yogurt or vegan yogurt

  • generous 2 Tbsp chopped fresh dill

  • 2 tsp / 10g lemon juice

  • 2 garlic cloves, minced, or 1/4 tsp garlic powder

  • salt and pepper, to taste

  • 1 large cucumber, chopped with skin/seeds removed as desired

  • extra virgin olive oil, for drizzling, optional

Directions:

  1. In a medium bowl combine yogurt, dill, lemon juice, garlic powder, salt and pepper.

  2. If serving immediately, add cucumber and stir to coat; drizzle with olive oil. Otherwise, refrigerate until ready to serve, adding cucumber and drizzling with oil at the last minute.

Jenny’s Notes:

  • For optimal creaminess, I would use full fat greek yogurt. If you are vegan or dairy-free, use a thick/Greek dairy-free yogurt alternative!

  • In an ideal world the dressing would be made a day ahead of time and the cucumber added just before serving. This helps the flavors meld together and cuts the sharpness of the garlic a bit, without the cucumber sitting in the dressing for a day and losing its liquid. However, this makes a great last minute dish and it tastes just fine if eaten right away!

vegan, vegetarian, dairy-free, gluten-free, veggie dip, cucumber, garlic, fresh dill, Greek yogurt, Ranch substitute
Side dish, lunch, sauces and condiments
Greek
Yield: 2
Author:

Tzatziki Cucumber Salad

Creamy salad form of the classic Tzatziki sauce: Cucumbers, Greek yogurt, lemon juice, garlic, and fresh dill.
prep time: 10 Mcook time: total time: 10 M

ingredients:

  • 3/4 cup / 170g plain greek yogurt or vegan yogurt
  • generous 2 Tbsp chopped fresh dill
  • 2 tsp / 10g lemon juice
  • 2 garlic cloves, minced, or 1/4 tsp garlic powder
  • salt and pepper, to taste
  • 1 large cucumber, chopped with skin/seeds removed as desired
  • extra virgin olive oil, for drizzling, optional

instructions:

How to cook Tzatziki Cucumber Salad

  1. In a medium bowl combine yogurt, dill, lemon juice, garlic powder, salt and pepper.
  2. If serving immediately, add cucumber and stir to coat; drizzle with olive oil. Otherwise, refrigerate until ready to serve, adding cucumber and drizzling with oil at the last minute.

NOTES:

For optimal creaminess, I would use full fat greek yogurt. If you are vegan or dairy-free, use a thick/Greek dairy-free yogurt alternative! In an ideal world the dressing would be made a day ahead of time and the cucumber added just before serving. This helps the flavors meld together and cuts the sharpness of the garlic a bit, without the cucumber sitting in the dressing for a day and losing its liquid. However, this makes a great last minute dish and it tastes just fine if eaten right away!

Calories

123.72

Fat (grams)

7.21

Sat. Fat (grams)

1.05

Carbs (grams)

5.89

Fiber (grams)

0.61

Net carbs

5.28

Sugar (grams)

3.78

Protein (grams)

9.30

Sodium (milligrams)

181.86

Cholesterol (grams)

4.25
Nutritional information is approximate.
Created using The Recipes Generator
IMG_0856.jpg

Roasted Red Pepper and Goat Cheese Pasta

IMG_1023.jpg

This post contains affiliate links. If you buy something using these links, Jennyblogs may receive a small commission, at no extra cost to you. This helps to support Jennyblogs. For further information see the privacy policy. Grazie!

July pasta month is over and I find I still have pasta dishes I want to share with you! Like this Roasted Red Pepper and Goat Cheese Pasta with toasted walnuts.

Several years ago I went through a phase where I wanted everything roasted red pepper. I’m not sure if that was an actual thing in the culinary world, or it just happened to be the first time that roasted red pepper really came to my attention, and thus started noticing and wanting all things roasted red pepper. Pastas and dips, sandwiches and wraps, and anything you could incorporate roasted red peppers into. That smoky, sweet flavor you get from grilling the red peppers was this elusive, elegant flavor profile because I didn’t know how it was made.

Then I found a recipe for roasted red pepper sauce, made it, and was floored by how NOT elusive it is. It’s so attainable. I even grilled my own peppers instead of going for the much easier option of buying a jar of roasted red peppers at the store. And you know what? Even grilling the peppers and peeling off the blackened skin wasn’t nearly as hard as I imagined it all to be. Sometimes those mountains we build in our heads are much more scalable than we make them out to be, even if that’s just learning how to make a dish you really like, as in this example, harhar. Or you come to realize it’s WAY more difficult than you ever imagined, and you were right to wait. Aha!

This was not meant to turn into a inspirational post, back to food.

It’s been a while since I’ve eaten roasted red pepper anything, definitely not much of a thing here in Italy. But I decided, while being inspired and eating so much pasta in the month of July, to make my own little twist of a roasted red pepper sauce. And it turned out really great! Amazing! Delizioso! As I stated above, however, it’s really not rocket science to make, so I should probably calm down. Adding goat cheese and toasted walnuts are no new pairing to goat cheese, but remain such a good combination. Never had nuts on your pasta? At least not that you’re aware of? Don’t knock it until you’ve tried it! Unless you have a nut allergy, then please don’t. (You’ve probably eaten basil pesto on pasta, yes? Pesto is made from pine nuts traditionally, and often walnuts when pine nuts are not available or too expensive. See? You love nuts on pasta and didn’t even know!)

The great thing is, the roasted red pepper sauce actually makes enough for two meals, and freezes well. The next time you want roasted red pepper pasta, just thaw the sauce and boil the pasta. So easy peasy.

For extra easy-ness, you can buy a jar of roasted red peppers or grill them yourself, completely up to you.

Are you vegan or dairy-free? Simply omit the goat cheese or substitute a vegan-friendly cheese!


Roasted Red Pepper and Goat Cheese Pasta

IMG_1026.jpg

Serves about 6

Ingredients:

  • 16 oz / 500g spaghetti

  • 2 Tbsp / 28g oil

  • 1/2 onion, diced

  • 4 garlic cloves, minced

  • 16 oz / 454g jar roasted red peppers, drained and sliced

  • 1 Tbsp fresh chopped thyme

  • 1/2 tsp / 1g chili powder

  • 1/2 tsp / 1g turmeric

  • 1 tsp / 5g balsamic vinegar

  • salt and pepper, to taste

  • 3 oz / 85g fresh goat cheese, cut into pieces, optional

  • 1/3 cup / 30g walnuts, chopped and toasted, optional

Directions:

  1. Bring a large pot of water to boil over high heat, adding salt just before water boils. Cook pasta according to instructions on package. Drain pasta and return to pan, reserving a generous 1 cup / 237g of pasta water.

  2. While the pasta is cooking, heat oil in a medium pan over medium heat. Add onion and cook until it begins to soften, about 2-3 minutes. Add garlic and cook for another 1-2 minutes, until fragrant.

  3. Add sliced peppers, thyme, chili powder, turmeric, balsamic vinegar, salt and pepper. Cook until peppers are heated through.

  4. Transfer all of the pepper mixture to a blender and puree until smooth.

  5. Pour half of the roasted red pepper sauce over the pasta and add a bit of the pasta water. Add goat cheese and toss until pasta is well coated and cheese has melted, adding more pasta water to thin out sauce as desired. For a saucier pasta, add remaining half of sauce, otherwise refrigerate remaining sauce for up to 2-3 days or freeze for future use.

  6. Plate pasta and top with toasted walnuts.

Jenny’s Notes:

  • To roast red peppers yourself, place whole on a heated grill or near an open flame, turning occasionally, until all sides are blistered and start to blacken. You can also roast them on a lined baking sheet in the oven for 30-45 minutes, or very carefully over a gas burner. Once done, place in covered pot, bowl, or re-sealable plastic, anything you can close, to let the peppers steam for about 20-30 minutes. This helps the skin to slip off easily. Then remove stems and seeds, and slice. Proceed as in recipe.

  • If you don’t have fresh thyme available, substitute about a scant teaspoon of dried.

  • Add more chili powder, cayenne, or hot spice of choice for a spicier kick!

  • If you’re in a pinch you don’t have to toast the walnuts, although you miss out on that tasty flavor that comes out of the nut only by toasting. But it will still be delicious!

  • Omit goat cheese or replace with suitable substitute to make vegan and dairy-free.

roasted red pepper, red pepper, thyme, turmeric, garlic, onion, goat cheese, toasted walnuts, pasta, recipe, vegan, vegetarian, dairy-free
Dinner, pasta
American
Yield: 6-8 servings
Author:
Roasted Red Pepper and Goat Cheese Pasta

Roasted Red Pepper and Goat Cheese Pasta

Pasta in a smoky, sweet, roasted red pepper sauce with goat cheese and toasted walnuts.
Prep time: 30 MinTotal time: 30 Min

Ingredients

Instructions

  1. Bring a large pot of water to boil over high heat, adding salt just before water boils. Cook pasta according to instructions on package. Drain pasta and return to pan, reserving a generous 1 cup / 237g of pasta water.
  2. While the pasta is cooking, heat oil in a medium pan over medium heat. Add onion and cook until it begins to soften, about 2-3 minutes. Add garlic and cook for another 1-2 minutes, until fragrant.
  3. Add sliced peppers, thyme, chili powder, turmeric, balsamic vinegar, salt and pepper. Cook until peppers are heated through.
  4. Transfer all of the pepper mixture to a blender and puree until smooth.
  5. Pour half of roasted red pepper sauce over pasta and add a bit of pasta water. Add goat cheese and toss until pasta is well coated and cheese has melted, adding more pasta water to thin out sauce as desired. For a saucier pasta, add remaining half of sauce, otherwise refrigerate remaining sauce for up to 2-3 days or freeze for future use.
  6. Plate pasta and top with toasted walnuts.

Notes

To roast red peppers yourself, place whole on a heated grill or near an open flame, turning occasionally, until all sides are blistered and start to blacken. You can also roast them on a lined baking sheet in the oven for 30-45 minutes, or very carefully over a gas burner. Once done, place in covered pot, bowl, or re-sealable plastic, anything you can close, to let the peppers steam for about 20-30 minutes. This helps the skin to slip off easily. Then remove stems and seeds, and slice. Proceed as in recipe. If you don’t have fresh thyme available, substitute about a scant teaspoon of dried. Add more chili powder, cayenne, or hot spice of choice for a spicier kick! If you’re in a pinch you don’t have to toast the walnuts, although you miss out on that tasty flavor that comes out of the nut only by toasting. But it will still be delicious! Omit goat cheese or replace with suitable substitute to make vegan and dairy-free.

Nutrition Facts

Calories

425.16

Fat

13.36 g

Sat. Fat

3.05 g

Carbs

62.47 g

Fiber

4.25 g

Net carbs

58.23 g

Sugar

2.89 g

Protein

14.43 g

Sodium

1128.86 mg

Cholesterol

6.52 mg

Nutritional information is approximate. Based on 6 servings and includes goat cheese and walnuts.

Did you make this recipe?
Tag @jennyblogsandbakes on instagram and hashtag it # jennyblogs
Now we’re being more honest about a real portion size! :)

Now we’re being more honest about a real portion size! :)


Chia Persimmon Pudding (Vegan)

This post contains affiliate links. If you buy something using these links, Jennyblogs may receive a small commission, at no extra cost to you. This helps to support Jennyblogs. For further information see the privacy policy. Grazie!

I had never eaten a persimmon before living in Italy.  I probably couldn't have even picked it out from a line up of fruit.  But if you asked me, of course I would want to try a persimmon!  I had heard good things about them, especially the elusive "persimmon pudding."  

I used to go the market several times a week for my fruit and vegetables, one of my favorite weekly errands.  It was a large market, the ground floor of the Mercato Centrale if you’ve been there, with lots of vendors, but there was this dear old man that always had the best tomatoes and lettuce.  He would say "Ciao, bella," shake my hand, and always round the price down for me.  He also had this habit of sneaking in a fruit or vegetable that I hadn't ordered.  Whether that was a sweet gesture or a marketing strategy, I may never know.  One day, after getting my usual tomatoes, I arrived home to find this strange object that looked curiously like an orange tomato, but was most definitely not.  So....squishy and lacking that earthy, pungent, tomato vine smell.  After a little research, I found I had in my possession a kaki!  Okay, now what is a kaki?  

After a little more research, I found that kaki is what the Italians call persimmons. Sweet, mysterious persimmons.  Now...how to eat it?  I quickly realized they are like jelly on the inside when ripe, and it's only the skin that holds it together.  If that skin breaks, you have a real mess if you weren't prepared with a bowl or your mouth beneath it.  I ate that first one in hurry, before it all dripped from my hands onto the floor. 

From then on I bought them in packs and beautiful things happened, including various versions of persimmon pudding.  Below is a raw and vegan version of the Persimmon Pudding.  Makes for a great dessert, snack, or breakfast!  Kaki on.  

Recipe adapted from Blissful Basil.


*Note: Make the Chia Pudding the day before you want to eat the pudding, as it takes at least 8 hours to set up.  

Chia Persimmon Pudding

Serves 4

Ingredients:

For the Chia Pudding Layer

  • 2 cups / 474g unsweetened coconut milk or milk of choice

  • generous 1/2 cup / 90g chia seeds

  • 3 Tbsp / 60g maple syrup or honey

  • 2 tsp / 9g vanilla extract

  • 1/2 tsp / 1g cinnamon

  • pinch of cardamom

For the Persimmon Pudding Layer

  • 3 ripe persimmons

  • 1/4 tsp cinnamon

Directions:

You’ll need 4 small (about 12 oz), clear glasses or bowls.

Make the Chia Pudding

  1. In a medium bowl whisk together milk, chia seeds, maple syrup, vanilla, cinnamon, and cardamom.  

  2. Cover and refrigerate overnight or at least 8 hours.  

Make the Persimmon Pudding

  1. Remove the stems from the persimmons and place in a food processor or blender.  Add the cinnamon and blend until smooth.  

  2. Spoon about scant 1/4 cup Persimmon Pudding into the bottom of each glass.  Top with a scant 1/4 cup Chia Pudding.  Repeat layers until both puddings are gone.  Should make three layers of each, or 6 layers total in each glass. Top with additional cinnamon, if desired.

Jenny's Notes:

  • You'll want your persimmons to be very ripe and very soft all the way through; they should be bursting when you try to remove the stems.

  • Persimmons are a great source of vitamin A, vitamin C, and high in fiber.  

vegan, raw, no bake, chia pudding, persimmon pudding, dairy free, gluten free, refined sugar free
dessert, pudding
American
Yield: 4
Author: Jennyblogs
Print
Chia Persimmon Pudding (Vegan)

Chia Persimmon Pudding (Vegan)

Layers of spiced coconut milk chia pudding and juicy persimmons are a simple, vegan, dairy-free, gluten, raw, etc. dessert, breakfast, or snack.
Prep time: 15 Mininactive time: 8 HourTotal time: 8 H & 15 M

Ingredients:

For the Chia Pudding Layer
  • 2 cups / 474g unsweetened coconut milk or milk of choice
  • generous 1/2 cup / 90g chia seeds
  • 3 Tbsp / 60g maple syrup or honey
  • 2 tsp / 9g vanilla extract
  • 1/2 tsp / 1g cinnamon
  • pinch of cardamom
For the Persimmon Pudding Layer
  • 3 ripe persimmons
  • 1/4 tsp cinnamon

Instructions:

Make the Chia Pudding
  1. *Note: Make the Chia Pudding the day before you want to eat the pudding, as it takes at least 8 hours to set up. 
  2. In a medium bowl whisk together milk, chia seeds, maple syrup, vanilla, cinnamon, and cardamom.
  3. Cover and refrigerate overnight or at least 8 hours.
Make the Persimmon Pudding
  1. You’ll need 4 small (about 12 oz), clear glasses or bowls.
  2. Remove the stems from the persimmons and place in a food processor or blender. Add the cinnamon and blend until smooth.
  3. Spoon about scant 1/4 cup Persimmon Pudding into the bottom of each glass. Top with a scant 1/4 cup Chia Pudding. Repeat layers until both puddings are gone. Should make three layers of each, or 6 layers total in each glass. Top with additional cinnamon, if desired.

Notes:

You'll want your persimmons to be very ripe and very soft all the way through; they should be bursting when you try to remove the stems.

Calories

266.73

Fat (grams)

9.61

Sat. Fat (grams)

2.90

Carbs (grams)

43.72

Fiber (grams)

12.46

Net carbs

35.76

Sugar (grams)

25.11

Protein (grams)

4.73

Sodium (milligrams)

12.43

Cholesterol (grams)

0.00
Nutritional information is approximate.
Did you make this recipe?
Tag @jennyblogsandbakes on instagram and hashtag it #jennyblogs
Created using The Recipes Generator

Enjoy your Kaki Pudding!

Homemade Marzipan

Marzipan!  That weird almond dessert that no one seems to really talk about in America, but people rave about in Europe.  It really should catch on in the US, because:

  1. It tastes like almonds and is delicious

  2. It's easy to make

  3. It's fun to work with and versatile

 It can be used as filling or toppings of baked goods, and it can also be colored and molded into shapes or rolled out and used to cover cakes in a fondant fashion.   Fondant has it's place, but I would rather eat a marzipan covered cake any day over a fondant cake.  

marzipan.jpg

You may have seen almond paste sold in stores, and although almond paste and marzipan are made from the same ingredients, they are not usually equal.  This depends on what part of the world you call home.  In many European countries the terms marzipan and almond paste are interchangeable, in other parts, such as the US, they are different products.  If they are different, for example in the US, marzipan is smoother, sweeter, made with egg whites and sometimes rose water, whereas almond pasted is less sweet and has a coarser texture.  When I first started dabbling in marzipan, I used almond paste as a base to make marzipan, but now I prefer to make it from scratch.

It's so simple, as you can see for yourself!

This post may contains affiliate links. If you buy something using these links, Jennyblogs may receive a small commission, at no extra cost to you. This helps to support Jennyblogs. For further information see the privacy policy. Grazie!

Recipe adapted from La Cuochina Sopraffina


Marzipan

Makes about 280g of marzipan, or about 10 oz. 

Ingredients:

  • 125g / 1 1/3 cup almond flour or almonds

  • 125g / 1 cup powdered sugar

  • 1 egg white (about 30g)

  • 6 drops almond extract

  • 3 drops rose water, optional

Directions:

  1. If using whole almonds, place in a food processor and process until finely ground.   

  2. Process almond flour, powdered sugar, egg white, almond extract, and rose water until a thick dough forms.  If the consistency is too thin, add more powdered sugar.  

  3. Turn marzipan out onto a surface lightly dusted with powdered sugar, knead for a few seconds.  Wrap tightly in plastic wrap and refrigerate until needed, or freeze.  

Jenny's Notes:

  • This recipe is very simple to adjust to the amount you need, especially if you scale/weigh your ingredients.  As you may have noticed, the almond flour to powdered sugar is a 1:1 ratio.  

  • If you are worried about eating or serving raw egg whites, be sure to buy pasteurized egg whites from the store.   

marzipan, almond paste, European sweets, marzipan fruit, fondant, gluten-free, dairy-free, raw
Yield: 10
Author:
Homemade Marzipan

Homemade Marzipan

Marzipan is a versatile and tasty European almond sweet, often paired with chocolate, molded into fruit shapes, or used to cover cakes in place of fondant. Gluten and dairy free.
Prep time: 10 MCook time: Total time: 10 M

Ingredients:

  • 125g / 1 1/3 cup almond flour or almonds
  • 125g / 1 cup powdered sugar
  • 1 egg white (about 30g)
  • 6 drops almond extract
  • 3 drops rose water, optional

Instructions:

  1. If using whole almonds, place in a food processor and process until finely ground.
  2. Process almond flour, powdered sugar, egg white, almond extract, and rose water until a thick dough forms. If the consistency is too thin, add more powdered sugar.
  3. Turn marzipan out onto a surface lightly dusted with powdered sugar, knead for a few seconds. Wrap tightly in plastic wrap and refrigerate until needed, or freeze.

Notes:

This recipe is very simple to adjust to the amount you need, especially if you scale/weigh your ingredients. As you may have noticed, the almond flour to powdered sugar is a 1:1 ratio. If you are worried about eating or serving raw egg whites, be sure to buy pasteurized egg whites from the store.

Calories

131.15

Fat (grams)

7.44

Sat. Fat (grams)

0.57

Carbs (grams)

14.21

Fiber (grams)

1.86

Net carbs

12.35

Sugar (grams)

11.43

Protein (grams)

3.51

Sodium (milligrams)

6.80

Cholesterol (grams)

0.00
Nutritional information is approximate. Based on 10 servings.
Did you make this recipe?
Tag @jenevamorris on instagram and hashtag it #jennyblogs
Created using The Recipes Generator

Quinoa Coconut Date Rolls

IMG_4728.jpg

These little morsels are so named because they are rolled, and no, these will not get you a date nor would I suggest bringing them on a first date.  Not because these aren't scrummy (that’s scrumptious and yummy combined), but because "healthy" baking should always be treated warily.  You must already have a well established relationship with that person, preferably have treated them to some normal sugary delicious desserts so that they understand that you understand what a dessert "should" be, and can trust your taste buds when you then try to sell them on your spinach-spirolina-turmeric-kale-ginger-wasabi-moringa bars that are also dairy-free and refined-sugar free.  Whew, I'm out of breath.  But that relationship is important.  So if I've never eaten anything that you've made before, know that I might distrust you at first, in the most genial way possible.  And you should distrust me, until I gain your trust.  

Also understand what your taste preferences are, and if you don't like healthy desserts, well then, may I ask why are you reading this particular recipe? May I kindly redirect you to this decadent Peanut Butter Brownie Trifle?  Or if you don't like dates, we might have a problem.  But if you like healthy desserts, or are exploring in this arena, then you probably know what you're getting yourself into.  The quinoa provides protein and grains, the almonds provide good fats and more protein, while the dates give sweetness and carbs and coconut brings flavor to the party. 

So now, using your own best judgment, allow me to introduce my friends, the Quinoa Coconut Date Rolls.

This post may contain affiliate links. If you buy something using these links, Jennyblogs may receive a small commission, at no extra cost to you. This helps to support Jennyblogs. For further information see the privacy policy. Grazie!

Recipe adapted from Skinny Ms.


Quinoa Coconut Date Rolls

Makes about 10-12 rolls

Ingredients:

  • 1/3 cup / 60g dry quinoa

  • 2/3 cup / 158g water

  • 1 cup / 160g pitted dates

  • 1/2 cup / 70g almonds

  • 1/3 cup / 33g grated unsweetened coconut, plus more for rolling

  • 2-3 tsp / 10-15g water

  • 1/4 cup / 42g chocolate chips, optional

Directions:

  1. Combine quinoa and water in a small saucepan over medium heat.  Bring to a boil and reduce heat.  Cover and simmer for 10-15 minutes, until all the water is absorbed.  Set aside to cool completely.  If you already have quinoa made, you'll need about 1 cup.  

  2. Place dates in a food processor and blend until they stick together in a ball.  Add the almonds, coconut, and quinoa; pulse until well combined.  Add water, if necessary, until the mixture holds together.  Shape into balls or roll.  Place extra coconut on a plate and roll the rolls around until completely covered in coconut.  

  3. *Optional:  Heat chocolate chips over a double boiler or in the microwave for 30 second bursts, until melted.  Drizzle chocolate over rolls.

  4. Store in an airtight container for up to a week, or freeze.  

Jenny's Notes:

  • For a chunkier roll, process for a shorter period of time.  

  • These rolls are also delicious if you add a 1/2 tsp of cinnamon. They could become autumnal if you add cinnamon along with a dash of nutmeg, cloves, and ginger. Yum!  

quinoa, coconut, almonds, gluten-free, vegan, dairy-free, refined sugar-free, vegetarian, healthy, nutritious, clean eating, egg-free
snack, breakfast
American
Yield: 10-12 rolls
Author: Jennyblogs
Print
Quinoa Coconut Date Rolls (Vegan)

Quinoa Coconut Date Rolls (Vegan)

Nutritious Lara-bar like rolls made with quinoa, dates, coconut, and almonds with optional chocolate drizzle. Great for breakfast, snacks, on the go, and after workouts!
Prep time: 25 MinCook time: 15 MinTotal time: 40 Min

Ingredients

  • 1/3 cup / 60g dry quinoa
  • 2/3 cup / 158g water
  • 1 cup / 160g pitted dates
  • 1/2 cup / 70g almonds
  • 1/3 cup / 33g grated unsweetened coconut, plus more for rolling
  • 2-3 tsp / 10-15g water
  • 1/4 cup / 42g chocolate chips, optional

Instructions

  1. Combine quinoa and water in a small saucepan over medium heat. Bring to a boil and reduce heat. Cover and simmer for 10-15 minutes, until all the water is absorbed. Set aside to cool completely. If you already have quinoa made, you'll need about 1 cup.
  2. Place dates in a food processor and blend until they stick together in a ball. Add the almonds, coconut, and quinoa; pulse until well combined. Add water, if necessary, until the mixture holds together. Shape into balls or roll. Place extra coconut on a plate and roll the rolls around until completely covered in coconut.
  3. *Optional: Heat chocolate chips over a double boiler or in the microwave for 30 second bursts, until melted. Drizzle chocolate over rolls.
  4. Store in an airtight container for up to a week, or freeze.

Notes:

For a chunkier roll, process for a shorter period of time. These rolls are also delicious if you add a 1/2 tsp of cinnamon. They could become autumnal if you add cinnamon along with a dash of nutmeg, cloves, and ginger. Yum!

Calories

151.00

Fat (grams)

7.49

Sat. Fat (grams)

2.97

Carbs (grams)

20.79

Fiber (grams)

3.25

Net carbs

17.54

Sugar (grams)

13.01

Protein (grams)

3.11

Sodium (milligrams)

37.86

Cholesterol (grams)

0.00
Nutritional information is approximate. Based on 10 servings and includes chocolate drizzle.
Did you make this recipe?
Tag @jennyblogsandbakes on instagram and hashtag it #jennyblogs
Created using The Recipes Generator

Healthy Chocolate Chip Cookie Pie

image.jpg

Some people are adverse to the word healthy when it comes to desserts.  This recipe today is to help you see you don't need to be one of those people. 

Oh, but what I would give to have a little slice of this pie right now, healthy or not!  Actually, I wouldn't give much.  But that doesn't mean I don't want it.  Yes, Whole30January is still happening.  It has gotten easier in recent days...but you can ask my mom, who is doing it with me, if that's a true statement.  So here is yet another recipe you can make and eat in my stead.  Please, for my sanity.  Just don't tell me how delicious it is.  I like to ask the people around me who are eating delicious nonWhole30food to tell me how disgusting it is.  It almost makes me feel better.  Won't you be glad when Whole30January is over so you won't have to hear any more of my sardonic complaining? 

What do I mean when I say healthy? I mean, aside from the chocolate chips (which have some health benefits in and of themselves aside from the sugar), that you could eat this for breakfast, lunch, or dinner.

This recipe is naturally gluten-free, vegan, dairy-free, and nut free. Just keep in mind you may need to use certified ingredients, i.e. certified GF oats (even though oats are a gluten-free food, they are almost always processed in facilities that also process foods that contain gluten, and there is a high risk of cross-contamination) and check your other ingredients for stowaway unwanted allergens! Chocolate chips, as long as they are semi-sweet or dark chocolate, should not contain any dairy, yet I’ve seen brands that do contain dairy. Reading labels is very important for so many reasons!

Yes ok, on to this nutritious pie that somehow tastes like dessert!

This post may contain affiliate links. If you buy something using these links, Jennyblogs may receive a small commission, at no extra cost to you. This helps to support Jennyblogs. For further information see the privacy policy. Grazie!

Recipe adapted from Chocolate Covered Katie


Healthy Chocolate Chip Cookie Pie

12-16 servings

Ingredients:

  • 2 15oz cans / 500g cooked white beans (navy, great northern, cannellini) or garbanzo beans, drained and rinsed

  • 1 cup / 90g oats or 180g ground flax seeds

  • 1/4 cup / 63g applesauce

  • 3 Tbsp / 42g oil

  • 2 tsp vanilla extract

  • 1/2 tsp baking soda

  • 2 tsp baking powder

  • 1/2 tsp salt

  • 1/2 cup / 100g brown sugar

  • 3 tsp stevia powder

  • 1 cup / 170g chocolate chips or chunks, plus more for sprinkling

Directions:

image.jpg

Oven 350°F / 177°C.  Greased 8 - 9in / 20 - 23cm pie dish.

  1. Combine all ingredients except chocolate chips in a food processor and blend until smooth.  Stir in chocolate chips. 

  2. Scrape dough into prepared pan and sprinkle with additional chocolate chips. 

  3. Bake in oven for 30-35 minutes.  Allow to cool before slicing and serving. 

Jenny's Notes:

  • If you don’t have applesauce, you can use oil instead. That means you would be adding a total of 7 Tbsp / 98g oil, or a scant half cup.

  • I adapted this recipe from Chocolate Covered Katie.  She is very good about giving lots of options if you are gluten-free, vegan, have a nut allergy, etc.  I simply narrowed it down to my favorite combination of ingredients from her options, and preferred amount of sweetener so that it tastes like dessert without giving in to your sugar dragon too much. 

  • Feel free to add more sugar if you feel the need! 

  • If for whatever reason your batter comes out too thick or thin, (didn't drain the beans as much, the applesauce brand you use is soupier, etc.) you can add more oats or flax to thicken, or applesauce, maple syrup, or milk to thin. 

vegan, dairy-free, gluten-free, nut-free, healthy, cookie pie,
dessert
American
Yield: 12-16
Author:
Healthy Chocolate Chip Cookie Pie

Healthy Chocolate Chip Cookie Pie

A healthy and somehow still delicious cookie pie that is gluten-free, dairy-free, nut-free, and vegan.
prep time: 15 Mcook time: 35 Mtotal time: 50 M

ingredients:

  • 2 15oz cans / 500g cooked white beans (navy, great northern, cannellini) or garbanzo beans, drained and rinsed
  • 1 cup / 90g oats or 180g ground flax seeds
  • 1/4 cup / 63g applesauce
  • 3 Tbsp / 42g oil
  • 2 tsp vanilla extract
  • 1/2 tsp baking soda
  • 2 tsp baking powder
  • 1/2 tsp salt
  • 1/2 cup / 100g brown sugar
  • 3 tsp stevia powder
  • 1 cup / 170g chocolate chips or chunks, plus more for sprinkling

instructions:

How to cook Healthy Chocolate Chip Cookie Pie

  1. Oven 350°F / 177°C. Greased 8 - 9in / 20 - 23cm pie dish.
  2. Combine all ingredients except chocolate chips in a food processor and blend until smooth. Stir in chocolate chips.
  3. Scrape dough into prepared pan and sprinkle with additional chocolate chips.
  4. Bake in oven for 30-35 minutes. Allow to cool before slicing and serving.

NOTES:

If you don’t have applesauce, you can use oil instead. That means you would be adding a total of 7 Tbsp / 98g oil, or a scant half cup. I adapted this recipe from Chocolate Covered Katie. She is very good about giving lots of options if you are gluten-free, vegan, have a nut allergy, etc. I simply narrowed it down to my favorite combination of ingredients from her options, and preferred amount of sweetener so that it tastes like dessert without giving in to your sugar dragon too much. Feel free to add more sugar if you feel the need! If for whatever reason your batter comes out too thick or thin, (didn't drain the beans as much, the applesauce brand you use is soupier, etc.) you can add more oats or flax to thicken, or applesauce, maple syrup, or milk to thin.

Calories

280.72

Fat (grams)

10.08

Sat. Fat (grams)

3.02

Carbs (grams)

44.03

Fiber (grams)

7.02

Net carbs

37.01

Sugar (grams)

20.13

Protein (grams)

7.85

Sodium (milligrams)

533.19

Cholesterol (grams)

0.00
Nutritional information is approximate. Based on 12 servings.
Did you make this recipe?
Tag @jenevamorris on instagram and hashtag it #jennyblogs
Created using The Recipes Generator
image.jpg

Pumpkin Spice Energy Bites

The great thing about these Pumpkin Spice Energy Bites is that they whip up so quick.  In less than 15 minutes you can have delicious morsels easy to grab for a snack, pack for a quick lunch, or take on long car rides.  They're so easy to make you might spend more time assembling the ingredients, or mis en place, than making them!

These little balls of energy are all about that pumpkin and spice and everything nice, and health and wealth with all of that schmealth.  Or something like that.  These will not make you rich.  Or give you schmealth.  I would never wish schmealth on anyone.  That sounds like some terrible disease.  Nor will these actually bite you.  You bite them.  Nom nom nom.

  Now if I would stop rambling you probably could've had them already made...Scusami.

This post may contain affiliate links. If you make a purchase using these links, Jennyblogs may receive a small commission, at no extra cost to you. This helps to support Jennyblogs. For further information see the privacy policy. Grazie!


Pumpkin Spice Energy Bites

Makes about 12-15 Bites

Ingredients:

    •    1 cup / 90g rolled oats
    •    1/4 cup / 45g ground flax seeds or wheat germ
    •    1 1/2 tsp cinnamon
    •    1/4 tsp cloves
    •    1/4 tsp ginger
    •    1/4 tsp nutmeg
    •    1/4 cup / 65g peanut butter
    •    1/4 cup / 60g pumpkin puree
    •    3 Tbsp / 60g maple syrup or honey
    •    1 tsp vanilla extract
    •    1/4 cup / 45g mini chocolate chips

Directions:

  1. In a medium bowl combine all ingredients; mix well.

  2. Roll mixture into approximately 1 inch balls.  Place in a container and store in the refrigerator, or freeze for snacking at a later date. 

Jenny's Notes:

  • With these types of recipes you do not have to be overly exact in your measurements.  If the dough seems too soft, simply add more oats or flax.  Too crumbly and you can add any number of things, honey, maple syrup, peanut butter...the choice is yours to personalize as you wish!

  • To make these energy bites vegan, be sure to use maple syrup instead of honey. For gluten-free energy bites, make sure your oats are certified gluten-free. For dairy-free, ensure your chocolate chips are dairy-free.

pumpkin spice, energy balls, vegan, gluten-free, dairy-free, fall recipe
snacks
American
Yield: 12-15
Author:
Pumpkin Spice Energy Bites

Pumpkin Spice Energy Bites

A quick and versatile snack, on the go breakfast, or dessert full of pumpkin and fall spice that is easily made vegan, gluten-free, and dairy-free.
prep time: 15 Mcook time: total time: 15 M

ingredients:

  • 1 cup / 90g rolled oats
  • 1/4 cup / 45g ground flax seeds or wheat germ
  • 1 1/2 tsp cinnamon
  • 1/4 tsp cloves
  • 1/4 tsp ginger
  • 1/4 tsp nutmeg
  • 1/4 cup / 65g peanut butter
  • 1/4 cup / 60g pumpkin puree
  • 3 Tbsp / 60g maple syrup or honey
  • 1 tsp vanilla extract
  • 1/4 cup / 45g mini chocolate chips

instructions:

How to cook Pumpkin Spice Energy Bites

  1. In a medium bowl combine all ingredients; mix well.
  2. Roll mixture into approximately 1 inch balls. Place in a container and store in the refrigerator, or freeze for snacking at a later date.

NOTES:

With these types of recipes you do not have to be overly exact in your measurements. If the dough seems too soft, simply add more oats or flax. Too crumbly and you can add any number of things, honey, maple syrup, peanut butter...the choice is yours to personalize as you wish! To make these energy bites vegan, be sure to use maple syrup instead of honey. For gluten-free energy bites, make sure your oats are certified gluten-free. For dairy-free, ensure your chocolate chips are dairy-free.

Calories

119.52

Fat (grams)

6.04

Sat. Fat (grams)

1.44

Carbs (grams)

14.60

Fiber (grams)

2.81

Net carbs

11.78

Sugar (grams)

5.77

Protein (grams)

3.37

Sodium (milligrams)

28.96

Cholesterol (grams)

0.00
Nutritional information is approximate. Based on 12 servings.
Did you make this recipe?
Tag @jenevamorris on instagram and hashtag it #jennyblogs
Created using The Recipes Generator

Now that didn't hurt, did it?  Happy snacking!

Scrumptious Apple Cake

One of the many things I love about Michigan is the diversity of seasons.  Autumn is no exception, with the leaves turning brilliant shades of red, orange, yellow, burgundy, green, and brown.  I love a brilliant brown, don't you?  It's just the prettiest.  I kid.

Back to how great Michigan and autumn is.  The dried cornstalks and gourds come out, decorating the fields and porches; pumpkins appear in all the stores, asking to be taken home and carved.  The air turns as crisp and refreshingly cool as the apples hanging on the trees in the orchards.  The cool, dewy mornings call for cozy sweaters, wool socks, warm scarves; the rainy afternoons make a crackling fire, a hot cup of apple cider, and a good book all but necessary.  Comforting squash soups and crusty breads, pumpkin pies and cinnamon rolls just out of the oven, and family nearby makes the dusk that comes sooner and sooner a welcome friend.  Autumn is wonderful, but Traverse City, Michigan, really is an idyllic place to experience it.   

Hannah, myself, and my mom apple picking

Hannah, myself, and my mom apple picking

We all know, the food of choice in autumn is pumpkin. 

So here is a recipe for Scrumptious Apple Cake.  Ha.  I just wanted to trick you into thinking this would be a recipe for something pumpkin. There will be plenty of pumpkin in the near future, but today I wanted to share with you this recipe, Scrumptious Apple Cake by my mamma. Yes, scrumptious is part of the title  It is not simply a scrumptious Apple Cake, it is a scrumptious Scrumptious Apple Cake. Trust her on this one.  

Now, if you have some fancy, two-tier frosted apple cake envisioned in your brain, erase that and think simple.  It's more like a moist bread.  9x13 pan.  I think I just felt some of you relax; "no cake tins?  Phew, 9x13 I can do..." and yes, it is so simple.  Did I mention scrumptious?   

The apples in this recipe are handpicked by my mom, Hannah, and yours truly.  Apple picking is one of the things I look forward to most in September, I recommend you find the nearest apple orchard and go!

This post may contain affiliate links. If you make a purchase using these links, Jennyblogs may receive a small commission, at no extra cost to you. This helps to support Jennyblogs. For further information see the privacy policy. Grazie!

Recipe from my mamma


Scrumptious Apple Cake

Serves 18-20

Ingredients:

For the Cake

  • 1 cup / 225g oil

  • 2 cups / 400g sugar

  • 2 eggs

  • 1 tsp vanilla extract

  • 3 cups peeled chopped apples, about 3 medium

  • 3 cups / 360g all-purpose flour

  • 1/2 tsp salt

  • 1 1/2 tsp baking soda

  • 1 tsp cinnamon

  • 1 tsp nutmeg

For the Cinnamon Topping

  • 1/4 cup / 50g sugar

  • 1 tsp cinnamon

Directions:

Oven 350°F / 177°C.  Greased 9x13in / 23x33cm pan. 

Make the Cake

  1. In a large bowl combine oil, sugar, eggs, and vanilla; beat.  Stir in chopped apples. 

  2. In a separate bowl whisk together flour, salt, baking soda, cinnamon, and nutmeg.  Add this mixture to first mixture and stir until combined.  Pour into prepared pan.

Make the Cinnamon Topping

  1. In a small bowl combine sugar and cinnamon.  Sprinkle evenly over batter in pan.

  2. Bake for 30-40 minutes or until toothpick inserted in the center comes out clean.  

Jenny's Notes:

  • My mom is very adverse to nuts in her desserts.  However, many people do enjoy nuts in their desserts, and if you do, a cup of chopped nuts added to the batter would do the trick.  You could also add about 1/2 cup chopped nuts to the topping.  *This note is not Jean-approved.  :)

Scrumptious Apple Cake
Yield 18-20
Author
Prep time
25 Min
Cook time
40 Min
Total time
1 H & 5 M

Scrumptious Apple Cake

A moist cake with apple chunks, a hint of nutmeg, and a gooey cinnamon sugar top.

Ingredients

For the Cake
For the Cinnamon Topping

Instructions

Make the Cake
  1. Oven 350°F / 177°C. Greased 9x13in / 23x33cm pan.
  2. In a large bowl combine oil, sugar, eggs, and vanilla; beat. Stir in chopped apples.
  3. In a separate bowl whisk together flour, salt, baking soda, cinnamon, and nutmeg. Add this mixture to first mixture and stir until combined. Pour into prepared pan.
Make the Cinnamon Topping
  1. In a small bowl combine sugar and cinnamon. Sprinkle evenly over batter in pan.
  2. Bake for 30-40 minutes or until toothpick inserted in the center comes out clean.

Notes

If you enjoy nuts in your desserts, a cup of chopped nuts added to the batter would do the trick. You could also add about 1/2 cup chopped nuts to the topping.

Nutrition Facts

Calories

299.52

Fat

13.26 g

Sat. Fat

1.03 g

Carbs

43.25 g

Fiber

1.16 g

Net carbs

42.09 g

Sugar

27.09 g

Protein

2.83 g

Sodium

178.26 mg

Cholesterol

20.67 mg

Nutritional information is approximate. Based on 18 servings.

quick bread, cinnamon sugar, apple cake, dessert, fall recipe, apple recipe
dessert
American
Did you make this recipe?
Tag @jennyblogsandbakes on instagram and hashtag it #jennyblogs
2016-09-25 14.09.03.jpg

Peanut Butter Energy Bites

What is energy, and why do these bites have so much?  I'm not about to give you a lesson in physics, I'll leave that to Iggy Azalea, but basically they are filled with good calories (energy) from the nutrients and natural sugar.  If there is the word energy in the title, it probably just means it's high calorie.  But if they were called Peanut Butter Calorie Bites, who would make them?  Calories get such a bad rap, poor things.  Calories, I can't liiive without yooooou!  Literally. (If you just sang that to the tune of "Without You" by Badfinger, congratulations. Me too.) 

So if you need a boost of energy or a quick pick-me-up, these are your friends.  Also great if you are about to expend a lot of energy, like going for a run or playing Twister, or after.  They are small but pack a punch, so they don't make you feel too full.  

This post may contain affiliate links. If you make a purchase using these links, Jennyblogs may receive a small commission, at no extra cost to you. This helps to support Jennyblogs. For further information see the privacy policy. Grazie!

Recipe adapted from Gimme Some Oven


Peanut Butter Energy Bites

Makes about 15 1-in. diameter balls

A mass of energy...

A mass of energy...

Ingredients:

  • 1 cup / 90g oats

  • 2/3 cup / 67g flaked or shredded coconut, unsweetened

  • 1/2 cup / 130g peanut butter

  • 1/2 cup wheat germ (50g), chia seeds (80g), or ground flax seed (90g)

  • 1/3 cup / 110g honey or maple syrup

  • 1 tsp / 5g vanilla extract

  • 1/2 cup / 85g mini chocolate chips

Directions:

  1. In a medium bowl, combine all ingredients.  If dough is too dry to form balls, add more honey or peanut butter; if they seem too sticky, add more oats or wheat germ. 

  2. Form into balls and store in the fridge or freezer for when you want a quick snack.

Jenny's Notes:

  • For vegan bites, be sure to use dairy-free chips and use maple syrup instead of honey.

  • For gluten-free bites, make sure your oats are certified gluten-free and use chia or flax seeds instead of wheat germ. 

  • You can get creative with these bites, substitute or add to the chocolate chips with your favorite dried fruit or nuts, or even types of cereal, such as grape-nuts, puffed rice, granola, etc.

peanut butter energy balls, chocolate chips, coconut, granola bar bites
Snacks
American
Yield: 15 Balls
Author: Jennyblogs
Print
Peanut Butter Energy Bites

Peanut Butter Energy Bites

All the goodness of granola bars in an easier, rolled form. Packed with energy and nutrients, these peanut butter, coconut, chocolate chip energy bites are perfect for a quick snack or pick-me-up.
Prep time: 15 MCook time: Total time: 15 M

Ingredients:

  • 1 cup / 90g oats
  • 2/3 cup / 67g flaked or shredded coconut, unsweetened
  • 1/2 cup / 130g peanut butter
  • 1/2 cup wheat germ (50g), chia seeds (80g), or ground flax seed (90g)
  • 1/3 cup / 110g honey or maple syrup
  • 1 tsp / 5g vanilla extract
  • 1/2 cup / 85g mini chocolate chips

Instructions:

  1. In a medium bowl, combine all ingredients. If dough is too dry to form balls, add more honey or peanut butter; if they seem too sticky, add more oats or wheat germ.
  2. Form into balls and store in the fridge or freezer for when you want a quick snack.

Notes:

For vegan bites, be sure to use dairy-free chips and use maple syrup instead of honey. For gluten-free bites, make sure your oats are certified gluten-free and use chia or flax seeds instead of wheat germ. You can get creative with these bites, substitute or add to the chocolate chips with your favorite dried fruit or nuts, or even types of cereal, such as grape-nuts, puffed rice, granola, etc.

Calories

167.43

Fat (grams)

9.64

Sat. Fat (grams)

4.52

Carbs (grams)

18.89

Fiber (grams)

2.68

Net carbs

16.21

Sugar (grams)

10.10

Protein (grams)

4.14

Sodium (milligrams)

44.67

Cholesterol (grams)

0.00
Nutritional information is approximate. Based on 15 servings.
Did you make this recipe?
Tag @jenevamorris on instagram and hashtag it #jennyblogs
Created using The Recipes Generator

No-Bake Pumpkin Date Bars

image.jpg

Happy Wednesday/Buon Mercoledì!! Still didn't quite make the "Baking Tuesday" but today I shall dub "Baking Wednesday."  And it shall be good.  And involve all things healthy disguised as dessert (did I just lose you? Don't go away just yet, I don't put gross food on my blog!), chocolate (there, now you'll stay), pumpkin, spice, and everything nice! Life is too short to eat and drink poorly.

"La vita è troppo breve per mangiare e bere male" - Eataly

These bars feature a creamy, pumpkin chocolate chip filling atop a wonderfully soft and chewy-sweet date crust. They can easily be made gluten-free, vegan, and dairy-free.  And you can eat them anytime for breakfast or a healthy snack (to be pronounced snaaaaaack with the Italian hand going) because there is no refined sugar (except from the chocolate chips), but there is protein from the beans, fiber from the oat flour and dates, antioxidants from the maple syrup and spices, and lots of vitamins and minerals from the pumpkin and above mentioned ingredients! 

You guys, this is such a win-win.  In fact, these bars might help you not die. 

That last claim is not backed by science. 

This post may contain affiliate links. If you make a purchase using these links, Jennyblogs may receive a small commission, at no extra cost to you. This helps to support Jennyblogs. For further information see the privacy policy. Grazie!

Adapted from Imma Eat That


No-Bake Pumpkin Date Bars

Serves about 9-12

image.jpg

Ingredients:

For the Date Crust

  • 1 cup / 160g packed pitted dates

  • 1 cup / 140g raw almonds

  • pinch of salt

For the Pumpkin Chocolate-Chip Filling

  • 1 15 oz can / 400g white beans, drained (navy beans, great northern, etc.)

  • 1 cup / 240g pumpkin purée

  • 1 cup / 100g oat flour

  • 1 1/2 tsp cinnamon

  • 1/4 tsp cloves

  • 1/4 tsp ginger

  • 1/4 tsp nutmeg

  • 1/4 tsp salt

  • 1/4 cup / 40g packed pitted dates

  • 5 Tbsp / 100g maple syrup or honey

  • 1 tsp / 5g vanilla extract

  • 2/3 cup / 113g semi-sweet mini chocolate chips, plus extra for topping

Directions:

Make the Date Crust

  1. In a food processor combine dates, almonds, and salt.  Pulse until the almonds are finely ground and everything comes together into a soft, crumbly dough that sticks together when pressed between your fingers.  If after a few minutes the crust doesn't come together, add a few more dates.

  2. Spread and press crust into a 8x8in / 20x20cm or 9x9in /23x23cm square pan.  Clean food processor, you are about to use it again.

Make the Pumpkin Chocolate-Chip Filling

  1. In the food processor, combine all the filling ingredients except for chocolate chips.  Blend until smooth.  Scrape filling into a bowl and stir in chocolate chips.  Spread over crust and top with more chocolate chips. 

  2. Cover and refrigerate for two hours before slicing and serving.  Of course, that's in an ideal world, if you just can't wait, it will be okay.  The center will just be softer.  (And I know this because...)

raw, vegan, dairy-free, egg-free, gluten-free, pumpkin bars, fall dessert, Thanksgiving
dessert, bars
American
Yield: 9-12
Author: Jennyblogs
Print
No-Bake Pumpkin Date Bars

No-Bake Pumpkin Date Bars

Raw Pumpkin Bars with an almond date crust topped with lightly sweetened pumpkin and chocolate chip filling. Vegan, Gluten-free, and dairy-free.
Prep time: 20 Mininactive time: 2 HourTotal time: 2 H & 20 M

Ingredients

For the Date Crust
  • 1 cup / 160g packed pitted dates
  • 1 cup / 140g raw almonds
  • pinch of salt
For the Pumpkin Chocolate-Chip Filling
  • 1 15 oz can / 400g white beans, drained (navy beans, great northern, etc.)
  • 1 cup / 240g pumpkin purée
  • 1 cup / 100g oat flour
  • 1 1/2 tsp cinnamon
  • 1/4 tsp cloves
  • 1/4 tsp ginger
  • 1/4 tsp nutmeg
  • 1/4 tsp salt
  • 1/4 cup / 40g packed pitted dates
  • 5 Tbsp / 100g maple syrup or honey
  • 1 tsp / 5g vanilla extract
  • 2/3 cup / 113g semi-sweet mini chocolate chips, plus extra for topping

Instructions

Make the Date Crust
  1. In a food processor combine dates, almonds, and salt. Pulse until the almonds are finely ground and everything comes together into a soft, crumbly dough that sticks together when pressed between your fingers. If after a few minutes the crust doesn't come together, add a few more dates.
  2. Spread and press crust into a 8x8in / 20x20cm or 9x9in /23x23cm square pan. Clean food processor, you are about to use it again.
Make the Pumpkin Chocolate-Chip Filling
  1. In the food processor, combine all the filling ingredients except for chocolate chips. Blend until smooth. Scrape filling into a bowl and stir in chocolate chips. Spread over crust and top with more chocolate chips.
  2. Cover and refrigerate for two hours before slicing and serving. 

Notes:

Vegan Version: Simply make sure your chocolate chips are vegan, as some brands contain dairy.

Gluten-free: Use certified gluten-free oats.

Dairy-free: Make sure your chocolate chips are dairy-free. 

  • Don't have oat flour? Make your own! Put the amount of oat flour you need of oats in a food processor or blender, plus a little extra, and blend until finely ground into flour! Tada.
  • If you like sweeter desserts, or are serving a crowd that isn't used to "healthy" desserts, you could always add up to an extra 1/2 cup / 100g or so of brown sugar to the filling.


Calories

360.82

Fat (grams)

12.91

Sat. Fat (grams)

3.10

Carbs (grams)

56.60

Fiber (grams)

9.02

Net carbs

47.58

Sugar (grams)

29.52

Protein (grams)

10.64

Sodium (milligrams)

24.38

Cholesterol (grams)

0.00
Nutritional information is approximate. Based on 9 servings.
Did you make this recipe?
Tag @jennyblogsandbakes on instagram and hashtag it #jennyblogs
Created using The Recipes Generator
image.jpg

Jenny's Notes:

Vegan Version: Simply make sure your chocolate chips are vegan, as some brands contain dairy.

Gluten-free: Use certified gluten-free oats.

Dairy-free: Make sure your chocolate chips are dairy-free.  Easy, no?

  • Don't have oat flour? Make your own! Put the amount of oat flour you need of oats in a food processor or blender, plus a little extra, and blend until finely ground into flour! Tada.

  • If you like sweeter desserts, or are serving a crowd that isn't used to "healthy" desserts, you could always add up to an extra 1/2 cup / 100g or so of brown sugar to the filling.

Maple syrup made by my dad, home-ground oat flour, dry beans, homemade vanilla extract

Maple syrup made by my dad, home-ground oat flour, dry beans, homemade vanilla extract


Healthy Chocolate Chip Banana Cookies

image.jpg

What has chocolate and oats in it, tastes like a cookie, but is sneakily nutritious for you?  These cookies!  Yay for things that taste good and are healthy simultaneously.  And don't forget fun to make!  So many wins, I want to make these all over again.  Instead, I shall have just as much fun writing out the recipe for you.

These cookies make an excellent on the go snack or breakfast. They’re easily gluten-free if you use certified GF oats, dairy-free (just make sure your chocolate chips don’t have any dairy hiding in them), and vegan if you use a flax or chia seed egg! See recipe notes for how to make a flax egg.

All of the sweetness in these cookies comes from dates and banana, with a boost from the chocolate chips.

This post may contain affiliate links. If you make a purchase using these links, Jennyblogs may receive a small commission, at no extra cost to you. This helps to support Jennyblogs. For further information see the privacy policy. Grazie!

Recipe adapted from Veggies Don't Bite


Chocolate Chip Banana Cookies

Makes about 30 cookies

Ingredients:

image.jpg
  • 1 1/3 cups / 215g pitted dates (about 15 regular dates or 12 medjool)

  • 1/4 cup / 60g almond milk (or milk of choice)

  • 1/2 cup / 130g peanut butter

  • 1 small / 80g very ripe banana, mashed

  • 1 egg

  • 1 1/2 tsp / 7g vanilla extract

  • 1 cup / 80g rolled oats

  • 1/2 tsp baking soda

  • 1/2 tsp salt

  • 2 cups / 340g semi-sweet chocolate chips

  • 1/2 cup / 62g chopped pecans (optional)

Directions:

Preheat oven to 350°F / 177°C. Prepare 1 or 2 cookie sheets lined with parchment paper or silpat.

  1. In a food processor, blend dates until very finely chopped.  Slowly add milk and continue to blend until a smooth paste forms.  (Be careful adding the milk as it may splatter; food processors aren’t always splatter proof.) 

  2. Add peanut butter, banana, egg, and vanilla to the date paste and mix well. 

  3. In a separate bowl whisk together oats, baking soda, and salt.  Add to date mixture.

  4. Stir in chocolate chips and pecans just until combined.  Refrigerate dough for 15 minutes. 

  5. Drop by spoonful onto prepared cookie sheets and bake for 12-15 minutes until edges start to turn lightly golden.  Allow cookies to cool and set a bit before removing from pan. 

Jenny's Notes:

  • These can easily be made vegan, dairy and/or gluten-free: Make a flax egg instead of a normal egg by adding 1 Tbsp ground flax seeds to 3 Tbsp water, use vegan chocolate chips (usually this means just making sure there is no dairy), use certified GF oats and vanilla extract.  Voila!  Now anyone can eat these delicious morsels. 

chunky monkey cookies, vegan, dairy free, gluten free, egg free, refined sugar free, chocolate chip banana cookies, healthy
dessert, cookies
American
Yield: 30
Author:
Healthy Chocolate Chip Banana Cookies

Healthy Chocolate Chip Banana Cookies

Chocolate Chip Banana Cookies loaded with oats, peanut butter, chocolate chips, and pecans are easily made vegan, gluten-free, dairy-free, egg-free! Most of the sweetness comes from dates and banana.
Prep time: 15 MinCook time: 15 Mininactive time: 15 MinTotal time: 45 Min

Ingredients

Instructions

  1. Preheat oven to 350°F / 177°C. Prepare 1 or 2 cookie sheets lined with parchment paper or silpat.
  2. In a food processor, blend dates until very finely chopped. Slowly add milk and continue to blend until a smooth paste forms. (Be careful adding the milk as it may splatter; food processors aren’t always splatter proof.)
  3. Add peanut butter, banana, egg, and vanilla to the date paste and mix well.
  4. In a separate bowl whisk together oats, baking soda, and salt. Add to date mixture.
  5. Stir in chocolate chips and pecans just until combined. Refrigerate dough for 15 minutes.
  6. Drop by spoonful onto prepared cookie sheets and bake for 12-15 minutes until edges start to turn lightly golden. Allow cookies to cool and set a bit before removing from pan.

Notes:

These can easily be made vegan, dairy and/or gluten-free: Make a flax egg instead of a normal egg by adding 1 Tbsp ground flax seeds to 3 Tbsp water, use vegan chocolate chips (usually this means just making sure there is no dairy), use certified GF oats and vanilla extract.  Voila!  Now anyone can eat these delicious morsels. 

Calories

130.36

Fat (grams)

7.42

Sat. Fat (grams)

2.64

Carbs (grams)

16.47

Fiber (grams)

2.03

Net carbs

14.43

Sugar (grams)

11.53

Protein (grams)

2.39

Sodium (milligrams)

84.40

Cholesterol (grams)

6.20
Nutritional information is approximate; based on 30 serving, includes pecans.
Did you make this recipe?
Tag @jennyblogsandbakes on instagram and hashtag it #jennyblogs
image.jpg

Coconut Banana Breakfast Cookies

Do you like cookies? Would you like to eat cookies for breakfast, or anytime? Then these cookies are for you, because they’re delicious and also healthy!

These Coconut Banana Breakfast Cookies have no refined sugar. Think bananas, coconut, pecans, and apricots with a light touch of maple syrup and oats. Of course, I practically just gave you the whole ingredient list so let's just get baking, shall we?? 


Coconut Banana Breakfast Cookies

Makes about 15 cookies

Ingredients:

Directions:

  • *1 1/2 cups oats

  • 1 cup unsweetened shredded coconut or flakes

  • 1/2 cup coarsely chopped pecans

  • 1/4 cup coarsely chopped almonds

  • 1 Tbsp flax seeds

  • 1/2 tsp salt

  • 1/2 cup dried apricots, chopped

  • 3 very ripe bananas, mashed

  • 1/4 cup coconut oil, melted

  • 1 Tbsp maple syrup

  • 1 tsp vanilla extract

Oven 350 Fahrenheit

In a medium bowl, stir together oats, coconut, pecans, flax, salt, and apricots.  Add the bananas, coconut oil, maple syrup, and vanilla until combined.  Spoon generous mounds onto a baking sheet lined with parchment paper or silpat. 

Bake 23-25 minutes, until lightly golden. 

Some raisins snuck into these ones

Some raisins snuck into these ones

Jenny's Notes:

Recipes like this are great because they can be so easily adapted to your tastes, or simply to change it up.  Feel free to use any kind of nuts you wish, or a combination of several, change up the dried fruit, or use honey instead of maple syrup.  I recommend also trying dried blueberries and dried cherries!

*Most recipes will list whether quick oats, rolled oats, or old-fashioned oats should be used.  You'll notice I don't specify unless I think the recipe really needs a specific kind of oat.  I've found that in most recipes the different kind of oats can be interchanged without affecting the quality of your product.  Just keep in mind that quick oats are more absorbent, so use slightly less than called for if substituting for old-fashioned or rolled, or slightly more rolled if substituting for quick.