Chicken Fricassée

Chicken fricassée is a French chicken stew, consisting of browned chicken and vegetables in a creamy mushroom sauce.

It starts with a simple pan fry of chicken in a skillet with butter, until they’re nice and brown. The chicken is removed from the pan so you can cook onions, carrots, mushrooms, garlic, and a bit of thyme. Flour, chicken broth, and white wine are added to make a slightly thick, hearty sauce. Finally, cream (or milk if you prefer a lighter or less expensive version) and a splash of lemon juice are added at the end to turn the sauce into a creamy, velvety wonder, perfect for serving over mashed potatoes.

The whole thing can be cooked on the stove or it can also be finished in the oven. It goes a little quicker on the stove, my preferred version. My mom, on the other hand, prefers to finish hers in the oven. She likes the hands-free time while it’s in the oven to clean up the kitchen, which is also useful!

This makes for a convenient rotation to weeknight dinners since most of the ingredients I always have on hand, save for the mushrooms. This can be made without the mushrooms if you so prefer, but honestly it’s one of my favorite parts so I make sure to add mushrooms to my grocery list!

I’m not normally a meat, carrot, and potato kind of girl, but ever since I first made this a few years ago it’s become a part of our regular dinner rotation, it’s so delicious and satisfying.

This post may contain affiliate links. If you make a purchase using these links, Jennyblogs may receive a small commission, at no extra cost to you. This helps to support Jennyblogs. For further information see the privacy policy. Grazie!

Recipe adapted from The Toasty Kitchen


Chicken Fricassée

Serves about 4

Ingredients:

Chicken fricassée over mashed potatoes

  • 2 Tbsp / 28g butter

  • 1 lb / 454g uncooked chicken breasts

  • 2-3 carrots, sliced into half moons

  • 1 onion, diced medium

  • 8 oz / 227g white button mushrooms, sliced

  • 2 cloves garlic, minced

  • 1/2 tsp dried thyme

  • 2 Tbsp / 15g flour

  • 1/2 cup / 119g dry white wine

  • 1 cup / 237g chicken broth

  • 1/2 cup / 119g heavy cream, half & half, or milk

  • 2 Tbsp / 28g fresh lemon juice

  • salt and pepper

Directions:

  1. Take the chicken breasts and lay them on a cutting board. Slice each chicken breast horizontally into two thinner breasts, slicing parallel to the cutting board. It’s like butterflying, but cut all the way through so you have two separate pieces.

  2. Heat the butter in a large pan or cast iron skillet over medium heat. Add all the pieces of chicken, and cook for a few minutes on each side until internal temperature reaches 165° / 74°C. Remove chicken from pan and set aside.

  3. Add carrots and onion to hot pan and cook several minutes, until starting to soften.

  4. Add mushrooms and cook for another few minutes, until mushrooms are cooked and have mostly released their water.

  5. Add garlic and thyme, cook for just another minute.

  6. Add flour and stir to coat all vegetables, cook another minute or so.

  7. Add the white wine to deglaze the pan.

  8. When the wine is almost evaporated, add the chicken broth; stir until sauce is smooth and slightly thickened.

  9. Remove pan from heat and stir in cream and lemon juice; season with salt and pepper to taste.

  10. Add chicken breasts back into sauce; serve. Goes great with mashed potatoes.

Jenny’s Notes:

  • Step 1 could be optional, you can keep your chicken breasts whole if you wish. I like cutting my chicken breasts into thinner pieces before cooking since a whole chicken breast is usually much bigger than a serving, and it takes longer to cook. Our butcher in Italy always cut our chicken breasts like this and I loved it, thinner pieces of meat that are done cooking in a matter of minutes.

  • If you prefer, bone-in chicken (legs, thighs, etc.) can be used. Adjust cooking time accordingly to ensure chicken is cooked through (165°F / 74°C)

  • I have made this before without the wine, and it was still wonderful. So if you don’t have any on hand or just prefer to cook without it, omit the wine with no worries.

  • To finish this dish in the oven, you’ll want to make the whole thing in a pan that is able to go into the oven, such as a cast iron skillet. Follow recipe as written up through step 8. Add chicken back into the pan (without adding cream or lemon juice) and place in an oven preheated to 350°F / 177°C. Bake uncovered for 35-45 minutes, or until sauce is bubbly. Remove from oven and stir in cream and lemon juice.

  • If you choose to finish in the oven, you can focus more on browning the chicken in the pan in step 2 rather than cooking it through, since it will be baked in the oven. Just make sure the chicken is fully cooked before you take it out of the oven at the end!

chicken breasts, chicken stew, french chicken dish, chicken fricassée, carrots, onions, mushrooms, white wine sauce
Dinner
French
Yield: 4
Author:
Chicken Fricassée

Chicken Fricassée

French chicken stew with carrots, onion, and mushrooms in a creamy white wine sauce
Prep time: 15 MinCook time: 35 MinTotal time: 50 Min

Ingredients

Instructions

  1. Take the chicken breasts and lay them on a cutting board. Slice each chicken breast horizontally into two thinner breasts, slicing parallel to the cutting board. It’s like butterflying, but cut all the way through so you have two separate pieces.
  2. Heat the butter in a large pan or cast iron skillet over medium heat. Add all the pieces of chicken, and cook for a few minutes on each side until internal temperature reaches 165° / 74°C. Remove chicken from pan and set aside.
  3. Add carrots and onion to hot pan and cook several minutes, until starting to soften.
  4. Add mushrooms and cook for another few minutes, until mushrooms are cooked and have mostly released their water.
  5. Add garlic and thyme, cook for just another minute.
  6. Add flour and stir to coat all vegetables, cook another minute or so.
  7. Add the white wine to deglaze the pan.
  8. When the wine is almost evaporated, add the chicken broth; stir until sauce is smooth and slightly thickened.
  9. Remove pan from heat and stir in cream and lemon juice; season with salt and pepper to taste.
  10. Add chicken breasts back into sauce; serve. Goes great with mashed potatoes.

Notes

  • Step 1 could be optional, you can keep your chicken breasts whole if you wish. I like cutting my chicken breasts into thinner pieces before cooking since a whole chicken breast is usually much bigger than a serving, and it takes longer to cook. Our butcher in Italy always cut our chicken breasts like this and I loved it, thinner pieces of meat that are done cooking in a matter of minutes.
  • If you prefer, bone-in chicken (legs, thighs, etc.) can be used. Adjust cooking time accordingly to ensure chicken is cooked through (165°F / 74°C)
  • I have made this before without the wine, and it was still wonderful. So if you don’t have any on hand or just prefer to cook without it, omit the wine with no worries.
  • To finish this dish in the oven, you’ll want to make the whole thing in a pan that is able to go into the oven, such as a cast iron skillet. Follow recipe as written up through step 8. Add chicken back into the pan (without adding cream or lemon juice) and place in an oven preheated to 350°F / 177°C. Bake uncovered for 35-45 minutes, or until sauce is bubbly. Remove from oven and stir in cream and lemon juice.
  • If you choose to finish in the oven, you can focus more on browning the chicken in the pan in step 2 rather than cooking it through, since it will be baked in the oven. Just make sure the chicken is fully cooked before you take it out of the oven at the end!


Nutrition Facts

Calories

304.93

Fat

12.69

Sat. Fat

6.48

Carbs

14.38

Fiber

2.31

Net carbs

12.05

Sugar

6.12

Protein

28.4

Sodium

494.26

Cholesterol

99.61

Nutritional Information is approximate. Based on 4 servings, using heavy cream

Did you make this recipe?
Tag @jennyblogsandbakes on instagram and hashtag it # jennyblogs

The Birth Story of Elyas

This is the story of how my first born, Elyas, was born in Italy.

It’s taken me a long time to write this, Elyas (pronounced like Elliott, just with an s at the end) just turned 21 months old. He’ll probably be closer to 2 by the time I finish this. Update: Elyas turns 2 tomorrow, and it seems a fitting time to share this.

I’m not entirely sure why, but a birth story feels so intimate that it can be hard to write it out in such a public space like the internet. It’s ironic, though, because ever since finding out I was pregnant with Elyas I can’t get enough of birth stories! Each is so different and so unique. Especially since my firstborn was born in a foreign-to-me country, I scoured the internet for other American, or really any, birth stories from Italy. I found a handful and yet I was always left with more questions. This is a big part of why I’m sharing mine on here, so that other women giving birth in Italy might find this and have one more experience to draw from. Or for anyone who’s curious what it’s like to have a baby in Italy.

It’s long. But so is labor, so it’s fitting, I think.

If you want to read about what it’s like to be pregnant in Italy, click here.

Here goes….


September 17th, 2020

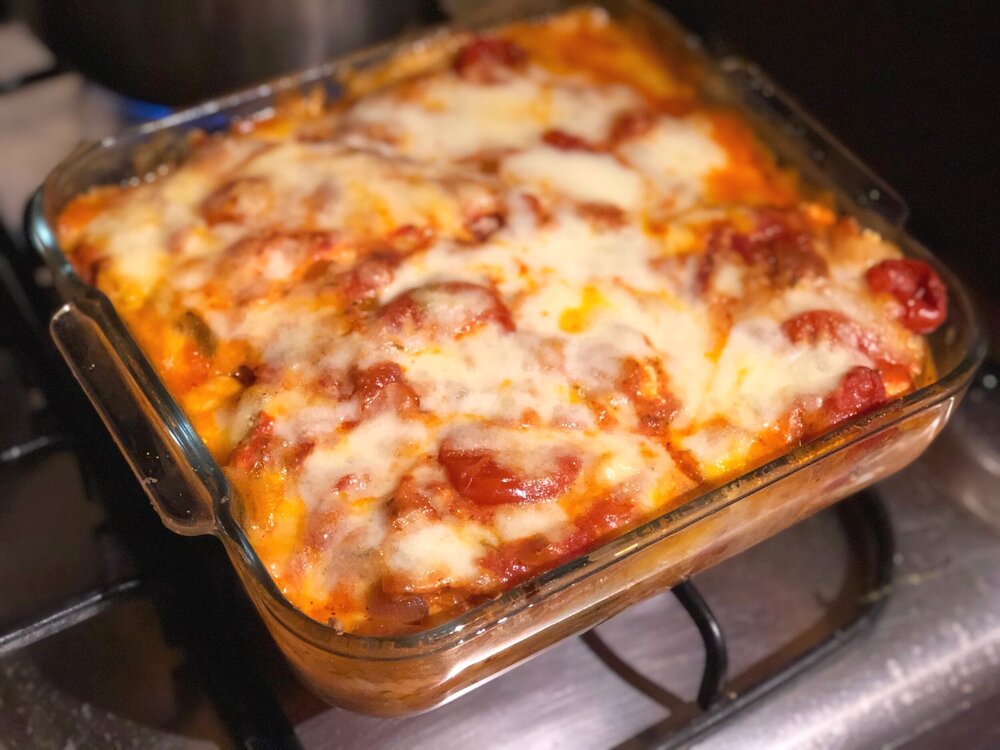
In a land, far far away, across the ocean, in a small town called Incisa, it was the day before Elyas was born. I was 40+3 weeks pregnant and had a sudden burst of energy (hind sight, that should’ve been telling, ha). The weather had recently “cooled” a bit, going from high 90’s and 100’s every day to mid 90’s. I had big plans for the day like cleaning, cooking, and personal care. I really wanted to make this eggplant parmesan recipe that supposedly makes women go into labor (I didn’t actually believe it, but it sounded fun and I like eggplant parmesan). In the end it took so long and I was on my feet for so long (4+ hours in the kitchen) that I figured I could do the other plans tomorrow.

Jenny’s note to self #1: never do tomorrow what you can do today while pregnant, especially at the end, because tomorrow is not promised you!!

Later that evening…

My husband and I went for a walk after sunset when it was cooler, then came back to feast on the really delicious eggplant parmesan. I called my mom, but she didn’t answer. This is unusual. Suddenly I felt lonely, as if something was going to happen. I decided to call my brother, who also didn’t respond. This isn’t as unusual, so I decided to call one of my best friends. Something was up with her phone, so she couldn’t talk. So there I sat, feeling forlorn. My mom ended up calling me back and we talked late, until almost 1am my time. We joked, as we did almost every day, that maybe I was in labor, as I had started having regular Braxton Hicks. I laughed it off, only learning later my mom actually did think I was in labor. I snuck another couple mouthfuls of eggplant parmesan and went off to bed.

If you’d like to make that eggplant parmesan recipe, which I really do recommend, click here! Pregnancy not required. ;)

That night…

I hadn’t been laying there too long when what was inexplicably a real contraction came on. After another very real contraction less than 20 minutes later, I decided I should try out my contraction timer. My husband was already asleep, so I lay there hoping to go to sleep myself. Every time I’d start drifting off to sleep a contraction would ruin it, coming every 12 minutes or less. After awhile I decided to text my mom, knowing she was still awake. She counseled me to try and get some sleep if I could. I kept trying but to no avail. One contraction came on so hard I suddenly understood why so many women panic. If I tried to get up or move, they came on every few minutes and I had to breathe through them, paralyzed. All of that talk of early labor being “a great time to shower” seemed complete nonsense now, how could women shower like this?? I could barely make it to the bathroom, so I gave up on the shower idea. I finally woke my husband around 5am, tossed my cookies around 5:30am, all the while contractions were coming every 3-5 minutes or less. We decided it was time to go to the hospital.

6:30am The ambulance comes

Having no car, our ride to the hospital was an ambulance. This isn’t unusual in Italy, and was exactly what my midwife told us to do. We called 118 (Italy’s 911) for an ambulance. Three men and a woman showed up in the bedroom, all seemingly clueless as to the proceedings of labor and probably terrified that birth was imminent. They helped me onto the stretcher and off we went at 6:50am. The woman kept asking me for all my information, which always seemed perfectly timed with a contraction…I still don’t understand why she didn’t ask my husband who was right there, haha. Labor and paperwork while riding on a bumpy stretcher under a crinkly silver blanket. On an ambulance with the siren blaring. Lovely. I was hoping we could speed down the highway incognito.

7:10am the ambulance breaks down

Yes it did. And I wasn’t surprised. Because, Italy, and also because I had noticed the siren kept going out. The paramedics informed us something was wrong (ambulance overheated) and pulled over into the nearest gas station so a different ambulance could come and get us.

At this point my mom, who was following my location on Find a Friend, was semi-freaking out, convinced the ambulance had to pull over because the baby was being born. bahahaha I’m sorry mom, for all I put you through.

7:45am arrival at the hospital

After a very long 30 minutes, the new ambulance pulled up and we were transferred over. Finally, we arrived at the hospital. Being wheeled through the hospital, still on the stretcher under the crinkly silver thing and seeing everything go by sideways is very disorienting. We arrived at the maternity ward, and I was taken into one of the exam rooms I had just been in earlier that week. Husband wasn’t allowed in.

More paperwork, sitting in a chair across from a midwife at a computer. Breathing through contractions, thinking how bizarre this is, with no smile or acknowledgement that hey, you’re in labor; no “congratulations”, or even “are you ready?”. Business as usual. Then I was hooked up to a fetal monitoring device. Baby wasn’t moving as much as they would’ve liked, and I ended up being hooked up to the monitor, sitting in a chair for 1 1/2 hours. They checked on me every half hour or so and brought me cookies once, to try and get baby to move more. Baby was moving some, I wasn’t concerned, but I guess they were a bit. The midwife examined me, confirmed that my waters had indeed already broken (that trickle since yesterday afternoon wasn’t incontinence as I had marked it off as) and I was dilated to 4-5cm. I was given the good news I would be admitted to a labor and delivery room. It was now 9:45am.

In Italy, or at least in Florence, you’re only admitted to your own labor and delivery room if you’re at least 3cm dilated. Anything less and you’ll either be encouraged to return home or have to labor in your hospital room, where no one is allowed in with you. Most public hospitals rooms are shared, and it was my great hope to NOT arrive less than 3cm dilated so as not to have to labor alone. Ospedale Santa Maria Annunziata, where I gave birth, had 3 occupants per room. Another, a bit more infamous hospital for birth, Ospedale San Giovanni di Dio, had up to 6 occupants per room.

To the Labor and Delivery Room!

My husband and I were briefly taken to my room, so I could drop off my stuff. I was the first one in this shared room. I changed into a cruddy nightgown and socks, no hospital gowns are provided in Italy, at least for labor. The midwife chided me because I put on socks instead of shoes, something about “that’s not sanitary”, but I was not about to labor and give birth IN SHOES so she let it drop.

Just kidding, let’s wait in the hallway for a bit

We were finally taken back to the labor and delivery ward, just to be told we had to wait. My room was still being cleaned. There was a little bench in the hallway, where we stayed and watched numerous nurses and maintenance people walk by. Very relaxing and great for having a baby. I jest.

Labor and Delivery Room

Finally, the room was ready and in we went. It was a comfortable, if bare bones room. I enjoyed the birthing ball, something I had always wanted to try. The midwife was nice enough and helpful, bringing a hot water bottle which felt excellent on my lower back, I was experiencing some intense back labor. She even brought a scarf and did Rebozo. My least favorite was having to walk down the hallway every hour or two to the bathroom, it took so long having to pause and breathe through all the contractions, and something about the bathroom always brought on the harder more frequent ones and I would get stuck in there forever. The midwife at least once had to knock and make sure I was ok…Yes, I’m fine, just hanging on to the sink for dear life!

Labor was hard, and though I felt prepared and well read, nothing can really prepare you for the actual thing.

At noon I was still at 4cm with a contraction.

By 2pm I was 6cm, 8cm during a contraction.

Pitocin or water breaking?

When 6pm rolled around and I was still at 6cm, the midwife started to put the pressure on. My water had now been broken for more than 24hrs and I was becoming higher risk. They were going to give me a round of antibiotics, and the midwife gave me the choice of completely rupturing the membranes (as she explained, baby’s head no longer having the buoyancy of the water would put more pressure on the cervix and thus hopefully speed labor up) or administering pitocin. I chose the rupturing membranes option, thinking it would be more natural. The midwife then strongly recommended I go with the pitocin. Why she even gave me the choice in the first place beats me, when she apparently wasn’t actually going to let me choose anyway. I conceded to the pitocin, on one condition: that I be given time to get my labor progressing more quickly on my own, by moving around as much as I could. She agreed. It was 6:00pm, she gave me until 6:30pm.

Having not slept at all for a day, a night, and now into another day, and the last meal I had my body kindly evicted, I didn’t have much energy. I had laid down and attempted to nap during the afternoon but was not successful, contractions were too much. Now the clock was ticking and I had half an hour to get this party started, so you better believe I got up and started dancing, and jiggling, and moving any which way I could. The contractions came on hard and fast, often bringing me to my knees, the back labor was getting worse and worse. But I danced. For the love of my baby I danced, rocked, swayed, and am generally content that my husband is not the type to whip out a camera to capture moments that would probably forever haunt me. Hahaha.

Water breaks

At 6:30pm with a satisfying Hollywood SPLAT, my water fully broke. I DID IT. I didn’t have to get pitocin! From then on my labor sped up, those contractions kept roaring on. Often people talk about contractions as waves, and how you should ride them. If that’s the metaphor, then the waves were crashing all around me and I could barely keep my head above water, let alone ride them. It was especially frustrating when a contraction would come on, and I would feel it peak, then instead of receding the pain would remain. I was hooked up to a monitor most of the time and could see when and how strong contractions were. I realized that even though the contraction would end, the pain was not. Then another contraction would come on. I later learned this is what you call back labor. And it’s pretty awful. I had to be in a very specific position on my hands and knees to keep the pain at a level where I didn’t want to jump out of my own skin. But I kept my eyes on the prize. Soon, there will be a baby! Every contraction is one contraction closer to meeting my baby.

Oh, and while I’m talking about things that are awful in labor, let me mention the drip I was hooked up to for the antibiotics. It had a very short line, so that whenever I dropped to my hands and knees for a contraction, I could only use one hand to support me, I had to keep my other hand in the air so the line wouldn’t jab the needle deeper down into my arm. Ouch.

Shift Change

8pm brought a shift change for the midwives. There was now a student midwife and a new midwife who I jokingly referred to as “my angel” afterwards. She was very kind and helped me so much when I felt tired and stuck at the end of labor. I had now been at the hospital for over 12 hours and things weren’t getting any easier. The student midwife was sweet and helpful, too. She was down on her hands and knees with me, encouraging me and chatting with me.

So…I push now?

It never became abundantly clear to me when it was time to push. I had always heard, oh, don’t worry, YOU WILL KNOW. A few contractions I started to feel pushy. This was probably around 8:30pmish. Then I’d have a few I didn’t. I don’t recall them ever checking me and letting me know I was fully dilated, but I must have been or I can’t imagine they’d let me push. I was pushing without much success, or so it felt. After awhile the midwife had me get into a standing position with my husband on one side of the bed and me on the other, criss-cross arms and holding hands, giving him my full weight during a contraction while bearing down and pushing. Using gravity and my husband’s muscles to speed things along.

Baby’s in distress

At some during pushing, baby started showing signs of distress. I went from making slow, but steady progress to being gently but urgently encouraged to get that baby out. I appreciate that the midwives didn’t make me feel panicky, but I also felt the gravity of the situation.

Having pity on my shaky and exhausted state, they suggested I lay on my side on the bed to deliver baby.

I had read one account of an American woman giving birth at this same hospital, and she was made to change rooms just before baby was born, a.k.a. when walking feels impossible. She had to be practically carried, because apparently at that time you delivered in a different room than you labored in. I was very thankful to find that I was not made to change rooms.

Every time the midwives would tell me what progress I was making, I inevitably ended discouraged. “We can see baby’s head!!!” And I’m thinking, “what?! You can only JUST now see baby’s head? I was convinced the head was almost out!”

The ring of fire is a very real thing. And what I didn’t realize is that contractions become a bit more spaced out while pushing, so wherever baby is when a contraction stops, there he stays until the next one a few minutes later, half out or head out or wherever. Like I said, ring of fire. I felt exceptionally lucid during this point, thinking “huh. So this is the ring of fire. Well here I am, living the ring of fire until the next contraction. So this is what women talk about” and wishing I was more out of it like some women recount being.

9:52pm Elyas Zakariah is born

After roughly 1hr15min of pushing, my baby BOY was born! We chose not to find out the sex, so he was a joyous surprise.

My husband bawled. He later told me he cried half because he was overjoyed and half because he was relieved for me, that it was over and the baby and I were ok.

I was too exuberant to cry, our baby boy was here, and I DID IT!! There is no feeling in the world like those first few moments after your baby is born. Joy. Love. Relief. Pride. Gratitude. I was smitten. My little buddy boy.


Now that same little baby is turning two. My heart and brain don’t quite know how to reconcile that with the all too recent memory of my sweet and funny newborn baby boy. Babies don’t keep and time is a thief.

Here’s to you, Elyas, my boy. The one who first made me a mamma. ❤️ Happy 2nd birthday.

Rhubarb Oat Bars

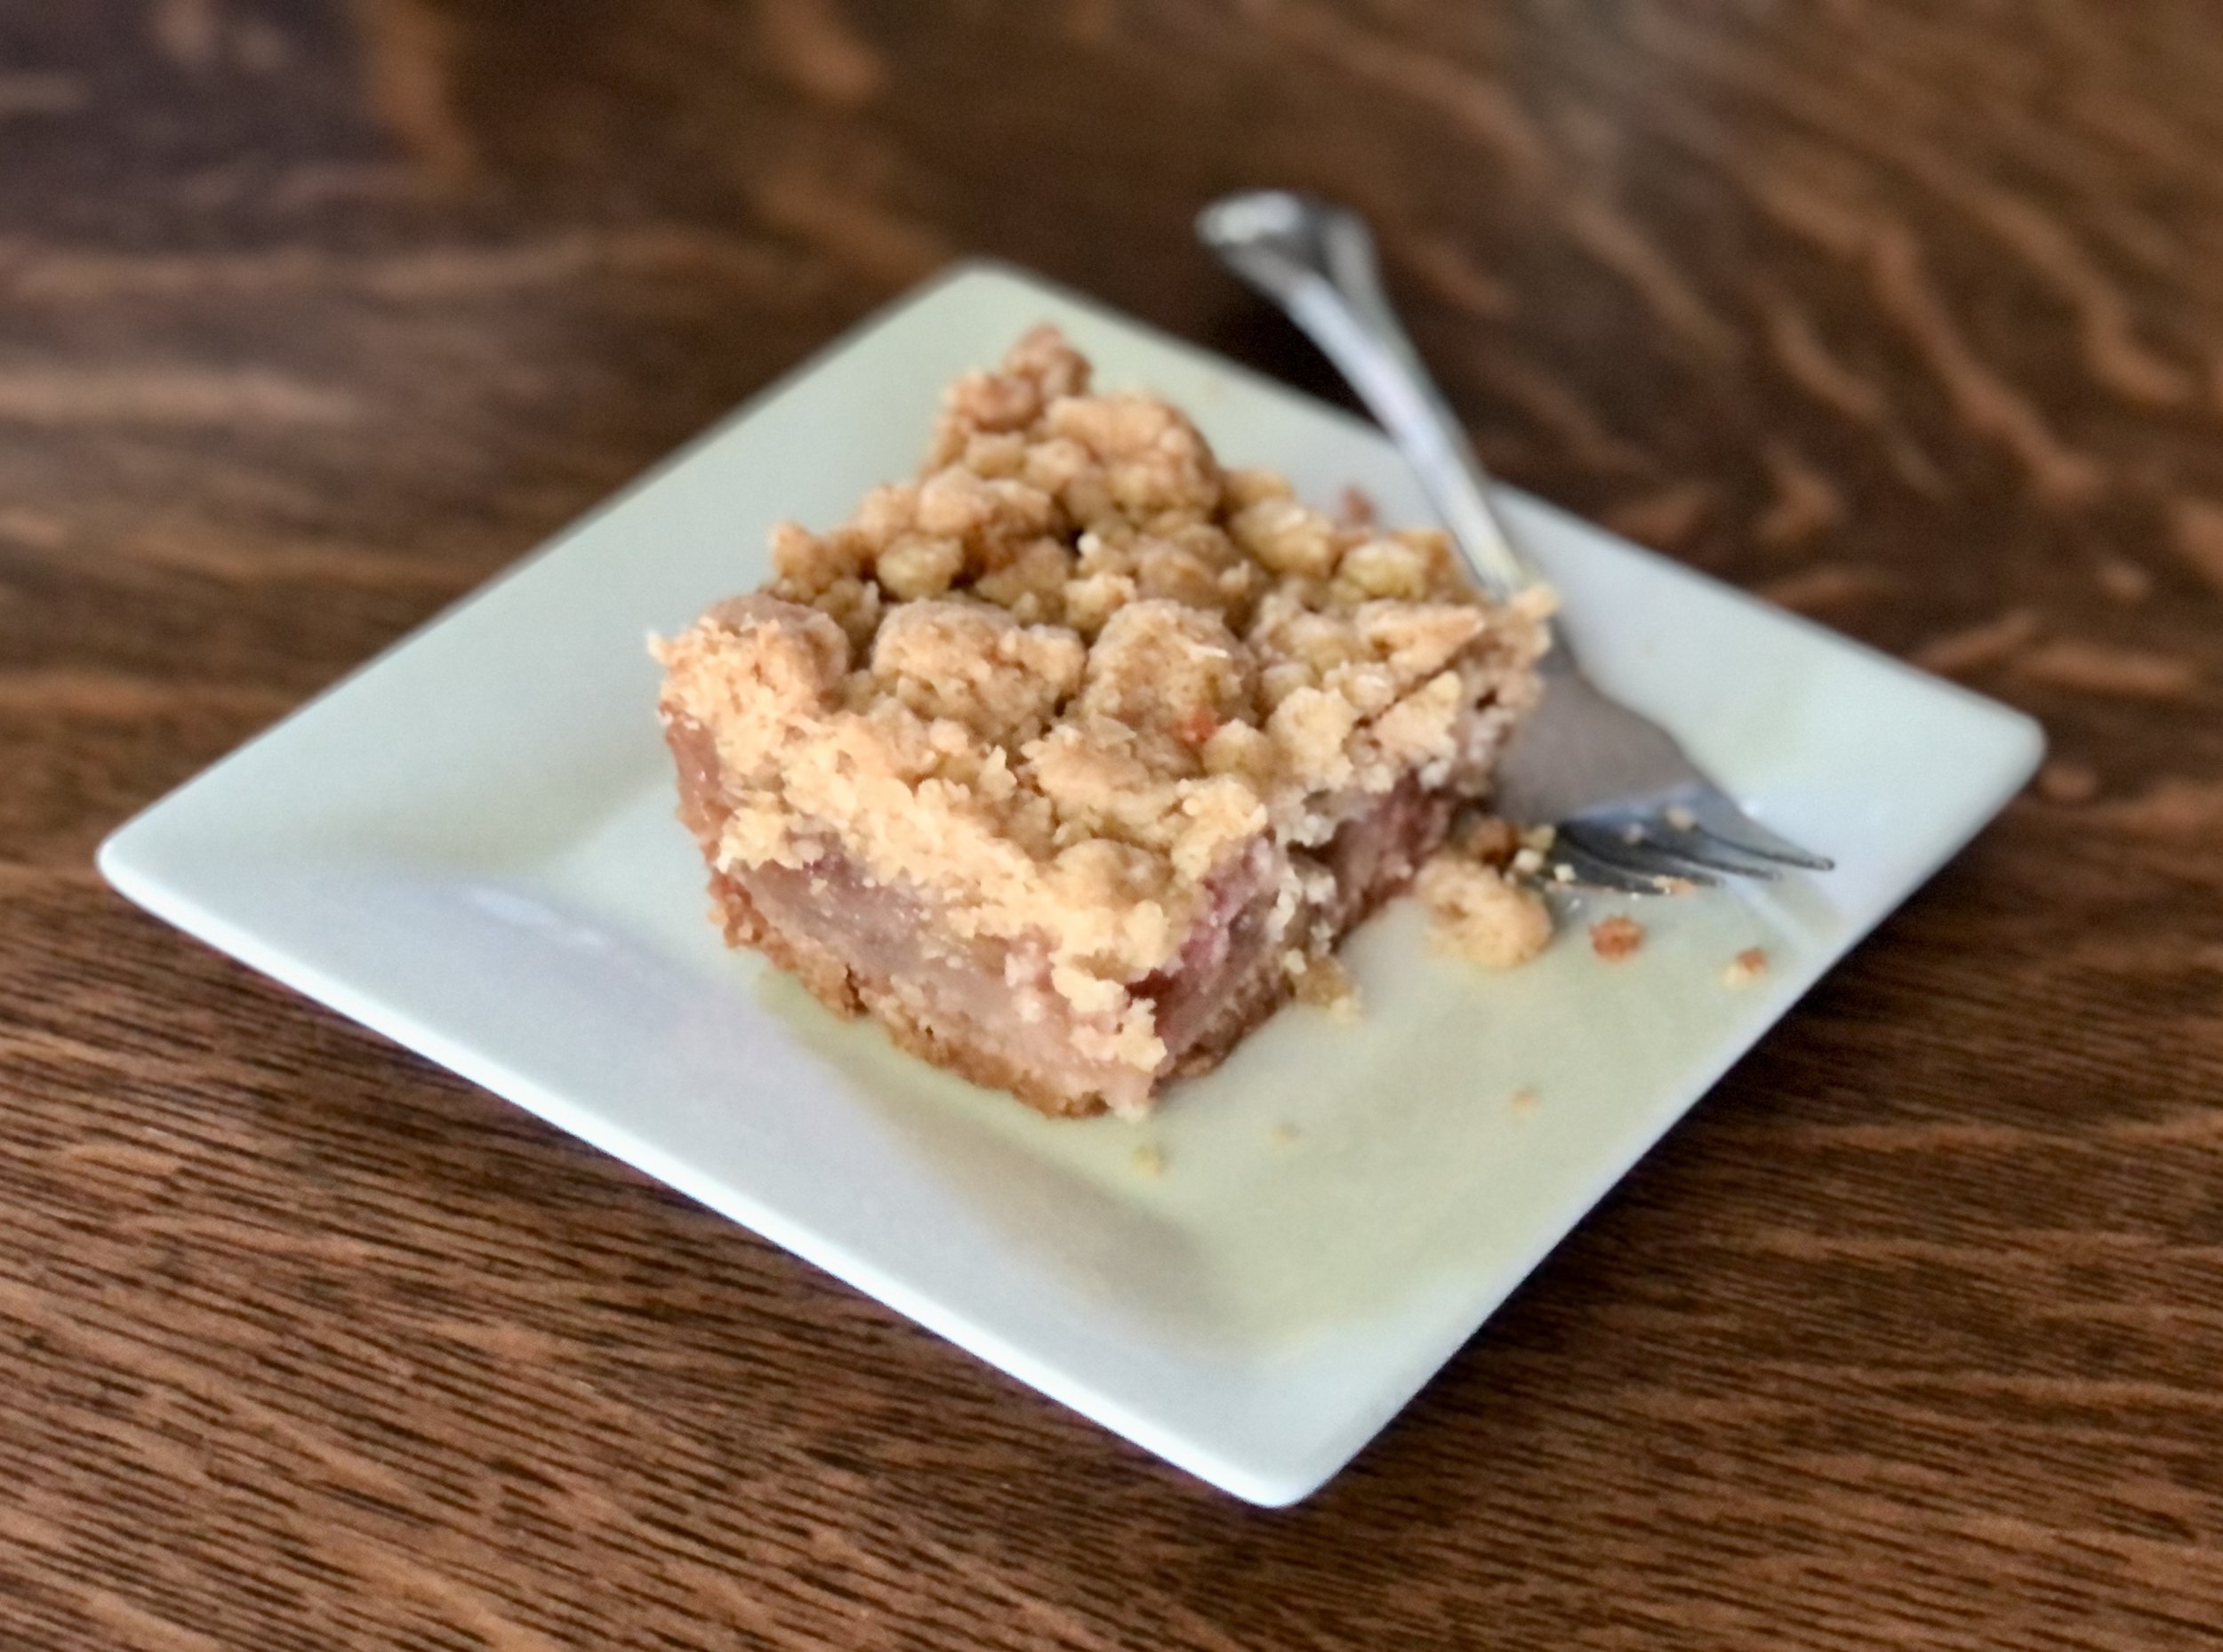
Are you taking advantage of this rhubarb season? I hope you are, I know I am, more so than ever, as I’ve missed living in a country where people use, let alone have heard of, rhubarb.

I don’t know about you, but when rhubarb season starts I usually think of pies as the first thing to make. Then, after a few rhubarb and rhubarb custard pies, I might want to make some ahem…I’m not sure what normal people call it, maybe rhubarb soup? I grew up calling it camel hair soup. (We’re so normal you can’t stand it.) After camel hair soup, then maybe some rhubarb hand pies made with puff pastry.

All of those things are delicious, but sometimes with rhubarb season being so short I don’t end up getting beyond the “classics.” This year I’ve been expanding my horizons a bit, and if you’d like to go beyond the rhubarb pies and crisps, here are some buttery rhubarb oat bars to try!

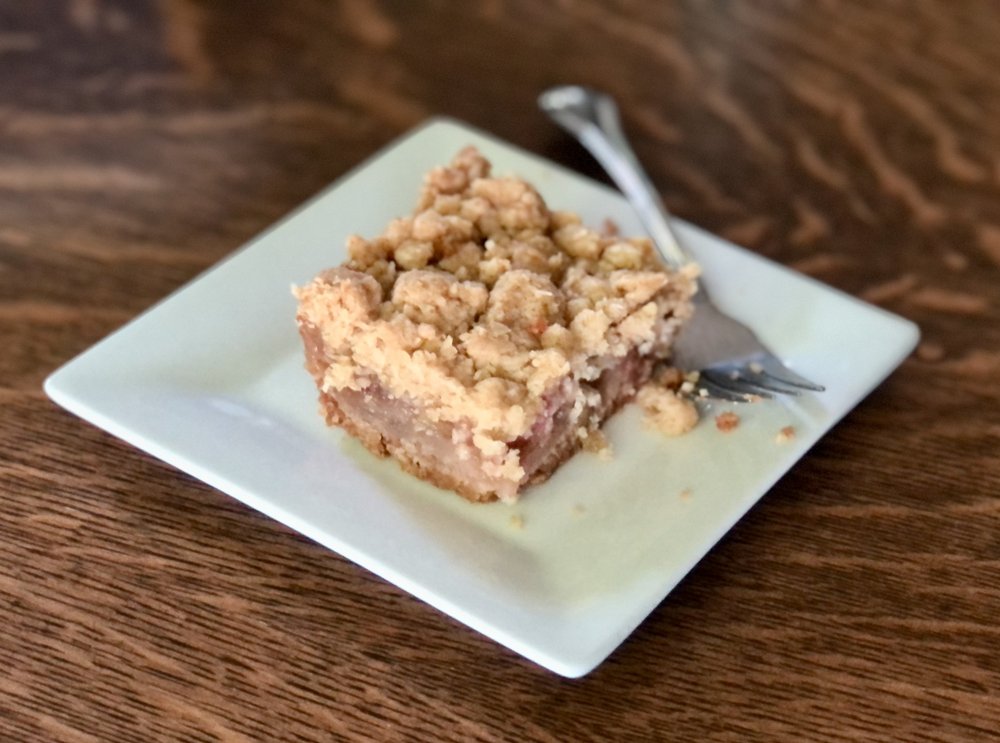
It’s a buttery crust, sticky and gooey strawberry rhubarb filling with a hint of nutmeg, and a buttery oat crumble on top.

Yes please.

I don’t think I need to go on much further, so here’s the recipe! Anyway, I better stop writing before rhubarb season is over, haha.

This post may contain affiliate links. If you make a purchase using these links, Jennyblogs may receive a small commission, at no extra cost to you. This helps to support Jennyblogs. For further information see the privacy policy. Grazie!

Recipe adapted from Curly Girl Kitchen


Rhubarb Oat Bars

Serves about 9-12

Ingredients

For the Crust and Topping

  • 1 1/2 cups / 180g flour

  • 1 cup / 90g rolled oats

  • 1 cup / 226g cold butter, cubed

  • 1/2 cup / 100g brown sugar

  • 1 tsp baking powder

  • 1/2 tsp salt

For the Rhubarb Filling

  • 1 lb / 454g (about 3 1/2 cups) rhubarb, cut into approx. 1/2” slices

  • 1/2 cup / 100g sugar

  • 6 Tbsp / 45g flour

  • 1/2 cup / 160g strawberry jam

  • 1 Tbsp / 15g lemon juice

  • 1 tsp / 5g vanilla extract

  • 1/4 tsp nutmeg

  • 1/4 tsp baking soda

Directions:

Oven preheated to 350F / 177C. Lightly grease an 8x8in / 20x20cm square baking dish.

Make the Crust and Topping

  1. In a food processor, blend all crust/topping ingredients together until the texture is like coarse pebbles. Alternately, you can mix by hand or with a fork or pastry cutter.

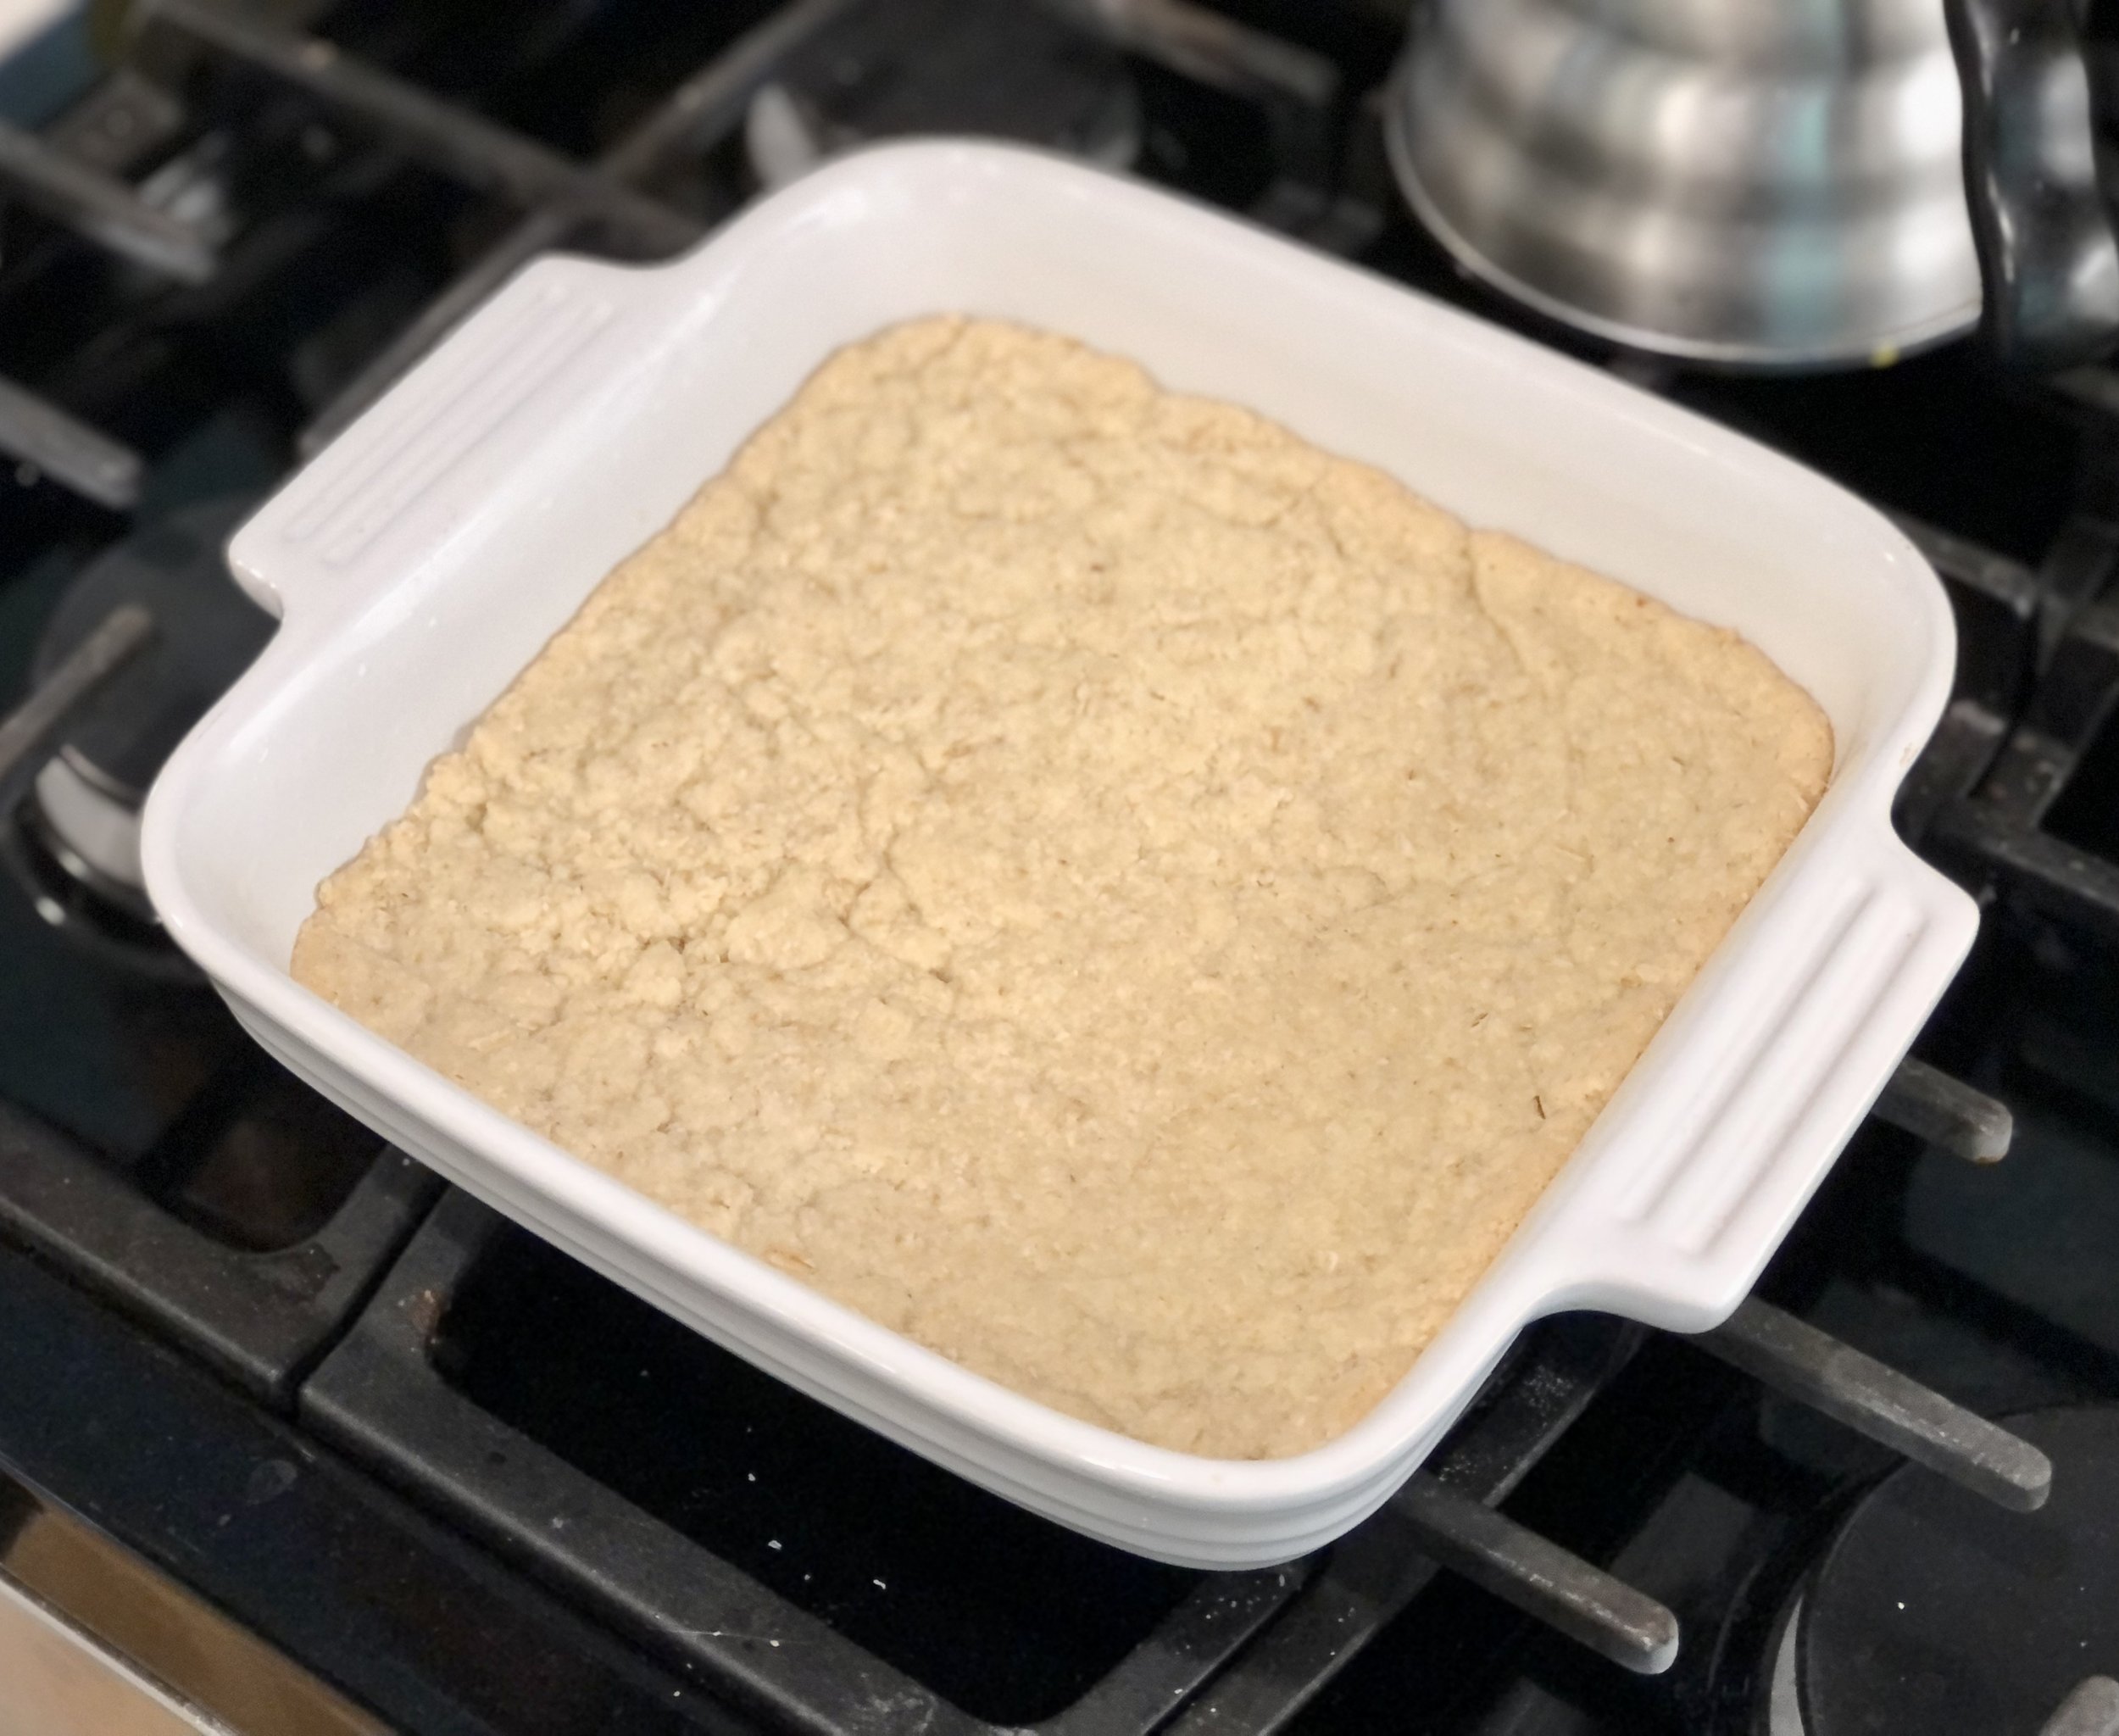
  2. Take half the mixture and press into the prepared baking dish. Reserve other half for topping.

  3. Bake for 15 minutes.

Meanwhile, Make the Rhubarb Filling

  1. In a large bowl, combine all filling ingredients. Mix together well.

  2. When the crust is done baking, pour filling over crust.

  3. Bake for 30 minutes.

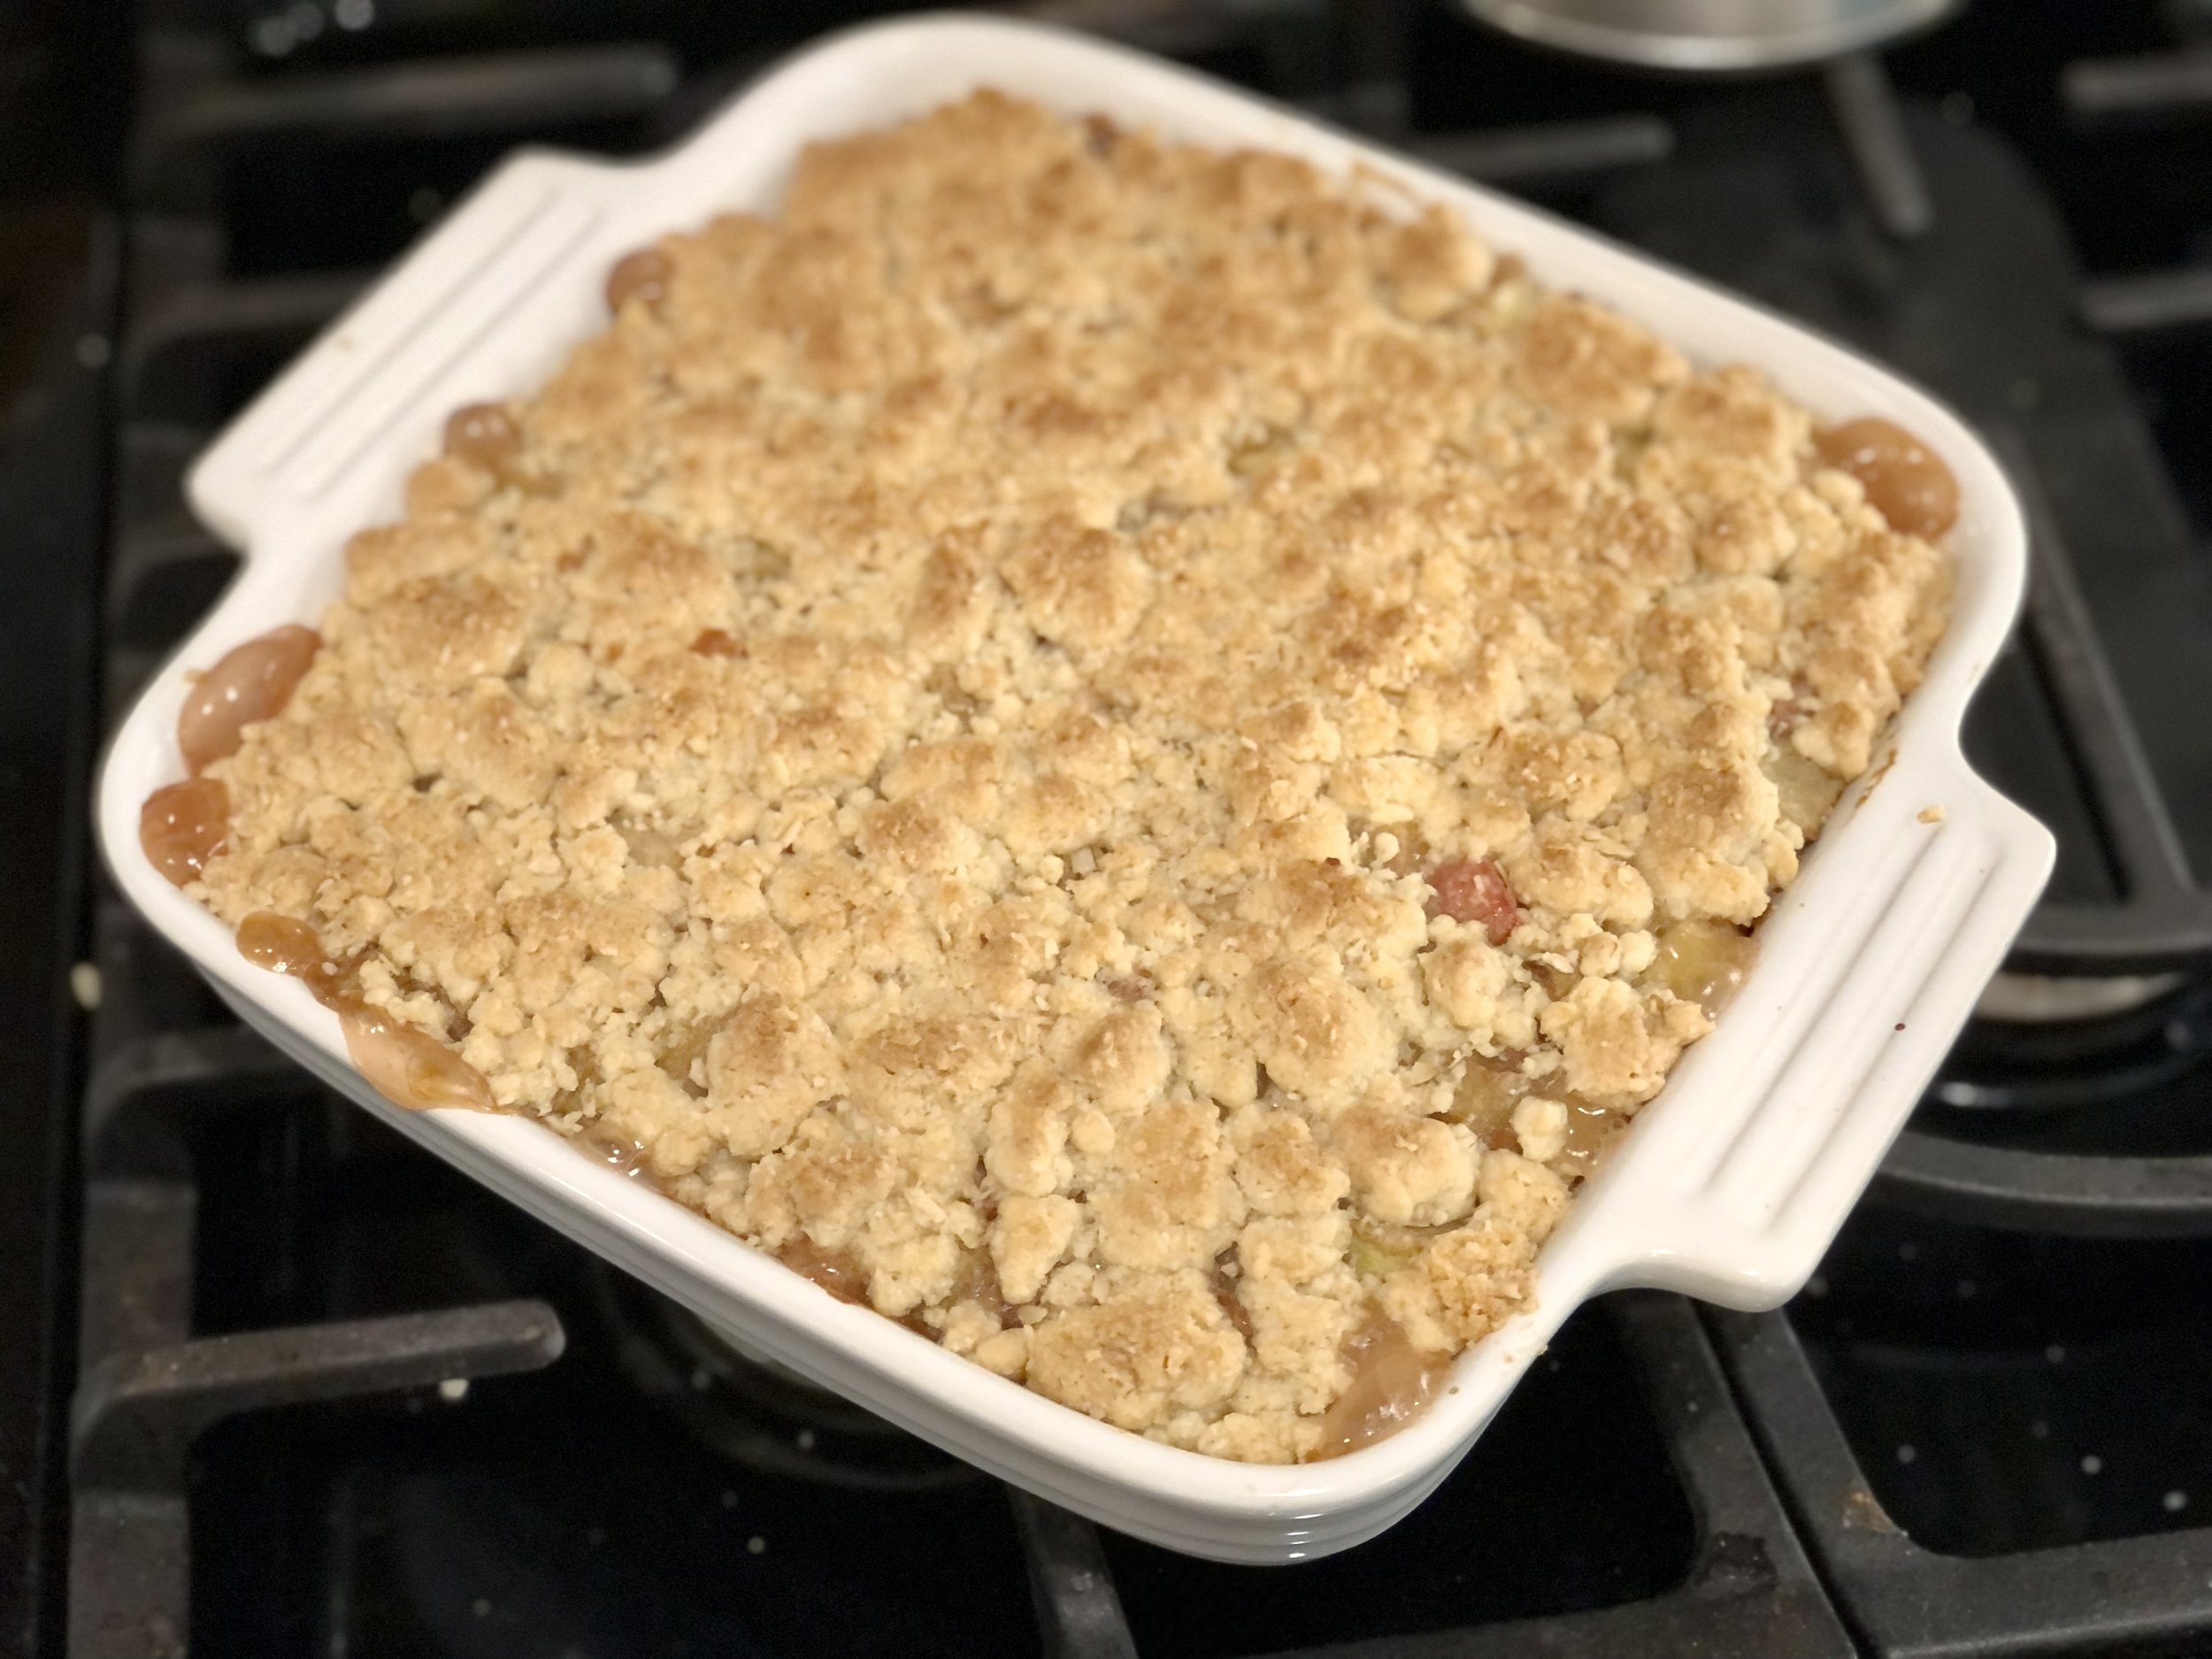
  4. When the filling is done baking, crumble the remaining topping over filling and bake for another 20-25 minutes, or until top is light golden-brown.

  5. Allow to cool completely before cutting and serving. (The refrigerator can help speed up this process.)

Jenny’s Notes:

  • If you don’t have rolled oats, instant oats can be used.

  • The strawberry jam could be switched out for a different flavor of jam!

  • If you can’t wait to dig into your freshly baked bars, you can always go at it with a spoon! It will be more like a crumble when it’s still warm, but hey, is that a bad thing?

rhubarb, oat bars, oaty bars, crumble
dessert
American
Yield: 9-12
Author:
Rhubarb Oat Bars

Rhubarb Oat Bars

Buttery, crumbly oat bars with a sweet rhubarb and strawberry filling
Prep time: 20 MinCook time: 1 H & 5 MTotal time: 1 H & 25 M

Ingredients

For the Crust and Topping
For the Rhubarb Filling

Instructions

Make the Crust and Topping
  1. Oven preheated to 350F / 177C. Lightly grease an 8x8in / 20x20cm square baking dish.
  2. In a food processor, blend all crust/topping ingredients together until the texture is like coarse pebbles. Alternately, you can mix by hand or with a fork or pastry cutter.
  3. Take half the mixture and press into the prepared baking dish. Reserve other half for topping.
  4. Bake for 15 minutes.
Meanwhile, Make the Rhubarb Filling
  1. In a large bowl, combine all filling ingredients. Mix together well.
  2. When the crust is done baking, pour filling over crust.
  3. Bake for 30 minutes.
  4. When the filling is done baking, crumble the remaining topping over filling and bake for another 20-25 minutes, or until top is light golden-brown.
  5. Allow to cool completely before cutting and serving. (The refrigerator can help speed up this process.)

Notes

  • If you don’t have rolled oats, instant oats can be used.
  • The strawberry jam could be switched out for a different flavor of jam!
  • If you can’t wait to dig into your freshly baked bars, you can always go at it with a spoon! It will be more like a crumble when it’s still warm, but hey, is that a bad thing?

Nutrition Facts

Calories

463.59

Fat

21.47

Sat. Fat

13.15

Carbs

64.53

Fiber

2.75

Net carbs

61.8

Sugar

32.96

Protein

4.61

Sodium

393.23

Cholesterol

54.23

Nutritional Information is approximate.

Did you make this recipe?
Tag @jennyblogsandbakes on instagram and hashtag it # jennyblogs

24 Hour Levain Pizza Dough

Margherita Pizza

Sourdough pizza!

My absolute favorite pizza dough recipe, and definitely worth the time to plan a day (or 2) ahead. At first glance the recipe might seem complicated (it is a 2 day recipe, after all), but it really is very simple, with no more than 1-2 minutes of kneading involved. With sourdough, time is your friend and does most of the work for you.

If you’ve ever made homemade pizza dough and wondered why it’s “good” but missing out on that chewy, wonderful crust texture that you get from the best pizzerias, this recipe will have you wondering no more. It’s chewy and flavorful and will have you whipping pizzas out of your home oven that taste about as close to your Italian vacation as can be possible! Which leads me to ask…

How’s it going? With your sourdough starter, I mean.

If you weren’t already dabbling in sourdough before 2020, everyone and their brother started a sourdough starter during all of the stay-home business and many varying lockdowns, ammiright?

Did your starter get off to success, or did it dwindle, never making it to its full, goopy, bubbly glory? Perhaps it’s sitting, forgotten, in the back of your fridge. Perhaps you’re a sourdough baking fiend, whipping out the loaves and baguettes like nobody’s business.

Or, just maybe, you’re like me, your friendly sourdough-user-but-not-an-expert, keeping the starter alive and using it occasionally but mostly as discard to flavor/boost other recipes. If this sounds familiar, then this recipe is perfect for you. Not too hard, I’ll try not to give you too much theory (yes, I do know some!), and, as long as you have a not-dead starter, basically foolproof.

Not convinced yet? This is the single pizza recipe I make most, by far, even though it takes 24+ hours, because it is that good and that simple. Actually, if I make pizza, I don’t even think about which crust I should make. I just make this one. Day 1 is really just stirring 3 ingredients together. That’s it.

Some Sourdough Tips

Did I mention I have experience but am not an expert on sourdough? Yes, so what follows is my experience and some of the most helpful sourdough tips I’ve learned over the past 5 years dabbling, that may help you too.

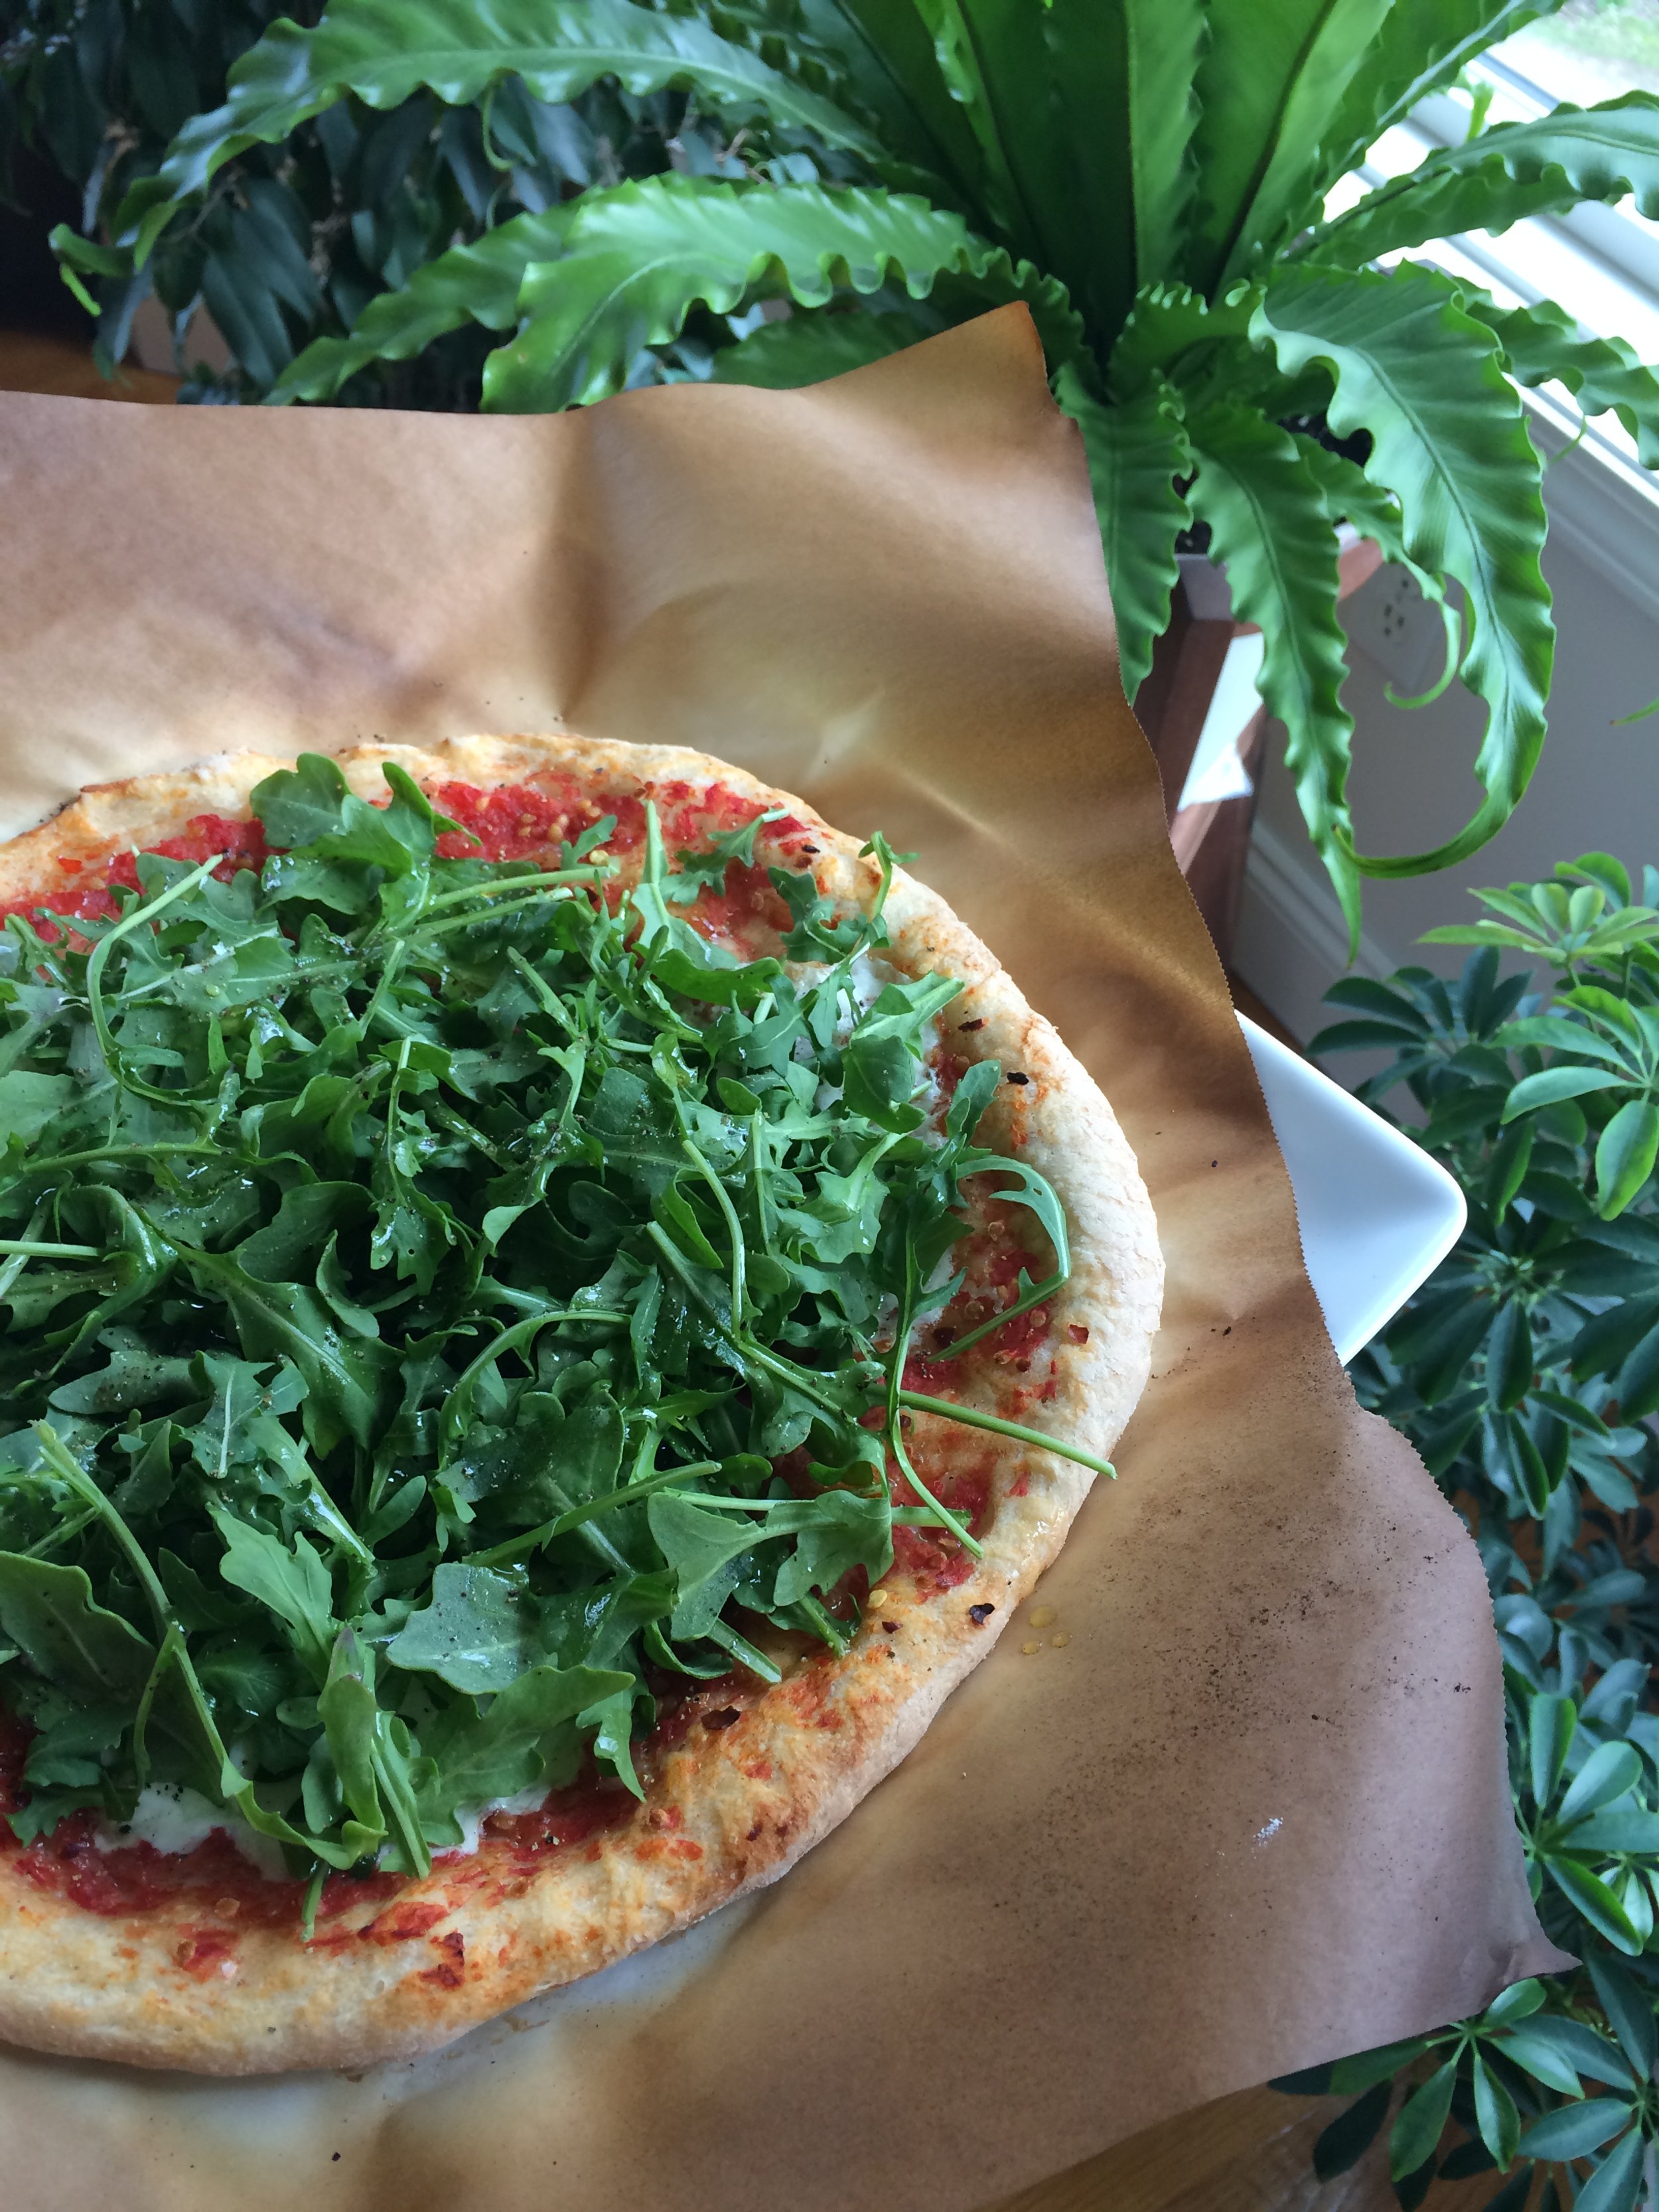
But where is the pizza? ;) Arugula Pizza

Keep in mind that sourdough is highly individual. Meaning, the time you give it, how active it is, the temperature of your house, types of flour you use, etc. will all affect your starter and your end product. For example, I’ve started sourdough starter on two separate continents with results that varied quite a bit. I’ve made this recipe several times with both my Italian and American starter. To be honest I always had more success with my American starter, it feels invincible where my Italian one always needed some tender care and coaxing. But maybe I subconsciously gave my Italian starter too much free reign thinking that it ought to know what to do, being Italian in the land of pizza, after all. Anyway, here goes nothing:

  1. When making sourdough breads, most recipes will assume or instruct you to have an active (freshly fed) starter. This means you probably fed your starter at least once the day before starting the recipe, and you’re not just taking your starter straight out of the fridge to start the recipe. Recipes that use NOT refreshed starters will often call themselves discard this or discard that.

    I USUALLY use my starter straight out of the fridge for this recipe. In fact, there may be a note somewhere with this recipe that says you can use your starter straight out of the fridge, making this not such a guilty confession. That’s another great thing about this recipe. And it turns out great. I will mention, though, that sometimes my Italian starter would yield a less fluffy crust, and I found more success if it was recently refreshed.

  2. I once read that it’s actually very hard to kill a (well-established) sourdough starter if it’s kept in the fridge. This relieved a great amount of guilt for me, as, if more than 1 week passed since I had last fed my starter, I had this constant nagging that every day more that passed my starter was dying and suffering. And while the sourdough starters of one person (me) are hardly a vast study, I would say this has turned out true. Even 1 month+ in the fridge and after just one feed it bounced back and was lively. Nice.

  3. Keep in mind the word “recipe” when associated with “sourdough” should be used loosely. Formula is a better word. The beauty, and frustrating part of sourdough is that it IS so variable. If something isn’t going right, in this recipe or any other with sourdough, go back to your starter, your little living friend. My two biggest mistakes with sourdough starter have been not giving a new starter enough time to get established, and not giving the actual dough enough time to rise. It can feel strange to let dough rise so many hours rather than the typical 1-2 hours with commercial yeast if that’s what you’re used to!

While the following recipe uses both volume and weight measurements, as is usual on this blog, I would encourage you in all baking but especially with sourdough to start using a scale. It makes everything easier, creates less dishes to wash, and is quicker and more accurate. When you’re working with sourdough it really does make most sense to use a scale. Scales are not expensive and you don’t need a top of the line one to do the job!

The Difference between “Sourdough Starter” and “Levain”

If these two terms confuse you, hopefully this explanation will help you.

Sourdough starter is your flour and water mixture that you keep in the fridge and feed.

Levain refers to the usually first part of a sourdough recipe where you add sourdough starter with more flour and water, that will end up as part of your bread product. Another way you can think of it, the levain is built from the starter and will always end up baked.

This post may contain affiliate links. If you make a purchase using these links, Jennyblogs may receive a small commission, at no extra cost to you. This helps to support Jennyblogs. For further information see the privacy policy. Grazie!

Recipe lightly adapted from Ken Forkish’s “The Elements of Pizza”


24+hr Levain Pizza Dough

Makes 2 large, 3 medium, or 5 small pizzas

Ingredients:

Day 1

  • 50g (2 Tbsp + 1 tsp) sourdough starter

  • 100g (1/3 cup + 4 tsp) water

  • 100g (3/4 cup + 2 tsp) bread flour or all-purpose flour

Day 2

  • 225g (scant 1 cup) water

  • 14g (2 1/2 tsp) salt

  • 250g (All of the levain [sourdough]) from day 1

  • 375g (scant 3 cups) all-purpose flour

Directions:

Day 1

  1. The evening before you intend to make pizzas, mix together in a medium bowl the sourdough starter, warm (100°F / 38°C) water, and flour.

  2. Cover the bowl and let it sit out on the countertop overnight.

Day 2

  1. Roughly 12 hours later, your starter from the day before should be bubbly, goopy, and active.

  2. Pour warm (90-95°F / 32°-38°C) water into a large bowl, add salt, and stir until salt has dissolved.

  3. Mix in all of the levain started the previous evening; it may not completely mix in, that’s ok. You can use a spoon or your hand with a “pincer” like motion, like a crab, helping the levain to break up into the water.

  4. Add flour and stir, with a spoon or by hand, just until dough forms into a mostly uniform mass. Continue for about 30 seconds, a shaggy looking dough ball is ok. Target dough temperature is 80°F / 27°C.

  5. Let dough rest for 20 minutes.

  6. Knead dough for 30 seconds - 1 minute on a lightly floured surface, dough should become very smooth and uniform. Shape into a ball and place seam side down into a lightly greased bowl; cover.

  7. Let dough rest at room temperature for about 3 hours.

  8. Turn dough out onto lightly floured surface and shape into desired number of balls (2 for larger pizzas, 3 for medium, or 5 for small), using a scale for consistency. Place shaped dough balls seam side down onto a lightly floured sheet tray, parchment paper, or silpat, keeping space between. Lightly flour tops and cover with plastic wrap; let rest for another 5 hours.

    After the 5 hours, the dough balls can either be refrigerated and used to make pizzas the next day (day 3), or continue and make pizzas!

Make Pizzas

  1. If you have a pizza stone, place it on the middle rack of your oven before turning it on.

  2. Preheat oven to 550°F / 288°C or the max of your oven.

  3. Roll with a rolling pin or toss a pizza dough ball to desired size, using lightly floured hands. Place dough round on parchment paper to easily transfer on and off the pizza stone.

  4. Bake about 5-7 minutes for small pizzas, 6-9 for medium, or 8-12 for large pizzas, using your eyes to test for readiness more than time.

Jenny’s Notes:

  • While I include the original temperature notes for ingredients from Ken Forkish’s original recipe, I will confess I don’t always take the time to measure or check them as I make this often enough in roughly the same environment/temperature house that I just go with it. It’s very educational to do so with new recipes and in new environments, and helps when sharing a sourdough recipe to keep the recipe as consistent as possible, keeping some of the factors (like temperature) the same.

  • The 8 hour rise time on day 2 as a mass, then as dough balls, (steps 7 and 8) doesn’t have to be precise, if you need to shape the dough after 2 hours, that’s perfectly fine, you just want a total time of about 8 hours, so you could rest the dough for 2 hours, shape, then rest for 6 hours.

  • If you refrigerate your dough and use it to make pizzas on what would be day 3, take dough out of the fridge about an hour before making/baking pizzas. In a pinch I’ve used the dough straight out of the fridge, but the dough will rise better and be fluffier if you don’t go cold turkey, heh.

  • If you’ve never used your oven at its maximum temperature and think that’s crazy, just keep in mind that pizzas made in wood burning pizza ovens like they are in Italy, are baked at temperatures of up to 900°F / 485°C, so your home oven at its max isn’t even going to get near the burst of heat that make the best pizzas!

pizza dough, levain, sourdough starter, homemade pizza
dinner
Italian, American
Yield: 3-5 pizzas
Author:
24 Hour Levain Pizza Dough

24 Hour Levain Pizza Dough

Homemade sourdough pizza crust in just 24 hours, with time doing most of the work for you!
Prep time: 35 MinCook time: 25 MinInactive time: 20 H & 20 MTotal time: 21 H & 20 M

Ingredients

Day 1
Day 2

Instructions

Day 1
  1. The evening before you intend to make pizzas, mix together in a medium bowl the sourdough starter, warm (100°F / 38°C) water, and flour.
  2. Cover the bowl and let it sit out on the countertop overnight.
Day 2
  1. Roughly 12 hours later, your starter from the day before should be bubbly, goopy, and active.
  2. Pour warm (90-95°F / 32°-38°C) water into a large bowl, add salt, and stir until salt has dissolved.
  3. Mix in all of the levain started the previous evening; it may not completely mix in, that’s ok. You can use a spoon or your hand with a “pincer” like motion, like a crab, helping the levain to break up into the water.
  4. Add flour and stir, with a spoon or by hand, just until dough forms into a mostly uniform mass. Continue for about 30 seconds, a shaggy looking dough ball is ok. Target dough temperature is 80°F / 27°C.
  5. Let dough rest for 20 minutes.
  6. Knead dough for 30 seconds - 1 minute on a lightly floured surface, dough should become very smooth and uniform. Shape into a ball and place seam side down into a lightly greased bowl; cover.
  7. Let dough rest at room temperature for about 3 hours.
  8. Turn dough out onto lightly floured surface and shape into desired number of balls (2 for larger pizzas, 3 for medium, or 5 for small), using a scale for consistency. Place shaped dough balls seam side down onto a lightly floured sheet tray, parchment paper, or silpat, keeping space between. Lightly flour tops and cover with plastic wrap; let rest for another 5 hours.
  9. After the 5 hours, the dough balls can either be refrigerated and used to make pizzas the next day (day 3), or continue and make pizzas!
Make Pizzas
  1. If you have a pizza stone, place it on the middle rack of your oven before turning it on.
  2. Preheat oven to 550°F / 288°C or the max of your oven.
  3. Roll with a rolling pin or toss a pizza dough ball to desired size, using lightly floured hands. Place dough round on parchment paper to easily transfer on and off the pizza stone.
  4. Bake about 5-7 minutes for small pizzas, 6-9 for medium, or 8-12 for large pizzas, using your eyes to test for readiness more than time.

Notes

  • While I include the original temperature notes for ingredients from Ken Forkish’s original recipe, I will confess I don’t always take the time to measure or check them as I make this often enough in roughly the same environment/temperature house that I just go with it. It’s very educational to do so with new recipes and in new environments, and helps when sharing a sourdough recipe to keep the recipe as consistent as possible, keeping some of the factors (like temperature) the same.
  • The 8 hour rise time on day 2 as a mass, then as dough balls, (steps 7 and 8) doesn’t have to be precise, if you need to shape the dough after 2 hours, that’s perfectly fine, you just want a total time of about 8 hours, so you could rest the dough for 2 hours, shape, then rest for 6 hours.
  • If you refrigerate your dough and use it to make pizzas on what would be day 3, take dough out of the fridge about an hour before making/baking pizzas. In a pinch I’ve used the dough straight out of the fridge, but the dough will rise better and be fluffier if you don’t go cold turkey, heh.
  • If you’ve never used your oven at its maximum temperature and think that’s crazy, just keep in mind that pizzas made in wood burning pizza ovens like they are in Italy, are baked at temperatures of up to 900°F / 485°C, so your home oven at its max isn’t even going to get near the burst of heat that make the best pizzas!


Nutrition Facts

Calories

591.5

Fat

1.59 g

Sat. Fat

0.24 g

Carbs

124.01 g

Fiber

4.39 g

Net carbs

119.62 g

Sugar

0.43 g

Protein

16.78 g

Sodium

1817.54 mg

Cholesterol

0 mg

Nutritional information is approximate. Based on 1 pizza dough ball if you make 3 medium sized dough balls.

Did you make this recipe?
Tag @jennyblogsandbakes on instagram and hashtag it #jennyblogs

Slata Tounsia - Tunisian Salad

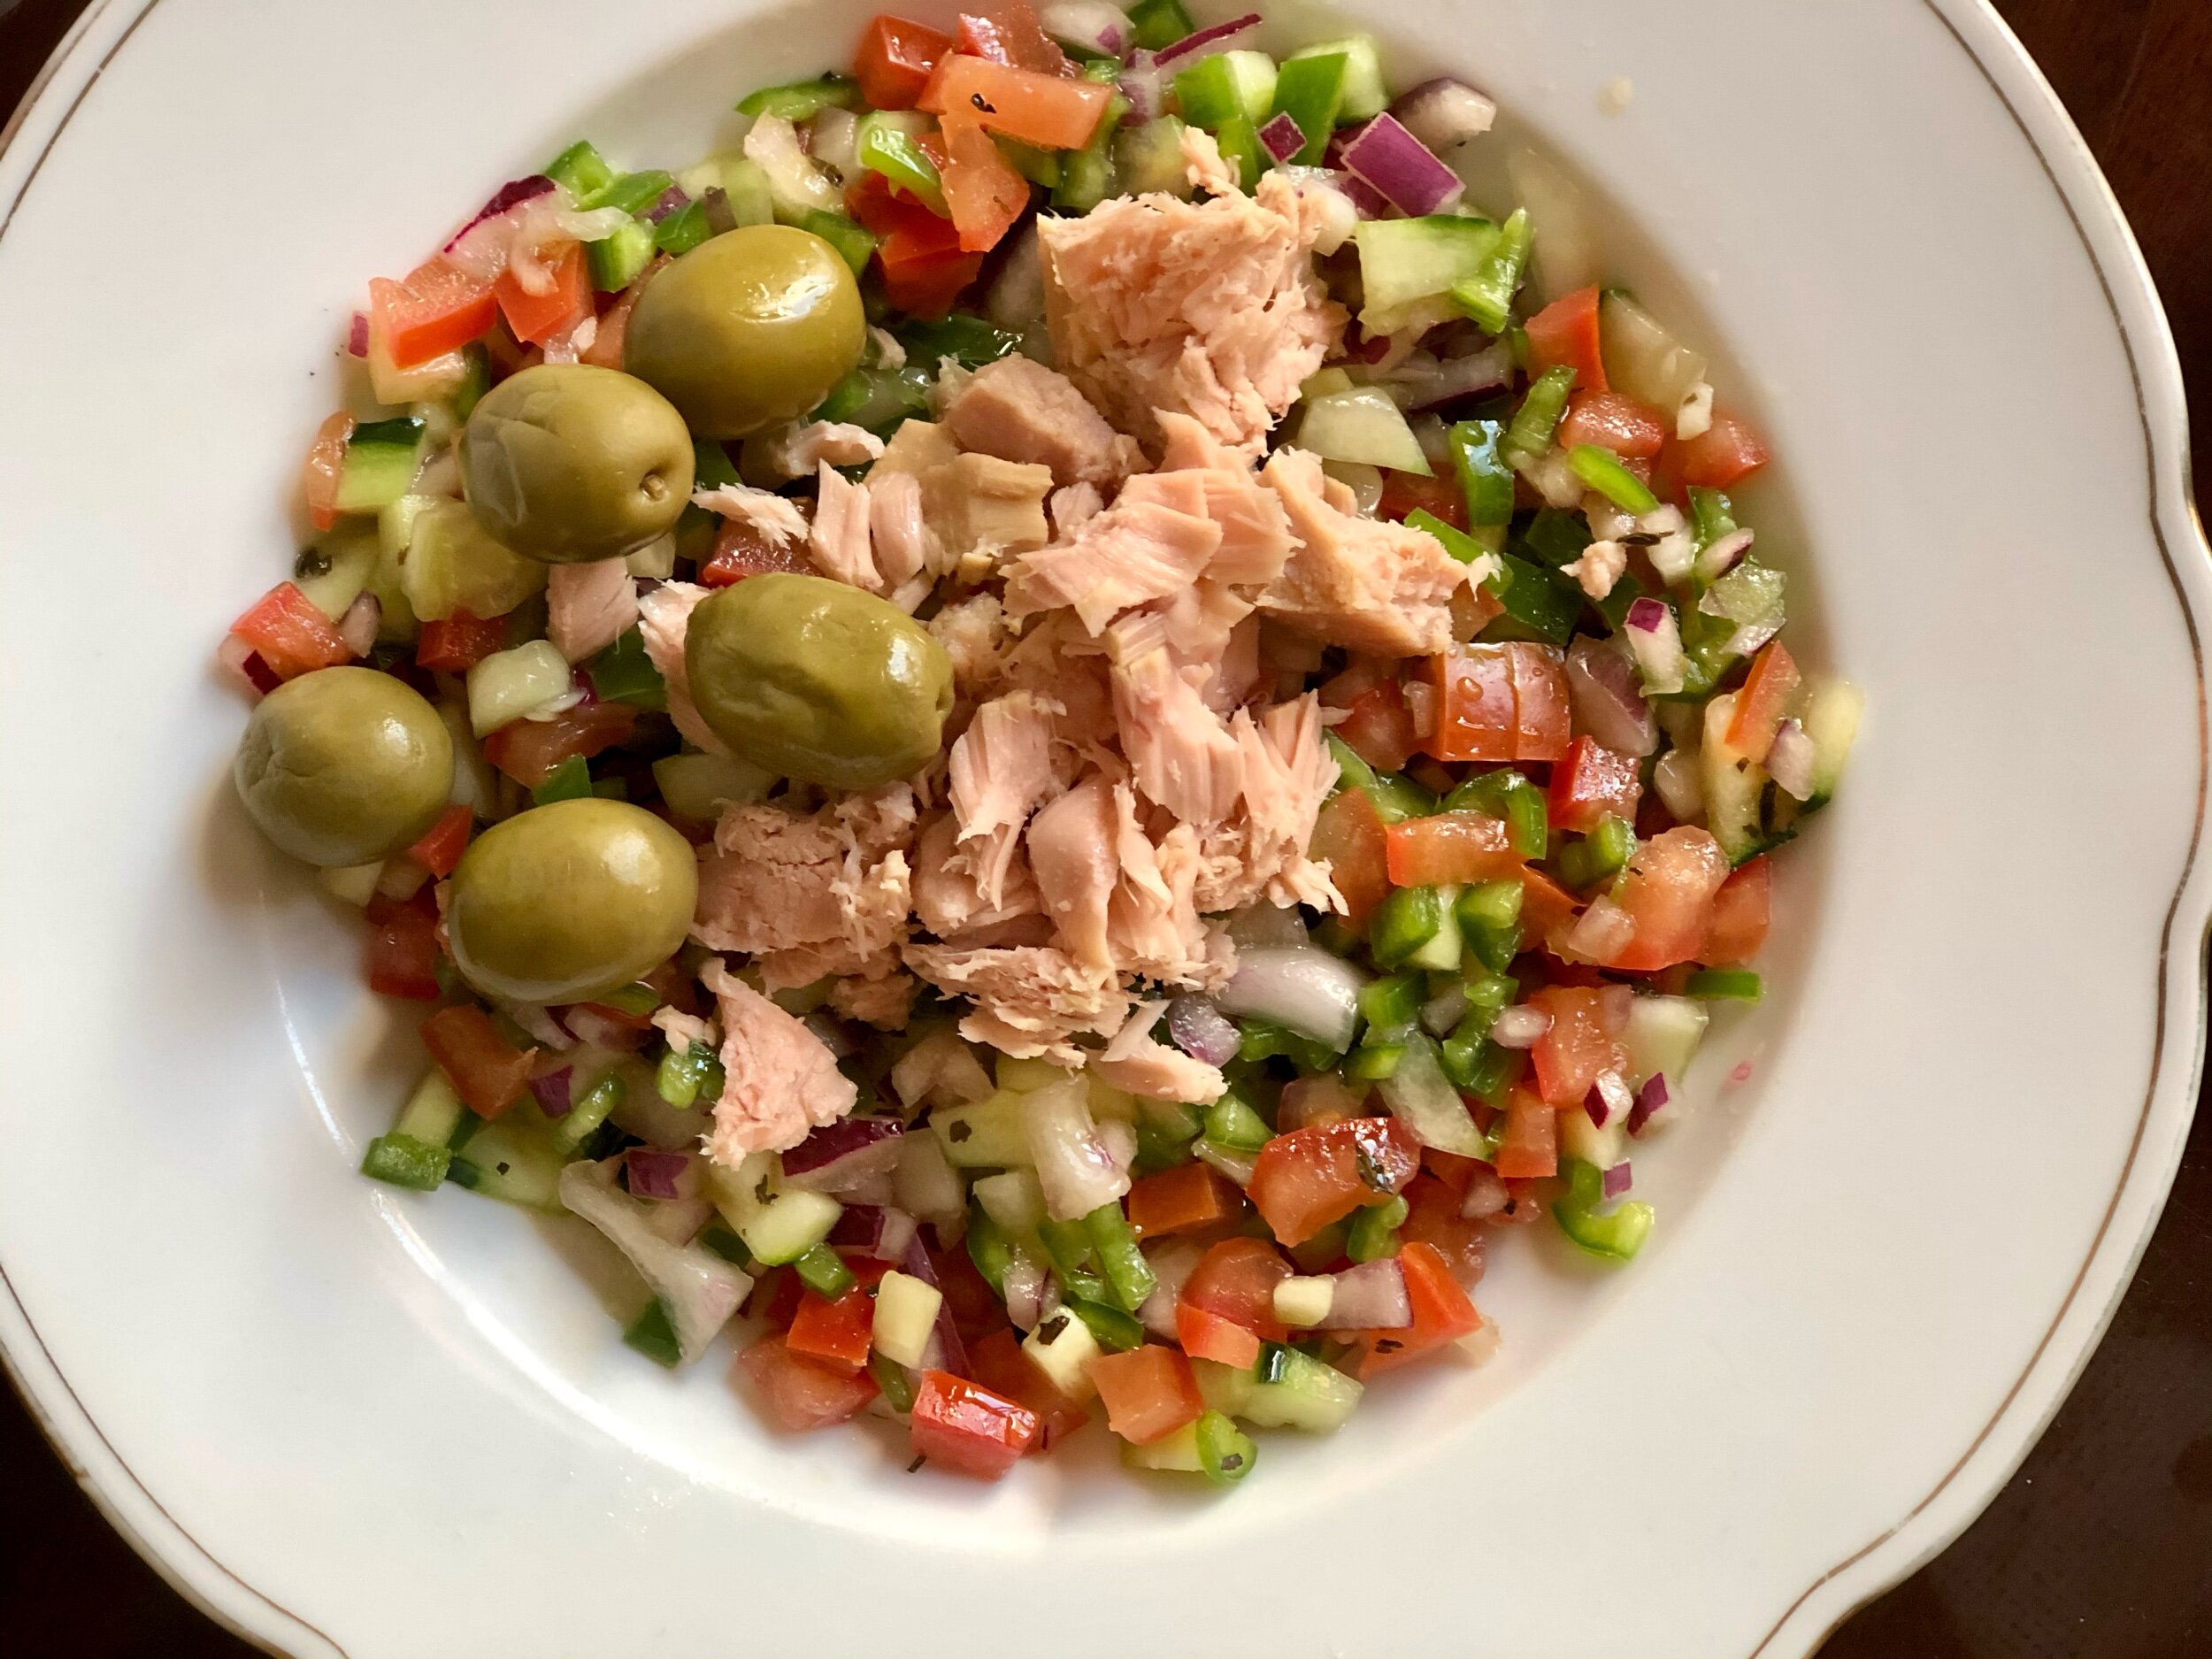
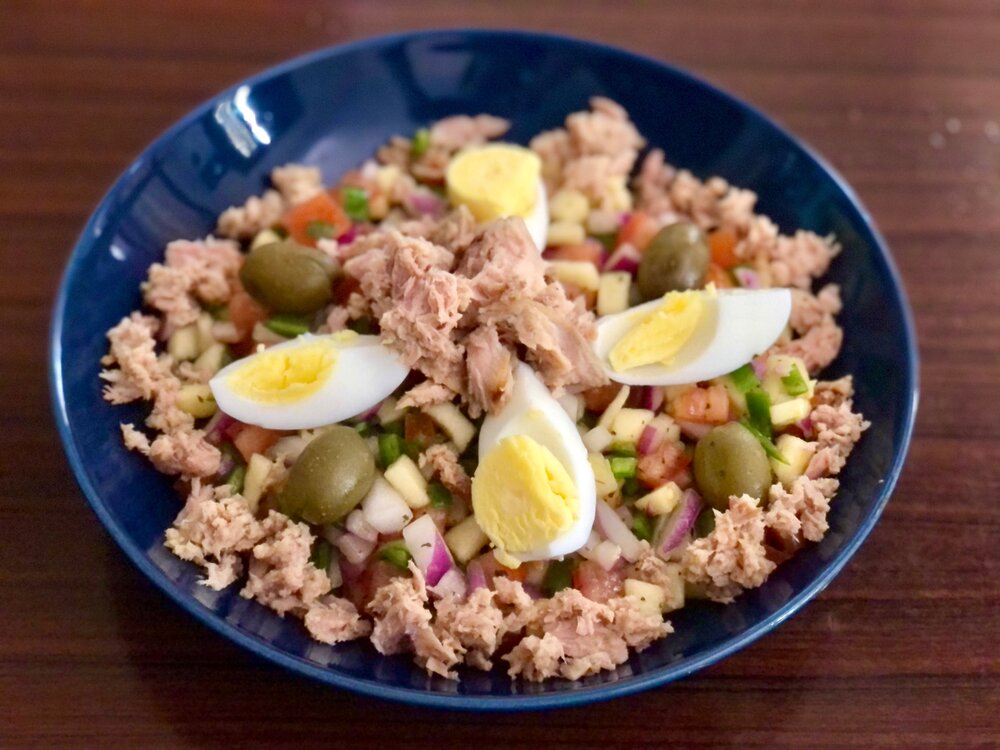
Slata Tounsia, or Tunisian Salad, also called Salade Tunisienne, is a summertime classic in Tunisia.

Unlike most American salads that involve lettuce, there is no lettuce to be seen here, just tomato, cucumber, onion, apple, jalapeno peppers and a bright dressing that brings it all together and makes it irresistible. It’s simple, yet delicious.

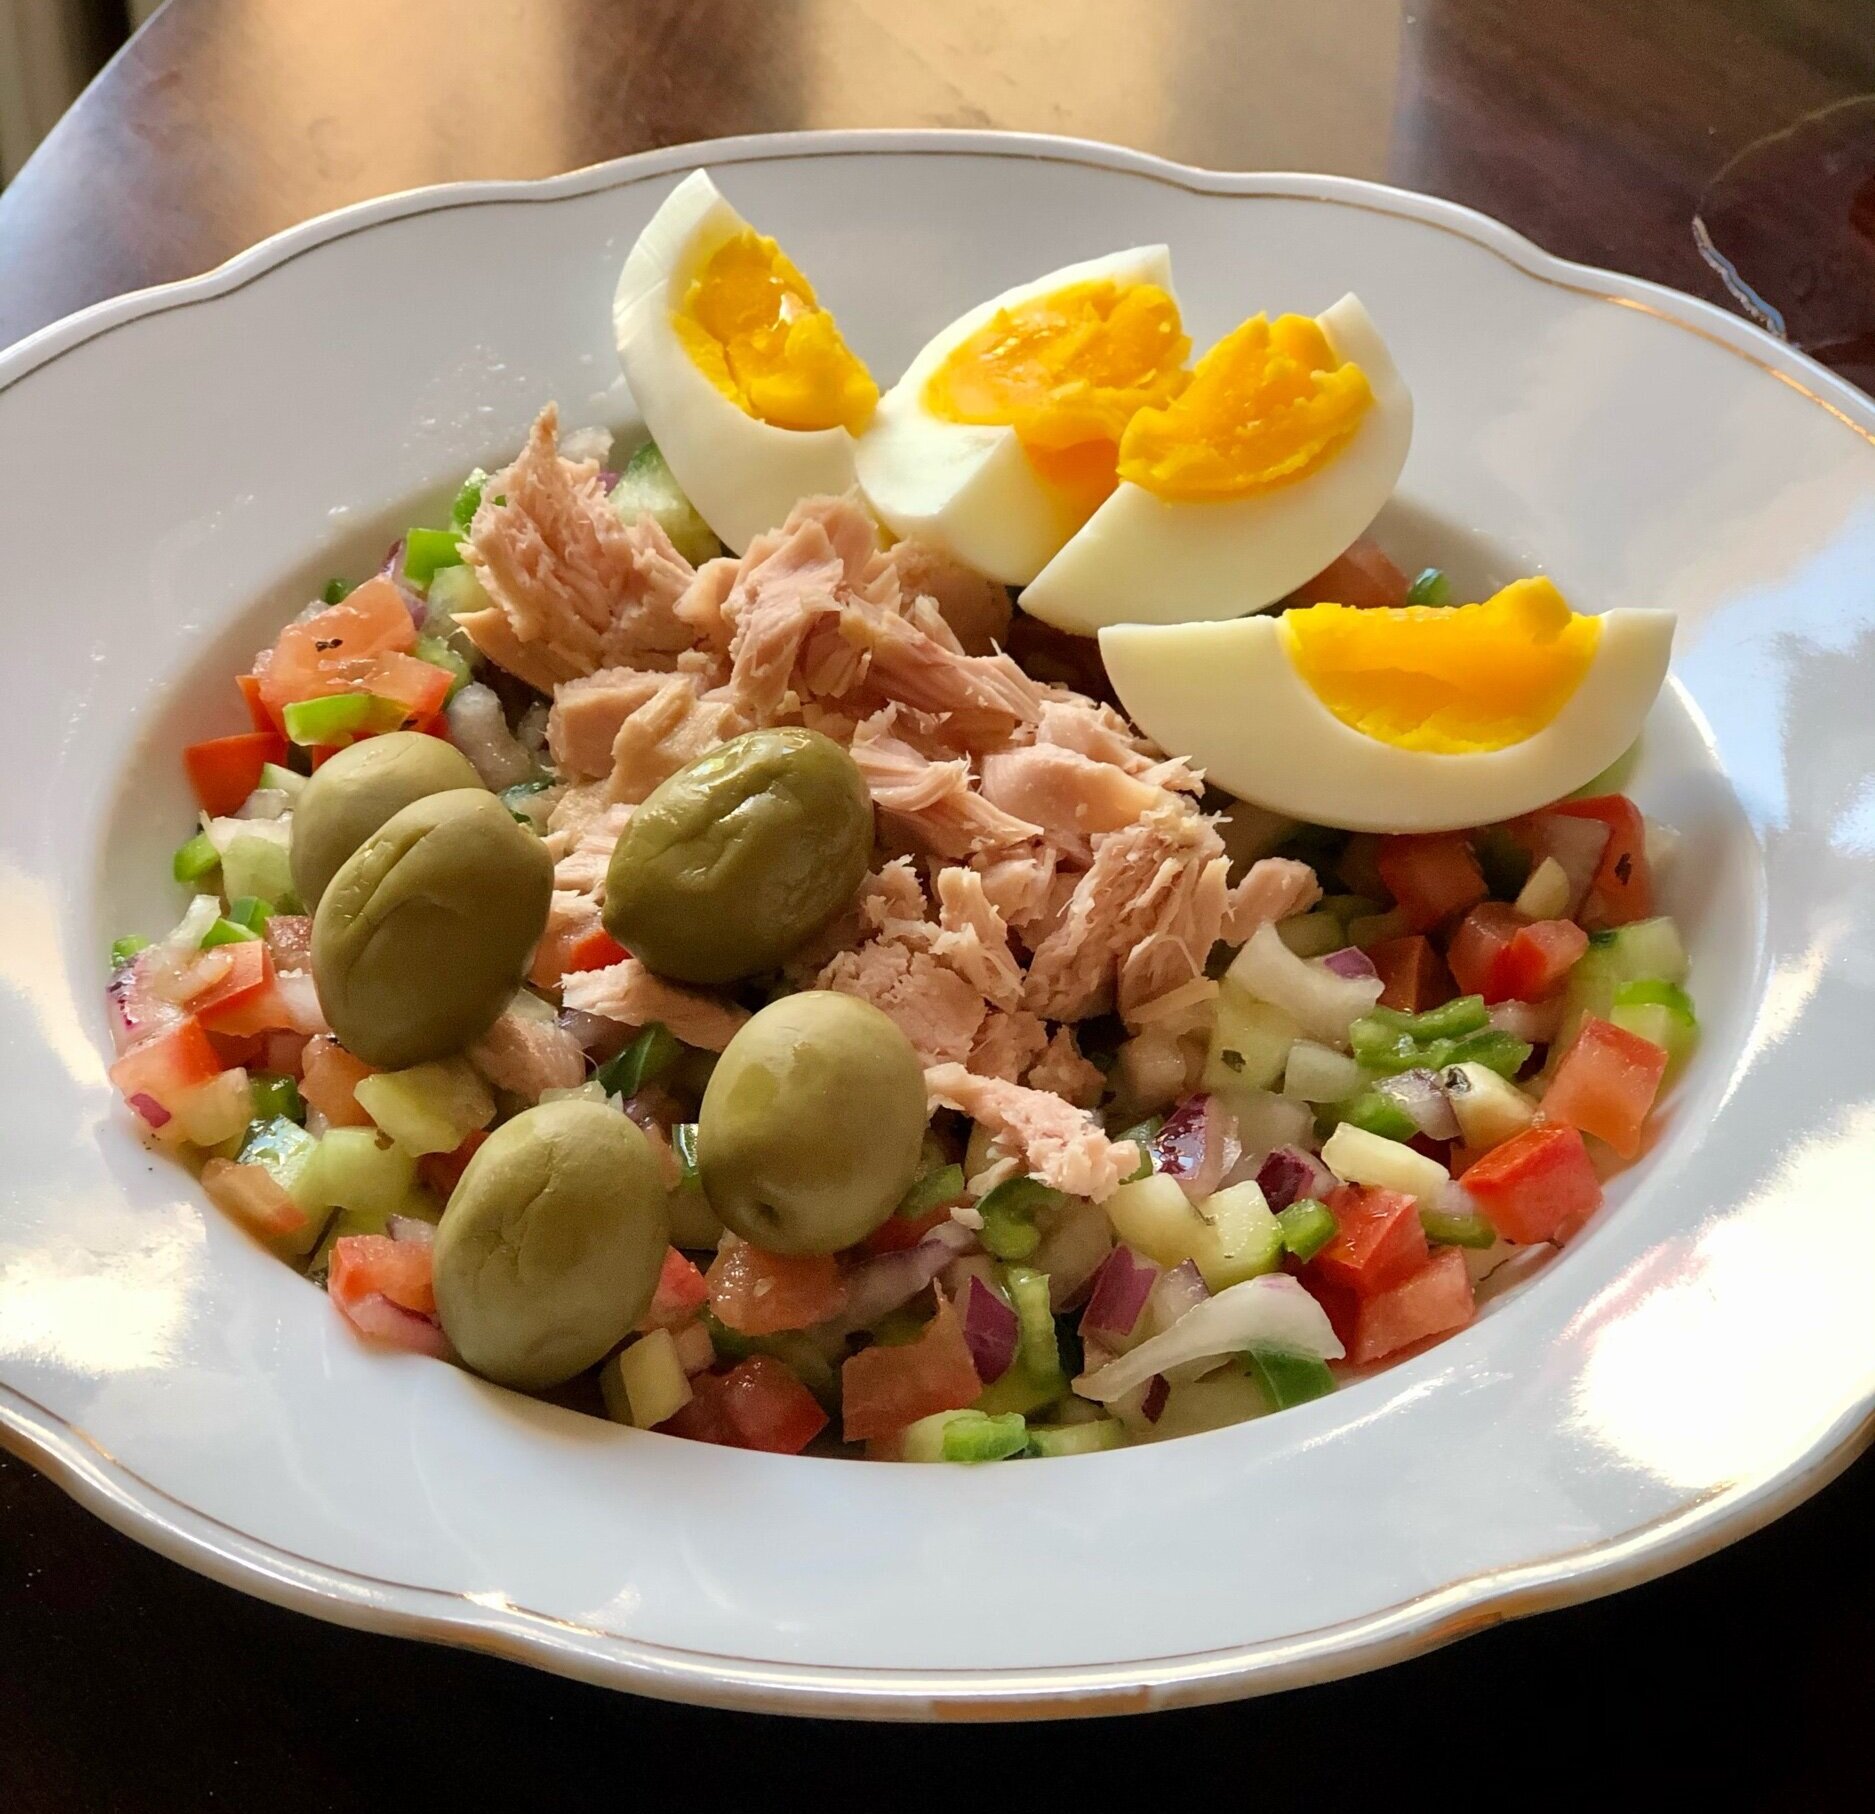
It can be served as is as a side dish, or as it would be served traditionally, with tuna and hard boiled eggs, and olives, making it a well-rounded meal. I’m partial to the full-meal version, although my mom would probably be making fun of me since every time I call her and she asks what we’re having for dinner tuna, eggs, or both are probably involved. Hey, they’re good for you! Very mediterranean, you find lots of eggs and tuna in Italy as well.

The most classic version of the salad doesn’t include apple, even though many in Tunisia add it. We always add it because it gives such a happy and sweet element to the salad. I thought it sounded a bit strange at first, but it works really well.

Onion breath and how to avoid the worst of it

If you, like me, love onion but are hesitant to eat it raw if you have to go out in public anytime after, you know….”heyyyyyy guysssss I just ate onion!” you’ll be happy to hear that the dressing helps to cut the strength of the onion. Yes, you’ll still have some onion breath afterwards, but the vinegar and lemon in the dressing do wonders. If you really can’t deal with the onion breath, you can try soaking the onions for a few hours or overnight in the dressing (essentially making pickled onions) to cut their oniony strength even more. This salad I probably ate several times a week last summer when I was pregnant. I craved it but couldn’t deal with the onion breath afterwards, made me gag, haha, so we would leave the onions in the dressing for at least a few hours before finishing the salad.

To further reduce the after effects, I’m just going to go ahead and share some other ideas that I gathered off the internets and found to help. Nothing is foolproof, but it does help.

  1. Brush your teeth. This might seem obvious, but the sooner you can brush your teeth after eating onions or other insulting foods the better.

  2. Floss your teeth. Yep, just like brushing, get out all the stuff from the cracks for the cleanest and best chance at a fresh tasting mouth.

  3. Swish mouthwash.

  4. Chew gum.

  5. Eat other fruits, vegetables, and bread afterwards.

  6. Drink lots of water. I find lemon water to be especially pleasant and offsets the onion taste nicely.

  7. Drink milk. Kinda like when you eat spicy food, drinking milk can help flush out the taste/spice faster.

While it might be overkill to do all, my comfy little routine became brushing and flossing immediately after, drinking lemon water a few times, and chewing gum and rebrushing teeth as needed.

Anyway where were we? Oh yes, making slata tounsia. Enough villainizing the onions, who are friends.

Recipe from the husband


Slata Tounsia - Tunisian Salad

Serves 2 as a main dish or 3-4 as a side

Ingredients:

  • 2 tsp / 10g apple cider vinegar

  • juice from 1/2 a lemon

  • 1 tsp dried mint

  • 1 red onion, diced small

  • 2 cucumbers, diced small

  • 2 tomatoes, diced small

  • 1 apple, peeled if desired and diced small, optional

  • 8 jalapeño peppers, seeds removed and diced small

  • salt to taste

  • extra virgin olive oil, for drizzling

  • tuna, hard-boiled eggs, olives, for serving, optional

Directions:

IMG_3408.jpeg
  1. In a large bowl combine vinegar, lemon, and dried mint. Add the onion and mix to coat evenly. Allow to sit while you chop the rest of the vegetables and fruit.

  2. Add cucumbers, tomatoes, apple, jalapeño peppers, and salt to taste to the bowl with the onions. Taste, adding more salt as needed.

  3. To serve, drizzle with olive oil and arrange tuna and sliced hard-boiled eggs on top.

Jenny’s Notes:

  • While red onion is the best in this salad (and the prettiest!), other types of onions work as well.

  • red wine vinegar, white wine vinegar, or your favorite vinegar could be used in place of apple cider vinegar.

  • 8 jalapeño peppers might seem like a lot, but as long as you’re careful to remove all the seeds the salad will have a light kick but should not be overly spicy. Since peppers can vary in spiciness even if they’re the same variety, it’s always smart to have tasted/used the peppers before consuming them raw so you know what you’re getting yourself into. That said, you could use other types of peppers, spicier varieties if you’re brave or milder if spicy isn’t your thing.

Mediterranean cuisine, Tunisian dish, summer salad, slata tounsia, salade tunisienne
salad, side dish, main dish
Tunisian, Mediterranean
Yield: 2-4
Author:
Slata Tounsia

Slata Tounsia

A classic Tunisian summer salad made of cucumber, tomato, hot peppers, onion, and sometimes apple with a bright and simple dressing served with hard boiled eggs, tuna, and olives.
Prep time: 30 MinTotal time: 30 Min

Ingredients

Instructions

  1. In a large bowl combine vinegar, lemon, and dried mint. Add the onion and mix to coat evenly. Allow to sit while you chop the rest of the vegetables and fruit.
  2. Add cucumber, tomatoes, apple, jalapeño peppers, and salt to taste to the bowl with the onions. Taste, adding more salt as needed.
  3. To serve, drizzle with olive oil and arrange tuna and sliced hard-boiled eggs on top.

Notes

  • While red onion is the best in this salad (and the prettiest!), other types of onions work as well.
  • red wine vinegar, white wine vinegar, or your favorite vinegar could be used in place of apple cider vinegar.
  • 8 jalapeño peppers might seem like a lot, but as long as you’re careful to remove all the seeds the salad will have a light kick but should not be overly spicy. Since peppers can vary in spiciness even if they’re the same variety, it’s always smart to have tasted/used the peppers before consuming them raw so you know what you’re getting yourself into. That said, you could use other types of peppers, spicier varieties if you’re brave or milder if spicy isn’t your thing.

Nutrition Facts

Calories

183.34

Fat

7.96 g

Sat. Fat

1.13 g

Carbs

28.25 g

Fiber

6.65 g

Net carbs

21.61 g

Sugar

17.75 g

Protein

3.27 g

Sodium

111.39 mg

Cholesterol

1.86 mg

Nutritional info is approximate. Based on 2 servings that includes apple. Not including tuna, eggs, and olives.

Did you make this recipe?
Tag @jennyblogsandbakes on instagram and hashtag it #jennyblogs

Explore Italy: Naples

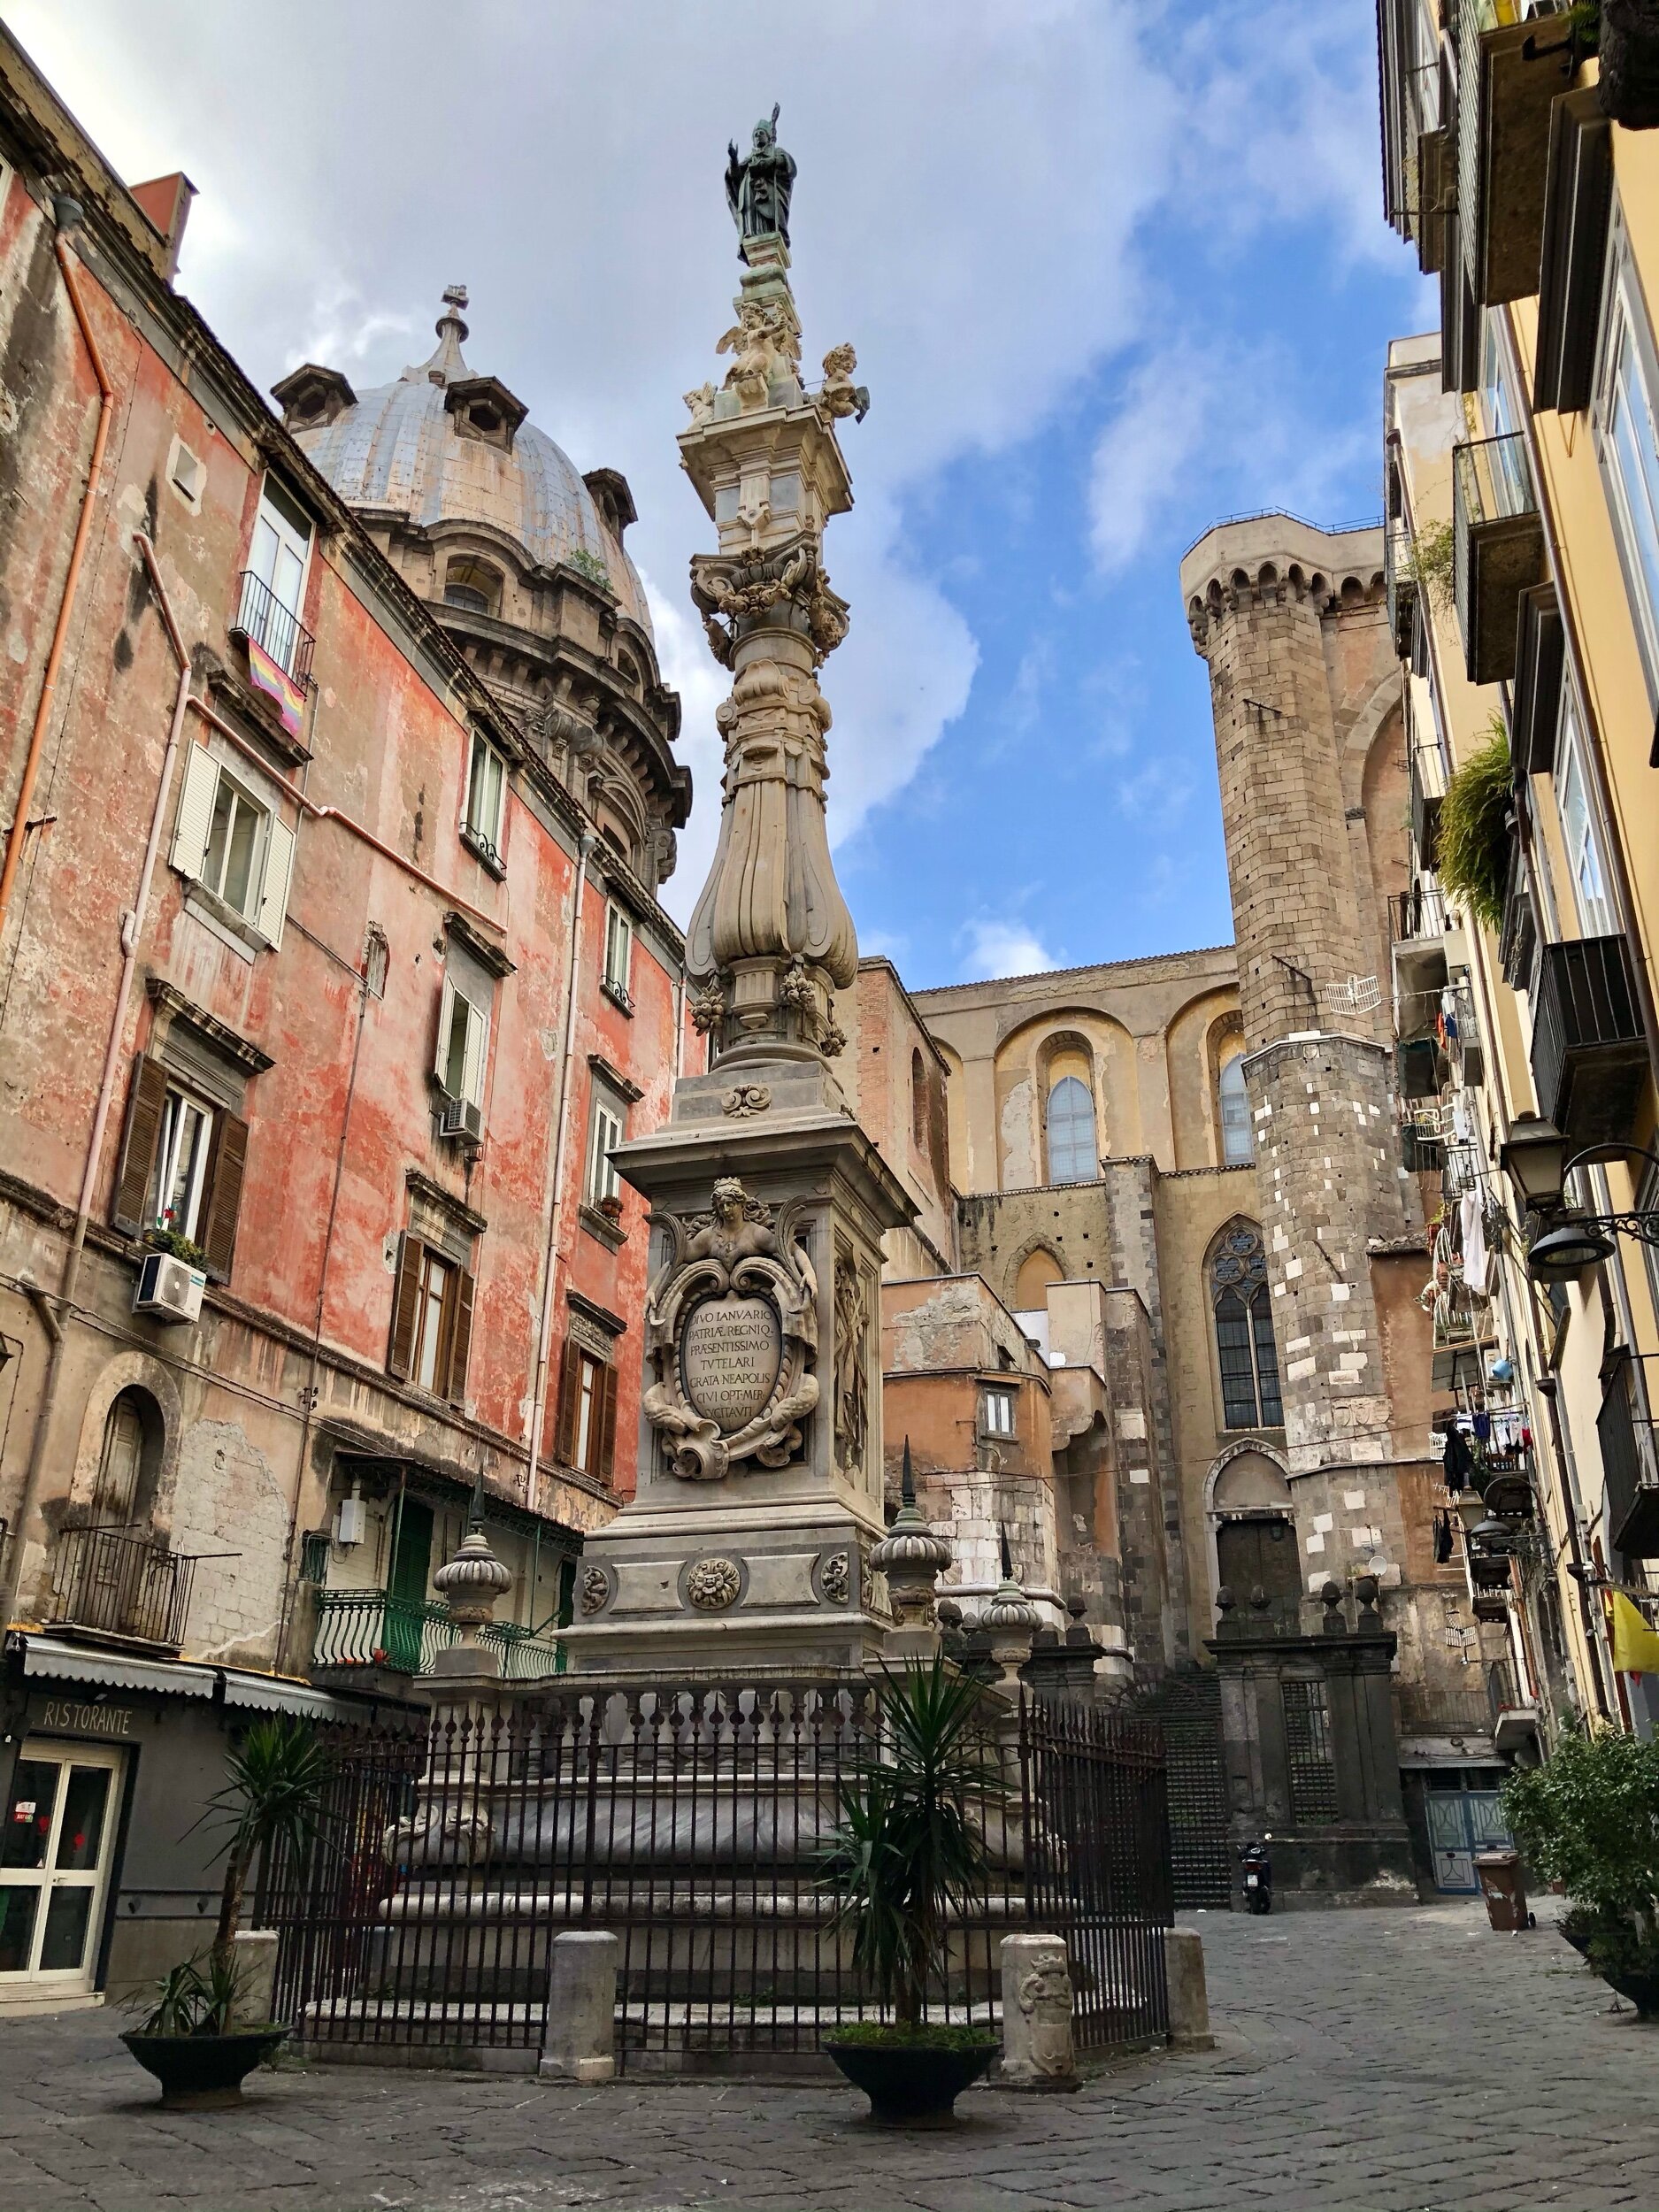
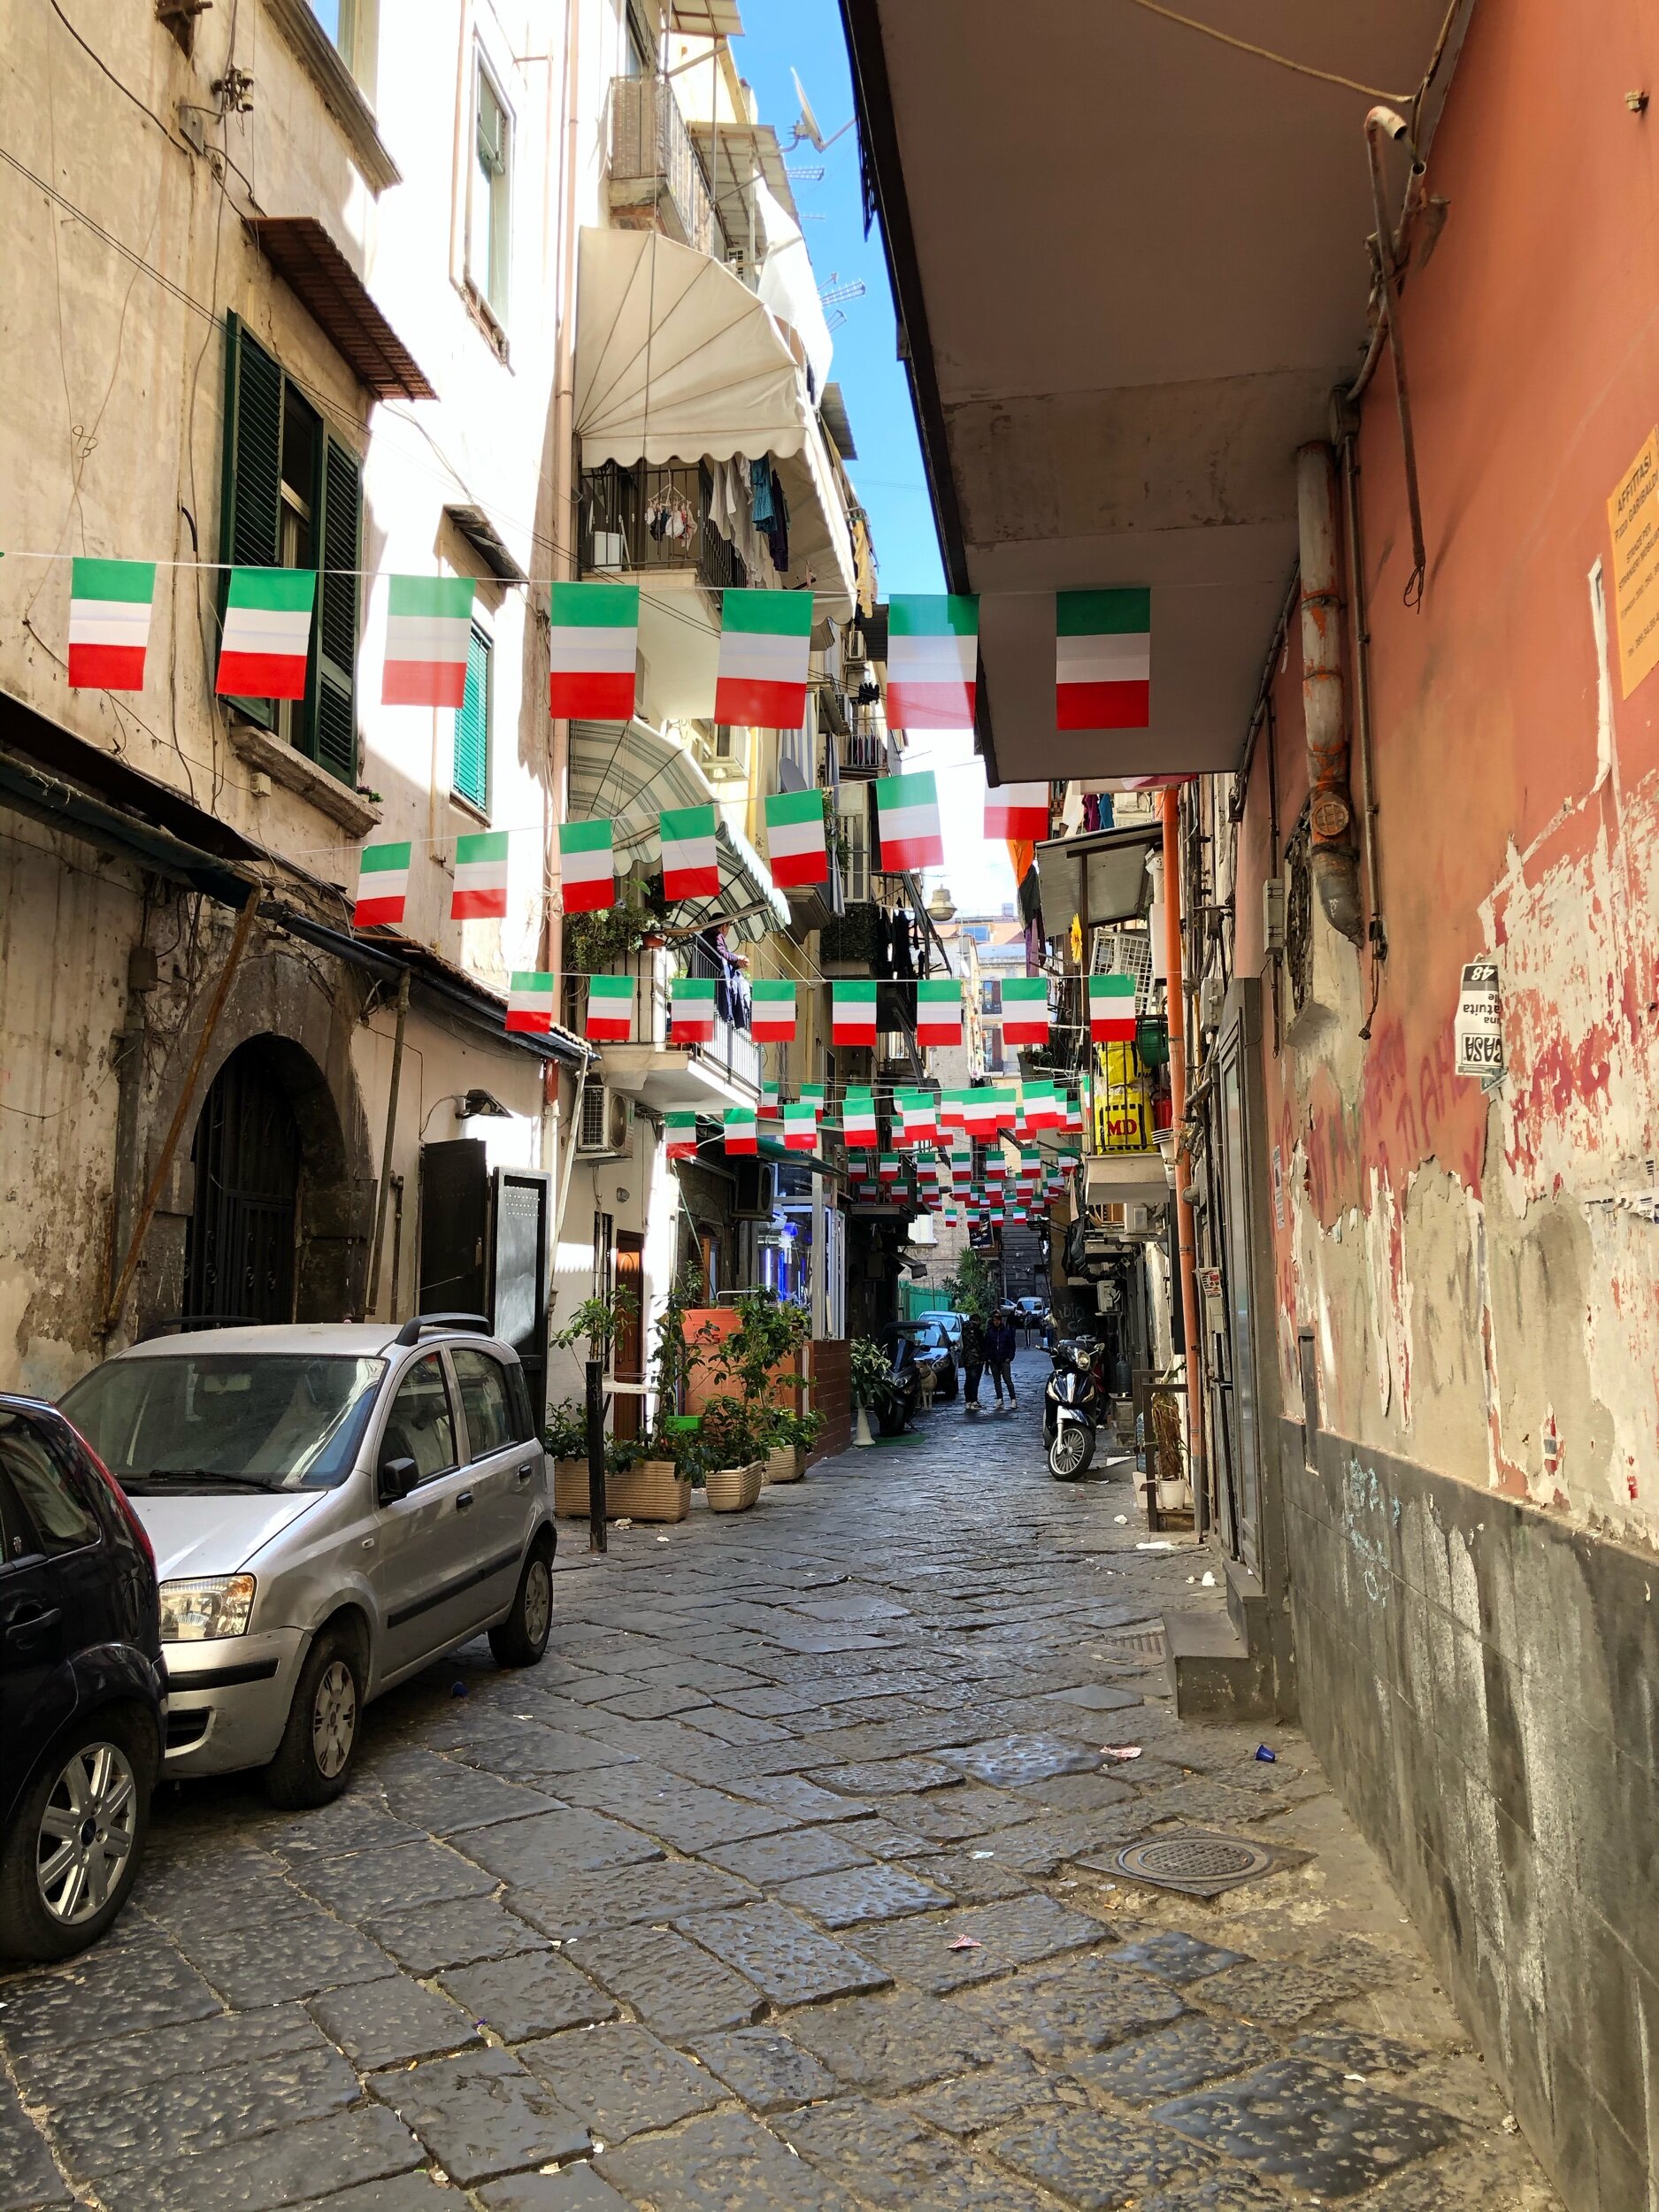
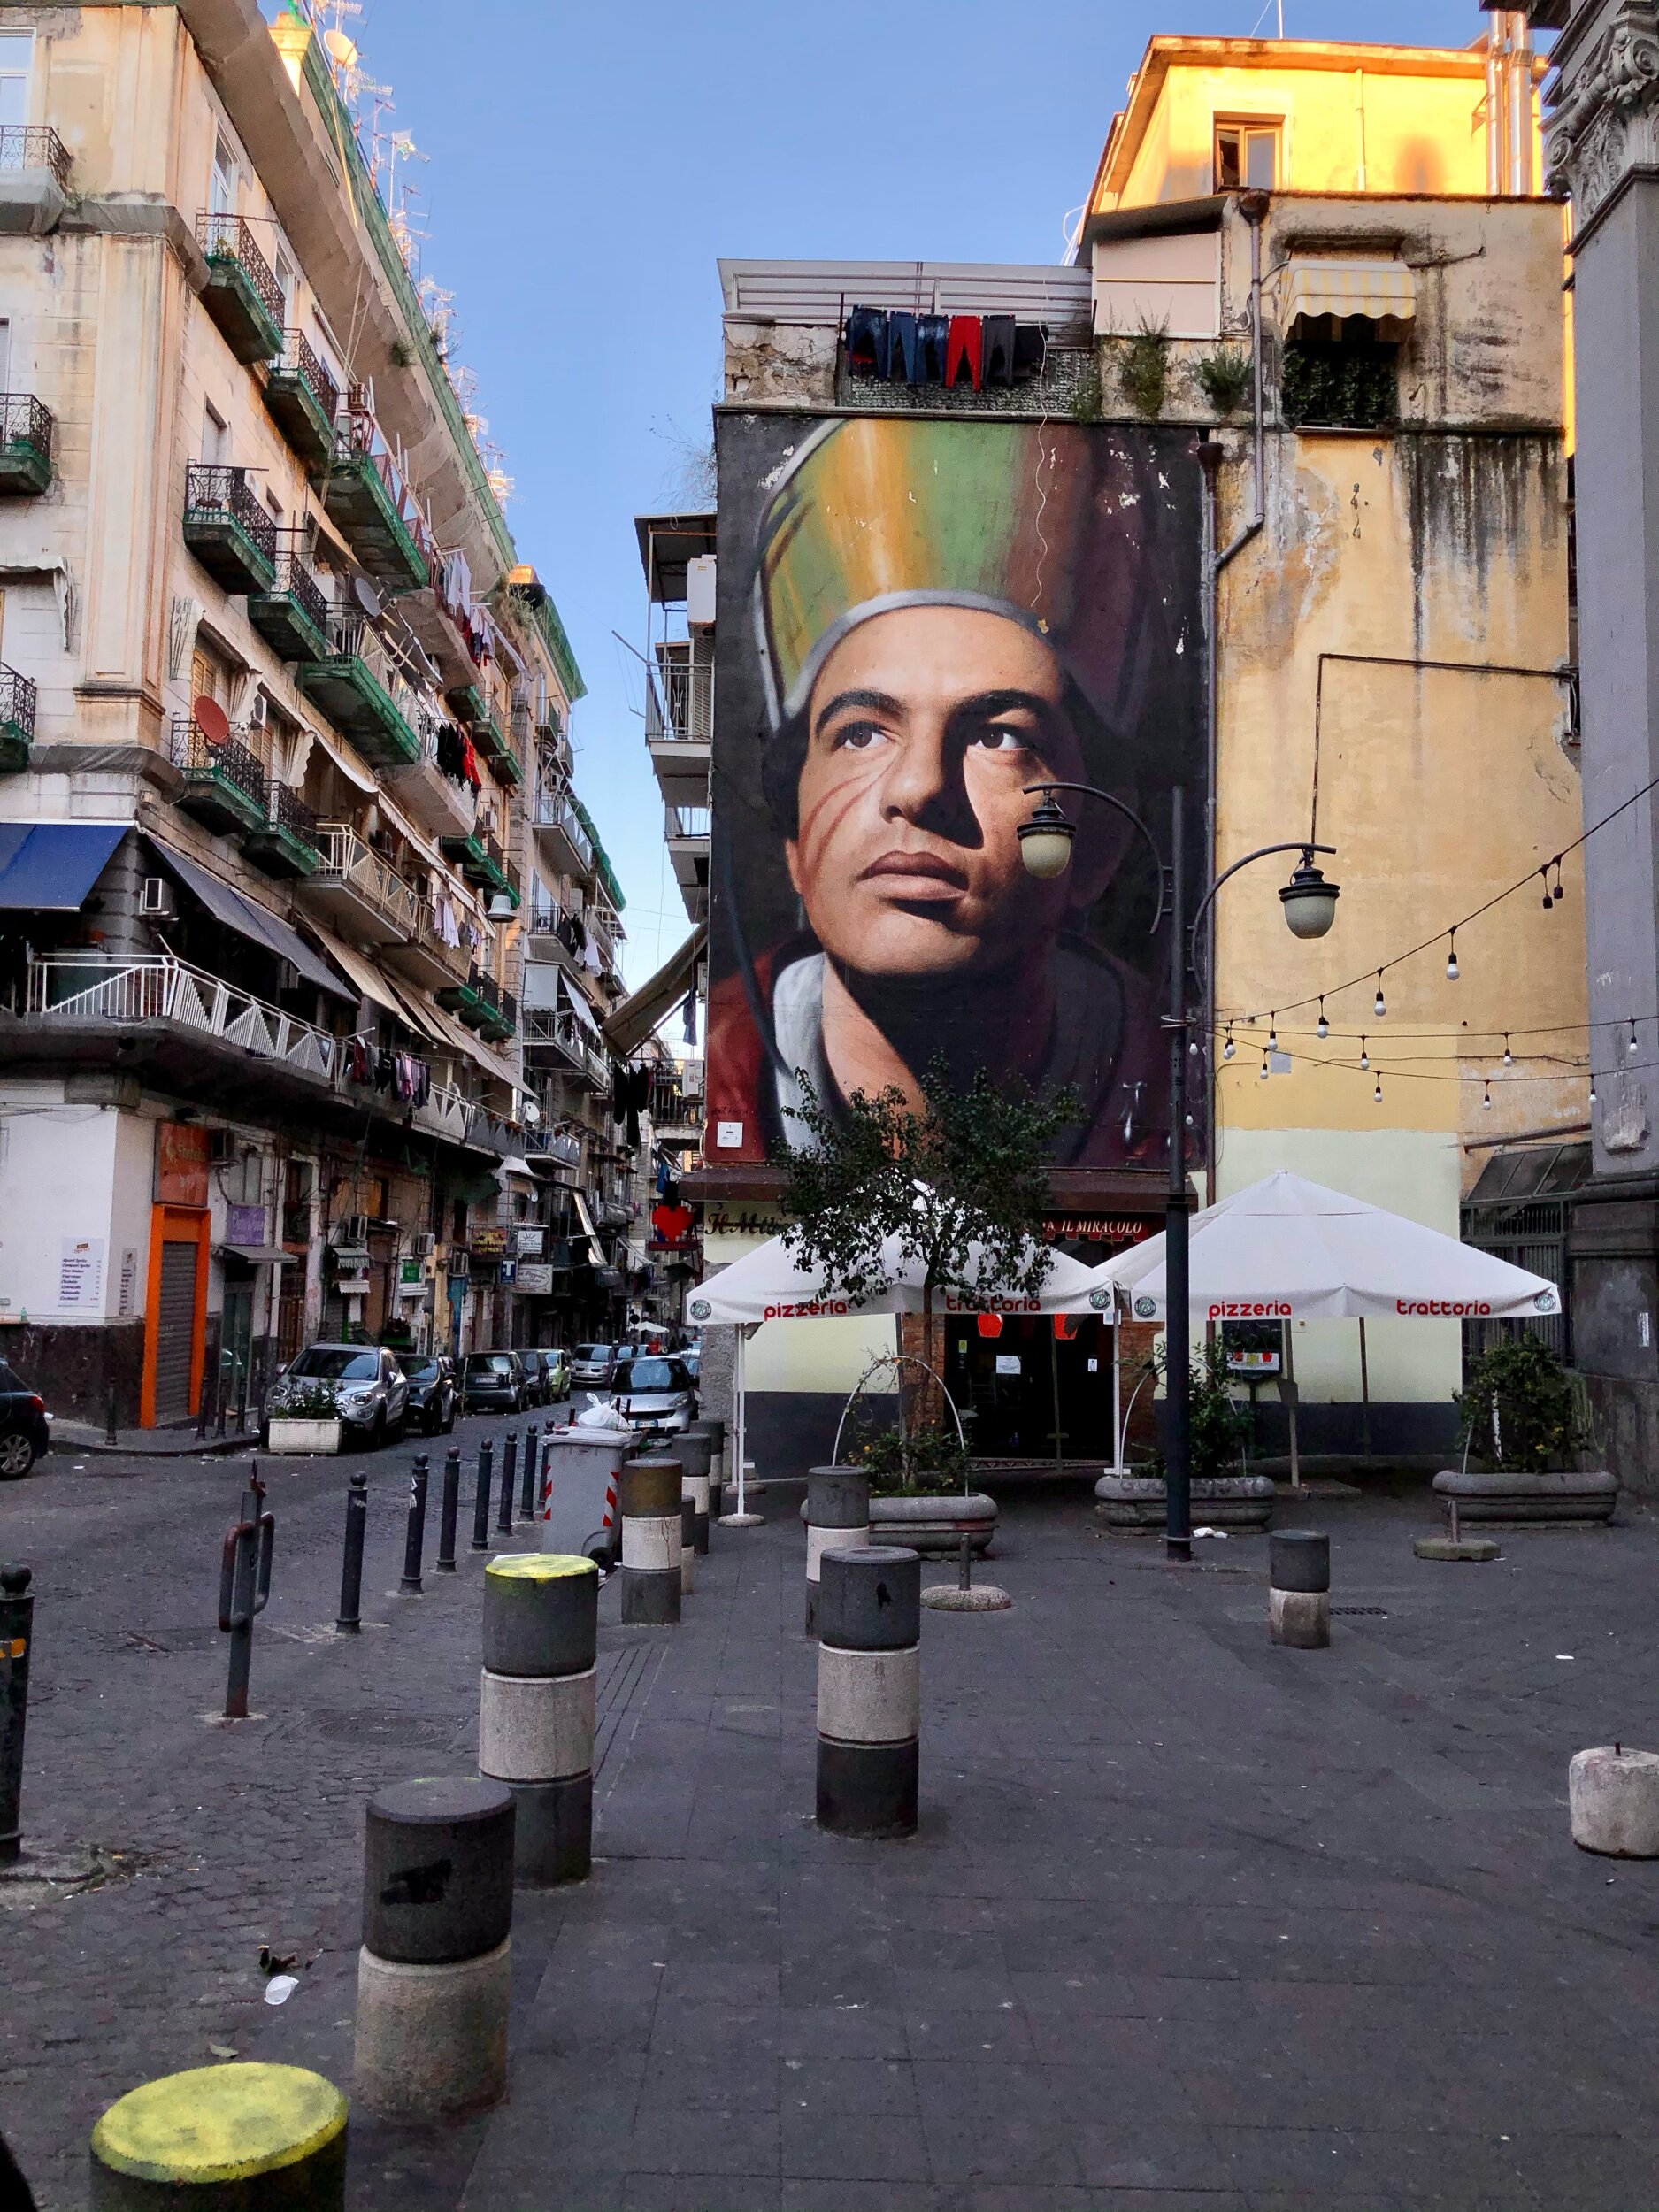
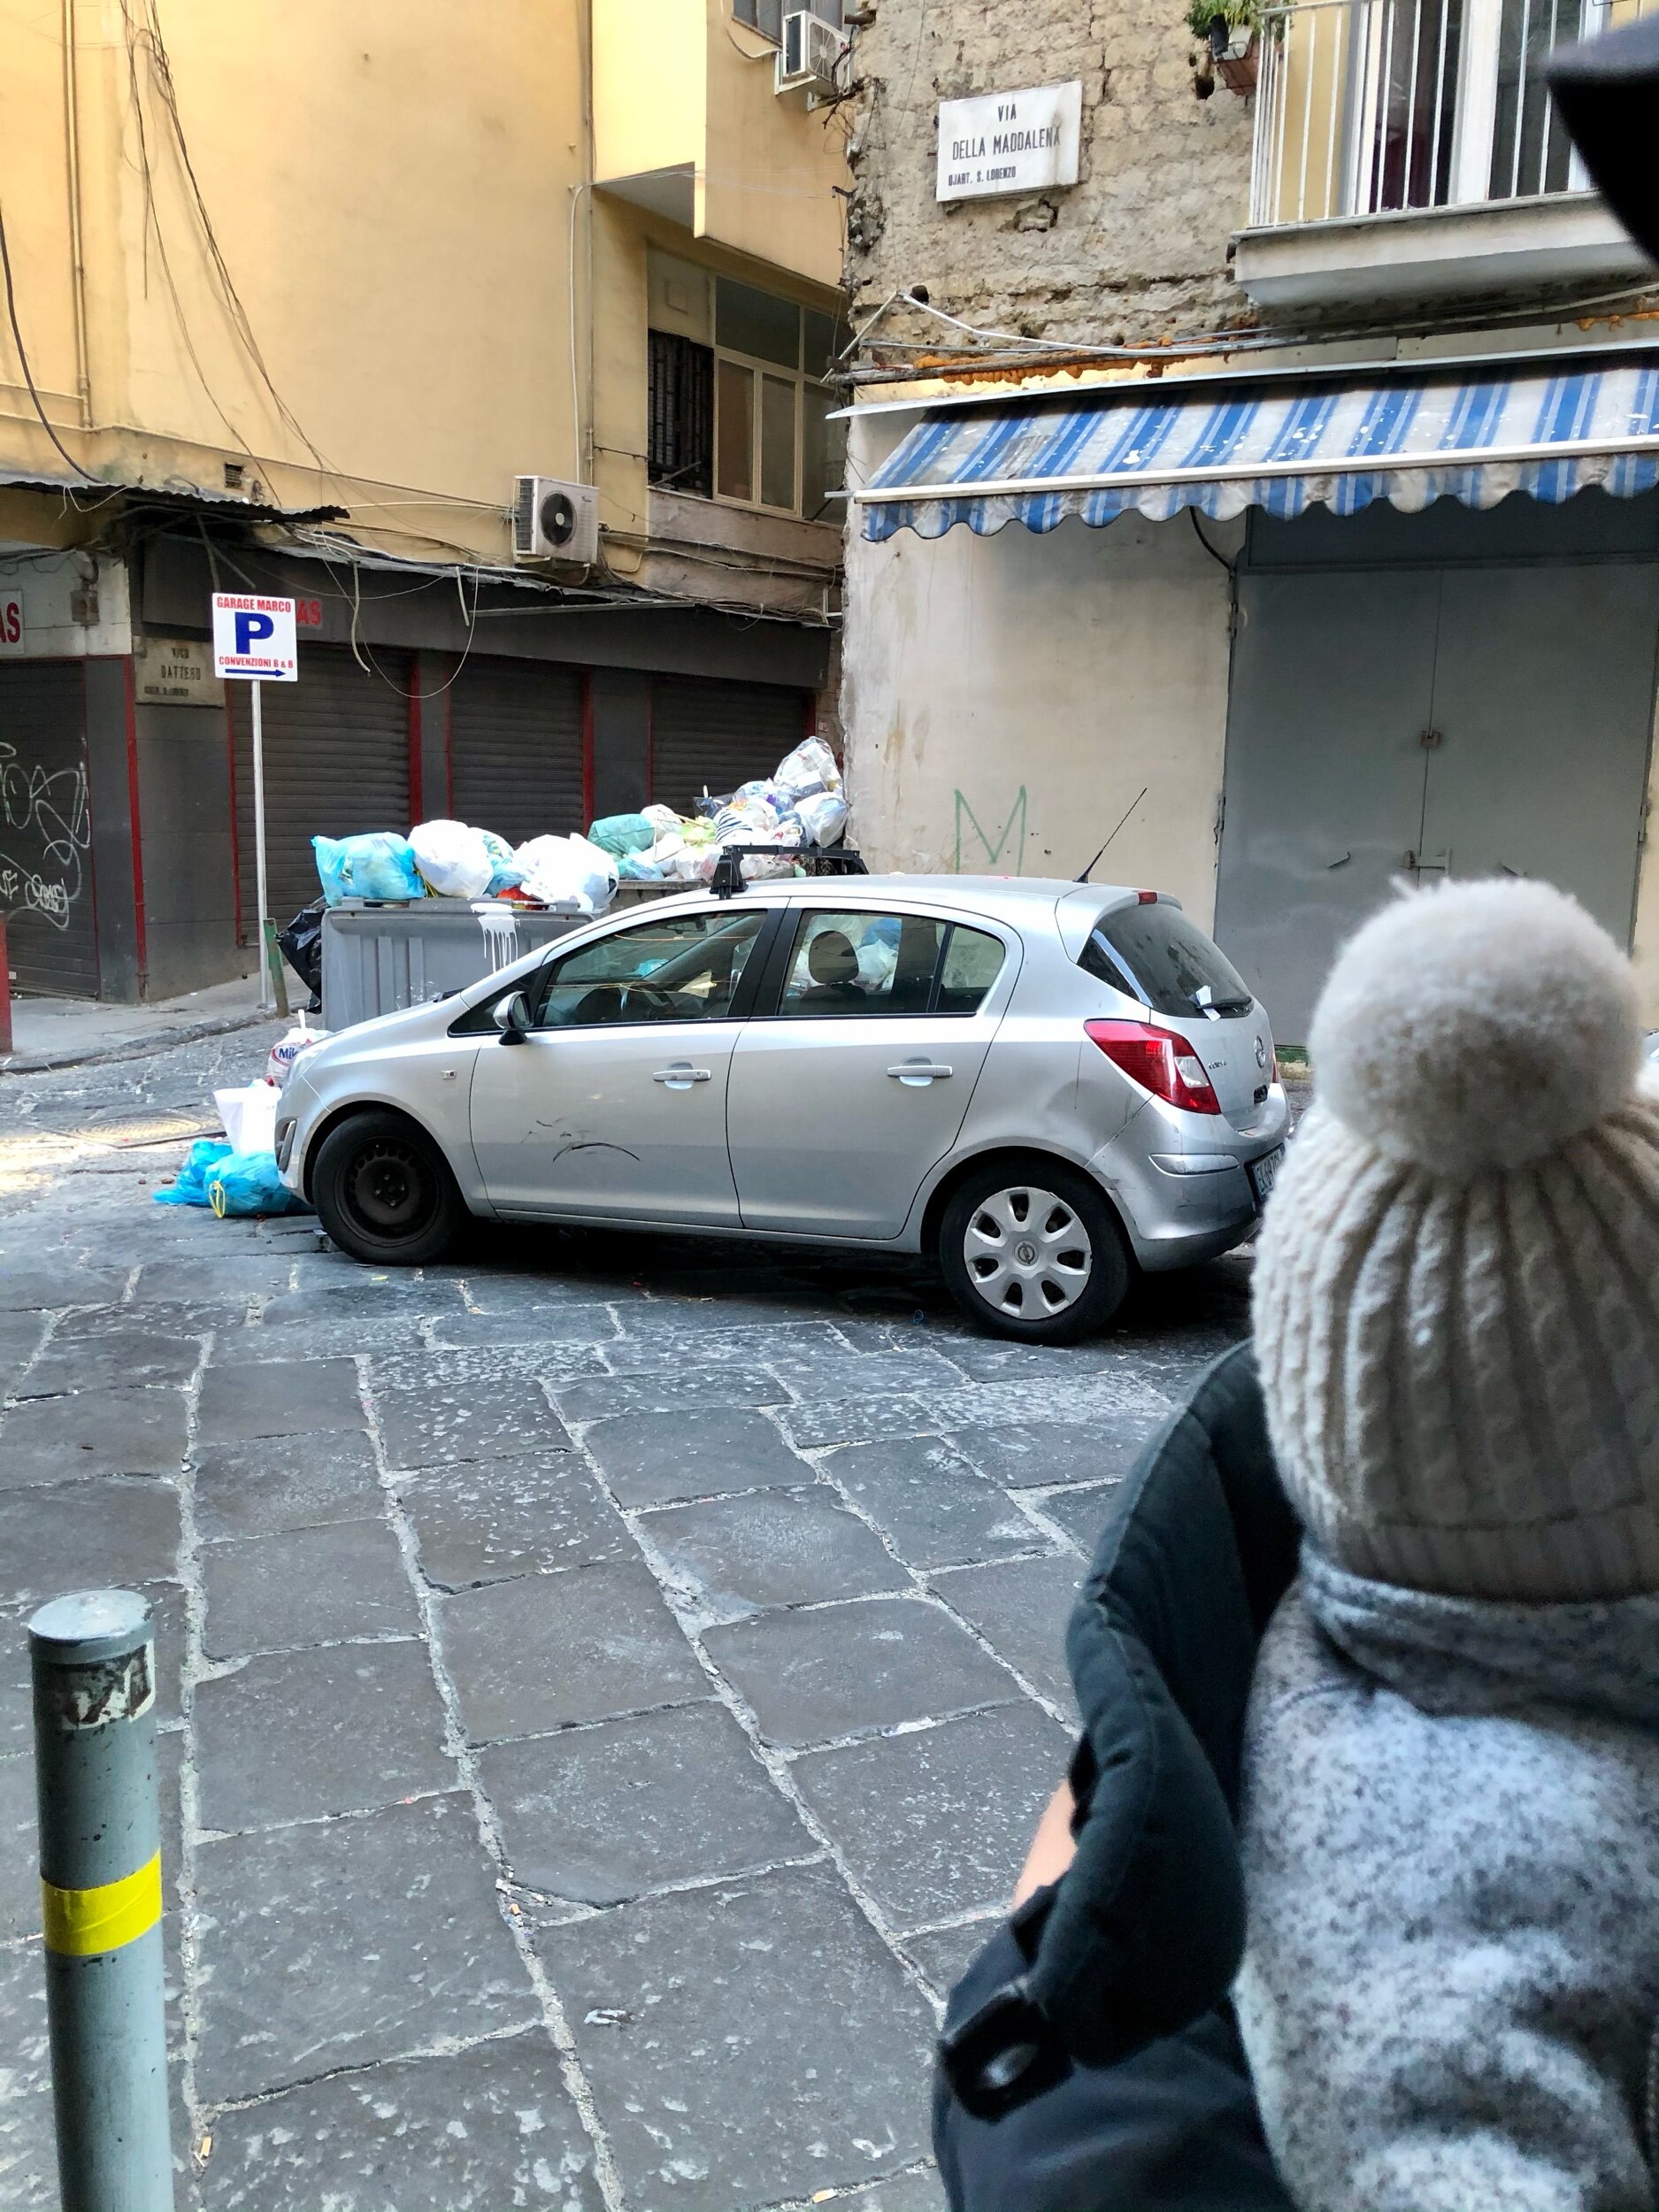
Bella Napoli, the city famous for its pizza, mafia, poverty, trash, and charm! Maybe not all of those words jive together, but I can honestly say that Naples was one of the dirtiest cities I have been to while also being completely charming. If you can get past the chaos and unkept streets, Naples has a lot to offer, not to mention the surrounding area!

Naples in a nutshell

Location: Campania, Italy

Best known for: world-class pizza

Days needed to explore: 2-3+ - to explore just Naples, you could get a nice idea in 2-3 days, but because the surrounding area has so much to explore Naples would be an ideal place to stay a week or more and use it as a base. It’s a very affordable city which makes this easier to do!

What to see and do:

Within Naples

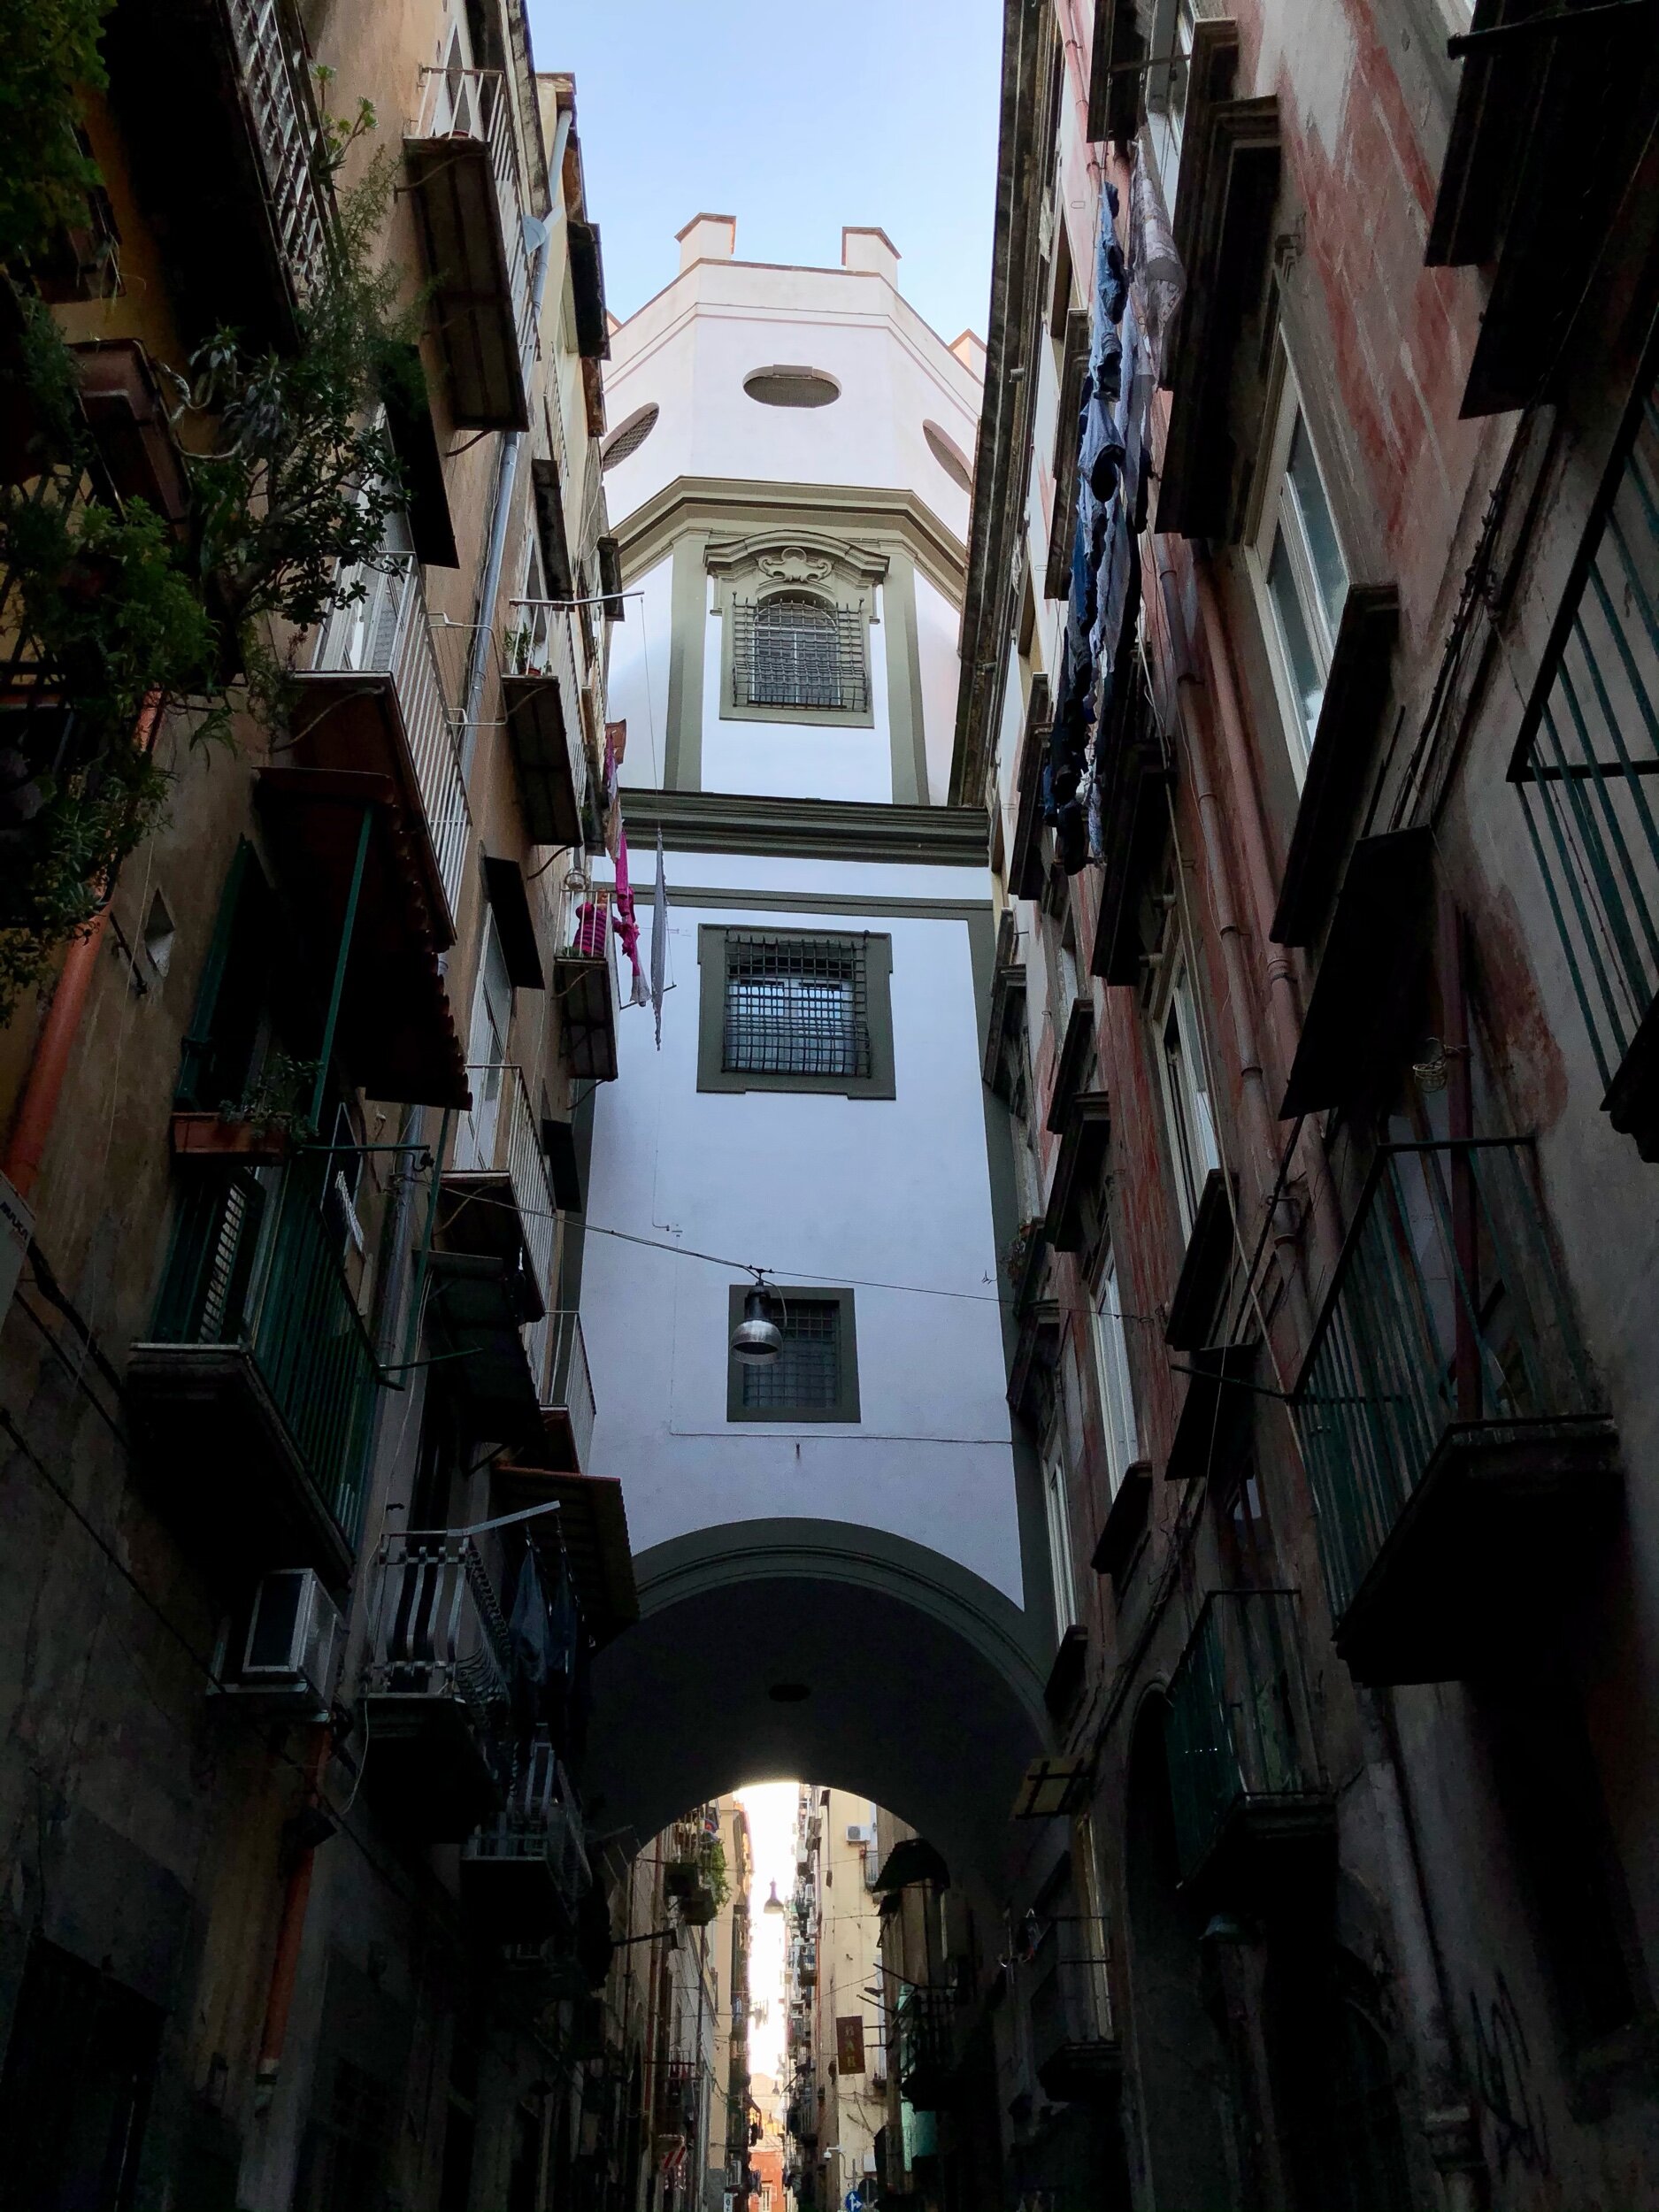
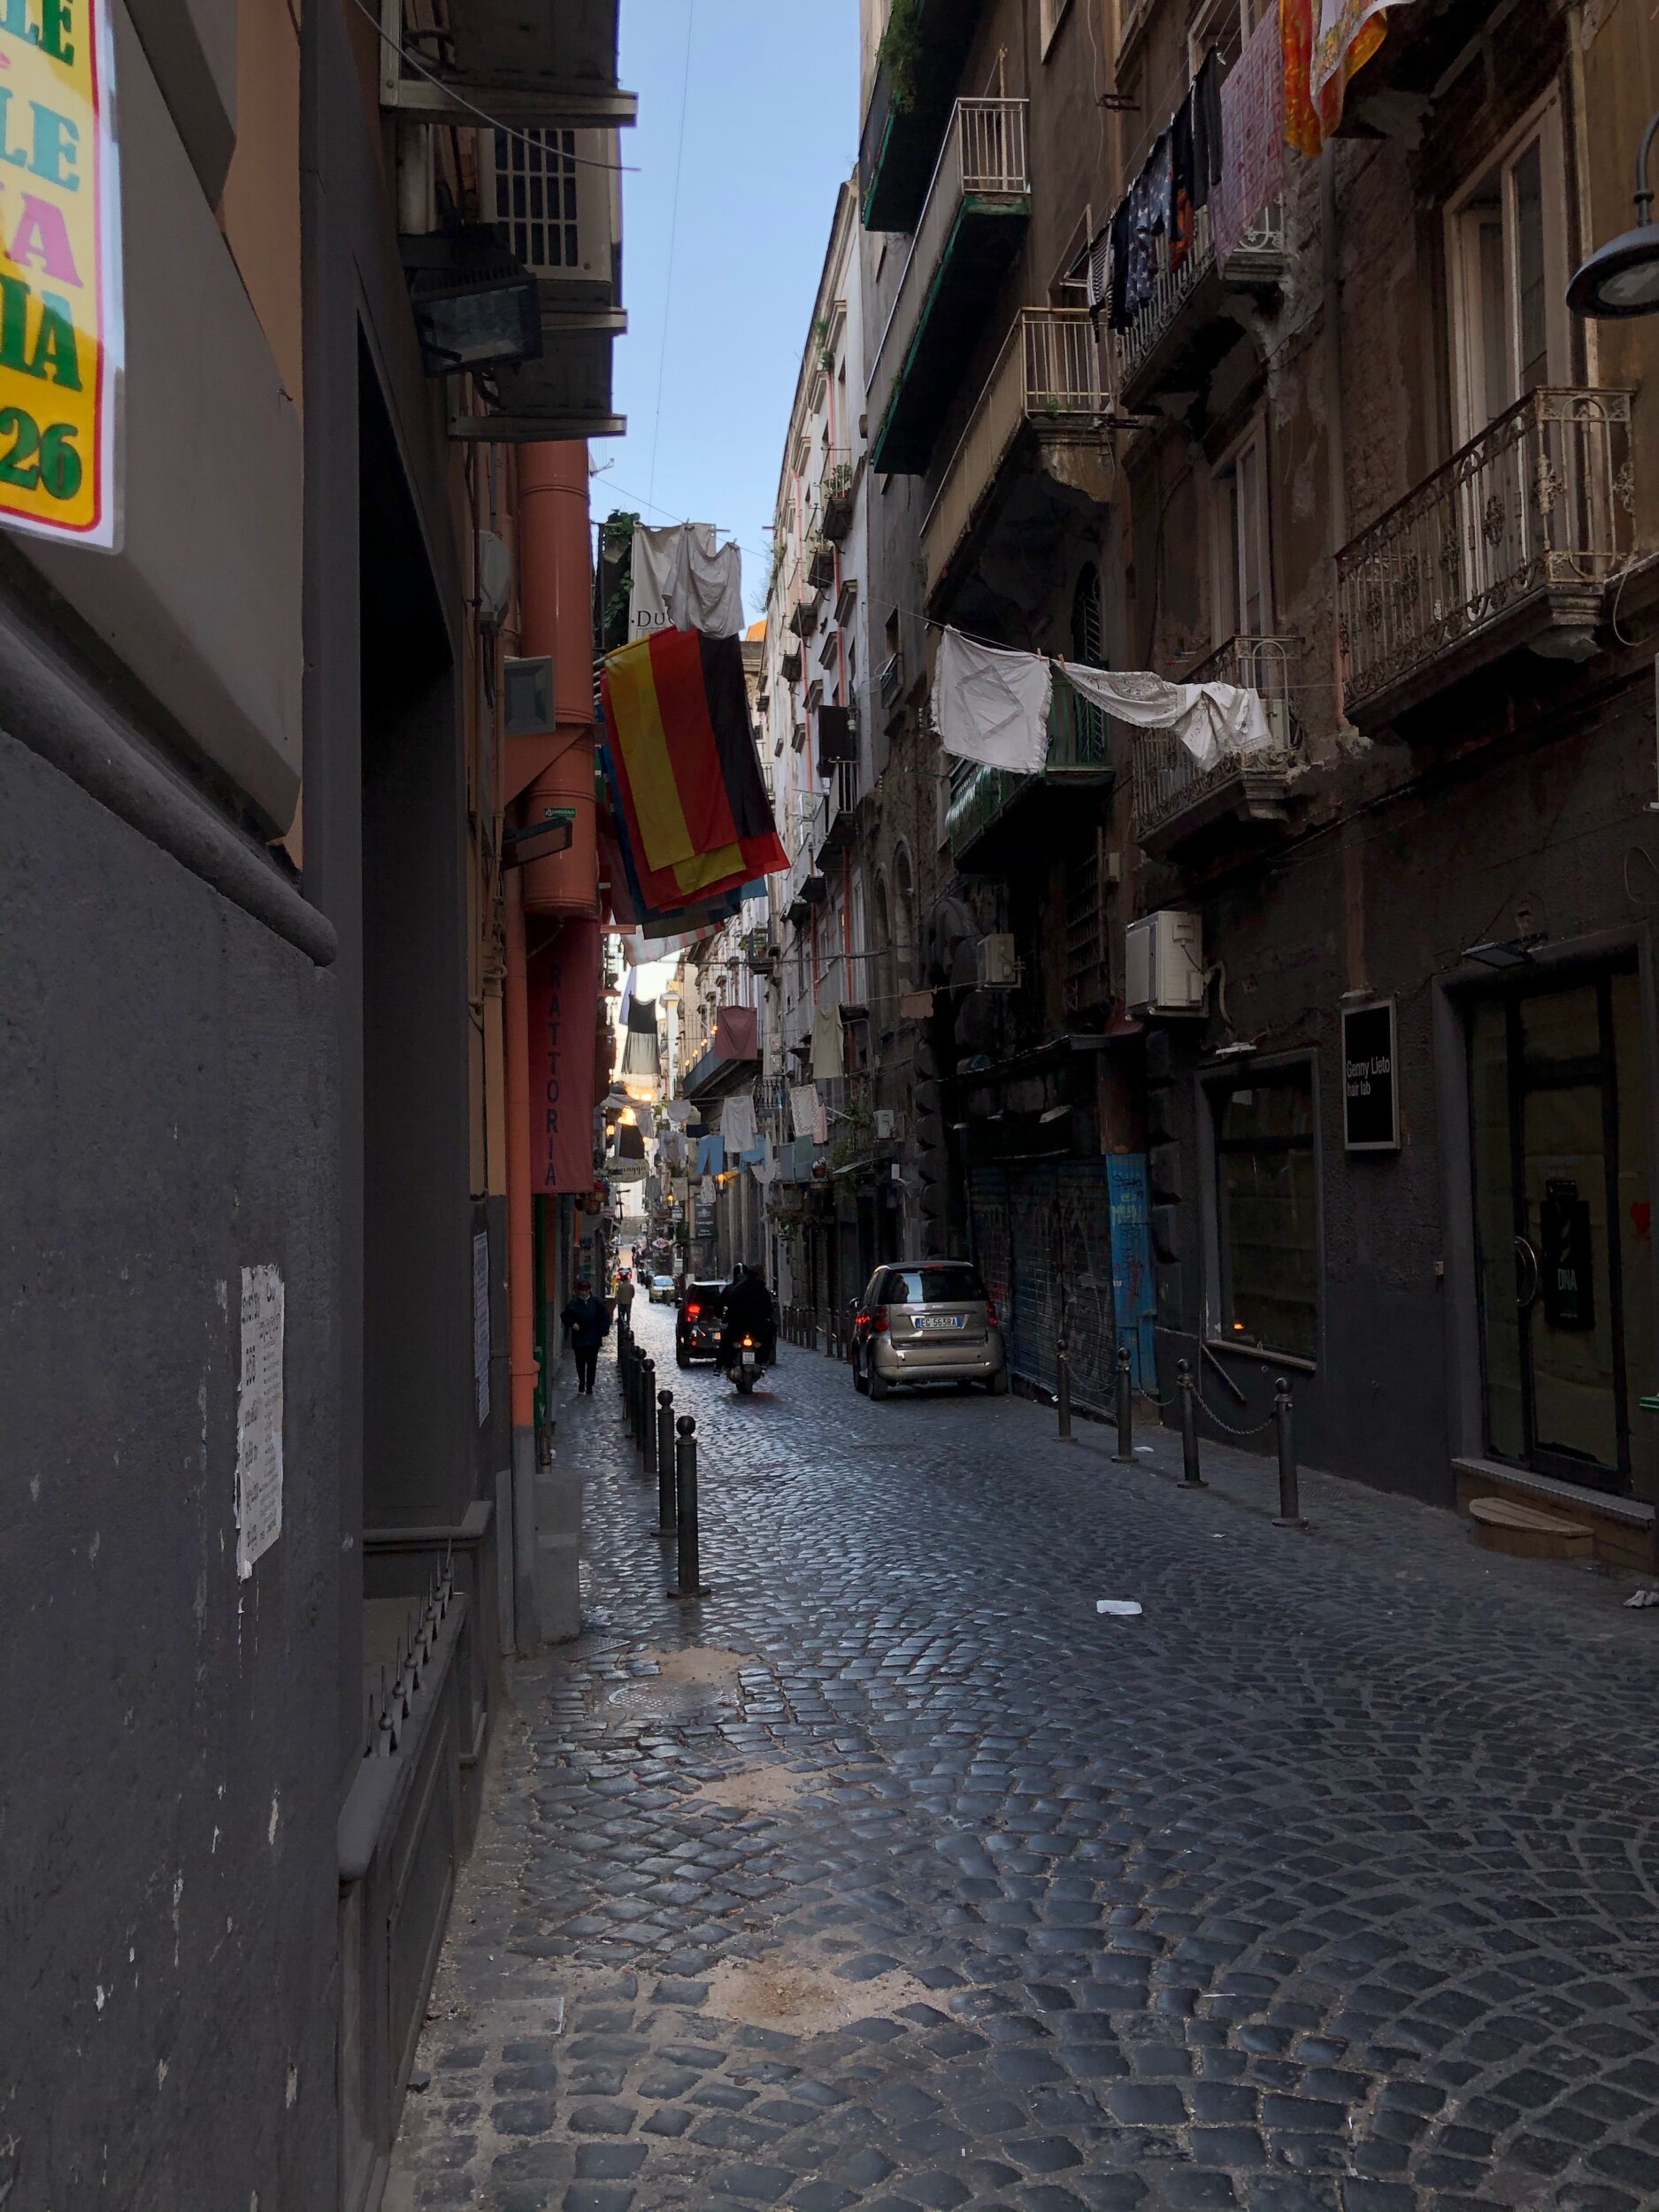
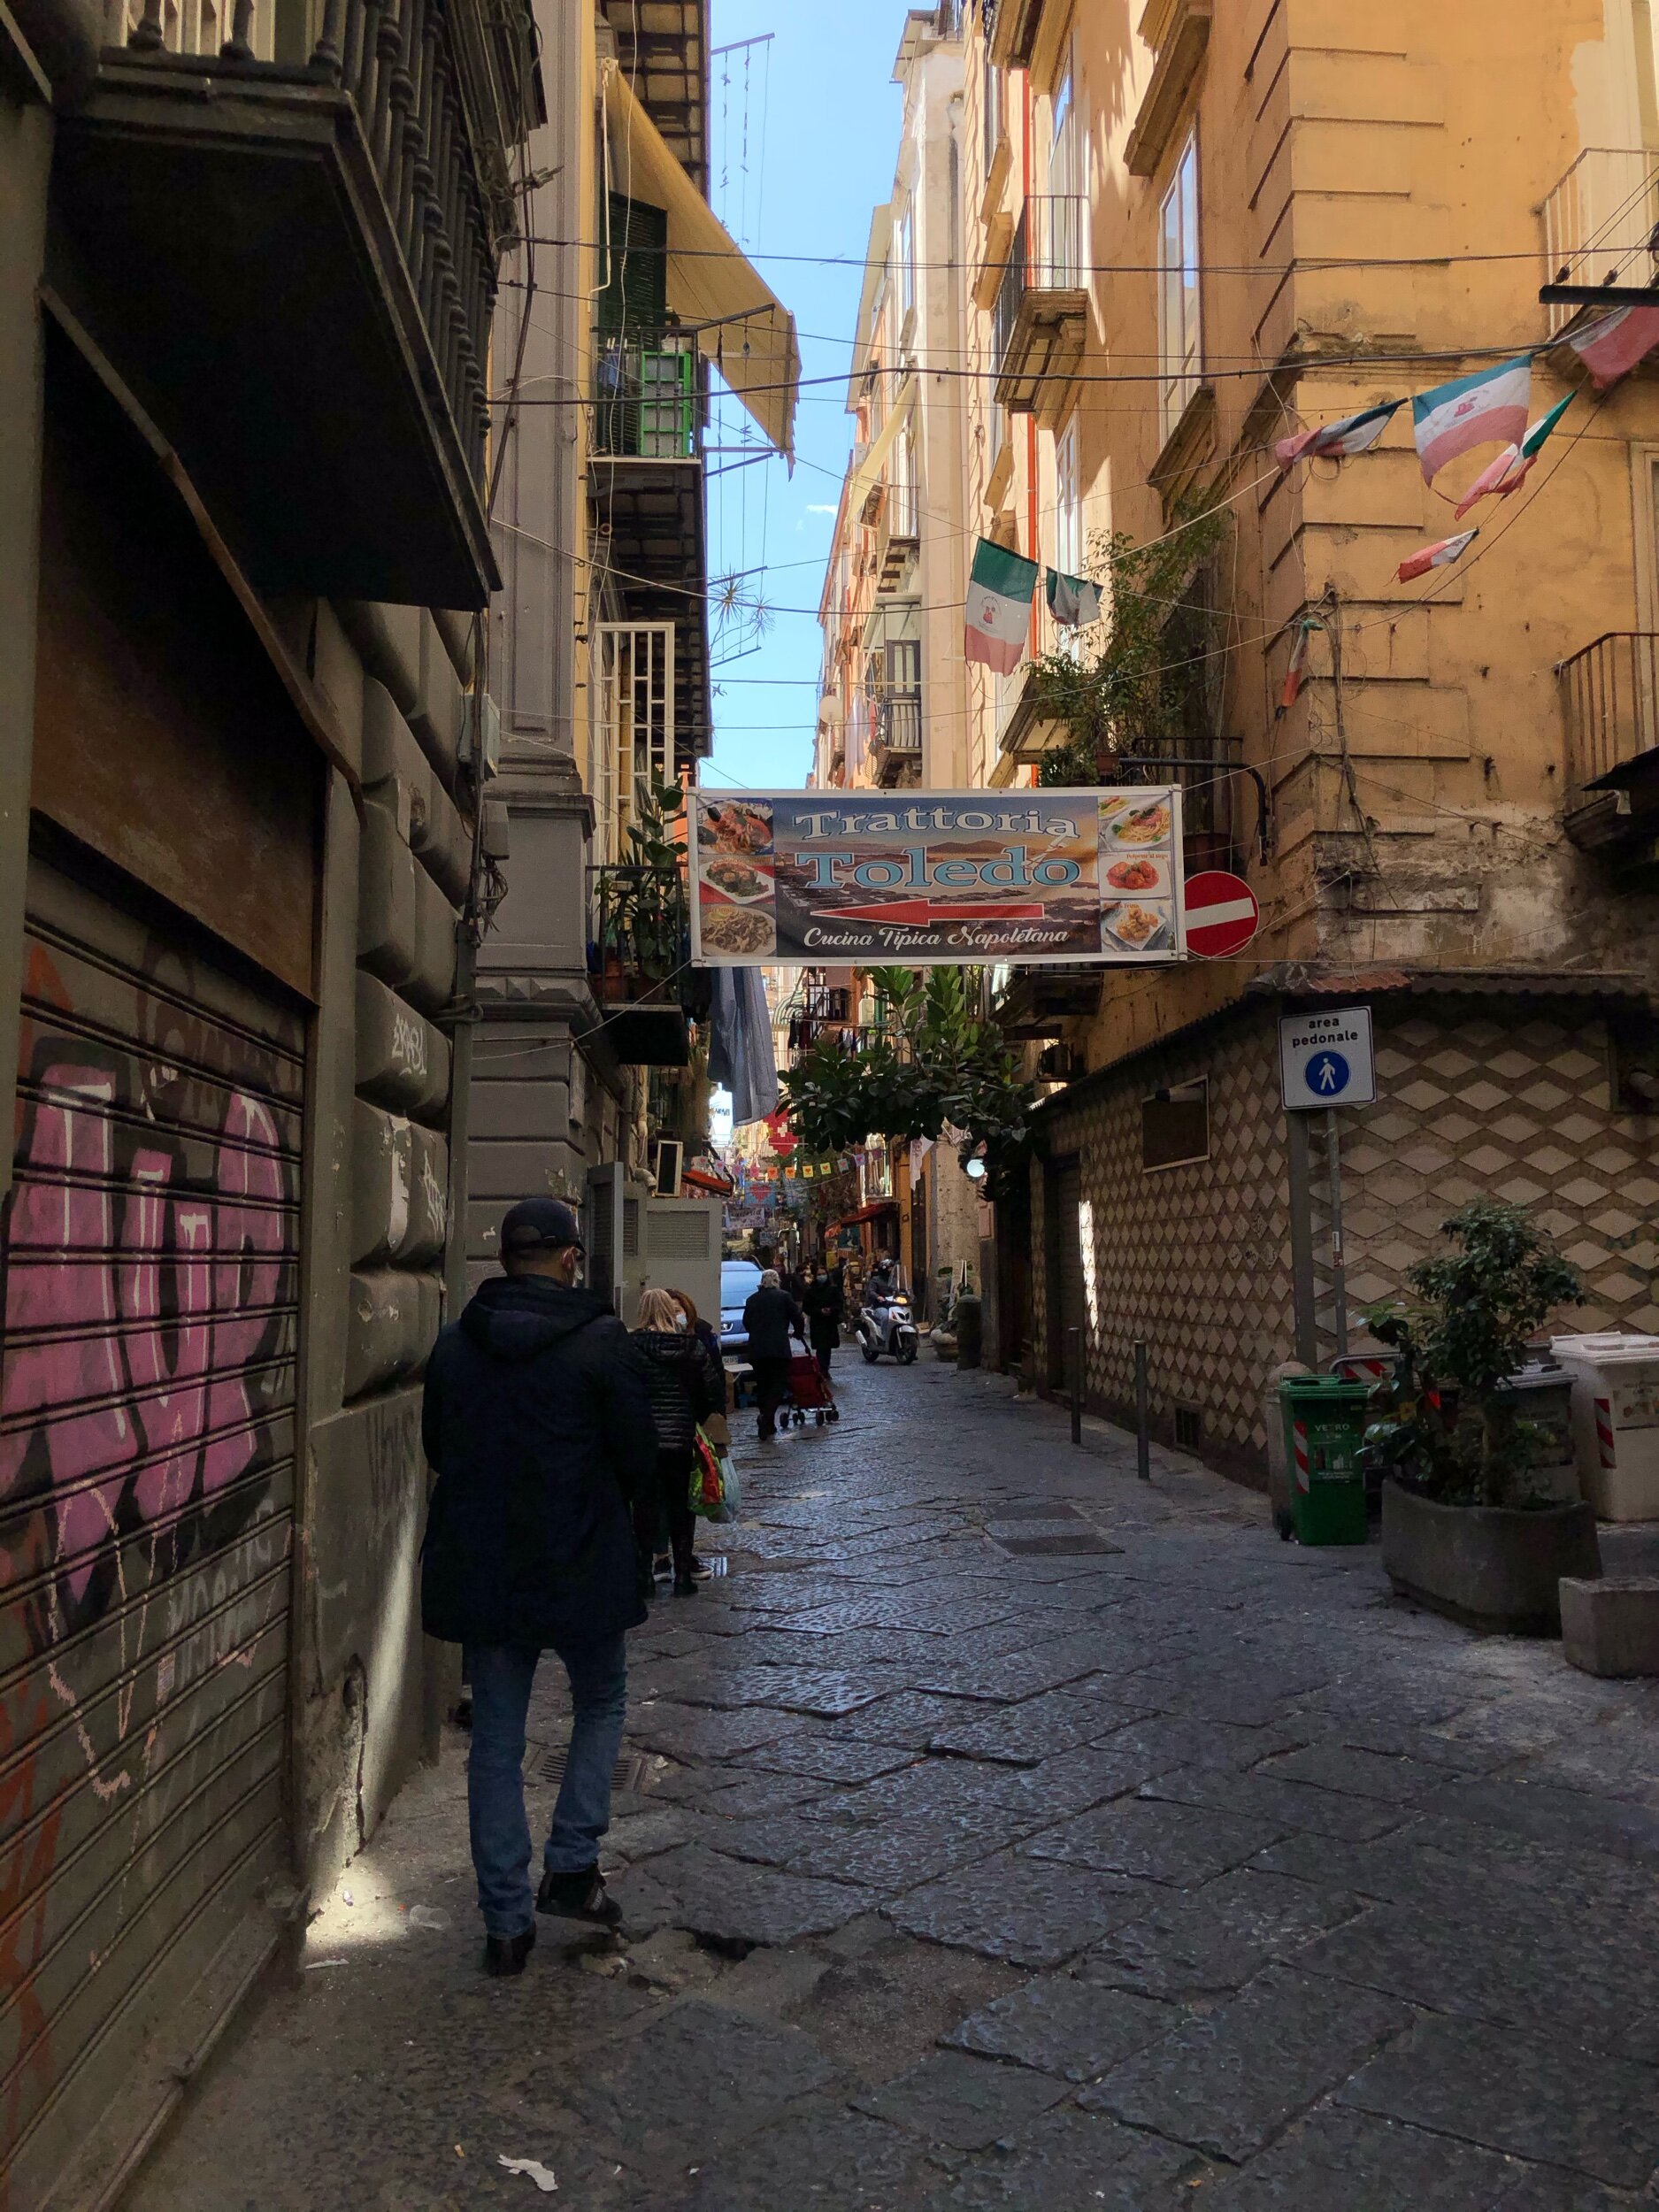
  • Quartieri Spagnoli (Spanish Quarters) - the famous residential area immediately recognizable by the close-set buildings and narrow streets, filled with locals and small shops

  • Duomo - also known as the Cattedrale di Santa Maria Assunta, this is another stunning duomo to see inside and out, even if it doesn’t quite have the impressive surroundings that draw attention to it like, say, the Duomo of Florence or Milan

  • Piazza del Plebiscito and the Palazzo Reale - The large square and palace that is an icon of Naples (Palazzo Reale paid entrance)

  • Napoli Sotterranea (Naples underground) - explore the bowels of the city by guided tour, where you can see Greek and Roman influence and see where many Neapolitans took cover during World War II bombings (paid entrance)

  • Museo Cappella Sansevero e Cristo Velato (Sansevero Chapel Museum and the Veiled Christ) - see the Veiled Christ and wonder just how one goes about carving a veil, the church, and some of the other strange sights this chapel holds. Some of the old rumors are a bit unsettling. Read more here

  • Spaccanapoli - the heart of the old city with many churches and interesting sights, the street that runs between the Spanish Quarter and the Forcella quarter

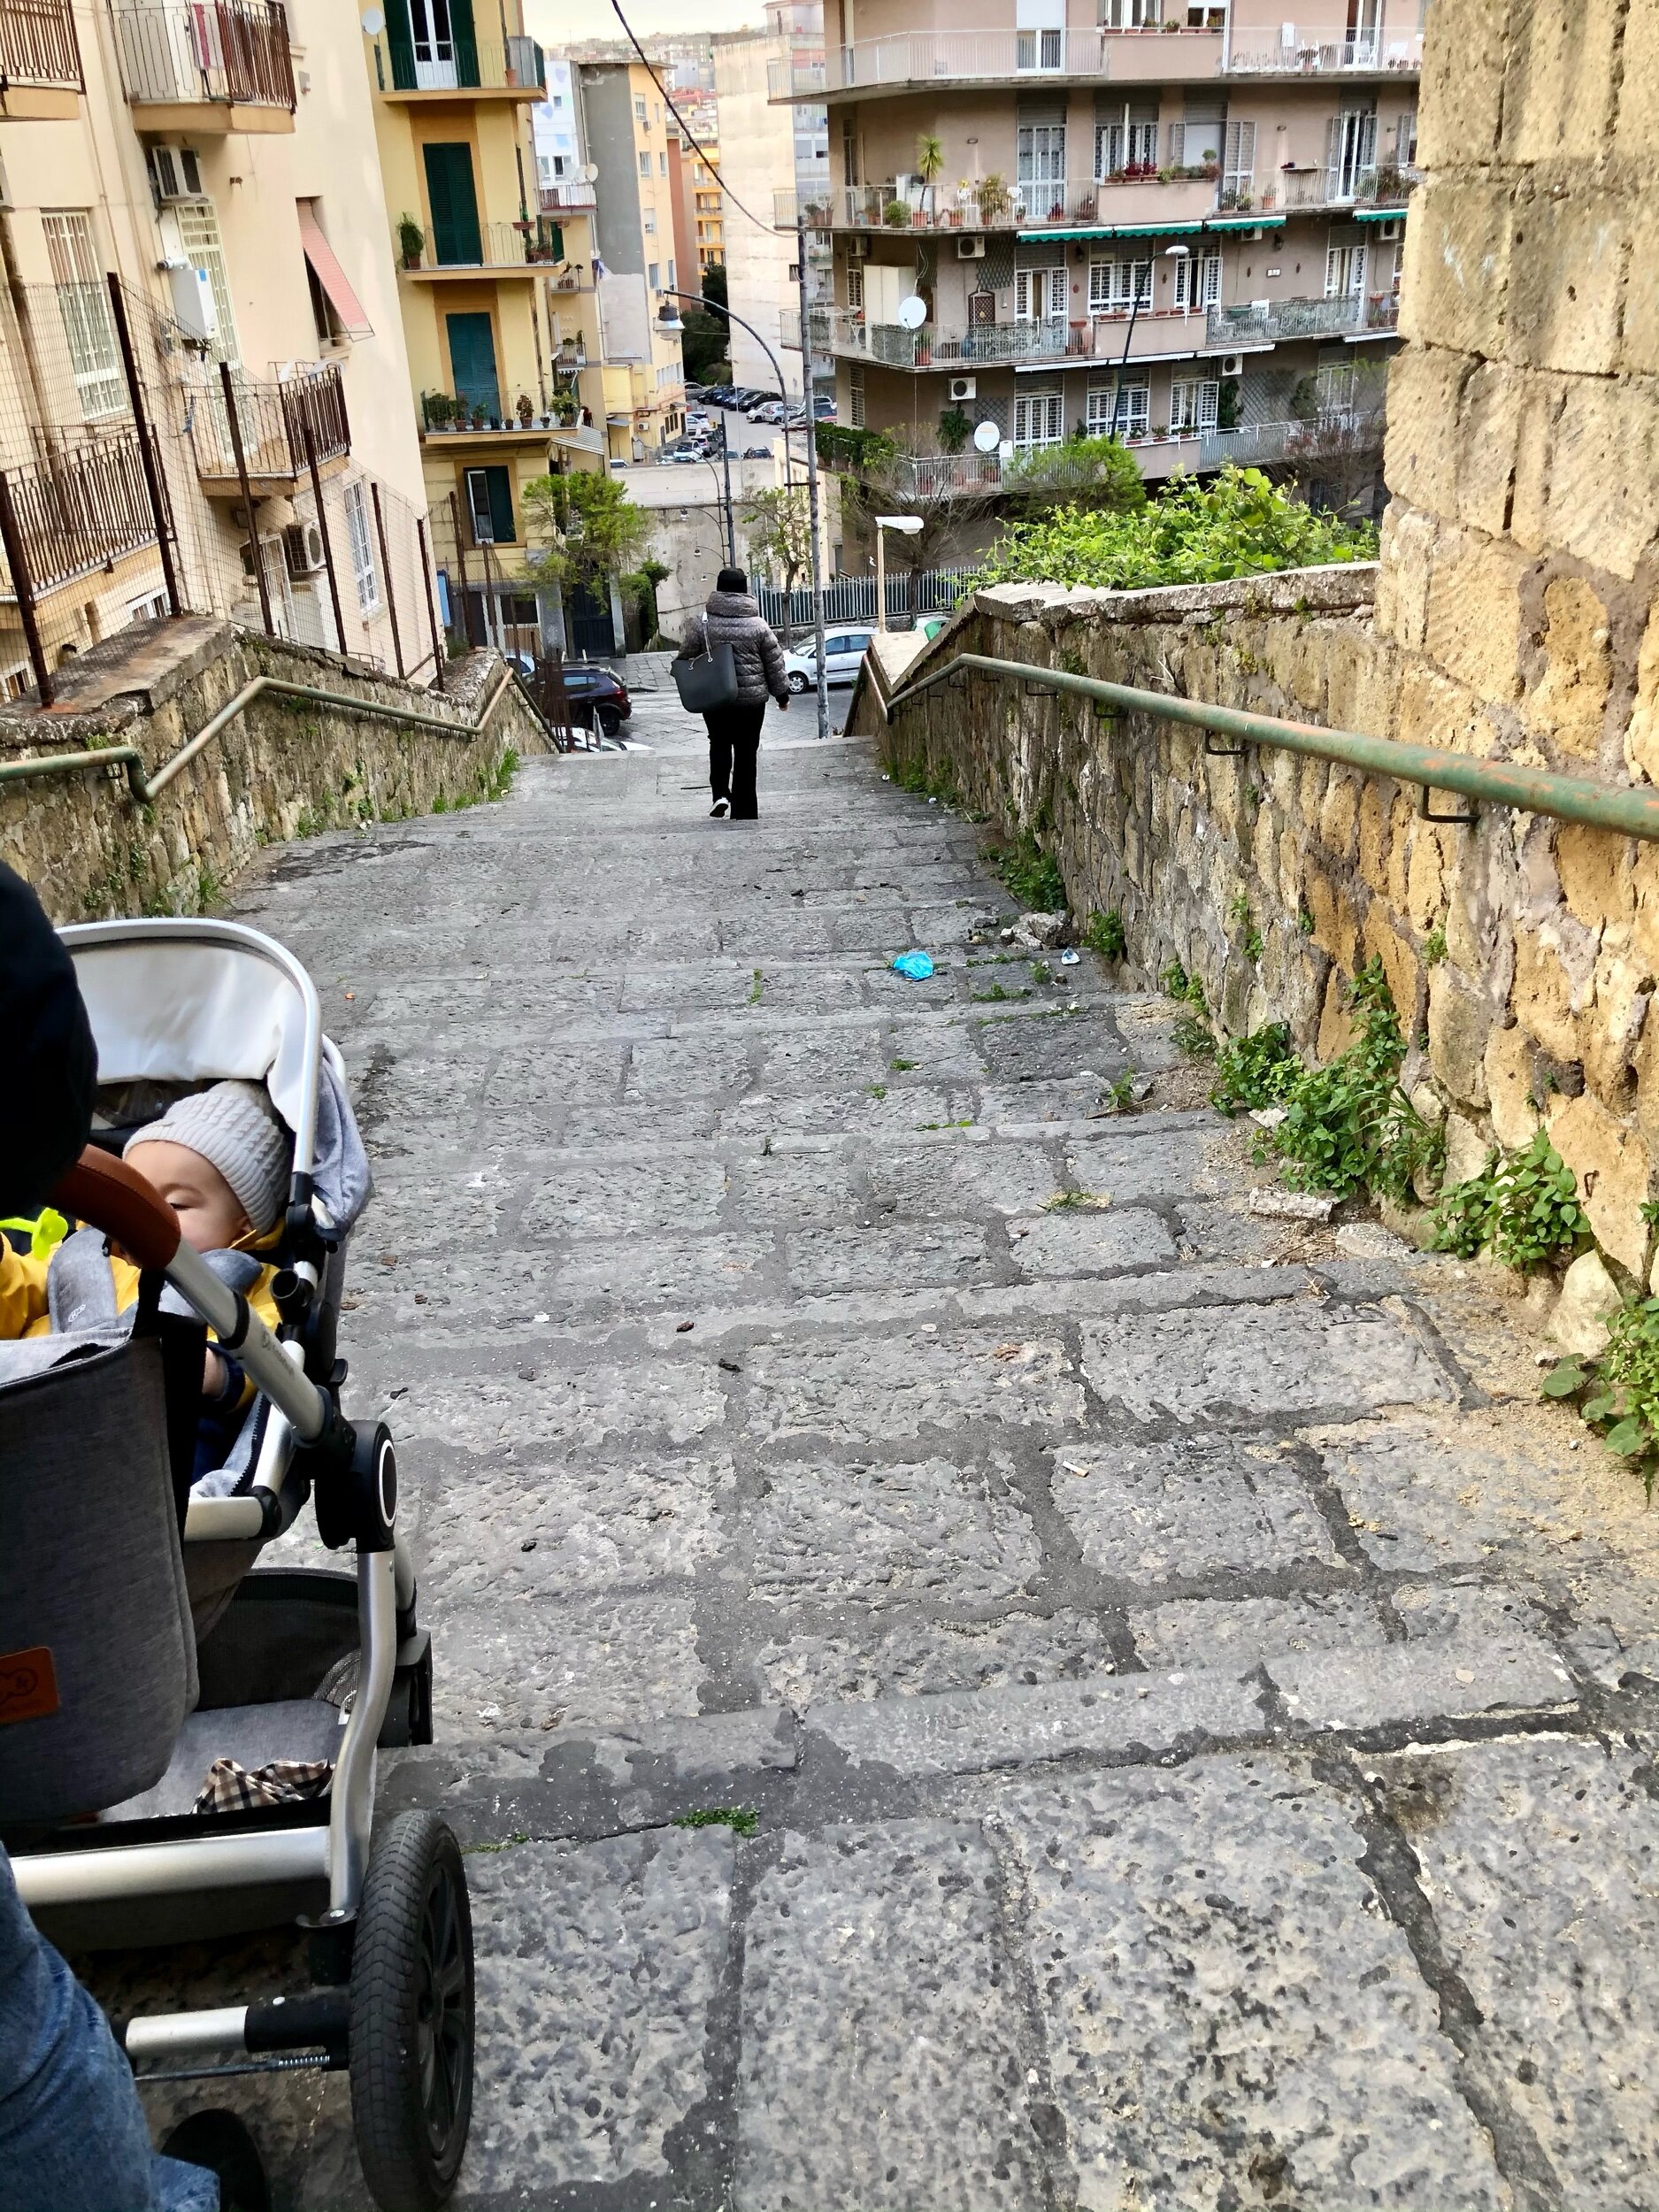
  • Walk the Petraio - walk up this stone path in the Vomero area, mostly steps, that leads to some spectacular views of Naples and the Bay. If you don’t prefer to walk there is always the funicular!

  • Castello dell’Ovo - fortress right on the Bay with two towers

Surrounding Naples

  • Reggia di Caserta (Royal Palace of Caserta) - the Versailles of southern Italy (paid entrance)

  • Pompeii - ruins of a city wiped out by the explosion of Mount Vesuvius in 79 AD

  • Herculaneum - another town near to Pompeii that was destroyed but well preserved by the volcano ash in 79 AD

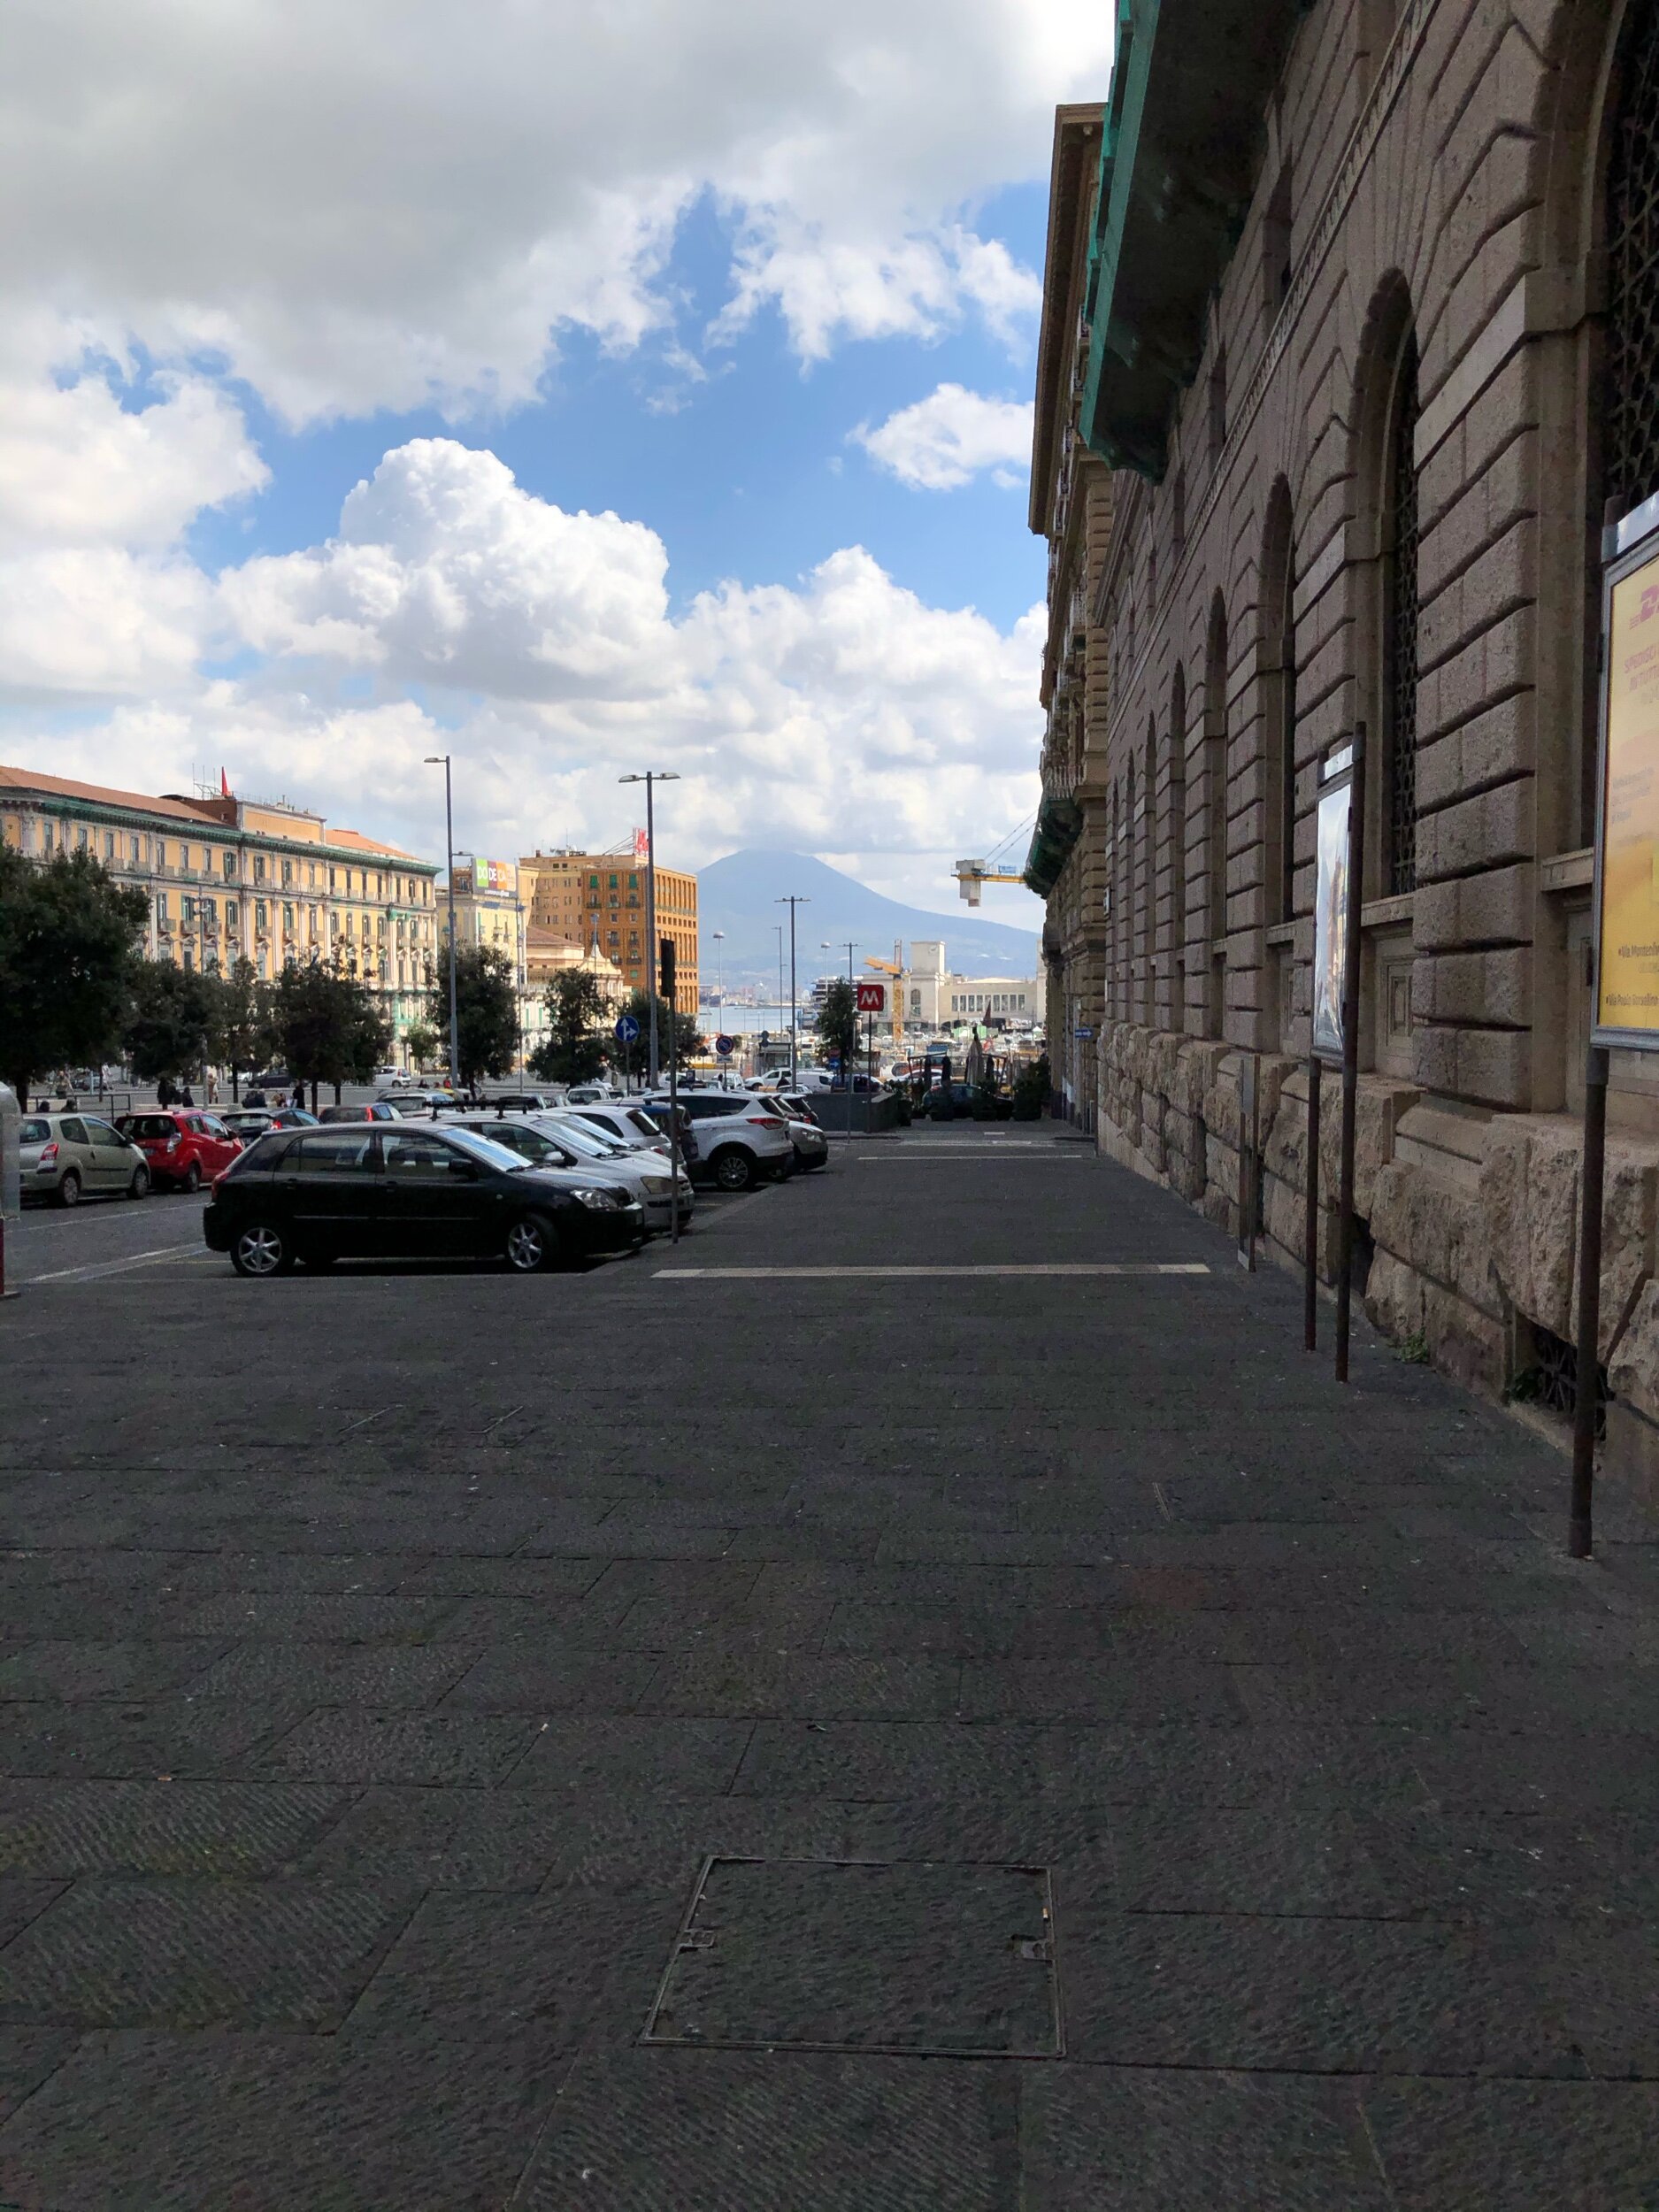
  • Mount Vesuvio - The volcano responsible for all the destruction - you can hike around and on it, all the way up to the “Gran Cono”. And yes, it’s still active, but the last eruption was in 1944.

  • Sorrento - a coastal town, you might have heard some songs about it

  • Positano - another coastal town not far from Sorrento

  • Amalfi Coast - the famous coast with viewsssss and winding roads

  • Capri - the island of rugged beauty with upscale shopping and hotels

  • Ischia - volcanic island with hot springs

  • Procida - Naples’ third colorful island sandwiched between Ischia and Capri

Established: founded by the ancient Greeks

Places to eat:

  • Pizzeria Vincenzo Costa Napoli

  • L’Antica Pizzeria Da Michele

  • Gino e Toto Sorbillo - pizzeria

  • Mennella il Gelato

  • Pizzeria Salvo

Typical foods to try:

  • pizza

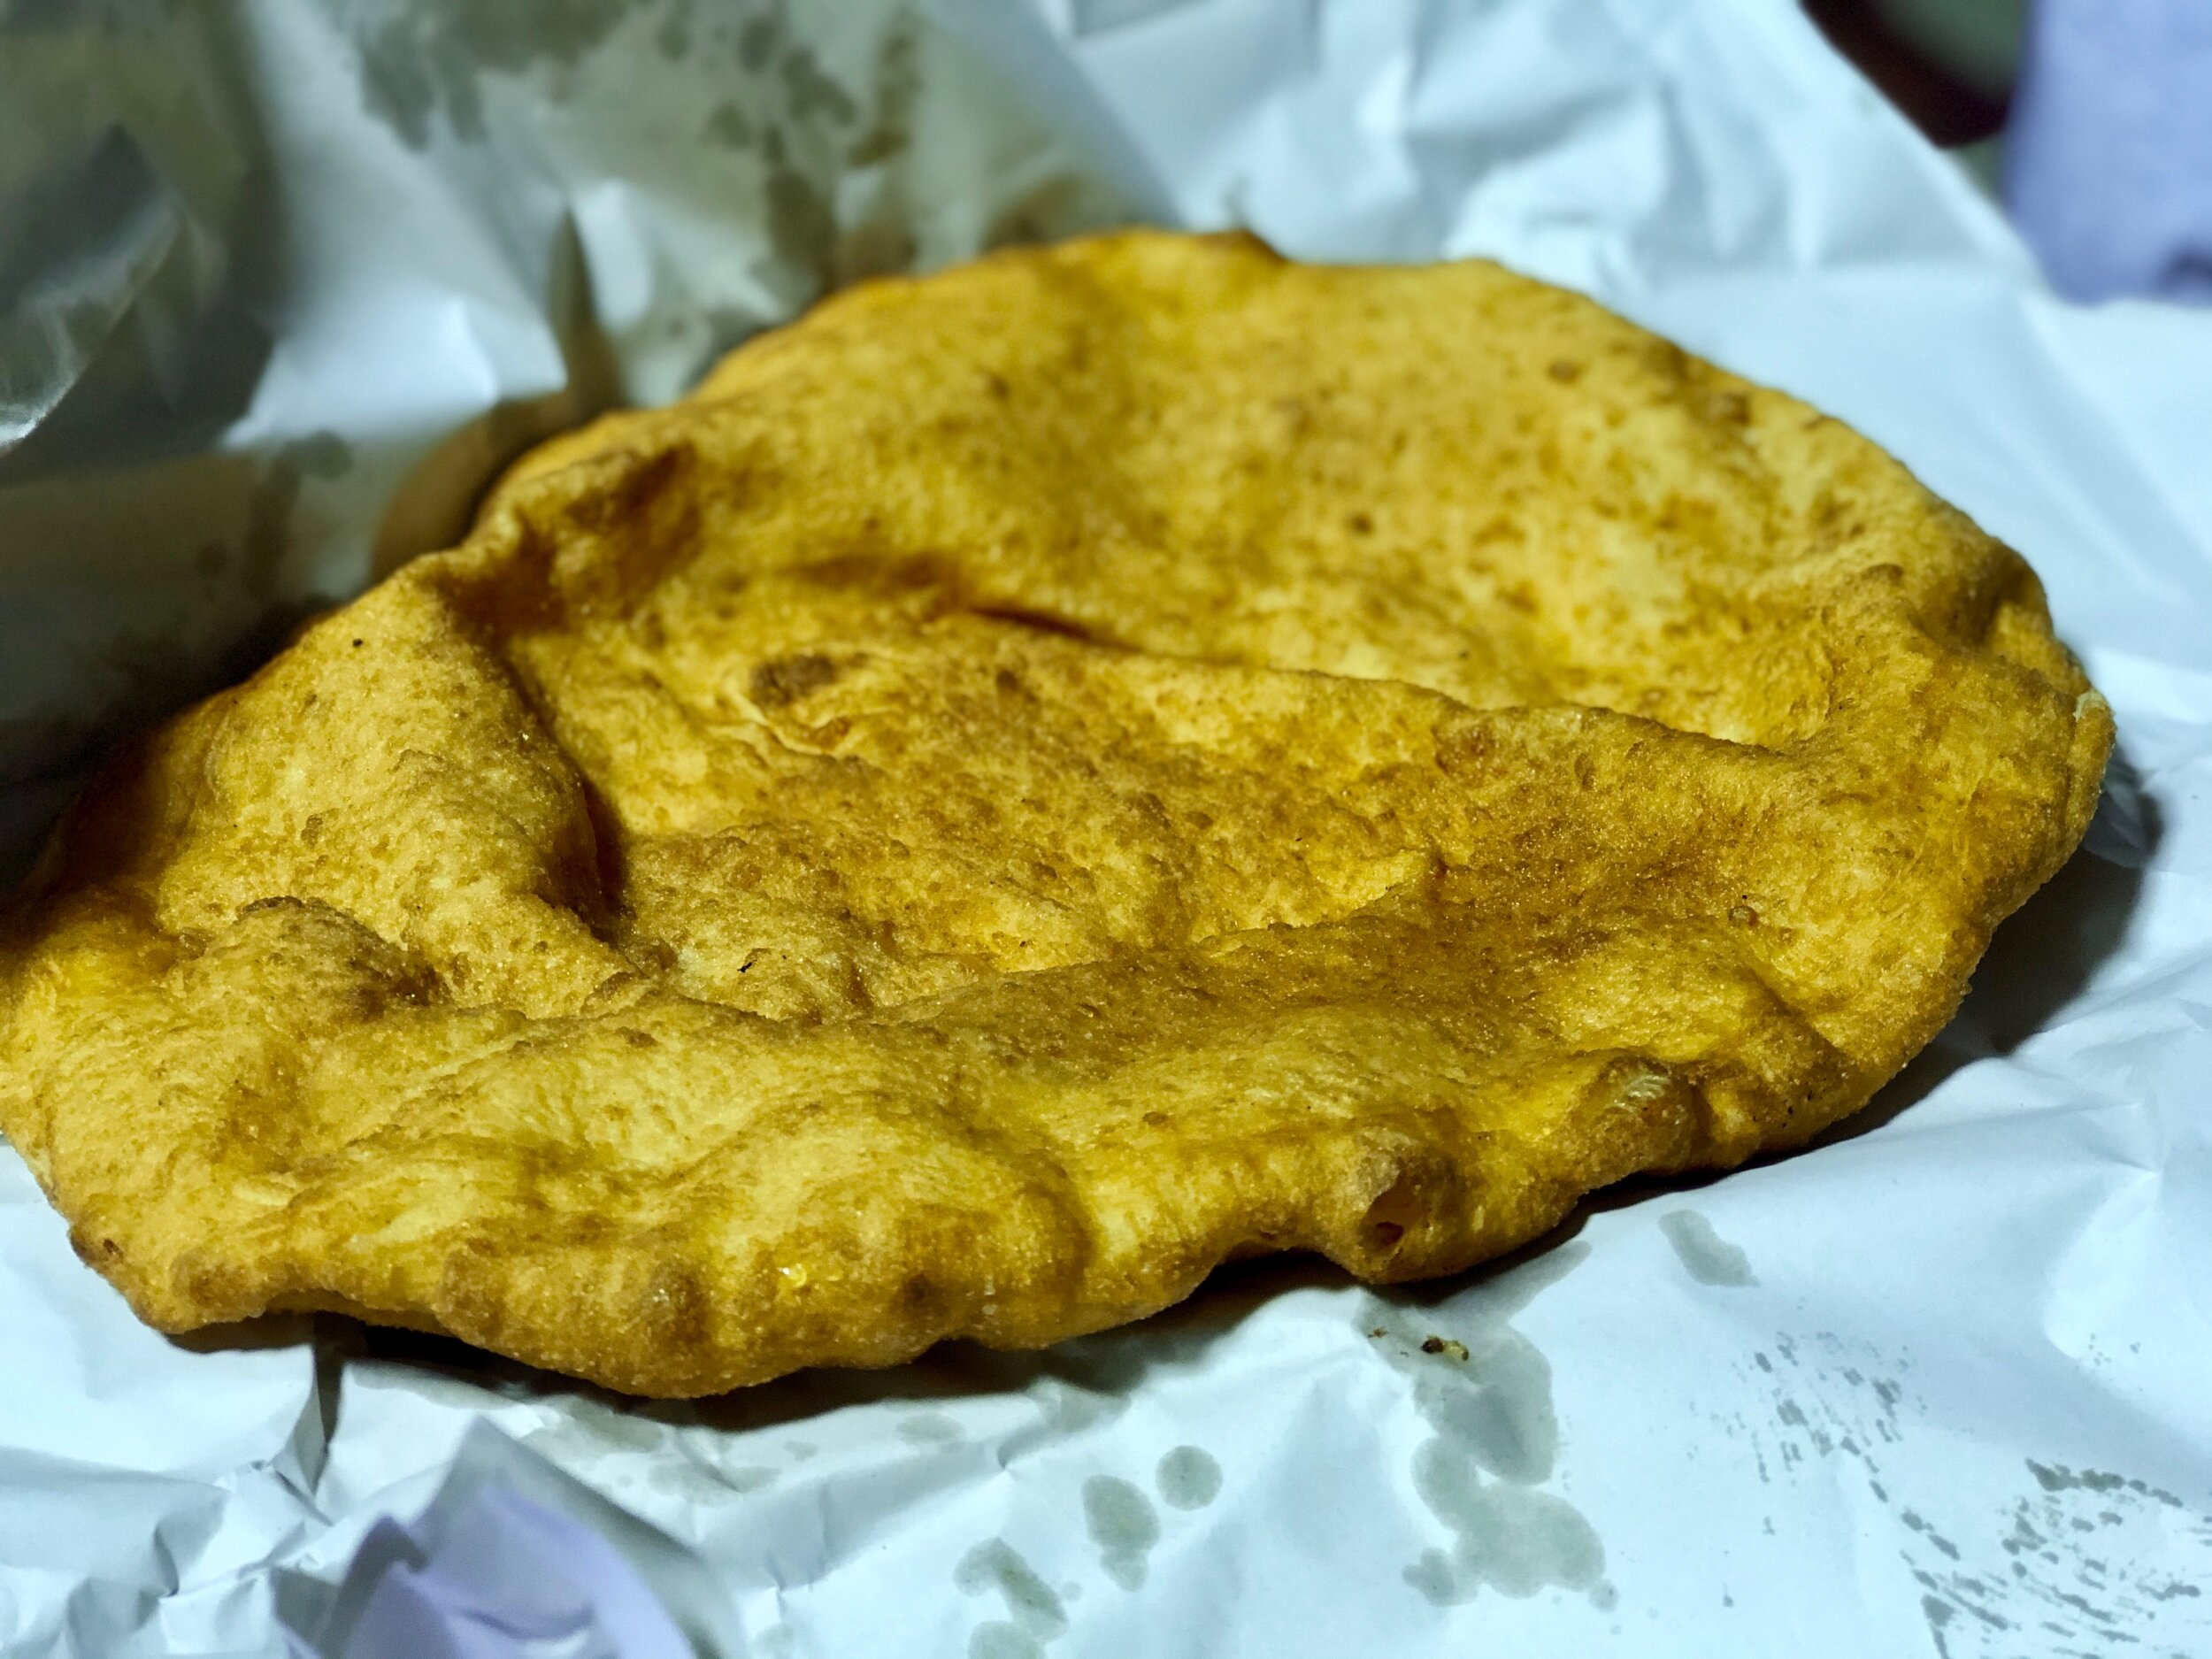
  • pizza fritta (fried pizza)

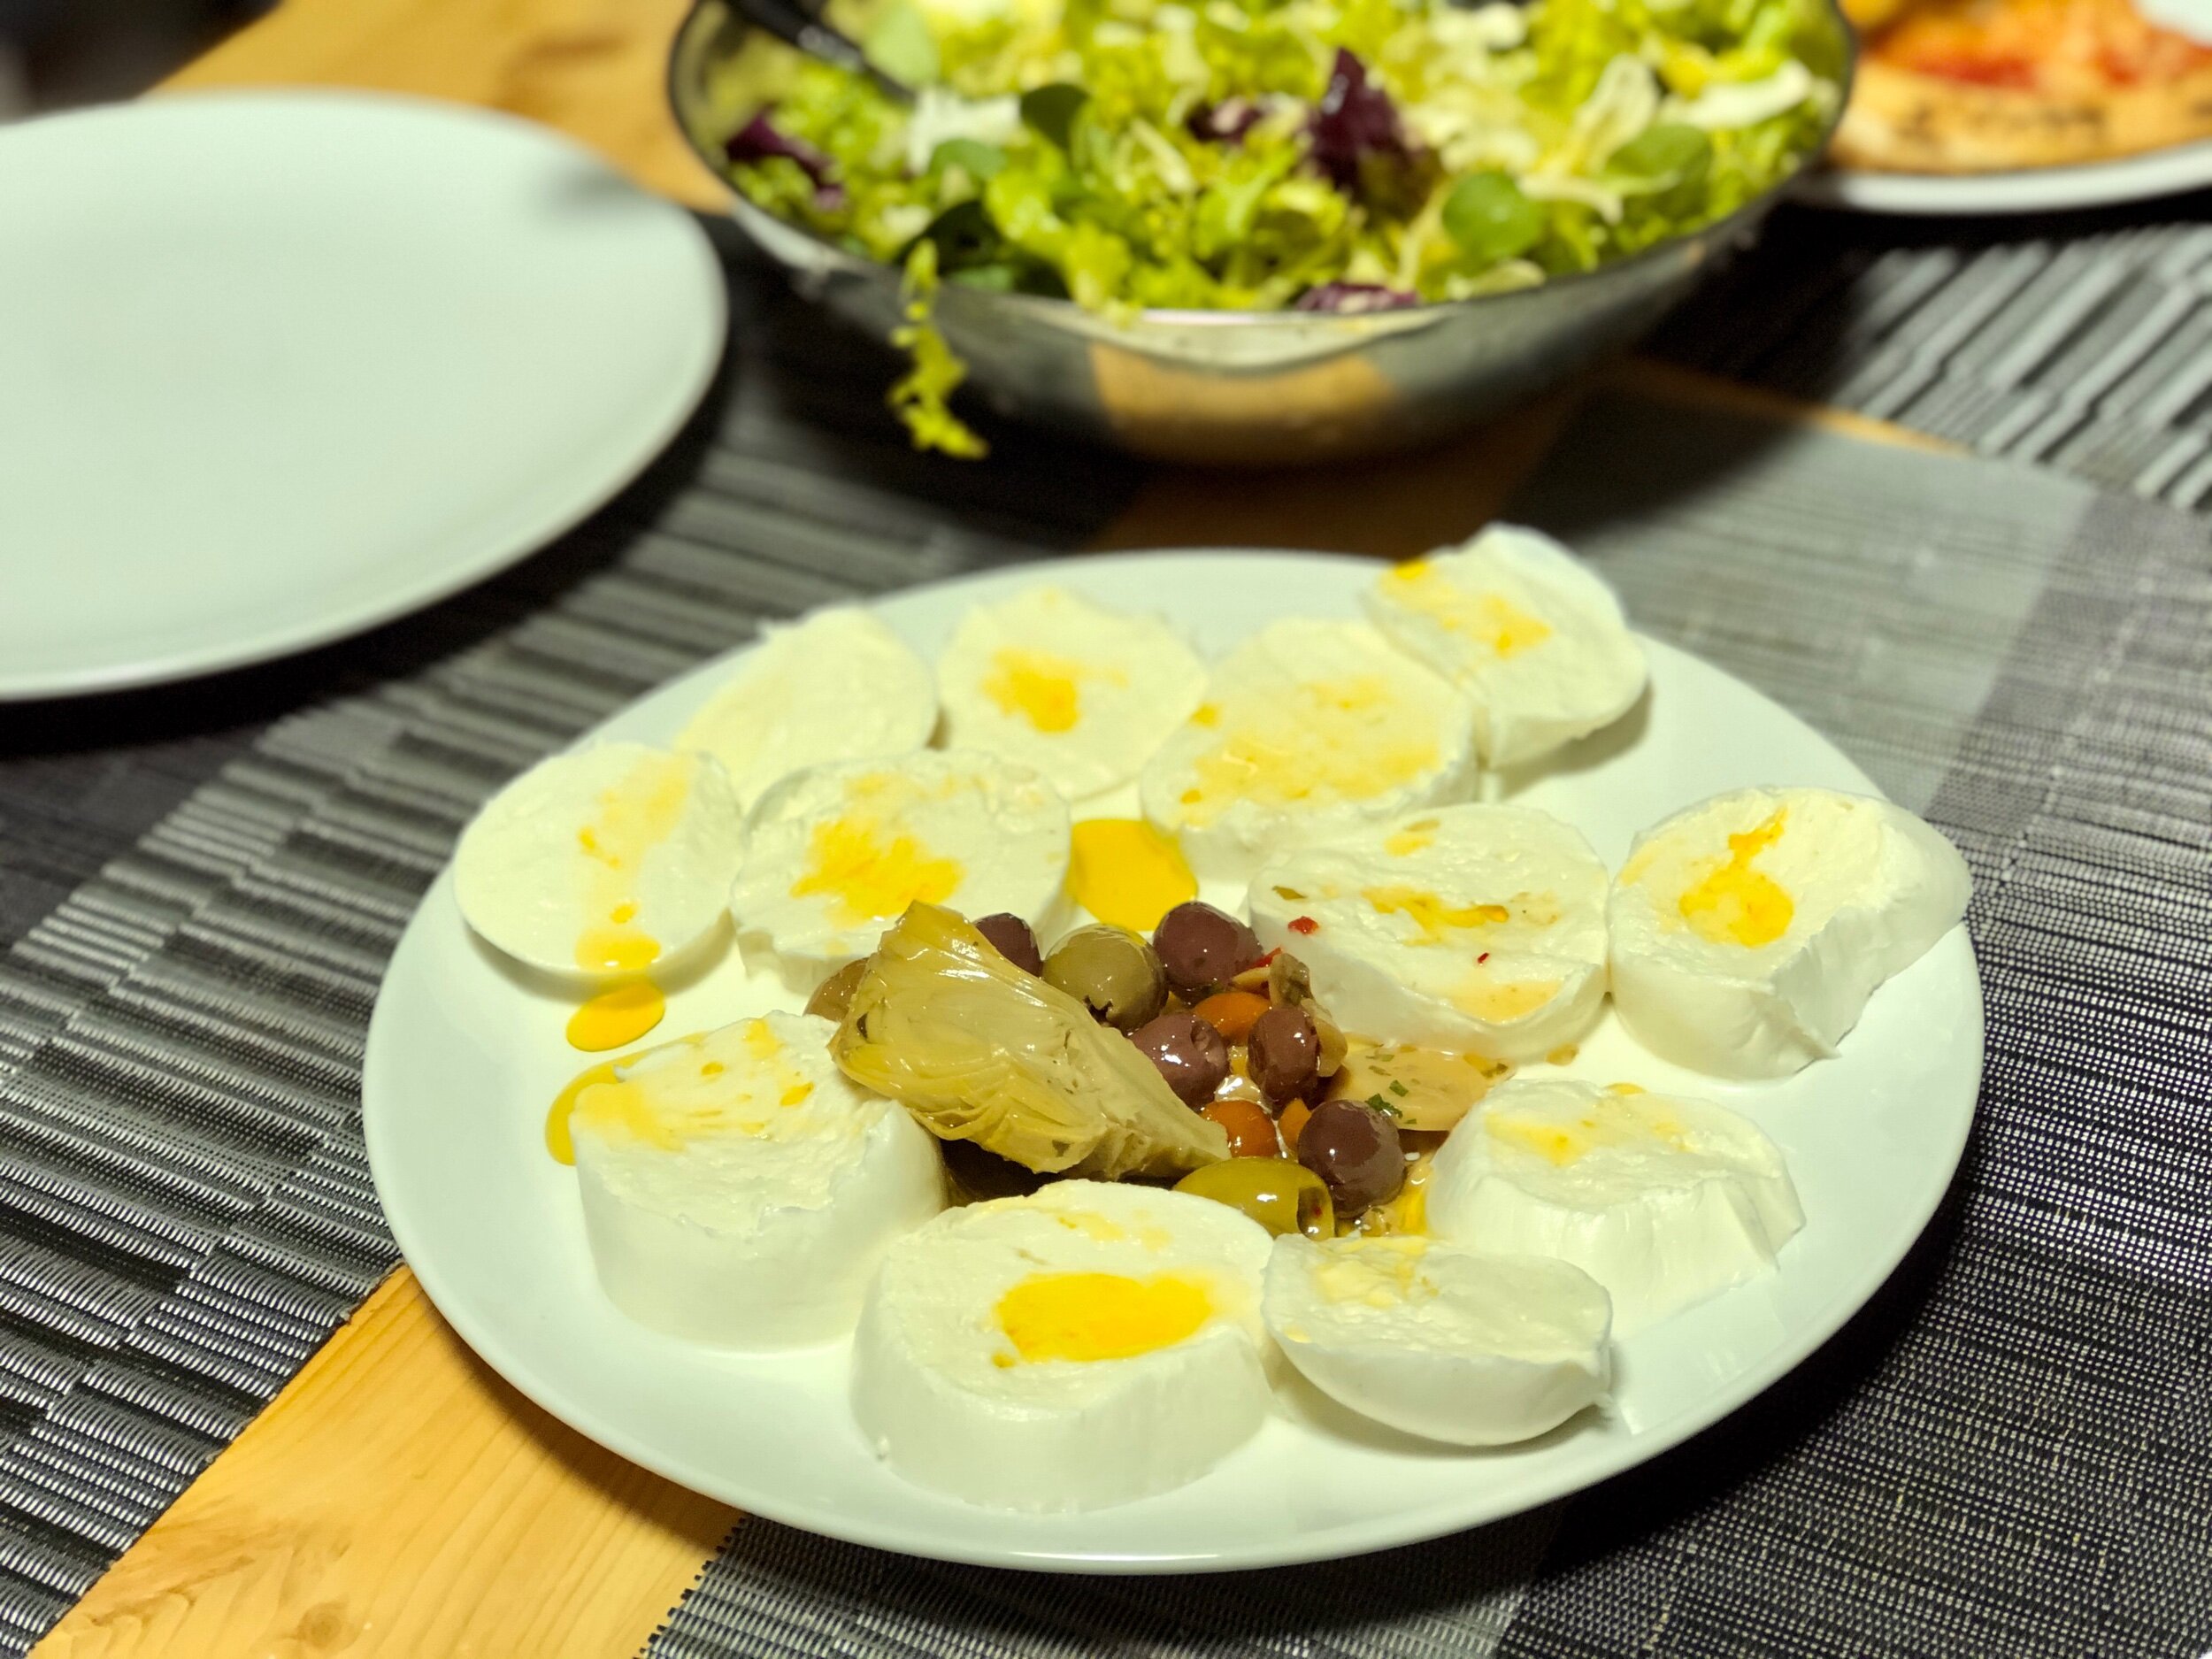
  • mozzarella di bufala - water buffalo mozzarella, the best mozzarella you will probably ever eat

  • babà - pastries soaked in alcohol, often rum

  • struffoli - little fried sweets topped with honey and sprinkles

  • sfogliatelle - pastries with an orange scented ricotta filling. There are two types, regular (shortcrust) and “curly” (flaky and crunchy)

IMG_6485.jpeg

Why I like Naples

It took me awhile to get to Naples. While I’ve long heard about the pizza, the mozzarella di bufala, I’ve also heard that Naples isn’t all that great. It’s a world of its own in Italy, with a dialect that even other Italians can’t understand. People either seem to love it or hate it. Those who love it usually reference the hospitality of the people, the delicious cuisine, and the beauty of the natural surroundings. Those who don’t favor Naples tend to say it’s dirty and unsafe with not much to see.

When we had an opportunity to go to Naples this past April, (read: a “necessary” reason as all of Italy was in a red zone lockdown and you could only leave your house with such), we jumped on it. I mean, worst case scenario it’s an ugly city but we’ll be eating amazing pizza, right? Well, we had a blast. After 4 days I was sad to leave, even though we were traveling with our 6 month old son and Naples’ streets are most definitely not stroller friendly. Word to the wise, if you’re traveling with a young child in Naples (or really anywhere in Italy), baby carriers are your best friends!

There’s nothing like being thrown into the different world that is Naples like stepping out of the train station and immediately witnessing a love triangle showdown by the man who didn’t realize he was in a love triangle. Yelling on the phone, accusing his lady of being with another man. Whatever she may have said to deny it, he continued to stand there on the street corner, yelling into his phone that he can see her walking hand in hand with some other guy, while completely oblivious to the rest of the world still moving around him. Welcome to Naples! Aside from masks, you’d never know Covid was a thing, let alone in a red zone.

We stayed in a lovely Airbnb not too far from the train station. Not the loveliest area, even for Naples, but I didn’t feel it was a dangerous area. The Airbnb was on the first floor (American second floor) with an elevator. Except, the elevator was so small I had to retract the stroller handle to the shortest level, suck in my stomach, and hover over the stroller to get the door closed. My husband (M) took the stairs and met us at the top, only to find the way the door opened onto the landing made it impossible to wheel out. One person had to hold the door and stand back while the other lifted the stroller out and over the steps. Every other time it was much easier for M to just carry the stroller down the steps. While the elevator wasn’t baby friendly, our host had a pack n play all set up for us!

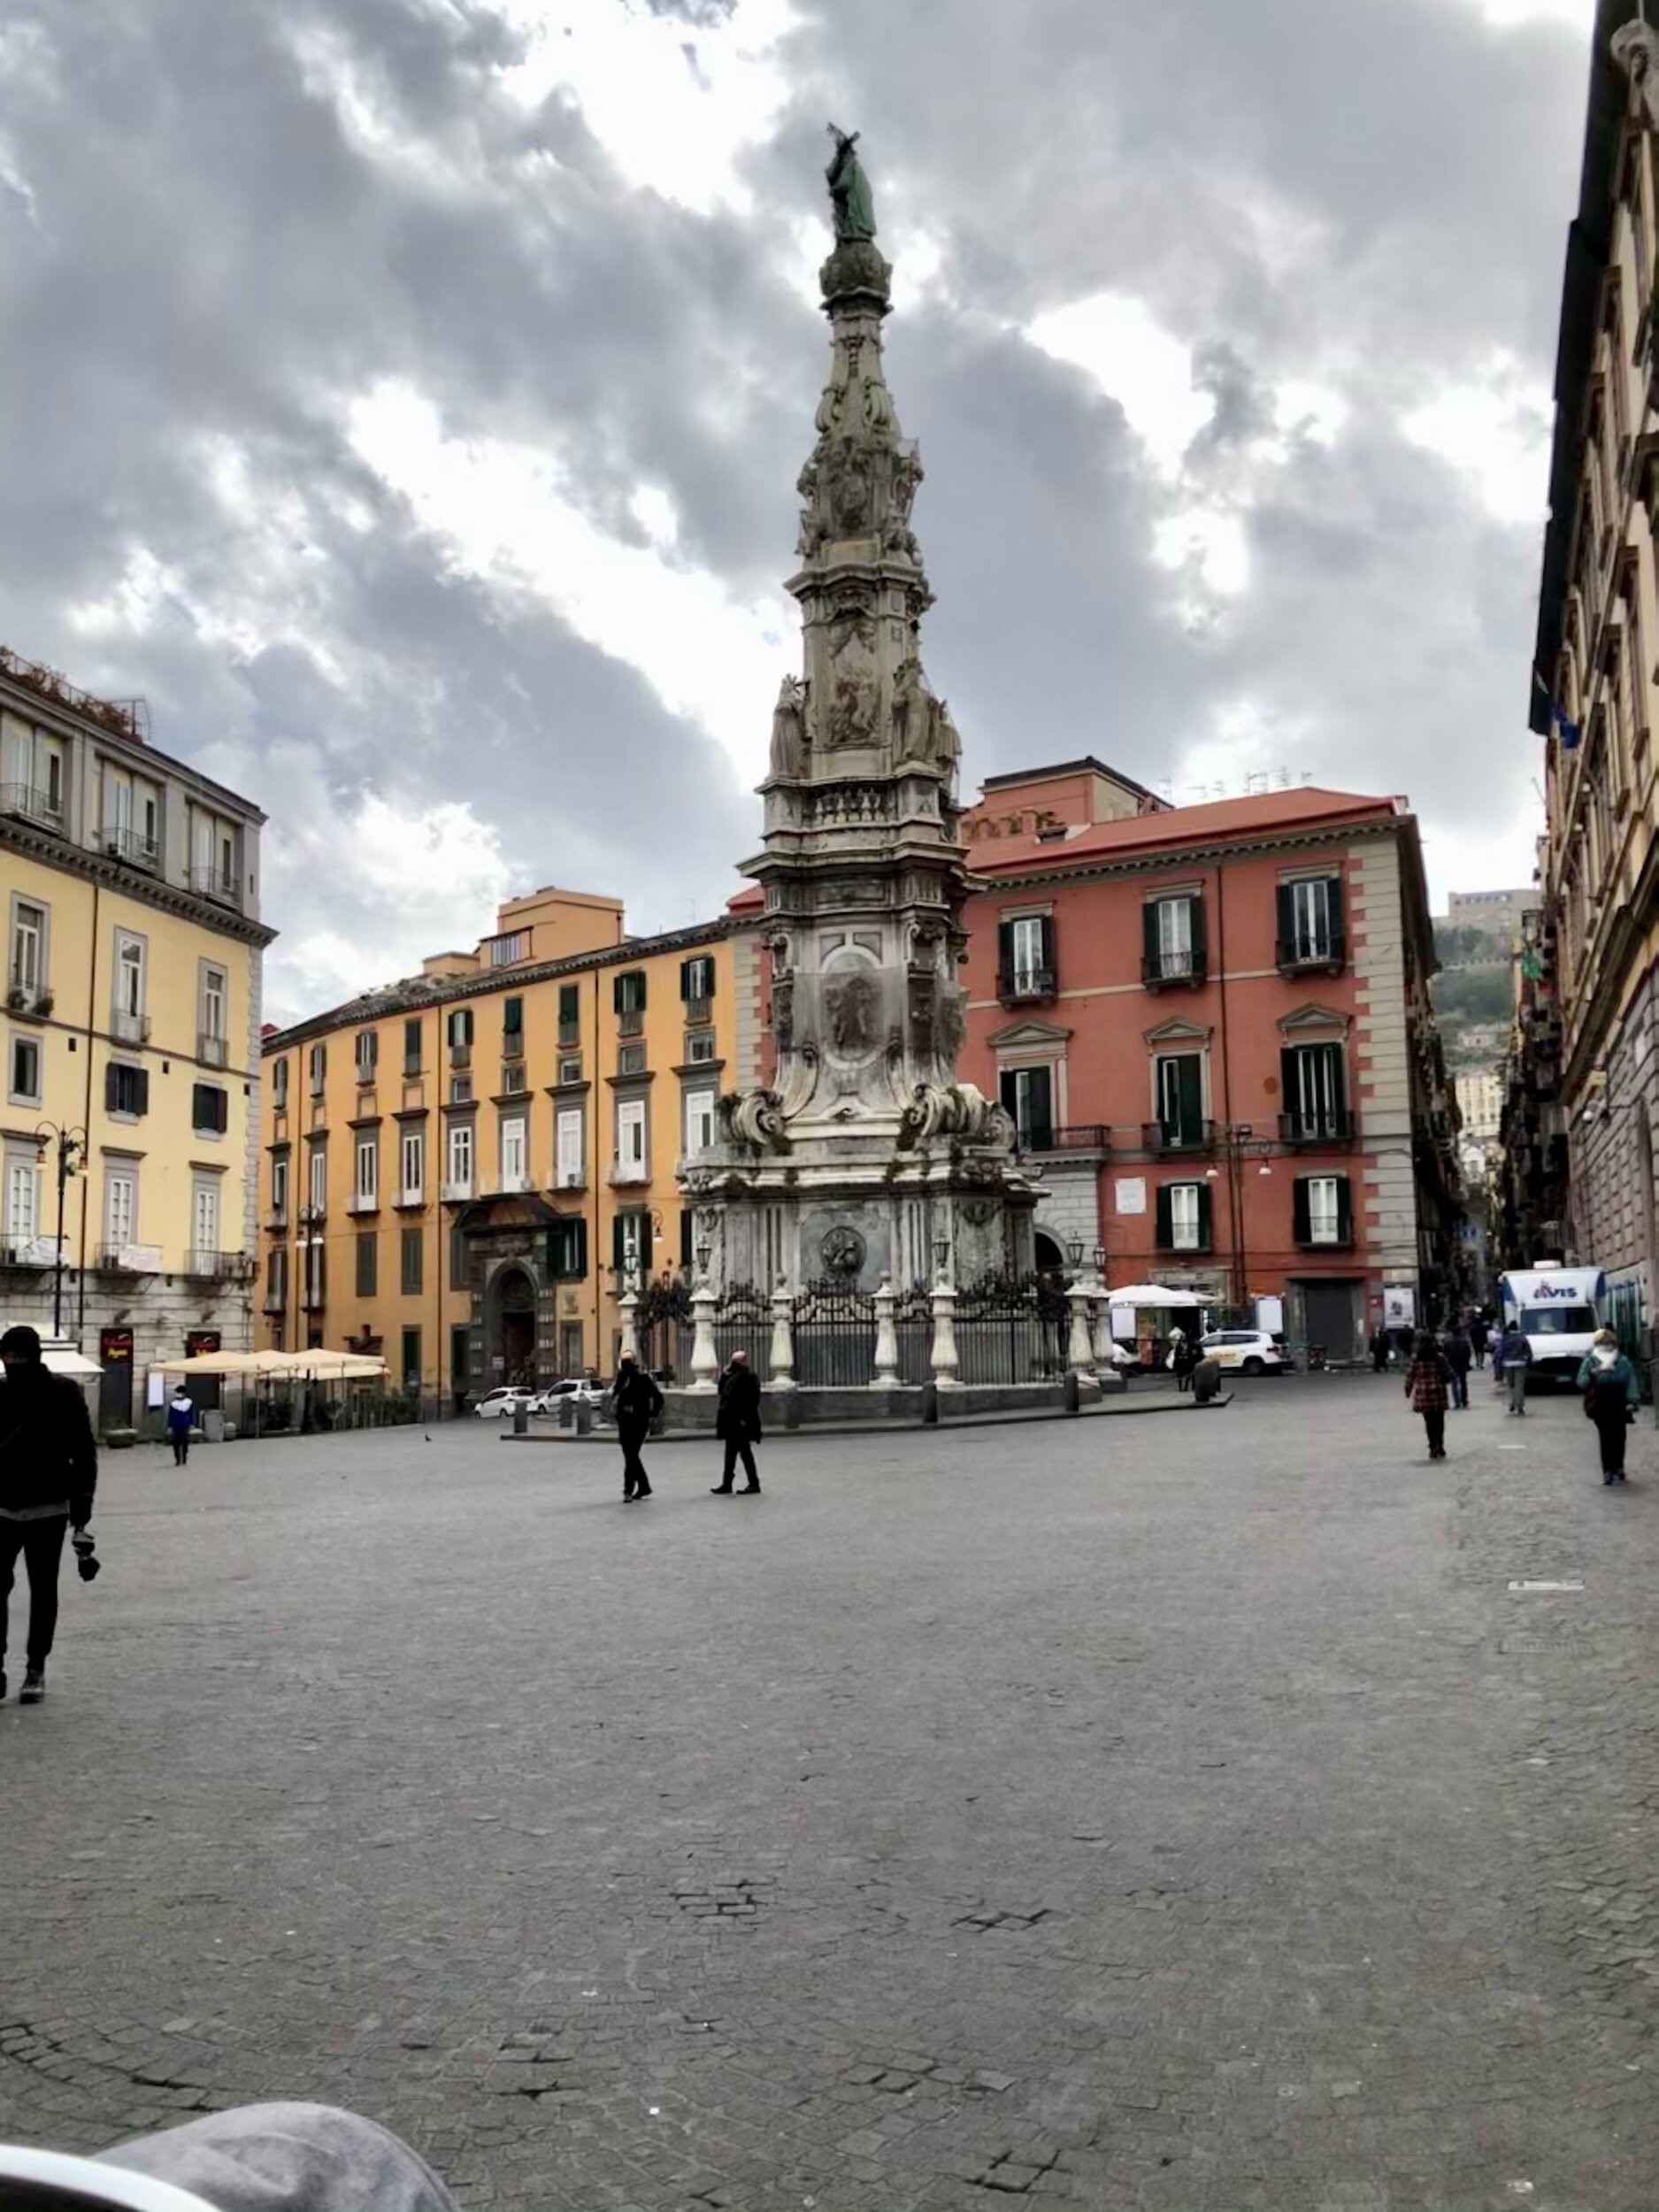
We spent as much time exploring as we could (and eating pizza), putting it under the category of “we’re taking a walk, exercise is necessary” while still being respectful of the rules. I can also tell you by the groups of old men chatting in the piazzas and people everywhere, most certainly not everyone was out with an “essential” reason. Ha. No museums or attractions were open, but we enjoyed our strolls and getting glimpses of the culture and city life. I took hardly any photos, so as not to draw attention to myself as a tourist. Every time I wanted a photo I would pretend I was taking a photo of the baby. “Hey, Elyas! Look at mommy!” :) Not that it probably did much good, all you had to do was watch us try to cross the street to realize we weren’t locals. There was one time I don’t know that we would’ve been able to cross if it wasn’t for the obviously local young woman who barely looked up as she pushed her toddler in a stroller out into the street while texting with one hand. All the cars dutifully stopped, and we dashed along after her.

We had been warned to avoid Spaccanapoli and the Spanish Quarter, as those were the most dangerous parts of town. Mugging and pickpocketing are supposed to be big here. I was even reading this blog from a girl who used to live in Naples who suggested “when you get mugged, keep a 10euro note in your front pocket to throw at them so you can run away safely.” Not if you get mugged…when. Hahaha. Ironically those are places you should definitely see, and we stumbled across both of them. Naples might feel rough around the edges, but as long as you use some common sense and are aware of your belongings, you should be fine. Like any big city. The Spanish Quarter was actually one of my favorite parts, I think we were the only non-residents during our stroll there, and got a unique glance of life there without tourists; the little shops with lines out the door for daily purchases, people reading newspapers on benches, birds singing from their cages on the balconies.

We tried to go up towards Castel Sant’Elmo to see some views, but that didn’t go as planned. With the uphill trek, mostly stairs and us having a stroller, we opted for the funicular. We got our tickets and went up the escalator to wait, only to find we had to pass through turnstiles that the stroller most definitely didn’t fit through. Thankfully some spunky teenager saw us struggling and came over to help us haul the baby and stroller over the turnstile. Did I mention we were trying to stay inconspicuous? We looked around, panting, and…oh no. What turnstiles did we go through? Now we’re in this closed off area that we can only get this…train thing from, the area for the funicular is over there, through those other turnstiles…we were amusingly mortified and mutually agreed there was no way we were lifting the stroller back over the turnstiles to go lift it over the other turnstiles…we were stuck taking the mysterious train to a mysterious destination. It was like an above ground subway, but you had to wait for some doors to open to access the platform. We got on, and got off at the first possible stop. We were…way outside the city in some nondescript area. We took one bus back towards the center but next Google maps was telling us to take the metro, and we couldn’t find an elevator down to the metro station. We decided to walk the hour back to the apartment rather than deal with all the stairs and the stroller. The hour turned into two, with Naples not being that easy to navigate apparently. Sometimes there was no sidewalk, drivers are crazy, and Google Maps led us down all the routes with major staircases. The whole thing was ridiculous and had us laughing.

I think one of my favorite moments was trying to cross at a major intersection. Despite the crosswalk light being green, there was a wall of cars and vespas turning left. When there seemed to be a let up, all of us pedestrians started to cross. Another wave of vehicles was coming, and when a man on a Vespa saw us with the baby in the carrier, he stopped and even held out his hand to stop the car that was turning beside him. He looked at the car and pointed at us, like, “Stop! Look, don’t you see there’s a baby crossing??” And that warmed my heart, that even strangers were looking out for my son.

I didn’t hear as much of the dialect as I was expecting, but when I did, it made me really happy. It’s so fun, and even though I speak Italian, I only understood a few words here and there. I didn’t even know that the guy who was making our fried pizza asked me if I wanted some cracked pepper. What?? Pepe. Oh er, yes please! I hadn’t felt like such a tourist in a long time! I can’t wait to go back and make a fool of myself again.

I guess I should say something about the pizza. When you eat pizza in Italy, you know you’ve found something special, as long as you don’t find yourself in a tourist trap restaurant. But then you eat pizza in Napoli, and just when you thought it couldn’t get any better, your mouth explodes. The creamy mozzarella, the fresh tomato sauce that tastes like the tomatoes are still growing on the vine, and the chewy, fluffy, but not overly so, crust that may leave you speechless, having nothing to do with your mouth being full.

Overall, Napoli is a city to be enjoyed without hurry and loved with all of its chaos and rugged beauty.


Crispy Gnocchi with Brussels Sprouts

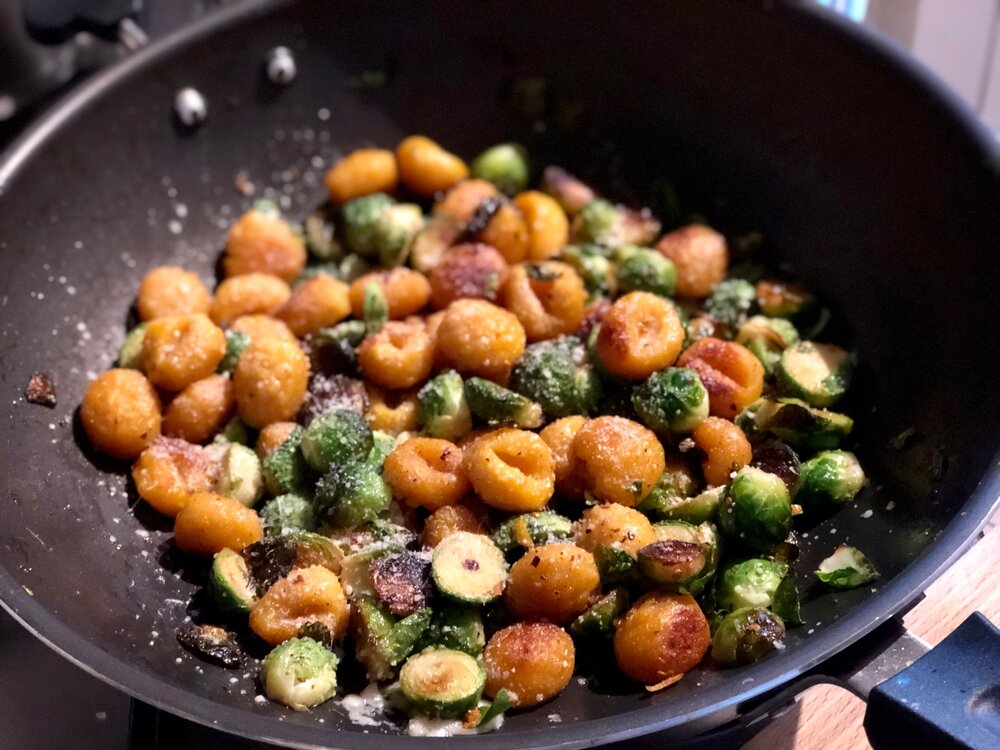
Made with pumpkin gnocchi

Made with pumpkin gnocchi

Think gnocchi with crispy sides, tender browned brussels sprouts with crispy edges, with a browned butter sauce and a bright hint of lemon.

I found this recipe thanks to New York Times’ Instagram account, and after the first OH YEAH THIS IS GOOD trial run I’ve made it several times since. It’s easy, the ingredient list isn’t scary long, and it has brussels sprouts so it’s totally healthy, right? Maybe not, but it’s rich and satisfying so you don’t need to eat a huge serving.

It starts with cooking and crisping up those little sprouts, then you trade out the sprouts to brown the gnocchi, then add butter, honey, lemon and a bit of red pepper flake spice and cook until the butter browns (when it smells like heaven); add the sprouts back in and grate a little parmesan cheese on top. Easy and impressive!

Brussels sprouts

Brussels sprouts often get a bad rap and I know people who will only eat them if they’re served with plenty of bacon. While I’m sure there do exist those people who truly dislike the sprouts, I believe that most people who claim to not like them just haven’t eaten them properly prepared. There’s nothing worse than limp or soggy brussels sprouts. Never ever boil them, yeah? They’re at their most delicious if they are pan fried or oven baked. Crispy brussels sprouts: yummy. Soggy brussels sprouts: yucky. If you or someone you know is a brussels sprout skeptic, this recipe may just be the one to win you over!

That said, if you are one of the true dislikers, you can switch out the brussels sprouts for other veggies like broccoli, cauliflower, cabbage, kale, or any of those cruciferous types.

Adaptations from the original recipe

While New York Times might think this recipe serves 4 people, I pretty consistently ate this in 2-3 sittings. Ahem. I added in the “3” part just to be generous.

I reduced the butter from 6 Tbsp to 4 Tbsp. 6 was just…a lot. You’re more than welcome to use that much if you’re looking for a very rich dish, but I think 4 was plenty, you could probably even get away with 2-3 Tbsp.

The original recipe calls for pan frying the brussels sprouts, but no matter how many times I’ve tried, it always took much longer for the brussels to cook than the specified 5-8 minutes. I would say up to 15-20 is closer. I’m sure part of it is that I don’t have a cast iron skillet. Otherwise, it can be more time efficient to roast the brussels sprouts in the oven while you’re preparing the gnocchi.

I reduced and changed the lemon aspect of the recipe. NYT says to peel thick strips of lemon zest, then chop, ending with about 2 tsp of zest. I personally found the lemon a little overpowering this way, so I compromised and was happy with the following adaptations: zesting a lemon with a regular zester, which creates a finer zest, and using only about 1/2-1 tsp of the finer zest, OR skipping the zest and adding in a splash of fresh lemon juice at the end. Either way a bit quicker and easier. One of my least favorite tasks in the kitchen is zesting citrus so sometimes I opt for a splash of lemon juice when I just don’t want to zest, ya know?

If you noticed I listed 1 lb of brussels sprouts as 500g, which are not equal weights. That’s because brussels sprouts often come in 500g packages in Italy. Since a pound is really only 454g, I rounded up for practicality’s sake. Yes, it bothers me to do so but I think it’s for the best, ahem. :)

This post may contain affiliate links. If you make a purchase using these links, Jennyblogs may receive a small commission, at no extra cost to you. This helps to support Jennyblogs. For further information see the privacy policy. Grazie!

Recipe adapted from New York Times


Crispy Gnocchi with Brussels Sprouts

Serves 2-3

Ingredients

  • 1/4 cup / 56g olive oil

  • 1 lb / 500g brussels sprouts

  • salt and pepper, to taste

  • 1/2 tsp lemon zest

  • 1/2 tsp red pepper flakes

  • 18 oz / 500g package of gnocchi

  • 4 Tbsp / 56g butter

  • 1/2 tsp honey

  • grated parmesan cheese, for serving

Directions:

  1. Clean and chop off the ends of the brussels sprouts, and any brown leaves. Slice into halves, or quarters if they’re particularly large.

  2. Cook the brussels sprouts OPTION 1, SKILLET:

    Heat 3 Tbsp / 42g of the oil in a large skillet over medium heat. Add brussels sprouts in an even layer, sprinkle with 1/2 tsp salt and some pepper. Sprinkle over lemon zest and cook for 10-15 minutes, stirring occasionally, or until sprouts are crispy and a nice golden brown.

    Add the red pepper flakes and stir, cook for another 3-4 minutes or until sprouts are crisp and tender.

    Transfer to a plate or bowl while you cook the gnocchi.

    OPTION 2, OVEN:

    Preheat oven to 450°F / 232°C.

    Toss the brussels sprouts with 3 Tbsp of oil, 1/2 tsp salt, some pepper, lemon zest, and red pepper to evenly coat; spread in an even layer on a baking sheet lined with parchment paper.

    Roast in the oven for about 15 minutes, or until crispy, golden, and tender. While roasting, prepare gnocchi.

  3. Add the remaining 1 tbsp / 14g of oil to a skillet over medium-high heat. Add gnocchi in an even layer and cook without stirring, 3-4 minutes or until golden brown underneath.

  4. Add butter and honey, season with salt and pepper. Cook until butter has melted and starts to turn golden brown and nutty smelling, this can take several minutes.

  5. Add the brussels sprouts to the skillet and cook just until everything is warmed through.

  6. Remove from heat and serve with a sprinkling of parmesan cheese.

Jenny’s Notes:

  • Use just 2 Tbsp / 28g butter for the lightest version of this!

  • Butter can go quickly from perfectly browned and nutty to burnt, so keep a close eye on it!

  • Whether you buy a package of gnocchi or make your own, different flavors are delicious in this recipe! Pictured in this post (first and last) are some pumpkin gnocchi, so good!

gnocchi, easy dinner, comfort food, brussels sprouts
dinner
American
Yield: 2-3
Author:
Crispy Gnocchi and Brussels Sprouts

Crispy Gnocchi and Brussels Sprouts

Crispy, pan-fried gnocchi and roasted brussels sprouts with parmesan cheese, a hint of lemon, spice, and honey.
Cook time: 40 MinTotal time: 40 Min

Ingredients

Instructions

  1. Clean and chop off the ends of the brussels sprouts, and any brown leaves. Slice into halves, or quarters if they’re particularly large.
  2. Cook the brussels sprouts OPTION 1, SKILLET:
  3. Heat 3 Tbsp / 42g of the oil in a large skillet over medium heat. Add brussels sprouts in an even layer, sprinkle with 1/2 tsp salt and some pepper. Sprinkle over lemon zest and cook for 10-15 minutes, stirring occasionally, or until sprouts are crispy and a nice golden brown.
  4. Add the red pepper flakes and stir, cook for another 3-4 minutes or until sprouts are crisp and tender.
  5. Transfer to a plate or bowl while you cook the gnocchi.
  6. OPTION 2, OVEN:
  7. Preheat oven to 450°F / 232°C.
  8. Toss the brussels sprouts with 3 Tbsp of oil, 1/2 tsp salt, some pepper, lemon zest, and red pepper to evenly coat; spread in an even layer on a baking sheet lined with parchment paper. Roast in the oven for about 15 minutes, or until crispy, golden, and tender. While roasting, prepare gnocchi.
  9. Add the remaining 1 tbsp / 14g of oil to a skillet over medium-high heat. Add gnocchi in an even layer and cook without stirring, 3-4 minutes or until golden brown underneath.
  10. Add butter and honey, season with salt and pepper. Cook until butter has melted and starts to turn golden brown and nutty smelling, this can take several minutes.
  11. Add the brussels sprouts to the skillet and cook just until everything is warmed through.
  12. Remove from heat and serve with a sprinkling of parmesan cheese.

Notes

  • Use just 2 Tbsp / 28g butter for the lightest version of this!
  • Butter can go quickly from perfectly browned and nutty to burnt, so keep a close eye on it!
  • Whether you buy a package of gnocchi or make your own, different flavors are delicious in this recipe! Pictured are some pumpkin gnocchi, so good!


Nutrition Facts

Calories

705.17

Fat

37.14 g

Sat. Fat

13.14 g

Carbs

81.25 g

Fiber

7.83 g

Net carbs

73.42 g

Sugar

4.94 g

Protein

15.02 g

Sodium

307.61 mg

Cholesterol

90.46 mg

Nutritional info is approximate. Based on 3 servings

Did you make this recipe?
Tag @jennyblogsandbakes on instagram and hashtag it # jennyblogs

Explore Italy: Pisa

2019-03-03 10.23.46.jpg

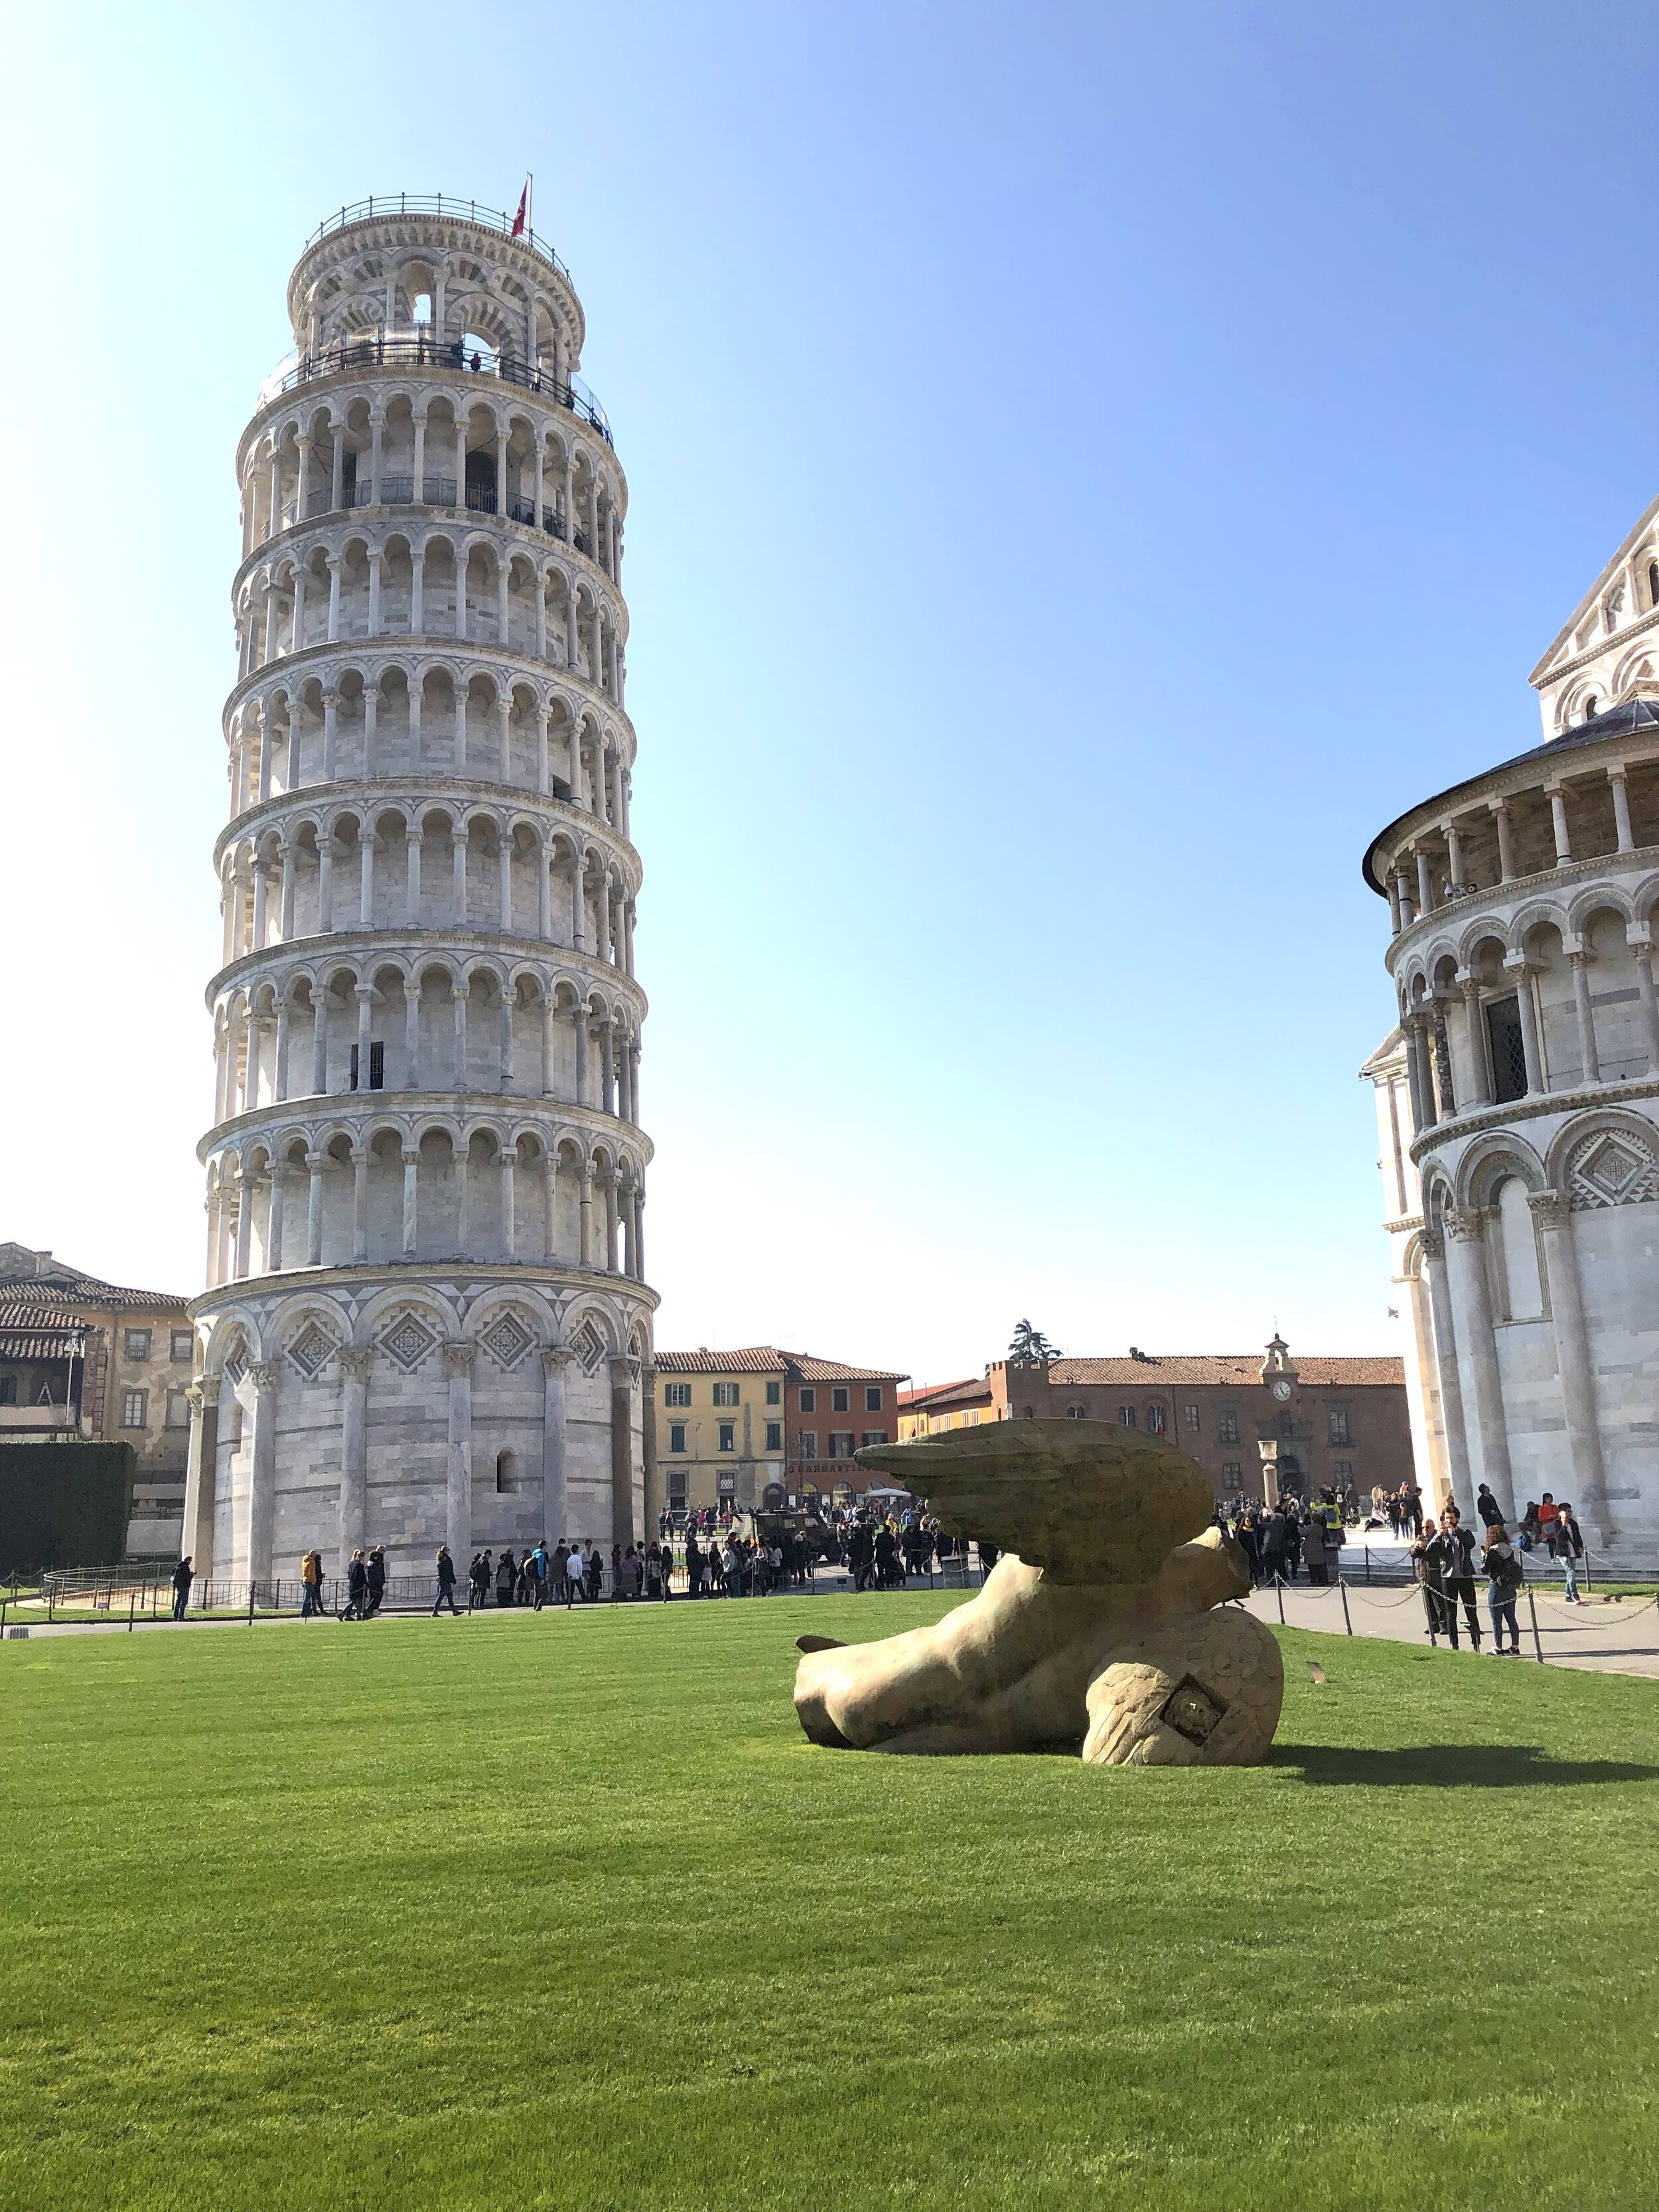
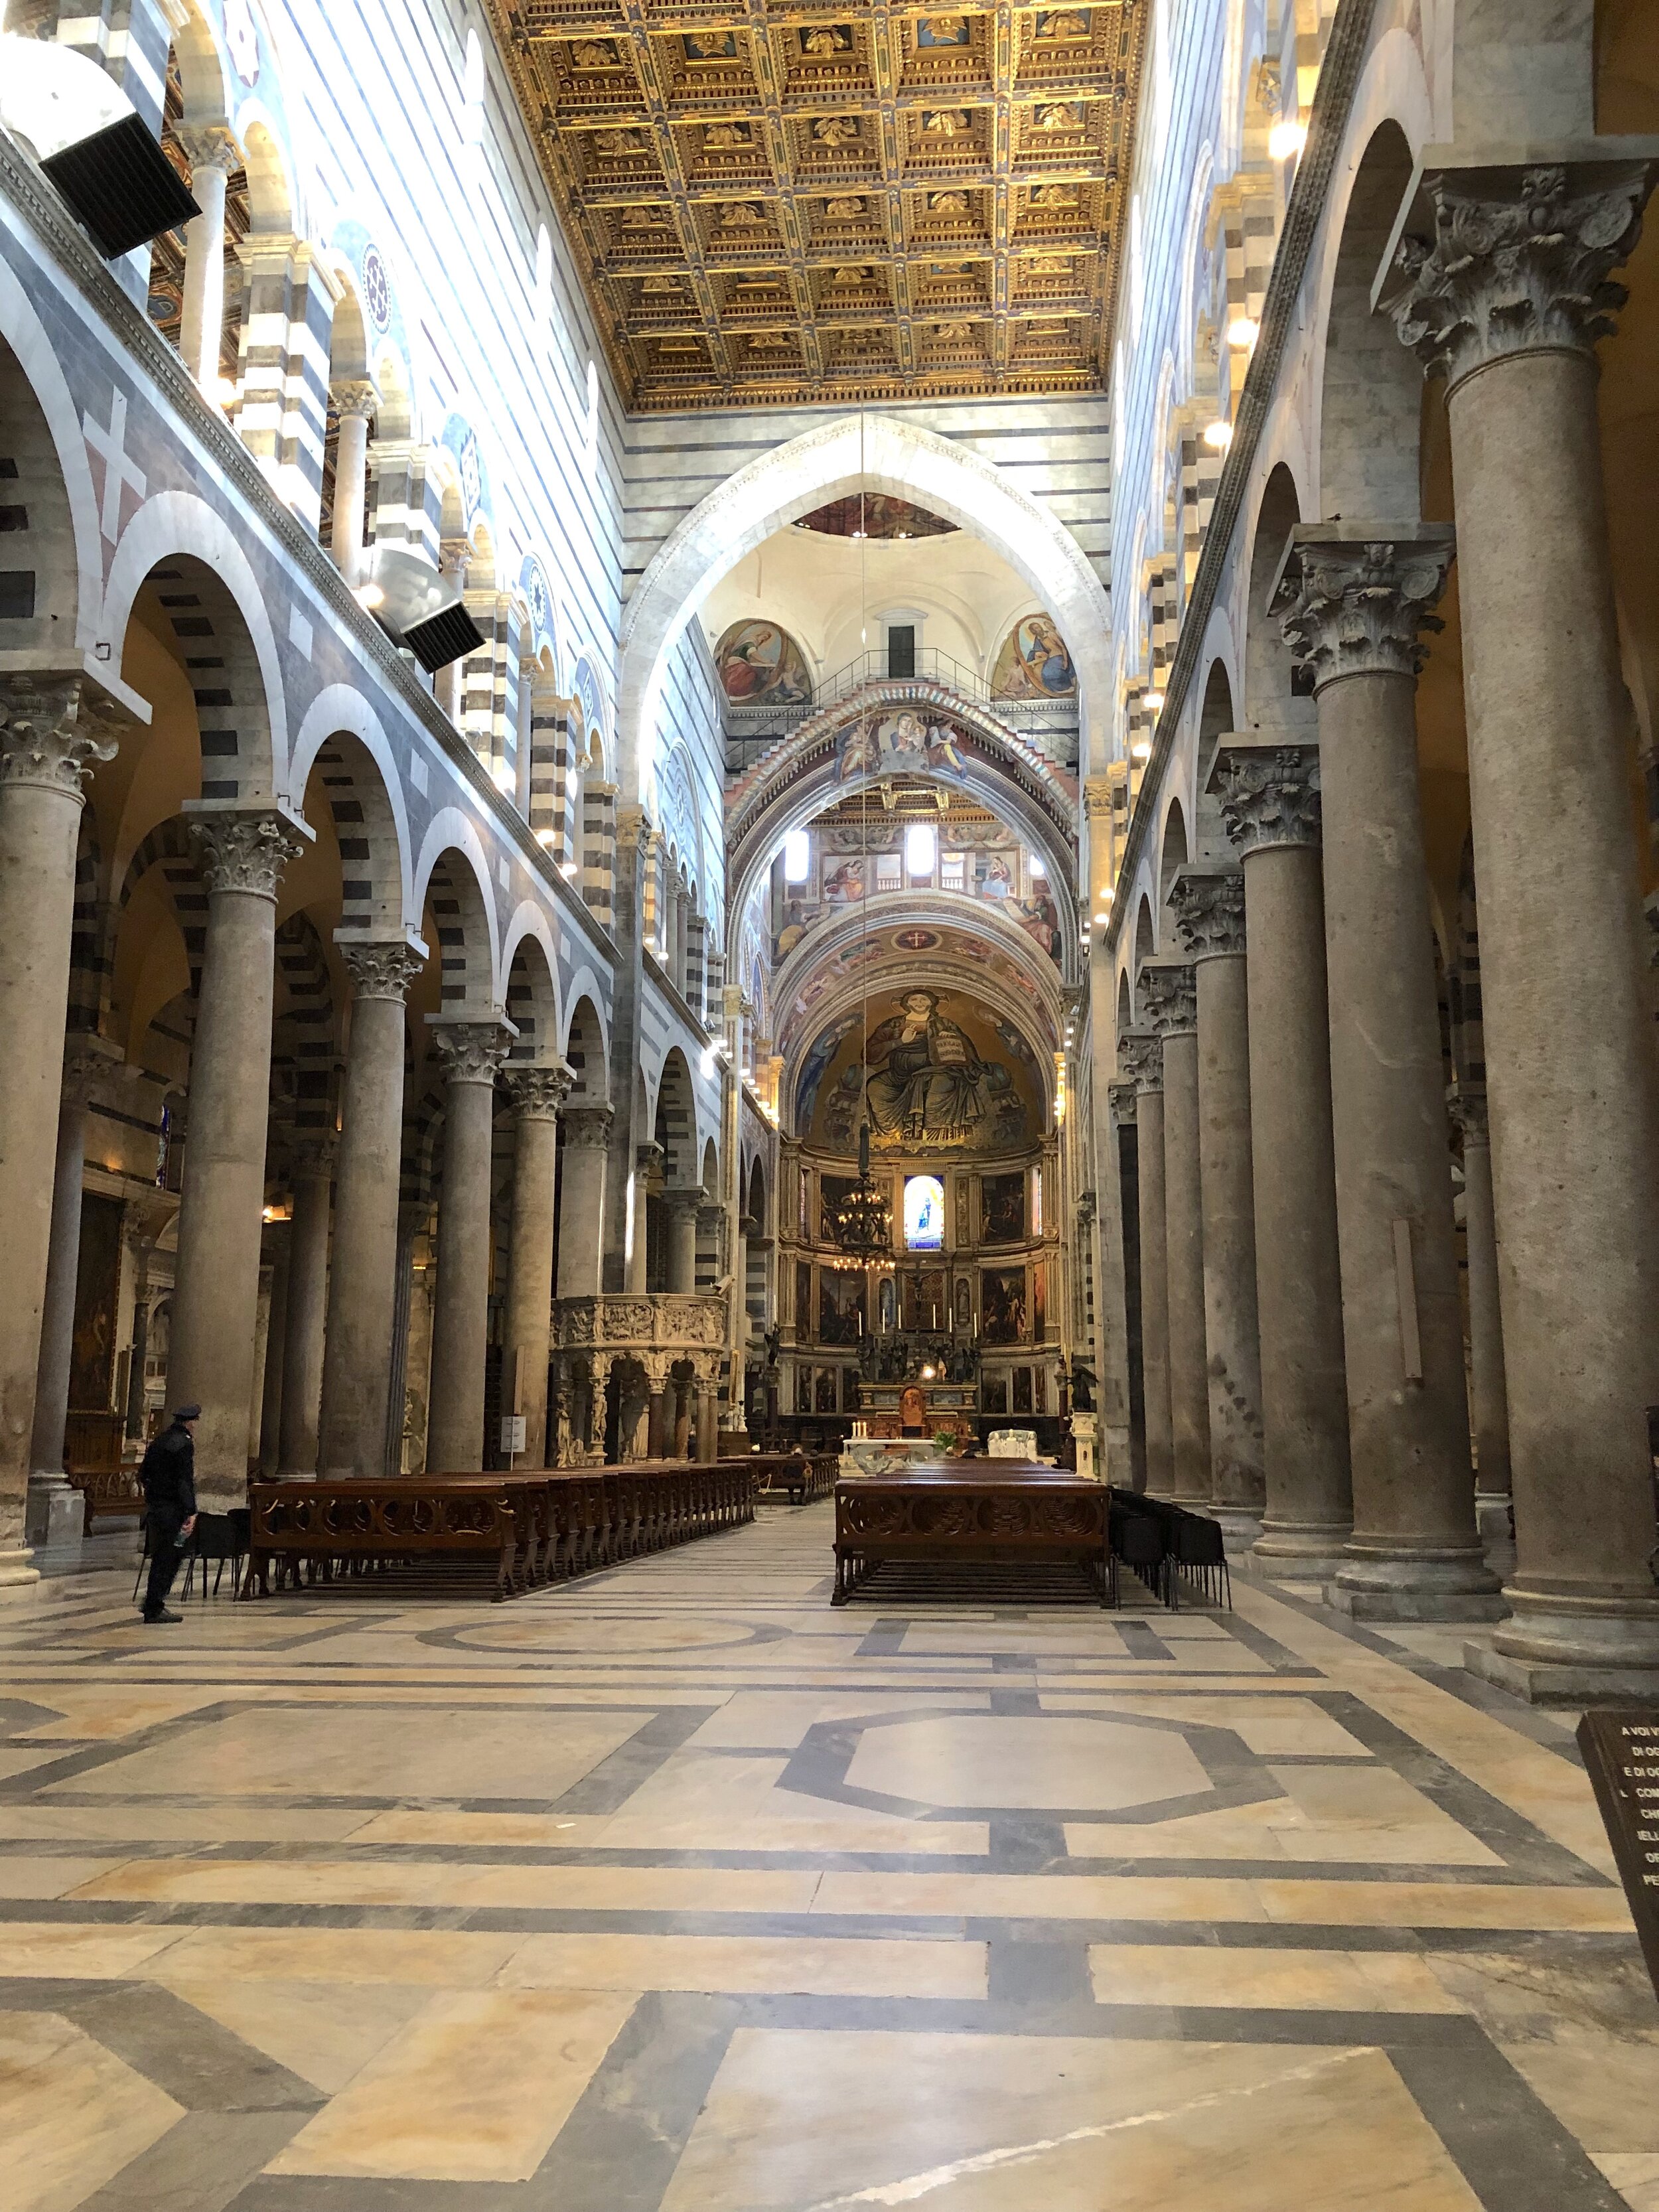
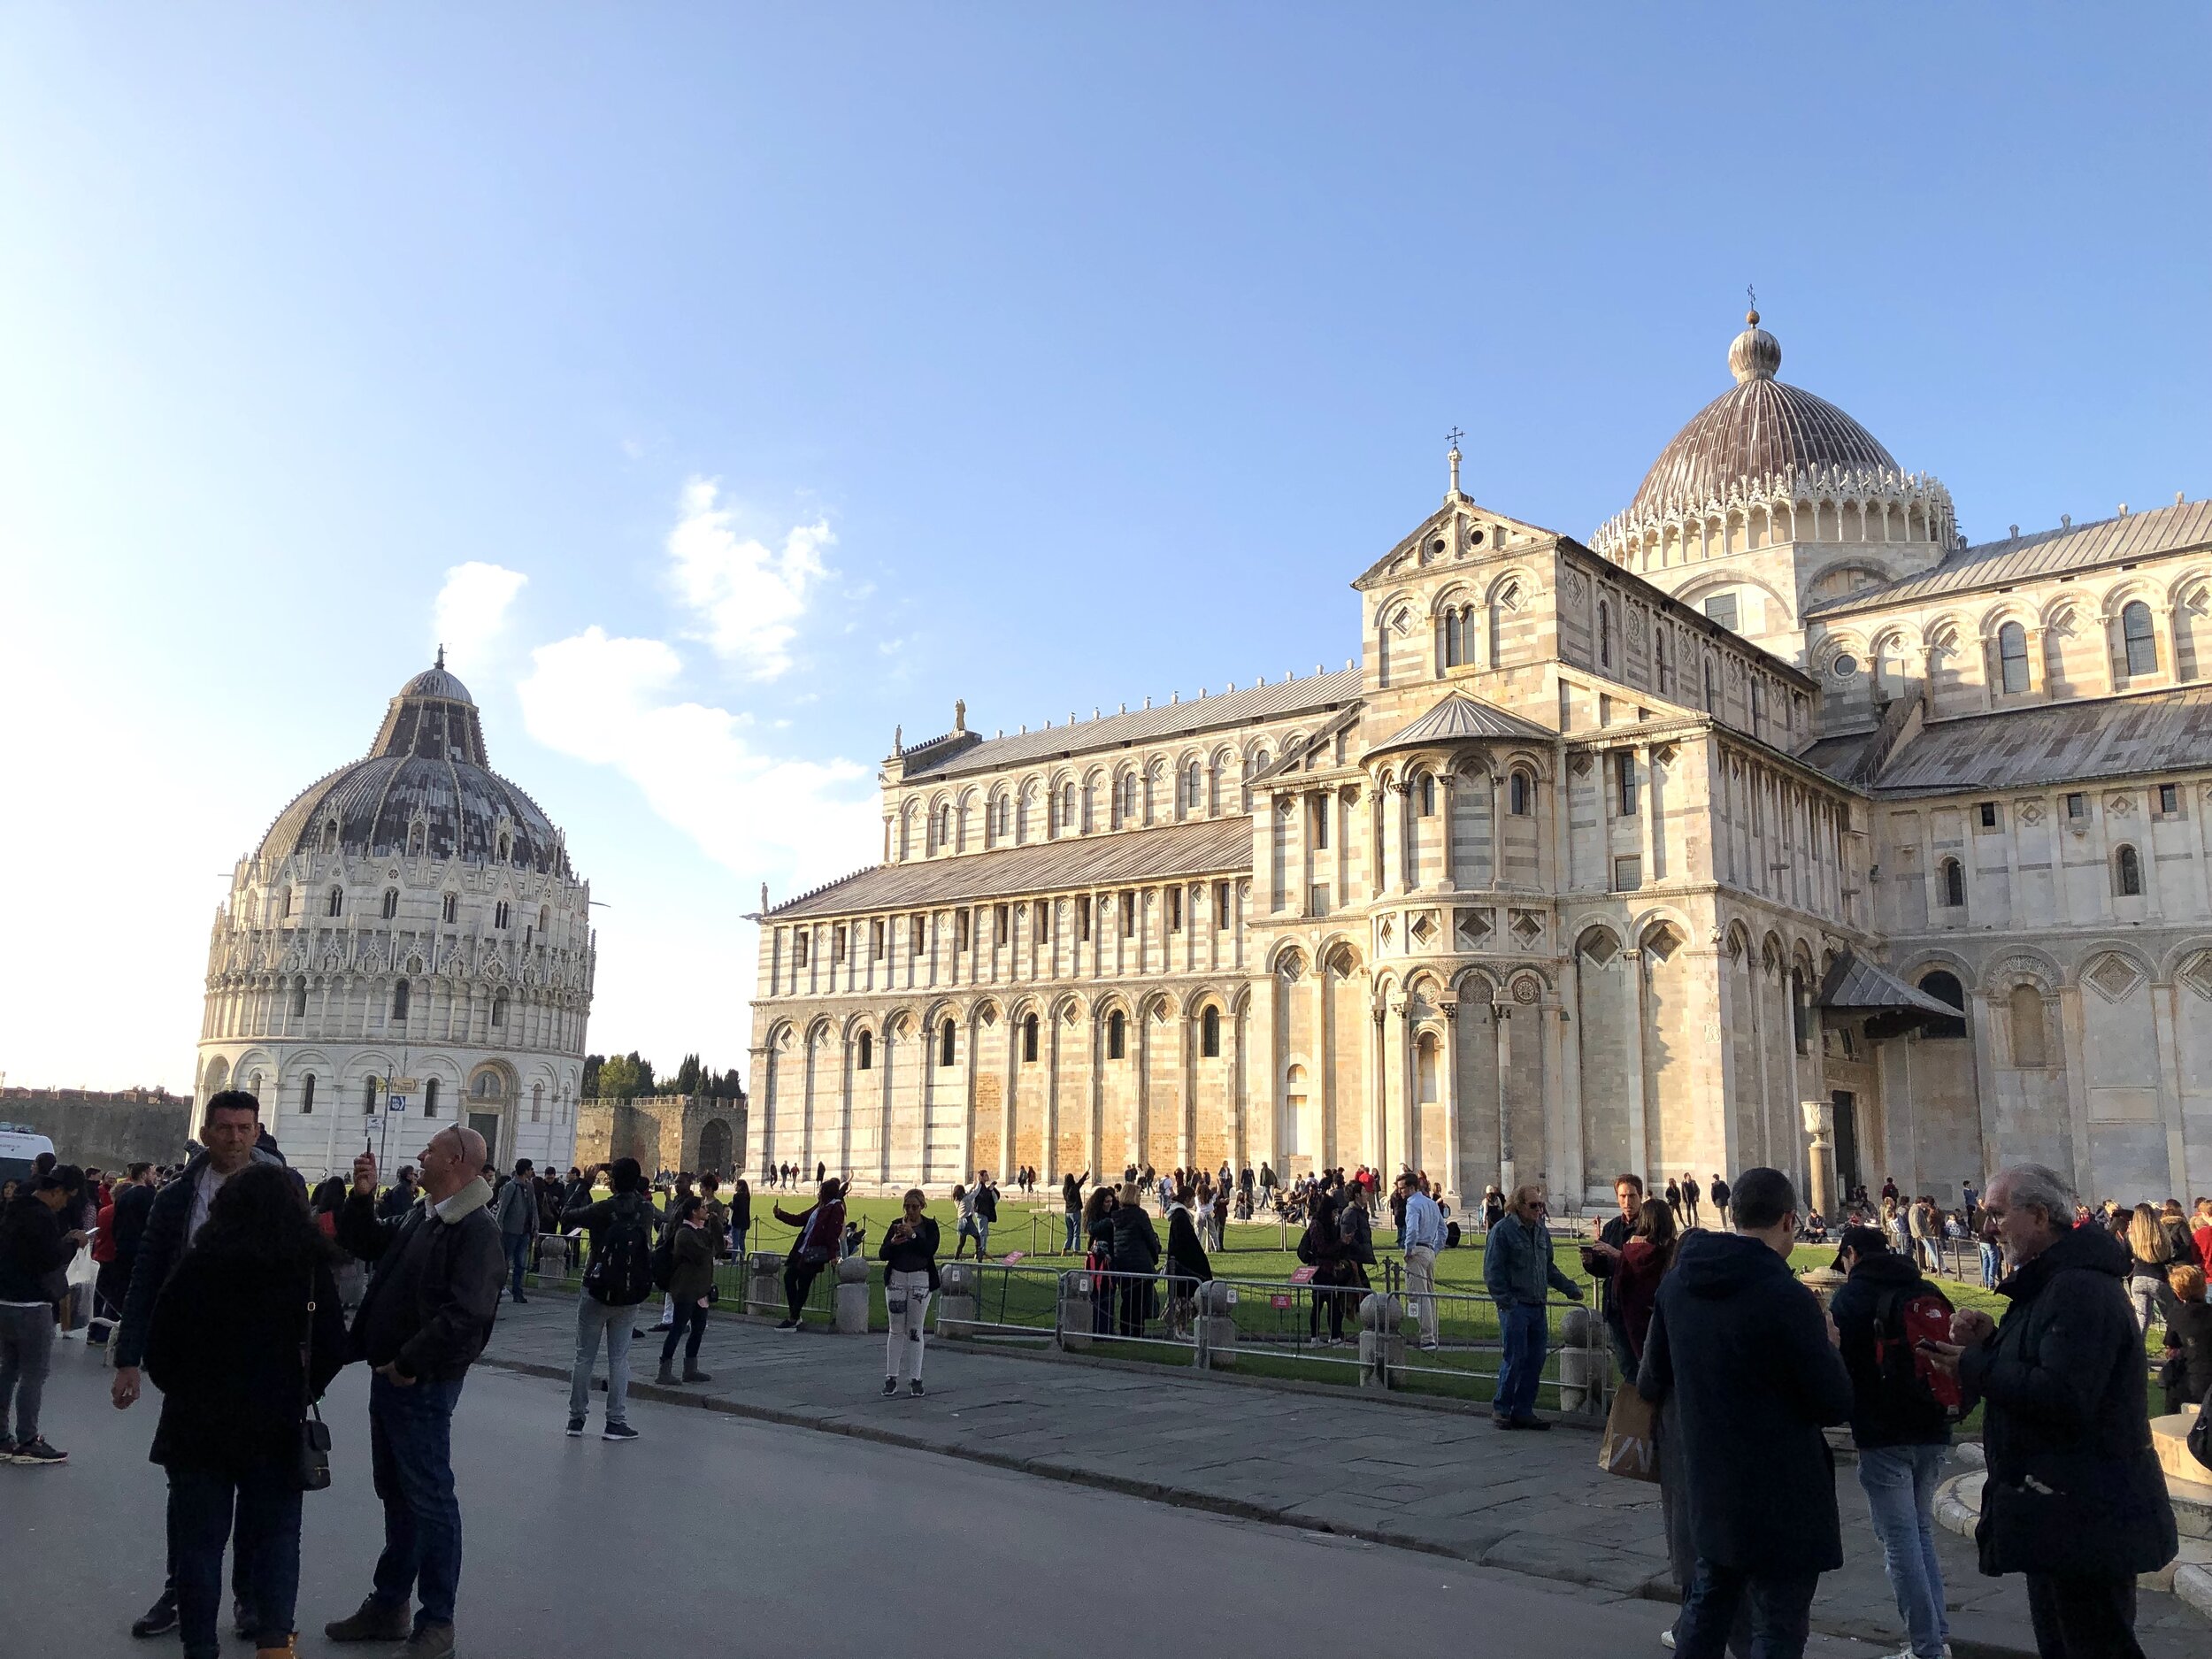
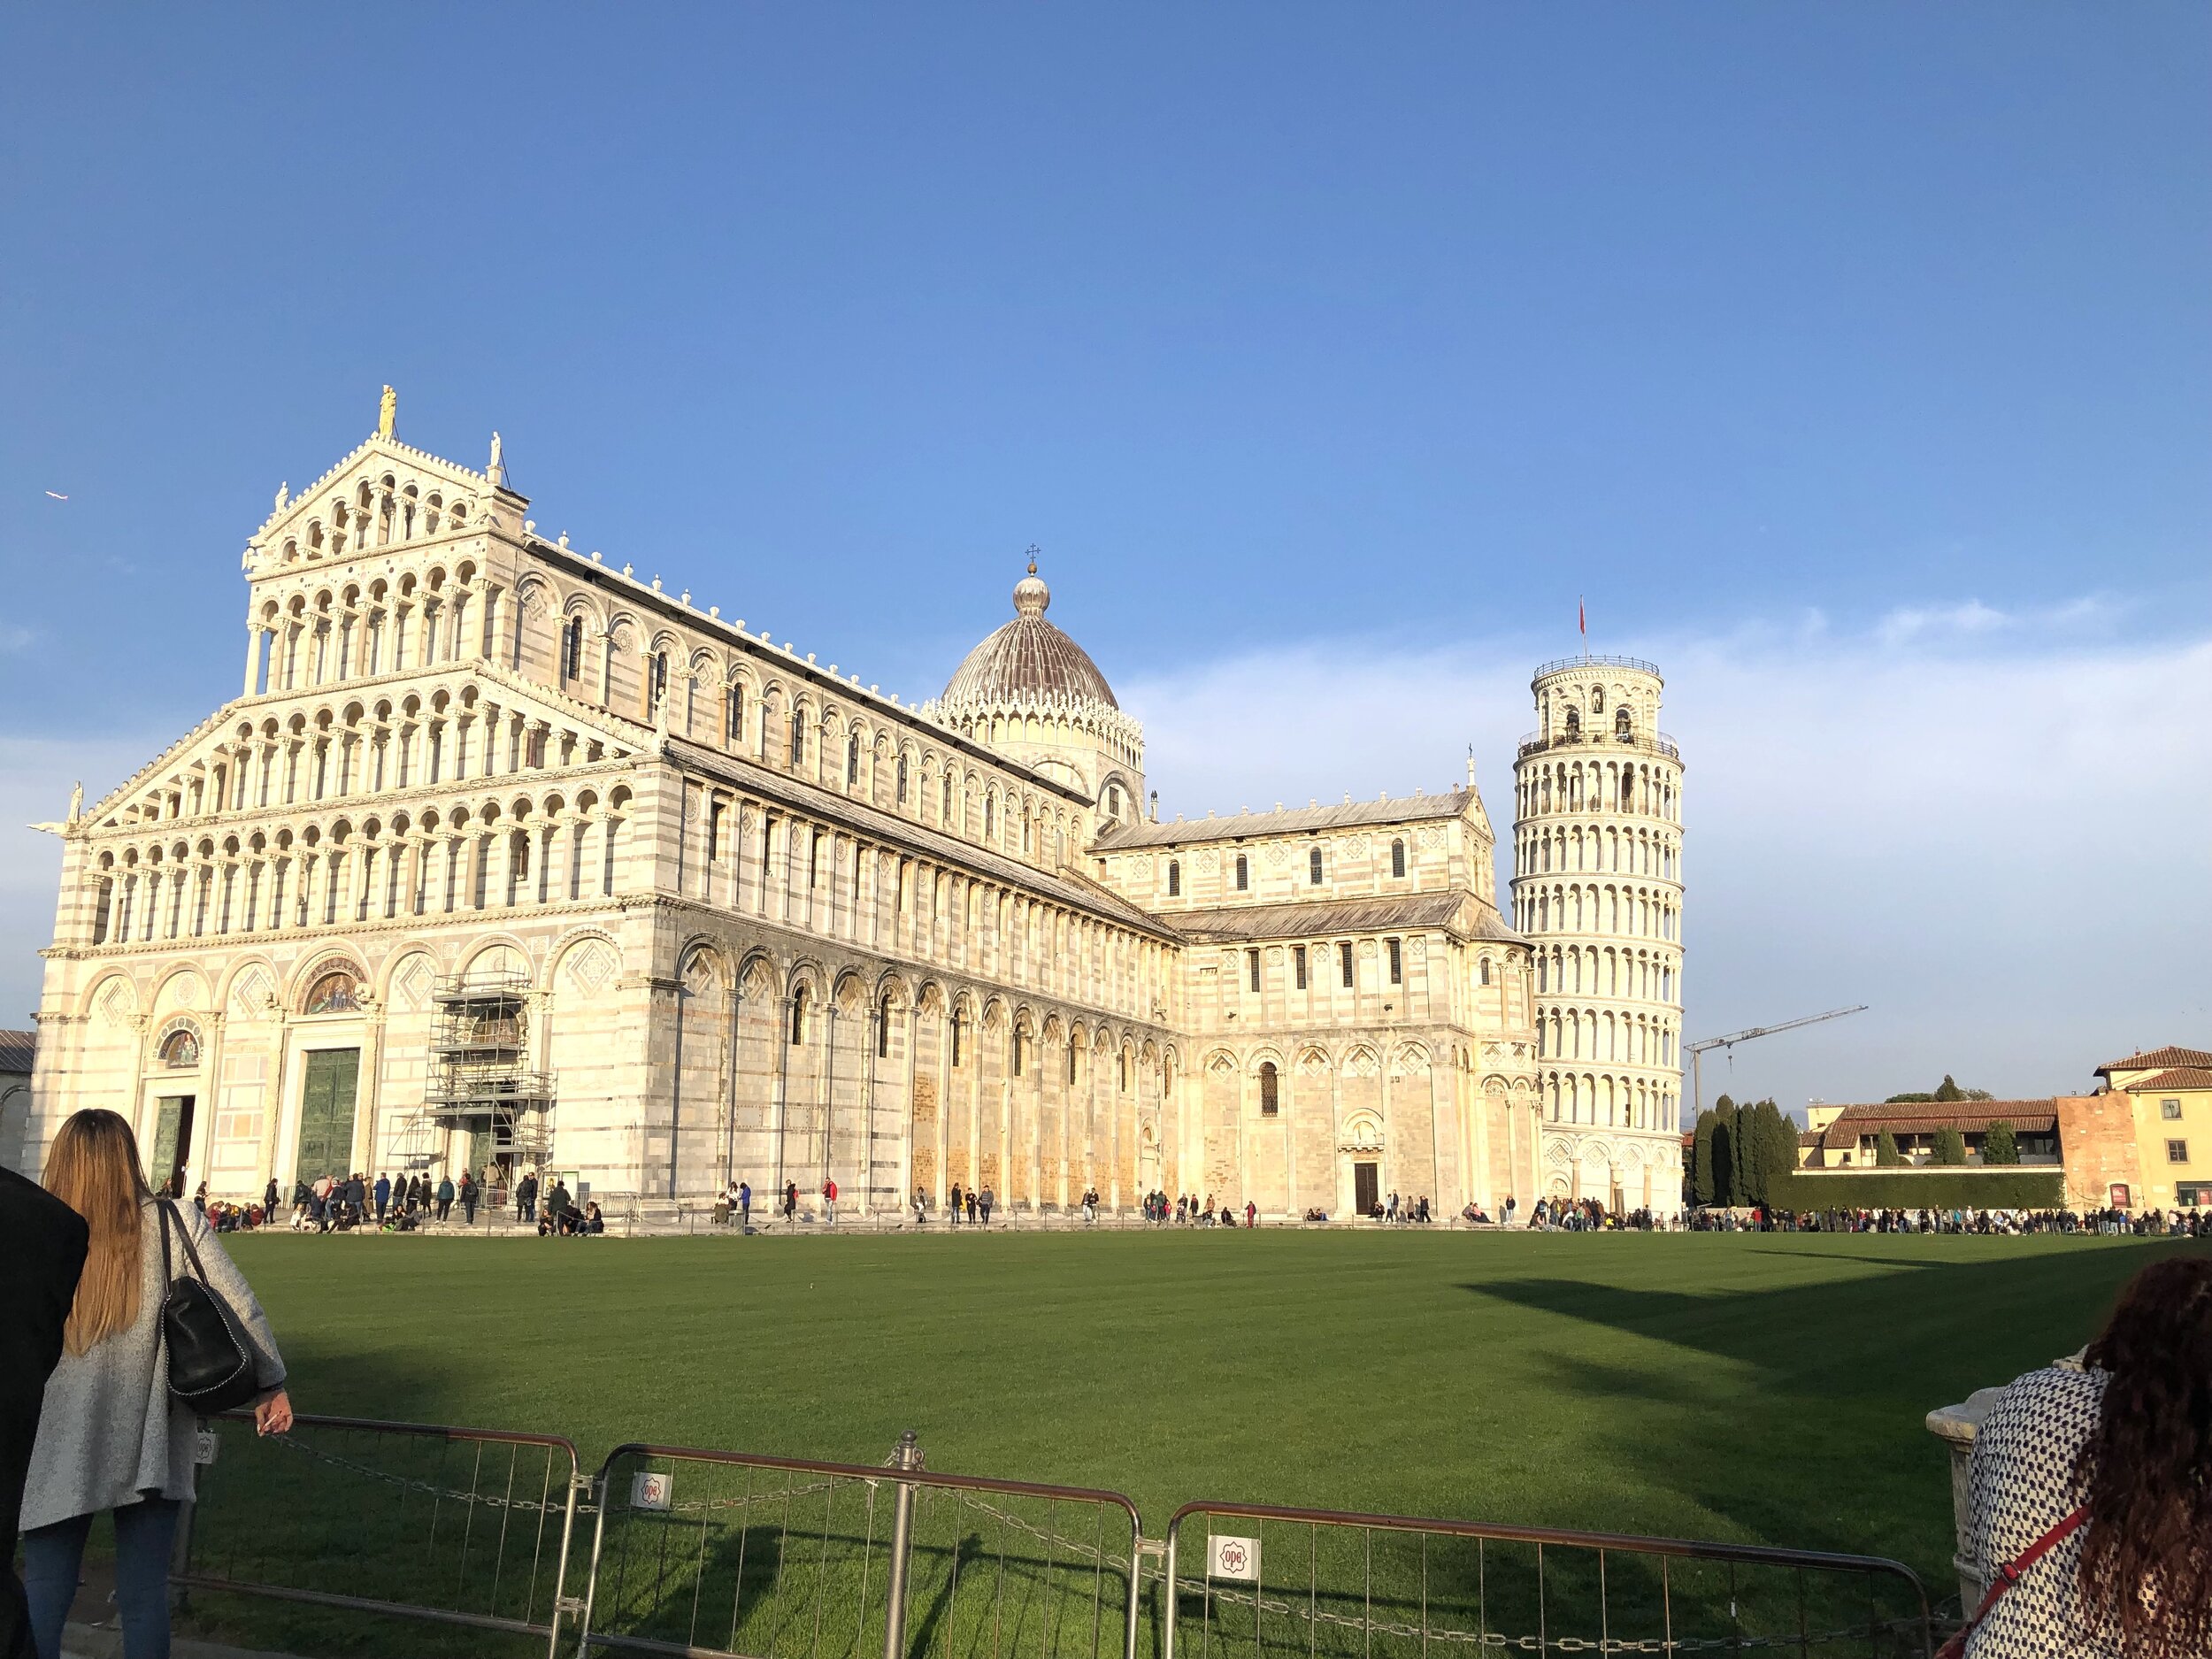
Pisa is a rather plain city with the exception of the Leaning Tower of Pisa and the surrounding piazza and Duomo. Tourists throng there, so you’d think it would be a top pick on an Italian vacation, yet people I talk to would always say that Pisa is boring. So is it worth going? Yes and no. Pisa may not be the most exciting of Italian cities, but it does have its few magnificent things to see. If it’s your first time in Italy, I wouldn’t recommend Pisa as a top pick, but it’s worth seeing at some point and easy to get to.

Pisa in a nutshell

Location: Tuscany, Italy

Best known for: The Leaning Tower of Pisa

Days needed to explore: 1+ - while you can easily see all Pisa has to offer in one day (hint, it’s all in one spot), I’m never going to discourage someone from making a smaller city a home base for doing other day trips. That said, if you’re spending one or more nights in Pisa just to discover Pisa better, I would encourage you to consider other cities instead, but that’s definitely your prerogative!

What to see and do:

  • La Piazza dei Miracoli (Square of Miracles) - within this expansive piazza you will find the top attractions of Pisa: The Leaning Tower, the Duomo, the Baptistry, and the Camposanto Monumentale

  • La Torre Pendente di Pisa (Leaning Tower of Pisa) - The famous tower, choose your side to take a picture, either “holding it up” or “pushing it over” (paid entrance to climb)

  • Il Duomo di Santa Maria Assunta

  • Il Battistero (The Baptistry) - The largest baptistry in Italy (paid entrance)

  • Camposanto Monumentale - considered a holy place because here the crusaders brought holy earth from Golgotha (where Jesus was crucified), just outside the city of Jerusalem. There are many of the most illustrious of Pisa buried here.

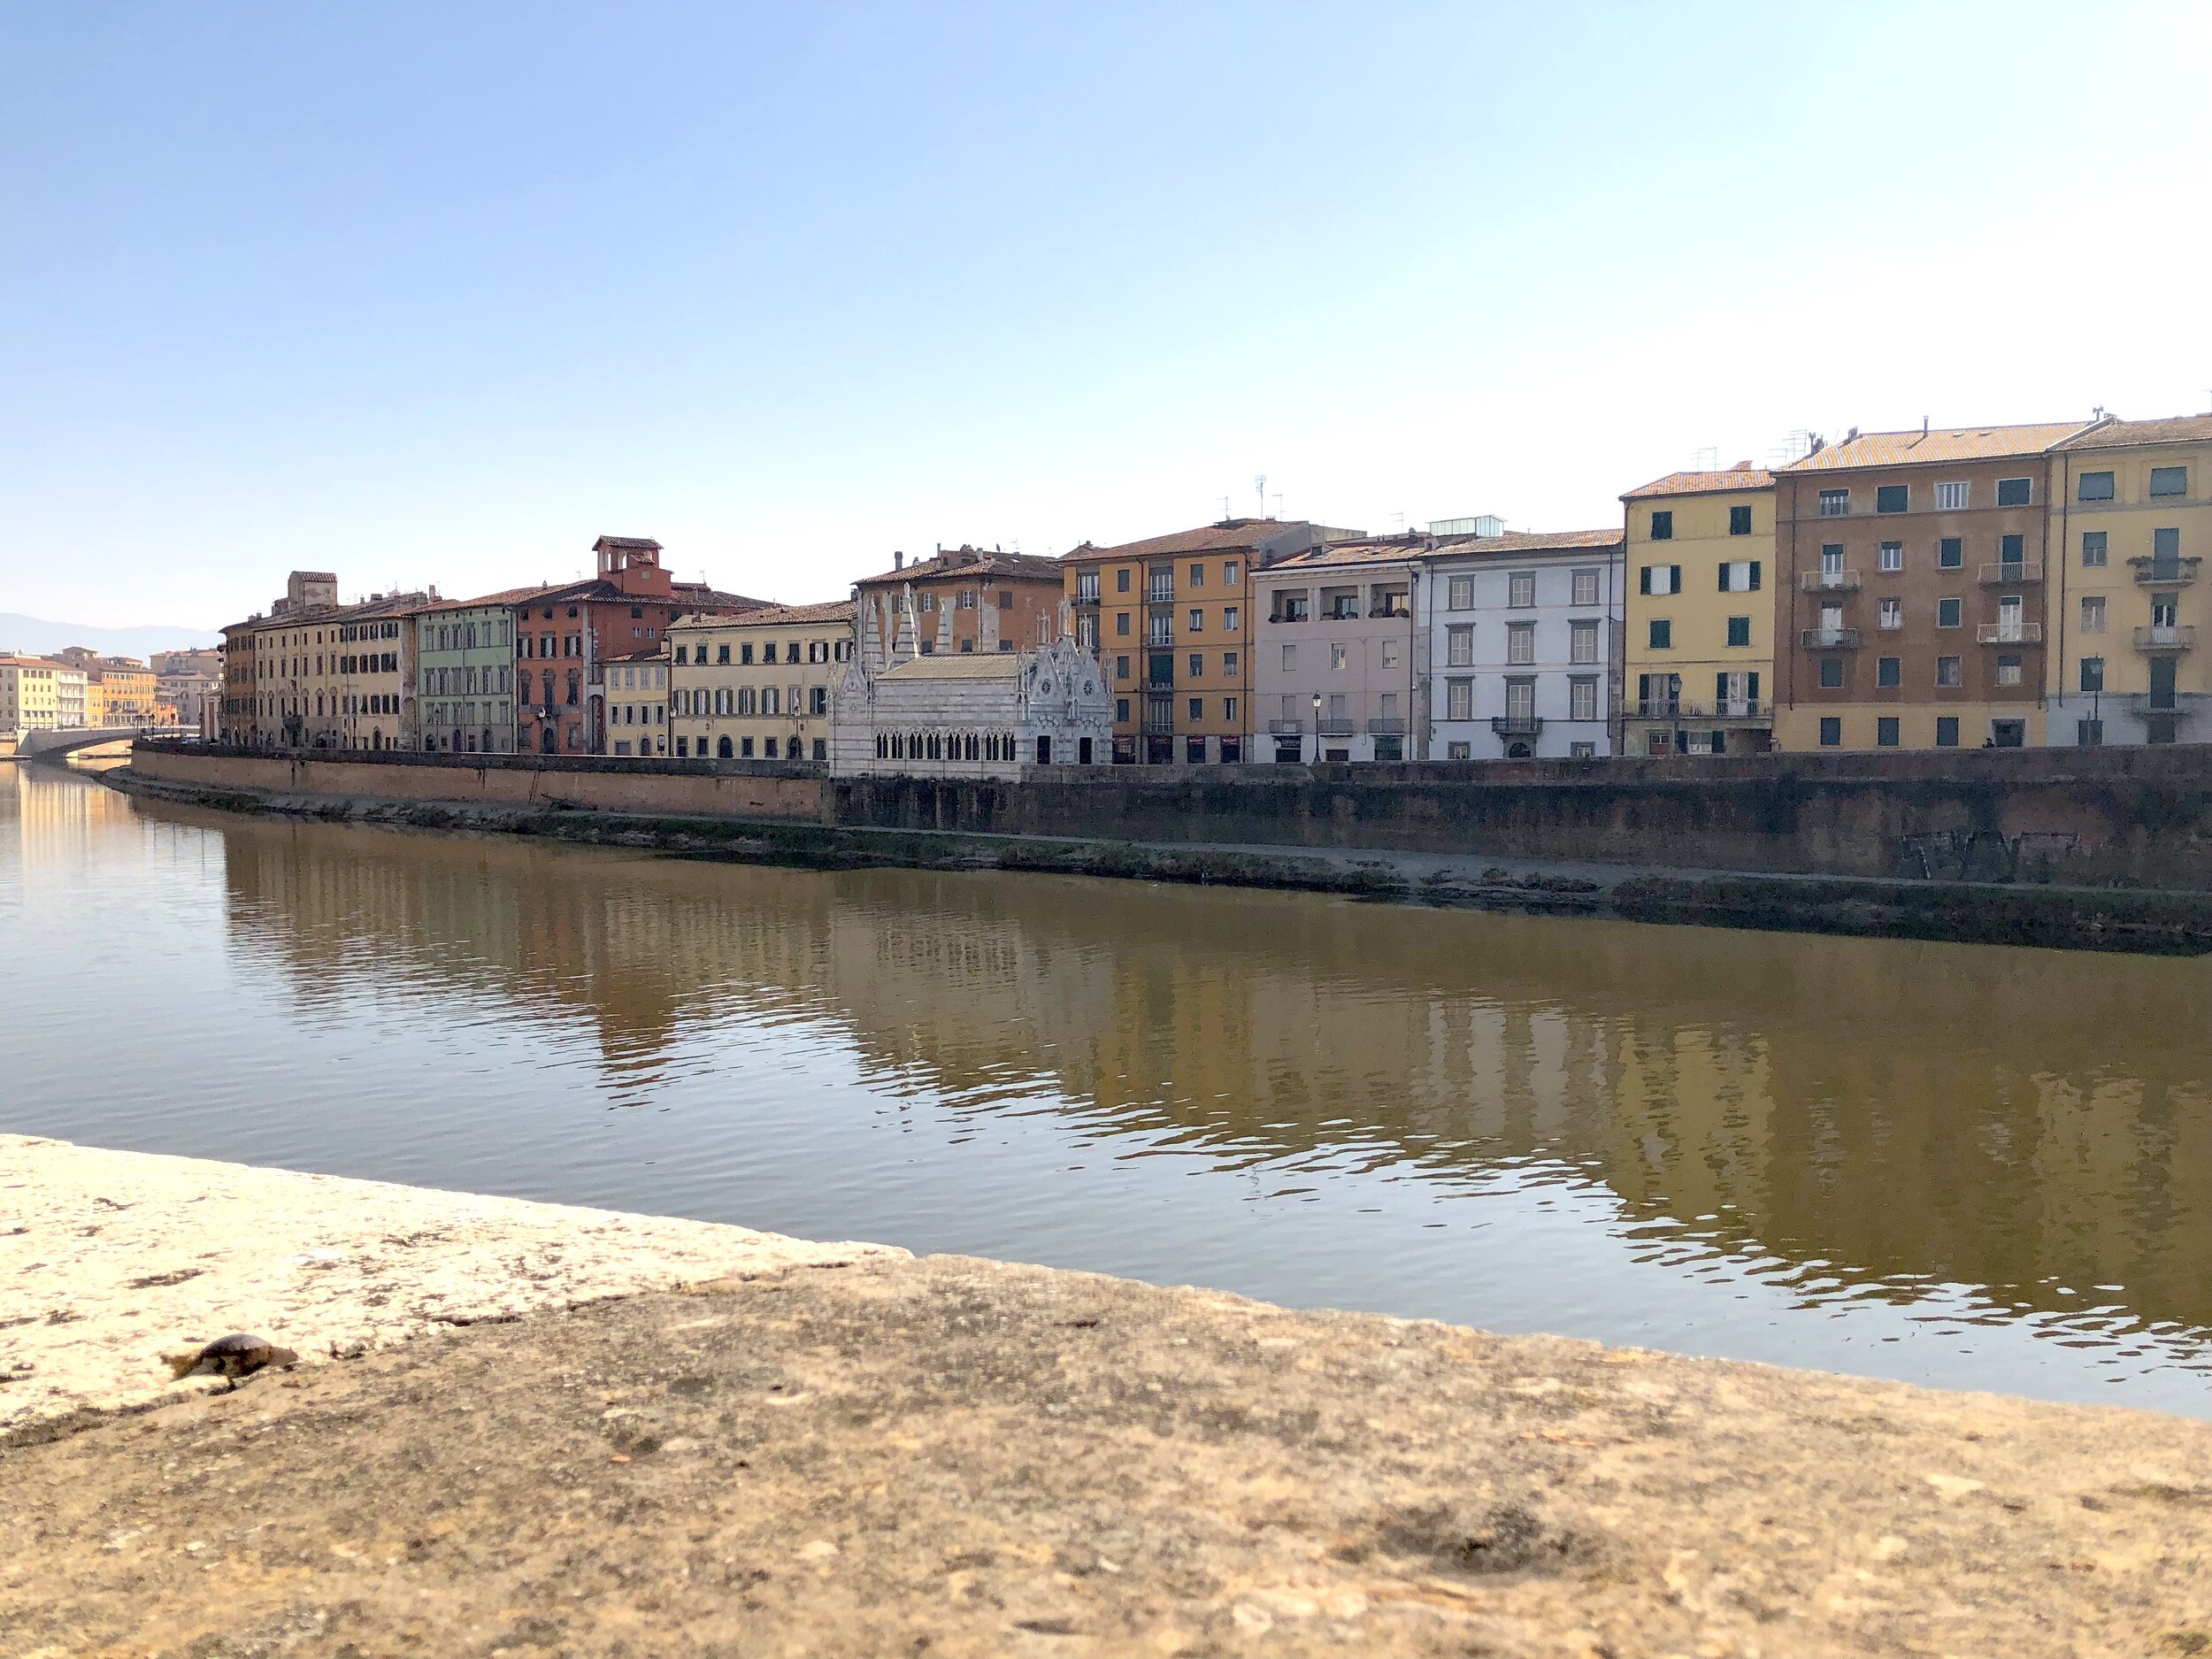
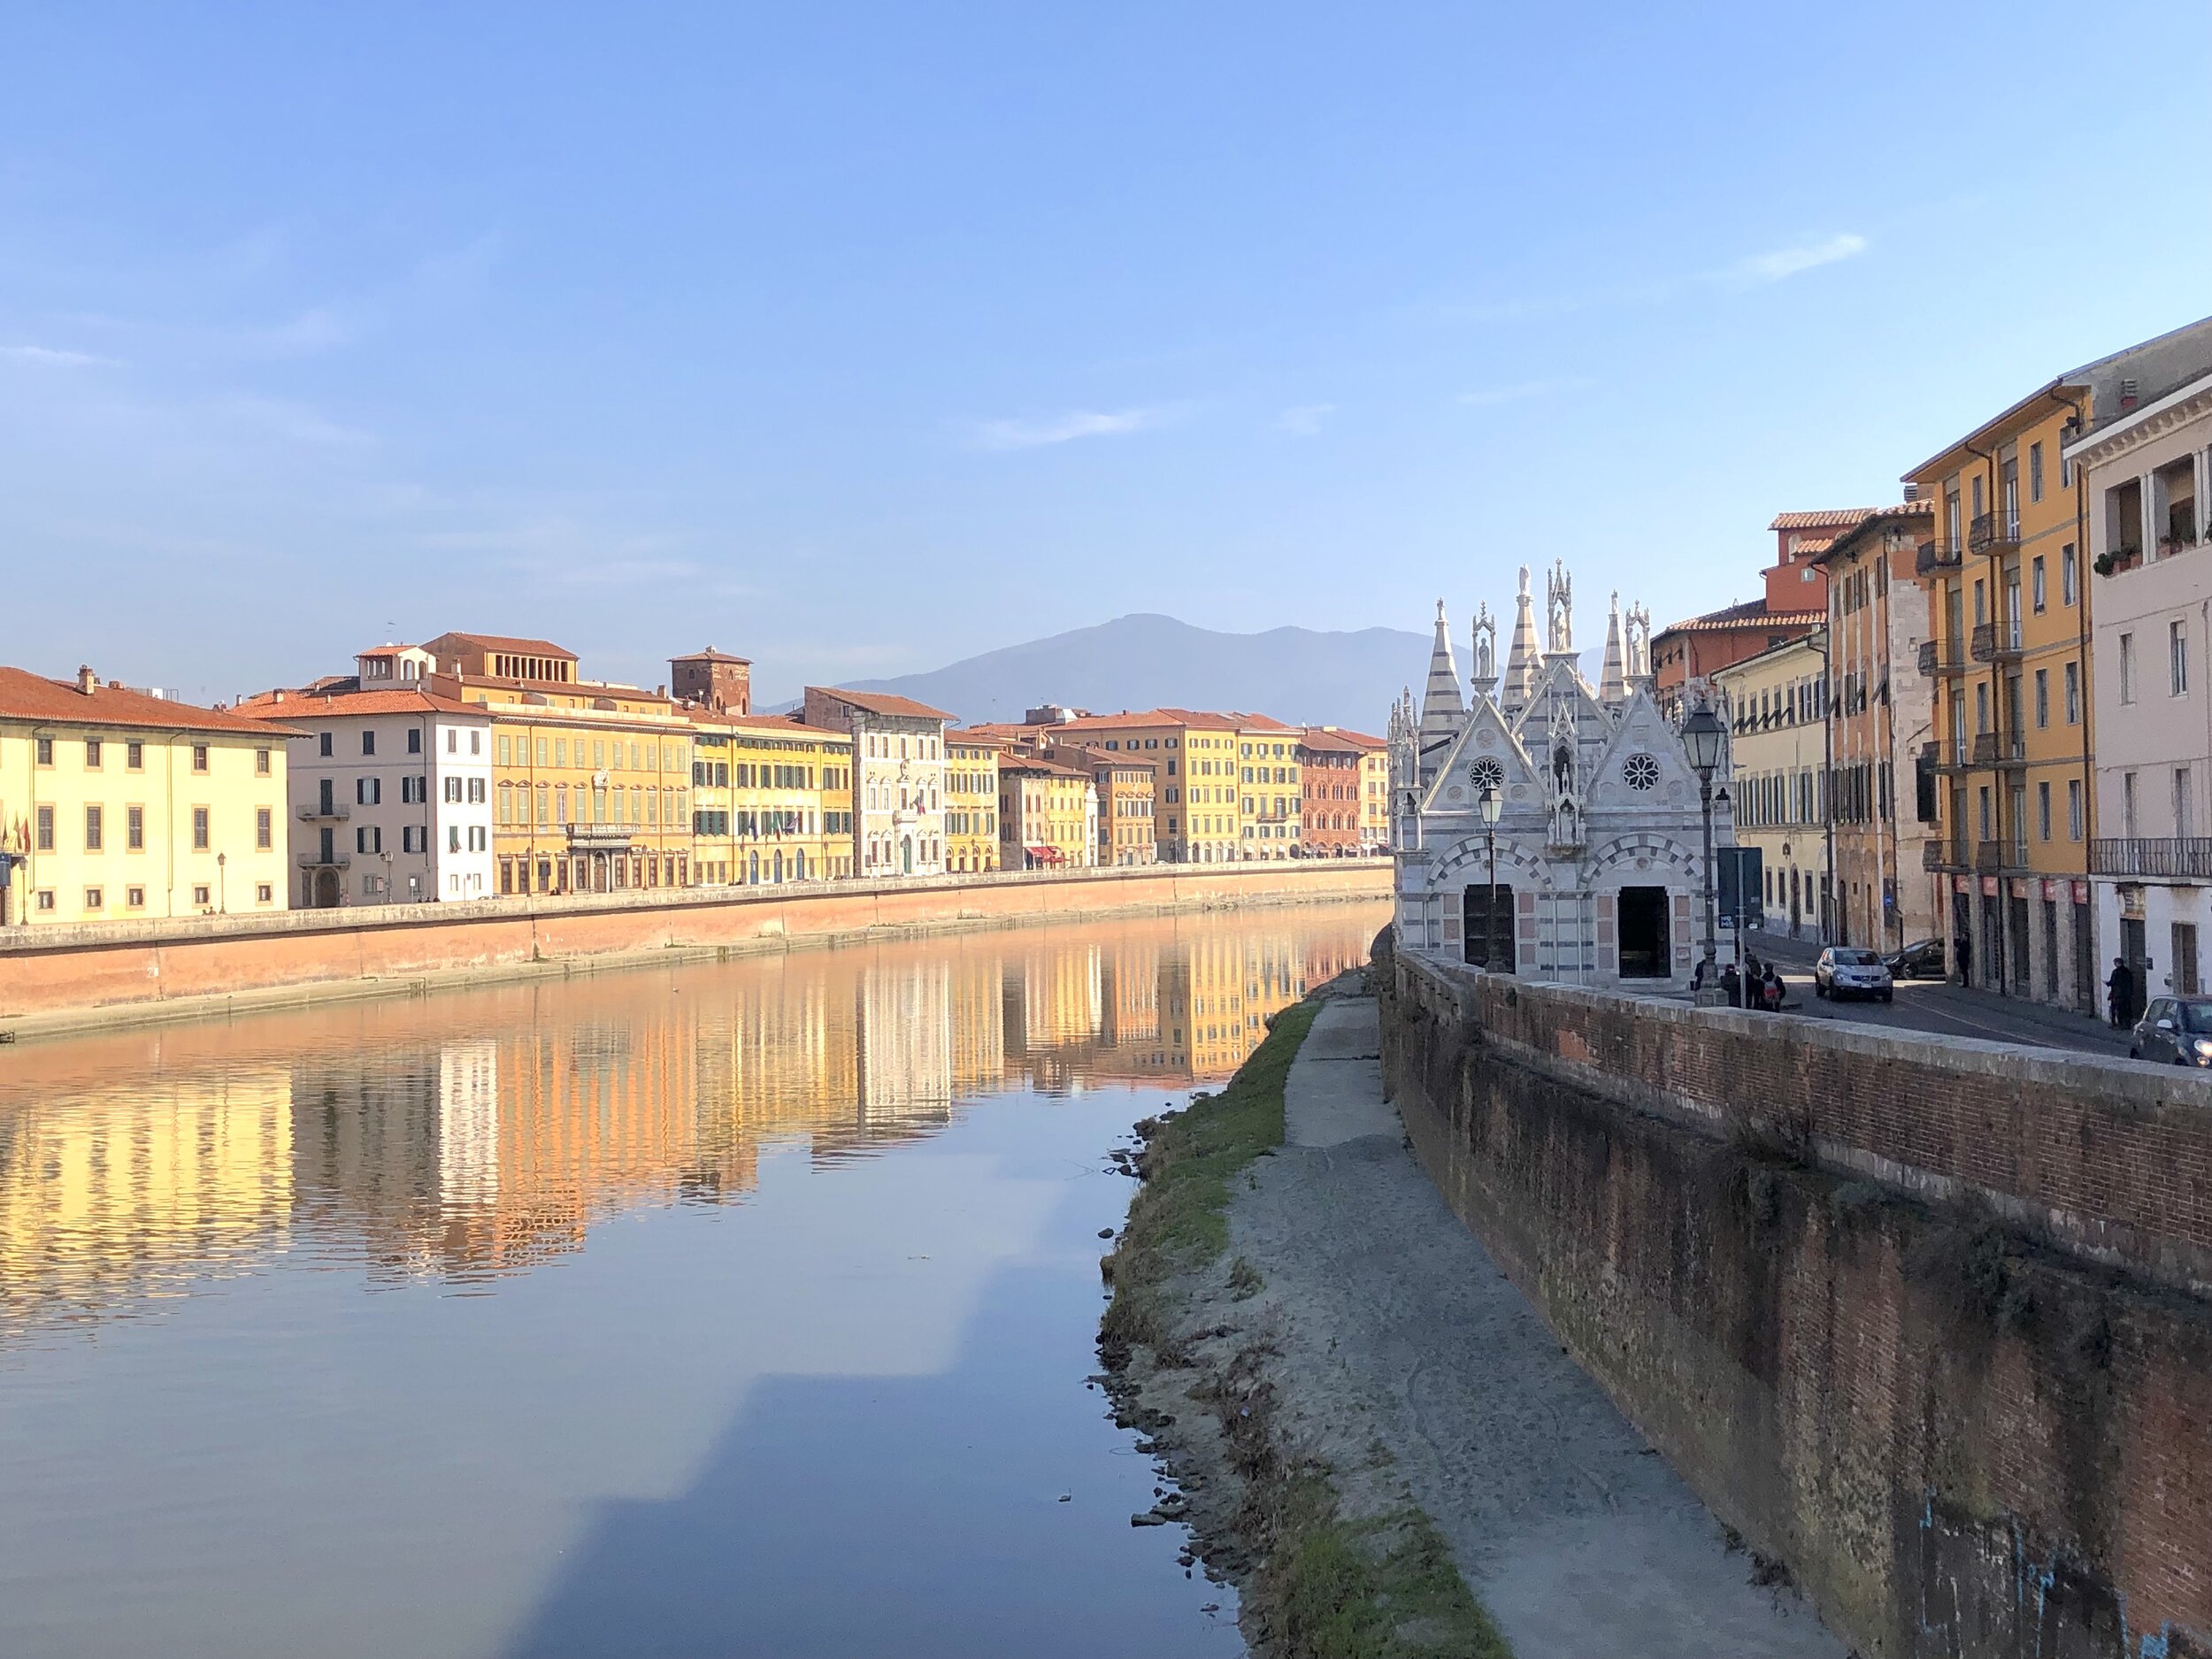
  • Stroll along the Arno River

  • Walk down Borgo Stretto and Borgo Largo or “Il Borgo” as the Pisani call it; the main street of the historic Pisa center. Shopping and eating a plenty!

  • Enjoy the night life; Pisa is a young university town with plenty of energy in the evening/night hours

Established: Unknown - it could be by the Greeks, could be the Ligurians; Roman and Etruscan traces have been confirmed. Some say it was most probably founded by the Etruscans.

Typical foods to try: Much of the Cucina Pisana is very similar to the rest of Tuscany. Many typical dishes are simple, nutritious, and what we now call “poor” dishes; whatever can be grown or hunted in the area. Here are some ideas:

  • Bordatino alla pisana - a type of bean minestrone with black cabbage and maybe a bit of lard or prosciutto; a winter dish

  • Pallette - a type of polenta usually served with with a meat ragù; another dish best eaten in the winter months, from September on

  • Pappa al pomodoro - a thick tomato basil bread soup, very traditionally Tuscan. While the description might sound strange, this is one of my favorites! In fact, you can make it easily yourself, find the recipe here.

  • Pasta e ceci - pasta with chickpeas

  • Trippa pisana - a cow’s third stomach (these typical plates are just making you die to come to Pisa, aren’t they??) Don’t be fooled by the ick factor, I’ve tried both trippa and its Florentine cousin, lampredotto, and they’re both surprisingly delicious if you can get over what you’re eating!

  • Dishes featuring seafood - a personal favorite is baccalà, or salted cod

  • Cantuccini col Vin Santo - Cantuccini cookies (like what Americans call biscotti) served with “holy wine”

Why I like Pisa

Don’t get the idea from my frank assessment of Pisa that I’m not a fan. On the contrary, I had a blast in Pisa and would gladly go again. Traveling is more about the company you have than the places you see.

Pisa is about an hour train ride from Florence and the ticket costs less than 10euro. It’s one of the easiest day trips you could ask for. Pisa itself isn’t hard to navigate, once you exit the train station the walk to the Piazza dei Miracoli and main sights is about a half hour pretty much straight north. Or “that way” if directions aren’t your thing.

My husband and I went in March and stayed overnight. Our cheap hotel with the stinky bathroom is not one I’d recommend, but it added to the character of our trip. Moral of the story, if you use Booking.com, make sure to read ALL fine print and read lots of reviews, especially the negative ones, before booking. They always appear nicer on the internet. I would’ve just as soon done Pisa in a day trip, but my husband and I had been talking about going for long enough that we decided we might as well make an overnighter of it. Despite it being the low season, there were still plenty of crowds. They were all concentrated at the Leaning Tower, as you can see from some of the photos, the rest of Pisa is quite tranquil during the day, but by night the city comes alive with locals and students out for a dinner or drinks and a good time. My idea of a good time is gelato, so we hunted down a gelateria. It took a surprisingly long time to find one open for being a student and tourist town, every single gelateria was closed. Sure, like I said March is the low season but usually gelato shops close around January/February, not ALL of them in March when Jenny wants a gelato. We did eventually find one open, Gelateria de’ Coltelli, and it was good! I recommend it.

Pisa was also my first experience with Indian food. I know a lot of people who love Indian food, so I suggested we try one of the numerous Indian restaurants we had passed. Really, so many Indian restaurants in Pisa. I’ve since discovered I love Indian food but that was a very bad introduction. Despite asking numerous times, water wasn’t brought to our table until after our meal was served. So thirsty, pant pant. We were charged for two bottles of water, despite only having one. Then there was this weird green mango appetizer that was so incredibly sour and the pits about took my tooth out. Then we were brought two dishes when we had ordered three, and one wasn’t even what we ordered. Indian food in Pisa? Ummmm I’ll wager any of the others would be better?? Haha! The whole experience was very amusing and a very memorable meal. Makes me laugh to this day.

The Piazza dei Miracoli is really very stunning, I wasn’t expecting to like it as much as I did. Pictures don’t do it justice!

While Pisa is no Paris or Rome, it’s still a fun stop!


Flax Bread

Recently I was determined to find a palatable bread for my husband who was eating a very restricted diet for a few months. The bread couldn’t contain gluten, yeast, sugar of any kind, or dairy. It’s already challenging to make a good gluten-free bread. But a bread without yeast? That’s tricky. Then throw in the dairy and sugar part and whew. Slim pickings. I tried a few recipes that I immediately discarded, but in the end I found this flax bread winner which contains none of the above.

Keep in mind with the above restrictions, you’re not going to get a bread thats crusty and artisanal and really anything like what you might imagine when you think of typical bread. But when your diet is restricted, and you come across a recipe like this, it tastes heavenly.

The original recipe was called Focaccia Flax Bread but I couldn’t quite bring myself to call it focaccia, since it’s so far from the real thing. It’s low, so similar in height to focaccia, but it’s also not really a flat bread. Maybe we can just call it a low bread?? Needless to say, I went with simple “flax bread”.

It also happens to be fabulously easy, which is a bonus. In less than 30 minutes you can have this bread hot out of the oven!

The flour in this bread is flax meal, although you can mix it up and use other GF flours, as well; the leavening is baking powder, the fat is coconut oil or really any non-dairy fat you choose. There’s also optional xylitol as a sweetener, which before this recipe I had never used. Sometimes I add it, sometimes I don’t, but I’ve found I rather enjoy using xylitol. It wasn’t as expensive as I had anticipated, it looks very similar to granulated sugar, it doesn’t have a weird taste to it like some sugar substitutes can, and it doesn’t feel as evil as say, aspartame.

If you’re a normal carb-ivore, I won’t try and sell this bread to you as “OMG you’ll never eat real bread again!” because that’s just silly. If you can eat real bread, eat real bread! I’m a normal carb-ivore and I find this bread tasty, but it certainly won’t replace my love of baguettes. But if you’re not able to eat normal bread, whether for a short time or indefinitely, I really hope this recipe brings some tastiness into your life!

This post may contain affiliate links. If you make a purchase using these links, Jennyblogs may receive a small commission, at no extra cost to you. This helps to support Jennyblogs. For further information see the privacy policy. Grazie!

Recipe adapted from whole new mom


Flax Bread

Serves 8

Ingredients:

  • 1 cup / 180g flax meal

  • 1 1/2 tsp baking powder

  • 1 tsp - 1 Tbsp / 5-15g xylitol, optional

  • 2 eggs

  • 1/2 cup / 119g water

  • 1/3 cup / 74g coconut oil, melted

Directions:

Preheat oven to 350°F / 177°C. Grease an 8x8in / 20x20cm square pan or 8in / 20cm round cake pan.

  1. In a medium bowl, combine flax meal, baking powder, and xylitol, if using.

  2. In a small bowl, lightly beat eggs. Add eggs to dry mixture along with water and coconut oil; mix until well combined.

  3. Let sit for a few minutes to thicken up slightly, then pour and spread into prepared pan.

  4. Bake for about 20 minutes or until turning golden-brown and bread is springy to the touch.

Jenny’s Notes:

  • You can make your own flax meal by grinding flax seeds in a food processor or coffee/spice grinder. Quick and easy! I do this every time.

  • Other GF flours can be substituted for part of the flaxmeal. I like to substitute about 25% (so 1/4 cup in this recipe) of the flax meal for buckwheat flour.

  • Really any fat can be used instead of coconut oil, choose your preference!

gluten free, dairy free, flaxmeal bread, candida diet friendly, sugar free, yeast free, flatbread
bread, special diets
American
Yield: 8
Author:
Flax Bread

Flax Bread

A versatile flatbread made with ground flax seeds that suits a variety of special dietary needs, including gluten-free, dairy-free, sugar-free, yeast-free and candida diet friendly.
Prep time: 7 MinCook time: 20 Mininactive time: 3 MinTotal time: 30 Min

Ingredients

Instructions

  1. Preheat oven to 350°F / 177°C. Grease an 8x8in / 20x20cm square pan or 8in / 20cm round cake pan.
  2. In a medium bowl, combine flax meal, baking powder, and xylitol, if using.
  3. In a small bowl, lightly beat eggs. Add eggs to dry mixture along with water and coconut oil; mix until well combined.
  4. Let sit for a few minutes to thicken up slightly, then pour and spread into prepared pan.
  5. Bake for about 20 minutes or until turning golden-brown and bread is springy to the touch.

Notes:

  • You can make your own flax meal by grinding flax seeds in a food processor or coffee/spice grinder. Quick and easy! I do this every time.
  • Other GF flours can be substituted for part of the flaxmeal. I like to substitute about 25% (so 1/4 cup in this recipe) of the flax meal for buckwheat flour.
  • Really any fat can be used instead of coconut oil, choose your preference!

Nutrition Facts

Calories

228.14

Fat (grams)

19.84

Sat. Fat (grams)

8.84

Carbs (grams)

8.54

Fiber (grams)

6.16

Net carbs

2.38

Sugar (grams)

0.40

Protein (grams)

5.69

Sodium (milligrams)

116.69

Cholesterol (grams)

46.50

Nutritional info is approximate. Based on 1 serving if recipe is made with 1 Tbsp of xylitol.

Did you make this recipe?
Tag @jennyblogsandbakes on instagram and hashtag it #jennyblogs
Created using The Recipes Generator

Explore Italy: Cinque Terre

Overlooking Vernazza

Overlooking Vernazza

One of the most beautiful natural spots in Italy, arguably on Earth, with the crowds to show for it. Cinque Terre is a must-see, made up of 5 little colorful towns perched on the Ligurian Sea with hiking trails connecting each of the villages.

Cinque Terre in a nutshell:

Location: Liguria, Italy

Best known for: 5 seaside towns with VIEWS of the Mediterranean and hiking trails that connect the towns

Days needed to explore: 1+ - It’s no secret that Cinque Terre is easily seen in a day, the towns are small and there are plenty of trains connecting each of them if you don’t want to hike the trails. You can comfortably see 2-3 of the villages in a day, some might say if you’ve seen one you’ve seen them all. I disagree, as I think they each hold their charm, and would encourage you to spend at least one night in Cinque Terre. This is the only way you will see Cinque Terre without the throngs of people. Even if you take the first train in and the last train out, that’s the plan of every other day-tripper. Given the tiny size of the towns and their immense popularity, it can be difficult to secure lodging. While I would recommend finding a B&B within any of the five towns if possible, Monterosso, Vernazza, Corniglia, Manarola, or Riomaggiore, another option would be to find a place in La Spezia, which is very near to Cinque Terre and the main hub from which to get to Cinque Terre.

What to see and do: The five towns and the hikes in between each! Listed below are the five towns, in order from the direction of La Spezia/Porto Venere towards Levanto, and the hiking trails in between. Cinque Terre and surrounding area is a national park and a UNESCO World Heritage site. If you choose to hike, most paths are free, but the two most popular ones require a Cinque Terre Card.

12km / 7.5mile (5hr) hiking trail from Portovenere to the first town, Riomaggiore

  • Riomaggiore

    1.5km / 1mile (30min) hiking trail (Via dell’Amore)

  • Manarola

    3.5km / 2.25mile (2hr) hiking trail

  • Corniglia

    4 km / 2.5mile (1.5-2hr) hiking trail (requires the Cinque Terre Card)

  • Vernazza

    3.5km / 2.25mile (1.5hr) hiking trail (requires the Cinque Terre Card)

  • Monterosso al Mare

    8km / 5mile (3hr) hiking trail from the last town, Monterosso, to Levanto

Established: Cinque Terre is first mentioned in documents from the 11th century. Monterosso and Vernazza were the first settled towns of the five.

Places to eat:

  • Gelateria Vernazza - Naturally, I don’t have real restaurant recommendations, just gelato. The best gelato between the five villages that I’ve had is in Vernazza. The gelateria is not hard to find as it’s on the main street heading down from the train station.

Typical foods to try:

  • Seafood is the shining star!

  • Trofie al pesto - pasta

  • Focaccia - apparently, a typical breakfast around here is focaccia dipped in cappuccino. I haven’t tried and can’t say I’ve seen anyone do it…but hey, if salty coffee is your thing, go for it!

  • Schiacchetrà - wine of Cinque Terre

More about Cinque Terre

Trains and stuff

Once you start getting into the logistics of how to get to Cinque Terre and move around once you’re there, it can seem confusing at first. Train? Which one? Buses? Boats? While getting to Cinque Terre isn’t as easy as hopping on one train, it really isn’t difficult, either. Once you have your train to La Spezia Centrale (which you could buy in advance or not) you can easily wait until you arrive at La Spezia to buy the Cinque Terre Card. Or you can buy it online here. You can get a 1, 2, or 3 day pass. From La Spezia you get the train that stops at all five towns. If you’re coming from La Spezia, you’ll get the train towards Levanto. Easy peasy. Just don’t forget to validate your train card before getting on the train the first time.

Cinque Terre Cards and hiking

There are two different cards you can get for Cinque Terre. The train card, and the trekking card.

  1. The train card includes unlimited rides on the regional Cinque Terre trains, shuttle buses, wifi, trekking, and free use of restrooms.

  2. The trekking card includes everything but the trains. If you only plan on taking the train once or twice, this might save you money. Otherwise it’s a better deal to get the train card.

A single train ride without the train card will cost you about 4 euros. Using the restroom without a card will cost 1 euro.

The only scenario I can think of where you probably wouldn’t need either card is if you plan on seeing 3 or less towns and only do the free hikes…and stay at least one night…even then I don’t know that that would work, as the paths are often closed so you’d have to plan carefully.

If you didn’t get a Cinque Terre Card or lost it, don’t fret. There is a little outstation shortly into the two paid hikes; they will ask to see your card or you can buy one from them, same price.

You can check ahead of time on this site to see which paths are open at the time of your trip, I’ve personally never been when all four of the hikes between the villages were open. There are alternative routes, all of which are free, even if the main ones are closed, but I don’t have personal experience with those. The whole area has 48 paths, but the main ones are those which go between the towns.

If you plan on hiking, make sure you have proper foot wear. Flip-flops aren’t allowed. I definitely wore sandals before I knew of these rules without any problems. I did the Vernazza-Corniglia hike shortly after it had rained once. Having been a professional ballerina I could say I have decent balance, but I was surprised at how slippery the trail was in certain areas. Steps and rocky areas were a bit scary. I had sneakers on and was still walking very slowly and hanging on to anything I could.

Swimming

If you plan on swimming, Monterosso has the largest sandy beach and sea access, with many umbrellas and chairs you can rent. That’s how beaches usually work in Italy; you rent a spot with an umbrella which usually comes with 2-3 reclinable beach chairs which is yours for the day. If you want more chairs or shade or have more than 3-4 people, you’ll probably need to rent more than one spot. Free beaches where you can just spread a beach towel are not the norm and hard to find in Italy.

Vernazza has a small harbor with water access, you can go swimming and it’s free.

Corniglia has no immediate beach or water access, but there are beaches not too far. One is known to be a nudist beach.

Manarola has some deep water swimming, accessible by ladder for the more adventurous.

Riomaggiore has a rocky beach close by.

For more details and directions, see here.

Why I like Cinque Terre

I’ve been to Cinque Terre a few times, a couple times by train, once by car; a couple times in the summer, once in the fall; a couple times as a day trip, once overnight. It never gets old. My favorite town is probably Vernazza, but I’ve also spent more time there than some of the others.

The first time I went was in 2014 with my family. We went for a day, the whole trip immaculately planned out, as my mom and I were the ones behind the trip planning. We had chosen to go to Cinque Terre because, well, all you need to see is one photo and you’re sold, plus my dad loves the outdoors so we figured this would be “his” part of the trip. We planned to take an early train in, start by exploring Vernazza, hike from Vernazza to Corniglia, eat dinner in Corniglia, then take the last train from Corniglia back to La Spezia and finally Florence, our home base. Everything went great, until the end. We made it to Corniglia, but had a bit less time than originally planned, so decided to get a quick aperitivo instead of dinner. We figured we had about an hour to order and enjoy some beverages, before making our way to the train station. We looked on Google Maps, the train station was just around the corner from where we were, all we need is 20 minutes to get there and get the train, with plenty of time to spare, right? Next thing we know, we have 15 minutes before the train leaves. Well golly, we better get up, tear our eyeballs away from the magnificent Mediterranean, and trot our little tushies to the train station. What we didn’t realize, was that the train station was wayyyyyyyyyyy downnnnnnnnnn a hill, many, many, many, stories of zig-zagging stairs, then a long sidewalk to the actual train platform. Google Maps, without landscape mode, did not portray the descent. I believe it’s now more appropriately called the “cliff staircase”. We zigged and zagged as fast as we could; we saw our train pull up. Did I mention this was the last train of the night, so if we missed it, we’d be forced to try and find lodging in the popular and tiny Corniglia, in August? As comfy as Italian sidewalks are, we didn’t want to sleep outside so we went faster. My dad and brother got ahead of my mom and I; they got to the train. There was a crowd of people coming from the train, including some goats. I managed to leap onto the train as I heard the door start to beep, about to close; I was holding the train doors open with the weight of my body, while we were all shouting for my mom to hurry up, give it all she’s worth, “just jump over the goats already!!!” as she was politely letting them go by, and the train is seconds from departing. She made it, the doors closed a second later, and all was well. Except for the stress that probably took a few years off our lives. We still laugh about the Corniglia train station and steps to this day. Heed this anecdote.

The next trip I took to Cinque Terre was with friends, in a car. I got to enjoy the ride, but I can tell you finding parking can be an ordeal. This time we started at Monterosso al Mare and hiked to Vernazza. There was an elderly woman trying to do the hike, I remember passing them and my party being quite worried about her. But you know what? She made it! We were all very proud. Halfway between Monterosso and Vernazza there was a man making and selling fresh orange juice. If ever there was a genius business move, this was it. It was hot and there is nothing else to eat or drink except for what you carry on the 2-3 hour hike.

Most recently I went to Cinque Terre in October 2019. My family came over to visit, and we all had such fond memories that we had to go to Cinque Terre again. While autumn can be more unpredictable with weather and the trails are more likely to be closed, I think this was my favorite trip. The moody sea and slightly lesser crowds, not to mention this was my first time staying the night. It’s so wonderful once the day-trippers go home! And sleeping with the sound of the sea, mmmm. Having more time, we explored more up and around the towns beside just seeing the main areas and hiking. Lots of stairs, hardly any people, and lots of cool houses and areas with views of the sea, showing just how high you’ve climbed up among the dwellings!

Corniglia

Corniglia


Paste di Pistacchio Siciliane - Sicilian Pistachio Cookies

Paste di Pistacchio, or Pistachio cookies, hail from the beautiful island of Sicily. They have a delightfully crisp outer shell and a chewy, soft center.

Two years ago I put up the recipe for Paste di Mandorle, or Sicilian Almond Cookies, and it has become one of the top recipes on this site.

It’s not hard to figure out why…with only 4 ingredients that get mixed together in a bowl with a spoon, rolled in powdered sugar and baked, it really doesn’t get much easier than this. No fancy equipment. Not to mention with the almonds there are more nutritional benefits to these than your average cookie. Or at least, that’s what I tell myself when I’m going for my fifth cookie. They’re also gluten-free and dairy-free friendly.

Sometimes great ideas pop into my head. Sometimes really awful ones, too, but I try to only filter the good ones here onto this blog, k? One day, I saw a half bag of pistachios in my cupboard. The first half had been ground into pistachio flour to make this Pistachio Cake with Honey Vanilla Buttercream for Christmas. Then I had an idea, what if I take the Paste di Mandorle recipe and replace part of the almond flour with pistachio flour?? So I did. And this recipe was born.

After the fact when all the cookies had been gobbled up within a couple hours, I wondered if maybe this recipe wasn’t original to me? It seemed too easy for no one else to have thought of this. Turns out these are definitely already a thing. Sicily is known not just for their almonds but also for their pistachios, especially the area of Bronte. Naturally, these pistachio cookies are a classic right alongside the almond ones.

The original Paste di Pistacchio Siciliane

The original recipe itself has a few variations, as I will list below. You can choose to implement any of the following as per your taste, or just follow the main recipe below, which is my favorite way of making it. Any way you go, you will have a scrumptious cookie that is not only unbelievably easy, but also an authentic Italian sweet!

  • Grind your own flour vs storebought flour. Some will instruct to grind your own almonds and pistachios. This not only gives you fresh nut flour, but it allows you to control how fine you grind it. Some advise against buying almond flour or pistachio flour from the store because it’s too thin. However, if you don’t have a food processor, spice grinder, coffee grinder or any other tool that will get the job done, I have used store bought flour and it turned out fine. No pun intended. ;)

  • Honey. I’d say most of the recipes claiming to be the original I’ve seen call for adding a bit of honey, anywhere from 10-20g. Honestly I don’t, but it would be easy to add if you truly want as close to the original as possible. If adding honey, use a bit less of the cane sugar.

  • Powdered sugar. Some recipes call for using powdered, others granulated. Others call for granulated but have you grind the sugar with the nuts, so you end up with powdered sugar anyway. I generally use granulated sugar and don’t grind, because I grind the nuts in a small electric coffee grinder and there isn’t room for the sugar. Either way you will have great results.

  • Cookie shape. The cookies can be shaped into the classic S shape (Roll dough into logs about the width of a finger, then slice into pieces about the length of half of an index finger, roll in powdered sugar, and use your fingers to shape into the S), ovals, or simply round cookies. I chose the round shape for the recipe below, as it’s the simplest. If you’d like to see the S shape, check out the pictures in this recipe.

  • Dough resting/refrigeration. Some will instruct to let the dough rest after you’ve shaped it so it will be less sticky. As with the almond cookies, if you’ve glanced or made that recipe, the refrigeration or resting is not strictly necessary. It allows the dough to dry out a bit, which means they retain their shapes better when baked. But if you’re going for the round or oval shape, there’s not much need.

This post may contain affiliate links. If you make a purchase using these links, Jennyblogs may receive a small commission, at no extra cost to you. This helps to support Jennyblogs. For further information see the privacy policy. Grazie!

Here is one of the recipes I referenced in Italian and also gives a good visual of the “S” shaped cookie.


Paste di Pistacchio Siciliane - Sicilian Pistachio Cookies

Makes about 2 dozen cookies

Ingredients:

  • 125g whole unsalted almonds or almond flour

  • 125g whole unsalted pistachios or pistachio flour

  • 250g granulated sugar (or 230g granulated sugar and 20g honey)

  • 2 / 60g egg whites

  • pinch of salt

  • powdered sugar, for rolling, optional

Directions:

Preheat oven to 350°F / 180°C.

  1. Using a food processor, spice grinder, or coffee grinder, grind the nuts until coarse. Small chunks are ok.

  2. Mix all ingredients together, and form into balls or desired shape. Roll in powder sugar, if desired.

  3. Place evenly spaced on ungreased cookie sheets. At this point cookies can be covered and refrigerated overnight or baked immediately.

  4. Bake in preheated oven for about 8-12 minutes, or until cookies just start to turn golden.

Jenny’s Notes:

  • If working with a food processor or other tool large enough, you can grind the nuts with the sugar, creating powdered sugar in the process, as some recipes call for.

  • If the dough is too sticky, you can let it sit for an hour or refrigerate for several hours to let it thicken/dry out a bit.

  • This recipe is also delicious using all pistachio flour!

Italian dessert, Italian cookie, Sicilian dessert, Sicilian recipe, authentic Italian recipe, original Sicilian dessert recipe, pistachio, almond, gluten free, dairy free
dessert, cookies
Italian
Yield: 24
Author:
Paste di Pistacchio Siciliane - Sicilian Pistachio Cookies

Paste di Pistacchio Siciliane - Sicilian Pistachio Cookies

Traditional Sicilian sweets with a delightfully crunchy outside and chewy inside. Made with just 4-5 ingredients and naturally gluten-free and dairy-free.
Prep time: 15 MinCook time: 12 MinTotal time: 27 Min

Ingredients

Instructions

  1. Preheat oven to 350°F / 180°C.
  2. Using a food processor, spice grinder, or coffee grinder, grind the nuts until coarse. Small chunks are ok.
  3. Mix all ingredients together, and form into balls or desired shape. Roll in powder sugar, if desired.
  4. Place evenly spaced on ungreased cookie sheets. At this point cookies can be covered and refrigerated overnight or baked immediately.
  5. Bake in preheated oven for about 8-12 minutes, or until cookies just start to turn golden.

Notes:

  • If working with a food processor or other tool large enough, you can grind the nuts with the sugar, creating powdered sugar in the process, as some Italian versions call for.
  • If the dough is too sticky, you can let it sit for an hour or refrigerate for several hours to let it thicken/dry out a bit.
  • This recipe is also delicious using all pistachio flour!


Calories

108.15

Fat (grams)

5.13

Sat. Fat (grams)

0.51

Carbs (grams)

14.12

Fiber (grams)

1.10

Net carbs

13.02

Sugar (grams)

12.21

Protein (grams)

2.73

Sodium (milligrams)

36.38

Cholesterol (grams)

0.00

Nutritional information is approximate. Based on 1 cookie rolled in powdered sugar.

Did you make this recipe?
Tag @jennyblogsandbakes on instagram and hashtag it #jennyblogs
Created using The Recipes Generator

Explore Italy: Desenzano del Garda

Porto Vecchio

Porto Vecchio

Desenzano is a small town on Lago di Garda, perfect for uncrowded strolls down Italian streets with views of the lake and mountains. It’s a quick stop from Verona or Brescia on the train, making it an easy add on to a northern Italy trip.

Desenzano in a nutshell

2019-03-16 11.04.56.jpg

Location: Lombardy, Italy

Best known for: Views of Lago di Garda

Days needed to explore: 1+ - Desenzano makes for a great day trip, although it’s close enough to Verona, Brescia, Milan, Sirmione and other cities of note that you could make it your base, if you prefer bases to be smaller, less crowded cities.

What to see and do:

  • Il Porto Vecchio / The Old Port - the heart of the town and a lovely place to find a bite to eat and enjoy the views.

  • Duomo di Santa Maria Maddalena - must always see the beautiful churches!

  • Castello di Desenzano - it’s a castle, and it has beautiful views. Winner winner. (Paid entrance)

  • Villa Romana - built at the end of the first century AD, this is an important and interesting ruin. (paid entrance)

  • Musel Archeologico - if archeology is your thing, Desenzano has a museum! (Paid entrance)

What style!

What style!

Established: Remains from the Bronze Age have been found, including primitive architecture pile-dwellings that led to it being named a World Heritage Site by UNESCO.

Typical foods to try:

  • Fish - being on the lake, the natural choice is fish!

Why I like Desenzano

Desenzano del Garda was not a city I had heard of until my husband took me there. He lived several years in Brescia and knows many of these little towns around there. We went to Desenzano for a day using Brescia as our base. It’s easy and inexpensive to reach by train. It’s a downhill walk form the train station, and small enough to wonder without a map, just enjoying the shopping, buildings, and nature. I loved walking along the lake, aside from the mountains looming in the distance, it reminded me of my hometown, Traverse City.

2019-03-16 10.49.17.jpg

Whole Wheat Garlic Knots

IMG_3863.jpeg

These whole wheat garlic knots are like your favorite garlic knots, but slightly healthified by adding whole wheat flour. You’re welcome.

I once spent two summers in NYC when I was a teenager, training with the American Ballet Theatre. My mom and I had great fun roaming around the streets of New York, trying NY bagels and pizza and walking miles for the free Lindt samples at the Lindt store. #dessert. We quickly discovered that NY pizza lives up to its name, and also that it is not the only star. You must get the garlic knots. And the best ones are at Ray’s Pizza, on 11th street. Buddy the Elf knows it. Except I may have read they closed. I’m really torn up about that. Such good memories, and guys, Buddy the Elf talks about it. How could they close?? How could they do that to me? I haven’t been able to support their business since 2008 but….such good memories. And if I had gone back to NYC since I would’ve eaten so many garlic knots! Alas. The world keeps turning, and there is this homemade recipe which is pretty durn good.

These knots are as good as any, and while the whole wheat flour might not be a part of the classic, I think it adds a wonderful nutty depth to the knots, as whole wheat flour does so well.

Want to lessen the garlic breath? Try Roasted Garlic Knots!

If there was a fault with garlic knots, it would be, well, the garlic. It’s what makes them. It’s also what makes them so dangerous. Fresh garlic, and so much. So good. So….smelly for the next 24 hours. But I discovered a trick to make these rolls a little less lethal. Normally you would bake the rolls, then slather them in the garlic butter. Instead, you can slather them with the garlic butter before baking, so they become roasted garlic knots. Also delicious, and may save your social interactions the next day. Somewhat.

The amount of garlic butter you use is also customizable. Really good, garlicky knots like you get in restaurants would probably be doused in a similar amount of garlic butter as the recipe below calls for, but if you want to lighten the load, you absolutely can. I often halve the garlic topping to keep it a bit lighter. Or, because of masks, social distancing, and generally staying home, you could also up the garlic…

Use up sourdough discard

If you are an avid sourdough baker, or at least, sourdough feeder, this recipe makes an excellent vessel for using up sourdough discard. Simply add discard to other ingredients before kneading (think 50-100g of starter) and continue as normal. Depending on how much starter you use, you will probably need to add a bit extra flour to the dough to ensure it’s not overly sticky.

So, an ode to Ray’s Pizza on 11th, that may no longer be in existence. May it Ray in Pizza. I mean, rest in peace.

This post may contain affiliate links. If you make a purchase using these links, Jennyblogs may receive a small commission, at no extra cost to you. This helps to support Jennyblogs. For further information see the privacy policy. Grazie!

Recipe adapted from Joy the Baker


Whole Wheat Garlic Knots

Makes 10 knots

IMG_3856.jpeg

Ingredients:

For the knots

  • 2 1/4 tsp / 7g active dry yeast

  • 2 tsp / 10g sugar

  • 1 cup / 237g warm water (about 100°F / 38°C)

  • 1 1/4 - 1 1/2 cups / 150-180g bread or all-purpose flour

  • 1 cup / 130g whole wheat flour

  • 2 Tbsp / 28g oil

  • 1 tsp / 5g salt

For the Garlic Butter Mixture

  • 4 cloves garlic, minced

  • 1/4 cup / 56g melted butter, olive oil, or a mixture of both

  • 1/4 cup chopped fresh parsley, optional

  • 1 /2 tsp salt

Directions:

Make the Knots

Oven preheated to 400°F / 205°C. Line 1 or 2 baking sheets with parchment paper or silpat.

  1. In a small bowl, combine yeast, sugar, and warm water; swirl to dissolve yeast and sugar. Let sit until frothy, about 5-10 minutes.

  2. In a large bowl or bowl of a stand mixer fitted with the dough hook, mix 1 1/4 cups bread flour, whole wheat flour, oil, salt, and yeast mixture until combined. Dough should be pliable, not too stiff but also not sticky. Add remaining 1/4 cup bread flour if necessary.

  3. Knead dough with bread hook for about 7 minutes or by hand for 10 minutes until dough is smooth and elastic.

  4. Grease a large bowl (can be the same bowl) and place dough in the bowl, flipping once to coat in oil. Cover with a kitchen towel or plastic wrap and allow to rise at room temperature for 1 hour, or until doubled in size.

  5. On a lightly floured surface, roll dough out into a square, roughly 10x10in / 25x25cm. Slice into ten 1in / 2.5cm strips.

  6. Take each strip and tie loosely in a knot; tuck the ends under. Place evenly spaced on baking sheet(s) and loosely cover with a kitchen towel or plastic wrap. Let rise in a warm place for about 30 minutes.

  7. Bake in preheated oven for 15 to 18 minutes or until golden.

Make the Garlic Butter Mixture

  1. Mix together all ingredients for garlic butter mixture.

  2. As soon as rolls are done baking, either toss in garlic butter or brush over the rolls with a pastry brush.

    Best if served warm.

Jenny’s Notes:

  • For Roasted Garlic Knots, brush rolls with garlic butter mixture before baking instead of after. Helps a bit with the garlic breath!

  • For a lighter, less garlicky roll, cut the garlic butter mixture in half. For extra garlicky rolls, use up to 6 garlic cloves!

  • The dough can be made a day ahead. Make and knead dough according to directions, and after placing dough in oiled bowl, place covered in fridge and allow to rise overnight. Bring dough to room temperature (or at least close) before rolling out.

  • You can use sourdough discard in this recipe. Add in with the flour and continue as in recipe, a bit more flour may be necessary to ensure your dough isn’t too sticky.

  • The above recipe can also be used as pizza dough. Likewise, you can also use your favorite pizza dough recipe (my mom used to buy pre-made pizza dough from Sam’s club to make easy breads and pizzas) and simply follow the recipe above for shaping and making the garlic butter.

Ray's Pizza Garlic Knots, Garlic Knots, Garlic Butter, Garlic Rolls
Bread
American
Yield: 10
Author:
Whole Wheat Garlic Knots

Whole Wheat Garlic Knots

Buttery, garlicky knots like the best pizzerias, made at home with whole wheat flour.
Prep time: 35 MinCook time: 18 Mininactive time: 1 H & 30 MTotal time: 2 H & 23 M

Ingredients

For the Knots
For the Garlic Butter Mixture

Instructions

Make the Knots
  1. Oven preheated to 400°F / 205°C. Line 1 or 2 baking sheets with parchment paper or silpat.
  2. In a small bowl, combine yeast, sugar, and warm water; swirl to dissolve yeast and sugar. Let sit until frothy, about 5-10 minutes.
  3. In a large bowl or bowl of a stand mixer fitted with the dough hook, mix 1 1/4 cups bread flour, whole wheat flour, oil, salt, and yeast mixture until combined. Dough should be pliable, not too stiff but also not sticky. Add remaining 1/4 cup bread flour if necessary.
  4. Knead dough with bread hook for about 7 minutes or by hand for 10 minutes until dough is smooth and elastic.
  5. Grease a large bowl (can be the same bowl) and place dough in the bowl, flipping once to coat in oil. Cover with a kitchen towel or plastic wrap and allow to rise at room temperature for 1 hour, or until doubled in size.
  6. On a lightly floured surface, roll dough out into a square, roughly 10x10in / 25x25cm. Slice into ten 1in / 2.5cm strips.
  7. Take each strip and tie loosely in a knot; tuck the ends under. Place evenly spaced on baking sheet(s) and loosely cover with a kitchen towel or plastic wrap. Let rise in a warm place for about 30 minutes.
  8. Bake in preheated oven for 15 to 18 minutes or until golden.
Make the Garlic Butter Mixture
  1. Mix together all ingredients for garlic butter mixture.
  2. As soon as rolls are done baking, either toss in garlic butter or brush over the rolls with a pastry brush.
  3. Best if served warm.

Notes:

  • For Roasted Garlic Knots, brush rolls with garlic butter mixture before baking instead of after. Helps a bit with the garlic breath!
  • For a lighter, less garlicky roll, cut the garlic butter mixture in half. For extra garlicky rolls, use up to 6 garlic cloves!
  • The dough can be made a day ahead. Make and knead dough according to directions, and after placing dough in oiled bowl, place covered in fridge and allow to rise overnight. Bring dough to room temperature (or at least close) before rolling out.
  • You can use sourdough discard in this recipe. Add in with the flour and continue as in recipe, a bit more flour may be necessary to ensure your dough isn’t too sticky.
  • The above recipe can also be used as pizza dough. Likewise, you can also use your favorite pizza dough recipe (my mom used to buy pre-made pizza dough from Sam’s club to make easy breads and pizzas) and simply follow the recipe above for shaping and making the garlic butter.


Calories

185.79

Fat (grams)

7.93

Sat. Fat (grams)

3.14

Carbs (grams)

20.38

Fiber (grams)

2.13

Net carbs

22.21

Sugar (grams)

1.10

Protein (grams)

4.01

Sodium (milligrams)

232.51

Cholesterol (grams)

12.04

Nutritional information is approximate. Based on 1 knot.

Did you make this recipe?
Tag @jennyblogsandbakes on instagram and hashtag it #jennyblogs
Created using The Recipes Generator
IMG_3868.jpeg

Explore Italy: Gubbio

IMG_6503.jpeg

Gubbio is a small Umbrian town, known as the “città grigia” or gray city, for its uniform color and terracotta roofs with lovely views of the Appenine mountains. It’s not overly crowded with tourists which makes it lovely for exploring. It has 5 main streets parallel to each other, with each one sitting up a bit higher than the first and connected by stairs. For all its beauty and medieval charm, Gubbio will forever be known to me as the town with the 1,000 year old man and bird-cage lifts.


Gubbio in a nutshell

Location: Umbria, Italy

Best known for: Being the medieval town with bird-cage cable cars up Mount Ingino

Days needed to explore: 1+ - Gubbio makes an excellent daytrip, although it’s so charming you may want to stay a few nights or even make it a base from which to see some of the larger and more crowded Umbrian towns

What to see and do:

  • Piazza Grande - the large, principal piazza of the city, with views of the valley

  • Palazzo dei Consoli - medieval palace off the main Piazza Grande (paid entrance)

  • Duomo di Gubbio (Cattedrale dei Santi Mariano e Giacomo) - not the most impressive Duomo of Italy, but still beautiful in and of itself and worth a stop!

  • Basilica di Sant’Ubaldo - take the funivia (bird cages, but for humans) up Mount Ingino to get even better views of the valley and Gubbio. The funivia ticket will cost you around 6euro there and back. Max 2 people per cage and watch out, like a true chairlift it doesn’t stop! An operator is there to assist you and a partner into the cage. Once at the top, stop in to see the church and the patron Saint, Sant’Ubaldo himself, who died in 1160, entombed in a glass casket for your viewing pleasure.

Established: By the 7th century BC Gubbio, which was then known as Ikuvium, was already becoming an important city. In the 4th century BC Ikuvium came under Roman rule and became known as Iguvium. It was later known as Eugubium before becoming Gubbio.

Typical foods to try:

  • Anything with white or black truffles

  • Olive oil

  • local cheese and meat boards, always

  • Friccò all’eugabina - a dish comprised of mixed meats including chicken, rabbit, lamb, pork, turkey, duck, or even guineafowl. No, I had never heard of that last one, either. The meats are stewed together in broth, white wine, garlic, rosemary, and sometimes tomatoes.

  • Crescia eugabina/torta al testo - Umbrian flatbread that can be filled with seasonal vegetables, meats, cheeses, and all kinds of yum.

Why I like Gubbio

Gubbio is a city that had never reached my radar but is now a city I wholeheartedly recommend visiting if you get the chance. A good friend of mine spent time in Italy as an au pair, and on a return trip to Europe we spent a weekend visiting her Italian “family” in Camucia. They were lovely and while we had merely planned on spending time with them and probably eating copious amounts of food, they decided to show us around. In a 3 day span we saw not only Camucia and Cortona, but also Gubbio and Assisi. It was a great time.

Having no agenda and no idea what any of these cities were like, it was enjoyable and quite unusual for me to not know where I was going and not having at least an idea of what I wanted to do/see. Instead, it was in the hands of a local family with a car and I tell you, do I love being a passenger. No, I really do. I don’t much enjoy driving. Especially in Italy. They drove, led us to see all the pretty things, and picked out the restaurants. It was like being a young kid again where you just go wherever your parents take you. And not knowing where you’re going, because you can’t understand your parents. Haha. It was great. I highly recommend you pick out an Italian family and let them take you around.

My favorite favorite part of Gubbio are those bird cage lifts. It’s possible to walk up to the church, about 30 minutes really uphill, but it’s probably a good thing i didn’t know that because I insist on walking places too much (hey, I save a lot of money this way). They’re exhilarating, a little bit freaky, and lead to a neat place. Views and that church with the dead guy. I’m sure he was a lovely man when he was alive, but it's bizarre to think that that was so long ago. Yet his mortal remains are still there and so well preserved. Crazy.

Not many cities leave impressions like Gubbio.

IMG_6549.jpeg

Broccoli Cheddar Pasta

Adjustments.jpeg

If the name of this pasta sounds familiar, it’s because you might be thinking of Panera Bread’s Broccoli Cheddar Soup. That’s exactly what you should be thinking, because this pasta is an ode to the soup.

Growing up one of my favorite meals was what we called “broccoli carrot cheese soup”. I would only get it every now and then, as my mom’s version included the likes of Velveeta cheese and didn’t line up with what she normally fed her family. No matter how much broccoli and carrots you put in the soup, they just won’t offset the mysterious substance that is Velveeta Cheese.

My childhood love of the soup led me to think, why couldn’t you recreate it as a pasta? You know, make the cheesy soup a little thicker so it’s like a sauce, then add pasta? Basically macaroni and cheese with broccoli and carrots. But you know, sans Velveeta.

Seemed like a great idea to me! While it normally takes at least a few tries, if not many, when I’m creating a new recipe or idea, this was one of the few instances where the first try turned out pretty great. Some things are just meant to be, ya know?

While the classic soup uses cheddar, I don’t use cheddar when I make this in Italy. Cheddar is only sold in select stores in Italy, almost always in slices, and is not the cheapest. For these reasons, I use my go-to melty cheese, Fontal. And a bit of Parmesan, because Italy. Cheddar is the original choice for the soup, and is often used as a melting cheese in many recipes, and one of my favorites to use when I’m making this in the States. On the other hand, you don’t have to use Fontal or cheddar, use your favorite melting cheese!

This post may contain affiliate links. If you make a purchase using these links, Jennyblogs may receive a small commission, at no extra cost to you. This helps to support Jennyblogs. For further information see the privacy policy. Grazie!

Recipe by Jenny Nicole


Broccoli Cheddar Pasta

Serves 3-4

Adjustments.jpeg

Ingredients:

  • 8oz / 250g (1/2 package) short pasta, such as shells, fusilli, macaroni, etc.

  • 2 Tbsp / 28g butter

  • 1 head of broccoli, chopped into small pieces

  • 2 medium carrots, sliced into half or quarter moons

  • 3 Tbsp / 23g all-purpose flour

  • 1/2 cup / 118g vegetable broth or water

  • 1 cup / 237g milk

  • 1/4 tsp turmeric

  • salt and pepper, to taste

  • 1 cup / 114g shredded cheddar, fontal, or similar cheese

  • 1/4 cup / 25g grated Parmesan cheese

Directions:

  1. Bring water to boil in a large pot and cook pasta according to directions. In the meantime you can start the sauce.

  2. In a large pot over medium heat, melt butter. Add broccoli and carrots and cover with a lid, stir frequently. Cook until vegetables start to become tender, about 12-15 minutes.

  3. Remove lid and turn heat down to low. Add flour and stir until it has coated the vegetables.

  4. Add broth and stir until thickened.

  5. Add milk, 1/4 cup at a time, stirring constantly. Allow mixture to start to thicken each time before adding the next 1/4 cup of milk.

  6. Add turmeric, salt and pepper, and cheeses; stir until all the cheese is melted and the sauce is homogeneous.

  7. Once the pasta is cooked, drain it, reserving some of the pasta water.

  8. Add the pasta to the sauce and stir to evenly coat. If a thinner sauce is desired, add some of the reserved pasta water.

Jenny’s Notes:

  • You can cook the broccoli and carrots in a couple different ways:

    • Sauté/steam them as in the recipe above
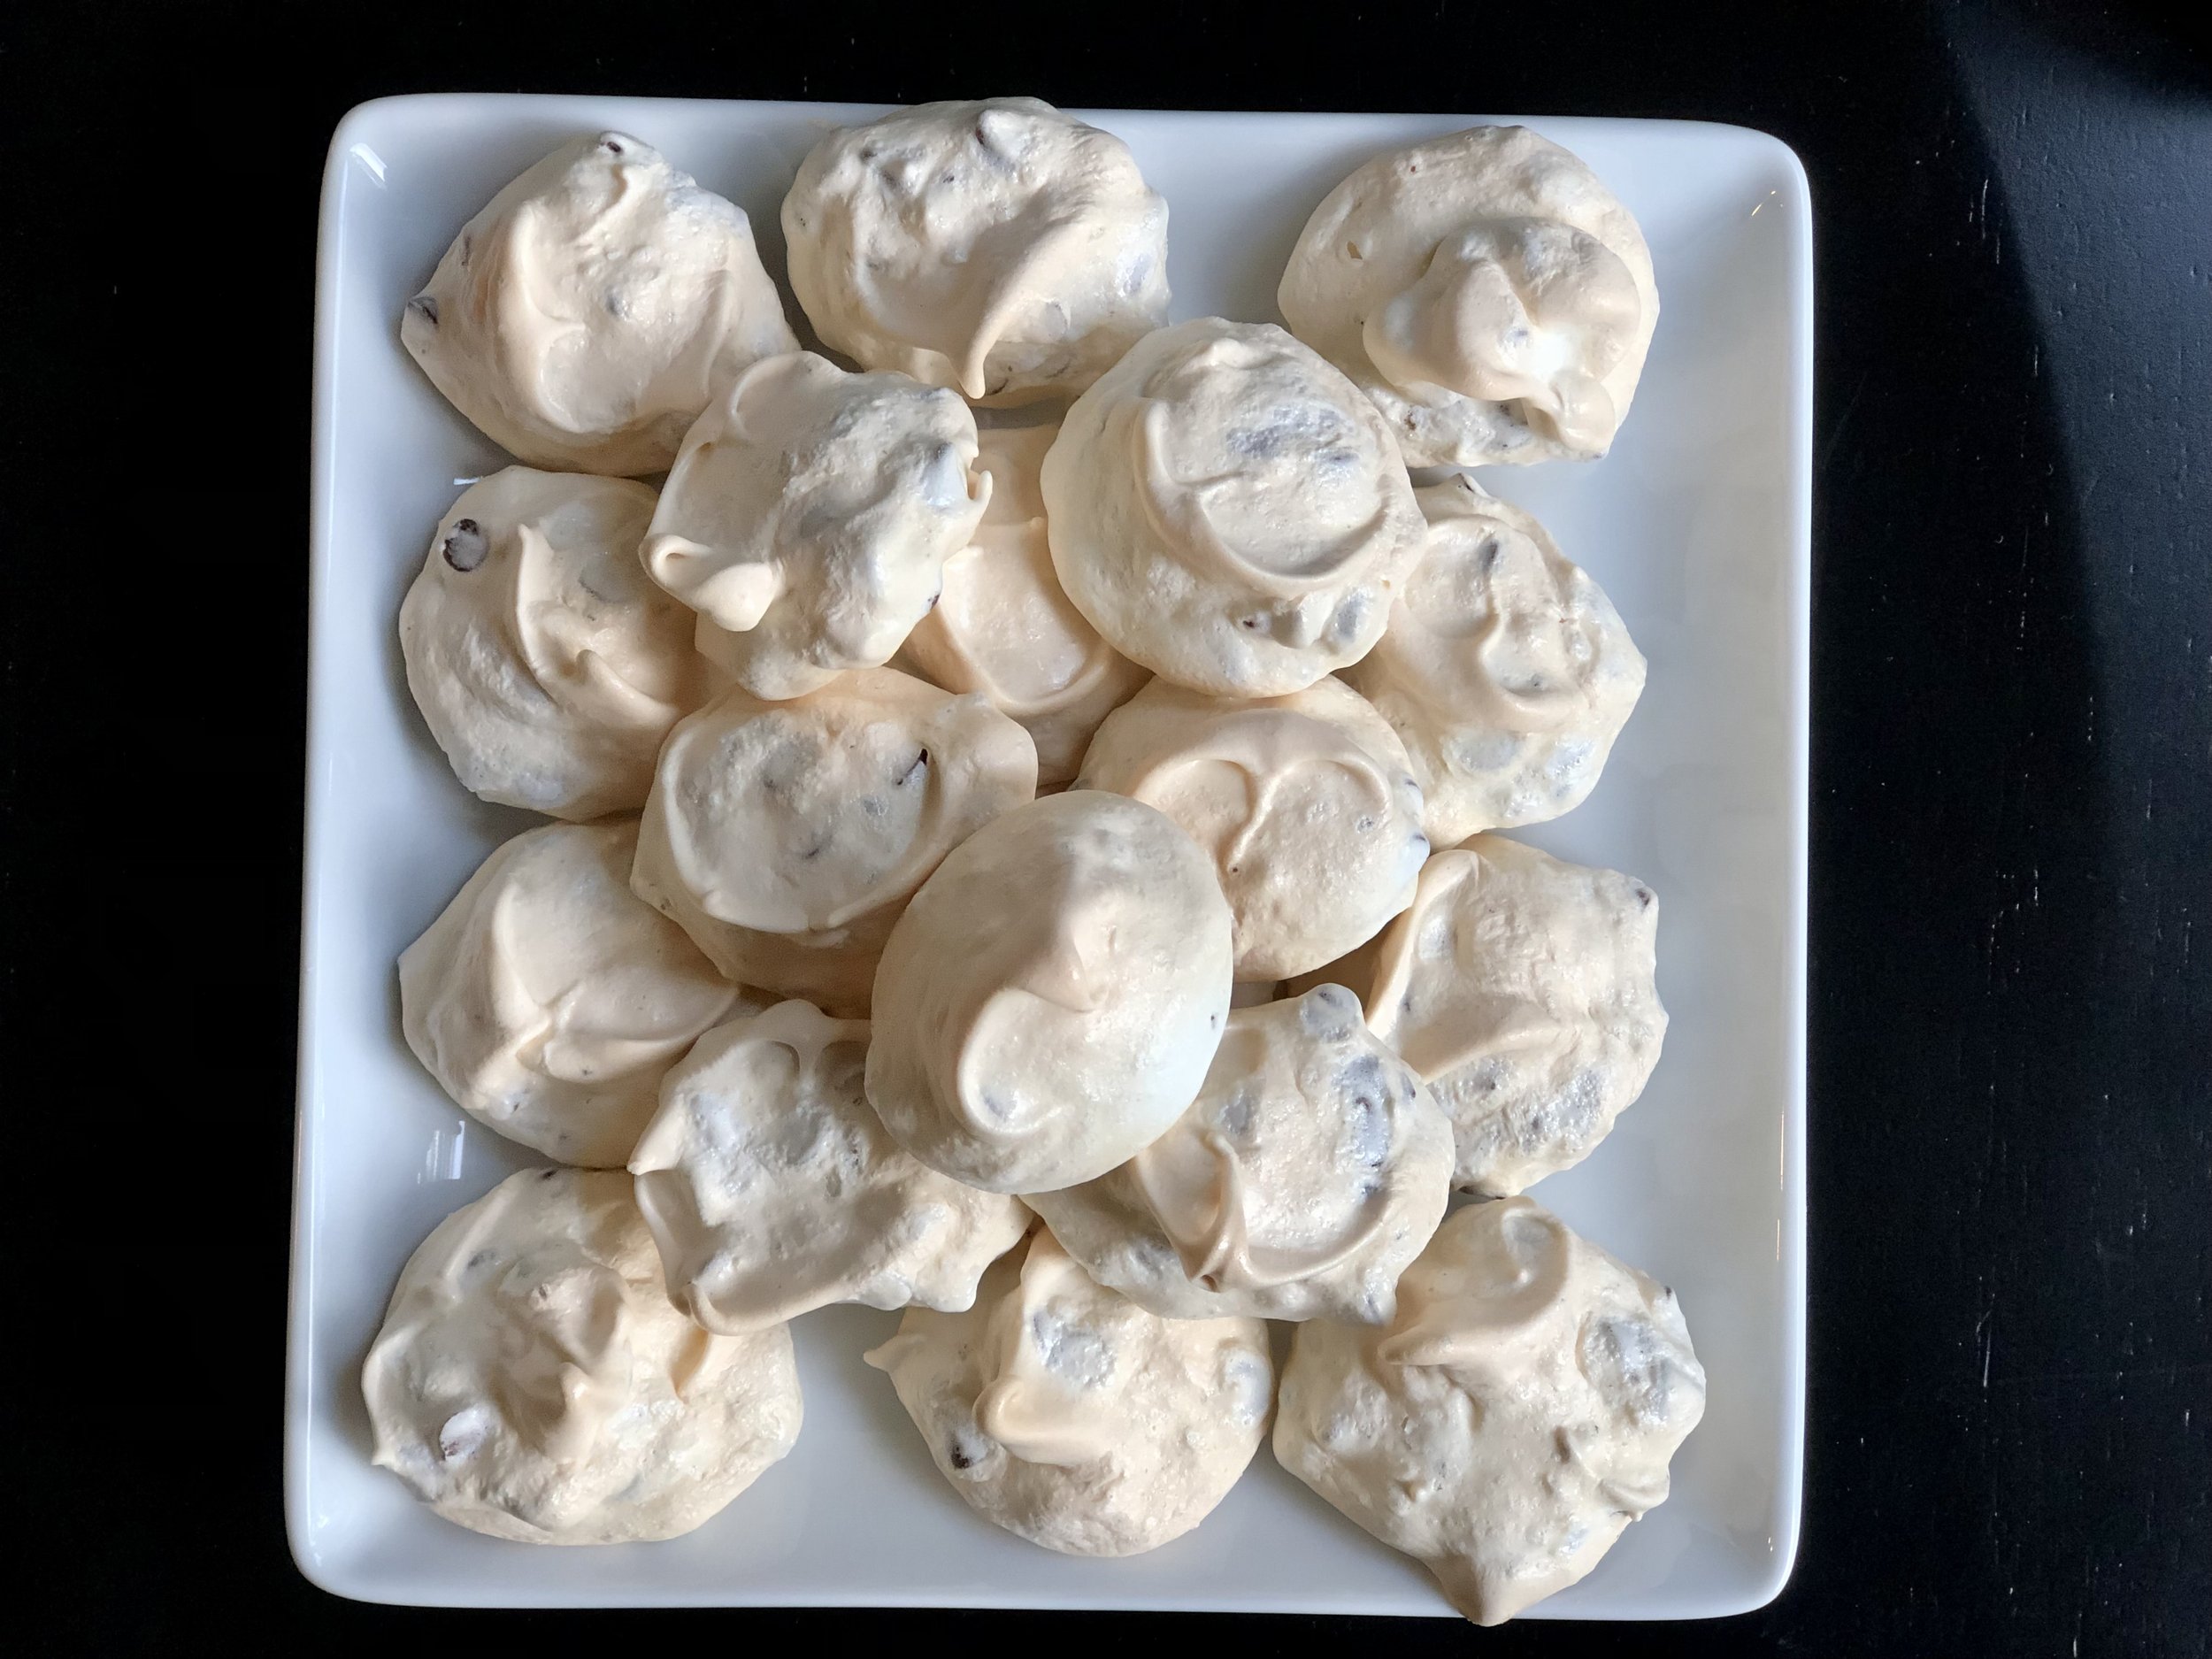
    • Steam them and make the sauce separately, adding the steamed veggies to the sauce after the cheese

    • Boil them with the pasta. If you choose this boiling method, you can add the veggies at the same time as the pasta which will result in very soft veggies, or add them in half way through to retain a bit of bite. Drain pasta and veggies as you normally would the pasta, then add all to sauce.

broccoli carrot cheese soup, broccoli cheddar pasta
Dinner, pasta
American
Yield: 3-4
Author:
Broccoli Cheddar Pasta

Broccoli Cheddar Pasta

Cheesy pasta with plenty of broccoli and carrots, just like the beloved Broccoli Cheddar soup!
Prep time: 10 MinCook time: 25 MinTotal time: 35 Min

Ingredients

Instructions

  1. Bring water to boil in a large pot and cook pasta according to directions. In the meantime you can start the sauce.
  2. In a large pot over medium heat, melt butter. Add broccoli and carrots and cover with a lid, stir frequently. Cook until vegetables start to become tender, about 12-15 minutes.
  3. Remove lid and turn heat down to low. Add flour and stir until it has coated the vegetables.
  4. Add broth and stir until thickened.
  5. Add milk, 1/4 cup at a time, stirring constantly. Allow mixture to start to thicken each time before adding the next 1/4 cup of milk.
  6. Add turmeric, salt and pepper, and cheeses; stir until all the cheese is melted and the sauce is homogeneous.
  7. Once the pasta is cooked, drain it, reserving some of the pasta water.
  8. Add the pasta to the sauce and stir to evenly coat. If a thinner sauce is desired, add some of the reserved pasta water.

Notes

You can cook the broccoli and carrots in a couple different ways:

  • Sauté/steam them as in the recipe above
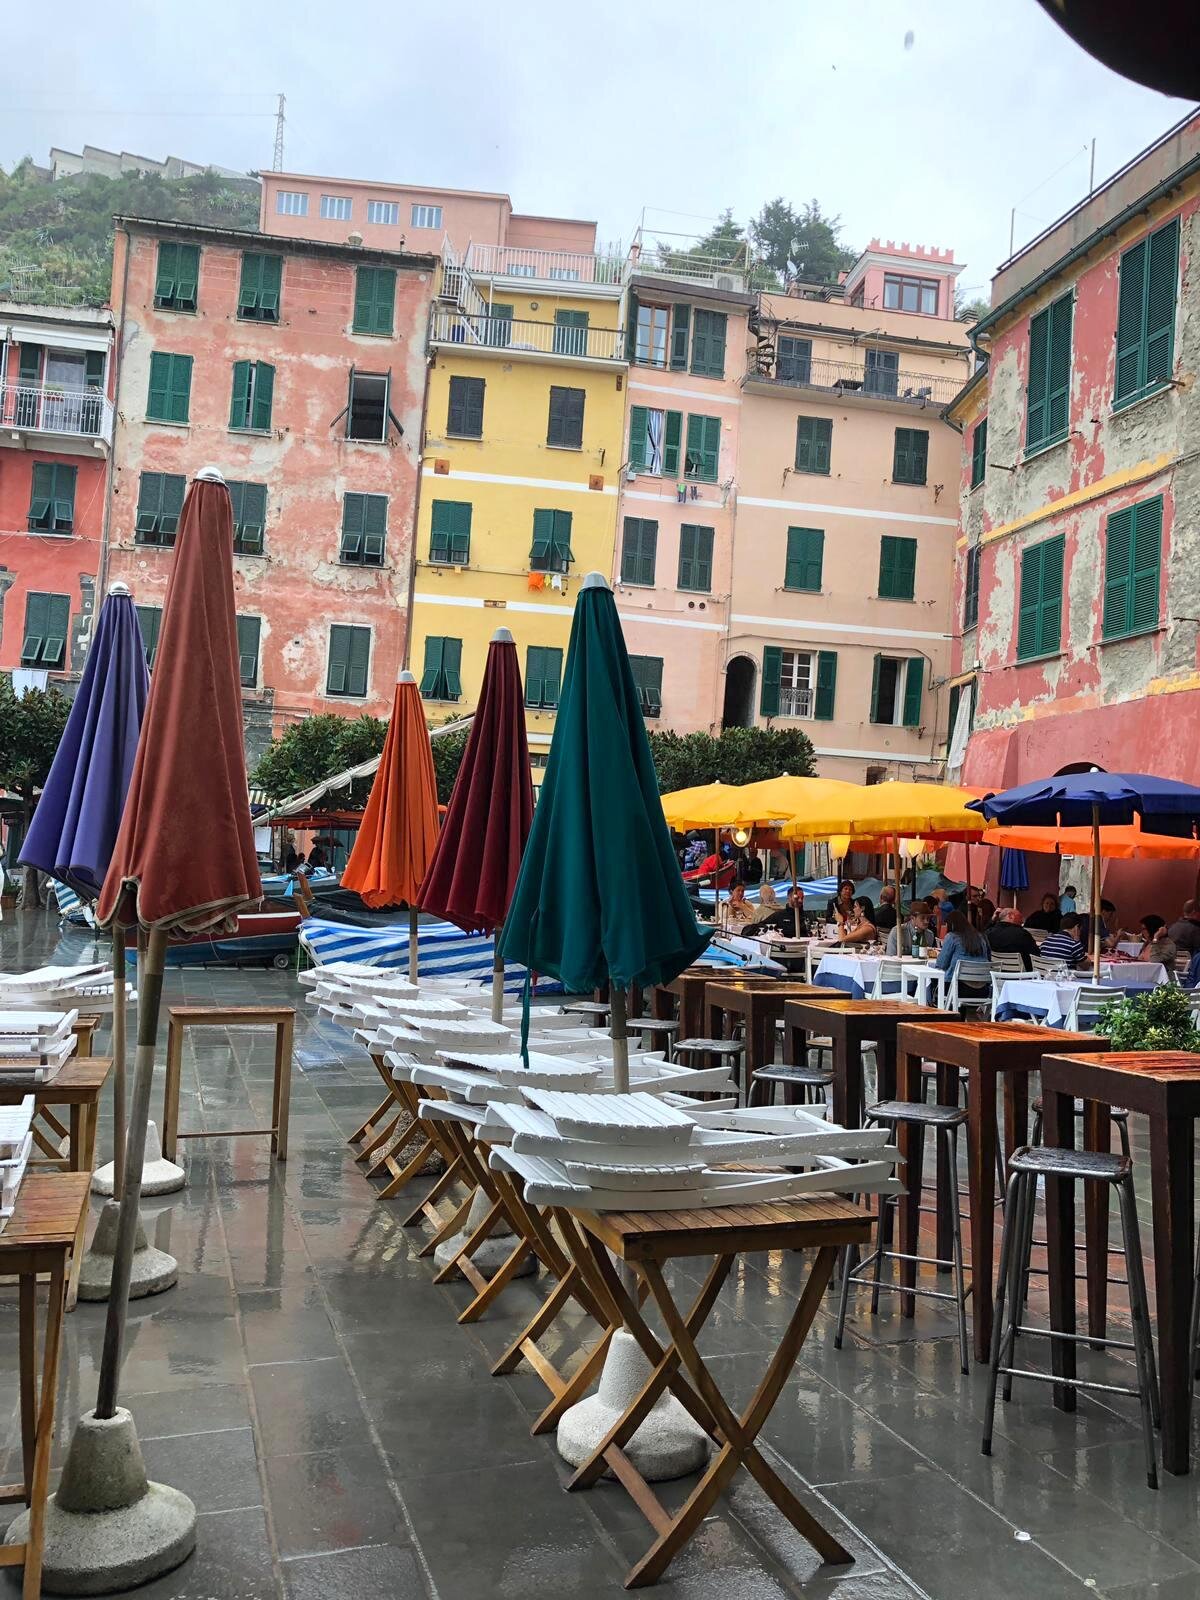
  • Steam them and make the sauce separately, adding the steamed veggies to the sauce after the cheese
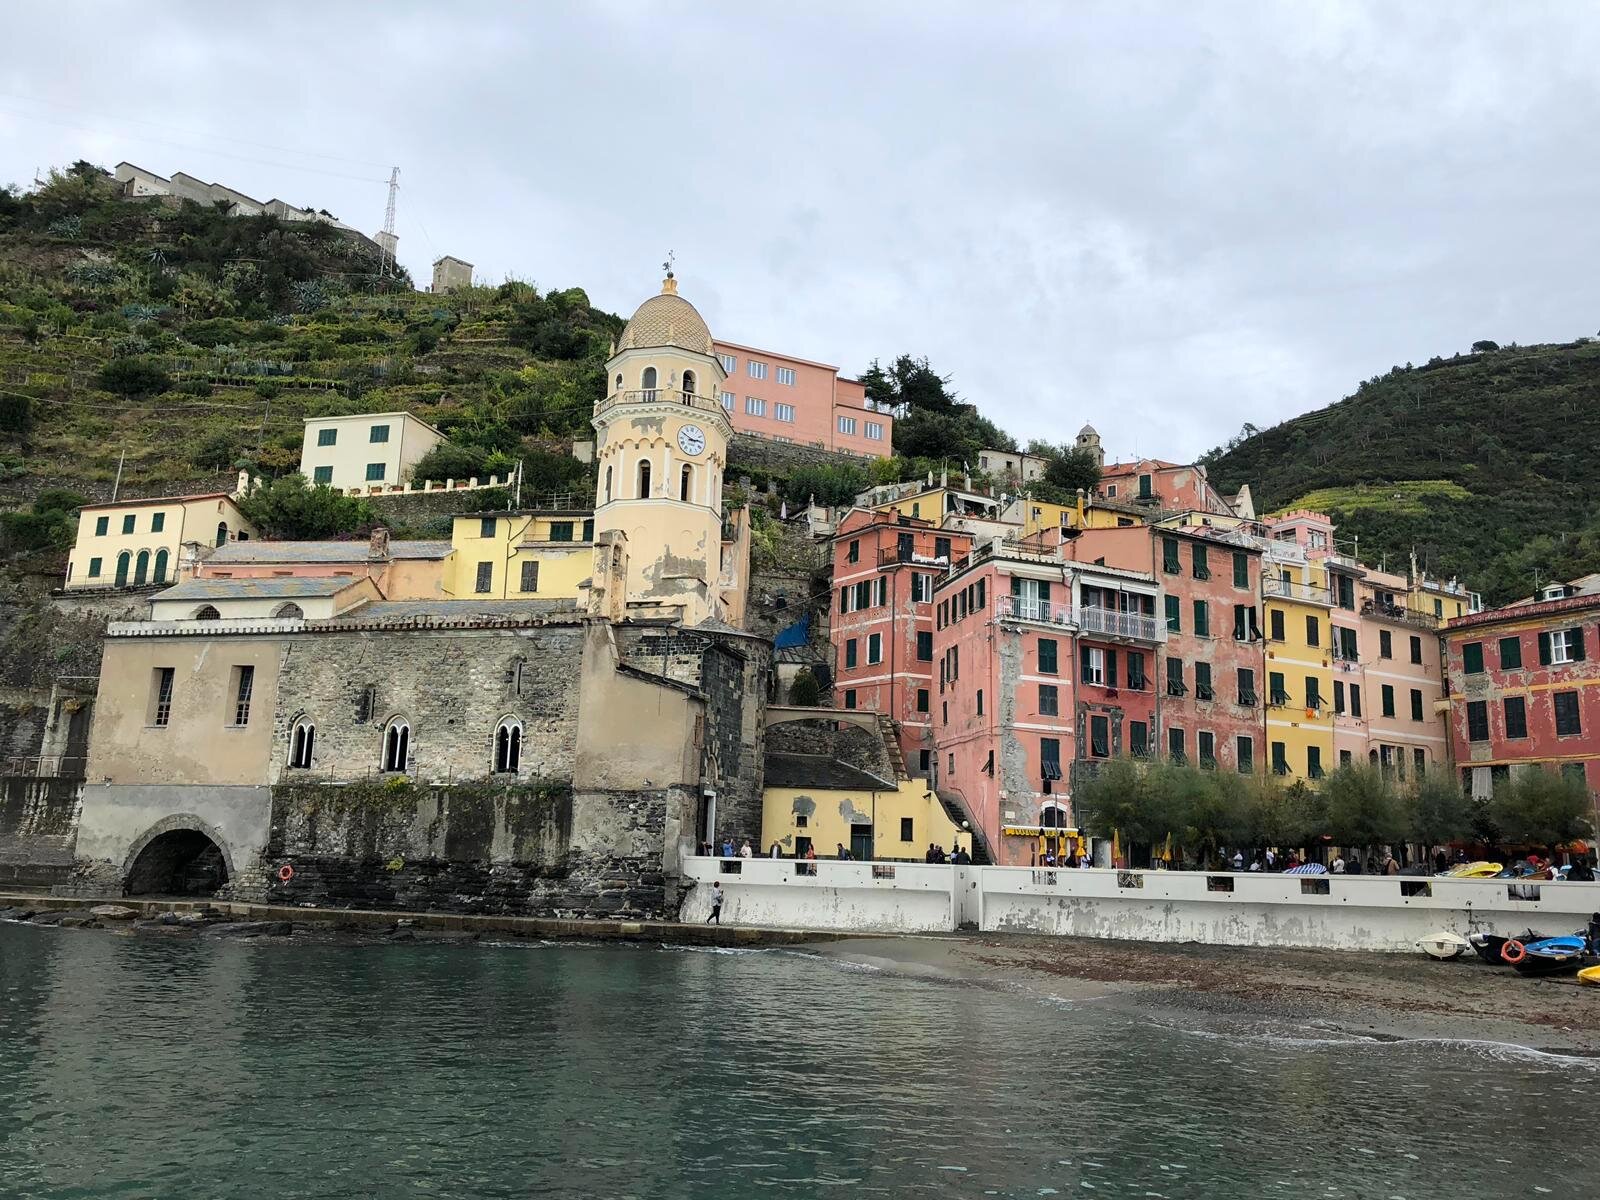
  • Boil them with the pasta. If you choose this boiling method, you can add the veggies at the same time as the pasta which will result in very soft veggies, or add them in half way through to retain a bit of bite. Drain pasta and veggies as you normally would the pasta, then add all to sauce.

As in just about all recipes, if you really love cheese you can always add more! Or less, for that matter.

Nutrition Facts

Calories

507.33

Fat

25.49 g

Sat. Fat

14.46 g

Carbs

48.60 g

Fiber

6.33 g

Net carbs

42.27 g

Sugar

3.16 g

Protein

22.70 g

Sodium

781.05 mg

Cholesterol

71.17 mg

Nutritional information is approximate. Based on 3 servings.

Did you make this recipe?
Tag @jennyblogsandbakes on instagram and hashtag it #jennyblogs
In these photos i used whole wheat radiatori pasta

In these photos i used whole wheat radiatori pasta


Explore Italy: Orvieto

Orvieto, the old city perched on a rocky hilltop with views of Umbria that make castles look like little specks. Orvieto is reached by funicular or car, either one good for a little thrill.


Orvieto in a nutshell

Location: Umbria, Italy

Best known for: Being a city on a hill, once an almost impregnable establishment

Days needed to explore: 1+ - While Orvieto can be done in a day, say from Rome, I think it has enough to offer to warrant spending at least one night here.

What to see and do:

  • Duomo di Orvieto (The outside itself is stunning; paid entrance)

  • Pozzo di San Patrizio (Well of St. Patrick, 175ft / 53m deep; paid entrance)

  • Orvieto Underground (can only be seen by guided tour, there are 1200 tunnels carved into the tuff, or volcanic rock on which the city rests.)

  • Etruscan Necropolis (just a 2,500 year old cemetery; paid entrance)

  • Climb the Torre del Moro (paid entrance)

  • Ruins of Etruscan Temple of Belvedere

Established: Inhabited by the Etruscans and known as Velzna until the 3rd century BC when it was taken by the Romans. Orvieto became a full functioning city/state by 1200 AD.

Typical foods to try: 

Look for dishes that include regional specialties, such as black truffle di Norcia, pork, pigeon, and pasta made in house.

  • Gallina ‘mbriacata (drunk chicken) - best if consumed with certain wines, such as Montefalco Rosso, Chianti, Sangiovese, and the like, since the chicken is often cooked in one of these wines

  • Frittata al tartufo bianco (white truffle frittata)

  • Lumachelle all’Orvietana (savory bread shaped like a snail)

  • Zuppa di ceci e castagne (chickpea and chestnut soup)

  • Umbrichelli (egg pasta made with wine in the shape of a thick spaghetti) - try it with a mushroom and boar ragù or a truffle Amatriciana

  • Wine: Try Orvieto Classico and Orvietano Rosso

  • L’Orvietan (local liquor made with more than 25 herbs including rhubarb!)

1X9B0033 copy copia.jpg

Why I like Orvieto

Orvieto made the itinerary when my family went on our first European adventure in 2014. Being on this large tuft of lava rock (called tuff), it offers delightful views of the surrounding region of Umbria, including other little towns and castles. While it is accessible by car, taking the funicular up is super fun! At the top near where you get off the funicular there is an area by the wall with lots of cats. A cat park. If you sit around long enough enjoying the views, you might see the old ladies come and feed the cats. Here, kitty kitty!

There is more to Orvieto than meets the eye. Underneath your feet as you walk around the city are more than 1,200 tunnels dug out of the tuff by the Etruscans. It makes you feel really secure that the city isn’t going to cave in or anything while you’re up there. The tunnels can only be seen by guided tour, and while I’m normally a see-but-don’t-pay-to-go-in type traveler, I’m really glad my dad convinced me to do the tour with him. My dad also decided to go to the barber while we were in Orvieto. He doesn’t speak Italian and I don’t recall the barber being able to speak English, but being my dad, he somehow not only went for it, but managed to come out with what my mom calls to this day “the best haircut he’s ever had.”

We spent 3 days/2 nights in Orvieto in a cute little hotel where the owner would make you a cappuccino or other coffee every morning. After visiting bustling London, Paris, Florence, and Rome being next on the agenda, Orvieto was a breath of fresh air and nice to see a bit of a smaller Italian city.

a667 Duomo di Orvieto copia.jpg

I also got my first taste of Italian customer service while here. One of the days I decided on a sandwich for lunch, and since I seemed to be the only hungry one in my family got to pick out this little butcher/lunch place. There was only one man behind the counter and he was on the phone the entire time. I somehow managed to order a dry pork sandwich (no menu, I don’t even know how I arrived at that) and we split a bottle of Orvieto Classico. While the man was inattentive and the sandwich nothing I’d recommend, that was our first experience with Orvieto Classico, a lovely white wine that we still buy regularly. It’s not expensive, even in the States.

If you’re looking for a break from the big cities but still want a city big enough to explore, Orvieto comes highly recommended!

Well of St. Patrick

Well of St. Patrick


Explore Italy: Lucca

La Cattedrale di San Martino


Adjustments.jpeg

Of the small, but well known Tuscan towns, Lucca has to be one of my favorites. This post will give you a small taste of Lucca to help you decide if this might be a place you might want to visit.

Lucca in a nutshell

Location: Tuscany, Italy

Best known for: Surrounding rampart walls that can be walked on.

Days needed to explore: 1+ - Lucca makes for a wonderful day trip, but it could also be leisurely enjoyed over a couple days.

What to see and do:

Bird’s Eye View of the Botanical Garden from my favorite spot on the wall

Bird’s Eye View of the Botanical Garden from my favorite spot on the wall

  • Walk or rent bikes for a turn on the walls; once around the city is about 4 kilometers / 2.5 miles

  • Duomo (La Cattedrale di San Martino)

  • Torre Guinigi (look for the tall tower with the tree on top)

  • Botanical Garden

  • Torture Museum? Nah.

Established: As far back as 218 BC, a Roman colony in 180 BC, the walls it is known for weren’t started until the 16th century.

Places to eat:

  • Forno Francesco Casali (bakery)

  • Gelatarium (gelato; self serve in the style of most American frozen yogurt shops)

Typical foods to try:

Walking under the wall to enter the city

Walking under the wall to enter the city

  • Tordelli Lucchesi (the tortelli, or ravioli of Lucca, typically filled with meat, cheese, and greens and served with a meat ragù)

  • Minestra di Farro alla Lucchese (bean and farro soup)

  • Rovelline (fried slices of meat in a flavorful tomato sauce with capers)

  • Baccalà (cured codfish, fried)

  • Pane di Patate (potato bread)

  • Buccellato (a poor man’s bread, made with anise and raisins)

  • Torta co’ Becchi (a type of cake, the one original to Lucca is made with herbs, pine nuts, and a touch of orange)

Adjustments.jpeg

More about Lucca

Lucca is small, not too touristy, but has a wonderful, relaxed feel to it and is easily explored in a day. It’s not a high adrenaline city with a long list of “must see” places, but the whole city is intertwined with that Italian rustic romance and charm which makes it perfect to wander along the cobblestone streets, no map needed.

Walking on the wall

Walking on the wall

Lucca is probably best known as the town with the outer wall you can walk on. Knowing this before going but not having ever really seen any photos of Lucca’s wall, I was surprised to find how wide it was. I guess I was picturing more of a medieval castle’s battalion and narrow-ish ramparts, but Lucca’s wall is more of a high mounded dirt wall that surrounds the city. It’s wide enough for a paved sidewalk where bicycles, joggers, walkers, and trees alike can coexist peacefully. Cars can drive on the wall even, although they’re no longer allowed. A leisurely stroll around the whole city wall on foot can easily be accomplished in a couple hours, if that. It gives you a lovely view of the town, and my favorite corner has some benches where you can sit and look down into the botanical garden. The garden has a paid entrance but I enjoyed it from the wall maybe more than if I had gone in.

Adjustments.jpeg

Why I like Lucca

I went in October and while I’m certain Lucca is lovely year round, I’ve dreamed of going back in October because it felt so autumnal and perfect. I grew up in Michigan where the fall colors are vibrant and vast, so the change through autumn and winter in Italy from green to yellow to brown to not there is so gradual I hardly notice it. This is one reason I enjoyed Lucca so much, it felt the closest to a real fall I’ve felt in Italy. Trees and nature throughout the city also help when you’re surrounded by cement and brick so often.

Adjustments.jpeg
Adjustments.jpeg

Labor Eggplant Parmesan

This Eggplant Parmesan is, apparently, labor-inducing magic.

Adjustments.jpg

If you’re pregnant and at full term (39 weeks), there’s an Italian restaurant that serves an Eggplant Parmesan that could help you go into labor, or so say hundreds of women. Too good to be true? Probably. I was certainly a skeptic. But it didn’t keep me from being curious!

The best part? They have the recipe up on their website so you don’t have to go to Georgia to have your baby!

Please note: If you are not expecting a baby, this recipe won’t make you go into labor. That’s good news, so everyone can enjoy this dish.

What’s the deal with this Eggplant Parmesan?

Down in Cobb County, Georgia, this Italian restaurant, Scalini’s, has their walls lined with photos of women and their babies, hundreds of them. What do they have in common? They all ate Scalini’s famous Eggplant Parmesan within 48 hours of going into labor. You can visit their site here and read some of the moms’ testimonies.

We know it can’t be the restaurant or their atmosphere, since the recipe is online and many moms from all over have made this and have their own Eggplant Parmesan babies!

By now I can’t even remember how I first came across this story. In fact, you may already know about it, it’s been on What to Expect, Today’s Parent, and others.

It seemed comically incredible to me, and I immediately decided I would have to make this a bit later on in my pregnancy. I of course gave no stock to its magical labor powers, reading the testimonies it seemed like a lot of coincidences. If you’re past your due date and you go into labor, uh, sorry but how do you know it was the eggplant? Chances are you would’ve gone into labor anyway! Or so I was inclined to think. But like eating spicy food, dancing, curb-walking, and any other means a woman might resort to for getting labor going, it seemed harmless and fun, one more thing to try. And I think women like to actively get labor on because not only are we uncomfortable and can’t wait to meet baby, but we also like to feel like we’re doing something and not just sitting around like…glowing whales?

My Eggplant Parmesan Labor Story

One fine September eve when I was 40+3 weeks pregnant I decided it was time to have some fun and try this parmigiana. It had only reached about 90°F/32°C that day, so naturally the first thing I decided to do would be to turn on the oven.

The whole making of this dish took me longer than I anticipated, so many eggplant slices! So after several hours on my feet in a hot kitchen I was feeling quite tuckered out. I had had plans with my husband to go out for our nightly passeggiata and it kept getting later and later. Finally the parmigiana was out of the oven and ready, so good. Worth it!

I later went out onto our little patio to cool down in the evening air and make some calls. No one answered, and I had this strange forlorn feeling, like something was about to happen and I couldn’t get ahold of anyone. My mom eventually called me back, and we laughed and talked until late. I had started having some more regular Braxton-Hicks shortly before and during the call, and I joked that maybe I should start practicing with my pregnancy app contraction timer so the first time I’m not trying to use it is in actual labor.

We hung up at almost 1am my time, on the premise that I should sleep. On reentering the apartment I saw the parmigiana again and had to eat another couple bites. I had barely laid down when I felt what was unmistakably a real contraction. Some more ensued and I started keeping track for real on the contraction timer. They were coming regularly and the more I moved the faster and harder they came. I didn’t get a wink of sleep as a contraction would wake me up anytime my eyes started to close, and eventually my body decided to evict all of the Eggplant Parmesan. A few hours later we were at the hospital. Almost exactly 24 hours after eating this Eggplant Parm my son was born. Am I believer now? I just might be, or yet another coincidence…

What is Eggplant Parmesan?

An Italian dish known as Parmigiana di Melanzane or often simply parmigiana, it consists of layers of deep fried eggplant, tomato sauce, and cheese. It’s as heavy and wonderfully delectable as it sounds.

Eggplant Parmesan is a rather labor intensive dish (no pun intended!). The eggplants need to be salted and sit for an hour, the marinara sauce needs to simmer for an hour, then there is the breading and frying of the eggplant, and the actual assembly and baking. To make things easier you can make the marinara ahead. You can also make the whole dish ahead of time, it makes for wonderful leftovers OR you can refrigerate it or freeze it before baking. One Italian recipe I was reading even went as far as to claim that time itself was one of the most important ingredients for an unbeatable parmigiana, time for the flavors to meld after it’s assembled and baked.

This particular recipe is a family recipe from Scalini’s restaurant. From what I know of Parmigiana, this is pretty close to the original dish, albeit slightly Americanized. I don’t mean that scathingly, as not everything that’s not the original is automatically bad. Often people tend to fall on two sides of this “issue.” They don’t know/don’t care what the difference is, or they’re righteously indignant that a restaurant could call itself Italian and serve, say, Fettuccine Alfredo. I do, however, think it’s important to understand what the original dish is meant to be, while appreciating that it may evolve into something different, especially as it’s served in different countries over the years. An Italian restaurant in Italy is naturally going to be different than an Italian restaurant in America, each having different clientele, differing availability of ingredients. This being a family recipe handed down in an Italian immigrant family, I’m sure they know the following stuff better than I!

That said, the main differences between the classic recipe and this one, are the following:

  • In Italy the eggplants in parmigiana are typically deep fried: I’ve mostly seen them fried as is, but some do batter in flour, egg, or both before frying. Scalini’s batters in flour, egg, and bread crumbs, but only directs to sauté.

  • The marinara usually would be simmered with salt, pepper, and onion, with fresh basil added in the last few minutes. Scalini’s uses oregano and several other spices. This right here is often what tips me off to an “Americanized” dish: we love to add more spice, more cheese, etc. Again, it’s not wrong, just different. I happen to think both ways can be delicious.

  • Scalini’s uses a generous amount of ricotta alongside parmesan and romano, the classic usually calls for just Parmigiano and mozzarella, although some use caciocavallo and yet others use provolone or a scamorza bianca.

In other Italian recipes for Parmigiana di Melanzane I’ve seen some of the following suggestions:

  • As far as the classic recipe goes, you can leave the skin on the eggplant, peel it, or peel it in stripes, depending on your preference. I recommend leaving it on for 3 main reasons: The skin is where most of the nutrients are, where most of the flavor and texture is, and it’s easier to leave it on.

  • Choose firm, ripe, dark purple globe eggplants.

  • While this recipe doesn’t specify, it’s often recommended to remove some of the extra water from the fresh mozzarella as well. Simply squeeze the mozzarella between paper towels until the paper towels remain mostly dry. This could be skipped if you choose a drier cheese such as caciocavallo or provolone in place of the mozzarella. Others recommend using a mozzarella closer to its expiration date, when it has naturally lost some of its water. (See note below though, as it may be why Scalini’s doesn’t say to remove the water.)

  • Some recipes in Italian say to layer in this order: eggplant, mozzarella, sauce, parmesan. They say finishing with mozzarella on top may cause it to become too dry and burn. You’ll notice this recipe finishes with mozzarella only on top. I didn’t have problems with the mozzarella burning, but I also didn’t remove too much water from the mozzarella first so that could be why.

The recipe below is Scalini’s exact recipe, to best preserve its baby’s-a-comin’ magic. Some of the directions I may have re-worded to make them a bit more clear. You’ll also find my usual recipe notes at the bottom, some of the questions I came across while making this and ideas to make things easier.

This post may contain affiliate links. If you make a purchase using these links, Jennyblogs may receive a small commission, at no extra cost to you. This helps to support Jennyblogs. For further information see the privacy policy. Grazie!


Eggplant Parmesan alla Scalini’s

Serves about 8-12

Ingredients:

For the Eggplant Parmesan

  • 3 medium eggplants, washed

  • 1 cup / 120g flour

  • 6 eggs, beaten

  • 4 cups / 400g fine Italian bread crumbs, seasoned

  • olive oil for sautéing

  • 8 cups marinara sauce, recipe below

  • 2 cups / 500g ricotta cheese

  • 1/2 cup / 50g grated Romano cheese

  • 1/2 cup / 50g grated Parmesan cheese

  • 1/2 lb / 227g fresh mozzarella, grated

For Scalini’s Marinara Sauce

  • 3 Tbsp / 42g olive oil

  • 1 cup onion, chopped

  • 2 Tbsp chopped garlic

  • 8 cups chopped tomatoes, fresh or canned

  • 1/2 cup chopped fresh parsley

  • 1 tsp oregano

  • 1 tsp crushed red pepper flakes

  • 1/8 cup chopped fresh sweet basil

  • pinch of thyme

  • pinch of rosemary

  • 1 tsp salt

  • 1 tsp black pepper

Directions:

Make the Eggplant Parmesan:

Oven preheated to 375°F / 190°C. 9x13in / 23x33cm or similar size baking dish.

  1. Slice the eggplant into 1/4in / 1/2cm slices.

  2. Line eggplant slices on paper towels. Lightly salt them, cover with more paper towels, and place something heavy on top of them. This will drain excess moisture. Allow to sit for about an hour.

  3. When the hour is up, heat a small amount of oil in a large frying pan over medium heat. Take one slice of eggplant and dip in flour, then dip in beaten eggs, then dredge in breadcrumbs. Place in hot pan and cook on each side until golden brown. Repeat with remaining slices of eggplants, adding more oil to pan as needed.

  4. In the baking dish, spread enough marinara sauce to generously cover the bottom. Add a layover of eggplants, then spread some ricotta, Romano, and Parmesan cheese over eggplants. Repeat layers until within about 1/8in / 1/4cm from the top.

  5. Evenly sprinkle mozzarella over top.

  6. Bake for about 25 minutes or until hot and bubbling. Let sit for 10 minutes before serving.

Make the Marinara Sauce

  1. In a large pot over medium heat, lightly sauté onions in oil for a few minutes.

  2. Add garlic and cook for another minute.

  3. Add tomatoes and bring to a boil.

  4. Turn heat to low and add remaining ingredients; stir and cover. Simmer for 1 hour, stirring occasionally.

Jenny’s Notes:

  • Scalini’s recipe doesn’t specify what size baking dish to use, so I guessed. I halved this recipe and used an 8x8in / 20x20cm baking dish and ended up with quite a few eggplant slices leftover. I did not halve the marinara recipe and made the full 8 cups, hoping to have leftover. However I didn’t have much leftover. If you’re making the full 9x13ish recipe above, you might want to consider making more than 8 cups sauce. Any leftovers you can use on pasta, as a dip for breadsticks or garlic bread, on pizza, or anything else you like marinara on.

  • The hour that the eggplant is sitting and sweating is a good moment to make the marinara. Then the marinara can simmer for its hour while you start frying the eggplant. Otherwise you can make the marinara sauce 1-2 days ahead.

  • Cup and Tbsp measurements are a bit less common than indicating the amount of vegetable/fruit, 1 onion, 1/2 an onion, etc. If you don’t feel like measuring the onion and garlic, I used 1 medium-large onion and 6 garlic cloves and it turned out great.

  • Seasoned Italian breadcrumbs are not a thing in Italy, only plain breadcrumbs exist, so that is what I used. I could have added a bit of dried oregano, basil, parsley, garlic and onion powder to make my own Italian breadcrumbs, but I opted not to since the marinara is already quite generously spiced.

  • I ended up needing quite a bit more flour and even breadcrumbs than called for, this will all depend on the size of your eggplants. The important part here is making sure all the eggplant slices get breaded rather than following the recipe precisely.

  • When it comes to sautéing the eggplant, you may want to use 2 pans simultaneously to fry them up, to make it go quicker. Otherwise, you could choose to deep fry them as is traditional (but use a frying oil such as refined peanut oil, not olive oil for deep frying) or bake them. I baked some of mine and thought it worked nicely and saved a lot of time. I’ve also read of Italians grilling the eggplant for a lighter version.

  • 1/8in seems like a very close and precise measurement for filling the baking dish, you can play it by, uh, eye, and stop where you feel comfortable. I left a touch more space so the marinara wouldn’t bubble over while baking.

Labor inducing, how to induce labor, eggplant parmesan, authentic Italian recipe, Eggplant parmigiana, Parmigiana alla melanzane, Scalini's
dinner
Italian
Yield: 8-10
Author:
Eggplant Parmesan alla Scalini's

Eggplant Parmesan alla Scalini's

Thinly sliced eggplant breaded and fried layered with a flavorful, homemade marinara and plenty of ricotta, parmesan, romano, and mozzarella. An Italian classic.
Prep time: 1 H & 20 MCook time: 1 H & 25 Minactive time: 1 H & 10 MTotal time: 3 H & 55 M

Ingredients

For the Eggplant Parmesan
For Scalini’s Marinara Sauce

Instructions

Make the Eggplant Parmesan
  1. Oven preheated to 375°F / 190°C. 9x13in / 23x33cm or similar size baking dish.
  2. Slice the eggplant into 1/4in / 1/2cm slices.
  3. Line eggplant slices on paper towels. Lightly salt them, cover with more paper towels, and place something heavy on top of them. This will drain excess moisture. Allow to sit for about an hour.
  4. When the hour is up, heat a small amount of oil in a large frying pan over medium heat. Take one slice of eggplant and dip in flour, then dip in beaten eggs, then dredge in breadcrumbs. Place in hot pan and cook on each side until golden brown. Repeat with remaining slices of eggplants, adding more oil to pan as needed.
  5. In the baking dish, spread enough marinara sauce to generously cover the bottom. Add a layover of eggplants, then spread some ricotta, Romano, and Parmesan cheese over eggplants. Repeat layers until within about 1/8in / 1/4cm from the top.
  6. Evenly sprinkle mozzarella over top.
  7. Bake for about 25 minutes or until hot and bubbling. Let sit for 10 minutes before serving.
Make the Marinara Sauce
  1. In a large pot over medium heat, lightly sauté onions in oil for a few minutes.
  2. Add garlic and cook for another minute.
  3. Add tomatoes and bring to a boil.
  4. Turn heat to low and add remaining ingredients; stir and cover. Simmer for 1 hour, stirring occasionally.

Notes:

  • Scalini’s recipe doesn’t specify what size baking dish to use, so I guessed. I halved this recipe and used an 8x8in / 20x20cm baking dish and ended up with quite a few eggplant slices leftover. I did not halve the marinara recipe and made the full 8 cups, hoping to have leftover. However I didn’t have much leftover. If you’re making the full 9x13ish recipe above, you might want to consider making more than 8 cups sauce. Any leftovers you can use on pasta, as a dip for breadsticks or garlic bread, on pizza, or anything else you like marinara on.
  • The hour that the eggplant is sitting and sweating is a good moment to make the marinara. Then the marinara can simmer for its hour while you start frying the eggplant. Otherwise you can make the marinara sauce 1-2 days ahead.
  • Cup and Tbsp measurements are a bit less common than indicating the amount of vegetable/fruit, 1 onion, 1/2 an onion, etc. If you don’t feel like measuring the onion and garlic, I used 1 medium-large onion and 6 garlic cloves and it turned out great.
  • Seasoned Italian breadcrumbs are not a thing in Italy, only plain breadcrumbs exist, so that is what I used. I could have added a bit of dried oregano, basil, parsley, garlic and onion powder to make my own Italian breadcrumbs, but I opted not to since the marinara is already quite generously spiced.
  • I ended up needing quite a bit more flour and even breadcrumbs than called for, this will all depend on the size of your eggplants. The important part here is making sure all the eggplant slices get breaded rather than following the recipe precisely.
  • When it comes to sautéing the eggplant, you may want to use 2 pans simultaneously to fry them up, to make it go quicker. Otherwise, you could choose to deep fry them as is traditional (but use a frying oil such as refined peanut oil, not olive oil for deep frying) or bake them. I baked some of mine and thought it worked nicely and saved a lot of time. I’ve also read of Italians grilling the eggplant for a lighter version.
  • 1/8in seems like a very close and precise measurement for filling the baking dish. I left a touch more space so the marinara wouldn’t bubble over while baking.


Calories

689.69

Fat (grams)

27.88

Sat. Fat (grams)

11.16

Carbs (grams)

79.97

Fiber (grams)

10.93

Net carbs

69.04

Sugar (grams)

16.07

Protein (grams)

33.24

Sodium (milligrams)

1434.96

Cholesterol (grams)

189.44

Nutritional Information is approximate. Based on the recipe as written, or approximately a 9x13in / 23x33cm dish providing 8 servings.

Did you make this recipe?
Tag @jennyblogsandbakes on instagram and hashtag it #jennyblogs

Italian Hospital Bag Checklist: What Not to Pack

You have birth support people picked out. You have your birth plan typed up. Your hospital bag has been packed since your 28th week. Your freezer is full to capacity with frozen dinners (and cookies). You’ve been doing your Spinning Babies exercises. You’ve asked your mom/friends a hundred questions just in the last week, and Google a couple hundred more. You’ve read every birth story you can get your hands on. You’re so ready.

The beautiful thing about birth is that you never know what will happen. Each woman, birth, and baby is different. If you’re a first time mom like me, you can do everything in the world to prepare, but nothing will truly prepare you for the experience until you actually experience it. And that’s ok. With all the unpredictability, though, it is nice to at least be ready in other aspects where you can.

If you live in Italy, it’s even more unpredictable. If you’re not an Italian native, you get to add on another layer of unpredictability. If you’re pregnant and giving birth during a pandemic, go ahead and add another layer. Now you have this layered onion of unpredictability; the more you cut into it, the more you might want to cry.

I know, I know, Google doesn’t need another hospital bag checklist. If you’ve been pregnant since the invention of Google, blogs, and Pinterest, you know what I’m talking about. If you took everyone’s advice on what to pack you’d look like you’re moving into the hospital for good. I’m glad everyone nailed their hospital bag and are now suddenly experts on all things birth and babies. If it makes you feel any better, my hospital bag kinda stunk. As you’ll see below, there’s the official recommendation from the hospital, then in italics what I brought/what I would do differently next time. Half the reason my bag was not Mary Poppins’ bag was because of conflicting information from the hospital. Half the stuff they recommended I bring they ended up providing. Other items they discouraged I wished I might’ve had with me.

This is where this post comes in. I shall be happy if I can help one person be better prepared for their hospital stay in Italy. In Florence. At Ponte a Niccheri (Ospedale Santa Maria Annunziata). Before the rules change. Ok, well, at the very least you can empathize and/or laugh at my expense.

The links in this post are not affiliate links, no revenue is earned if you click on them, simply things I used and enjoyed. :)


Italian Hospital Bag Checklist: What Not to Pack

Hospital checklist.jpg

The actual hospital checklist

At my first visit to the hospital at 39+1 weeks, I was given a checklist. A bit late in the game to be receiving it, but better late than never. It was enlightening, as Italian hospitals operate differently than American hospitals and expect you to bring more.

What follows are the hospital’s suggestions on what to bring. (Translation and sometimes paraphrasing by yours truly, oh joy.) See photo for the original list.

Our structure is public, able to provide whatever is indispensable for the hospital stay, obviously ours are all disposable items.
If you’d like a recommendation on what to bring we can suggest:

  1. Breakfast is distributed in a carafe, so a mug and silverware are useful. (Breakfast is milk, tea, coffee, toast, cookies, butter, jam, and honey.) If you have other food habits, they’re not provided by the hospital.

    I had heard stories from other moms about having to bring their own dishes to the hospital, so was expecting this. Ironically I didn’t bring any because labor came on faster than I thought and we accidentally left several things at home.

    The infamous fette biscottate I roughly translated above as “toast” because they’re store-bought, very small pieces of dry bread. Think crouton texture. I had heard about women having just given birth, after many hours at the hospital, to be given as their first meal…fette biscottate. And a cup of tea. 60 calories of refined carbs will get you back your energy real quick after the hardest work of your life. Hahaha. However, I was not served the fette biscottate, but instead a little package of cookies, akin to graham crackers in taste. I even got TWO packages for breakfast. And because I didn’t have a mug, they gave me a tiny plastic cup of caffè latte or tea.

    Also, I would bring your own water and whatever beverages you desire. In my 76 hour stay at the hospital I was never once given nor offered water. When I was escorted to my room at 1am after the birth, I asked if I might have some water. All I had was a swig of an electrolyte drink my husband had gotten me during labor, but I hadn’t been much able to drink. That water never arrived so I spent the rest of the night rationing those few ounces. It was so hot, too. I asked again the next morning, and still didn’t get any (Throat…parched…so dry…have pity…pant pant). The coffee tasted wonderful (although I’m pretty sure it was some kind of powder mix) just because I was so thirsty. For lunch visiting hours when my husband was able to come back he brought me a pack of water and drinks. So consider bringing your own!

  2. Lunch and dinner come directly on trays, if you follow particular diets or have food allergies let the staff know so they can present to you a different menu.

    I don’t have any food allergies, but a nurse would come in twice a day and rattle off the menu. There was a surprising amount of choices I thought, and each meal consisted of several different items. It’s hospital food, though, not delicious. But hey, after birth and being generally ravenous after not wanting to eat for 24+ hours, I almost enjoyed it.

    Each meal usually consisted of a choice of protein, choice of bland boiled vegetable, possibly a soup, a dry piece of bread, a mealy apple and some possibly worm-infested plums, with a small cheese chunk and some grated cheese and a little packet of olive oil since these were the “hyper-caloric with supplement” meals for the moms.

  3. Clothing needs to be above all comfortable, for labor and birth a shirt or short nightgown, for the recovery garments that favor breastfeeding.

    The hospital video had recommended 2-3 nightgowns, button up and short sleeve so they can poke you with needles and stuff. I ended up bringing 3 nightgowns and a stretchy comfortable maternity dress for going home. I should’ve brought more, as the nightgown I wore during labor/birth I tossed. (It was old and stretched out, there’s a reason I chose that one.) Which basically left me with one gown per day in hospital. I’m sure that would’ve been fine normally but when your milk comes in and baby spits up…let’s just say I was wet and stained all the time. Bring options if you can!

    It was very hot in the rooms. Even though my clothes were very light I suffered a bit. I would wager it was about 85°F/30°C. Being mid September the weather could’ve gone either way, but leading up to then it was still quite hot. Never touched my fuzzy blanket. With the way Italians use air conditioning I figured it would be warm, I just didn’t expect it to feel like they had the heat cranked.

  4. Disposable underwear are the most practical, but what you use daily is also fine.

    This is where information I received started conflicting. At first I heard to bring the Depends type disposable adult underwear, not pads. I originally didn’t want to because when you break it down, it was about €1 per disposable pair. I had decided to get some pads since they were cheaper, then once things slowed down switch to my trusty ModiBodi period undies. I didn’t want to be chided at the hospital for not bringing what they recommended, so I ended up buying one pack of the Tena disposable undies when I found a good sale. Yes, they were very nice, secure, and comfy. Not too cumbersome either. I recommend them. But are they necessary? No. Postpartum pads and nighttime pads were fine, too.

    All that deliberating on my end of what to buy/bring, and the hospital provided pads. Sure, they were roughly the size of a small magic carpet and without any adhesive to keep them in place, but that would’ve saved me time, money, and room in my hospital bag if they had just said they provide them.

  5. Instead of a bidet towel a roll of toilet paper is more practical given the abundant blood loss after birth.

    Spoiler alert: despite having heard from others that hospitals don’t have toilet paper, this one did. That roll of toilet paper in my bag? Didn’t need it. (Maybe I should’ve TPed them? Lol)

    I wondered if the hospitals might have bidets, as that might render the classic postpartum peri bottle redundant. I had looked and looked, but could only find these much fancier “portable bidet” bottles on Amazon for €15ish. Why can’t I get a peri bottle for $3 like in the States? Feeling quite proud of myself, I got around the problem by buying a food condiment bottle for €2, basically the same thing as a peri bottle and cheaper! But. The hospitals did have bidets and the midwives were probably quite amused by this American carrying around her salad dressing bottle.

  6. A towel and washcloth for everyday hygiene.

    I packed soap, a washcloth, and towel, but no shampoo. I figured I would have my hair freshly washed before going to the hospital and could survive just fine washing my hair after at home. In real life, labor came on quickly and none of that “try and sleep, shower, do daily life until you can’t anymore” stuff happened. And when labor came on, my hair was dirty. No washing it now! Because of this, I had my husband bring me a bottle of shampoo. In the end I didn’t get to use that either, being alone in the hospital, who was going to watch my newborn while I showered? (No bathrooms in the shared rooms, you had to go down the hall, and there was only one shower.)

  7. Comfortable and washable socks/slippers.

    Yes to comfy socks. I brought an old cruddy pair to wear for labor and throw away after I was done. For the rest of the time I brought a pair of flip flops; that was a good choice since the maternity ward was so hot.

    When I first arrived at the hospital I was shown my room and locker for my stuff next to the bed. I changed into my nightgown and socks and the midwife who was waiting to escort us to my labor room immediately started chiding me that wearing socks in a hospital was “unsanitary.” Sorry, but I’m not wearing shoes while I’m laboring! And why do they list socks if they’re going to give me a hard time about it?

  8. For your baby if you want you can bring your garments (pajamas and clothes or onesies).

    If I want? Is my baby going to go home naked? Hahaha.

    The hospital video mentioned bringing 2-3 outfits and 2-3 onesies for baby. Similar to clothes for me as mentioned above, I would bring more for a 3 day stay, for similar reasons. There’s milk, spit up, and that wonderful meconium.

    You might also consider bringing a few size options, just in case your baby is born bigger or smaller than you expect. Coming from a family of big babies, I had no reason to expect my son to come out not even 7 lbs/3.1kg. Poor little guy, all his clothes were huge on him for the first month of his life.

  9. 1 pack of nighttime pads for mamma.

    See #4. Might make more sense to put these next to each other on the list? What do you think, would they let me rewrite their list for them?

  10. 1 pack of diapers for the baby.

    The video that was so hard to understand from the hospital we thought had said no diapers, but now we need to bring them? Ok.

    Then we show up to the hospital and they provided diapers. That now makes half of my hospital bag redundant.

Pacifiers are generally discouraged because they can interfere negatively with breastfeeding.

The day we left the hospital the pediatrician recommended we wait until baby is at least four weeks old before introducing a pacifier, so as to establish a good breastfeeding relationship first.

This was fine by us since we had more or less decided not to introduce pacifiers unless we felt a desperate need. That desperation beset us by two weeks in, but at that point baby boy clearly had NO confusion that the pacifier wasn’t his mama and wanted none of it.

For the first days after birth the use of nursing pads are also discouraged.

I’m actually not sure why they say this, I haven’t heard this anywhere else. If you know, please let me know in the comments or drop me a message, I’m curious to know!

For me, they would have been very useful in the hospital, I was so very leaky. Might’ve looked a little less “Singing in the Rain” and a little more Audrey Hepburn.

Ideas of what TO pack

Here are some more ideas I heard from people I trust. While I packed some of these myself, I didn’t touch a thing in my bag during labor or birth. I thought it out so carefully, what I thought I might like and be like during birth. Nope. It was labor and that was it. No trinkets. I would have so loved having my mom or doula there, experienced women who know childbirth and could have proactively helped me and anticipated my needs. My husband was lovely, but he was as new to the experience as I was. The midwife was in and out, and didn’t offer a whole lot.

  1. Hot water bottle

    I didn’t pack this, but this is one of the few things the midwife offered and it provided some relief from back labor, at least somewhat for an hour or two.

  2. Tennis balls tied in a sock

    For massaging. Sounded nice in theory, used to use those a lot after ballet class.

  3. Essential oils

    It’s better to bring some cotton balls or smell the oils straight from the bottles than apply topically. Some women have very strong smell aversions, and what you love one minute during labor you might not be able to stand shortly after. It’s much easier to close a bottle or toss a cotton ball than it is to wash an oil off your body. I had with me lavender, lime, and clary sage, simply because I thought those might be nice during labor.

  4. Music

    It’s funny that I didn’t think about it at the time, but my room was completely silent. Looking back I think music would’ve been nice, and in a way also helps you mark the passage of time. I had picked out what music I wanted to listen to on Spotify beforehand, but never thought about it in the moment.

  5. Homey items

    Anything that reminds you of home and might make your birth area more comfortable.

  6. Washcloths

    These can be multi-purpose, use with cold water during transition or pushing while you might be hot, sweaty, and possibly nauseated. Or wet with hot water to provide comfort to muscles and other body parts.

  7. A concentration token

    A meaningful object to focus on. I chose a necklace in the shape of my home state, Michigan…that stayed around my neck and I forgot was there until after baby was born. Hahaha.

  8. Flameless candles

    I didn’t bring these, but I thought they were a lovely idea for ambiance. A hospital isn’t going to let you burn down the building, but flameless or some kind of twinkle light would be neat!

All these are lovely, some I had in my bag. None I used. Their existence was completely forgotten during those long hours. Oh well, maybe next time!


Pregnancy: The Italian Edition - Part 3

Click here to read Part 1 or Part 2


Pregnancy: The Italian Edition - Part 3, the Third Trimester

The hot Florentine summer was now in full swing, as was my third trimester. Normally in the States checkups increase in frequency in the third trimester to every two weeks. Here they remained once a month, so I only had 3 appointments with midwife, plus the third trimester ultrasound. Once you reach about 40 weeks you start going to the hospital once a week for a checkup.

We had since moved from the outskirts of Florence to a small town outside of Florence called Figline e Incisa Valdarno. Technically we now lived in a different township, so we would need to change our official residency before we could change primary care doctor and possibly midwife. However, to change residency you need to fill out a form, provide documentation, then wait for the police to come to your home in the hours you wrote that you would be home every day. You don’t know what day they’ll show up once you submit your residency request. For my last residency I stayed home during the hours I said I would, every day like a good girl. When did the police show up? NOT during the window of time they were supposed to! And I had left. Thankfully my husband was home, he let them in, showed them an ID of mine, and that was good enough. I’m certainly not going to complain that they didn’t insist on coming back another day, but it does rather defeat the point of ensuring I truly do live there, as anyone could give an address and leave an ID! Because the process can be a bit lengthy, I decided to not go through all that and just keep my doctor and midwife, even if it meant over an hour in public transport in 90-100°F weather. Buses, trains, stores are all air conditioned in theory, but Italian air conditioning is not 68F American A/C. The nicest department stores usually have theirs set around 80°F. Public transport usually ends up being a wish and a thought, something like warm, stuffy air blowing on you. I would keep napkins in my purse to put on the (empty, thanks social distancing) train seat opposite me and prop up my feet to keep the swelling down. That way the train manager couldn’t say anything to me, as I’m not dirtying the seat!

Chapter 13: The 7th month checkup

The morning of my 7th month checkup when I went to the lab to do bloodwork, the area had been rearranged. There was a new waiting area setup outside the lab in the courtyard, complete with a new number screen. After my number was called the first time for “accettazione” I returned outside to wait for the second time my number would be called. I settled in for the long wait, and after almost an hour I started to realize that people who had arrived after me were already done. I decided to go inside to ask. They had continued calling numbers without ever returning to call my number the second time. If this number system had changed, they neither explained this to me nor gave me a new number. The lady at the fold-out “reception” table didn’t know why I hadn’t been called back. She stared at the screen for a bit, then told me to “go back and ask.” Ok, um, where exactly? I went back to the room indicated, and found several nurses sitting there and no one getting their blood drawn. I told them what happened and the one nurse immediately invited me to sit down. So they’re back here with no one, and I’m out front forgotten. This is a fantastic new system. Love it. Now up to see midwife.

At my sixth month checkup I had made sure to inform the lab and midwife of my new address, since the old would still come up when my tessera sanitaria/healthcare card was scanned. Midwife offered to put me in touch with the midwives at the Figline hospital, but for reasons already stated I declined. She said it pleased her to continue to follow me through the end of my pregnancy. This made me feel nice, as until now I had no idea what she thought of this strange pregnant American in Italy. Well, at least she’s enjoying herself! Last month’s checkup was the rushed one, and she neither mentioned my weight nor brought up the glucose test. The window for doing the test had passed and midwife didn’t sign and stamp it, therefore I couldn’t have done it if I had wanted to! Such a shame. After weighing me and seeing I had gained .5kg/1lb more than I was supposed to in the last month, she once again asked if I had been eating a lot? Like a ninja I circumnavigated the subject quickly; I was not getting into this again!

I was to remind midwife this appointment to change the date of my third trimester ultrasound, since she had scheduled it for an earlier date than is ideal, just to make sure I at least had one booked. July/August are when all the Italians go on vacation. She looked for a new date for me, but there were still none available. She said she would call me if she managed to get me another. If not, at least I had one.

Now being seven months pregnant and realizing that I was very little prepared for the task of birth ever looming, I was ready to grill my midwife with questions. Hospital tours were a no go, birth classes and mom support groups cancelled, and when it came to actual hospital procedures midwife was not forthcoming with information. It also didn’t help calm my nerves that the Covid rules were in constant flux. If a regulation changed, by the time midwife was informed it had probably already changed twice more. This was frustrating for both of us, but couldn’t be helped.
Following are some of the questions I asked midwife:

  • Will my husband be allowed in with me?

    At Ponte a Niccheri, yes. I would get tested for Covid, and as long as I’m negative, he doesn’t need to be tested and can be in the labor room with me. This wasn’t the case at Careggi, where husbands also had to be tested. I had seen other women’s stories where the husbands’ results didn’t come back in time and they missed the birth. This is another reason Ponte a Niccheri was more appealing!

  • Is a water birth possible?

    Yes, but that’s something I’d have to ask for at the hospital.

  • How many days will I be in the hospital?

    Given there are no complications, about 3 days for a natural, 4 for a caesarean.

  • Is skin to skin contact a common occurrence?
    Yes, skin to skin contact is encouraged, as Ponte a Niccheri is a very family oriented, physiologically-minded hospital.

  • What happens if I go into labor early?

    I go to the emergency room. No need to call midwife.

Midwife also mentioned I could go to the hospital’s website and find some videos for birth preparation. I was expecting maybe some birth classes and other helpful things. Alas. There were maybe 4-5 low-quality clips of varying degrees of unhelpfulness. No birth classes. One had strange music with some weird artwork and a midwife talking about the role of hormones in pregnancy and what a special time it is in your life. Um. That’s lovely and all, but how is this helping me learn how to most effectively get a baby out?? The only slightly helpful one had a midwife talking about what to bring to the hospital. A written list would’ve been more helpful, so I didn’t have to keep rewinding (is that called scrubbing nowadays?) and writing down what to bring. The sound quality was also such that I had to ask my husband at one point what she was saying, as I still couldn’t understand after listening to it 4 times. After playing it 3 times more for him, we finally decided she was saying we don’t need to bring diapers. Needless to say, the hospital was also leaving me to be very…independent in my birth prep, to put a positive spin on it?

Favorite take-aways from this appointment:

  • Per usual, one of the first questions midwife asks is if I have any new bloodwork results for her. This time I had to say no, because the results from last month never showed up in the mail, they must’ve gotten my new address wrong. She sent me down to the front desk to get the results, which only took a couple minutes (I guess she can’t or didn’t want to access the results from her computer) and I gave them to her. She asked if I wanted a copy or to wait for my results to come in the mail? Uh, it’s been a month, I don’t think they’re coming? I then looked at my address on the paper and showed her that indeed the city was wrong. They’re not going to be showing up to my place anytime soon!

  • When midwife measures my uterus, she always has me go to the bathroom first. I find it ironic that she weighs me, chides me on my weight, then asks me to go to the bathroom so she can get an accurate measurement of my uterus. Ha.

  • Parting comments from midwife: “Don’t eat too much fruit or sugar.” “You have a very nice look about you.” So which one is it? Careful what you eat because you’ve gained too much weight, or I look good? Haha!

Chapter 14: Certificato telematico

I was supposed to get the “certificato telematico” from my midwife, a form you need in order to apply for the standard 5-month paid maternity leave in Italy. As it turns out, she wasn’t able to get it for me, it had to be my primary care doctor or a gynecologist. Getting it from my doctor would be problematic, because he’s very hard to get ahold of, especially since Covid. So midwife said she’d try and get ahold of one of her colleague gynecologists, get them to fill out this form for me, and email it to me. If this didn’t work, I’d have to come to an appointment with a gynecologist to do the form. She made me an appointment in case she couldn’t get it, but the earliest appointment was the next week, which would be after my maternity appointment at CISL. Ergh. It was also the same day and time as my currently scheduled ultrasound that she had tried unsuccessfully to change. She suggested I try and get ahold of my doctor and in the meantime she would see what she could do. The problem with my primary care doctor is that he only takes patients by appointment since Covid. To make an appointment you must call, but he only answers one of his numbers, sometimes, if you sprinkle a little pixie dust, and you’d only know this number by showing up to one of his offices to find it’s closed and need to call this particular number. After numerous tries, the doctor did answer and I got an appointment. AMAZING.

My appointment was at the same time that the doctor’s office opened in the afternoon, and I got there early. How American of me. I rang the bell but no one answered. I realized the lady across the street parking her Vespa and having a chat was the receptionist, as she yelled across that they weren’t open yet. About 5 minutes after opening time, she unlocked the door and went in, letting me come with her. She told me I could wait in the waiting room, and 45 minutes after my appointment time the doctor decided to grace us with his presence. Once he got settled in his office he called me back and we got to work getting the certificato telematico. In the end it was the receptionist who did everything, she only needed the doctor for a password sent to his cell number. He and I just sat by and watched, making awkward small talk about Italy and America, poverty, and how young I am. 27 isn’t that young I didn’t think. “No, you’re veryyyyy young.” Ok. An hour and multiple attempts later, because the INPS site that the certificate is downloaded from was having problems (shocking), I had the certificate in hand. I almost didn’t get it, and since my maternity appointment was the next day, it was very important that I get it. It was close to a miracle that I walked out with the certificate in hand!

I called midwife to let her know I obtained the certificate and she could cancel the other appointment with the gynecologist. In other good news, she was able to switch my third trimester ultrasound to a later date.

Chapter 15: Maternity leave appointment

Armed with the certificato telematico and all the other required documents, I headed off to the INPS/CISL office on the far side of Florence. I waited my turn outside on one of the few plastic chairs before being called in. The signora set everything up for me and soon I would have the standard 5 months maternity. What she failed to explain was that I would have to come back after baby is born to continue the maternity. I thought the 5 months maternity started at 7 months pregnant, then continued until baby was 3 months old. Nope. You get 2 months (roughly, depending on when you give birth), then you go back after baby is born to get the last 3 months. I discovered this when the payments stopped. A couple phone calls and appointments later it was remedied, the usual run around. I’m thankful to be getting any maternity at all though, I know not everyone does!

Chapter 16: Baby bonuses and an expired permesso

There were a couple other bonuses and such for new parents and babies, there was even a special one for babies born in 2020, the pandemic babies, haha! I was unable to apply at the same time as my maternity appointment however, because I didn’t have a currently valid permesso. (Permesso di soggiorno, or permission to stay, is what allows me to stay and live in Italy.) My permesso had expired back in March, and I had applied to renew it by the end of February.

Because applying for and renewing permessos can take so long (up to a year or beyond, for a document that is valid generally from 1-5 years), when you submit your application/renewal request at the post office you are given a receipt, which is valid as your permesso until your appointment at the questura (police station). Your appointment is usually 2-4 months after submission at the post office. Once you go to your appointment, it will take another 3-6 months or longer to receive the notification that your permesso is ready for pickup. Keep in mind the average weight time at the actual questura is about 4-5 hours. You may be given an appointment time, but really you have to get there as early as possible, 5-6am ideally, and wait in a line that wraps around the building. They don’t actually open until 8am.

Upon submitting my renewal request in February, a few days later I received a text message and eventually a letter in the mail confirming my appointment at the questura for October. I was instructed to bring that letter with me to the appointment. 8 months later? Guess I shouldn’t be surprised, things are extra slow with Covid. A few days after that I received another text message informing me that my appointment was changed from October 2020 to end of January 2021. Huh. As I write this, I still haven’t been to my appointment. That permesso receipt is getting very faded and wrinkled in my purse. I get to go wait at the questura with a 4 month old baby in January during Covid, yay! Prayers and snacks appreciated.

How does this tie into the pregnancy novel? Because the permesso receipt wasn’t acceptable to apply for these other baby bonuses. I would have to come back when I have my new permesso. Which would be in more than 6 months. The signora suggested I go to the questura and hassle them to try and get my new permesso sooner.

On our way back home we stopped by the questura to see what could be done. The police officer at the door said he wasn’t the one to ask, come back tomorrow morning. The next morning we came back to ask. This police officer informed us that, due to Covid, all permessos that expired after January 31, 2020 were automatically extended until 31 July. Originally I believe it was until June 15, but a few days before they had extended the extension. This means that, at the moment of my appointment for the maternity and baby bonuses, my permesso was technically still valid. But we didn’t know that in the moment as the law had just been passed the day prior, and news had apparently not reached the signora helping me. Oof.

Chapter 17: Renewing, once again, the tessera sanitaria

As you probably don’t remember back from part 1, my tessera sanitaria had expired the same date as my permesso, in March. When I renewed it I was only given another 5 months. That time was drawing to an end so off I was to try and renew it yet again, so I wouldn’t have problems in the next couple months with giving birth and all.

I arrived at the same ASL office where I had renewed it last time. I waited, and when someone finally walked by I asked if I could renew my tessera. She said I had to make an appointment and told me what number to call. On my way out I happened to run into an acquaintance of mine who works in that office. He informed me that because the permessos’ validity were being extended, therefore also my tessera validity should be extended. So instead of expiring July 31, it should be valid until August 31. Not super helpful as that just had me renewing my tessera again in a month, just weeks before my due date. He said he would check to make sure mine was extended, and kindly took my information. For some unknown reason my card had not been extended and did indeed expire in July. But he was able to renew it for me, with a simple email sending me a temporary tessera with the real thing to follow in the mail. So easy, and now valid until January! So I can forget about that until at least after baby is born, phew!

Chapter 18: 3rd trimester ultrasound

Off again to the Palagi hospital for my final ultrasound. Once we arrived huffing and puffing at the top of the hill, I headed towards the main entrance as that’s where I was redirected to last time. Now there were big paper signs redirecting us to the side entrance. We climbed the steps and I entered alone, sad that my husband didn’t get to experience a single ultrasound with me.

60994998618__79E5E401-D13D-41BF-A5C5-67EBEA63129D.jpg

I wasn’t entirely sure where to go, since it was different every single I had been there, so I went to the accettazione/CUP area to see if I could check in and ask. I took a number and when I was called the lady barely glanced at my appointment paper and told me to head up to the third floor. This was the same area I had been last time, so felt semi-confident in what I was doing. I reached the waiting area and sat down. I was the only one there for the longest time. Then a doctor appeared and called my name. He promptly disappeared beyond the door and by the time I reached it (8 months pregnant and not exactly moving at the speed of lightning) he was nowhere in sight. I thought I saw him head towards the right, so I headed to the right and looked both ways down the hallway. No one. Ok, well I was called from the left last time so that makes more sense. I turn around and headed to the left. I look down that hallway both ways. Not a soul. Well, this is just embarrassing. I head back to the right again. Still no sign of the living. Where did he go?! Just as I’m wondering, “now what do I do??” I hear him yelling “MORRIS?” from somewhere down the hallway on the right. So I yelled back “where are you?!?” with a hint of despair in my voice, like the sophisticated person that I am. He shouted back some stellar directions, something like “back here” and I somehow managed to find him further down the hall, around the corner, in his room. There you are, Peter!

The first few minutes of the appointment the doctor was on his phone, talking about how tired he was, he was on his last patient of the day, almost done, etc., while I got out my tessera sanitaria and appointment slip for him. When he had hung up and and seemed in a good place with the computer stuff, I ventured to ask if it would be possible for him to write down on a slip of paper baby’s gender, without me seeing. My husband and I wanted it to be a surprise, but with Covid it was looking all but certain that my mom wouldn’t be allowed to come to Italy for the birth. We had decided to ask the doctor for the slip of paper, and I would show my mom the paper over FaceTime without me seeing it. That way she would know and could have fun preparing a little box to ship to us, blue or pink items, that we would open after baby was born. The doctor interrupted me before I had finished, “no.” It was so blunt, I figured he must be joking, right? So I sheepishly finished, to which he didn’t respond.

I laid down and he commenced the ultrasound. He didn’t say much and the whole ultrasound lasted maybe 5 minutes? I knew the second ultrasound was the longest and most thorough, but still, it seemed too brief. I had a couple questions I wanted to ask him, but hesitated because of his abrupt response earlier. I finally got them out and he responded genially enough. I asked baby’s position, is he/she head down, and he was. He actually went back and found baby’s back to show me, and took some screenshots while he did so (he hadn’t even looked at baby’s back and wouldn’t have if I hadn’t said something, he was about to finish!). Then I was done, he handed me the photos and never mentioned the note with baby’s gender. I guess he really hadn’t been joking, and I didn’t want to push him, so I left. It was weird.

Chapter 19: 8th month checkup

I went into the eighth month checkup feeling quite lighthearted, thinking this was my last appointment with midwife (it wasn’t). I could gain all the weight I wanted in this last month and she’ll never know, ha! Next step, hospital and birth! At the same time, I felt a bit in limbo since my midwife would not be present at the birth, and I wouldn’t know any of the midwives at the hospital while I’m giving birth, so I felt…like an orphan?

You see, in Italy the midwife or gynecologist who follows you only does so for the clinical visits. Once it’s time to give birth, whichever midwives or doctors are on duty at the hospital you’ve chosen are the ones who will be assisting your birth, people you’ve never met before. If you want the same medical professional to be at the birth, you’d have to go into the private sector.

I finished my last round of blood work, which went smoothly for maybe the first time ever? It went quickly, only 30 minutes, I wasn’t forgotten, and when I was called back I went to a different room than normal, which was bigger and had a comfy chair. I was the only one in that room and the nicest young nurse took my blood, she spoke English and it really made my morning! I also picked up my lab results from last month, since they still didn’t arrive at my new address.

All the usual checkup things happened, weight, blood pressure, uterus measurement, listening to baby’s heartbeat. Except, we were in a different room than usual this day which caused some discrepancies in some measurements. At first my uterus wasn’t measuring the right size, then midwife realized it was a different exam table and I was lying at a different angle. Since we were also using a different scale than normal, she didn’t believe that I had only gained 2kg/4.5lbs this month, and actually waited for the doctor using our usual room to finish with her patient, then escorted me into that room just to weigh me. And she was correct, that scale read a bit more. So she felt vindicated that I couldn’t possibly have gained the correct amount, but she didn’t go beyond “aha, I thought so”. It seems every other appointment she decided to make a big deal out of it, but thankfully this wasn’t one of those.

This appointment also included the crowd favorite from the libretto di gravidanza, the vaginal rectal swab (to see if you’re positive for Group B streptococcus). I didn’t know what to expect for this; it’s basically like a Pap smear but with no speculum, just a long Q-tip, therefore less uncomfortable. Dear midwife cautioned me right before doing the swab that I might feel some discomfort. I laughed and said something to the effect of “if a little Q-tip causes me discomfort what am I going to do about the baby that has to come out in a few weeks??” She laughed. She didn’t laugh often. I think that was a very American moment for me.

I made sure to tell midwife this appointment about some preeclampsia symptoms I had been exhibiting. Each one could easily be explained away with the hot weather, but when just a few days before this appointment I had a severe headache that ended in vomiting, I wanted reassurance. When midwife took my blood pressure it was a bit higher than usual but nothing alarming. She recommended I check it once a week. Pharmacies in Florence center were not allowing people to have their blood pressure measured due to Covid regulations, but midwife suggested I try where I lived as their rules might be different.

To my surprise, midwife scheduled one last appointment with her, granted I didn’t go into labor beforehand. She also scheduled my first appointment with the hospital, about a week before my due date. The hospital later called me to tell me where and when to come for the Covid test.

Chapter 20: Where to check blood pressure during a world pandemic?

A week later I was supposed to get my blood pressure checked. I tried asking at the pharmacy in Figline. They also weren’t allowed to check anyone’s blood pressure during Covid. They suggested I try across the street, where there happened to be a Red Cross. I went across and rang the bell, and a man came down and kindly agreed to measure my bp. This involved going out and opening the garage door and getting into the ambulance. To my dismay my blood pressure was higher than it had been yet (135/91).

The next day I decided to go pick up my lab results from last week, and to see if they would measure my bp. After the higher reading yesterday I wanted to check it again, but didn’t necessarily want to have to measure it in an ambulance every day. My results were ready and I was relieved to see no protein in my urine. After asking at the front desk who sent me back to the lab who sent me back to one of the rooms who sent me to another room, a nurse cheerily took my bp which was back down to 128/80. Still not my normal but at least lower.

After that my husband suggested I get my own bp cuff so I can measure it at home every day. Midwife had said to check it weekly, but never actually said to let her know, or even to let her know if it was above a certain number. I sent her an email with all my numbers anyway. Haha.

Chapter 21: The 9th month checkup

Now I finally could rejoice in my last midwife appointment! All the normal proceedings happened and midwife seemed almost, dare I say it, affectionate? She even went as far as to say, “ah, if only everyone were like Jenny” after asking me to do something that I had already done. I’m no exceptional being, but apparently one of the few organized people in this country? Haha!

Favorite take-aways from this appointment:

  • Midwife recommending some breathing/birth films to look into to help me in labor…uh, better late than never? I’m over 38 weeks pregnant here…

  • Midwife explaining to me what contractions are . “It’s not constant pain, like a headache, it come and goes. Like a wave.” Again, if I didn’t already know this at almost 9 months pregnant, what am I doing here? I may have spent most of my pregnancy in lockdown but I wasn’t in a cave!

  • As I’m leaving and we’ve already said our goodbyes, midwife follows me out of the room and leans over the railing as I walk down the stairs. “Best wishes, you’ll do well, let me know how it goes! I can hear by the sound of your footfalls that you carry yourself well.” Such high praise! I just might miss this lady.

Chapter 22: Covid test and 1st hospital checkup

At 39+1 weeks pregnant I had my first appointment at the hospital. I had no idea what to expect, other than the Covid test and maybe a cardiotocography, the last exam in my “libretto di gravidanza.”

When the hospital contacted me they told me to come at 7:30am for the Covid test, no other option. That meant a 4am alarm, a walk, a train, and two buses to get to the hospital that early. The bright spot was before getting the second bus we would stop and get a fresh pastry and cappuccino. No one mentioned fasting for this test so I took full advantage! We got to the hospital about half an hour early, and went to the old ER as I had been instructed. We passed the abandoned triage tent, up the steps and found the door to the ER locked, but the lights were on. Not a soul was around so we went back down the steps to see if there might be another entrance. After passing some areas that didn’t look fit for human habitation, we approached some other doors. Two guards at the door started taking our temperature before we could ask where to go for the Covid test. They told us to go to the old ER. And if we were just there and no one is around? “Oh, well you have to knock.” Naturally. We returned to the old ER and tried knocking. A couple other pregnant women had started to show up at this point as it was almost 7:30. Finally a nurse fully garbed in PPE showed up and told us to hang on, he can’t let us in until at least 7:30. Mind you, just beyond the doors is the empty waiting room and out here it’s a crumbly cement landing and stairs, no seating. My husband asked if the 9 months-pregnant women might be able to wait in the waiting room (might be nice)? The nurse looked behind him at the room and decided there was no harm in it.

A bit past 7:30 and the PPE nurse came back to give his Covid spiel, as for most of us this was our first time. Someone had told me they would probably do the Covid blood test instead of the dreaded swab, and I wish this had been true. It wasn’t, hence the spiel. So remember, if you’re getting Covid swabbed:

  • You will be swabbed down the throat first, then in each nostril.

  • Be careful not to accidentally touch the sample after you’ve been swabbed, or it will be considered contaminated and you’ll have to redo the whole thing. Even if it just grazes the outside of your nose.

  • Don’t touch or sneeze on the nurse or he has to go change all his PPE.

  • Don’t make any sudden movements, especially during the nose swab, as you could cause yourself serious injury.

  • It’s a normal, physiological response in pregnant women to gag/vomit after the throat swab. Likewise, watery eyes and crying after the nose swab is also normal.

  • If you do have to vomit, please vomit in the designated bucket next to you. Vomiting on the floor will shut down the whole Covid testing operation while they have to clean and sterilize the area. Please, please, we beg of you, vomit in the bucket.

  • The samples will be sent to Careggi hospital, once there it will take about 12 hours to get the results. You’ll only be notified if you’re positive.

  • Your negative test result is valid for one week. This is more than the standard 48 hours since it is assumed pregnant women are already cautious and at home more, therefore less likely to contract Covid-19. You will be tested once a week until you give birth. (No time like the present to eat spicy food and go for some nice long walks!!)

  • The record number of tests for a pregnant woman (at that hospital) is 5 times. Try not to beat her record.

Since I was the first one to arrive, I was also the first to be called back. I generously tried to offer the lady after me my spot, but she didn’t go for it. Back I walked (waddled?), checked that my name and birthdate were correct, and sat in the chair. I confirmed the trash bag-lined box next to me was the vomit bucket, pulled down my mask, and I was ready. I overzealously thrust up my chin, which I was asked to lower some, opened my mouth and back went the long, long Q-tip. The nurse asked me to say “ahhhh” three times, and just when I thought I might actually lose it, that part was done. With the removal of the swab I did have a healthy gag, but my breakfast stayed put. Then up the nose went the swab, where the nurse seemed to enjoy sweeping out the cobwebs. With involuntary tears now trickling down my face, I thanked him and leapt out of there, probably leaving the remaining dozen women filled with even more trepidation, seeing me coming out “crying.” About as unpleasant as I was expecting, and secretly hoping baby might arrive before next week.

Now not even 8am, I headed around and up to the main hospital area. Midwife had asked me what time I wanted for the hospital appointment, I had the choice of between 7:30am-10:30am. I opted for 10:30, not knowing at the time that the Covid tests were only at 7:30. So would I now have to wait over 2 hours? I checked in and waited in the hallway seats, where many other people were waiting for various reasons, as many different doctors’ rooms were just off this hall. The first three doors were for the midwives, and I settled myself in for a long wait. I had barely started writing some cards when a midwife came out and called each of the pregnant women waiting and told us to remember a number she gave us. I was number 5, so figured I would be the fifth called back. She asked us to be patient, since there were many of us and only two midwives working. Not even half an hour later and the other midwife called me back. She escorted me to a different wing of the hospital and unlocked an unused room. I felt kinda special and also a bit relieved to get away from the hubbub in that other area. She hooked me up for the cardiotocography, and I got to listen to baby’s heartbeat for almost an hour. I pressed a button every time I felt a kick. The midwife in the meantime entered all my information into the computer. When she was done she sent me back to where I was waiting originally, to be called a second time. The same midwife called me 5 minutes later, and this time she used an ultrasound to measure the amniotic fluid. I still had plenty, then she realized I wasn’t even 40 weeks yet, why ever did I come in so early? I explained that midwife made me this appointment. She understood, I was just doing what I was told to do. Oh well, no big deal. She made sure I was feeling alright, no major contractions, bleeding, my water hadn’t broken, or any other complications or signs of labor. Should any of those happen I was to call or come in to the hospital. I refused the pelvic exam as I really didn’t see the point and it’s not completely risk free. If nothing happened I was to return to the hospital a week from today, she made me a slip with the appointment which I took to the CUP area to make an official appointment. Then I was done, about the same time my appointment should’ve started at 10:30! Now, can this pregnant lady get a nap or what?

Chapter 23: 2nd Covid test and hospital checkup

Now at 40+1 weeks pregnant and no new developments, I was off to the hospital again. Here we were once more up at 4am to be there by 7:30. We walked past the empty triage tent and up the stairs to the old ER. The doors were still locked. We knocked, no one answered. After a few more women had arrived we heard someone shout up at us, “Covid testing is no longer in there! Wait by the triage tent while we get suited up.” It was the nurse, just arriving. So we all waited on the overgrown lawn (garden?) while the nurses prepared everything. They went through the swab spiel, and I was first up…again. Early bird gets the first Covid swab! This time there was just a chair setup outside the tent on the grass. I confirmed the location of the vomit bucket, and was ready. Maybe because I opened my mouth wider and said “ahhh” more confidently this time, it wasn’t as long or as awful. I didn’t gag and my eyes only watered, no actual tears escaped. The nurse even complimented how well I did. Why thank you, this isn’t my first rodeo. He said “see you next time” to which I genially replied, “I hope not!” Spoiler alert, I got my wish, as two days after I would go into labor.

Then it was up to the hospital for my second checkup. My appointment was earlier this time, 8:30am, but it didn’t really matter as I was called back almost right away. I sometimes think they put the time on appointment slips just to look pretty. I was in a shared room today for the cardiotocography, then was called to another room for the amniotic fluid assessment. Everything was in order, and I had the pelvic exam done today since I was now technically overdue and curious. No dilation but the cervix was softening and baby was at -2. I was sent home with the same instructions from last week and an appointment for the next week, an appointment I would never make it to…dun dun!


Are you still reading? I’m impressed. Now go make cookies or something! :)

Coming soon, sometime, eventually…the birth story!