Sweet and Salty Chocolate Chip Cookies

Also known as MMM Cookies, or Magical Marvelous Memorable Cookies.

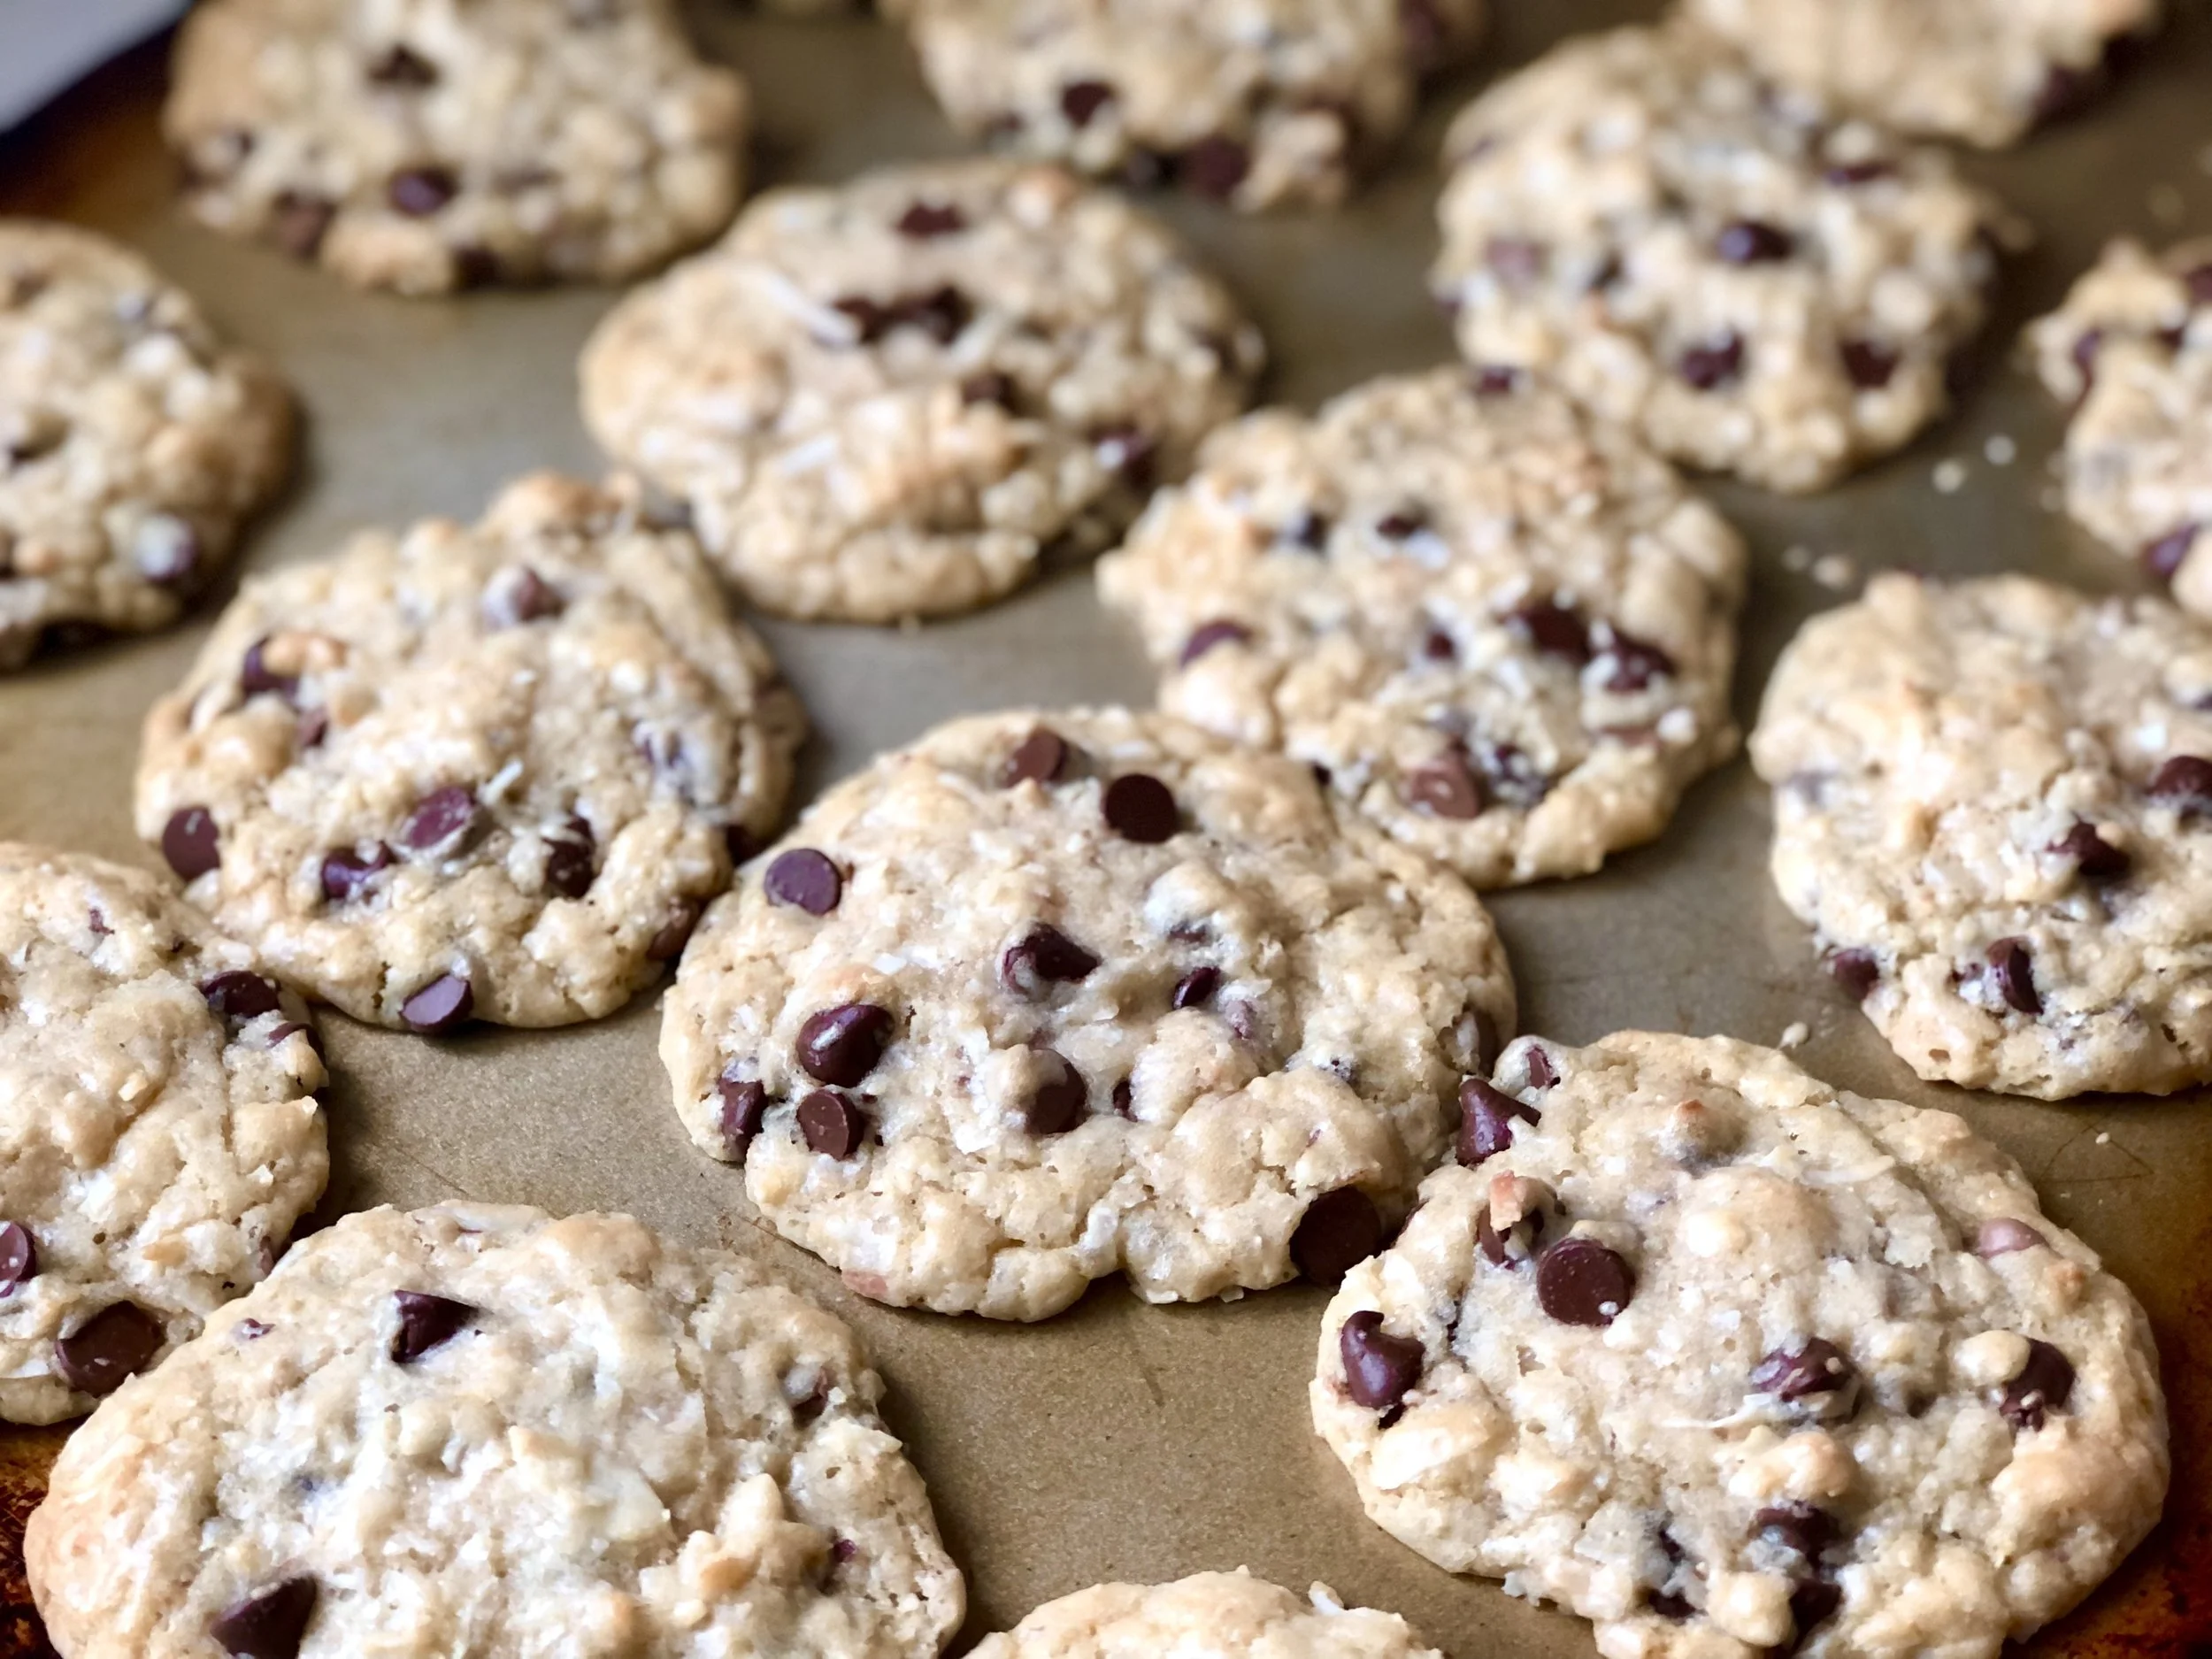
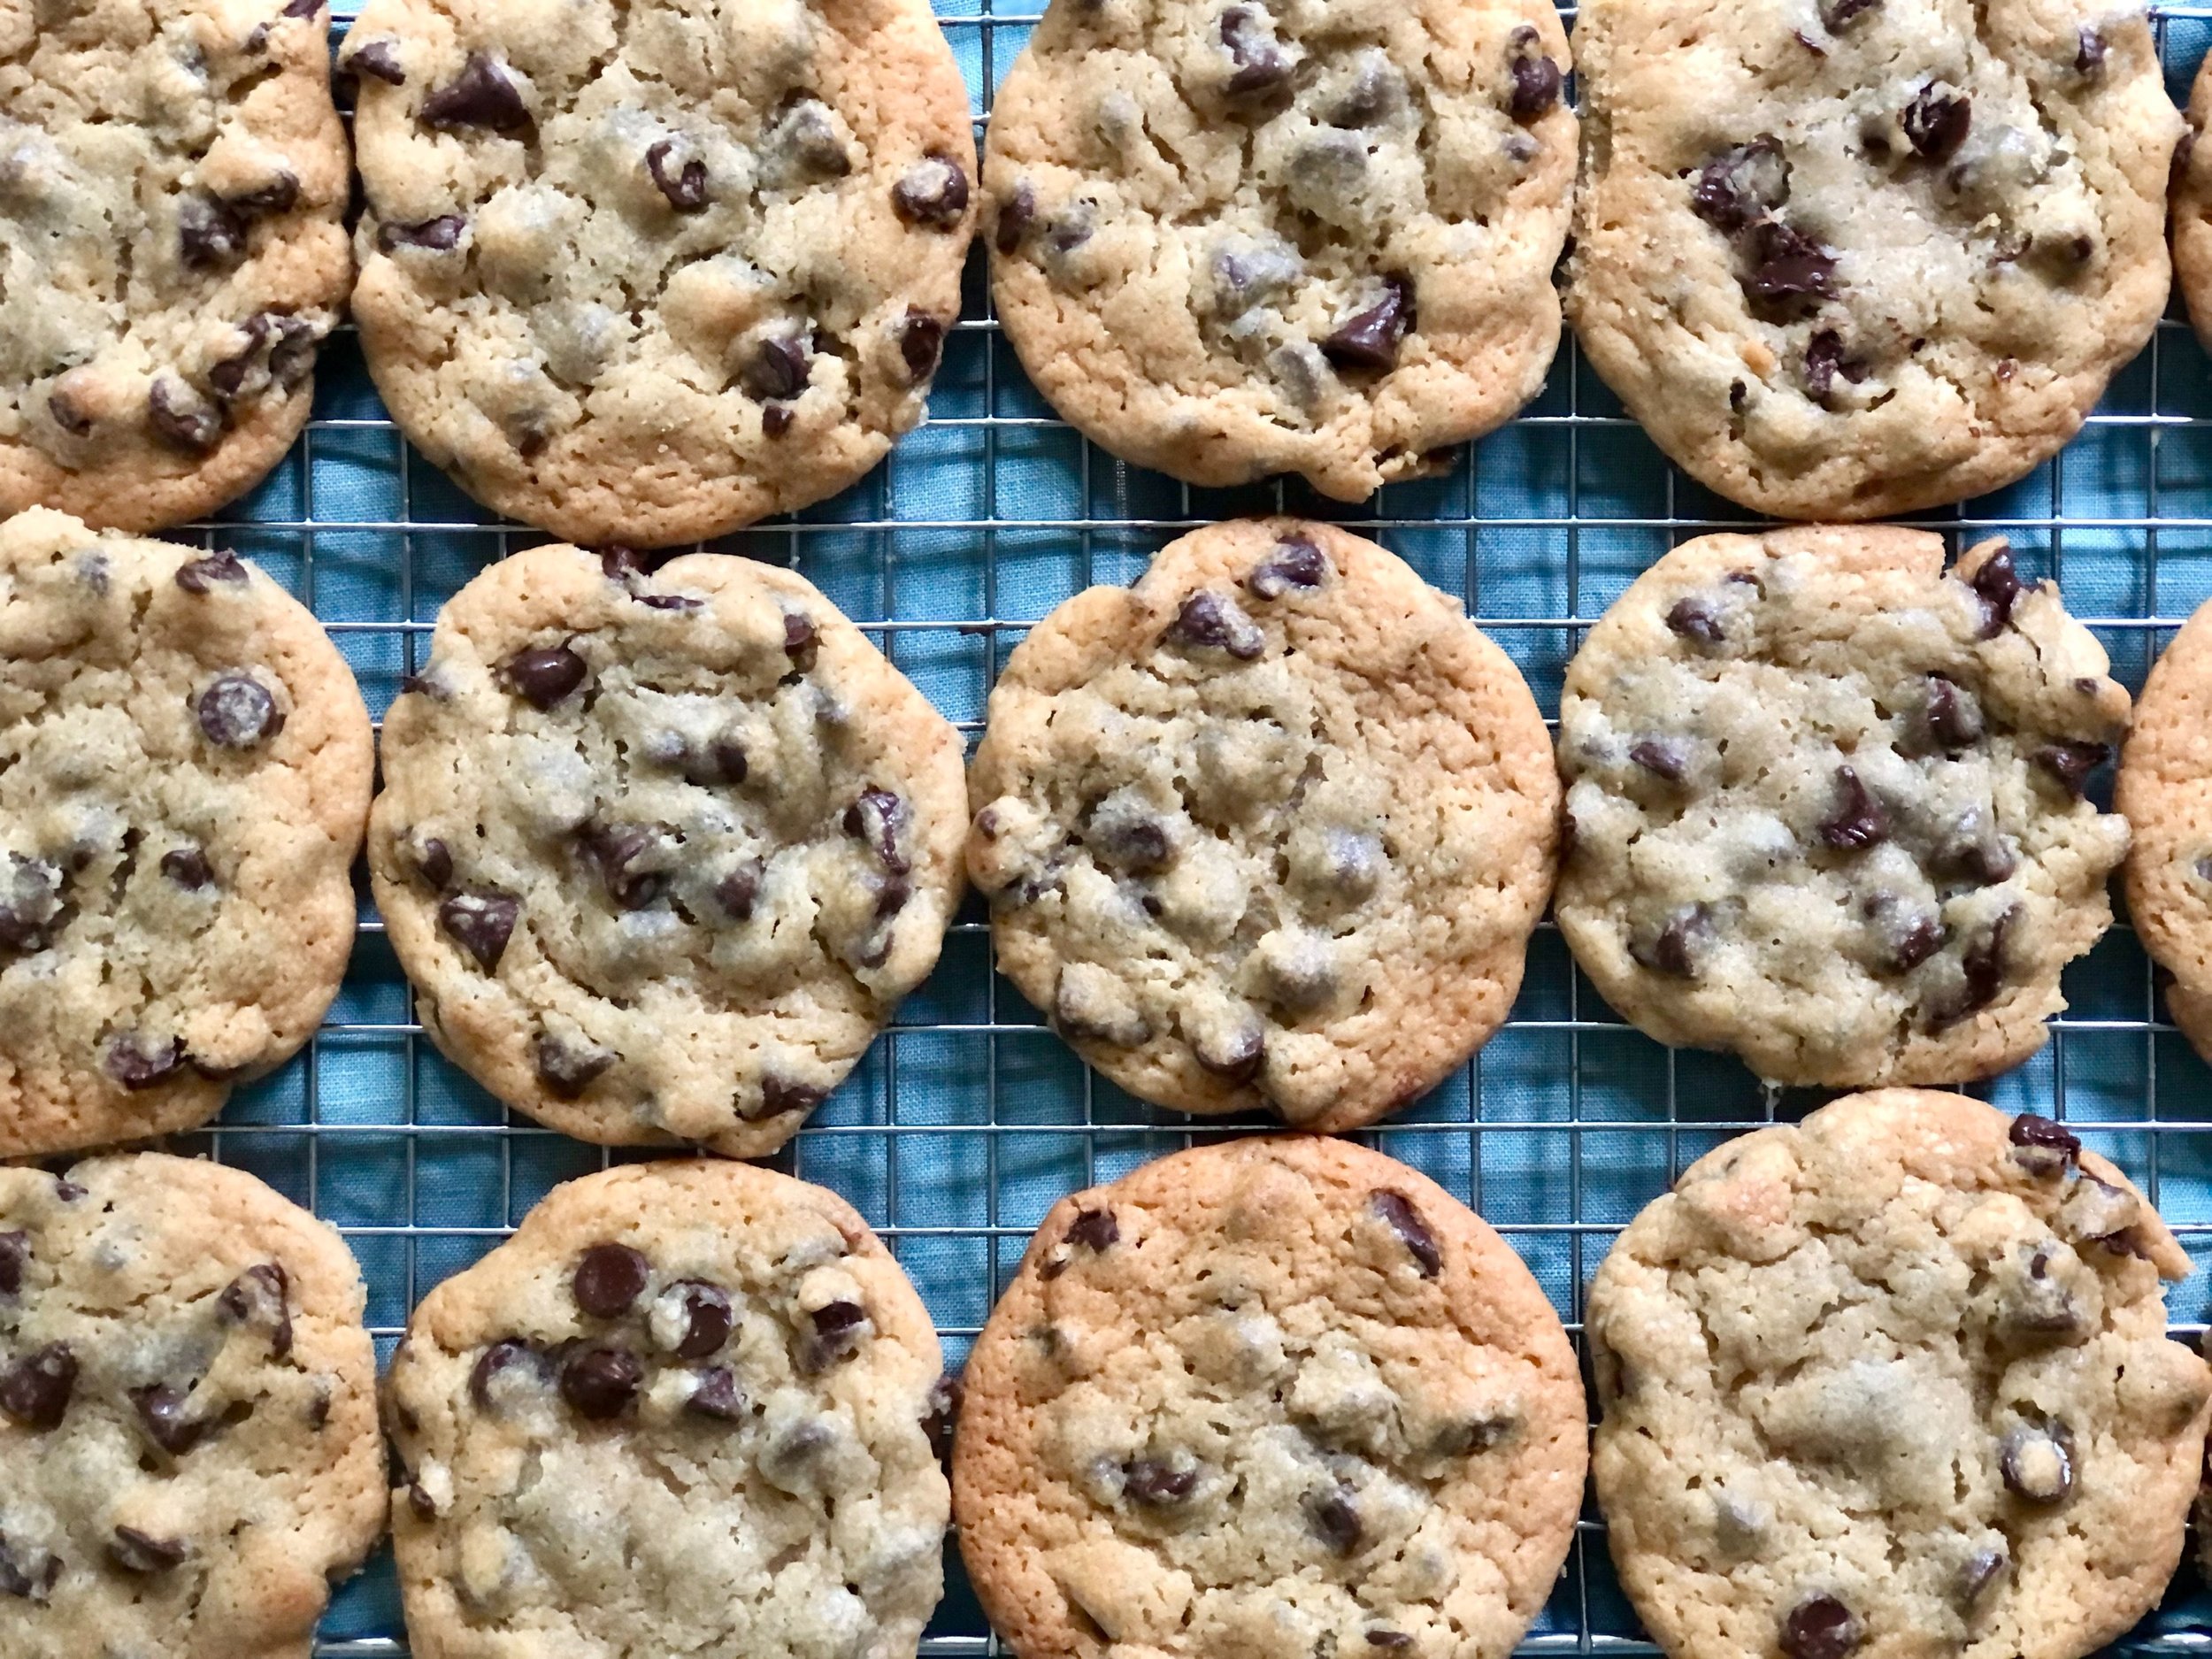
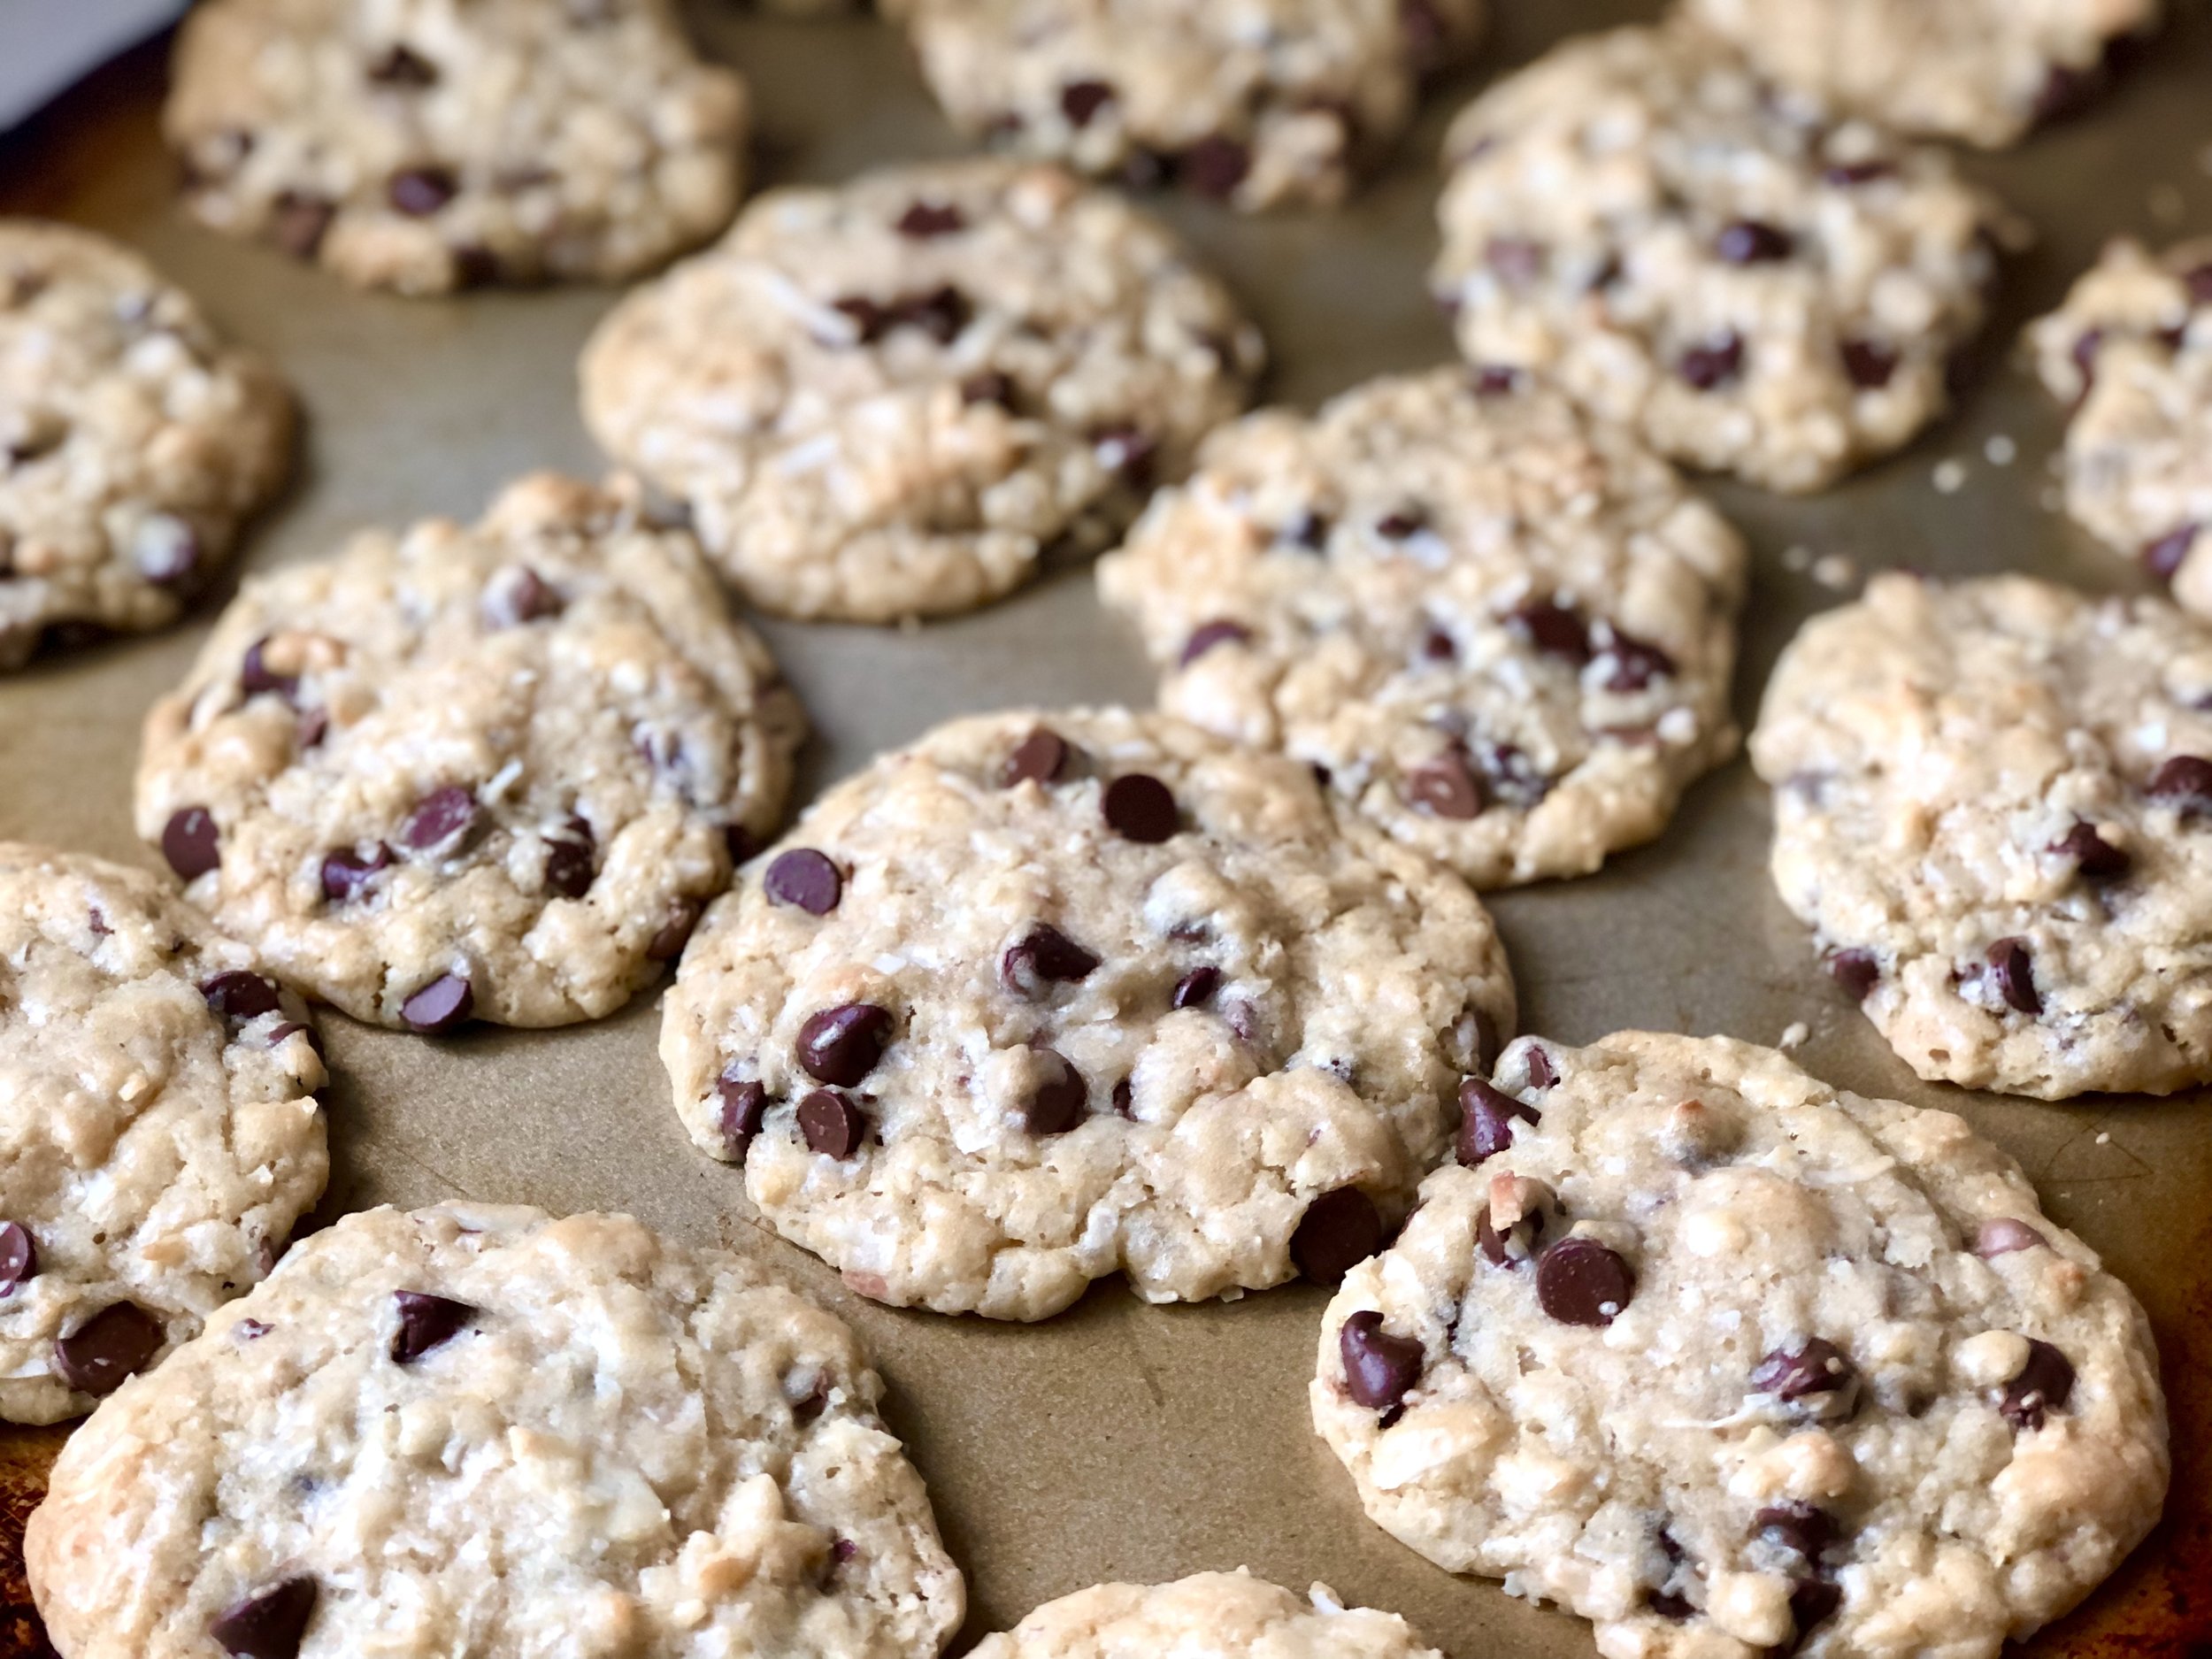
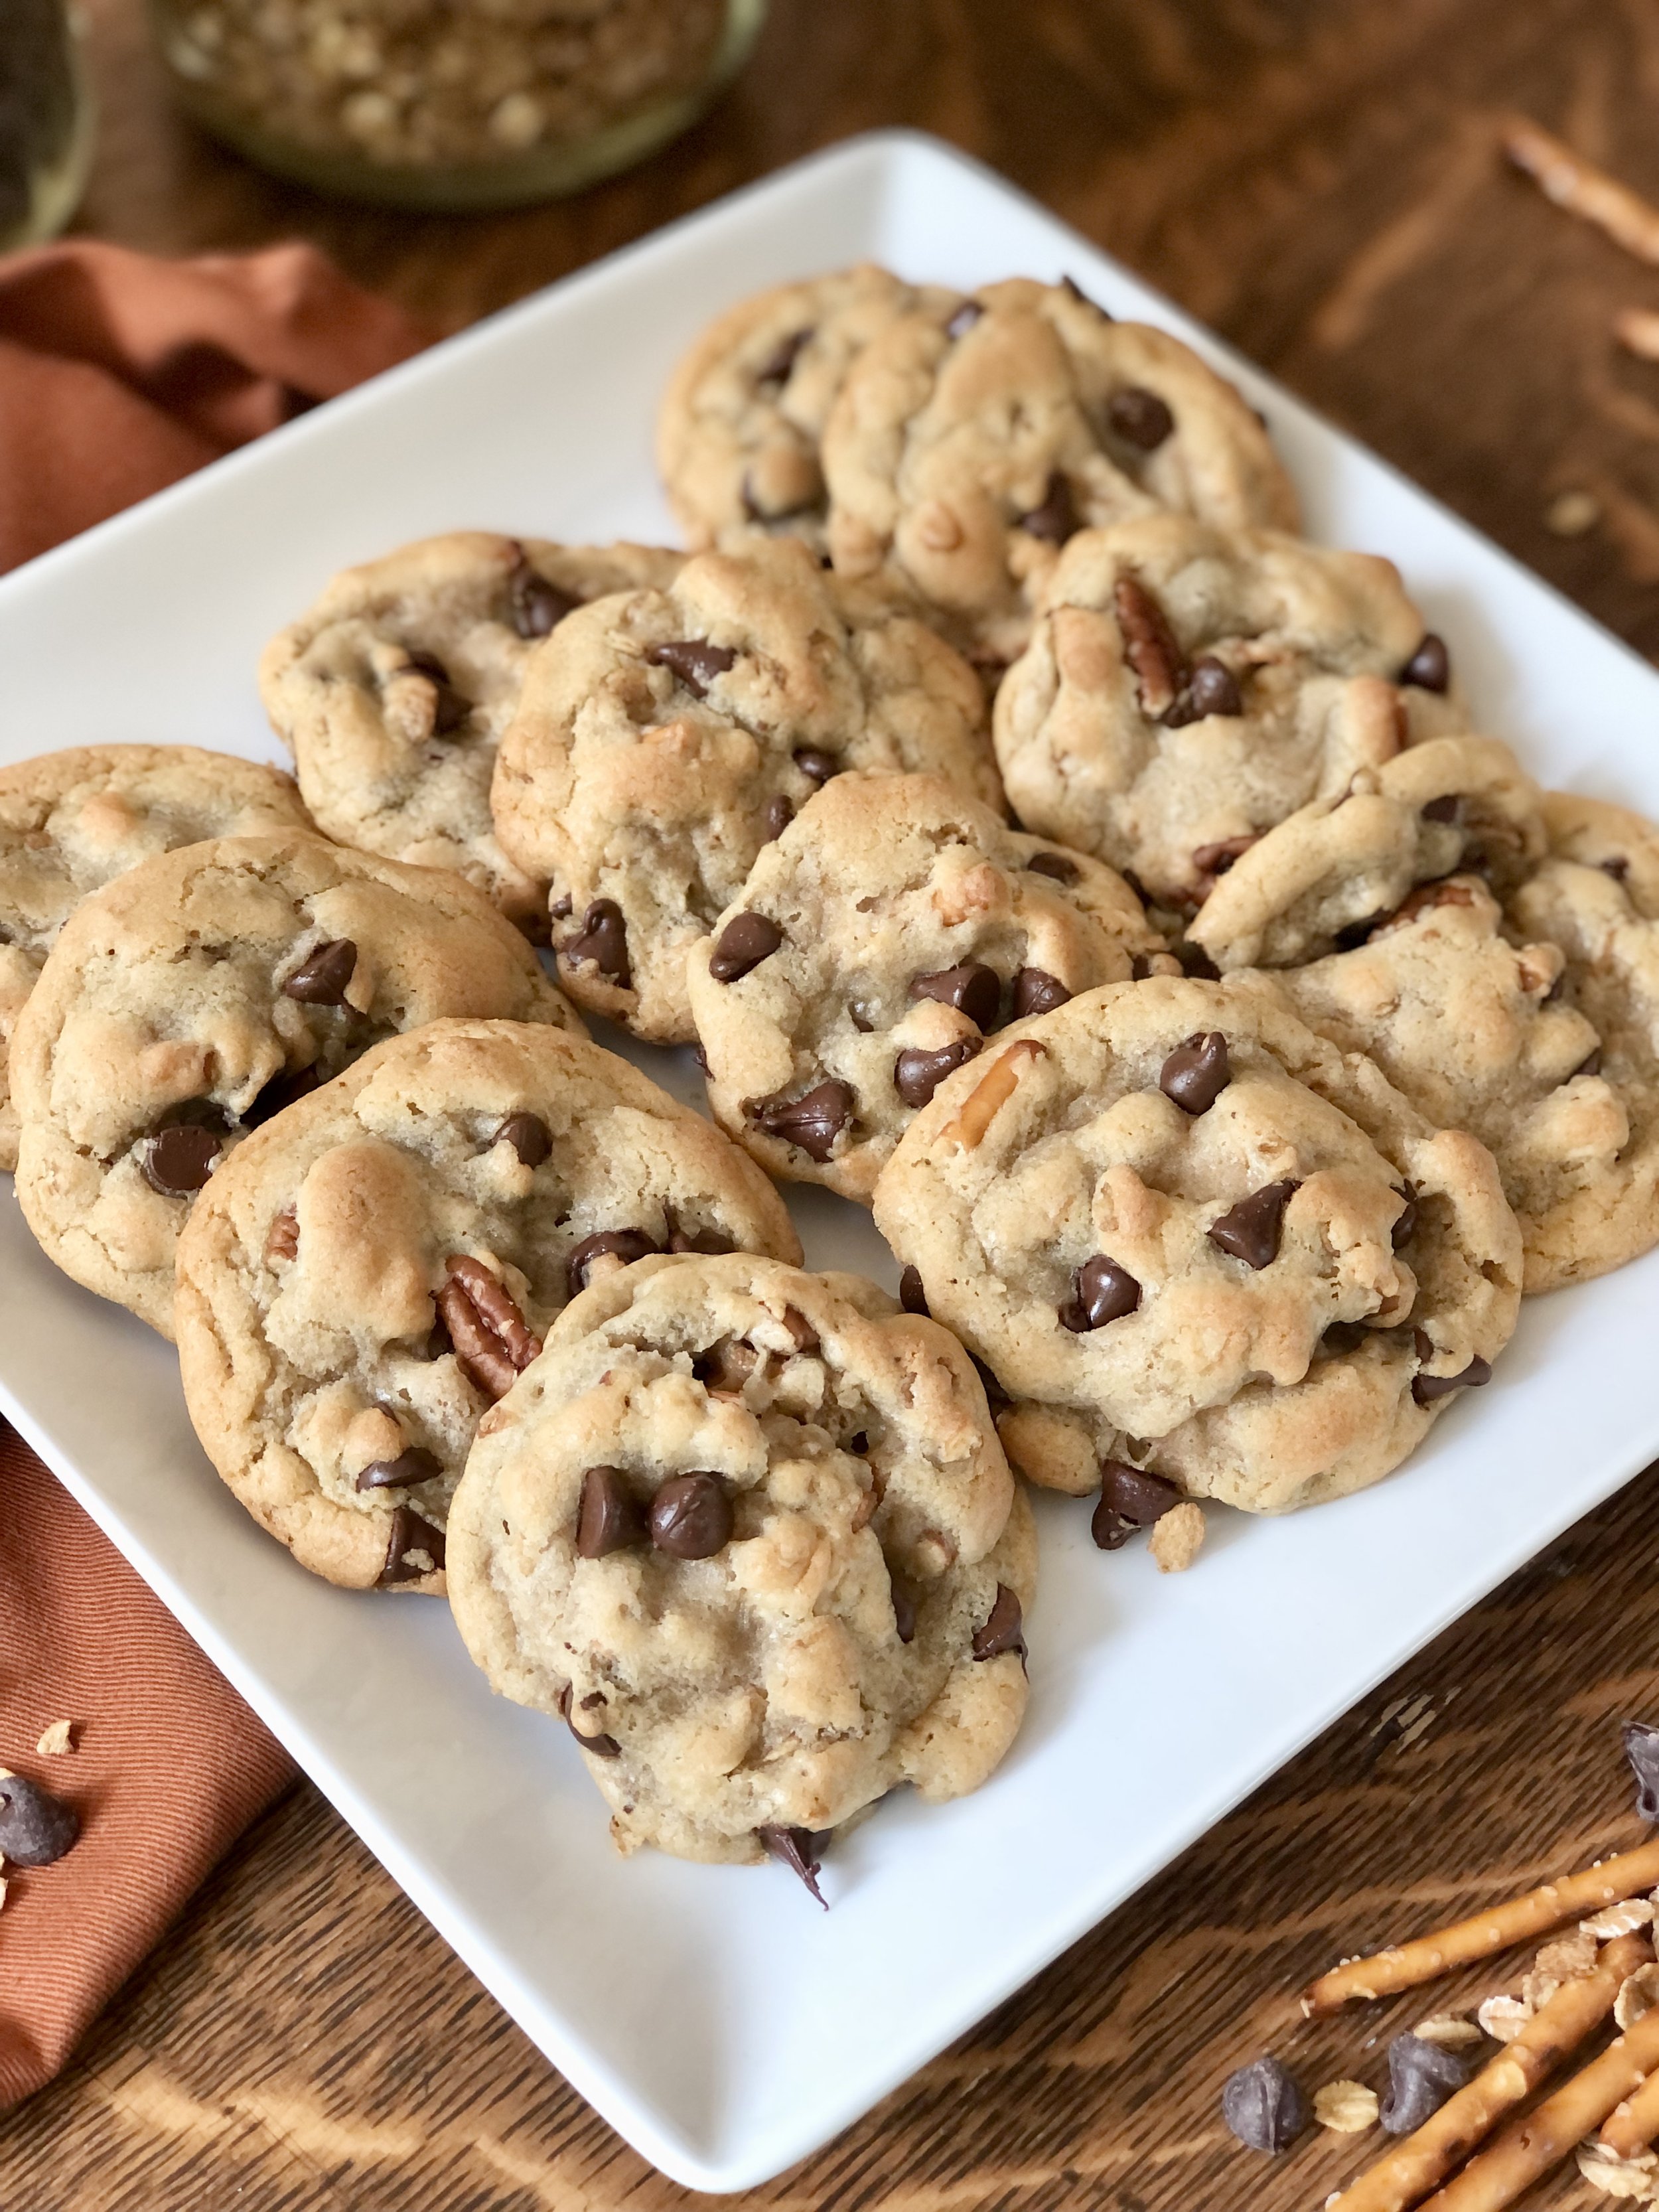
These cookies are sweet, salty, and have little crunchies in them from granola and pecans. Many people pick them up thinking they’re just a normal chocolate chip cookie only to ask, “hey, what’s in here?” when they realize there are some delightful little sweet and salty add-ins dotting the chocolate chip landscape.

The recipe that inspired these cookies is called “Magical, Marvelous, Memorable Cookies”. I like to think of the pretzels as magical, the pecans as marvelous, and the granola as memorable. Irony of ironies, I could never remember the whole title and would always forget “memorable.” I decided to give them a little bit easier and more descriptive name. While I do enjoy the original more whimsical one, it is harder to remember and gives no indication as to what is in these cookies or what they will taste like.

Cookies that unite

Somehow, their everything-but-the-kitchen-sink-esque ingredient list works really well together. They unite people, when you think they would divide, especially when they include things like pretzels and nuts. I’m not normally one to like pretzels in my desserts. The pretzels are one of my favorite parts. My mom doesn’t like nuts in her cookies. She likes the pecans in these.

Granola? In cookies?

The recipe calls for granola, which might seem ambiguous in light of all of the different kinds of granola out there, store-bought and homemade. Use whatever kind you’d like! Yes, each time the cookies will be a bit different, but as long as you like the granola you’re using, the cookies should turn out delightful. It doesn’t even have to be pure granola. Recently I’ve been using Post Great Grains Crunchy Pecan and it works very well.

Likewise, pecans are one of my favorite nuts in dessert (if I want nuts), but you can use your favorite nut here, if you don’t have or don’t want to use pecans.

This post may contain affiliate links. If you make a purchase using these links, Jennyblogs may receive a small commission, at no extra cost to you. This helps to support Jennyblogs. Where possible, links are prioritized to small businesses and ethically and responsibly made items. For further information see the privacy policy. Grazie!

Recipe inspired by Food52


Sweet and Salty Chocolate Chip Cookies

Makes about 24-30 cookies

Ingredients:

  • 1 cup / 225g Butter, softened OR 3/4 cup / 169g Neutral-flavored cooking oil

  • 3/4 cup / 150g Granulated sugar

  • 3/4 cup / 150g Brown sugar

  • 2 Eggs

  • 2 tsp / 10g Vanilla extract

  • 2 1/4 cup / 270g All-purpose flour

  • 1 tsp Baking soda

  • 1 tsp Salt

  • 1 cup / 170g Semi-sweet chocolate chips

  • 1 cup / 120g Granola or granola-like cereal

  • 1/2 cup / 50g Pecans, chopped

  • 1/2 cup / 20g Pretzels, crushed

Directions:

Oven 375°F / 177°C. 1 or 2 ungreased cookie sheets

  1. In bowl of a stand mixer or with a handheld mixer, beat butter and sugars until light and fluffy. If using oil, simply mix oil and sugars.

  2. Beat in eggs and vanilla, until thoroughly combined.

  3. In a separate large bowl, whisk together flour, baking soda, and salt.

  4. Add dry ingredients to wet ingredients, mixing just until combined.

  5. Stir in chocolate chips, granola, pecans, and pretzels until evenly distributed.

  6. Bake in preheated oven for 8-10 minutes or until edges start to turn golden and centers still look a bit soft.

  7. Allow to cool for a few minutes before removing from cookie sheet to cool completely.

Jenny’s Notes:

  • Any variety of pretzels can be used, as long as they can be broken into small pieces. Sticks or tiny twists (mini) are probably the easiest to work with.

  • The options for what kind of granola to use in these is almost endless. You could use store-bought or homemade, any flavor you like.
Sweet and Salty Chocolate Chip Cookies
Yield 24-30
Author
Prep time
25 Min
Cook time
10 Min
Total time
35 Min

Sweet and Salty Chocolate Chip Cookies

Sweet and Salty Chocolate Chip Cookies with the addition of pretzels, pecans, and granola. The ingredients might sound a bit "everything but the kitchen sink" but surprise everyone with just how tasty they are.
Cook modePrevent screen from turning off

Ingredients

Instructions

  1. Oven 375°F / 177°C. 1 or 2 ungreased cookie sheets
  2. In bowl of a stand mixer or with a handheld mixer, beat butter and sugars until light and fluffy. If using oil, simply mix oil and sugars.
  3. Beat in eggs and vanilla, until thoroughly combined.
  4. In a separate large bowl, whisk together flour, baking soda, and salt.
  5. Add dry ingredients to wet ingredients, mixing just until combined.
  6. Stir in chocolate chips, granola, pecans, and pretzels until evenly distributed.
  7. Bake in preheated oven for 8-10 minutes or until edges start to turn golden and centers still look a bit soft.
  8. Allow to cool for a few minutes before removing from cookie sheet to cool completely.

Notes

  • Any variety of pretzels can be used, as long as they can be broken into small pieces. Sticks or tiny twists (mini) are probably the easiest to work with.
  • The options for what kind of granola to use in these is almost endless. You could use store-bought or homemade, any flavor you like.

Nutrition Facts

Calories

268

Fat

15 g

Sat. Fat

3 g

Carbs

31 g

Fiber

1 g

Net carbs

29 g

Sugar

17 g

Protein

3 g

Sodium

180 mg

Cholesterol

14 mg

Nutritional information is approximate. Based on 1 cookie from a 24-cookie batch.

no chill chocolate chip cookies, everything but the kitchen sink cookies, magical marvelous memorable cookies
dessert
American
Did you make this recipe?
Tag @jennyblogsandbakes on instagram and hashtag it #jennyblogs

Butterscotch Chocolate Chip Cookies

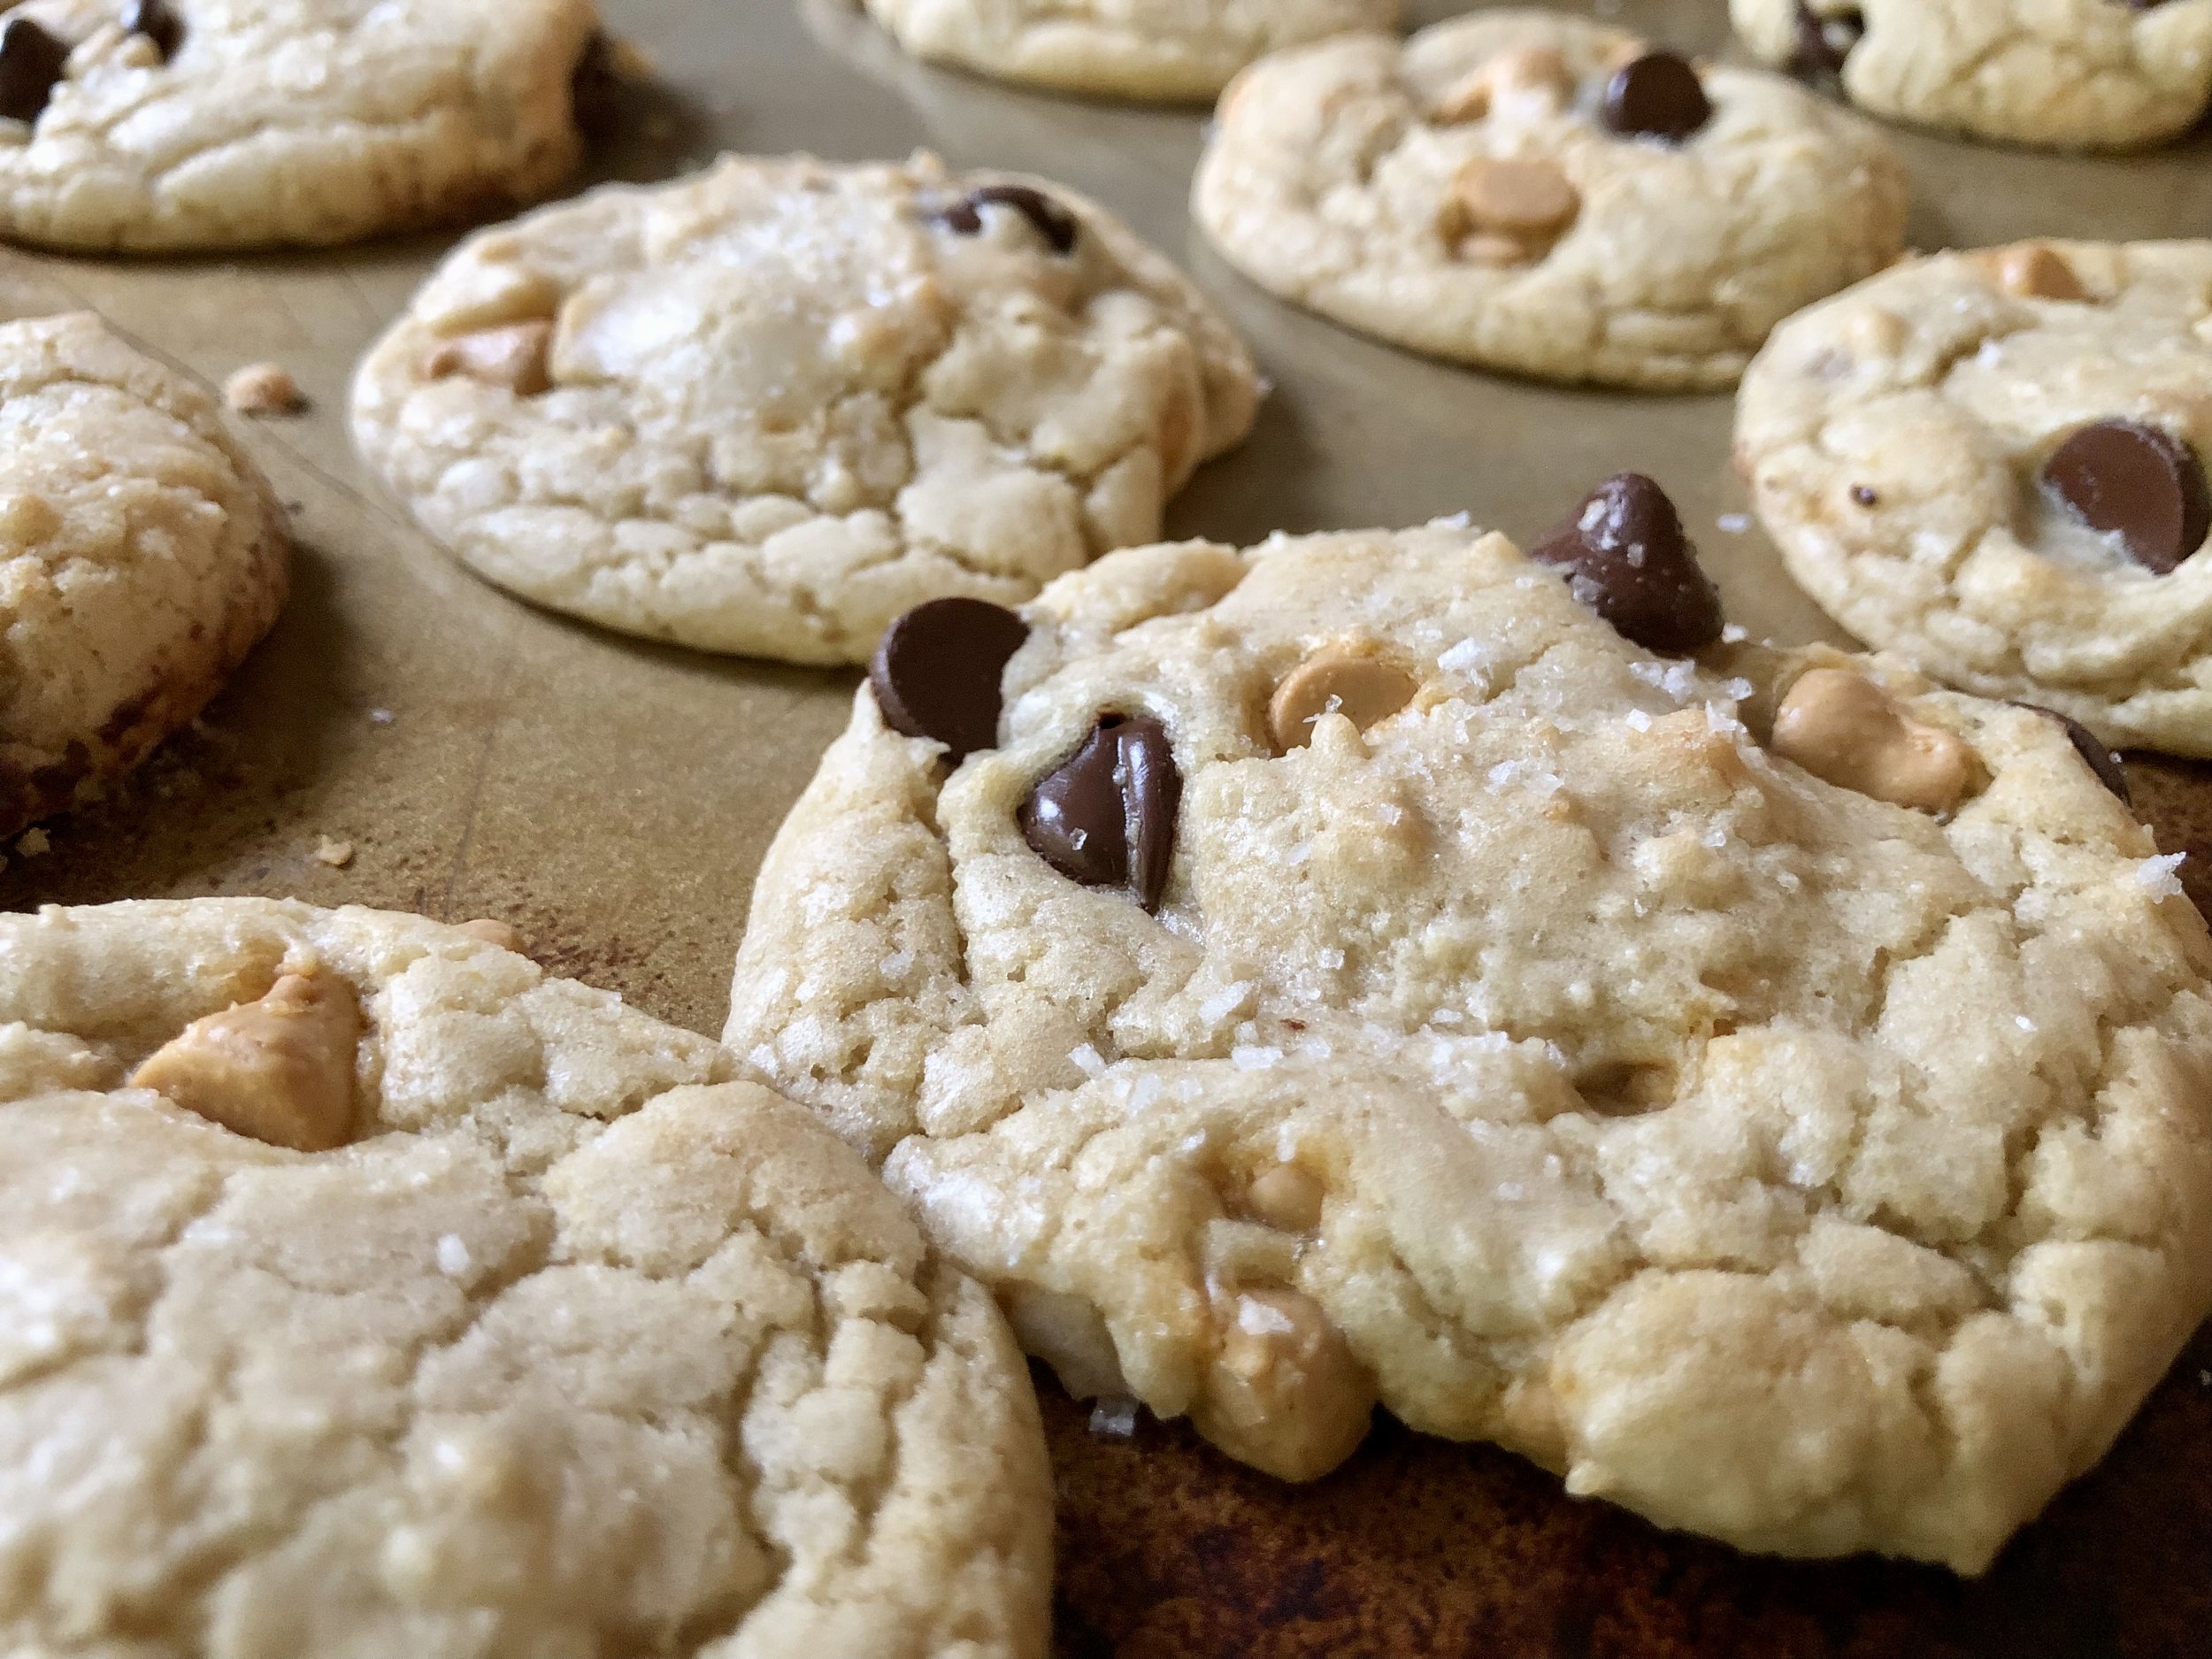
Butterscotch Chocolate Chip Cookies are very much like a classic chocolate chip cookie, but with two important differences: They have butterscotch chips and dark chocolate chips instead of the classic semi-sweet. Also, a sprinkling of sea salt on top gives these an extra little sweet and salty kick.

The orange and dark chocolate give these an autumnal, even Halloween look. I love that a simple, quick to make cookie can still look subtly festive without having to make cutout cookies with icing and such.

A Note on Chips:

These cookies call for butterscotch chips. I recommend checking the ingredients of butterscotch chips before buying as some brands include artificial colors. While butterscotch chips may not be the most wholesome thing on the market, some options are still better than others. I’ve found butterscotch chips at Aldi that use natural coloring and for one of the better prices, too!

While any flavor of chocolate chips can be used in these, milk, semi-sweet, or dark, I really enjoy dark chocolate chips or chunks. The bitterness from the dark chocolate helps to cut the sweetness of the butterscotch chips while also complimenting the sea salt.

This post may contain affiliate links. If you make a purchase using these links, Jennyblogs may receive a small commission, at no extra cost to you. This helps to support Jennyblogs. Where possible, links are prioritized to small businesses and ethically and responsibly made items. For further information see the privacy policy. Grazie!


Butterscotch Chocolate Chip Cookies

Makes about 24-30 cookies

Ingredients:

  • 3/4 cup / 168g neutral-flavored cooking oil

  • 3/4 cup / 150g sugar

  • 3/4 cup / 150g brown sugar

  • 2 eggs

  • 1 tsp / 5g vanilla extract

  • 2 1/2 cups / 300g all-purpose flour

  • 1 tsp baking soda

  • 1 tsp salt

  • 1 cup / 170g butterscotch chips

  • 1 cup / 170g dark chocolate or semi-sweet chocolate chips

  • sea salt, for sprinkling, optional

Directions:

Oven 375° / 190°C. 1 or 2 ungreased cookie sheets.

  1. In a large bowl, combine oil, both sugars, eggs, and vanilla. Beat well with a spoon for about 30 seconds - 1 minute.

  2. In a medium bowl, whisk together flour, baking soda, and salt.

  3. Add dry ingredients along with butterscotch and chocolate chips to wet ingredients. Mix until well combined.

  4. Drop by generous tablespoonfuls onto cookie sheets and bake for 8-10 minutes, or until edges are just starting to turn light golden brown and centers look mostly set.

Jenny’s Notes:

  • While cookie recipes never include notes about needing to add more flour, like bread recipes often do, I often find it necessary to add more flour to get the consistency I like. If you can see cookie dough spreading in the bowl after mixing, rather than staying mostly in a mounded shape, it’s probably too soft. Add 1/4 cup flour at a time until desired thickness is achieved. If in doubt, you can always bake off a test cookie. Scoop out enough dough for just one cookie onto cookie sheet and bake, adding more flour if cookie spreads too thin. Conversely, if cookie is too thick and doesn’t spread much at all, next time add less flour.

Butterscotch Chocolate Chip Cookies
Yield 24-30
Author
Prep time
15 Min
Cook time
10 Min
Total time
25 Min

Butterscotch Chocolate Chip Cookies

Chewy cookies with dark chocolate, butterscotch, and a sprinkling of sea salt.
Cook modePrevent screen from turning off

Ingredients

Instructions

  1. Oven 375° / 190°C. 1 or 2 ungreased cookie sheets.
  2. In a large bowl, combine oil, both sugars, eggs, and vanilla. Beat well with a spoon for about 30 seconds - 1 minute.
  3. In a medium bowl, whisk together flour, baking soda, and salt.
  4. Add dry ingredients along with butterscotch and chocolate chips to wet ingredients. Mix until well combined.
  5. Drop by generous tablespoonfuls onto cookie sheets and bake for 8-10 minutes, or until edges are just starting to turn light golden brown and centers look mostly set.

Notes

  • While cookie recipes never include notes about needing to add more flour, like bread recipes often do, I often find it necessary to add more flour to get the consistency I like. If you can see cookie dough spreading in the bowl after mixing, rather than staying mostly in a mounded shape, it’s probably too soft. Add 1/4 cup flour at a time until desired thickness is achieved. If in doubt, you can always bake off a test cookie. Scoop out enough dough for just one cookie onto cookie sheet and bake, adding more flour if cookie spreads too thin. Conversely, if cookie is too thick and doesn’t spread much at all, next time add less flour.

Nutrition Facts

Calories

235

Fat

11 g

Sat. Fat

2 g

Carbs

31 g

Fiber

1 g

Net carbs

30 g

Sugar

15 g

Protein

2 g

Sodium

193 mg

Cholesterol

15 mg

Nutritional information is approximate. Based on 1 cookie if recipe makes 24.

no chill cookies, chocolate chip cookies, butterscotch chip cookies, sea salt cookies, crackly cookies
dessert
American
Did you make this recipe?
Tag @jennyblogsandbakes on instagram and hashtag it #jennyblogs

S'mores Cookies

Last Updated September 22, 2024

An ode to the sweet, summer campfire treat, these cookies are full of nostalgia and summer goodness.

Graham crackers are ground into a flour to make soft and chewy graham cracker cookies, speckled with milk chocolate and pops of marshmallows that get all toasty in the oven.

There are a couple of different ways to make these cookies, depending on if you prefer to whip up cookies using ingredients you probably already have on hand, or if you don’t mind planning a bit ahead to make it as close to a real s’more as possible.

The Chocolate

Classic s’mores call for Hershey’s milk chocolate. The thin, milk chocolate 1.55oz bars. Not thick ones, not the minis given out at Halloween. For some reason, s’mores need that specific thickness and size of Hershey’s. For this reason, to get the closest to classic s’mores as possible, use the 1.55oz Hershey’s milk chocolate bars.

For a slightly more convenient option, use milk chocolate chips. It’s still milk chocolate, even if it doesn’t have the unique taste of Hershey’s milk chocolate.

In a pinch, you can use semi-sweet or dark chocolate chips in these, but those options are not as s’mores-esque as milk chocolate.

The Marshmallows

Classic s’mores call for regular sized marshmallows, but cutting up marshmallows is sticky and not so fun. Mini marshmallows are the way to go. Here I do highly recommend you do not skip nor forget to line your cookie sheets with silpat or parchment paper, as any marshmallows that come into contact with the cookie sheet while baking will want to stay attached for life. The marshmallows get all chewy in the cookies and delicious, so can be worth any potential mess.

S'mores cookies made with milk chocolate chips and dehydrated marshmallows

Another option is to use dehydrated marshmallows. They still give the marshmallow flavor without getting too sticky. They might not be as readily available as regular or mini marshmallows, but they have become more mainstream than when I first discovered them years ago. My local Meijer grocery store carries them! If you aren’t able to find them locally, they can be found on Amazon if all else fails, although probably more expensive than a grocery store.

The Graham Crackers

You’ll want to use classic, or regular graham crackers for these, or whatever you’d normally use to make s’mores. They lend a subtle, but buttery graham flavor to the cookies that completes the trio of s’mores flavors. They’ll need to be ground up to make fine crumbs, almost flour-like in consistency, or at least as fine as you can get them. Using a food processor is quickest, but you can also grind them up with a rolling pin.

If you’re thinking that adding 18 sheets (270g), of graham crackers feels like a lot, especially when the recipe already calls for 2 cups of flour, rest assured it is the correct amount. In fact, when I first began playing with this recipe I started with less graham crackers because I thought it might be too much. It wasn’t, and I was able to easily square off the recipe with using an even two packages (9 each) of graham crackers.

This post may contain affiliate links. If you make a purchase using these links, Jennyblogs may receive a small commission, at no extra cost to you. This helps to support Jennyblogs. Where possible, links are prioritized to small businesses and ethically and responsibly made items. For further information see the privacy policy. Grazie!


S’mores Cookies

Makes about 26-32 cookies

Cookies and 2 year old drawings in the background, does it get any sweeter?

  • 3/4 cup / 169g neutral-flavored cooking oil

  • 3/4 cup / 150g sugar

  • 3/4 cup / 150g brown sugar

  • 3 eggs

  • 18 sheets / 270g graham crackers, finely ground

  • 2 cups / 240g all-purpose flour

  • 1 tsp baking powder

  • 1 tsp baking soda

  • 1 tsp salt

  • 1 cup / 175g milk chocolate chips OR 4 (1.55oz bars) Hershey’s milk chocolate candy bars, roughly chopped

  • 1 cup / 50g dehydrated marshmallows OR 2 cups / 114g mini marshmallows

Directions:

Oven 375°F / 190°C. Line 2 cookies sheets with parchment paper or silpat.

  1. In a large bowl combine oil and both sugars. Beat in eggs.

  2. In a separate bowl whisk together Graham cracker crumbs, flour, baking powder, baking soda, and salt. Gently stir in marshmallows and chocolate just until combined.

  3. Drop by generous tablespoonfuls evenly spaced onto prepared cookie sheets. Bake in preheated oven for 7-10 minutes or until just starting to turn golden and centers look set.

  4. Allow cookies to cool just for a few minutes on cookie sheets before removing to cool completely.

Jenny’s Notes:

  • The use of mini marshmallows in these can cause a sticky mess if not handled carefully. Try to keep marshmallows on the top and center of cookies and away from bottom and edges, so as to stick less to cookie sheet. Don’t skip the parchment or silpat! Remove cookies from cookie sheet as soon as they’ll hold up, just a few minutes.

S'mores Cookies
Yield 26-32
Author
Prep time
25 Min
Cook time
10 Min
Total time
35 Min

S'mores Cookies

Graham crackers are ground into a flour to make soft and chewy graham cracker cookies, speckled with milk chocolate and pops of marshmallows that get all toasty in the oven. An ode to the sweet, summer campfire treat, these cookies are full of nostalgia and summery goodness.
Cook modePrevent screen from turning off

Ingredients

Instructions

  1. Oven 375°F / 190°C. Line 2 cookies sheets with parchment paper or silpat.
  2. In a large bowl combine oil and both sugars. Beat in eggs.
  3. In a separate bowl whisk together Graham cracker crumbs, flour, baking powder, baking soda, and salt. Gently stir in marshmallows and chocolate just until combined.
  4. Drop by generous tablespoonfuls evenly spaced onto prepared cookie sheets. Bake in preheated oven for 7-10 minutes or until just starting to turn golden and centers look set.
  5. Allow cookies to cool just for a few minutes on cookie sheets before removing to cool completely.

Notes

  • The use of mini marshmallows in these can cause a sticky mess if not handled carefully. Try to keep marshmallows on the top and center of cookies and away from bottom and edges, so as to stick less to cookie sheet. Don’t skip the parchment or silpat! Remove cookies from cookie sheet as soon as they’ll hold up, just a few minutes.

Nutrition Facts

Calories

227.73

Fat

9.98 g

Sat. Fat

2.05 g

Carbs

30.67 g

Fiber

0.59 g

Net carbs

30.08 g

Sugar

13.51 g

Protein

2.35 g

Sodium

231.19 mg

Cholesterol

18.89 mg

Nutritional information is approximate, based on 26 servings.

s'mores cookies, toasted marshmallows, Hershey's milk chocolate, graham cracker cookies, summer dessert
dessert
American
Did you make this recipe?
Tag @jennyblogsandbakes on instagram and hashtag it #jennyblogs

Malted Chocolate Chip Cookies

Last Updated September 2, 2024

Malted Chocolate Chip Cookies made with semi-sweet chocolate chips

Malted Chocolate Chip Cookies: like classic chocolate chip cookies, but malted. The malt is subtle, but irresistible, and makes the cookies extra tender and chewy.

The Effect of Adding Malt Powder to Cookies

You’d think you could take your favorite chocolate chip cookie recipe and just add some malted milk powder, right? Not quite. Something about malted milk powder makes cookies thin and spread a lot. If you add less malt powder, the flavor won’t come through enough. Adding more flour to try and offset this will only make the cookies cakey and weird.

To combat the cookies from spreading too much, there are a few key things this recipe includes:

  1. Cornstarch - helps keeps cookies thick and soft

  2. Brown sugar - most chocolate chip cookies call for both white sugar and brown sugar. Cookies made with white sugar spread more, so these cookies only call for brown sugar

  3. Refrigeration - Chilling dough helps cookies to maintain their shape a bit more and get those golden, crispy edges while maintaining a soft, chewy center. While these cookies are already naturally chewier than most thanks to the malt powder, chilling the dough helps them to spread less. While I’m fully aware of the benefits and reasons for chilling cookie dough, I’m also a huge fan of no-chill cookie dough, and most of the recipes on this blog reflect that. I usually want cookies NOW, haha. That said, the chilling for this recipe is important enough that I really do recommend it!

This recipe has been on the blog since its first year, but you would never know it because it was very well hidden at the end of a satire piece I wrote for April Fools. I only recently rediscovered it myself and decided it was high time to give these cookies their own post, their own spotlight, not hidden in some other piece.

So here’s a fresh and clean post for Malted Chocolate Chip Cookies with some fresh photos to boot!

This post may contain affiliate links. If you make a purchase using these links, Jennyblogs may receive a small commission, at no extra cost to you. This helps to support Jennyblogs. Where possible, links are prioritized to small businesses and ethically and responsibly made items. For further information see the privacy policy. Grazie!

Recipe adapted from Cookies and Cups.


Malted Chocolate Chip Cookies

Makes 24-36 cookies

Ingredients:

  • 2 1/2 cups / 300g all-purpose flour

  • 1/2 cup malted milk powder

  • 1 tsp baking powder

  • 1 tsp salt

  • 2 tsp cornstarch

  • 1 cup / 113g butter, softened or 3/4 cup / 169g oil

  • 1 1/2 cups / 300g brown sugar

  • 2 eggs

  • 1 Tbsp / 15g vanilla extract

  • 2 cups / 340g semi-sweet or milk chocolate chips or 2 cups (250g) coarsely chopped malted milk ball candies (Whoppers)

Directions:

  1. Whisk together flour, malted milk powder, baking powder, salt, and cornstarch in a medium bowl. Set aside.

  2. Beat together butter and sugar in the bowl of a stand mixer until light and fluffy, about 3-5 minutes. If using oil, beat to combine. Add eggs, one at a time, mixing well after each addition. Add vanilla.  

  3. Stir in dry ingredients until just combined. Switch to a spoon and stir in chocolate chips.

  4. Cover and chill dough for at least 2 hours or up to 72 hours.  

  5. When ready to bake dough, preheat oven to 350°F / 177°C.  Scoop out dough by rounded spoonfuls onto cookie sheets. 

  6. Bake for 8-10 minutes, or until edges begin to turn golden-brown but centers still look soft.  

  7. Allow to cool for a a few minutes before transferring from cookie sheets to cooling racks or clean counter to cool completely. Store in an airtight container for up to 3 days or freeze for up to 6 months.

Jenny's Notes:

  • 2 cups of whoppers is about 2 (5oz) packages of Whoppers

  • Try these cookies with chocolate malt powder for a chocolatey twist!

Malted Chocolate Chip Cookies
Yield 24-36
Author
Prep time
20 Min
Cook time
10 Min
Inactive time
2 Hour
Total time
2 H & 30 M

Malted Chocolate Chip Cookies

Soft and extra chewy chocolate chip cookies with an irresistible malty flavor
Cook modePrevent screen from turning off

Ingredients

Instructions

  1. Whisk together flour, malted milk powder, baking powder, salt, and cornstarch in a medium bowl. Set aside.
  2. Beat together butter and sugar in the bowl of a stand mixer until light and fluffy, about 3-5 minutes. If using oil, beat to combine. Add eggs, one at a time, mixing well after each addition. Add vanilla.
  3. Stir in dry ingredients until just combined. Switch to a spoon and stir in chocolate chips.
  4. Cover and chill dough for at least 2 hours or up to 72 hours.
  5. When ready to bake dough, preheat oven to 350°F / 177°C. Scoop out dough by rounded spoonfuls onto cookie sheets.
  6. Bake for 8-10 minutes, or until edges begin to turn golden-brown but centers still look soft.
  7. Allow to cool for a a few minutes before transferring from cookie sheets to cooling racks or clean counter to cool completely. Store in an airtight container for up to 3 days or freeze for up to 6 months.

Notes

  • Try these cookies with chocolate malt powder for a chocolatey twist!

Nutrition Facts

Calories

261.15

Fat

12.69 g

Sat. Fat

7.79 g

Carbs

35.23 g

Fiber

0.35 g

Net carbs

34.87 g

Sugar

23.27 g

Protein

2.27 g

Sodium

197.97 mg

Cholesterol

34.61 mg

Nutritional information is approximate and based on 1 serving if recipe makes 24 cookies.

chocolate chip cookies, best ever soft and chewy chocolate chip cookies, malted Whopper chocolate chip cookies
dessert
American
Did you make this recipe?
Tag @jennyblogsandbakes on instagram and hashtag it #jennyblogs

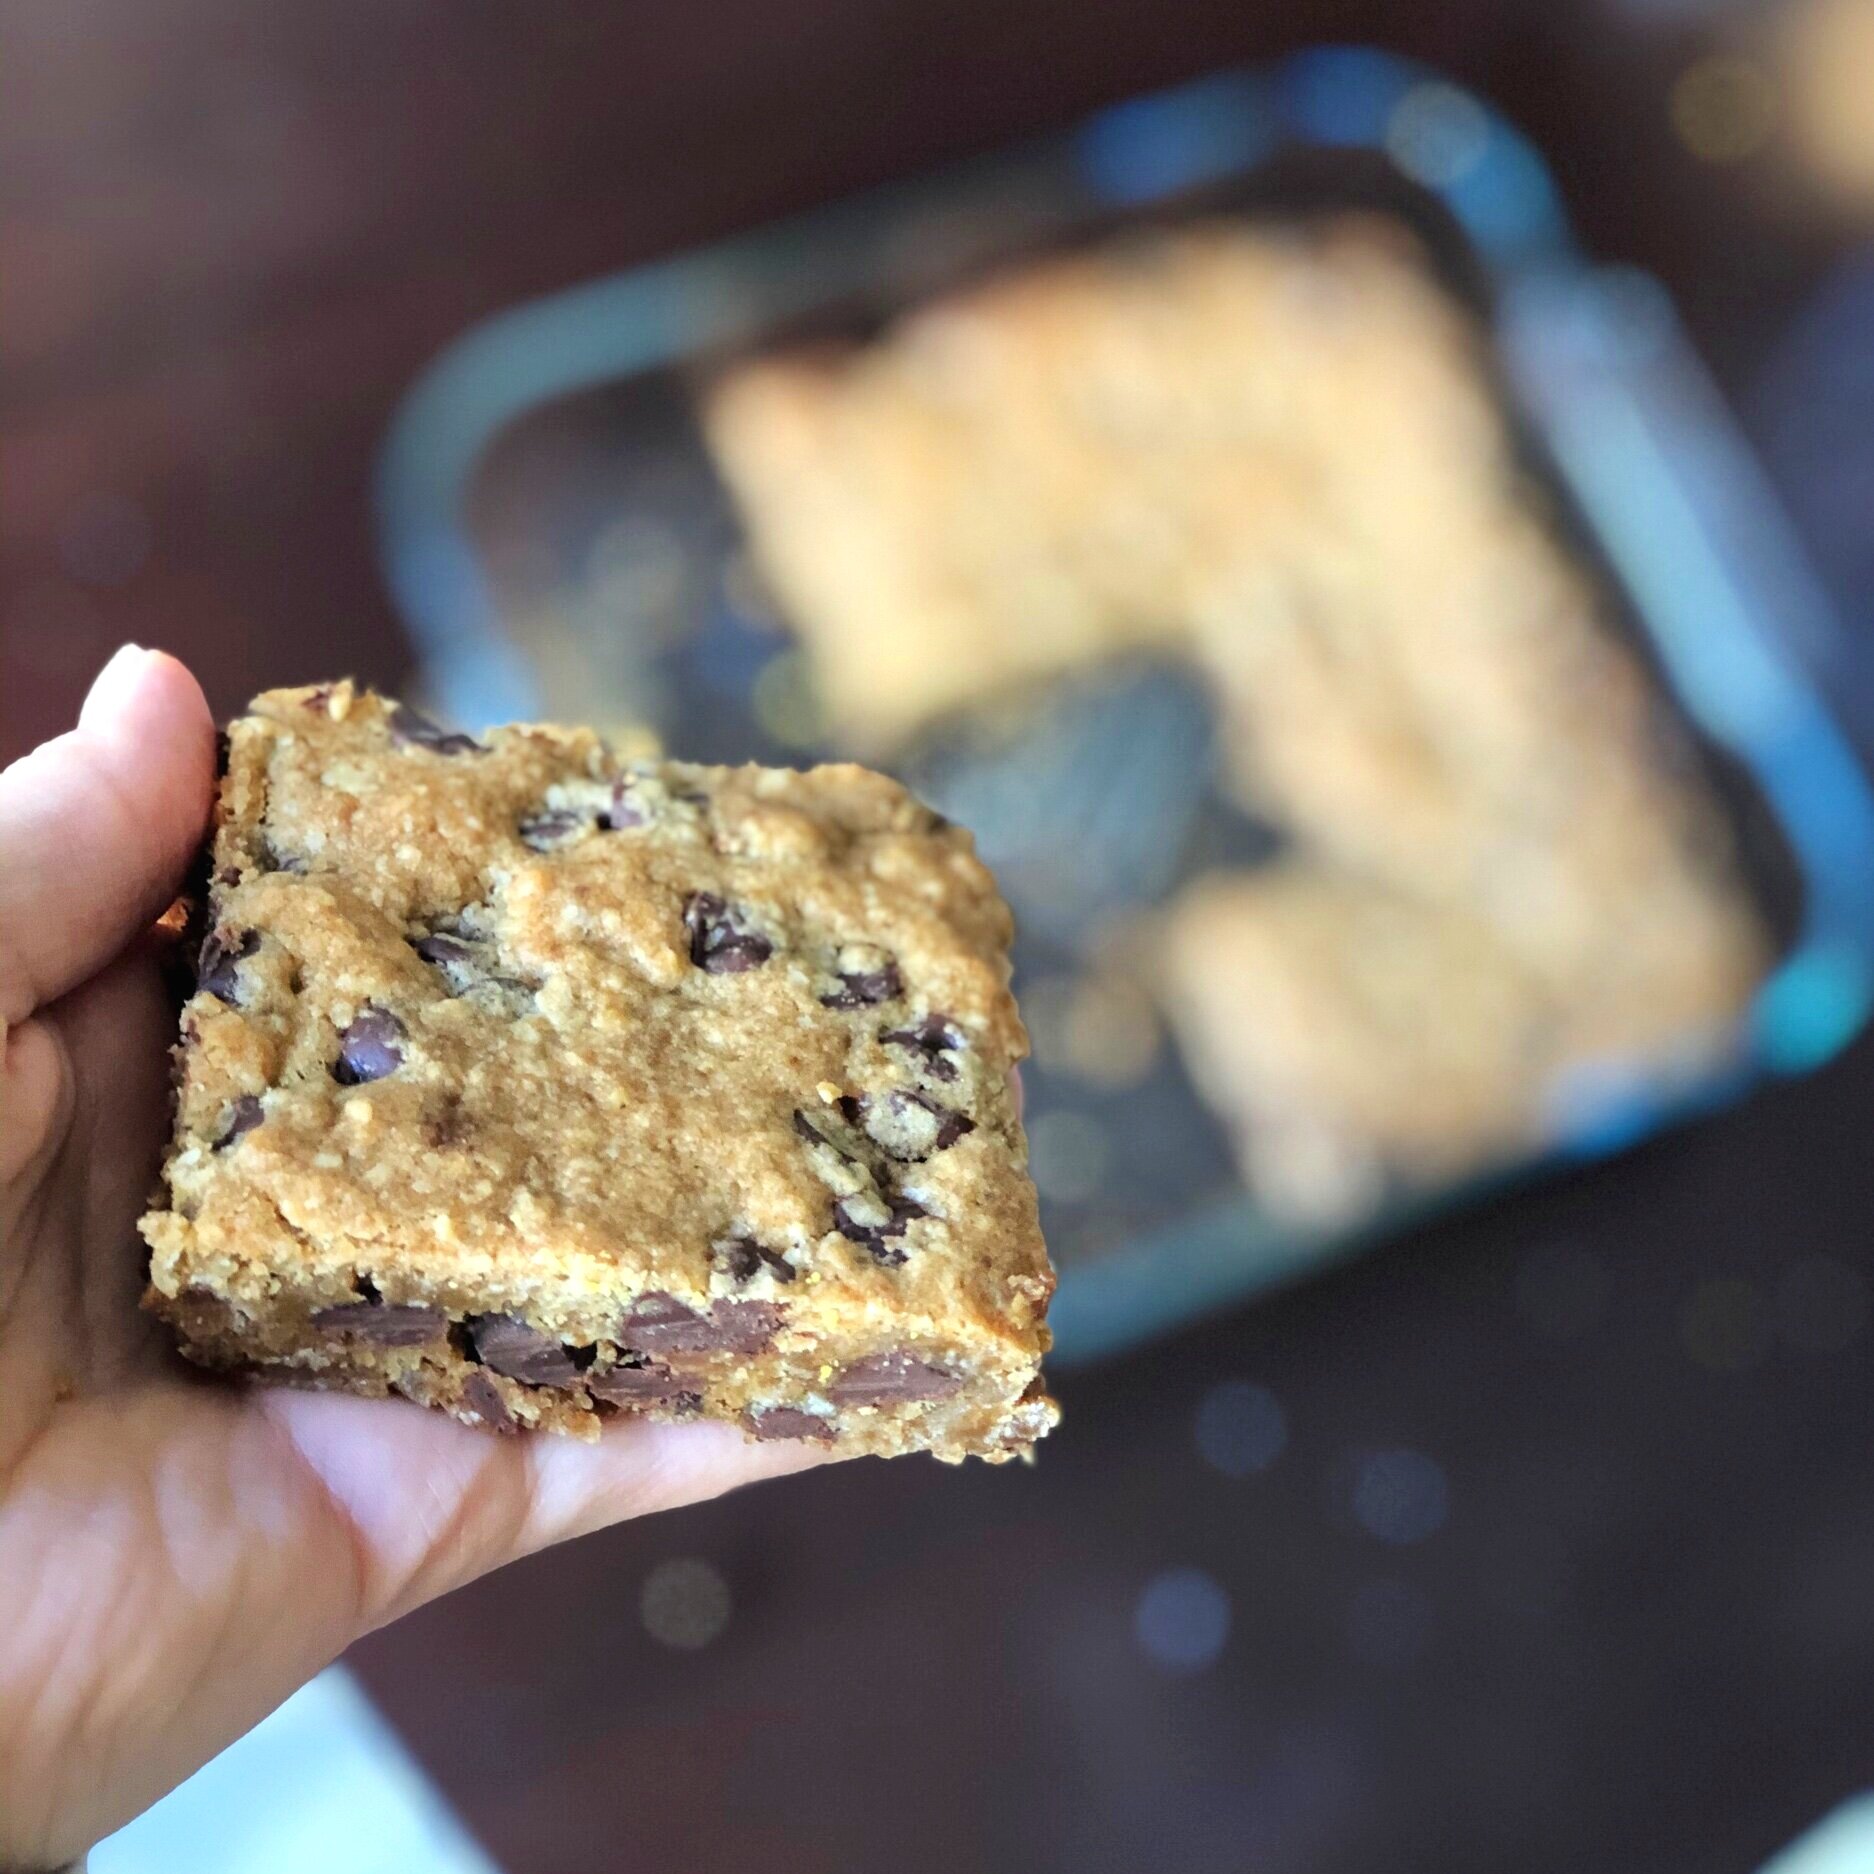
Healthier Chocolate Peanut Butter Bars

Last updated July 19, 2024

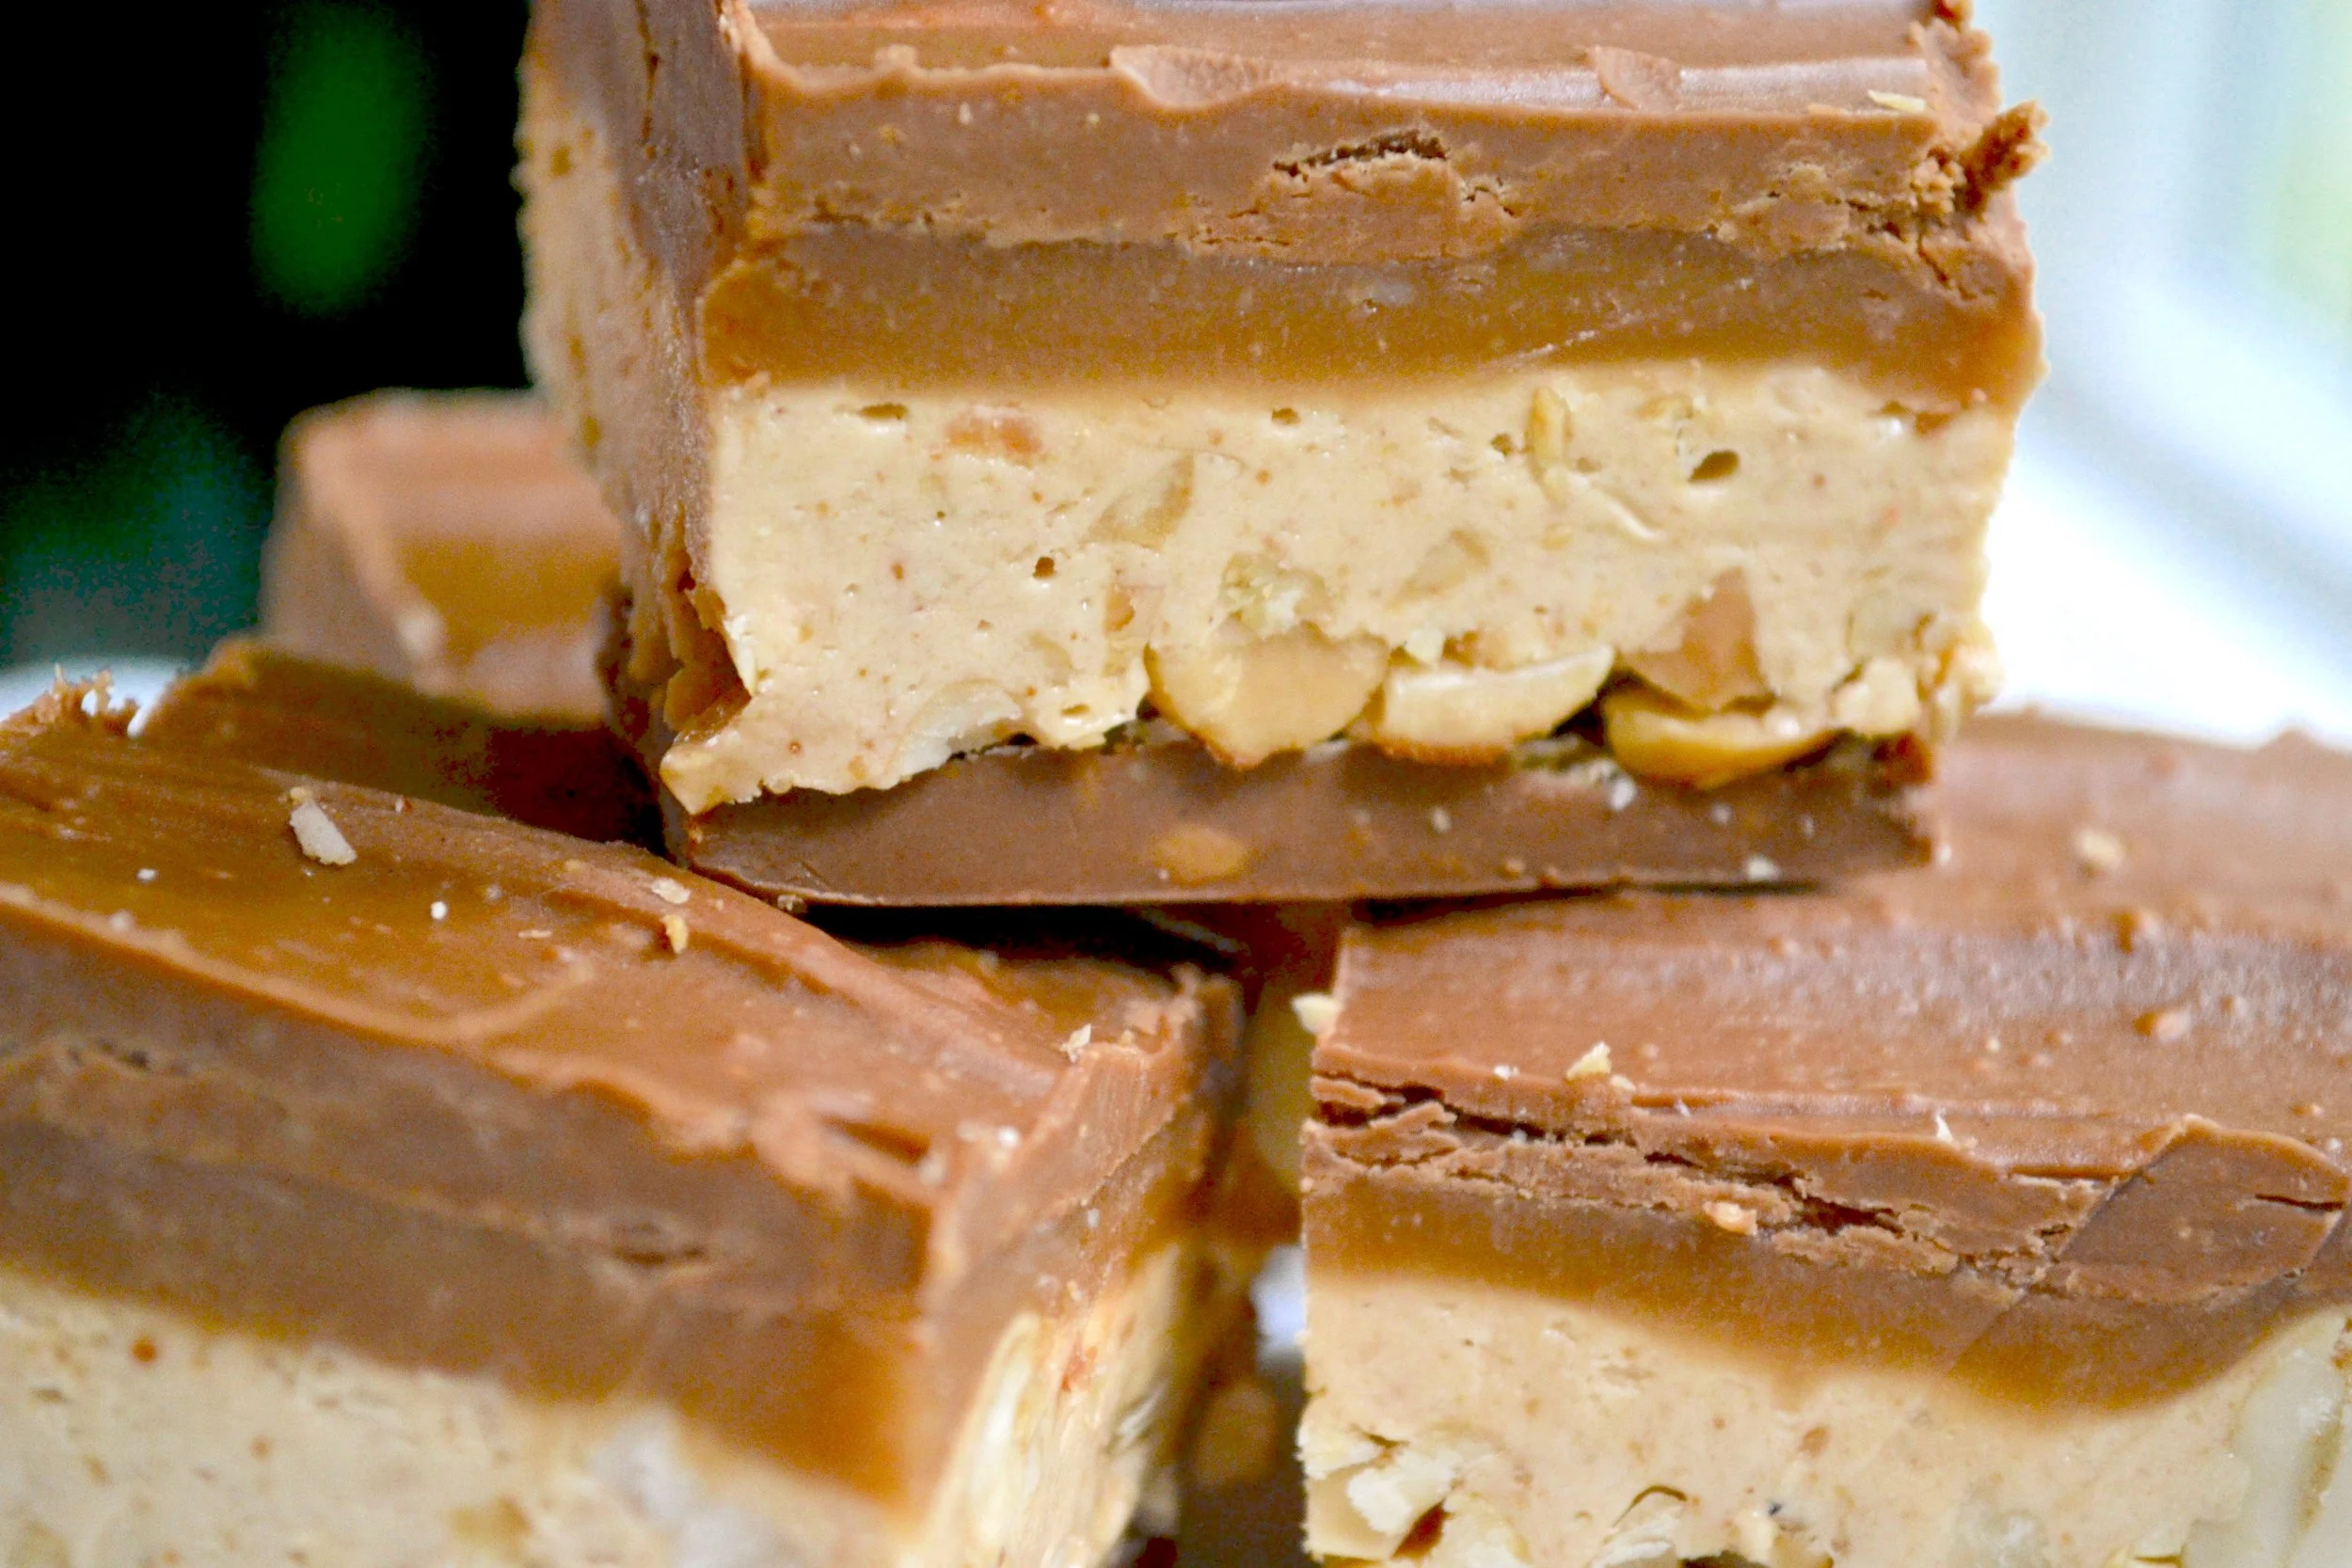
These Chocolate Peanut Butter Bars check a lot of boxes.

  • Delicious. These bars somehow bridge the gap between “coconut lovers” and “chocolate peanut butter lovers”, even for those who don’t normally love coconut, and those who don’t normally love peanut butter and chocolate together. I know, weird, but those people do exist and they’re some of my taste testers.

  • Healthier than most desserts. I would (and did) unabashedly eat these for breakfast. They’re full of nuts and coconut, and only use coconut oil, depending on which camp you fall in as far as viewing coconut oil as a good medium-chain fatty acid or simply another saturated fat.

  • No bake. Great for summer, if you don’t have an oven available to you, or simply don’t want to turn it on.

  • Easy. These can be ready in less than 30 minutes, quick and satisfying to whip up, with most of the work done in a food processor.

  • Satisfying. With the protein and fat content, these will keep you satisfied for longer. When you’re satisfied, you’re less likely to keep reaching for other unhealthy foods or overeating.

  • Gluten-free, vegan, dairy-free, egg-free, and almost refined sugar-free (there’s sugar in chocolate chips, which are in the chocolate topping.)

If those aren’t enough reasons to love these bars, I have one more. You don’t have to grease your baking dish! I know, that’s a little thing, but it’s a small kitchen task I don’t overly enjoy, and the fact that these bars slide ride out of an ungreased pan is a small yippee from me!

Another reason I like these, is because they don’t call for dates. Don’t get me wrong, I love dates, but it’s nice to have a healthy dessert recipe that doesn’t call for dates since so many do. I don’t always have dates on hand, and this way I can still whip up a healthier dessert/snack without waiting for my next grocery run. That makes this recipe’s ingredient list pretty close to being all pantry staples.

This post may contain affiliate links. If you make a purchase using these links, Jennyblogs may receive a small commission, at no extra cost to you. This helps to support Jennyblogs. Where possible, links are prioritized to small businesses, and American companies and products made in the USA for American readers. For further information see the privacy policy. Grazie!

Recipe inspired by Dani’s Healthy Eats


Healthier Chocolate Peanut Butter Bars

Serves about 16

Ingredients:

For the Chocolate Coconut Crust

  • 1 1/2 cups / 120g shredded unsweetened coconut

  • 6 Tbsp / 120g maple syrup

  • 6 Tbsp / 97g peanut butter

  • 6 Tbsp / 59g peanuts

  • 6 Tbsp / 38g cocoa powder

  • 5 Tbsp / 70g coconut oil

For the Peanut Butter Filling

  • 1/2 cup / 130g peanut butter

  • 1/4 cup / 81g maple syrup

  • 1/4 cup / 56g coconut oil

For the Chocolate Topping

  • 1 cup / 175g semi sweet or dark chocolate chips

  • 1 Tbsp / 14g coconut oil

Directions:

Ungreased 8x8 inch / 20x20 centimeter square baking dish

Make the Chocolate Coconut Crust

  1. Add all ingredients to a food processor; blend until smooth and mixture comes together in a soft dough-like ball.

  2. Press into pan and freeze while preparing filling.

Make the Peanut Butter Filling

  1. Add all filling ingredients to a medium bowl or food processor and mix until smooth. (It’s not necessary to clean food processor between mixing the crust and filling.)

  2. Remove crust from freezer and evenly spread filling over crust. Place back in freezer while preparing topping.

Make the Chocolate Topping

  1. In a small saucepan, combine chocolate and coconut oil. Melt over low heat, stirring frequently. Remove from heat when there are still a few tiny bits of chocolate; continue stirring until all is melted and smooth.

  2. Remove bars from freezer and spread topping evenly over filling. Cover and place in freezer or refrigerator to set, at least 30 minutes. Store covered in refrigerator.

Jenny’s Notes:

  • Different nut butters and nuts can be swapped out for the peanut butter and peanuts. Almond butter and almonds can be used, or cashews and cashew butter, or mix them up as you wish!

Healthier Chocolate Peanut Butter Bars
Yield 16
Author
Prep time
25 Min
Inactive time
30 Min
Total time
55 Min

Healthier Chocolate Peanut Butter Bars

Decadent, no-bake chocolate peanut butter bars with a chocolate coconut crust, peanut butter filling, and simple chocolate topping are deceivingly simple to make and satisfying to eat. Gluten-free, dairy-free, vegan, and almost refined sugar-free.
Cook modePrevent screen from turning off

Ingredients

For the Chocolate Coconut Crust
For the Peanut Butter Filling
For the Chocolate Topping

Instructions

Make the Chocolate Coconut Crust
  1. Ungreased 8x8 inch / 20x20 centimeter square baking dish
  2. Add all ingredients to a food processor; blend until smooth and mixture comes together in a soft dough-like ball.
  3. Press into pan and freeze while preparing filling.
Make the Peanut Butter Filling
  1. Add all filling ingredients to a medium bowl or food processor and mix until smooth. (It’s not necessary to clean food processor between mixing the crust and filling.)
  2. Remove crust from freezer and evenly spread filling over crust. Place back in freezer while preparing topping.
Make the Chocolate Topping
  1. In a small saucepan, combine chocolate and coconut oil. Melt over low heat, stirring frequently. Remove from heat when there are still a few tiny bits of chocolate; continue stirring until all is melted and smooth.
  2. Remove bars from freezer and spread topping evenly over filling. Cover and place in freezer or refrigerator to set, at least 30 minutes. Store covered in refrigerator.

Notes

  • Different nut butters and nuts can be swapped out for the peanut butter and peanuts. Almond butter and almonds can be used, or cashews and cashew butter, or mix them up as you wish!

Nutrition Facts

Calories

332.91

Fat

26.92 g

Sat. Fat

17.14 g

Carbs

21.81 g

Fiber

3.64 g

Net carbs

18.19 g

Sugar

13.5 g

Protein

6.06 g

Sodium

77.98 mg

Cholesterol

0.11 mg

Nutritional information is approximate. Based on 1 serving if cut into 16 pieces.

healthy coconut chocolate peanut butter bars, vegan, gluten free, dairy free, refined sugar free, no bake
dessert
American
Did you make this recipe?
Tag @jennyblogsandbakes on instagram and hashtag it #jennyblogs

Sourdough Discard Chocolate Chip Cookie BAKE OFF

Last Updated: July 9, 2024

Welcome to my sourdough chocolate chip cookie throw down.

What did I do with scads of sourdough discard piling up in my fridge? Why, bake up multiple batches of sourdough discard chocolate chip cookies to see which ones are the best, of course.

The first step was to pick the recipes. I wanted ones that seemed to be popular, but most importantly, recipes with varied approaches. The first time I ever made sourdough discard chocolate chip cookies was a recipe by the Boy Who Bakes. That recipe involved browning butter and using only egg yolks, which may seem fussy for chocolate chip cookies, but there are valid reasons behind it.

Can’t you just throw some sourdough discard in your favorite chocolate chip cookie recipe and call it a day?

Well, yes. And no.

When it comes to sourdough discard, it works very well in quick breads, pancakes, muffins, etc. It starts to change things up noticeably, though, when added to things like cookies. This is because cookies have a very low moisture content compared to cakes or muffins. If you add water or liquids to a cookie, they’ll turn cake-y. Sourdough discard is often half water. This poses a problem for cookies. This can be offset by eliminating water elsewhere in the recipe to make up for it. Egg whites contain water, so the first step is to use just egg yolks. Secondly, by browning the butter, you evaporate the water content in butter.

When I learned this, it all started to make so much sense why you can’t just toss some discard in your cookie dough if you want the same beloved, chewy texture. There is a science-y reason for it! Yet…why are there so many recipes for sourdough discard chocolate chip cookies that call for only one or neither of these things? Does that mean it’s not necessary to do the extra work? Is the science not science-ing?

Well, I was here to find out!

I decided to make 3 new sourdough discard recipes, combined with 2 more I tried at different times, for a total of 5 contenders.

Each recipe has different elements so you can see how they affect the final product. I found it fascinating and hopefully the results will help you decide which sourdough chocolate chip cookie recipe will be your new go-to!

About this Bake Off

  • The 3 principal recipes in this bake off were all made on the same day with the same ingredients and baked in the same oven. Recipe 4 was made in Italy with Italian ingredients, so that would be the most different. However, being so similar in nature to recipe 2, I felt it was still worthwhile to include it. Recipe 5 was made shortly after but not on the same day as the 3 principal recipes.

  • All 5 recipes were followed as precisely as possible, without making any adjustments, even based on best judgement. For example, 2 recipes I would have normally added more flour, but I resisted to keep this bake off as true as possible.

  • All recipes requiring refrigeration were chilled overnight, even if one recipe’s minimum chill time was 2 hours, it still got an overnight chill.

  • All ingredients in these recipes were weighed for maximum consistency.

This post may contain affiliate links. If you make a purchase using these links, Jennyblogs may receive a small commission, at no extra cost to you. This helps to support Jennyblogs. Where possible, links are prioritized to small businesses, and American companies and products made in the USA for American readers. For further information see the privacy policy. Grazie!


Sourdough Discard Chocolate Chip Cookie Bake Off

Cookie #1 Little Spoon Farm

This recipe was the closest to a traditional chocolate chip cookie recipe, calling for regular butter and a whole egg.

Raw dough: Gooey, had a “pull” to it, rather like a stiffer bread dough, where you can see and feel the gluten build up in the dough. This dough had the most pronounced “sourdough” taste to it.

Baked: Had a pockmarked appearance, and a texture again that made one think of bread. But it was not “bready” per se, nor was it cake-y. It still had a nice chew to it, it just wasn’t as dense as a classic chocolate chip cookie. Overall a very tasty cookie, and the sourdough taste was lessened with baking.


Cookie #2 Sugar Spun Run

This recipe was the most tedious to make, because it not only required browning and cooling the butter, but also called for just egg yolks.

Raw dough: almost identical to classic chocolate chip cookie dough in texture, with a lovely nuttiness from the browned butter. The browned butter also did a good job of balancing out the sourdough taste.

Baked cookie: nice bake, not too flat, not to tall. Chewy, delicious, and still very similar to a classic chocolate chip cookie. Minimal sourdough taste.


Cookie #3 King Arthur

This recipe was a hybrid of the two recipes above, using browned butter yet a whole egg.

Raw dough: very soft; too soft. I knew it would need more flour but decided to make the recipe exactly as written for testing purposes. Delicious, again with browned butter the nuttiness really mellowed out the sourdough taste. Had it been a bit firmer it probably would’ve been similar to cookie #1 in texture with that slight glutinous “pull.”

Baked cookie: too much spread, too flat and soft. Definitely the most chocolatey. Tricky to get off the tray (should have used a silicone baking mat or parchment paper).


Cookie #4 The Boy Who Bakes

This is the first sourdough discard chocolate chip cookie recipe I ever made. I could really get behind his method, and how he thoroughly and clearly explained how he arrived at the recipe. Science. It made sense to me. I didn’t include this recipe in with my 3 cookie bake-off since I had 1) already made these 2) was looking to try all new ones, and 3) Sugar Spun Run’s was already similar.

This recipe is very similar to Sugar Spun Run in that it calls for browned butter and only egg yolks.

Raw Dough: Sticky, I should’ve known it would need more flour despite the chilling, but other than that pretty similar to standard chocolate chip cookie dough, with that wonderful nutty flavor from the browned butter pairing with the subtle tang from the discard.

Baked Cookie: Yes, they were delicious. Similar to King Arthur’s recipe, for test results in my kitchen, I would have adjusted the recipe to include more flour the next time, as the cookies came out very thin and flat.


Cookie #5 My mom’s chocolate chip cookies

My mom always uses oil in her cookies. Oil (certain kinds, anyway) is often seen as a healthier alternative to butter, especially for those who avoid dairy or cholesterol.

None of the other 4 cookies I tried included oil in the recipe, so I decided to try my mom’s recipe with sourdough discard, and used whole eggs.

Raw Dough: Stickier and with more of, again, that glutinous “pull” than is usual for cookie dough. Tasted wonderful, faint tang from the discard.

Baked Cookie: These turned out closest to Little Spoon Farm, which used regular butter and whole eggs; a delicious chocolate chip cookie with a just a bit more volume, hint of chew, hint of breadiness.

These were by far the easiest and least fussy. No need to separate of eggs, no need to brown then cool butter, no need to cream the butter, no need to chill the dough. Easy.


Conclusion:

All of these recipes are valid and yielded delicious cookies. Boy Who Bakes and King Arthur both would need more flour, based on my results, but this could also be dependent on my preference of cookies as well as the state of discard starter and various other possible factors.

At the end of the day, there are two recipes I would be most likely to return to.

For absolute best taste and texture, #2 Sugar Spun Run was the stand out, followed closely by the #4 Boy Who Bakes.

For quickest cookies to whip up in a pinch, #5 my mom’s recipe wins for easiest and fastest.


Peanut Butter Butterscotch Bars

Last updated: June 9, 2024

Peanut Butter Butterscotch Bars are similar to Rice Krispie Treats, but coated in peanut butter and butterscotch. Ohhhh yummmm.

The recipe calls for only 5 ingredients and takes all of 15 minutes to make! These Peanut Butter Butterscotch Bars and other butterscotch bars are often made around Christmastime, but I love making these in the summer, too, because this is a no-bake recipe and very quick for when you’d rather spend your time outside than inside baking.

I love butterscotch, but I didn’t often choose to bake or eat butterscotch desserts until recently because they often contain artificial coloring. While some still do, I was happy to find Aldi brand butterscotch chips use natural coloring!

Recipe by Jenny, inspired by the many other butterscotch no-bake desserts out there :)


Peanut Butter Butterscotch Bars

Makes 1 8x8inch pan, about 9-12 servings

Ingredients:

  • 1 bag (about 10oz / 283g ) butterscotch chips

  • 3/4 cup / 195g peanut butter

  • 6 Tbsp / 85g butter

  • 2 cups / 114g mini marshmallows

  • 2 cups / 56g Rice Krispies

Directions:

8x8inch / 20x20cm pan lightly greased or lined with wax paper.

  1. In a medium saucepan, melt butterscotch chips, peanut butter, and butter together. Stir until smooth.

  2. Remove from heat and allow to cool for a few minutes.

  3. Stir in marshmallows and Krispies.

  4. Spread into prepared pan and let set before slicing. Placing in the fridge can speed this process up.

Peanut Butter Butterscotch Bars
Yield 9
Author
Prep time
5 Min
Cook time
5 Min
Inactive time
30 Min
Total time
40 Min

Peanut Butter Butterscotch Bars

Easy no-bake butterscotch peanut butter bars with rice krispies and marshmallows.

Ingredients

Instructions

  1. 8x8inch / 20x20cm pan lightly greased or lined with wax paper.
  2. In a medium saucepan, melt butterscotch chips, peanut butter, and butter together. Stir until smooth.
  3. Remove from heat and allow to cool for a few minutes.
  4. Stir in marshmallows and Krispies.
  5. Spread into prepared pan and let set before slicing. Placing in the fridge can speed this process up.

Nutrition Facts

Calories

255.7

Fat

18.82 g

Sat. Fat

7.08 g

Carbs

19.22 g

Fiber

1.06 g

Net carbs

18.15 g

Sugar

9.37 g

Protein

5.54 g

Sodium

195.21 mg

Cholesterol

20.36 mg

Nutritional information is approximate. Based on 1 piece if cut into 9 squares.

peanut butter rice krispie bars, butterscotch marshmallow bars, no-bake, summer dessert
dessert
American
Did you make this recipe?
Tag @jennyblogsandbakes on instagram and hashtag it #jennyblogs

Avalanche Bark - Rocky Mountain Chocolate Factory Copycat

White chocolate peanut butter coated Rice Krispie treats with mini marshmallows and chocolate chips.

These are so delicious and simple to make, needing only about 10 minutes and 5 ingredients. Pop it in the fridge and you’ve got yourself a tasty treat for yourself or for that party you forgot you were supposed to bring something to!

I always have people asking for this recipe when I take it places, and it’s an easy one to give because it’s so simple. Even once when I had made this in Italy, and only had some older overly-chewy marshmallows, (marshmallows aren’t a big thing there and different than US ones to begin with) it was still a hit. In fact, a friend, after asking for the recipe, asked what the chewy bits were, and when I embarrassingly told him about the stale marshmallows, he laughed and said, “they’re my favorite part!” These are so good, they’ll even make chewy marshmallows shine.

The shameless blogger backstory

I once worked at a Rocky Mountain Chocolate Factory, and honestly it was one of the most fun jobs I ever had. I enjoyed working with chocolate, making the caramel apples, fudge, barks, etc., I liked my colleagues, had a good boss, and yes, also enjoyed eating some chocolate. It was very low-stress and not overly physical, at least compared to having spent 6+ hours at the ballet studio during the day before going to RMCF.

This recipe is a copycat of the Rocky Mountain Chocolate Factory’s Avalanche Bark. While legally I can’t give you the exact recipe, I would like to note that it would be completely impractical for me to even try. Everything there is made in much larger batches than a home baker would need to make, and by the time the recipe would be reduced down to a manageable quantity, you would have awful measurements like 0.1625 lbs of this or 2/3 tsp of that.

What I can tell you, is that this recipe is probably the closest you can get. But all of that could actually be irrelevant, as some of the other copycat recipes probably adjusted the recipe according to their tastes, and you can too! It wouldn’t take a rocket scientist to look at a slice of authentic Rocky Mountain Avalanche Bark and compare it to some of the other copycat recipes to realize that hey, Rocky Mountain’s has more Krispies. Because really, if you like a lighter, crunchier version, add more Krispies (it would also be crumblier, by the way). If you want more of a true “bark”, add less Krispies. Or, add more marshmallows and less Krispies, for a chewier version. Maybe you want more chocolate chips on top. Maybe you want to mix chocolate chips into these instead of just sprinkling on top. As you can see, for only having 5 ingredients, this recipe has quite a few possibilities for customization.


Avalanche Bark

Makes about 9 generous squares

Ingredients:

  • 12 oz white chocolate chips

  • 1/2 cup / 130g peanut butter

  • 1 1/2 cups / 86g mini marshmallows

  • 3 1/2 cups / 98g rice krispies

  • 1/4 cup / 43g mini chocolate chips

Directions:

  1. Line bottom of an 8x8in / 20x20cm square pan with wax paper.

  2. In a medium large pot, melt white chocolate chips and peanut butter together over low heat, stirring often.

  3. When white chocolate has just melted, remove from heat and stir in mini marshmallows. Gently fold in Rice Krispies until evenly coated.

  4. Spoon and spread into prepared pan, being careful not to flatten too much.

  5. Sprinkle with mini chocolate chips and press lightly.

  6. Allow to set at room temperature or in fridge before slicing.

Jenny’s Notes:

  • While this recipe is very similar to Rocky Mountain’s, feel free to customize as you wish. Add more or less Krispies, more or less Mini marshmallows, more chocolate chips or even mix them in, etc.

Avalanche Bark - Rocky Mountain Chocolate Factory Copycat
Yield 9
Author
Prep time
10 Min
Inactive time
20 Min
Total time
30 Min

Avalanche Bark - Rocky Mountain Chocolate Factory Copycat

White chocolate and peanut butter coated rice krispies with chewy mini marshmallows and mini chocolate chips make up this simple, no-bake dessert that tastes just like Rocky Mountain Chocolate Factory's

Ingredients

Instructions

  1. Line bottom of an 8x8in / 20x20cm square pan with wax paper.
  2. In a medium large pot, melt white chocolate chips and peanut butter together over low heat, stirring often.
  3. When white chocolate has just melted, remove from heat and stir in mini marshmallows. Gently fold in Rice Krispies until evenly coated.
  4. Spoon and spread into prepared pan, being careful not to flatten too much.
  5. Sprinkle with mini chocolate chips and press lightly.
  6. Allow to set at room temperature or in fridge before slicing.

Notes

  • While this recipe is very similar to Rocky Mountain’s, feel free to customize as you wish. Add more or less Krispies, more or less Mini marshmallows, more chocolate chips or even mix them in, etc.

Nutrition Facts

Calories

382.4

Fat

20.86 g

Sat. Fat

9.55 g

Carbs

45.03 g

Fiber

0.96 g

Net carbs

44.08 g

Sugar

32.81 g

Protein

6.56 g

Sodium

162.96 mg

Cholesterol

8.69 mg

Nutritional information is approximate. Based on 1 square if cut into 9 slices.

Rocky Mountain Chocolate Factory, Avalanche Bark, no bake dessert
dessert
American
Did you make this recipe?
Tag @jennyblogsandbakes on instagram and hashtag it #jennyblogs

Almond Joy Cookies

Almond Joy candy bars in an easy to make, homemade cookie form.

These cookies are loaded with chocolate chips, coconut, and sliced almonds, bursting with that coconut and almond flavor. They’re sweet, chewy, and pure joy to eat. (Heh heh.)

Make these with toasted coconut!

While I’ve written the recipe as a quick and easy to whip up recipe with regular, unsweetened coconut, these are DELICIOUS if you have a few extra minutes to toast your coconut.

To toast coconut:

  1. Preheat oven to 350°F / 177°C.

  2. Spread 2 cups coconut into an even layer onto an ungreased baking sheet or dish.

  3. Bake in oven for 8-10* minutes, or until golden and fragrant. Check every 2 minutes or so to ensure it doesn’t burn. Stir as necessary.

* Baking time will vary depending on oven and type of baking dish used.

I used to always use a baking sheet or cookie sheet to toast coconut, until I tried using a Le Creuset baking dish, and I’ve never used anything else since. The coconut toasts so evenly I rarely have to stir it anymore, and burning it is a distant memory.

Le Creuset is made of enameled stoneware which creates even baking, and easy clean up! One more amazing use for Le Creuset. They’re an investment and can be very expensive, but certain pieces are more affordable, or even if you can find them on occasion at Home Goods or Le Creuset’s outlet stores, you can get some pretty good deals.


Almond Joy Cookies

Makes about 2 dozen cookies

Ingredients:

  • 3/4 cup / 168g neutral-flavored cooking oil

  • 3/4 cup / 150g sugar

  • 3/4 cup / 150g brown sugar

  • 2 eggs

  • 1 tsp vanilla extract

  • 1 tsp coconut extract

  • 1 tsp almond extract

  • 2 cups / 160g unsweetened shredded coconut

  • 2 1/4 cups / 270g all-purpose flour

  • 1 tsp baking soda

  • 1 tsp salt

  • 2 cups (12 oz bag) / 350g semi-sweet or milk chocolate chocolate chips

  • 1/2 cup / 42g sliced almonds

Directions:

  1. In a large bowl or bowl of a stand mixer, mix together oil, and sugars.

  2. Beat in eggs and extracts. Stir in coconut.

  3. In another medium bowl, whisk together flour, baking soda, and salt.

  4. Stir dry ingredients into wet ingredients.

  5. Stir in chocolate chips and almonds by hand, just until evenly distributed.

  6. Drop by generous tablespoonfuls onto ungreased cookie sheets. Bake in preheated oven for 8-10 minutes or until cookies look puffed, slightly golden, and center no longer looks gooey.

  7. Allow to cool for about 5 minutes on cookies sheets before removing to cool completely.

Jenny’s Notes:

  • Try these cookies using toasted coconut! (Toast coconut by spreading into an even layer on a baking sheet or dish, and bake at 350°F / 177°C for 5-10 minutes or until golden brown, check every 2 minutes or so to ensure it doesn’t burn, stirring if necessary.)

  • I like to use a mix of both semi-sweet and milk chocolate chips in these!

  • For nut lovers, you can increase the amount of sliced almonds in this recipe!

Almond Joy Cookies
Yield 24 cookies
Author
Prep time
20 Min
Cook time
10 Min
Total time
30 Min

Almond Joy Cookies

Chewy cookies loaded with coconut, chocolate, and almonds, just like the Almond Joy candy bar.

Ingredients

Instructions

  1. In a large bowl or bowl of a stand mixer, mix together oil, and sugars.
  2. Beat in eggs and extracts. Stir in coconut.
  3. In another medium bowl, whisk together flour, baking soda, and salt.
  4. Stir dry ingredients into wet ingredients.
  5. Stir in chocolate chips and almonds by hand, just until evenly distributed.
  6. Drop by generous tablespoonfuls onto ungreased cookie sheets. Bake in preheated oven for 8-10 minutes or until cookies look puffed, slightly golden, and center no longer looks gooey.
  7. Allow to cool for about 5 minutes on cookies sheets before removing to cool completely.

Notes

  • Try these cookies using toasted coconut! (Toast coconut by spreading into an even layer on a baking sheet or dish, and bake at 350°F / 177°C for 5-10 minutes or until golden brown, check every 2 minutes or so to ensure it doesn’t burn, stirring if necessary.)
  • I like to use a mix of both semi-sweet and milk chocolate chips in these!
  • For nut lovers, you can increase the amount of sliced almonds in this recipe!

Nutrition Facts

Calories

298.91

Fat

17.71 g

Sat. Fat

7.83 g

Carbs

31.57 g

Fiber

1.82 g

Net carbs

29.76 g

Sugar

16 g

Protein

2.62 g

Sodium

159.65 mg

Cholesterol

13.64 mg

Nutritional information is approximate and based on 1 cookie.

no chill cookie dough, chocolate chip cookies, Almond Joy
dessert
American
Did you make this recipe?
Tag @jennyblogsandbakes on instagram and hashtag it #jennyblogs

Whole Wheat Oat Chocolate Chip Cookies

One bowl chocolate chip cookies featuring whole wheat flour and oats.

While the whole wheat flour and oats may trick you into thinking these cookies are trying to be healthy, that’s really not what they’re here for! Sure, an added bonus is that these cookies do have added nutrition, but the whole wheat flour and oats serve to add a more complex flavor profile.

Whole wheat flour adds a nutty flavor while the oats add, ahem, “oatiness” and that beloved chew from an oatmeal cookie. You can use your favorite kind of chocolate chips in this recipe, but I really love the bitterness of dark chocolate chips in these. On the flip side, I also think using white, or even white and dark (!) would be a really beautiful combo.

Chocolate chip cookies are a timeless American staple, and I love all the endless variations! Here is yet another for you to try and add to your baking repertoire!!

This post may contain affiliate links. If you make a purchase using these links, Jennyblogs may receive a small commission, at no extra cost to you. This helps to support Jennyblogs. For further information see the privacy policy. Grazie!


Whole Wheat Oat Chocolate Chip Cookies

Makes about 14-18 medium cookies

Ingredients:

  • 1/2 cup / 113g oil

  • 1/2 cup / 100g brown sugar

  • 1/4 cup / 50g sugar

  • 1/2 tsp salt

  • 1 egg

  • 1 tsp / 5g vanilla extract

  • 3/4 tsp baking powder

  • 1/2 tsp baking soda

  • 1 1/2 cups / 135g rolled or quick oats

  • 3/4 cup / 96g whole wheat flour

  • 1/4 cup / 25g oat bran, wheat germ, or wheat bran

  • 1 cup / 175g semi-sweet or dark chocolate chips

Directions:

Oven preheated to 350°F / 177°C. 1 ungreased baking sheet

  1. In a large bowl or the bowl of a stand mixer, combine oil, both sugars, and salt. Beat in egg and vanilla.

  2. Mix in baking powder and baking soda until thoroughly combined.

  3. Stir in oats, flour, oat bran, and chips until combined.

  4. Drop by generous tablespoonfuls onto baking sheet, leaving about 2 inches between cookies. Bake for 8-12 minutes or until lightly golden and no longer look wet.

  5. Allow to cool for several minutes before removing from cookie sheets to cool completely.

Jenny’s Notes:

  • If you don’t have oat bran, wheat bran, or wheat germ on hand, you could add in extra flour or oats, instead. In fact, I’ve even used baby cereal with great success!

  • While you can really use any kind of chocolate chips you wish, I really enjoy dark chocolate chips or chunks in these cookies; it really compliments the nutty whole wheat flour!

Whole Wheat Oat Chocolate Chip Cookies
Yield 14-18 cookies
Author
Prep time
15 Min
Cook time
12 Min
Total time
27 Min

Whole Wheat Oat Chocolate Chip Cookies

Chocolate Chip Cookies made with oats and whole wheat flour. The extra nutty flavor pairs beautifully with the chocolate chips for an indulgent yet nutritious treat.
Cook modePrevent screen from turning off

Ingredients

Instructions

  1. Oven preheated to 350°F / 177°C. 1 ungreased baking sheet
  2. In a large bowl or the bowl of a stand mixer, combine oil, both sugars, and salt. Beat in the egg and vanilla.
  3. Mix in baking powder and baking soda until thoroughly combined.
  4. Stir in oats, flour, oat bran, and chips until combined.
  5. Drop by generous tablespoonfuls onto baking sheet. Bake for 8-12 minutes or until lightly golden and no longer look wet.
  6. Allow to cool for several minutes before removing from cookie sheets to cool completely.

Notes

  • If you don’t have oat bran, wheat bran, or wheat germ on hand, you could add in extra flour or oats, instead. In fact, I’ve even used baby cereal with great success!
  • While you can really use any kind of chocolate chips you wish, I really enjoy dark chocolate chips or chunks in these cookies; it really compliments the nutty whole wheat flour!

Nutrition Facts

Calories

231.82

Fat

13.14 g

Sat. Fat

4.56 g

Carbs

28.53 g

Fiber

2.44 g

Net carbs

26.1 g

Sugar

12.2 g

Protein

3.66 g

Sodium

174.98 mg

Cholesterol

11.82 mg

Nutritional information is approximate and based on 14 servings.

cookies, chocolate chip cookies, oatmeal cookies, whole grain, whole wheat flour
dessert, cookies
American
Did you make this recipe?
Tag @jennyblogsandbakes on instagram and hashtag it #jennyblogs

Nutella-Filled Pillow Cookies

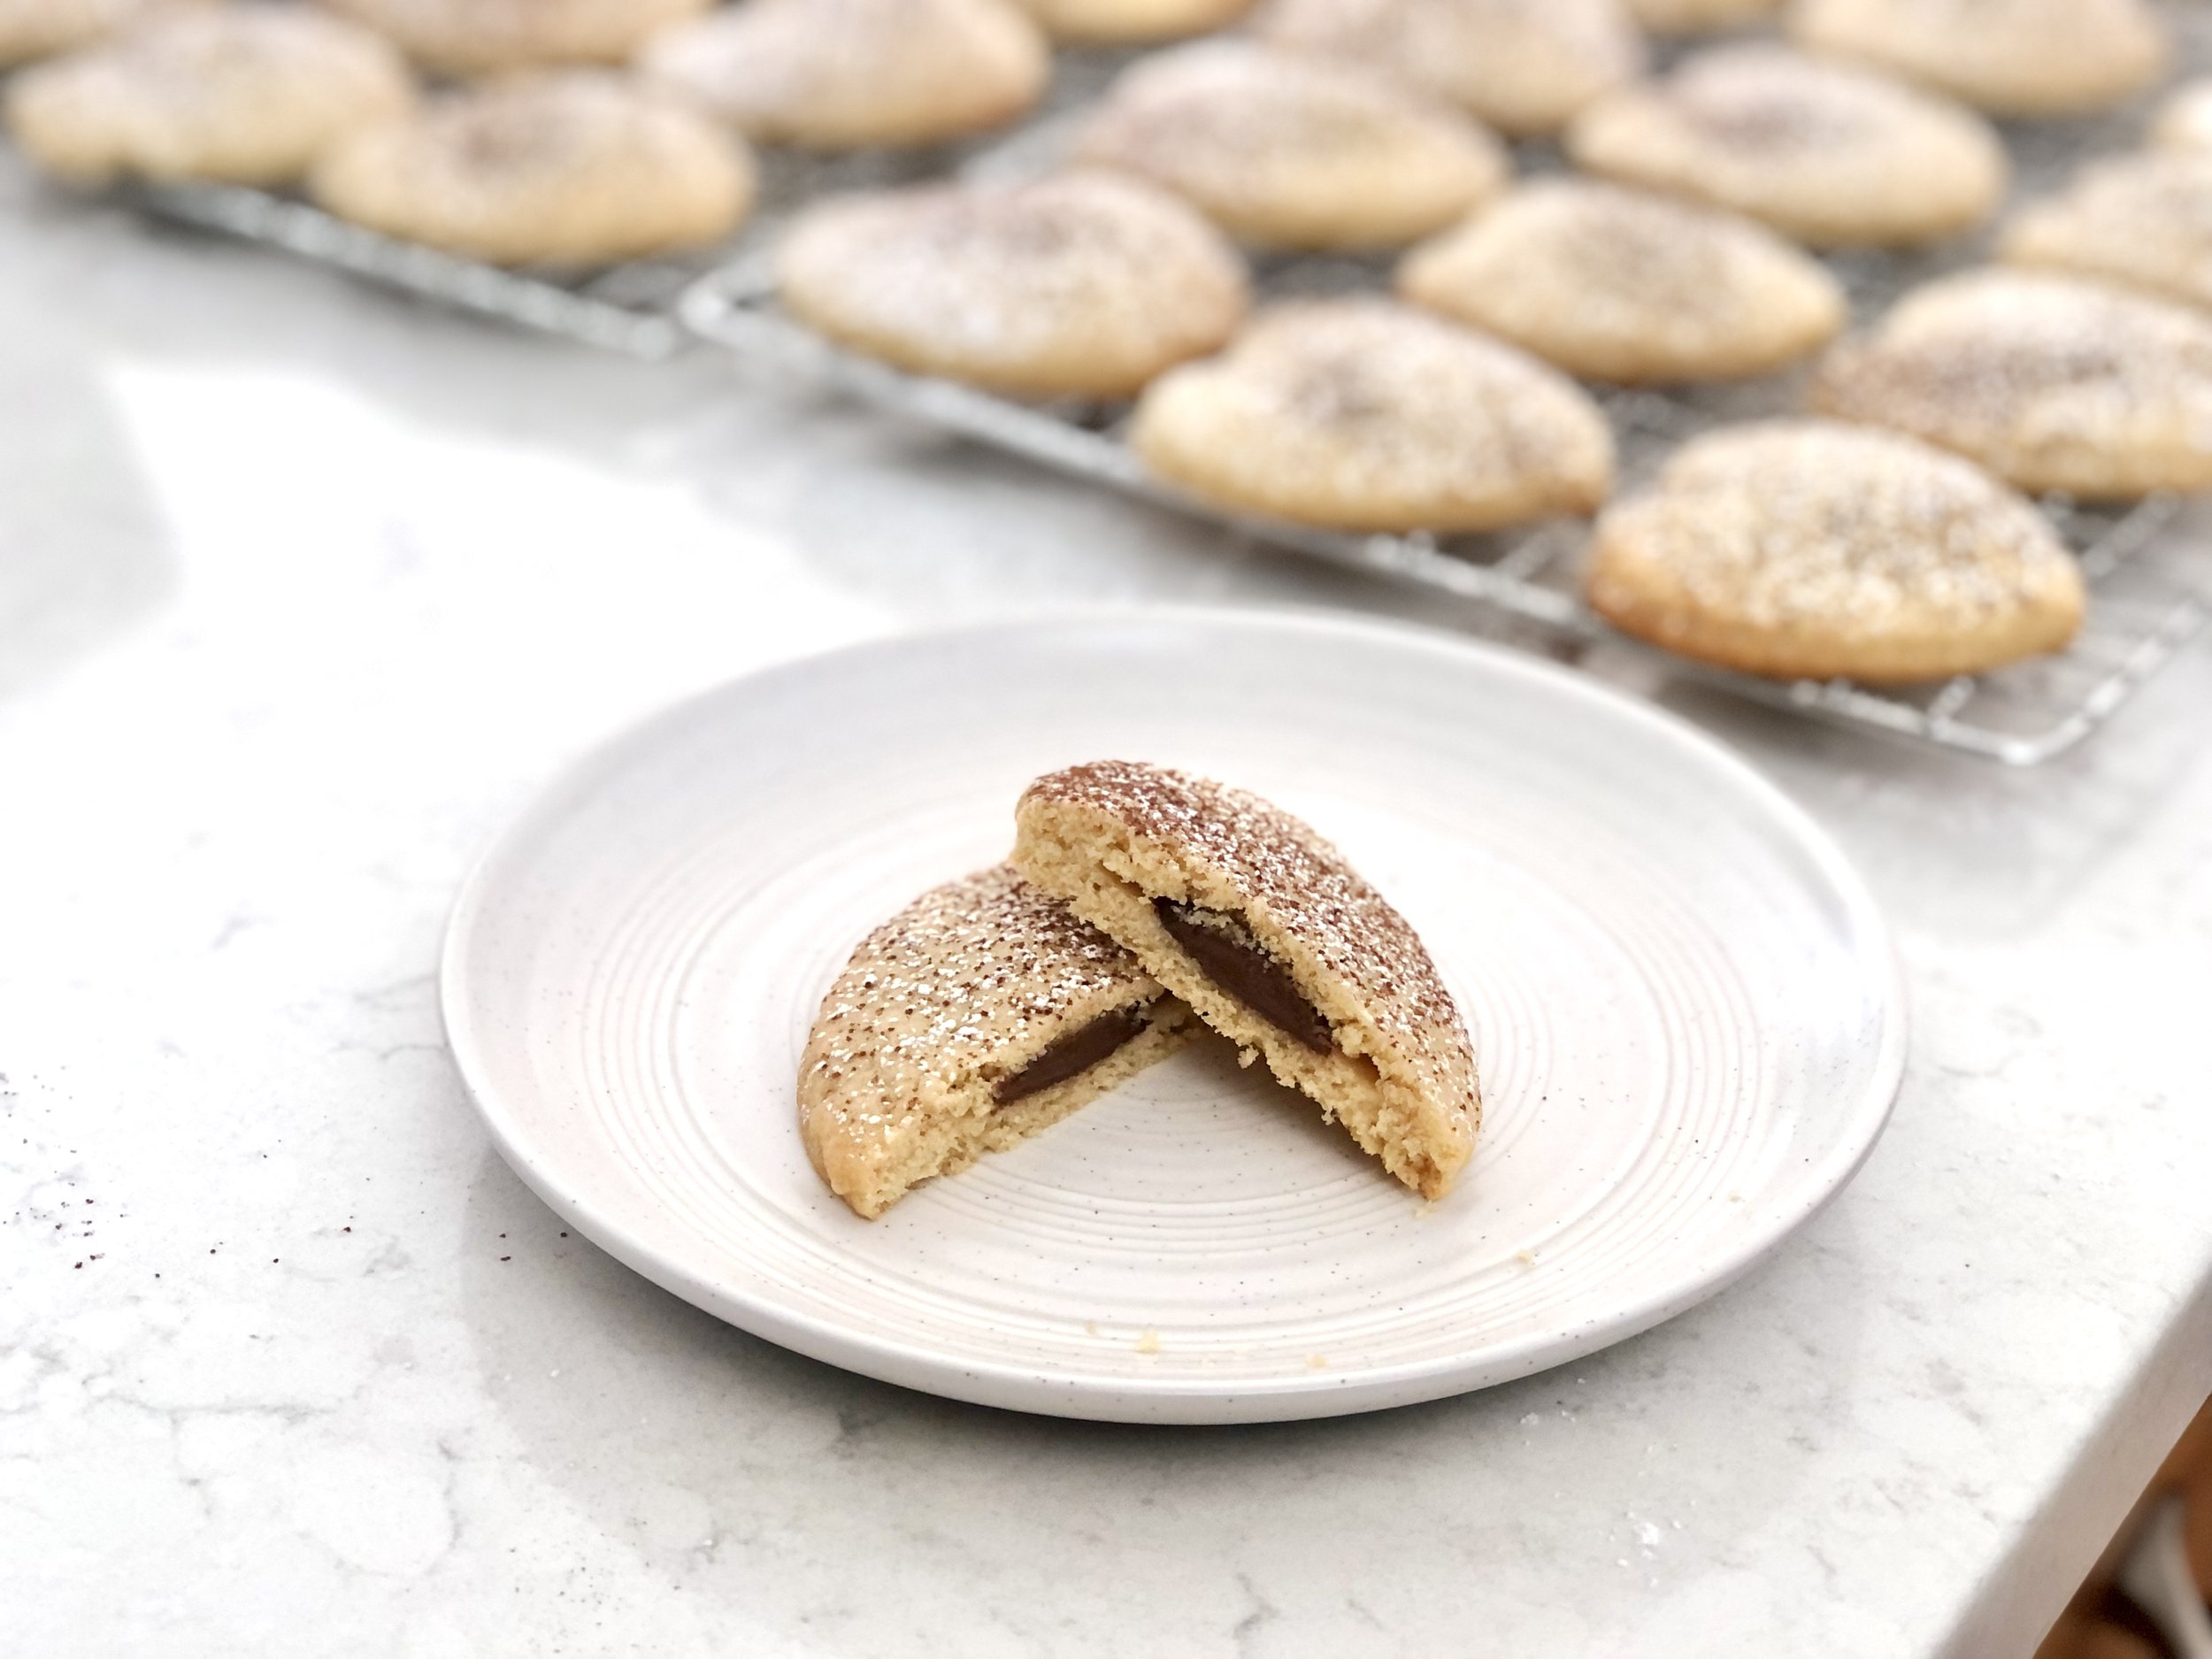
These are buttery sugar cookies with hints of almond and vanilla, stuffed with Nutella. The almond really compliments the Nutella! I guess hazelnuts and almonds make good company.

I first made these cookies over 10 years ago and they’re still a cookie I love to make. Because they’re cutouts, I tend to save them for special occasions, but the extra time is so worth it!

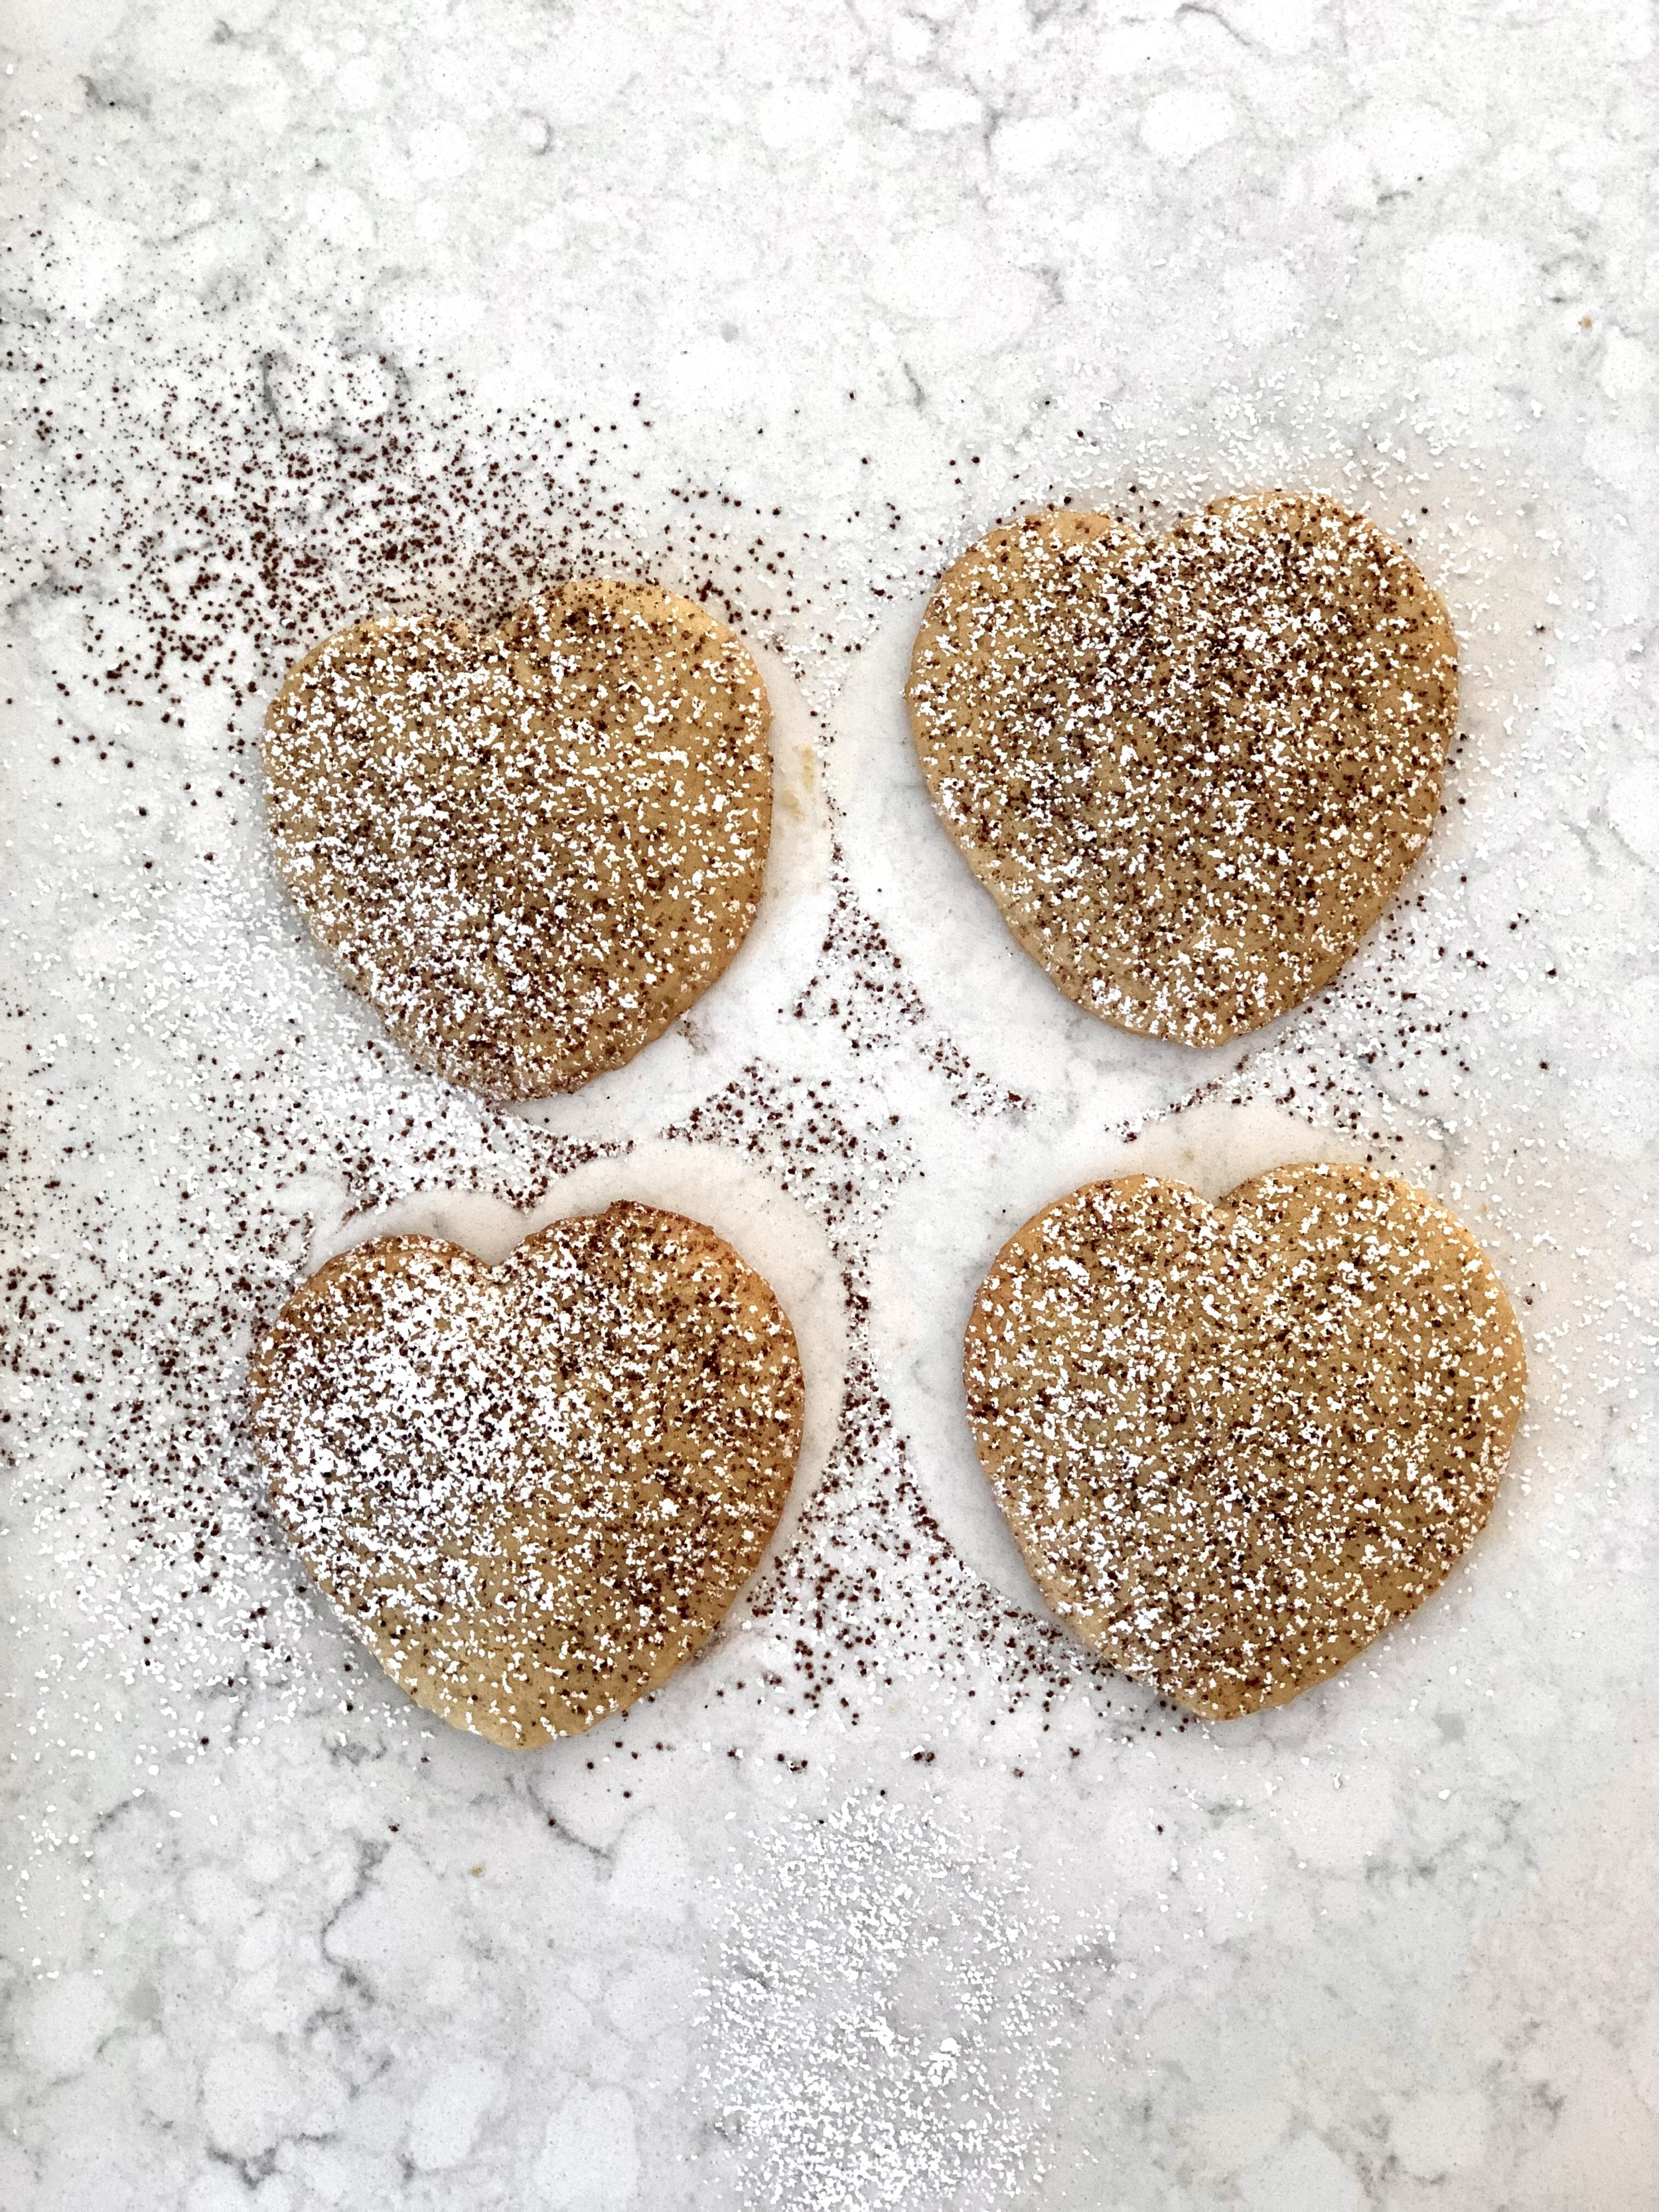
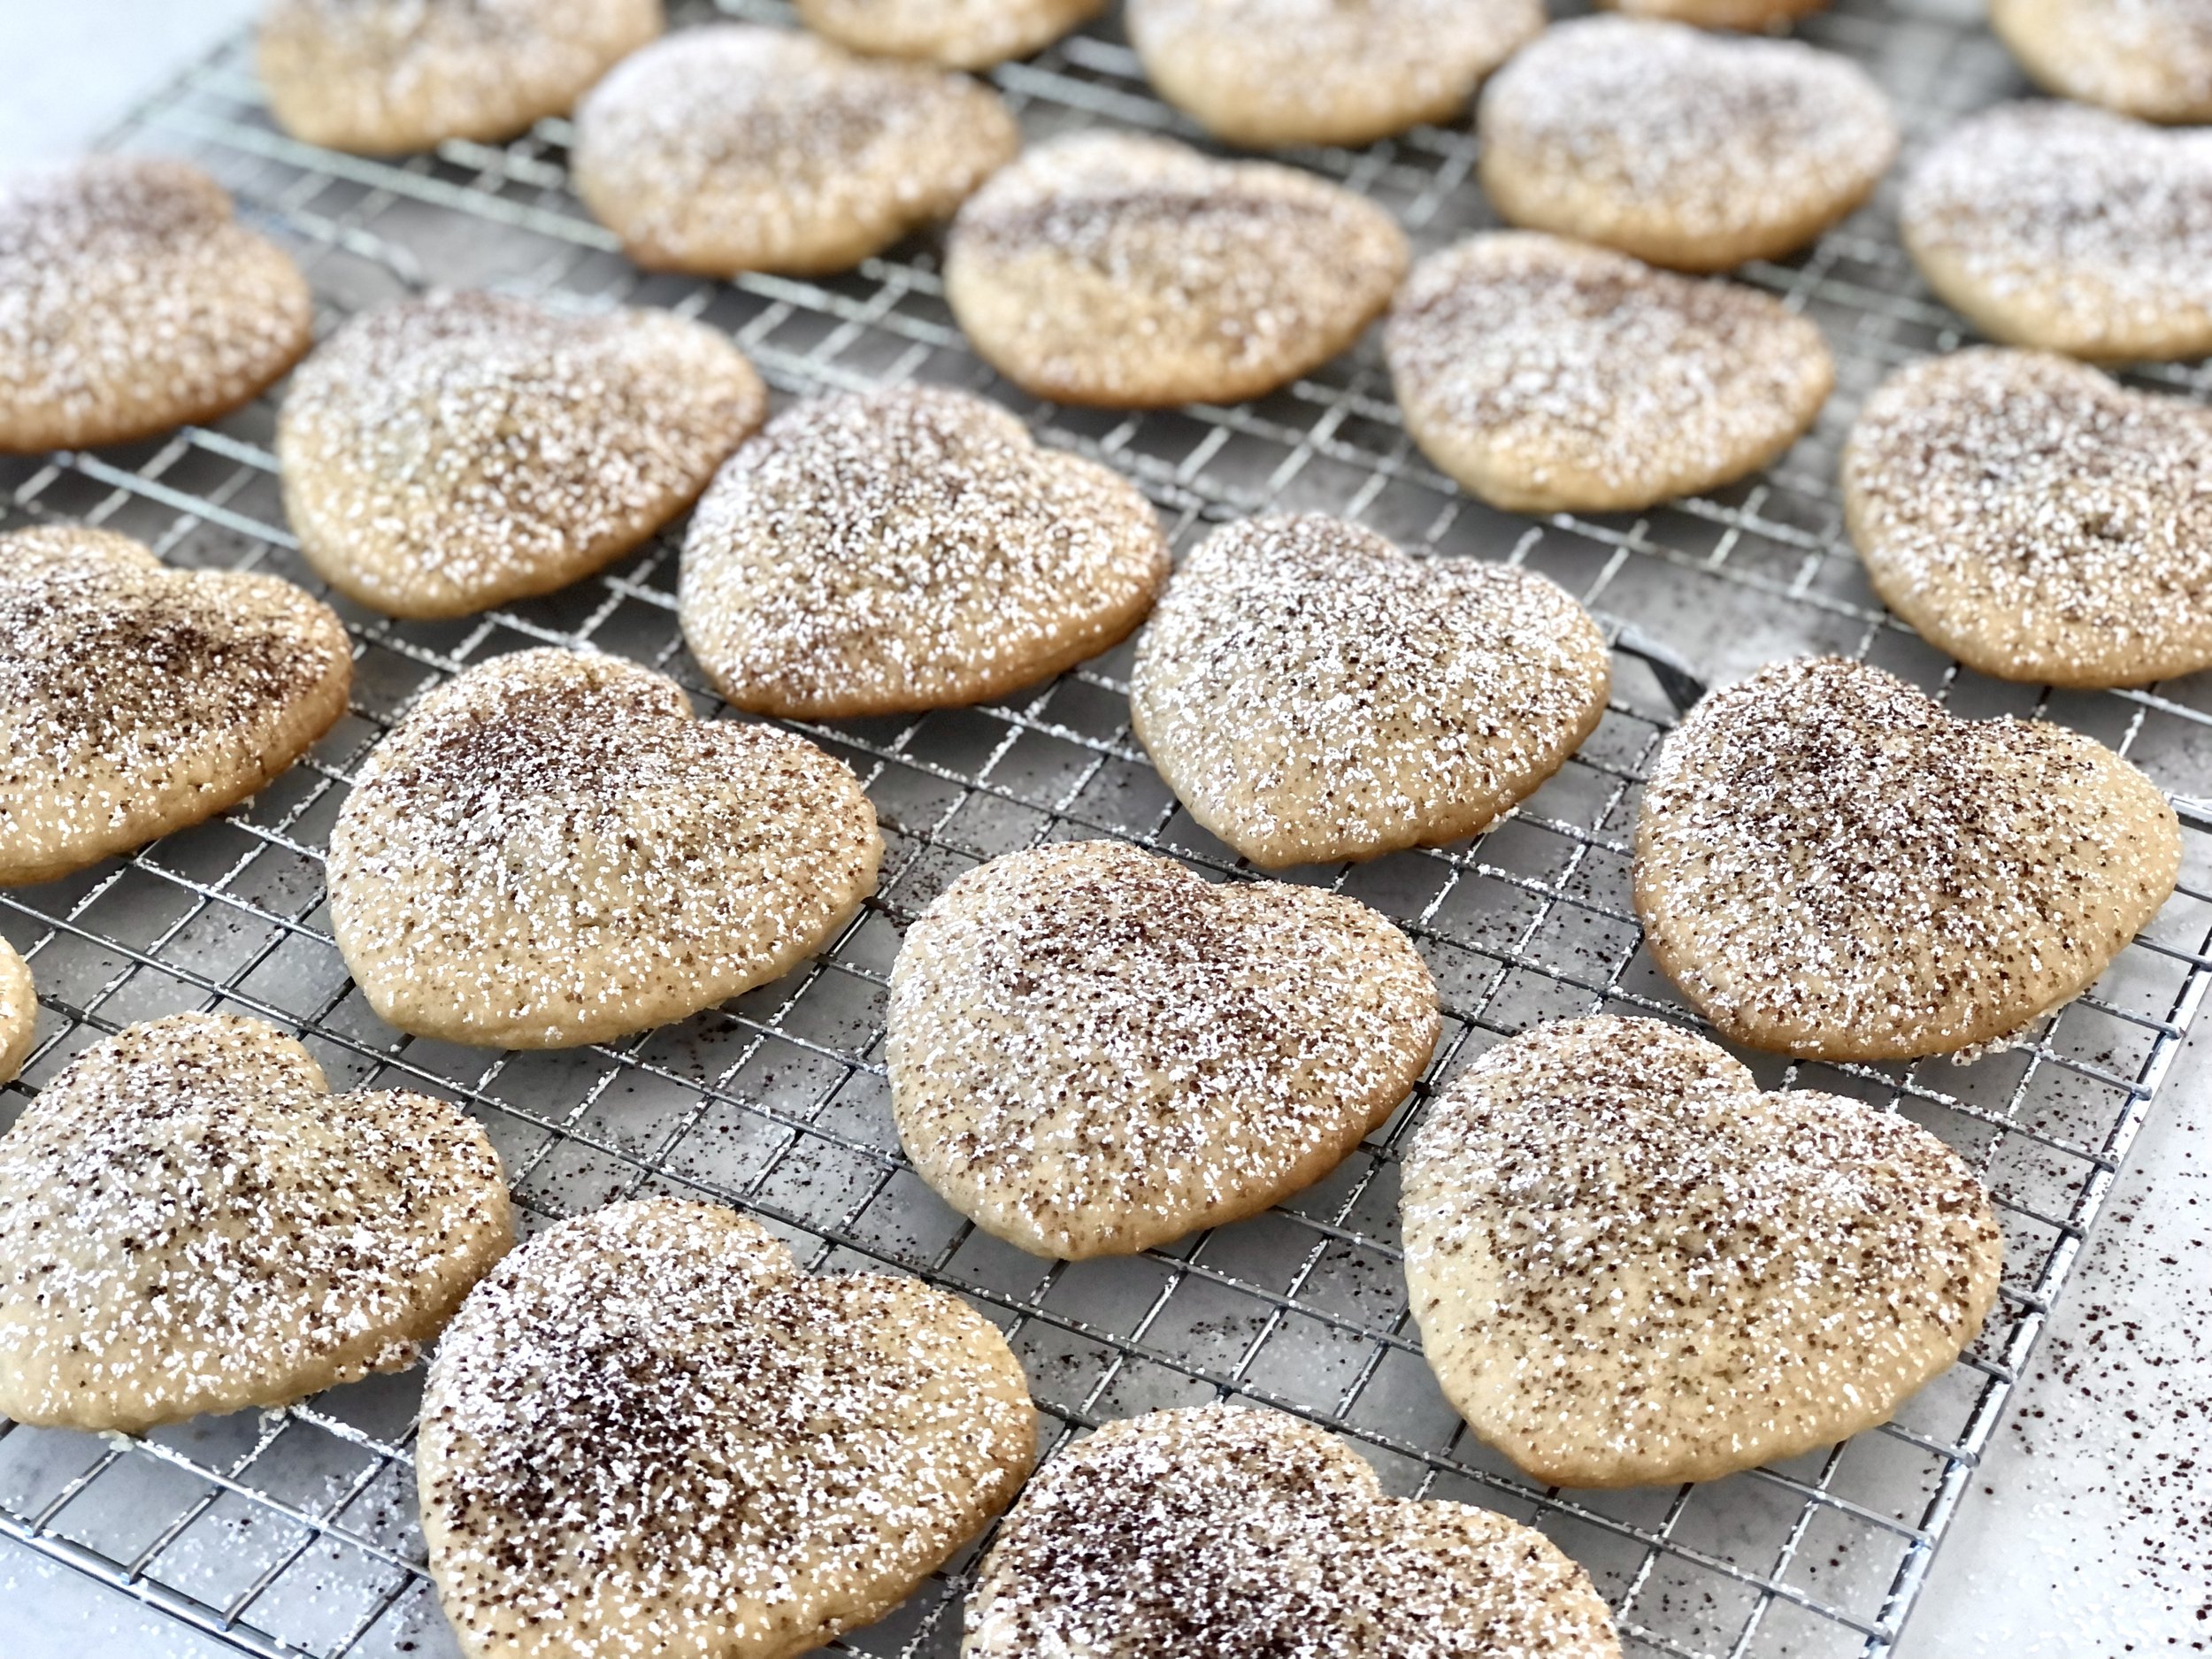
These cookies melt in your mouth and keep you going back for more, despite being a generous size to begin with! They’re also pretty little things, which makes them suitable for nice occasions, especially with a little dusting of powdered sugar or cocoa powder on top. You can use different shapes for different occasions, which makes these not only delicious and beautiful, but also versatile! These are always a winner.

This post may contain affiliate links. If you make a purchase using these links, Jennyblogs may receive a small commission, at no extra cost to you. This helps to support Jennyblogs. For further information see the privacy policy. Grazie!


Nutella-Filled Pillow Cookies

Makes about 12 large cookies

Ingredients:

  • 1 cup / 225g butter

  • 1/2 cup / 100g sugar

  • 1/2 cup / 100g brown sugar

  • 2 eggs

  • 1 Tbsp / 15g vanilla

  • 1/2 tsp almond extract

  • 3 cups / 360g flour

  • 1 Tbsp baking powder

  • 1/2 tsp salt

  • about 2/3 cup / 200g Nutella

  • powdered sugar and/or cocoa powder for dusting, optional

Directions:

Oven preheated to 375°F / 190°C. Ungreased cookie sheets.

  1. In the bowl of a stand mixer or with a handheld mixer, cream butter and sugar together until light and fluffy, about 5 minutes.

  2. Beat in eggs, one at a time. Stir in extracts.

  3. In a medium bowl, combine flour, baking powder, and salt with a whisk.

  4. Add dry ingredients to butter mixture, mix until thoroughly combined. If dough seems too wet, add a bit more flour until a thicker consistency is reached.

  5. Cover and place dough in refrigerator until chilled, at least 1 hour.

  6. Remove dough from fridge. Roll dough out onto a lightly floured surface to a thickness of about 1/4in / 1/2cm. Use a 3in / 7.5cm cookie cutter to cut the cookie dough. Re-roll and cut more.

  7. Place half of the cut out cookies onto a cookie sheet. Spoon or pipe about 2 tsp of Nutella onto the middle of the cookie. Place a second cookie on top, using fingers or a fork to seal edges together.

  8. Bake in preheated oven for 9-11 minutes, or until edges just barely start to turn golden. Allow cookies to cool for several minutes on the cookie sheet before transferring to cooling racks or the counter.

  9. When cookies are completely cool, dust with powdered sugar, if desired.

Jenny’s Notes:

  • Round or square cookie cutters work best for these pillow cookies, but any shape will do, as long as it has a large enough center area for the Nutella to be able to be sealed in. I like to do heart shapes for Valentine’s day, as pictured!

  • While these may have Nutella in the name, I’ve stuffed these with other things before that were also delicious! Small chocolates like Reese’s, Dove chocolates, etc. could be used. I once used these hazelnut chocolates that are common in Italy, Gianduja, and they were wondeful in these!

  • Don’t over bake! Not only can this lead to dry cookies, but it can affect the filling, as well.

Nutella-Filled Pillow Cookies
Yield 12 Large Cookies
Author
Prep time
45 Min
Cook time
11 Min
Inactive time
1 Hour
Total time
1 H & 56 M

Nutella-Filled Pillow Cookies

Buttery, melt-in-your-mouth sugar cookies with hint of vanilla and almond, stuffed with Nutella, and topped with a dusting of powdered sugar and cocoa powder.
Cook modePrevent screen from turning off

Ingredients

Instructions

  1. Oven preheated to 375°F / 190°C. Ungreased cookie sheets.
  2. In the bowl of a stand mixer or with a handheld mixer, cream butter and sugar together until light and fluffy, about 5 minutes.
  3. Beat in eggs, one at a time. Stir in extracts.
  4. In a medium bowl, combine flour, baking powder, and salt with a whisk.
  5. Add dry ingredients to butter mixture, mix until thoroughly combined. If dough seems too wet, add a bit more flour until a thicker consistency is reached.
  6. Cover and place dough in refrigerator until chilled, at least 1 hour.
  7. Remove dough from fridge. Roll dough out onto a lightly floured surface to a thickness of about 1/4in / 1/2cm. Use a 3in / 7.5cm cookie cutter to cut the cookie dough. Re-roll and cut more.
  8. Place half of the cut out cookies onto a cookie sheet. Spoon or pipe about 2 tsp of Nutella onto the middle of the cookie. Place a second cookie on top, using fingers or a fork to seal edges together.
  9. Bake in preheated oven for 9-11 minutes, or until edges just barely start to turn golden. Allow cookies to cool for several minutes on the cookie sheet before transferring to cooling racks or the counter.
  10. When cookies are completely cool, dust with powdered sugar, if desired.

Notes

  • Round or square cookie cutters work best for these pillow cookies, but any shape will do, as long as it has a large enough center area for the Nutella to be able to be sealed in. I like to do heart shapes for Valentine’s day, as pictured!
  • While these may have Nutella in the name, I’ve stuffed these with other things before that were also delicious! Small chocolates like Reese’s, Dove chocolates, etc. could be used. I once used these hazelnut chocolates that are common in Italy, Gianduja, and they were wondeful in these!
  • Don’t over bake! Not only can this lead to dry cookies, but it can affect the filling, as well.

Nutrition Facts

Calories

388.68

Fat

21.3 g

Sat. Fat

14.73 g

Carbs

48.95 g

Fiber

1.74 g

Net carbs

47.2 g

Sugar

18.17 g

Protein

5.22 g

Cholesterol

67.95 mg

Sodium

345.08 mg

Nutritional info is approximate, based on 1 cookie

Cookies, Nutella, Pillow Cookies, Cutout Cookies, Rolled Cookies, Sugar Cookies
dessert, cookies
American
Did you make this recipe?
Tag @jennyblogsandbakes on instagram and hashtag it #jennyblogs

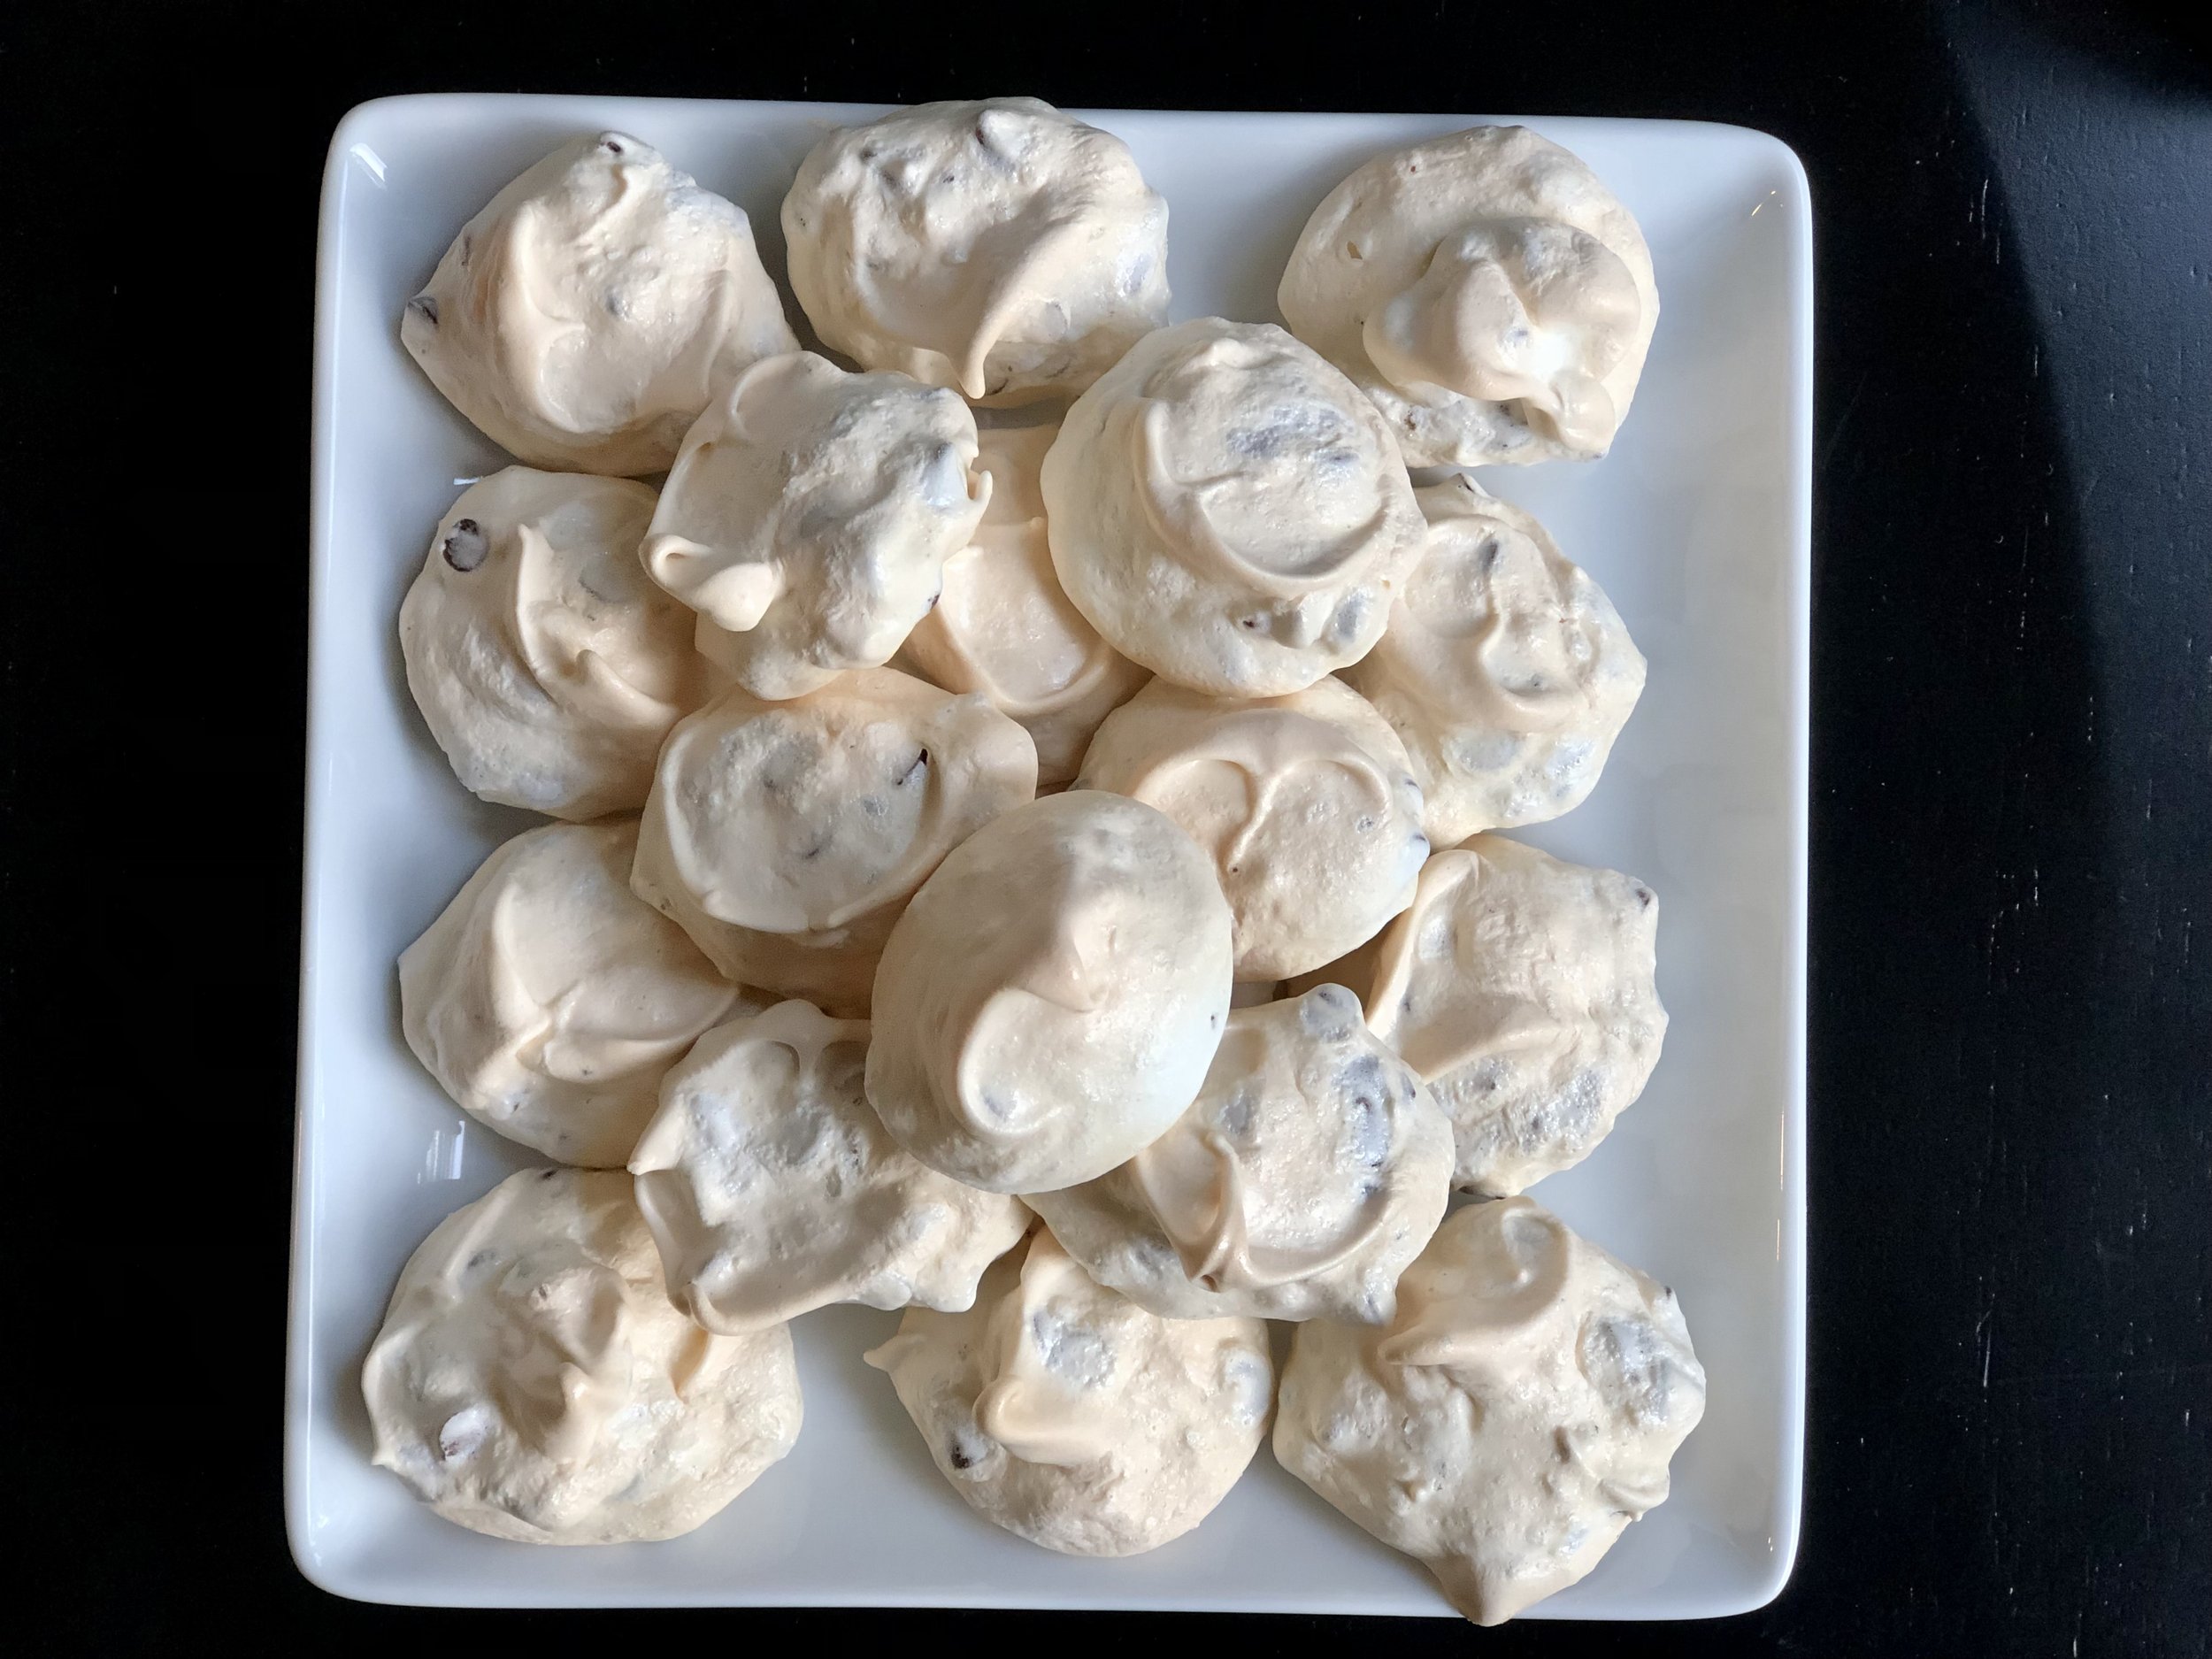
Chocolate Chip Meringue Cookies

Last Updated September 7, 2024

As far as simple and delicious cookie recipes go, this is a good one to have on hand.

These cookies have only 4 ingredients, and are gluten-free, dairy-free (as long as your chocolate chips don’t contain dairy), and many other allergen and dietary needs friendly.

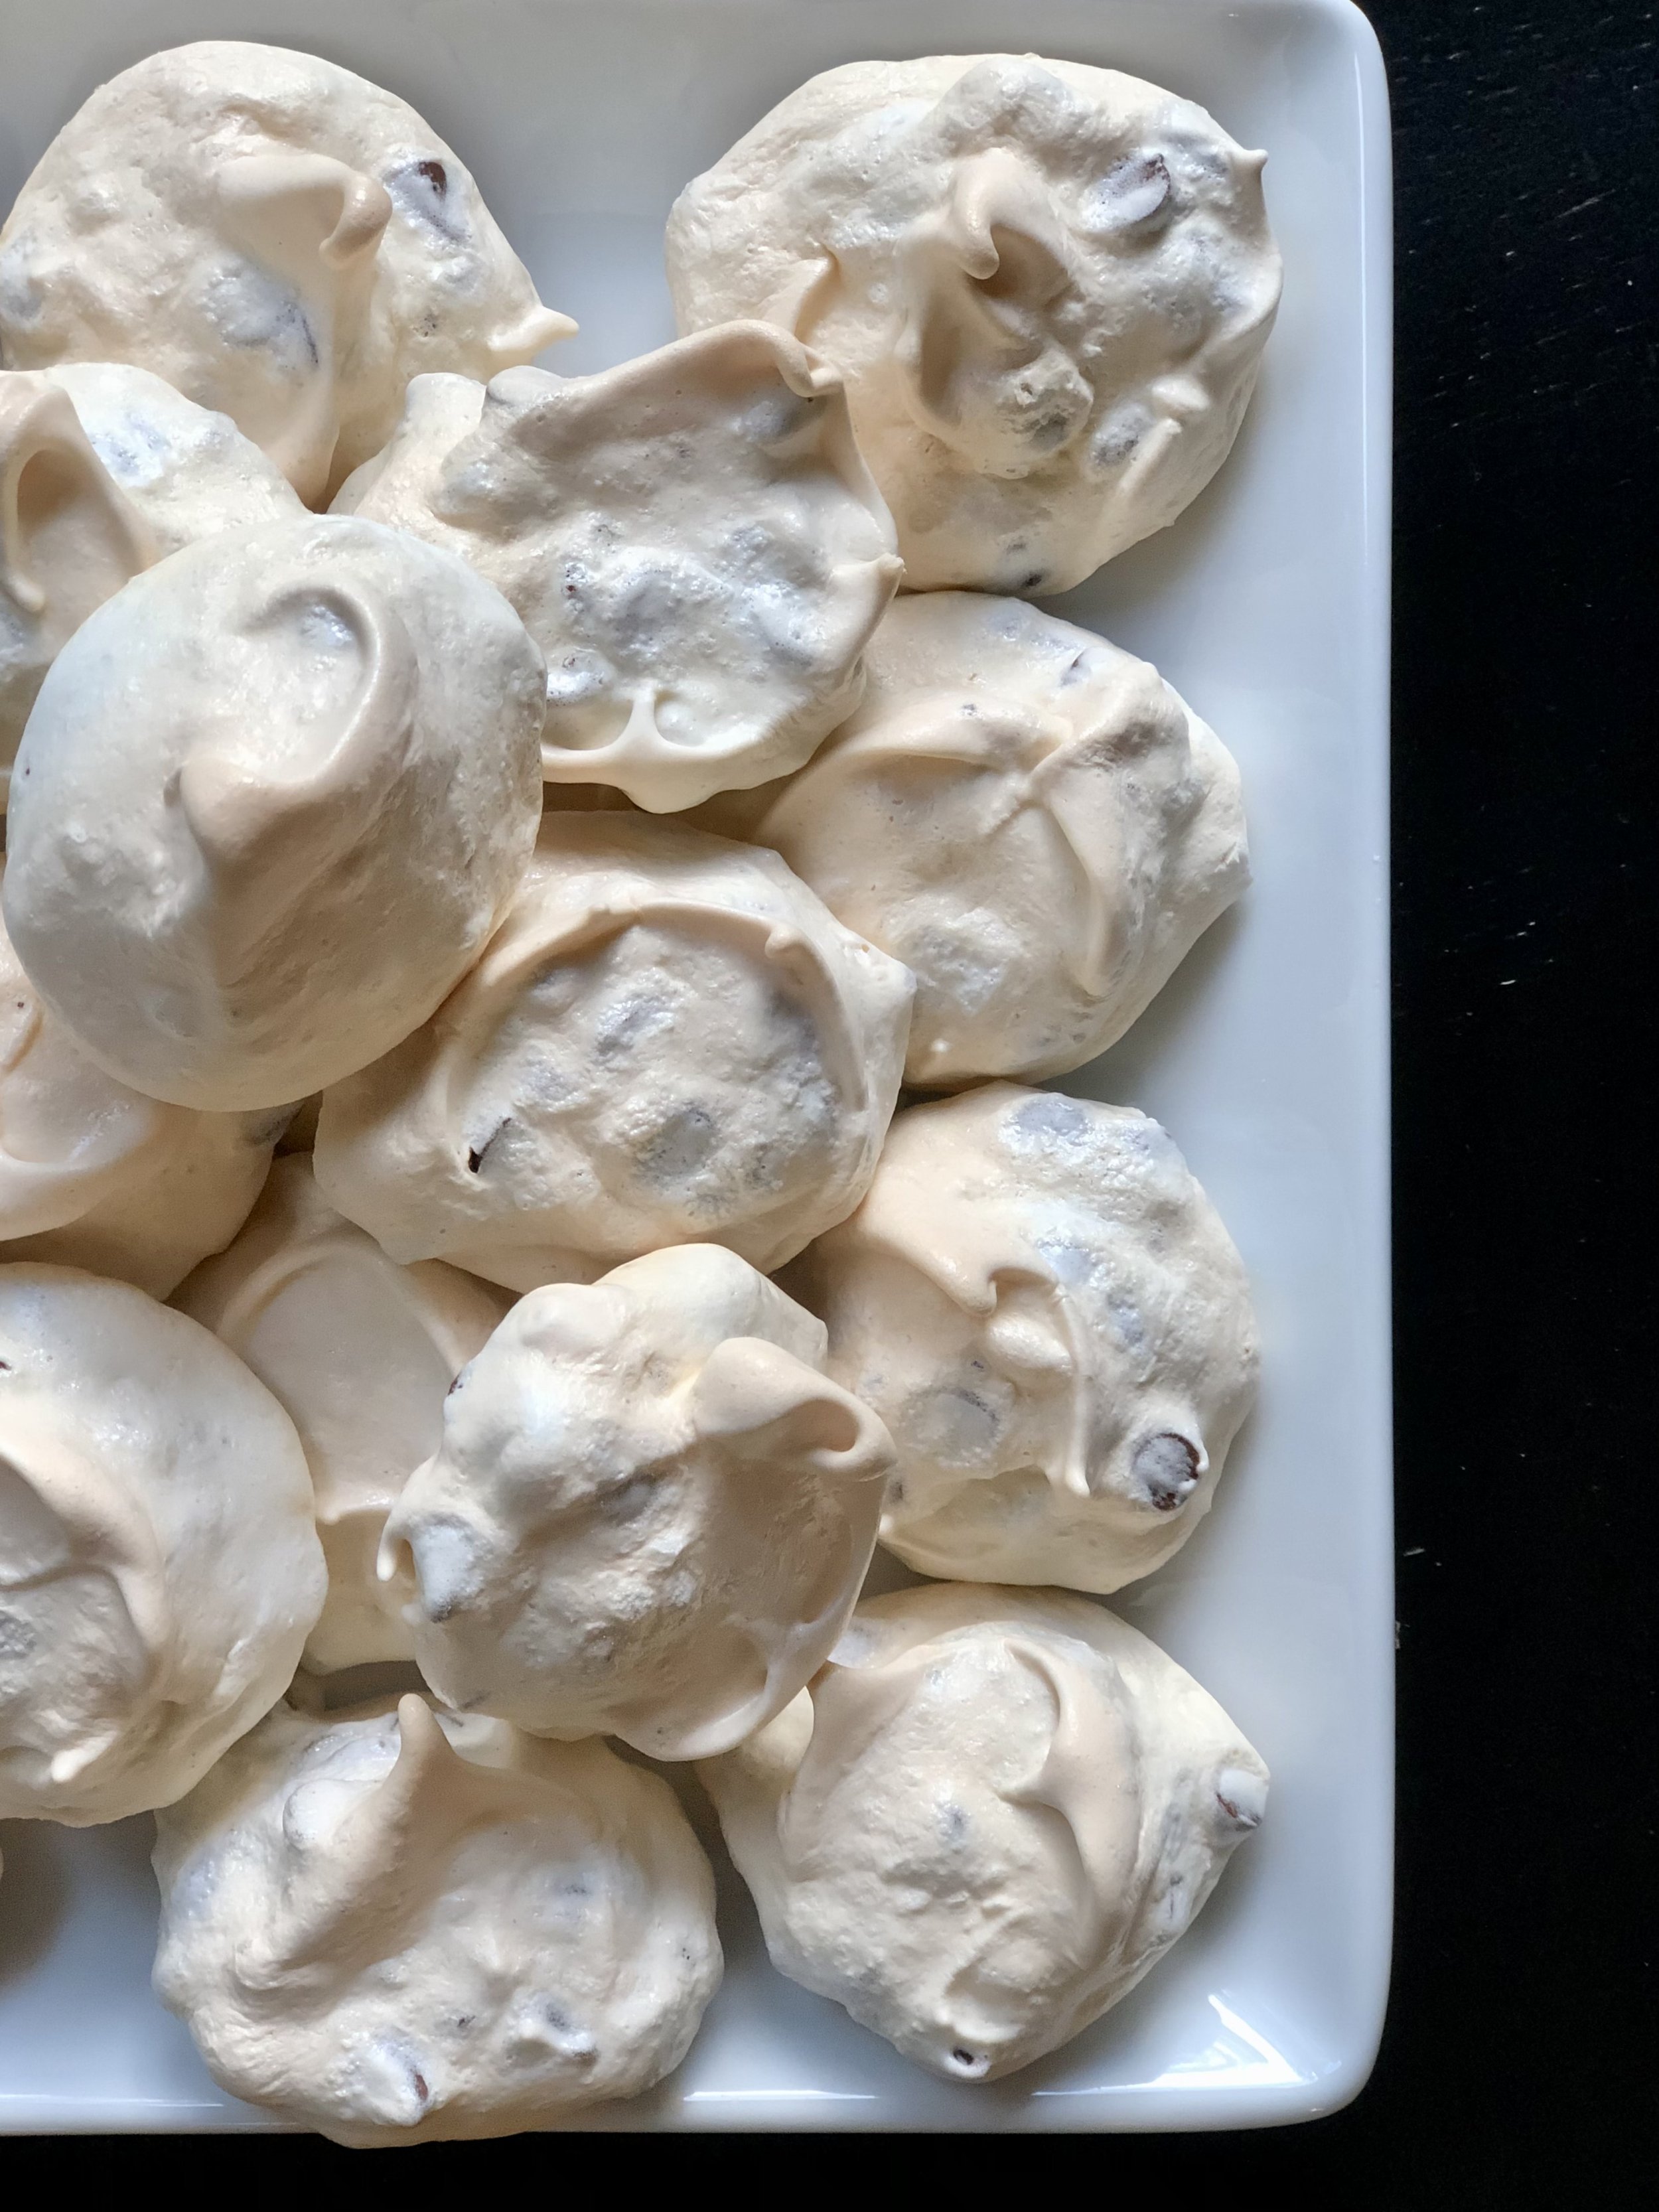
This is a recipe I’ve had around for ages, since I was a kid! I believe I originally got it from my cousin. I recently re-discovered these, they’re almost too easy to make, and a great way to use up extra egg whites. They’re easy enough kids can help or even make them by themselves, and with the chocolate chips, M&M’s, or other add ins, also very appealing to kids!

Are you ready for some of the easiest cookies you’ve made yet? Yeah, let’s go!

This post may contain affiliate links. If you make a purchase using these links, Jennyblogs may receive a small commission, at no extra cost to you. This helps to support Jennyblogs. For further information see the privacy policy. Grazie!

Recipe from my cousin


Chocolate Chip Meringue Cookies

M&M Meringue Cookies

Makes about 24 (about 1 1/2inch / 3cm) cookies

Ingredients:

  • 2 egg whites

  • 1 pinch of cream of tartar

  • 1/2 cup / 100g granulated sugar

  • 3/4 cup / 128g mini chocolate chips or other add-in of choice

Directions:

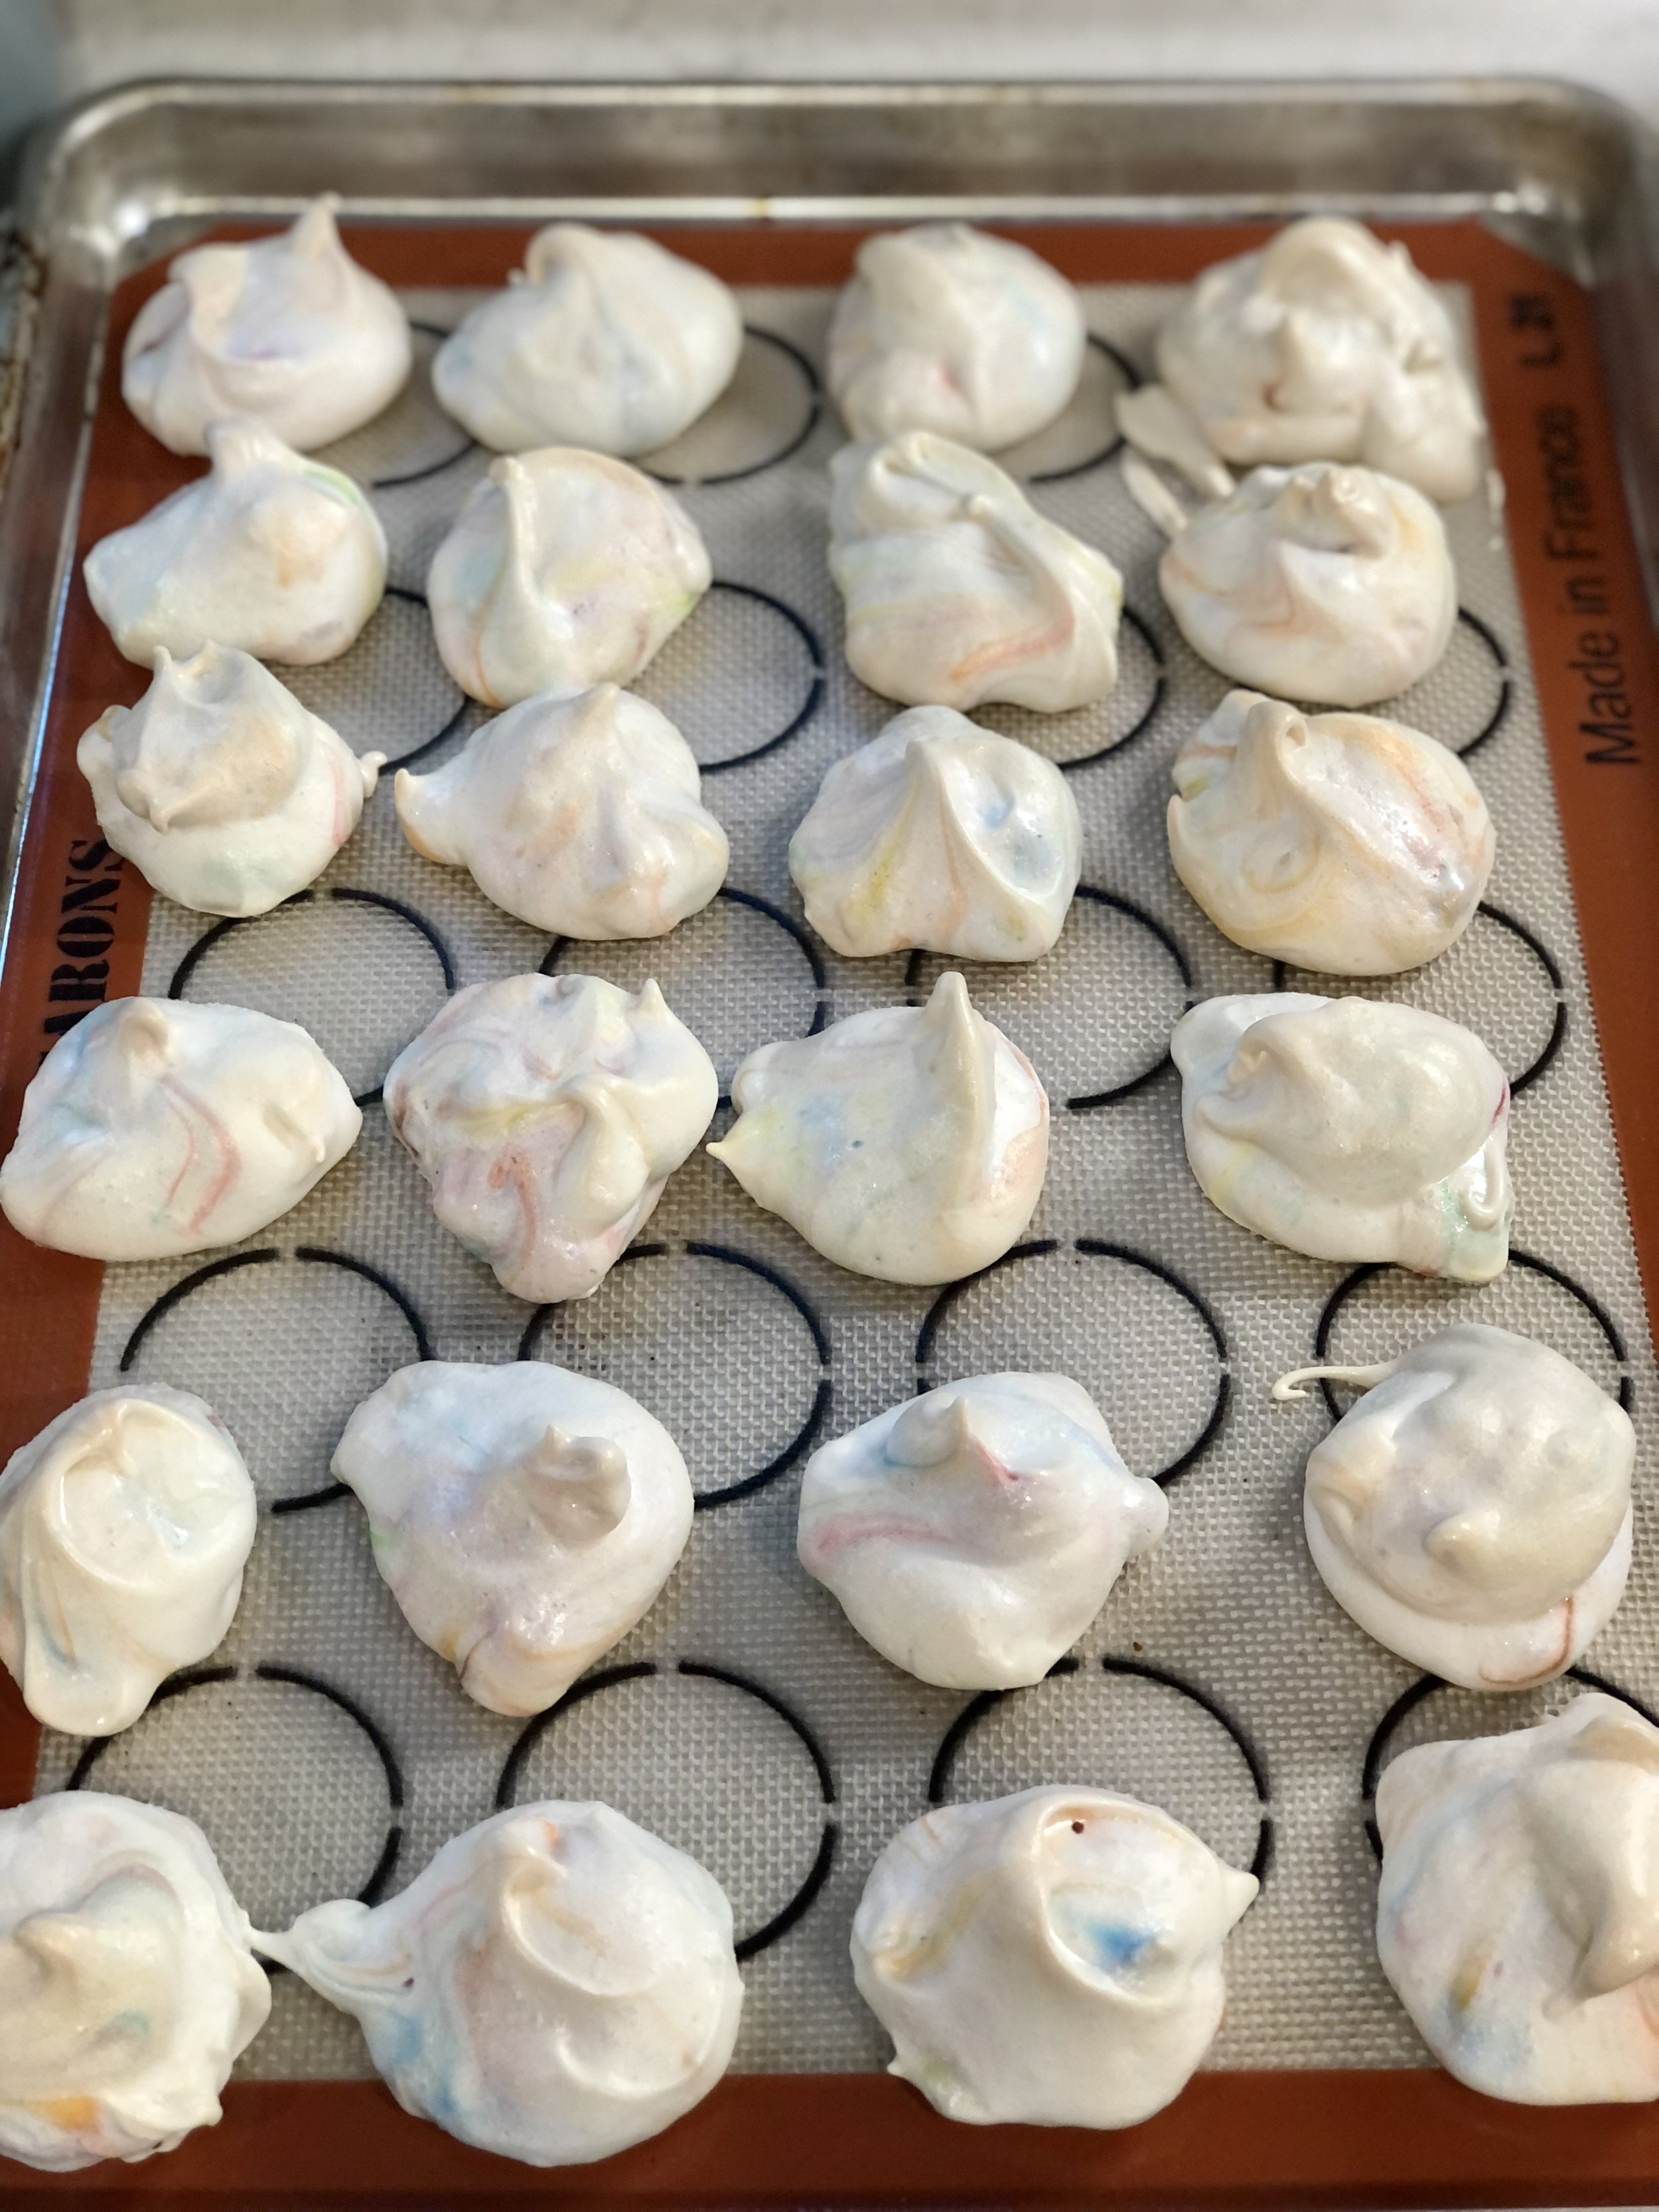
Oven preheated to 250°F / 121°C. Line a cookie sheet with a silpat or lightly grease.

  1. In the bowl of a stand mixer or with a hand-held electric mixer, beat egg whites and cream of tartar with whisk attachment until foamy.

  2. Add sugar and beat until stiff peaks form.

  3. Fold in chocolate chips with a spatula.

  4. Drop onto prepared cookie sheet and bake for about 30 minutes, or until set and just starting to turn a light golden color. Allow to cool slightly before removing from cookie sheet.

Jenny’s Notes:

  • Mini M&M’s are also a hit in these cookies! You can get creative, any kind of crushed candy or cookie like Oreo’s, or nuts, sprinkles, etc.

  • These cookies are best enjoyed within a day or two. They can be stored loosely covered at room temperature, but if you cover too tightly they turn soft and sticky even quicker.

Chocolate Chip Meringue Cookies
Yield 24
Author
Prep time
20 Min
Cook time
30 Min
Total time
50 Min

Chocolate Chip Meringue Cookies

4 ingredient meringue cookies with a slightly crunchy exterior and a soft, chewy inside, speckled with chocolate chips.
Cook modePrevent screen from turning off

Ingredients

Instructions

  1. Oven preheated to 250°F / 121°C. Line a cookie sheet with a silpat or lightly grease.
  2. In the bowl of a stand mixer or with a hand-held electric mixer, beat egg whites and cream of tartar with whisk attachment until foamy.
  3. Add sugar and beat until stiff peaks form.
  4. Fold in chocolate chips with a spatula.
  5. Drop onto prepared cookie sheet and bake for about 30 minutes, or until set and just starting to turn a light golden color. Allow to cool slightly before removing from cookie sheet.

Notes

  • Mini M&M’s are also a hit in these cookies! You can get creative, any kind of crushed candy or cookie like Oreo’s, or nuts, sprinkles, etc.
  • These cookies are best enjoyed within a day or two. They can be stored loosely covered at room temperature, but if you cover too tightly they turn soft and sticky even quicker.

Nutrition Facts

Calories

45.69

Fat

1.32 g

Sat. Fat

0.81 g

Carbs

8.05 g

Fiber

0.15 g

Net carbs

7.9 g

Sugar

7.7 g

Protein

0.54 g

Cholesterol

0.84 mg

Sodium

8.04 mg

Nutritional information is approximate. Based on 1 cookie from a 24-cookie batch.

meringue, egg whites, cookies, gluten-free, dairy-free
dessert, cookies
American
Did you make this recipe?
Tag @jennyblogsandbakes on instagram and hashtag it #jennyblogs

Rhubarb Oat Bars

Last Updated September 7, 2024

Are you taking advantage of this rhubarb season? I hope you are, I know I am, more so than ever, as I’ve missed living in a country where people use, let alone have heard of, rhubarb.

I don’t know about you, but when rhubarb season starts I usually think of pies as the first thing to make. Then, after a few rhubarb and rhubarb custard pies, I might want to make some ahem…I’m not sure what normal people call it, maybe rhubarb soup? I grew up calling it camel hair soup. (We’re so normal you can’t stand it.) After camel hair soup, then maybe some rhubarb hand pies made with puff pastry.

All of those things are delicious, but sometimes with rhubarb season being so short I don’t end up getting beyond the “classics.” This year I’ve been expanding my horizons a bit, and if you’d like to go beyond the rhubarb pies and crisps, here are some buttery rhubarb oat bars to try!

It’s a buttery crust, sticky and gooey strawberry rhubarb filling with a hint of nutmeg, and a buttery oat crumble on top.

Yes please.

I don’t think I need to go on much further, so here’s the recipe! Anyway, I better stop writing before rhubarb season is over, haha.

This post may contain affiliate links. If you make a purchase using these links, Jennyblogs may receive a small commission, at no extra cost to you. This helps to support Jennyblogs. For further information see the privacy policy. Grazie!

Recipe adapted from Curly Girl Kitchen


Rhubarb Oat Bars

Serves about 9-12

Ingredients

For the Crust and Topping

  • 1 1/2 cups / 180g flour

  • 1 cup / 90g rolled oats

  • 1 cup / 226g cold butter, cubed

  • 1/2 cup / 100g brown sugar

  • 1 tsp baking powder

  • 1/2 tsp salt

For the Rhubarb Filling

  • 1 lb / 454g (about 3 1/2 cups) rhubarb, cut into approx. 1/2” slices

  • 1/2 cup / 100g sugar

  • 6 Tbsp / 45g flour

  • 1/2 cup / 160g strawberry jam

  • 1 Tbsp / 15g lemon juice

  • 1 tsp / 5g vanilla extract

  • 1/4 tsp nutmeg

  • 1/4 tsp baking soda

Directions:

Oven preheated to 350F / 177C. Lightly grease an 8x8in / 20x20cm square baking dish.

Make the Crust and Topping

  1. In a food processor, blend all crust/topping ingredients together until the texture is like coarse pebbles. Alternately, you can mix by hand or with a fork or pastry cutter.

  2. Take half the mixture and press into the prepared baking dish. Reserve other half for topping.

  3. Bake for 15 minutes.

Meanwhile, Make the Rhubarb Filling

  1. In a large bowl, combine all filling ingredients. Mix together well.

  2. When the crust is done baking, pour filling over crust.

  3. Bake for 30 minutes.

  4. When the filling is done baking, crumble the remaining topping over filling and bake for another 20-25 minutes, or until top is light golden-brown.

  5. Allow to cool completely before cutting and serving. (The refrigerator can help speed up this process.)

Jenny’s Notes:

  • If you don’t have rolled oats, instant oats can be used.

  • The strawberry jam could be switched out for a different flavor of jam!

  • If you can’t wait to dig into your freshly baked bars, you can always go at it with a spoon! It will be more like a crumble when it’s still warm, but hey, is that a bad thing?

Rhubarb Oat Bars
Yield 9-12
Author
Prep time
20 Min
Cook time
1 H & 5 M
Total time
1 H & 25 M

Rhubarb Oat Bars

Buttery, crumbly oat bars with a sweet rhubarb and strawberry filling
Cook modePrevent screen from turning off

Ingredients

For the Crust and Topping
For the Rhubarb Filling

Instructions

Make the Crust and Topping
  1. Oven preheated to 350F / 177C. Lightly grease an 8x8in / 20x20cm square baking dish.
  2. In a food processor, blend all crust/topping ingredients together until the texture is like coarse pebbles. Alternately, you can mix by hand or with a fork or pastry cutter.
  3. Take half the mixture and press into the prepared baking dish. Reserve other half for topping.
  4. Bake for 15 minutes.
Meanwhile, Make the Rhubarb Filling
  1. In a large bowl, combine all filling ingredients. Mix together well.
  2. When the crust is done baking, pour filling over crust.
  3. Bake for 30 minutes.
  4. When the filling is done baking, crumble the remaining topping over filling and bake for another 20-25 minutes, or until top is light golden-brown.
  5. Allow to cool completely before cutting and serving. (The refrigerator can help speed up this process.)

Notes

  • If you don’t have rolled oats, instant oats can be used.
  • The strawberry jam could be switched out for a different flavor of jam!
  • If you can’t wait to dig into your freshly baked bars, you can always go at it with a spoon! It will be more like a crumble when it’s still warm, but hey, is that a bad thing?

Nutrition Facts

Calories

463.59

Fat

21.47 g

Sat. Fat

13.15 g

Carbs

64.53 g

Fiber

2.75 g

Net carbs

61.8 g

Sugar

32.96 g

Protein

4.61 g

Cholesterol

54.23 mg

Sodium

393.23 mg

Nutritional Information is approximate.

rhubarb, oat bars, oaty bars, crumble
dessert
American
Did you make this recipe?
Tag @jennyblogsandbakes on instagram and hashtag it #jennyblogs

Paste di Pistacchio Siciliane - Sicilian Pistachio Cookies

Last Updated September 7, 2024

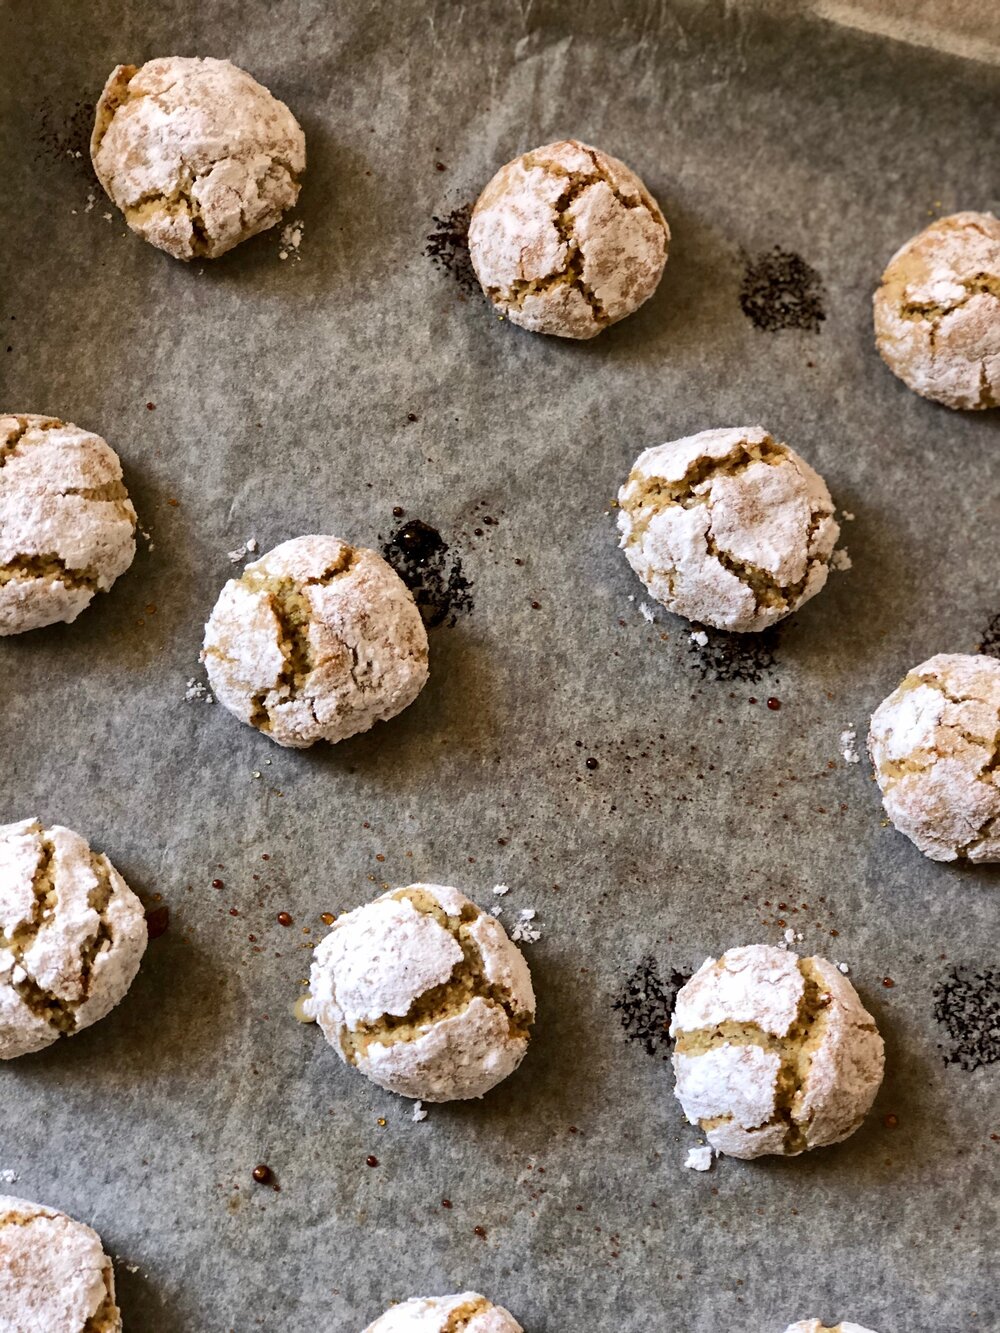
Paste di Pistacchio, or Pistachio cookies, hail from the beautiful island of Sicily. They have a delightfully crisp outer shell and a chewy, soft center.

Two years ago I put up the recipe for Paste di Mandorle, or Sicilian Almond Cookies, and it has become one of the top recipes on this site.

It’s not hard to figure out why…with only 4 ingredients that get mixed together in a bowl with a spoon, rolled in powdered sugar and baked, it really doesn’t get much easier than this. No fancy equipment. Not to mention with the almonds there are more nutritional benefits to these than your average cookie. Or at least, that’s what I tell myself when I’m going for my fifth cookie. They’re also gluten-free and dairy-free friendly.

Sometimes great ideas pop into my head. Sometimes really awful ones, too, but I try to only filter the good ones here onto this blog, k? One day, I saw a half bag of pistachios in my cupboard. The first half had been ground into pistachio flour to make this Pistachio Cake with Honey Vanilla Buttercream for Christmas. Then I had an idea, what if I take the Paste di Mandorle recipe and replace part of the almond flour with pistachio flour?? So I did. And this recipe was born.

After the fact when all the cookies had been gobbled up within a couple hours, I wondered if maybe this recipe wasn’t original to me? It seemed too easy for no one else to have thought of this. Turns out these are definitely already a thing. Sicily is known not just for their almonds but also for their pistachios, especially the area of Bronte. Naturally, these pistachio cookies are a classic right alongside the almond ones.

The original Paste di Pistacchio Siciliane

The original recipe itself has a few variations, as I will list below. You can choose to implement any of the following as per your taste, or just follow the main recipe below, which is my favorite way of making it. Any way you go, you will have a scrumptious cookie that is not only unbelievably easy, but also an authentic Italian sweet!

  • Grind your own flour vs storebought flour. Some will instruct to grind your own almonds and pistachios. This not only gives you fresh nut flour, but it allows you to control how fine you grind it. Some advise against buying almond flour or pistachio flour from the store because it’s too thin. However, if you don’t have a food processor, spice grinder, coffee grinder or any other tool that will get the job done, I have used store bought flour and it turned out fine. No pun intended. ;)

  • Honey. I’d say most of the recipes claiming to be the original I’ve seen call for adding a bit of honey, anywhere from 10-20g. Honestly I don’t, but it would be easy to add if you truly want as close to the original as possible. If adding honey, use a bit less of the cane sugar.

  • Powdered sugar. Some recipes call for using powdered, others granulated. Others call for granulated but have you grind the sugar with the nuts, so you end up with powdered sugar anyway. I generally use granulated sugar and don’t grind, because I grind the nuts in a small electric coffee grinder and there isn’t room for the sugar. Either way you will have great results.

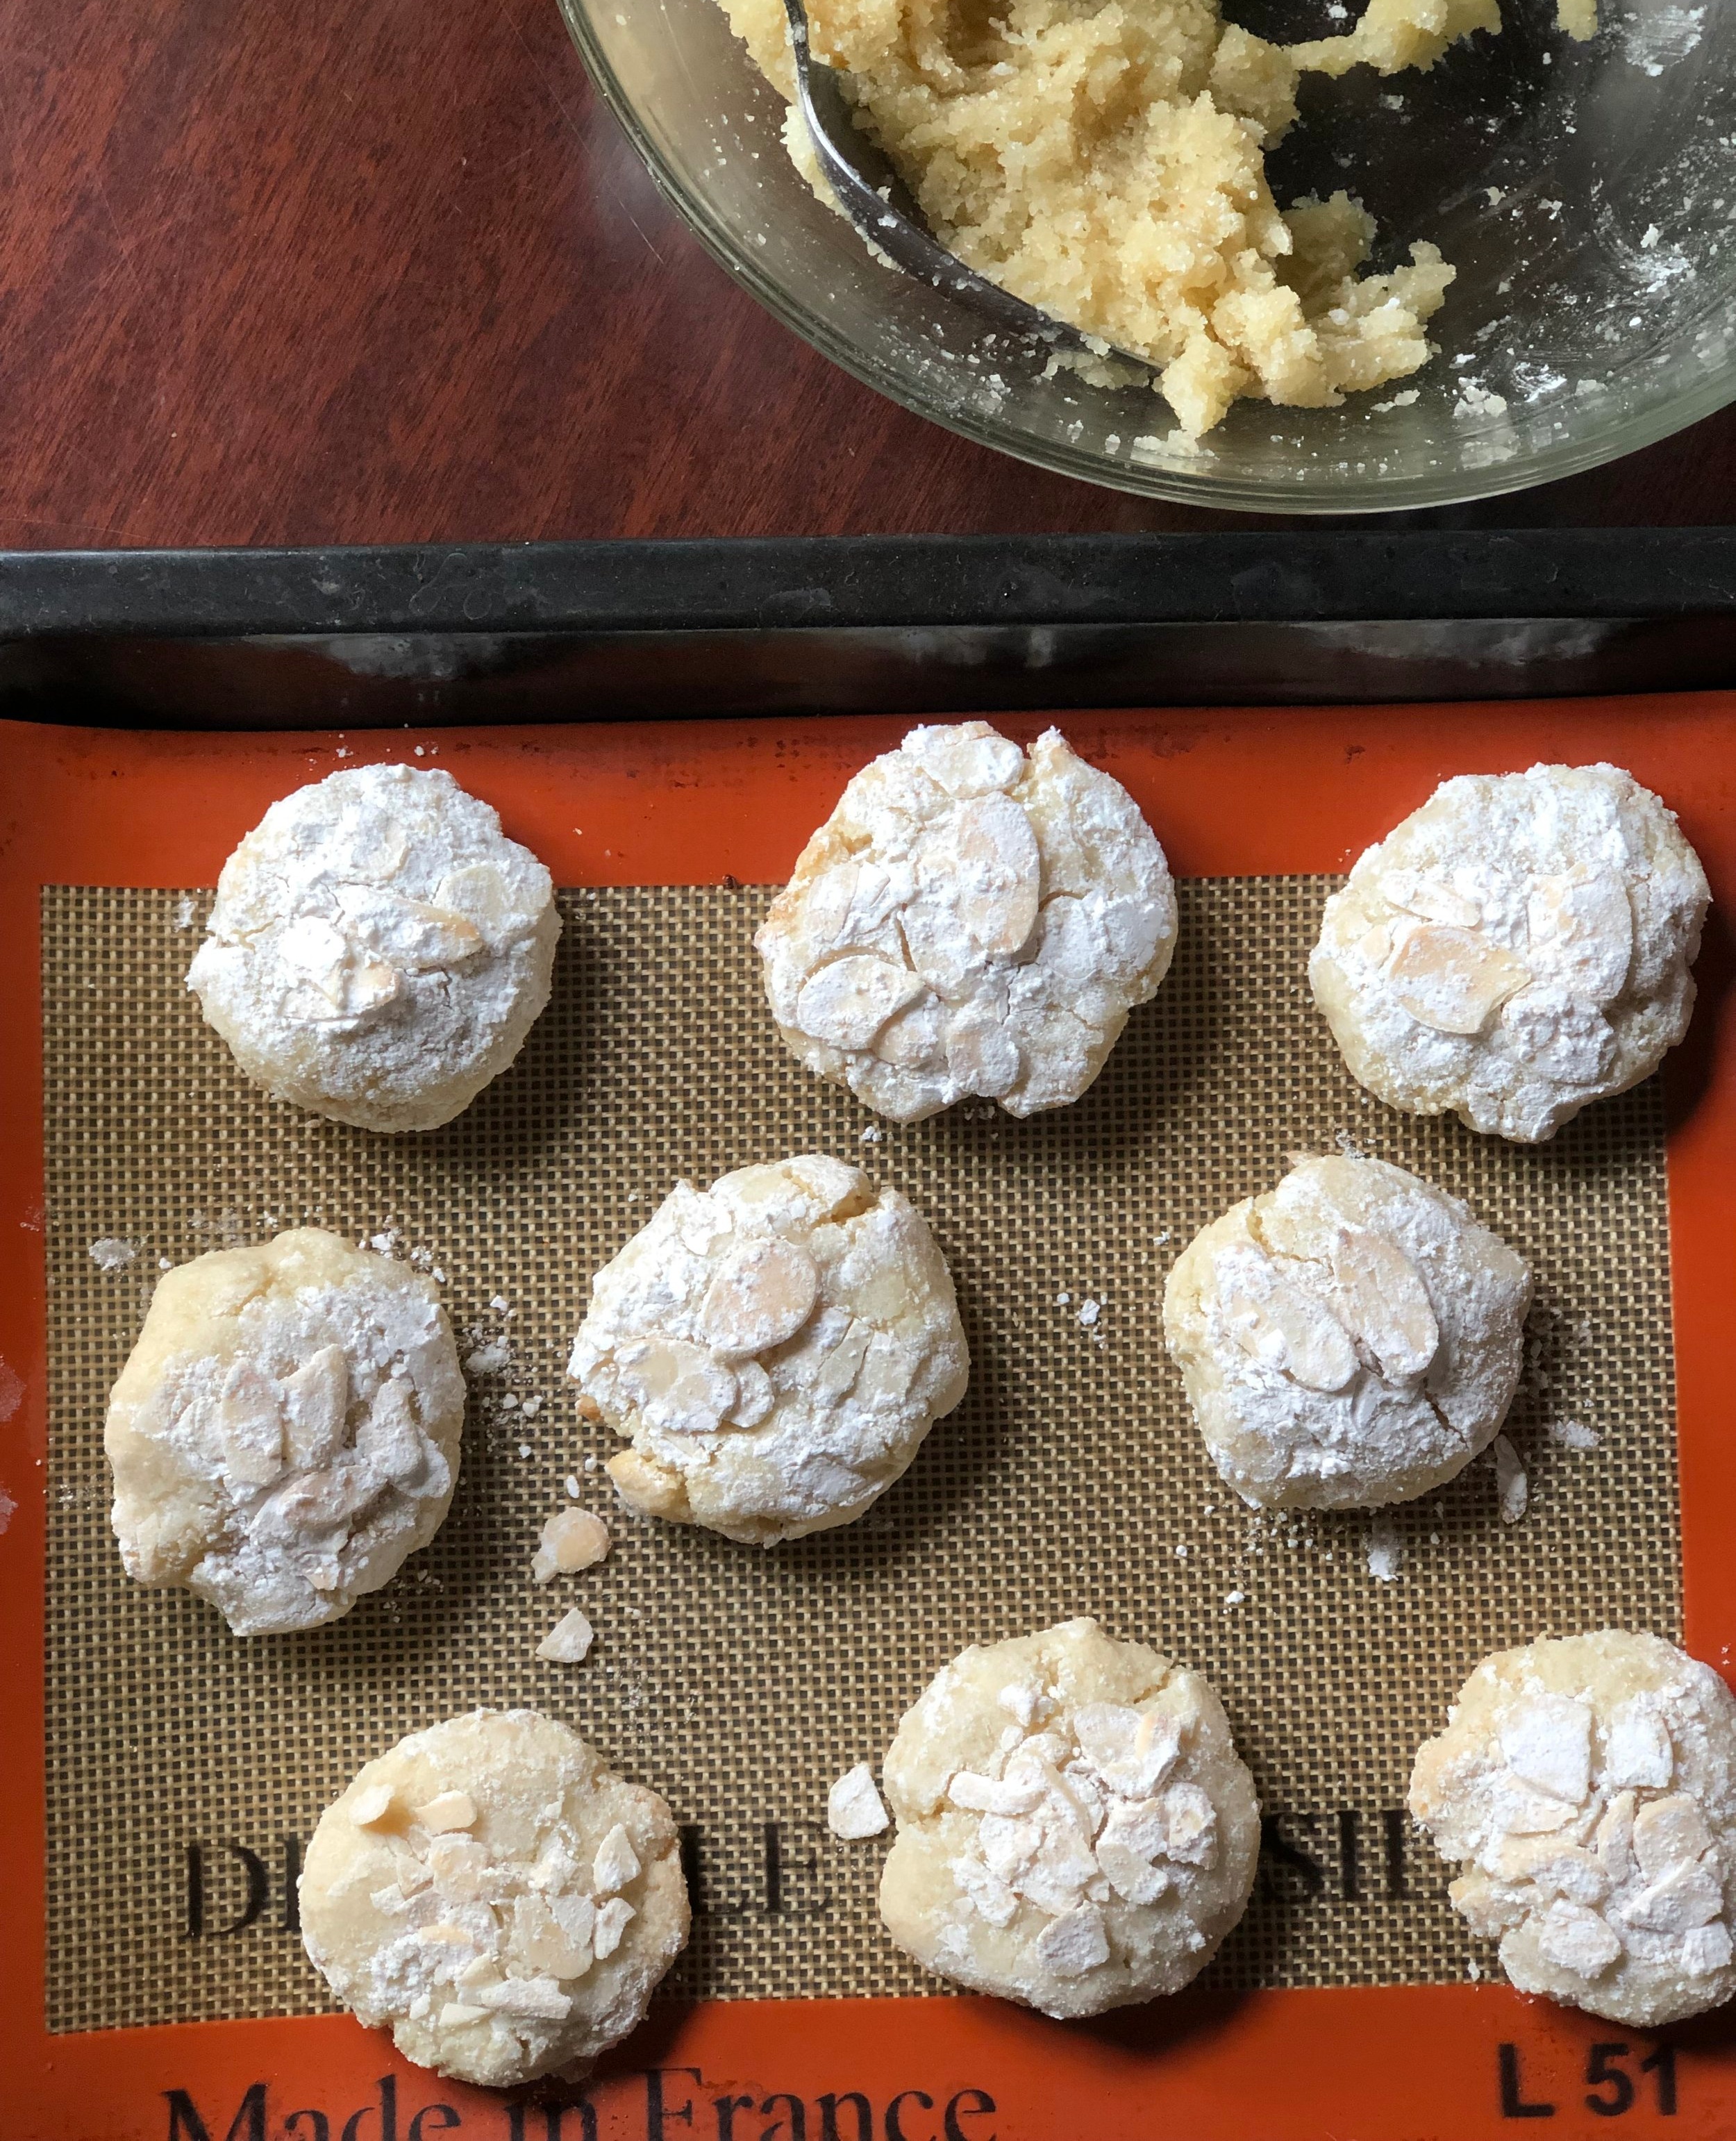
  • Cookie shape. The cookies can be shaped into the classic S shape (Roll dough into logs about the width of a finger, then slice into pieces about the length of half of an index finger, roll in powdered sugar, and use your fingers to shape into the S), ovals, or simply round cookies. I chose the round shape for the recipe below, as it’s the simplest. If you’d like to see the S shape, check out the pictures in this recipe.

  • Dough resting/refrigeration. Some will instruct to let the dough rest after you’ve shaped it so it will be less sticky. As with the almond cookies, if you’ve glanced or made that recipe, the refrigeration or resting is not strictly necessary. It allows the dough to dry out a bit, which means they retain their shapes better when baked. But if you’re going for the round or oval shape, there’s not much need.

This post may contain affiliate links. If you make a purchase using these links, Jennyblogs may receive a small commission, at no extra cost to you. This helps to support Jennyblogs. For further information see the privacy policy. Grazie!

Here is one of the recipes I referenced in Italian and also gives a good visual of the “S” shaped cookie.


Paste di Pistacchio Siciliane - Sicilian Pistachio Cookies

Makes about 2 dozen cookies

Ingredients:

  • 125g whole unsalted almonds or almond flour

  • 125g whole unsalted pistachios or pistachio flour

  • 250g granulated sugar (or 230g granulated sugar and 20g honey)

  • 2 / 60g egg whites

  • pinch of salt

  • powdered sugar, for rolling, optional

Directions:

Preheat oven to 350°F / 180°C.

  1. Using a food processor, spice grinder, or coffee grinder, grind the nuts until coarse. Small chunks are ok.

  2. Mix all ingredients together, and form into balls or desired shape. Roll in powder sugar, if desired.

  3. Place evenly spaced on ungreased cookie sheets. At this point cookies can be covered and refrigerated overnight or baked immediately.

  4. Bake in preheated oven for about 8-12 minutes, or until cookies just start to turn golden.

Jenny’s Notes:

  • If working with a food processor or other tool large enough, you can grind the nuts with the sugar, creating powdered sugar in the process, as some recipes call for.

  • If the dough is too sticky, you can let it sit for an hour or refrigerate for several hours to let it thicken/dry out a bit.

  • This recipe is also delicious using all pistachio flour!

Paste di Pistacchio Siciliane - Sicilian Pistachio Cookies
Yield 24
Author
Prep time
15 Min
Cook time
12 Min
Total time
27 Min

Paste di Pistacchio Siciliane - Sicilian Pistachio Cookies

Traditional Sicilian sweets with a delightfully crunchy outside and chewy inside. Made with just 4-5 ingredients and naturally gluten-free and dairy-free.
Cook modePrevent screen from turning off

Ingredients

Instructions

  1. Preheat oven to 350°F / 180°C.
  2. Using a food processor, spice grinder, or coffee grinder, grind the nuts until coarse. Small chunks are ok.
  3. Mix all ingredients together, and form into balls or desired shape. Roll in powder sugar, if desired.
  4. Place evenly spaced on ungreased cookie sheets. At this point cookies can be covered and refrigerated overnight or baked immediately.
  5. Bake in preheated oven for about 8-12 minutes, or until cookies just start to turn golden.

Notes

  • If working with a food processor or other tool large enough, you can grind the nuts with the sugar, creating powdered sugar in the process, as some Italian versions call for.
  • If the dough is too sticky, you can let it sit for an hour or refrigerate for several hours to let it thicken/dry out a bit.
  • This recipe is also delicious using all pistachio flour!


Nutrition Facts

Calories

108.15

Fat

5.13 g

Sat. Fat

0.51 g

Carbs

14.12 g

Fiber

1.10 g

Net carbs

13.02 g

Sugar

12.21 g

Protein

2.73 g

Cholesterol

0.00 mg

Sodium

36.38 mg

Nutritional information is approximate. Based on 1 cookie rolled in powdered sugar.

Italian dessert, Italian cookie, Sicilian dessert, Sicilian recipe, authentic Italian recipe, original Sicilian dessert recipe, pistachio, almond, gluten free, dairy free
dessert, cookies
Italian
Did you make this recipe?
Tag @jennyblogsandbakes on instagram and hashtag it #jennyblogs

Lemon Blondies

Last Updated September 6, 2024

These bars are like brownies but LEMON.

IMG_3410.jpg

Chewy, sugary, zingy and bright lemony bar goodness. With a lemony glaze to boot! Some people call these lemon brownies, others lemon blondies. I couldn’t bring myself to say lemon brownies because they’re not chocolatey nor brown, so using the word “brownie” seemed to be sending the wrong signals. Blondie is much more accurate, although if you consider a blondie as having chocolate chips, you must take the notion out of your brain for a moment to fully understand and appreciate these beauties.

It’s really just a blondie recipe with lemon juice and zest added to it, with a wonderfully simple but tart lemon glaze! You can also add lemon extract for extra lemon flavor, but I don’t think they need it. I add more lemon juice than some, which has a more authentic lemon flavor anyway, yeah?

This post may contain affiliate links. If you make a purchase using these links, Jennyblogs may receive a small commission, at no extra cost to you. This helps to support Jennyblogs. For further information see the privacy policy. Grazie!

Recipe adapted from Sugar Spun Run


Lemon Blondies

Serves about 9

Adjustments.jpeg

Ingredients:

For the Lemon Blondies

  • 3/4 cup / 168g oil

  • 1 1/2 cups / 300g sugar

  • 1 egg + 1 egg yolk

  • 2 Tbsp lemon zest

  • 3 Tbsp / 42g lemon juice

  • 1/2 tsp vanilla extract

  • 2 1/2 cups / 300g all-purpose flour

  • 1 tsp / 3g cornstarch

  • 3/4 tsp salt

  • 1/4 tsp baking soda

For the Lemon Glaze

  • 3/4 cup / 94g powdered sugar

  • 1-2 Tbsp / 14-28g lemon juice

  • 1-2 tsp lemon zest, optional

Directions:

Make the Lemon Blondies

Preheat oven to 350°F / 177°C. Grease an 8x8 or 9x9inch / 20x20 or 23x23cm square baking pan.

  1. In a large bowl, mix together oil, sugar, egg and egg yolk, lemon zest, lemon juice, and vanilla.

  2. In another medium bowl, whisk together flour, cornstarch, salt, and baking soda.

  3. Add flour to lemon mixture and mix until combined. Dough will be thick.

  4. Scrape batter into prepared pan and spread in an even layer to the edges.

  5. Bake for 25-30 minutes, or until toothpick inserted near the center comes out mostly clean.

Adjustments.jpg

Make the Lemon Glaze

  1. In a small bowl, whisk together powdered sugar and enough lemon juice to make a drizzleable glaze. Pour over lemon blondies, spreading to edges with spatula, if necessary. Sprinkle lemon zest over top, if desired.

  2. Allow lemon blondies to cool completely before slicing and serving.

Jenny’s Notes:

  • I know it may be hard to resist cutting into these lemon blondies right away, but it’s best to wait until they are cooled to avoid them crumbling on you.

Lemon Blondies
Yield 9
Author
Prep time
20 Min
Cook time
30 Min
Total time
50 Min

Lemon Blondies

Chewy and dense like brownies, but lemon instead of chocolate with a zesty glaze!
Cook modePrevent screen from turning off

Ingredients

For the Lemon Blondies
For the Lemon Glaze

Instructions

Make the Lemon Blondies
  1. Preheat oven to 350°F / 177°C. Grease an 8x8 or 9x9inch / 20x20 or 23x23cm square baking pan.
  2. In a large bowl, mix together oil, sugar, egg and egg yolk, lemon zest, lemon juice, and vanilla.
  3. In another medium bowl, whisk together flour, cornstarch, salt, and baking soda.
  4. Add flour to lemon mixture and mix until combined. Dough will be thick.
  5. Scrape batter into prepared pan and spread in an even layer to the edges.
  6. Bake for 25-30 minutes, or until toothpick inserted near the center comes out mostly clean.
Make the Lemon Glaze
  1. In a small bowl, whisk together powdered sugar and enough lemon juice to make a drizzleable glaze. Pour over lemon blondies, spreading to edges with spatula, if necessary. Sprinkle lemon zest over top, if desired.
  2. Allow lemon blondies to cool completely before slicing and serving.

Notes

I know it may be hard to resist cutting into these lemon blondies right away, but it’s best to wait until they are cooled to avoid them crumbling on you.

Nutrition Facts

Calories

474.05

Fat

20.03 g

Sat. Fat

1.62 g

Carbs

70.33 g

Fiber

1.13 g

Net carbs

69.19 g

Sugar

43.82 g

Protein

4.50 g

Sodium

205.81 mg

Cholesterol

41.16 mg

Nutritional information is approximate. Based on 1 bar if sliced into 9 servings.

Lemon Blondies, Lemon Brownies, Lemon bars
dessert
American
Did you make this recipe?
Tag @jennyblogsandbakes on instagram and hashtag it #jennyblogs

Chocolate No-Bake Cookies

Last Updated September 6, 2024

IMG_3299.jpg

Chocolate no-bake cookies are actually known as Chocolate Sand Dune Cookies around the Morris household, because no-bakes is not as fun, ya know? They’re well enough known that probably doesn’t matter, but as I grew up near the famous Sleeping Bear Sand Dunes, you will understand why, many years ago, my older brother decided to call these mounds of cookies “sand dunes”. Or rather “chocolate sand dunes” because these cookies are not the color of sand. The name stuck, and here we are today.

Chocolate sand dune cookies a.k.a. chocolate no-bake cookies, no matter what you call them, are delicious and just a little too easy to make.

They’re also made without any flour, so if you use certified GF oats, they are easily gluten-free. These cookies made a come back during the quarantine and the flour shortage! They can also be made with a milk-alternative and butter-alternative if you wish to have dairy-free cookies. They’re naturally egg-free!

What follows is the classic recipe I grew up making with my mom. Little did I know until I was a teenager and making no-bake cookies with a friend that the actual “original” recipe includes peanut butter. What?! You don’t put peanut butter into chocolate sand dune cookies! Actually you can, and it’s delicious. Peanut butter and chocolate together, hello. Of course it’s delicious.

However, this is not to disregard my mom’s classic recipe. While she loves chocolate and peanut butter, she doesn’t prefer them together. So she omitted the peanut butter and never looked back from making this pure chocolatey, fudgy version of no-bake cookies. Some of my family members still prefer them without the peanut butter, others prefer with. So if you or someone you know doesn’t like peanut butter with chocolate, or has a nut allergy, know you can omit the peanut butter and have an equally delicious cookie.

This post may contain affiliate links. If you make a purchase using these links, Jennyblogs may receive a small commission, at no extra cost to you. This helps to support Jennyblogs. For further information see the privacy policy. Grazie!

A recipe from my mama


Chocolate Sand Dune Cookies

Makes about 36 cookies

The pan was full at one point…

The pan was full at one point…

Ingredients:

  • 4 cups / 800g sugar

  • 1/2 cup / 50g cocoa powder

  • 1 cup / 237g milk

  • dash of salt

  • 1 cup / 225g butter (2 sticks)

  • 1/4-1 cup / 65g - 260g peanut butter, optional

  • 2 tsp / 10g vanilla extract

  • 5 1/2 cups / 495g quick oats

Directions

  1. In a large pot, stir together sugar, cocoa, milk, and salt; bring to a boil over medium heat. Boil for 2 minutes then remove from heat.

  2. Add butter, peanut butter, and vanilla; stir well.

  3. Add the oats and stir until all oats are coated. Let mixture sit for 8-10 minutes to thicken, stirring occasionally to check consistency.

  4. When mixture has thickened enough, spoon mounds onto wax paper or a clean counter. Allow to set and enjoy!

Jenny’s Notes:

  • Brown sugar can be used instead of white sugar, if you prefer.

  • I grew up baking with salted butter and this recipe reflects that with the dash of salt. Here in Europe and in most bakeries unsalted butter is used, so if that’s what you are using, simply add two dashes of salt if you wish!

  • You may notice the variance in the peanut butter measurement; use up to 1 cup for peanut butter lovers, or as little as 1/4 cup for just a hint.

  • Regular or crunchy peanut butter can be used, and it’s also fine to use natural peanut butter. People often don’t recommend using natural in recipes, but as I prefer not to buy the kinds with added sugars and hydrogenated oils, I usually use it anyway and have hardly met a recipe where you can’t successfully use the natural kind.

  • Quick or instant oats are my preferred kind of oats to use for chocolate sand dunes, but as you will notice from my photos that regular or rolled oats can also be used. Rolled oats give more of a bite to your cookies, and you will probably need to let the mixture sit a bit longer before spooning out the cookies so the oats have time to thicken up the mixture. If after 10-15 minutes your mixture still isn’t thickening up satisfactorily, you may need to add additional oats.

  • The above recipe makes about 36 cookies, great for sharing, large families, and parties. It can also easily be halved to make about 18 cookies, or even quartered to make 9. The photos on this post are from the 2 month lockdown in Italy when I decided that a quarter batch should suffice for 2 people who can’t leave the house.

Chocolate No-Bake Cookies
Yield 36
Author
Prep time
20 Min
Cook time
5 Min
Total time
25 Min

Chocolate No-Bake Cookies

Chocolate No-bakes are decadent mounds of chocolatey oat cookies made without flour, eggs, or an oven, which makes them ideal for summer baking and people with gluten or egg allergies.
Cook modePrevent screen from turning off

Ingredients

Instructions

  1. In a large pot, stir together sugar, cocoa, milk, and salt; bring to a boil over medium heat. Boil for 2 minutes then remove from heat.
  2. Add butter, peanut butter, and vanilla; stir well.
  3. Add the oats and stir until all oats are coated. Let mixture sit for 8-10 minutes to thicken, stirring occasionally to check consistency.
  4. When mixture has thickened enough, spoon mounds onto wax paper or a clean counter. Allow to set and enjoy!

Notes

Brown sugar can be used instead of white sugar, if you prefer.I grew up baking with salted butter and this recipe reflects that with the dash of salt. Here in Europe and in most bakeries unsalted butter is used, so if that’s what you are using, simply add two dashes of salt if you wish! You may notice the variance in the peanut butter measurement; use up to 1 cup for peanut butter lovers, or as little as 1/4 cup for just a hint. Regular or crunchy peanut butter can be used, and it’s also fine to use natural peanut butter. People often don’t recommend using natural in recipes, but as I prefer not to buy the kinds with added sugars and hydrogenated oils, I usually use it anyway and have hardly met a recipe where you can’t successfully use the natural kind. Quick or instant oats are my preferred kind of oats to use for chocolate sand dunes, but as you will notice from my photos that regular or rolled oats can also be used. Rolled oats give more of a bite to your cookies, and you will probably need to let the mixture sit a bit longer before spooning out the cookies so the oats have time to thicken up the mixture. If after 10-15 minutes your mixture still isn’t thickening up satisfactorily, you may need to add additional oats. The above recipe makes about 36 cookies, great for sharing, large families, and parties. It can also easily be halved to make about 18 cookies, or even quartered to make 9. The photos on this post are from the 2 month lockdown in Italy when I decided that a quarter batch should suffice for 2 people who can’t leave the house.

Nutrition Facts

Calories

192.48

Fat

9.10 g

Sat. Fat

4.01 g

Carbs

26.75 g

Fiber

0.92 g

Net carbs

25.83 g

Sugar

22.75 g

Protein

2.47 g

Sodium

89.28 mg

Cholesterol

13.96 mg

Nutritional information is approximate. Based on 1 cookie if using the full cup of peanut butter in the recipe.

no-bake cookies, chocolate, oats, no bake dessert, summer dessert, fudgy chocolate cookies, oat cookies, peanut butter
dessert
American
Did you make this recipe?
Tag @jennyblogsandbakes on instagram and hashtag it #jennyblogs
IMG_3302.jpg

Beurre Noisette (browned butter) Congo Bars

Last Updated September 3, 2024

With oats.

Adjustments.jpg

One of the best things to happen to the cookie world is browned butter, or beurre noisette as the French call it. It not only ups the baked cookie game, but it takes cookie dough to a whole new level.

Will someone please get browned butter cookie dough ice cream on the market? Thanks.

You can find my original recipe for Beurre Noisette Chocolate Chip Cookies right here, but you might want to stick around a little longer for today’s recipe because it’s essentially the same thing, just a different form and a little quicker to make. And cookies are already quick to make, so imagine that!

Why the name congo bars? I really have no idea. They’re just chocolate chip cookies in bar form. Therefore quicker to make but not necessarily superior to the classic cookie form. It’s really down to whatever tickles your fancy in that moment.

This recipe was born under full Italian lockdown. Ironically, you think I wouldn’t want to short cut a recipe with all the time I had on my hands, but you see, I have a very small oven. I can bake a max of 5-6 cookies a time, so that’s a long time to be waiting around to take cookies out of the oven, reload the tray, and repeat. Not to mention a higher electric bill.

So what did I do? I took my handy dandy Beurre Noisette Chocolate Chip Cookie recipe and adjusted it to fit in an 8x8in / 20x20cm square pan. So great. So delicious. And the timer only goes off once! A square baking dish is also a bit easier to wash than a large and cumbersome cookie sheet.

This recipe also features oats, and you can use the browned butter while it’s still melted if you want one more time-saving trick. While I do think it’s worth the time/planning ahead to brown the butter, allow it to cool, then whip it up as you normally would in a cookie recipe (so fluffy and so delicious), it’s not essential and can save you a lot of time if you don’t.

To learn how to make browned butter, see the original Beurre Noisette Chocolate Chip Cookie recipe.

This post may contain affiliate links. If you make a purchase using these links, Jennyblogs may receive a small commission, at no extra cost to you. This helps to support Jennyblogs. For further information see the privacy policy. Grazie!

A recipe by Jenny


Beurre Noisette (browned butter) Congo Bars

Makes about 9 bars

Adjustments.jpg

Ingredients:

  • 1/2 cup / 113g butter, melted, browned, and cooled

  • 3/4 cup / brown sugar

  • 1 egg

  • 1 1/2 tsp vanilla extract

  • 1 cup / 120g all-purpose flour

  • 1/2 cup / 45g oats

  • 1/2 tsp baking powder

  • 1/2 tsp baking soda

  • 1/2 tsp salt

  • 6 oz / 170g (half a bag) chocolate chips

Directions:

Oven preheated to 350°F / 177°C. 8x8in / 20x20cm pan, greased.

  1. In a medium bowl, mix together melted and cooled browned butter, brown sugar, egg, and vanilla and smooth.

  2. Add in flour, oats, baking powder, baking soda, salt, and chocolate chips. Mix until well combined.

  3. Scrape dough into an even layer in the prepared pan and bake for 18-22 minutes, or until set and center no longer looks doughy.

Jenny’s Notes:

  • This recipe can easily be doubled and baked in a 9x13in / 23x33cm pan.

  • If you choose to whip your butter, cream first just the butter and sugar until light and fluffy, about 4-5 minutes. Then add in the rest of the wet ingredients and continue with recipe.

  • Before baking you can also sprinkle some flaked sea salt on top if you’re craving the sweet and salty!

Beurre Noisette (browned butter) Congo Bars
Yield 9
Author
Prep time
25 Min
Cook time
22 Min
Total time
47 Min

Beurre Noisette (browned butter) Congo Bars

All the goodness of browned butter chocolate chip cookies in a bar form!
Cook modePrevent screen from turning off

Ingredients

Instructions

  1. Oven preheated to 350°F / 177°C. 8x8in / 20x20cm pan, greased.
  2. In a medium bowl, mix together melted and cooled browned butter, brown sugar, egg, and vanilla and smooth.
  3. Add in flour, oats, baking powder, baking soda, salt, and chocolate chips. Mix until well combined.
  4. Scrape dough into an even layer in the prepared pan and bake for 18-22 minutes, or until set and center no longer looks doughy.

Notes

This recipe can easily be doubled and baked in a 9x13in / 23x33cm pan.If you choose to whip your butter, cream first just the butter and sugar until light and fluffy, about 4-5 minutes. Then add in the rest of the wet ingredients and continue with recipe. Before baking you can also sprinkle some flaked sea salt on top if you’re craving the sweet and salty!

Nutrition Facts

Calories

316.06

Fat

16.84 g

Sat. Fat

10.05 g

Carbs

40.76 g

Fiber

1.98 g

Net carbs

38.78 g

Sugar

25.25 g

Protein

3.65 g

Sodium

321.79 mg

Cholesterol

47.66 mg

Nutritional information is approximate. Based on 9 servings.

browned butter, chocolate chip cookies, congo bars, cookies
cookies, dessert
American
Did you make this recipe?
Tag @jennyblogsandbakes on instagram and hashtag it #jennyblogs

Pumpkin Cheesecake Swirled Brownies

Last Updated August 29, 2024

IMG_1331.jpg

Happy October!

I realize I’m a tad bit late as it’s almost November, but I’ve been MIA here on the blog for the past 3 weeks. I flew to meet some of my family in Paris and IT WAS A DREAM. All the hugs and jokes, pastries, sight-seeing, adventures, and everything else that happens when in Paris with some Morris family. We fit right in, people kept mistaking us for Parisians with our striped shirts, berets, and flawless French while taking photos constantly. I should probably write a blog about it when I get back.

Just kidding, just kidding.

I already miss my family so much. Nothing like watching your family fly away and suddenly feeling like my 18-year-old self again watching my parents drive away after having helped me move to Mississippi. I miss Paris too. Another thing I really enjoyed was the real fall weather there. Paris weather is actually quite similar to my hometown in Traverse City, Michigan. Except that Paris isn’t under 2+ feet of snow for 4+ months…meanwhile I left Florence still reaching into the high 70’s and 80’s (Fahrenheit), and returned to the same temperatures. In Paris I actually needed the sweaters, coats, boots, and hot beverages and it felt so right. C’mon Firenze, you can do it! Chilly temperatures for some serious fall-ing.

Until Firenze decides to get its act together, these rich chocolate brownies with a spiced pumpkin cream cheese swirl can help out.

While I didn’t bake or blog in Paris (why would I bake when world-class pastries are so cheap and at my doorstep??) I did whip up some autumn and pumpkin goodies and took photos of the blog-worthy ones before coming because I planned ahead! One catch though, I meant to post this WHILE I was in Paris, but that just didn’t happen and I’m ok with it. I was eating pain au chocolat, chaussons aux pommes, and macarons.

This post may contain affiliate links. If you make a purchase using these links, Jennyblogs may receive a small commission, at no extra cost to you. This helps to support Jennyblogs. For further information see the privacy policy. Grazie!

A recipe by Jenny.


Pumpkin Cheesecake Swirled Brownies

Serves 9-12

Ingredients:

IMG_1341.jpg

For the Brownies

  • scant 1/2 cup / 85g oil

  • 1 cup / 200g sugar

  • 1 egg

  • 1 1/2 tsp vanilla extract

  • 1/3 cup / 33g unsweetened cocoa powder

  • 1/4 tsp salt

  • 1/2 cup / 60g all-purpose flour

For the Pumpkin Cheesecake Swirl

  • 4 oz / 115g cream cheese, softened

  • 1/4 cup / 60g pumpkin purée

  • 2 Tbsp / 25g sugar

  • 1/4 tsp cinnamon

  • dash of ginger

  • dash of nutmeg

  • dash of cloves

Directions

Make the Brownies

Oven 350°F / 177°C.  Lightly greased 8x8in / 20x20cm pan.

  1. In a large mixing bowl, combine oil and sugar.  Beat in egg and vanilla.  Add cocoa powder and salt.  Mix in flour until just combined. 

  2. Pour into prepared pan and smooth with a spatula.

Make the Pumpkin Cheesecake Swirl

  1. In a medium bowl, beat together cream cheese, pumpkin, sugar, and spices until smooth and creamy. This can be done with a spoon or in a stand mixer.

  2. Dollop pumpkin cheesecake by spoonful over brownie batter. Use a a knife or the edge of a spatula to smooth and swirl pumpkin cheesecake into brownie batter.

  3. Bake for 20-25 minutes or until toothpick inserted near the center comes out mostly clean.  Allow to cool.


Jenny’s Notes:

  • The brownie batter and cream cheese will be thick and may stick up in places where it has been swirled, that’s ok, just do your best to smooth it down so everything is mostly level.

Pumpkin Cheesecake Swirled Brownies
Yield 9
Author
Prep time
20 Min
Cook time
25 Min
Total time
45 Min

Pumpkin Cheesecake Swirled Brownies

Fudgy chocolate brownies with a spiced cream cheese swirl.
Cook modePrevent screen from turning off

Ingredients

For the Brownies
For the Pumpkin Cheesecake Swirl

Instructions

Make the Brownies
  1. Oven 350°F / 177°C. Lightly greased 8x8in / 20x20cm pan.
  2. In a large mixing bowl, combine oil and sugar. Beat in egg and vanilla.
  3. Add cocoa powder and salt. Mix in flour until just combined.
  4. Pour into prepared pan and smooth with a spatula.
Make the Pumpkin Cheesecake Swirl
  1. In a medium bowl, beat together cream cheese, pumpkin, sugar, and spices until smooth and creamy. This can be done with a spoon or in a stand mixer.
  2. Dollop pumpkin cheesecake by spoonful over brownie batter. Use a a knife or the edge of a spatula to smooth and swirl pumpkin cheesecake into brownie batter.
  3. Bake for 20-25 minutes or until toothpick inserted near the center comes out mostly clean. Allow to cool.

Notes

The brownie batter and cream cheese will be thick and may stick up in places where it has been swirled, that’s ok, just do your best to smooth it down so everything is mostly level.

Nutrition Facts

Calories

277.12

Fat

14.78 g

Sat. Fat

3.39 g

Carbs

28.67 g

Fiber

0.98 g

Net carbs

27.68 g

Sugar

25.76 g

Protein

2.30 g

Sodium

113.35 mg

Cholesterol

33.57 mg

Nutritional information is approximate. Based on 9 servings.

brownies, pumpkin spice, pumpkin cream cheese, fall recipe, cream cheese swirled brownies
dessert
American
Did you make this recipe?
Tag @jennyblogsandbakes on instagram and hashtag it #jennyblogs
IMG_1326.jpg

White Chocolate Cranberry Pumpkin Cookies

Last Updated August 29, 2024

public.jpg

Happy official fall and pumpkin season!!!

Starting off the season with soft, fluffy pumpkin cookies stuffed with white chocolate and cranberries with a hint of orange. These are lightly sweet which helps the white chocolate shine and offset the tartness of the cranberries. A bit of orange extract makes the whole combo into this deliciously bright fall offering.

Aside from the orange, these cookies are similar to my White Chocolate Cranberry Oatmeal Cookies. Same condiments, different cookie. One a light and fluffy ode to fall, another a chewy classic oatmeal cookie. Both scrumptious.

Before writing up this recipe I felt a twinge of pumpkin guilt. You know, the I’m making and sharing so many pumpkin recipes and desserts that maybe everyone is already sick of them except me? Then I remembered that I actually haven’t shared any truly fall recipes on the blog yet this year! I somehow managed to hold myself off until after the autumn solstice. That doesn’t mean I haven’t been baking fally things, uh uh no. I’ve already opened one of my precious cans of pumpkin from the States (what I did with the extra room in my baggage because a small can of pumpkin costs almost 5euro in Florence) and squeaked out a batch of these pumpkin cookies, brownies with a spiced pumpkin cream cheese swirl, and pumpkin streusel coffee cake. Fall, I welcome thee with open arms.

So, I hope wherever you are in the world, you share my love for autumnal things, and enjoy baking up these White Chocolate Cranberry Pumpkin Cookies, don a sweater and some cozy socks, and read a book with a nice mug of tea. Hopefully your weather allows for that.

This post may contain affiliate links. If you make a purchase using these links, Jennyblogs may receive a small commission, at no extra cost to you. This helps to support Jennyblogs. Where possible, links are prioritized to small businesses, and American companies and products made in the USA for American readers. For further information see the privacy policy. Grazie!


White Chocolate Cranberry Pumpkin Cookies

Makes about 2 dozen cookies

public.jpg

Ingredients:

  • 1 cup / 240g pumpkin purée

  • 1 1/4 cups / 250g sugar

  • 1 egg

  • scant 1/2 cup / 90g oil

  • 1 tsp vanilla extract

  • 1/4 tsp orange extract

  • 2 1/2 cups / 300g all-purpose flour

  • 1 tsp cinnamon

  • 1 tsp baking powder

  • 1 tsp baking soda

  • 1/2 tsp salt

  • 3/4 cup / 105g dried cranberries

  • 3/4 cup / 127g white chocolate chips

Directions:

Oven 350°F / 177°C. Baking sheet lined with parchment paper, silpat, or greased.

  1. Combine pumpkin, sugar, egg, oil, and extracts in a large bowl.

  2. In another medium bowl, whisk together flour, cinnamon, baking powder, baking soda, salt.

  3. Add dry ingredients, cranberries, and white chocolate chips to wet ingredients, stirring until evenly moistened.

  4. Drop by generous spoonful onto prepared baking sheet and bake for 9-12 minutes, or until bottom of cookies are golden brown and the center still looks a bit wet.


Jenny’s Notes:

  • I used half goji berries half cranberries last time and really liked it. Dried cranberries usually have loads of sugar and I liked that the goji berries were unsweetened.

White Chocolate Cranberry Pumpkin Cookies
Yield 24-26
Author
Prep time
25 Min
Cook time
12 Min
Total time
37 Min

White Chocolate Cranberry Pumpkin Cookies

Soft and fluffy pumpkin cookies loaded with mini white chocolate chips, dried cranberries, and goji berries with a hint of orange and cinnamon.
Cook modePrevent screen from turning off

Ingredients

Instructions

  1. Oven 350°F / 177°C. Baking sheet lined with parchment paper, silpat, or greased.
  2. Combine pumpkin, sugar, egg, oil, and extracts in a large bowl.
  3. In another medium bowl, whisk together flour, cinnamon, baking powder, baking soda, salt.
  4. Add dry ingredients, cranberries, and white chocolate chips to wet ingredients, stirring until evenly moistened.
  5. Drop by generous spoonful onto prepared baking sheet and bake for 9-12 minutes, or until bottom of cookies are golden brown and the center still looks a bit wet.

Notes

I used half goji berries half cranberries last time and really liked it. Dried cranberries are usually sweetened and I liked that the goji berries were unsweetened.

Nutrition Facts

Calories

168.23

Fat

5.85 g

Sat. Fat

1.37 g

Carbs

27.70 g

Fiber

0.93 g

Net carbs

26.77 g

Sugar

17.09 g

Protein

1.99 g

Sodium

130.03 mg

Cholesterol

8.86 mg

Nutritional information is approximate. Based on 24 servings.

cookies, pumpkin, white chocolate chips, cinnamon, orange, cranberry, goji berry, fall recipe
dessert
American
Did you make this recipe?
Tag @jennyblogsandbakes on instagram and hashtag it #jennyblogs
public.jpg

Jeannie's Healthy Breakfast Cookies

Last Updated August 28, 2024

2019-02-17+15.32.23.jpg

What could be better than a cookie? How about a cookie that’s packed with nutrients and can be eaten anytime, especially for breakfast, guilt free?

I love cookies. They are my go-to when I want to whip up something with limited time, or don’t have much energy for other more entailed desserts. I’m sure this has NOTHING to do with the fact that cookies are also one of my favorite things to eat. It ends up turning into a win-win-win situation because I’m having fun, being productive, get to eat some of the ingredients while baking, get to eat some dough while baking, and BONUS if there is enough dough to actually be baked into cookies! So many wins.

I have to bring up the negative, however, to classic cookie baking. They’re kinda calorific and not very good for you. I’m all for eating cookies for breakfast, but that usually goes along with a sugar crash later on. What to do?

Bake healthy cookies! They have to be delicious of course, and not gross. I have just the recipe for you, made up by my mom many years ago when we needed a portable nutritious breakfast for a trip. This recipe has been in my recipe box ever since as “Jean’s breakfast cookies”, made with many adjustments because the add ins are very versatile depending on your tastes. My mom likes to be called Jeannie (not by her kids of course) so I adapted the title accordingly.

One thing this recipe is not is a taste-alike recipe to say, chocolate chip cookies with a surprise twist that it’s healthy. Nope, these cookies have a satisfyingly healthy look and taste and are upfront about it from the get go. They get positive feedback and recipe requests wherever they go!

The recipe that follows is just one version of many, many possibilities. Just keep in mind that major adjustments may need other adjustments. For example, if you don’t have any honey or maple syrup on hand for the sweetener, you could use raw or regular cane sugar. Substituting a liquid for a dry ingredient, however, will mean you may need more liquid from elsewhere. Maybe add another egg, a bit more oil, or even water until you get a cookie dough consistency once again. Other ideas to make the recipe your own:

  • Use any kind of flour you wish instead of wheat flour. Oat flour, almond flour, coconut flour…I often use wheat germ in place of part of the flour or flaxmeal, usually 1/4 cup.

  • If you want these cookies to be gluten-free, ensure that your oats are gluten-free, and use a gluten-free flour.

  • Change up the spices. Sometimes towards fall I also add a bit of ginger, nutmeg, and cloves. Cardamom is also nice.

  • Beyond dried fruit and walnuts, get creative with your add-ins! Just try not to go too far beyond 1 cup, otherwise there might not be enough dough to hold everything together. In the photos on this post I used dried apples, dried cranberries, and walnuts. I’ve also added various combinations of dried cherries, prunes, dried apricots, raisins, dates, dried figs, dried pears, fresh apples, grated coconut, pecans, hazelnuts, dark chocolate, crystallized ginger, and anything else I had on hand!

This post may contain affiliate links. If you make a purchase using these links, Jennyblogs may receive a small commission, at no extra cost to you. This helps to support Jennyblogs. For further information see the privacy policy. Grazie!

Recipe adapted from my mama


Jeannie’s Healthy Breakfast Cookies

Makes about 18-22 cookies

Ingredients:

2019-02-17 14.45.17.jpg
  • 1/2 cup / 112g olive or coconut oil

  • generous 1/3 cup / 120g maple syrup or honey

  • 2 eggs

  • 1 tsp vanilla extract

  • 1 cup / 120g all-purpose or whole wheat flour

  • 1 1/2 cups / 135g rolled oats

  • 1/2 cup / 90g flaxmeal

  • 1/2 tsp baking soda

  • 1/2 tsp salt

  • 1/8 tsp cinnamon

  • 3/4 cup / 105g nuts, roughly chopped

  • 1/2 apple, diced

  • 1/4 cup / 50g dried fruit, chopped if necessary

Directions:

Oven 375°F / 190°C. Baking sheet lined with silpat or parchment paper.

  1. In a large bowl combine wet ingredients: oil, maple syrup, eggs, and vanilla; beat with a spoon until smooth.

  2. In another medium bowl whisk together dry ingredients: flour, oats, flaxmeal, baking soda, salt, and cinnamon.

  3. Add dry ingredients, nuts, apple, and dried fruit to wet ingredients, mix until well combined.

  4. Spoon generous tablespoons of dough onto prepared baking sheet and flatten slightly as they won’t spread much, leaving at least 1 inch between cookies. Bake for 8-10 minutes or until edges turn lightly golden brown and centers are no longer doughy.

Jenny’s Notes:

  • you can make flaxmeal at home by simply processing some flaxseeds in a coffee or spice grinder.

  • olive oil has a rather strong taste so if you prefer to avoid that, try going with the coconut oil option or even a neutral oil like peanut oil.

  • 3 egg whites can be substituted for the 2 eggs for cholesterol-conscience people.

Jeannie's Breakfast Cookies
Yield 12-16 cookies
Author
Prep time
20 Min
Cook time
10 Min
Total time
30 Min

Jeannie's Breakfast Cookies

Healthy cookies packed with nutritious ingredients that make for a great breakfast or anytime snack. Dairy-free, refined sugar-free, and can easily be made gluten-free.
Cook modePrevent screen from turning off

Ingredients

Instructions

  1. Oven 375°F / 190°C. Baking sheet lined with silpat or parchment paper.
  2. In a large bowl combine wet ingredients: oil, maple syrup, eggs, and vanilla; beat with a spoon until smooth.
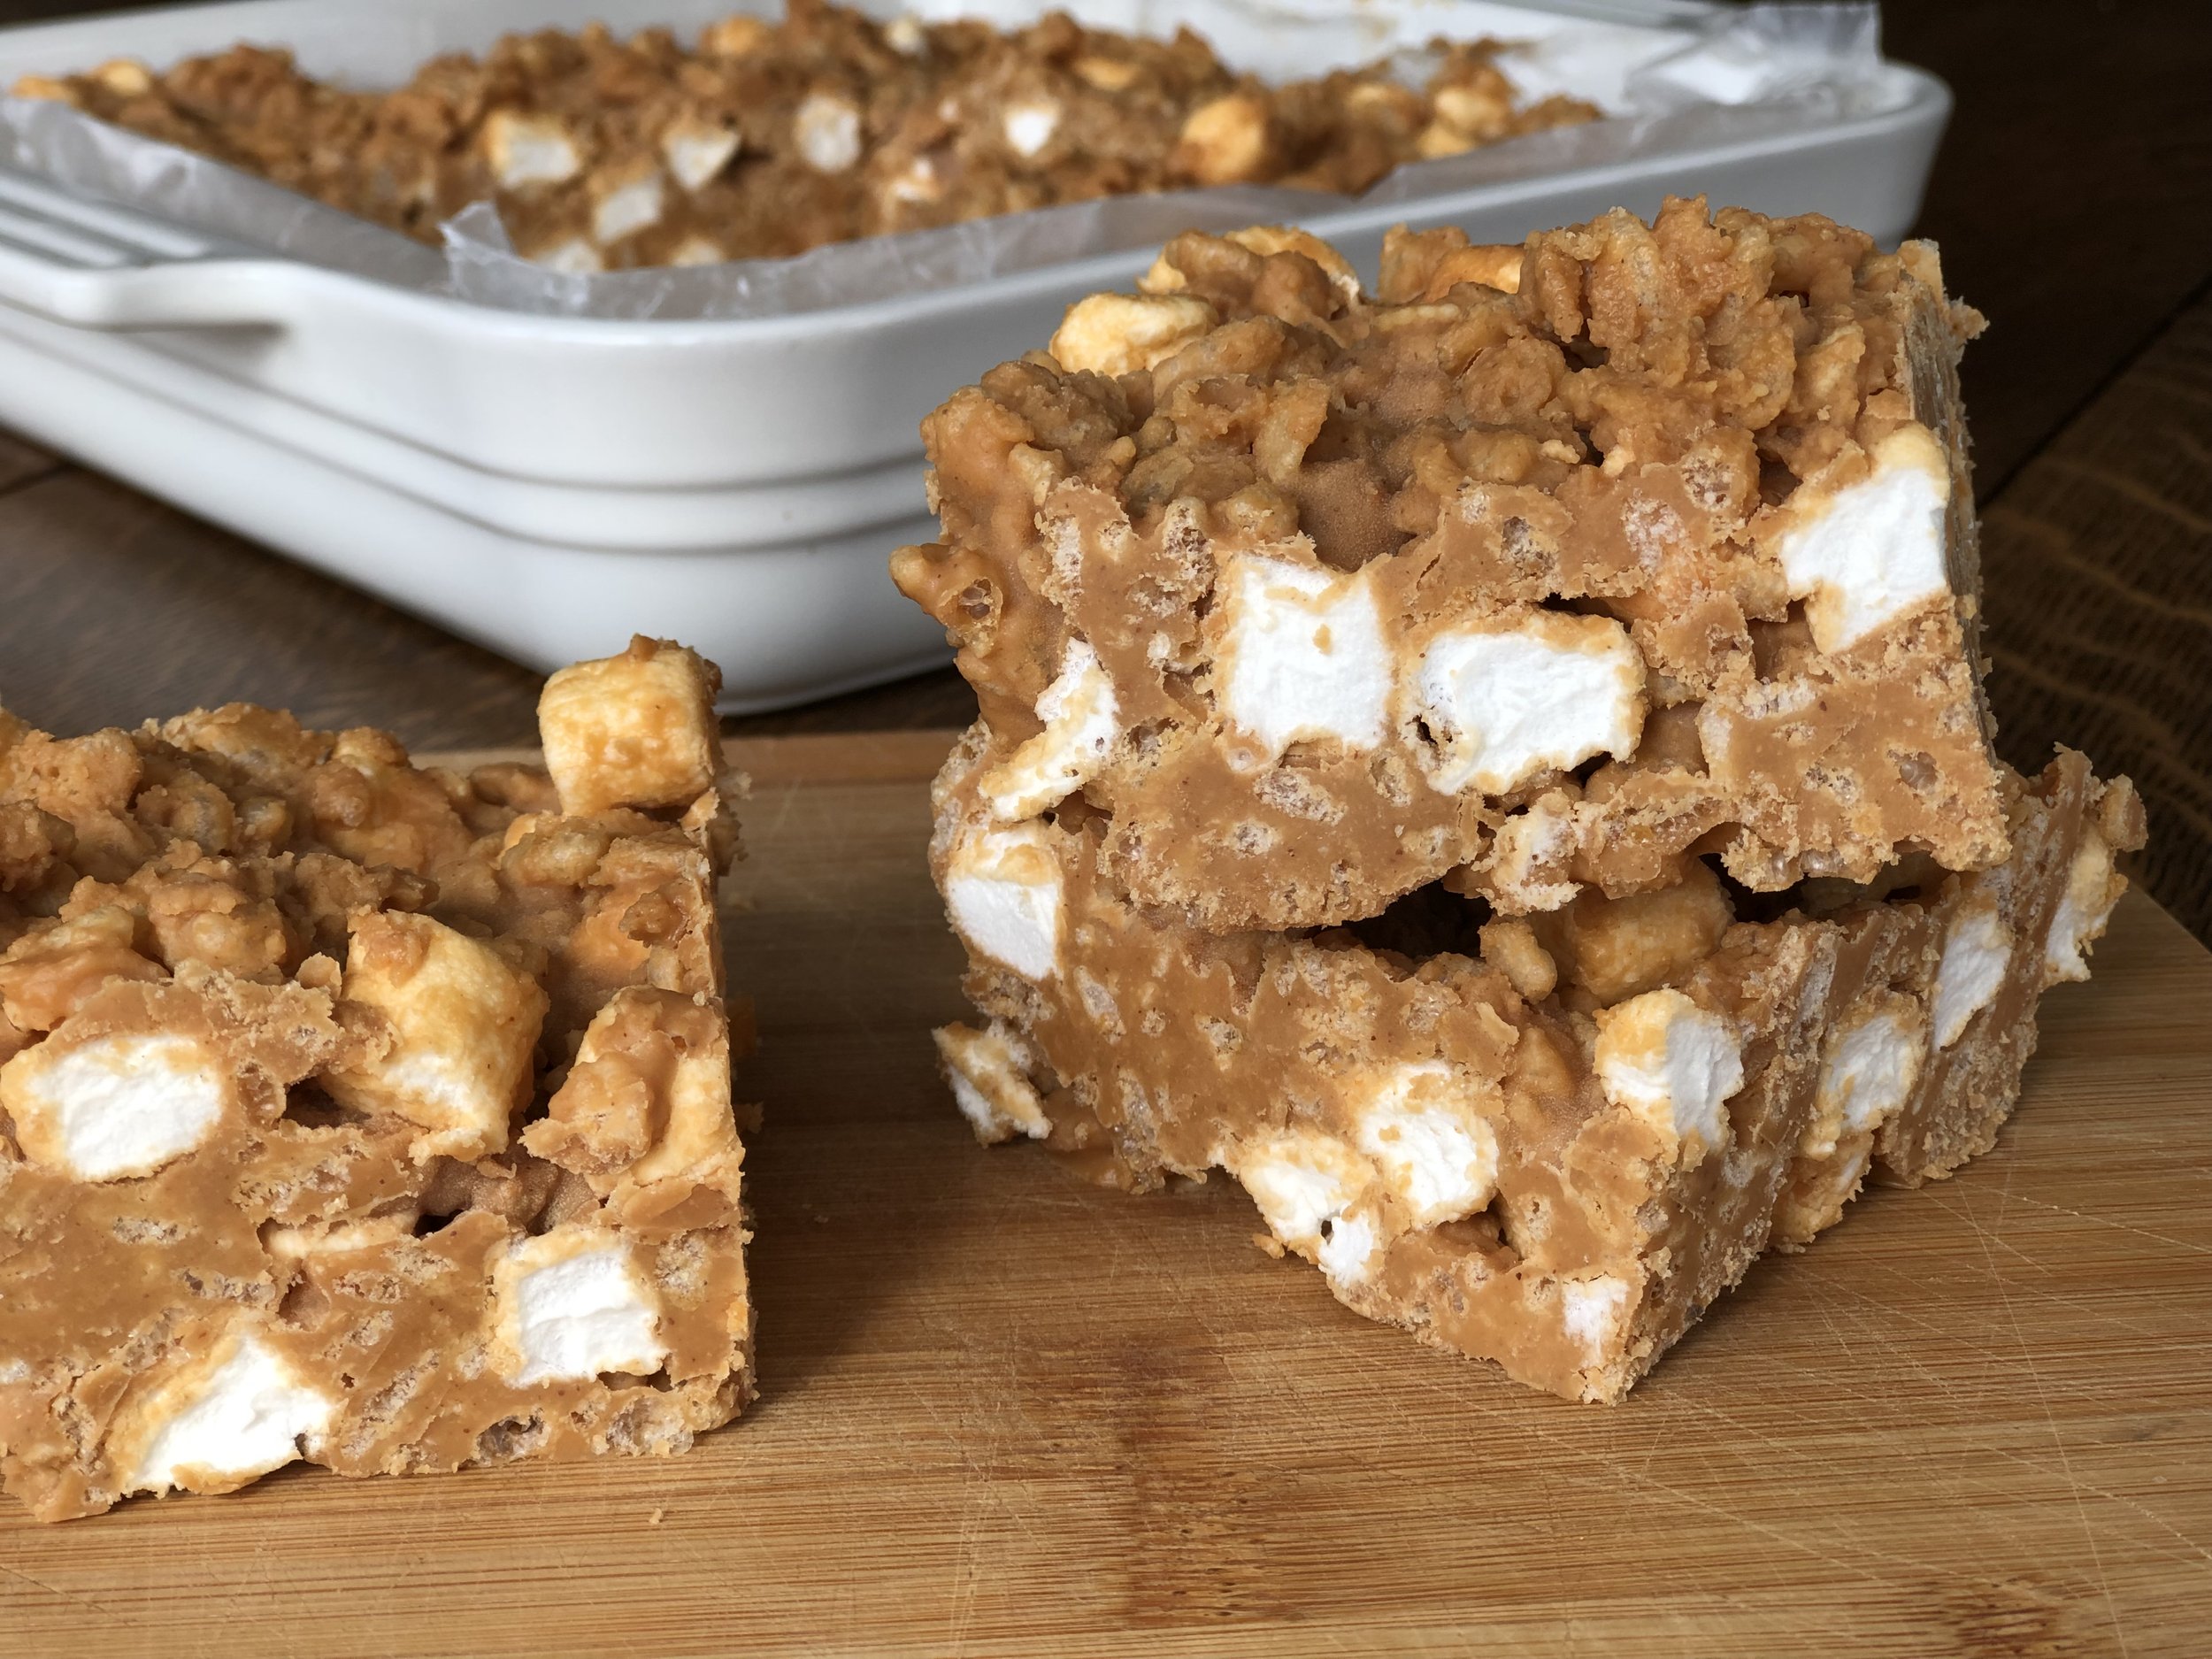
  3. In another medium bowl whisk together dry ingredients: flour, oats, flaxmeal, baking soda, salt, and cinnamon.
  4. Add dry ingredients, nuts, apple, and dried fruit to wet ingredients, mix until well combined.
  5. Spoon generous tablespoons of dough onto prepared baking sheet and flatten slightly as they won’t spread much, leaving at least 1 inch between cookies. Bake for 8-10 minutes or until edges turn lightly golden brown and centers are no longer doughy.

Notes

you can make flaxmeal at home by simply processing some flaxseeds in a coffee or spice grinder.olive oil has a rather strong taste so if you prefer to avoid that, try going with the coconut oil option or even a neutral oil like peanut oil. 3 egg whites can be substituted for the 2 eggs for cholesterol-conscience people.

Nutrition Facts

Calories

265.40

Fat

15.87 g

Sat. Fat

2.49 g

Carbs

27.23 g

Fiber

3.34 g

Net carbs

23.89 g

Sugar

9.53 g

Protein

5.72 g

Sodium

188.36 mg

Cholesterol

31.00 mg

Nutritional information is approximate and based on 12 servings.

healthy, nutritious, cookies, gluten-free, dairy-free, refined sugar-free, dried fruit, apple, fall spices, oats, nuts, coconut, portable
breakfast, dessert, snack
American
Did you make this recipe?
Tag @jennyblogsandbakes on instagram and hashtag it #jennyblogs
2019-02-17+15.36.02.jpg