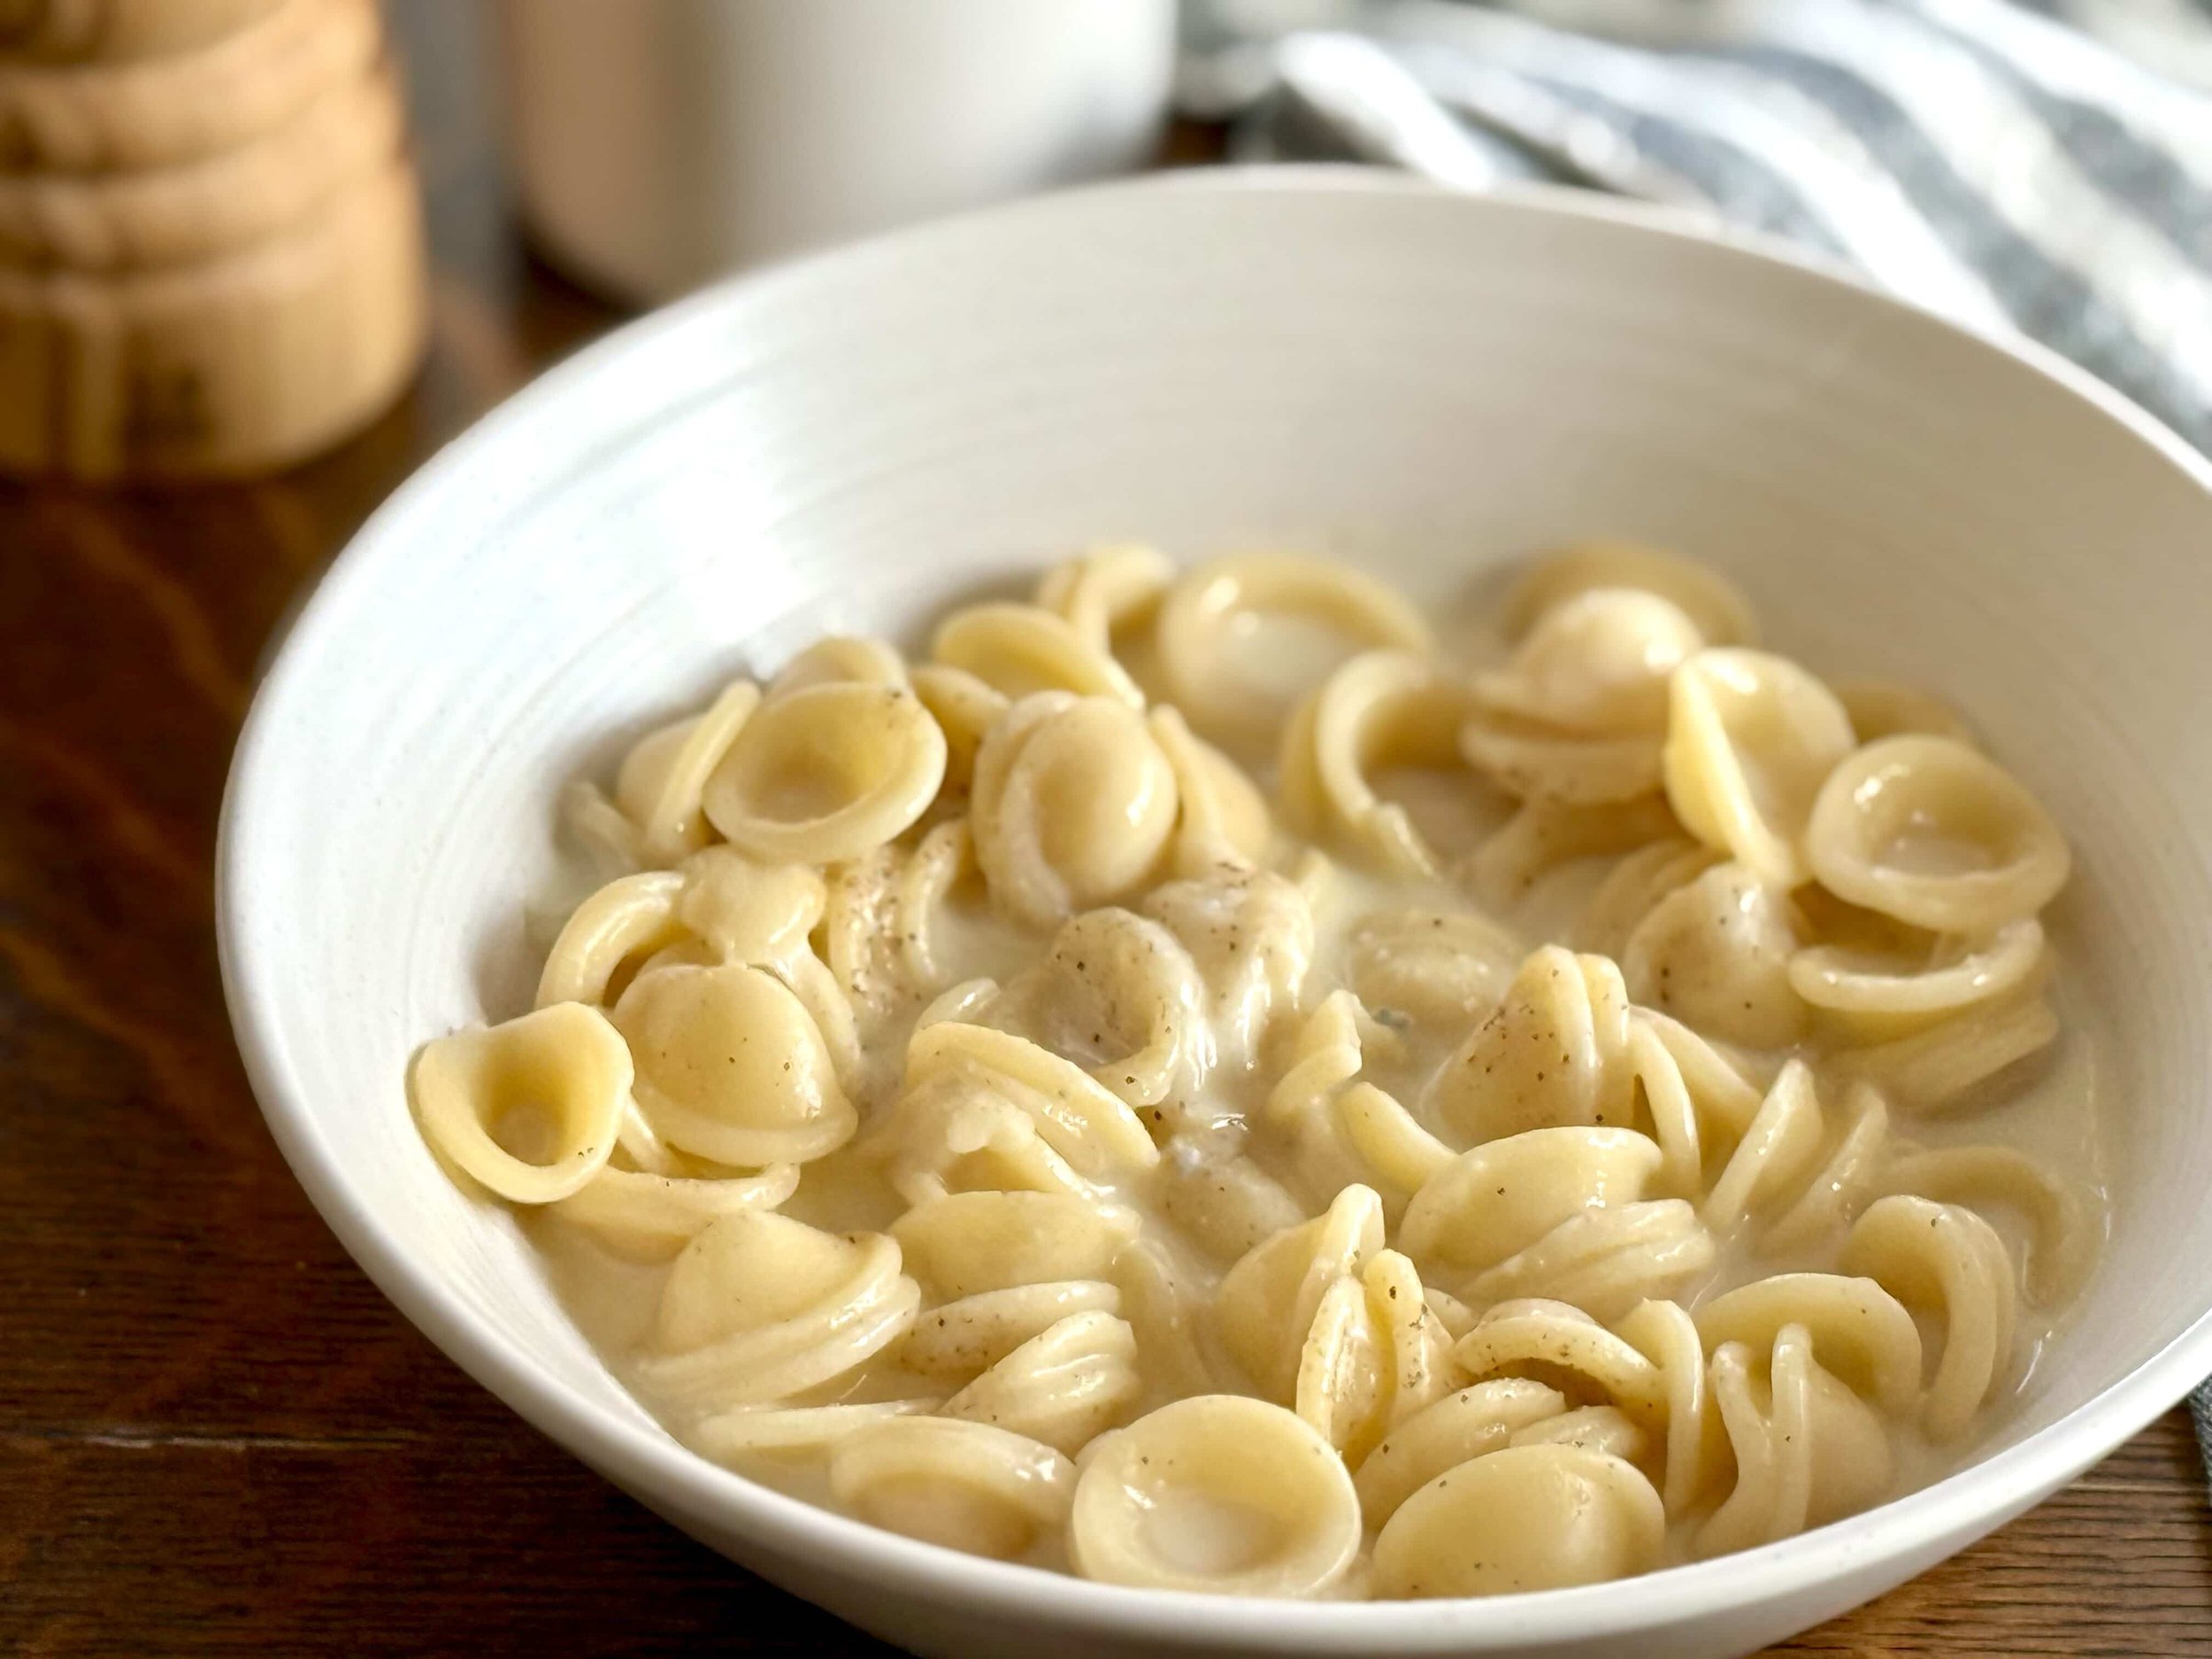
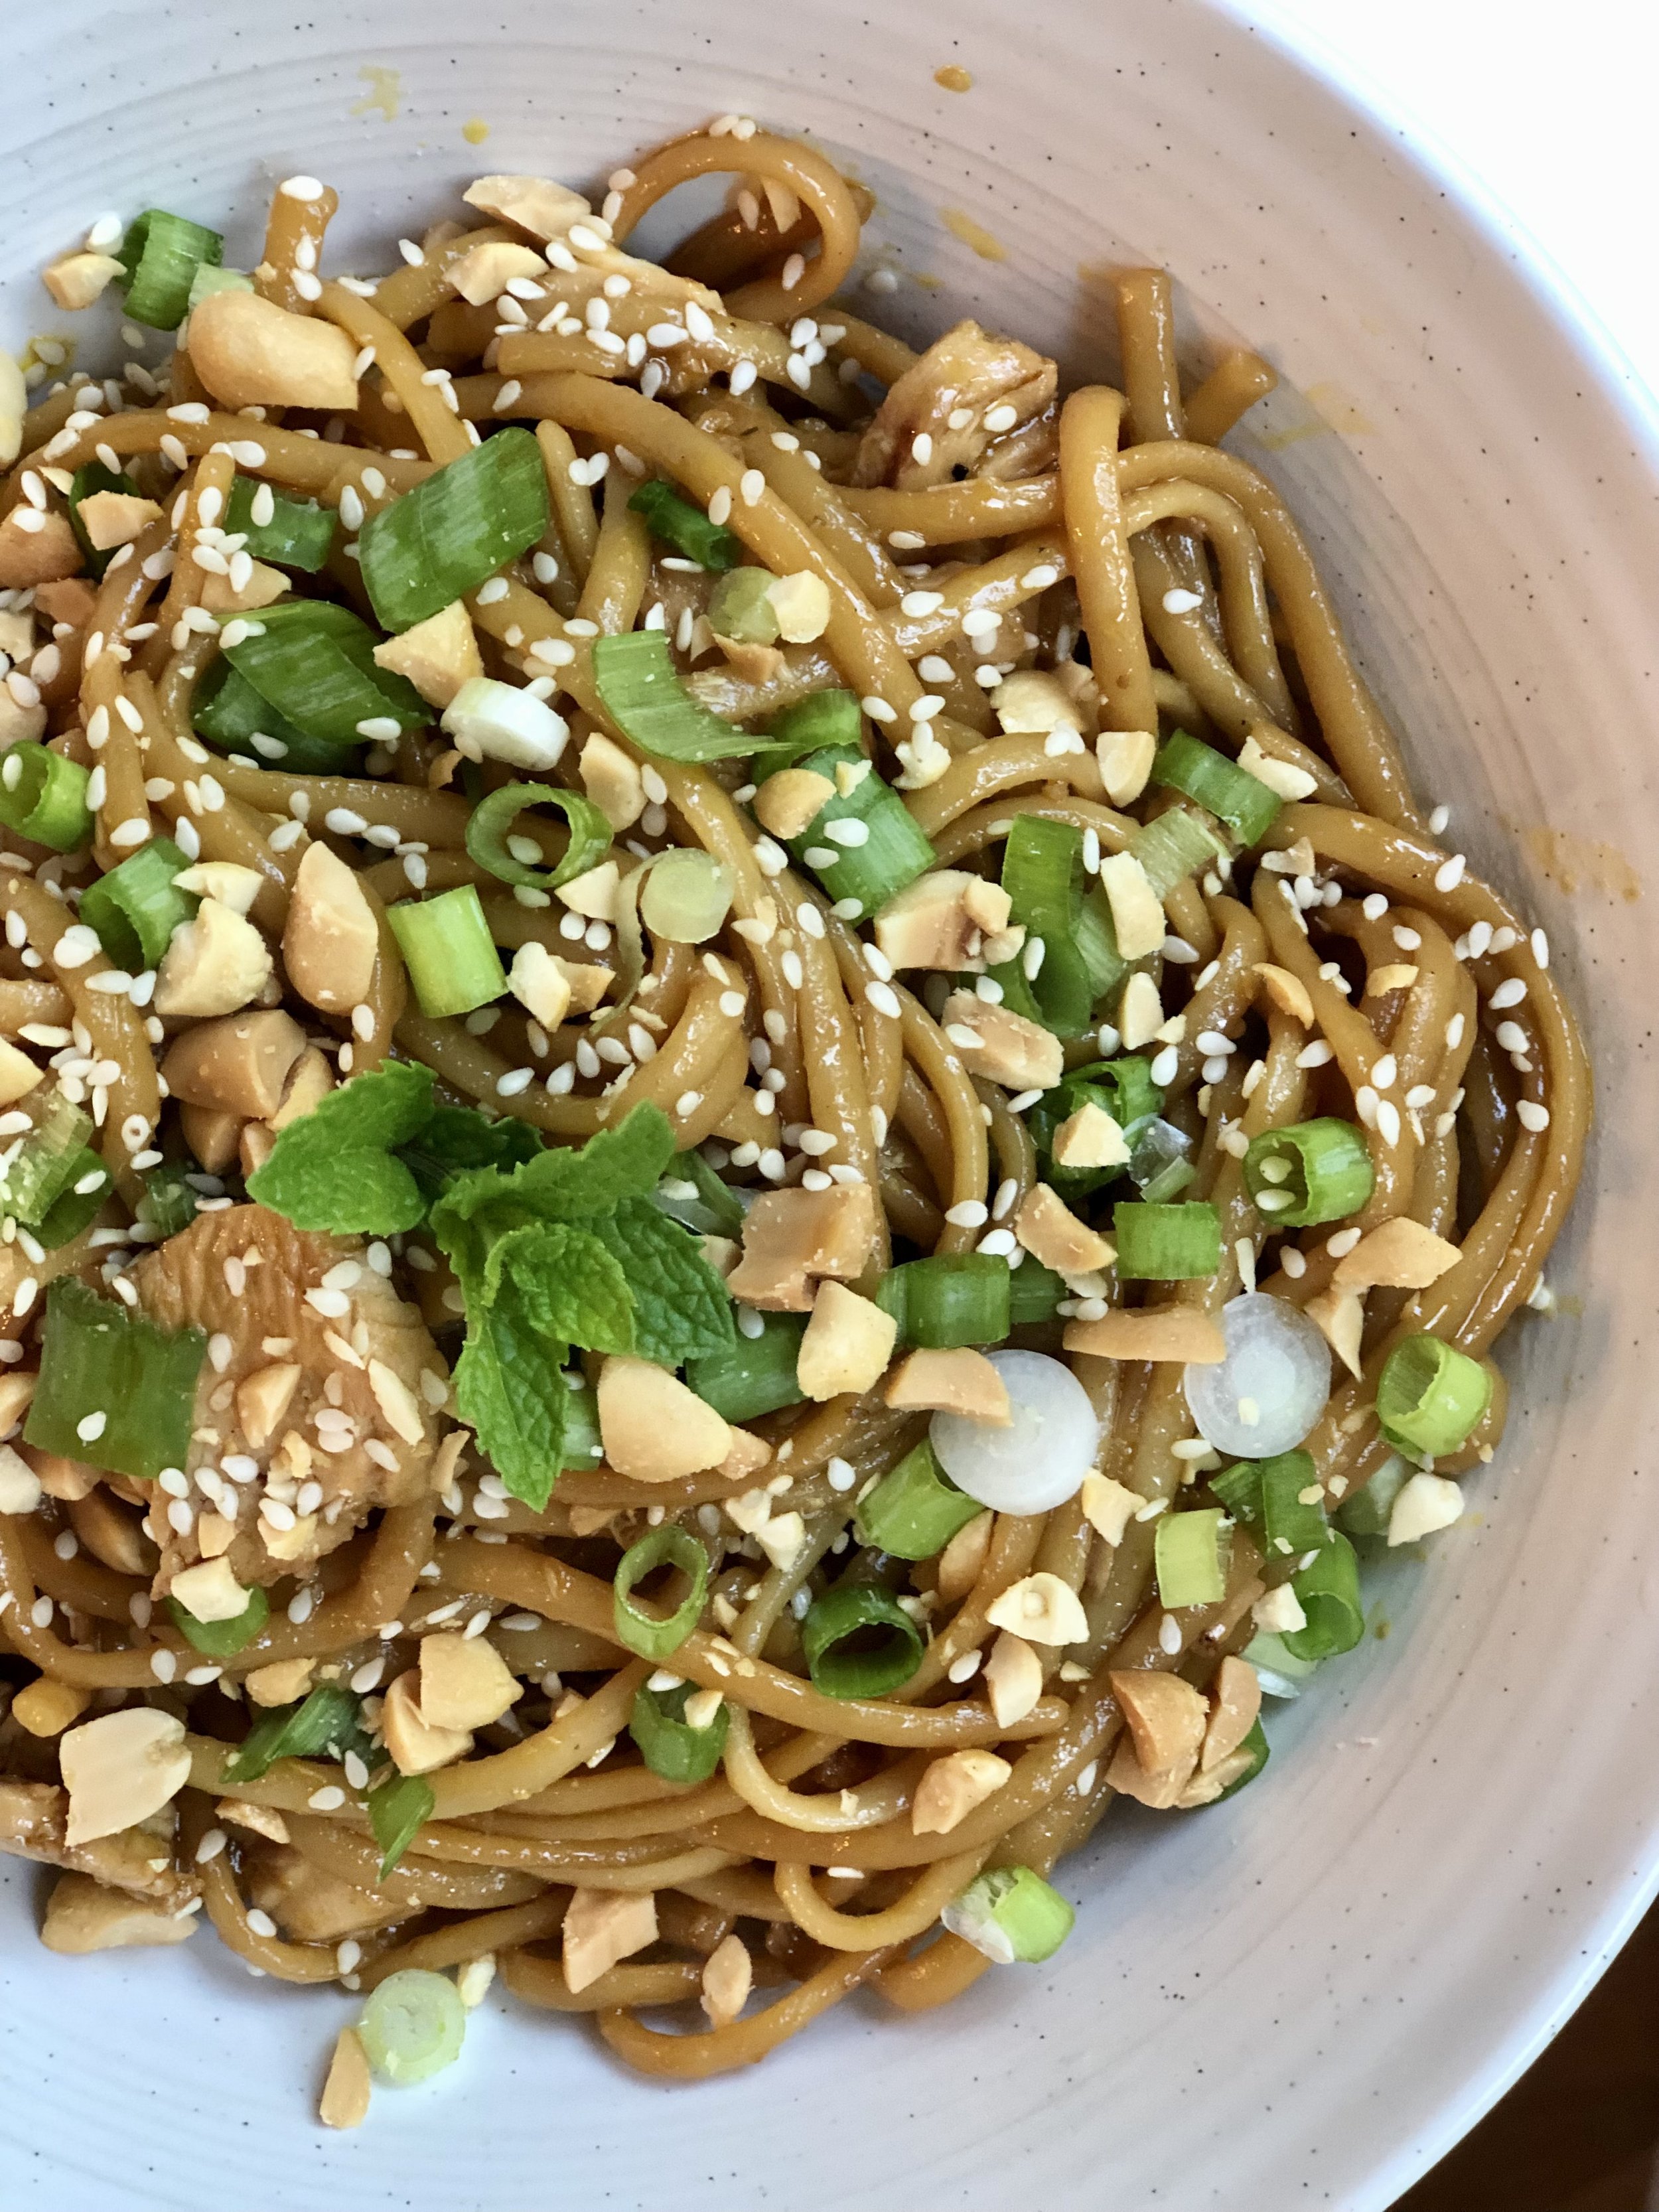
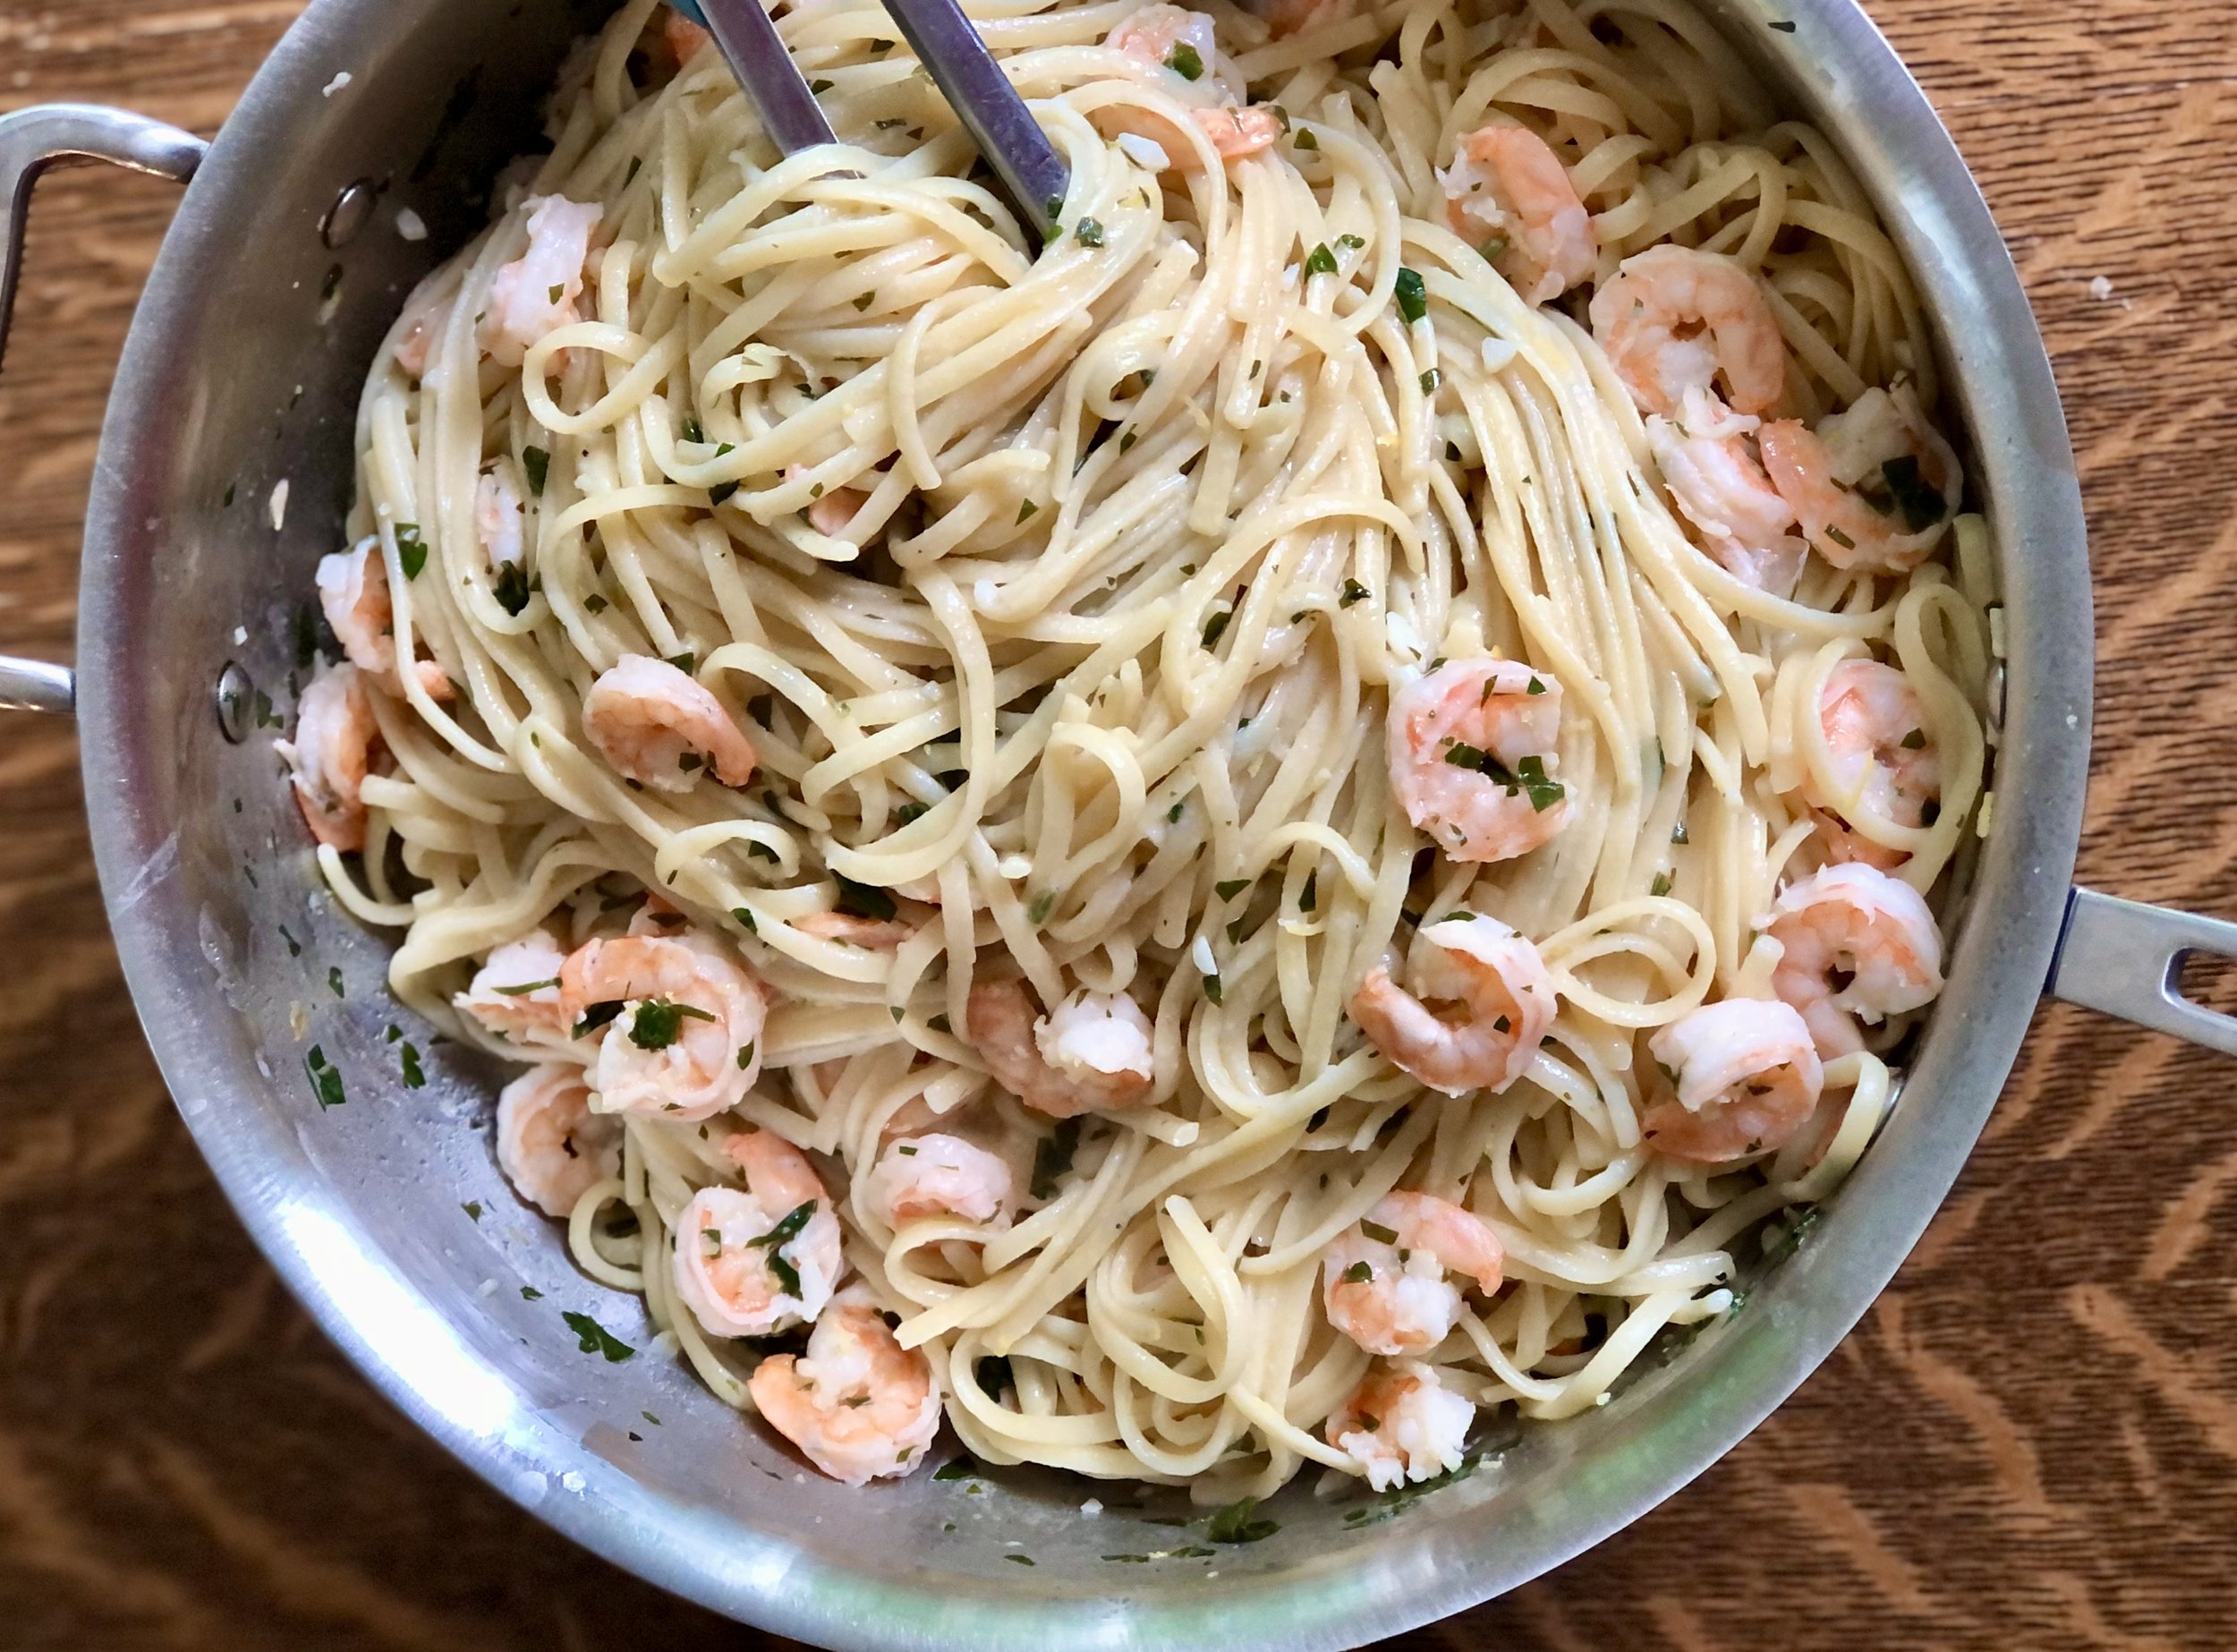
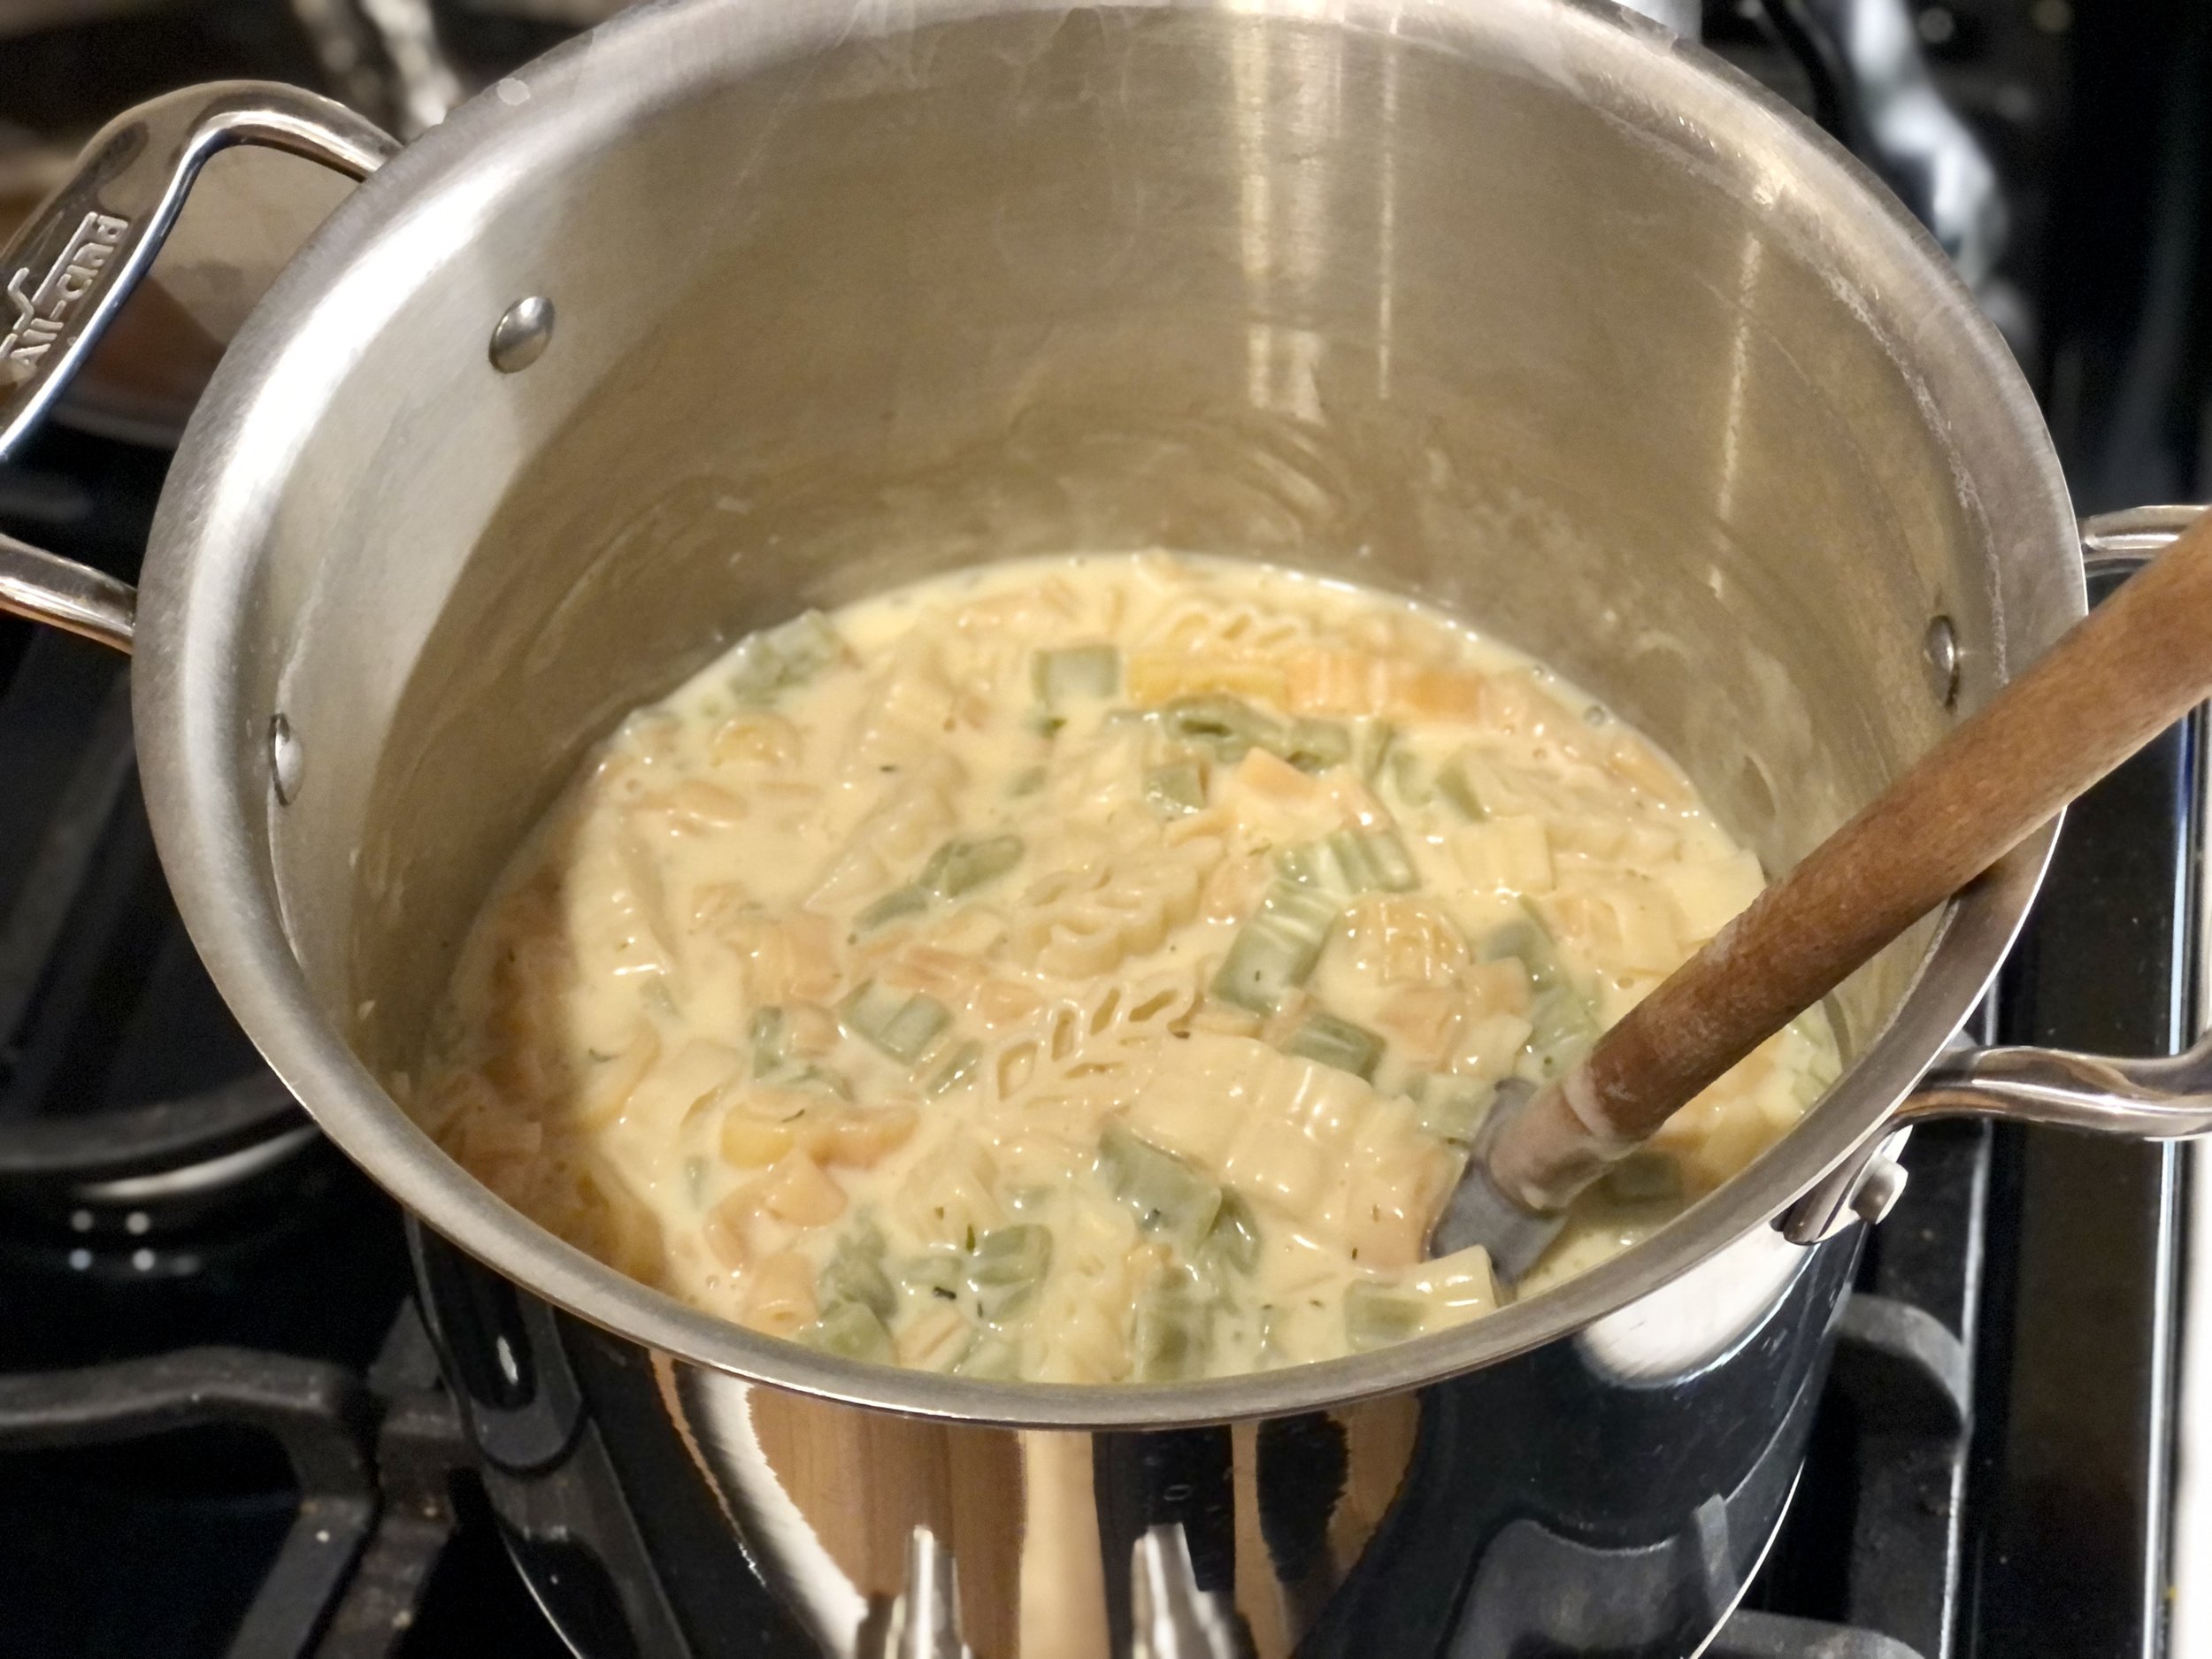
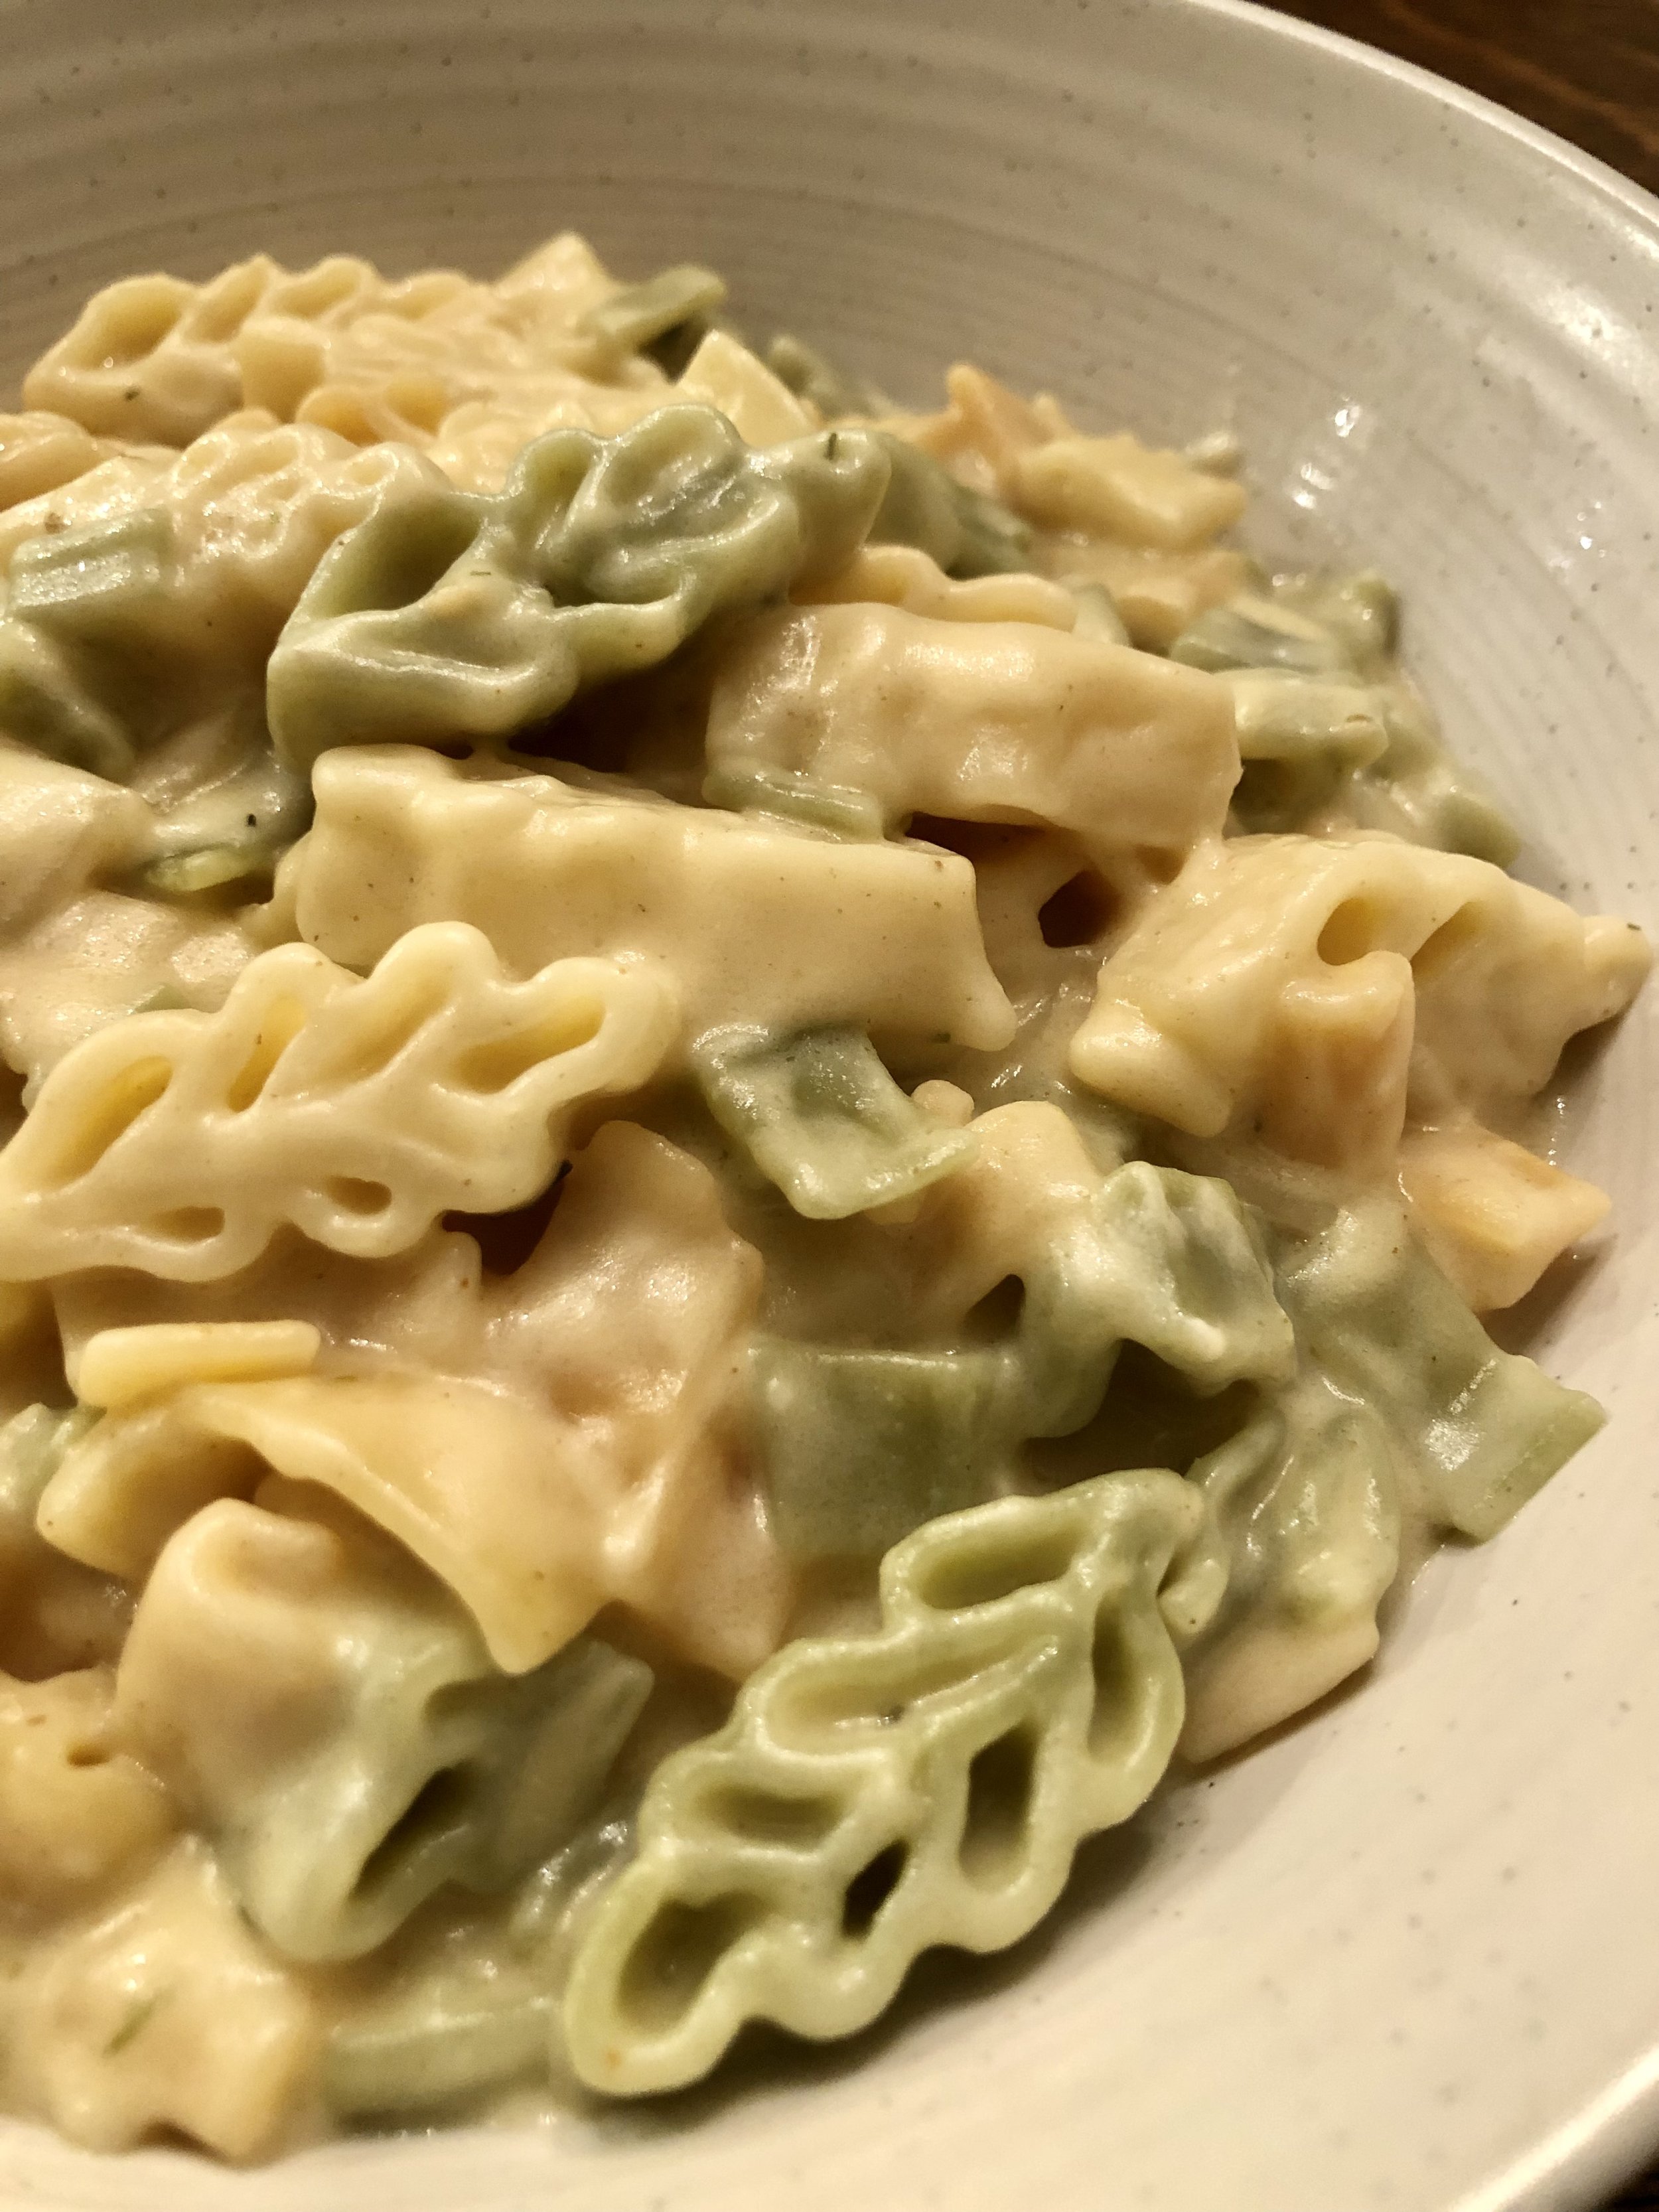
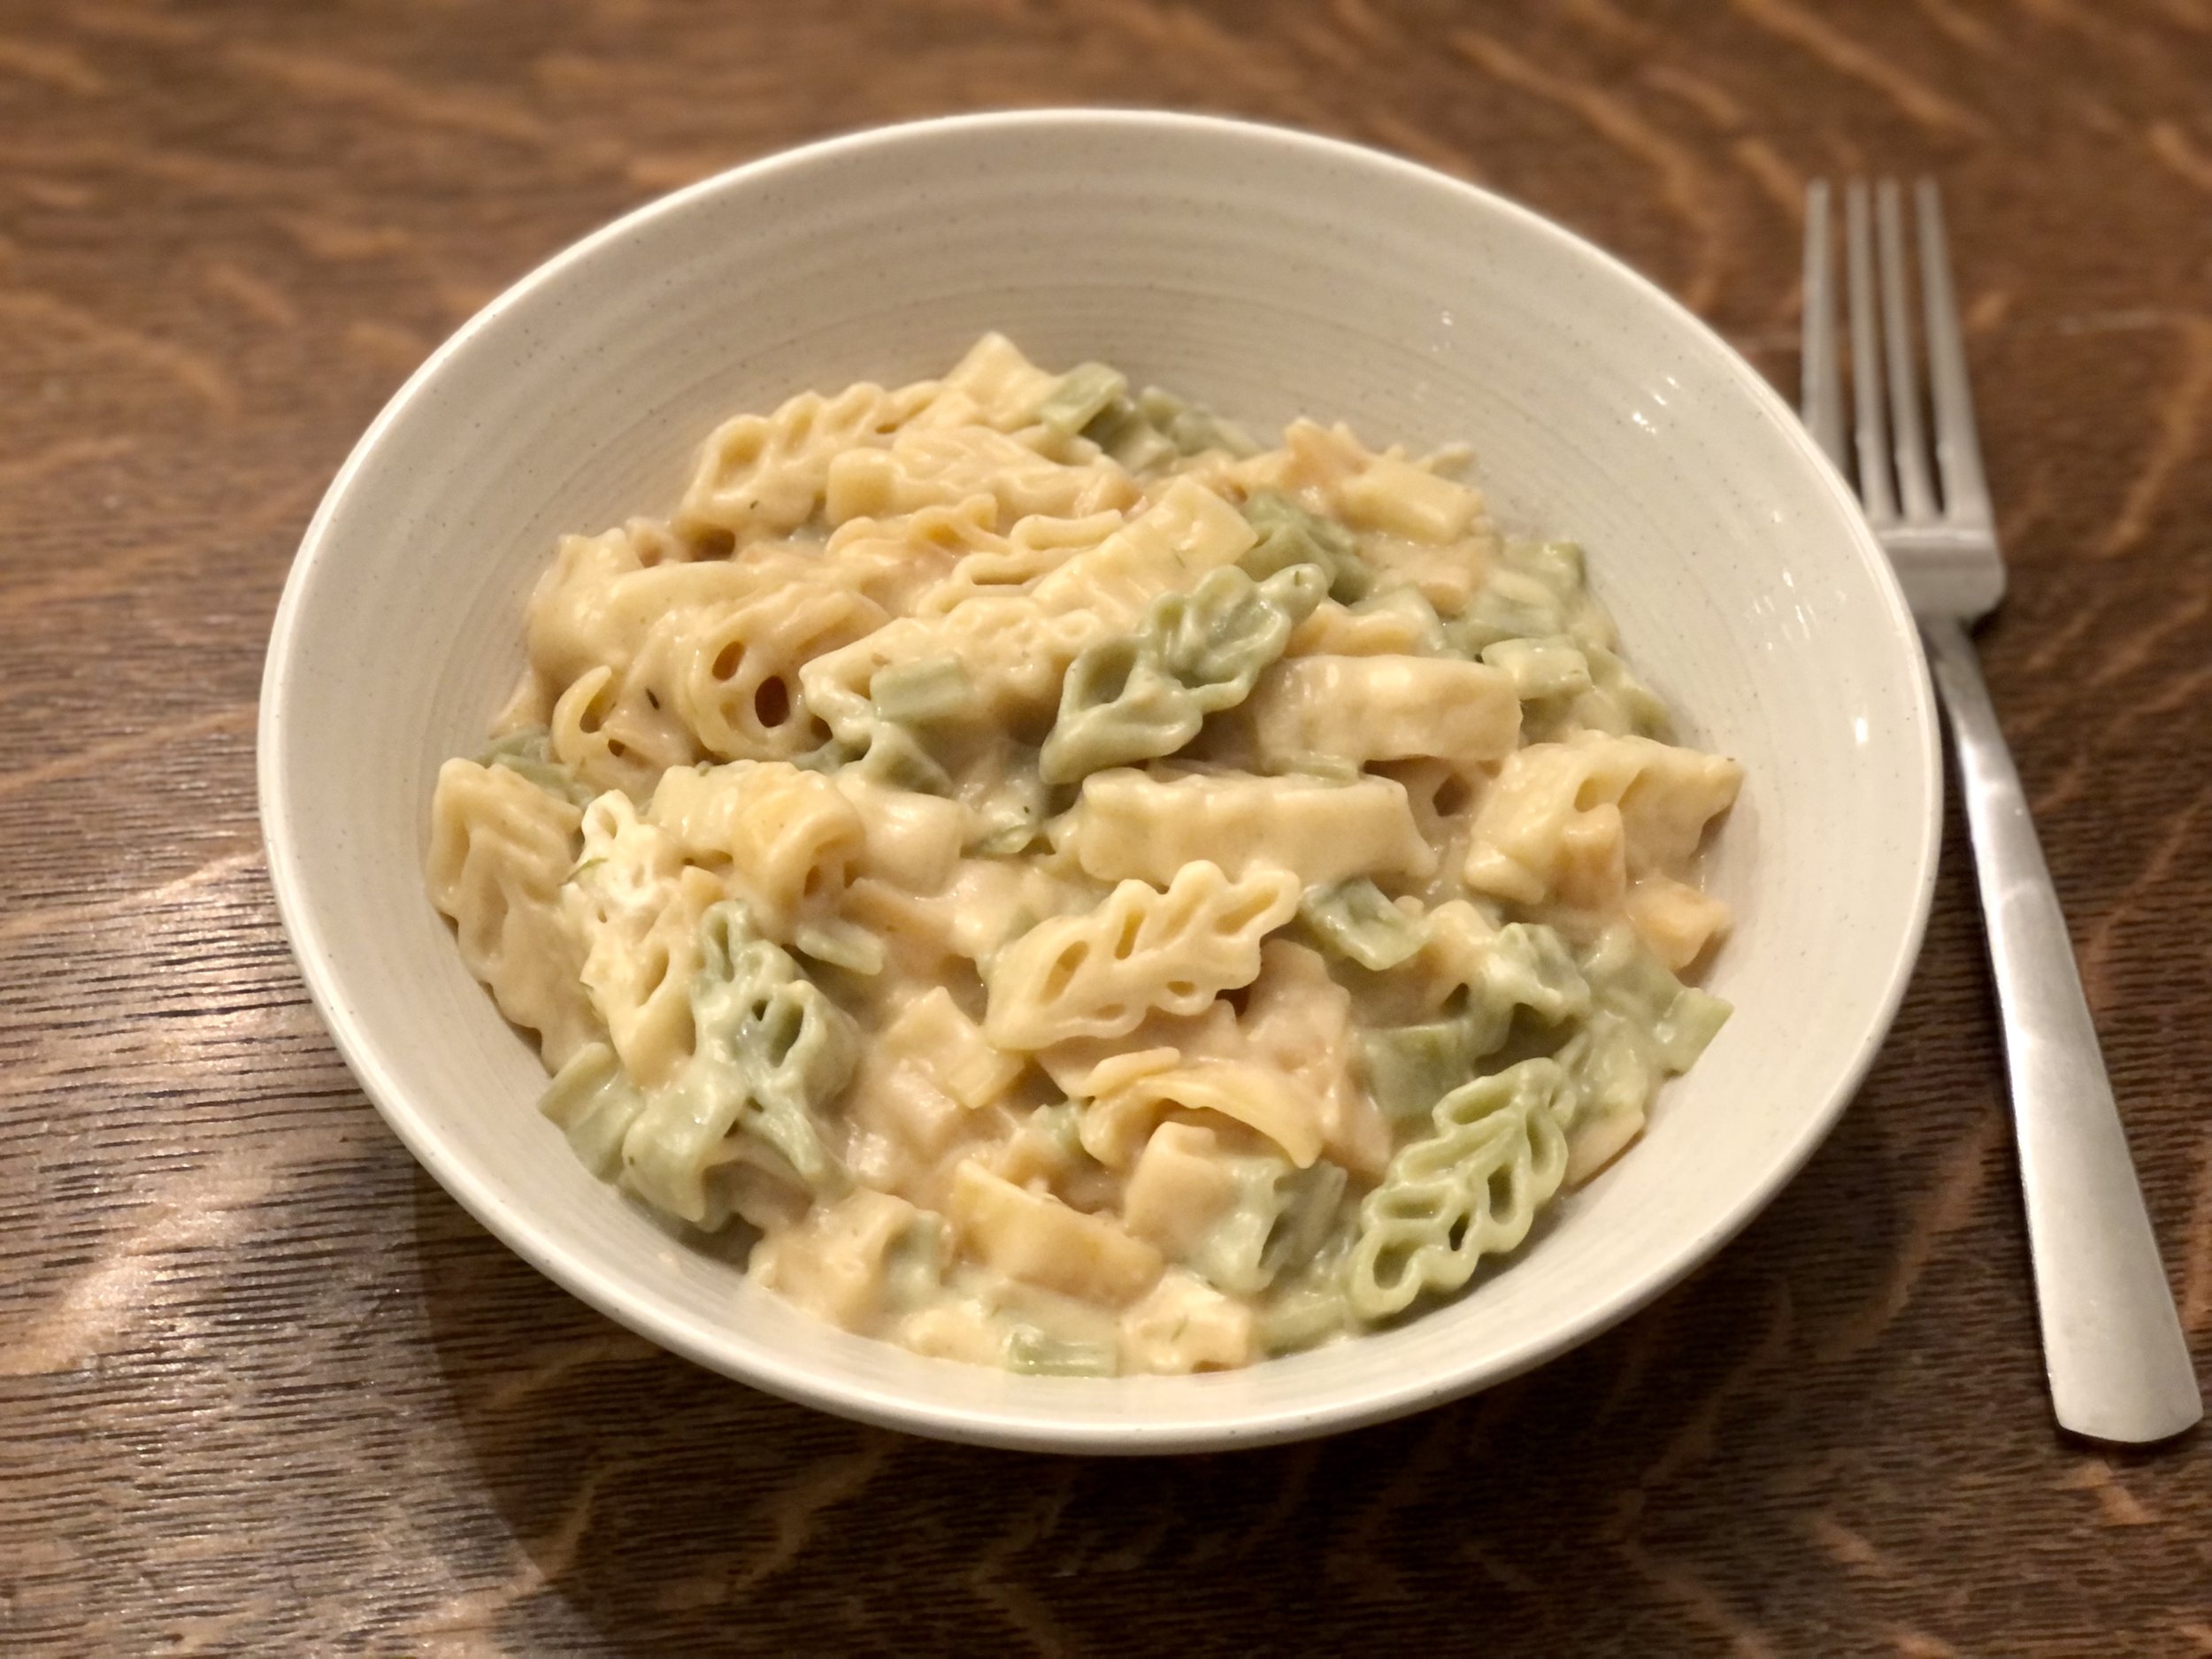
Herbed Six Cheese Pasta

Why, when we make macaroni and cheese, do we usually just add one cheese? Because it’s easy, yes. But have you ever added 2, 3 or even 6 different cheeses to your pasta? Because it’s wonderful and the flavor profile explodes. In a good way.

Here is one of my cheesy pasta recipes, made with yes, 6 different cheeses! You can easily mix up which cheeses you use, with whatever you have on hand. It creates a unique but divine pasta every time. The herbs I added in with the inspiration from herb cream cheese that I sometimes like to put on my toasted bagels. MMMMMMmmmmmmmm.

Now, one of my first thoughts when I see a number of cheeses (especially 6!!) in a dish is that it’s probably a really rich, high fat dish. Good for special occasions, not so much a weeknight dinner. The best thing about this pasta, is that it doesn’t use any more cheese than a regular, homemade, stove top macaroni and cheese. Actually, it uses less than some recipes! I like to use about 2 cups of shredded cheese (equal to about 8oz of cheese) for 1lb of pasta. This recipe also uses a total of 2 cups of shredded cheese. No heavy whipping cream, no half & half, just milk. It’s not overly indulgent, like so many recipes can be, while still tasting indulgent!

This pasta is cheesy, creamy, smoky, and should be cooking on your stove and in your tummy ASAP! :)

This post may contain affiliate links. If you make a purchase using these links, Jennyblogs may receive a small commission, at no extra cost to you. This helps to support Jennyblogs. For further information see the privacy policy. Grazie!

Recipe by Jenny. Inspired by Inspired with a Twist


Herbed Six Cheese Pasta

Serves 4-6

Ingredients:

  • 1 lb. / 500g pasta of your choice

  • 4 Tbsp / 56g oil or butter

  • 2 cloves garlic, minced

  • 1/4 cup / 30g all-purpose flour

  • 2 cups / 474g milk

  • 1/2 tsp smoked paprika

  • 1/2 tsp chopped fresh basil

  • 1/2 tsp chopped fresh oregano

  • 1/4 tsp chopped fresh thyme

  • 1/4 tsp chopped fresh rosemary

  • 1/8 tsp nutmeg

  • 1/2 cup / 56g shredded sharp cheddar cheese

  • 1/2 cup / 56g shredded mozzarella cheese

  • 1/4 cup / 25g shredded asiago cheese

  • 1/4 cup / 25g shredded parmesan cheese

  • 1/4 cup / 28g shredded smoked gruyère cheese

  • 2 oz / 57g cream cheese

Directions:

  1. In a large pot bring a good quantity of water to boil. Just before the water boils, salt the water. Stir to dissolve salt, then add in pasta. Cook pasta to al dente according to package directions. Drain, reserving about 2 cups of pasta water.

  2. While pasta is cooking, heat oil or butter in a large pot over medium-low heat. Add garlic and stir, for about 1 minute, until fragrant.

  3. Add flour and stir with a whisk, until all the oil or butter has been absorbed by the flour. Stir for an extra few seconds, to toast the flour.

  4. Slowly add in milk, a bit at a time, stirring constantly. The mixture will thicken, then slowly thin out as you add more milk.

  5. When all the milk has been added and the mixture comes to a simmer, add in all the spices and herbs.

  6. Add in all of the cheese and stir until melted and smooth. Turn off heat. Salt and pepper to taste.

  7. Add cooked pasta to the sauce, along with 1 cup of reserved pasta water. Stir well. Add in more pasta water until desired consistency is reached. Sauce will continue to thicken as it cools and sits. Serve.

Jenny’s Notes:

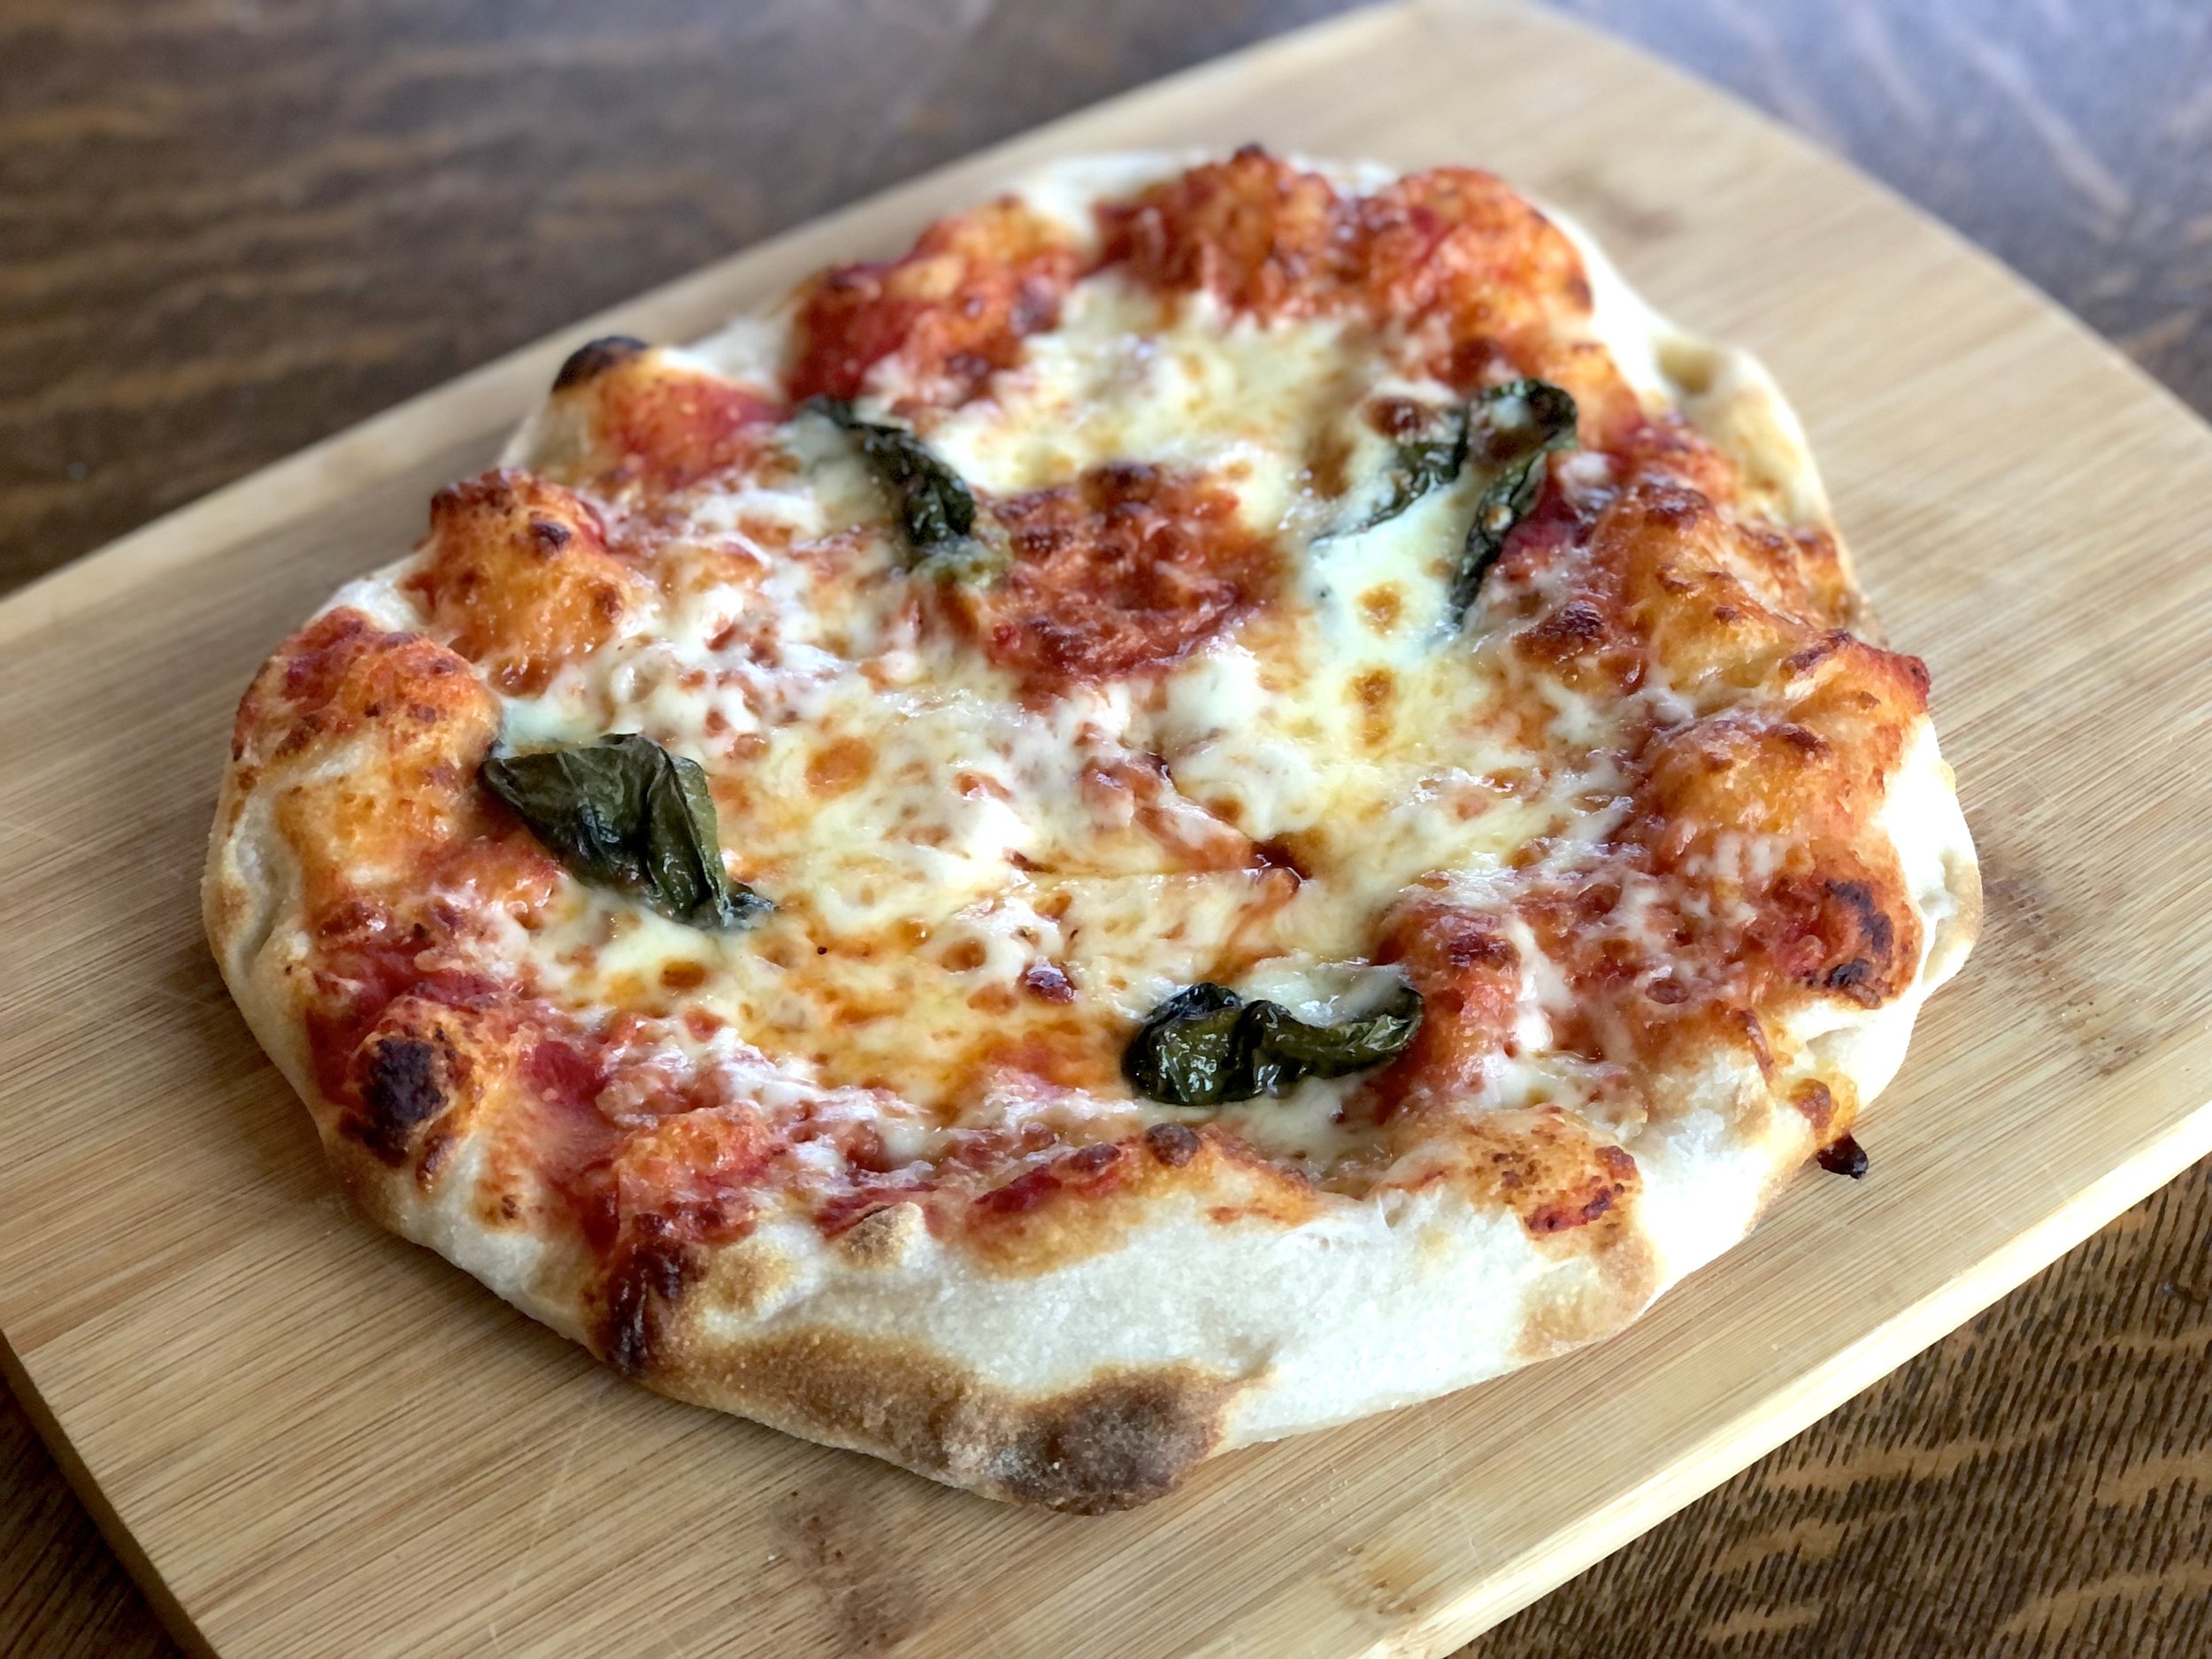
  • The cheese options for this pasta really are endless, no need to feel confined by the exact cheeses I have written here. I use different ones all the time! Cheddars, mozzarellas, Monterey or Colby Jack, gruyere, gouda, smoked cheeses, havarti, provolone, taleggio, Swiss…think of your favorites! Another I love to add? A blue cheese, like Gorgonzola. Mmmmm. It’s like one of my favorite Italian pizzas, quattro formaggi, a pizza with four cheeses, one of which is Gorgonzola.

  • If you don’t have fresh herbs available to you, you can easily sub in dried. As a general rule of thumb, use 1/3 the amount of dried in place of fresh. In this recipe, because the measurements are already quite small, I usually end up going with “generous 1/8th teaspoon”, or “pinch of this”, and it turns out wonderful!

  • If you enjoy especially rich pasta, you can use half & half or some cream in with the milk. I usually use 2% milk, still creates a luscious, cheesy, pasta, but without being overly indulgent!

Deluxe macaroni and cheese, best macaroni and cheese, six cheese pasta
Dinner, Pasta
American
Yield: 6-8
Author:
Herbed Six Cheese Pasta

Herbed Six Cheese Pasta

Creamy, smokey, cheesy pasta featuring 6 different cheeses with a sprinkling of fresh herbs and spices
Prep time: 10 MinCook time: 20 MinTotal time: 30 Min

Ingredients

Instructions

  1. In a large pot bring a good quantity of water to boil. Just before the water boils, salt the water. Stir to dissolve salt, then add in pasta. Cook pasta to al dente according to package directions. Drain, reserving about 2 cups of pasta water.
  2. While pasta is cooking, heat oil or butter in a large pot over medium-low heat. Add garlic and stir, for about 1 minute, until fragrant.
  3. Add flour and stir with a whisk, until all the oil or butter has been absorbed by the flour. Stir for an extra few seconds, to toast the flour.
  4. Slowly add in milk, a bit at a time, stirring constantly. The mixture will thicken, then slowly thin out as you add more milk.
  5. When all the milk has been added and the mixture comes to a simmer, add in all the spices and herbs.
  6. Add in all of the cheese and stir until melted and smooth. Turn off heat. Salt and pepper to taste.
  7. Add cooked pasta to the sauce, along with 1 cup of reserved pasta water. Stir well. Add in more pasta water until desired consistency is reached. Sauce will continue to thicken as it cools and sits. Serve.

Notes

  • The cheese options for this pasta really are endless, no need to feel confined by the exact cheeses I have written here. I use different ones all the time! Cheddars, mozzarellas, Monterey or Colby Jack, gruyere, gouda, smoked cheeses, havarti, provolone, taleggio, Swiss…think of your favorites! Another I love to add? A blue cheese, like Gorgonzola. Mmmmm. It’s like one of my favorite Italian pizzas, quattro formaggi, a pizza with four cheeses, one of which is Gorgonzola.
  • If you don’t have fresh herbs available to you, you can easily sub in dried. As a general rule of thumb, use 1/3 the amount of dried in place of fresh. In this recipe, because the measurements are already quite small, I usually end up going with “generous 1/8th teaspoon”, or “pinch of this”, and it turns out wonderful!
  • If you enjoy especially rich pasta, you can use half & half or some cream in with the milk. I usually use 2% milk, still creates a luscious, cheesy, pasta, but without being overly indulgent!


Nutrition Facts

Calories

574

Fat

24 g

Sat. Fat

14 g

Carbs

66 g

Fiber

3 g

Net carbs

63 g

Sugar

7 g

Protein

23 g

Sodium

419 mg

Cholesterol

68 mg

Nutritional information is approximate, based on 6 servings.

Did you make this recipe?
Tag @jennyblogsandbakes on instagram and hashtag it #jennyblogs

Crispy Gnocchi with Brussels Sprouts

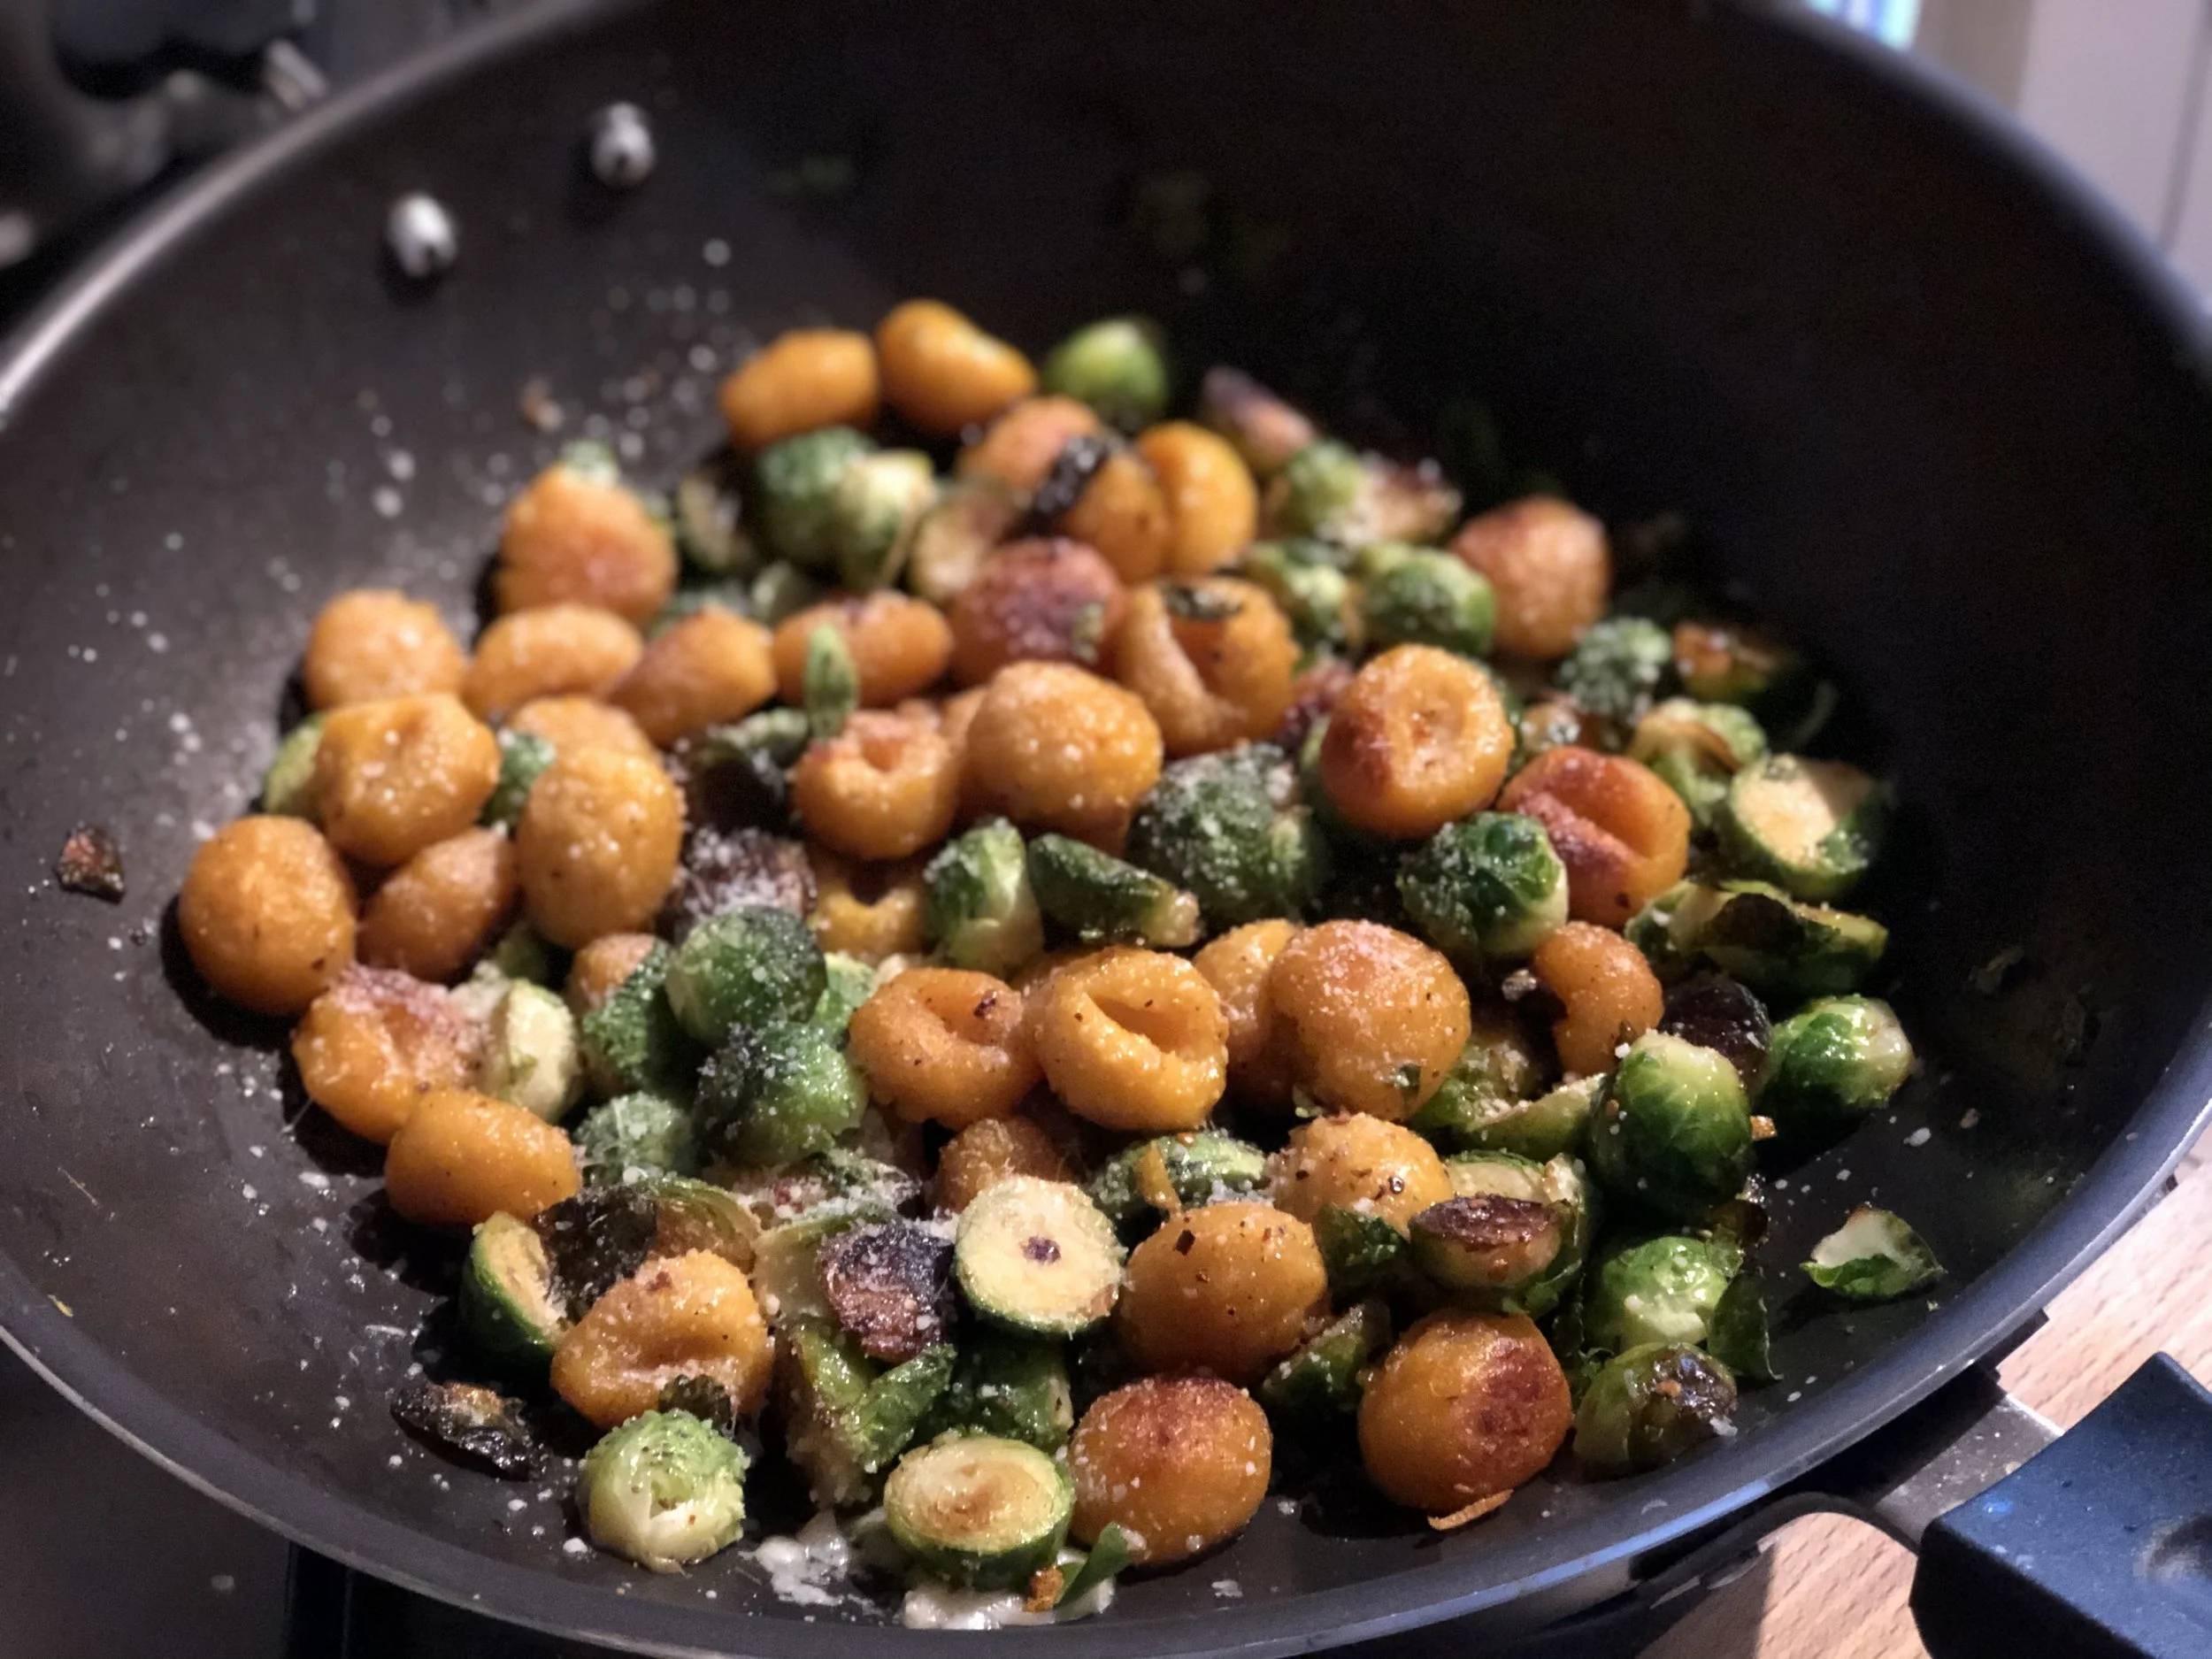
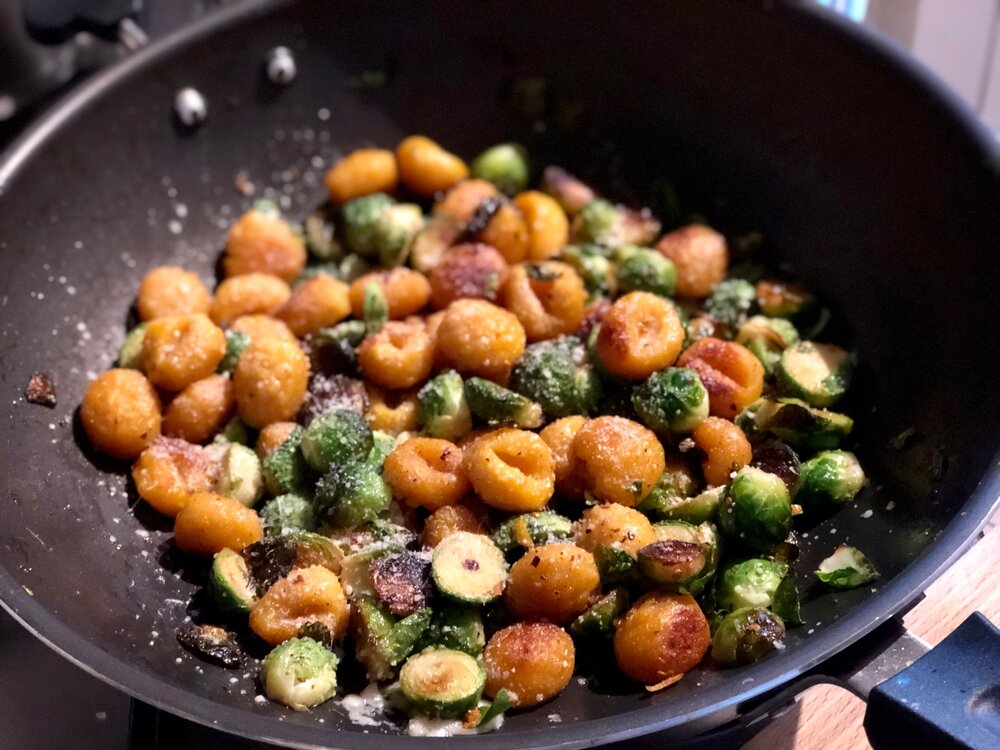
Made with pumpkin gnocchi

Made with pumpkin gnocchi

Think gnocchi with crispy sides, tender browned brussels sprouts with crispy edges, with a browned butter sauce and a bright hint of lemon.

I found this recipe thanks to New York Times’ Instagram account, and after the first OH YEAH THIS IS GOOD trial run I’ve made it several times since. It’s easy, the ingredient list isn’t scary long, and it has brussels sprouts so it’s totally healthy, right? Maybe not, but it’s rich and satisfying so you don’t need to eat a huge serving.

It starts with cooking and crisping up those little sprouts, then you trade out the sprouts to brown the gnocchi, then add butter, honey, lemon and a bit of red pepper flake spice and cook until the butter browns (when it smells like heaven); add the sprouts back in and grate a little parmesan cheese on top. Easy and impressive!

Brussels sprouts

Brussels sprouts often get a bad rap and I know people who will only eat them if they’re served with plenty of bacon. While I’m sure there do exist those people who truly dislike the sprouts, I believe that most people who claim to not like them just haven’t eaten them properly prepared. There’s nothing worse than limp or soggy brussels sprouts. Never ever boil them, yeah? They’re at their most delicious if they are pan fried or oven baked. Crispy brussels sprouts: yummy. Soggy brussels sprouts: yucky. If you or someone you know is a brussels sprout skeptic, this recipe may just be the one to win you over!

That said, if you are one of the true dislikers, you can switch out the brussels sprouts for other veggies like broccoli, cauliflower, cabbage, kale, or any of those cruciferous types.

Adaptations from the original recipe

While New York Times might think this recipe serves 4 people, I pretty consistently ate this in 2-3 sittings. Ahem. I added in the “3” part just to be generous.

I reduced the butter from 6 Tbsp to 4 Tbsp. 6 was just…a lot. You’re more than welcome to use that much if you’re looking for a very rich dish, but I think 4 was plenty, you could probably even get away with 2-3 Tbsp.

The original recipe calls for pan frying the brussels sprouts, but no matter how many times I’ve tried, it always took much longer for the brussels to cook than the specified 5-8 minutes. I would say up to 15-20 is closer. I’m sure part of it is that I don’t have a cast iron skillet. Otherwise, it can be more time efficient to roast the brussels sprouts in the oven while you’re preparing the gnocchi.

I reduced and changed the lemon aspect of the recipe. NYT says to peel thick strips of lemon zest, then chop, ending with about 2 tsp of zest. I personally found the lemon a little overpowering this way, so I compromised and was happy with the following adaptations: zesting a lemon with a regular zester, which creates a finer zest, and using only about 1/2-1 tsp of the finer zest, OR skipping the zest and adding in a splash of fresh lemon juice at the end. Either way a bit quicker and easier. One of my least favorite tasks in the kitchen is zesting citrus so sometimes I opt for a splash of lemon juice when I just don’t want to zest, ya know?

If you noticed I listed 1 lb of brussels sprouts as 500g, which are not equal weights. That’s because brussels sprouts often come in 500g packages in Italy. Since a pound is really only 454g, I rounded up for practicality’s sake. Yes, it bothers me to do so but I think it’s for the best, ahem. :)

This post may contain affiliate links. If you make a purchase using these links, Jennyblogs may receive a small commission, at no extra cost to you. This helps to support Jennyblogs. For further information see the privacy policy. Grazie!

Recipe adapted from New York Times


Crispy Gnocchi with Brussels Sprouts

Serves 2-3

Ingredients

  • 1/4 cup / 56g olive oil

  • 1 lb / 500g brussels sprouts

  • salt and pepper, to taste

  • 1/2 tsp lemon zest

  • 1/2 tsp red pepper flakes

  • 18 oz / 500g package of gnocchi

  • 4 Tbsp / 56g butter

  • 1/2 tsp honey

  • grated parmesan cheese, for serving

Directions:

  1. Clean and chop off the ends of the brussels sprouts, and any brown leaves. Slice into halves, or quarters if they’re particularly large.

  2. Cook the brussels sprouts OPTION 1, SKILLET:

    Heat 3 Tbsp / 42g of the oil in a large skillet over medium heat. Add brussels sprouts in an even layer, sprinkle with 1/2 tsp salt and some pepper. Sprinkle over lemon zest and cook for 10-15 minutes, stirring occasionally, or until sprouts are crispy and a nice golden brown.

    Add the red pepper flakes and stir, cook for another 3-4 minutes or until sprouts are crisp and tender.

    Transfer to a plate or bowl while you cook the gnocchi.

    OPTION 2, OVEN:

    Preheat oven to 450°F / 232°C.

    Toss the brussels sprouts with 3 Tbsp of oil, 1/2 tsp salt, some pepper, lemon zest, and red pepper to evenly coat; spread in an even layer on a baking sheet lined with parchment paper.

    Roast in the oven for about 15 minutes, or until crispy, golden, and tender. While roasting, prepare gnocchi.

  3. Add the remaining 1 tbsp / 14g of oil to a skillet over medium-high heat. Add gnocchi in an even layer and cook without stirring, 3-4 minutes or until golden brown underneath.

  4. Add butter and honey, season with salt and pepper. Cook until butter has melted and starts to turn golden brown and nutty smelling, this can take several minutes.

  5. Add the brussels sprouts to the skillet and cook just until everything is warmed through.

  6. Remove from heat and serve with a sprinkling of parmesan cheese.

Jenny’s Notes:

  • Use just 2 Tbsp / 28g butter for the lightest version of this!

  • Butter can go quickly from perfectly browned and nutty to burnt, so keep a close eye on it!

  • Whether you buy a package of gnocchi or make your own, different flavors are delicious in this recipe! Pictured in this post (first and last) are some pumpkin gnocchi, so good!

gnocchi, easy dinner, comfort food, brussels sprouts
dinner
American
Yield: 2-3
Author:
Crispy Gnocchi and Brussels Sprouts

Crispy Gnocchi and Brussels Sprouts

Crispy, pan-fried gnocchi and roasted brussels sprouts with parmesan cheese, a hint of lemon, spice, and honey.
Cook time: 40 MinTotal time: 40 Min

Ingredients

Instructions

  1. Clean and chop off the ends of the brussels sprouts, and any brown leaves. Slice into halves, or quarters if they’re particularly large.
  2. Cook the brussels sprouts OPTION 1, SKILLET:
  3. Heat 3 Tbsp / 42g of the oil in a large skillet over medium heat. Add brussels sprouts in an even layer, sprinkle with 1/2 tsp salt and some pepper. Sprinkle over lemon zest and cook for 10-15 minutes, stirring occasionally, or until sprouts are crispy and a nice golden brown.
  4. Add the red pepper flakes and stir, cook for another 3-4 minutes or until sprouts are crisp and tender.
  5. Transfer to a plate or bowl while you cook the gnocchi.
  6. OPTION 2, OVEN:
  7. Preheat oven to 450°F / 232°C.
  8. Toss the brussels sprouts with 3 Tbsp of oil, 1/2 tsp salt, some pepper, lemon zest, and red pepper to evenly coat; spread in an even layer on a baking sheet lined with parchment paper. Roast in the oven for about 15 minutes, or until crispy, golden, and tender. While roasting, prepare gnocchi.
  9. Add the remaining 1 tbsp / 14g of oil to a skillet over medium-high heat. Add gnocchi in an even layer and cook without stirring, 3-4 minutes or until golden brown underneath.
  10. Add butter and honey, season with salt and pepper. Cook until butter has melted and starts to turn golden brown and nutty smelling, this can take several minutes.
  11. Add the brussels sprouts to the skillet and cook just until everything is warmed through.
  12. Remove from heat and serve with a sprinkling of parmesan cheese.

Notes

  • Use just 2 Tbsp / 28g butter for the lightest version of this!
  • Butter can go quickly from perfectly browned and nutty to burnt, so keep a close eye on it!
  • Whether you buy a package of gnocchi or make your own, different flavors are delicious in this recipe! Pictured are some pumpkin gnocchi, so good!


Nutrition Facts

Calories

705.17

Fat

37.14 g

Sat. Fat

13.14 g

Carbs

81.25 g

Fiber

7.83 g

Net carbs

73.42 g

Sugar

4.94 g

Protein

15.02 g

Sodium

307.61 mg

Cholesterol

90.46 mg

Nutritional info is approximate. Based on 3 servings

Did you make this recipe?
Tag @jennyblogsandbakes on instagram and hashtag it # jennyblogs

Broccoli Cheddar Pasta

Adjustments.jpeg

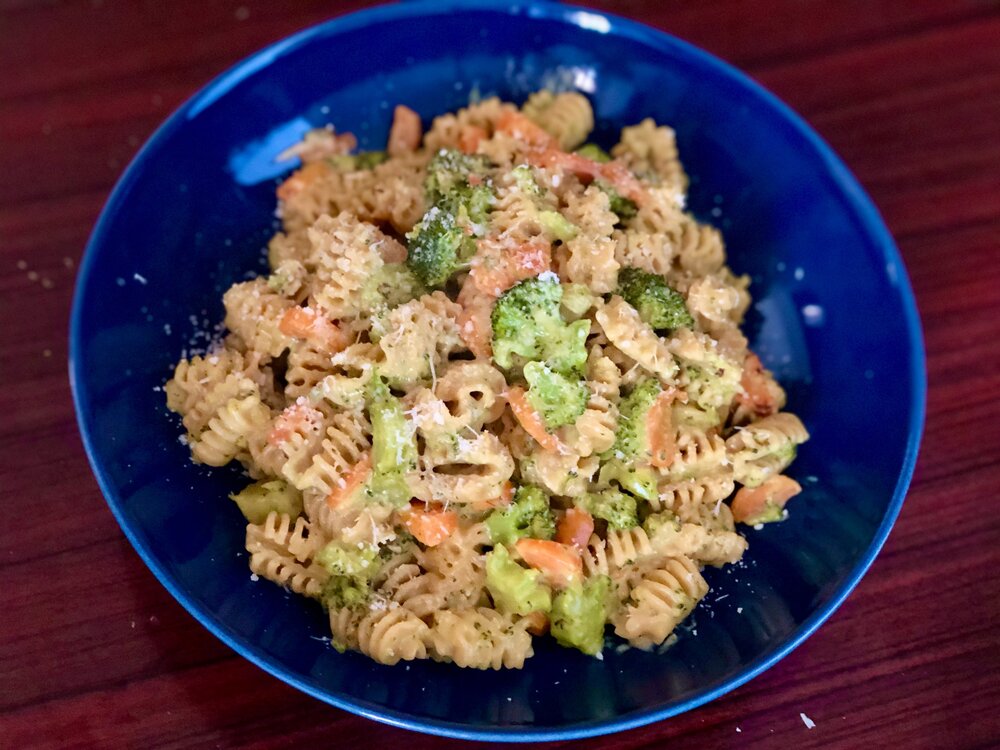
If the name of this pasta sounds familiar, it’s because you might be thinking of Panera Bread’s Broccoli Cheddar Soup. That’s exactly what you should be thinking, because this pasta is an ode to the soup.

Growing up one of my favorite meals was what we called “broccoli carrot cheese soup”. I would only get it every now and then, as my mom’s version included the likes of Velveeta cheese and didn’t line up with what she normally fed her family. No matter how much broccoli and carrots you put in the soup, they just won’t offset the mysterious substance that is Velveeta Cheese.

My childhood love of the soup led me to think, why couldn’t you recreate it as a pasta? You know, make the cheesy soup a little thicker so it’s like a sauce, then add pasta? Basically macaroni and cheese with broccoli and carrots. But you know, sans Velveeta.

Seemed like a great idea to me! While it normally takes at least a few tries, if not many, when I’m creating a new recipe or idea, this was one of the few instances where the first try turned out pretty great. Some things are just meant to be, ya know?

While the classic soup uses cheddar, I don’t use cheddar when I make this in Italy. Cheddar is only sold in select stores in Italy, almost always in slices, and is not the cheapest. For these reasons, I use my go-to melty cheese, Fontal. And a bit of Parmesan, because Italy. Cheddar is the original choice for the soup, and is often used as a melting cheese in many recipes, and one of my favorites to use when I’m making this in the States. On the other hand, you don’t have to use Fontal or cheddar, use your favorite melting cheese!

This post may contain affiliate links. If you make a purchase using these links, Jennyblogs may receive a small commission, at no extra cost to you. This helps to support Jennyblogs. For further information see the privacy policy. Grazie!

Recipe by Jenny Nicole


Broccoli Cheddar Pasta

Serves 3-4

Adjustments.jpeg

Ingredients:

  • 8oz / 250g (1/2 package) short pasta, such as shells, fusilli, macaroni, etc.

  • 2 Tbsp / 28g butter

  • 1 head of broccoli, chopped into small pieces

  • 2 medium carrots, sliced into half or quarter moons

  • 3 Tbsp / 23g all-purpose flour

  • 1/2 cup / 118g vegetable broth or water

  • 1 cup / 237g milk

  • 1/4 tsp turmeric

  • salt and pepper, to taste

  • 1 cup / 114g shredded cheddar, fontal, or similar cheese

  • 1/4 cup / 25g grated Parmesan cheese

Directions:

  1. Bring water to boil in a large pot and cook pasta according to directions. In the meantime you can start the sauce.

  2. In a large pot over medium heat, melt butter. Add broccoli and carrots and cover with a lid, stir frequently. Cook until vegetables start to become tender, about 12-15 minutes.

  3. Remove lid and turn heat down to low. Add flour and stir until it has coated the vegetables.

  4. Add broth and stir until thickened.

  5. Add milk, 1/4 cup at a time, stirring constantly. Allow mixture to start to thicken each time before adding the next 1/4 cup of milk.

  6. Add turmeric, salt and pepper, and cheeses; stir until all the cheese is melted and the sauce is homogeneous.

  7. Once the pasta is cooked, drain it, reserving some of the pasta water.

  8. Add the pasta to the sauce and stir to evenly coat. If a thinner sauce is desired, add some of the reserved pasta water.

Jenny’s Notes:

  • You can cook the broccoli and carrots in a couple different ways:

    • Sauté/steam them as in the recipe above

    • Steam them and make the sauce separately, adding the steamed veggies to the sauce after the cheese

    • Boil them with the pasta. If you choose this boiling method, you can add the veggies at the same time as the pasta which will result in very soft veggies, or add them in half way through to retain a bit of bite. Drain pasta and veggies as you normally would the pasta, then add all to sauce.

broccoli carrot cheese soup, broccoli cheddar pasta
Dinner, pasta
American
Yield: 3-4
Author:
Broccoli Cheddar Pasta

Broccoli Cheddar Pasta

Cheesy pasta with plenty of broccoli and carrots, just like the beloved Broccoli Cheddar soup!
Prep time: 10 MinCook time: 25 MinTotal time: 35 Min

Ingredients

Instructions

  1. Bring water to boil in a large pot and cook pasta according to directions. In the meantime you can start the sauce.
  2. In a large pot over medium heat, melt butter. Add broccoli and carrots and cover with a lid, stir frequently. Cook until vegetables start to become tender, about 12-15 minutes.
  3. Remove lid and turn heat down to low. Add flour and stir until it has coated the vegetables.
  4. Add broth and stir until thickened.
  5. Add milk, 1/4 cup at a time, stirring constantly. Allow mixture to start to thicken each time before adding the next 1/4 cup of milk.
  6. Add turmeric, salt and pepper, and cheeses; stir until all the cheese is melted and the sauce is homogeneous.
  7. Once the pasta is cooked, drain it, reserving some of the pasta water.
  8. Add the pasta to the sauce and stir to evenly coat. If a thinner sauce is desired, add some of the reserved pasta water.

Notes

You can cook the broccoli and carrots in a couple different ways:

  • Sauté/steam them as in the recipe above
  • Steam them and make the sauce separately, adding the steamed veggies to the sauce after the cheese
  • Boil them with the pasta. If you choose this boiling method, you can add the veggies at the same time as the pasta which will result in very soft veggies, or add them in half way through to retain a bit of bite. Drain pasta and veggies as you normally would the pasta, then add all to sauce.

As in just about all recipes, if you really love cheese you can always add more! Or less, for that matter.

Nutrition Facts

Calories

507.33

Fat

25.49 g

Sat. Fat

14.46 g

Carbs

48.60 g

Fiber

6.33 g

Net carbs

42.27 g

Sugar

3.16 g

Protein

22.70 g

Sodium

781.05 mg

Cholesterol

71.17 mg

Nutritional information is approximate. Based on 3 servings.

Did you make this recipe?
Tag @jennyblogsandbakes on instagram and hashtag it #jennyblogs
In these photos i used whole wheat radiatori pasta

In these photos i used whole wheat radiatori pasta


Greek Pasta Salad

IMG_3827.jpg

It’s August. It’s hot. I’ve already made all the different classic versions of pasta salad and have moved on to making up my own versions. Hot dishes are out when hot weather is in!

Well, most of the time. I say this a bit sheepishly as I’m about to eat a big plate of aglio, olio, peperoncino pasta. That’s not only hot, it’s also lightly spicy. It’s about 100°F out and no, we don’t have air conditioning. Sometimes you just know what you want to eat (especially as a pregnant person) and that’s ok. At least, that’s what I keep telling myself. :D

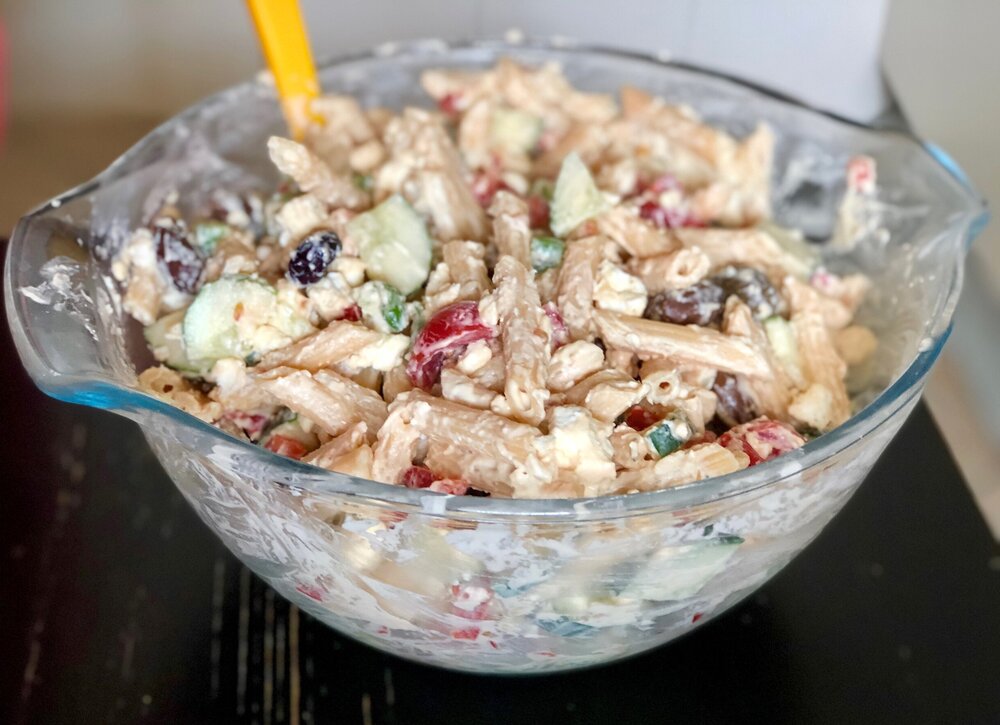
I’ve also been really into Greek everything. I’ve been making lots of Greek wraps, Greek salads, learned what a traditional Greek salad is, and made a 7+ layer Greek dip! I’ll have a recipe up for the Greek dip soon, it’s very easy to whip up and nutritious to boot! And if you hadn’t already noticed, today’s recipe is a Greek pasta salad! I actually saw a similar idea to this on Instagram recently and decided I needed to eat that. I noticed the recipe used a dressing with ingredients similar to what we’d call Italian dressing in America (oil, vinegar, basil, oregano, garlic, etc) and I decided I wanted to try a hummus dressing. And it was delicious! Hummus mixed with some plain yogurt makes for a creamy and wonderful twist to this pasta salad. You can make homemade hummus, or use whatever brand and flavor you prefer!

Enjoy, my friends, and stay cool!

This post may contain affiliate links. If you make a purchase using these links, Jennyblogs may receive a small commission, at no extra cost to you. This helps to support Jennyblogs. For further information see the privacy policy. Grazie!

A recipe by Jenny Nicole


Greek Pasta Salad

Serves 3-4

Adjustments.jpeg

Ingredients:

  • 8oz / 250g short pasta of choice, fusilli, penne, shells, etc.

  • 3/4 cup / 185g plain yogurt

  • 3/4 cup / 185g hummus, flavor of choice

  • 1 Tbsp / 14g red wine vinegar

  • 1/4 tsp dried oregano

  • 1/4 tsp dried basil

  • 1 cucumber, diced

  • 1/2 red or green bell pepper, diced

  • 1/2 cup / 90g pitted kalamata olives, sliced if large

  • 1 cup / 150g cherry tomatoes, halved or quartered

  • 2/3 cup / 100g crumbled feta cheese

  • drizzle of extra virgin olive oil, for finishing

Directions:

  1. Cook pasta one minute less than according to directions, nicely al dente, drain and rinse in cold water to stop it from continuing to cook. Cool in fridge while you make the dressing.

  2. In a large bowl, stir together yogurt, hummus, vinegar, and spices.

  3. Add pasta, all the chopped vegetables, and cheese; stir until everything is evenly coated in dressing.

  4. Refrigerate until chilled, at least 2 hours. The longer the pasta sits the more the flavors will meld and the sauce be absorbed by the pasta, creating the ideal pasta salad! Just before serving, drizzle with olive oil.

Jenny’s Notes:

  • If you have fresh herbs on hand, use about 1 tsp each of finely chopped fresh basil and fresh oregano!

  • The quantity of vegetables is really up to you and easy to adjust in simple recipes like this, measurements are approximate.

  • While you might think Greek yogurt would be better adapted to this “Greek” pasta salad, plain/soupier yogurt actually works better because as the pasta sits, it absorbs the dressing. If you use already thick Greek yogurt, the dressing will probably end up too thick. If Greek yogurt is all you have, you can simply add a few tablespoons of water or milk to thin up the dressing to your liking. This can also be done if you make/buy a particularly thick brand of hummus, or just want the dressing thinner anyway!

  • The photos you see in this post I actually used a gluten-free penne pasta made from red lentils and brown rice. I had never tried it before but it is an excellent pasta, I would never have known it’s gluten-free. Probably also because it was made by my favorite pasta brand here in Italy, Rummo. If you live here or can find it in the States, I highly recommend it! Although I think I’ve only seen it at World Market for way more than I pay here in Italy. Bummer.

Pasta salad, cold pasta, summer pasta, summer dish, Greek, hummus dressing
Pasta, Side dish
American
Yield: 3-4
Author: Jennyblogs
Print
Greek Pasta Salad

Greek Pasta Salad

A twist on the classic pasta salad with a creamy, herbed hummus dressing, vegetables, and Feta cheese.
Prep time: 20 MCook time: 20 MTotal time: 40 M

Ingredients:

  • 8oz / 250g short pasta of choice, fusilli, penne, shells, etc.
  • 3/4 cup / 185g plain yogurt
  • 3/4 cup / 185g hummus, flavor of choice
  • 1 Tbsp / 14g red wine vinegar
  • 1/4 tsp dried oregano
  • 1/4 tsp dried basil
  • 1 cucumber, diced
  • 1/2 red or green bell pepper, diced
  • 1/2 cup / 90g pitted kalamata olives, sliced if large
  • 1 cup / 150g cherry tomatoes, halved or quartered
  • 2/3 cup / 100g crumbled feta cheese
  • drizzle of extra virgin olive oil, for finishing

Instructions:

  1. Cook pasta one minute less than according to directions, nicely al dente, drain and rinse in cold water to stop it from continuing to cook. Cool in fridge while you make the dressing.
  2. In a large bowl, stir together yogurt, hummus, vinegar, and spices.
  3. Add pasta, all the chopped vegetables, and cheese; stir until everything is evenly coated in dressing.
  4. Refrigerate until chilled, at least 2 hours. The longer the pasta sits the more the flavors will meld and the sauce be absorbed by the pasta, creating the ideal pasta salad! Just before serving, drizzle with olive oil.
  5. Jenny’s Notes:

Notes:

If you have fresh herbs on hand, use about 1 tsp each of finely chopped fresh basil and fresh oregano! The quantity of vegetables is really up to you and easy to adjust in simple recipes like this, measurements are approximate. While you might think Greek yogurt would be better adapted to this “Greek” pasta salad, plain/soupier yogurt actually works better because as the pasta sits, it absorbs the dressing. If you use already thick Greek yogurt, the dressing will probably end up too thick. If Greek yogurt is all you have, you can simply add a few tablespoons of water or milk to thin up the dressing to your liking. This can also be done if you make/buy a particularly thick brand of hummus, or just want the dressing thinner anyway!

Calories

486.29

Fat (grams)

26.16

Sat. Fat (grams)

8.20

Carbs (grams)

46.18

Fiber (grams)

7.25

Net carbs

38.93

Sugar (grams)

8.71

Protein (grams)

18.81

Sodium (milligrams)

779.53

Cholesterol (grams)

33.37
Nutritional information is approximate; based on 3 servings.
Did you make this recipe?
Tag @jenevamorris on instagram and hashtag it #jennyblogs
Created using The Recipes Generator
IMG_3831.jpg

Butternut Squash and Sage Pasta

It’s fall and not only has the Charlie Brown Great Pumpkin arrived, but so have all the gourds!

Adjustments.jpeg

There are many types but the good news is they are all delicious (opinion) and are often quite interchangeable. Unless you’re making spaghetti squash. Then you need spaghetti squash. Also, spaghetti squash is super delicious with marinara and parmesan cheese. I’m hungry now!

In fact today’s recipe is, in a way, spaghetti squash. The principal difference is that instead of the noodles being spaghetti squash the actual spaghetti is covered in a wonderfully flavored, creamy, cheesy, butternut squash sauce! With sage, apple, onion, celery, and basically all of the best autumn flavors in one. Even just the first step of this dish, sautéeing onions in butter, made me so happy and nostalgic. Why? Because onions cooking in butter reminds me of my mom’s stuffing recipe. And it’s the best, obviously.

Making this pasta is quite simple, cooking some veggies on the stove and then blending them at the end. Finish some spaghetti in the sauce, sprinkle with Pecorino Romano cheese and you’ve got yourself a delectably seasonal meal!

I love it so much. In fact, it makes quite a bit of sauce so I am able to stick some in the fridge AND freezer! The quantity of sauce may vary slightly depending on how thick or thin you like your sauce and how exact you are with vegetable ingredients. I tend to be over-generous on portions.

This post may contain affiliate links. If you make a purchase using these links, Jennyblogs may receive a small commission, at no extra cost to you. This helps to support Jennyblogs. For further information see the privacy policy. Grazie!

Recipe adapted from Jake Cohen at the feedfeed


Butternut Squash and Sage Pasta

Serves 4-6 with leftover sauce for another meal

Ingredients:

  • 4 Tbsp / 56g butter

  • 1 medium onion, chopped

  • 1 1/2 pounds / 675g peeled and chopped butternut squash

  • 2-3 stalks celery, chopped

  • 1 apple, chopped

  • generous Tbsp of chopped fresh sage

  • 3/4 cup / 178g milk

  • 1 lb / 500g package spaghetti

  • 1/2 cup / 50g shredded parmigiano reggiano

  • 1/2 cup / 50g shredded fontal or other good melting cheese

  • 1/2 cup / 50g shredded pecorino romano, plus more for finishing

  • salt and pepper to taste


Directions:

Adjustments.jpeg
  1. In a large pan over medium heat, melt butter. Add onions, stirring occasionally, until mostly translucent, about 5 minutes.

  2. Add squash, celery, apple, and sage; continue to cook until things start to caramelize, about 5 minutes.

  3. Add milk. Stir and cover, allowing to cook until vegetables are tender, about 10 minutes. Note: The milk may look a bit curdled, which is fine since everything will be blended in the end.

  4. While the vegetables are simmering, place a large pot of water over high heat. Just before boiling, salt the water. When the water is boiling and salt has dissolved, add pasta and cook according to package directions.

  5. When the vegetables are tender, either blend with an immersion blender or transfer to a blender. Blend until smooth. Stir in the three cheeses and salt and pepper to taste.

  6. When the pasta is cooked al dente, drain, reserving 1 cup / 237g of pasta water. Return pasta to pan and toss in desired quantity of sauce. If the sauce is too thick, add reserved pasta water until desired consistency is reached.

  7. Serve with a generous dusting of pecorino romano.

Jenny’s Notes:

  • This recipe makes a generous amount of sauce, so you can choose to refrigerate the leftovers (will probably be enough for another 4-6 servings) for a few days or stick it in the freezer for a future quick dinner!

  • Feel free to use other kinds of squash or even pumpkin! The other night when I made this the store had run out of Butternut so I selected another Tuscan variety and it was lovely! Just keep in mind that the different squashes may have different starch levels and may affect how thick or thin the sauce will end up, which you can adjust by adding the pasta water at the end.

  • Play with the cheeses you use! Parmigiano reggiano, or parmesan, is a wonderfully nutty, aged cheese that you probably already have because it is amazing on almost everything. Fontal is an inexpensive but wonderful melting cheese which I generally have on hand, but you could also use gruyere, gouda, fontina, cheddar, etc. The one I recommend you splurge on would be the Pecorino Romano, which is an aged sheep’s milk cheese. There are many different varieties, those aged in walnut leaves or with truffles, young or aged, easily identified by the word “pecorino” usually followed by it’s defining factor. Pecorino Romano is one of the most exported cheeses from Italy and is aged a minimum of 5 months, giving it a wonderful sharp flavor that pairs so well with our velvety, squashy pasta today.

pasta, fall recipe, butternut squash, sage, seasonal pasta, pecorino romano, butternut squash sauce
dinner, pasta
American
Yield: 4-6 + extra sauce for another meal
Author: Jennyblogs
Print
Butternut Squash and Sage Pasta

Butternut Squash and Sage Pasta

A perfectly seasonal pasta with a creamy, cheesy butternut squash and sage sauce.
Cook time: 40 MinTotal time: 40 Min

Ingredients:

  • 4 Tbsp / 56g butter
  • 1 medium onion, chopped
  • 1 1/2 pounds / 675g peeled and chopped butternut squash
  • 2-3 stalks celery, chopped
  • 1 apple, chopped
  • generous Tbsp of chopped fresh sage
  • 3/4 cup / 178g milk
  • 1 lb / 500g package spaghetti
  • 1/2 cup / 50g shredded parmigiano reggiano
  • 1/2 cup / 50g shredded fontal or other good melting cheese
  • 1/2 cup / 50g shredded pecorino romano, plus more for finishing
  • salt and pepper to taste

Instructions:

  1. In a large pan over medium heat, melt butter. Add onions, stirring occasionally, until mostly translucent, about 5 minutes.
  2. Add squash, celery, apple, and sage; continue to cook until things start to caramelize, about 5 minutes.
  3. Add milk. Stir and cover, allowing to cook until vegetables are tender, about 10 minutes. Note: The milk may look a bit curdled, which is fine since everything will be blended in the end.
  4. While the vegetables are simmering, place a large pot of water over high heat. Just before boiling, salt the water. When the water is boiling and salt has dissolved, add pasta and cook according to package directions.
  5. When the vegetables are tender, either blend with an immersion blender or transfer to a blender. Blend until smooth. Stir in the three cheeses and salt and pepper to taste.
  6. When the pasta is cooked al dente, drain, reserving 1 cup / 237g of pasta water. Return pasta to pan and toss in desired quantity of sauce. If the sauce is too thick, add reserved pasta water until desired consistency is reached.
  7. Serve with a generous dusting of pecorino romano.

Notes:

This recipe makes a generous amount of sauce, so you can choose to refrigerate the leftovers (will probably be enough for another 4-6 servings) for a few days or stick it in the freezer for a future quick dinner! Feel free to use other kinds of squash or even pumpkin! Just keep in mind that the different squashes may have different starch levels and may affect how thick or thin the sauce will end up, which you can adjust by adding the pasta water at the end. Play with the cheeses you use! Parmigiano reggiano, or parmesan, is a wonderfully nutty, aged cheese that you probably already have because it is amazing on almost everything. Fontal is an inexpensive but wonderful melting cheese which I generally have on hand, but you could also use gruyere, gouda, fontina, cheddar, etc. The one I recommend you splurge on would be the Pecorino Romano, which is an aged sheep’s milk cheese. There are many different varieties, those aged in walnut leaves or with truffles, young or aged, easily identified by the word “pecorino” usually followed by it’s defining factor. Pecorino Romano is one of the most exported cheeses from Italy and is aged a minimum of 5 months, giving it a wonderful sharp flavor that pairs so well with our velvety, squashy pasta today.

Calories

375.87

Fat (grams)

23.82

Sat. Fat (grams)

14.35

Carbs (grams)

68.67

Fiber (grams)

8.85

Net carbs

59.83

Sugar (grams)

13.66

Protein (grams)

21.97

Sodium (milligrams)

691.50

Cholesterol (grams)

66.70
Nutritional information is approximate. Based on 4 servings.
Did you make this recipe?
Tag @jennyblogsandbakes on instagram and hashtag it #jennyblogs
Created using The Recipes Generator
Adjustments.jpeg

Roasted Red Pepper and Goat Cheese Pasta

IMG_1023.jpg

This post contains affiliate links. If you buy something using these links, Jennyblogs may receive a small commission, at no extra cost to you. This helps to support Jennyblogs. For further information see the privacy policy. Grazie!

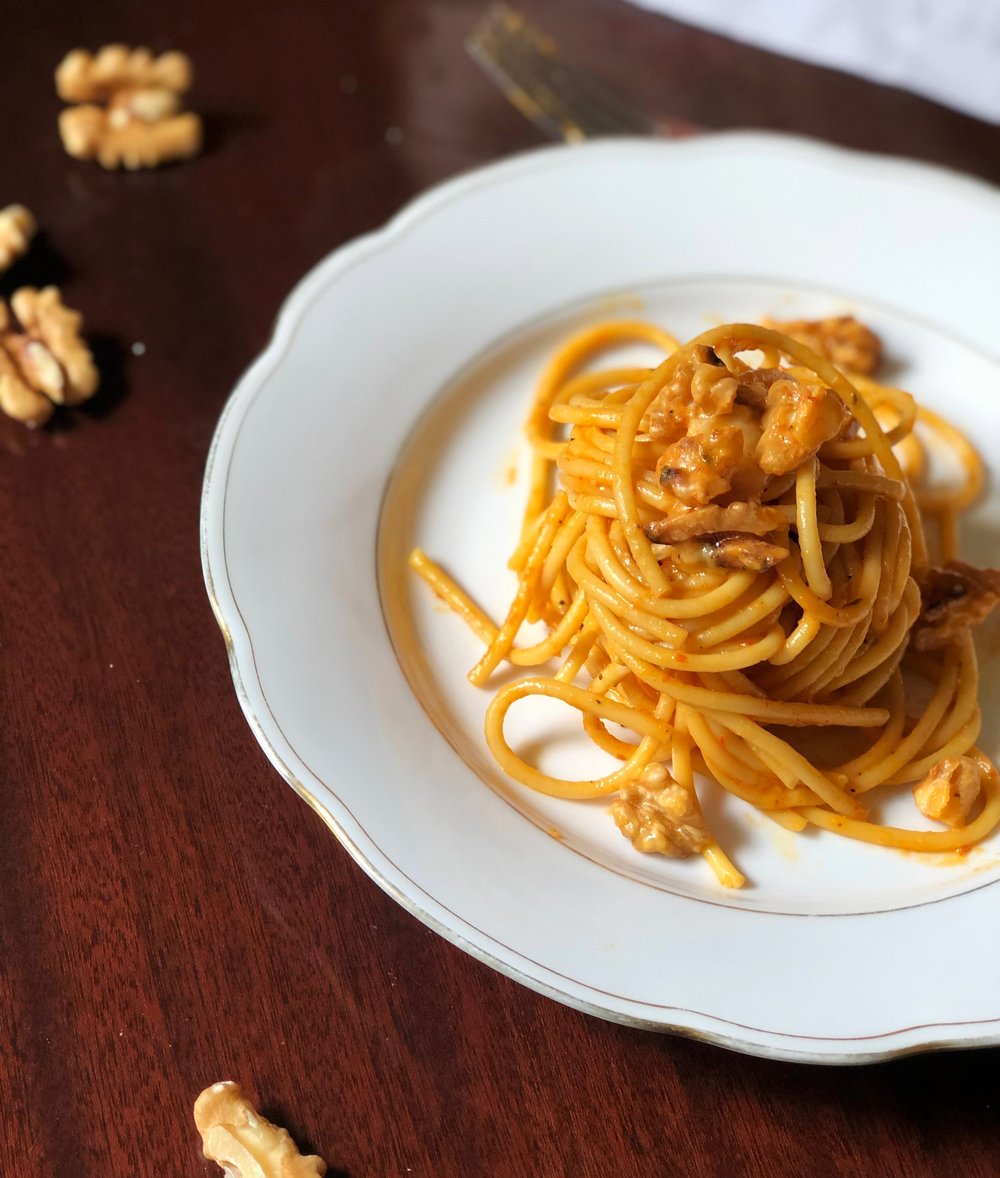
July pasta month is over and I find I still have pasta dishes I want to share with you! Like this Roasted Red Pepper and Goat Cheese Pasta with toasted walnuts.

Several years ago I went through a phase where I wanted everything roasted red pepper. I’m not sure if that was an actual thing in the culinary world, or it just happened to be the first time that roasted red pepper really came to my attention, and thus started noticing and wanting all things roasted red pepper. Pastas and dips, sandwiches and wraps, and anything you could incorporate roasted red peppers into. That smoky, sweet flavor you get from grilling the red peppers was this elusive, elegant flavor profile because I didn’t know how it was made.

Then I found a recipe for roasted red pepper sauce, made it, and was floored by how NOT elusive it is. It’s so attainable. I even grilled my own peppers instead of going for the much easier option of buying a jar of roasted red peppers at the store. And you know what? Even grilling the peppers and peeling off the blackened skin wasn’t nearly as hard as I imagined it all to be. Sometimes those mountains we build in our heads are much more scalable than we make them out to be, even if that’s just learning how to make a dish you really like, as in this example, harhar. Or you come to realize it’s WAY more difficult than you ever imagined, and you were right to wait. Aha!

This was not meant to turn into a inspirational post, back to food.

It’s been a while since I’ve eaten roasted red pepper anything, definitely not much of a thing here in Italy. But I decided, while being inspired and eating so much pasta in the month of July, to make my own little twist of a roasted red pepper sauce. And it turned out really great! Amazing! Delizioso! As I stated above, however, it’s really not rocket science to make, so I should probably calm down. Adding goat cheese and toasted walnuts are no new pairing to goat cheese, but remain such a good combination. Never had nuts on your pasta? At least not that you’re aware of? Don’t knock it until you’ve tried it! Unless you have a nut allergy, then please don’t. (You’ve probably eaten basil pesto on pasta, yes? Pesto is made from pine nuts traditionally, and often walnuts when pine nuts are not available or too expensive. See? You love nuts on pasta and didn’t even know!)

The great thing is, the roasted red pepper sauce actually makes enough for two meals, and freezes well. The next time you want roasted red pepper pasta, just thaw the sauce and boil the pasta. So easy peasy.

For extra easy-ness, you can buy a jar of roasted red peppers or grill them yourself, completely up to you.

Are you vegan or dairy-free? Simply omit the goat cheese or substitute a vegan-friendly cheese!


Roasted Red Pepper and Goat Cheese Pasta

IMG_1026.jpg

Serves about 6

Ingredients:

  • 16 oz / 500g spaghetti

  • 2 Tbsp / 28g oil

  • 1/2 onion, diced

  • 4 garlic cloves, minced

  • 16 oz / 454g jar roasted red peppers, drained and sliced

  • 1 Tbsp fresh chopped thyme

  • 1/2 tsp / 1g chili powder

  • 1/2 tsp / 1g turmeric

  • 1 tsp / 5g balsamic vinegar

  • salt and pepper, to taste

  • 3 oz / 85g fresh goat cheese, cut into pieces, optional

  • 1/3 cup / 30g walnuts, chopped and toasted, optional

Directions:

  1. Bring a large pot of water to boil over high heat, adding salt just before water boils. Cook pasta according to instructions on package. Drain pasta and return to pan, reserving a generous 1 cup / 237g of pasta water.

  2. While the pasta is cooking, heat oil in a medium pan over medium heat. Add onion and cook until it begins to soften, about 2-3 minutes. Add garlic and cook for another 1-2 minutes, until fragrant.

  3. Add sliced peppers, thyme, chili powder, turmeric, balsamic vinegar, salt and pepper. Cook until peppers are heated through.

  4. Transfer all of the pepper mixture to a blender and puree until smooth.

  5. Pour half of the roasted red pepper sauce over the pasta and add a bit of the pasta water. Add goat cheese and toss until pasta is well coated and cheese has melted, adding more pasta water to thin out sauce as desired. For a saucier pasta, add remaining half of sauce, otherwise refrigerate remaining sauce for up to 2-3 days or freeze for future use.

  6. Plate pasta and top with toasted walnuts.

Jenny’s Notes:

  • To roast red peppers yourself, place whole on a heated grill or near an open flame, turning occasionally, until all sides are blistered and start to blacken. You can also roast them on a lined baking sheet in the oven for 30-45 minutes, or very carefully over a gas burner. Once done, place in covered pot, bowl, or re-sealable plastic, anything you can close, to let the peppers steam for about 20-30 minutes. This helps the skin to slip off easily. Then remove stems and seeds, and slice. Proceed as in recipe.

  • If you don’t have fresh thyme available, substitute about a scant teaspoon of dried.

  • Add more chili powder, cayenne, or hot spice of choice for a spicier kick!

  • If you’re in a pinch you don’t have to toast the walnuts, although you miss out on that tasty flavor that comes out of the nut only by toasting. But it will still be delicious!

  • Omit goat cheese or replace with suitable substitute to make vegan and dairy-free.

roasted red pepper, red pepper, thyme, turmeric, garlic, onion, goat cheese, toasted walnuts, pasta, recipe, vegan, vegetarian, dairy-free
Dinner, pasta
American
Yield: 6-8 servings
Author:
Roasted Red Pepper and Goat Cheese Pasta

Roasted Red Pepper and Goat Cheese Pasta

Pasta in a smoky, sweet, roasted red pepper sauce with goat cheese and toasted walnuts.
Prep time: 30 MinTotal time: 30 Min

Ingredients

Instructions

  1. Bring a large pot of water to boil over high heat, adding salt just before water boils. Cook pasta according to instructions on package. Drain pasta and return to pan, reserving a generous 1 cup / 237g of pasta water.
  2. While the pasta is cooking, heat oil in a medium pan over medium heat. Add onion and cook until it begins to soften, about 2-3 minutes. Add garlic and cook for another 1-2 minutes, until fragrant.
  3. Add sliced peppers, thyme, chili powder, turmeric, balsamic vinegar, salt and pepper. Cook until peppers are heated through.
  4. Transfer all of the pepper mixture to a blender and puree until smooth.
  5. Pour half of roasted red pepper sauce over pasta and add a bit of pasta water. Add goat cheese and toss until pasta is well coated and cheese has melted, adding more pasta water to thin out sauce as desired. For a saucier pasta, add remaining half of sauce, otherwise refrigerate remaining sauce for up to 2-3 days or freeze for future use.
  6. Plate pasta and top with toasted walnuts.

Notes

To roast red peppers yourself, place whole on a heated grill or near an open flame, turning occasionally, until all sides are blistered and start to blacken. You can also roast them on a lined baking sheet in the oven for 30-45 minutes, or very carefully over a gas burner. Once done, place in covered pot, bowl, or re-sealable plastic, anything you can close, to let the peppers steam for about 20-30 minutes. This helps the skin to slip off easily. Then remove stems and seeds, and slice. Proceed as in recipe. If you don’t have fresh thyme available, substitute about a scant teaspoon of dried. Add more chili powder, cayenne, or hot spice of choice for a spicier kick! If you’re in a pinch you don’t have to toast the walnuts, although you miss out on that tasty flavor that comes out of the nut only by toasting. But it will still be delicious! Omit goat cheese or replace with suitable substitute to make vegan and dairy-free.

Nutrition Facts

Calories

425.16

Fat

13.36 g

Sat. Fat

3.05 g

Carbs

62.47 g

Fiber

4.25 g

Net carbs

58.23 g

Sugar

2.89 g

Protein

14.43 g

Sodium

1128.86 mg

Cholesterol

6.52 mg

Nutritional information is approximate. Based on 6 servings and includes goat cheese and walnuts.

Did you make this recipe?
Tag @jennyblogsandbakes on instagram and hashtag it # jennyblogs
Now we’re being more honest about a real portion size! :)

Now we’re being more honest about a real portion size! :)


Garlic, Oil, and Pepper Pasta - Aglio, Olio, e Peperoncino

IMG_1090.jpg

This post contains affiliate links. If you buy something using these links, Jennyblogs may receive a small commission, at no extra cost to you. This helps to support Jennyblogs. For further information see the privacy policy. Grazie!

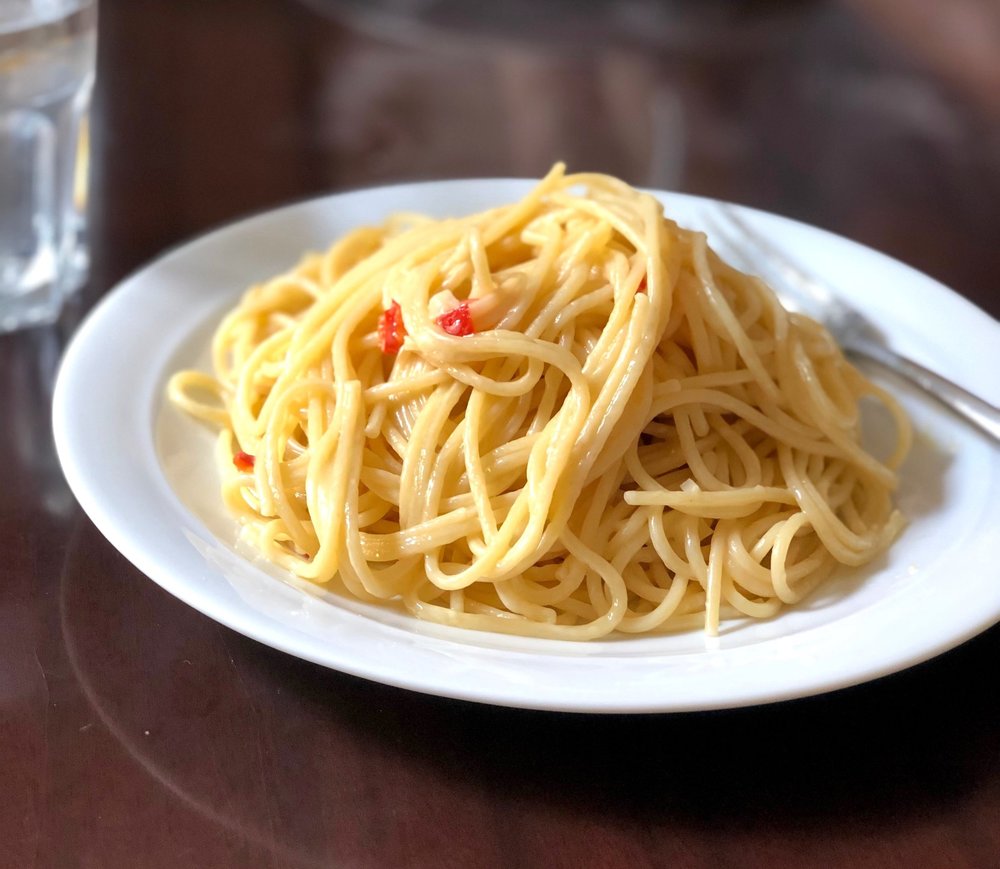
Aglio, olio, peperoncino is a pasta found often throughout Tuscany, and even more often on my table for lunch. It originally hails from Napoli but has become beloved throughout Italy.

It’s simple, so simple, with the classic version requiring just 4 ingredients: spaghetti, garlic, olive oil, and a hot pepper. It’s great to whip up in a pinch because it’s quick and the ingredients are those you probably have in your pantry. It can be on the table in about as long as it takes to boil and cook pasta, plus 2 minutes for mixing. Because of its simplicity, as many Italian dishes are, attention to the quality and freshness of your ingredients will really make this dish shine. (Especially with that olive oil, nice and shiny. :)

There are many slight variations, but they hardly vary more than an ingredient or two. Some use fresh hot peppers, some use chili flakes; some versions call for bread crumbs, others a bit of fresh parsley added at the end, some say to mince the garlic, others slice. Based on these variances, you can always decide to play a bit to find exactly how you like to eat your aglio, olio, e peperoncino pasta.

The version that follows I learned from my husband, the fresh pasta expert. We usually use fresh hot peppers, but will also use chili flakes if we don’t feel like running to the store. It’s pretty close to the classic recipe, with one exception. We add a bit of grated Parmigiano Reggiano and it catapults the pasta to the next level. OH YES, cheese!

A note about using fresh peppers: I’m not actually sure what kind of peppers I use here in Italy. At the supermarket there are usually bell peppers “peperoni” and hot peppers “peperoncini” with no indication what variety they might be. Bell peppers come in red and green, but not always at the same time, and the hot peppers are usually red OR green, depending on the season. I suppose they’re serrano or a similar variety because they’re spicy but not overly so, although they do vary. Apparently Italians are not pepper connoisseurs, you won’t find jalapeño, habanero, serrano, and other pepper types readily available year round! If I were writing this recipe in Italian I would just put “peperoncino,” and everyone would know to get the only kind of peperoncino available from the store. In English recipes we are used to being told more specifics, and writing “1 hot pepper” would not be as helpful. So I wrote serrano on the recipe, but just be aware that you can play around with the kind you use if you want, especially if you think serrano might be too spicy for you!

Recipe from my husband


Garlic, Oil, and Pepper Pasta - Aglio, Olio, e Peperoncino

Serves about 6

IMG_1093.jpg

Ingredients:

  • 500g / 16 oz spaghetti

  • 84g / 6 Tbsp olive oil

  • 4 garlic cloves

  • 1 serrano pepper, or spicy pepper of choice

  • generous 1/4 cup /30g grated parmesan cheese

Directions:

  1. Bring water to boil in a large pot over high heat. Just before boiling, add some salt.

  2. While water is heating up, mince the garlic and dice the pepper. Add the oil, garlic, and pepper to a small pot or pan.

  3. When the water boils add spaghetti and cook according to instructions on package. Meanwhile, place the small pan of oil over low heat.

  4. Simmer oil for 5-8 minutes; remove from heat when garlic is fragrant and starts to appear to dry with barely golden edges.

  5. When pasta is done cooking, drain, reserving about 1/2 cup / 120g of pasta water.

  6. Return drained pasta to the pot and immediately add oil mixture, reserved pasta water, and cheese. Working quickly, use two forks to mix and toss spaghetti until oil, cheese, and water have coated the pasta in a light, creamy sauce. Serve immediately.


Jenny’s Notes:

  • These measurements are approximate, we never measure when making this, but this is pretty close to our normal. So if you decide you want to use 5 cloves garlic and 2 jalapeños, that’s fine, too, because this is not an overly precise recipe!

  • For less heat, remove the seeds of the pepper before dicing. If using chili flakes, don’t simmer them in the oil but add to the pasta with the cheese at the end.

  • Look for parmigiano reggiano, which is the best. It can only be called so if it is made and aged in the designated area in Italy according to their regulations. Even if you are a world-class parmesan maker but make it in Wisconsin, it cannot legally be called parmigiano reggiano. This pasta is also delicious with other sharp, aged Italian cheeses. I like a mixture of aged pecorino and parmigiano.

  • Keep a close eye on the simmering oil, the garlic goes quickly from perfectly cooked (barely golden) to burnt (anything golden or beyond.) Even if you happen to burn your garlic, it only takes a few minutes to start the oil, garlic, and pepper over again and could still be ready before the pasta even finishes cooking.

  • One of the great things about making this is that even if you add too much pasta water, it will eventually evaporate out while mixing. One of the first times I ever made this solo, I added way too much and had a good inch or so sitting in the bottom of my pan. I had already added the oil and cheese and it was too late to dump the extra out. So I tossed and mixed for several minutes, and what do you know, the water eventually evaporated and mixed in, and I ended up with a wonderfully creamy and cheesy sauce.

  • When making this in Italy I always use the classic spaghetti option, as this is called spaghetti aglio e olio traditionally. However, the typical spaghettis you find in grocery stores in America don’t hold up as well, so I usually opt to use linguine in the USA.

aglio, olio, peperoncino, garlic, olive oil, hot pepper, spaghetti, Napoli, pasta, Italian pasta dish,
Dinner, pasta
Italian
Yield: 6-8
Author:
Garlic, Oil, and Pepper Pasta - Aglio, Olio, e Peperoncino

Garlic, Oil, and Pepper Pasta - Aglio, Olio, e Peperoncino

A simple and classic pasta dish served throughout Italy with plenty of garlic, olive oil, spicy pepper, and a bit of parmigiano reggiano.
Prep time: 25 MinTotal time: 25 Min

Ingredients

Instructions

  1. Bring water to boil in a large pot over high heat. Just before boiling, add some salt.
  2. While water is heating up, mince the garlic and dice the pepper. Add the oil, garlic, and pepper to a small pot or pan.
  3. When the water boils add spaghetti and cook according to instructions on package. Meanwhile, place the small pan of oil over low heat.
  4. Simmer oil for 5-8 minutes; remove from heat when garlic is fragrant and starts to appear to dry with barely golden edges.
  5. When pasta is done cooking, drain, reserving about 1 cup / 237g of pasta water.
  6. Return drained pasta to the pot and immediately add oil mixture, reserved pasta water, and cheese. Working quickly, use two forks to mix and toss spaghetti until oil, cheese, and water have coated the pasta in a light, creamy sauce. Serve immediately.

Notes

These measurements are approximate, we never measure when making this, but this is pretty close to our normal. So if you decide you want to use 5 cloves garlic and 2 jalapeños, that’s fine, too, because this is not an overly precise recipe! For less heat, remove the seeds of the pepper before dicing. If using chili flakes, don’t simmer them in the oil but add to the pasta with the cheese at the end. Look for parmigiano reggiano, which is the best. It can only be called so if it is made and aged in the designated area in Italy according to their regulations. Even if you are a world-class parmesan maker but make it in Wisconsin, it cannot legally be called parmigiano reggiano. This pasta is also delicious with other sharp, aged Italian cheeses. I like a mixture of aged pecorino and parmigiano. Keep a close eye on the simmering oil, the garlic goes quickly from perfectly cooked (barely golden) to burnt (anything golden or beyond.) Even if you happen to burn your garlic, it only takes a few minutes to start the oil, garlic, and pepper over again and could still be ready before the pasta even finishes cooking.

Nutrition Facts

Calories

257.59

Fat

15.37 g

Sat. Fat

2.72 g

Carbs

24.37 g

Fiber

1.09 g

Net carbs

23.28 g

Sugar

0.94 g

Protein

5.56 g

Sodium

94.52 mg

Cholesterol

4.30 mg

Nutritional information is approximate, based on 6 servings.
Did you make this recipe?
Tag @jennyblogsandbakes on instagram and hashtag it # jennyblogs
IMG_1100.jpg

Spinach Artichoke Pasta

IMG_0921.jpg

This post may contain affiliate links. If you buy something using these links, Jennyblogs may receive a small commission, at no extra cost to you. This helps to support Jennyblogs. For further information see the privacy policy. Grazie!

Welcome back to pasta month on Jennyblogs!

So far we’ve seen a Thai-inspired pasta, an Italian pasta, and today an American pasta. One of the biggest differences between these cuisines is the amount of cheese used. We Americans really like our cheese! Italian cuisine uses quite a bit of cheese in certain dishes, but it’s usually a seasoned, more pungent cheese (hello, beautiful parmigiano!) used as a finishing touch. Aside from pizza, of course, but even then, their pizzas or not nearly as cheese-blanketed as an American pizza can be!

From that you’ve learned that today’s pasta is going to be cheesy…even if you’ve already learned that my posts are usually cheesy….

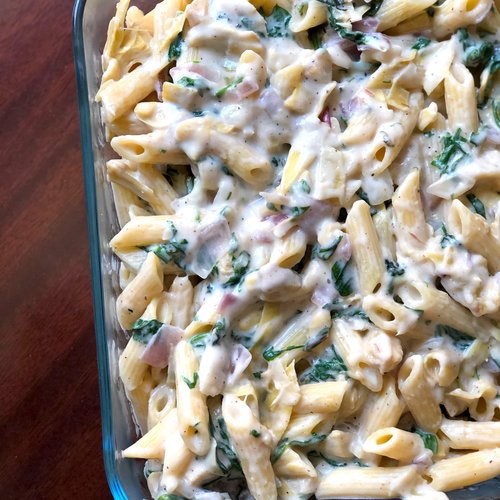
You’ve heard of spinach and artichoke dip? That rich, creamy, decadent dip usually found at parties served with little pieces of toast? That one you say you aren’t going to eat because it’s so high-fat, but you just can’t help yourself and end up splurging anyway? Today we’re going to make a Spinach and Artichoke PASTA. As much as I love spinach and artichoke dip, I think this pasta is even better. Plus, there is no sour cream, mayonnaise, or cream cheese involved! It’s still cheesy of course, but you can largely control how much or how little cheese you add, and the same goes for the veggies, in particularly the spinach.

For as much as I love the precision and science behind baking, I’m really coming around to cooking and how versatile it can be!

I mentioned that this Spinach Artichoke Pasta is delicious, right? I made an 8x8in pan once for lunch and my husband and I ate the WHOLE THING in one sitting. I listed the servings as 3-4 for an 8x8in / 20x20cm pan, but don’t be surprised if it becomes only 2 servings! Especially if there are men or growing children involved. Or, just double the recipe and put it in a 9x13in / 23x33cm pan. Problem solved!

Short on time? You can make this ahead of time, store in the fridge, and broil the pasta about 10 minutes before serving, OR you can serve this straight out of the pan and skip the broiling. Sprinkle the cheese on top and voila, you just saved yourself a step.

Recipe adapted from Dam* Delicious (and yes, I just censored that.)


Spinach Artichoke Pasta

Serves 3-4

IMG_0913.jpg

Ingredients:

  • 8 oz / 250g (half package) penne or your choice of short pasta (my favorite are the shells for this!)

  • 2 Tbsp / 28g oil

  • 1/2 large onion, diced

  • 2 cloves garlic, minced

  • 2 Tbsp / 15g all-purpose flour

  • 1/4 cup / 60g water, or chicken or vegetable broth

  • 1 cup / 237g milk

  • about 5 oz / 150g fresh spinach, chopped

  • 7 oz / 200g frozen or canned cooked artichoke hearts, drained/thawed and chopped

  • 1/4 tsp nutmeg, or a few grates of fresh, if available

  • salt and pepper, to taste

  • about 2 oz / 57g fontal or other semi-soft cheese, shredded

  • about 2 oz / 57g parmesan cheese, shredded or grated

Directions:

Ungreased 8x8in / 20x20cm pan, if you’re making this ahead of time (see step 8. and 9.)

IMG_0917.jpg
  1. Place a large pot of water over high heat, adding salt just before it boils. Cook the pasta al dente according to directions on package; drain.

  2. While you’re boiling the water and cooking the pasta, heat oil in a large saucepan over medium heat. Add onion and cook for about 2-3 minutes, then add the garlic and cook for another 2 minutes or so, until the onion is translucent and garlic fragrant.

  3. Add flour and stir, it will absorb all the liquid. Cook 1-2 minutes, until flour is toasted.

  4. Slowly add in the water, stirring constantly to make a thick paste (roux), then slowly stir in milk.

  5. Bring to a simmer to thicken the sauce; add spinach, artichokes, nutmeg, and salt and pepper to taste. Cook until spinach has wilted and artichokes are heated through, about 2 minutes.

  6. Remove from heat and add a generous half of the fontal and generous half of the parmesan, stir until melted.

  7. Add the cooked pasta and stir to coat.

  8. If serving right away, spoon onto plates and sprinkle with remaining cheese.

  9. If serving later, transfer pasta to prepared baking dish, sprinkle with remaining cheese, and refrigerate. When ready to eat, place oven rack near top and broil pasta for a few minutes, or until cheese is melty and starts to turn golden.


Jenny’s Notes:

  • Instead of fresh spinach you can also use frozen spinach, defrosted, drained, and chopped. Or you can use beet greens, arugula, or other cookable green of choice.

  • If you are watching your fat intake, feel free to reduce the cheese and use low-fat milk. On the other hand, if you love cheesy pasta and could care less about the fat, double the cheese!

  • Double this recipe and put in a 9x13in / 23x33cm pan!

  • If making ahead more than a few hours, I suggest boiling the pasta by 1-2 minutes less than indicated time, as it can become mushy sitting in the sauce. You may also need to add a bit more liquid (water, broth, or milk) to the sauce to compensate for the bit the pasta absorbs.

  • If you don’t know what to do with the other half can of artichokes, I suggest 1) making this dish twice within a few days, 2) doubling the recipe, or 3) using frozen artichokes or cooking them yourself so you don’t have to worry about the half can. I usually end up going for option 1, honestly, because making this once just isn’t enough.

spinach artichoke dip, pasta
pasta, dinner
American
Yield: 3-4 servings
Author:
Spinach Artichoke Pasta

Spinach Artichoke Pasta

Pasta in a cheesy, creamy sauce with spinach and artichokes, playing off the flavors of the beloved spinach and artichoke dip.
Prep time: 50 MinCook time: 10 MinTotal time: 1 Hour

Ingredients

Instructions

  1. Ungreased 8x8in / 20x20cm pan, if you’re making this ahead of time (see steps 9. and 10.)
  2. Place a large pot of water over high heat, adding salt just before it boils. Cook the pasta al dente according to directions on package; drain.
  3. While you’re boiling the water and cooking the pasta, heat oil in a large saucepan over medium heat. Add onion and cook for about 2-3 minutes, then add the garlic and cook for another 2 minutes or so, until the onion is translucent and garlic fragrant.
  4. Add flour and stir, it will absorb all the liquid. Cook 1-2 minutes, until flour is toasted.
  5. Slowly add in the water, stirring constantly to make a thick paste (roux), then slowly stir in milk.
  6. Bring to a simmer to thicken the sauce; add spinach, artichokes, nutmeg, and salt and pepper to taste. Cook until spinach has wilted and artichokes are heated through, about 2 minutes.
  7. Remove from heat and add a generous half of the fontal and generous half of the parmesan, stir until melted.
  8. Add the cooked pasta and stir to coat.
  9. If serving right away, spoon onto plates and sprinkle with remaining cheese.
  10. If serving later, transfer pasta to prepared baking dish, sprinkle with remaining cheese, and refrigerate. When ready to eat, place oven rack near top and broil pasta for a few minutes, or until cheese is melty and starts to turn golden.

Notes

  • Instead of fresh spinach you can also use frozen spinach, defrosted, drained, and chopped. Or you can use beet greens, arugula, or other cookable green of choice.
  • If you are watching your fat intake, feel free to reduce the cheese and use low-fat milk. On the other hand, if you love cheesy pasta and could care less about the fat, double the cheese!
  • Double this recipe and put in a 9x13in / 23x33cm pan!
  • If making ahead more than a few hours, I suggest boiling the pasta by 1-2 minutes less than indicated time, as it can become mushy sitting in the sauce. You may also need to add a bit more liquid (water, broth, or milk) to the sauce to compensate for the bit the pasta absorbs.
  • If you don’t know what to do with the other half can of artichokes, I suggest 1) making this dish twice within a few days, 2) doubling the recipe, or 3) using frozen artichokes or cooking them yourself so you don’t have to worry about the half can. I usually end up going for option 1, honestly, because making this once just isn’t enough.

Nutrition Facts

Calories

488.68

Fat

23.74 g

Sat. Fat

8.73 g

Carbs

47.45 g

Fiber

6.94 g

Net carbs

40.51 g

Sugar

2.65 g

Protein

23.43 g

Sodium

668.13 mg

Cholesterol

38.81 mg

Nutritional information is approximate. Based on 3 servings using water (not broth) and 2% milk.

Did you make this recipe?
Tag @jennyblogsandbakes on instagram and hashtag it #jennyblogs
IMG_0932.jpg

Spaghetti with Tuna - Spaghetti al Tonno

IMG_0896.jpg

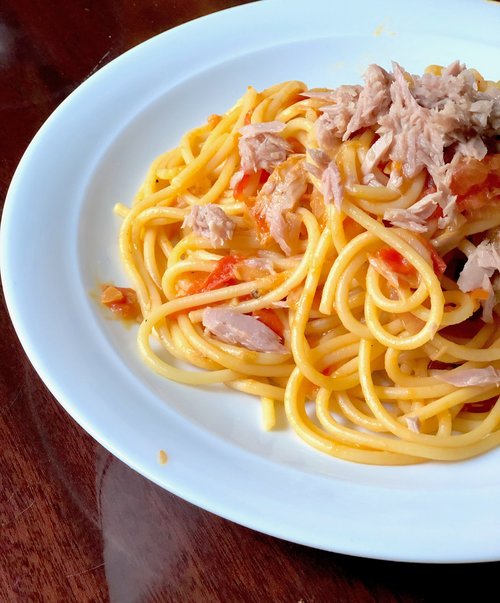
Spaghetti with tuna; It’s like spaghetti, but instead of meatballs you add tuna to the tomato sauce!

Now, that might sound kinda weird at first to my American friends, just like Italians think we’re weird for putting meatballs on our spaghetti in the first place. But let me tell you. It’s really delicious and I find it strangely comforting. Italian comfort food.

If you haven’t noticed, July is pasta month here at Jennyblogs! What, you couldn’t tell from the 1 other pasta recipe I’ve posted so far this month that this whole month is going to be pasta? I’m so offended. (I’m just kidding you guyssss.) But now you know! So be sure to stay tuned (you can sign up for updates) for the rest of the month where I will share with you various recipes, some Italian, some American, and last week was Thai inspired! Everyone should have some quick and delicious pasta recipes in their repertoire that don’t need store-bought sauce! Homemade is always better, if you can manage it. That way you control exactly what goes into your and your loved ones bodies. No more excess sugar, preservatives, and high levels of salt and fat that can be hidden away in the store-bought jars of sauce.

Today, a recipe for Italian spaghetti al tonno, or spaghetti with tuna. Homemade sauce and all this can be on your table in less than 45 minutes!

This post may contain affiliate links. If you buy something using these links, Jennyblogs may receive a small commission, at no extra cost to you. This helps to support Jennyblogs. For further information see the privacy policy. Grazie!

Recipe by my husband, the pasta master


Spaghetti with Tuna - Spaghetti al Tonno

Serves 6-8

IMG_0899.jpg

Ingredients:

  • 1 lb. / 500g spaghetti

  • 2 Tbsp / 28g oil

  • 1/2 onion, chopped

  • 3 tomatoes, diced

  • 1 clove garlic, minced

  • 1 Tbsp / 14g tomato paste

  • 1/2 tsp / 2.5g ground turmeric

  • salt and pepper, to taste

  • 5 oz / 148g can of tuna, drained

Directions:

  1. Heat a large pot of water over high heat, adding salt just before it boils. Cook pasta al dente according to directions and drain.

  2. Meanwhile, while the pasta is cooking, heat oil in a large sauté pan over medium-low heat. Add the onion and cook until just fragrant and translucent, about 1-2 minutes.

  3. Add the tomatoes and simmer for about 10-15 minutes, or until they are pretty well broken down. If the sauce becomes too thick or starts to stick, add a bit of water.

  4. Add the garlic, tomato paste, turmeric, salt and pepper, and a small chunk of tuna*; simmer for another few minutes.

  5. Add the cooked pasta to the sauce, toss and stir to coat pasta. At this point you can either add the rest of the tuna and stir, or plate the pasta and add the tuna on top.

  6. Serve and eat!


Jenny’s Notes:

  • As with any pasta recipe, you don’t have to use spaghetti or the type called for. Use your favorite kind or whatever you think would go best with the sauce you’re making.

  • If you prefer a stronger tuna taste, you can use the liquid from the tuna can instead of water to keep the sauce from getting too thick while simmering. It doesn’t matter if it is packed in water or oil.

  • Add just a bit of tuna to flavor the sauce instead of the whole can because it doesn’t need to be cooked. The rest will be added in at the end.

  • In a pinch you can use a 15oz can of diced tomatoes instead of fresh.

spaghetti al tonno, tuna spaghetti, pasta
pasta, dinner
Italian
Yield: 6-8 servings
Author:
Spaghetti with Tuna - Spaghetti al Tonno

Spaghetti with Tuna - Spaghetti al Tonno

A classic Italian pasta dish with spaghetti, homemade tomato sauce, and tuna.
Prep time: 25 MinCook time: 15 MinTotal time: 40 Min

Ingredients

Instructions

  1. Heat a large pot of water over high heat, adding salt just before it boils. Cook pasta al dente according to directions and drain.
  2. Meanwhile, while the pasta is cooking, heat oil in a large sauté pan over medium-low heat. Add the onion and cook until just fragrant and translucent, about 1-2 minutes.
  3. Add the tomatoes and simmer for about 10-15 minutes, or until they are pretty well broken down. If the sauce becomes too thick or starts to stick, add a bit of water.
  4. Add the garlic, tomato paste, turmeric, salt and pepper, and a small chunk of tuna*; simmer for another few minutes.
  5. Add the cooked pasta to the sauce, toss and stir to coat pasta. At this point you can either add the rest of the tuna and stir, or plate the pasta and add the tuna on top.
  6. Serve and eat!

Notes:

As with any pasta recipe, you don’t have to use spaghetti or the type called for. Use your favorite kind or whatever you think would go best with the sauce you’re making. If you prefer a stronger tuna taste, you can use the liquid from the tuna can instead of water to keep the sauce from getting too thick while simmering. It doesn’t matter if it is packed in water or oil. Add just a bit of tuna to flavor the sauce instead of the whole can because it doesn’t need to be cooked. The rest will be added in at the end. In a pinch you can use a 15oz can of diced tomatoes instead of fresh.

Calories

216.63

Fat (grams)

6.08

Sat. Fat (grams)

0.62

Carbs (grams)

29.31

Fiber (grams)

2.14

Net carbs

27.17

Sugar (grams)

3.19

Protein (grams)

11.05

Sodium (milligrams)

151.14

Cholesterol (grams)

10.36

Nutritional Information is approximate.

Did you make this recipe?
Tag @jennyblogsandbakes on instagram and hashtag it #jennyblogs
IMG_0897.jpg

Simple Thai Noodles

IMG_0875.jpg

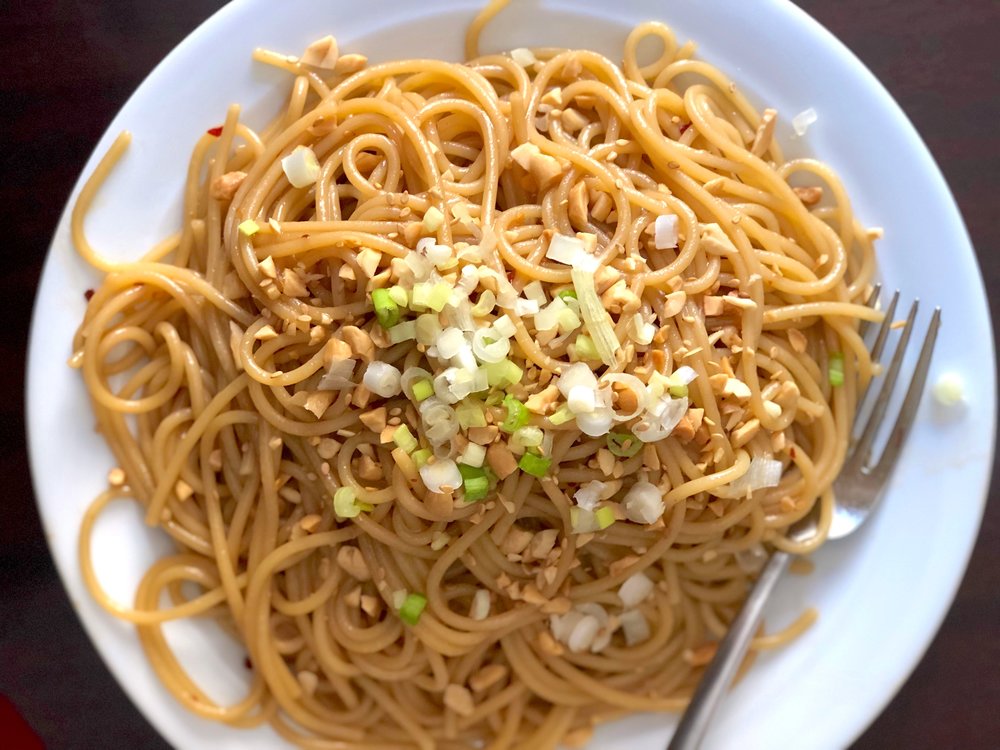
Some nights you get caught unprepared and need something quick to whip up for dinner. Or maybe that’s every night? I know Sunday food prepping is all the rage, and it’s a really great idea…if you’re only feeding yourself or a small family, and not taking into account the unexpected that happens. Even if you’re the most organized person cooking just for yourself, those nights are going to spring up on you when you want something quick and easy, delicious, and you have all the ingredients on hand. This recipe for Simple Thai Noodles falls in that category.

Sesame oil might not be in everyone’s pantry, but if you invest in a bottle, it can last you months, depending on how often you make Asian or other dishes that often call for sesame oil. It really is worth it, if you try and substitute another oil it won’t be the same. It lends such a nutty depth to dishes!

I actually have several versions of lo mein, Thai noodles, fried rice, etc. and even a couple more waiting to be tried that all have in common varying quantities and varieties of green onion, sesame oil, soy sauce, ginger, peanuts or peanut butter, and a sweet and a spicy element. Each with their merits, and the occasions for which I like to make them. If you can’t tell, I love Asian dishes, whether they’re authentic or simply inspired by Asian flavors.

This pasta is kept in my repertoire for its simplicity while still retaining all the delicious flavors, and now you can make it too, whether you’re in a pinch for a quick dinner, or not! No one said you have to make it only when in a pinch. :)

This post may contain affiliate links. If you buy something using these links, Jennyblogs may receive a small commission, at no extra cost to you. This helps to support Jennyblogs. For further information see the privacy policy. Grazie!

Recipe adapted from A Small Snippet


Simple Thai Noodles

Serves 4-6

IMG_0878.jpg

Ingredients:

  • 16 oz / 500g linguine or spaghetti

  • 2 Tbsp / 28g olive oil, or oil of choice

  • 1/4 cup / 54g sesame oil

  • about 1 Tbsp / 5g red pepper flakes

  • 3 Tbsp / 63g honey

  • 3 Tbsp / 45g soy sauce

  • cilantro, chopped peanuts, chopped green onions, julienned carrots, sesame seeds, or your choice of toppings

Directions:

  1. Bring a large pot of water to boil, adding salt just before it boils. Cook pasta according to directions on box; drain, and return to pot.

  2. While the pasta is cooking, whisk together the oils, red pepper flakes, honey, and soy sauce in a small bowl.

  3. When the pasta is done and drained, add the sauce to the noodles and toss to coat well.

  4. Serve immediately, adding toppings of choice.

Jenny’s Notes:

  • You can adjust the amount of red pepper flakes to suit your spicy preference. 1 Tbsp, as in the recipe, results in reasonably spicy, but not overwhelming. Also, you could use a spicy oil if you have some on hand instead of the red pepper flakes.

  • For a stronger sesame taste, use all sesame oil instead of olive oil. (6 Tbsp / 84g total of sesame oil.)

  • Feel free to add veggies or a protein, if you desire. For veggies, chop small and sauté in a pan with a bit of oil for a few minutes or until tender, toss in when you add the sauce. Cook your protein and slice as desired, add at the end on top of plates of pasta or mix in with sauce.

6 ingredients, 20 minute dinner, pasta, Thai Noodles
Dinner, Pasta
American
Yield: 4-6 servings
Author:
Simple Thai Noodles

Simple Thai Noodles

The simplest Thai noodles using only 6 pantry ingredients for a quick and easy dinner! Sweet, savory, and irresistible.
Prep time: 10 MinCook time: 10 MinTotal time: 20 Min

Ingredients

Instructions

  1. Bring a large pot of water to boil, adding salt just before it boils. Cook pasta according to directions on box; drain, and return to pot.
  2. While the pasta is cooking, whisk together the oils, red pepper flakes, honey, and soy sauce in a small bowl.
  3. When the pasta is done and drained, add the sauce to the noodles and toss to coat well.
  4. Serve immediately, adding toppings of choice.

Notes

You can adjust the amount of red pepper flakes to suit your spicy preference. 1 Tbsp, as in the recipe, results in reasonably spicy, but not overwhelming. Also, you could use a spicy oil if you have some on hand instead of the red pepper flakes.For a stronger sesame taste, use all sesame oil instead of olive oil. (6 Tbsp / 84g total of sesame oil.)Feel free to add veggies or a protein, if you desire. For veggies, chop small and sauté in a pan with a bit of oil for a few minutes or until tender, toss in when you add the sauce. Cook your protein and slice as desired, add at the end on top of plates of pasta or mix in with sauce.

Nutrition Facts

Calories

676.11

Fat

23.63 g

Sat. Fat

3.4 g

Carbs

99.87 g

Fiber

4.71 g

Net carbs

95.17 g

Sugar

16.33 g

Protein

16.89 g

Sodium

794.7 mg

Cholesterol

0 mg

Nutritional info is approximate, based on 4 servings including toppings.

Did you make this recipe?
Tag @jennyblogsandbakes on instagram and hashtag it #jennyblogs
IMG_0876.jpg