Is Ice Necessary When Baking Sourdough Bread in Dutch Ovens?
/This post may contain affiliate links. If you make a purchase using these links, Jennyblogs may receive a small commission, at no extra cost to you. This helps to support Jennyblogs. Where possible, links are prioritized to small businesses and ethically and responsibly made items. For further information see the privacy policy. Grazie!
The use of steam when baking sourdough loaves is essential to allow them to spring up in the oven before the crust forms.
One of the easiest ways to ensure your loaf is getting enough steam, is to bake it in a Dutch oven. Even more, you can put a couple of ice cubes in the hot Dutch oven right after you load your dough in, before you place the lid on and put it all back into the oven.
But is ice necessary? No, it’s not necessary, but it can be a helpful tool.


Safety First
It’s important to note that using ice in a very hot Dutch oven comes with the risk of thermal shock. Certain materials, like the enameled cast iron often used in Dutch Ovens, is prone to thermal shock. Adding any amount of ice to a very hot Dutch Oven risks breaking or shattering the pan. Not all Dutch ovens are made equal, also. Le Creuset, for example, are high quality, made in France enameled cast iron. They’re designed to distribute heat and cold evenly, but shouldn’t be taken from the freezer to the oven, unlike high quality stoneware such as Emile Henry which can be taken straight from freezer to oven. Other, cheaper brands of enameled cast iron, especially the more economical options, appear to report higher incidences of shattering and breaking, from my observations. I use La Tramontina oval 5.5Qt dutch ovens multiple times a week for several hours at a time to bake bread in.
I actually didn’t know the thermal shock element until I had used ice in my Dutch Ovens many, many times. I used to use about 4 ice cubes per loaf, but once I realized the risk, I reduced to 2 ice cubes. I read both sides from many seasoned sourdough bakers, those that were absolutely against using ice ever because of the risk, and those that pooh-poohed the advice, having used ice many times themselves and stating 1-2 ice cubes isn’t enough to cause thermal shock.
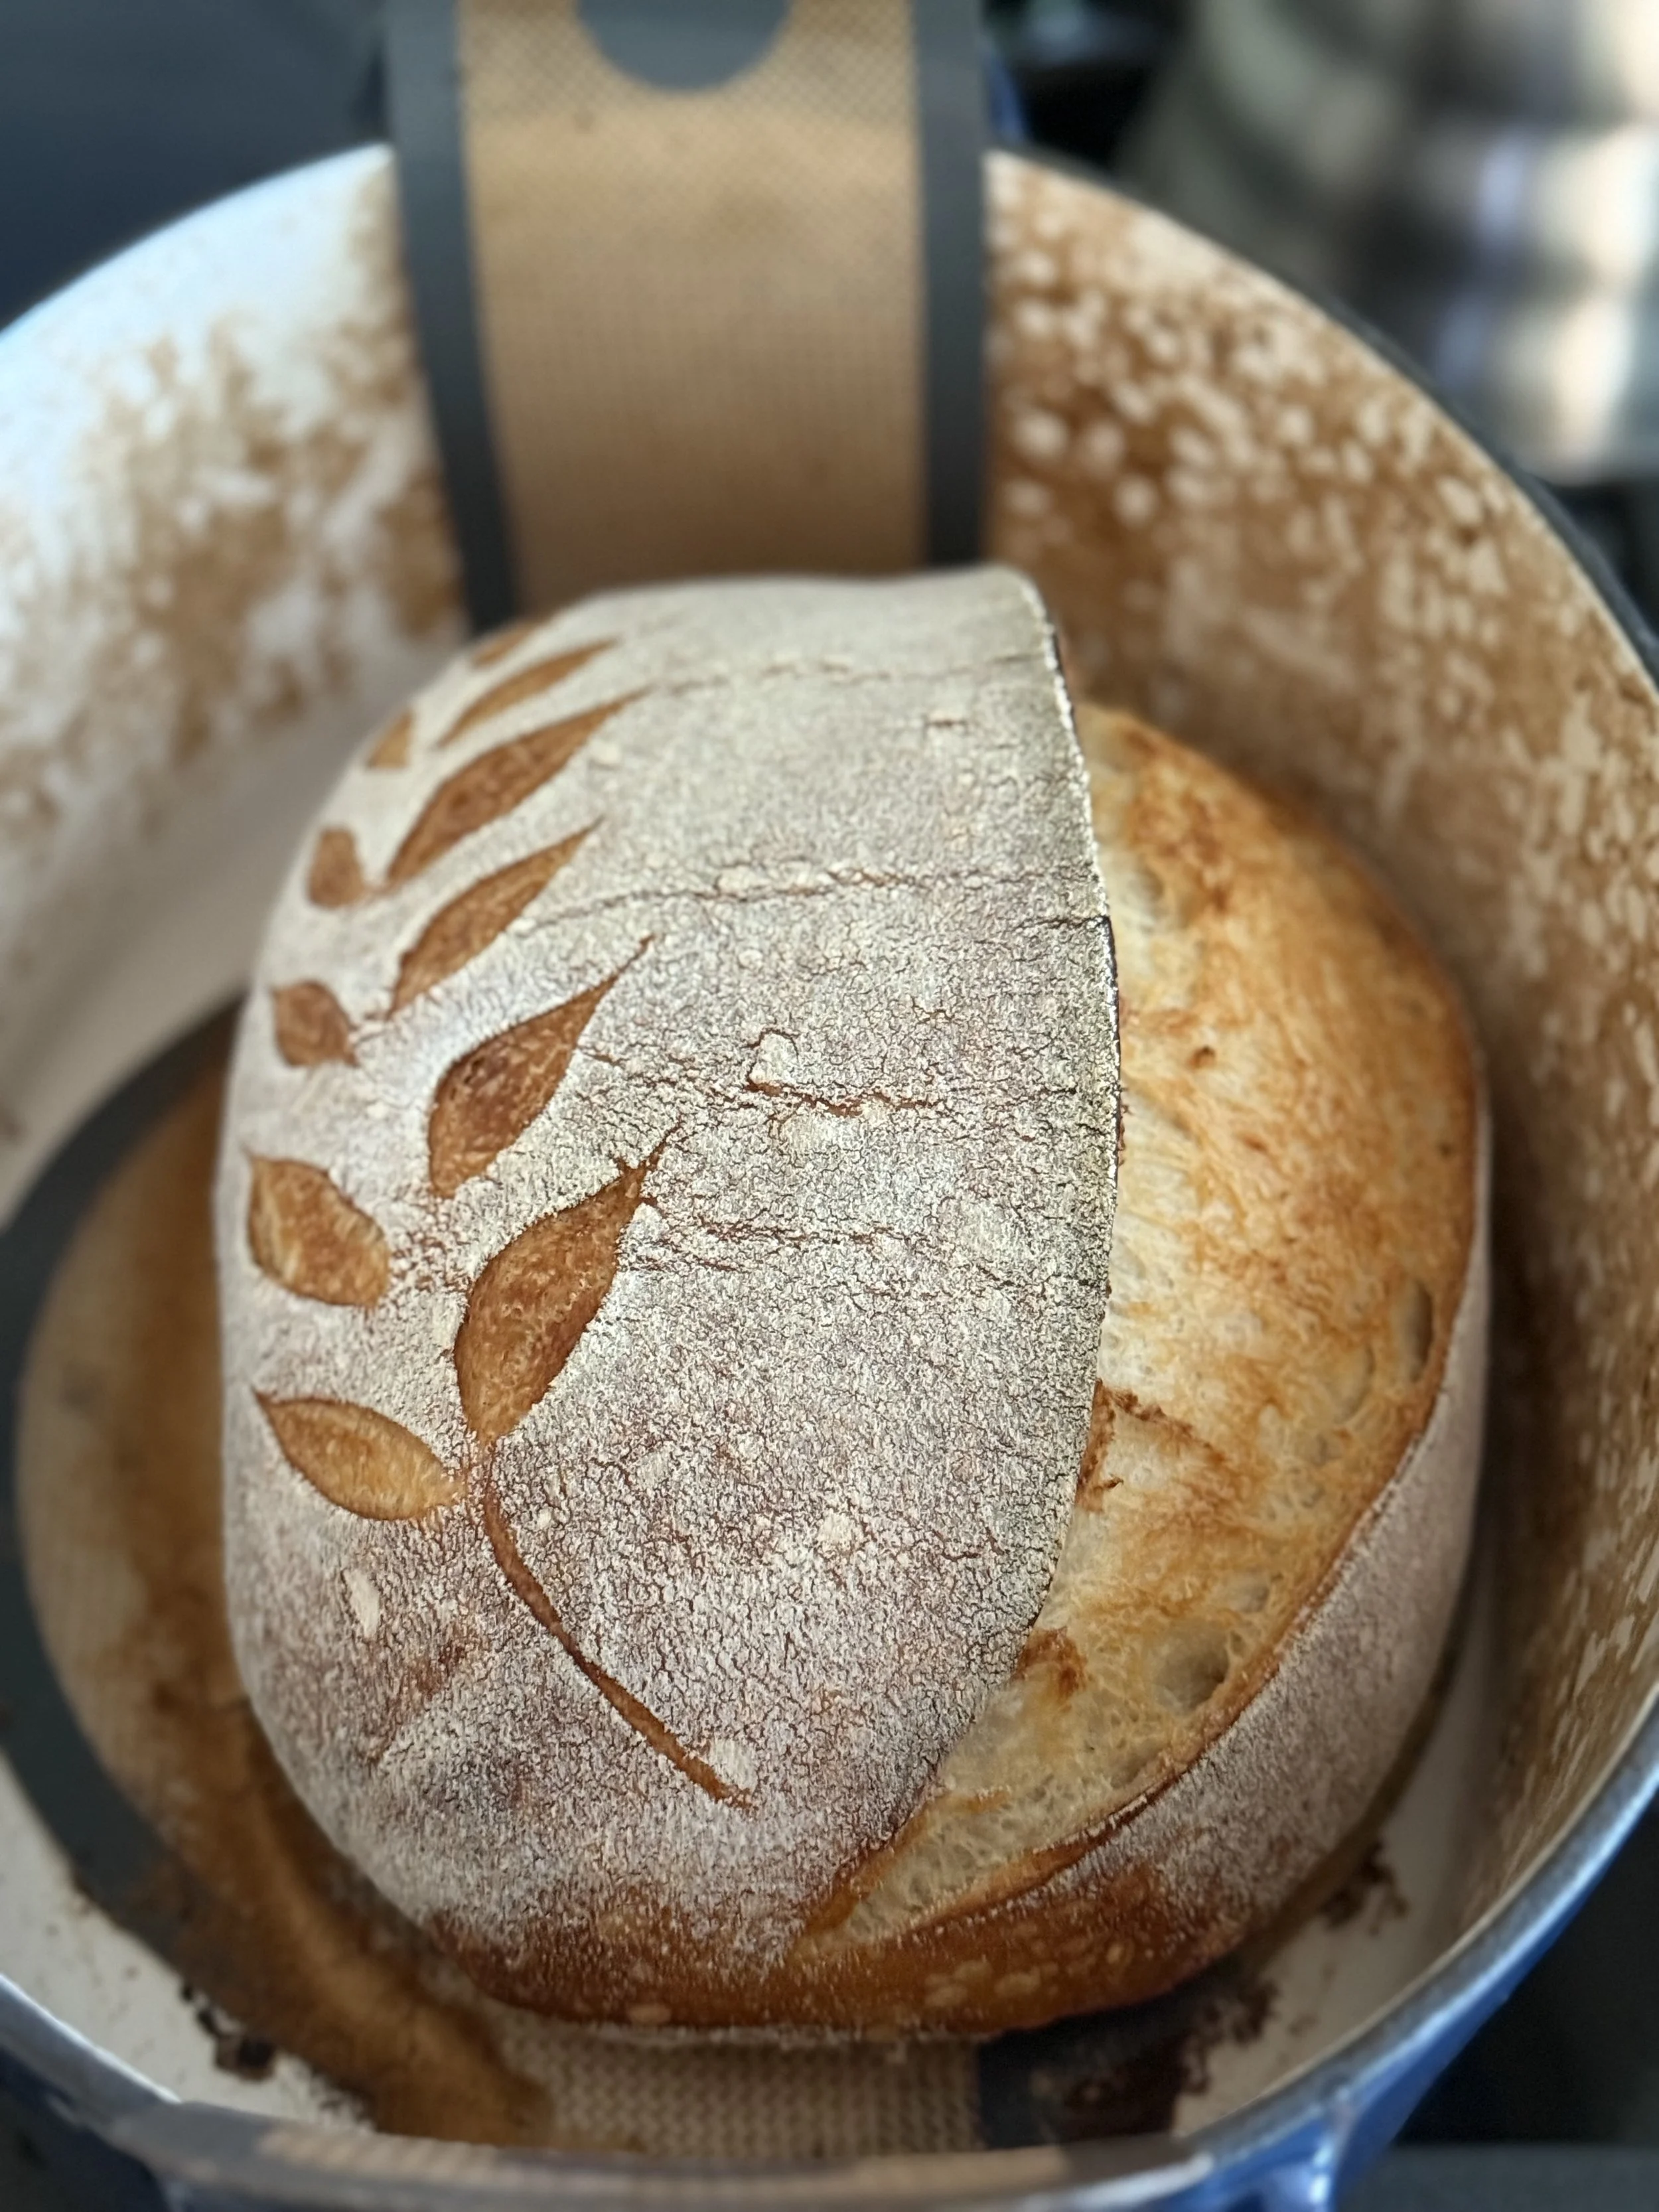
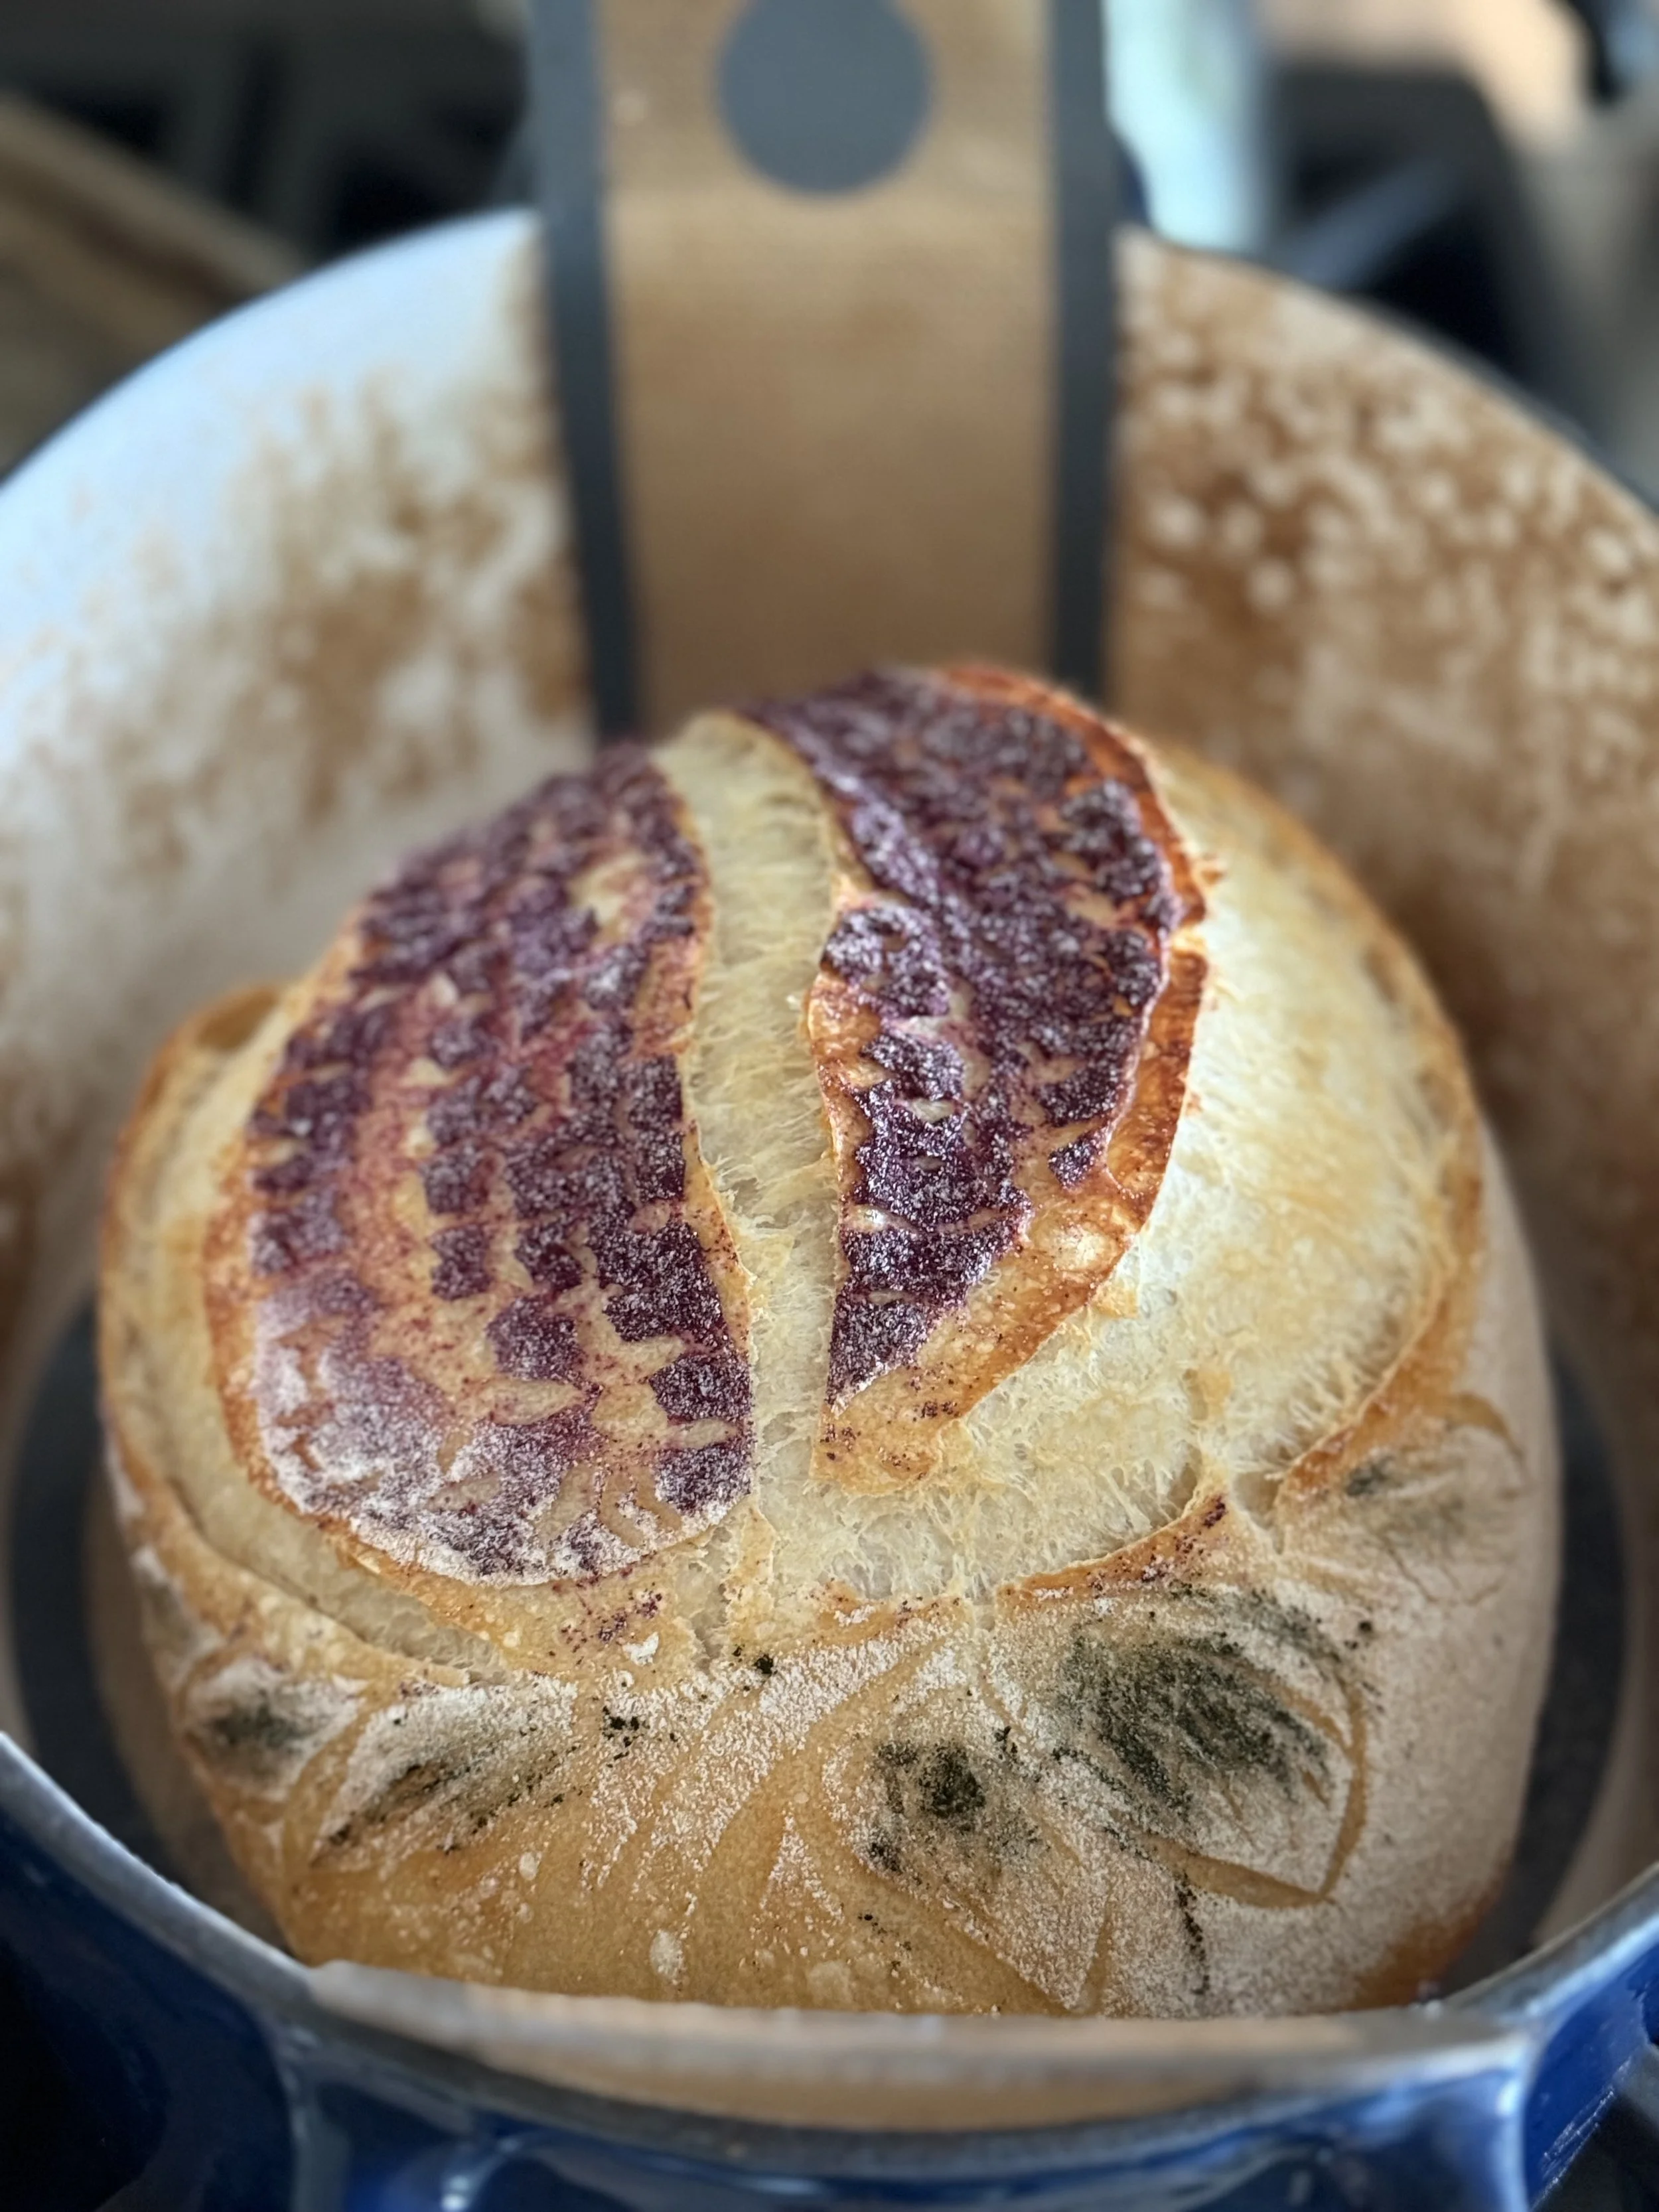
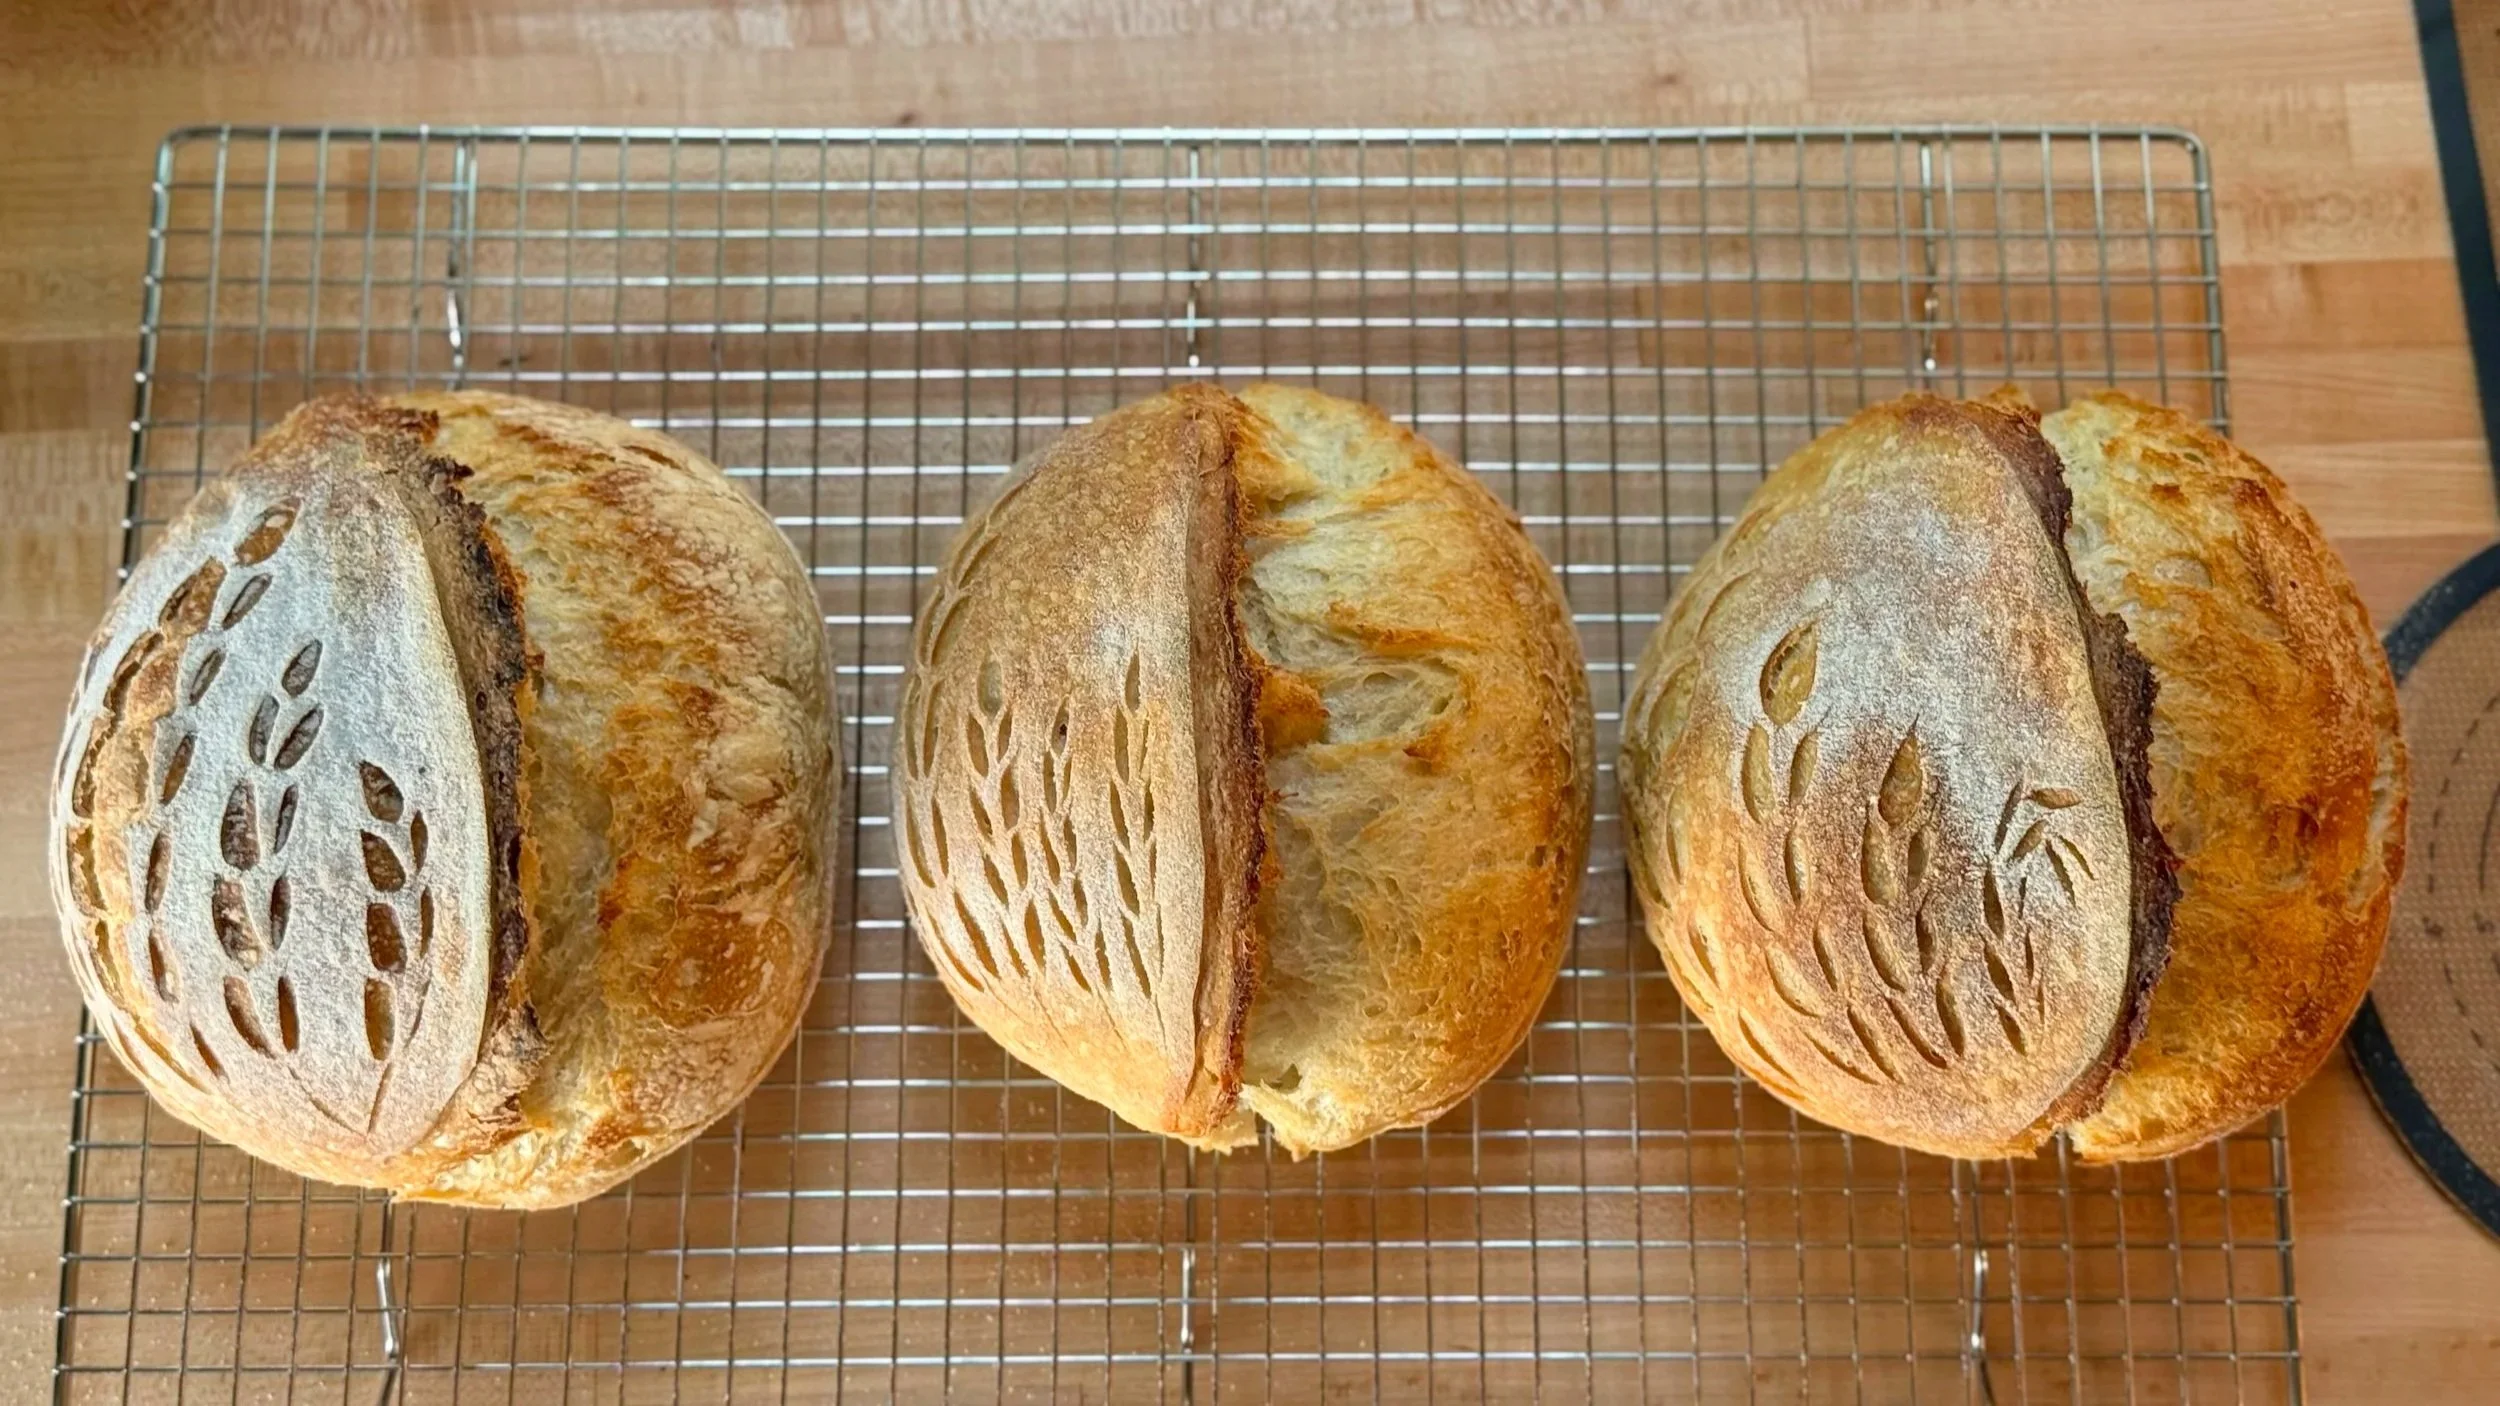
I now only use ice sometimes for certain kinds of loaves, those that benefit the most from a little extra steam. I score all of my classic/regular sourdough loaves using rice flour and don’t want the design to disappear, which extra steam can do, so don’t use ice with those.
Ultimately it’s up to you if you want to use ice.
When to use ice in a Dutch Oven
If you suspect the crust is forming on your loaf prematurely, use ice to keep the inside of your Dutch Oven steamier
If your loaves are springing up nicely but splitting in unwanted places, despite scoring, try ice
If your loaves rise nicely but don’t get an ear, try ice
If you want more of a blistered crust, use ice
When NOT to use ice
If you’re worried about thermal shock and potential breaking/shattering of your Dutch Oven, as talked about above
If you have used flour and scored a design on your bread, you’ll want to skip ice as the steam causes the flour to disappear and thus making the scoring difficult to see
If you don’t see any noticeable differences in your loaves whether you use ice or not, no need to bother with it!
If you decide to use ice, here are a few tips:
Once your oven and Dutch Ovens are sufficiently preheated, load your dough in before adding the ice. Ice starts steaming within seconds of hitting the hot Dutch Oven, and if you load your dough after you risk burning your wrists or arms.
I recommend using parchment paper rather than silicone bread slings so the ice doesn’t come in direct contact with the bread, causing a soggy or gummy crust.
Place the ice underneath/outside the parchment paper in the Dutch Oven, not next to the bread. This way, like point 2, your bread won’t up with a soggy spot.
Ice is slippery, so place with care. I always do so with my beloved elbow-length Lanon oven mitts, to protect from burns. Despite these having fingers and more dexterity, I can still feel clumsy trying to grab a thin piece of parchment and holding it back while slipping an ice cube in. Go slowly as an ice cube that slips in next to the bread is stupidly difficult to get out. Don’t ask me how I know that, nor how many minutes of my life have been wasted trying to fish out a slippery little cube before it completely melts.
If you decide not to use ice, you could try misting your bread with water before loading it into your Dutch oven. Score your bread, spray generously with a spray bottle filled with water, and bake.
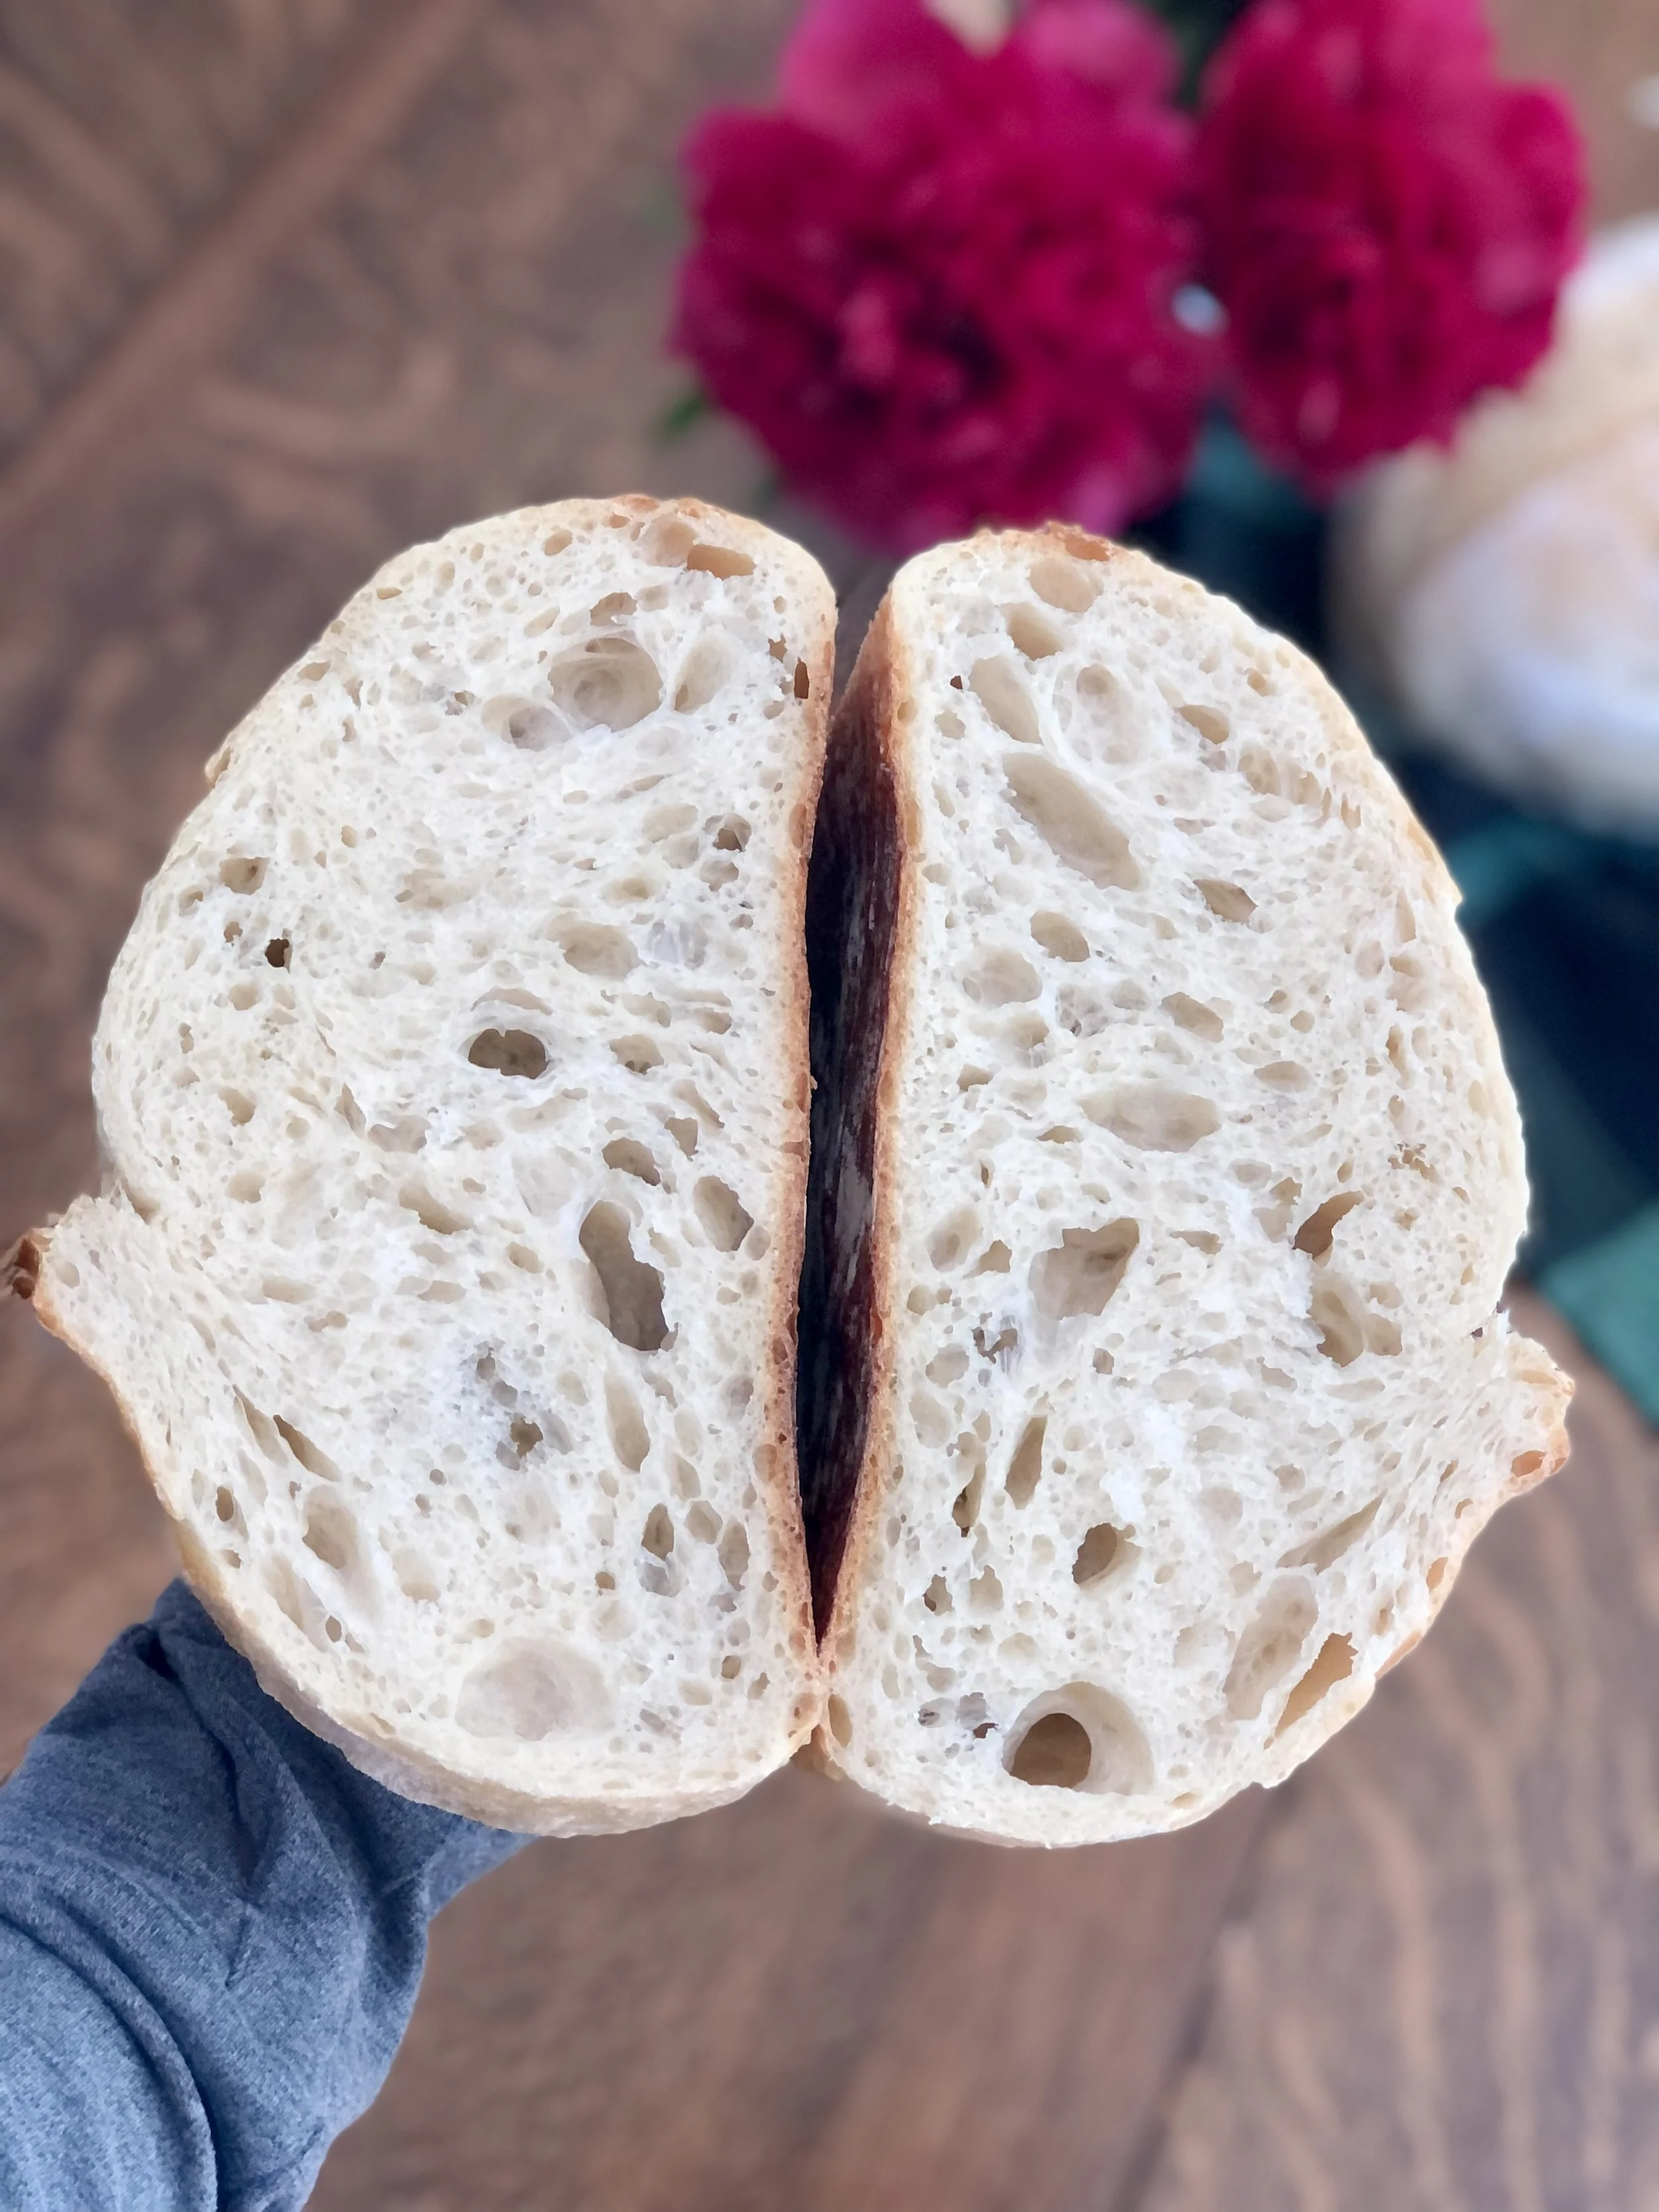
Ice vs. No Ice: A Side-by-Side Experiment
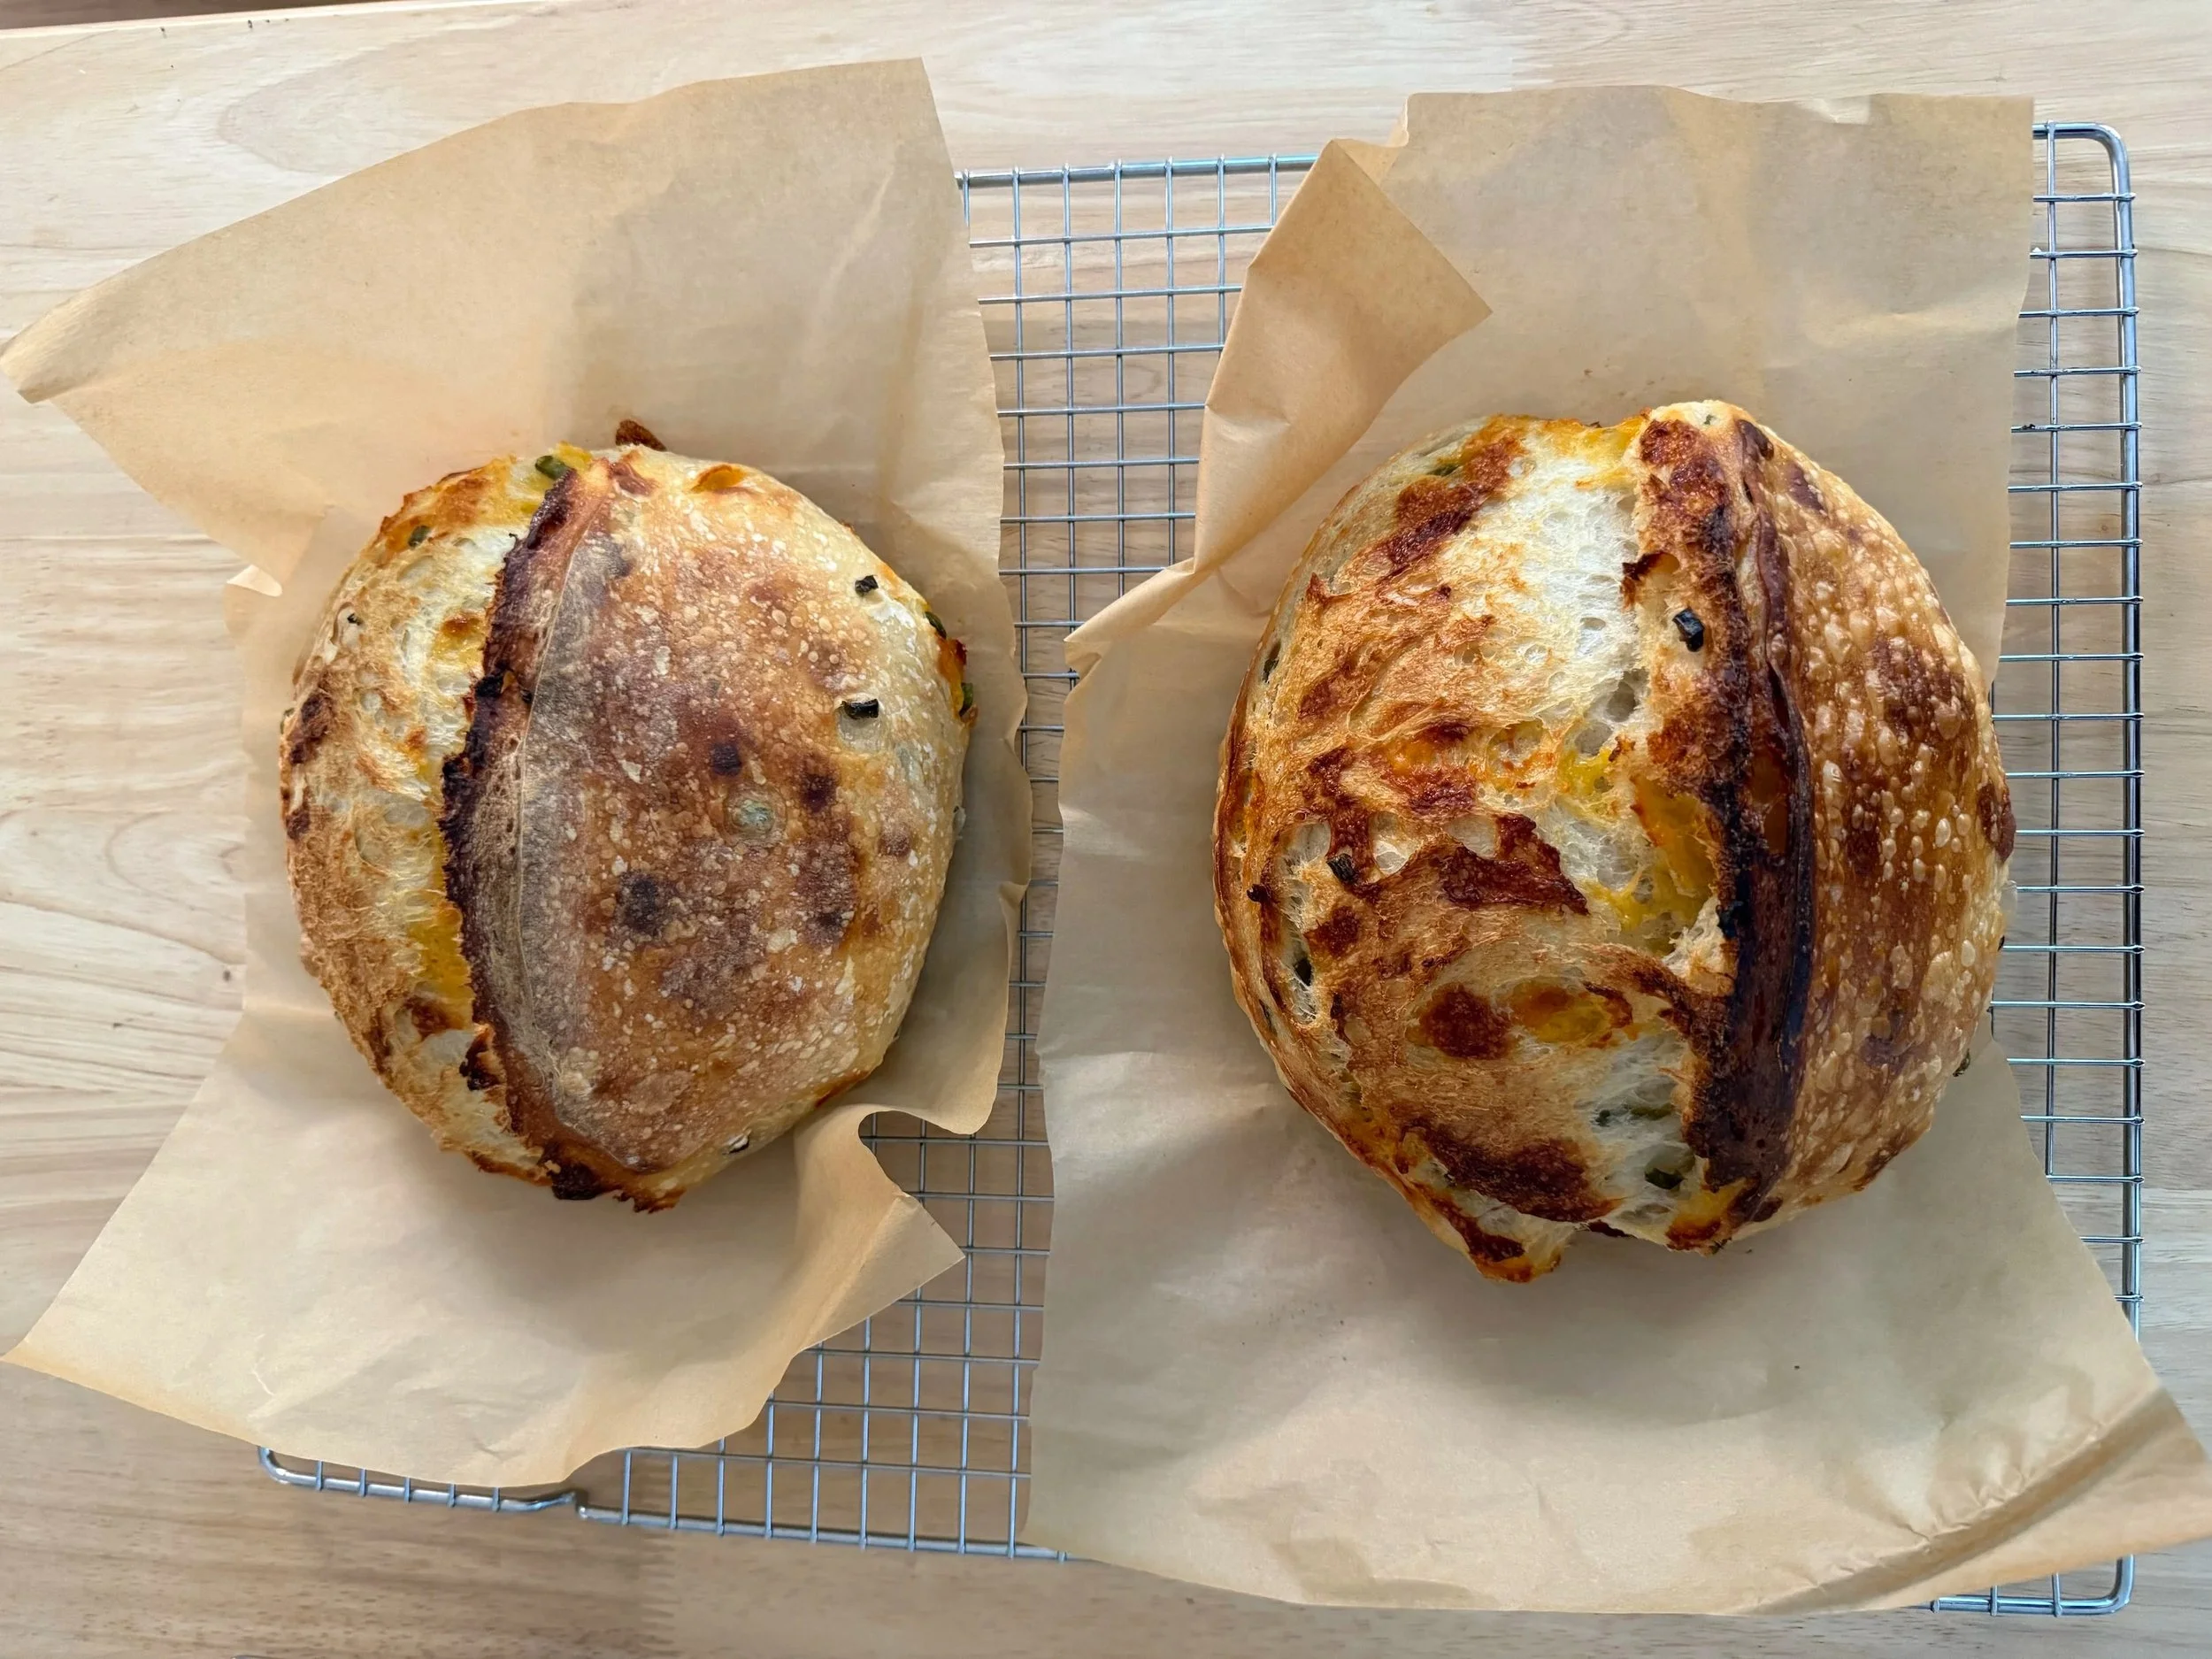
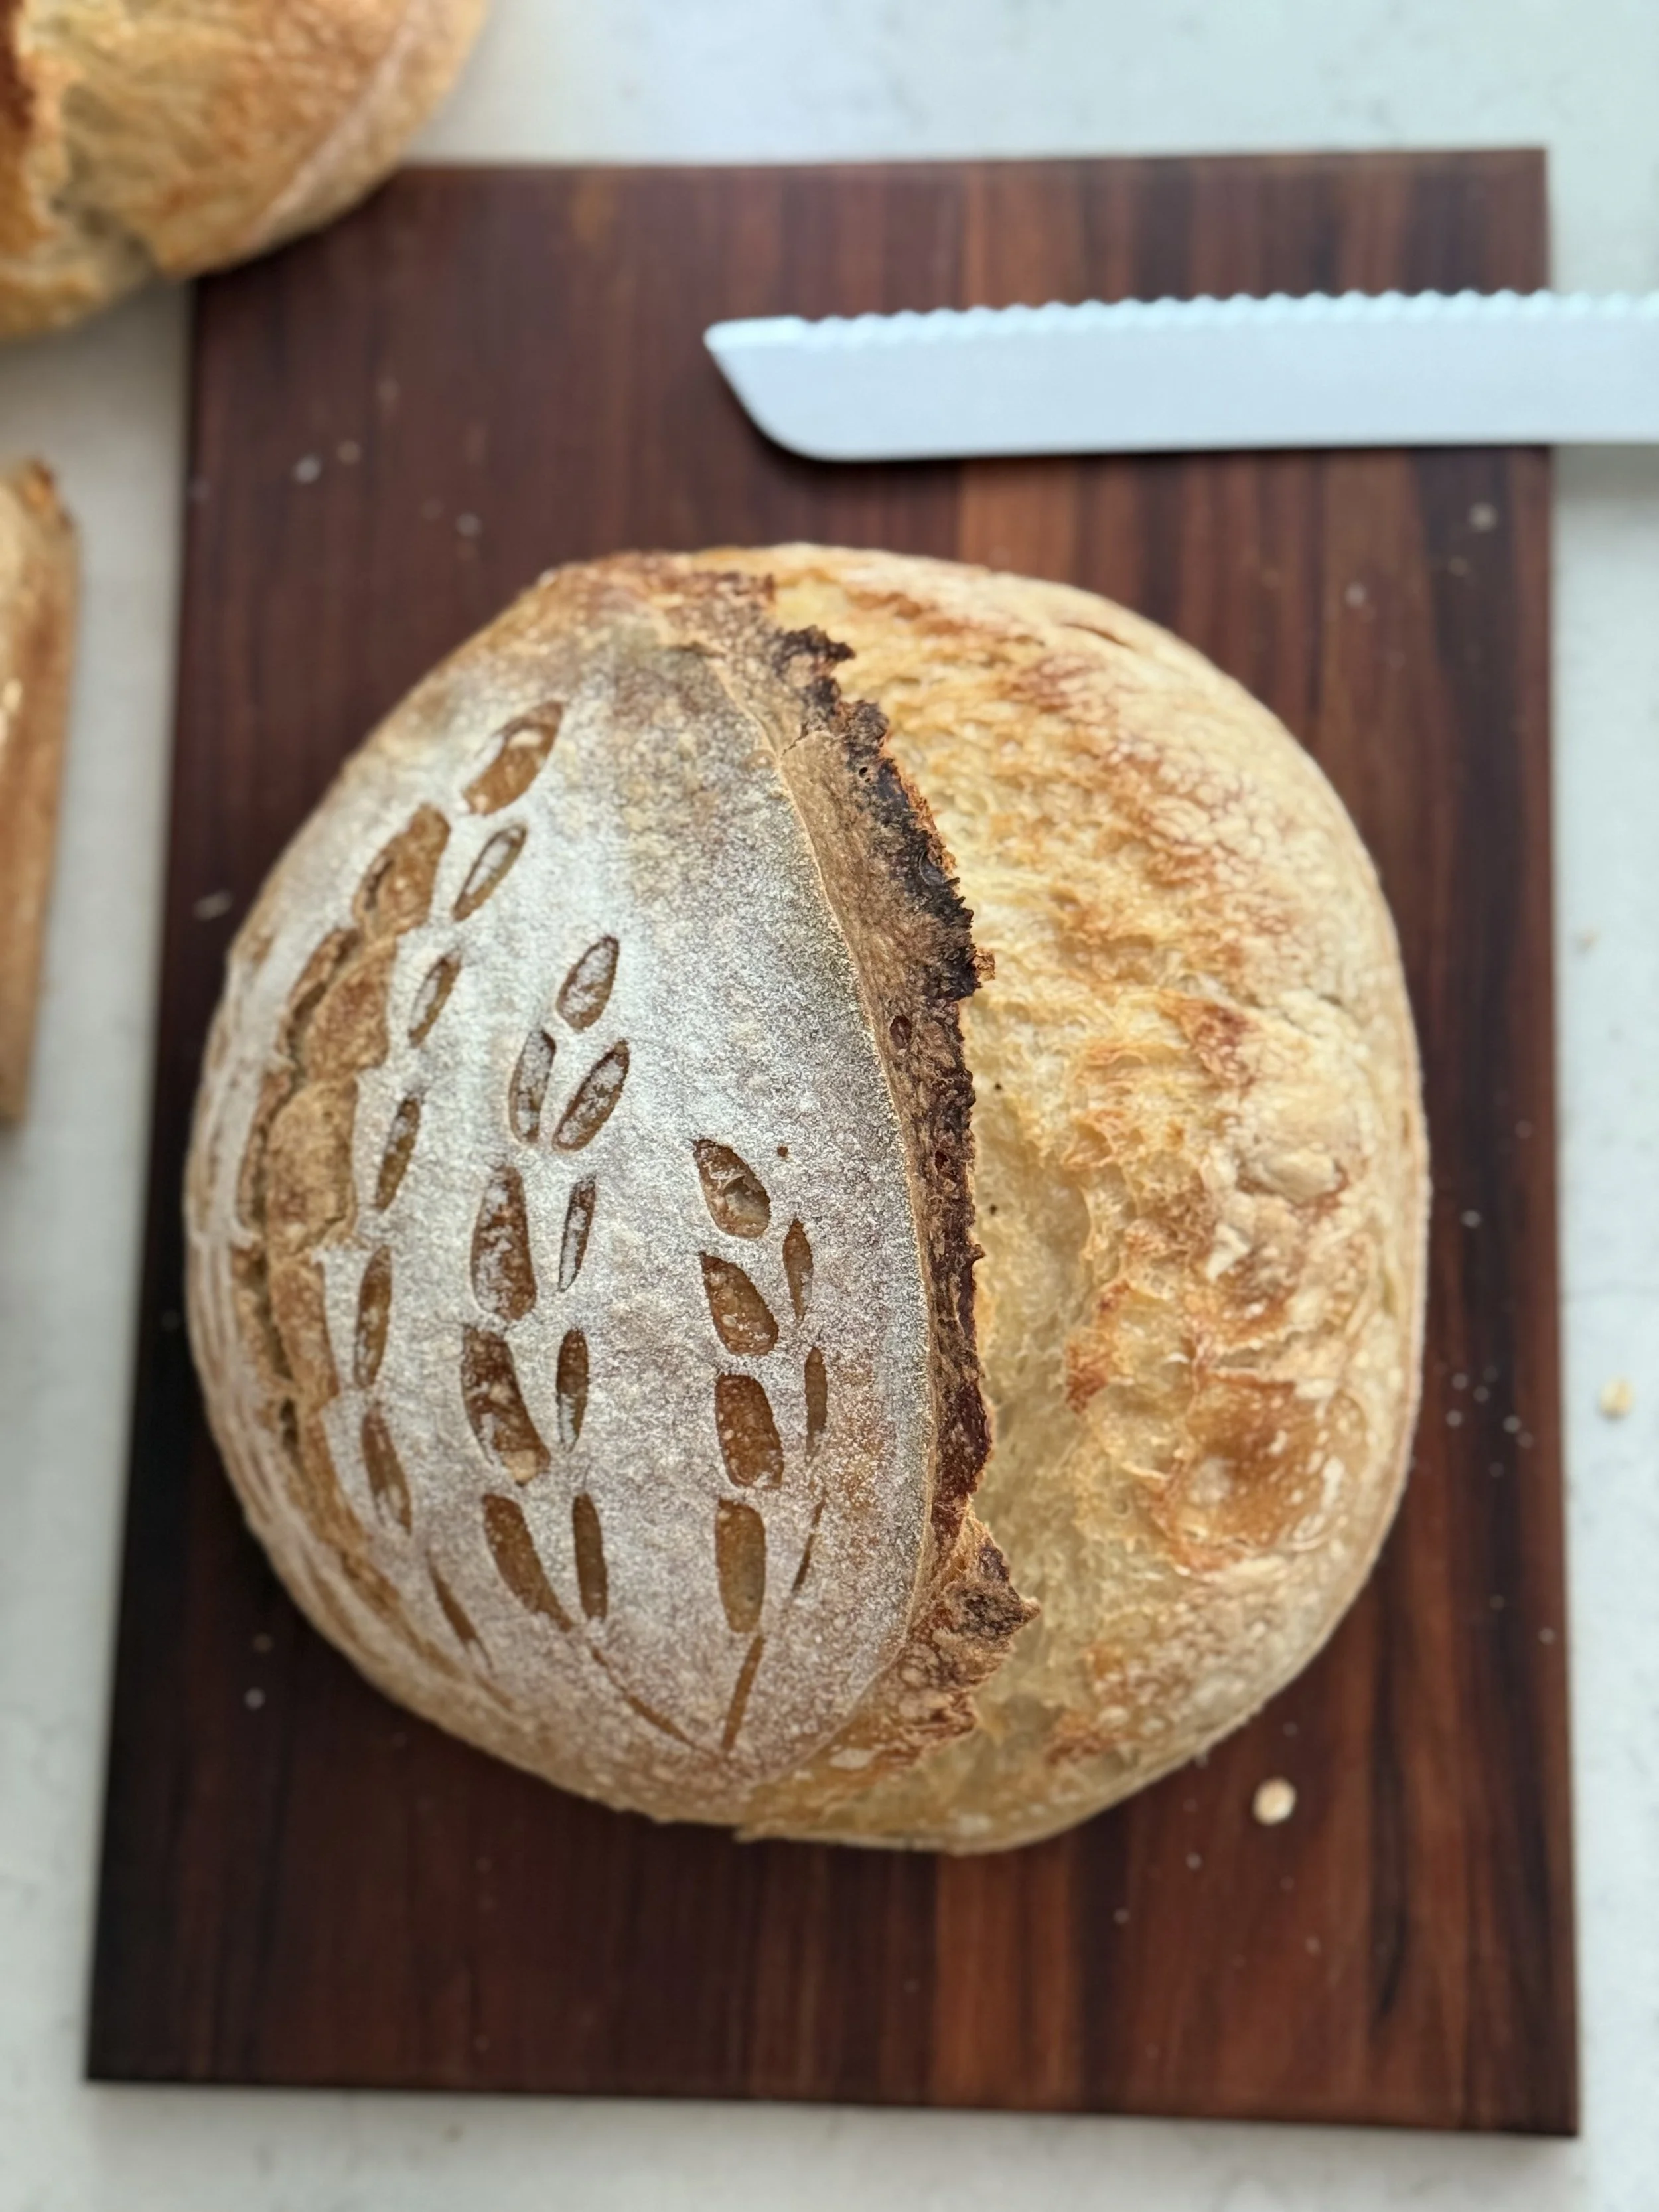
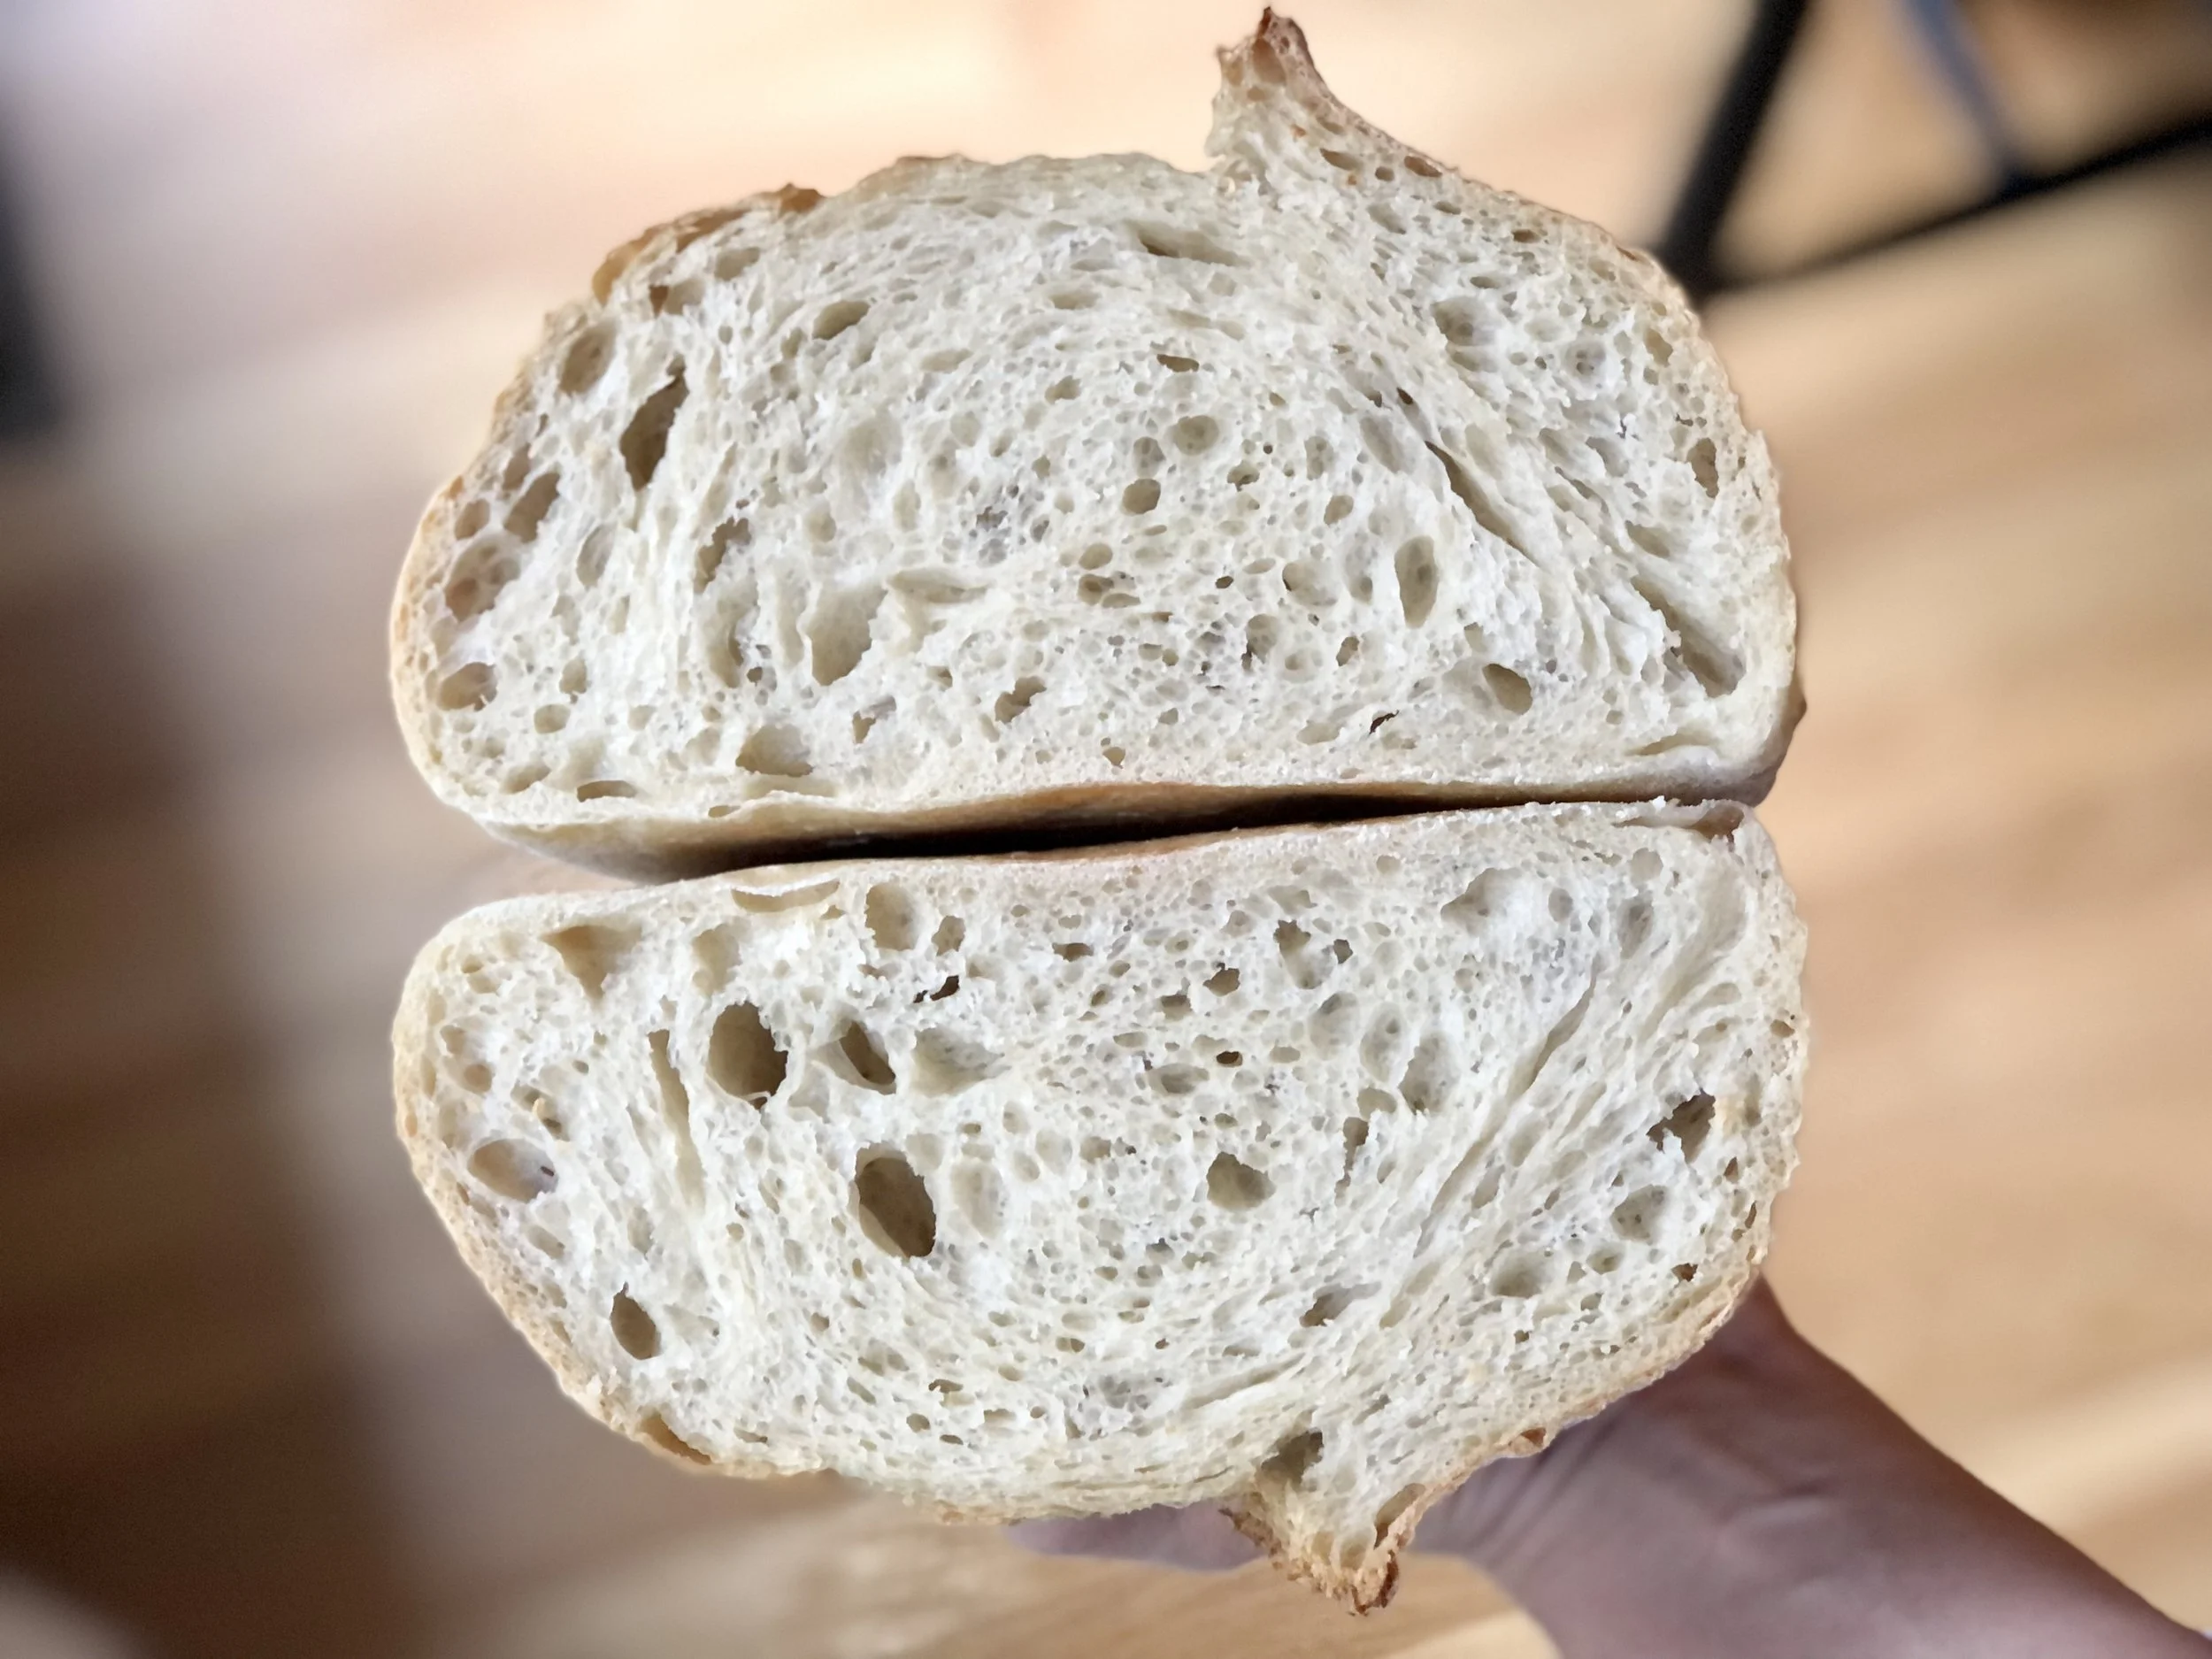
loaf baked without ice (L) next to loaf baked with ice (R)
I’ve now run this experiment a few times, and finally remembered to snap a few pictures for a visual experiment.
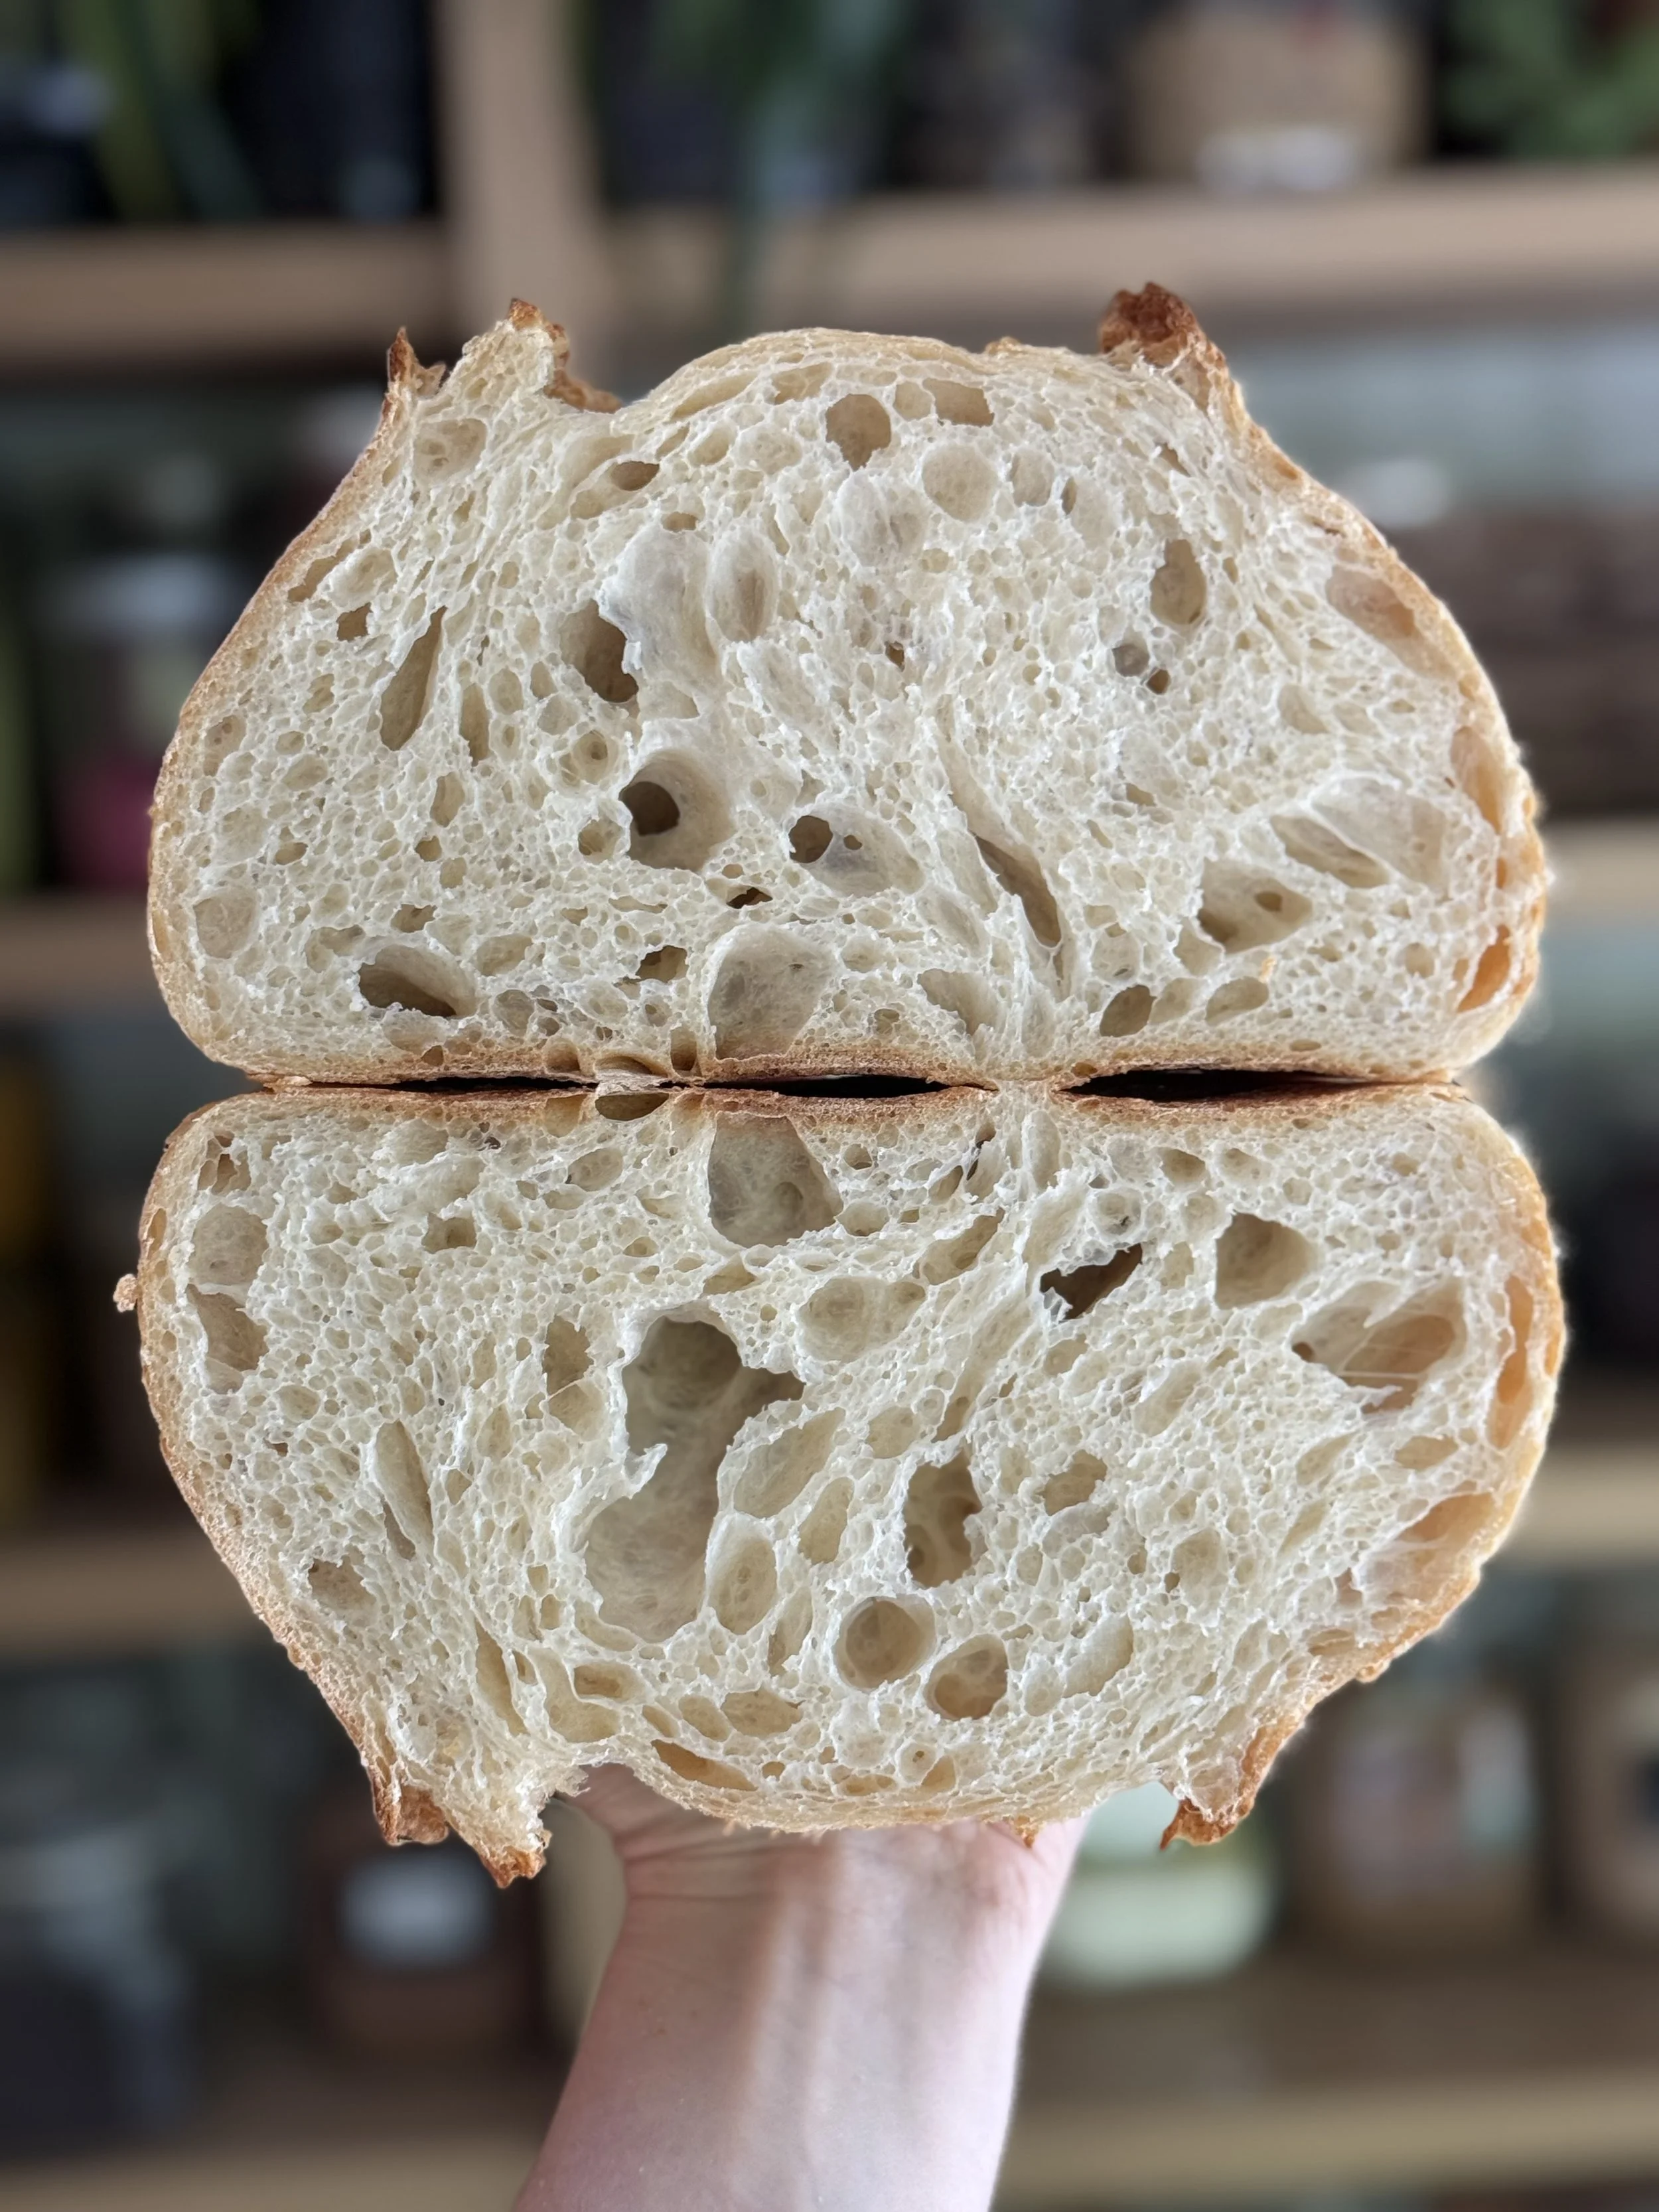
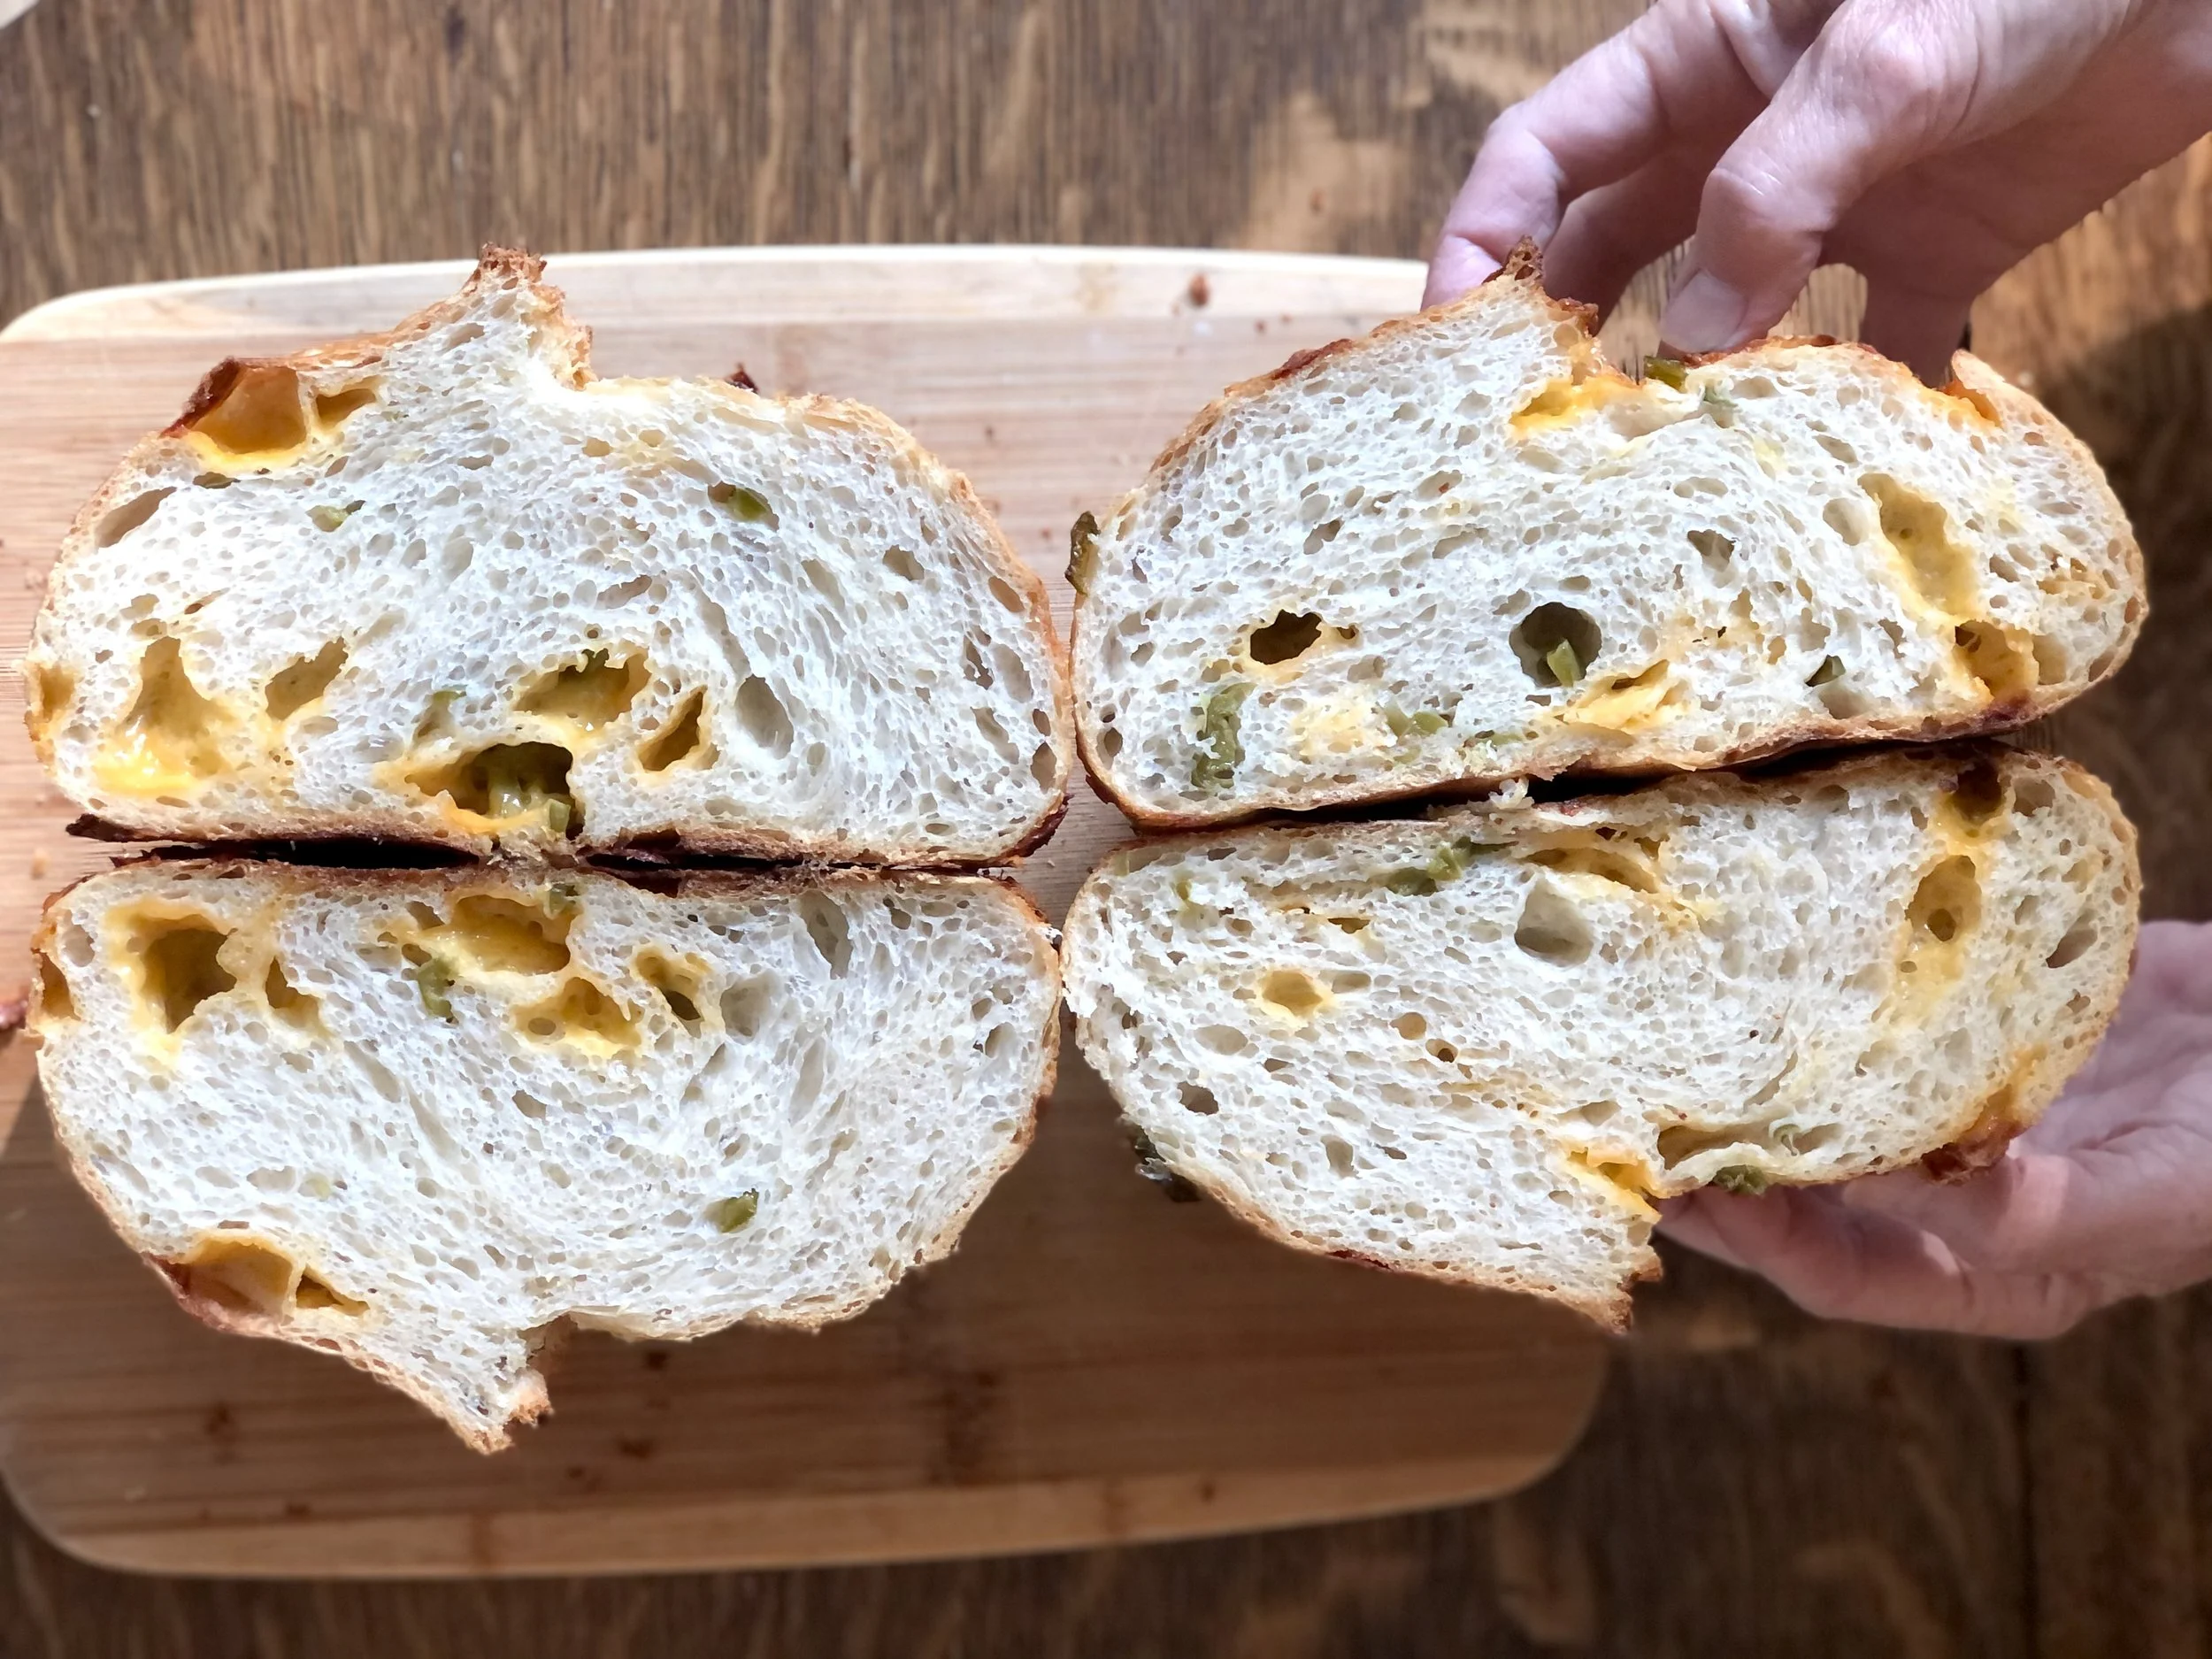
Both of these loaves are cheddar jalapeño loaves from the same batch, identical in every way, baked in the same oven at the same time, in two separate Dutch Ovens, with the exception that one was baked with ice and one was baked without ice.
The loaf baked with ice is a little bit bigger, probably because it had more time to expand before the crust set.
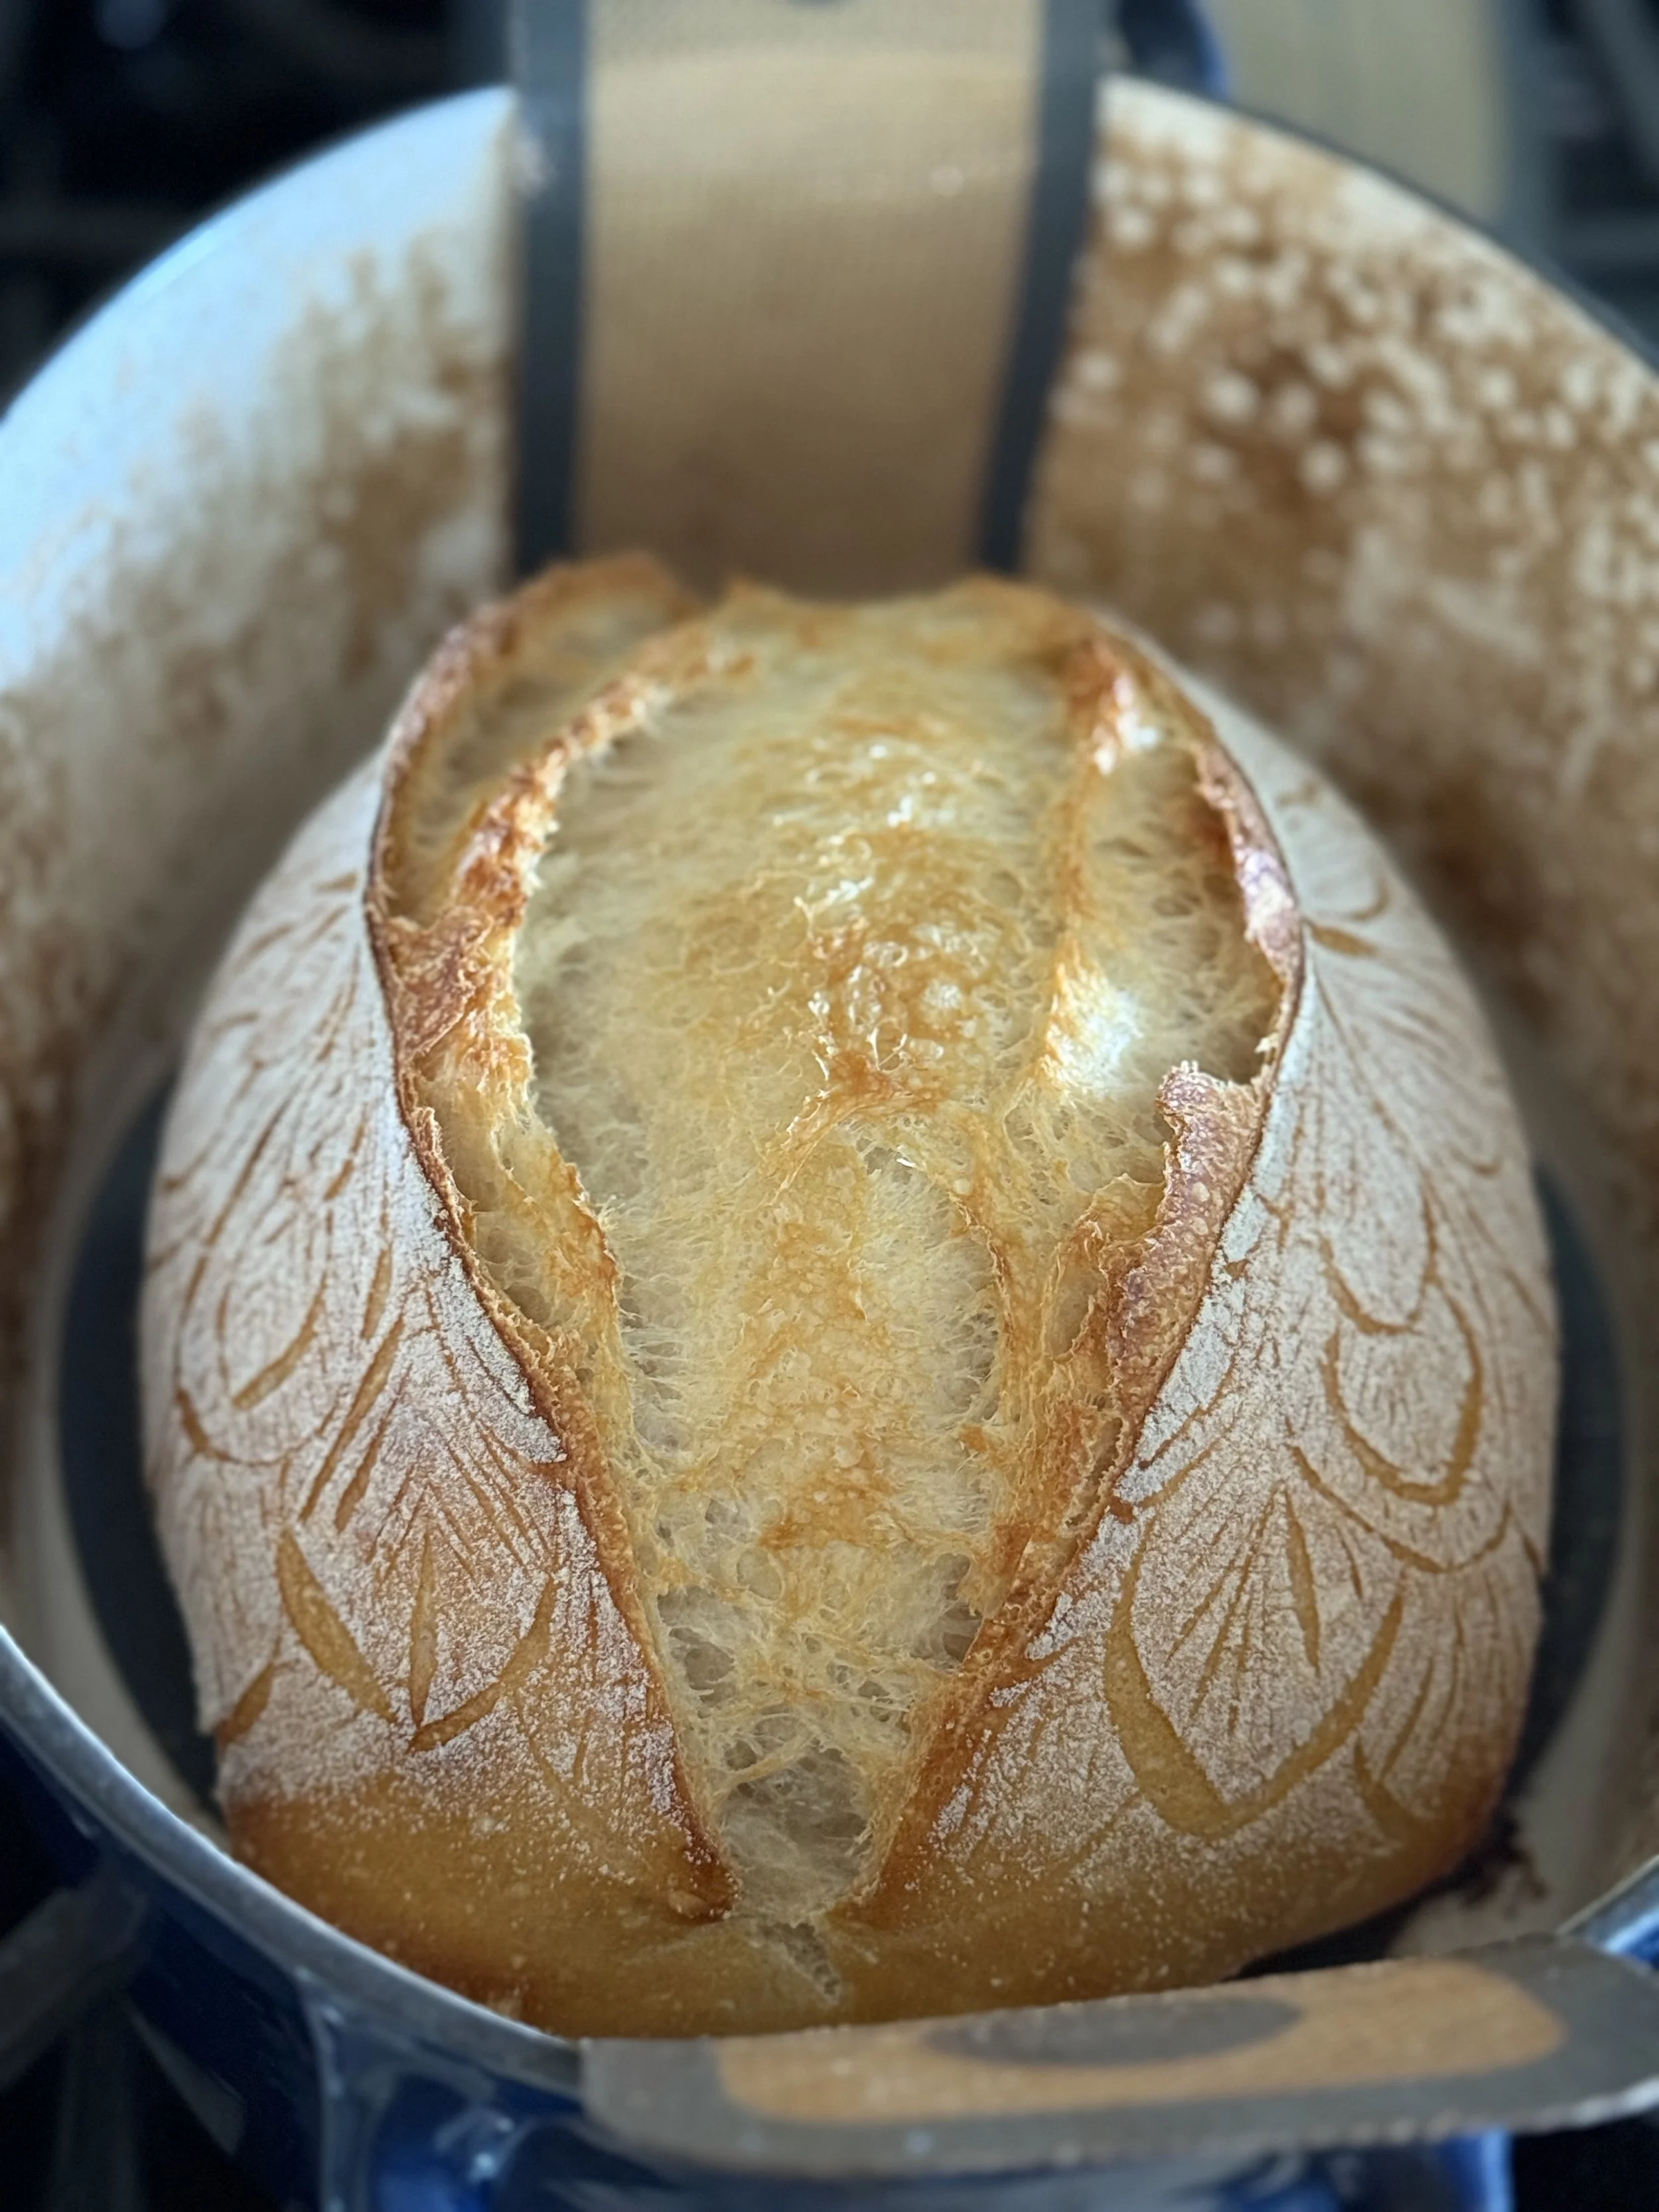
You’ll notice that the loaf baked with ice has a more pronounced ear. Honestly, while this is often the more aesthetically desired outcome for sourdough, less or no ears are easier to slice into.
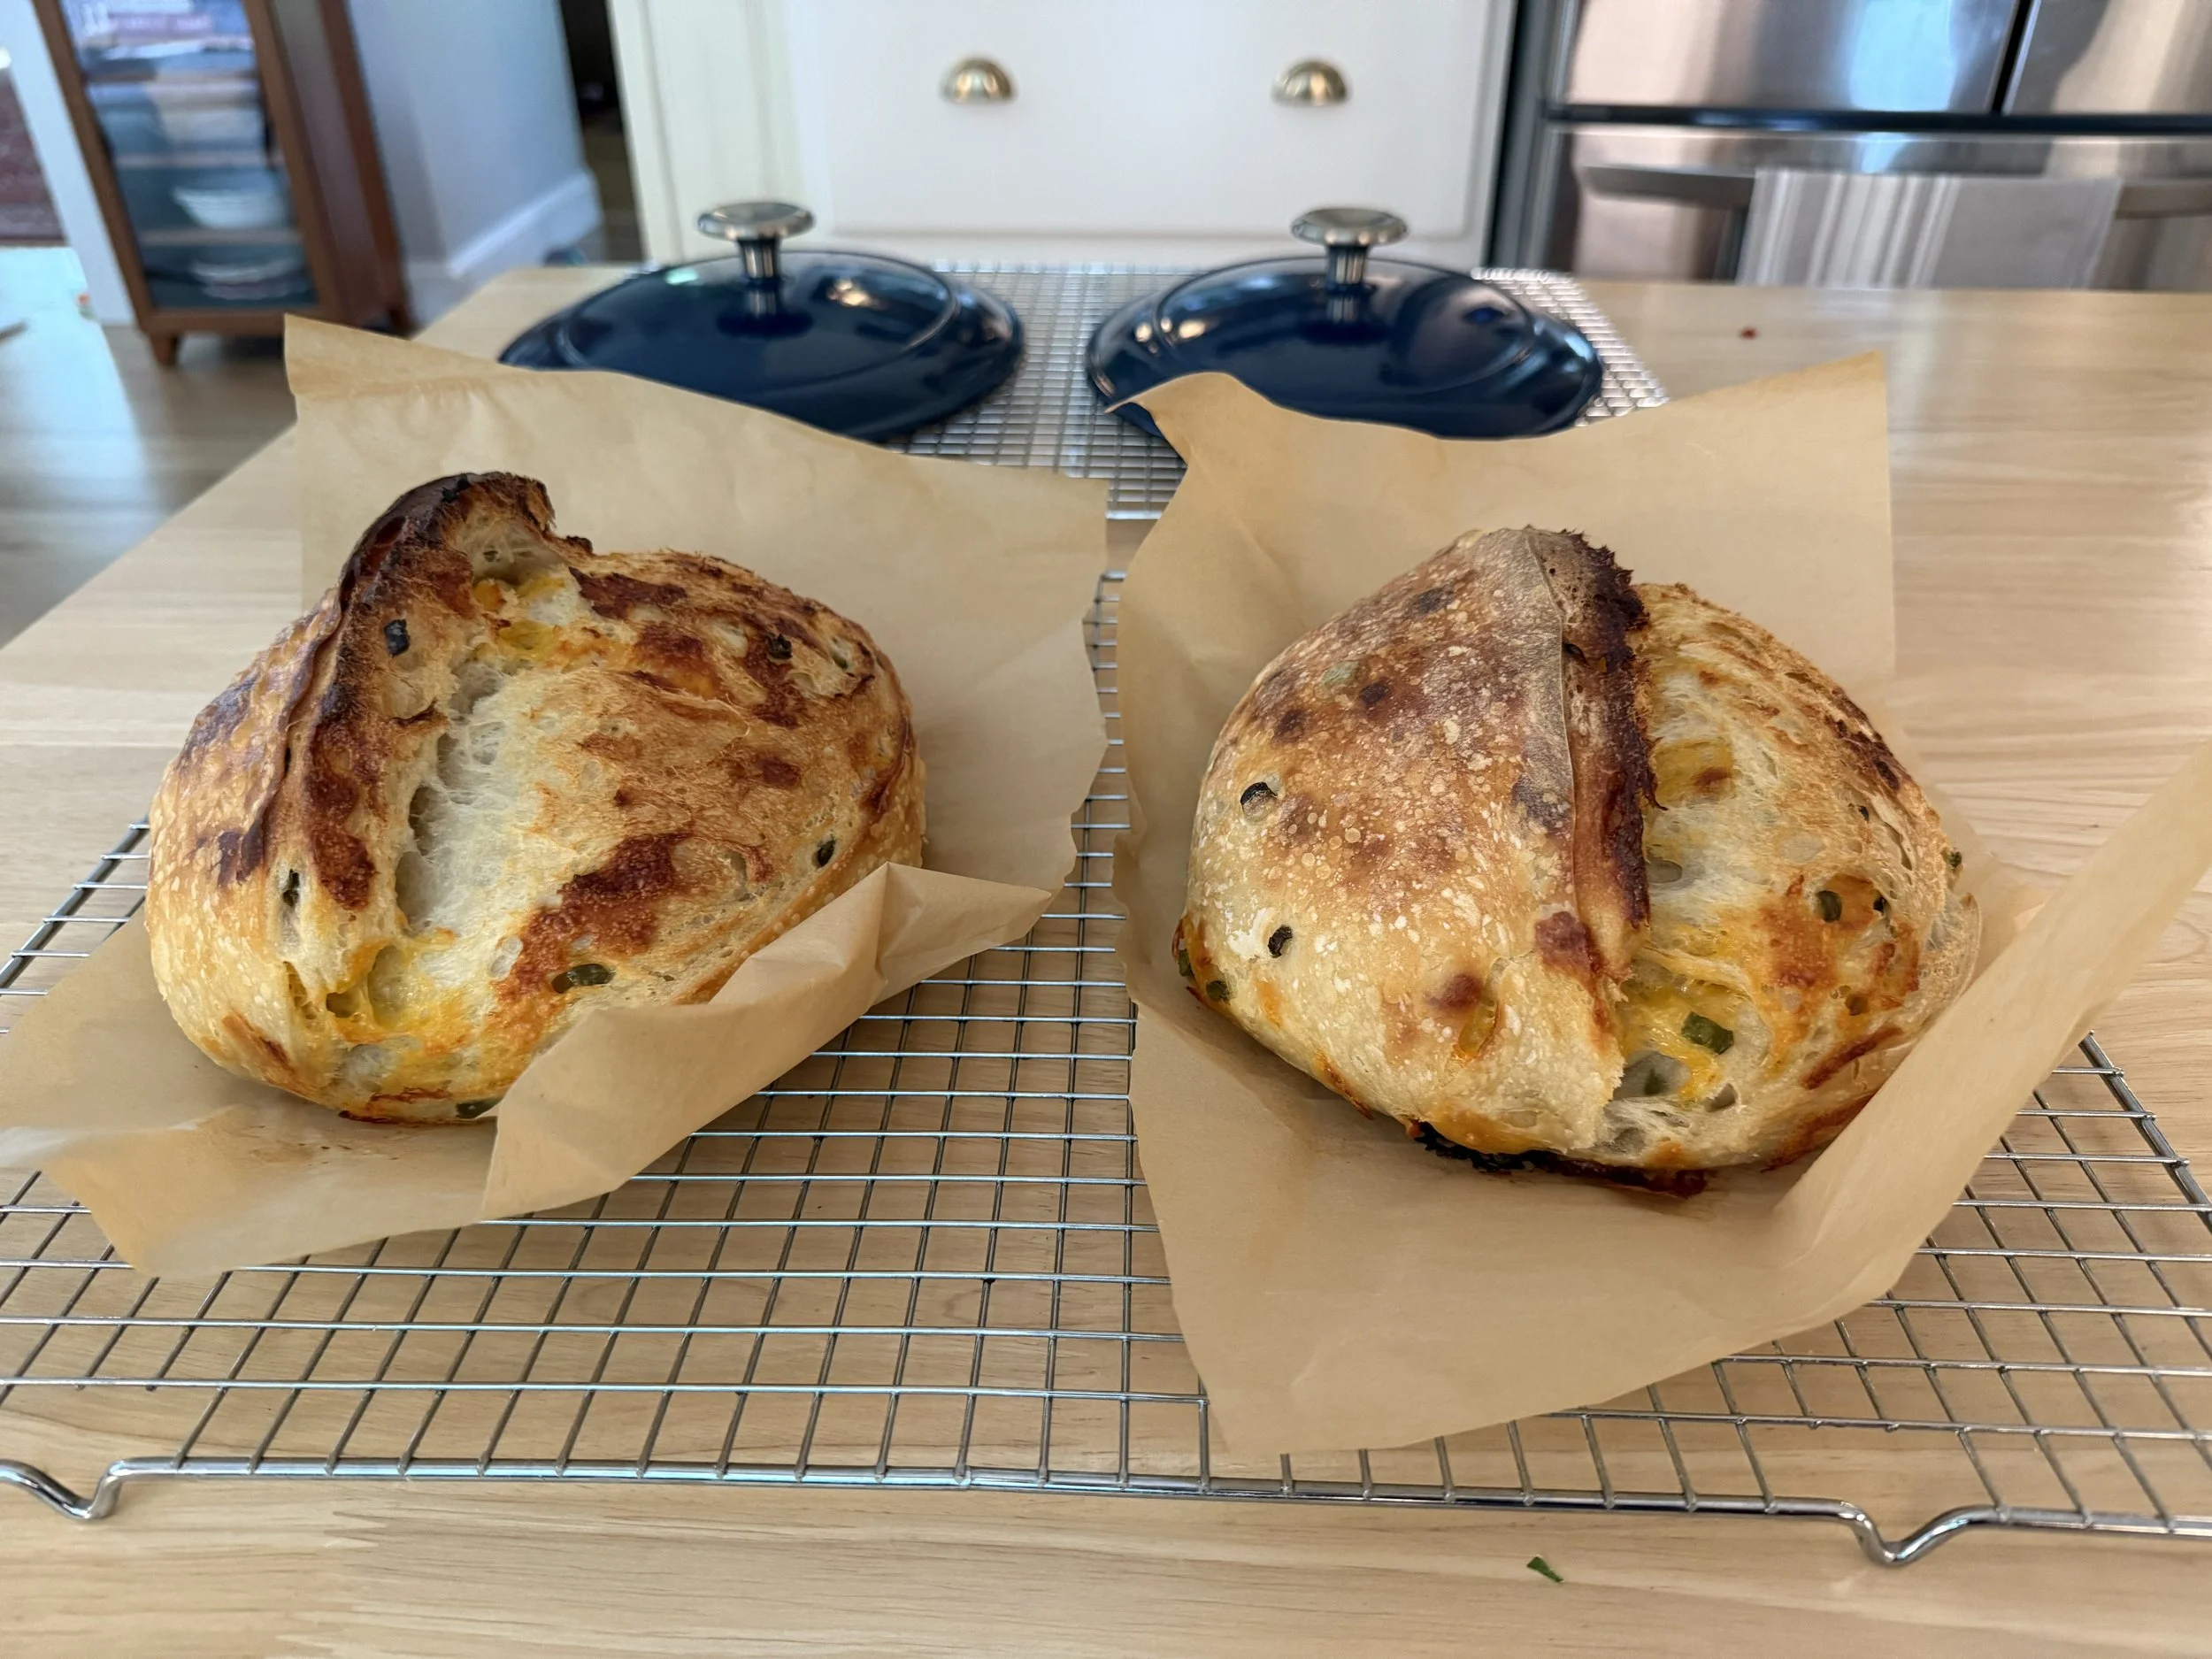
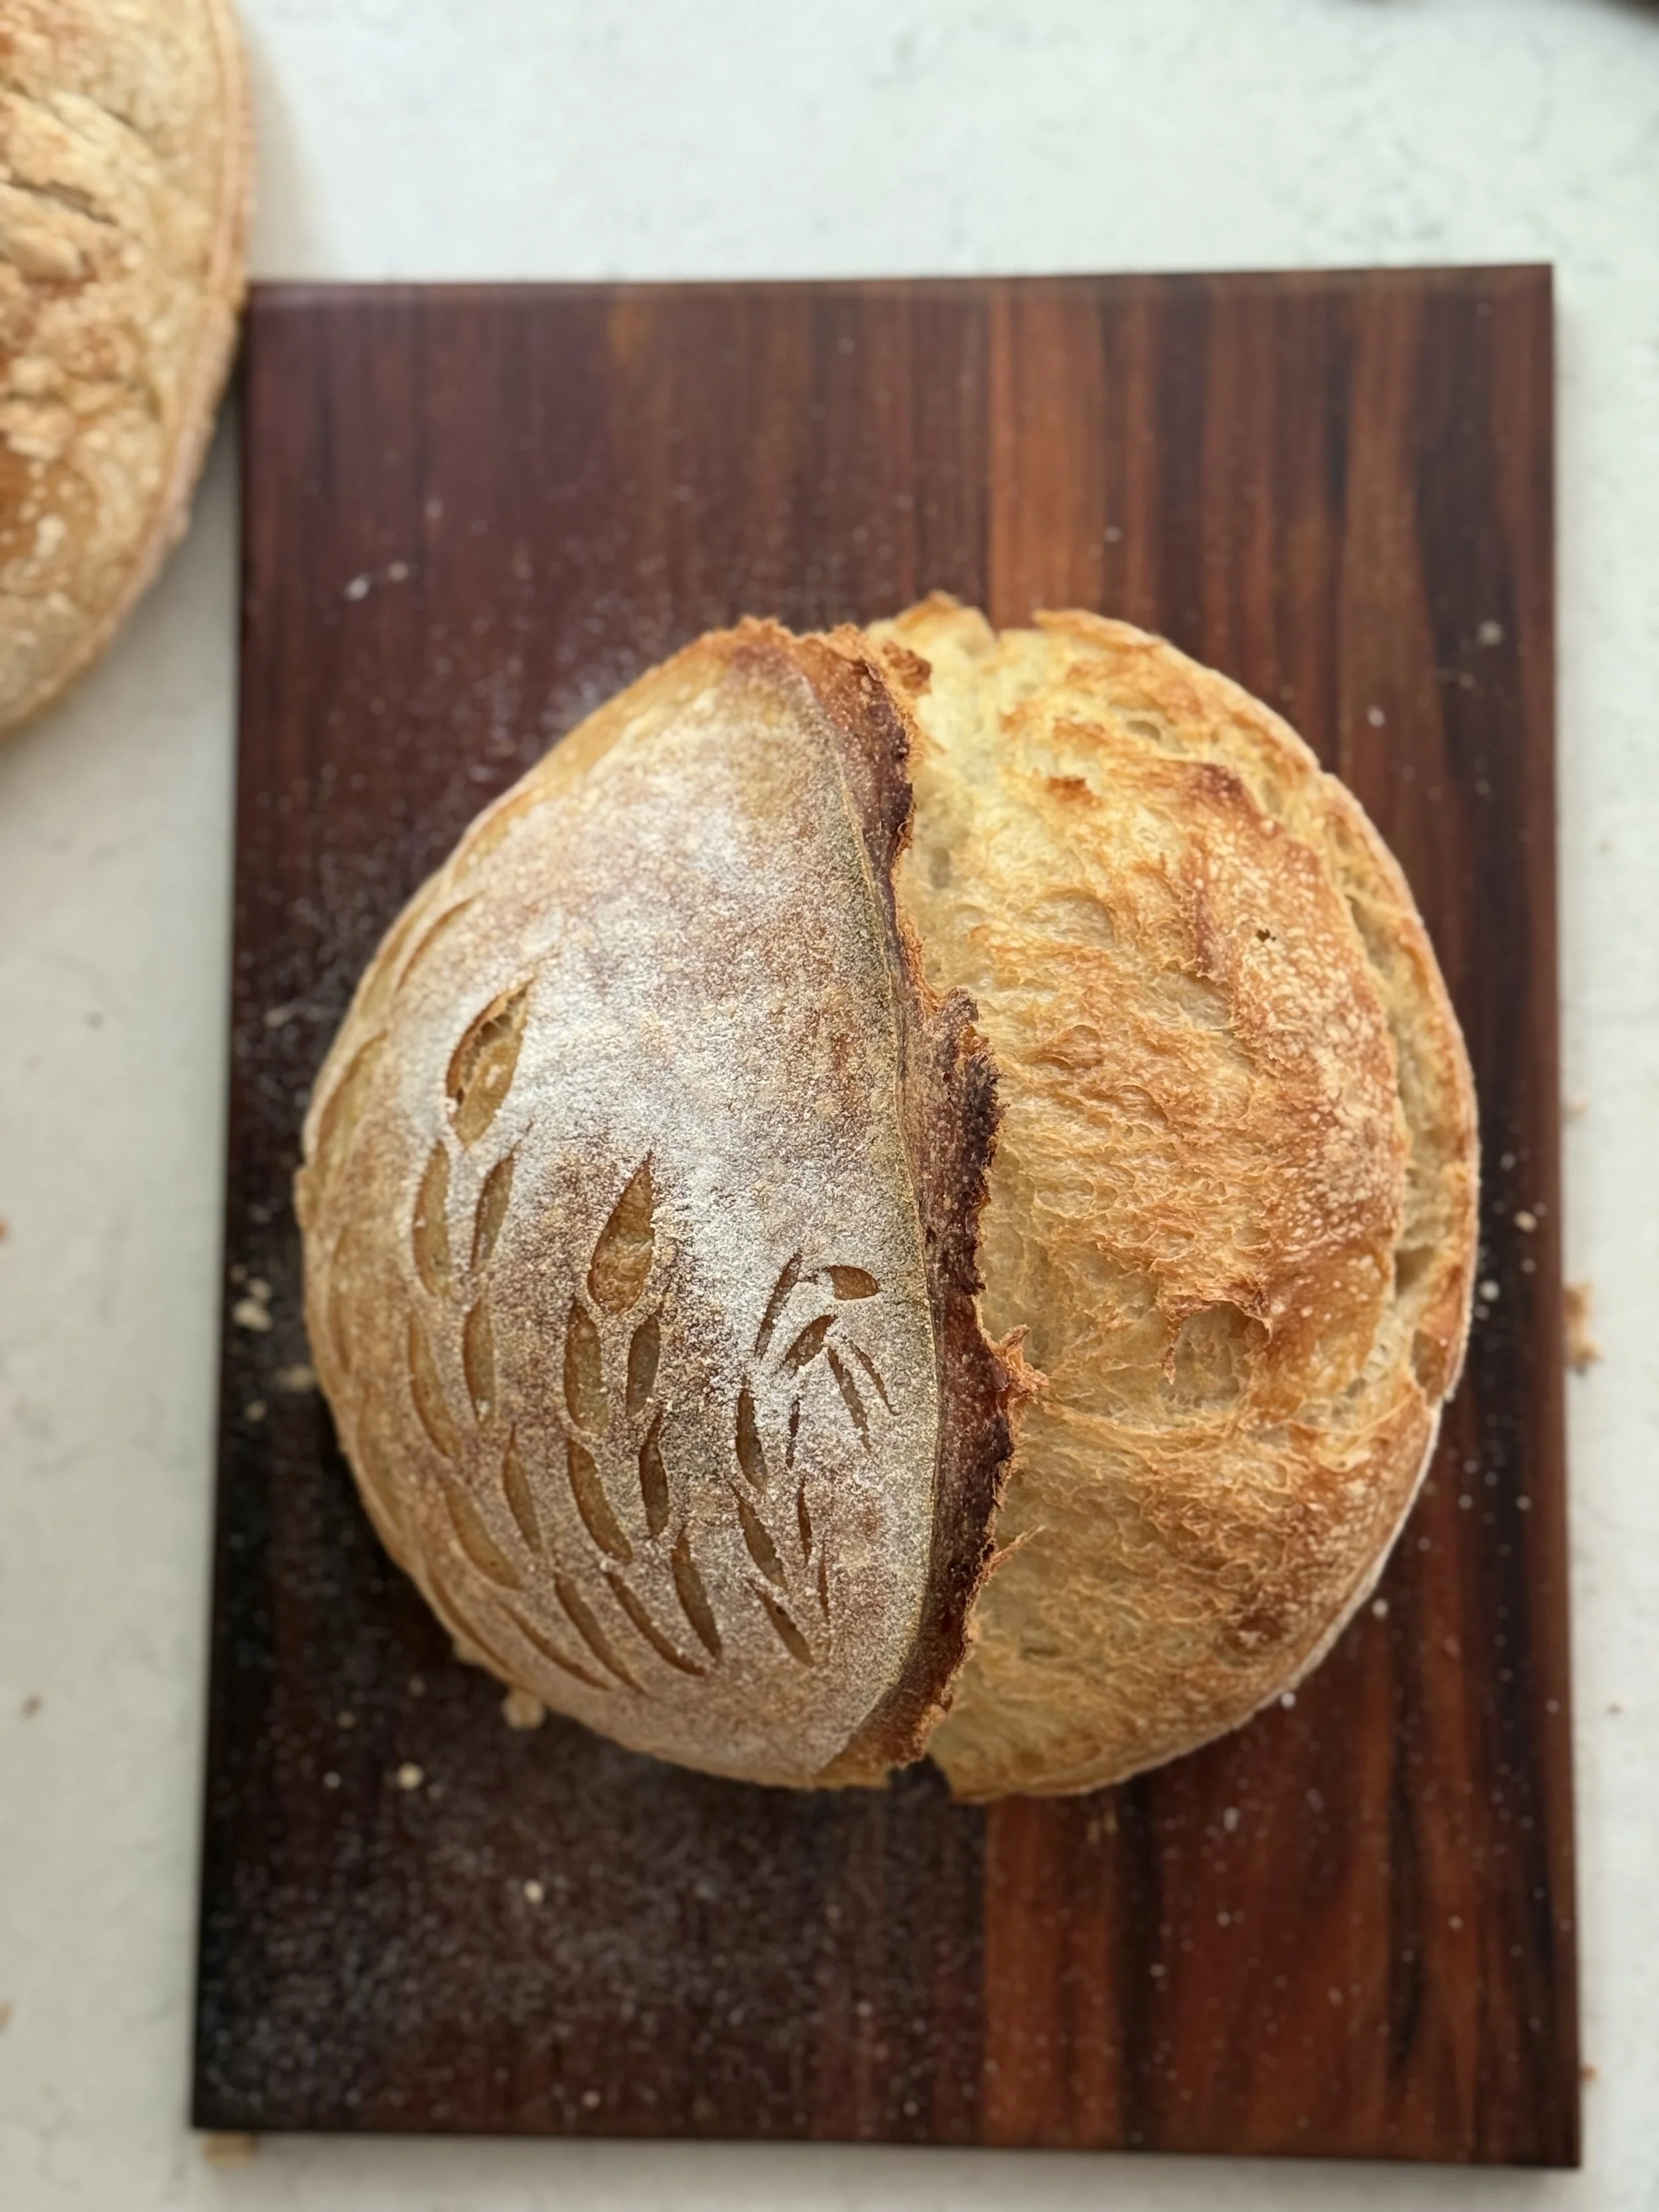
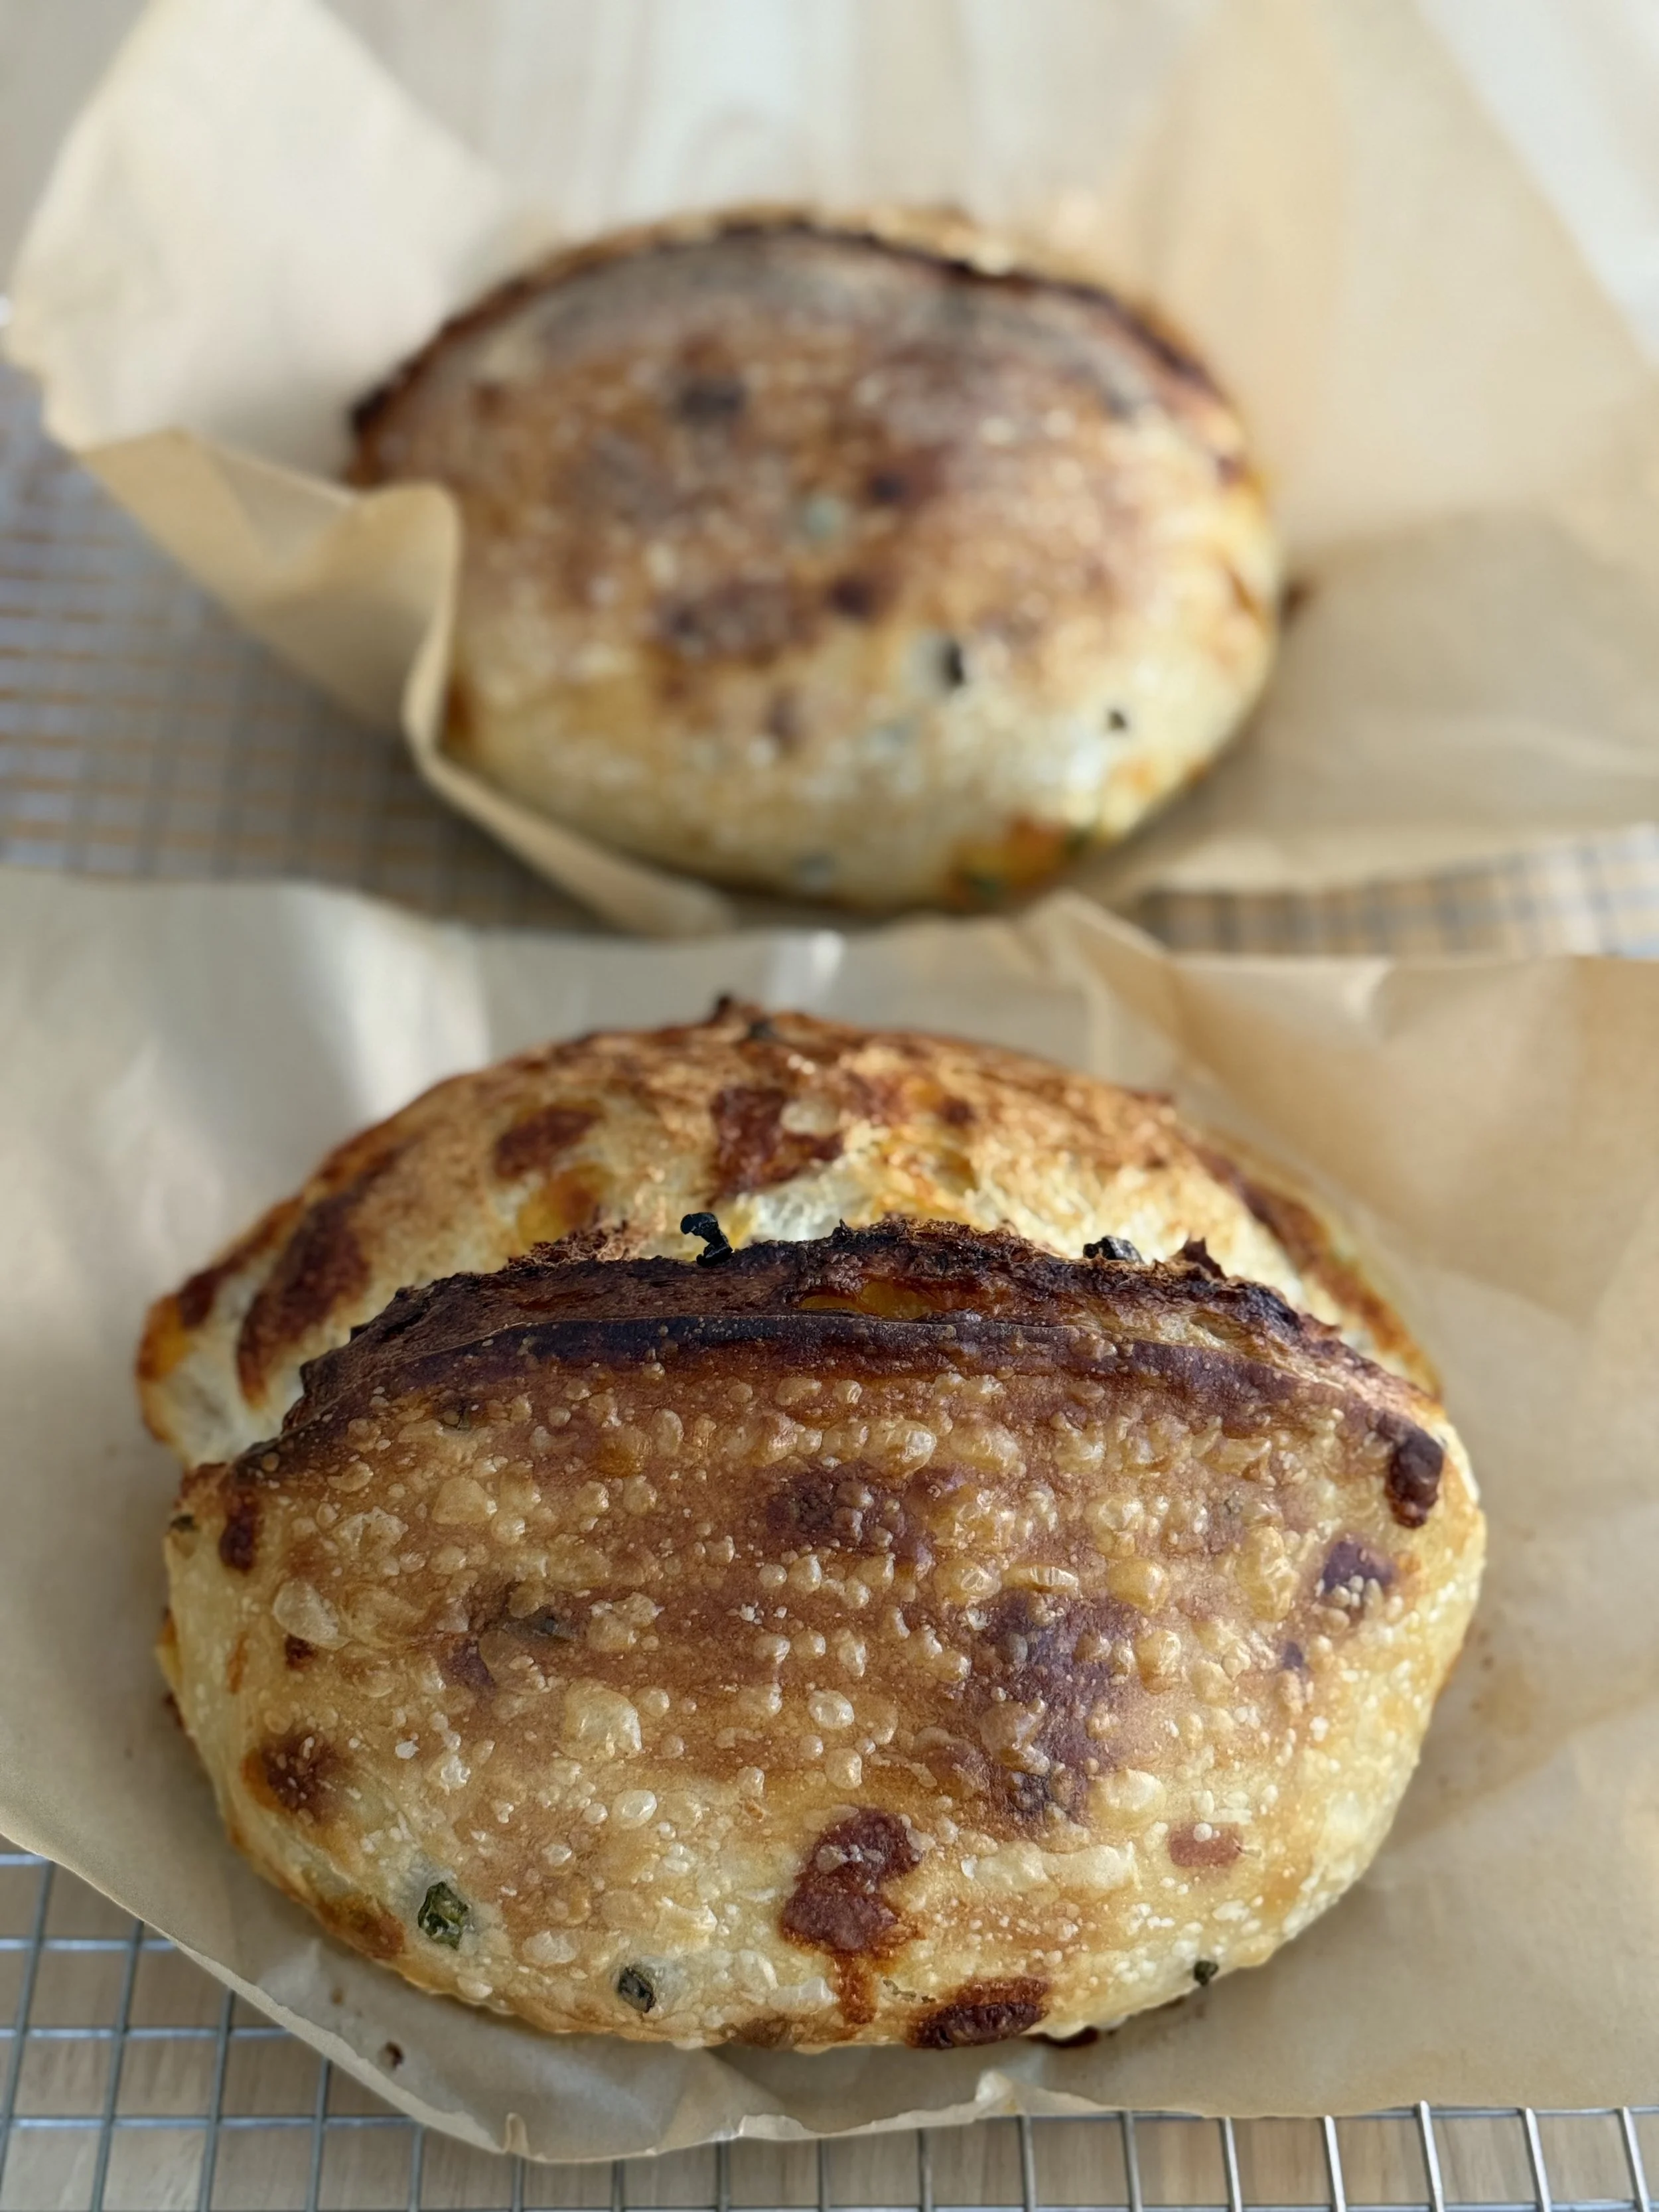
loaf baked with ice (L) and loaf baked without ice (R))
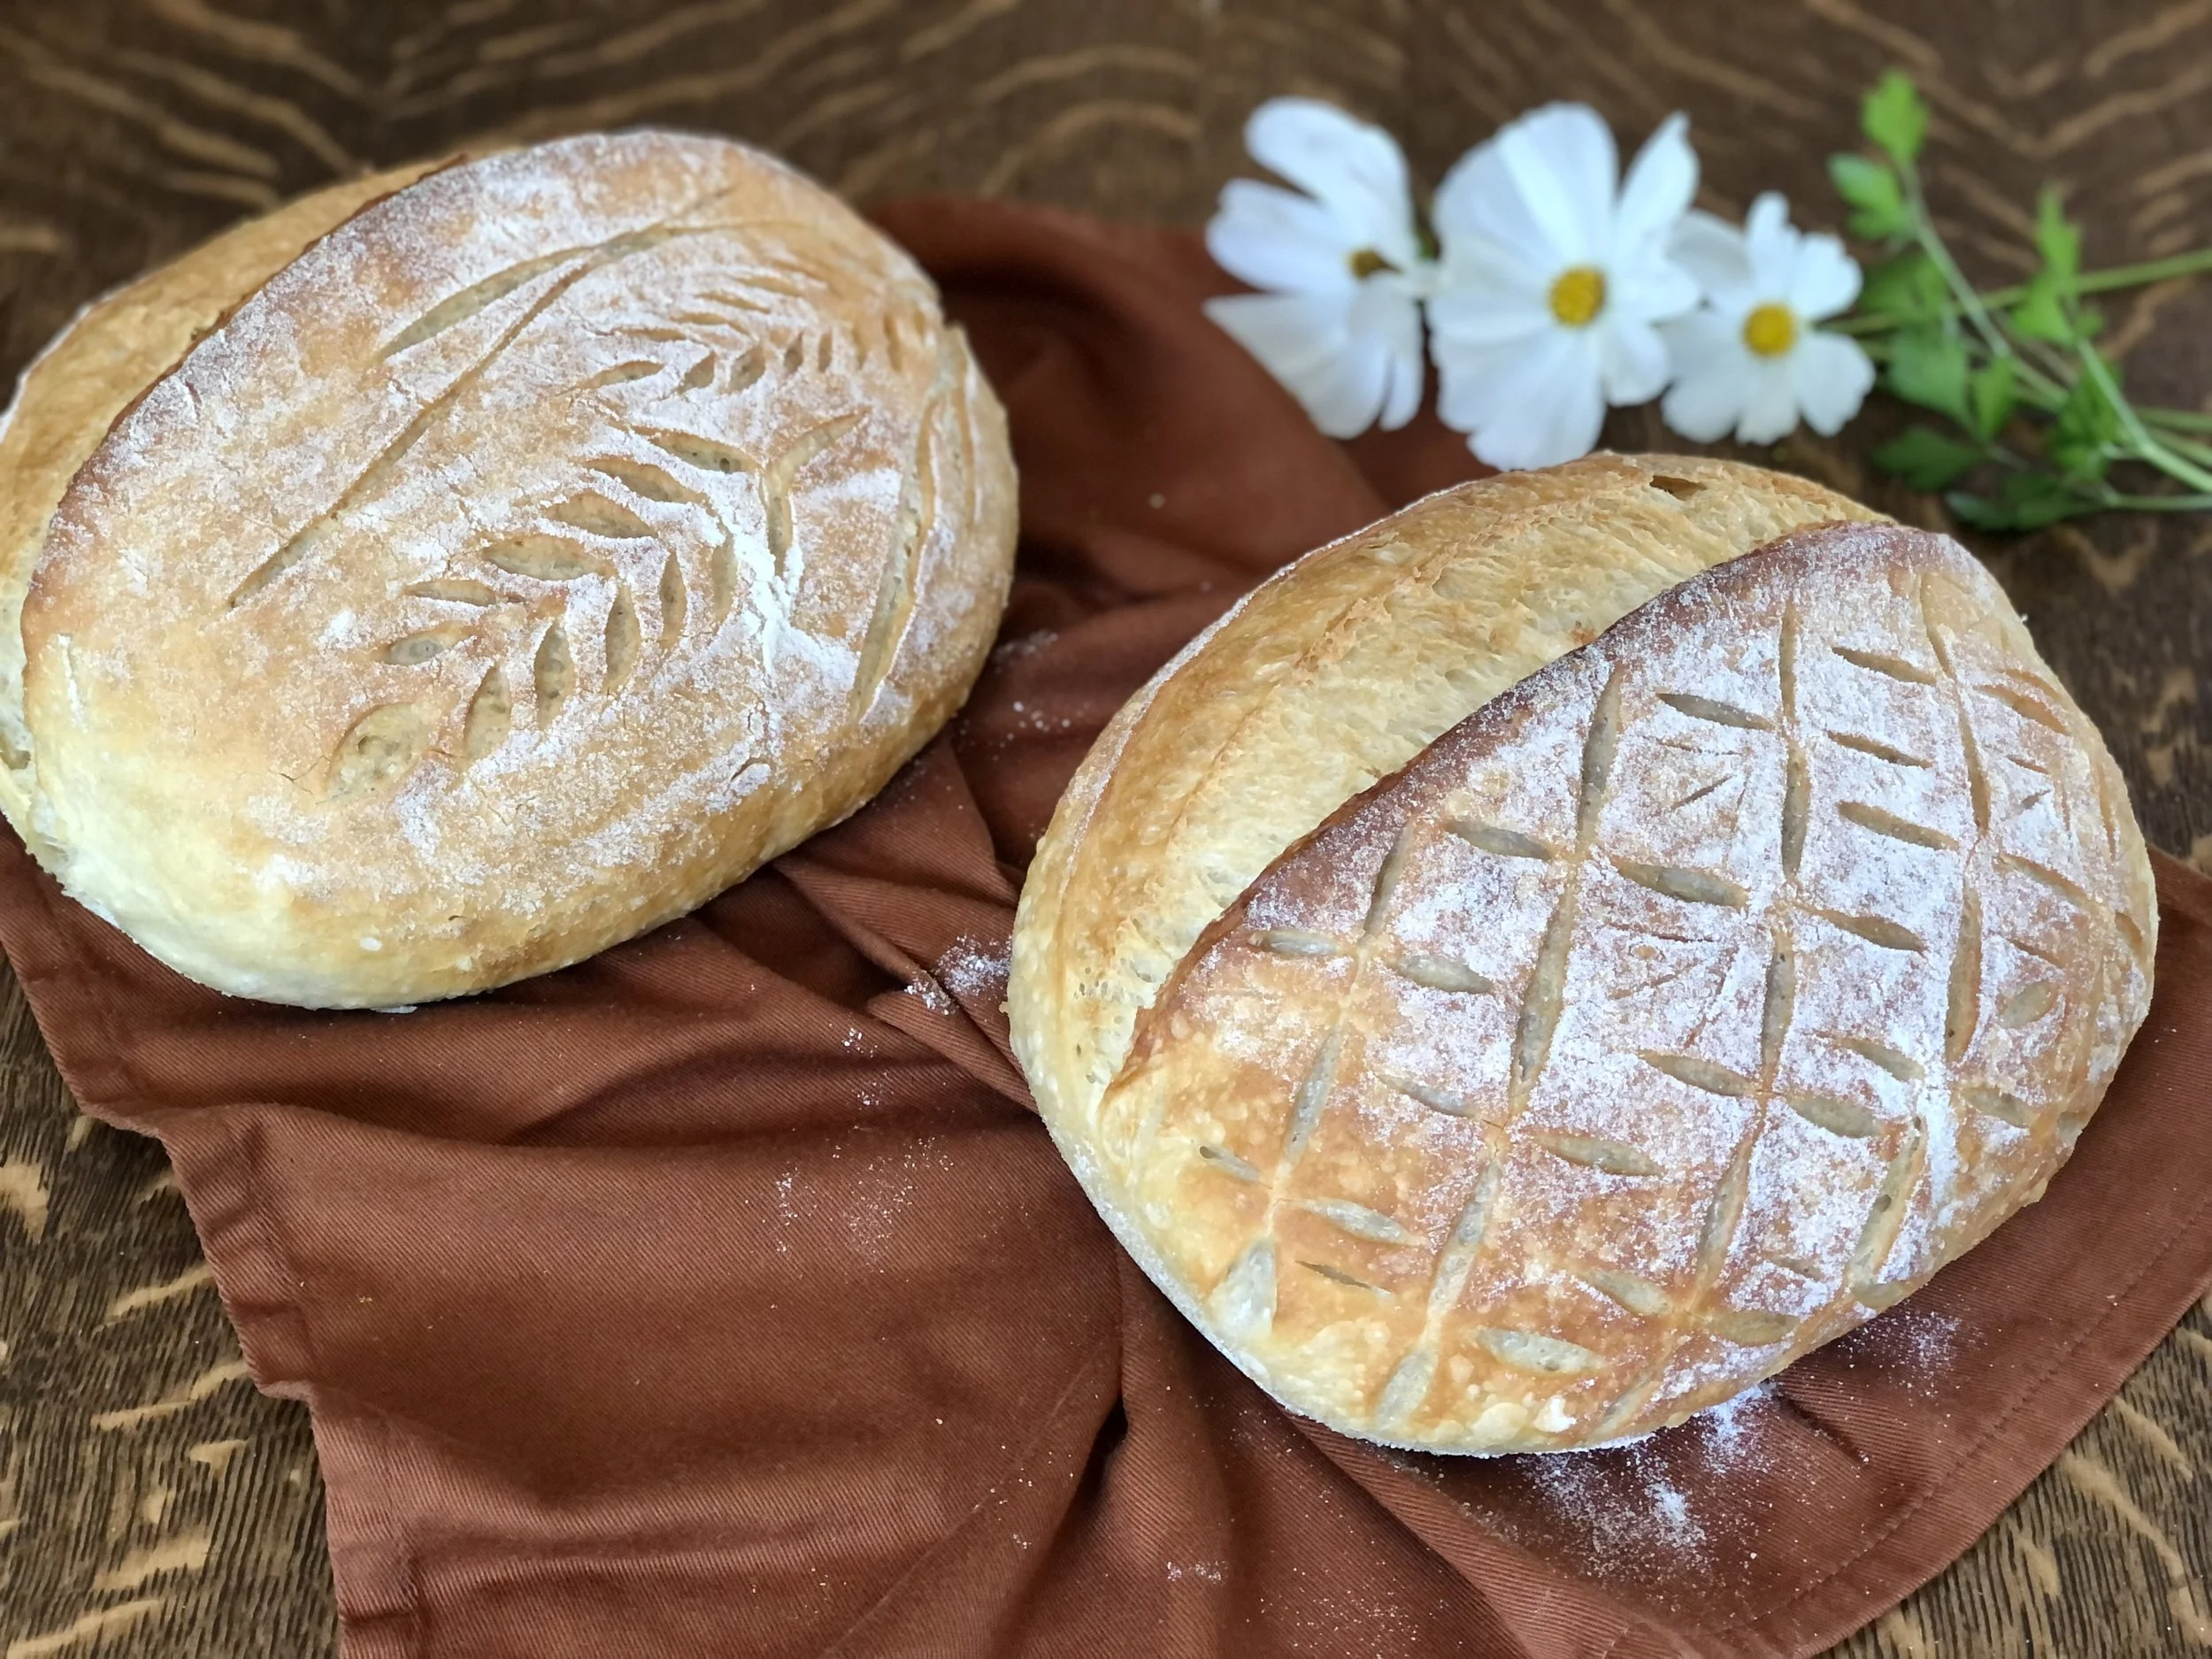
The loaf baked with ice has a more blistered, glistening crust. The loaf baked without ice has a drier, almost “dusty” look to it. While neither loaf looks bad and both will taste divine, a blistered crust is a coveted outcome for sourdough and proves the bread had adequate steam.
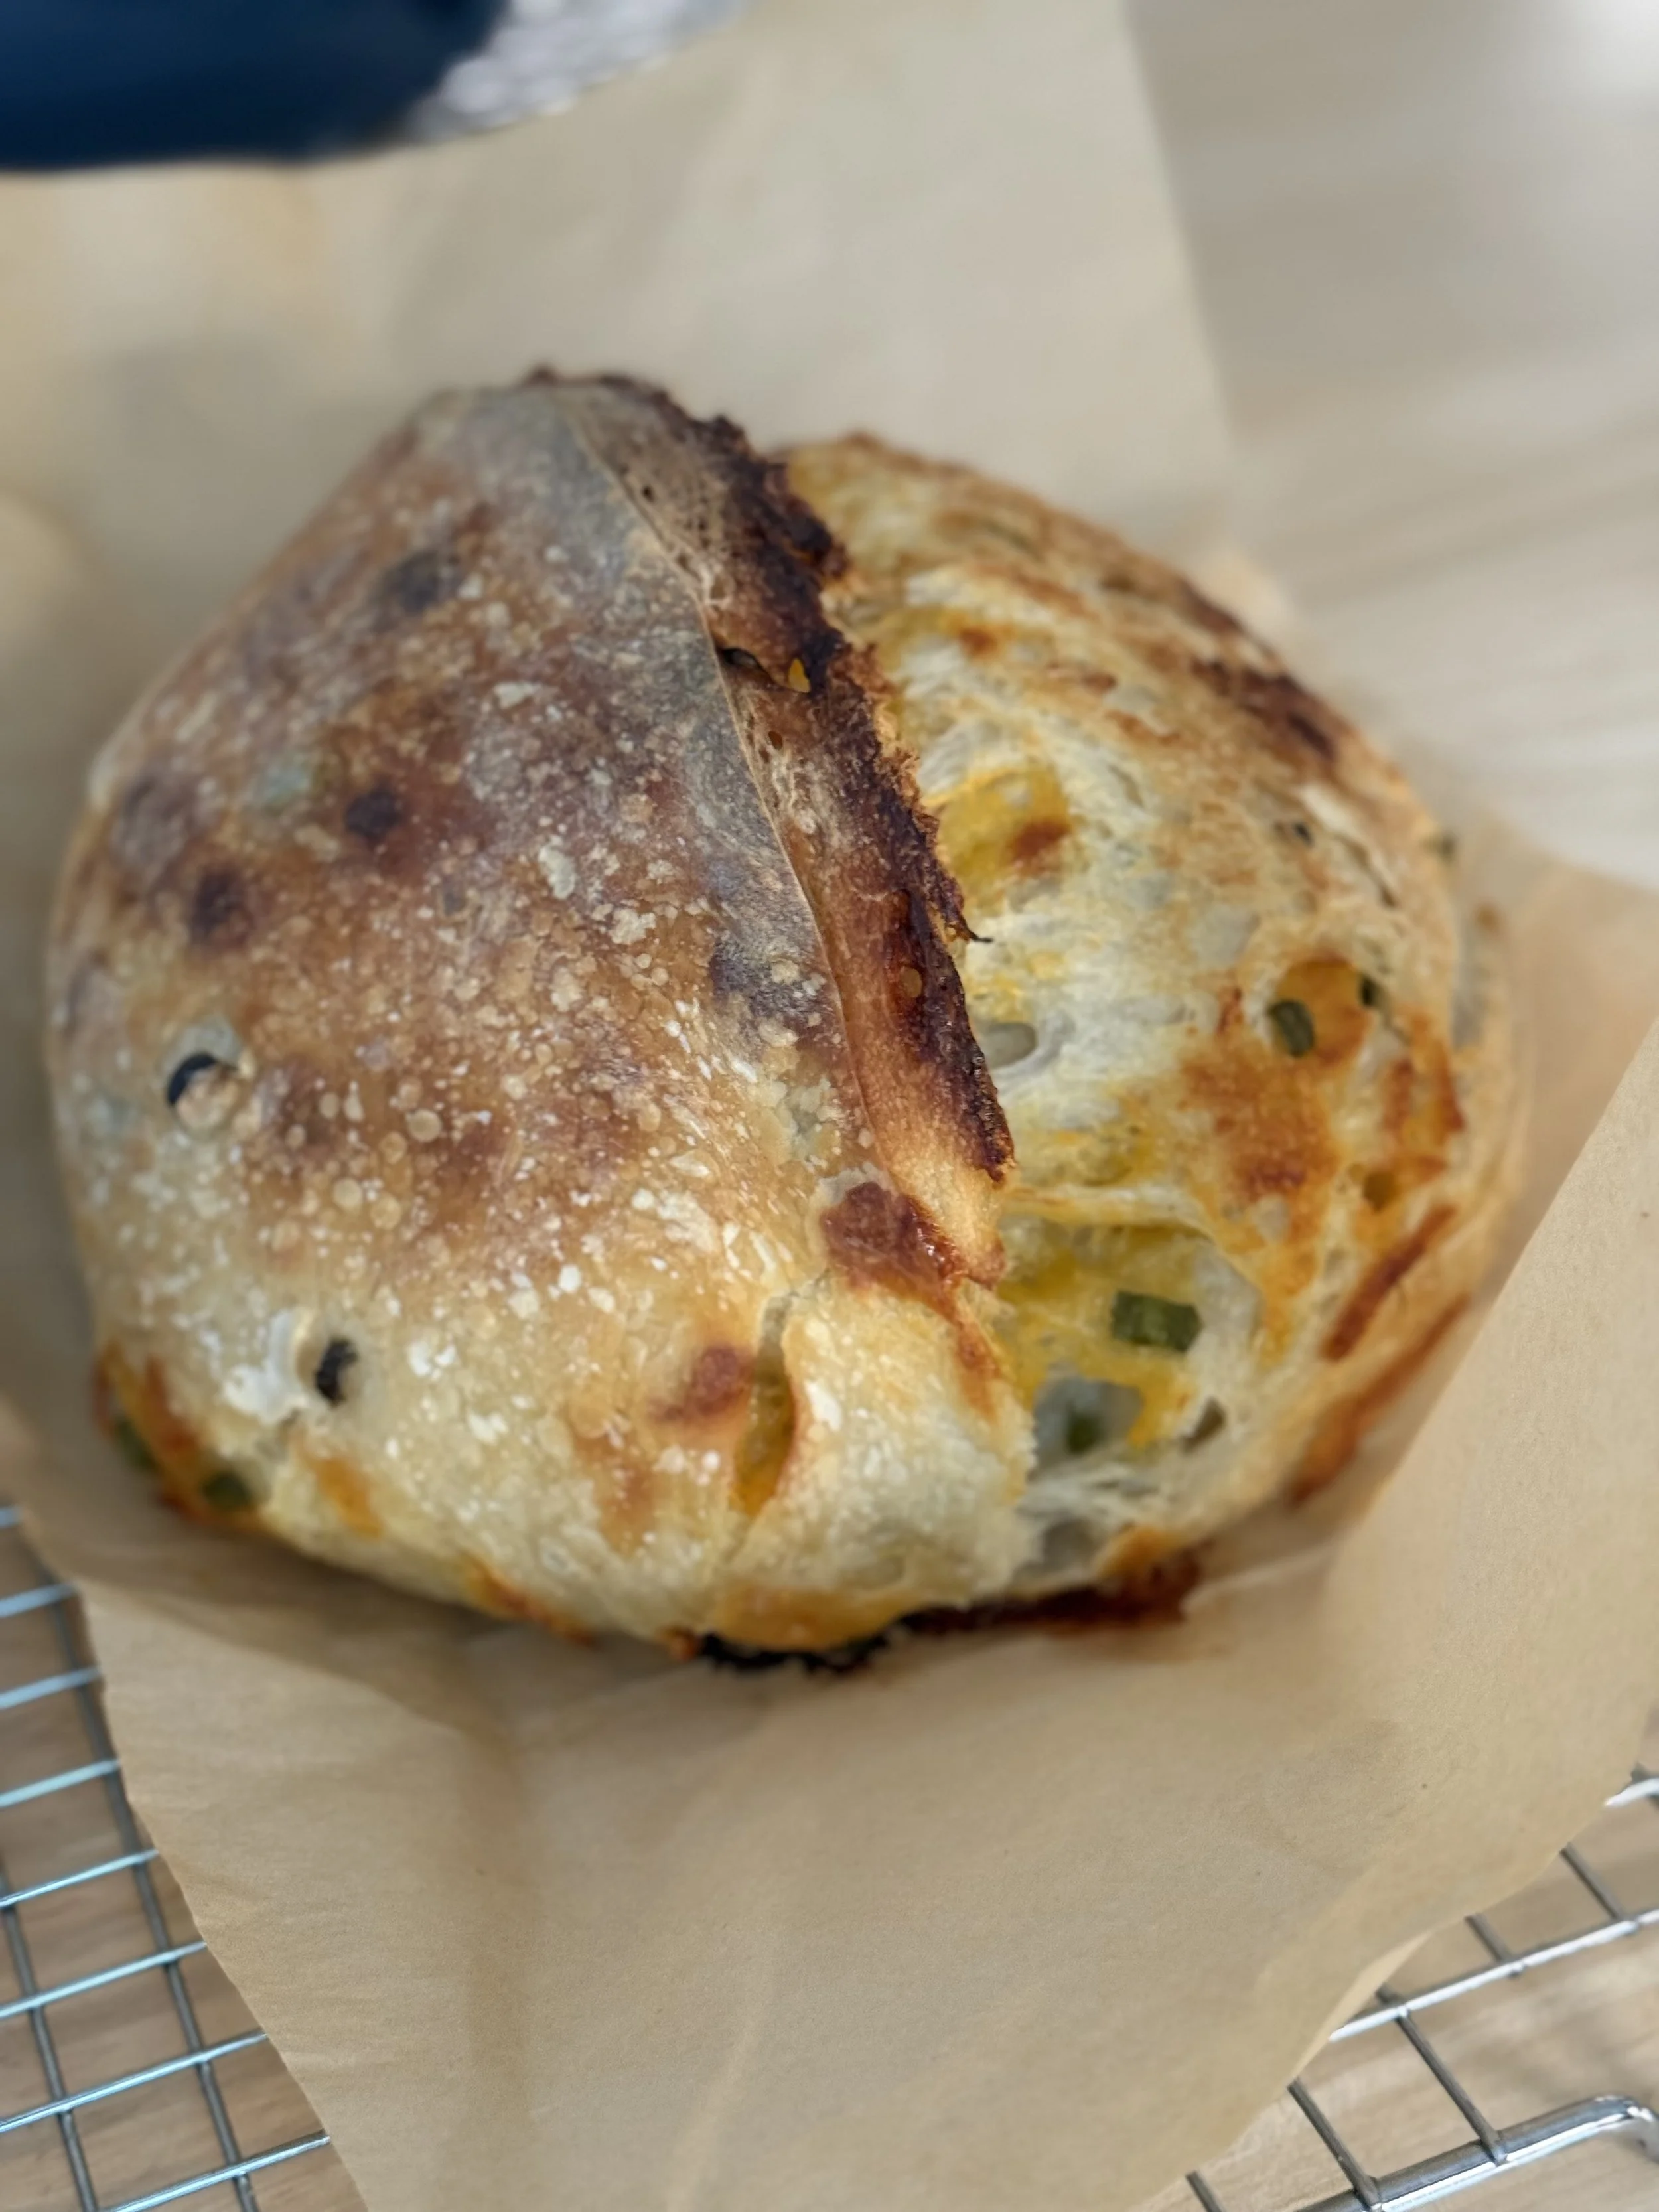
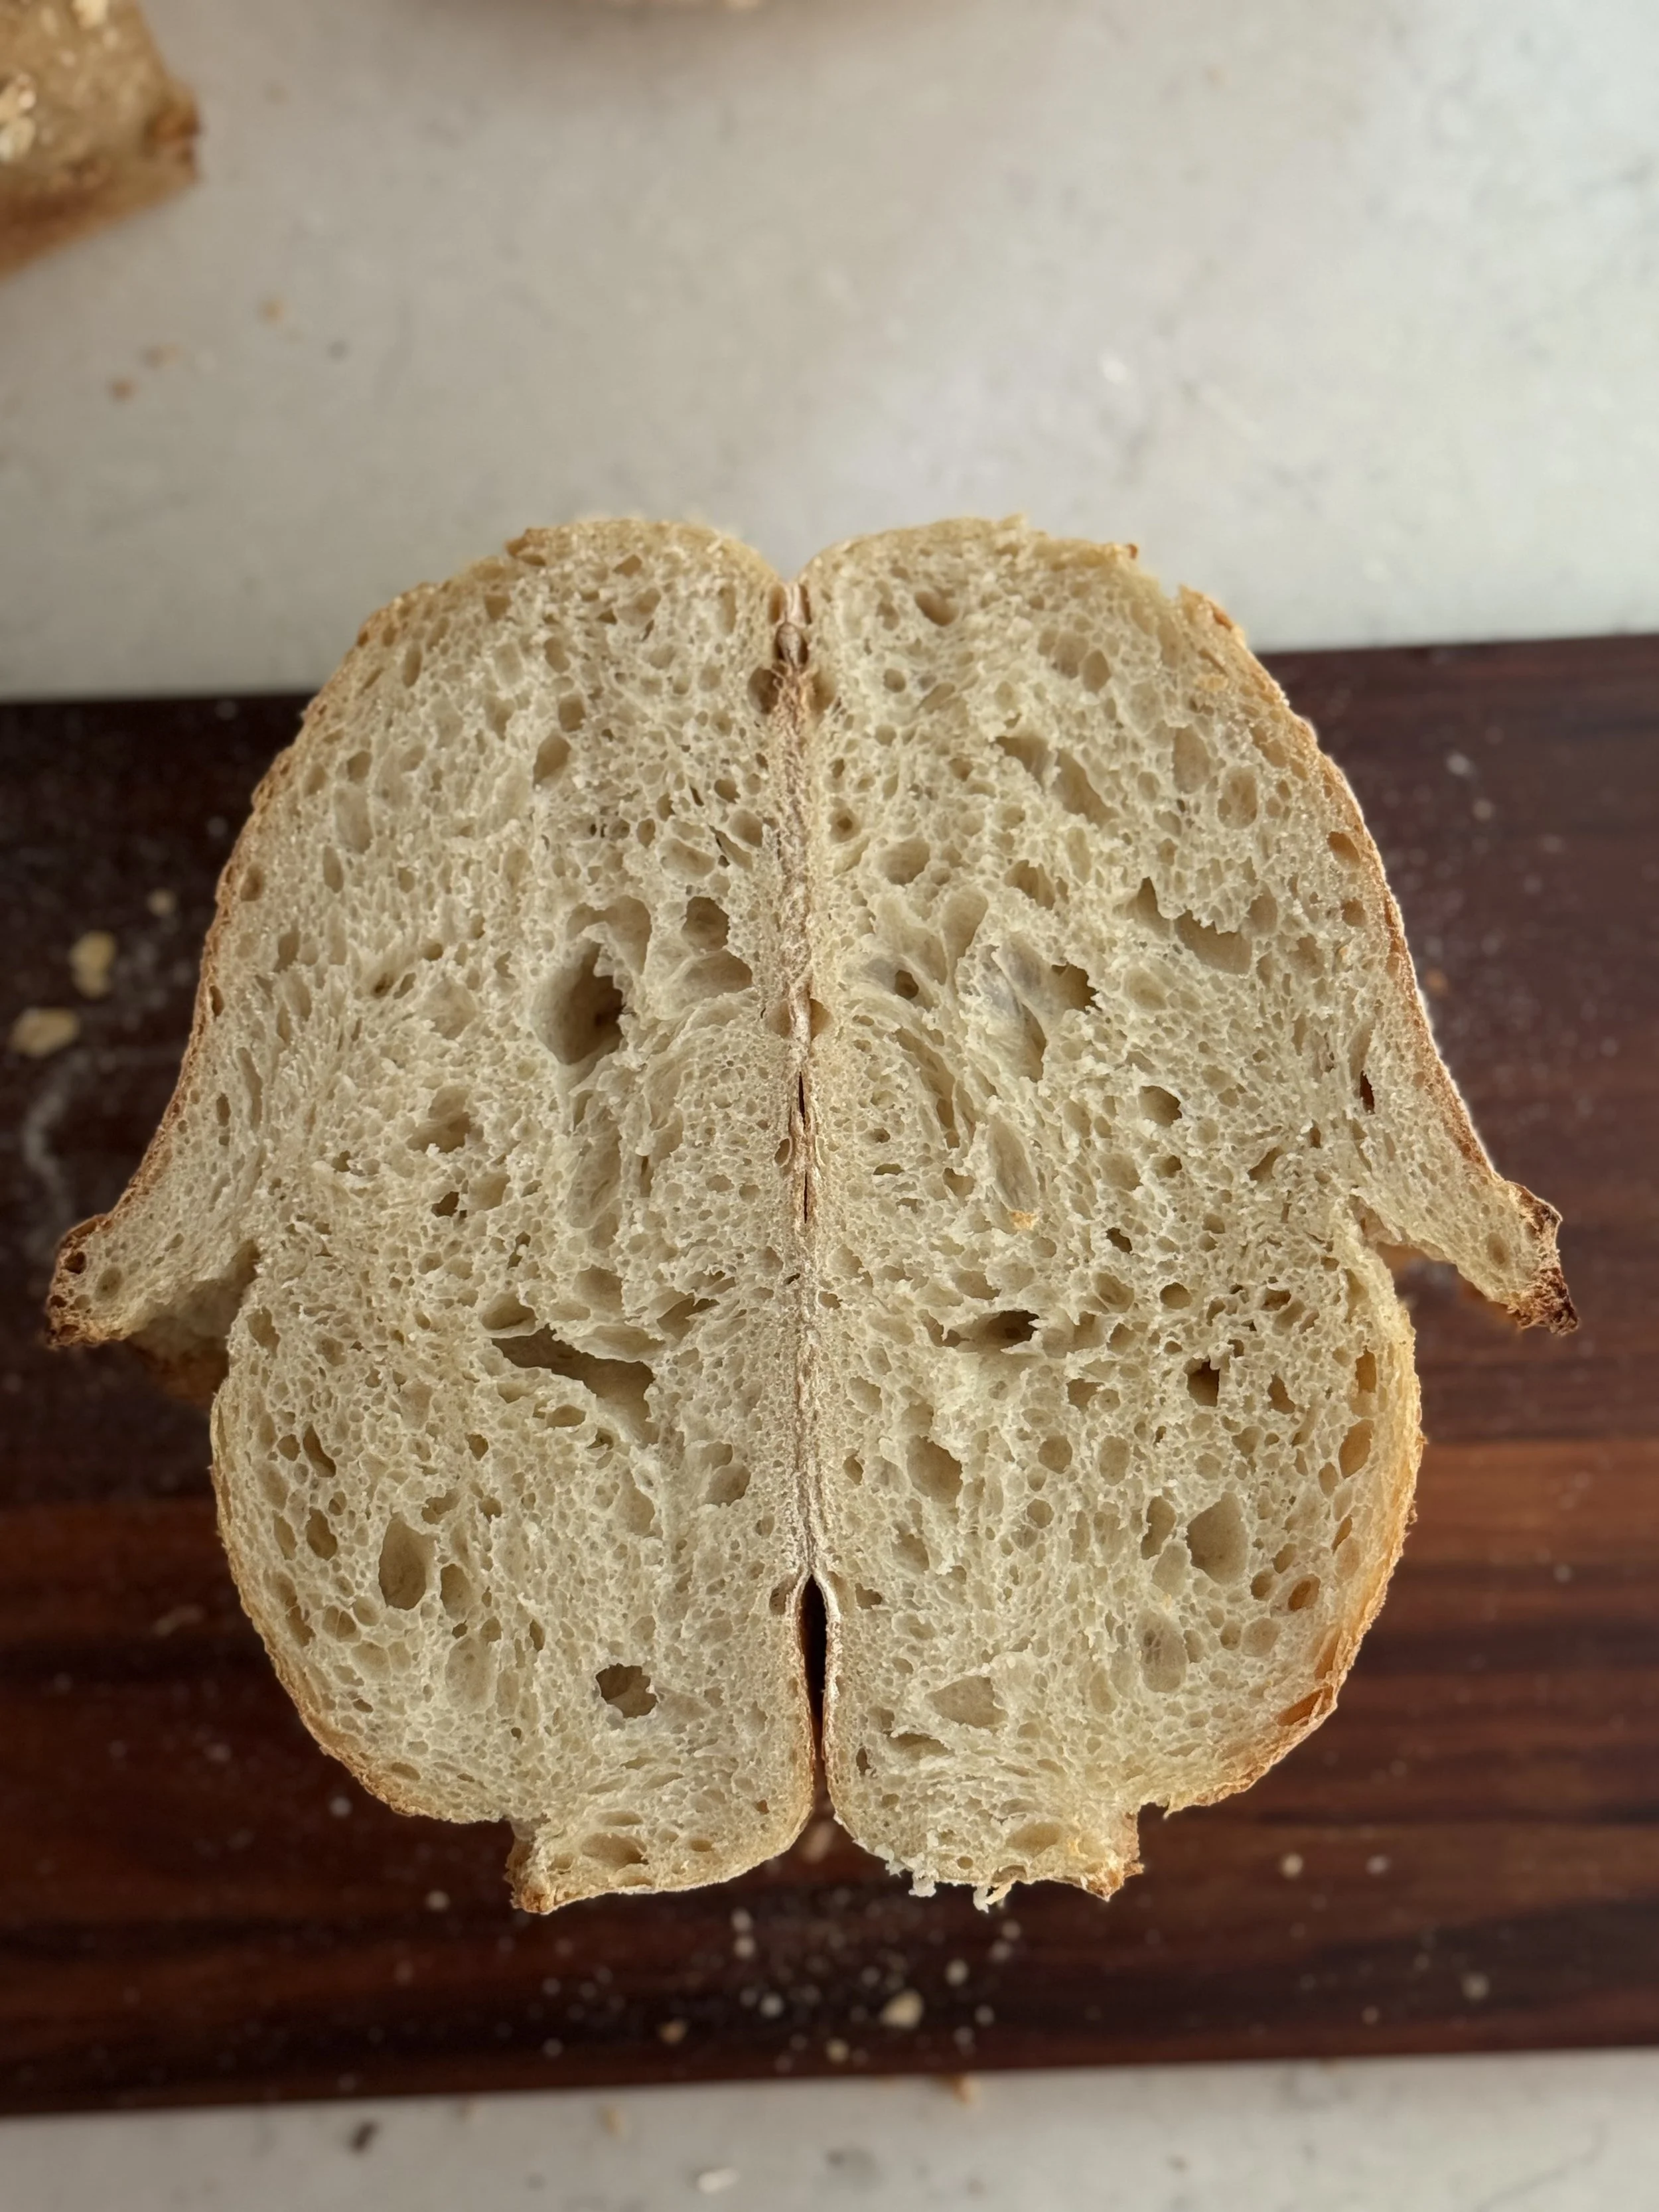
loaf baked without ice
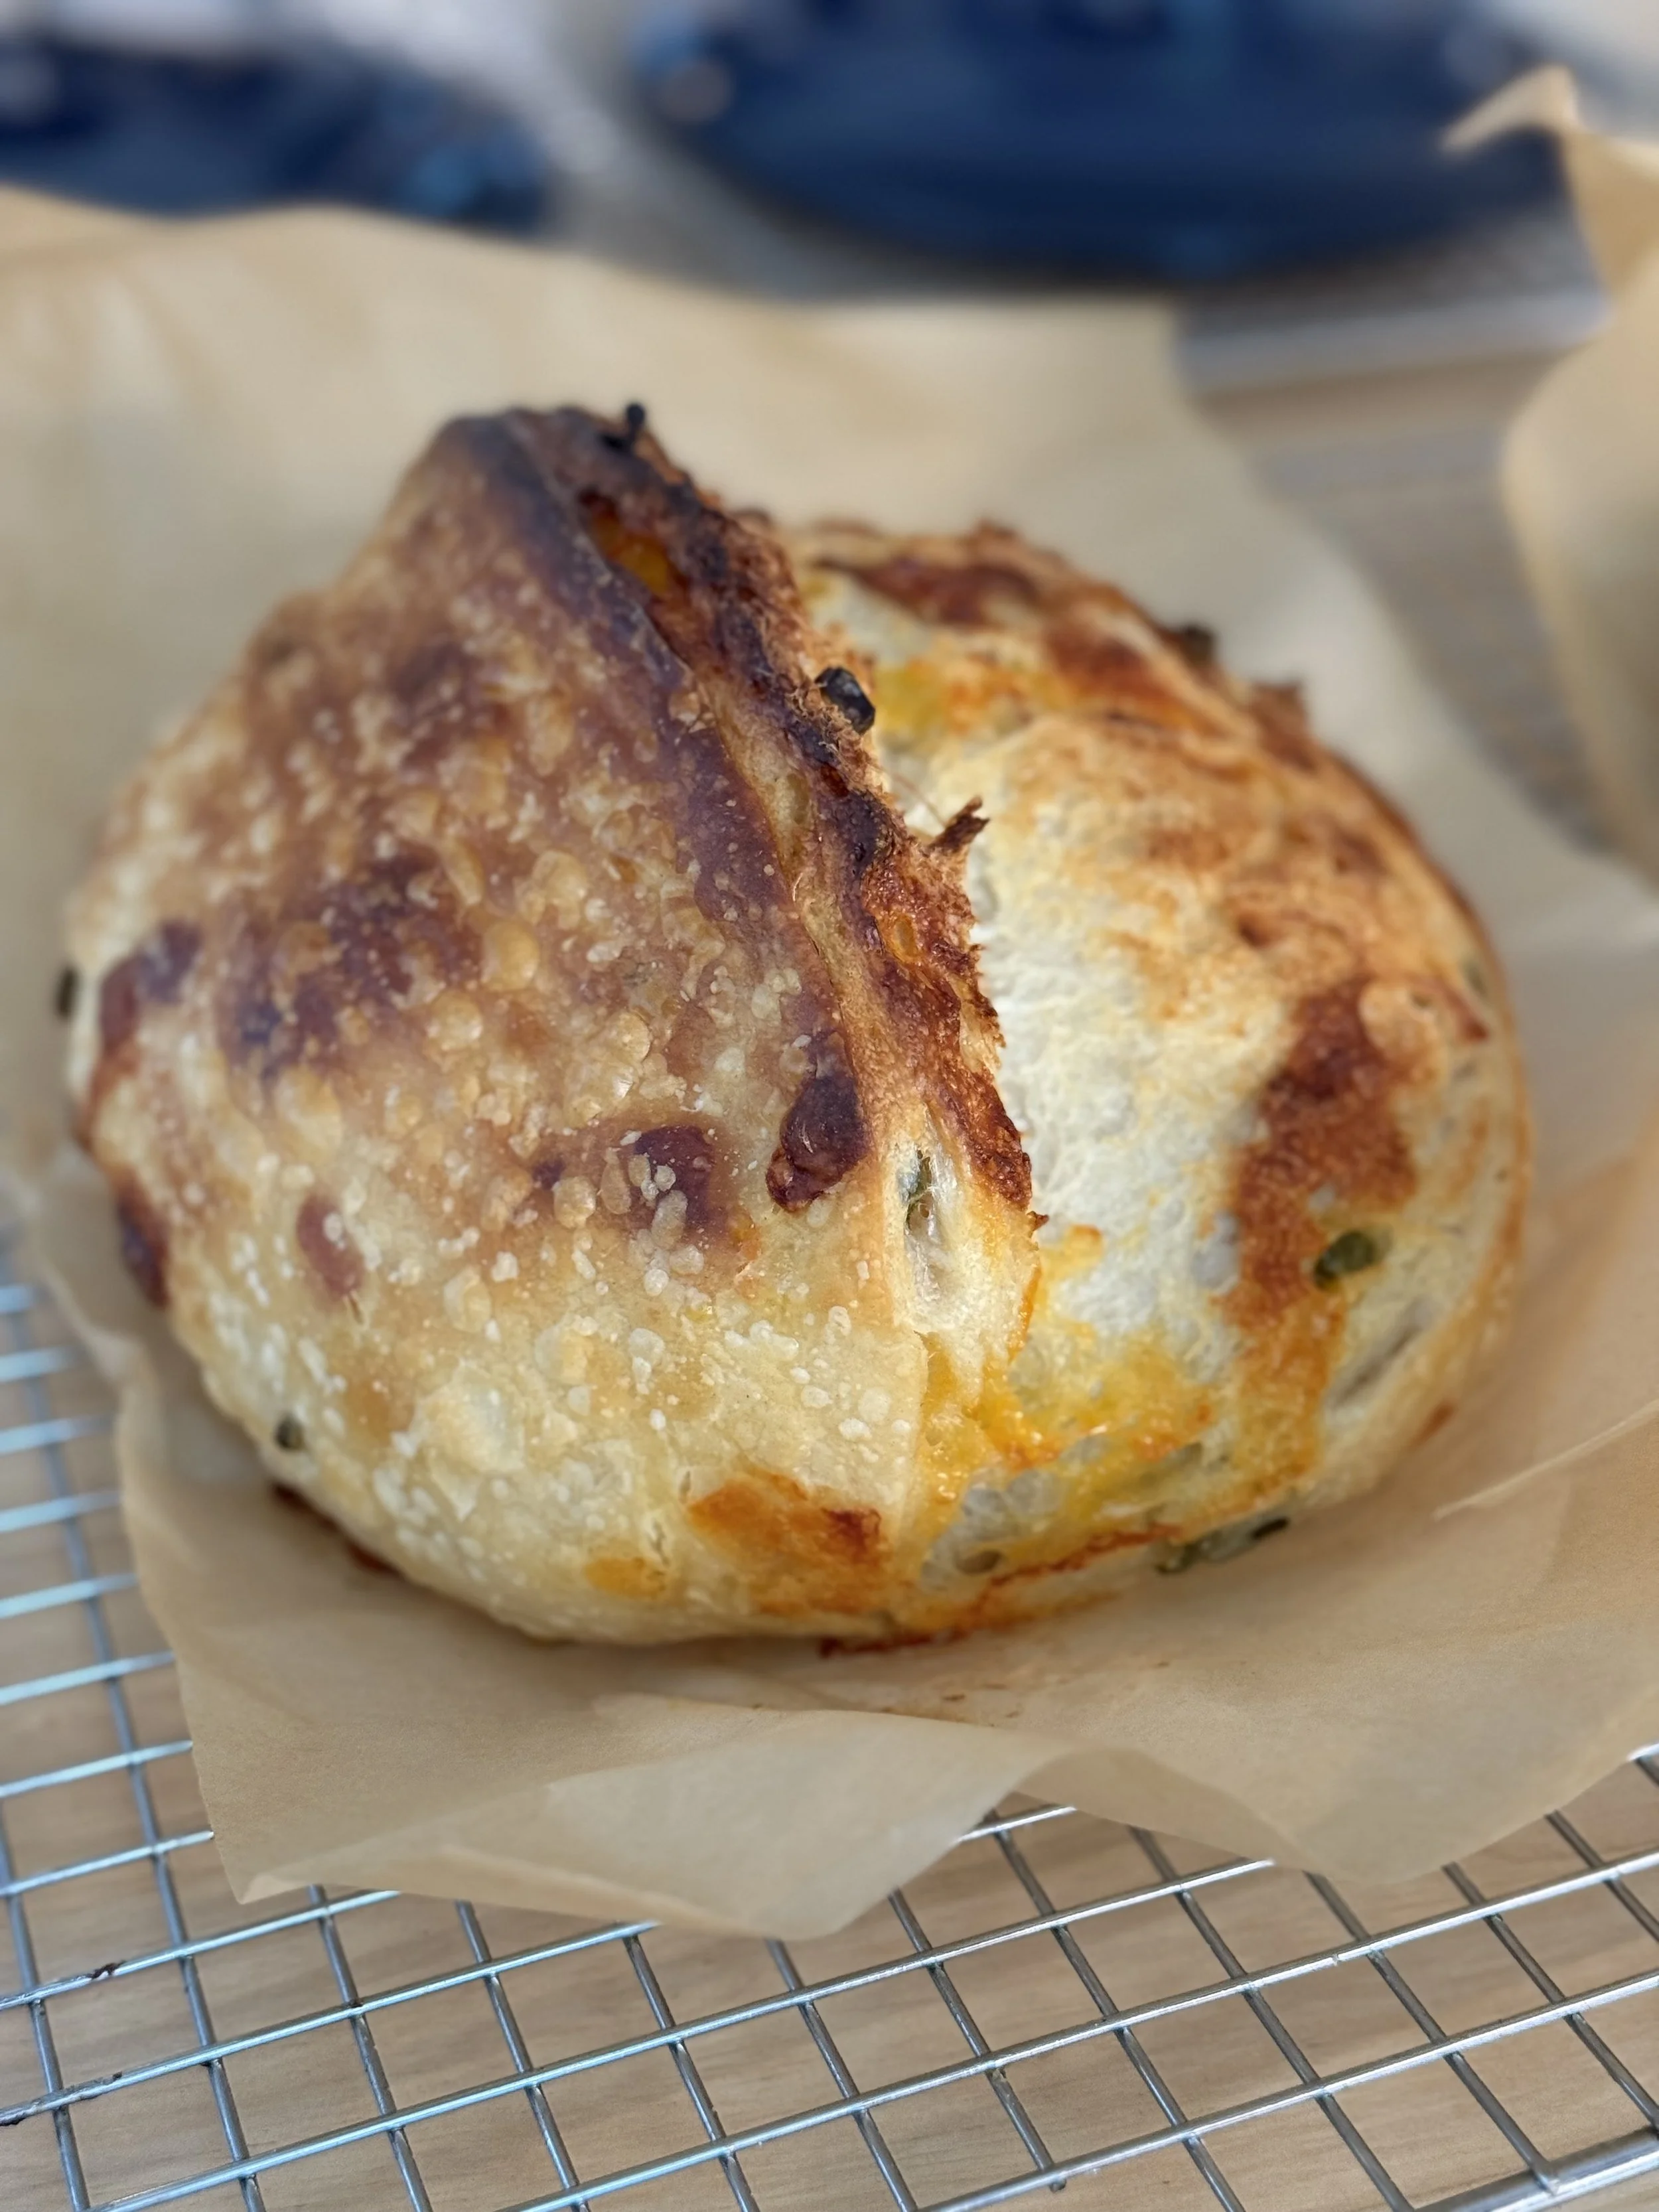
loaf baked wit hice
Hopefully this has been enlightening for you. What do you think, are you team ice or no ice?