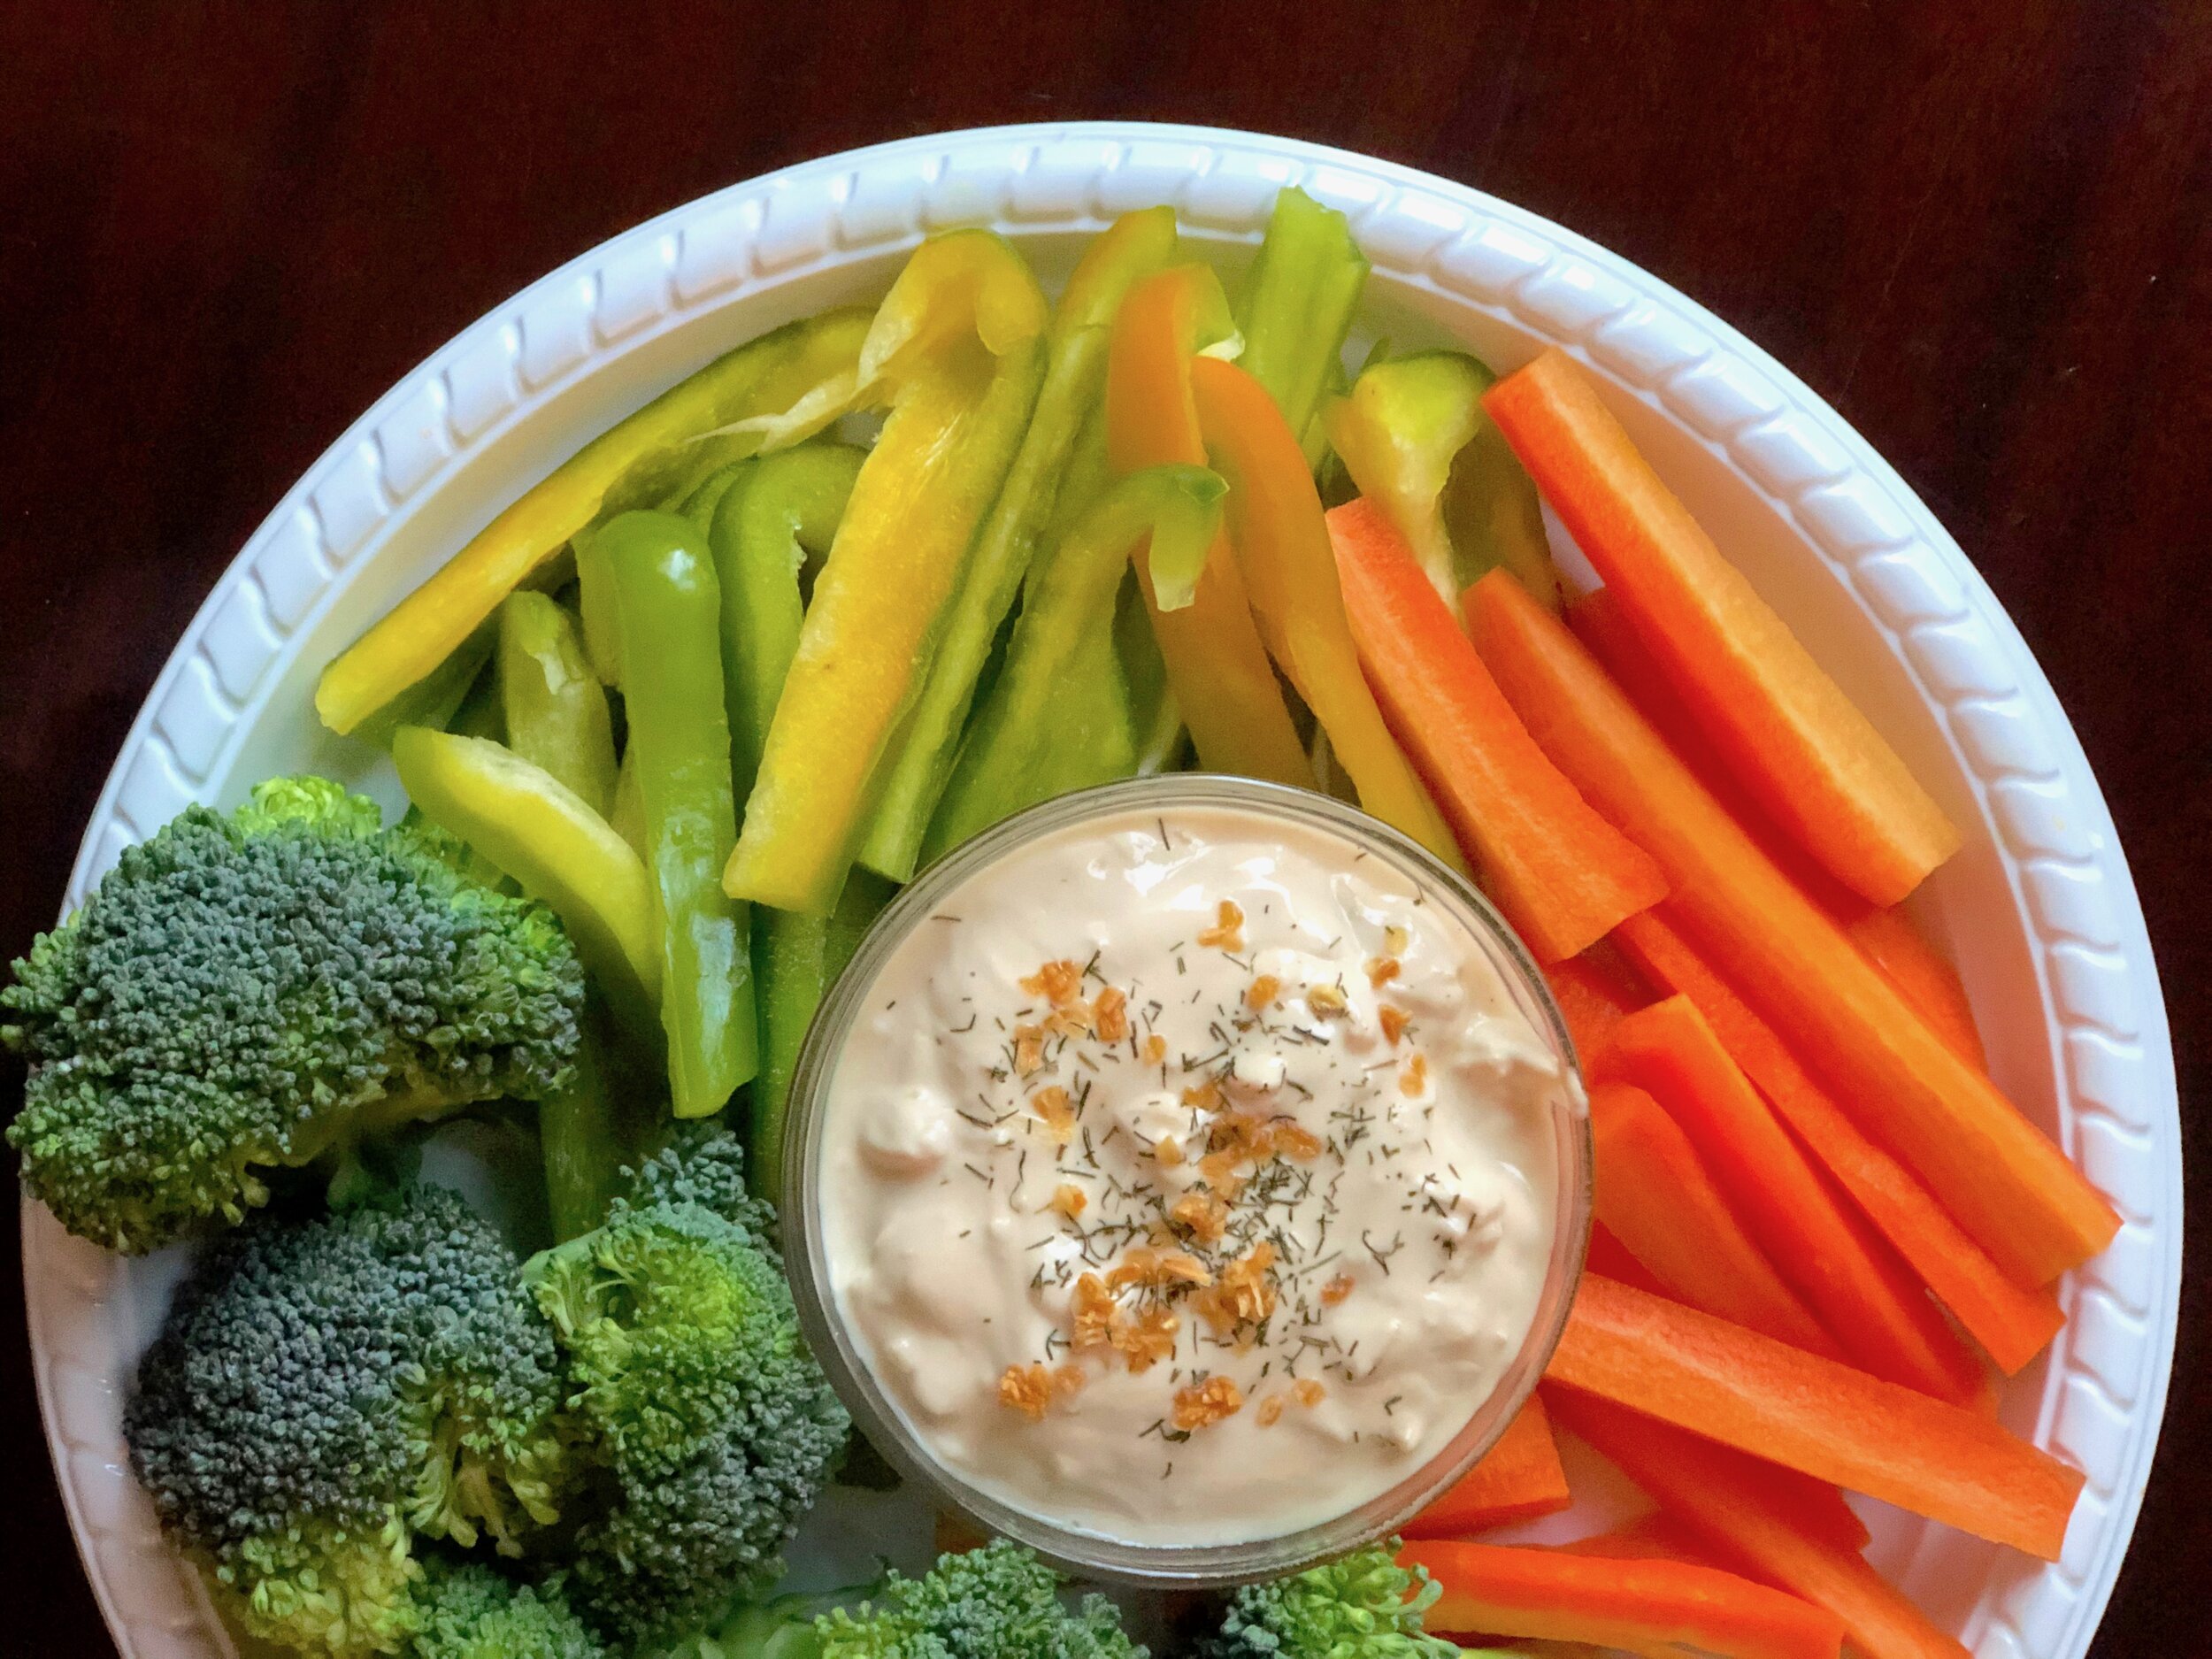
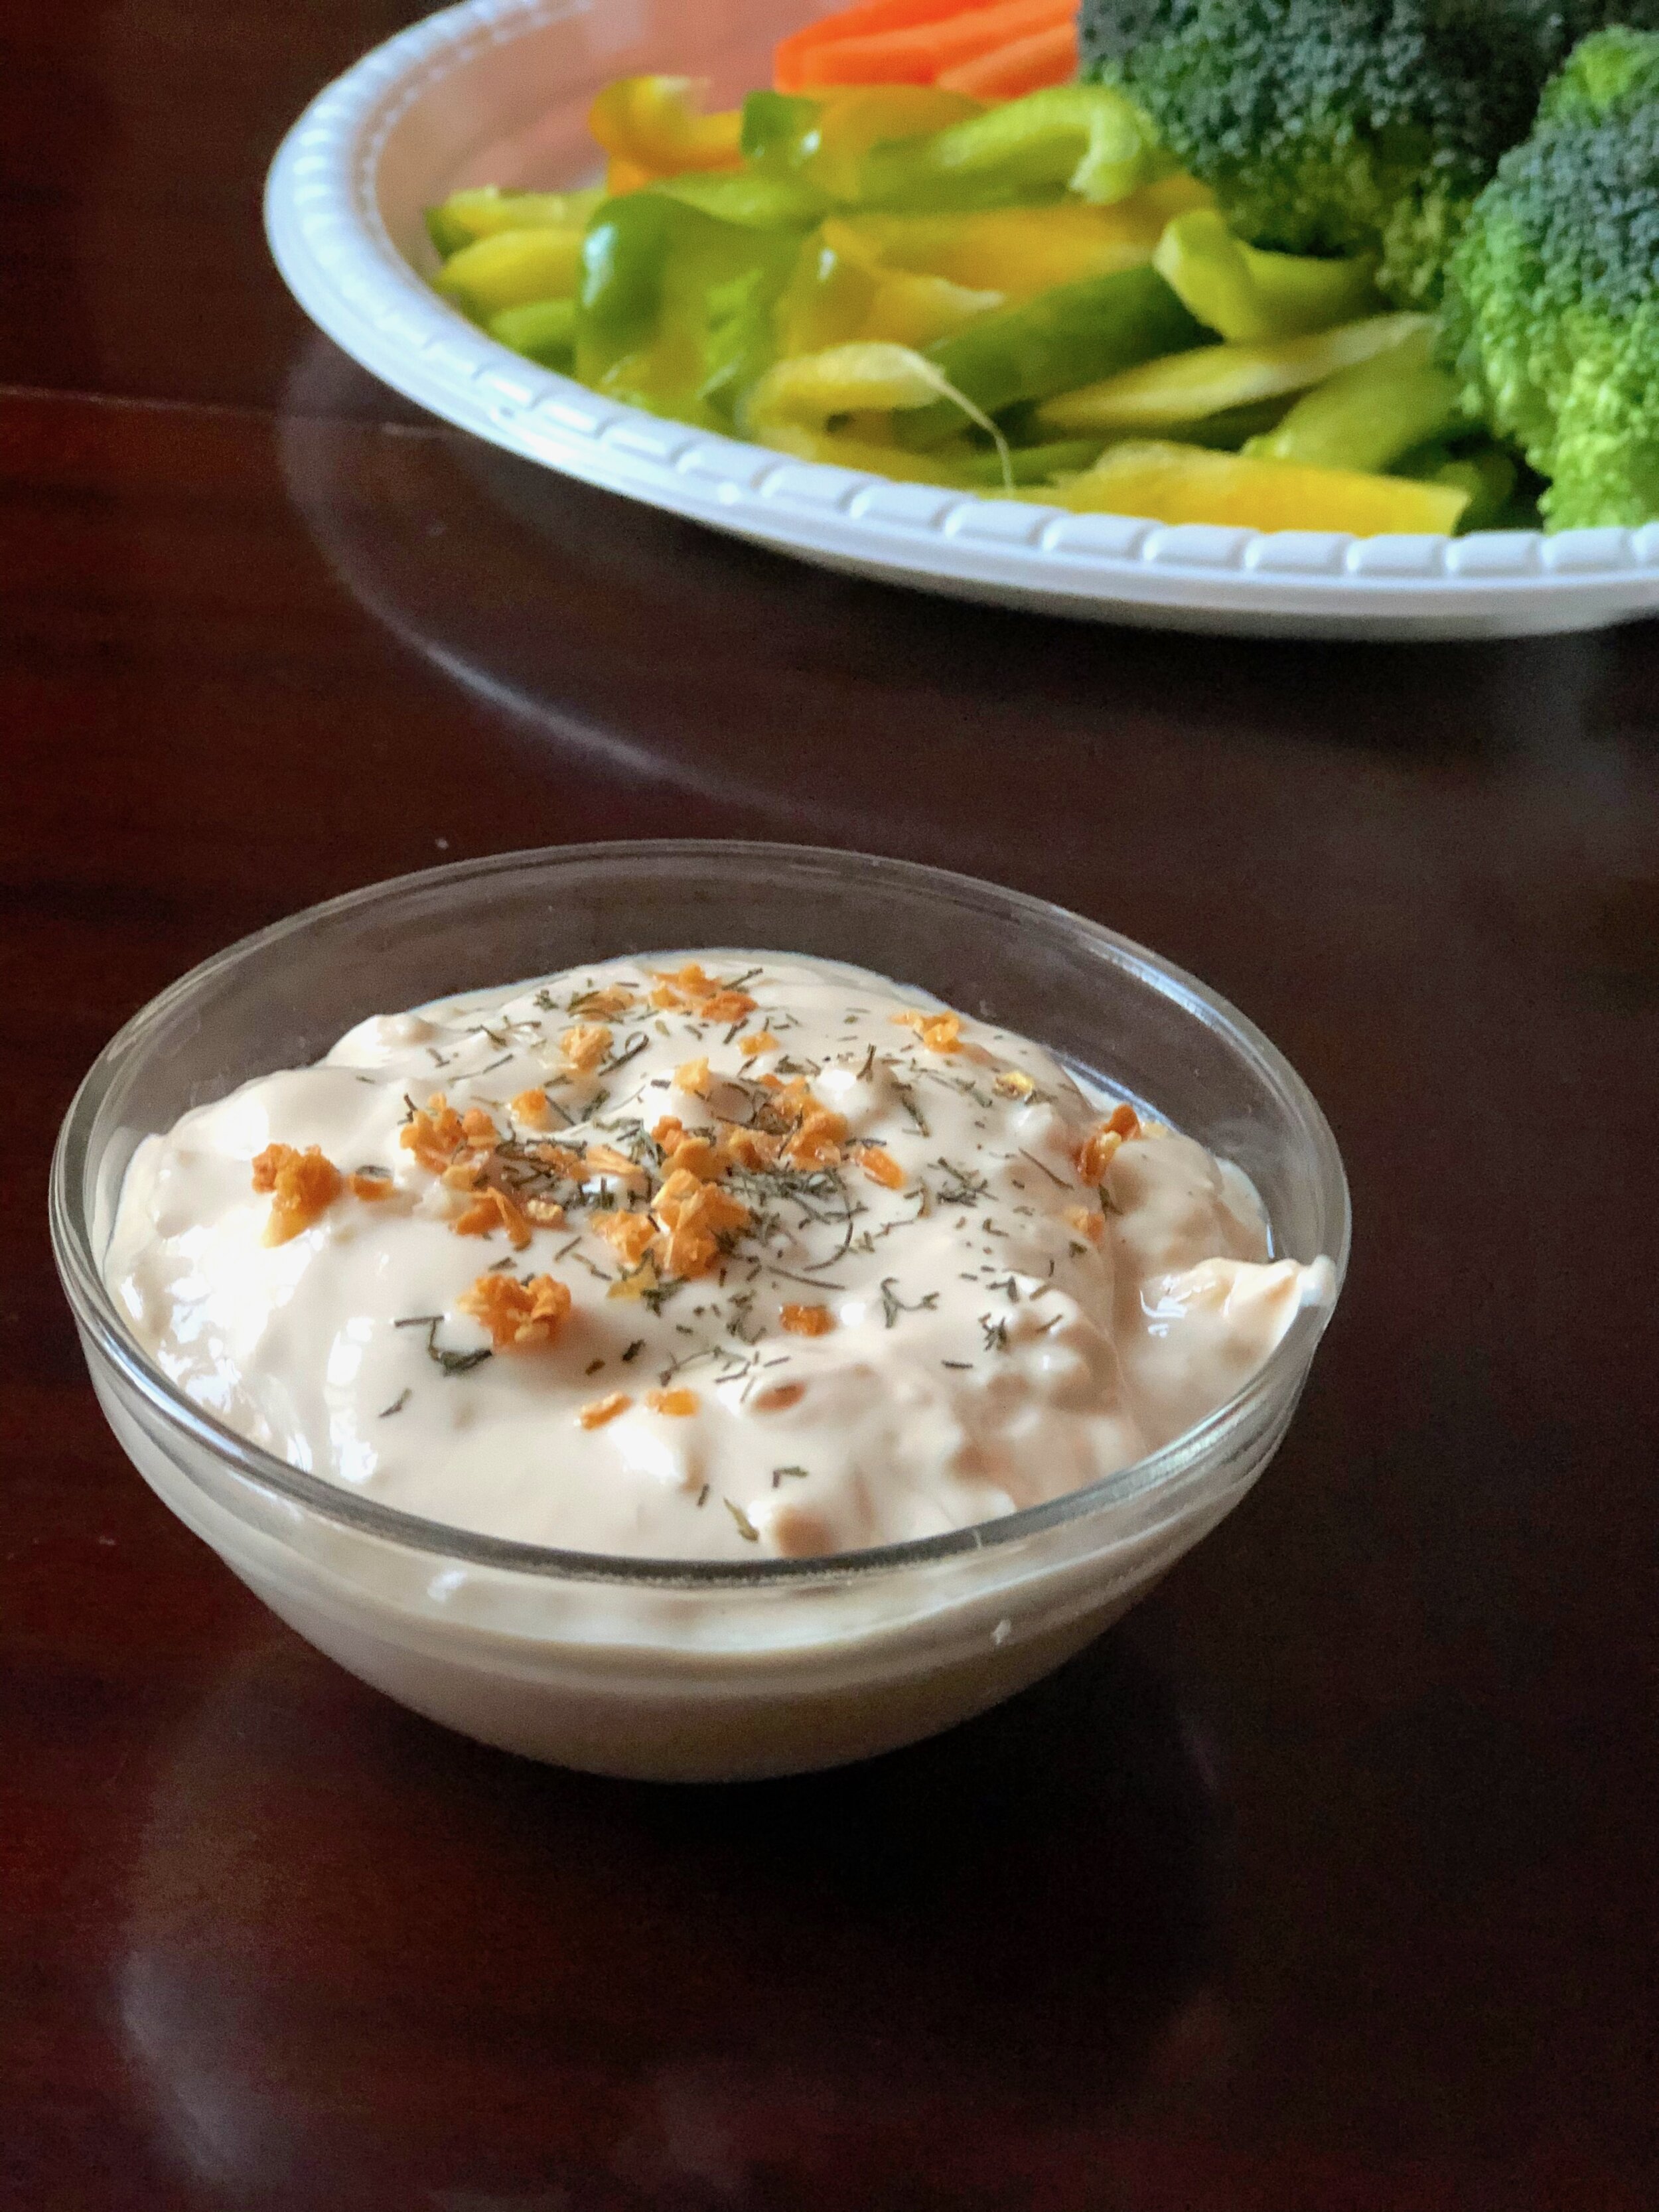
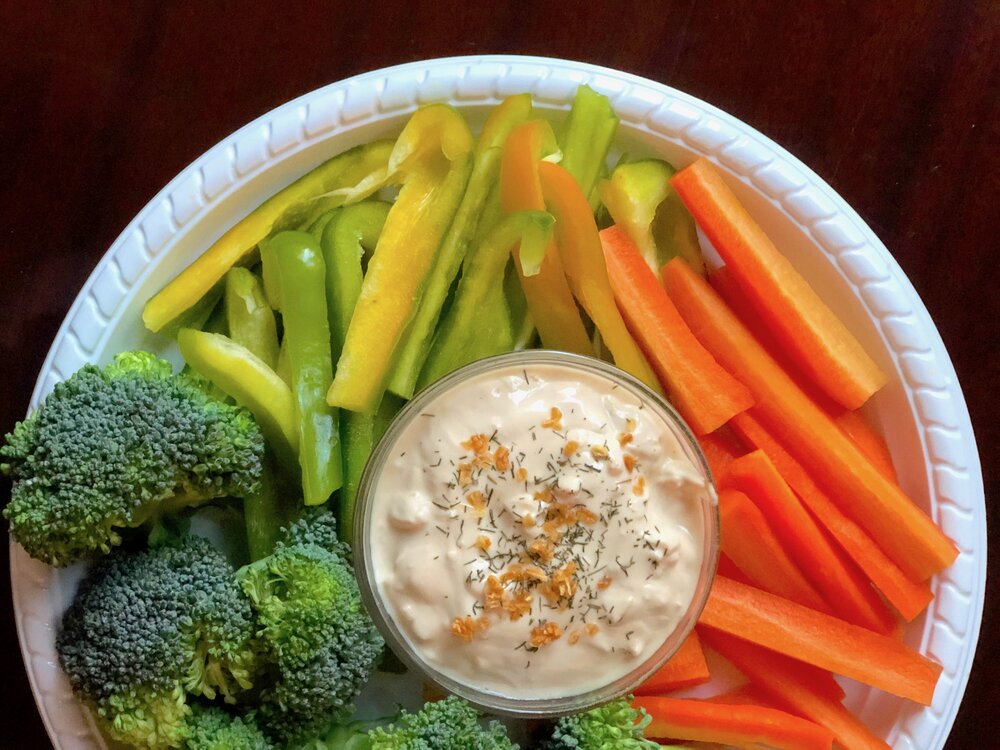
Copycat Homemade Lipton Onion Dip

Last Updated September 4, 2024

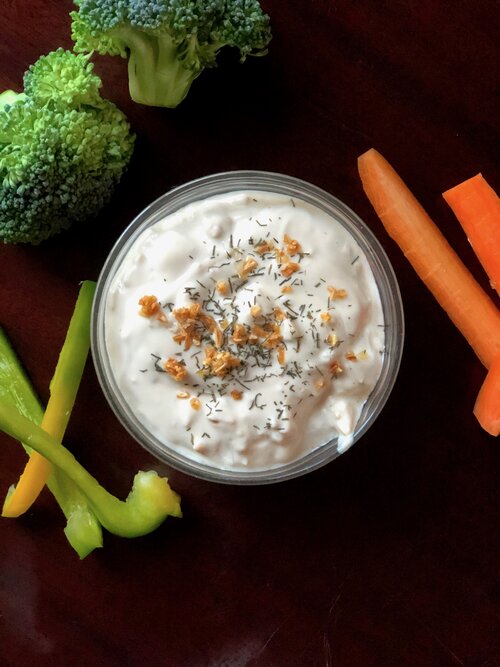
What if I told you that there is a way to enjoy Onion Dip but with less guilt? No preservatives, corn syrup, caramel color, and other ingredients you’re not quite sure what they are?

Because there IS a way! And it’s very simple. Not that you get much simpler than mixing sour cream with a Lipton onion packet, but it’s pretty darn close.

For this recipe I use yogurt, as I do even if I mix a Lipton packet, because yogurt is actually good for you, sour cream is usually more found on diet naughty lists.

I first made this during lockdown, and while I couldn’t find beef broth granules, just “classic” powdered broth, it came out satisfactorily close to the real thing. As I was explaining on the Healthier Lipton Onion Dip post, I had inherited two Lipton onion mixes from a friend who moved away from Florence. My husband had never had such a thing before and requested it again. When he requested it a third time, I had to break it to him gently…”honey, there were only two packets, and I don’t think we can find Lipton around Florence.”

Since people requesting a specific food/dessert/recipe from me to make is like a love language for me, I was not about to let a request go unfulfilled. So I began a hunt for the necessary ingredients and a recipe to go off of that doesn’t just make bulk powdered onion mix (there are many of those but I don’t make Onion dip all THAT often) but just a recipe for the standard 16oz/two cups of dip.

Thanks to Daring Gourmet for providing just that! Recipe with a few of my usual tweaks below.

This post may contain affiliate links. If you make a purchase using these links, Jennyblogs may receive a small commission, at no extra cost to you. This helps to support Jennyblogs. For further information see the privacy policy. Grazie!


Copycat Lipton Onion Dip

Makes about 2 cups of dip

Ingredients:

  • 2-4 tsp beef broth granules

  • 2 Tbsp dried minced onions

  • 1 tsp onion powder

  • 1/4 tsp pepper

  • 1/8 tsp paprika

  • 16oz / 454g regular or Greek plain yogurt

  • fresh or dried dill, more dried minced onions, for topping, optional

  • washed sliced veggies, potato chips, etc, for dipping

Directions:

  1. In a medium bowl, combine 2 tsp of broth granules with the rest of the spices.

  2. Stir in the yogurt and mix well. Taste; if you desire the dip to be saltier, add another teaspoon of broth granules and stir. Taste again, adding the last teaspoon of broth, if desired. Refrigerate for about two hours before serving.

  3. Top with dill and more onions, if desired, and serve with veggies, potato chips, pita, or whatever dippers you like!

Jenny’s Notes:

  • While beef broth is probably closest to the real taste, I have never found beef broth granules here in Italy and get away with using the “classic” broth flavor or even vegetable broth granules. It still tastes delicious! Check labels for MSG, it often gets sneaked into these types of things.

  • If using low-sodium broth granules you will be better able to control the sodium, and can even add a bit more broth for more flavor without the dip becoming too salty.

  • The refrigeration is not strictly necessary, but it gives some time for the flavors to meld and the onions to rehydrate a bit. If you simply can’t wait that long to dig in or need it ASAP for a party, go ahead and use it straight away.

  • 1/8 tsp celery seed, and 1/4 tsp dried parsley can also be added. I don’t usually add them just because I don’t have celery seed on hand here and don’t personally think dried parsley adds any kind of flavor value to dishes. It does add a touch of green, though!
Copycat Lipton Onion Dip
Yield 4
Author
Prep time
10 Min
Total time
10 Min

Copycat Lipton Onion Dip

Classic Lipton Onion Dip made from scratch, creating a delicious and nutritious snack to be served with veggies, potato chips, or your favorite dippers.
Cook modePrevent screen from turning off

Ingredients

Instructions

  1. In a medium bowl, combine 2 tsp of broth granules with the rest of the spices.
  2. Stir in the yogurt and mix well. Taste; if you desire the dip to be saltier, add another teaspoon of broth granules and stir. Taste again, adding the last teaspoon of broth, if desired. Refrigerate for about two hours before serving.
  3. Top with dill and more onions, if desired, and serve with veggies, potato chips, pita, or whatever dippers you like!

Notes

  • While beef broth is probably closest to the real taste, I have never found beef broth granules here in Italy and get away with using the “classic” broth flavor or even vegetable broth granules. It still tastes delicious! Check labels for MSG, it often gets sneaked into these types of things.
  • If using low-sodium broth granules you will be better able to control the sodium, and can even add a bit more broth for more flavor without the dip becoming too salty.
  • The refrigeration is not strictly necessary, but it gives some time for the flavors to meld and the onions to rehydrate a bit. If you simply can’t wait that long to dig in or need it ASAP for a party, go ahead and use it straight away.
  • 1/8 tsp celery seed, and 1/4 tsp dried parsley can also be added. I don’t usually add them just because I don’t have celery seed on hand here and don’t personally think dried parsley adds any kind of flavor value to dishes. It does add a touch of green, though!

Nutrition Facts

Calories

89.67

Fat

1.93 g

Sat. Fat

1.17 g

Carbs

11.95 g

Fiber

1.33 g

Net carbs

10.61 g

Sugar

9.31 g

Protein

6.84 g

Sodium

105.53 mg

Cholesterol

6.81 mg

Nutritional information is approximate. Based on 1/2 cup dip with 1 cup sliced veggies.

Lipton Onion soup mix, Lipton Onion dip, French onion dip, copycat Lipton onion dip, beef broth, yogurt, veggie dip
appetizer
American
Did you make this recipe?
Tag @jennyblogsandbakes on instagram and hashtag it #jennyblogs

Healthier Lipton Onion Dip

Last Updated September 3, 2024

IMG_3184.jpg

Lipton Onion Dip. Too easy to whip up, pop open a bag of potato chips, and have a summer favorite ready to rock and roll.

Unfortunately, it’s not very healthy. At all. Reading the ingredients usually leaves me wishing I hadn’t so I can enjoy my snacking in peace. Then the recipe on the side of the Lipton box has you mix it with a tub of sour cream and dip potato chips. Yum. But ouch.

I have actually eaten this very few times in my life, growing up in a “healthy” household (thankful for that!) usually meant if I was eating onion dip, someone else had made and brought it to a party. But recently, when a friend moved away from Florence and gave me a few boxes of stuff and food, I found myself with two packets of Lipton Onion soup/dip mix. Not part of my usual diet, but hey, I’m not one to turn my nose up at free food, being an overly-budget minded person. Plus, part of the fun of having a non-American husband is getting to share with him all the joys and junk foods of America that you just can’t find in the rest of the world. Heck, Lipton probably has some ingredients that are banned in the EU, haha! And you know what? He loved it. And requested it again.

How to healthify Lipton Onion dip? Not too hard. Doesn’t cure all the wonky ingredients, but let’s say we’re righting two of three wrongs. ;)

First, potato chips are delicious, but so are veggies dipped in onion dip! Honestly, if you are an onion dip lover, you’ve probably figured this out a long time ago.

Second easy way to healthify it? Use yogurt instead of sour cream. Regular and Greek both work, as the dip thickens as it sits. (Does anyone ever actually make it the full two hours it’s supposed to sit in the fridge before eating?) I might even like it better than sour cream! Not to mention that sour cream is usually only found in the tiny Mexican food section at my local grocery store. And not refrigerated. Weird.

If you’d like a completely guilt-free Onion Dip snacking experience, try out this Copycat Lipton Onion Dip, made from scratch!

This post may contain affiliate links. If you make a purchase using these links, Jennyblogs may receive a small commission, at no extra cost to you. This helps to support Jennyblogs. For further information see the privacy policy. Grazie!


Healthier Lipton Onion Dip

Makes about 2 cups of dip

IMG_3174.jpg

Ingredients:

  • 1 packet Lipton onion soup/dip

  • 16 oz / 454g plain Greek or regular yogurt

  • Washed and sliced veggies, carrots, celery, cucumber, broccoli, cauliflower, radishes, bell peppers, etc etc

  • Fresh or dried dill and onion powder, optional

Directions:

  1. Add Lipton onion dip to yogurt and mix well.

  2. Cover and refrigerate for at least 2 hours, to thicken and let flavors meld.

  3. Top with dill and a dash or two of onion powder, if desired, and serve with veggies. And maybe just one or two potato chips. :)
Healthier Lipton Onion Dip
Yield 2 cups dip
Author
Prep time
5 Min
Total time
5 Min

Healthier Lipton Onion Dip

A healthier version of the classic Lipton Onion dip, by mixing with yogurt instead of sour cream and using veggies instead of potato chips!
Cook modePrevent screen from turning off

Ingredients

Instructions

  1. Add Lipton onion dip to yogurt and mix well.
  2. Cover and refrigerate for at least 2 hours, to thicken and let flavors meld.
  3. Top with dill and a dash or two of onion powder, if desired, and serve with veggies. And maybe just one or two potato chips. :)

Nutrition Facts

Calories

112.03

Fat

1.92 g

Sat. Fat

1.16 g

Carbs

16.91 g

Fiber

1.72 g

Net carbs

15.19 g

Sugar

9.36 g

Protein

7.33 g

Sodium

873.86 mg

Cholesterol

6.81 mg

Nutritional information is approximate. Based on 4 servings of 1/2 cup dip with 1 cup of vegetables.

Lipton Onion soup dip, Onion dip, yogurt, onion, veggie dip, yogurt veggie dip, healthier lipton dip
Appetizers
American
Did you make this recipe?
Tag @jennyblogsandbakes on instagram and hashtag it #jennyblogs

Insalata Caprese Tradizionale - Traditional Caprese Salad

Last Updated August 26, 2024

IMG_0994.jpg

Insalata Caprese, often just referred to as Caprese, is by now known the world over and has been adapted into many different dishes and styles. In today’s post we are going to cover the traditional Italian Insalata Caprese, unaltered and in its purest form. How the Italians make it. Leave aside the Caprese grilled cheeses and Caprese pasta for just one second.

Insalata Caprese (EEN-sah-lah-ta cuh-PRAY-zay), or Caprese Salad is an Italian dish consisting of merely 5 ingredients: fresh mozzarella, fresh tomatoes, fresh basil, extra virgin olive oil, and a touch of salt, maybe pepper. Oregano is also added sometimes. That’s it, simple and fresh.

Because there are so few ingredients, no cooking required, and little spice, the quality and freshness of the ingredients are of upmost importance. This is one of the golden rules of the Italian kitchen. In fact, I would say that any caprese salad you’ve eaten in the States is probably a far cry from the shining beacon that it is here in Italy. This is not through any fault of your own, but Italy has certain protected regions and methods for making foods, with rigorous control checks and rules, which holds the product to high standards.

You may be familiar with some of these rules, especially if you seen some Italian wine bottles. You might have noticed special seals that read DOC or DOCG (Denominazione di Origine Controllata or Denominazione di Origine Controllata Garantita), which basically act as a quality seal. One such wine, considered one of the kings of Italian wine, Brunello di Montalcino, will always have the DOCG seal because it can only be grown in the Montalcino region near Siena which has ideal soil and climate for this particular wine. If it doesn’t have the seal, don’t buy it. Hazelnuts, mozzarella, how to make a Neopolitan pizza, and many other food items and processes, sometimes connected to a specific region, are protected by law in Italy.

I just mentioned mozzarella, so you may be understanding how I managed to go on that long spiel and still connect it to today’s subject matter. :) Suffice to say, Italian mozzarella, the good stuff, is in a class of its own.

That’s the beauty of Italian summers, where lunches are made up of ripe tomatoes, a slab of cheese, a drizzle of olive oil. Maybe with a hunk of fresh, salty focaccia. Or maybe just prosciutto and melon.

But maybe you aren’t IN Italy, and you’re wondering how you can make the best Insalata Caprese possible? Let’s dissect the ingredients real quick before getting into the recipe.

Suggestions for selecting ingredients for the Insalata Caprese

  • Tomatoes. You want the freshest, tastiest tomatoes available. The most widely used in Italy would probably be the tomato variety “cuore di bue” or literally, “ox heart,” which originated in America. There are two prinicipal varieties of cuore di bue, Arawak and Albenga. These tomatoes are ideal for salads because they have a thin skin, great flavor, and very few seeds and water inside. They are not usually very round, but fall into the ugly tomato category with lots of ridges. As they say, the uglier the tomato, the more delicious it will be. If you can’t get your hands on a cuore di bue, use your favorite, fresh tomatoes. In the States I often go for an heirloom tomato.

  • Mozzarella. You’ll want the freshest mozzarella possible, which might not be that easy to find unless you know a cheese producer. Traditionally the mozzarella di fiordilatte is used (normal cow’s milk mozzarella), but if you want to up your game, go for the more expensive mozzarella di bufala (buffalo mozzarella) which can also be protected by one of the laws we were talking about above, this time the DOP.

  • Basil. Fresh basil, torn into pieces if desired and ideally added just before serving so it can’t even think about wilting. I mention torn, not sliced, because Italians have this thing against cutting basil with a knife, or it touching metal for that matter.

  • Extra Virgin Olive Oil. I cannot stress enough to you the importance of having a good bottle of olive oil on hand. In Italy there are usually two kinds of olive oil, those used for cooking, and those use for drizzling just before serving. Select your oil carefully, paying attention to where it is produced, when, and when it expires. Olive oil generally has a best if used by date of two years from being bottled. So if you find a bottle that expires in a year or less, you know that bottle has already been sitting on the shelf for too long and is best used for cooking. Also pay attention to wording like “produced in” or “bottled in.” The latter may mean that olives were brought in from elsewhere and merely bottled in Italy so they could write that on the bottle. No really, there are so many shady practices when it comes to olive oil, it can be hard to decipher the great ones, especially when dealing with imported bottles. My mom used to order bottles straight from Italy to get some of the high quality stuff. Basically, you don’t want to pay less than $15 for a bottle in the States. Frantoio Franci and Laudemia are two very high quality brands. If you know your EVOO’s, select a light and fruity oil.

  • Salt and Pepper. Usually just the tomatoes are salted, and pepper is completely optional.

  • Oregano. Oregano is also optional, but a bit of fresh or dried is a nice touch!

This post may contain affiliate links. If you make a purchase using these links, Jennyblogs may receive a small commission, at no extra cost to you. This helps to support Jennyblogs. Where possible, links are prioritized to small businesses and ethically and responsibly made items. For further information see the privacy policy. Grazie!


Insalata Caprese

IMG_1002.jpg

Serves 2

Ingredients:

  • about 1/2lb / 200g fresh mozzarella

  • 2 medium tomatoes

  • a few fresh basil leaves, whole or torn into pieces

  • extra virgin olive oil, for drizzling

  • salt and pepper, to taste

  • fresh or dried oregano, optional

Directions:

  1. Slice the mozzarella and the tomatoes into equally sized slices and place on a plate.

  2. Drizzly lightly with olive oil and sprinkle tomatoes with salt. Sprinkle with a bit of pepper, if desired.

  3. Garnish with basil leaves and oregano; serve.

Jenny’s Notes:

  • It may seem strange, but some recommend to serve the mozzarella at room temperature. If the mozzarella is cut while cold it may lose more water, interacting with and changing the flavor of the tomatoes. If the mozzarella is losing lots of liquid regardless, it may not be as fresh as desired.

  • You can use a paper towel on both the mozzarella and tomatoes to absorb any excess liquid, dabbing or letting them sit on the paper towel if they are very wet.

  • Contrary to American belief, Caprese Salad does not traditionally have balsamic vinegar. Nor mayonnaise, olives, eggs, or other non-Italian inventions.

Traditional Caprese Salad
Yield 2
Author
Prep time
5 Min
Total time
5 Min

Traditional Caprese Salad

This classic Caprese Insalata is bursting with summer flavors. Tomatoes, fresh mozzarella, basil, and extra virgin olive oil, just as the Italians would make it.
Cook modePrevent screen from turning off

Ingredients

Instructions

  1. Slice mozzarella and tomatoes into equally sized slices and place on a plate.
  2. Drizzly lightly with olive oil and sprinkle tomatoes with salt. Sprinkle with a bit of pepper, if desired.
  3. Garnish with basil leaves and oregano; serve.

Notes

  • It may seem strange, but some recommend to serve the mozzarella at room temperature. If the mozzarella is cut while cold it may lose more water, interacting with and changing the flavor of the tomatoes. If the mozzarella is losing lots of liquid regardless, it may not be as fresh as desired.
  • You can use a paper towel on both the mozzarella and tomatoes to absorb any excess liquid, dabbing or letting them sit on the paper towel if they are very wet.
  • Contrary to American belief, Caprese Salad does not traditionally have balsamic vinegar. Nor mayonnaise, olives, eggs, or other non-Italian inventions.

Nutrition Facts

Calories

326.94

Fat

25.15 g

Sat. Fat

11.64 g

Carbs

7.00 g

Fiber

1.73 g

Net carbs

5.27 g

Sugar

4.09 g

Protein

19.14 g

Sodium

663.60 mg

Cholesterol

64.09 mg

Nutritional information is approximate and based on 2 servings.

Gluten-free, tomatoes, fresh mozzarella, mozzarella di bufala, extra virgin olive oil, fresh basil, fresh oregano, Italian recipe, real italian caprese salad, traditional caprese, authentic italian caprese, how to make the best caprese
Side, Lunch
Italian
Did you make this recipe?
Tag @jennyblogsandbakes on instagram and hashtag it #jennyblogs
IMG_0996.jpg

Leek and Morel Mushroom Phyllo Pies

IMG_4874.JPG

Last Updated July 8, 2024

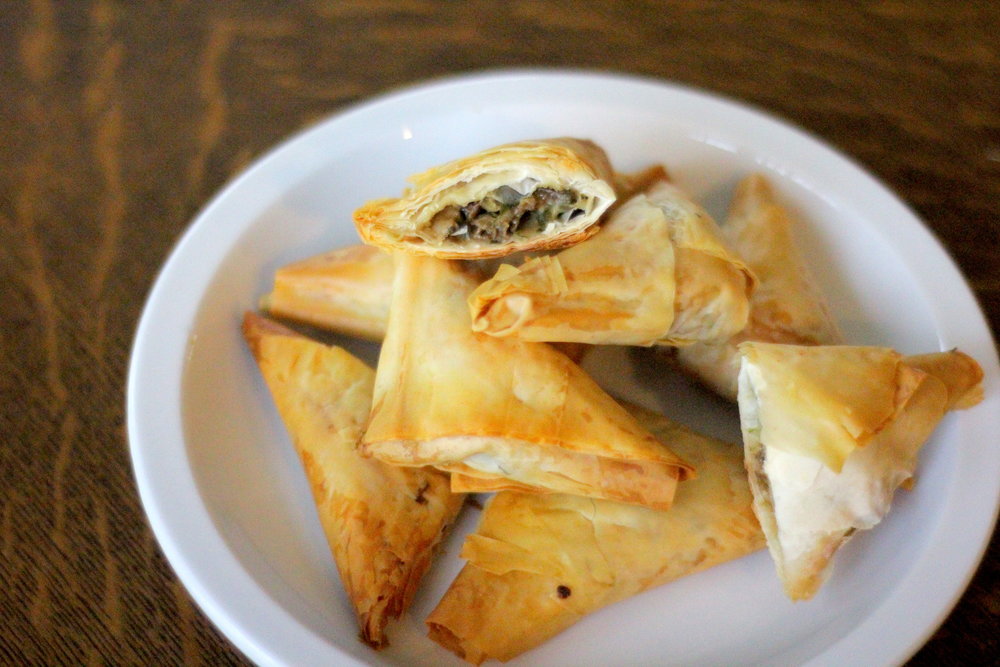
Handheld, light and flaky phyllo pies with a savory mushroom, leek, and parmesan filling. Seasonal and satisfying.

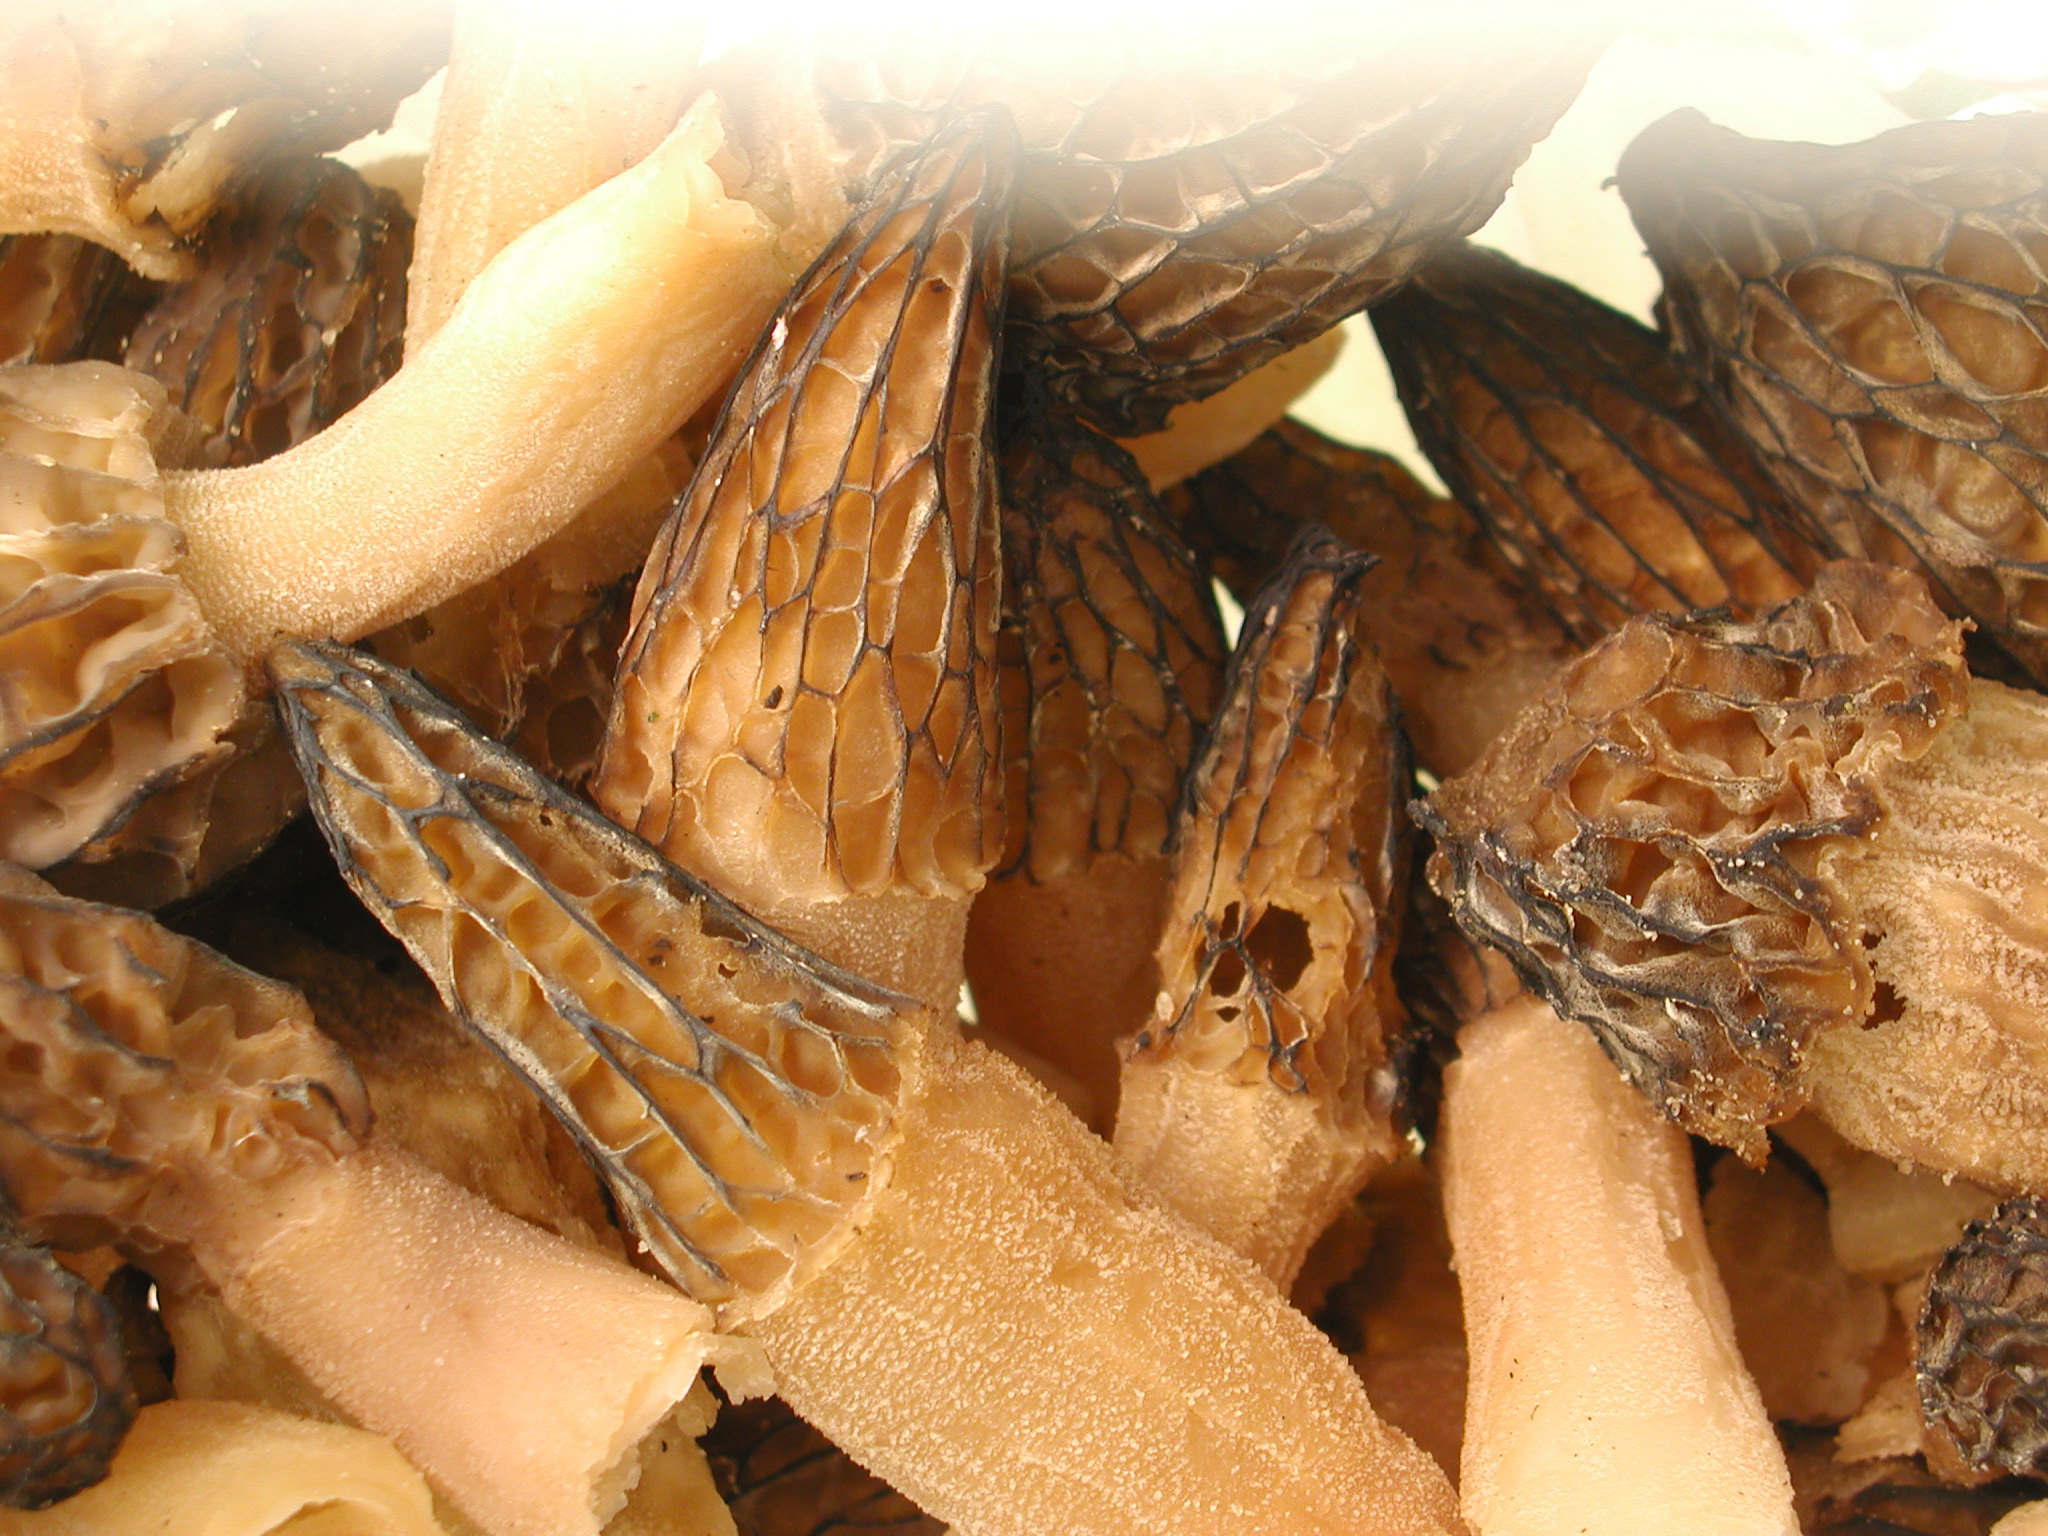
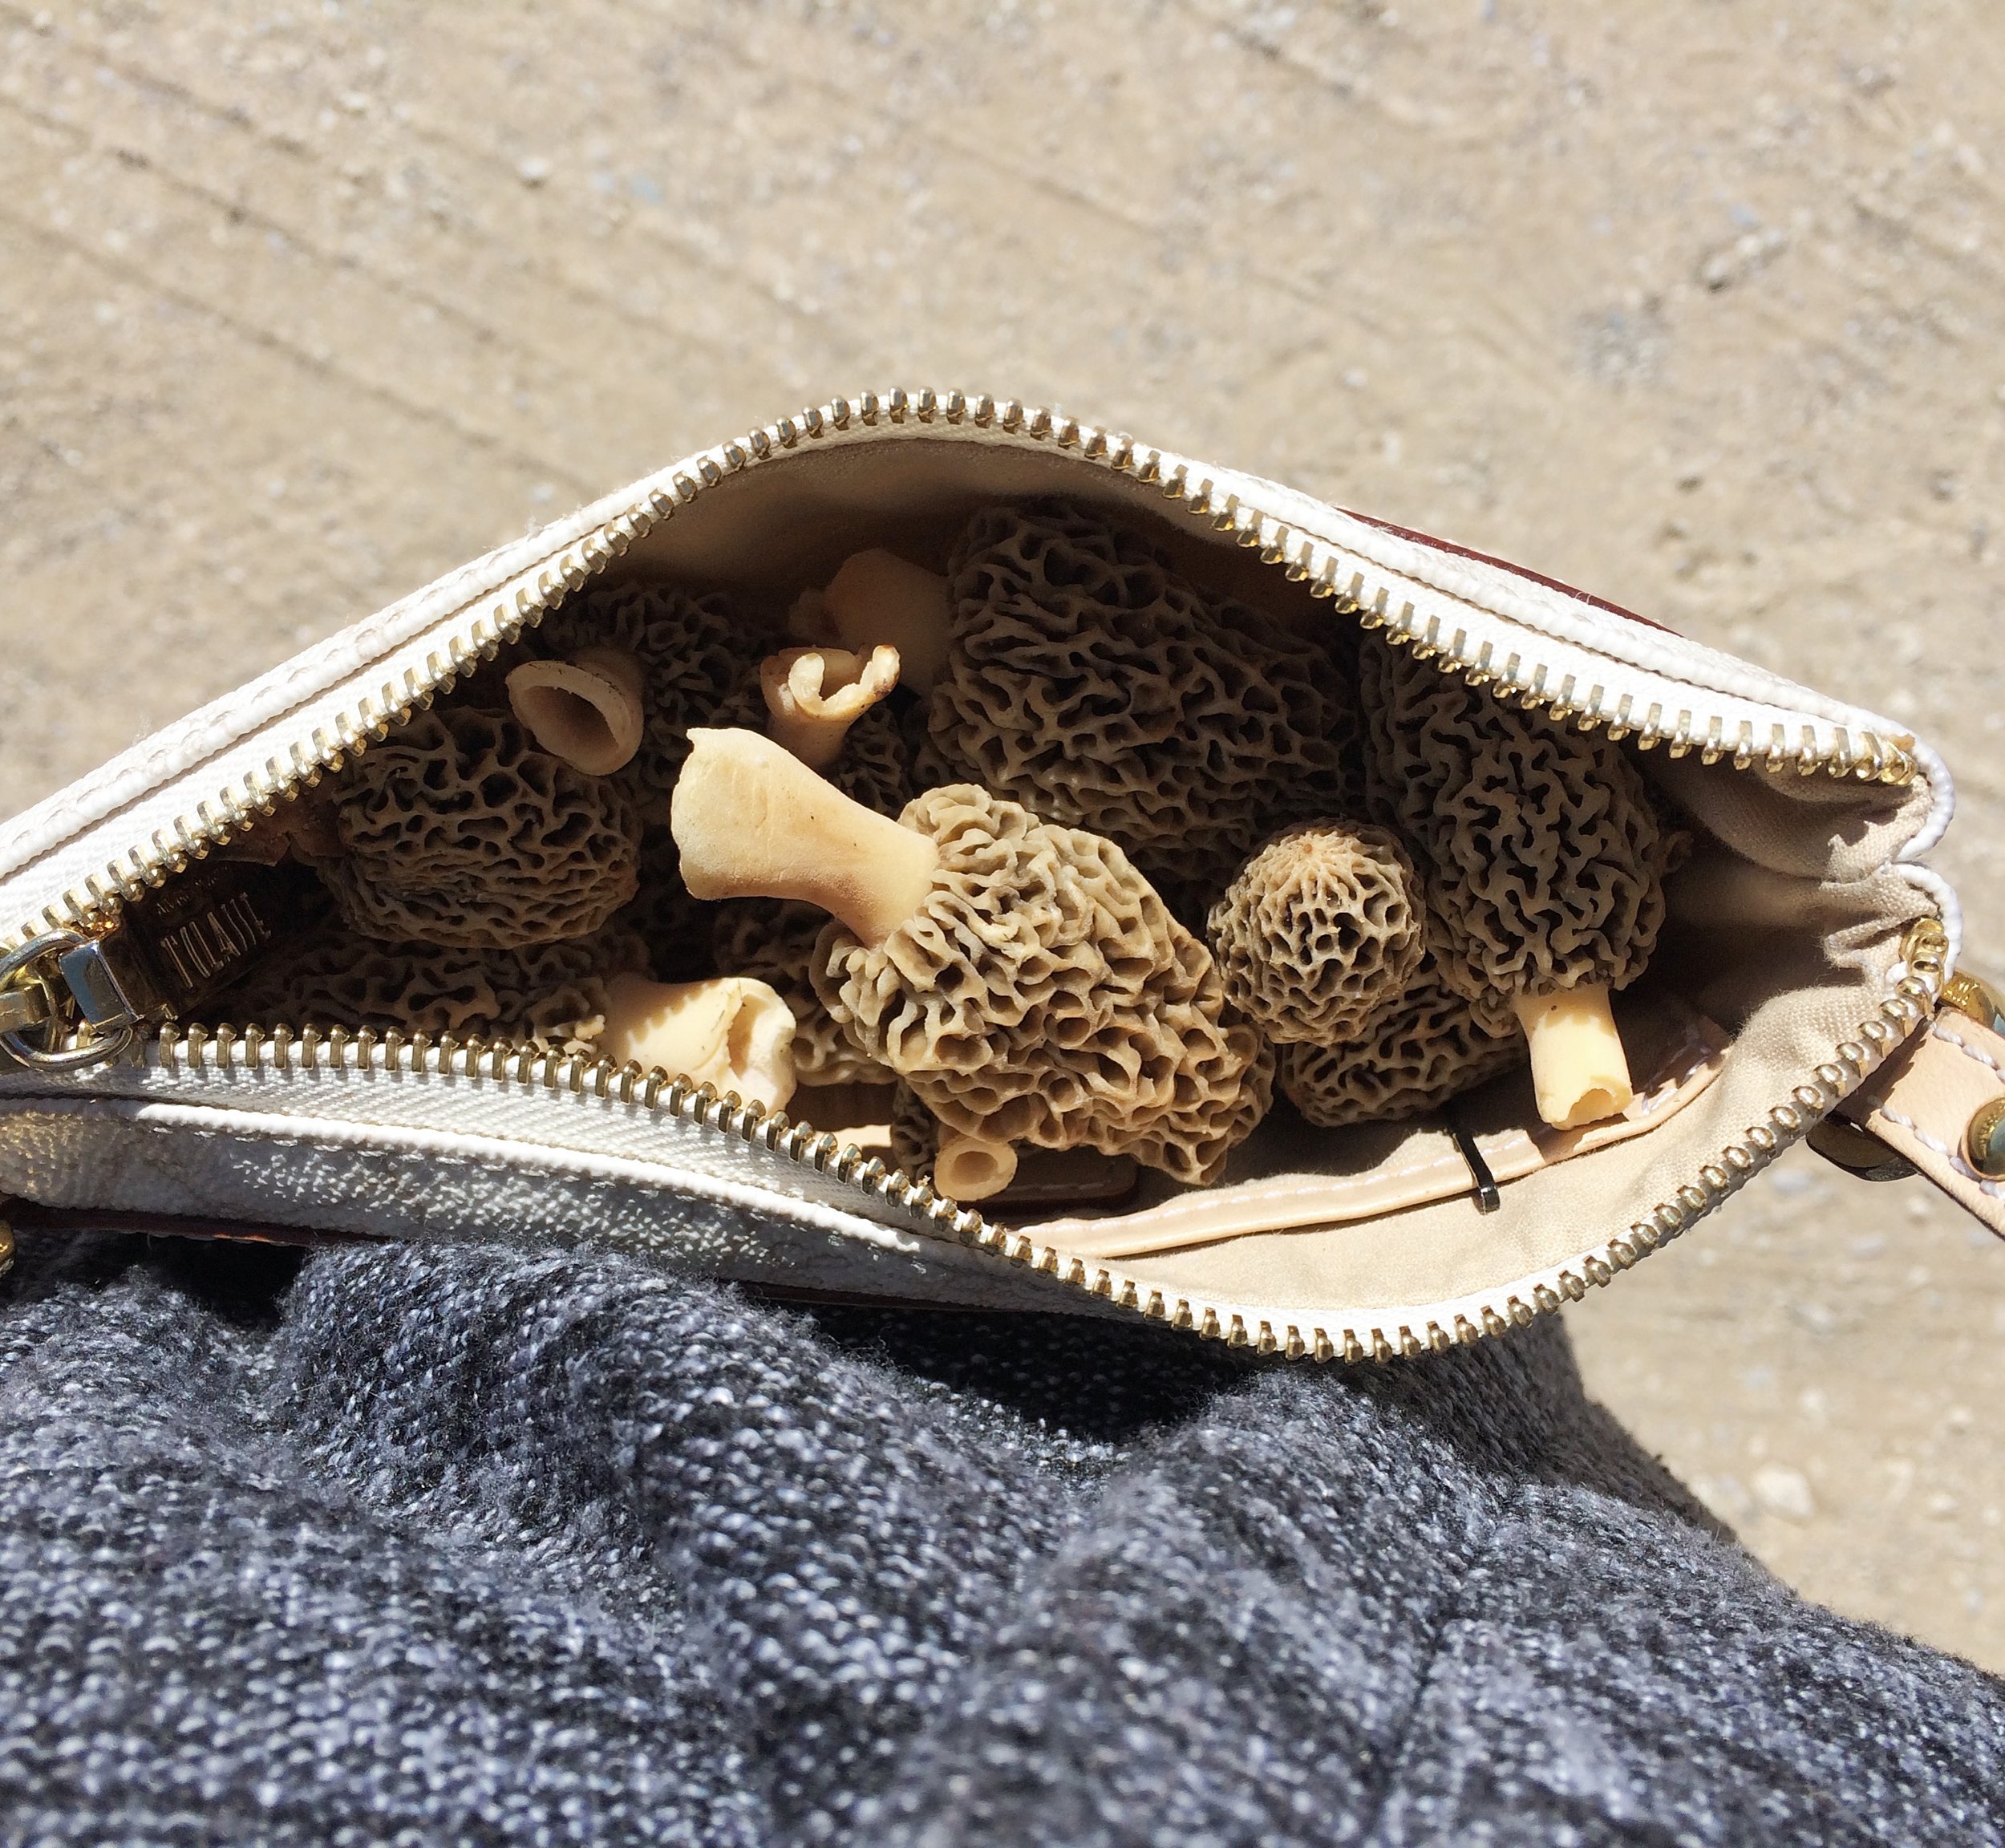
My favorite way to make these is with morel mushrooms, but these can also be made with other mushrooms, such as white or brown button mushrooms. Morel mushrooms are a delicacy where I’m from in Michigan, and definitely not available year round or in all places.

Morel Mushrooms

I've hunted for morel mushrooms with my family for as long as I can remember. Apparently it's not as common outside of the mitten and non-Michiganders sometimes think we're crazy.

There are two main types, that I know of anyway, black and white.  The season for blacks is just before the white, usually end of April to mid May, and the whites start mid May to the end of May, all depending on the weather.  After you pick the mushrooms it's best to soak them in salt water for a bit to clean them and evict any bugs. When I was younger my mom would throw out the mushroom water in the woods in the hopes that more morel mushrooms would grow. That never happened. However, we do have a spot or two in our woods that always have white morels.

Some years you can barely find any morel mushrooms, just a handful, best enjoyed lightly breaded in flour and fried in butter. Other years you find plenty, and when you’ve had your fill of them fried, you can start to use them in other dishes. 

These phyllo pies, my friends, are an absolutely delightful way to eat morels. They can be a bit fussy to make, but they’re worth it.

Phyllo plays an important part in these, it is the vessel that transports all the lovely mushrooms, leeks, and cheese to your mouth. I’m aware you can make your own homemade phyllo dough, but for most of us simple folk, it’s absolutely fine to use store-bought phyllo dough.  I've never made phyllo and don't have plans to. To you die hards out there that make it at home, my hat is off to you. In the meantime, I'm going to stroll over to my freezer and pull out some phyllo. Whew, hard work.  

Leeks vs. Wild Leeks

If you’re lucky enough to live in an area where morel mushrooms grow, chances are you might also have wild leeks available to you. Wild leeks, also known as ramps or spring onions, are small onion-like greens that grow plentiful in the woods. They’re quite small when compared to their regular leek counterparts, but have a wonderful smell and taste. While you’re out foraging for morel mushrooms, you might as well pick some wild leeks, too. Pull from the bottom to be able to pull up the whole white onion-looking root.

If you don’t have or prefer to use wild leeks, 1 regular leek from the store will do the trick.

This post may contain affiliate links. If you buy something using these links, Jennyblogs may receive a small commission, at no extra cost to you. This helps to support Jennyblogs. For further information see the privacy policy. Grazie!

Recipe adapted from Drizzle and Dip


Leek and Morel Mushroom Phyllo Pies

Makes about 12 pies

Ingredients:

  • 2 Tbsp / 28g oil

  • 4 garlic cloves, minced

  • 1 medium store-bought leek or about 12 wild leeks/ramps (about 3 cups / 270g), finely chopped

  • 1 shallot or 1/2 small onion, diced

  • 4 Tbsp / 56g butter or oil

  • about 5 cups / 375g chopped morel mushrooms, or other kind of mushrooms

  • 1/4 cup / 60g milk

  • 1/2 cup / 65g grated parmesan cheese

  • salt and pepper, to taste

  • 1 16 oz. package phyllo pastry sheets, thawed

  • melted butter or olive oil for brushing phyllo dough

Directions:

How to fold the phyllo pies

How to fold the phyllo pies

Oven 350°F / 177°C.  Line two sheet pans with parchment paper.  

  1. In a large saucepan, heat oil.

  2. Add garlic, leeks, and onion and sauté until tender onions are translucent and garlic fragrant.

  3. Add butter and mushrooms, cook until the liquid released from mushrooms has mostly evaporated; add milk and cook until the mixture is thick, just a few minutes. 

  4. Remove from heat and add cheese, mixing just until melted. Salt and pepper to taste. Allow to cool slightly while you prepare the phyllo dough.

  5. Remove phyllo pastry from plastic, unroll, and set aside the first two sheets to work with; cover remaining sheets with a slightly damp cloth to prevent them from drying out and becoming brittle.  

  6. Working quickly so the sheets don't dry out, brush the top side of one sheet with a bit of butter or oil and lay the second sheet on top. Cut the layered sheets lengthwise in thirds, so you will know have 3 long strips. 

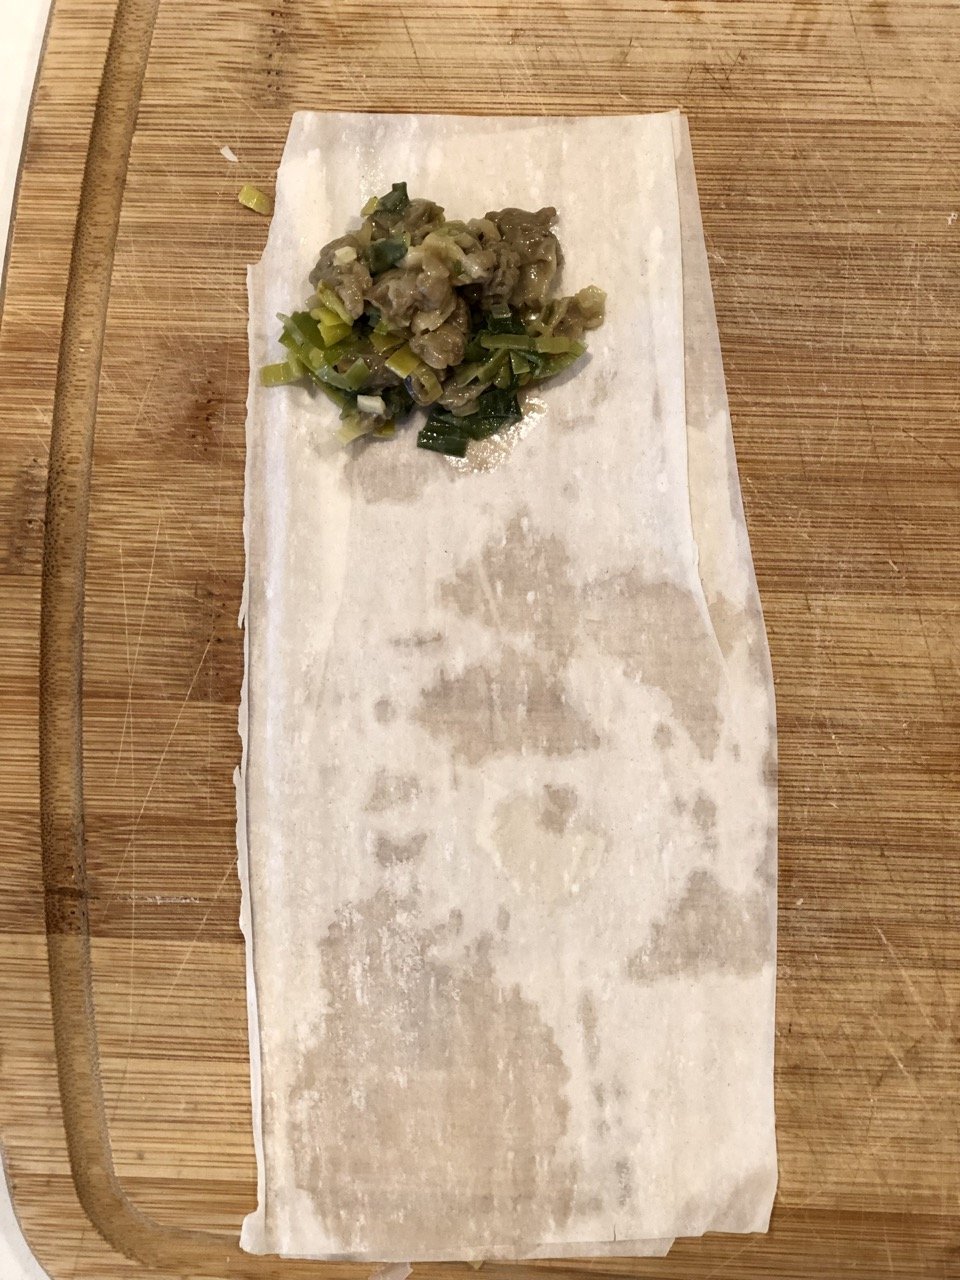
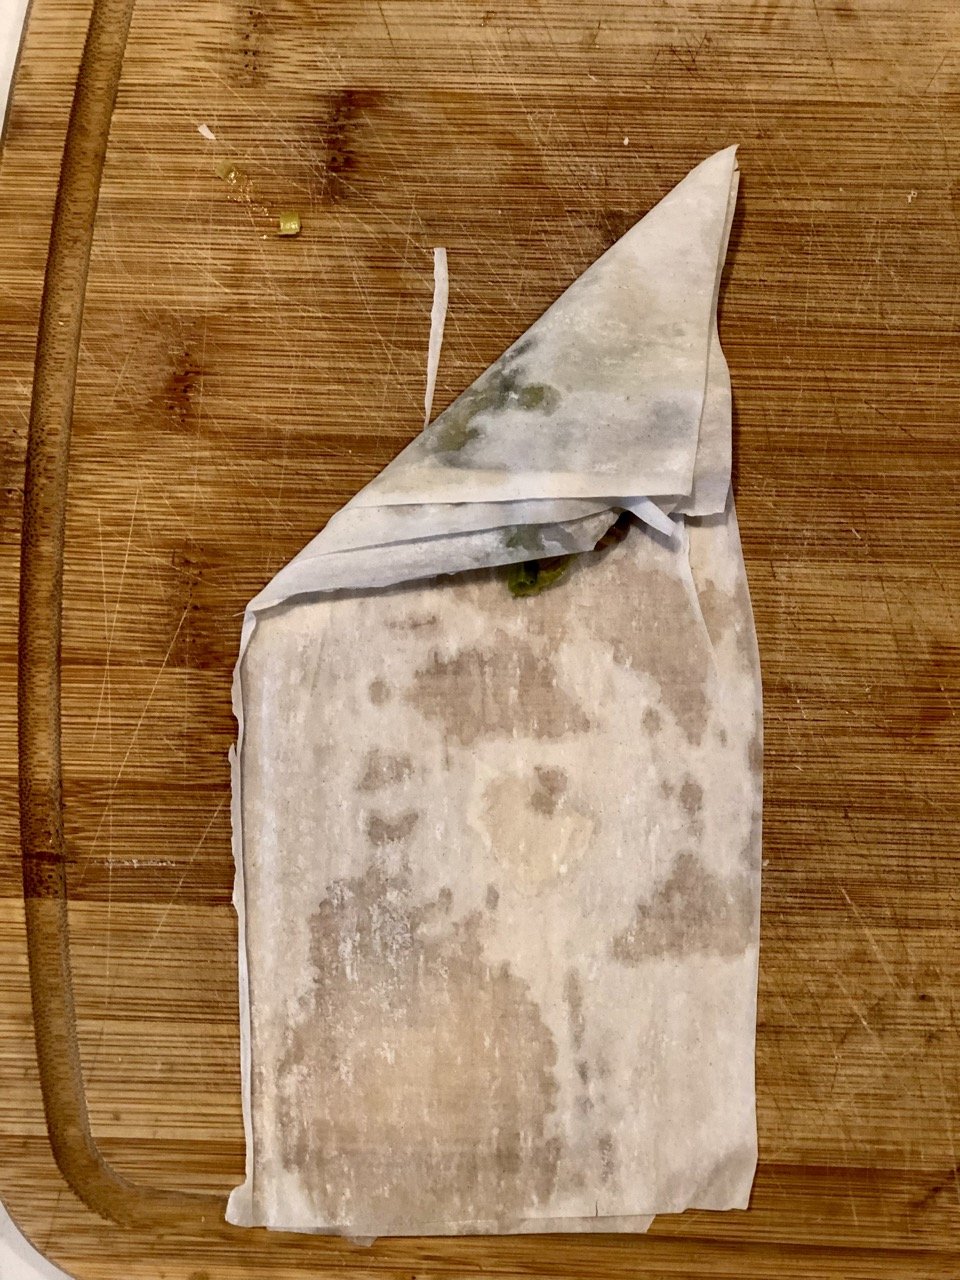
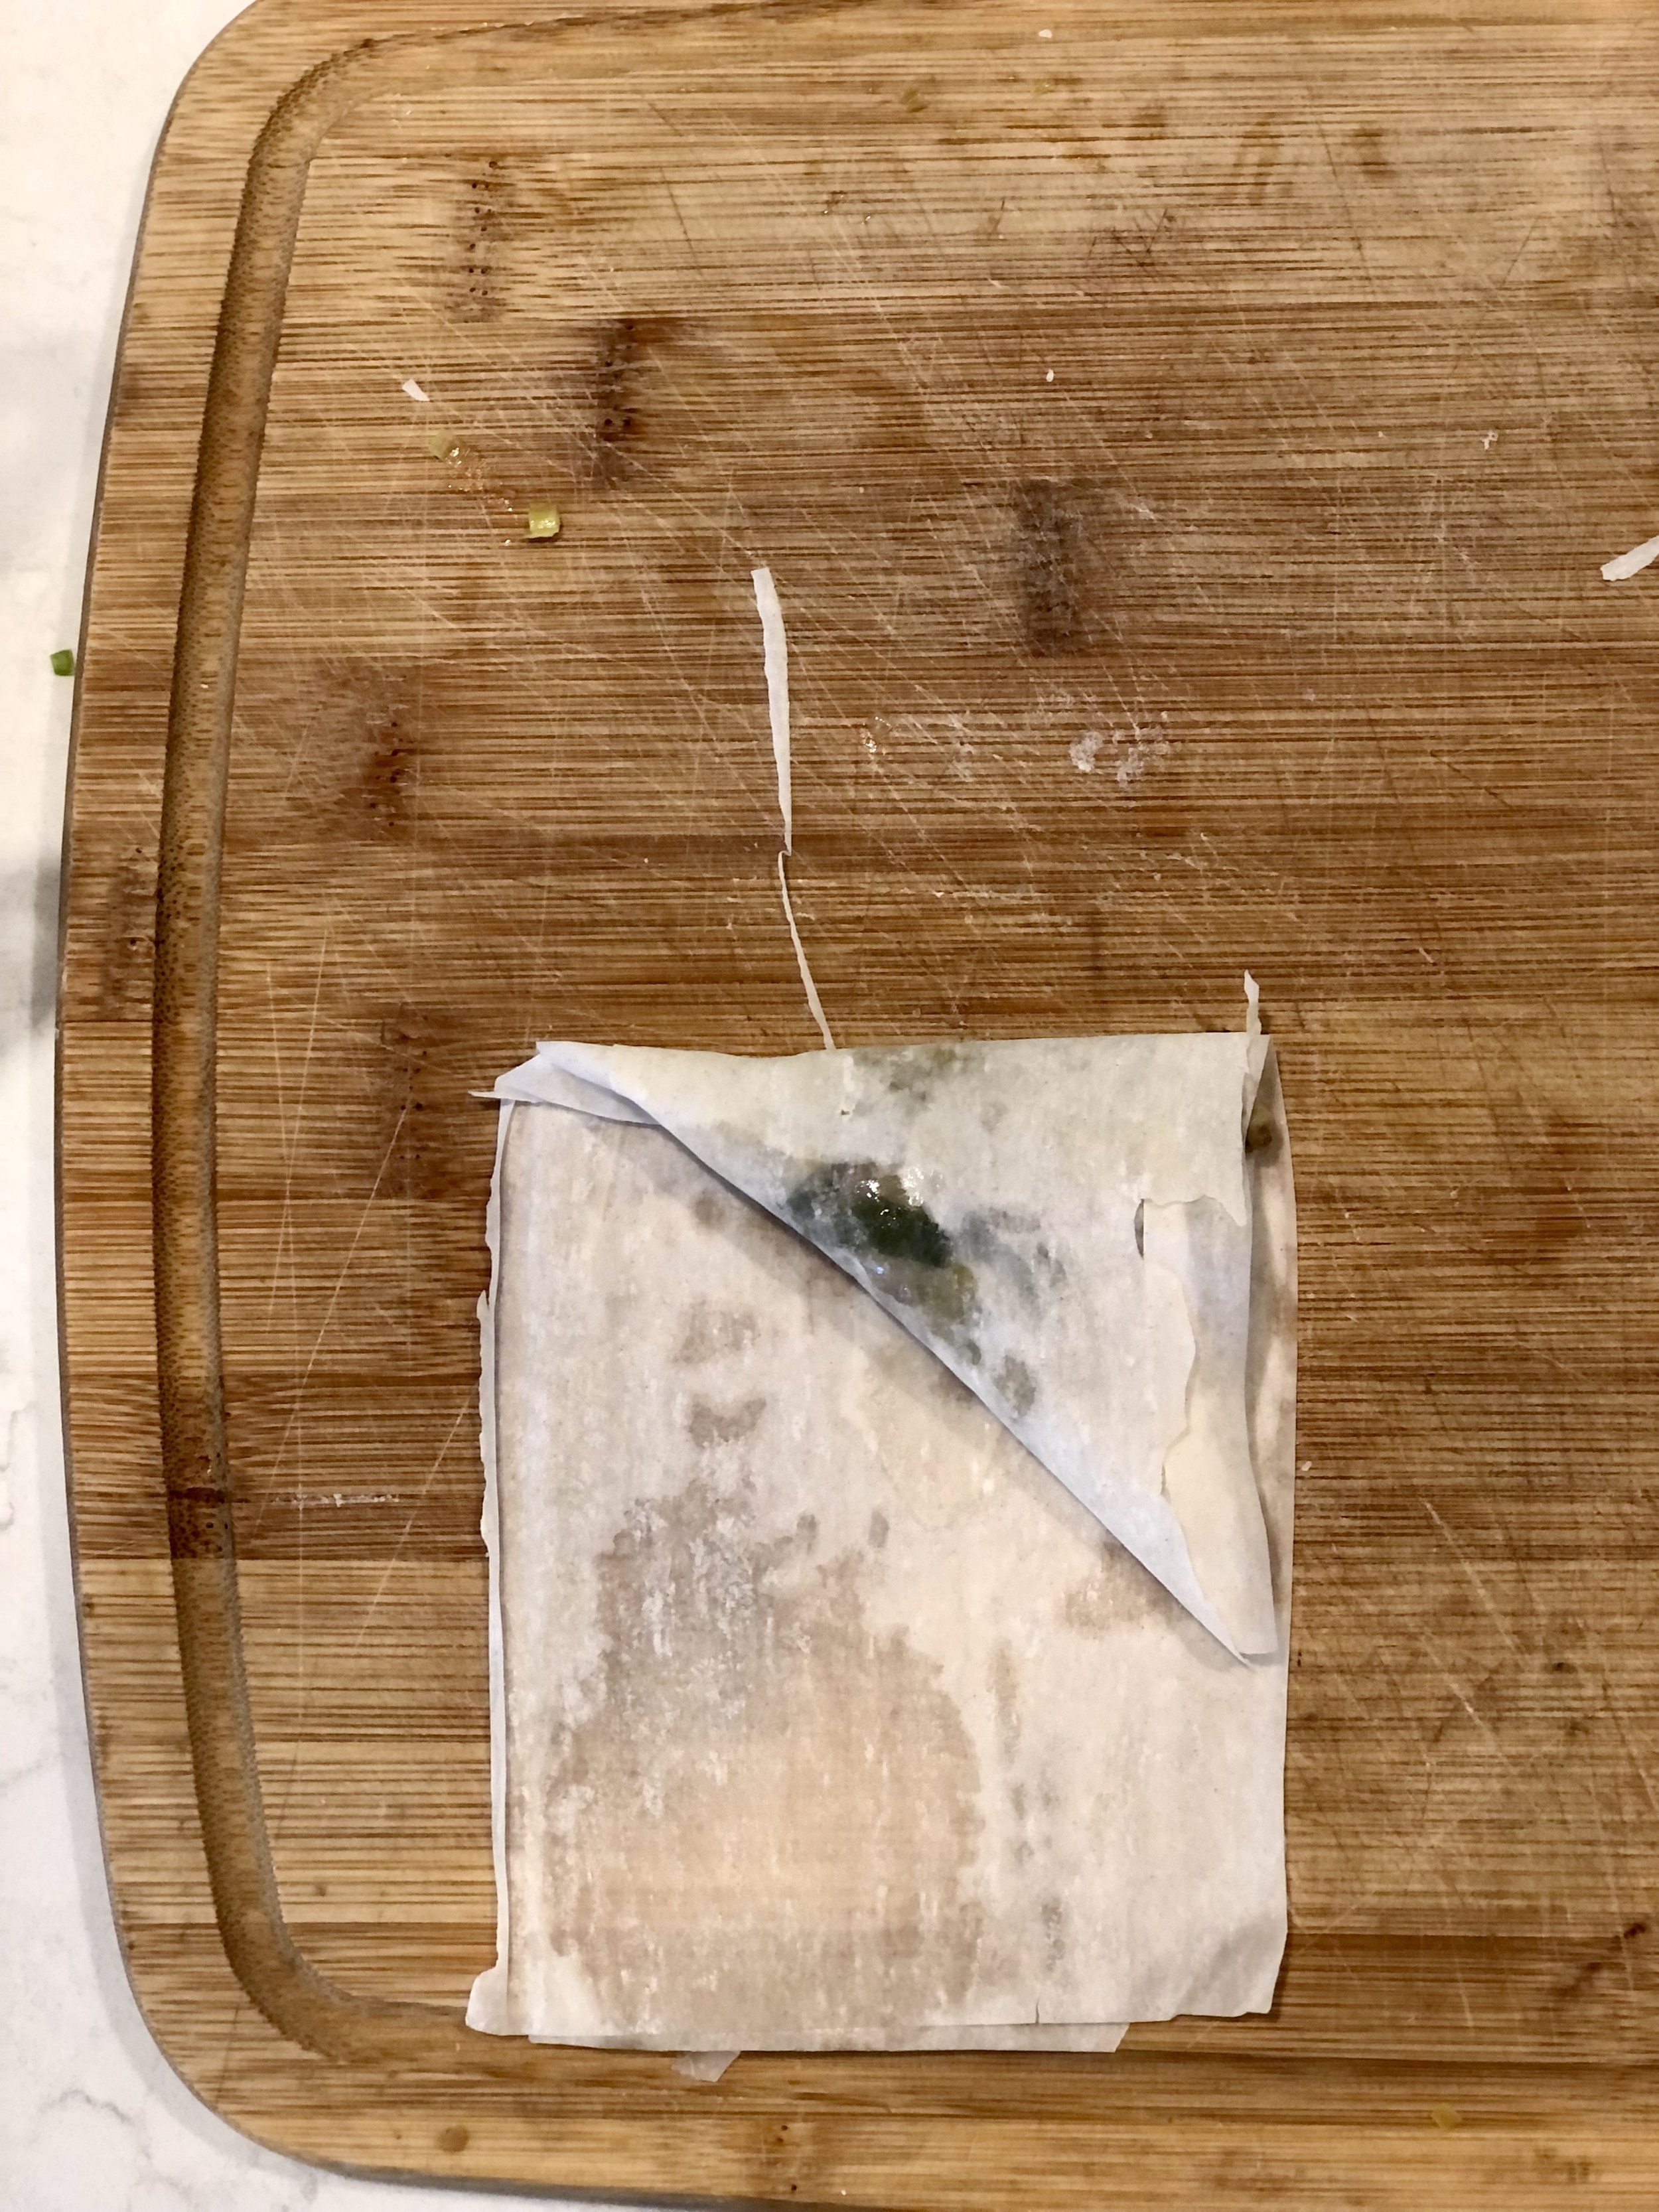
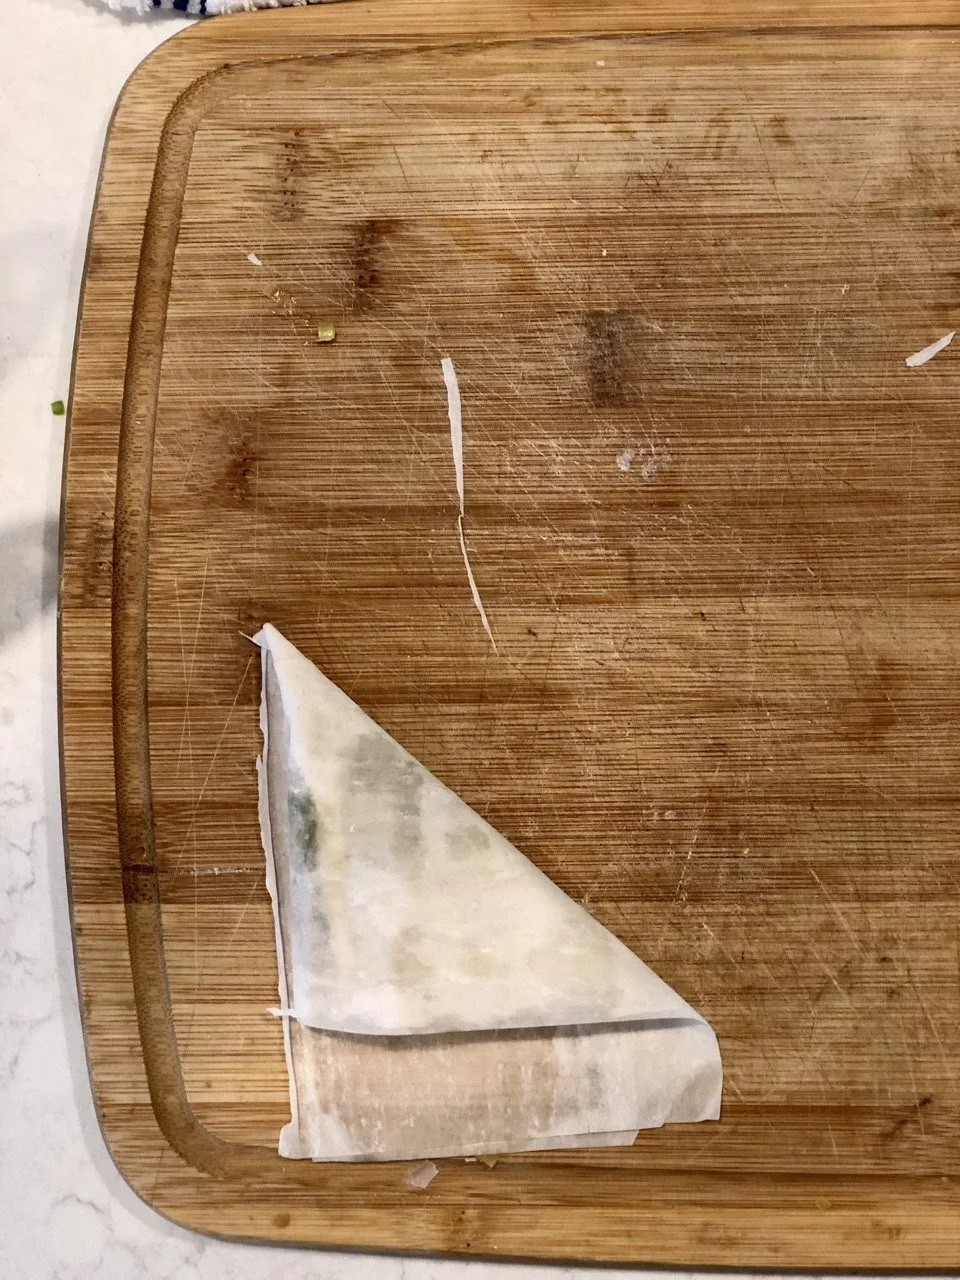
  7. Now for the fun "flipping" part.  (See photo above for reference.) Working with the first strip, spoon a small amount of filling, about 1 Tbsp, in the top corner.  Take that corner and fold it down until the tip reaches the opposite side; the filling should now be covered.  Next flip it straight down, the top should be level again. Fold again, taking the filled corner to the opposite side.  The dough should be kept taught through all this, but not so taught it rips.  Continue flipping/folding until the end of the strip. Use a dab of butter or oil to stick the end of the strip to the pie, if desired.  Place on pan, tucked side down, and repeat until all the filling or all the phyllo pastry has been used up.  Wrap any remaining phyllo tightly in plastic wrap and refrigerate until next use.

  8. Brush the tops of the pies with butter or oil and bake for 20-25 minutes, or until golden.       

Jenny's Notes:

  1. Store-bought leeks differ greatly from “wild leeks” in size. You may also know wild leeks by the name of ramps or spring onions.

  2. Give your phyllo dough ample time to thaw. Cold or frozen phyllo will crack as you try to unroll it, and can mess up your slicing and folding/flipping of the pies.

  3. If your phyllo is brittle or cracking, it probably got dried out. Keep phyllo dough in its plastic until absolutely necessary, then once opened keep under a damp towel. Once you start working with some of the sheets, move quickly so they won’t dry out. No need to panic, just don’t dawdle.

Leek and Morel Mushroom Phyllo Pies
Yield 24 servings
Author
Prep time
1 H & 15 M
Cook time
25 Min
Total time
1 H & 40 M

Leek and Morel Mushroom Phyllo Pies

Flaky phyllo hand pies stuffed with a leek, morel mushroom, and cheese filling.

Ingredients

Instructions

  1. Oven 350°F / 177°C. Line two sheet pans with parchment paper.
  2. In a large saucepan, heat oil.
  3. Add garlic, leeks, and onion and sauté until tender onions are translucent and garlic fragrant.
  4. Add butter and mushrooms, cook until the liquid released from mushrooms has mostly evaporated; add milk and cook until the mixture is thick, just a few minutes.
  5. Remove from heat and add cheese, mixing just until melted. Salt and pepper to taste. Allow to cool slightly while you prepare the phyllo dough.
  6. Remove phyllo pastry from plastic, unroll, and set aside the first two sheets to work with; cover remaining sheets with a slightly damp cloth to prevent them from drying out and becoming brittle.
  7. Working quickly so the sheets don't dry out, brush the top side of one sheet with a bit of butter or oil and lay the second sheet on top. Cut the layered sheets lengthwise in thirds, so you will know have 3 long strips.
  8. Now for the fun "flipping" part. (See photo above for reference.) Working with the first strip, spoon a small amount of filling, about 1 Tbsp, in the top corner. Take that corner and fold it down until the tip reaches the opposite side; the filling should now be covered. Next flip it straight down, the top should be level again. Fold again, taking the filled corner to the opposite side. The dough should be kept taught through all this, but not so taught it rips. Continue flipping/folding until the end of the strip. Use a dab of butter or oil to stick the end of the strip to the pie, if desired. Place on pan, tucked side down, and repeat until all the filling or all the phyllo pastry has been used up. Wrap any remaining phyllo tightly in plastic wrap and refrigerate until next use.
  9. Brush the tops of the pies with butter or oil and bake for 20-25 minutes, or until golden.

Notes

Store-bought leeks differ greatly from “wild leeks” in size. You may also know wild leeks by the name of ramps or spring onions.

Nutrition Facts

Calories

102.58

Fat

5.01 g

Sat. Fat

1.98 g

Carbs

11.88 g

Fiber

0.81 g

Net carbs

11.05 g

Sugar

0.34 g

Protein

2.62 g

Sodium

158.93 mg

Cholesterol

7.2 mg

Nutritional information is approximate, based on 1 phyllo pie

phyllo pies, hand pies, morel mushroom, leeks
appetizers, snacks, sides
American
Did you make this recipe?
Tag @jennyblogsandbakes on instagram and hashtag it #jennyblogs
IMG_4871.JPG

Have you ever gone morel mushroom hunting?  Tell me about your adventures in the comments below! :)

Pinwheels 3 Ways: Avocado Veggie - Buffalo Chicken - Thanksgiving

From top to bottom: Thanksgiving, Veggie, Buffalo Chicken

Last Updated August 11, 2024

Pinwheels. Also known as veggie rolls, veggie wraps, or veggie roll-ups, (but that just makes me think of fruit roll-ups, yuck. No offense to my fruit roll-up loving friends. Actually, every once in a blue moon I see a fruit roll up and think, hey, that sounds good right about now. Then I walk on. That's the end of the story.)  Or you could just call these tortilla/veggie/cream cheese concoctions for what they are; delicious. That would be fine. And the truth.  

Pinwheels make for a great snack or appetizer, or lunch because it can be hard to stop eating these! They're also very portable, quick, and simple to make, which make them ideal for parties, potlucks, lunch at the office, etc.  

The formula is very easy to get the hang of, think tortillas, cream cheese, and your flavors. Deli meat is easy to roll and adds some protein. Chopped, sliced, or grated veggies, raw or cooked, add some nutrients. Other kinds of cheese are tasty. Spices and herbs add flavor. Tuna and sliced hardboiled eggs could be a very European take on these. The options are endless, feel free to create your own!

Following are some of my favorite pinwheel flavors: Fresh Veggie and Avocado, Buffalo Chicken, and Turkey Cranberry a.k.a. Thanksgiving.  

This post may contain affiliate links. If you buy something using these links, Jennyblogs may receive a small commission, at no extra cost to you. This helps to support Jennyblogs. For further information see the privacy policy. Grazie!

Recipes by Jenny


Avocado Veggie Pinwheels

Makes about 24 pinwheels

Ingredients: 

Hmm, these photos could use improving upon…

Hmm, these photos could use improving upon…

  • 4 8-inch or 6 6-inch flour tortillas

  • 8 oz / 225g cream cheese, softened

  • 1/3 cup shredded carrots, or about 1-2 small carrots

  • 1/3 chopped spinach or broccoli

  • 1 bunch green onions, chopped

  • 1/4 tsp garlic powder

  • 1/4 tsp dill weed

  • salt and pepper, to taste

  • 1/2 cup guacamole

Directions:

  1. In a medium bowl, mix together cream cheese, carrots, spinach, green onions, garlic powder, dill weed, and salt and pepper.  

  2. Distribute evenly over tortillas, spreading almost to the edges.  Spread a thick layer of guacamole over cream cheese mixture.  Roll up tightly.  

  3. Trim edges and slice into approximately 1 inch slices.  Serve or chill until it's par-tay time.  

Avocado Veggie Pinwheels
Yield 24
Author
Prep time
25 Min
Total time
25 Min

Avocado Veggie Pinwheels

Tortillas slathered with seasoned cream cheese, avocado, and veggies, rolled up and sliced.
Cook modePrevent screen from turning off

Ingredients

Instructions

  1. In a medium bowl, mix together cream cheese, carrots, spinach, green onions, garlic powder, dill weed, and salt and pepper.
  2. Distribute evenly over tortillas, spreading almost to edges. Spread a thick layer of guacamole over cream cheese mixture. Roll up tightly.
  3. Trim edges and slice into approximately 1 inch slices. Chill until ready to serve.

Notes

All quantities are very approximate. You could double basically any ingredient you want to have more filling, less filling, more flavor, less flavor. The tortilla is your playground.

Nutrition Facts

Calories

68.72

Fat

4.49 g

Sat. Fat

2.11 g

Carbs

5.73 g

Fiber

0.61 g

Net carbs

5.05 g

Sugar

0.50 g

Protein

1.52 g

Sodium

104.65 mg

Cholesterol

9.47 mg

Nutritional information is approximate, based on 1 pinwheel.

pinwheels, roll ups, veggie rolls, veggie wraps, avocado, buffalo chicken pinwheels, Thanksgiving pinwheels, vegetable wraps, cranberry sauce, appetizer, finger food, snack
American
Did you make this recipe?
Tag @jennyblogsandbakes on instagram and hashtag it #jennyblogs

Buffalo Chicken Pinwheels

Makes about 24 pinwheels

Ingredients:

  • 4 8-inch or 6 6-inch flour tortillas

  • 8 oz / 225g cream cheese, softened

  • 1/3 cup / 80g Frank's hot sauce

  • 1/2 cup cooked chopped or shredded chicken

  • 1 bunch green onions, chopped

  • 1/4 cup blue cheese, crumbled, optional

Directions:

  1. In a medium bowl, mix together cream cheese, hot sauce, chicken, green onion, and blue cheese.

  2. Distribute evenly over tortillas, spreading almost to the edges.  Roll up tightly.  

  3. Trim edges and slice into approximately 1 inch slices.  Serve or chill until it's par-tay time.   

Buffalo Chicken Pinwheels
Yield 24
Author
Prep time
15 Min
Total time
15 Min

Buffalo Chicken Pinwheels

Tortillas slathered in Frank's hot sauce and cream cheese with chicken and green onions, rolled, and sliced for bite size hot wing pinwheels.
Cook modePrevent screen from turning off

Ingredients

Instructions

  1. In a medium bowl, mix together cream cheese, hot sauce, chicken, green onion, and blue cheese.
  2. Distribute evenly over tortillas, spreading almost to the edges. Roll up tightly.
  3. Trim edges and slice into approximately 1 inch slices. Chill until ready to serve.

Notes

All quantities are approximate. You could double basically any ingredient you want to have more filling, less filling, more flavor, less flavor. I often use canned chicken for the buffalo chicken. Pinwheels aren't exactly a showcase of your cooking/baking skills, anyway, so I like to keep things chop, chop. (Literally)

Nutrition Facts

Calories

74.28

Fat

4.60 g

Sat. Fat

2.40 g

Carbs

5.20 g

Fiber

0.30 g

Net carbs

4.90 g

Sugar

0.42 g

Protein

3.02 g

Sodium

177.01 mg

Cholesterol

14.74 mg

Nutritional information is approximate. Based on one pinwheel; includes blue cheese.

pinwheel, veggie roll up, veggie wrap, buffalo chicken, blue cheese, buffalo chicken wrap, buffalo chicken pinwheel, canned chicken
snack, appetizer
American
Did you make this recipe?
Tag @jennyblogsandbakes on instagram and hashtag it #jennyblogs

Thanksgiving Pinwheels

Makes about 24 Pinwheels

Ingredients:

  • 4 8-inch or 6 6-inch flour tortillas

  • 8 oz / 225g cream cheese, softened

  • 1/2 cup cranberry sauce

  • 8 oz sliced deli turkey (or leftover Turkey!)

  • 1/3 cup chopped spinach, optional

Directions:

  1. In a medium bowl mix together cream cheese, cranberry sauce, and spinach.  Distribute evenly over tortillas, spreading almost to the edges.  

  2. Layer turkey slices over cream cheese mixture.  Roll up tightly.  

  3. Trim edges and slice into approximately 1 inch slices.  Serve or chill until it's par-tay time.  

Thanksgiving Pinwheels
Yield 24
Author
Prep time
15 Min
Total time
15 Min

Thanksgiving Pinwheels

Tortilla spread with cream cheese, cranberry sauce, and turkey, rolled and sliced for a nostalgic bite-sized taste of Thanksgiving.
Cook modePrevent screen from turning off

Ingredients

Instructions

  1. In a medium bowl mix together cream cheese, cranberry sauce, and spinach. Distribute evenly over tortillas, spreading almost to the edges.
  2. Layer turkey slices over cream cheese mixture. Roll up tightly.
  3. Trim edges and slice into approximately 1 inch slices. Chill until ready to serve.

Notes

All quantities are approximate. You could double basically any ingredient you want to have more filling, less filling, more flavor, less flavor. Like I said, the tortilla is your playground. I like the spinach, it gives it a nice punch of color. It also makes the roll versatile for Christmas, beautiful red and green!

Nutrition Facts

Calories

79.26

Fat

4.10 g

Sat. Fat

2.05 g

Carbs

8.14 g

Fiber

0.39 g

Net carbs

7.75 g

Sugar

2.56 g

Protein

2.63 g

Sodium

182.60 mg

Cholesterol

14.67 mg

Nutritional information is approximate. Based on one pinwheel; Includes spinach.

pinwheels, veggie roll ups, Thanksgiving, cream cheese, Thanksgiving pinwheel, Thanksgiving wrap, turkey, cranberry sauce, spinach
snack, appetizer
American
Did you make this recipe?
Tag @jennyblogsandbakes on instagram and hashtag it #jennyblogs

Jenny's Notes:

  • All quantities are approximate.  You could double basically any ingredient you want to have more filling, less filling, more flavor, less flavor.  Like I said, the tortilla is your playground.  

  • I like the spinach in the Thanksgiving roll, it gives it a nice punch of color.  It also makes the roll versatile for Christmas, beautiful red and green! 

  • I usually use canned chicken for the buffalo chicken. Pinwheels aren't exactly a showcase of your cooking/baking skills, anyway, so I like to keep things easy.