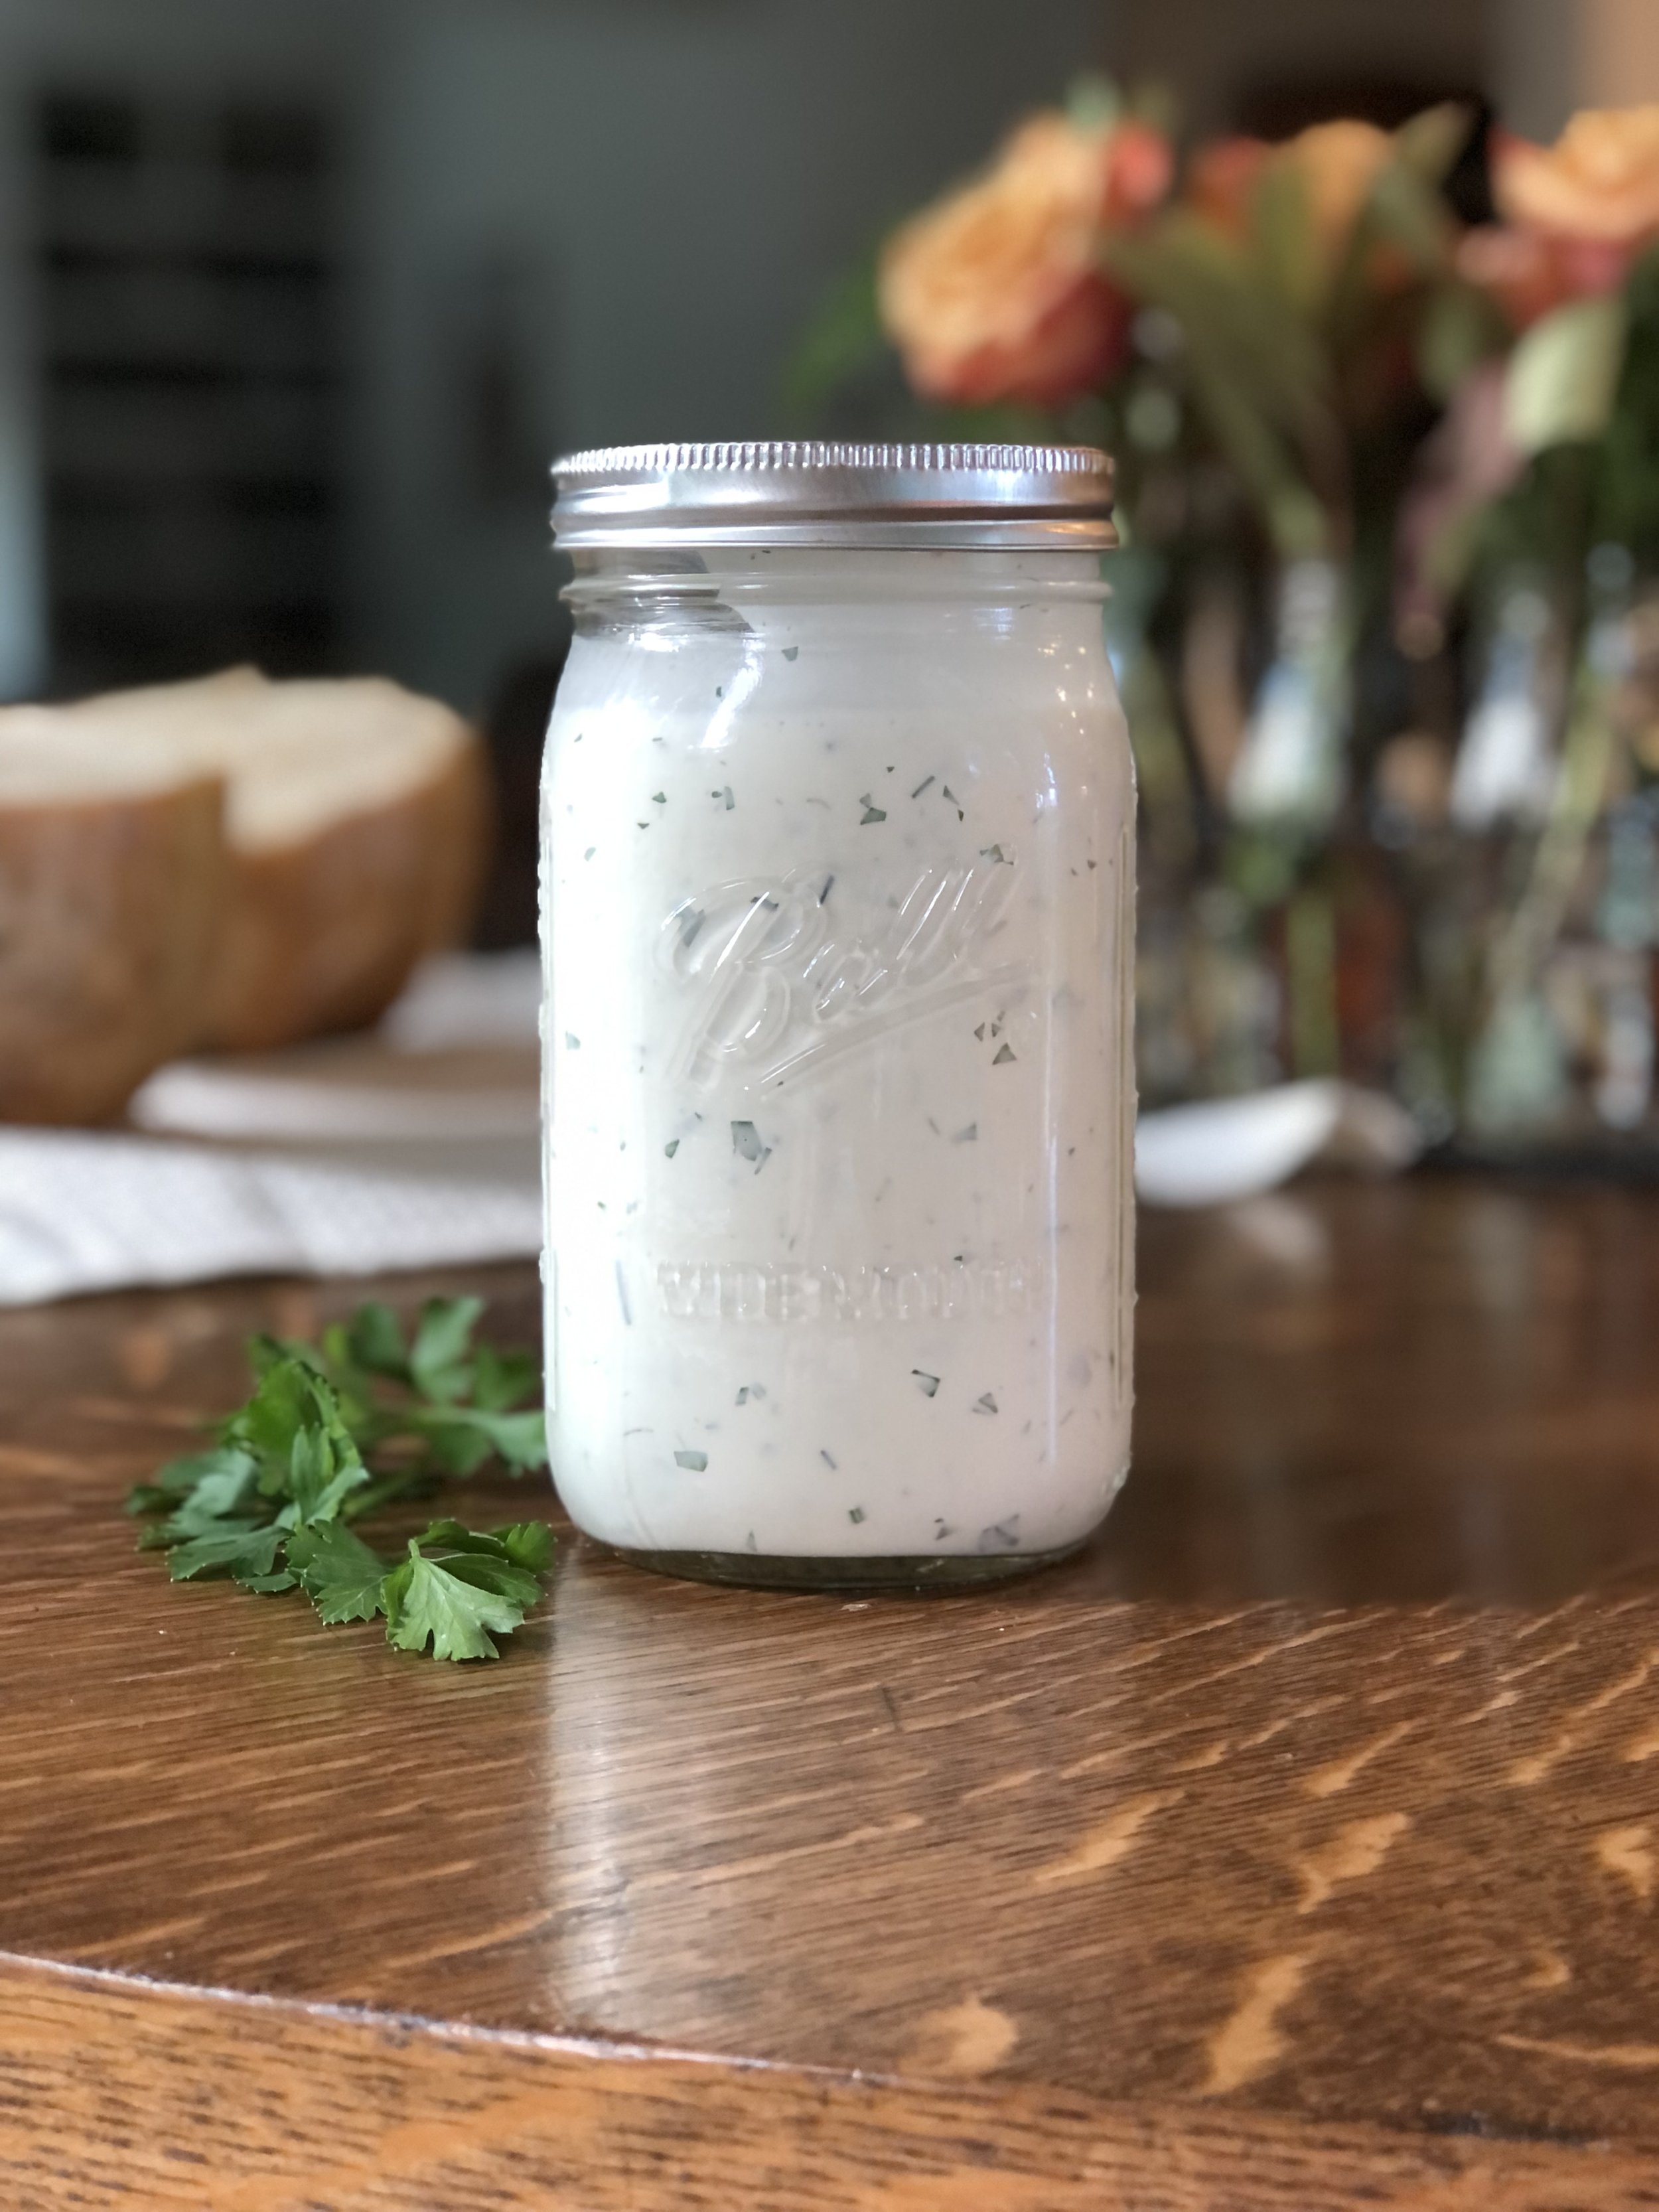
Homemade Thousand Island Dressing

Thousand Island Dressing - you know it as the pinkish, sweet and salty dressing for salads, hamburgers, and various other creative uses.

What you might not know is what this salad dressing is made of, and that it is super simple to whip up at home with only 7 ingredients you very possibly already have on hand!

Essentially, Thousand Island Dressing is a mayonnaise and ketchup based dressing. Beyond that, there are many variations, although my favorite below features sweet relish and onions.

Where did Thousand Island Dressing come from?

Its origin is disputed, but two main tales originate in the Thousand Islands region, between northern New York and Canada.

One tale starts at Boldt Castle when George Boldt (Waldorf-Astoria billionaire) and his wife Louise were out on their yacht. Their chef forgot to bring a dressing for some greens and had to scrounge something up, which turned into Thousand Island Dressing.

Another tale stems from a recipe found in a restaurant in the same Thousand Islands area. The recipe appears to be what we know now as Thousand Island Dressing, but is simply called “Sophia’s Sauce”. Sophia and George Lelonde used to own the restaurant.

Wherever it came from, it blossomed in popularity, although honestly I never understood why.

Why Make Thousand Island Dressing? One Reason: Taco Salad

Thousand Island has always been a bit mysterious to me, I never much cared for it and I never gave much thought to what it was actually made of. I usually saw it in a bottle, and per usual with store-bought salad dressings, many of the ingredients weren’t ones I cared overly to be eating.

my tiny photo stager :)

However, despite having no strong feelings for Thousand Island dressing, there is one dish that I and my family love that Thousand Island is crucial to: Taco Salad. Yep, that’s right. I don’t even know how Thousand Island came to be “the” dressing for Taco Salad, as I’ve never heard of anyone putting it on their tacos. I’m not sure where the Taco Salad recipe in my family came from originally, but whoever made it up decided, oh let’s make a salad with all the components of tacos in it…what kind of dressing should we use? I know, Thousand Island Dressing, naturally!

Due to our love for Taco Salad and also our desire to eat healthier and make things homemade, we decided to look in to making our own Thousand Island Dressing, especially since we don’t use it for anything else. I came across this recipe and we haven’t bought a bottle of Thousand Island since.

Recipe Adapted from Simply Recipes


Homemade Thousand Island Dressing

Makes about 1 1/2 cups of dressing

Ingredients:

  • 1 cup / 230g mayonnaise

  • 1/4 of an onion or 1 shallot, minced

  • 2 Tbsp / 30g ketchup

  • 2-3 Tbsp / 30g sweet pickle relish

  • 1 tsp / 5g lemon juice

  • 1/2 tsp sweet paprika

  • 1/4 tsp salt

Directions:

  1. Combine all ingredients together in a bowl, mix well.

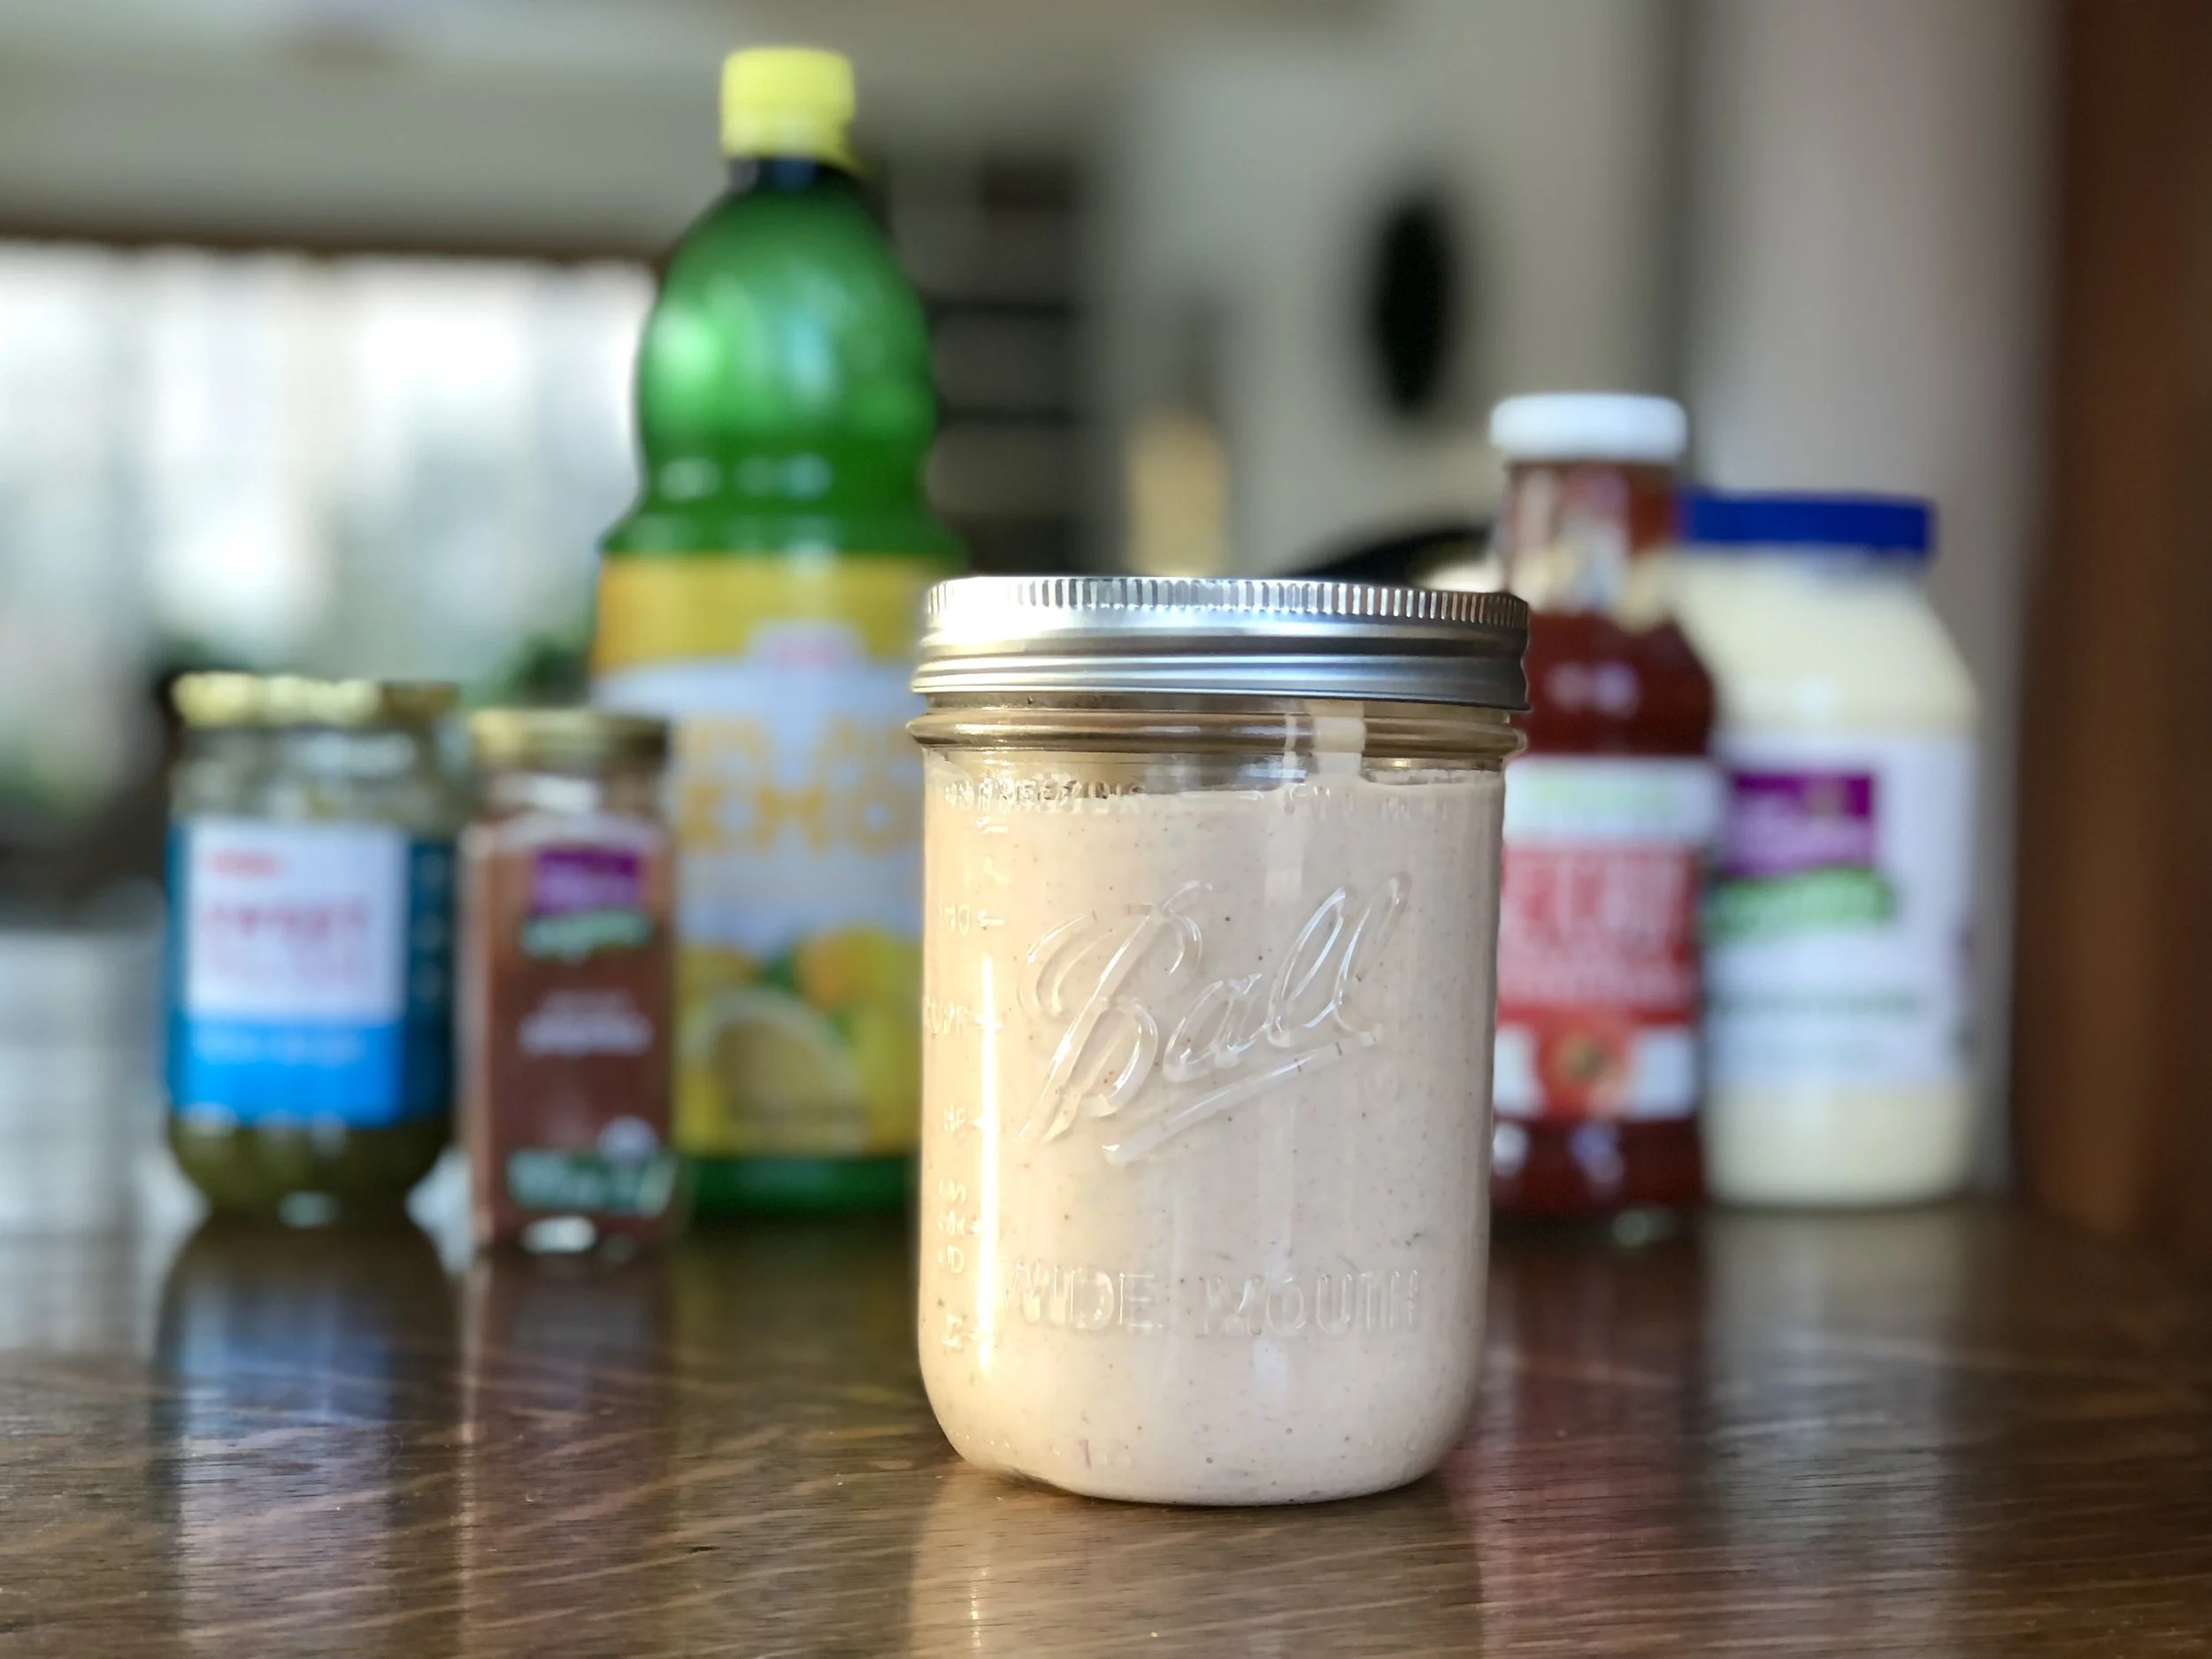
  2. Place in a jar or sealed container and store in the fridge.

Jenny’s Notes:

  • Letting the dressing sit for a few hours or ideally a day or two really lets the flavors meld. It also can help to tame the onion or shallot a bit.

  • Use more sweet relish if you like a sweeter and tangier Thousand Island, use less if you don’t want it as sweet.

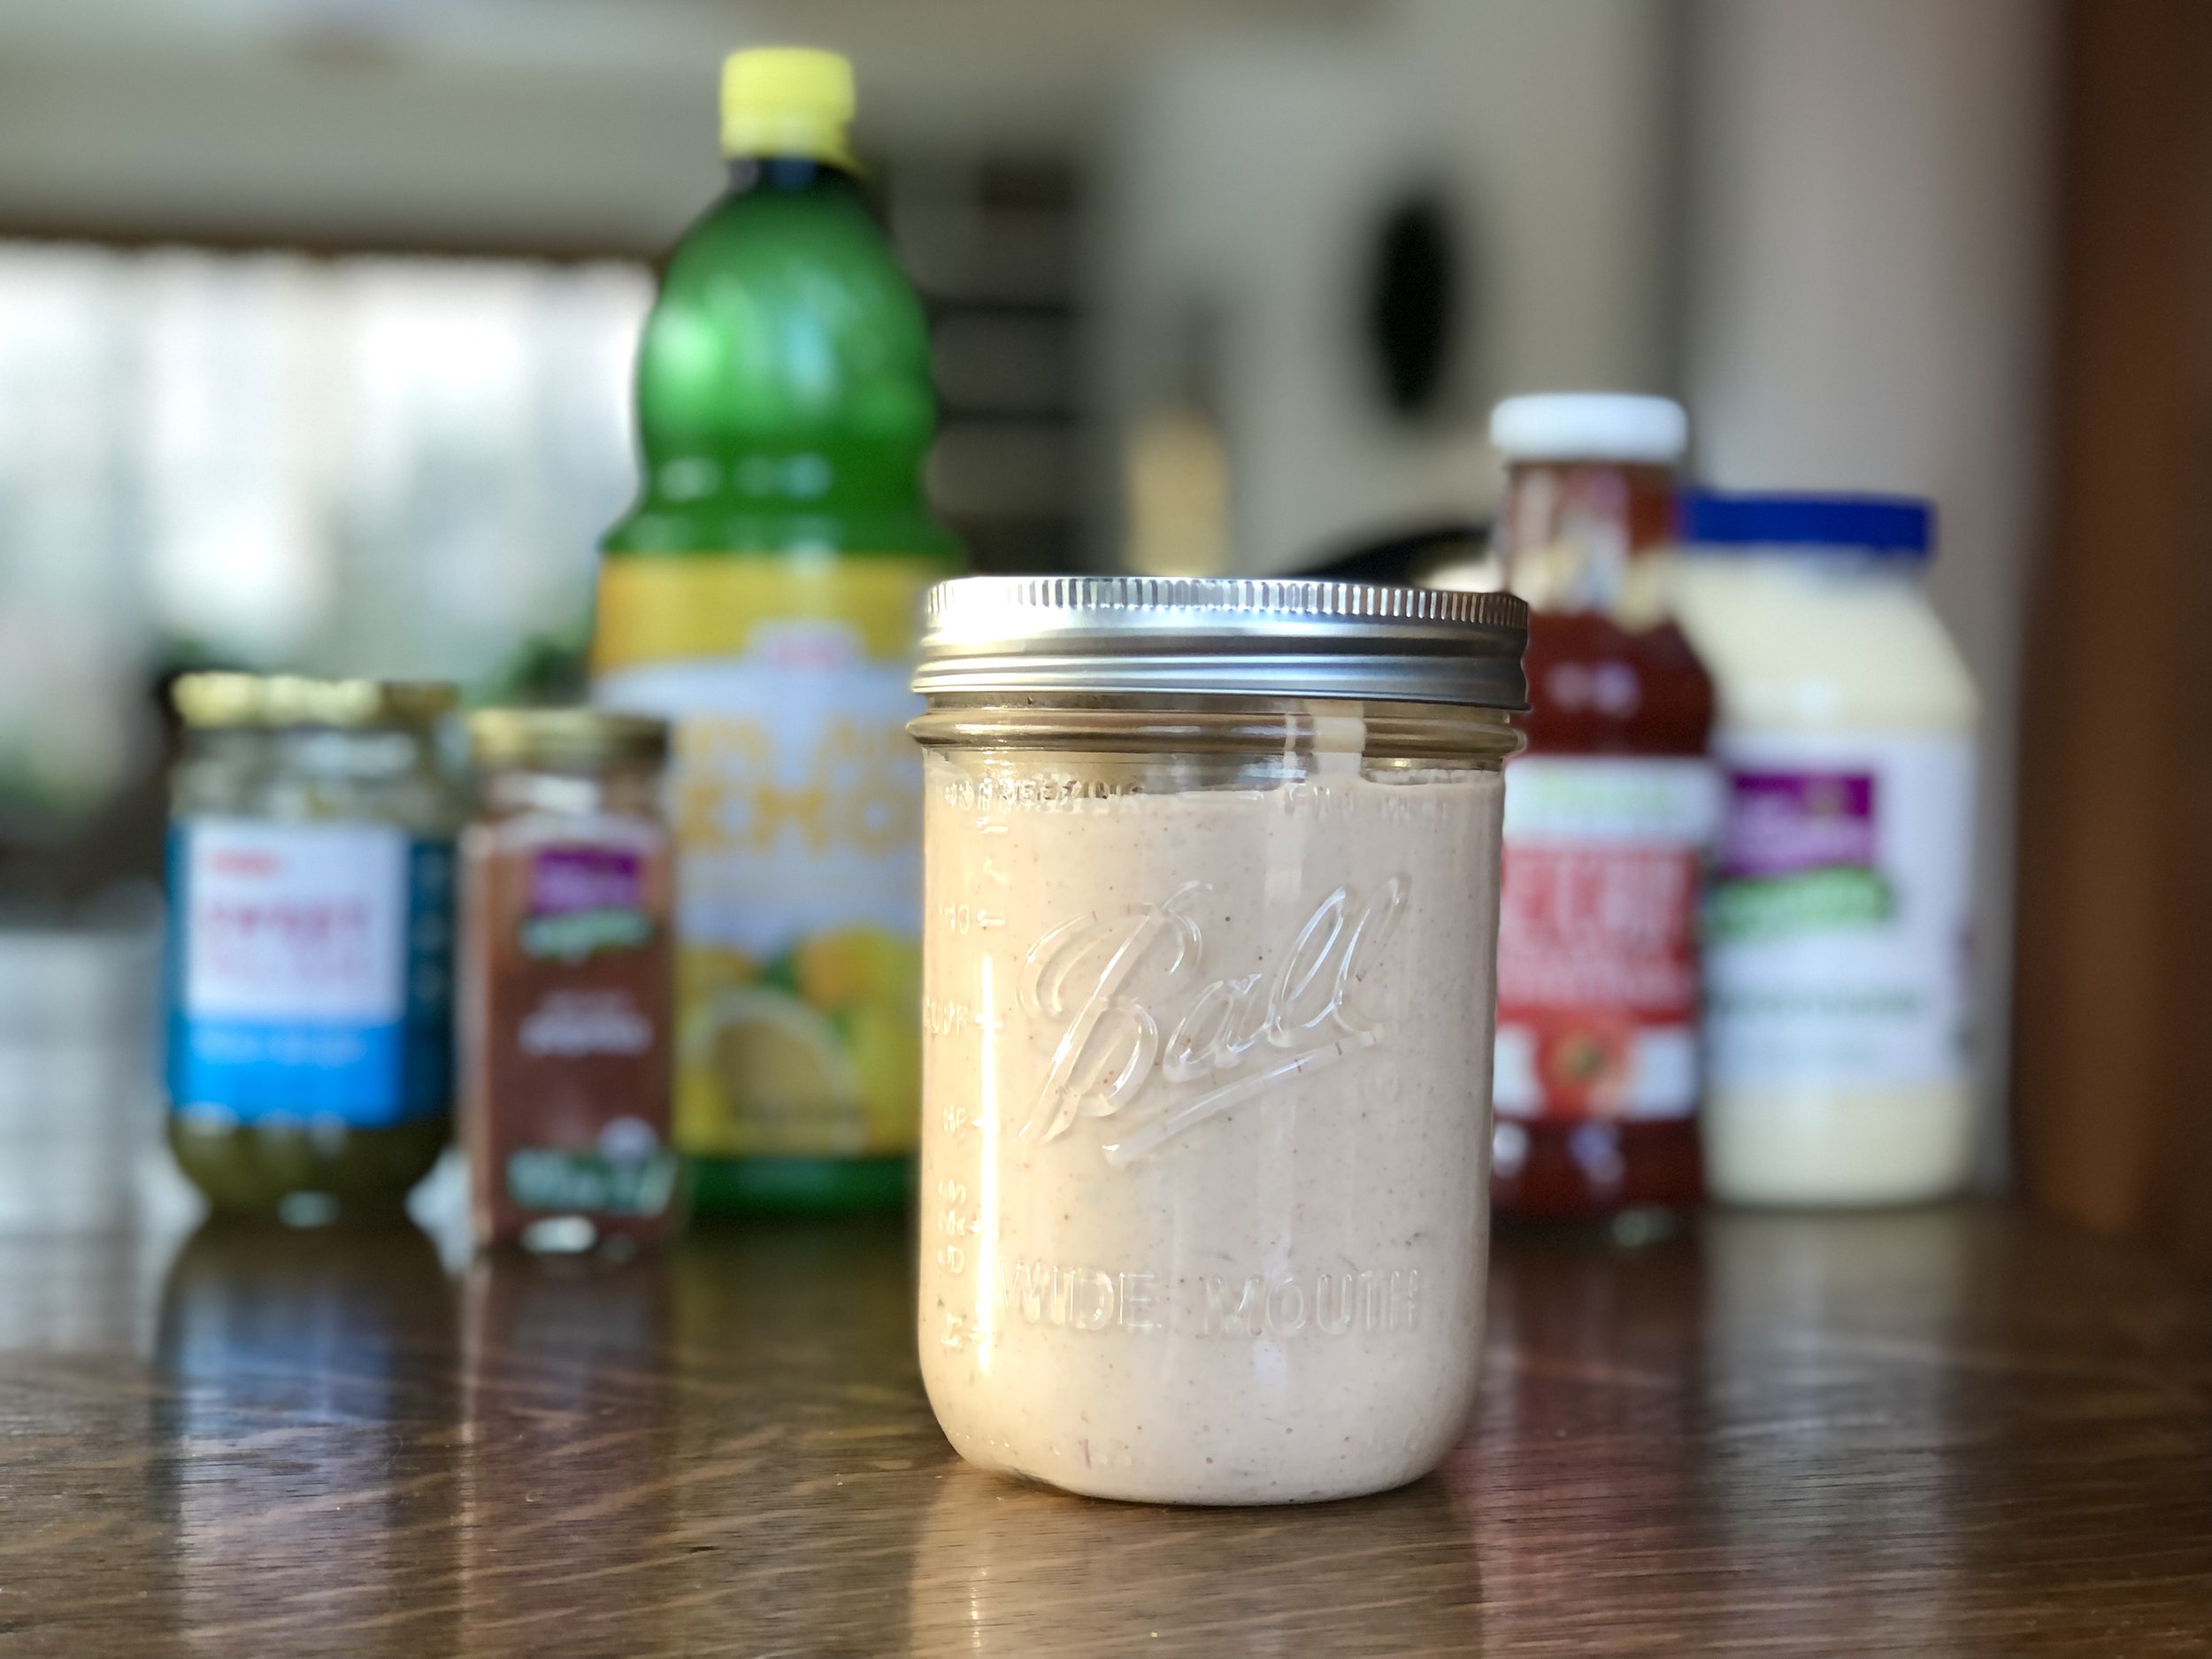
  • Mason jars make great storage containers!

Thousand Island Dressing, homemade, Sofia's Sauce, Salad Dressing
Condiment,
American
Yield: 12 servings. about 1 1/2 cups
Author:
Homemade Thousand Island Dressing

Homemade Thousand Island Dressing

Sweet and tangy homemade Thousand Island Dressing comes together in minutes with just 7 ingredients. It's tastier, healthier, and cheaper than its store-bought counterpart!
Prep time: 10 MinTotal time: 10 Min

Ingredients

Instructions

  1. Combine all ingredients together in a bowl, mix well.
  2. Place in a jar or sealed container and store in the fridge.

Notes

  • Letting the dressing sit for a few hours or ideally a day or two really lets the flavors meld. It also can help to tame the onion or shallot a bit.
  • Use more sweet relish if you like a sweeter and tangier Thousand Island, use less if you don’t want it as sweet.

Nutrition Facts

Calories

134.56

Fat

13.99 g

Sat. Fat

2.18 g

Carbs

2.15 g

Fiber

0.09 g

Net carbs

2.06 g

Sugar

1.68 g

Protein

0.24 g

Sodium

218.14 mg

Cholesterol

7.84 mg

Nutritional information is approximate. Based on a serving of 2Tbsp.

Did you make this recipe?
Tag @jennyblogsandbakes on instagram and hashtag it #jennyblogs

Homemade Evaporated Milk

Making evaporated milk at home is very simple to do. You only need one ingredient: milk!

The evaporated milk you buy from the store is simply milk that has had 60% of its water evaporated.You can make your own by simmering it on the stove until reduced by 60%, or a bit more than half. It takes a bit of time and diligence, half hour or so of simmering, and remembering it’s there so it doesn’t boil dry. And no. of course I’ve never done either of those things, nope. But really, it’s so simple to make you can hardly call this a “recipe”!

Now, knowing how to make evaporated milk is wonderful for various occasions, but it does have its cons. The most obvious being it takes time and is easy to forget simmering on the stove. Second, even when made correctly the milk can cook onto the bottom of the pan over the simmering period and is not the most fun to clean. Because of these drawbacks, I still do buy cans of evaporated milk at times!

On the flip side, the beauty of making your own evaporated milk is that you can personalize to your tastes or dietary needs. To make the closest to store-bought evaporated milk, use whole milk. Otherwise, you can use lower fat varieties or even any plant or nut milks you prefer!

The recipe as written below will give you the equivalent of 1 can of evaporated milk, or 1 1/2 cups. Adjust the recipe depending on how much you need!

Do you want to learn how to make homemade sweetened condensed milk, also? Click here for the recipe!

This post may contain affiliate links. If you make a purchase using these links, Jennyblogs may receive a small commission, at no extra cost to you. This helps to support Jennyblogs. For further information see the privacy policy. Grazie!

Recipe by Jenny


Homemade Evaporated Milk

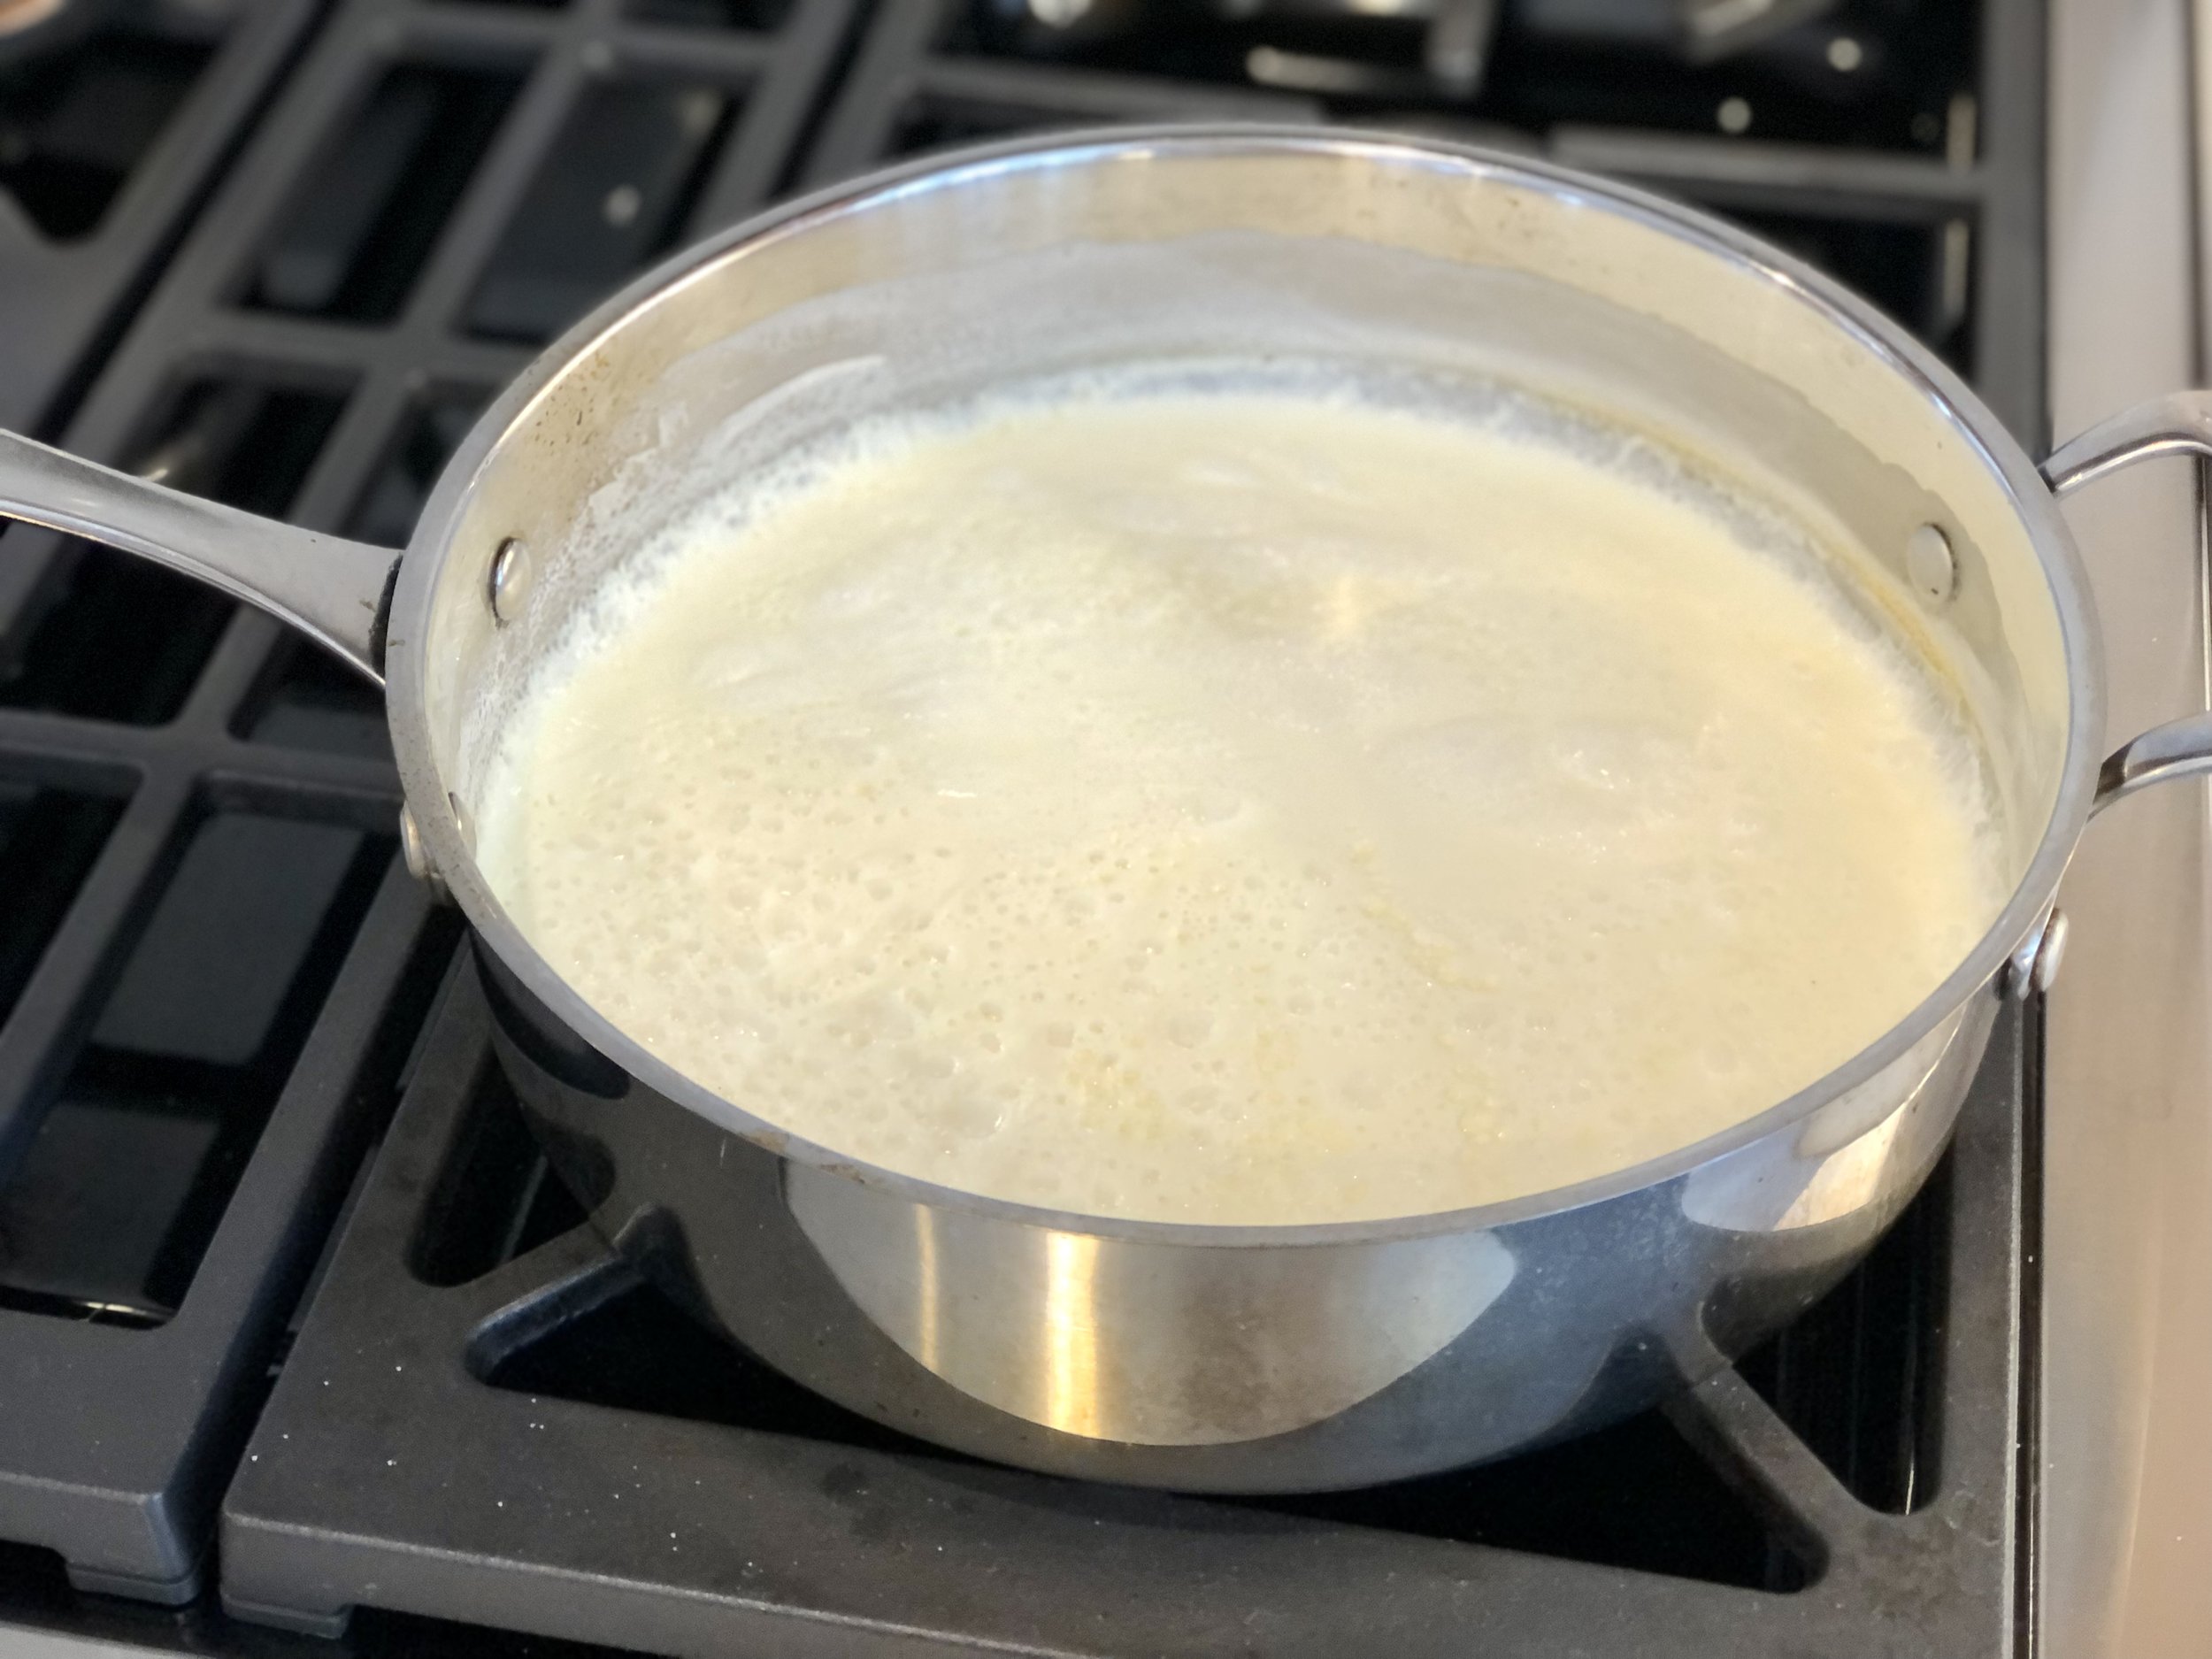
simmering milk

Makes 1 1/2 cups / 12 oz (355ml) of evaporated milk

Ingredients:

  • 3 1/4 cups / 770g milk

Directions:

  1. Place milk in wide pan over medium heat. When it starts to simmer, reduce heat to low.

  2. Simmer until reduced by just more than half, this can take anywhere from half an hour to an hour, all depending on the stove. Remove from heat and cool.

  3. Strain and store in refrigerator.

Jenny’s Notes:

Lightly golden, evaporated milk

  • Whole milk will get you the closest to store-bought evaporated milk, but the beauty of making your own is that you can use whatever kind of milk you please, whether a lower fat milk or a plant-based milk.

  • While eyeballing may be the easiest way to judge if it the milk has reduced by half, it’s not the most exact. Instead, try dipping a toothpick in the milk before simmering and making a mark on the toothpick where the milk comes up to. That way, as the milk simmers down, you can periodically dip the toothpick back in to see how close to half it is.

  • When milk is almost ready, it will take on a very light golden color as it reduces and caramelizes.

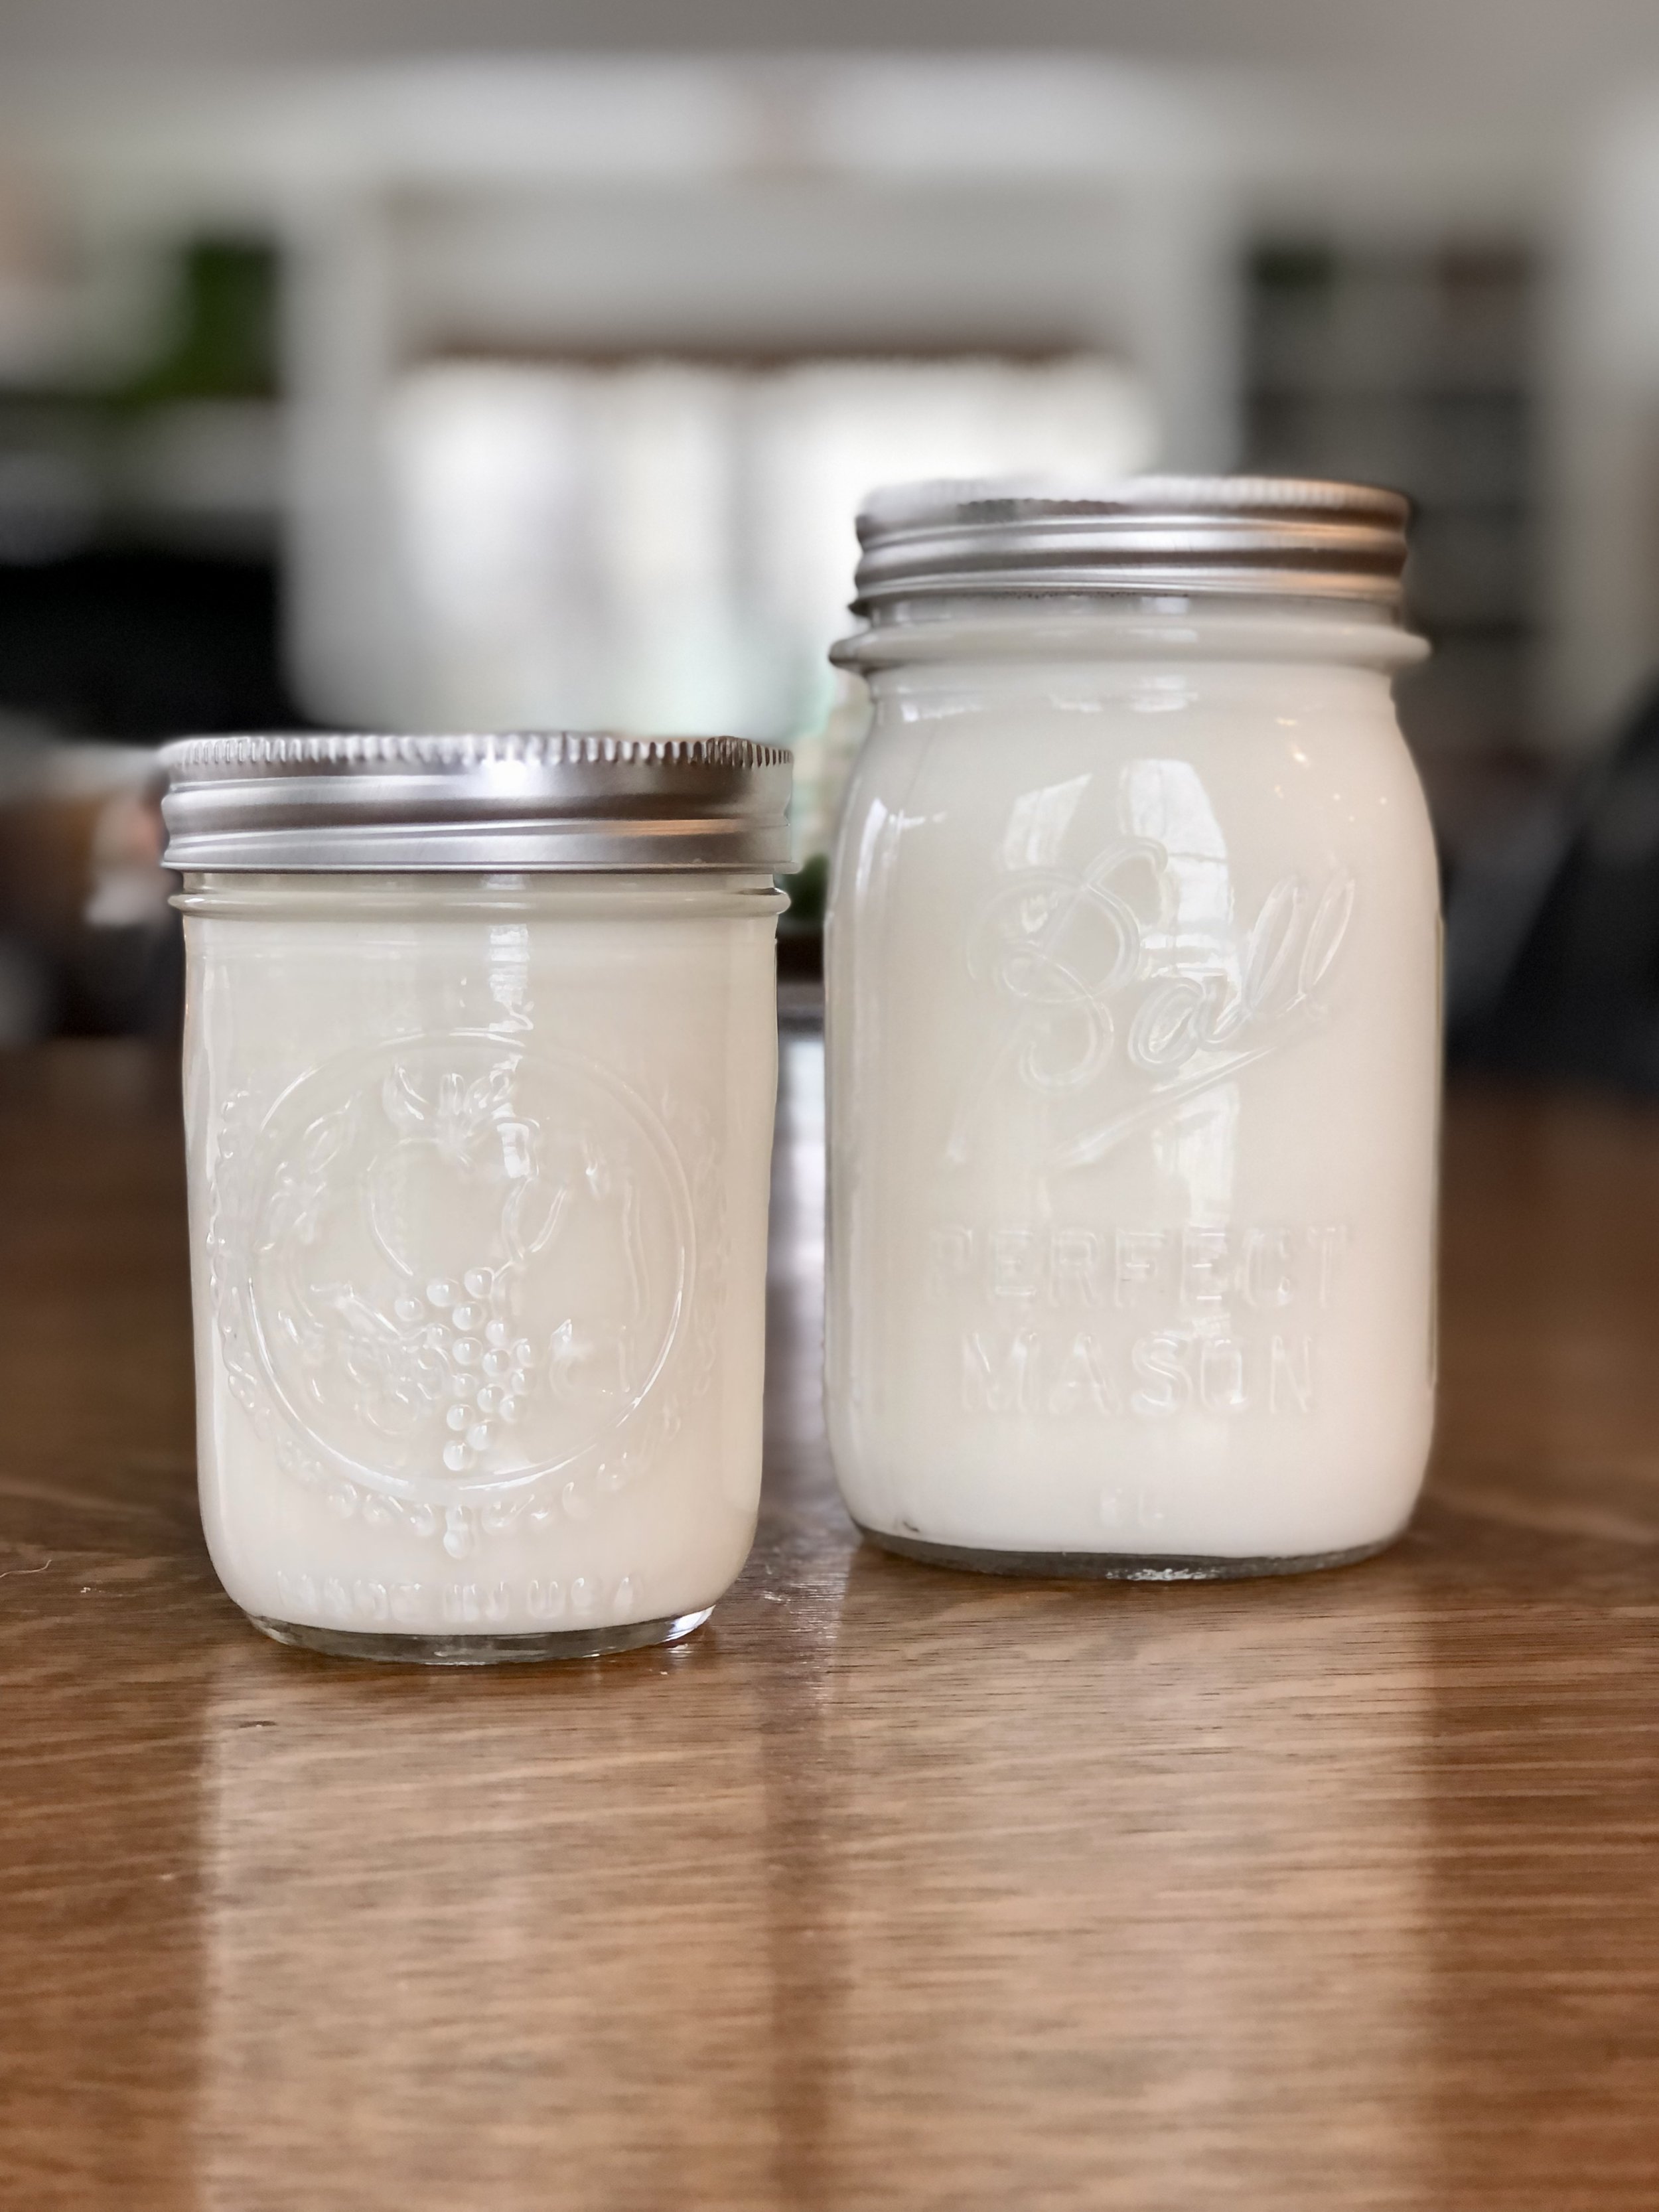
  • Mason jars make great storage containers!

evaporated milk, dairy free evaporated milk, unsweetened condensed milk
beverage, baking
American
Yield: 12 oz
Author:
Homemade Evaporated Milk

Homemade Evaporated Milk

Making evaporated milk at home is as easy as simmering milk on the stove!
Prep time: 2 MinCook time: 45 MinTotal time: 47 Min

Ingredients

Instructions

  1. Place milk in wide pan over medium heat. When it starts to simmer, reduce heat to low.
  2. Simmer until reduced by just more than half, this can take anywhere from half an hour to an hour, all depending on the stove. Remove from heat and cool.
  3. Strain and store in refrigerator.

Notes

  • Whole milk will get you the closest to store-bought evaporated milk, but the beauty of making your own is that you can use whatever kind of milk you please, whether a lower fat milk or a plant-based milk.
  • While eyeballing may be the easiest way to judge if it the milk has reduced by half, it’s not the most exact. Instead, try dipping a toothpick in the milk before simmering and making a mark on the toothpick where the milk comes up to. That way, as the milk simmers down, you can periodically dip the toothpick back in to see how close to half it is.
  • When milk is almost ready, it will take on a very light golden color as it reduces and caramelizes.


Nutrition Facts

Calories

39.65

Fat

2.11 g

Sat. Fat

1.23 g

Carbs

3.09 g

Fiber

0 g

Net carbs

3.09 g

Sugar

3.18 g

Protein

2.17 g

Sodium

25.11 mg

Cholesterol

7.93 mg

Nutritional info is approximate, based on 1 serving size of 2 Tbsp.

Did you make this recipe?
Tag @jennyblogsandbakes on instagram and hashtag it #jennyblogs

Homemade Chocolate Pudding

Everybody needs a good, quick, chocolate pudding recipe!

This recipe is almost as fast as the instant box kind, but much healthier! Well, as healthy as chocolate pudding can be. :) All it requires is a few ingredients whisked together, heated on the stove, then left to set up in the fridge. Easy peasy!

Because it’s so quick and easy, the original name of this recipe is “Hasty Chocolate Pudding”. I use this recipe in place of instant chocolate pudding when called for in recipes, in popsicles, as a filling for cupcakes, and when anyone just wants a bowl of chocolate pudding!

This post may contain affiliate links. If you make a purchase using these links, Jennyblogs may receive a small commission, at no extra cost to you. This helps to support Jennyblogs. For further information see the privacy policy. Grazie!

Recipe adapted from All Recipes


Homemade Chocolate Pudding

Makes about 2 cups of pudding

Ingredients:

  • 1/2 cup / 100g granulated sugar

  • 1/3 cup / 33g unsweetened cocoa powder

  • 3 Tbsp / 27g corn starch

  • 2 cups / 474g milk

  • 2 tsp / 10g vanilla extract

Directions:

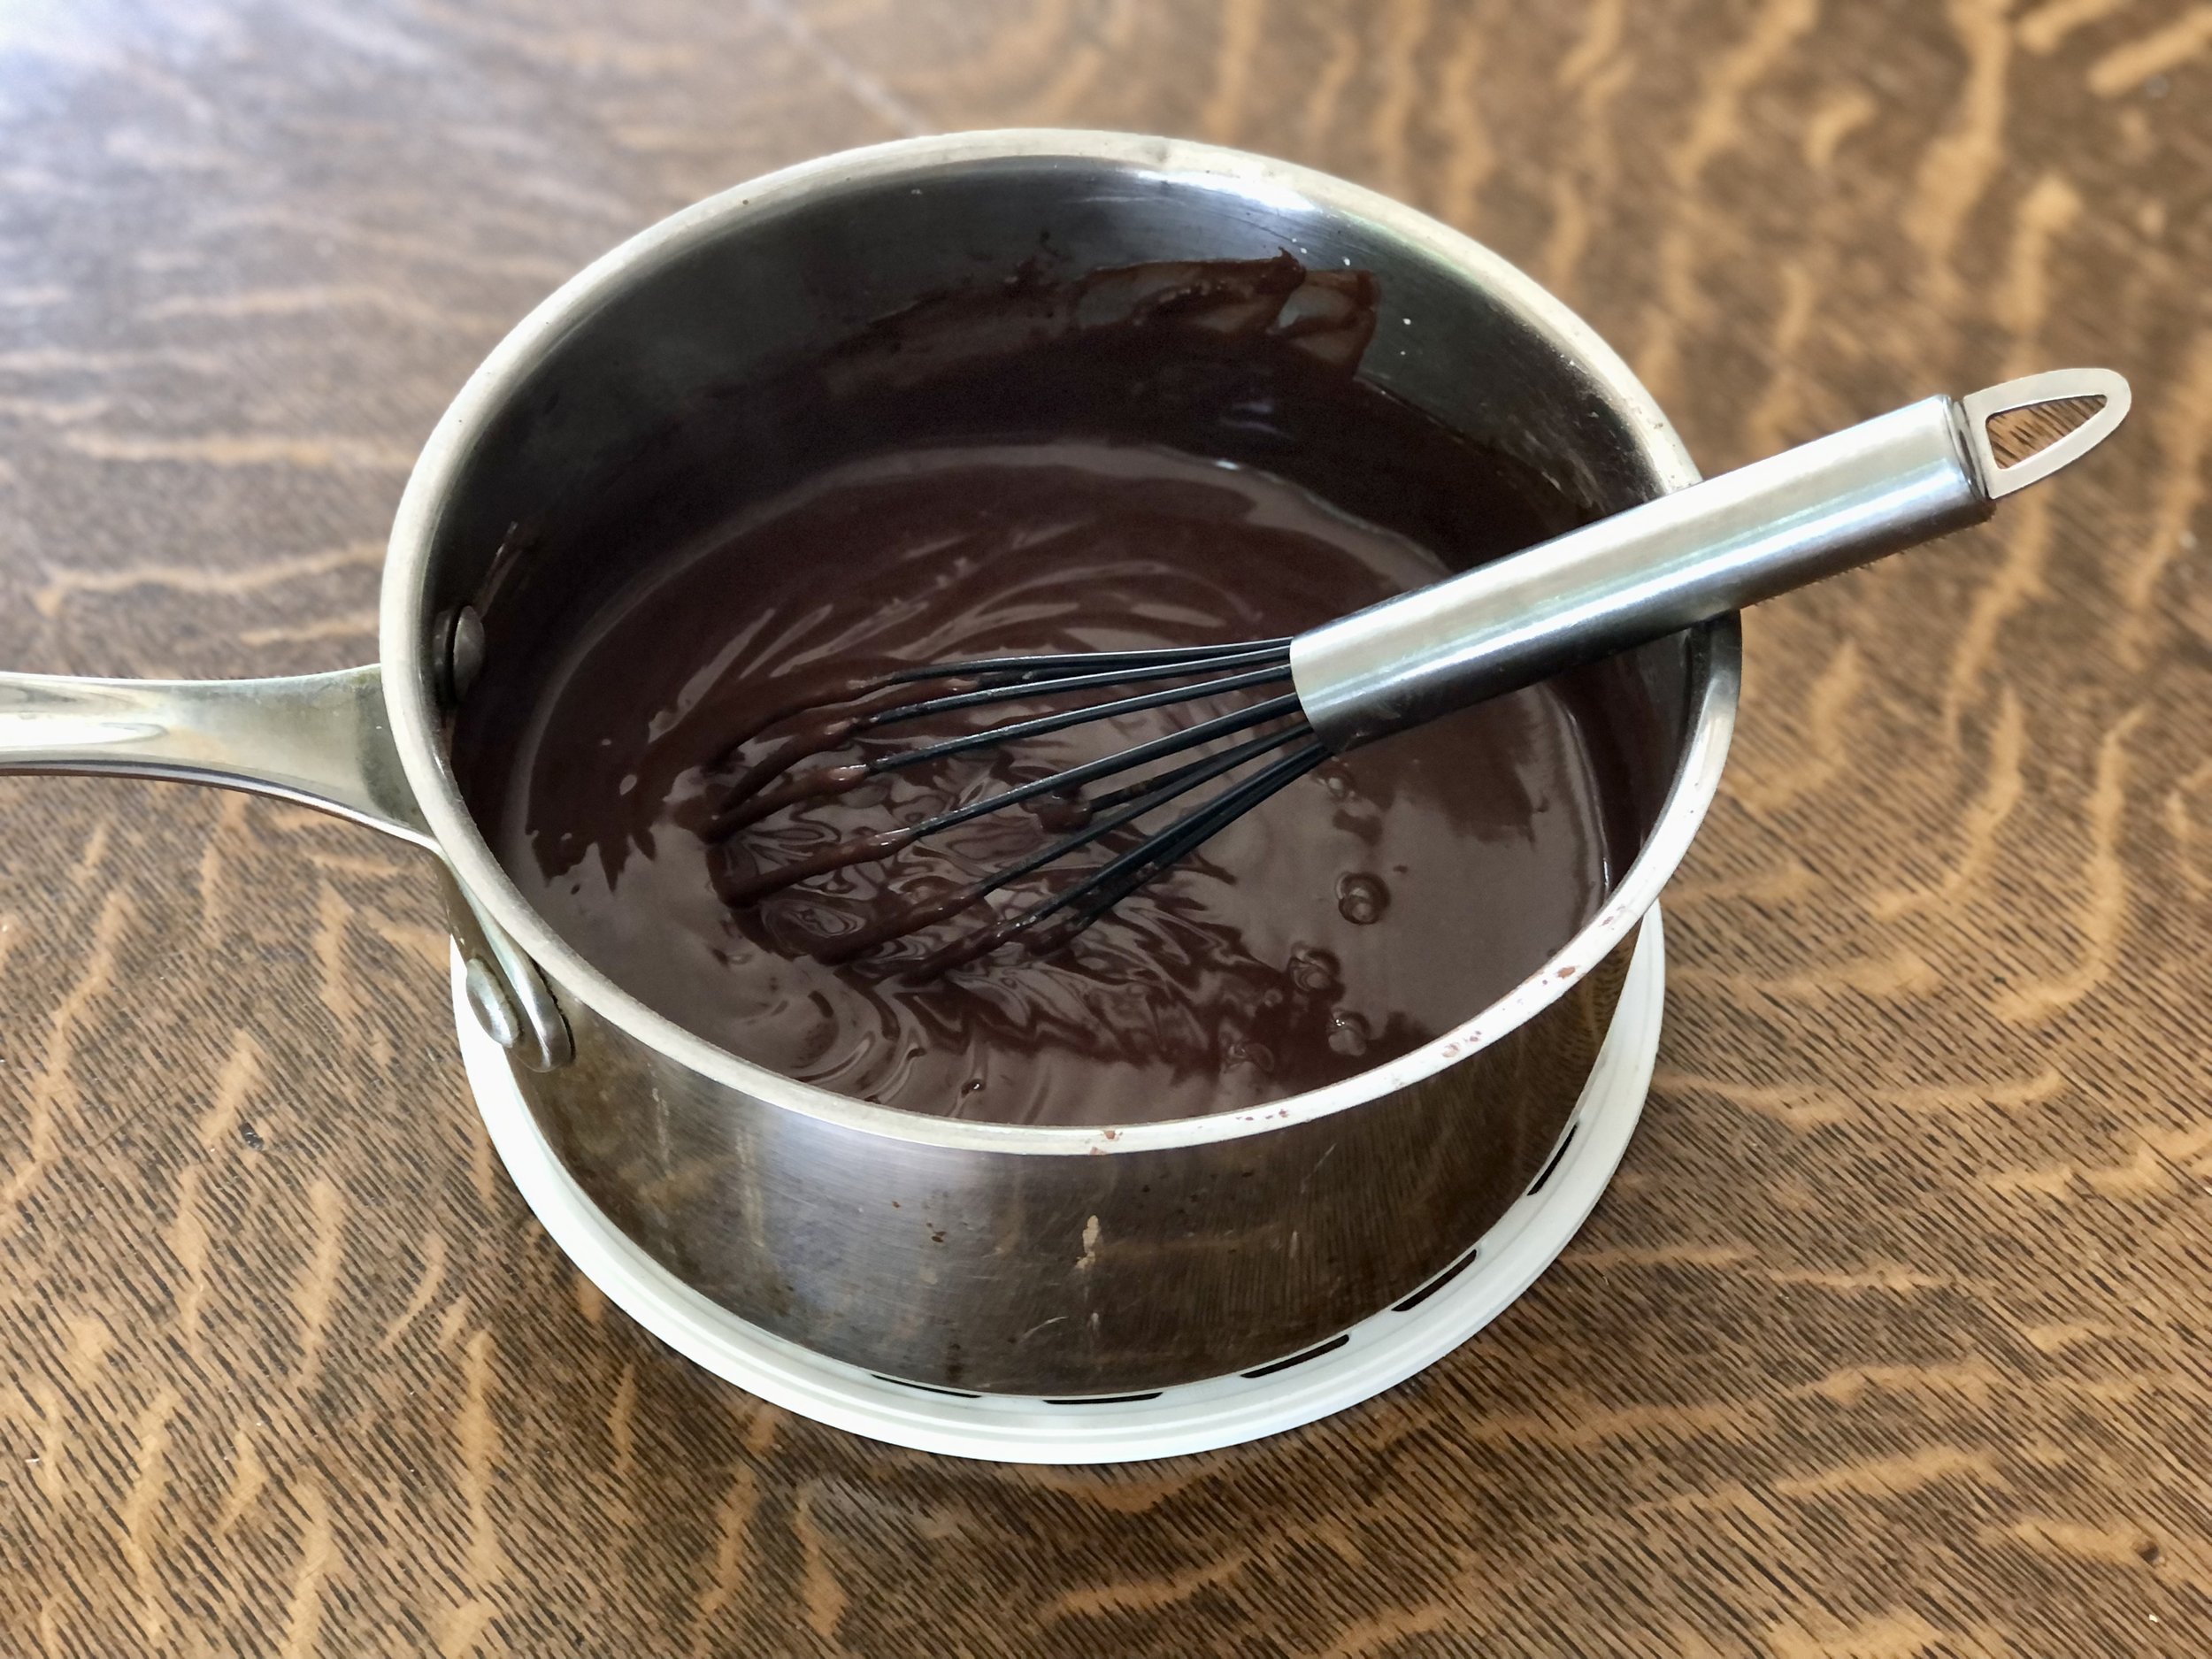
  1. In a medium pot, whisk together sugar, cocoa powder, and corn starch until no lumps remain.

  2. Slowly add in milk, whisking well to get a smooth mixture.

  3. Place mixture over medium heat and whisk constantly, until mixture thickens and begins to simmer.

  4. Remove from heat and stir in vanilla extract

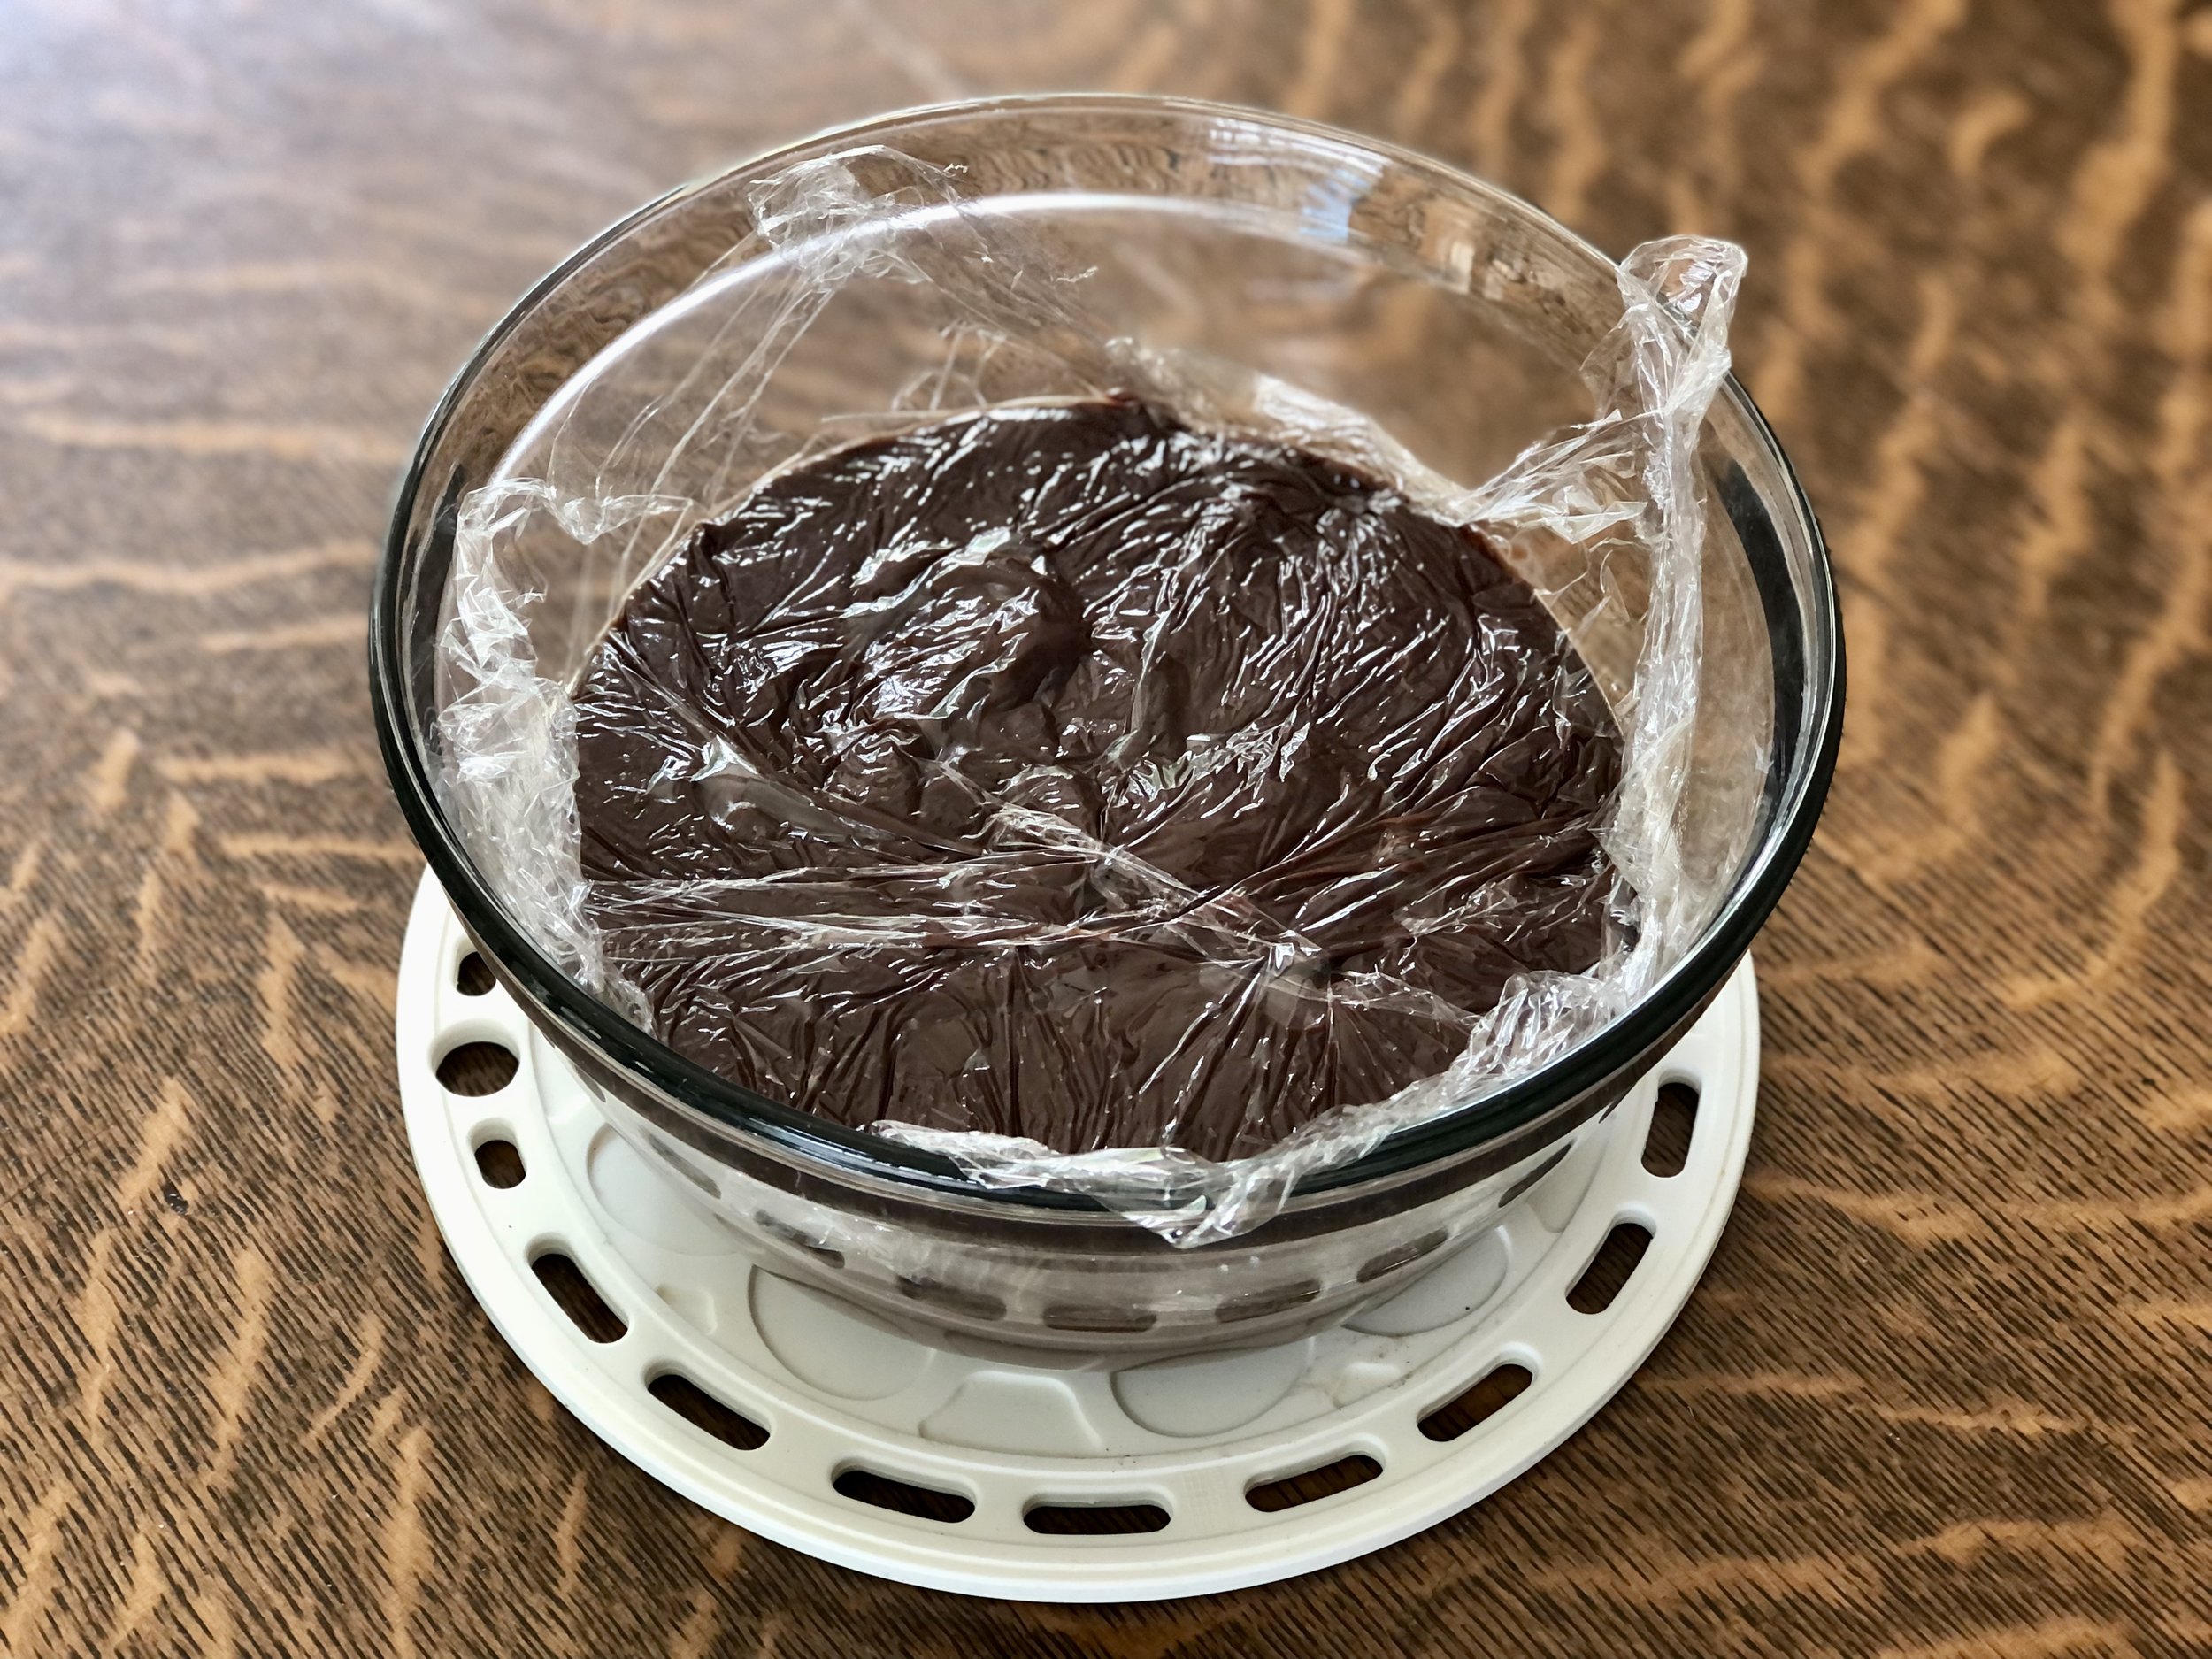
  5. Transfer pudding to a heat-proof bowl, and allow to cool slightly, whisking now and then to avoid the “skin” forming. When pudding is cooler, place a piece of plastic wrap directly onto pudding.

  6. Refrigerate until set.

Jenny’s Notes:

  • “heat-proof” just means a bowl that is safe to handle hot food; one that won’t break (certain glass bowls), or won’t leak dangerous chemicals into your food (plastic), or in any other way form a peril if you pour hot liquid into it. :)

  • Placing the plastic wrap directly onto the pudding prevents that “skin” from forming as the pudding cools. Because I don’t enjoy using plastic in general and especially when coming into contact with hot food, I try to wait for the pudding to cool before placing it on. This also ensures the plastic wrap won’t melt, as it could if you put it on immediately after taking it off the heat.

The plastic wrap placed directly on the pudding to prevent a skin from forming

chocolate pudding, chocolate cream, no bake
dessert
American
Yield: 4
Author:
Homemade Chocolate Pudding

Homemade Chocolate Pudding

Chocolate pudding can be made at home with just 5 ingredients and a stovetop. It couldn't be easier and it's all natural!
Prep time: 5 MinCook time: 10 MinInactive time: 1 HourTotal time: 1 H & 15 M

Ingredients

Instructions

  1. In a medium pot, whisk together sugar, cocoa powder, and corn starch until no lumps remain.
  2. Slowly add in milk, whisking well to get a smooth mixture.
  3. Place mixture over medium heat and whisk constantly, until mixture thickens and begins to simmer.
  4. Remove from heat and stir in vanilla extract
  5. Transfer pudding to a heat-proof bowl, and allow to cool slightly, whisking now and then to avoid the “skin” forming. When pudding is cooler, place a piece of plastic wrap directly onto pudding.
  6. Refrigerate until set.

Notes

  • “heat-proof” just means a bowl that is safe to handle hot food; one that won’t break (certain glass bowls), or won’t leak dangerous chemicals into your food (plastic), or in any other way form a peril if you pour hot liquid into it. :)
  • Placing the plastic wrap directly onto the pudding prevents that “skin” from forming as the pudding cools. Because I don’t enjoy using plastic in general and especially when coming into contact with hot food, I try to wait for the pudding to cool before placing it on. This also ensures the plastic wrap won’t melt, as it could if you put it on immediately after taking it off the heat.


Nutrition Facts

Calories

214.7

Fat

4.96 g

Sat. Fat

2.85 g

Carbs

40.48 g

Fiber

2.71 g

Net carbs

37.79 g

Sugar

31.21 g

Protein

5.42 g

Sodium

48.84 mg

Cholesterol

14.64 mg

Nutritional information is approximate; based on four 1/2 cup servings.

Did you make this recipe?
Tag @jennyblogsandbakes on instagram and hashtag it #jennyblogs

Homemade Italian Dressing

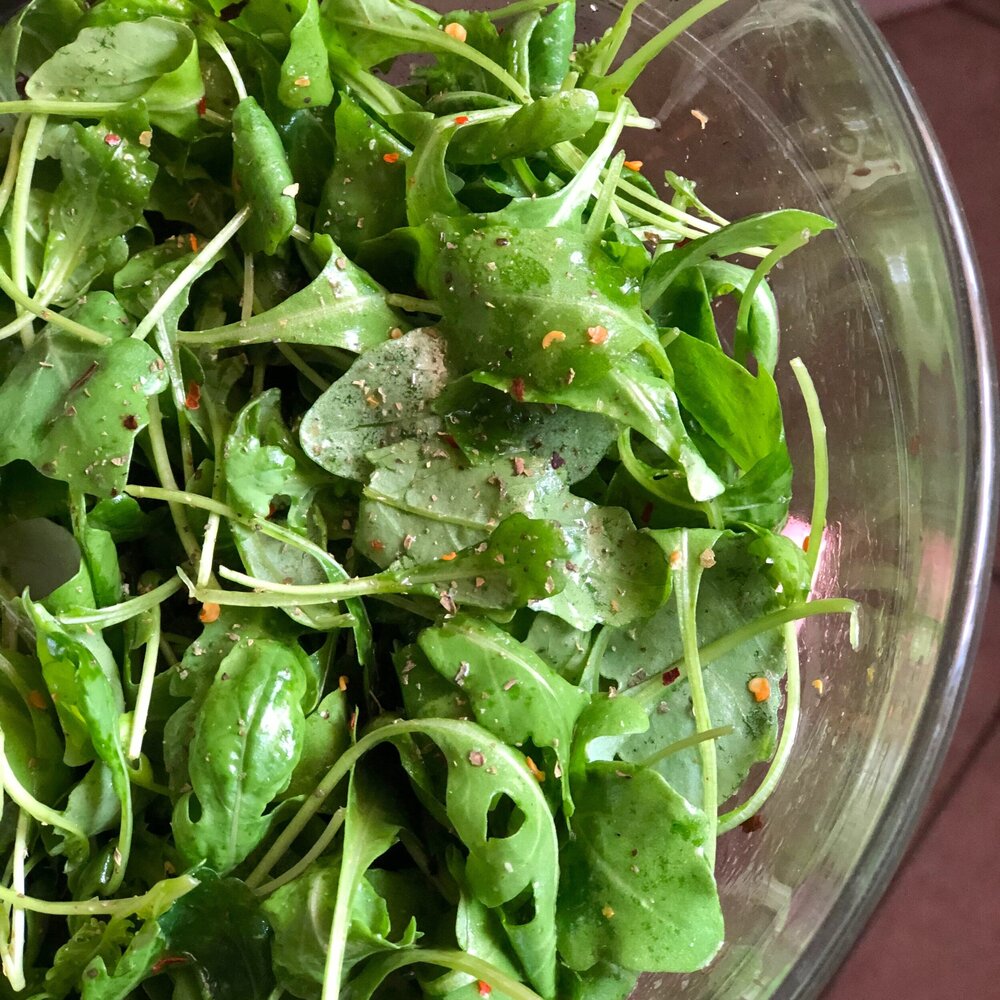
Simple goodness: Arugula tossed with Homemade Italian Dressing

Simple goodness: Arugula tossed with Homemade Italian Dressing

Have you ever thought to make homemade Italian dressing? I certainly hadn’t, until this summer, as it’s usually something I buy. Why bother making it homemade when it’s cheap and I really don’t use it that often? Except for pasta salad, and I’ve been allll about the pasta salads this summer.

First I wanted the classic creamy pasta salad (dressing made with mayo and mustard), then the Italian dressing pasta salad, then I started going off and making up my own, like this Greek Pasta Salad I posted a couple weeks ago. But you know what’s ironic? You can’t find Italian dressing in Italy. Italian dressing is very American. Italians dress their salads with a quality olive oil, salt and pepper, generally speaking. One time I was in Switzerland grocery shopping and saw American dressing. I’m American and had no idea what it was. It was creamy, maybe like Ranch? Haha. I was amused. I wonder if that’s how Italians feel about Italian dressing.

Being in Italy with no Italian dressing ready made at the store, I figured I would see if I could find a homemade recipe. Surreeee there are plenty on the interwebs! And easy enough ingredients, you probably have them all on hand, as I did. Olive oil, vinegar, some spices…I looked at several different recipes, looked up the ingredients for “classic” Kraft Italian dressing, and combined a few of them to create a bit of my own version. It’s tangy and got the job done! Success. Made a delicious pasta salad and had a bit leftover even to dress some regular ol’ salads.

It probably won’t taste exactly like the store bought version, but maybe better if you’re not a die-hard Kraft fan? Some of the ingredients listed on the Kraft Zesty Italian dressing are a bit vague, like “spice,” which can be hard to replicate, but the bright side is that you can control the quality and freshness of ingredients going into your dressing. Better yet, no preservatives at all!

Great for salads, pasta salad, marinades for all types of proteins!

This post may contain affiliate links. If you make a purchase using these links, Jennyblogs may receive a small commission, at no extra cost to you. This helps to support Jennyblogs. For further information see the privacy policy. Grazie!

Recipe adapted from Kraft, Five Heart Home, and the Whole Cook


Homemade Italian Dressing

Makes about 1 cup dressing

I clearly need to figure out how to attractively photograph liquids…and find my whisk. (Recently moved apartments.) But hey, forks work, too!

I clearly need to figure out how to attractively photograph liquids…and find my whisk. (Recently moved apartments.) But hey, forks work, too!

Ingredients:

  • 3/4 cup / 168g extra virgin olive oil

  • 1/4 cup / 60g red or white wine vinegar

  • 1 tsp / 5g lemon juice

  • 1 tsp / 7g honey

  • 3/4 tsp dried basil

  • 1/2 tsp dried oregano

  • 1/2 tsp garlic powder

  • 1/2 tsp salt

  • 1/4 tsp onion powder

  • 1/4 tsp crushed red pepper

  • 1/4 tsp black pepper

  • 1/4 cup / 25g grated parmesan cheese, optional

Directions:

  1. Whisk or shake all ingredients together; taste and adjust seasonings as desired.

  2. Store in fridge, shake well before using.

Jenny’s Notes:

  • This is one of those very versatile and very easily adjustable recipes, no one says you have to follow this one to a T! If you don’t have red or white wine vinegar, use what you have on hand. Even the olive oil can be switched out for what you have. While olive oil will give you the heartiest flavor, technically Kraft uses a bunch of rather junkier oils that don’t add much to the flavor profile (soybean, canola), but oils do tone the vinegar in dressings/vinaigrettes. The spices can be upped if you want a very zesty dressing, or you can add another teaspoon of honey to help tone it down a bit.

  • You could also finely dice red bell pepper to add to this instead of the crushed red pepper, but that seemed like more work than I wanted to put in for this “whip up” type recipe. Plus, I like the touch of added spice, even if not original.

Homemade Italian dressing recipe, copycat Zesty Kraft Dressing, Greek dressing
Condiment
American
Yield: 8
Author: Jennyblogs
Print
Homemade Italian Dressing

Homemade Italian Dressing

Homemade zesty Italian dressing is simple, uses pantry ingredients, and doesn't have any preservatives like store-bought versions.
Prep time: 10 MinTotal time: 10 Min

Ingredients:

  • 3/4 cup / 168g extra virgin olive oil
  • 1/4 cup / 60g red or white wine vinegar
  • 1 tsp / 5g lemon juice
  • 1 tsp / 7g honey
  • 3/4 tsp dried basil
  • 1/2 tsp dried oregano
  • 1/2 tsp garlic powder
  • 1/2 tsp salt
  • 1/4 tsp onion powder
  • 1/4 tsp crushed red pepper
  • 1/4 tsp black pepper
  • 1/4 cup / 25g grated parmesan cheese, optional

Instructions:

  1. Whisk or shake all ingredients together; taste and adjust seasonings as desired.
  2. Store in fridge, shake well before using.

Notes:

This is one of those very versatile and very easily adjustable recipes, no one says you have to follow this one to a T! If you don’t have red or white wine vinegar, use what you have on hand. Even the olive oil can be switched out for what you have. While olive oil will give you the heartiest flavor, technically Kraft uses a bunch of rather junkier oils that don’t add much to the flavor profile (soybean, canola), but oils do tone the vinegar in dressings/vinaigrettes. The spices can be upped if you want a very zesty dressing, or you can add another teaspoon of honey to help tone it down a bit. You could also finely dice red bell pepper to add to this instead of the crushed red pepper, but that seemed like more work than I wanted to put in for this “whip up” type recipe. Plus, I like the touch of added spice, even if not original.

Calories

204.62

Fat (grams)

21.89

Sat. Fat (grams)

3.39

Carbs (grams)

1.58

Fiber (grams)

0.14

Net carbs

1.44

Sugar (grams)

0.75

Protein (grams)

0.98

Sodium (milligrams)

202.78

Cholesterol (grams)

2.69
Nutritional information is approximate. Based on 8 servings of 2 Tbsp each and includes parmesan cheese.
Did you make this recipe?
Tag @jenevamorris on instagram and hashtag it #jennyblogs
Created using The Recipes Generator

Strawberry Nutella Coconut Milkshake

This post may contain affiliate links. If you make a purchase using these links, Jennyblogs may receive a small commission, at no extra cost to you. This helps to support Jennyblogs. For further information see the privacy policy. Grazie!

IMG_0952.jpg

Buon Ferragosto!

Also known as the day where everything is closed and I feel slightly trapped. Hmmm the gelato place is closed so I’ll just run to the store and pick up some…oh wait, all the grocery stores are closed. Ok, well maybe I’ll go browse some shops, oh wait, all closed. I’ll go walk around in the center for a bit…nope, hardly any buses running today to get to the center. Even if I could find a bus, all the places I could buy a ticket are closed. Ok, so I’ll walk to the gym to work out and enjoy some air conditioning. Ah, closed. So, I hunker down and eat whatever food is in the house, try to stay cool. Actually we’ve come to a bit of a cool spell, today only has a high of 90°F. I’ll take it!

I actually planned ahead this year and went grocery shopping last night. I got fruit and veggies for lunch and dinner today, but why didn’t I get better snackies? But then I remembered that I have a good stash of gelato in the freezer, and made me think of this delectable milkshake I made a few weeks ago.

So with all this time on my hands, I shall be milkshaking and sharing this milkshake with you! What’s so great about this milkshake?

It’s a Strawberry Nutella Coconut Milkshake. That’s such a long name, and kinda going against my own rule of not listing every ingredient in the title, but otherwise I didn’t quite know how to get the dream across, ya know?

How about this: Strawnutelloco Milkshake. Stranucoco Milkshake. Conuterry. Strawconutella. Regardless, this milkshake tastes like a chocolate covered strawberry rolled in coconut with a hint of hazelnut.

I have a confession to make. I originally made this milkshake to try and hide this not-awesome gelato I bought. There was a sale on a brand I had never tried before at the grocery store, and they had coconut and I love coconut but it just did not end well. Icy and so much coconut it was chewy. I didn’t want to waste it, but I also didn’t necessarily want to force myself to eat gelato?

Enter the milkshake idea. I had strawberries, Nutella, and milk, and this beautiful combo was born. The copious amounts of coconut from the gelato still rendered my milkshake a bit chewy, but if you have a GOOD brand of coconut ice cream, or even vanilla ice cream with a bit of flaked coconut and maybe a drop of coconut extract or two thrown in, you’ve got yourself the perfect summer day’s treat.

So thank you, gelato brand that shall remain unnamed, for the not delicious gelato that prompted me to create a delicious milkshake.


Strawberry Nutella Coconut Milkshake

Serves 2

IMG_0947.jpg

Ingredients:

  • 2 cups coconut ice cream, slightly softened

  • 1/2 cup milk, any variety

  • 1/2 cup hulled strawberries, fresh or frozen

  • 2 heaping Tbsp Nutella

  • Dash of vanilla extract, optional

  • Whipped cream, optional

Directions:

  1. Add all ingredients except whipped cream to a blender and blend until smooth. Check consistency and add more milk if desired.

  2. Spoon into 2 glasses and top with whipped cream. Serve immediately.


Jenny’s Notes:

  • Don’t have coconut ice cream but still want that coconut taste? Substitute chocolate or vanilla ice cream and add a bit of flaked coconut and a drop or two of coconut extract.

  • For creamier shakes, use whole milk.

  • For thinner shakes you can sip, add more milk. For thicker, spoonable shakes, add less milk. Some blenders don’t blend thicker shakes well, so if yours is having problems, either wait a minute or two for the ice cream to soften a bit more before continuing to blend, or add a touch more milk.

  • To make fresh whipped cream, whip about 1/4 cup / 60g heavy whipping cream with 1 Tbsp / 14g sugar in the bowl of a stand mixer fitted with whisk attachment, or with a handheld mixer. This makes about 1/2 cup fresh whipped cream. Store in fridge, best if used within a few days.

milkshake, milk, strawberry, Nutella, coconut, ice cream, vanilla, fresh whipped cream, dessert, summer
Dessert, Beverage
American
Yield: 2 Servings
Author:

Strawberry Nutella Coconut Milkshake

Thick and creamy milkshake with coconut ice cream, Nutella, strawberries and whipped cream on top.
prep time: 5 Mcook time: total time: 5 M

ingredients:

  • 2 cups coconut ice cream, slightly softened
  • 1/2 cup milk, any variety
  • 1/2 cup hulled strawberries, fresh or frozen
  • 2 heaping Tbsp Nutella
  • Dash of vanilla extract, optional
  • Whipped cream, optional

instructions:

How to cook Strawberry Nutella Coconut Milkshake

  1. Add all ingredients except whipped cream to a blender and blend until smooth. Check consistency and add more milk if desired.
  2. Spoon into 2 glasses and top with whipped cream. Serve immediately.

NOTES:

Don’t have coconut ice cream but still want that coconut taste? Substitute chocolate or vanilla ice cream and add a bit of flaked coconut and a drop or two of coconut extract. For creamier shakes, use whole milk. For thinner shakes you can sip, add more milk. For thicker, spoonable shakes, add less milk. Some blenders don’t blend thicker shakes well, so if yours is having problems, either wait a minute or two for the ice cream to soften a bit more before continuing to blend, or add a touch more milk. To make fresh whipped cream, whip about 1/4 cup / 60g heavy whipping cream with 1 Tbsp / 14g sugar in the bowl of a stand mixer fitted with whisk attachment, or with a handheld mixer. This makes about 1/2 cup fresh whipped cream. Store in fridge, best if used within a few days.

Calories

440.85

Fat (grams)

23.21

Sat. Fat (grams)

19.31

Carbs (grams)

54.51

Fiber (grams)

3.87

Net carbs

50.64

Sugar (grams)

40.58

Protein (grams)

6.95

Sodium (milligrams)

49.23

Cholesterol (grams)

9.42
Nutritional information is approximate and based on 2 servings and includes whipped cream.
Created using The Recipes Generator
IMG_0943.jpg

All About that Wheat Flour - FARINA part 2

2019-05-17+18.29.09-2.jpg

This post contains affiliate links. If you buy something using these links, Jennyblogs may receive a small commission, at no extra cost to you. This helps to support Jennyblogs. For further information see the privacy policy. Grazie!

If you’re reading this, you have probably have some form of wheat flour in your home. Even the person nearest to you, who is most likely not reading this, probably has some kind of wheat flour in their home. It almost sounds funny to say wheat flour because it is universally known as just flour. Flour refers to wheat flour, and only the other types of flour need to differentiate themselves. Rice flour is no less a flour, but we need to say “rice” in front of “flour” otherwise it will be assumed we are talking about flour; that is, wheat flour.

All-purpose, bread, cake, pastry, self-raising, strong, durum, semolina, whole wheat, whole wheat pastry, and graham are just some of the names for wheat flour types…what do you always have on hand? Besides maybe the price and brand of your flour, what else do you know about the substance that goes into so many hundreds of recipes? Should you care? It may not make a life or death difference, but if you enjoy cooking and baking, or generally like learning, then learning to understand wheat flour varieties and how best to use them can take the food you make to a whole new level!

If you’d like to read Part 1 and learn how flour is used in Italy, click here.

The Six Categories of Wheat

In your American pantry you probably have an all-purpose flour, a bread flour, maybe a cake flour, maybe a self-raising, possibly a few others. If you know when and how to use these flours (or just follow a recipe), you might not need to know where or what kind of wheat is actually grown and ground to make these. But once you become familiar with the types of wheat, their properties and best uses, you can make more educated choices about your baking and end up with a superior result. Even the most nominal baker will eventually come across recipes that call for cake flour or bread flour, and knowing more about the wheat characteristics and which kinds are used to make these flours will help you understand if you can substitute say, all-purpose flour, and the results if you do so.

The first thing to know is that wheat can be defined by these six characteristics:

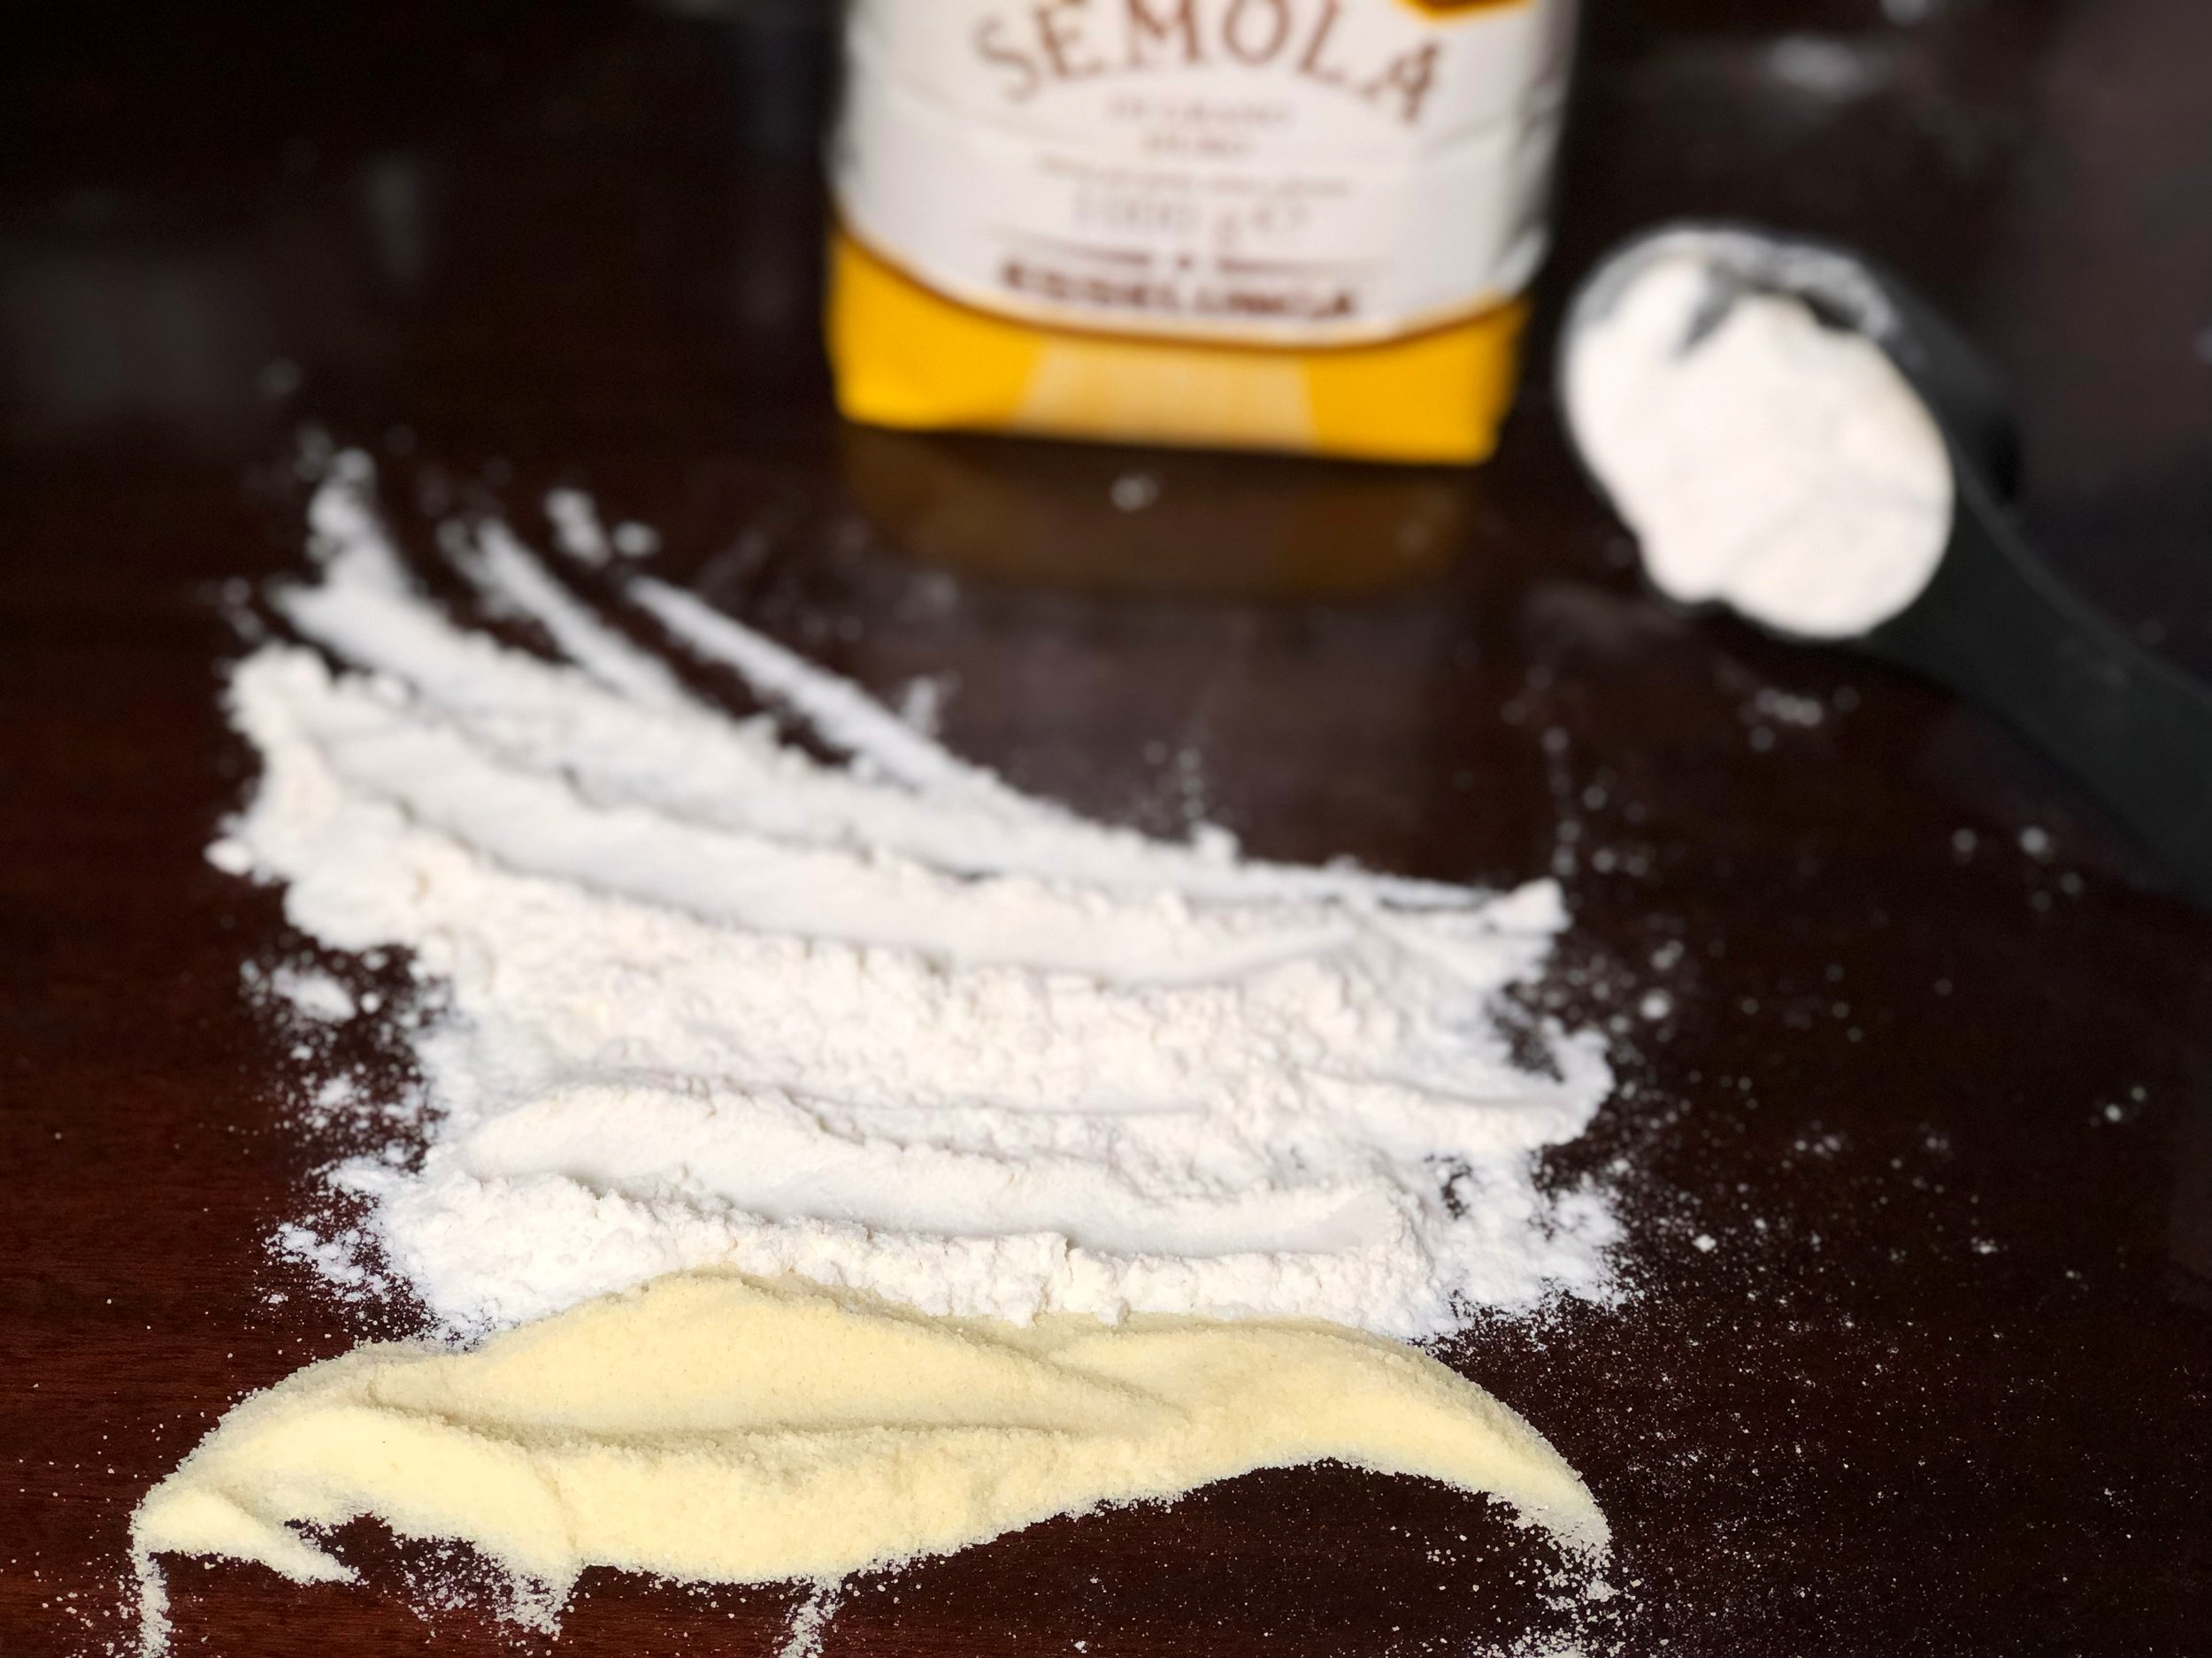
L to R: durum wheat (semola), soft wheat for sweets, soft wheat (manitoba) for bread

L to R: durum wheat (semola), soft wheat for sweets, soft wheat (manitoba) for bread

  • Soft wheat has a higher moisture content and less gluten, suitable for making cake and cookies and more delicate baked goods

  • Hard wheat has a lower moisture content and higher protein/gluten* content, usually between 12-14%, suitable for bread making

  • Red wheat has a slightly higher protein than white and a bolder taste

  • White wheat is milder in taste even if the color is not so different from red once milled into flour

  • Winter wheat is usually planted in the fall and harvested in the summer, with the exception of countries that have too harsh of winters, such as Canada where it is planted in the spring

  • Spring wheat is usually planted in the spring and harvested in the fall, with the exception of countries that have too hot and dry of summers, such as California in which case it is planted in the fall. You can read more about winter and spring wheat here.

*Many use the terms protein and gluten in wheat flour interchangeably. This is because gluten is a type of protein found in wheat, the kind that is “developed” when you knead bread and gives it the elastic/chewy quality. In most cases, the higher the protein content, the higher the gluten. It is important to note that all gluten is protein, but not all protein is gluten, as your celiac friends should be able to tell you. Also, all wheat contains gluten, but not all gluten comes from wheat. Make sense? You can read more here or here for better understanding gluten in the light of gluten allergies, or here for a good explanation of gluten. For my purposes today, and baking in general, if someone says a flour is high in protein, and someone else says a flour has a high gluten content, they mean the same thing. And they both mean the flour is good for bread making.

There are thousands of varieties of wheat grown around the world, but chaos can be brought to order with the following six principle categories, using the characteristics we reviewed above:

  1. Hard Red Winter Wheat (HRW)

  2. Hard Red Spring Wheat (HRS)

  3. Soft Red Winter Wheat (SRW)

  4. Hard White Wheat (HW)

  5. Soft White Wheat (SW)

  6. Durum Wheat (DW) is the hardest of all wheat, used for pasta making

The flour you buy from the store will most likely fall into one of these six categories. The bread flour in your pantry is most likely a hard red or white spring wheat; your cake flour is probably milled from a soft white wheat; all-purpose is usually a mixture of hard and soft wheat. You’d know now, for example, that baking a loaf of bread with all-purpose or cake flour will not yield a wonderfully chewy loaf like using bread flour would; they don’t have the gluten required to achieve the chewiness.

If you’d like to start experimenting with flour varieties, check your area for a local mill. If you live in the States and are not fortunate enough to have a mill near you, check out Bob’s Red Mill, in store or online. They have some clearly labeled high-quality flours. You could buy some of their whole-wheat hard red flour and whole-wheat hard white flour and make some simple bread loaves, trying the two wheat varieties side by side.

Happy baking!

Mixing flours

Mixing flours


Mocha Punch

2018-12-29+15.42.50.jpg

This post contains affiliate links. If you buy something using these links, Jennyblogs may receive a small commission, at no extra cost to you. This helps to support Jennyblogs. For further information see the privacy policy. Grazie!

On entering any coffee shop in America, you’ll easily find mocha on the menu. I usually think of black coffee and cappuccino as being among the most commonly ordered, vanilla latte and mocha closely following. Because after enjoying coffee in its purer forms it is logical to then pair it with two of the greatest flavors: vanilla and chocolate. No? But I’m not a barista, so if you are, you tell me. :)

This is not the case in Italy. Italy may be the birthplace of coffee as we know it today, but that doesn’t mean that they own ALL the copyrights to the best coffee drinks. Cappuccino, espresso, macchiato….but Vanilla Latte and Mocha are not on the menu here, unless you go to one of the few “American” coffee shops, such as Arnold. First of all, if you order a latte you will get….milk. And if you order a mocha you will get…a withering stare. Not the end of the world, especially with all of the other types of coffee you can order, but sometimes I just want a mocha, ya know? I usually order my cappuccino with cocoa powder on top, but that’s not quite the same.

What’s a person to do when they don’t have mocha readily available to them? Make it at home, of course! It’s so easy, and can be even easier in a pinch, see my notes below!

But doesn’t the title say punch, you ask? Yes, yes it does. The recipe that follows can be drunk as a classic mocha, hot or iced, by simply not adding the ice cream. Or, as per the recipe, pour the whole thing in a punch bowl, add scoops of ice cream, and voila! Mocha punch fit for any party.

Recipe adapted from a friend’s mama. :)


Mocha Punch

Serves about 20

Ingredients:

  • 3 quarts / 3 L freshly brewed strong coffee

  • 1 1/2 cups / 300g sugar

  • 2 quarts / 2 L milk

  • 3/4 cup / 240g chocolate syrup, try this homemade recipe!

  • 3 tsp vanilla extract

  • 1/2 gallon (8 cups) / 1 kg vanilla ice cream

Directions:

  1. Pour brewed coffee into a large pot, bowl, or other large container. Stir sugar into hot coffee until dissolved. Cool in fridge.

  2. Remove coffee from fridge and add milk, chocolate syrup, and vanilla and stir until well combined.

  3. Chill until cold or overnight.

  4. Just before serving, pour into serving container, mix briefly, and scoop ice cream into the punch, allowing the ice cream to melt for a few minutes before serving. (Skip this step if not serving as a punch.)

  5. Store in fridge.

Jenny’s Notes:

  • For an everyday mocha I reduce the sugar and milk, sometimes by up to half, as I usually drink my coffee black, and it makes it less indulgent.

  • You can substitute store-bought chocolate syrup for the homemade and use instant coffee instead of brewing, if you wish! I think the flavor will always be superior when you make things from scratch, or in this instance, use good and fresh coffee instead of instant!

  • If you choose to make the homemade chocolate syrup recipe, make a half recipe for exactly the quantity needed for this Mocha Punch. Or make a full recipe and enjoy the extra!

  • Of course, you don’t have to use vanilla ice cream, you could use chocolate or moose tracks or heck, coffee ice cream! Whatever you like.

  • When serving, you can choose to pour the whole recipe’s worth of punch into a punch bowl with ice cream, or, for smaller or longer parties, start with just a portion of the punch and ice cream, keeping the remainder in the fridge and freezer, respectively, so by the end the punch isn’t warm and the ice cream long melted.

  • This punch is easily stored in pitchers or empty milk jugs!

American
Yield: 20
Author:

Mocha Punch

Sweet and creamy coffee meets chocolate in this adaptable mocha. Add ice cream for a delectable party punch or drink hot or cold for an anytime mocha!
prep time: 25 Mcook time: total time: 25 M

ingredients:

  • 3 quarts / 3 L freshly brewed strong coffee
  • 1 1/2 cups / 300g sugar
  • 2 quarts / 2 L milk
  • 3/4 cup / 240g chocolate syrup, try this homemade recipe!
  • 3 tsp vanilla extract
  • 1/2 gallon (8 cups) / 1 kg vanilla ice cream

instructions:

How to cook Mocha Punch

  1. Pour brewed coffee into a large pot, bowl, or other large container. Stir sugar into hot coffee until dissolved. Cool in fridge.
  2. Remove coffee from fridge and add milk, chocolate syrup, and vanilla and stir until well combined.
  3. Chill until cold or overnight.
  4. Just before serving, pour into serving container, mix briefly, and scoop ice cream into the punch, allowing the ice cream to melt for a few minutes before serving. (Skip this step if not serving as a punch.)
  5. Store in fridge.

NOTES:

For an everyday mocha I reduce the sugar and milk, sometimes by up to half, as I usually drink my coffee black, and it makes it less indulgent. You can substitute store-bought chocolate syrup for the homemade and use instant coffee instead of brewing, if you wish! I think the flavor will always be superior when you make things from scratch, or in this instance, use good and fresh coffee instead of instant! If you choose to make the homemade chocolate syrup recipe, make a half recipe for exactly the quantity needed for this Mocha Punch. Or make a full recipe and enjoy the extra! Of course, you don’t have to use vanilla ice cream, you could use chocolate or moose tracks or heck, coffee ice cream! Whatever you like. When serving, you can choose to pour the whole recipe’s worth of punch into a punch bowl with ice cream, or, for smaller or longer parties, start with just a portion of the punch and ice cream, keeping the remainder in the fridge and freezer, respectively, so by the end the punch isn’t warm and the ice cream long melted. This punch is easily stored in pitchers or empty milk jugs!

Calories

202.41

Fat (grams)

4.98

Sat. Fat (grams)

3.02

Carbs (grams)

33.94

Fiber (grams)

0.49

Net carbs

33.45

Sugar (grams)

26.31

Protein (grams)

5.27

Sodium (milligrams)

91.66

Cholesterol (grams)

19.30
Nutritional information is approximate. Calculated including vanilla ice cream
Created using The Recipes Generator
2018-12-29+15.44.21-2.jpg

Chocolate Sauce

Photo Public Domain https://creativecommons.org/licenses/by-sa/3.0/at/deed.en Permission: Sammlung J.P. Adlbrecht

Photo Public Domain https://creativecommons.org/licenses/by-sa/3.0/at/deed.en Permission: Sammlung J.P. Adlbrecht

This post contains affiliate links. If you buy something using these links, Jennyblogs may receive a small commission, at no extra cost to you. This helps to support Jennyblogs. For further information see the privacy policy. Grazie!

Classic. Quintessential. Chocolatey. Good on everything, from your morning pancakes and coffee to ice cream and that cake you just made. Or ya know, by the spoonful. Just a spoonful of…I’ll let you sing the rest yourself. ;)

What is it? Chocolate Sauce! I’m sorry, come again? Chocolate Sauce!!!! I didn’t hear you!! CHOCOLATE SAUCE!!!!!!!! That’s right. Or chocolate syrup, as you prefer. No more Hershey’s in a bottle, or going without if you live outside the USofA. It’s so easy you’ll wonder why you never made it before. No high fructose corn syrup involved!

Recipe from my Mama


Chocolate Sauce

Makes about 3/4 cup of sauce

Ingredients:

  • 3/4 cup / 150g sugar

  • 1/3 cup / 33g unsweetened cocoa powder

  • 1 Tbsp / 7.5g cornstarch

  • 1/2 cup / 118g water

  • 1 tsp vanilla

Directions:

  1. Combine sugar, cocoa, and cornstarch in a small saucepan.
  2. Add water and whisk until there are no cornstarch lumps.

  3. Cook over medium heat, stirring constantly, until mixture boils. Reduce heat to low and boil for 5 minutes, continuing to stir.

  4. Remove from heat and add vanilla.

Jenny’s Notes:

  • The better quality your cocoa powder the better your sauce will taste!

  • Keeps well in the fridge.

Hershey's chocolate sauce, ice cream topping, hot fudge sundae sauce, chocolate sauce
dessert, sauce, topping
American
Yield: 12
Author:
Chocolate Sauce

Chocolate Sauce

A basic chocolate sauce for ice cream topping, drizzling, mixing in coffee, and anything you need chocolate sauce for!
Prep time: 5 MinCook time: 10 MinTotal time: 15 Min

Ingredients

Instructions

  1. Combine sugar, cocoa, and cornstarch in a small saucepan.
  2. Add water and whisk until there are no lumps.
  3. Cook over medium heat, stirring constantly, until mixture boils. Reduce heat to low and boil for 5 minutes, continuing to stir.
  4. Remove from heat and add vanilla.

Notes:

The better quality your cocoa powder the better your sauce will taste! Keeps well in the fridge.

Nutrition Facts

Calories

63.04

Fat (grams)

0.27

Sat. Fat (grams)

0.00

Carbs (grams)

14.76

Fiber (grams)

0.56

Net carbs

14.21

Sugar (grams)

12.52

Protein (grams)

0.55

Sodium (milligrams)

0.61

Cholesterol (grams)

0.00

Nutritional information is approximate.

Did you make this recipe?
Tag @jennyblogsandbakes on instagram and hashtag it #jennyblogs

Pumpkin Pudding

IMG_5018.JPG

Fall is coming fall is coming! Or, autumn is coming autumn is coming! Either way, I’m excited. I love the changing of seasons and the different nostalgias and expectations that come with each one. Living in Italy, the nostalgia is a little bit stronger. Autumn is still autumn, but the changes are a little less distinct, and the comfort of knowing where to pick out the best pumpkins and buy the best apple cider is not something I have down pat yet. It’s not even that easy, finding the new places to do the things you’ve always done, because some things aren’t done here, or at least not in the magnitude they are in the States. Pumpkins will be few and far between, unless you’re lucky enough to stumble upon some markets that have the mini gourds; apple cider is practically nonexistent; trick-or-treating happens, but most Italians wear scary costumes instead of characters; the leaf change is not the brilliant red, orange, and yellows like in Michigan, but more of a subtle green-to-yellow with the occasional leaves fluttering down. Despite the differences with what I grew up with, there are still oodles of things I love to do to make my home fall-y and to welcome the chilly evenings. Lighting candles, brewing tea, pulling out the fuzzy socks and sweaters (even if I’d be sweating if I actually tried to wear them yet) and baking and eating lots of fall goodies that include pumpkin, cinnamon, and spices, breads, soups, and hearty autumn recipes.

Now that I’m officially feeling ready for fall after dwelling in those thoughts, what are we making? Pumpkin Pudding! It’s like pumpkin pie, but without all the fuss of the crust. This is great to make in the time leading up to Thanksgiving, because you’re not ruining your appetite for pumpkin pie (you can’t call it pie if it doesn’t have a crust, therefore, totally different) while not wasting time NOT eating pumpkin. Oh, and so, so easy.

This post may contain affiliate links. If you buy something using these links, Jennyblogs may receive a small commission, at no extra cost to you. This helps to support Jennyblogs. For further information see the privacy policy. Grazie!

Recipe from my mama


Pumpkin Pudding

IMG_5023.JPG

Serves: 4-6

Ingredients:

  • 15 oz / 425g pumpkin purée

  • 2/3 cup / 132g sugar

  • 1/2 tsp / 2.5g salt

  • 1 tsp / 5g cinnamon

  • 1/2 tsp / 2.5g ginger

  • 1/4 tsp / 1g cloves

  • 1 cup / 237g milk of choice

Directions:

Oven 375°F / 190°C. Lightly grease an 8x8in / 20x20cm baking pan.

  1. Mix all ingredients in a bowl until smooth.

  2. Pour into prepared pan; bake for 20-25 minutes in preheated oven until edges are bubbling.

Jenny’s Notes:

  • To dress this lovely and simple dessert up you can top it with confectioner’s sugar or crumbled cookies such as shortbread or Nilla Wafers, or serve with ice cream and/or whipped cream.

  • This recipe is gluten free, vegan (if you use a milk substitute like coconut or almond), and probably many of the other diet fads that I can’t quite keep track of. Eat up!

American
Yield: 4-6
Author: Jennyblogs
Print
Pumpkin Pudding

Pumpkin Pudding

Like pumpkin pie but without the hassle of the crust. Gluten-free and can easily be made vegan.
Prep time: 10 MCook time: 25 MTotal time: 35 M

Ingredients:

  • 15 oz / 425g pumpkin purée
  • 2/3 cup / 132g sugar
  • 1/2 tsp / 2.5g salt
  • 1 tsp / 5g cinnamon
  • 1/2 tsp / 2.5g ginger
  • 1/4 tsp / 1g cloves
  • 1 cup / 237g milk of choice

Instructions:

  1. Oven 375F / 190C. Lightly greased 8x8in / 20x20cm baking pan.
  2. Mix all ingredients in a bowl until smooth.
  3. Pour into prepared pan; bake for 20-25 minutes in preheated oven until edges are bubbling.

Notes:

To dress this lovely and simple dessert up you can top it with confectioner’s sugar or crumbled cookies such as shortbread or Nilla Wafers, or serve with ice cream and/or whipped cream. This recipe is gluten free, vegan (if you use a milk substitute like coconut or almond), and probably many of the other diet fads that I can’t quite keep track of. Eat up!

Calories

198.32

Fat (grams)

1.49

Sat. Fat (grams)

0.88

Carbs (grams)

45.81

Fiber (grams)

3.85

Net carbs

41.97

Sugar (grams)

36.49

Protein (grams)

3.31

Sodium (milligrams)

279.59

Cholesterol (grams)

4.74
Nutritional information is approximate. Based on 4 servings.
Created using The Recipes Generator
The slowly melting confectioner’s sugar…

The slowly melting confectioner’s sugar…


Pinwheels 3 Ways: Avocado Veggie, Buffalo Chicken, and Thanksgiving

From top to bottom: Thanksgiving, Veggie, Buffalo Chicken

From top to bottom: Thanksgiving, Veggie, Buffalo Chicken

Or veggie rolls, veggie wraps, or veggie roll-ups, (but that just makes me think of fruit roll-ups, blech! No offense to my fruit roll-up loving friends.  Actually, every once in a blue moon I see a fruit roll up and think, hey, that sounds good right about now.  Then I walk on.  That's the end of the story.)  Or you could just call these tortilla/veggie/cream cheese concoctions for what they are; delicious.  That would be fine.  And the truth.  

They make for a great snack or appetizer, or lunch even if you forgot just how many pinwheels you popped in your mouth.  They're also very portable, quick, and simple to make, which make them ideal for parties, potlucks, lunch at the office, you name it.  

The formula is very easy to get the hang of, think tortillas, cream cheese, and condiments/spices!  The tortilla is your playground and the cream cheese is your best friend, so get creative!  Put all those flavor combinations you dreamt up while watching Food Network, The Great British Bake-Off, and Chef's Table to work in these tortillas.  Might be more manageable than that fried parmesan cheese bowl filled with pickled cabbage, grilled chicken, diced red peppers, fresh cilantro, lemon garlic aioli swiped across the plate and turmeric sprinkled over top.  But, hey, you could totally manage to put all that in a tortilla.  You might be on to something.  

To get you started, I give you three recipes: Fresh Veggie and Avocado, Buffalo Chicken, and Turkey Cranberry a.k.a. Thanksgiving.  

This post may contain affiliate links. If you buy something using these links, Jennyblogs may receive a small commission, at no extra cost to you. This helps to support Jennyblogs. For further information see the privacy policy. Grazie!

Recipes by Jenny


Avocado Veggie Pinwheels

Makes about 24 pinwheels

Ingredients: 

Hmm, these photos could use improving upon…

Hmm, these photos could use improving upon…

  • 4 8-inch or 6 6-inch flour tortillas

  • 8 oz / 225g cream cheese, softened

  • 1/3 cup shredded carrots, or about 1-2 small carrots

  • 1/3 chopped spinach or broccoli

  • 1 bunch green onions, chopped

  • 1/4 tsp garlic powder

  • 1/4 tsp dill weed

  • salt and pepper, to taste

  • 1/2 cup guacamole

Directions:

  1. In a medium bowl, mix together cream cheese, carrots, spinach, green onions, garlic powder, dill weed, and salt and pepper.  

  2. Distribute evenly over tortillas, spreading almost to the edges.  Spread a thick layer of guacamole over cream cheese mixture.  Roll up tightly.  

  3. Trim edges and slice into approximately 1 inch slices.  Serve or chill until it's par-tay time.  

pinwheels, roll ups, veggie rolls, veggie wraps, avocado, buffalo chicken pinwheels, Thanksgiving pinwheels, vegetable wraps, cranberry sauce, appetizer, finger food, snack
American
Yield: 24
Author: Jennyblogs
Print
Avocado Veggie Pinwheels

Avocado Veggie Pinwheels

Tortillas slathered with seasoned cream cheese, avocado, and veggies, rolled up and sliced.
Prep time: 25 MinTotal time: 25 Min

Ingredients:

  • 4 8-inch or 6 6-inch flour tortillas
  • 8 oz / 225g cream cheese, softened
  • 1/3 cup shredded carrots, or about 1-2 small carrots
  • 1/3 chopped spinach or broccoli
  • 1 bunch green onions, chopped
  • 1/4 tsp garlic powder
  • 1/4 tsp dill weed
  • salt and pepper, to taste
  • 1/2 cup guacamole

Instructions:

  1. In a medium bowl, mix together cream cheese, carrots, spinach, green onions, garlic powder, dill weed, and salt and pepper.
  2. Distribute evenly over tortillas, spreading almost to edges. Spread a thick layer of guacamole over cream cheese mixture. Roll up tightly.
  3. Trim ends and slice into approximately 1 inch slices. Serve or chill until it's par-tay time.

Notes:

All quantities are very approximate. You could double basically any ingredient you want to have more filling, less filling, more flavor, less flavor. The tortilla is your playground.

Calories

68.72

Fat (grams)

4.49

Sat. Fat (grams)

2.11

Carbs (grams)

5.73

Fiber (grams)

0.61

Net carbs

5.05

Sugar (grams)

0.50

Protein (grams)

1.52

Sodium (milligrams)

104.65

Cholesterol (grams)

9.47
Nutritional information is approximate, based on 1 pinwheel.
Did you make this recipe?
Tag @jennyblogsandbakes on instagram and hashtag it #jennyblogs
Created using The Recipes Generator

Buffalo Chicken Pinwheels

Makes about 24 pinwheels

Ingredients:

  • 4 8-inch or 6 6-inch flour tortillas

  • 8 oz / 225g cream cheese, softened

  • 1/3 cup / 80g Frank's hot sauce

  • 1/2 cup cooked chopped or shredded chicken

  • 1 bunch green onions, chopped

  • 1/4 cup blue cheese, crumbled, optional

Directions:

  1. In a medium bowl, mix together cream cheese, hot sauce, chicken, green onion, and blue cheese.

  2. Distribute evenly over tortillas, spreading almost to the edges.  Roll up tightly.  

  3. Trim edges and slice into approximately 1 inch slices.  Serve or chill until it's par-tay time.   

pinwheel, veggie roll up, veggie wrap, buffalo chicken, blue cheese, buffalo chicken wrap, buffalo chicken pinwheel, canned chicken
snack, appetizer
American
Yield: 24
Author: Jennyblogs
Print
Buffalo Chicken Pinwheels

Buffalo Chicken Pinwheels

Tortillas slathered in Frank's hot sauce and cream cheese with chicken and green onions, rolled, and sliced for bite size hot wing pinwheels.
Prep time: 15 MinTotal time: 15 Min

Ingredients:

  • 4 8-inch or 6 6-inch flour tortillas
  • 8 oz / 225g cream cheese, softened
  • 1/3 cup / 80g Frank's hot sauce
  • 1/2 cup cooked chopped or shredded chicken
  • 1 bunch green onions, chopped
  • 1/4 cup blue cheese, crumbled, optional

Instructions:

  1. In a medium bowl, mix together cream cheese, hot sauce, chicken, green onion, and blue cheese.
  2. Distribute evenly over tortillas, spreading almost to the edges. Roll up tightly.
  3. Trim edges and slice into approximately 1 inch slices. Serve or chill until it's par-tay time.

Notes:

All quantities are approximate. You could double basically any ingredient you want to have more filling, less filling, more flavor, less flavor. I often use canned chicken for the buffalo chicken. Pinwheels aren't exactly a showcase of your cooking/baking skills, anyway, so I like to keep things chop, chop. (Literally)

Calories

74.28

Fat (grams)

4.60

Sat. Fat (grams)

2.40

Carbs (grams)

5.20

Fiber (grams)

0.30

Net carbs

4.90

Sugar (grams)

0.42

Protein (grams)

3.02

Sodium (milligrams)

177.01

Cholesterol (grams)

14.74
Nutritional information is approximate. Based on one pinwheel; includes blue cheese.
Did you make this recipe?
Tag @jennyblogsandbakes on instagram and hashtag it #jennyblogs
Created using The Recipes Generator

Thanksgiving Pinwheels

Makes about 24 Pinwheels

Ingredients:

  • 4 8-inch or 6 6-inch flour tortillas

  • 8 oz / 225g cream cheese, softened

  • 1/2 cup cranberry sauce

  • 8 oz sliced deli turkey (or leftover Turkey, hey!)

  • 1/3 cup chopped spinach, optional

Directions:

  1. In a medium bowl mix together cream cheese, cranberry sauce, and spinach.  Distribute evenly over tortillas, spreading almost to the edges.  

  2. Layer turkey slices over cream cheese mixture.  Roll up tightly.  

  3. Trim edges and slice into approximately 1 inch slices.  Serve or chill until it's par-tay time.  

pinwheels, veggie roll ups, Thanksgiving, cream cheese, Thanksgiving pinwheel, Thanksgiving wrap, turkey, cranberry sauce, spinach
snack, appetizer
American
Yield: 24
Author: Jennyblogs
Print
Thanksgiving Pinwheels

Thanksgiving Pinwheels

Tortilla spread with cream cheese, cranberry sauce, and turkey, rolled and sliced for a nostalgic bite-sized taste of Thanksgiving.
Prep time: 15 MinTotal time: 15 Min

Ingredients:

  • 4 8-inch or 6 6-inch flour tortillas
  • 8 oz / 225g cream cheese, softened
  • 1/2 cup cranberry sauce
  • 8 oz sliced deli turkey (or leftover Turkey, hey!)
  • 1/3 cup / 15g chopped spinach, optional

Instructions:

  1. In a medium bowl mix together cream cheese, cranberry sauce, and spinach. Distribute evenly over tortillas, spreading almost to the edges.
  2. Layer turkey slices over cream cheese mixture. Roll up tightly.
  3. Trim edges and slice into approximately 1 inch slices. Serve or chill until it's par-tay time.

Notes:

All quantities are approximate. You could double basically any ingredient you want to have more filling, less filling, more flavor, less flavor. Like I said, the tortilla is your playground. I like the spinach, it gives it a nice punch of color. It also makes the roll versatile for Christmas, beautiful red and green!

Calories

79.26

Fat (grams)

4.10

Sat. Fat (grams)

2.05

Carbs (grams)

8.14

Fiber (grams)

0.39

Net carbs

7.75

Sugar (grams)

2.56

Protein (grams)

2.63

Sodium (milligrams)

182.60

Cholesterol (grams)

14.67
Nutritional information is approximate. Based on one pinwheel; Includes spinach.
Did you make this recipe?
Tag @jennyblogsandbakes on instagram and hashtag it #jennyblogs
Created using The Recipes Generator

Jenny's Notes:

  • All quantities are approximate.  You could double basically any ingredient you want to have more filling, less filling, more flavor, less flavor.  Like I said, the tortilla is your playground.  

  • I like the spinach in the Thanksgiving roll, it gives it a nice punch of color.  It also makes the roll versatile for Christmas, beautiful red and green! 

  • Speaking of the Thanksgiving roll, you could probably make a much more legitimate roll by using all Thanksgiving leftovers in a roll...gravy instead of cream cheese...nah that'd be gross.  

  • I usually use canned chicken for the buffalo chicken.  Pinwheels aren't exactly a showcase of your cooking/baking skills, anyway, so I like to keep things chop, chop.  (Literally)   


Refrigerator Dill Pickles

Summertime calls for watermelon, lemonade, ice cream, swimming, and cook outs.  And every quintessential cookout will have something to cook outside, usually meat and vegetables in some form.  (I know we're all thinking hamburgers, bratwursts, and hotdogs, but hey, there are some other weird traditions out there, too.)  And if you're cooking out, you're going to need buns and condiments.  And the best condiment award goes to....pickles!!

Not only does it have the best taste (opinion), but it stands alone.  As in, if you eat a pickle, no one will think twice.  But if we see you munching on a romaine lettuce leaf or slurping on a spoonful of ketchup, well, you might get some stares.  Of course, this is coming from someone who doesn't like hamburgers and once ate a romaine sandwich.  As in, onion, ketchup, mustard, and pickles sandwiched between to Romaine lettuce leaves.  Mmmmm.  Yeah, it was weird.  But I was so hungry, and hamburgers were the only option, I rather enjoyed it.  That's now on the worldwide webs.  Maybe I should change my heading to be: "Jenny, the girl who eats condiments like a main dish." Don't worry I won't, only you, my seven followers, are now privy to this information.  Haha.  

Back to pickles.  Now that we have remembered how great pickles are, did you know they are super easy to make at home?  Yes they are, and now you know that too.  Boil some water, throw some ingredients in a jar, chop up some cucumbers, stick them in the fridge, and voila!  Pickles.  

This post may contain affiliate links. If you buy something using these links, Jennyblogs may receive a small commission, at no extra cost to you. This helps to support Jennyblogs. For further information see the privacy policy. Grazie!

Recipe adapted from my mama


Refrigerator Dill Pickles

Makes about 24 spears/servings

Ingredients:

  • 3 1/2 cups / 830g water

  • 1 1/4 cups / 296g white vinegar

  • 1 Tbsp / 12g sugar

  • 1 Tbsp / 17g salt

  • 1 tsp / 2g turmeric, optional

  • 4 cups or about 2-3 large cucumbers, cut into slices, spears, or shape of choice

  • 2 cloves garlic

  • 2 heads fresh dill

  • 1 tsp red chili flakes, mustard seeds, or celery seeds, optional

Directions:

  1. Stir together water, vinegar, sugar, and salt in a large saucepan.  Place over medium-high heat and bring to a boil.  Remove from heat and allow to cool completely. 

  2. In a large glass jar or container, 4-quart or larger, arrange garlic, dill, cucumbers, and any spices you choose to use.  Pour the cooled liquid over the cucumbers, discarding or saving any leftover for another use.  Top with lid, sealing well, and refrigerate.  

  3. They will start to taste pickle-y the next day, but for optimum flavor refrigerate at least 3 days before consuming.  

Jenny's Notes:

  • I recommend making this recipe once as is to get an idea of the flavor profile, then play around to make it your own!

    1) If you like more bread & butter or sweet style pickles, up the sugar

    2) If you love dill, use more dill

    3) Add sliced onions or bell peppers

    4) Add more red pepper flakes or other hot pepper for more spice

    5) Really, add whatever suits your fancy. The garden is your playground.

  • The turmeric is for color, not so much flavor, to get that idyllic yellow pickle.  However, if you could care less about having a yellow pickle or don’t enjoy turmeric, leave it out!  I for one don't think the turmeric is very obvious in this recipe, but it's detectable if you really think about it.  

dill pickles, refrigerator pickles, homemade pickles
condiment, snack
American
Yield: 24
Author: Jennyblogs
Print
Refrigerator Dill Pickles

Refrigerator Dill Pickles

Classic dill pickles made in your refrigerator in just 3 days.
Prep time: 15 MinCook time: 10 Mininactive time: 72 HourTotal time: 72 H & 25 M

Ingredients:

  • 3 1/2 cups / 830g water
  • 1 1/4 cups / 296g white vinegar
  • 1 Tbsp / 12g sugar
  • 1 Tbsp / 17g salt
  • 1 tsp / 2g turmeric, optional
  • 4 cups or about 2-3 large cucumbers, cut into slices, spears, or shape of choice
  • 2 cloves garlic
  • 2 heads fresh dill

Instructions:

  1. Stir together water, vinegar, sugar, and salt in a large saucepan. Place over medium-high heat and bring to a boil. Remove from heat and allow to cool completely.
  2. In a large glass jar or container, 4-quart or larger, arrange garlic, dill, cucumbers, and any spices you choose to use. Pour the cooled liquid over the cucumbers, discarding or saving any leftover for another use. Top with lid, sealing well, and refrigerate.
  3. They will start to taste pickley the next day, but for optimum flavor refrigerate at least 3 days before consuming.

Notes:

I recommend making this recipe once as is to get an idea of the flavor profile, then play around to make it your own! 1) If you like more bread & butter or sweet style pickles, up the sugar 2) If you love dill, use more dill 3) Add sliced onions or bell peppers 4) Add more red pepper flakes or other hot pepper for more spice 5) Really, add whatever suits your fancy. The garden is your playground. The turmeric is for color, not so much flavor, to get that idyllic yellow pickle. However, if you could care less about having a yellow pickle or don’t enjoy turmeric, leave it out! I for one don't think the turmeric is very obvious in this recipe, but it's detectable if you really think about it.

Calories

10.04

Fat (grams)

0.04

Sat. Fat (grams)

0.01

Carbs (grams)

1.91

Fiber (grams)

0.20

Net carbs

1.72

Sugar (grams)

1.09

Protein (grams)

0.25

Sodium (milligrams)

276.95

Cholesterol (grams)

0.00
Nutritional information is approximate. Based on one pickle spear.
Did you make this recipe?
Tag @jennyblogsandbakes on instagram and hashtag it #jennyblogs
Created using The Recipes Generator

Homemade Marzipan

Marzipan!  That weird almond dessert that no one seems to really talk about in America, but people rave about in Europe.  It really should catch on in the US, because:

  1. It tastes like almonds and is delicious

  2. It's easy to make

  3. It's fun to work with and versatile

 It can be used as filling or toppings of baked goods, and it can also be colored and molded into shapes or rolled out and used to cover cakes in a fondant fashion.   Fondant has it's place, but I would rather eat a marzipan covered cake any day over a fondant cake.  

marzipan.jpg

You may have seen almond paste sold in stores, and although almond paste and marzipan are made from the same ingredients, they are not usually equal.  This depends on what part of the world you call home.  In many European countries the terms marzipan and almond paste are interchangeable, in other parts, such as the US, they are different products.  If they are different, for example in the US, marzipan is smoother, sweeter, made with egg whites and sometimes rose water, whereas almond pasted is less sweet and has a coarser texture.  When I first started dabbling in marzipan, I used almond paste as a base to make marzipan, but now I prefer to make it from scratch.

It's so simple, as you can see for yourself!

This post may contains affiliate links. If you buy something using these links, Jennyblogs may receive a small commission, at no extra cost to you. This helps to support Jennyblogs. For further information see the privacy policy. Grazie!

Recipe adapted from La Cuochina Sopraffina


Marzipan

Makes about 280g of marzipan, or about 10 oz. 

Ingredients:

  • 125g / 1 1/3 cup almond flour or almonds

  • 125g / 1 cup powdered sugar

  • 1 egg white (about 30g)

  • 6 drops almond extract

  • 3 drops rose water, optional

Directions:

  1. If using whole almonds, place in a food processor and process until finely ground.   

  2. Process almond flour, powdered sugar, egg white, almond extract, and rose water until a thick dough forms.  If the consistency is too thin, add more powdered sugar.  

  3. Turn marzipan out onto a surface lightly dusted with powdered sugar, knead for a few seconds.  Wrap tightly in plastic wrap and refrigerate until needed, or freeze.  

Jenny's Notes:

  • This recipe is very simple to adjust to the amount you need, especially if you scale/weigh your ingredients.  As you may have noticed, the almond flour to powdered sugar is a 1:1 ratio.  

  • If you are worried about eating or serving raw egg whites, be sure to buy pasteurized egg whites from the store.   

marzipan, almond paste, European sweets, marzipan fruit, fondant, gluten-free, dairy-free, raw
Yield: 10
Author:
Homemade Marzipan

Homemade Marzipan

Marzipan is a versatile and tasty European almond sweet, often paired with chocolate, molded into fruit shapes, or used to cover cakes in place of fondant. Gluten and dairy free.
Prep time: 10 MCook time: Total time: 10 M

Ingredients:

  • 125g / 1 1/3 cup almond flour or almonds
  • 125g / 1 cup powdered sugar
  • 1 egg white (about 30g)
  • 6 drops almond extract
  • 3 drops rose water, optional

Instructions:

  1. If using whole almonds, place in a food processor and process until finely ground.
  2. Process almond flour, powdered sugar, egg white, almond extract, and rose water until a thick dough forms. If the consistency is too thin, add more powdered sugar.
  3. Turn marzipan out onto a surface lightly dusted with powdered sugar, knead for a few seconds. Wrap tightly in plastic wrap and refrigerate until needed, or freeze.

Notes:

This recipe is very simple to adjust to the amount you need, especially if you scale/weigh your ingredients. As you may have noticed, the almond flour to powdered sugar is a 1:1 ratio. If you are worried about eating or serving raw egg whites, be sure to buy pasteurized egg whites from the store.

Calories

131.15

Fat (grams)

7.44

Sat. Fat (grams)

0.57

Carbs (grams)

14.21

Fiber (grams)

1.86

Net carbs

12.35

Sugar (grams)

11.43

Protein (grams)

3.51

Sodium (milligrams)

6.80

Cholesterol (grams)

0.00
Nutritional information is approximate. Based on 10 servings.
Did you make this recipe?
Tag @jenevamorris on instagram and hashtag it #jennyblogs
Created using The Recipes Generator

Salted Chocolate Caramel Pretzel Bark

Pretzels. Homemade caramel. Chocolate. And salted. This bark has only 5 ingredients, it’s super easy to make, and you keep going back for more.

Oh yes.  For the sugar lovers, sweets devotees, and when you want to whip up something delicious with precious little effort, this bark is it.  Some people even refer to it as crack bark. Maybe because you break, or crack it, at the end?  (Just kidding everyone, I know what they mean when they call it that.)  Plus all 5 ingredients are pretty easy to have on hand. 

Now, if this were Pinterest, you could call it "5 Ingredient Crack Bark."  Remember my thing with Pinterest names?  Yep.  Still there.  Keep it classy, people, keep it classy.  It already bothers me that this recipe has as many words in its title as it does ingredients.  If you have any better and more concise ideas for the title, please, let me know!

Slightly adapted from Where the Cookies Are

This post may contain affiliate links. If you buy something using these links, Jennyblogs may receive a small commission, at no extra cost to you. This helps to support Jennyblogs. For further information see the privacy policy. Grazie!


Salted Chocolate Caramel Pretzel Bark

Makes approximately one 11x17in / 28x43cm sheet of bark

Ingredients:

  • Enough mini pretzels to cover an approximately 11x17in / 28x43cm jelly roll pan, about half of a 15oz bag / 200g.

  • 1 cup / 226g butter

  • 1 cup / 200g brown sugar

  • 2 cups / 340g semi-sweet chocolate chips

  • coarse salt

Directions:

Oven 375°F / 190°C.  Line an approximately 11x17in / 28x43cm jelly roll pan with tinfoil. 

  1. Cover pan with an even layer of pretzels.

  2. In a medium saucepan over medium-low heat, combine butter and brown sugar.  Stir until mixture starts to simmer, then allow to cook, without stirring, until mixture turns a nice golden-brown.  This should take 3-5 minutes after the mixture has started to simmer. 

  3. Remove mixture from heat and immediately pour evenly over pretzels. 

  4. Place in the oven and bake for 6 minutes. 

  5. Remove from oven and immediately sprinkle chocolate chips over pretzels and caramel. 

  6. Wait a few minutes, then use a spatula to spread now melted chocolate chips over pretzels.  Sprinkle with salt. 

  7. Allow to cool completely before breaking into pieces.  You can place your pan in the fridge or freezer to speed up the process. 

Jenny's Notes:

  • If you’re wondering what a jelly-roll pan is, it’s merely a baking sheet with about a 1in side around it, which in this case keeps the bark contained. You can shop them on Amazon by clicking on the link to the right. —>

  • Don't have tinfoil?  You can always use wax or parchment paper, but I would recommend greasing them beforehand as I have had the bark stick to both of those products. 

  • Want to go crazy?  Use any kind of chips in place of the semisweet chips, such as milk, peanut butter, bittersweet...or a combination! 

  • Once you have spread the melted chocolate, feel free to add some extra toppings if you wish.  Coconut, chopped peanuts, finely chopped coffee beans...

salted caramel, salted chocolate, bark, butter, toffee, caramel, chocolate chips, crack bark
dessert, snack
American
Yield: 12-15 servings
Author:

Salted Chocolate Caramel Pretzel Bark

Salty, crunchy, chocolatey, caramelly, and only 5 ingredients to whip up this addicting bark!
prep time: 25 Mcook time: 6 Mtotal time: 31 M

ingredients:

  • mini pretzels, enough to cover an approximately 11x17in / 28x43cm jelly roll pan, about half of a 15oz bag or 200g
  • 1 cup / 226g butter
  • 1 cup / 200g brown sugar
  • 2 cups / 340g semi-sweet chocolate chips
  • coarse salt

instructions:

How to cook Salted Chocolate Caramel Pretzel Bark

  1. Oven 375°F / 190°C. Line an approximately 11x17in / 28x43cm jelly roll pan with tinfoil.
  2. Cover pan with an even layer of pretzels.
  3. In a medium saucepan over medium-low heat, combine butter and brown sugar. Stir until mixture starts to simmer, then allow to cook, without stirring, until mixture turns a nice golden-brown. This should take 3-5 minutes after the mixture has started to simmer.
  4. Remove mixture from heat and immediately pour evenly over pretzels.
  5. Place in the oven and bake for 6 minutes.
  6. Remove from oven and immediately sprinkle chocolate chips over pretzels and caramel.
  7. Wait a few minutes, then use a spatula to spread now melted chocolate chips over pretzels. Sprinkle with salt.
  8. Allow to cool completely before breaking into pieces. You can place your pan in the fridge or freezer to speed up the process.

NOTES:

If you’re wondering what a jelly-roll pan is, it’s merely a baking sheet with about a 1in side around it, which in this case keeps the bark contained. Don't have tinfoil? You can always use wax or parchment paper, but I would recommend greasing them beforehand as I have had the bark stick to both of those products. Want to go crazy? Use any kind of chips in place of the semisweet chips, such as milk, peanut butter, bittersweet...or a combination! Once you have spread the melted chocolate, feel free to add some extra toppings if you wish. Coconut, chopped peanuts, finely chopped coffee beans...

Calories

398.37

Fat (grams)

24.26

Sat. Fat (grams)

14.77

Carbs (grams)

47.86

Fiber (grams)

2.24

Net carbs

45.63

Sugar (grams)

31.99

Protein (grams)

3.04

Sodium (milligrams)

384.00

Cholesterol (grams)

40.49
Nutritional information is approximate and based on 12 servings.
Created using The Recipes Generator

Homemade Eggnog

Do you know what 2 weeks from today is?  Yes, Thanksgiving!  A big feast requires lots of food, lots of planning, and of course lots of shopping, preparing, and cooking.  There are of course all the traditional dishes to make, but sometimes you want to throw in something new and delicious.  Since many of you, my smart friends, break out the eggnog for the first time on Thanksgiving, why not try making it homemade this year?  No high fructose corn syrup, artificial flavor, or "Holly"-ness about it.  (I still am not sure I know the difference between store-bought Hollynog and Eggnog?)  It's very simple to make, and can easily be doubled, tripled, or quadrupled (Hello, Morris family) to fit your needs.  'Tis the season to be jolly, not drink Hollynog.  

Homemade Eggnog

Makes 8 Servings

Ingredients:

  • 4 eggs

  • 1/2 cup sugar

  • 2 tsp vanilla extract

  • 1/2 tsp nutmeg, plus more for sprinkling

  • 4 cups milk

  • 4 oz. (1/4 cup) brandy, bourbon, or rum, optional

Directions: 

In a large bowl, whisk together eggs and sugar until light in color and the sugar has dissolved.  Whisk in vanilla, nutmeg, milk, and alcohol.  Strain into a pitcher or serving dish of choice and chill until ready to serve.  Sprinkle with additional nutmeg. 

Halve, double, or triple this recipe as needed.

Jenny's Notes:

So easy and delicious!  If you are worried about the raw eggs in this, simply use pasteurized eggs.  I am fortunate enough to be able to us eggs straight from chickens I know and trust. 

If you are serving this to children and/or people who don't drink, obviously don't add any alcohol.  What I like to do is add the alcohol to only half so everyone is happy, or let people add their own.  But not the children.

Serve in a punch bowl with dollops of vanilla ice cream for an extra decadent treat! 

Caramel Sauce

Everyone should have a good caramel sauce on hand, in my mind it's an essential tool in the baker's repertoire.  It's simple to make and not too time consuming, the only special item you will need is a candy thermometer, and you can find those pretty cheaply.  Everyone will love you for making it.  Take it one step further to make salted caramel, and everyone and their brother will love you, too. 

So get your thermometers ready, let's get cracking!  Actually, we will not be going to the soft-crack nor hard-crack stages like on your thermometer, so calm down.  If we did, our caramel would not be soft and pour-able but capable of cracking teeth.  

This post may contain affiliate links. If you make a purchase using these links, Jennyblogs may receive a small commission, at no extra cost to you. This helps to support Jennyblogs. For further information see the privacy policy. Grazie!

Recipe adapted from Martha Stewart


Caramel Sauce

Makes 2+ cups

Ingredients:

  • 2 cups / 400g sugar

  • 2 Tbsp / 40g light corn syrup

  • 2 Tbsp / 28g water

  • 1 cup / 237g heavy whipping cream

  • 1/4 tsp coarse salt

  • 1/2 cup / 113g cold, unsalted butter

Directions:

  1. Combine sugar, corn syrup, and water in a medium sauce over high heat.  Allow to cook without stirring until the mixture turns a beautiful amber color.  (If it turns an ugly amber color, I can't help ya. Just kidding. Proceed.)  This could take anywhere from 10-20 minutes, depending on how hot your stove top cooks.  Keep a watchful eye on it, as it goes fast from light golden, perfectly amber, to burnt.  

  2. Remove from heat and carefully pour in cream, a little at a time, as it will bubble up and spatter at you.  Stir until all the cream is mixed in. 

  3. Attach a candy thermometer to the pan and return to the heat.  Cook until mixture reaches 238°F / 114°C, about 2-5 minutes. 

  4. Remove from heat and stir in salt.  Stir in butter, one tablespoon at a time, until completely smooth.  Transfer to a bowl and allow to cool completely before using.  Store in the refrigerator. 

Jenny's Notes:

  • Don't like using corn syrup? Neither do I, in which case you can substitute honey for the corn syrup.  Keep in mind that it will give it a honey taste, so use discernment for which type of dessert you will be using it with and who you will be serving it to, if honey will suit or not. Honey also has a tendency to result in a slightly grainy caramel, rather than the silken smooth corn syrup caramel, especially if you are using a natural or raw honey that naturally crystallizes. (This is actually a sign of good honey.) Again, use your best judgment!

  • To make salted caramel, use salted butter and/or up the salt in the recipe to 1/2-1 tsp or to taste.

  • This is great in coffee, for cookies, swirling in brownies, using as a filling between cake layers, dipping apples and fruit into, on ice cream, and anything else you like to use caramel sauce for!  Get creative and may the streams of caramel forever be abundant in your life.   

Homemade Caramel, Caramel Sauce, Caramel fruit dip, Caramel recipe
Dessert
French
Yield: 16
Author: Jennyblogs
Print
Caramel Sauce

Caramel Sauce

A reliable and versatile caramel sauce you can use on most anything! Think in coffee, for cookies, swirling in brownies, using as a filling between cake layers, dipping apples and fruit into, on ice cream, or by the spoonful!
Prep time: 10 MCook time: 25 MTotal time: 35 M

Ingredients:

  • 2 cups / 400g sugar
  • 2 Tbsp / 40g light corn syrup
  • 2 Tbsp / 28g water
  • 1 cup / 237g heavy whipping cream
  • 1/4 tsp coarse salt
  • 1/2 cup / 113g cold, unsalted butter

Instructions:

  1. Combine sugar, corn syrup, and water in a medium sauce over high heat. Allow to cook without stirring until the mixture turns a beautiful amber color. (If it turns an ugly amber color, I can't help ya. Just kidding. Proceed.) This could take anywhere from 10-20 minutes, depending on how hot your stove top cooks. Keep a watchful eye on it, as it goes fast from light golden, perfectly amber, to burnt.
  2. Remove from heat and carefully pour in cream, a little at a time, as it will bubble up and spatter at you. Stir until all the cream is mixed in.
  3. Attach a candy thermometer to the pan and return to the heat. Cook until mixture reaches 238°F / 114°C, about 2-5 minutes.
  4. Remove from heat and stir in salt. Stir in butter, one tablespoon at a time, until completely smooth. Transfer to a bowl and allow to cool completely before using. Store in the refrigerator.

Notes:

Don't like using corn syrup? Neither do I, in which case you can substitute honey for the corn syrup. Keep in mind that it will give it a honey taste, so use discernment for which type of dessert you will be using it with and who you will be serving it to, if honey will suit or not. Honey also has a tendency to result in a slightly grainy caramel, rather than the silken smooth corn syrup caramel, especially if you are using a natural or raw honey that naturally crystallizes. (This is actually a sign of good honey.) Again, use your best judgment! To make salted caramel, use salted butter and/or up the salt in the recipe to 1/2-1 tsp or to taste.

Calories

204.83

Fat (grams)

11.08

Sat. Fat (grams)

6.98

Carbs (grams)

27.32

Fiber (grams)

0.00

Net carbs

27.32

Sugar (grams)

27.31

Protein (grams)

0.48

Sodium (milligrams)

42.98

Cholesterol (grams)

31.92
Nutritional information is approximate; based on roughly 16 servings of 2 Tbsp each.
Did you make this recipe?
Tag @jenevamorris on instagram and hashtag it #jennyblogs
Created using The Recipes Generator

Peanut Butter Brownie Trifle

image.jpg

Yes, a trifle, not a truffle.  It is neither a chocolate truffle nor does it require pigs or dogs to dig it up, thankfully.  Although I personally would love to go truffle hunting, or more or less watch the pigs/dogs truffle hunt.  Then eat them, of course.  The truffles, not the dogs or pigs. 

What's the difference between a truffle, a truffle, and a trifle? 

  • The original truffle, as I will call it here, is the fungus found in the ground.  There are two main kinds: black and white.  They are difficult to find, hence the need for dogs and pigs, and very expensive.  And divine to eat.  If you haven't eaten one, you definitely should, even if just to say you have.  All your foodie friends will hold you in high esteem henceforth.  ;)

  • Then there is the chocolate truffle, which is essentially a chocolate confection made to look like the original truffle.  It usually consists of a ganache (chocolate melted with heavy cream) center, covered in chocolate.  Also delicious. 

  • Thirdly, the trifle.  It is originally an English dessert, you could think of it like a large parfait to share.  My mom calls it a "Dump Cake" and in the south it is called a "Husband's Delight."  It usually consists of layers of cake, custard or pudding, whipped cream, and various fruits.  The possibilities of flavors and combinations are endless, and yes, delicious.

The moral of the story is, if someone offers you a truffle, a truffle, or a trifle, always say yes.  Because they are all delicious. 

Today’s trifle is also delicious. It has layers of fluffy peanut butter vanilla pudding, peanut butter chip brownies, and Reese’s peanut butter cups. Each element is simple to make, and homemade. It might dirty several bowls and pans, but it is so worth it! It’s creamy, chocolatey, peanut buttery. It’s rich, a little bit goes a long way. And yet it has you coming back for more. A crowd favorite!

This post may contain affiliate links. If you make a purchase using these links, Jennyblogs may receive a small commission, at no extra cost to you. This helps to support Jennyblogs. For further information see the privacy policy. Grazie!

Recipe adapted from Taste of Home


Peanut Butter Brownie Trifle

Serves about 12

Ingredients:

For the Vanilla Pudding *Make this first*

  • 3 Tbsp / 37g sugar

  • 4 1/2 tsp / 11g cornstarch

  • 1/8 tsp salt

  • 1 1/4 cups / 297g cold milk

  • 2 tsp / 10g vanilla extract

For the Peanut Butter Chip Brownies

  • 5 Tbsp / 70g oil

  • 1 cup / 200g sugar

  • 2 eggs

  • 1 tsp / 5g vanilla extract

  • 1/3 cup / 33g cocoa powder

  • 1/2 cup / 60g all-purpose flour

  • 1/4 tsp salt

  • 3/4 cup / 132g peanut butter chips

image.jpg

Extras

  • 1/2 cup / 230g creamy peanut butter

  • 1 1/2 cups / 356g heavy whipping cream, whipped until stiff peaks form

  • 1 12 oz package / 340g miniature Reese's cups, each cut in half


Directions:

Make the Vanilla Pudding

  1. In a small saucepan, whisk together sugar, cornstarch, and salt.  Gradually whisk in milk. 

  2. Heat over medium-low heat, stirring constantly, until pudding thickens and the whisk leaves a trail. 

  3. Remove from heat and add vanilla.  Place a piece of plastic wrap directly onto the pudding and put in fridge or freezer until pudding is thick and set. 

Meanwhile,

Make the Peanut Butter Chip Brownies

Oven preheated to 350°F / 177°C. Lightly grease an 8x8in / 20x20cm baking dish.

  1. In a medium bowl, mix together oil, sugar, eggs, and vanilla. 

  2. In a separate bowl, whisk together cocoa, flour, and salt.  Stir dry mixture into wet mixture.  Stir in peanut butter chips.  Spread evenly in prepared baking dish.

  3. Bake for 12 - 15 minutes or until toothpick inserted off center comes out mostly clean.  Allow to cool. 

Assembly

  1. Once pudding is set, mix in peanut butter.  Gently fold in whipped cream.

  2. Cut cooled brownies into bite size pieces, about 1in / 2.5cm squares.

  3. In a large glass bowl, layer in this order:

    • 1/3 of the brownies

    • 1/4 of the Reese's cups

    • 1/3 of the pudding mixture

    • another 1/3 of the brownies

    • another 1/4 of the Reese’s cups

    • another 1/3 of the pudding

    • final 1/3 of the brownies

    • another 1/4 of the Reese’s cups

    • final 1/3 of the pudding

    • final 1/4 of the Reese’se cups for decoration on top

  4. Chill until ready to serve.

Jenny’s Notes:

  • Placing plastic wrap directly onto pudding instead of just over the bowl prevents the “skin” from forming.

  • Both the brownies and the pudding can easily be made a day ahead.

peanut butter,trifle,dump cake, husband's delight, Reese's dessert, chilled dessert, vanilla pudding, whipped cream
dessert, trifle
American
Yield: 12 servings
Author:
Peanut Butter Brownie Trifle

Peanut Butter Brownie Trifle

A rich trifle dessert with layers of whipped peanut butter vanilla pudding, peanut butter chip brownies, and peanut butter cups.
Prep time: 45 MinCook time: 15 MinTotal time: 1 Hour

Ingredients

For the Vanilla Pudding *Make this first*
For the Peanut Butter Chip Brownies
Extras

Instructions

Make the Vanilla Pudding
  1. In a small saucepan, whisk together sugar, cornstarch, and salt. Gradually whisk in milk.
  2. Heat over medium-low heat, stirring constantly, until pudding thickens and the whisk leaves a trail.
  3. Remove from heat and add vanilla. Place in fridge or freezer until pudding is thick and set.
Make the Peanut Butter Chip Brownies
  1. Oven preheated to 350°F / 177°C. Lightly grease an 8x8in / 20x20cm baking dish.
  2. In a medium bowl, mix together oil, sugar, eggs, and vanilla.
  3. In a separate bowl, whisk together cocoa, flour, and salt. Stir dry mixture into wet mixture. Stir in peanut butter chips. Spread evenly in prepared baking dish.
  4. Bake for 12 - 15 minutes or until toothpick inserted off center comes out mostly clean. Allow to cool.
Assembly
  1. Once pudding is set, mix in peanut butter. Gently fold in whipped cream.
  2. Cut cooled brownies into bite size pieces, about 1in / 2.5cm squares.
  3. In a large glass bowl, preferably a cylinder, layer in this order:
  4. 1/3 of the brownies
  5. 1/4 of the Reese's cups
  6. 1/3 of the pudding mixture
  7. another 1/3 of the brownies
  8. another 1/4 of the Reese’s cups
  9. another 1/3 of the pudding
  10. final 1/3 of the brownies
  11. another 1/4 of the Reese’s cups
  12. final 1/3 of the pudding
  13. final 1/4 of the Reese’se cups for decoration on top
  14. Chill until ready serve.

Notes:

  • Placing plastic wrap directly onto pudding instead of just over the bowl prevents the “skin” from forming.
  • Both the brownies and the pudding can easily be made a day ahead.

Calories

606.07

Fat (grams)

41.47

Sat. Fat (grams)

13.60

Carbs (grams)

51.17

Fiber (grams)

3.43

Net carbs

47.74

Sugar (grams)

36.05

Protein (grams)

13.34

Sodium (milligrams)

349.61

Cholesterol (grams)

68.20
Nutritional information is approximate; based on 12 servings.
Did you make this recipe?
Tag @jennyblogsandbakes on instagram and hashtag it #jennyblogs
IMG_4139.jpg

Homemade Sweetened Condensed Milk

Making your own homemade sweetened condensed milk is as easy as simmering two ingredients on the stove.

As long as you have an extra hour or so or plan ahead, you’ll no longer need sweetened condensed milk from a can! Not to mention, it can actually be quicker to make than a trip to the store if you’re out, plus no BPA from a can! Overall it’s just a really lovely idea.

This post may contain affiliate links. If you make a purchase using these links, Jennyblogs may receive a small commission, at no extra cost to you. This helps to support Jennyblogs. For further information see the privacy policy. Grazie!


Homemade Sweetened Condensed Milk

Makes the equivalent to a 14 oz can

Ingredients

  • 3 cups / 711g milk

  • 1 cup / 200g sugar

Directions

  1. In a medium-small sauce pan, combine milk and sugar over lowest heat. Take a toothpick or food-safe wooden rod or dowel, insert into pan until it touches the bottom, then make a mark where the milk reaches. Each time you check the milk you can insert this toothpick to get an idea how far the milk is reduced without having to measure.

  2. Simmer for about an hour, checking occasionally, especially toward the end. Depending on your burner this time can vary. It can go very quickly from the perfect thickness to burnt. 

  3. When it's reduced by just more than half (60% is how much a can of sweetened condensed milk is generally condensed) and thick, it's done! 

Jenny's Notes:

  • While whole milk would be the choice closest to the canned version of sweetened condensed milk, you can use whichever you prefer, knowing that the fat content or varying plant-based milks will give slightly different flavors and textures.

  • Some recipes only call for 1/2 a can of sweetened condensed milk, which would normally leave you with an open half can in the fridge for forever until you find another recipe that calls for just half.  With this recipe, you can just make half and simmer for about 30-45 minutes instead of an hour. No waste!

  • If you're careful, you can slightly over-reduce this, to where the milk solids turn golden.  Immediately remove from heat and whisk to keep the milk solids from burning to the bottom of the pan.  It gives it a wonderful toasty, nutty flavor.  This is to sweetened condensed milk what browned butter is to normal butter.  If you followed me on that, you are following me to a very happy place. 

  • Accidentally over-reduced and now your sweetened condensed milk is too thick?  No worries, as long as it’s not burnt, just add a dash of milk and whisk, repeat until the desired consistency is reached. 

homemade sweetened condensed milk
miscellaneous, toppings
American
Yield: 10 servings
Author:
Homemade Sweetened Condensed Milk

Homemade Sweetened Condensed Milk

Sweetened condensed milk as good as or better than the can!
Prep time: 2 MinCook time: 60 MinTotal time: 1 H & 2 M

Ingredients

Instructions

  1. In a medium-small sauce pan, combine milk and sugar over lowest heat. Take a toothpick or food-safe wooden rod or dowel, insert into pan until it touches the bottom, then make a mark where the milk reaches. Each time you check the milk you can insert this toothpick to get an idea how far the milk is reduced without having to measure.
  2. Simmer for about an hour, checking occasionally, especially toward the end. Depending on your burner this time can vary. It can go very quickly from the perfect thickness to burnt.
  3. When it's reduced by just more than half (60% is how much a can of sweetened condensed milk is generally condensed) and thick, it's done!

Notes:

  • While whole milk would be the choice closest to the canned version of sweetened condensed milk, you can use whichever you prefer, knowing that the fat content or varying plant-based milks will give slightly different flavors and textures.
  • Some recipes only call for 1/2 a can of sweetened condensed milk, which would normally leave you with an open half can in the fridge for forever until you find another recipe that calls for just half.  With this recipe, you can just make half and simmer for about 30-45 minutes instead of an hour. No waste!
  • If you're careful, you can slightly over-reduce this, to where the milk solids turn golden.  Immediately remove from heat and whisk to keep the milk solids from burning to the bottom of the pan.  It gives it a wonderful toasty, nutty flavor.  This is to sweetened condensed milk what browned butter is to normal butter.  The photo on this post are of this golden nutty version!
  • Accidentally over-reduced and now your sweetened condensed milk is too thick?  No worries, as long as it’s not burnt, just add a dash of milk and whisk, repeat until the desired consistency is reached. 


Calories

120.77

Fat (grams)

2.31

Sat. Fat (grams)

1.33

Carbs (grams)

23.41

Fiber (grams)

0.00

Net carbs

23.41

Sugar (grams)

23.55

Protein (grams)

2.24

Sodium (milligrams)

30.77

Cholesterol (grams)

7.11

Nutritional info is approximate. Based on 1 serving of 2 Tbsp made with whole milk.

Did you make this recipe?
Tag @jennyblogsandbakes on instagram and hashtag it #jennyblogs
Created using The Recipes Generator

Snickers Salad

Don't be deceived, this is not a real salad.  If visions of spinach salad with Snickers on top were dancing across your brain, I am so so sorry.  I love my greens and Snickers, but they do not belong together.  No no no.  Instead, think crisp Granny Smith apples and bits of Snickers lovingly folded into fluffy whipped cream and vanilla pudding.  So simple, and so delicious.  

No spinach, kale, or arugula were harmed in the making of this recipe. 

No spinach, kale, or arugula were harmed in the making of this recipe. 

If it makes you feel better, you could call this Green Apple Salad, like my mom does.  But it has the word "salad" in it, so I feel fully justified in keeping Snickers in the title.  As you wish.  OR if someone were to pin this on Pinterest it should probably be called Green Apple Snickers Salad That's Not a Salad with Whipped Cream and Home-Made Vanilla Pudding and Served in a Bowl and Should Be Eaten with a Spoon.  Because titles on Pinterest are really long and descriptive like that.  Actually that's what they are, descriptions, not titles.  I get it, people want people to know what's in it.  I want to know what's in it too, but a title WITH a description is in my opinion the best way to go.  "Oooh whatcha making?"  "Oh just a batch of kale-potato-onion-carrot-chicken-noodle-soup with fresh thyme and salt and pepper in organic free-range low-sodium chicken broth."  "Sounds good! What's in it?"  "Kale, potatoes, onions, carrots, chicken, noodles, fresh thyme, salt, pepper...oh, and chicken broth."  Next person walks in the room, "Oh, watcha eating?"  "..."   It can get tiring giving the spiel over and over again.  By no means are my titles perfect or always concise, mock them as you wish. Heheh.

Snickers Salad

Serves 8ish

Ingredients:

  • 1/4 cup sugar
  • 2 Tbsp cornstarch
  • 1/8 tsp salt
  • 1 1/3 cup milk of choice
  • 1 egg yolk
  • 1 tsp vanilla
  • 8 oz heavy whipping cream (1 cup)
  • about 11 oz Snickers, chopped, plus extra for serving
  • 4 Granny Smith apples, chopped

Directions:

At least a few hours before assembling recipe, or up to 2 days before, make the vanilla pudding:

Whisk together sugar, cornstarch, and salt in a medium saucepan.  Slowly whisk in 1 cup of the milk.  Measure out the remaining 1/3 cup milk and whisk in the yolk, then whisk this slowly into the mixture in the saucepan. 

Place over medium heat and stir constantly until mixture thickens and the whisk leaves a trail.  Remove from heat and add vanilla.  Place in refrigerator until completely chilled.

Next, whip the heavy whipping cream in bowl of a stand mixer with whisk attachment or with an electric mixer until stiff peaks form. 

Gently fold whipped cream into pudding, start with just a portion, about a third, then continue folding in whipped cream by thirds.  Gently fold in apples and Snickers.  Transfer to serving bowl and top with remaining Snickers.  Store in fridge until ready to serve.   

Best if assembled day of serving. 

Jenny's Notes:

  1. This can be made with any candy you like, Rolo, Milky Way, Payday, Twix, etc.  I personally do half and half of Snickers and Reese's.  And play with the ratio of apples to candy! 
  2. If using a candy with caramel, freeze to make chopping easier. 
  3. You can also add chopped peanuts if you want an extra crunch!
  4. I usually make this for large family gatherings and double the recipe for 12 or more people.

Adapted from Taste of Home