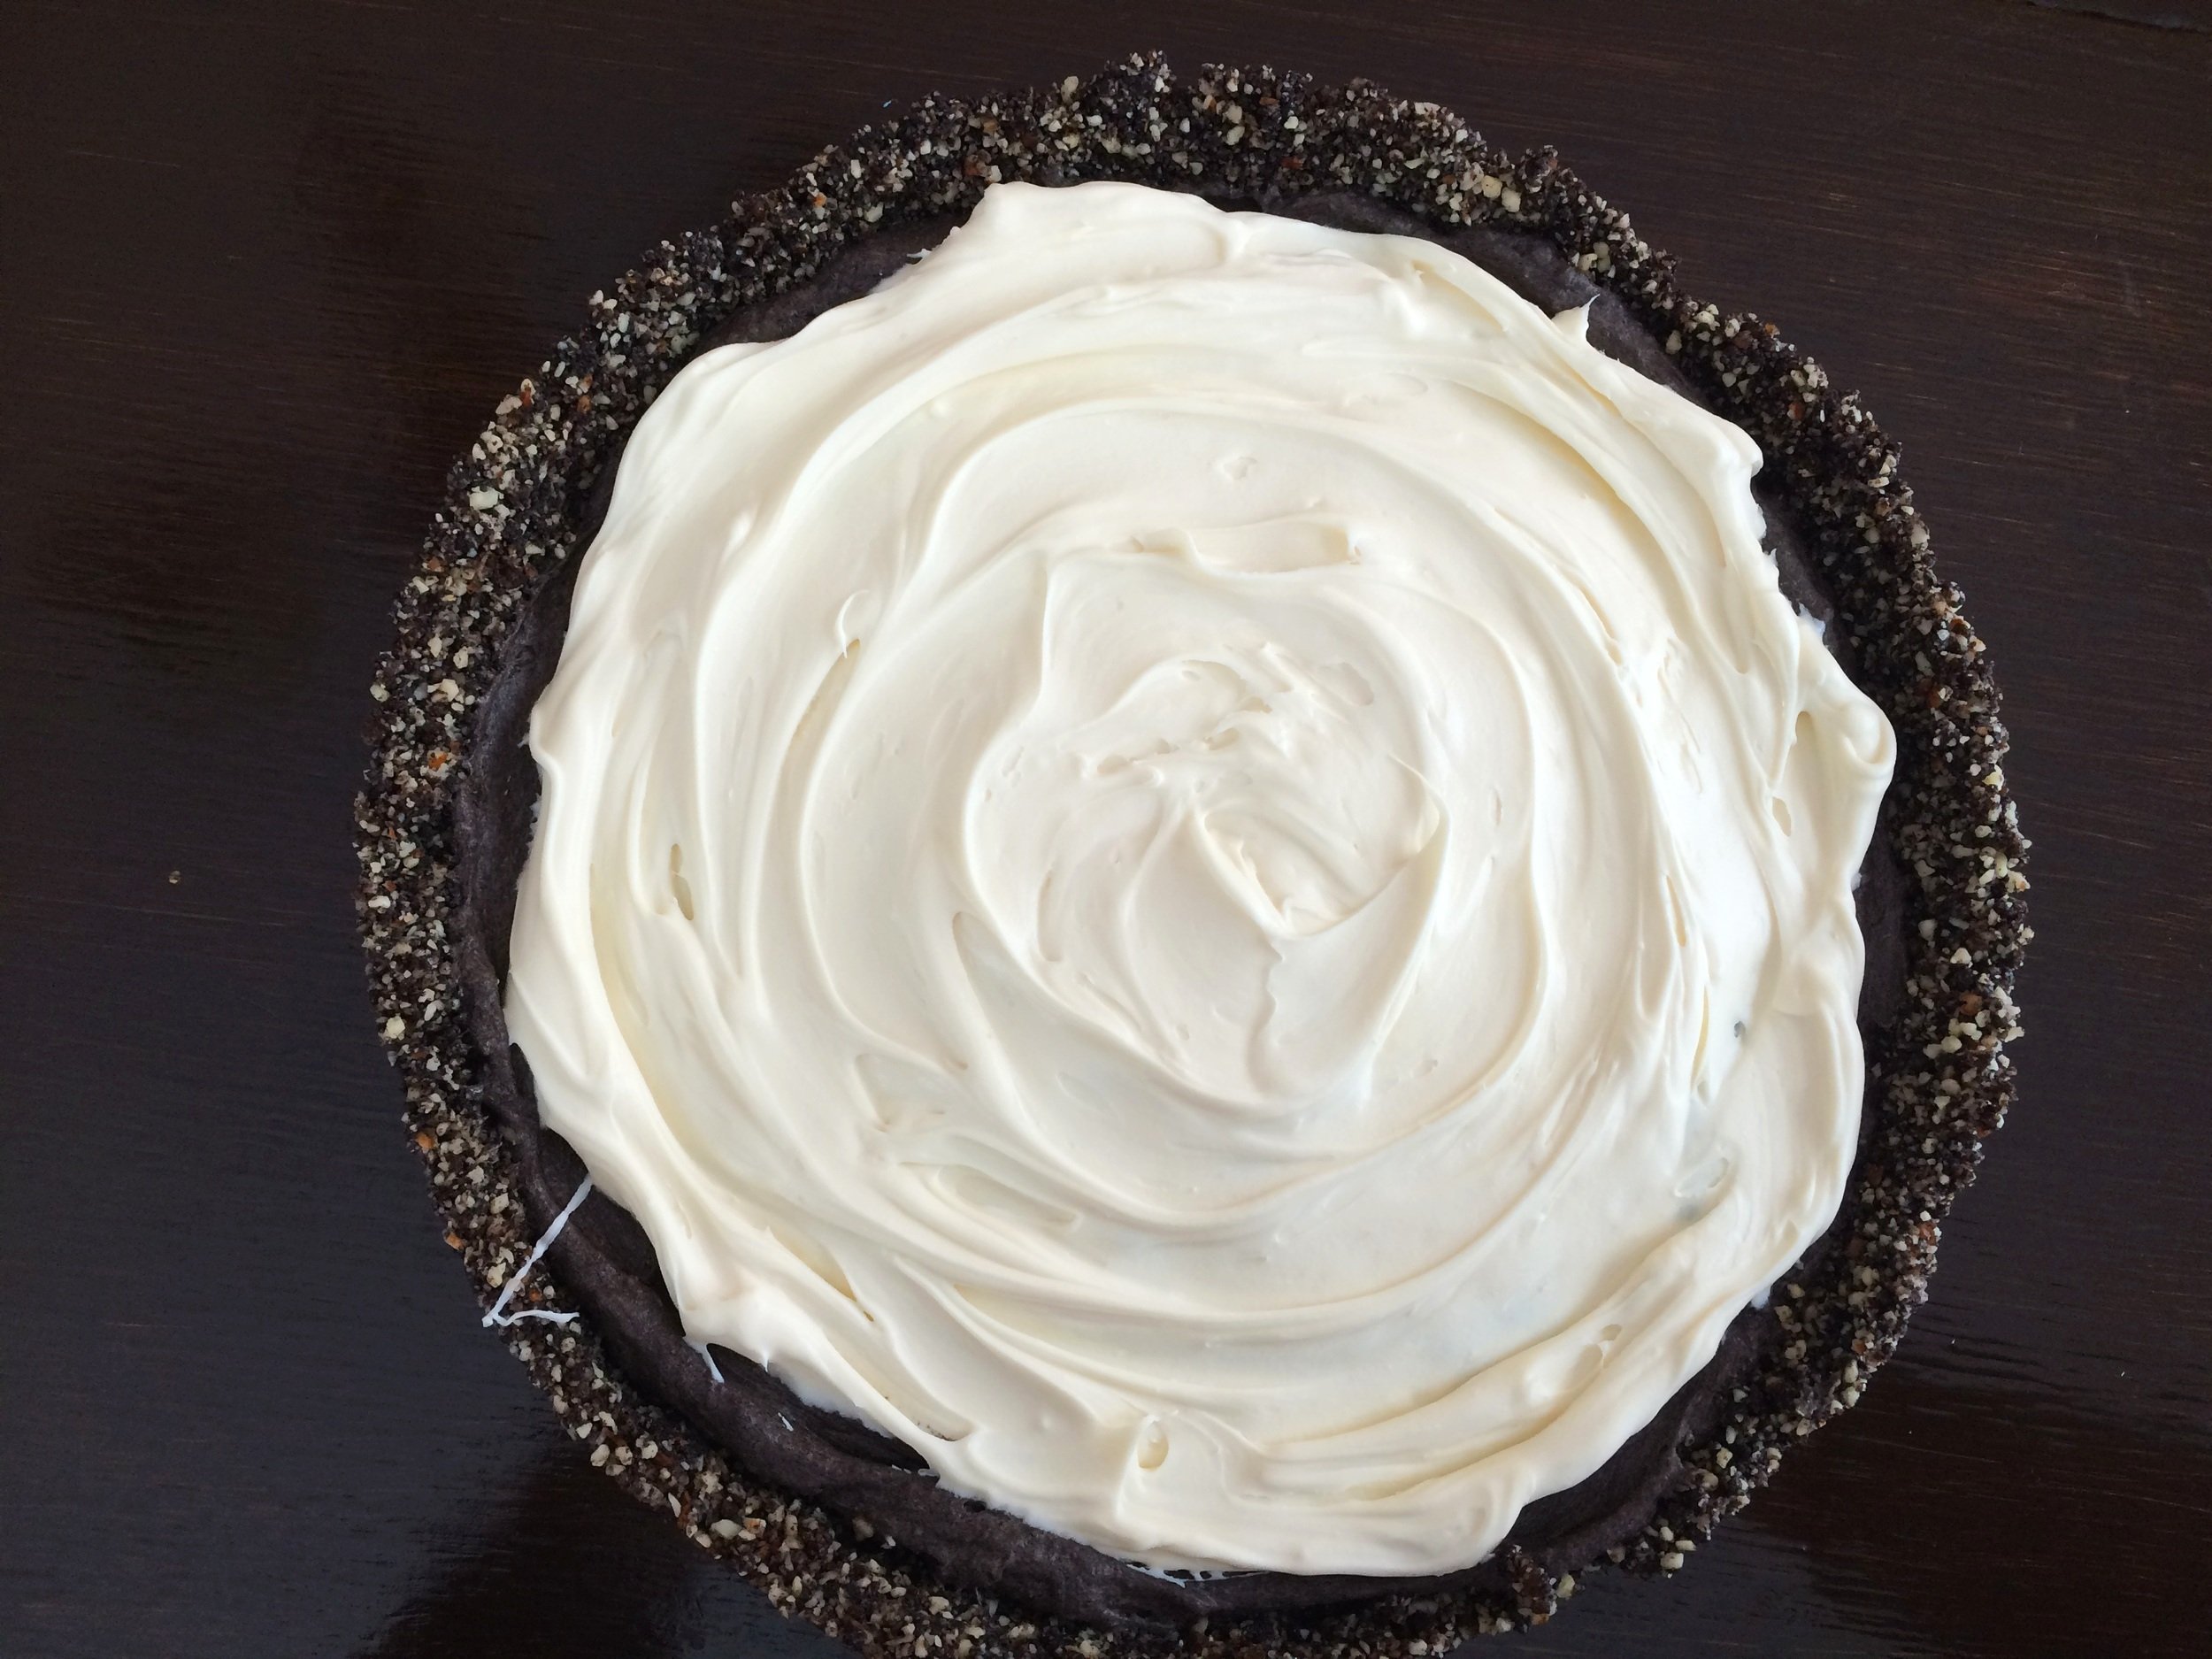
Healthy Chocolate Chip Cookie Dough Dip

Last updated August 3, 2024

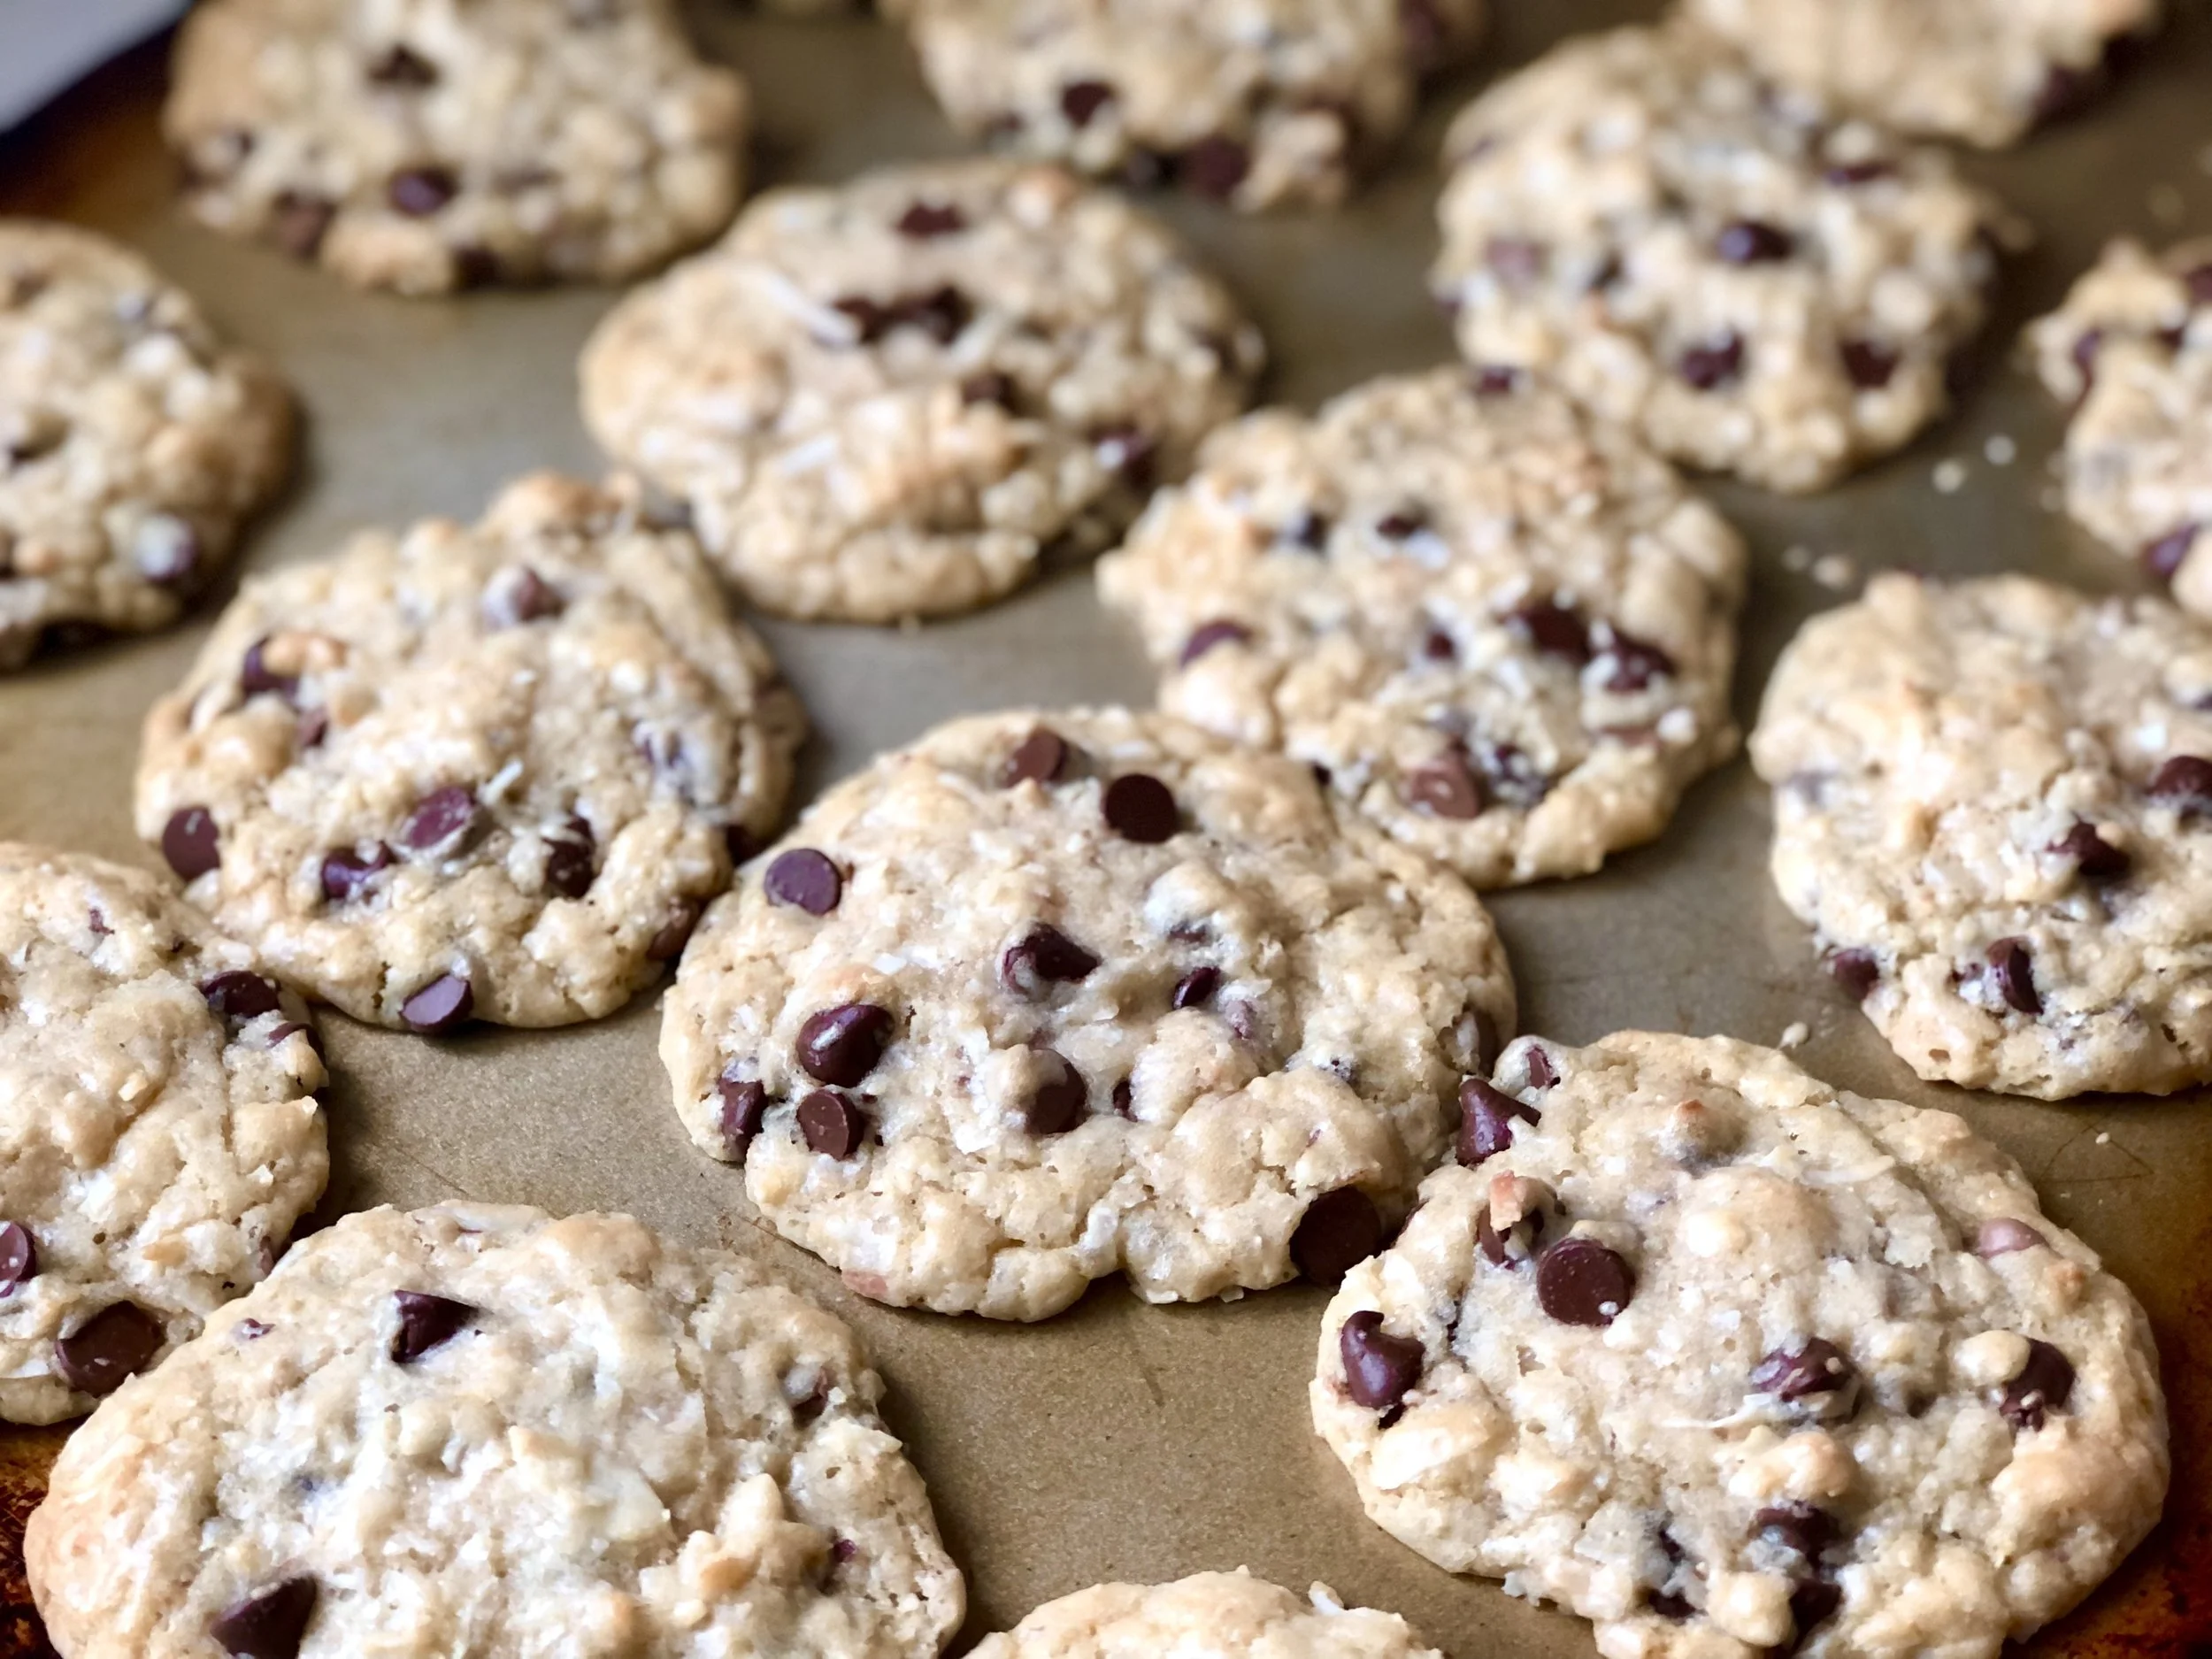
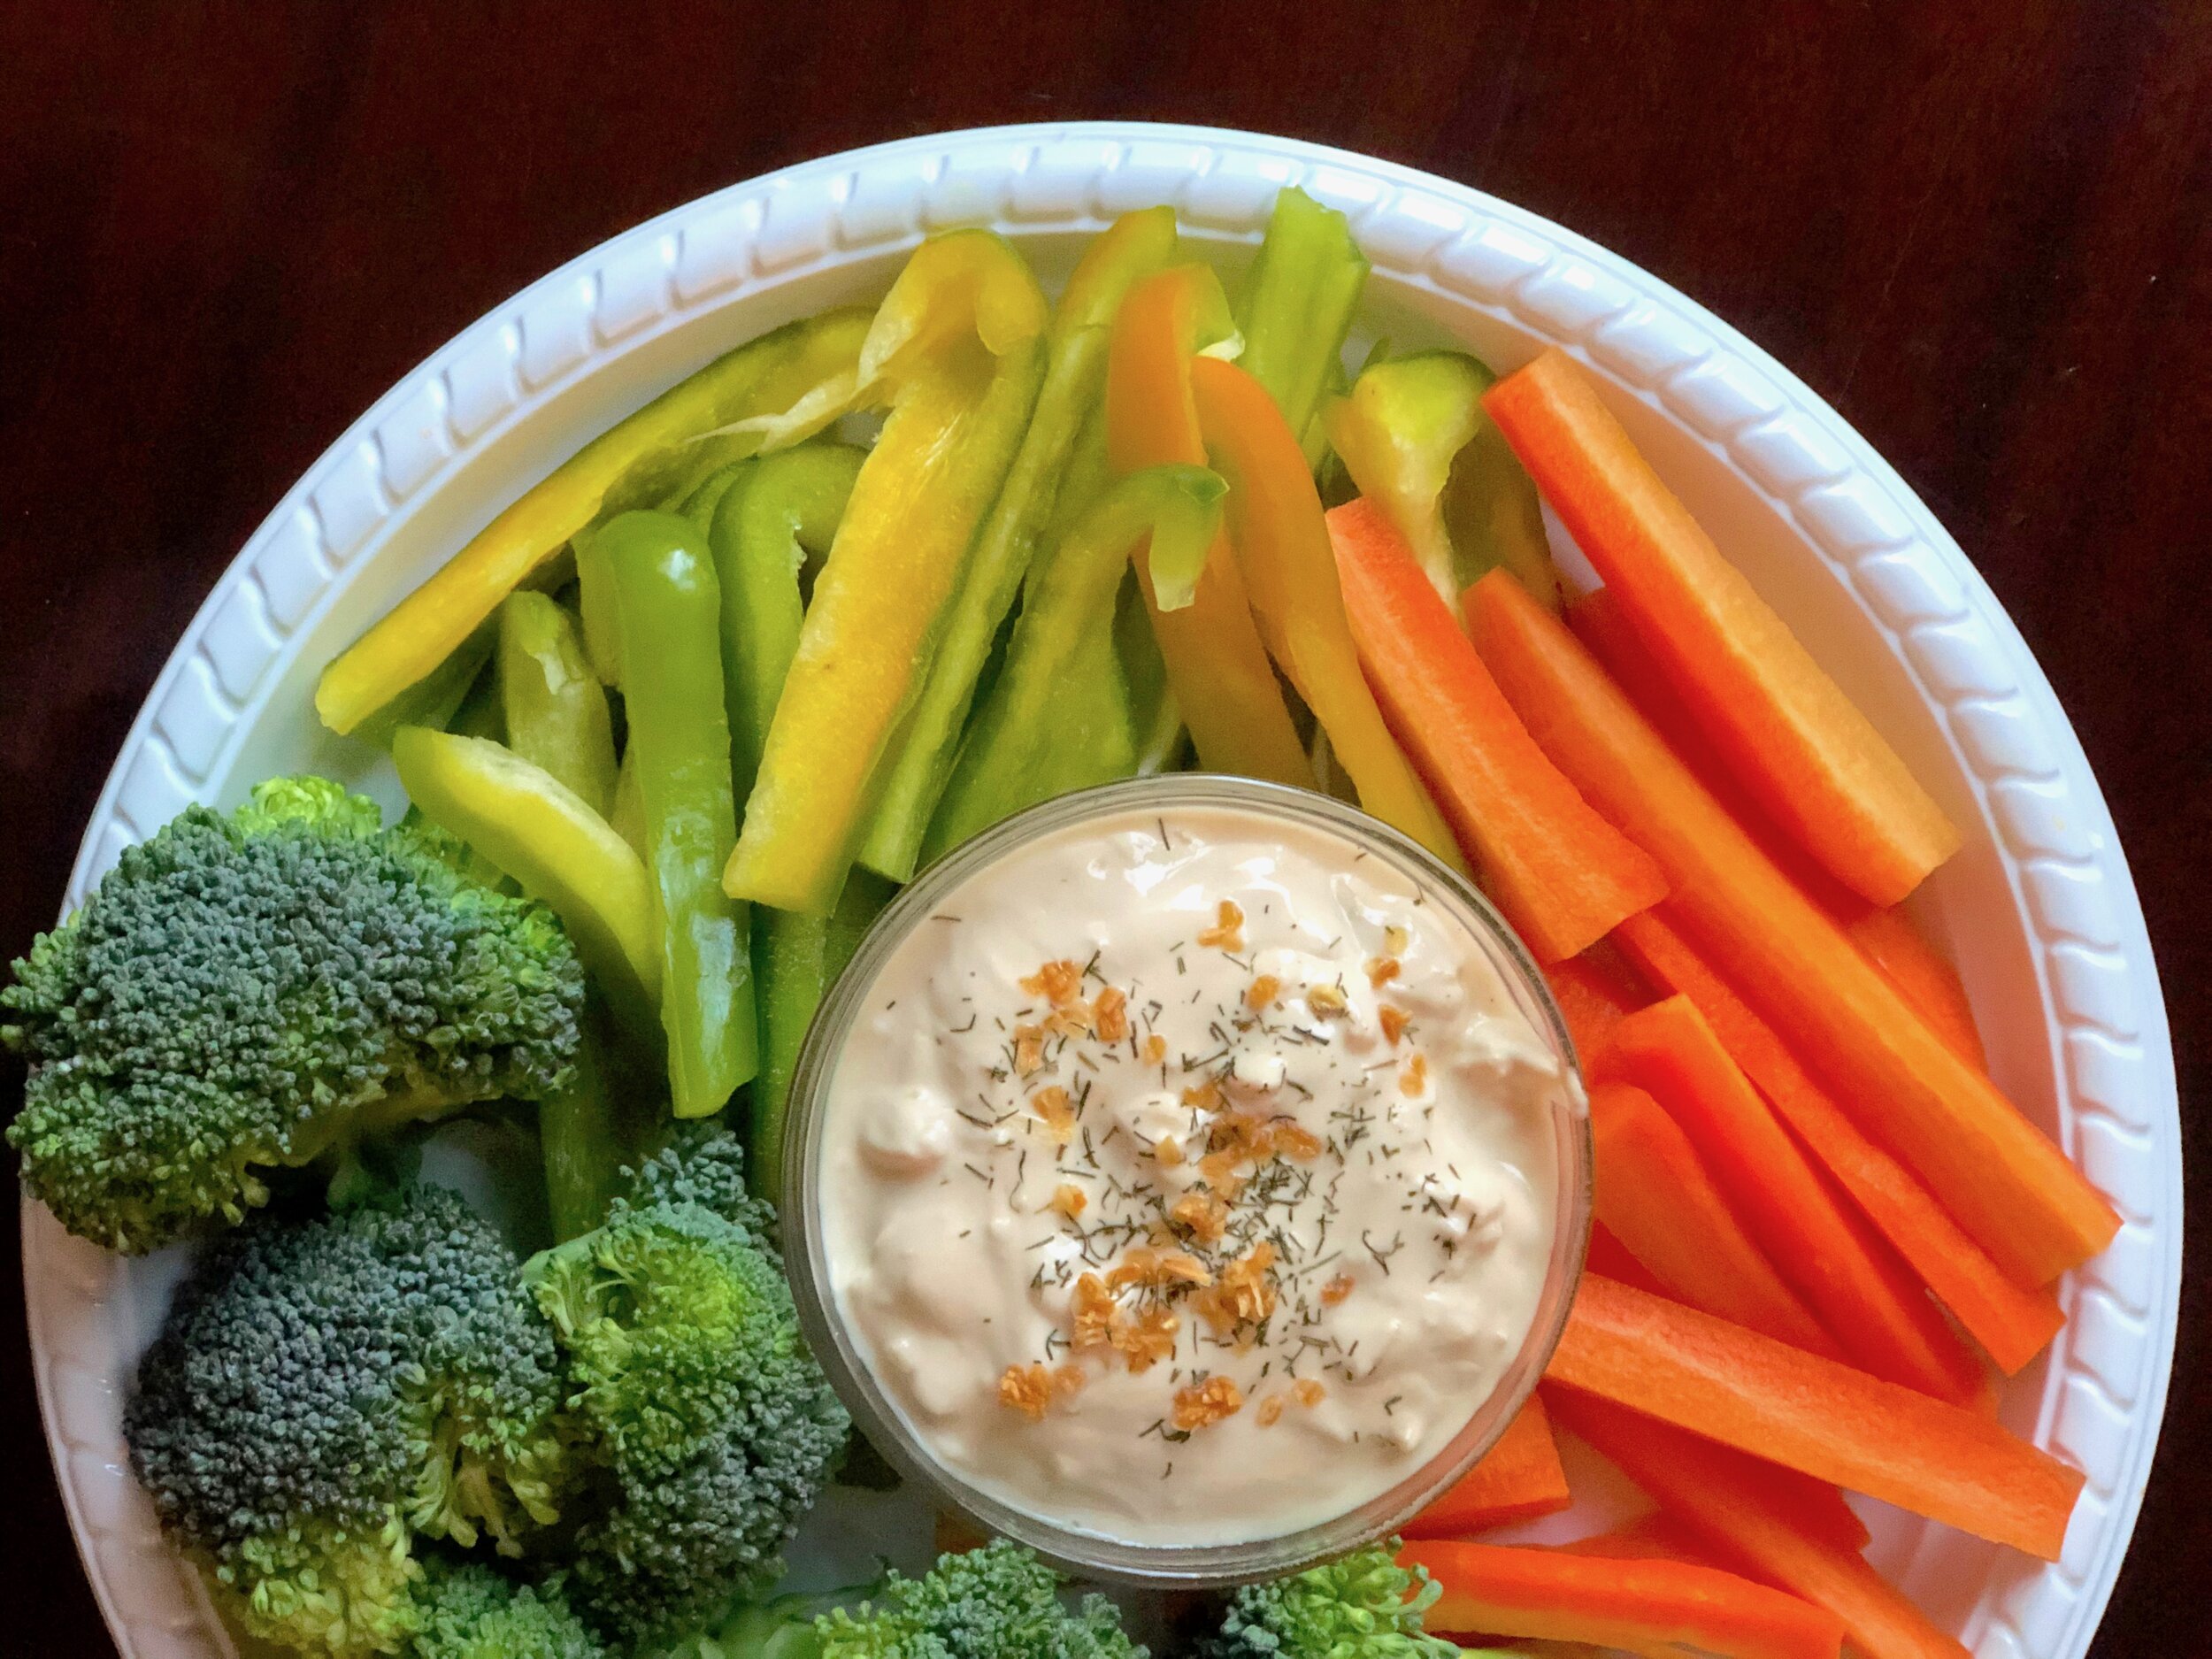
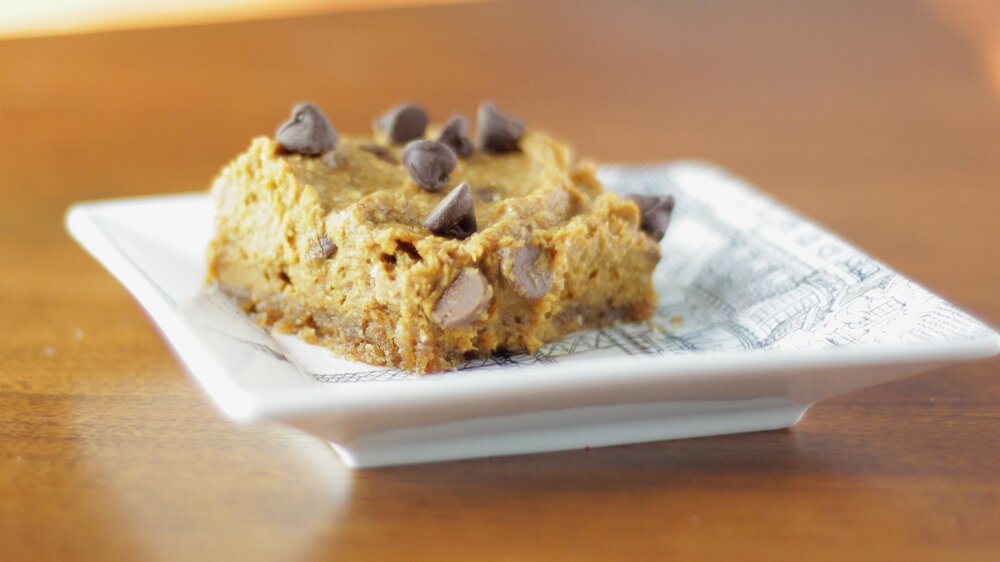
Looks pretty delicious, right? Chocolate Chip Cookie Dough Dip, but actually pretty good for you! I’m not going to say that you could do a blind taste test with real cookie dough and not know the difference, but also, for having beans as a base, this is weirdly close. It’s delicious in its own right. The only time this recipe gets flack is if someone knows it is made with beans before trying it. Even then they admit it’s pretty tasty. If they don’t know and aren’t prejudiced, they love it.

This cookie dough dip is one I’ve been making for over a decade now. A blogger by the name of Chocolate Covered Katie was having a big moment and I made and loved a lot of her recipes. She was, I believe, the person who got me into the ‘healthy” baking scene. Back when I was dancing full time, I loved all of the healthier desserts, food that actually provided some fuel for my body while still tasting like dessert (my favorite thing). Well, most of the time. I ate and made some pretty weird things that I no longer eat and make and will most definitely not ever share as a recipe on this blog. This one, though, is one I’ve kept and made over and over again. Now, it’s a snack for my kids that they have no idea is not actual decadent cookie dough. One day, they will realize the deception. Ah, it’s fun being a parent, isn’t it? (My kids also get to experience real cookie dough, don’t worry!!) 

While this recipe is based on Chocolate Covered Katie’s, almost every element is highly customizable depending on your tastes, dietary needs (vegan, gluten-free, dairy-free, etc.), or simply which ingredients you have on hand. If you make and like this recipe, you too will probably find your groove in how you like to make it and it will become your own. 

In fact, let’s walk through the ingredient list so you can see all the different options that are possible with this recipe. I don’t normally do this, but this one has a lot, too many to simply add to the “Jenny’s Notes” that I usually have at the bottom of each recipe. 

Beans

The base of this recipe is beans. You can use any kind of white bean you’d like, as long as it doesn’t have too strong of a flavor. Rinse beans to keep the flavor as neutral as possible. Use a can or cook up your own. I prefer to use chickpeas, but also use great northern beans and cannellini beans if that’s what I have on hand.

Nut Butter

Any nut butter can be used in this recipe, as long as it’s something you like, of course! Think peanut butter, almond butter, cashew butter, sunflower butter, etc…the stronger the flavor of the butter (like sunflower), the more it will come through in the dip. Completely up to you what you prefer. I like using peanut butter, mostly because I always have peanut butter. I also like to use almond butter. 

Sweetener

Brown sugar will get you the closest flavor to cookie dough. You can also use higher amounts than in the recipe below to get that super sweet cookie dough taste. Conversely, you can also use less. I think 1/4 cup is that sweet spot for keeping it on the healthier side, while still tasting plenty sweet, especially when paired with plenty of chocolate chips! 

Other sweeteners can also be used. I probably use maple syrup the most. You can also use any kind of sugar (granulated, superfine, demarara, rapadura, sucanat, powdered, etc.), honey, stevia, agave, or any other sweetener you prefer. Keep in mind that the consistency of the sweetener used will affect the overall consistency of the dip, and will need to be adjusted accordingly. 

Oats

Oats help to give the dip a little bit of texture while also thickening it. The amount you need will vary depending on how well the beans are drained, how thick or thin your nut butter is, and if using a liquid sweetener. Remember that oats and some of the other options below will continue to absorb moisture as they sit, so it’s okay to leave the dip a bit thinner than desired to allow it to thicken up without getting too thick. 

You can use quick or rolled oats, wheat germ, oat bran, flaxmeal, almond flour, or even baby cereal. Just keep in mind that wheat germ and oats have gluten or possible gluten contamination, for those with wheat or gluten sensitivities. If you don’t have any problems with wheat, you could also just use flour. Since flour is supposed to be cooked before eating due to possibly harboring harmful bacteria that can cause food poisoning, this is the part where I’m supposed to recommend that you toast it first before adding to this dip. 

Vanilla Extract

A little extra vanilla for great flavor! Not much to say here other than use real vanilla extract for best flavor! Unless, of course, you have some real vanilla bean lying around you’d like to add.

Salt

Regular cookie dough usually has about a teaspoon of salt per batch. This recipe does not make as much as a batch of cookie dough, but you do have the option of increasing the salt, to taste. Keep in mind that some nut butters may have salt in them, so take that into consideration when adding salt.

Baking Soda

Baking soda might seem like an unusual addition when this dip is raw and not baked, but it lends a slight, but authentic flavor to the dip. It’s not a huge deal if you omit it, but if you do, consider increasing the salt slightly since baking soda is also salty. 

Milk

If your dough is too thick for your liking, add a bit of milk of choice, 1 tablespoon at a time, until desired consistency is reached. To keep this dairy-free, use a plant or nut based milk instead of dairy milk.

I don’t usually need to add any milk when I make this, since my sweetener is liquid (maple syrup) and the almond butter I use is quite runny. 

Chocolate Chips

You can use any size, shape or flavor of chips that you’d like. Regular semi-sweet chocolate chips would be the classic choice, but my favorite is probably using mini chocolate chips in this dip. I also really like dark chocolate. Chocolate chips sometimes sneakily have dairy in them, so check your ingredients if wanting to keep this dairy-free.

Use as little as 1/4 cup of chocolate chips to really keep things on the lighter/healthier side, but I recommend starting with 1/2 cup / 85g or up to 1 cup / 170g to really get the party going. 

Equipment

The last thing you need to know, is that you need a food processor to make this. Some quality blenders may be able to handle the thickness of this, but most blenders and mine most definitely cannot.

Such a simple dip to make and eat, but oh so many options! Have fun, friends! 

This post may contain affiliate links. If you make a purchase using these links, Jennyblogs may receive a small commission, at no extra cost to you. This helps to support Jennyblogs. Where possible, links are prioritized to small businesses and ethically and responsibly made items. For further information see the privacy policy. Grazie!

Recipe adapted from Chocolate Covered Katie


Healthy Chocolate Chip Cookie Dough Dip

Makes about 2 cups

Ingredients:

  • 266g (1 14oz can drained) chickpeas or white beans

  • 1/4 cup / 65g peanut butter or nut butter of choice

  • 1/4 cup / 50g brown sugar or 1/4 cup / 80g maple syrup or other sweetener of choice

  • 1/4 cup / 22g quick oats

  • 2 tsp / 10g vanilla extract

  • 1/8 tsp salt

  • 1/8 tsp baking soda

  • a few tablespoons of milk, as needed

  • 1/2 - 1 cup / 85g - 170g regular or mini semi-sweet chocolate chips

Directions:

  1. Combine chickpeas, peanut butter, sugar, oats, vanilla, salt, and baking soda in a food processor. Blend until smooth.

  2. Add milk, 1 tablespoon at a time, if a thinner consistency is desired. (Dip will continue to thicken slightly.)

  3. Stir in chocolate chips with spoon or spatula.

  4. Serve with fruit, graham crackers, pretzels, etc. or simply eat by the spoonful!

Jenny’s Notes:

  • Oats will continue to absorb liquid as they sit, so it’s okay to let the dip sit for 30 minutes or so (if it lasts that long!) before deciding to add more oats to thicken.

  • If blended in the food processor for more than a couple minutes, the motor may heat up the dip. If this happens, simply allow to cool or stick in the fridge before stirring in chocolate chips. Alternatively, stir in chips gently while warm for a melty, swirly, fresh baked cookie taste.

Healthy Chocolate Chip Cookie Dough Dip
Yield 8
Author
Prep time
15 Min
Total time
15 Min

Healthy Chocolate Chip Cookie Dough Dip

What could be better than a cookie dough dip? One that's so healthy you can eat it for breakfast or anytime! Made with a base of beans and highly customizable, this dip is delicious and can also be gluten-free, dairy-free, vegan, and it's no-bake.
Cook modePrevent screen from turning off

Ingredients

Instructions

  1. Combine chickpeas, peanut butter, sugar, oats, vanilla, salt, and baking soda in a food processor. Blend until smooth.
  2. Add milk, 1 tablespoon at a time, if a thinner consistency is desired. (Dip will continue to thicken slightly.)
  3. Stir in chocolate chips with spoon or spatula.
  4. Serve with fruit, graham crackers, pretzels, etc. or simply eat by the spoonful!

Notes

  • Oats will continue to absorb liquid as they sit, so it’s okay to let the dip sit for 30 minutes or so (if it lasts that long!) before deciding to add more oats to thicken.
  • If blended in the food processor for more than a couple minutes, the motor may heat up the dip. If this happens, simply allow to cool or stick in the fridge before stirring in chocolate chips. Alternatively, stir in chips gently while warm for a melty, swirly, fresh baked cookie taste.

Nutrition Facts

Calories

200.64

Fat

8.78 g

Sat. Fat

3.38 g

Carbs

24.77 g

Fiber

3.6 g

Net carbs

21.18 g

Sugar

11.45 g

Protein

6.24 g

Sodium

96.89 mg

Cholesterol

1.34 mg

Nutritional information is approximate. Based on 8 servings of about 1/4 cup each.

healthy chickpea chocolate chip cookie dough dip, bean dessert dip, vegan, gluten free, dairy free, no bake
dessert
American
Did you make this recipe?
Tag @jennyblogsandbakes on instagram and hashtag it #jennyblogs

Healthier Chocolate Peanut Butter Bars

Last updated July 19, 2024

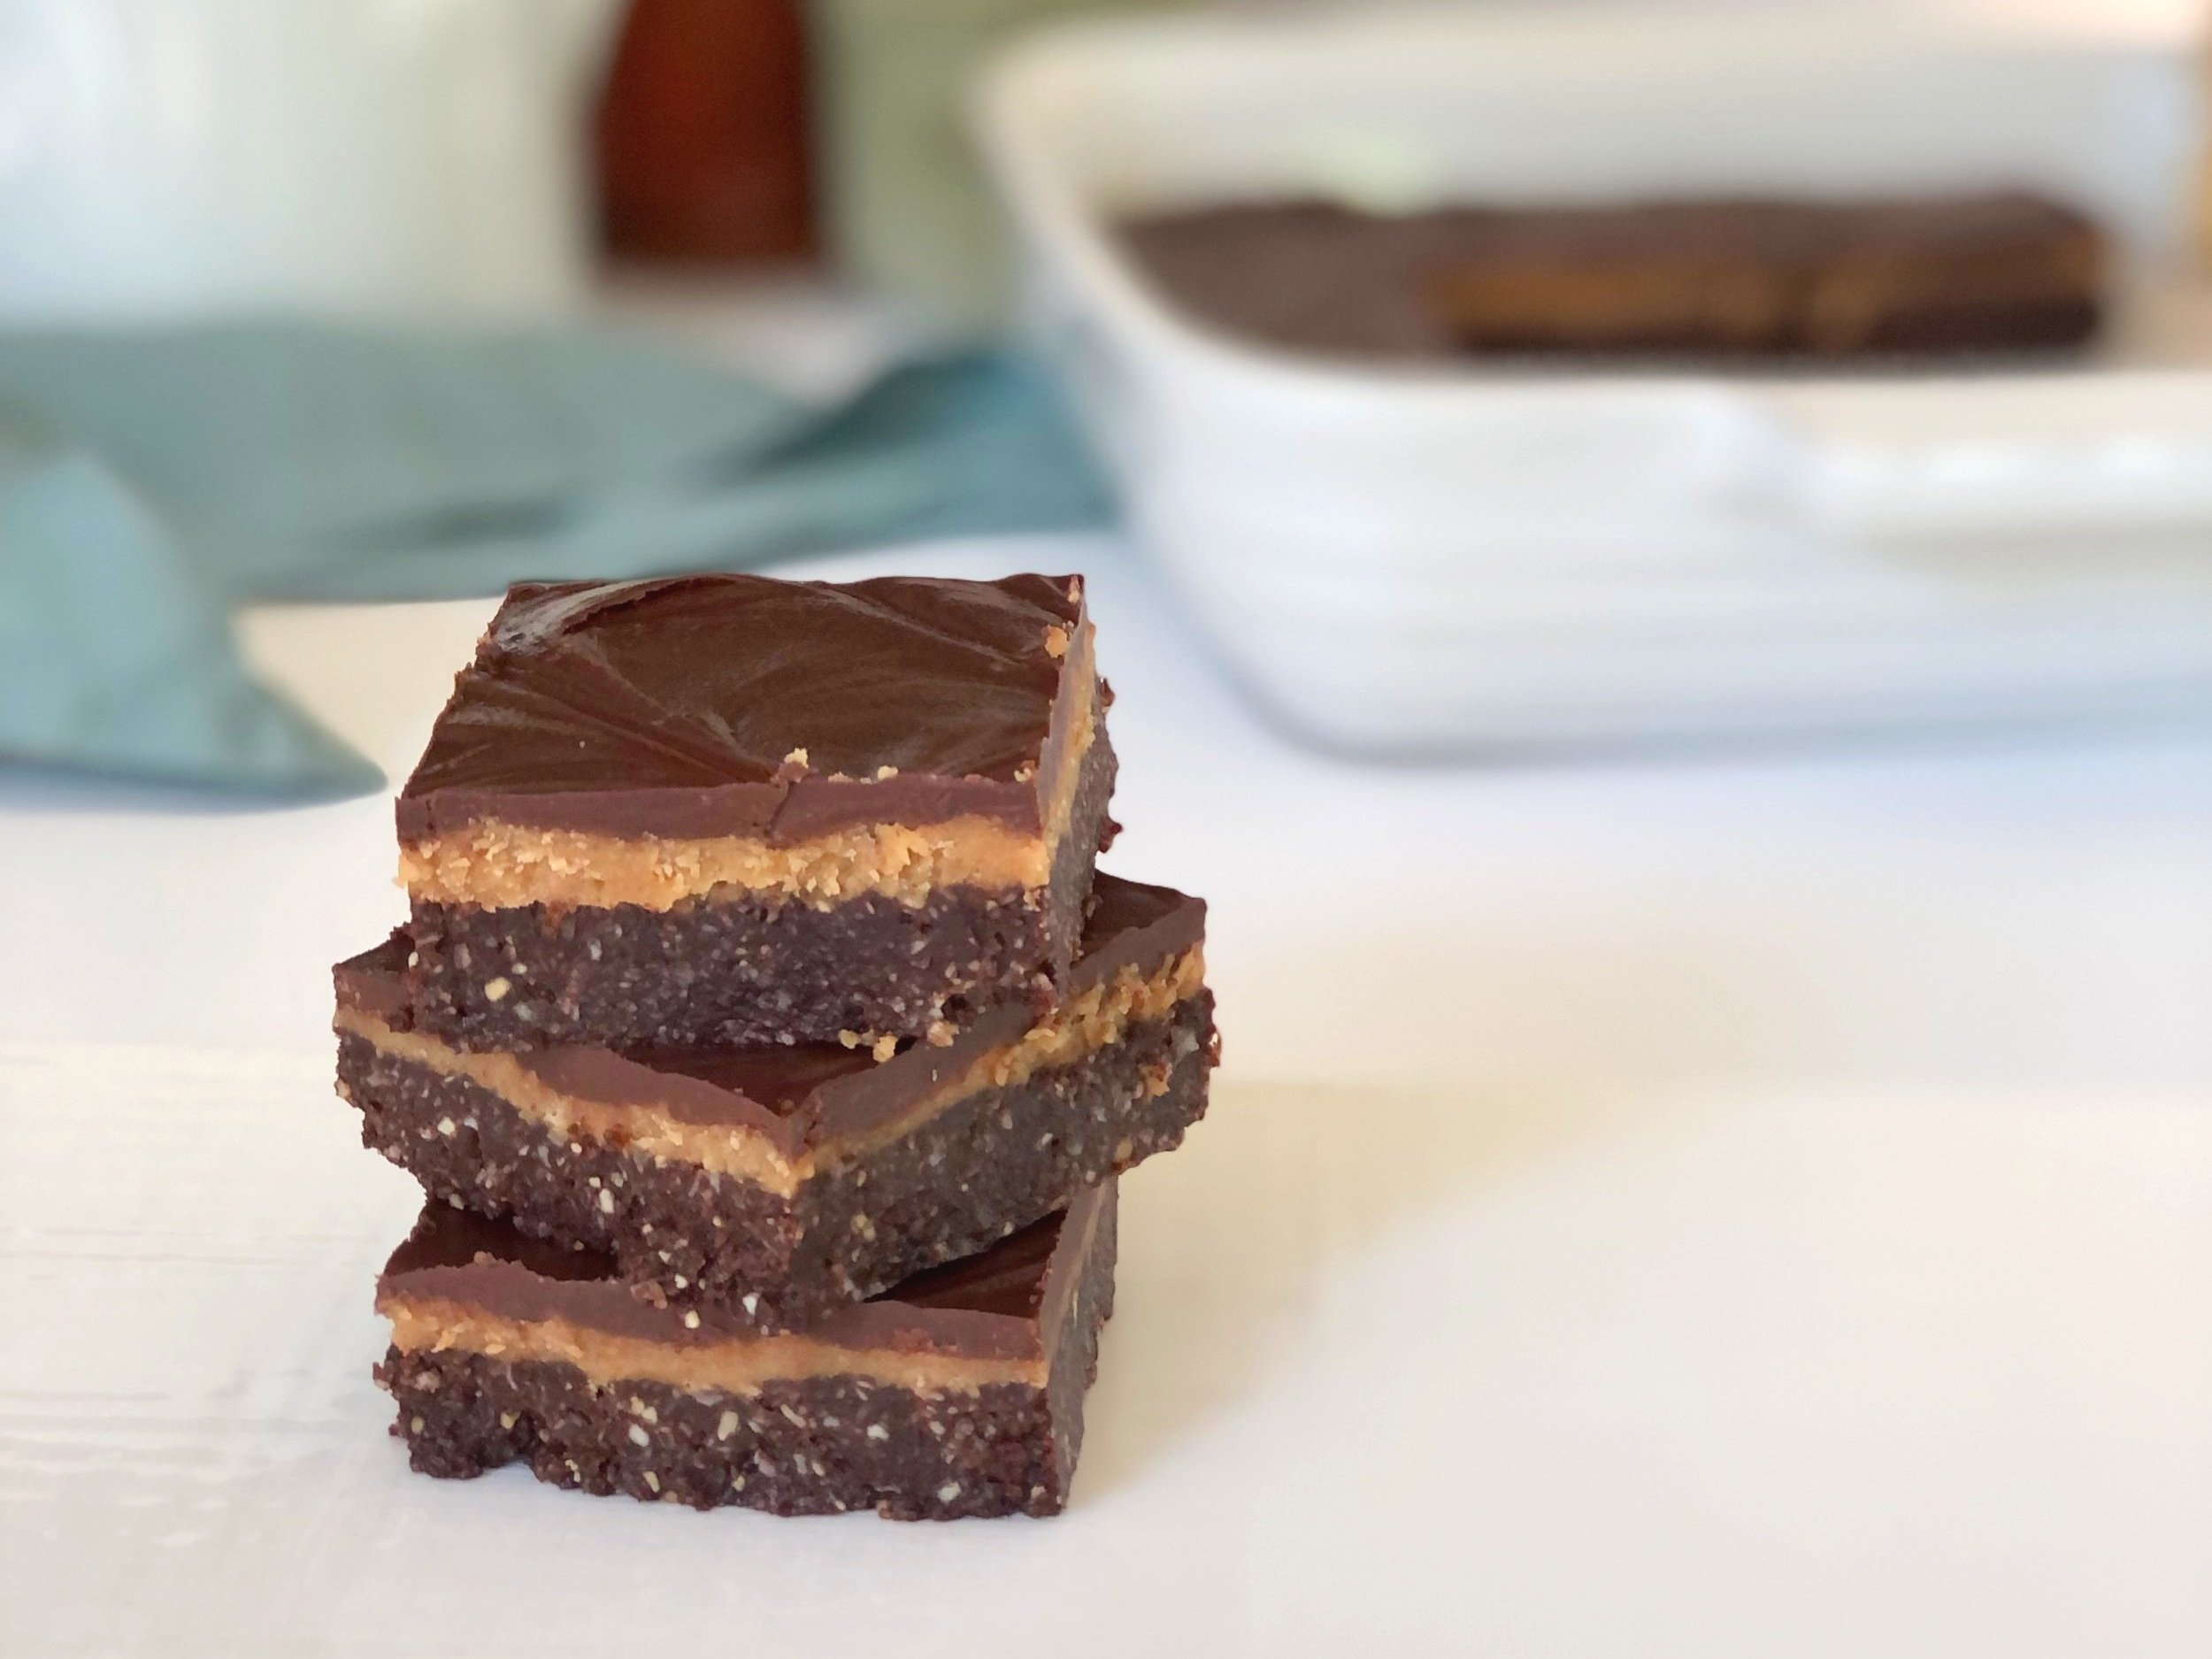
These Chocolate Peanut Butter Bars check a lot of boxes.

  • Delicious. These bars somehow bridge the gap between “coconut lovers” and “chocolate peanut butter lovers”, even for those who don’t normally love coconut, and those who don’t normally love peanut butter and chocolate together. I know, weird, but those people do exist and they’re some of my taste testers.

  • Healthier than most desserts. I would (and did) unabashedly eat these for breakfast. They’re full of nuts and coconut, and only use coconut oil, depending on which camp you fall in as far as viewing coconut oil as a good medium-chain fatty acid or simply another saturated fat.

  • No bake. Great for summer, if you don’t have an oven available to you, or simply don’t want to turn it on.

  • Easy. These can be ready in less than 30 minutes, quick and satisfying to whip up, with most of the work done in a food processor.

  • Satisfying. With the protein and fat content, these will keep you satisfied for longer. When you’re satisfied, you’re less likely to keep reaching for other unhealthy foods or overeating.
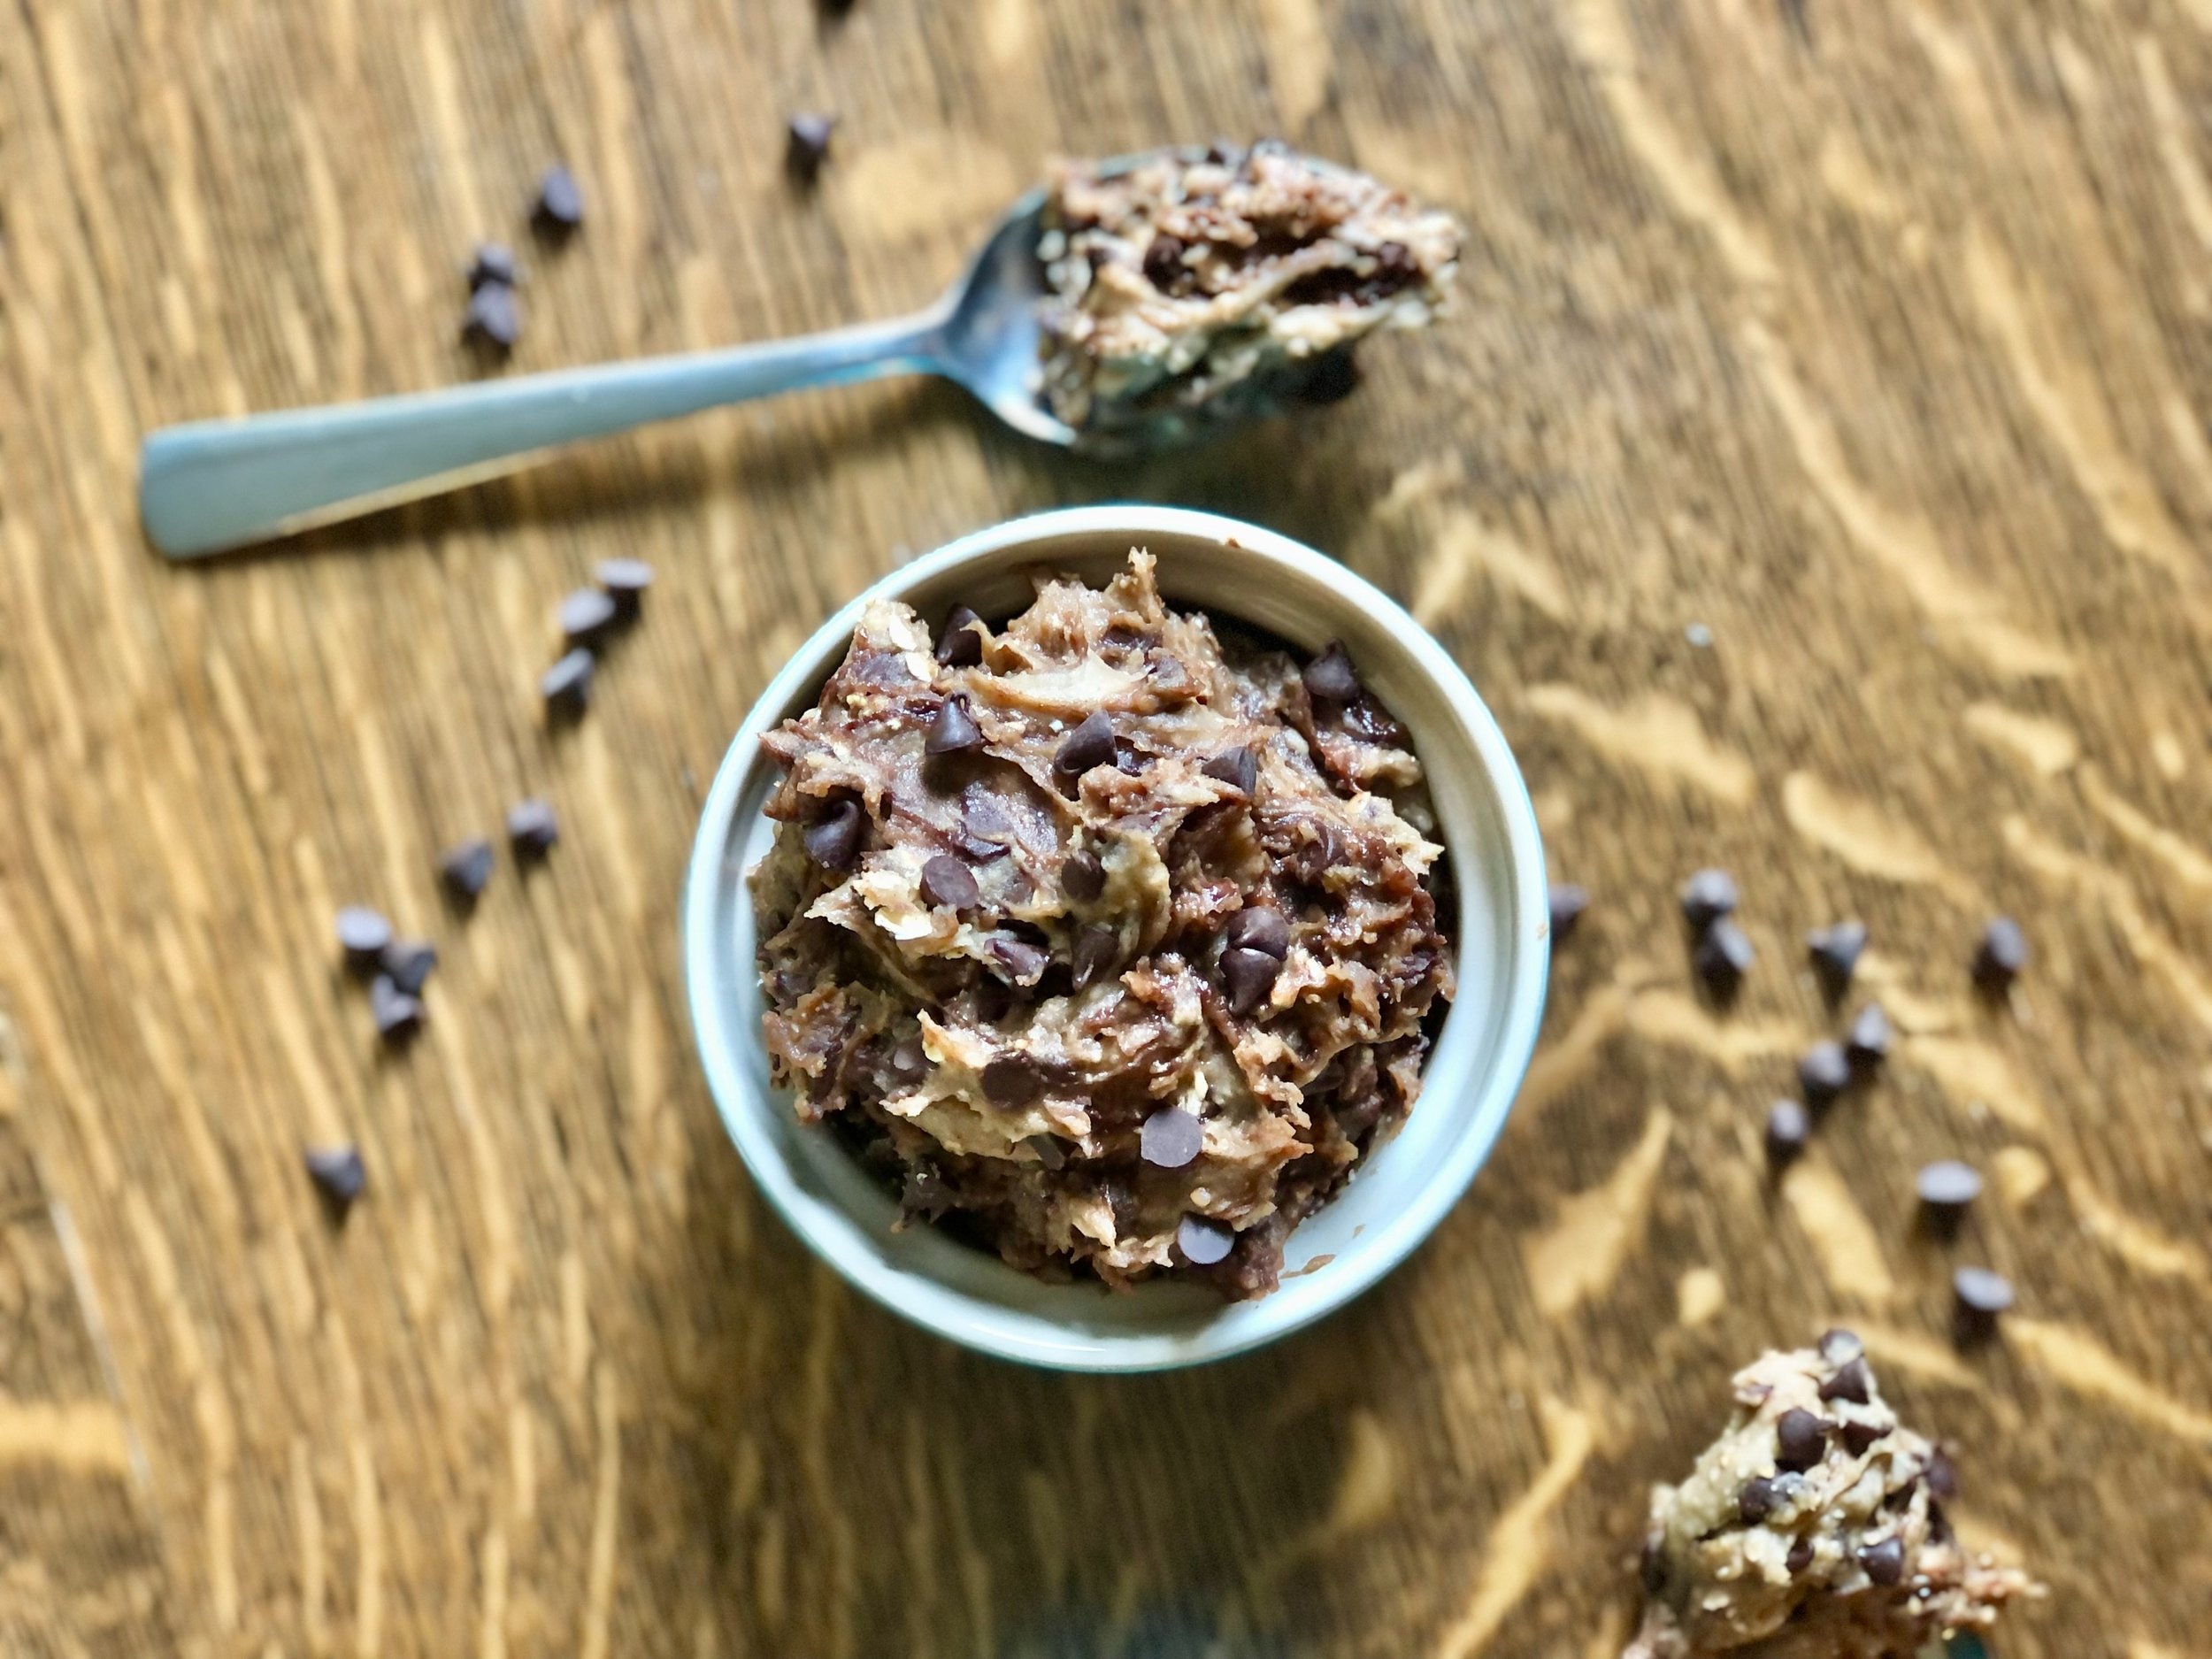
  • Gluten-free, vegan, dairy-free, egg-free, and almost refined sugar-free (there’s sugar in chocolate chips, which are in the chocolate topping.)

If those aren’t enough reasons to love these bars, I have one more. You don’t have to grease your baking dish! I know, that’s a little thing, but it’s a small kitchen task I don’t overly enjoy, and the fact that these bars slide ride out of an ungreased pan is a small yippee from me!

Another reason I like these, is because they don’t call for dates. Don’t get me wrong, I love dates, but it’s nice to have a healthy dessert recipe that doesn’t call for dates since so many do. I don’t always have dates on hand, and this way I can still whip up a healthier dessert/snack without waiting for my next grocery run. That makes this recipe’s ingredient list pretty close to being all pantry staples.

This post may contain affiliate links. If you make a purchase using these links, Jennyblogs may receive a small commission, at no extra cost to you. This helps to support Jennyblogs. Where possible, links are prioritized to small businesses, and American companies and products made in the USA for American readers. For further information see the privacy policy. Grazie!

Recipe inspired by Dani’s Healthy Eats


Healthier Chocolate Peanut Butter Bars

Serves about 16

Ingredients:

For the Chocolate Coconut Crust

  • 1 1/2 cups / 120g shredded unsweetened coconut

  • 6 Tbsp / 120g maple syrup

  • 6 Tbsp / 97g peanut butter

  • 6 Tbsp / 59g peanuts

  • 6 Tbsp / 38g cocoa powder

  • 5 Tbsp / 70g coconut oil

For the Peanut Butter Filling

  • 1/2 cup / 130g peanut butter

  • 1/4 cup / 81g maple syrup

  • 1/4 cup / 56g coconut oil

For the Chocolate Topping

  • 1 cup / 175g semi sweet or dark chocolate chips

  • 1 Tbsp / 14g coconut oil

Directions:

Ungreased 8x8 inch / 20x20 centimeter square baking dish

Make the Chocolate Coconut Crust

  1. Add all ingredients to a food processor; blend until smooth and mixture comes together in a soft dough-like ball.

  2. Press into pan and freeze while preparing filling.

Make the Peanut Butter Filling

  1. Add all filling ingredients to a medium bowl or food processor and mix until smooth. (It’s not necessary to clean food processor between mixing the crust and filling.)

  2. Remove crust from freezer and evenly spread filling over crust. Place back in freezer while preparing topping.

Make the Chocolate Topping

  1. In a small saucepan, combine chocolate and coconut oil. Melt over low heat, stirring frequently. Remove from heat when there are still a few tiny bits of chocolate; continue stirring until all is melted and smooth.

  2. Remove bars from freezer and spread topping evenly over filling. Cover and place in freezer or refrigerator to set, at least 30 minutes. Store covered in refrigerator.

Jenny’s Notes:

  • Different nut butters and nuts can be swapped out for the peanut butter and peanuts. Almond butter and almonds can be used, or cashews and cashew butter, or mix them up as you wish!

Healthier Chocolate Peanut Butter Bars
Yield 16
Author
Prep time
25 Min
Inactive time
30 Min
Total time
55 Min

Healthier Chocolate Peanut Butter Bars

Decadent, no-bake chocolate peanut butter bars with a chocolate coconut crust, peanut butter filling, and simple chocolate topping are deceivingly simple to make and satisfying to eat. Gluten-free, dairy-free, vegan, and almost refined sugar-free.
Cook modePrevent screen from turning off

Ingredients

For the Chocolate Coconut Crust
For the Peanut Butter Filling
For the Chocolate Topping

Instructions

Make the Chocolate Coconut Crust
  1. Ungreased 8x8 inch / 20x20 centimeter square baking dish
  2. Add all ingredients to a food processor; blend until smooth and mixture comes together in a soft dough-like ball.
  3. Press into pan and freeze while preparing filling.
Make the Peanut Butter Filling
  1. Add all filling ingredients to a medium bowl or food processor and mix until smooth. (It’s not necessary to clean food processor between mixing the crust and filling.)
  2. Remove crust from freezer and evenly spread filling over crust. Place back in freezer while preparing topping.
Make the Chocolate Topping
  1. In a small saucepan, combine chocolate and coconut oil. Melt over low heat, stirring frequently. Remove from heat when there are still a few tiny bits of chocolate; continue stirring until all is melted and smooth.
  2. Remove bars from freezer and spread topping evenly over filling. Cover and place in freezer or refrigerator to set, at least 30 minutes. Store covered in refrigerator.

Notes

  • Different nut butters and nuts can be swapped out for the peanut butter and peanuts. Almond butter and almonds can be used, or cashews and cashew butter, or mix them up as you wish!

Nutrition Facts

Calories

332.91

Fat

26.92 g

Sat. Fat

17.14 g

Carbs

21.81 g

Fiber

3.64 g

Net carbs

18.19 g

Sugar

13.5 g

Protein

6.06 g

Sodium

77.98 mg

Cholesterol

0.11 mg

Nutritional information is approximate. Based on 1 serving if cut into 16 pieces.

healthy coconut chocolate peanut butter bars, vegan, gluten free, dairy free, refined sugar free, no bake
dessert
American
Did you make this recipe?
Tag @jennyblogsandbakes on instagram and hashtag it #jennyblogs

Peanut Butter Butterscotch Bars

Last updated: June 9, 2024

Peanut Butter Butterscotch Bars are similar to Rice Krispie Treats, but coated in peanut butter and butterscotch. Ohhhh yummmm.

The recipe calls for only 5 ingredients and takes all of 15 minutes to make! These Peanut Butter Butterscotch Bars and other butterscotch bars are often made around Christmastime, but I love making these in the summer, too, because this is a no-bake recipe and very quick for when you’d rather spend your time outside than inside baking.

I love butterscotch, but I didn’t often choose to bake or eat butterscotch desserts until recently because they often contain artificial coloring. While some still do, I was happy to find Aldi brand butterscotch chips use natural coloring!

Recipe by Jenny, inspired by the many other butterscotch no-bake desserts out there :)


Peanut Butter Butterscotch Bars

Makes 1 8x8inch pan, about 9-12 servings

Ingredients:

  • 1 bag (about 10oz / 283g ) butterscotch chips

  • 3/4 cup / 195g peanut butter

  • 6 Tbsp / 85g butter

  • 2 cups / 114g mini marshmallows

  • 2 cups / 56g Rice Krispies

Directions:

8x8inch / 20x20cm pan lightly greased or lined with wax paper.

  1. In a medium saucepan, melt butterscotch chips, peanut butter, and butter together. Stir until smooth.

  2. Remove from heat and allow to cool for a few minutes.

  3. Stir in marshmallows and Krispies.

  4. Spread into prepared pan and let set before slicing. Placing in the fridge can speed this process up.

Peanut Butter Butterscotch Bars
Yield 9
Author
Prep time
5 Min
Cook time
5 Min
Inactive time
30 Min
Total time
40 Min

Peanut Butter Butterscotch Bars

Easy no-bake butterscotch peanut butter bars with rice krispies and marshmallows.

Ingredients

Instructions

  1. 8x8inch / 20x20cm pan lightly greased or lined with wax paper.
  2. In a medium saucepan, melt butterscotch chips, peanut butter, and butter together. Stir until smooth.
  3. Remove from heat and allow to cool for a few minutes.
  4. Stir in marshmallows and Krispies.
  5. Spread into prepared pan and let set before slicing. Placing in the fridge can speed this process up.

Nutrition Facts

Calories

255.7

Fat

18.82 g

Sat. Fat

7.08 g

Carbs

19.22 g

Fiber

1.06 g

Net carbs

18.15 g

Sugar

9.37 g

Protein

5.54 g

Sodium

195.21 mg

Cholesterol

20.36 mg

Nutritional information is approximate. Based on 1 piece if cut into 9 squares.

peanut butter rice krispie bars, butterscotch marshmallow bars, no-bake, summer dessert
dessert
American
Did you make this recipe?
Tag @jennyblogsandbakes on instagram and hashtag it #jennyblogs

Momsy's Pancakes

7CCA3EAB-FC24-468B-AC50-AD97ADBD242E.jpg

Last Updated September 8, 2024

As the weather cools down, what could possibly be better than flipping some fresh, hot pancakes off the griddle?

Well, let’s be honest, whether the weather is heating up, cooling down, stagnant, or generally doing its weather-pattern-season thingy, are pancakes ever not a good idea?

Thought not.

Breakfast, lunch, dinner. Summer. Winter. Inside. Outside. Buttermilk. Pumpkin. Lemon poppyseed. There is always room for a plate of pancakes at the table!

Growing up I can’t say we had a family tradition of eating pancakes on a specific day of the week. It was more of a, whenever the fancy hits you. My mom would make a up a large batch of homemade dry pancake mix (you can get that recipe here), then tape instructions to the jar of how much wet ingredients to add, to be whipped up at a moment’s notice. My dad makes maple syrup every spring and there are always quarts of the liquid gold in the pantry, so we were always pancake ready.
When my nieces and nephews were younger they spent a lot of time at our house, and pancakes were a regular deal. Especially my oldest niece, Gwen, could pack them away! From the time she was a toddler she would eat more than anyone, a stack of 4 or more. It was actually amazing she could fit that many in her tiny body. Realize that we make big pancakes, the size of your face or a large dinner plate. I usually eat 2. The first time I ate pancakes at a friend’s house when I was little the mom seemed surprised I only wanted two. I realized why when two itty bitty pancakes arrived in front of me. Oh. I’ll take 8 more, please. Plus, my friend’s mom made them with chocolate chips and my mom usually didn’t let us, too much sugar. ;)

The pancake recipe below is my mom’s basic recipe, it’s wonderful as-is for a buttermilk pancake, or a base for any add-ins you want, whether that be chocolate chip, raspberry, gingerbread, apple-cinnamon, or whatever your taste-buds can dream up!

This post may contain affiliate links. If you make a purchase using these links, Jennyblogs may receive a small commission, at no extra cost to you. This helps to support Jennyblogs. For further information see the privacy policy. Grazie!

Recipe from my mama


Buttermilk Pancakes

Serves 1-2

Ingredients:

  • 1 cup / 120g flour

  • 2 1/2 tsp baking powder

  • 2 1/2 tsp sugar

  • 1/2 tsp salt

  • 1 cup / 237g buttermilk

  • 1 egg

  • 2 Tbsp / 28g oil

  • up to 1 cup / 250g sourdough discard, optional

Directions:

Preheat a lightly greased griddle or large pan over medium heat (375°F / 290°C if using an electric griddle.)

  1. In a medium bowl whisk together flour, baking powder, sugar, and salt.

  2. In another bowl, combine buttermilk, egg, oil, and sourdough discard, if using. Add to dry ingredients and mix until just moistened. Lumps are ok as long as they’re not too big.

  3. Pour pancake batter to desired size (or shape!) on hot griddle, repeat as you have room, but making sure to leave about an inch / 2cm between pancakes. Flip after a couple minutes or a when the edges look dry and the bubbles towards the middle pop but don’t immediately fill in. Cook for a few minutes on the second side, until golden. Repeat until batter is gone.

  4. Serve hot with butter and maple syrup, or your favorite toppings such as peanut butter, honey, powdered sugar, jams, fruit, Nutella, etc.

Jenny’s Notes:

IMG_3216.jpg
  • Pancakes are easy, quick, and delicious, and also very easy to fit to your dietary needs and choices. With the exception of the baking powder, every ingredient can be substituted or even omitted at times. Even then, some use baking soda instead of baking powder or a combo of the two. Just don’t do more than one, maybe two substitutions at a time without risking the quality of your pancakes. So don’t be frying’ up flour, water and baking powder, okayyyy?

    - Replace flour with a gluten-free flour or flour of your choice. My mom likes grinding oats in a food processor to make oat flour pancakes. I also like substituting part of the flour with buckwheat.
    - Omit sugar if desired. I used to not eat sugar during the week and simply left out the sugar so I could still enjoy pancakes. I recommend leaving it in, though, as it rounds out the flavor of the pancake, especially if you use toppings that aren’t as sweet as maple syrup.
    - If you don’t have buttermilk, you can make it at home by adding 1 Tbsp / 14g vinegar or lemon juice to a 1 cup measure and filling up to the 1 cup mark (223g) with milk. You can also use plain ol’ water in a pinch, or alternative milks as desired!
    - If you don’t have or don’t eat eggs, try using a flax egg, or you can also leave the egg out.
    - For the oil, use whichever oil you prefer. A neutral baking oil is best for a classic pancake taste, but that doesn’t mean you can’t use olive or coconut oil if that’s what you prefer. Or even melted butter. Also, the oil can be left out if need be.

Fluffy Buttermilk Pancakes
Yield 1-2
Author
Prep time
5 Min
Cook time
10 Min
Total time
15 Min

Fluffy Buttermilk Pancakes

Classic, fluffy, buttermilk pancakes hot off the griddle in 15 minutes! Plus substitutions to make delicious pancakes for your dietary needs.
Cook modePrevent screen from turning off

Ingredients

Instructions

  1. Preheat a lightly greased griddle or large pan over medium heat (375°F / 290°C if using an electric griddle.)
  2. In a medium bowl whisk together flour, baking powder, sugar, and salt.
  3. In another bowl, combine buttermilk, egg, and oil. Add to dry ingredients and mix until just moistened. Lumps are ok as long as they’re not too big.
  4. Pour pancake batter to desired size (or shape!) on hot griddle, repeat as you have room, but making sure to leave about an inch / 2cm between pancakes. Flip after a couple minutes or a when the edges look dry and the bubbles towards the middle pop but don’t immediately fill in. Cook for a few minutes on the second side, until golden. Repeat until batter is gone.
  5. Serve hot with butter and maple syrup, or your favorite toppings such as peanut butter, honey, powdered sugar, jams, fruit, Nutella, etc.

Notes

  • Pancakes are easy, quick, and delicious, and also very easy to fit to your dietary needs and choices. With the exception of the baking powder, every ingredient can be substituted or even omitted at times. Even then, some use baking soda instead of baking powder or a combo of the two. Just don’t do more than one, maybe two substitutions at a time without risking the quality of your pancakes. So don’t be frying’ up flour, water and baking powder, okayyyy?

- Replace flour with a gluten-free flour or flour of your choice. My mom likes grinding oats in a food processor to make oat flour pancakes. I also like substituting part of the flour with buckwheat.

- Omit sugar if desired. I used to not eat sugar during the week and simply left out the sugar so I could still enjoy pancakes. I recommend leaving it in, though, as it rounds out the flavor of the pancake, especially if you use toppings that aren’t as sweet as maple syrup.

- If you don’t have buttermilk, you can make it at home by adding 1 Tbsp / 14g vinegar or lemon juice to a 1 cup measure and filling up to the 1 cup mark (223g) with milk. You can also use plain ol’ water in a pinch, or alternative milks as desired!

- If you don’t have or don’t eat eggs, try using a flax egg, or you can also leave the egg out.

- For the oil, use whichever oil you prefer. A neutral baking oil is best for a classic pancake taste, but that doesn’t mean you can’t use olive or coconut oil if that’s what you prefer. Or even melted butter. Also, the oil can be left out if need be.

Nutrition Facts

Calories

448.68

Fat

18.02 g

Sat. Fat

2.44 g

Carbs

58.48 g

Fiber

1.63 g

Net carbs

56.85 g

Sugar

11.17 g

Protein

13.26 g

Cholesterol

97.74 mg

Sodium

1452.78 mg

Nutritional information is approximate, based on 2 servings.

buttermilk pancakes, homemade pancakes recipe, hot cakes, griddle cakes, best
breakfast
American
Did you make this recipe?
Tag @jennyblogsandbakes on instagram and hashtag it #jennyblogs

Chocolate No-Bake Cookies

Last Updated September 6, 2024

IMG_3299.jpg

Chocolate no-bake cookies are actually known as Chocolate Sand Dune Cookies around the Morris household, because no-bakes is not as fun, ya know? They’re well enough known that probably doesn’t matter, but as I grew up near the famous Sleeping Bear Sand Dunes, you will understand why, many years ago, my older brother decided to call these mounds of cookies “sand dunes”. Or rather “chocolate sand dunes” because these cookies are not the color of sand. The name stuck, and here we are today.

Chocolate sand dune cookies a.k.a. chocolate no-bake cookies, no matter what you call them, are delicious and just a little too easy to make.

They’re also made without any flour, so if you use certified GF oats, they are easily gluten-free. These cookies made a come back during the quarantine and the flour shortage! They can also be made with a milk-alternative and butter-alternative if you wish to have dairy-free cookies. They’re naturally egg-free!

What follows is the classic recipe I grew up making with my mom. Little did I know until I was a teenager and making no-bake cookies with a friend that the actual “original” recipe includes peanut butter. What?! You don’t put peanut butter into chocolate sand dune cookies! Actually you can, and it’s delicious. Peanut butter and chocolate together, hello. Of course it’s delicious.

However, this is not to disregard my mom’s classic recipe. While she loves chocolate and peanut butter, she doesn’t prefer them together. So she omitted the peanut butter and never looked back from making this pure chocolatey, fudgy version of no-bake cookies. Some of my family members still prefer them without the peanut butter, others prefer with. So if you or someone you know doesn’t like peanut butter with chocolate, or has a nut allergy, know you can omit the peanut butter and have an equally delicious cookie.

This post may contain affiliate links. If you make a purchase using these links, Jennyblogs may receive a small commission, at no extra cost to you. This helps to support Jennyblogs. For further information see the privacy policy. Grazie!

A recipe from my mama


Chocolate Sand Dune Cookies

Makes about 36 cookies

The pan was full at one point…

The pan was full at one point…

Ingredients:

  • 4 cups / 800g sugar

  • 1/2 cup / 50g cocoa powder

  • 1 cup / 237g milk

  • dash of salt

  • 1 cup / 225g butter (2 sticks)

  • 1/4-1 cup / 65g - 260g peanut butter, optional

  • 2 tsp / 10g vanilla extract

  • 5 1/2 cups / 495g quick oats

Directions

  1. In a large pot, stir together sugar, cocoa, milk, and salt; bring to a boil over medium heat. Boil for 2 minutes then remove from heat.

  2. Add butter, peanut butter, and vanilla; stir well.

  3. Add the oats and stir until all oats are coated. Let mixture sit for 8-10 minutes to thicken, stirring occasionally to check consistency.

  4. When mixture has thickened enough, spoon mounds onto wax paper or a clean counter. Allow to set and enjoy!

Jenny’s Notes:

  • Brown sugar can be used instead of white sugar, if you prefer.

  • I grew up baking with salted butter and this recipe reflects that with the dash of salt. Here in Europe and in most bakeries unsalted butter is used, so if that’s what you are using, simply add two dashes of salt if you wish!

  • You may notice the variance in the peanut butter measurement; use up to 1 cup for peanut butter lovers, or as little as 1/4 cup for just a hint.

  • Regular or crunchy peanut butter can be used, and it’s also fine to use natural peanut butter. People often don’t recommend using natural in recipes, but as I prefer not to buy the kinds with added sugars and hydrogenated oils, I usually use it anyway and have hardly met a recipe where you can’t successfully use the natural kind.

  • Quick or instant oats are my preferred kind of oats to use for chocolate sand dunes, but as you will notice from my photos that regular or rolled oats can also be used. Rolled oats give more of a bite to your cookies, and you will probably need to let the mixture sit a bit longer before spooning out the cookies so the oats have time to thicken up the mixture. If after 10-15 minutes your mixture still isn’t thickening up satisfactorily, you may need to add additional oats.

  • The above recipe makes about 36 cookies, great for sharing, large families, and parties. It can also easily be halved to make about 18 cookies, or even quartered to make 9. The photos on this post are from the 2 month lockdown in Italy when I decided that a quarter batch should suffice for 2 people who can’t leave the house.

Chocolate No-Bake Cookies
Yield 36
Author
Prep time
20 Min
Cook time
5 Min
Total time
25 Min

Chocolate No-Bake Cookies

Chocolate No-bakes are decadent mounds of chocolatey oat cookies made without flour, eggs, or an oven, which makes them ideal for summer baking and people with gluten or egg allergies.
Cook modePrevent screen from turning off

Ingredients

Instructions

  1. In a large pot, stir together sugar, cocoa, milk, and salt; bring to a boil over medium heat. Boil for 2 minutes then remove from heat.
  2. Add butter, peanut butter, and vanilla; stir well.
  3. Add the oats and stir until all oats are coated. Let mixture sit for 8-10 minutes to thicken, stirring occasionally to check consistency.
  4. When mixture has thickened enough, spoon mounds onto wax paper or a clean counter. Allow to set and enjoy!

Notes

Brown sugar can be used instead of white sugar, if you prefer.I grew up baking with salted butter and this recipe reflects that with the dash of salt. Here in Europe and in most bakeries unsalted butter is used, so if that’s what you are using, simply add two dashes of salt if you wish! You may notice the variance in the peanut butter measurement; use up to 1 cup for peanut butter lovers, or as little as 1/4 cup for just a hint. Regular or crunchy peanut butter can be used, and it’s also fine to use natural peanut butter. People often don’t recommend using natural in recipes, but as I prefer not to buy the kinds with added sugars and hydrogenated oils, I usually use it anyway and have hardly met a recipe where you can’t successfully use the natural kind. Quick or instant oats are my preferred kind of oats to use for chocolate sand dunes, but as you will notice from my photos that regular or rolled oats can also be used. Rolled oats give more of a bite to your cookies, and you will probably need to let the mixture sit a bit longer before spooning out the cookies so the oats have time to thicken up the mixture. If after 10-15 minutes your mixture still isn’t thickening up satisfactorily, you may need to add additional oats. The above recipe makes about 36 cookies, great for sharing, large families, and parties. It can also easily be halved to make about 18 cookies, or even quartered to make 9. The photos on this post are from the 2 month lockdown in Italy when I decided that a quarter batch should suffice for 2 people who can’t leave the house.

Nutrition Facts

Calories

192.48

Fat

9.10 g

Sat. Fat

4.01 g

Carbs

26.75 g

Fiber

0.92 g

Net carbs

25.83 g

Sugar

22.75 g

Protein

2.47 g

Sodium

89.28 mg

Cholesterol

13.96 mg

Nutritional information is approximate. Based on 1 cookie if using the full cup of peanut butter in the recipe.

no-bake cookies, chocolate, oats, no bake dessert, summer dessert, fudgy chocolate cookies, oat cookies, peanut butter
dessert
American
Did you make this recipe?
Tag @jennyblogsandbakes on instagram and hashtag it #jennyblogs
IMG_3302.jpg

Insalata Caprese Tradizionale - Traditional Caprese Salad

Last Updated August 26, 2024

IMG_0994.jpg

Insalata Caprese, often just referred to as Caprese, is by now known the world over and has been adapted into many different dishes and styles. In today’s post we are going to cover the traditional Italian Insalata Caprese, unaltered and in its purest form. How the Italians make it. Leave aside the Caprese grilled cheeses and Caprese pasta for just one second.

Insalata Caprese (EEN-sah-lah-ta cuh-PRAY-zay), or Caprese Salad is an Italian dish consisting of merely 5 ingredients: fresh mozzarella, fresh tomatoes, fresh basil, extra virgin olive oil, and a touch of salt, maybe pepper. Oregano is also added sometimes. That’s it, simple and fresh.

Because there are so few ingredients, no cooking required, and little spice, the quality and freshness of the ingredients are of upmost importance. This is one of the golden rules of the Italian kitchen. In fact, I would say that any caprese salad you’ve eaten in the States is probably a far cry from the shining beacon that it is here in Italy. This is not through any fault of your own, but Italy has certain protected regions and methods for making foods, with rigorous control checks and rules, which holds the product to high standards.

You may be familiar with some of these rules, especially if you seen some Italian wine bottles. You might have noticed special seals that read DOC or DOCG (Denominazione di Origine Controllata or Denominazione di Origine Controllata Garantita), which basically act as a quality seal. One such wine, considered one of the kings of Italian wine, Brunello di Montalcino, will always have the DOCG seal because it can only be grown in the Montalcino region near Siena which has ideal soil and climate for this particular wine. If it doesn’t have the seal, don’t buy it. Hazelnuts, mozzarella, how to make a Neopolitan pizza, and many other food items and processes, sometimes connected to a specific region, are protected by law in Italy.

I just mentioned mozzarella, so you may be understanding how I managed to go on that long spiel and still connect it to today’s subject matter. :) Suffice to say, Italian mozzarella, the good stuff, is in a class of its own.

That’s the beauty of Italian summers, where lunches are made up of ripe tomatoes, a slab of cheese, a drizzle of olive oil. Maybe with a hunk of fresh, salty focaccia. Or maybe just prosciutto and melon.

But maybe you aren’t IN Italy, and you’re wondering how you can make the best Insalata Caprese possible? Let’s dissect the ingredients real quick before getting into the recipe.

Suggestions for selecting ingredients for the Insalata Caprese

  • Tomatoes. You want the freshest, tastiest tomatoes available. The most widely used in Italy would probably be the tomato variety “cuore di bue” or literally, “ox heart,” which originated in America. There are two prinicipal varieties of cuore di bue, Arawak and Albenga. These tomatoes are ideal for salads because they have a thin skin, great flavor, and very few seeds and water inside. They are not usually very round, but fall into the ugly tomato category with lots of ridges. As they say, the uglier the tomato, the more delicious it will be. If you can’t get your hands on a cuore di bue, use your favorite, fresh tomatoes. In the States I often go for an heirloom tomato.

  • Mozzarella. You’ll want the freshest mozzarella possible, which might not be that easy to find unless you know a cheese producer. Traditionally the mozzarella di fiordilatte is used (normal cow’s milk mozzarella), but if you want to up your game, go for the more expensive mozzarella di bufala (buffalo mozzarella) which can also be protected by one of the laws we were talking about above, this time the DOP.

  • Basil. Fresh basil, torn into pieces if desired and ideally added just before serving so it can’t even think about wilting. I mention torn, not sliced, because Italians have this thing against cutting basil with a knife, or it touching metal for that matter.

  • Extra Virgin Olive Oil. I cannot stress enough to you the importance of having a good bottle of olive oil on hand. In Italy there are usually two kinds of olive oil, those used for cooking, and those use for drizzling just before serving. Select your oil carefully, paying attention to where it is produced, when, and when it expires. Olive oil generally has a best if used by date of two years from being bottled. So if you find a bottle that expires in a year or less, you know that bottle has already been sitting on the shelf for too long and is best used for cooking. Also pay attention to wording like “produced in” or “bottled in.” The latter may mean that olives were brought in from elsewhere and merely bottled in Italy so they could write that on the bottle. No really, there are so many shady practices when it comes to olive oil, it can be hard to decipher the great ones, especially when dealing with imported bottles. My mom used to order bottles straight from Italy to get some of the high quality stuff. Basically, you don’t want to pay less than $15 for a bottle in the States. Frantoio Franci and Laudemia are two very high quality brands. If you know your EVOO’s, select a light and fruity oil.

  • Salt and Pepper. Usually just the tomatoes are salted, and pepper is completely optional.

  • Oregano. Oregano is also optional, but a bit of fresh or dried is a nice touch!

This post may contain affiliate links. If you make a purchase using these links, Jennyblogs may receive a small commission, at no extra cost to you. This helps to support Jennyblogs. Where possible, links are prioritized to small businesses and ethically and responsibly made items. For further information see the privacy policy. Grazie!


Insalata Caprese

IMG_1002.jpg

Serves 2

Ingredients:

  • about 1/2lb / 200g fresh mozzarella

  • 2 medium tomatoes

  • a few fresh basil leaves, whole or torn into pieces

  • extra virgin olive oil, for drizzling

  • salt and pepper, to taste

  • fresh or dried oregano, optional

Directions:

  1. Slice the mozzarella and the tomatoes into equally sized slices and place on a plate.

  2. Drizzly lightly with olive oil and sprinkle tomatoes with salt. Sprinkle with a bit of pepper, if desired.

  3. Garnish with basil leaves and oregano; serve.

Jenny’s Notes:

  • It may seem strange, but some recommend to serve the mozzarella at room temperature. If the mozzarella is cut while cold it may lose more water, interacting with and changing the flavor of the tomatoes. If the mozzarella is losing lots of liquid regardless, it may not be as fresh as desired.

  • You can use a paper towel on both the mozzarella and tomatoes to absorb any excess liquid, dabbing or letting them sit on the paper towel if they are very wet.

  • Contrary to American belief, Caprese Salad does not traditionally have balsamic vinegar. Nor mayonnaise, olives, eggs, or other non-Italian inventions.

Traditional Caprese Salad
Yield 2
Author
Prep time
5 Min
Total time
5 Min

Traditional Caprese Salad

This classic Caprese Insalata is bursting with summer flavors. Tomatoes, fresh mozzarella, basil, and extra virgin olive oil, just as the Italians would make it.
Cook modePrevent screen from turning off

Ingredients

Instructions

  1. Slice mozzarella and tomatoes into equally sized slices and place on a plate.
  2. Drizzly lightly with olive oil and sprinkle tomatoes with salt. Sprinkle with a bit of pepper, if desired.
  3. Garnish with basil leaves and oregano; serve.

Notes

  • It may seem strange, but some recommend to serve the mozzarella at room temperature. If the mozzarella is cut while cold it may lose more water, interacting with and changing the flavor of the tomatoes. If the mozzarella is losing lots of liquid regardless, it may not be as fresh as desired.
  • You can use a paper towel on both the mozzarella and tomatoes to absorb any excess liquid, dabbing or letting them sit on the paper towel if they are very wet.
  • Contrary to American belief, Caprese Salad does not traditionally have balsamic vinegar. Nor mayonnaise, olives, eggs, or other non-Italian inventions.

Nutrition Facts

Calories

326.94

Fat

25.15 g

Sat. Fat

11.64 g

Carbs

7.00 g

Fiber

1.73 g

Net carbs

5.27 g

Sugar

4.09 g

Protein

19.14 g

Sodium

663.60 mg

Cholesterol

64.09 mg

Nutritional information is approximate and based on 2 servings.

Gluten-free, tomatoes, fresh mozzarella, mozzarella di bufala, extra virgin olive oil, fresh basil, fresh oregano, Italian recipe, real italian caprese salad, traditional caprese, authentic italian caprese, how to make the best caprese
Side, Lunch
Italian
Did you make this recipe?
Tag @jennyblogsandbakes on instagram and hashtag it #jennyblogs
IMG_0996.jpg

Chocolate Sauce

Photo Public Domain https://creativecommons.org/licenses/by-sa/3.0/at/deed.en Permission: Sammlung J.P. Adlbrecht

Photo Public Domain https://creativecommons.org/licenses/by-sa/3.0/at/deed.en Permission: Sammlung J.P. Adlbrecht

Last Updated August 15, 2024

This post contains affiliate links. If you buy something using these links, Jennyblogs may receive a small commission, at no extra cost to you. This helps to support Jennyblogs. For further information see the privacy policy. Grazie!

Classic. Quintessential. Chocolatey. Good on everything, from your morning pancakes and coffee to ice cream and that cake you just made. Or ya know, by the spoonful. Just a spoonful of…I’ll let you sing the rest yourself. ;)

What is it? Chocolate Sauce! Or chocolate syrup, as you prefer. No more Hershey’s in a bottle, or going without if you live outside the USofA. It’s so easy you’ll wonder why you never made it before. No high fructose corn syrup involved!

Recipe from my Mama


Chocolate Sauce

Makes about 3/4 cup of sauce

Ingredients:

  • 3/4 cup / 150g sugar

  • 1/3 cup / 33g unsweetened cocoa powder

  • 1 Tbsp / 7.5g cornstarch

  • 1/2 cup / 118g water

  • 1 tsp vanilla

Directions:

  1. Combine sugar, cocoa, and cornstarch in a small saucepan.

  2. Add water and whisk until there are no cornstarch lumps.

  3. Cook over medium heat, stirring constantly, until mixture boils. Reduce heat to low and boil for 5 minutes, continuing to stir.

  4. Remove from heat and add vanilla. Cool.

  5. Store in an airtight container in the refrigerator.

Jenny’s Notes:

  • The better quality your cocoa powder the better your sauce will taste!

  • Keeps well in the fridge.

Chocolate Sauce
Yield 12
Author
Prep time
5 Min
Cook time
10 Min
Total time
15 Min

Chocolate Sauce

A basic chocolate sauce for ice cream topping, drizzling, mixing in coffee, and anything you need chocolate sauce for!
Cook modePrevent screen from turning off

Ingredients

Instructions

  1. Combine sugar, cocoa, and cornstarch in a small saucepan.
  2. Add water and whisk until there are no lumps.
  3. Cook over medium heat, stirring constantly, until mixture boils. Reduce heat to low and boil for 5 minutes, continuing to stir.
  4. Remove from heat and add vanilla. Cool.
  5. Store in an airtight container in the refrigerator.

Notes

The better quality your cocoa powder the better your sauce will taste! Keeps well in the fridge.

Nutrition Facts

Calories

63.04

Fat

0.27 g

Sat. Fat

0.00 g

Carbs

14.76 g

Fiber

0.56 g

Net carbs

14.21 g

Sugar

12.52 g

Protein

0.55 g

Sodium

0.61 mg

Cholesterol

0.00 mg

Nutritional information is approximate.

Hershey's chocolate sauce, ice cream topping, hot fudge sundae sauce, chocolate sauce
dessert, sauce, topping
American
Did you make this recipe?
Tag @jennyblogsandbakes on instagram and hashtag it #jennyblogs

Refrigerator Dill Pickles

Last Updated August 11, 2024

Summertime calls for watermelon, lemonade, ice cream, swimming, and cook outs.  And every quintessential cookout will have something to cook outside, usually meat and vegetables in some form.  (I know we're all thinking hamburgers, bratwursts, and hotdogs, but hey, there are some other weird traditions out there, too.)  And if you're cooking out, you're going to need buns and condiments.  And the best condiment award goes to....pickles!!

Not only does it have the best taste (opinion), but it stands alone.  As in, if you eat a pickle, no one will think twice.  But if we see you munching on a romaine lettuce leaf or slurping on a spoonful of ketchup, well, you might get some stares.  Of course, this is coming from someone who doesn't like hamburgers and once ate a romaine sandwich.  As in, onion, ketchup, mustard, and pickles sandwiched between to Romaine lettuce leaves.  Mmmmm.  Yeah, it was weird.  But I was so hungry, and hamburgers were the only option, I rather enjoyed it.  That's now on the worldwide webs.  Maybe I should change my heading to be: "Jenny, the girl who eats condiments like a main dish." Don't worry I won't, only you, my seven followers, are now privy to this information.  Haha.  

Back to pickles.  Now that we have remembered how great pickles are, did you know they are super easy to make at home?  Yes they are, and now you know that too.  Boil some water, throw some ingredients in a jar, chop up some cucumbers, stick them in the fridge, and voila!  Pickles.  

This post may contain affiliate links. If you buy something using these links, Jennyblogs may receive a small commission, at no extra cost to you. This helps to support Jennyblogs. For further information see the privacy policy. Grazie!

Recipe adapted from my mama


Refrigerator Dill Pickles

Makes about 24 spears/servings

Ingredients:

  • 3 1/2 cups / 830g water

  • 1 1/4 cups / 296g white vinegar

  • 1 Tbsp / 12g sugar

  • 1 Tbsp / 17g salt

  • 1 tsp / 2g turmeric, optional

  • 4 cups or about 2-3 large cucumbers, cut into slices, spears, or shape of choice

  • 2 cloves garlic

  • 2 heads fresh dill

  • 1 tsp red chili flakes, mustard seeds, or celery seeds, optional

Directions:

  1. Stir together water, vinegar, sugar, and salt in a large saucepan.  Place over medium-high heat and bring to a boil.  Remove from heat and allow to cool completely. 

  2. In a large glass jar or container, 4-quart or larger, arrange garlic, dill, cucumbers, and any spices you choose to use.  Pour the cooled liquid over the cucumbers, discarding or saving any leftover for another use.  Top with lid, sealing well, and refrigerate.  

  3. They will start to taste pickle-y the next day, but for optimum flavor refrigerate at least 3 days before consuming.  

Jenny's Notes:

  • I recommend making this recipe once as is to get an idea of the flavor profile, then play around to make it your own!

    1) If you like more bread & butter or sweet style pickles, up the sugar

    2) If you love dill, use more dill

    3) Add sliced onions or bell peppers

    4) Add more red pepper flakes or other hot pepper for more spice

    5) Really, add whatever suits your fancy. The garden is your playground.

  • The turmeric is for color, not so much flavor, to get that idyllic yellow pickle.  However, if you could care less about having a yellow pickle or don’t enjoy turmeric, leave it out!  I for one don't think the turmeric is very obvious in this recipe, but it's detectable if you really think about it.  

Refrigerator Dill Pickles
Yield 24
Author
Prep time
15 Min
Cook time
10 Min
Inactive time
72 Hour
Total time
72 H & 25 M

Refrigerator Dill Pickles

Classic dill pickles made in your refrigerator in just 3 days.
Cook modePrevent screen from turning off

Ingredients

Instructions

  1. Stir together water, vinegar, sugar, and salt in a large saucepan. Place over medium-high heat and bring to a boil. Remove from heat and allow to cool completely.
  2. In a large glass jar or container, 4-quart or larger, arrange garlic, dill, cucumbers, and any spices you choose to use. Pour the cooled liquid over the cucumbers, discarding or saving any leftover for another use. Top with lid, sealing well, and refrigerate.
  3. They will start to taste pickley the next day, but for optimum flavor refrigerate at least 3 days before consuming.

Notes

I recommend making this recipe once as is to get an idea of the flavor profile, then play around to make it your own! 1) If you like more bread & butter or sweet style pickles, up the sugar2) If you love dill, use more dill3) Add sliced onions or bell peppers4) Add more red pepper flakes or other hot pepper for more spice5) Really, add whatever suits your fancy. The garden is your playground.The turmeric is for color, not so much flavor, to get that idyllic yellow pickle. However, if you could care less about having a yellow pickle or don’t enjoy turmeric, leave it out! I for one don't think the turmeric is very obvious in this recipe, but it's detectable if you really think about it.

Nutrition Facts

Calories

10.04

Fat

0.04 g

Sat. Fat

0.01 g

Carbs

1.91 g

Fiber

0.20 g

Net carbs

1.72 g

Sugar

1.09 g

Protein

0.25 g

Sodium

276.95 mg

Cholesterol

0.00 mg

Nutritional information is approximate. Based on one pickle spear.

dill pickles, refrigerator pickles, homemade pickles
condiment, snack
American
Did you make this recipe?
Tag @jennyblogsandbakes on instagram and hashtag it #jennyblogs

Chia Persimmon Pudding

Last Updated August 10, 2024

This post contains affiliate links. If you buy something using these links, Jennyblogs may receive a small commission, at no extra cost to you. This helps to support Jennyblogs. For further information see the privacy policy. Grazie!

I had never eaten a persimmon before living in Italy.  I probably couldn't have even picked it out from a line up of fruit.  But if you asked me, of course I would want to try a persimmon!  I had heard good things about them, especially the elusive "persimmon pudding."  

I used to go the market several times a week for my fruit and vegetables, one of my favorite weekly errands.  It was a large market, the ground floor of the Mercato Centrale if you’ve been there, with lots of vendors, but there was this dear old man that always had the best tomatoes and lettuce.  He would say "Ciao, bella," shake my hand, and always round the price down for me.  He also had this habit of sneaking in a fruit or vegetable that I hadn't ordered.  Whether that was a sweet gesture or a marketing strategy, I may never know.  One day, after getting my usual tomatoes, I arrived home to find this strange object that looked curiously like an orange tomato, but was most definitely not.  So....squishy and lacking that earthy, pungent, tomato vine smell.  After a little research, I found I had in my possession a kaki!  Okay, now what is a kaki?  

After a little more research, I found that kaki is what the Italians call persimmons. Sweet, mysterious persimmons.  Now...how to eat it?  I quickly realized they are like jelly on the inside when ripe, and it's only the skin that holds it together.  If that skin breaks, you have a real mess if you weren't prepared with a bowl or your mouth beneath it.  I ate that first one in hurry, before it all dripped from my hands onto the floor. 

From then on I bought them in packs and beautiful things happened, including various versions of persimmon pudding.  Below is a raw and vegan version of the Persimmon Pudding.  Makes for a great dessert, snack, or breakfast!  Kaki on.  

Recipe adapted from Blissful Basil.


Chia Persimmon Pudding

Serves 4

Ingredients:

For the Chia Pudding Layer

  • 2 cups / 474g unsweetened coconut milk or milk of choice

  • generous 1/2 cup / 90g chia seeds

  • 3 Tbsp / 60g maple syrup or honey

  • 2 tsp / 9g vanilla extract

  • 1/2 tsp / 1g cinnamon

  • pinch of cardamom

For the Persimmon Pudding Layer

  • 3 ripe persimmons

  • 1/4 tsp cinnamon

Directions:

*Note: Make the Chia Pudding the day before you want to eat the pudding, as it takes at least 8 hours to set up.  

You’ll need 4 small (about 12 oz), clear glasses or bowls.

Make the Chia Pudding

  1. In a medium bowl whisk together milk, chia seeds, maple syrup, vanilla, cinnamon, and cardamom.  

  2. Cover and refrigerate overnight or at least 8 hours.  

Make the Persimmon Pudding

  1. Remove the stems from the persimmons and place in a food processor or blender.  Add the cinnamon and blend until smooth.  

  2. Spoon about scant 1/4 cup Persimmon Pudding into the bottom of each glass.  Top with a scant 1/4 cup Chia Pudding.  Repeat layers until both puddings are gone.  Should make three layers of each, or 6 layers total in each glass. Top with additional cinnamon, if desired.

Jenny's Notes:

  • You'll want your persimmons to be very ripe and very soft all the way through; they should be bursting when you try to remove the stems.

  • Persimmons are a great source of vitamin A, vitamin C, and high in fiber.  

Chia Persimmon Pudding
Yield 4
Author
Prep time
15 Min
Inactive time
8 Hour
Total time
8 H & 15 M

Chia Persimmon Pudding

Layers of spiced coconut milk chia pudding and juicy persimmons are a simple, vegan, dairy-free, gluten, raw, etc. dessert, breakfast, or snack.
Cook modePrevent screen from turning off

Ingredients

For the Chia Pudding Layer
For the Persimmon Pudding Layer

Instructions

Make the Chia Pudding
  1. *Note: Make the Chia Pudding the day before you want to eat the pudding, as it takes at least 8 hours to set up.
  2. In a medium bowl whisk together milk, chia seeds, maple syrup, vanilla, cinnamon, and cardamom.
  3. Cover and refrigerate overnight or at least 8 hours.
Make the Persimmon Pudding
  1. You’ll need 4 small (about 12 oz), clear glasses or bowls.
  2. Remove the stems from the persimmons and place in a food processor or blender. Add the cinnamon and blend until smooth.
  3. Spoon about scant 1/4 cup Persimmon Pudding into the bottom of each glass. Top with a scant 1/4 cup Chia Pudding. Repeat layers until both puddings are gone. Should make three layers of each, or 6 layers total in each glass. Top with additional cinnamon, if desired.

Notes

You'll want your persimmons to be very ripe and very soft all the way through; they should be bursting when you try to remove the stems.

Nutrition Facts

Calories

266.73

Fat

9.61 g

Sat. Fat

2.90 g

Carbs

43.72 g

Fiber

12.46 g

Net carbs

35.76 g

Sugar

25.11 g

Protein

4.73 g

Sodium

12.43 mg

Cholesterol

0.00 mg

Nutritional information is approximate.

vegan, raw, no bake, chia pudding, persimmon pudding, dairy free, gluten free, refined sugar free
dessert, pudding
American
Did you make this recipe?
Tag @jennyblogsandbakes on instagram and hashtag it #jennyblogs

Enjoy your Kaki Pudding!

Quinoa Coconut Date Rolls

IMG_4728.jpg

Last Updated August 8, 2024

These little morsels are so named because they are rolled, and no, these will not get you a date nor would I suggest bringing them on a first date.  Not because these aren't scrummy (that’s scrumptious and yummy combined), but because "healthy" baking should always be treated warily.  You must already have a well established relationship with that person, preferably have treated them to some normal sugary delicious desserts so that they understand that you understand what a dessert "should" be, and can trust your taste buds when you then try to sell them on your spinach-spirolina-turmeric-kale-ginger-wasabi-moringa bars that are also dairy-free and refined-sugar free.  Whew, I'm out of breath.  But that relationship is important.  So if I've never eaten anything that you've made before, know that I might distrust you at first, in the most genial way possible.  And you should distrust me, until I gain your trust.  

Also understand what your taste preferences are, and if you don't like healthy desserts, well then, may I ask why are you reading this particular recipe? May I kindly redirect you to this decadent Peanut Butter Brownie Trifle?  Or if you don't like dates, we might have a problem.  But if you like healthy desserts, or are exploring in this arena, then you probably know what you're getting yourself into.  The quinoa provides protein and grains, the almonds provide good fats and more protein, while the dates give sweetness and carbs and coconut brings flavor to the party. 

So now, using your own best judgment, allow me to introduce my friends, the Quinoa Coconut Date Rolls.

This post may contain affiliate links. If you buy something using these links, Jennyblogs may receive a small commission, at no extra cost to you. This helps to support Jennyblogs. For further information see the privacy policy. Grazie!

Recipe adapted from Skinny Ms.


Quinoa Coconut Date Rolls

Makes about 10-12 rolls

Ingredients:

  • 1/3 cup / 60g dry quinoa

  • 2/3 cup / 158g water

  • 1 cup / 160g pitted dates

  • 1/2 cup / 70g almonds

  • 1/3 cup / 33g grated unsweetened coconut, plus more for rolling

  • 2-3 tsp / 10-15g water

  • 1/4 cup / 42g chocolate chips, optional

Directions:

  1. Combine quinoa and water in a small saucepan over medium heat.  Bring to a boil and reduce heat.  Cover and simmer for 10-15 minutes, until all the water is absorbed.  Set aside to cool completely.  If you already have quinoa made, you'll need about 1 cup.  

  2. Place dates in a food processor and blend until they stick together in a ball.  Add the almonds, coconut, and quinoa; pulse until well combined.  Add water, if necessary, until the mixture holds together.  Shape into balls or roll.  Place extra coconut on a plate and roll the rolls around until completely covered in coconut.  

  3. *Optional:  Heat chocolate chips over a double boiler or in the microwave for 30 second bursts, until melted.  Drizzle chocolate over rolls.

  4. Store in an airtight container for up to a week, or freeze.  

Jenny's Notes:

  • For a chunkier roll, process for a shorter period of time.  

  • These rolls are also delicious if you add a 1/2 tsp of cinnamon. They could become autumnal if you add cinnamon along with a dash of nutmeg, cloves, and ginger. Yum!  

Quinoa Coconut Date Rolls (Vegan)
Yield 10-12 rolls
Author
Prep time
25 Min
Cook time
15 Min
Total time
40 Min

Quinoa Coconut Date Rolls (Vegan)

Nutritious Lara-bar like rolls made with quinoa, dates, coconut, and almonds with optional chocolate drizzle. Great for breakfast, snacks, on the go, and after workouts!
Cook modePrevent screen from turning off

Ingredients

Instructions

  1. Combine quinoa and water in a small saucepan over medium heat. Bring to a boil and reduce heat. Cover and simmer for 10-15 minutes, until all the water is absorbed. Set aside to cool completely. If you already have quinoa made, you'll need about 1 cup.
  2. Place dates in a food processor and blend until they stick together in a ball. Add the almonds, coconut, and quinoa; pulse until well combined. Add water, if necessary, until the mixture holds together. Shape into balls or roll. Place extra coconut on a plate and roll the rolls around until completely covered in coconut.
  3. *Optional: Heat chocolate chips over a double boiler or in the microwave for 30 second bursts, until melted. Drizzle chocolate over rolls.
  4. Store in an airtight container for up to a week, or freeze.

Notes

For a chunkier roll, process for a shorter period of time. These rolls are also delicious if you add a 1/2 tsp of cinnamon. They could become autumnal if you add cinnamon along with a dash of nutmeg, cloves, and ginger. Yum!

Nutrition Facts

Calories

151.00

Fat

7.49 g

Sat. Fat

2.97 g

Carbs

20.79 g

Fiber

3.25 g

Net carbs

17.54 g

Sugar

13.01 g

Protein

3.11 g

Sodium

37.86 mg

Cholesterol

0.00 mg

Nutritional information is approximate. Based on 10 servings and includes chocolate drizzle.

quinoa, coconut, almonds, gluten-free, vegan, dairy-free, refined sugar-free, vegetarian, healthy, nutritious, clean eating, egg-free
snack, breakfast
American
Did you make this recipe?
Tag @jennyblogsandbakes on instagram and hashtag it #jennyblogs

Pumpkin Coconut Energy Bars

One week until Thanksgiving!  'Tis the season for baking too much, cooking too much, and eating too much. 

Sometimes you don't want to wait until Thanksgiving for a slice of pumpkin pie, yet you don't want to ruin it, or sometimes you just want something of a lighter nature that you can feel good about eating.  The upcoming season of delicious foods and feasting does not mean that you should be eating plain lettuce, carrot sticks, and rutabaga all day to "save up" for the holidays.  In fact, if it's not delicious, then you shouldn't eat it.  I believe food is a good gift and should always be enjoyed, and never suffered through.  If it's not delicious, then something isn't being done right.  Nutritious can be delicious. But delicious does not always have to be nutritious.  Everything in moderation.

Now for something that falls into the three most important categories: Delicious, Nutritious, AND Festive. 

Namely, Pumpkin Coconut Energy Bars. They’re pumpkin spiced, vegan, dairy-free, and gluten-free (if you use gluten-free oats), so most everyone can enjoy them! They’re sweetened with dates which also makes them refined sugar free.

Eat them as dessert, snack, after-workout boost, or for on the go. By nature they’re a bit soft, so if you prefer them harder keep them in the fridge or freezer until you need a little nutritious pick-me-up.

This post may contain affiliate links. If you make a purchase using these links, Jennyblogs may receive a small commission, at no extra cost to you. This helps to support Jennyblogs. For further information see the privacy policy. Grazie!

Recipe adapted from Nutritionist in the Kitch


Pumpkin Coconut Energy Bars

Makes 8-10 Bars

Ingredients:

  • 1 cup / 160g pitted dates

  • 1/2 cup / 75g nuts of choice, raw and unsalted

  • 2 Tbsp / 24g pumpkin seeds or chia seeds

  • 2 Tbsp / 14g unsweetened shredded or flaked coconut

  • 1/4 cup / 23g oats

  • 1 tsp cinnamon

  • 1/4 tsp nutmeg

  • 1/4 tsp cloves

  • 1/4 tsp ginger

  • 1/4 cup / 60g pumpkin puree

Directions:

  1. Combine all ingredients in a food processor.  Blend for several minutes, until slightly chunky or completely smooth, as you wish.

  2. Line an 8x8in / 20x20cm square baking dish with parchment paper.  Lightly sprinkle with oats or coconut to prevent mixture from sticking too much.

  3. Scoop mixture into dish and carefully spread to the edges.  Use lightly oiled or wet hands to help this process.  Sprinkle with more coconut, pumpkin seeds, or both.

  4. Place in the freezer for a couple hours, then slice into bars.  Store in at room temperature, in the fridge, or in the freezer, depending on how firm you want the bars to be. 

Jenny's Notes:

  • I used a combination of almonds, pecans, hazelnuts, cashews, and Brazil nuts.  Why use only 1 or 2 varieties of nuts when you can use 5?? Haha

Pumpkin Coconut Energy Bars
Yield 8-10 servings
Author
Prep time
15 Min
Total time
15 Min

Pumpkin Coconut Energy Bars

No-bake pumpkin bars with plenty of fall spice, coconut, and pumpkin seeds. Vegan, gluten-free if using gluten-free oats, refined-sugar free, and dairy-free.
Cook modePrevent screen from turning off

Ingredients

Instructions

  1. Combine all ingredients in a food processor. Blend for several minutes, until slightly chunky or completely smooth, as you wish.
  2. Line an 8x8in / 20x20cm square baking dish with parchment paper. Lightly sprinkle with oats or coconut to prevent mixture from sticking too much.
  3. Scoop mixture into dish and carefully spread to the edges. Use lightly oiled or wet hands to help this process. Sprinkle with more coconut, pumpkin seeds, or both.
  4. Place in the freezer for a couple hours, then slice into bars. Store in at room temperature, in the fridge, or in the freezer, depending on how firm you want the bars to be.

Nutrition Facts

Calories

149.51

Fat

6.45 g

Sat. Fat

1.46 g

Carbs

22.40 g

Fiber

3.70 g

Net carbs

18.70 g

Sugar

13.99 g

Protein

3.46 g

Sodium

32.30 mg

Cholesterol

0.00 mg

Nutritional information is approximate and based on 8 servings.

pumpkin, pumpkin spice, fall recipe, no bake, vegan, dairy free, gluten free, refined sugar free, pumpkin seeds, raw, coconut
dessert, snack
American
Did you make this recipe?
Tag @jennyblogsandbakes on instagram and hashtag it #jennyblogs

Peanut Butter Energy Bites

What is energy, and why do these bites have so much?  I'm not about to give you a lesson in physics, I'll leave that to Iggy Azalea, but basically they are filled with good calories (energy) from the nutrients and natural sugar.  If there is the word energy in the title, it probably just means it's high calorie.  But if they were called Peanut Butter Calorie Bites, who would make them?  Calories get such a bad rap, poor things.  Calories, I can't liiive without yooooou!  Literally. (If you just sang that to the tune of "Without You" by Badfinger, congratulations. Me too.) 

So if you need a boost of energy or a quick pick-me-up, these are your friends.  Also great if you are about to expend a lot of energy, like going for a run or playing Twister, or after.  They are small but pack a punch, so they don't make you feel too full.  

This post may contain affiliate links. If you make a purchase using these links, Jennyblogs may receive a small commission, at no extra cost to you. This helps to support Jennyblogs. For further information see the privacy policy. Grazie!

Recipe adapted from Gimme Some Oven


Peanut Butter Energy Bites

Makes about 15 1-in. diameter balls

A mass of energy...

A mass of energy...

Ingredients:

  • 1 cup / 90g oats

  • 2/3 cup / 67g flaked or shredded coconut, unsweetened

  • 1/2 cup / 130g peanut butter

  • 1/2 cup wheat germ (50g), chia seeds (80g), or ground flax seed (90g)

  • 1/3 cup / 110g honey or maple syrup

  • 1 tsp / 5g vanilla extract

  • 1/2 cup / 85g mini chocolate chips

Directions:

  1. In a medium bowl, combine all ingredients.  If dough is too dry to form balls, add more honey or peanut butter; if they seem too sticky, add more oats or wheat germ. 

  2. Form into balls and store in the fridge or freezer for when you want a quick snack.

Jenny's Notes:

  • For vegan bites, be sure to use dairy-free chips and use maple syrup instead of honey.

  • For gluten-free bites, make sure your oats are certified gluten-free and use chia or flax seeds instead of wheat germ. 

  • You can get creative with these bites, substitute or add to the chocolate chips with your favorite dried fruit or nuts, or even types of cereal, such as grape-nuts, puffed rice, granola, etc.

Peanut Butter Energy Bites
Yield 15 Balls
Author
Prep time
15 Min
Total time
15 Min

Peanut Butter Energy Bites

All the goodness of granola bars in an easier, rolled form. Packed with energy and nutrients, these peanut butter, coconut, chocolate chip energy bites are perfect for a quick snack or pick-me-up.
Cook modePrevent screen from turning off

Ingredients

Instructions

  1. In a medium bowl, combine all ingredients. If dough is too dry to form balls, add more honey or peanut butter; if they seem too sticky, add more oats or wheat germ.
  2. Form into balls and store in the fridge or freezer for when you want a quick snack.

Notes

For vegan bites, be sure to use dairy-free chips and use maple syrup instead of honey.For gluten-free bites, make sure your oats are certified gluten-free and use chia or flax seeds instead of wheat germ. You can get creative with these bites, substitute or add to the chocolate chips with your favorite dried fruit or nuts, or even types of cereal, such as grape-nuts, puffed rice, granola, etc.

Nutrition Facts

Calories

167.43

Fat

9.64 g

Sat. Fat

4.52 g

Carbs

18.89 g

Fiber

2.68 g

Net carbs

16.21 g

Sugar

10.10 g

Protein

4.14 g

Sodium

44.67 mg

Cholesterol

0.00 mg

Nutritional information is approximate. Based on 15 servings.

peanut butter energy balls, chocolate chips, coconut, granola bar bites
Snacks
American
Did you make this recipe?
Tag @jenevamorris on instagram and hashtag it #jennyblogs

Peanut Butter Pie with Chocolate Whipped Cream

Shortbread crust.  A layer of creamy peanut butter filling.  Topped with a mountain of chocolate whipped cream.  And chocolate shavings.  Because, we're so fancy, you already know.  Did I mention No-Bake?

I first made this pie with a pretzel crust.  The salty sweetness really off-set the creamy full-bodied mouth feel of the layers well.  Yes, sometimes I describe dessert and food like wine.  It just works so well.  But if you ever catch me saying "I prefer the '98 vintage of this cheesecake" or something along that line, I might have taken it too far.  Ew, rancid cheesecake.  Anyway...

The next time I made this pie was in Italy.  Pretzels do exist here, but they have a very strange texture.  Think pretzels that went stale and chewy and then got so stale they got crispy again, almost. But still a little chewy.  And don't chop well in a food processor. It took over 8 minutes to get them partly broken up.  The crust was still good, but it looked more like a bird's nest of pretzel sticks than a uniform crust.  

Oh hey, Thanksgiving pie. And there is Lucia the poinsettia in the background. Good times, good times.

Oh hey, Thanksgiving pie. And there is Lucia the poinsettia in the background. Good times, good times.

Regardless, all the Americans in Italy are so peanut butter deprived that everyone loved it.  In fact, two days later was Thanksgiving and it was requested of me to make and bring this pie to Thanksgiving dinner.  Not pecan pie.  Not pumpkin pie.  Peanut Butter Pie with Chocolate Whipped Cream.  With a delicious but slightly strange looking crust.  

When I made the pie this time, I used shortbread cookies with great success.  The Italian supermarkets have practically a whole aisle devoted to all their different kinds of shortbread cookies, called frollini.  A nice big 800g bag for 1.5-2.5 euros?  Hehe don't mind if I do.  Shortbread with cream, or chocolate and stars, buckwheat, almond, almond and chocolate, hazelnut, stuffed with apricot, stuffed with chocolate, coarse sugar-topped, made with egg, chocolate drops...the varieties go on. 

Someday I will share with you the pretzel crust, but when I have access again to pretzels that behave in a food processor and I can get some decent photos.  But until then, get your hands on some shortbread cookies.  You could make some homemade (classic shortbread consists of just 3 ingredients: flour, butter, sugar) or if you're in the States buy some Sandie's shortbread cookies or something similar. 

This post may contain affiliate links. If you make a purchase using these links, Jennyblogs may receive a small commission, at no extra cost to you. This helps to support Jennyblogs. For further information see the privacy policy. Grazie!

Recipe adapted from the Cooking Channel


Peanut Butter Pie with Chocolate Whipped Cream

Makes 1 9in / 23cm pie - 8-12 servings

Ingredients:

For the Shortbread Crust

  • about 15 / 150g shortbread cookies

  • 4 Tbsp / 56g butter, melted

For the Peanut Butter Filling

  • 1/2 cup / 119g heavy whipping cream

  • 1/2 cup / 113g mascarpone or cream cheese, room temperature

  • 1/3 cup / 87g creamy peanut butter

  • 1/4 cup / 50g brown sugar

For the Chocolate Whipped Cream

  • 3-4 oz / 100g good quality dark chocolate, chopped

  • 2 cups / 474g heavy whipping cream

  • Extra chocolate in bar form, for chocolate shavings, optional

Directions:

Make the Chocolate Whipped Cream First

  1. Place chocolate and cream in a double boiler or a glass or metal bowl over a pan of simmering water.  The bottom of the bowl shouldn’t touch the water.

  2. Gently stir until chocolate is mostly melted.  Remove from heat and continue stirring until chocolate has completely melted.  Place in the refrigerator for 2 hours. 

Make the Shortbread Crust

  1. In a food processor, pulse cookies until they become crumbly.  Add butter and pulse until smooth and can be pressed into a crust.  Depending on the type of cookies you use, you may need to add a touch more melted butter to ensure the crust will stay together.  Press into a 9in / 23cm pie dish and refrigerate.

Make the Peanut Butter Filling

  1. In the bowl of a stand mixer or with a handheld mixer, whip heavy cream until stiff peaks form.  Transfer to another bowl. 

  2. Again, in the bowl of the stand mixer beat mascarpone, peanut butter, and brown sugar together until smooth.  Gently fold in the whipped cream with a spatula.  Pour filling over crust and return to the refrigerator. 

Assembly

  1. Once the chocolate cream is cooled, beat with a stand mixer or handheld mixer until stiff peaks form.  Remove pie from the refrigerator and spread or pipe chocolate whipped cream over the top. 

  2. Use a vegetable peeler or knife to shave a chocolate bar over the pie for the finishing touch. 

Jenny's Notes:

  • Try using Nutella or Biscoff spread instead of peanut butter.  YUM.

Peanut Butter Pie with Chocolate Whipped Cream
Yield 8-12
Author
Prep time
50 Min
Inactive time
2 Hour
Total time
2 H & 50 M

Peanut Butter Pie with Chocolate Whipped Cream

No-bake pie with shortbread crust, mascarpone peanut butter filling, chocolate whipped cream and topped with chocolate shavings.
Cook modePrevent screen from turning off

Ingredients

For the Shortbread Crust
For the Peanut Butter Filling
For the Chocolate Whipped Cream

Instructions

Make the Chocolate Whipped Cream (first)
  1. Place chocolate and cream in a double boiler or a glass or metal bowl over a pan of simmering water. The bottom of the bowl shouldn’t touch the water.
  2. Gently stir until chocolate is mostly melted. Remove from heat and continue stirring until chocolate has completely melted. Place in the refrigerator for 2 hours.
Make the Shortbread Crust
  1. In a food processor, pulse cookies until they become crumbly. Add butter and pulse until smooth and can be pressed into a crust. Depending on the type of cookies you use, you may need to add a touch more melted butter to ensure the crust will stay together. Press into a 9in / 23cm pie dish and refrigerate.
Make the Peanut Butter Filling
  1. In the bowl of a stand mixer or with a handheld mixer, whip heavy cream until stiff peaks form. Transfer to another bowl.
  2. Again, in the bowl of the stand mixer beat mascarpone, peanut butter, and brown sugar together until smooth. Gently fold in the whipped cream with a spatula. Pour filling over crust and return to the refrigerator.
Assembly
  1. Once the chocolate cream is cooled, beat with a stand mixer or handheld mixer until stiff peaks form. Remove pie from the refrigerator and spread or pipe chocolate whipped cream over the top.
  2. Use a vegetable peeler or knife to shave a chocolate bar over the pie for the finishing touch.

Notes

Try using Nutella or Biscoff spread instead of peanut butter. YUM.

Nutrition Facts

Calories

636.86

Fat

54.27 g

Sat. Fat

29.83 g

Carbs

27.35 g

Fiber

1.81 g

Net carbs

25.54 g

Sugar

20.45 g

Protein

7.07 g

Sodium

259.95 mg

Cholesterol

119.26 mg

Nutritional information is approximate. Based on the pie cut into 8 servings; includes chocolate shavings.

peanut butter pie, no bake pie, summer dessert, chocolate whipped cream, mascarpone, shortbread crust
dessert, pie
American
Did you make this recipe?
Tag @jennyblogsandbakes on instagram and hashtag it #jennyblogs

No-Bake Pumpkin Date Bars

image.jpg

Last updated June 27, 2024

"La vita è troppo breve per mangiare e bere male" - Eataly

These bars feature a creamy, pumpkin chocolate chip filling atop a wonderfully soft and chewy-sweet date crust. They can easily be made gluten-free, vegan, and dairy-free. On top of that, they’re no bake! You could eat them anytime for breakfast or a healthy snack (to be pronounced snaaaaaack with the Italian hand going) because there is no refined sugar (except from the chocolate chips), but there is protein from the beans, fiber from the oat flour and dates, antioxidants from the maple syrup and spices, and lots of vitamins and minerals from the pumpkin and above mentioned ingredients! 

You guys, this is such a win-win.  In fact, these bars might help you not die. 

That last claim is not backed by science. 

This post may contain affiliate links. If you make a purchase using these links, Jennyblogs may receive a small commission, at no extra cost to you. This helps to support Jennyblogs. Where possible, links are prioritized to small businesses, and American companies and products made in the USA for American readers. For further information see the privacy policy. Grazie!

Adapted from Imma Eat That


No-Bake Pumpkin Date Bars

Serves about 9-12

image.jpg

Ingredients:

For the Date Crust

  • 1 cup / 160g packed pitted dates

  • 1 cup / 140g raw almonds

  • pinch of salt

For the Pumpkin Chocolate-Chip Filling

  • 1 15 oz can / 400g white beans, drained (navy beans, great northern, etc.)

  • 1 cup / 240g pumpkin purée

  • 1 cup / 100g oat flour

  • 1 1/2 tsp cinnamon

  • 1/4 tsp cloves

  • 1/4 tsp ginger

  • 1/4 tsp nutmeg

  • 1/4 tsp salt

  • 1/4 cup / 40g packed pitted dates

  • 5 Tbsp / 100g maple syrup or honey

  • 1 tsp / 5g vanilla extract

  • 2/3 cup / 113g semi-sweet mini chocolate chips, plus extra for topping

Directions:

Make the Date Crust

  1. In a food processor combine dates, almonds, and salt.  Pulse until the almonds are finely ground and everything comes together into a soft, crumbly dough that sticks together when pressed between your fingers.  If after a few minutes the crust doesn't come together, add a few more dates.

  2. Spread and press crust into a 8x8in / 20x20cm or 9x9in /23x23cm square pan. 

Make the Pumpkin Chocolate-Chip Filling

  1. In a food processor, combine all the filling ingredients except for chocolate chips.  Blend until smooth.  Scrape filling into a bowl and stir in chocolate chips.  Spread over crust and top with more chocolate chips. 

  2. Cover and refrigerate for two hours before slicing and serving. 

Jenny's Notes:

  • Don't have oat flour? Make your own! Put the amount of oat flour you need of oats in a food processor or blender, plus a little extra for good measure, and blend until finely ground into flour. Tada!

  • If you like sweeter desserts, or are serving a crowd that isn't used to "healthy" desserts, you could always add up to an extra 1/2 cup / 100g or so of brown sugar to the filling.

Vegan Version: Simply make sure your chocolate chips are vegan, as some brands contain dairy.

Gluten-free: Use certified gluten-free oats.

Dairy-free: Make sure your chocolate chips are dairy-free.  asy, no?

No-Bake Pumpkin Date Bars
Yield 9-12
Author
Prep time
20 Min
Inactive time
2 Hour
Total time
2 H & 20 M

No-Bake Pumpkin Date Bars

Raw Pumpkin Bars with an almond date crust topped with lightly sweetened pumpkin and chocolate chip filling. Vegan, Gluten-free, and dairy-free, no bake..

Ingredients

For the Date Crust
For the Pumpkin Chocolate-Chip Filling

Instructions

Make the Date Crust
  1. In a food processor combine dates, almonds, and salt. Pulse until the almonds are finely ground and everything comes together into a soft, crumbly dough that sticks together when pressed between your fingers. If after a few minutes the crust doesn't come together, add a few more dates.
  2. Spread and press crust into a 8x8in / 20x20cm or 9x9in /23x23cm square pan.
Make the Pumpkin Chocolate-Chip Filling
  1. In a food processor, combine all the filling ingredients except for chocolate chips. Blend until smooth. Scrape filling into a bowl and stir in chocolate chips. Spread over crust and top with more chocolate chips.
  2. Cover and refrigerate for two hours before slicing and serving.

Notes

Vegan Version: Simply make sure your chocolate chips are vegan, as some brands contain dairy.

Gluten-free: Use certified gluten-free oats.

Dairy-free: Make sure your chocolate chips are dairy-free. 

  • Don't have oat flour? Make your own! Put the amount of oat flour you need of oats in a food processor or blender, plus a little extra, and blend until finely ground into flour! Tada.
  • If you like sweeter desserts, or are serving a crowd that isn't used to "healthy" desserts, you could always add up to an extra 1/2 cup / 100g or so of brown sugar to the filling.


Nutrition Facts

Calories

360.82

Fat

12.91 g

Sat. Fat

3.10 g

Carbs

56.60 g

Fiber

9.02 g

Net carbs

47.58 g

Sugar

29.52 g

Protein

10.64 g

Sodium

24.38 mg

Cholesterol

0.00 mg

Nutritional information is approximate. Based on 9 servings.

raw, vegan, dairy-free, egg-free, gluten-free, pumpkin bars, fall dessert, no bake
dessert, bars
American
Did you make this recipe?
Tag @jennyblogsandbakes on instagram and hashtag it #jennyblogs
image.jpg
Maple syrup made by my dad, home-ground oat flour, dry beans, homemade vanilla extract

Maple syrup made by my dad, home-ground oat flour, dry beans, homemade vanilla extract


No-Bake Oreo Cheesecake

Last Updated September 15, 2024

What do you do when you have 55 days until you move to another country?  Start thinking about all the food items and ingredients you won't be able to eat or buy while you're there. Naturally. 

I started to make a list of such things, and some of the items on there are rather tragic. No real vanilla extract? No Oreos (false, Oreos are readily available in Italy), Butterfingers, or other terribly wonderful processed American goodies? Pretzels only to be found of sketchy tough texture? Weird behaving marshmallows and graham crackers? (No S'mores for this girl.) Italians also don't understand our love for peanut butter. In all the grocery stores I've been in in Florence, (probably all of them because they're kinda my happy place) I have only seen Skippy, maybe Peter Pan once, and usually priced about 4-5 euros, roughly $6. There is a specialty Asian market, Vivi Market, that has an "American" section, and they sell the closest thing to real peanut butter I found. It's called Calve, made in the Netherlands, but it still has the hydrogenated oil and sugar added to it. Pumpkin is also a rarity over there. They make such wonderful pumpkin filled ravioli and pumpkins for carving come out for a couple weeks around Halloween, but to buy a 15 oz can of Libby's pumpkin costs over €4. Pumpkin pie, bread, muffins, cake, pudding, only for special occasions, I guess...

Now don't get me wrong, I'm really not that worried about missing American food. I did just fine for three months last fall, it's just a matter of understanding how different ingredients and substitutions behave in my favorite recipes. I mean, this is Italy we're talking about.  Home to some of the best food in the world. But I'm not partial or anything.  I keep a pretty good cover, though; you can't tell how much I love the food by the way I skip home from the super market with my arms full of pasta and heart bursting, waltz past the shelves of Nutella, guzzle acqua frizzante, double fist the cones of gelato, or giggle as I sweep the tubs of mascarpone that are cheaper than milk off the shelves. Nope. Not even around Christmas time when all the different kinds of panettone start filling the shelves and Jenny's shopping cart. 

I'm happy just thinking about all this wonderful food and its potential, but right now I am in the States, and I'm going to bake something I won't be able to for awhile. Something with Oreos.  Lots of Oreos. Or not bake, because this is a super easy no-bake cheesecake. Again, wasting my time, because I didn’t realize at the time of making this before moving to Italy that almost every grocery store carries Oreos.

This post may contain affiliate links. If you make a purchase using these links, Jennyblogs may receive a small commission, at no extra cost to you. This helps to support Jennyblogs. Where possible, links are prioritized to small businesses, and American companies and products made in the USA for American readers. For further information see the privacy policy. Grazie!


No-Bake Oreo Cheesecake

Serves about 12

Ingredients:

For the Crust:

  • 16-18 Oreos

  • 4 Tbsp / 56g butter, melted

For the Filling:

  • 1 cup / 237g heavy whipping cream

  • 24 oz / 675g cream cheese, room temperature

  • 1/2 cup / 100g sugar

  • 32 Oreos, coarsely chopped, divided

Directions:

Make the Crust:

  1. In a food processor, pulse Oreos until finely ground.  Add butter and pulse until combined. 

  2. Press into bottom and a bit up the sides of a 9 in. tart pan, pie pan, or springform pan.  Freeze while you make the filling.

Make the Filling:

  1. In the bowl of a stand mixer or with an electric mixer, whip cream until stiff peaks form. Set aside.

  2. Beat cream cheese in the bowl of a stand mixer or with an electric mixer until light and fluffy. Beat in sugar. 

  3. Fold in 24 (about 3/4) of the coarsely chopped Oreos, then gently fold in whipped cream. 

  4. Remove crust from freezer. Pour in filling and smooth the top. 

  5. Sprinkle with remaining chopped Oreos and place in fridge until completely chilled, about 2 hours. 

Jenny's Notes:

  • This cheesecake can also be frozen. Allow to sit at room temperature for 10 minutes or so before slicing.

No-Bake Oreo Cheesecake
Yield 12
Author
Prep time
30 Min
Inactive time
2 Hour
Total time
2 H & 30 M

No-Bake Oreo Cheesecake

No-Bake Oreo Cheesecake features an easy Oreo crust with an ultra creamy, yet light filling with chunks of Oreos throughout and more Oreos on top.

Ingredients

For the Crust:
For the Filling:

Instructions

Make the Crust:
  1. In a food processor, pulse Oreos until finely ground. Add butter and pulse until combined.
  2. Press into bottom and a bit up the sides of a 9 in. tart pan, pie pan, or springform pan. Freeze while you make the filling.
Make the Filling:
  1. In the bowl of a stand mixer or with an electric mixer, whip cream until stiff peaks form. Set aside.
  2. Beat cream cheese in the bowl of a stand mixer or with an electric mixer until light and fluffy. Beat in sugar.
  3. Fold in 24 (about 3/4) of the coarsely chopped Oreos, then gently fold in whipped cream.
  4. Remove crust from freezer. Pour in filling and smooth the top.
  5. Sprinkle with remaining chopped Oreos and place in fridge until completely chilled, about 2 hours.

Notes

  • This cheesecake can also be frozen. Allow to sit at room temperature for 10 minutes or so before slicing.

Nutrition Facts

Calories

559.39

Fat

39.86 g

Sat. Fat

21.21 g

Carbs

43.69 g

Fiber

1.42 g

Net carbs

42.27 g

Sugar

22.65 g

Protein

6.65 g

Sodium

403.94 mg

Cholesterol

89.86 mg

Nutritional information is approximate, based on 1 serving if recipe serves 12.

no-bake cheesecake, oreo pie, oreo cream cheese pie, summer dessert
dessert
American
Did you make this recipe?
Tag @jennyblogsandbakes on instagram and hashtag it #jennyblogs

White Russian Tart

Last updated on September 15, 2024

This tart is a refreshingly scrumptious, not-as-guilty dessert. It is no-bake, gluten-free, refined-sugar free, and somehow delicious. It’s filled with healthy fats which help keep you satisfied for longer than sugary, carb-heavy desserts.

Crust

The crust is like a chewy Lara bar, made of dates, nuts, coconut and cocoa powder to make it dark and chocolatey.

Dark Chocolate Cream

Next, there is a smooth, dark chocolate layer spiked with vodka and Kahlua. You’d never guess the main ingredient for this “cream” is avocado.

Mascarpone Cream

The top layer is decadent and lightly sweetened mascarpone. Put the three layers together and you have yourself quite the treat!

A healthy dessert? Is it any good?

When I'm experimenting and trying new recipes in the "healthy" department (as defined by trying to limit refined-sugars or flours, using a vegetable or bean or something that doesn't normally go belong in desserts, or generally replacing healthier ingredients for less healthy ones) I look for the 3 different categories of reactions from my tasters:

  1. The category of "This is honest deliciousness."  When people ask for a recipe or have no idea that there are chickpeas or spinach powder hidden in what they're eating. Something a normal or even picky eater would eat. 

  2. The category of "It's good for a healthy dessert!"  So it's palatable and they're not gagging, but most would still take a slice of cheesecake over it. AKA, just not as good as it’s regular counterpart.

  3. The category of "I would rather just eat a salad."  If actual fruits and vegetables are tastier than the “dessert” that is trying to be passed off, then that recipe should probably be scrapped.

This tart is a solid category 1.  Even my mom and brother approved this, and they keep me pretty honest when it comes to healthy desserts. 

I bounce back and forth between decadent desserts and healthier desserts. I have a love and respect for both, and each have their place. Some days it's honey, nuts, and coconut oil; other days it's sugar, heavy whipping cream, and butter. Variety is the spice of life. Today, it's dates, avocado, and mascarpone.

This post may contain affiliate links. If you make a purchase using these links, Jennyblogs may receive a small commission, at no extra cost to you. This helps to support Jennyblogs. Where possible, links are prioritized to small businesses, and American companies and products made in the USA for American readers. For further information see the privacy policy. Grazie!


White Russian Tart

Serves 8-12

Ingredients:

Chocolate Crust

  • 1-1/2 cups / 210g whole almonds

  • 2 Tbsp / 10g unsweetened shredded coconut

  • 4-5 medjool or 8-10 / 100g deglet dates, pitted

  • 1/2 tsp vanilla extract

  • 1 Tbsp / 7g unsweetened cocoa powder

  • 1/4 tsp salt

Chocolate Vodka Cream

  • 1/4 cup / 56g unrefined coconut oil, melted

  • 1 Tbsp finely ground coffee beans

  • 1 large ripe avocado, peeled, pit removed, and sliced

  • 3 Tbsp / 20g unsweetened cocoa powder

  • 1 tsp vodka

  • 1 tsp rum or Kahlua (of course the Kahlua option adds sugar)

  • 2 Tbsp / 40g+ maple syrup, or more to taste

Mascarpone Cream

  • 8 oz / 225g mascarpone cheese

  • 1 Tbsp / 20g maple syrup

  • 1 tsp vanilla extract

Directions:

Make the Chocolate Crust

  1. In a food processor, combine almonds and coconut and pulse until small crumbles. 

  2. Add dates, vanilla, cocoa powder, and salt.  Process until well combined. 

  3. Press into the bottom of a 8 or 9 inch spring-form pan or pie plate.

Make the Chocolate Vodka Cream

  1. Combine melted coconut oil, coffee, avocado, cocoa powder, vodka, Kahlua, and maple syrup in a food processor until smooth. Stop and scrape down sides and bottom occasionally. 

  2. Spread over crust and place in freezer for about 30 minutes.

Make the Mascarpone Cream

  1. Combine mascarpone, maple syrup, and vanilla in a small bowl.  Take the tart out of the freezer and spread mascarpone mixture over it. 

  2. Place in fridge for about 2 hours before serving.   

Jenny's Notes:

  • This tart is not very sweet and really lets the mascarpone shine through.  However, if you or your guests prefer things a little on the sweeter side, feel free to add more maple syrup in either of the creams. 

  • Also, I like to use black cocoa powder in this recipe.  Black cocoa powder is what gives Oreos their signature black color.  (I didn't know the flavor of Oreo was supposed to be chocolate until I was an adult.)  If you can get your hands on it, it's really great. I usually order it from Amazon. 

White Russian Tart
Yield 8-12
Author
Prep time
35 Min
Inactive time
2 Hour
Total time
2 H & 35 M

White Russian Tart

Chewy chocolate almond and date crust, creamy chocolate cream, topped with a lightly sweet mascarpone cream. This dessert is decadent and also gluten-free, refined sugar-free, no-bake, and full of healthy fats.

Ingredients

Chocolate Crust
Chocolate Vodka Cream
Mascarpone Cream

Instructions

Make the Chocolate Crust
  1. In a food processor, combine almonds and coconut and pulse until small crumbles.
  2. Add dates, vanilla, cocoa powder, and salt. Process until well combined.
  3. Press into the bottom of a 8 or 9 inch spring-form pan or pie plate.
Make the Chocolate Vodka Cream
  1. Combine melted coconut oil, coffee, avocado, cocoa powder, vodka, Kahlua, and maple syrup in a food processor until smooth. Stop and scrape down sides and bottom occasionally.
  2. Spread over crust and place in freezer for about 30 minutes.
Make the Mascarpone Cream
  1. Combine mascarpone, maple syrup, and vanilla in a small bowl. Take the tart out of the freezer and spread mascarpone mixture over it.
  2. Place in fridge for about 2 hours before serving.

Notes

  • This tart is not very sweet and really lets the mascarpone shine through.  However, if you or your guests prefer things a little on the sweeter side, feel free to add more maple syrup in either of the creams. 
  • Also, I like to use black cocoa powder in this recipe.  Black cocoa powder is what gives Oreos their signature black color.  (I didn't know the flavor of Oreo was supposed to be chocolate until I was an adult.)  If you can get your hands on it, it's really great. I usually order it from Amazon. 

Nutrition Facts

Calories

358.31

Fat

29.26 g

Sat. Fat

15.72 g

Carbs

22.26 g

Fiber

5.01 g

Net carbs

17.27 g

Sugar

14.6 g

Protein

5.29 g

Sodium

92.3 mg

Cholesterol

28.35 mg

Nutritional information is approximate. Based on 8 servings.

no bake, refined sugar free, gluten free dessert, raw dessert
dessert
American
Did you make this recipe?
Tag @jennyblogsandbakes on instagram and hashtag it #jennyblogs