Sticky Lemon Tofu

Last updated September 27, 2024

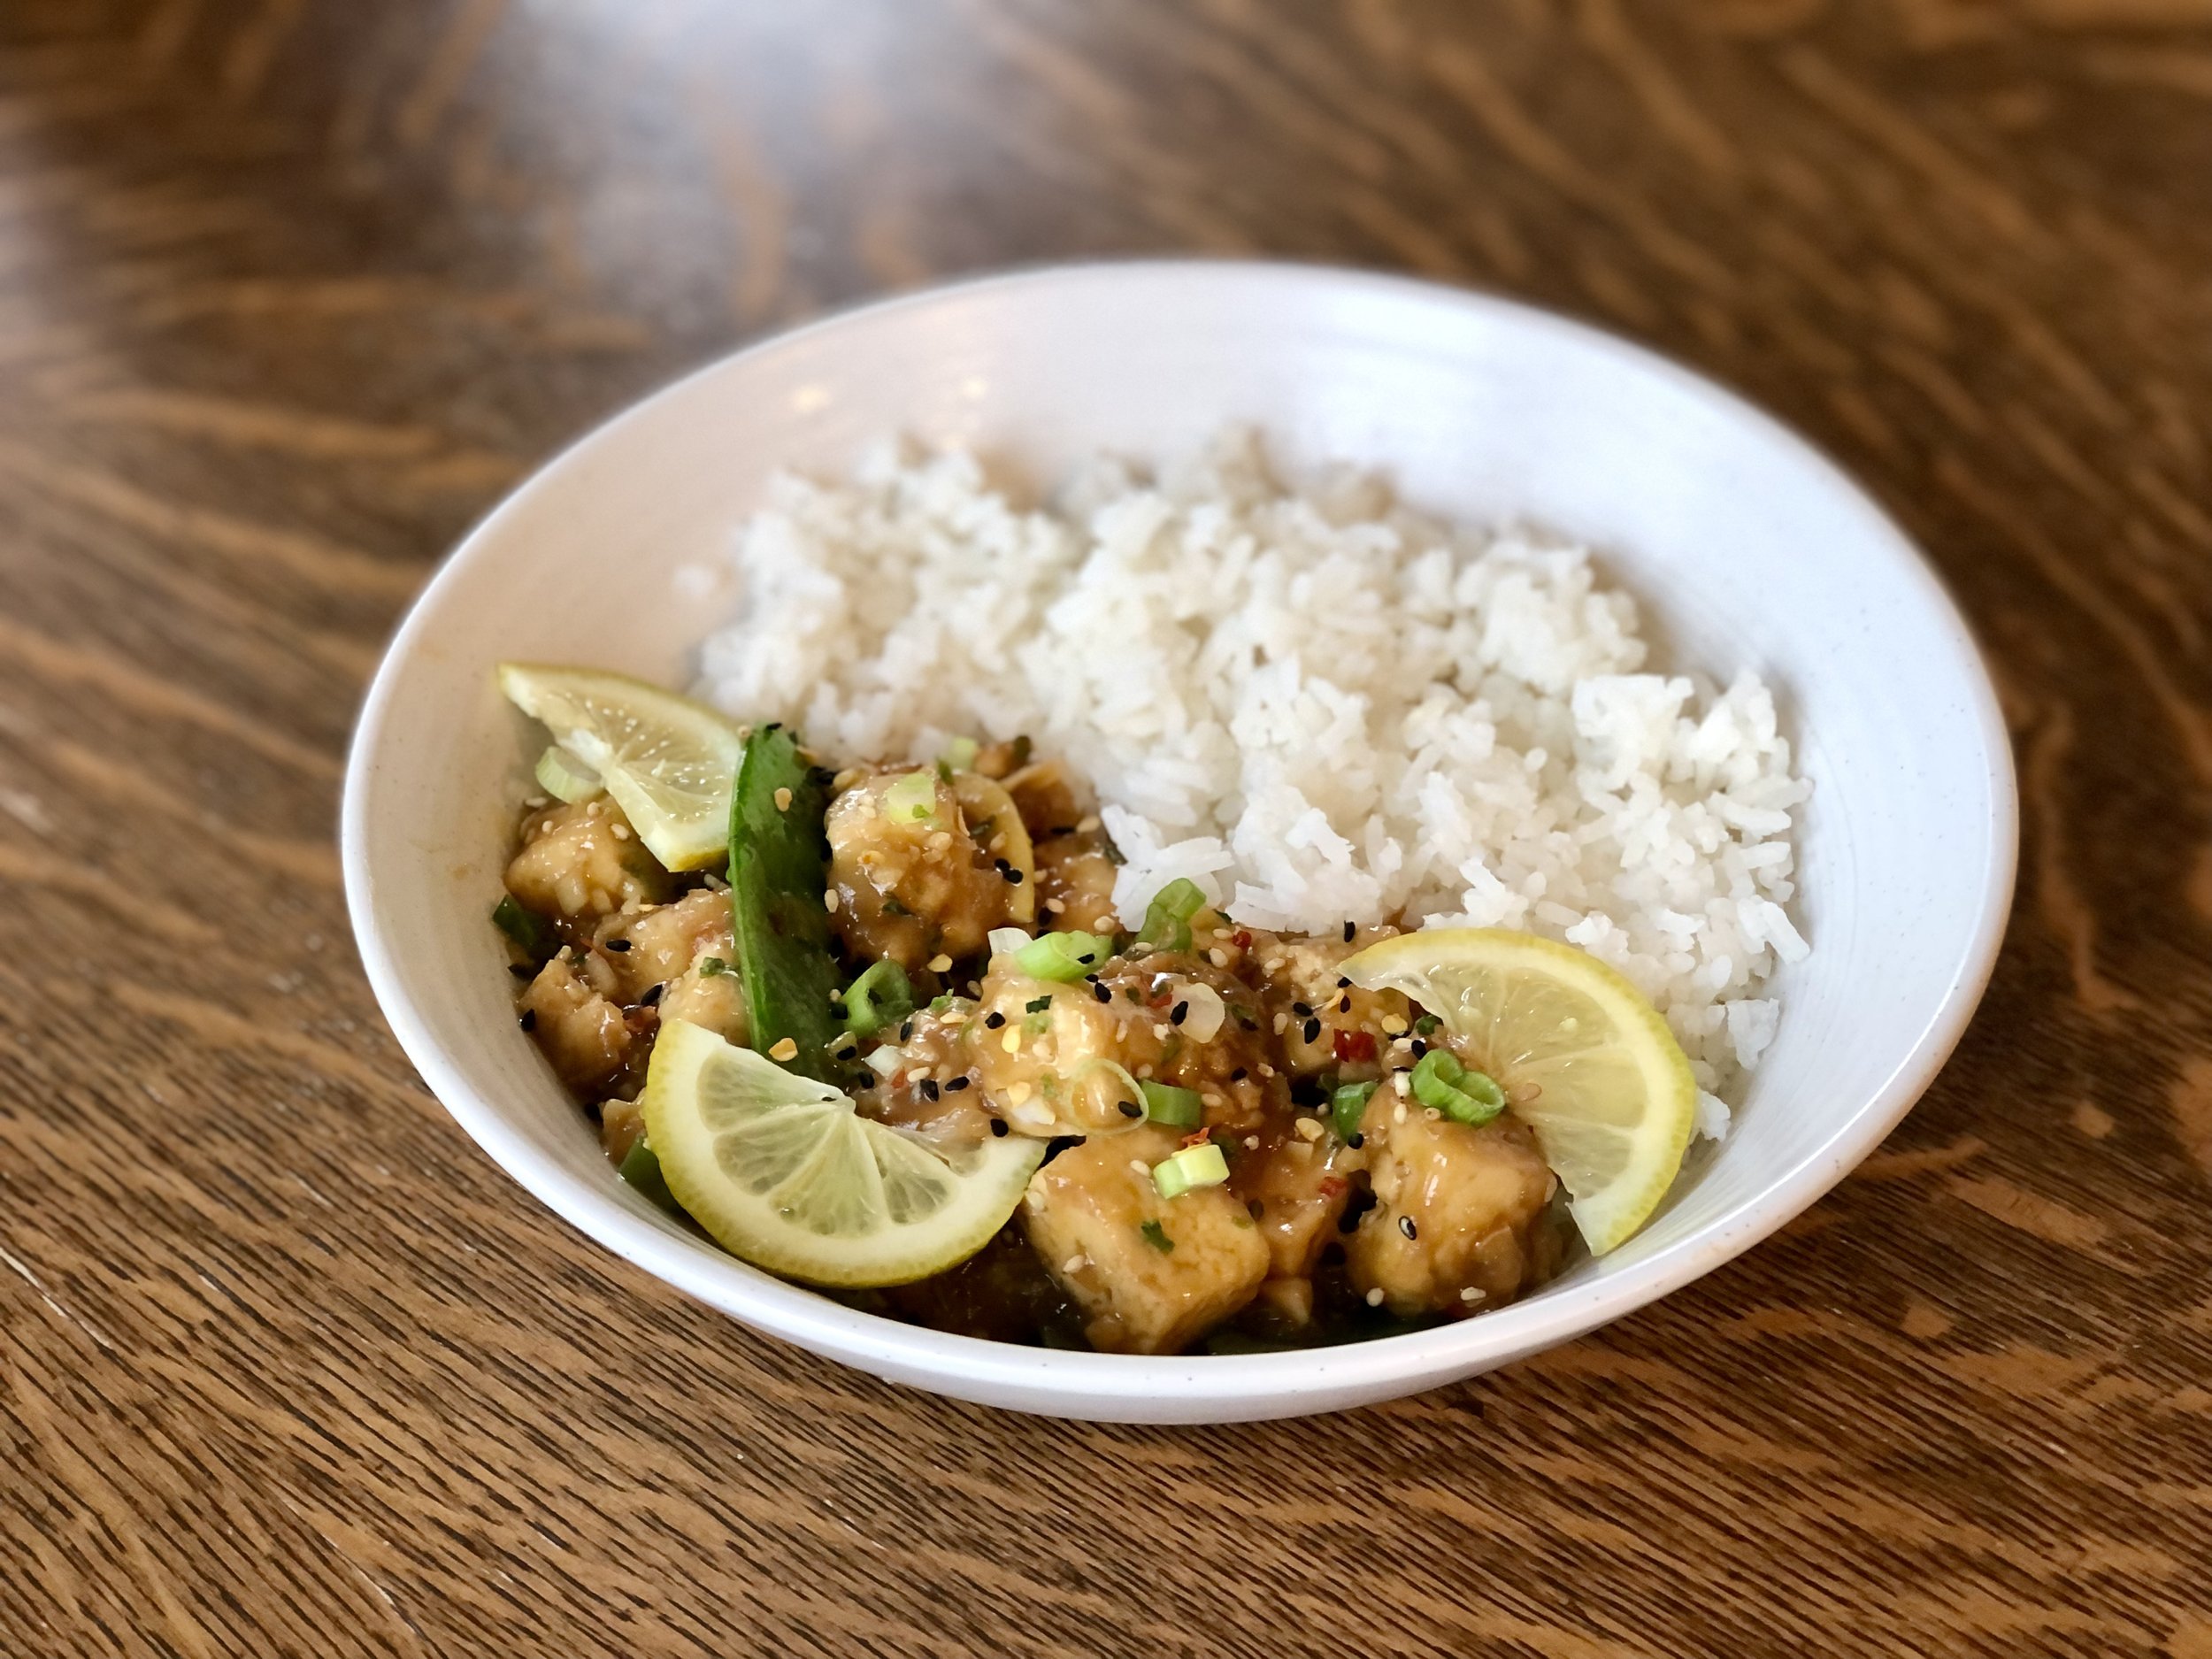
Crispy tofu with a zingy, sweet, and super flavorful sticky sauce over rice makes for a quick and easy weeknight dinner.

Serve with your favorite garnishes and you’ll feel like you’re eating takeout, but it’s actually much healthier!

Inspired by Chinese takeout “lemon chicken” but made with tofu instead. Meatless, nutritious, and you can choose to add veggies, as you wish.

The tofu can be baked or fried, depending on your preference, either way resulting in delicious, crispy bites of tofu that are just asking to be covered in a sticky lemon sauce. I prefer baking them, it’s healthier and the oven does the work while I work on the sauce. Either way is delicious and simple, though!


Sticky Lemon Tofu

Serves 2-3

Ingredients:

For the Crispy Tofu

  • 1 14oz / 400g block of firm or extra-firm tofu

  • 1 Tbsp / 14g oil

  • 1 Tbsp / 17g soy sauce

  • 1/4 cup / 40g cornstarch

For the Lemon Sauce

  • 1/2 cup / 119g chicken broth or water

  • 1/4 cup / 56g lemon juice

  • 2 Tbsp / 34g soy sauce

  • 3 Tbsp / 60g maple syrup

  • zest of 1 lemon

To sautè

  • 1 Tbsp / 14g cooking oil

  • 2-3 green onions, sliced

  • 1 Tbsp grated or minced fresh ginger

  • 4 cloves of garlic, minced

For Serving

  • Rice

  • Garnishes such as sliced green onions, sesame seeds, red chili flakes, and/or lemon slices

Directions:

Make the Crispy Tofu

  1. Place tofu block between some paper towels and press to absorb extra water. Repeat until tofu feels mostly dry and no more water comes out. You can also do this ahead of time by placing something heavy over the tofu and paper towels, such as a bowl or pot, and leave it for several minutes.

  2. Slice tofu into squares and toss together with the oil, soy sauce, and corn starch until evenly coated.

    Pan fry:

  3. Heat a large fry pan over medium heat and add tofu. Fry for a few minutes until golden, then flip tofu over. Add more oil to pan as needed to get a nice golden crust on the tofu. Remove from heat when done.

    OR Bake:

  4. Disperse tofu cubes evenly onto a parchment paper or silpat lined baking sheet. Bake in a preheated oven at 400°F / 205°C for about 30 minutes, or until light golden and crispy. Ideally, flip tofu halfway through baking.

Make the sauce

  1. Whisk together all ingredients for the sauce; set aside.

Sauté

  1. Heat oil in a large fry pan over medium heat. (Can be the pan you used for the tofu if you pan-fried it).

  2. Add green onions, ginger, and garlic and sauté for 1-2 minutes, or until fragrant.

  3. Add lemon sauce ingredients to pan and bring to a simmer.

  4. Add in tofu, carefully stir to evenly coat tofu in sauce. Allow to simmer, stirring occasionally, until sauce thickens.

  5. Serve with rice and garnishes, as desired.

Jenny’s Notes:

  • Veggies can be added to this dish if desired. I like snow peas and broccoli, which can be added at the very end with the tofu into the sauce. Put a lid on and let the veggies steam for a few minutes, or until desired tenderness is achieved.

  • If pan frying the tofu, you can flip the tofu with tongs, or simply sauté/flip the tofu using the pan. The second way is faster, but requires a bit more skill and you have less control over which sides of the tofu land down.

  • Instead of maple syrup you can also use 1/4 cup / 50g of sugar or brown sugar. Or, 3 Tbsp / 63g of honey, which lends a slightly different flavor.

Sticky Lemon Tofu
Yield 2-3
Author
Prep time
15 Min
Cook time
40 Min
Total time
55 Min

Sticky Lemon Tofu

Crispy tofu nuggets tossed in a super flavorful sticky lemon sauce inspired by Chinese takeout Lemon Chicken, served over rice.

Ingredients

For the Crispy Tofu
For the Lemon Sauce
To sautè
For Serving

Instructions

Make the Crispy Tofu
  1. Place tofu block between some paper towels and press to absorb extra water. Repeat until tofu feels dry and no more water comes out. You can also do this ahead of time by placing something heavy over the tofu and paper towels, such as a bowl or pot, and leave it for several minutes.
  2. Slice tofu into squares and toss together with the oil, soy sauce, and corn starch until evenly coated.
  3. Pan fry:
  4. Heat a large fry pan and add tofu. Fry for a few minutes until golden, then flip tofu over. Add more oil to pan as needed to get a nice golden crust on the tofu. Remove from heat when done.
  5. OR Bake:
  6. Disperse tofu cubes evenly onto a parchment paper or silpat lined baking sheet. Bake in a preheated 400°F / 205°C for about 30 minutes, or until light golden and crispy. Ideally, flip tofu halfway through baking.
Make the sauce
  1. Whisk together all ingredients for the sauce; set aside.
Sauté
  1. Heat oil in a large fry pan over medium heat. (Can be the pan you used for the tofu if you pan-fried it).
  2. Add green onions, ginger, and garlic and sauté for 1-2 minutes, or until fragrant.
  3. Add lemon sauce ingredients to pan and bring to a simmer.
  4. Add in tofu, carefully stir to evenly coat tofu in sauce. Allow to simmer, stirring occasionally, until sauce thickens.
  5. Serve with rice and garnishes, as desired.

Notes

  • Veggies can be added to this dish if desired. I like snow peas and broccoli, which can be added at the very end with the tofu into the sauce. Put a lid on and let the veggies steam for a few minutes, or until desired tenderness is achieved.
  • If pan frying the tofu, you can flip the tofu with tongs, or simply sauté/flip the tofu using the pan. The second way is faster, but requires a bit more skill and you have less control over which sides of the tofu land down.
  • Use whichever kind of cooking oil you prefer. I simply write “oil” since specifying often gets people thinking they must use a specific oil, when really you can use any high-heat cooking oil (peanut oil, avocado oil, some use olive oil, etc.)
  • Instead of maple syrup you can also use 1/4 cup / 50g of sugar or brown sugar. Or, 3 Tbsp / 63g of honey, which lends a slightly different flavor.


Nutrition Facts

Calories

476.8

Fat

23.04 g

Sat. Fat

2.04 g

Carbs

47.45 g

Fiber

2.93 g

Net carbs

44.51 g

Sugar

20.62 g

Protein

21.78 g

Sodium

1742.63 mg

Cholesterol

1.18 mg

Nutritional information is approximate, based on 1 serving if recipe serves 2. Does not include rice or garnishes.

Sticky lemon tofu, chinese takeout lemon chicken
dinner
Asian
Did you make this recipe?
Tag @jennyblogsandbakes on instagram and hashtag it #jennyblogs

Crispy Gnocchi with Brussels Sprouts

Made with pumpkin gnocchi

Made with pumpkin gnocchi

Last Updated August 10, 2024

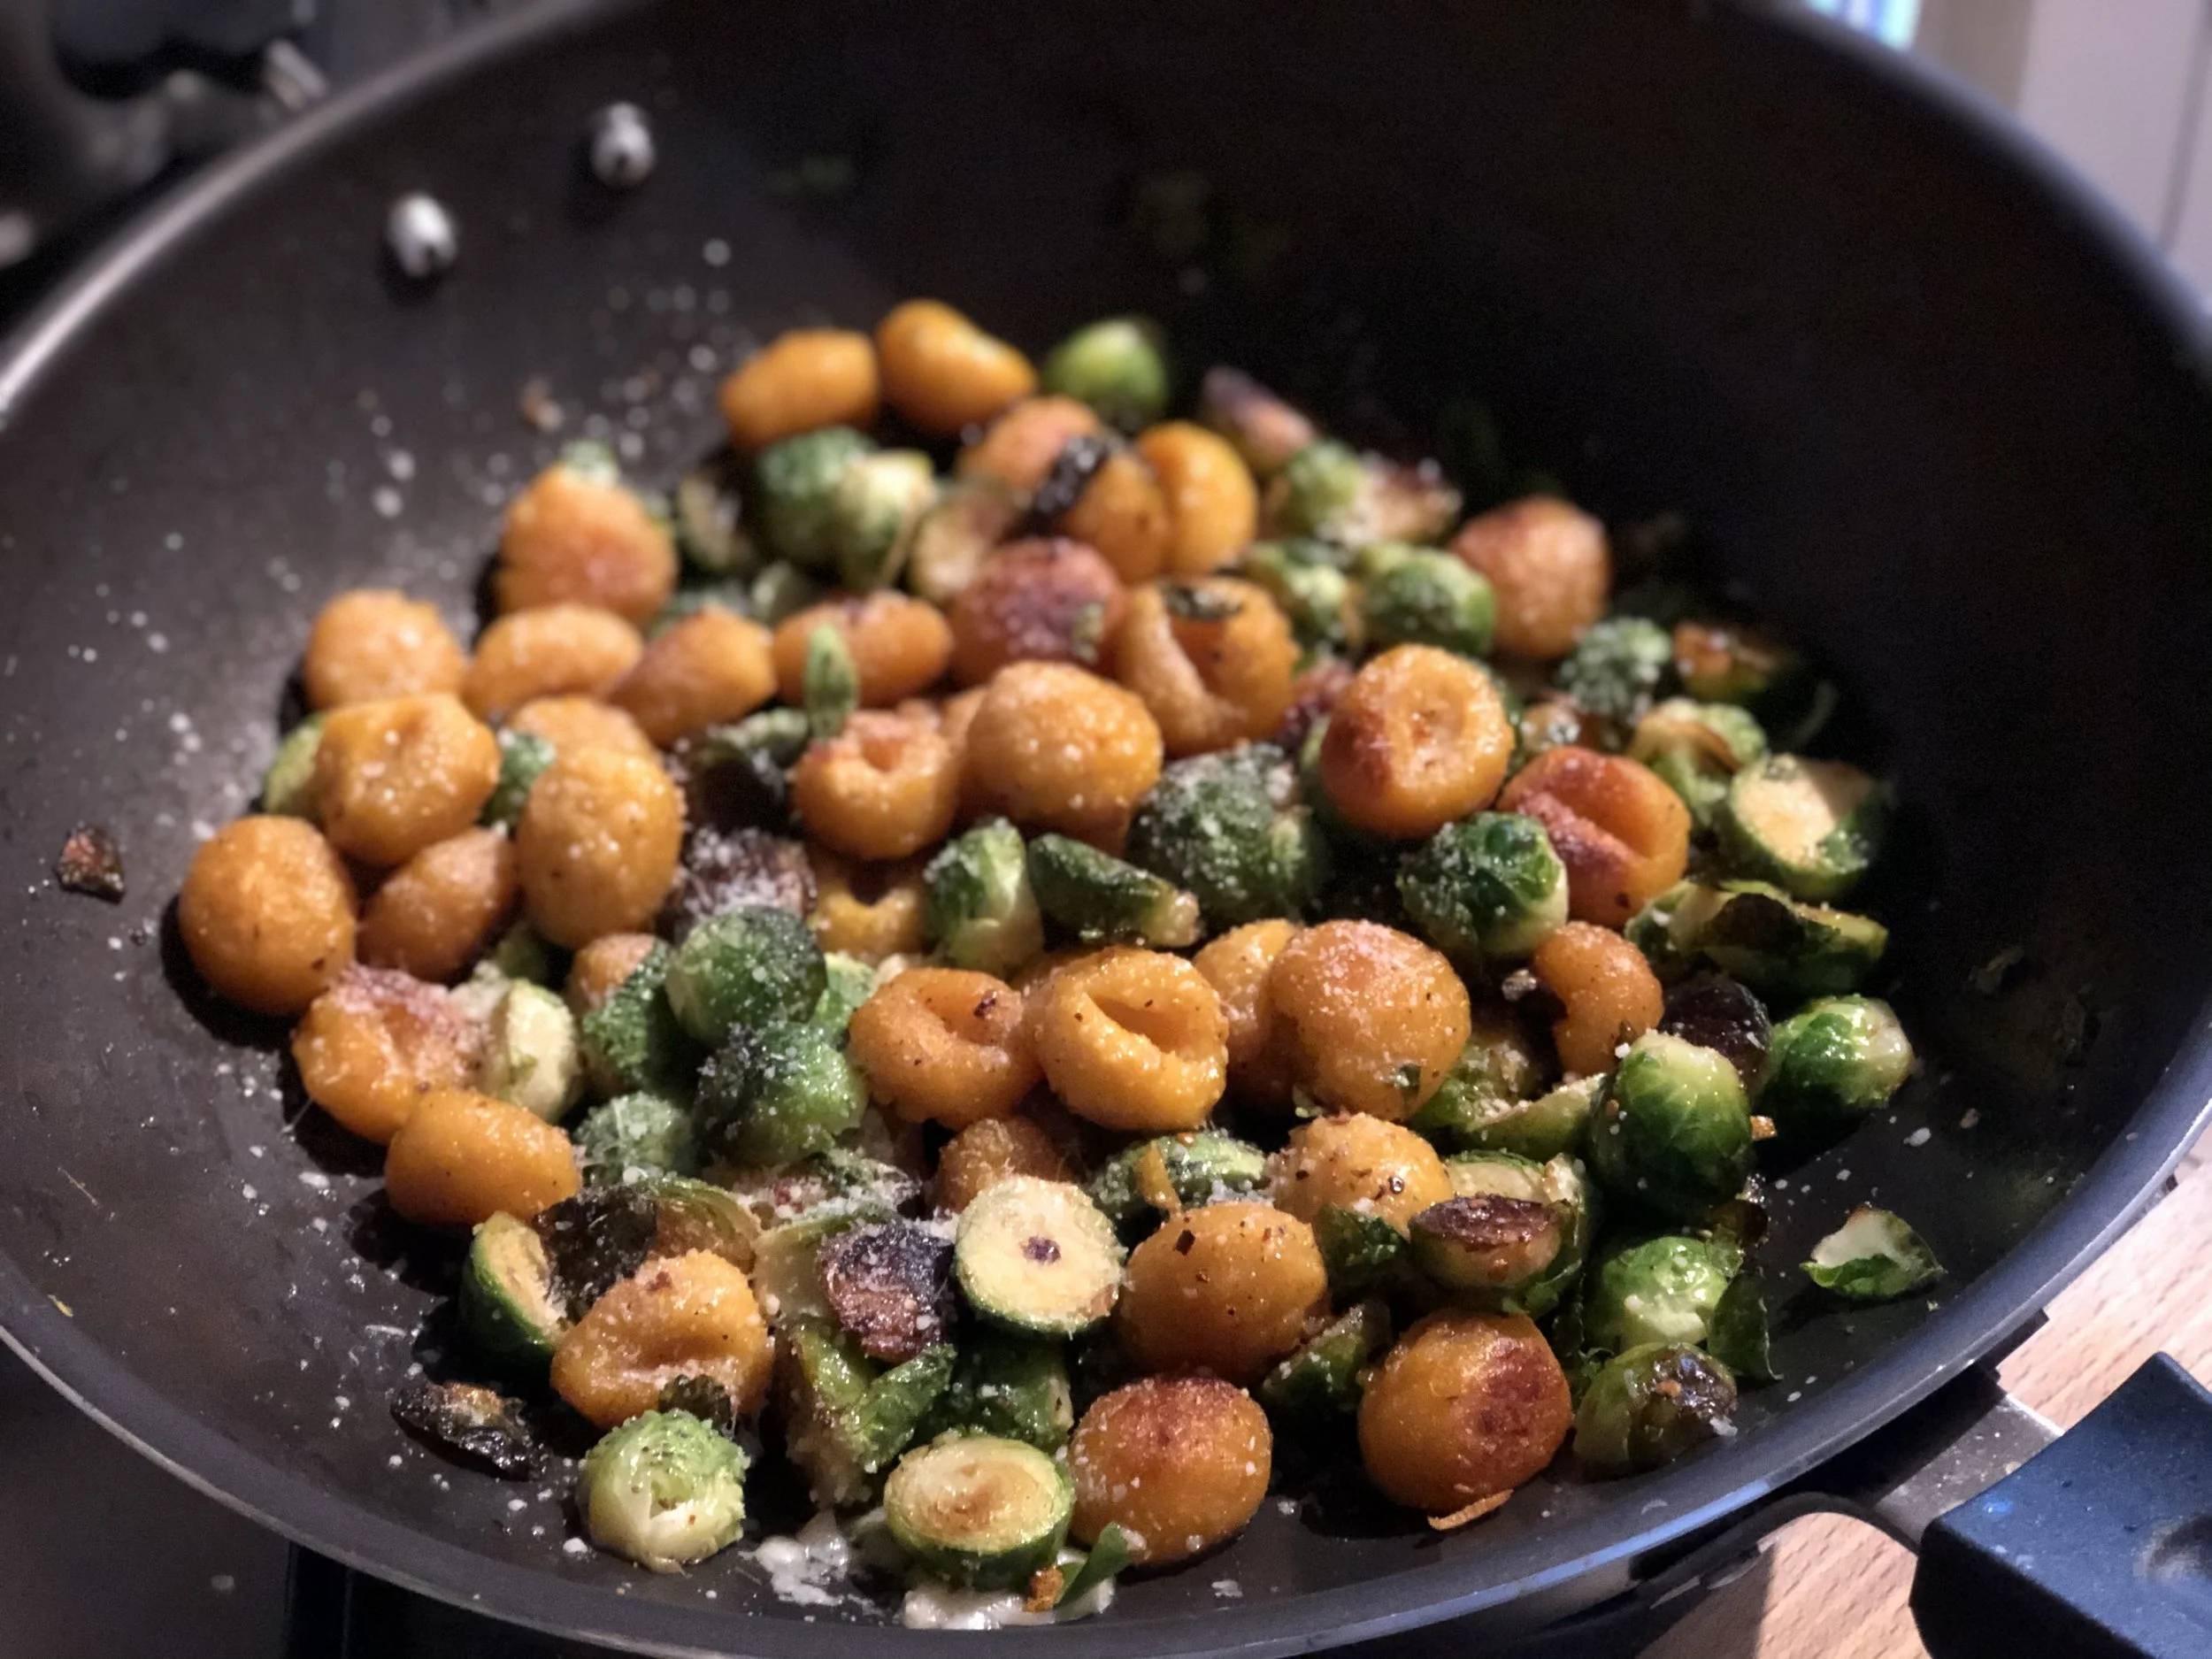
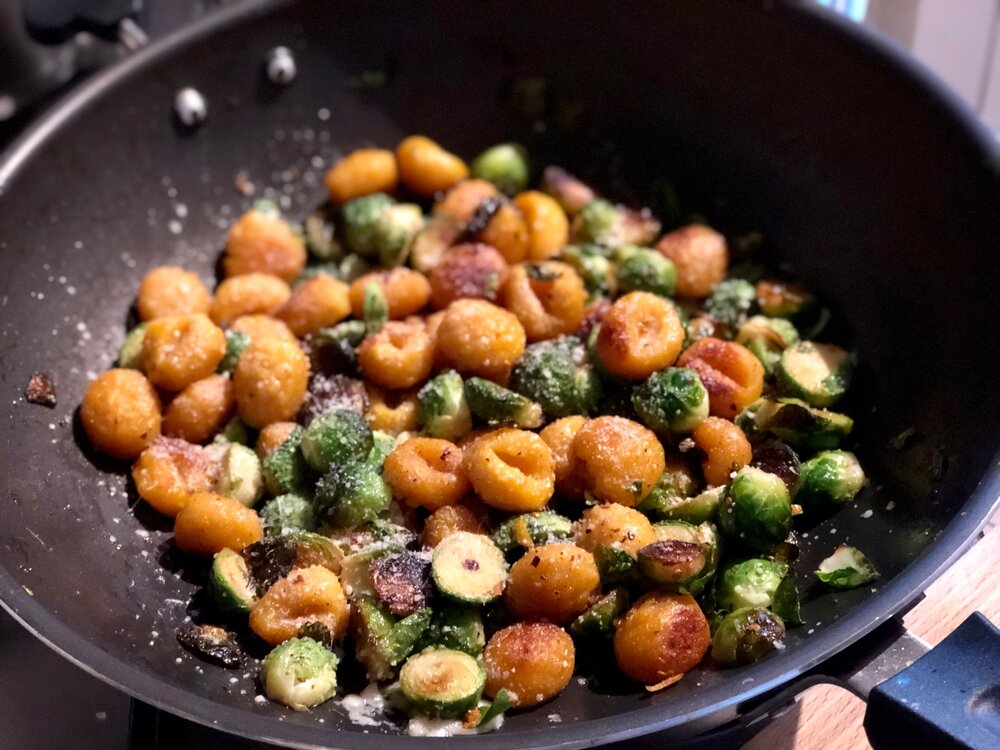
Think gnocchi with crispy sides, tender browned brussels sprouts with crispy edges, with a browned butter sauce and a bright hint of lemon.

I found this recipe thanks to New York Times’ Instagram account, and after the first OH YEAH THIS IS GOOD trial run I’ve made it several times since. It’s easy, the ingredient list isn’t scary long, and it has brussels sprouts so it’s totally healthy, right? Maybe not, but it’s rich and satisfying so you don’t need to eat a huge serving.

It starts with cooking and crisping up those little sprouts, then you trade out the sprouts to brown the gnocchi, then add butter, honey, lemon and a bit of red pepper flake spice and cook until the butter browns (when it smells like heaven); add the sprouts back in and grate a little parmesan cheese on top. Easy and impressive!

Brussels sprouts

Brussels sprouts often get a bad rap and I know people who will only eat them if they’re served with plenty of bacon. While I’m sure there do exist those people who truly dislike the sprouts, I believe that most people who claim to not like them just haven’t eaten them properly prepared. There’s nothing worse than limp or soggy brussels sprouts. Never ever boil them, yeah? They’re at their most delicious if they are pan fried or oven baked. Crispy brussels sprouts: yummy. Soggy brussels sprouts: yucky. If you or someone you know is a brussels sprout skeptic, this recipe may just be the one to win you over!

That said, if you are one of the true dislikers, you can switch out the brussels sprouts for other veggies like broccoli, cauliflower, cabbage, kale, or any of those cruciferous types.

Adaptations from the original recipe

While New York Times might think this recipe serves 4 people, I pretty consistently ate this in 2-3 sittings. Ahem. I added in the “3” part just to be generous.

I reduced the butter from 6 Tbsp to 4 Tbsp. 6 was just…a lot. You’re more than welcome to use that much if you’re looking for a very rich dish, but I think 4 was plenty, you could probably even get away with 2-3 Tbsp.

The original recipe calls for pan frying the brussels sprouts, but no matter how many times I’ve tried, it always took much longer for the brussels to cook than the specified 5-8 minutes. I would say up to 15-20 is closer. I’m sure part of it is that I don’t have a cast iron skillet. Otherwise, it can be more time efficient to roast the brussels sprouts in the oven while you’re preparing the gnocchi.

I reduced and changed the lemon aspect of the recipe. NYT says to peel thick strips of lemon zest, then chop, ending with about 2 tsp of zest. I personally found the lemon a little overpowering this way, so I compromised and was happy with the following adaptations: zesting a lemon with a regular zester, which creates a finer zest, and using only about 1/2-1 tsp of the finer zest, OR skipping the zest and adding in a splash of fresh lemon juice at the end. Either way gets you there a bit quicker and easier. One of my least favorite tasks in the kitchen is zesting citrus so sometimes I opt for a splash of lemon juice when I just don’t want to zest, ya know?

If you noticed I listed 1 lb of brussels sprouts as 500g, which are not equal weights. That’s because brussels sprouts often come in 500g packages in Italy. Since a pound is really only 454g, I rounded up for practicality’s sake. Yes, it bothers me to do so but I think it’s for the best, ahem. :)

This post may contain affiliate links. If you make a purchase using these links, Jennyblogs may receive a small commission, at no extra cost to you. This helps to support Jennyblogs. For further information see the privacy policy. Grazie!

Recipe adapted from New York Times


Crispy Gnocchi with Brussels Sprouts

Serves 2-3

Ingredients

  • 1/4 cup / 56g olive oil

  • 1 lb / 500g brussels sprouts

  • salt and pepper, to taste

  • 1/2 tsp lemon zest

  • 1/2 tsp red pepper flakes

  • 18 oz / 500g package of gnocchi

  • 4 Tbsp / 56g butter

  • 1/2 tsp honey

  • grated parmesan cheese, for serving

Directions:

  1. Clean and chop off the ends of the brussels sprouts, and any brown leaves. Slice into halves, or quarters if particularly large.

  2. Cook the brussels sprouts OPTION 1, SKILLET:

    Heat 3 Tbsp / 42g of the oil in a large skillet over medium heat. Add brussels sprouts in an even layer, sprinkle with 1/2 tsp salt and some pepper. Sprinkle over lemon zest and cook for 10-15 minutes, stirring occasionally, or until sprouts are crispy and a nice golden brown.

    Add the red pepper flakes and stir, cook for another 3-4 minutes or until sprouts are crisp and tender.

    Transfer to a plate or bowl while you cook the gnocchi.

    OPTION 2, OVEN:

    Preheat oven to 450°F / 232°C.

    Toss the brussels sprouts with 3 Tbsp of oil, 1/2 tsp salt, some pepper, lemon zest, and red pepper to evenly coat; spread in an even layer on a baking sheet lined with parchment paper.

    Roast in the oven for about 15 minutes, or until crispy, golden, and tender. While roasting, prepare gnocchi.

  3. Add the remaining 1 tbsp / 14g of oil to a skillet over medium-high heat. Add gnocchi in an even layer and cook without stirring, 3-4 minutes or until golden brown underneath.

  4. Add butter and honey, season with salt and pepper. Cook until butter has melted and starts to turn golden brown and nutty smelling, this can take several minutes.

  5. Add the brussels sprouts to the skillet and cook just until everything is warmed through.

  6. Remove from heat and serve with a sprinkling of parmesan cheese.

Jenny’s Notes:

  • Use just 2 Tbsp / 28g butter for an even lighter version of this

  • Butter can go quickly from perfectly browned and nutty to burnt, so keep a close eye on it!

  • Whether you buy a package of gnocchi or make your own, different flavors are delicious in this recipe. Pictured in this post (first and last) are some pumpkin gnocchi, so good!

Crispy Gnocchi and Brussels Sprouts
Yield 2-3
Author
Cook time
40 Min
Total time
40 Min

Crispy Gnocchi and Brussels Sprouts

Crispy, pan-fried gnocchi and roasted brussels sprouts with parmesan cheese, a hint of lemon, spice, and honey.
Cook modePrevent screen from turning off

Ingredients

Instructions

  1. Clean and chop off the ends of the brussels sprouts, and any brown leaves. Slice into halves, or quarters if they’re particularly large.
  2. Cook the brussels sprouts OPTION 1, SKILLET:
  3. Heat 3 Tbsp / 42g of the oil in a large skillet over medium heat. Add brussels sprouts in an even layer, sprinkle with 1/2 tsp salt and some pepper. Sprinkle over lemon zest and cook for 10-15 minutes, stirring occasionally, or until sprouts are crispy and a nice golden brown.
  4. Add the red pepper flakes and stir, cook for another 3-4 minutes or until sprouts are crisp and tender.
  5. Transfer to a plate or bowl while you cook the gnocchi.
  6. OPTION 2, OVEN:
  7. Preheat oven to 450°F / 232°C.
  8. Toss the brussels sprouts with 3 Tbsp of oil, 1/2 tsp salt, some pepper, lemon zest, and red pepper to evenly coat; spread in an even layer on a baking sheet lined with parchment paper. Roast in the oven for about 15 minutes, or until crispy, golden, and tender. While roasting, prepare gnocchi.
  9. Add the remaining 1 tbsp / 14g of oil to a skillet over medium-high heat. Add gnocchi in an even layer and cook without stirring, 3-4 minutes or until golden brown underneath.
  10. Add butter and honey, season with salt and pepper. Cook until butter has melted and starts to turn golden brown and nutty smelling, this can take several minutes.
  11. Add the brussels sprouts to the skillet and cook just until everything is warmed through.
  12. Remove from heat and serve with a sprinkling of parmesan cheese.

Notes

  • Use just 2 Tbsp / 28g butter for the lightest version of this!
  • Butter can go quickly from perfectly browned and nutty to burnt, so keep a close eye on it!
  • Whether you buy a package of gnocchi or make your own, different flavors are delicious in this recipe! Pictured are some pumpkin gnocchi, so good!


Nutrition Facts

Calories

705.17

Fat

37.14 g

Sat. Fat

13.14 g

Carbs

81.25 g

Fiber

7.83 g

Net carbs

73.42 g

Sugar

4.94 g

Protein

15.02 g

Sodium

307.61 mg

Cholesterol

90.46 mg

Nutritional info is approximate. Based on 3 servings

gnocchi, easy dinner, comfort food, brussels sprouts
dinner
American
Did you make this recipe?
Tag @jennyblogsandbakes on instagram and hashtag it #jennyblogs

Lemon Blondies

Last Updated September 6, 2024

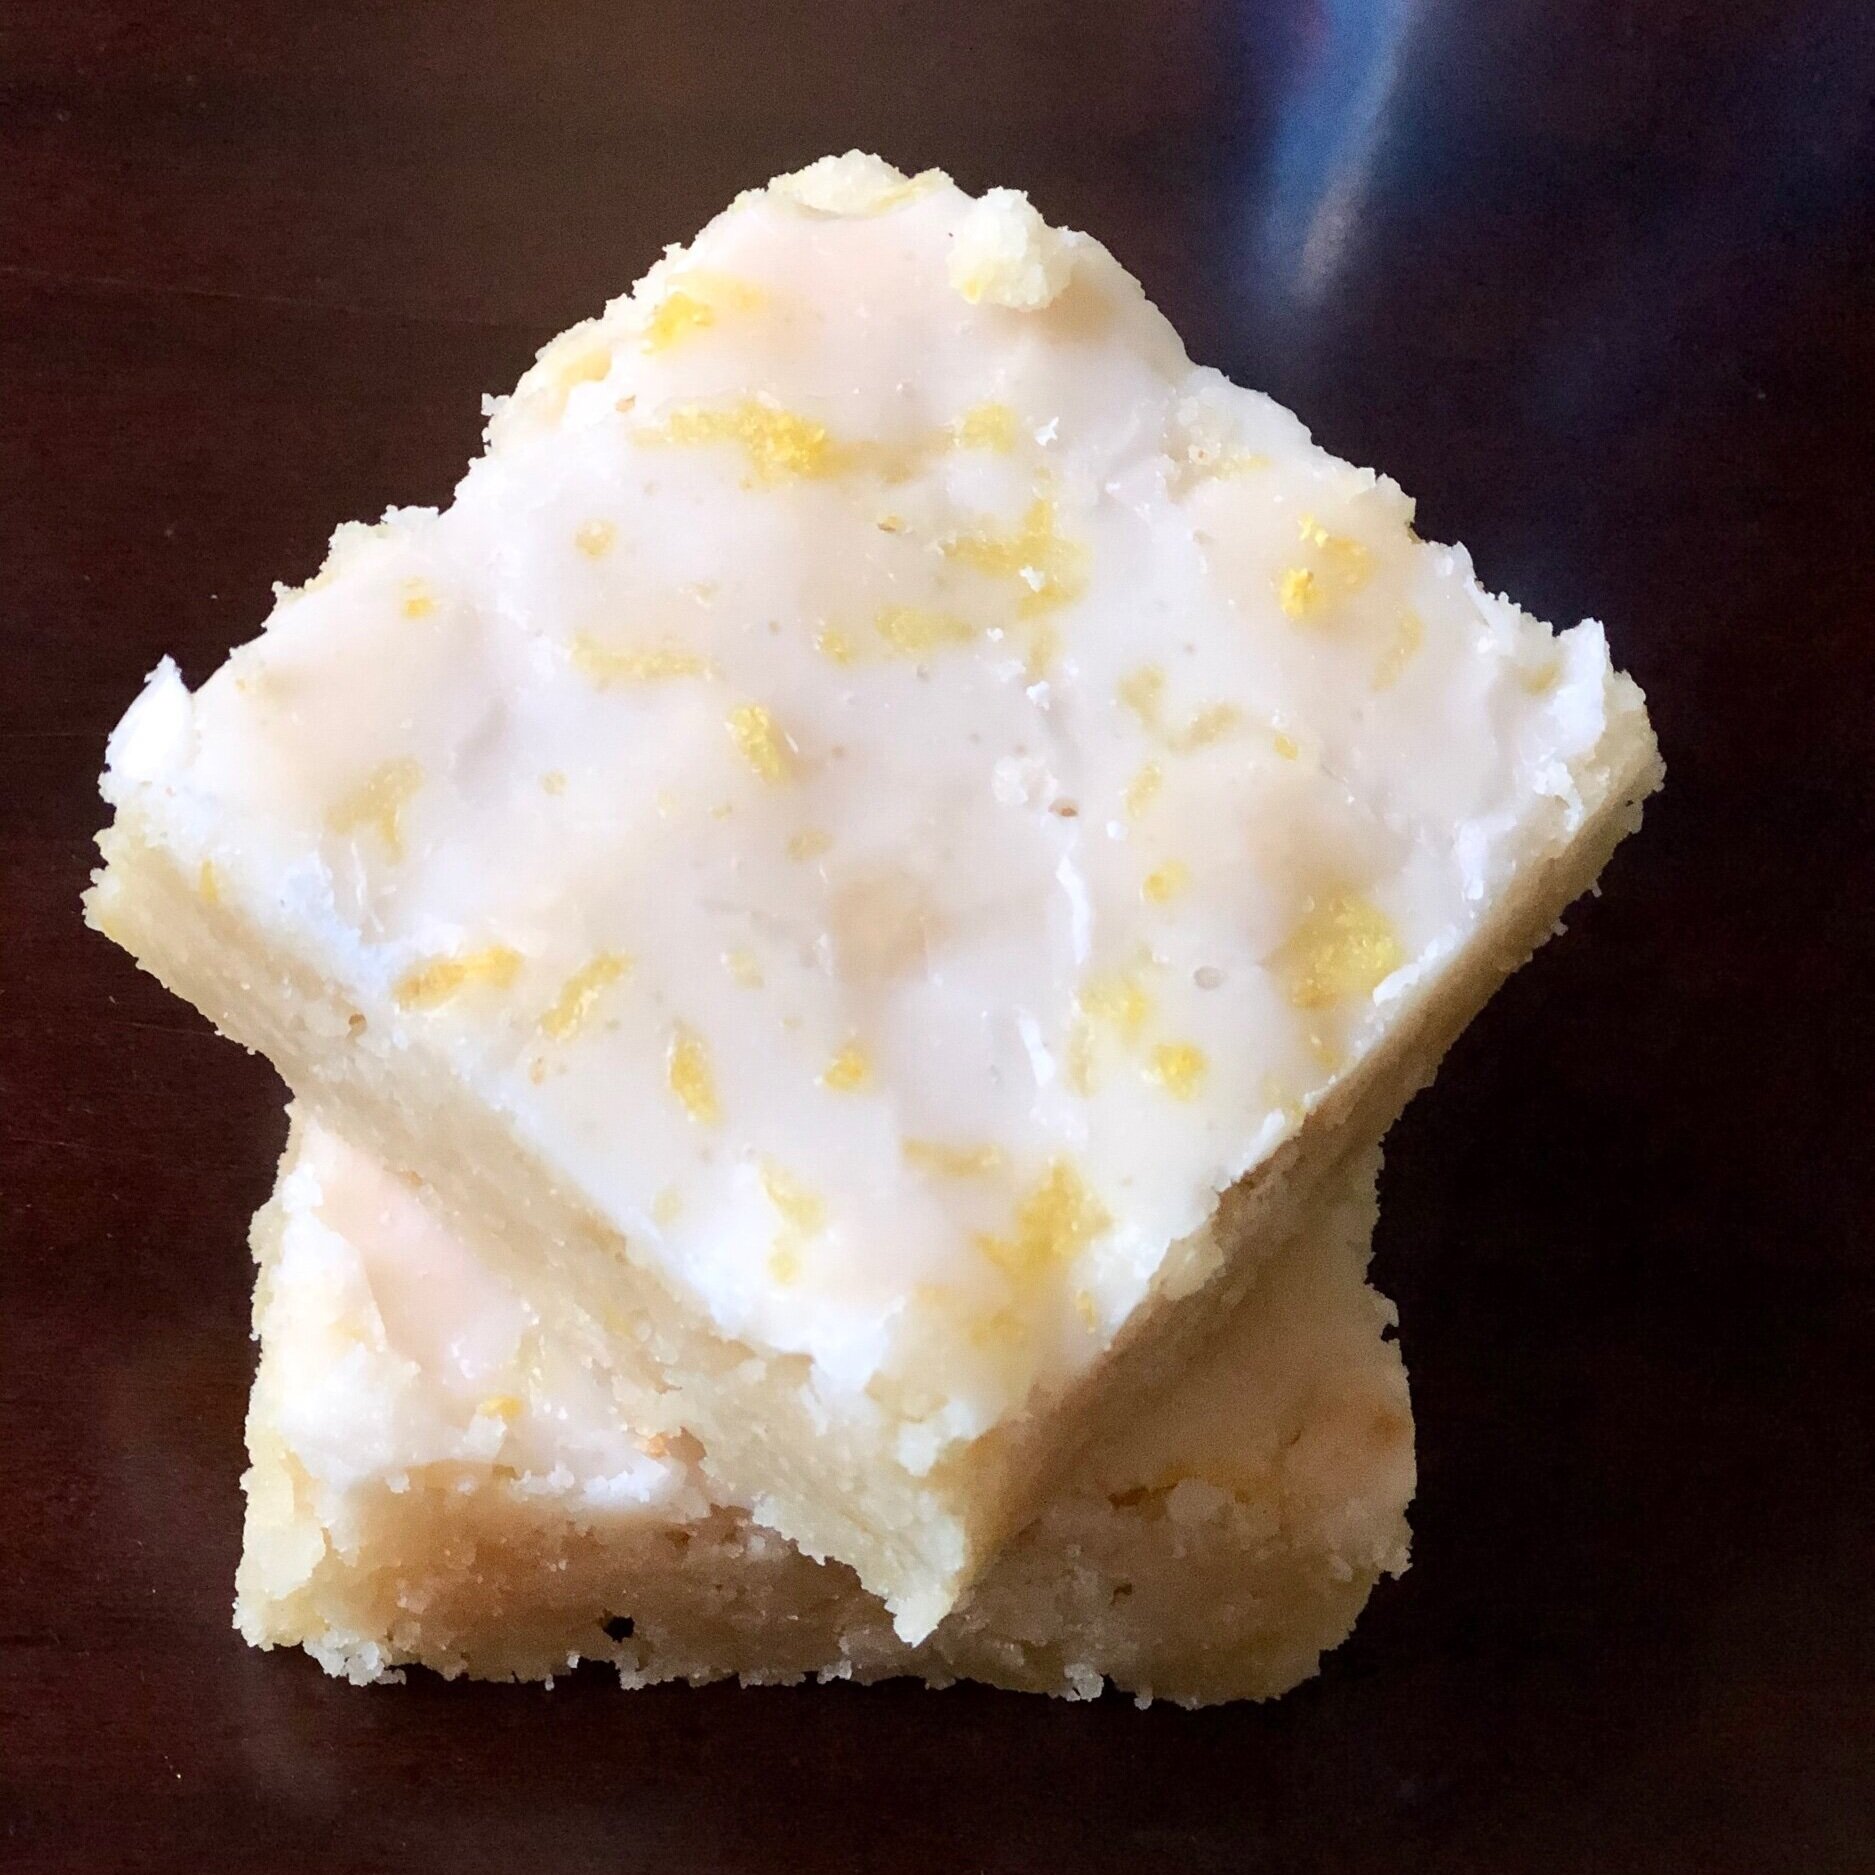
These bars are like brownies but LEMON.

IMG_3410.jpg

Chewy, sugary, zingy and bright lemony bar goodness. With a lemony glaze to boot! Some people call these lemon brownies, others lemon blondies. I couldn’t bring myself to say lemon brownies because they’re not chocolatey nor brown, so using the word “brownie” seemed to be sending the wrong signals. Blondie is much more accurate, although if you consider a blondie as having chocolate chips, you must take the notion out of your brain for a moment to fully understand and appreciate these beauties.

It’s really just a blondie recipe with lemon juice and zest added to it, with a wonderfully simple but tart lemon glaze! You can also add lemon extract for extra lemon flavor, but I don’t think they need it. I add more lemon juice than some, which has a more authentic lemon flavor anyway, yeah?

This post may contain affiliate links. If you make a purchase using these links, Jennyblogs may receive a small commission, at no extra cost to you. This helps to support Jennyblogs. For further information see the privacy policy. Grazie!

Recipe adapted from Sugar Spun Run


Lemon Blondies

Serves about 9

Adjustments.jpeg

Ingredients:

For the Lemon Blondies

  • 3/4 cup / 168g oil

  • 1 1/2 cups / 300g sugar

  • 1 egg + 1 egg yolk

  • 2 Tbsp lemon zest

  • 3 Tbsp / 42g lemon juice

  • 1/2 tsp vanilla extract

  • 2 1/2 cups / 300g all-purpose flour

  • 1 tsp / 3g cornstarch

  • 3/4 tsp salt

  • 1/4 tsp baking soda

For the Lemon Glaze

  • 3/4 cup / 94g powdered sugar

  • 1-2 Tbsp / 14-28g lemon juice

  • 1-2 tsp lemon zest, optional

Directions:

Make the Lemon Blondies

Preheat oven to 350°F / 177°C. Grease an 8x8 or 9x9inch / 20x20 or 23x23cm square baking pan.

  1. In a large bowl, mix together oil, sugar, egg and egg yolk, lemon zest, lemon juice, and vanilla.

  2. In another medium bowl, whisk together flour, cornstarch, salt, and baking soda.

  3. Add flour to lemon mixture and mix until combined. Dough will be thick.

  4. Scrape batter into prepared pan and spread in an even layer to the edges.

  5. Bake for 25-30 minutes, or until toothpick inserted near the center comes out mostly clean.

Adjustments.jpg

Make the Lemon Glaze

  1. In a small bowl, whisk together powdered sugar and enough lemon juice to make a drizzleable glaze. Pour over lemon blondies, spreading to edges with spatula, if necessary. Sprinkle lemon zest over top, if desired.

  2. Allow lemon blondies to cool completely before slicing and serving.

Jenny’s Notes:

  • I know it may be hard to resist cutting into these lemon blondies right away, but it’s best to wait until they are cooled to avoid them crumbling on you.

Lemon Blondies
Yield 9
Author
Prep time
20 Min
Cook time
30 Min
Total time
50 Min

Lemon Blondies

Chewy and dense like brownies, but lemon instead of chocolate with a zesty glaze!
Cook modePrevent screen from turning off

Ingredients

For the Lemon Blondies
For the Lemon Glaze

Instructions

Make the Lemon Blondies
  1. Preheat oven to 350°F / 177°C. Grease an 8x8 or 9x9inch / 20x20 or 23x23cm square baking pan.
  2. In a large bowl, mix together oil, sugar, egg and egg yolk, lemon zest, lemon juice, and vanilla.
  3. In another medium bowl, whisk together flour, cornstarch, salt, and baking soda.
  4. Add flour to lemon mixture and mix until combined. Dough will be thick.
  5. Scrape batter into prepared pan and spread in an even layer to the edges.
  6. Bake for 25-30 minutes, or until toothpick inserted near the center comes out mostly clean.
Make the Lemon Glaze
  1. In a small bowl, whisk together powdered sugar and enough lemon juice to make a drizzleable glaze. Pour over lemon blondies, spreading to edges with spatula, if necessary. Sprinkle lemon zest over top, if desired.
  2. Allow lemon blondies to cool completely before slicing and serving.

Notes

I know it may be hard to resist cutting into these lemon blondies right away, but it’s best to wait until they are cooled to avoid them crumbling on you.

Nutrition Facts

Calories

474.05

Fat

20.03 g

Sat. Fat

1.62 g

Carbs

70.33 g

Fiber

1.13 g

Net carbs

69.19 g

Sugar

43.82 g

Protein

4.50 g

Sodium

205.81 mg

Cholesterol

41.16 mg

Nutritional information is approximate. Based on 1 bar if sliced into 9 servings.

Lemon Blondies, Lemon Brownies, Lemon bars
dessert
American
Did you make this recipe?
Tag @jennyblogsandbakes on instagram and hashtag it #jennyblogs

Lemon Cream Tart

Last Updated January 3, 2025

I've been on a French kick recently. This past Christmas I was gifted "The Art of French Classics" by Jacquy Pfeiffer. At first glance it seemed detailed, confusing, and lengthy. Second glance didn't get much better. This was not the type of book you would use to whip up a batch of cookies or bake a cake for dessert tonight. No, this book was going to require time, diligence, patience, determination, and careful reading.  

I decided to dissect this book by my favorite method: list making. Simple and efficient. I started employing this method when I was 13. My mom had bought me a cake mix cookbook by Betty Crocker, and I was thrilled to have my own cookbook to go through and cook all on my own.  Most of those recipes I would shudder at now (they're not completely from scratch, haha!!), but I wanted to make everything in there. Well, almost. Which is where the list came in. I wrote down every recipe I wanted to make, referencing the page numbers. When I had made a recipe, I would put a check mark by it. Much easier to glance at one page (or two or three, there were too many recipes I wanted to make!) than to go through the book every time. And oh so satisfying to make that little check mark. But, I am a nerd when it comes to baking, so you can take this as more of an anecdote than a recommendation.  :)

After initially being intimidated from reading “The Art of French Pastry” and applying my list method, I realized it wouldn’t be so difficult to make a lot of these recipes, after all. Some recipes, yes, which include making puff pastry, choux pastry, and various pastry creams and caramel all for one magnificent cake, but if French cuisine was easy we would all be making cream puffs, croissants, and eclairs everyday now, wouldn’t we? But to my pleasant surprise many of the recipes were quite manageable. This book helps you master some basic techniques that then become easier because you use them often for many of the recipes.

One of the simpler, but nonetheless delicious recipes from the cookbook is this Lemon Cream Tart. Everyone should have a good lemon tart in their repertoire. Someone once asked me, after learning I liked to bake, if I could make a good lemon tart. I had made good lemon tarts before, but sometimes I lack confidence that even if I like something, will it live up to other people's tastes buds? Until I find the recipe, that is. Then I know the search is over, although I will always be open to trying new things. I hung on to my current lemon tart recipe, but I felt like I could do better. A recipe that would be reliable, and deliver that over-the-top creamy, lemony zing. I found it in this recipe, oh yes.  

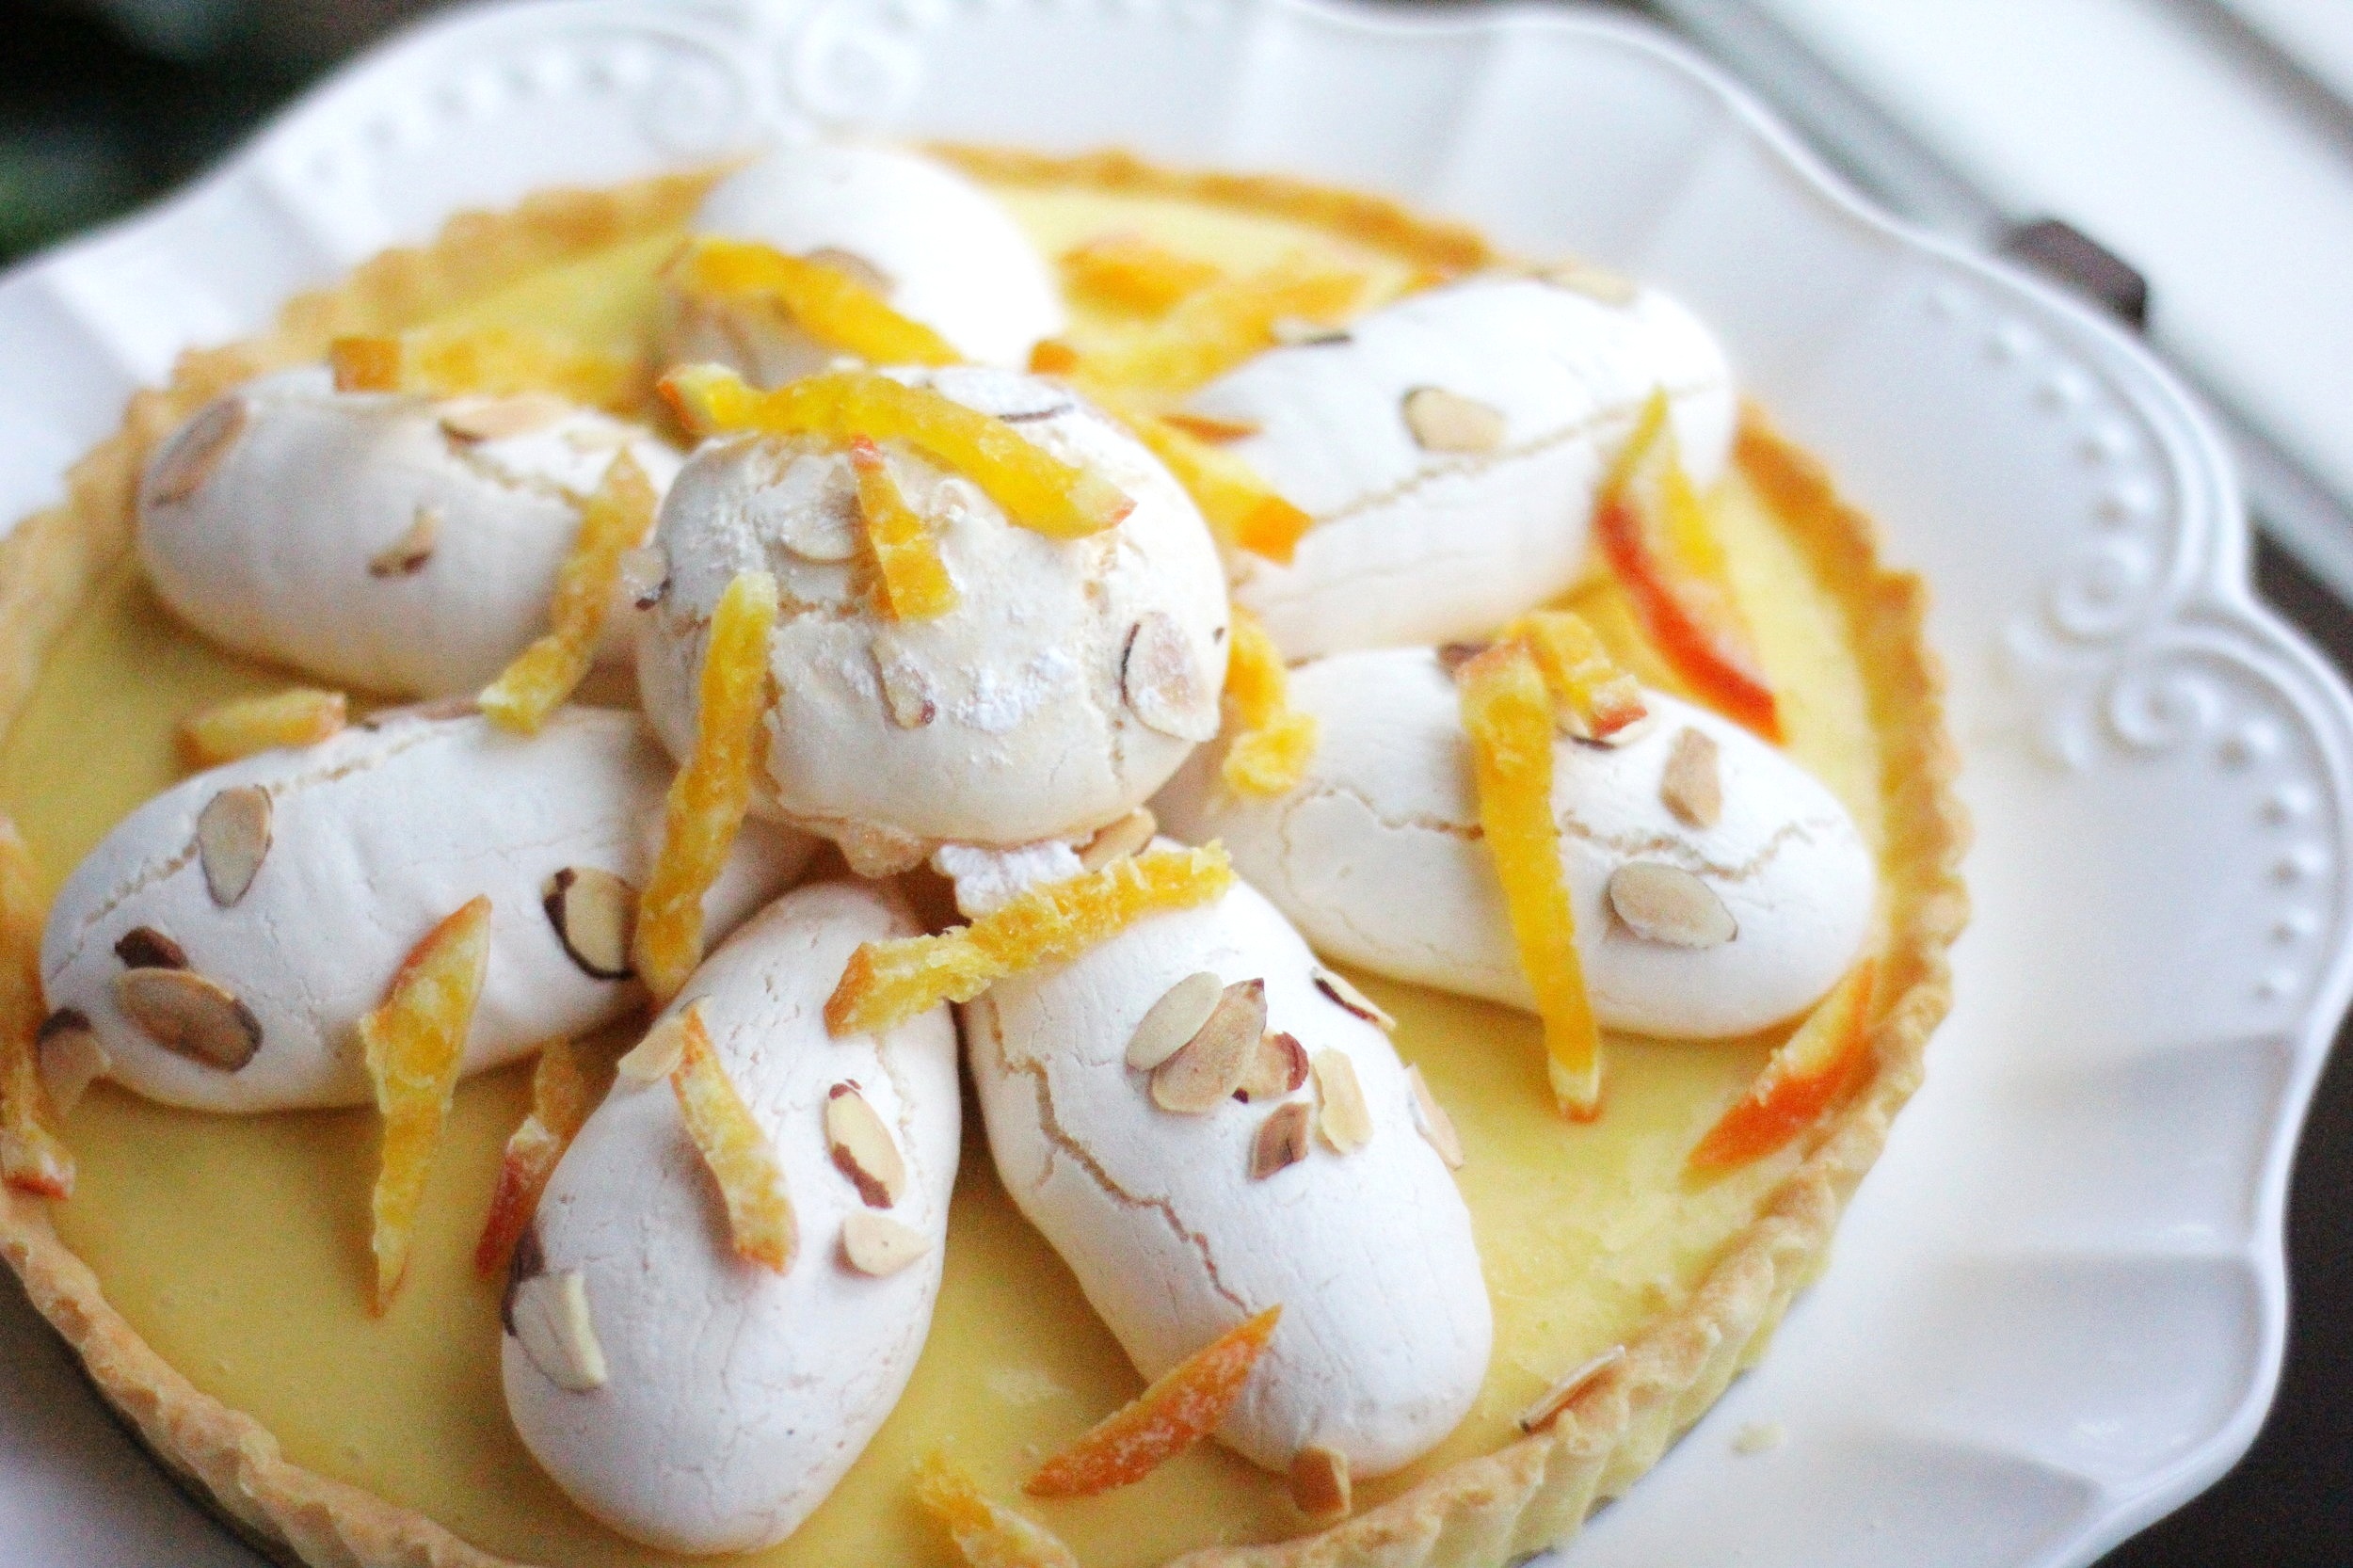
You’ll notice in my photos that the lemon tart is decorated with meringues and candied orange peels. The recipe does not include those because I feel that for the time spent making them, they don’t add significantly to the eating experience and are more for the wow factor. Don’t get me wrong, they’re yummy, but meringues do require a certain technique (mine unfortunately cracked a bit) and candying orange peel requires 10 days. So. I more than encourage you to get the book and try out those recipes yourselves, and especially the others, like the croissants, palmiers (my absolute favorite recipe from the cookbook), the brioche variations, eclairs, and on and on! Or, if all this seems a bit ambitious to you, gift the book to your favorite baking enthusiast and have them make them for you. :)

A quick tip when approaching seemingly complicated recipes like this one: break it down. Although this recipe may seem lengthy and entailed, it's actually simpler than it seems, especially if you separate it into a "crust" day and a "filling" day.  

This post may contain affiliate links. If you make a purchase using these links, Jennyblogs may receive a small commission, at no extra cost to you. This helps to support Jennyblogs. Where possible, links are prioritized to small businesses and ethically and responsibly made items. For further information see the privacy policy. Grazie!

Recipe adapted from “The Art of French Pastry” by Jacquy Pfeiffer.


*Note:  Make the pâte sablée at least one day ahead as it needs to rest overnight in the refrigerator; two nights is ideal.    

Lemon Cream Tart

Serves 8-12

Ingredients:

For the Pâte Sablée

  • 6 Tbsp / 97g butter

  • 1/4 tsp / 1g salt

  • 1 cup + 1 Tbsp / 145g all-purpose flour

  • 3 Tbsp / 18g almond flour

  • 1/2 cup / 55g powdered sugar

  • 1/4 tsp / 1g vanilla extract

  • 2 egg yolks

For the Lemon Cream

  • 1 cup / 200g sugar, divided

  • 5/8 cup / 140g lemon juice

  • pinch of salt

  • 3 eggs + 1 yolk

  • zest of half a lemon

  • 14 Tbsp / 192g butter, softened and cut into cubes

  • candied lemon peel, toasted nuts, or meringues for decoration, optional

Directions:

DAY 1:

Make the Pâte Sablée (2-3 days ahead of time you actually want the tart finished)

  1. In the bowl of a stand mixer, add butter, sea salt, and all-purpos flour. Mix on low speed just until crumbly.  Over-mixing will activate gluten in flour and make for a tougher crust. Add almond flour and powdered sugar, mixing until just combined.  Add vanilla and egg yolks on medium speed until just combined.  

  2. Scrape dough out onto a sheet of plastic wrap. Press into a 1/2 inch rectangle and wrap airtight in the plastic. Refrigerate overnight.  

ay 2:

Roll out Pâte Sablée

  1. Very lightly grease a tart pan with softened butter. You should barely see the butter on the pan.  If it is over-greased the dough may slip down the side as it is baking.  

  2. Remove dough from fridge, unwrap from plastic wrap, and place on a lightly floured surface.  For easier transportation to tart pan, you can roll it out on a floured silpat or piece of parchment paper.  

  3. Tap dough with a rolling pin to make sure it's pliable.  If at any point dough seems too stiff or cold, or cracks as you roll it out, let it rest at room temperature for a few minutes before continuing. Roll dough 3 times in one direction, then make a quarter turn. Periodically check to make sure your dough isn't sticking to the surface.  If it is, use a thin spatula to peel it off and re-flour the surface underneath.  Repeat rolling 3 times and making quarter turns until you have an evenly rolled out, 1/4" thick round of dough.

  4. At this point your dough should be larger than your tart pan.  Carefully transfer dough to pan. You can do this by gently wrapping the dough around the rolling pin, then unrolling it over the pan. Press dough into the pan, paying careful attention to the corners and being careful not to stretch or tear the dough to do so.  Use a knife to trim away any extra dough.  Refrigerate the tart shell uncovered for at least one hour, or preferably overnight.  

Day 2, 1 hour later ~ OR ~ Day 3:

  1. Preheat oven to 325°F / 160°C.  

  2. Remove crust from fridge and dock (poke holes in) bottom with a fork. This will allow steam to escape evenly during baking.  

  3. Line the shell with parchment paper or cheesecloth and pie weights, dry beans, or rice.

  4. Bake for 15 minutes, then remove parchment paper and pie weights. Bake for an additional 5-15 minutes, or until crust begins to evenly color and turn golden. Allow to cool.

Make the Lemon Cream

  1. In a small bowl, combine 1/2 cup / 100g of the sugar with lemon juice and salt; whisk until sugar and salt have dissolved.  

  2. In a medium bowl, combine remaining 1/2 cup / 200g of sugar with egg yolks and whisk for 30 seconds. Whisk the first lemon juice mixture into this mixture and add zest.  

  3. Create a water bath by simmering 1 inch of water in a medium saucepan over low heat.  Place bowl with lemon mixture over saucepan, making sure the bottom of the bowl isn't touching the water; whisk constantly so eggs don't scramble. Attach a digital thermometer to the bowl and continue to whisk until mixture reaches 176-179.6°F / 80-82°C.  

  4. Remove from heat and strain into a bowl through a fine-meshed sieve. Use a spatula to push mixture through strainer, if necessary. Transfer thermometer to the new bowl.  Allow mixture to cool to 140°F / 60°C, about 5 minutes.  

  5. At this point pour mixture into a blender, or leave in bowl if using an immersion blender. Add half of the butter and blend, then add second half of the butter and blend for an additional 30 seconds or so, until mixture is completely smooth.  

  6. Pour lemon cream filling into baked crust and allow to set for at least 2 hours in refrigerator. Decorate as desired, dust with powdered sugar, or leave as is. 

Buon Appetit!

Jenny's Notes:

  • The unbaked pâte sablée will keep well covered in the fridge for up to a week, or a month in the freezer.  

Lemon Cream Tart
Yield 8-12
Author
Prep time
1 H & 10 M
Cook time
30 Min
Inactive time
15 Hour
Total time
16 H & 40 M

Lemon Cream Tart

Lemony, creamy, zingy tart with a perfect butter tart crust from Jacquy Pfeiffer's "The Art of French Pastry."
Cook modePrevent screen from turning off

Ingredients

For the Pâte Sablée
For the Lemon Cream Filling

Instructions

Make the Pâte Sablée (2-3 Days Ahead of time)
  1. In the bowl of a stand mixer, add butter, sea salt, and all-purpos flour. Mix on low speed just until crumbly. Over-mixing will activate gluten in flour and make for a tougher crust. Add almond flour and powdered sugar, mixing until just combined. Add vanilla and egg yolks on medium speed until just combined.
  2. Scrape dough out onto a sheet of plastic wrap. Press into a 1/2 inch rectangle and wrap airtight in the plastic. Refrigerate overnight.
The next day:
  1. Very lightly grease a tart pan with softened butter. You should barely see the butter on the pan. If it is over-greased the dough may slip down the side as it is baking.
  2. Remove dough from fridge, unwrap from plastic wrap, and place on a lightly floured surface. For easier transportation to tart pan, you can roll it out on a floured silpat or piece of parchment paper.
  3. Tap dough with a rolling pin to make sure it's pliable. If at any point dough seems too stiff or cold, or cracks as you roll it out, let it rest at room temperature for a few minutes before continuing. Roll dough 3 times in one direction, then make a quarter turn. Periodically check to make sure your dough isn't sticking to the surface. If it is, use a thin spatula to peel it off and re-flour the surface underneath. Repeat rolling 3 times and making quarter turns until you have an evenly rolled out, 1/4" thick round of dough.
  4. At this point your dough should be larger than your tart pan. Carefully transfer dough to pan. You can do this by gently wrapping the dough around the rolling pin, then unrolling it over the pan. Press dough into the pan, paying careful attention to the corners and being careful not to stretch or tear the dough to do so. Use a knife to trim away any extra dough. Refrigerate the tart shell uncovered for at least one hour, or preferably overnight.
An hour later or the next day:
  1. Preheat oven to 325°F / 160°C.
  2. Remove crust from fridge and dock (poke holes in) bottom with a fork. This will allow steam to escape evenly during baking.
  3. Line the shell with parchment paper or cheesecloth and pie weights, dry beans, or rice.
  4. Bake for 15 minutes, then remove parchment paper and pie weights. Bake for an additional 5-15 minutes, or until crust begins to evenly color and turn golden. Allow to cool.
Make the Lemon Cream
  1. In a small bowl, combine 1/2 cup / 100g of the sugar with lemon juice and salt; whisk until sugar and salt have dissolved.
  2. In a medium bowl, combine remaining 1/2 cup / 200g of sugar with egg yolks and whisk for 30 seconds. Whisk the first lemon juice mixture into this mixture and add zest.
  3. Create a water bath by simmering 1 inch of water in a medium saucepan over low heat. Place lemon mixture over saucepan, making sure the bottom of the bowl isn't touching the water; whisk constantly so eggs don't scramble. Attach a digital thermometer to the bowl and continue to whisk until mixture reaches 176-179.6°F / 80-82°C.
  4. Remove from heat and strain into a bowl through a fine-meshed sieve. Use a spatula to push mixture through strainer, if necessary. Transfer thermometer to the new bowl. Allow mixture to cool to 140°F / 60°C, about 5 minutes.
  5. At this point pour mixture into a blender, or leave in bowl if using an immersion blender. Add half of the butter and blend, then add second half of the butter and blend for an additional 30 seconds or so, until mixture is completely smooth.
  6. Pour lemon cream filling into baked crust and allow to set for at least 2 hours in refrigerator. Decorate as desired, dust with powdered sugar, or leave as is.

Notes

The unbaked pâte sablée will keep well covered in the fridge for up to a week, or a month in the freezer.  

Nutrition Facts

Calories

496.27

Fat

33.28 g

Sat. Fat

19.43 g

Carbs

38.08 g

Fiber

0.79 g

Net carbs

37.28 g

Sugar

8.06 g

Protein

4.42 g

Sodium

311.86 mg

Cholesterol

197.83 mg

Nutritional information is approximate. Based on 1 serving if sliced into 8 pieces.

lemon tart, lemon cream, lemon curd, french tart, dessert, lemon bars, Jacquy Pfeiffer
dessert
French
Did you make this recipe?
Tag @jennyblogsandbakes on instagram and hashtag it #jennyblogs
IMG_4714.jpg

Lemon Raspberry Sweet Rolls

Last Updated August 18, 2024

We all love a good cinnamon roll.  The soft dough, warm-gooey-buttery-cinnamon filling, topped with a sweet glaze or cream cheese icing.  The smell of fresh baked breads wafting from the kitchen and the warmth of bread in our tummy are especially comforting as the months turn colder. 

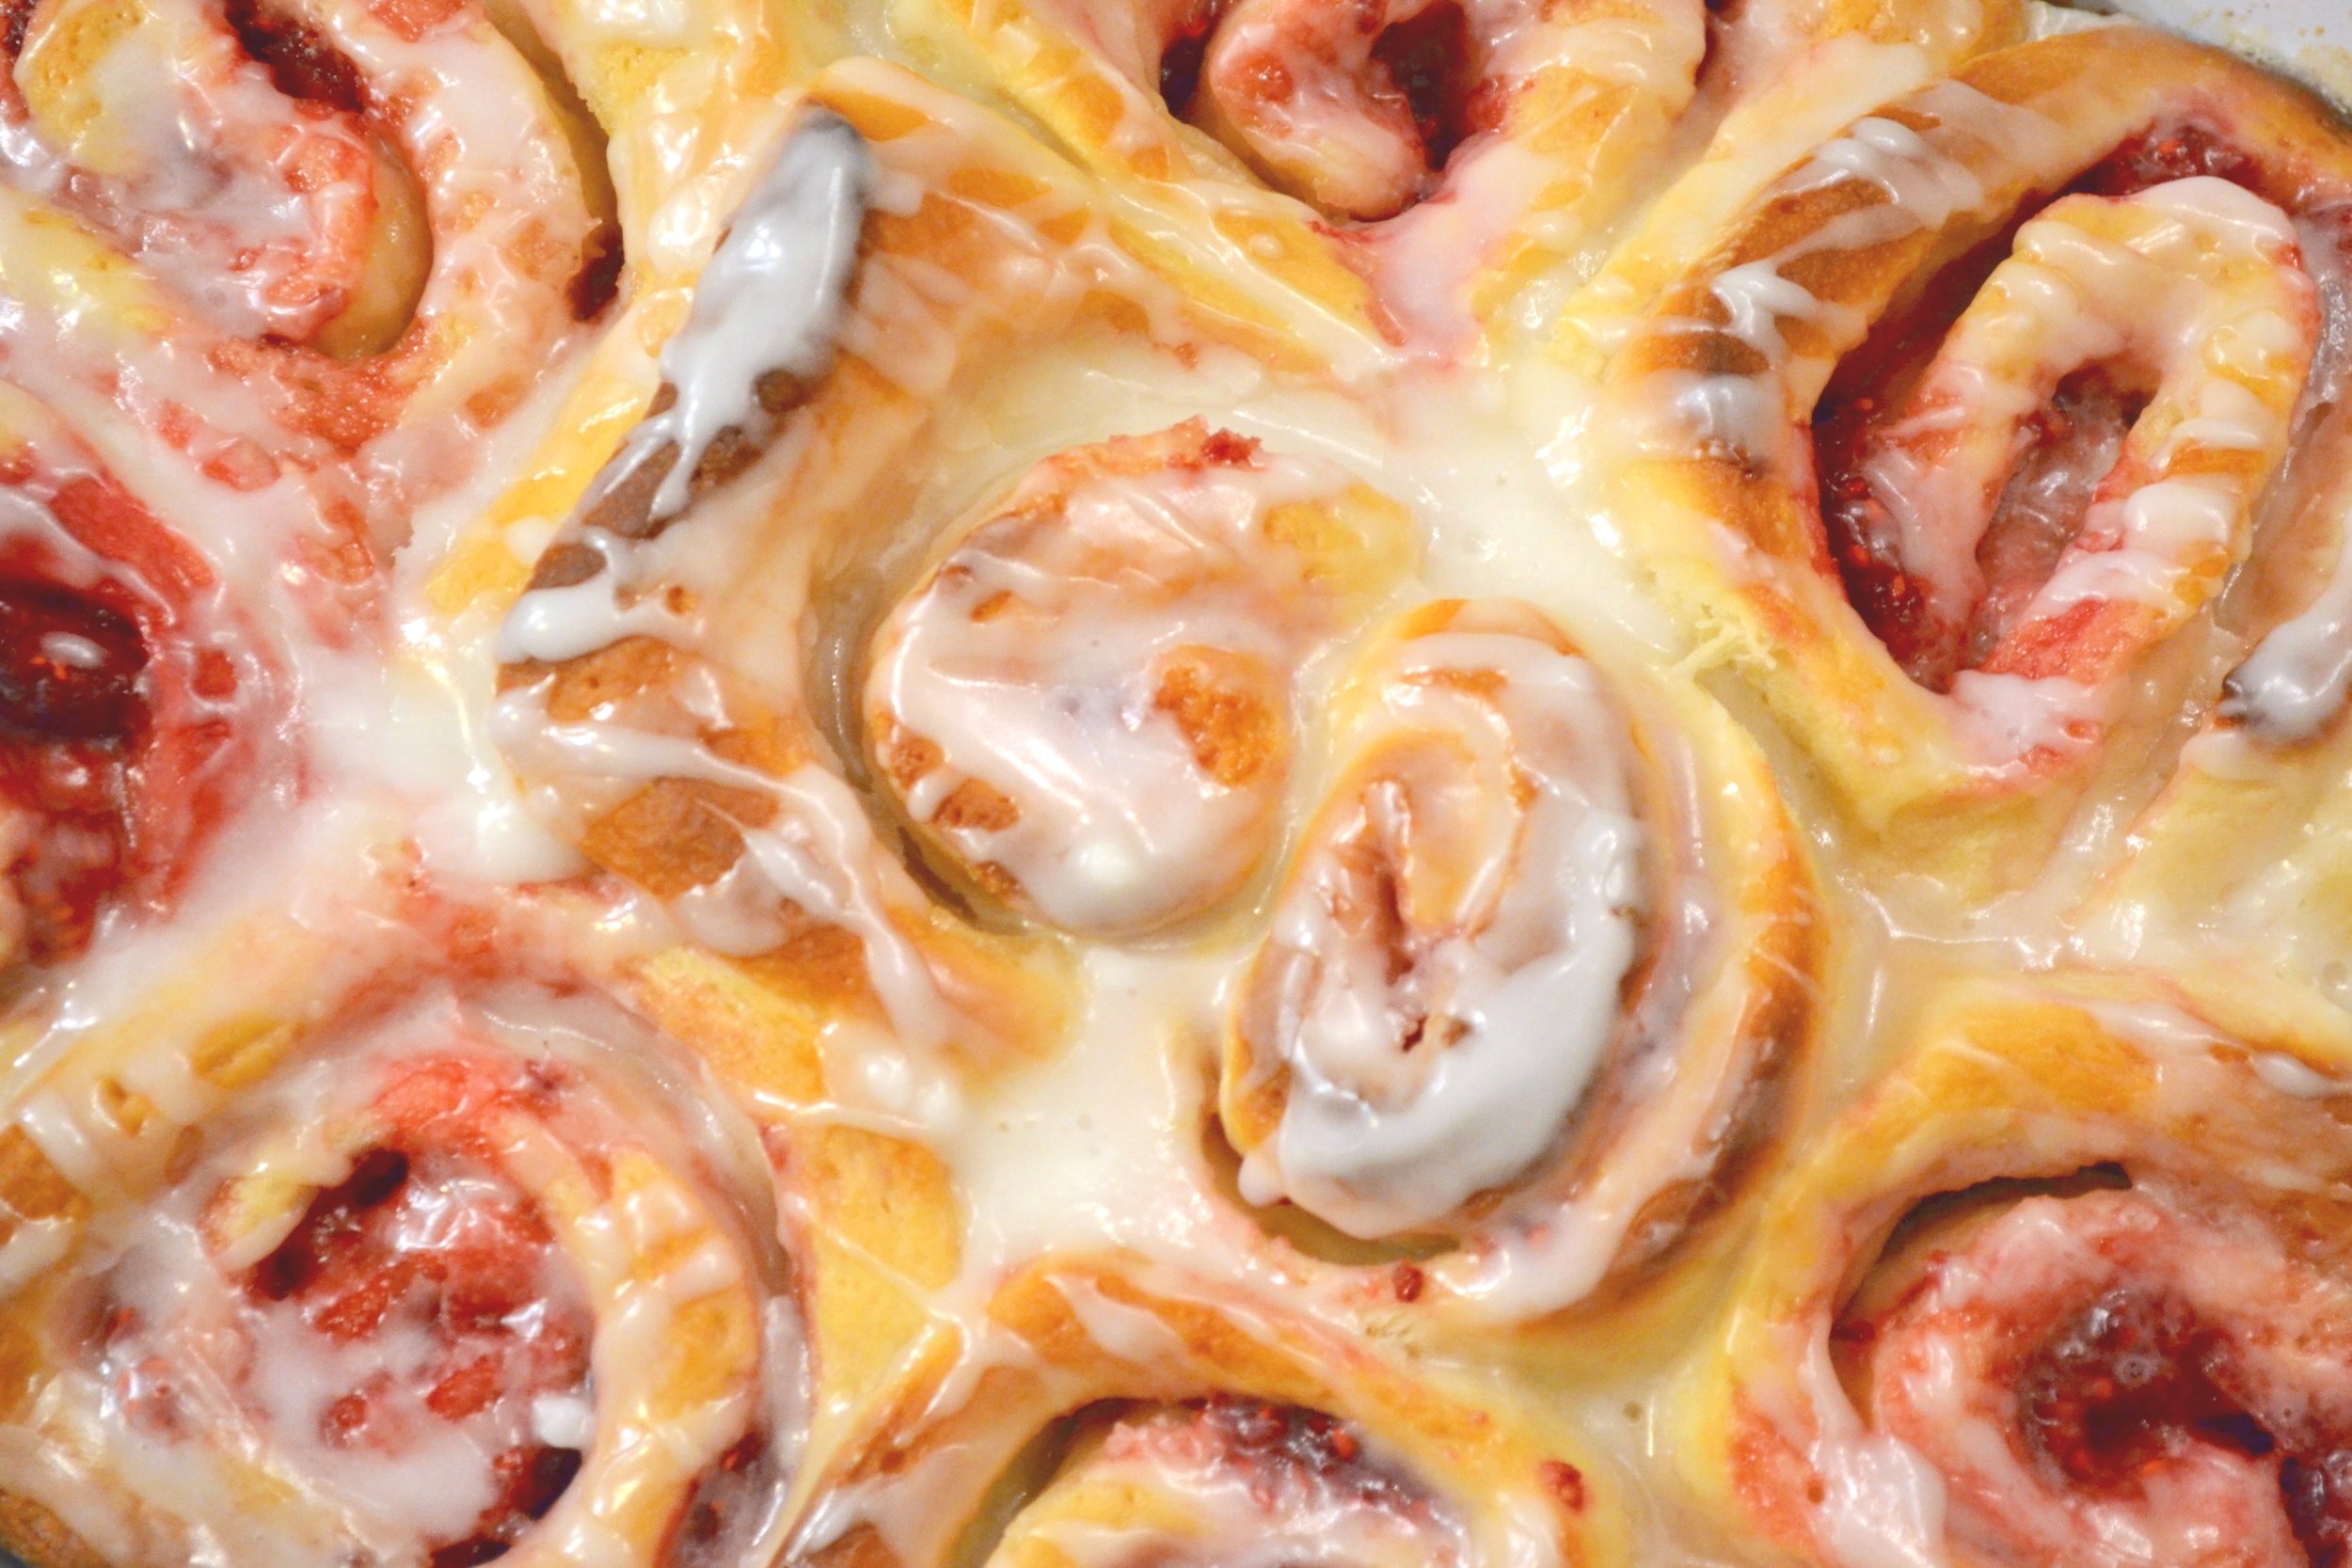
Today, however, we are not making cinnamon rolls (that's old hat :) but lemon raspberry rolls.  The tang of the lemon and raspberry paired with the sweet glaze is a match made for breakfast.  Or anytime. Pair it with a cup of tea or coffee and you have all the incentive you need to get out of bed in the morning!

This post may contain affiliate links. If you make a purchase using these links, Jennyblogs may receive a small commission, at no extra cost to you. This helps to support Jennyblogs. For further information see the privacy policy. Grazie!

Recipe adapted from Joy the Baker


Lemon Raspberry Sweet Rolls

Makes 12 regular rolls or 8 jumbo

Ingredients:

For the Dough

  • 1 cup / 237g warm milk (about 100°F / 38°C)

  • 1/2 cup / 100g sugar

  • 4 1/2 tsp / 14g active dry yeast

  • 1/4 cup / 56g oil

  • 2 eggs

  • Zest of 1 lemon

  • 1/2 tsp salt

  • 4 1/4 cups / 510g all-purpose flour + about 1/2 cup / 60g for kneading

For the Lemon Raspberry Filling

  • Generous 1 1/4 cups / 170g (1 6oz container) fresh or frozen raspberries (if using frozen do not thaw)

  • 1/2 cup / 100g sugar

  • Zest of 1 lemon

  • 1 tsp cornstarch

  • 1/4 cup / 56g butter

For the Glaze

  • 1 1/2 cups / 188g powdered sugar

  • 3 Tbsp / 42g lemon juice

Directions:

Preheat oven to 400°F / 205°C. Grease a 9x13inch / 23x33cm rectangular baking dish.

Make the Dough

  1. Pour milk into a large bowl. Add sugar and yeast and allow to sit for 7-10 minutes. Yeast should foam up a bit. 

  2. Add oil, eggs, zest, and salt. Add 4 1/4 cups of flour and mix until combined. 

  3. Flour a clean surface and turn out dough. Knead for about 8-10 minutes, sprinkling more flour on your work surface as needed. Dough should be soft and elastic by the end, so don't get too flour-happy. Alternately, knead in a stand mixer with dough hook attachment for 8-10 minutes, adding in flour as needed. The dough should stick only to bottom of bowl, not much to the sides.

  4. Lightly grease or flour a large bowl (the bowl you mixed the dough in is fine) and place dough in bowl. Cover and place in a warm area to rise for about 1 1/2 hours or until doubled in size. 

Make the Lemon Raspberry Filling

  1. In a small saucepan melt butter and let simmer until it starts to brown. Remove from heat and cool slightly. 

  2. In a medium bowl lightly mix raspberries with sugar, zest, and cornstarch.  It's okay if raspberries get a little crushed. 

Assemble the Rolls

  1. When dough has risen, punch it down and turn out onto a lightly floured surface. Knead for about a minute, then roll into a large rectangle, about 10x20inch / 25x50cm.   

  2. Spread cooled butter over dough almost to edges; sprinkle evenly with raspberry mixture. 

  3. Starting from one of the longer sides, roll dough up, pinching dough together at the end to seal it. 

  4. Slice into 12 even pieces, or 8 for jumbo sized. Place rolls in prepared pan and cover with plastic wrap. Place in a warm area to rise for about an hour, or until puffed.

  5. Bake for 20-22 minutes, until golden on top and centers no longer look doughy. Internal temperature should be about 185°F / 90°C of an outside roll.

Make the Glaze

  1. In a small bowl whisk together powdered sugar and lemon juice.  It should be thin enough to drizzle but not too liquidy. Add more powdered sugar or lemon juice as needed. 

  2. Drizzle warm rolls with glaze. 

Jenny's Notes:

  • If you don't have a thermometer handy to know what 100 degrees is, simply warm until milk feels quite warm, but not hot. 

  • You can freeze these rolls once you have sliced them and put them in the pan. Once removed from the freezer allow to thaw and proceed as normal. 

  • When using a stand mixer to knead, I still recommend kneading it for a few minutes by hand afterwards. I find they are not always as thorough as kneading by hand and you want an even rise for your dough.  I often to do it all by hand just because it’s therapeutic!

Lemon Raspberry Rolls
Yield 12
Author
Prep time
1 H & 10 M
Cook time
22 Min
Total time
1 H & 32 M

Lemon Raspberry Rolls

These bright breakfast rolls are like cinnamon rolls, but made with fresh lemon zest and raspberries instead!
Cook modePrevent screen from turning off

Ingredients

For the Dough
For the Lemon Raspberry Filling
For the Glaze

Instructions

Make the Dough
  1. In a small saucepan over low heat, warm milk until it is about 100F / 38C. Pour milk into a large bowl. Add the sugar and yeast and allow to sit for 7-10 minutes. The yeast should foam up a bit.
  2. Add oil, eggs, zest, and salt. Add the 4 1/4 cups of flour and mix until combined.
  3. Flour a clean surface and turn out dough. Knead for about 8-10 minutes, sprinkling more flour on your work surface as needed. Dough should be soft and elastic by the end, so don't get too flour-happy. Alternately, you can use the bread hook on a stand mixer and knead for 8-10 minutes, adding in flour as needed. The dough should stick only to the bottom of the pan, not the sides.
  4. Lightly grease or flour a large bowl (the bowl you mixed the dough in is fine) and place dough in the bowl. Cover with a towel and place in a warm area to rise for about 1 1/2 hours or until doubled in size.
Make the Lemon Raspberry Filling
  1. In a small saucepan melt the butter and let simmer until it starts to brown. Remove from heat and cool slightly.
  2. In a medium bowl lightly mix raspberries with sugar, zest, and cornstarch. It's okay if the raspberries get a little crushed.
Assemble and Bake the Rolls
  1. Preheat oven to 400F / 205C. Grease a 9x13inch / 23x33cm rectangular baking dish.
  2. When the dough has risen, punch it down and turn out onto a lightly floured surface. Knead for about a minute, then roll into a large rectangle, about 10x20inch / 25x50cm.
  3. Spread cooled butter over dough almost to the edges, then sprinkle evenly with raspberry mixture.
  4. Starting from one of the longer sides, roll dough into a spiral, pinching the dough together at the end to seal it.
  5. Cut the log in quarters, then each quarter into 3 slices. Place the rolls in the prepared pan and cover lightly with plastic wrap or a damp towel. Place in a warm area to rise for about an hour, or until puffed
  6. Bake for 20-22 minutes, until golden on top and centers no longer look doughy. Internal temperature should be about 195F / 90C.
Make the Glaze
  1. In a small bowl whisk together powdered sugar and lemon juice. It should be thin enough to drizzle but not too liquidy. Add more powdered sugar or lemon juice as needed.
  2. Drizzle warm rolls with glaze.

Notes

If you don't have a thermometer handy to know what 100 degrees is, simply warm until the milk feels quite warm, but not hot. It'll be fine!You can freeze these rolls once you have sliced them and put them in the pan. Once removed from the freezer allow to thaw and proceed as normal. When using a stand mixer to knead, I still recommend kneading it for a few minutes by hand afterwards. I find they are not always as thorough as kneading by hand and you want an even rise for your dough.

Nutrition Facts

Calories

355.58

Fat

6.43 g

Sat. Fat

0.88 g

Carbs

68.26 g

Fiber

2.37 g

Net carbs

65.89 g

Sugar

32.75 g

Protein

6.77 g

Sodium

121.93 mg

Cholesterol

32.58 mg

Nutritional information is approximate. Based on 1 roll.

Breakfast rolls, lemon raspberry
Breakfast, Dessert
American
Did you make this recipe?
Tag @jennyblogsandbakes on instagram and hashtag it #jennyblogs