24 Hour Sourdough Pizza Dough

Last Updated: June 5, 2024

Sourdough pizza!

My absolute favorite pizza dough recipe, and definitely worth the time to plan a day (or 2) ahead. At first glance the recipe might seem complicated (it is a 2 day recipe, after all), but it really is very simple, with no more than 1-2 minutes of kneading involved. With sourdough, time is your friend and does most of the work for you.

If you’ve ever made homemade pizza dough and wondered why it’s “good” but missing out on that chewy, wonderful crust texture that you get from the best pizzerias, this recipe will have you wondering no more. It’s chewy and flavorful and will have you whipping pizzas out of your home oven that taste about as close to your Italian vacation as can be possible! Which leads me to ask…

How’s it going? With your sourdough starter, I mean.

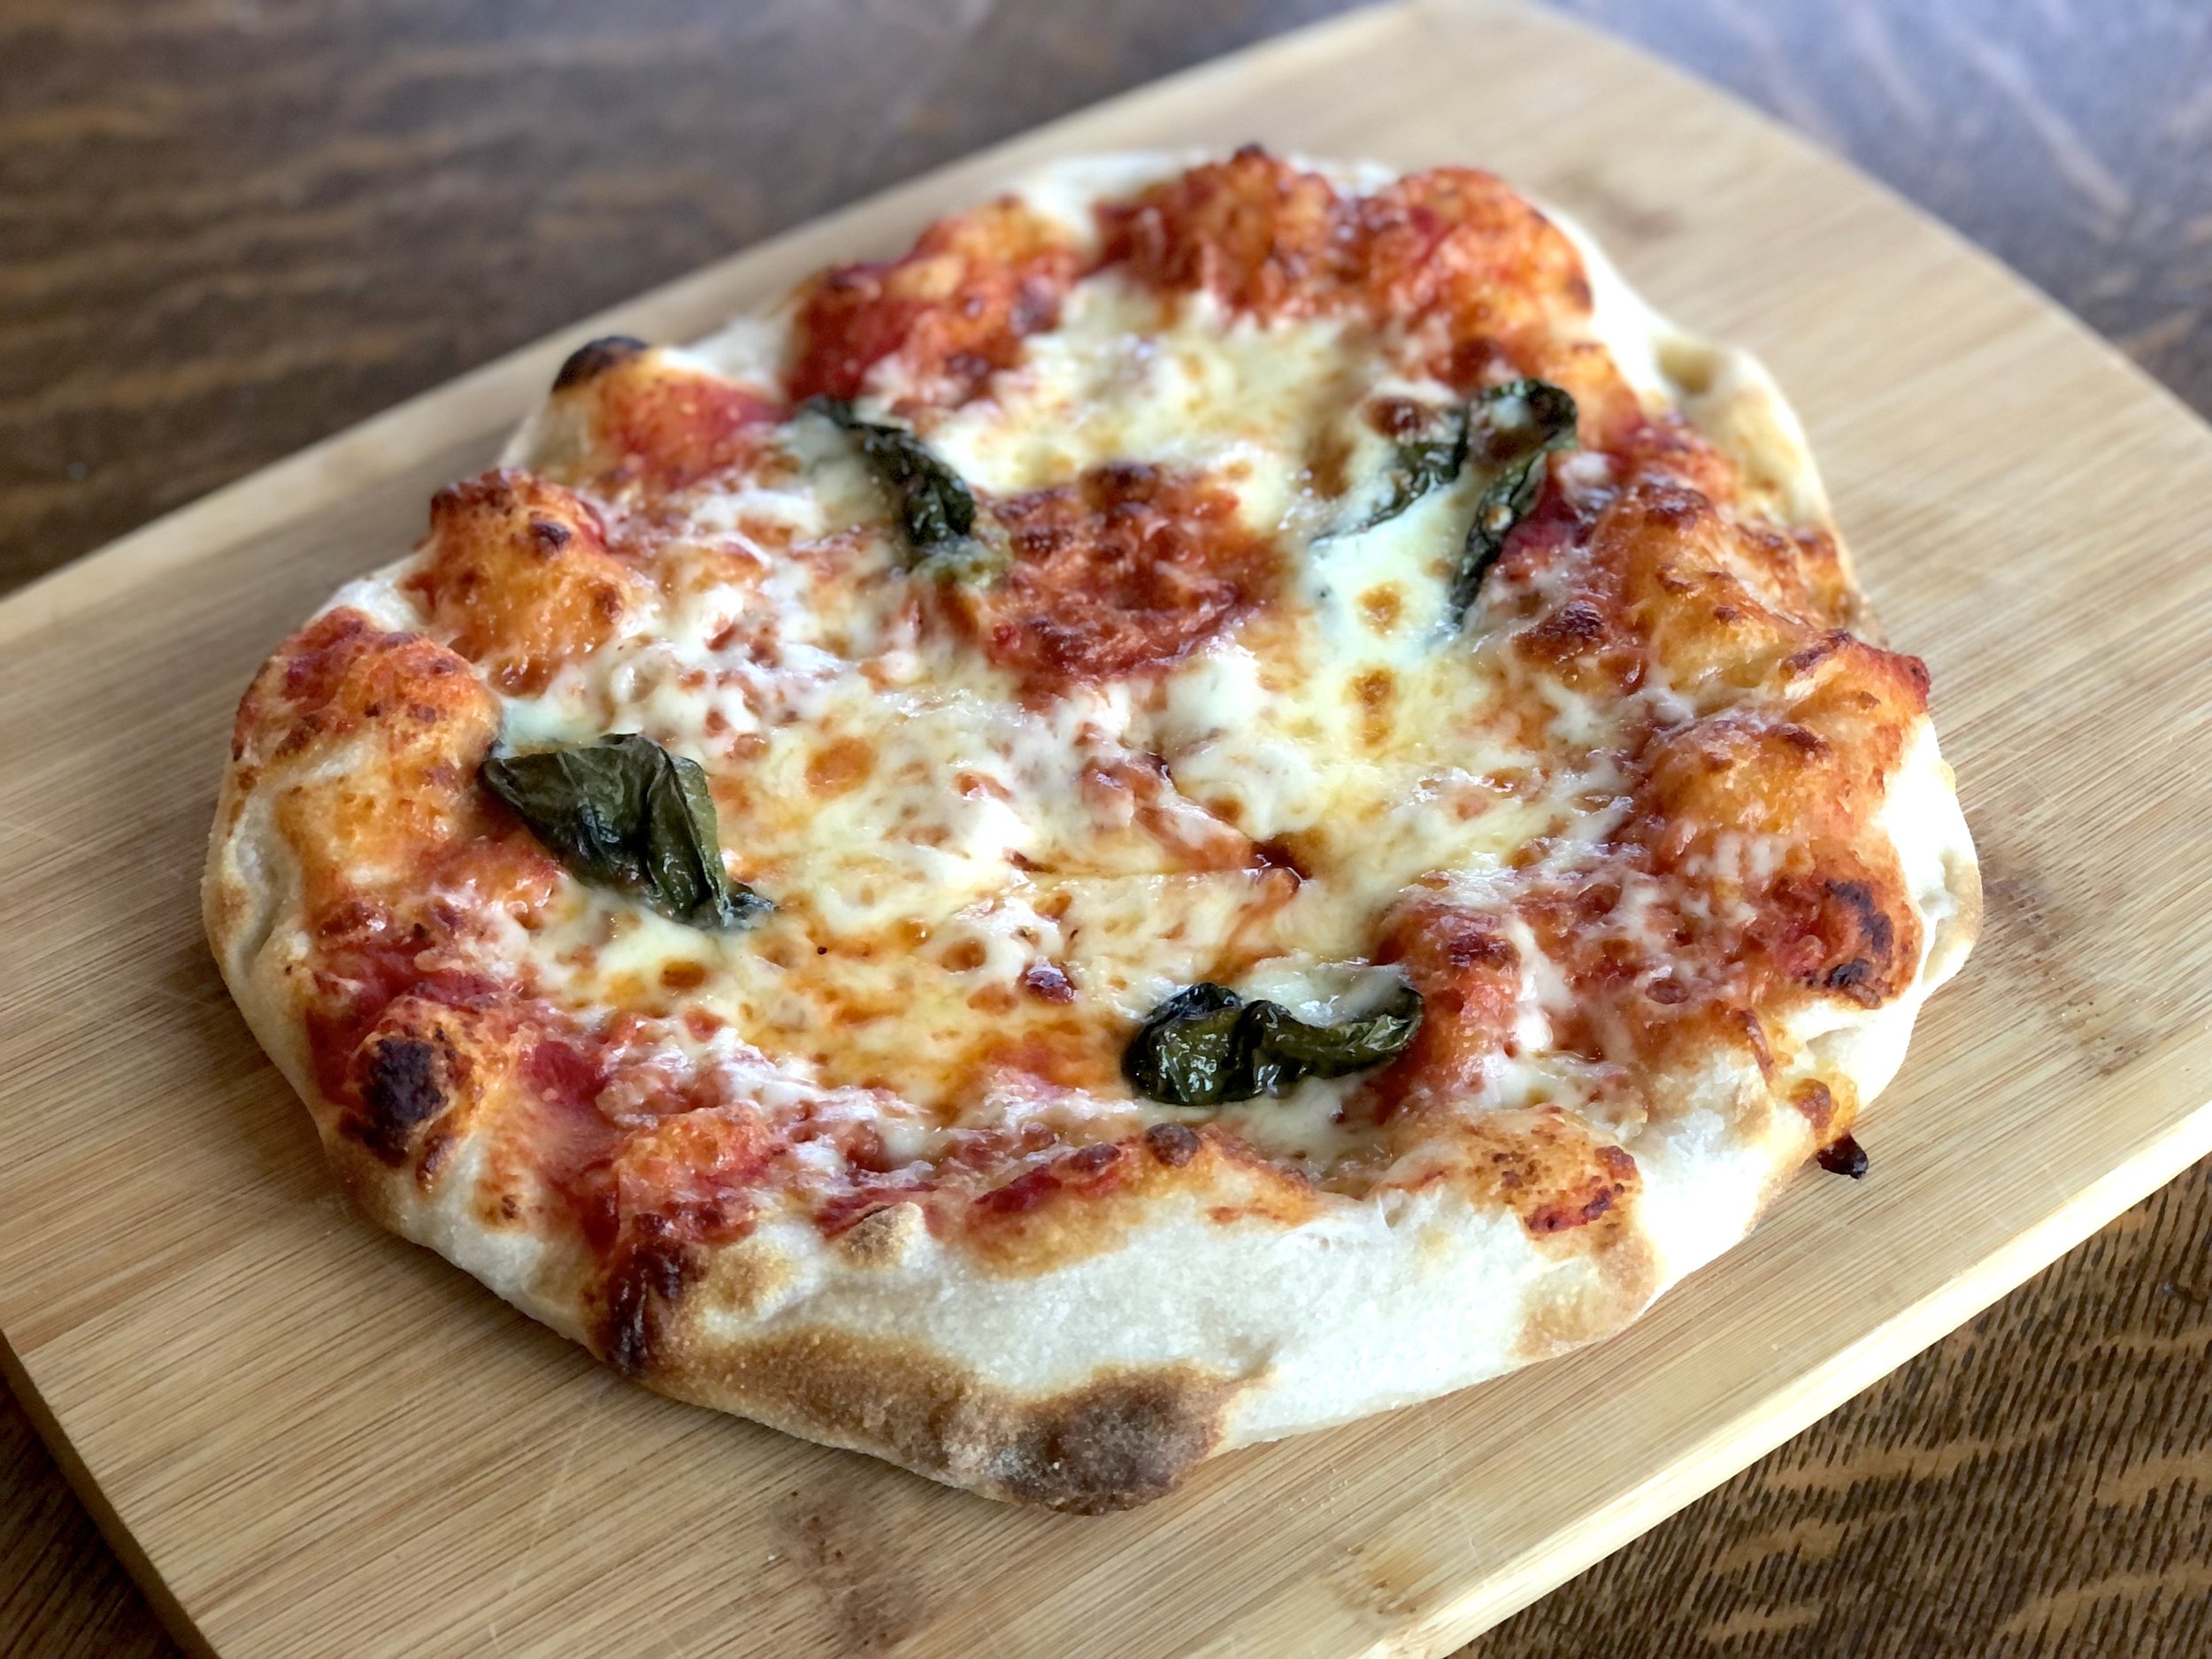
Margherita Pizza

If you weren’t already dabbling in sourdough before 2020, everyone and their brother started a sourdough starter during all of the stay-home business and many varying lockdowns, ammiright?

Did your starter get off to success, or did it dwindle, never making it to its full, goopy, bubbly glory? Perhaps it’s sitting, forgotten, in the back of your fridge. Perhaps you’re a sourdough baking fiend, whipping out the loaves and baguettes like nobody’s business.

Or, just maybe, you’re like me, your friendly sourdough-user-but-not-an-expert, keeping the starter alive and using it occasionally but mostly as discard to flavor/boost other recipes. If this sounds familiar, then this recipe is perfect for you. Not too hard, I’ll try not to give you too much theory (yes, I do know some!), and, as long as you have a not-dead starter, basically foolproof.

Not convinced yet? This is the single pizza recipe I make most, by far, even though it takes 24+ hours, because it is that good and that simple. Actually, if I make pizza, I don’t even think about which crust I should make. I just make this one. Day 1 is really just stirring 3 ingredients together. That’s it.

Some Sourdough Tips

Did I mention I have experience but am not an expert on sourdough? Yes, so what follows is my experience and some of the most helpful sourdough tips I’ve learned over the past 5 years dabbling, that may help you too.

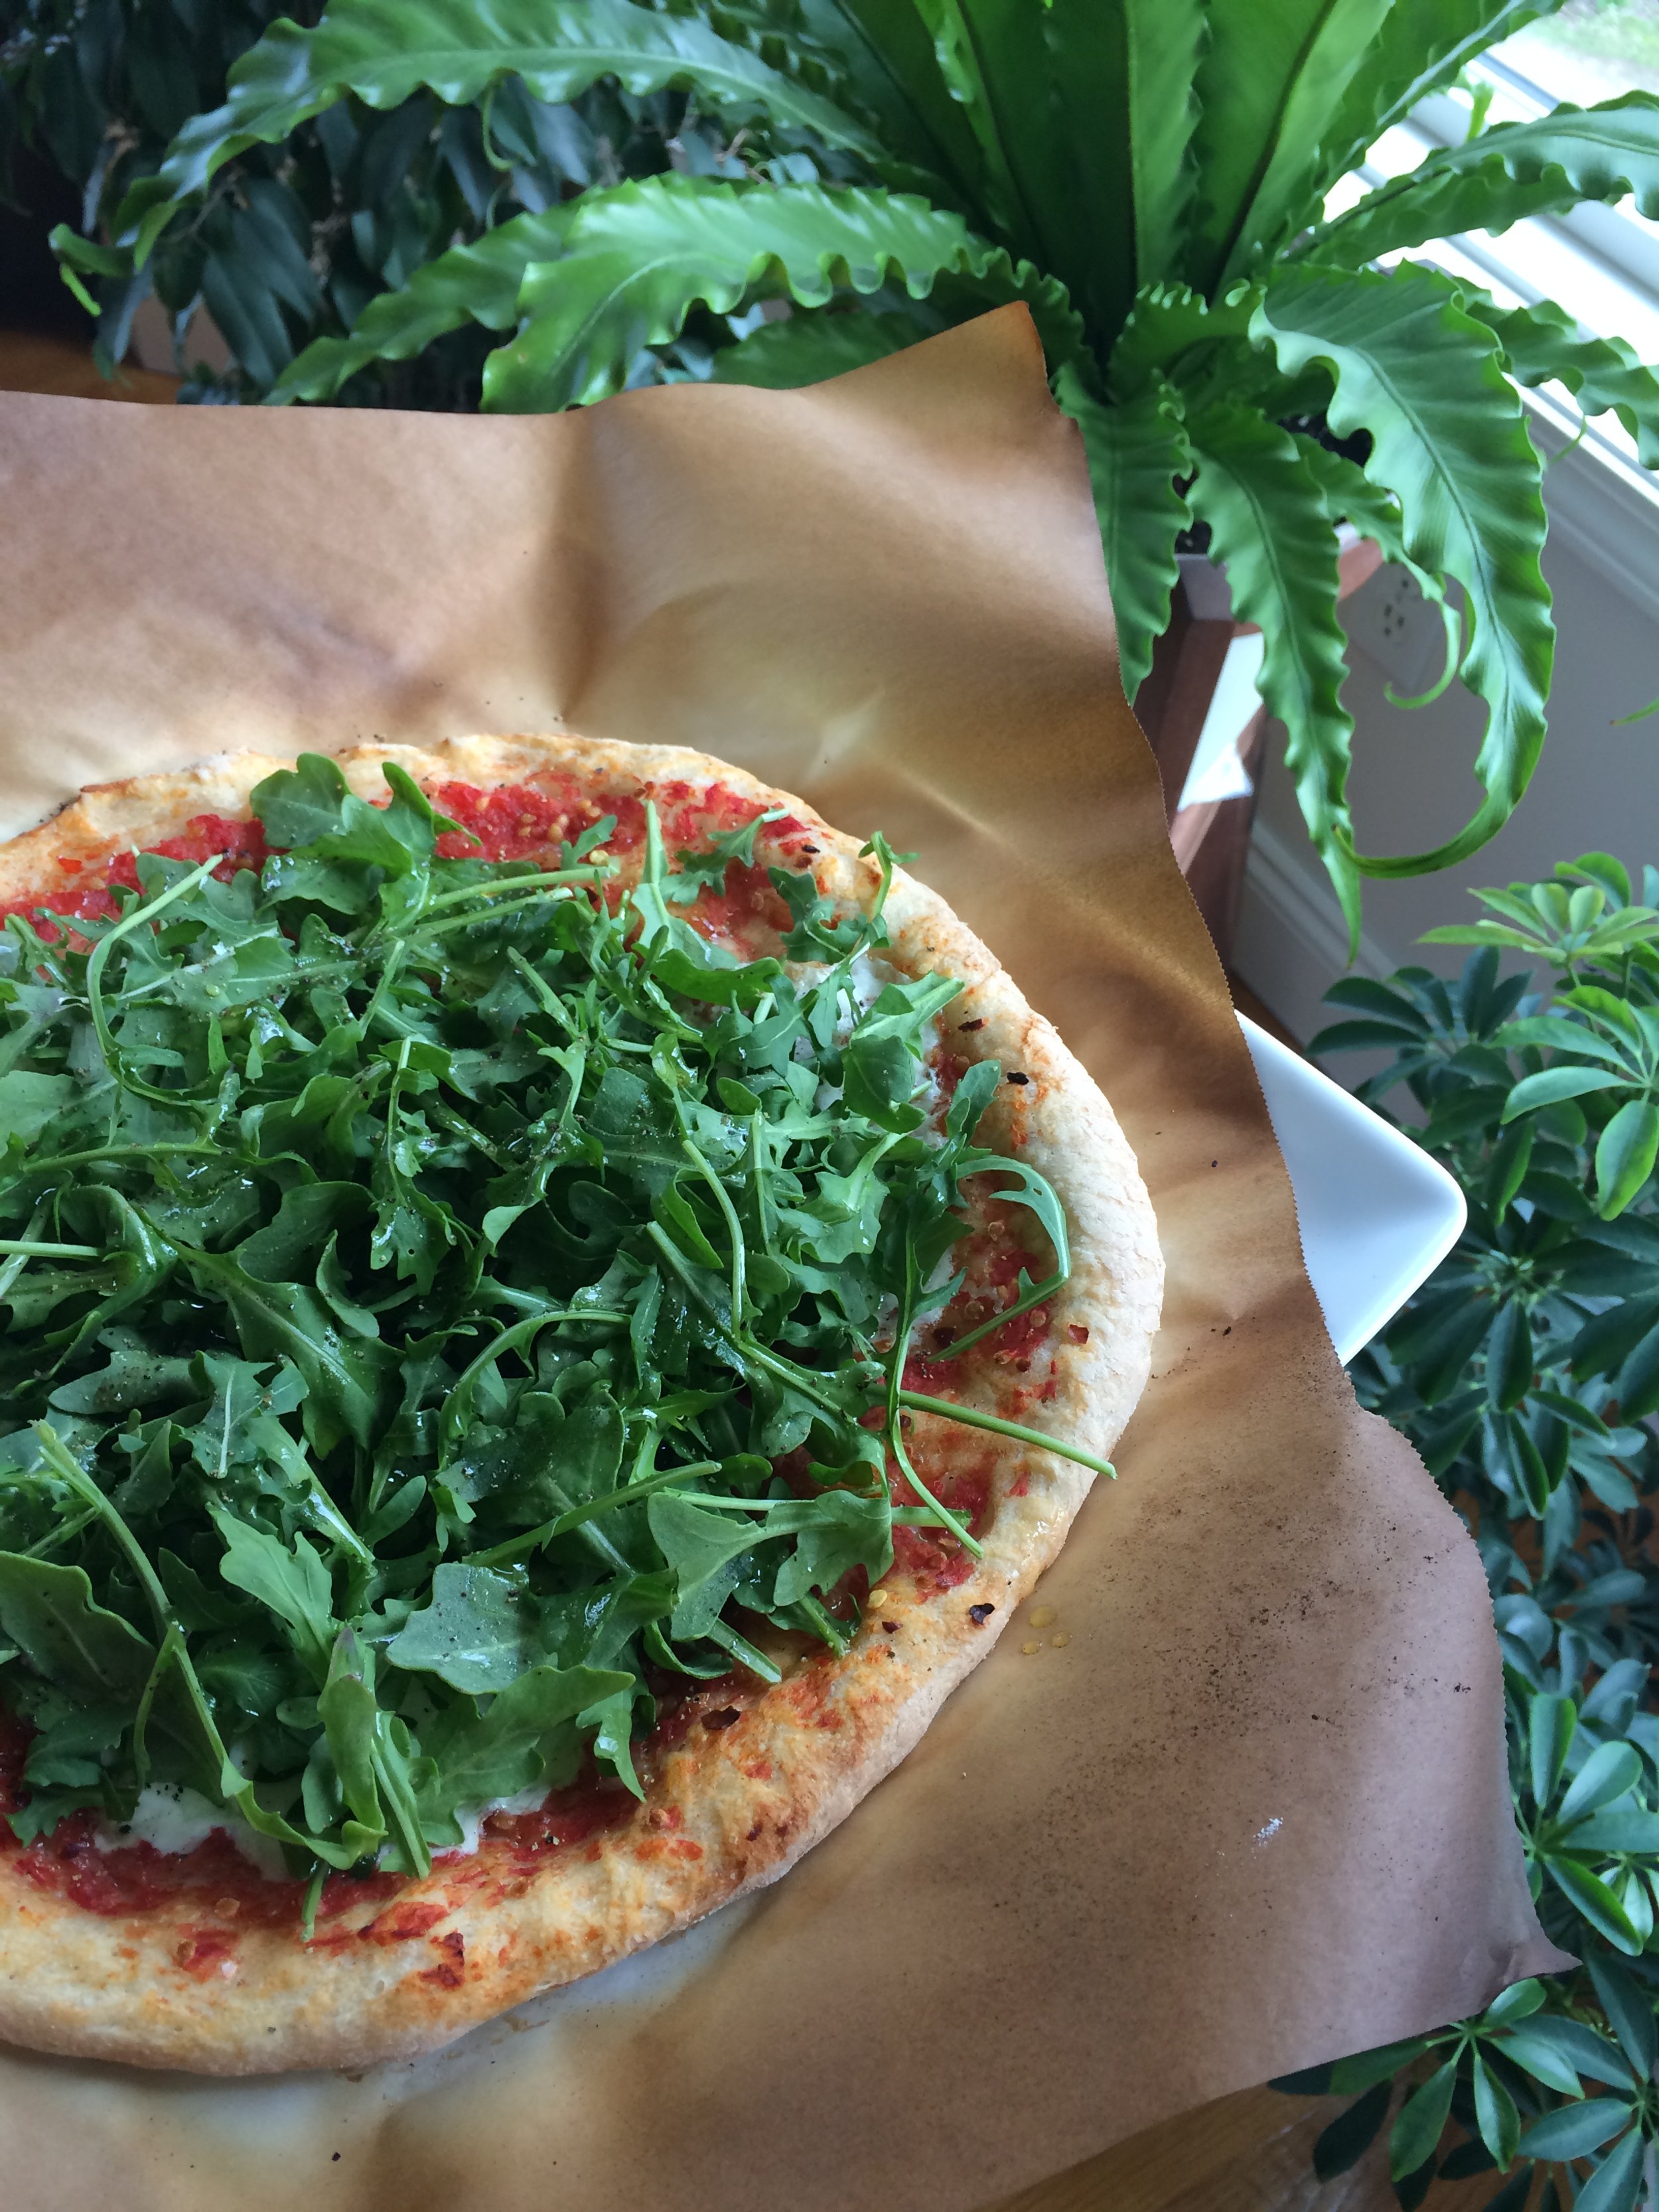
master of disguise: Arugula Pizza

Keep in mind that sourdough is highly individual. Meaning, the time you give it, how active it is, the temperature of your house, types of flour you use, etc. will all affect your starter and your end product. For example, I’ve started sourdough starter on two separate continents with results that varied quite a bit. I’ve made this recipe several times with both my Italian and American starter. To be honest I always had more success with my American starter, it feels invincible where my Italian one always needed some tender care and coaxing. But maybe I subconsciously gave my Italian starter too much free reign thinking that it ought to know what to do, being Italian in the land of pizza, after all. Anyway, here goes nothing:

  1. When making sourdough breads, most recipes will assume or instruct you to have an active/ripe (freshly fed) starter. This means you probably fed your starter at least once the day before starting the recipe, and you’re not just taking your starter straight out of the fridge to start the recipe. Recipes that use NOT refreshed starters will often call themselves discard this or discard that.

    I USUALLY use my starter straight out of the fridge for this recipe. In fact, there may be a note somewhere with this recipe that says you can use your starter straight out of the fridge, making this not such a guilty confession. That’s another great thing about this recipe. And it turns out great. I will mention, though, that sometimes my Italian starter would yield a less fluffy crust, and I found more success if it was recently refreshed.

  2. I once read that it’s actually very hard to kill a (well-established) sourdough starter if it’s kept in the fridge. This relieved a great amount of guilt for me, as, if more than 1 week passed since I had last fed my starter, I had this constant nagging that every day more that passed my starter was dying and suffering. And while the sourdough starters of one person (me) are hardly a vast study, I would say this has turned out true. Even 1 month+ in the fridge and after just one feed it bounced back and was lively. Nice.

  3. Keep in mind the word “recipe” when associated with “sourdough” should be used loosely. Formula might be a better word. The beauty, and frustrating part of sourdough is that it IS so variable. If something isn’t going right, in this recipe or any other with sourdough, go back to your starter, your little living friend. My two biggest mistakes with sourdough starter have been not giving a new starter enough time to get established, and not giving the dough enough time to rise/proof. It can feel strange to let dough rise for so many hours rather than the typical 1-2 hours with instant yeast if that’s what you’re used to!

While the following recipe uses both volume and weight measurements as is usual on this blog, I would encourage you in all baking but especially with sourdough to use a scale. It makes everything easier, creates less dishes to wash, and is quicker and more accurate. When you’re working with sourdough it really does make most sense to use a scale. Scales are not expensive and you don’t need a top of the line one to do the job! You can get a handy little one for as little as $9.99 on Amazon.

If you’re wanting to get more serious about your baking and invest in a slightly larger scale, this is the one I just started using, and am really liking it so far. It’s very similar to the type of scale I would use when working at bakeries or La Pasta Fresca in Florence.

The Difference between “Sourdough Starter” and “Levain”

If these two terms confuse you, hopefully this explanation will help you.

Sourdough starter is your flour and water mixture that you keep in the fridge and feed.

Levain refers to the usually first part of a sourdough recipe where you add sourdough starter with more flour and water, that will end up as part of your bread product. Another way you can think of it, the levain is built from the starter and will always end up baked.

This post may contain affiliate links. If you make a purchase using these links, Jennyblogs may receive a small commission, at no extra cost to you. This helps to support Jennyblogs. Where possible, links are prioritized to small businesses and ethically and responsibly made items. For further information see the privacy policy. Grazie!

Recipe lightly adapted from Ken Forkish’s “The Elements of Pizza”


24+hr Levain Pizza Dough

Makes 2 large, 3 medium, or 5 small pizzas

Ingredients:

Day 1

  • 50g (2 Tbsp + 1 tsp) sourdough starter

  • 100g (1/3 cup + 4 tsp) water

  • 100g (3/4 cup + 2 tsp) bread flour or all-purpose flour

Day 2

  • 225g (scant 1 cup) water

  • 14g (2 1/2 tsp) salt

  • 250g (All of the levain [sourdough]) from day 1

  • 375g (scant 3 cups) all-purpose flour

Directions:

Day 1

  1. The evening before you intend to make pizzas, mix together in a medium bowl the sourdough starter, warm (100°F / 38°C) water, and flour.

  2. Cover the bowl and let it sit out on the countertop overnight.

Day 2

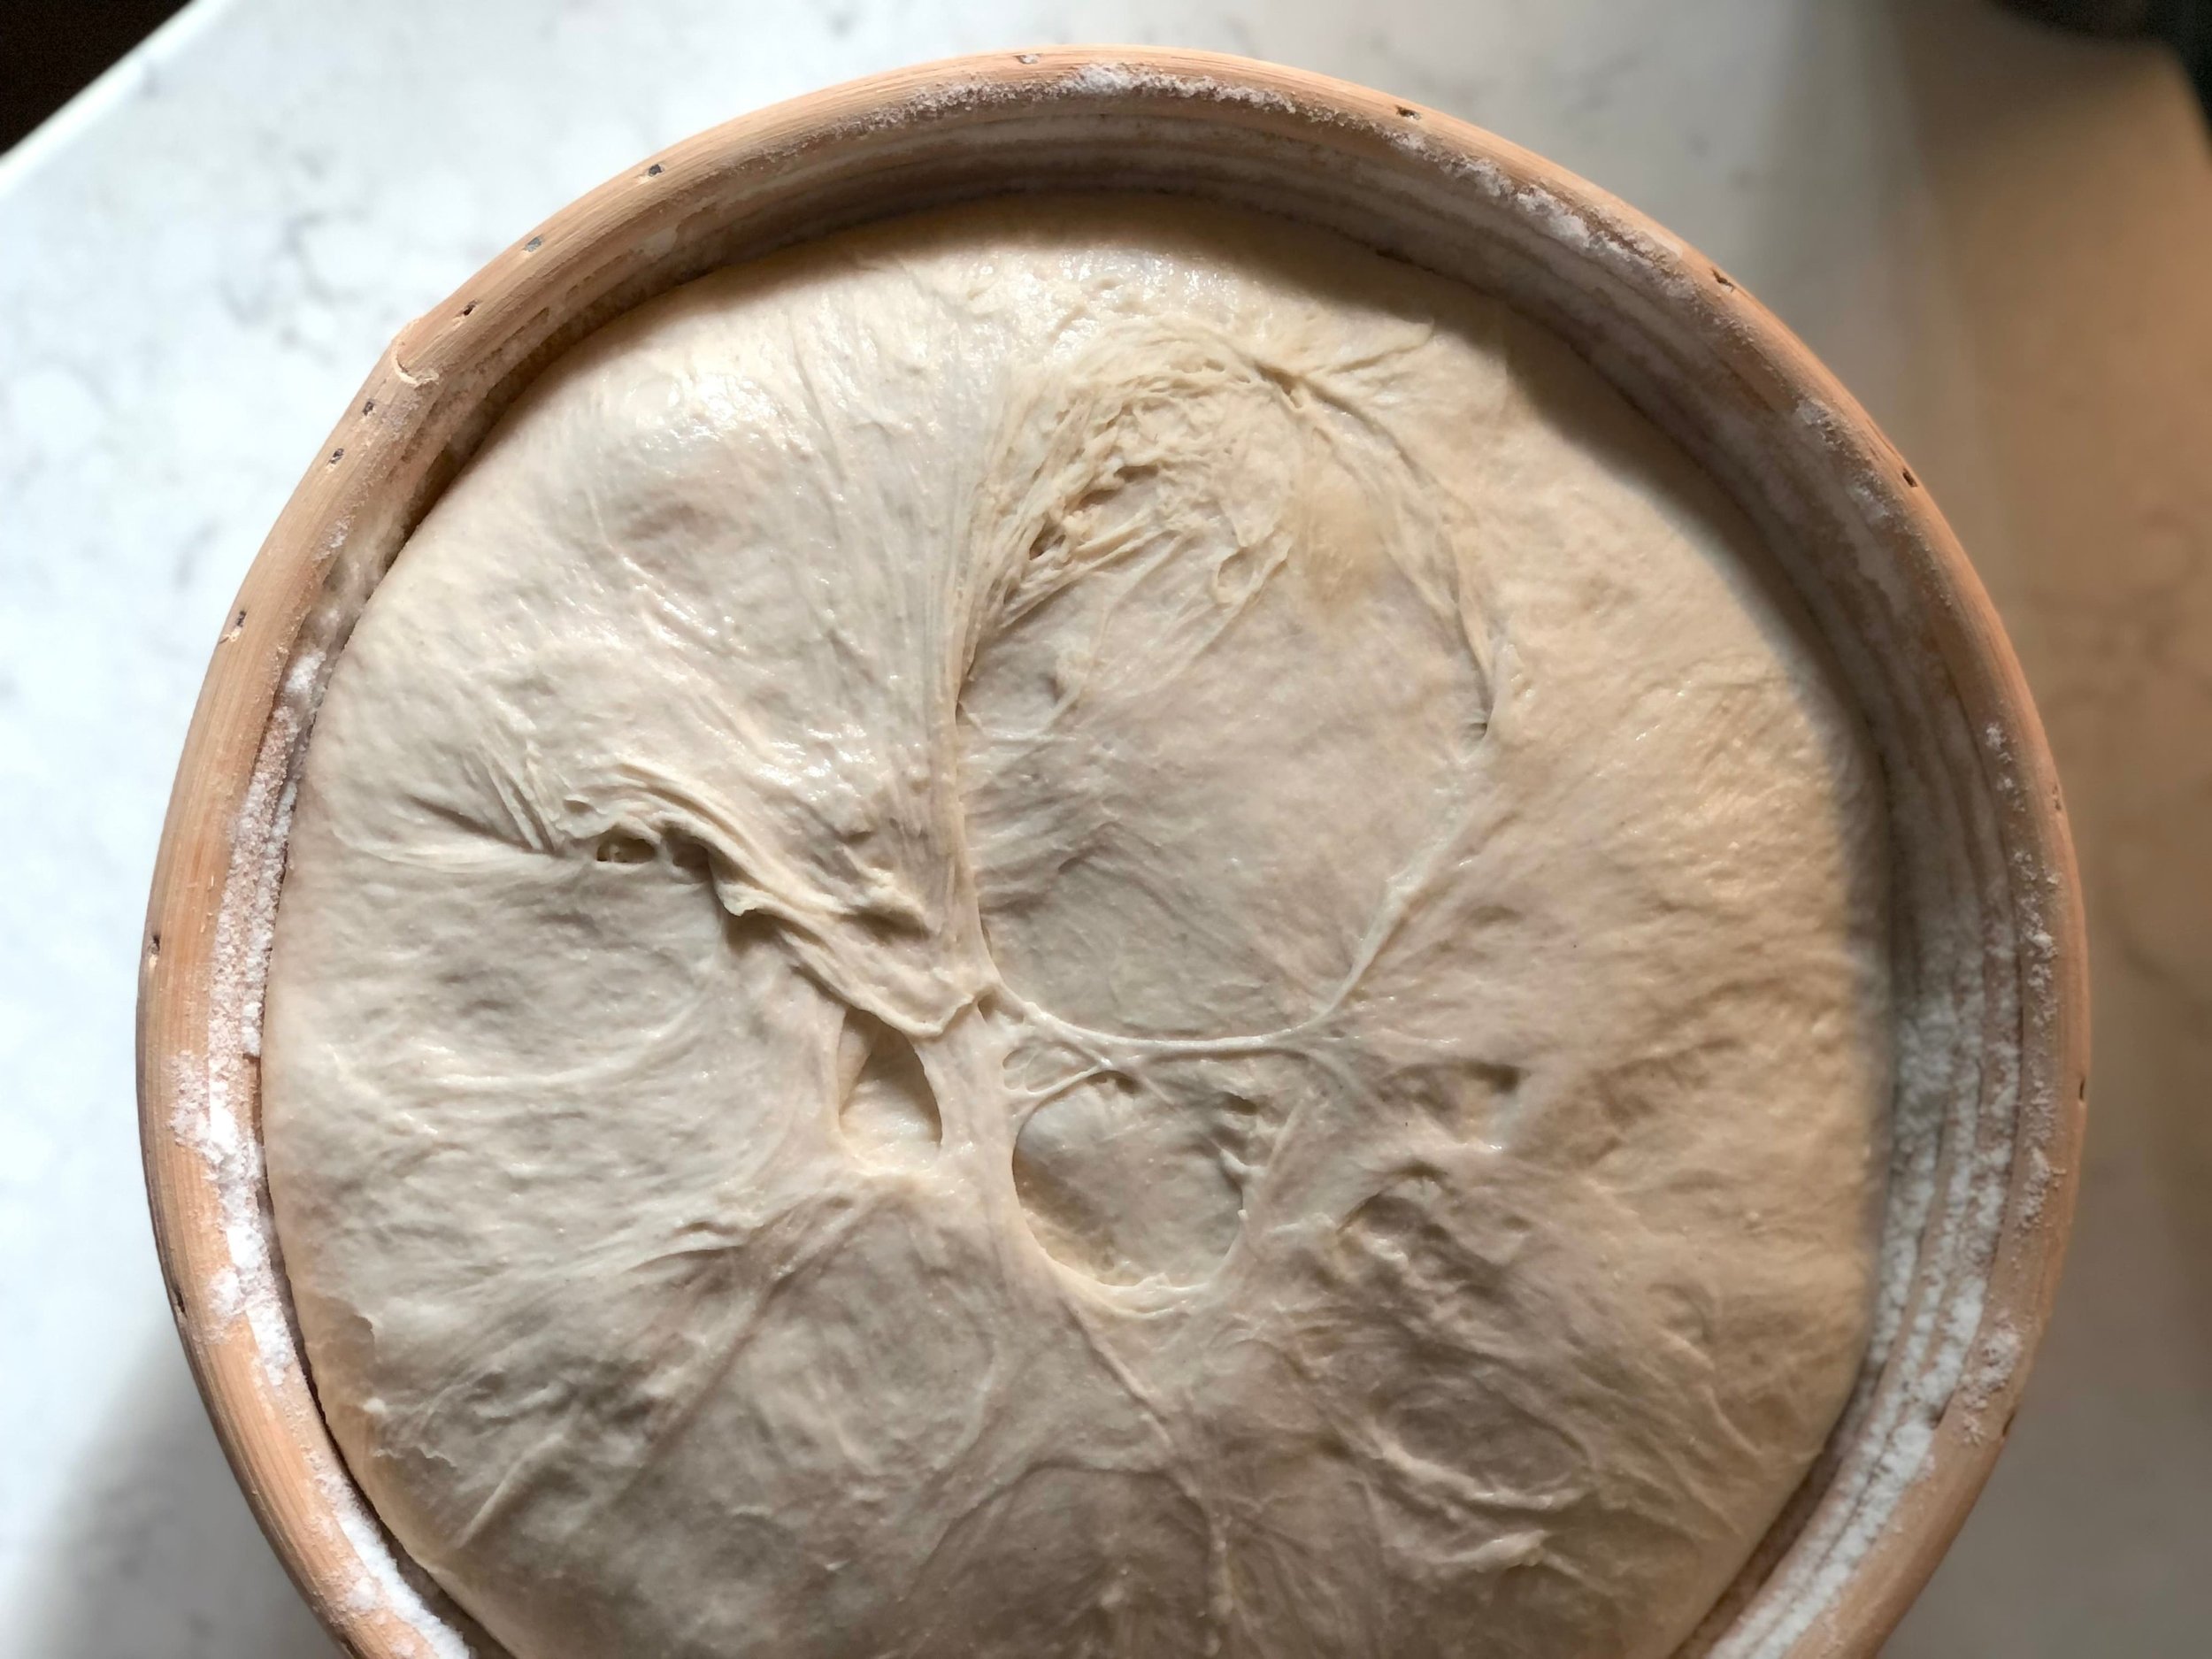
  1. Roughly 12 hours later, your starter from the day before should be bubbly, goopy, and active.

  2. Pour warm (90-95°F / 32°-38°C) water into a large bowl, add salt, and stir until salt has dissolved.

  3. Mix in all of the levain started the previous evening; it may not completely mix in, that’s ok. You can use a spoon or your hand with a “pincer” like motion, like a crab, helping the levain to break up into the water.

  4. Add flour and stir, with a spoon or by hand, just until dough forms into a mostly uniform mass. Continue for about 30 seconds, a shaggy looking dough ball is ok. Target dough temperature is 80°F / 27°C.

  5. Let dough rest for 20 minutes.

  6. Knead dough for 30 seconds - 1 minute on a lightly floured surface, dough should become very smooth and uniform. Shape into a ball and place seam side down into a lightly greased bowl; cover.

  7. Let dough rest at room temperature for about 3 hours.

  8. Turn dough out onto lightly floured surface and shape into desired number of balls (2 for larger pizzas, 3 for medium, or 5 for small), using a scale for consistency. Place shaped dough balls seam side down onto a lightly floured sheet tray, parchment paper, or silpat, keeping space between. Lightly flour tops and cover with plastic wrap; let rest for another 5 hours.

    After the 5 hours, the dough balls can either be refrigerated and used to make pizzas the next day (day 3), or continue and make pizzas!

Make Pizzas

  1. If you have a pizza stone, place it on the middle rack of your oven before preheating.

  2. Preheat oven to 550°F / 288°C or the max of your oven.

  3. Roll with a rolling pin or toss a pizza dough ball to desired size, using lightly floured or oiled hands. Place dough round on parchment paper to easily transfer on and off the pizza stone.

  4. Bake about 5-7 minutes for small pizzas, 6-9 for medium, or 8-12 for large pizzas, using your eyes to test for readiness more than time.

Jenny’s Notes:

  • While I include the original temperature notes for ingredients from Ken Forkish’s original recipe, I will confess I don’t always take the time to measure or check them as I make this often enough in roughly the same environment/temperature house that I just go with it. It’s very educational to do so with new recipes and in new environments, and helps when sharing a sourdough recipe to keep the recipe as consistent as possible, keeping some of the factors (like temperature) the same.

  • The 8 hour rise time on day 2 as a mass, then as dough balls, (steps 7 and 8) doesn’t have to be precise, if you need to shape the dough after 2 hours, that’s perfectly fine, you just want a total time of about 8 hours, so you could rest the dough for 2 hours, shape, then rest for 6 hours.

  • If you refrigerate your dough and use it to make pizzas on what would be day 3, take dough out of the fridge about an hour before making/baking pizzas. In a pinch I’ve used the dough straight out of the fridge, but the dough will rise better and be fluffier if you don’t go cold turkey, heh.

  • If you’ve never used your oven at its maximum temperature and think that’s crazy, just keep in mind that pizzas made in wood burning pizza ovens like they are in Italy, are baked at temperatures of up to 900°F / 485°C, so your home oven at its max isn’t even going to get near the burst of heat that make the best pizzas!

24 Hour Levain Pizza Dough
Yield 3-5 pizzas
Author
Prep time
35 Min
Cook time
25 Min
Inactive time
20 H & 20 M
Total time
21 H & 20 M

24 Hour Levain Pizza Dough

Homemade sourdough pizza crust in just 24 hours, with time doing most of the work for you!

Ingredients

Day 1
Day 2

Instructions

Day 1
  1. The evening before you intend to make pizzas, mix together in a medium bowl the sourdough starter, warm (100°F / 38°C) water, and flour.
  2. Cover the bowl and let it sit out on the countertop overnight.
Day 2
  1. Roughly 12 hours later, your starter from the day before should be bubbly, goopy, and active.
  2. Pour warm (90-95°F / 32°-38°C) water into a large bowl, add salt, and stir until salt has dissolved.
  3. Mix in all of the levain started the previous evening; it may not completely mix in, that’s ok. You can use a spoon or your hand with a “pincer” like motion, like a crab, helping the levain to break up into the water.
  4. Add flour and stir, with a spoon or by hand, just until dough forms into a mostly uniform mass. Continue for about 30 seconds, a shaggy looking dough ball is ok. Target dough temperature is 80°F / 27°C.
  5. Let dough rest for 20 minutes.
  6. Knead dough for 30 seconds - 1 minute on a lightly floured surface, dough should become very smooth and uniform. Shape into a ball and place seam side down into a lightly greased bowl; cover.
  7. Let dough rest at room temperature for about 3 hours.
  8. Turn dough out onto lightly floured surface and shape into desired number of balls (2 for larger pizzas, 3 for medium, or 5 for small), using a scale for consistency. Place shaped dough balls seam side down onto a lightly floured sheet tray, parchment paper, or silpat, keeping space between. Lightly flour tops and cover with plastic wrap; let rest for another 5 hours.
  9. After the 5 hours, the dough balls can either be refrigerated and used to make pizzas the next day (day 3), or continue and make pizzas!
Make Pizzas
  1. If you have a pizza stone, place it on the middle rack of your oven before preheating oven.
  2. Preheat oven to 550°F / 288°C or the max of your oven.
  3. Roll with a rolling pin or toss a pizza dough ball to desired size, using lightly floured hands. Place dough round on parchment paper to easily transfer on and off the pizza stone.
  4. Bake about 5-7 minutes for small pizzas, 6-9 for medium, or 8-12 for large pizzas, using your eyes to test for readiness more than time.

Notes

  • While I include the original temperature notes for ingredients from Ken Forkish’s original recipe, I will confess I don’t always take the time to measure or check them as I make this often enough in roughly the same environment/temperature house that I just go with it. It’s very educational to do so with new recipes and in new environments, and helps when sharing a sourdough recipe to keep the recipe as consistent as possible, keeping some of the factors (like temperature) the same.
  • The 8 hour rise time on day 2 as a mass, then as dough balls, (steps 7 and 8) doesn’t have to be precise, if you need to shape the dough after 2 hours, that’s perfectly fine, you just want a total time of about 8 hours, so you could rest the dough for 2 hours, shape, then rest for 6 hours.
  • If you refrigerate your dough and use it to make pizzas on what would be day 3, take dough out of the fridge about an hour before making/baking pizzas. In a pinch I’ve used the dough straight out of the fridge, but the dough will rise better and be fluffier if you don’t go cold turkey, heh.
  • If you’ve never used your oven at its maximum temperature and think that’s crazy, just keep in mind that pizzas made in wood burning pizza ovens like they are in Italy, are baked at temperatures of up to 900°F / 485°C, so your home oven at its max isn’t even going to get near the burst of heat that make the best pizzas!


Nutrition Facts

Calories

591.5

Fat

1.59 g

Sat. Fat

0.24 g

Carbs

124.01 g

Fiber

4.39 g

Net carbs

119.62 g

Sugar

0.43 g

Protein

16.78 g

Sodium

1817.54 mg

Cholesterol

0 mg

Nutritional information is approximate. Based on 1 pizza dough ball if you make 3 medium sized dough balls.

pizza dough, levain, sourdough starter, homemade pizza, sourdough pizza
dinner
Italian, American
Did you make this recipe?
Tag @jennyblogsandbakes on instagram and hashtag it #jennyblogs

Whole Wheat Garlic Knots

Last Updated September 7, 2024

IMG_3863.jpeg

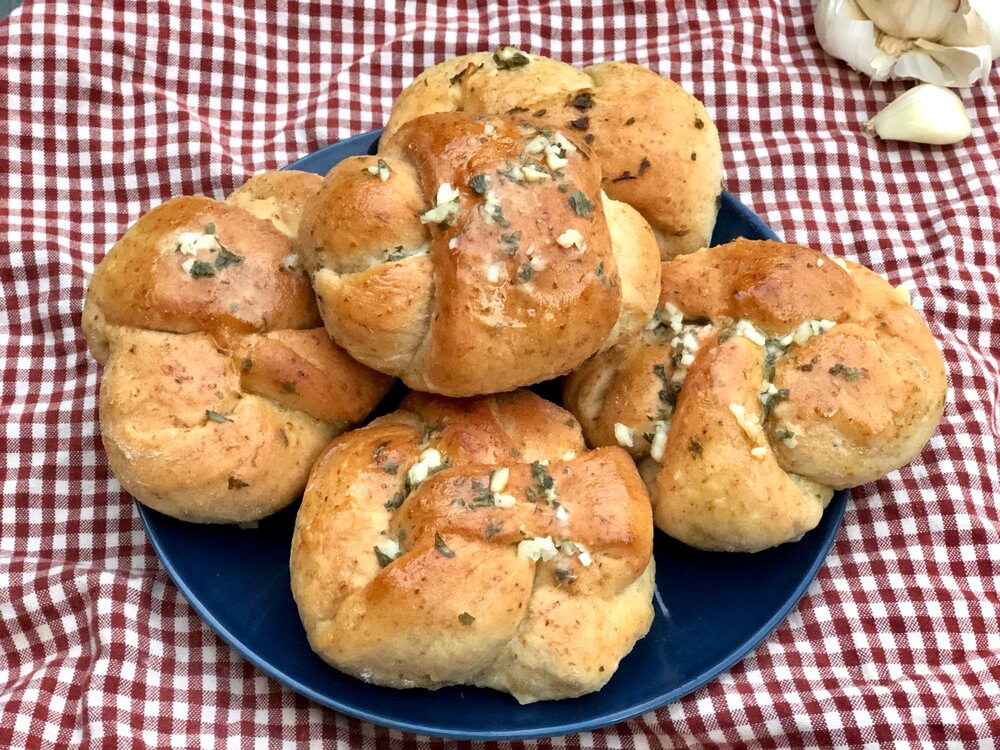
These whole wheat garlic knots are like your favorite garlic knots, but slightly healthified by adding whole wheat flour. You’re welcome.

I once spent two summers in NYC when I was a teenager, training with the American Ballet Theatre. My mom and I had great fun roaming around the streets of New York, trying NY bagels and pizza and walking miles for the free Lindt samples at the Lindt store. #dessert. We quickly discovered that NY pizza lives up to its name, and also that it is not the only star. You must get the garlic knots. And the best ones are at Ray’s Pizza, on 11th street. Buddy the Elf knows it. Except I may have read they closed. I’m really torn up about that. Such good memories, and guys, Buddy the Elf talks about it. How could they close?? How could they do that to me? I haven’t been able to support their business since 2008 but….such good memories. And if I had gone back to NYC since I would’ve eaten so many garlic knots! Alas. The world keeps turning, and there is this homemade recipe which is pretty durn good.

These knots are as good as any, and while the whole wheat flour might not be a part of the classic, I think it adds a wonderful nutty depth to the knots, as whole wheat flour does so well.

Want to lessen the garlic breath? Try Roasted Garlic Knots!

If there was a fault with garlic knots, it would be, well, the garlic. It’s what makes them. It’s also what makes them so dangerous. Fresh garlic, and so much. So good. So….smelly for the next 24 hours. But I discovered a trick to make these rolls a little less lethal. Normally you would bake the rolls, then slather them in the garlic butter. Instead, you can slather them with the garlic butter before baking, so they become roasted garlic knots. Also delicious, and may save your social interactions the next day. Somewhat.

The amount of garlic butter you use is also customizable. Really good, garlicky knots like you get in restaurants would probably be doused in a similar amount of garlic butter as the recipe below calls for, but if you want to lighten the load, you absolutely can. I often halve the garlic topping to keep it a bit lighter. Or, because of masks, social distancing, and generally staying home, you could also up the garlic…

Use up sourdough discard

If you are an avid sourdough baker, or at least, sourdough feeder, this recipe makes an excellent vessel for using up sourdough discard. Simply add discard to other ingredients before kneading (think 50-100g of starter) and continue as normal. Depending on how much starter you use, you will probably need to add a bit extra flour to the dough to ensure it’s not overly sticky.

So, an ode to Ray’s Pizza on 11th, that may no longer be in existence. May it Ray in Pizza. I mean, rest in peace.

This post may contain affiliate links. If you make a purchase using these links, Jennyblogs may receive a small commission, at no extra cost to you. This helps to support Jennyblogs. Where possible, links are prioritized to small businesses and ethically and responsibly made items. For further information see the privacy policy. Grazie!

Recipe adapted from Joy the Baker


Whole Wheat Garlic Knots

Makes 10 knots

IMG_3856.jpeg

Ingredients:

For the knots

  • 2 1/4 tsp / 7g active dry yeast

  • 2 tsp / 10g sugar

  • 1 cup / 237g warm water (about 100°F / 38°C)

  • 1 1/4 - 1 1/2 cups / 150-180g bread or all-purpose flour

  • 1 cup / 130g whole wheat flour

  • 2 Tbsp / 28g oil

  • 1 tsp / 5g salt

For the Garlic Butter Mixture

  • 4 cloves garlic, minced

  • 1/4 cup / 56g melted butter, olive oil, or a mixture of both

  • 1/4 cup chopped fresh parsley, optional

  • 1 /2 tsp salt

Directions:

Make the Knots

Oven preheated to 400°F / 205°C. Line 1 or 2 baking sheets with parchment paper or silpat.

  1. In a small bowl, combine yeast, sugar, and warm water; swirl to dissolve yeast and sugar. Let sit until frothy, about 5-10 minutes.

  2. In a large bowl or bowl of a stand mixer fitted with the dough hook, mix 1 1/4 cups bread flour, whole wheat flour, oil, salt, and yeast mixture until combined. Dough should be pliable, not too stiff but also not sticky. Add remaining 1/4 cup bread flour if necessary.

  3. Knead dough with bread hook for about 7 minutes or by hand for 10 minutes until dough is smooth and elastic.

  4. Grease a large bowl (can be the same bowl) and place dough in the bowl, flipping once to coat in oil. Cover with a kitchen towel or plastic wrap and allow to rise at room temperature for 1 hour, or until doubled in size.

  5. On a lightly floured surface, roll dough out into a square, roughly 10x10in / 25x25cm. Slice into ten 1in / 2.5cm strips.

  6. Take each strip and tie loosely in a knot; tuck the ends under. Place evenly spaced on baking sheet(s) and loosely cover with a kitchen towel or plastic wrap. Let rise in a warm place for about 30 minutes.

  7. Bake in preheated oven for 15 to 18 minutes or until golden.

Make the Garlic Butter Mixture

  1. Mix together all ingredients for garlic butter mixture.

  2. As soon as rolls are done baking, either toss in garlic butter or brush over the rolls with a pastry brush.

    Best if served warm.

Jenny’s Notes:

  • For Roasted Garlic Knots, brush rolls with garlic butter mixture before baking instead of after. Helps a bit with the garlic breath!

  • For a lighter, less garlicky roll, cut the garlic butter mixture in half. For extra garlicky rolls, use up to 6 garlic cloves!

  • The dough can be made a day ahead. Make and knead dough according to directions, and after placing dough in oiled bowl, place covered in fridge and allow to rise overnight. Bring dough to room temperature (or at least close) before rolling out.

  • You can use sourdough discard in this recipe. Add in with the flour and continue as in recipe, a bit more flour may be necessary to ensure your dough isn’t too sticky.

  • The above recipe can also be used as pizza dough. Likewise, you can also use your favorite pizza dough recipe (my mom used to buy pre-made pizza dough from Sam’s club to make easy breads and pizzas) and simply follow the recipe above for shaping and making the garlic butter.

Whole Wheat Garlic Knots
Yield 10
Author
Prep time
35 Min
Cook time
18 Min
Inactive time
1 H & 30 M
Total time
2 H & 23 M

Whole Wheat Garlic Knots

Buttery, garlicky knots like the best pizzerias, made at home with whole wheat flour.
Cook modePrevent screen from turning off

Ingredients

For the Knots
For the Garlic Butter Mixture

Instructions

Make the Knots
  1. Oven preheated to 400°F / 205°C. Line 1 or 2 baking sheets with parchment paper or silpat.
  2. In a small bowl, combine yeast, sugar, and warm water; swirl to dissolve yeast and sugar. Let sit until frothy, about 5-10 minutes.
  3. In a large bowl or bowl of a stand mixer fitted with the dough hook, mix 1 1/4 cups bread flour, whole wheat flour, oil, salt, and yeast mixture until combined. Dough should be pliable, not too stiff but also not sticky. Add remaining 1/4 cup bread flour if necessary.
  4. Knead dough with bread hook for about 7 minutes or by hand for 10 minutes until dough is smooth and elastic.
  5. Grease a large bowl (can be the same bowl) and place dough in the bowl, flipping once to coat in oil. Cover with a kitchen towel or plastic wrap and allow to rise at room temperature for 1 hour, or until doubled in size.
  6. On a lightly floured surface, roll dough out into a square, roughly 10x10in / 25x25cm. Slice into ten 1in / 2.5cm strips.
  7. Take each strip and tie loosely in a knot; tuck the ends under. Place evenly spaced on baking sheet(s) and loosely cover with a kitchen towel or plastic wrap. Let rise in a warm place for about 30 minutes.
  8. Bake in preheated oven for 15 to 18 minutes or until golden.
Make the Garlic Butter Mixture
  1. Mix together all ingredients for garlic butter mixture.
  2. As soon as rolls are done baking, either toss in garlic butter or brush over the rolls with a pastry brush.
  3. Best if served warm.

Notes

  • For Roasted Garlic Knots, brush rolls with garlic butter mixture before baking instead of after. Helps a bit with the garlic breath!
  • For a lighter, less garlicky roll, cut the garlic butter mixture in half. For extra garlicky rolls, use up to 6 garlic cloves!
  • The dough can be made a day ahead. Make and knead dough according to directions, and after placing dough in oiled bowl, place covered in fridge and allow to rise overnight. Bring dough to room temperature (or at least close) before rolling out.
  • You can use sourdough discard in this recipe. Add in with the flour and continue as in recipe, a bit more flour may be necessary to ensure your dough isn’t too sticky.
  • The above recipe can also be used as pizza dough. Likewise, you can also use your favorite pizza dough recipe (my mom used to buy pre-made pizza dough from Sam’s club to make easy breads and pizzas) and simply follow the recipe above for shaping and making the garlic butter.


Nutrition Facts

Calories

185.79

Fat

7.93 g

Sat. Fat

3.14 g

Carbs

20.38 g

Fiber

2.13 g

Net carbs

22.21 g

Sugar

1.10 g

Protein

4.01 g

Cholesterol

12.04 mg

Sodium

232.51 mg

Nutritional information is approximate. Based on 1 knot.

Ray's Pizza Garlic Knots, Garlic Knots, Garlic Butter, Garlic Rolls
Bread
American
Did you make this recipe?
Tag @jennyblogsandbakes on instagram and hashtag it #jennyblogs
IMG_3868.jpeg

Momsy's Pancakes

7CCA3EAB-FC24-468B-AC50-AD97ADBD242E.jpg

Last Updated September 8, 2024

As the weather cools down, what could possibly be better than flipping some fresh, hot pancakes off the griddle?

Well, let’s be honest, whether the weather is heating up, cooling down, stagnant, or generally doing its weather-pattern-season thingy, are pancakes ever not a good idea?

Thought not.

Breakfast, lunch, dinner. Summer. Winter. Inside. Outside. Buttermilk. Pumpkin. Lemon poppyseed. There is always room for a plate of pancakes at the table!

Growing up I can’t say we had a family tradition of eating pancakes on a specific day of the week. It was more of a, whenever the fancy hits you. My mom would make a up a large batch of homemade dry pancake mix (you can get that recipe here), then tape instructions to the jar of how much wet ingredients to add, to be whipped up at a moment’s notice. My dad makes maple syrup every spring and there are always quarts of the liquid gold in the pantry, so we were always pancake ready.
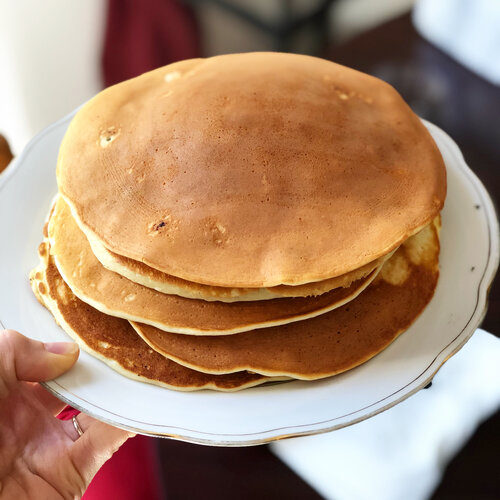
When my nieces and nephews were younger they spent a lot of time at our house, and pancakes were a regular deal. Especially my oldest niece, Gwen, could pack them away! From the time she was a toddler she would eat more than anyone, a stack of 4 or more. It was actually amazing she could fit that many in her tiny body. Realize that we make big pancakes, the size of your face or a large dinner plate. I usually eat 2. The first time I ate pancakes at a friend’s house when I was little the mom seemed surprised I only wanted two. I realized why when two itty bitty pancakes arrived in front of me. Oh. I’ll take 8 more, please. Plus, my friend’s mom made them with chocolate chips and my mom usually didn’t let us, too much sugar. ;)

The pancake recipe below is my mom’s basic recipe, it’s wonderful as-is for a buttermilk pancake, or a base for any add-ins you want, whether that be chocolate chip, raspberry, gingerbread, apple-cinnamon, or whatever your taste-buds can dream up!

This post may contain affiliate links. If you make a purchase using these links, Jennyblogs may receive a small commission, at no extra cost to you. This helps to support Jennyblogs. Where possible, links are prioritized to small businesses and ethically and responsibly made items. For further information see the privacy policy. Grazie!

Recipe from my mama


Buttermilk Pancakes

Serves 1-2

Ingredients:

  • 1 cup / 120g flour

  • 2 1/2 tsp baking powder

  • 2 1/2 tsp sugar

  • 1/2 tsp salt

  • 1 cup / 237g buttermilk

  • 1 egg

  • 2 Tbsp / 28g oil

  • up to 1 cup / 250g sourdough discard, optional

Directions:

Preheat a lightly greased griddle or large pan over medium heat (375°F / 290°C if using an electric griddle.)

  1. In a medium bowl whisk together flour, baking powder, sugar, and salt.

  2. In another bowl, combine buttermilk, egg, oil, and sourdough discard, if using. Add to dry ingredients and mix until just moistened. Lumps are ok as long as they’re not too big.

  3. Pour pancake batter to desired size (or shape!) on hot griddle, repeat as you have room, but making sure to leave about an inch / 2cm between pancakes. Flip after a couple minutes or a when the edges look dry and the bubbles towards the middle pop but don’t immediately fill in. Cook for a few minutes on the second side, until golden. Repeat until batter is gone.

  4. Serve hot with butter and maple syrup, or your favorite toppings such as peanut butter, honey, powdered sugar, jams, fruit, Nutella, etc.

Jenny’s Notes:

IMG_3216.jpg
  • Pancakes are easy, quick, and delicious, and also very easy to fit to your dietary needs and choices. With the exception of the baking powder, every ingredient can be substituted or even omitted at times. Even then, some use baking soda instead of baking powder or a combo of the two. Just don’t do more than one, maybe two substitutions at a time without risking the quality of your pancakes. So don’t be frying’ up flour, water and baking powder, okayyyy?

    - Replace flour with a gluten-free flour or flour of your choice. My mom likes grinding oats in a food processor to make oat flour pancakes. I also like substituting part of the flour with buckwheat.
    - Omit sugar if desired. I used to not eat sugar during the week and simply left out the sugar so I could still enjoy pancakes. I recommend leaving it in, though, as it rounds out the flavor of the pancake, especially if you use toppings that aren’t as sweet as maple syrup.
    - If you don’t have buttermilk, you can make it at home by adding 1 Tbsp / 14g vinegar or lemon juice to a 1 cup measure and filling up to the 1 cup mark (223g) with milk. You can also use plain ol’ water in a pinch, or alternative milks as desired!
    - If you don’t have or don’t eat eggs, try using a flax egg, or you can also leave the egg out.
    - For the oil, use whichever oil you prefer. A neutral baking oil is best for a classic pancake taste, but that doesn’t mean you can’t use olive or coconut oil if that’s what you prefer. Or even melted butter. Also, the oil can be left out if need be.

Fluffy Buttermilk Pancakes
Yield 1-2
Author
Prep time
5 Min
Cook time
10 Min
Total time
15 Min

Fluffy Buttermilk Pancakes

Classic, fluffy, buttermilk pancakes hot off the griddle in 15 minutes! Plus substitutions to make delicious pancakes for your dietary needs.
Cook modePrevent screen from turning off

Ingredients

Instructions

  1. Preheat a lightly greased griddle or large pan over medium heat (375°F / 290°C if using an electric griddle.)
  2. In a medium bowl whisk together flour, baking powder, sugar, and salt.
  3. In another bowl, combine buttermilk, egg, and oil. Add to dry ingredients and mix until just moistened. Lumps are ok as long as they’re not too big.
  4. Pour pancake batter to desired size (or shape!) on hot griddle, repeat as you have room, but making sure to leave about an inch / 2cm between pancakes. Flip after a couple minutes or a when the edges look dry and the bubbles towards the middle pop but don’t immediately fill in. Cook for a few minutes on the second side, until golden. Repeat until batter is gone.
  5. Serve hot with butter and maple syrup, or your favorite toppings such as peanut butter, honey, powdered sugar, jams, fruit, Nutella, etc.

Notes

  • Pancakes are easy, quick, and delicious, and also very easy to fit to your dietary needs and choices. With the exception of the baking powder, every ingredient can be substituted or even omitted at times. Even then, some use baking soda instead of baking powder or a combo of the two. Just don’t do more than one, maybe two substitutions at a time without risking the quality of your pancakes. So don’t be frying’ up flour, water and baking powder, okayyyy?

- Replace flour with a gluten-free flour or flour of your choice. My mom likes grinding oats in a food processor to make oat flour pancakes. I also like substituting part of the flour with buckwheat.

- Omit sugar if desired. I used to not eat sugar during the week and simply left out the sugar so I could still enjoy pancakes. I recommend leaving it in, though, as it rounds out the flavor of the pancake, especially if you use toppings that aren’t as sweet as maple syrup.

- If you don’t have buttermilk, you can make it at home by adding 1 Tbsp / 14g vinegar or lemon juice to a 1 cup measure and filling up to the 1 cup mark (223g) with milk. You can also use plain ol’ water in a pinch, or alternative milks as desired!

- If you don’t have or don’t eat eggs, try using a flax egg, or you can also leave the egg out.

- For the oil, use whichever oil you prefer. A neutral baking oil is best for a classic pancake taste, but that doesn’t mean you can’t use olive or coconut oil if that’s what you prefer. Or even melted butter. Also, the oil can be left out if need be.

Nutrition Facts

Calories

448.68

Fat

18.02 g

Sat. Fat

2.44 g

Carbs

58.48 g

Fiber

1.63 g

Net carbs

56.85 g

Sugar

11.17 g

Protein

13.26 g

Cholesterol

97.74 mg

Sodium

1452.78 mg

Nutritional information is approximate, based on 2 servings.

buttermilk pancakes, homemade pancakes recipe, hot cakes, griddle cakes, best
breakfast
American
Did you make this recipe?
Tag @jennyblogsandbakes on instagram and hashtag it #jennyblogs

Double Chocolate Zucchini Bread

Last Updated August 30, 2024

IMG_3532.jpg

It’s zucchini season!

Don’t ask me why, but I am always surprised when summer rolls around and so do all the mountains of ripe zucchini…I associate zucchini with fall and winter dishes. Why? No idea. Especially when I look back over my childhood, and my mom almost always had zucchini growing in her garden (they would get huge and there would be so many, who wants zucchini???) Ah, the things we take for granted! Summer dinners would often see zucchini battered in flour and fried up over the griddle.

Now that I live in Italy, I always see the zucchini blossoms battered and fried. It’s a favorite appetizer in restaurants come summer. In fact, more often than not zucchini are sold with the blossoms still attached. Or you can buy just the blossoms. I rarely batter and fry things at home and haven’t bothered to discover other ways of using them, so I have to be careful because the blossoms go moldy much quicker than the zucchini itself! The zucchini are also quite small and light in color, at least compared to the monster dark green baseball bats that used to grow in my mom’s garden.

With the abundance of zucchini around, or any produce, I tend to start looking for new ways to cook them or improving current recipes. While I love zucchini in a stir-fry, with pasta, in risotto, pan-fried like my mama’s, etc., I wanted something different. Zucchini bread came to mind. But not just classic zucchini bread. I wanted chocolate zucchini bread. Double chocolate zucchini bread.

Thus this recipe was born, and if you’re at the point where you’re getting sick of all the zucchini, this is the recipe for you. You won’t even know there is zucchini in it. It’s chocolatey, fudgy, not overly sweet, and just exactly what I was wanting.

Aside from having vegetables in it, it doesn’t have much oil, using half yogurt or applesauce instead, keeping the calories and fat content down. If you’re concerned about cholesterol, you can also use egg whites instead of the whole egg! See notes below recipe for more ideas to customize this bread to your tastes and needs.

Use up sourdough discard

Another great thing about this recipe? You can use up some sourdough discard that may be lurking in your fridge. No need to feed it or for it to be active at all, just make sure it hasn’t gone bad! Sometimes my discard sits up to 2-3 weeks in my fridge before I get to it. The longer it sits the more sour it will taste/smell, but even using a 3 week old discard I couldn’t have told you there was any in this zucchini bread! It can help bulk up recipes like this and add a little fermented nutrition!

This post may contain affiliate links. If you make a purchase using these links, Jennyblogs may receive a small commission, at no extra cost to you. This helps to support Jennyblogs. Where possible, links are prioritized to small businesses and ethically and responsibly made items. For further information see the privacy policy. Grazie!

Recipe adapted from my mama’s classic zucchini bread


Double Chocolate Zucchini Bread

Makes 1 loaf

IMG_3541.jpg

Ingredients:

  • 1/2 cup / 100g sugar

  • 1/4 cup / 56g oil

  • 1/4 cup / 60g plain yogurt or applesauce

  • 1 egg or 2 egg whites

  • 1 tsp / 5g vanilla extract

  • about 1/2 cup / 100g sourdough discard, optional

  • 1 1/2 cups / 250g grated zucchini (about 2 medium)

  • 1 cup / 120g all-purpose flour

  • 1/2 cup / 50g cocoa powder

  • 1 tsp baking soda

  • 1/2 tsp salt

  • 1/4 tsp baking powder

  • 1 cup / 170g chocolate chips

Directions:

Preheat oven to 350°F / 177°C. Grease 1 9x5inch / 23x13cm bread pan or line with parchment paper.

  1. In a large bowl, beat together sugar, oil, yogurt, egg, vanilla, and sourdough discard, if using. Stir in zucchini.

  2. In a separate bowl, whisk together flour, cocoa, baking soda, salt, and baking powder.

  3. Fold dry ingredients and chocolate chips into wet ingredients until just combined. Reserve a handful of chocolate chips for sprinkling on top, if you wish.

  4. Pour into prepared bread pan, sprinkle with remaining chocolate chips, and bake in preheated oven for 40-45 minutes or until toothpick inserted in the center comes out mostly clean. A few moist crumbs clinging to the toothpick is a good sign the bread is done but still moist! Allow to bread to cool before removing from pan and serving.

Jenny’s Notes:

  • If you desire a sweeter bread, you can up the sugar to 1 cup / 200g.

  • I know not everyone has plain yogurt on hand, so if you have French Vanilla or another flavor you wouldn’t mind mixing with chocolate, use that! Flavored yogurt has added sugar, so if that is important to you to keep the sugar down, simply reduce the sugar from 1/2 cup / 100g to a scant 1/2 cup / 80-90g.

  • Zucchini quantity can be played with! My mom’s original recipe calls for 1 cup, but here I’ve increased it to 1 1/2 cups. If you can’t detect the veggies, why not add more so you get maximum nutrition? On that note, measuring grated, sliced, or cubed veggies by weight is always a bit tricky. From my research, the average medium zucchini weighs about 5oz or 140g, so if you’re buying zucchini specifically for this recipe, you’ll probably want to get 2, making a bit more than 1 1/2 cups, but that’s ok! I would use it all. Or just get one zucchini that’s a bit bigger. However you please, as I said it’s flexible! And I just way over-analyzed that for you. You’re welcome.

Double Chocolate Zucchini Bread
Yield 1 loaf
Author
Prep time
20 Min
Cook time
45 Min
Total time
1 H & 5 M

Double Chocolate Zucchini Bread

Fudgy, chocolatey zucchini bread loaded with chocolate chips. A sneaky way to get in more vegetables and you can even use up some sourdough discard with this recipe!
Cook modePrevent screen from turning off

Ingredients

Instructions

  1. Preheat oven to 350°F / 177°C. Grease 1 9x5inch / 23x13cm bread pan or line with parchment paper.
  2. In a large bowl, beat together sugar, oil, yogurt, egg, vanilla, and sourdough discard, if using. Stir in zucchini.
  3. In a separate bowl, whisk together flour, cocoa, baking soda, salt, and baking powder.
  4. Fold dry ingredients and chocolate chips into wet ingredients until just combined. Reserve a handful of chocolate chips for sprinkling on top, if you wish.
  5. Pour into prepared bread pan, sprinkle with remaining chocolate chips, and bake in preheated oven for 40-45 minutes or until toothpick inserted in the center comes out mostly clean. A few moist crumbs clinging to the toothpick is a good sign the bread is done but still moist! Allow to bread to cool before removing from pan and serving.

Notes

If you desire a sweeter bread, you can up the sugar to 1 cup / 200g.I know not everyone has plain yogurt on hand, so if you have French Vanilla or another flavor you wouldn’t mind mixing with chocolate, use that! Flavored yogurt has added sugar, so if that is important to you to keep the sugar down, simply reduce the sugar from 1/2 cup / 100g to a scant 1/2 cup / 80-90g. Zucchini quantity can be played with! My mom’s original recipe calls for 1 cup, but here I’ve increased it to 1 1/2 cups. If you can’t detect the veggies, why not add more so you get maximum nutrition? On that note, measuring grated, sliced, or cubed veggies by weight is always a bit tricky. From my research, the average medium zucchini weighs about 5oz or 140g, so if you’re buying zucchini specifically for this recipe, you’ll probably want to get 2, making a bit more than 1 1/2 cups, but that’s ok! I would use it all. Or just get one zucchini that’s a bit bigger. However you please, as I said it’s flexible! And I just way over-analyzed that for you. You’re welcome.

Nutrition Facts

Calories

277.93

Fat

13.31 g

Sat. Fat

4.04 g

Carbs

38.03 g

Fiber

2.86 g

Net carbs

35.17 g

Sugar

22.45 g

Protein

4.65 g

Sodium

291.43 mg

Cholesterol

21.07 mg

Nutritional information is approximate; based on roughly 9 slices from 1 loaf. Does not include using sourdough discard.

zucchini bread, quick bread, sourdough discard, low fat recipe, double chocolate zucchini bread
bread, dessert
American
Did you make this recipe?
Tag @jennyblogsandbakes on instagram and hashtag it #jennyblogs
A zucchini lurking in the background, for proof there truly is zucchini in this bread

A zucchini lurking in the background, for proof there truly is zucchini in this bread