Healthier Chocolate Peanut Butter Bars

Last updated July 19, 2024

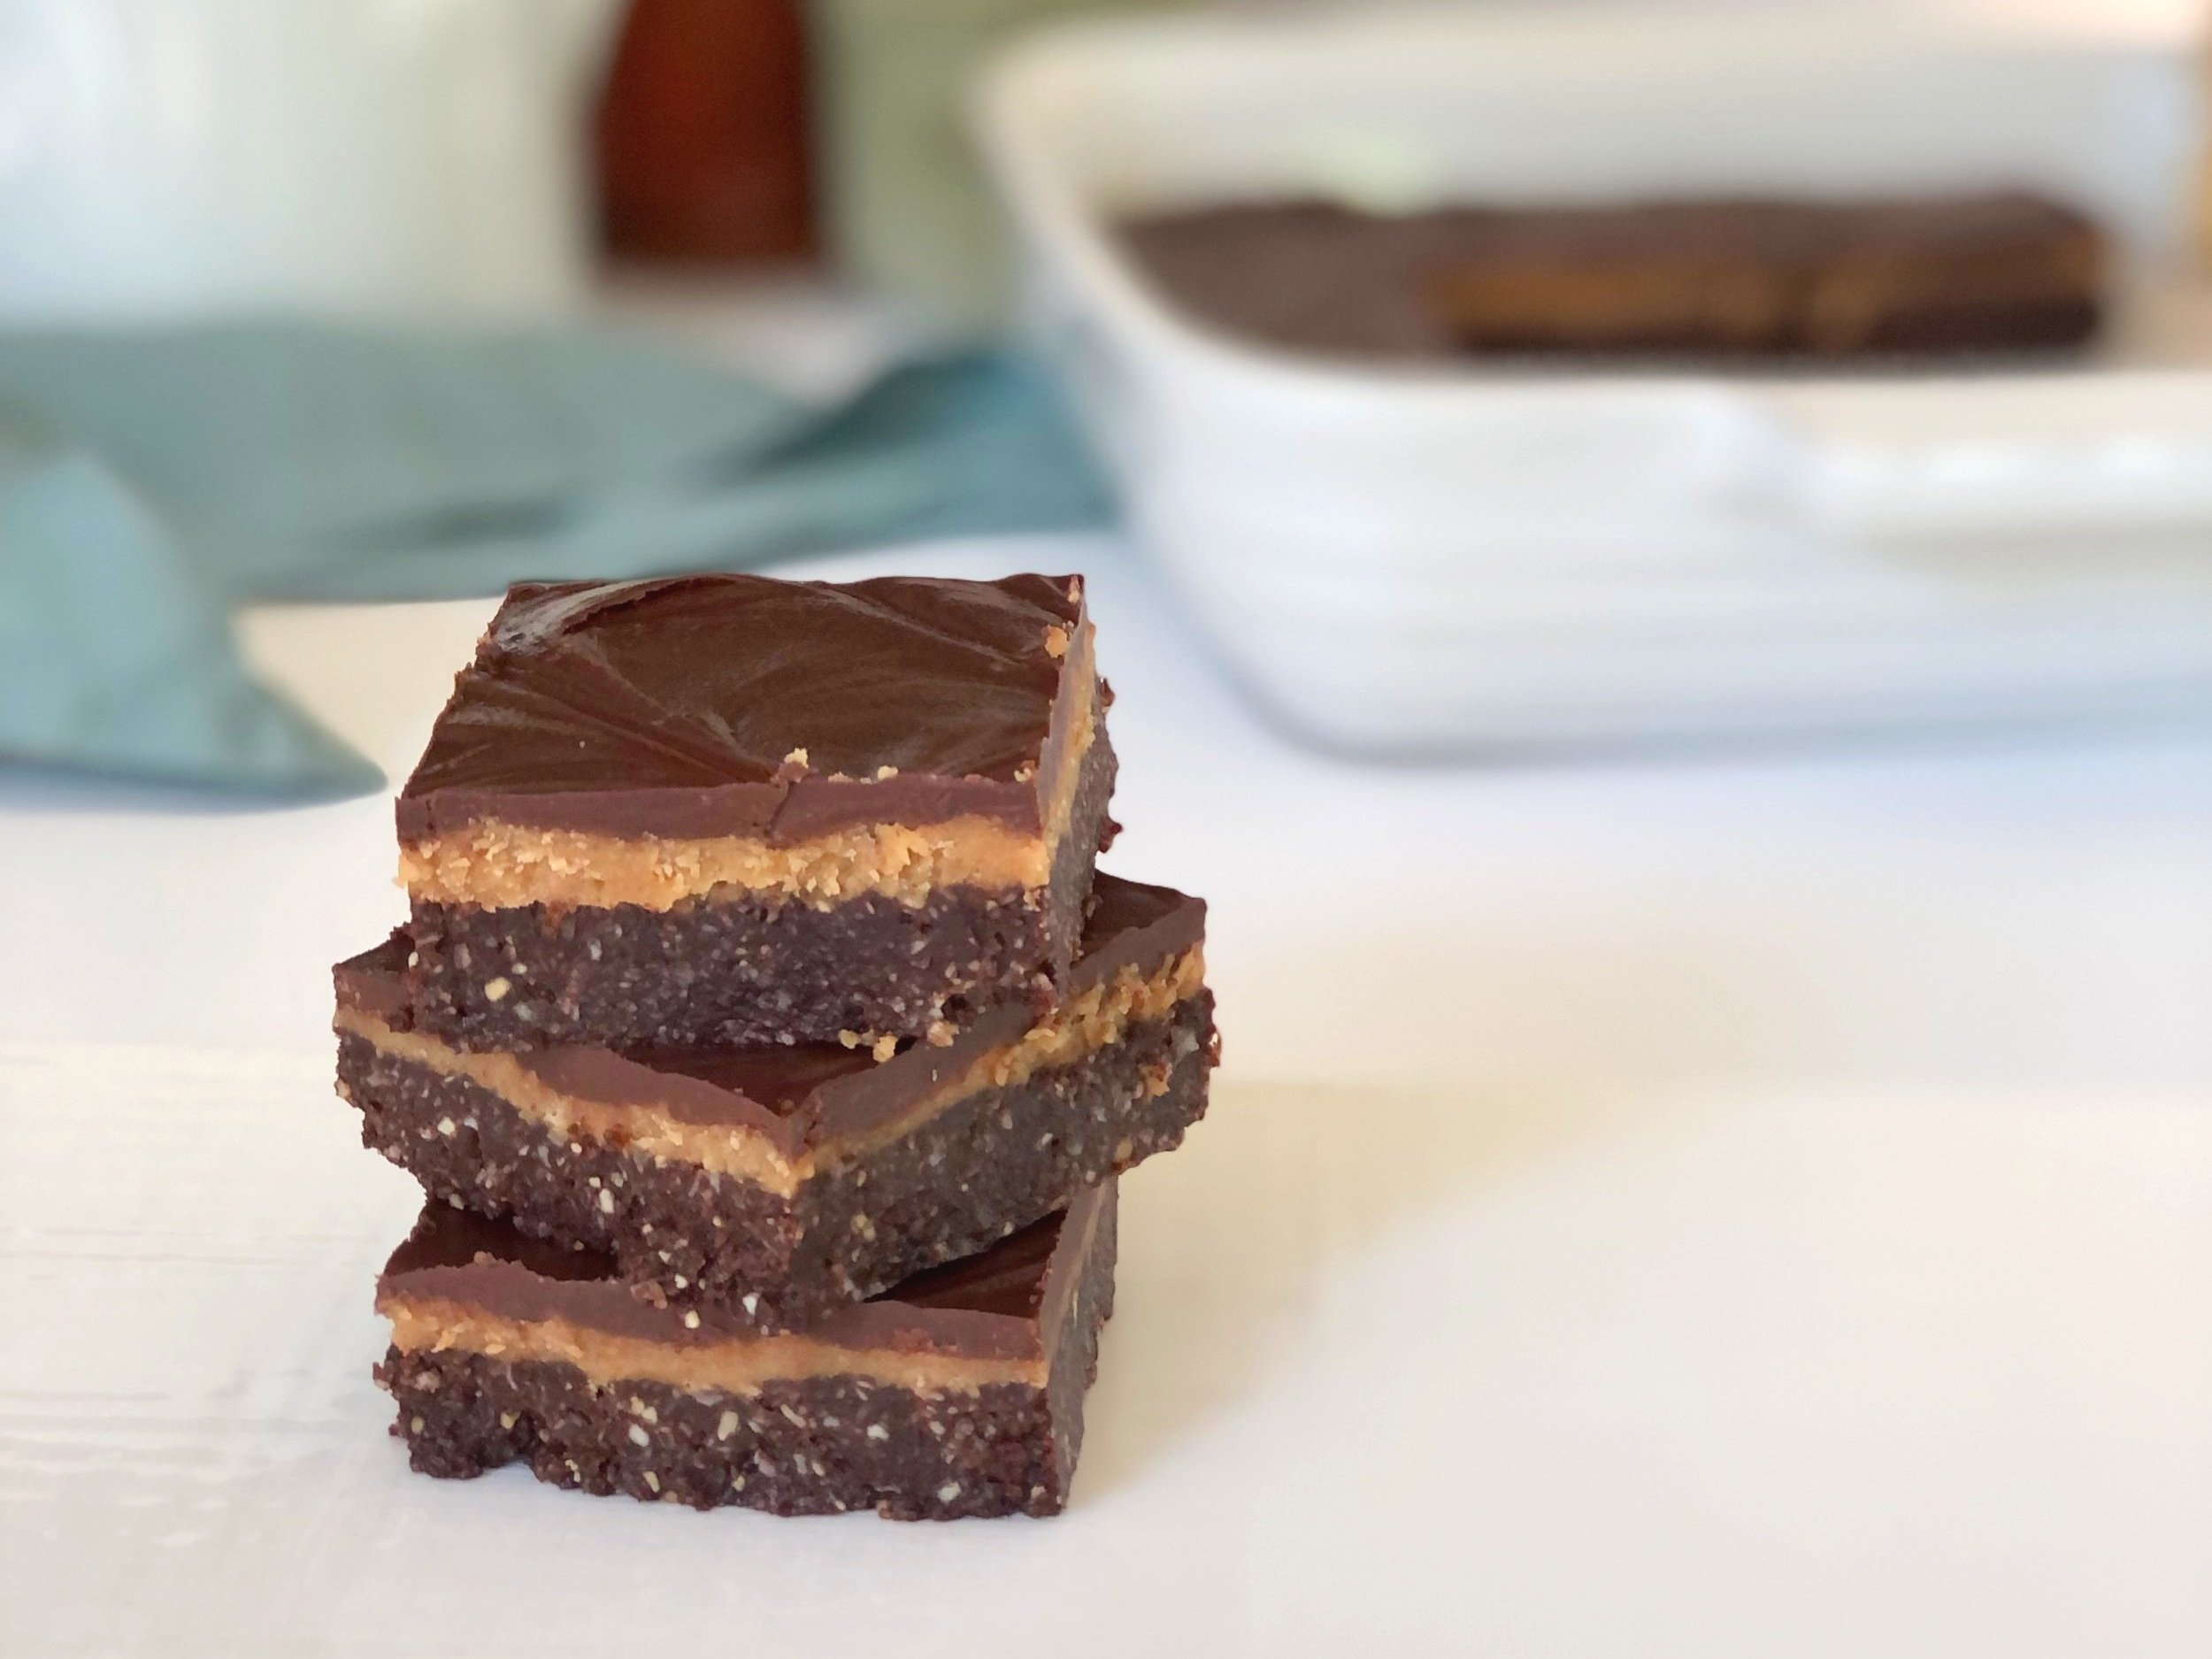
These Chocolate Peanut Butter Bars check a lot of boxes.

  • Delicious. These bars somehow bridge the gap between “coconut lovers” and “chocolate peanut butter lovers”, even for those who don’t normally love coconut, and those who don’t normally love peanut butter and chocolate together. I know, weird, but those people do exist and they’re some of my taste testers.

  • Healthier than most desserts. I would (and did) unabashedly eat these for breakfast. They’re full of nuts and coconut, and only use coconut oil, depending on which camp you fall in as far as viewing coconut oil as a good medium-chain fatty acid or simply another saturated fat.

  • No bake. Great for summer, if you don’t have an oven available to you, or simply don’t want to turn it on.

  • Easy. These can be ready in less than 30 minutes, quick and satisfying to whip up, with most of the work done in a food processor.

  • Satisfying. With the protein and fat content, these will keep you satisfied for longer. When you’re satisfied, you’re less likely to keep reaching for other unhealthy foods or overeating.

  • Gluten-free, vegan, dairy-free, egg-free, and almost refined sugar-free (there’s sugar in chocolate chips, which are in the chocolate topping.)

If those aren’t enough reasons to love these bars, I have one more. You don’t have to grease your baking dish! I know, that’s a little thing, but it’s a small kitchen task I don’t overly enjoy, and the fact that these bars slide ride out of an ungreased pan is a small yippee from me!

Another reason I like these, is because they don’t call for dates. Don’t get me wrong, I love dates, but it’s nice to have a healthy dessert recipe that doesn’t call for dates since so many do. I don’t always have dates on hand, and this way I can still whip up a healthier dessert/snack without waiting for my next grocery run. That makes this recipe’s ingredient list pretty close to being all pantry staples.

This post may contain affiliate links. If you make a purchase using these links, Jennyblogs may receive a small commission, at no extra cost to you. This helps to support Jennyblogs. Where possible, links are prioritized to small businesses, and American companies and products made in the USA for American readers. For further information see the privacy policy. Grazie!

Recipe inspired by Dani’s Healthy Eats


Healthier Chocolate Peanut Butter Bars

Serves about 16

Ingredients:

For the Chocolate Coconut Crust

  • 1 1/2 cups / 120g shredded unsweetened coconut

  • 6 Tbsp / 120g maple syrup

  • 6 Tbsp / 97g peanut butter

  • 6 Tbsp / 59g peanuts

  • 6 Tbsp / 38g cocoa powder

  • 5 Tbsp / 70g coconut oil

For the Peanut Butter Filling

  • 1/2 cup / 130g peanut butter

  • 1/4 cup / 81g maple syrup

  • 1/4 cup / 56g coconut oil

For the Chocolate Topping

  • 1 cup / 175g semi sweet or dark chocolate chips

  • 1 Tbsp / 14g coconut oil

Directions:

Ungreased 8x8 inch / 20x20 centimeter square baking dish

Make the Chocolate Coconut Crust

  1. Add all ingredients to a food processor; blend until smooth and mixture comes together in a soft dough-like ball.

  2. Press into pan and freeze while preparing filling.

Make the Peanut Butter Filling

  1. Add all filling ingredients to a medium bowl or food processor and mix until smooth. (It’s not necessary to clean food processor between mixing the crust and filling.)

  2. Remove crust from freezer and evenly spread filling over crust. Place back in freezer while preparing topping.

Make the Chocolate Topping

  1. In a small saucepan, combine chocolate and coconut oil. Melt over low heat, stirring frequently. Remove from heat when there are still a few tiny bits of chocolate; continue stirring until all is melted and smooth.

  2. Remove bars from freezer and spread topping evenly over filling. Cover and place in freezer or refrigerator to set, at least 30 minutes. Store covered in refrigerator.

Jenny’s Notes:

  • Different nut butters and nuts can be swapped out for the peanut butter and peanuts. Almond butter and almonds can be used, or cashews and cashew butter, or mix them up as you wish!
Healthier Chocolate Peanut Butter Bars
Yield 16
Author
Prep time
25 Min
Inactive time
30 Min
Total time
55 Min

Healthier Chocolate Peanut Butter Bars

Decadent, no-bake chocolate peanut butter bars with a chocolate coconut crust, peanut butter filling, and simple chocolate topping are deceivingly simple to make and satisfying to eat. Gluten-free, dairy-free, vegan, and almost refined sugar-free.
Cook modePrevent screen from turning off

Ingredients

For the Chocolate Coconut Crust
For the Peanut Butter Filling
For the Chocolate Topping

Instructions

Make the Chocolate Coconut Crust
  1. Ungreased 8x8 inch / 20x20 centimeter square baking dish
  2. Add all ingredients to a food processor; blend until smooth and mixture comes together in a soft dough-like ball.
  3. Press into pan and freeze while preparing filling.
Make the Peanut Butter Filling
  1. Add all filling ingredients to a medium bowl or food processor and mix until smooth. (It’s not necessary to clean food processor between mixing the crust and filling.)
  2. Remove crust from freezer and evenly spread filling over crust. Place back in freezer while preparing topping.
Make the Chocolate Topping
  1. In a small saucepan, combine chocolate and coconut oil. Melt over low heat, stirring frequently. Remove from heat when there are still a few tiny bits of chocolate; continue stirring until all is melted and smooth.
  2. Remove bars from freezer and spread topping evenly over filling. Cover and place in freezer or refrigerator to set, at least 30 minutes. Store covered in refrigerator.

Notes

  • Different nut butters and nuts can be swapped out for the peanut butter and peanuts. Almond butter and almonds can be used, or cashews and cashew butter, or mix them up as you wish!

Nutrition Facts

Calories

332.91

Fat

26.92 g

Sat. Fat

17.14 g

Carbs

21.81 g

Fiber

3.64 g

Net carbs

18.19 g

Sugar

13.5 g

Protein

6.06 g

Sodium

77.98 mg

Cholesterol

0.11 mg

Nutritional information is approximate. Based on 1 serving if cut into 16 pieces.

healthy coconut chocolate peanut butter bars, vegan, gluten free, dairy free, refined sugar free, no bake
dessert
American
Did you make this recipe?
Tag @jennyblogsandbakes on instagram and hashtag it #jennyblogs

Momsy's Pancakes

7CCA3EAB-FC24-468B-AC50-AD97ADBD242E.jpg

Last Updated September 8, 2024

As the weather cools down, what could possibly be better than flipping some fresh, hot pancakes off the griddle?

Well, let’s be honest, whether the weather is heating up, cooling down, stagnant, or generally doing its weather-pattern-season thingy, are pancakes ever not a good idea?

Thought not.

Breakfast, lunch, dinner. Summer. Winter. Inside. Outside. Buttermilk. Pumpkin. Lemon poppyseed. There is always room for a plate of pancakes at the table!

Growing up I can’t say we had a family tradition of eating pancakes on a specific day of the week. It was more of a, whenever the fancy hits you. My mom would make a up a large batch of homemade dry pancake mix (you can get that recipe here), then tape instructions to the jar of how much wet ingredients to add, to be whipped up at a moment’s notice. My dad makes maple syrup every spring and there are always quarts of the liquid gold in the pantry, so we were always pancake ready.
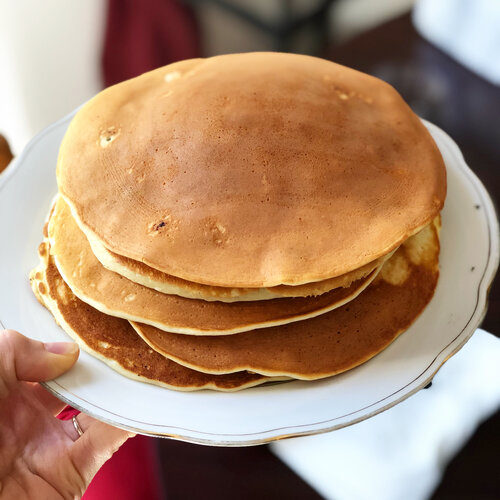
When my nieces and nephews were younger they spent a lot of time at our house, and pancakes were a regular deal. Especially my oldest niece, Gwen, could pack them away! From the time she was a toddler she would eat more than anyone, a stack of 4 or more. It was actually amazing she could fit that many in her tiny body. Realize that we make big pancakes, the size of your face or a large dinner plate. I usually eat 2. The first time I ate pancakes at a friend’s house when I was little the mom seemed surprised I only wanted two. I realized why when two itty bitty pancakes arrived in front of me. Oh. I’ll take 8 more, please. Plus, my friend’s mom made them with chocolate chips and my mom usually didn’t let us, too much sugar. ;)

The pancake recipe below is my mom’s basic recipe, it’s wonderful as-is for a buttermilk pancake, or a base for any add-ins you want, whether that be chocolate chip, raspberry, gingerbread, apple-cinnamon, or whatever your taste-buds can dream up!

This post may contain affiliate links. If you make a purchase using these links, Jennyblogs may receive a small commission, at no extra cost to you. This helps to support Jennyblogs. For further information see the privacy policy. Grazie!

Recipe from my mama


Buttermilk Pancakes

Serves 1-2

Ingredients:

  • 1 cup / 120g flour

  • 2 1/2 tsp baking powder

  • 2 1/2 tsp sugar

  • 1/2 tsp salt

  • 1 cup / 237g buttermilk

  • 1 egg

  • 2 Tbsp / 28g oil

  • up to 1 cup / 250g sourdough discard, optional

Directions:

Preheat a lightly greased griddle or large pan over medium heat (375°F / 290°C if using an electric griddle.)

  1. In a medium bowl whisk together flour, baking powder, sugar, and salt.

  2. In another bowl, combine buttermilk, egg, oil, and sourdough discard, if using. Add to dry ingredients and mix until just moistened. Lumps are ok as long as they’re not too big.

  3. Pour pancake batter to desired size (or shape!) on hot griddle, repeat as you have room, but making sure to leave about an inch / 2cm between pancakes. Flip after a couple minutes or a when the edges look dry and the bubbles towards the middle pop but don’t immediately fill in. Cook for a few minutes on the second side, until golden. Repeat until batter is gone.

  4. Serve hot with butter and maple syrup, or your favorite toppings such as peanut butter, honey, powdered sugar, jams, fruit, Nutella, etc.

Jenny’s Notes:

IMG_3216.jpg
  • Pancakes are easy, quick, and delicious, and also very easy to fit to your dietary needs and choices. With the exception of the baking powder, every ingredient can be substituted or even omitted at times. Even then, some use baking soda instead of baking powder or a combo of the two. Just don’t do more than one, maybe two substitutions at a time without risking the quality of your pancakes. So don’t be frying’ up flour, water and baking powder, okayyyy?

    - Replace flour with a gluten-free flour or flour of your choice. My mom likes grinding oats in a food processor to make oat flour pancakes. I also like substituting part of the flour with buckwheat.
    - Omit sugar if desired. I used to not eat sugar during the week and simply left out the sugar so I could still enjoy pancakes. I recommend leaving it in, though, as it rounds out the flavor of the pancake, especially if you use toppings that aren’t as sweet as maple syrup.
    - If you don’t have buttermilk, you can make it at home by adding 1 Tbsp / 14g vinegar or lemon juice to a 1 cup measure and filling up to the 1 cup mark (223g) with milk. You can also use plain ol’ water in a pinch, or alternative milks as desired!
    - If you don’t have or don’t eat eggs, try using a flax egg, or you can also leave the egg out.
    - For the oil, use whichever oil you prefer. A neutral baking oil is best for a classic pancake taste, but that doesn’t mean you can’t use olive or coconut oil if that’s what you prefer. Or even melted butter. Also, the oil can be left out if need be.

Fluffy Buttermilk Pancakes
Yield 1-2
Author
Prep time
5 Min
Cook time
10 Min
Total time
15 Min

Fluffy Buttermilk Pancakes

Classic, fluffy, buttermilk pancakes hot off the griddle in 15 minutes! Plus substitutions to make delicious pancakes for your dietary needs.
Cook modePrevent screen from turning off

Ingredients

Instructions

  1. Preheat a lightly greased griddle or large pan over medium heat (375°F / 290°C if using an electric griddle.)
  2. In a medium bowl whisk together flour, baking powder, sugar, and salt.
  3. In another bowl, combine buttermilk, egg, and oil. Add to dry ingredients and mix until just moistened. Lumps are ok as long as they’re not too big.
  4. Pour pancake batter to desired size (or shape!) on hot griddle, repeat as you have room, but making sure to leave about an inch / 2cm between pancakes. Flip after a couple minutes or a when the edges look dry and the bubbles towards the middle pop but don’t immediately fill in. Cook for a few minutes on the second side, until golden. Repeat until batter is gone.
  5. Serve hot with butter and maple syrup, or your favorite toppings such as peanut butter, honey, powdered sugar, jams, fruit, Nutella, etc.

Notes

  • Pancakes are easy, quick, and delicious, and also very easy to fit to your dietary needs and choices. With the exception of the baking powder, every ingredient can be substituted or even omitted at times. Even then, some use baking soda instead of baking powder or a combo of the two. Just don’t do more than one, maybe two substitutions at a time without risking the quality of your pancakes. So don’t be frying’ up flour, water and baking powder, okayyyy?

- Replace flour with a gluten-free flour or flour of your choice. My mom likes grinding oats in a food processor to make oat flour pancakes. I also like substituting part of the flour with buckwheat.

- Omit sugar if desired. I used to not eat sugar during the week and simply left out the sugar so I could still enjoy pancakes. I recommend leaving it in, though, as it rounds out the flavor of the pancake, especially if you use toppings that aren’t as sweet as maple syrup.

- If you don’t have buttermilk, you can make it at home by adding 1 Tbsp / 14g vinegar or lemon juice to a 1 cup measure and filling up to the 1 cup mark (223g) with milk. You can also use plain ol’ water in a pinch, or alternative milks as desired!

- If you don’t have or don’t eat eggs, try using a flax egg, or you can also leave the egg out.

- For the oil, use whichever oil you prefer. A neutral baking oil is best for a classic pancake taste, but that doesn’t mean you can’t use olive or coconut oil if that’s what you prefer. Or even melted butter. Also, the oil can be left out if need be.

Nutrition Facts

Calories

448.68

Fat

18.02 g

Sat. Fat

2.44 g

Carbs

58.48 g

Fiber

1.63 g

Net carbs

56.85 g

Sugar

11.17 g

Protein

13.26 g

Cholesterol

97.74 mg

Sodium

1452.78 mg

Nutritional information is approximate, based on 2 servings.

buttermilk pancakes, homemade pancakes recipe, hot cakes, griddle cakes, best
breakfast
American
Did you make this recipe?
Tag @jennyblogsandbakes on instagram and hashtag it #jennyblogs

Chocolate No-Bake Cookies

Last Updated September 6, 2024

IMG_3299.jpg

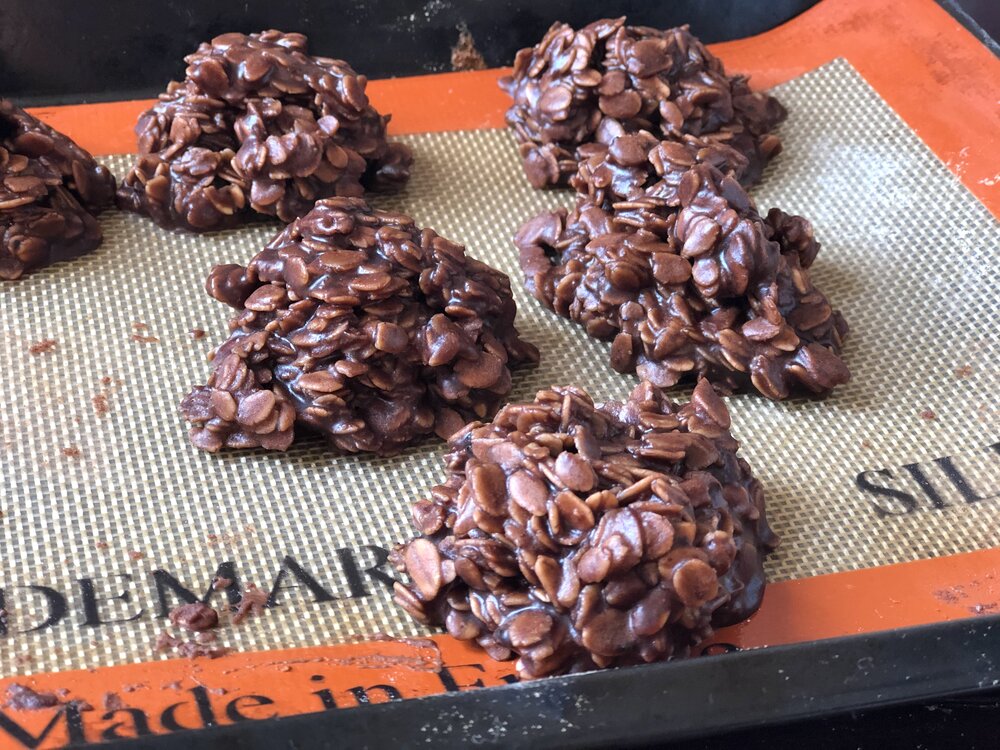
Chocolate no-bake cookies are actually known as Chocolate Sand Dune Cookies around the Morris household, because no-bakes is not as fun, ya know? They’re well enough known that probably doesn’t matter, but as I grew up near the famous Sleeping Bear Sand Dunes, you will understand why, many years ago, my older brother decided to call these mounds of cookies “sand dunes”. Or rather “chocolate sand dunes” because these cookies are not the color of sand. The name stuck, and here we are today.

Chocolate sand dune cookies a.k.a. chocolate no-bake cookies, no matter what you call them, are delicious and just a little too easy to make.

They’re also made without any flour, so if you use certified GF oats, they are easily gluten-free. These cookies made a come back during the quarantine and the flour shortage! They can also be made with a milk-alternative and butter-alternative if you wish to have dairy-free cookies. They’re naturally egg-free!

What follows is the classic recipe I grew up making with my mom. Little did I know until I was a teenager and making no-bake cookies with a friend that the actual “original” recipe includes peanut butter. What?! You don’t put peanut butter into chocolate sand dune cookies! Actually you can, and it’s delicious. Peanut butter and chocolate together, hello. Of course it’s delicious.

However, this is not to disregard my mom’s classic recipe. While she loves chocolate and peanut butter, she doesn’t prefer them together. So she omitted the peanut butter and never looked back from making this pure chocolatey, fudgy version of no-bake cookies. Some of my family members still prefer them without the peanut butter, others prefer with. So if you or someone you know doesn’t like peanut butter with chocolate, or has a nut allergy, know you can omit the peanut butter and have an equally delicious cookie.

This post may contain affiliate links. If you make a purchase using these links, Jennyblogs may receive a small commission, at no extra cost to you. This helps to support Jennyblogs. For further information see the privacy policy. Grazie!

A recipe from my mama


Chocolate Sand Dune Cookies

Makes about 36 cookies

The pan was full at one point…

The pan was full at one point…

Ingredients:

  • 4 cups / 800g sugar

  • 1/2 cup / 50g cocoa powder

  • 1 cup / 237g milk

  • dash of salt

  • 1 cup / 225g butter (2 sticks)

  • 1/4-1 cup / 65g - 260g peanut butter, optional

  • 2 tsp / 10g vanilla extract

  • 5 1/2 cups / 495g quick oats

Directions

  1. In a large pot, stir together sugar, cocoa, milk, and salt; bring to a boil over medium heat. Boil for 2 minutes then remove from heat.

  2. Add butter, peanut butter, and vanilla; stir well.

  3. Add the oats and stir until all oats are coated. Let mixture sit for 8-10 minutes to thicken, stirring occasionally to check consistency.

  4. When mixture has thickened enough, spoon mounds onto wax paper or a clean counter. Allow to set and enjoy!

Jenny’s Notes:

  • Brown sugar can be used instead of white sugar, if you prefer.

  • I grew up baking with salted butter and this recipe reflects that with the dash of salt. Here in Europe and in most bakeries unsalted butter is used, so if that’s what you are using, simply add two dashes of salt if you wish!

  • You may notice the variance in the peanut butter measurement; use up to 1 cup for peanut butter lovers, or as little as 1/4 cup for just a hint.

  • Regular or crunchy peanut butter can be used, and it’s also fine to use natural peanut butter. People often don’t recommend using natural in recipes, but as I prefer not to buy the kinds with added sugars and hydrogenated oils, I usually use it anyway and have hardly met a recipe where you can’t successfully use the natural kind.

  • Quick or instant oats are my preferred kind of oats to use for chocolate sand dunes, but as you will notice from my photos that regular or rolled oats can also be used. Rolled oats give more of a bite to your cookies, and you will probably need to let the mixture sit a bit longer before spooning out the cookies so the oats have time to thicken up the mixture. If after 10-15 minutes your mixture still isn’t thickening up satisfactorily, you may need to add additional oats.

  • The above recipe makes about 36 cookies, great for sharing, large families, and parties. It can also easily be halved to make about 18 cookies, or even quartered to make 9. The photos on this post are from the 2 month lockdown in Italy when I decided that a quarter batch should suffice for 2 people who can’t leave the house.

Chocolate No-Bake Cookies
Yield 36
Author
Prep time
20 Min
Cook time
5 Min
Total time
25 Min

Chocolate No-Bake Cookies

Chocolate No-bakes are decadent mounds of chocolatey oat cookies made without flour, eggs, or an oven, which makes them ideal for summer baking and people with gluten or egg allergies.
Cook modePrevent screen from turning off

Ingredients

Instructions

  1. In a large pot, stir together sugar, cocoa, milk, and salt; bring to a boil over medium heat. Boil for 2 minutes then remove from heat.
  2. Add butter, peanut butter, and vanilla; stir well.
  3. Add the oats and stir until all oats are coated. Let mixture sit for 8-10 minutes to thicken, stirring occasionally to check consistency.
  4. When mixture has thickened enough, spoon mounds onto wax paper or a clean counter. Allow to set and enjoy!

Notes

Brown sugar can be used instead of white sugar, if you prefer.I grew up baking with salted butter and this recipe reflects that with the dash of salt. Here in Europe and in most bakeries unsalted butter is used, so if that’s what you are using, simply add two dashes of salt if you wish! You may notice the variance in the peanut butter measurement; use up to 1 cup for peanut butter lovers, or as little as 1/4 cup for just a hint. Regular or crunchy peanut butter can be used, and it’s also fine to use natural peanut butter. People often don’t recommend using natural in recipes, but as I prefer not to buy the kinds with added sugars and hydrogenated oils, I usually use it anyway and have hardly met a recipe where you can’t successfully use the natural kind. Quick or instant oats are my preferred kind of oats to use for chocolate sand dunes, but as you will notice from my photos that regular or rolled oats can also be used. Rolled oats give more of a bite to your cookies, and you will probably need to let the mixture sit a bit longer before spooning out the cookies so the oats have time to thicken up the mixture. If after 10-15 minutes your mixture still isn’t thickening up satisfactorily, you may need to add additional oats. The above recipe makes about 36 cookies, great for sharing, large families, and parties. It can also easily be halved to make about 18 cookies, or even quartered to make 9. The photos on this post are from the 2 month lockdown in Italy when I decided that a quarter batch should suffice for 2 people who can’t leave the house.

Nutrition Facts

Calories

192.48

Fat

9.10 g

Sat. Fat

4.01 g

Carbs

26.75 g

Fiber

0.92 g

Net carbs

25.83 g

Sugar

22.75 g

Protein

2.47 g

Sodium

89.28 mg

Cholesterol

13.96 mg

Nutritional information is approximate. Based on 1 cookie if using the full cup of peanut butter in the recipe.

no-bake cookies, chocolate, oats, no bake dessert, summer dessert, fudgy chocolate cookies, oat cookies, peanut butter
dessert
American
Did you make this recipe?
Tag @jennyblogsandbakes on instagram and hashtag it #jennyblogs
IMG_3302.jpg

Quinoa Coconut Date Rolls

IMG_4728.jpg

Last Updated August 8, 2024

These little morsels are so named because they are rolled, and no, these will not get you a date nor would I suggest bringing them on a first date.  Not because these aren't scrummy (that’s scrumptious and yummy combined), but because "healthy" baking should always be treated warily.  You must already have a well established relationship with that person, preferably have treated them to some normal sugary delicious desserts so that they understand that you understand what a dessert "should" be, and can trust your taste buds when you then try to sell them on your spinach-spirolina-turmeric-kale-ginger-wasabi-moringa bars that are also dairy-free and refined-sugar free.  Whew, I'm out of breath.  But that relationship is important.  So if I've never eaten anything that you've made before, know that I might distrust you at first, in the most genial way possible.  And you should distrust me, until I gain your trust.  

Also understand what your taste preferences are, and if you don't like healthy desserts, well then, may I ask why are you reading this particular recipe? May I kindly redirect you to this decadent Peanut Butter Brownie Trifle?  Or if you don't like dates, we might have a problem.  But if you like healthy desserts, or are exploring in this arena, then you probably know what you're getting yourself into.  The quinoa provides protein and grains, the almonds provide good fats and more protein, while the dates give sweetness and carbs and coconut brings flavor to the party. 

So now, using your own best judgment, allow me to introduce my friends, the Quinoa Coconut Date Rolls.

This post may contain affiliate links. If you buy something using these links, Jennyblogs may receive a small commission, at no extra cost to you. This helps to support Jennyblogs. For further information see the privacy policy. Grazie!

Recipe adapted from Skinny Ms.


Quinoa Coconut Date Rolls

Makes about 10-12 rolls

Ingredients:

  • 1/3 cup / 60g dry quinoa

  • 2/3 cup / 158g water

  • 1 cup / 160g pitted dates

  • 1/2 cup / 70g almonds

  • 1/3 cup / 33g grated unsweetened coconut, plus more for rolling

  • 2-3 tsp / 10-15g water

  • 1/4 cup / 42g chocolate chips, optional

Directions:

  1. Combine quinoa and water in a small saucepan over medium heat.  Bring to a boil and reduce heat.  Cover and simmer for 10-15 minutes, until all the water is absorbed.  Set aside to cool completely.  If you already have quinoa made, you'll need about 1 cup.  

  2. Place dates in a food processor and blend until they stick together in a ball.  Add the almonds, coconut, and quinoa; pulse until well combined.  Add water, if necessary, until the mixture holds together.  Shape into balls or roll.  Place extra coconut on a plate and roll the rolls around until completely covered in coconut.  

  3. *Optional:  Heat chocolate chips over a double boiler or in the microwave for 30 second bursts, until melted.  Drizzle chocolate over rolls.

  4. Store in an airtight container for up to a week, or freeze.  

Jenny's Notes:

  • For a chunkier roll, process for a shorter period of time.  

  • These rolls are also delicious if you add a 1/2 tsp of cinnamon. They could become autumnal if you add cinnamon along with a dash of nutmeg, cloves, and ginger. Yum!  

Quinoa Coconut Date Rolls (Vegan)
Yield 10-12 rolls
Author
Prep time
25 Min
Cook time
15 Min
Total time
40 Min

Quinoa Coconut Date Rolls (Vegan)

Nutritious Lara-bar like rolls made with quinoa, dates, coconut, and almonds with optional chocolate drizzle. Great for breakfast, snacks, on the go, and after workouts!
Cook modePrevent screen from turning off

Ingredients

Instructions

  1. Combine quinoa and water in a small saucepan over medium heat. Bring to a boil and reduce heat. Cover and simmer for 10-15 minutes, until all the water is absorbed. Set aside to cool completely. If you already have quinoa made, you'll need about 1 cup.
  2. Place dates in a food processor and blend until they stick together in a ball. Add the almonds, coconut, and quinoa; pulse until well combined. Add water, if necessary, until the mixture holds together. Shape into balls or roll. Place extra coconut on a plate and roll the rolls around until completely covered in coconut.
  3. *Optional: Heat chocolate chips over a double boiler or in the microwave for 30 second bursts, until melted. Drizzle chocolate over rolls.
  4. Store in an airtight container for up to a week, or freeze.

Notes

For a chunkier roll, process for a shorter period of time. These rolls are also delicious if you add a 1/2 tsp of cinnamon. They could become autumnal if you add cinnamon along with a dash of nutmeg, cloves, and ginger. Yum!

Nutrition Facts

Calories

151.00

Fat

7.49 g

Sat. Fat

2.97 g

Carbs

20.79 g

Fiber

3.25 g

Net carbs

17.54 g

Sugar

13.01 g

Protein

3.11 g

Sodium

37.86 mg

Cholesterol

0.00 mg

Nutritional information is approximate. Based on 10 servings and includes chocolate drizzle.

quinoa, coconut, almonds, gluten-free, vegan, dairy-free, refined sugar-free, vegetarian, healthy, nutritious, clean eating, egg-free
snack, breakfast
American
Did you make this recipe?
Tag @jennyblogsandbakes on instagram and hashtag it #jennyblogs