Healthy Chocolate Chip Cookie Dough Dip

Last updated August 3, 2024

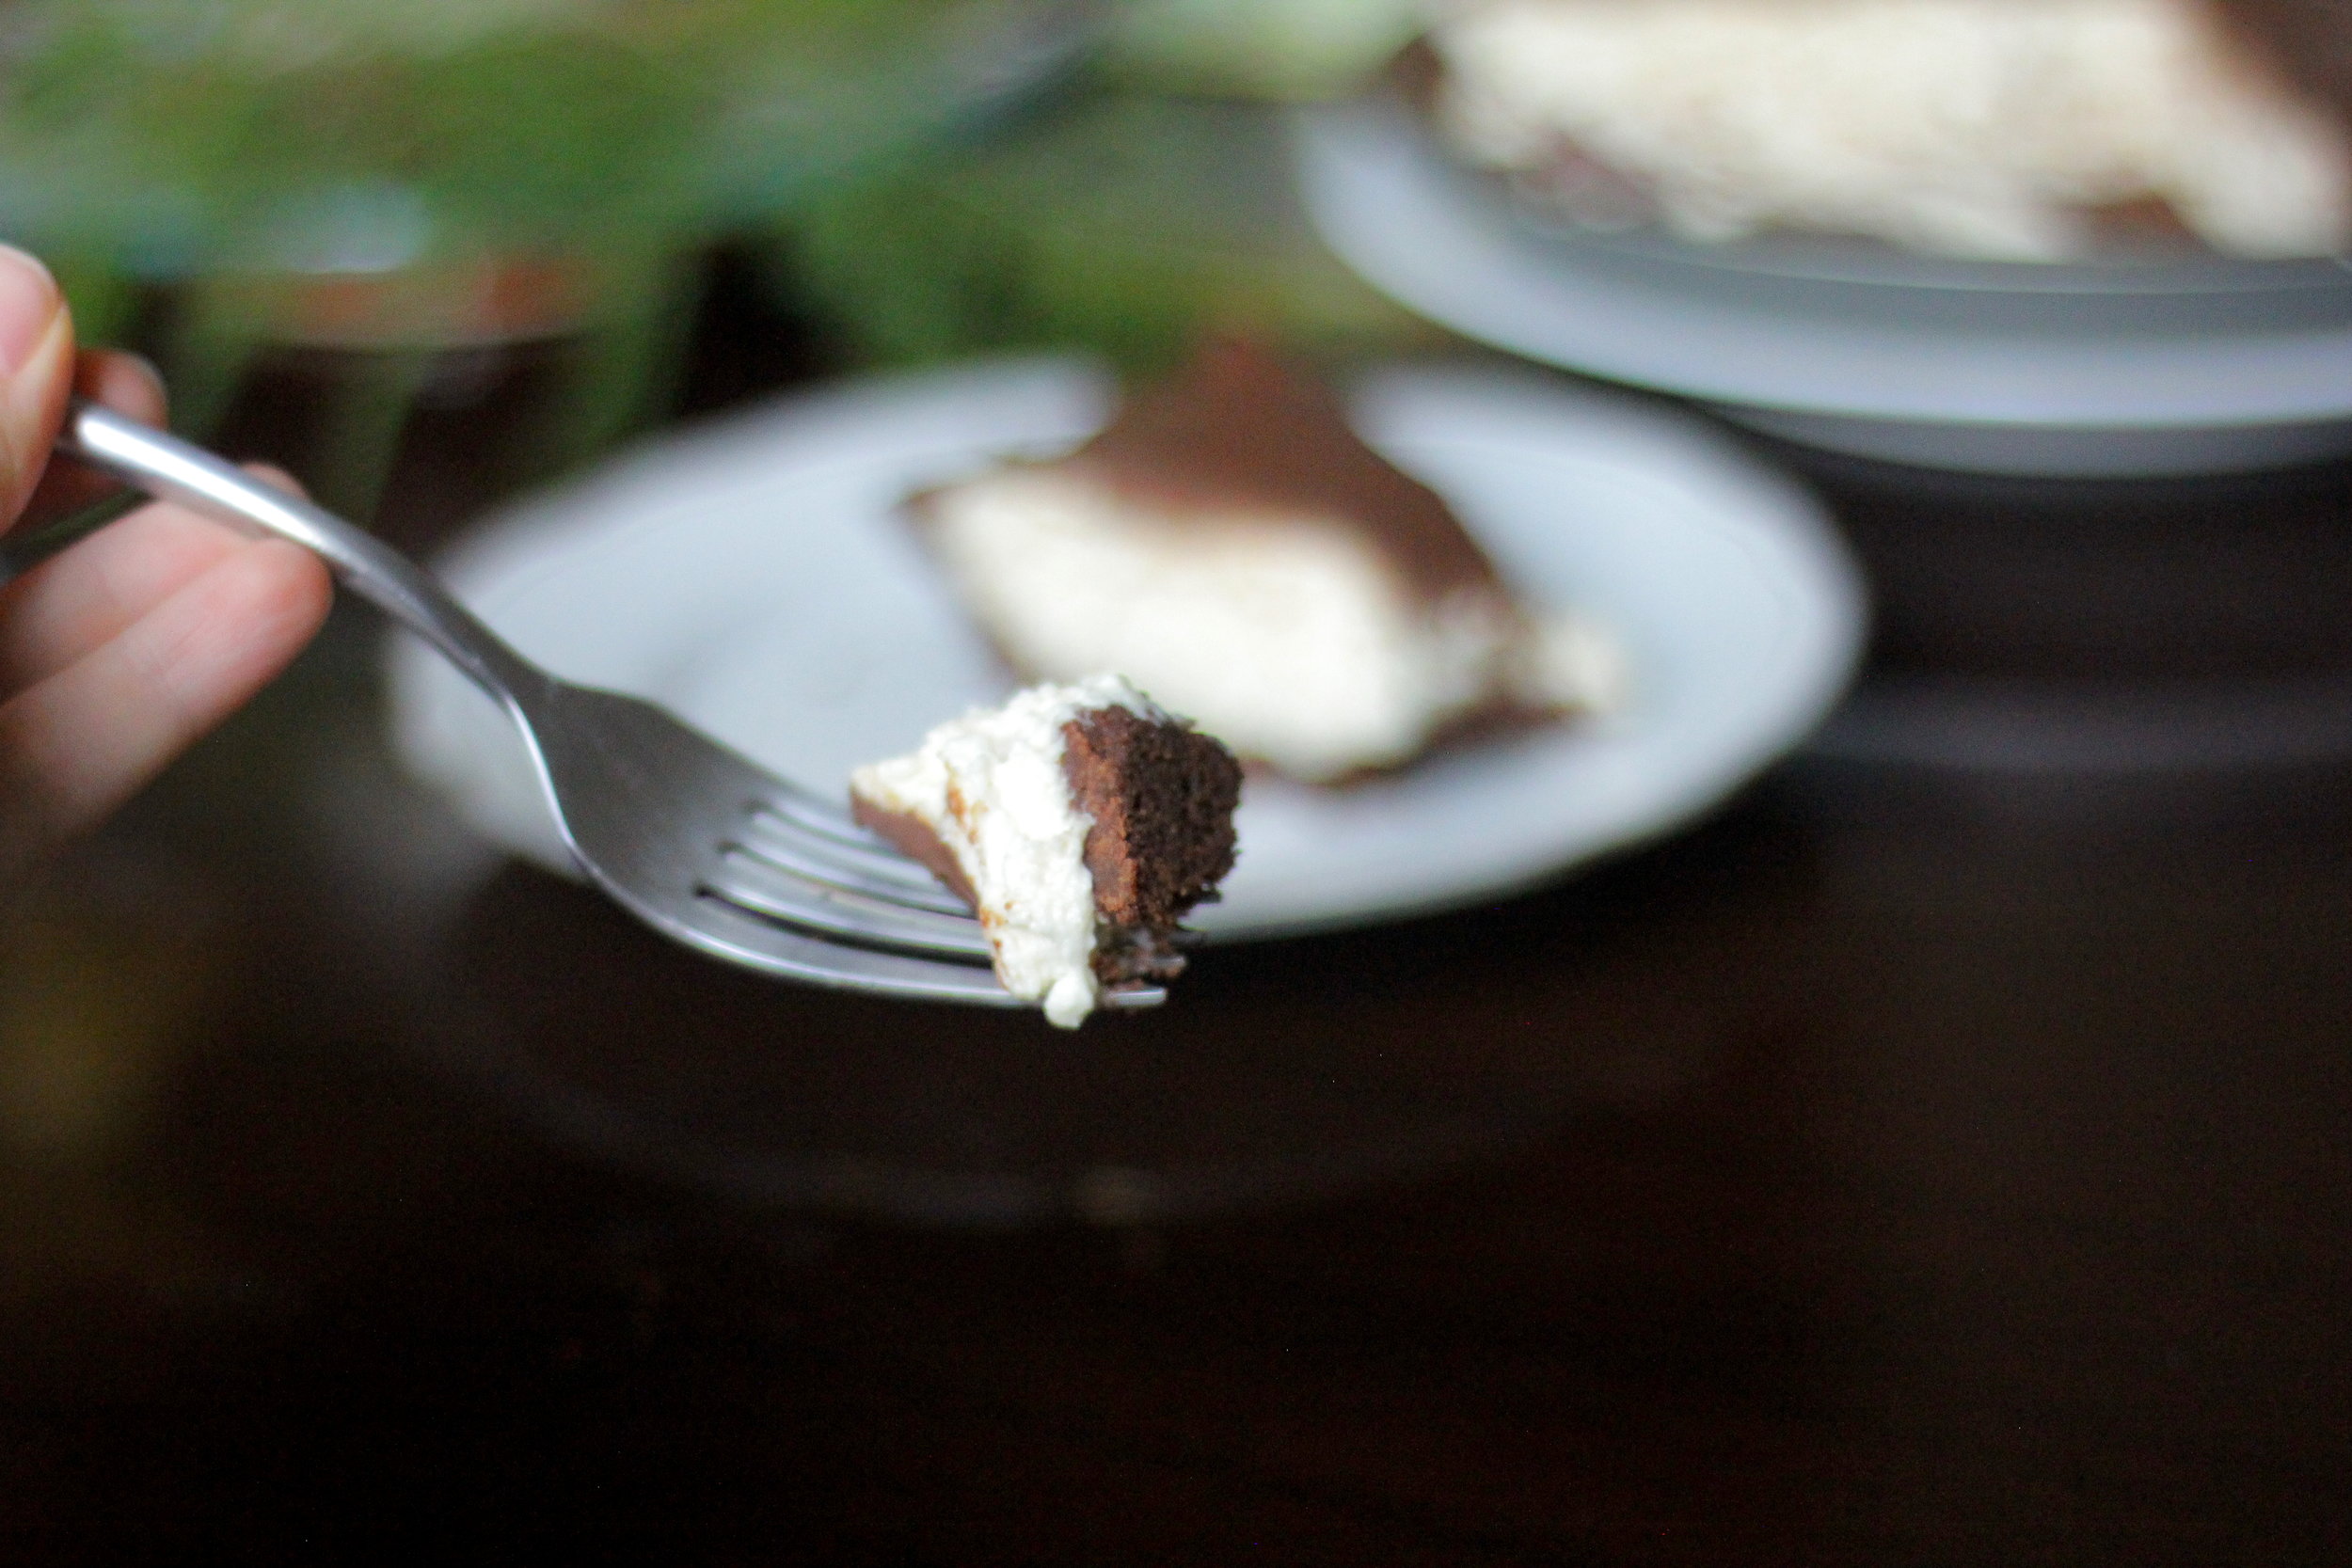
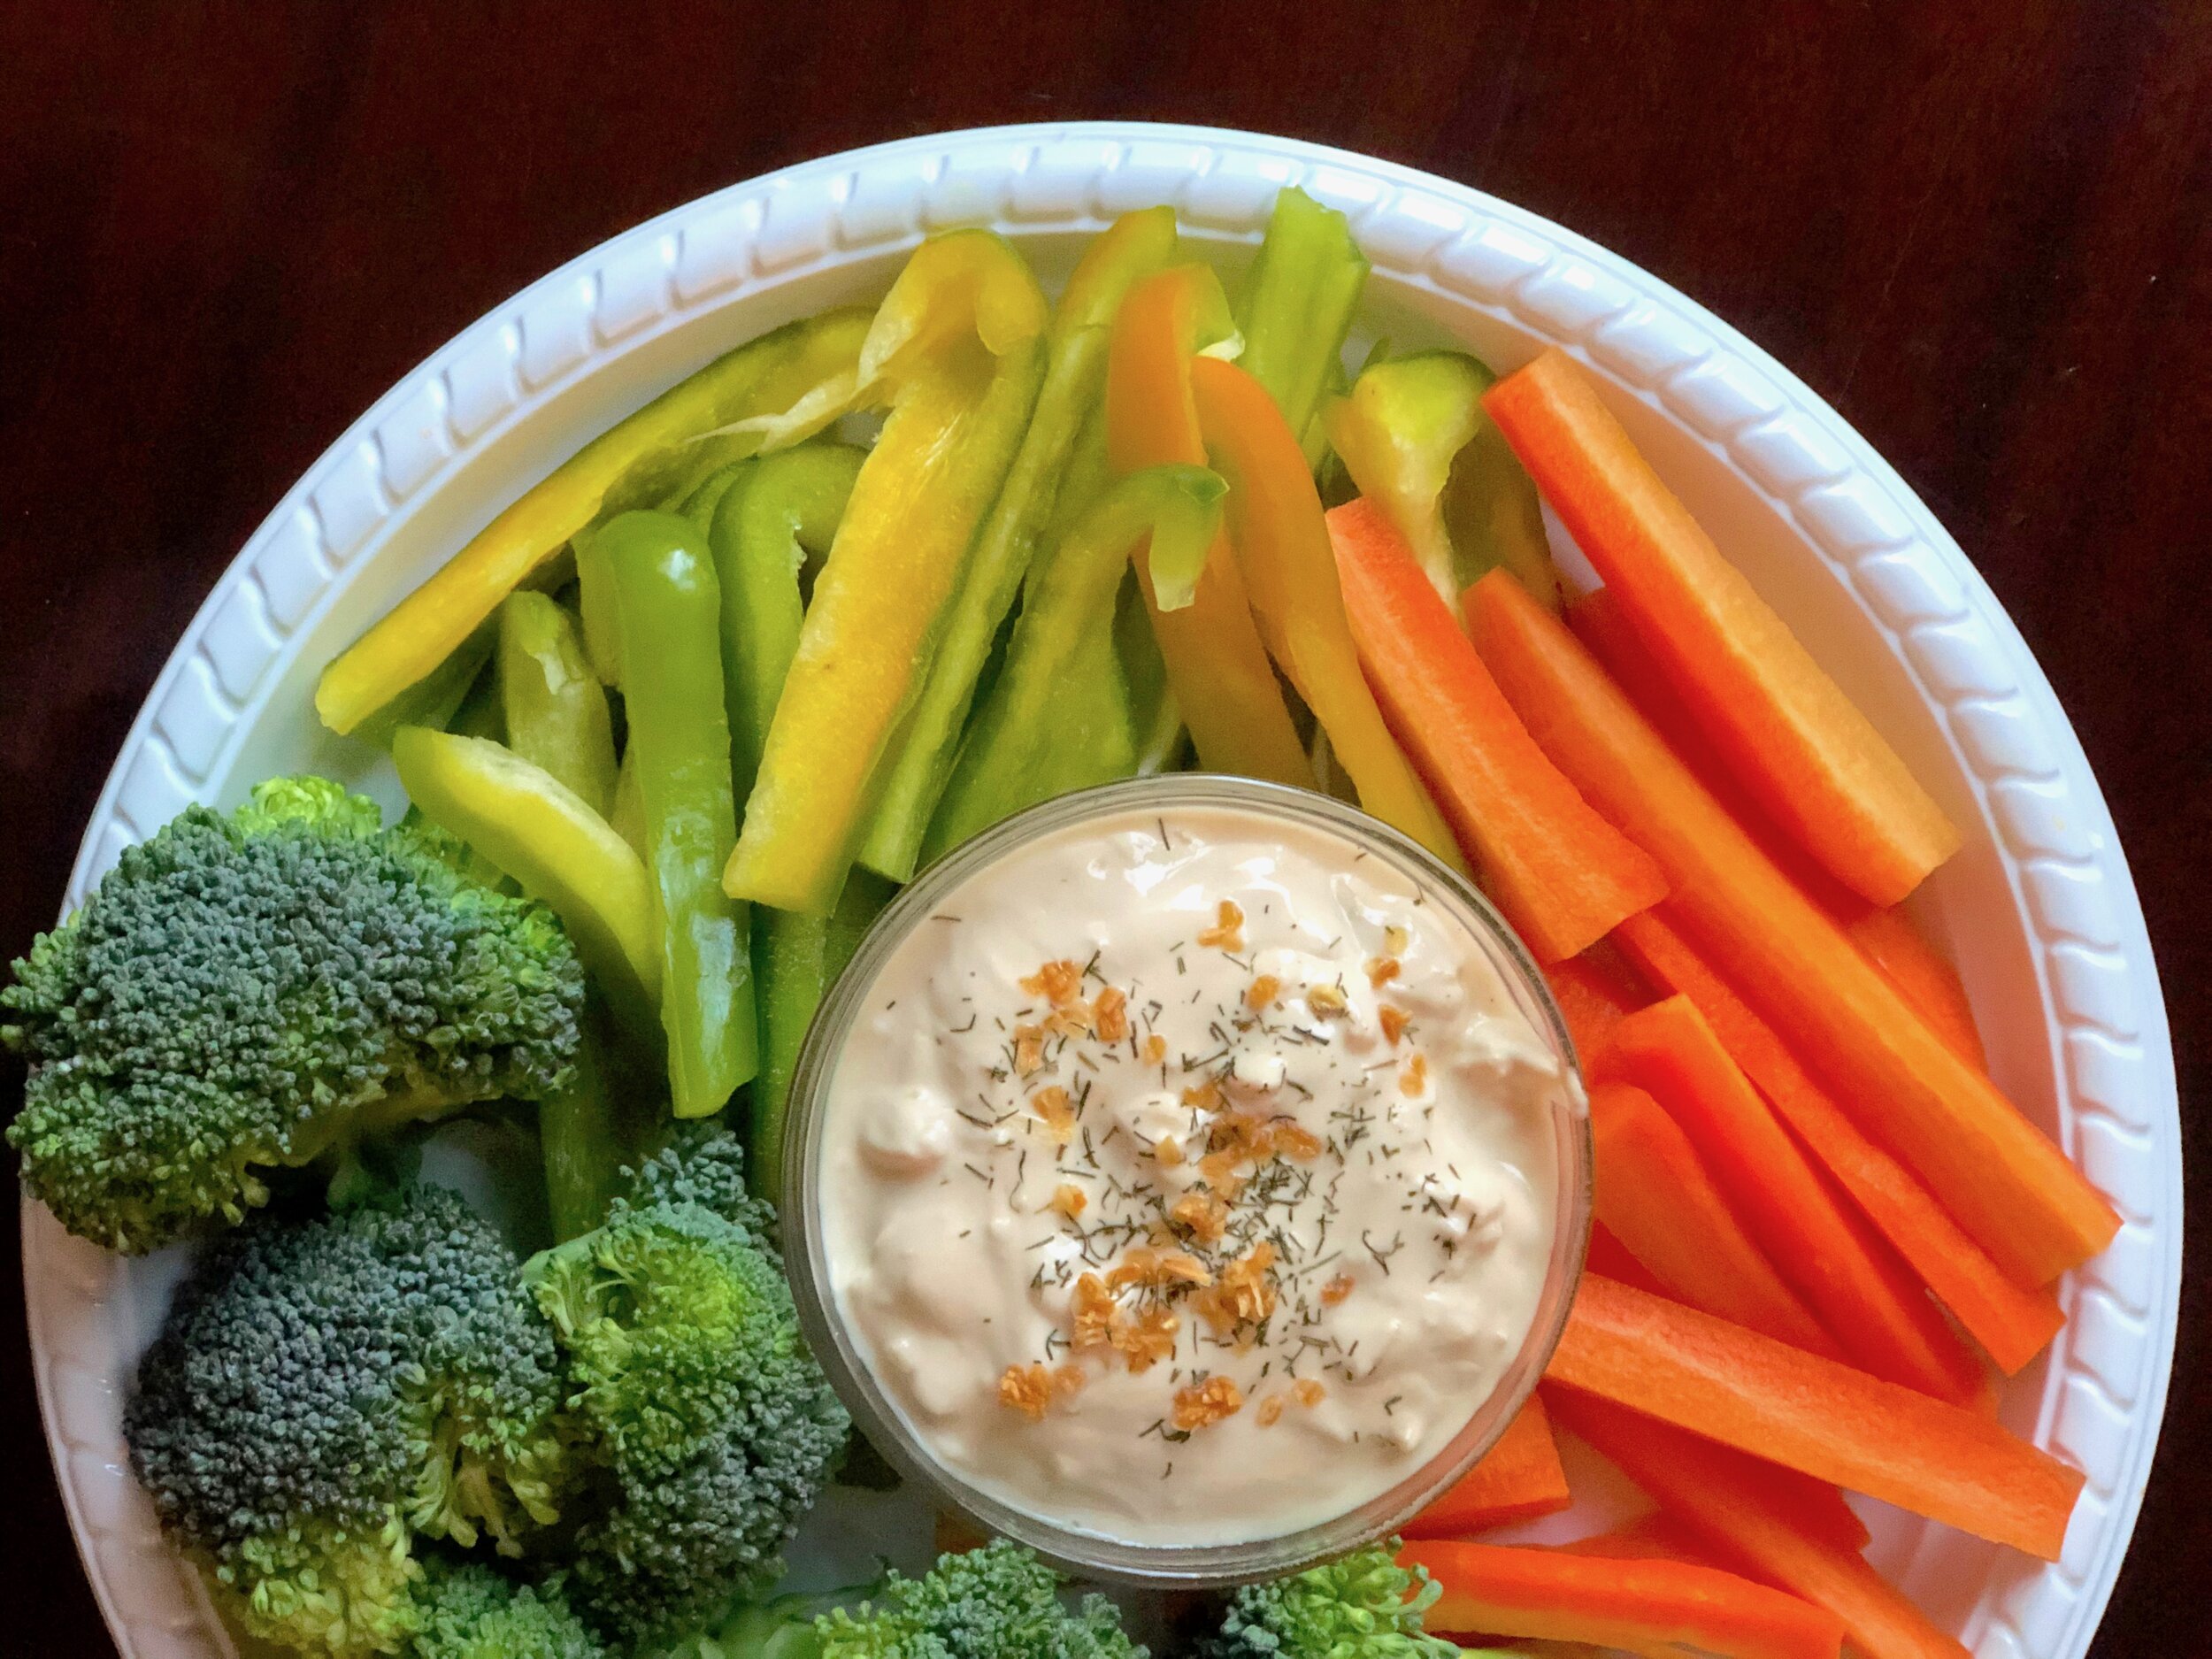
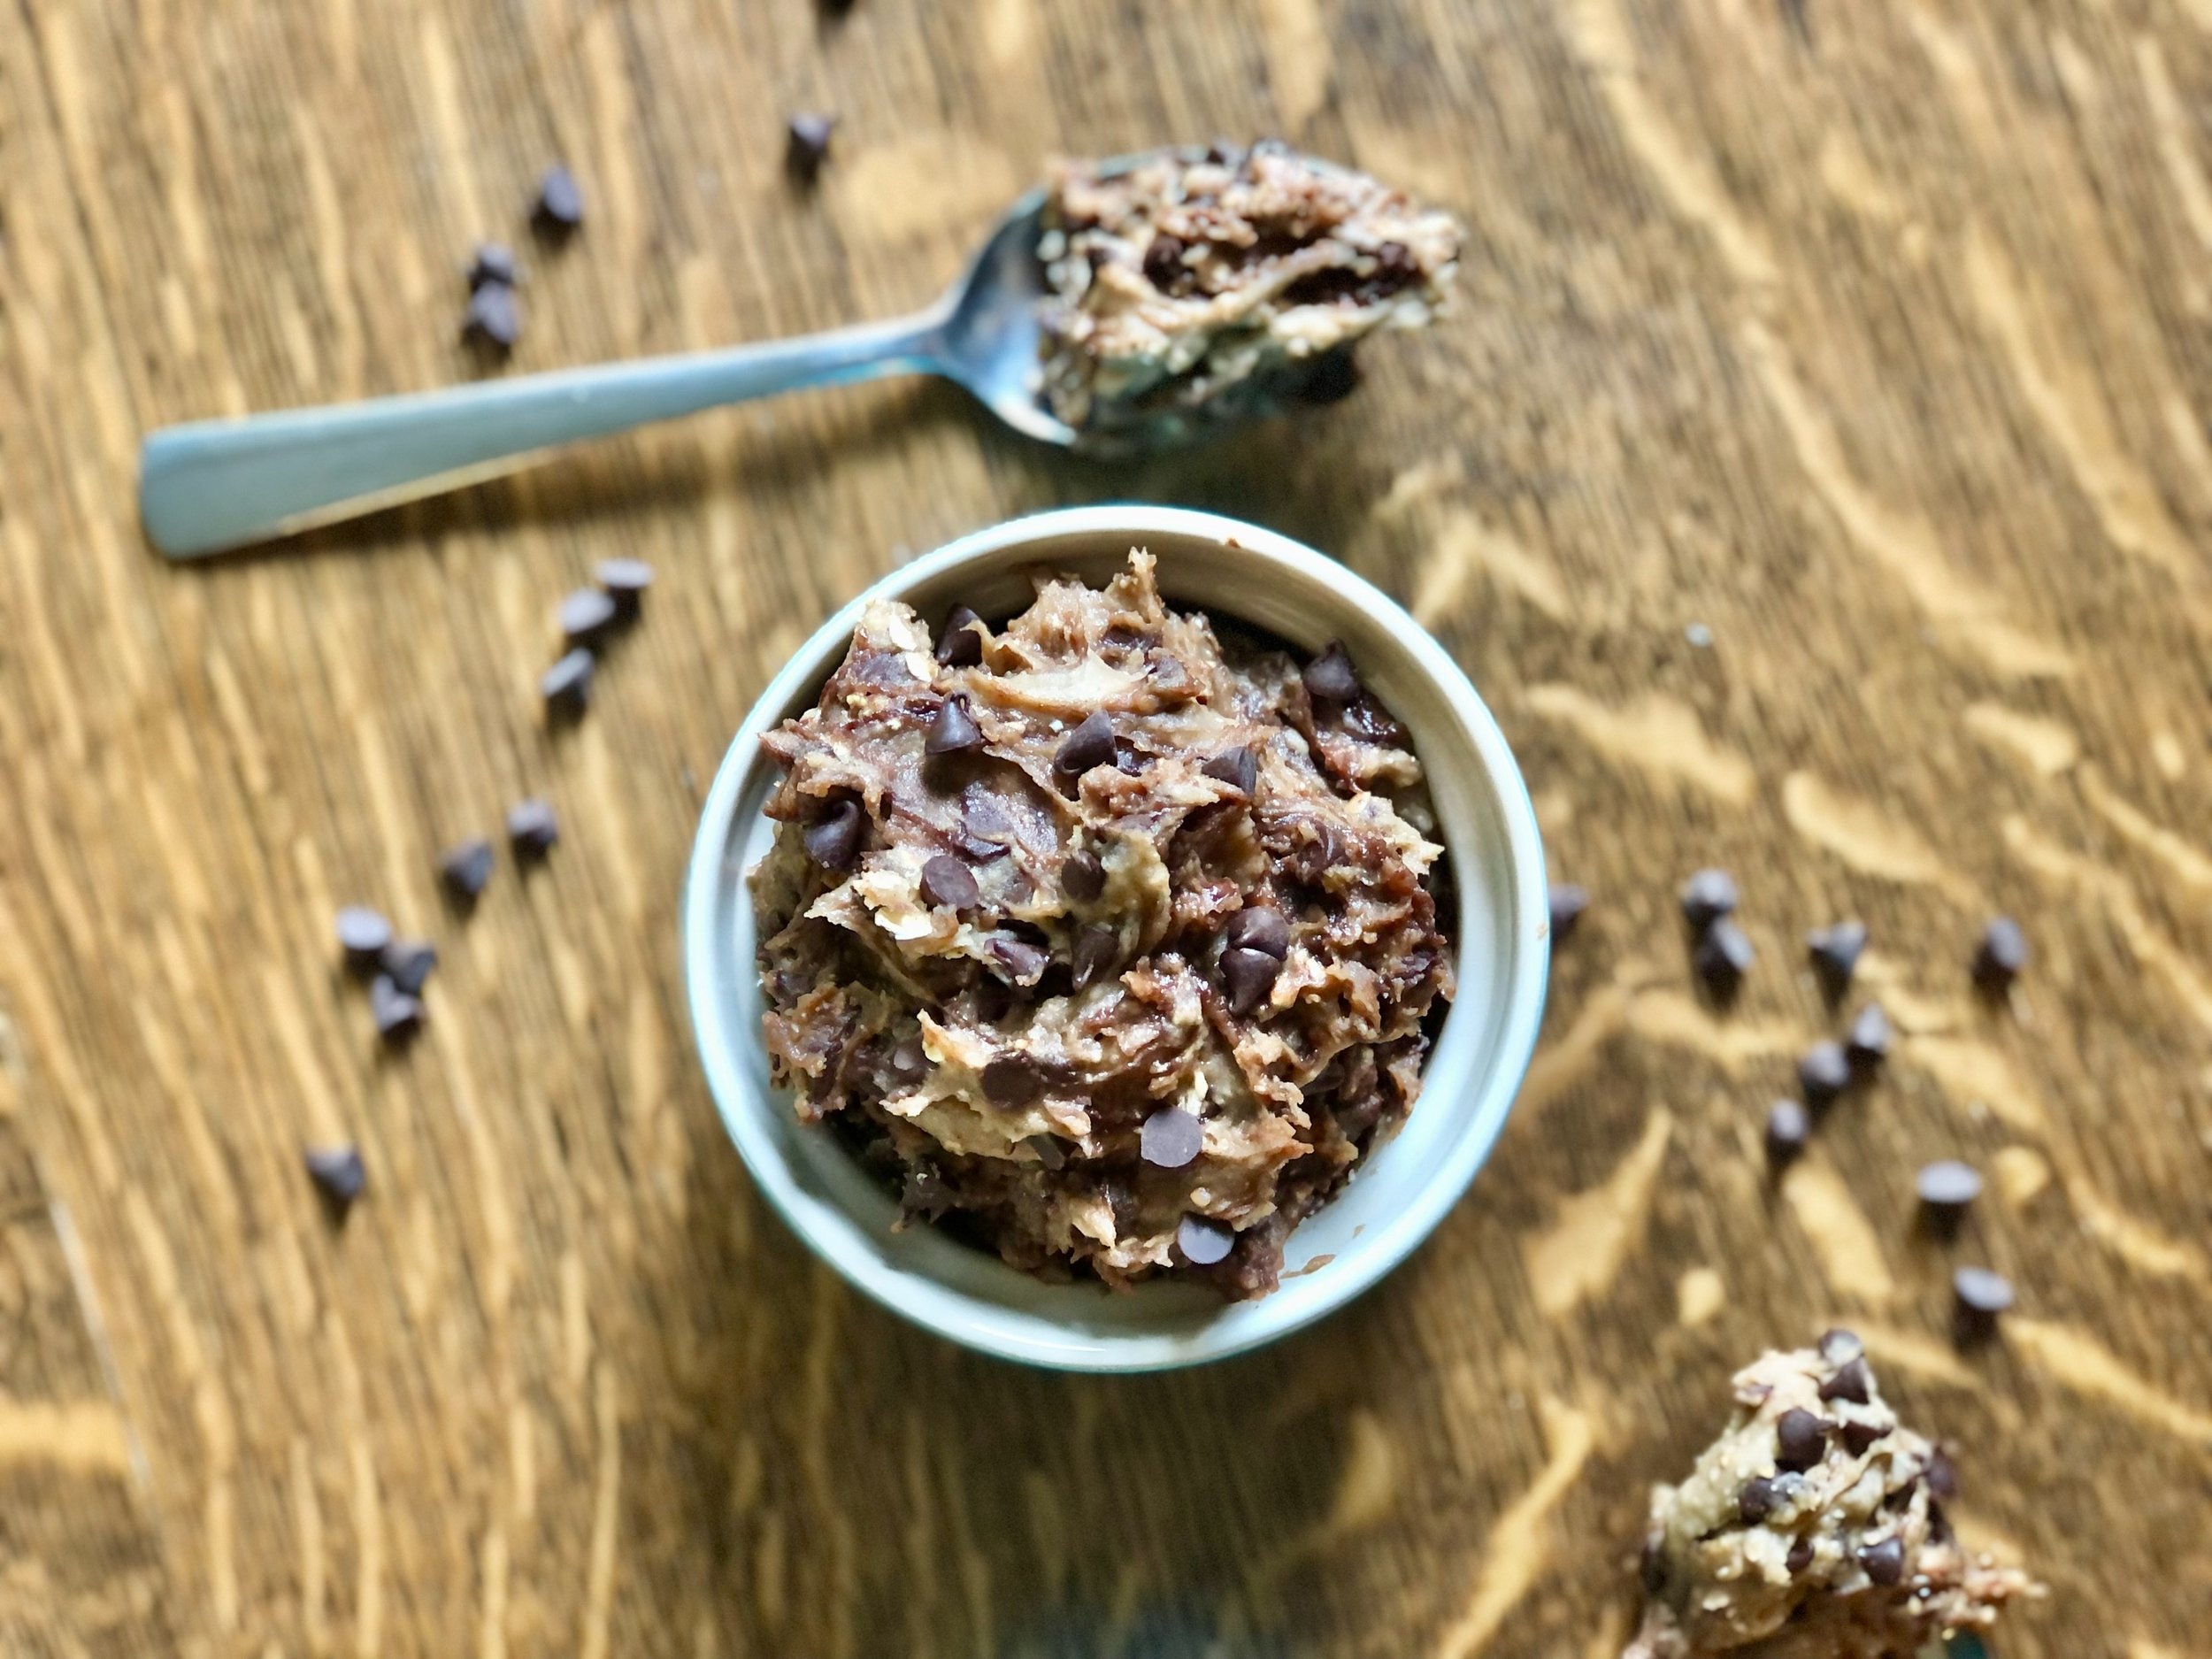
Looks pretty delicious, right? Chocolate Chip Cookie Dough Dip, but actually pretty good for you! I’m not going to say that you could do a blind taste test with real cookie dough and not know the difference, but also, for having beans as a base, this is weirdly close. It’s delicious in its own right. The only time this recipe gets flack is if someone knows it is made with beans before trying it. Even then they admit it’s pretty tasty. If they don’t know and aren’t prejudiced, they love it.

This cookie dough dip is one I’ve been making for over a decade now. A blogger by the name of Chocolate Covered Katie was having a big moment and I made and loved a lot of her recipes. She was, I believe, the person who got me into the ‘healthy” baking scene. Back when I was dancing full time, I loved all of the healthier desserts, food that actually provided some fuel for my body while still tasting like dessert (my favorite thing). Well, most of the time. I ate and made some pretty weird things that I no longer eat and make and will most definitely not ever share as a recipe on this blog. This one, though, is one I’ve kept and made over and over again. Now, it’s a snack for my kids that they have no idea is not actual decadent cookie dough. One day, they will realize the deception. Ah, it’s fun being a parent, isn’t it? (My kids also get to experience real cookie dough, don’t worry!!) 

While this recipe is based on Chocolate Covered Katie’s, almost every element is highly customizable depending on your tastes, dietary needs (vegan, gluten-free, dairy-free, etc.), or simply which ingredients you have on hand. If you make and like this recipe, you too will probably find your groove in how you like to make it and it will become your own. 

In fact, let’s walk through the ingredient list so you can see all the different options that are possible with this recipe. I don’t normally do this, but this one has a lot, too many to simply add to the “Jenny’s Notes” that I usually have at the bottom of each recipe. 

Beans

The base of this recipe is beans. You can use any kind of white bean you’d like, as long as it doesn’t have too strong of a flavor. Rinse beans to keep the flavor as neutral as possible. Use a can or cook up your own. I prefer to use chickpeas, but also use great northern beans and cannellini beans if that’s what I have on hand.

Nut Butter

Any nut butter can be used in this recipe, as long as it’s something you like, of course! Think peanut butter, almond butter, cashew butter, sunflower butter, etc…the stronger the flavor of the butter (like sunflower), the more it will come through in the dip. Completely up to you what you prefer. I like using peanut butter, mostly because I always have peanut butter. I also like to use almond butter. 

Sweetener

Brown sugar will get you the closest flavor to cookie dough. You can also use higher amounts than in the recipe below to get that super sweet cookie dough taste. Conversely, you can also use less. I think 1/4 cup is that sweet spot for keeping it on the healthier side, while still tasting plenty sweet, especially when paired with plenty of chocolate chips! 

Other sweeteners can also be used. I probably use maple syrup the most. You can also use any kind of sugar (granulated, superfine, demarara, rapadura, sucanat, powdered, etc.), honey, stevia, agave, or any other sweetener you prefer. Keep in mind that the consistency of the sweetener used will affect the overall consistency of the dip, and will need to be adjusted accordingly. 

Oats

Oats help to give the dip a little bit of texture while also thickening it. The amount you need will vary depending on how well the beans are drained, how thick or thin your nut butter is, and if using a liquid sweetener. Remember that oats and some of the other options below will continue to absorb moisture as they sit, so it’s okay to leave the dip a bit thinner than desired to allow it to thicken up without getting too thick. 

You can use quick or rolled oats, wheat germ, oat bran, flaxmeal, almond flour, or even baby cereal. Just keep in mind that wheat germ and oats have gluten or possible gluten contamination, for those with wheat or gluten sensitivities. If you don’t have any problems with wheat, you could also just use flour. Since flour is supposed to be cooked before eating due to possibly harboring harmful bacteria that can cause food poisoning, this is the part where I’m supposed to recommend that you toast it first before adding to this dip. 

Vanilla Extract

A little extra vanilla for great flavor! Not much to say here other than use real vanilla extract for best flavor! Unless, of course, you have some real vanilla bean lying around you’d like to add.

Salt

Regular cookie dough usually has about a teaspoon of salt per batch. This recipe does not make as much as a batch of cookie dough, but you do have the option of increasing the salt, to taste. Keep in mind that some nut butters may have salt in them, so take that into consideration when adding salt.

Baking Soda

Baking soda might seem like an unusual addition when this dip is raw and not baked, but it lends a slight, but authentic flavor to the dip. It’s not a huge deal if you omit it, but if you do, consider increasing the salt slightly since baking soda is also salty. 

Milk

If your dough is too thick for your liking, add a bit of milk of choice, 1 tablespoon at a time, until desired consistency is reached. To keep this dairy-free, use a plant or nut based milk instead of dairy milk.

I don’t usually need to add any milk when I make this, since my sweetener is liquid (maple syrup) and the almond butter I use is quite runny. 

Chocolate Chips

You can use any size, shape or flavor of chips that you’d like. Regular semi-sweet chocolate chips would be the classic choice, but my favorite is probably using mini chocolate chips in this dip. I also really like dark chocolate. Chocolate chips sometimes sneakily have dairy in them, so check your ingredients if wanting to keep this dairy-free.

Use as little as 1/4 cup of chocolate chips to really keep things on the lighter/healthier side, but I recommend starting with 1/2 cup / 85g or up to 1 cup / 170g to really get the party going. 

Equipment

The last thing you need to know, is that you need a food processor to make this. Some quality blenders may be able to handle the thickness of this, but most blenders and mine most definitely cannot.

Such a simple dip to make and eat, but oh so many options! Have fun, friends! 

This post may contain affiliate links. If you make a purchase using these links, Jennyblogs may receive a small commission, at no extra cost to you. This helps to support Jennyblogs. Where possible, links are prioritized to small businesses and ethically and responsibly made items. For further information see the privacy policy. Grazie!

Recipe adapted from Chocolate Covered Katie


Healthy Chocolate Chip Cookie Dough Dip

Makes about 2 cups

Ingredients:

  • 266g (1 14oz can drained) chickpeas or white beans

  • 1/4 cup / 65g peanut butter or nut butter of choice

  • 1/4 cup / 50g brown sugar or 1/4 cup / 80g maple syrup or other sweetener of choice

  • 1/4 cup / 22g quick oats

  • 2 tsp / 10g vanilla extract

  • 1/8 tsp salt

  • 1/8 tsp baking soda

  • a few tablespoons of milk, as needed

  • 1/2 - 1 cup / 85g - 170g regular or mini semi-sweet chocolate chips

Directions:

  1. Combine chickpeas, peanut butter, sugar, oats, vanilla, salt, and baking soda in a food processor. Blend until smooth.

  2. Add milk, 1 tablespoon at a time, if a thinner consistency is desired. (Dip will continue to thicken slightly.)

  3. Stir in chocolate chips with spoon or spatula.

  4. Serve with fruit, graham crackers, pretzels, etc. or simply eat by the spoonful!

Jenny’s Notes:

  • Oats will continue to absorb liquid as they sit, so it’s okay to let the dip sit for 30 minutes or so (if it lasts that long!) before deciding to add more oats to thicken.

  • If blended in the food processor for more than a couple minutes, the motor may heat up the dip. If this happens, simply allow to cool or stick in the fridge before stirring in chocolate chips. Alternatively, stir in chips gently while warm for a melty, swirly, fresh baked cookie taste.
Healthy Chocolate Chip Cookie Dough Dip
Yield 8
Author
Prep time
15 Min
Total time
15 Min

Healthy Chocolate Chip Cookie Dough Dip

What could be better than a cookie dough dip? One that's so healthy you can eat it for breakfast or anytime! Made with a base of beans and highly customizable, this dip is delicious and can also be gluten-free, dairy-free, vegan, and it's no-bake.
Cook modePrevent screen from turning off

Ingredients

Instructions

  1. Combine chickpeas, peanut butter, sugar, oats, vanilla, salt, and baking soda in a food processor. Blend until smooth.
  2. Add milk, 1 tablespoon at a time, if a thinner consistency is desired. (Dip will continue to thicken slightly.)
  3. Stir in chocolate chips with spoon or spatula.
  4. Serve with fruit, graham crackers, pretzels, etc. or simply eat by the spoonful!

Notes

  • Oats will continue to absorb liquid as they sit, so it’s okay to let the dip sit for 30 minutes or so (if it lasts that long!) before deciding to add more oats to thicken.
  • If blended in the food processor for more than a couple minutes, the motor may heat up the dip. If this happens, simply allow to cool or stick in the fridge before stirring in chocolate chips. Alternatively, stir in chips gently while warm for a melty, swirly, fresh baked cookie taste.

Nutrition Facts

Calories

200.64

Fat

8.78 g

Sat. Fat

3.38 g

Carbs

24.77 g

Fiber

3.6 g

Net carbs

21.18 g

Sugar

11.45 g

Protein

6.24 g

Sodium

96.89 mg

Cholesterol

1.34 mg

Nutritional information is approximate. Based on 8 servings of about 1/4 cup each.

healthy chickpea chocolate chip cookie dough dip, bean dessert dip, vegan, gluten free, dairy free, no bake
dessert
American
Did you make this recipe?
Tag @jennyblogsandbakes on instagram and hashtag it #jennyblogs

Healthier Chocolate Peanut Butter Bars

Last updated July 19, 2024

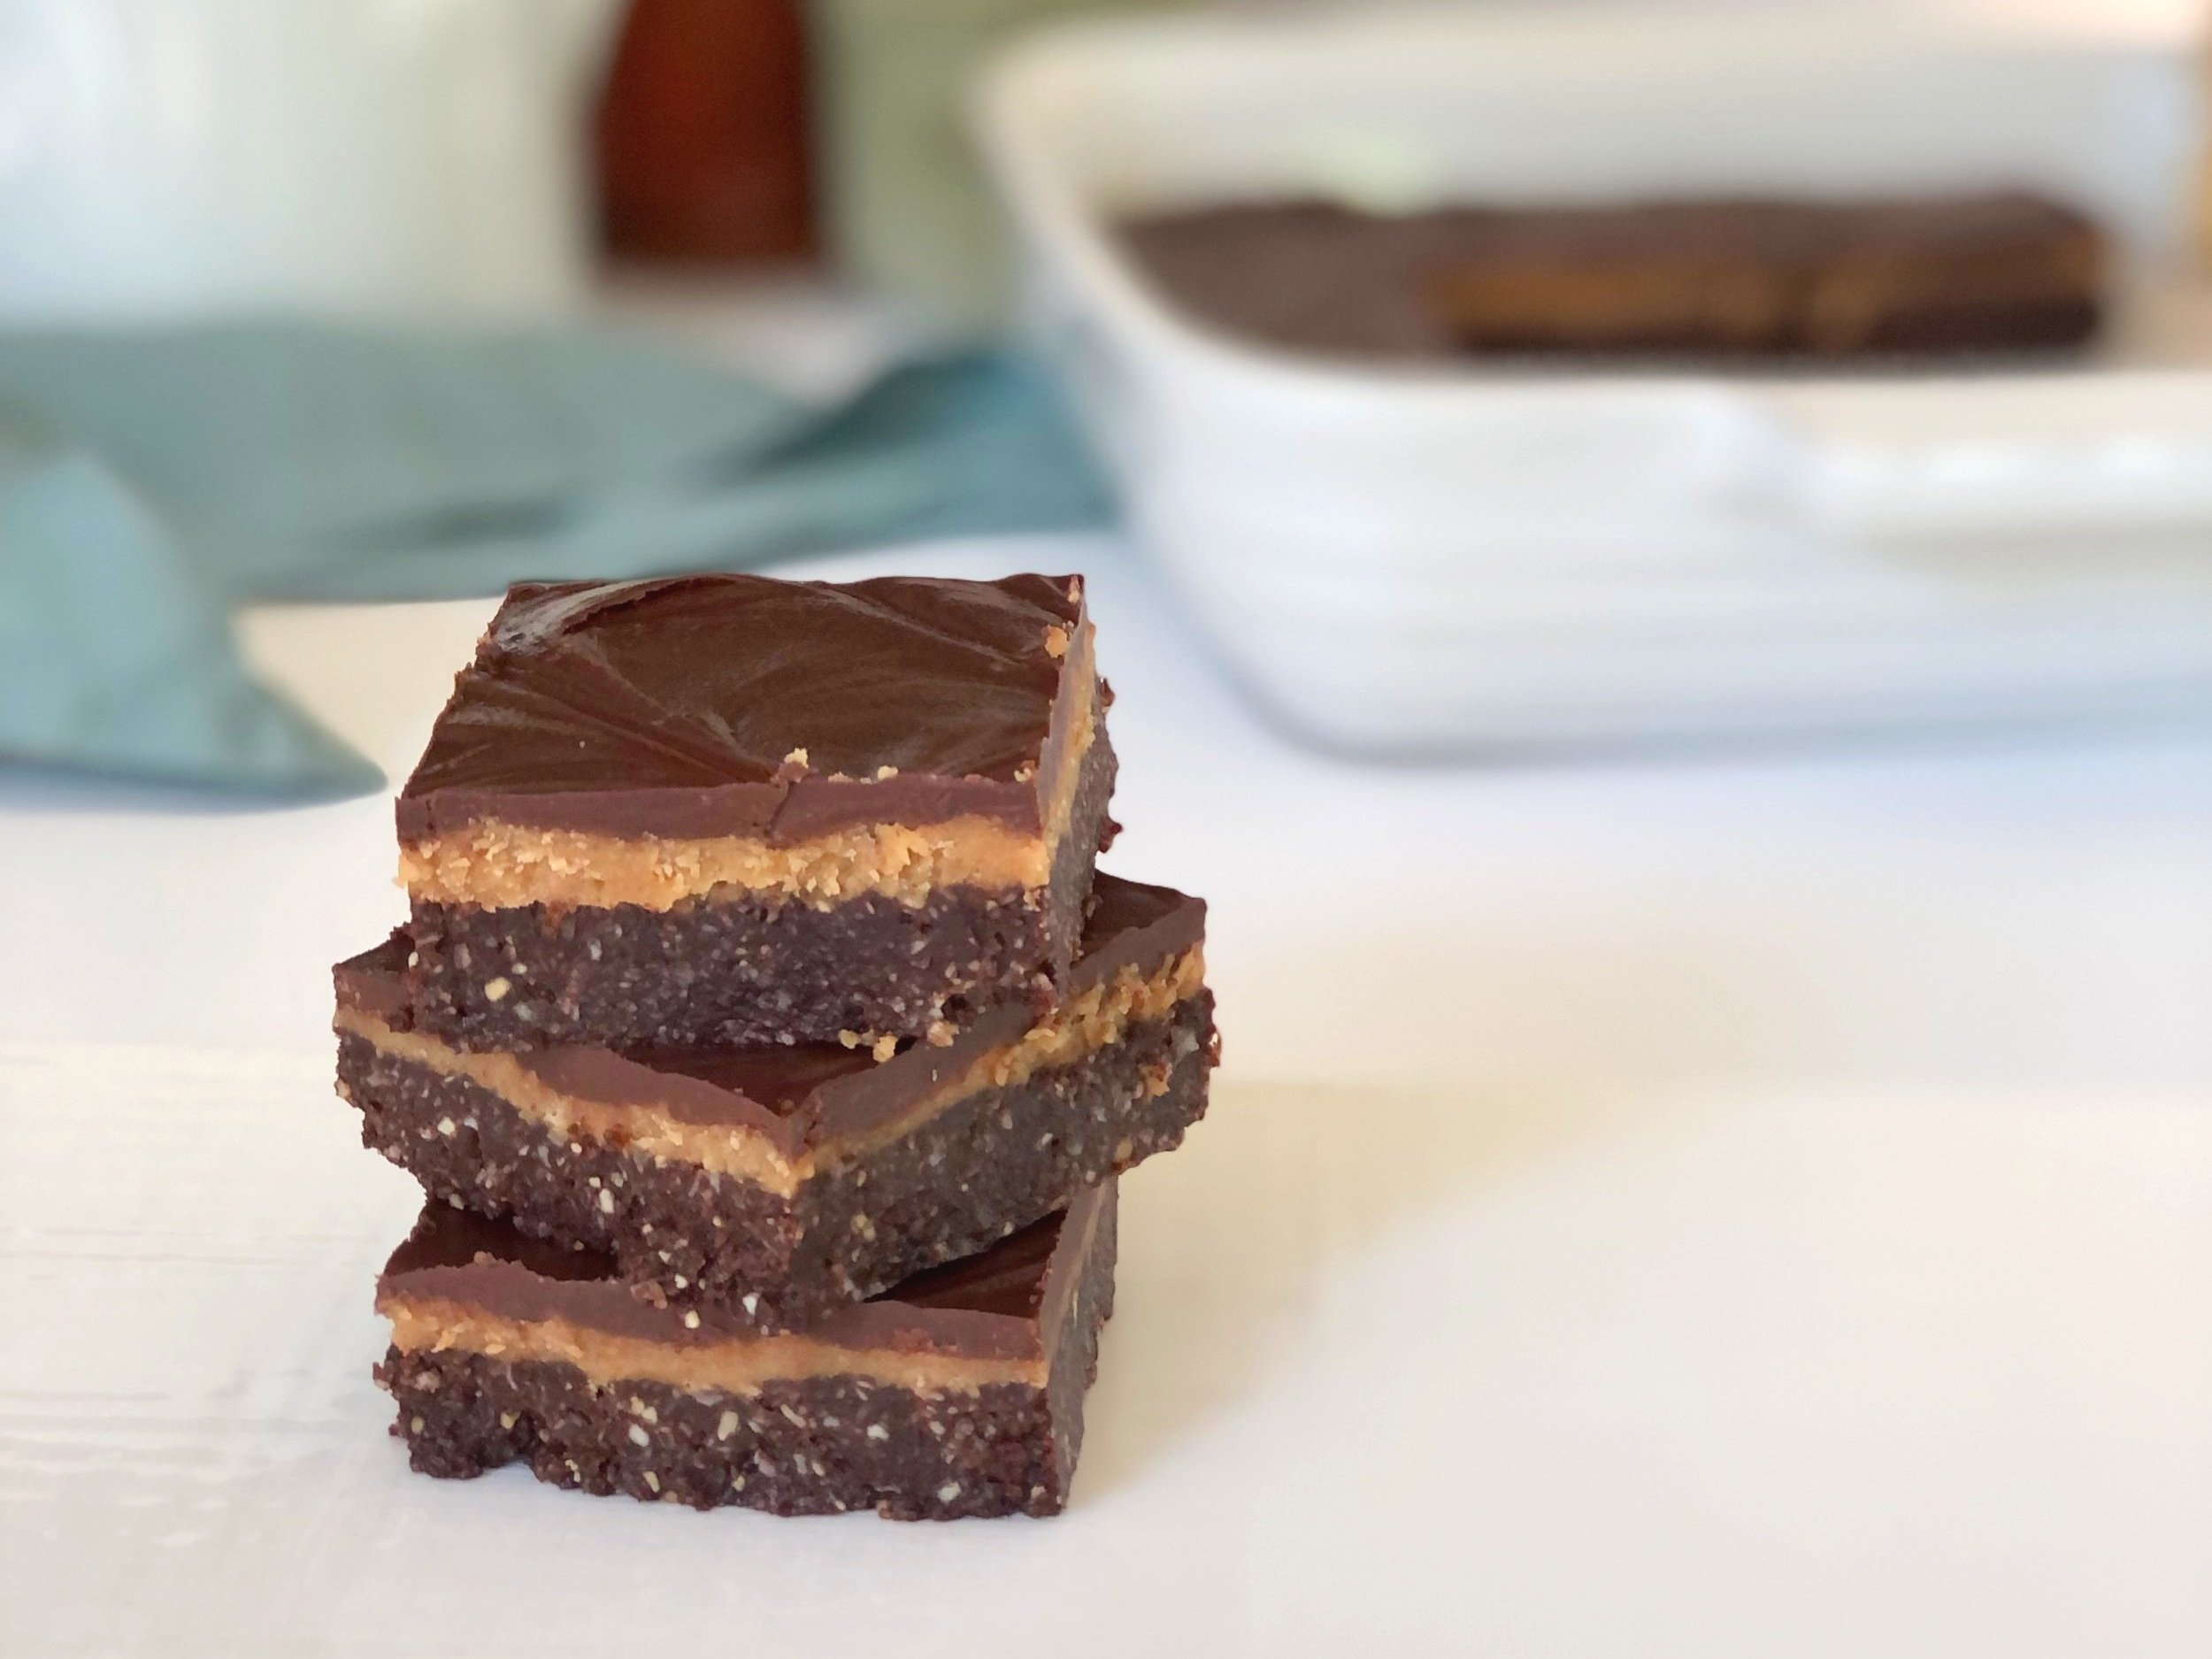
These Chocolate Peanut Butter Bars check a lot of boxes.

  • Delicious. These bars somehow bridge the gap between “coconut lovers” and “chocolate peanut butter lovers”, even for those who don’t normally love coconut, and those who don’t normally love peanut butter and chocolate together. I know, weird, but those people do exist and they’re some of my taste testers.

  • Healthier than most desserts. I would (and did) unabashedly eat these for breakfast. They’re full of nuts and coconut, and only use coconut oil, depending on which camp you fall in as far as viewing coconut oil as a good medium-chain fatty acid or simply another saturated fat.

  • No bake. Great for summer, if you don’t have an oven available to you, or simply don’t want to turn it on.

  • Easy. These can be ready in less than 30 minutes, quick and satisfying to whip up, with most of the work done in a food processor.

  • Satisfying. With the protein and fat content, these will keep you satisfied for longer. When you’re satisfied, you’re less likely to keep reaching for other unhealthy foods or overeating.

  • Gluten-free, vegan, dairy-free, egg-free, and almost refined sugar-free (there’s sugar in chocolate chips, which are in the chocolate topping.)

If those aren’t enough reasons to love these bars, I have one more. You don’t have to grease your baking dish! I know, that’s a little thing, but it’s a small kitchen task I don’t overly enjoy, and the fact that these bars slide ride out of an ungreased pan is a small yippee from me!

Another reason I like these, is because they don’t call for dates. Don’t get me wrong, I love dates, but it’s nice to have a healthy dessert recipe that doesn’t call for dates since so many do. I don’t always have dates on hand, and this way I can still whip up a healthier dessert/snack without waiting for my next grocery run. That makes this recipe’s ingredient list pretty close to being all pantry staples.

This post may contain affiliate links. If you make a purchase using these links, Jennyblogs may receive a small commission, at no extra cost to you. This helps to support Jennyblogs. Where possible, links are prioritized to small businesses, and American companies and products made in the USA for American readers. For further information see the privacy policy. Grazie!

Recipe inspired by Dani’s Healthy Eats


Healthier Chocolate Peanut Butter Bars

Serves about 16

Ingredients:

For the Chocolate Coconut Crust

  • 1 1/2 cups / 120g shredded unsweetened coconut

  • 6 Tbsp / 120g maple syrup

  • 6 Tbsp / 97g peanut butter

  • 6 Tbsp / 59g peanuts

  • 6 Tbsp / 38g cocoa powder

  • 5 Tbsp / 70g coconut oil

For the Peanut Butter Filling

  • 1/2 cup / 130g peanut butter

  • 1/4 cup / 81g maple syrup

  • 1/4 cup / 56g coconut oil

For the Chocolate Topping

  • 1 cup / 175g semi sweet or dark chocolate chips

  • 1 Tbsp / 14g coconut oil

Directions:

Ungreased 8x8 inch / 20x20 centimeter square baking dish

Make the Chocolate Coconut Crust

  1. Add all ingredients to a food processor; blend until smooth and mixture comes together in a soft dough-like ball.

  2. Press into pan and freeze while preparing filling.

Make the Peanut Butter Filling

  1. Add all filling ingredients to a medium bowl or food processor and mix until smooth. (It’s not necessary to clean food processor between mixing the crust and filling.)

  2. Remove crust from freezer and evenly spread filling over crust. Place back in freezer while preparing topping.

Make the Chocolate Topping

  1. In a small saucepan, combine chocolate and coconut oil. Melt over low heat, stirring frequently. Remove from heat when there are still a few tiny bits of chocolate; continue stirring until all is melted and smooth.

  2. Remove bars from freezer and spread topping evenly over filling. Cover and place in freezer or refrigerator to set, at least 30 minutes. Store covered in refrigerator.

Jenny’s Notes:

  • Different nut butters and nuts can be swapped out for the peanut butter and peanuts. Almond butter and almonds can be used, or cashews and cashew butter, or mix them up as you wish!

Healthier Chocolate Peanut Butter Bars
Yield 16
Author
Prep time
25 Min
Inactive time
30 Min
Total time
55 Min

Healthier Chocolate Peanut Butter Bars

Decadent, no-bake chocolate peanut butter bars with a chocolate coconut crust, peanut butter filling, and simple chocolate topping are deceivingly simple to make and satisfying to eat. Gluten-free, dairy-free, vegan, and almost refined sugar-free.
Cook modePrevent screen from turning off

Ingredients

For the Chocolate Coconut Crust
For the Peanut Butter Filling
For the Chocolate Topping

Instructions

Make the Chocolate Coconut Crust
  1. Ungreased 8x8 inch / 20x20 centimeter square baking dish
  2. Add all ingredients to a food processor; blend until smooth and mixture comes together in a soft dough-like ball.
  3. Press into pan and freeze while preparing filling.
Make the Peanut Butter Filling
  1. Add all filling ingredients to a medium bowl or food processor and mix until smooth. (It’s not necessary to clean food processor between mixing the crust and filling.)
  2. Remove crust from freezer and evenly spread filling over crust. Place back in freezer while preparing topping.
Make the Chocolate Topping
  1. In a small saucepan, combine chocolate and coconut oil. Melt over low heat, stirring frequently. Remove from heat when there are still a few tiny bits of chocolate; continue stirring until all is melted and smooth.
  2. Remove bars from freezer and spread topping evenly over filling. Cover and place in freezer or refrigerator to set, at least 30 minutes. Store covered in refrigerator.

Notes

  • Different nut butters and nuts can be swapped out for the peanut butter and peanuts. Almond butter and almonds can be used, or cashews and cashew butter, or mix them up as you wish!

Nutrition Facts

Calories

332.91

Fat

26.92 g

Sat. Fat

17.14 g

Carbs

21.81 g

Fiber

3.64 g

Net carbs

18.19 g

Sugar

13.5 g

Protein

6.06 g

Sodium

77.98 mg

Cholesterol

0.11 mg

Nutritional information is approximate. Based on 1 serving if cut into 16 pieces.

healthy coconut chocolate peanut butter bars, vegan, gluten free, dairy free, refined sugar free, no bake
dessert
American
Did you make this recipe?
Tag @jennyblogsandbakes on instagram and hashtag it #jennyblogs

Mascarpone Peanut Butter Pie with Chocolate Ganache

IMG_5063.jpg

Peanut Butter Pie with Chocolate Whipped Cream

Last Updated August 14, 2024

Let me take a gander at what you're thinking, probably something like, "OH! PEANUT BUTTER PIE? I love peanut butter pie! So good! But I already have a recipe for peanut butter pie. Why do I need this recipe? Wait, don't YOU already have a recipe up on this blog for peanut butter pie??"

Well, you'd be right about one thing, this is not my first recipe up for a peanut butter pie. But let me tell you, they each have their own merited place. For example, the Peanut Butter Pie with Chocolate Whipped Cream has a shortbread crust, creamy peanut butter filling, topped with chocolate whipped cream.  

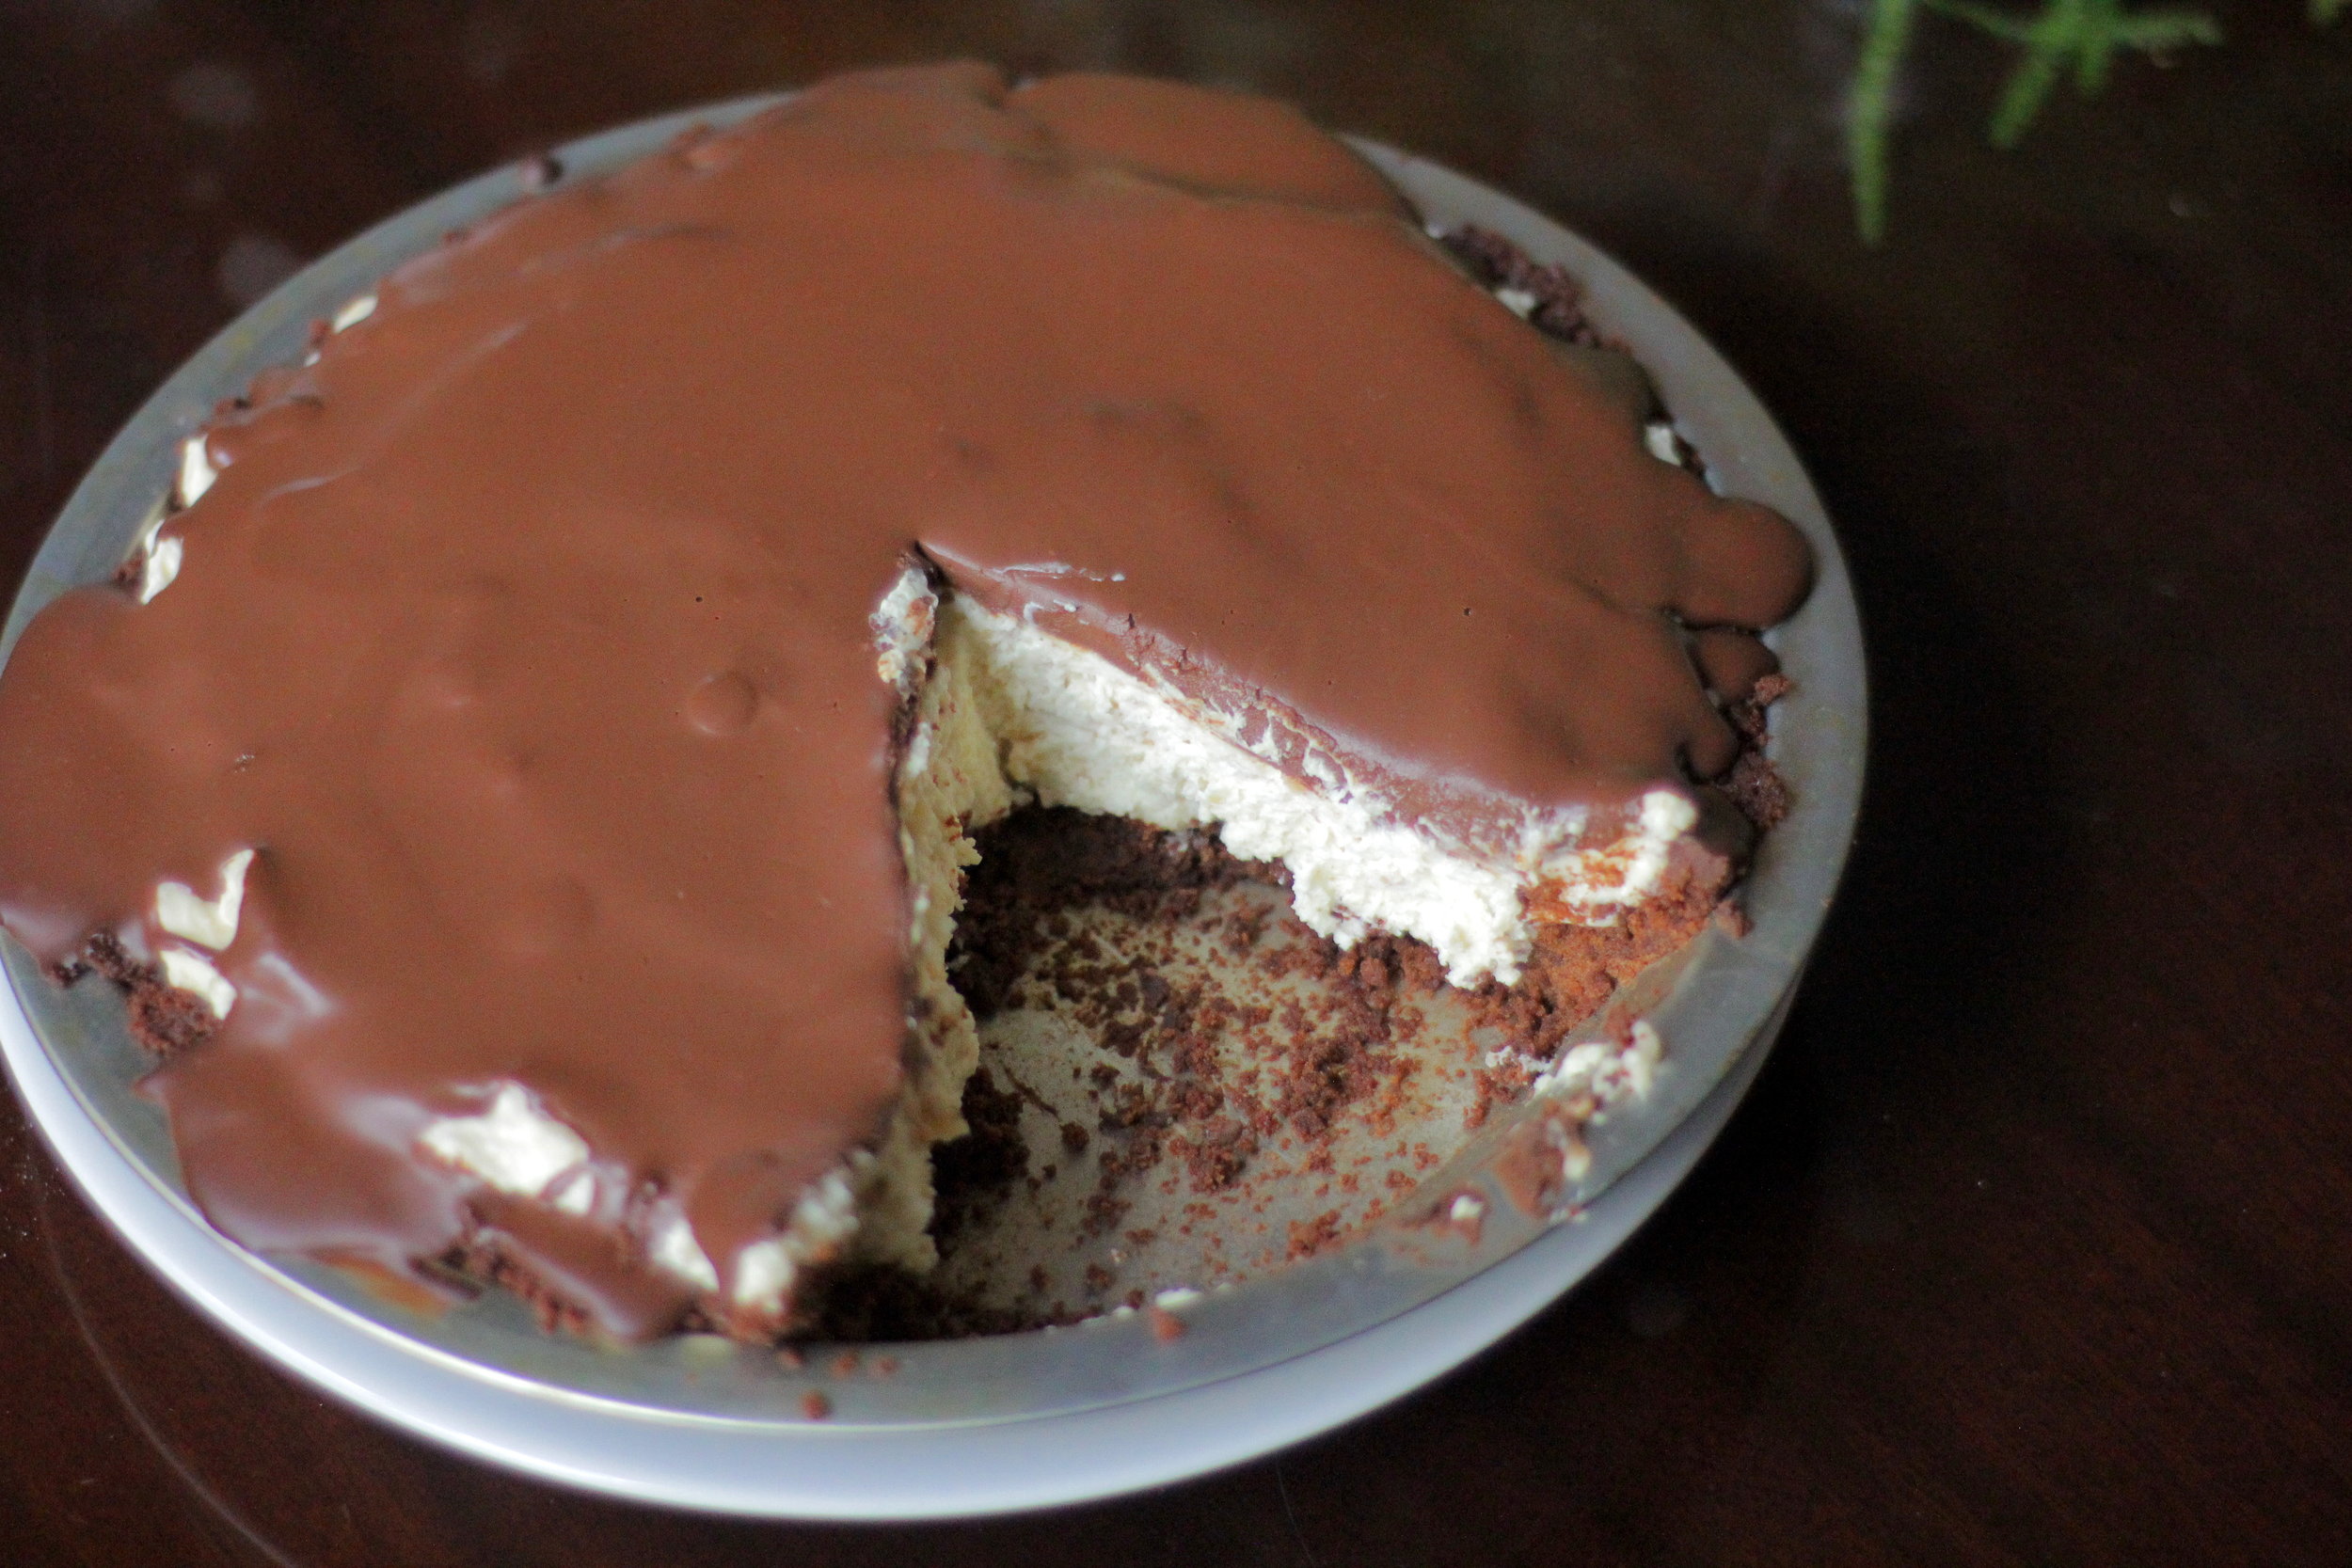
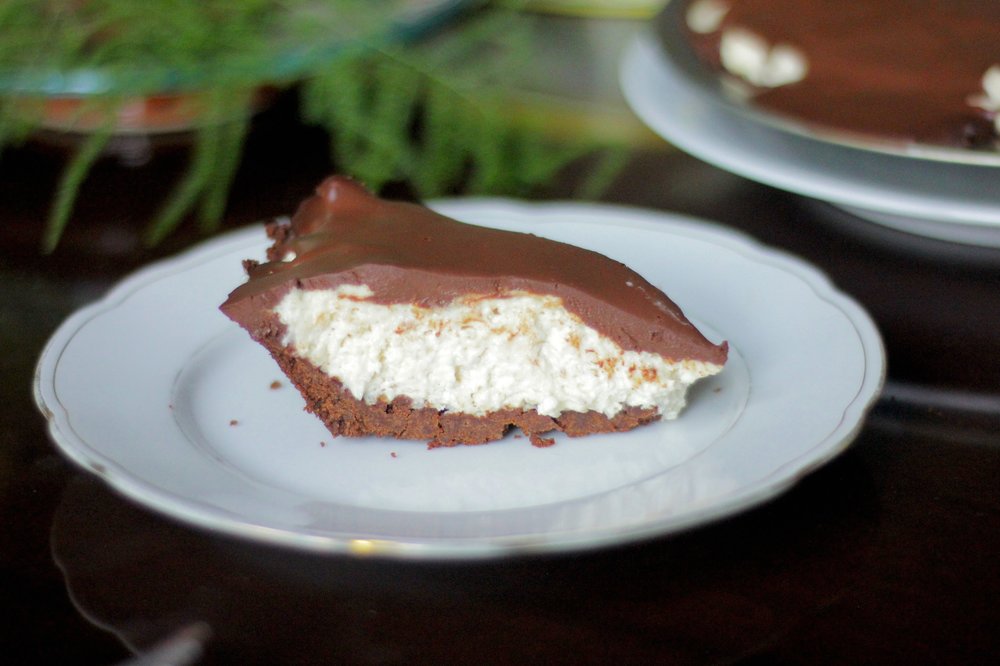
This peanut butter pie has a chocolate crust, an ultra creamy peanut butter mascarpone filling topped with flowing chocolate ganache. The chocolate ganache envelopes the peanut butter filling in a tender embrace...still with me? Ok let's stop dreaming and comparing peanut butter pies and MAKE one!  

Nutter Butter Pie

Not a fan of chocolate and peanut butter together? Neither is my mom.  That's ok, we can still be friends. And because of that, why not head over to this Nutter Butter Pie instead? No chocolate there! 

This post may contain affiliate links. If you buy something using these links, Jennyblogs may receive a small commission, at no extra cost to you. This helps to support Jennyblogs. For further information see the privacy policy. Grazie!

Recipe adapted from what megan's making.


Mascarpone Peanut Butter Pie with Chocolate Ganache

Serves 8-12

Ingredients:

For the Chocolate Crust

  • 7.5 oz / 210g chocolate graham crackers, teddy grahams, or chocolate shortbread

  • 2 oz / 55g (1/3 cup) semi-sweet chocolate, finely chopped, or mini chips

  • 5 Tbsp / 65g butter, melted

For the Peanut Butter Filling

IMG_5030.JPG
  • 1 cup / 237g heavy whipping cream

  • 8 oz / 227g mascarpone or cream cheese, room temperature

  • 1 cup / 250g peanut butter

  • 1/2 cup / 100g sugar

  • 1 tsp / 5g vanilla extract

For the Chocolate Ganache

  • 4 oz / 110g (2/3 cup) semi-sweet chocolate, finely chopped, or chips

  • 1 Tbsp / 14g butter

  • 1/2 cup / 118g heavy whipping cream

Directions:

Oven 325°F / 163°C.  Ungreased 9in / 23cm pie dish.  

Make the Chocolate Crust

  1. In a food processor combine chocolate grahams, butter, and chocolate chips.  Pulse until the mixture is uniformly fine crumbs.  Or do it the "old fashioned" way and beat the crumbs to oblivion in a well sealed plastic bag with a rolling pin or other hard object, then mixing in the chocolate and butter in a bowl with a spoon. 

  2. Press evenly into the bottom and sides of pie dish and bake for 8 minutes or until fragrant.  Set aside to cool completely.

Make the Peanut Butter Filling

  1. In the bowl of a stand mixer or with a handheld mixer, beat the whipping cream until stiff peaks form.  Transfer to another bowl if using a stand mixer and set aside.

  2. Again in the bowl of a stand mixer or a separate bowl with a handheld mixer, beat the cream cheese, peanut butter, sugar, and vanilla until light and fluffy.  

  3. Carefully fold the whipped cream into the peanut butter mixture in three or four parts.  

  4. Spoon the filling over the cooled crust and smooth the top.  Refrigerate to set.  

IMG_5064.JPG

Make the Chocolate Ganache

  1. Place the chocolate and butter in a small bowl.  Heat the cream in a small saucepan over low heat, just until simmering.  The moment you see bubbles remove from heat and pour over chocolate and butter.  Let sit for 1 minute to melt the chocolate, then whisk briskly until smooth and shiny.  

  2. Pour over chilled pie.  If you don't desire chocolate running over the sides, you may have to wait a minute or two between pourings, or simply don't use all the ganache.  (The rest can be disposed of with a spoon and a mouth.  But I don't need to tell you that.)  

  3. Chill for 3-4 hours or overnight until set.  

Jenny's Notes:

  • If using a shallow pie dish you may have some leftover crust, and that's ok. Don't feel like you have to use all the crust mixture or you may have an impenetrable crust, especially in the corners.

  • I frequently substitute whole milk or coconut milk for all or part of the cream in ganache, but usually not when it's a topper as it can separate a bit if you don't use all cream. However, one time when making this I only had 1/4 cup cream left for the topping and so added 1/4 cup whole milk, and it made for a beautiful ganache, even as the topper.

  • Top with chocolate chips or chocolate shavings as desired!

Mascarpone Peanut Butter Pie with Chocolate Ganache
Yield 8-12
Author
Prep time
1 Hour
Cook time
8 Min
Inactive time
3 Hour
Total time
4 H & 8 M

Mascarpone Peanut Butter Pie with Chocolate Ganache

Chocolate cookie crust, whipped mascarpone peanut butter filling, and chocolate ganache to top.
Cook modePrevent screen from turning off

Ingredients

For the Chocolate Crust
For the Peanut Butter Filling
For the Chocolate Ganache

Instructions

Make the Chocolate Crust
  1. Oven 325°F / 163°C. Ungreased 9in / 23cm pie dish.
  2. In a food processor combine chocolate grahams, butter, and chocolate chips. Pulse until the mixture is uniformly fine crumbs. Or do it the "old fashioned" way and beat the crumbs to oblivion in a well sealed plastic bag with a rolling pin or other hard object, then mixing in the chocolate and butter in a bowl with a spoon.
  3. Press evenly into the bottom and sides of pie dish and bake for 8 minutes or until fragrant. Set aside to cool completely.
Make the Peanut Butter Filling
  1. In the bowl of a stand mixer or with a handheld mixer, beat whipping cream until stiff peaks form. Transfer to another bowl if using a stand mixer and set aside.
  2. Again in the bowl of a stand mixer or a separate bowl with a handheld mixer, beat cream cheese, peanut butter, sugar, and vanilla until light and fluffy.
  3. Carefully fold whipped cream into peanut butter mixture in three or four parts.
  4. Spoon filling over cooled crust and smooth top. Refrigerate to set.
Make the Chocolate Ganache
  1. Place chocolate and butter in a small bowl. Heat cream in a small saucepan over low heat, just until simmering. The moment you see bubbles remove from heat and pour over chocolate and butter. Let sit for 1 minute to melt chocolate, then whisk briskly until smooth and shiny.
  2. Pour over chilled pie. If you don't desire chocolate running over the sides, you may have to wait a minute or two between pourings, or simply don't use all the ganache.
  3. Chill for 3-4 hours or overnight until set.

Notes

If using a shallow pie dish you may have some leftover crust, and that's ok. Don't feel like you have to use all the crust mixture or you may have an impenetrable crust, especially in the corners.I frequently substitute whole milk or coconut milk for all or part of the cream in ganache, but usually not when it's a topper as it can separate a bit if you don't use all cream. However, one time when making this I only had 1/4 cup cream left for the topping and so added 1/4 cup whole milk, and it made for a beautiful ganache, even as the topper.Top with chocolate chips or chocolate shavings as desired!

Nutrition Facts

Calories

791.91

Fat

62.46 g

Sat. Fat

30.79 g

Carbs

54.43 g

Fiber

3.89 g

Net carbs

50.53 g

Sugar

37.64 g

Protein

12.12 g

Sodium

502.22 mg

Cholesterol

110.56 mg

Nutritional information is approximate. Based on 8 servings.

best peanut butter pie, PB pie, mascarpone peanut butter pie, chocolate ganache, cookie crust, cream cheese peanut butter pie, no bake
Dessert, Pie
American
Did you make this recipe?
Tag @jennyblogsandbakes on instagram and hashtag it #jennyblogs
IMG_5066.JPG


Whole Wheat Peanut Butter Muffins

Do you like my snowman liners? :)

Do you like my snowman liners? :)

This post may contain affiliate links. If you buy something using these links, Jennyblogs may receive a small commission, at no extra cost to you. This helps to support Jennyblogs. For further information see the privacy policy. Grazie!

Muffins are great, aren’t they? So American and so versatile. They can be savory or sweet and just about any flavor you could desire. They can be calorie bombs or nutrition bombs. These Whole Wheat Peanut Butter Muffins are actually pretty good for you, considering how delicious they are.

The sugar content is low, only whole wheat flour is used, and they’re rich in peanut butter and chocolate!

Sometimes I think muffins don’t get the recognition they deserve. Each country has its specialty and maybe of all the things that my country could’ve invented I would’ve chosen croissants or pastries, but muffins have their place on the table for sure! I am not ashamed.

The world is a beautiful place full of diverse people, traditions, and food.  The beauty of the age we live in is how accessible it has become to travel.  You no longer have to rely on magazines and other people's experience, or weigh the cost of time it takes to get places and the chance of death as you voyage on a ship or whatnot.  Even if you remain right where you are, chances are the other people around you are coming and going.  The world is opening up more and more, we are no longer isolated from each other.  We are exposed to different ways of thinking, culture, languages, ideals.  Sometimes we agree, and sometimes we don't, and as long as we know how to do those two things humbly and lovingly, it can be a beautiful thing.  Even when it seems the disagreements outweigh the agreements, there will always be one thing we have in common: Food. 

Never underestimate the power of food.  We can thank France for flaky, buttery pastries, crepes, chocolate mousse, and baguettes, Italy for pizza, pasta, gelato, and panettone, Germany for pretzels and bratwurst, Greece for Gyros and tzatziki, the middle east for hummus, falafel, tabbouleh, baba ganoush, pita, and shawarma, Turkey for Turkish delight and baklava, Japan for sushi, China for wontons, spring rolls, and dumplings, Ireland for Shepherd's pie, Mexico for tacos, burritos, and enchiladas, Canada for Poutine, U.S. for macaroni and cheese, apple pie, s'mores, buffalo wings, jambalaya, annnnnnd muffins. 

Basically, while the French are making pastries, Americans are making muffins.  Hm.  That's fine.  Taking two days to make something does not necessarily mean it will be automatically better.  (In this case, however, I think it does.)  But we don't always have the luxury of taking two days to make pastries when the fancy strikes.  Life and work happens.  Enter the humble muffin.  Simple, humble, delicious, and quick to whip up.  It has its place in the kitchen.

They tend to get a bad rap for being high in calories, unhealthy, and associated with muffin tops.  I promise, their sole intent in life is not give you a muffin top.  Poor muffins.  I am here today to show you that muffins can be nutritious, not 500 calories a pop, and enjoyable to make.  I hope I don't have to tell you they are also enjoyable to eat.  Especially these ones. :)

Recipe adapted from Culinary Adventures in the Kitchen


Whole Wheat Peanut Butter Muffins

12-14 muffins

Ingredients:

  • 2 1/4 cups / 270g whole wheat or white whole wheat flour

  • 1 tsp baking soda

  • 1 tsp baking powder

  • 1/4 tsp salt

  • 3 Tbsp / 42g oil

  • 1/4 cup / 61g yogurt

  • 1/2 cup / 100g brown sugar

  • 3/4 cup / 195g peanut butter

  • 2 tsp vanilla extract

  • 2 eggs

  • 1 cup / 237g buttermilk

  • 1 cup / 175g chocolate chips

Directions:

Oven 375°F / 190°C.  Muffin tin lined with cupcake liners or greased.  You may need two pans.

  1. In a medium bowl, whisk together flour, baking soda, baking powder, and salt. 

  2. In the bowl of a stand mixer, combine oil, yogurt, and brown sugar.  Add peanut butter and mix until incorporated.  Add the eggs one at a time, scraping down sides of bowl as needed. 

  3. Add 1/3 of flour mixture to the stand mixer, mixing just until combined.  Add half of the buttermilk, again mixing until just combined.  Repeat with another third of the flour, the remaining half of the buttermilk, and finally the last third of flour.  Gently stir in 3/4 cup / 130g chocolate chips with a spoon or spatula. 

  4. Fill muffin cups 3/4 full, and sprinkle remaining 1/4 cup / 44g chocolate chips over the tops. 

  5. Bake until lightly golden around the edges and/or a toothpick inserted near the center comes out clean, about 16-18 minutes. 

Jenny's Notes:

  • Whole wheat flour is not necessarily healthier than white whole wheat flour, they are simply different kinds of wheat.  Whole wheat flour is a red wheat, which gives it the darker color and slightly heavier texture.  Think of it like a Granny Smith apple and a Macintosh Apple, they are different varieties of apple but equally nutritious for you. 

  • Using either plain yogurt or a sweetened yogurt like vanilla is fine in this recipe. 

  • These muffins are not overly sweet, (I think they're perfect for breakfast so you don't start your day with a sugar coma) so feel free to up the sugar if you prefer sweeter muffins. 

Whole Wheat Peanut Butter Muffins
Yield 12-14 Muffins
Author
Prep time
30 Min
Cook time
18 Min
Total time
48 Min

Whole Wheat Peanut Butter Muffins

Lightly sweet, whole wheat peanut butter muffins with a healthy sprinkling of chocolate chips.
Cook modePrevent screen from turning off

Ingredients

Instructions

  1. Oven 375°F / 190°C. Muffin tin lined with cupcake liners or greased. You may need two pans.
  2. In a medium bowl, whisk together flour, baking soda, baking powder, and salt.
  3. In the bowl of a stand mixer, combine oil, yogurt, and brown sugar. Add peanut butter and mix until incorporated. Add the eggs one at a time, scraping down sides of bowl as needed.
  4. Add 1/3 of flour mixture to the stand mixer, mixing just until combined. Add half of the buttermilk, again mixing until just combined. Repeat with another third of the flour, the remaining half of the buttermilk, and finally the last third of flour. Gently stir in 3/4 cup / 130g chocolate chips with a spoon or spatula.
  5. Fill muffin cups 3/4 full, and sprinkle remaining 1/4 cup / 44g chocolate chips over the tops.
  6. Bake until lightly golden around the edges and/or a toothpick inserted near the center comes out clean, about 16-18 minutes.

Notes

Whole wheat flour is not necessarily healthier than white whole wheat flour, they are simply different kinds of wheat. Whole wheat flour is a red wheat, which gives it the darker color and slightly heavier texture. Think of it like a Granny Smith apple and a Macintosh Apple, they are different varieties of apple but equally nutritious for you. Using either plain yogurt or a sweetened yogurt like vanilla is fine in this recipe. These muffins are not overly sweet, (I think they're perfect for breakfast so you don't start your day with a sugar coma) so feel free to up the sugar if you prefer sweeter muffins.

Nutrition Facts

Calories

329.90

Fat

17.53 g

Sat. Fat

4.88 g

Carbs

39.14 g

Fiber

4.20 g

Net carbs

34.95 g

Sugar

18.61 g

Protein

9.13 g

Sodium

328.68 mg

Cholesterol

32.10 mg

Nutritional information is approximate and based on 12 servings.

muffins,snack,nutritious, chocolate chips, whole wheat, dark chocolate, peanut butter, buttermilk,yogurt
Breakfast, Bread
American
Did you make this recipe?
Tag @jennyblogsandbakes on instagram and hashtag it #jennyblogs

Banana Chocolate Chip Cake with Peanut Butter Frosting

Last Updated August 4, 2024

It's almost Christmas!!!  The most wonderful time of the year, filled with family, friends, delicious food, and cheery music.  Wasn't that a wonderfully cliché sentence?  Yes, but we hope it's true.  I am fortunate enough to say that it is for me.  I love all my family, I love Christmas music (I can't always vouch for it all being "good" music, but it lifts your spirit and you can mindlessly sing along while wearing a Santa hat and elf socks without anyone thinking twice), and we have an abundance of delicious food.  So much food. 

What is one to do when they have been indundated with rich holiday food?  Take a break?  No fun.  Stand by the vegetable tray all night?  Nah, I hear the conversation can get a little heated with those peppers.  Chew gum?  No, you need a compromise.  Something that will satisfy, but not put you over like your great-aunt's cousin-once-removed on your dad's side triple chocolate cake with chocolate buttercream, ganache, whipped cream, sprinkles, drizzled with caramel and bonbons on top.  Something more like a fruit based cake.  Banana.  With chocolate chips, because it is Christmas, and peanut butter because that makes the whole thing.  The bow on top of the present.  The icing on the cake...so very literally. Plus protein. It’s basically a health food, you guys.

This post may contain affiliate links. If you buy something using these links, Jennyblogs may receive a small commission, at no extra cost to you. This helps to support Jennyblogs. For further information see the privacy policy. Grazie!

Recipe adapted from Handle the Heat


Banana Chocolate Chip Cake with Peanut Butter Frosting

Makes 12-16 servings

Ingredients:

For the Banana Chocolate Chip Cake

  • 2 1/2 cups / 300g all-purpose flour

  • 1 1/2 tsp baking powder

  • 3/4 baking soda

  • 1 tsp cinnamon

  • 1/2 tsp salt

  • 3/4 cup / 168g oil

  • 3/4 cup / 150g sugar

  • 1/2 cup / 100g brown sugar

  • 2 eggs

  • 1 tsp vanilla extract

  • 1/2 cup / 123g plain yogurt or sour cream

  • 4 overripe bananas, mashed, to get roughly 1 1/3 cups / 400g mashed banana

  • 1 cup / 170g mini chocolate chips

For the Peanut Butter Frosting

  • 1 cup / 226g unsalted butter (2 sticks, 8 oz), room temperature

  • 1 cup / 260g creamy peanut butter

  • 1 tsp vanilla extract

  • pinch of salt

  • 2 - 2 1/2 cups / 250-313g powdered sugar

Directions:

Oven preheated to 350°F / 177°C.  Grease and flour two 8 or 9in / 20 or 23cm round cake pans.

Make the Banana Chocolate Chip Cake

  1. In a medium bowl, whisk together flour, baking powder, baking soda, cinnamon, and salt.  Set aside.

  2. In the bowl of a stand mixer, beat together oil and sugars.  Add vanilla and eggs; beat well.

  3. Add 1/3 of the flour mixture to the egg mixture.  Mix in yogurt.  Add another third of flour mixture.  Add bananas.  Add final third of flour mixture.  Fold in chocolate chips.

  4. Pour and divide batter evenly between the two prepared pans. 

  5. Bake for 35-40 minutes, or until toothpick inserted in the center comes out clean.   Allow to cool for about 10 minutes in the pans before flipping out onto cooling racks to cool completely. 

Make the Peanut Butter Frosting

  1. In the bowl of a stand mixer, beat butter and peanut butter together until light and fluffy.  Add vanilla and salt.  Add 2 cups of powdered sugar; add more as needed until frosting is thick enough to spread. 

Assembly

  1. Center one cake layer upside down on a cake stand or plate.  Frost this layer within 1/4 inch of edge of cake. 

  2. Place second layer on top, and frost cake with remaining frosting.  Sprinkle with additional chocolate chips, if desired. 

Jenny's Notes:

  • I prefer to use organic yogurt instead of sour cream in recipes simply because it's healthier.  I don’t always have plain yogurt on hand, so in those cases I use vanilla yogurt and reduce the sugar in the recipe by 1/3-1/2 cup, depending on the amount of yogurt called for.  Feel free to use whatever you have on hand! 

Banana Chocolate Chip Cake with Peanut Butter Frosting
Yield 12-16
Author
Prep time
1 Hour
Cook time
40 Min
Total time
1 H & 40 M

Banana Chocolate Chip Cake with Peanut Butter Frosting

A tender banana cake speckled with chocolate chips topped with a creamy peanut butter frosting.
Cook modePrevent screen from turning off

Ingredients

For the Banana Chocolate Chip Cake
For the Peanut Butter Frosting

Instructions

Make the Banana Chocolate Chip Cake
  1. Oven preheated to 350°F / 177°C. Grease and flour two 8 or 9in / 20 or 23cm round cake pans.
  2. In a medium bowl, whisk together flour, baking powder, baking soda, cinnamon, and salt. Set aside.
  3. In the bowl of a stand mixer, beat together oil and sugars. Add vanilla and eggs; beat well.
  4. Add 1/3 of the flour mixture to the egg mixture. Mix in yogurt. Add another third of flour mixture. Add bananas. Add final third of flour mixture. Fold in chocolate chips.
  5. Pour and divide batter evenly between the two prepared pans.
  6. Bake for 35-40 minutes, or until toothpick inserted in the center comes out clean. Allow to cool for about 10 minutes in the pans before flipping out onto cooling racks to cool completely.
Make the Peanut Butter Frosting
  1. In the bowl of a stand mixer, beat butter and peanut butter together until light and fluffy. Add vanilla and salt. Add 2 cups of powdered sugar; add more as needed until frosting is thick enough to spread.
Assembly
  1. Center one cake layer upside down on a cake stand or plate. Frost this layer within 1/4 inch of edge of cake.
  2. Place second layer on top, and frost cake with remaining frosting. Sprinkle with additional chocolate chips, if desired.

Notes

I prefer to use organic yogurt instead of sour cream in recipes simply because it's healthier. I don’t always have plain yogurt on hand, so in those cases I use vanilla yogurt and reduce the sugar in the recipe by 1/3-1/2 cup, depending on the amount of yogurt called for. Feel free to use whatever you have on hand!

Nutrition Facts

Calories

785.39

Fat

45.52 g

Sat. Fat

15.55 g

Carbs

88.21 g

Fiber

3.37 g

Net carbs

84.84 g

Sugar

59.78 g

Protein

10.55 g

Sodium

386.82 mg

Cholesterol

75.36 mg

Nutritional information is approximate. Based on 12 servings using the full 2 1/2 cups of powdered sugar for the frosting.

Banana, cake, banana chocolate chip, chocolate chip cake, peanut butter, peanut butter frosting, banana cake, ripe banana recipe
Dessert, Cake
American
Did you make this recipe?
Tag @jennyblogsandbakes on instagram and hashtag it #jennyblogs

Peanut Butter Rice Krispie Treats

Last Updated July 20, 2024

What's peanut buttery, sweet, chewy, crispy, (aren't you so glad I didn't just spell that "krispy"?) easy to make, and makes you want more? 

This. Peanut Butter Rice Krispie Treats DELUXE.  Or....Reese's Loaf, as my brother affectionately called it the first time I made it. 

As if Rice Krispie Treats weren't delicious enough, we added peanut butter, Reese's, and mini marshmallows. Oh yes. OH YES.

This post may contain affiliate links. If you buy something using these links, Jennyblogs may receive a small commission, at no extra cost to you. This helps to support Jennyblogs. For further information see the privacy policy. Grazie!

Recipe adapted from Shugary Sweets


Peanut Butter Rice Krispie Treats

Makes about 16 squares, but hey, that all depends on who's slicing, doesn't it?

Ingredients:

  • 1/4 cup / 56g butter

  • 10 oz / 283g bag of marshmallows, regular or mini

  • 1/2 cup / 130g peanut butter

  • 5 cups / 140g Rice Krispie cereal

  • 1 1/4 cups / 70g mini marshmallows

  • 1 8 oz / 227g bag mini Reese's, miniatures, or regular, chopped

Directions:

  1. Prepare an 8 or 9in / 20 or 23cm square baking dish by greasing or lining with parchment paper.

  2. In a large pot over medium-low heat, melt butter and marshmallows.  Stir until melted and smooth. 

  3. Working quickly, remove from heat and stir in peanut butter, then Rice Krispies.  Gently fold in mini marshmallows. 

  4. Using a well greased hand or spatula, scrape Krispies out of the pan and into the baking dish, gently pressing into an even layer. 

  5. Top with mini Reese's and (try to) allow to set before slicing. 

Jenny's Notes:

  • Optional: For an even loafier loaf of Peanut Butter Rice Krispie Treats, melt a bag (about 10 oz) of peanut butter chips and spread on top of the Rice Krispies, right before adding the Mini Reese's on top.

  • Like super chewy Rice Krispie treats?  Increase the amount of marshmallows you use!

Peanut Butter Rice Krispie Treats
Yield 16 pieces
Author
Prep time
10 Min
Cook time
5 Min
Total time
15 Min

Peanut Butter Rice Krispie Treats

Deluxe peanut butter Rice Krispies treats amped up with Reese's peanut butter cups and chewy chunks of marshmallow.
Cook modePrevent screen from turning off

Ingredients

Instructions

  1. Prepare an 8 or 9 inch / 20 or 23 centimeter square baking dish by greasing or lining with parchment paper.
  2. In a large pot over medium-low heat, melt butter and marshmallows. Stir until melted and smooth.
  3. Working quickly, remove from heat and stir in peanut butter, then Rice Krispies. Gently fold in mini marshmallows.
  4. Using a well greased hand or spatula, carefully scrape Krispies out of pan and into baking dish, gently pressing into an even layer.
  5. Top with mini Reese's and (try to) allow to set before slicing.

Notes

Optional: For an even loafier loaf of Peanut Butter Rice Krispie Treats, melt a bag (about 10 oz) of peanut butter chips and spread on top of the Rice Krispies, right before adding the Mini Reese's on top.


Like super chewy Rice Krispie treats? Increase the amount of marshmallows you use!

Nutrition Facts

Calories

249.37

Fat

11.42 g

Sat. Fat

4.14 g

Carbs

35.18 g

Fiber

1.03 g

Net carbs

34.15 g

Sugar

20.78 g

Protein

4.25 g

Sodium

175.55 mg

Cholesterol

8.38 mg

Nutritional information is approximate. Based on 16 servings.

Rice Krispies, Rice Krispie Treats, peanut butter, deluxe rice krispies, Reeses, Reeses rice krispie treats, Fluffernutter rice krispie treats, peanut butter bars, marshmallows, peanut butter desserts
dessert, bars
American
Did you make this recipe?
Tag @jennyblogsandbakes on instagram and hashtag it #jennyblogs

Peanut Butter Energy Bites

What is energy, and why do these bites have so much?  I'm not about to give you a lesson in physics, I'll leave that to Iggy Azalea, but basically they are filled with good calories (energy) from the nutrients and natural sugar.  If there is the word energy in the title, it probably just means it's high calorie.  But if they were called Peanut Butter Calorie Bites, who would make them?  Calories get such a bad rap, poor things.  Calories, I can't liiive without yooooou!  Literally. (If you just sang that to the tune of "Without You" by Badfinger, congratulations. Me too.) 

So if you need a boost of energy or a quick pick-me-up, these are your friends.  Also great if you are about to expend a lot of energy, like going for a run or playing Twister, or after.  They are small but pack a punch, so they don't make you feel too full.  

This post may contain affiliate links. If you make a purchase using these links, Jennyblogs may receive a small commission, at no extra cost to you. This helps to support Jennyblogs. For further information see the privacy policy. Grazie!

Recipe adapted from Gimme Some Oven


Peanut Butter Energy Bites

Makes about 15 1-in. diameter balls

A mass of energy...

A mass of energy...

Ingredients:

  • 1 cup / 90g oats

  • 2/3 cup / 67g flaked or shredded coconut, unsweetened

  • 1/2 cup / 130g peanut butter

  • 1/2 cup wheat germ (50g), chia seeds (80g), or ground flax seed (90g)

  • 1/3 cup / 110g honey or maple syrup

  • 1 tsp / 5g vanilla extract

  • 1/2 cup / 85g mini chocolate chips

Directions:

  1. In a medium bowl, combine all ingredients.  If dough is too dry to form balls, add more honey or peanut butter; if they seem too sticky, add more oats or wheat germ. 

  2. Form into balls and store in the fridge or freezer for when you want a quick snack.

Jenny's Notes:

  • For vegan bites, be sure to use dairy-free chips and use maple syrup instead of honey.

  • For gluten-free bites, make sure your oats are certified gluten-free and use chia or flax seeds instead of wheat germ. 

  • You can get creative with these bites, substitute or add to the chocolate chips with your favorite dried fruit or nuts, or even types of cereal, such as grape-nuts, puffed rice, granola, etc.

Peanut Butter Energy Bites
Yield 15 Balls
Author
Prep time
15 Min
Total time
15 Min

Peanut Butter Energy Bites

All the goodness of granola bars in an easier, rolled form. Packed with energy and nutrients, these peanut butter, coconut, chocolate chip energy bites are perfect for a quick snack or pick-me-up.
Cook modePrevent screen from turning off

Ingredients

Instructions

  1. In a medium bowl, combine all ingredients. If dough is too dry to form balls, add more honey or peanut butter; if they seem too sticky, add more oats or wheat germ.
  2. Form into balls and store in the fridge or freezer for when you want a quick snack.

Notes

For vegan bites, be sure to use dairy-free chips and use maple syrup instead of honey.For gluten-free bites, make sure your oats are certified gluten-free and use chia or flax seeds instead of wheat germ. You can get creative with these bites, substitute or add to the chocolate chips with your favorite dried fruit or nuts, or even types of cereal, such as grape-nuts, puffed rice, granola, etc.

Nutrition Facts

Calories

167.43

Fat

9.64 g

Sat. Fat

4.52 g

Carbs

18.89 g

Fiber

2.68 g

Net carbs

16.21 g

Sugar

10.10 g

Protein

4.14 g

Sodium

44.67 mg

Cholesterol

0.00 mg

Nutritional information is approximate. Based on 15 servings.

peanut butter energy balls, chocolate chips, coconut, granola bar bites
Snacks
American
Did you make this recipe?
Tag @jenevamorris on instagram and hashtag it #jennyblogs

Peanut Butter Pie with Chocolate Whipped Cream

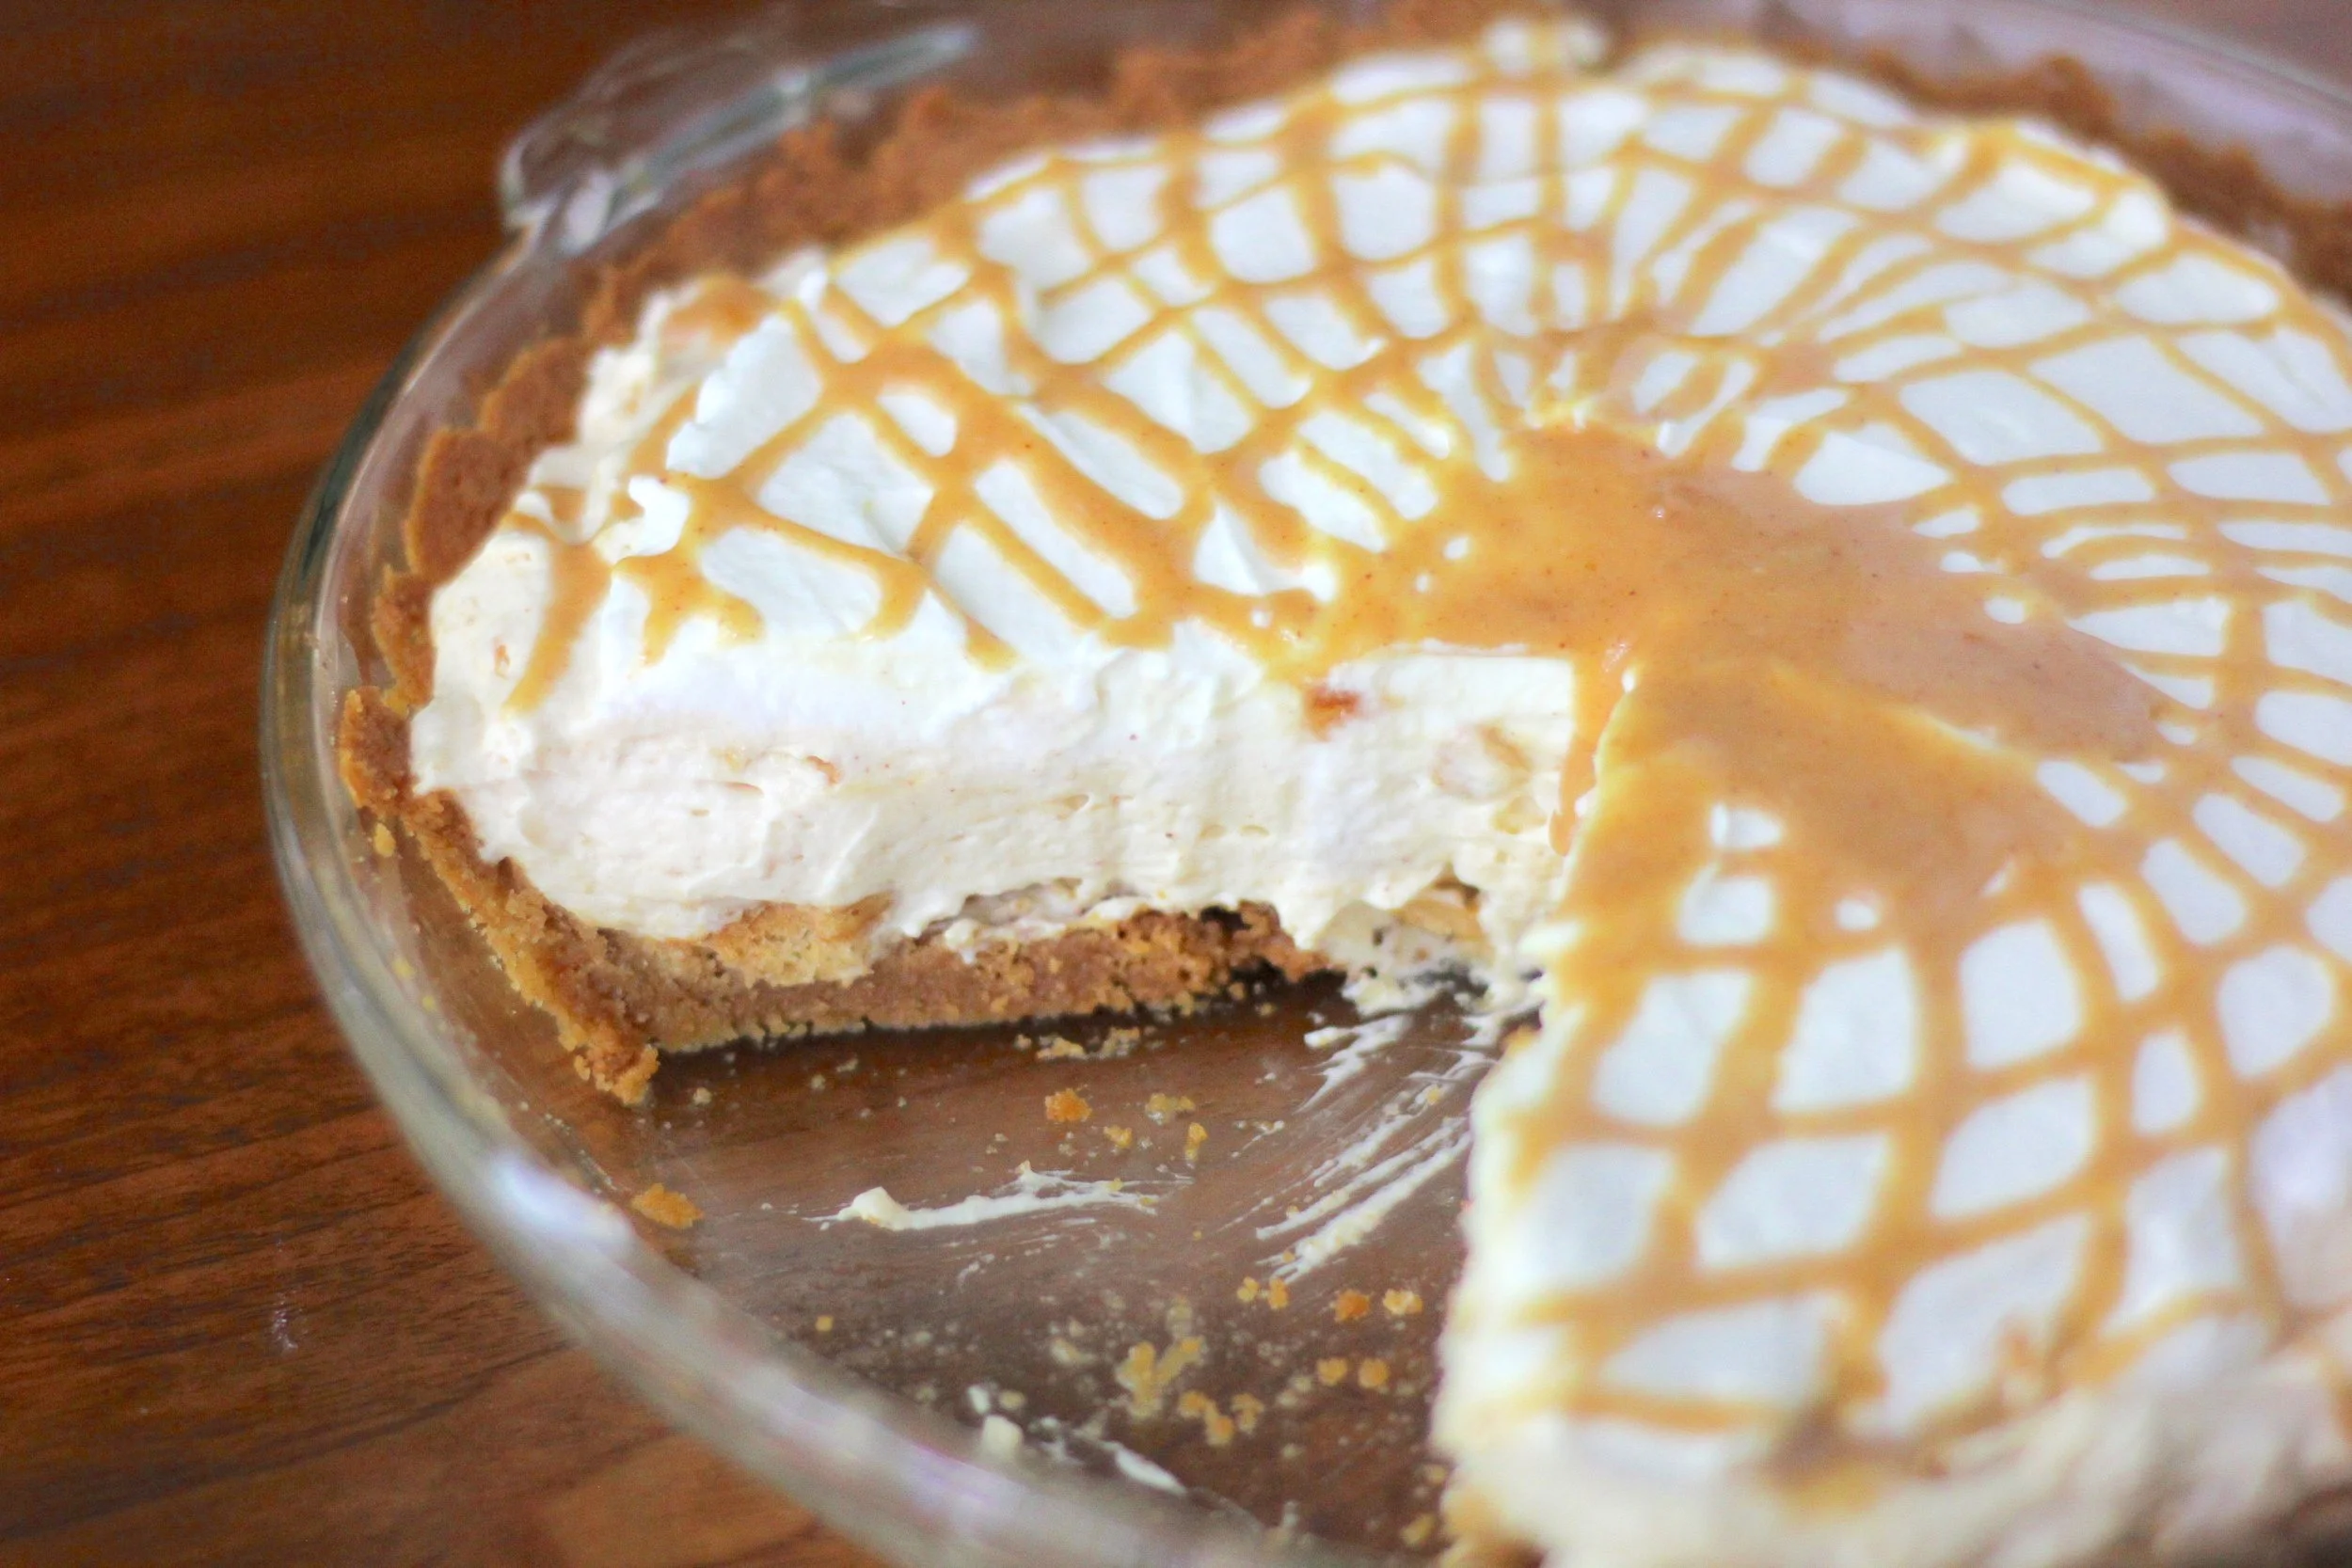
Shortbread crust.  A layer of creamy peanut butter filling.  Topped with a mountain of chocolate whipped cream.  And chocolate shavings.  Because, we're so fancy, you already know.  Did I mention No-Bake?

I first made this pie with a pretzel crust.  The salty sweetness really off-set the creamy full-bodied mouth feel of the layers well.  Yes, sometimes I describe dessert and food like wine.  It just works so well.  But if you ever catch me saying "I prefer the '98 vintage of this cheesecake" or something along that line, I might have taken it too far.  Ew, rancid cheesecake.  Anyway...

The next time I made this pie was in Italy.  Pretzels do exist here, but they have a very strange texture.  Think pretzels that went stale and chewy and then got so stale they got crispy again, almost. But still a little chewy.  And don't chop well in a food processor. It took over 8 minutes to get them partly broken up.  The crust was still good, but it looked more like a bird's nest of pretzel sticks than a uniform crust.  

Oh hey, Thanksgiving pie. And there is Lucia the poinsettia in the background. Good times, good times.

Oh hey, Thanksgiving pie. And there is Lucia the poinsettia in the background. Good times, good times.

Regardless, all the Americans in Italy are so peanut butter deprived that everyone loved it.  In fact, two days later was Thanksgiving and it was requested of me to make and bring this pie to Thanksgiving dinner.  Not pecan pie.  Not pumpkin pie.  Peanut Butter Pie with Chocolate Whipped Cream.  With a delicious but slightly strange looking crust.  

When I made the pie this time, I used shortbread cookies with great success.  The Italian supermarkets have practically a whole aisle devoted to all their different kinds of shortbread cookies, called frollini.  A nice big 800g bag for 1.5-2.5 euros?  Hehe don't mind if I do.  Shortbread with cream, or chocolate and stars, buckwheat, almond, almond and chocolate, hazelnut, stuffed with apricot, stuffed with chocolate, coarse sugar-topped, made with egg, chocolate drops...the varieties go on. 

Someday I will share with you the pretzel crust, but when I have access again to pretzels that behave in a food processor and I can get some decent photos.  But until then, get your hands on some shortbread cookies.  You could make some homemade (classic shortbread consists of just 3 ingredients: flour, butter, sugar) or if you're in the States buy some Sandie's shortbread cookies or something similar. 

This post may contain affiliate links. If you make a purchase using these links, Jennyblogs may receive a small commission, at no extra cost to you. This helps to support Jennyblogs. For further information see the privacy policy. Grazie!

Recipe adapted from the Cooking Channel


Peanut Butter Pie with Chocolate Whipped Cream

Makes 1 9in / 23cm pie - 8-12 servings

Ingredients:

For the Shortbread Crust

  • about 15 / 150g shortbread cookies

  • 4 Tbsp / 56g butter, melted

For the Peanut Butter Filling

  • 1/2 cup / 119g heavy whipping cream

  • 1/2 cup / 113g mascarpone or cream cheese, room temperature

  • 1/3 cup / 87g creamy peanut butter

  • 1/4 cup / 50g brown sugar

For the Chocolate Whipped Cream

  • 3-4 oz / 100g good quality dark chocolate, chopped

  • 2 cups / 474g heavy whipping cream

  • Extra chocolate in bar form, for chocolate shavings, optional

Directions:

Make the Chocolate Whipped Cream First

  1. Place chocolate and cream in a double boiler or a glass or metal bowl over a pan of simmering water.  The bottom of the bowl shouldn’t touch the water.

  2. Gently stir until chocolate is mostly melted.  Remove from heat and continue stirring until chocolate has completely melted.  Place in the refrigerator for 2 hours. 

Make the Shortbread Crust

  1. In a food processor, pulse cookies until they become crumbly.  Add butter and pulse until smooth and can be pressed into a crust.  Depending on the type of cookies you use, you may need to add a touch more melted butter to ensure the crust will stay together.  Press into a 9in / 23cm pie dish and refrigerate.

Make the Peanut Butter Filling

  1. In the bowl of a stand mixer or with a handheld mixer, whip heavy cream until stiff peaks form.  Transfer to another bowl. 

  2. Again, in the bowl of the stand mixer beat mascarpone, peanut butter, and brown sugar together until smooth.  Gently fold in the whipped cream with a spatula.  Pour filling over crust and return to the refrigerator. 

Assembly

  1. Once the chocolate cream is cooled, beat with a stand mixer or handheld mixer until stiff peaks form.  Remove pie from the refrigerator and spread or pipe chocolate whipped cream over the top. 

  2. Use a vegetable peeler or knife to shave a chocolate bar over the pie for the finishing touch. 
Jenny's Notes:

  • Try using Nutella or Biscoff spread instead of peanut butter.  YUM.

Peanut Butter Pie with Chocolate Whipped Cream
Yield 8-12
Author
Prep time
50 Min
Inactive time
2 Hour
Total time
2 H & 50 M

Peanut Butter Pie with Chocolate Whipped Cream

No-bake pie with shortbread crust, mascarpone peanut butter filling, chocolate whipped cream and topped with chocolate shavings.
Cook modePrevent screen from turning off

Ingredients

For the Shortbread Crust
For the Peanut Butter Filling
For the Chocolate Whipped Cream

Instructions

Make the Chocolate Whipped Cream (first)
  1. Place chocolate and cream in a double boiler or a glass or metal bowl over a pan of simmering water. The bottom of the bowl shouldn’t touch the water.
  2. Gently stir until chocolate is mostly melted. Remove from heat and continue stirring until chocolate has completely melted. Place in the refrigerator for 2 hours.
Make the Shortbread Crust
  1. In a food processor, pulse cookies until they become crumbly. Add butter and pulse until smooth and can be pressed into a crust. Depending on the type of cookies you use, you may need to add a touch more melted butter to ensure the crust will stay together. Press into a 9in / 23cm pie dish and refrigerate.
Make the Peanut Butter Filling
  1. In the bowl of a stand mixer or with a handheld mixer, whip heavy cream until stiff peaks form. Transfer to another bowl.
  2. Again, in the bowl of the stand mixer beat mascarpone, peanut butter, and brown sugar together until smooth. Gently fold in the whipped cream with a spatula. Pour filling over crust and return to the refrigerator.
Assembly
  1. Once the chocolate cream is cooled, beat with a stand mixer or handheld mixer until stiff peaks form. Remove pie from the refrigerator and spread or pipe chocolate whipped cream over the top.
  2. Use a vegetable peeler or knife to shave a chocolate bar over the pie for the finishing touch.

Notes

Try using Nutella or Biscoff spread instead of peanut butter. YUM.

Nutrition Facts

Calories

636.86

Fat

54.27 g

Sat. Fat

29.83 g

Carbs

27.35 g

Fiber

1.81 g

Net carbs

25.54 g

Sugar

20.45 g

Protein

7.07 g

Sodium

259.95 mg

Cholesterol

119.26 mg

Nutritional information is approximate. Based on the pie cut into 8 servings; includes chocolate shavings.

peanut butter pie, no bake pie, summer dessert, chocolate whipped cream, mascarpone, shortbread crust
dessert, pie
American
Did you make this recipe?
Tag @jennyblogsandbakes on instagram and hashtag it #jennyblogs

Peanut Butter Cheesecake Bars

Bars. Like cookies, but without all the rolling and fussing. Just…plopping in a pan and baking. I like it.

These bars are extra special because they are cheesecake bars. I really like cheesecake.  I mean creamy, not overpoweringly sweet, with a bit of graham cracker accompanying each bite.  Good morning, sunshine!  I also really like chocolate and peanut butter.  So today let's make some peanut butter cheesecake bars with chocolate chips. 

Fair warning: These particular bars can be very difficult to make.  You have to be able to resist eating all of the dough.  If you can do that, then the actual making of these are quite simple.  Va bene? Va bene.

This post may contain affiliate links. If you make a purchase using these links, Jennyblogs may receive a small commission, at no extra cost to you. This helps to support Jennyblogs. For further information see the privacy policy. Grazie!

Adapted from Pinch of Yum


Peanut Butter Cheesecake Bars

Serves 9-12

Ingredients:

For the Peanut Butter Chocolate Chip Cookie Dough

image.jpg
  • 6 Tbsp / 84g oil

  • 1/2 cup / 100g sugar

  • 1/2 cup / 100g brown sugar

  • 1/2 cup / 130g peanut butter

  • 1 egg

  • 1 cup / 120g all-purpose flour

  • 1 tsp baking soda

  • 1/2 tsp salt

  • 1/2 cup / 40g rolled oats

  • 1 1/2 cups / 255g mini chocolate chips

For the Cream Cheese Filling

  • 8 oz / 225g cream cheese, room temperature

  • 1/4 cup / 50g sugar

  • 1 egg

  • 1 tsp / 5g vanilla

Directions:

Oven preheated to 325°F / 163°C

Make the Peanut Butter Chocolate Chip Cookie Dough

  1. Mix together the oil, sugars, and peanut butter in a large bowl until well combined.  Add the egg and beat well.

  2. In a separate bowl, whisk together flour, baking soda, salt, and oats.

  3. Stir flour mixture into sugar mixture, then add chocolate chips and stir until evenly distributed. Set aside.

Make the Cream Cheese Filling

  1. Beat cream cheese in a stand mixer or with a handheld mixer until smooth, about 30 seconds. Add sugar, egg, and vanilla and beat until thoroughly combined. 

Assembly

  1. Press half of the cookie dough into the bottom of an 8x8in / 20x20cm or 9x9in / 23x23cm pan.  Pour and spread cream cheese filling evenly over dough.  Using your hands, crumble the remaining half of cookie dough over cream cheese until it is thoroughly covered.

  2. Cover with tinfoil and bake for 15 minutes.  Remove foil and continue to bake for another 10-15 minutes, until cream cheese center is almost set and the top is lightly golden brown. 

Peanut Butter Cheesecake Bars
Yield 9-12
Author
Prep time
25 Min
Cook time
30 Min
Total time
55 Min

Peanut Butter Cheesecake Bars

Layers of peanut butter chocolate chip and oat cookie layers with a cheesecake filling.
Cook modePrevent screen from turning off

Ingredients

For the Peanut Butter Chocolate Chip Cookie Dough
For the Cream Cheese Filling

Instructions

Make the Peanut Butter Chocolate Chip Cookie Dough
  1. Mix together the oil, sugars, and peanut butter in a large bowl until well combined. Add the egg and beat well.
  2. In a separate bowl, whisk together flour, baking soda, salt, and oats.
  3. Stir flour mixture into sugar mixture, then add chocolate chips and stir until evenly distributed. Set aside.
Make the Cream Cheese Filling
  1. Beat cream cheese in a stand mixer or with a handheld mixer until smooth, about 30 seconds. Add sugar, egg, and vanilla and beat until thoroughly combined.
Assembly
  1. Oven preheated to 325°F / 163°C
  2. Press half of the cookie dough into the bottom of an 8x8in / 20x20cm or 9x9in / 23x23cm pan. Pour and spread cream cheese filling evenly over dough. Using your hands, crumble the remaining half of cookie dough over cream cheese until it is thoroughly covered.
  3. Cover with tinfoil and bake for 15 minutes. Remove foil and continue to bake for another 10-15 minutes, until cream cheese center is almost set and the top is lightly golden brown.

Nutrition Facts

Calories

596.11

Fat

34.98 g

Sat. Fat

12.70 g

Carbs

62.57 g

Fiber

2.60 g

Net carbs

59.97 g

Sugar

44.08 g

Protein

10.24 g

Sodium

458.31 mg

Cholesterol

73.10 mg

Nutritional information is approximate. Based on 9 servings.

cheesecake, bars, peanut butter chocolate chip cookie cheesecake bars, peanut butter oatmeal, cream cheese
dessert, bars, cheesecake
American
Did you make this recipe?
Tag @jennyblogsandbakes on instagram and hashtag it #jennyblogs
image.jpg

Peanut Butter Brownie Trifle

image.jpg

Yes, a trifle, not a truffle.  It is neither a chocolate truffle nor does it require pigs or dogs to dig it up, thankfully.  Although I personally would love to go truffle hunting, or more or less watch the pigs/dogs truffle hunt.  Then eat them, of course.  The truffles, not the dogs or pigs. 

What's the difference between a truffle, a truffle, and a trifle? 

  • The original truffle, as I will call it here, is the fungus found in the ground.  There are two main kinds: black and white.  They are difficult to find, hence the need for dogs and pigs, and very expensive.  And divine to eat.  If you haven't eaten one, you definitely should, even if just to say you have.  All your foodie friends will hold you in high esteem henceforth.  ;)

  • Then there is the chocolate truffle, which is essentially a chocolate confection made to look like the original truffle.  It usually consists of a ganache (chocolate melted with heavy cream) center, covered in chocolate.  Also delicious. 

  • Thirdly, the trifle.  It is originally an English dessert, you could think of it like a large parfait to share.  My mom calls it a "Dump Cake" and in the south it is called a "Husband's Delight."  It usually consists of layers of cake, custard or pudding, whipped cream, and various fruits.  The possibilities of flavors and combinations are endless, and yes, delicious.

The moral of the story is, if someone offers you a truffle, a truffle, or a trifle, always say yes.  Because they are all delicious. 

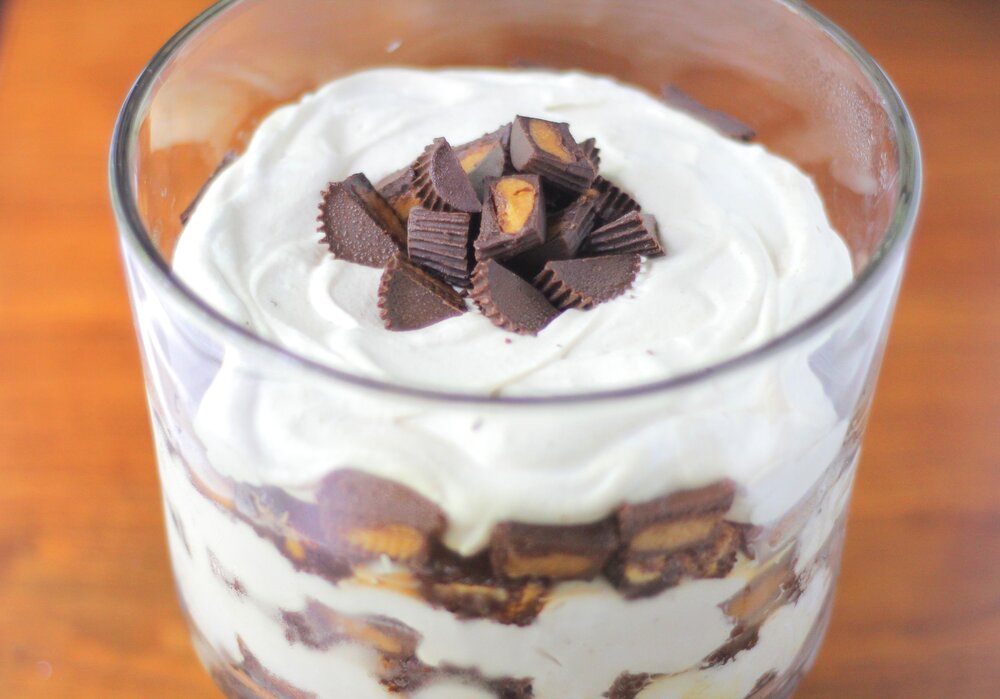
Today’s trifle is also delicious. It has layers of fluffy peanut butter vanilla pudding, peanut butter chip brownies, and Reese’s peanut butter cups. Each element is simple to make, and homemade. It might dirty several bowls and pans, but it is so worth it! It’s creamy, chocolatey, peanut buttery. It’s rich, a little bit goes a long way. And yet it has you coming back for more. A crowd favorite!

This post may contain affiliate links. If you make a purchase using these links, Jennyblogs may receive a small commission, at no extra cost to you. This helps to support Jennyblogs. For further information see the privacy policy. Grazie!

Recipe adapted from Taste of Home


Peanut Butter Brownie Trifle

Serves about 12

Ingredients:

For the Vanilla Pudding *Make this first*

  • 3 Tbsp / 37g sugar

  • 4 1/2 tsp / 11g cornstarch

  • 1/8 tsp salt

  • 1 1/4 cups / 297g cold milk

  • 2 tsp / 10g vanilla extract

For the Peanut Butter Chip Brownies

  • 5 Tbsp / 70g oil

  • 1 cup / 200g sugar

  • 2 eggs

  • 1 tsp / 5g vanilla extract

  • 1/3 cup / 33g cocoa powder

  • 1/2 cup / 60g all-purpose flour

  • 1/4 tsp salt

  • 3/4 cup / 132g peanut butter chips

image.jpg

Extras

  • 1/2 cup / 230g creamy peanut butter

  • 1 1/2 cups / 356g heavy whipping cream, whipped until stiff peaks form

  • 1 12 oz package / 340g miniature Reese's cups, each cut in half


Directions:

Make the Vanilla Pudding

  1. In a small saucepan, whisk together sugar, cornstarch, and salt.  Gradually whisk in milk. 

  2. Heat over medium-low heat, stirring constantly, until pudding thickens and the whisk leaves a trail. 

  3. Remove from heat and add vanilla.  Place a piece of plastic wrap directly onto the pudding and put in fridge or freezer until pudding is thick and set. 

Meanwhile,

Make the Peanut Butter Chip Brownies

Oven preheated to 350°F / 177°C. Lightly grease an 8x8in / 20x20cm baking dish.

  1. In a medium bowl, mix together oil, sugar, eggs, and vanilla. 

  2. In a separate bowl, whisk together cocoa, flour, and salt.  Stir dry mixture into wet mixture.  Stir in peanut butter chips.  Spread evenly in prepared baking dish.

  3. Bake for 12 - 15 minutes or until toothpick inserted off center comes out mostly clean.  Allow to cool. 

Assembly

  1. Once pudding is set, mix in peanut butter.  Gently fold in whipped cream.

  2. Cut cooled brownies into bite size pieces, about 1in / 2.5cm squares.

  3. In a large glass bowl, layer in this order:

    • 1/3 of the brownies

    • 1/4 of the Reese's cups

    • 1/3 of the pudding mixture

    • another 1/3 of the brownies

    • another 1/4 of the Reese’s cups

    • another 1/3 of the pudding

    • final 1/3 of the brownies

    • another 1/4 of the Reese’s cups

    • final 1/3 of the pudding

    • final 1/4 of the Reese’se cups for decoration on top

  4. Chill until ready to serve.

Jenny’s Notes:

  • Placing plastic wrap directly onto pudding instead of just over the bowl prevents the “skin” from forming.

  • Both the brownies and the pudding can easily be made a day ahead.

Peanut Butter Brownie Trifle
Yield 12 servings
Author
Prep time
45 Min
Cook time
15 Min
Total time
1 Hour

Peanut Butter Brownie Trifle

A rich trifle dessert with layers of whipped peanut butter vanilla pudding, peanut butter chip brownies, and peanut butter cups.
Cook modePrevent screen from turning off

Ingredients

For the Vanilla Pudding *Make this first*
For the Peanut Butter Chip Brownies
Extras

Instructions

Make the Vanilla Pudding
  1. In a small saucepan, whisk together sugar, cornstarch, and salt. Gradually whisk in milk.
  2. Heat over medium-low heat, stirring constantly, until pudding thickens and the whisk leaves a trail.
  3. Remove from heat and add vanilla. Place in fridge or freezer until pudding is thick and set.
Make the Peanut Butter Chip Brownies
  1. Oven preheated to 350°F / 177°C. Lightly grease an 8x8in / 20x20cm baking dish.
  2. In a medium bowl, mix together oil, sugar, eggs, and vanilla.
  3. In a separate bowl, whisk together cocoa, flour, and salt. Stir dry mixture into wet mixture. Stir in peanut butter chips. Spread evenly in prepared baking dish.
  4. Bake for 12 - 15 minutes or until toothpick inserted off center comes out mostly clean. Allow to cool.
Assembly
  1. Once pudding is set, mix in peanut butter. Gently fold in whipped cream.
  2. Cut cooled brownies into bite size pieces, about 1in / 2.5cm squares.
  3. In a large glass bowl, preferably a cylinder, layer in this order:
  4. 1/3 of the brownies
  5. 1/4 of the Reese's cups
  6. 1/3 of the pudding mixture
  7. another 1/3 of the brownies
  8. another 1/4 of the Reese’s cups
  9. another 1/3 of the pudding
  10. final 1/3 of the brownies
  11. another 1/4 of the Reese’s cups
  12. final 1/3 of the pudding
  13. final 1/4 of the Reese’se cups for decoration on top
  14. Chill until ready serve.

Notes

  • Placing plastic wrap directly onto pudding instead of just over the bowl prevents the “skin” from forming.
  • Both the brownies and the pudding can easily be made a day ahead.

Nutrition Facts

Calories

606.07

Fat

41.47 g

Sat. Fat

13.60 g

Carbs

51.17 g

Fiber

3.43 g

Net carbs

47.74 g

Sugar

36.05 g

Protein

13.34 g

Sodium

349.61 mg

Cholesterol

68.20 mg

Nutritional information is approximate; based on 12 servings.

peanut butter,trifle,dump cake, husband's delight, Reese's dessert, chilled dessert, vanilla pudding, whipped cream
dessert, trifle
American
Did you make this recipe?
Tag @jennyblogsandbakes on instagram and hashtag it #jennyblogs
IMG_4139.jpg