Strawberry Rhubarb Coffee Cake

Last Updated September 7, 2024

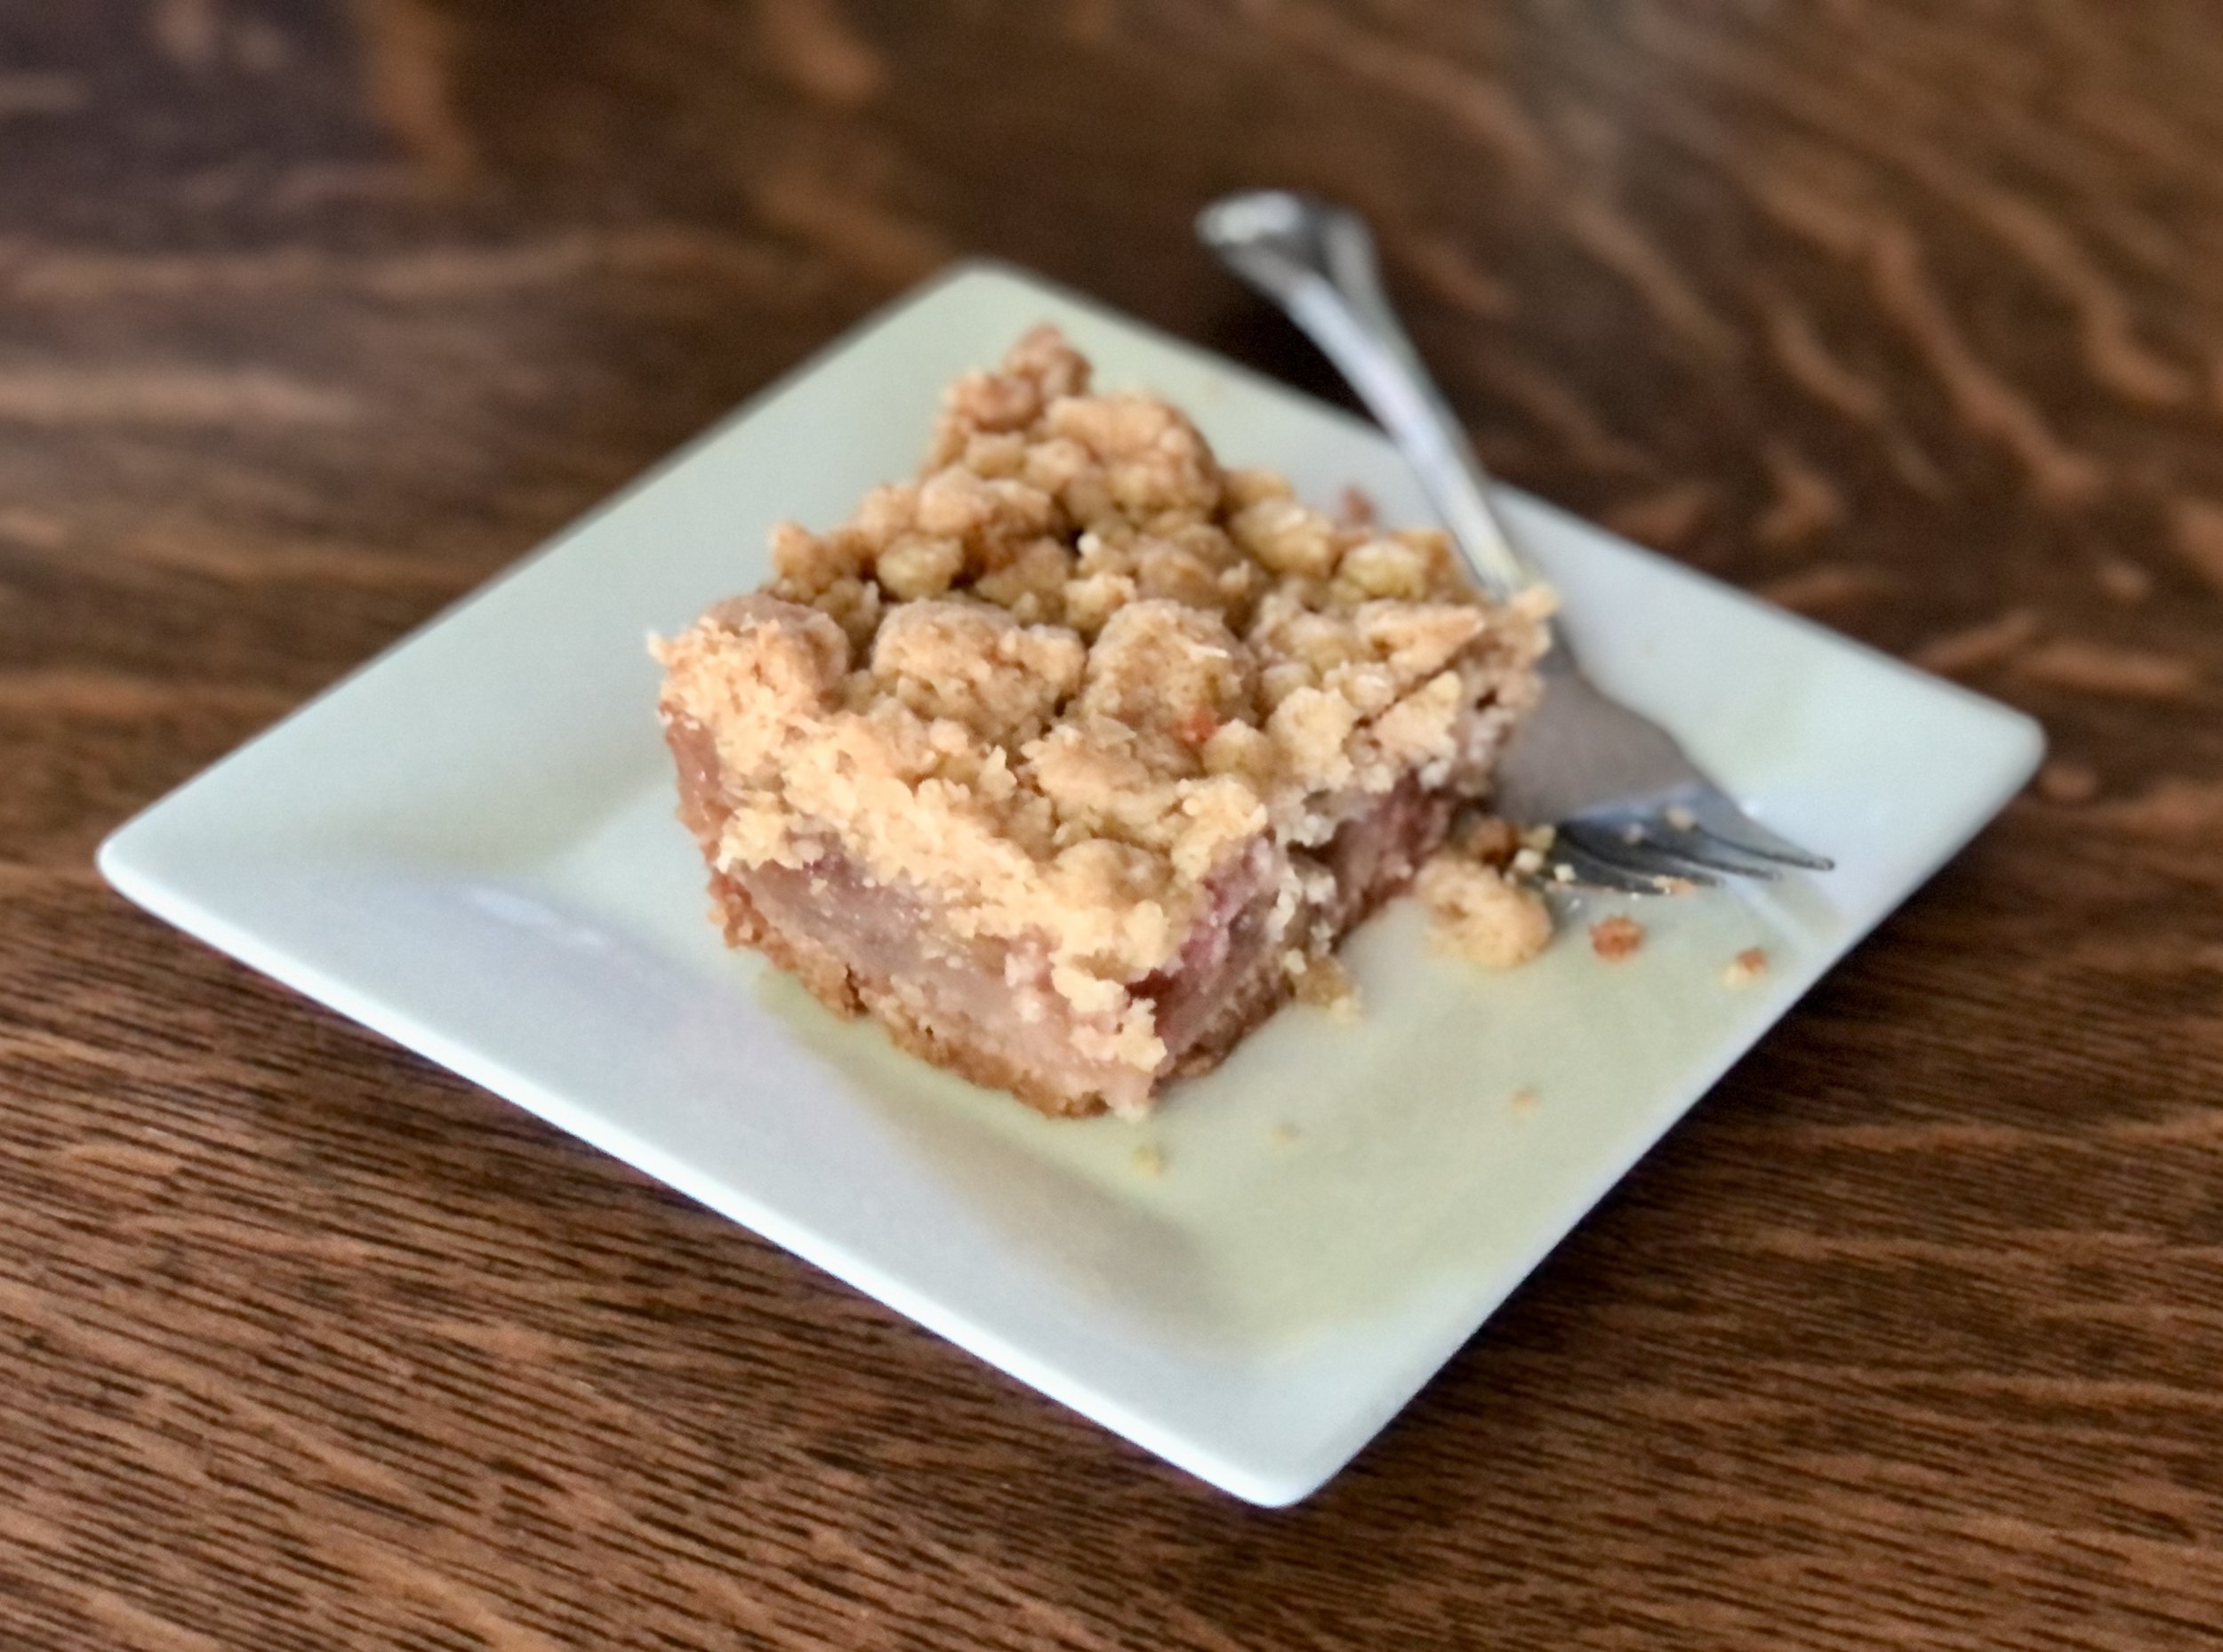
Moist vanilla coffee cake with a thick layer of strawberry rhubarb filling and a buttery oat crumble. While this recipe may parade under the name of “coffee cake”, don’t be deceived. It has so much strawberry and rhubarb filling that it could adequately be called a dump cake, or almost a cobbler, especially when cut into while it’s still hot and wonderfully molten.

Rhubarb season is teasingly short. It hardly feels or looks like spring before the rhubarb is shooting up in my mom’s garden. By the time June rolls around, it’s the last call for rhubarb!

With each season being so short, I usually get in just a couple classic rhubarb custard pies and maybe one or two other favorite rhubarb desserts. There’s hardly time to try new recipes by the time you make a few pies!

A few years ago I added these buttery Strawberry Rhubarb Oat Bars to the favorite rhubarb recipe collection, and this year I managed to sneak in yet another one: this Strawberry Rhubarb Coffee Cake. I wondered when I first made this if I should halve the recipe to make an 8x8inch, knowing I would be making the recipe a couple of times to make sure it was ready. I didn’t and made the full 9x13inch, and it disappeared so quickly I was glad I didn’t cut the recipe in half! I made it again, and again it disappeared quickly, even with other rhubarb desserts around!

I managed to snap a few photos of the last rhubarb dessert for this season, along with some of the last peonies. I love seasonal things, don’t you? It’s sad to see them go, but makes them so, so special.


Strawberry Rhubarb Coffee Cake

Makes 1 - 9x13inch pan, about 20 servings

Ingredients:

For the Strawberry Rhubarb Filling

  • 5 cups / about 800g rhubarb cut into 1” pieces

  • 3 cups / about 350g strawberries, halved

  • 1 cup / 200g sugar

  • 1/3 cup / 40g cornstarch

  • 2 Tbsp / 28g lemon juice

For the Coffee Cake

  • 3 cups / 360g all-purpose or pastry flour

  • 3/4 cup / 150g sugar

  • 1 tsp baking soda

  • 1 tsp baking powder

  • 1/2 tsp salt

  • 3/4 cup / 169g oil

  • 1 1/2 cups / 355g buttermilk

  • 2 eggs

  • 2 tsp vanilla extract

For the Crumble Topping

  • 1/2 cup / 113g butter, melted

  • 1 cup / 120g all-purpose or pastry flour

  • 1 cup / 200g sugar

  • 1 cup / 90g oats

Directions:

Preheat oven to 350°F / 177°C. Lightly grease a 9x13inch / 23x33centimeter rectangle pan.

Make the Strawberry Rhubarb Filling:

  1. In a medium pot, combine all filling ingredients over medium heat. Bring to a simmer and cook for about five minutes, stirring frequently, until rhubarb and strawberries are tender and start to break down and mixture is thickened.

  2. Remove from heat and set aside.

Make the Coffee Cake

  1. Whisk together the flour, sugar, baking soda, baking powder, and salt.

  2. Stir in oil until mixture looks like wet sand with some small chunks.

  3. Mix in buttermilk, eggs, and vanilla; stir until mostly smooth. A few lumps are ok.

  4. Set aside while crumble is prepared.

Make the Crumble Topping

  1. In a small saucepan, melt the butter.

  2. Remove from heat and mix in flour, sugar, and oats until mixture resembles wet sand with some chunks.

Assemble and Bake

  1. Pour and spread half of cake mixture into prepared pan. Dollop strawberry rhubarb filling over cake batter, gently spreading to edges, then pour remaining half of cake batter over filling, gently spreading to edges. Top with crumble.

  2. Bake for 50-60 minutes or until cake starts to turn golden and a toothpick inserted into the center comes out clean.

  3. Allow to cool completely before slicing and serving.

Jenny’s Notes:

  • Waiting until the coffee cake cools completely will result in easier to slice bars. If you cut into it early, the rhubarb filling will still be molten, but you can embrace the mess and serve it warm, in a bowl with a spoon, and call it a dump cake. :)

Strawberry Rhubarb Coffee Cake
Yield 20 servings
Author
Prep time
30 Min
Cook time
1 H & 10 M
Total time
1 H & 40 M

Strawberry Rhubarb Coffee Cake

Moist vanilla coffee cake with a thick layer of strawberry rhubarb filling and a buttery oat crumble.
Cook modePrevent screen from turning off

Ingredients

For the Strawberry Rhubarb Filling
For the Coffee Cake
For the Crumble Topping

Instructions

Make the Strawberry Rhubarb Filling:
  1. In a medium pot, combine all filling ingredients over medium heat. Bring to a simmer and cook for about five minutes, stirring frequently, until rhubarb and strawberries are tender and start to break down and mixture is thickened.
  2. Remove from heat and set aside.
Make the Coffee Cake
  1. Whisk together the flour, sugar, baking soda, baking powder, and salt.
  2. Stir in oil until mixture looks like wet sand with some small chunks.
  3. Mix in buttermilk, eggs, and vanilla; stir until mostly smooth. A few lumps are ok.
  4. Set aside while crumble is prepared.
Make the Crumble Topping
  1. In a small saucepan, melt the butter.
  2. Remove from heat and mix in flour, sugar, and oats until mixture resembles wet sand with some chunks.
Assemble and Bake
  1. Pour and spread half of cake mixture into prepared pan. Dollop strawberry rhubarb filling over cake batter, gently spreading to edges, then pour remaining half of cake batter over filling, gently spreading to edges. Top with crumble.
  2. Bake for 50-60 minutes or until cake starts to turn golden and a toothpick inserted into the center comes out clean.
  3. Allow to cool completely before slicing and serving.

Notes

  • Waiting until the coffee cake cools completely will result in easier to slice bars. If you cut into it early, the rhubarb filling will still be molten, but you can embrace the mess and serve it warm, in a bowl with a spoon, and call it a dump cake. :)


Nutrition Facts

Calories

358.75

Fat

15.01 g

Sat. Fat

4.2 g

Carbs

43.31 g

Fiber

3.98 g

Net carbs

39.36 g

Sugar

2.52 g

Protein

5.3 g

Cholesterol

30.55 mg

Sodium

209.49 mg

Nutritional info is approximate, based on 1 serving

strawberry rhubarb coffee cake, crumble cake, dump cake, rhubarb dessert
dessert
American
Did you make this recipe?
Tag @jennyblogsandbakes on instagram and hashtag it #jennyblogs

Strawberry Shortcake

Last Updated August 18, 2024

This post may contain affiliate links. If you buy something using these links, Jennyblogs may receive a small commission, at no extra cost to you. This helps to support Jennyblogs. For further information see the privacy policy. Grazie!

Strawberry shortcake is a summer classic. All you need are juicy, ripe strawberries, shortcakes, which are really just biscuits with a bit of sugar added to them, and whipped cream. If you decided on adding some vanilla ice cream to the mix I don’t think anyone would be mad about it. I certainly wouldn’t be. Did I mention they’re really simple to make?

public.jpg

It’s so simple because the strawberries are the shining star and don’t need much dressing up. If you try and make this when strawberries are out of season, even if you can find them in the grocery store, it just won’t be the same. This is a dessert that calls for strawberries ripened under the summer sun, bursting with flavor.

Do you want to know a secret? Strawberry shortcakes will reach the pinnacle of their goodness if you are able to pick the strawberries yourself! Not only will you be the one choosing the juiciest berries, but you’ll KNOW they’re as fresh as they come! Plus, you’ll taste the fruits of your own hard work and it makes it that much sweeter. Literally. I loved going strawberry picking with my mom as a kid. Strawberry season in Michigan is always in beginning to mid summer, usually end of June or early July, and we’d come home with baskets full. Then I’d help my mom hull and slice them, keeping some for eating, some for making strawberry shortcake and other desserts, and some for freezing and making jam.

Eat strawberry shortcake for dessert, or breakfast, snack, lunch, and dinner. I mean, biscuits and fruit sounds like a balanced and great way to start off the morning! Plus you’ll want to eat them as much as you can while the strawberry season lasts. A great thing about these is that you can add as little or as much sugar as you want! See notes at bottom of recipe for some ideas.

Recipe from my mama with tweaks from moi.


Strawberry Shortcake

Serves: 8-10

Ingredients:

public.jpg

For the Macerated Strawberries

  • 4-5 cups strawberries, washed, hulled, and sliced

  • 3-4 Tbsp / 35-50g sugar or to taste

For the Shortcakes

  • 2 cups / 240g all-purpose flour

  • 1/4 cup / 50g sugar

  • 4 tsp / 19g baking powder

  • 1/2 tsp / 2g salt

  • 1/2 cup / 113g cold butter or scant 1/2 cup / 100g oil

  • 2/3 cup / 158g cold milk or buttermilk

For the Whipped Cream

  • 1 cup / 237g heavy whipping cream

  • 3-4 Tbsp / 35-50g sugar or to taste

  • 1 tsp / 4g vanilla extract

Directions:

Oven 450°F / 232°C. Have ready an ungreased baking sheet.

Make the Macerated Strawberries

  1. Place strawberries in a bowl, add sugar, and mash them a bit or a lot, as desired, with a fork or masher. Place in fridge while you prepare shortcakes.

Make the Shortcakes

  1. In a large bowl whisk together flour, sugar, baking powder, and salt.

  2. Cut in butter or oil until mixture resembles coarse crumbs.

  3. Make a well in center of flour mixture and pour in milk. Mix just until most of the flour is moistened, then turn mixture out onto a floured surface.

  4. Knead lightly, up to 10-12 times, until you have a soft but not too sticky dough. Don’t overwork or biscuits will be tough.

  5. Gently pat dough out into a circle about 1in / 2.5cm thick, checking to make sure underneath is still floured well and dough isn’t sticking.

  6. Using a biscuit cutter or a round glass 2-3in / 5-7cm in diameter, cut out as many biscuits as you can. Place biscuits on baking sheet. Collect dough scraps and reshape into a ball. Repeat patting into a circle and cutting until dough is used up, probably 2-3 times at most, depending on size of biscuit cutter.

  7. Bake biscuits in preheated oven for 10-12 minutes, or until risen and lightly golden brown.

Make the Whipped Cream

  1. In the bowl of a stand mixer fitted with whisk attachment or with a hand mixer, whip heavy cream until soft peaks form.

  2. Add sugar and vanilla and continue whipping until stiff peaks form.

Assembly

Slice biscuits open and spoon over strawberries and whipped cream.

Jenny’s Notes:

  • The sugar mixed in with the strawberries is traditional but not absolutely necessary. Although it helps soften the strawberries to lose their juice and create more of a soft sauce, I like it also without adding any sugar, because everything else in this recipe is already a bit sweet.

  • The biscuit dough might seem too soft at first, but the moment the baking powder starts working and it hits the floured surface it should become very manageable. Just be careful not to over work it, a little bit goes a long way.

  • When cutting biscuits, cut straight down, no twisting, or this can seal the edges and prevent a good rise. You can dip the biscuit cutter in some flour to help prevent any sticking.

  • If you place the biscuits next to each other on the baking sheet they can help each other “climb” up and achieve a nicer rise! I know this feels counterintuitive as so often things are supposed to be “spaced evenly apart”, but give it a try!

Strawberry Shortcake
Yield 8-10 servings
Author
Prep time
40 Min
Cook time
12 Min
Total time
52 Min

Strawberry Shortcake

Classic strawberry shortcake recipe handed down from my mama. Homemade biscuits, juicy strawberries, and fresh whipped cream assembled together in a summery dessert.
Cook modePrevent screen from turning off

Ingredients

For the Macerated Strawberries
For the Shortcakes
For the Whipped Cream

Instructions

Make the Macerated Strawberries
  1. Place strawberries in a bowl, add sugar, and mash them a bit or a lot, as desired, with a fork or masher. Place in fridge while you prepare the shortcakes.
Make the Shortcakes
  1. Preheat oven to 450°F / 232°C. Have ready an ungreased baking sheet.
  2. In a large bowl whisk together flour, sugar, baking powder, and salt.
  3. Cut in butter or oil until mixture resembles coarse crumbs.
  4. Make a well in center of flour mixture and pour in milk. Mix just until most of the flour is moistened, then turn mixture out onto a floured surface.
  5. Knead lightly, up to 10-12 times, until you have a soft but not too sticky dough. Don’t overwork or biscuits will be tough.
  6. Gently pat dough out into a circle about 1in / 2.5cm thick, checking to make sure underneath is still floured well and dough isn’t sticking.
  7. Using a biscuit cutter or a round glass 2-3in / 5-7cm in diameter, cut out as many biscuits as you can. Place biscuits on baking sheet. Collect dough scraps and reshape into a ball. Repeat patting into a circle and cutting until dough is used up, probably 2-3 times at most, depending on size of biscuit cutter.
  8. Bake biscuits in preheated oven for 10-12 minutes, or until risen and lightly golden brown.
Make the Whipped Cream
  1. In the bowl of a stand mixer fitted with whisk attachment or with a hand mixer, whip heavy cream until soft peaks form.
  2. Add sugar and vanilla and continue whipping until stiff peaks form.
Assembly
  1. Slice biscuits open and spoon over strawberries and whipped cream!

Notes

The sugar mixed in with the strawberries is traditional but not absolutely necessary. Although it helps soften the strawberries to lose their juice and create more of a soft sauce, I like it also without adding any sugar, because everything else in this recipe is already a bit sweet.The biscuit dough might seem too soft at first, but the moment the baking powder starts working and it hits the floured surface it should become very workable. Just be careful not to over work it, a little bit goes a long way.When cutting the biscuits, cut straight down, no twisting, or this can seal the edges and prevent a good rise. You can dip the biscuit cutter in some flour to help prevent any sticking. If you place the biscuits next to each other on the baking sheet they can help each other “climb” up and achieve a nicer rise!

Nutrition Facts

Calories

436.99

Fat

24.15 g

Sat. Fat

7.94 g

Carbs

51.65 g

Fiber

2.77 g

Net carbs

48.88 g

Sugar

24.49 g

Protein

5.28 g

Sodium

368.72 mg

Cholesterol

35.06 mg

Nutritional Information is approximate.

strawberry shortcakes, summer dessert, best traditional classic strawberry shortcake
dessert
American
Did you make this recipe?
Tag @jennyblogsandbakes on instagram and hashtag it #jennyblogs
public.jpg

Pistachio Cake with Honey Vanilla Buttercream

Last Updated August 10, 2024

Pistachios remind me of Christmas.  In fact, just this morning I had my first pang of "I miss Christmas," which usually hits me around July.  My family rarely eats/buys/uses pistachios, but we always have bowls of them out for Christmas.  It's tradition.  Beyond that, I never thought too much of cooking or baking with them because they were only ever around when we were already over inundated with food.  And yes, they are expensive and you may have to shell them.  

Then I went to Europe where pistachio gelato is the best flavor and the line up of pastries always includes pistachio right next to the chocolate and vanilla.  Pistachio was this flavor, this nut, that I had not tapped into.  And I've only just started.  Oh the thrills!  This cake was a light bulb of "What have I been missing out on!?" My poor family and friends, all these years and I didn't make this for them.  How selfish of me.  Selfish no more, here is the recipe so you can revel in the glory with me!

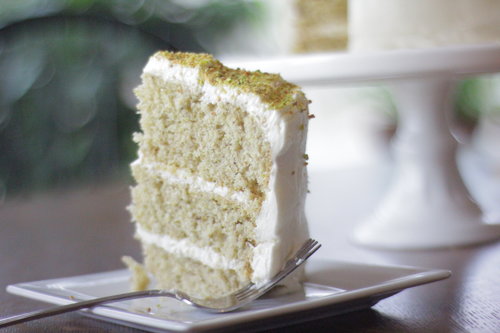
This cake is fluffy, light, with a wonderful, nutty pistachio flavor that is not overbearing. It has a slight elegance to it, something about being more than 2 layers and the white frosting.

The cake ingredients are fairly standard aside from the pistachios. If you have pistachio flour ready-made available to you, you can save yourself step. Maybe try Amazon, you can find anything online these days! If not, pistachios should be readily available, and you can make pistachio flour yourself by grinding them for a few seconds in a food processor. I don’t have a food processor in Italy, so I get by with an electric coffee grinder which works great!

The frosting is a light and creamy, not-too-sweet cooked frosting. Ever since the first time I’ve made a cooked frosting, the raves come pouring in about how it’s the best frosting they’ve ever eaten. Between cooked frostings and Italian meringue buttercream, I’ve rarely looked back at the traditional American buttercream that is mostly sugar. It has its place, but it seems the general consensus between anyone who has tried some of my cakes and cupcakes that a not-too-sweet frosting is GREATLY appreciated. Give the cooked frosting below a try and see if you don’t fall in love with it!

This post may contain affiliate links. If you buy something using these links, Jennyblogs may receive a small commission, at no extra cost to you. This helps to support Jennyblogs. For further information see the privacy policy. Grazie!

Recipe adapted from Joanne eats well with others


Pistachio Cake with Honey Vanilla Buttercream

Makes 1 three layer 6-inch round cake. Serves about 8

Ingredients:

For the Pistachio Cake

  • 1/2 cup / 63g shelled pistachios

  • 1 1/4 cups / 164g cake flour

  • scant 1/2 cup / 47g all-purpose flour

  • 1 1/2 tsp / 7g baking powder

  • 1/2 tsp / 2.5g baking soda

  • 1/2 tsp / 2.5g salt

  • scant 1/2 cup / 100g oil

  • 3/4 cup / 150g sugar

  • 1 1/2 tsp / 7g vanilla extract

  • 1 egg

  • 3/4 cup / 178g ice water

  • 1 egg white

  • 1/4 tsp cream of tartar

For the Honey Vanilla Buttercream

  • 3/4 cup / 150g sugar

  • 3 Tbsp / 20g all-purpose flour

  • 3/4 cup / 178g milk

  • 3 Tbsp / 44g heavy whipping cream

  • 3/4 cup / 170g butter, cubed

  • 1 tsp / 5g vanilla extract

  • 2 Tbsp / 42g honey

Directions:

Oven 350°F / 177°C.  Grease and line the bottoms of three 6-inch cake rounds with parchment paper.

Make the Pistachio Cake

  1. Place the pistachios in a food processor and pulse until coarsely chopped.  Set aside 2 tablespoons.  Continue to pulse remaining pistachios until finely ground, like flour in texture.  

  2. In a medium bowl, whisk together pistachio flour, cake flour, all-purpose flour, baking powder, baking soda, and salt.  

  3. In a normal bowl or bowl of a stand mixer, beat together oil, sugar, and vanilla.  Add egg and beat until just combined.  

  4. With the mixer on low, add the pistachio flour mixture to the batter in three additions, alternating with the ice water, beginning and ending with pistachio flour mixture.  After each addition mix until just combined.  

  5. In another medium bowl, beat the egg white with cream of tartar until soft peaks form, about 3-4 minutes.  Gently fold the egg white into the cake batter, starting with just a spoonful to lighten the batter, then continue on with the rest.  

  6. Pour batter into prepared cake pans and bake for 25-30 minutes, or until toothpick inserted in center comes out clean.  Allow cakes to cool in pans for 10 minutes, then flip onto a wire rack to cool completely while you make the buttercream.  Remove parchment paper from bottoms.  

Make the Honey Vanilla Buttercream

  1. In a medium saucepan, whisk together sugar and flour.  Add milk and cream and place over medium heat, stirring frequently, until mixture boils and thickens, about 5-10 minutes.  

  2. Once thickened, pour mixture into a bowl of a stand mixer.  Beat on high until cool, 8-10 minutes.  Reduce speed to medium low and add butter, piece by piece, until fully incorporated.  Increase speed and beat a few minutes, until light and fluffy.  Beat in vanilla and honey.  

Assembly

Use a serrated knife to level off the top of the cakes.  Cut off just as much as necessary to make the top of the cake level and flat.  If you prefer domed cakes, leave one layer uncut for the top. Place one leveled layer on desired serving plate, cut side down.  Generously spread frosting over top and place second layer on top, again cut side down.  Top with more frosting.  Finish with top layer, domed side up if desired.  Frost the whole cake.  Top with remaining 2 tablespoons chopped pistachios.   

Jenny's Notes:

  • For an 8 - 9in / 20-23cm 3 layer cake, double this recipe.  

  • If your buttercream seems too thin or soupy after you've added the butter, stick it in the fridge for a few minutes, then rewhip.  Most likely it has not cooled down enough to stabilize.

  • These layers are not overly thick, so don't worry if the amount of batter in the pans seems low or they don't rise very high, you still made it right! Once all three layers are stacked on top of one another, it makes for a nicely high, but not towering, 6 inch round cake.

  • If you don’t have 3 6-inch pans, it is easier to split the batter in two and bake in two pans, instead of 3. You then have the option of making a two layer cake, or cutting each layer in two for a four layer cake.  

Pistachio Cake with Honey Vanilla Buttercream
Yield 8 servings
Author
Prep time
1 H & 25 M
Cook time
30 Min
Total time
1 H & 55 M

Pistachio Cake with Honey Vanilla Buttercream

3 layer moist pistachio cake with a light and fluffy cooked honey vanilla buttercream frosting.
Cook modePrevent screen from turning off

Ingredients

For the Pistachio Cake
For the Honey Vanilla Buttercream

Instructions

Make the Pistachio Cake
  1. Oven 350°F / 177°C. Grease and line the bottoms of three 6-inch cake rounds with parchment paper.
  2. Place the pistachios in a food processor and pulse until coarsely chopped. Set aside 2 tablespoons. Continue to pulse remaining pistachios until finely ground, like flour in texture.
  3. In a medium bowl, whisk together pistachio flour, cake flour, all-purpose flour, baking powder, baking soda, and salt.
  4. In a normal bowl or bowl of a stand mixer, beat together oil, sugar, and vanilla. Add egg and beat until just combined.
  5. With the mixer on low, add the pistachio flour mixture to the batter in three additions, alternating with the ice water, beginning and ending with pistachio flour mixture. After each addition mix until just combined.
  6. In another medium bowl, beat the egg white with cream of tartar until soft peaks form, about 3-4 minutes. Gently fold the egg white into the cake batter, starting with just a spoonful to lighten the batter, then continue on with the rest.
  7. Pour batter into prepared cake pans and bake for 25-30 minutes, or until toothpick inserted in center comes out clean. Allow cakes to cool in pans for 10 minutes, then flip onto a wire rack to cool completely while you make the buttercream. Remove parchment paper from bottoms.
Make the Honey Vanilla Buttercream
  1. In a medium saucepan, whisk together sugar and flour. Add milk and cream and place over medium heat, stirring frequently, until mixture boils and thickens, about 5-10 minutes.
  2. Once thickened, pour mixture into a bowl of a stand mixer. Beat on high until cool, 8-10 minutes. Reduce speed to medium low and add butter, piece by piece, until fully incorporated. Increase speed and beat a few minutes, until light and fluffy. Beat in vanilla and honey.
Assembly
  1. Use a serrated knife to level off the top of the cakes. Cut off just as much as necessary to make the top of the cake level and flat. If you prefer domed cakes, leave one layer uncut for the top. Place one leveled layer on desired serving plate, cut side down. Generously spread frosting over top and place second layer on top, again cut side down. Top with more frosting. Finish with top layer, domed side up if desired. Frost the whole cake. Top with remaining 2 tablespoons chopped pistachios.

Notes

For an 8 - 9in / 20-23cm 3 layer cake, double this recipe. If your buttercream seems too thin or soupy after you've added the butter, stick it in the fridge for a few minutes, then rewhip. Most likely it has not cooled down enough to stabilize.


These layers are not overly thick, so don't worry if the amount of batter in the pans seems low or they don't rise very high, you still made it right! Once all three layers are stacked on top of one another, it makes for a nicely high, but not towering, 6 inch round cake.


If you don’t have three 6-inch pans, it is easier to split the batter in two and bake in two pans, instead of 3. You then have the option of making a two layer cake, or cutting each layer in two for a four layer cake.  

Nutrition Facts

Calories

619.89

Fat

36.67 g

Sat. Fat

13.98 g

Carbs

68.16 g

Fiber

1.40 g

Net carbs

66.76 g

Sugar

42.85 g

Protein

6.57 g

Sodium

500.72 mg

Cholesterol

77.11 mg

Nutritional information is approximate. Based on 8 servings.

cake,layer cake,pistachio flour,pistachio,roux,cooked frosting,buttercream,honey vanilla
dessert, cake
American
Did you make this recipe?
Tag @jennyblogsandbakes on instagram and hashtag it #jennyblogs

Cream Cheese Coffee Cake

Last Updated August 6, 2024

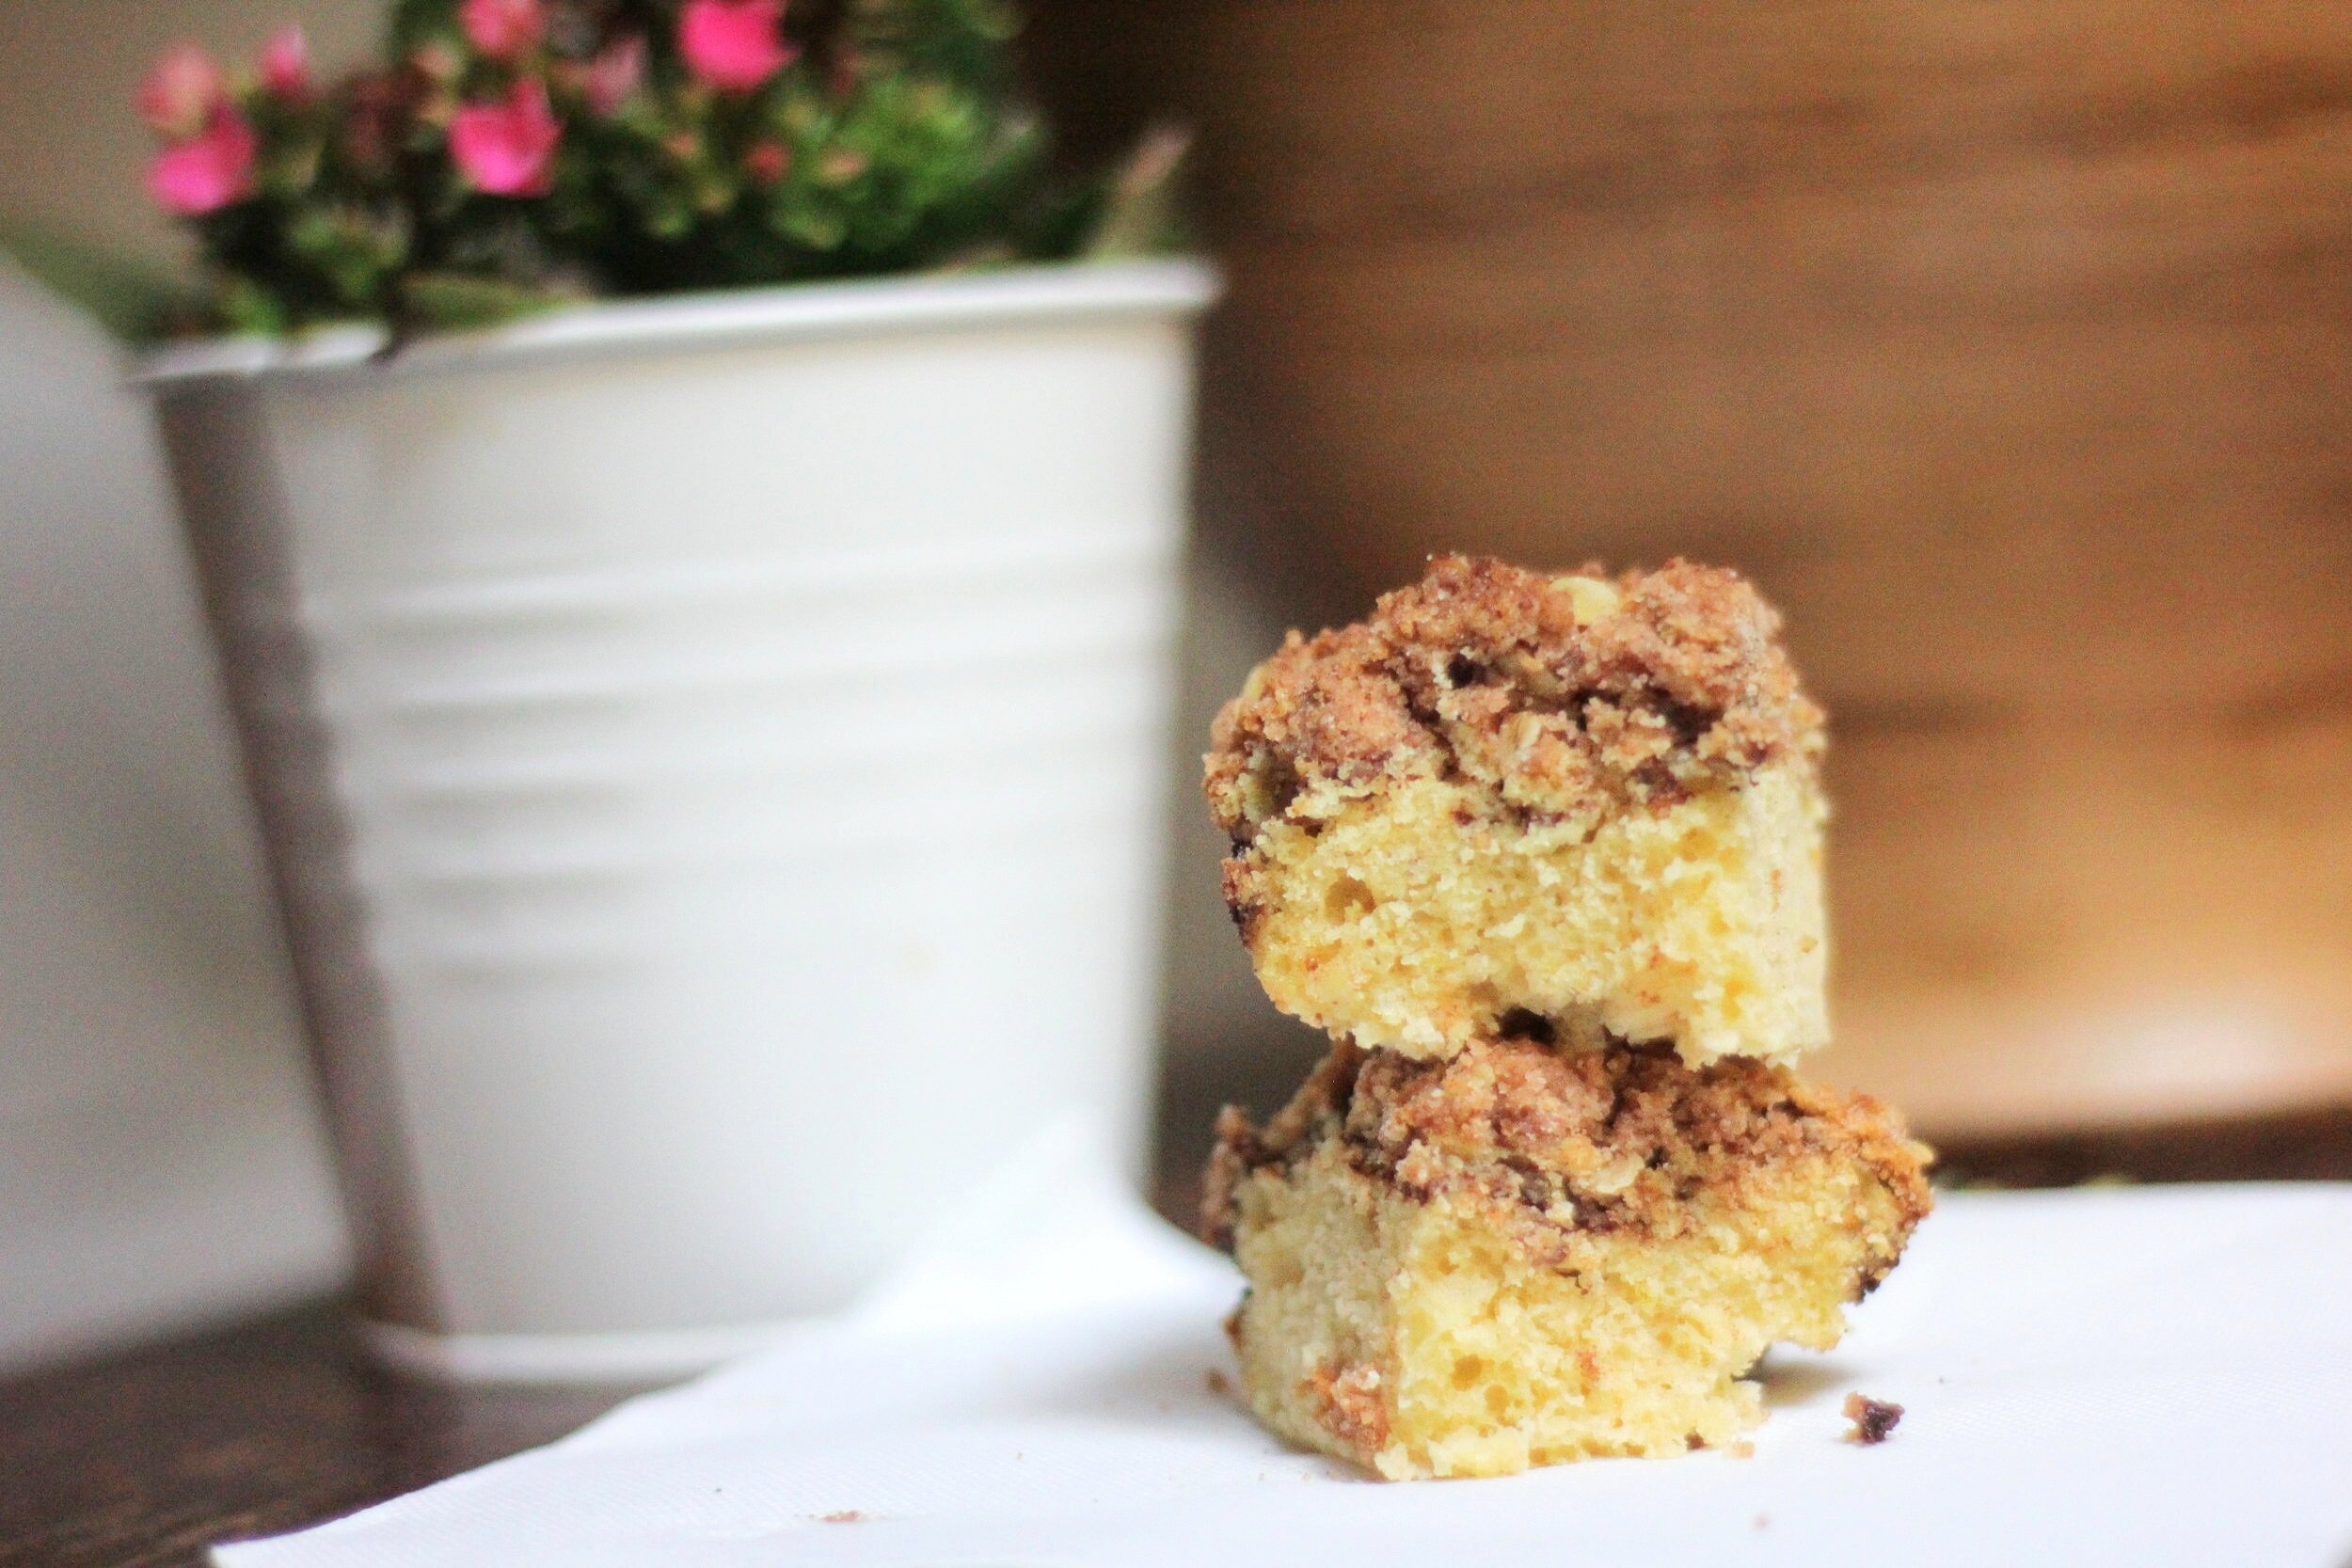
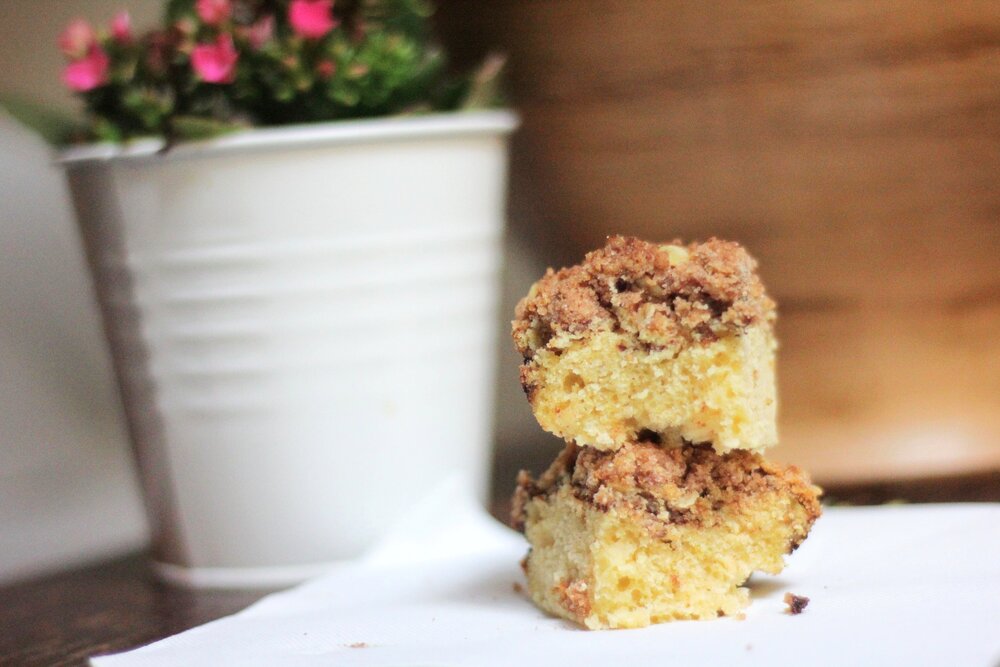
Cream Cheese Coffee Cake. Think a delicate crumb, super moist with swirls of cream cheese making the coffee cake even softer, and a sweet crumble on top.

Coffee cakes (and scones) often get a bad rap for being dry. No one likes to eat something that makes their mouth feel like it’s full of sawdust. There is no need to make dry baked goods when there are so many good recipes out there! A good example? This Cream Cheese Coffee Cake recipe. I already have a few favorite NOT dry recipes like this Cinnamon Streusel Coffee Cake, but today’s Cream Cheese Coffee Cake really uh, takes the cake on the moist scale. I apologize if you don’t like the word “moist”, but I struggle finding suitable synonyms that get the same point across. If you have any ideas, I’m open to suggestions so I don’t offend some people’s sensibilities. :)

Now, post Valentine's Day, or Galentine's Day, you may need to take a break from chocolate.  No wait, never mind, that's silly.  Chocolate is always necessary.  What was I thinking?  But I'm sure you already have plenty of chocolate on your hands (maybe literally, put that candy bar down and get busy making this coffee cake) in the form of heart boxes, Dove dark chocolate with those hidden messages, Hershey's kisses, or in my case, Toblerone.  So instead, let's make a very white dessert (or breakfast, hey) with a delicate crumb and cheesecake filling. Yes? Yes.

This post may contain affiliate links. If you make a purchase using these links, Jennyblogs may receive a small commission, at no extra cost to you. This helps to support Jennyblogs. Where possible, links are prioritized to mall businesses and ethically and responsibly made items. For further information see the privacy policy. Grazie!


Cream Cheese Coffee Cake

Serves 12-16

Ingredients:

For the Filling

  • 8 oz / 225g cream cheese, softened

  • 1/4 cup / 50g sugar

  • 1/2 tsp vanilla extract

  • 1 egg

For the Cake

  • 1 1/2 cups / 180g all-purpose flour

  • 1/2 tsp baking powder

  • 1/2 tsp baking soda

  • 1/2 tsp salt

  • 3 Tbsp / 42g oil

  • 1/2 cup / 100g sugar

  • 2 eggs

  • 1 tsp vanilla

  • 1/2 cup / 123g yogurt or sour cream

For the Streusel

  • 1/4 cup / 50g sugar

  • 1/4 cup / 30g all-purpose flour

  • 3 Tbsp / 42g cold butter, cubed

Directions:

Oven 350°F / 177°C.  Greased 8x8in / 20x20cm square baking pan.

For the Filling

  1. In the bowl of a stand mixer beat cream cheese until smooth, about 30 seconds. 

  2. Add sugar, vanilla, egg and beat on medium-low speed until combined.  Pour into another bowl and set aside. 

For the Cake

  1. In a medium bowl whisk together flour, baking powder, baking soda, and salt. 

  2. In the bowl of a stand mixer combine oil and sugar.  Beat in eggs one at a time.  Add vanilla. 

  3. Alternate adding the dry ingredients and yogurt to the oil and sugar mixture.  Dry, yogurt, dry, yogurt, dry.  Mix only until just combined after each addition. 

For the Streusel

  1. Combine sugar, flour, and butter in a small bowl with a pastry cutter, fork, or your hands until crumbles the size of pebbles appear.

Assembly

  1. Spread half of the cake batter in the bottom of prepared pan. 

  2. Pour and spread cream cheese filling evenly over batter; gently swirl.

  3. Spread remaining half of cake batter over cream cheese filling. 

  4. Evenly sprinkle streusel over the top.

  5. Bake for 20-25 minutes or until toothpick inserted near the center comes out mostly clean. 

Jenny's Notes:

  • Love coffee cake or serving at a party?  You can double this recipe and bake in a 9x13 inch pan.  Increase baking time to about 40 minutes.

Cream Cheese Coffee Cake
Yield 12-16 Servings
Author
Prep time
45 Min
Cook time
25 Min
Total time
1 H & 10 M

Cream Cheese Coffee Cake

Super moist coffee cake with a thick cream cheese swirl and delicate streusel topping.
Cook modePrevent screen from turning off

Ingredients

For the Filling
For the Cake
For the Streusel

Instructions

For the Filling
  1. In the bowl of a stand mixer beat cream cheese until smooth, about 30 seconds.
  2. Add sugar, vanilla, egg and beat on medium-low speed until combined. Pour into another bowl and set aside.
For the Cake
  1. In a medium bowl whisk together flour, baking powder, baking soda, and salt.
  2. In the bowl of a stand mixer combine oil and sugar. Beat in eggs one at a time. Add vanilla.
  3. Alternate adding the dry ingredients and yogurt to the oil and sugar mixture. Dry, yogurt, dry, yogurt, dry. Mix only until just combined after each addition.
For the Streusel
  1. Combine sugar, flour, and butter in a small bowl with a pastry cutter, fork, or your hands until crumbles the size of pebbles appear.
Assembly
  1. Oven 350°F / 177°C. Greased 8x8in / 20x20cm square baking pan.
  2. Spread half of the cake batter in the bottom of prepared pan.
  3. Pour and spread cream cheese filling evenly over batter; gently swirl.
  4. Spread remaining half of cake batter over cream cheese filling.
  5. Evenly sprinkle streusel over the top.
  6. Bake for 20-25 minutes or until toothpick inserted near the center comes out mostly clean.

Notes

Love coffee cake or serving at a party? You can double this recipe and bake in a 9x13 inch pan. Increase baking time to about 40 minutes.

Nutrition Facts

Calories

269.85

Fat

13.92 g

Sat. Fat

6.21 g

Carbs

31.96 g

Fiber

0.47 g

Net carbs

31.48 g

Sugar

18.21 g

Protein

4.58 g

Sodium

270.60 mg

Cholesterol

58.08 mg

Nutritional information is approximate and based on 12 servings.

cream cheese, coffee cake, streusel, cream cheese filling, swirl, moist
Breakfast, Dessert
American
Did you make this recipe?
Tag @jennyblogsandbakes on instagram and hashtag it #jennyblogs

Cinnamon Streusel Coffee Cake

Last Updated Septemer 6, 2024

IMG_4443.jpg

Last Updated August 4, 2024

Think of a delicately moist coffee cake with a cinnamon swirl and a crunchy, sweet streusel on top. That’s what we’re making today.

If the first thought that comes to your mind when you think of coffee cake is dry-crumbly-use-up-a-week's-worth-of-saliva-in-one-bite-cake, then think again.  No, no, no.  Coffee cake is supposed to be sweet, but not quite as sweet as regular cake, flavorful, and with a beautifully dense crumb.  That's fancy talk for moist.  But for the mental care of some readers who have an avid dislike for that term, I tried to avoid using it.  But I still did to explain myself.  Just can't win. 

Oh, and for some people who may be confused, there is (most often) no coffee involved in the batter.  The final product, however, pairs beautifully with a mug of coffee.  Hence the name.  (Speaking of words we don't like...mug?  No thanks.  It's like your mouth was too lazy to talk - "mmmm" - then made a huge effort and ended up with "ug."  Mmmmmmug.) 

On to more delicious sounding, looking, and tasting things!! 

This post may contain affiliate links. If you buy something using these links, Jennyblogs may receive a small commission, at no extra cost to you. This helps to support Jennyblogs. For further information see the privacy policy. Grazie!


Cinnamon Streusel Coffee Cake

Serves 9-12

Ingredients:

For the Cake

  • 1/2 cup / 112g oil

  • 1/2 cup / 100g sugar

  • 1/4 cup / 50g brown sugar

  • 1 1/4 tsp baking powder

  • 3/4 tsp salt

  • 1 tsp vanilla extract

  • 1 egg

  • 1/2 cup / 122g plain yogurt

  • 1/2 cup / 119g milk

  • 2 cups / 240g all-purpose flour

For the Cinnamon Swirl

  • 1/2 cup / 100g brown sugar

  • 2 1/2 tsp cinnamon

  • 1 tsp unsweetened cocoa powder

For the Streusel

  • 1/3 cup / 67g sugar

  • 1/4 cup / 30g all-purpose flour

  • 1/4 cup / 23g rolled oats

  • 1 tsp cinnamon

  • 2 Tbsp / 28g butter, melted

Directions:

Oven 350°F / 177°C.  Greased 8x8in / 20x20cm square baking pan, or 8in / 20cm round cake pan.

Make the Cake

  1. In the bowl of a stand mixer, beat oil, sugars, baking powder, salt, and vanilla until well combined.  Beat in egg. 

  2. In a separate small bowl mix together yogurt and milk. 

  3. Add a third of the flour to the oil mixture, mixing until almost combined.  Add half of the yogurt mixture.  Continue adding flour and yogurt mixture to oil mixture until everything is just combined. 

  4. Pour half of the batter into the prepared pan, spreading all the way to edges; set other half aside. 

Make the Cinnamon Swirl

  1. In a small bowl combine brown sugar, cinnamon, and cocoa powder. 

  2. Sprinkle evenly over batter in pan. 

  3. Pour remaining batter over cinnamon filling and use a spatula to gently spread to edges.

Make the Streusel

  1. In another small bowl, combine sugar, flour, oats, and cinnamon.  Add the melted butter and mix until crumbles form. 

  2. Evenly distribute crumble over batter in pan. 

  3. Bake for 40-45 minutes or until toothpick inserted in center comes out clean. 

Jenny's Notes:

  • Watch that bake time.  Toothpicks are your best friend.  I was testing this recipe using my Italian oven that didn't like to bake things on the bottom, so you may need less time.

  • REALLY like coffee cake?  Double this recipe and put in a 9x13 inch pan or two cake pans.  You can always freeze one pan!

  • Don't have plain yogurt on hand? You can also use sweetened yogurt and reduce sugar by 1/4 cup / 50g, or try Greek yogurt, fresh ricotta, sour cream, or mascarpone.  The dairy options are endless!!!!  I really liked fresh ricotta in this recipe. 

Cinnamon Streusel Coffee Cake
Yield 9-12 servings
Author
Prep time
30 Min
Cook time
45 Min
Total time
1 H & 15 M

Cinnamon Streusel Coffee Cake

Delicate, moist coffee cake with a cinnamon swirl and streusel to top it all off.
Cook modePrevent screen from turning off

Ingredients

For the Cake
For the Cinnamon Swirl
For the Streusel

Instructions

Make the Cake
  1. Oven 350°F / 177°C. Greased 8x8in / 20x20cm square baking pan, or 8in / 20cm round cake pan.
  2. In the bowl of a stand mixer, beat oil, sugars, baking powder, salt, and vanilla until well combined. Beat in egg.
  3. In a separate small bowl mix together yogurt and milk.
  4. Add a third of the flour to the oil mixture, mixing until almost combined. Add half of the yogurt mixture. Continue adding flour and yogurt mixture to oil mixture until everything is just combined.
  5. Pour half of the batter into the prepared pan, spreading all the way to edges; set other half aside.
Make the Cinnamon Swirl
  1. In a small bowl combine brown sugar, cinnamon, and cocoa powder.
  2. Sprinkle evenly over batter in pan.
  3. Pour remaining batter over cinnamon filling and use a spatula to gently spread to edges.
Make the Streusel
  1. In another small bowl, combine sugar, flour, oats, and cinnamon. Add the melted butter and mix until crumbles form.
  2. Evenly distribute crumble over batter in pan.
  3. Bake for 40-45 minutes or until toothpick inserted in center comes out clean.

Notes

  • Watch that bake time. Toothpicks are your best friend. I was testing this recipe using my Italian oven that didn't like to bake things on the bottom, so you may need less time.
  • REALLY like coffee cake? Double this recipe and put in a 9x13 inch pan or two cake pans. You can always freeze one pan!
  • Don't have plain yogurt on hand? You can also use sweetened yogurt and reduce sugar by 1/4 cup / 50g, or try Greek yogurt, fresh ricotta, sour cream, or mascarpone. The dairy options are endless!!!! I really liked fresh ricotta in this recipe.

Nutrition Facts

Calories

402.38

Fat

16.42 g

Sat. Fat

2.95 g

Carbs

59.80 g

Fiber

1.55 g

Net carbs

58.24 g

Sugar

35.85 g

Protein

5.08 g

Cholesterol

29.23 mg

Sodium

311.45 mg

Nutritional information is approximate and based on 9 servings.

coffee cake, cinnamon swirl, brunch, streusel topping
breakfast, cake, dessert
American
Did you make this recipe?
Tag @jennyblogsandbakes on instagram and hashtag it #jennyblogs

Banana Chocolate Chip Cake with Peanut Butter Frosting

Last Updated August 4, 2024

It's almost Christmas!!!  The most wonderful time of the year, filled with family, friends, delicious food, and cheery music.  Wasn't that a wonderfully cliché sentence?  Yes, but we hope it's true.  I am fortunate enough to say that it is for me.  I love all my family, I love Christmas music (I can't always vouch for it all being "good" music, but it lifts your spirit and you can mindlessly sing along while wearing a Santa hat and elf socks without anyone thinking twice), and we have an abundance of delicious food.  So much food. 

What is one to do when they have been indundated with rich holiday food?  Take a break?  No fun.  Stand by the vegetable tray all night?  Nah, I hear the conversation can get a little heated with those peppers.  Chew gum?  No, you need a compromise.  Something that will satisfy, but not put you over like your great-aunt's cousin-once-removed on your dad's side triple chocolate cake with chocolate buttercream, ganache, whipped cream, sprinkles, drizzled with caramel and bonbons on top.  Something more like a fruit based cake.  Banana.  With chocolate chips, because it is Christmas, and peanut butter because that makes the whole thing.  The bow on top of the present.  The icing on the cake...so very literally. Plus protein. It’s basically a health food, you guys.

This post may contain affiliate links. If you buy something using these links, Jennyblogs may receive a small commission, at no extra cost to you. This helps to support Jennyblogs. For further information see the privacy policy. Grazie!

Recipe adapted from Handle the Heat


Banana Chocolate Chip Cake with Peanut Butter Frosting

Makes 12-16 servings

Ingredients:

For the Banana Chocolate Chip Cake

  • 2 1/2 cups / 300g all-purpose flour

  • 1 1/2 tsp baking powder

  • 3/4 baking soda

  • 1 tsp cinnamon

  • 1/2 tsp salt

  • 3/4 cup / 168g oil

  • 3/4 cup / 150g sugar

  • 1/2 cup / 100g brown sugar

  • 2 eggs

  • 1 tsp vanilla extract

  • 1/2 cup / 123g plain yogurt or sour cream

  • 4 overripe bananas, mashed, to get roughly 1 1/3 cups / 400g mashed banana

  • 1 cup / 170g mini chocolate chips

For the Peanut Butter Frosting

  • 1 cup / 226g unsalted butter (2 sticks, 8 oz), room temperature

  • 1 cup / 260g creamy peanut butter

  • 1 tsp vanilla extract

  • pinch of salt

  • 2 - 2 1/2 cups / 250-313g powdered sugar

Directions:

Oven preheated to 350°F / 177°C.  Grease and flour two 8 or 9in / 20 or 23cm round cake pans.

Make the Banana Chocolate Chip Cake

  1. In a medium bowl, whisk together flour, baking powder, baking soda, cinnamon, and salt.  Set aside.

  2. In the bowl of a stand mixer, beat together oil and sugars.  Add vanilla and eggs; beat well.

  3. Add 1/3 of the flour mixture to the egg mixture.  Mix in yogurt.  Add another third of flour mixture.  Add bananas.  Add final third of flour mixture.  Fold in chocolate chips.

  4. Pour and divide batter evenly between the two prepared pans. 

  5. Bake for 35-40 minutes, or until toothpick inserted in the center comes out clean.   Allow to cool for about 10 minutes in the pans before flipping out onto cooling racks to cool completely. 

Make the Peanut Butter Frosting

  1. In the bowl of a stand mixer, beat butter and peanut butter together until light and fluffy.  Add vanilla and salt.  Add 2 cups of powdered sugar; add more as needed until frosting is thick enough to spread. 

Assembly

  1. Center one cake layer upside down on a cake stand or plate.  Frost this layer within 1/4 inch of edge of cake. 

  2. Place second layer on top, and frost cake with remaining frosting.  Sprinkle with additional chocolate chips, if desired. 

Jenny's Notes:

  • I prefer to use organic yogurt instead of sour cream in recipes simply because it's healthier.  I don’t always have plain yogurt on hand, so in those cases I use vanilla yogurt and reduce the sugar in the recipe by 1/3-1/2 cup, depending on the amount of yogurt called for.  Feel free to use whatever you have on hand! 

Banana Chocolate Chip Cake with Peanut Butter Frosting
Yield 12-16
Author
Prep time
1 Hour
Cook time
40 Min
Total time
1 H & 40 M

Banana Chocolate Chip Cake with Peanut Butter Frosting

A tender banana cake speckled with chocolate chips topped with a creamy peanut butter frosting.
Cook modePrevent screen from turning off

Ingredients

For the Banana Chocolate Chip Cake
For the Peanut Butter Frosting

Instructions

Make the Banana Chocolate Chip Cake
  1. Oven preheated to 350°F / 177°C. Grease and flour two 8 or 9in / 20 or 23cm round cake pans.
  2. In a medium bowl, whisk together flour, baking powder, baking soda, cinnamon, and salt. Set aside.
  3. In the bowl of a stand mixer, beat together oil and sugars. Add vanilla and eggs; beat well.
  4. Add 1/3 of the flour mixture to the egg mixture. Mix in yogurt. Add another third of flour mixture. Add bananas. Add final third of flour mixture. Fold in chocolate chips.
  5. Pour and divide batter evenly between the two prepared pans.
  6. Bake for 35-40 minutes, or until toothpick inserted in the center comes out clean. Allow to cool for about 10 minutes in the pans before flipping out onto cooling racks to cool completely.
Make the Peanut Butter Frosting
  1. In the bowl of a stand mixer, beat butter and peanut butter together until light and fluffy. Add vanilla and salt. Add 2 cups of powdered sugar; add more as needed until frosting is thick enough to spread.
Assembly
  1. Center one cake layer upside down on a cake stand or plate. Frost this layer within 1/4 inch of edge of cake.
  2. Place second layer on top, and frost cake with remaining frosting. Sprinkle with additional chocolate chips, if desired.

Notes

I prefer to use organic yogurt instead of sour cream in recipes simply because it's healthier. I don’t always have plain yogurt on hand, so in those cases I use vanilla yogurt and reduce the sugar in the recipe by 1/3-1/2 cup, depending on the amount of yogurt called for. Feel free to use whatever you have on hand!

Nutrition Facts

Calories

785.39

Fat

45.52 g

Sat. Fat

15.55 g

Carbs

88.21 g

Fiber

3.37 g

Net carbs

84.84 g

Sugar

59.78 g

Protein

10.55 g

Sodium

386.82 mg

Cholesterol

75.36 mg

Nutritional information is approximate. Based on 12 servings using the full 2 1/2 cups of powdered sugar for the frosting.

Banana, cake, banana chocolate chip, chocolate chip cake, peanut butter, peanut butter frosting, banana cake, ripe banana recipe
Dessert, Cake
American
Did you make this recipe?
Tag @jennyblogsandbakes on instagram and hashtag it #jennyblogs

Scrumptious Apple Cake

One of the many things I love about Michigan is the diversity of seasons.  Autumn is no exception, with the leaves turning brilliant shades of red, orange, yellow, burgundy, green, and brown.  I love a brilliant brown, don't you?  It's just the prettiest.  I kid.

Back to how great Michigan and autumn is.  The dried cornstalks and gourds come out, decorating the fields and porches; pumpkins appear in all the stores, asking to be taken home and carved.  The air turns as crisp and refreshingly cool as the apples hanging on the trees in the orchards.  The cool, dewy mornings call for cozy sweaters, wool socks, warm scarves; the rainy afternoons make a crackling fire, a hot cup of apple cider, and a good book all but necessary.  Comforting squash soups and crusty breads, pumpkin pies and cinnamon rolls just out of the oven, and family nearby makes the dusk that comes sooner and sooner a welcome friend.  Autumn is wonderful, but Traverse City, Michigan, really is an idyllic place to experience it.   

Hannah, myself, and my mom apple picking

apple picking

We all know, the food of choice in autumn is pumpkin. 

So here is a recipe for Scrumptious Apple Cake.  Ha.  I just wanted to trick you into thinking this would be a recipe for something pumpkin. There will be plenty of pumpkin in the near future, but today I wanted to share with you this recipe, Scrumptious Apple Cake by my mamma. Yes, scrumptious is part of the title  It is not simply a scrumptious Apple Cake, it is a scrumptious Scrumptious Apple Cake. Trust her on this one.  

Now, if you have some fancy, two-tier frosted apple cake envisioned in your brain, erase that and think simple.  It's more like a moist bread.  9x13 pan.  I think I just felt some of you relax; "no cake tins?  Phew, 9x13 I can do..." and yes, it is so simple.  Did I mention scrumptious?   

The apples in this recipe are handpicked by my mom, Hannah, and yours truly.  Apple picking is one of the things I look forward to most in September, I recommend you find the nearest apple orchard and go!

This post may contain affiliate links. If you make a purchase using these links, Jennyblogs may receive a small commission, at no extra cost to you. This helps to support Jennyblogs. For further information see the privacy policy. Grazie!

Recipe from my mamma


Scrumptious Apple Cake

Serves 18-20

Ingredients:

For the Cake

  • 1 cup / 225g oil

  • 2 cups / 400g sugar

  • 2 eggs

  • 1 tsp vanilla extract

  • 3 cups peeled chopped apples, about 3 medium

  • 3 cups / 360g all-purpose flour

  • 1/2 tsp salt

  • 1 1/2 tsp baking soda

  • 1 tsp cinnamon

  • 1 tsp nutmeg

For the Cinnamon Topping

  • 1/4 cup / 50g sugar

  • 1 tsp cinnamon

Directions:

Oven 350°F / 177°C.  Greased 9x13in / 23x33cm pan. 

Make the Cake

  1. In a large bowl combine oil, sugar, eggs, and vanilla; beat.  Stir in chopped apples. 

  2. In a separate bowl whisk together flour, salt, baking soda, cinnamon, and nutmeg.  Add this mixture to first mixture and stir until combined.  Pour into prepared pan.

Make the Cinnamon Topping

  1. In a small bowl combine sugar and cinnamon.  Sprinkle evenly over batter in pan.

  2. Bake for 30-40 minutes or until toothpick inserted in the center comes out clean.  

Jenny's Notes:

  • My mom is very adverse to nuts in her desserts.  However, many people do enjoy nuts in their desserts, and if you do, a cup of chopped nuts added to the batter would do the trick.  You could also add about 1/2 cup chopped nuts to the topping.  *This note is not Jean-approved.  :)

Scrumptious Apple Cake
Yield 18-20
Author
Prep time
25 Min
Cook time
40 Min
Total time
1 H & 5 M

Scrumptious Apple Cake

A moist cake with apple chunks, a hint of nutmeg, and a gooey cinnamon sugar top.

Ingredients

For the Cake
For the Cinnamon Topping

Instructions

Make the Cake
  1. Oven 350°F / 177°C. Greased 9x13in / 23x33cm pan.
  2. In a large bowl combine oil, sugar, eggs, and vanilla; beat. Stir in chopped apples.
  3. In a separate bowl whisk together flour, salt, baking soda, cinnamon, and nutmeg. Add this mixture to first mixture and stir until combined. Pour into prepared pan.
Make the Cinnamon Topping
  1. In a small bowl combine sugar and cinnamon. Sprinkle evenly over batter in pan.
  2. Bake for 30-40 minutes or until toothpick inserted in the center comes out clean.

Notes

If you enjoy nuts in your desserts, a cup of chopped nuts added to the batter would do the trick. You could also add about 1/2 cup chopped nuts to the topping.

Nutrition Facts

Calories

299.52

Fat

13.26 g

Sat. Fat

1.03 g

Carbs

43.25 g

Fiber

1.16 g

Net carbs

42.09 g

Sugar

27.09 g

Protein

2.83 g

Sodium

178.26 mg

Cholesterol

20.67 mg

Nutritional information is approximate. Based on 18 servings.

quick bread, cinnamon sugar, apple cake, dessert, fall recipe, apple recipe
dessert
American
Did you make this recipe?
Tag @jennyblogsandbakes on instagram and hashtag it #jennyblogs
2016-09-25 14.09.03.jpg

Amaretto Mascarpone Coffee Cake

Guest Photography featuring Bailey Shoemaker

Guest Photography featuring Bailey Shoemaker

When my roommate Rachel moved back to the States at the at the end of June, it wasn't possible to take everything with her.  Some things got left behind, and I got to inherit them.  Dishes? Yay, I don't have to eat off my hands.  Laundry hamper?  Keeping all the dirty clothes in one place, I like it.  Coffee grinder?  Yahoo, fresh ground coffee in the morning!  And a of bottle Disaronno?? Oh, joy! What baking adventures lie before us, my sweet (literally), Italian made, amaretto flavored, almond liqueur? Maybe cupcakes, coffee cake, and cookies, oh my! 

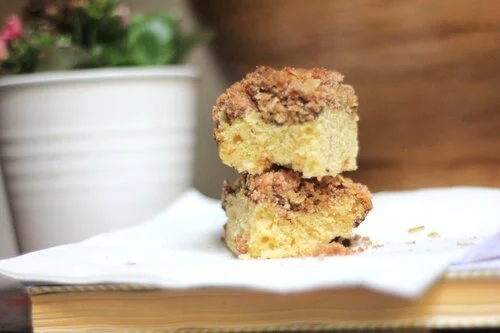
Today, coffee cake.  With a layer of slightly sweet mascarpone in the middle to balance the sweetness of the Disaronno and oatmeal crumble on top. 

This post may contain affiliate links. If you make a purchase using these links, Jennyblogs may receive a small commission, at no extra cost to you. This helps to support Jennyblogs. For further information see the privacy policy. Grazie!

Recipe adapted from Call Me PMc


Amaretto Mascarpone Coffee Cake

Makes 1 8in / 20cm coffee cake, about 12 servings

Ingredients:

For the Cake

  • 1 1/4 cups / 150g all-purpose flour

  • 1/2 cup / 100g sugar

  • 1/4 tsp baking soda

  • 1/4 tsp baking powder

  • 1/4 tsp salt

  • 1/4 cup / 56g oil

  • 1 whole egg + 1 egg white

  • 1/4 cup / 60g amaretto

  • 1/3 cup / 79g buttermilk or sour milk

For the Mascarpone Filling

  • 8 oz / 225g mascarpone, room temperature

  • 1/4 cup / 50g sugar

  • 1 egg yolk

For the Oat Streusel

  • 1 cup / 120g all-purpose flour

  • 3/4 cup / 150g sugar

  • 1/2 cup / 45g oats

  • 1/4 tsp salt

  • 1/2 cup / 113g butter, room temperature

Directions:

Oven 325°F / 163°C.  Grease well either an 8in / 20cm spring-form pan or 8x8in / 20x20cm square pan. 

Make the cake

  1. In a large bowl or the bowl of a stand mixer, combine flour, sugar, baking soda, baking powder, and salt.  Add oil and mix until crumbly.  Add eggs, milk, and amaretto and beat until smooth. 

  2. Pour half of this batter into prepared pan.  Set remaining half aside while you make the mascarpone filling.

Make the Mascarpone Filling

  1. In the bowl of a stand mixer or with a handheld mixer, beat mascarpone, sugar, and yolk just until creamy.  Pour over cake batter in pan and carefully spread to edges. 

  2. Pour remaining cake batter over mascarpone filling and spread to edges. 

Make the Oat Streusel

  1. In a medium bowl combine flour, sugar, oats, and salt.  Cut in the butter with a pastry cutter, fork, or clean hands.  Combine until coarse crumbs form.  Evenly crumble over the top of the cake batter in pan.

  2. Bake cake for 25-30 minutes or until center is almost set but still has a slight jiggle to it.  Allow to cool completely before slicing and serving. 

Jenny's Notes:

  • Don't have mascarpone on hand, but do have cream cheese?  They can usually be substituted for each other, and certainly in this case if you wish.  Mascarpone is a decadently creamy Italian cheese, a touch thicker than cream cheese, but it is the same price here as the cream cheese, if not cheaper.  Despite what you've probably heard most of your life, even sadly from chefs and cooks on TV, it is not pronounced mas-car-pone nor mars-cah-pone, but mas-car-pone-NAY.  Let that Italian fly free and pronounce the hard E at the end!

  • You can get creative with what type of liqueur or liquor you use in this coffee cake!  Bailey's, rum, Kahlua, Triple Sec...

  • I suggest serving (to the adults, of course!) with hot coffee with a splash of milk and amaretto...your very own caffè corretto!  Caffè corretto means "corrected coffee."  Because we all know, coffee without alcohol isn't correct...haha.

Amaretto Mascarpone Coffee Cake
Yield 12 servings
Author
Prep time
45 Min
Cook time
21 Min
Total time
1 H & 6 M

Amaretto Mascarpone Coffee Cake

Moist coffee cake flavored with amaretto liqueur and a decadent mascarpone filling, topped with an oat streusel
Cook modePrevent screen from turning off
Ingredients

For the Cake
For the Mascarpone Filling
For the Oat Streusel

Instructions

Make the Cake
  1. Oven 325°F / 163°C. Grease well either an 8in / 20cm spring-form or 8x8in / 20x20cm square pan.
  2. In a large bowl or the bowl of a stand mixer, combine flour, sugar, baking soda, baking powder, and salt. Add oil and mix until crumbly. Add eggs, milk, and amaretto and beat until smooth.
  3. Pour half of this batter into prepared pan. Set remaining half aside while you make the mascarpone filling.
Make the Mascarpone Filling
  1. In the bowl of a stand mixer or with a handheld mixer, beat mascarpone, sugar, and yolk just until creamy. Pour over cake batter in pan and carefully spread to edges.
  2. Pour remaining cake batter over mascarpone filling and spread to edges.
Make the Oat Streusel
  1. In a medium bowl combine flour, sugar, oats, and salt. Cut in the butter with a pastry cutter, fork, or clean hands. Combine until coarse crumbs form. Evenly crumble over the top of the cake batter in pan.
  2. Bake cake for 25-30 minutes or until center is almost set but still has a slight jiggle to it. Allow to cool completely before slicing and serving.

Notes

Don't have mascarpone on hand, but do have cream cheese? They can usually be substituted for each other, and certainly in this case if you wish. Mascarpone is a decadently creamy Italian cheese, a touch thicker than cream cheese, but it is the same price here in Italy as the cream cheese, if not cheaper. You can get creative with what type of liqueur or liquor you use in this coffee cake! Bailey's, rum, Kahlua, Triple Sec...

Nutrition Facts

Calories

414.77

Fat

22.26 g

Sat. Fat

10.64 g

Carbs

47.32 g

Fiber

0.99 g

Net carbs

46.33 g

Sugar

27.48 g

Protein

5.34 g

Sodium

305.52 mg

Cholesterol

77.06 mg

Nutritional information is approximate. Based on 12 servings.

coffee cake, cream cheese coffee cake recipe, mascarpone coffee cake, amaretto, disaronno, oat streusel
breakfast, dessert, brunch, cake
American
Did you make this recipe?
Tag @jennyblogsandbakes on instagram and hashtag it #jennyblogs

Banana Cupcakes with Chocolate Cream Cheese Frosting

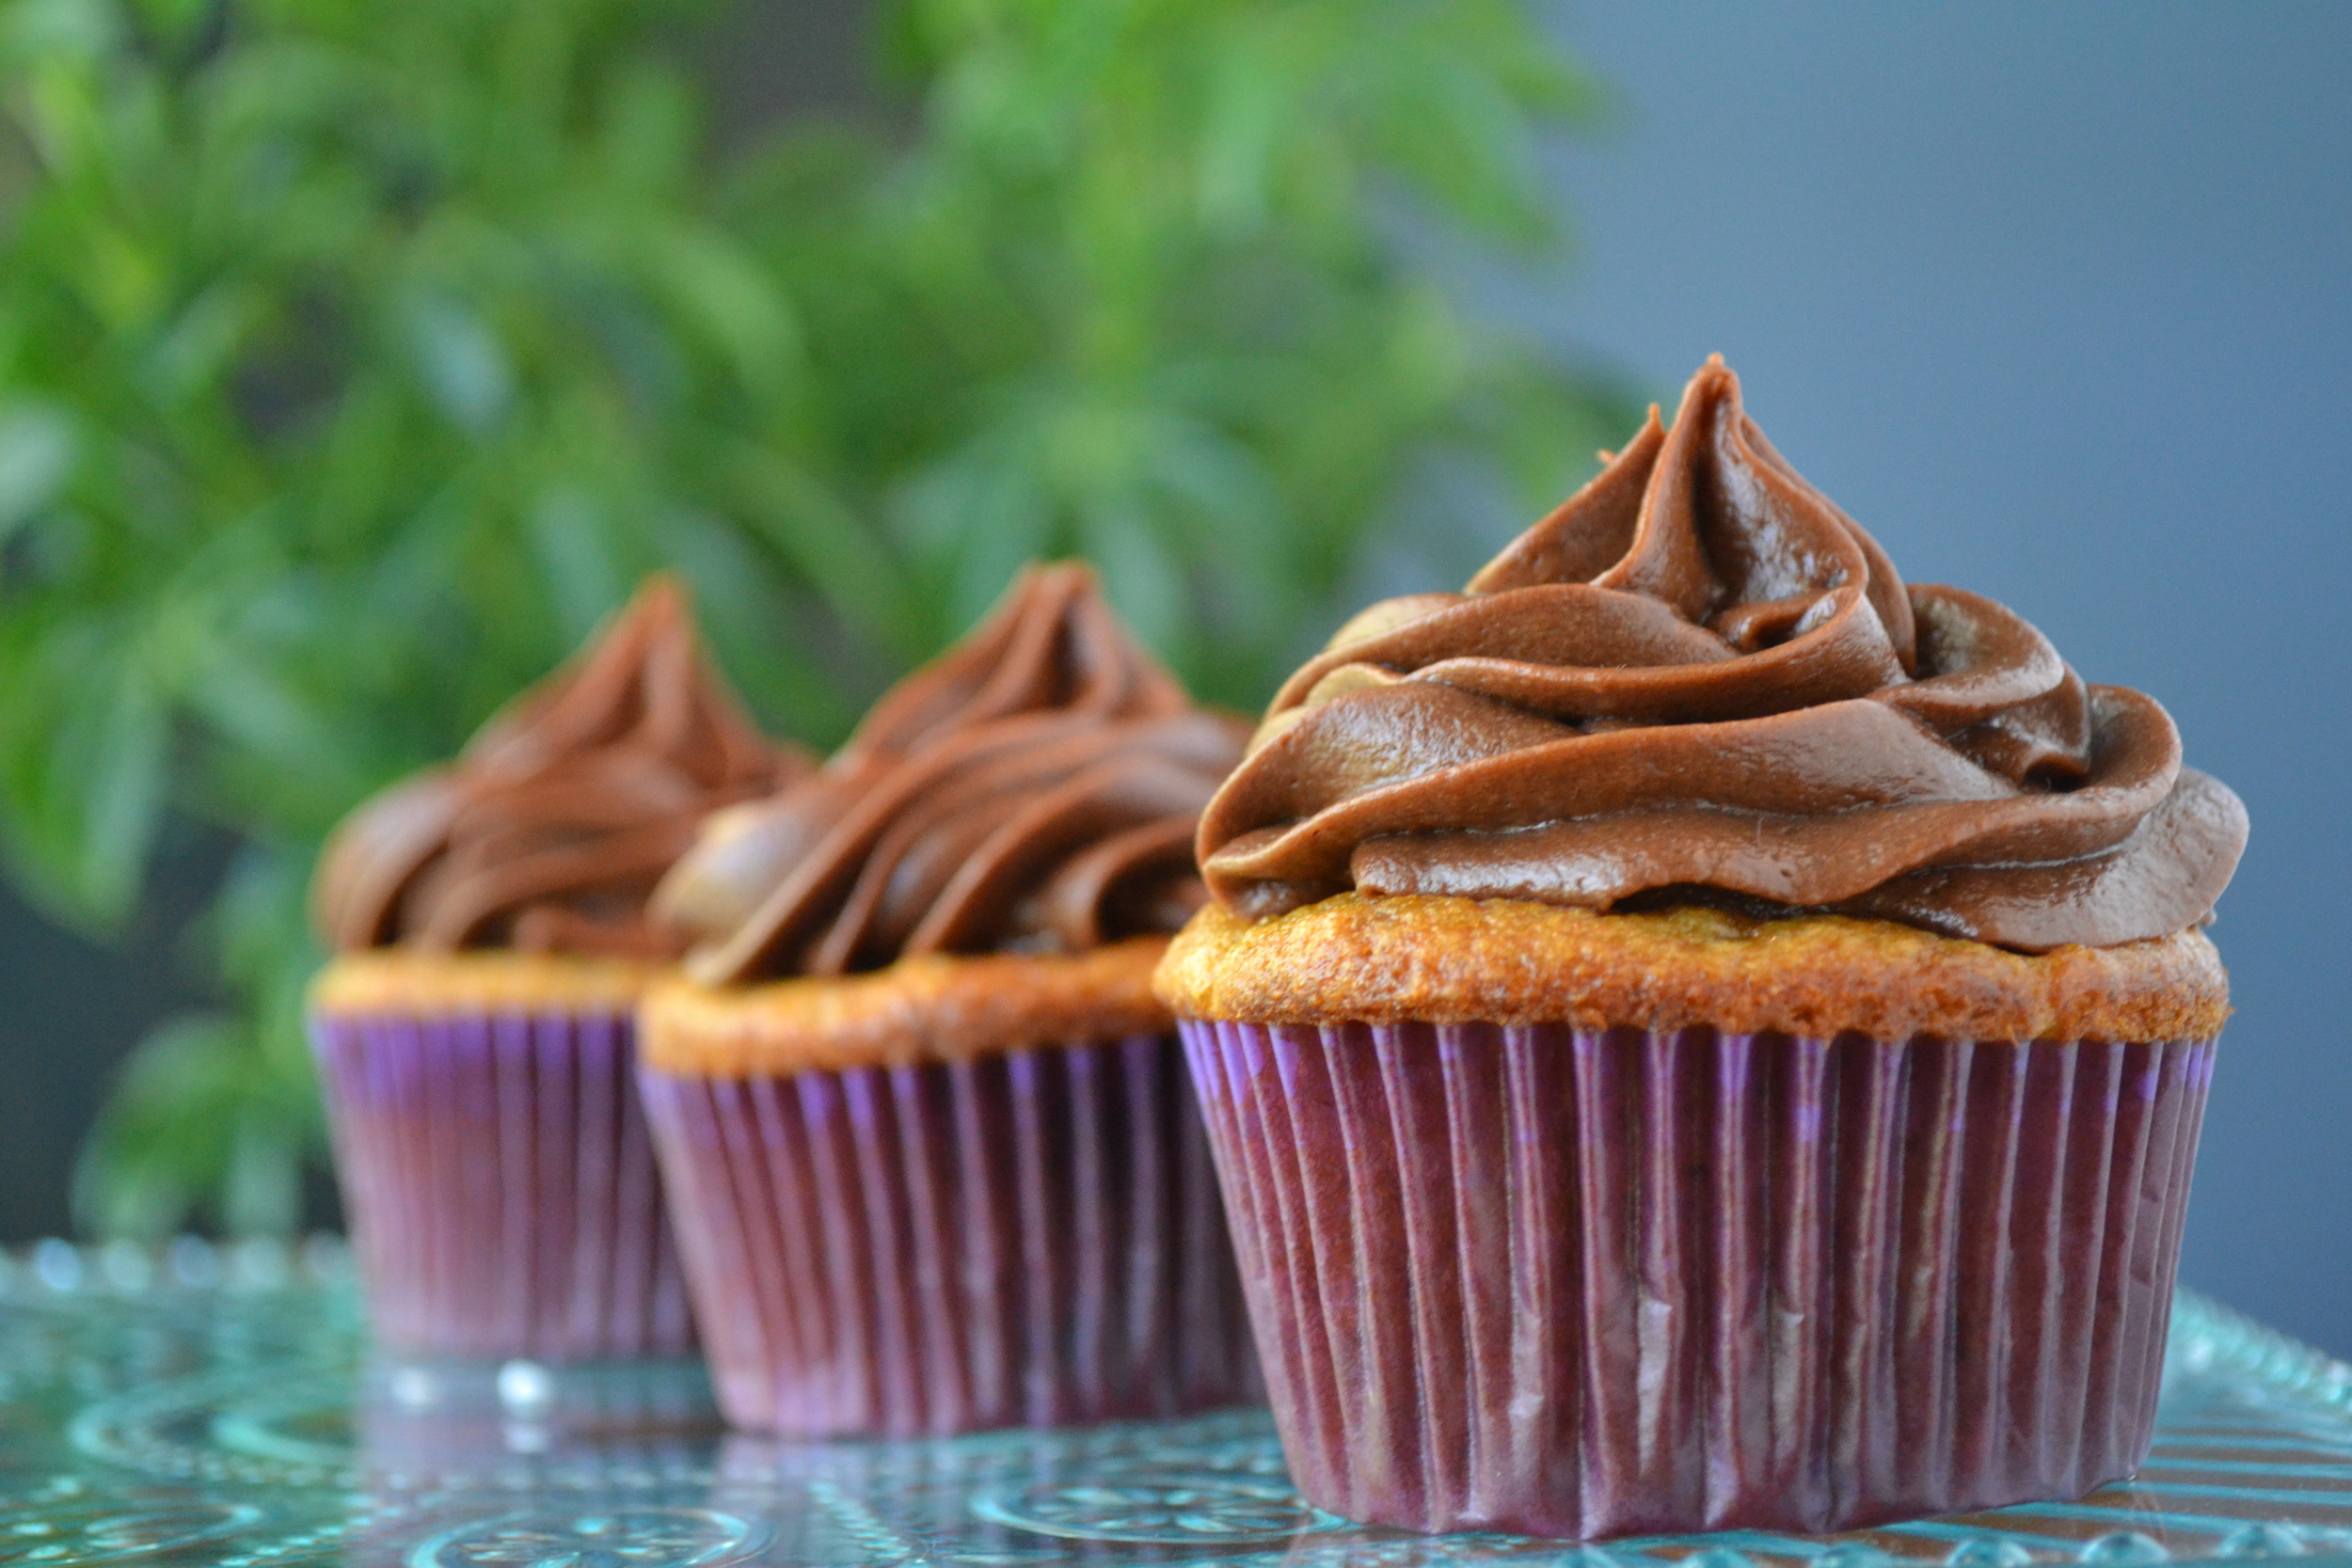
Banana cupcakes! Your friendly neighborhood cupcake made soft and moist with the humble browned bananas that otherwise would’ve been thrown away. A delicious dessert that avoids waste, I love it. Not to mention, these throw in chopped Reese’s cups to make them that much more delicious.

What kind of frosting do you put on banana cupcakes? That’s a great question that I present to you with an answer: CHOCOLATE CREAM CHEESE FROSTING.

Cream cheese frosting is the staple frosting for pumpkin cake, carrot cake, spice cake, and red velvet cake. I’m starting to think it should be for banana cake, too.

(Warning, rabbit trail: I really think people like red velvet cake for the cream cheese frosting.  After all, red velvet cake is more of a barely chocolate cake with a bottle of red food coloring.  The original recipe wasn't originally artificially colored.  The color came from a natural reaction between some of the ingredients, but somewhere along the line someone decided to add a bottle of poison [aka Red Dye #40] to make it more red.  Boo.  So you will probably never see a red velvet recipe on this blog, unless it's colored with beets or something.  I'm so sorry, but red velvet is overrated. #unpopularopinion.  But cream cheese frosting is not!  It's wonderful and tangy and creamy and delicious.  And if you add chocolate to it?  Ohhhh.)

Chocolate cream cheese frosting is new to my repertoire.  If it's not a part of yours, then might I suggest you make this now and let the soft tang of the cream cheese awaken your taste buds while the smoothness of the chocolate soothes them over?  And it goes really well on these Banana Peanut Butter Cup Cupcakes.  Nom nom nom.

This post may contain affiliate links. If you make a purchase using these links, Jennyblogs may receive a small commission, at no extra cost to you. This helps to support Jennyblogs. For further information see the privacy policy. Grazie!


Banana Cupcakes

Ingredients:

For the Banana Peanut Butter Cup Cupcakes

  • 1 cup / 120g all-purpose flour

  • 1/2 tsp baking powder

  • 1/2 tsp baking soda

  • 1/4 tsp salt

  • 1/4 cup + 2 / 84g Tbsp oil

  • scant 1/2 cup / 80g sugar

  • 1/4 cup / 61g vanilla yogurt

  • 1 1/2 tsp / 8g vanilla extract

  • 2 eggs

  • 2 medium ripe bananas, peeled and well mashed

  • 6 Reese's Cups, chopped small (about 1 cup)

For the Chocolate Cream Cheese Frosting

  • 1/2 cup / 113g unsalted butter (1 stick), room temperature

  • 1 8 oz / 225g package cream cheese, room temperature

  • 1/4 cup / 25g unsweetened cocoa powder

  • 3 oz / 90g semi-sweet chocolate, melted and cooled

  • 1 tsp / 5g vanilla extract

  • 3 cups / 360g powdered sugar

  • 1 -2 Tbsp / 15-30g milk

Directions:

Make the cupcakes

  1. Oven preheated to 350°F / 177°C.  Grease a 12 cup muffin tin or line with cupcake liners

  2. In a medium bowl whisk together flour, baking powder, baking soda, and salt. 

  3. In the bowl of a stand mixer mix together oil and sugar.  Add yogurt and vanilla.  Beat in eggs one at a time.  Slowly incorporate dry mixture into the wet mixture until thoroughly combined.  Stir in mashed bananas and Reese's. 

  4. Using a measuring cup or ice cream scoop, fill each cupcake about 3/4 full.  Bake for 18-20 minutes, or until tops or lightly golden brown and a toothpick inserted in the center comes out clean. 

  5. Allow cupcakes to cool for about 5 minutes in the pan, then remove onto a wire rack to cool completely. 

Make the frosting

  1. While the cupcakes are cooling, beat cream cheese and butter together in the bowl of a stand mixer until light and fluffy, about 2-3 minutes.

  2. Add cocoa powder slowly so as not to create a cocoa powder cloud.  Then stir in cooled chocolate and vanilla until combined.  Slowly beat in powdered sugar.  Add in enough milk, 1-2 Tbsp, to make a spreadable or pipe-able frosting. 

  3. Frost cooled cupcakes and top with more chopped Reese's, if desired. 

Jenny's Notes:

  • Banana cupcakes are very moist by nature, so be sure they get their full baking time.  Normally I would recommend taking cupcakes out of the oven when there are still small crumbs clinging to the toothpick, but not with banana cupcakes.  You want to make sure the toothpick is clean. 

  • I would recommend chopping the Reese's for the cupcakes small.  Too big and they will sink, too fine and they will get lost in the cupcake. 

  • You can easily substitute plain yogurt or sour cream for the vanilla yogurt in the cupcake recipe, just add a level 1/2 cup of sugar instead of the scant 1/2 cup.  (Scant in the baking world means "just less than" the designated amount.)

Banana Cupcakes with Chocolate Cream Cheese Frosting
Yield 12
Author
Prep time
50 Min
Cook time
20 Min
Total time
1 H & 10 M

Banana Cupcakes with Chocolate Cream Cheese Frosting

Classic, moist banana cupcakes with chunks of Reese's Peanut Butter Cups topped with chocolate cream cheese frosting
Cook modePrevent screen from turning off

Ingredients

For the Banana Peanut Butter Cup Cupcakes
For the Chocolate Cream Cheese Frosting

Instructions

Make the cupcakes
  1. Oven preheated to 350°F / 177°C. Grease a 12 cup muffin tin or line with cupcake liners
  2. In a medium bowl whisk together flour, baking powder, baking soda, and salt.
  3. In the bowl of a stand mixer mix together oil and sugar. Add yogurt and vanilla. Beat in eggs one at a time. Slowly incorporate dry mixture into the wet mixture until thoroughly combined. Stir in mashed bananas and Reese's.
  4. Using a measuring cup or ice cream scoop, fill each cupcake about 3/4 full. Bake for 18-20 minutes, or until tops or lightly golden brown and a toothpick inserted in the center comes out clean.
  5. Allow cupcakes to cool for about 5 minutes in the pan, then remove onto a wire rack to cool completely.
Make the frosting
  1. While the cupcakes are cooling, beat cream cheese and butter together in the bowl of a stand mixer until light and fluffy, about 2-3 minutes.
  2. Add cocoa powder slowly so as not to create a cocoa powder cloud. Then stir in cooled chocolate and vanilla until combined. Slowly beat in powdered sugar. Add in enough milk, 1-2 Tbsp, to make a spreadable or pipe-able frosting.
  3. Frost cooled cupcakes and top with more chopped Reese's, if desired.

Notes

  • Banana cupcakes are very moist by nature, so be sure they get their full baking time.  Normally I would recommend taking cupcakes out of the oven when there are still small crumbs clinging to the toothpick, but not with banana cupcakes.  You want to make sure the toothpick is clean. 
  • I would recommend chopping the Reese's for the cupcakes small.  Too big and they will sink, too fine and they will get lost in the cupcake. 
  • You can easily substitute plain yogurt or sour cream for the vanilla yogurt in the cupcake recipe, just add a level 1/2 cup of sugar instead of the scant 1/2 cup.  (Scant in the baking world means "just less than" the designated amount.)


Nutrition Facts

Calories

486.88

Fat

25.42 g

Sat. Fat

11.97 g

Carbs

62.19 g

Fiber

2.33 g

Net carbs

59.85 g

Sugar

48.38 g

Protein

5.41 g

Sodium

228.69 mg

Cholesterol

68.13 mg

Nutritional Information is approximate. Based on 1 cupcake.

cupcakes, banana muffins, banana cupcakes, banana peanut butter cup cupcakes, Reese's, chocolate cream cheese frosting
dessert
American
Did you make this recipe?
Tag @jennyblogsandbakes on instagram and hashtag it #jennyblogs