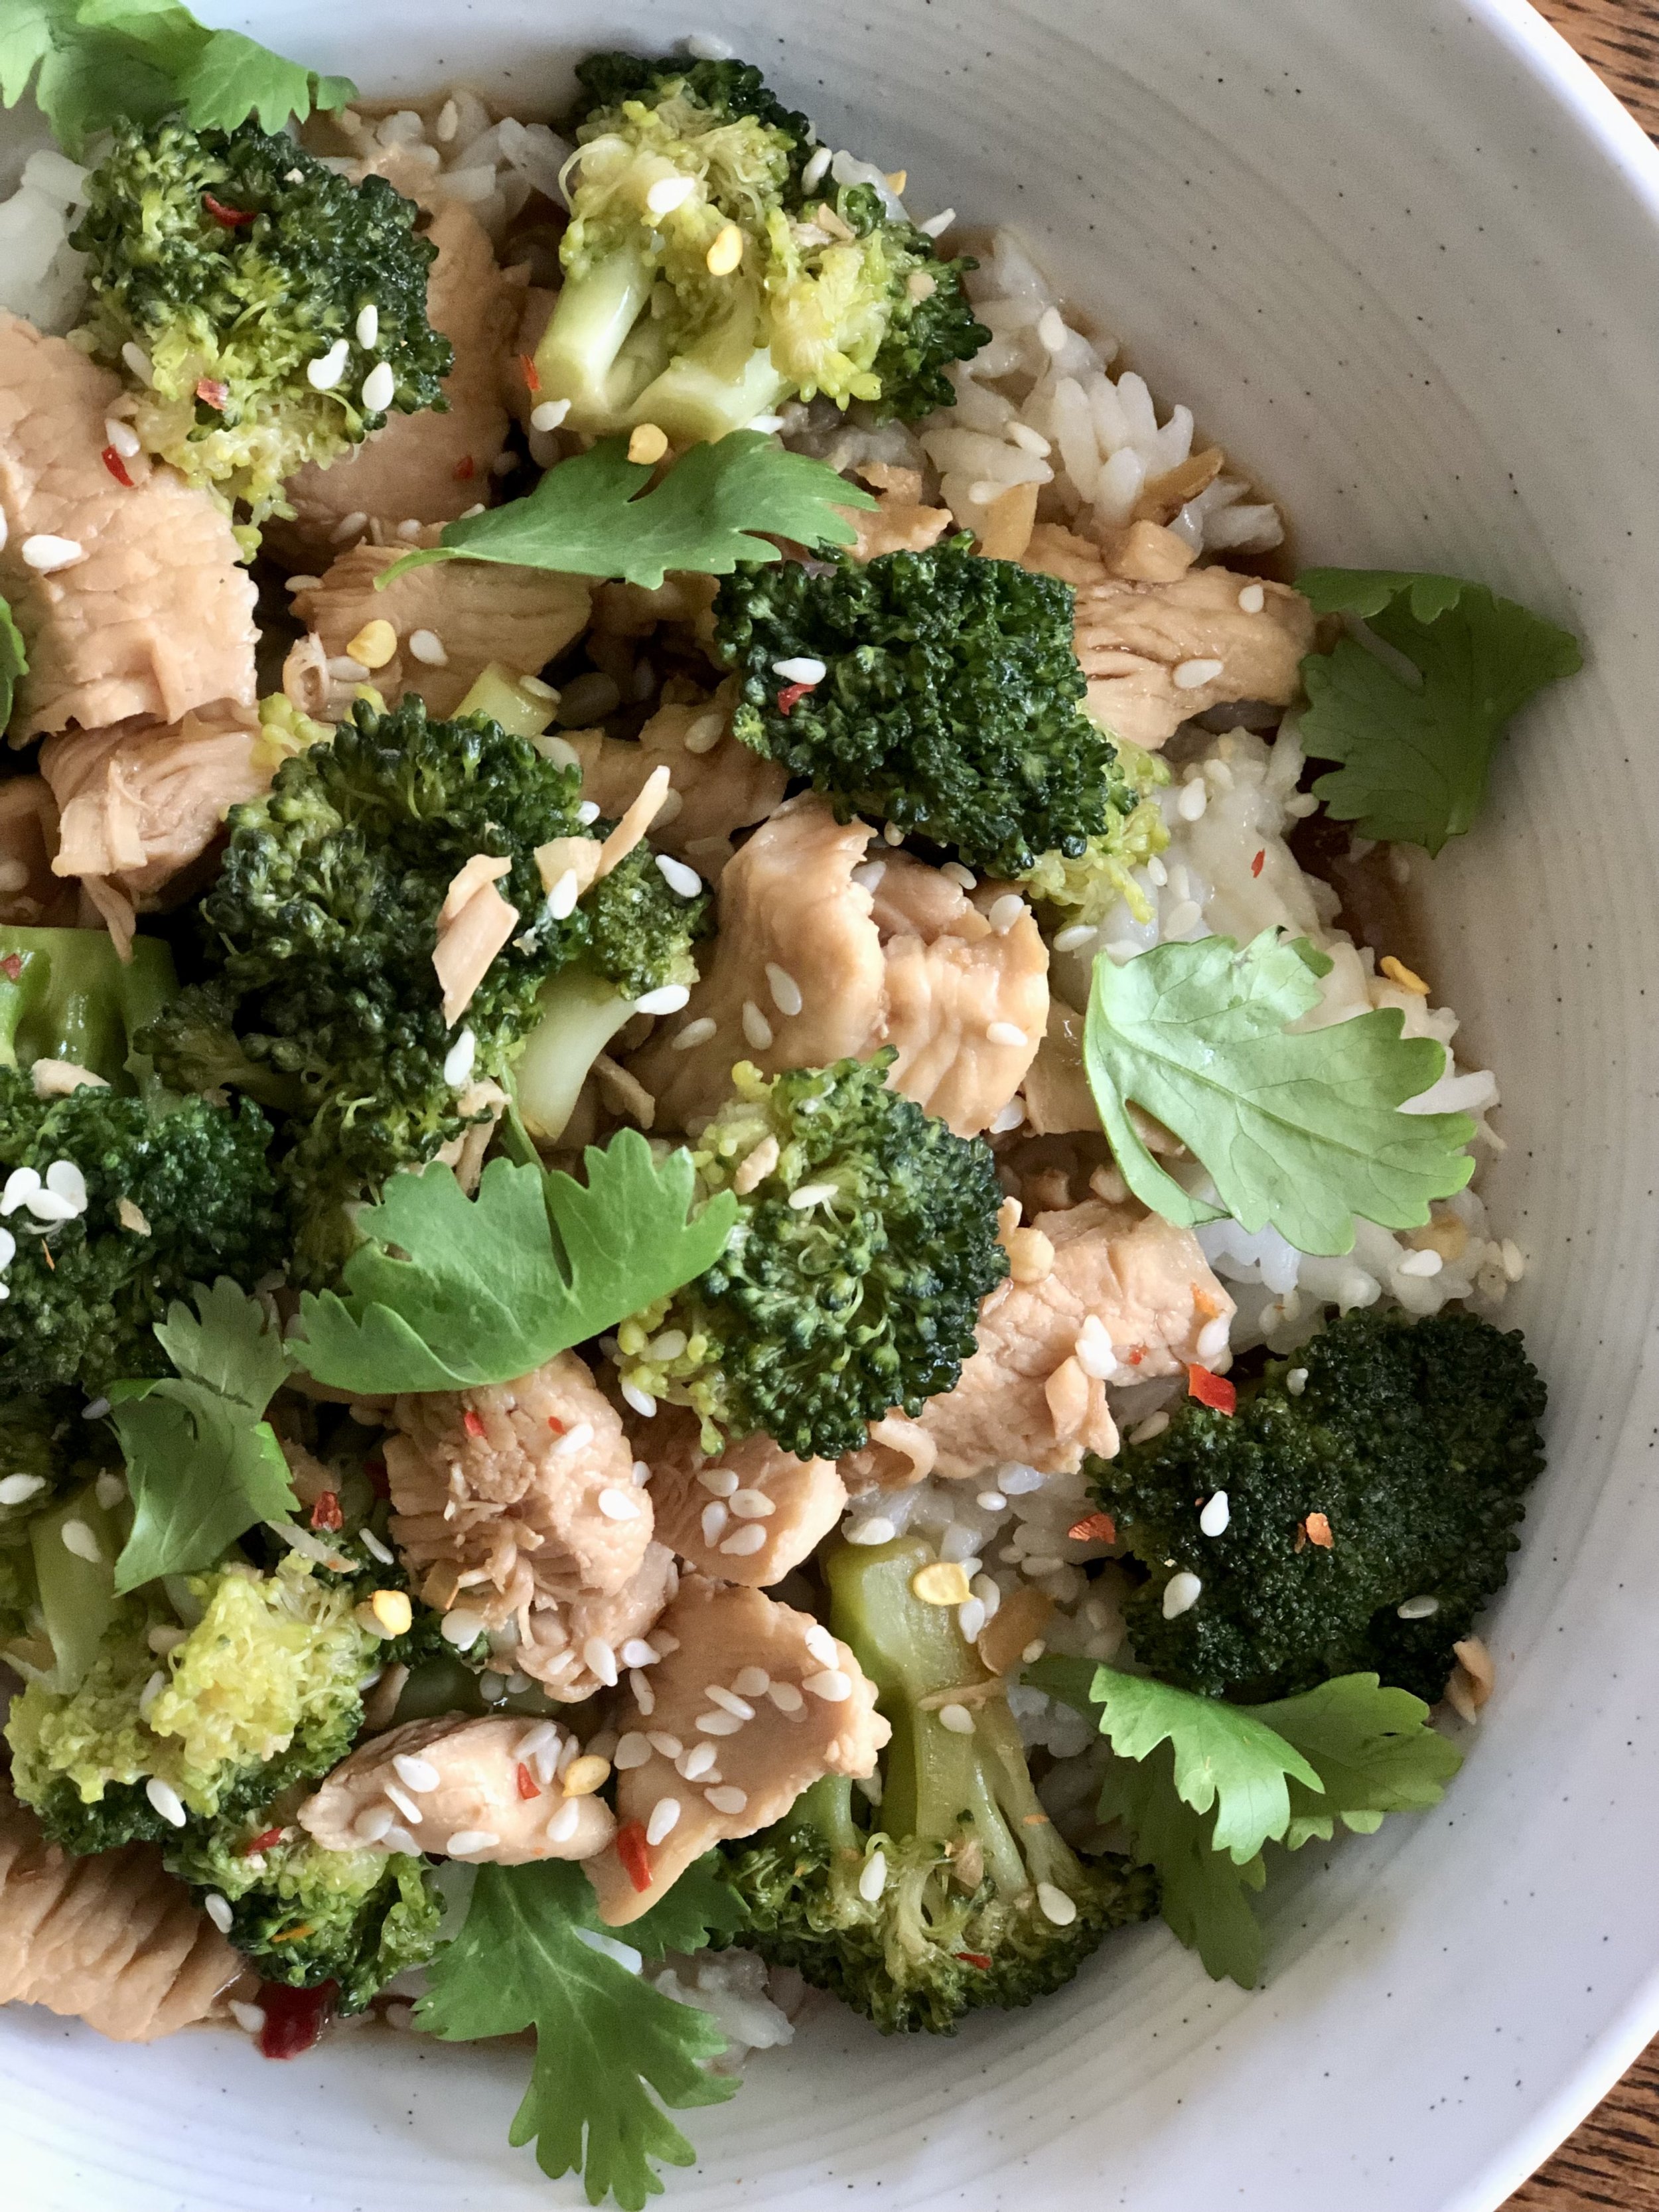
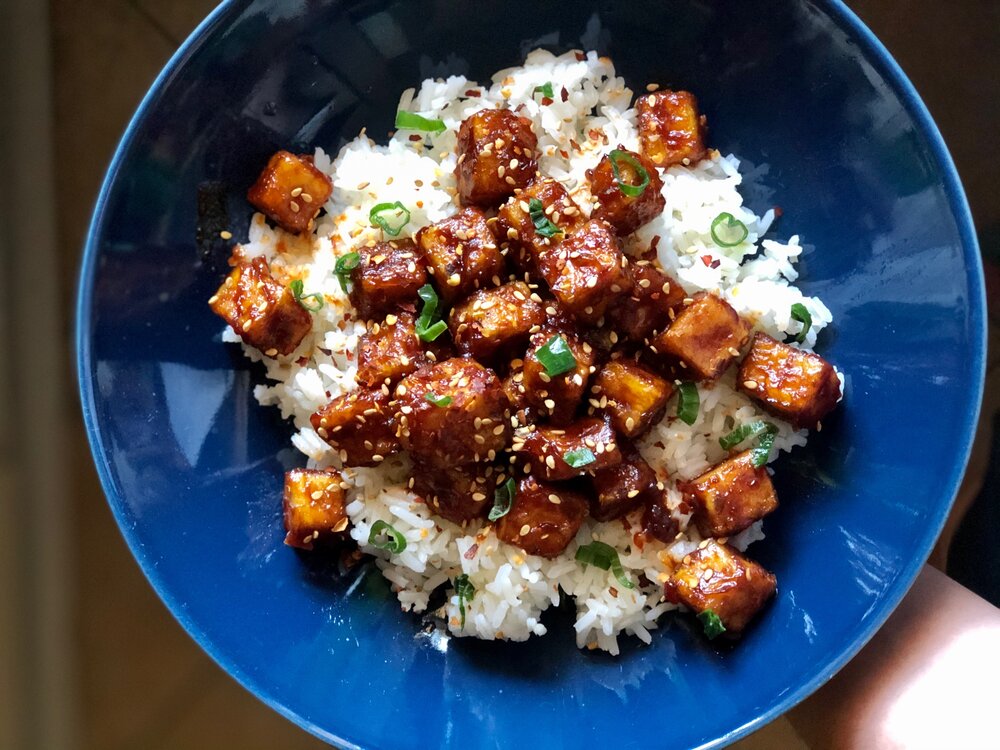
Chicken and Broccoli Stir Fry

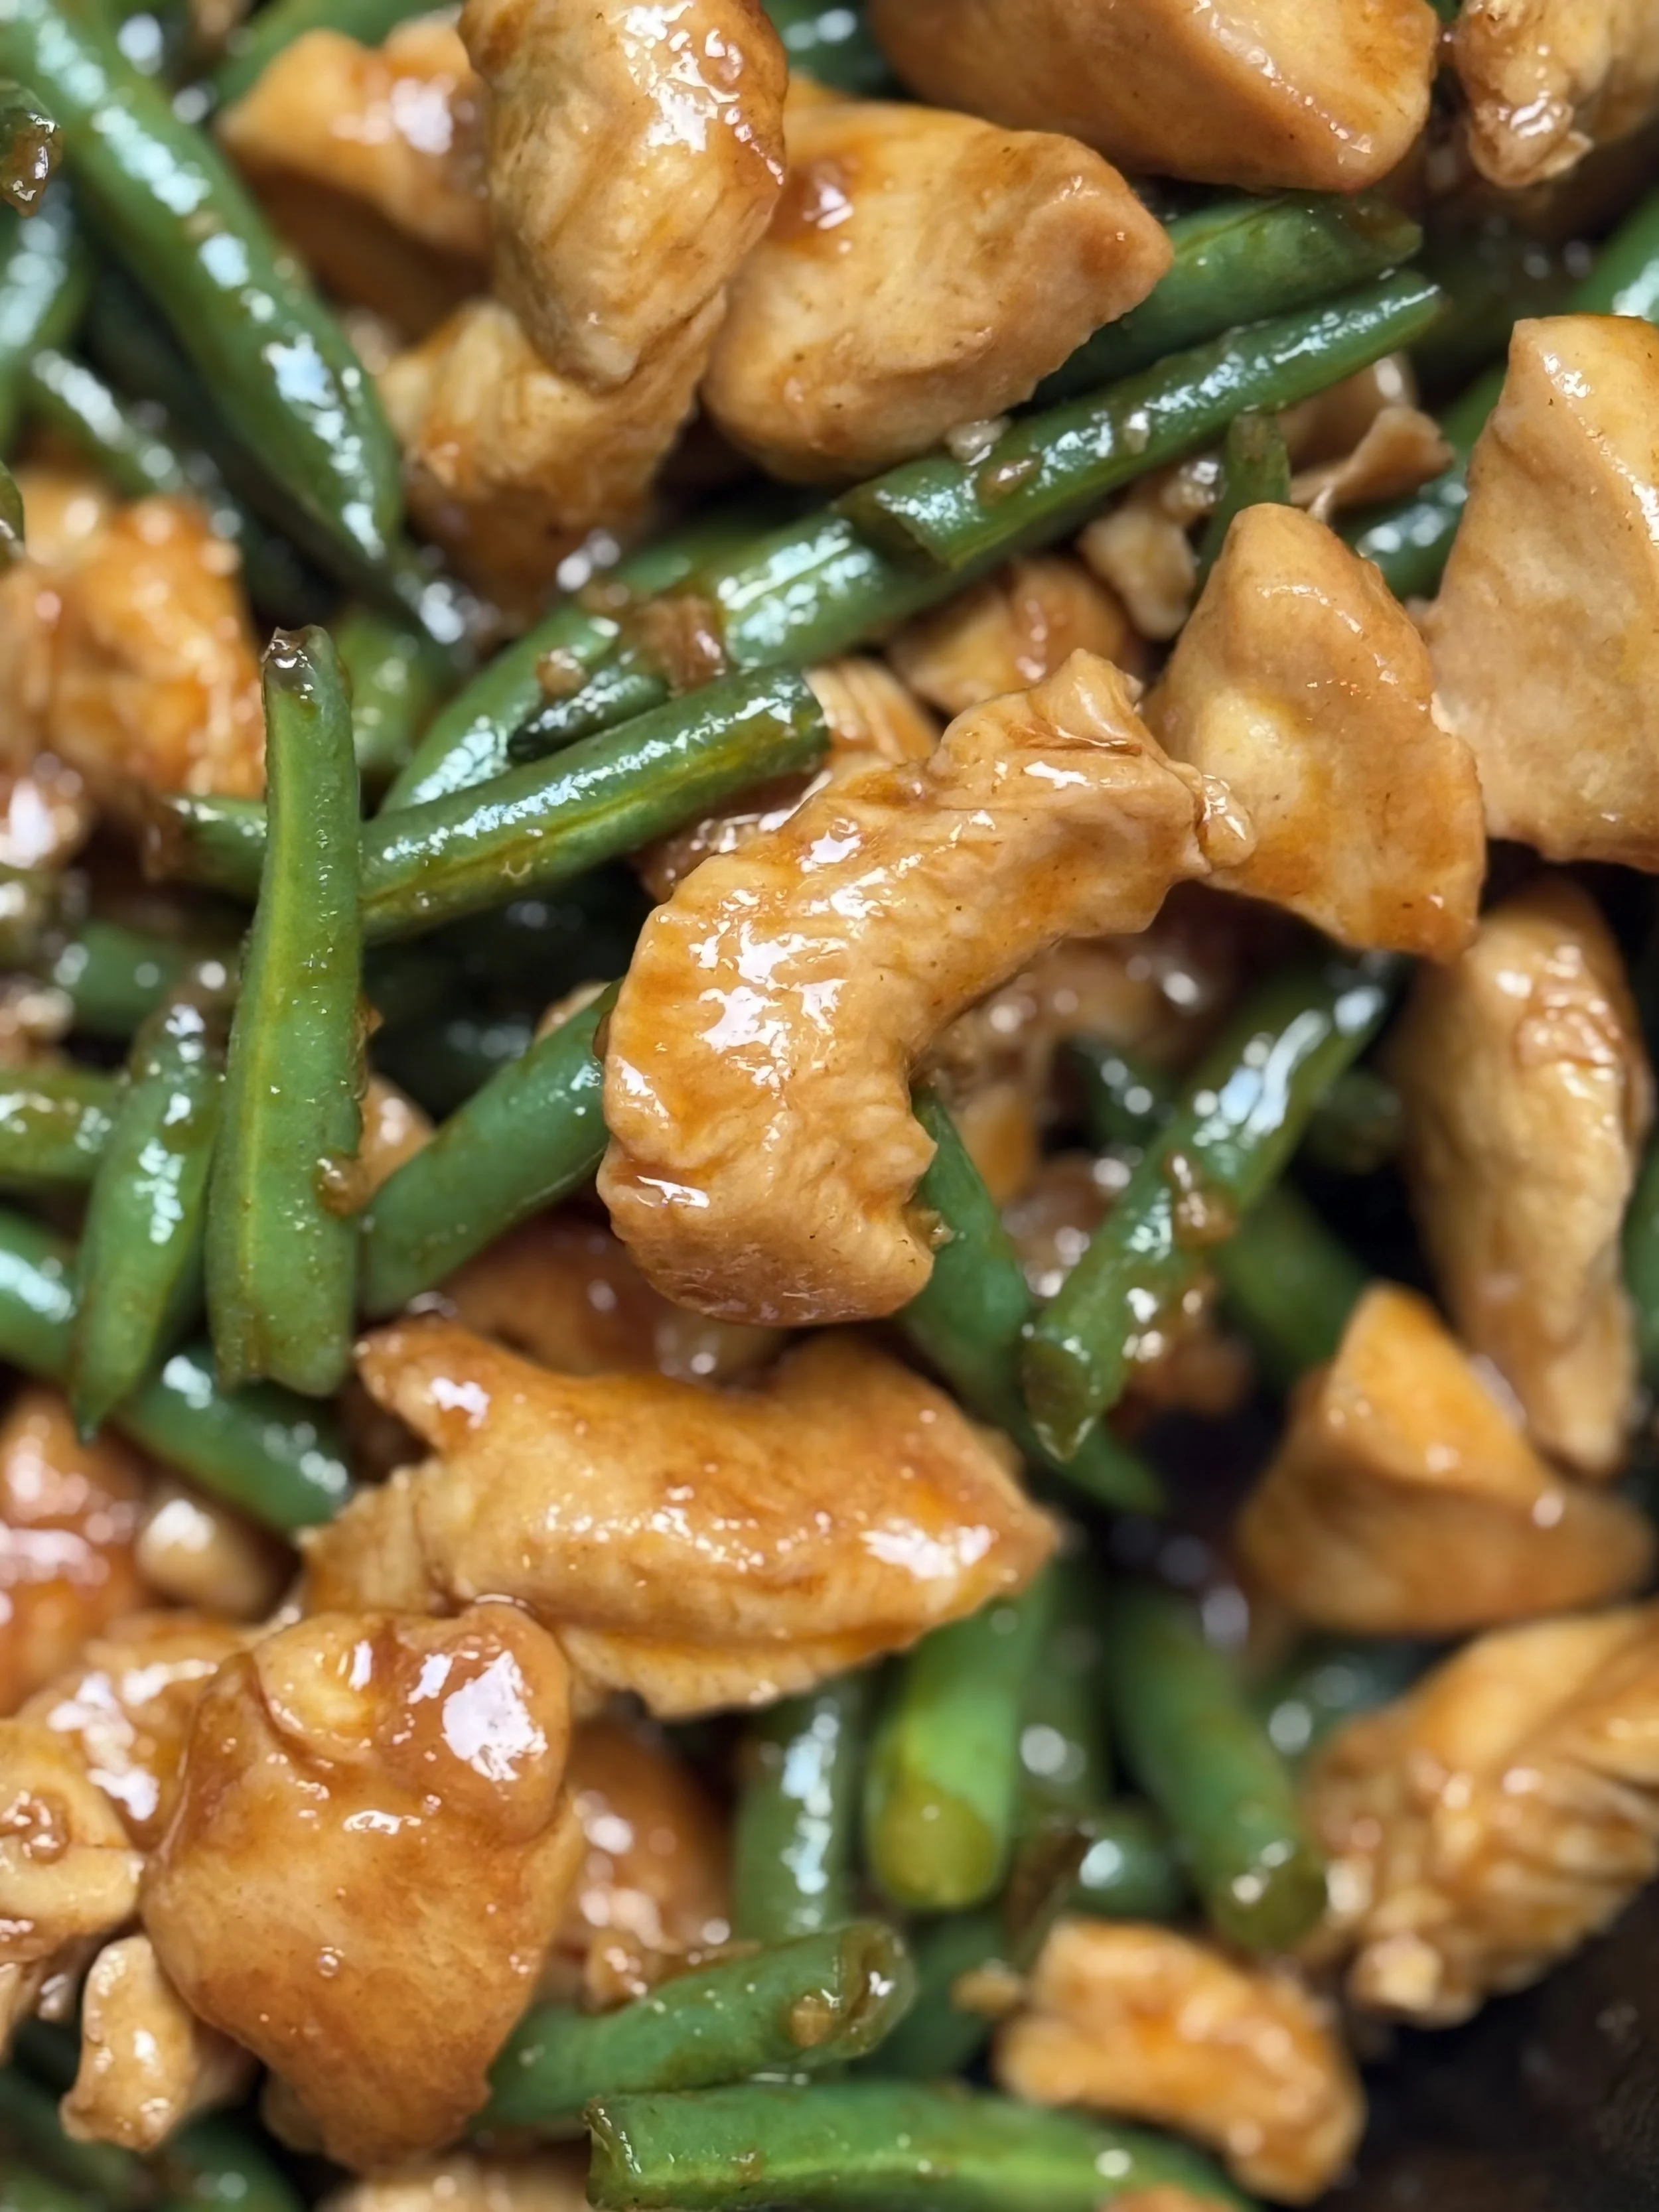
Bite-sized morsels of chicken and lightly crunchy broccoli pieces tossed in a salty and sweet stir fry sauce makes for a dinner that tastes like take-out, but is actually quite quick and easy.

We eat a lot of chicken and broccoli around here, so it only makes sense that we make a chicken and broccoli stir fry. In fact, the Tofu and Broccoli Stir Fry is very much based on this recipe, we just use tofu instead of chicken for meatless meals.

The chicken is lightly battered in cornstarch, which helps to thicken the sauce once it’s added. The sauce is initially just 3 ingredients whisked together: broth, soy sauce, and sugar. Then, the chicken is cooked up, some garlic and ginger are added for aroma, and finally, the sauce. The broccoli is added in just at the very end, and steams up in 2-3 minutes. Tada! Simple enough for all but the busiest of evenings, and delicious to boot.

This post may contain affiliate links. If you make a purchase using these links, Jennyblogs may receive a small commission, at no extra cost to you. This helps to support Jennyblogs. Where possible, links are prioritized to small businesses and ethically and responsibly made items. For further information see the privacy policy. Grazie!

Recipe from my Mama


Chicken and Broccoli Stir-Fry

Serves about 3-4

Ingredients:

  • 1 cup / 237g vegetable or chicken broth

  • 3 Tbsp / 42g soy sauce

  • 2 tsp / 10g sugar

  • 1lb / 454g chicken breasts, cut into bite-sized piece

  • 2 Tbsp / 15g cornstarch

  • oil, for pan

  • 2 teaspoons grated fresh ginger

  • 2 garlic cloves, minced

  • 2 cups broccoli florets

  • Red pepper flakes, sesame seeds, sliced green onions, lime wedges, fresh mint, etc. for topping, as desired

Directions:

  1. Combine broth, soy sauce, and sugar; set aside.

  2. Toss chicken with cornstarch.

  3. Generously drizzle an iron skillet or other large pan with oil; place over medium-high heat.

  4. Add chicken, stirring frequently, until internal temperature reaches 165°F / 74°C, about 3-5 minutes.

  5. Reduce heat to low; add ginger and garlic; stir, until fragrant and sizzling, about a minute.

  6. Add in broth mixture and stir occasionally, until starting to simmer.

  7. Add in broccoli, cover, and let sit for 2 minutes for “al dente” broccoli, or a couple more minutes for softer broccoli.

  8. Remove from heat. Serve over rice with desired garnishes.

Chicken and Broccoli Stir-Fry
Yield 3-4
Author
Prep time
15 Min
Cook time
15 Min
Total time
30 Min

Chicken and Broccoli Stir-Fry

Bite-sized morsels of chicken and lightly crunchy broccoli pieces tossed in a salty and sweet stir fry sauce makes for a quick and easy dinner that tastes like take-out!
Cook modePrevent screen from turning off

Ingredients

Instructions

  1. Combine broth, soy sauce, and sugar; set aside.
  2. Toss chicken with cornstarch.
  3. Generously drizzle an iron skillet or other large pan with oil; place over medium-high heat.
  4. Add chicken, stirring frequently, until internal temperature reaches 165°F / 74°C, about 3-5 minutes.
  5. Reduce heat to low; add ginger and garlic; stir, until fragrant and sizzling, about a minute.
  6. Add in broth mixture and stir occasionally, until starting to simmer.
  7. Add in broccoli, cover, and let sit for 2 minutes for “al dente” broccoli, or a couple more minutes for softer broccoli.
  8. Remove from heat. Serve over rice with desired garnishes.

Nutrition Facts

Calories

286.74

Fat

9.11 g

Sat. Fat

1.3 g

Carbs

13.21 g

Fiber

2.07 g

Net carbs

11.14 g

Sugar

1.77 g

Protein

36.45 g

Sodium

1503.43 mg

Cholesterol

98.34 mg

Nutritional information is approximate, based on 1 serving of 3.

chicken stir fry, better than take-out, broccoli stir fry, sweet and sour stir fry, healthy stir fry
dinner
Asian
Did you make this recipe?
Tag @jennyblogsandbakes on instagram and hashtag it #jennyblogs

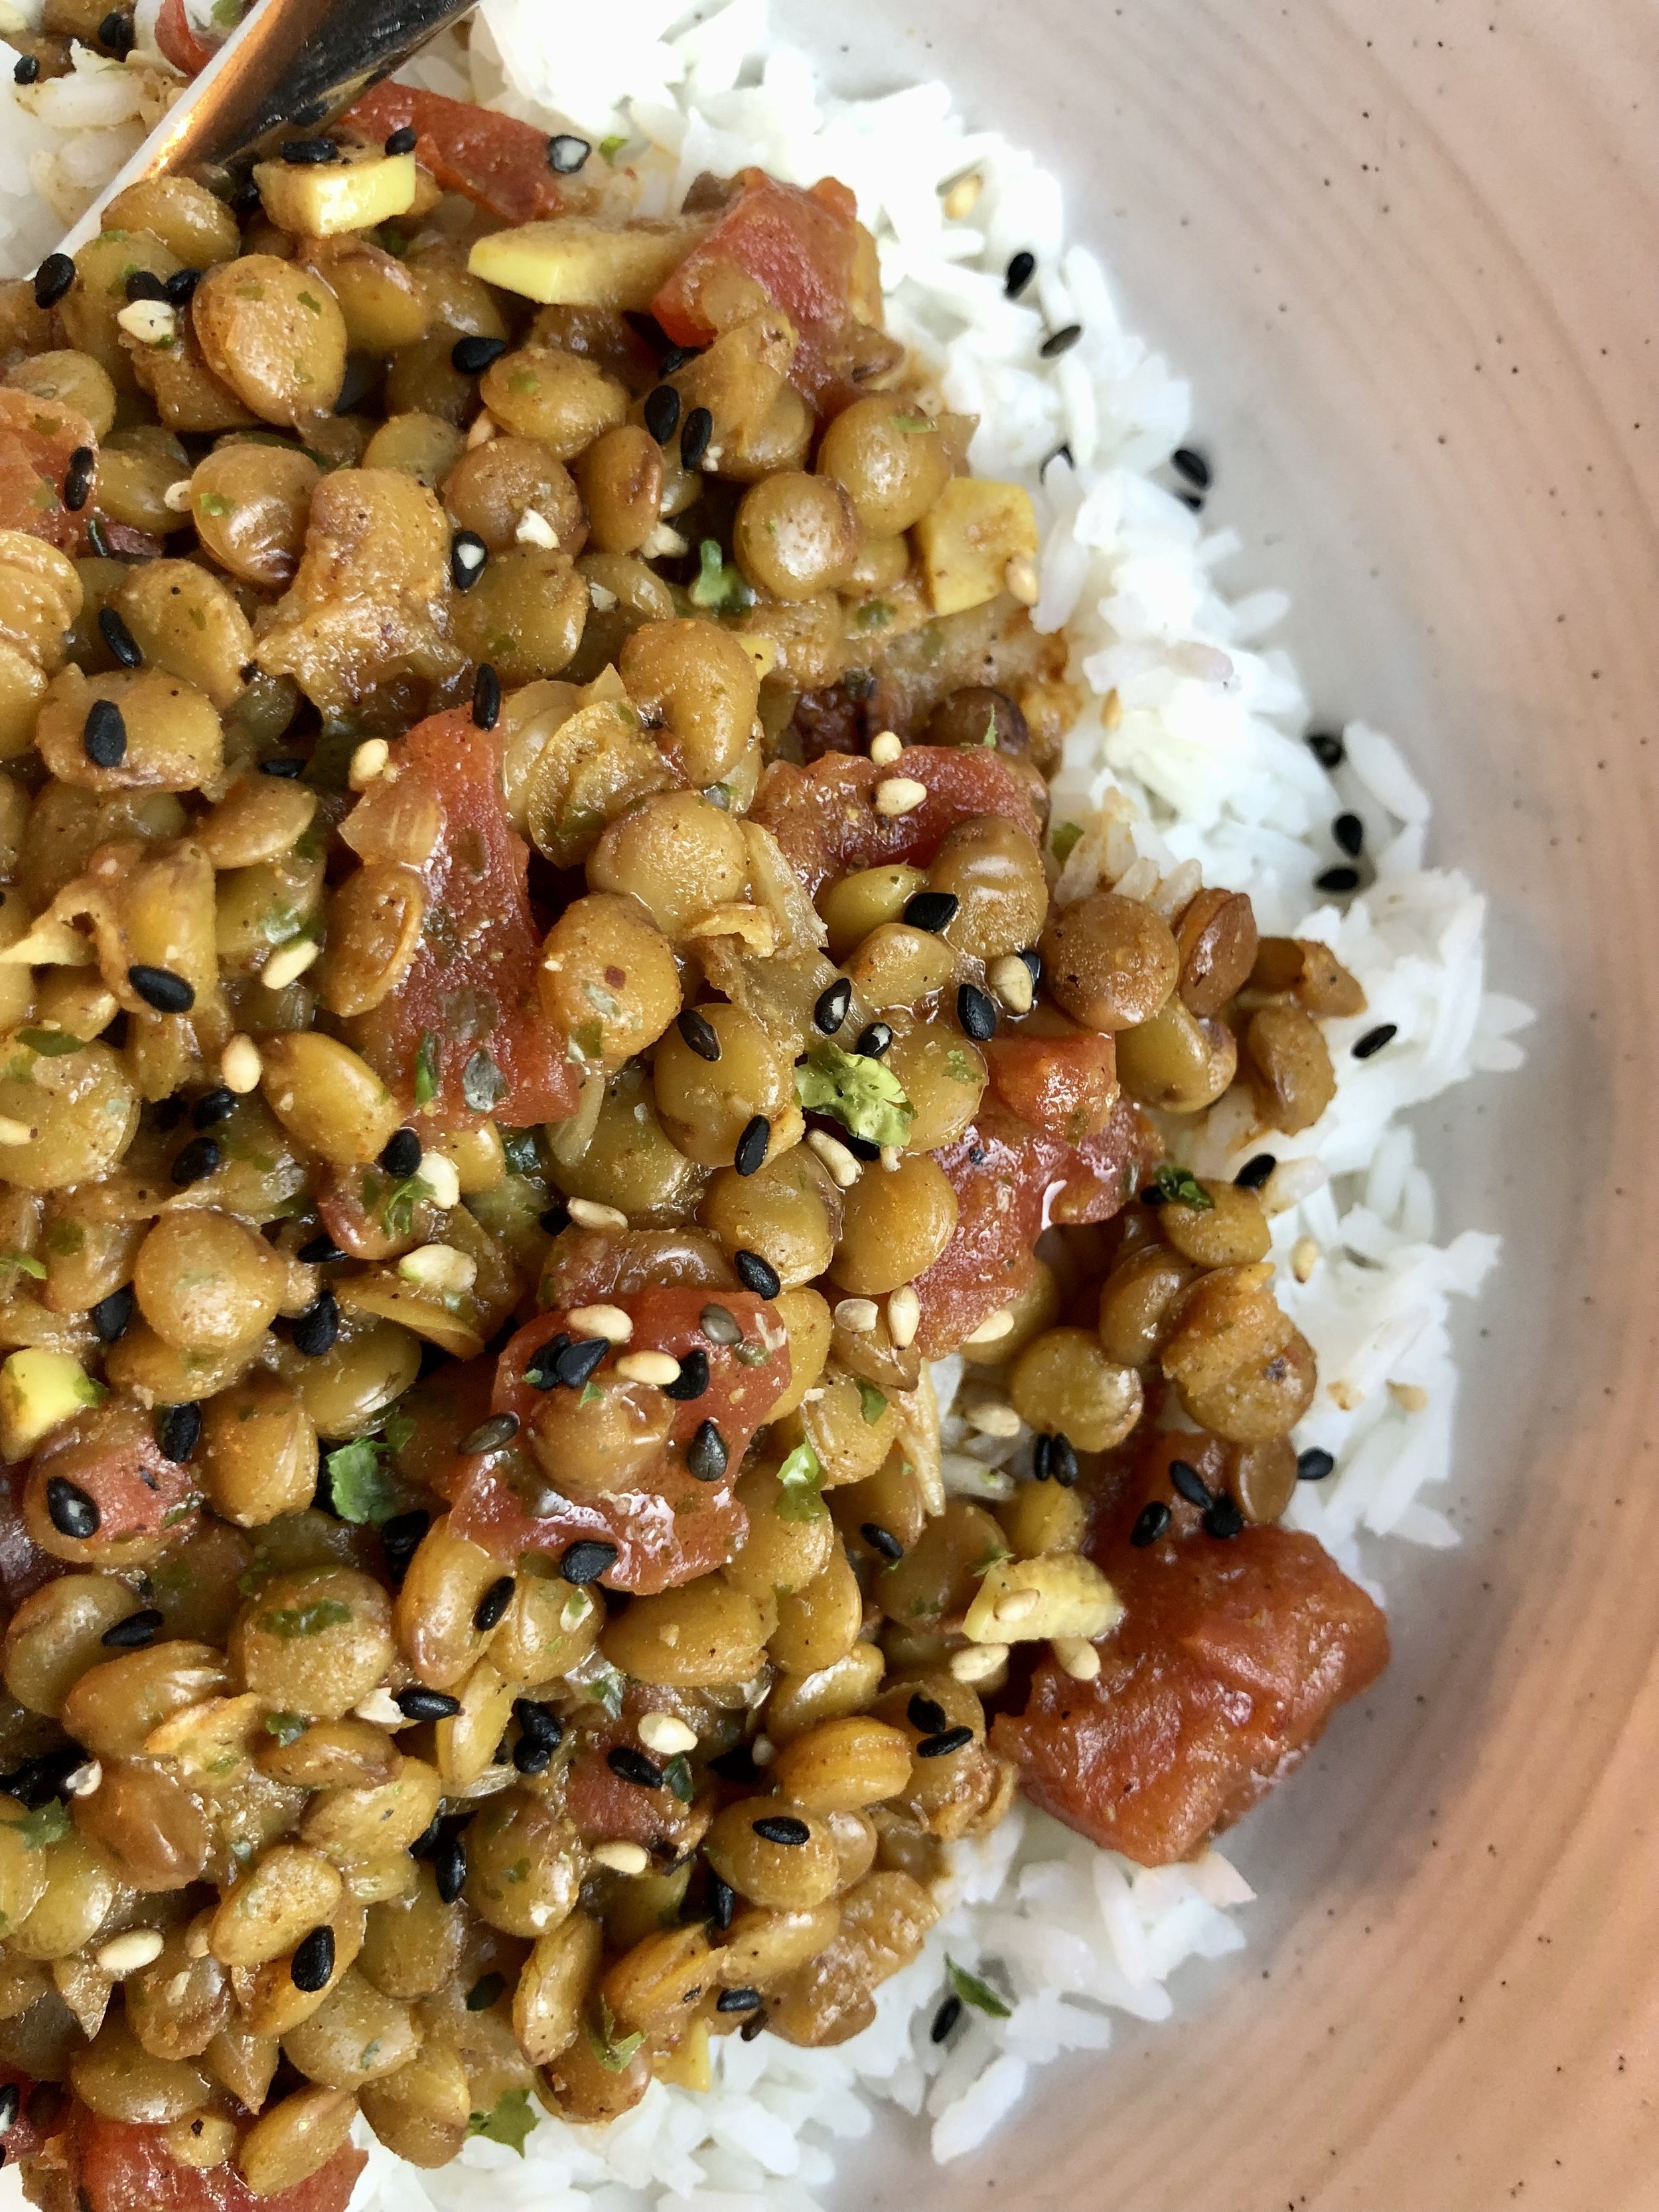
Cozy Lentil Curry

Cozy lentils cooked to perfection with flavors of ginger, garlic, and curry, served over rice. Easy, nutritious, and filling for when you want a comforting meal.

Something about August sits different. It’s still summer, yet somehow, inexplicably, you can feel that maybe before you’re ready, fall will be here. School starting, shorter evenings, cooler weather. Curries are one of my favorite cozy weather dishes. They’re easy to make and there are so many! While I love summer and all the summer no-cook or grilled dishes that go along with the season, I do start to miss cooking and hearty dishes. Those hot days where it’s too hot to turn on the oven are hard on me! Michigan summers are mild compared to Florentine summers, but I was still excited that this week held some cooler days that felt perfect for this lentil curry with rice.

I first started making this curry in Florence, I think it was during 2020 and have been making it regularly ever since. I love to add spinach to get in some vegetables, and I would often make it in a crockpot while also adding rice and more water straight to the crockpot; curried lentils and rice all cooked up together!

A note about ground coriander

While most of the ingredients in this recipe would be considered pantry staples, the biggest exception for me would be ground coriander. (Coconut milk might not be a staple for everyone, but if you make Asian dishes frequently it is!!) Now, a little pet peeve of mine is recipes that sound wonderful but call for one or more obscure ingredients that are “essential”, but also ones you’ll never use again. You know what I’m talking about, right? Well, normally I would be tempted to skip or find a substitute for ground coriander since that has never been a spice I’ve really used. The first time I made this recipe I somehow had coriander seeds in a spice grinder. It was a labor of love to hand grind 1 1/2 tsps, but I was surprised at how good it was! It’s not that you can taste the coriander itself, but the one time I didn’t have enough I could actually tell and missed the depth of flavor it lended. Bottom line, you can make this curry without it, but if you plan on making this again I would get yourself a bottle of ground coriander!

This post may contain affiliate links. If you make a purchase using these links, Jennyblogs may receive a small commission, at no extra cost to you. This helps to support Jennyblogs. Where possible, links are prioritized to small businesses and ethically and responsibly made items. For further information see the privacy policy. Grazie!

Recipe adapted from Janet’s Munch Meals


Cozy Lentil Curry

Serves 4-6

Ingredients:

  • 1 Tbsp oil

  • 1 onion or shallot, diced small

  • 4 garlic cloves, minced

  • 1 Tbsp grated fresh ginger

  • 1 Tbsp curry powder

  • 1 Tbsp cumin

  • 2 tsp chili powder or paprika

  • 1 1/2 tsp ground coriander

  • 1 cup / 210g dry lentils

  • 1 (15 oz) can diced or crushed tomatoes

  • 1 (14 oz) can coconut milk

  • 2 cups / 474g vegetable broth or water

  • salt and pepper to taste

  • Several handfuls of spinach, 100-200g spinach, finely chopped, optional

  • Rice, cilantro, red pepper flakes, sesame seeds, for serving, optional

Directions:

  1. Heat oil in a large pot over medium heat. Add onion and cook for several minutes, until translucent.

  2. Add garlic, ginger, curry, cumin, chili powder, and coriander and cook for about 3 minutes, until toasted and fragrant.

  3. Add lentils, tomatoes, coconut milk, broth, salt and pepper, and bring to a boil.

  4. Lower heat, cover, and allow to simmer for 25-30 minutes or until lentils are tender, stirring occasionally. Add more liquid at any point, if necessary.

  5. Stir in spinach and cook for another minute or two.

  6. Serve over rice with cilantro and red pepper flakes, as desired.

Jenny’s Notes:

  • This lentil curry can also be made in a crockpot: Place all ingredients in crockpot and stir. Cook on high for 4 hours or low for 8 hours, or until lentils are tender, stirring occasionally and adding any extra liquid as necessary.

Cozy Lentil Curry
Yield 4-6
Author
Prep time
5 Min
Cook time
45 Min
Total time
50 Min

Cozy Lentil Curry

Cozy lentils cooked to perfection with flavors of curry, ginger, and garlic, served over rice for a meal that is quick, nutritious, filling, and easy on the budget!
Cook modePrevent screen from turning off

Ingredients

Instructions

  1. Heat oil in a large pot over medium heat. Add onion and cook for several minutes, until translucent.
  2. Add garlic, ginger, curry, cumin, chili powder, and coriander and cook for about 3 minutes, until toasted and fragrant.
  3. Add lentils, tomatoes, coconut milk, broth, salt and pepper, and bring to a boil.
  4. Lower heat, cover, and allow to simmer for 25-30 minutes or until lentils are tender, stirring occasionally. Add more liquid at any point, if necessary.
  5. Stir in spinach and cook for another minute or two.
  6. Serve over rice with cilantro and red pepper flakes, as desired.

Notes

  • This lentil curry can also be made in a crockpot: Place all ingredients in crockpot and stir. Cook on high for 4 hours or low for 8 hours, or until lentils are tender, stirring occasionally and adding any extra liquid as necessary.

Nutrition Facts

Calories

497.79

Fat

29.02 g

Sat. Fat

21.57 g

Carbs

48.62 g

Fiber

20.69 g

Net carbs

27.95 g

Sugar

10.59 g

Protein

17.68 g

Sodium

705.08 mg

Cholesterol

0 mg

Nutritional information is approximate. Based on 4 servings, not including rice.

curried lentils, vegetarian, vegan, cheap meals, budget meals, curry
dinner
Asian
Did you make this recipe?
Tag @jennyblogsandbakes on instagram and hashtag it #jennyblogs

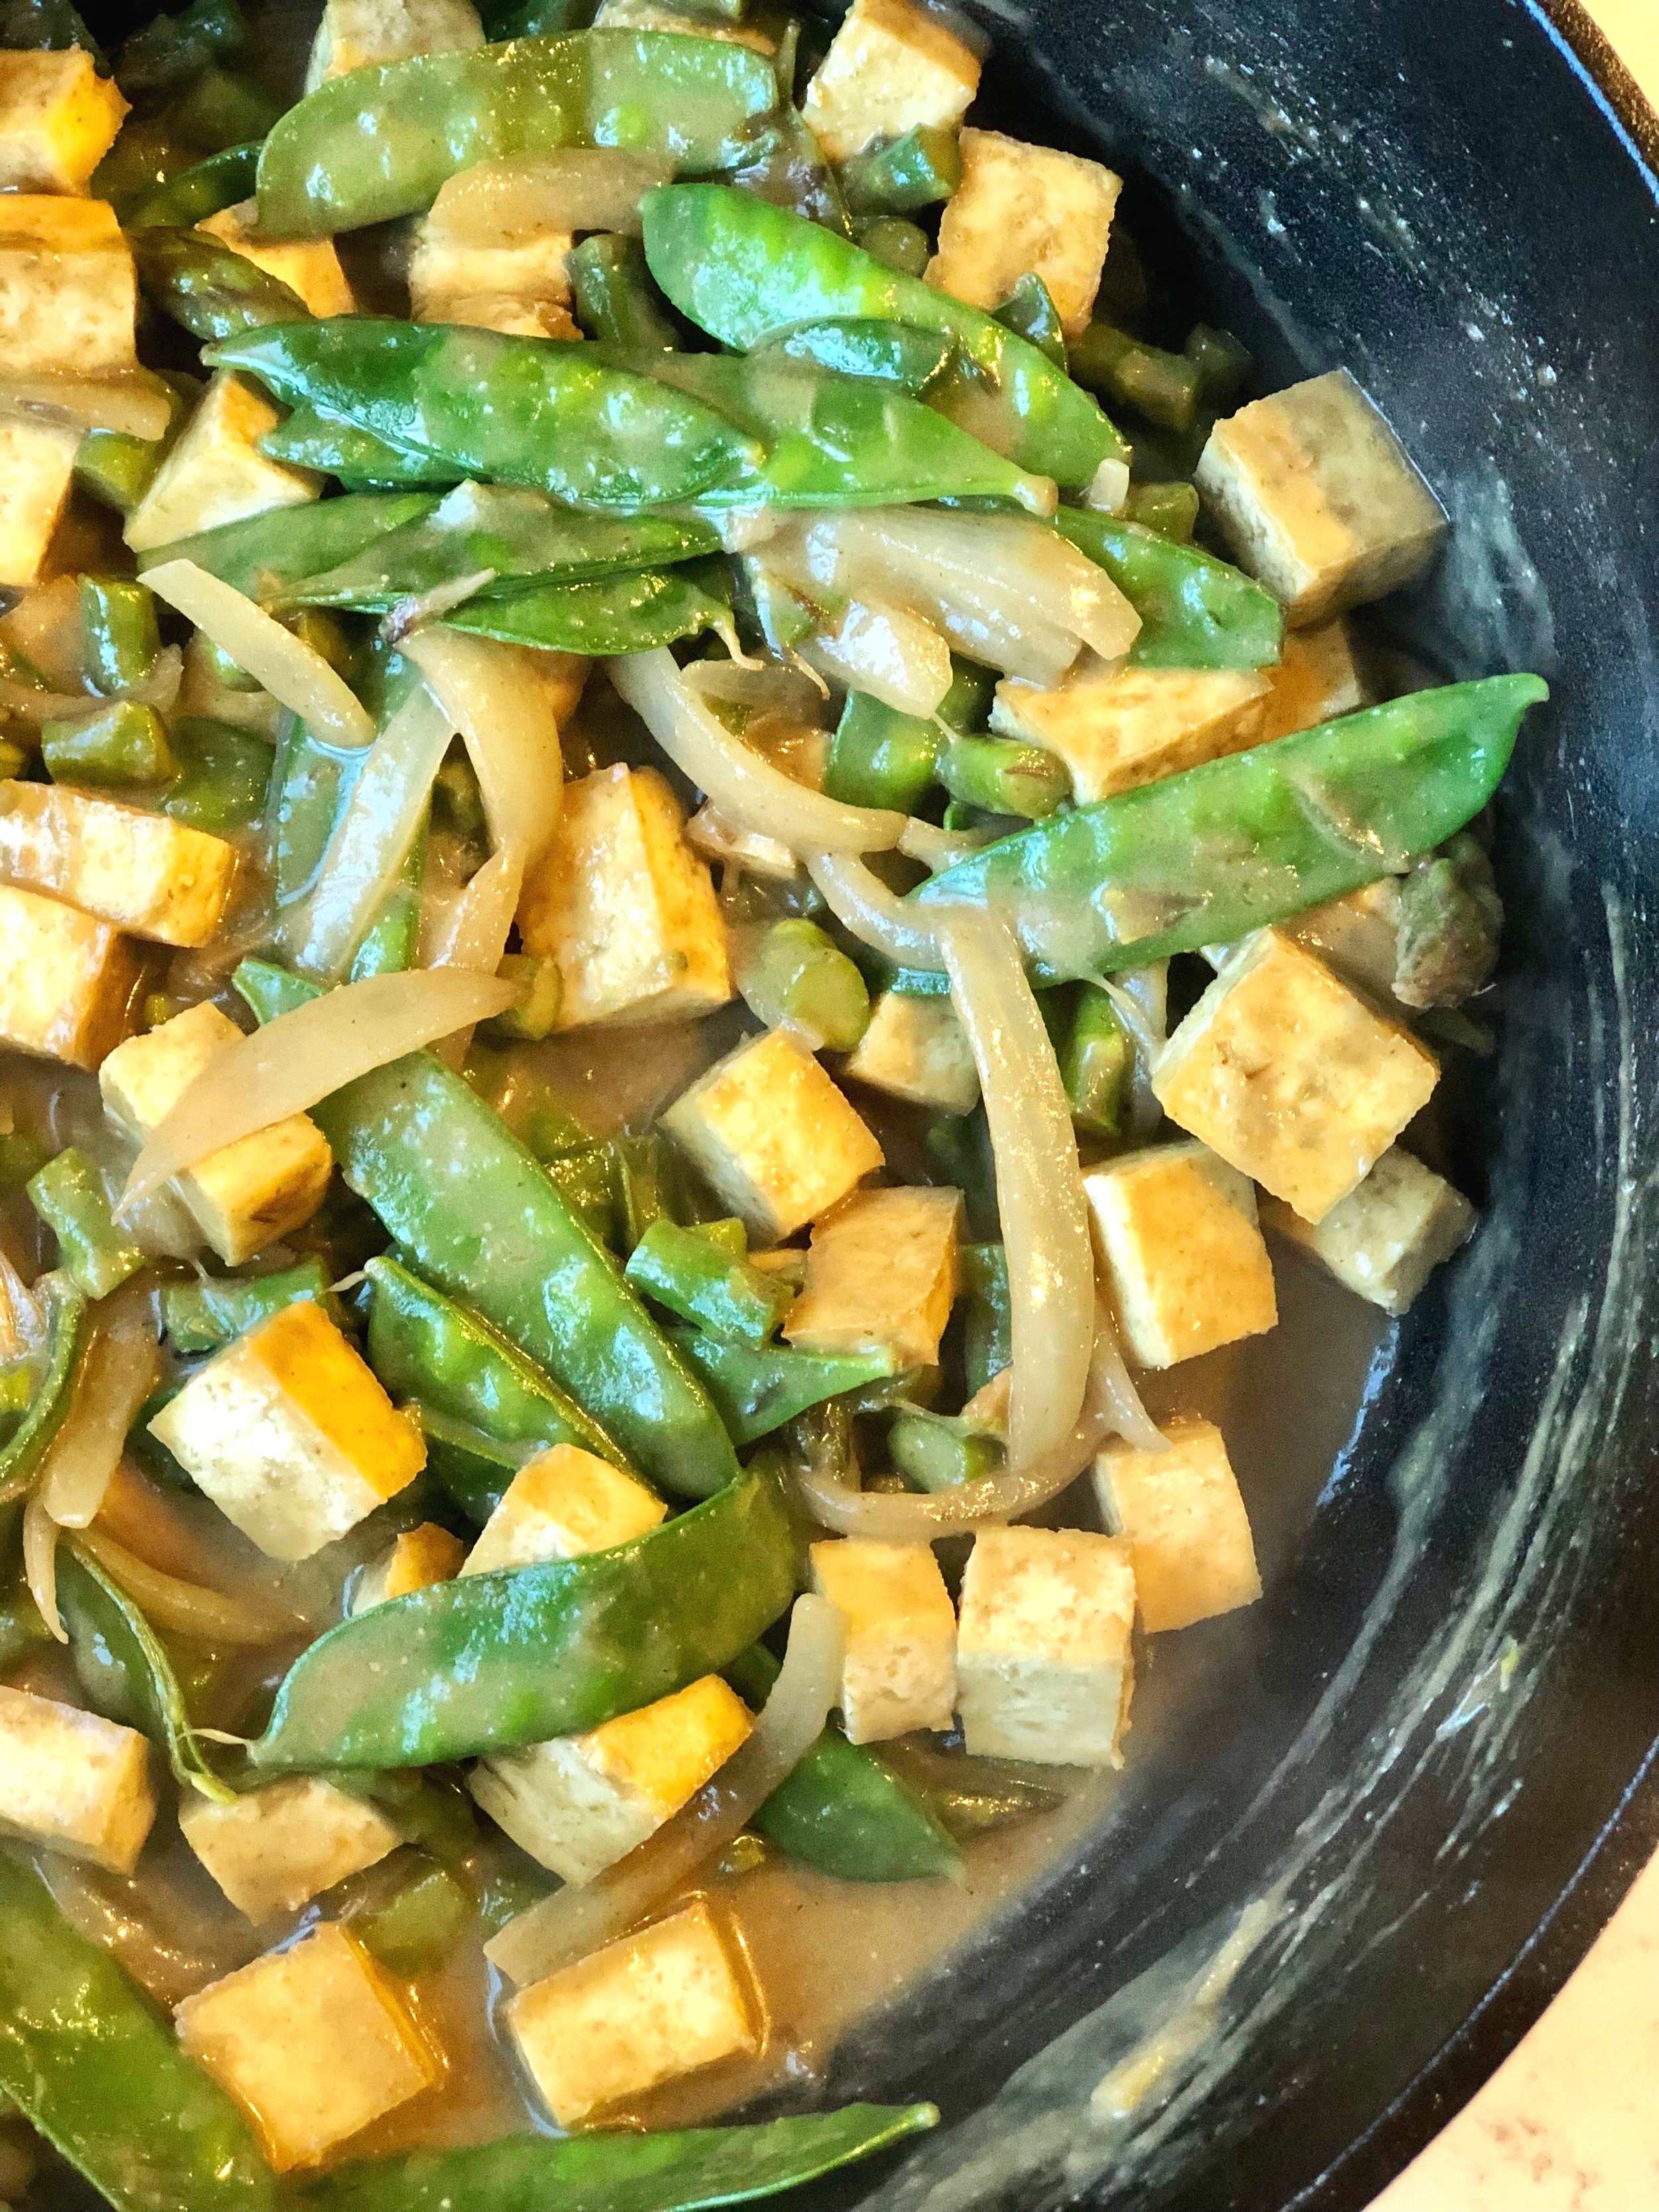
Green Tofu and Vegetable Curry

This Green Tofu and Vegetable Curry is one of the easiest in our repertoire. A good green curry paste and coconut milk carry the flavor in the sauce, while a quick sauté on some green vegetables of choice and baked tofu bring this quick and tasty meal together in no time.

You can use just about any vegetable you choose in this dish, but I love keeping it all green. Goes with the green curry paste, and keeps it feeling fresh and spring-like, you know?

Tofu: to bake or to pan-fry?

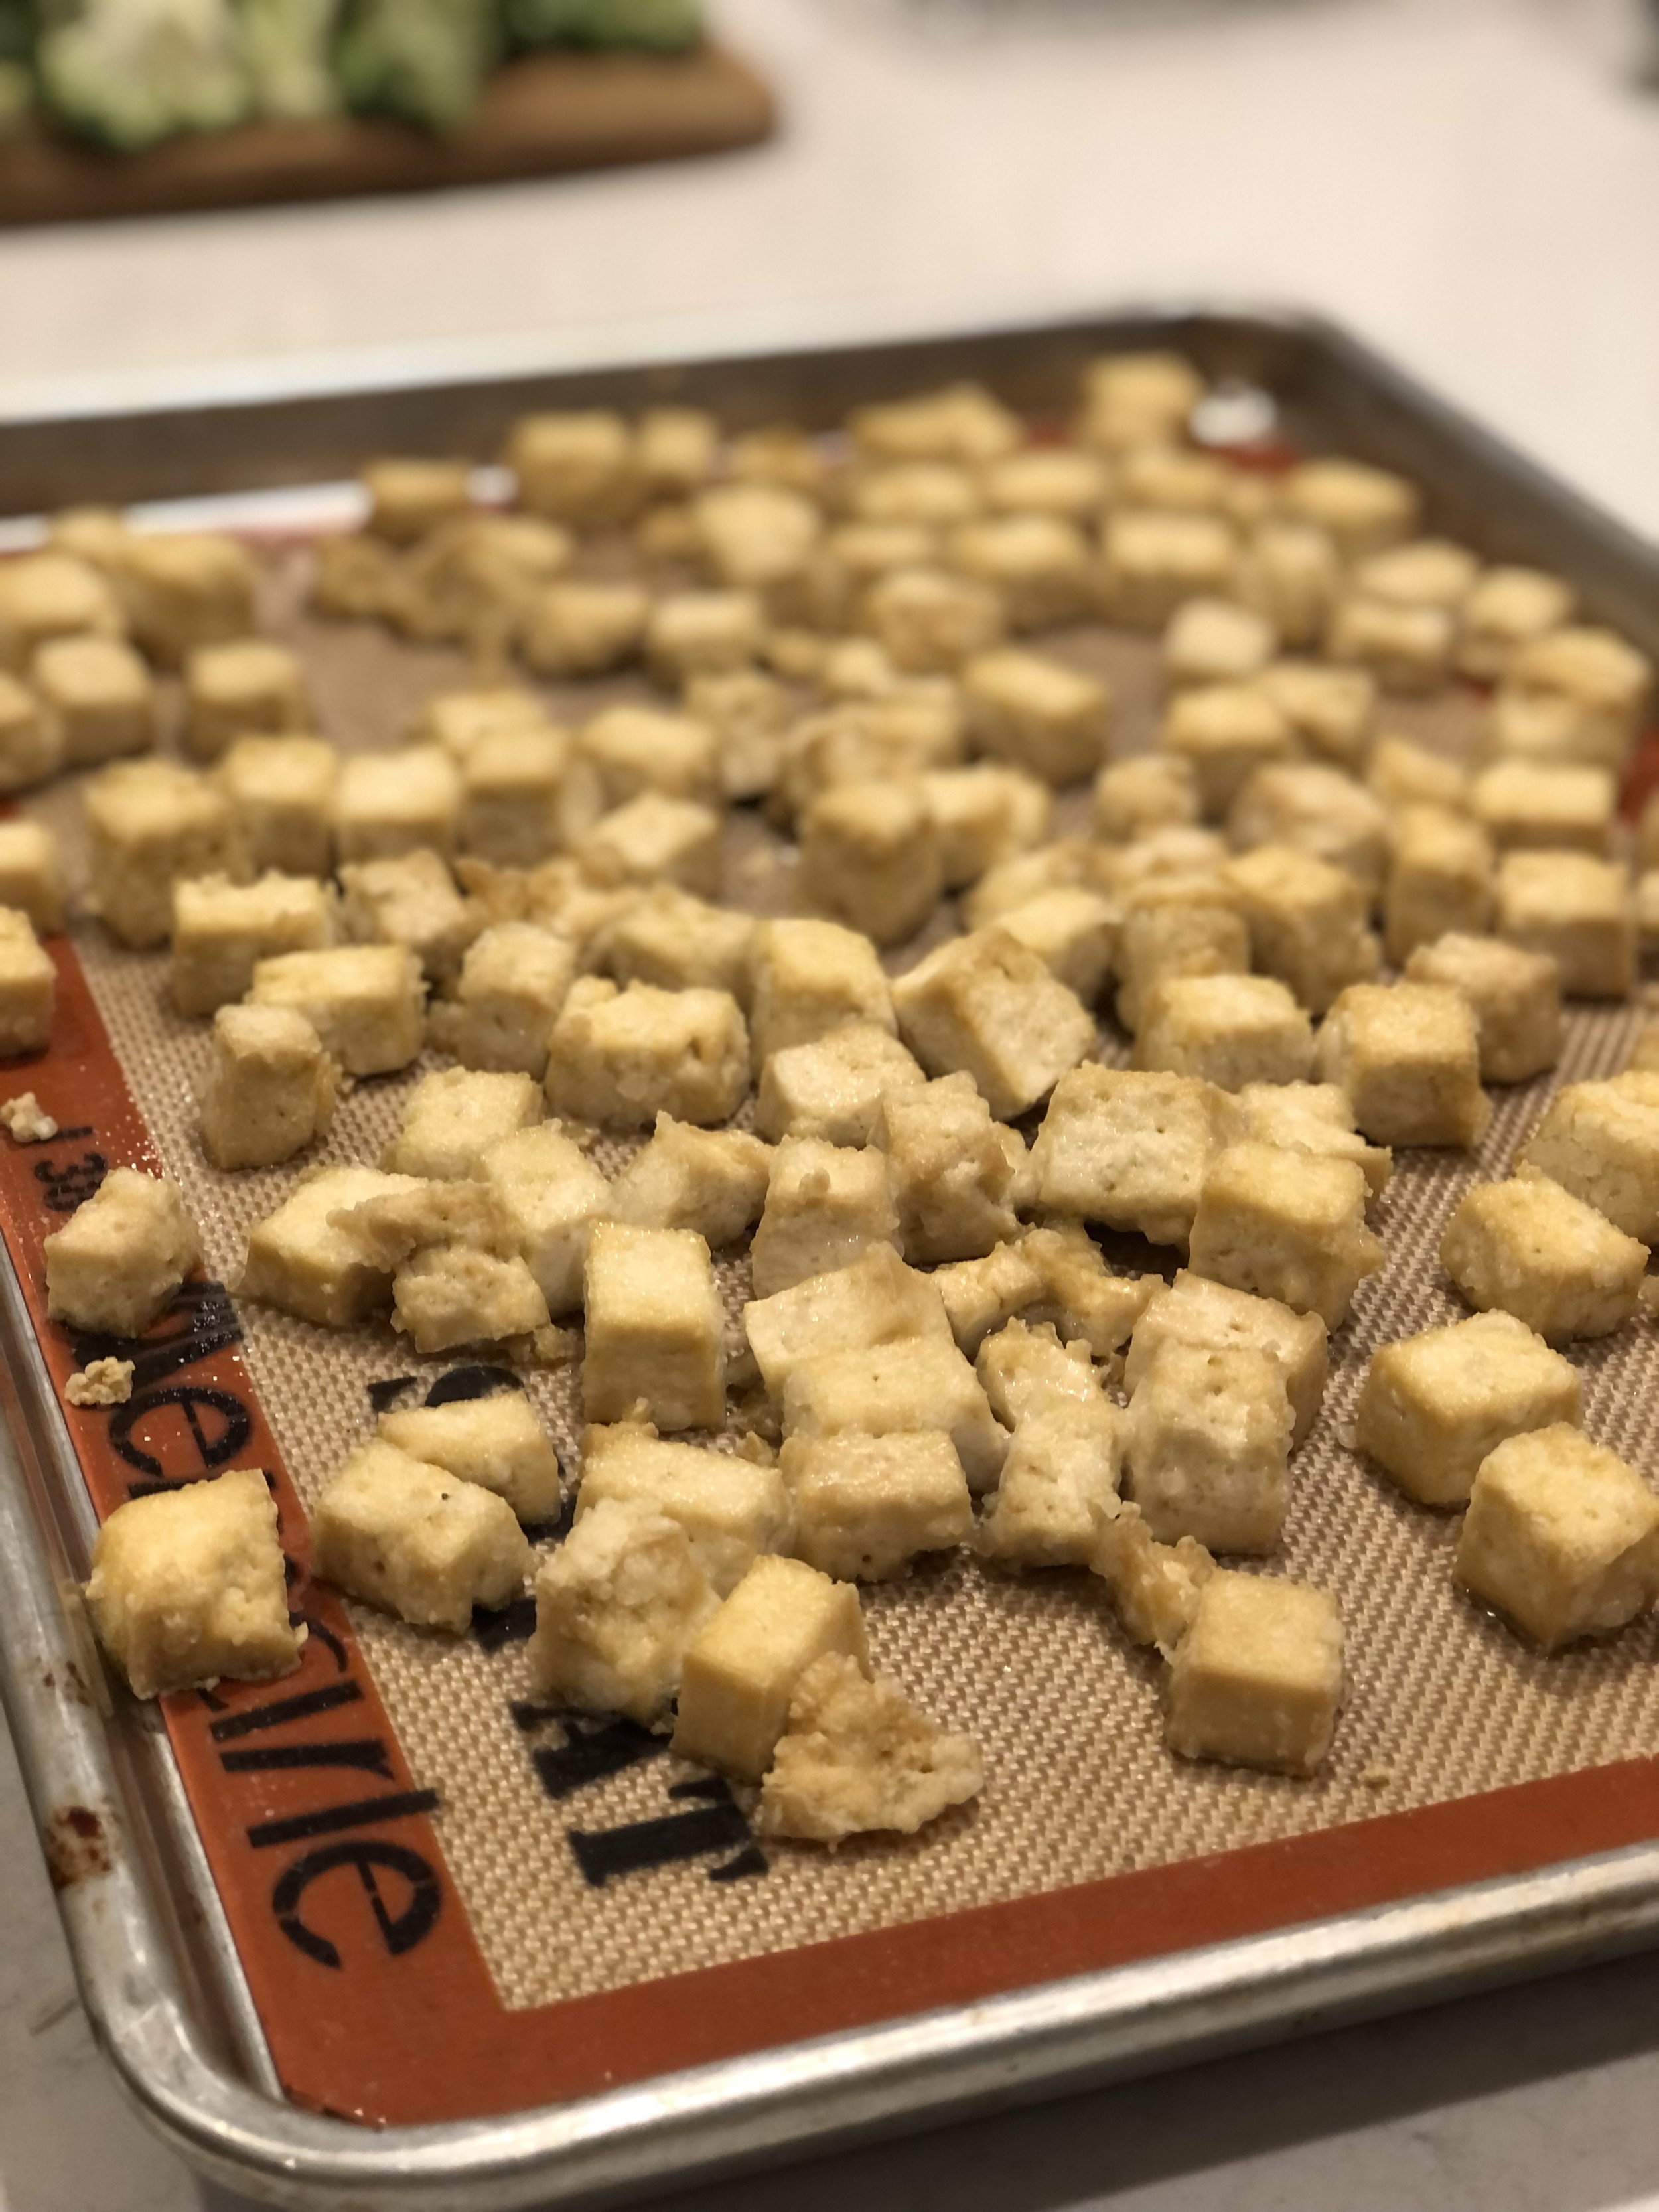
You have the option of pan-frying or baking the tofu. Baking overall takes longer, but it’s less hands on, so may save you time in the end. It’s also a healthier alternative to pan-frying. Pan-frying, though, will always give you the edge on perfectly crispy, golden tofu. Baking can also get you crispy tofu, don’t get me wrong, but it’s just a little different. Baking is my preferred method!

If you choose to bake, there are actually two different ways you can go about this. Normally, after the water has been pressed out of the tofu, it would be lightly breaded in cornstarch and oil before being baked. This way is delicious and I highly recommend it.

Another way, as in the recipe below, is simply baking the tofu, no coating no fuss. This results in a crisp, almost chewy tofu that is another great option. I choose this method when crunched for time or cooking for people who prefer to eat lighter.

I paired the bake method with this particular curry recipe to keep it as simple and straightforward as possible. However, feel free to bake/fry tofu in your favorite way before tossing in the sauce with the veggies!

This post may contain affiliate links. If you make a purchase using these links, Jennyblogs may receive a small commission, at no extra cost to you. This helps to support Jennyblogs. Where possible, links are prioritized to small businesses and ethically and responsibly made items. For further information see the privacy policy. Grazie!

Recipe adapted from New York Times


Green Tofu and Vegetable Curry

Serves 2-3

Ingredients:

  • 1 14oz / 400g block of firm or extra-firm tofu

  • 1 Tbsp / 14g cooking oil

  • 1 onion, sliced

  • 1 bunch of asparagus, cut into 1-inch pieces

  • 1 cup snow peas

  • 1 14oz / 400g can of coconut milk

  • 2-4 Tbsp / 36-72g green curry paste

  • Juice of 1 lime

  • Rice, lime wedges, cilantro, sesame seeds, etc. as desired, for serving

Directions:

Prepare the Tofu

Oven preheated to 400°F / 205°C. Line a baking sheet with parchment paper or silpat.

  1. Place tofu block between some paper towels and press to absorb extra water. Repeat until tofu feels dry and no more water comes out. You can also do this ahead of time by placing something heavy over the tofu and paper towels, such as a bowl or pot, and leave it for several minutes.

  2. Slice tofu into 1-inch cubes. Disperse tofu cubes evenly onto prepared baking sheet.

  3. Bake in preheated oven for about 30 minutes, or until light golden.

Cook Vegetables and Sauce

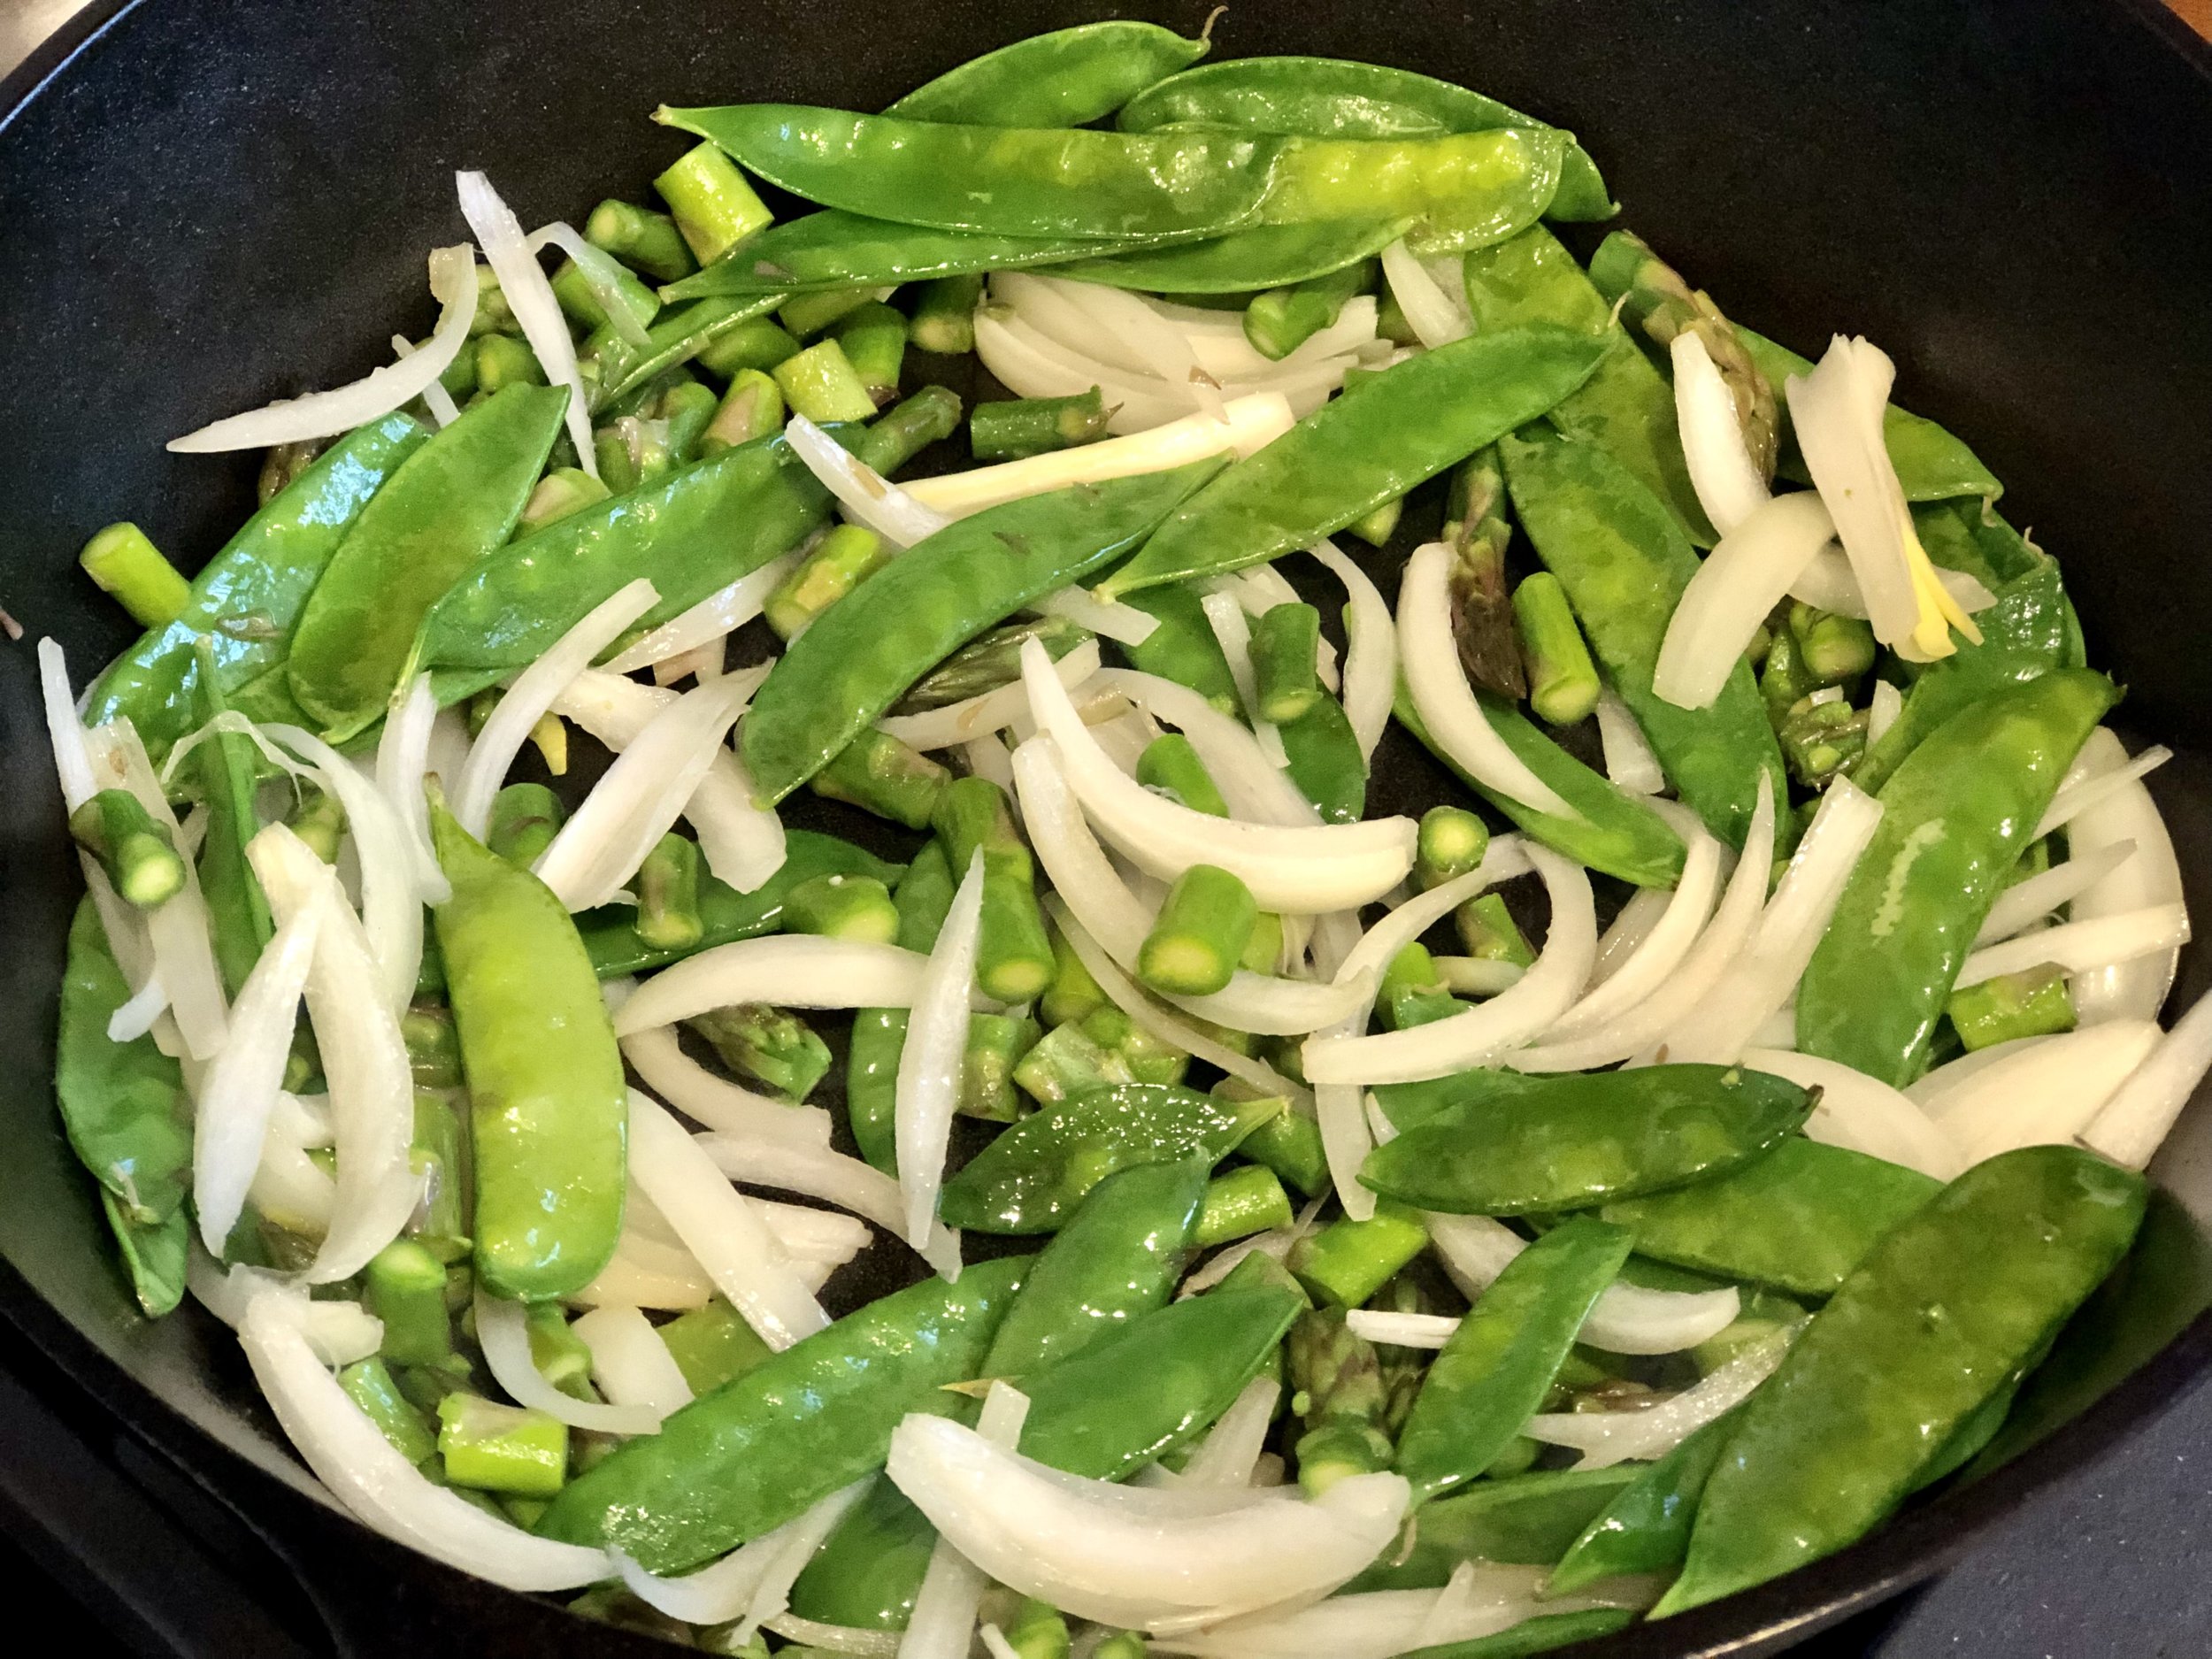
  1. Heat oil in a large pan over medium-high heat. Add onions, asparagus, and snow peas; cook, stirring occasionally, until starting to get some color, about 2-3 minutes.

  2. Add coconut milk and green curry paste to pan and stir to combine. Simmer until sauce starts to thicken.

  3. Remove from heat and stir in lime juice and tofu.

  4. Serve over rice with desired garnishes.

Jenny’s Notes:

  • Use whichever vegetables you like best, the recipe as written above is the winning combo of veggies that we liked, while keeping it a fun green theme. Some ideas include using corn kernels, carrots, broccoli, kale, bell peppers, fennel, etc. Just keep in mind the approximate cooking length of the veggies you’re adding. Hardy root vegetables like carrots will take a bit longer, while veggies like broccoli, especially if you like them with a bit of a crunch like I do, will take just a few minutes until al dente perfection.

  • Certain veggies like broccoli and kale tend to “absorb” the sauce more than others, so if using these you might find your dish overall less saucy.

  • To avoid soggy vegetables, make sure not to cook them all the way through before you add the sauce, as they will still cook once you add the sauce.

  • Green curry pastes can vary in spiciness, so I would advise starting with just 2 Tbsp of curry and tasting for spice level before adding more.

Green Tofu and Vegetable Curry
Yield 2-3
Author
Prep time
15 Min
Cook time
30 Min
Total time
45 Min

Green Tofu and Vegetable Curry

Creamy, spicy, springy curry with tofy and green veggies served over rice. A quick and simple curry!

Ingredients

Instructions

Prepare the Tofu
  1. Oven preheated to 400°F / 205°C. Line a baking sheet with parchment paper or silpat.
  2. Place tofu block between some paper towels and press to absorb extra water. Repeat until tofu feels dry and no more water comes out. You can also do this ahead of time by placing something heavy over the tofu and paper towels, such as a bowl or pot, and leave it for several minutes.
  3. Slice tofu into 1-inch cubes. Disperse tofu cubes evenly onto prepared baking sheet.
  4. Bake in preheated oven for about 30 minutes, or until light golden.
Cook Vegetables and Sauce
  1. Heat oil in a large pan over medium-high heat. Add onions, asparagus, and snow peas; cook, stirring occasionally, until starting to get some color, about 2-3 minutes.
  2. Add coconut milk and green curry paste to pan and stir to combine. Simmer until sauce starts to thicken.
  3. Remove from heat and stir in lime juice and tofu.
  4. Serve over rice with desired garnishes.

Notes

  • Use whichever vegetables you like best, the recipe as written above is the winning combo of veggies that we liked, while keeping it a fun green theme. Some ideas include using corn kernels, carrots, broccoli, kale, bell peppers, fennel, etc. Just keep in mind the approximate cooking length of the veggies you’re adding. Hardy root vegetables like carrots will take a bit longer, while veggies like broccoli, especially if you like them with a bit of a crunch like I do, will take just a few minutes until al dente perfection.
  • Certain veggies like broccoli and kale tend to “absorb” the sauce more than others, so if using these you might find your dish overall less saucy.
  • To avoid soggy vegetables, make sure not to cook them all the way through before you add the sauce, as they will still cook once you add the sauce.
  • Green curry pastes can vary in spiciness, so I would advise starting with just 2 Tbsp of curry and tasting for spice level before adding more.

Nutrition Facts

Calories

736.72

Fat

60.15 g

Sat. Fat

39.85 g

Carbs

30.97 g

Fiber

9.42 g

Net carbs

21.55 g

Sugar

10.97 g

Protein

29.01 g

Sodium

43.1 mg

Cholesterol

0 mg

Nutritional information is approximate, based on 2 servings, not including rice or garnishes.

Green curry, spring curry, coconut milk curry
dinner
Asian
Did you make this recipe?
Tag @jennyblogsandbakes on instagram and hashtag it #jennyblogs

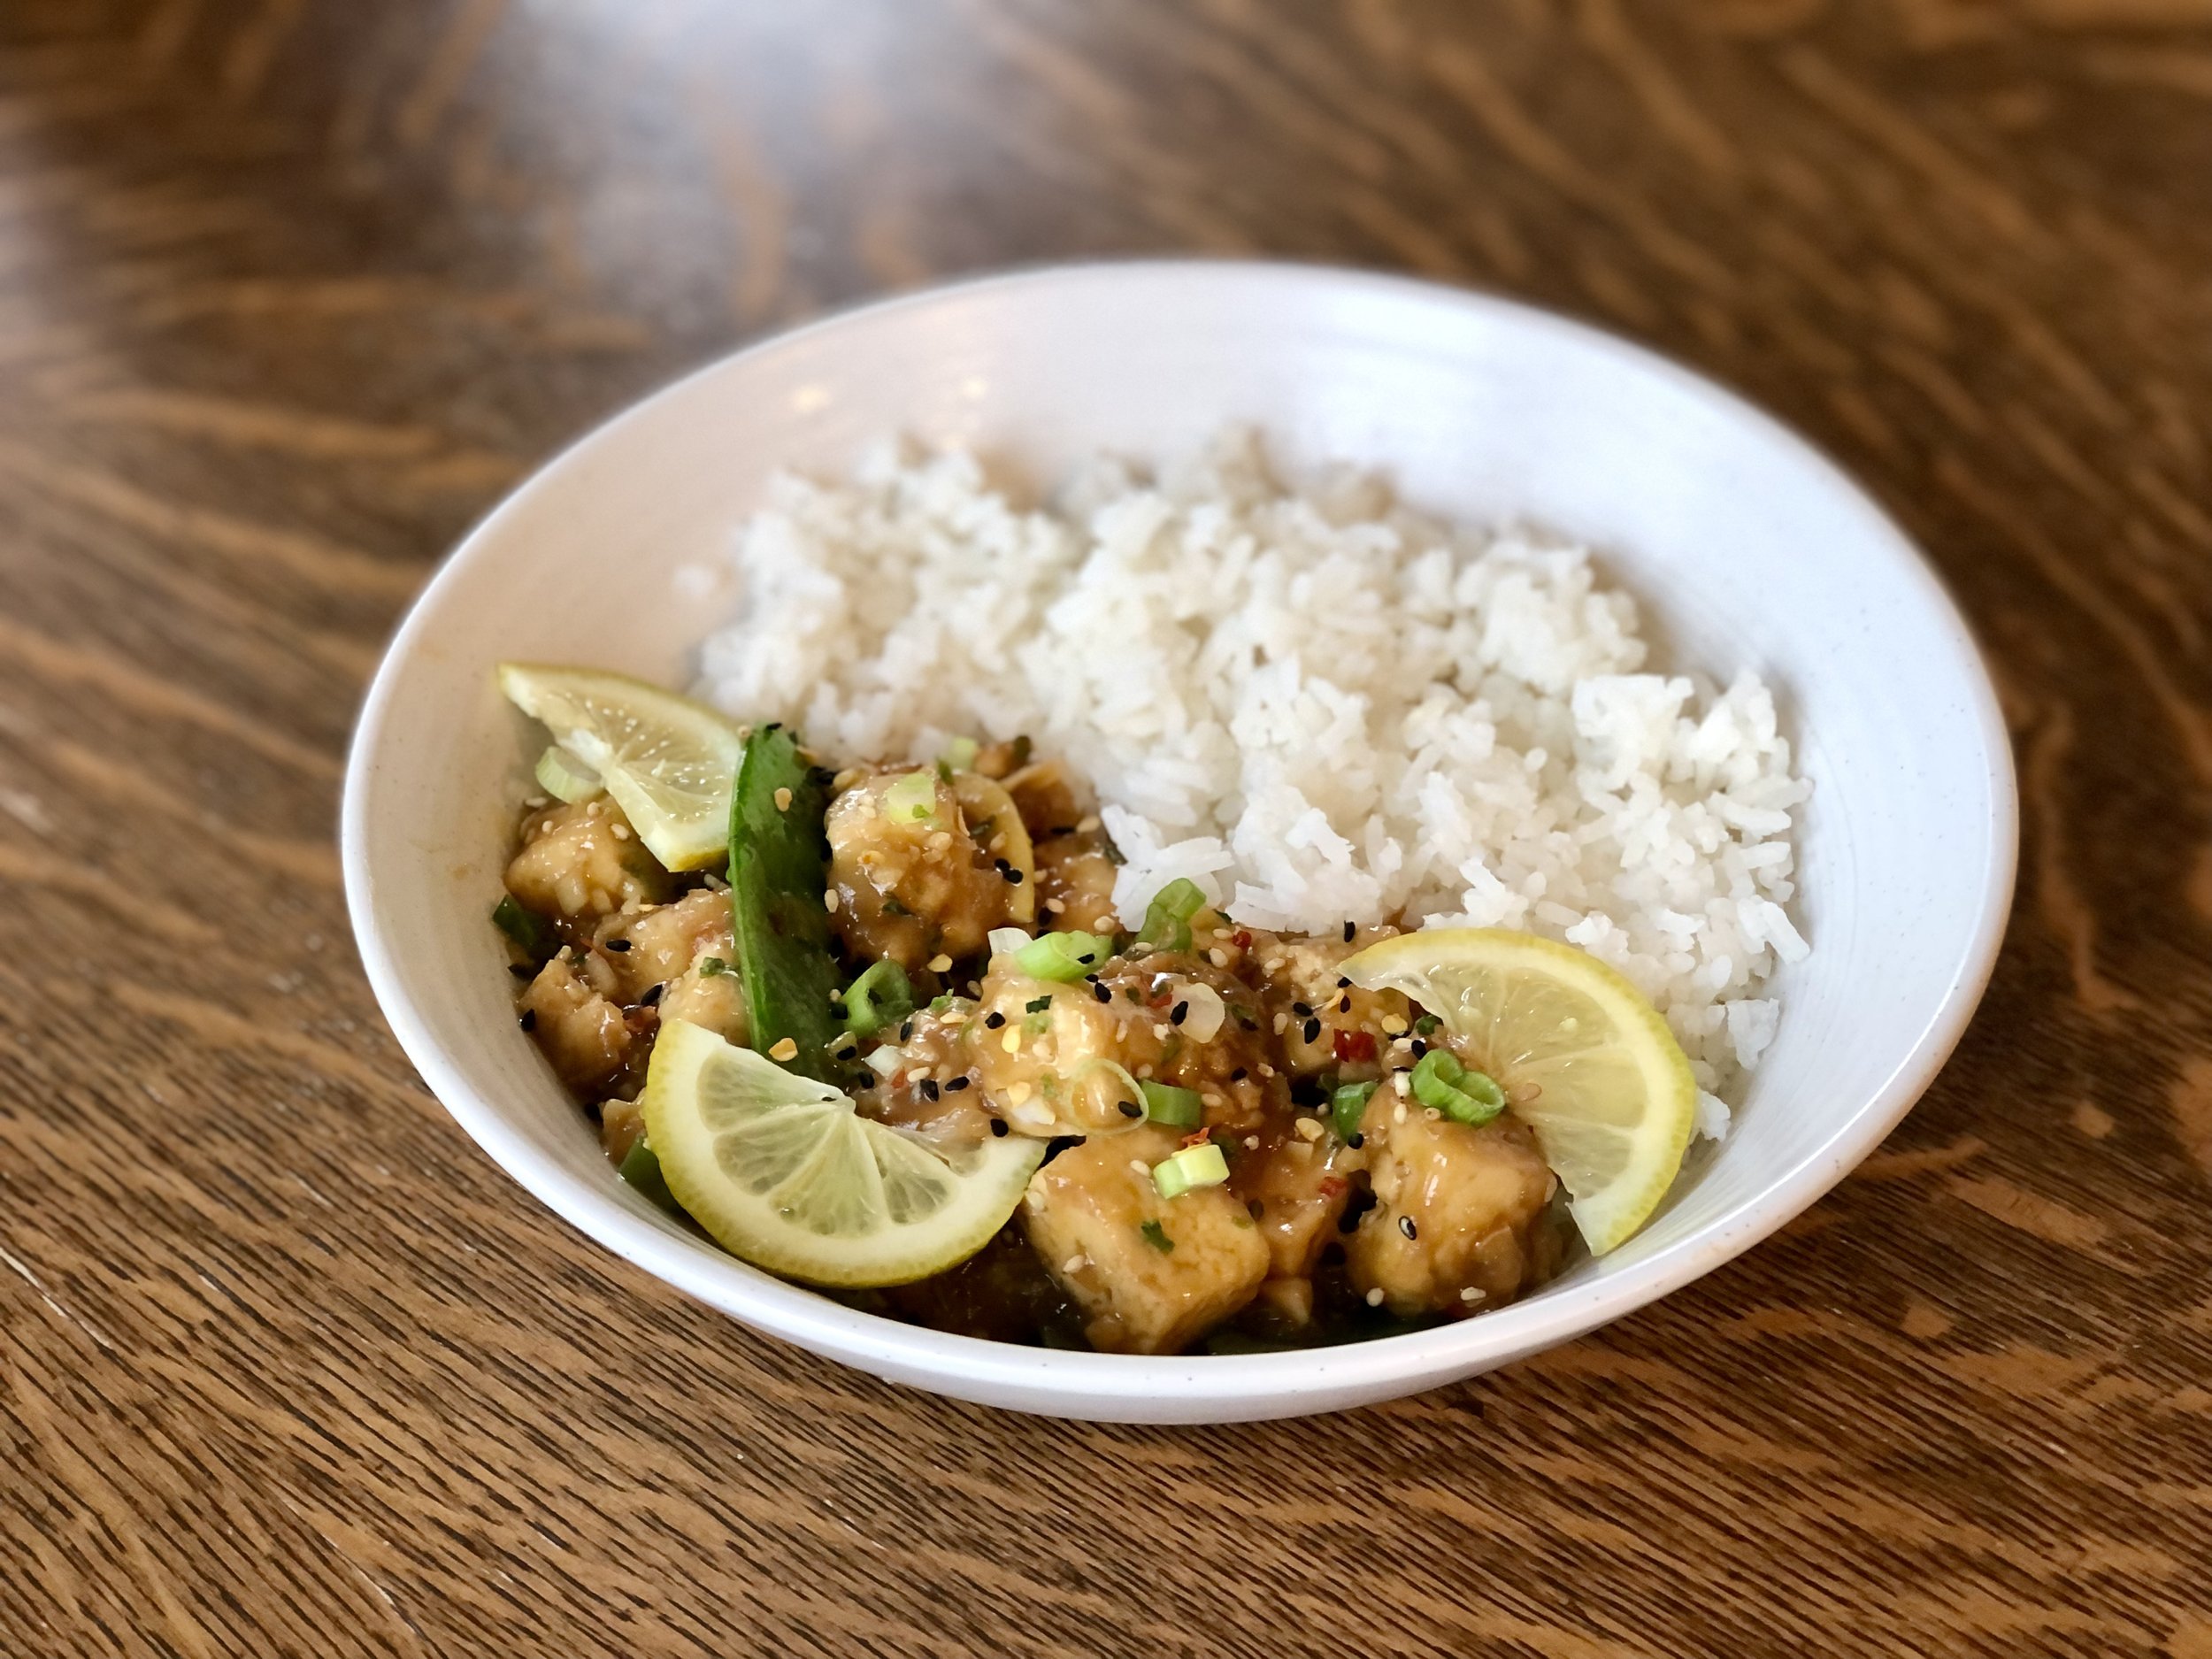
Sticky Lemon Tofu

Last updated September 27, 2024

Crispy tofu with a zingy, sweet, and super flavorful sticky sauce over rice makes for a quick and easy weeknight dinner.

Serve with your favorite garnishes and you’ll feel like you’re eating takeout, but it’s actually much healthier!

Inspired by Chinese takeout “lemon chicken” but made with tofu instead. Meatless, nutritious, and you can choose to add veggies, as you wish.

The tofu can be baked or fried, depending on your preference, either way resulting in delicious, crispy bites of tofu that are just asking to be covered in a sticky lemon sauce. I prefer baking them, it’s healthier and the oven does the work while I work on the sauce. Either way is delicious and simple, though!


Sticky Lemon Tofu

Serves 2-3

Ingredients:

For the Crispy Tofu

  • 1 14oz / 400g block of firm or extra-firm tofu

  • 1 Tbsp / 14g oil

  • 1 Tbsp / 17g soy sauce

  • 1/4 cup / 40g cornstarch

For the Lemon Sauce

  • 1/2 cup / 119g chicken broth or water

  • 1/4 cup / 56g lemon juice

  • 2 Tbsp / 34g soy sauce

  • 3 Tbsp / 60g maple syrup

  • zest of 1 lemon

To sautè

  • 1 Tbsp / 14g cooking oil

  • 2-3 green onions, sliced

  • 1 Tbsp grated or minced fresh ginger

  • 4 cloves of garlic, minced

For Serving

  • Rice

  • Garnishes such as sliced green onions, sesame seeds, red chili flakes, and/or lemon slices

Directions:

Make the Crispy Tofu

  1. Place tofu block between some paper towels and press to absorb extra water. Repeat until tofu feels mostly dry and no more water comes out. You can also do this ahead of time by placing something heavy over the tofu and paper towels, such as a bowl or pot, and leave it for several minutes.

  2. Slice tofu into squares and toss together with the oil, soy sauce, and corn starch until evenly coated.

    Pan fry:

  3. Heat a large fry pan over medium heat and add tofu. Fry for a few minutes until golden, then flip tofu over. Add more oil to pan as needed to get a nice golden crust on the tofu. Remove from heat when done.

    OR Bake:

  4. Disperse tofu cubes evenly onto a parchment paper or silpat lined baking sheet. Bake in a preheated oven at 400°F / 205°C for about 30 minutes, or until light golden and crispy. Ideally, flip tofu halfway through baking.

Make the sauce

  1. Whisk together all ingredients for the sauce; set aside.

Sauté

  1. Heat oil in a large fry pan over medium heat. (Can be the pan you used for the tofu if you pan-fried it).

  2. Add green onions, ginger, and garlic and sauté for 1-2 minutes, or until fragrant.

  3. Add lemon sauce ingredients to pan and bring to a simmer.

  4. Add in tofu, carefully stir to evenly coat tofu in sauce. Allow to simmer, stirring occasionally, until sauce thickens.

  5. Serve with rice and garnishes, as desired.

Jenny’s Notes:

  • Veggies can be added to this dish if desired. I like snow peas and broccoli, which can be added at the very end with the tofu into the sauce. Put a lid on and let the veggies steam for a few minutes, or until desired tenderness is achieved.

  • If pan frying the tofu, you can flip the tofu with tongs, or simply sauté/flip the tofu using the pan. The second way is faster, but requires a bit more skill and you have less control over which sides of the tofu land down.

  • Instead of maple syrup you can also use 1/4 cup / 50g of sugar or brown sugar. Or, 3 Tbsp / 63g of honey, which lends a slightly different flavor.

Sticky Lemon Tofu
Yield 2-3
Author
Prep time
15 Min
Cook time
40 Min
Total time
55 Min

Sticky Lemon Tofu

Crispy tofu nuggets tossed in a super flavorful sticky lemon sauce inspired by Chinese takeout Lemon Chicken, served over rice.

Ingredients

For the Crispy Tofu
For the Lemon Sauce
To sautè
For Serving

Instructions

Make the Crispy Tofu
  1. Place tofu block between some paper towels and press to absorb extra water. Repeat until tofu feels dry and no more water comes out. You can also do this ahead of time by placing something heavy over the tofu and paper towels, such as a bowl or pot, and leave it for several minutes.
  2. Slice tofu into squares and toss together with the oil, soy sauce, and corn starch until evenly coated.
  3. Pan fry:
  4. Heat a large fry pan and add tofu. Fry for a few minutes until golden, then flip tofu over. Add more oil to pan as needed to get a nice golden crust on the tofu. Remove from heat when done.
  5. OR Bake:
  6. Disperse tofu cubes evenly onto a parchment paper or silpat lined baking sheet. Bake in a preheated 400°F / 205°C for about 30 minutes, or until light golden and crispy. Ideally, flip tofu halfway through baking.
Make the sauce
  1. Whisk together all ingredients for the sauce; set aside.
Sauté
  1. Heat oil in a large fry pan over medium heat. (Can be the pan you used for the tofu if you pan-fried it).
  2. Add green onions, ginger, and garlic and sauté for 1-2 minutes, or until fragrant.
  3. Add lemon sauce ingredients to pan and bring to a simmer.
  4. Add in tofu, carefully stir to evenly coat tofu in sauce. Allow to simmer, stirring occasionally, until sauce thickens.
  5. Serve with rice and garnishes, as desired.

Notes

  • Veggies can be added to this dish if desired. I like snow peas and broccoli, which can be added at the very end with the tofu into the sauce. Put a lid on and let the veggies steam for a few minutes, or until desired tenderness is achieved.
  • If pan frying the tofu, you can flip the tofu with tongs, or simply sauté/flip the tofu using the pan. The second way is faster, but requires a bit more skill and you have less control over which sides of the tofu land down.
  • Use whichever kind of cooking oil you prefer. I simply write “oil” since specifying often gets people thinking they must use a specific oil, when really you can use any high-heat cooking oil (peanut oil, avocado oil, some use olive oil, etc.)
  • Instead of maple syrup you can also use 1/4 cup / 50g of sugar or brown sugar. Or, 3 Tbsp / 63g of honey, which lends a slightly different flavor.


Nutrition Facts

Calories

476.8

Fat

23.04 g

Sat. Fat

2.04 g

Carbs

47.45 g

Fiber

2.93 g

Net carbs

44.51 g

Sugar

20.62 g

Protein

21.78 g

Sodium

1742.63 mg

Cholesterol

1.18 mg

Nutritional information is approximate, based on 1 serving if recipe serves 2. Does not include rice or garnishes.

Sticky lemon tofu, chinese takeout lemon chicken
dinner
Asian
Did you make this recipe?
Tag @jennyblogsandbakes on instagram and hashtag it #jennyblogs

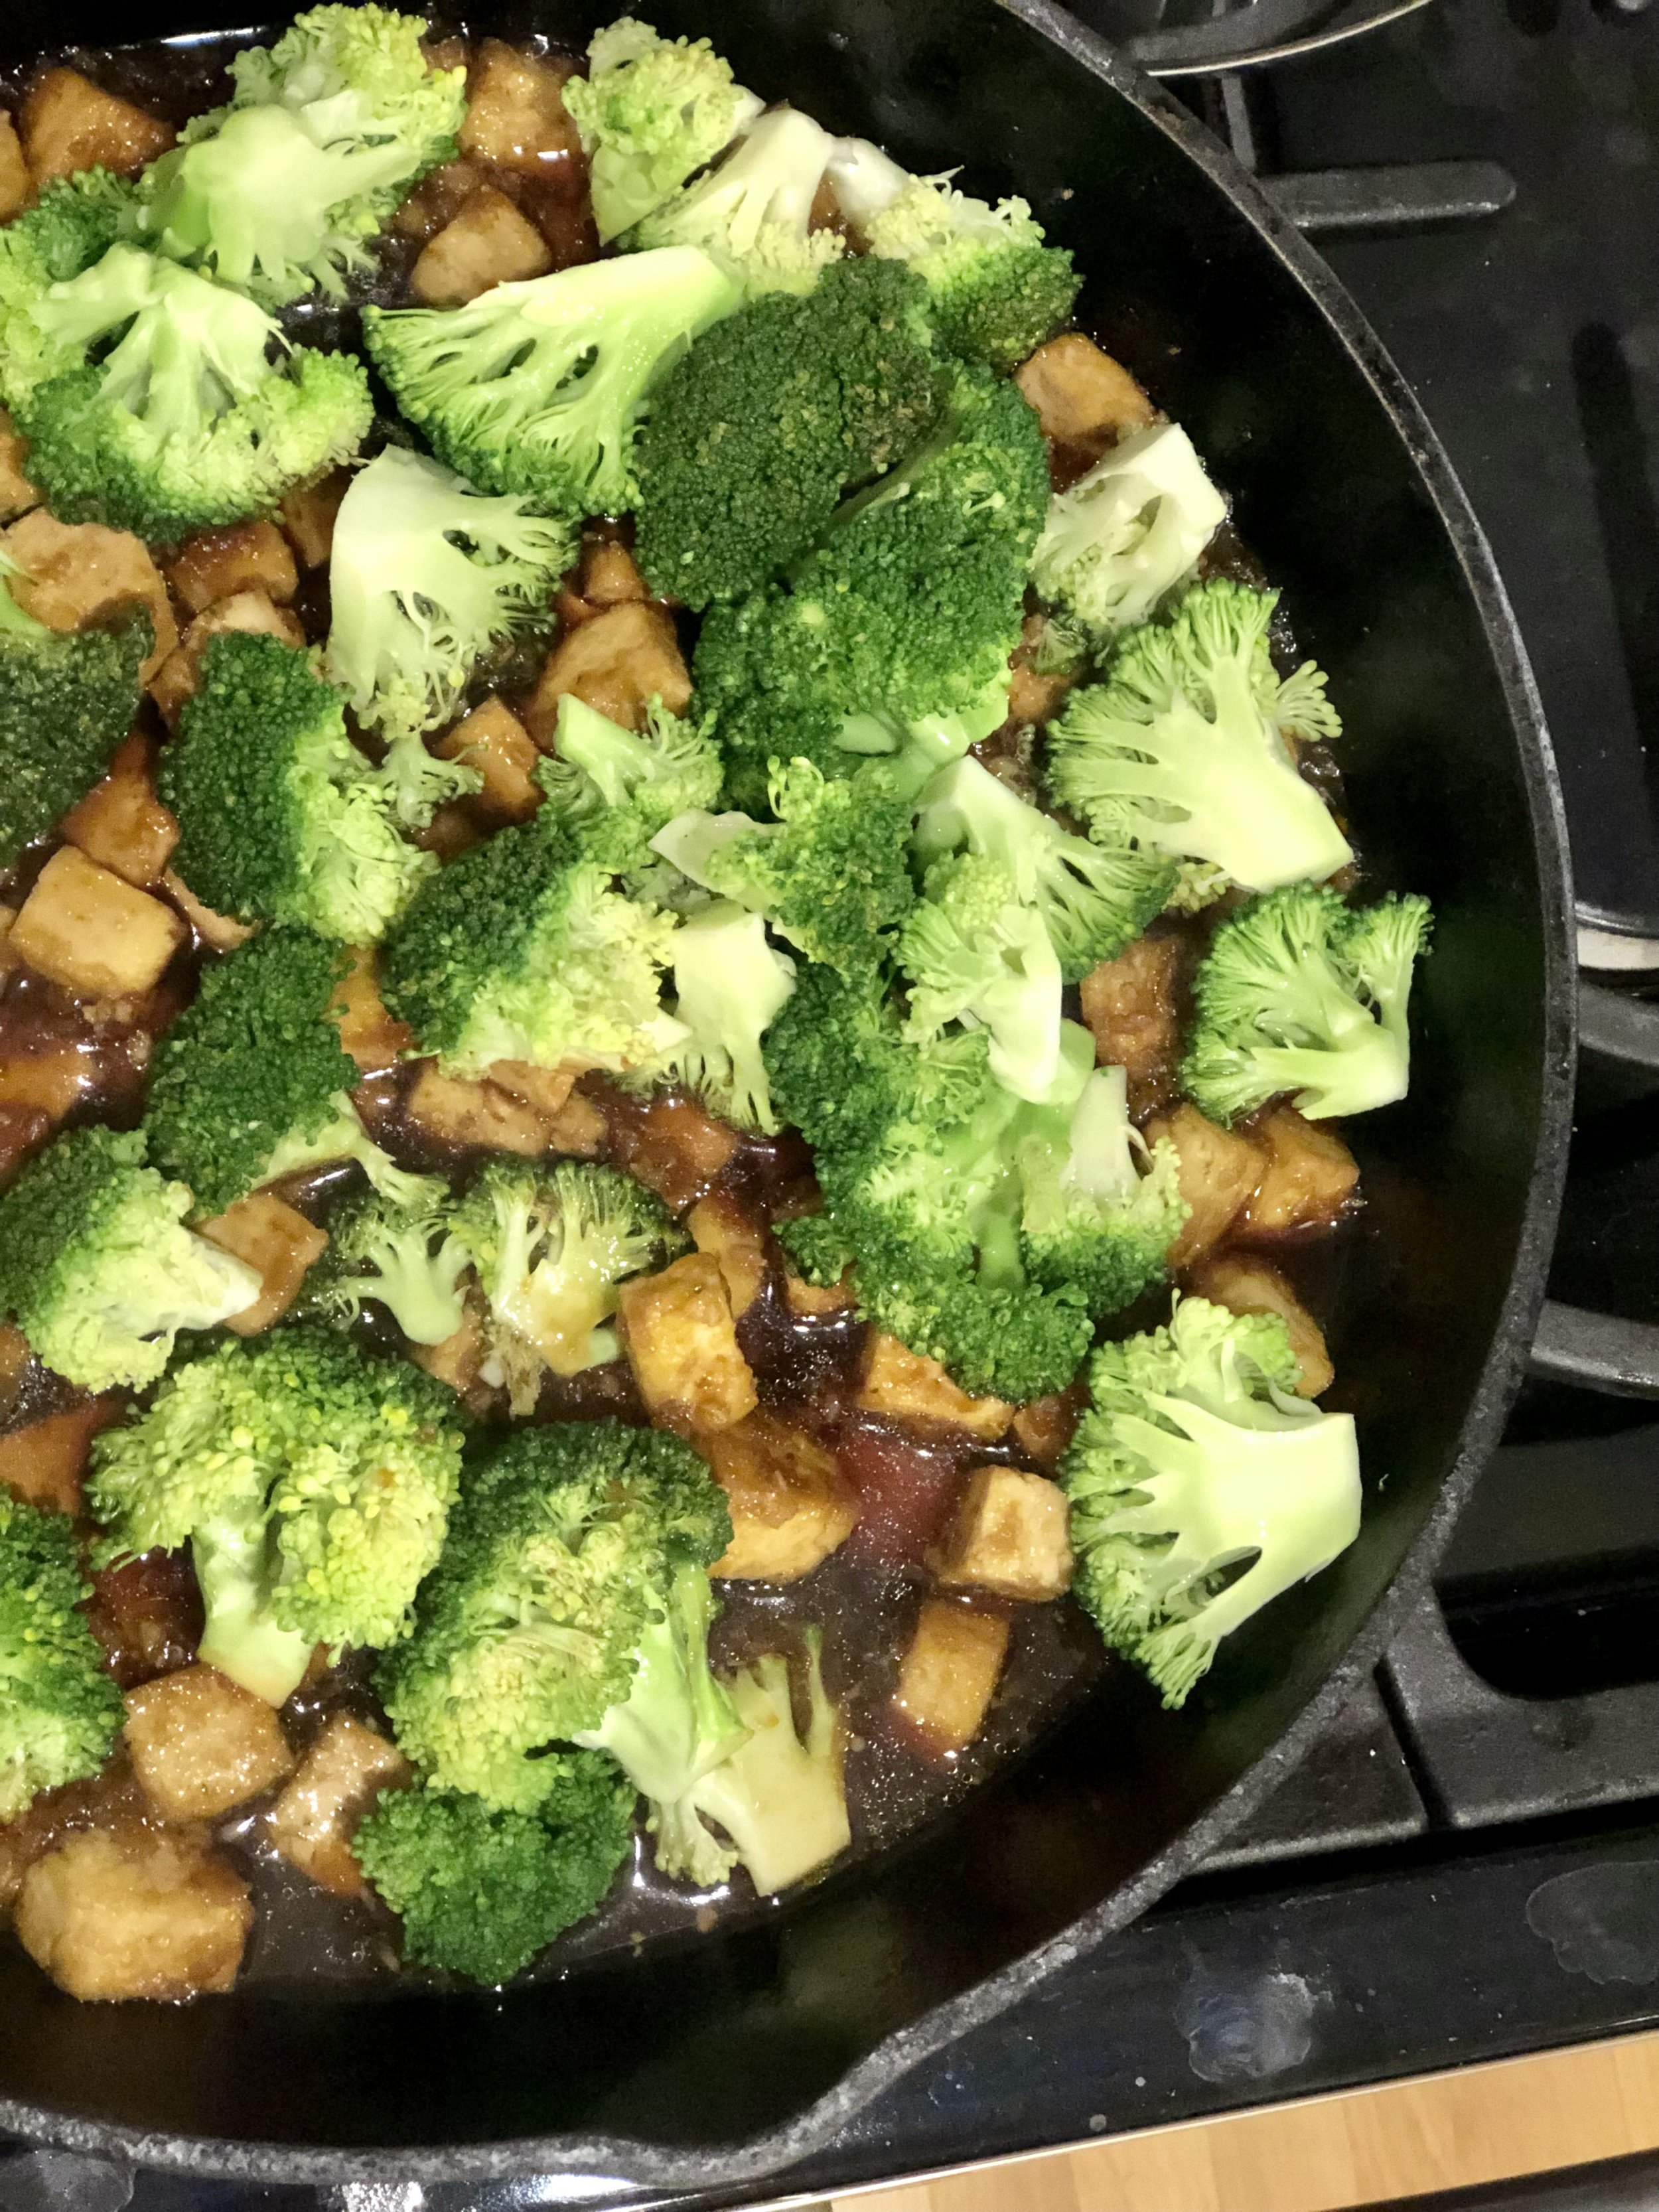
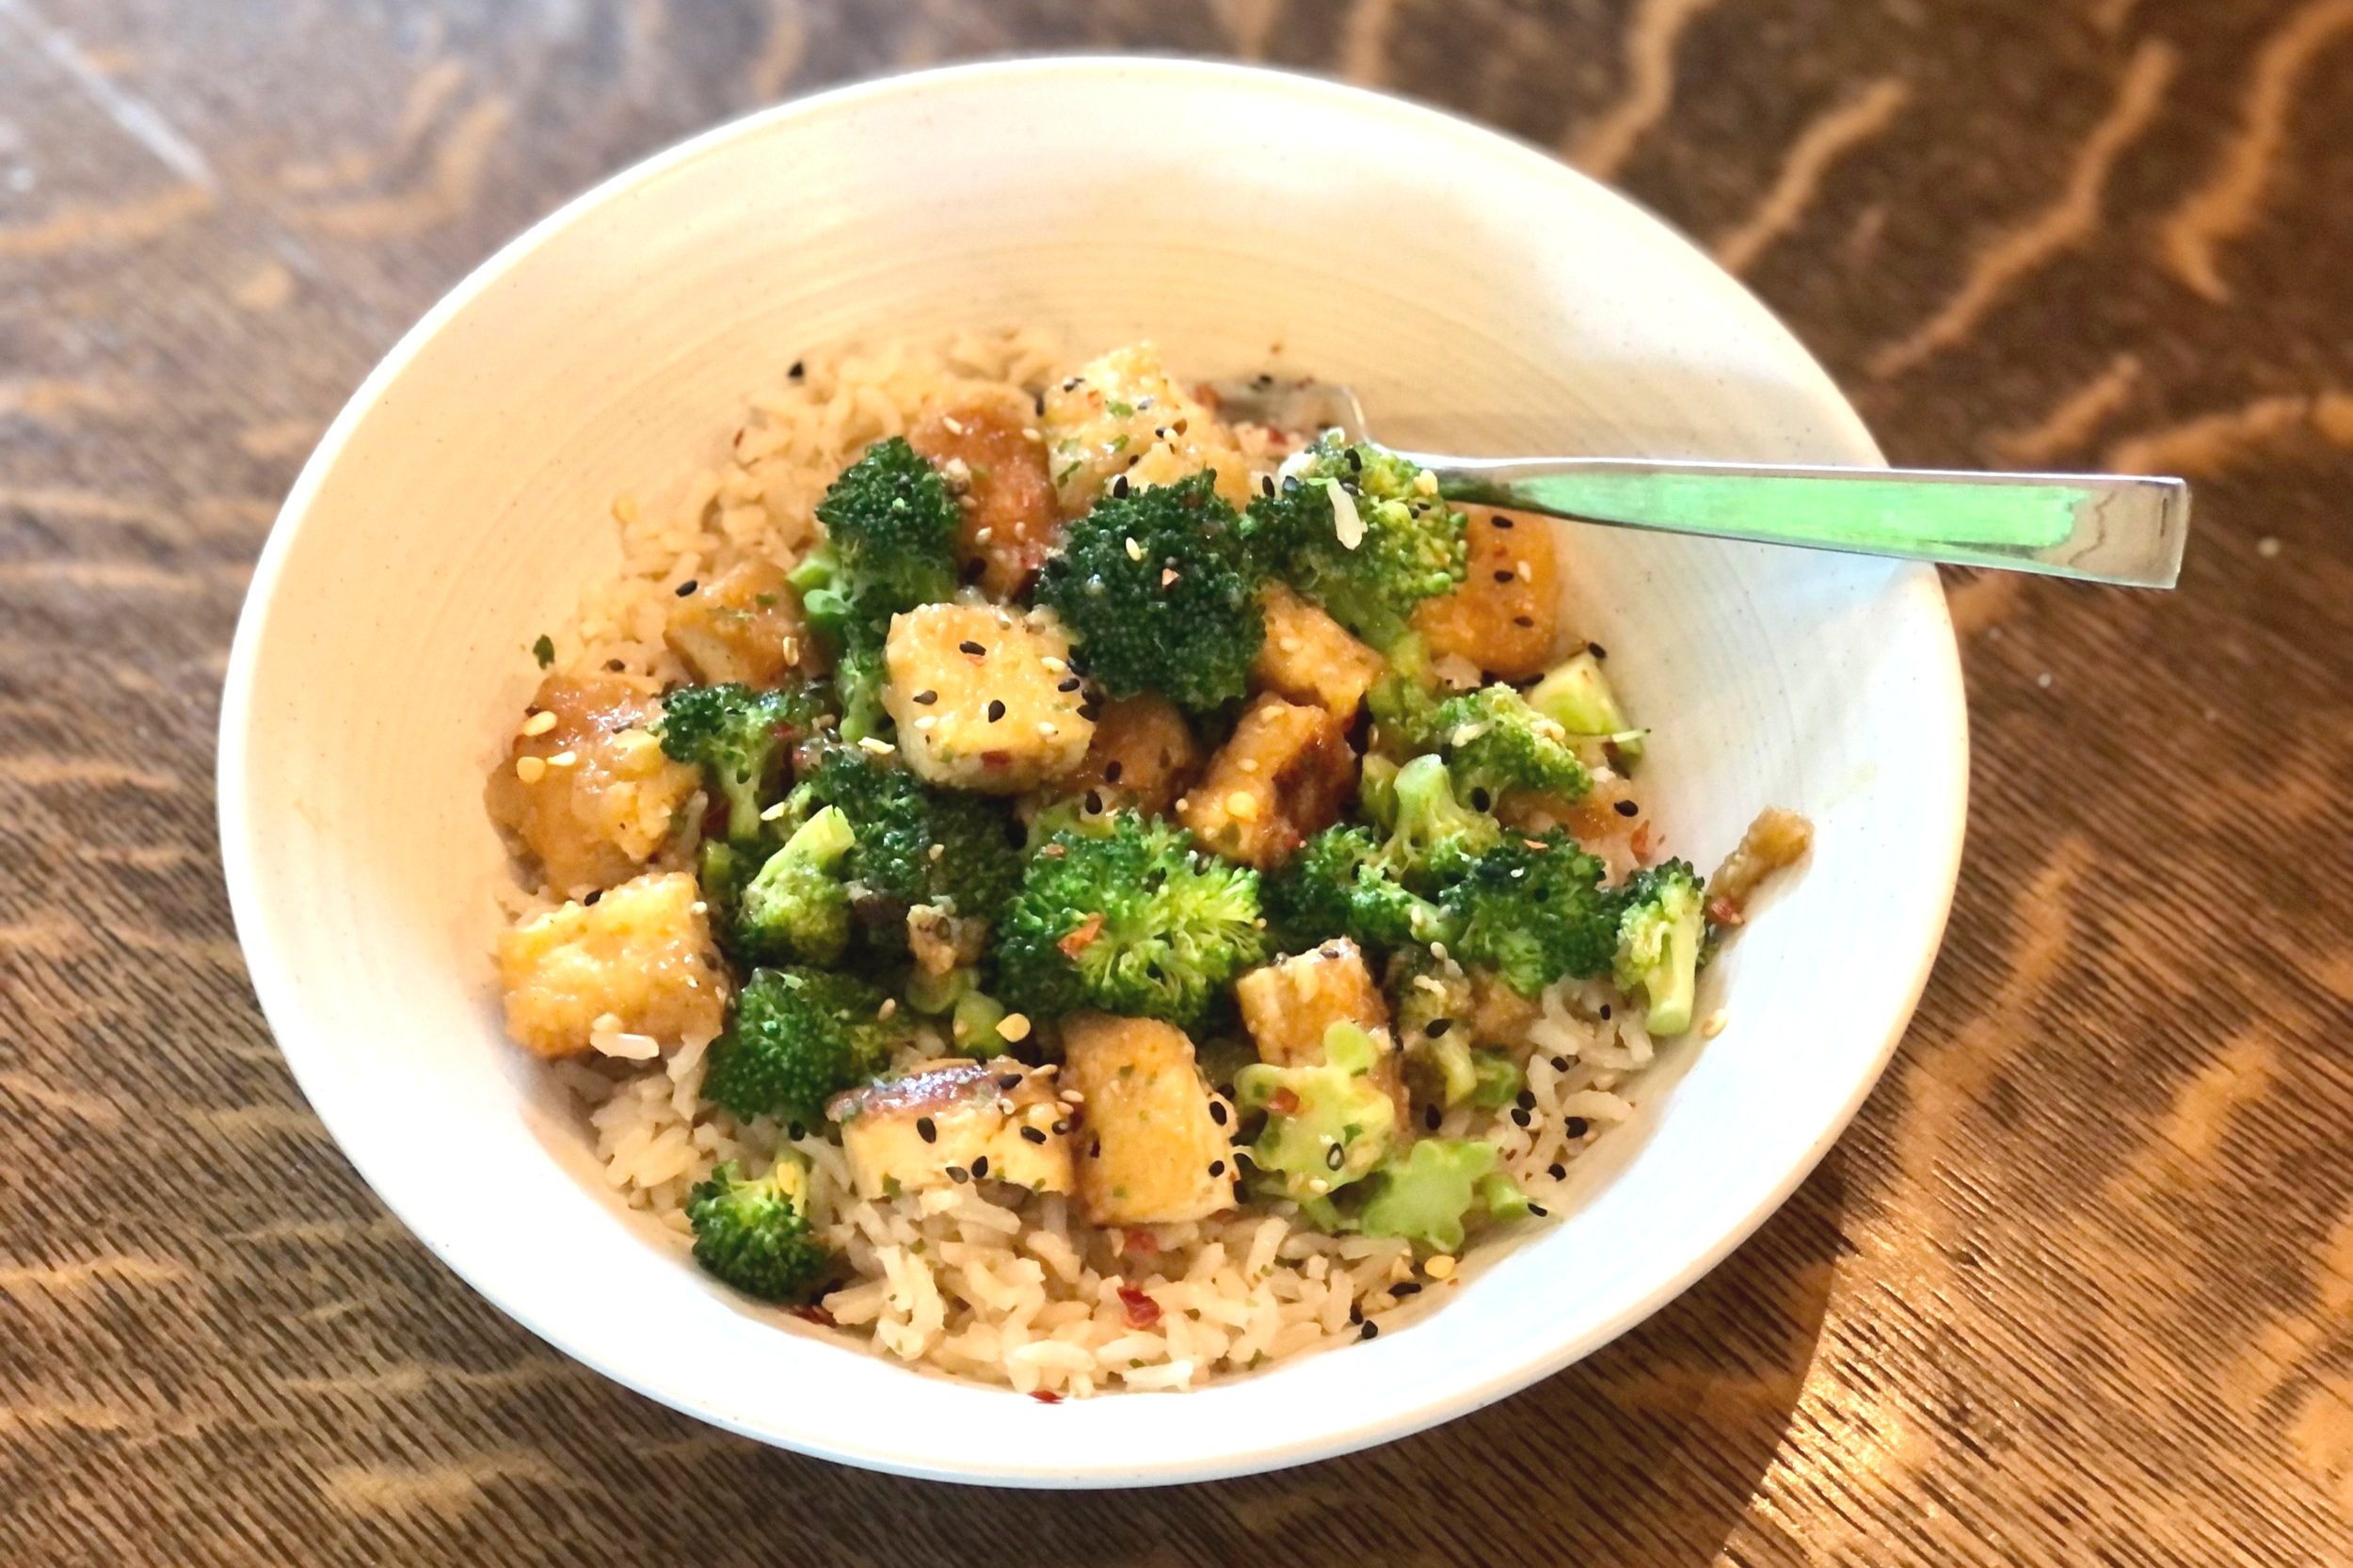
Tofu and Broccoli Stir Fry

Last Updated September 7, 2024

This Tofu and Broccoli Stir Fry is deliciously salty, satisfying, and nutritious.

My family makes this recipe quite a bit, it’s quick and easy, providing protein and vegetables and a carb, if you serve it over rice.

If you’re watching your salt intake, you might prefer to use a low-sodium soy sauce and broth. Using low-sodium ingredients allows you to have more control over how salty your dish is, whether or not you actually may need low-sodium for health reasons.

This dish is also delicious meat-ified…by that I mean, with chicken instead of tofu. I’m not a vegetarian, and I love this recipe both ways. If making with chicken, you’ll want to cut it into cubes or bite-sized pieces. You can still coat the chicken in the cornstarch, and proceed with recipe as written. You’ll simply want to cook the chicken thoroughly, before adding in the garlic and ginger and finishing the stir fry. Voila! Meat-ified.

This post may contain affiliate links. If you make a purchase using these links, Jennyblogs may receive a small commission, at no extra cost to you. This helps to support Jennyblogs. For further information see the privacy policy. Grazie!


Tofu and Broccoli Stir Fry

Serves about 3-4

Ingredients:

  • 1 14oz / 400g container of extra-firm tofu

  • 2 Tbsp / 15g cornstarch

  • 1 cup / 237g vegetable or chicken broth

  • 3 Tbsp / 42g soy sauce

  • 2 tsp / 10g sugar

  • oil, for pan

  • 2 teaspoons grated fresh ginger

  • 2 garlic cloves, minced

  • 2 cups broccoli florets

Directions:

  1. Open and drain tofu. Wrap tightly in paper towels, place on a plate or cutting board, and place a weighted object on it, such as a bowl. Once the paper towel is soaked through, change them out for fresh paper towels. Repeat until paper towels remain mostly dry. Slice tofu into approx. 1/2” / 1cm cubes. Toss in a medium bowl with the cornstarch.

  2. Combine broth, soy sauce, and sugar; set aside.

  3. Generously drizzle an iron skillet or other non-stick pan with oil; place over medium-high heat.

  4. Fry tofu until golden brown and crispy, about 3-5 minutes. Flip the tofu, and fry other side until golden brown, another 3-5ish minutes.

  5. Lower heat to low; Add ginger and garlic and stir, until fragrant and sizzling, about a minute.

  6. Add in broth mixture and stir occasionally, until it starts to simmer.

  7. Add in broccoli, cover, and let sit for 2 minutes for “al dente” broccoli, or a couple more minutes for softer broccoli.

  8. Turn off heat and serve over rice.

Suggested toppings: red pepper flakes, sesame seeds, sliced green onions, etc.

Jenny’s Notes:

oven baked tofu

  • In an ideal world the tofu is prepared a bit in advance, so it has ample time to release as much water as possible. However, you can also wrap the tofu just 2x in paper towels. It only takes a couple minutes and still gets a good amount of water out. You may need more cornstarch in this case since the tofu will be moister, and that’s perfectly fine. Frying time may also take a few minutes longer, for the water to evaporate and get a proper crisp on the tofu.

  • If you prefer to bake tofu instead of frying: Prepare tofu as in step 1, than transfer onto a silpat or parchment paper lined cooking sheet. Bake in an oven preheated to 400°F / 205°C for 25-30 minutes, or until crisp and golden. Stir tofu once or twice during baking time. Add tofu into simmering sauce, let simmer for a few minutes, then add in broccoli to finish.

  • This is wonderful with red pepper flakes, sesame seeds, cilantro, and green onions sprinkled on top for garnish.

Tofu and Broccoli Stir Fry
Yield 3-4
Author
Prep time
20 Min
Cook time
15 Min
Total time
35 Min

Tofu and Broccoli Stir Fry

Crispy tofu with lightly crunchy broccoli in a salty stir fry sauce makes for a quick and satisfying dinner that is as good as take-out!
Cook modePrevent screen from turning off

Ingredients

Instructions

  1. Open and drain tofu. Wrap tightly in paper towels, place on a plate or cutting board, and place a weighted object on it, such as a bowl. Once the paper towel is soaked through, change them out for fresh paper towels. Repeat until paper towels remain mostly dry. Slice tofu into approx. 1/2” / 1cm cubes. Toss in a medium bowl with the cornstarch.
  2. Combine broth, soy sauce, and sugar; set aside.
  3. Generously drizzle an iron skillet or other non-stick pan with oil; place over medium-high heat.
  4. Fry tofu until golden brown and crispy, about 3-5 minutes. Flip the tofu, and fry other side until golden brown, another 3-5ish minutes.
  5. Lower heat to low; Add ginger and garlic and stir, until fragrant and sizzling, about a minute.
  6. Add in broth mixture and stir occasionally, until it starts to simmer.
  7. Add in broccoli, cover, and let sit for 2 minutes for “al dente” broccoli, or a couple more minutes for softer broccoli.
  8. Turn off heat and serve over rice.
  9. Suggested toppings: red pepper flakes, sesame seeds, sliced green onions, etc

Notes

  • In an ideal world the tofu is prepared a bit in advance, so it has ample time to release as much water as possible. However, you can also wrap the tofu just 2x in paper towels. It only takes a couple minutes and still gets a good amount of water out. You may need more cornstarch in this case since the tofu will be moister, and that’s perfectly fine. Frying time may also take a few minutes longer, for the water to evaporate and get a proper crisp on the tofu.
  • If you prefer to bake tofu instead of frying: Prepare tofu as in step 1, than transfer onto a silpat or parchment paper lined cooking sheet. Bake in an oven preheated to 400°F / 205°C for 25-30 minutes, or until crisp and golden. Stir tofu once or twice during baking time. Add tofu into simmering sauce, let simmer for a few minutes, then add in broccoli to finish.
  • This is wonderful with red pepper flakes, sesame seeds, cilantro, and green onions sprinkled on top for garnish.


Nutrition Facts

Calories

223

Fat

11 g

Sat. Fat

1 g

Carbs

16 g

Fiber

3 g

Net carbs

13 g

Sugar

2 g

Protein

16 g

Cholesterol

2 mg

Sodium

1322 mg

Nutritional information is approximate, based on 3 servings, not including rice or garnishes.

stir fry, tofu, broccoli, takeout, Chinese takeout, vegetarian dinner
dinner
Asian
Did you make this recipe?
Tag @jennyblogsandbakes on instagram and hashtag it #jennyblogs

Sticky Sesame Tofu

Adjustments.jpeg

Last Updated August 10, 2024

Lightly pan-fried, crispy tofu nuggets tossed in a sweet and salty, sticky sesame sauce and served over rice. Extra delicious when served with hot pepper flakes, green onion, sesame seeds, and broccoli.

This Sticky Sesame Tofu is like Sesame Chicken and General Tso’s Chicken all wrapped up in one. Except it’s tofu, and not chicken, which makes it a vegan recipe. I’m not vegan, I just happen to love tofu. BUT this recipe can also be made with chicken! Simply pan fry it until cooked through, then proceed with the recipe as written.

Some notes about this recipe for making it in Italy vs. US:

  1. The tofu I would get in Italy, seems to come in 380g packages instead of the 400-450gish (14-16oz) like in the States, which means that recipe proportions will be a tiny bit different. The photos you see on this post are when I used the Italian 380g package of tofu, but I used to make half the sauce recipe as written below. If you are using a smaller than 380g block of tofu, you could consider cutting this recipe in half, to keep it more “sticky” and less saucy.

  2. Tofu in Italy also comes in a vacuum-packed container and not in water like in the States. This means the tofu starts out less watery and is easier to dry. Usually one heavy duty napkin or paper towel is sufficient for pressing.

This post may contain affiliate links. If you make a purchase using these links, Jennyblogs may receive a small commission, at no extra cost to you. This helps to support Jennyblogs. For further information see the privacy policy. Grazie!

Recipe by Jenny


Adjustments.jpeg

Sticky Sesame Tofu

Serves 3-4

Ingredients:

For the Crispy Tofu

  • 1 box / roughly 400g firm or extra firm tofu, drained

  • 1/2 cup / 60g cornstarch

  • 2 Tbsp / 28g peanut oil or other high-heat oil, plus more as needed

For the Sticky Sesame Sauce

  • 1/2 cup / 120g soy sauce or tamari

  • 6 Tbsp / 90g tomato purée

  • 6 Tbsp / 76g brown sugar, or 6 Tbsp / 120g maple syrup

  • 2 Tbsp / 30g rice vinegar

  • 2 tsp sriracha or 1 tsp red pepper flakes

  • 2 tsp freshly grated ginger or 1/4 tsp ground ginger

  • 2 tsp / 10g cooking oil

  • 4 cloves garlic, finely chopped

  • 2 tsp / 10g sesame oil

For Serving (optional):

  • rice

  • steamed broccoli

  • avocado, sesame seeds, sliced green onion, lime wedges, red pepper flakes, cilantro

Directions:

Make the Crispy Tofu

  1. Place tofu block between some paper towels and press to absorb extra water. Repeat until tofu feels dry and no more water comes out. You can also do this ahead of time by placing something heavy over the tofu and paper towels, such as a bowl or pot, and leave it for several minutes.

  2. Place corn starch in a medium bowl. Slice tofu into squares and toss in the corn starch until evenly coated.

    Pan fry:

  3. Heat oil in a large fry pan and add tofu. Fry for a few minutes until golden, then flip tofu over. You can do this with tongs, or simply sauté/flip the tofu. The second way is faster, but requires a bit more skill and you have less control over which sides of the tofu land down. Add more oil to the pan as needed to get a nice golden crust on the tofu. Remove from heat when done.

    OR Bake:

  4. Disperse tofu cubes evenly onto a parchment paper or silpat lined baking sheet. Bake in a preheated 400°F / 205°C for about 30 minutes, or until light golden and crispy. Ideally, flip tofu halfway through baking.

Make the Sticky Sesame Sauce:

  1. While tofu is frying or baking, prepare the sauce. In a bowl stir together soy sauce, tomato purée, brown sugar, rice vinegar, sriracha, and ginger.

  2. Heat cooking oil in a medium pan over medium-low heat. Add garlic and cook until just starting to turn golden, 1-2 minutes.

  3. Add soy sauce mixture and cook for 3-4 minutes, stirring occasionally, until sauce just starts to thicken. Stir in sesame oil.

  4. Add tofu to sauce and toss until evenly covered; serve immediately with rice, broccoli, and garnishes, if desired.

Jenny’s Notes:

  • For the sodium conscious, you may wish to use reduced-sodium soy sauce. If you only have regular soy sauce available, you can replace 1/2 of the soy sauce with water.

  • If you don’t have rice vinegar, use any vinegar you have on hand.

  • You can add more sriracha or red pepper flakes if you want it extra spicy, or omit if you don’t like spice.

  • If not serving all the tofu right away, it’s best to store it separately from the sauce if you wish to keep the tofu crispy.

Sticky Sesame Tofu
Yield 2-3
Author
Prep time
10 Min
Cook time
20 Min
Total time
30 Min

Sticky Sesame Tofu

Lightly pan-fried or baked, crispy tofu nuggets tossed in a sweet and salty, sticky sesame sauce and served over rice. Tastes like Sesame Chicken or General Tso's Chicken, but vegan!

Ingredients

For the Crispy Tofu
For the Sticky Sesame Sauce
For Serving (all optional):

Instructions

Make the Crispy Tofu
  1. Place tofu block between some paper towels and press to absorb extra water. Repeat until tofu feels dry and no more water comes out. You can also do this ahead of time by placing something heavy over the tofu and paper towels, such as a bowl or pot, and leave it for several minutes.
  2. Place corn starch in a medium bowl. Slice tofu into squares and toss in the corn starch until evenly coated.
  3. Pan fry:
  4. Heat oil in a large fry pan and add tofu. Fry for a few minutes until golden, then flip tofu over. You can do this with tongs, or simply sauté/flip the tofu. The second way is faster, but requires a bit more skill and you have less control over which sides of the tofu land down. Add more oil to the pan as needed to get a nice golden crust on the tofu. Remove from heat when done.
  5. OR Bake:
  6. Disperse tofu cubes evenly onto a parchment paper or silpat lined tray. Bake in a preheated 400°F / 205°C for about 30 minutes, or until light golden and crispy. Ideally, flip tofu halfway through baking.
Make the Sticky Sesame Sauce:
  1. While the tofu is frying, prepare the sauce. In a bowl stir together soy sauce, tomato purée, brown sugar, rice vinegar, sriracha, and ginger.
  2. Heat the cooking oil in a medium pan over medium-low heat. Add the garlic and cook until just starting to turn golden, 1-2 minutes.
  3. Add the soy sauce mixture and cook for 3-4 minutes, stirring occasionally, until sauce just starts to thicken. Stir in the sesame oil.
  4. Add tofu to the sauce and toss until evenly covered; serve immediately with rice, broccoli, and garnishes, if desired.

Notes

  • For the sodium conscious, you may wish to use reduced-sodium soy sauce. If you only have regular soy sauce available, you can replace 1/2 of the soy sauce with water.
  • If you don’t have rice vinegar, use any vinegar you have on hand.
  • You can add more sriracha or red pepper flakes if you want it extra spicy, or omit if you don’t like spice.
  • If not serving all the tofu right away, it’s best to store it separately from the sauce if you wish to keep the tofu crispy.

Nutrition Facts

Calories

529

Fat

23 g

Sat. Fat

3 g

Carbs

76 g

Fiber

4 g

Net carbs

71 g

Sugar

40 g

Protein

9 g

Sodium

3296 mg

Cholesterol

0 mg

Nutritional information is approximate. Based on 2 servings of tofu with sauce, not including rice or garnishes

vegan, sticky sesame sauce, tofu, Sesame chicken tofu, General Tso's chicken tofu, sweet and sour
Dinner, Main
Asian
Did you make this recipe?
Tag @jennyblogsandbakes on instagram and hashtag it #jennyblogs
IMG_3749.jpeg

Caprese Risotto

Last updated August 28, 2024

IMG_0975.jpg

You know risotto, right? That creamy Italian rice dish, usually cooked with a splash of wine? And you also know Caprese salad, the traditional Italian salad consisting of just tomatoes, mozzarella, and basil? (I gave you a nice preface to today’s recipe by sharing the recipe for Insalata Caprese Tradizionale last month on the blog.) Do you know what happens when you combine these two ideas into one dish?

You get a delicious creamy, rice dish with flavors of tomatoes, mozzarella, and basil! Risotto is usually a pretty hearty, comforting dish, better for cooler months, but this one has delicate summer flavors so you can have a risotto for every season. Because It’s mid September, my family back home in Michigan has been wearing jackets and pants for weeks, meanwhile it’s still in the mid 30’sC / 90’sF here in Florence. I’m dreaming of cooler weather, breaking out the sweaters and cozy socks, lighting candles, and making hearty chilis, soups, and everything pumpkin spice and nice. And risotto. So I compromise with a taste of summer, the remnants of summer Italian produce, and a comforting cooler month recipe.

This Caprese Risotto is a bit of a mix between Italian and American cuisines. It’s a risotto and involves all the ingredients from Caprese, but that doesn’t necessarily make it Italian. It’s one of those dishes stuck in the in between, and that’s ok. If it’s anything, it’s American. And I thought I should let you know that, so I don’t give you the false impression that I’m giving you some nonna’s recipe passed down for generations. Nope, this is me being American, taking one thing and combining it with another to create something that doesn’t fall into any category really. That’s one of my pet peeves actually, when I see recipes labeled Italian this or Tuscan that…just because something has oregano, basil, sun-dried tomatoes, or parmesan, does not make it Italian. Especially if it’s a meat, usually chicken is what I see, mixed with pasta. That’s a big no-no in Italy. Pasta is a primo piatto, or first course, and chicken and proteins are always a secondo piatto. You will also never find chicken on pizza. Or pineapple. This doesn’t mean to say you can’t do these things, of course you can, but just keep in mind that it is not Italian. After that, call it as you wish. Oh, and hand me a nice slice of pizza with pineapple, ya? Thanks.

Back to this summery risotto. When I first was making this I wanted to make sure the tomato flavor was closer to a fresh, sun-ripened tomato as it would be for Caprese, and not pungent and salty/sweet like we associate with a lot of canned tomato soups. I love tomato soup, just not the flavor that I was going for here. By using fresh tomatoes and getting saltiness from just the low-sodium broth, this turned out quite nicely. Add the creamy, pull-apart cheesiness from the mozzarella and the sweet, nutty basil, you’ve got a winner summer dinner! If you like, although not traditional to the Italian Caprese salad, add a drizzle of balsamic vinegar at the end. This dish isn’t traditional, so I feel ok about adding it. ;)

Bonus, this dish is also effortlessly gluten-free.

This post may contain affiliate links. If you make a purchase using these links, Jennyblogs may receive a small commission, at no extra cost to you. This helps to support Jennyblogs. For further information see the privacy policy. Grazie!


Caprese Risotto

Serves 4-6

IMG_0980.jpg

Ingredients:

  • 6 cups / 1,422g low-sodium vegetable broth

  • 2 Tbsp / 28g olive oil

  • 1/2 onion, diced

  • 3 cloves garlic, minced

  • 1 1/2 cups / 278g arborio rice, uncooked

  • 1/2 cup / 119g white wine, optional

  • 3 medium tomatoes, chopped

  • 1/2 cup cherry tomatoes, halved or quartered

  • Parmigiano reggiano (parmesan) rind, optional

  • 1 1/2 tsp fresh oregano, or 1/2 tsp dried

  • about 16 fresh basil leaves, sliced into ribbons

  • 1/2 cup / 50g grated parmigiano reggiano

  • 200g fresh mozzarella, sliced into chunks

  • extra virgin olive oil, more cherry tomatoes, basil leaves for garnishing, and balsamic vinegar if desired

Directions:

  1. Heat broth in a pan over low heat.

  2. In a large pot, heat oil over medium heat. Add onions and simmer for a few minutes, until starting to turn translucent.

  3. Add garlic and rice, stirring occasionally, until rice is toasted and just starting to turn translucent on the edges; about 3-4 minutes.
  4. Add the wine slowly, stirring all the while, until mostly absorbed by the rice.

  5. Add all of the tomatoes, stir until heated through. Add parmigiano reggiano rind, if using.

  6. Begin adding heated broth to the rice mixture, 1/2 cup / 119g at a time, stirring and allowing broth to be mostly absorbed before adding the next bit. As you near the end of the broth, start checking the rice every minute or two. When it looks cooked and is al dente when tasted, remove from heat. You may not need all the broth, but make sure it’s not too dry or thick. You’ll want to pull it from the heat when it still looks a bit soupy, as it will continue to cook and absorb liquid. (Thick, moundable risotto is a technically overcooked risotto. It should lazily settle back into the plate if you try and mound it.)

  7. Add oregano, basil, parmigiano, and mozzarella. Stir until parmigiano is melted and mozzarella is stringy. Remove any chunks of parmigiano reggiano rind before serving.

  8. Spoon risotto onto plates, drizzle with olive oil and garnish with cherry tomatoes and basil leaves. Drizzle with a bit of balsamic, if desired. Serve immediately.


Jenny’s Notes:

  • In a pinch you can use a 14.5oz / 411g can of diced tomatoes instead of the 3 medium tomatoes. Fresh tomatoes will always be better but sometimes you gotta do what you gotta do!

  • If using wine, try using a dry white wine, nothing too aged or overpowering, as this is a risotto with more delicate, summery flavors. Think Pinot Blanc, Gewurztraminer, a young Riesling, etc. Whichever wine you use in your cooking should ideally be served with the meal. Because of this, it is mistaken to use the “cheap” wines in cooking and then bring out the nice stuff for the meal. Remember, you’re cooking out (most of) the alcohol, not the flavor.

    In fact, because of the delicate flavors of this risotto I don’t always add wine, but it’s up to you if you do! Wine is traditional in risotto. :)

  • If you have only bouillon cubes or normal-sodium broth on hand, you can substitute part water for the broth to keep the sodium levels down. I recommend using 4 cups / 948g worth of broth/bouillon broth and 2 cups / 474g water.

  • Using heated broth speeds up the cooking time so you’re not waiting for the broth to simmer and be absorbed between each addition. I have, however, made risotto many a time before I learned this trick, and although it takes a bit longer to cook when adding cold or room temp broth, it won’t in any way ruin your risotto.

  • Parmigiano Reggiano (parmesan cheese) is another ingredient typically used in risotto. It’s not used in caprese but it lends a cheesy hand to the mozzarella which is quite mild.

  • Another idea I’m drooling over right now, would be to add a nice portion of burrata on top of the plated risotto right before serving. Burrata is very similar to mozzarella, except it’s softer. It usually comes in round form, and the moment you cut into it the super soft, creamy center oozes out. Oh yes. Oh yes please.

    If you don’t live in Italy chances are burrata and even fresh mozzarella will cost you, so you may opt for one or the other in this recipe. If your budget allows, go for both!! Here in Italy fresh mozzarella can be found easily for 2-3euro a pound.

Caprese Risotto
Yield 4-6 servings
Author
Prep time
45 Min
Total time
45 Min

Caprese Risotto

Creamy risotto playing off the classic Italian summer dish of caprese; tomatoes, fresh mozzarella, fresh basil, parmesan cheese and a hint of oregano.
Cook modePrevent screen from turning off

Ingredients

Instructions

  1. Heat broth in a pan over low heat.
  2. In a large pot, heat oil over medium heat. Add onions and simmer for a few minutes, until starting to turn translucent.
  3. Add garlic and rice, stirring occasionally, until rice is toasted and just starting to turn translucent on the edges; about 3-4 minutes.
  4. Add the wine slowly, stirring all the while, until mostly absorbed by the rice.
  5. Add all of the tomatoes, stir until heated through.
  6. Begin adding heated broth to the rice mixture, 1/2 cup / 119g at a time, stirring and allowing the broth to be mostly absorbed before adding the next bit. Keep an eye on the rice; when it starts to look cooked and is al dente when tasted, remove from the heat. You may or may not need all the broth, but make sure it’s not too dry or thick. You’ll want to pull it from the heat when it still looks a bit soupy, as it will continue to cook and absorb liquid. (A thick, moundable risotto is a technically overcooked risotto. A correctly cooked risotto should lazily settle back into the plate if you try and mound it.)
  7. Add oregano, basil, parmigiano, and mozzarella. Stir until parmigiano is melted and mozzarella is stringy.
  8. Spoon risotto into plates, drizzle with olive oil and garnish with cherry tomatoes and basil leaves. Drizzle with a bit of balsamic, if desired. Serve immediately.

Notes

In a pinch you can use a 14.5oz / 411g can of diced tomatoes instead of the 3 medium tomatoes. Fresh tomatoes will always be better but sometimes you gotta do what you gotta do! If using wine, try using a light white wine, nothing too aged or overpowering, as this is a risotto with more delicate, summery flavors. Think Pinot Blanc, Gewurztraminer, a young Riesling, etc. Whichever wine you use in your cooking should ideally be served with the meal. Because of this, it is mistaken to use the “cheap” wines in cooking and then bring out the nice stuff for the meal. Remember, you’re cooking out (most of) the alcohol, not the flavor. In fact, because of the delicate flavors of this risotto I don’t add wine, but it’s up to you if you do! Wine is traditional in risotto so you may think me odd that I don’t add it. :)If you have only bouillon cubes or normal-sodium broth on hand, you can substitute part water for the broth to keep the sodium levels down. I recommend using 4 cups / 948g worth of broth/bouillon broth and 2 cups / 474g water. Using heated broth speeds up the cooking time so you’re not waiting for the broth to simmer and be absorbed between each addition. I have, however, made risotto many a time before I learned this trick, and although it takes a bit longer to cook when adding cold or room temp broth, it won’t in any way ruin your risotto. Another idea would be to add a nice portion of burrata on top of the plated risotto right before serving. Burrata is very similar to mozzarella, except it’s softer. It usually comes in round form, and the moment you cut into it the super soft, creamy center oozes out.

Nutrition Facts

Calories

423.93

Fat

21.69 g

Sat. Fat

8.54 g

Carbs

36.34 g

Fiber

2.31 g

Net carbs

34.03 g

Sugar

7.25 g

Protein

16.20 g

Sodium

714.71 mg

Cholesterol

42.80 mg

Nutritional information is approximate and based on 4 servings.

gluten-free caprese, risotto, rice, tomatoes, fresh basil, fresh mozzarella, parmesan cheese, parmigiano reggiano, burrata, Italian recipe, oregano, extra virgin olive oil, balsamic vinegar, white wine, which wine to use in risotto
dinner, vegetarian
Italian, American
IMG_0982.jpg

Butternut Squash Risotto

IMG_2738.JPG

Last updated July 12, 2024

A simple, risotto bursting with flavor with butternut squash, bell pepper, and spinach.

The formula is straightforward and simple, not requiring wine or cheese as risotto traditionally does, which keeps it friendly for certain dietary restrictions. Wine and cheese can certainly be added though, fear not!

This post may contain affiliate links. If you buy something using these links, Jennyblogs may receive a small commission, at no extra cost to you. This helps to support Jennyblogs. For further information see the privacy policy. Grazie!


Butternut Squash Risotto

Serves 2-4

Ingredients:

  • 2 Tbsp / 28g oil

  • 2 cloves garlic, peeled and minced

  • 10 oz / 300g butternut squash, seeded, peeled and chopped small (or you could just say half of a small squash)

  • 1 medium onion, chopped

  • 1 large red bell pepper, seeded and chopped

  • 7 oz / 200g arborio rice

  • Parmigiano reggiano (parmesan) rind, optional

  • 1 pint / 500ml vegetable broth

  • about 3 oz / 100g spinach, chopped or whole

Directions:

IMG_2737.JPG
  1. In a large pan over medium-low heat, add oil and garlic and simmer until fragrant, about a minute.

  2. Add squash, onion, and bell pepper and cook until squash begins to soften.

  3. Add rice and stir around to toast, about 1-2 minutes.

  4. Add parmigiano reggiano rind, if using.

  5. Add stock and simmer for 15-20 minutes, stirring frequently. If rice starts to cook dry, add more water or stock as needed.

  6. Once the rice is cooked, the squash is tender, and the liquid is mostly absorbed (but not all!), add the spinach and stir until wilted. Remove any chunks of parmigiano reggiano rind before serving.

  7. Serve immediately.

Jenny’s Notes:

  • Risotto is a fairly quick, delicious, and versatile dish, great for colder months. Feel free to add or subtract vegetables to your liking. Any type of squash you like could be used, even fresh pumpkin!

  • If you like to ahem, cook with wine, and sometimes add it to your food even, feel free to add about 1/2 cup of red or white wine or dry white vermouth. Add it in after step 3, after you’ve toasted the rice and before the stock. Allow the wine to evaporate and absorb into the rice before continuing with stock.

  • When you’re in a pinch and don’t have risotto or arborio rice, you really could use any kind. Just keep an eye on the cooking instructions for the kind of rice you are using so you will have an idea how long it will take. Other kinds of rice won’t hold their “bite” as well and end up mushier.

  • If reheating leftovers, I would recommend adding in a touch more water or broth. The longer risotto sits the more liquid it will absorb, and may end up a bit dry.

Butternut Squash Risotto
Yield 2-4
Author
Prep time
15 Min
Cook time
30 Min
Total time
45 Min

Butternut Squash Risotto

Classic risotto with butternut squash, bell peppers, and spinach. Creamy and delicious, yet this particular risotto is dairy-free and alcohol-free

Ingredients

Instructions

  1. In a large pan over medium-low heat, add oil and garlic and simmer until fragrant, about a minute.
  2. Add squash, onion, and bell pepper and cook until squash begins to soften.
  3. Add rice and stir around to toast, about 1-2 minutes.
  4. Add parmigiano reggiano rind, if using.
  5. Add stock and simmer for 15-20 minutes, stirring frequently. If rice starts to cook dry, add more water or stock as needed.
  6. Once rice is cooked, the squash is tender, and the liquid is mostly absorbed (but not all!), add spinach and stir until wilted. Remove any chunks of parmigiano reggiano rind before serving.
  7. Serve immediately.

Notes

  • Risotto is a fairly quick, delicious, and versatile dish, great for colder months. Feel free to add or subtract  vegetables to your liking. Any type of  squash you like could be used, even fresh pumpkin!
  • If you like to ahem, cook with wine, and sometimes add it to your food even, feel free to add about 1/2 cup of red or white wine or dry white vermouth. Add it in after step 3, after you’ve toasted the  rice and before the stock. Allow the wine to evaporate and absorb into the  rice before continuing with stock.
  • When you’re in a pinch and don’t have risotto or arborio rice, you really could use any kind. Just keep an eye on the cooking instructions for the kind of rice you are using so you will have an idea how long it will take. Other kinds of rice won’t hold their “bite” as well and end up mushier.
  • If reheating leftovers, I would recommend adding in a touch more water or broth. The longer risotto sits the more liquid it will absorb, and may end up a bit dry.


Nutrition Facts

Calories

670.96

Fat

19.02 g

Sat. Fat

3.75 g

Carbs

111.23 g

Fiber

9.27 g

Net carbs

101.97 g

Sugar

11.24 g

Protein

16.05 g

Sodium

1232.89 mg

Cholesterol

10.2 mg

Nutritional information is approximate, based on 1 serving if recipe serves 2.

risotto, traditional, classic, alcohol free, dairy, free, butternut squash bell pepper and spinach risotto
dinner
American, Italian
Did you make this recipe?
Tag @jennyblogsandbakes on instagram and hashtag it #jennyblogs