Strawberry Shortcake

Last Updated August 18, 2024

This post may contain affiliate links. If you buy something using these links, Jennyblogs may receive a small commission, at no extra cost to you. This helps to support Jennyblogs. For further information see the privacy policy. Grazie!

Strawberry shortcake is a summer classic. All you need are juicy, ripe strawberries, shortcakes, which are really just biscuits with a bit of sugar added to them, and whipped cream. If you decided on adding some vanilla ice cream to the mix I don’t think anyone would be mad about it. I certainly wouldn’t be. Did I mention they’re really simple to make?

public.jpg

It’s so simple because the strawberries are the shining star and don’t need much dressing up. If you try and make this when strawberries are out of season, even if you can find them in the grocery store, it just won’t be the same. This is a dessert that calls for strawberries ripened under the summer sun, bursting with flavor.

Do you want to know a secret? Strawberry shortcakes will reach the pinnacle of their goodness if you are able to pick the strawberries yourself! Not only will you be the one choosing the juiciest berries, but you’ll KNOW they’re as fresh as they come! Plus, you’ll taste the fruits of your own hard work and it makes it that much sweeter. Literally. I loved going strawberry picking with my mom as a kid. Strawberry season in Michigan is always in beginning to mid summer, usually end of June or early July, and we’d come home with baskets full. Then I’d help my mom hull and slice them, keeping some for eating, some for making strawberry shortcake and other desserts, and some for freezing and making jam.

Eat strawberry shortcake for dessert, or breakfast, snack, lunch, and dinner. I mean, biscuits and fruit sounds like a balanced and great way to start off the morning! Plus you’ll want to eat them as much as you can while the strawberry season lasts. A great thing about these is that you can add as little or as much sugar as you want! See notes at bottom of recipe for some ideas.

Recipe from my mama with tweaks from moi.


Strawberry Shortcake

Serves: 8-10

Ingredients:

public.jpg

For the Macerated Strawberries

  • 4-5 cups strawberries, washed, hulled, and sliced

  • 3-4 Tbsp / 35-50g sugar or to taste

For the Shortcakes

  • 2 cups / 240g all-purpose flour

  • 1/4 cup / 50g sugar

  • 4 tsp / 19g baking powder

  • 1/2 tsp / 2g salt

  • 1/2 cup / 113g cold butter or scant 1/2 cup / 100g oil

  • 2/3 cup / 158g cold milk or buttermilk

For the Whipped Cream

  • 1 cup / 237g heavy whipping cream

  • 3-4 Tbsp / 35-50g sugar or to taste

  • 1 tsp / 4g vanilla extract

Directions:

Oven 450°F / 232°C. Have ready an ungreased baking sheet.

Make the Macerated Strawberries

  1. Place strawberries in a bowl, add sugar, and mash them a bit or a lot, as desired, with a fork or masher. Place in fridge while you prepare shortcakes.

Make the Shortcakes

  1. In a large bowl whisk together flour, sugar, baking powder, and salt.

  2. Cut in butter or oil until mixture resembles coarse crumbs.

  3. Make a well in center of flour mixture and pour in milk. Mix just until most of the flour is moistened, then turn mixture out onto a floured surface.

  4. Knead lightly, up to 10-12 times, until you have a soft but not too sticky dough. Don’t overwork or biscuits will be tough.

  5. Gently pat dough out into a circle about 1in / 2.5cm thick, checking to make sure underneath is still floured well and dough isn’t sticking.

  6. Using a biscuit cutter or a round glass 2-3in / 5-7cm in diameter, cut out as many biscuits as you can. Place biscuits on baking sheet. Collect dough scraps and reshape into a ball. Repeat patting into a circle and cutting until dough is used up, probably 2-3 times at most, depending on size of biscuit cutter.

  7. Bake biscuits in preheated oven for 10-12 minutes, or until risen and lightly golden brown.

Make the Whipped Cream

  1. In the bowl of a stand mixer fitted with whisk attachment or with a hand mixer, whip heavy cream until soft peaks form.

  2. Add sugar and vanilla and continue whipping until stiff peaks form.

Assembly

Slice biscuits open and spoon over strawberries and whipped cream.

Jenny’s Notes:

  • The sugar mixed in with the strawberries is traditional but not absolutely necessary. Although it helps soften the strawberries to lose their juice and create more of a soft sauce, I like it also without adding any sugar, because everything else in this recipe is already a bit sweet.

  • The biscuit dough might seem too soft at first, but the moment the baking powder starts working and it hits the floured surface it should become very manageable. Just be careful not to over work it, a little bit goes a long way.

  • When cutting biscuits, cut straight down, no twisting, or this can seal the edges and prevent a good rise. You can dip the biscuit cutter in some flour to help prevent any sticking.

  • If you place the biscuits next to each other on the baking sheet they can help each other “climb” up and achieve a nicer rise! I know this feels counterintuitive as so often things are supposed to be “spaced evenly apart”, but give it a try!

Strawberry Shortcake
Yield 8-10 servings
Author
Prep time
40 Min
Cook time
12 Min
Total time
52 Min

Strawberry Shortcake

Classic strawberry shortcake recipe handed down from my mama. Homemade biscuits, juicy strawberries, and fresh whipped cream assembled together in a summery dessert.
Cook modePrevent screen from turning off

Ingredients

For the Macerated Strawberries
For the Shortcakes
For the Whipped Cream

Instructions

Make the Macerated Strawberries
  1. Place strawberries in a bowl, add sugar, and mash them a bit or a lot, as desired, with a fork or masher. Place in fridge while you prepare the shortcakes.
Make the Shortcakes
  1. Preheat oven to 450°F / 232°C. Have ready an ungreased baking sheet.
  2. In a large bowl whisk together flour, sugar, baking powder, and salt.
  3. Cut in butter or oil until mixture resembles coarse crumbs.
  4. Make a well in center of flour mixture and pour in milk. Mix just until most of the flour is moistened, then turn mixture out onto a floured surface.
  5. Knead lightly, up to 10-12 times, until you have a soft but not too sticky dough. Don’t overwork or biscuits will be tough.
  6. Gently pat dough out into a circle about 1in / 2.5cm thick, checking to make sure underneath is still floured well and dough isn’t sticking.
  7. Using a biscuit cutter or a round glass 2-3in / 5-7cm in diameter, cut out as many biscuits as you can. Place biscuits on baking sheet. Collect dough scraps and reshape into a ball. Repeat patting into a circle and cutting until dough is used up, probably 2-3 times at most, depending on size of biscuit cutter.
  8. Bake biscuits in preheated oven for 10-12 minutes, or until risen and lightly golden brown.
Make the Whipped Cream
  1. In the bowl of a stand mixer fitted with whisk attachment or with a hand mixer, whip heavy cream until soft peaks form.
  2. Add sugar and vanilla and continue whipping until stiff peaks form.
Assembly
  1. Slice biscuits open and spoon over strawberries and whipped cream!

Notes

The sugar mixed in with the strawberries is traditional but not absolutely necessary. Although it helps soften the strawberries to lose their juice and create more of a soft sauce, I like it also without adding any sugar, because everything else in this recipe is already a bit sweet.The biscuit dough might seem too soft at first, but the moment the baking powder starts working and it hits the floured surface it should become very workable. Just be careful not to over work it, a little bit goes a long way.When cutting the biscuits, cut straight down, no twisting, or this can seal the edges and prevent a good rise. You can dip the biscuit cutter in some flour to help prevent any sticking. If you place the biscuits next to each other on the baking sheet they can help each other “climb” up and achieve a nicer rise!

Nutrition Facts

Calories

436.99

Fat

24.15 g

Sat. Fat

7.94 g

Carbs

51.65 g

Fiber

2.77 g

Net carbs

48.88 g

Sugar

24.49 g

Protein

5.28 g

Sodium

368.72 mg

Cholesterol

35.06 mg

Nutritional Information is approximate.

strawberry shortcakes, summer dessert, best traditional classic strawberry shortcake
dessert
American
Did you make this recipe?
Tag @jennyblogsandbakes on instagram and hashtag it #jennyblogs
public.jpg

Mascarpone Peanut Butter Pie with Chocolate Ganache

IMG_5063.jpg

Peanut Butter Pie with Chocolate Whipped Cream

Last Updated August 14, 2024

Let me take a gander at what you're thinking, probably something like, "OH! PEANUT BUTTER PIE? I love peanut butter pie! So good! But I already have a recipe for peanut butter pie. Why do I need this recipe? Wait, don't YOU already have a recipe up on this blog for peanut butter pie??"

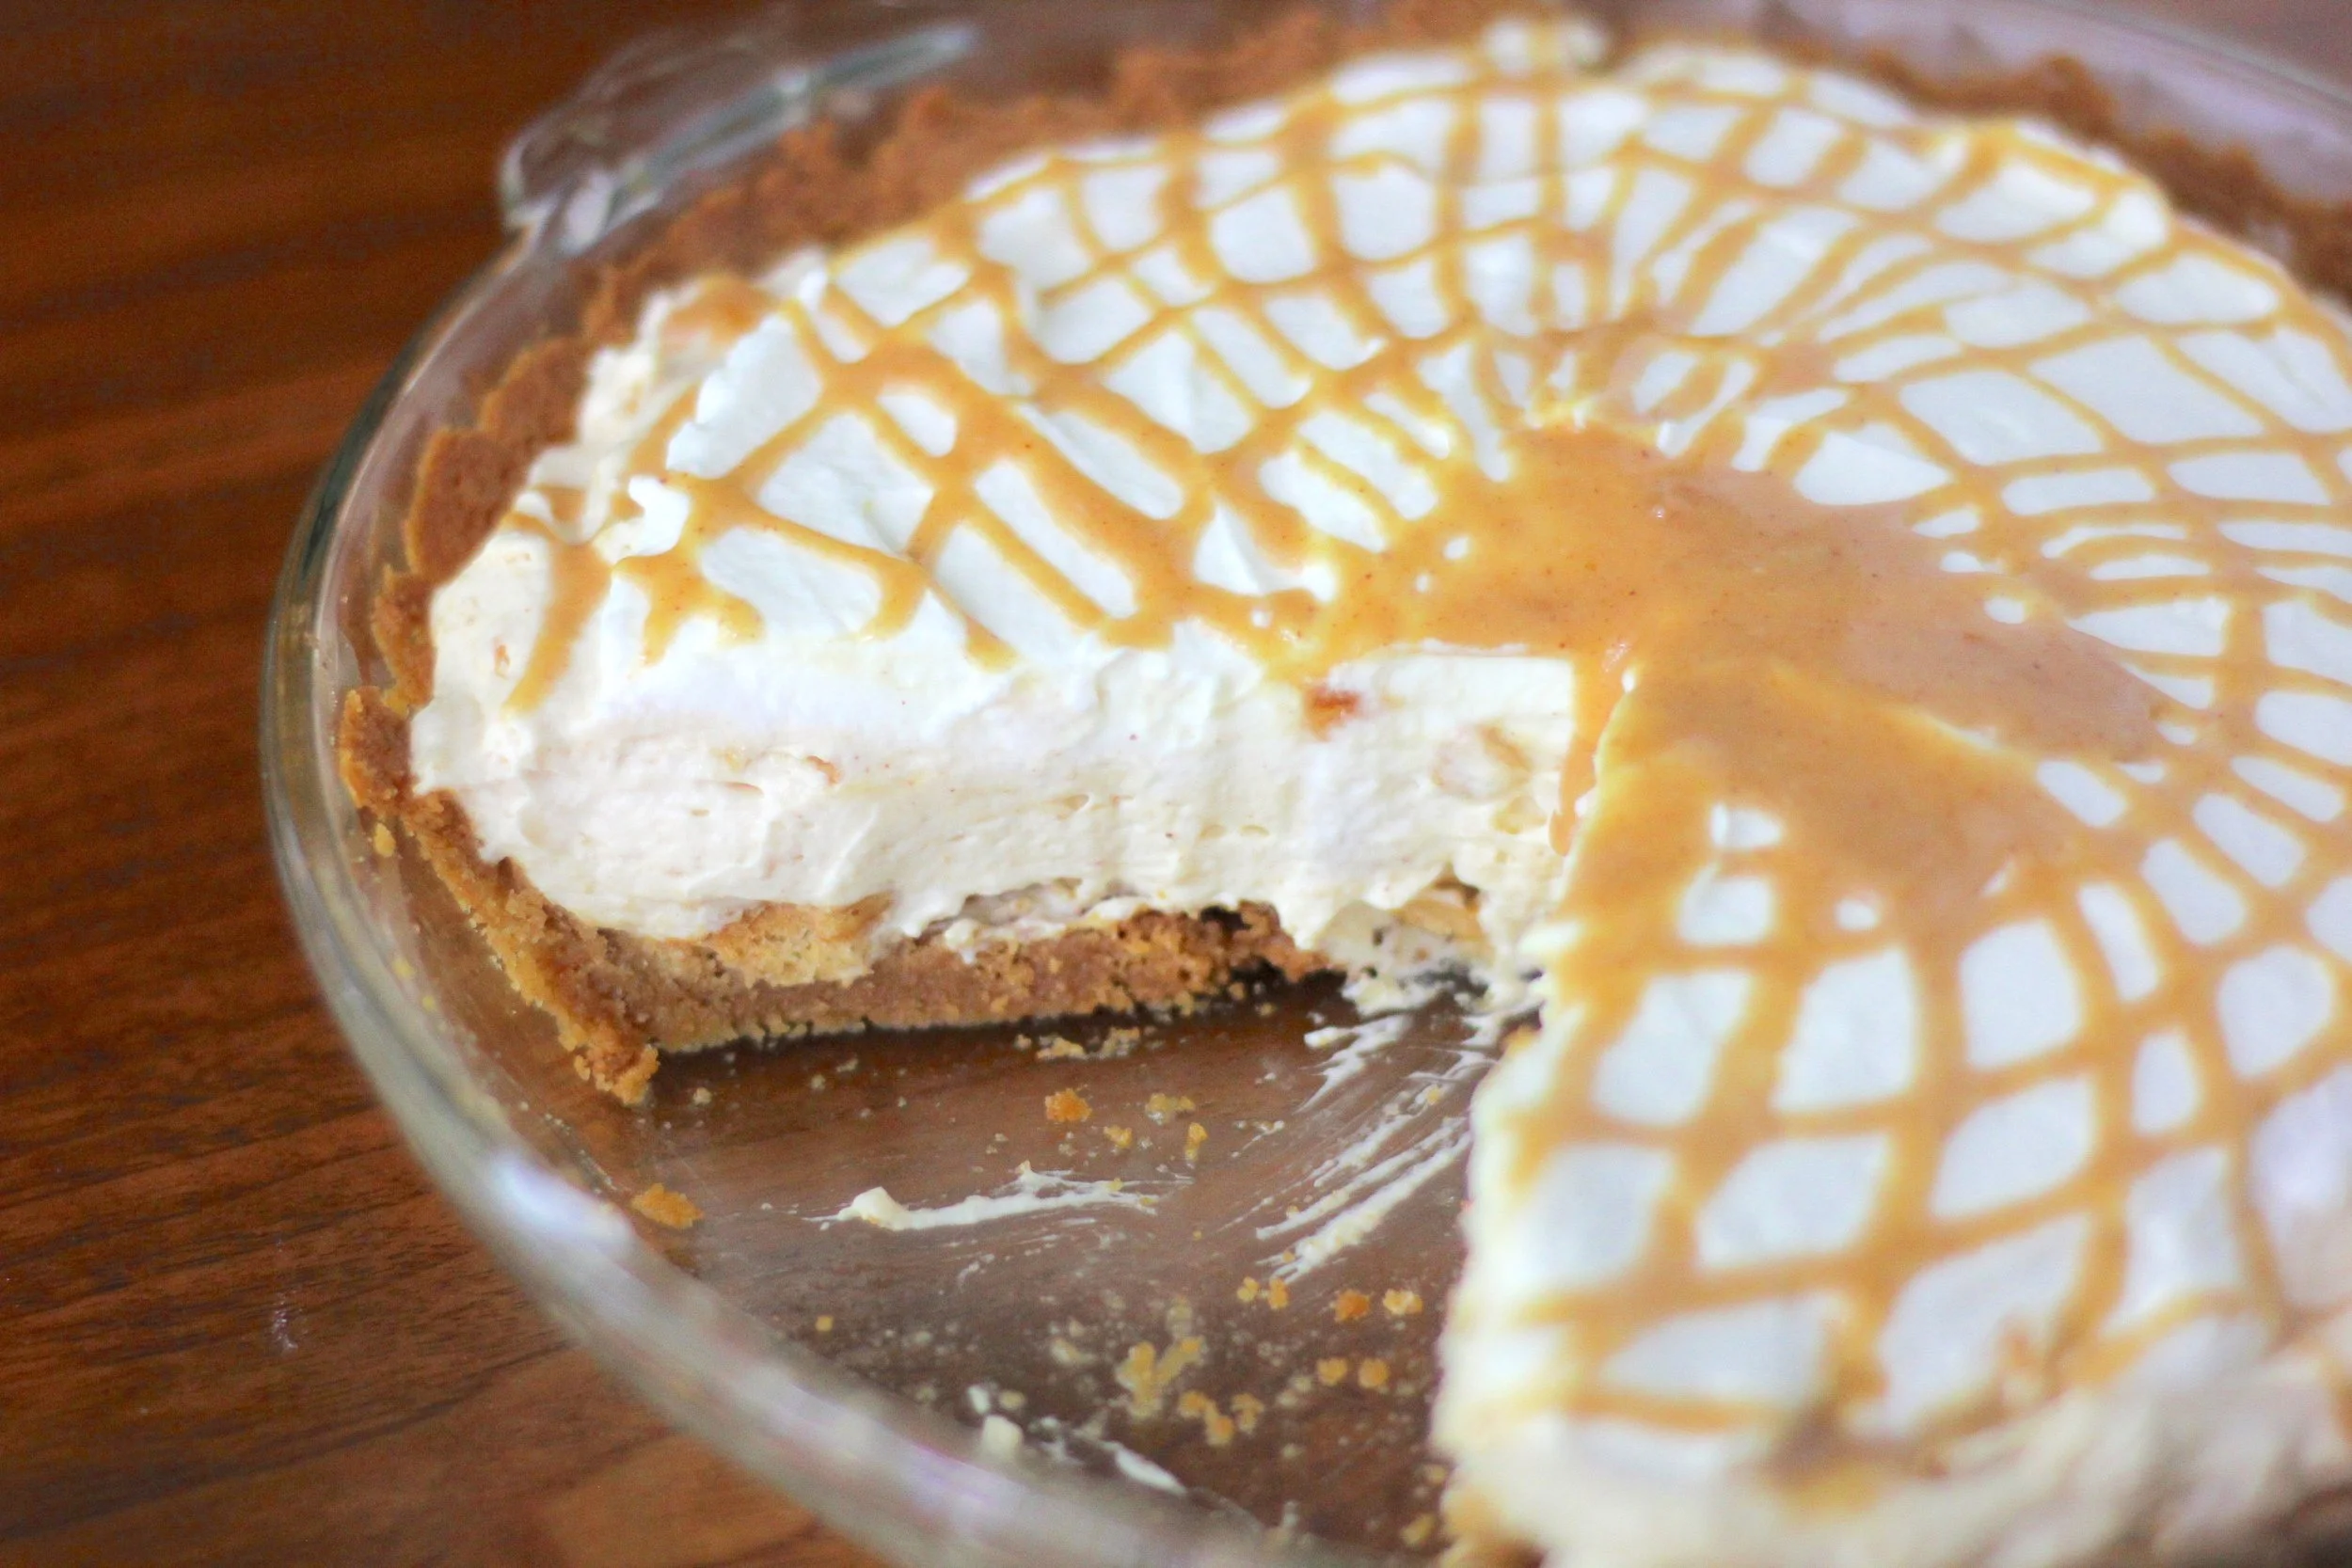
Well, you'd be right about one thing, this is not my first recipe up for a peanut butter pie. But let me tell you, they each have their own merited place. For example, the Peanut Butter Pie with Chocolate Whipped Cream has a shortbread crust, creamy peanut butter filling, topped with chocolate whipped cream.  

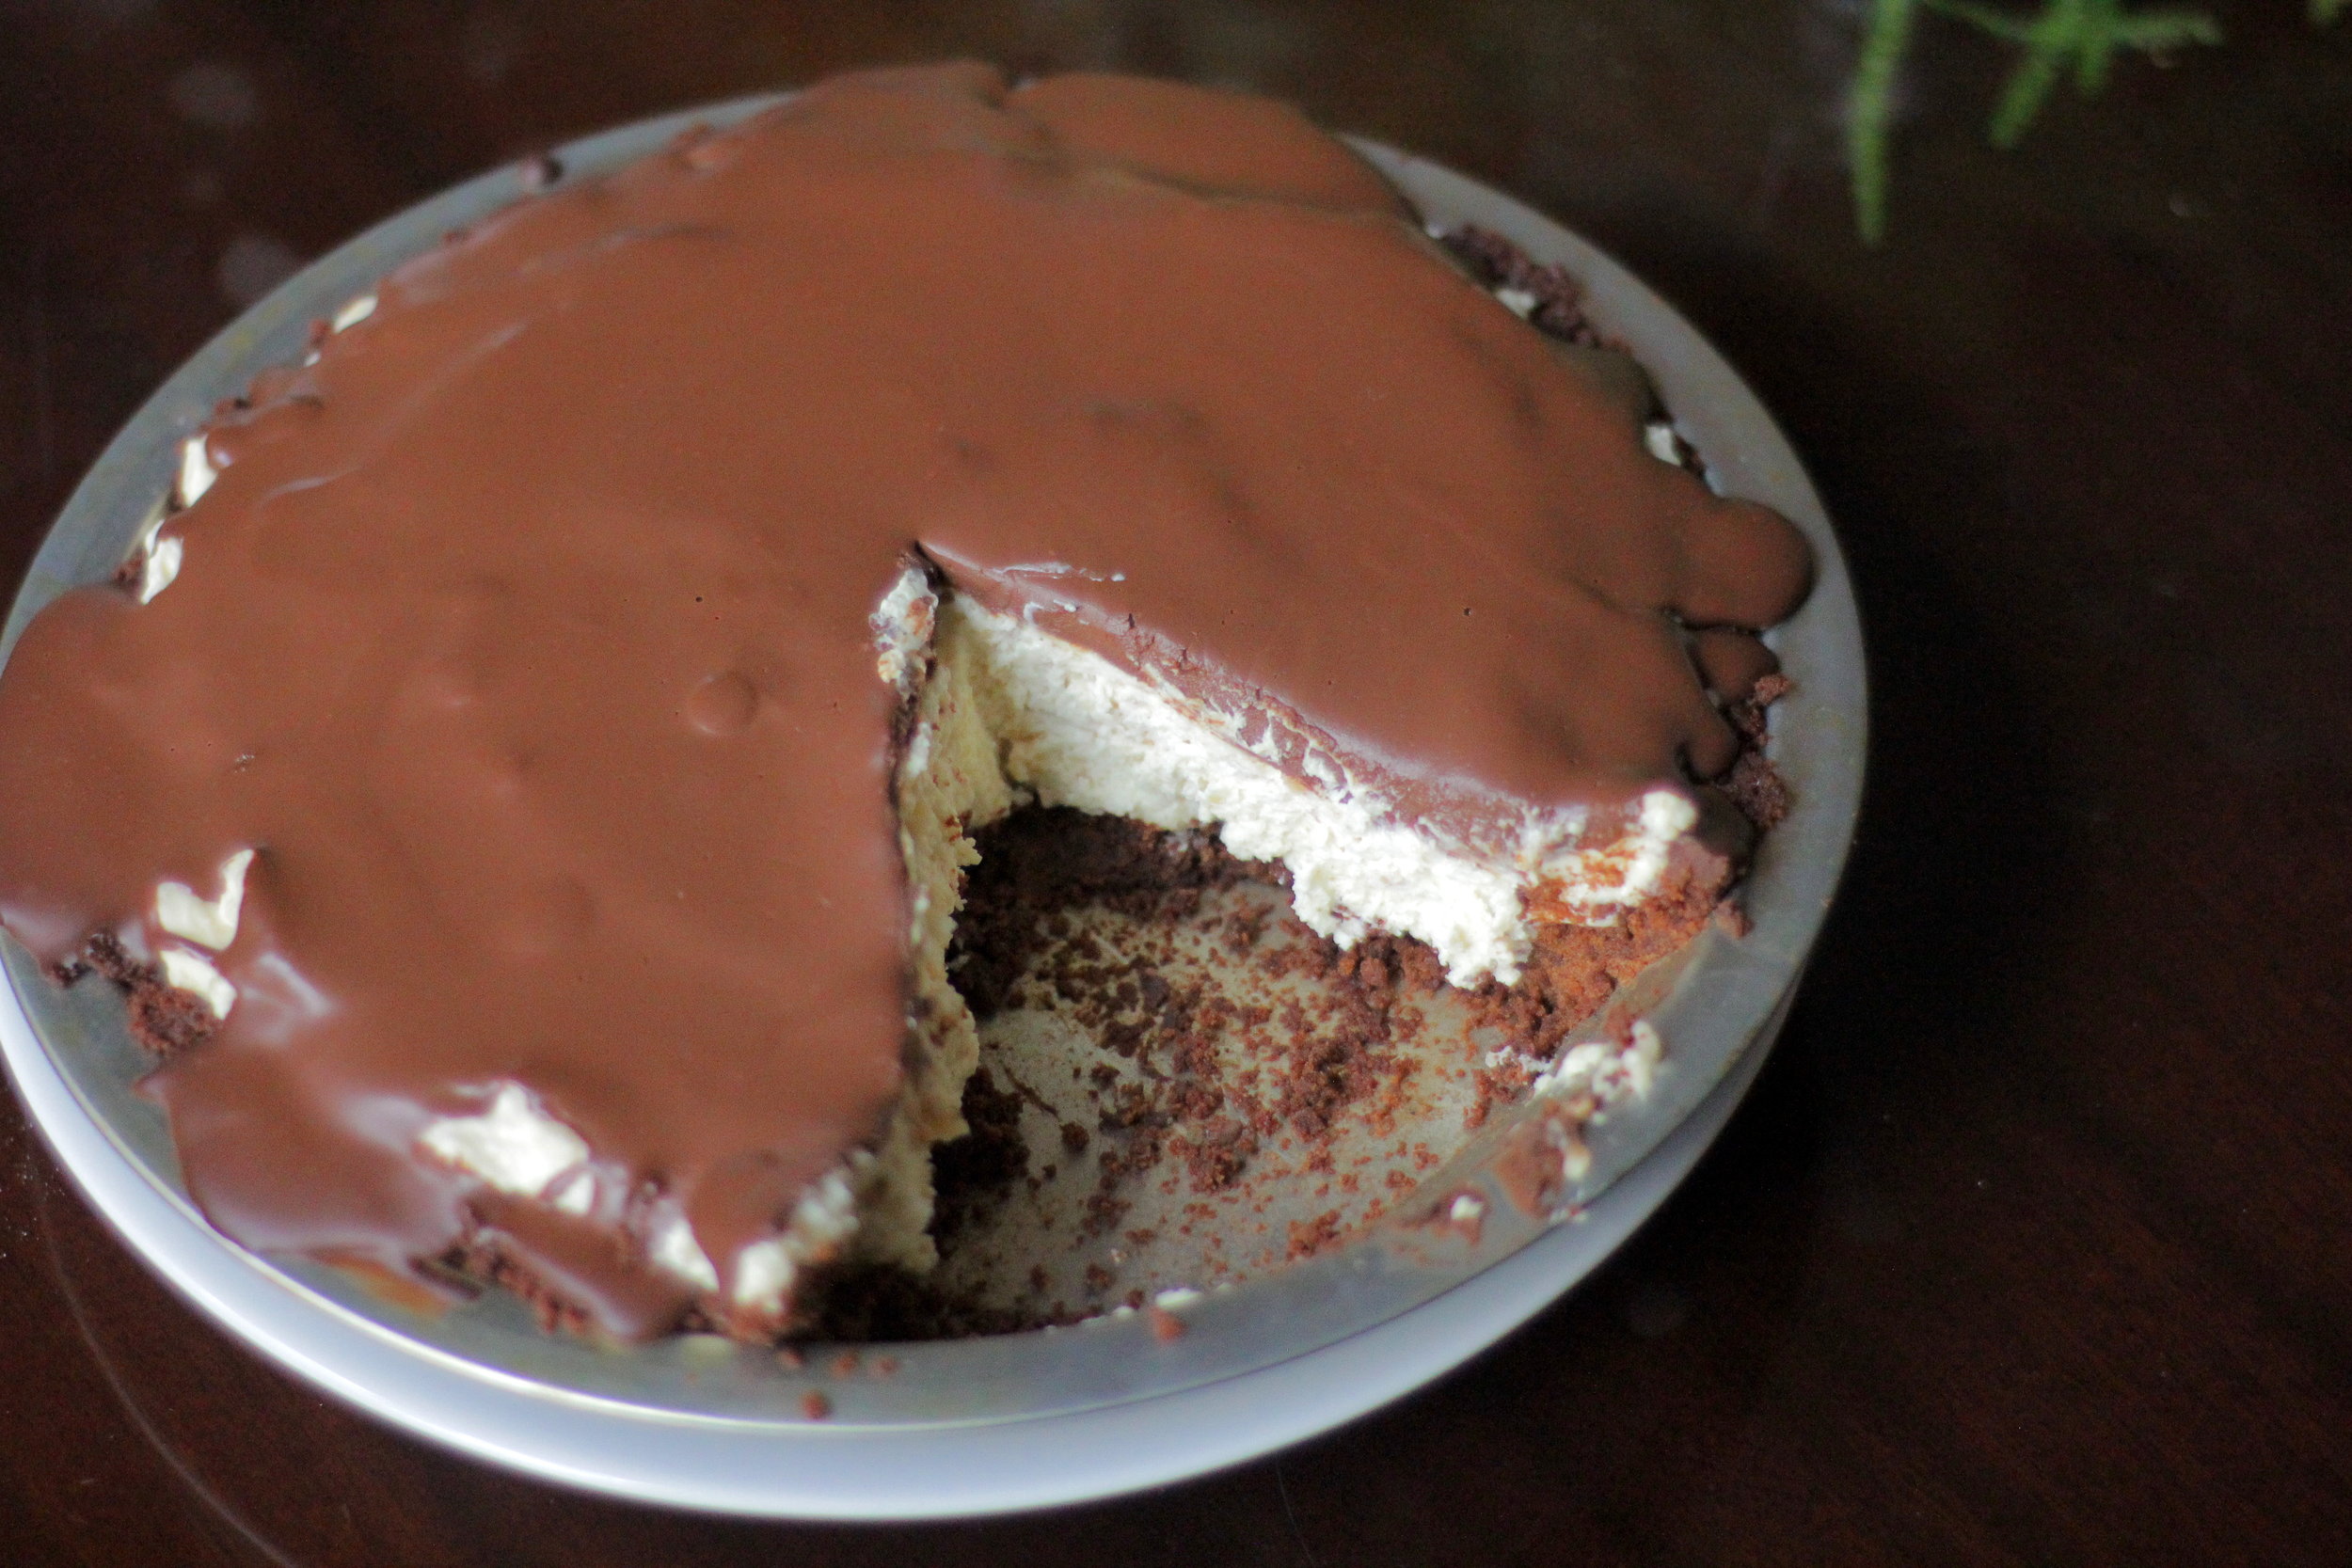
This peanut butter pie has a chocolate crust, an ultra creamy peanut butter mascarpone filling topped with flowing chocolate ganache. The chocolate ganache envelopes the peanut butter filling in a tender embrace...still with me? Ok let's stop dreaming and comparing peanut butter pies and MAKE one!  

Nutter Butter Pie

Not a fan of chocolate and peanut butter together? Neither is my mom.  That's ok, we can still be friends. And because of that, why not head over to this Nutter Butter Pie instead? No chocolate there! 

This post may contain affiliate links. If you buy something using these links, Jennyblogs may receive a small commission, at no extra cost to you. This helps to support Jennyblogs. For further information see the privacy policy. Grazie!

Recipe adapted from what megan's making.


Mascarpone Peanut Butter Pie with Chocolate Ganache

Serves 8-12

Ingredients:

For the Chocolate Crust

  • 7.5 oz / 210g chocolate graham crackers, teddy grahams, or chocolate shortbread

  • 2 oz / 55g (1/3 cup) semi-sweet chocolate, finely chopped, or mini chips

  • 5 Tbsp / 65g butter, melted

For the Peanut Butter Filling

IMG_5030.JPG
  • 1 cup / 237g heavy whipping cream

  • 8 oz / 227g mascarpone or cream cheese, room temperature

  • 1 cup / 250g peanut butter

  • 1/2 cup / 100g sugar

  • 1 tsp / 5g vanilla extract

For the Chocolate Ganache

  • 4 oz / 110g (2/3 cup) semi-sweet chocolate, finely chopped, or chips

  • 1 Tbsp / 14g butter

  • 1/2 cup / 118g heavy whipping cream

Directions:

Oven 325°F / 163°C.  Ungreased 9in / 23cm pie dish.  

Make the Chocolate Crust

  1. In a food processor combine chocolate grahams, butter, and chocolate chips.  Pulse until the mixture is uniformly fine crumbs.  Or do it the "old fashioned" way and beat the crumbs to oblivion in a well sealed plastic bag with a rolling pin or other hard object, then mixing in the chocolate and butter in a bowl with a spoon. 

  2. Press evenly into the bottom and sides of pie dish and bake for 8 minutes or until fragrant.  Set aside to cool completely.

Make the Peanut Butter Filling

  1. In the bowl of a stand mixer or with a handheld mixer, beat the whipping cream until stiff peaks form.  Transfer to another bowl if using a stand mixer and set aside.

  2. Again in the bowl of a stand mixer or a separate bowl with a handheld mixer, beat the cream cheese, peanut butter, sugar, and vanilla until light and fluffy.  

  3. Carefully fold the whipped cream into the peanut butter mixture in three or four parts.  

  4. Spoon the filling over the cooled crust and smooth the top.  Refrigerate to set.  

IMG_5064.JPG

Make the Chocolate Ganache

  1. Place the chocolate and butter in a small bowl.  Heat the cream in a small saucepan over low heat, just until simmering.  The moment you see bubbles remove from heat and pour over chocolate and butter.  Let sit for 1 minute to melt the chocolate, then whisk briskly until smooth and shiny.  

  2. Pour over chilled pie.  If you don't desire chocolate running over the sides, you may have to wait a minute or two between pourings, or simply don't use all the ganache.  (The rest can be disposed of with a spoon and a mouth.  But I don't need to tell you that.)  

  3. Chill for 3-4 hours or overnight until set.  

Jenny's Notes:

  • If using a shallow pie dish you may have some leftover crust, and that's ok. Don't feel like you have to use all the crust mixture or you may have an impenetrable crust, especially in the corners.

  • I frequently substitute whole milk or coconut milk for all or part of the cream in ganache, but usually not when it's a topper as it can separate a bit if you don't use all cream. However, one time when making this I only had 1/4 cup cream left for the topping and so added 1/4 cup whole milk, and it made for a beautiful ganache, even as the topper.

  • Top with chocolate chips or chocolate shavings as desired!

Mascarpone Peanut Butter Pie with Chocolate Ganache
Yield 8-12
Author
Prep time
1 Hour
Cook time
8 Min
Inactive time
3 Hour
Total time
4 H & 8 M

Mascarpone Peanut Butter Pie with Chocolate Ganache

Chocolate cookie crust, whipped mascarpone peanut butter filling, and chocolate ganache to top.
Cook modePrevent screen from turning off

Ingredients

For the Chocolate Crust
For the Peanut Butter Filling
For the Chocolate Ganache

Instructions

Make the Chocolate Crust
  1. Oven 325°F / 163°C. Ungreased 9in / 23cm pie dish.
  2. In a food processor combine chocolate grahams, butter, and chocolate chips. Pulse until the mixture is uniformly fine crumbs. Or do it the "old fashioned" way and beat the crumbs to oblivion in a well sealed plastic bag with a rolling pin or other hard object, then mixing in the chocolate and butter in a bowl with a spoon.
  3. Press evenly into the bottom and sides of pie dish and bake for 8 minutes or until fragrant. Set aside to cool completely.
Make the Peanut Butter Filling
  1. In the bowl of a stand mixer or with a handheld mixer, beat whipping cream until stiff peaks form. Transfer to another bowl if using a stand mixer and set aside.
  2. Again in the bowl of a stand mixer or a separate bowl with a handheld mixer, beat cream cheese, peanut butter, sugar, and vanilla until light and fluffy.
  3. Carefully fold whipped cream into peanut butter mixture in three or four parts.
  4. Spoon filling over cooled crust and smooth top. Refrigerate to set.
Make the Chocolate Ganache
  1. Place chocolate and butter in a small bowl. Heat cream in a small saucepan over low heat, just until simmering. The moment you see bubbles remove from heat and pour over chocolate and butter. Let sit for 1 minute to melt chocolate, then whisk briskly until smooth and shiny.
  2. Pour over chilled pie. If you don't desire chocolate running over the sides, you may have to wait a minute or two between pourings, or simply don't use all the ganache.
  3. Chill for 3-4 hours or overnight until set.

Notes

If using a shallow pie dish you may have some leftover crust, and that's ok. Don't feel like you have to use all the crust mixture or you may have an impenetrable crust, especially in the corners.I frequently substitute whole milk or coconut milk for all or part of the cream in ganache, but usually not when it's a topper as it can separate a bit if you don't use all cream. However, one time when making this I only had 1/4 cup cream left for the topping and so added 1/4 cup whole milk, and it made for a beautiful ganache, even as the topper.Top with chocolate chips or chocolate shavings as desired!

Nutrition Facts

Calories

791.91

Fat

62.46 g

Sat. Fat

30.79 g

Carbs

54.43 g

Fiber

3.89 g

Net carbs

50.53 g

Sugar

37.64 g

Protein

12.12 g

Sodium

502.22 mg

Cholesterol

110.56 mg

Nutritional information is approximate. Based on 8 servings.

best peanut butter pie, PB pie, mascarpone peanut butter pie, chocolate ganache, cookie crust, cream cheese peanut butter pie, no bake
Dessert, Pie
American
Did you make this recipe?
Tag @jennyblogsandbakes on instagram and hashtag it #jennyblogs
IMG_5066.JPG


Semlor (Swedish Cardamom Buns)

Last Updated August 11, 2024

Semlor are yeasted Swedish sweet buns filled with marzipan and whipped cream with hints of cardamom.

These buns, as I've read, are traditionally associated with Lent and eaten on Shrove Tuesday, or Fat Tuesday. You could think of them as the equivalent to Polish paczki. If you're thinking, "Wow, thanks, that helps me so much - WHAT is a paczki??" It's similar to a jelly filled doughnut (but better!!) traditionally eaten on Shrove Tuesday and pronounced poonch-key or pawnch-key (it’s much debated). There is quite a large Polish population near where I grew up, including an annual Polka Fest! Plenty of polka-ing and beer to go around. Anyway, Semlor are also eaten in various forms and under other names in other Nordic countries such as Finland, Estonia, Norway, Denmark, Lithuania, Latvia, Iceland, and the Faroe Islands.

This post may contain affiliate links. If you buy something using these links, Jennyblogs may receive a small commission, at no extra cost to you. This helps to support Jennyblogs. For further information see the privacy policy. Grazie!

Recipe adapted from LondonEats


Semlor

Makes 10 buns

Ingredients:

For the Cardamom Buns

  • 1 cup / 237g milk

  • 7 Tbsp / 100g butter

  • 2 tsp / 6.3g instant yeast

  • 1/4 tsp / 1g salt

  • 1/3 cup / 40g sugar

  • 1/2 tsp / 1g ground cardamom

  • 2 eggs

  • 3 1/2 cups / 450g all-purpose flour or bread flour

  • 1 tsp / 5g water, milk, or heavy cream

For the Marzipan Filling

  • insides of the buns

  • 7 oz / 200g marzipan (make your own marzipan here!)

  • generous 3/4 cup / 195g milk

  • generous 3/4 cup / 195g heavy whipping cream

  • powdered sugar, for dusting

Directions:

Make the Cardamom Buns

Oven 390°F / 200°C. 2 baking sheets lined with parchment paper or silpat.

  1. Place milk in a small saucepan and heat until milk just begins to simmer.  Remove from heat and add butter, stirring to melt.  Once butter is completely melted and integrated, allow mixture to sit until lukewarm.  

  2. Place milk mixture, yeast, salt, sugar, cardamom, and 1 egg in the bowl of a stand mixer fitted with a paddle.  Beat until all ingredients are incorporated.  Switch to the dough hook and add flour slowly on medium-low speed until a soft dough forms.  Continue to beat for several minutes on medium speed.  You should hear the dough slapping the sides of the bowl, sticking only to the bottom.  If the dough is sticking to the sides, add flour gradually until dough no longer sticks.  

  3. Turn out onto a lightly floured surface and knead 1-2 minutes more.  Divide dough into 10 equal portions and roll into balls.  Place evenly prepared baking sheets. Cover with a cloth and let rise in a warm place until doubled in size, about 1 hour.   

  4. Beat the second egg with the water and use a pastry brush or your hands to evenly brush the buns.

  5. Bake for about 15 minutes until golden brown or when internal temperature registers 185-190°F / 85-88°C.  

  6. Transfer buns to a cooling rack, cover with a towel, and allow to cool.  

Make the Marzipan Filling

Your filling may look like baby spit-up, too. And that's ok.

Your filling may look like baby spit-up, too. And that's ok.

  1. Once the buns are cool enough to handle, cut out a lid from the top using a small serrated knife. Set the lids aside.  Using a fork, scoop out the inside of each bun and place in a medium bowl.  Crumble/tear with your fingers as best you can.  Add marzipan and milk and work into a smooth paste using your hands or a fork.  

  2. In the bowl of a stand mixer fitted with the whisk attachment, whip the cream until stiff peaks from.  

Assembly

  1. Fill the buns evenly with the marzipan mixture. Pipe whipped cream over the filling using a large star tip (1M) or a spoon.  

  2. Place the tops on the whipped cream, then dust tops with powdered sugar using a small sieve.  

Jenny's Notes:

  • I always knead my dough by hand for a bit after kneading it in a machine. The machine doesn't always do a perfect job and I've had instances before where I kneaded solely in the machine and had a strange dough rise as a result. A few rounds of kneading by hand fixed the problem; the yeast hadn't been distributed evenly when kneaded only by machine.

  • If you have a scale you can ensure your buns will be all the same size. Weigh the dough mass, then divide this number by 10. This will give you an idea how much each of the 10 buns should weigh. You don't have to be exact down to the gram, of course, but I would stay within 5 or so grams of this number. Divide the dough mass in 2, then divide each half into 5 equal parts. Then weigh each piece to see how accurate your eye was.

  • When you "crumble" the filling into pieces you may notice the dough is moist and hard to crumble, but tear it as best you can into small chunks. When you add the milk and marzipan the pieces will absorb the liquid and eventually come together into a smoothish mass.

  • I made my own marzipan for this recipe and used rose water. Rose is a very strong flavor, so go light, but I thought it made for a very unique pairing with almond and cardamom and very "European" tasting. Or, leave out the rose if you're skeptical and you'll still have a lovely cardamom/almond combination.

  • "Semlor" is plural, so if you would like to eat only one bun, ask for a "Semla."

Semlor (Swedish Cardamom Buns)
Yield 10
Author
Prep time
1 H & 20 M
Cook time
15 Min
Inactive time
1 Hour
Total time
2 H & 35 M

Semlor (Swedish Cardamom Buns)

Sweet, yeasted cardamom buns with a creamy marzipan filling and whipped cream topping.
Cook modePrevent screen from turning off

Ingredients

For the Cardamom Buns
For the Marzipan Filling

Instructions

Make the Cardamom Buns
  1. Oven 390°F / 200°C. 2 baking sheets lined with parchment paper or silpat.
  2. Place milk in a small saucepan and heat until milk just begins to simmer. Remove from heat and add butter, stirring to melt. Once butter is completely melted and integrated, allow mixture to sit until lukewarm.
  3. Place milk mixture, yeast, salt, sugar, cardamom, and 1 egg in the bowl of a stand mixer fitted with a paddle. Beat until all ingredients are incorporated. Switch to the dough hook and add flour slowly on medium-low speed until a soft dough forms. Continue to beat for several minutes on medium speed. You should hear the dough slapping the sides of the bowl, sticking only to the bottom. If the dough is sticking to the sides, add flour gradually until dough no longer sticks.
  4. Turn out onto a lightly floured surface and knead 1-2 minutes more. Divide dough into 10 equal portions and roll into balls. Place evenly prepared baking sheets. Cover with a cloth and let rise in a warm place until doubled in size, about 1 hour.
  5. Beat the second egg with the water and use a pastry brush or your hands to evenly brush the buns.
  6. Bake for about 15 minutes until golden brown or when internal temperature registers 185-190°F / 85-88°C.
  7. Transfer buns to a cooling rack, cover with a towel, and allow to cool.
Make the Marzipan Filling
  1. Once the buns are cool enough to handle, cut out a lid from the top using a small serrated knife. Set the lids aside. Using a fork, scoop out the inside of each bun and place in a medium bowl. Crumble/tear with your fingers as best you can. Add marzipan and milk and work into a smooth paste using your hands or a fork.
  2. In the bowl of a stand mixer fitted with the whisk attachment, whip the cream until stiff peaks from.
Assembly
  1. Fill the buns evenly with the marzipan mixture. Pipe whipped cream over the filling using a large star tip (1M) or a spoon.
  2. Place the tops on the whipped cream, then dust tops with powdered sugar using a small sieve.

Notes

I always knead my dough by hand for a bit after kneading it in a machine. The machine doesn't always do a perfect job and I've had instances before where I kneaded solely in the machine and had a strange dough rise as a result. A few rounds of kneading by hand fixed the problem; the yeast hadn't been distributed evenly when kneaded only by machine.If you have a scale you can ensure your buns will be all the same size. Weigh the dough mass, then divide this number by 10. This will give you an idea how much each of the 10 buns should weigh. You don't have to be exact down to the gram, of course, but I would stay within 5 or so grams of this number. Divide the dough mass in 2, then divide each half into 5 equal parts. Then weigh each piece to see how accurate your eye was.When you "crumble" the filling into pieces you may notice the dough is moist and hard to crumble, but tear it as best you can into small chunks. When you add the milk and marzipan the pieces will absorb the liquid and eventually come together into a smoothish mass.I made my own marzipan for this recipe and used rose water. Rose is a very strong flavor, so go light, but I thought it made for a very unique pairing with almond and cardamom and very "European" tasting. Or, leave out the rose if you're skeptical and you'll still have a lovely cardamom/almond combination.

Nutrition Facts

Calories

436.24

Fat

19.78 g

Sat. Fat

10.76 g

Carbs

56.25 g

Fiber

1.82 g

Net carbs

54.43 g

Sugar

18.41 g

Protein

9.08 g

Sodium

149.19 mg

Cholesterol

84.19 mg

Nutritional information is approximate. Based on one semla.

semla,semlor,cardamom buns,marzipan filling,swedish buns, yeasted bread, sweet buns
bread, breakfast, dessert
Nordic
Did you make this recipe?
Tag @jennyblogsandbakes on instagram and hashtag it #jennyblogs

Caramel Toffee Cheesecake

DSC_0185.jpg

Last Updated: August 4, 2024

Happy Thanksgiving!  I am thankful for so many things.  One of those things is cheesecake. 

Especially a caramel cheesecake with a layer of chocolate between the crust and cheesecake, toffee bits, whipped cream, and more caramel drizzled on top. Yep, especially that.

I love the graham cracker crust because it stays together so well! The secret is to use toffee bits in the crust. Toffee is sticky and while the crust is baking all the little pieces melt a bit, fusing the graham cracker crust together into a beautiful, slightly crunchy mass. No crumbling graham cracker crusts today! I mean, I even pressed the crust all the way up the sides of the pan and it stayed even after taking off the spring form pan. Success.

You know how they say actions speak louder than words?  Well, instead of talking about how much I love cheesecake and how great this crust is, I'm going to share the recipe with you...that's an action, right?  Then in turn you can make it, and then you acted on your thankfulness too.  This is such a great plan, let's go! 

This post may contain affiliate links. If you buy something using these links, Jennyblogs may receive a small commission, at no extra cost to you. This helps to support Jennyblogs. For further information see the privacy policy. Grazie!

Recipe adapted from Yammie’s Noshery


Caramel Toffee Cheesecake

Serves about 16-20

Ingredients:

For the Toffee Crust

  • 3 cups / 255g crushed graham crackers, about 2 packages or 18 sheets

  • 1/2 cup / 85g toffee bits, plain or with chocolate (Heath Bits O Brickle)

  • 1/2 cup / 100g brown sugar

  • 1 cup / 226g butter, melted

  • 6 oz / 170g bitter-sweet chocolate, chopped

For the Filling

  • 3 8oz packages / 675g cream cheese, room temperature

  • 1 cup / 245g sour cream

  • 1 cup / 200g sugar

  • 1 Tbsp / 15g vanilla extract

  • 1/4 cup / 75g caramel sauce (To make homemade caramel, halve this recipe here)

  • 4 eggs, lightly beaten

For the Topping

  • 1 cup / 237g heavy whipping cream

  • 2 Tbsp / 40g maple syrup or sugar

  • 1/4 cup / 75g caramel sauce

  • 1/4 cup / 43g toffee bits

Directions:

Oven 300°F / 149°C.  10in / 26cm spring-form pan lined with parchment paper, bottom and sides.

Make the Toffee Crust

  1. Combine graham crackers, toffee, brown sugar, and butter.  Press firmly into the prepared spring-form pan, pressing all the way up the sides.  Sprinkle chopped chocolate evenly over bottom of crust. 

  2. Bake for 5 minutes or until chocolate is melted.  Remove from oven and spread chocolate evenly with a spatula.  Place crust in freezer while you make the filling.

Make the Filling

  1. In the bowl of a stand mixer, beat cream cheese, sour cream, and sugar on low-medium speed for a few minutes.  Add vanilla and caramel.  Beat in the eggs, one at a time, until just combined. 

  2. Pour over crust and bake for about 1 hour and 20 minutes, or until edges are set and center is still a bit jiggly when lightly shaken. 

  3. Turn off oven and crack open the door, leaving cheesecake to set for another 30 minutes.  Remove from oven and allow to cool for a further 30 minutes.

  4. Refrigerate until completely chilled, about 6 hours or overnight.

Make the Topping

  1. When cheesecake is ready, beat whipping cream in the bowl of a stand mixer until soft peaks form.  Add maple syrup and beat until stiff peaks form. 

  2. Pipe whipped cream onto cheesecake, or if you don't have piping bags or tips, simply spread it with a spatula. 

  3. Warm caramel in a small saucepan and drizzle all over the cheesecake with a spoon or spatula.  Sprinkle with toffee and chill until ready to serve.

Jenny's Notes:

  • Cheesecakes require a decent amount of beating, however, avoid beating on high speeds as you don't want to incorporate too much air into the batter. 

  • You can also use an 8in / 20cm spring-form pan + a 6in / 15cm spring-form pan to make this recipe. Or, instead of the 6 incher just stick any extra crust in the bottom of a square baking dish, top with lefotver filling and you have cheesecake bars! I have done the second option before. :) The bars will bake for less time than a spring-form pan.

Caramel Toffee Cheesecake
Yield 16-20 servings
Author
Prep time
1 Hour
Cook time
1 H & 55 M
Total time
2 H & 55 M

Caramel Toffee Cheesecake

Toffee graham gracker crust, a layer of dark chocolate, caramel cheesecake filling, and whipped cream, caramel, and more toffee bits on top.
Cook modePrevent screen from turning off

Ingredients

For the Toffee Crust
For the Filling
For the Topping

Instructions

  1. Oven 300°F / 149°C. 10in / 26cm spring-form pan lined with parchment paper, bottom and sides.
Make the Toffee Crust
  1. Combine graham crackers, toffee, brown sugar, and butter. Press firmly into the prepared spring-form pan, pressing all the way up the sides. Sprinkle chopped chocolate evenly over bottom of crust.
  2. Bake for 5 minutes or until chocolate is melted. Remove from oven and spread chocolate evenly with a spatula. Place crust in freezer while you make the filling.
Make the Filling
  1. In the bowl of a stand mixer, beat cream cheese, sour cream, and sugar on low-medium speed for a few minutes. Add vanilla and caramel. Beat in the eggs, one at a time, until just combined.
  2. Pour over crust and bake for about 1 hour and 20 minutes, or until edges are set and center is still a bit jiggly when lightly shaken.
  3. Turn off oven and crack open the door, leaving cheesecake to set for another 30 minutes. Remove from oven and allow to cool for a further 30 minutes.
  4. Refrigerate until completely chilled, about 6 hours or overnight.
Make the Topping
  1. When cheesecake is ready, beat whipping cream in the bowl of a stand mixer until soft peaks form. Add maple syrup and beat until stiff peaks form.
  2. Pipe whipped cream onto cheesecake, or if you don't have piping bags or tips, simply spread it with a spatula.
  3. Warm caramel in a small saucepan and drizzle all over the cheesecake with a spoon or spatula. Sprinkle with toffee and chill until ready to serve.

Notes

Cheesecakes require a decent amount of beating, however, avoid beating on high speeds as you don't want to incorporate too much air into the batter. You can also use an 8in / 20cm spring-form pan + a 6in / 15cm spring-form pan to make this recipe. Or, instead of the 6 incher just stick any extra crust in the bottom of a square baking dish, top with lefotver filling and you have cheesecake bars! I have done the second option before. :) The bars will bake for less time than a spring-form pan.

Nutrition Facts

Calories

619.24

Fat

42.95 g

Sat. Fat

25.01 g

Carbs

53.18 g

Fiber

0.90 g

Net carbs

52.27 g

Sugar

42.62 g

Protein

7.17 g

Sodium

376.36 mg

Cholesterol

156.01 mg

Nutritional information is approximate and based on 16 servings.

caramel, toffee crunch, Heath, Bits O Brickle, cheesecake, homemade caramel, chocolate, graham cracker crust
dessert
American
Did you make this recipe?
Tag @jennyblogsandbakes on instagram and hashtag it #jennyblogs

Peanut Butter Pie with Chocolate Whipped Cream

Shortbread crust.  A layer of creamy peanut butter filling.  Topped with a mountain of chocolate whipped cream.  And chocolate shavings.  Because, we're so fancy, you already know.  Did I mention No-Bake?

I first made this pie with a pretzel crust.  The salty sweetness really off-set the creamy full-bodied mouth feel of the layers well.  Yes, sometimes I describe dessert and food like wine.  It just works so well.  But if you ever catch me saying "I prefer the '98 vintage of this cheesecake" or something along that line, I might have taken it too far.  Ew, rancid cheesecake.  Anyway...

The next time I made this pie was in Italy.  Pretzels do exist here, but they have a very strange texture.  Think pretzels that went stale and chewy and then got so stale they got crispy again, almost. But still a little chewy.  And don't chop well in a food processor. It took over 8 minutes to get them partly broken up.  The crust was still good, but it looked more like a bird's nest of pretzel sticks than a uniform crust.  

Oh hey, Thanksgiving pie. And there is Lucia the poinsettia in the background. Good times, good times.

Oh hey, Thanksgiving pie. And there is Lucia the poinsettia in the background. Good times, good times.

Regardless, all the Americans in Italy are so peanut butter deprived that everyone loved it.  In fact, two days later was Thanksgiving and it was requested of me to make and bring this pie to Thanksgiving dinner.  Not pecan pie.  Not pumpkin pie.  Peanut Butter Pie with Chocolate Whipped Cream.  With a delicious but slightly strange looking crust.  

When I made the pie this time, I used shortbread cookies with great success.  The Italian supermarkets have practically a whole aisle devoted to all their different kinds of shortbread cookies, called frollini.  A nice big 800g bag for 1.5-2.5 euros?  Hehe don't mind if I do.  Shortbread with cream, or chocolate and stars, buckwheat, almond, almond and chocolate, hazelnut, stuffed with apricot, stuffed with chocolate, coarse sugar-topped, made with egg, chocolate drops...the varieties go on. 

Someday I will share with you the pretzel crust, but when I have access again to pretzels that behave in a food processor and I can get some decent photos.  But until then, get your hands on some shortbread cookies.  You could make some homemade (classic shortbread consists of just 3 ingredients: flour, butter, sugar) or if you're in the States buy some Sandie's shortbread cookies or something similar. 

This post may contain affiliate links. If you make a purchase using these links, Jennyblogs may receive a small commission, at no extra cost to you. This helps to support Jennyblogs. For further information see the privacy policy. Grazie!

Recipe adapted from the Cooking Channel


Peanut Butter Pie with Chocolate Whipped Cream

Makes 1 9in / 23cm pie - 8-12 servings

Ingredients:

For the Shortbread Crust

  • about 15 / 150g shortbread cookies

  • 4 Tbsp / 56g butter, melted

For the Peanut Butter Filling

  • 1/2 cup / 119g heavy whipping cream

  • 1/2 cup / 113g mascarpone or cream cheese, room temperature

  • 1/3 cup / 87g creamy peanut butter

  • 1/4 cup / 50g brown sugar

For the Chocolate Whipped Cream

  • 3-4 oz / 100g good quality dark chocolate, chopped

  • 2 cups / 474g heavy whipping cream

  • Extra chocolate in bar form, for chocolate shavings, optional

Directions:

Make the Chocolate Whipped Cream First

  1. Place chocolate and cream in a double boiler or a glass or metal bowl over a pan of simmering water.  The bottom of the bowl shouldn’t touch the water.

  2. Gently stir until chocolate is mostly melted.  Remove from heat and continue stirring until chocolate has completely melted.  Place in the refrigerator for 2 hours. 

Make the Shortbread Crust

  1. In a food processor, pulse cookies until they become crumbly.  Add butter and pulse until smooth and can be pressed into a crust.  Depending on the type of cookies you use, you may need to add a touch more melted butter to ensure the crust will stay together.  Press into a 9in / 23cm pie dish and refrigerate.

Make the Peanut Butter Filling

  1. In the bowl of a stand mixer or with a handheld mixer, whip heavy cream until stiff peaks form.  Transfer to another bowl. 

  2. Again, in the bowl of the stand mixer beat mascarpone, peanut butter, and brown sugar together until smooth.  Gently fold in the whipped cream with a spatula.  Pour filling over crust and return to the refrigerator. 

Assembly

  1. Once the chocolate cream is cooled, beat with a stand mixer or handheld mixer until stiff peaks form.  Remove pie from the refrigerator and spread or pipe chocolate whipped cream over the top. 

  2. Use a vegetable peeler or knife to shave a chocolate bar over the pie for the finishing touch. 

Jenny's Notes:

  • Try using Nutella or Biscoff spread instead of peanut butter.  YUM.

Peanut Butter Pie with Chocolate Whipped Cream
Yield 8-12
Author
Prep time
50 Min
Inactive time
2 Hour
Total time
2 H & 50 M

Peanut Butter Pie with Chocolate Whipped Cream

No-bake pie with shortbread crust, mascarpone peanut butter filling, chocolate whipped cream and topped with chocolate shavings.
Cook modePrevent screen from turning off

Ingredients

For the Shortbread Crust
For the Peanut Butter Filling
For the Chocolate Whipped Cream

Instructions

Make the Chocolate Whipped Cream (first)
  1. Place chocolate and cream in a double boiler or a glass or metal bowl over a pan of simmering water. The bottom of the bowl shouldn’t touch the water.
  2. Gently stir until chocolate is mostly melted. Remove from heat and continue stirring until chocolate has completely melted. Place in the refrigerator for 2 hours.
Make the Shortbread Crust
  1. In a food processor, pulse cookies until they become crumbly. Add butter and pulse until smooth and can be pressed into a crust. Depending on the type of cookies you use, you may need to add a touch more melted butter to ensure the crust will stay together. Press into a 9in / 23cm pie dish and refrigerate.
Make the Peanut Butter Filling
  1. In the bowl of a stand mixer or with a handheld mixer, whip heavy cream until stiff peaks form. Transfer to another bowl.
  2. Again, in the bowl of the stand mixer beat mascarpone, peanut butter, and brown sugar together until smooth. Gently fold in the whipped cream with a spatula. Pour filling over crust and return to the refrigerator.
Assembly
  1. Once the chocolate cream is cooled, beat with a stand mixer or handheld mixer until stiff peaks form. Remove pie from the refrigerator and spread or pipe chocolate whipped cream over the top.
  2. Use a vegetable peeler or knife to shave a chocolate bar over the pie for the finishing touch.

Notes

Try using Nutella or Biscoff spread instead of peanut butter. YUM.

Nutrition Facts

Calories

636.86

Fat

54.27 g

Sat. Fat

29.83 g

Carbs

27.35 g

Fiber

1.81 g

Net carbs

25.54 g

Sugar

20.45 g

Protein

7.07 g

Sodium

259.95 mg

Cholesterol

119.26 mg

Nutritional information is approximate. Based on the pie cut into 8 servings; includes chocolate shavings.

peanut butter pie, no bake pie, summer dessert, chocolate whipped cream, mascarpone, shortbread crust
dessert, pie
American
Did you make this recipe?
Tag @jennyblogsandbakes on instagram and hashtag it #jennyblogs

Peanut Butter Brownie Trifle

image.jpg

Yes, a trifle, not a truffle.  It is neither a chocolate truffle nor does it require pigs or dogs to dig it up, thankfully.  Although I personally would love to go truffle hunting, or more or less watch the pigs/dogs truffle hunt.  Then eat them, of course.  The truffles, not the dogs or pigs. 

What's the difference between a truffle, a truffle, and a trifle? 

  • The original truffle, as I will call it here, is the fungus found in the ground.  There are two main kinds: black and white.  They are difficult to find, hence the need for dogs and pigs, and very expensive.  And divine to eat.  If you haven't eaten one, you definitely should, even if just to say you have.  All your foodie friends will hold you in high esteem henceforth.  ;)

  • Then there is the chocolate truffle, which is essentially a chocolate confection made to look like the original truffle.  It usually consists of a ganache (chocolate melted with heavy cream) center, covered in chocolate.  Also delicious. 
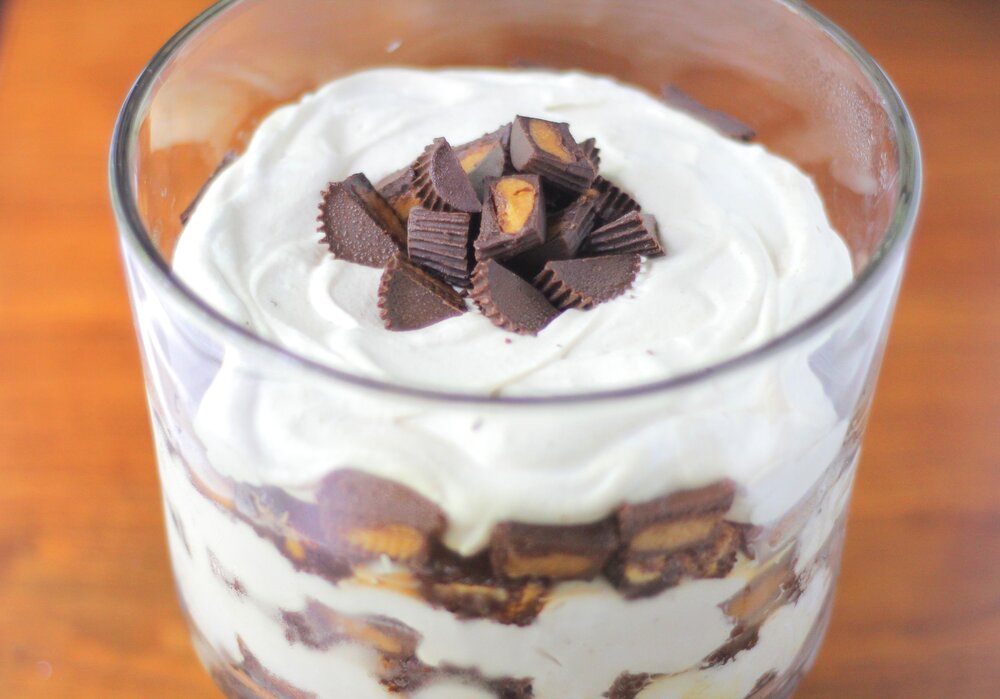
  • Thirdly, the trifle.  It is originally an English dessert, you could think of it like a large parfait to share.  My mom calls it a "Dump Cake" and in the south it is called a "Husband's Delight."  It usually consists of layers of cake, custard or pudding, whipped cream, and various fruits.  The possibilities of flavors and combinations are endless, and yes, delicious.

The moral of the story is, if someone offers you a truffle, a truffle, or a trifle, always say yes.  Because they are all delicious. 

Today’s trifle is also delicious. It has layers of fluffy peanut butter vanilla pudding, peanut butter chip brownies, and Reese’s peanut butter cups. Each element is simple to make, and homemade. It might dirty several bowls and pans, but it is so worth it! It’s creamy, chocolatey, peanut buttery. It’s rich, a little bit goes a long way. And yet it has you coming back for more. A crowd favorite!

This post may contain affiliate links. If you make a purchase using these links, Jennyblogs may receive a small commission, at no extra cost to you. This helps to support Jennyblogs. For further information see the privacy policy. Grazie!

Recipe adapted from Taste of Home


Peanut Butter Brownie Trifle

Serves about 12

Ingredients:

For the Vanilla Pudding *Make this first*

  • 3 Tbsp / 37g sugar

  • 4 1/2 tsp / 11g cornstarch

  • 1/8 tsp salt

  • 1 1/4 cups / 297g cold milk

  • 2 tsp / 10g vanilla extract

For the Peanut Butter Chip Brownies

  • 5 Tbsp / 70g oil

  • 1 cup / 200g sugar

  • 2 eggs

  • 1 tsp / 5g vanilla extract

  • 1/3 cup / 33g cocoa powder

  • 1/2 cup / 60g all-purpose flour

  • 1/4 tsp salt

  • 3/4 cup / 132g peanut butter chips

image.jpg

Extras

  • 1/2 cup / 230g creamy peanut butter

  • 1 1/2 cups / 356g heavy whipping cream, whipped until stiff peaks form

  • 1 12 oz package / 340g miniature Reese's cups, each cut in half


Directions:

Make the Vanilla Pudding

  1. In a small saucepan, whisk together sugar, cornstarch, and salt.  Gradually whisk in milk. 

  2. Heat over medium-low heat, stirring constantly, until pudding thickens and the whisk leaves a trail. 

  3. Remove from heat and add vanilla.  Place a piece of plastic wrap directly onto the pudding and put in fridge or freezer until pudding is thick and set. 

Meanwhile,

Make the Peanut Butter Chip Brownies

Oven preheated to 350°F / 177°C. Lightly grease an 8x8in / 20x20cm baking dish.

  1. In a medium bowl, mix together oil, sugar, eggs, and vanilla. 

  2. In a separate bowl, whisk together cocoa, flour, and salt.  Stir dry mixture into wet mixture.  Stir in peanut butter chips.  Spread evenly in prepared baking dish.

  3. Bake for 12 - 15 minutes or until toothpick inserted off center comes out mostly clean.  Allow to cool. 

Assembly

  1. Once pudding is set, mix in peanut butter.  Gently fold in whipped cream.

  2. Cut cooled brownies into bite size pieces, about 1in / 2.5cm squares.

  3. In a large glass bowl, layer in this order:

    • 1/3 of the brownies

    • 1/4 of the Reese's cups

    • 1/3 of the pudding mixture

    • another 1/3 of the brownies

    • another 1/4 of the Reese’s cups

    • another 1/3 of the pudding

    • final 1/3 of the brownies

    • another 1/4 of the Reese’s cups

    • final 1/3 of the pudding

    • final 1/4 of the Reese’se cups for decoration on top

  4. Chill until ready to serve.

Jenny’s Notes:

  • Placing plastic wrap directly onto pudding instead of just over the bowl prevents the “skin” from forming.

  • Both the brownies and the pudding can easily be made a day ahead.

Peanut Butter Brownie Trifle
Yield 12 servings
Author
Prep time
45 Min
Cook time
15 Min
Total time
1 Hour

Peanut Butter Brownie Trifle

A rich trifle dessert with layers of whipped peanut butter vanilla pudding, peanut butter chip brownies, and peanut butter cups.
Cook modePrevent screen from turning off

Ingredients

For the Vanilla Pudding *Make this first*
For the Peanut Butter Chip Brownies
Extras

Instructions

Make the Vanilla Pudding
  1. In a small saucepan, whisk together sugar, cornstarch, and salt. Gradually whisk in milk.
  2. Heat over medium-low heat, stirring constantly, until pudding thickens and the whisk leaves a trail.
  3. Remove from heat and add vanilla. Place in fridge or freezer until pudding is thick and set.
Make the Peanut Butter Chip Brownies
  1. Oven preheated to 350°F / 177°C. Lightly grease an 8x8in / 20x20cm baking dish.
  2. In a medium bowl, mix together oil, sugar, eggs, and vanilla.
  3. In a separate bowl, whisk together cocoa, flour, and salt. Stir dry mixture into wet mixture. Stir in peanut butter chips. Spread evenly in prepared baking dish.
  4. Bake for 12 - 15 minutes or until toothpick inserted off center comes out mostly clean. Allow to cool.
Assembly
  1. Once pudding is set, mix in peanut butter. Gently fold in whipped cream.
  2. Cut cooled brownies into bite size pieces, about 1in / 2.5cm squares.
  3. In a large glass bowl, preferably a cylinder, layer in this order:
  4. 1/3 of the brownies
  5. 1/4 of the Reese's cups
  6. 1/3 of the pudding mixture
  7. another 1/3 of the brownies
  8. another 1/4 of the Reese’s cups
  9. another 1/3 of the pudding
  10. final 1/3 of the brownies
  11. another 1/4 of the Reese’s cups
  12. final 1/3 of the pudding
  13. final 1/4 of the Reese’se cups for decoration on top
  14. Chill until ready serve.

Notes

  • Placing plastic wrap directly onto pudding instead of just over the bowl prevents the “skin” from forming.
  • Both the brownies and the pudding can easily be made a day ahead.

Nutrition Facts

Calories

606.07

Fat

41.47 g

Sat. Fat

13.60 g

Carbs

51.17 g

Fiber

3.43 g

Net carbs

47.74 g

Sugar

36.05 g

Protein

13.34 g

Sodium

349.61 mg

Cholesterol

68.20 mg

Nutritional information is approximate; based on 12 servings.

peanut butter,trifle,dump cake, husband's delight, Reese's dessert, chilled dessert, vanilla pudding, whipped cream
dessert, trifle
American
Did you make this recipe?
Tag @jennyblogsandbakes on instagram and hashtag it #jennyblogs
IMG_4139.jpg

Snickers Salad

Last Updated August 27, 2024

No spinach, kale, or arugula were harmed in the making of this recipe. 

Don't be deceived, this is not a real salad. If visions of spinach salad with Snickers on top were dancing across your brain, I am so so sorry. I love my greens and Snickers, but not together. No no no. If it makes you feel better, you could call this Green Apple Salad, like my mom does. But it has the word "salad" in it, so I feel fully justified in keeping Snickers in the title. As you wish.

Instead, think crisp Granny Smith apples and bits of Snickers lovingly folded into fluffy whipped cream and vanilla pudding.  So simple, and so delicious.

I usually make this for large family gatherings and double the recipe for 12 or more people.

This post may contain affiliate links. If you make a purchase using these links, Jennyblogs may receive a small commission, at no extra cost to you. This helps to support Jennyblogs. Where possible, links are prioritized to small businesses and ethically and responsibly made items. For further information see the privacy policy. Grazie!

Recipe adapted from Taste of Home


Snickers Salad

Serves about 8

Ingredients:

For the Vanilla Pudding

  • 1/4 cup / 50g sugar

  • 2 Tbsp / 15g cornstarch

  • 1/8 tsp salt

  • 1 1/3 cup / 316g milk, divided

  • 1 egg yolk

  • 1 tsp vanilla

For the Whipped Cream

  • 1 cup / 237g heavy whipping cream

For Assembling

  • about 13 oz / 369g of Snickers, chopped, divided

  • 4 Granny Smith apples, cored and chopped

Directions:

Make the Vanilla Pudding

At least a few hours before assembling recipe, or up to 2 days before, make the vanilla pudding:

  1. Whisk together sugar, cornstarch, and salt in a medium saucepan. Slowly whisk in 1 cup milk. 

  2. In a separate small bowl, measure out remaining 1/3 cup milk and add yolk; whisk to combine. Slowly whisk into mixture in the saucepan. 

  3. Place over medium heat and stir constantly until mixture thickens and whisk leaves a trail. Remove from heat and add vanilla. Place a piece of plastic wrap directly on to the top of pudding to prevent skin from forming.

  4. Place in refrigerator until completely chilled.

Make the Whipped Cream

  1. Whip heavy whipping cream in bowl of a stand mixer with whisk attachment or with an electric mixer until stiff peaks form. 

Assemble

  1. Gently fold about one third of whipped cream into pudding. Continue folding in whipped cream by thirds.  Gently fold in apples and about 3/4 of the Snickers. 

  2. Transfer to serving bowl and top with remaining 1/4 of Snickers. Store in fridge until ready to serve.   

Jenny's Notes:

  • Best if assembled on day of serving. 

  • Using whole milk will get you the creamiest result, but 2% all the way down to skim milk will also work. You can also sub out the milk for other milk substitutes as desired: oat milk, almond milk, etc.

  • This can be made with other candy bars, such as Rolo, Milky Way, Payday, Twix, etc. While Snickers is my favorite, I also really like this with Reese’s. Sometimes I do half and half! 

  • If using a candy that has caramel in it, you can freeze it before hand to make chopping easier. 

  • Add chopped peanuts for an extra crunch!

Snickers Salad
Yield 6-8
Author
Prep time
20 Min
Cook time
10 Min
Inactive time
2 Hour
Total time
2 H & 30 M

Snickers Salad

Crisp, green granny smith apples and sweet and salty Snickers bars tossed in a light vanilla whipped pudding.
Cook modePrevent screen from turning off

Ingredients

For the Vanilla Pudding
For the Whipped Cream
For Assembling

Instructions

Make the Vanilla Pudding
  1. At least a few hours before assembling recipe, or up to 2 days before, make the vanilla pudding:
  2. Whisk together sugar, cornstarch, and salt in a medium saucepan. Slowly whisk in 1 cup milk.
  3. In a separate small bowl, measure out remaining 1/3 cup milk and add yolk; whisk to combine. Slowly whisk into mixture in the saucepan.
  4. Place over medium heat and stir constantly until mixture thickens and whisk leaves a trail. Remove from heat and add vanilla. Place a piece of plastic wrap directly on to the top of pudding to prevent skin from forming.
  5. Place in refrigerator until completely chilled.
Make the Whipped Cream
  1. Whip heavy whipping cream in bowl of a stand mixer with whisk attachment or with an electric mixer until stiff peaks form.
Assemble
  1. Gently fold about one third of whipped cream into pudding. Continue folding in whipped cream by thirds. Gently fold in apples and about 3/4 of the Snickers.
  2. Transfer to serving bowl and top with remaining 1/4 of Snickers. Store in fridge until ready to serve.

Notes

  • Best if assembled on day of serving. 
  • Using whole milk will get you the creamiest result, but 2% all the way down to skim milk will also work. You can also sub out the milk for other milk substitutes as desired: oat milk, almond milk, etc.
  • This can be made with other candy bars, such as Rolo, Milky Way, Payday, Twix, etc. While Snickers is my favorite, I also really like this with Reese’s. Sometimes I do half and half! 
  • If using a candy that has caramel in it, you can freeze it before hand to make chopping easier. 
  • Add chopped peanuts for an extra crunch!

Nutrition Facts

Calories

439.59

Fat

23.76 g

Sat. Fat

12.02 g

Carbs

49.52 g

Fiber

3.26 g

Net carbs

46.26 g

Sugar

35.63 g

Protein

6.25 g

Sodium

172.14 mg

Cholesterol

68.79 mg

Nutritional information is approximate and based on 1 serving if recipe serves 8.

dessert salad, Snickers salad, Granny smith green apple salad, vanilla pudding whipped cream salad
dessert
American
Did you make this recipe?
Tag @jennyblogsandbakes on instagram and hashtag it #jennyblogs

Coffee Pancakes with Mocha Syrup

I got a little chocolate drizzle happy.  Not to mention this was a time sensitive photo, the first whipped cream mound melted and slipped off the back due to the hot and delicious nature of the pancakes.  Pictured here, whipped cream mound…

I got a little chocolate drizzle happy.  Not to mention this was a time sensitive photo, the first whipped cream mound melted and slipped off the back due to the hot and delicious nature of the pancakes.  Pictured here, whipped cream mound take 2. 

Some mornings just call for pancakes, and not just any pancakes: pancakes that involve coffee, chocolate, and whipped cream.

Enter, these pancakes. They’re made with some espresso powder and served with a homemade mocha syrup and freshly whipped cream. They’re delicious and decadent and more like dessert posing as breakfast!

These are the pancakes you turn to when it’s your birthday, when you want to make someone breakfast in bed, or you just want an excuse to have dessert for breakfast. Breakfast and dessert are my favorite meals, so why not combine them??

Americans are big on oatmeal, cereal, or starting your day with a big protein like eggs and sausage or bacon. While I often eat oatmeal for breakfast, I really love the Italian rhythm of waking up to a fresh pastry and a cappuccino, no guilt. As someone who really loves their sweets, I appreciate the excitement of waking up to a breakfast I’m looking forward to. A sweet breakfast also tends to help me eat less sweet things throughout the day.

Are you convinced yet of the beauty of starting your day with something sweet? Alright! Chocolate and coffee in pancakes, let’s go!

Coffee Pancakes with Mocha Syrup

Makes 2-3 servings (6-8 pancakes)

Ingredients:

Mocha Syrup

Make this first so it has time to cool and your pancakes don't get cold!

  • 1/4 cup sugar

  • 2 Tbsp cocoa powder

  • 1 tsp corn starch

  • 2 Tbsp strong brewed coffee

  • 1 tsp vanilla extract

Combine all ingredients except vanilla in small saucepan.  Cook over medium heat, stirring constantly, until boiling.  Reduce heat to low and boil for 5 minutes.

Remove from heat and add vanilla.  Allow to cool while you make the pancakes.  Store leftovers in the fridge for up to 1 month.  Sugar is a wonderful preservative.  I'm going to live so long. 

Whipped Cream

  • 1/2 cup heavy whipping cream

  • 2 Tbsp granulated sugar

  • 1/2 tsp vanilla extract

In the bowl of a stand mixer or with a hand held mixer, beat cream until soft peaks form.  Add sugar and vanilla, beat until stiff peaks appear.

Coffee Pancakes

Make these last so they will be nice and hot when you serve them!

  • 1 1/4 cups all-purpose flour

  • 1 Tbsp baking powder

  • 1 Tbsp sugar

  • 1/2 tsp salt

  • 2 tsp ground espresso, or freshly ground coffee (sometimes I use the contents of a Nespresso capsule)

  • 1 egg

  • 1 cup milk of choice, or water

  • 2 Tbsp oil of choice, or melted butter or coconut oil

  • 1 tsp vanilla extract

Directions:

Preheat lightly greased griddle or pan to 350 Fahrenheit.

In a medium bowl whisk together flour, baking powder, sugar, salt, and ground espresso. 

Make a well in the center of the dry ingredients and add the egg, milk, oil, and vanilla.  Stir until just moistened, some lumps will remain.  If you prefer thinner pancakes, you may add more milk.  Allow to sit for a few minutes.

Pour about 1/4 cup of batter onto hot griddle, allow to cook 1-2 minutes on each side, either until light golden-brown or when the air bubbles pop, but don't fill in immediately.  If the first pancakes seem too thick or too thin, add more milk or flour, respectively, until desired consistency is reached.  Repeat with remaining batter. 

Any leftover batter or pancakes can be stored in the refrigerator for about 1-2 days.  They can be reheated on the griddle or pan, microwave (boo), or my favorite way, the toaster. 

Assembly:

Place pancakes on a plate.  If desired, butter each pancake.  Drizzle generously with mocha syrup and top with copious amounts of whipped cream. And maybe drizzle with more syrup.  Don't forgot a complementary cup of coffee.  Complementary as in it goes with it nicely, not I'm giving you a complimentary cup of coffee.  I would totally give you a free cup of coffee, but, you're reading a blog right now, and this is only 2016.  Maybe by 2038 when Leslie Knope is President, I can send you coffee over the interwebs. 
Adapted from Pastry Affair

And Happy Good Friday.  This morning I kept thinking to myself "Black Friday" but that is quite the opposite of what today is.  No consumerism today.  A day to reflect on Jesus as He took our place on the cross.  The least deserving and only perfect man to walk the earth, bearing the wrath and punishment of separation from God the Father so that we might never have to.  Instead, He cloaks us in His righteousness so that we might receive the love of the Father freely.  Hallelujah, what a Savior.