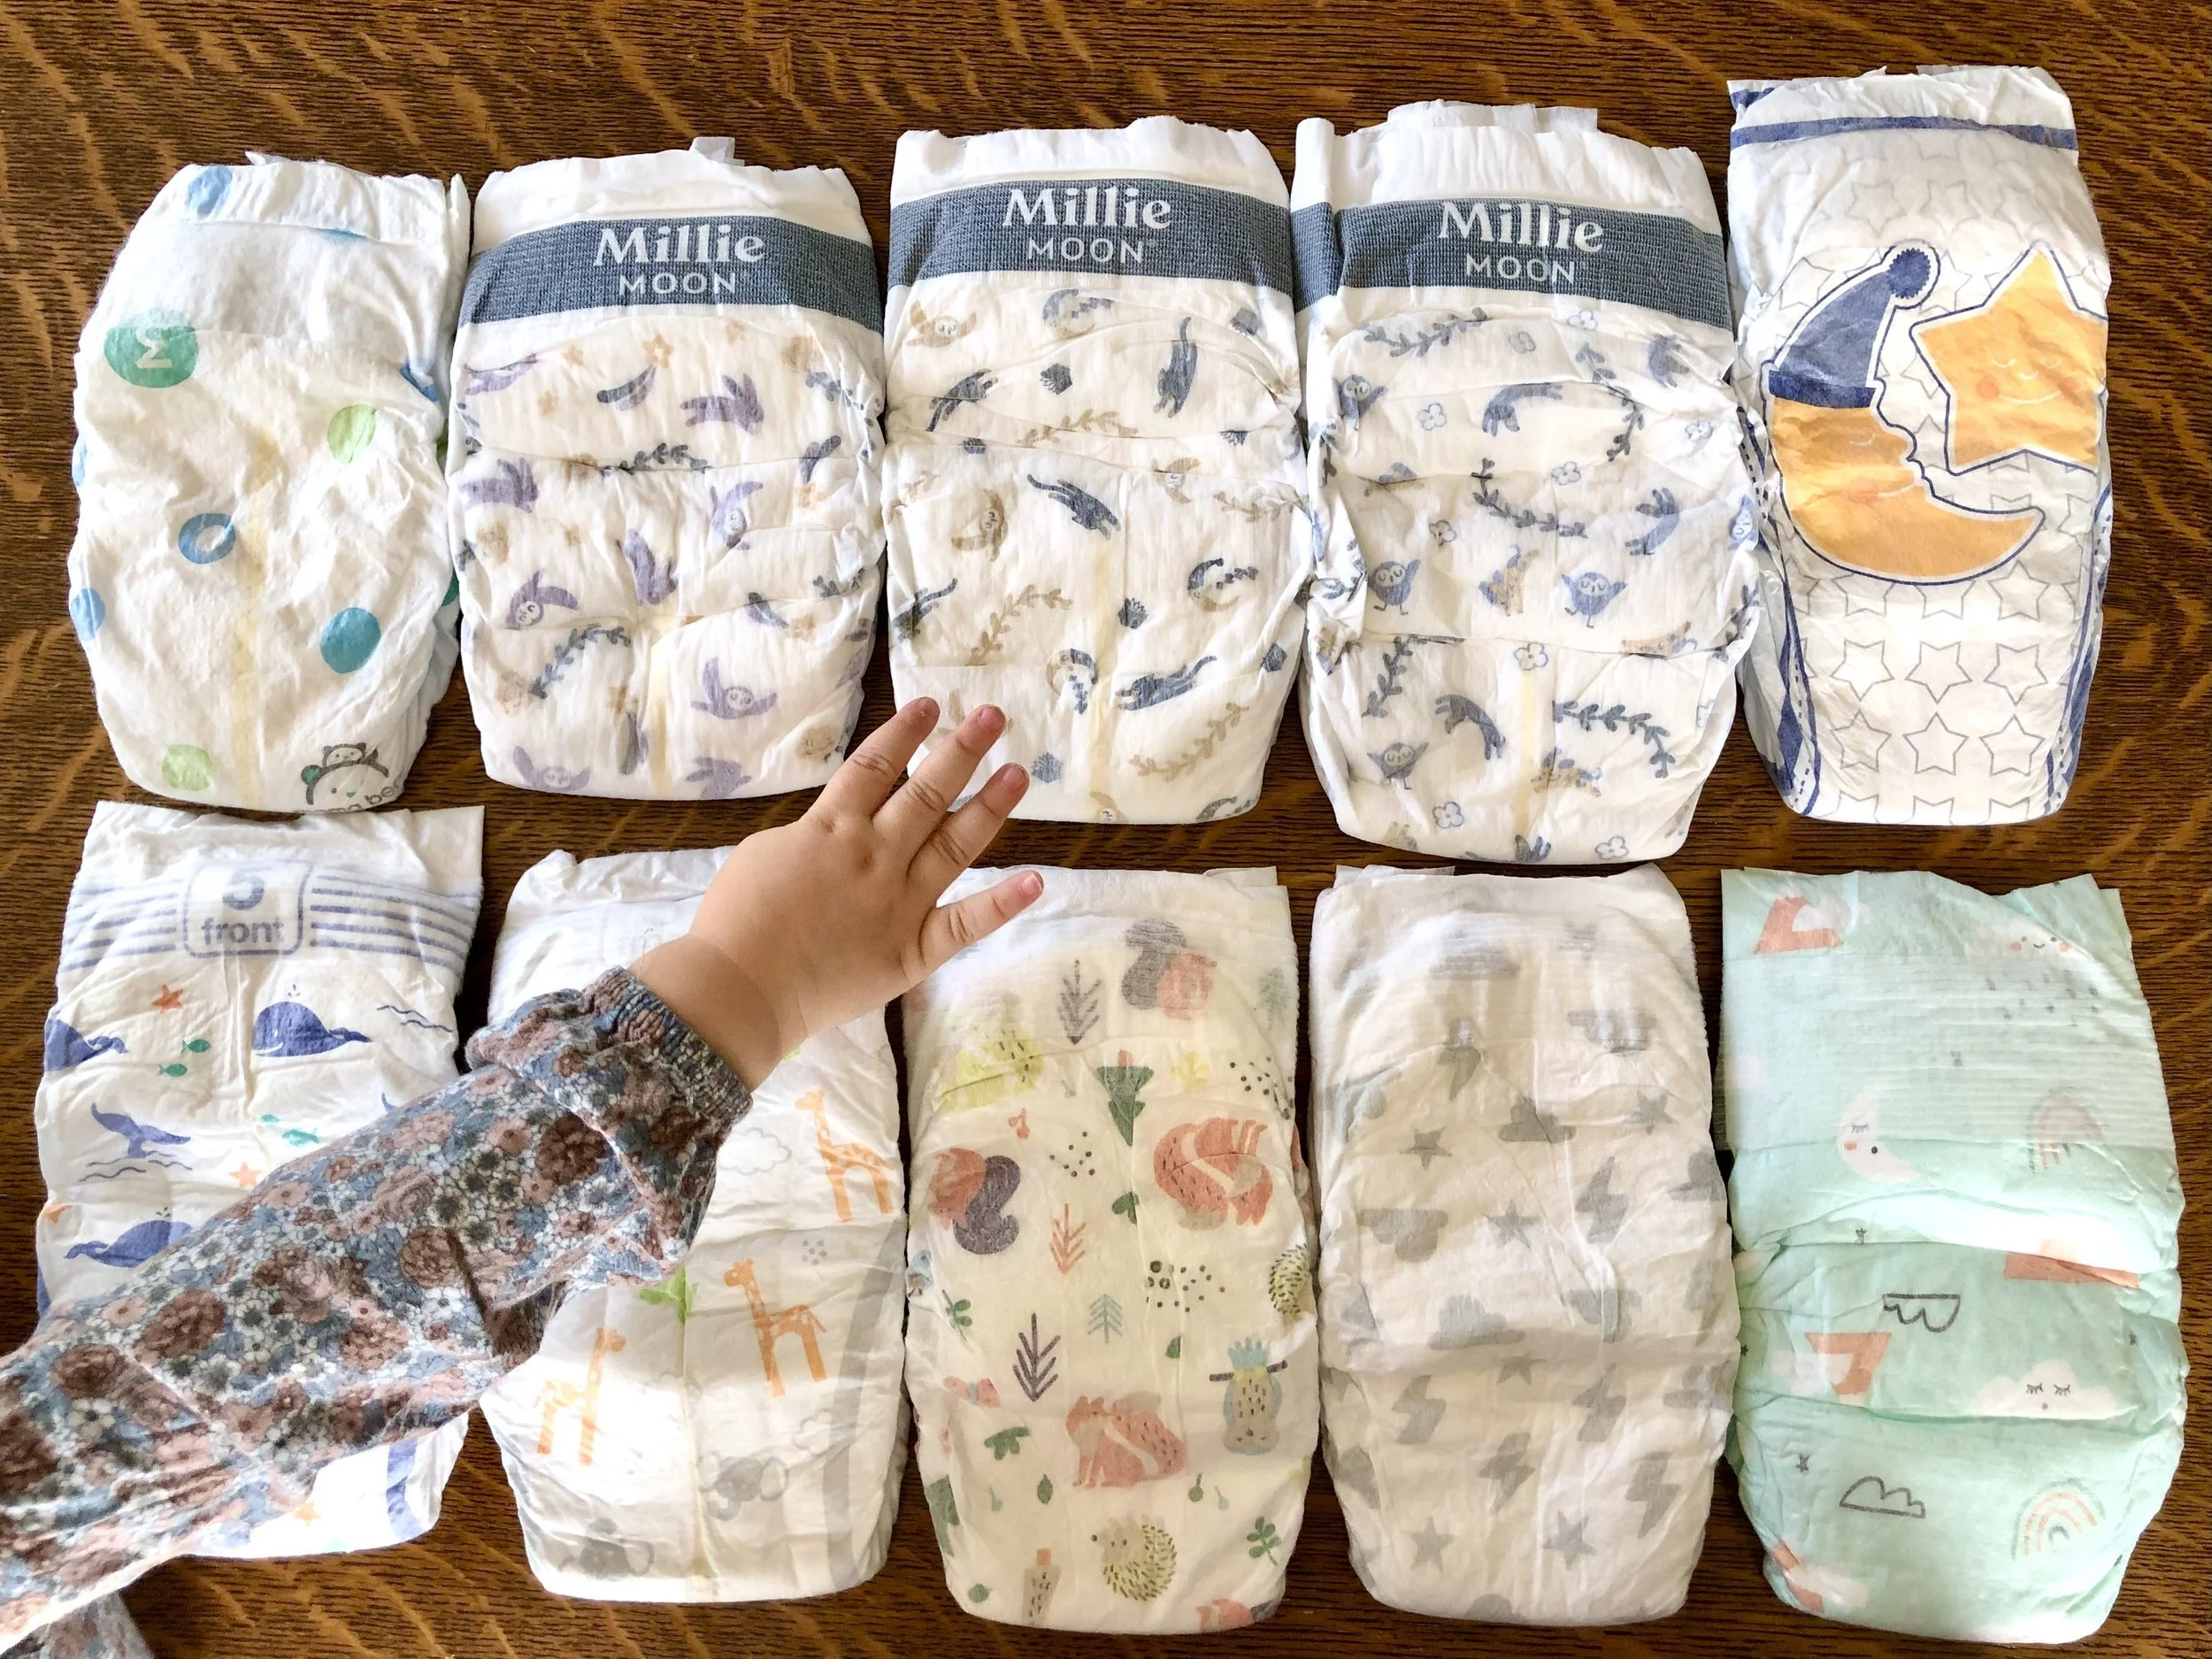
38 Diaper Comparison

Last updated October 26, 2024

Oh boy, diapers! Every parent’s favorite subject.

You either love or hate diaper changes, but having the right diapers can make your life so much easier. No (or at least less) blowouts, dry pajamas when they wake up, no fluids leaking while holding them, in a baby carrier, or in a car seat, saves you a whole lot of time in clean up and laundry, and time is precious when you’re caring for littles.

I really don’t mind diaper changes. Part of the way I keep it fun is by trying as many different diapers as I can. I currently have 3 kids 3 and under, so I’ve been changing my fair share of diapers over the last few years. Chances are, if there’s a diaper that’s reasonably priced, I’ve tried it. There are still plenty to try, but I’ve got a pretty good leg up. Or two baby legs up. Ha.

I’ve even tried diapers in two different countries! And no, the same brand in different countries are not the same. I’m looking at you, Huggies.

The following diaper comparison is a list of diapers in alphabetical order and my rating of them. While a list like this can be helpful, the last word on diapers is personal preference, depending on baby’s body shape and weight, how heavy of wetters they are, their age, how often they poop, parents’ budget, and generally what other diapers the parents’ have tried. Complicated much? Yeah. That’s why I’ve given subcategories under the diaper ratings, such as absorbency, price, softness, etc. Have I spent too much time thinking about diapers? Yes.

What’s my ideal diaper, and the criteria for ratings? All of the following:

  • Great absorbency/no leaks

  • Soft

  • White or not-obnoxious prints

  • Natural

  • Stretchy waistbands and tabs, a higher waist, none of that low-rider business that lets all the #2 out

  • Affordable.

Is there such a diaper? Almost. There is one that checks all but one of those boxes: it may very well be the most expensive diaper, which makes it unattainable for many. Which is why diaper comparisons like this exist, to help parents find the qualities they’re looking for most in a diaper, at a price they can afford, because you just can’t have it all.

Determining which features are most important to you can help you find which diapers you should be trying!

This post may contain affiliate links. If you make a purchase using these links, Jennyblogs may receive a small commission, at no extra cost to you. This helps to support Jennyblogs. For further information see the privacy policy. Grazie!


The overall winners in each category…

Best Diaper Overall:

Coterie

Most Absorbent:

Coterie

Softest:

Coterie

Least Expensive:

Parent’s Choice

Most Fun:

Hello Bello Subscription

Best Natural:

Coterie, Dyper


For reference:

$ = $0.30 or less per diaper

$$ = $0.31 - $0.49 per diaper

$$$ = $0.50 or more per diaper

All prices are based on size 5 diapers and the cheapest price they can be purchased at any of the big retailers (Amazon, Target, Walmart); current as of April 2024.


The diapers we’ve tried, in alphabetical order:

  1. All Good (5/5)

Absorbency: 5/5 These diapers are super absorbent, great for day or night. In fact, these are so absorbent, they make for terrible beach diapers since they just keep absorbing liquid, ha! I don’t think I can remember a time when one of my children leaked through these.

Softness: 3/5 Really the only con I can think of with these diapers is that they’re not the softest. They’re not bad, I just think they could do better. If they were softer, these diapers would be pretty near infallible!

Price: $ For the absorbency of these diapers, they are a great value.

Naturalness: Paraben, latex, and fragrance-free

Sizing: True to size

Noteworthy: These diapers are only available through Walmart, and recently they’ve been almost continuously out of stock in most sizes. I believe they’re discontinued.

2. Cloth Diapering:

Yes, I even cloth diapered for a few months! I really wanted to go full steam with cloth diapering but it ended up just not being practical for us. My husband didn’t care to deal with them and even my other caregivers said they would rather buy disposable diapers for when they were watching my kid(s), than deal with the cloth diapering, which would have meant only part-time cloth diapering. Factor in an international move, being pregnant and going back to work and generally dealing with life and kids, it just felt like a lot.

I did have fun with it though while we were in Italy, and found what worked for us with what we had. Although I later found out it could’ve been so much easier. My mom, who cloth-diapered all 5 of her kids, helped show me what I needed and how to do it, or at least one way as I found there are different kinds of cloth diapers now. More things to learn and choose which way to do it, oh me oh my. I couldn’t find any kind of cloth diaper covers in Italy except for the pocket kind, so I got those and paired them with some prefolds. Despite using 1-2 prefolds and 1-2 inserts, my son’s diaper still would only last 3-4 hours before soaking his clothes. I learned to consistently change it before the 3 hour mark to avoid having to change diaper AND clothes. I later found out the prefolds I had were much thinner than what they’re supposed to be…but I powered through for several months despite not having the proper stuff. Because of the leakage issue, I didn’t even consider using the cloth diapers at night, I always used a disposable for nighttime. But I saved a little bit of money and some diapers going in the land fill, anyway. Ha.

3. Coterie (5/5)

Absorbency: 5/5 These things are amazing, for day and night.

Softness: 5/5 so soft.

Tabs: 5/5

Price: $$$ The downfall of these diapers, is their high price tag. I guess the old adage continues to ring true, you get what you pay for.

Naturalness: While there are no organic or purely biodegradable diapers yet (that I know of), these diapers come pretty close and I appreciate Coterie’s transparency in their processes and why they choose the materials they do, without trying to green-wash anything. They have some noteworthy certifications, including EWG.

Sizing: Coterie has slightly smaller size ranges in their smaller diapers, therefore their smallest sizes (N-4) fit smaller. For example, their size 1 fits 8-12lbs where a standard size 1 fits 8-14lbs

Noteworthy: These diapers are solid white, which I think is a pro. No dyes, look better under clothes, and just look classier all around. But if you’re a print-fan, you might find these boring. Can be bought by box or subscription.

4. Cuties (2.5/5)

Absorbency: 2/5 These diapers get a pretty good “saggy crotch” long before they’ve reached capacity, and can start to leak. They’re alright for the daytime given the price if you’re up on changing them, but I wouldn’t use them at night.

Softness: 4/5

Price: $

Naturalness: “Made from materials free of latex, fragrance, dyes and chlorine, these diapers feature a hypoallergenic inner liner enriched with aloe, natural botanicals and vitamin E”

Sizing: True to size

5. Daddy’s Choice (2/5)

Absorbency: 2/5 These diapers get the saggy crotch after just an hour or two of wear, and must be changed regularly or you run the risk of the diaper coming apart and the absorbent beads coming out.

Softness: 5/5

Tabs: 3/5 They have shorter, not very stretchy tabs that make it harder to fasten the diaper on.

Price: $

Naturalness: 0% additives, parabens, chlorine, fragrance, bleach

Sizing: True to size

Noteworthy: These may be discontinued as well, as they are out of stock everywhere.

6. Dyper (4.5/5)

Absorbency: 4/5

Softness: 5/5

Tabs: 3/5 Another diaper that I wish had stretchier, longer tabs.

Price: $$

Naturalness: Bamboo diapers that have an impressive list of testing and transparency; they even offer a compost program to reduce the impact of diapers in landfills.

Sizing: I’d say true to size. Last time I tried these they had their own sizing (S, M, L), but they have since switched to standard diaper sizing.

Noteworthy: These are white, classy looking diapers. They have a newer line of black charcoal diapers which I think look quite cool. These can be bought by box or subscription. Overall I really liked these diapers and would probably give them a 5, except my husband didn’t like them as well, so I gave them a 4.5 :)

7. Earth & Eden (3.5/5)

Absorbency: 3/5 A bit of saggy crotch can start to happen after awhile.

Softness: 4/5

Price: $$

Naturalness: “clinically proven gentle on your baby's skin; free from lotions, latex, fragrance, and chlorine bleaching. Not tested on animals; Made with SFI Certified sustainably sourced fluff; Printed with non-toxic water-based inks; Produced in a Zero Waste to Landfill Facility; Non-toxic super absorbent polymer(sodium polyacrylate)”

Sizing: True to size

Noteworthy: These diapers are white with just a design around the band. Each box comes with several different designs, which is a little detail I enjoy. Most diapers, if they have a design, have just 2 per size. Last time I had these I think I counted 8+ designs per size.

8. Esselunga (Italian) (3/5)

Absorbency: 3/5

Softness: 3/5

Price: €

Naturalness: ?

Sizing: True to size, but please note that standard diaper sizes in Italy differ from standard diaper sizing in the US

Noteworthy: These are Italian grocery store brand diapers

9. Hello Bello (4/5)

Absorbency: 3/5 These diapers are pretty good but I would have to keep an eye on my heavy wetters as they would often wake up from their nap wet.

Softness: 5/5

Tabs: 5/5

Price: $$

Naturalness: “Hypoallergenic, made without artificial fragrance, phthalates, parabens, lotions, or latex”

Sizing: Hello Bello has slightly smaller size ranges in their smaller diapers, therefore their smallest sizes (N-3) fit smaller. For example, their size 1 fits 8-12lbs where a standard size 1 fits 8-14lbs.

Noteworthy: Made in the USA. These diapers can be bought by box, or set up as a subscription. In each box you can have up to two different sizes and pick 7 different designs. As many of those designs as you wish can be nighttime diapers. Each month you can edit your box, changing up size and designs. This keeps things fresh and new and really had me looking forward to diapering, always excited to see which design we’d get to open up next. It’s the little things in parenthood sometimes, you know? If you buy these by box on Amaxon or at the grocery store, the prices are cheaper. I’ve also wondered if somehow the diapers differ between subscription and box? I might be imagining it, but beyond the price the subscription ones seem a bit thicker and softer…

10. Hello Bello Nighttime (5/5)

Absorbency: 5/5 These are good nighttime diapers and my children have had no leaks with these.

Softness: 5/5

Price: $$$

Naturalness: “Hypoallergenic, made without artificial fragrance, phthalates, parabens, lotions, or latex”

Sizing: Hello Bello has slightly smaller size ranges in their smaller diapers, therefore their smallest sizes (N-3) fit smaller. For example, their size 1 fits 8-12lbs where a standard size 1 fits 8-14lbs.

Noteworthy: Made in the USA. These diapers can be bought by box, or set up as a subscription. In each box you can have up to two different sizes and pick 7 different designs. As many of those designs as you wish can be nighttime diapers. Night diapers usually only have 3 or so designs, and some designs can be sold out. Each month you can edit your box, changing up size and designs. This keeps things fresh and new and really had me looking forward to diapering, always excited to see which design we’d get to open up next. It’s the little things in parenthood sometimes, you know?

11. Honest (4/5)

Absorbency: 4/5

Softness: 3/5

Price: $$$

Naturalness: “To make the core of the diaper, we now harvest wood from well-managed, responsibly sourced trees in North America (instead of Scandinavia) to reduce our transportation carbon footprint.

  • Turned into fluff pulp

  • We don't add latex, fragrance, or parabens

  • We use a plant-based backsheet, and our new, more efficient design reduces the amount of material used in each diaper

  • Our diapers are cruelty-free and never tested on animals”

They also list diaper ingredients right on their website, which is nice.

Sizing: True to size

Noteworthy: Honest seems to be ever striving to create a better, more sustainable diaper. I’ve used them off and on since 2021, and there have been noticeable differences in their diaper formulas. First time I tried them, I really liked them. Second time, they were so bad I didn’t plan on buying them ever again, especially for the price! But a couple of coupons later I decided to give them another try, and more recently they’ve proven to be pretty good, absorbent diapers again.

12. Honest Overnights (5/5)

Absorbency: 5/5

Softness: 5/5

Price: $$$

Naturalness: “To make the core of the diaper, we now harvest wood from well-managed, responsibly sourced trees in North America (instead of Scandinavia) to reduce our transportation carbon footprint.

  • Turned into fluff pulp

  • We don't add latex, fragrance, or parabens

  • We use a plant-based backsheet, and our new, more efficient design reduces the amount of material used in each diaper

  • Our diapers are cruelty-free and never tested on animals”

They also list diaper ingredients right on their website, which is nice.

Sizing: True to size

Noteworthy: I’m not sure why their overnight diapers are softer than their daytime diapers, unless I tried them at awkward times as they’ve been switching up diaper formulas?

13. Huggies Unistar (Italian) 1/5

Absorbency: 1/5 While Huggies are not my preferred diaper in the US nor in Italy, I still don’t know why the Huggies in Italy were so bad. I would go to change my son’s diaper, and basically if he wasn’t on his back when he peed, it would leak right out, even if the diaper was far from capacity. Beyond that, it got to the point where I knew I had to change his diaper after 1.5hrs or the diaper would leak. They were the right size, on correctly, and no matter what, leaked more often than not.

Softness: 2/5

Price: €

Naturalness: ?

Sizing: True to size, but note that standard diaper sizes in Italy differ from standard diaper sizing in the US

14. Huggies Extra Care (Italian) 2/5

Absorbency: 2/5 While Huggies are not my preferred diaper in the US nor in Italy, I still don’t know why the Huggies in Italy were so bad. I would go to change my son’s diaper, and basically if he wasn’t on his back when he peed, it would leak right out, even if the diaper was far from capacity. Beyond that, it got to the point where I knew I had to change his diaper after 1.5hrs or the diaper would leak. They were the right size, on correctly, and matter what, leaked more often than not. These Extra Care ones I had when my son was a newborn, and I don’t remember them being as bad as the All-star variety.

Softness: 3/5

Price: €

Naturalness: ?

Sizing: True to size, but note that standard diaper sizes in Italy differ from standard diaper sizing in the US

15. Huggies Snug & Dry (3/5)

Absorbency: 4/5 Maybe a touch over 3 for absorbency, these could “almost” be used for nighttime, but not quite. My kids would often wake up wet, so they don’t pass the nighttime test, but just by a little.

Softness: 3/5 average softness. Not rough nor silky.

Price: $$

Naturalness: “Huggies® Snug & Dry™ diapers are hypoallergenic, fragrance free and dermatologist tested.”

While they are transparent about their ingredients and have them listed on their website, that doesn’t mean they’re good ingredients.

Sizing: Run a touch small, with a lower waist band.

16. Huggies Little Movers (3/5)

Absorbency: 3/5 Another Huggies that falls maybe a touch over 3 for absorbency. In a pinch they could be used for nighttime, but these sometimes don’t make it through an extra-long toddler nap, so not super reliable.

Softness: 2/5 I find these quite rough, and catch annoyingly on dry or rough fingers.

Price: $$

Naturalness: “All Huggies sensitive diapers are free of fragrance and elemental chlorine and made without parabens or natural rubber latex”

Sizing: Run a touch small, with a lower waist band, but I do enjoy that the waistband is stretchy, generous and easy to get on even chubbier babies!

Noteworthy: Huggies’ prints fail to win me over, and while they might not be my favorite, they’re also not a deal breaker. I just wish they were nicer.

17. Kirkland (Costco brand) (4/5)

Absorbency: 4/5 These have a very decent absorbency, almost nighttime worthy, almost. They do get a little saggy in the crotch after a while.

Softness: 3/5

Price: $

Naturalness: “They are hypoallergenic, made with plant-based materials* and made without fragrance, lotion, natural rubber latex, elemental chlorine.”

Sizing: Run a touch in the small side, with the lower riding waistband.

Noteworthy: The makers of Huggies also make Kirkland diapers, hence their similarities. I like Kirkland better overall because they’re cheaper and have nicer prints.

18. Little Journey (Aldi brand) (3/5)

Absorbency: 3/5 At first sight these diapers seem a little flimsy, and for the price I wasn’t expecting these to be that great. I was pleasantly surprised to find how well these hold some poop-explosions. The back elastic has held in several large, liquidy breast-fed baby poops, when otherwise I expect many other diapers would’ve ended with a blow-out. I finally understand what some diapers tout as having that “poop pocket”, that is supposed to catch the poop before it blows out, because this diaper has actually done it. Ultimately I knocked the scoring down to 3 out of 5 because the poop-pocket is not fool-proof, a blow-outs still do happen with these diapers. On top of that, the absorption, while not bad, is liable to leaking, especially with pressure. Baby carriers, bouncers, anything like that tends to make these diapers start leaking before they’re completely full. I once was holding my 6 month old on my hip and suddenly my clothes were wet and the floor was wet - the diaper had not just leaked, it had squirted!

Softness: 4/5 Quite soft for so cheap!

Price: $

Naturalness: “Hypoallergenic Liner with Vitamin E and Aloe”

Sizing: True to size

Noteworthy: Some of the absolute cheapest diapers on this list (Cheapest price found in store at Aldi, not online)

19. Luv’s (1/5)

Absorbency: 3/5

Softness: 2/5 crinkly and don’t feel very soft.

Price: $

Naturalness: Luv’s does not disclose their full ingredient list, and if you dig through their FAQ’s you’ll discover only that they’re latex free and elemental chlorine free. These have a very strong chemical-perfume smell that I highly dislike.

Sizing: These run a touch small, but they do have a higher waistband going for them.

Noteworthy: Proctor and Gamble, the same makers of Pampers, make Luv’s diapers. Makes sense, since Pamper’s Baby Dry and Luv’s are the two strongest perfume smelling diapers I can think of. Aside from that I find their prints obnoxious.

20. Mama Bear Gentle Touch (Amazon Brand) (4/5)

Absorbency: 4/5 I’ve tried these periodically over the past few years, and either they’ve grown on me or they’ve improved their formula. I wasn’t a huge fan the first time I tried these with my first, I would’ve given them maybe a 3/5. Currently I have my youngest in these and I’m rather impressed. The absorbency is great, at least during the daytime for my heavy wetter!

Softness: 4/5

Price: $

Naturalness: “Formulated without elemental chlorine, perfumes, lotions, parabens, and pthalathates.”

Sizing: True to size

21. Mama Bear Overnight Diapers (Amazon brand) (4/5)

Absorbency: 4/5 These are mostly reliable overnight diapers. They do occasionally leak, but for the most part I’m happy to buy these, given the value for price.

Softness: 4/5 Soft, not silky

Price: $$ One of the cheaper of the official “overnight” diapers

Naturalness: “Hypoallergic and dermatologically tested: free from chlorine bleaching, perfumes, lotions, parabens & phthalates”

Sizing: True to size

Noteworthy: Their design of little purple stars is more subtle than others, I enjoy it.

22. Mama Bear Plush Protection (Amazon brand) (4/5)

Absorbency: 4/5

Softness: 4/5 While these are supposed to be Amazon’s softer, nicer line of diapers, I was underwhelmed. I like their other diapers, but I didn’t necessarily think these were that much better.

Price: $

Naturalness: “Made with sustainably sourced pulp; Free from Elemental Chlorine, Bleaching, Natural Latex, Phthalates, Lotions and Fragrances”

Sizing: True to size

23. Mama Bear (Italian) (3/5)

Absorbency: 3/5

Softness: 3/5

Price: €

Naturalness: ?

Sizing: True to size, but note that standard diaper sizes in Italy differ from standard diaper sizing in the US

Noteworthy: Overall pretty nice/average diapers, but their prints were nicer than the US ones I thought!

24. Meijer (grocery store brand) (2/5)

Absorbency: 2/5 These don’t last very many hours, so for active toddlers this means being more pro-active about diaper changes rather than waiting until they actually need one. They would be better for smaller babies who need more frequent changes, anyway.

Softness: 3/5 A tad softer than Meijer’s night diapers

Price: $

Naturalness: “The diapers are hypoallergenic and free of latex, lotions, and perfumes.”

Sizing: True to size, maybe a touch big

Noteworthy: I was a bit underwhelmed with the daytime diapers from Meijer after using their more impressive overnights first. The daytime diapers are not nearly as good. Ah well, I do believe they must be discontinuing them because all the boxes at the store are on clearance and they have not been getting any more in. The waistband is stretchy and secure, one of my favorites.

25. Meijer Overnight (grocery store brand) (3.5/5)

Absorbency: 5/5 no leaks here!

Softness: 2/5 rather papery

Price: $

Naturalness: “The diapers are hypoallergenic and free of latex, lotions, and perfumes.”

Sizing: True to size, maybe a touch big

Noteworthy: Gosh the designs are just so unattractive! Overall these are pretty great, reliable diapers, but I wish they were softer and because of their designs I don’t care to purchase these again, which feels silly to me for the value that they are.

26. Member’s Mark (Sam’s Club brand) (3/5)

Absorbency: 3/5

Softness: 3/5

Price: $

Naturalness: “Hypoallergenic free from lotions, parabens, fragrances, natural rubber latex & chlorine bleaching”

Sizing: These run a touch small.

Noteworthy: I find these similar to Kirkland and Amazon brand diapers. They have the lower waistband which I don’t prefer.

27. Millie Moon (4.5/5)

Absorbency: 5/5 These are great diapers all around, I often use these as night diapers, but they’re not my favorite night diapers due to occasional leaks.

Softness: 5/5

Price: $$

Naturalness: “Free from Lotions, Latex, Fragrance and Elemental Chlorine to protect delicate skin”

Sizing: Run slightly large

Noteworthy: I wish their tabs were a little stretchier and longer.

28. Pampers Baby Dry (2/5)

Absorbency: 4/5 These used to be some of my go-to affordable diapers, I even used to use them as nighttime diapers.

Softness: 3/5 I’ve always been curious as to why these fuzz out more than the Italian Pampers ever did.

Price: $

Naturalness: “hypoallergenic and free of parabens and latex* (*Natural Rubber)”

I dislike the fragrance these have, not because it’s unpleasant, but because I don’t want chemical smells by such tender body parts.

Sizing: True to size

Noteworthy: These used to be some of my favorite absorbent diapers until something changed and the tabs became awful. They don’t stick well and the diapers fall off of my children frequently. I thought it might have been a bad box from Amazon, but I also got a box from my local grocery store and it was exactly the same. I got tired of waking up to my kids with their diaper half off, or them walking around and suddenly hearing a “plop!”. Unless something changes, I would not buy these again. Based on more recent reviews of these diapers, it appears I’m not alone in my dissatisfaction of this apparent new formula.

29. Pampers Cruisers (2/5)

Absorbency: 3/5

Softness: 2/5 papery

Price: $$

Naturalness: “free of parabens and latex.* (*Natural Rubber)”

Sizing: Run a touch small

30. Pampers Baby-Dry (Italian) 5/5

Absorbency: 5/5 These were my favorite for overnight and trips!

Softness: 3/5

Price: €€

Naturalness: “0% profumo”

Sizing: True to size, but note that standard diaper sizes in Italy differ from standard diaper sizing in the US

Noteworthy: Pampers in Italy are solid diapers! Very reliable and yes, a bit different than the US ones.

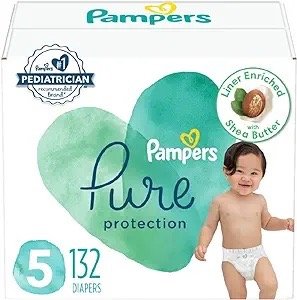
31. Pampers Pure (4/5)

Absorbency: 4/5 Good absorbency, I have on occasion used these as night diapers, but they weren’t foolproof.

Softness: 4/5

Price: $$

Naturalness: Made WITHOUT: Elemental Chlorine, Fragrances (Pure is Fragrance Free), Parabens, or Latex (Natural Rubber)

  • Made WITH: Premium cotton, polypropylene, polyethylene and polyester blend, pH-Sensitive materials, Elemental chlorine-free fluff pulp, mineral-based odor absorber, super absorbent polymer

Sizing: True to size

32. Pampers Sole e Luna (Italian) 5/5

Absorbency: 5/5 These were trustworthy, everyday diapers and also good for nighttime.

Softness: 3/5

Price: €

Naturalness: ?

Sizing: True to size, but note that standard diaper sizes in Italy differ from standard diaper sizing in the US

Noteworthy: Pampers in Italy are solid diapers! Very reliable and yes, a bit different than the US ones.

33. Pampers Swaddlers (4/5)

Absorbency: 4/5 another good absorbency from Pampers, another one I used for a bit as night diapers. One too many leaks, though, and I decided I could do better for night time.

Softness: 4/5

Price: $$

Naturalness: Made WITHOUT: Parabens, Bisphenol A (BPA), Elemental Chlorine or Latex (Natural Rubber)

  • Made WITH: Polypropylene non-woven and spandex (free of natural rubber latex), Absorbent fluff pulp derived from wood pulp, pH-sensitive material, Safe and Nontoxic Polyacrylate Polymer, Polyester, Polypropylene and stretch film, Aloe Barbadensis Leaf Extract

Sizing: True to size

34. Parents’ Choice (3/5)

Absorbency: 3/5 nothing amazing, but really, this is hands down the cheapest diaper I know of, which makes it a pretty good deal, at least for day time!

Softness: 3/5

Price: $

Naturalness: “Each diaper is made without natural latex, lotions, and perfumes”

No ingredients list to be found. A third party source mentions Parents’ Choice as using bleached materials.

Sizing: Run a touch small

35. Proudly (2/5)

Absorbency: 2/5 I was really hoping for better from these, but alas. Temperamental and leaky even during the day.

Softness: 5/5

Price: $$

Naturalness: ingredients: sustainably-sourced and biodegradable wood pulp, sodium polyacrylate, shea butter, polypropylene, polyethylene, polyester, calcium carbonate, spandex/elastane fiber, non-toxic adhesives, and non-toxic ink (for our adorable print).

No: elemental chlorine, fragrance, latex, parabens, phtalates

Sizing: True to size but with the less flexible, short tabs

Noteworthy: Black and woman owned company

36. Rascal + Friends (3/5)

Absorbency: 3/5

Softness: 4/5 surprisingly soft for such inexpensive diapers!

Price: $

Naturalness: No latex, fragrance or lotions “Our premium diapers and diaper pants are predominantly made of fluff pulp, super absorbent material (SAP), polypropylene non-woven fabrics, polyethylene film, together with some fastening and elastic materials.”

Sizing: True to size, these have the less stretchy, shorter waistband tabs.

Noteworthy: These diapers can be bought in Cocomelon prints, which many children would probably greatly enjoy (and may make diaper changing time less of a struggle for some toddlers!)

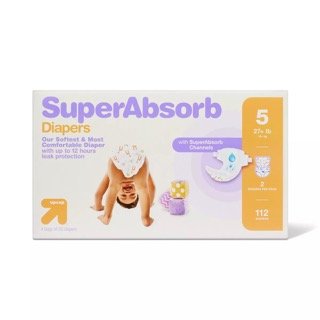
37. Up & Up SuperAbsorb (Target brand) (3/5)

Absorbency: 3/5 For the price, these make great day diapers. However, I find they don’t live up to their 12-hour boast (not that they need to for the day, and if they did, why would they make a night time diaper, anyway?). I always have to change my 2yo daughter’s diaper just before or just after her nap.

Softness: 3/5 not overly soft, verging on papery

Price: $

Naturalness: “Made without elemental chlorine, lotions, latex, fragrances, parabens and phthalates”

Sizing: These run a touch small

38. Up & Up SuperAbsorb Overnight (Target brand) (4/5)

Absorbency: 5/5 These end up a little saggy but they consistently get my toddlers through the night which makes them a winner in my book, especially for the price.

Softness: 3/5 not overly soft, verging on papery

Price: $

Naturalness: “Made without elemental chlorine, lotions, latex, fragrances, parabens and phthalates”

Sizing: These run a touch small, I size up for nighttime.


Morris House Rolls (Parker House Rolls)

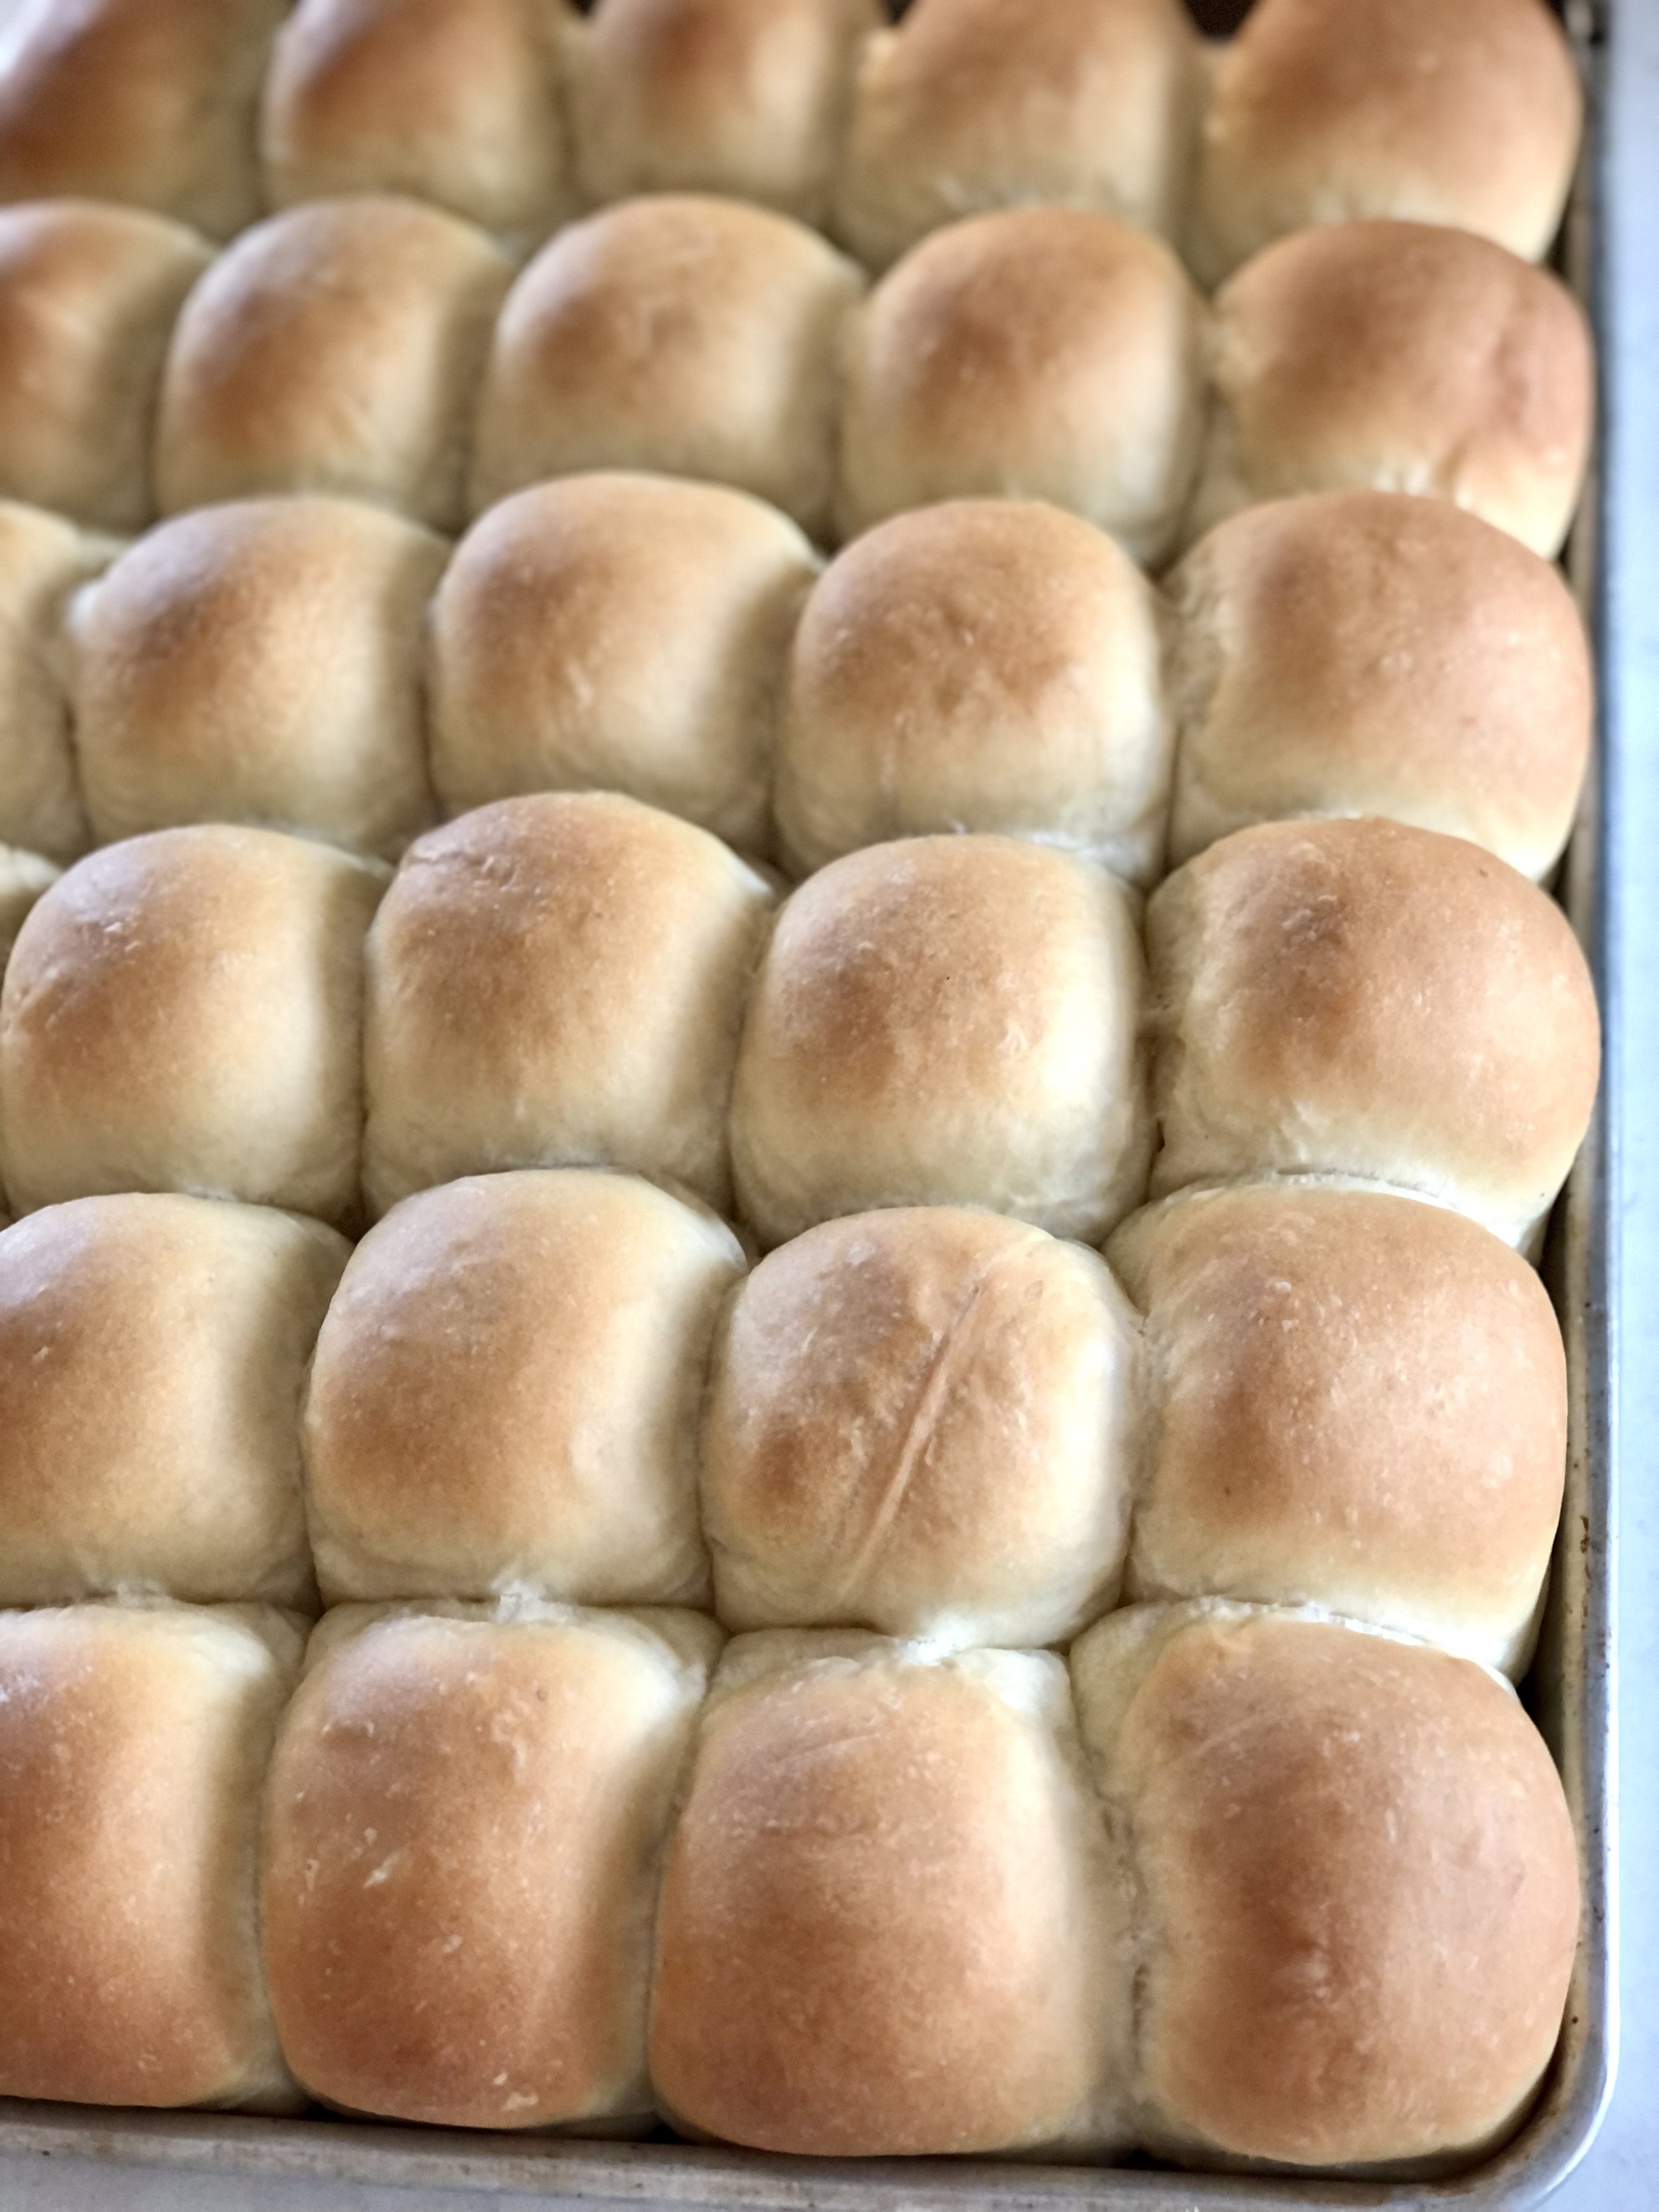
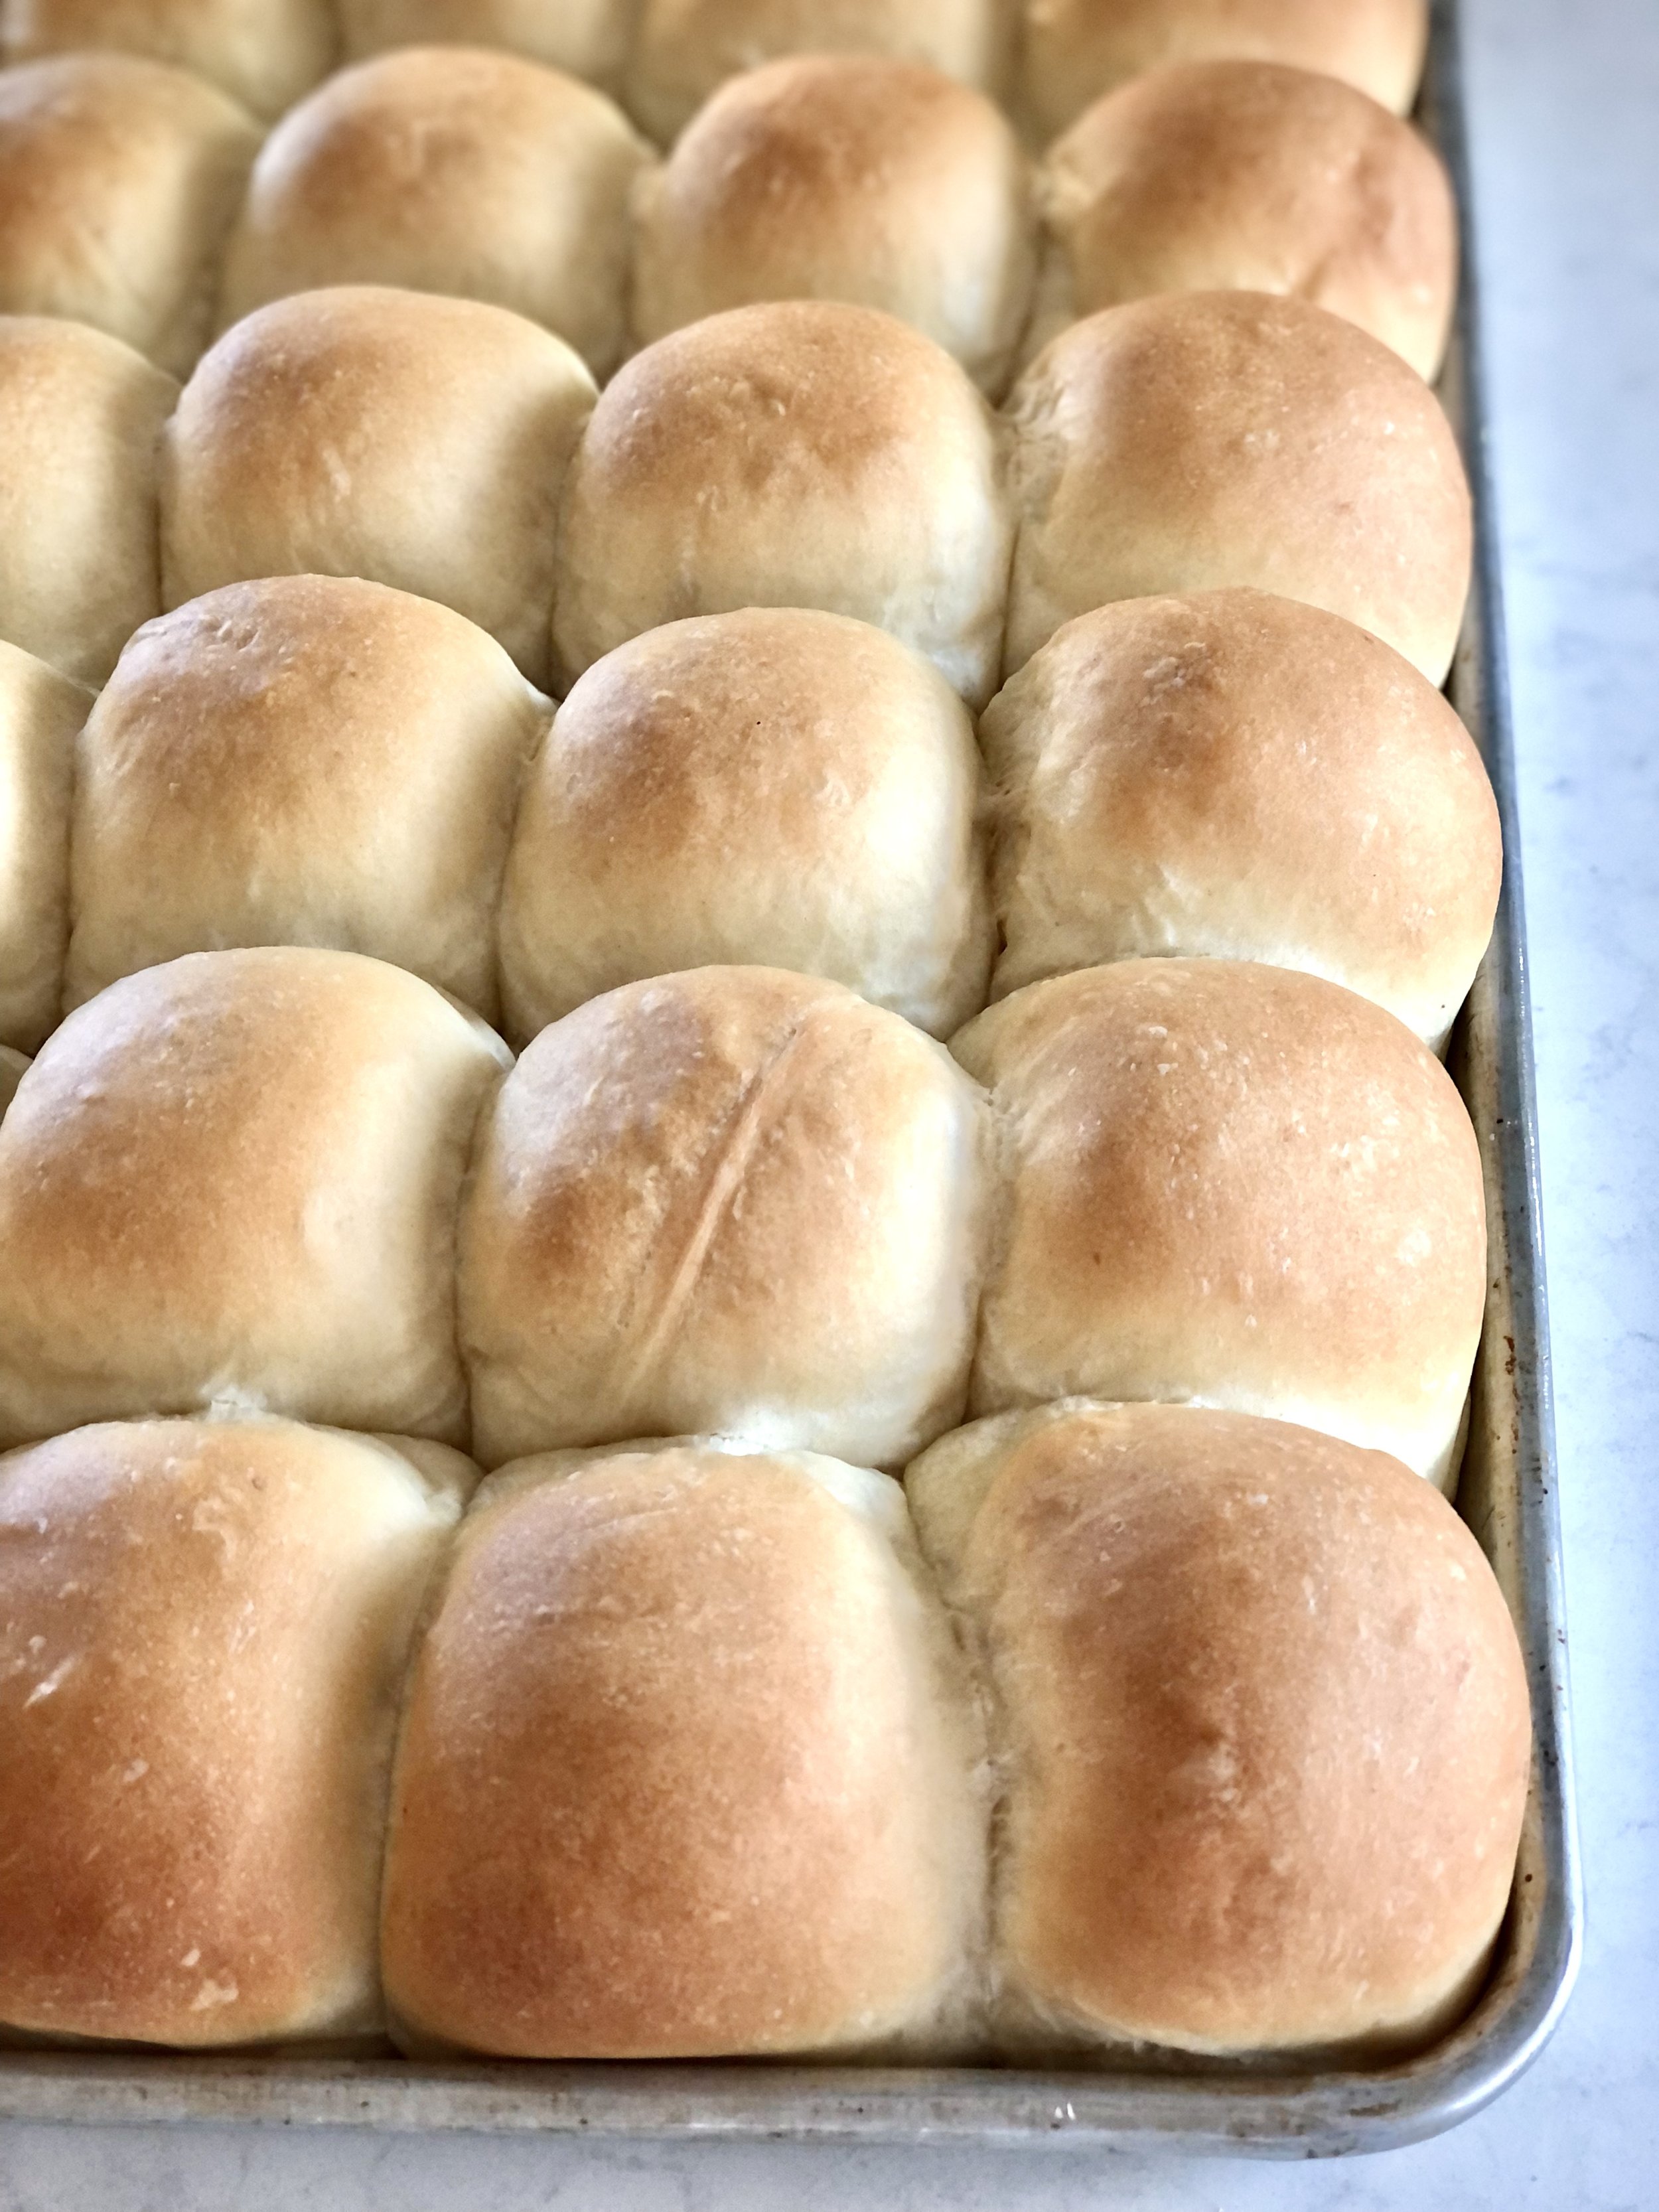
Soft and fluffy, these rolls have become a staple for holiday dinners and everyday dinners. There are hardly ever any leftovers, no matter how many batches we make! It’s hard to resist delicious, buttery, homemade bread.

Originally called Parker House Rolls, we’ve since changed the name of these to Morris House Rolls since, well, we make them so pretty and slightly changed the method of Parker House Rolls. Their origin has something to do with some rolls made at a hotel, where any angry baker threw some unfinished rolls into the oven. Apparently these were the rather delicious result that stuck and became famous. The method nowadays involves rolls that are dipped in butter and folded in half before they’re baked. This all seems rather fussy and messy, so we’ve adapted these into a more classic dinner roll shape. Just as delicious without all the fuss.

These are wonderful as is, or sliced and used for sliders or other small sandwiches. These freeze beautifully, so you can always pull some out for an impromptu dinner side!

Sourdough Discard Friendly

This is a great recipe to use up some sourdough discard. Add up to 100g of discard and a bit more flour as needed.

Why Heat the Milk First?

Heating milk, often known as “scalding”, is a technique often found in older recipes. It involves heating the milk to at least 181°F / 83°C. It has a few different purposes, depending on what you’re making.

  • Kill Bacteria: Before milk was widely pasteurized, scalding milk helped to kill bacteria.

  • Enhance Flavor: Milk takes on flavors really well when heated, so scalding works well with recipes that use vanilla, spices, herbs, etc., such as ice creams and custards.

  • Help Bread Rise: Milk contains whey protein, which can weaken gluten. If gluten isn’t strong, bread won’t rise properly. Scalding milk deactivates the whey protein, for an optimal rise.

The final reason is the reason why milk is scalded in this recipe.

This post may contain affiliate links. If you make a purchase using these links, Jennyblogs may receive a small commission, at no extra cost to you. This helps to support Jennyblogs. For further information see the privacy policy. Grazie!

Recipe adapted from Food Network


Morris House Rolls

Ingredients:

  • 1 1/2 cups / 356g milk

  • 1/2 cup / 113g butter, plus more for brushing

  • 1/2 cup / 100g sugar

  • 2 1/4 tsp / 7g instant yeast

  • 1/2 cup / 119g warm water

  • 3 eggs

  • 1 1/2 tsp salt

  • 6 cups / 720g all-purpose flour

Directions:

Oven 350°F / 177°C. 1 baking sheet lined with parchment paper or silpat.

  1. In a small pan, bring milk to a simmer. Remove from heat and stir in butter and sugar until melted. Allow to cool.

  2. In a large mixing bowl or bowl of a stand mixer fitted with the dough hook, combine yeast, water, eggs, salt, half of the flour, and cooled milk mixture until smooth. Add remaining flour, 1/2 cup at a time, until a soft, smooth dough forms. Knead for a few minutes with the dough hook.

  3. Transfer dough to floured surface and knead about 5 more minutes by hand.

  4. Place dough in a lightly oiled bowl, flip once to coat in oil, cover, and let rest for about 1 hour at room temperature, or until doubled in size.

  5. Punch dough down and divide dough into about 30 pieces. This will work out to be about 55g per piece if you have a scale to weigh them. Roll each piece into a tight ball and place on prepared baking sheet.

  6. Cover and let rest at room temperature for about 30-45 minutes, or until dough balls are puffed and almost doubled in size.

  7. Bake in preheated oven for 18-20 minutes or until golden brown. Remove from oven and brush with melted butter, if desired.

Jenny’s Notes:

  • If using instant dry yeast, you will want to active it before adding it in with the other dough ingredients. Add active dry yeast and the warm water to a small bowl and let sit for 5-10 minutes or until bubbly and active, before proceeding by adding them in with the rest of the dough ingredients.

  • This is a great recipe to use up some sourdough discard. Add up to 100g of discard and a bit more flour as needed.

  • These are so good, we don’t usually brush them with the extra butter!

Morris (Parker) House Rolls
Yield 30 rolls
Author
Prep time
45 Min
Cook time
20 Min
Inactive time
1 H & 45 M
Total time
2 H & 50 M

Morris (Parker) House Rolls

Parker House Rolls, renamed Morris House Rolls, are fluffy, buttery dinner rolls that never fail to disappear.

Ingredients

Instructions

  1. Oven 350°F / 177°C. 1 baking sheet lined with parchment paper or silpat.
  2. In a small pan, bring milk to a simmer. Remove from heat and stir in butter and sugar until melted. Allow to cool.
  3. In a large mixing bowl or bowl of a stand mixer fitted with the dough hook, combine yeast, water, eggs, salt, half of the flour, and cooled milk mixture until smooth. Add remaining flour, 1/2 cup at a time, until a soft, smooth dough forms. Knead for a few minutes with the dough hook.
  4. Transfer dough to floured surface and knead about 5 more minutes by hand.
  5. Place dough in a lightly oiled bowl, flip once to coat in oil, cover, and let rest for about 1 hour at room temperature, or until doubled in size.
  6. Punch dough down and divide dough into about 30 pieces. This will work out to be about 55g per piece if you have a scale to weigh them. Roll each piece into a tight ball and place on prepared baking sheet.
  7. Cover and let rest at room temperature for about 30-45 minutes, or until dough balls are puffed and almost doubled in size.
  8. Bake in preheated oven for 18-20 minutes or until golden brown. Remove from oven and brush with melted butter, if desired.

Notes

  • If using instant dry yeast, you will want to active it before adding it in with the other dough ingredients. Add active dry yeast and the warm water to a small bowl and let sit for 5-10 minutes or until bubbly and active, before proceeding by adding them in with the rest of the dough ingredients.
  • This is a great recipe to use up some sourdough discard. Add up to 100g of discard and a bit more flour as needed.
  • These are so good, we don’t usually brush them with the extra butter!


Nutrition Facts

Calories

145.59

Fat

4.14 g

Sat. Fat

2.35 g

Carbs

21.88 g

Fiber

0.76 g

Net carbs

21.12 g

Sugar

4.01 g

Protein

3.68 g

Sodium

152.34 mg

Cholesterol

25.96 mg

Nutritional information is approximate. Based on 1 roll.

dinner roll, parker house rolls
bread, side
American
Did you make this recipe?
Tag @jennyblogsandbakes on instagram and hashtag it #jennyblogs

Avalanche Bark - Rocky Mountain Chocolate Factory Copycat

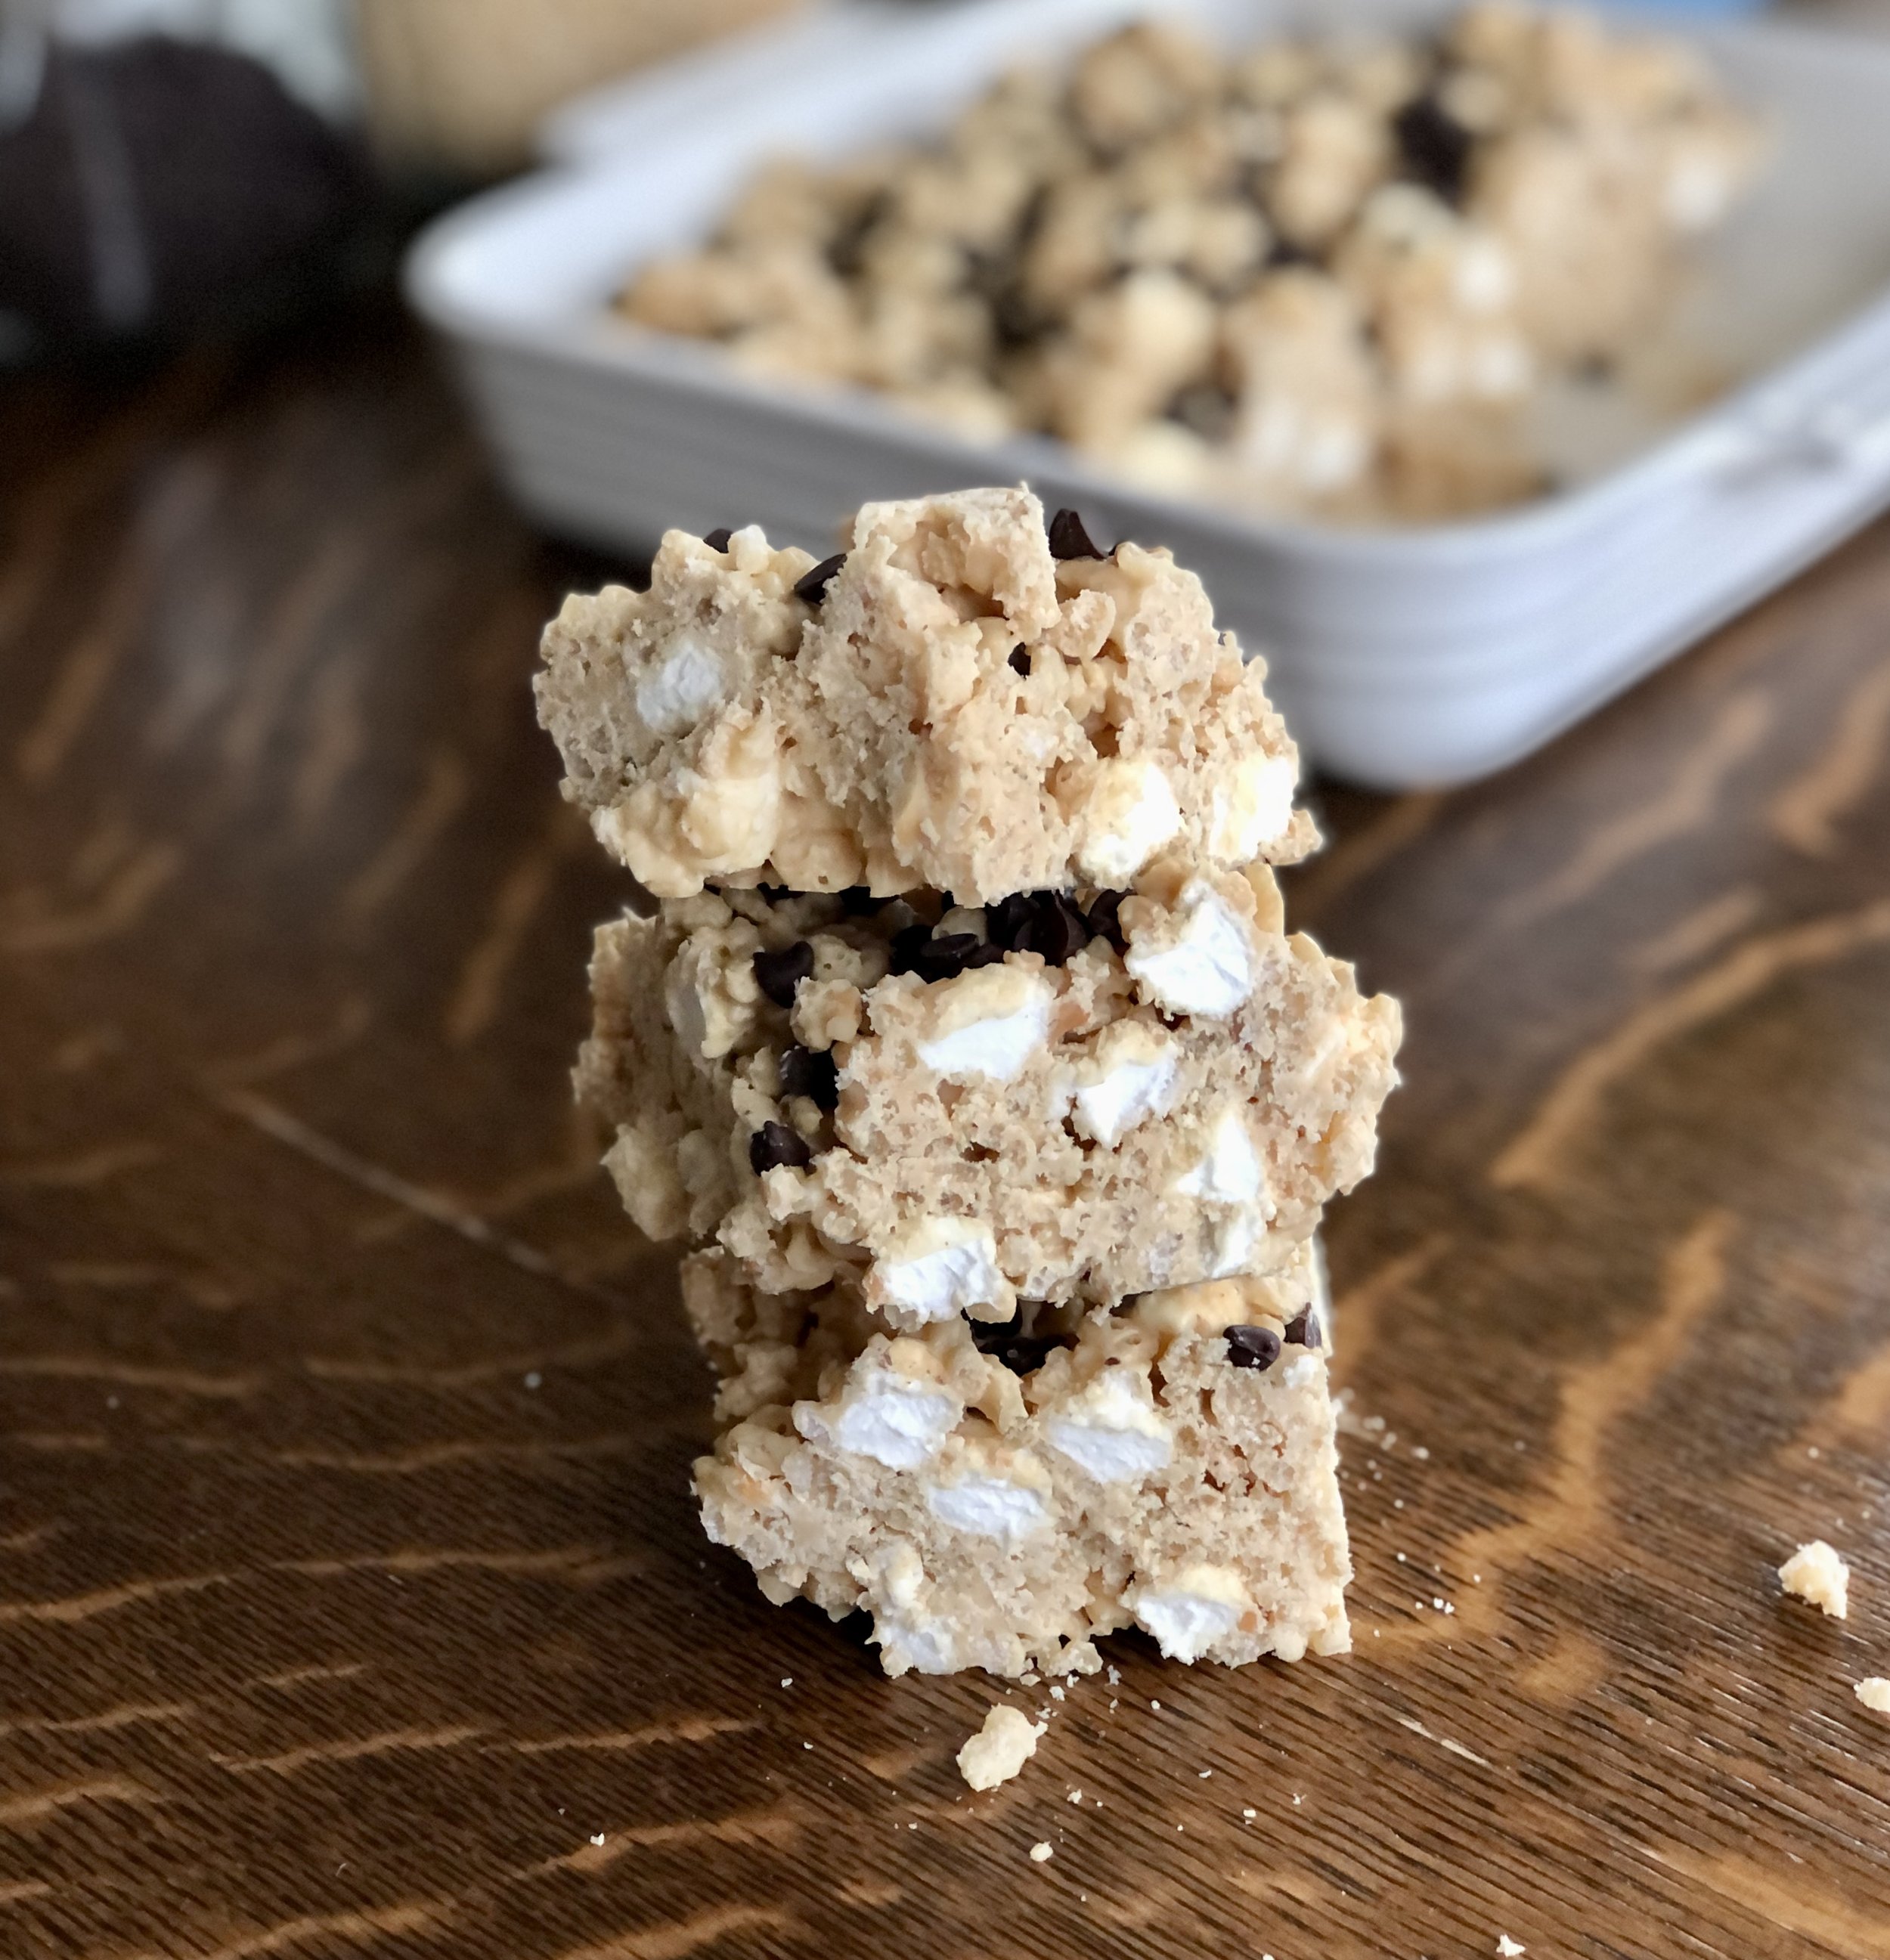
White chocolate peanut butter coated Rice Krispie treats with mini marshmallows and chocolate chips.

These are so delicious and simple to make, needing only about 10 minutes and 5 ingredients. Pop it in the fridge and you’ve got yourself a tasty treat for yourself or for that party you forgot you were supposed to bring something to!

I always have people asking for this recipe when I take it places, and it’s an easy one to give because it’s so simple. Even once when I had made this in Italy, and only had some older overly-chewy marshmallows, (marshmallows aren’t a big thing there and different than US ones to begin with) it was still a hit. In fact, a friend, after asking for the recipe, asked what the chewy bits were, and when I embarrassingly told him about the stale marshmallows, he laughed and said, “they’re my favorite part!” These are so good, they’ll even make chewy marshmallows shine.

The shameless blogger backstory

I once worked at a Rocky Mountain Chocolate Factory, and honestly it was one of the most fun jobs I ever had. I enjoyed working with chocolate, making the caramel apples, fudge, barks, etc., I liked my colleagues, had a good boss, and yes, also enjoyed eating some chocolate. It was very low-stress and not overly physical, at least compared to having spent 6+ hours at the ballet studio during the day before going to RMCF.

This recipe is a copycat of the Rocky Mountain Chocolate Factory’s Avalanche Bark. While legally I can’t give you the exact recipe, I would like to note that it would be completely impractical for me to even try. Everything there is made in much larger batches than a home baker would need to make, and by the time the recipe would be reduced down to a manageable quantity, you would have awful measurements like 0.1625 lbs of this or 2/3 tsp of that.

What I can tell you, is that this recipe is probably the closest you can get. But all of that could actually be irrelevant, as some of the other copycat recipes probably adjusted the recipe according to their tastes, and you can too! It wouldn’t take a rocket scientist to look at a slice of authentic Rocky Mountain Avalanche Bark and compare it to some of the other copycat recipes to realize that hey, Rocky Mountain’s has more Krispies. Because really, if you like a lighter, crunchier version, add more Krispies (it would also be crumblier, by the way). If you want more of a true “bark”, add less Krispies. Or, add more marshmallows and less Krispies, for a chewier version. Maybe you want more chocolate chips on top. Maybe you want to mix chocolate chips into these instead of just sprinkling on top. As you can see, for only having 5 ingredients, this recipe has quite a few possibilities for customization.


Avalanche Bark

Makes about 9 generous squares

Ingredients:

  • 12 oz white chocolate chips

  • 1/2 cup / 130g peanut butter

  • 1 1/2 cups / 86g mini marshmallows

  • 3 1/2 cups / 98g rice krispies

  • 1/4 cup / 43g mini chocolate chips

Directions:

  1. Line bottom of an 8x8in / 20x20cm square pan with wax paper.

  2. In a medium large pot, melt white chocolate chips and peanut butter together over low heat, stirring often.

  3. When white chocolate has just melted, remove from heat and stir in mini marshmallows. Gently fold in Rice Krispies until evenly coated.

  4. Spoon and spread into prepared pan, being careful not to flatten too much.

  5. Sprinkle with mini chocolate chips and press lightly.

  6. Allow to set at room temperature or in fridge before slicing.

Jenny’s Notes:

  • While this recipe is very similar to Rocky Mountain’s, feel free to customize as you wish. Add more or less Krispies, more or less Mini marshmallows, more chocolate chips or even mix them in, etc.

Avalanche Bark - Rocky Mountain Chocolate Factory Copycat
Yield 9
Author
Prep time
10 Min
Inactive time
20 Min
Total time
30 Min

Avalanche Bark - Rocky Mountain Chocolate Factory Copycat

White chocolate and peanut butter coated rice krispies with chewy mini marshmallows and mini chocolate chips make up this simple, no-bake dessert that tastes just like Rocky Mountain Chocolate Factory's

Ingredients

Instructions

  1. Line bottom of an 8x8in / 20x20cm square pan with wax paper.
  2. In a medium large pot, melt white chocolate chips and peanut butter together over low heat, stirring often.
  3. When white chocolate has just melted, remove from heat and stir in mini marshmallows. Gently fold in Rice Krispies until evenly coated.
  4. Spoon and spread into prepared pan, being careful not to flatten too much.
  5. Sprinkle with mini chocolate chips and press lightly.
  6. Allow to set at room temperature or in fridge before slicing.

Notes

  • While this recipe is very similar to Rocky Mountain’s, feel free to customize as you wish. Add more or less Krispies, more or less Mini marshmallows, more chocolate chips or even mix them in, etc.

Nutrition Facts

Calories

382.4

Fat

20.86 g

Sat. Fat

9.55 g

Carbs

45.03 g

Fiber

0.96 g

Net carbs

44.08 g

Sugar

32.81 g

Protein

6.56 g

Sodium

162.96 mg

Cholesterol

8.69 mg

Nutritional information is approximate. Based on 1 square if cut into 9 slices.

Rocky Mountain Chocolate Factory, Avalanche Bark, no bake dessert
dessert
American
Did you make this recipe?
Tag @jennyblogsandbakes on instagram and hashtag it #jennyblogs

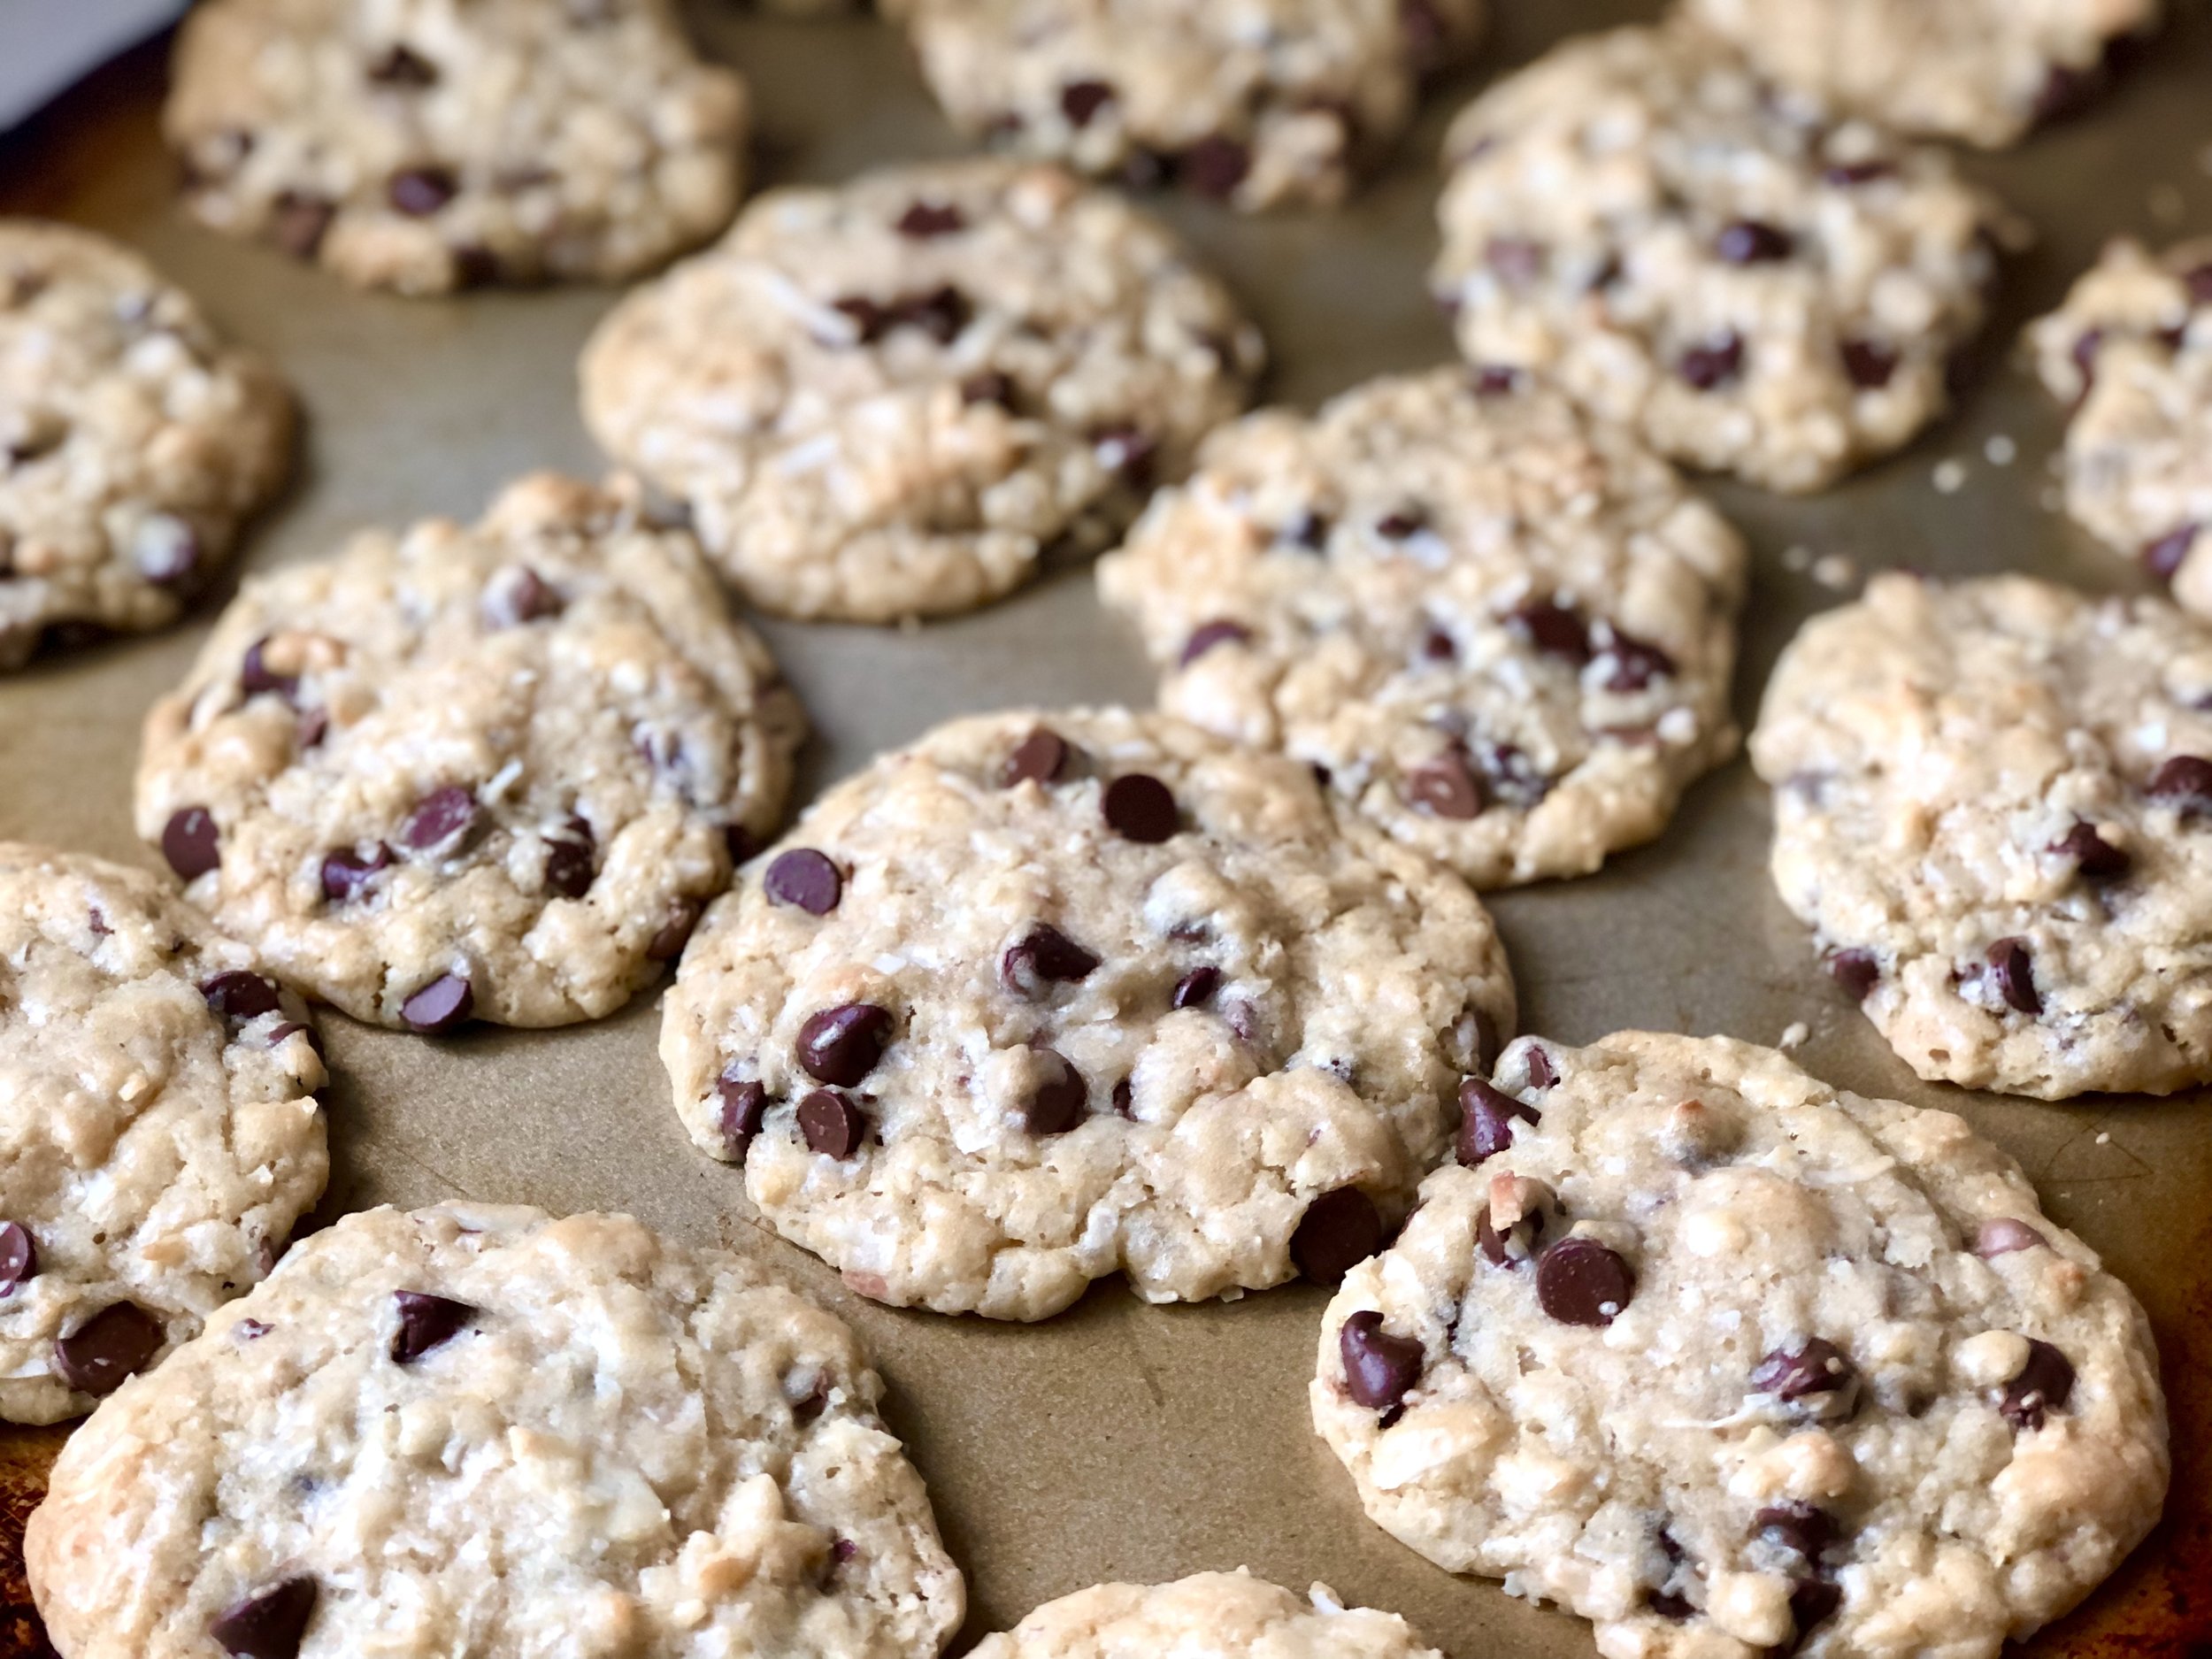
Almond Joy Cookies

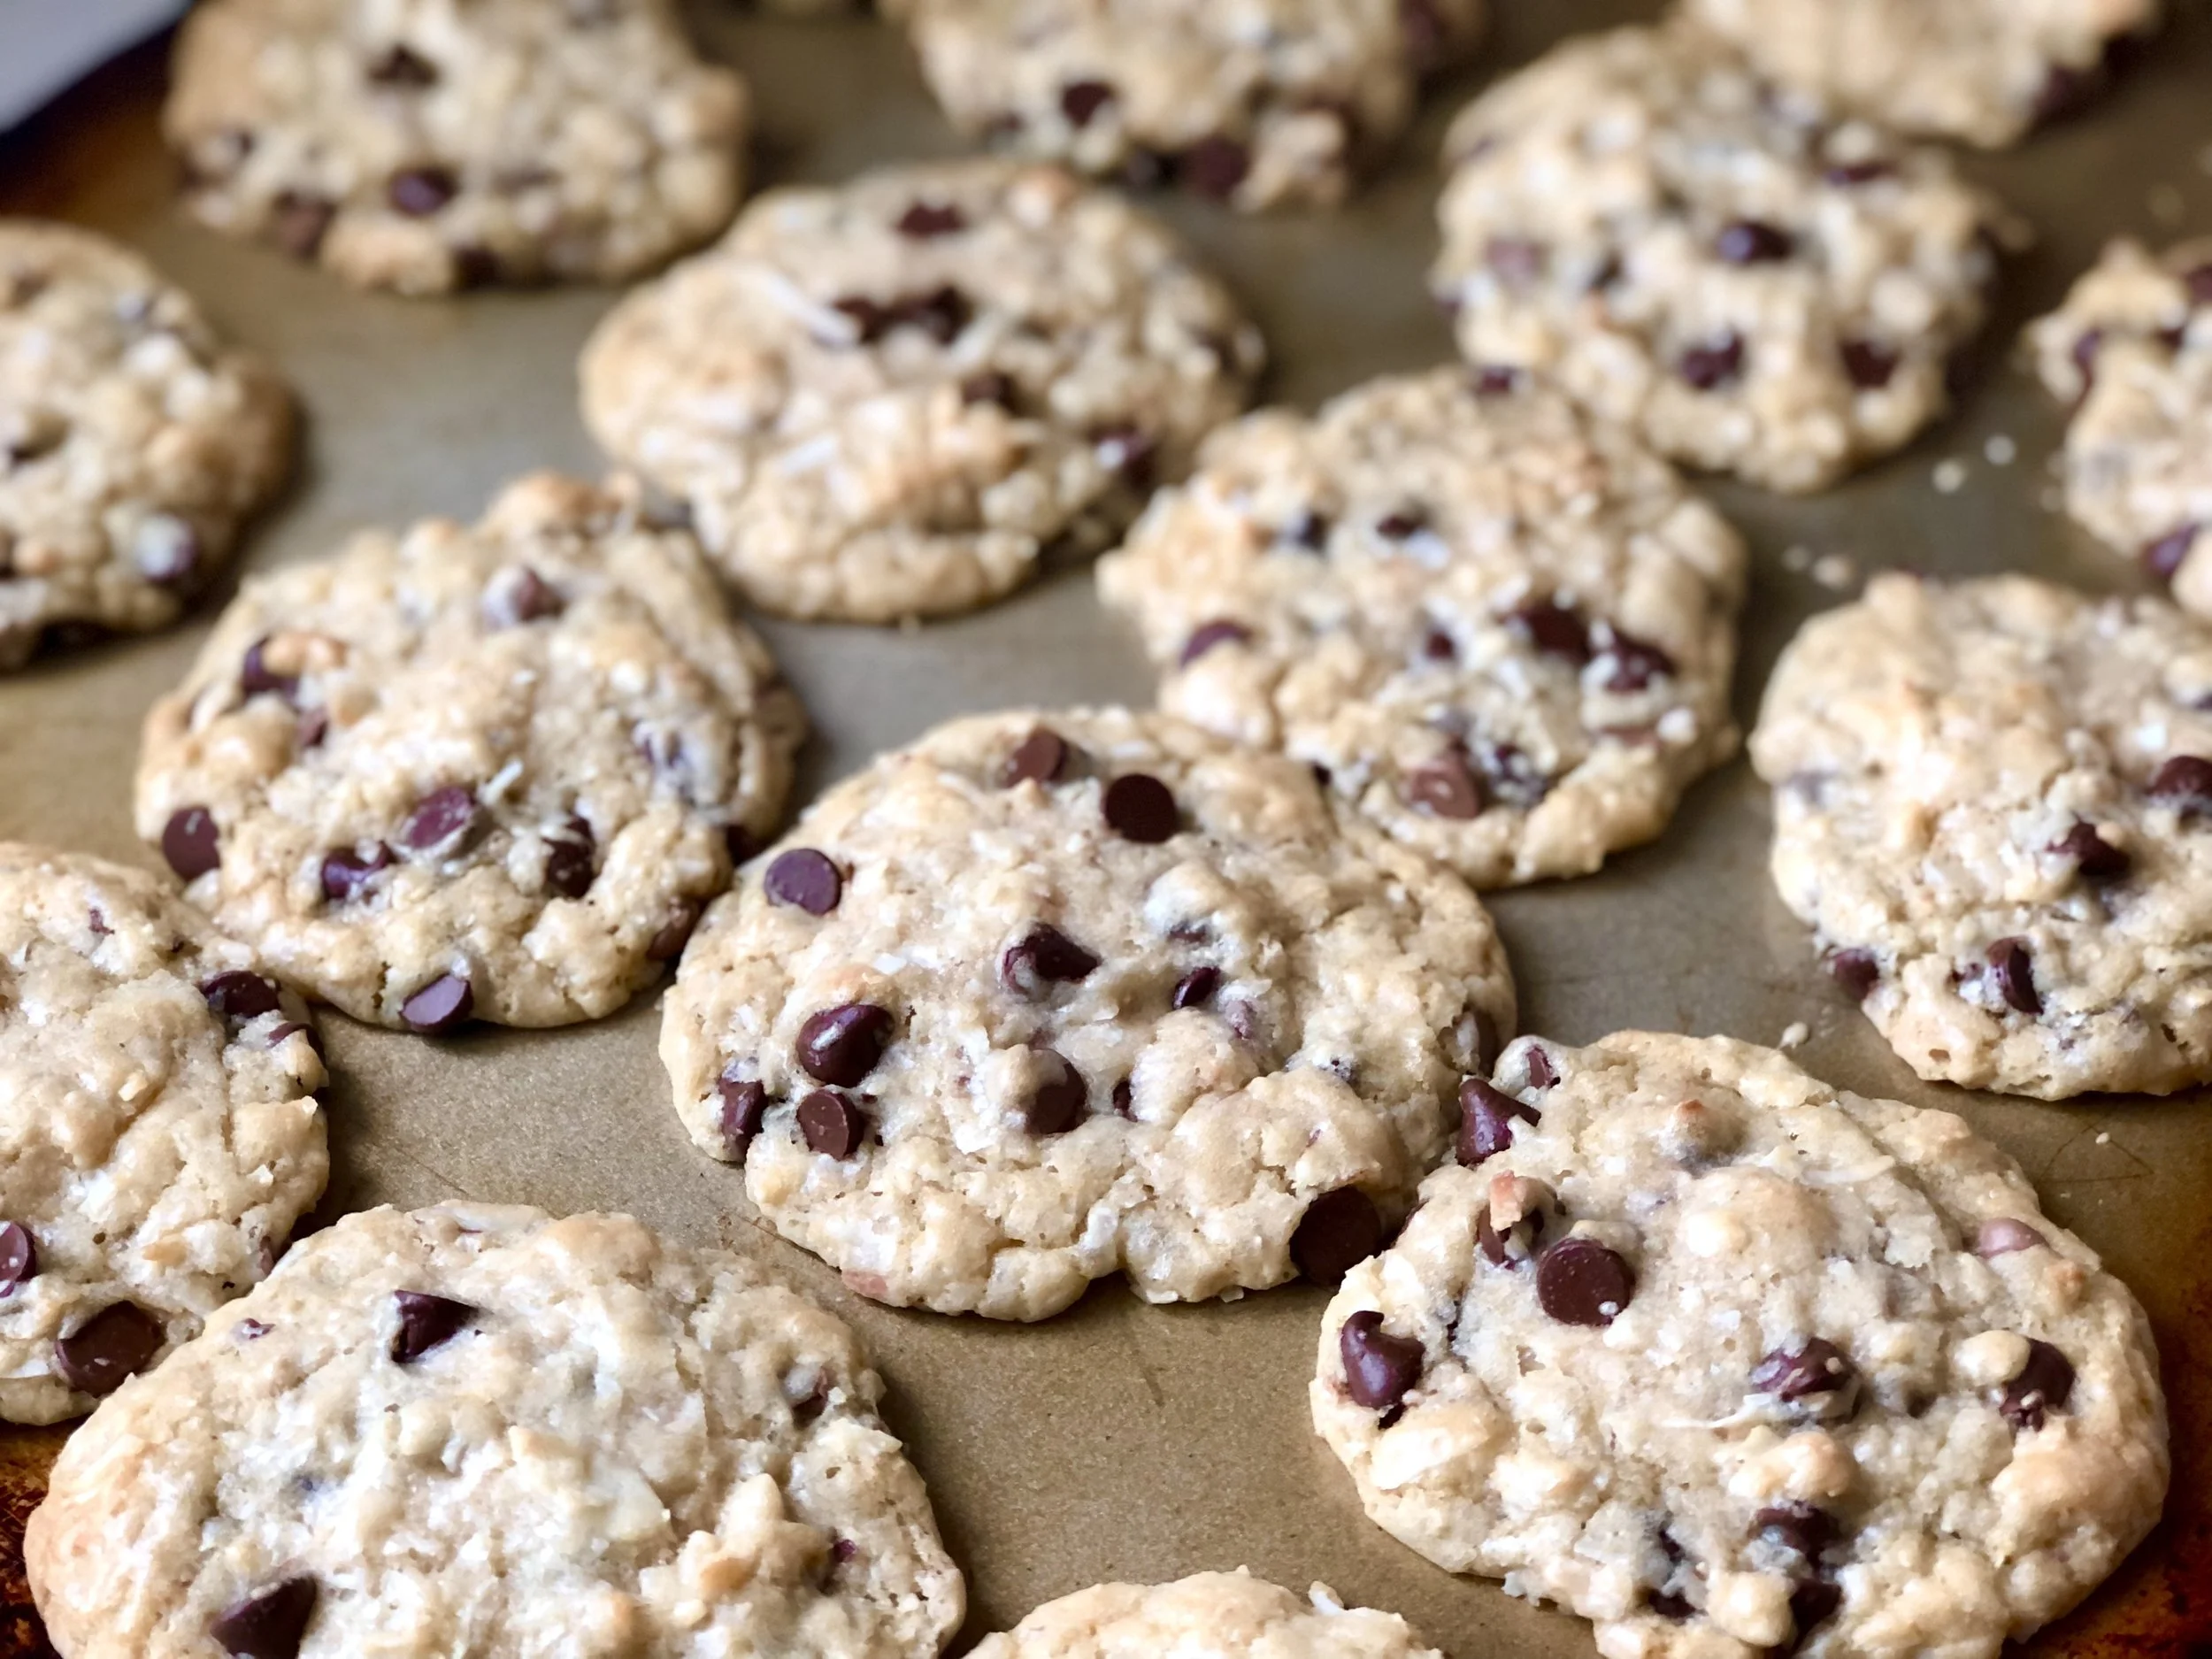
Almond Joy candy bars in an easy to make, homemade cookie form.

These cookies are loaded with chocolate chips, coconut, and sliced almonds, bursting with that coconut and almond flavor. They’re sweet, chewy, and pure joy to eat. (Heh heh.)

Make these with toasted coconut!

While I’ve written the recipe as a quick and easy to whip up recipe with regular, unsweetened coconut, these are DELICIOUS if you have a few extra minutes to toast your coconut.

To toast coconut:

  1. Preheat oven to 350°F / 177°C.

  2. Spread 2 cups coconut into an even layer onto an ungreased baking sheet or dish.

  3. Bake in oven for 8-10* minutes, or until golden and fragrant. Check every 2 minutes or so to ensure it doesn’t burn. Stir as necessary.

* Baking time will vary depending on oven and type of baking dish used.

I used to always use a baking sheet or cookie sheet to toast coconut, until I tried using a Le Creuset baking dish, and I’ve never used anything else since. The coconut toasts so evenly I rarely have to stir it anymore, and burning it is a distant memory.

Le Creuset is made of enameled stoneware which creates even baking, and easy clean up! One more amazing use for Le Creuset. They’re an investment and can be very expensive, but certain pieces are more affordable, or even if you can find them on occasion at Home Goods or Le Creuset’s outlet stores, you can get some pretty good deals.


Almond Joy Cookies

Makes about 2 dozen cookies

Ingredients:

  • 3/4 cup / 168g neutral-flavored cooking oil

  • 3/4 cup / 150g sugar

  • 3/4 cup / 150g brown sugar

  • 2 eggs

  • 1 tsp vanilla extract

  • 1 tsp coconut extract

  • 1 tsp almond extract

  • 2 cups / 160g unsweetened shredded coconut

  • 2 1/4 cups / 270g all-purpose flour

  • 1 tsp baking soda

  • 1 tsp salt

  • 2 cups (12 oz bag) / 350g semi-sweet or milk chocolate chocolate chips

  • 1/2 cup / 42g sliced almonds

Directions:

  1. In a large bowl or bowl of a stand mixer, mix together oil, and sugars.

  2. Beat in eggs and extracts. Stir in coconut.

  3. In another medium bowl, whisk together flour, baking soda, and salt.

  4. Stir dry ingredients into wet ingredients.

  5. Stir in chocolate chips and almonds by hand, just until evenly distributed.

  6. Drop by generous tablespoonfuls onto ungreased cookie sheets. Bake in preheated oven for 8-10 minutes or until cookies look puffed, slightly golden, and center no longer looks gooey.

  7. Allow to cool for about 5 minutes on cookies sheets before removing to cool completely.

Jenny’s Notes:

  • Try these cookies using toasted coconut! (Toast coconut by spreading into an even layer on a baking sheet or dish, and bake at 350°F / 177°C for 5-10 minutes or until golden brown, check every 2 minutes or so to ensure it doesn’t burn, stirring if necessary.)

  • I like to use a mix of both semi-sweet and milk chocolate chips in these!

  • For nut lovers, you can increase the amount of sliced almonds in this recipe!

Almond Joy Cookies
Yield 24 cookies
Author
Prep time
20 Min
Cook time
10 Min
Total time
30 Min

Almond Joy Cookies

Chewy cookies loaded with coconut, chocolate, and almonds, just like the Almond Joy candy bar.

Ingredients

Instructions

  1. In a large bowl or bowl of a stand mixer, mix together oil, and sugars.
  2. Beat in eggs and extracts. Stir in coconut.
  3. In another medium bowl, whisk together flour, baking soda, and salt.
  4. Stir dry ingredients into wet ingredients.
  5. Stir in chocolate chips and almonds by hand, just until evenly distributed.
  6. Drop by generous tablespoonfuls onto ungreased cookie sheets. Bake in preheated oven for 8-10 minutes or until cookies look puffed, slightly golden, and center no longer looks gooey.
  7. Allow to cool for about 5 minutes on cookies sheets before removing to cool completely.

Notes

  • Try these cookies using toasted coconut! (Toast coconut by spreading into an even layer on a baking sheet or dish, and bake at 350°F / 177°C for 5-10 minutes or until golden brown, check every 2 minutes or so to ensure it doesn’t burn, stirring if necessary.)
  • I like to use a mix of both semi-sweet and milk chocolate chips in these!
  • For nut lovers, you can increase the amount of sliced almonds in this recipe!

Nutrition Facts

Calories

298.91

Fat

17.71 g

Sat. Fat

7.83 g

Carbs

31.57 g

Fiber

1.82 g

Net carbs

29.76 g

Sugar

16 g

Protein

2.62 g

Sodium

159.65 mg

Cholesterol

13.64 mg

Nutritional information is approximate and based on 1 cookie.

no chill cookie dough, chocolate chip cookies, Almond Joy
dessert
American
Did you make this recipe?
Tag @jennyblogsandbakes on instagram and hashtag it #jennyblogs

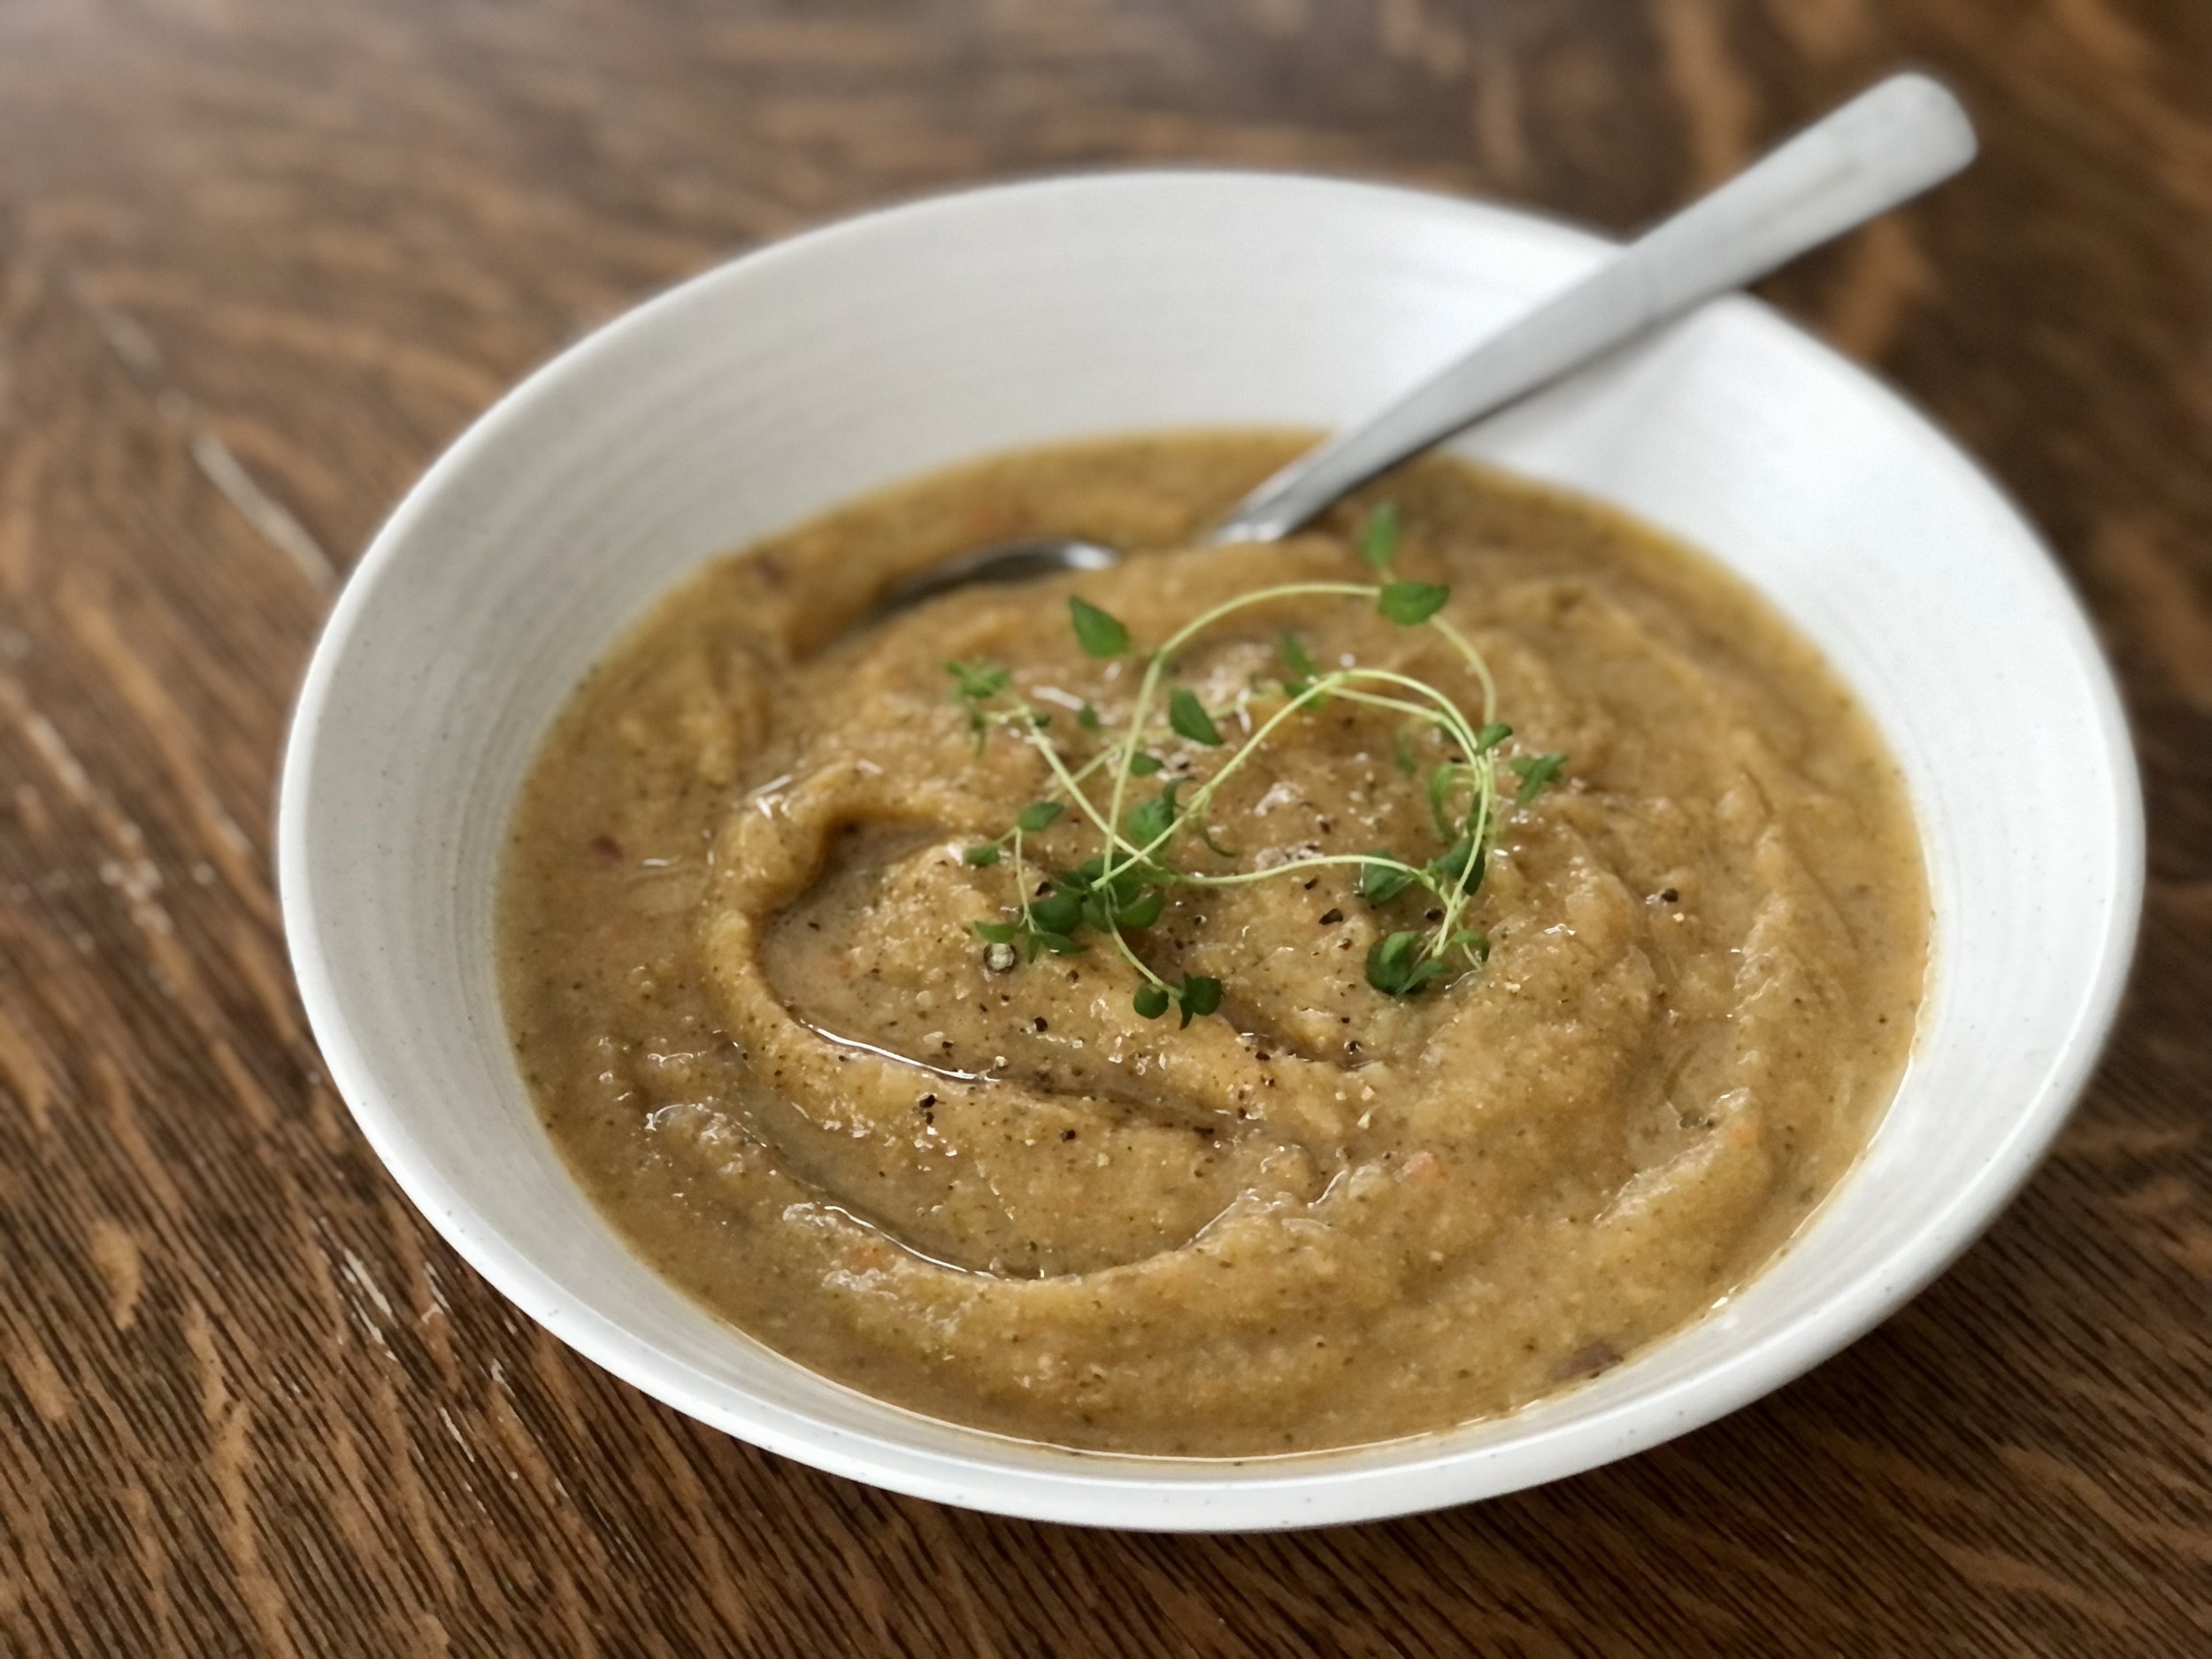
Smooth Potato and Vegetable Soup

This soup couldn’t be simpler to make, simply chop up vegetables, boil them, and purée them. Tada! Dinner. It’s high on my list for easy meals that require little hands on prep, think 10 minutes or less. Feasible even with a newborn and other little kids demanding all your time!

It’s all vegetables, which makes it hearty and very nutritious. Once it’s puréed you can’t tell what’s in it which makes it easy to sneak in maybe some of those vegetables that your family isn’t so fond of. If I’m going to be really honest, veggie soups aren’t overly exciting, but I really enjoy this one. It’s difficult to ruin, even if you swap out different kinds of veggies. Make as written at first if you feel more comfortable, rather than branching out on your own right away. After the first time or two making this, you’ll quickly learn what you want more of or less of in the veggie department to suit you and your family’s tastes.

And, being all vegetables, this soup is vegetarian and vegan, gluten and dairy free. Friendly for many diets and dietary needs!

This post may contain affiliate links. If you make a purchase using these links, Jennyblogs may receive a small commission, at no extra cost to you. This helps to support Jennyblogs. For further information see the privacy policy. Grazie!


Smooth Potato and Vegetable Soup

Serves about 4-6

Ingredients:

  • 1 quart / 1 liter chicken or vegetable broth

  • 2 cloves of garlic, peeled

  • 3 medium potatoes

  • 2 medium carrots

  • 2 stalks of celery

  • 1 small-medium broccoli crown

  • 1/2 medium onion

  • 2 fresh artichoke hearts, or 1 14 oz can, drained

  • salt and pepper, to taste

  • extra virgin olive oil, for drizzling, and crusty bread, optional

Directions:

  1. Rinse vegetables and chop all into chunks.

  2. Add all ingredients to a large pot over medium-high heat and brig to a boil.

  3. Allow to simmer for 30-45 minutes, or until all vegetables are tender when checked with a sharp knife. Check periodically to ensure it doesn’t boil dry, adding more water if necessary. Total time will depend on how large or small your vegetable chunks are.

  4. Once the vegetables are tender, transfer to a blender with enough broth to cover or almost cover them in the blender, or use an immersion blender to blend until smooth. If you desire a thinner soup, add more broth or water.

  5. Serve immediately with bread and a drizzle of olive oil, if desired. Store in the refrigerator or freeze.

Jenny’s Notes:

  1. You’ll notice the recipe is a bit vague, and I did that on purpose. If I wrote all the options or different ways I’ve made this soup, it would be quite confusing to read. So, you can find some variations down here.

  2. What kind of broth? Completely up to you. I prefer vegetable as this is a vegetable soup, but you could just as easily use chicken, beef, a combo, or your own homemade broth.

  3. Try using sweet potatoes for part or all of the potatoes.

  4. I don’t even bother to remove the skin from any of the potatoes or carrots. It all gets blended anyway, and it saves a lot of time while adding nutrition!

  5. The first time I made this with artichokes I hadn’t ever worked with a fresh artichoke before. I thought the center was bigger than it was, and thus ended up with some strands of fiber throughout the soup from the leaves. Not a deal breaker, but beware of those fibrous artichoke outer leaves. If you aren’t sure what exactly is the “center”, simply try biting the leaves. If it’s too fibrous and hard to chew, don’t blend it. The center will be small, as in, I-bought-that-whole-artichoke-just-for-that-tiny-thing? and yellow and almost melt in your mouth tender.

  6. Feel free to play with some spices to change things up! I like to add a Tbsp of turmeric, and sometimes some thyme or sage.

  7. Finally, add or subtract any vegetables you want! Basically as long as you have the same volume of vegetables to liquid, ish, you’ll end up with a vegetable soup. Ha. I love how simple it is. It’s just playing with flavors and textures!

Smooth Potato and Veggie Soup
Yield 4-6
Author
Prep time
15 Min
Cook time
30 Min
Total time
45 Min

Smooth Potato and Veggie Soup

Simple and nutritious purèed potato and vegetable soup

Ingredients

Instructions

  1. Rinse vegetables and chop all into chunks.
  2. Add all ingredients to a large pot over medium-high heat and brig to a boil.
  3. Allow to simmer for 30-45 minutes, or until all vegetables are tender when checked with a sharp knife. Check periodically to ensure it doesn’t boil dry, adding more water if necessary. Total time will depend on how large or small your vegetable chunks are.
  4. Once the vegetables are tender, transfer to a blender with enough broth to cover or almost cover them in the blender, or use an immersion blender to blend until smooth. If you desire a thinner soup, add more broth or water.
  5. Serve immediately with bread and a drizzle of olive oil, if desired. Store in the refrigerator or freeze.

Notes

  1. You’ll notice the recipe is a bit vague, and I did that on purpose. If I wrote all the options or different ways I’ve made this soup, it would be quite confusing to read. So, you can find some variations down here.
  2. What kind of broth? Completely up to you. I prefer vegetable as this is a vegetable soup, but you could just as easily use chicken, beef, a combo, or your own homemade broth.
  3. Try using sweet potatoes for part or all of the potatoes.
  4. I don’t even bother to remove the skin from any of the potatoes or carrots. It all gets blended anyway, and it saves a lot of time while adding nutrition!
  5. The first time I made this with artichokes I hadn’t ever worked with a fresh artichoke before. I thought the center was bigger than it was, and thus ended up with some strands of fiber throughout the soup from the leaves. Not a deal breaker, but beware of those fibrous artichoke outer leaves. If you aren’t sure what exactly is the “center”, simply try biting the leaves. If it’s too fibrous and hard to chew, don’t blend it. The center will be small, as in, I-bought-that-whole-artichoke-just-for-that-tiny-thing? and yellow and almost melt in your mouth tender.
  6. Feel free to play with some spices to change things up! I like to add a Tbsp of turmeric, and sometimes some thyme or sage.
  7. Finally, add or subtract any vegetables you want! Basically as long as you have the same volume of vegetables to liquid, ish, you’ll end up with a vegetable soup. Ha. I love how simple it is. It’s just playing with flavors and textures!


Nutrition Facts

Calories

240.61

Fat

4.33 g

Sat. Fat

0.72 g

Carbs

46.34 g

Fiber

8.9 g

Net carbs

37.42 g

Sugar

8.16 g

Protein

8.2 g

Sodium

1094.33 mg

Cholesterol

0 mg

Nutritional information is approximate, based on 1 serving if recipe serves 4, including olive oil drizzle.

potato soup, Armenian vegetable soup, vegan, vegetarian
dinner
American
Did you make this recipe?
Tag @jennyblogsandbakes on instagram and hashtag it #jennyblogs


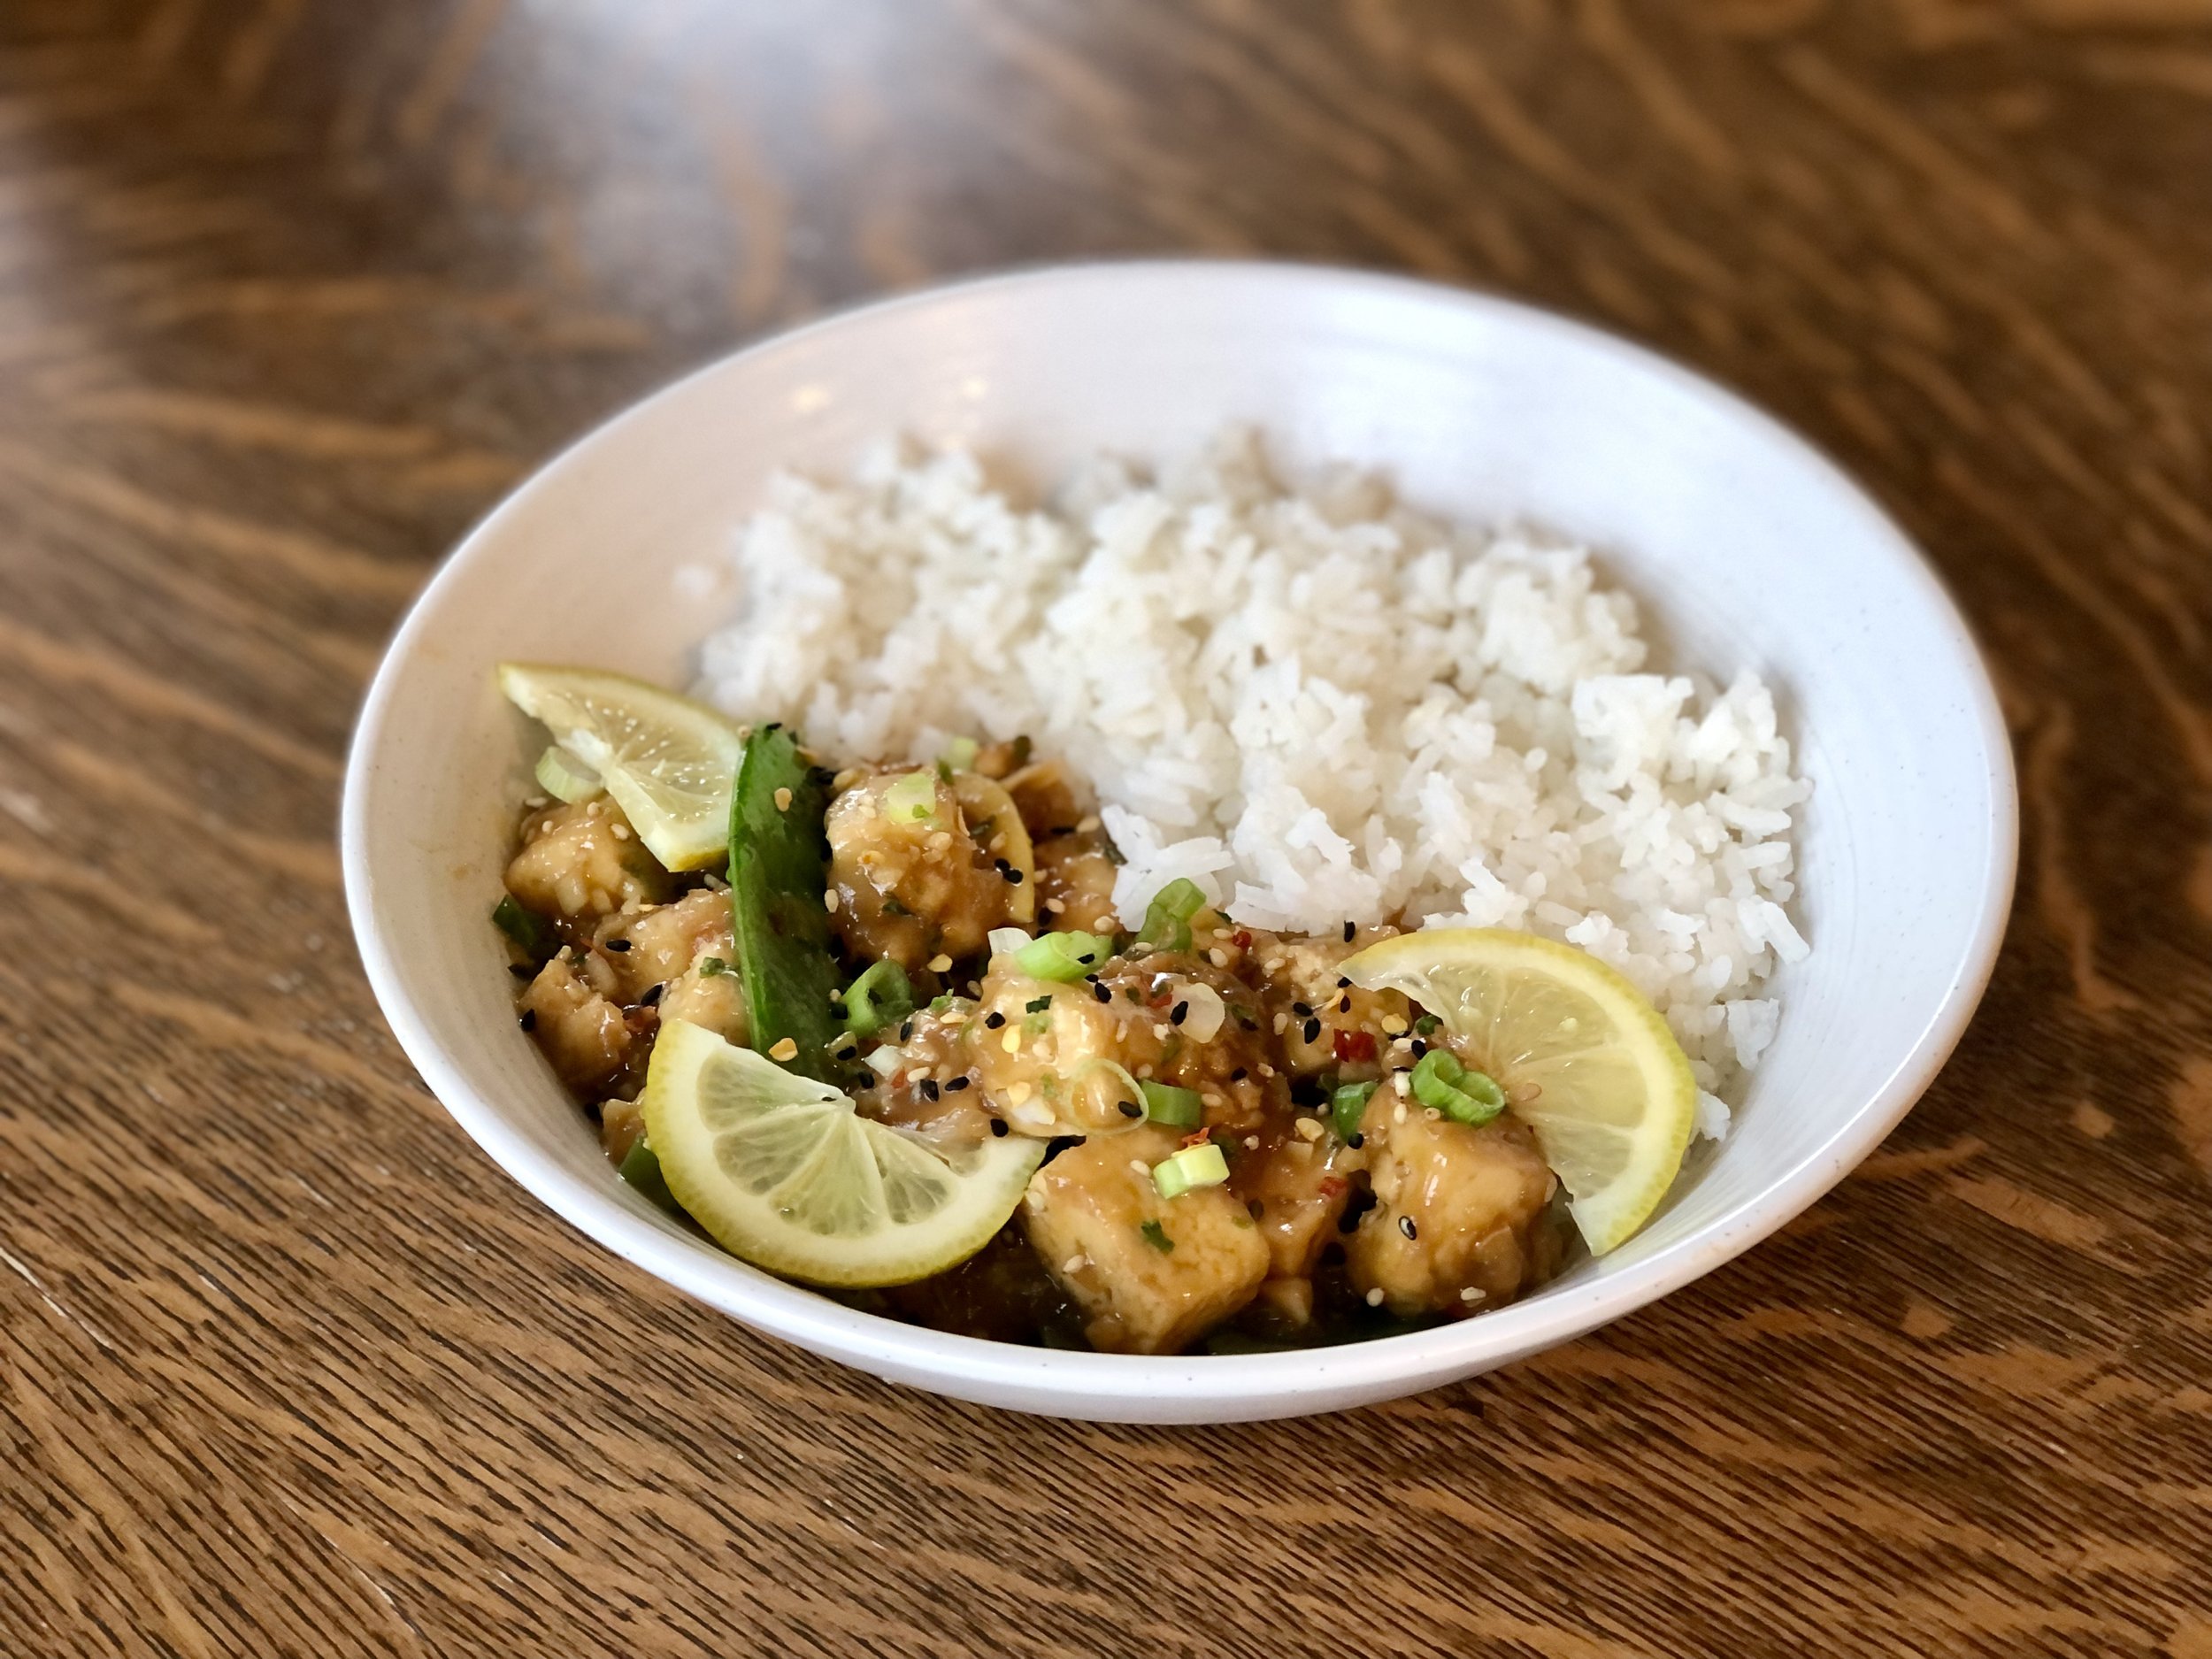
Sticky Lemon Tofu

Last updated September 27, 2024

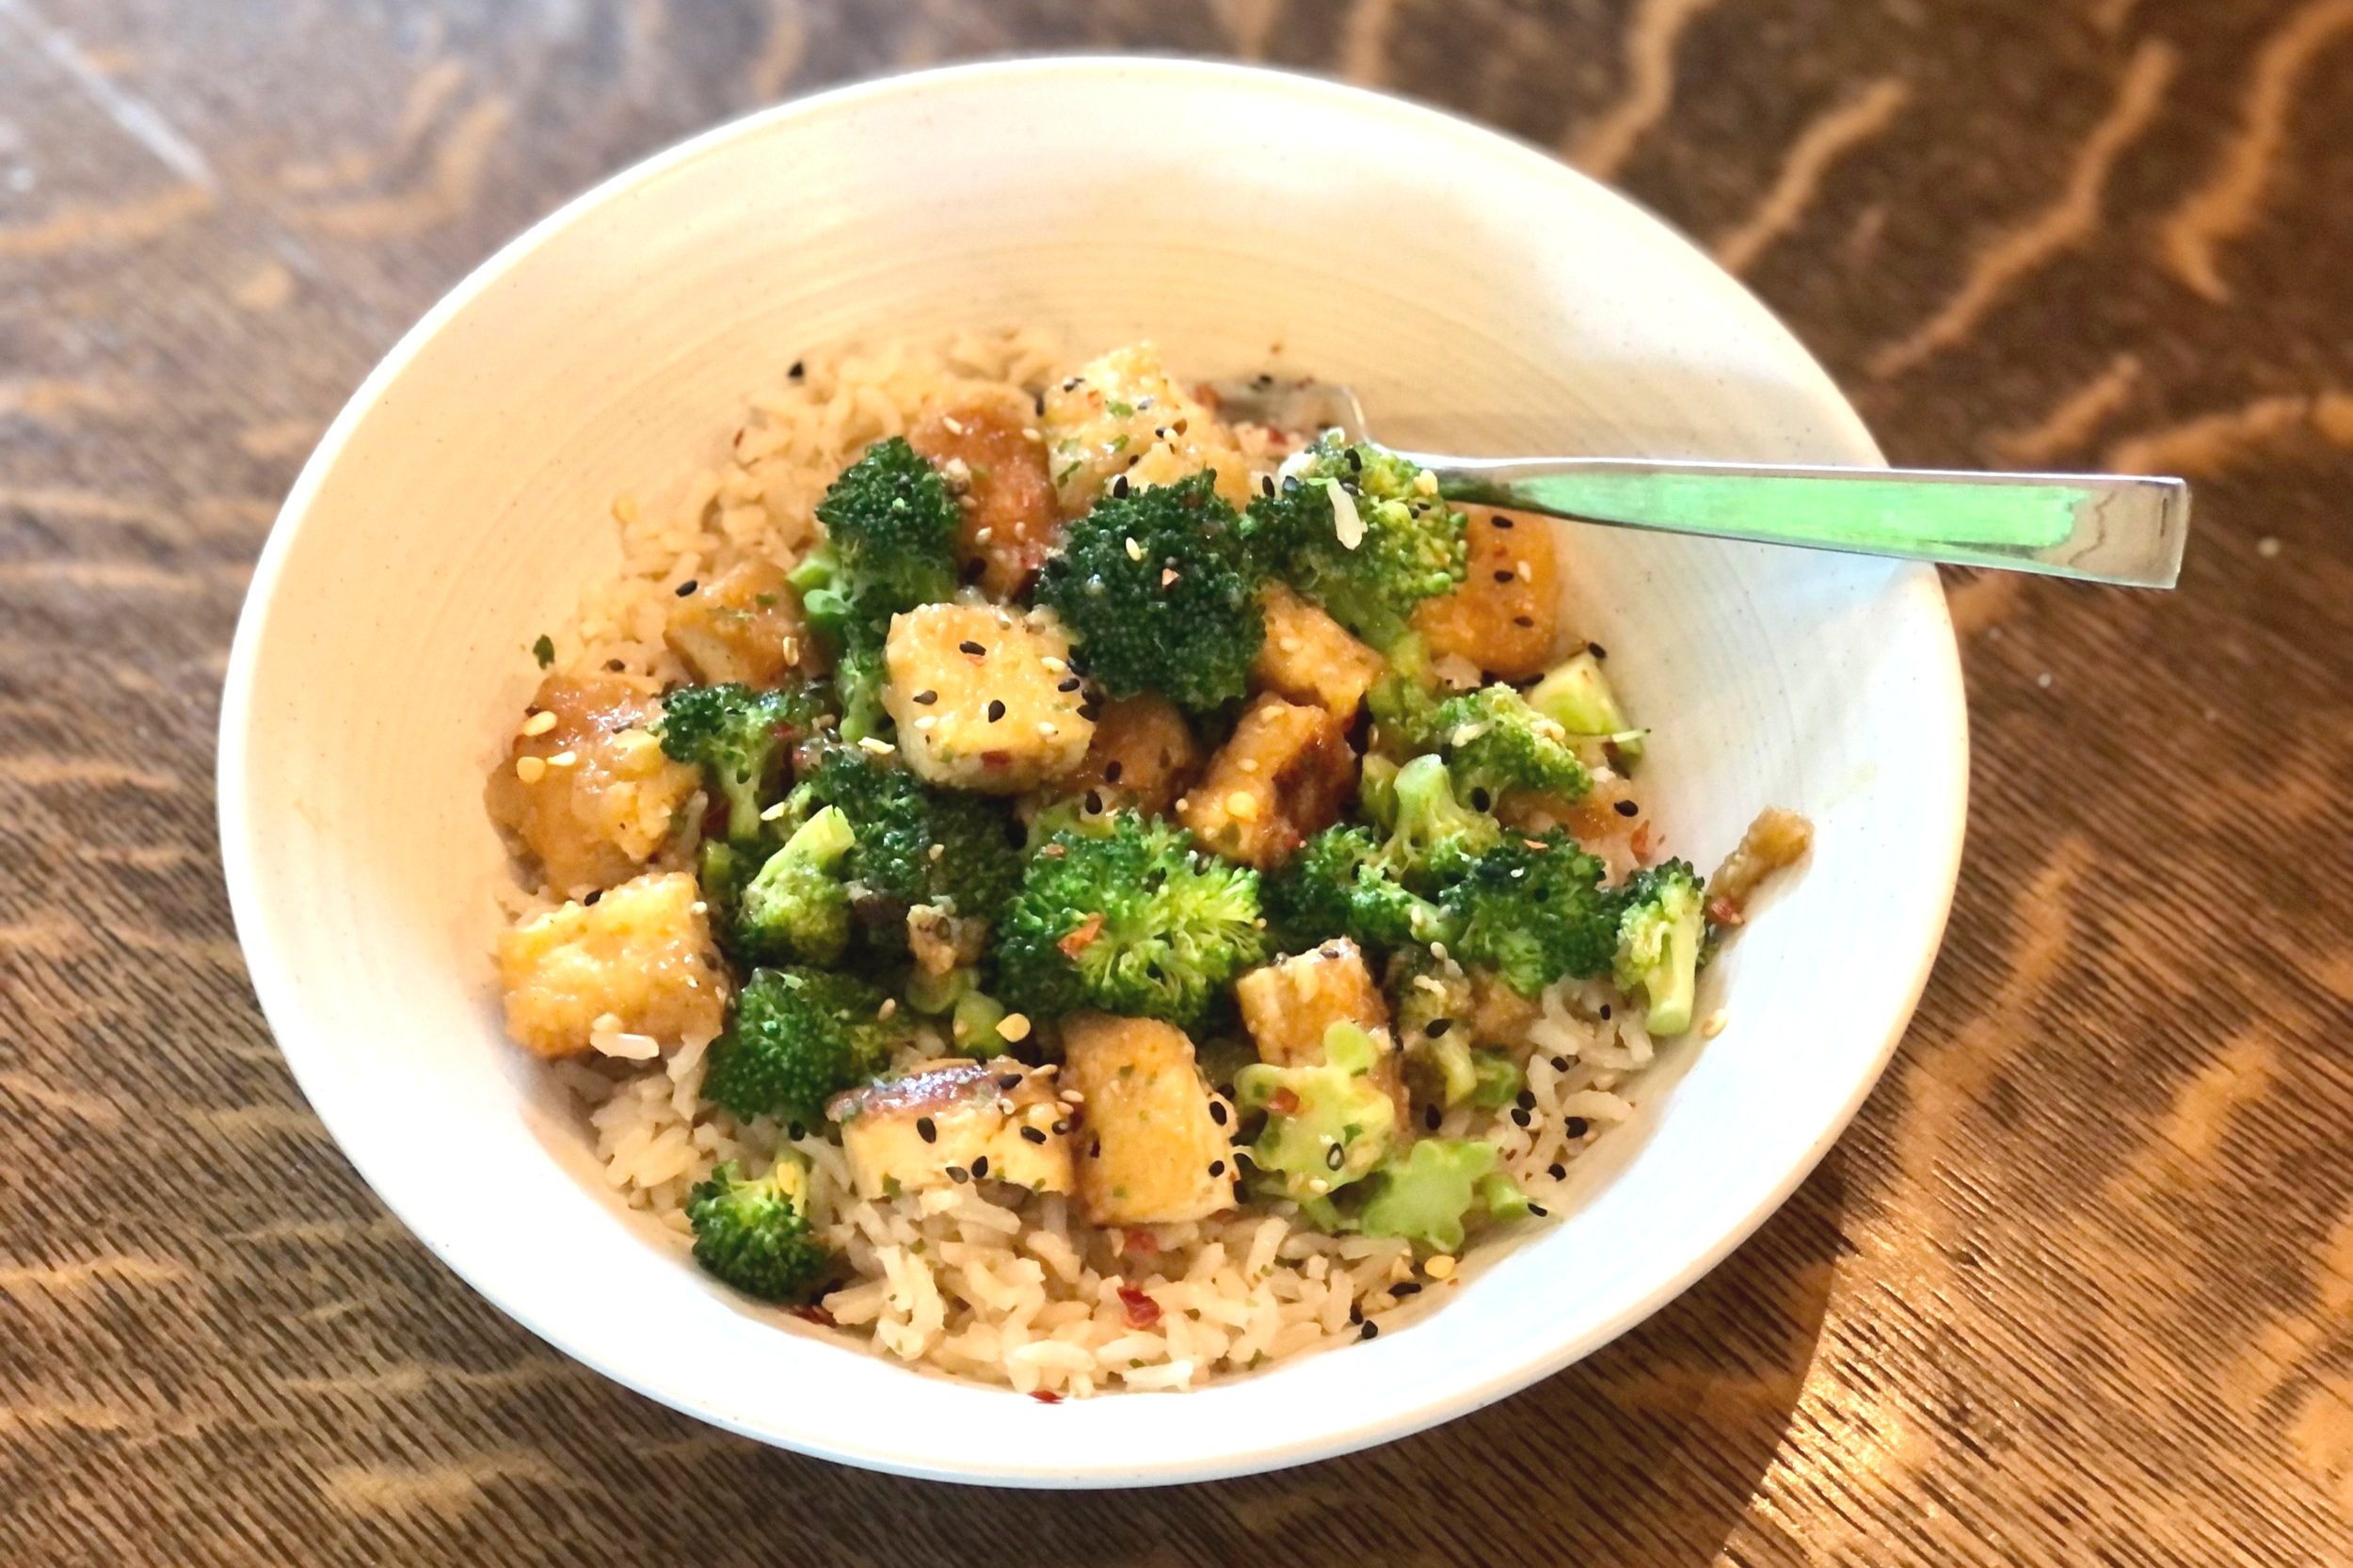
Crispy tofu with a zingy, sweet, and super flavorful sticky sauce over rice makes for a quick and easy weeknight dinner.

Serve with your favorite garnishes and you’ll feel like you’re eating takeout, but it’s actually much healthier!

Inspired by Chinese takeout “lemon chicken” but made with tofu instead. Meatless, nutritious, and you can choose to add veggies, as you wish.

The tofu can be baked or fried, depending on your preference, either way resulting in delicious, crispy bites of tofu that are just asking to be covered in a sticky lemon sauce. I prefer baking them, it’s healthier and the oven does the work while I work on the sauce. Either way is delicious and simple, though!


Sticky Lemon Tofu

Serves 2-3

Ingredients:

For the Crispy Tofu

  • 1 14oz / 400g block of firm or extra-firm tofu

  • 1 Tbsp / 14g oil

  • 1 Tbsp / 17g soy sauce

  • 1/4 cup / 40g cornstarch

For the Lemon Sauce

  • 1/2 cup / 119g chicken broth or water

  • 1/4 cup / 56g lemon juice

  • 2 Tbsp / 34g soy sauce

  • 3 Tbsp / 60g maple syrup

  • zest of 1 lemon

To sautè

  • 1 Tbsp / 14g cooking oil

  • 2-3 green onions, sliced

  • 1 Tbsp grated or minced fresh ginger

  • 4 cloves of garlic, minced

For Serving

  • Rice

  • Garnishes such as sliced green onions, sesame seeds, red chili flakes, and/or lemon slices

Directions:

Make the Crispy Tofu

  1. Place tofu block between some paper towels and press to absorb extra water. Repeat until tofu feels mostly dry and no more water comes out. You can also do this ahead of time by placing something heavy over the tofu and paper towels, such as a bowl or pot, and leave it for several minutes.

  2. Slice tofu into squares and toss together with the oil, soy sauce, and corn starch until evenly coated.

    Pan fry:

  3. Heat a large fry pan over medium heat and add tofu. Fry for a few minutes until golden, then flip tofu over. Add more oil to pan as needed to get a nice golden crust on the tofu. Remove from heat when done.

    OR Bake:

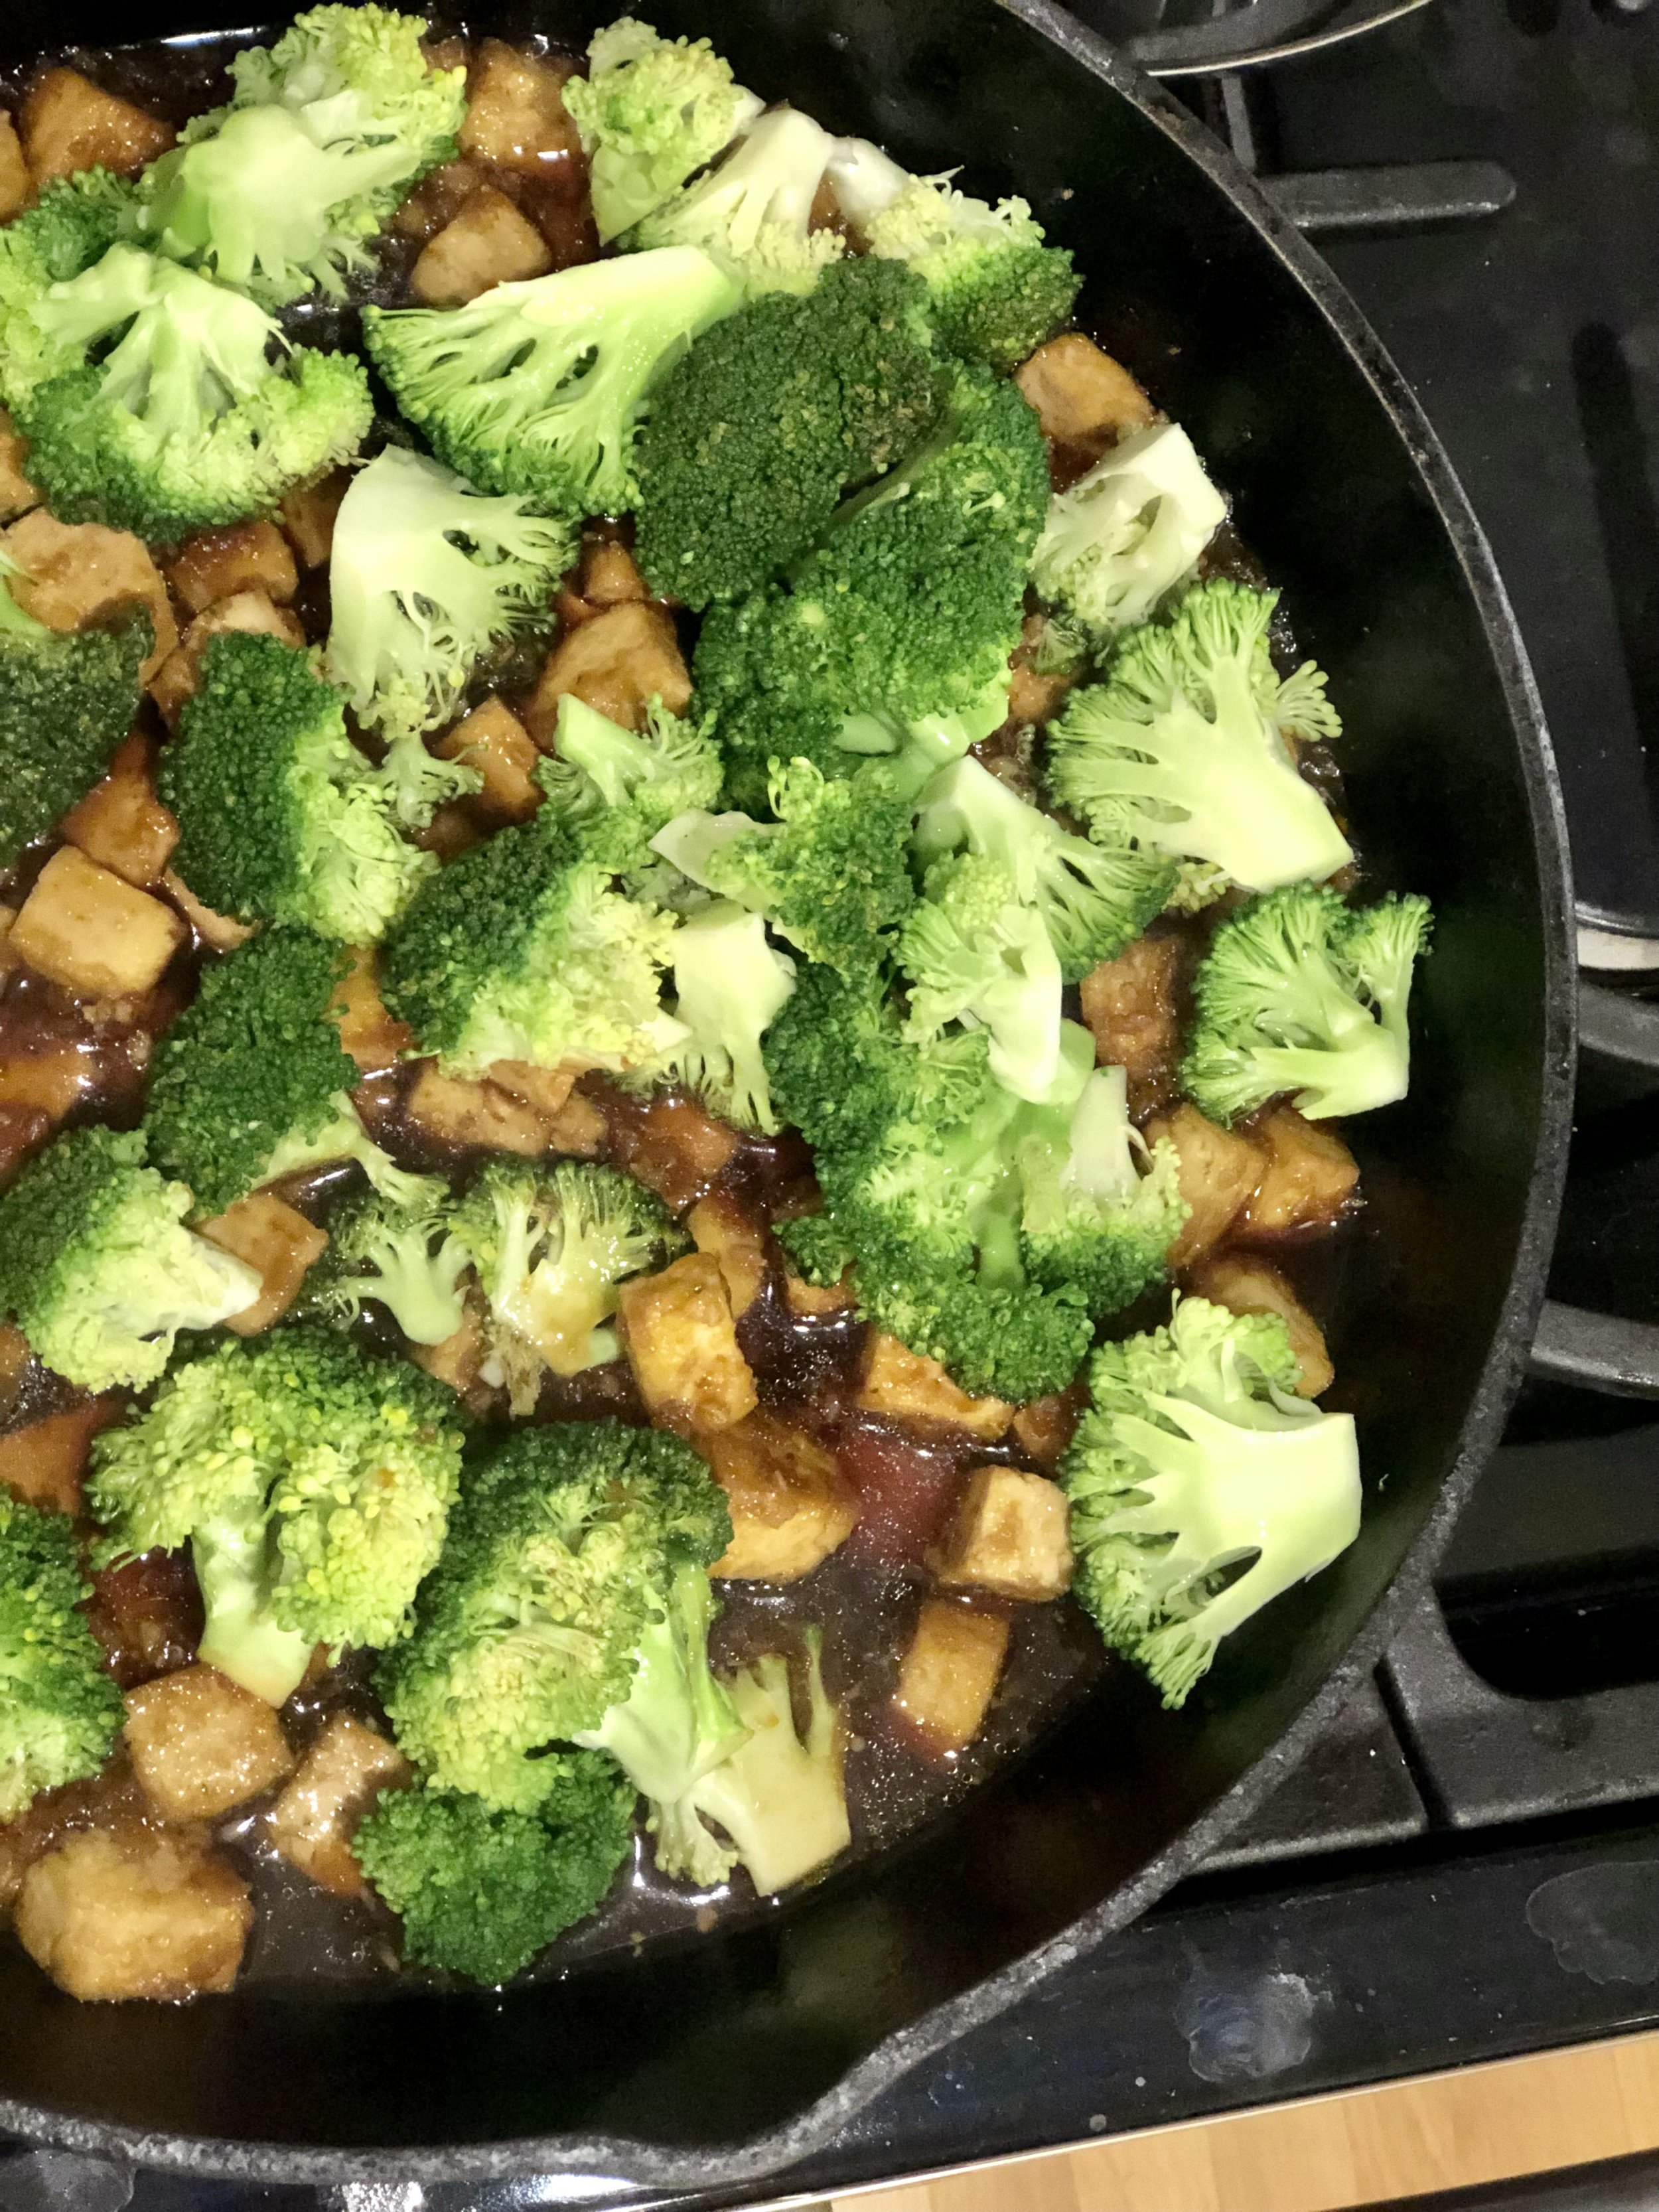
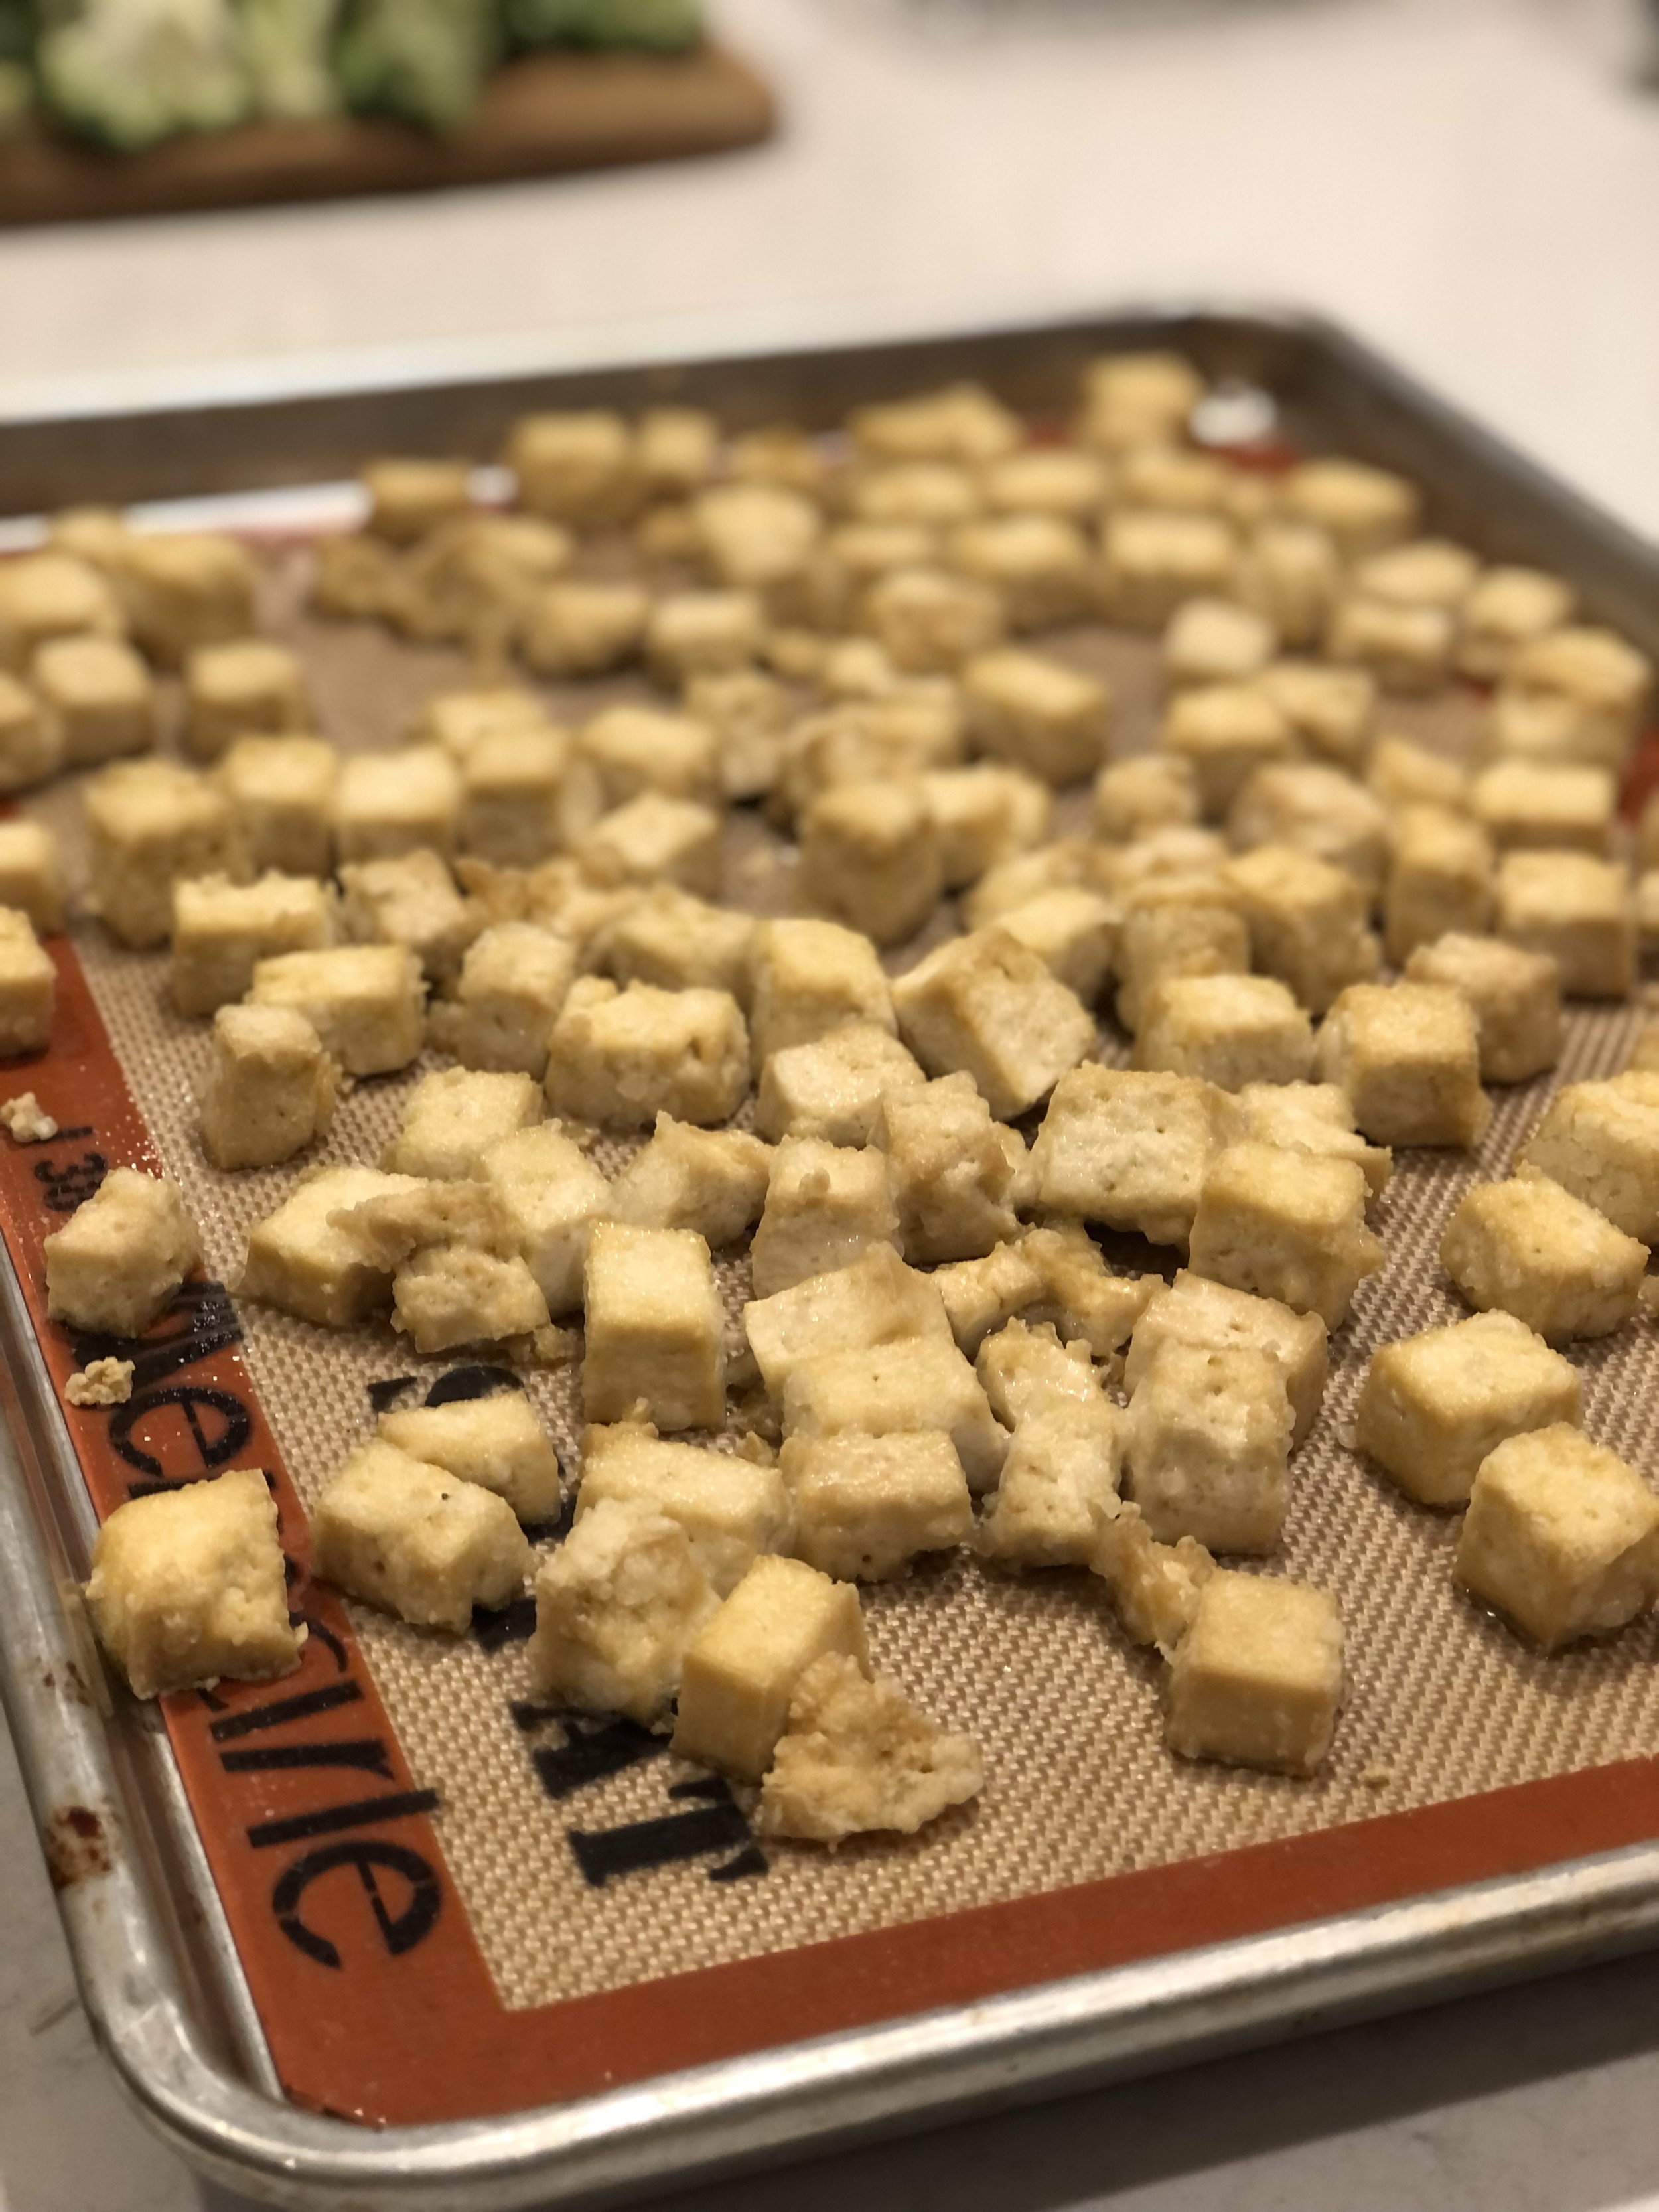
  4. Disperse tofu cubes evenly onto a parchment paper or silpat lined baking sheet. Bake in a preheated oven at 400°F / 205°C for about 30 minutes, or until light golden and crispy. Ideally, flip tofu halfway through baking.

Make the sauce

  1. Whisk together all ingredients for the sauce; set aside.

Sauté

  1. Heat oil in a large fry pan over medium heat. (Can be the pan you used for the tofu if you pan-fried it).

  2. Add green onions, ginger, and garlic and sauté for 1-2 minutes, or until fragrant.

  3. Add lemon sauce ingredients to pan and bring to a simmer.

  4. Add in tofu, carefully stir to evenly coat tofu in sauce. Allow to simmer, stirring occasionally, until sauce thickens.

  5. Serve with rice and garnishes, as desired.

Jenny’s Notes:

  • Veggies can be added to this dish if desired. I like snow peas and broccoli, which can be added at the very end with the tofu into the sauce. Put a lid on and let the veggies steam for a few minutes, or until desired tenderness is achieved.

  • If pan frying the tofu, you can flip the tofu with tongs, or simply sauté/flip the tofu using the pan. The second way is faster, but requires a bit more skill and you have less control over which sides of the tofu land down.

  • Instead of maple syrup you can also use 1/4 cup / 50g of sugar or brown sugar. Or, 3 Tbsp / 63g of honey, which lends a slightly different flavor.

Sticky Lemon Tofu
Yield 2-3
Author
Prep time
15 Min
Cook time
40 Min
Total time
55 Min

Sticky Lemon Tofu

Crispy tofu nuggets tossed in a super flavorful sticky lemon sauce inspired by Chinese takeout Lemon Chicken, served over rice.

Ingredients

For the Crispy Tofu
For the Lemon Sauce
To sautè
For Serving

Instructions

Make the Crispy Tofu
  1. Place tofu block between some paper towels and press to absorb extra water. Repeat until tofu feels dry and no more water comes out. You can also do this ahead of time by placing something heavy over the tofu and paper towels, such as a bowl or pot, and leave it for several minutes.
  2. Slice tofu into squares and toss together with the oil, soy sauce, and corn starch until evenly coated.
  3. Pan fry:
  4. Heat a large fry pan and add tofu. Fry for a few minutes until golden, then flip tofu over. Add more oil to pan as needed to get a nice golden crust on the tofu. Remove from heat when done.
  5. OR Bake:
  6. Disperse tofu cubes evenly onto a parchment paper or silpat lined baking sheet. Bake in a preheated 400°F / 205°C for about 30 minutes, or until light golden and crispy. Ideally, flip tofu halfway through baking.
Make the sauce
  1. Whisk together all ingredients for the sauce; set aside.
Sauté
  1. Heat oil in a large fry pan over medium heat. (Can be the pan you used for the tofu if you pan-fried it).
  2. Add green onions, ginger, and garlic and sauté for 1-2 minutes, or until fragrant.
  3. Add lemon sauce ingredients to pan and bring to a simmer.
  4. Add in tofu, carefully stir to evenly coat tofu in sauce. Allow to simmer, stirring occasionally, until sauce thickens.
  5. Serve with rice and garnishes, as desired.

Notes

  • Veggies can be added to this dish if desired. I like snow peas and broccoli, which can be added at the very end with the tofu into the sauce. Put a lid on and let the veggies steam for a few minutes, or until desired tenderness is achieved.
  • If pan frying the tofu, you can flip the tofu with tongs, or simply sauté/flip the tofu using the pan. The second way is faster, but requires a bit more skill and you have less control over which sides of the tofu land down.
  • Use whichever kind of cooking oil you prefer. I simply write “oil” since specifying often gets people thinking they must use a specific oil, when really you can use any high-heat cooking oil (peanut oil, avocado oil, some use olive oil, etc.)
  • Instead of maple syrup you can also use 1/4 cup / 50g of sugar or brown sugar. Or, 3 Tbsp / 63g of honey, which lends a slightly different flavor.


Nutrition Facts

Calories

476.8

Fat

23.04 g

Sat. Fat

2.04 g

Carbs

47.45 g

Fiber

2.93 g

Net carbs

44.51 g

Sugar

20.62 g

Protein

21.78 g

Sodium

1742.63 mg

Cholesterol

1.18 mg

Nutritional information is approximate, based on 1 serving if recipe serves 2. Does not include rice or garnishes.

Sticky lemon tofu, chinese takeout lemon chicken
dinner
Asian
Did you make this recipe?
Tag @jennyblogsandbakes on instagram and hashtag it #jennyblogs

Thoughtfully Selecting a Maternity Wardrobe

This is not “The Be All End All on How to buy Maternity Wear” or “The ONLY maternity clothes you’ll ever need”. This article is inspired by my own experience as a first-time-mom, trying to figure out WHAT I’ll need, WHEN I’ll need it, WHERE to get it, and WHICH kind I’ll want. It’s easy to get lost in the marketing and lists of must-haves when really, you can get by with much less than you think.

Rather, this post will offer some “ideas” to help you think through, and maybe discover, some maternity items, to best customize a new little wardrobe for yourself, with an emphasis on comfort, affordability, and choosing items you can get the most use out of. A minimalist maternity wardrobe, if you will.

This post may contain affiliate links. If you make a purchase using these links, Jennyblogs may receive a small commission, at no extra cost to you. This helps to support Jennyblogs. Where possible, links are prioritized to small businesses and ethically and responsibly made items. For further information see the privacy policy. Grazie!


For starters, you’ll want to get a clear picture of where and when you’ll be wearing your maternity wardrobe:

Depending on your due date, what season(s) will your second and third trimester be in?

You may need to buy a bit more clothes for a winter baby, since you might want a bigger coat or a coat extender, and may wear more pants in the winter. On the flip side, summer dresses and skirts can be more forgiving, so you may not need to buy as much as you might think!

My first baby was born in September in Italy (it was still 90°F), and I got away with buying just 2 maternity dresses. I was surprised that several of my summer dresses and skirts and shirts fit all the way through! But being my first baby, and my smallest, I also didn’t get as big as with my other 2. When it was the hottest peak of the Florentine summer, and Covid was still keeping us mostly at home, I bought a few (non-maternity) t-shirts and a pair of comfy shorts in a size bigger than I normally wear just to lounge in at home in our non-air conditioned apartment. I still have some of those and wear them for pajamas and even in my other 2 pregnancies.

If you work, do you plan on working all the way up to your due date?

The answer to this will determine if you need to also buy work maternity clothes, depending on if you work in a more formal work setting, or if you work from home and may just want to invest in more of that wonderful maternity loungewear!

I teach dance, and got away with my buying some athletic wear from Target in a size larger than I normally wear as “work” clothes.

If your work is full-time mommy-ing, then your choice of clothes may also be different than if you work in an office or even if this is your first pregnancy. For example, with my first, I happily existed exclusively in dresses and skirts during the hot summer months in my third trimester. However, with my next pregnancies, dresses became increasingly impractical for running around after my other children, and I wore more shorts and pants.

Next, what do you already own that could be bump-friendly?

Before you buy anything, you may want to go through your closet and look for pieces that you might be able to wear through part, most, or maybe even all of your pregnancy. Maxi dresses, mid or long flowy skirts with elastic waist bands, sweatpants or joggers with very stretchy waistbands, oversized shirts and sweaters, long tops, are all promising pieces.

Now, take a look at some of the maternity options that you’ll come across:

Under-the-Bump Vs. Over-the-Bump Maternity bottoms

Under-the-bump is best for versatility, as they can be worn before, during, and after pregnancy. Their main disadvantage is they leave your belly exposed if you’re not wearing an adequately long sweater. Any low-rise stretchy pants you own currently have the potential of being a part of your maternity wardrobe as “under-the-bump”. I have several stretchy pants/joggers/sweatpants; a couple of them I can wear all the way through, and others become uncomfortable around the waistband by 5 months pregnant. A pair of under-the-bump pants I really enjoyed (and still am!) is this pair by Motherhood Maternity, that is sadly no longer available.

The main advantage to over-the-bump pants is offering a tiny bit of support to the belly while also keeping it covered, which in turn allows you to wear some shorter tops for longer into your pregnancy. The main disadvantage is that there is really a short period in which the over-the-bump pants fit, since they’re often too big in the first part of the pregnancy and soon after baby is born. Also, I’ve found that not all over-the-bump pants fit my bump well. Some are too tight. Some are too loose. Some are too tight in some spots, while being too loose in other spots.

Maternity Tops

Sometimes they having ruching, sometimes slits, sometimes they’re made of extra stretchy material, sometimes they’re flowy…what they all have in common is room for a growing tummy. I bought a few key maternity tops, but with tops it’s also quite easy to find non-maternity wear that fits a bump, just select longer, looser styles, maybe in a larger size or two. It’s especially easy to do when long and over-sized is in.

One of my favorite maternity tops is an Ingrid and Isabel cowl neck sweater. It fits just as well when I’m not pregnant as when I’m 9 months. It’s form fitting, but not tight, with flattering ruched sides and it’s long enough to cover my bum.

Maternity/Nursing Bras

These can be tricky to know your size if you’ve never had a baby before. Some women increase a band size or two, and several cups bigger. Some barely grow.

Nursing bras come in two general styles: the clasp kind, and the criss cross kind. I’ve tried both, but prefer the clasp kind. The criss cross you merely pull down, which is super easy to use, but I often found with that style that the material would start riding back up and get in the way of baby latching. After a while they tended to stretch out.

For your first baby, I’d recommend starting with some of the comfy, stretchy, “quintessential” nursing bra. They basically look like a sports bra. Just about every brand that makes nursing bras has some of this style, to the point where I wish sometimes there was more variety, specifically more feminine and pretty styles! These often have at least 4 sets of clasps and some come with an extender for your growing rib cage and bust. They also stretch with you, so you shouldn’t have to buy multiple sizes, and will work through pregnancy and even those first few days/weeks of engorgement when your milk is first coming in and regulating! They’re sized in S/M/L etc. rather than band and cup sizes, which is much easier to guess your size.

Here are some very affordable ones on Amazon, I got something similar for my first and they lasted and held up with daily wear and washing.

As I’m now nursing my third baby, some of my nursing bras need a refresh and I’ve been looking for “pretty” nursing bras. So many are comfortable and practical, which is great, but I do miss me some lace! If you, too, would like some prettier nursing bras, check out some of these, several of which can also be found on Amazon (easier to return):

Maternity Underwear

When I was first pregnant, I rolled my eyes at maternity underwear. I thought that having to buy special underwear, when it’s your belly, not your butt that’s growing, was silly. Joke’s on me! Your abdomen most definitely grows, right where most underwear sits. And let me tell you, I hate the feeling of underwear or pants being the least bit tight on my low abdomen when I’m pregnant.

Since I have now been brought down off of my high horse, I will be the first one to sing the praises of maternity underwear and how comfortable it is! Seriously, I love it so much I actually now buy maternity underwear when I’m not pregnant. It usually covers your rear-end better, doesn’t give you love handles, and is just plain super comfy.

I originally bought a pack of super cheap maternity underwear form Amazon, which did their job, but I found the leg holes strangely un-elastic and a bit too small once I got to the last trimester.

I highly recommend H&M’s maternity underwear, whether you’re pregnant or not, ha! They’re inexpensive and cute, sometimes with bits of lace so not overly boring.

Pregnancy Support Belt

There are a couple different styles of pregnancy support belts, which mainly fall into three categories in my mind:

  1. The over / under support belt (highest level of support) - these are best for someone who would anticipate spending good chunks of time on their feet. They offer the highest level of support, but aren’t meant to be used while sitting. They take a minute to get on, which can be annoying if you want the higher level of support but spend most of your days going back forth between standing and sitting. Can be worn without the “over” band, so it’s almost like a two-in-one.

    This is the kind I got for my third pregnancy, and while there were certain key moments I was very grateful to have it, overall I didn’t wear it as much as I thought I would. My lifestyle with 2 other littles was a lot of sitting, standing, crouching, crawling, etc. and I just didn’t have the time to take it off and put it back on repeatedly.

    Find the over / under I used here

  2. The under support belt (medium support) - quicker to get on while still providing decent support. However, they’re still not meant to be used while sitting and are uncomfortable if you try, so that’s where I think the over/under option might make more sense. I had a similar band that I would use sometimes while dancing or teaching, and while not technically meant for pregnancy, it got me by while teaching dance in my second pregnancy.

    Find an “under” belt here

  3. The support band (lightest support) - a stretchy band that can ideally be used all during pregnancy and even postpartum. It provides the lightest support of these three options, but if that’s all you need, it’s the cheapest option and also the easiest to get on, off, and wash. Honestly, if I were to have another baby, I would probably just use one of these. Actually, I would get 2-3 so I would always have one clean! I got one after my third was born, and it was great even postpartum and helped keep my tummy covered while nursing, double win.

    This can also help you transition between pants in pregnancy and postpartum. It can keep your pre-pregnancy pants up unbuttoned before your maternity clothes start to fit, and keep your maternity pants up when they start to get loose but before you’re able to fit back into your pre-pregnancy pants.

    Here is the Bella Band I got after my third

    Or find a 2 pack here

I purchased the Bellaband postpartum after seeing some women on social media with similar bands, and doing some research on the better liked belly bands. I didn’t want compression, just support.

Due to my own confusion of whether this band was really what I wanted, since it’s primarily marketed as a maternity band, I ordered it alongside the Ingrid & Isabel postpartum band.

Trying them on side by side, they are very similar but with different compression. The postpartum band was much tighter, but comfy and reassuring to a jiggly postpartum belly, and also harder to get on. The postpartum wrap has the “No slip” silicone at both the top and bottom, where the maternity band has it only at the bottom. Another reason the maternity band is easier to get on.

I honestly liked both, but I ultimately kept the maternity band since it was what I was looking for with light support, not too tight, and I didn’t feel I needed two.

You can find the Ingrid & Isabel postpartum band here. I liked this band because it was much easier to get on and off, easier to wash, and not as bulky as the wrap/velcro kind.

Pregnancy Pillow

This is not a pregnancy “must have” but simply a “nice to have”. You can get by with pillows, rolled up blankets, etc. to stay comfortable. It might be a hassle sometimes when you’re just trying to roll over in bed, but it’s free!

Full body support

I never had a pregnancy pillow, but I really, really, wanted one with my third. That was my most uncomfortable pregnancy (my midwife later told me the third pregnancy is usually the hardest. You’re running around after 2 other kids and often start showing sooner and get just a little bit bigger than your first 2. By the time you get to a 4th, you’re just just accepted it is how it is and roll with the punches) and I just really wanted one pillow rather than always having to arrange 2-3 pillows or blankets to be able to rest. I considered getting one second hand, but the prices I saw weren’t that much cheaper than brand new and a pillow didn’t seem the most hygienic thing to be buying used.

velvet Full body support

I was looking at these full body styles on Amazon, they look comfy and check all my boxes:

  • support for top arm while side lying

  • support for hips

  • support for knees

  • support for ankles

  • back support to help keep everything (hips, knees, ankles) stacked while side lying, which is important in the Spinning Babies “Rest Smart” idea

You can also get full body ones with luxurious velvety covering, great for cooler months but maybe not so much for sweaty summer preggo bodies.

There are also the smaller “wedge” style pillows, smaller and easier to carry around, but they only provide support for belly or belly and back. Not as appealing to me, especially since they’re almost the same price as the full body pillows, but preferable for others if that’s all they need, and easier to tote around.

What are some of your favorite maternity items, or least favorite? Let me know in the comments below or send me a message through the contact form!


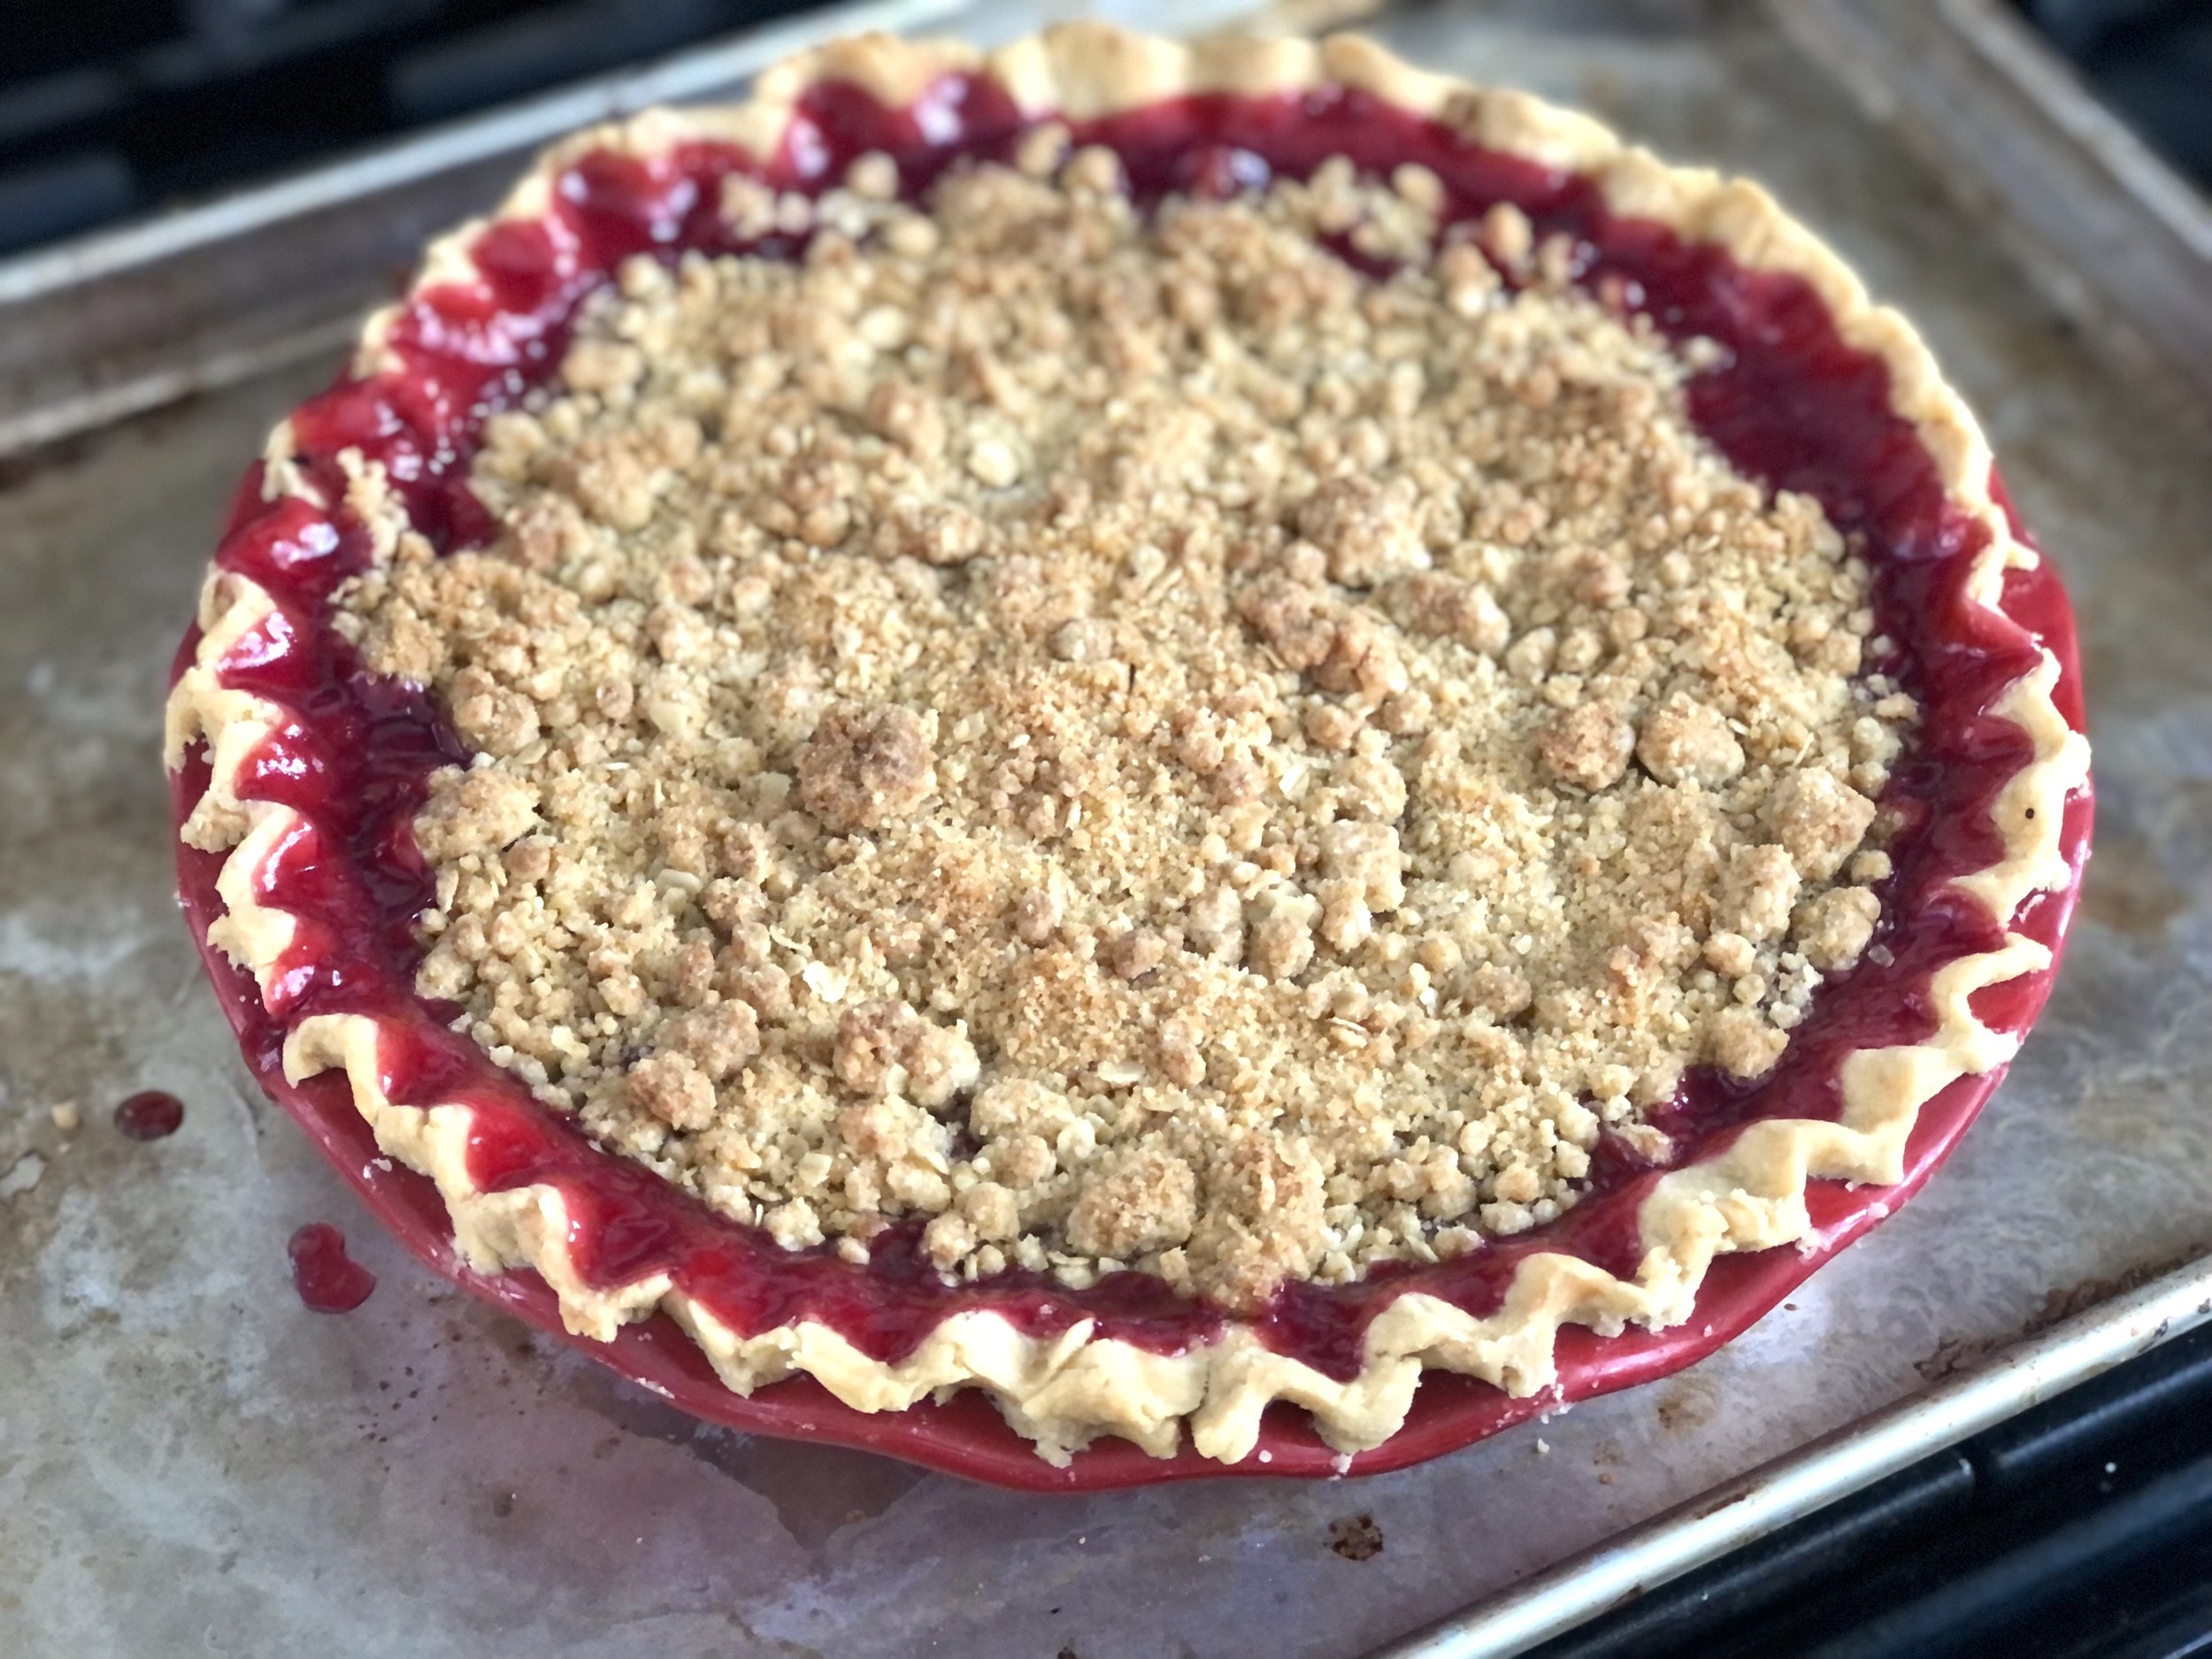
Tart Cherry Pie

Last updated July 31, 2024

Nothing speaks summer in Traverse City like cherry pie.

Or January, because of the beauty of things like frozen fruit. This recipe actually originally called for frozen cherries, but it all turns out about the same whether you use fresh or frozen, so feel free to use whichever you have available.

How do you know when you find the best cherry pie? Or the best anything? I don’t know, and I don’t love recipes that boast to be the best, but this one is delicious. This is my go-to cherry pie recipe, until such a time as I should come across a better one!

The beauty of fruit pies is that they don’t need much. A good recipe lets the fruit shine. This recipe does exactly that. It’s perfectly cherry; tart, sweet, and one of my favorite flavor combinations: cherry / almond.

It features a crumble topping and this recipe has an extra: amaretto. It takes it up a notch, but if you don’t happen to have any on hand, this recipe is still divine.

Here’s to July, or summer in January!

This post may contain affiliate links. If you make a purchase using these links, Jennyblogs may receive a small commission, at no extra cost to you. This helps to support Jennyblogs. Where possible, links are prioritized to mall businesses and ethically and responsibly made items. For further information see the privacy policy. Grazie!

Recipe adapted from Ambitious Kitchen


Tart Cherry Pie

Serves about 8

Ingredients:

For the Crust

For the Filling

  • 6 cups / roughly 24oz fresh or frozen tart cherries, pitted

  • 1 cup / 200g sugar

  • 2 Tbsp / 15g cornstarch

  • 2 Tbsp / 16g flour

  • 1/2 tsp almond extract

  • 1 Tbsp / 14g butter

  • 1 Tbsp amaretto liqueur, optional

For the Crumble Topping

  • 1 cup / 120g flour

  • 1/2 cup / 100g brown sugar

  • 1/4 cup / 20g rolled oats

  • 6 Tbsp / 84g butter, melted

Directions:

Oven preheated to 350°F / 177°C.

Make the crust

  1. Prepare pie crust; refrigerate until filling is ready

Make the Filling

  1. In a medium large pot, combine cherries, sugar, cornstarch, flour, and almond extract over medium heat. Stir frequently until sugar has melted and cherries begin to break down.

  2. Add butter and amaretto. Continue to stir occasionally until mixture begins to bubble and thickens enough to coat the back of a spoon.

  3. Remove from heat and allow to cool while you prepare topping

Make the Crumble Topping

  1. In a medium bowl, combine flour, brown sugar, and oats.

  2. Add melted butter and stir until mixture resembles clumpy wet sand.

Assemble and Bake

  1. Pour filling into prepared crust. Evenly sprinkle crumble topping over filling.

  2. Bake pie in preheated oven for 50-60 minutes, until edges are bubbling and crumble is golden brown. Place a cookie sheet lined with tinfoil under the pie plate to catch any filling that bubbles over.

  3. Allow to cool completely before slicing and serving. Serve with vanilla ice cream, if desired.

Jenny’s Notes:

  • For crumble topping, I use rolled oats and quick oats interchangeably.

  • If not using the amaretto, I recommend increasing the almond extract to 1 tsp

  • Check the pie halfway through baking to ensure it’s not browning too quickly. If it is, place some tinfoil on top to prevent it browning too quickly.

  • Fruit pies like this are best made in the morning or the day before you need them, since they need to cool completely before being sliced into. If it’s not completely cool, it won’t be completely set, and the filling will ooze out.

Tart Cherry Pie
Yield 8
Author
Prep time
40 Min
Cook time
1 Hour
Inactive time
8 Hour
Total time
9 H & 40 M

Tart Cherry Pie

A classic summer pie bursting with juicy sour cherries, a touch of almond extract and amaretto liqueur, topped with a buttery oat crumble
Cook modePrevent screen from turning off

Ingredients

For the Crust
For the Filling
For the Crumble Topping

Instructions

Make the crust
  1. Prepare pie crust; refrigerate until filling is ready
Make the Filling
  1. Oven preheated to 350°F / 177°C.
  2. In a medium large pot, combine cherries, sugar, cornstarch, flour, and almond extract over medium heat. Stir frequently until sugar has melted and cherries begin to break down.
  3. Add butter and amaretto. Continue to stir occasionally until mixture begins to bubble and thickens enough to coat the back of a spoon.
  4. Remove from heat and allow to cool while you prepare topping
Make the Crumble Topping
  1. In a medium bowl, combine flour, brown sugar, and oats.
  2. Add melted butter and stir until mixture resembles clumpy wet sand.
Assemble and Bake
  1. Pour filling into prepared crust. Evenly sprinkle crumble topping over filling.
  2. Bake pie in preheated oven for 50-60 minutes, until edges are bubbling and crumble is golden brown. Place a cookie sheet lined with tinfoil under the pie plate to catch any filling that bubbles over.
  3. Allow to cool completely before slicing and serving. Serve with vanilla ice cream, if desired.

Notes

  • For crumble topping, I use rolled oats and quick oats interchangeably.
  • If not using the amaretto, I recommend increasing the almond extract to 1 tsp
  • Check the pie halfway through baking to ensure it’s not browning too quickly. If it is, place some tinfoil on top to prevent it browning too quickly.
  • Fruit pies like this are best made in the morning or the day before you need them, since they need to cool completely before being sliced into. If it’s not completely cool, it won’t be completely set, and the filling will ooze out.


Nutrition Facts

Calories

487.73

Fat

16.18 g

Sat. Fat

8.2 g

Carbs

73.55 g

Fiber

3.45 g

Net carbs

70.09 g

Sugar

27.3 g

Protein

4.67 g

Sodium

171.5 mg

Cholesterol

26.72 mg

Nutritional information is approximate. Based on 8 servings.

Cherry Pie, Best Tart Cherry Pie, Oat Crumble Topping, Sour Cherry Pie
dessert
American
Did you make this recipe?
Tag @jennyblogsandbakes on instagram and hashtag it #jennyblogs

Homemade Thousand Island Dressing

Last Updated August 14, 2024

Thousand Island Dressing - you know it as the pinkish, sweet and salty dressing for salads, hamburgers, and various other creative uses.

What you might not know is what this salad dressing is made of, and that it is super simple to whip up at home with only 7 ingredients you very possibly already have on hand!

Essentially, Thousand Island Dressing is a mayonnaise and ketchup based dressing. Beyond that, there are many variations, although my favorite below features sweet relish and onions.

Where did Thousand Island Dressing come from?

Its origin is disputed, but two main tales originate in the Thousand Islands region, between northern New York and Canada.

One tale starts at Boldt Castle when George Boldt (Waldorf-Astoria billionaire) and his wife Louise were out on their yacht. Their chef forgot to bring a dressing for some greens and had to scrounge something up, which turned into Thousand Island Dressing.

Another tale stems from a recipe found in a restaurant in the same Thousand Islands area. The recipe appears to be what we know now as Thousand Island Dressing, but is simply called “Sophia’s Sauce”. Sophia and George Lelonde used to own the restaurant.

Wherever it came from, it blossomed in popularity, although honestly I never understood why.

Why Make Thousand Island Dressing? One Reason: Taco Salad

Thousand Island has always been a bit mysterious to me, I never much cared for it and I never gave much thought to what it was actually made of. I usually saw it in a bottle, and per usual with store-bought salad dressings, many of the ingredients weren’t ones I cared overly to be eating.

my tiny photo stager :)

However, despite having no strong feelings for Thousand Island dressing, there is one dish that I and my family love that Thousand Island is crucial to: Taco Salad. Yep, that’s right. I don’t even know how Thousand Island came to be “the” dressing for Taco Salad, as I’ve never heard of anyone putting it on their tacos. I’m not sure where the Taco Salad recipe in my family came from originally, but whoever made it up decided, oh let’s make a salad with all the components of tacos in it…what kind of dressing should we use? I know, Thousand Island Dressing! Naturally.

Taco Salad

Due to our love for Taco Salad and also our desire to eat whole foods and make things homemade, we decided to look in to making our own Thousand Island Dressing, especially since we don’t use it for anything else. I came across this recipe and we haven’t bought a bottle of Thousand Island since.

Find the recipe for Taco Salad here!

This post may contain affiliate links. If you make a purchase using these links, Jennyblogs may receive a small commission, at no extra cost to you. This helps to support Jennyblogs. Where possible, links are prioritized to small businesses and ethically and responsibly made items. For further information see the privacy policy. Grazie!

Recipe Adapted from Simply Recipes


Homemade Thousand Island Dressing

Makes about 1 1/2 cups of dressing

Ingredients:

  • 1 cup / 230g mayonnaise

  • 1/4 of an onion or 1 small shallot, minced

  • 2 Tbsp / 30g ketchup

  • 2-3 Tbsp / 30g sweet pickle relish

  • 1 tsp / 5g lemon juice

  • 1/2 tsp sweet paprika

  • 1/4 tsp salt

Directions:

  1. Combine all ingredients together in a bowl, mix well.

  2. Place in a jar or sealed container and store in the fridge.

Jenny’s Notes:

  • Letting the dressing sit for a few hours or ideally a day or two really lets the flavors meld. It also can help to tame the onion or shallot a bit.

  • Use more sweet relish if you like a sweeter and tangier Thousand Island, use less if you don’t want it as sweet.

  • Mason jars make great storage containers!

Homemade Thousand Island Dressing
Yield 12 servings. about 1 1/2 cups
Author
Prep time
10 Min
Total time
10 Min

Homemade Thousand Island Dressing

Sweet and tangy homemade Thousand Island Dressing comes together in minutes with just 7 ingredients. It's tastier, healthier, and cheaper than its store-bought counterpart!
Cook modePrevent screen from turning off

Ingredients

Instructions

  1. Combine all ingredients together in a bowl, mix well.
  2. Place in a jar or sealed container and store in the fridge.

Notes

  • Letting the dressing sit for a few hours or ideally a day or two really lets the flavors meld. It also can help to tame the onion or shallot a bit.
  • Use more sweet relish if you like a sweeter and tangier Thousand Island, use less if you don’t want it as sweet.

Nutrition Facts

Calories

134.56

Fat

13.99 g

Sat. Fat

2.18 g

Carbs

2.15 g

Fiber

0.09 g

Net carbs

2.06 g

Sugar

1.68 g

Protein

0.24 g

Sodium

218.14 mg

Cholesterol

7.84 mg

Nutritional information is approximate. Based on a serving of 2Tbsp.

Thousand Island Dressing, homemade, Sofia's Sauce, Salad Dressing
Condiment,
American
Did you make this recipe?
Tag @jennyblogsandbakes on instagram and hashtag it #jennyblogs

Whole Wheat Oat Chocolate Chip Cookies

One bowl chocolate chip cookies featuring whole wheat flour and oats.

While the whole wheat flour and oats may trick you into thinking these cookies are trying to be healthy, that’s really not what they’re here for! Sure, an added bonus is that these cookies do have added nutrition, but the whole wheat flour and oats serve to add a more complex flavor profile.

Whole wheat flour adds a nutty flavor while the oats add, ahem, “oatiness” and that beloved chew from an oatmeal cookie. You can use your favorite kind of chocolate chips in this recipe, but I really love the bitterness of dark chocolate chips in these. On the flip side, I also think using white, or even white and dark (!) would be a really beautiful combo.

Chocolate chip cookies are a timeless American staple, and I love all the endless variations! Here is yet another for you to try and add to your baking repertoire!!

This post may contain affiliate links. If you make a purchase using these links, Jennyblogs may receive a small commission, at no extra cost to you. This helps to support Jennyblogs. For further information see the privacy policy. Grazie!


Whole Wheat Oat Chocolate Chip Cookies

Makes about 14-18 medium cookies

Ingredients:

  • 1/2 cup / 113g oil

  • 1/2 cup / 100g brown sugar

  • 1/4 cup / 50g sugar

  • 1/2 tsp salt

  • 1 egg

  • 1 tsp / 5g vanilla extract

  • 3/4 tsp baking powder

  • 1/2 tsp baking soda

  • 1 1/2 cups / 135g rolled or quick oats

  • 3/4 cup / 96g whole wheat flour

  • 1/4 cup / 25g oat bran, wheat germ, or wheat bran

  • 1 cup / 175g semi-sweet or dark chocolate chips

Directions:

Oven preheated to 350°F / 177°C. 1 ungreased baking sheet

  1. In a large bowl or the bowl of a stand mixer, combine oil, both sugars, and salt. Beat in egg and vanilla.

  2. Mix in baking powder and baking soda until thoroughly combined.

  3. Stir in oats, flour, oat bran, and chips until combined.

  4. Drop by generous tablespoonfuls onto baking sheet, leaving about 2 inches between cookies. Bake for 8-12 minutes or until lightly golden and no longer look wet.

  5. Allow to cool for several minutes before removing from cookie sheets to cool completely.

Jenny’s Notes:

  • If you don’t have oat bran, wheat bran, or wheat germ on hand, you could add in extra flour or oats, instead. In fact, I’ve even used baby cereal with great success!

  • While you can really use any kind of chocolate chips you wish, I really enjoy dark chocolate chips or chunks in these cookies; it really compliments the nutty whole wheat flour!

Whole Wheat Oat Chocolate Chip Cookies
Yield 14-18 cookies
Author
Prep time
15 Min
Cook time
12 Min
Total time
27 Min

Whole Wheat Oat Chocolate Chip Cookies

Chocolate Chip Cookies made with oats and whole wheat flour. The extra nutty flavor pairs beautifully with the chocolate chips for an indulgent yet nutritious treat.
Cook modePrevent screen from turning off

Ingredients

Instructions

  1. Oven preheated to 350°F / 177°C. 1 ungreased baking sheet
  2. In a large bowl or the bowl of a stand mixer, combine oil, both sugars, and salt. Beat in the egg and vanilla.
  3. Mix in baking powder and baking soda until thoroughly combined.
  4. Stir in oats, flour, oat bran, and chips until combined.
  5. Drop by generous tablespoonfuls onto baking sheet. Bake for 8-12 minutes or until lightly golden and no longer look wet.
  6. Allow to cool for several minutes before removing from cookie sheets to cool completely.

Notes

  • If you don’t have oat bran, wheat bran, or wheat germ on hand, you could add in extra flour or oats, instead. In fact, I’ve even used baby cereal with great success!
  • While you can really use any kind of chocolate chips you wish, I really enjoy dark chocolate chips or chunks in these cookies; it really compliments the nutty whole wheat flour!

Nutrition Facts

Calories

231.82

Fat

13.14 g

Sat. Fat

4.56 g

Carbs

28.53 g

Fiber

2.44 g

Net carbs

26.1 g

Sugar

12.2 g

Protein

3.66 g

Sodium

174.98 mg

Cholesterol

11.82 mg

Nutritional information is approximate and based on 14 servings.

cookies, chocolate chip cookies, oatmeal cookies, whole grain, whole wheat flour
dessert, cookies
American
Did you make this recipe?
Tag @jennyblogsandbakes on instagram and hashtag it #jennyblogs

The Birth Story of Miriam

Today is Miriam’s second birthday. Following suit, I’m posting her birth story on her second birthday, as I did Elyas’. It’s a good way for me to relive those moments, some of the hardest and best of my life, and let you in on a such a monumental event.

To start with Elyas’ birth story, my first, click here.

Preamble

One winter day in 2022, I was 6 days past my due date with baby #2, a girl.

She was due on 2/15, and I had this silly, yet completely serious, wish that baby girl would be born on 2/22/22, which would be exactly 1 week after my due date. Maybe at 2:22 and 22 seconds, maybe weighing 8lbs2oz and 22 inches long. She was, after all, our 2nd baby…and I was getting pretty close to getting my wish. With the date, anyway.

At my appointment on 2/18 the midwife checked me, but I was only 1cm dilated and 80% effaced. She suggested I have an induction scheduled; they didn’t want me going much past 41 weeks because I had had Covid during this pregnancy. I agreed, thinking the induction would be scheduled for next week, but that baby would most likely come on her own before then. I was unpleasantly surprised when I got the call informing me of an induction for 2/20, in just 2 days. I didn’t feel ready. I cried. The nurse was very understanding, and suggested I call the hospital to see if their scheduling had more availability than what she was seeing. I did, and changed the induction to 2/23, giving baby more time to come on her own.

The morning of 2/21, labor commences

I woke up on 2/21 still not in labor, yet wanting to get things going, with an induction hanging over my head. Having labor start naturally was important to me. Around 10am I went to my chiropractor, who gave me one final crack, the one to supposedly kick start labor. I then went for my daily walk, at Sam’s Club with my mom. Some Braxton Hicks were starting to happen more regularly, and we started noting their time.

We got home, I gave Elyas some lunch and got him down for his nap. I took a shower and laid down for a nap also, since around 1pm contractions were happening regularly enough I decided this very well could be it! By 4pm contractions were getting strong enough that I wasn’t able to sleep, and even had to start utilizing some breath. When Elyas woke up from his nap my husband kept him busy, and I was able to take it easy, lay down again, and work through the contractions that were increasing in intensity. My mom stayed by me, timing the contractions. I was excited, knowing baby would be here soon, after waiting so long for labor to start! Not to mention, I was getting comfortably close to a 2/22 birth day. Labor was getting harder, but also felt manageable, relatively speaking. After an almost 24 hr labor, mostly back labor with Elyas, this labor felt very doable.

A significant snow and ice storm was predicted to start at 7pm, so we also had it in our minds that we should be going to the hospital before the roads became too bad, or even impassable.

Active labor

Shortly before the storm was supposed to start, my mom was starting to get anxious, noticing how much harder and faster the contractions seemed to be coming: only 2-5 minutes apart, for over an hour. She went and got my husband, saying she thought it would be prudent to head to the hospital ASAP. She gently brought me back from my very inward-focused state of mind on the couch, and I agreed with her it was a good time to go to the hospital.

I did some last minute things to get ready, riding out contractions as needed. Now, enter my mom, who was becoming increasingly worried that I wasn’t going to make it to the hospital, and couldn’t believe I was taking the time to curl my eyelashes. Yes, that was important to me, since labor started so fast and furious with Elyas that I did not have the capability of taking a shower, so I showed up to the hospital in an….unkempt state. I did not want a repeat of that. I was determined to show up neat, clean, and ready, curled eyelashes and all, to the hospital!!

Off to the hospital, water breaks

We got to the hospital by 7:15pm and parked. Despite the entrance being close, I was having a hard time getting inside. I had only a few contractions on the drive there (praise the Lord because I really dread the transfer to the hospital in labor, having to be strapped in a sitting position), then 1 contraction as soon as I got out of the car, another walking up to the entrance where I had to stop and lean on my husband. We stopped at the security entrance and I was interrupted mid conversation by another contraction (husband didn’t speak much English at that point so I was doing most of the talking). We were quickly directed around the corner to the labor and delivery ward. We got to the locked doors of the maternity ward and I rang the bell to be buzzed in. Just as a nurse over the intercom crackled a “hello?” A hard contraction hit me and my water broke, Hollywood style, soaking my pants, boots, and christening the carpet. (Who puts carpet in a maternity ward, anyway??) Another “hello??” came over the intercom. I forced myself to speak, pretty sure something like, “hi just a second I’m having a contraction and my water just broke” squeaked out. Another hard contraction ensued. The voice continued to “hello” me despite my having told her, or at least I thought she would understand, that I’m in the middle of a contraction(s), my water just broke, she’s going to have to wait a second for me to speak eloquently to her. The contraction subsided and I was able to say again, “hi I’m here and in labor”, and we got buzzed in.

We made it to the reception desk where they started asking me questions; what’s my name, did they know I was coming, etc. I had to keep working through contractions every couple of minutes since being in an upright position kept them coming steady and hard. When they were done asking questions they said they were going to take me down to triage where I would get a Covid test. I told them I didn’t think I was going to be able to make it down to wherever this blessed “triage” was, could it come to me? Apparently it couldn’t, but they told me not to worry, it wasn’t too far. They lead me just down the hall to a small room where a nurse wanted to weigh me. I didn’t think that getting my weight was all that important, given the circumstances. While I was on the scale admiring the impressively high number, I had another ever harder contraction, and I told the nurse calmly, “I think I’m starting to push.” I didn’t get much of a reaction, so when another contraction came on and the urge to push, I exclaimed, “I’m pushing!” The nurses were probably still trying to read me, thinking I’m just another woman in labor who’s probably still only 1cm dilated, acting it up. One of them asked if I thought I could walk to my room, it was just at the end of the hall, or if I wanted a wheel chair. I stubbornly said that I could walk.

I didn’t get very far, as the contractions seemed to be coming back to back and I just. Couldn’t. Seem. To. Get. To the. Room. I could not will my body there, no matter how I tried. I could hear a couple of nurses conferring behind me, talking about getting me into the nearest room, the one I was just outside of, rather than the room they had prepared for me. Finally they brought a wheel chair and I conceded to be wheeled into the room that was, frustratingly, a few feet away. It’s a good thing, because I very well could have had the baby right there in the hall had I persisted!

Finally in a room

Once in the room and still in the wheel chair, they administered the Covid test. I was dismayed that this nurse was quite exacting when it came to leaving the swab up each nostril for the full 15 seconds, wondering how I could safely work through a contraction without accidentally moving and jabbing the swab up into my brains. The Lord was gracious and I did NOT have a contraction during the Covid test! The test came back negative.

The nurses then asked if I would like to get on the bed (oh boy would I!), and I asked if I could change my clothes first. The nurses commented “oh you are sopping wet!!” as they helped me out of my pants, and I realized they either didn’t know or had forgotten the fact that my water had broken dramatically at the doors, and yes, I was still in my very wet clothes. Dry socks and a hospital gown have never felt so good!

10cm

Laying down felt wonderful, and the contractions slowed down a bit; a much needed reprieve. When the midwife came in, she checked me, and informed me that I was complete (10cm) and baby was in a -1 station. I told them I would like to wait until I felt the urge to push. They agreed. I wanted to rest after that hard entrance!

It was now after 8pm and we were settled enough that my husband finally got to Facetime my mom, so she could be “present”. I eventually found my happy place on my R side, calmly working through the contractions that kept coming hard, but without the urge to push. Now, I had read stories through the Spinning Babies site and such about women who, when experiencing natural and unmedicated labor, actually had a lull in their labor at 10cm and were able to take a nap before pushing. While laying still felt “relatively” wonderful, I certainly wasn’t drifting off to sleep. The midwife checked in on me periodically, staying close, wondering if I was ready to push yet. I still wasn’t.

Almost 2 hours since arriving at the hospital and still hanging out fully dilated

It got to be after 9pm, and I was still working through contractions quietly on my side. The nurse asked if I needed to use the bathroom (having a full bladder can sometimes inhibit baby from descending). I did not need to nor want to use the bathroom. Did they want me to have the baby in the toilet? I knew that moving would bring on the urge to push, I just wasn’t sure if I felt quite ready yet mentally to go through pushing. I was still comfy on my side with the peanut ball when the midwife approached me. She was concerned that if I kept holding off, I might not be able to control my pushing and tear. As not tearing was something I also hoped to experience, I agreed. Now this whole time my husband was still holding my phone for my mom to be FaceTimed in. I looked over at the phone and asked my mom, “well, should we have a baby??” I don’t think my mom heard, but that’s alright. Earlier I had talked through pushing positions with the midwife and opted for hands and knees. I got into position, with movement bringing on the hardest contractions and a stronger urge to push.

Baby is born!

I started pushing at 9:20pm, and Miriam was born at 9:31pm. Less than 2 1/2 hrs away from 2/22/22, hahaha!

Instant joy and exuberance, Miriam Jeannie was here, finally! That labor was a DREAM after my first. I joked that I now could fathom having twins, I could have done round 2!

Baby is too purple

Joy quickly turned to concern when Miriam, who had taken her first breath a second too soon and inhaled some mucous, was dark purple and still not breathing properly or pinking up. She cried a little, and they handed her to me, but she still was a frighteningly beautiful shade of purple. The nurses and midwife continued to rub her back and suction her, and she was making some improvements, but slowly. They called in a NICU team to assess her, just in case. Hubby cut the cord, much later than usual after the excitement, and the NICU team looked her over and suctioned some mucous out of her lungs. She looked and was breathing well enough finally that they didn’t need to take any further action. I got my roly poly baby girl back after a few minutes, and finally, the bliss of holding my new baby in my arms, this new little wonder, a precious gift. A first meeting.

The two hours after birth, I now completely understand why they are often called the “golden hours”. That feeling, the immense work, mental concentration, determination, prayer, literal blood, sweat, and tears….to utter joy and RELIEF. 9 months of knowing that your baby is coming but first, labor…and then you made it and you’re shaking, and you have your precious new baby in your arms to gaze at and memorize all their features...and after 9 months, you get to REST. Physically. Mentally. The bubbling over of joy and thankfulness that your baby is here, safe, and healthy. The pride you feel knowing YOU DID IT. And being able to physically rest like you haven’t been able to rest in the last how many hours and months? You’re not working up to labor, you’re not getting bigger and heavier; you’re now healing. Soaking in the soreness in your newly postpartum body. Those hours, these immense emotions, are some of the moments I will treasure in my heart for all my days. 

Baby stats

Miriam weighed 8lbs 11oz at birth and was 20 3/4 inches long. I did tear again, as I now had 2 for 2 babies come out with a hand by their face, but I did not feel the midwife stitching me up this time like I did in Italy. We stayed two nights in the hospital, mostly because we didn’t want to be discharged at 10pm at night. So we stayed and ate delicious (ahem) hospital food and cuddled our baby girl while the snow and ice storm raged outside. It was a good day to have a baby. And while I may have desired Miriam to be born on 2/22/22, a nurse later told me that Miriam was the only one born on 2/21/22, while 6 babies were born on 2/22/22. Miriam was unique, and showed her stubborn and wonderful personality right from the get go!

Happy Birthday, Miriam Jeannie! Oh, how you are loved!

What I Miss About Italy

Last Updated August 26, 2024

We’ve now been back in the US for 2 1/2 years.

In some respects, these 2 years have felt like forever. In other ways, it still feels like we just got here.

Much joy has been had, along with many trials. From new babies to hard-to-swallow health diagnoses, new jobs, new adjustments, new living spaces. Enjoying family, enjoying seasons.

Most of my time is very busy, taking care of three young children. In the quiet moments (that’s called nap time!), sometimes I take time to reflect. I’m grateful for where I am, and I’m also grateful for the time I spent in Italy.

To be honest, there are a lot of things I don’t miss about Italy, but no country is perfect, and what follows are some of the little things, and bigger things, that I miss about living in Italy. The things that make my heart happy when I think back on them.


What I Miss About Italy

Walking Everywhere

I love walking. I don’t love driving. I love the exercise, I like the ease of being able to walk out the door and not have to worry about car keys, I love being able to go anywhere just with my own two feet. I love not having to worry about parking, or gas. I loved being able to walk out my door and go get a morning pastry and cappuccino in a matter of minutes. I like being able to step out my door and just…walk, as far as I want. I liked the slowness of it, having time to observe the Italian scenes, the intricate and interesting buildings, the Christmas lights, everything.

I never owned a car in Italy, only rode a bike a couple times, but solely relied on my own two feet, buses, and trains. I know, buses and trains and transportation in Italy in general is unreliable, but it was there and affordable when my two feet couldn’t take me where I needed to be. I loved that I could get most places, even a vacation, without ever having to use a car. No worries about where to park or how much you’d be paying, car insurance, and all those fun things.

I miss the freedom of walking!

me, walking

Pastries for breakfast e’er day!

I love sweets, and starting my day out with a sweet pastry and coffee was really my er, cup of tea. In a weird sort of way, sweets first thing seemed to satisfy my sweet tooth, so I found myself actually eating less and desiring sugar less throughout the day.

Panettone Season

I loovveeee panettone. See point above about sweets. Sweet, tall bread with various fruits and add-ins. Chantilly cream. Chocolate cream. Chocolate chips. Candied fruits. And for as cheap as €3 or €4 for 1kg loaves! I loved when October would come around and I would start seeing the first panettone in the stores. I would often eat panettone for breakfast at home in November and December. So festive!

Have you had panettone? You can find them on Amazon for decent prices, like this classic one!

A classic panettone

The Christmas Lights

Christmas is my favorite time of the year, not matter where I am. Christmas trees and Christmas lights bring out the inner child/Elf in me. I feel gleeful when I see them. Florence, and most other Italian cities, have fabulous Christmas lights. They hang them up in many streets, they have small Christmas trees, they have large Christmas trees, and they love to load them with Christmas lights. It’s one of my favorite things, walking down all the streets under the lights, walking by the piazzas with the sparkling trees. It’s Christmas magic. Via Tornabuoni is always a show-stopper, and always a favorite. Every year it’s a little different, a little bit better.

Good Gelato

Sure, you can find gelato here and there in America, but it doesn’t count if it’s in the freezer section in a store. Yes, I like Talenti, but it’s not the same. I once had good gelato in Washington D.C., and my hometown briefly had a really decent little gelato store, but it was only open for a few seasons. Sad.

In Italy, and especially Florence which is considered the “birthplace” of gelato, good gelato is quite easy to find. Don’t be fooled, there is a ton of bad gelato too, but you just have to have a bit of discernment and it’s hard to go wrong. The servings aren’t overly large, unless you get a “grande”, but a generic small 2euro cone I always thought was the perfect amount without being overly indulgent. It becomes much more justifiable to eat not-huge cones of gelato a couple times a week than it is huge American cones…right? :)

If you’re visiting Florence, Italy, and want to find some authentic, house-made, GOOD gelato, check out my guide here!

gelato from Gelateria dei neri

The Shopping

I come from a smaller town that does not have fabulous shopping. Our options tend to be big box stores like Target, expensive boutiques downtown, or shopping online.

Florence has good shopping. They have a nice range of small, local boutiques, affordable “fast-fashion” like Mango, Zara, H&M, and higher end luxury shopping, with lots in between.

the old top floor of la rinascente before they remodeled

Twice-a-Year Sales

Speaking of shopping, I love the simplicity of Italian sales. The big ones happen twice year, starting in January and July. It’s almost across the board with all stores, all merchandise from the current season making way for the incoming season. The first week some stores may start off at 30% off, but usually by the second week everything on sale is 50%. I learned to only buy clothes, when I could, during the sales. Why pay full price for something in December that will soon be 50% off in January? The sales usually last for about 2 months, but if you want the good stuff, go in the first week or two. By the end of the sales, merchandise can go up to 70% off, sometimes with additional discounts on top of that.

A few years ago some stores in Italy started to catch on to the big “Black Friday” that happens in the USA, which can also get you some good sales, but usually not quite as big as in the US. I prefer to wait for the two big sales of the year.

Personal Pizza

I’m not here to bash American pizza and say Italian pizza is best, because honestly, I view them in separate categories. They can be so different, I don’t always see it as fair to compare them. They are each delicious in their own right, if made well. I’ve had bad, and great, pizza in both countries. But the “great” pizza in each country looked quite different.

I do miss Italian pizza. There are very, very few pizzas, if any? anywhere near where I live that compare to a good Neapolitan-style, fluffy crust pizza. So yes, I miss that chewy, steamy crust, simple and high-quality minimalist ingredients.

Do you know what else I miss? That in Italy it’s customary to order your own pizza. Pizzas are smaller, 12 inches maybe? So it can still be challenging to eat your whole pizza if you’re not ravenous, but the glorious fun is you get to choose what kind of pizza you want every time, no sharing necessary.

My top pizza choices were usually:

  • the classic Margherita (tomato sauce, fresh mozzarella, sometimes mozzarella di bufala as an option!!, and fresh basil)

  • Ortolana (tomato sauce, fresh mozzarella, grilled zucchini, grilled eggplant, marinated bell peppers, sometimes I would add on smoked scamorza)

  • Quattro Formaggi (four cheese pizza, usually a blend of mozzarella, parmigiano, fontina, and Gorgonzola, I like it when they use a tomato sauce, but this pizza often comes without)

  • Caprese (fresh mozzarella, fresh cherry tomatoes, fresh basil)

    and sometimes:

  • Marinara (very simple pizza, just tomato sauce, garlic, oregano, and a sprinkling of parmigiano and olive oil)

  • Tonno e Cipolla (tomato sauce, fresh mozzarella, tuna, onion - yes, am I letting my weird side show? haha)

If you haven’t been to Italy you might be thinking, don’t they ever put meat on their pizzas?? The answer is yes, they certainly do, but I really love their vegetarian pizzas, apparently! They use various kinds of cured meats, one of my favorites would be salame piccante, a spicy cured meat similar to pepperoni, featured on the “Diavola” pizza.

margerita pizza

Holiday Festivity

Human beings love holidays and excuses to celebrate (and days off), and Italians are no exceptions! In fact, it feels like every few days there is some holiday that has the post offices and stores closed, grocery stores closing early, and buses running on an (even more) irregular schedule.

One of the best things about walking everywhere is how much more a part of the city and culture I feel. On holidays, you see everyone out and about with good cheer, the pasticcerie extra full while people buy a caffè for a friend or pick up a special cake, and walking to get to their big midday festive meal. While the big holidays like Christmas and Easter are of course my favorites, I also appreciate the smaller holidays that are still observed with flair. I love Palm Sunday and all the people carrying their palm (actually olive) branches around, and International Women’s Day (March 8) with women being gifted small bouquets of mimosas, or picking up littles cakes decorated to look like a mimosa. I also love December 8th, The Immaculate Conception, which is also a big holiday in Italy. There is a parade through the city center, and the giant Christmas tree in Piazza Duomo is lit. Involving Christmas and Christmas lights, I of course, love it.

It’s the little things that bring spots of joy into the day!

If you’d like to read more about Italian Holidays, what they mean and how they might be celebrated, click here!

A mimosa tree

Parades All the Time

Going off of the holiday festivity above, I always loved going into the city center and stumbling upon crowds of people stopped to watch a procession or show. It felt like every time I went into the city there was some obscure holiday I had forgotten about, but that the Italians felt needed a parade, flags, and traditional Renaissance garb to celebrate. Seriously, so many parades, flag throwing, horses, drums and horns.

If there wasn’t a parade, then there was always something else to watch, like street performers. Never a dull moment!

Parade in front of the duomo on Befana (january 6th), where the wisemen go to see baby jesus

Very Good Wine for Very Good Prices

Of course a list about the good things in Italy couldn’t go by without a mention of wine, right??

Some of my favorite wines are Italian, not sure if I’m just most familiar with Italian wines or Italian wines really truly are superior. Either way, it’s a definite perk living in a country with excellent wine for affordable prices. Who sells wine for €2 a bottle?? Of course, I’m not saying that wine is worth buying, but still. €2. And then some really really nice wines, some excellent chiantis or Montepulcianos, for around €15? A Brunello for €20? I’m not complaining.

a selection of wines, olive oils, and balsamic vinegars at the mercato centrale

The All-You-Can-Eat Sushi

I’m not entirely sure why, but all of the sushi restaurants around Florence (and there are a good number) are always an all-you-can-eat formula. And honestly, it was one of the best things. While it means you might be paying more per person than your average night out in Florence, it’s absolutely worth it! Do you know how giddy I felt sitting down in Aji Tei (my favorite sushi place in Florence) and being able to order anything and everything I want, all for €30?? Yes. Very giddy. And not just sushi, but sushi cones, soups, desserts…only drinks excluded. Especially now, post-Covid and post-inflation, that feels like a steal. Especially especially since even at that time in the States that’s about what you’d pay for two rolls of sushi! Of course, at the time, this was still very much a splurge for us, birthday or anniversary dinner, maybe. For perspective, eating out in Florence can be as cheap as a €7 margherita pizza per person, or maybe a more “average” expenditure would be a plate of pasta in a ristorante for €15 per person. When that’s more the normal, maybe you can see where suddenly 2x or 4x the expense per person becomes a splurge. But oh, what a great concept. Endless rounds of sushi. Take me back.

the first of many orders of all-you-can-eat sushi at Aji tei

The Blossoming Jasmine in the Spring

I’m pretty sure it’s jasmine, anyway? All over Florence, beginning in March, all of those green hedges everywhere suddenly get thousands of white buds that bloom into these glorious little white flowers. Not only are they pretty, but you can smell them long before you see them!

I was never much a fan of artificial jasmine scents and perfumes growing up, but I guess that’s because they pale in comparison to the fresh, real flower. OH MY do they smell good. Do you like peonies? Or a David Austen rose? Then you would love jasmine. It rivals these, if not more pungent and beautiful. I could never get enough of it walking around Florence in the spring time!

hedges of jasmine

Mercati Everywhere

It seems that every weekend in Florence there is a different market, in a different piazza. And this is true! I actually found the schedule after so many years in Florence, it wasn’t random, ha! Some would pop up every second Sunday of the month, some were annual, some are daily. I loved always stumbling upon a new one and discovering new treasures!

Don’t forget of course, the staple mercati for food, Mercato Centrale and Mercato di Sant’Ambrogio for your daily produce!

the annual christmas market in piazza santa croce

Fresh Olive Oil Season

While Florence may not have had the most brilliant display of autumnal color-changing leaves, there were other signs of fall and things to get excited about. One of my favorites was when the olio nuovo would come out in October. The grocery stores would set up a special display for all of the many liters of the freshly produced olive oil, perfectly golden green. Unlike the olive oil produced for longer term storage that is kept in dark glass bottles to protect it, these were often bottled in clear glass to show off their pretty and vibrant golden hues, intended for immediate consumption and enjoyment. It was easy to find bottles that were “non filtrato” or unfiltered, for the most pure, unadulterated flavor. It was hard to find olio nuovo that was bad. It would only last for a short time, a month or so, before the olio nuovo would fade away and no longer be the olio nuovo, because, well, it was no longer new, It was just the olive oil now. It’s easy to take for granted having so many wonderful olive oils available, especially the spicy, fruity Tuscan oil I am so partial to. With a bit of scrounging I can find some decent olive oils and sometimes good ones here in the States, but the amount of forgettable and just plain bad oil is really sad. If ever you’re in Italy during the new oil season, be sure to visit an oil farm or just walk into any grocery store and look for the “olio nuovo” display and pick up any bottle!

Olio Nuovo at my local Coop supermercato

Nutella-Filled Pillow Cookies

These are buttery sugar cookies with hints of almond and vanilla, stuffed with Nutella. The almond really compliments the Nutella! I guess hazelnuts and almonds make good company.

I first made these cookies over 10 years ago and they’re still a cookie I love to make. Because they’re cutouts, I tend to save them for special occasions, but the extra time is so worth it!

These cookies melt in your mouth and keep you going back for more, despite being a generous size to begin with! They’re also pretty little things, which makes them suitable for nice occasions, especially with a little dusting of powdered sugar or cocoa powder on top. You can use different shapes for different occasions, which makes these not only delicious and beautiful, but also versatile! These are always a winner.

This post may contain affiliate links. If you make a purchase using these links, Jennyblogs may receive a small commission, at no extra cost to you. This helps to support Jennyblogs. For further information see the privacy policy. Grazie!


Nutella-Filled Pillow Cookies

Makes about 12 large cookies

Ingredients:

  • 1 cup / 225g butter

  • 1/2 cup / 100g sugar

  • 1/2 cup / 100g brown sugar

  • 2 eggs

  • 1 Tbsp / 15g vanilla

  • 1/2 tsp almond extract

  • 3 cups / 360g flour

  • 1 Tbsp baking powder

  • 1/2 tsp salt

  • about 2/3 cup / 200g Nutella

  • powdered sugar and/or cocoa powder for dusting, optional

Directions:

Oven preheated to 375°F / 190°C. Ungreased cookie sheets.

  1. In the bowl of a stand mixer or with a handheld mixer, cream butter and sugar together until light and fluffy, about 5 minutes.

  2. Beat in eggs, one at a time. Stir in extracts.

  3. In a medium bowl, combine flour, baking powder, and salt with a whisk.

  4. Add dry ingredients to butter mixture, mix until thoroughly combined. If dough seems too wet, add a bit more flour until a thicker consistency is reached.

  5. Cover and place dough in refrigerator until chilled, at least 1 hour.

  6. Remove dough from fridge. Roll dough out onto a lightly floured surface to a thickness of about 1/4in / 1/2cm. Use a 3in / 7.5cm cookie cutter to cut the cookie dough. Re-roll and cut more.

  7. Place half of the cut out cookies onto a cookie sheet. Spoon or pipe about 2 tsp of Nutella onto the middle of the cookie. Place a second cookie on top, using fingers or a fork to seal edges together.

  8. Bake in preheated oven for 9-11 minutes, or until edges just barely start to turn golden. Allow cookies to cool for several minutes on the cookie sheet before transferring to cooling racks or the counter.

  9. When cookies are completely cool, dust with powdered sugar, if desired.

Jenny’s Notes:

  • Round or square cookie cutters work best for these pillow cookies, but any shape will do, as long as it has a large enough center area for the Nutella to be able to be sealed in. I like to do heart shapes for Valentine’s day, as pictured!

  • While these may have Nutella in the name, I’ve stuffed these with other things before that were also delicious! Small chocolates like Reese’s, Dove chocolates, etc. could be used. I once used these hazelnut chocolates that are common in Italy, Gianduja, and they were wondeful in these!

  • Don’t over bake! Not only can this lead to dry cookies, but it can affect the filling, as well.

Nutella-Filled Pillow Cookies
Yield 12 Large Cookies
Author
Prep time
45 Min
Cook time
11 Min
Inactive time
1 Hour
Total time
1 H & 56 M

Nutella-Filled Pillow Cookies

Buttery, melt-in-your-mouth sugar cookies with hint of vanilla and almond, stuffed with Nutella, and topped with a dusting of powdered sugar and cocoa powder.
Cook modePrevent screen from turning off

Ingredients

Instructions

  1. Oven preheated to 375°F / 190°C. Ungreased cookie sheets.
  2. In the bowl of a stand mixer or with a handheld mixer, cream butter and sugar together until light and fluffy, about 5 minutes.
  3. Beat in eggs, one at a time. Stir in extracts.
  4. In a medium bowl, combine flour, baking powder, and salt with a whisk.
  5. Add dry ingredients to butter mixture, mix until thoroughly combined. If dough seems too wet, add a bit more flour until a thicker consistency is reached.
  6. Cover and place dough in refrigerator until chilled, at least 1 hour.
  7. Remove dough from fridge. Roll dough out onto a lightly floured surface to a thickness of about 1/4in / 1/2cm. Use a 3in / 7.5cm cookie cutter to cut the cookie dough. Re-roll and cut more.
  8. Place half of the cut out cookies onto a cookie sheet. Spoon or pipe about 2 tsp of Nutella onto the middle of the cookie. Place a second cookie on top, using fingers or a fork to seal edges together.
  9. Bake in preheated oven for 9-11 minutes, or until edges just barely start to turn golden. Allow cookies to cool for several minutes on the cookie sheet before transferring to cooling racks or the counter.
  10. When cookies are completely cool, dust with powdered sugar, if desired.

Notes

  • Round or square cookie cutters work best for these pillow cookies, but any shape will do, as long as it has a large enough center area for the Nutella to be able to be sealed in. I like to do heart shapes for Valentine’s day, as pictured!
  • While these may have Nutella in the name, I’ve stuffed these with other things before that were also delicious! Small chocolates like Reese’s, Dove chocolates, etc. could be used. I once used these hazelnut chocolates that are common in Italy, Gianduja, and they were wondeful in these!
  • Don’t over bake! Not only can this lead to dry cookies, but it can affect the filling, as well.

Nutrition Facts

Calories

388.68

Fat

21.3 g

Sat. Fat

14.73 g

Carbs

48.95 g

Fiber

1.74 g

Net carbs

47.2 g

Sugar

18.17 g

Protein

5.22 g

Cholesterol

67.95 mg

Sodium

345.08 mg

Nutritional info is approximate, based on 1 cookie

Cookies, Nutella, Pillow Cookies, Cutout Cookies, Rolled Cookies, Sugar Cookies
dessert, cookies
American
Did you make this recipe?
Tag @jennyblogsandbakes on instagram and hashtag it #jennyblogs

Homemade Evaporated Milk

Last Updated October 27, 2024

Making evaporated milk at home is very simple to do. You only need one ingredient: milk!

The evaporated milk you buy from the store is simply milk that has had 60% of its water evaporated.You can make your own by simmering it on the stove until reduced by 60%, or a bit more than half. It takes a bit of time and diligence, half hour or so of simmering, and remembering it’s there so it doesn’t boil dry. And no. of course I’ve never done either of those things, nope. But really, it’s so simple to make you can hardly call this a “recipe”!

Now, knowing how to make evaporated milk is wonderful for various occasions, but it does have its cons. The most obvious being it takes time and is easy to forget simmering on the stove. Second, even when made correctly the milk can cook onto the bottom of the pan over the simmering period and is not the most fun to clean. Because of these drawbacks, I still do buy cans of evaporated milk at times!

On the flip side, the beauty of making your own evaporated milk is that you can personalize to your tastes or dietary needs. To make the closest to store-bought evaporated milk, use whole milk. Otherwise, you can use lower fat varieties or even any plant or nut milks you prefer!

The recipe as written below will give you the equivalent of 1 can of evaporated milk, or 1 1/2 cups. Adjust the recipe depending on how much you need!

Do you want to learn how to make homemade sweetened condensed milk, also? Click here for the recipe!

This post may contain affiliate links. If you make a purchase using these links, Jennyblogs may receive a small commission, at no extra cost to you. This helps to support Jennyblogs. Where possible, links are prioritized to small businesses and ethically and responsibly made items. For further information see the privacy policy. Grazie!Recipe by Jenny


Homemade Evaporated Milk

simmering milk

Makes 1 1/2 cups / 12 oz (355ml) of evaporated milk

Ingredients:

  • 3 1/4 cups / 770g milk

Directions:

  1. Place milk in wide pan over medium heat. When it starts to simmer, reduce heat to low.

  2. Simmer until reduced by just more than half, this can take anywhere from half an hour to an hour, all depending on the stove. Remove from heat and cool.

  3. Strain and store in an airtight container in the refrigerator. Best if used within 5 days.

Jenny’s Notes:

Lightly golden, evaporated milk

  • Whole milk will get you the closest to store-bought evaporated milk, but the beauty of making your own is that you can use whatever kind of milk you please, whether a lower fat milk or a plant-based milk.

  • While eyeballing may be the easiest way to judge if it the milk has reduced by half, it’s not the most exact. Instead, try dipping a toothpick in the milk before simmering and making a mark on the toothpick where the milk comes up to. That way, as the milk simmers down, you can periodically dip the toothpick back in to see how close to half it is.

  • When milk is almost ready, it will take on a very light golden color as it reduces and caramelizes.

  • Mason jars make great storage containers!

Homemade Evaporated Milk
Yield 12 oz
Author
Prep time
2 Min
Cook time
45 Min
Total time
47 Min

Homemade Evaporated Milk

Making evaporated milk at home is as easy as simmering milk on the stove!
Cook modePrevent screen from turning off

Ingredients

Instructions

  1. Place milk in wide pan over medium heat. When it starts to simmer, reduce heat to low.
  2. Simmer until reduced by just more than half, this can take anywhere from half an hour to an hour, all depending on the stove. Remove from heat and cool.
  3. Strain and store in refrigerator.

Notes

  • Whole milk will get you the closest to store-bought evaporated milk, but the beauty of making your own is that you can use whatever kind of milk you please, whether a lower fat milk or a plant-based milk.
  • While eyeballing may be the easiest way to judge if it the milk has reduced by half, it’s not the most exact. Instead, try dipping a toothpick in the milk before simmering and making a mark on the toothpick where the milk comes up to. That way, as the milk simmers down, you can periodically dip the toothpick back in to see how close to half it is.
  • When milk is almost ready, it will take on a very light golden color as it reduces and caramelizes.


Nutrition Facts

Calories

39.65

Fat

2.11 g

Sat. Fat

1.23 g

Carbs

3.09 g

Fiber

0 g

Net carbs

3.09 g

Sugar

3.18 g

Protein

2.17 g

Sodium

25.11 mg

Cholesterol

7.93 mg

Nutritional info is approximate, based on 1 serving size of 2 Tbsp.

evaporated milk, dairy free evaporated milk, unsweetened condensed milk
beverage, baking
American
Did you make this recipe?
Tag @jennyblogsandbakes on instagram and hashtag it #jennyblogs

Finding "Premaman" Maternity Clothes in Italy

You’re pregnant, you’re excited, and now you have to figure out what to wear and what you’ll need!

For a first-time mamma, if you’re anything like me (ahem, overly detailed and analytical) even a seemingly simple task like picking out some maternity clothes can feel overwhelming and unnecessarily time consuming; even more so when you’re in a foreign country.

When will I actually need new clothes? Do I want over or under the bump pants? Is maternity underwear actually necessary? How much should I budget for clothes that may only get worn for 9 months, maybe less? How will I know what size bras to get, if my size is supposed to get bigger, but I don’t know how big?? Where do I find maternity clothes in Italy, anyway?

If this is your first pregnancy and would like some ideas on how to select maternity clothes, I will soon have an article for you!

If you’ve already been pregnant but this is your first baby in Italy, then you probably already know what you want, you just need to know where to find it!

Below you’ll find some of my favorite maternity choices in Italy!

This post may contain affiliate links. If you make a purchase using these links, Jennyblogs may receive a small commission, at no extra cost to you. This helps to support Jennyblogs. For further information see the privacy policy. Grazie!

shopping for maternity clothes in the time of covid: no tourists, no people


Where to Find Maternity Clothes

US Amazon Maternity

While this is primarily written with mamas in Italy at heart, many of these sites can be used by anyone in Europe, the US, or even beyond, since they are online sites with European or international shipping. Others are actually US based, but do offer international shipping. Maybe the most obvious is Amazon, which can be shopped in many countries, although their merchandise varies greatly from country to country.

These sites are listed roughly in order of ease of shopping and returning. While I try and indicate if shipping and returns are free, please check the site’s policy as it may have changed since this post was written.

  1. H&M Italy

    Yes, H&M has maternity wear! They have decent prices, although I’ve watched them go up since Covid, with inflation and H&M transitioning to more “sustainable” practices, but still definitely some of the lower priced items with decent quality.

    I highly recommend their maternity underwear and nursing bras, very comfortable and bits of lace so they still feel feminine.

    If you become a member you get free shipping for orders over €30 and free returns. Keep an eye out for sales which they have very frequently, the biggest sale usually being 30% off for Black Friday. The rest of the time they frequently have 15%, 20%, or 25% you can snag pretty easily. As a general rule, I don’t buy anything if it’s not on sale. The downside is their stock sells out very quickly, so if there is something you really really like, sometimes you just have to buy it, sale or not.

    The H&M store in Florence by Ponte Vecchio does not carry maternity, intimates, or children’s clothing in store.

  2. Zalando.it

    Zalando is great. It’s like an Amazon, but for clothing and accessories. My shopping experience in Italy took an uptick for the better when I discovered Zalando, pregnant or not. For the most part, Italy has great in-person shopping, but stores’ online presence and shopping is minimal. When there was something I needed but just couldn’t find, or couldn't get out much (due to Covid restrictions, having a newborn, etc.), I could almost always find something on Zalando. It has a vast selection of clothes, many top brands, and a section just for expecting moms and even baby clothing.

    They offer convenient shipping and returns, with most orders over €28.90 including free shipping. If your order is under or includes items coming from long distance, then shipping will be €4.95. Returns are free, simply take them to any PosteItaliane or even schedule a pick up at your house.

  3. Amazon.it

    Yes, Amazon, too! There is something about shopping for clothing on Amazon that I find very dissatisfying, but it’s always an option! I bought my first set of maternity underwear and nursing bras from Amazon. They were comfortable and definitely the least expensive option, but they didn’t last the longest, either. In short, if you have a limited budget like I did, they served their purpose well, but if you’re able, opt for higher quality if you can.

    Free shipping on orders over €35, and free returns most of the time, too, per usual Amazon standard.

  4. Seraphine

    This is a site based in the UK, and shopped at by royalty, as you can see on their site. Could be fun, wearing something that Kate Middleton also wore! Ultimately I have never boughten anything from them, even though they have some pieces I really like, since there was a small shipping cost, plus customs, and I had no idea what their clothes would fit like.

    Standard shipping to Italy is €4.95, plus potential customs fees, with free returns.

  5. Envie de Fraise

    This is a lovely French maternity brand that I bought my maternity dresses from.

    Free shipping to Italy for orders over €60, it looks as though returns may be at expense of customer, but I’m not sure. I actually exchanged 2 dresses for different sizes, and at the time I remember the returns being free. It may have changed, though. Their site looks as though it’s transitioning over to “vertbaudet”.

  6. Nothing Fits But

    I only just discovered this South Korean based brand in the past year, but they have some of the absolute loveliest dresses out there, that can easily be worn before and after maternity as well as during and for nursing. They are pricier with most dresses costing over $100, but they are light, and quality made. Wait for their sales and it won’t make as big of a dent. When I bought my dress, I found the one I wanted on sale, plus a matching dress for my daughter and a nursing/maternity sweater, plus shipping since I didn’t spend enough, and the total was still under $100. I got a pretty good deal!

    The US Amazon sells some Nothing Fits But dresses, although for a bit more money than the Nothing Fits But site. BUT Amazon offers free shipping and free returns, where Nothing Fits But does not until a much higher threshold. Reviews on their sizing was quite varied which left me uncertain what size I would like most, so I ended up ordering the two dresses I was eyeing from Amazon to figure out which size I was. At that point the same dress on Nothing Fits But went on sale, so I took advantage of Amazon’s generous return policy and returned both of the dresses, then bought the one I wanted on sale from Nothing Fits But.

    Free worldwide shipping on orders over $200USD, returns at cost of customer.

  7. Pink Blush Maternity

    Pink Blush has a wide assortment of maternity wear, from cute dresses to comfy sweaters. I’ve never bought anything from them, although I was tempted in Italy, but again I didn’t want to deal with not being able to do returns or pay potential customs fees.

    They have frequent sales, a generous 25% off your first order when you sign up for email, and a good Black Friday Sale.

    International shipping varies by order total, starting at $10.99. Customer is responsible for any customs once they arrive in Italy or destination country.

  8. HATCH Collection

    If you have a more generous budget for maternity wear, check out HATCH. Their prices are beyond my budget, but I’ve heard and read good things about them, and they certainly have some nice looking pieces!

    International shipping looks to be a flat rate of $50, customs to be paid by customer. International returns could be an option, they say to contact them for more info, but per any international return, it would probably be a good wait and costly.

  9. Stowaway Collection

    I came across this brand recently, a mother-daughter duo based in NYC. I haven’t ordered anything from them, but they have a lovely collection of very comfy, minimal looking dresses and pieces.

    They can ship internationally to Italy, with DHL, pricing determined by DHL.

  10. Bae the Label

    Another brand with sharp looking maternity clothes, not always an easy feat! They are an Australian brand, so even if you’re in the States you’ll be paying for international shipping.

    They offer free international shipping on orders over AUD$350, or a flat rate of $35 for anything less than that.

You may notice that this list is solidly online shopping. That’s because I never did find any maternity wear worth mentioning on this list in any stores around Florence. Of course, it also didn’t help that the peak time I was shopping for and needed maternity clothes was during the 2020 Covid lockdown. You could try La Rinascente in the center, off of Piazza della Repubblica, but their prices are usually higher since they stock a lot of designer brands.

If you know of any good “premaman” clothing stores around Florence, send me a message or leave a comment and I’d be happy to add it to this list!

Pregnancy Exercise: Walking in the Tuscan Hills once the covid mandate to stay home had been lifted


Herbed Six Cheese Pasta

Last Updated September 7, 2024

Why, when we make macaroni and cheese, do we usually just add one cheese? Because it’s easy, yes. But have you ever added 2, 3 or even 6 different cheeses to your pasta? Because it’s wonderful and the flavor profile explodes. In a good way.

Here is one of my cheesy pasta recipes, made with yes, 6 different cheeses! You can easily mix up which cheeses you use, with whatever you have on hand. It creates a unique but divine pasta every time. The herbs I added in with the inspiration from herb cream cheese that I sometimes like to put on my toasted bagels. MMMMMMmmmmmmmm.

Now, one of my first thoughts when I see a number of cheeses (especially 6!!) in a dish is that it’s probably a really rich, high fat dish. Good for special occasions, not so much a weeknight dinner. The best thing about this pasta, is that it doesn’t use any more cheese than a regular, homemade, stove top macaroni and cheese. Actually, it uses less than some recipes! I like to use about 2 cups of shredded cheese (equal to about 8oz of cheese) for 1lb of pasta. This recipe also uses a total of 2 cups of shredded cheese. No heavy whipping cream, no half & half, just milk. It’s not overly indulgent, like so many recipes can be, while still tasting indulgent!

This pasta is cheesy, creamy, smoky, and should be cooking on your stove and in your tummy ASAP! :)

This post may contain affiliate links. If you make a purchase using these links, Jennyblogs may receive a small commission, at no extra cost to you. This helps to support Jennyblogs. For further information see the privacy policy. Grazie!

Recipe by Jenny. Inspired by Inspired with a Twist


Herbed Six Cheese Pasta

Serves 4-6

Ingredients:

  • 1 lb. / 500g pasta of your choice

  • 4 Tbsp / 56g oil or butter

  • 2 cloves garlic, minced

  • 1/4 cup / 30g all-purpose flour

  • 2 cups / 474g milk

  • 1/2 tsp smoked paprika

  • 1/2 tsp chopped fresh basil

  • 1/2 tsp chopped fresh oregano

  • 1/4 tsp chopped fresh thyme

  • 1/4 tsp chopped fresh rosemary

  • 1/8 tsp nutmeg

  • 1/2 cup / 56g shredded sharp cheddar cheese

  • 1/2 cup / 56g shredded mozzarella cheese

  • 1/4 cup / 25g shredded asiago cheese

  • 1/4 cup / 25g shredded parmesan cheese

  • 1/4 cup / 28g shredded smoked gruyère cheese

  • 2 oz / 57g cream cheese

Directions:

  1. In a large pot bring a good quantity of water to boil. Just before the water boils, salt the water. Stir to dissolve salt, then add in pasta. Cook pasta to al dente according to package directions. Drain, reserving about 2 cups of pasta water.

  2. While pasta is cooking, heat oil or butter in a large pot over medium-low heat. Add garlic and stir, for about 1 minute, until fragrant.

  3. Add flour and stir with a whisk, until all the oil or butter has been absorbed by the flour. Stir for an extra few seconds, to toast the flour.

  4. Slowly add in milk, a bit at a time, stirring constantly. The mixture will thicken, then slowly thin out as you add more milk.

  5. When all the milk has been added and the mixture comes to a simmer, add in all the spices and herbs.

  6. Add in all of the cheese and stir until melted and smooth. Turn off heat. Salt and pepper to taste.

  7. Add cooked pasta to the sauce, along with 1 cup of reserved pasta water. Stir well. Add in more pasta water until desired consistency is reached. Sauce will continue to thicken as it cools and sits. Serve.

Jenny’s Notes:

  • The cheese options for this pasta really are endless, no need to feel confined by the exact cheeses I have written here. I use different ones all the time! Cheddars, mozzarellas, Monterey or Colby Jack, gruyere, gouda, smoked cheeses, havarti, provolone, taleggio, Swiss…think of your favorites! Another I love to add? A blue cheese, like Gorgonzola. Mmmmm. It’s like one of my favorite Italian pizzas, quattro formaggi, a pizza with four cheeses, one of which is Gorgonzola.

  • If you don’t have fresh herbs available to you, you can easily sub in dried. As a general rule of thumb, use 1/3 the amount of dried in place of fresh. In this recipe, because the measurements are already quite small, I usually end up going with “generous 1/8th teaspoon”, or “pinch of this”, and it turns out wonderful!

  • If you enjoy especially rich pasta, you can use half & half or some cream in with the milk. I usually use 2% milk, still creates a luscious, cheesy, pasta, but without being overly indulgent!

Herbed Six Cheese Pasta
Yield 6-8
Author
Prep time
10 Min
Cook time
20 Min
Total time
30 Min

Herbed Six Cheese Pasta

Creamy, smokey, cheesy pasta featuring 6 different cheeses with a sprinkling of fresh herbs and spices
Cook modePrevent screen from turning off

Ingredients

Instructions

  1. In a large pot bring a good quantity of water to boil. Just before the water boils, salt the water. Stir to dissolve salt, then add in pasta. Cook pasta to al dente according to package directions. Drain, reserving about 2 cups of pasta water.
  2. While pasta is cooking, heat oil or butter in a large pot over medium-low heat. Add garlic and stir, for about 1 minute, until fragrant.
  3. Add flour and stir with a whisk, until all the oil or butter has been absorbed by the flour. Stir for an extra few seconds, to toast the flour.
  4. Slowly add in milk, a bit at a time, stirring constantly. The mixture will thicken, then slowly thin out as you add more milk.
  5. When all the milk has been added and the mixture comes to a simmer, add in all the spices and herbs.
  6. Add in all of the cheese and stir until melted and smooth. Turn off heat. Salt and pepper to taste.
  7. Add cooked pasta to the sauce, along with 1 cup of reserved pasta water. Stir well. Add in more pasta water until desired consistency is reached. Sauce will continue to thicken as it cools and sits. Serve.

Notes

  • The cheese options for this pasta really are endless, no need to feel confined by the exact cheeses I have written here. I use different ones all the time! Cheddars, mozzarellas, Monterey or Colby Jack, gruyere, gouda, smoked cheeses, havarti, provolone, taleggio, Swiss…think of your favorites! Another I love to add? A blue cheese, like Gorgonzola. Mmmmm. It’s like one of my favorite Italian pizzas, quattro formaggi, a pizza with four cheeses, one of which is Gorgonzola.
  • If you don’t have fresh herbs available to you, you can easily sub in dried. As a general rule of thumb, use 1/3 the amount of dried in place of fresh. In this recipe, because the measurements are already quite small, I usually end up going with “generous 1/8th teaspoon”, or “pinch of this”, and it turns out wonderful!
  • If you enjoy especially rich pasta, you can use half & half or some cream in with the milk. I usually use 2% milk, still creates a luscious, cheesy, pasta, but without being overly indulgent!


Nutrition Facts

Calories

574

Fat

24 g

Sat. Fat

14 g

Carbs

66 g

Fiber

3 g

Net carbs

63 g

Sugar

7 g

Protein

23 g

Cholesterol

68 mg

Sodium

419 mg

Nutritional information is approximate, based on 6 servings.

Deluxe macaroni and cheese, best macaroni and cheese, six cheese pasta
Dinner, Pasta
American
Did you make this recipe?
Tag @jennyblogsandbakes on instagram and hashtag it #jennyblogs

Tofu and Broccoli Stir Fry

Last Updated September 7, 2024

This Tofu and Broccoli Stir Fry is deliciously salty, satisfying, and nutritious.

My family makes this recipe quite a bit, it’s quick and easy, providing protein and vegetables and a carb, if you serve it over rice.

If you’re watching your salt intake, you might prefer to use a low-sodium soy sauce and broth. Using low-sodium ingredients allows you to have more control over how salty your dish is, whether or not you actually may need low-sodium for health reasons.

This dish is also delicious meat-ified…by that I mean, with chicken instead of tofu. I’m not a vegetarian, and I love this recipe both ways. If making with chicken, you’ll want to cut it into cubes or bite-sized pieces. You can still coat the chicken in the cornstarch, and proceed with recipe as written. You’ll simply want to cook the chicken thoroughly, before adding in the garlic and ginger and finishing the stir fry. Voila! Meat-ified.

This post may contain affiliate links. If you make a purchase using these links, Jennyblogs may receive a small commission, at no extra cost to you. This helps to support Jennyblogs. For further information see the privacy policy. Grazie!


Tofu and Broccoli Stir Fry

Serves about 3-4

Ingredients:

  • 1 14oz / 400g container of extra-firm tofu

  • 2 Tbsp / 15g cornstarch

  • 1 cup / 237g vegetable or chicken broth

  • 3 Tbsp / 42g soy sauce

  • 2 tsp / 10g sugar

  • oil, for pan

  • 2 teaspoons grated fresh ginger

  • 2 garlic cloves, minced

  • 2 cups broccoli florets

Directions:

  1. Open and drain tofu. Wrap tightly in paper towels, place on a plate or cutting board, and place a weighted object on it, such as a bowl. Once the paper towel is soaked through, change them out for fresh paper towels. Repeat until paper towels remain mostly dry. Slice tofu into approx. 1/2” / 1cm cubes. Toss in a medium bowl with the cornstarch.

  2. Combine broth, soy sauce, and sugar; set aside.

  3. Generously drizzle an iron skillet or other non-stick pan with oil; place over medium-high heat.

  4. Fry tofu until golden brown and crispy, about 3-5 minutes. Flip the tofu, and fry other side until golden brown, another 3-5ish minutes.

  5. Lower heat to low; Add ginger and garlic and stir, until fragrant and sizzling, about a minute.

  6. Add in broth mixture and stir occasionally, until it starts to simmer.

  7. Add in broccoli, cover, and let sit for 2 minutes for “al dente” broccoli, or a couple more minutes for softer broccoli.

  8. Turn off heat and serve over rice.

Suggested toppings: red pepper flakes, sesame seeds, sliced green onions, etc.

Jenny’s Notes:

oven baked tofu

  • In an ideal world the tofu is prepared a bit in advance, so it has ample time to release as much water as possible. However, you can also wrap the tofu just 2x in paper towels. It only takes a couple minutes and still gets a good amount of water out. You may need more cornstarch in this case since the tofu will be moister, and that’s perfectly fine. Frying time may also take a few minutes longer, for the water to evaporate and get a proper crisp on the tofu.

  • If you prefer to bake tofu instead of frying: Prepare tofu as in step 1, than transfer onto a silpat or parchment paper lined cooking sheet. Bake in an oven preheated to 400°F / 205°C for 25-30 minutes, or until crisp and golden. Stir tofu once or twice during baking time. Add tofu into simmering sauce, let simmer for a few minutes, then add in broccoli to finish.

  • This is wonderful with red pepper flakes, sesame seeds, cilantro, and green onions sprinkled on top for garnish.

Tofu and Broccoli Stir Fry
Yield 3-4
Author
Prep time
20 Min
Cook time
15 Min
Total time
35 Min

Tofu and Broccoli Stir Fry

Crispy tofu with lightly crunchy broccoli in a salty stir fry sauce makes for a quick and satisfying dinner that is as good as take-out!
Cook modePrevent screen from turning off

Ingredients

Instructions

  1. Open and drain tofu. Wrap tightly in paper towels, place on a plate or cutting board, and place a weighted object on it, such as a bowl. Once the paper towel is soaked through, change them out for fresh paper towels. Repeat until paper towels remain mostly dry. Slice tofu into approx. 1/2” / 1cm cubes. Toss in a medium bowl with the cornstarch.
  2. Combine broth, soy sauce, and sugar; set aside.
  3. Generously drizzle an iron skillet or other non-stick pan with oil; place over medium-high heat.
  4. Fry tofu until golden brown and crispy, about 3-5 minutes. Flip the tofu, and fry other side until golden brown, another 3-5ish minutes.
  5. Lower heat to low; Add ginger and garlic and stir, until fragrant and sizzling, about a minute.
  6. Add in broth mixture and stir occasionally, until it starts to simmer.
  7. Add in broccoli, cover, and let sit for 2 minutes for “al dente” broccoli, or a couple more minutes for softer broccoli.
  8. Turn off heat and serve over rice.
  9. Suggested toppings: red pepper flakes, sesame seeds, sliced green onions, etc

Notes

  • In an ideal world the tofu is prepared a bit in advance, so it has ample time to release as much water as possible. However, you can also wrap the tofu just 2x in paper towels. It only takes a couple minutes and still gets a good amount of water out. You may need more cornstarch in this case since the tofu will be moister, and that’s perfectly fine. Frying time may also take a few minutes longer, for the water to evaporate and get a proper crisp on the tofu.
  • If you prefer to bake tofu instead of frying: Prepare tofu as in step 1, than transfer onto a silpat or parchment paper lined cooking sheet. Bake in an oven preheated to 400°F / 205°C for 25-30 minutes, or until crisp and golden. Stir tofu once or twice during baking time. Add tofu into simmering sauce, let simmer for a few minutes, then add in broccoli to finish.
  • This is wonderful with red pepper flakes, sesame seeds, cilantro, and green onions sprinkled on top for garnish.


Nutrition Facts

Calories

223

Fat

11 g

Sat. Fat

1 g

Carbs

16 g

Fiber

3 g

Net carbs

13 g

Sugar

2 g

Protein

16 g

Cholesterol

2 mg

Sodium

1322 mg

Nutritional information is approximate, based on 3 servings, not including rice or garnishes.

stir fry, tofu, broccoli, takeout, Chinese takeout, vegetarian dinner
dinner
Asian
Did you make this recipe?
Tag @jennyblogsandbakes on instagram and hashtag it #jennyblogs

Chocolate Chip Meringue Cookies

Last Updated September 7, 2024

As far as simple and delicious cookie recipes go, this is a good one to have on hand.

These cookies have only 4 ingredients, and are gluten-free, dairy-free (as long as your chocolate chips don’t contain dairy), and many other allergen and dietary needs friendly.

This is a recipe I’ve had around for ages, since I was a kid! I believe I originally got it from my cousin. I recently re-discovered these, they’re almost too easy to make, and a great way to use up extra egg whites. They’re easy enough kids can help or even make them by themselves, and with the chocolate chips, M&M’s, or other add ins, also very appealing to kids!

Are you ready for some of the easiest cookies you’ve made yet? Yeah, let’s go!

This post may contain affiliate links. If you make a purchase using these links, Jennyblogs may receive a small commission, at no extra cost to you. This helps to support Jennyblogs. For further information see the privacy policy. Grazie!

Recipe from my cousin


Chocolate Chip Meringue Cookies

M&M Meringue Cookies

Makes about 24 (about 1 1/2inch / 3cm) cookies

Ingredients:

  • 2 egg whites

  • 1 pinch of cream of tartar

  • 1/2 cup / 100g granulated sugar

  • 3/4 cup / 128g mini chocolate chips or other add-in of choice

Directions:

Oven preheated to 250°F / 121°C. Line a cookie sheet with a silpat or lightly grease.

  1. In the bowl of a stand mixer or with a hand-held electric mixer, beat egg whites and cream of tartar with whisk attachment until foamy.

  2. Add sugar and beat until stiff peaks form.

  3. Fold in chocolate chips with a spatula.

  4. Drop onto prepared cookie sheet and bake for about 30 minutes, or until set and just starting to turn a light golden color. Allow to cool slightly before removing from cookie sheet.

Jenny’s Notes:

  • Mini M&M’s are also a hit in these cookies! You can get creative, any kind of crushed candy or cookie like Oreo’s, or nuts, sprinkles, etc.

  • These cookies are best enjoyed within a day or two. They can be stored loosely covered at room temperature, but if you cover too tightly they turn soft and sticky even quicker.

Chocolate Chip Meringue Cookies
Yield 24
Author
Prep time
20 Min
Cook time
30 Min
Total time
50 Min

Chocolate Chip Meringue Cookies

4 ingredient meringue cookies with a slightly crunchy exterior and a soft, chewy inside, speckled with chocolate chips.
Cook modePrevent screen from turning off

Ingredients

Instructions

  1. Oven preheated to 250°F / 121°C. Line a cookie sheet with a silpat or lightly grease.
  2. In the bowl of a stand mixer or with a hand-held electric mixer, beat egg whites and cream of tartar with whisk attachment until foamy.
  3. Add sugar and beat until stiff peaks form.
  4. Fold in chocolate chips with a spatula.
  5. Drop onto prepared cookie sheet and bake for about 30 minutes, or until set and just starting to turn a light golden color. Allow to cool slightly before removing from cookie sheet.

Notes

  • Mini M&M’s are also a hit in these cookies! You can get creative, any kind of crushed candy or cookie like Oreo’s, or nuts, sprinkles, etc.
  • These cookies are best enjoyed within a day or two. They can be stored loosely covered at room temperature, but if you cover too tightly they turn soft and sticky even quicker.

Nutrition Facts

Calories

45.69

Fat

1.32 g

Sat. Fat

0.81 g

Carbs

8.05 g

Fiber

0.15 g

Net carbs

7.9 g

Sugar

7.7 g

Protein

0.54 g

Cholesterol

0.84 mg

Sodium

8.04 mg

Nutritional information is approximate. Based on 1 cookie from a 24-cookie batch.

meringue, egg whites, cookies, gluten-free, dairy-free
dessert, cookies
American
Did you make this recipe?
Tag @jennyblogsandbakes on instagram and hashtag it #jennyblogs

Oil Pie Crust

Last Updated July 31, 2024

Pie crusts are a baking staple, but one that can be intimidating, even if you’ve made them before. Once you master how to make crust, however, a whole world of baking and cooking opens up to you: sweet pies, savory pies, quiches, galettes, home-made pop tarts, etc.

The ingredients for pie crusts couldn’t be more simple. Flour, salt, fat, and water for a basic crust. They differ mostly in what kind of fat is used. Top choices are:

  • Lard - tends to be a more traditional choice, many family recipes handed down include lard. It’s supposed to make a very tender, melt-in-your mouth crust. I prefer to avoid it because of its health value, or lack thereof.

  • Shortening - one of the cheaper options, and is easier to work with, making it a good choice for those that want their crust to hold up and make designs or cutouts. Another I prefer to avoid because it is a very unhealthy fat.
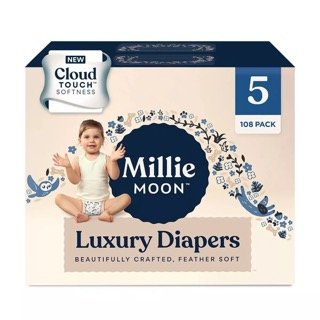
  • Butter - usually touted for having the best flavor. Since butter easily melts while it’s being worked with, it can be slightly more finicky than the previous two to keep tender, and less reliable for designs and cutouts.

  • Oil - the trickiest to work with by far, few are the people I know who make oil crusts. Actually, my mom may be the only one I know who only makes oil crusts. It’s the healthiest option, as a lot of oils have good fats and you can choose which oil you want to use. I tend to go for a neutral flavored oil, like refined olive oil or peanut oil, but you could even go for extra virgin olive oil, especially if used for a savory pie! You can taste extra virgin olive oil, but yum! Oil crusts are almost useless when it comes to making designs and cutouts. With experience and patience you can get a lattice crust out of it, but if you go this route know it may not turn out and will look lovely and rustic.

Today we’re talking about oil crusts, the most fearful, yet arguably healthiest, of them all. While they can be notoriously tricky in my family to get a consistently tender crust, I’ve been working on my family’s recipe a lot over the past 2 years especially and have discovered a few tricks. I feel the recipe is just about foolproof, so I’ve decided to finally share it with you!

I’ll warn you, it is still not an “easy” pie crust to work with, but with a little patience, can yield a wonderful and very tender, melt-in-your-mouth crust. I’ll give you all the tricks and knowledge that I know of!

Flour Matters

What brand and what kind of flour you use DOES matter. While all-purpose flour is generally all-purpose, it’s helpful to know what the protein content is of the flour that you’re using. For pie crusts and other delicate baked goods, you may want to get some pastry flour for the best results.

For awhile there we were using Good & Gather’s organic all-purpose flour. Gradually, we both noticed our baked goods weren’t turning out like they used to. We kept chalking it up to bad baking days, or this or that. We finally came to the conclusion that the Good & Gather flour was always the common denominator in things turning out…with unusual results. We switched to King Arthur flours and all our recipes suddenly started turning out wonderfully.

Until the next few crusts we made. A little crusty. Tough. Then we realized, that’s because King Arthur’s all-purpose flour has a protein content of 11.7%. Some might say, a medium-strength bread flour. Bread flour’s have a higher protein content, which helps to develop gluten for bread. This is why bread’s are kneaded, to help develop that gluten. But you do NOT want gluten developing in a pie crust, which is why you mix minimally and use a low-protein flour. All-purpose flours are generally seen as well, all-purpose. High enough protein content to make decent breads, low enough to be able to still make cakes, cookies, etc. With King Arthur’s all-purpose flour having a higher than average protein content, this is why our crusts were turning out tough. For this reason, we now like to use Bob’s Red Mill pastry flour specifically for our pie crusts and those desserts of the most delicate nature.

Use Enough Oil

The single biggest difference between a potentially hard/crunchy crust, and a tender, melt-in-your-mouth crust? Making sure you are using sufficient fat, in this instance, oil. Once you add the oil, practically all the flour should be saturated. Like wet sand. Not some wet, a little dry. Not mostly dry. Well saturated. Which also means you may need less water. Adding less water can mean less mixing, which is another important aspect.

Don’t Over Mix

Never over-mix a pie crust once the water is added. Just a few turns with a spoon or spatula should suffice.

If Time, Let it Rest

Another trick is to let the dough rest before rolling it out. I’ve found success with two rests, if time allows. When you first add the water, let the mixture sit for a few minutes. Don’t mix the water in, just let it sit. Then gently mix. This gives the water more time to penetrate deep into the flour/oil, thus reducing the amount of time you may need to mix it.

A second rest, once you’ve gently mixed the dough, can be helpful. Form the dough into a ball, press into a disc, and wrap in plastic wrap. Let rest for anywhere from 10 minutes to overnight. The more time you give it, the more time the gluten has to relax and again, the water to absorb evenly throughout the dough. When you mix flour with water, gluten starts to form. This is good if you are making bread, helps give it a strong structure so it can rise, but bad if you are making crust. It will be tough. Neither of these rests are essential, but can be helpful, especially if you struggle with tough crusts.

How Do I Know How Much Water to Use?

The more you make this recipe the more you will become familiar with just how much water you need. The brand of flour you use, your kitchen, the temperature, humidity, elevation, season, etc. can all affect how much water you need. For example, in my kitchen, I almost always use exactly 5 Tbsp of water when I make this. However, in your kitchen, you may need 7. Somewhere else, maybe only 4. Each time you make your crust it becomes easier, knowing better how much water to add, what the consistency should look/feel like. Sometimes it can be hard to tell in the mixing stage, and despite your best guess, you may find your crust is too dry or too wet. That’s ok, just roll with it (aha literally), and make a note for next time. Once you’ve started rolling out your dough it’s too late to be adding more water, but you CAN add more flour while rolling it out if it’s a touch too wet. Carefully. Just enough at a time so that the dough isn’t sticking to the surface or the rolling pin. The first time making a recipe, especially a more technical one like a crust, is always the trickiest.

How Do You Transfer the Rolled Out Pie Dough into the Pie Plate?

It’s true, this step is more challenging when dealing with a more delicate oil pie crust, but certainly doable.

Option 1: First, I recommend rolling out the dough on a silpat, or even a large cutting board. Once it’s rolled to size, carefully slide a thin spatula under the edges of the dough, to ensure it hasn’t glued itself to the surface you rolled it out on. Place the pie plate upside down directly onto the crust, centered. Slide one hand under the silpat or cutting board, place the other hand on the bottom of the pie plate, and quickly flip all. Then gently peel off the silpat, or remove the cutting board. Some flour may go flying, but this is the way I’ve had most consistent success keeping an intact oil pie crust.

Option 2: Fold the dough in half once it’s been rolled out, then transfer it to one side of the pie plate. Unfold the crust, and adjust/repair as needed. With an oil crust, it’s common for it to “crack” where you folded it, but that’s easily repaired if it’s a bottom crust.

Option 3: Starting at one end of the rolled out dough, carefully and loosely roll the dough around the rolling pin. Slide it over to the pie plate, and unroll.

Some of these tips are repeated in the “Jenny’s Notes” section immediately following the recipe, so you can reference them should you choose to print the recipe. :)

This post may contain affiliate links. If you make a purchase using these links, Jennyblogs may receive a small commission, at no extra cost to you. This helps to support Jennyblogs. Where possible, links are prioritized to small businesses, and American companies and products made in the USA for American readers. For further information see the privacy policy. Grazie!

Recipe from my mom


Oil Pie Crust

Makes 1 top and 1 bottom crust for a standard 8 inch / 20cm pie

Ingredients:

  • 3 3/4 cup / 450g all-purpose flour

  • 1 tsp / 5g salt

  • 3/4 cup / 168g neutral-flavored oil

  • 5-7 Tbsp / 70-98g ice water

Directions:

  1. In a large bowl, whisk together flour and salt.

  2. Stir in oil until flour is evenly moistened. It should look like wet sand with very little to no dry flour in the bottom of the bowl.

  3. Take your ice water and start by measuring 5 Tbsp / 70g evenly over flour mixture. Gently stir until just moistened. Be very careful not to over mix. If there is still a lot of drier oil mixture at the bottom of the bowl and it can’t be formed into a ball without crumbling, add more water, 1 Tbsp at a time, mixing until just combined.

  4. Divide dough into two equal pieces.

  5. On a generously floured surface, (a silpat makes for easy transfer to pie plate) roll out one half of the dough into a circle about 2 inches / 5cm larger than your pie plate.

  6. Carefully transfer dough to pie plate and press in.

  7. Repeat the rolling out process for the other half of dough. Add your pie filling and transfer top crust over pie. Trim any excess overhang from top and bottom crusts.

  8. Fold edge of top crust under edge of bottom crust, pressing and sealing together. Crimp with fingers or press with a fork. Use a knife or fork to poke some vent holes into the top.

  9. Bake according to pie recipe.

Jenny’s Notes:

  • To help ensure you don’t over-mix the dough when you add the water, you can allow the crust to sit for a few minutes after you sprinkle over the 5 Tbsp of water, BEFORE mixing. Optional, but helpful.

  • Another optional, but helpful tip to ensure a tender crust: After the water has been gently mixed in, gently form dough into a ball, then flatten into a disc and wrap in plastic film. Place in refrigerator for anywhere from 10-30+ minutes, even overnight. The more time it sits the more the moisture from the water will evenly distribute throughout the dough, simultaneously allowing any gluten that formed while mixing the dough a chance to “relax”, thus creating a more tender crust.

  • While rolling out the dough, occasionally turn it OR run a thin spatula underneath the dough, to ensure it is not glueing itself to the surface you are rolling it out on. If needed, sprinkle more flour underneath.

  • To easily see if you’ve rolled the pie crust out into a large enough circle, flip your pie plate upside down and hover it over the dough. You should be able to see about 2 inches / 5cm extending beyond the edges of your pie plate in all directions.

Oil Pie Crust
Yield 8
Author
Prep time
15 Min
Total time
15 Min

Oil Pie Crust

A 100% oil pie crust that is flaky, tender, and simple to make. Learn how to make one of the trickiest, yet healthiest pie crusts out there with this recipe, following the tips and tricks!
Cook modePrevent screen from turning off

Ingredients

Instructions

  1. In a large bowl, whisk together flour and salt.
  2. Stir in oil until flour is evenly moistened. It should look like wet sand with very little to no dry flour in the bottom of the bowl.
  3. Take your ice water and start by measuring 5 Tbsp / 70g evenly over flour mixture. Gently stir until just moistened. Be very careful not to over mix. If there is still a lot of drier oil mixture at the bottom of the bowl and it can’t be formed into a ball without crumbling, add more water, 1 Tbsp at a time, mixing until just combined.
  4. Divide dough into two equal pieces.
  5. On a generously floured surface, (a silpat makes for easy transfer to pie plate) roll out one half of the dough into a circle about 2 inches / 5cm larger than your pie plate.
  6. Carefully transfer dough to pie plate and press in.
  7. Repeat the rolling out process for the other half of dough. Add your pie filling and transfer top crust over pie. Trim any excess overhang from top and bottom crusts.
  8. Fold edge of top crust under edge of bottom crust, pressing and sealing together. Crimp with fingers or press with a fork. Use a knife or fork to poke some vent holes into the top.
  9. Bake according to pie recipe.

Notes

  • To help ensure you don’t over-mix the dough when you add the water, you can allow the crust to sit for a few minutes after you sprinkle over the 5 Tbsp of water, BEFORE mixing. Optional, but helpful.
  • Another optional, but helpful tip to ensure a tender crust: After the water has been gently mixed in, gently form dough into a ball, then flatten into a disc and wrap in plastic film. Place in refrigerator for anywhere from 10-30+ minutes, even overnight. The more time it sits the more the moisture from the water will evenly distribute throughout the dough, simultaneously allowing any gluten that formed while mixing the dough a chance to “relax”, thus creating a more tender crust.
  • While rolling out the dough, occasionally turn it OR run a thin spatula underneath the dough, to ensure it is not glueing itself to the surface you are rolling it out on. If needed, sprinkle more flour underneath.
  • To easily see if you’ve rolled the pie crust out into a large enough circle, flip your pie plate upside down and hover it over the dough. You should be able to see about 2 inches / 5cm extending beyond the edges of your pie plate in all directions.


Nutrition Facts

Calories

398.92

Fat

21.57 g

Sat. Fat

1.64 g

Carbs

44.71 g

Fiber

1.58 g

Net carbs

43.13 g

Sugar

0.16 g

Protein

6.05 g

Sodium

292.42 mg

Cholesterol

0 mg

Nutritional information is approximate. Based on 8 servings.

homemade oil pie crust recipe
Dessert, Dinner, Breakfast
American
Did you make this recipe?
Tag @jennyblogsandbakes on instagram and hashtag it #jennyblogs

Homemade Chocolate Pudding

Everybody needs a good, quick, chocolate pudding recipe!

This recipe is almost as fast as the instant box kind, but much healthier! Well, as healthy as chocolate pudding can be. :) All it requires is a few ingredients whisked together, heated on the stove, then left to set up in the fridge. Easy peasy!

Because it’s so quick and easy, the original name of this recipe is “Hasty Chocolate Pudding”. I use this recipe in place of instant chocolate pudding when called for in recipes, in popsicles, as a filling for cupcakes, and when anyone just wants a bowl of chocolate pudding!

This post may contain affiliate links. If you make a purchase using these links, Jennyblogs may receive a small commission, at no extra cost to you. This helps to support Jennyblogs. For further information see the privacy policy. Grazie!

Recipe adapted from All Recipes


Homemade Chocolate Pudding

Makes about 2 cups of pudding

Ingredients:

  • 1/2 cup / 100g granulated sugar

  • 1/3 cup / 33g unsweetened cocoa powder

  • 3 Tbsp / 27g corn starch

  • 2 cups / 474g milk

  • 2 tsp / 10g vanilla extract

Directions:

  1. In a medium pot, whisk together sugar, cocoa powder, and corn starch until no lumps remain.

  2. Slowly add in milk, whisking well to get a smooth mixture.

  3. Place mixture over medium heat and whisk constantly, until mixture thickens and begins to simmer.

  4. Remove from heat and stir in vanilla extract

  5. Transfer pudding to a heat-proof bowl, and allow to cool slightly, whisking now and then to avoid the “skin” forming. When pudding is cooler, place a piece of plastic wrap directly onto pudding.

  6. Refrigerate until set.

Jenny’s Notes:

  • “heat-proof” just means a bowl that is safe to handle hot food; one that won’t break (certain glass bowls), or won’t leak dangerous chemicals into your food (plastic), or in any other way form a peril if you pour hot liquid into it. :)

  • Placing the plastic wrap directly onto the pudding prevents that “skin” from forming as the pudding cools. Because I don’t enjoy using plastic in general and especially when coming into contact with hot food, I try to wait for the pudding to cool before placing it on. This also ensures the plastic wrap won’t melt, as it could if you put it on immediately after taking it off the heat.

The plastic wrap placed directly on the pudding to prevent a skin from forming

Homemade Chocolate Pudding
Yield 4
Author
Prep time
5 Min
Cook time
10 Min
Inactive time
1 Hour
Total time
1 H & 15 M

Homemade Chocolate Pudding

Chocolate pudding can be made at home with just 5 ingredients and a stovetop. It couldn't be easier and it's all natural!
Cook modePrevent screen from turning off

Ingredients

Instructions

  1. In a medium pot, whisk together sugar, cocoa powder, and corn starch until no lumps remain.
  2. Slowly add in milk, whisking well to get a smooth mixture.
  3. Place mixture over medium heat and whisk constantly, until mixture thickens and begins to simmer.
  4. Remove from heat and stir in vanilla extract
  5. Transfer pudding to a heat-proof bowl, and allow to cool slightly, whisking now and then to avoid the “skin” forming. When pudding is cooler, place a piece of plastic wrap directly onto pudding.
  6. Refrigerate until set.

Notes

  • “heat-proof” just means a bowl that is safe to handle hot food; one that won’t break (certain glass bowls), or won’t leak dangerous chemicals into your food (plastic), or in any other way form a peril if you pour hot liquid into it. :)
  • Placing the plastic wrap directly onto the pudding prevents that “skin” from forming as the pudding cools. Because I don’t enjoy using plastic in general and especially when coming into contact with hot food, I try to wait for the pudding to cool before placing it on. This also ensures the plastic wrap won’t melt, as it could if you put it on immediately after taking it off the heat.


Nutrition Facts

Calories

214.7

Fat

4.96 g

Sat. Fat

2.85 g

Carbs

40.48 g

Fiber

2.71 g

Net carbs

37.79 g

Sugar

31.21 g

Protein

5.42 g

Sodium

48.84 mg

Cholesterol

14.64 mg

Nutritional information is approximate; based on four 1/2 cup servings.

chocolate pudding, chocolate cream, no bake
dessert
American
Did you make this recipe?
Tag @jennyblogsandbakes on instagram and hashtag it #jennyblogs