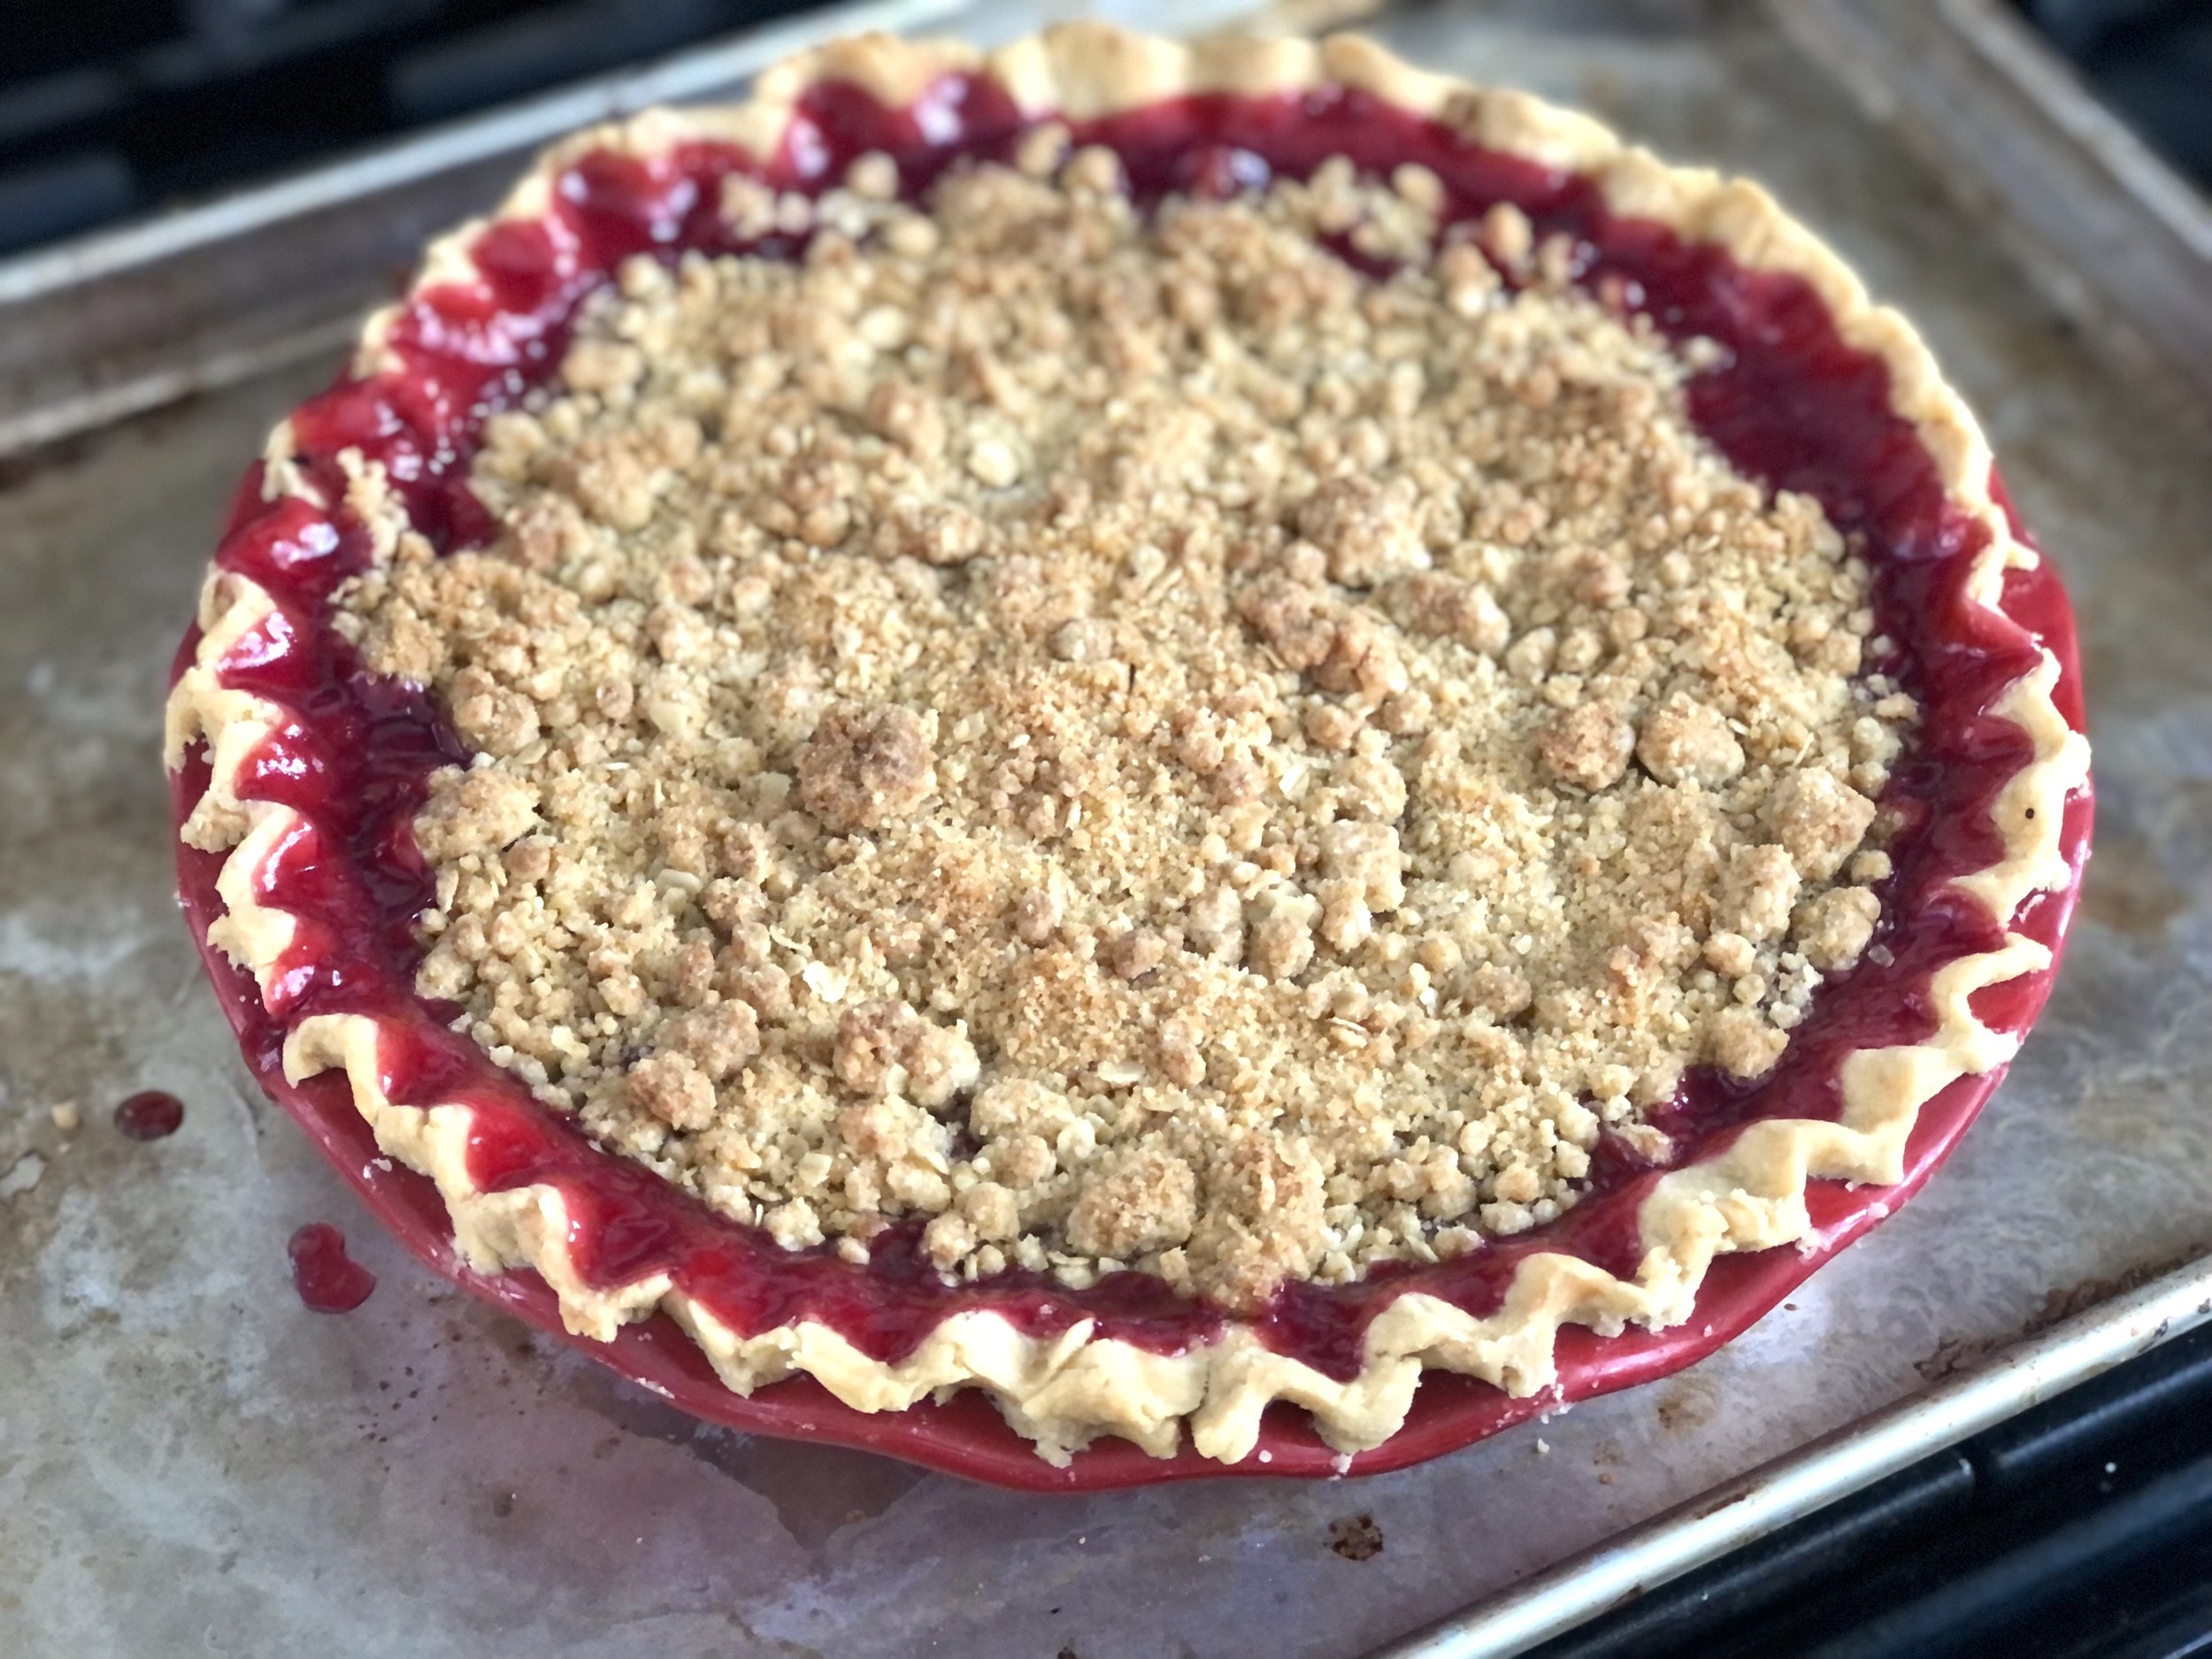
Tart Cherry Pie

Last updated July 31, 2024

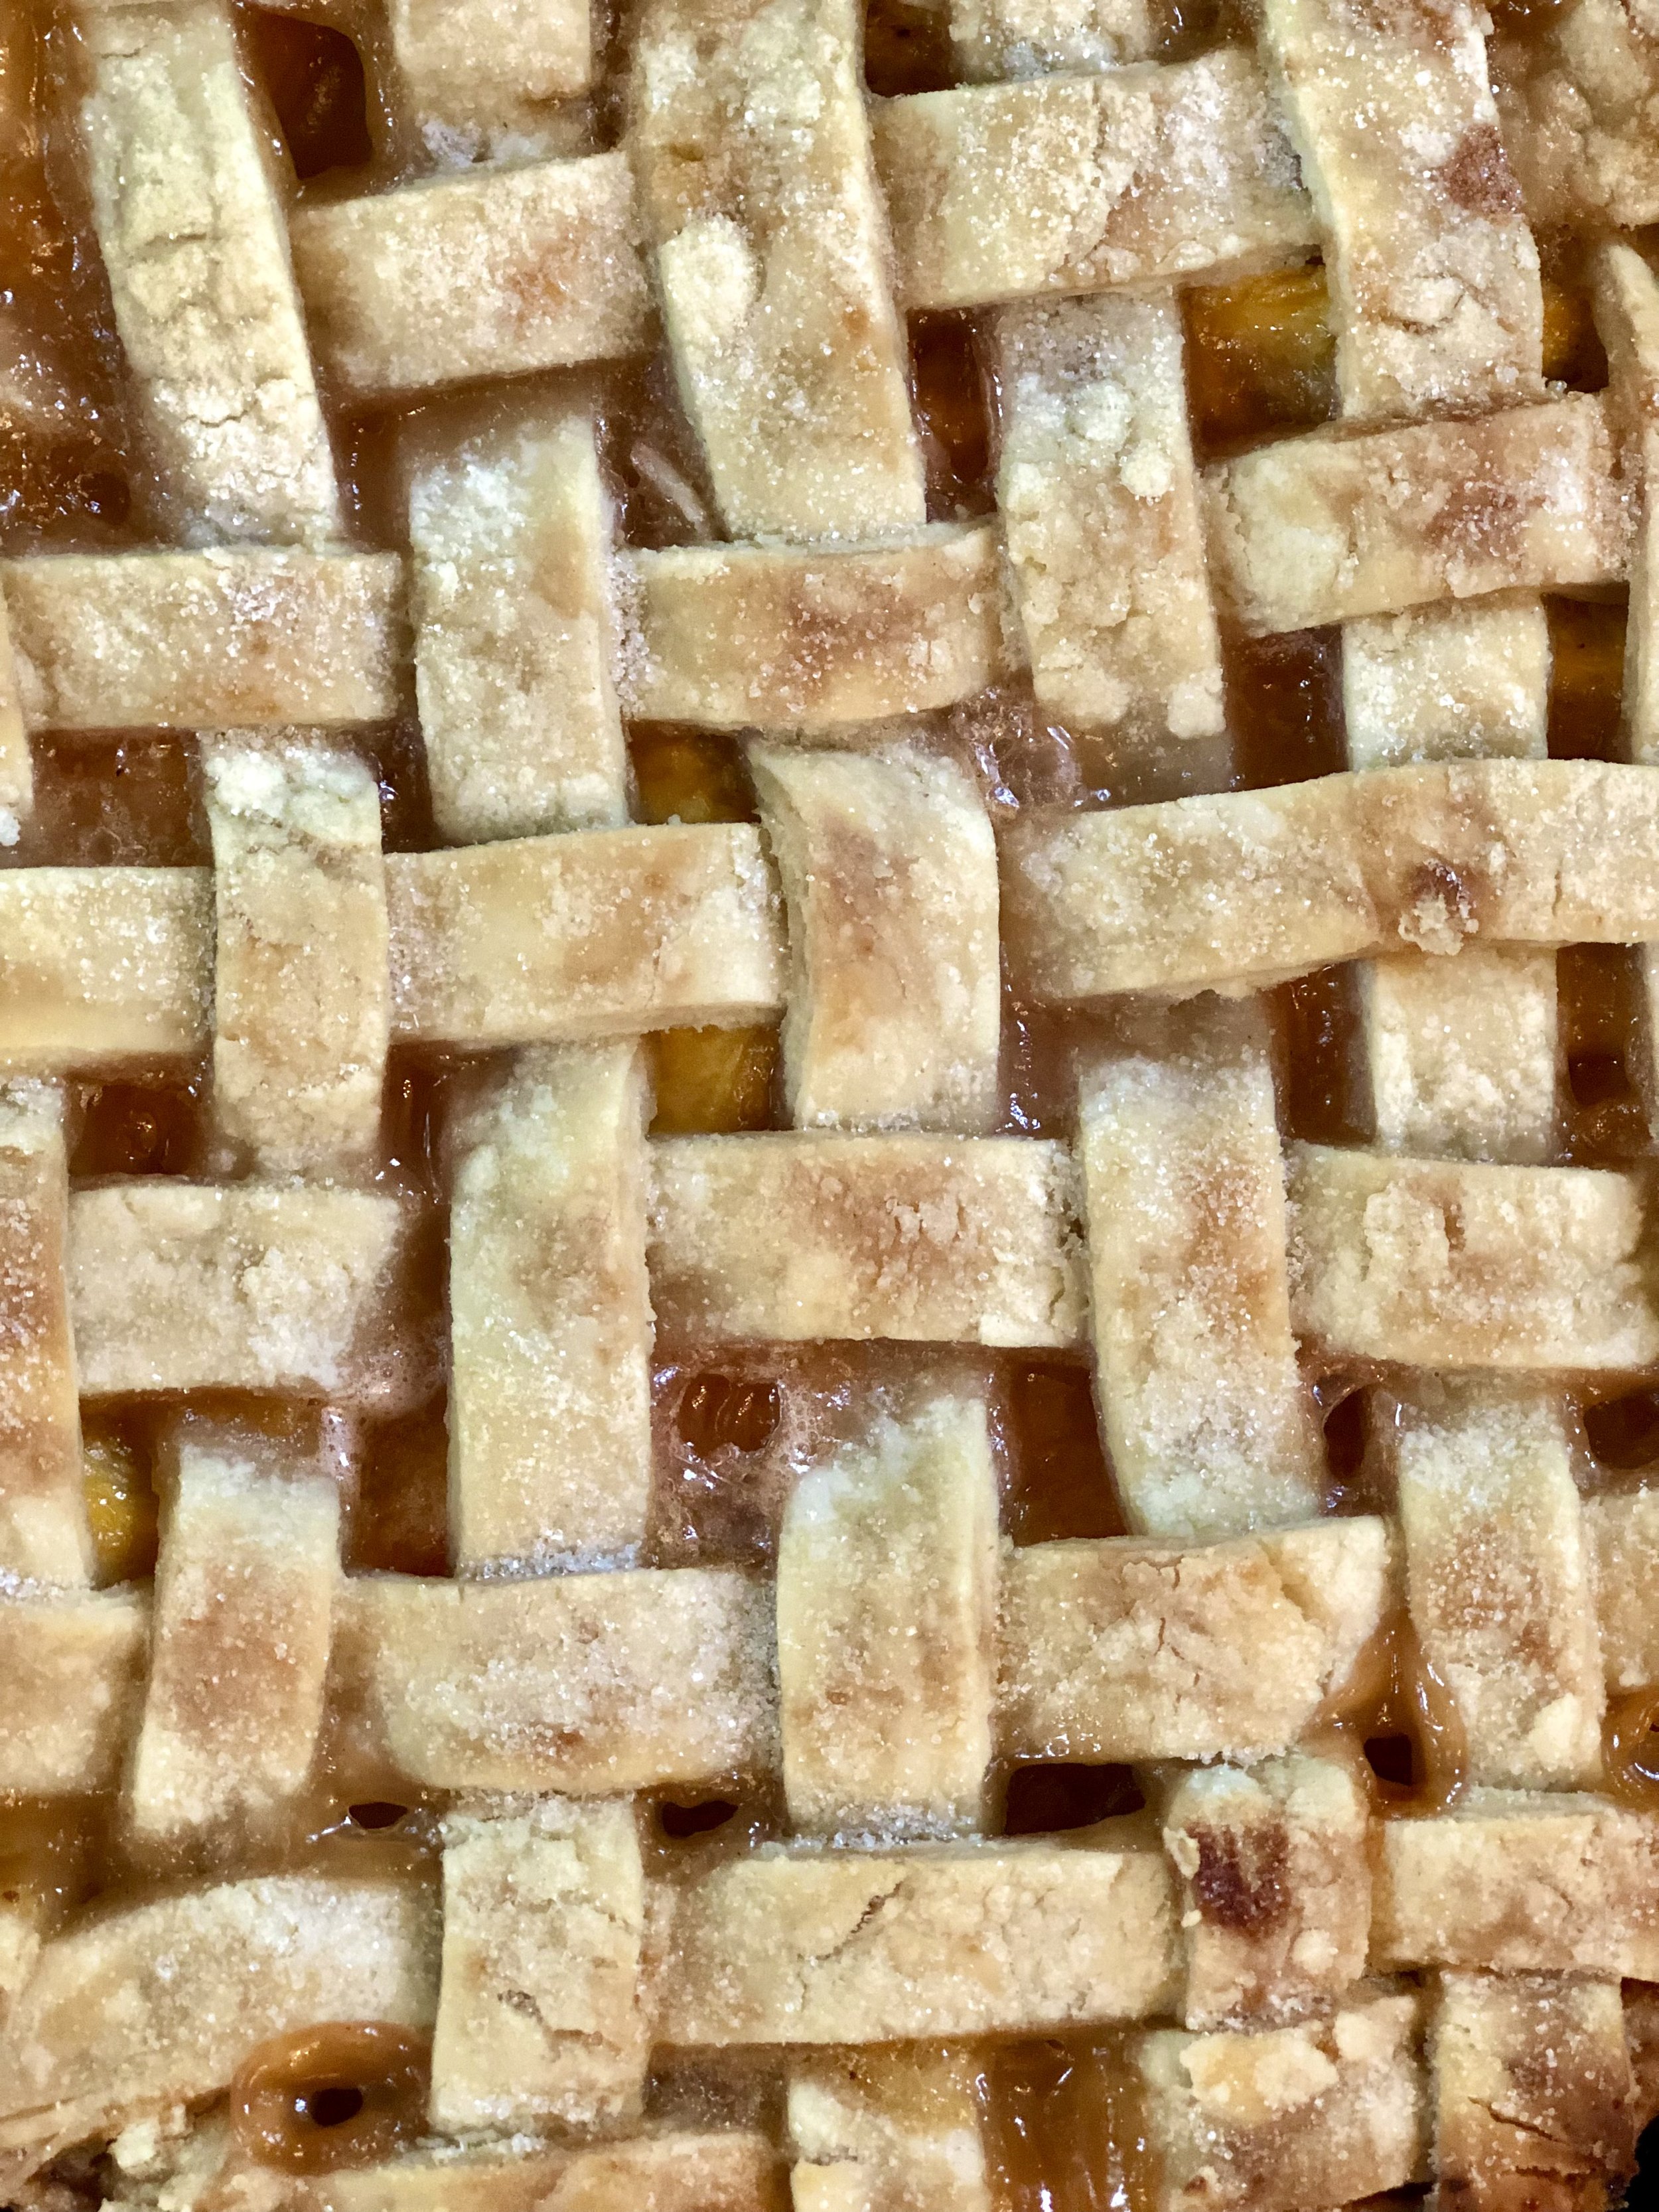
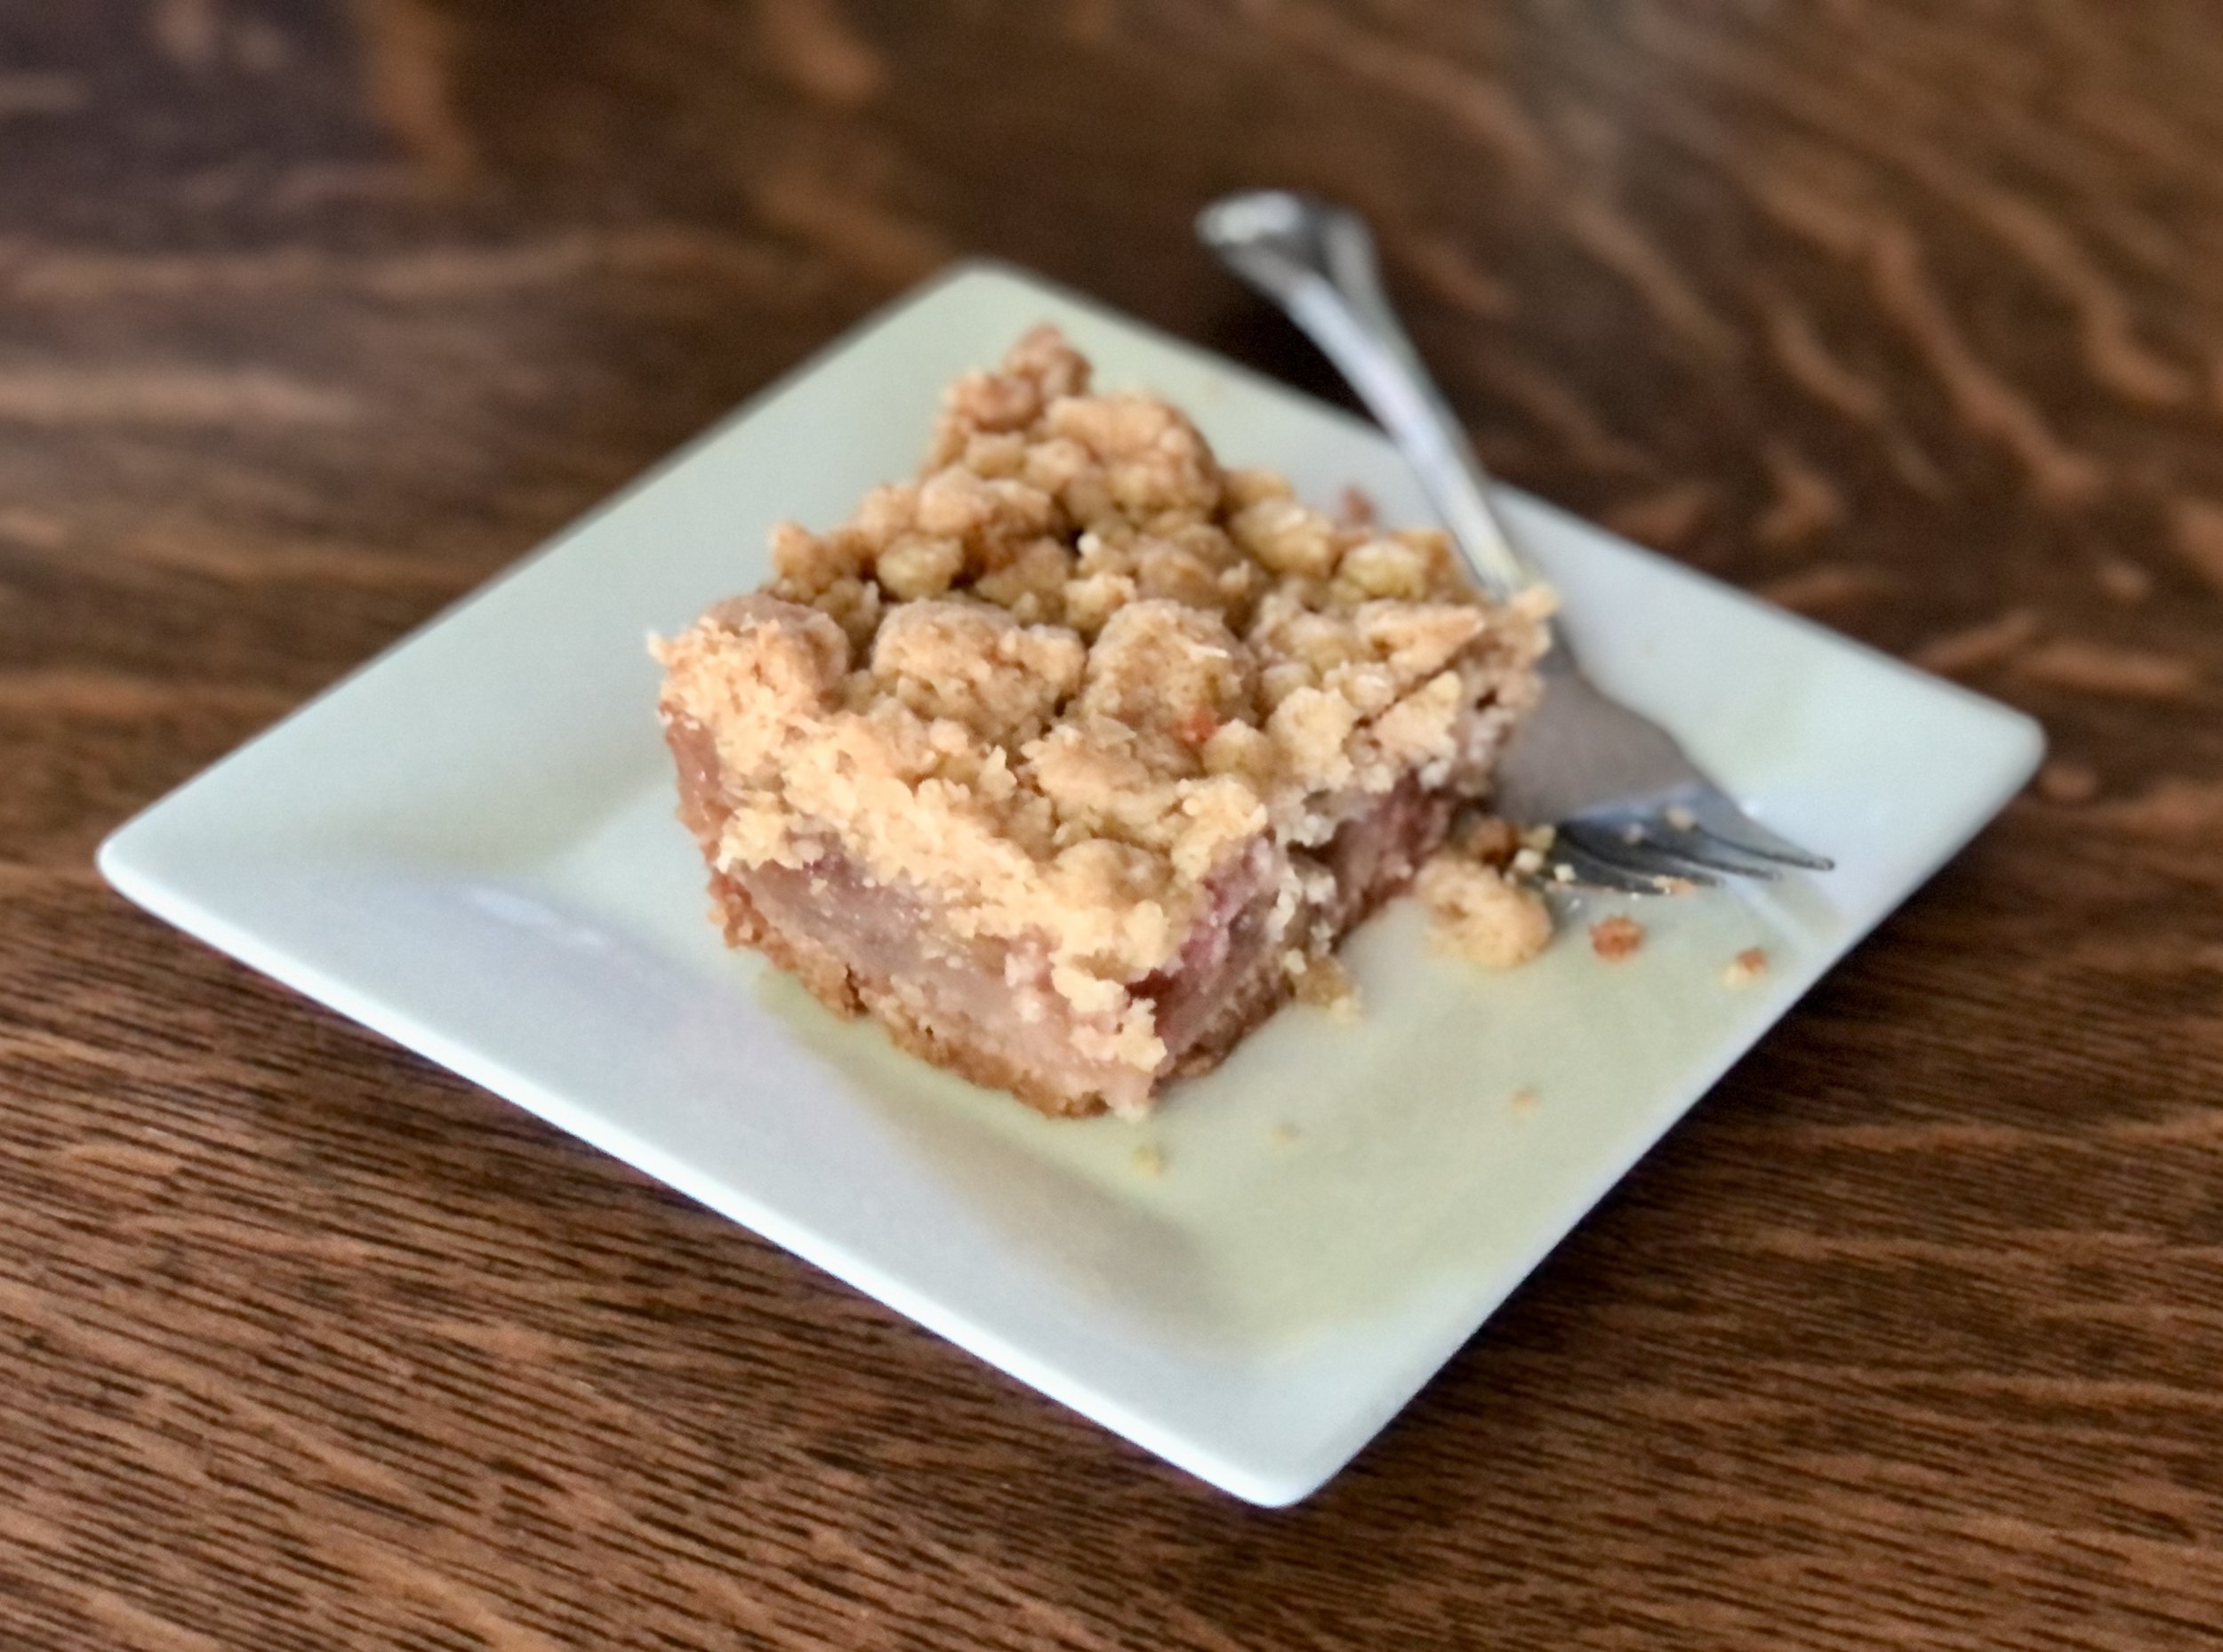
Nothing speaks summer in Traverse City like cherry pie.

Or January, because of the beauty of things like frozen fruit. This recipe actually originally called for frozen cherries, but it all turns out about the same whether you use fresh or frozen, so feel free to use whichever you have available.

How do you know when you find the best cherry pie? Or the best anything? I don’t know, and I don’t love recipes that boast to be the best, but this one is delicious. This is my go-to cherry pie recipe, until such a time as I should come across a better one!

The beauty of fruit pies is that they don’t need much. A good recipe lets the fruit shine. This recipe does exactly that. It’s perfectly cherry; tart, sweet, and one of my favorite flavor combinations: cherry / almond.

It features a crumble topping and this recipe has an extra: amaretto. It takes it up a notch, but if you don’t happen to have any on hand, this recipe is still divine.

Here’s to July, or summer in January!

This post may contain affiliate links. If you make a purchase using these links, Jennyblogs may receive a small commission, at no extra cost to you. This helps to support Jennyblogs. Where possible, links are prioritized to mall businesses and ethically and responsibly made items. For further information see the privacy policy. Grazie!

Recipe adapted from Ambitious Kitchen


Tart Cherry Pie

Serves about 8

Ingredients:

For the Crust

For the Filling

  • 6 cups / roughly 24oz fresh or frozen tart cherries, pitted

  • 1 cup / 200g sugar

  • 2 Tbsp / 15g cornstarch

  • 2 Tbsp / 16g flour

  • 1/2 tsp almond extract

  • 1 Tbsp / 14g butter

  • 1 Tbsp amaretto liqueur, optional

For the Crumble Topping

  • 1 cup / 120g flour

  • 1/2 cup / 100g brown sugar

  • 1/4 cup / 20g rolled oats

  • 6 Tbsp / 84g butter, melted

Directions:

Oven preheated to 350°F / 177°C.

Make the crust

  1. Prepare pie crust; refrigerate until filling is ready

Make the Filling

  1. In a medium large pot, combine cherries, sugar, cornstarch, flour, and almond extract over medium heat. Stir frequently until sugar has melted and cherries begin to break down.

  2. Add butter and amaretto. Continue to stir occasionally until mixture begins to bubble and thickens enough to coat the back of a spoon.

  3. Remove from heat and allow to cool while you prepare topping

Make the Crumble Topping

  1. In a medium bowl, combine flour, brown sugar, and oats.

  2. Add melted butter and stir until mixture resembles clumpy wet sand.

Assemble and Bake

  1. Pour filling into prepared crust. Evenly sprinkle crumble topping over filling.

  2. Bake pie in preheated oven for 50-60 minutes, until edges are bubbling and crumble is golden brown. Place a cookie sheet lined with tinfoil under the pie plate to catch any filling that bubbles over.

  3. Allow to cool completely before slicing and serving. Serve with vanilla ice cream, if desired.

Jenny’s Notes:

  • For crumble topping, I use rolled oats and quick oats interchangeably.

  • If not using the amaretto, I recommend increasing the almond extract to 1 tsp

  • Check the pie halfway through baking to ensure it’s not browning too quickly. If it is, place some tinfoil on top to prevent it browning too quickly.

  • Fruit pies like this are best made in the morning or the day before you need them, since they need to cool completely before being sliced into. If it’s not completely cool, it won’t be completely set, and the filling will ooze out.

Tart Cherry Pie
Yield 8
Author
Prep time
40 Min
Cook time
1 Hour
Inactive time
8 Hour
Total time
9 H & 40 M

Tart Cherry Pie

A classic summer pie bursting with juicy sour cherries, a touch of almond extract and amaretto liqueur, topped with a buttery oat crumble
Cook modePrevent screen from turning off

Ingredients

For the Crust
For the Filling
For the Crumble Topping

Instructions

Make the crust
  1. Prepare pie crust; refrigerate until filling is ready
Make the Filling
  1. Oven preheated to 350°F / 177°C.
  2. In a medium large pot, combine cherries, sugar, cornstarch, flour, and almond extract over medium heat. Stir frequently until sugar has melted and cherries begin to break down.
  3. Add butter and amaretto. Continue to stir occasionally until mixture begins to bubble and thickens enough to coat the back of a spoon.
  4. Remove from heat and allow to cool while you prepare topping
Make the Crumble Topping
  1. In a medium bowl, combine flour, brown sugar, and oats.
  2. Add melted butter and stir until mixture resembles clumpy wet sand.
Assemble and Bake
  1. Pour filling into prepared crust. Evenly sprinkle crumble topping over filling.
  2. Bake pie in preheated oven for 50-60 minutes, until edges are bubbling and crumble is golden brown. Place a cookie sheet lined with tinfoil under the pie plate to catch any filling that bubbles over.
  3. Allow to cool completely before slicing and serving. Serve with vanilla ice cream, if desired.

Notes

  • For crumble topping, I use rolled oats and quick oats interchangeably.
  • If not using the amaretto, I recommend increasing the almond extract to 1 tsp
  • Check the pie halfway through baking to ensure it’s not browning too quickly. If it is, place some tinfoil on top to prevent it browning too quickly.
  • Fruit pies like this are best made in the morning or the day before you need them, since they need to cool completely before being sliced into. If it’s not completely cool, it won’t be completely set, and the filling will ooze out.


Nutrition Facts

Calories

487.73

Fat

16.18 g

Sat. Fat

8.2 g

Carbs

73.55 g

Fiber

3.45 g

Net carbs

70.09 g

Sugar

27.3 g

Protein

4.67 g

Sodium

171.5 mg

Cholesterol

26.72 mg

Nutritional information is approximate. Based on 8 servings.

Cherry Pie, Best Tart Cherry Pie, Oat Crumble Topping, Sour Cherry Pie
dessert
American
Did you make this recipe?
Tag @jennyblogsandbakes on instagram and hashtag it #jennyblogs

Oil Pie Crust

Last Updated July 31, 2024

Pie crusts are a baking staple, but one that can be intimidating, even if you’ve made them before. Once you master how to make crust, however, a whole world of baking and cooking opens up to you: sweet pies, savory pies, quiches, galettes, home-made pop tarts, etc.

The ingredients for pie crusts couldn’t be more simple. Flour, salt, fat, and water for a basic crust. They differ mostly in what kind of fat is used. Top choices are:

  • Lard - tends to be a more traditional choice, many family recipes handed down include lard. It’s supposed to make a very tender, melt-in-your mouth crust. I prefer to avoid it because of its health value, or lack thereof.

  • Shortening - one of the cheaper options, and is easier to work with, making it a good choice for those that want their crust to hold up and make designs or cutouts. Another I prefer to avoid because it is a very unhealthy fat.

  • Butter - usually touted for having the best flavor. Since butter easily melts while it’s being worked with, it can be slightly more finicky than the previous two to keep tender, and less reliable for designs and cutouts.

  • Oil - the trickiest to work with by far, few are the people I know who make oil crusts. Actually, my mom may be the only one I know who only makes oil crusts. It’s the healthiest option, as a lot of oils have good fats and you can choose which oil you want to use. I tend to go for a neutral flavored oil, like refined olive oil or peanut oil, but you could even go for extra virgin olive oil, especially if used for a savory pie! You can taste extra virgin olive oil, but yum! Oil crusts are almost useless when it comes to making designs and cutouts. With experience and patience you can get a lattice crust out of it, but if you go this route know it may not turn out and will look lovely and rustic.

Today we’re talking about oil crusts, the most fearful, yet arguably healthiest, of them all. While they can be notoriously tricky in my family to get a consistently tender crust, I’ve been working on my family’s recipe a lot over the past 2 years especially and have discovered a few tricks. I feel the recipe is just about foolproof, so I’ve decided to finally share it with you!

I’ll warn you, it is still not an “easy” pie crust to work with, but with a little patience, can yield a wonderful and very tender, melt-in-your-mouth crust. I’ll give you all the tricks and knowledge that I know of!

Flour Matters

What brand and what kind of flour you use DOES matter. While all-purpose flour is generally all-purpose, it’s helpful to know what the protein content is of the flour that you’re using. For pie crusts and other delicate baked goods, you may want to get some pastry flour for the best results.

For awhile there we were using Good & Gather’s organic all-purpose flour. Gradually, we both noticed our baked goods weren’t turning out like they used to. We kept chalking it up to bad baking days, or this or that. We finally came to the conclusion that the Good & Gather flour was always the common denominator in things turning out…with unusual results. We switched to King Arthur flours and all our recipes suddenly started turning out wonderfully.

Until the next few crusts we made. A little crusty. Tough. Then we realized, that’s because King Arthur’s all-purpose flour has a protein content of 11.7%. Some might say, a medium-strength bread flour. Bread flour’s have a higher protein content, which helps to develop gluten for bread. This is why bread’s are kneaded, to help develop that gluten. But you do NOT want gluten developing in a pie crust, which is why you mix minimally and use a low-protein flour. All-purpose flours are generally seen as well, all-purpose. High enough protein content to make decent breads, low enough to be able to still make cakes, cookies, etc. With King Arthur’s all-purpose flour having a higher than average protein content, this is why our crusts were turning out tough. For this reason, we now like to use Bob’s Red Mill pastry flour specifically for our pie crusts and those desserts of the most delicate nature.

Use Enough Oil

The single biggest difference between a potentially hard/crunchy crust, and a tender, melt-in-your-mouth crust? Making sure you are using sufficient fat, in this instance, oil. Once you add the oil, practically all the flour should be saturated. Like wet sand. Not some wet, a little dry. Not mostly dry. Well saturated. Which also means you may need less water. Adding less water can mean less mixing, which is another important aspect.

Don’t Over Mix

Never over-mix a pie crust once the water is added. Just a few turns with a spoon or spatula should suffice.

If Time, Let it Rest

Another trick is to let the dough rest before rolling it out. I’ve found success with two rests, if time allows. When you first add the water, let the mixture sit for a few minutes. Don’t mix the water in, just let it sit. Then gently mix. This gives the water more time to penetrate deep into the flour/oil, thus reducing the amount of time you may need to mix it.

A second rest, once you’ve gently mixed the dough, can be helpful. Form the dough into a ball, press into a disc, and wrap in plastic wrap. Let rest for anywhere from 10 minutes to overnight. The more time you give it, the more time the gluten has to relax and again, the water to absorb evenly throughout the dough. When you mix flour with water, gluten starts to form. This is good if you are making bread, helps give it a strong structure so it can rise, but bad if you are making crust. It will be tough. Neither of these rests are essential, but can be helpful, especially if you struggle with tough crusts.

How Do I Know How Much Water to Use?

The more you make this recipe the more you will become familiar with just how much water you need. The brand of flour you use, your kitchen, the temperature, humidity, elevation, season, etc. can all affect how much water you need. For example, in my kitchen, I almost always use exactly 5 Tbsp of water when I make this. However, in your kitchen, you may need 7. Somewhere else, maybe only 4. Each time you make your crust it becomes easier, knowing better how much water to add, what the consistency should look/feel like. Sometimes it can be hard to tell in the mixing stage, and despite your best guess, you may find your crust is too dry or too wet. That’s ok, just roll with it (aha literally), and make a note for next time. Once you’ve started rolling out your dough it’s too late to be adding more water, but you CAN add more flour while rolling it out if it’s a touch too wet. Carefully. Just enough at a time so that the dough isn’t sticking to the surface or the rolling pin. The first time making a recipe, especially a more technical one like a crust, is always the trickiest.

How Do You Transfer the Rolled Out Pie Dough into the Pie Plate?

It’s true, this step is more challenging when dealing with a more delicate oil pie crust, but certainly doable.

Option 1: First, I recommend rolling out the dough on a silpat, or even a large cutting board. Once it’s rolled to size, carefully slide a thin spatula under the edges of the dough, to ensure it hasn’t glued itself to the surface you rolled it out on. Place the pie plate upside down directly onto the crust, centered. Slide one hand under the silpat or cutting board, place the other hand on the bottom of the pie plate, and quickly flip all. Then gently peel off the silpat, or remove the cutting board. Some flour may go flying, but this is the way I’ve had most consistent success keeping an intact oil pie crust.

Option 2: Fold the dough in half once it’s been rolled out, then transfer it to one side of the pie plate. Unfold the crust, and adjust/repair as needed. With an oil crust, it’s common for it to “crack” where you folded it, but that’s easily repaired if it’s a bottom crust.

Option 3: Starting at one end of the rolled out dough, carefully and loosely roll the dough around the rolling pin. Slide it over to the pie plate, and unroll.

Some of these tips are repeated in the “Jenny’s Notes” section immediately following the recipe, so you can reference them should you choose to print the recipe. :)

This post may contain affiliate links. If you make a purchase using these links, Jennyblogs may receive a small commission, at no extra cost to you. This helps to support Jennyblogs. Where possible, links are prioritized to small businesses, and American companies and products made in the USA for American readers. For further information see the privacy policy. Grazie!

Recipe from my mom


Oil Pie Crust

Makes 1 top and 1 bottom crust for a standard 8 inch / 20cm pie

Ingredients:

  • 3 3/4 cup / 450g all-purpose flour

  • 1 tsp / 5g salt

  • 3/4 cup / 168g neutral-flavored oil

  • 5-7 Tbsp / 70-98g ice water

Directions:

  1. In a large bowl, whisk together flour and salt.

  2. Stir in oil until flour is evenly moistened. It should look like wet sand with very little to no dry flour in the bottom of the bowl.

  3. Take your ice water and start by measuring 5 Tbsp / 70g evenly over flour mixture. Gently stir until just moistened. Be very careful not to over mix. If there is still a lot of drier oil mixture at the bottom of the bowl and it can’t be formed into a ball without crumbling, add more water, 1 Tbsp at a time, mixing until just combined.

  4. Divide dough into two equal pieces.

  5. On a generously floured surface, (a silpat makes for easy transfer to pie plate) roll out one half of the dough into a circle about 2 inches / 5cm larger than your pie plate.

  6. Carefully transfer dough to pie plate and press in.

  7. Repeat the rolling out process for the other half of dough. Add your pie filling and transfer top crust over pie. Trim any excess overhang from top and bottom crusts.

  8. Fold edge of top crust under edge of bottom crust, pressing and sealing together. Crimp with fingers or press with a fork. Use a knife or fork to poke some vent holes into the top.

  9. Bake according to pie recipe.

Jenny’s Notes:

  • To help ensure you don’t over-mix the dough when you add the water, you can allow the crust to sit for a few minutes after you sprinkle over the 5 Tbsp of water, BEFORE mixing. Optional, but helpful.

  • Another optional, but helpful tip to ensure a tender crust: After the water has been gently mixed in, gently form dough into a ball, then flatten into a disc and wrap in plastic film. Place in refrigerator for anywhere from 10-30+ minutes, even overnight. The more time it sits the more the moisture from the water will evenly distribute throughout the dough, simultaneously allowing any gluten that formed while mixing the dough a chance to “relax”, thus creating a more tender crust.

  • While rolling out the dough, occasionally turn it OR run a thin spatula underneath the dough, to ensure it is not glueing itself to the surface you are rolling it out on. If needed, sprinkle more flour underneath.

  • To easily see if you’ve rolled the pie crust out into a large enough circle, flip your pie plate upside down and hover it over the dough. You should be able to see about 2 inches / 5cm extending beyond the edges of your pie plate in all directions.

Oil Pie Crust
Yield 8
Author
Prep time
15 Min
Total time
15 Min

Oil Pie Crust

A 100% oil pie crust that is flaky, tender, and simple to make. Learn how to make one of the trickiest, yet healthiest pie crusts out there with this recipe, following the tips and tricks!
Cook modePrevent screen from turning off

Ingredients

Instructions

  1. In a large bowl, whisk together flour and salt.
  2. Stir in oil until flour is evenly moistened. It should look like wet sand with very little to no dry flour in the bottom of the bowl.
  3. Take your ice water and start by measuring 5 Tbsp / 70g evenly over flour mixture. Gently stir until just moistened. Be very careful not to over mix. If there is still a lot of drier oil mixture at the bottom of the bowl and it can’t be formed into a ball without crumbling, add more water, 1 Tbsp at a time, mixing until just combined.
  4. Divide dough into two equal pieces.
  5. On a generously floured surface, (a silpat makes for easy transfer to pie plate) roll out one half of the dough into a circle about 2 inches / 5cm larger than your pie plate.
  6. Carefully transfer dough to pie plate and press in.
  7. Repeat the rolling out process for the other half of dough. Add your pie filling and transfer top crust over pie. Trim any excess overhang from top and bottom crusts.
  8. Fold edge of top crust under edge of bottom crust, pressing and sealing together. Crimp with fingers or press with a fork. Use a knife or fork to poke some vent holes into the top.
  9. Bake according to pie recipe.

Notes

  • To help ensure you don’t over-mix the dough when you add the water, you can allow the crust to sit for a few minutes after you sprinkle over the 5 Tbsp of water, BEFORE mixing. Optional, but helpful.
  • Another optional, but helpful tip to ensure a tender crust: After the water has been gently mixed in, gently form dough into a ball, then flatten into a disc and wrap in plastic film. Place in refrigerator for anywhere from 10-30+ minutes, even overnight. The more time it sits the more the moisture from the water will evenly distribute throughout the dough, simultaneously allowing any gluten that formed while mixing the dough a chance to “relax”, thus creating a more tender crust.
  • While rolling out the dough, occasionally turn it OR run a thin spatula underneath the dough, to ensure it is not glueing itself to the surface you are rolling it out on. If needed, sprinkle more flour underneath.
  • To easily see if you’ve rolled the pie crust out into a large enough circle, flip your pie plate upside down and hover it over the dough. You should be able to see about 2 inches / 5cm extending beyond the edges of your pie plate in all directions.


Nutrition Facts

Calories

398.92

Fat

21.57 g

Sat. Fat

1.64 g

Carbs

44.71 g

Fiber

1.58 g

Net carbs

43.13 g

Sugar

0.16 g

Protein

6.05 g

Sodium

292.42 mg

Cholesterol

0 mg

Nutritional information is approximate. Based on 8 servings.

homemade oil pie crust recipe
Dessert, Dinner, Breakfast
American
Did you make this recipe?
Tag @jennyblogsandbakes on instagram and hashtag it #jennyblogs

New York Style Cheesecake

Happy December!

Adjustments.jpeg

Our bellies may still be lamenting the onslaught of food this past weekend, but planning for Christmas will soon be under way, if it’s not already! Actually, for it just being my husband and I (and baby!) eating a 15lb turkey, we demolished it in good time. Read, the only thing left of the turkey is some turkey broth I made from the bones.

What’s on your Christmas menu? Do you have traditional recipes or try new ones every year? A mix of both? One thing that’s not strictly traditional but I love for Christmas…is cheesecake. It just seems so rich and stately, special enough for my favorite holiday, yet not terribly difficult.

If you’re surprised by that last statement, good. This recipe’s point is to make a bakery-worthy cheesecake attainable in your own kitchen. Cheesecake shouldn’t be intimidating to make. Heed a few simple techniques and the rest is as easy as crushing graham crackers and mixing a few ingredients together.

Tips for making great cheesecake

The most difficult part, at least for me, is baking. Under bake, and it won’t set up. Over bake, and it’ll be a bit dry/crumbly, especially near the edges. It just feels wrong to turn off the oven when the cheesecake is still jiggly in the middle! But it’s supposed to be that way because it works. Trust!

My biggest piece of advice for you, don’t rush your cheesecake. While not difficult, it requires time. Shortcuts will jeopardize the final product. Your ingredients need time to come to room temperature, cheesecakes usually bake an hour or upwards, then there is the gradual cooling, and finally, the refrigeration. All essential for the best cheesecake, no cracks. Other things to remember when making cheesecakes:

  • As mentioned above, it’s important for your ingredients to be room temperature before starting. This may mean pulling out your cream cheese, sour cream, and eggs, etc. first thing in the morning. If it’s particularly cold in your home, you may need to put them near a source of heat. If it’s a holiday baking day, I might put them near the oven that’s giving off heat. You can use a microwave to soften cream cheese, but not eggs. I don’t have a microwave so must stay on top of getting my ingredients out in a timely manner. It’s also possible to stick them in a bowl of warm water to speed up the process.

  • Use full fat ingredients where possible. This is coming from a person who often cuts corners to lighten up dishes, using less sugar, milk instead of cream, and so on. But if you’re going to eat cheesecake, you might as well make it super creamy. I have often used the lower fat Neufchâtel instead of cream cheese in cheesecakes, but there IS a difference. Enough of one for once I am recommending you use the full fat. Take my word for it or try it yourself, but now you know!

  • Use a bain-marie. I’ve made many a cheesecake in my shortish life, sometimes with and sometimes without a bain-marie. A bain-marie is simply a water bath that helps the cheesecake bake evenly thus producing a creamier end product and helps prevent cracks. You might be tempted to skip this step, as I have in the past, but I’ve come to the conclusion that it really does help. A water bath alone can’t save a cheesecake that wasn’t made correctly, but it is one of the keys to a perfect cheesecake.

  • Don’t over mix! In fact, because cheesecake batter shouldn’t be beaten, it’s a good one to mix by hand.

Keeping these simple tips in mind you’re already on your merry way to a fantastic cheesecake.

We’ve all heard of it, but what exactly makes a New York Cheesecake, New York?

To simplify cheesecakes in the most general way possible, there are two kinds. Baked and unbaked. You’ll see unbaked cheesecakes pop up more in hot summer months, but I think most Americans will think of “classic” cheesecake as the baked version. Among the baked variety there are many more categories, I’ve heard of New York style, Chicago style, Pennsylvania-Dutch, Philadelphia, Swedish, Vegan, Roman, Japanese, Savory, among others. Some are made with cream cheese, farmer’s cheese, or ricotta, some are baked in springforms or squarepans. Of the baked variety, probably the most familiar by far is the New York style. And according to some, that’s the only kind that should matter.

In fact, as an American I’m so conditioned to think of cheesecake as the cream cheese based dessert, often in the guise of New York style, that when I try some of the other kinds that use different cheeses, such as ricotta or farmer’s cheese, I don’t like it as well. That’s preference, but for me there is nothing like the silky smooth texture of a cream cheese cheesecake. Here in Italy cheesecake is…weird. Often the cheesecake is more of a semi-freddo or uses ricotta and mascarpone and it’s just not the same. Maybe if it wasn’t called cheesecake I could go into it with more of an open mind. If you’re going to use ricotta, make cannoli!!

A typical cheesecake usually calls for a moderate amount of cream cheese and is  “lightened” with sour cream or heavy cream, whereas a New York style is heavy on the cream cheese, with less sour cream or heavy cream. NY style will usually call for 2lbs (32oz or four 8oz blocks; that’s roughly 900g) of cream cheese, has a graham cracker crust, and maybe just a touch of lemon juice or vanilla extract for flavor, nothing more. The density and richness of the cheesecake speaks for itself and needs no more extra fluff. The original recipe used at The Cheesecake Factory uses the iconic sour cream topping. The first time I ever made a cheesecake with a sour cream topping I thought that was the weirdest thing, but it’s so good. You can choose to make a sour cream topping, use a fruit topping, dust with powdered sugar, or just leave your cheesecake plain, as you can see I did in these photos. It might have looked more picture perfect with a topping but I honestly love how it looks with its golden and crackless top.

And that’s it. New York style cheesecake is just a richer, denser, no frills cheesecake. And when done well, as I hope you’ll agree with me this recipe does, it needs nothing else.

This post may contain affiliate links. If you make a purchase using these links, Jennyblogs may receive a small commission, at no extra cost to you. This helps to support Jennyblogs. For further information see the privacy policy. Grazie!

Recipe adapted from Butternut Bakery


New York Style Cheesecake

Serves 12-16

Adjustments.jpeg

Ingredients:

For the Graham Cracker Crust

  • 12 sheets / 170g graham crackers

  • 1/3 cup / 66g sugar

  • 1/2 cup / 113g butter, melted

  • 1/2 tsp cinnamon, optional

  • 1/8 tsp salt

For the Filling

  • 32oz / 900g cream cheese, room temperature

  • 1 1/2 cups / 300g sugar

  • 3 Tbsp / 23g cornstarch

  • 4 eggs + 1 egg yolk

  • 2 tsp / 10g vanilla extract

  • 2 tsp / 10g lemon juice

  • 1 cup / 245g sour cream, room temperature

Directions:

Make the Graham Cracker Crust

Oven preheated to 350°F / 177°C. Lightly grease a 9in / 23cm springform pan. Line the sides by cutting two or three strips of parchment paper that are a little bit wider than the springform sides are tall, about 5in / 13cm, and wrap them around the inside of the springform. The parchment paper should rise up a little higher than the sides.

  1. Finely crush graham crackers with a rolling pin or in a food processor. Add sugar, butter, cinnamon, and salt to the graham cracker crumbs in a large bowl or pulse in the processor until graham cracker crumbs are evenly moistened, like wet sand.

  2. Press mixture evenly and firmly into the bottom and up the sides of the springform pan, reaching almost to the top.

  3. Bake in preheated oven for 10 minutes; remove and let cool.

Make the Filling

Reduce oven temperature to 305°F / 152°C. Place one oven rack in the middle and the second below it. Place a large baking dish on the bottom rack. Bring a quart or so of water to boil while you make the cheesecake filling.

  1. In a large bowl combine cream cheese, sugar, and cornstarch with a rubber spatula. The mixture should be smooth.

  2. Add eggs and yolk one at a time, mixing well after each addition.

  3. Add vanilla and lemon juice, mixing until smooth.

  4. Add sour cream, mixing just until combined.

  5. Pour filling over cooled crust, gently tap pan on counter to encourage any air bubbles to come up.

  6. Place cheesecake in oven on the middle rack and pour the boiling water into the baking pan on the rack below. Bake for about 1 hour 40 minutes or until 1-2in / 2.5-5cm of the edges of the cheesecake are set and the center is still jiggly when lightly shaken.

  7. Turn off the oven and crack the oven door, leaving the cheesecake inside for 1 hour.

  8. Remove cheesecake from oven and let cool the rest of the way. Once cool, cover cheesecake and refrigerate for 8 hours or overnight.

  9. Remove sides of springform, top cheesecake if so desired, and serve!

Adjustments.jpg

Jenny’s Notes:

  • When pressing the graham cracker mixture into the springform pay special attention that the corners don’t get too thick.

  • It might seem unusual to mix a cheesecake by hand, but it’s the simplest and safest way to ensure you’re not incorporating excess air into the batter. You can use a stand mixer or hand held mixer, but only use the lowest speed. While it’s important for the cheesecake batter to be well combined and smooth, too much air that inevitably gets incorporated when over beaten can lead to the cheesecake cracking.

  • Most often cheesecake recipes call to place the cheesecake IN the bain-marie, but this recipe has you place the cheesecake on the rack ABOVE the bain-marie, so they’re not touching. Why? It’s easier and it works! If you however wish to place the cheesecake in the water bath (if your oven only has one rack or any other reason) first wrap the outside of your springform in tinfoil to keep the water out.

New York Style Cheesecake
Yield 12-16 Servings
Author
Prep time
45 Min
Cook time
1 H & 40 M
Inactive time
9 Hour
Total time
11 H & 25 M

New York Style Cheesecake

Classic New York Cheesecake is rich, dense, slightly tangy and oh so creamy.
Cook modePrevent screen from turning off

Ingredients

For the Graham Cracker Crust
For the Filling

Instructions

Make the Graham Cracker Crust
  1. Oven preheated to 350°F / 177°C. Lightly grease a 9in / 23cm springform pan. Line the sides by cutting two or three strips of parchment paper that are a little bit wider than the springform sides are tall, about 5in / 13cm, and wrap them around the inside of the springform. The parchment paper should rise up a little higher than the sides.
  2. Finely crush graham crackers with a rolling pin or in a food processor. Add sugar, butter, cinnamon, and salt to the graham cracker crumbs in a large bowl or pulse in the processor until graham cracker crumbs are evenly moistened, like wet sand.
  3. Press mixture evenly and firmly into the bottom and up the sides of the springform pan, reaching almost to the top.
  4. Bake in preheated oven for 10 minutes; remove and let cool.
Make the Filling
  1. Reduce oven temperature to 305°F / 152°C. Place one oven rack in the middle and the second below it. Place a large baking dish on the bottom rack. Bring a quart or so of water to boil while you make the cheesecake filling.
  2. In a large bowl combine cream cheese, sugar, and cornstarch with a rubber spatula. The mixture should be smooth.
  3. Add eggs and yolk one at a time, mixing well after each addition.
  4. Add vanilla and lemon juice, mixing until smooth.
  5. Add sour cream, mixing just until combined.
  6. Pour filling over cooled crust, gently tap pan on counter to encourage any air bubbles to come up.
  7. Place cheesecake in oven on the middle rack and pour the boiling water into the baking pan on the rack below. Bake for about 1 hour 40 minutes or until 1-2in / 2.5-5cm of the edges of the cheesecake are set and the center is still jiggly when lightly shaken.
  8. Turn off the oven and crack the oven door, leaving the cheesecake inside for 1 hour.
  9. Remove cheesecake from oven and let cool the rest of the way. Once cool, cover cheesecake and refrigerate for 8 hours or overnight.
  10. Remove sides of springform, top cheesecake if so desired, and serve!

Notes

  • Room temperature ingredients are essential for making a cheesecake correctly!
  • While I'm for lightening up recipes to make them healthier, cheesecake is one area I fully endorse using full-fat ingredients!
  • When pressing the graham cracker mixture into the springform pay special attention that the corners don’t get too thick.
  • It might seem unusual to mix a cheesecake by hand, but it’s the simplest and safest way to ensure you’re not incorporating excess air into the batter. You can use a stand mixer or hand held mixer, but only use the lowest speed. While it’s important for the cheesecake batter to be well combined and smooth, too much air that inevitably gets incorporated when over beaten can lead to the cheesecake cracking.
  • Most often cheesecake recipes call to place the cheesecake IN the bain-marie, but this recipe has you place the cheesecake on the rack ABOVE the bain-marie, so they’re not touching. Why? It’s easier and it works! If you however wish to place the cheesecake in the water bath (if your oven only has one rack or any other reason) first wrap the outside of your springform in tinfoil to keep the water out.


Nutrition Facts

Calories

591.48

Fat

40.97 g

Sat. Fat

22.97 g

Carbs

49.39 g

Fiber

0.59 g

Net carbs

48.80 g

Sugar

37.88 g

Protein

8.53 g

Cholesterol

185.41 mg

Sodium

396.34 mg

Nutritional information is approximate. Based on 12 servings.

NY style cheesecake, new york cheesecake, best cheesecake, cheesecake troubleshooting,
dessert, cheesecake
American
Did you make this recipe?
Tag @jennyblogsandbakes on instagram and hashtag it #jennyblogs

Basic Butter Pie Crust

IMG_4560.jpg

Last updated June 24, 2024

Everybody needs a basic butter pie crust. A recipe that’s easy to make, reliable, and goes with all your baking ideas. Oh, and dinner too! Dinner is important.

Like last night. I decided I wanted to make a quiche for dinner, and it was SO nice to be able to pull up this recipe and be able to whip it out, knowing it would turn out, not shrink, and be flaky but sturdy enough to hold a whopping load of eggs, milk, and veggies.

This crust is your easy buttery friend. If you bake things that need crusts a lot, like quiche, pies, pot pies, homemade poptarts, etc. you’ll have this recipe memorized in no time and can whip it up on command!

I like butter because it tastes the best and is the healthier option when looking at lard and shortening. My mom always uses oil, but oil makes for a finicky and tough crust if you don’t handle it just so. For all the tricks to make a tender, melt-in-your-mouth, oil pie crust, here’s my family’s recipe I’ve spun into a fool-proof recipe!

This butter crust is only flour, salt, butter, and water. If you’ve been burned by crusts in the past (or you’ve burned them, heheh) because they shrink, fall apart, or are tough, despair not, my friend! I think we’ve all been there, maybe on repeat and it can be very frustrating. Along with the recipe I’m also going to share with you all the tips and tricks I’ve learned to get a fool-proof pie crust every time!

Plan Ahead

If you normally eat dinner at 6:30pm and it’s now 6:21pm, I’m sorry but your pie crust will be compromised. Pie crusts need time if they’re going to be the flaky, tasty, shapely vessels for filling that we want them to be!

For this crust you need about 1 hour minimum, plus more if you need to blind-bake it.

It can be made up to 2-3 days ahead of time and kept in the fridge. It also freezes beautifully. Either way, you can store it as a block of dough or even already prepared in the pie dish.

Tips for a Flaky Crust

  • What brand and what kind of flour you use DOES matter. While all-purpose flour is generally all-purpose, it’s helpful to know what the protein content is of the flour that you’re using. For  pie  crusts and other delicate baked goods, you may want to get some pastry flour for the best results.

    For awhile my mom and I were using Good & Gather’s organic all-purpose flour. Gradually, we both noticed our baked goods weren’t turning out like they used to. We kept chalking it up to bad baking days, or this or that. We finally came to the conclusion that the Good & Gather flour was always the common denominator in things turning out…with unusual results. We switched to King Arthur flours and all our recipes suddenly started turning out wonderfully.

    Until the next few  crusts we made. A little crusty. Tough. Then we realized, that’s because King Arthur’s all-purpose flour has a protein content of 11.7%. Some might say, a medium-strength  bread flour. Bread flour’s have a higher protein content, which helps to develop gluten for  bread. This is why bread’s are kneaded, to help develop that gluten. But you do NOT want gluten developing in a  pie  crust, which is why you mix minimally and use a low-protein flour. All-purpose flours are generally seen as well, all-purpose. High enough protein content to make decent breads, low enough to be able to still make cakes, cookies, etc. With King Arthur’s all-purpose flour having a higher than average protein content, this is why our  crusts were turning out tough. For this reason, we now like to use Bob’s Red Mill pastry flour specifically for our  pie crusts and those desserts of the most delicate nature.

  • When cutting up the cold butter, the chunks don’t have to be super small. 1/2” chunks are great, and try to keep them all the same size so smaller chunks don’t melt while you’re still squishing the bigger chunks.

  • When crumbling the butter, less is always more. You may be tempted to really integrate the butter, but this is more likely to cause the butter to melt and result in a tough crust. Leave chunks of butter, really, it’ll turn out great!

  • Make sure your butter is cold and stays cold while you’re making the dough. If your house is warm or even hot like my house in the summertime, then you will probably need to stick your butter back in the fridge or freezer after you cut it into small pieces. If you do this first, you can then weigh your flour, salt, and prepare your ice water while it’s chilling.

  • If your cold butter softens up too much while crumbling it into the flour mixture, it’s best to stick it back into the fridge/freezer for a few minutes before adding the ice water.

  • Another note on the ice water, you can also just stick some water in the freezer, but this requires a bit of planning so it’s cold enough when you go to make the crust. I often do this because I have only one ice tray and don’t always have ice ready…especially in the summer. Sometimes an iced beverage takes preference over a crust, haha.

How to Avoid a Shrinking Crust

If your crust is shrinking, most likely it didn’t rest long enough in the fridge. While you are mixing the dough it is inevitable that a bit of gluten builds up, which is a very elastic-like substance. This is good when making bread, bad when making flaky pie crust. The dough needs to rest so that the gluten strands have time to relax. If the gluten strands didn’t have adequate time to relax they will shrink back on themselves, hence the shrinking crust.

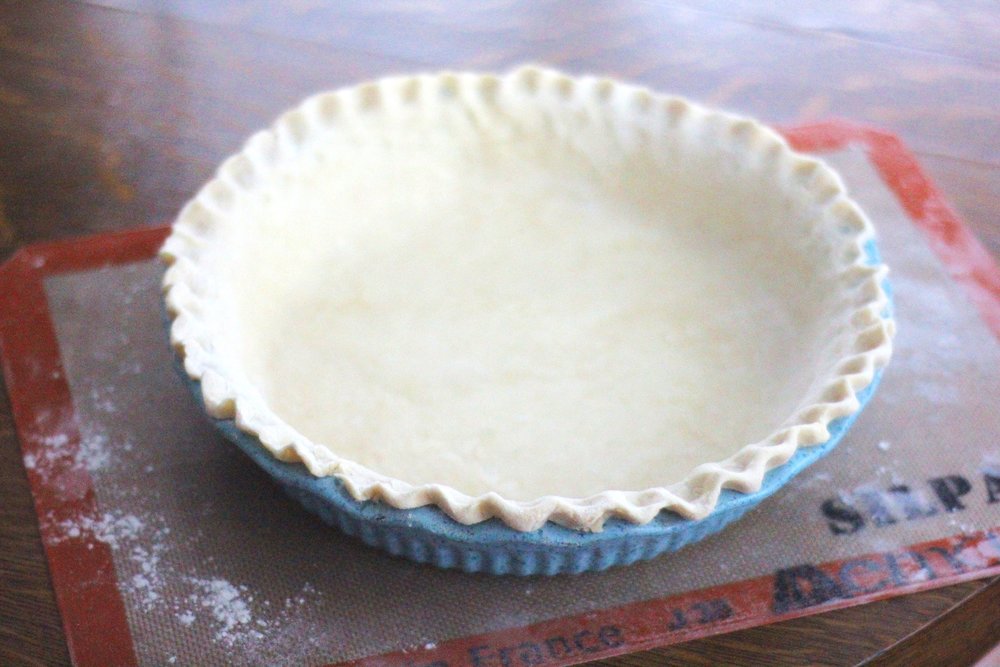
If your crust is still shrinking, try to use a ceramic or metal pie dish instead of slippery glass. I LOVE my Emile Henry ceramic pie dish. French baking ware like Emile Henry and Le Creuset are pricey but so worth it!

You can also try using pie weights if you are blind-baking, or dry beans if you have those on hand. Simply line the inside of your prepared crust with parchment paper and add the pie weights or dry beans. Bake as directed.

Still shrinking? Bake at low temperatures, like 325°F - 350°F / 163°C - 177°C.

Freeze the prepared crust for at least one hour or even overnight.

Make sure your crust reaches high enough that it rests on the lip of the pie dish, not beyond or too short, but just resting on the edge. It also helps to cut off the extra pie crust while leaving an overhang of about 1/2” all the way around. Tuck this overhang under and crimp the edge, or use a fork. The thicker crust edge not only gives you more to work with while crimping, it is also less likely to shrink down.

This post may contain affiliate links. If you make a purchase using these links, Jennyblogs may receive a small commission, at no extra cost to you. This helps to support Jennyblogs. Where possible, links are prioritized to small businesses, and American companies and products made in the USA for American readers. For further information see the privacy policy. Grazie!


Basic Butter Pie Crust

Makes 1 bottom pie crust. For a bottom and top crust, double this recipe.

Ingredients:

IMG_4558.JPG
  • 1 1/3 cup / 160g all-purpose flour

  • 1/2 tsp / 2.5g salt

  • 4 Tbsp / 56g butter, cold, cut into equally-sized 1/2” chunks

  • 4-6 Tbsp / 59 - 89g ice water

Directions:

Oven 425°F / 220°C. Ungreased 8 - 9in / 20 - 23cm pie dish.

  1. In a medium bowl whisk together flour and salt.  Blend in cold butter using a pastry cutter, fork, or your hands.  You want the butter to end up in pieces, no smaller than peas. 

  2. Add the ice water, starting with 4 Tbsp / 59g, mixing as little as possible.  The dough should be able to hold together in a ball, without being too dry or too wet, but still a bit shaggy looking.  Add more water if necessary, 1 tablespoon at a time.  

  3. Place dough on a piece of plastic wrap, shape into a disc, and wrap tightly.  Place in fridge for 1 - 48 hours.  

  4. After the crust has rested, roll into a circle on a lightly floured surface or silpat.  Roll a few times with your rolling pin in one direction before turning the crust 45° (quarter turn) and continuing with a few more rolls.  Periodically check under the crust to make sure it isn’t sticking and sprinkling more flour if needed. Continue like this until your crust is nicely round and roughly 2in / 5cm larger than your pie dish.

  5. Carefully transfer crust to pie dish (this is easier if using a silpat), trim the excess overhang to within about 1/2” of the edge of pie dish if necessary, and fold the ends under. Crimp as desired, or press with a fork.  Prick the bottom of the crust with a fork.  The crust can also be refrigerated or even frozen at this point, if needed.  

  6. If blind baking, bake in preheated oven for 10-12 minutes, or until crust is lightly golden-brown.  Cool completely.  Otherwise fill and proceed according to your recipe.


Jenny’s Notes:

  • You can also use a food processor, pulsing in the butter until it has the desired consistency.  Just be sure to remove the dough from the food processor and mix in the water with a fork or pastry cutter so you don't overwork the dough.  You want to work it as little as possible once you add the water. The liquid helps to awaken the gluten, and the more you work it and the gluten strands develop, the tougher your crust will be.  The minimum of 1 hour rest in the fridge allows what gluten inevitably developed to relax.  

  • If you are having problems with a shrinking crust, try using a metal or ceramic pie dish and allowing the crust more time to rest before baking.  You can also try using pie weights and baking at a lower temperature.

  • I have made this pie several times over the past year, and have always needed all 6 tablespoons of water, possibly because it was always during the dry winter.  If you live in a really dry climate, you might need up to 7.  Just be aware, an overly wet crust is more likely to glue itself to the pan during baking.   

Basic Butter Pie Crust
Yield 8 Servings
Author
Prep time
15 Min
Inactive time
1 Hour
Total time
1 H & 15 M

Basic Butter Pie Crust

An everyday all-butter pie crust that is easy, flaky, reliable, and can be made ahead. Great for all your pie crust needs.

Ingredients

Instructions

  1. Oven 425°F / 220°C. Ungreased 8 - 9in / 20 - 23cm pie dish.
  2. In a medium bowl whisk together flour and salt. Blend in cold butter using a pastry cutter, fork, or your hands. You want the butter to end up in pieces, no smaller than peas.
  3. Add the ice water, starting with 4 Tbsp / 59g, mixing as little as possible. The dough should be able to hold together in a ball, without being too dry or too wet, but still a bit shaggy looking. Add more water if necessary, 1 tablespoon at a time.
  4. Place dough on a piece of plastic wrap, shape into a disc, and wrap tightly. Place in fridge for 1 - 48 hours.
  5. After the crust has rested, roll into a circle on a lightly floured surface or silpat. Roll a few times with your rolling pin in one direction before turning the crust 45° (quarter turn) and continuing with a few more rolls. Periodically check under the crust to make sure it isn’t sticking and sprinkling more flour if needed. Continue like this until your crust is nicely round and roughly 2in / 5cm larger than your pie dish.
  6. Carefully transfer crust to pie dish (this is easier if using a silpat), trim the excess overhang to within about 1/2” of the edge of pie dish if necessary, and fold the ends under. Crimp as desired, or press with a fork. Prick the bottom of the crust with a fork. The crust can also be refrigerated or even frozen at this point, if needed.
  7. If blind baking, bake in preheated oven for 10-12 minutes, or until crust is lightly golden-brown. Cool completely. Otherwise fill and proceed according to your recipe.

Notes

You can also use a food processor, pulsing in the butter until it has the desired consistency. Just be sure to remove the dough from the food processor and mix in the water with a fork or pastry cutter so you don't overwork the dough. You want to work it as little as possible once you add the water. The liquid helps to awaken the gluten, and the more you work it and the gluten strands develop, the tougher your crust will be. The minimum of 1 hour rest in the fridge allows what gluten inevitably developed to relax. If you are having problems with a shrinking crust, try using a metal or ceramic pie dish and allowing the crust more time to rest before baking. You can also try using pie weights and baking at a lower temperature. I have made this pie several times over the past year, and have always needed all 6 tablespoons of water, possibly because it was always during the dry winter. If you live in a really dry climate, you might need up to 7. Just be aware, an overly wet crust is more likely to glue itself to the pan during baking.

Nutrition Facts

Calories

122.99

Fat

5.87 g

Sat. Fat

3.63 g

Carbs

15.27 g

Fiber

0.54 g

Net carbs

14.73 g

Sugar

0.06 g

Protein

2.13 g

Sodium

192.78 mg

Cholesterol

15.05 mg

Nutritional information is approximate and based on 8 servings.

easy crust, best crust recipe, all-butter crust, pie crust, crust for quiche, flaky crust, tender crust, butter
dessert, dinner
American
Did you make this recipe?
Tag @jennyblogsandbakes on instagram and hashtag it #jennyblogs
IMG_4555.JPG

Classic Rhubarb Custard Pie

IMG_1860.jpg

Last updated July 31, 2024

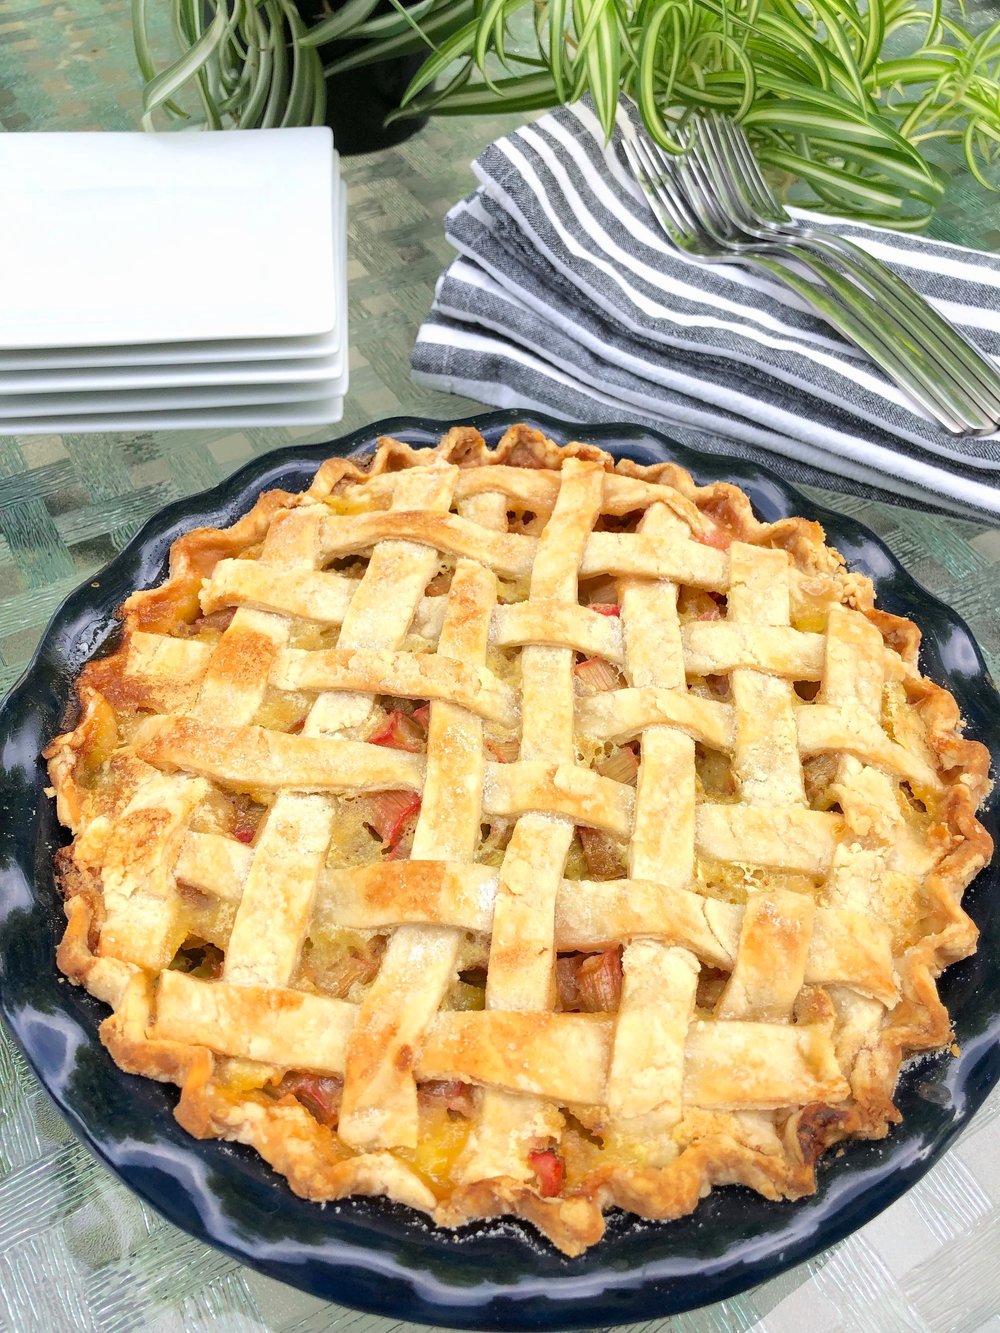
Nothings says summer like a rhubarb pie. Better yet, a rhubarb CUSTARD pie.

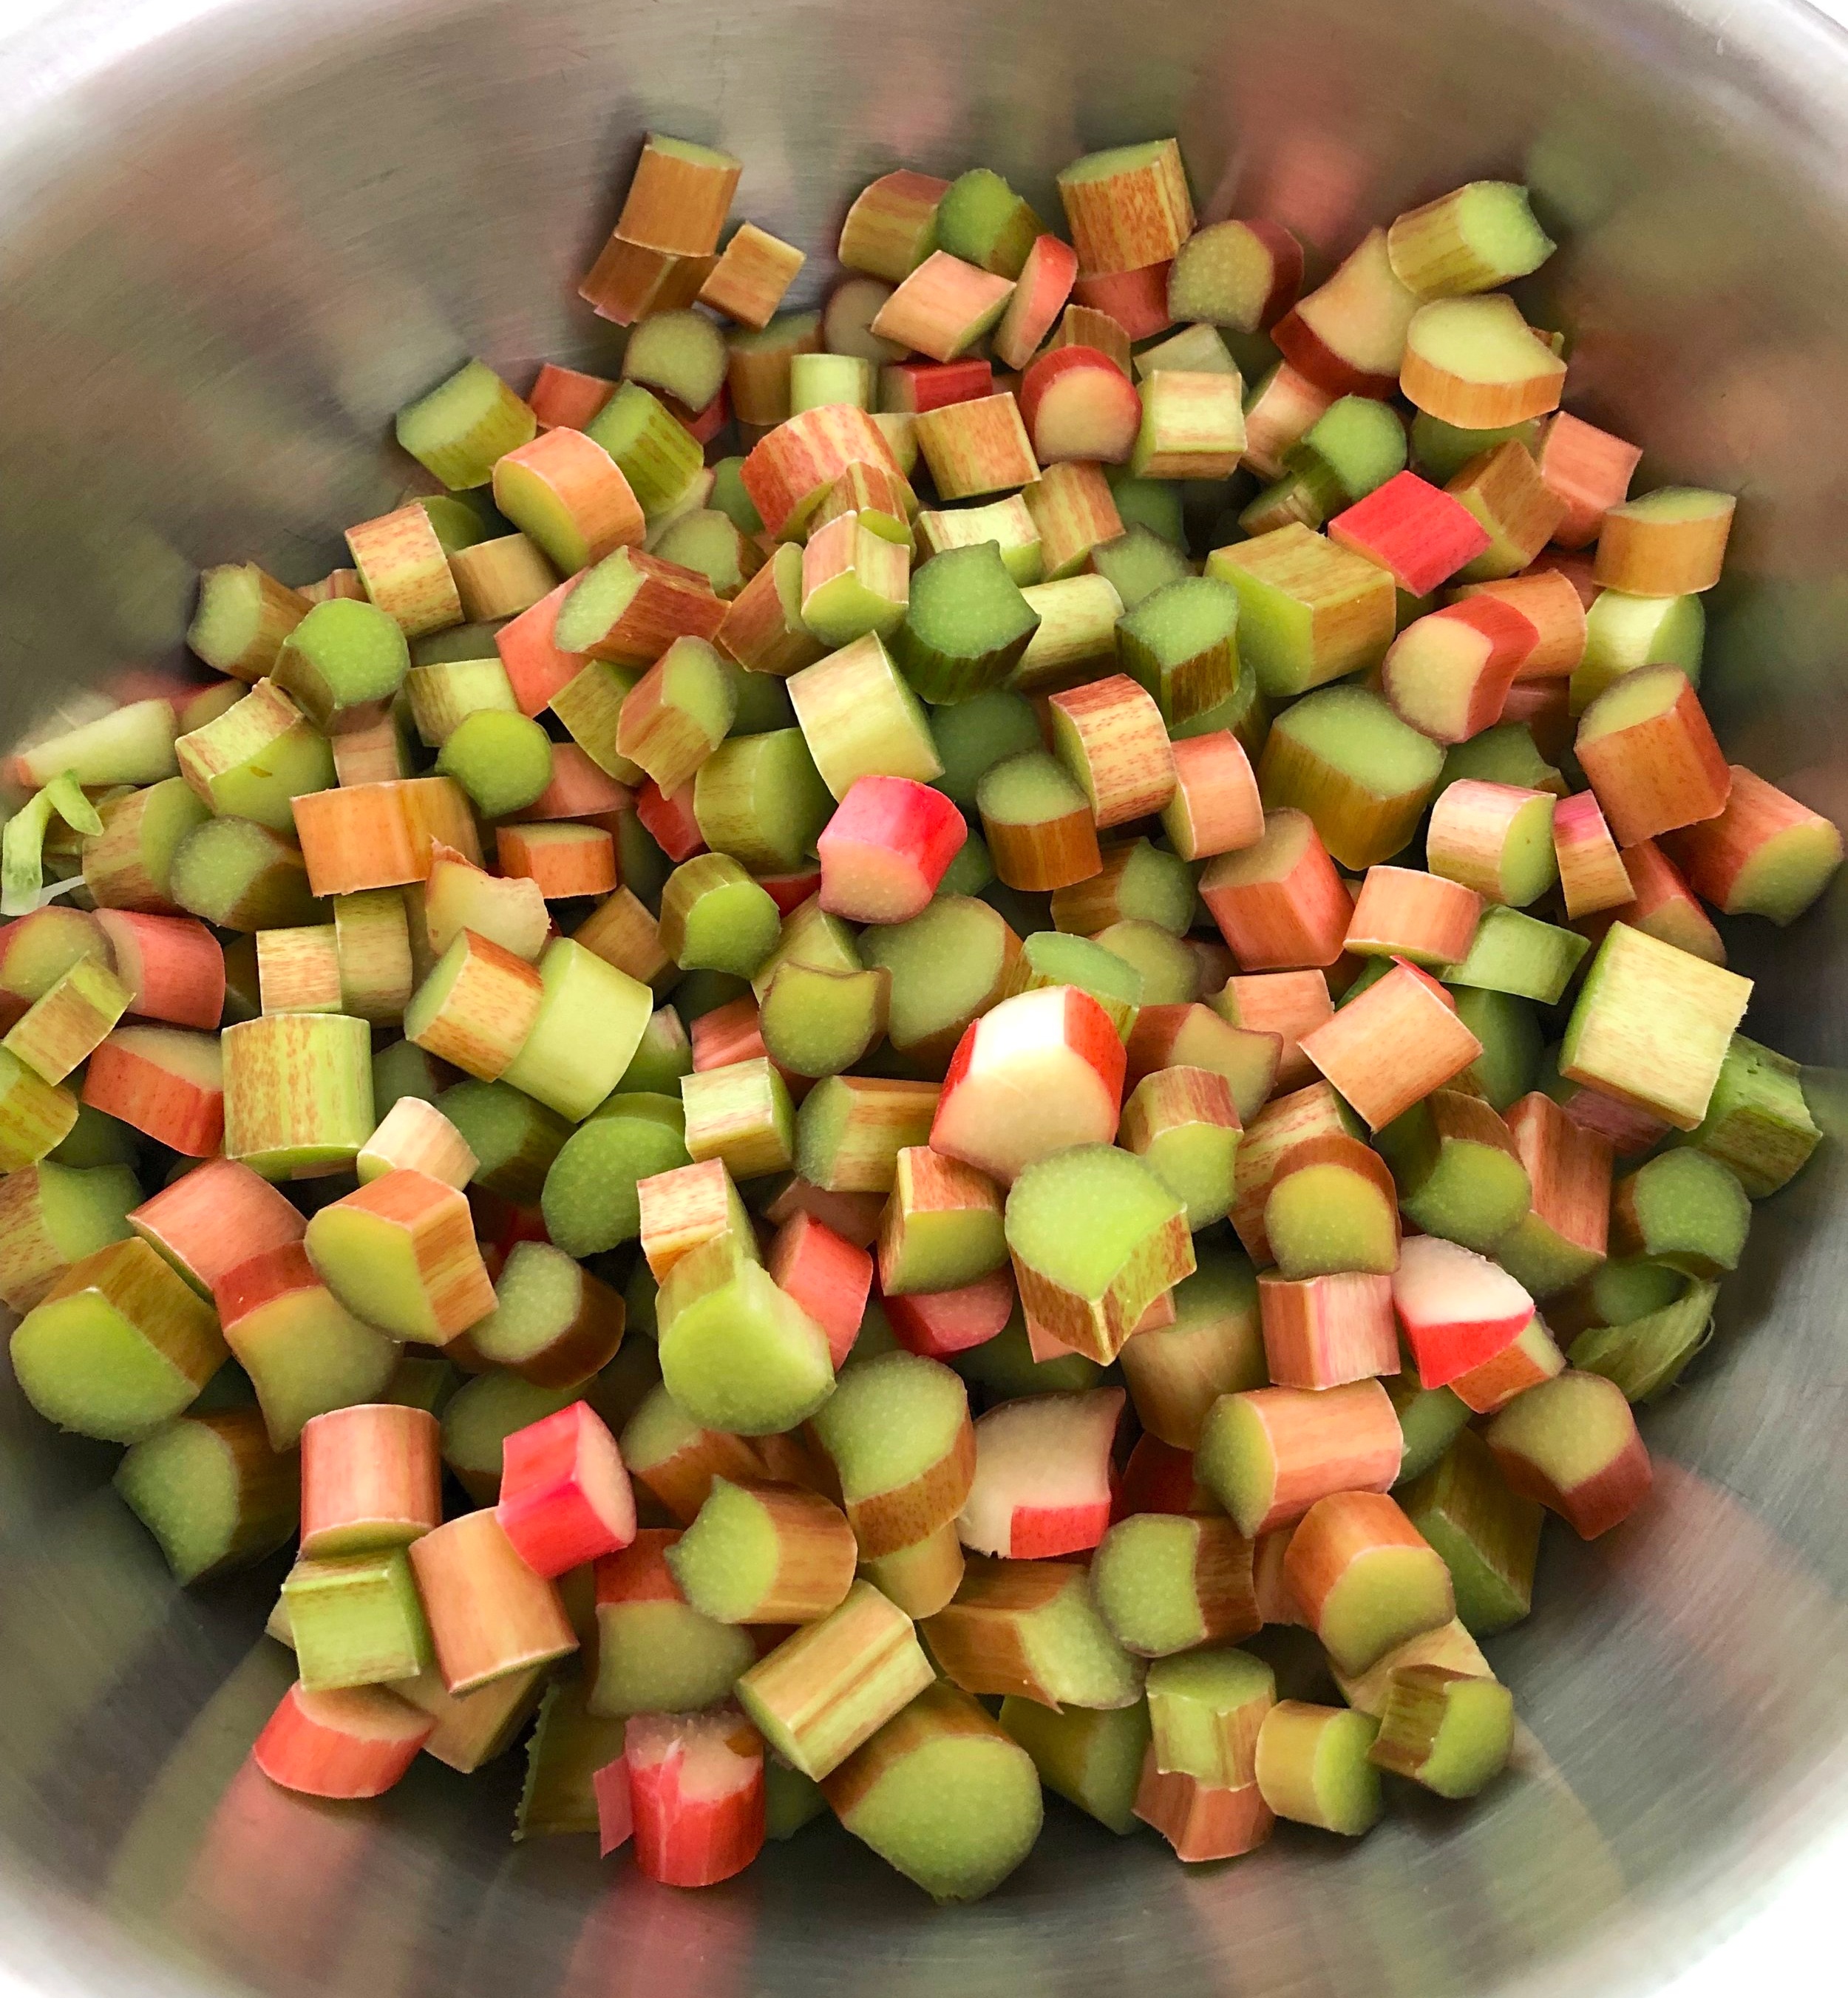
Rhubarb is always one of the first garden plants to grow each spring in Michigan, announcing that after a long, cold winter summer is indeed coming and didn’t get lost along the way after all. Rhubarb likes to grow so extensively in its short season that you don’t know what to do with all of it, until it withers in the approach of hotter weather and leaves you already looking forward to next year’s crop. Unless, of course, you planned ahead and froze some. But frozen rhubarb will never be like fresh, so make all the pie and hand pie, crisp, cake, syrup, and camel hair soup you can! I mean, er, rhubarb sauce…not camel hair soup. Hehe, who’d call it that??

IMG_1835.jpg

Do you want to know something really sad? I’ve never seen rhubarb in Italy, at least not in Florence. So for my international friends, I’m sorry if your area fails you and doesn’t grow rhubarb so you aren’t able to make this recipe. If there is rhubarb in Florence though, someone please tell me where to find it? So far everyone I’ve asked just said, “…what’s that?” This just goes to show my ignorance. Before moving to Italy I was trying to bake with all of the ingredients that aren’t readily available here, or at least what I figured wouldn’t be readily available. I should have been in a baking frenzy with rhubarb instead of things like Oreos. Because, no rhubarb and Oreos everywhere. There are even Oreo donuts in the grocery store bakery section…I’ve come so close to trying them during various weak moments.

Wherever you are in the world, be sure to bake or eat a rhubarb pie at the next chance. You won’t regret it and might inspire you to move to a part of the world where rhubarb is grown.

This recipe is the old-fashioned classic from my mama. The crust is one of my favorite traditional pie crust recipes, simple and can be made ahead of time if needed. It uses butter instead of shortening, which in my mind is a bit of a compromise between shortening or lard (which most people and bakeries use to make tender and flaky crusts but it’s also horrendous for your health and has no taste if it’s not artificially flavored.) and oil, which my mom has always used because oil can actually be good for you, although it makes for the trickiest to handle and often um, hardier pie crusts. So I use butter, which tastes wonderful and makes the crust easy enough to work with, even if it’s not as healthy as oil.

This post may contain affiliate links. If you make a purchase using these links, Jennyblogs may receive a small commission, at no extra cost to you. This helps to support Jennyblogs. Where possible, links are prioritized to mall businesses and ethically and responsibly made items. For further information see the privacy policy. Grazie!

Recipe from my Mama


Classic Rhubarb Custard Pie

Makes one 9in / 23cm pie, about 8 servings

Ingredients:

For the Crust

For the Rhubarb Custard Filling

  • 3 eggs

  • 3 Tbsp / 45g milk

  • 1 1/2 cups / 300g granulated sugar

  • 1/4 cup / 30g all-purpose flour

  • 3/4 tsp nutmeg

  • 4 cups fresh rhubarb, sliced into 1/2in / 1cm chunks

Directions:

Oven 400°F / 205°C. 8 or 9 inch pie dish. 

Make the Crust

IMG_4560.jpg
  1. Prepare pie crust per recipe instructions, refrigerate until needed.

Make the Rhubarb Custard Filling

  1. Blend eggs and milk together in a large bowl.

  2. Add the flour and nutmeg to the sugar then add to the egg mixture and beat well.

  3. Add in the rhubarb and mix to coat well.

  4. Pour into prepared pie crust and add top crust.

    For a classic top pie crust, place crust on top, cut off overhang, and crimp together the edges of the top and bottom crust to seal.

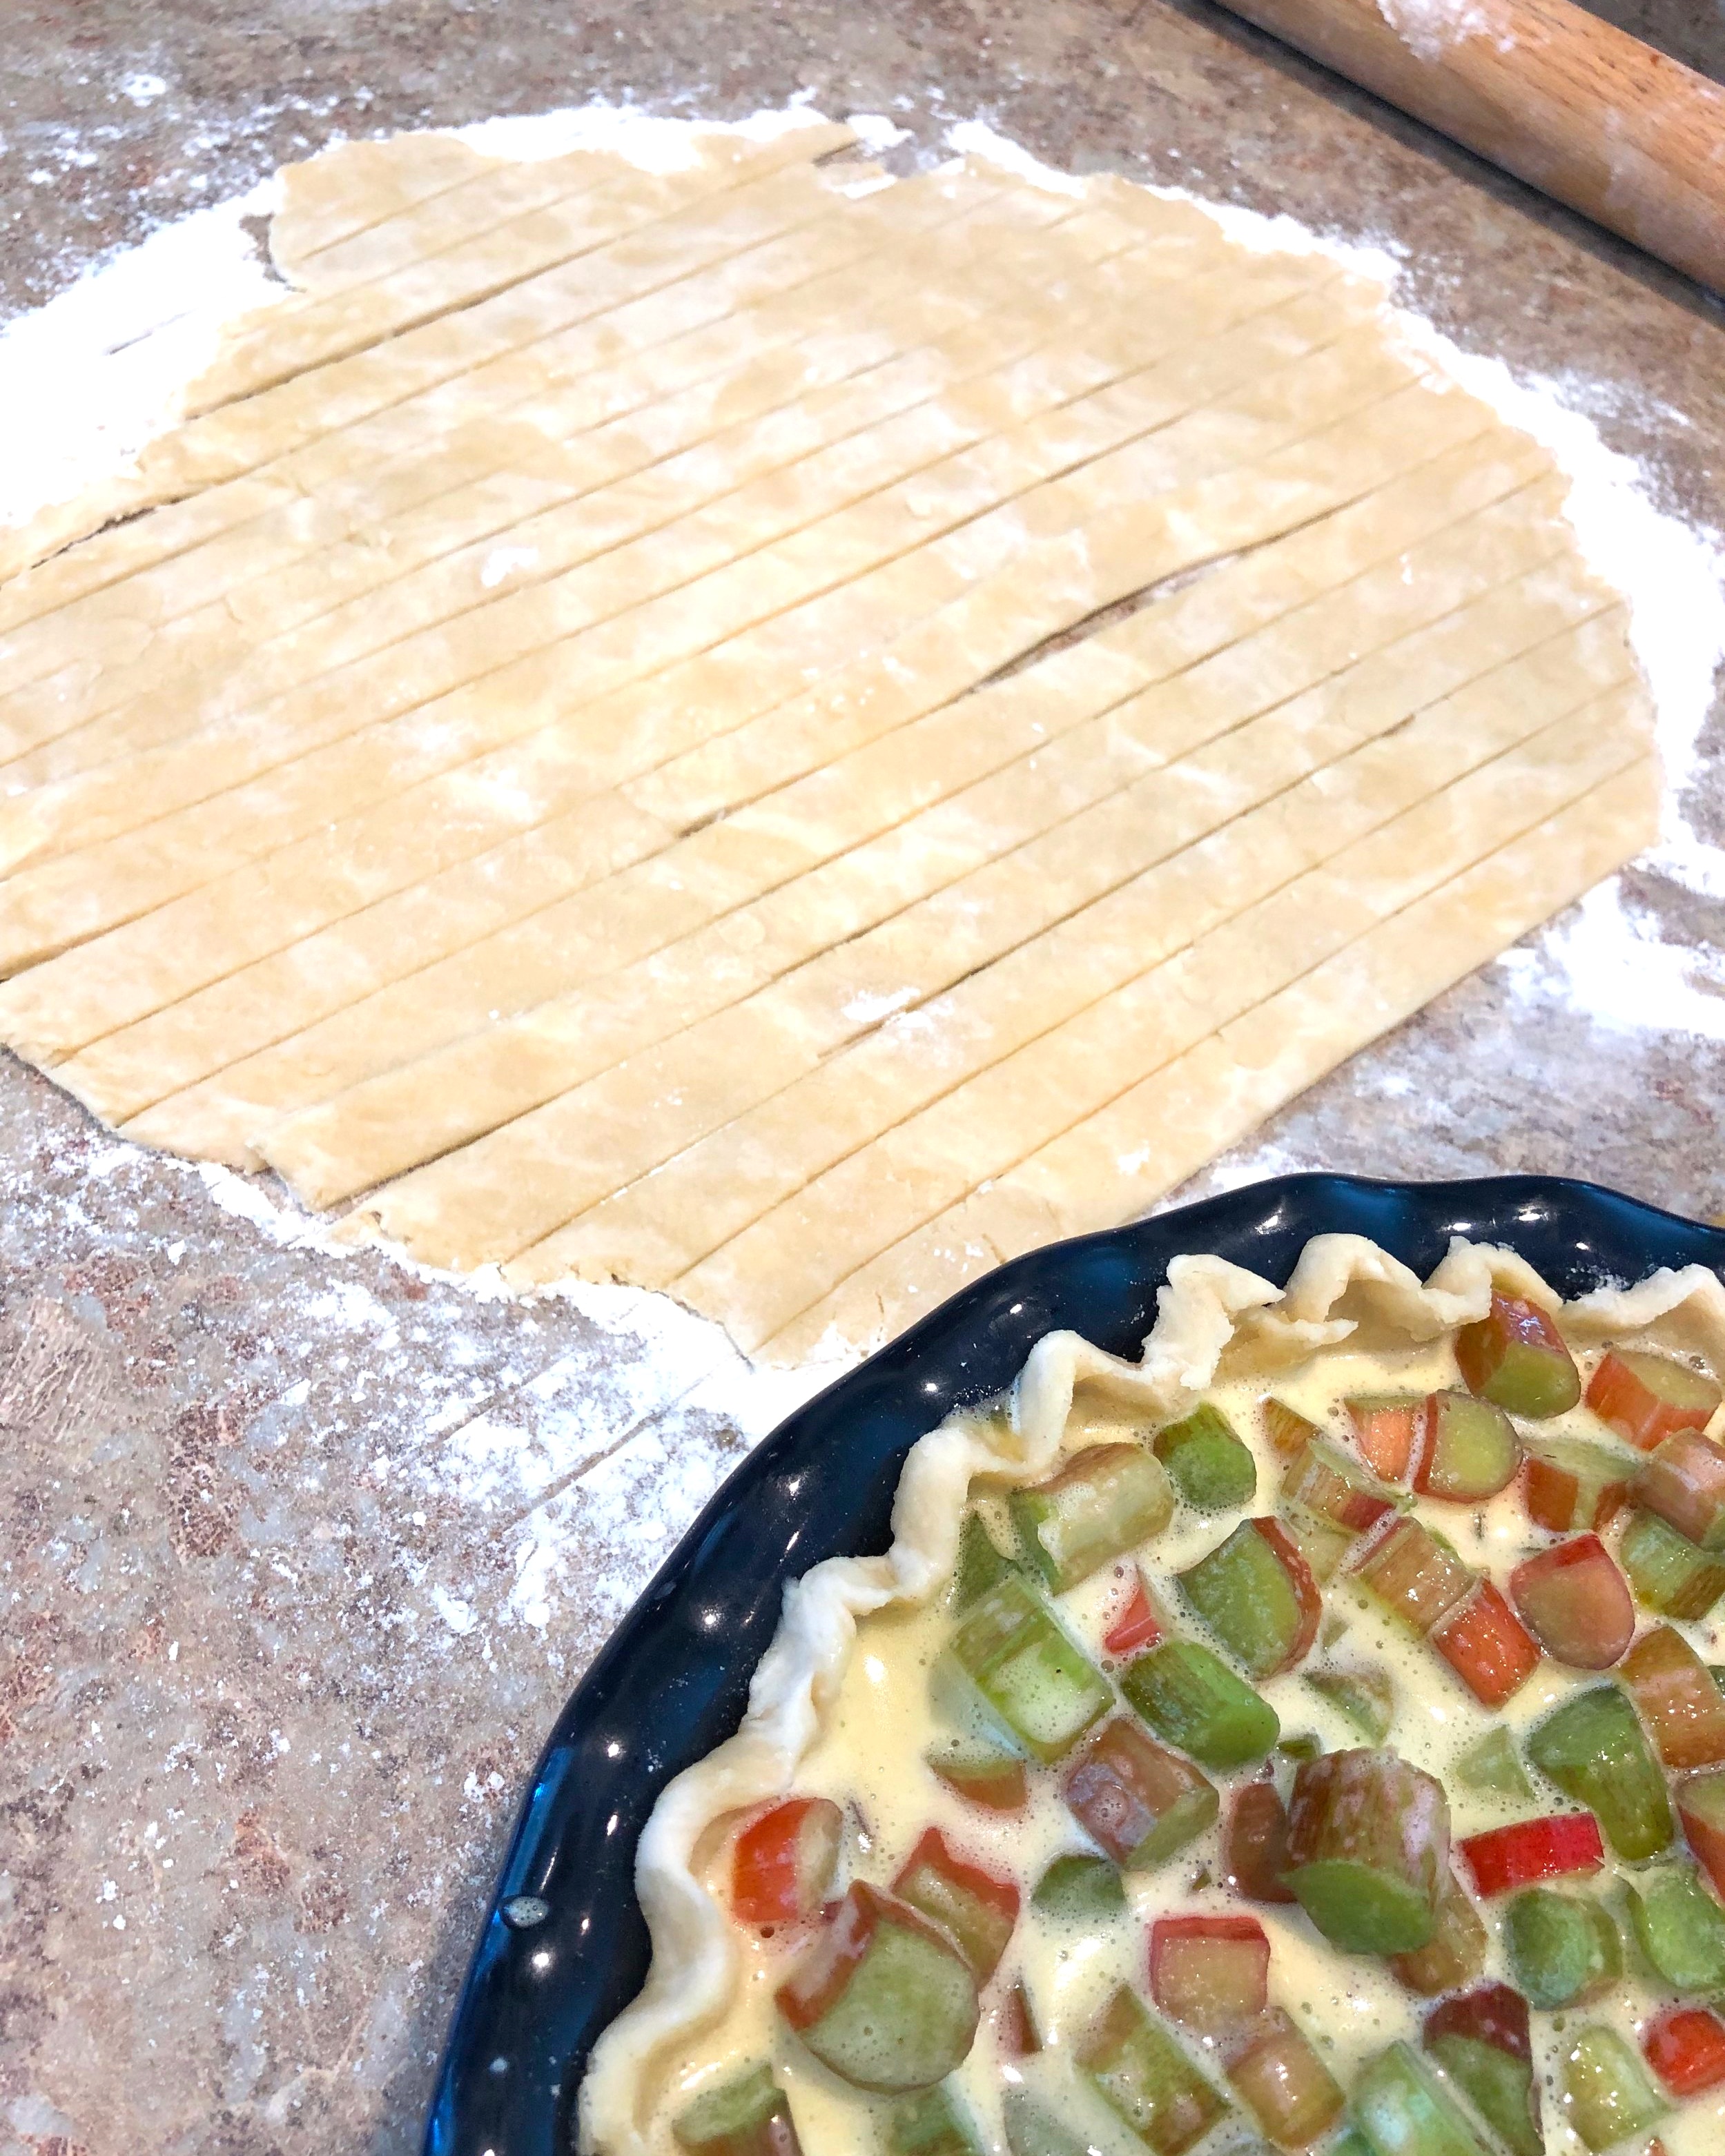
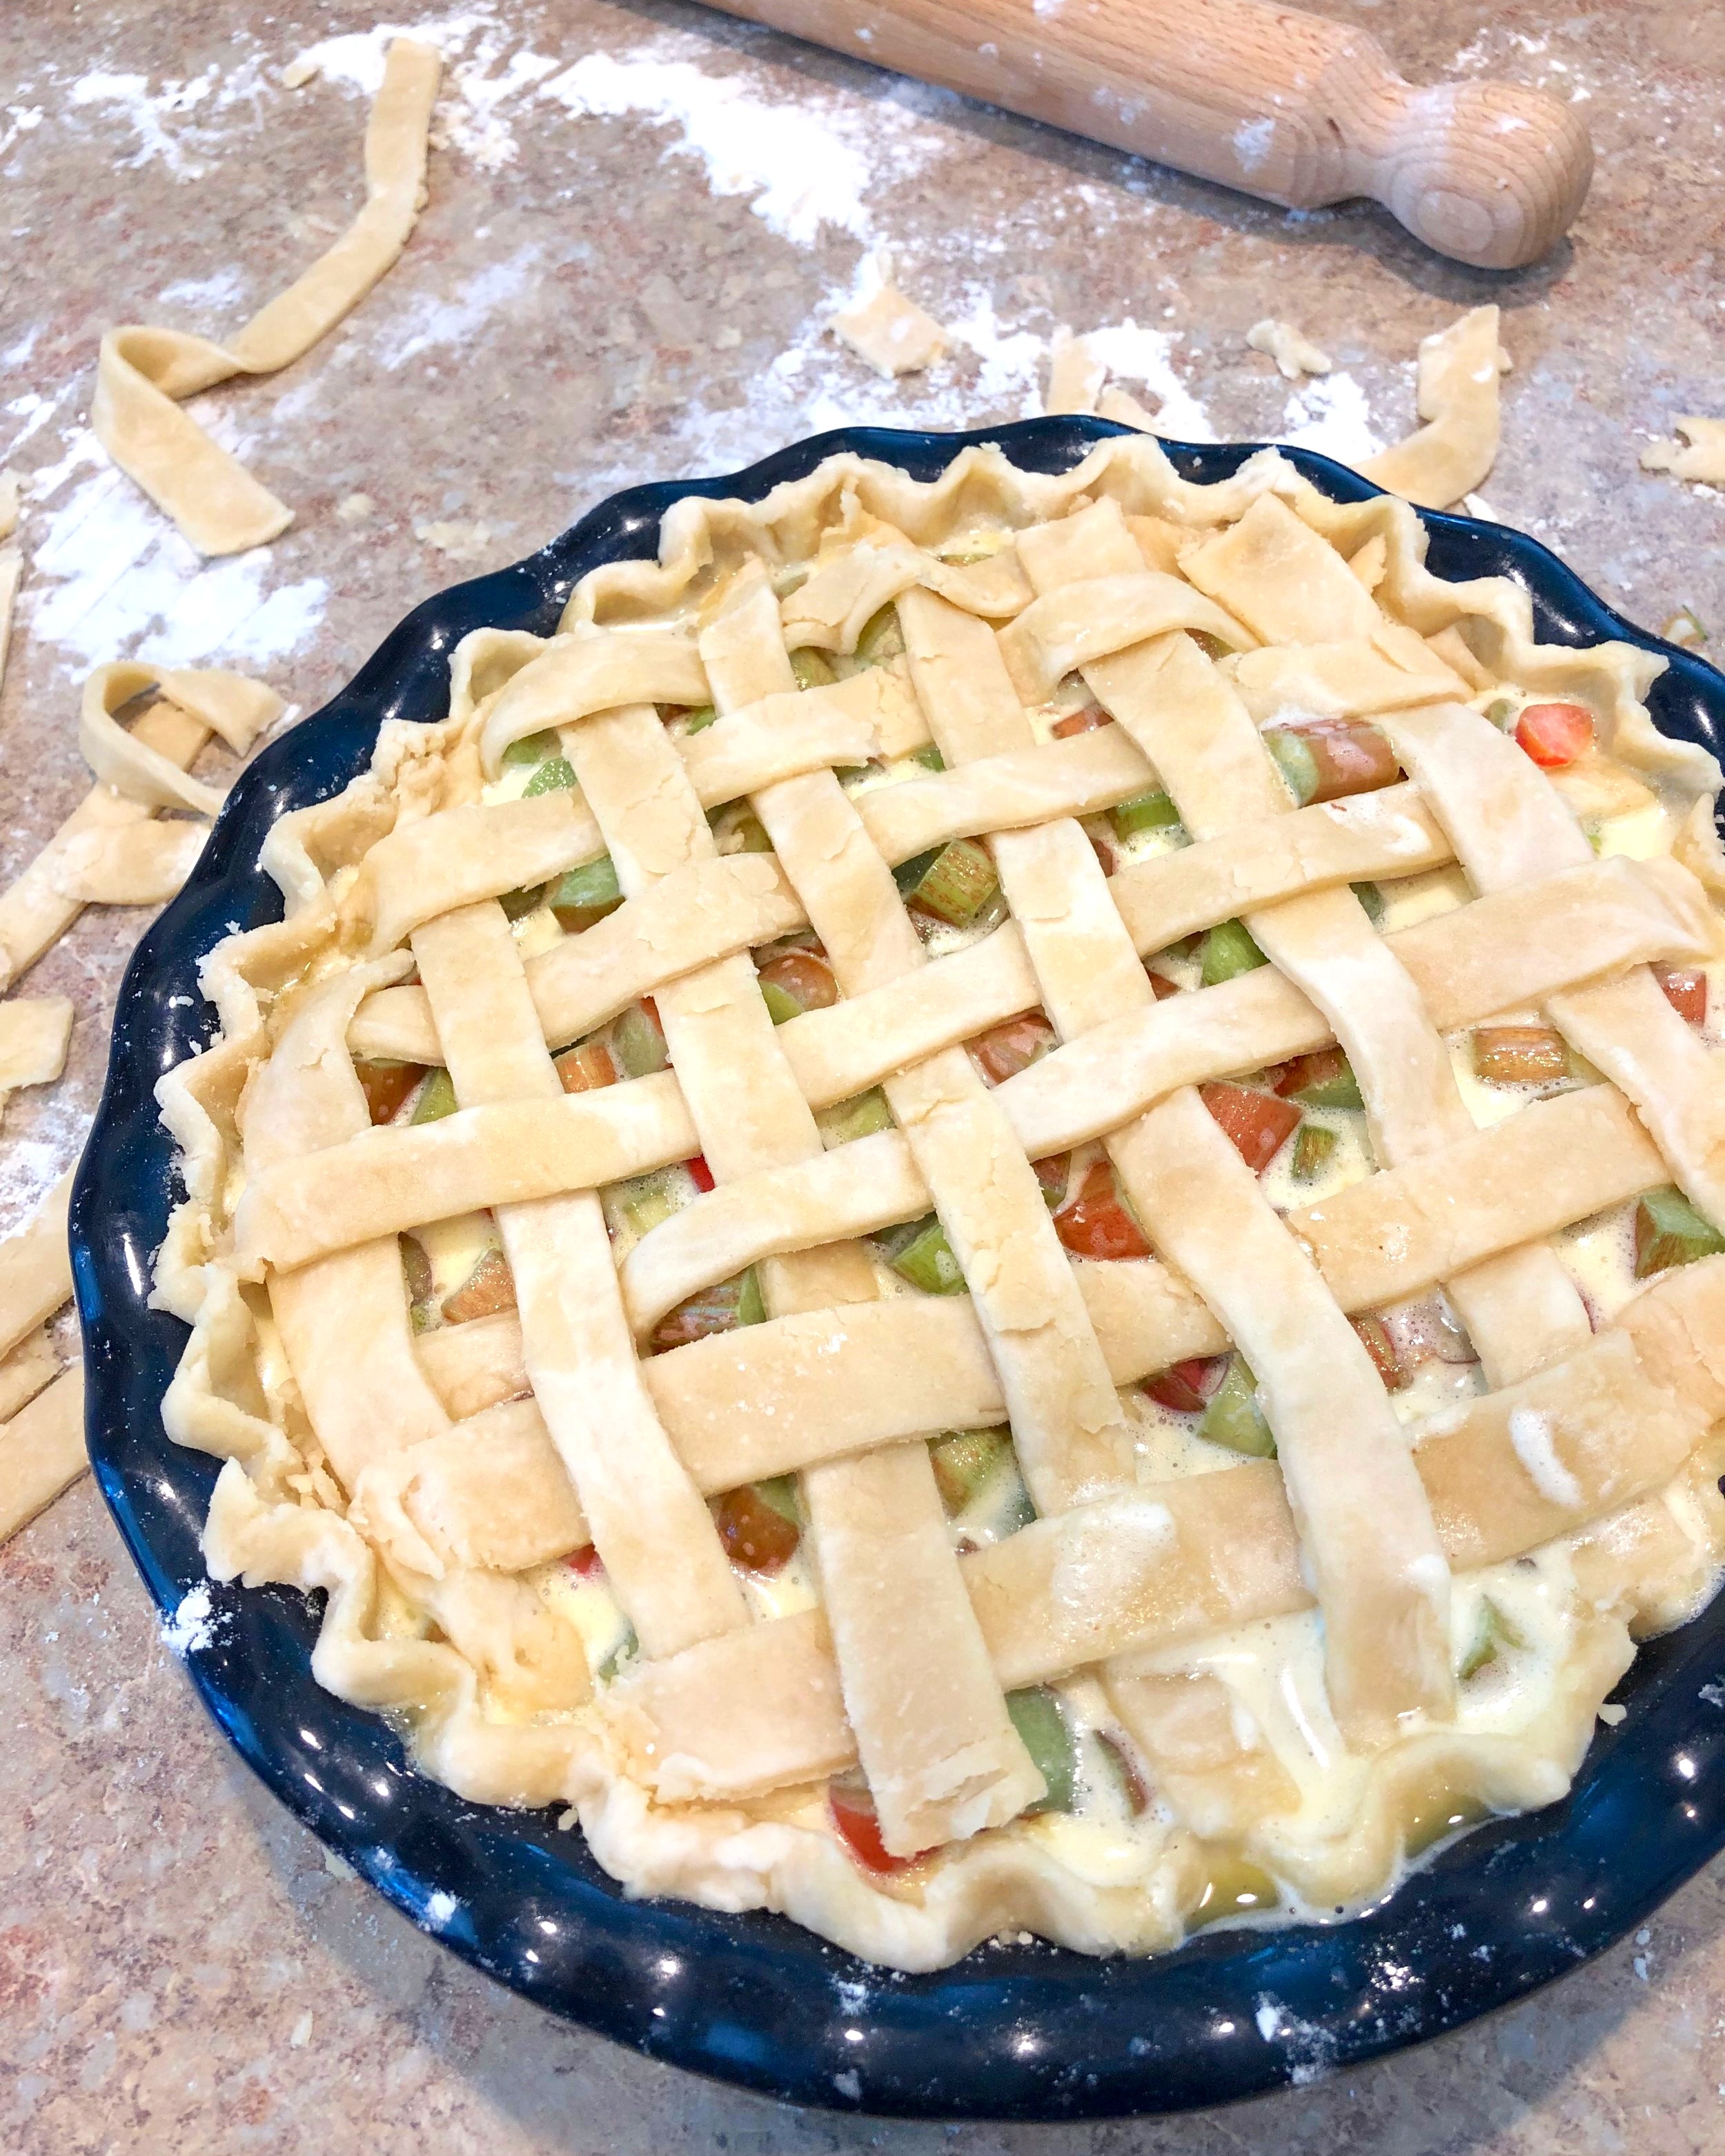
    For an interwoven lattice, start in the center of the pie and work outward, then repeat with the other half. Arrange half of the strips evenly spaced over the pie all in one direction, then flip every other strip back over itself, so half are now only covering half of the pie. Take a new strip and place it perpendicularly just in front of the folded strips. Unfold the folded strips so these ones now cover the new strip. The new strip should be under and over every other one. Working on that same half of the pie, fold back every other strip, all the ones that were NOT just folded. Take another new strip and place it evenly apart from the first perpendicular strip. Unfold the folded strips. Repeat folding back strips, placing new strip, and unfolding until you reach the edge of the pie. You may need to trim down the strips as you get closer to the edge. Repeat with other half of the pie.

    Sprinkle sugar on top, if desired.

  5. Bake pie in preheated oven for 50-60 minutes or until crust is golden brown and a knife inserted in center of pie confirms rhubarb is tender.

  6. Allow to cool completely before slicing and serving.

Jenny’s Notes:

  • If you make the crust and pie in the same day, you could make the filling while the crust is resting in the fridge for an hour or so before rolling out.

  • Instead of a traditional top pie crust or lattice you could add a streusel/crumble, delicious and definitely the easiest option of the three.

Rhubarb Custard Pie
Yield 8
Author
Prep time
1 H & 10 M
Cook time
1 Hour
Total time
2 H & 10 M

Rhubarb Custard Pie

Classic rhubarb custard pie recipe handed down from my mama. Homemade pie crust with the uniquely sweet and sour filling you can only get with rhubarb.
Cook modePrevent screen from turning off

Ingredients

For the Crust
For the Rhubarb Custard Filling

Instructions

Make the Crust
  1. Prepare pie crust per recipe instructions, refrigerate until needed.
Make the Rhubarb Custard Filling
  1. Oven 400°F / 205°C. 8 or 9 inch pie dish.
  2. Blend eggs and milk together in a large bowl.
  3. Add the flour and nutmeg to the sugar then add to the egg mixture and beat well.
  4. Add in the rhubarb and mix to coat well.
  5. Pour into prepared pie crust and add top crust.
  6. For a classic top pie crust, place crust on top, cut off overhang, and crimp together the edges of the top and bottom crust to seal. For an interwoven lattice, start in the center of the pie and work outward, then repeat with the other half. Arrange half of the strips evenly spaced over the pie all in one direction, then flip every other strip back over itself, so half are now only covering half of the pie. Take a new strip and place it perpendicularly just in front of the folded strips. Unfold the folded strips so these ones now cover the new strip. The new strip should be under and over every other one. Working on that same half of the pie, fold back every other strip, all the ones that were NOT just folded. Take another new strip and place it evenly apart from the first perpendicular strip. Unfold the folded strips. Repeat folding back strips, placing new strip, and unfolding until you reach the edge of the pie. You may need to trim down the strips as you get closer to the edge. Repeat with other half of the pie.
  7. Sprinkle sugar on top, if desired.
  8. Bake pie in preheated oven for 50-60 minutes or until crust is golden brown and a knife inserted in center of pie confirms rhubarb is tender.
  9. Allow to cool completely before slicing and serving.

Notes

If you make the crust and pie in the same day, you could make the filling while the crust is resting in the fridge for an hour or so before rolling out. Instead of a traditional top pie crust or lattice you could add a streusel/crumble, delicious and definitely the easiest option of the three.

Nutrition Facts

Calories

431.35

Fat

12.79 g

Sat. Fat

7.67 g

Carbs

74.08 g

Fiber

2.32 g

Net carbs

71.76 g

Sugar

38.25 g

Protein

6.18 g

Sodium

397.03 mg

Cholesterol

54.07 mg

Nutritional Information is approximate.

Rhubarb, custard, pie, all butter crust, oil pie crust, old fashioned
Dessert, Pie
American
Did you make this recipe?
Tag @jennyblogsandbakes on instagram and hashtag it #jennyblogs

Rhubarb Custard Pie made with an all oil crust


Triple Dark Chocolate Cheesecake

Last Updated August 17, 2024

2019-05-26+17.58.07-2.jpg

This post contains affiliate links. If you buy something using these links, Jennyblogs may receive a small commission, at no extra cost to you. This helps to support Jennyblogs. For further information see the privacy policy. Grazie!

After more than two years in Italy, I have finally made a cheesecake.

Proof that you don’t need a springform pan to bake a cheesecake

Proof that you don’t need a springform pan to bake a cheesecake

Cheesecakes are not hard to make, but the baking is important, probably the most important part, and can be tricky. Cheesecakes are usually baked at a slightly lower temperature, usually around 325°F, and just until the sides are set but the center is still jiggly. If the center sets, the cheesecake is over done, but if the center is too jiggly, then your cheesecake won’t set up in the fridge and you’ll end up with soup when you cut into it. You don’t want the cheesecake to crack, and some recipes will tell you to add a bain-marie (a hot water bath) to the oven to keep the atmosphere humid or to crack the oven door after you’ve turned it off so your cheesecake won’t cool down too quickly and yes, crack.

So when you live in Italy with strange ovens, you think twice before baking things when you can’t perfectly control the heat in your oven or where the heat is coming from. IF you’re able to tell the temperature of your oven at all. (I’m thinking of you, my oven two apartments ago. I DO NOT miss you!) Or if your oven is small and cooks things a lot quicker. Add on top of that the cream cheese here, “formaggio fresco” or literally translated fresh cheese, is…different. I’m not even sure what it is, it tastes similar to cream cheese in the States, but when you whip it it doesn’t become soupy like the American stuff, it becomes super creamy. Sometimes I think the American stuff is stickier too, maybe? Philadelphia brand is very popular here, and you can also get grocery store generic brand. But the cheesecakes I’ve eaten in restaurants or pastry shops? Always weird. They taste and look more like semi-freddo or a mousse. I therefore assumed when I made a cheesecake it would be weird like the other ones I’ve eaten here. So I never made one.

Along came Easter and I wanted to make a cheesecake. I didn’t even have a springform pan but found that pie dishes work pretty great as substitutes. And you know what? The cheesecake turned out delicious and not weird. And my husband and colleagues liked it so well I made the same one again and bought a springform pan. And if you know me, you know I rarely bake the same thing twice in a row, unless I’m perfecting a new recipe. I’m always on to the next recipe. But this recipe asked to be made again. And so I did. And now you can make it, too, weird cream cheese or normal cream cheese!

Recipe adapted from omgchocolatedesserts


Triple Dark Chocolate Cheesecake

Serves about 12

Ingredients:

For the Oreo Crust

Crushing Oreos the old-fashioned way…

Crushing Oreos the old-fashioned way…

  • 24 Oreos

  • 1/4 cup / 56g butter, melted

For the Filling

  • 7.5 oz / 225g dark chocolate, broken into small chunks

  • 24 oz (3 8 oz packages) / 675g cream cheese, room temperature

  • 1/2 cup + 2 Tbsp / 125g granulated sugar

  • 2 Tbsp / 14 g cocoa powder

  • 3 eggs

For the Ganache Topping

  • 3/4 cup / 175g heavy whipping cream

  • 6 oz / 180g dark chocolate, broken into small chunks

Directions:

Oven 350°F / 177°C. Grease an 8in - 9in / 20cm - 24cm springform pan.

Make the Oreo Crust

  1. Crush Oreos in a food processor or with a rolling pin.

  2. If using a food processor, pulse in melted butter until crumbs are evenly moistened. If crushing Oreos by hand, transfer to a bowl and stir in butter.

  3. Press mixture evenly into bottom of prepared springform pan and bake for 8 minutes.

  4. Remove from oven and let cool while you prepare filling.

Spreading cream cheese mixture over baked crust

Spreading cream cheese mixture over baked crust

Make the Filling

  1. In a double boiler or pan over low heat, melt chocolate, stirring constantly. Remove from heat when there are still small chunks of chocolate, and continue to stir until completely melted. This way the chocolate won’t overheat or burn. Let chocolate cool.

  2. In the bowl of a stand mixer or a large bowl with a handheld mixer, beat cream cheese and sugar on medium speed until smooth. Changing to low speed, carefully beat in cocoa powder so that it doesn’t “poof” everywhere. Every so often stop beating and scrape down the sides of the bowl well.

  3. Beat in eggs, one at a time, until smooth.

  4. Beat in melted and cooled chocolate.

  5. Pour mixture over crust, smoothing the top.

  6. Bake for 45 - 60 minutes, or until center is still slightly wiggly and the top looks dry.

  7. Turn oven off and crack open the door for about 10 minutes. Remove cheesecake from oven and place in fridge until completely cooled, 8 hours or overnight.

Make the Ganache Topping

  1. In a small pan place heavy cream and chocolate over low heat. Stir constantly until mixture is smooth and melted. Allow to cool slightly.

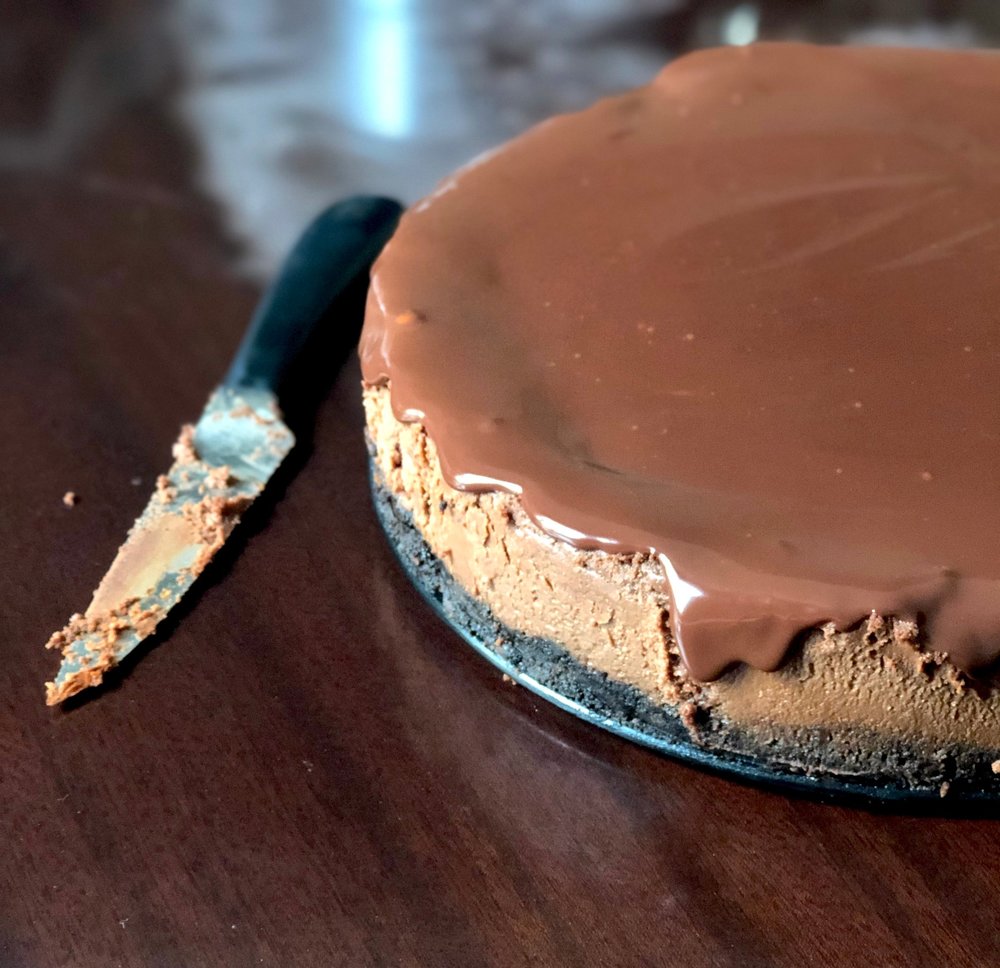
  2. Remove cheesecake from fridge and pour ganache evenly over top. Allow to set before running a dull knife around edge of cheesecake and releasing from springform pan. Alternately, if you don’t need to transport the cheesecake anywhere, you can remove the ring of the springform first and then pour the ganache over, using a spoon to guide the ganache toward the edges and allowing some to dribble down the sides.

Jenny’s Notes:

  • Not a dark chocolate fan? Try it out with milk chocolate or a mixture of milk and dark to create your preferred bitterness!

  • If you don’t own a double boiler, you can make a makeshift one by placing a small pan with an inch or so of water in the bottom and bring to a simmer. Place the chocolate in a bowl big enough that it can sit on top of the pan without touching the water. Stir constantly and proceed as in the recipe. This might take a touch more effort than just melting the chocolate in a pan, but it’s safer if you’re not used to melting chocolate so as not to burn it.

  • Powdered sugar can be substituted for the granulated, use 1 cup / 110g.

  • For cleaner slicing, try running your knife under hot water for a few seconds between slices.

Triple Dark Chocolate Cheesecake
Yield 12
Author
Prep time
1 Hour
Cook time
1 H & 8 M
Inactive time
8 Hour
Total time
10 H & 8 M

Triple Dark Chocolate Cheesecake

Oreo crust, creamy dark chocolate cheesecake filling, and a decadent dark chocolate ganache.
Cook modePrevent screen from turning off

Ingredients

For the Oreo Crust
For the Filling
For the Ganache Topping

Instructions

Make the Oreo Crust
  1. Preheat oven to 350°F / 177°C. Grease an 8in - 9in / 20cm - 24cm springform pan.
  2. Crush Oreos in a food processor or with a rolling pin.
  3. If using a food processor, pulse in melted butter until crumbs are evenly moistened. If crushing Oreos by hand, transfer to a bowl and stir in butter.
  4. Press mixture evenly into bottom of prepared springform pan and bake for 8 minutes.
  5. Remove from oven and let cool while you prepare filling.
Make the Filling
  1. In a double boiler or pan over low heat, melt chocolate, stirring constantly. Remove from heat when there are still small chunks of chocolate, and continue to stir until completely melted. This way the chocolate won’t overheat or burn. Let chocolate cool.
  2. In the bowl of a stand mixer or a large bowl with a handheld mixer, beat cream cheese and sugar on medium speed until smooth. Changing to low speed, carefully beat in cocoa powder so that it doesn’t “poof” everywhere. Every so often stop beating and scrape down the sides of the bowl well.
  3. Beat in eggs, one at a time, until smooth.
  4. Beat in melted and cooled chocolate.
  5. Pour mixture over crust, smoothing the top.
  6. Bake for 45 - 60 minutes, or until center is still slightly wiggly and the top looks dry.
  7. Turn oven off and crack open the door for about 10 minutes. Remove cheesecake from oven and place in fridge until completely cooled, 8 hours or overnight.
Make the Ganache Topping
  1. In a small pan place heavy cream and chocolate over low heat. Stir constantly until mixture is smooth and melted. Allow to cool slightly.
  2. Remove cheesecake from fridge and pour ganache evenly over top. Allow to set before running a dull knife around edge of cheesecake and releasing from springform pan. Alternately, if you don’t need to transport the cheesecake anywhere, you can remove the ring of the springform first and then pour the ganache over, using a spoon to guide the ganache toward the edges and allowing some to dribble down the sides.

Notes

Not a dark chocolate fan? Try it out with milk chocolate or a mixture of milk and dark to create your preferred bitterness! If you don’t own a double boiler, you can make a makeshift one by placing a small pan with an inch or so of water in the bottom and bring to a simmer. Place the chocolate in a bowl big enough that it can sit on top of the pan without touching the water. Stir constantly and proceed as in the recipe. This might take a touch more effort than just melting the chocolate in a pan, but it’s safer if you’re not used to melting chocolate so as not to burn it. Powdered sugar can be substituted for the granulated, use 1 cup / 110g. For cleaner slicing, try running your knife under hot water for a few seconds between slices.

Nutrition Facts

Calories

715.12

Fat

54.28 g

Sat. Fat

31.43 g

Carbs

52.73 g

Fiber

3.26 g

Net carbs

49.47 g

Sugar

39.29 g

Protein

7.29 g

Cholesterol

118.98 mg

Sodium

316.65 mg

Nutritional Information is Approximate.

triple dark chocolate cheesecake, decadent, creamy, rich, oreo crust, ganache
dessert
American
Did you make this recipe?
Tag @jennyblogsandbakes on instagram and hashtag it #jennyblogs
2019-04-24+19.00.29.jpg

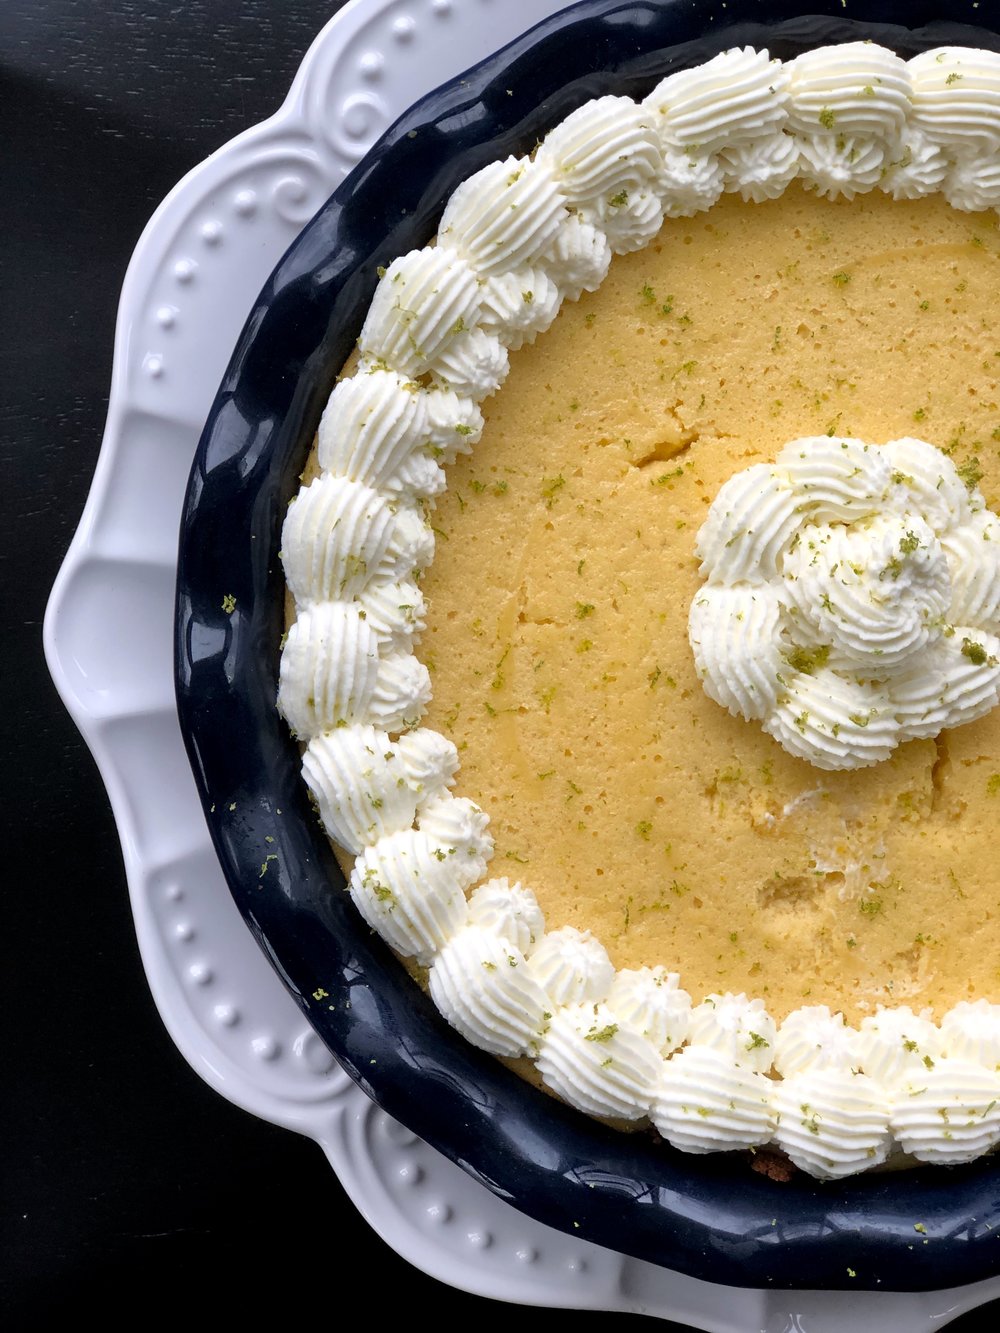
The Fluffiest Key Lime Pie with a Gingersnap Crust

2018-12-20 14.16.59.jpg

Fluffy? Isn’t key lime pie supposed to be creamy, custardy, silken? Yes! And this recipe is all of those things but with a special touch of fluffiness, thanks to our friends the egg whites. Whipped egg whites. It’s magical. And with Easter just around the corner, this is the perfect dessert to celebrate with! I even gave you two weeks time to plan ahead, aren't I nice?

I don’t know why I always want to make citrus desserts for Easter, maybe because it’s always in the spring. And in the spring everything is coming alive, the rebirth of nature, and calls for bright, happy citrus flavors. You can’t call citrus sad. And what is Easter but the celebration of the resurrection of Jesus, giving those who believe on Him new life? The celebration of rebirth. It all fits. Not to mention if you observe Lent, getting to eat what you gave up for 6 weeks is lovely.

And whether you have a big Easter meal planned or not, you’re going to want to make this pie. And if you’ve never made key lime pie before? This is not a bad place to start. Just be warned that other key lime pies after this one might be…tame.

This post may contain affiliate links. If you buy something using these links, Jennyblogs may receive a small commission, at no extra cost to you. This helps to support Jennyblogs. For further information see the privacy policy. Grazie!

Recipe adapted from the Williams-Sonoma cookbook Savoring America


The Fluffiest Key Lime Pie with a Gingersnap Crust

Serves 8-12

2018-12-20+14.27.07.jpg

Ingredients:

For the Gingersnap Crust

  • 28 gingersnaps broken into pieces, about 1 1/2in / 4cm in diameter (homemade or storebought)

  • 1/2 cup / 60g chopped pecans

  • 1 Tbsp / 15g chopped crystallized ginger

  • 1/8 tsp ground cinnamon

  • 1/4 cup / 57g butter, melted and cooled

For the Filling

  • 4 eggs, separated

  • 1/4 cup / 30g cornstarch

  • 1/2 cup / 100g sugar

  • 1 14oz can / 440g sweetened condensed milk, make it homemade here

  • 1/2 cup / 118g key lime juice

  • 2 Tbsp / 12g freshly grated key lime zest

  • 1/2 tsp cream of tartar

  • 1 tsp vanilla extract

For the Topping and Garnish

  • 1 cup / 237g heavy whipping cream

  • 1/3 cup / 42g confectioner’s sugar

  • 1/8 tsp almond extract

  • thin key lime slices or lime zest, optional

Directions:

Oven 350°F / 177°C. Lightly grease a 9in / 23cm pie dish.

Make the Gingersnap Crust

  1. In a food processor, combine the gingersnaps, pecans, ginger, and cinnamon. Pulse until everything is finely ground in crumbs. Add the butter and pulse briefly until the crumbs are evenly moistened.

  2. Press evenly into the bottom and up the sides of the prepared pie dish. Bake in the preheated oven for 10 minutes or until fragrant and lightly browned. (This can be hard to see because of the dark color of the gingersnaps.) Allow to cool.

Make the Filling

  1. In the bowl of a stand mixer fitted with the whisk attachment, beat 2 egg whites and the cream of tartar on high speed until soft peaks form and can hold their shape, about 1-2 minutes. Beat in the vanilla and scrape the egg whites into a small bowl; set aside.

  2. In the bowl of the stand mixer (no need to clean it), beat on medium-high speed the egg yolks, 2 remaining egg whites, cornstarch, sugar, and sweetened condensed milk until light and fluffy, about 5 minutes. Add lime juice and zest and beat until smooth.

  3. Gently fold 1/3 of the egg white mixture into the lime mixture to lighten. Add the rest of the egg whites and fold just until combined.

  4. Pour the filling into the cooled pie crust, smooth the top with a spatula. Bake until just firm, about 20 minutes. To test for firmness, jiggle the dish slightly. When the center jiggles just slightly, it’s ready.

  5. Cool completely, then cover and refrigerate for at least 4 hours or overnight.

Make the Topping

  1. In the bowl of a stand mixer, beat the heavy whipping cream on medium speed. As it starts to thicken (and will no longer splatter) increase the speed to high. Add the powdered sugar and almond extract. Continue beating until firm peaks form, about 2-4 minutes total.

  2. Spoon whipped cream over pie or use a piping bag and tips to decorate. Garnish with lime slices/and or zest. Serve immediately or refrigerate.

Jenny’s Notes:

  • The crust can be made without the pecans and/or ginger, if you’re like me and sometimes feel too lazy to chop things!

  • Freshly squeezed key lime juice is best, but if you’ve ever used real key limes you’ll know that getting half a cup can be a real labor of love. Those things can be tiny! Hand cramp hand cramp hand cramp. And just when you think you’re there, you realize you’ve only squeezed 1 Tbsp worth. So, I gladly buy bottled key lime juice.

  • If you can’t find fresh key limes or juice, use limes! And I suppose, lemons if you’re in a pinch. Lemon pies are good too! Same goes for the zest.

  • No food processor handy? Do it the old fashioned way and stick the cookies in a resealable plastic bag and whack and roll with a rolling pin. The pecans and ginger can be finely chopped by hand.

The Fluffiest Key Lime Pie with a Gingersnap Crust
Yield 8-12 servings
Author
Prep time
50 Min
Cook time
30 Min
Total time
1 H & 20 M

The Fluffiest Key Lime Pie with a Gingersnap Crust

Classic key lime pie with a twist. Tart filling made extra light and fluffy by whipping the egg whites, a spicy gingersnap crust, and fresh whipped cream.
Cook modePrevent screen from turning off

Ingredients

For the Gingersnap Crust
For the Filling
For the Topping and Garnish

Instructions

Make the Gingersnap Crust
  1. Oven 350°F / 177°C. Lightly greased 9in / 23cm pie dish.
  2. In a food processor, combine the gingersnaps, pecans, ginger, and cinnamon. Pulse until everything is finely ground in crumbs. Add the butter and pulse briefly until the crumbs are evenly moistened.
  3. Press evenly into the bottom and up the sides of the prepared pie dish. Bake in the preheated oven for 10 minutes or until fragrant and lightly browned. (This can be hard to see because of the dark color of the gingersnaps.) Allow to cool.
Make the Filling
  1. In the bowl of a stand mixer fitted with the whisk attachment, beat 2 egg whites and the cream of tartar on high speed until soft peaks form, about 1-2 minutes. Beat in the vanilla and scrape the egg whites into a small bowl; set aside.
  2. In the bowl of the stand mixer (don’t worry about cleaning it), beat on medium-high speed the egg yolks, 2 remaining egg whites, cornstarch, sugar, and sweetened condensed milk until light and fluffy, about 5 minutes. Add the lime juice and zest and beat until smooth.
  3. Gently fold 1/3 of the egg white mixture into the lime mixture to lighten. Add the rest of the egg whites and fold just until combined.
  4. Pour the filling into the cooled pie crust, smooth the top with a spatula. Bake until just firm, about 20 minutes. To test for firmness, jiggle the dish slightly. When the center jiggles just slightly, it’s ready.
  5. Cool completely, then cover and refrigerate for at least 4 hours or overnight.
Make the Topping
  1. In the bowl of a stand mixer, beat the heavy whipping cream on medium speed. As it starts to thicken (and will no longer splatter) increase the speed to high. Add the powdered sugar and almond extract. Continue beating until stiff peaks form, about 2-4 minutes total.
  2. Spoon whipped cream over pie or use a piping bag and tips to decorate. Garnish with lime slices/and or zest. Serve immediately or refrigerate.

Notes

The crust can be made without the pecans and/or ginger, if you’re like me and sometimes feel too lazy to chop things! Freshly squeezed key lime juice is best, but if you’ve ever used real key limes you’ll know that getting half a cup can be a real labor of love. Those things can be tiny! Hand cramp hand cramp hand cramp. And just when you think you’re there, you realize you’ve only squeezed 1 Tbsp worth. So, I gladly buy bottled key lime juice. If you can’t find fresh key limes or juice, use limes! And I suppose, lemons if you’re in a pinch. Lemon pies are good too! Same goes for the zest. No food processor handy? Do it the old fashioned way and stick the cookies in a resealable plastic bag and whack and roll with a rolling pin. The pecans and ginger can be finely chopped by hand.

Nutrition Facts

Calories

590.80

Fat

29.69 g

Sat. Fat

14.77 g

Carbs

76.33 g

Fiber

1.88 g

Net carbs

74.45 g

Sugar

55.81 g

Protein

8.28 g

Sodium

256.68 mg

Cholesterol

90.75 mg

Nutritional information is approximate. Based on 8 servings.

key lime pie, gingersnap crust, fluffy pie, whipped cream
Dessert, Pie
American
Did you make this recipe?
Tag @jennyblogsandbakes on instagram and hashtag it #jennyblogs
2018-12-20 14.14.52-2.jpg

Mascarpone Peanut Butter Pie with Chocolate Ganache

IMG_5063.jpg

Peanut Butter Pie with Chocolate Whipped Cream

Last Updated August 14, 2024

Let me take a gander at what you're thinking, probably something like, "OH! PEANUT BUTTER PIE? I love peanut butter pie! So good! But I already have a recipe for peanut butter pie. Why do I need this recipe? Wait, don't YOU already have a recipe up on this blog for peanut butter pie??"

Well, you'd be right about one thing, this is not my first recipe up for a peanut butter pie. But let me tell you, they each have their own merited place. For example, the Peanut Butter Pie with Chocolate Whipped Cream has a shortbread crust, creamy peanut butter filling, topped with chocolate whipped cream.  

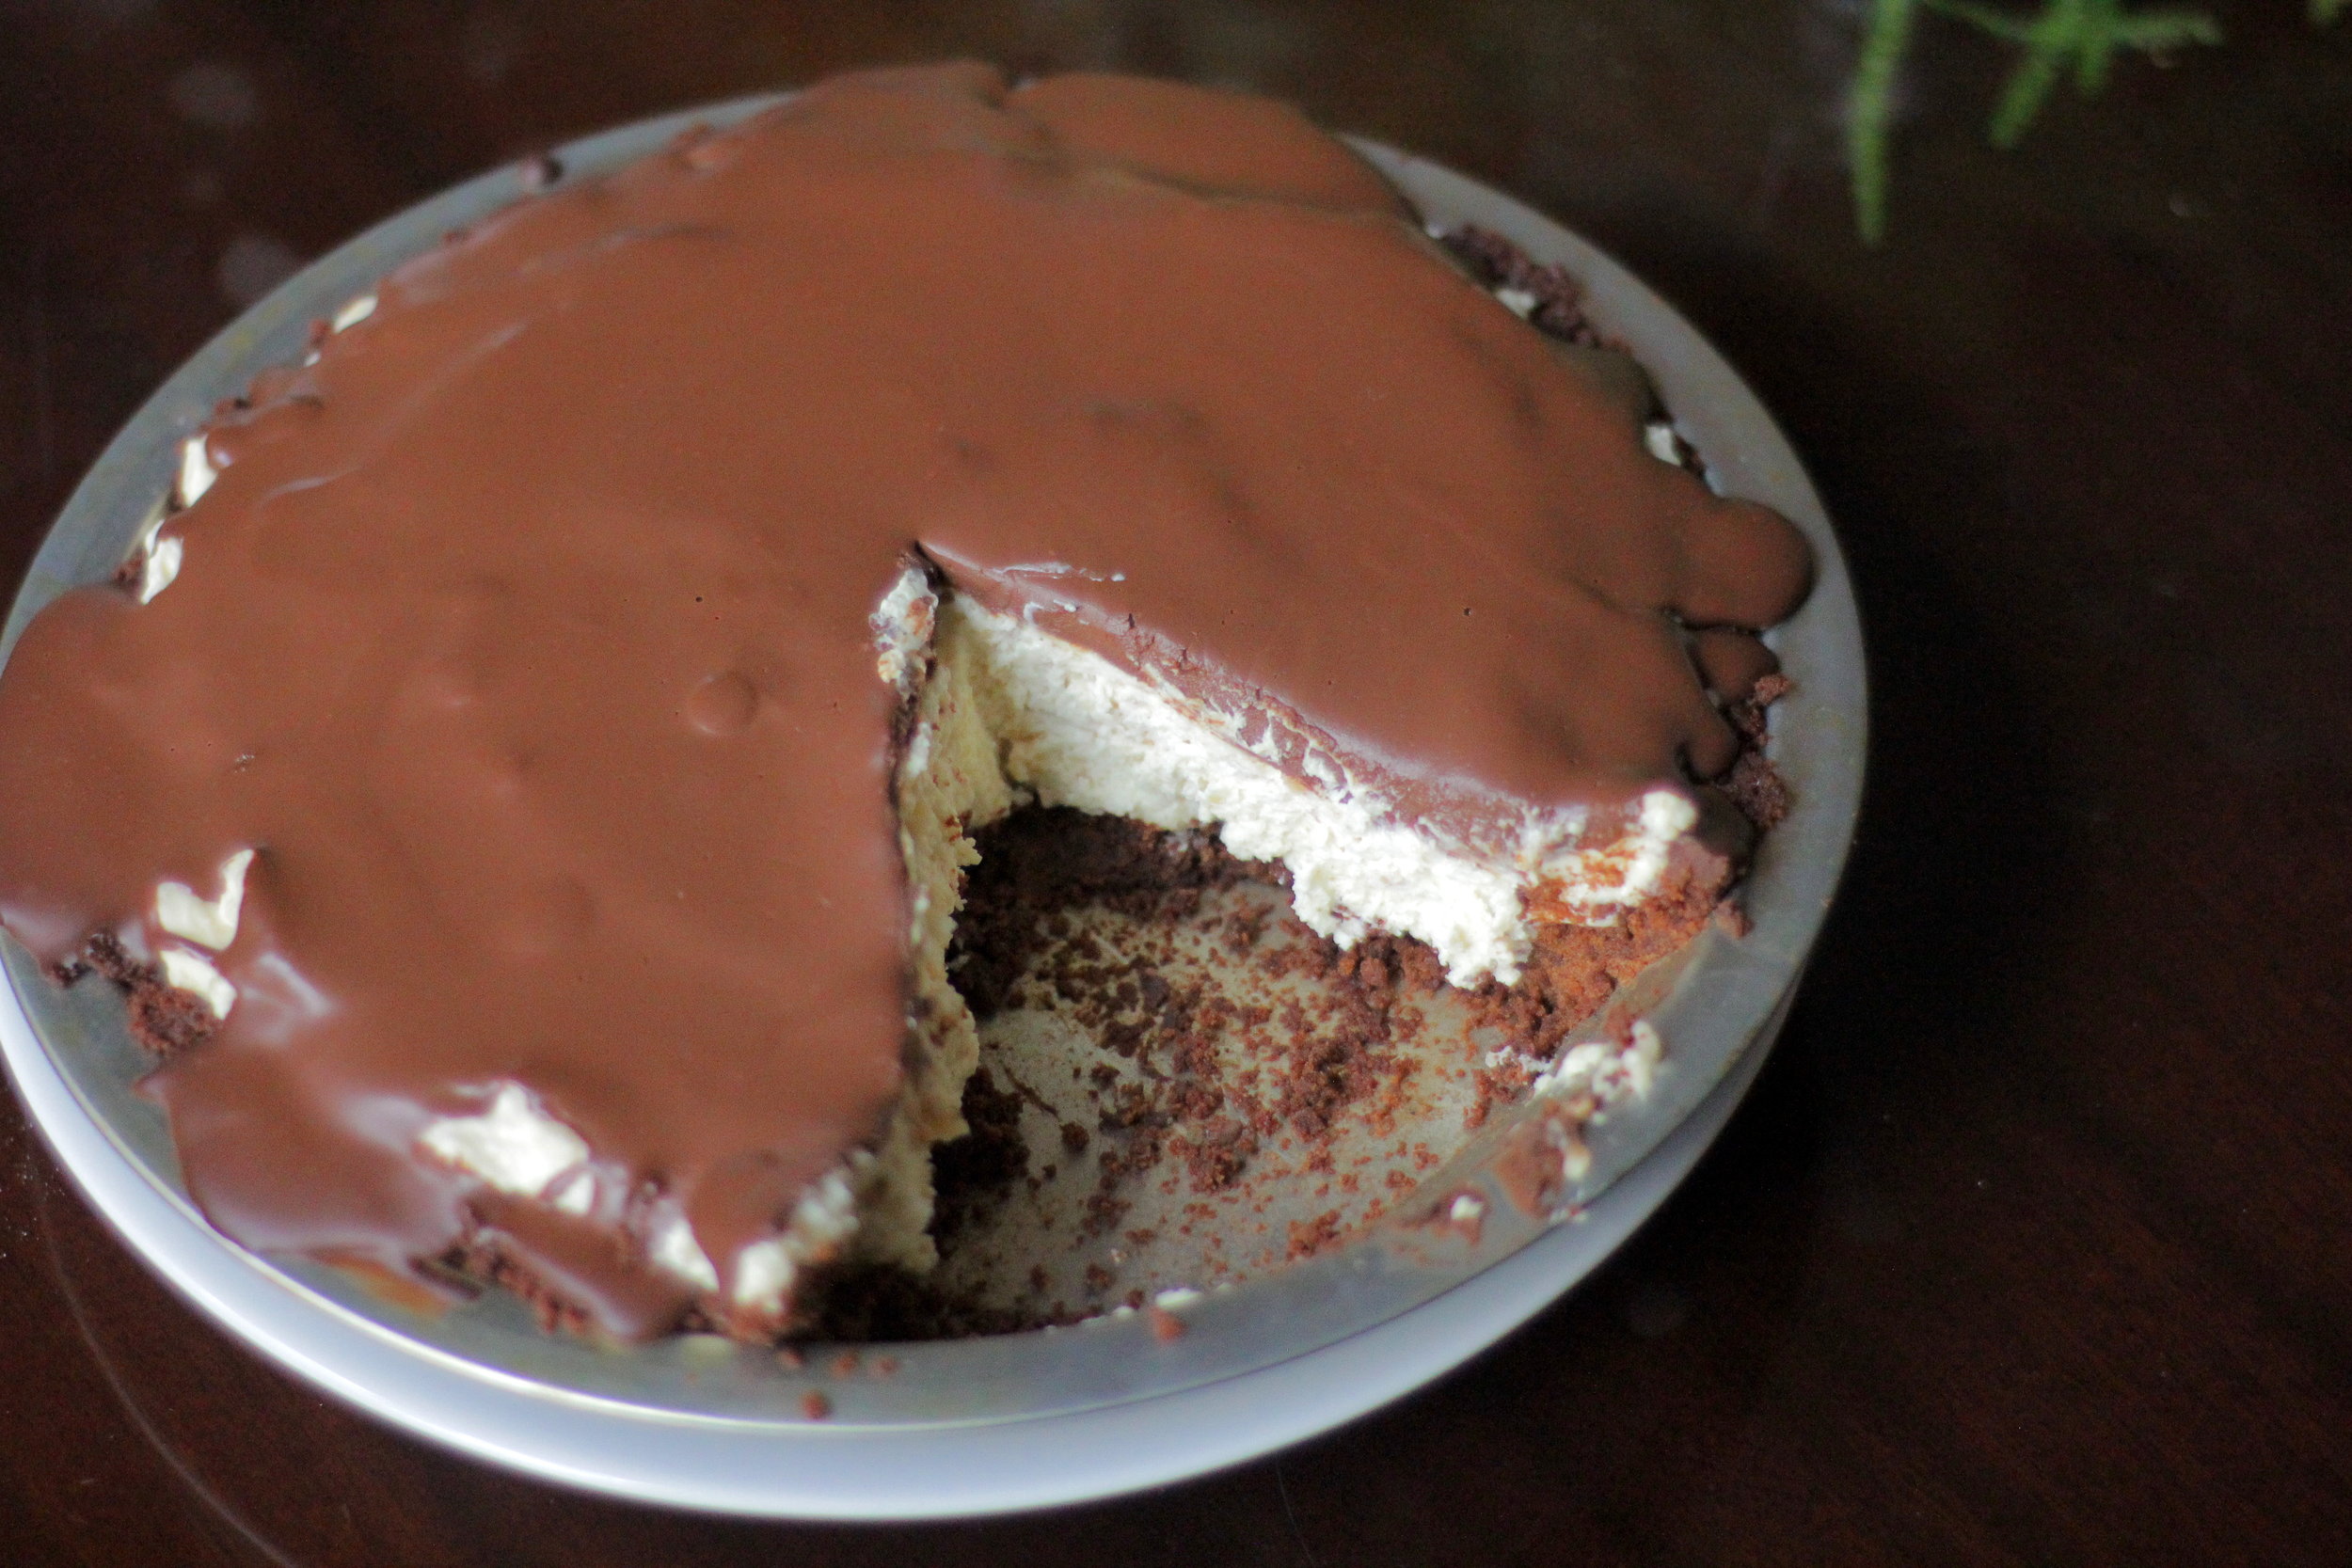
This peanut butter pie has a chocolate crust, an ultra creamy peanut butter mascarpone filling topped with flowing chocolate ganache. The chocolate ganache envelopes the peanut butter filling in a tender embrace...still with me? Ok let's stop dreaming and comparing peanut butter pies and MAKE one!  

Nutter Butter Pie

Not a fan of chocolate and peanut butter together? Neither is my mom.  That's ok, we can still be friends. And because of that, why not head over to this Nutter Butter Pie instead? No chocolate there! 

This post may contain affiliate links. If you buy something using these links, Jennyblogs may receive a small commission, at no extra cost to you. This helps to support Jennyblogs. For further information see the privacy policy. Grazie!

Recipe adapted from what megan's making.


Mascarpone Peanut Butter Pie with Chocolate Ganache

Serves 8-12

Ingredients:

For the Chocolate Crust

  • 7.5 oz / 210g chocolate graham crackers, teddy grahams, or chocolate shortbread

  • 2 oz / 55g (1/3 cup) semi-sweet chocolate, finely chopped, or mini chips

  • 5 Tbsp / 65g butter, melted

For the Peanut Butter Filling

IMG_5030.JPG
  • 1 cup / 237g heavy whipping cream

  • 8 oz / 227g mascarpone or cream cheese, room temperature

  • 1 cup / 250g peanut butter

  • 1/2 cup / 100g sugar

  • 1 tsp / 5g vanilla extract

For the Chocolate Ganache

  • 4 oz / 110g (2/3 cup) semi-sweet chocolate, finely chopped, or chips

  • 1 Tbsp / 14g butter

  • 1/2 cup / 118g heavy whipping cream

Directions:

Oven 325°F / 163°C.  Ungreased 9in / 23cm pie dish.  

Make the Chocolate Crust

  1. In a food processor combine chocolate grahams, butter, and chocolate chips.  Pulse until the mixture is uniformly fine crumbs.  Or do it the "old fashioned" way and beat the crumbs to oblivion in a well sealed plastic bag with a rolling pin or other hard object, then mixing in the chocolate and butter in a bowl with a spoon. 

  2. Press evenly into the bottom and sides of pie dish and bake for 8 minutes or until fragrant.  Set aside to cool completely.

Make the Peanut Butter Filling

  1. In the bowl of a stand mixer or with a handheld mixer, beat the whipping cream until stiff peaks form.  Transfer to another bowl if using a stand mixer and set aside.

  2. Again in the bowl of a stand mixer or a separate bowl with a handheld mixer, beat the cream cheese, peanut butter, sugar, and vanilla until light and fluffy.  

  3. Carefully fold the whipped cream into the peanut butter mixture in three or four parts.  

  4. Spoon the filling over the cooled crust and smooth the top.  Refrigerate to set.  

IMG_5064.JPG

Make the Chocolate Ganache

  1. Place the chocolate and butter in a small bowl.  Heat the cream in a small saucepan over low heat, just until simmering.  The moment you see bubbles remove from heat and pour over chocolate and butter.  Let sit for 1 minute to melt the chocolate, then whisk briskly until smooth and shiny.  

  2. Pour over chilled pie.  If you don't desire chocolate running over the sides, you may have to wait a minute or two between pourings, or simply don't use all the ganache.  (The rest can be disposed of with a spoon and a mouth.  But I don't need to tell you that.)  

  3. Chill for 3-4 hours or overnight until set.  

Jenny's Notes:

  • If using a shallow pie dish you may have some leftover crust, and that's ok. Don't feel like you have to use all the crust mixture or you may have an impenetrable crust, especially in the corners.

  • I frequently substitute whole milk or coconut milk for all or part of the cream in ganache, but usually not when it's a topper as it can separate a bit if you don't use all cream. However, one time when making this I only had 1/4 cup cream left for the topping and so added 1/4 cup whole milk, and it made for a beautiful ganache, even as the topper.

  • Top with chocolate chips or chocolate shavings as desired!

Mascarpone Peanut Butter Pie with Chocolate Ganache
Yield 8-12
Author
Prep time
1 Hour
Cook time
8 Min
Inactive time
3 Hour
Total time
4 H & 8 M

Mascarpone Peanut Butter Pie with Chocolate Ganache

Chocolate cookie crust, whipped mascarpone peanut butter filling, and chocolate ganache to top.
Cook modePrevent screen from turning off

Ingredients

For the Chocolate Crust
For the Peanut Butter Filling
For the Chocolate Ganache

Instructions

Make the Chocolate Crust
  1. Oven 325°F / 163°C. Ungreased 9in / 23cm pie dish.
  2. In a food processor combine chocolate grahams, butter, and chocolate chips. Pulse until the mixture is uniformly fine crumbs. Or do it the "old fashioned" way and beat the crumbs to oblivion in a well sealed plastic bag with a rolling pin or other hard object, then mixing in the chocolate and butter in a bowl with a spoon.
  3. Press evenly into the bottom and sides of pie dish and bake for 8 minutes or until fragrant. Set aside to cool completely.
Make the Peanut Butter Filling
  1. In the bowl of a stand mixer or with a handheld mixer, beat whipping cream until stiff peaks form. Transfer to another bowl if using a stand mixer and set aside.
  2. Again in the bowl of a stand mixer or a separate bowl with a handheld mixer, beat cream cheese, peanut butter, sugar, and vanilla until light and fluffy.
  3. Carefully fold whipped cream into peanut butter mixture in three or four parts.
  4. Spoon filling over cooled crust and smooth top. Refrigerate to set.
Make the Chocolate Ganache
  1. Place chocolate and butter in a small bowl. Heat cream in a small saucepan over low heat, just until simmering. The moment you see bubbles remove from heat and pour over chocolate and butter. Let sit for 1 minute to melt chocolate, then whisk briskly until smooth and shiny.
  2. Pour over chilled pie. If you don't desire chocolate running over the sides, you may have to wait a minute or two between pourings, or simply don't use all the ganache.
  3. Chill for 3-4 hours or overnight until set.

Notes

If using a shallow pie dish you may have some leftover crust, and that's ok. Don't feel like you have to use all the crust mixture or you may have an impenetrable crust, especially in the corners.I frequently substitute whole milk or coconut milk for all or part of the cream in ganache, but usually not when it's a topper as it can separate a bit if you don't use all cream. However, one time when making this I only had 1/4 cup cream left for the topping and so added 1/4 cup whole milk, and it made for a beautiful ganache, even as the topper.Top with chocolate chips or chocolate shavings as desired!

Nutrition Facts

Calories

791.91

Fat

62.46 g

Sat. Fat

30.79 g

Carbs

54.43 g

Fiber

3.89 g

Net carbs

50.53 g

Sugar

37.64 g

Protein

12.12 g

Sodium

502.22 mg

Cholesterol

110.56 mg

Nutritional information is approximate. Based on 8 servings.

best peanut butter pie, PB pie, mascarpone peanut butter pie, chocolate ganache, cookie crust, cream cheese peanut butter pie, no bake
Dessert, Pie
American
Did you make this recipe?
Tag @jennyblogsandbakes on instagram and hashtag it #jennyblogs
IMG_5066.JPG


Ganache Coconut Cream Pie Bars

Last Updated October 8, 2024

Oh my gosh! Ganache. Yes, coconut cream pie is delicious.  So are Almond Joys and Mounds.  So why not put them together, add a shortbread crust, put them in the slightly less formidable to cut bar form instead of pie, and voila: Ganache Coconut Cream Pie Bars. 

These bars are slightly involved, but the end product is very worthwhile.  Not to mention, you can make an 8x8 pan worth of bars, or 9x13!  I almost always go the 9x13 route.  This has become a favorite for Christmas, my mom's birthday, and just about any occasion that a little creamy coconut and chocolate is welcome.  As what seems to be turning into a trend, I failed to get any kind of decent photo of the inside, so for now, (or maybe forever...once these are cut into you'll understand why photos never get taken) please enjoy the photos of the whipped cream and toasted coconut topping.  If you'd like an idea of what bliss you're getting in to, take a peak over at Willow Bird Baking, from whom I adapted the recipe, and see her beautiful photos! 


Ganache Coconut Cream Pie Bars

Makes about 20 servings

Ingredients:

For the Shortbread Crust

  • 1 cup (2 sticks) / 226g cold butter

  • 2 cups / 240g all-purpose flour

  • 1/2 cup / 100g sugar

For the Ganache

  • 1/4 cup + 2 Tbsp / 87g heavy whipping cream

  • 6 oz (1 cup) / 175g bittersweet or semisweet chocolate, chopped, or chips

For the Coconut Cream Filling

  • 6 cups / 1,422g unsweetened coconut milk or milk of choice

  • 4 eggs

  • 1 1/2 cups / 300g sugar

  • 2/3 cup / 73g cornstarch

  • 1/2 tsp / 2.5g salt

  • 1 1/2 cups / 150g flaked unsweetened coconut

  • 1/2 tsp / 2.5g coconut extract

  • 1/2 tsp / 2.5g vanilla extract

For the Whipped Cream Topping

  • 2 cups / 464g heavy whipping cream

  • 1/2 cup / 100g sugar

  • 1 tsp / 5g vanilla extract

  • 1/2 cup / 50g flaked unsweetened coconut, toasted (see below)

Directions:

Oven 350°F / 177°C.  Ungreased 9x13in / 23x33cm baking dish.

Make the Shortbread Crust

  1. Cut the butter into flour and sugar using a fork, pastry cutter, or in a food processor.  Once the mixture resembles coarse sand and the butter chunks are no larger than small peas, press mixture evenly into bottom prepared pan. 

  2. Bake for 18-22 minutes until lightly golden-brown.  Set aside to cool.  Leave oven on for toasting the coconut.

Make the Ganache

  1. While the crust is baking, prepare the ganache.  Place the chocolate in a medium bowl and the cream in a small saucepan.  Over medium-low heat, bring the cream to a simmer.  You can also use the microwave, 30 seconds-1 minute or until cream is just simmering, but not boiling.  

  2. Pour the cream over the chocolate and let sit for 1-2 minutes to melt the chocolate.  Whisk until completely smooth.  

  3. Once the crust is finished and partly cooled, pour ganache evenly over crust.  Place in fridge to set.   

Toast the Coconut

Place the 1/2 cup coconut for the topping in a shallow baking dish.  Place in oven and stir every 1-2 minutes, making sure it doesn't over-brown, for a total of 5-10 minutes.  Remove and let cool.

Make the Coconut Cream Filling

  1. Combine milk, eggs, sugar, cornstarch, and salt in a large saucepan. 

  2. Place over medium heat, whisking constantly, until mixture begins to thicken and comes to a boil.  This can take anywhere from 15-35 minutes, depending on your stove.

  3. Once thickened, remove from heat and stir in coconut and both extracts.  

  4. Remove crust from fridge and pour filling over crust.  Place back in fridge to set, 2-4 hours.  

Make the Whipped Cream Topping

  1. Whip the cream and sugar in the bowl of a stand mixer or with a handheld mixer until stiff peaks form.

  2. Spoon over chilled bars, or pipe.  Finish with toasted coconut.  Store in fridge.  

Jenny's Notes:

  • Because the ganache in this recipe is not decorative, you can easily substitute coconut milk or another kind for the heavy whipping cream. I prefer using coconut milk, reducing the amount of fat/calories. Save those for when you need the high-shine perfect ganache!

  • If you only have sweetened coconut milk or sweetened flaked coconut on hand, go ahead and use those. Simply reduce the sugar by about 1/4-1/2 cup / 50-100g in the filling, if you wish. I prefer to have unsweetened coconut on hand so I can control how much sugar I'm adding to breakfasts, desserts, etc., plus I like the smaller size of flaked and grated coconut vs. shredded.

  • For toasting coconut, and every use really, I highly recommend Le Creuset pans. My toasted coconut used to always come out in various shades, but since using Le Creuset it always turns out a beautiful even, golden-brown. They conduct heat evenly and beautifully.

  • If a 9x13 pan of coconut cream heaven seems daunting to you, it's super easy to halve this recipe for a 8x8 or 9x9in pan!

  • These bars should ideally be eaten within 3-4 days. Otherwise the whipped cream starts to separate and the crust gets soggy.

Ganache Coconut Cream Pie Bars
Yield 20
Author
Prep time
1 H & 45 M
Cook time
32 Min
Total time
2 H & 17 M

Ganache Coconut Cream Pie Bars

Shortbread crust, a thin layer of ganache, classic coconut cream pie filling, all topped with fresh whipped cream and toasted coconut.
Cook modePrevent screen from turning off

Ingredients

For the Shortbread Crust
For the Ganache
For the Coconut Cream Filling
For the Whipped Cream Topping

Instructions

Make the Shortbread Crust
  1. Oven 350°F / 177°C. Ungreased 9x13in / 23x33cm baking dish.
  2. Cut the butter into flour and sugar using a fork, pastry cutter, or in a food processor. Once the mixture resembles coarse sand and the butter chunks are no larger than small peas, press mixture evenly into bottom prepared pan.
  3. Bake for 18-22 minutes until lightly golden-brown. Set aside to cool. Leave oven on for toasting the coconut.
Make the Ganache
  1. While the crust is baking, prepare the ganache. Place the chocolate in a medium bowl and the cream in a small saucepan. Over medium-low heat, bring the cream to a simmer. You can also use the microwave, 30 seconds-1 minute or until cream is just simmering, but not boiling.
  2. Pour the cream over the chocolate and let sit for 1-2 minutes to melt the chocolate. Whisk until completely smooth.
  3. Once the crust is finished and partly cooled, pour ganache evenly over crust. Place in fridge to set.
Toast the Coconut
  1. Place the 1/2 cup coconut for the topping in a shallow baking dish. Place in oven and stir every 1-2 minutes, making sure it doesn't over-brown, for a total of 5-10 minutes. Remove and let cool.
Make the Coconut Cream Filling
  1. Combine milk, eggs, sugar, cornstarch, and salt in a large saucepan.
  2. Place over medium heat, whisking constantly, until mixture begins to thicken and comes to a boil. This can take anywhere from 15-35 minutes, depending on your stove.
  3. Once thickened, remove from heat and stir in coconut and vanilla extracts.
  4. Remove crust from fridge and pour filling over crust. Place back in fridge to set, 2-4 hours.
Make the Whipped Cream Topping
  1. Whip the cream and sugar in the bowl of a stand mixer or with a handheld mixer until stiff peaks form.
  2. Spoon over chilled bars, or pipe. Finish with toasted coconut. Store in fridge.

Notes

Because the ganache in this recipe is not decorative, you can easily substitute coconut milk or another kind for the heavy whipping cream. I prefer using coconut milk, reducing the amount of fat/calories. Save those for when you need the high-shine perfect ganache!If you only have sweetened coconut milk or sweetened flaked coconut on hand, go ahead and use those. Simply reduce the sugar by about 1/4-1/2 cup / 50-100g in the filling, if you wish. I prefer to have unsweetened coconut on hand so I can control how much sugar I'm adding to breakfasts, desserts, etc., plus I like the smaller size of flaked and grated coconut vs. shredded.For toasting coconut, and every use really, I highly recommend Le Creuset pans. My toasted coconut used to always come out in various shades, but since using Le Creuset it always turns out a beautiful even, golden-brown. They conduct heat evenly and beautifully.If a 9x13 pan of cream coconut heaven seems daunting to you, it's super easy to halve this recipe for an 8x8 or 9x9in pan!These bars should ideally be eaten within 3-4 days. Otherwise the whipped cream starts to separate and the crust gets soggy.

Nutrition Facts

Calories

446.04

Fat

30.59 g

Sat. Fat

21.07 g

Carbs

41.54 g

Fiber

2.52 g

Net carbs

39.02 g

Sugar

26.41 g

Protein

4.58 g

Sodium

152.00 mg

Cholesterol

92.63 mg

Nutritional information is approximate. Based on 20 servings.

Coconut Cream pie, bars, shortbread, chocolate ganache, fresh whipped cream, toasted coconut
Dessert, Pie, bars
American
Did you make this recipe?
Tag @jennyblogsandbakes on instagram and hashtag it #jennyblogs

Classic Tiramisù: The Real Deal.

IMG_4530.jpg

As in, I could just copy and paste the original recipe in Italian, and we could all follow the pretty pictures to make it.  That doesn't sound very reliable to me, so I shall do my best to translate it.  Maybe also not very reliable. My point is, this is a good, sound, Italian written recipe of Tiramisù.  Raw eggs, real mascarpone (pronounced mas-car-pohn-AY no matter what those chefs on Food Network say.  I cry a little on the inside when people insist on saying mars-cah-pone.  There is no R before the C. Mas-car-pone is acceptable, as that would be how to say it in English.  But deep down we all want to be a bit more Italian, no?) no cream cheese involved.  It's so simple, and the ingredients are few. Mascarpone can be quite expensive in the States, which is why many substitute cream cheese, but it is so worth the splurge.  If you do feel the need to use cream cheese, (I don't know, maybe your 3 year-old wants tiramisù for a birthday party of 50??) then maybe don't call it tiramisù, call it something else.  Tiramigiù, maybe.  :)

Just like any replication, it will never be as good as in the place where it was founded and crafted and came to fame.  Some of the best mascarpone will be found here in Italy, and at much cheaper costs.  In fact, it's cheaper than cream cheese. Even if you take the exact same method and make mascarpone in another country, those cows will be different cows, who eat different sustenance, and produce milk that tastes different .  Not to mention if the first time you ever tried tiramisù was on your first trip to Italy, surrounded by cobblestone streets, freshly hung laundry on the corner, magnificent old buildings, and the too-loud Italian conversations and even louder hand gestures whirling about, that is something very hard to replicate in anywhere but Italy.  

That said, this is the best recipe for Tiramisù I have yet found.  No, it's not from a wonderful Italian nonna (grandma) I know from down the street or a recipe handed down for generations in one of my friend's families, but I did listen to a podcast once in Italian where a girl was making tiramisù with a nonna and it was essentially the same as the one I'm about to share with you. That counts, right? Ok, andiamo! (Let's go!) 

This post may contain affiliate links. If you make a purchase using these links, Jennyblogs may receive a small commission, at no extra cost to you. This helps to support Jennyblogs. Where possible, links are prioritized to small businesses and ethically and responsibly made items. For further information see the privacy policy. Grazie!

Original recipe in Italian or English, with video and step by step photos, on GialloZafferano.


Tiramisù

Serves 12-15

Ingredients:

  • 220g / about 4 medium eggs, as fresh as you can get them

  • 100g / 1/2 cup sugar

  • 500g mascarpone

  • 300g / about 1 medium package Savoiardi (lady fingers)

  • 300g / 1 1/4 cup brewed coffee from a Moka pot or very strong coffee, sweetened to taste and cooled

  • Cocoa powder for dusting the top

Directions:

IMG_4520.JPG
  1. Separate the egg yolks from the whites, placing the yolks in the bowl of a stand mixer and setting aside the egg whites, or placing them in two medium bowls if you plan on using an electric hand mixer. 

  2. Beat the yolks, slowly adding half the sugar.  

  3. When the mixture becomes light and frothy, beat in the mascarpone, a little at a time.  Once all the mascarpone is beat in, you should have a dense and creamy mixture.  

  4. Clean the beaters well or transfer mascarpone mixture to another bowl and clean the stand mixer bowl and beater.  Beat the egg whites, slowly adding in the rest of the sugar.  Beat until stiff peaks form.

  5. Add one spoonful of the beaten whites to the mascarpone mixture, stirring energetically with a spatula, to begin to lighten it.  Then continue adding the egg whites, folding in delicately one spoonful at a time, until all has been incorporated. 

  6. In a 30x20cm / 8x11in pan, spoon about 1/3 of the cream mixture into the bottom and spread evenly.  Place your cold coffee in a shallow bowl or dish.  Dip your savoiardi in the coffee for a few seconds and place in rows over the cream until an even layer has been established.  

  7. Spoon another third of cream evenly over the savoiardi and repeat another layer of coffee soaked savoiardi.  Top with the remaining cream and smooth evenly.  

  8. Dust with cocoa powder using a sieve and refrigerate for a few hours before serving.             

Buon Appetito!

Jenny's Notes:

IMG_4524.jpg
  • Most grocery stores and supermarkets carry mascarpone and lady fingers in the States, mascarpone being with the cheese or special cheese, lady fingers are in the "imported" section in my local grocery store.

  • Remember that in order to beat egg whites there must not be any trace of egg yolk or grease or they won't beat up properly.

  • One way to tell if your egg whites have been properly beaten is to hold the bowl upside down. The egg whites shouldn't move. Of course, at this point you should already be confident that your whites are stiff enough so you don't end up with, um, egg whites everywhere. It is possible to overbeat egg whites, so don't over do it or they become dry.

  • The Italians making this recipe said they added only 1 tsp of sugar to the coffee, I don't usually add any. If you prefer sweeter desserts, you may decide to add more.

  • If you don't have a 30x20cm / 8x11in pan on hand, you can use a 9x13in. Or halve the recipe and use an 8x8in / 20x20cm or 9x9in.

  • When dipping the Savoiardi I found 4-5 seconds to be ideal. Any less and the coffee didn't soak all the way through, any more and the cookies became over-saturated and broke. When you start running out of coffee you may need to dip one side of the cookie and then the other to get an even soak.

  • Some say it's almost a sin if you cut into the tiramisù if it has been in the fridge for any less than 24 hours. I think it's optimal after just a few hours, and best if eaten within a few days.

  • Can be frozen for up to 2 weeks.

Classic Tiramisù
Yield 12-15
Author
Prep time
45 Min
Total time
45 Min

Classic Tiramisù

Recipe for the classic Italian tiramisù with savoiardi (ladyfingers), mascarpone, raw eggs, and not too much sugar. Translated from Italian.
Cook modePrevent screen from turning off

Ingredients

Instructions

  1. Separate the egg yolks from the whites, placing the yolks in the bowl of a stand mixer and setting aside the egg whites, or placing them in two medium bowls if you plan on using an electric hand mixer.
  2. Beat the yolks, slowly adding half the sugar.
  3. When the mixture becomes light and frothy, beat in the mascarpone, a little at a time. Once all the mascarpone is beat in, you should have a dense and creamy mixture.
  4. Clean the beaters well or transfer mascarpone mixture to another bowl and clean the stand mixer bowl and beater. Beat the egg whites, slowly adding in the rest of the sugar. Beat until stiff peaks form.
  5. Add one spoonful of the beaten whites to the mascarpone mixture, stirring energetically with a spatula, to begin to lighten it. Then continue adding the egg whites, folding in delicately one spoonful at a time, until all has been incorporated.
  6. In a 30x20cm / 8x11in pan, spoon about 1/3 of the cream mixture into the bottom and spread evenly. Place your cold coffee in a shallow bowl or dish. Dip your savoiardi in the coffee for a few seconds and place in rows over the cream until an even layer has been established.
  7. Spoon another third of cream evenly over the savoiardi and repeat another layer of coffee soaked savoiardi. Top with the remaining cream and smooth evenly.
  8. Dust with cocoa powder using a sieve and refrigerate for a few hours before serving.

Notes

Remember that in order to beat egg whites there must not be any trace of egg yolk or grease or they won't beat up properly. One way to tell if your egg whites have been properly beaten is to hold the bowl upside down. The egg whites shouldn't move. Of course, at this point you should already be confident that your whites are stiff enough so you don't end up with, um, egg whites everywhere. It is possible to overbeat egg whites, so don't over do it or they become dry.The Italians making this recipe said they added only 1 tsp of sugar to the coffee, I don't usually add any. If you prefer sweeter desserts, you may decide to add more.If you don't have a 30x20cm / 8x11in pan on hand, you can use a 9x13in. Or halve the recipe and use an 8x8in / 20x20cm or 9x9in.When dipping the Savoiardi I found 4-5 seconds to be ideal. Any less and the coffee didn't soak all the way through, any more and the cookies became over-saturated and broke. When you start running out of coffee you may need to dip one side of the cookie and then the other to get an even soak.Some say it's almost a sin if you cut into the tiramisù if it has been in the fridge for any less than 24 hours. I think it's optimal after just a few hours, and best if eaten within a few days.Can be frozen for up to 2 weeks.

Nutrition Facts

Calories

327.99

Fat

20.59 g

Sat. Fat

11.84 g

Carbs

9.97 g

Fiber

0.08 g

Net carbs

9.88 g

Sugar

9.38 g

Protein

3.90 g

Sodium

202.45 mg

Cholesterol

111.33 mg

Nutritional information is approximate. Based on 12 servings.

authentic tiramisu, Italian tiramisu, real tiramisu, original tiramisu,
Dessert
Italian
Did you make this recipe?
Tag @jenevamorris on instagram and hashtag it #jennyblogs
I have somehow never managed to get a photo after it has been dug into. And I couldn't take photos before, because, well, Christmas and other events. "Who broke into the dessert early?!?!" I never would've hear the end of it.

I have somehow never managed to get a photo after it has been dug into. And I couldn't take photos before, because, well, Christmas and other events. "Who broke into the dessert early?!?!" I never would've hear the end of it.


Caramel Cream Pie

2017-12-23+15.32.59.jpg

Last Updated August 13, 2024

Caramel cream pie is a pie that you should be adding to your pie repertoire ASAP. A homemade buttery pie crust, with a light, creamy, caramel-y filling, topped with more whipped cream and more caramel. Decadent and oh so worth it.

Homemade pies can sometimes feel intimidating, but this one really is not hard to make! You can make your own homemade caramel (I have a recipe for that here, also linked below), or you can rely on a good ol’ can of dulce de leche for absolute ease. I’ve made this pie with both options and it’s absolutely delicious either way.

This post may contain affiliate links. If you buy something using these links, Jennyblogs may receive a small commission, at no extra cost to you. This helps to support Jennyblogs. For further information see the privacy policy. Grazie!

Recipe adapted from Shugary Sweets


Caramel Cream Pie

2017-12-23+15.34.15.jpg

Serves 8-12

Ingredients:

For the Crust

  • 1 1/3 cup / 160g all-purpose flour

  • 1/2 tsp / 2.5g salt

  • 4 Tbsp / 56g butter, cold, cut into small pieces

  • 4-6 Tbsp / 59 - 89g ice water

For the Caramel Cream filling and topping

  • 1 14oz can / 380g dulche de leche, your favorite caramel, or 1/2 recipe of this Caramel Sauce

  • 8 oz / 225g cream cheese, room temperature

  • 2 1/2 cups / 605g heavy whipping cream

  • 1/4 cup / 50g sugar

Directions:

Make the Crust

Oven 425°F / 220°C. Ungreased 8 - 9in / 20 - 23cm pie dish. 

IMG_4555.JPG
  1. In a medium bowl whisk together flour and salt.  Blend in cold butter using a pastry cutter, fork, or your hands.  You want the butter to end up in small pieces, like peas. 

  2. Add the ice water, starting with 4 Tbsp / 59g, mixing as little as possible.  The dough should be able to hold together in a ball, without being too dry and shaggy or too wet.  Add more water if necessary, 1 tablespoon at a time.  

  3. Place dough on a piece of plastic wrap, shape into a disc, and wrap tightly.  Place in the fridge for 1 - 48 hours.  

  4. After the crust has rested, roll into a circle on a lightly floured surface or silpat.  Roll a few times with your rolling pin in one direction before turning the crust 45° (quarter turn) and continuing with a few more rolls.  Periodically check under the crust to make sure it isn’t sticking and sprinkling more flour if needed. Continue like this until your crust is nicely round and roughly 2in / 5cm larger than your pie dish.  

  5. Carefully transfer crust to pie dish (this is easier if using a silpat), trim the excess overhang if necessary, and fold the ends under. Crimp as desired, or press with a fork.  Prick the bottom of the crust with a fork.  The crust can also be refrigerated at this point, if needed.  

  6. Bake in preheated oven for 10-12 minutes, or until crust is lightly golden-brown.  Cool completely.  

Make the Caramel Cream filling and topping

  1. In the bowl of a stand mixer, beat cream cheese with 1/2 cup / 120g caramel.  Set aside.

  2. In the clean bowl of a stand mixer, beat whipping cream and sugar until stiff peaks form.  Reserve 1/2 cup for the topping.  Fold the remaining whipped cream into cream cheese mixture, about a quarter at a time.  

  3. Reserve 1-2 tablespoons of the remaining caramel for the topping.  Spread the rest into the bottom of the crust.  Spread cream cheese mixture over caramel.  

  4. Top pie with reserved 1/2 cup whipped cream and caramel, using a spoon or piping desired.

Jenny's Notes:

  • For the crust, you can also use a food processor, pulsing in the butter until it has the desired consistency.  Just be sure to remove the dough from the food processor and mix in the water with a fork or pastry cutter so you don't overwork the dough.  You want to work it as little as possible once you add the water. The liquid helps to awaken the gluten, and the more you work it and the gluten strands develop, the tougher your crust will be.  The minimum of 1 hour rest in the fridge allows what gluten inevitably developed to relax.  

  • If you are having problems with a shrinking crust, try using a metal or ceramic pie dish and allowing the crust more time to rest before baking.  

  • I have made this pie several times over the past year, and have always needed all 6 tablespoons of water, possibly because it was always during the dry winter.  If you live in a really dry climate, you might need up to 7.  Just be aware, an overly wet crust is more likely to glue itself to the pan during baking.   

Caramel Cream Pie
Yield 8-12 servings
Author
Prep time
1 Hour
Cook time
12 Min
Total time
1 H & 12 M

Caramel Cream Pie

Flaky, buttery crust, whipped caramel filling, and fresh whipped cream with caramel drizzled on top.
Cook modePrevent screen from turning off

Ingredients

For the Crust
For the Caramel Cream filling and topping

Instructions

Make the Crust
  1. Oven 425°F / 220°C. Ungreased 8 - 9in / 20 - 23cm pie dish.
  2. In a medium bowl whisk together flour and salt. Blend in cold butter using a pastry cutter, fork, or your hands. You want the butter to end up in small pieces, like peas.
  3. Add the ice water, starting with 4 Tbsp / 59g, mixing as little as possible. The dough should be able to hold together in a ball, without being too dry and shaggy or too wet. Add more water if necessary, 1 tablespoon at a time.
  4. Place dough on a piece of plastic wrap, shape into a disc, and wrap tightly. Place in the fridge for 1 - 48 hours.
  5. After the crust has rested, roll into a circle on a lightly floured surface or silpat. Roll a few times with your rolling pin in one direction before turning the crust 45° (quarter turn) and continuing with a few more rolls. Periodically check under the crust to make sure it isn’t sticking and sprinkling more flour if needed. Continue like this until your crust is nicely round and roughly 2in / 5cm larger than your pie dish.
  6. Carefully transfer crust to pie dish (this is easier if using a silpat), trim the excess overhang if necessary, and fold the ends under. Crimp as desired, or press with a fork. Prick the bottom of the crust with a fork. The crust can also be refrigerated at this point, if needed.
  7. Bake in preheated oven for 10-12 minutes, or until crust is lightly golden-brown. Cool completely.
Make the Caramel Cream filling and topping
  1. In the bowl of a stand mixer, beat cream cheese with 1/2 cup / 120g caramel. Set aside.
  2. In the clean bowl of a stand mixer, beat whipping cream and sugar until stiff peaks form. Reserve 1/2 cup for the topping. Fold the remaining whipped cream into cream cheese mixture, about a quarter at a time.
  3. Reserve 1-2 tablespoons of the remaining caramel for the topping. Spread the rest into the bottom of the crust. Spread cream cheese mixture over caramel.
  4. Top pie with reserved 1/2 cup whipped cream and caramel, using a spoon or piping desired.

Notes

For the crust, you can also use a food processor, pulsing in the butter until it has the desired consistency. Just be sure to remove the dough from the food processor and mix in the water with a fork or pastry cutter so you don't overwork the dough. You want to work it as little as possible once you add the water. The liquid helps to awaken the gluten, and the more you work it and the gluten strands develop, the tougher your crust will be. The minimum of 1 hour rest in the fridge allows what gluten inevitably developed to relax. If you are having problems with a shrinking crust, try using a metal or ceramic pie dish and allowing the crust more time to rest before baking. I have made this pie several times over the past year, and have always needed all 6 tablespoons of water, possibly because it was always during the dry winter. If you live in a really dry climate, you might need up to 7. Just be aware, an overly wet crust is more likely to glue itself to the pan during baking.

Nutrition Facts

Calories

652.74

Fat

42.84 g

Sat. Fat

26.73 g

Carbs

56.39 g

Fiber

0.54 g

Net carbs

55.85 g

Sugar

40.81 g

Protein

6.75 g

Sodium

437.41 mg

Cholesterol

128.91 mg

Nutritional information is approximate. Based on 8 servings.

caramel cream pie, butter crust, fresh whipped cream, dulche de leche
Dessert, Pie
American
Did you make this recipe?
Tag @jennyblogsandbakes on instagram and hashtag it #jennyblogs
And yet, for as many times as I've made this pie, I've yet to get a photo of it sliced. Oh well, there's butter, caramel, and whipped cream, what more do you need to know?

And yet, for as many times as I've made this pie, I've yet to get a photo of it sliced. Oh well, there's butter, caramel, and whipped cream, what more do you need to know?


Fresh Peach Cobbler

IMG_4958.jpg

Last Updated August 11, 2024

I was really tempted to write, The BEST peach cobbler, because, I've never met a better one, but titles with such descriptives usually drive me away.  I try to call it like it is, and this is a peach cobbler, if I know anything. I get a bit tired of seeing THE BEST everything, ya know? Only one can be right, and the rest are...full of themselves? Fudging? Just trying to get more clicks? All of the above?  

However, in my opinion, this is the best.  Why?  Because it's my mom's peach cobbler.  If you have the privilege of knowing my mom, then I need go no further.  However, if you don't, all you need to know is, she's the greatest, and she knows her way around the kitchen.  I think mom's are born knowing stuff like this.  

Summer is all about picking the fresh produce, eating it, baking with it, and canning with it so you can enjoy the bounty of summer even in the winter months.  Of course, nothing beats fresh food, so I think making as many fruity and vegetable-y dishes as you and your family and friends and neighbors and dog and strangers walking by can eat.  

As a last adieu to summer, before the recipes start reflecting fall, here is the recipe for The. Best. Peach Cobbler.  In all its simplicity and flavors of summer.  

Tips for Blanching Peaches

The amount of time needed to blanch peaches largely depends on how ripe your fruit is. The more ripe, the less time it will need to be blanched.

  • For very ripe, even over-ripe peaches, blanch for 30-45 seconds. For more perfectly ripe peaches, about 1 minute is good.

  • Sightly under-ripe peaches, 1-2 minutes. Keep in mind that under-ripe peaches, no matter how well you blanch them, will be hard to peel.

A successful peach blanching has the peach skins slopping off easily, without the peach itself having gotten too mushy.

The best method for peeling and slicing blanched peaches that I learned from my mom is as follows: Slice peach in half, you can use your knife to gently pry one half of the peach off the pit. Then peel/slop off skin. Continue to slice into wedges. A ripe peach should come off the pit easily, but if it doesn’t, you can cut it into quarters while still attached to the pit. Smaller pieces will be easier to pry of the pit, if necessary.

This post may contain affiliate links. If you buy something using these links, Jennyblogs may receive a small commission, at no extra cost to you. This helps to support Jennyblogs. For further information see the privacy policy. Grazie!

Recipe from my mama, who has made this since I can remember.


Peach Cobbler

Serves about 6 

IMG_4943.jpg

Ingredients:

  • 4 large ripe peaches

  • 1/8 tsp nutmeg, for sprinkling, optional

  • 1 1/4 cups / 250g sugar

  • 3 Tbsp / 42g oil

  • 1/2 cup / 119g milk

  • 1 cup / 120g all-purpose flour

  • 1 tsp / 5g baking powder

  • dash of salt

  • 1 tsp / 3g cornstarch

  • 1 cup / 237g boiling water

Directions:

Oven 375°F / 190°C.     Ungreased 8x8in / 20x20cm baking dish.

Blanch the Peaches

IMG_4959.jpg
  1. Place a large pot of water on the stove and bring to a boil.  While waiting for water to boil, prepare a large bowl of cold/ice water.  

  2. Once water is boiling, carefully place all peaches into the water and blanch (cook briefly in boiling water) for about 1 minute.  Remove from water with a slotted spoon or tongs and immediately dunk in ice water to stop the cooking.  

  3. Peel and slice peaches; place in bottom of baking dish. Sprinkle with nutmeg.

Make the Cobbler

  1. In the bowl of a stand mixer, combine oil and  3/4 cup / 150g of the sugar.  Add milk, flour, baking powder, and salt.  Mix well. Mixture will be thin. Dollop the batter by spoonful over the peaches.

  2. In a small bowl, mix together the remaining 1/2 cup / 100g sugar with cornstarch.  Sprinkle evenly over batter in the baking dish.  

  3. Finally, pour boiling water over top.  Bake for 45-60 minutes, or until the sides are bubbling and the cobbler topping no longer looks doughy.  

  4. Serve warm with a dollop of vanilla ice cream, if desired.

IMG_4941.jpg

Jenny's Notes:

  • The amount of time needed to blanch peaches depends largely on how ripe they are. Very ripe peaches need just 30-45 seconds, perfectly ripe peaches need around 1 minute.

  • This recipe is adapted for a 8x8in pan, perfect for a small crowd. Or 1 person. But this is easily doubled for a 9x13in, and then there's enough to go around. Yay! If doubling, blanch the peaches in two batches if you don’t have a big enough pan.

  • Skin not coming easily off your peaches? Could be they weren't quite ripe enough. If they're mushy, could be your peaches were overripe or blanched slightly too long.

  • Have a different favorite fruit? Go ahead and use it in place of the peaches! This cobbler is very versatile.

  • You can use butter in place of oil. I learned from my mom to often use oil in the place of butter simply because of the healthier mono and poly unsaturated fats, versus the mostly saturated fats in butter. Just be aware of what kind of oil you use if you decide to go the "healthier" route, as not all oils are made equally.

Peach Cobbler
Yield 6 servings
Author
Prep time
45 Min
Cook time
1 Hour
Total time
1 H & 45 M

Peach Cobbler

A classic summer dessert bursting with fresh peaches and topped with a soft and sugary-crusted cobbler topping, all with a hint of nutmeg.
Cook modePrevent screen from turning off

Ingredients

Instructions

Blanch the Peaches
  1. Place a large pot of water on the stove and bring to a boil. While waiting for water to boil, prepare a large bowl of cold/ice water.
  2. Once water is boiling, carefully place all peaches into the water and blanch (cook briefly in boiling water) for about 1 minute. Remove from water with a slotted spoon or tongs and immediately dunk in ice water to stop the cooking.
  3. Peel and slice peaches; place in bottom of baking dish. Sprinkle with nutmeg.
Make the Cobbler
  1. In the bowl of a stand mixer, combine oil and 3/4 cup / 150g of the sugar. Add milk, flour, baking powder, and salt. Mix well. Mixture will be thin. Dollop the batter by spoonful over the peaches.
  2. In a small bowl, mix together the remaining 1/2 cup / 100g sugar with cornstarch. Sprinkle evenly over batter in the baking dish.
  3. Finally, pour boiling water over top. Bake for 45-60 minutes, or until the sides are bubbling and the cobbler topping no longer looks doughy.
  4. Serve warm with a dollop of vanilla ice cream, if desired.

Notes

  • The amount of time needed to blanch peaches depends largely on how ripe they are. Very ripe peaches need just 30-45 seconds, perfectly ripe peaches need around 1 minute.
  • This recipe is adapted for a 8x8in pan, perfect for a small crowd. Or 1 person. But this is easily doubled for a 9x13in, and then there's enough to go around. Yay! If doubling, blanch the peaches in two batches if you don’t have a big enough pan.
  • Skin not coming easily off your peaches? Could be they weren't quite ripe enough. If they're mushy, could be your peaches were overripe or blanched slightly too long.
  • Have a different favorite fruit? Go ahead and use it in place of the peaches! This cobbler is very versatile.
  • You can use butter in place of oil. I learned from my mom to often use oil in the place of butter simply because of the healthier mono and poly unsaturated fats, versus the mostly saturated fats in butter. Just be aware of what kind of oil you use if you decide to go the "healthier" route, as not all oils are made equally.

Nutrition Facts

Calories

352.11

Fat

7.68 g

Sat. Fat

0.63 g

Carbs

69.73 g

Fiber

2.30 g

Net carbs

67.43 g

Sugar

52.46 g

Protein

3.80 g

Sodium

125.34 mg

Cholesterol

0.99 mg

Nutritional information is approximate. Based on 6 servings.

peach cobbler, recipe, fresh peaches, the best peach cobbler, summer dessert, how to make peach cobbler, old-fashioned cobbler
Dessert
American
Did you make this recipe?
Tag @jennyblogsandbakes on instagram and hashtag it #jennyblogs
IMG_4952.jpg

Lemon Cream Tart

Last Updated August 10, 2024

I've been on a French kick recently. This past Christmas I was gifted "The Art of French Classics" by Jacquy Pfeiffer. At first glance it seemed detailed, confusing, and lengthy. Second glance didn't get much better. This was not the type of book you would use to whip up a batch of cookies or bake a cake for dessert tonight. No, this book was going to require time, diligence, patience, determination, and careful reading.  

I decided to dissect this book by my favorite method: list making. Simple and efficient. I started employing this method when I was 13. My mom had bought me a cake mix cookbook by Betty Crocker, and I was thrilled to have my own cookbook to go through and cook all on my own.  Most of those recipes I would shudder at now (they're not completely from scratch, haha!!), but I wanted to make everything in there. Well, almost. Which is where the list came in. I wrote down every recipe I wanted to make, referencing the page numbers. When I had made a recipe, I would put a check mark by it. Much easier to glance at one page (or two or three, there were too many recipes I wanted to make!) than to go through the book every time. And oh so satisfying to make that little check mark. But, I am a nerd when it comes to baking, so you can take this as more of an anecdote than a recommendation.  :)

After initially being intimidated from reading “The Art of French Pastry” and applying my list method, I realized it wouldn’t be so difficult to make a lot of these recipes, after all. Some recipes, yes, which include making puff pastry, choux pastry, and various pastry creams and caramel all for one magnificent cake, but if French cuisine was easy we would all be making cream puffs, croissants, and eclairs everyday now, wouldn’t we? But to my pleasant surprise many of the recipes were quite manageable. This book helps you master some basic techniques that then become easier because you use them often for many of the recipes.

One of the simpler, but nonetheless delicious recipes from the cookbook is this Lemon Cream Tart. Everyone should have a good lemon tart in their repertoire. Someone once asked me, after learning I liked to bake, if I could make a good lemon tart. I had made good lemon tarts before, but sometimes I lack confidence that even if I like something, will it live up to other people's tastes buds? Until I find the recipe, that is. Then I know the search is over, although I will always be open to trying new things. I hung on to my current lemon tart recipe, but I felt like I could do better. A recipe that would be reliable, and deliver that over-the-top creamy, lemony zing. I found it in this recipe, oh yes.  

You’ll notice in my photos that the lemon tart is decorated with meringues and candied orange peels. The recipe does not include those because I feel that for the time spent making them, they don’t add significantly to the eating experience and are more for the wow factor. Don’t get me wrong, they’re yummy, but meringues do require a certain technique (mine unfortunately cracked a bit) and candying orange peel requires 10 days. So. I more than encourage you to get the book and try out those recipes yourselves, and especially the others, like the croissants, palmiers (my absolute favorite recipe from the cookbook), the brioche variations, eclairs, and on and on! Or, if all this seems a bit ambitious to you, gift the book to your favorite baking enthusiast and have them make them for you. :)

A quick tip when approaching seemingly complicated recipes like this one: break it down. Although this recipe may seem lengthy and entailed, it's actually simpler than it seems, especially if you separate it into a "crust" day and a "filling" day.  

This post may contain affiliate links. If you make a purchase using these links, Jennyblogs may receive a small commission, at no extra cost to you. This helps to support Jennyblogs. Where possible, links are prioritized to small businesses and ethically and responsibly made items. For further information see the privacy policy. Grazie!

Recipe adapted from “The Art of French Pastry” by Jacquy Pfeiffer.


*Note:  Make the pâte sablée at least one day ahead as it needs to rest overnight in the refrigerator; two nights is ideal.    

Lemon Cream Tart

Serves 8-12

Ingredients:

For the Pâte Sablée

  • 6 Tbsp / 97g butter

  • 1/4 tsp / 1g salt

  • 1 cup + 1 Tbsp / 145g all-purpose flour

  • 3 Tbsp / 18g almond flour

  • 1/2 cup / 55g powdered sugar

  • 1/4 tsp / 1g vanilla extract

  • 2 egg yolks

For the Lemon Cream

  • 1 cup / 200g sugar, divided

  • 5/8 cup / 140g lemon juice

  • pinch of salt

  • 3 eggs + 1 yolk

  • zest of half a lemon

  • 14 Tbsp / 192g butter, softened and cut into cubes

  • candied lemon peel, toasted nuts, or meringues for decoration, optional

Directions:

Make the Pâte Sablée (2-3 Days Ahead of time)

  1. In the bowl of a stand mixer, add butter, sea salt, and all-purpos flour. Mix on low speed just until crumbly.  Over-mixing will activate gluten in flour and make for a tougher crust. Add almond flour and powdered sugar, mixing until just combined.  Add vanilla and egg yolks on medium speed until just combined.  

  2. Scrape dough out onto a sheet of plastic wrap. Press into a 1/2 inch rectangle and wrap airtight in the plastic. Refrigerate overnight.  

The next day:

  1. Very lightly grease a tart pan with softened butter. You should barely see the butter on the pan.  If it is over-greased the dough may slip down the side as it is baking.  

  2. Remove dough from fridge, unwrap from plastic wrap, and place on a lightly floured surface.  For easier transportation to tart pan, you can roll it out on a floured silpat or piece of parchment paper.  

  3. Tap dough with a rolling pin to make sure it's pliable.  If at any point dough seems too stiff or cold, or cracks as you roll it out, let it rest at room temperature for a few minutes before continuing. Roll dough 3 times in one direction, then make a quarter turn. Periodically check to make sure your dough isn't sticking to the surface.  If it is, use a thin spatula to peel it off and re-flour the surface underneath.  Repeat rolling 3 times and making quarter turns until you have an evenly rolled out, 1/4" thick round of dough.

  4. At this point your dough should be larger than your tart pan.  Carefully transfer dough to pan. You can do this by gently wrapping the dough around the rolling pin, then unrolling it over the pan. Press dough into the pan, paying careful attention to the corners and being careful not to stretch or tear the dough to do so.  Use a knife to trim away any extra dough.  Refrigerate the tart shell uncovered for at least one hour, or preferably overnight.  

An hour later or the next day:

  1. Preheat oven to 325°F / 160°C.  

  2. Remove crust from fridge and dock (poke holes in) bottom with a fork. This will allow steam to escape evenly during baking.  

  3. Line the shell with parchment paper or cheesecloth and pie weights, dry beans, or rice.

  4. Bake for 15 minutes, then remove parchment paper and pie weights. Bake for an additional 5-15 minutes, or until crust begins to evenly color and turn golden. Allow to cool.

Make the Lemon Cream

  1. In a small bowl, combine 1/2 cup / 100g of the sugar with lemon juice and salt; whisk until sugar and salt have dissolved.  

  2. In a medium bowl, combine remaining 1/2 cup / 200g of sugar with egg yolks and whisk for 30 seconds. Whisk the first lemon juice mixture into this mixture and add zest.  

  3. Create a water bath by simmering 1 inch of water in a medium saucepan over low heat.  Place lemon mixture over saucepan, making sure the bottom of the bowl isn't touching the water; whisk constantly so eggs don't scramble. Attach a digital thermometer to the bowl and continue to whisk until mixture reaches 176-179.6°F / 80-82°C.  

  4. Remove from heat and strain into a bowl through a fine-meshed sieve. Use a spatula to push mixture through strainer, if necessary. Transfer thermometer to the new bowl.  Allow mixture to cool to 140°F / 60°C, about 5 minutes.  

  5. At this point pour mixture into a blender, or leave in bowl if using an immersion blender. Add half of the butter and blend, then add second half of the butter and blend for an additional 30 seconds or so, until mixture is completely smooth.  

  6. Pour lemon cream filling into baked crust and allow to set for at least 2 hours in refrigerator. Decorate as desired, dust with powdered sugar, or leave as is. 

Buon Appetit!

Jenny's Notes:

  • The unbaked pâte sablée will keep well covered in the fridge for up to a week, or a month in the freezer.  

Lemon Cream Tart
Yield 8-12
Author
Prep time
1 H & 10 M
Cook time
30 Min
Inactive time
15 Hour
Total time
16 H & 40 M

Lemon Cream Tart

Lemony, creamy, zingy tart with a perfect butter tart crust from Jacquy Pfeiffer's "The Art of French Pastry."
Cook modePrevent screen from turning off

Ingredients

For the Pâte Sablée
For the Lemon Cream Filling

Instructions

Make the Pâte Sablée (2-3 Days Ahead of time)
  1. In the bowl of a stand mixer, add butter, sea salt, and all-purpos flour. Mix on low speed just until crumbly. Over-mixing will activate gluten in flour and make for a tougher crust. Add almond flour and powdered sugar, mixing until just combined. Add vanilla and egg yolks on medium speed until just combined.
  2. Scrape dough out onto a sheet of plastic wrap. Press into a 1/2 inch rectangle and wrap airtight in the plastic. Refrigerate overnight.
The next day:
  1. Very lightly grease a tart pan with softened butter. You should barely see the butter on the pan. If it is over-greased the dough may slip down the side as it is baking.
  2. Remove dough from fridge, unwrap from plastic wrap, and place on a lightly floured surface. For easier transportation to tart pan, you can roll it out on a floured silpat or piece of parchment paper.
  3. Tap dough with a rolling pin to make sure it's pliable. If at any point dough seems too stiff or cold, or cracks as you roll it out, let it rest at room temperature for a few minutes before continuing. Roll dough 3 times in one direction, then make a quarter turn. Periodically check to make sure your dough isn't sticking to the surface. If it is, use a thin spatula to peel it off and re-flour the surface underneath. Repeat rolling 3 times and making quarter turns until you have an evenly rolled out, 1/4" thick round of dough.
  4. At this point your dough should be larger than your tart pan. Carefully transfer dough to pan. You can do this by gently wrapping the dough around the rolling pin, then unrolling it over the pan. Press dough into the pan, paying careful attention to the corners and being careful not to stretch or tear the dough to do so. Use a knife to trim away any extra dough. Refrigerate the tart shell uncovered for at least one hour, or preferably overnight.
An hour later or the next day:
  1. Preheat oven to 325°F / 160°C.
  2. Remove crust from fridge and dock (poke holes in) bottom with a fork. This will allow steam to escape evenly during baking.
  3. Line the shell with parchment paper or cheesecloth and pie weights, dry beans, or rice.
  4. Bake for 15 minutes, then remove parchment paper and pie weights. Bake for an additional 5-15 minutes, or until crust begins to evenly color and turn golden. Allow to cool.
Make the Lemon Cream
  1. In a small bowl, combine 1/2 cup / 100g of the sugar with lemon juice and salt; whisk until sugar and salt have dissolved.
  2. In a medium bowl, combine remaining 1/2 cup / 200g of sugar with egg yolks and whisk for 30 seconds. Whisk the first lemon juice mixture into this mixture and add zest.
  3. Create a water bath by simmering 1 inch of water in a medium saucepan over low heat. Place lemon mixture over saucepan, making sure the bottom of the bowl isn't touching the water; whisk constantly so eggs don't scramble. Attach a digital thermometer to the bowl and continue to whisk until mixture reaches 176-179.6°F / 80-82°C.
  4. Remove from heat and strain into a bowl through a fine-meshed sieve. Use a spatula to push mixture through strainer, if necessary. Transfer thermometer to the new bowl. Allow mixture to cool to 140°F / 60°C, about 5 minutes.
  5. At this point pour mixture into a blender, or leave in bowl if using an immersion blender. Add half of the butter and blend, then add second half of the butter and blend for an additional 30 seconds or so, until mixture is completely smooth.
  6. Pour lemon cream filling into baked crust and allow to set for at least 2 hours in refrigerator. Decorate as desired, dust with powdered sugar, or leave as is.

Notes

The unbaked pâte sablée will keep well covered in the fridge for up to a week, or a month in the freezer.  

Nutrition Facts

Calories

496.27

Fat

33.28 g

Sat. Fat

19.43 g

Carbs

38.08 g

Fiber

0.79 g

Net carbs

37.28 g

Sugar

8.06 g

Protein

4.42 g

Sodium

311.86 mg

Cholesterol

197.83 mg

Nutritional information is approximate. Based on 1 serving if sliced into 8 pieces.

lemon tart, lemon cream, lemon curd, french tart, dessert, lemon bars, Jacquy Pfeiffer
dessert
French
Did you make this recipe?
Tag @jennyblogsandbakes on instagram and hashtag it #jennyblogs
IMG_4714.jpg

Healthy Chocolate Chip Cookie Pie

image.jpg

Last Updated August 5, 2024

Some people are adverse to the word healthy when it comes to desserts.  This recipe today is to help you see you don't need to be one of those people. 

Oh, but what I would give to have a little slice of this pie right now, healthy or not!  Actually, I wouldn't give much.  But that doesn't mean I don't want it.  Yes, Whole30January is still happening.  It has gotten easier in recent days...but you can ask my mom, who is doing it with me, if that's a true statement.  So here is yet another recipe you can make and eat in my stead.  Please, for my sanity.  Just don't tell me how delicious it is.  I like to ask the people around me who are eating delicious nonWhole30food to tell me how disgusting it is.  It almost makes me feel better.  Won't you be glad when Whole30January is over so you won't have to hear any more of my sardonic complaining? 

What do I mean when I say healthy? I mean, aside from the chocolate chips (which have some health benefits in and of themselves aside from the sugar), that you could eat this for breakfast, lunch, or dinner.

This recipe is naturally gluten-free, vegan, dairy-free, and nut free. Just keep in mind you may need to use certified ingredients, i.e. certified GF oats (even though oats are a gluten-free food, they are almost always processed in facilities that also process foods that contain gluten, and there is a high risk of cross-contamination) and check your other ingredients for stowaway unwanted allergens! Chocolate chips, as long as they are semi-sweet or dark chocolate, should not contain any dairy, yet I’ve seen brands that do contain dairy. Reading labels is very important for so many reasons!

Yes ok, on to this nutritious pie that somehow tastes like dessert!

This post may contain affiliate links. If you buy something using these links, Jennyblogs may receive a small commission, at no extra cost to you. This helps to support Jennyblogs. For further information see the privacy policy. Grazie!

Recipe adapted from Chocolate Covered Katie


Healthy Chocolate Chip Cookie Pie

12-16 servings

Ingredients:

  • 2 15oz cans / 500g cooked white beans (navy, great northern, cannellini) or garbanzo beans, drained and rinsed

  • 1 cup / 90g oats or 180g ground flax seeds

  • 1/4 cup / 63g applesauce

  • 3 Tbsp / 42g oil

  • 2 tsp vanilla extract

  • 1/2 tsp baking soda

  • 2 tsp baking powder

  • 1/2 tsp salt

  • 1/2 cup / 100g brown sugar

  • 3 tsp stevia powder

  • 1 cup / 170g chocolate chips or chunks, plus more for sprinkling

Directions:

image.jpg

Oven 350°F / 177°C.  Greased 8 - 9in / 20 - 23cm pie dish.

  1. Combine all ingredients except chocolate chips in a food processor and blend until smooth.  Stir in chocolate chips. 

  2. Scrape dough into prepared pan and sprinkle with additional chocolate chips. 

  3. Bake in oven for 30-35 minutes.  Allow to cool before slicing and serving. 

Jenny's Notes:

  • If you don’t have applesauce, you can use oil instead. That means you would be adding a total of 7 Tbsp / 98g oil, or a scant half cup.

  • I adapted this recipe from Chocolate Covered Katie.  She is very good about giving lots of options if you are gluten-free, vegan, have a nut allergy, etc.  I simply narrowed it down to my favorite combination of ingredients from her options, and preferred amount of sweetener so that it tastes like dessert without giving in to your sugar dragon too much. 

  • Feel free to add more sugar if you feel the need! 

  • If for whatever reason your batter comes out too thick or thin, (didn't drain the beans as much, the applesauce brand you use is soupier, etc.) you can add more oats or flax to thicken, or applesauce, maple syrup, or milk to thin. 

Healthy Chocolate Chip Cookie Pie
Yield 12-16
Author
Prep time
15 Min
Cook time
35 Min
Total time
50 Min

Healthy Chocolate Chip Cookie Pie

A healthy and somehow still delicious cookie pie that is gluten-free, dairy-free, nut-free, and vegan.
Cook modePrevent screen from turning off

Ingredients

Instructions

  1. Oven 350°F / 177°C. Greased 8 - 9in / 20 - 23cm pie dish.
  2. Combine all ingredients except chocolate chips in a food processor and blend until smooth. Stir in chocolate chips.
  3. Scrape dough into prepared pan and sprinkle with additional chocolate chips.
  4. Bake in oven for 30-35 minutes. Allow to cool before slicing and serving.

Notes

If you don’t have applesauce, you can use oil instead. That means you would be adding a total of 7 Tbsp / 98g oil, or a scant half cup. I adapted this recipe from Chocolate Covered Katie. She is very good about giving lots of options if you are gluten-free, vegan, have a nut allergy, etc. I simply narrowed it down to my favorite combination of ingredients from her options, and preferred amount of sweetener so that it tastes like dessert without giving in to your sugar dragon too much. Feel free to add more sugar if you feel the need! If for whatever reason your batter comes out too thick or thin, (didn't drain the beans as much, the applesauce brand you use is soupier, etc.) you can add more oats or flax to thicken, or applesauce, maple syrup, or milk to thin.

Nutrition Facts

Calories

280.72

Fat

10.08 g

Sat. Fat

3.02 g

Carbs

44.03 g

Fiber

7.02 g

Net carbs

37.01 g

Sugar

20.13 g

Protein

7.85 g

Sodium

533.19 mg

Cholesterol

0.00 mg

Nutritional information is approximate. Based on 12 servings.

vegan, dairy-free, gluten-free, nut-free, healthy, cookie pie,
dessert
American
Did you make this recipe?
Tag @jennyblogsandbakes on instagram and hashtag it #jennyblogs
image.jpg

Caramel Toffee Cheesecake

DSC_0185.jpg

Last Updated: August 4, 2024

Happy Thanksgiving!  I am thankful for so many things.  One of those things is cheesecake. 

Especially a caramel cheesecake with a layer of chocolate between the crust and cheesecake, toffee bits, whipped cream, and more caramel drizzled on top. Yep, especially that.

I love the graham cracker crust because it stays together so well! The secret is to use toffee bits in the crust. Toffee is sticky and while the crust is baking all the little pieces melt a bit, fusing the graham cracker crust together into a beautiful, slightly crunchy mass. No crumbling graham cracker crusts today! I mean, I even pressed the crust all the way up the sides of the pan and it stayed even after taking off the spring form pan. Success.

You know how they say actions speak louder than words?  Well, instead of talking about how much I love cheesecake and how great this crust is, I'm going to share the recipe with you...that's an action, right?  Then in turn you can make it, and then you acted on your thankfulness too.  This is such a great plan, let's go! 

This post may contain affiliate links. If you buy something using these links, Jennyblogs may receive a small commission, at no extra cost to you. This helps to support Jennyblogs. For further information see the privacy policy. Grazie!

Recipe adapted from Yammie’s Noshery


Caramel Toffee Cheesecake

Serves about 16-20

Ingredients:

For the Toffee Crust

  • 3 cups / 255g crushed graham crackers, about 2 packages or 18 sheets

  • 1/2 cup / 85g toffee bits, plain or with chocolate (Heath Bits O Brickle)

  • 1/2 cup / 100g brown sugar

  • 1 cup / 226g butter, melted

  • 6 oz / 170g bitter-sweet chocolate, chopped

For the Filling

  • 3 8oz packages / 675g cream cheese, room temperature

  • 1 cup / 245g sour cream

  • 1 cup / 200g sugar

  • 1 Tbsp / 15g vanilla extract

  • 1/4 cup / 75g caramel sauce (To make homemade caramel, halve this recipe here)

  • 4 eggs, lightly beaten

For the Topping

  • 1 cup / 237g heavy whipping cream

  • 2 Tbsp / 40g maple syrup or sugar

  • 1/4 cup / 75g caramel sauce

  • 1/4 cup / 43g toffee bits

Directions:

Oven 300°F / 149°C.  10in / 26cm spring-form pan lined with parchment paper, bottom and sides.

Make the Toffee Crust

  1. Combine graham crackers, toffee, brown sugar, and butter.  Press firmly into the prepared spring-form pan, pressing all the way up the sides.  Sprinkle chopped chocolate evenly over bottom of crust. 

  2. Bake for 5 minutes or until chocolate is melted.  Remove from oven and spread chocolate evenly with a spatula.  Place crust in freezer while you make the filling.

Make the Filling

  1. In the bowl of a stand mixer, beat cream cheese, sour cream, and sugar on low-medium speed for a few minutes.  Add vanilla and caramel.  Beat in the eggs, one at a time, until just combined. 

  2. Pour over crust and bake for about 1 hour and 20 minutes, or until edges are set and center is still a bit jiggly when lightly shaken. 

  3. Turn off oven and crack open the door, leaving cheesecake to set for another 30 minutes.  Remove from oven and allow to cool for a further 30 minutes.

  4. Refrigerate until completely chilled, about 6 hours or overnight.

Make the Topping

  1. When cheesecake is ready, beat whipping cream in the bowl of a stand mixer until soft peaks form.  Add maple syrup and beat until stiff peaks form. 

  2. Pipe whipped cream onto cheesecake, or if you don't have piping bags or tips, simply spread it with a spatula. 

  3. Warm caramel in a small saucepan and drizzle all over the cheesecake with a spoon or spatula.  Sprinkle with toffee and chill until ready to serve.

Jenny's Notes:

  • Cheesecakes require a decent amount of beating, however, avoid beating on high speeds as you don't want to incorporate too much air into the batter. 

  • You can also use an 8in / 20cm spring-form pan + a 6in / 15cm spring-form pan to make this recipe. Or, instead of the 6 incher just stick any extra crust in the bottom of a square baking dish, top with lefotver filling and you have cheesecake bars! I have done the second option before. :) The bars will bake for less time than a spring-form pan.

Caramel Toffee Cheesecake
Yield 16-20 servings
Author
Prep time
1 Hour
Cook time
1 H & 55 M
Total time
2 H & 55 M

Caramel Toffee Cheesecake

Toffee graham gracker crust, a layer of dark chocolate, caramel cheesecake filling, and whipped cream, caramel, and more toffee bits on top.
Cook modePrevent screen from turning off

Ingredients

For the Toffee Crust
For the Filling
For the Topping

Instructions

  1. Oven 300°F / 149°C. 10in / 26cm spring-form pan lined with parchment paper, bottom and sides.
Make the Toffee Crust
  1. Combine graham crackers, toffee, brown sugar, and butter. Press firmly into the prepared spring-form pan, pressing all the way up the sides. Sprinkle chopped chocolate evenly over bottom of crust.
  2. Bake for 5 minutes or until chocolate is melted. Remove from oven and spread chocolate evenly with a spatula. Place crust in freezer while you make the filling.
Make the Filling
  1. In the bowl of a stand mixer, beat cream cheese, sour cream, and sugar on low-medium speed for a few minutes. Add vanilla and caramel. Beat in the eggs, one at a time, until just combined.
  2. Pour over crust and bake for about 1 hour and 20 minutes, or until edges are set and center is still a bit jiggly when lightly shaken.
  3. Turn off oven and crack open the door, leaving cheesecake to set for another 30 minutes. Remove from oven and allow to cool for a further 30 minutes.
  4. Refrigerate until completely chilled, about 6 hours or overnight.
Make the Topping
  1. When cheesecake is ready, beat whipping cream in the bowl of a stand mixer until soft peaks form. Add maple syrup and beat until stiff peaks form.
  2. Pipe whipped cream onto cheesecake, or if you don't have piping bags or tips, simply spread it with a spatula.
  3. Warm caramel in a small saucepan and drizzle all over the cheesecake with a spoon or spatula. Sprinkle with toffee and chill until ready to serve.

Notes

Cheesecakes require a decent amount of beating, however, avoid beating on high speeds as you don't want to incorporate too much air into the batter. You can also use an 8in / 20cm spring-form pan + a 6in / 15cm spring-form pan to make this recipe. Or, instead of the 6 incher just stick any extra crust in the bottom of a square baking dish, top with lefotver filling and you have cheesecake bars! I have done the second option before. :) The bars will bake for less time than a spring-form pan.

Nutrition Facts

Calories

619.24

Fat

42.95 g

Sat. Fat

25.01 g

Carbs

53.18 g

Fiber

0.90 g

Net carbs

52.27 g

Sugar

42.62 g

Protein

7.17 g

Sodium

376.36 mg

Cholesterol

156.01 mg

Nutritional information is approximate and based on 16 servings.

caramel, toffee crunch, Heath, Bits O Brickle, cheesecake, homemade caramel, chocolate, graham cracker crust
dessert
American
Did you make this recipe?
Tag @jennyblogsandbakes on instagram and hashtag it #jennyblogs

Peanut Butter Pie with Chocolate Whipped Cream

Shortbread crust.  A layer of creamy peanut butter filling.  Topped with a mountain of chocolate whipped cream.  And chocolate shavings.  Because, we're so fancy, you already know.  Did I mention No-Bake?

I first made this pie with a pretzel crust.  The salty sweetness really off-set the creamy full-bodied mouth feel of the layers well.  Yes, sometimes I describe dessert and food like wine.  It just works so well.  But if you ever catch me saying "I prefer the '98 vintage of this cheesecake" or something along that line, I might have taken it too far.  Ew, rancid cheesecake.  Anyway...

The next time I made this pie was in Italy.  Pretzels do exist here, but they have a very strange texture.  Think pretzels that went stale and chewy and then got so stale they got crispy again, almost. But still a little chewy.  And don't chop well in a food processor. It took over 8 minutes to get them partly broken up.  The crust was still good, but it looked more like a bird's nest of pretzel sticks than a uniform crust.  

Oh hey, Thanksgiving pie. And there is Lucia the poinsettia in the background. Good times, good times.

Oh hey, Thanksgiving pie. And there is Lucia the poinsettia in the background. Good times, good times.

Regardless, all the Americans in Italy are so peanut butter deprived that everyone loved it.  In fact, two days later was Thanksgiving and it was requested of me to make and bring this pie to Thanksgiving dinner.  Not pecan pie.  Not pumpkin pie.  Peanut Butter Pie with Chocolate Whipped Cream.  With a delicious but slightly strange looking crust.  

When I made the pie this time, I used shortbread cookies with great success.  The Italian supermarkets have practically a whole aisle devoted to all their different kinds of shortbread cookies, called frollini.  A nice big 800g bag for 1.5-2.5 euros?  Hehe don't mind if I do.  Shortbread with cream, or chocolate and stars, buckwheat, almond, almond and chocolate, hazelnut, stuffed with apricot, stuffed with chocolate, coarse sugar-topped, made with egg, chocolate drops...the varieties go on. 

Someday I will share with you the pretzel crust, but when I have access again to pretzels that behave in a food processor and I can get some decent photos.  But until then, get your hands on some shortbread cookies.  You could make some homemade (classic shortbread consists of just 3 ingredients: flour, butter, sugar) or if you're in the States buy some Sandie's shortbread cookies or something similar. 

This post may contain affiliate links. If you make a purchase using these links, Jennyblogs may receive a small commission, at no extra cost to you. This helps to support Jennyblogs. For further information see the privacy policy. Grazie!

Recipe adapted from the Cooking Channel


Peanut Butter Pie with Chocolate Whipped Cream

Makes 1 9in / 23cm pie - 8-12 servings

Ingredients:

For the Shortbread Crust

  • about 15 / 150g shortbread cookies

  • 4 Tbsp / 56g butter, melted

For the Peanut Butter Filling

  • 1/2 cup / 119g heavy whipping cream

  • 1/2 cup / 113g mascarpone or cream cheese, room temperature

  • 1/3 cup / 87g creamy peanut butter

  • 1/4 cup / 50g brown sugar

For the Chocolate Whipped Cream

  • 3-4 oz / 100g good quality dark chocolate, chopped

  • 2 cups / 474g heavy whipping cream

  • Extra chocolate in bar form, for chocolate shavings, optional

Directions:

Make the Chocolate Whipped Cream First

  1. Place chocolate and cream in a double boiler or a glass or metal bowl over a pan of simmering water.  The bottom of the bowl shouldn’t touch the water.

  2. Gently stir until chocolate is mostly melted.  Remove from heat and continue stirring until chocolate has completely melted.  Place in the refrigerator for 2 hours. 

Make the Shortbread Crust

  1. In a food processor, pulse cookies until they become crumbly.  Add butter and pulse until smooth and can be pressed into a crust.  Depending on the type of cookies you use, you may need to add a touch more melted butter to ensure the crust will stay together.  Press into a 9in / 23cm pie dish and refrigerate.

Make the Peanut Butter Filling

  1. In the bowl of a stand mixer or with a handheld mixer, whip heavy cream until stiff peaks form.  Transfer to another bowl. 

  2. Again, in the bowl of the stand mixer beat mascarpone, peanut butter, and brown sugar together until smooth.  Gently fold in the whipped cream with a spatula.  Pour filling over crust and return to the refrigerator. 

Assembly

  1. Once the chocolate cream is cooled, beat with a stand mixer or handheld mixer until stiff peaks form.  Remove pie from the refrigerator and spread or pipe chocolate whipped cream over the top. 

  2. Use a vegetable peeler or knife to shave a chocolate bar over the pie for the finishing touch. 

Jenny's Notes:

  • Try using Nutella or Biscoff spread instead of peanut butter.  YUM.

Peanut Butter Pie with Chocolate Whipped Cream
Yield 8-12
Author
Prep time
50 Min
Inactive time
2 Hour
Total time
2 H & 50 M

Peanut Butter Pie with Chocolate Whipped Cream

No-bake pie with shortbread crust, mascarpone peanut butter filling, chocolate whipped cream and topped with chocolate shavings.
Cook modePrevent screen from turning off

Ingredients

For the Shortbread Crust
For the Peanut Butter Filling
For the Chocolate Whipped Cream

Instructions

Make the Chocolate Whipped Cream (first)
  1. Place chocolate and cream in a double boiler or a glass or metal bowl over a pan of simmering water. The bottom of the bowl shouldn’t touch the water.
  2. Gently stir until chocolate is mostly melted. Remove from heat and continue stirring until chocolate has completely melted. Place in the refrigerator for 2 hours.
Make the Shortbread Crust
  1. In a food processor, pulse cookies until they become crumbly. Add butter and pulse until smooth and can be pressed into a crust. Depending on the type of cookies you use, you may need to add a touch more melted butter to ensure the crust will stay together. Press into a 9in / 23cm pie dish and refrigerate.
Make the Peanut Butter Filling
  1. In the bowl of a stand mixer or with a handheld mixer, whip heavy cream until stiff peaks form. Transfer to another bowl.
  2. Again, in the bowl of the stand mixer beat mascarpone, peanut butter, and brown sugar together until smooth. Gently fold in the whipped cream with a spatula. Pour filling over crust and return to the refrigerator.
Assembly
  1. Once the chocolate cream is cooled, beat with a stand mixer or handheld mixer until stiff peaks form. Remove pie from the refrigerator and spread or pipe chocolate whipped cream over the top.
  2. Use a vegetable peeler or knife to shave a chocolate bar over the pie for the finishing touch.

Notes

Try using Nutella or Biscoff spread instead of peanut butter. YUM.

Nutrition Facts

Calories

636.86

Fat

54.27 g

Sat. Fat

29.83 g

Carbs

27.35 g

Fiber

1.81 g

Net carbs

25.54 g

Sugar

20.45 g

Protein

7.07 g

Sodium

259.95 mg

Cholesterol

119.26 mg

Nutritional information is approximate. Based on the pie cut into 8 servings; includes chocolate shavings.

peanut butter pie, no bake pie, summer dessert, chocolate whipped cream, mascarpone, shortbread crust
dessert, pie
American
Did you make this recipe?
Tag @jennyblogsandbakes on instagram and hashtag it #jennyblogs

Nutter Butter Pie

Last updated September 27, 2024

image.jpg

Who doesn't love Nutter Butter cookies?  They remind me of chocolate fondue and my Aunt Cathy.  My mom didn't buy them growing up so I never really knew what I was missing out on.  Except when we would go over my aunt's house and on the special occasion when a fondue was involved for a holiday or bonfire, she always had Nutter Butters as one of the dipping tools.  And they were my favorite.  #inmyeyesyoudonowrong.  I don't even think we had fondue that much, but there must have been one glorious time with Nutter Butters, and the rest is history. 

This pie really lets them shine through, with most of the flavor and sweetness coming from the cookies themselves. There’s a fluffy (thanks to marshmallow fluff) peanut butter cream cheese filling with Nutter Butters chunks and its all topped with a whipped cream topping and peanut butter drizzle.

This post may contain affiliate links. If you make a purchase using these links, Jennyblogs may receive a small commission, at no extra cost to you. This helps to support Jennyblogs. For further information see the privacy policy. Grazie!

Recipe adapted from Cookies & Cups


Nutter Butter Pie

image.jpg

Ingredients:

For the crust

  • 20 / 280g Nutter Butter cookies

  • 5 Tbsp / 70g butter, melted

For the filling

  • 8 oz / 225g cream cheese, room temperature

  • 1 cup / 85g marshmallow fluff

  • 1/3 cup / 87g creamy peanut butter

  • 1 cup / 237g heavy whipping cream

  • 12 / 168g Nutter Butter cookies, crushed

For the topping

  • 1 cup / 237g heavy whipping cream

  • 2 Tbsp / 16g powdered sugar

For the drizzle

  • 1/4 cup / 65g creamy peanut butter

Directions:

Make the crust

Oven preheated to 350°F / 177°C. Ungreased 9in / 23cm pie dish.

  1. In a food processor, pulse the Nutter Butter cookies until mostly fine crumbs.  Add the butter and pulse until thoroughly combined.  Press firmly into the bottom and up the sides of the pie dish. 

  2. Bake for 10-12 minutes or until edges start to turn golden.  Allow to cool completely.

Make the filling

  1. In the bowl of a stand mixer or by hand, beat cream cheese for about one minute.  Add marshmallow fluff and peanut butter and beat until smooth.  If using a stand mixer, transfer to another bowl and set aside.

  2. In the bowl of a stand mixer fitted with the whisk attachment or with a hand beater, beat heavy whipping cream until stiff peaks form. 

  3. Gently fold 1/3 of whipped cream into the cream cheese mixture, repeat two more times. 

  4. Fold in Nutter Butter cookies.  Spread over cooled crust.

Make the topping

  1. In the bowl of a stand mixer fitted with the whisk attachment, beat the heavy whipping cream and powdered sugar until stiff peaks form.   Gently spread over cream cheese filling.

Make the drizzle

  1. In a small pan, heat peanut butter on low heat for about a minute or until it is thin enough to drizzle. 

  2. Use a spoon or piping bag to drizzle over pie.

  3. Cover and chill pie in fridge for at least two hours before serving, ideally.  But we don't live in an ideal world, and if you can't wait that long, it will hold together if you cut into it immediately.  But I always follow directions and chill for the recommended time, so how would I know that? heh. heh. heh.

Jenny's Notes:

  • Which is better, natural soupy peanut butter or the stiff peanut butter, like Jif?  Most recipes will tell you to use the stiff kind, because it emulsifies better (in other words, doesn't separate as easily.)  I like to use natural because it doesn't have the added sugar or hydrogenated or partially hydrogenated fats.  I find that subbing the natural almost always turns out fine, just be careful not to beat more than necessary, as that can sometimes cause the separation. 

  • This recipe as is uses exactly one container of Nutter Butters.  If you're feeling generous, you could buy 2 packages and use more Nutter Butters crushed in the filling, and some crushed on top.  And have some left over for snacking...or fondue...

Nutter Butter Pie
Yield 12
Author
Prep time
50 Min
Cook time
13 Min
Inactive time
2 Hour
Total time
3 H & 3 M

Nutter Butter Pie

Nutter Butter crust, fluffy peanut butter filling with Nutter Butter chunks and a whipped cream topping make up this peanut butter pie.

Ingredients

For the Crust
For the Filling
For the topping
For the drizzle

Instructions

Make the crust
  1. Oven preheated to 350°F / 177°C. Ungreased 9in / 23cm pie dish.
  2. In a food processor, pulse the Nutter Butter cookies until mostly fine crumbs. Add the butter and pulse until thoroughly combined. Press firmly into the bottom and up the sides of the pie dish.
  3. Bake for 10-12 minutes or until edges start to turn golden. Allow to cool completely.
Make the filling
  1. In the bowl of a stand mixer or by hand, beat cream cheese for about one minute. Add marshmallow fluff and peanut butter and beat until smooth. If using a stand mixer, transfer to another bowl and set aside.
  2. In the bowl of a stand mixer fitted with the whisk attachment or with a hand beater, beat heavy whipping cream until stiff peaks form.
  3. Gently fold 1/3 of whipped cream into the cream cheese mixture, repeat two more times.
  4. Fold in Nutter Butter cookies. Spread over cooled crust.
Make the topping
  1. In the bowl of a stand mixer fitted with the whisk attachment, beat the heavy whipping cream and powdered sugar until stiff peaks form. Gently spread over cream cheese filling.
Make the drizzle
  1. In a small pan, heat peanut butter on low heat for about a minute or until it is thin enough to drizzle.
  2. Use a spoon or piping bag to drizzle over pie.
  3. Cover and chill pie in fridge for at least two hours before serving, ideally. But we don't live in an ideal world, and if you can't wait that long, it will hold together if you cut into it immediately. But I always follow directions and chill for the recommended time, so how would I know that?

Notes

  • Which is better, natural soupy peanut butter or the stiff peanut butter, like Jif?  Most recipes will tell you to use the stiff kind, because it emulsifies better (in other words, doesn't separate as easily.)  I like to use natural because it doesn't have the added sugar or hydrogenated or partially hydrogenated fats.  I find that subbing the natural almost always turns out fine, just be careful not to beat more than necessary, as that can sometimes cause the separation. 
  • This recipe as is uses exactly one container of Nutter Butters.  If you're feeling generous, you could buy 2 packages and use more Nutter Butters crushed in the filling, and some crushed on top.  And have some left over for snacking...or fondue...


Nutrition Facts

Calories

513.10

Fat

38.75 g

Sat. Fat

21.22 g

Carbs

36.64 g

Fiber

1.03 g

Net carbs

35.61 g

Sugar

14.32 g

Protein

7.51 g

Sodium

278.29 mg

Cholesterol

119.79 mg

Nutritional information is approximate. Based on 1 slice, if pie is cut into 12 slices.

pie, Nutter Butter cookies, Nutter Butter crust, peanut butter pie, whipped cream
dessert, pie
American
Did you make this recipe?
Tag @jennyblogsandbakes on instagram and hashtag it #jennyblogs
image.jpg

No-Bake Oreo Cheesecake

Last Updated September 15, 2024

What do you do when you have 55 days until you move to another country?  Start thinking about all the food items and ingredients you won't be able to eat or buy while you're there. Naturally. 

I started to make a list of such things, and some of the items on there are rather tragic. No real vanilla extract? No Oreos (false, Oreos are readily available in Italy), Butterfingers, or other terribly wonderful processed American goodies? Pretzels only to be found of sketchy tough texture? Weird behaving marshmallows and graham crackers? (No S'mores for this girl.) Italians also don't understand our love for peanut butter. In all the grocery stores I've been in in Florence, (probably all of them because they're kinda my happy place) I have only seen Skippy, maybe Peter Pan once, and usually priced about 4-5 euros, roughly $6. There is a specialty Asian market, Vivi Market, that has an "American" section, and they sell the closest thing to real peanut butter I found. It's called Calve, made in the Netherlands, but it still has the hydrogenated oil and sugar added to it. Pumpkin is also a rarity over there. They make such wonderful pumpkin filled ravioli and pumpkins for carving come out for a couple weeks around Halloween, but to buy a 15 oz can of Libby's pumpkin costs over €4. Pumpkin pie, bread, muffins, cake, pudding, only for special occasions, I guess...

Now don't get me wrong, I'm really not that worried about missing American food. I did just fine for three months last fall, it's just a matter of understanding how different ingredients and substitutions behave in my favorite recipes. I mean, this is Italy we're talking about.  Home to some of the best food in the world. But I'm not partial or anything.  I keep a pretty good cover, though; you can't tell how much I love the food by the way I skip home from the super market with my arms full of pasta and heart bursting, waltz past the shelves of Nutella, guzzle acqua frizzante, double fist the cones of gelato, or giggle as I sweep the tubs of mascarpone that are cheaper than milk off the shelves. Nope. Not even around Christmas time when all the different kinds of panettone start filling the shelves and Jenny's shopping cart. 

I'm happy just thinking about all this wonderful food and its potential, but right now I am in the States, and I'm going to bake something I won't be able to for awhile. Something with Oreos.  Lots of Oreos. Or not bake, because this is a super easy no-bake cheesecake. Again, wasting my time, because I didn’t realize at the time of making this before moving to Italy that almost every grocery store carries Oreos.

This post may contain affiliate links. If you make a purchase using these links, Jennyblogs may receive a small commission, at no extra cost to you. This helps to support Jennyblogs. Where possible, links are prioritized to small businesses, and American companies and products made in the USA for American readers. For further information see the privacy policy. Grazie!


No-Bake Oreo Cheesecake

Serves about 12

Ingredients:

For the Crust:

  • 16-18 Oreos

  • 4 Tbsp / 56g butter, melted

For the Filling:

  • 1 cup / 237g heavy whipping cream

  • 24 oz / 675g cream cheese, room temperature

  • 1/2 cup / 100g sugar

  • 32 Oreos, coarsely chopped, divided

Directions:

Make the Crust:

  1. In a food processor, pulse Oreos until finely ground.  Add butter and pulse until combined. 

  2. Press into bottom and a bit up the sides of a 9 in. tart pan, pie pan, or springform pan.  Freeze while you make the filling.

Make the Filling:

  1. In the bowl of a stand mixer or with an electric mixer, whip cream until stiff peaks form. Set aside.

  2. Beat cream cheese in the bowl of a stand mixer or with an electric mixer until light and fluffy. Beat in sugar. 

  3. Fold in 24 (about 3/4) of the coarsely chopped Oreos, then gently fold in whipped cream. 

  4. Remove crust from freezer. Pour in filling and smooth the top. 

  5. Sprinkle with remaining chopped Oreos and place in fridge until completely chilled, about 2 hours. 

Jenny's Notes:

  • This cheesecake can also be frozen. Allow to sit at room temperature for 10 minutes or so before slicing.

No-Bake Oreo Cheesecake
Yield 12
Author
Prep time
30 Min
Inactive time
2 Hour
Total time
2 H & 30 M

No-Bake Oreo Cheesecake

No-Bake Oreo Cheesecake features an easy Oreo crust with an ultra creamy, yet light filling with chunks of Oreos throughout and more Oreos on top.

Ingredients

For the Crust:
For the Filling:

Instructions

Make the Crust:
  1. In a food processor, pulse Oreos until finely ground. Add butter and pulse until combined.
  2. Press into bottom and a bit up the sides of a 9 in. tart pan, pie pan, or springform pan. Freeze while you make the filling.
Make the Filling:
  1. In the bowl of a stand mixer or with an electric mixer, whip cream until stiff peaks form. Set aside.
  2. Beat cream cheese in the bowl of a stand mixer or with an electric mixer until light and fluffy. Beat in sugar.
  3. Fold in 24 (about 3/4) of the coarsely chopped Oreos, then gently fold in whipped cream.
  4. Remove crust from freezer. Pour in filling and smooth the top.
  5. Sprinkle with remaining chopped Oreos and place in fridge until completely chilled, about 2 hours.

Notes

  • This cheesecake can also be frozen. Allow to sit at room temperature for 10 minutes or so before slicing.

Nutrition Facts

Calories

559.39

Fat

39.86 g

Sat. Fat

21.21 g

Carbs

43.69 g

Fiber

1.42 g

Net carbs

42.27 g

Sugar

22.65 g

Protein

6.65 g

Sodium

403.94 mg

Cholesterol

89.86 mg

Nutritional information is approximate, based on 1 serving if recipe serves 12.

no-bake cheesecake, oreo pie, oreo cream cheese pie, summer dessert
dessert
American
Did you make this recipe?
Tag @jennyblogsandbakes on instagram and hashtag it #jennyblogs

White Russian Tart

Last updated on September 15, 2024

This tart is a refreshingly scrumptious, not-as-guilty dessert. It is no-bake, gluten-free, refined-sugar free, and somehow delicious. It’s filled with healthy fats which help keep you satisfied for longer than sugary, carb-heavy desserts.

Crust

The crust is like a chewy Lara bar, made of dates, nuts, coconut and cocoa powder to make it dark and chocolatey.

Dark Chocolate Cream

Next, there is a smooth, dark chocolate layer spiked with vodka and Kahlua. You’d never guess the main ingredient for this “cream” is avocado.

Mascarpone Cream

The top layer is decadent and lightly sweetened mascarpone. Put the three layers together and you have yourself quite the treat!

A healthy dessert? Is it any good?

When I'm experimenting and trying new recipes in the "healthy" department (as defined by trying to limit refined-sugars or flours, using a vegetable or bean or something that doesn't normally go belong in desserts, or generally replacing healthier ingredients for less healthy ones) I look for the 3 different categories of reactions from my tasters:

  1. The category of "This is honest deliciousness."  When people ask for a recipe or have no idea that there are chickpeas or spinach powder hidden in what they're eating. Something a normal or even picky eater would eat. 

  2. The category of "It's good for a healthy dessert!"  So it's palatable and they're not gagging, but most would still take a slice of cheesecake over it. AKA, just not as good as it’s regular counterpart.

  3. The category of "I would rather just eat a salad."  If actual fruits and vegetables are tastier than the “dessert” that is trying to be passed off, then that recipe should probably be scrapped.

This tart is a solid category 1.  Even my mom and brother approved this, and they keep me pretty honest when it comes to healthy desserts. 

I bounce back and forth between decadent desserts and healthier desserts. I have a love and respect for both, and each have their place. Some days it's honey, nuts, and coconut oil; other days it's sugar, heavy whipping cream, and butter. Variety is the spice of life. Today, it's dates, avocado, and mascarpone.

This post may contain affiliate links. If you make a purchase using these links, Jennyblogs may receive a small commission, at no extra cost to you. This helps to support Jennyblogs. Where possible, links are prioritized to small businesses, and American companies and products made in the USA for American readers. For further information see the privacy policy. Grazie!


White Russian Tart

Serves 8-12

Ingredients:

Chocolate Crust

  • 1-1/2 cups / 210g whole almonds

  • 2 Tbsp / 10g unsweetened shredded coconut

  • 4-5 medjool or 8-10 / 100g deglet dates, pitted

  • 1/2 tsp vanilla extract

  • 1 Tbsp / 7g unsweetened cocoa powder

  • 1/4 tsp salt

Chocolate Vodka Cream

  • 1/4 cup / 56g unrefined coconut oil, melted

  • 1 Tbsp finely ground coffee beans

  • 1 large ripe avocado, peeled, pit removed, and sliced

  • 3 Tbsp / 20g unsweetened cocoa powder

  • 1 tsp vodka

  • 1 tsp rum or Kahlua (of course the Kahlua option adds sugar)

  • 2 Tbsp / 40g+ maple syrup, or more to taste

Mascarpone Cream

  • 8 oz / 225g mascarpone cheese

  • 1 Tbsp / 20g maple syrup

  • 1 tsp vanilla extract

Directions:

Make the Chocolate Crust

  1. In a food processor, combine almonds and coconut and pulse until small crumbles. 

  2. Add dates, vanilla, cocoa powder, and salt.  Process until well combined. 

  3. Press into the bottom of a 8 or 9 inch spring-form pan or pie plate.

Make the Chocolate Vodka Cream

  1. Combine melted coconut oil, coffee, avocado, cocoa powder, vodka, Kahlua, and maple syrup in a food processor until smooth. Stop and scrape down sides and bottom occasionally. 

  2. Spread over crust and place in freezer for about 30 minutes.

Make the Mascarpone Cream

  1. Combine mascarpone, maple syrup, and vanilla in a small bowl.  Take the tart out of the freezer and spread mascarpone mixture over it. 

  2. Place in fridge for about 2 hours before serving.   

Jenny's Notes:

  • This tart is not very sweet and really lets the mascarpone shine through.  However, if you or your guests prefer things a little on the sweeter side, feel free to add more maple syrup in either of the creams. 

  • Also, I like to use black cocoa powder in this recipe.  Black cocoa powder is what gives Oreos their signature black color.  (I didn't know the flavor of Oreo was supposed to be chocolate until I was an adult.)  If you can get your hands on it, it's really great. I usually order it from Amazon. 

White Russian Tart
Yield 8-12
Author
Prep time
35 Min
Inactive time
2 Hour
Total time
2 H & 35 M

White Russian Tart

Chewy chocolate almond and date crust, creamy chocolate cream, topped with a lightly sweet mascarpone cream. This dessert is decadent and also gluten-free, refined sugar-free, no-bake, and full of healthy fats.

Ingredients

Chocolate Crust
Chocolate Vodka Cream
Mascarpone Cream

Instructions

Make the Chocolate Crust
  1. In a food processor, combine almonds and coconut and pulse until small crumbles.
  2. Add dates, vanilla, cocoa powder, and salt. Process until well combined.
  3. Press into the bottom of a 8 or 9 inch spring-form pan or pie plate.
Make the Chocolate Vodka Cream
  1. Combine melted coconut oil, coffee, avocado, cocoa powder, vodka, Kahlua, and maple syrup in a food processor until smooth. Stop and scrape down sides and bottom occasionally.
  2. Spread over crust and place in freezer for about 30 minutes.
Make the Mascarpone Cream
  1. Combine mascarpone, maple syrup, and vanilla in a small bowl. Take the tart out of the freezer and spread mascarpone mixture over it.
  2. Place in fridge for about 2 hours before serving.

Notes

  • This tart is not very sweet and really lets the mascarpone shine through.  However, if you or your guests prefer things a little on the sweeter side, feel free to add more maple syrup in either of the creams. 
  • Also, I like to use black cocoa powder in this recipe.  Black cocoa powder is what gives Oreos their signature black color.  (I didn't know the flavor of Oreo was supposed to be chocolate until I was an adult.)  If you can get your hands on it, it's really great. I usually order it from Amazon. 

Nutrition Facts

Calories

358.31

Fat

29.26 g

Sat. Fat

15.72 g

Carbs

22.26 g

Fiber

5.01 g

Net carbs

17.27 g

Sugar

14.6 g

Protein

5.29 g

Sodium

92.3 mg

Cholesterol

28.35 mg

Nutritional information is approximate. Based on 8 servings.

no bake, refined sugar free, gluten free dessert, raw dessert
dessert
American
Did you make this recipe?
Tag @jennyblogsandbakes on instagram and hashtag it #jennyblogs

Blueberry Icebox Pie

Serves 10-12

A day late and a dollar short on pi day, I know.  But hear me out! If 3/14 is pi day, do you know what comes after the .14? That's right.  .1415.  Emphasis on the 15, because that's today.  Pie the food is so great it should get two days of recognition anyway. There, there, pie, I didn't forget about you.  But you didn't come here to listen to me ramble, you're probably here because you love pie, or blueberries, or math, or all of the above.  Moving on, before this post accidentally ends up on 3/16.

This is a simple recipe, fairly quick and delicious to eat!  The only baking required is for the crust.  Great for summer time, especially when blueberries are in season.

Blueberry Icebox Pie

Ingredients:

  • 1 sleeve graham crackers

  • 4 Tbsp butter, melted

  • 2 cups fresh blueberries (or frozen and thawed)

  • 2 Tbsp lemon juice

  • 2 tsp unflavored powdered gelatin, or 1 1/4-oz packet

  • 16 oz. cream cheese (2 blocks), room temperature

  • 14 oz can sweetened condensed milk

Directions:

Preheat oven to 350 F.

In a food processor, process graham crackers until fine.  Alternately, you can always crush them with a rolling pin on a cutting board or in a seal-able plastic bag. Add melted butter and pulse until graham cracker crumbs hold together some.  Press into a 9 in. spring form pan or pie plate.

Bake for 10 minutes.

Purée 1 1/2 cups of the blueberries in a food processor or blender.  Add lemon juice. 

Transfer to a small saucepan and sprinkle gelatin over the surface.  Let sit for 10 minutes.

Place blueberry mixture on the stove over medium-low, heating until gelatin has just dissolved. Remove from heat.

In a bowl with electric beaters or with a stand mixer, beat cream cheese for about a minute.  Add condensed milk.  On low speed, slowly add blueberry mixture.  Increase speed and beat until smooth.

Pour over baked crust, top with remaining blueberries, and chill until set. 

To serve, garnish with fresh mint, if desired.

Jenny's Note:  This can also be frozen, perfect for the hottest of summer days.  Just let set at room temperature for about 10 minutes before slicing.

Disclaimer on the ahem, er, photography.  It can only get better from here, right?

Disclaimer on the ahem, er, photography.  It can only get better from here, right?

And do you know what number comes after 3.1415? Yep. 926.  And guess what? I was writing this post at 9:26.  Oh yes, I went there.  Enjoy your pi. I mean, pie.

And here is a pie chart to go with your pie on the day after pi.  Sincerely, Jenny Leslie Knope Morris.

Recipes Currently Waiting to be Made

Recipe adapted from Self