My Favorite Scones

Adjustments.jpeg

Happy 2020!
Once again heading into the Christmas season I went MIA from the blog, there’s just too much to be done, eaten, seen, and experienced!

I closed out 2019 by getting to show my husband America for the first time ever, and more importantly, my hometown! It was a blast traveling home for Christmas, and busy. Every year it seems to get a little bit harder to say goodbye.

2020 started out completely uneventful, we were flying somewhere over the Atlantic Ocean and we don’t know when or where we were when the new year happened. It just did. I think 2020 is going to be a good year, though, if nothing else, it’s a great number, right?

I must confess, I was a bit nonplussed at the seeming coincidence of seeing photos of not one, not two, but several 20’s or Gatsby themed New Year’s parties. The movie came out several years ago, guys, why the big comeback? … It took seeing someone’s post on fb about entering the roaring 20’s again for it to click for me. I can’t help it, guys, I’m just not always the brightest bulb in the case.

However, our vision is 2020 and it is roaring and all those good things, so let’s get rolling. Rolling scones. I mean, these scones don’t have to be rolled, it just sounds like the band…;)

Now. This scone recipe is not just any recipe I am about to share with you, no no no. This is my favorite scone recipe, and I like/use several different scone recipes, so this is saying something.

Like these coconut scones, which are pretty darn delicious.
And these Orange Chocolate Chip Scones. YUM.

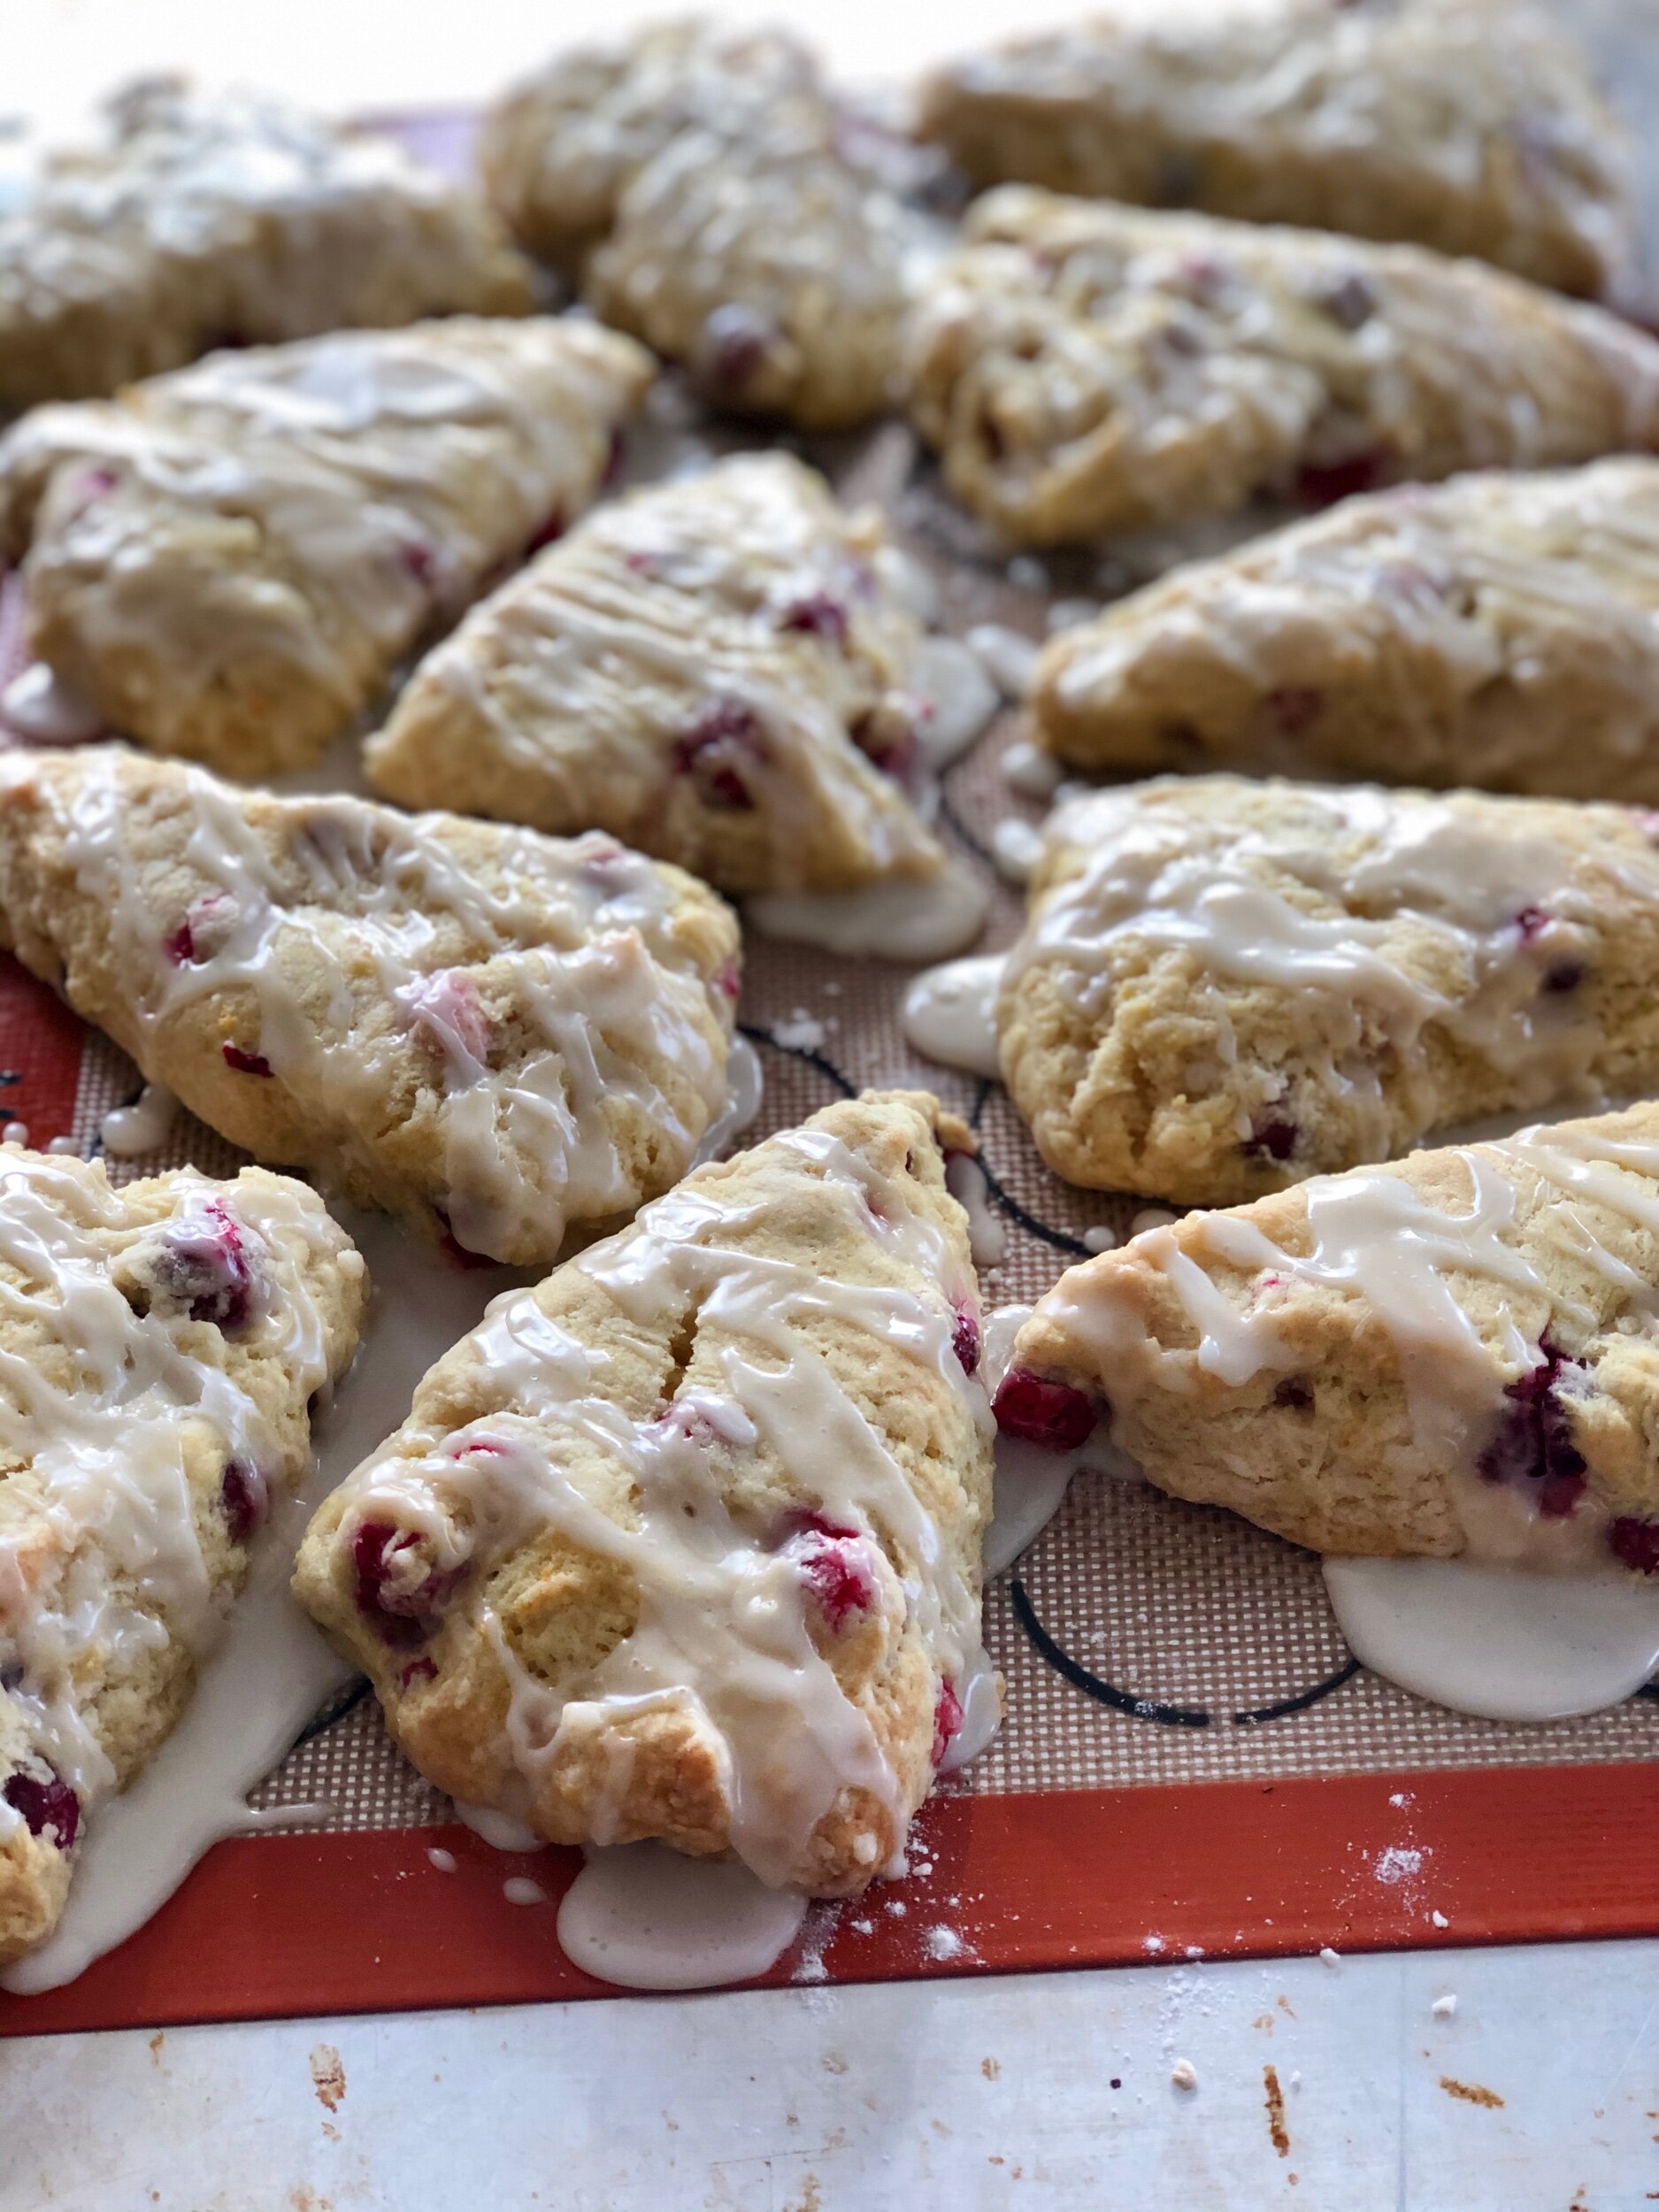
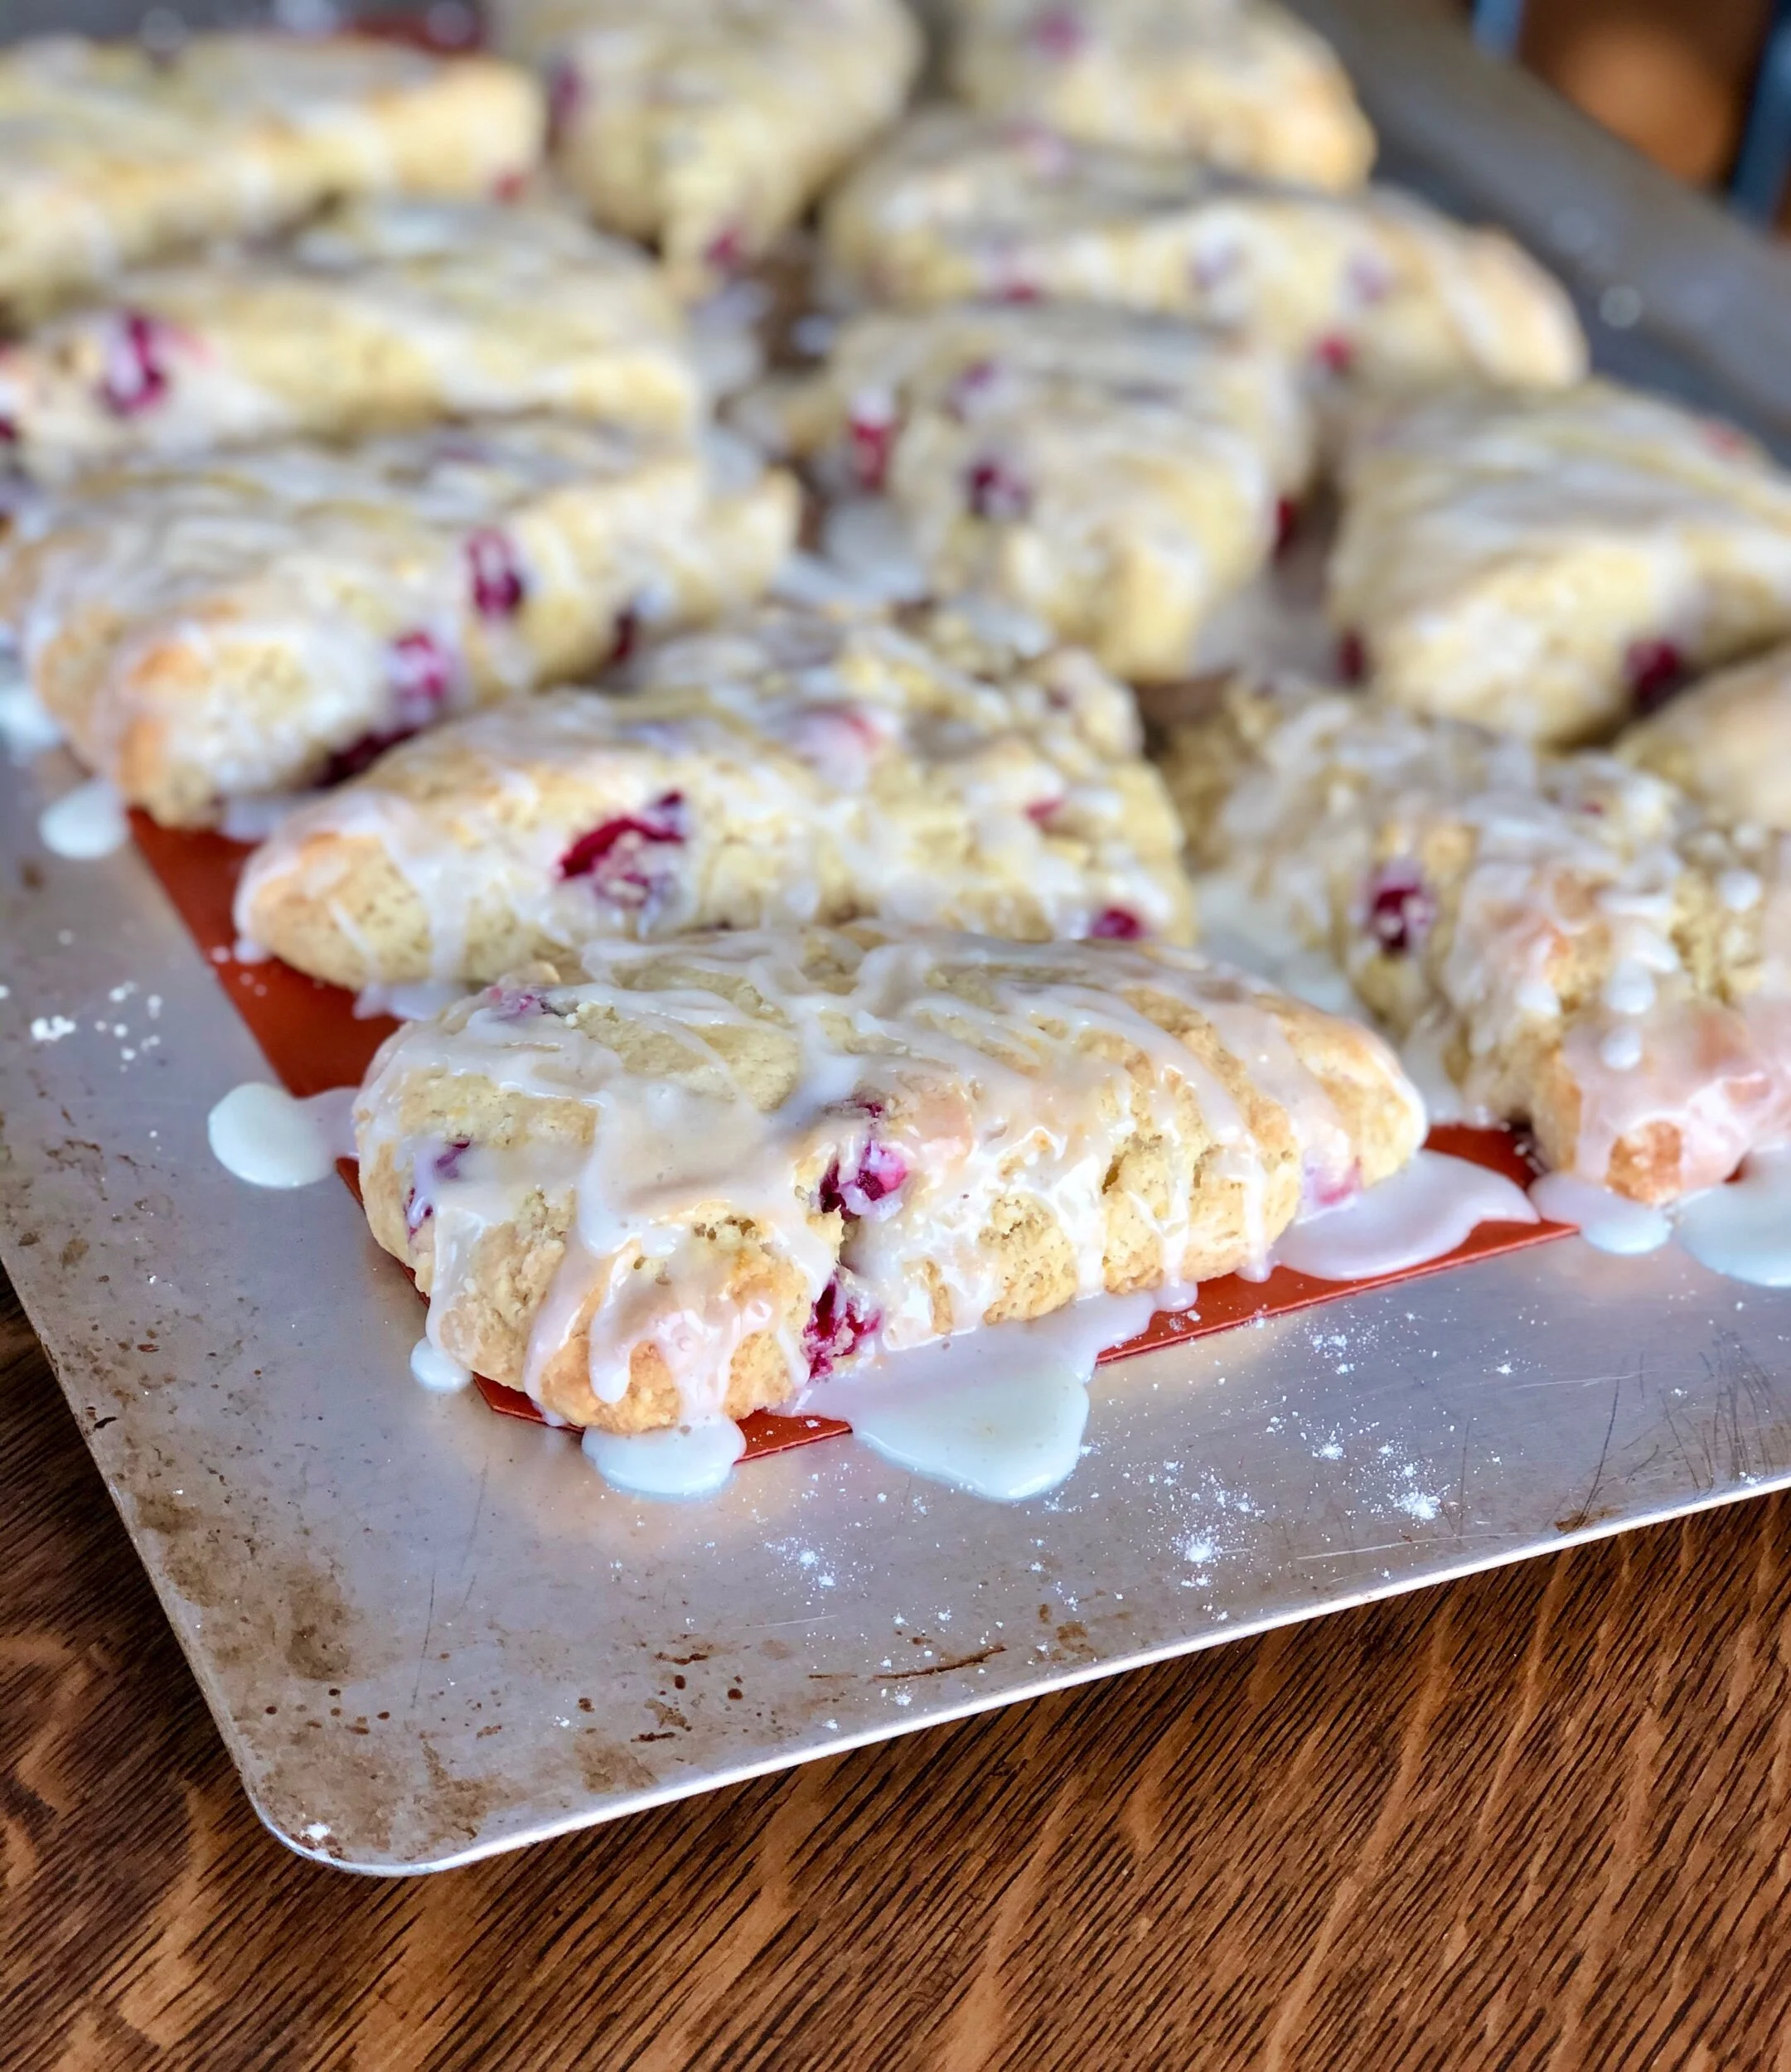
But. This scone recipe to beat all scone recipes (opinion) is so versatile, you can make just about any flavor you can think up! It’s also quite forgiving, which makes your scones turn out great every single time. Pictured are cranberry orange scones, but I will give you more flavor ideas and a launch pad to create your own flavors after the basic recipe!

I know, I know, calm down, this is all a lot to take in. The best scone recipe ever PLUS so many different flavors?? What is it, Christmas or something? No, but I decided to start the year off right with one of my favorites recipes (and I’m not even talking just in the scone category! Gasp.) and extending an olive branch for having ignored the inter webs for a bit longer than intended. (It was the eggnog, you guys!)

Ok, scones, let’s go!

This post may contain affiliate links. If you make a purchase using these links, Jennyblogs may receive a small commission, at no extra cost to you. This helps to support Jennyblogs. For further information see the privacy policy. Grazie!

Recipe adapted from allrecipes


My Favorite Scones

Makes 12 scones

Adjustments.jpeg

Ingredients:

For the Scones

  • 1 cup / 225g plain yogurt

  • 1 tsp baking soda

  • 4 cups / 480g all-purpose flour

  • 1 cup / 200g sugar

  • 2 tsp baking powder

  • 1 tsp salt

  • 3/4 cup / 169g oil

  • 1 egg

  • 1 cup flavorings, 1 tsp extract, 1 Tbsp zest, etc. (see below)

For the Glaze

  • 1 cup / 120g powdered sugar

  • 1-2 Tbsp / 15-30g milk

Directions:

Make the Scones

Oven 350°F / 177°C. Baking sheet lined with parchment paper or silpat.

  1. In a small bowl, combine yogurt and baking soda; set aside.

  2. In a large bowl, whisk together flour, sugar, baking powder, and salt.

  3. Add oil to flour mixture, mixing until coarse crumbs form.

  4. Stir in egg, yogurt mixture, and any add-ins just until barely moistened.

  5. Turn the dough out onto a generously floured surface. Knead briefly, about 4-8 turns, then press into an even 1-inch thick circle.

  6. Cut the circle into 12 triangular shaped scones, and place on prepared baking sheet.

  7. Bake for 12-15 minutes or until the centers look set, the scones have cracked slightly, and/or the bottoms or a light golden brown.

Make the Glaze

  1. Stir together powdered sugar and 1 Tbsp milk. Continue adding milk, a tsp at a time, until a thick but drizzleable glaze is achieved. Drizzle over cooled scones.

Scone Flavors:

Use one of these ideas (they’re all tried and true!) or create your own!

Adjustments.jpeg
  • Lemon Scones: 1 tsp lemon extract, 1 Tbsp lemon zest; use lemon juice to make the glaze. Use lemon yogurt if available.

  • Orange Coconut Scones: 1 tsp orange extract, 1 Tbsp orange zest, optional 1/2 tsp coconut extract, 3/4 cup coconut; use orange juice to make the glaze. Use orange or coconut yogurt if available.

  • Chocolate Chip Scones: 1 cup mini chocolate chips, 1 tsp vanilla extract. Make the simple glaze as in the basic recipe or melt more chocolate chips and drizzle over scones.

  • Chestnut Chocolate Chip Scones: 1 cup mini chocolate chips, 1 tsp vanilla extract, replace 1/4 cup of the yogurt with 1/4 cup chestnut purée. Glaze as in basic recipe.

  • Cherry Maple Scones: 1 cup dried cherries; use maple syrup to make the glaze.

  • Strawberry Scones: 1/2 cup diced fresh strawberries; use strawberry yogurt. Use basic glaze, sprinkle with demarara sugar before baking, or spread strawberry jam over the top while the scones are still warm.

  • Cranberry Orange Scones: 1 tsp orange extract, 1 Tbsp orange zest, 1 cup fresh (or frozen and thawed/drained) cranberries; use orange juice to make the glaze. Use orange yogurt if available.

  • Gingerbread Scones: replace 1/4 cup of the oil with 1/4 cup molasses, add 1 tsp cinnamon, 1 tsp ginger, 1/2 tsp cloves; use basic glaze or make a cream cheese drizzle by beating 4oz softened cream cheese with 1/4 cup powdered sugar until smooth, then adding milk 1 Tbsp at a time until mixture is thin enough to be drizzled.

Jenny’s Notes

  • In place of the plain yogurt you can also use sour cream or even mascarpone if you have leftovers from say, making tiramisu. You can also easily use Greek yogurt, or sweetened vanilla yogurt. If you use a sweetened yogurt, cut sugar in the recipe by 1/3 cup / 67g. You can also use a flavored yogurt to boost the scones flavor. For example, in the cranberry orange recipe above you could use orange yogurt.

  • If you accidentally make your glaze too thick or too thin, it’s a super easy fix. For a too-thick glaze, keep adding more milk (or whichever liquid you are using) gradually until desired consistency is achieved. Likewise, for a too-thin glaze, keeping adding a bit more powdered sugar until thick enough.

Best scone recipe, Scone base, teatime
Breakfast, Brunch
British
Yield: 12
Author:
Jenny

Jenny's Favorite Scones

If I had to make one scone recipe for the rest of my life this, would be it: the perfect base to add any fill-ins and flavorings you wish. Perfectly moist, a sweet glaze, and pairs perfectly with a good book and a cup of tea!
prep time: 25 Mcook time: 15 Mtotal time: 40 M

ingredients:

For the Scones
  • 1 cup / 225g plain yogurt
  • 1 tsp baking soda
  • 4 cups / 480g all-purpose flour
  • 1 cup / 200g sugar
  • 2 tsp baking powder
  • 1 tsp salt
  • 3/4 cup / 169g oil
  • 1 egg
  • 1 cup flavorings, 1 tsp extract, 1 Tbsp zest, etc. (see below)
For the Glaze
  • 1 cup / 120g powdered sugar
  • 1-2 Tbsp / 15-30g milk
Scone Flavor Ideas
  • Lemon Scones: 1 tsp lemon extract, 1 Tbsp lemon zest; use lemon juice to make the glaze. Use lemon yogurt if available.
  • Orange Coconut Scones: 1 tsp orange extract, 1 Tbsp orange zest, optional 1/2 tsp coconut extract, 3/4 cup coconut; use orange juice to make the glaze. Use orange or coconut yogurt if available.
  • Chocolate Chip Scones: 1 cup mini chocolate chips, 1 tsp vanilla extract. Make the simple glaze as in the basic recipe or melt more chocolate chips and drizzle over scones.
  • Chestnut Chocolate Chip Scones: 1 cup mini chocolate chips, 1 tsp vanilla extract, replace 1/4 cup of the yogurt with 1/4 cup chestnut purée. Glaze as in basic recipe.
  • Cherry Maple Scones: 1 cup dried cherries; use maple syrup to make the glaze.
  • Strawberry Scones: 1/2 cup diced fresh strawberries; use strawberry yogurt. Use basic glaze, sprinkle with demarara sugar before baking, or spread strawberry jam over the top while the scones are still warm.
  • Cranberry Orange Scones: 1 tsp orange extract, 1 Tbsp orange zest, 1 cup fresh (or frozen and thawed/drained) cranberries; use orange juice to make the glaze. Use orange yogurt if available.
  • Gingerbread Scones: replace 1/4 cup of the oil with 1/4 cup molasses, add 1 tsp cinnamon, 1 tsp ginger, 1/2 tsp cloves; use basic glaze or make a cream cheese drizzle by beating 4oz softened cream cheese with 1/4 cup powdered sugar until smooth, then adding milk 1 Tbsp at a time until mixture is thin enough to be drizzled.

instructions:

How to cook Jenny's Favorite Scones

Make the Scones
  1. Oven 350°F / 177°C. Baking sheet lined with parchment paper or silpat.
  2. In a small bowl, combine yogurt and baking soda; set aside.
  3. In a large bowl, whisk together flour, sugar, baking powder, and salt.
  4. Add oil to flour mixture, mixing until coarse crumbs form.
  5. Stir in egg, yogurt mixture, and any add-ins just until barely moistened.
  6. Turn the dough out onto a generously floured surface. Knead briefly, about 4-8 turns, then press into an even 1-inch thick circle.
  7. Cut the circle into 12 triangular shaped scones, and place on prepared baking sheet.
  8. Bake for 12-15 minutes or until the centers look set, the scones have cracked slightly, and/or the bottoms or a light golden brown.
Make the Glaze
  1. Stir together powdered sugar and 1 Tbsp milk. Continue adding milk, a tsp at a time, until a thick but drizzleable glaze is achieved. Drizzle over cooled scones.

NOTES:

In place of the plain yogurt you can also use sour cream or even mascarpone if you have leftovers from say, making tiramisu. You can also easily use Greek yogurt, or sweetened vanilla yogurt. If you use a sweetened yogurt, cut sugar in the recipe by 1/3 cup / 67g. You can also use a flavored yogurt to boost the scones flavor. For example, in the cranberry orange recipe above you could use orange yogurt. If you accidentally make your glaze too thick or too thin, it’s a super easy fix. For a too-thick glaze, keep adding more milk (or whichever liquid you are using) gradually until desired consistency is achieved. Likewise, for a too-thin glaze, keeping adding a bit more powdered sugar until thick enough.

Calories

397.79

Fat (grams)

15.22

Sat. Fat (grams)

1.33

Carbs (grams)

60.11

Fiber (grams)

1.47

Net carbs

58.64

Sugar (grams)

28.27

Protein (grams)

5.78

Sodium (milligrams)

401.65

Cholesterol (grams)

16.82
Nutritional information is approximate. Based on 12 servings of cranberry orange scones.
Did you make this recipe?
Tag @jenevamorris on instagram and hashtag it #jennyblogs
Created using The Recipes Generator

Buttermilk Bread

This post may contain affiliate links. If you make a purchase using these links, Jennyblogs may receive a small commission, at no extra cost to you. This helps to support Jennyblogs. For further information see the privacy policy. Grazie!

What’s the first thing that comes to mind when someone says, "Buttermilk"?  

For me, that would be buttermilk pancakes.  The lightest and fluffiest of all pancakes.  If you live in the south, maybe that's buttermilk biscuits.  Maybe your favorite cake recipe or scone recipe calls for buttermilk.  Whatever it may be, these delectable food items all have one thing in common:  Their light crumb, a.k.a. fluffiness.  The high acidity in the buttermilk reacts with the leavening agent, like baking soda, thus creating a beautiful rise, and a nice, light product.  

I don't often have buttermilk on hand; I find it much easier to make my own as I always have milk and lemon juice/vinegar on hand.  Lemon juice or vinegar are both very acidic and will have a similar effect on the leavening agent.  However, there is something so satisfying about using true buttermilk in a recipe.  After all, Milk and Lemon Juice Pancakes don't sound nearly as appealing as Buttermilk pancakes.   

So, a trip to the store, a carton of buttermilk bought, pancakes made and eaten.  Now, there is only 7/8 of a carton of buttermilk left in your fridge.  The likelihood of making 7 or more batches of buttermilk pancakes before the buttermilk goes bad is, well, not likely.  (But if you do, let me know, I’ll come live at your house!)  

The question remains, what I can do with the rest of this buttermilk without being wasteful?  Make buttermilk bread! (Another side note, if you like to drink buttermilk straight, well then.  You just can't relate with our buttermilk overload predicament, can you?)  The fluffiness factor we were talking about earlier still plays a role in this bread.  So fluffy.  Makes great toast.  And did I mention french toast?  Now you can serve buttermilk french toast! Oh yes.  Full circle, baby.  Actually, I don't really know where the circle started, so it's hard to tell if we actually came full circle...

On to the recipe! 

Recipe adapted from Jane's Sweets and Baking Journal


Buttermilk Bread

Makes 2 approx. 9x5 inch loaves

Ingredients:

  • 5-6 cups / 620-740g all-purpose flour

  • 1 Tbsp / 9g instant yeast

  • 2 tsp / 10g salt

  • 2 cups / 474g buttermilk

  • 1 Tbsp / 20g maple syrup or honey

  • 2 Tbsp / 28g oil or melted butter

Directions:

Oven 375°F / 190°C.  Grease two approx. 9x5in / 24x13cm loaf pans.

  1. In a large bowl or bowl of a stand mixer fitted with the paddle attachment, place 5 cups of flour, yeast, and salt.  Mix together.  Add buttermilk, maple syrup, and oil, mixing well.  Switch to the dough hook if using a stand mixer.  

  2. Knead in the stand mixer or by hand on a lightly floured surface, until a smooth dough is formed, adding more flour as needed.   This should take about 5-7 minutes with a stand mixer, 10 minutes by hand.  If using a stand mixer, still knead a few rounds on a lightly floured surface at the end.

  3. Lightly grease a bowl and place your dough in it, flipping once so that all the dough is lightly coated in oil.  Cover with a clean towel or plastic wrap and place in a warm place to rise until doubled in volume, about one hour.  

  4. When bread has risen, punch or press down to degas it.  Dump back onto your floured surface and divide the dough into two even pieces, using a scale for accuracy.  

  5. Starting with one half, form dough into a ball by flattening in a small square, then folding 3-4 times to create a ball, stretching as you do to create some tension. Move to a part of your work surface that has minimal flour.  Place the ball between your two floured hands, loosely cupped. Move the ball between your hands in a circular motion while gently pulling the dough in a downward action.  The bottom of the dough should stick to your surface a bit, and as you gently stretch it down in a circular motion you are creating surface tension.  If the dough starts to tear lighten up on the pressure; the dough should look taught and smooth.  The surface tension will create a nice crust for your dough.  This is called shaping a "Boule."  If you're as confused as I would be reading this for the first time, this demonstration from King Arthur Flour is very helpful, the technique we're going for is shown starting at about 0:30.  

  6. Repeat with other half of dough.  Place towel or plastic wrap over the two boules and let rest for 15 minutes.

  7. Shape each round into a loaf and place in prepared pans.  Place back in a warm place to double, about 1 hour.  Preheat your oven towards the end of this time.  

  8. When dough has risen for the second time and the oven is hot, spray the inside walls of your oven with water to create steam.  A spray bottle works well.  Place loaves in oven and bake for 25-30 minutes, or until internal temperature reads 200-210°F / 93-99°C.  Allow to cool in pans for 10 minutes, then remove and transfer to a wire rack.  

bread, white bread, carbs, buttermilk, toast, french toast bread
Bread
American
Yield: 20
Author:

Buttermilk Bread

A soft white bread made extra fluffy with the use of buttermilk. Great for toast and french toast.
prep time: 40 Mcook time: 30 Mtotal time: 70 M

ingredients:

  • 5-6 cups / 620g-740g all-purpose flour
  • 1 Tbsp / 9g instant yeast
  • 2 tsp / 10g salt
  • 2 cups / 474g buttermilk
  • 1 Tbsp / 20g maple syrup or honey
  • 2 Tbsp / 28g oil or melted butter

instructions:

How to cook Buttermilk Bread

  1. Oven 375°F / 190°C. Grease two approx. 9x5in / 24x13cm loaf pans.
  2. In a large bowl or bowl of a stand mixer fitted with the paddle attachment, place 5 cups of flour, yeast, and salt. Mix together. Add buttermilk, maple syrup, and oil, mixing well. Switch to the dough hook if using a stand mixer.
  3. Knead in the stand mixer or by hand on a lightly floured surface, until a smooth dough is formed, adding more flour as needed. This should take about 5-7 minutes with a stand mixer, 10 minutes by hand. If using a stand mixer, still knead a few rounds on a lightly floured surface at the end.
  4. Lightly grease a bowl and place your dough in it, flipping once so that all the dough is lightly coated in oil. Cover with a clean towel or plastic wrap and place in a warm place to rise until doubled in volume, about one hour.
  5. When bread has risen, punch or press down to degas it. Dump back onto your floured surface and divide the dough into two even pieces, using a scale for accuracy.
  6. Starting with one half, form dough into a ball by flattening in a small square, then folding 3-4 times to create a ball, stretching as you do to create some tension. Move to a part of your work surface that has minimal flour. Place the ball between your two floured hands, loosely cupped. Move the ball between your hands in a circular motion while gently pulling the dough in a downward action. The bottom of the dough should stick to your surface a bit, and as you gently stretch it down in a circular motion you are creating surface tension. If the dough starts to tear lighten up on the pressure; the dough should look taught and smooth. The surface tension will create a nice crust for your dough. This is called shaping a "Boule." If you're as confused as I would be reading this for the first time, this demonstration from King Arthur Flour is very helpful, the technique we're going for is shown starting at about 0:30.
  7. Repeat with other half of dough. Place towel or plastic wrap over the two boules and let rest for 15 minutes.
  8. Shape each round into a loaf and place in prepared pans. Place back in a warm place to double, about 1 hour. Preheat your oven towards the end of this time.
  9. When dough has risen for the second time and the oven is hot, spray the inside walls of your oven with water to create steam. A spray bottle works well. Place loaves in oven and bake for 25-30 minutes, or until internal temperature reads 200-210°F / 93-99°C. Allow to cool in pans for 10 minutes, then remove and transfer to a wire rack.

Calories

161.19

Fat (grams)

2.00

Sat. Fat (grams)

0.28

Carbs (grams)

30.42

Fiber (grams)

1.12

Net carbs

29.30

Sugar (grams)

2.10

Protein (grams)

4.79

Sodium (milligrams)

239.83

Cholesterol (grams)

0.95
Nutritional information is approximate and based on 1 slice from 20 servings.
Created using The Recipes Generator

Whole Wheat Bread

This post may contain affiliate links. If you make a purchase using these links, Jennyblogs may receive a small commission, at no extra cost to you. This helps to support Jennyblogs. For further information see the privacy policy. Grazie!

Simple, delicious, whole wheat bread.  No batons, bread machines, or rocket scientists required.  Actually, if you have a bread machine your bread making life is probably a lot simpler than mine.  I enjoy working the bread with my own hands, though.  It's very therapeutic and gives you a nice upper body workout.   Which means you could then eat more bread, yes?

Anyway, this is a simple, versatile bread, good for sandwiches, toast, and...bread.  

Recipe adapted from The Frugal Girl


Whole Wheat Bread

Makes 2 approx. 9in / 23cm loaves

Ingredients:

  • 1 1/2 Tbsp / 14g instant yeast

  • 2 1/2 tsp / 13g salt

  • 3 cups / 384g whole wheat flour

  • 2 3/4 cups / 330g all-purpose flour

  • 2 1/3 cups / 552g warm water (about 110°F / 43°C)

  • 1/4 cup / 80g maple syrup or honey

  • 1/4 cup / 56g oil or melted butter

Directions:

Oven 350°F / 177°C.  Grease 2 approx. 9x5in / 23x13cm bread pans. 

  1. Combine yeast, salt, 1 cup / 128g whole wheat flour, and 1 cup / 120g all-purpose flour in the bowl of a stand mixer on low speed, or mix by hand.  

  2. Add warm water, maple syrup, and oil.  Mix until ingredients are combined, then increase speed to medium, beating for 3 minutes, or vigorously by hand.  

  3. Add remaining whole wheat flour and all-purpose flour until a soft but kneadable dough is formed.  

  4. Switch to dough hook and knead for 5-7 minutes, turning out on to a lightly floured surface to knead for 1-2 minutes more, until dough looks smooth and elastic. Or, knead by hand on a lightly floured surface for about 10 minutes.  

  5. Grease a large bowl and place dough in it.  Flip the dough over once so that both sides are lightly greased.  Cover bowl with a clean towel and place in a warm place to rise until doubled in volume, about 45-60 minutes.  

  6. When dough has risen, punch down and knead on a lightly floured surface for 4-5 minutes.  

  7. Separate dough into two equal pieces.  Roll or press one piece out into a small rectangle.  It does not have to be exact or very big, the width of it should be a touch smaller than your bread pan, or 9 inches.  Starting from the short end, roll the dough up and place in your prepared pan.  Repeat with second piece.  

  8. Place towel back over loaves and let rise until doubled, about 30-45 minutes.  

  9. When loaves have risen, bake for about 30 minutes.  They should sound hollow when tapped on the bottom or the internal temperature should read about 205°F / 96°C.  

  10. Cool in pans 10 minutes before removing and allowing to cool fully.  

Jenny's Notes:

  • If you use oil to make this bread, it will be dairy-free. If you use oil and maple syrup, it will also be vegan.

  • I have also made this bread with great success substituting part of the all-purpose flour with wheat germ.  Gives it an extra nutty flavor profile.  

  • The rolling step creates surface tension in the bread, and therefore a prettier loaf.  I only eat pretty loaves.  ;)

vegan, dairy-free, whole wheat bread, wheat germ, honey, maple syrup, toast, french toast, whole wheat sandwich bread, homemade bread, loaves
Bread
American
Yield: 20
Author:

Whole Wheat Bread

Classic everyday whole wheat bread, great for sandwiches, toast, or anyway you like to eat bread!
prep time: 35 Mcook time: 30 Mtotal time: 65 M

ingredients:

  • 1 1/2 Tbsp / 14g instant yeast
  • 2 1/2 tsp / 13g salt
  • 3 cups / 384g whole wheat flour
  • 2 3/4 cups / 330g all-purpose flour
  • 2 1/3 cups / 552g warm water (about 110°F / 43°C)
  • 1/4 cup / 80g maple syrup or honey
  • 1/4 cup / 56g oil or melted butter

instructions:

How to cook Whole Wheat Bread

  1. Oven 350°F / 177°C. Grease 2 approx. 9x5in / 23x13cm bread pans.
  2. Combine yeast, salt, 1 cup / 128g whole wheat flour, and 1 cup / 120g all-purpose flour in the bowl of a stand mixer on low speed, or mix by hand.
  3. Add warm water, maple syrup, and oil. Mix until ingredients are combined, then increase speed to medium, beating for 3 minutes, or vigorously by hand.
  4. Add remaining whole wheat flour and all-purpose flour until a soft but kneadable dough is formed.
  5. Switch to dough hook and knead for 5-7 minutes, turning out on to a lightly floured surface to knead for 1-2 minutes more, until dough looks smooth and elastic. Or, knead by hand on a lightly floured surface for about 10 minutes.
  6. Grease a large bowl and place dough in it. Flip the dough over once so that both sides are lightly greased. Cover bowl with a clean towel and place in a warm place to rise until doubled in volume, about 45-60 minutes.
  7. When dough has risen, punch down and knead on a lightly floured surface for 4-5 minutes.
  8. Separate dough into two equal pieces. Roll or press one piece out into a small rectangle. It does not have to be exact or very big, the width of it should be a touch smaller than your bread pan, or 9 inches. Starting from the short end, roll the dough up and place in your prepared pan. Repeat with second piece.
  9. Place towel back over loaves and let rise until doubled, about 30-45 minutes.
  10. When loaves have risen, bake for about 30 minutes. They should sound hollow when tapped on the bottom or the internal temperature should read about 205°F / 96°C.
  11. Cool in pans 10 minutes before removing and allowing to cool fully.

NOTES:

If you use oil to make this bread, it will be dairy-free. If you use oil and maple syrup, it will also be vegan. I have also made this bread with great success substituting part of the all-purpose flour with wheat germ. Gives it an extra nutty flavor profile. The rolling step creates surface tension in the bread, and therefore a prettier loaf.

Calories

162.77

Fat (grams)

3.50

Sat. Fat (grams)

0.30

Carbs (grams)

29.38

Fiber (grams)

2.69

Net carbs

26.69

Sugar (grams)

2.54

Protein (grams)

4.53

Sodium (milligrams)

254.58

Cholesterol (grams)

0.00
Nutritional information is approximate and based on 1 slice from a 10-slice loaf.
Created using The Recipes Generator

Caramel Toffee Cheesecake

DSC_0185.jpg

Happy Thanksgiving!  I am thankful for so many things.  One of those things is cheesecake. 

Especially a caramel cheesecake with a layer of chocolate between the crust and cheesecake, toffee bits, whipped cream, and more caramel drizzled on top. Yep, especially that.

I love the graham cracker crust because it stays together so well! The secret is to use toffee bits in the crust. Toffee is sticky and while the crust is baking all the little pieces melt a bit, fusing the graham cracker crust together into a beautiful, slightly crunchy mass. No crumbling graham cracker crusts today! I mean, I even pressed the crust all the way up the sides of the pan and it stayed even after taking off the spring form pan. Success.

You know how they say actions speak louder than words?  Well, instead of talking about how much I love cheesecake and how great this crust is, I'm going to share the recipe with you...that's an action, right?  Then in turn you can make it, and then you acted on your thankfulness too.  This is such a great plan, let's go! 

This post may contain affiliate links. If you buy something using these links, Jennyblogs may receive a small commission, at no extra cost to you. This helps to support Jennyblogs. For further information see the privacy policy. Grazie!

Recipe adapted from Yammie’s Noshery


Caramel Toffee Cheesecake

Serves about 16-20

Ingredients:

For the Toffee Crust

  • 3 cups / 255g crushed graham crackers, about 2 packages or 18 sheets

  • 1/2 cup / 85g toffee bits, plain or with chocolate (Heath Bits O Brickle)

  • 1/2 cup / 100g brown sugar

  • 1 cup / 226g butter, melted

  • 6 oz / 170g bitter-sweet chocolate, chopped

For the Filling

  • 3 8oz packages / 675g cream cheese, room temperature

  • 1 cup / 245g sour cream

  • 1 cup / 200g sugar

  • 1 Tbsp / 15g vanilla extract

  • 1/4 cup / 75g caramel sauce (To make homemade caramel, halve this recipe here)

  • 4 eggs, lightly beaten

For the Topping

  • 1 cup / 237g heavy whipping cream

  • 2 Tbsp / 40g maple syrup or sugar

  • 1/4 cup / 75g caramel sauce

  • 1/4 cup / 43g toffee bits

Directions:

Oven 300°F / 149°C.  10in / 26cm spring-form pan lined with parchment paper, bottom and sides.

Make the Toffee Crust

  1. Combine graham crackers, toffee, brown sugar, and butter.  Press firmly into the prepared spring-form pan, pressing all the way up the sides.  Sprinkle chopped chocolate evenly over bottom of crust. 

  2. Bake for 5 minutes or until chocolate is melted.  Remove from oven and spread chocolate evenly with a spatula.  Place crust in freezer while you make the filling.

Make the Filling

  1. In the bowl of a stand mixer, beat cream cheese, sour cream, and sugar on low-medium speed for a few minutes.  Add vanilla and caramel.  Beat in the eggs, one at a time, until just combined. 

  2. Pour over crust and bake for about 1 hour and 20 minutes, or until edges are set and center is still a bit jiggly when lightly shaken. 

  3. Turn off oven and crack open the door, leaving cheesecake to set for another 30 minutes.  Remove from oven and allow to cool for a further 30 minutes.

  4. Refrigerate until completely chilled, about 6 hours or overnight.

Make the Topping

  1. When cheesecake is ready, beat whipping cream in the bowl of a stand mixer until soft peaks form.  Add maple syrup and beat until stiff peaks form. 

  2. Pipe whipped cream onto cheesecake, or if you don't have piping bags or tips, simply spread it with a spatula. 

  3. Warm caramel in a small saucepan and drizzle all over the cheesecake with a spoon or spatula.  Sprinkle with toffee and chill until ready to serve.

Jenny's Notes:

  • Cheesecakes require a decent amount of beating, however, avoid beating on high speeds as you don't want to incorporate too much air into the batter. 

  • You can also use an 8in / 20cm spring-form pan + a 6in / 15cm spring-form pan to make this recipe. Or, instead of the 6 incher just stick any extra crust in the bottom of a square baking dish, top with lefotver filling and you have cheesecake bars! I have done the second option before. :) The bars will bake for less time than a spring-form pan.

caramel, toffee crunch, Heath, Bits O Brickle, cheesecake, homemade caramel, chocolate, graham cracker crust
dessert
American
Yield: 16-20 servings
Author:

Caramel Toffee Cheesecake

Toffee graham gracker crust, a layer of dark chocolate, caramel cheesecake filling, and whipped cream, caramel, and more toffee bits on top.
prep time: 1 hourcook time: 1 H & 55 Mtotal time: 2 H & 55 M

ingredients:

For the Toffee Crust
  • 3 cups / 255g crushed graham crackers, about 2 packages or 18 sheets
  • 1/2 cup / 85g toffee bits, plain or with chocolate
  • 1/2 cup / 100g brown sugar
  • 1 cup / 226g butter, melted
  • 6 oz / 170g bitter-sweet chocolate, chopped
For the Filling
  • 3 8oz packages / 675g cream cheese, room temperature
  • 1 cup / 245g sour cream
  • 1 cup / 200g sugar
  • 1 Tbsp / 15g vanilla extract
  • 1/4 cup / 75g caramel sauce (To make homemade caramel, halve this recipe here)
  • 4 eggs, lightly beaten
For the Topping
  • 1 cup / 237g heavy whipping cream
  • 2 Tbsp / 40g maple syrup or sugar
  • 1/4 cup / 75g caramel sauce
  • 1/4 cup / 43g toffee bits

instructions:

How to cook Caramel Toffee Cheesecake

  1. Oven 300°F / 149°C. 10in / 26cm spring-form pan lined with parchment paper, bottom and sides.
Make the Toffee Crust
  1. Combine graham crackers, toffee, brown sugar, and butter. Press firmly into the prepared spring-form pan, pressing all the way up the sides. Sprinkle chopped chocolate evenly over bottom of crust.
  2. Bake for 5 minutes or until chocolate is melted. Remove from oven and spread chocolate evenly with a spatula. Place crust in freezer while you make the filling.
Make the Filling
  1. In the bowl of a stand mixer, beat cream cheese, sour cream, and sugar on low-medium speed for a few minutes. Add vanilla and caramel. Beat in the eggs, one at a time, until just combined.
  2. Pour over crust and bake for about 1 hour and 20 minutes, or until edges are set and center is still a bit jiggly when lightly shaken.
  3. Turn off oven and crack open the door, leaving cheesecake to set for another 30 minutes. Remove from oven and allow to cool for a further 30 minutes.
  4. Refrigerate until completely chilled, about 6 hours or overnight.
Make the Topping
  1. When cheesecake is ready, beat whipping cream in the bowl of a stand mixer until soft peaks form. Add maple syrup and beat until stiff peaks form.
  2. Pipe whipped cream onto cheesecake, or if you don't have piping bags or tips, simply spread it with a spatula.
  3. Warm caramel in a small saucepan and drizzle all over the cheesecake with a spoon or spatula. Sprinkle with toffee and chill until ready to serve.

NOTES:

Cheesecakes require a decent amount of beating, however, avoid beating on high speeds as you don't want to incorporate too much air into the batter. You can also use an 8in / 20cm spring-form pan + a 6in / 15cm spring-form pan to make this recipe. Or, instead of the 6 incher just stick any extra crust in the bottom of a square baking dish, top with lefotver filling and you have cheesecake bars! I have done the second option before. :) The bars will bake for less time than a spring-form pan.

Calories

619.24

Fat (grams)

42.95

Sat. Fat (grams)

25.01

Carbs (grams)

53.18

Fiber (grams)

0.90

Net carbs

52.27

Sugar (grams)

42.62

Protein (grams)

7.17

Sodium (milligrams)

376.36

Cholesterol (grams)

156.01
Nutritional information is approximate and based on 16 servings.
Created using The Recipes Generator

White Russian Tart

Mmmmm I love me a White Russian.  Or a Black Russian.  Or you can just give me the Kahlua.  But you know what I love more?  This tart.  Not to mention it is raw, gluten-free, refined-sugar free, and somehow delicious.  Nah I'm just kidding, there a lot of really delicious healthier desserts and foods out there, but the ones that aren't so much tend to get the attention and give the above labels a bad rap. 

When I'm experimenting and trying new recipes in the "healthy" department (as defined by trying to limit refined-sugars or flours, using a vegetable or bean or something that doesn't normally go in that there fudge brownie) I look for the 3 different categories of reactions from my tasters.  I tend to like some very strange things so I can't always judge by whether I like it or not...  Unsweetened cocoa powder by the spoonful, anyone??

  1. The category of "This is honest deliciousness."  When people ask for a recipe or have no idea that there are chickpeas or spinach powder hidden in what they're eating.  Something a normal or even picky eater would eat. 
  2. The category of "It's good for a healthy dessert!"  So it's palatable and they're not gagging, but most would still take a slice of cheesecake over it.  
  3. The category of "I would rather just eat a salad."  If I'm tempted to remedy the taste by adding cups and cups of maple syrup, then when that isn't strong enough, real sugar, it's probably beyond saving.  I know it's bad if I don't even like it.  No worries, those recipes won't come anywhere near this blog. 

This tart is a solid category 1.  Even my mom and brother approved this, and they keep me pretty honest when it comes to healthy desserts. 

I bounce back and forth between decadent desserts and healthier desserts.  I have a love and respect for both, and each have their place and time.  Some days it's honey, nuts, and coconut oil, and other days it's sugar, heavy whipping cream, and butter.  Variety is the spice of life.  Today, it's dates, avocado, and mascarpone.

White Russian Tart

Serves 8-12

Ingredients:

Crust

  • 1 1/2 cups almonds
  • 2 Tbsp unsweetened shredded coconut
  • 8-10 dates
  • 1/2 tsp vanilla extract
  • 1 Tbsp unsweetened cocoa powder
  • 1/4 tsp salt

Chocolate Vodka Cream

  • 1/4 cup coconut oil (virgin, unrefined)
  • 1 Tbsp finely ground coffee beans
  • 1 large ripe avocado, peeled and sliced
  • 3 Tbsp unsweetened cocoa powder
  • 1 tsp vodka
  • 1 tsp rum or Kahlua (of course the Kahlua option adds sugar)
  • 2 Tbsp maple syrup

Mascarpone Cream

  • 8 oz mascarpone cheese
  • 1 Tbsp maple syrup
  • 1 tsp vanilla extract

Directions:

Make the Crust

In a food processor, combine almonds and coconut and pulse until small crumbles.  Add dates, vanilla, cocoa powder, and salt.  Process until well combined. 

Press into the bottom of a 8 or 9 inch spring-form pan or pie plate.

Make the Chocolate Vodka Cream

Heat coconut oil in small pan over low heat until liquefied.  Combine the melted coconut oil, coffee, avocado, cocoa powder, vodka, rum or Kahlua, and maple syrup in a food processor until smooth.  Stop and scrape down sides and bottom occasionally.  Spread over crust and place in freezer for about 30 minutes.

Make the Mascarpone Cream

Shortly before taking tart out of the freezer, combine mascarpone, maple syrup, and vanilla in a small bowl.  Take the tart out of the freezer and spread mascarpone mixture over it.  Place in fridge for about 2 hours before serving.   

Jenny's Notes:

This tart is not very sweet and really lets the mascarpone shine through.  However, if you or your guests prefer things a little on the sweeter side, feel free to add more maple syrup in either of the creams. 

Also, I like to use black cocoa powder in this recipe.  Sounds ghastly, but it's the stuff of Oreos.  (I didn't know the flavor of Oreo was supposed to be chocolate until I was an adult, but they get their unique flavor from black cocoa.)  If you can get your hands on it, it's really great.  I usually order it from Amazon. 

Adapted from The Clean Dish