How to Learn Some Italian Using Words You Already Know - Lesson 3

1X9B0135 copy copia.jpg

Here we are at the third and final installment of this little series, “How to Learn Some Italian Using Words You Already Know.”

What originally began as my fascination with the amount of English words used in Italian ended up turning into these comical learn-Italian-effortlessly lessons. Aren’t you glad I decided to write them down? Heheheh. :)

In Lesson 1 we saw all the English words Italians use in every day conversations, or that are the same. Words like budget, Facebook, privacy, password, etc.

In Lesson 2 we saw all the Italian words we can learn simply by adding vowels onto the end of English words, like tubo, musica, dieta, cono, etc.

After Lesson 2 you might be feeling pretty snazzy with all the new words you learned. If you spend any time listening to or reading Italian, maybe you have started to keep an eye out for other words that can easily be deciphered. You’ll probably notice plenty of them that didn’t even make it in these lessons!

Therefore, before things get too comfy, I am going to burst your bubble a bit in Lesson 3. How lovely. We are still going to learn some new words, but we will look at a variety of words that are the same (at least written) or that you think would be the same or mean something similar. But they’re not, or they don’t.

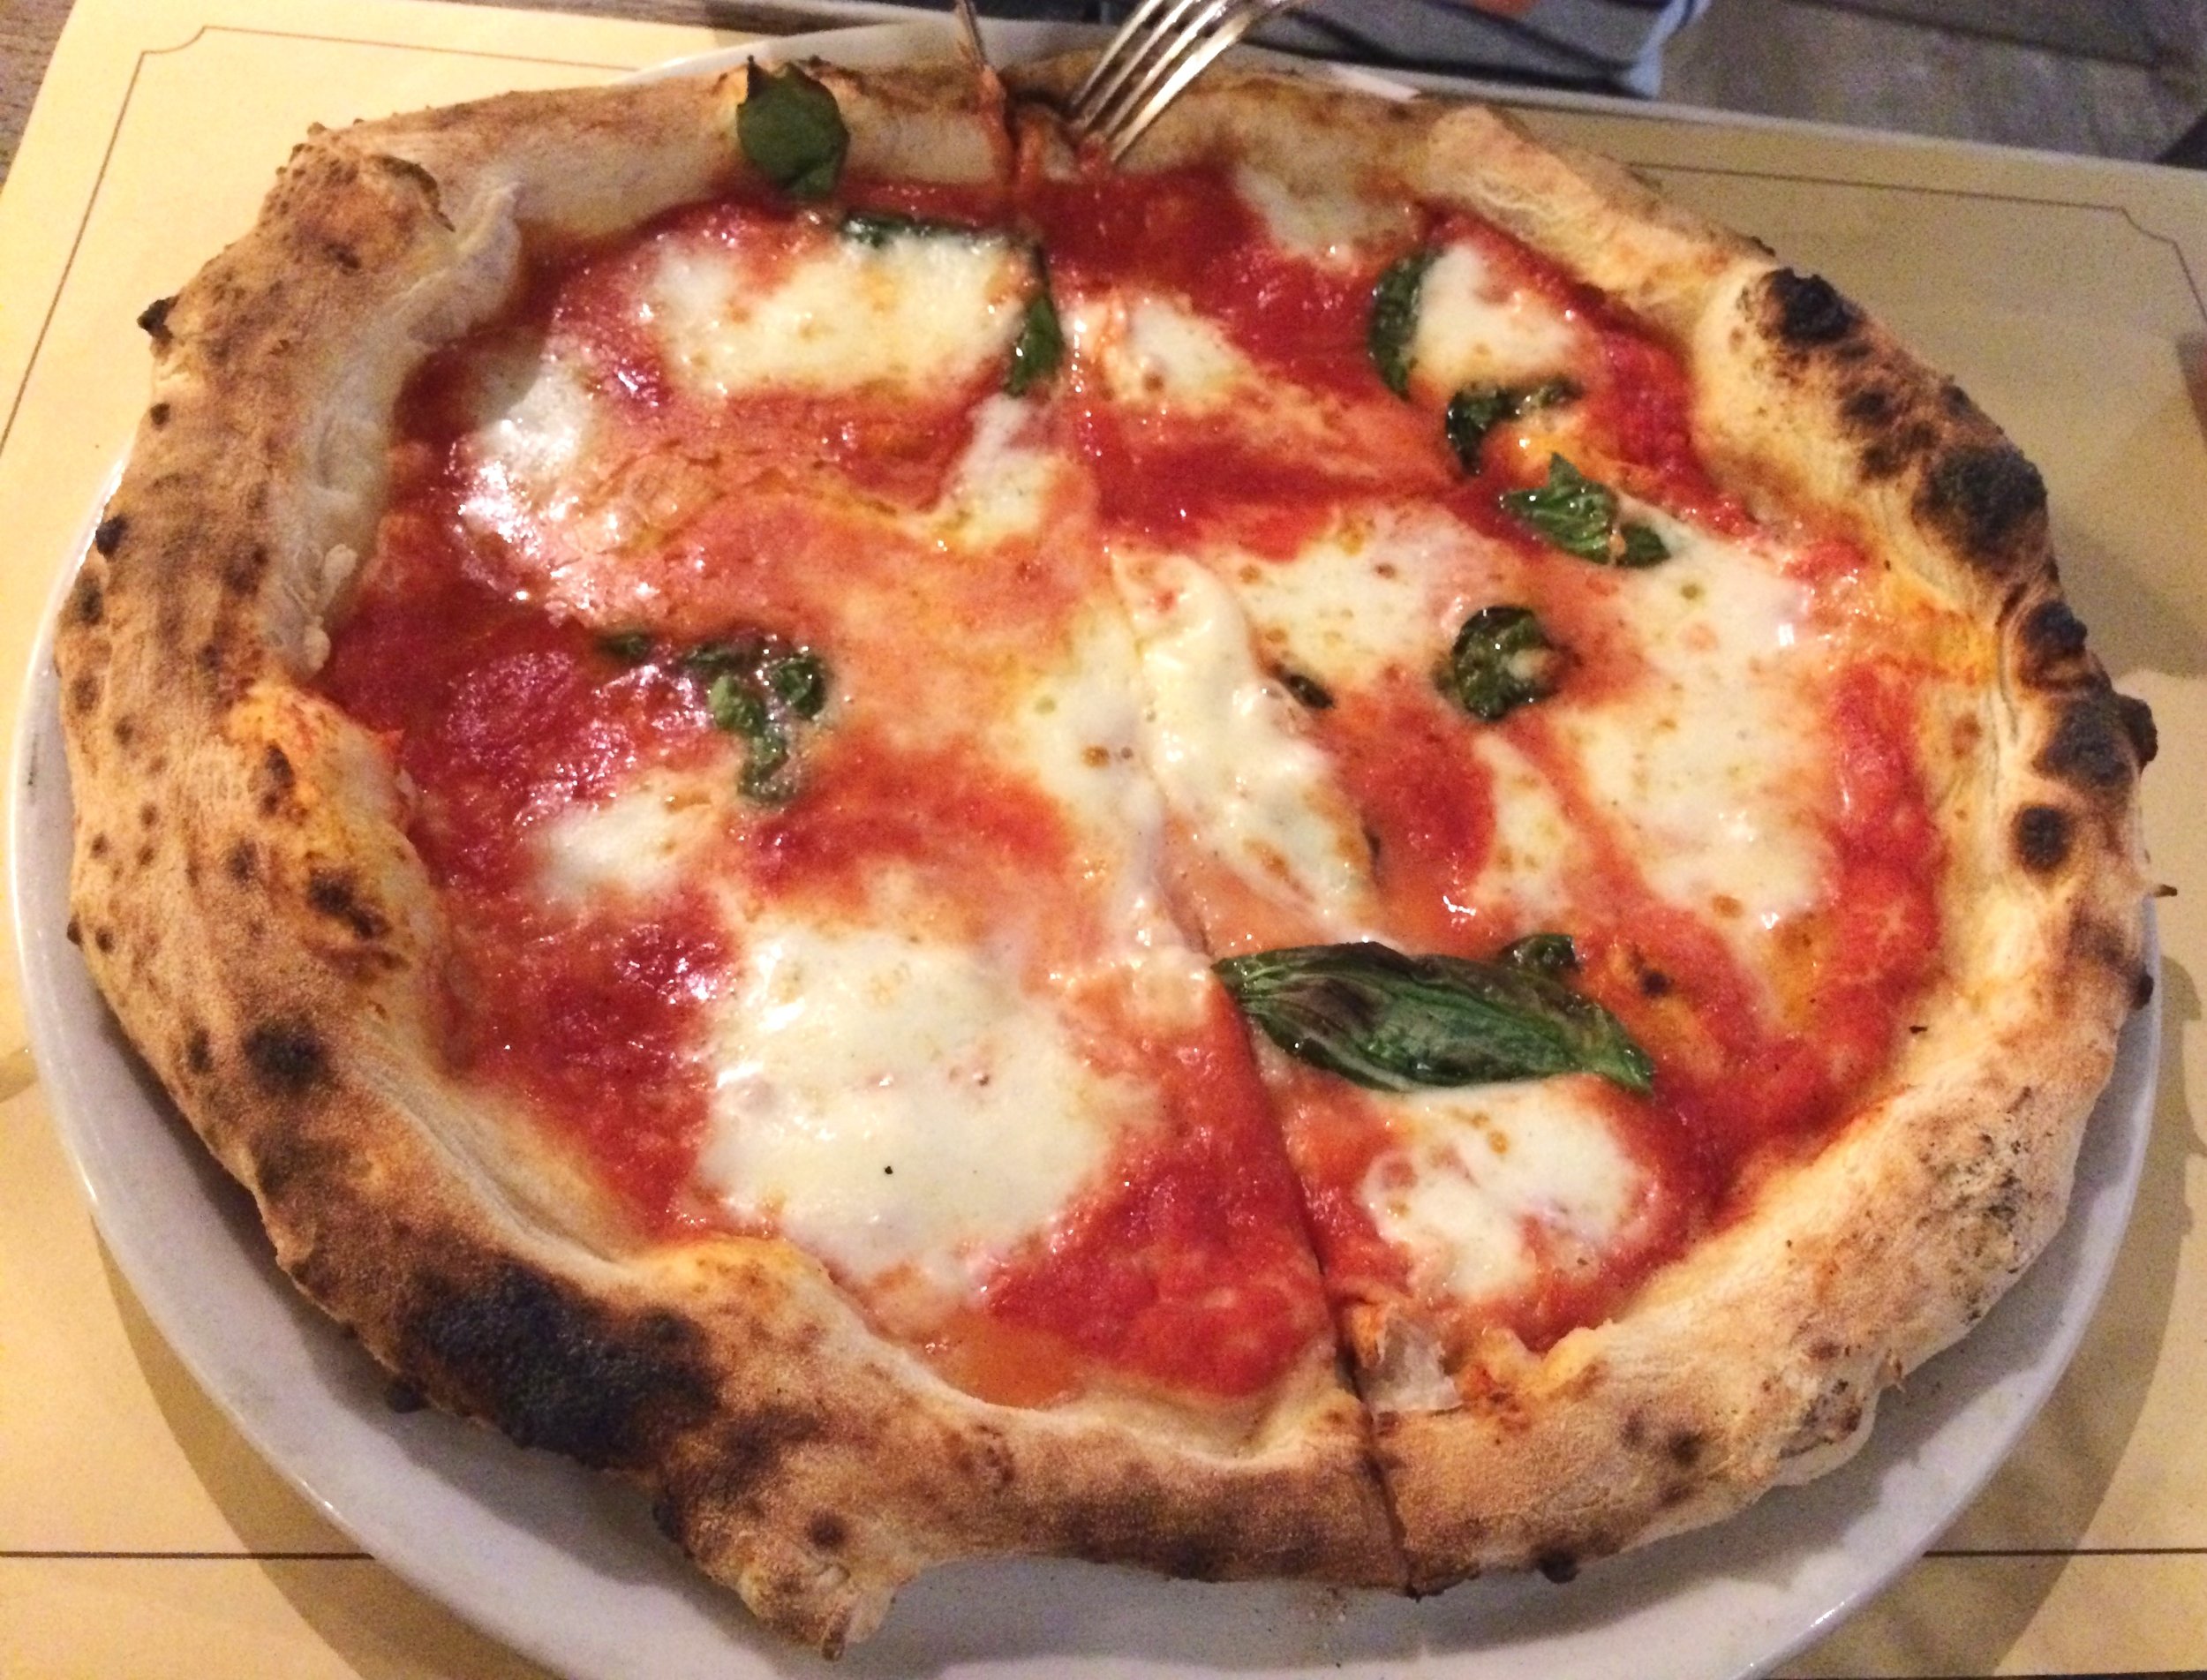
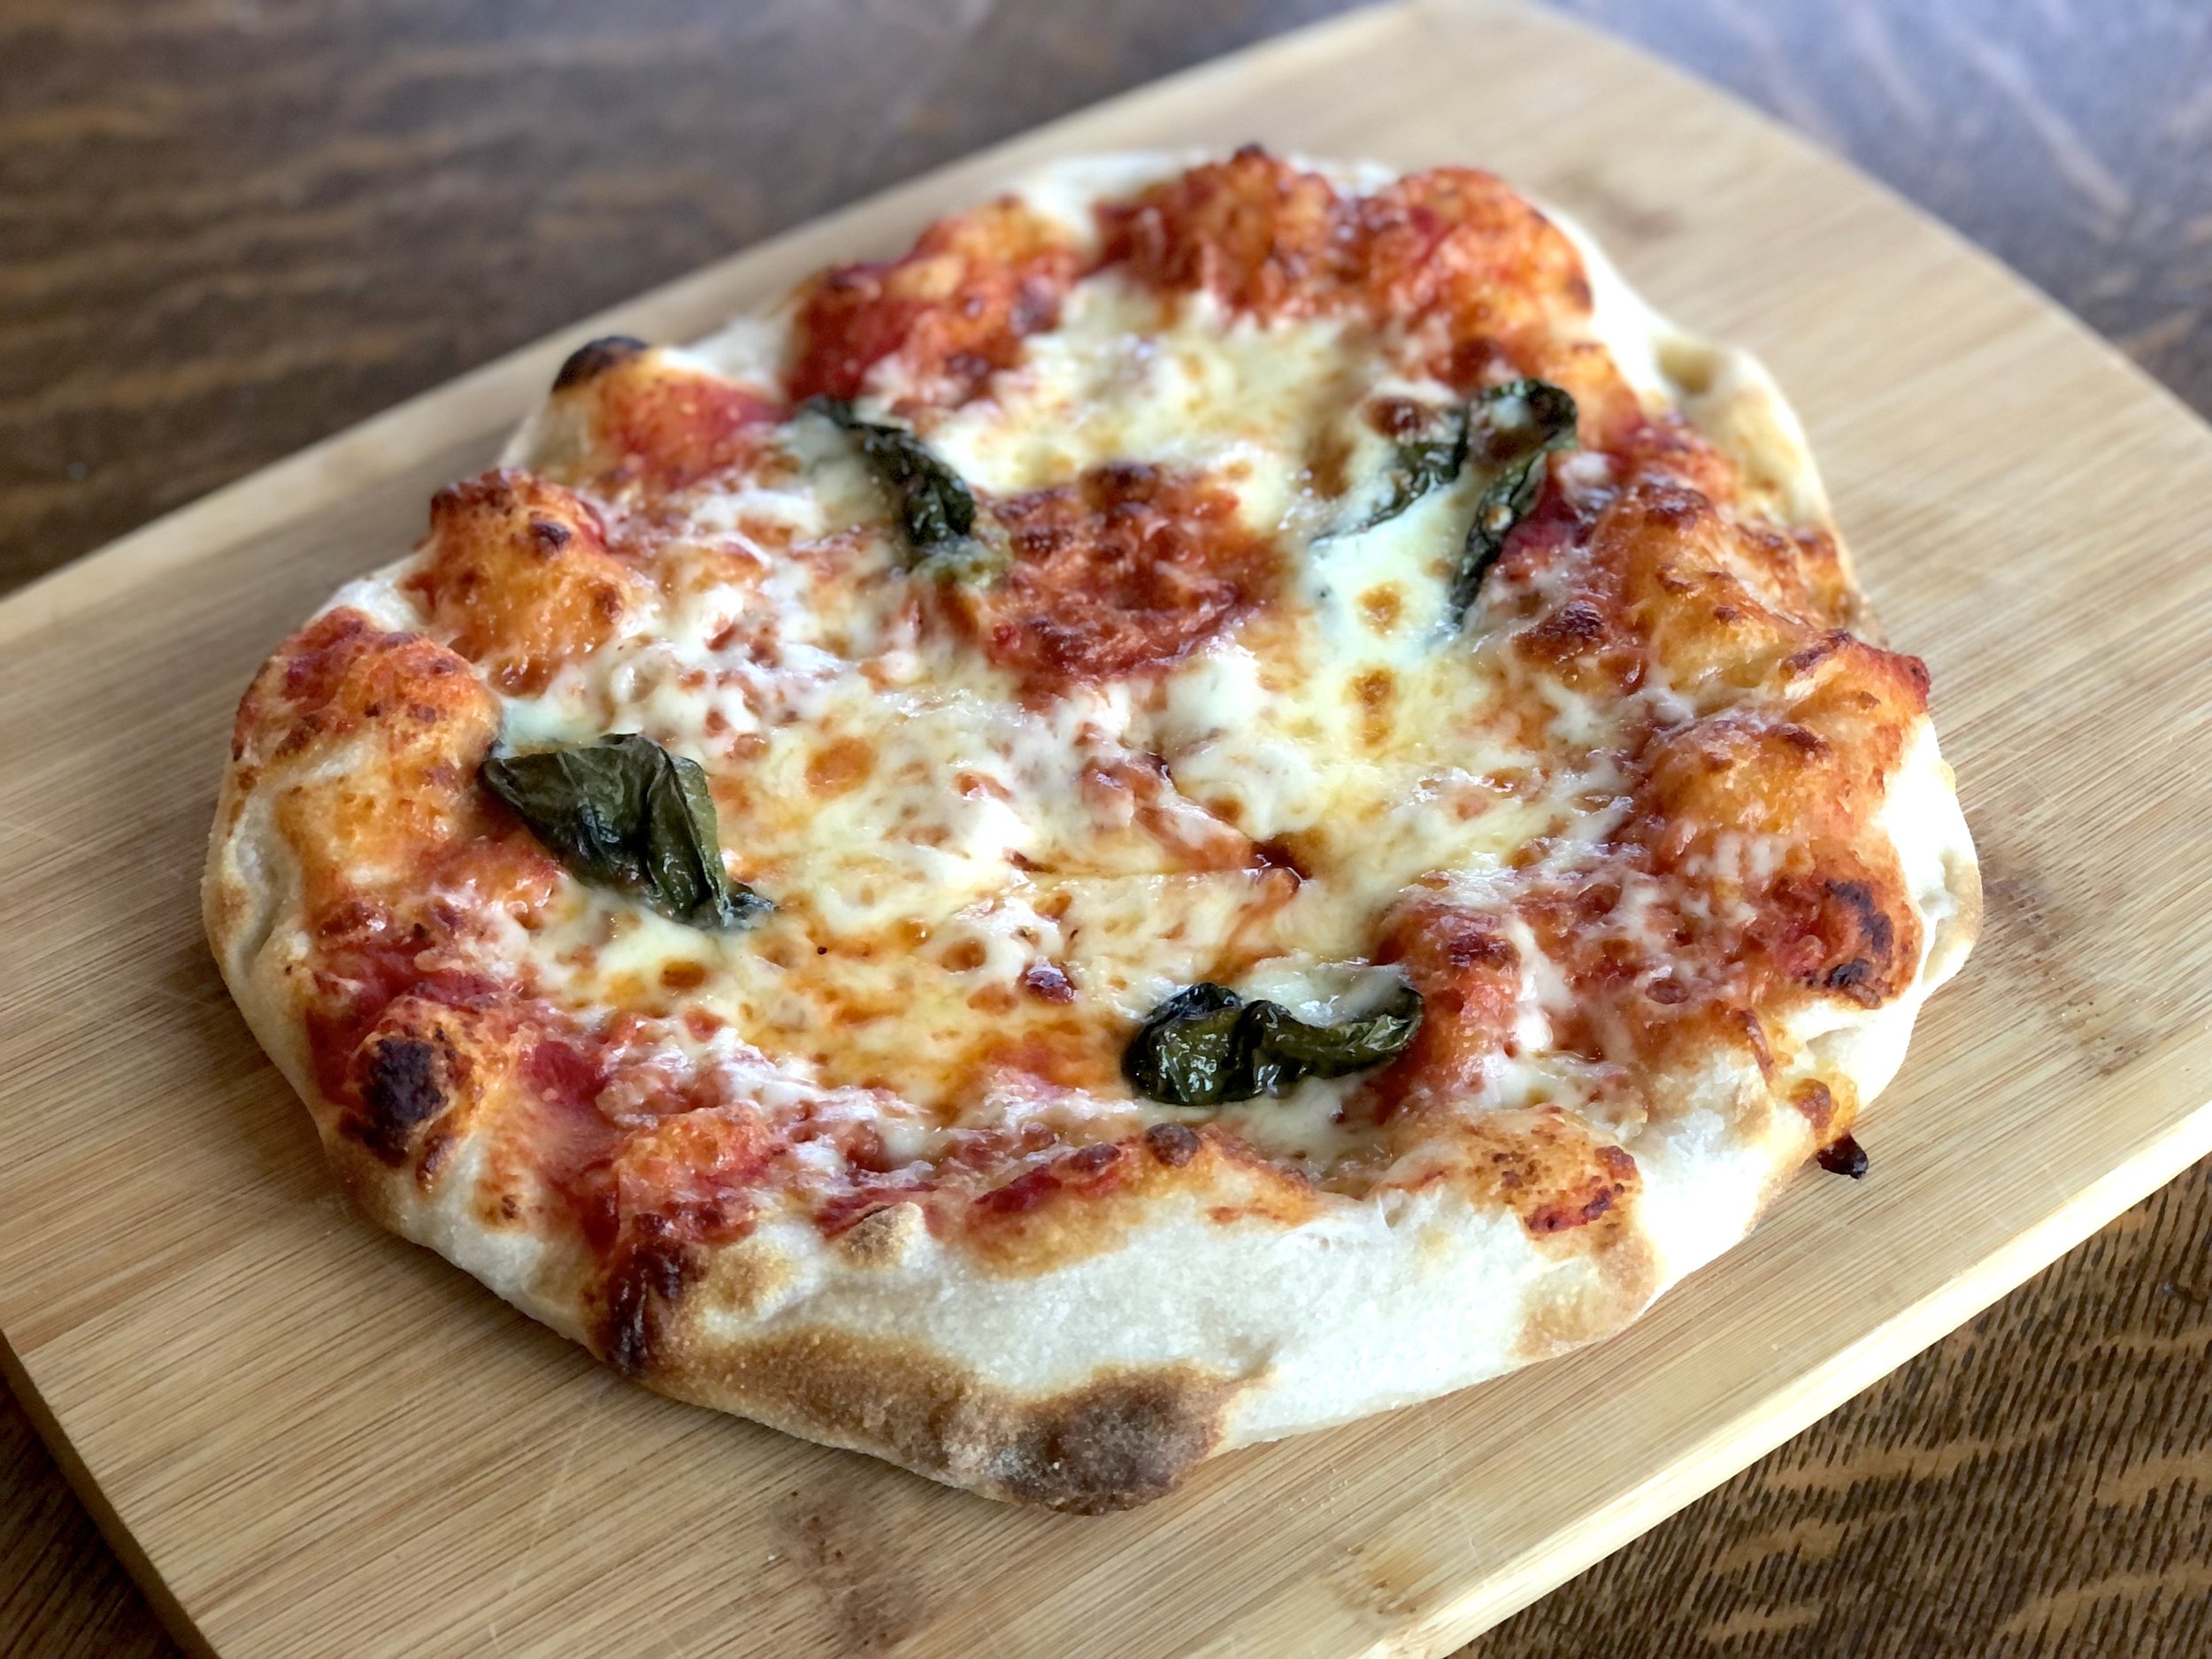
For example, let’s look at the word “peperoni.” You might be looking at an Italian pizza menu and spot a friendly face: Peperoni Pizza. (Truly it would probably be called “Pizza ai Peperoni” or “Pizza con Peperoni” but regardless, you understand “pizza” and “peperoni,” right? Maybe not—>) You order your peperoni pizza while snickering at how they spelled “pepperoni” with only one “p” instead of two. Your pizza arrives and to your shock and dismay, you have a cheese pizza with bell peppers, not pepperoni, and are snickering no more. This is an all too common mistake made by meat-loving American tourists, as indeed “peperoni” means bell peppers in Italian, not spicy-meat-sausage-pizza-condiment.

One more for ya: If you saw the word “arma” you might think it means “arm.” I probably would, too. But guess what? It actually means “weapon.” So don’t go around saying what a nice “arma” that person has, thinking you’re complimenting their strong biceps, alright?

You’ll be happy to see that today’s list is not as extensive as the other lessons, but I’m sure it will continue to expand as I’ve been adding new words almost daily to the other lessons since I’ve posted them. If you want to be of help in growing any of these lists, drop me a note in the comments below or send me a message!

This post may contain affiliate links. If you make a purchase using these links, Jennyblogs may receive a small commission, at no extra cost to you. This helps to support Jennyblogs. Where possible, links are prioritized to small businesses and ethically and responsibly made items. For further information see the privacy policy. Grazie!


Italian Words That Are Not All That They Seem

  1. Camera (CAH-mair-a) - not a photo camera, but a room. An apartment with two camere.

  2. Lampone (Lahm-PO-nay) - you might think this means lamp, but it actually means raspberry.

  3. Lampo (LAHM-po) - still doesn’t mean lamp, but this refers to a twinkle, flash of light, or lightning. I frequently get this confused with lampone and am forever saying “ohhh, did you see that raspberry in the sky?” It’s embarrassing.

  4. Stiro (STEE-ro) - not stir, but a verb that means “I iron.”

  5. Topo (TO-po) - I’m on topo of the world! Nope. Topo means mouse.

  6. Formica (for-MEE-ca) - You might be thinking formica countertops? Nope. Formica means ant. So you might have a formica or two on your formica.

  7. Peperoni (peh-per-OHN-ee) - As mentioned above, this is not pepperoni misspelled, but actually bell peppers. By the way, I love peperoni on my pizza! Give me all the pizze ai peperoni! ;)

  8. Sale (SAH-lay) - Shopping friends, don’t get too excited, this doesn’t mean sale, as in discounts or reduced prices. Sale in Italian means “salt”.

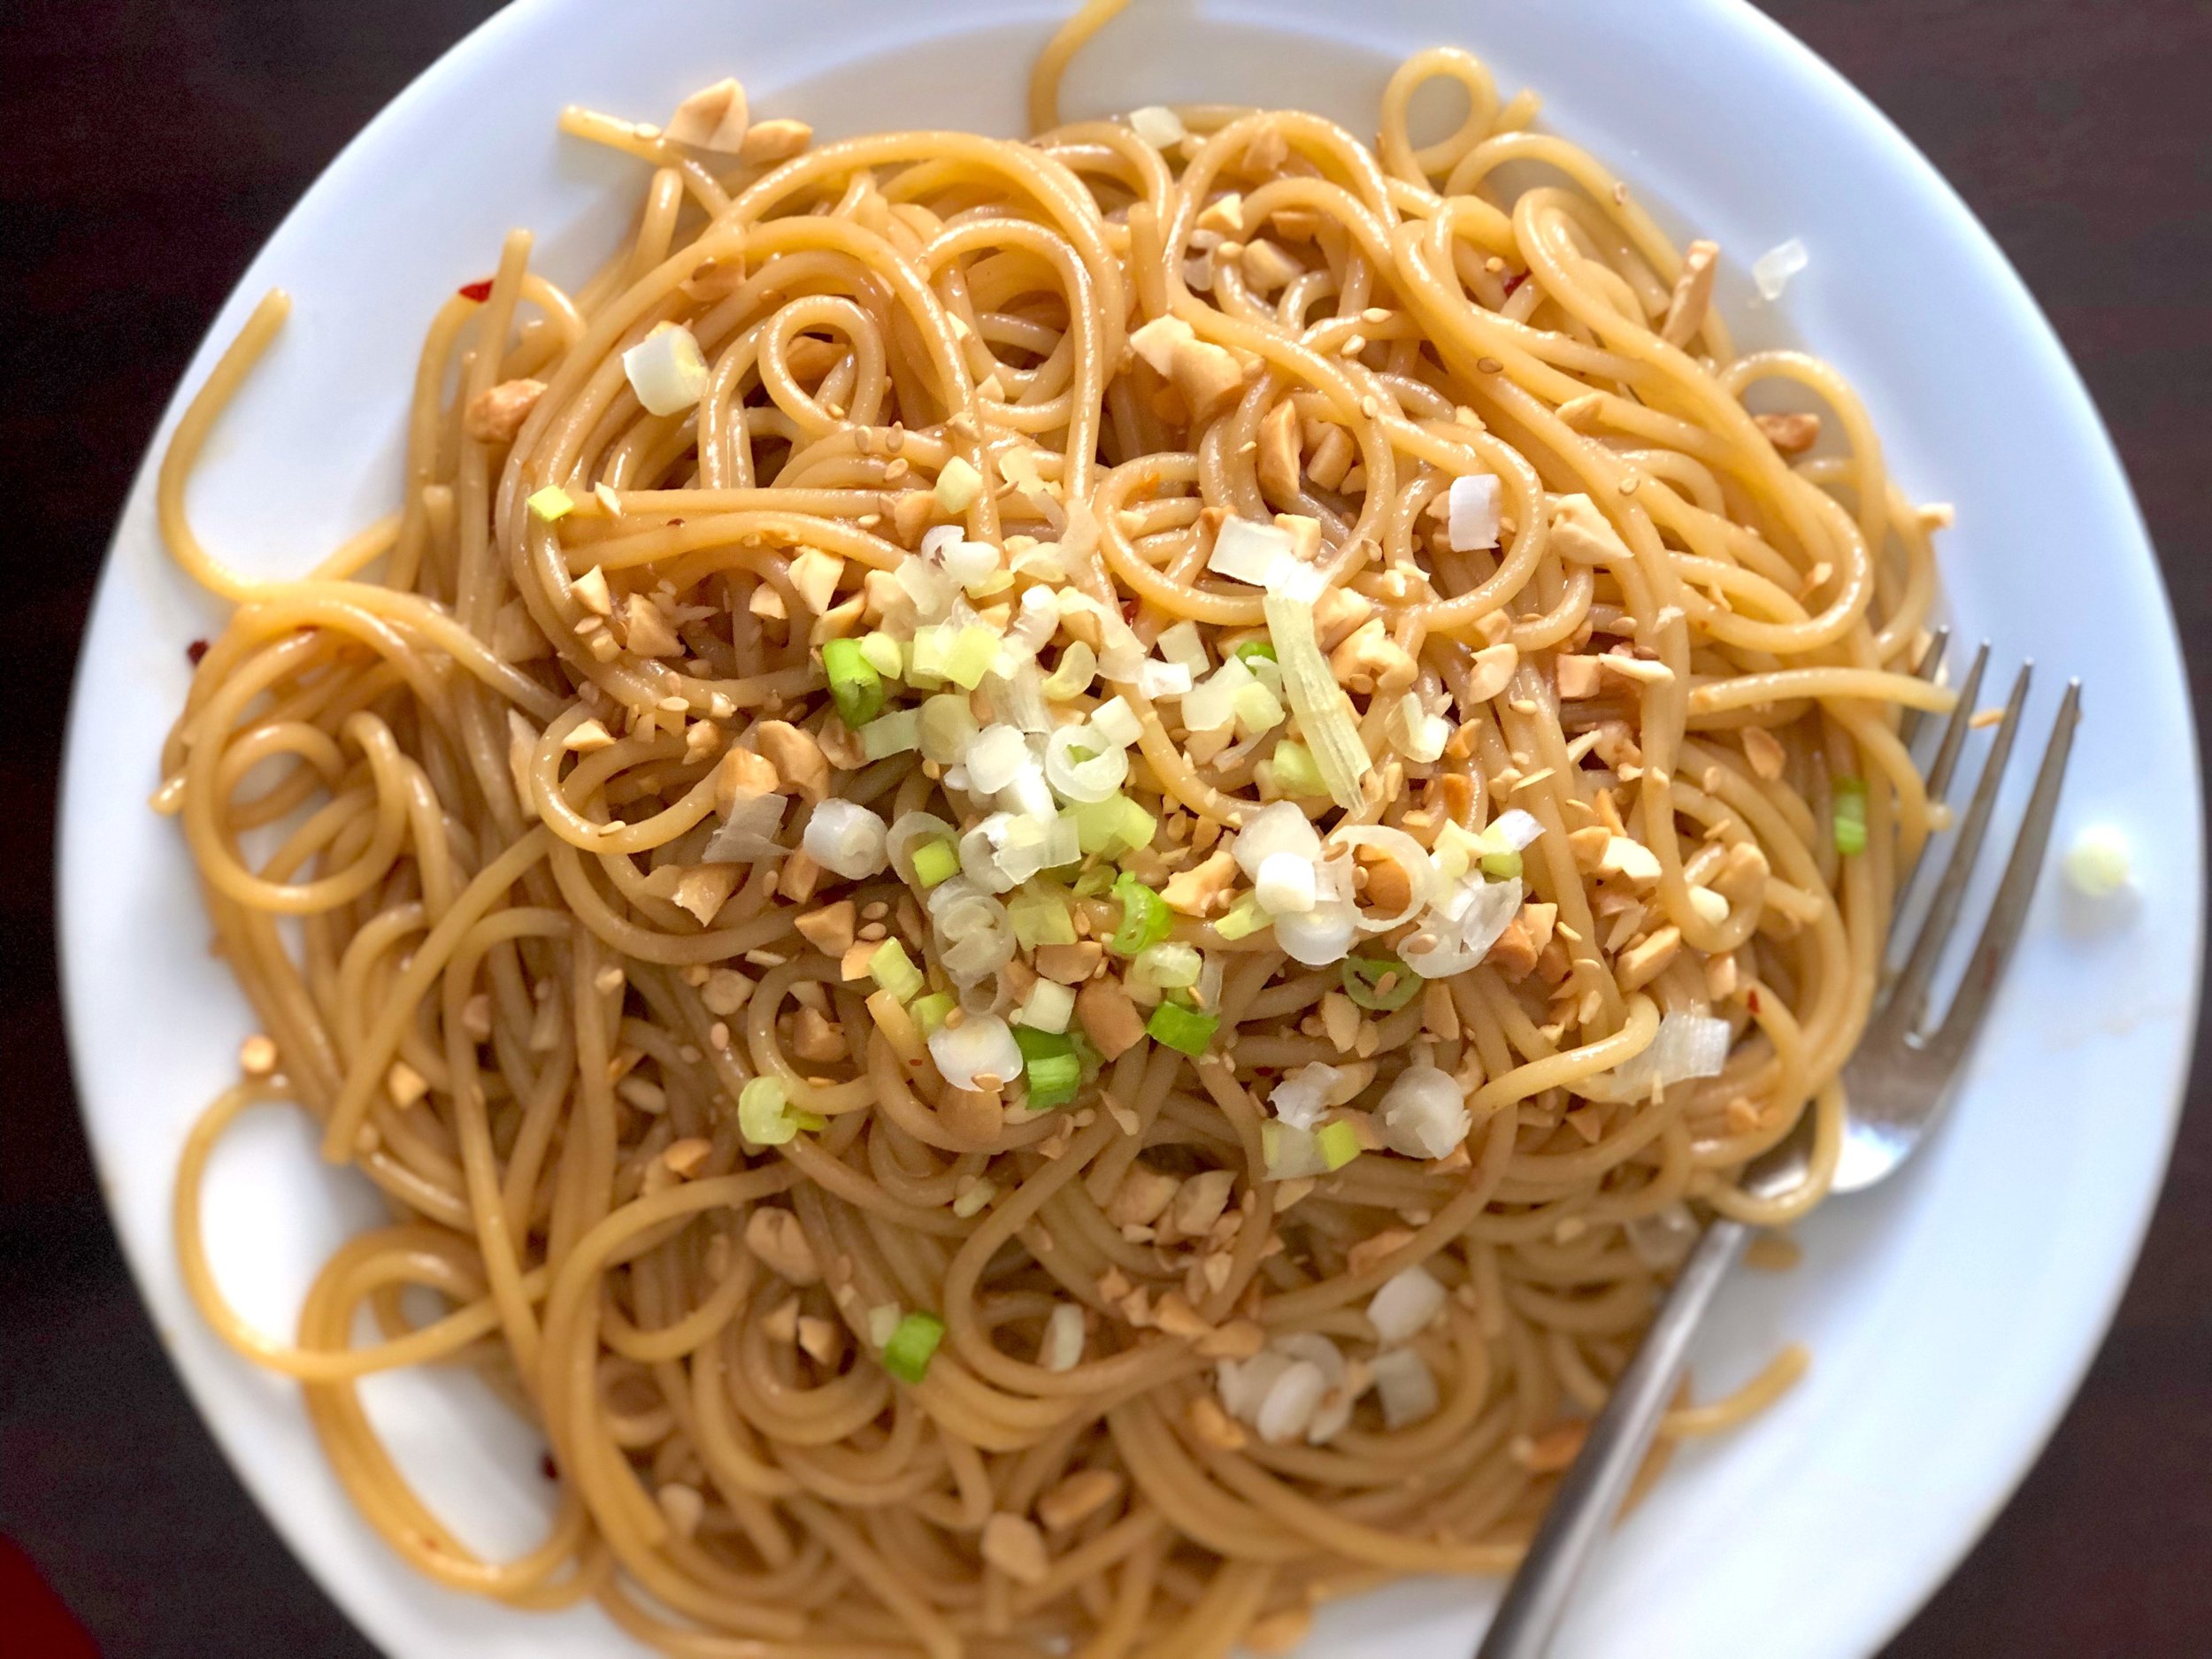
  9. Salsa - salsa means sauce. While Americans take salsa to mean the spicy red tomato and pepper sauce (ya know, chips and salsa?), this is used much more generically in Italian. It can be used to mean a dressing, condiment, sauce, gravy, etc. You can also say sugo, which is a bit more specifically translated to sauce. So if you’re deciding which sauce you want to go with your pasta, you would be better off saying sugo.

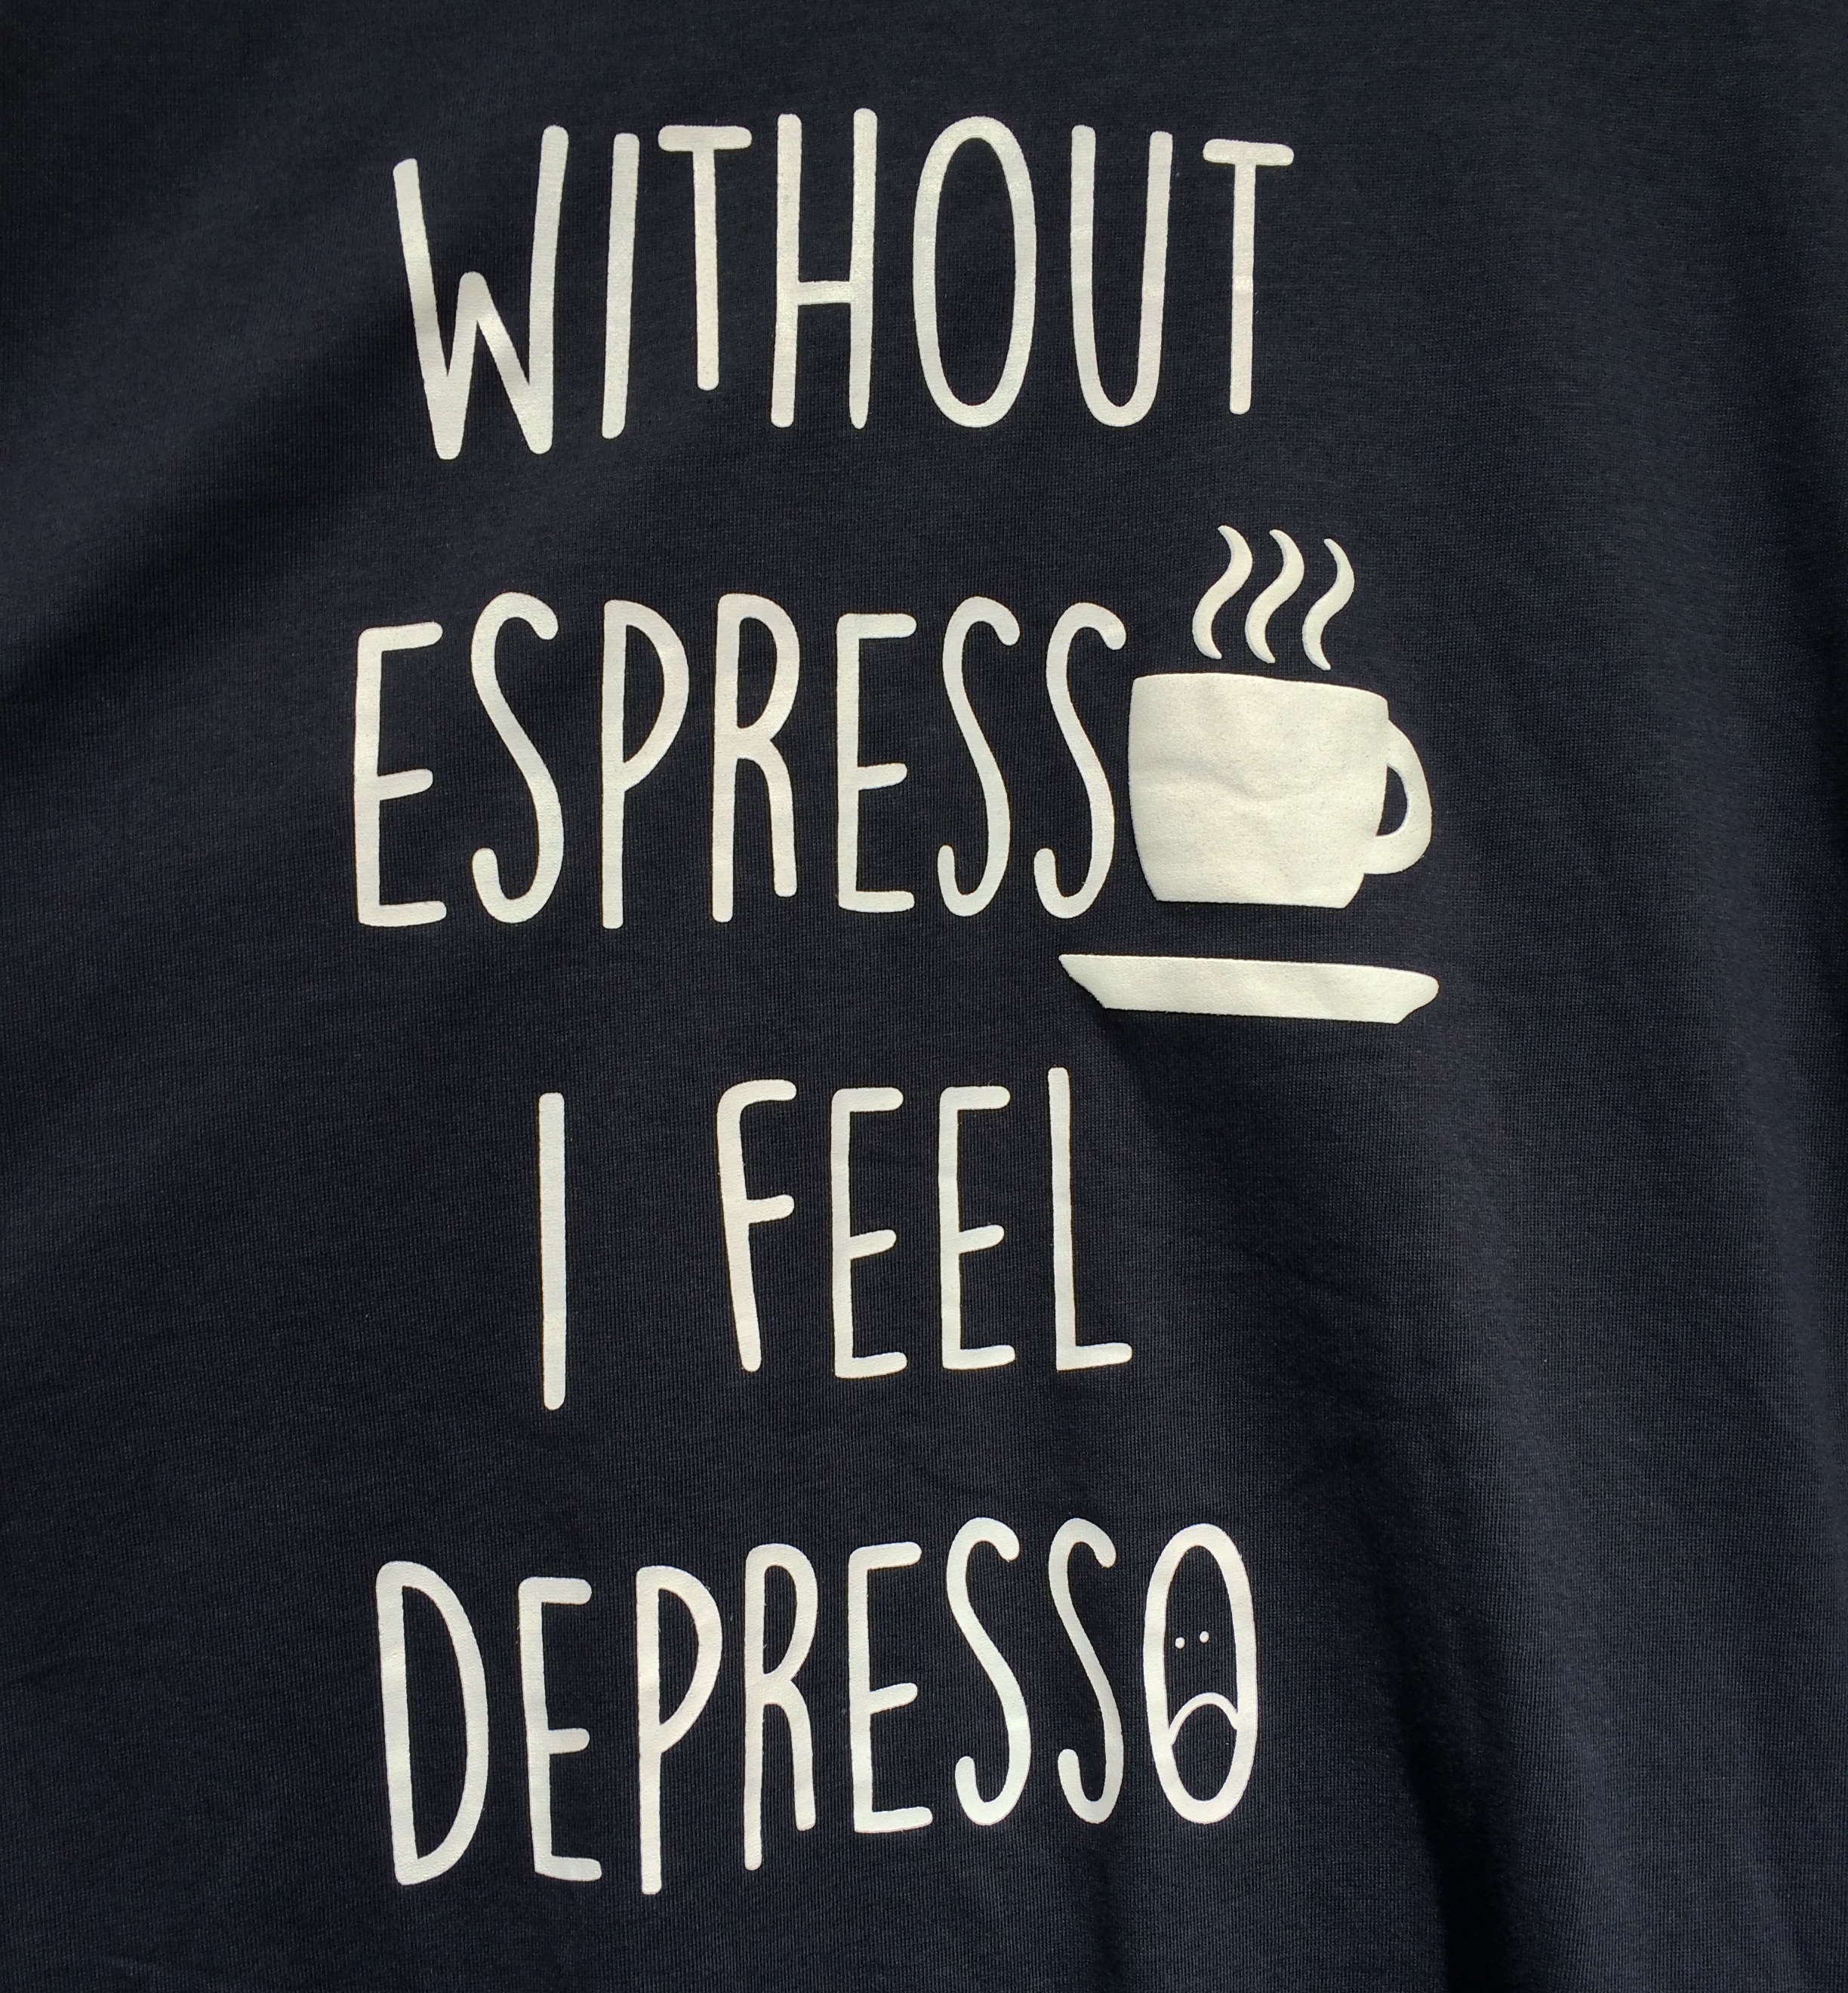
  10. Moka - if you hear someone talking about moka, you might be thinking of the mocha with coffee and chocolate. What they’re probably referring to, though, is a moka pot, the instrument of choice for making espresso at home!

  11. Latte - another word that often results with tourists in a conundrum. Latte as it is known in the English speaking world is really a shortened form of caffè latte, which is Italian in origin. So when you try and order a simple latte in Italy, you will end up with a glass of milk. If you want a latte WITH coffee, then go ahead and order that caffè latte, sometimes also spelled caffelatte or caffellatte.

  12. Kebab - While we could call anything in America that’s skewered (fruit, meat, veggies) a kebab, in Italy it refers to the very large hunk of mixed meats that is skewered and slowly roasted while rotating. This meat is shaved as it’s roasted and used to make kebab wraps or sandwiches, referred to as just kebabs. It has origins in the Middle East, and is why most of the kebab restaurants will be Pakistani, Turkish, Indian, etc. It’s delicious, by the way.

  13. Granite (grah-NEE-tay) - more countertops? No, rather the Italian version of a slushy. I’ve never had one, maybe because I don’t much care for slushies. I’m sure if I tried one, in its little 8oz-ish cup with fresh fruit flavors, I would enjoy it, especially if I were in Sicily where they’re supposed to be the bomb.

  14. Gusto (GOOS-toh) - I always thought we used this to mean with oomph, with style, in English. As in, “he swirled his cape with gusto.” In Italian, this means taste. So it still kinda works, “he swirled his cape with taste.” Eh, not quite the same.

  15. Punto (POON-toh) - Not a football punt, but a point, period, or dot. Get my punto?

  16. Solo - dance solo, flying solo? Yes, finally one that is more or less correct! Solo means by yourself, alone, or just or only, as in “just one pizza, please!” How many cones of gelato did you eat today? “Solo uno!” (Only one!)

  17. Mano (MAH-no) - if someone asks you if want a mano, they’re asking if you want a hand, not a man, silly. Man is uomo. Mano is hand.

  18. Oro - do you want pizza oro pasta? <——Not correct usage. Oro means gold. The Italian way to say “sweet dreams” is to say “sogni d’oro” or literally, dream of gold! Awwwwwww.

  19. Argento - maybe this one isn’t all that close to Argentinian, but if I didn’t know what it meant that would probably be my guess. It actually means silver! Now that you know how to say both silver and gold in Italian, you can sing your favorite song come Christmas time. Argentooooo e oroooo, argentoooo e oroooo..!!

  20. Avvocato - if you ask someone what they do for a living and they respond with, “I’m an avvocato,” they’re not delusional, they mean that they’re a lawyer. That double v and t for a d makes a very big difference in differentiating between our little green friend and a career choice.

  21. Slip (sleep) - we might say slip in reference to an under-dress or under-skirt, but in Italian this refers to underwear. This can be men’s briefs or ladies’ undies.

  22. Casino (cah-ZEE-no) - you might think Italians talk an awful lot about casinos as you hear them mutter, “che casino!”, but this really means “what a mess.” If you come to Italy to live you too will soon be muttering this under your breath, often and fervently. To say casino it’s actually casinò, with the accent on the end.

  23. Per - this literally means for in Italian, and although it is used in both languages, we use it a bit differently in English. If you want to translate the English per to Italian, sometimes it’s per, other times a. “Let’s make 3 cookies per person” / “Facciamo 3 dolcetti per persona.” “We earn about $100 per day” / “Guadagniamo circa $100 al giorno.” It can also be used to talk multiplication. Five times five equals twenty-five. Or cinque per cinque fa venticinque.

  24. Grasso - what a nice, lovely yard of green grasso you have there! Grasso means fat. We basically just insulted someone’s fat yard. If you want to say grass, say erba.

  25. Grosso - not gross, but another way of saying big, fat, and wide. For example, the movie “My Big Fat Greek Wedding” is called “Il Mio Grosso Grasso Matrimonio Greco” in Italian. If you wish to say gross, say schifo. Che schifo! / How gross!

  26. Fine (FEE-nay) - La fine / the end! Not “Fine and dandy!”

  27. Arma - this one we also discussed above, so you should be wise enough to know it doesn’t mean arm, but rather weapon. Unless you swing a good one and want to think of your arm as a good one?

  28. Pronto - “I need the report pronto!” meaning right away, asap…in Italian, this means ready, and also what they say when they answer the phone. “Pronto? ahh ciao Chiara, come va?”

  29. Vesto / Vesti / Veste - none of which mean vest. These are the first, second, and third person of the verb vestire which means to dress, so I dress, you dress, and he/she dresses, respectively. Sounds like an article of clothing but refers to dressing, easy enough to remember, no?


Here we are, 3 lessons later, actually 4 if you needed a refresher on the Italian alphabet and pronunciation. What have learned? Oh, ya know, only 200+ new Italian words!

Roasted Red Pepper and Goat Cheese Pasta

Last Updated August 24, 2024

IMG_1023.jpg

Roasted Red Pepper and Goat Cheese Pasta with toasted walnuts. It’s a little smoky, a little sweet, feels impressive, yet it’s easy enough to make.

Several years ago I went through a phase where I wanted everything roasted red pepper. I’m not sure if that was an actual thing in the culinary world, or it just happened to be the first time that roasted red pepper really came to my attention, and thus started noticing and wanting all things roasted red pepper. Pastas and dips, sandwiches and wraps, and anything you could incorporate roasted red peppers into. That smoky, sweet flavor you get from grilling the red peppers was this elusive, elegant flavor profile because I didn’t know how it was made.

Then I found a recipe for roasted red pepper sauce, made it, and was floored by how NOT elusive it is. It’s quite simple, really. I even grilled my own peppers instead of going for the much easier option of buying a jar of roasted red peppers at the store. And you know what? Even grilling the peppers and peeling off the blackened skin wasn’t nearly as hard as I imagined it all to be. Sometimes those mountains we build in our heads are much more scalable than we make them out to be, even if that’s just learning how to make a dish you really like, as in this example...orrr sometimes it really is as hard as we make it out to be. But that is not this Roasted Red Pepper sauce!

This was not meant to turn into a inspirational post, back to food.

It’s been a while since I’ve eaten roasted red pepper anything, definitely not much of a thing here in Italy. But I decided, while being inspired and eating so much pasta in the month of July, to make my own little twist of a roasted red pepper sauce. And it turned out really great! Amazing! Delizioso! As I stated above, however, it’s really not rocket science to make, so I should probably calm down. Adding goat cheese and toasted walnuts are no new pairing to goat cheese, but remain such a good combination. Never had nuts on your pasta? At least not that you’re aware of? Don’t knock it until you’ve tried it! Unless you have a nut allergy, then please don’t. (You’ve probably eaten basil pesto on pasta, yes? Pesto is made from pine nuts traditionally, and often walnuts when pine nuts are not available or too expensive. See? You love nuts on pasta and didn’t even know!)

The great thing is, the roasted red pepper sauce actually makes enough for two meals, and freezes well. The next time you want roasted red pepper pasta, just thaw the sauce and boil the pasta. So easy peasy.

For extra easy-ness, you can buy a jar of roasted red peppers or grill them yourself, completely up to you.

Are you vegan or dairy-free? Simply omit the goat cheese or substitute a vegan-friendly cheese!

This post may contain affiliate links. If you make a purchase using these links, Jennyblogs may receive a small commission, at no extra cost to you. This helps to support Jennyblogs. Where possible, links are prioritized to small businesses and ethically and responsibly made items. For further information see the privacy policy. Grazie!


Roasted Red Pepper and Goat Cheese Pasta

IMG_1026.jpg

Serves 6-8

Ingredients:

  • 16 oz / 500g spaghetti

  • 2 Tbsp / 28g oil

  • 1/2 onion, diced

  • 4 garlic cloves, minced

  • 16 oz / 454g jar roasted red peppers, drained and sliced

  • 1 Tbsp fresh chopped thyme

  • 1/2 tsp / 1g chili powder

  • 1/2 tsp / 1g turmeric

  • 1 tsp / 5g balsamic vinegar

  • salt and pepper, to taste

  • 3 oz / 85g fresh goat cheese, cut into pieces, optional

  • 1/3 cup / 30g walnuts, chopped and toasted, optional

Directions:

  1. Bring a large pot of water to boil over high heat, adding salt just before water boils. Cook pasta according to instructions on package. Drain pasta and return to pan, reserving a generous 1 cup / 237g of pasta water.

  2. While the pasta is cooking, heat oil in a medium pan over medium heat. Add onion and cook until it begins to soften, about 2-3 minutes. Add garlic and cook for another 1-2 minutes, until fragrant.

  3. Add sliced peppers, thyme, chili powder, turmeric, balsamic vinegar, salt and pepper. Cook until peppers are heated through.

  4. Transfer all of the pepper mixture to a blender and puree until smooth.

  5. Pour half of the roasted red pepper sauce over the pasta and add a bit of the pasta water. Add goat cheese and toss until pasta is well coated and cheese has melted, adding more pasta water to thin out sauce as desired. For a saucier pasta, add remaining half of sauce, otherwise refrigerate remaining sauce for up to 2-3 days or freeze for future use.

  6. Plate pasta and top with toasted walnuts.

Jenny’s Notes:

  • To roast red peppers yourself, place whole on a heated grill or near an open flame, turning occasionally, until all sides are blistered and start to blacken. You can also roast them on a lined baking sheet in the oven for 30-45 minutes, or very carefully over a gas burner. Once done, place in covered pot, bowl, or re-sealable plastic, anything you can close, to let the peppers steam for about 20-30 minutes. This helps the skin to slip off easily. Then remove stems and seeds, and slice. Proceed as in recipe.

  • If you don’t have fresh thyme available, substitute about a scant teaspoon of dried.

  • Add more chili powder, cayenne, or hot spice of choice for a spicier kick!

  • If you’re in a pinch you don’t have to toast the walnuts, although you miss out on that tasty flavor that comes out of the nut only by toasting. But it will still be delicious!

  • Omit goat cheese or replace with suitable substitute to make vegan and dairy-free.

Roasted Red Pepper and Goat Cheese Pasta
Yield 6-8 servings
Author
Prep time
30 Min
Total time
30 Min

Roasted Red Pepper and Goat Cheese Pasta

Pasta in a smoky, sweet, roasted red pepper sauce with goat cheese and toasted walnuts.
Cook modePrevent screen from turning off

Ingredients

Instructions

  1. Bring a large pot of water to boil over high heat, adding salt just before water boils. Cook pasta according to instructions on package. Drain pasta and return to pan, reserving a generous 1 cup / 237g of pasta water.
  2. While the pasta is cooking, heat oil in a medium pan over medium heat. Add onion and cook until it begins to soften, about 2-3 minutes. Add garlic and cook for another 1-2 minutes, until fragrant.
  3. Add sliced peppers, thyme, chili powder, turmeric, balsamic vinegar, salt and pepper. Cook until peppers are heated through.
  4. Transfer all of the pepper mixture to a blender and puree until smooth.
  5. Pour half of roasted red pepper sauce over pasta and add a bit of pasta water. Add goat cheese and toss until pasta is well coated and cheese has melted, adding more pasta water to thin out sauce as desired. For a saucier pasta, add remaining half of sauce, otherwise refrigerate remaining sauce for up to 2-3 days or freeze for future use.
  6. Plate pasta and top with toasted walnuts.

Notes

To roast red peppers yourself, place whole on a heated grill or near an open flame, turning occasionally, until all sides are blistered and start to blacken. You can also roast them on a lined baking sheet in the oven for 30-45 minutes, or very carefully over a gas burner. Once done, place in covered pot, bowl, or re-sealable plastic, anything you can close, to let the peppers steam for about 20-30 minutes. This helps the skin to slip off easily. Then remove stems and seeds, and slice. Proceed as in recipe. If you don’t have fresh thyme available, substitute about a scant teaspoon of dried. Add more chili powder, cayenne, or hot spice of choice for a spicier kick! If you’re in a pinch you don’t have to toast the walnuts, although you miss out on that tasty flavor that comes out of the nut only by toasting. But it will still be delicious! Omit goat cheese or replace with suitable substitute to make vegan and dairy-free.

Nutrition Facts

Calories

425.16

Fat

13.36 g

Sat. Fat

3.05 g

Carbs

62.47 g

Fiber

4.25 g

Net carbs

58.23 g

Sugar

2.89 g

Protein

14.43 g

Sodium

1128.86 mg

Cholesterol

6.52 mg

Nutritional information is approximate. Based on 6 servings and includes goat cheese and walnuts.

roasted red pepper, red pepper, thyme, turmeric, garlic, onion, goat cheese, toasted walnuts, pasta, recipe, vegan, vegetarian, dairy-free
Dinner, pasta
American
Did you make this recipe?
Tag @jennyblogsandbakes on instagram and hashtag it #jennyblogs
Now we’re being more honest about a real portion size! :)

Now we’re being more honest about a real portion size! :)


How to Learn Some Italian Using Words You Already Know - Lesson 2

1X9B0092 copy copia.jpg

In the first lesson of How to Learn Some Italian Using Words You Already know we focused on all the English words Italians use on a daily basis, thus making our lives that much easier when trying to communicate. There are over 70 words, in fact, that are either English, the same in Italian and English, or so similar that you understand anyway, and I keep finding words to add to that list!

To read Lesson 1, click here.

For Lesson 2 we are going to focus on taking the English words you can turn into Italian, simply by adding a vowel on the end. (If you hadn’t noticed from lesson 1, these lessons aren’t exactly serious… they aren’t aimed at the studious, full-time Italian-language student, but rather can be enjoyed by anyone, whether you speak any Italian or not. :)

If you have spent any time around the Italian culture (or just watching The Godfather) you will have noticed that Italian words all end in vowels, and that it’s very easy to imitate them by adding a vowel on to any word. This is often found highly entertaining by other cultures (ahem, American), even if it (obviously) ends with made-up words. '“Yes, ciao, I will take-o the pizza and the pasta to take-away-o!”

If you don’t want to sound like you are speaking Ameritalian or someone who has lived their whole life imitating Italian stereotypes, read this post about the Italian alphabet and pronunciation of key letters. Some words in the list that follows are spelled the same as in English but with a vowel on the end, but the pronunciation might be slightly different. Likewise, some are spelled differently but are pronounced the same, aside from that last vowel, of course. If I don’t indicate how it should be pronounced, that means the accent and pronunciation stay essentially the same as in English.

One more note to remember as we progress: Italian words are split into two categories, feminine and masculine, usually ending in a or o, respectively. The ending of adjectives can fluctuate, depending on if the word or person they are describing is masculine or feminine. For example, “buono” is an adjective that means “good,” and you could say “oliO buonO” or “pizzA buonA.”

One more example to make sure we’re clear, let’s take #1 from the list below. I am an American, (and a woman) so I would say, “sono un’Americana.” I can’t (or shouldn’t) say “sono un Americano” because the adjective “Americano” no longer matches what it is describing, me the woman. So if you see the o/a below or realize a word is an adjective, remember it depends on if the noun the adjective is describing is masculine or feminine!

Ok, ready to add to your Italian vocabulary?

This post may contain affiliate links. If you make a purchase using these links, Jennyblogs may receive a small commission, at no extra cost to you. This helps to support Jennyblogs. Where possible, links are prioritized to small businesses and ethically and responsibly made items. For further information see the privacy policy. Grazie!


English Words to Which You Can Add Vowels to Make Italian Words

  1. American, Italian, Indian, and others / Americano/a, Italiano/a, Indiano/a - This holds true for several nationalities, but not all. For example, Australian is Australiano/a, but British is Inglese and French is Francese, Ah well, helpful for some!

  2. Person / Persona (per-SOHN-a)

  3. Tube / Tubo

  4. Cube / Cubo (COO-Boh)

  5. Sphere / Sfera (SFAIR-ah)

  6. Case / Caso (CAH-zo) - in any caso…

  7. Event / Evento - Hey let’s go to that evento!

  8. Concert / Concerto (cone-CHAIR-toh)

  9. Art / Arte

  10. Ballet / Balletto - Ah, finally you can pronounce that “t” sound like you’ve always been tempted to!

  11. Dance / Danza (DAH-nza)

  12. Music / Musica (MOO-zee-cah)

  13. Tambourine / Tamburino

  14. Battery / Batteria (Baht-TAIR-ee-ah) - this also can refer to drums.

  15. Angelic / Angelico/a (ahn-JEL-ee-co)

  16. Content / Contento/a - I am so contenta to see you!

  17. Conversion / Conversione (cohn-VAIR-zee-ohn-ay)

  18. Impression / Impressione (eem-PRESS-ee-ohn-ay)

  19. Candle / Candela (cahn-DEL-ah)

  20. Diamond / Diamante (dee-ah-MAHN-tay)

  21. Mark / Marchio note that there is also “marca” but that means a brand or make, such as Gucci or Ferrari, rather than a mark on something.

  22. Television / Televisione (tel-eh-viz-ee-OHN-ay)

  23. Kiosk / Chiosco (kee-OH-sco) - or newspaper stand.

  24. Zone / Zona

  25. Current / Corrente (cohr-EHN-tay) - this can be used for all forms of “current” in English, current in water, current events, etc.

  26. Equilibrium / Equilibrio (ee-quil-EE-bree-oh)

  27. Diet / Dieta (dee-EH-ta)

  28. Vitamin / Vitamina (vee-tah-MEE-na) - Let’s go soak up some vitamina d!

  29. Ingredient / Ingrediente (een-GREY-dee-en-tay)

  30. Rice / Riso ( REE-zo)

  31. Cone / Cono

  32. Carrot / Carota (cah-ROH-ta)

  33. Melon / Melone (Meh-LOHN-ay)

  34. Marmalade / Marmellata (mar-may-LAH-ta) - you might not eat marmalade very often, but “marmellata” refers to all jams, jellies, and marmalades.

  35. Olive / Oliva (oh-LEE-va)

  36. Liquor/Liqueur / Liquore - although liquor refers to stronger spirits (vodka, taquila, etc.) and liqueur to sweeter spirits (Kahlua, Bailey’s, etc.) both of these are encompassed in the Italian “liquore.”

  37. Cream / Crema - this can refer to any kind of cream, such as a face cream or a cream you would eat. Crema is also how you would say “pudding” in Italian.

  38. Spinach / Spinaci (spee-NAH-chee)

  39. Protein / Proteine (pro-tay-EEN-ay)

  40. Pork / Porco it’s also often referred to as “maiale”

  41. Pen / Penna - if this word looks familiar, that’s because yes, penne pasta literally means “pens” in Italian! Remember to lay those n’s on nice and thick, because if you take away one “n” you end up with a completely different word that you definitely don’t want to be ordering for dinner! (If I got you curious, it’s anatomy, not a swear word or worse, but you can go translate it because I prefer to keep this blog G rated. :)

  42. Train / Treno (TRAY-no)

  43. Airplane / Aeroplano (air-oh-PLAHN-o)

  44. Airport / Aeroporto (air-oh-PORT-o)

  45. Bank / Banca (BAHN-ca)

  46. Post / Posta - this can refer to the post in your mailbox as well as the actual post office.

  47. Postal / Postale (post-AHL-ay)

  48. Pharmacy / Farmacia (far-ma-chee-ah)

  49. University / Università (oon-ee-vers-ee-TAH)

  50. Camp / Campo (CAHM-po) also means field, realm, sphere, domain, any of those kinds of camp.

  51. Metal / Metallo (Meh-TAHL-lo)

  52. Metallic / Metallico/a

  53. Atomic / Atomica (Ah-TOH-mee-ca)

  54. Comic / Comico/a also known as a comedian or used as an adjective to describe something funny

  55. Animal / Animale (ahn-ee-MAHL-ay)

  56. Elephant / Elefante

  57. Lion / Leone (lay-OHN-ay)

  58. Dolphin / Delfino (del-FEEN-o)

  59. Serpent / Serpente

  60. Rat / Ratto

  61. Vote / Voto

  62. System / Sistema (sees-TAIM-a)

  63. Problem / Problema

  64. Terrible / Terribile (tair-REE-bee-lay)

  65. Crucial / Cruciale (croo-CHYA-lay)

  66. Special / Speciale (speh-CHYA-lay)

  67. Incredible / Incredibile (in-cred-EE-bee-lay)

  68. Important / Importante (eem-por-TAHN-tay)

  69. Fine / Fino - thin, the dimension, not “fine, be that way.”

  70. False / Falso - true or falso?

  71. Liberty / Libertà

  72. Destiny / Destino (des-TEEN-o)

  73. Ocean / Oceano (och-YA-no)

  74. Divine / Divino/a (Dee-VEE-no) - not to be confused with “divano” which means “couch.”

  75. Noble / Nobile (NO-bee-lay)

  76. Dollar / Dollaro - (DOL-lar-o)

  77. Button / Bottone (boo-TOH-nay)

  78. Distant / Distante (dee-STAN-tay)

  79. Second / Secondo

  80. Moment / Momento

  81. Medicine / Medicina (meh-dee-CHEE-na)

  82. Pulse / Polso (POHL-so)

  83. Palm / Palma

  84. Penicillin / Penicillina (pen-ee-chee-LEE-na)

  85. Vein / Vena

  86. Nude / Nudo/a - Don’t come in, I’m nuda! In English we more commonly say naked rather than nude, but in Italian you get one option. Try not to laugh too much the first time you actually get to use it.

  87. Cigarette / Sigaretta

  88. Rose / Rosa - means rose as well as pink.

  89. Vase / Vaso (VAH-zo) - I got you a vaso to put your rosa in.

  90. Medium / Medio (meh-dyo)

  91. Category / Categoria

  92. Comment / Commento (cohm-MEN-toh)

  93. Phrase / Frase (FRAH-zay)

  94. Alphabet / Alfabeto

  95. Letter / Lettera - as in English, this can mean both a letter in a word and a letter you write someone.

  96. Note / Nota - like a note you write someone along with musical notes, etc.

  97. Icon / Icona (ee-COHN-a)


There is yet another taste for you, that Italian can be easy to learn! And fun(ny). There are many, many more words like this, which is why it can be almost effortless to expand your vocabulary of nouns and adjectives. And this doesn’t even touch upon all the letter combinations you’ll start to pick on, those that are in English but not Italian, then figuring out the Italian equivalent, which enables you to translate words on your own without using a translator or asking a friend. Huh? Let me explain quickly.

Take for example, words in English that end in “tion.”

Frustration. Eradication.

If I tell you that “frustration” becomes “frustrazione” and “eradication” becomes “eradicazione,” you can see that the root of the word stays the same, and the “tion” suffix becomes “zione" in Italian. Easy, right? I bet you can figure out the next three.

  • Extraction = Estrazione

  • Indication = Indicazione

  • Indecision = Indecisione

Did you catch the exceptions? Where one root word didn’t stay the same, and one word didn’t end in “tion”? The “ex” in “extraction” became “es” in “estrazione,” and “indecision” ends in “sion.” This, in turn, could open the next letter combinations you could translate by yourself. There is no “x” in the Italian alphabet, therefore the combination of “ex” usually becomes “es,” and words that end in “sion” often become “sione” in Italian.

  • Expulsion = Espulsione

  • Extrusion = Estrusione

  • Extrinsic = Estrinsico

  • Invasion = Invasione

I’m getting ahead of myself, and going beyond the just the light-hearted lesson I had planned-o today-o, but I’ll leave you with on last word to translate on your own. Conversation…go!

Until next time, alla prossima!


Garlic, Oil, and Pepper Pasta - Aglio, Olio, e Peperoncino

Last Updated August 20, 2024

IMG_1090.jpg

Aglio, olio, peperoncino is a pasta found often throughout Tuscany, and even more often on my table for lunch. It originally hails from Napoli but has become beloved throughout Italy.

It’s simple, so simple, with the classic version requiring just 4 ingredients: spaghetti, garlic, olive oil, and a hot pepper. It’s great to whip up in a pinch because it’s quick and the ingredients are those you probably have in your pantry. It can be on the table in about as long as it takes to boil and cook pasta, plus 2 minutes for mixing. Because of its simplicity, as many Italian dishes are, attention to the quality and freshness of your ingredients will really make this dish shine. (Especially with that olive oil, nice and shiny. :)

There are many slight variations, but they hardly vary more than an ingredient or two. Some use fresh hot peppers, some use chili flakes; some versions call for bread crumbs, others a bit of fresh parsley added at the end, some say to mince the garlic, others slice. Based on these variances, you can always decide to play a bit to find exactly how you like to eat your aglio, olio, e peperoncino pasta.

The version that follows I learned from my husband, the fresh pasta expert. We usually use fresh hot peppers, but will also use chili flakes if we don’t feel like running to the store. It’s pretty close to the classic recipe, with one exception. We add a bit of grated Parmigiano Reggiano and it catapults the pasta to the next level. OH YES, cheese!

A note about using fresh peppers: I’m not actually sure what kind of peppers I use here in Italy. At the supermarket there are usually bell peppers “peperoni” and hot peppers “peperoncini” with no indication what variety they might be. Bell peppers come in red and green, but not always at the same time, and the hot peppers are usually red OR green, depending on the season. I suppose they’re serrano or a similar variety because they’re spicy but not overly so, although they do vary. Apparently Italians are not pepper connoisseurs, you won’t find jalapeño, habanero, serrano, and other pepper types readily available year round! If I were writing this recipe in Italian I would just put “peperoncino,” and everyone would know to get the only kind of peperoncino available from the store. In English recipes we are used to being told more specifics, and writing “1 hot pepper” would not be as helpful. So I wrote serrano on the recipe, but just be aware that you can play around with the kind you use if you want, especially if you think serrano might be too spicy for you!

This post may contain affiliate links. If you make a purchase using these links, Jennyblogs may receive a small commission, at no extra cost to you. This helps to support Jennyblogs. Where possible, links are prioritized to small businesses and ethically and responsibly made items. For further information see the privacy policy. Grazie!

Recipe Adapted from the Italian Classic


Garlic, Oil, and Pepper Pasta - Aglio, Olio, e Peperoncino

Serves about 4-6

IMG_1093.jpg

Ingredients:

  • 500g / 16 oz spaghetti

  • 84g / 6 Tbsp olive oil

  • 4 garlic cloves

  • 1 serrano pepper, or spicy pepper of choice

  • generous 1/4 cup /30g grated parmesan cheese

Directions:

  1. Bring water to boil in a large pot over high heat. Just before boiling, add some salt.

  2. While water is heating up, mince the garlic and dice the pepper. Add the oil, garlic, and pepper to a small pot or pan.

  3. When the water boils add spaghetti and cook according to instructions on package. Meanwhile, place the small pan of oil over low heat.

  4. Simmer oil for 5-8 minutes; remove from heat when garlic is fragrant and starts to appear to dry with barely golden edges.

  5. When pasta is done cooking, drain, reserving about 1/2 cup / 120g of pasta water.

  6. Return drained pasta to the pot and immediately add oil mixture, reserved pasta water, and cheese. Working quickly, use two forks to mix and toss spaghetti until oil, cheese, and water have coated the pasta in a light, creamy sauce. Serve immediately.


Jenny’s Notes:

  • These measurements are approximate, we never measure when making this, but this is pretty close to our normal. So if you decide you want to use 5 cloves garlic and 2 jalapeños, that’s fine, too, because this is not an overly precise recipe!

  • For less heat, remove the seeds of the pepper before dicing. If using chili flakes, don’t simmer them in the oil but add to the pasta with the cheese at the end.

  • Look for parmigiano reggiano, which is the best. It can only be called so if it is made and aged in the designated area in Italy according to their regulations. Even if you are a world-class parmesan maker but make it in Wisconsin, it cannot legally be called parmigiano reggiano. This pasta is also delicious with other sharp, aged Italian cheeses. I like a mixture of aged pecorino and parmigiano.

  • Keep a close eye on the simmering oil, the garlic goes quickly from perfectly cooked (barely golden) to burnt (anything golden or beyond.) Even if you happen to burn your garlic, it only takes a few minutes to start the oil, garlic, and pepper over again and could still be ready before the pasta even finishes cooking.

  • One of the great things about making this is that even if you add too much pasta water, it will eventually evaporate out while mixing. One of the first times I ever made this solo, I added way too much and had a good inch or so sitting in the bottom of my pan. I had already added the oil and cheese and it was too late to dump the extra out. So I tossed and mixed for several minutes, and what do you know, the water eventually evaporated and mixed in, and I ended up with a wonderfully creamy and cheesy sauce.

  • When making this in Italy I always use the classic spaghetti option, as this is called spaghetti aglio e olio traditionally. However, the typical spaghettis you find in grocery stores in America don’t hold up as well, so I usually opt to use linguine in the USA.

Garlic, Oil, and Pepper Pasta - Aglio, Olio, e Peperoncino
Yield 6-8
Author
Prep time
25 Min
Total time
25 Min

Garlic, Oil, and Pepper Pasta - Aglio, Olio, e Peperoncino

A simple and classic pasta dish served throughout Italy with plenty of garlic, olive oil, spicy pepper, and a bit of parmigiano reggiano.
Cook modePrevent screen from turning off

Ingredients

Instructions

  1. Bring water to boil in a large pot over high heat. Just before boiling, add some salt.
  2. While water is heating up, mince the garlic and dice the pepper. Add the oil, garlic, and pepper to a small pot or pan.
  3. When the water boils add spaghetti and cook according to instructions on package. Meanwhile, place the small pan of oil over low heat.
  4. Simmer oil for 5-8 minutes; remove from heat when garlic is fragrant and starts to appear to dry with barely golden edges.
  5. When pasta is done cooking, drain, reserving about 1 cup / 237g of pasta water.
  6. Return drained pasta to the pot and immediately add oil mixture, reserved pasta water, and cheese. Working quickly, use two forks to mix and toss spaghetti until oil, cheese, and water have coated the pasta in a light, creamy sauce. Serve immediately.

Notes

  • These measurements are approximate, we never measure when making this, but this is pretty close to our normal. So if you decide you want to use 5 cloves garlic and 2 jalapeños, that’s fine, too, because this is not an overly precise recipe!
  • For less heat, remove the seeds of the pepper before dicing. If using chili flakes, don’t simmer them in the oil but add to the pasta with the cheese at the end.
  • Look for parmigiano reggiano, which is the best. It can only be called so if it is made and aged in the designated area in Italy according to their regulations. Even if you are a world-class parmesan maker but make it in Wisconsin, it cannot legally be called parmigiano reggiano. This pasta is also delicious with other sharp, aged Italian cheeses. I like a mixture of aged pecorino and parmigiano.
  • Keep a close eye on the simmering oil, the garlic goes quickly from perfectly cooked (barely golden) to burnt (anything golden or beyond.) Even if you happen to burn your garlic, it only takes a few minutes to start the oil, garlic, and pepper over again and could still be ready before the pasta even finishes cooking.

Nutrition Facts

Calories

257.59

Fat

15.37 g

Sat. Fat

2.72 g

Carbs

24.37 g

Fiber

1.09 g

Net carbs

23.28 g

Sugar

0.94 g

Protein

5.56 g

Sodium

94.52 mg

Cholesterol

4.30 mg

Nutritional information is approximate, based on 6 servings.

aglio, olio, peperoncino, garlic, olive oil, hot pepper, spaghetti, Napoli, pasta, classic Italian pasta dish
Dinner, pasta
Italian
Did you make this recipe?
Tag @jennyblogsandbakes on instagram and hashtag it #jennyblogs
IMG_1100.jpg

How to Learn Some Italian Using Words You Already Know - Lesson 1

1X9B0155 copy copia.jpg

Did you know that you already know a whole bunch of words that Italians use everyday? You’re basically fluent in Italian and don’t even know it. Ok, ok, not really, but the fact is, Italians use a good bit of English in their everyday jargon. I’m not talking about Italians when they’re speaking in English, I mean the English words that are thrown in to Italian conversations. English words that have come to replace the traditional Italian, or words that were coined in English in recent decades and have wound their way into Italian.

Some Italian words by now are almost obsolete. I’ve spent almost 3 years’ worth of time in Italy, only including the time in which I was learning Italian and conversing maybe more in Italian than English, and still have yet to hear the Italian equivalent of certain English words. For example, “privacy.” Written, spoken, it’s always “privacy.” I didn’t even notice I had no idea how to say nor had I ever heard someone say “privacy” in Italian until someone brought it to my attention. So I had to ask, how do you say “privacy” in Italian? “Privatezza.” By now with "terms of privacy” and the like around the internet, especially here in the EU, “privatezza” has been rendered all but forgotten, I guess. Maybe just uncool.

Buca di Beppo requires full out Italian speaking mode ON

Buca di Beppo requires full out Italian speaking mode ON

English is a desired language and thus becomes cool if you can speak any. Plus Italy is so dependent upon tourism that many people’s jobs require them to speak some basic English, if not fluently. Many parents look to English speaking au pairs to teach their children English from a young age, or get them in any programs that involve English native-tongues, no matter the program, just for the language experience. Teaching English is almost always an option for native speakers.

I can’t tell you how often my Italian colleagues in every day conversation would sprinkle in some English. “Yes” would replace a “si,” “excuse me,” “oh my god,” “please,” “thank you,” and “you’re welcome” would be used just as often as their Italian counterparts. And my colleagues often weren’t talking to me, the only native English speaker who worked there. Americans learn a second language often in high school, but because we have no need of the language it is never exercised and usually forgotten. Even the basic words we retain we don’t often use, even if we also think it’s cool, because it seems a bit pretentious. At least I think the general consensus is that it is. Here, I don’t know, maybe the desire to learn English (and French, German, Spanish, etc.) is almost so accepted that it’s more common everyone is “practicing” in a way, and therefore not pretentious? Shrug.

Whether you’re looking forward to an upcoming Italian adventure, learning Italian, or simply curious, here is a great way to add some QUICK and EASY words to your repertoire. Heheh.

Quick Note on Italian Pronunciation

Even if it is a true English word that Italians use, they often pronounce it with their wonderful accent ( and sometimes may not understand you the first time [or ever] if you pronounce the same word but in the correct English way.) So as you are reading the words that follow, you might want to learn or brush up on the Italian alphabet and how to pronounce some of their key words to get the full appreciation. (Click here to do so.) It’s way more fun to pronounce things in an Italian accent anyway, so let your inner Fabio/Martina come bursting forth!

If you want to actually learn Italian or you have a base that you would like to build upon, I have found this book to be very useful in clarifying all the different verbs in Italian. One of my dear friends used it while she was in Italy as an au pair, and later passed it on to me when I first came to Italy!

This post may contain affiliate links. If you make a purchase using these links, Jennyblogs may receive a small commission, at no extra cost to you. This helps to support Jennyblogs. Where possible, links are prioritized to small businesses and ethically and responsibly made items. For further information see the privacy policy. Grazie!


Italian Words You Already Know

Some they borrow from us, some we borrow from them, either way we understand each other!

  1. Weekend - Il Weekend. By now everyone wishes you a “buon weekend!” instead of “buon fine settimana!” I once heard an elderly gentleman say “buon fine settimana” to an acquaintance on the bus. It actually made me turn around and take note of this gentleman. And that’s it. Just that one time I’ve heard it. It’s really just the older generations that use it. I think it’s a bit sad, really, that some words aren’t hardly even used anymore. As someone who wants to learn Italian and learn it well, it feels a bit like cheating injecting words you already know!

  2. Relax - you could use the Italian verb rilassarsi, but why don’t you relax and use what you already know? ;)

  3. Budget - I was using the Italian “bilancio” for the longest time until I realized that Italians use “budget.” Why do I even try?

  4. Zero - one number down, uh, a couple trillion to go?

  5. Radio - La radio. This I learned when briefly taking Italian lessons. Yay for words that are the same, just a slightly different pronunciation! Rahhhhdio instead of Rayyyydio. Remember those pronunciation rules?

  6. Computer - they even say this one a bit like we do, the u is a “yoo” sound instead of the usual Italian “oo.” But try and roll that r a bit. I know I know, but you’ll get there!

  7. iPhone, Android, iPad, and other well-known technological products and companies - Even though Android seems to have a higher number of cell phone users, Apple is still as desired here as it is in the States. Except an iPhone can cost about €100-300 more than it’s American retail price. Add that in with a weaker economy and it doesn’t take much imagination why Android is still #1.

  8. Social - the only difference here is that Italians don’t say “media” after. It’s always just “social.”

  9. Facebook, Instagram, selfie, etc. - all those trendy words coined in recent years are all the same!

  10. Email - la email…

  11. Password - la password…I don’t even know if these have a translation in Italian. I think they are what they are.

  12. Account - I believe you can also say il conto, the same you would say when asking for the bill or tab at a restaurant. But I’ve never heard anyone use anything other than account, so, no worries!

  13. Display - what a nice display of words we have here! There are several different ways to say this in Italian, such as “mettere in mostra” / to put on display, or “sfoggiare” / to show off, display. But it’s much easier just saying display, now, isn’t it?

  14. Wi-Fi and Internet - need WiFi? You can communicate with one word. WiFi? Si? Grazie!

  15. TV - pronounced “tee-vo,” and short for televisione, but reading it is the same.

  16. Modem and Router - at this rate you might be thinking you can handle calling a help center for internet or something. You can say password, account, email, internet, modem, router…right? Wrong. This bit of knowledge I can pass on to you, internet, cable, and phone companies are awful to talk to all the world round. You may have already known this. ;)

  17. Giga - like social media, they don’t say the second word. Instead of giga-byte, it’s simply giga. I have 50 giga per month, and so far my phone service has only taken unauthorized money from my account once, and they fixed it afterwards, these are two positives of my phone company!

  18. Touch Screen - you could be all fancy and say “schermo tattile” or “schermo sensibile al tatto” but I haven’t seen those readily as touch screen is way easier to say, no?

  19. Cliccare and taggare - these might be the only verbs on this list, but they make me laugh because they just turned English words into Italian verbs. All Italian verbs end in “are” (ah-ray), “ere” (air-ay), or “ire” (eer-ay) in the infinitive form. Thus “click” became “cliccare” (to click) and “tag” became “taggare” (to tag, as in Instagram).

  20. Privacy - as stated above, I finally had to ask, how DO you say privacy in Italian? Ah. Privatezza. But goodness, you’re so uncool if you say the Italian.

  21. Area - pronounced like the name “Aria” this is the same in Italian and English.

  22. Marketing - Italians have taken American marketing to new levels. The kind that makes you roll your eyes and say “marketing.”

  23. Logo - “il logo” logos are logos the world round!

  24. Range - this one seems really random to me. But useful, because I can’t think of how to say it in Italian. Gamma, assortimento, portata, actually there a quite a few.

  25. Babysitter - or you can be a tata!

  26. Stalker - useful. Very useful.

  27. Gas - as in water “with gas.” You’ll hear this quite a bit in restaurants, but not necessarily to be used for gasoline, or the other kind. Um, flatulence?

  28. Spa - the relaxing wellness center, not to be confused with S.p.a. which is the Italian equivalent of our LLC.

  29. Fitness - fitness is so important, people! Even Italians understand this.

  30. Personal Trainer - there are so many at the gym I go to!

  31. Zumba, Spinning, Yoga, Pilates, Box, and other popular sports and activities - there are also plenty of corsi di fitness at my gym. Note that boxing is said just “box.”

  32. Studio - Pilates è in studio 1. Pilates is in studio 1. Only one word is different. Crazy, huh? (Although 1 would be pronounced “uno”)

  33. Sport - lo sport, very important in Italy and Europe.

  34. Basket - like social and box, basketball is just “basket.” Or pallacanestro.

  35. Trek - un trek!

  36. Adidas, Nike, Prada, Timberland, any well-known international brand - except, much to my enjoyment, the pronunciations are sometimes different. Not just the letters but the accent, too. I grew up hearing Adidas as “ah-DEE-des” but here it is “AH-dee-das.”

  37. Performance - or spettacolo.

  38. Record - un nuovo record! Used as in “setting a record” and that type of record, but I haven’t heard it used as the type of record related to music and other meanings.

  39. Stop - I learned some Italian phrases before coming to Italy for the first time, including the useful “basta” (stop, or enough). It would have been nice to know I could’ve also used good ol’ STOP, too.

  40. Bus - short for autobus, but ends up essentially the same in the abbreviated.

  41. Mascara - long a’s, ladies, for long eyelashes.

  42. Shopping - shoppers, rejoice!

  43. T-shirt - mi piace la tua t-shirt! Italian is “maglietta,” but they are interchangeable.

  44. Jeans - jeans are jeans. “Pantaloni” refers to all long pants, but if you want specifically a pair of jeans, the term is jeans.

  45. Push-up - I’m not sure about the exercise push-up, but ladies will have an easy time finding a certain type of lingerie in this style!

  46. Influenza - the sickness, but is also Italian for “influence.”

  47. Stress - lo stress. Yes, even Italians living their dolce vita experience stress. Che stress / what stress!

  48. Idea - what a great idea! Che bella idea! It’s the same, different pronunciation.

  49. Blu - said the same as our blue, but without the e. There is another word for blue in Italian, azzurro, that is more commonly used, especially for medium and lighter blues, but for your purposes, using “blu” is just fine.

  50. In - this is actually Italian and English, and generally used in the same way: Inside something.

  51. Me - also both Italian and English. Chi, me? Yes, you.

  52. Circa - this is usually used in English to determine an approximate date. “He was born circa 1950.” You can use it this same way in Italian, but also in many other ways, such as: with regard to, about, approximately, roughly, thereabouts, etc etc.

  53. Via - Used similarly in the two languages, to express a means of getting somewhere. “I sent it via email.” Only in Italian, however, it is the equivalent of street. I want to live in Via delle Belle Donne! In Italian you can also say “attraverso,” meaning through.

  54. Film - usually used in place of movie. Do you want to go see a movie? Vuoi andare a vedere un film?

  55. Set - film set, set of plates/set di piatti, set of silverware/set di posati…if Italians lift weights in the gym they probably have a number of steps they do. I just said set too many times in my head and now it seems like the most bizarre word. Set. Weird.

  56. Fan - this is widely used in Italian in reference to a fan club (not the ventilation fan), but if you want to sound more Italian you could say appassionato/a, fanatico/a, or tifoso/a for a sports fan.

  57. Video - a videoclip on Facebook or recording on your phone is considered a “video.”

  58. Foto - short for fotografia, but pronounced the same.

  59. Piercing - your parents might not appreciate that there isn’t even much of a language barrier for getting a piercing here. Heheh.

  60. Bomber - I’m not cool enough to know how to use this exactly right in actual English, but I do know that Italians understand it as a cool, “fuoriclasse,” or out-of-their-league person. Cristiano Ronaldo is a bomber. Maybe “This cake is the bomb” and if you made the cake, you’re the bomber? I’m trying, ok!?! Let’s just say it can be used exactly the same in Italian as it is in English, mmmk?

  61. Rock, Pop, Rap, and other types or styles of music - la radio, pop, per favore! Look, we’re already able to easily build phrases from this list. Amazing. “Per favore” I realize is not on here, but you’ll find that in any guidebook. ;)

  62. Bar - bar is the same in both languages, although it is a bit more widely used term in Italy. Bar is used to refer to just about any place that sells coffee. A true bar usually opens early with coffee and pastries, somewhere around 10am transitions to selling sandwiches “panini” and maybe some lunch dishes, and sells alcohol all day long, and finally closes sometime in the early evening.

  63. Hotel - these, of course, you will see everywhere, and if you ask an Italian they will point you to the nearest “otel.” Italian is albergo, but maybe they also eventually adopted hotel because the people who search for hotels, that would be tourists, would find and understand hotel better than albergo. Just a theory.

  64. Pizza - I think this has long been accepted as both English and Italian.

  65. Pasta - Another dual citizen here, except it has a few more meanings in Italian, not always meaning the delicious plate of carbs with wonderful sauces. Pasta can also mean dough, batter, paste, and pastry.

  66. Spaghetti, Gnocchi, Linguini, etc. - these probably seem obvious, however I will add a quick note: for whatever reason, types of pasta are sometimes referred to in their singular form. You may not notice this as a tourist, but if you hang out enough with pasta and Italians, you’ll start hearing “spaghetto” and “raviolo” or “gnocco” and “casereccia.”

  67. Panini - important note on this one…panini is PLURAL. You shouldn’t ask for one panini in Italian, that’s like ordering “one sandwiches.” It’s panino, and denotes any kind of sandwich rather than the American grilled sandwich. Just so you know. :D

  68. Cheesecake - there are many cheesecake gelato flavors and cheesecakes themselves in restaurants and gelaterie, but they generally taste quite different. They are more like a semi-freddo in texture. I don’t know why. I thought it was the cream cheese, but after making cheesecakes at home that turned out great, I still don’t understand. It shall remain a mystery for now.

  69. Hamburger - to be pronounced as Jacques Clouseau from the Pink Panther. Hamburgers are very popular here, and based on the restaurants Italians seem to think that America is stuck in the 1950’s diner era and all we eat are hamburgers, French fries, and milkshakes. Ah well, Americans think Italians only eat pizza, pasta, and wine, so we’re even, right?

  70. Hotdog - not as popular as the hamburger, but it has it’s own following and can be found in most grocery stores.

  71. Yogurt - the yogurt section can be quite extensive in grocery stores, as Italians are rather obsessed with their digestion.

  72. Avocado - millennials, rejoice! No translator needed to find your beloved green fruit. Your wallet will not rejoice, as avocados usually hover about €5/kg (that’s about $2.50-3.00/lb)

  73. Banana - you say “bah-naaa-nah,” Italians say “bah-nah-nah.”

  74. Lime - sometimes called the same as a limone. But lime and lemon are very different, how can I tell what you are offering me if you say limone? I don’t understand.

  75. Sushi and other ethnic foods - entering an ethnic restaurant that then tries to explain under the title what the dish is in Italian, can be very amusing to me. Lo mein that is explained as spaghetti just doesn’t get it for me, haha.

  76. Paprika - spelled the same, but in Italian it has a different pronunciation: PAH-pree-kuh instead of pah-PREE-kuh

  77. Curry - the same, although the u is not pronounced as the Italian u, instead it is a strong a, like in “carry.”

  78. Sultana - we usually say raisin in English, but sultana works in English and Italian!

  79. Brioche - technically a buttery, enriched French bread in French or English, this term in Italian applies to any pastry.

  80. Cocktail - cocktail and most of the classic cocktail names, Mojito, Moscow Mule, etc. will get you far during aperitivo hour.

  81. Espresso, Cappuccino, etc. - yes, all the famed coffee drinks that were invented in Italy are the same and so far we haven’t managed to mess up the pronunciation too much! Good job, everybody!

  82. Broccoli - the same in Italian and English. Random, but hey, we could all use a little more broccoli in our life!

  83. Hobby - an Italian hobby might be sitting at the local bar and people watching, wine tasting, long dinners, long strolls, watching soccer, discussing soccer, watching news discussing soccer, and playing soccer.

  84. Food Truck - Italians have picked up on the food truck trend in America and are following suit with their own trendy hamburger food trucks!

  85. Street Food - like food truck above, except I don’t think that restaurant I saw the other day advertising “street food” fully understood the concept.

  86. Take-away - mangi qui o take-away? Italian is “da portare via” or “d’asporto.”

  87. All You Can Eat - ALL sushi restaurants I have ever seen or eaten at in Italy are always the “all you can eat” formula. And “all you can eat” is always written in English, everything else in Italian. Don’t ask me why.

  88. Freezer - I always appreciated this one because for a while there I could never remember “congelatore.” Maybe because I heard the English more often than the Italian, didn’t stick with me, haha!

  89. Zebra - the same, except I say ZEE-brah, you say ZAY-brah…

  90. Zoo - everyone loves the zoo! It’s the same word except for in Italian you pronounce it “Zo.”


There you are, a whole list of “Italian” words you already knew. My little Italian prodigies!

I’m sure I’m missing a whole slew of English/Italian words, if you want to add to this list drop me a comment below!

Spinach Artichoke Pasta

Last Updated August 20, 2024

IMG_0921.jpg

Welcome back to pasta month on Jennyblogs!

So far we’ve seen a Thai-inspired pasta, an Italian pasta, and today an American pasta. One of the biggest differences between these cuisines is the amount of cheese used. We Americans really like our cheese! Italian cuisine uses quite a bit of cheese in certain dishes, but it’s usually a seasoned, more pungent cheese (hello, beautiful parmigiano!) used as a finishing touch. Aside from pizza, of course, but even then, their pizzas or not nearly as cheese-blanketed as an American pizza can be!

From that you’ve learned that today’s pasta is going to be cheesy…even if you’ve already learned that my posts are usually cheesy….

You’ve heard of spinach and artichoke dip? That rich, creamy, decadent dip usually found at parties served with little pieces of toast? That one you say you aren’t going to eat because it’s so high-fat, but you just can’t help yourself and end up splurging anyway? Today we’re going to make a Spinach and Artichoke PASTA. As much as I love spinach and artichoke dip, I think this pasta is even better. Plus, there is no sour cream, mayonnaise, or cream cheese involved! It’s still cheesy of course, but you can largely control how much or how little cheese you add, and the same goes for the veggies, in particularly the spinach.

For as much as I love the precision and science behind baking, I’m really coming around to cooking and how versatile it can be!

I mentioned that this Spinach Artichoke Pasta is delicious, right? I made an 8x8in pan once for lunch and my husband and I ate the WHOLE THING in one sitting. I listed the servings as 3-4 for an 8x8in / 20x20cm pan, but don’t be surprised if it becomes only 2 servings! Especially if there are men or growing children involved. Or, just double the recipe and put it in a 9x13in / 23x33cm pan. Problem solved!

Short on time? You can make this ahead of time, store in the fridge, and broil the pasta about 10 minutes before serving, OR you can serve this straight out of the pan and skip the broiling. Sprinkle the cheese on top and voila, you just saved yourself a step.

This post may contain affiliate links. If you make a purchase using these links, Jennyblogs may receive a small commission, at no extra cost to you. This helps to support Jennyblogs. Where possible, links are prioritized to small businesses and ethically and responsibly made items. For further information see the privacy policy. Grazie!

Recipe adapted from Dam* Delicious (and yes, I just censored that.)


Spinach Artichoke Pasta

Serves 3-4

IMG_0913.jpg

Ingredients:

  • 8 oz / 250g (half package) penne or your choice of short pasta (my favorite are the shells for this!)

  • 2 Tbsp / 28g oil

  • 1/2 large onion, diced

  • 2 cloves garlic, minced

  • 2 Tbsp / 15g all-purpose flour

  • 1/4 cup / 60g water, or chicken or vegetable broth

  • 1 cup / 237g milk

  • about 5 oz / 150g fresh spinach, chopped

  • 7 oz / 200g frozen or canned cooked artichoke hearts, drained/thawed and chopped

  • 1/4 tsp nutmeg, or a few grates of fresh, if available

  • salt and pepper, to taste

  • about 2 oz / 57g fontal or other semi-soft cheese, shredded

  • about 2 oz / 57g parmesan cheese, shredded or grated

Directions:

Ungreased 8x8in / 20x20cm pan, if you’re making this ahead of time (see step 8. and 9.)

IMG_0917.jpg
  1. Place a large pot of water over high heat, adding salt just before it boils. Cook the pasta al dente according to directions on package; drain.

  2. While you’re boiling the water and cooking the pasta, heat oil in a large saucepan over medium heat. Add onion and cook for about 2-3 minutes, then add the garlic and cook for another 2 minutes or so, until the onion is translucent and garlic fragrant.

  3. Add flour and stir, it will absorb all the liquid. Cook 1-2 minutes, until flour is toasted.

  4. Slowly add in the water, stirring constantly to make a thick paste (roux), then slowly stir in milk.

  5. Bring to a simmer to thicken the sauce; add spinach, artichokes, nutmeg, and salt and pepper to taste. Cook until spinach has wilted and artichokes are heated through, about 2 minutes.

  6. Remove from heat and add a generous half of the fontal and generous half of the parmesan, stir until melted.

  7. Add the cooked pasta and stir to coat.

  8. If serving right away, spoon onto plates and sprinkle with remaining cheese.

  9. If serving later, transfer pasta to prepared baking dish, sprinkle with remaining cheese, and refrigerate. When ready to eat, place oven rack near top and broil pasta for a few minutes, or until cheese is melty and starts to turn golden.


Jenny’s Notes:

  • Instead of fresh spinach you can also use frozen spinach, defrosted, drained, and chopped. Or you can use beet greens, arugula, or other cookable green of choice.

  • If you are watching your fat intake, feel free to reduce the cheese and use low-fat milk. On the other hand, if you love cheesy pasta and could care less about the fat, double the cheese!

  • Double this recipe and put in a 9x13in / 23x33cm pan!

  • If making ahead more than a few hours, I suggest boiling the pasta by 1-2 minutes less than indicated time, as it can become mushy sitting in the sauce. You may also need to add a bit more liquid (water, broth, or milk) to the sauce to compensate for the bit the pasta absorbs.

  • If you don’t know what to do with the other half can of artichokes, I suggest 1) making this dish twice within a few days, 2) doubling the recipe, or 3) using frozen artichokes or cooking them yourself so you don’t have to worry about the half can. I usually end up going for option 1, honestly, because making this once just isn’t enough.

Spinach Artichoke Pasta
Yield 3-4 servings
Author
Prep time
50 Min
Cook time
10 Min
Total time
1 Hour

Spinach Artichoke Pasta

Pasta in a cheesy, creamy sauce with spinach and artichokes, playing off the flavors of the beloved spinach and artichoke dip.
Cook modePrevent screen from turning off

Ingredients

Instructions

  1. Ungreased 8x8in / 20x20cm pan, if you’re making this ahead of time (see steps 9. and 10.)
  2. Place a large pot of water over high heat, adding salt just before it boils. Cook the pasta al dente according to directions on package; drain.
  3. While you’re boiling the water and cooking the pasta, heat oil in a large saucepan over medium heat. Add onion and cook for about 2-3 minutes, then add the garlic and cook for another 2 minutes or so, until the onion is translucent and garlic fragrant.
  4. Add flour and stir, it will absorb all the liquid. Cook 1-2 minutes, until flour is toasted.
  5. Slowly add in the water, stirring constantly to make a thick paste (roux), then slowly stir in milk.
  6. Bring to a simmer to thicken the sauce; add spinach, artichokes, nutmeg, and salt and pepper to taste. Cook until spinach has wilted and artichokes are heated through, about 2 minutes.
  7. Remove from heat and add a generous half of the fontal and generous half of the parmesan, stir until melted.
  8. Add the cooked pasta and stir to coat.
  9. If serving right away, spoon onto plates and sprinkle with remaining cheese.
  10. If serving later, transfer pasta to prepared baking dish, sprinkle with remaining cheese, and refrigerate. When ready to eat, place oven rack near top and broil pasta for a few minutes, or until cheese is melty and starts to turn golden.

Notes

  • Instead of fresh spinach you can also use frozen spinach, defrosted, drained, and chopped. Or you can use beet greens, arugula, or other cookable green of choice.
  • If you are watching your fat intake, feel free to reduce the cheese and use low-fat milk. On the other hand, if you love cheesy pasta and could care less about the fat, double the cheese!
  • Double this recipe and put in a 9x13in / 23x33cm pan!
  • If making ahead more than a few hours, I suggest boiling the pasta by 1-2 minutes less than indicated time, as it can become mushy sitting in the sauce. You may also need to add a bit more liquid (water, broth, or milk) to the sauce to compensate for the bit the pasta absorbs.
  • If you don’t know what to do with the other half can of artichokes, I suggest 1) making this dish twice within a few days, 2) doubling the recipe, or 3) using frozen artichokes or cooking them yourself so you don’t have to worry about the half can. I usually end up going for option 1, honestly, because making this once just isn’t enough.

Nutrition Facts

Calories

488.68

Fat

23.74 g

Sat. Fat

8.73 g

Carbs

47.45 g

Fiber

6.94 g

Net carbs

40.51 g

Sugar

2.65 g

Protein

23.43 g

Sodium

668.13 mg

Cholesterol

38.81 mg

Nutritional information is approximate. Based on 3 servings using water (not broth) and 2% milk.

spinach artichoke dip, pasta
pasta, dinner
American
Did you make this recipe?
Tag @jennyblogsandbakes on instagram and hashtag it #jennyblogs
IMG_0932.jpg

The Italian Alphabet and Pronunciation

A nook along Cinque Terre hiking trails in full Italian speaking mode…you don’t like to find crevices that are just your size??

A nook along Cinque Terre hiking trails in full Italian speaking mode…you don’t like to find crevices that are just your size??

Listening to Italian makes you happy, doesn’t it? It doesn’t even matter if you know what they’re saying or not. The rolls and lilts of the language are filled with an over-exaggerated sense of passion and drama, and you can’t help but smile. Unless they’re yelling, then I’m not smiling. Even if it’s probably just a friendly exchange about the last soccer match. I’m very non-confrontational and the public displays of conflict make me nervous. Run awayyyyyy! In fact, someone once thought I was Hungarian because I was so laid back and calm. Hmmm…

As far as languages go, Italian is really not that difficult to learn. Yes, it’s a foreign language and difficult, but. Have you ever tried to learn Chinese or Arabic? That’ll put things into perspective real quick! With Italian you can learn just a few phrases and suddenly you feel alive and all the hand gestures come as if you were born doing them. But before we warm up our hands and our best “mamma mia” expressions, let’s go over the alphabet and pronunciation of vowels that is oh-so-important.

The Italian Alphabet

Alright sing this and see if you can figure out which letters are missing:

A B C D E F G H I L M N O P Q R S T U V Z

(Pronounced: ah-bee-chee-dee-ae-effe-jee-acca-ee-elle-emme-enne-oh-pee-coo-erre-esse-tee-oo-voo-zeta)

Haha got it? See, Italian is easy because they have less letters than the English alphabet! Only 21, to be exact. But they messed up our nicely coordinated ABC song by Mozart. Rude. (You’ve made the connection by now that the ABC song is the same as Twinkle Twinkle, yes? Great. Ok, we can move on.)

The following letters don’t technically exist in Italian, except for in the foreign words that have been adopted:

J K W X Y

(Pronounced: ee loonga - kappa - doppio voo - eex - eepsilon)

And thusly we have eliminated half of the letters in my first name. Thanks guys!

This post may contain affiliate links. If you make a purchase using these links, Jennyblogs may receive a small commission, at no extra cost to you. This helps to support Jennyblogs. Where possible, links are prioritized to small businesses and ethically and responsibly made items. For further information see the privacy policy. Grazie!


Pronunciation of Those Vowels in Italian

  • “A” in Italian is a long A as in “ah”

    “casa” (CAH-zah)

  • “E” is usually a hard A as in “mate,” but can also be softer, closer to “eh”

    “re” (RAY [king]) / “permesso” (pair-MEH-sso [permission]); the first e is harder, the second softer

  • “I” is a hard E as in “feet”

    “ravioli” (rah-vee-oh-lee)

  • “O” is usually a hard O as in “poke,” but can also be softer, closer to “moss”

    “otto” (OHT-toe [eight]); the first o is softer, the second harder

  • “U” is a hard U as in “fluke”

    “cappuccino” (CAP-poo-CHEE-no)


How to Pronounce Key Consonants in Italian

  • “C” is a hard c as in “cup” unless it is immediately followed by an i or e in which case it is a soft c as in “chocolate.”

    “cono” (CO-no [cone]) / “cioccolato” (CHYO-co-lah-to [chocolate]) / “cena” (CHAY-na [dinner])

  • “Ch” is always pronounced as a hard c.

    “chiuso” (kee-OO-zo [closed])

  • “G” is a hard g as in “gas” unless it is immediately followed by an i or e in which case it is a soft g as in “Germany.” (J doesn’t exist in the Italian alphabet, so any j sound is made with a g and an i or e. The Italian version of my name is spelled Genny, short for Giovanna.)

    “gatto” (GAH-to [cat]) / “giardino” (jyar-DEE-no [garden]) / “gelato” (je-LAH-to)

  • “Gh” is always pronounced as a hard g.

    “ghiaccio” ( ghyA-chyo [ice])

  • S” is a z sound like the s in “pose” if it is between vowels, otherwise it is an s sound as in “soup”

    “casino” (ca-ZEE-no [mess]) / “pasta” (PAH-sta)

  • “SS” is an s sound like in “messy”

    “bellissima” (bell-EE-see-ma [so pretty])

  • “Z” is a normal z sound as in “zebra” at the beginning of words, otherwise it is a ts sound as in “mats”

    “zucchero” (ZOO-kair-o [sugar]) / “stazione” (Sta-tsee-O-nay [station])

  • “R” is always semi-rolled, not the “er” sound we make in English where the tongue doesn’t come in contact with any part of the mouth.

    “mercato” (mair-CAH-to [market])

  • “RR” is an exaggerated roll. And yes, you can learn to roll your r’s!

    “ferro” (FAY-rrrr-o [iron])

  • “GN” is pronounced like the ñ in Spanish; the g is silent.

    “gnocchi” (nyO-kee)

  • “GLI” when it is in the middle of a word or used as an article (“gli” [plural for the]) is the L version of ñ; the closest example would be like the lli in “million.” This one is harder to write without hearing it, especially because many people struggle with this subtle but particular sound. It’s like saying “Lee” while trying to stretch the back of your tongue between your molars and the roof of your mouth instead of just touching the tip of your tongue to the front of the mouth to make the normal L sound…or in other words trying to say it more from the back of your mouth than just the front. (How are we doing? If there is anyone by you, you may want to explain why you’re contorting your mouth so much.)

    “famiglia” (fa-MEE-lya) / “gli uomini” (LYEE oo-OH-mee-nee [the men])

  • “SC” is an sh sound as in “shop” if it is followed by an i or e, otherwise the letters are pronounced normally as in “escape.”

    “scienza” (shee-EN-za [science]) / “sconto” (SKOHN-toe [discount])

  • “H” is always silent.

    Santa Clause says “ho ho ho” / Babbo Natale says “O O O”


In my head it was going to be a lot easier writing all that out than it actually was. It seems like a lot of information, but don’t worry, it’s actually quite simple with a bit of practice!

Spaghetti with Tuna - Spaghetti al Tonno

Last Updated August 20, 2024

IMG_0896.jpg

Spaghetti with tuna; It’s like spaghetti, but instead of meatballs you add tuna to the tomato sauce!

Now, that might sound kinda weird at first to my American friends, just like Italians think we’re weird for putting meatballs on our spaghetti in the first place. But let me tell you. It’s really delicious and I find it strangely comforting. Italian comfort food.

If you haven’t noticed, July is pasta month here at Jennyblogs! What, you couldn’t tell from the 1 other pasta recipe I’ve posted so far this month that this whole month is going to be pasta? I’m so offended. (I’m just kidding you guyssss.) But now you know! So be sure to stay tuned (you can sign up for updates) for the rest of the month where I will share with you various recipes, some Italian, some American, and last week was Thai inspired! Everyone should have some quick and delicious pasta recipes in their repertoire that don’t need store-bought sauce! Homemade is always better, if you can manage it. That way you control exactly what goes into your and your loved ones bodies. No more excess sugar, preservatives, and high levels of salt and fat that can be hidden away in the store-bought jars of sauce.

Today, a recipe for Italian spaghetti al tonno, or spaghetti with tuna. Homemade sauce and all this can be on your table in less than 45 minutes!

This post may contain affiliate links. If you make a purchase using these links, Jennyblogs may receive a small commission, at no extra cost to you. This helps to support Jennyblogs. Where possible, links are prioritized to small businesses and ethically and responsibly made items. For further information see the privacy policy. Grazie!

Recipe from a pasta chef


Spaghetti with Tuna - Spaghetti al Tonno

Serves 6-8

IMG_0899.jpg

Ingredients:

  • 1 lb. / 500g spaghetti

  • 2 Tbsp / 28g oil

  • 1/2 onion, chopped

  • 3 tomatoes, diced

  • 1 clove garlic, minced

  • 1 Tbsp / 14g tomato paste

  • 1/2 tsp / 2.5g ground turmeric

  • salt and pepper, to taste

  • 5 oz / 148g can of tuna, drained

Directions:

  1. Heat a large pot of water over high heat, adding salt just before it boils. Cook pasta al dente according to directions and drain.

  2. Meanwhile, while the pasta is cooking, heat oil in a large sauté pan over medium-low heat. Add the onion and cook until just fragrant and translucent, about 1-2 minutes.

  3. Add the tomatoes and simmer for about 10-15 minutes, or until they are pretty well broken down. If the sauce becomes too thick or starts to stick, add a bit of water.

  4. Add the garlic, tomato paste, turmeric, salt and pepper, and a small chunk of tuna*; simmer for another few minutes.

  5. Add the cooked pasta to the sauce, toss and stir to coat pasta. At this point you can either add the rest of the tuna and stir, or plate the pasta and add the tuna on top.

  6. Serve and eat!


Jenny’s Notes:

  • As with any pasta recipe, you don’t have to use spaghetti or the type called for. Use your favorite kind or whatever you think would go best with the sauce you’re making.

  • If you prefer a stronger tuna taste, you can use the liquid from the tuna can instead of water to keep the sauce from getting too thick while simmering. It doesn’t matter if it is packed in water or oil.

  • Add just a bit of tuna to flavor the sauce instead of the whole can because it doesn’t need to be cooked. The rest will be added in at the end.

  • In a pinch you can use a 15oz can of diced tomatoes instead of fresh.

Spaghetti with Tuna - Spaghetti al Tonno
Yield 6-8 servings
Author
Prep time
25 Min
Cook time
15 Min
Total time
40 Min

Spaghetti with Tuna - Spaghetti al Tonno

A classic Italian pasta dish with spaghetti, homemade tomato sauce, and tuna.
Cook modePrevent screen from turning off

Ingredients

Instructions

  1. Heat a large pot of water over high heat, adding salt just before it boils. Cook pasta al dente according to directions and drain.
  2. Meanwhile, while the pasta is cooking, heat oil in a large sauté pan over medium-low heat. Add the onion and cook until just fragrant and translucent, about 1-2 minutes.
  3. Add the tomatoes and simmer for about 10-15 minutes, or until they are pretty well broken down. If the sauce becomes too thick or starts to stick, add a bit of water.
  4. Add the garlic, tomato paste, turmeric, salt and pepper, and a small chunk of tuna*; simmer for another few minutes.
  5. Add the cooked pasta to the sauce, toss and stir to coat pasta. At this point you can either add the rest of the tuna and stir, or plate the pasta and add the tuna on top.
  6. Serve and eat!

Notes

  • As with any pasta recipe, you don’t have to use spaghetti or the type called for. Use your favorite kind or whatever you think would go best with the sauce you’re making.
  • If you prefer a stronger tuna taste, you can use the liquid from the tuna can instead of water to keep the sauce from getting too thick while simmering. It doesn’t matter if it is packed in water or oil.
  • Add just a bit of tuna to flavor the sauce instead of the whole can because it doesn’t need to be cooked. The rest will be added in at the end.
  • In a pinch you can use a 15oz can of diced tomatoes instead of fresh.

Nutrition Facts

Calories

216.63

Fat

6.08 g

Sat. Fat

0.62 g

Carbs

29.31 g

Fiber

2.14 g

Net carbs

27.17 g

Sugar

3.19 g

Protein

11.05 g

Sodium

151.14 mg

Cholesterol

10.36 mg

Nutritional Information is approximate.

spaghetti al tonno, tuna spaghetti, pasta, classic Italian recipe
pasta, dinner
Italian
Did you make this recipe?
Tag @jennyblogsandbakes on instagram and hashtag it #jennyblogs
IMG_0897.jpg

Food in Florence: Where to Find Great Aperitivo

IMG_9795.jpg

Aperitivo. You either love it or…don’t know what it is?

Aperitivo in Italy refers to a period in the evening, usually between 6pm - 8pm where people gather to drink cocktails, wine, or non-alcoholic drinks and eat some light snacks and food. You usually pay between 7-10euro for a drink and includes all the food they have set out in a buffet-like style. It’s a bit like happy hour, except the point isn’t to take advantage of the cheap drinks, but to stimulate your digestion before dinner. Ya know, science, heheh.

Plate of random food from buffet at O Bar

Plate of random food from buffet at O Bar

In my personal experience, if I actually want to be able to eat dinner afterwards, I just get a drink without going for the actual “aperitivo” price which includes the snackies. But. Also in my experience, if you plan on going out for aperitivo, especially with a group of students, people on a budget, or people with light appetites, that actually means you’ll linger so long you basically eat a meal of the hors d’oeuvres, or end up ordering a couple plates to share because everyone is too full to eat their own but felt bad that their party wiped clean the buffet bar. The larger your group I think the more likely the latter is to happen, but it’s not uncommon, and either way is highly enjoyable. Either way you look at it you’re with good food, drinks, and company.

A Quick History of the Aperitivo

The Italian word “Aperitivo” comes from the Latin “Aperitivus” which means “che apre” or “which tends to open the bowels.” (Do I sound like the dad on My Big Fat Greek Wedding?) Namely, a drink that is able to stimulate or “open” your digestion from the forthcoming onslaught of food. That thing we normally call dinner.

Apparently, in the 5th century the Greek physician Hippocrates discovered that a drink based on white wine, flowers of dittany, absinthe, and rue could help his patients who complained of loss of appetite. This concoction was then passed down through time until it reached the medicinal doctors of Medieval times. These doctors found that it wasn’t so much these particular ingredients that had this effect, but rather the bitterness of them. For this reason, the principal drinks served during aperitivo hour are based on bitter components.

The actual aperitivo as it is known in Italy today was born in Torino in the late 1700’s by one Antonio Benedetto Carpano, who invented vermouth. It was tasted by the then King of Italy, Vittorio Emanule II, who enjoyed this bitter drink so much he made it an official drink of court. It became a must drink for many famous people to come, such as Cavour and Garibaldi. Entering the 1800’s others eventually invented their own bitter drinks for the aperitivo to be drunk before a meal, with amaro, Campani, and Martini becoming particularly popular and are still the main stays of aperitivo today.

Which brings us to the question, what are the cocktails you can expect to find in Florence and around Italy?

Typical Cocktails in Italy

  • Spritz - prosecco, club soda, and either Aperol or Campari. Born in Italy, this is probably the most famous aperitivo here. There are two main versions, the Aperol Spritz, with Aperol, and the Campari Spritz, with Campari.

  • Negroni - gin, vermouth rosso, Campari. Invented in Florence in the 1920’s.

  • Negroni Sbagliato - vermouth rosso, Campari, prosecco. Created by accident in the 1960’s when a barman went to make a Negroni and instead of gin found in his hand prosecco…the rest is history.

  • Americano - Campari, sweet vermouth, club soda. Created in the latter half of the 19th century in either Torino or Milan.

  • Martini Dry - gin, dry vermouth. Another Italian cocktail born in the 19th century.

These are the typical Italian aperitivi, although be sure to check out the menus or ask wherever you go to see the creations and offerings of that particular place, including all the classics such as mojito, Moscow mule, gin and tonic, etc.

If for whatever reason you don’t want to partake in an alcoholic beverage, you can usually get a tonic with lemon or various other flavors of Schweppes they might have on hand, fruit juice, Crudino (a sweet and bitter non-alcoholic drink similar in taste to the alcoholic ones, I love it), soft drinks, or ask if the barman can make you a special non-alcoholic drink of his or your choice!

This post may contain affiliate links. If you make a purchase using these links, Jennyblogs may receive a small commission, at no extra cost to you. This helps to support Jennyblogs. Where possible, links are prioritized to small businesses and ethically and responsibly made items. For further information see the privacy policy. Grazie!


Great Aperitivo Around Florence

In no particular order

Non-alcoholic cocktail invented by the barman.

Non-alcoholic cocktail invented by the barman.

  1. ARTS INN

    Via del Porcellana, 63r, close to the church of Santa Maria Novella.

    A very cool little place specializing in cocktails, two floors and various nooks and crannies where you’re bound to find a cozy little corner to chat with friends.

  2. La Cité

    Borgo S. Frediano, 20, south of the river not far from the church of Santo Spirito.

    This place is also featured on my list for the best coffee in Florence (as is Caffetteria delle Oblate below), because it is such a great and versatile place. Great for meeting friends, studying, going for cocktails or coffee. Like ARTS INN, it has an up and downstairs and much more exciting seating options than your typical place.

  3. La Pescatoria

    Via Palazzuolo 80r, not far from the train station SMN.

    This is the aperitivo for fish lovers. Most of their buffet has something to do with some kind of fish, dips, crostini, salads etc. I think my favorite part was the fried fish, so good! Nice atmosphere as well.

  4. Caffetteria delle Oblate

    Via dell’Oriuolo, 26, in the center not far from the Duomo.

    An aperitivo on the third floor of an old convent. It has views of the Duomo without paying the higher prices of aperitivos usually on hotel rooftops. This place is very popular with students and at times it can be hard to find seating, but sitting on the steps or floor around the terrace is always an option if your bones can take it.

  5. Quelo Bar

    Borgo Santa Croce, 15r, two steps from the church of Santa Croce.

    Very chic place with nice offerings in a relatively quiet street leading straight to Santa Croce. Limited outdoor seating, nice seating inside.

  6. O Bar

    Via de’ bardi, 54, just a few steps from Ponte Vecchio.

    Nice wines and buffet with a great view of Ponte Vecchio and the river! Prices aren’t bad either considering, I believe it’s 10euro for drink and buffet, which is pretty standard.

  7. Gallery

    Via dei Benci, 30, close to the church of Santa Croce.

    This for me is the quintessential aperitivo in Italy. Something about the type of place and their offerings make them appealing to many and accessible, but not super special. This was one of the more frequented places for meeting with friends when I first came to Florence. There are quite a few aperitivo places on the street, and it has quite the night life.

  8. Kitsch

    Two locations: Viale Antonio Gramsci 1/5r on the east edge of the city center, and Via San Gallo, 22r, close to San Marco.

    An eclectic place with a decent offering of drinks and buffet food. Usually one of the first places suggested when trying to meet for aperitivo, as it’s known to most and has two convenient locations.

Seasonal summer pop-ups:

Because these are seasonal places they don’t usually have an actual address, but you can find it on Googlemaps by typing in the name. These places don’t include the buffet but you can choose to order some small plates or meals along with your drinks.

  1. Utopiko

    Lots of unique and hand crafted seating in a park along the river, outside the city center. They have some delicious cocktails, but their non-alcoholic options are limited.

  2. Lungarno del Tempio

    Food truck style food kiosks and bars appear for the summer in this park along the river just outside the crazy city center. Great to finally catch the breeze off the river while sipping on a cold drink after a hot day walking around the city. Note: Typing in Lungarno del Tempio will get you a pin on the map actually across the street, for more accuracy type in La Toraia Lungarno del Tempio which is one of the food kiosks.

  3. Molo Firenze

    Outdoor and great summery aperitivo on the river, just past Lungarno del Tempio. They can get the music going so best if you want more of club vibe than a quiet, chat with my friends type feel.

For a classy aperitivo experience try:

  1. The Fusion Bar & Restaurant

    Vicolo dell’Oro, 3, a few steps from the Ponte Vecchio.

    A part of a hotel, this place is a local institution with competent barmen and original cocktails. The food is Asian fusion cuisine, so don’t forget the sushi! Higher end prices.

  2. Harry’s Bar Firenze

    Lungarno Amerigo Vespucci, 22r, just a 6 minute walk from the American Consulate.

    Elegant ambience in a historic Florentine locale with nice views and elevated prices.

  3. Locale Firenze

    Via delle Seggiole, 12r, between the Duomo and Santa Croce.

    A historic restaurant with a notable bar and aperitivo smack dab in the center of the center. If you decide to stay and dine you’ll find well-thought out Italian dishes. You’ll want to dress up a bit for this place for sure.


If you have any questions or have suggestions to add to the list, leave a comment below! I always love hearing from you guys!

Simple Thai Noodles

IMG_0875.jpg

Some nights you get caught unprepared and need something quick to whip up for dinner. Or maybe that’s every night? I know Sunday food prepping is all the rage, and it’s a really great idea…if you’re only feeding yourself or a small family, and not taking into account the unexpected that happens. Even if you’re the most organized person cooking just for yourself, those nights are going to spring up on you when you want something quick and easy, delicious, and you have all the ingredients on hand. This recipe for Simple Thai Noodles falls in that category.

Sesame oil might not be in everyone’s pantry, but if you invest in a bottle, it can last you months, depending on how often you make Asian or other dishes that often call for sesame oil. It really is worth it, if you try and substitute another oil it won’t be the same. It lends such a nutty depth to dishes!

I actually have several versions of lo mein, Thai noodles, fried rice, etc. and even a couple more waiting to be tried that all have in common varying quantities and varieties of green onion, sesame oil, soy sauce, ginger, peanuts or peanut butter, and a sweet and a spicy element. Each with their merits, and the occasions for which I like to make them. If you can’t tell, I love Asian dishes, whether they’re authentic or simply inspired by Asian flavors.

This pasta is kept in my repertoire for its simplicity while still retaining all the delicious flavors, and now you can make it too, whether you’re in a pinch for a quick dinner, or not! No one said you have to make it only when in a pinch. :)

This post may contain affiliate links. If you make a purchase using these links, Jennyblogs may receive a small commission, at no extra cost to you. This helps to support Jennyblogs. Where possible, links are prioritized to small businesses and ethically and responsibly made items. For further information see the privacy policy. Grazie!

Recipe adapted from A Small Snippet


Simple Thai Noodles

Serves 4-6

IMG_0878.jpg

Ingredients:

  • 16 oz / 500g linguine or spaghetti

  • 2 Tbsp / 28g olive oil, or oil of choice

  • 1/4 cup / 54g sesame oil

  • about 1 Tbsp / 5g red pepper flakes

  • 3 Tbsp / 63g honey

  • 3 Tbsp / 45g soy sauce

  • cilantro, chopped peanuts, chopped green onions, julienned carrots, sesame seeds, or your choice of toppings

Directions:

  1. Bring a large pot of water to boil, adding salt just before it boils. Cook pasta according to directions on box; drain, and return to pot.

  2. While the pasta is cooking, whisk together the oils, red pepper flakes, honey, and soy sauce in a small bowl.

  3. When the pasta is done and drained, add the sauce to the noodles and toss to coat well.

  4. Serve immediately, adding toppings of choice.

Jenny’s Notes:

  • You can adjust the amount of red pepper flakes to suit your spicy preference. 1 Tbsp, as in the recipe, results in reasonably spicy, but not overwhelming. Also, you could use a spicy oil if you have some on hand instead of the red pepper flakes.

  • For a stronger sesame taste, use all sesame oil instead of olive oil. (6 Tbsp / 84g total of sesame oil.)

  • Feel free to add veggies or a protein, if you desire. For veggies, chop small and sauté in a pan with a bit of oil for a few minutes or until tender, toss in when you add the sauce. Cook your protein and slice as desired, add at the end on top of plates of pasta or mix in with sauce.

Simple Thai Noodles
Yield 4-6 servings
Author
Prep time
10 Min
Cook time
10 Min
Total time
20 Min

Simple Thai Noodles

The simplest Thai noodles using only 6 pantry ingredients for a quick and easy dinner! Sweet, savory, and irresistible.
Cook modePrevent screen from turning off

Ingredients

Instructions

  1. Bring a large pot of water to boil, adding salt just before it boils. Cook pasta according to directions on box; drain, and return to pot.
  2. While the pasta is cooking, whisk together the oils, red pepper flakes, honey, and soy sauce in a small bowl.
  3. When the pasta is done and drained, add the sauce to the noodles and toss to coat well.
  4. Serve immediately, adding toppings of choice.

Notes

  • You can adjust the amount of red pepper flakes to suit your spicy preference. 1 Tbsp, as in the recipe, results in reasonably spicy, but not overwhelming. Also, you could use a spicy oil if you have some on hand instead of the red pepper flakes.
  • For a stronger sesame taste, use all sesame oil instead of olive oil. (6 Tbsp / 84g total of sesame oil.)
  • Feel free to add veggies or a protein, if you desire. For veggies, chop small and sauté in a pan with a bit of oil for a few minutes or until tender, toss in when you add the sauce. Cook your protein and slice as desired, add at the end on top of plates of pasta or mix in with sauce.

Nutrition Facts

Calories

676.11

Fat

23.63 g

Sat. Fat

3.4 g

Carbs

99.87 g

Fiber

4.71 g

Net carbs

95.17 g

Sugar

16.33 g

Protein

16.89 g

Sodium

794.7 mg

Cholesterol

0 mg

Nutritional info is approximate, based on 4 servings including toppings.

6 ingredients, 20 minute dinner, pasta, Thai Noodles
Dinner, Pasta
American
Did you make this recipe?
Tag @jennyblogsandbakes on instagram and hashtag it #jennyblogs
IMG_0876.jpg

Food in Florence: Where to Find the Best Eats

Choosing where to eat in a new city is always one of the hardest decisions. Especially if that city is half way across the world and you don’t get over there every day.

Fiesole+pasta.jpg

This is important because I essentially love traveling for two principle reasons: The culture and the food. But how to find, say, good Belgian waffles and frites in Bruges, Belgium, or croissants and baguettes in Paris, France, or pizza and mozzarella di bufala in Napoli, Italy, when most of the places you see are screaming “tourist trap!”?

Unless you are fortunate enough to know some locals, you are completely left to yourselves, aside, of course, from the hundreds of books and online guides touting the 10 best places to eat. The overwhelming part for me is weighing through the endless sites and opinions, some of which are good, and an amazing number of which are not at all reliable. So here I’m just going to throw myself in the mix, as a local in Florence, with some of my favorite places to eat, namely lunch and dinner!

Lunch and Dinner in Italy

First, a few quick notes about lunch and dinner in Italy.

Sit-down lunchtime is roughly from 12:00pm - 3:00pm, with the peak being 1:00pm - 2:00pm. If you go before or after these hours, chances are the restaurant will be closed or not serving lunch anymore.

If you find yourself in need of a snack before lunchtime hits, pop into any bar and pick up a quick sandwich. If I eat a late breakfast at a bar I often notice quite a few local workers who pop in for a sandwich starting as early as 10:00am. These sandwiches are pre-made (but should be made that same day!) in the display case and slowly replace the pastries as the morning wears on. You can get a large or small, and they are usually simple with just 2-3 ingredients on a focaccia type bread. You could try a mozzarella, tomato, and lettuce, or prosciutto and tomato, or mortadella (Italian equivalent of bologna) and cheese, or bresaola (prosciutto made with beef instead of pork), arugula, and grana padano, etc.

Dinnertime in Italy generally starts from 7:30pm and can linger on until 11 or later, especially in the summer when that is when it finally cools down. Most restaurants don’t even open until 7:30pm for the dinner shift. It’s rare to find a restaurant that doesn’t close between the lunch and dinner shifts, as you’ll be able to see from the opening hours below.

Remember, if you sit down in a restaurant there will almost always be a “coperto” or cover charge, usually about 1.50 - 2euro per person, which cover the cost of napkins, bread, etc. And you have to pay for water, even if it’s tap water that comes in a refillable bottle. For more dining and Italy tips take a look at this list.

Hours may vary. You can make reservations on quandoo.it or thefork.it or by calling the restaurant directly.

This post may contain affiliate links. If you make a purchase using these links, Jennyblogs may receive a small commission, at no extra cost to you. This helps to support Jennyblogs. Where possible, links are prioritized to small businesses and ethically and responsibly made items. For further information see the privacy policy. Grazie!


Where to Find the Best Eats In Florence

In no particular order

  1. Simbiosi Organic

    Via de’ Ginori, 56r, 58r/60r (two locations), near to San Lorenzo.

    Simbiosi has two different locations around the corner from each other. The original location is an organic pizzeria, with great decor: exposed bricks and chandeliers! The second location features organic pasta and other dishes, and both locations have a nice selection of organic beer and wine. Oh, and the food is really good, especially the pizza. They appreciate reservations.

  2. Osteria Cinghiale Bianco

    Borgo San Jacop, 43, just a bit away from the Santa Trinita bridge in a lovely neighborhood south of the center.

    Lovely local place with delicious typical Tuscan food and wine, housed in the bottom of a tower from 300 a.d.! I would highly recommend reservations, even if during the “off” season (which hardly seems to exist in Florence anymore) or you may not get in.

  3. Enoteca Fuori Porta

    Via del Monte alle Croci, 10, on the way to Piazzale Michelangelo.

    This is a cute little wine shop with great meat and cheese plates and, of course, wine. Great for a snack, a light meal, or just a drink. Indoor and outdoor seating and conveniently located on the way to Piazzale Michelangelo (a nice uphill hike to get the views) for a snack after all that exertion. ;)

  4. All’antico Vinaio

    Via dei Neri, 76, between Palazzo Vecchio and the church of Santa Croce.

    This is the most famous sandwich place in Florence, and have had lines since the first time I went in 2014. They have since expanded to at least 3 locations all on the same street near each other, two for sandwiches and one Osteria. I recommend going before or after prime lunch time to avoid the long lines; I’ve never been for dinner so can’t vouch for what the lines are like. Take your sandwich to go and sit on the steps of a church or piazza to enjoy your food. Keep in mind that if you don’t eat or don’t like pork, your pickings will be slim. They usually have turkey, sometimes bresaola (the beef equivalent of prosciutto), or you could always get some of the vegetable toppings with cheese and call it a day if you’re vegetarian.

  5. Antica Panineria

    Via Faenza, 53. Between the train station and San Lorenzo.

    Another delicious and cheap focaccia sandwich place. Located not too far from the train station, this makes for a convenient lunch on the train, or there is a nice area outside to sit! Unlike All’Antico Vinaio here there are is usually no or a very short line which is convenient for a quicker meal.

  6. Gustapizza

    Via Maggio, 46r, south of the river.

    Decent prices and just really good pizza. This is considered by some the best pizza in Florence. In my personal opinion, as they’ve become well known and busy, their quality control has dropped a bit. Obviously, they still made this list, but maybe instead of THE best they are one of the best. How’s that? They’re small and often full but even if Italy doesn’t have much of a “to go” culture, pizza is always acceptable to get to go. In fact, if they’re full up, take your pizza a few steps away and sit and eat on the steps of the church of Santo Spirito or in the piazza.

  7. Mercato Centrale

    Piazza del Mercato Centrale, Via dell’Ariento, near to the church of San Lorenzo

    On the second floor is the Italian style food court, except everything is made fresh and on the spot. This is great for larger groups because there is something to please everyone, but be warned, it can get crazy up here even if there are hundreds of tables; it’s popular! So aim for a bit before or after lunch or dinner, if you can. There’s pasta, pizza, sushi, hamburgers, steak, vegan, seafood, various typical Florentine options, and more. My only word of warning is that not every stall is made equally. I personally recommend the pizza (that fluffy Neopolitan crust, oh man!), the seafood fresh or fried, the famous Florentine steak (bistecca fiorentina, one of the best), gelato, bread or desserts from the French stall “Bedu,” and vegan. They also have large TVs setup so you can watch the soccer matches, although that also means many seats will be occupied by people who aren’t even eating during those times. Rude. ;)

  8. Da Nerbone

    Piazza del Mercato Centrale, near to the church of San Lorenzo

    This is a very busy, very delicious, traditional Tuscan food stand on the ground floor of the Mercato Centrale among all the farmer’s market stands. They usually have a long line but it moves fast enough. The hard part is getting a seat, so have someone ordering and picking up the food, another scouting and claiming a table! The seating is quite tight but for a taste of scrumptious Florentine comfort food, it’s worth it. I love the Lampredotto (very typical Florentine, I’m gonna go ahead and let you google that one), any of the pasta dishes, and the beef cheek called “stracotto.” And I don’t even hardly eat beef! Comfort food at it’s greatest.

  9. Pizzeria Orto del Cigno

    Via di Varlungo, 27, on the east side of the city center not far from Tuscany Hall.

    A pizzeria that feels like home, because they serve large pizzas that everyone can eat a slice from American style, instead of the individual pizzas. You can get each pizza with 2 or 3 of the topping options, so you can try more! I absolutely fell in love with the parmigiana…definitely one of the top 5 pizzas I’ve ever eaten!

    I recommend taking a stroll from the city center along the river going east, the sidewalk eventually turns into a peaceful reprieve from the touristy center, with nature and the river on your right and locals jogging past. About a 45 minute walk and the pizzeria will be on your left.

  10. Aji Tei

    Viale Spartaco Lavagnini, 20A, not far from the tip of the city center, Piazza Libertà.

    My favorite sushi in Florence, and that’s saying something because there are a ton of Japanese restaurants around. I know of very few sushi places in Italy that are not the “all you can eat” formula, but have you ever not wanted to eat all you can of sushi? Their menu is extensive (sushi, sashimi, special rolls, fried stuff, hot and cold plates) and the “all you can eat” includes everythinggggg except drinks, I think it even includes dessert. The price is higher, 29euro a head for dinner, but if you break down how many rolls of sushi I can consume, it turns out to be a pretty good deal. Unlike some sushi places, their price is the same for lunch and dinner. Oh, and the ambience is super cool. I recommend asking to eat in the garden if there is space. Even in the off season this place fills up quickly so I recommend making a reservation.

  11. Ristorante Giapponese Rakutei

    Via della Casaccia, 19-21-23, on the east side of the city center.

    I just mentioned my favorite sushi above, but this place is also really good and much more conveniently located for where I live, and also for those of you who are staying on the east side of town or at the campground. “All you can eat” once again! Take bus 14 to get here and get off at the “casaccia” bus stop. Their prices are a bit lower, and you can take advantage of the lunch hour and pay 14euro for all you can eat, otherwise it’s 24euro drinks excluded for dinner.

  12. PassaGuai

    Borgo San Frediano, 44r, on the south side of the river near to the church of Santo Spirito.

    This was one of the favorite places my family ate at during our vacation here in 2014, a cool little spot with absolutely delicious sandwiches for 4euro. It’s now evolved into a restaurant with an emphasis on meat and fish, but still the same owners and quality food.

  13. Le Sorgenti

    Via Chiara, 6r, right by the Mercato Centrale.

    One of my favorite Chinese places, although there are so many and quite a few of them are delicious! Order lots of small plates and share, they’re reasonably priced. I recommend the taglierini alla griglia (basically grilled lo mein) and the branzino alla griglia (grilled sea bass). YUM.

  14. Los Chicos

    Via dei Benci, 15r, near to the church of Santa Croce.

    Florence has a sadly lacking Mexican food scene. This place, however, can get a you a nice burrito or taco! The tacos are 3euro each, and you can get a burrito starting at 5euro. Choose your protein then add all the condiments and veggies you like. Oh, and don’t forget margaritas!

  15. Ararat Ristorante Armeno

    Borgo la Croce, 32r, near to Sant’Ambrogio on the east side of the center.

    I had never had Armenian food until I ate here, but I can now say I’m a fan! Their food is well-executed with lots of meat and vegetables. The flatbread is DELICIOUS. It’s also a really pretty place, golden silverware, anyone?

  16. Avanti - Pizza & Grill - Ristorante Arabo

    Via S. Pier Maggiore, 6r, close to the Santa Maria Nuova hospital.

    The menu is a mix of pizza and Iraqi food, and although I can’t speak for the pizza, I haven’t eaten anything short of scrumptious from the Iraqi section. And why would you need a pizza if you have such Arab goodness in front of you?

  17. Rosticceria Tavola Marrochina

    Piazza del Mercato Centrale, 11, directly opposite the Mercato Centrale on the parking lot side. Beware of the pinpoint on google maps because it isn’t on the right street, even if the address itself seems to be correct.

    This is a little hole in the wall restaurant owned and run by a Moroccan family. The seating can be a bit tight and the ambiance not the best, but the food is delicious and the prices decent. In short, this is not the place to bring to impress, but if you’re familiar with Morocco and wanting a taste, this is a great casual place to go. Lunchtime is best, as the options get slimmer the longer the evening wears on. My favorites are couscous (of course, and you can get a “small” plate for around 4euro), the harira soup, msemmen (thin, crispy bread often filled with cheese, harissa, and boiled eggs or cheese and honey), and the mint tea.

  18. Foody Farm

    Lungargno Corsini, 2A, on the river not far from Palazzo Strozzi.

    When Foody Farm first opened I didn’t care to go just because of the name…too many cliché ideas in a title for me. Then they moved to their current location on the Arno and by then I had heard enough good things to want to go. When I finally went the old saying “don’t judge a book by its cover” came to mind. The service was friendly and the menu fun. They offer both a normal menu and one made up of pictures so you can see what each dish looks like. Their wine menu was made up of a collage of wine labels so they are more easily recognizable. What’s more, most of their menu is able to be ordered in half or full portions, so everyone can easily order two dishes getting to try more! I loved the whole experience and thought the food was delicious and creatively served.

  19. Pizzeria La Luna

    Via Vincenzo Gioberti, 93r, just outside the city center near to Piazza Beccaria

    A delightful pizza place I stumbled upon by accident one night when I was far from home but needing nourishment. Although I have passed this pizzeria many, many times, it never struck me as a “must try” and I was pleasantly surprised when the pizza was absolutely delicious. I’ve only ever gotten the pizza to go, but it seems to get pretty busy so if you’d like to sit down I would go with a reservation! They offer gluten-free pizza.

  20. Le Follie di Romualdo

    Via di San Niccolò, 39r, south of the city center on the way to Piazzale Michelangelo.Romualdo is a well-known “pizzaiuolo” (pizza maker) around Florence and beyond, his being named among the top 20 best pizzas in the world by the New York Times and has received twice the highest acknowledgment from the best pizza guide Pizzerie D’Italia del Gambero Rosso. All that to say, you’ll eat some really, really good pizza here. The other food is good, too! During the summer he has a popup pizza place near the river. This location is on the newer side, the location where I was introduced to Romualdo’s was further away from the center, much bigger, and always bustling. I liked the old location better even if the new location is nice and easier to get to; their menu seemed to shrink and it was emptier. To be fair, I’ve only been to the new location once and that was towards the end of October, the pizza was still delicious and the wines great.

  21. Koto Ramen

    Via Giuseppe Verdi, 42r, close to Santa Croce, and Borgo San Frediano, 41r, not far from the Ponte alla Carraia.

    If you’re craving some good ramen this is a good place to come! The menu is not overly extensive, but what they do, they do well with fresh ingredients and vibrant flavors. They have some good gyoza and appetizers, really all you need to supplement a large bowl of ramen.

Now I’m hungry…ah well off to eat some homemade vegan sloppy joes, it’ll be just as good. I hope.


More Ideas

This is a list of places that I would like to try one day, either that I’ve heard good things about or they just looked really interesting walking by! If you try any of them before me, let me know in the comments below how you liked it!

  1. Adagio

  2. Cacio Vino Trallalla

  3. Gucci Osteria da Massimo Bottura

  4. Ristorante Sultan (Turkish food)

  5. Royal India (Indian food)


Where are your favorite places to eat around Florence, what have I missed? Have you tried any of the places on here? Tell me about it in the comments below! I always love hearing your thoughts and experiences!

Strawberry Shortcake

Last Updated August 18, 2024

Strawberry shortcake is a summer classic. All you need are juicy, ripe strawberries, shortcakes, which are really just biscuits with a bit of sugar added to them, and whipped cream. If you decided on adding some vanilla ice cream to the mix I don’t think anyone would be mad about it. I certainly wouldn’t be. Did I mention they’re really simple to make?

public.jpg

It’s so simple because the strawberries are the shining star and don’t need much dressing up. If you try and make this when strawberries are out of season, even if you can find them in the grocery store, it just won’t be the same. This is a dessert that calls for strawberries ripened under the summer sun, bursting with flavor.

Do you want to know a secret? Strawberry shortcakes will reach the pinnacle of their goodness if you are able to pick the strawberries yourself! Not only will you be the one choosing the juiciest berries, but you’ll KNOW they’re as fresh as they come! Plus, you’ll taste the fruits of your own hard work and it makes it that much sweeter. Literally. I loved going strawberry picking with my mom as a kid. Strawberry season in Michigan is always in beginning to mid summer, usually end of June or early July, and we’d come home with baskets full. Then I’d help my mom hull and slice them, keeping some for eating, some for making strawberry shortcake and other desserts, and some for freezing and making jam.

Eat strawberry shortcake for dessert, or breakfast, snack, lunch, and dinner. I mean, biscuits and fruit sounds like a balanced and great way to start off the morning! Plus you’ll want to eat them as much as you can while the strawberry season lasts. A great thing about these is that you can add as little or as much sugar as you want! See notes at bottom of recipe for some ideas.

This post may contain affiliate links. If you make a purchase using these links, Jennyblogs may receive a small commission, at no extra cost to you. This helps to support Jennyblogs. Where possible, links are prioritized to small businesses and ethically and responsibly made items. For further information see the privacy policy. Grazie!

Recipe from my mama with tweaks from moi.


Strawberry Shortcake

Serves: 8-10

Ingredients:

public.jpg

For the Macerated Strawberries

  • 4-5 cups strawberries, washed, hulled, and sliced

  • 3-4 Tbsp / 35-50g sugar or to taste

For the Shortcakes

  • 2 cups / 240g all-purpose flour

  • 1/4 cup / 50g sugar

  • 4 tsp / 19g baking powder

  • 1/2 tsp / 2g salt

  • 1/2 cup / 113g cold butter or scant 1/2 cup / 100g oil

  • 2/3 cup / 158g cold milk or buttermilk

For the Whipped Cream

  • 1 cup / 237g heavy whipping cream

  • 3-4 Tbsp / 35-50g sugar or to taste

  • 1 tsp / 4g vanilla extract

Directions:

Oven 450°F / 232°C. Have ready an ungreased baking sheet.

Make the Macerated Strawberries

  1. Place strawberries in a bowl, add sugar, and mash them a bit or a lot, as desired, with a fork or masher. Place in fridge while you prepare shortcakes.

Make the Shortcakes

  1. In a large bowl whisk together flour, sugar, baking powder, and salt.

  2. Cut in butter or oil until mixture resembles coarse crumbs.

  3. Make a well in center of flour mixture and pour in milk. Mix just until most of the flour is moistened, then turn mixture out onto a floured surface.

  4. Knead lightly, up to 10-12 times, until you have a soft but not too sticky dough. Don’t overwork or biscuits will be tough.

  5. Gently pat dough out into a circle about 1in / 2.5cm thick, checking to make sure underneath is still floured well and dough isn’t sticking.

  6. Using a biscuit cutter or a round glass 2-3in / 5-7cm in diameter, cut out as many biscuits as you can. Place biscuits on baking sheet. Collect dough scraps and reshape into a ball. Repeat patting into a circle and cutting until dough is used up, probably 2-3 times at most, depending on size of biscuit cutter.

  7. Bake biscuits in preheated oven for 10-12 minutes, or until risen and lightly golden brown.

Make the Whipped Cream

  1. In the bowl of a stand mixer fitted with whisk attachment or with a hand mixer, whip heavy cream until soft peaks form.

  2. Add sugar and vanilla and continue whipping until stiff peaks form.

Assembly

Slice biscuits open and spoon over strawberries and whipped cream.

Jenny’s Notes:

  • The sugar mixed in with the strawberries is traditional but not absolutely necessary. Although it helps soften the strawberries to lose their juice and create more of a soft sauce, I like it also without adding any sugar, because everything else in this recipe is already a bit sweet.

  • The biscuit dough might seem too soft at first, but the moment the baking powder starts working and it hits the floured surface it should become very manageable. Just be careful not to over work it, a little bit goes a long way.

  • When cutting biscuits, cut straight down, no twisting, or this can seal the edges and prevent a good rise. You can dip the biscuit cutter in some flour to help prevent any sticking.

  • If you place the biscuits next to each other on the baking sheet they can help each other “climb” up and achieve a nicer rise! I know this feels counterintuitive as so often things are supposed to be “spaced evenly apart”, but give it a try!

Strawberry Shortcake
Yield 8-10 servings
Author
Prep time
40 Min
Cook time
12 Min
Total time
52 Min

Strawberry Shortcake

Classic strawberry shortcake recipe handed down from my mama. Homemade biscuits, juicy strawberries, and fresh whipped cream assembled together in a summery dessert.
Cook modePrevent screen from turning off

Ingredients

For the Macerated Strawberries
For the Shortcakes
For the Whipped Cream

Instructions

Make the Macerated Strawberries
  1. Place strawberries in a bowl, add sugar, and mash them a bit or a lot, as desired, with a fork or masher. Place in fridge while you prepare the shortcakes.
Make the Shortcakes
  1. Preheat oven to 450°F / 232°C. Have ready an ungreased baking sheet.
  2. In a large bowl whisk together flour, sugar, baking powder, and salt.
  3. Cut in butter or oil until mixture resembles coarse crumbs.
  4. Make a well in center of flour mixture and pour in milk. Mix just until most of the flour is moistened, then turn mixture out onto a floured surface.
  5. Knead lightly, up to 10-12 times, until you have a soft but not too sticky dough. Don’t overwork or biscuits will be tough.
  6. Gently pat dough out into a circle about 1in / 2.5cm thick, checking to make sure underneath is still floured well and dough isn’t sticking.
  7. Using a biscuit cutter or a round glass 2-3in / 5-7cm in diameter, cut out as many biscuits as you can. Place biscuits on baking sheet. Collect dough scraps and reshape into a ball. Repeat patting into a circle and cutting until dough is used up, probably 2-3 times at most, depending on size of biscuit cutter.
  8. Bake biscuits in preheated oven for 10-12 minutes, or until risen and lightly golden brown.
Make the Whipped Cream
  1. In the bowl of a stand mixer fitted with whisk attachment or with a hand mixer, whip heavy cream until soft peaks form.
  2. Add sugar and vanilla and continue whipping until stiff peaks form.
Assembly
  1. Slice biscuits open and spoon over strawberries and whipped cream!

Notes

The sugar mixed in with the strawberries is traditional but not absolutely necessary. Although it helps soften the strawberries to lose their juice and create more of a soft sauce, I like it also without adding any sugar, because everything else in this recipe is already a bit sweet.The biscuit dough might seem too soft at first, but the moment the baking powder starts working and it hits the floured surface it should become very workable. Just be careful not to over work it, a little bit goes a long way.When cutting the biscuits, cut straight down, no twisting, or this can seal the edges and prevent a good rise. You can dip the biscuit cutter in some flour to help prevent any sticking. If you place the biscuits next to each other on the baking sheet they can help each other “climb” up and achieve a nicer rise!

Nutrition Facts

Calories

436.99

Fat

24.15 g

Sat. Fat

7.94 g

Carbs

51.65 g

Fiber

2.77 g

Net carbs

48.88 g

Sugar

24.49 g

Protein

5.28 g

Sodium

368.72 mg

Cholesterol

35.06 mg

Nutritional Information is approximate.

strawberry shortcakes, summer dessert, best traditional classic strawberry shortcake
dessert
American
Did you make this recipe?
Tag @jennyblogsandbakes on instagram and hashtag it #jennyblogs
public.jpg

Coffee Culture in Italy

Last Updated July 12, 2024

Coffee. caffè. قهوة. ቡና. koffie. kafe. սուրճ. קפה. kaffi. caife. café. コーヒー. кофе. 咖啡. káva. kahve. ყავა. coffi. καφές. kope. ikhofi. cà phê. کافی. കോഫി. kahvi. kape. kohvi. kafo. kaffe. కాఫీ. kafija. capulus. kahawa.

IMG_9451.jpg

More than 33 ways to say coffee in at least 37 different languages.  (Some overlap, i.e. café is Spanish, French, and Portugal.)  And even the ones that don’t share the Latin alphabet and I can’t even begin to sound out sound similar to the word “coffee.”  I know that because Google Translate and transliteration.  Amazing, isn’t it?  I mean, the languages, not Google Translate, but yeah, that’s pretty amazing also.  So many different cultures and people and centuries, and coffee is so important in so many of them.  Not least of all Italy, which is why I’m writing this post.  (Coffee in Italian is the second language written, “caffè,” and you will hear it and see it, ALOT.) 

In fact, Italy is the birthplace of many of the coffee drinks you drink today, including cappuccino, espresso, macchiato, and latte, although ordering them at Starbucks is going to get you something very different than what you would get in Italy.

So, what are the principal coffee drinks in Italy?

(You can find your own espresso depresso t-shirt on Amazon, yasssss)

This post may contain affiliate links. If you make a purchase using these links, Jennyblogs may receive a small commission, at no extra cost to you. This helps to support Jennyblogs. Where possible, links are prioritized to small businesses and ethically and responsibly made items. For further information see the privacy policy. Grazie!


The drinks on a typical Italian coffee menu

Cappuccino

Cappuccino

  • Espresso - “Expressed”

    A strong shot of coffee and what is considered “normal coffee.” If you go into a bar and order a “caffè,” they will usually clarify by asking “caffè normale?” which of course, literally means normal coffee. It is drunk throughout the day at any time, and particularly after lunch and dinner to help digestion.

    You can order a “ristretto” (restricted) where the espresso shot is pulled early resulting in a shorter, stronger shot, or you can order a “lungo” (long) which is the opposite, a taller and waterier (is that a word?) shot of espresso.

    The name means “expressed” which could denote any or all of the three meanings of the word in English or Italian. First, the method in which espresso is made, where the steam “expresses” and pressures the coffee flavor into the water, second, that it is made quickly or “expressly,” and third, that it is made “expressly” for one person. This, however, still does not give you license to call it an “expresso,” mmk?

  • Macchiato - “Stained”

    You can order a macchiato two ways: A caffè macchiato or a latte macchiato. Caffè macchiato means “stained coffee” so you will get an espresso with a small dollop of milk, usually foamed. A latte macchiato means “stained milk” and will get you hot milk with some coffee served in a glass, with or without the foamy milk, depending on the different preparations.

  • Cappuccino - “Little Hood”

    The Italian coffee of choice for breakfast (and mine!) and probably doesn’t need much intro. The cappuccino, also called cappuccio which means just “hood,” got its name from the color of the hood of the Capuchin monks which it apparently resembles. According to this site (in Italian) a cappuccino should be 25ml of coffee and 125ml of milk with lots of foam.

    Oh, and you might have heard that you should never drink a cappuccino in Italy after noon or you’ll get kicked out of the country? Not exactly true. It’s mostly because, according to most Italians, milk upsets digestion unless it is a part of the traditional cappuccino and pastry breakfast in which the milk acts as an element of the meal.  But consuming milk after a heavier lunch or dinner, especially at night, is too much.  As this Italian Mamma explains, “When the casein in milk combines with the hot coffee, given the high temperature, it combines with the tannic acids characteristic of the drink (or rather the coffee); this meeting then produces a chemical composition that weighs down the digestion.” I’m not here to vouch if this is sound science or not, just quoting so you can get an idea of the Italian thinking. If you choose to abide by this “rule,” drink your cappuccino by itself or with a cookie, pastry, or something small and light and far away from mealtimes, breakfast aside.

  • Caffè Latte - “Milk Coffee”

    Or caffellatte. In America we have long since dropped the “caffè” and simply order a latte. This strategy in Italy, however, will simply get you a glass of milk. A caffè latte is essentially a cappuccino without the foam.

  • Caffè Americano - “American Coffee”

    A larger cup of weaker coffee in comparison to the classic espresso.  The classic way to prepare a caffè americano in Italy is to add hot water to an espresso.  Yum.  Not.  There are a few places you can find that have drip “American” coffee and even a few who do pour overs. 

  • Caffè Corretto - “Corrected Coffee”

    Because, normal coffee is not correct. It must be corrected, and with a small amount of liquor. The type of alcohol used can vary depending on the region, but usually grappa is used, sometimes brandy, Sambuco, or l’anice, a type of anise liquor, or even Bailey’s.

  • Caffè al Ginseng - “Ginseng Coffee”

    This is definitely one you should try, delicious even if it is a bit pre-fab. It is usually a powder mix they add to a machine and dispense as ordered, so not fresh coffee, but it’s a pungent and sweet little drink that I unabashedly love. You can order an “alto” tall or “basso” short, depending on if you want it to be the equivalent to roughly a shot of espresso or double shot. The sugar usually lies at the bottom so you’ll want to stir it before consuming.

    Ginseng has long been a part of Chinese medicine and has become popular around the world where you can find it in just about any store’s health supplement section. It is supposed to have many health benefits, including being a powerful antioxidant reducing inflammation, benefiting brain function, benefiting against cancer, boosting the immune system, increasing energy, lowering blood sugar, and having aphrodisiacal qualities. However, many of these studies seem to prove only the “may benefit” or “could help” factors with nothing concrete.

  • Marocchino - “Moroccan”

    Despite its name this drink was also invented in Italy, in Piemonte. At first glance it may seem just a cappuccino with cocoa, but it is much better than that. There are quite a few different preparations, but almost all include espresso, cocoa, and steamed milk served in a clear glass. Often the glass is first sprinkled with cocoa, then the espresso is added, then steamed milk and finally more cocoa. The official site of Illy (one of the top Italian coffee roasters, you’ve probably heard of them or seen their coffee in the States) gives the preparation for the Marocchino at home as thus: Place about 1 Tbsp / 10-15ml of hot chocolate in a glass, then prepare directly in the same cup about 2 Tbsp / 20-25ml of espresso, sprinkle with a thin layer of cocoa, then steam about 2 Tbsp / 25ml of milk and add to the glass over the cocoa.

  • Shakerato - “Shaken”

    Coffee shaken in a cocktail shaker with ice and if desired, sugar. The resulting refreshingly icy coffee with a bit of foam is usually served in a martini glass, sometimes a flute glass.

    I like this word because it is an English word that has been Italianified. I don’t think that’s even a word. “Sh” doesn’t exist in traditional Italian spelling, nor does “k.” They say a “sh” sound, but it is spelled with “sci” or “sce.” Essentially they took the word “shaker” and turned it into an Italian verb, shakerare, which means to shake drinks in a shaker. Then this drink’s name is the past tense, shakerato, meaning shaken. It makes me laugh, neither truly Italian or English!

  • Caffè d’Orzo - “Barley Coffee”

    For those who prefer decaffeinated drinks you have the choice between ordering your favorite coffee decaffeinated or with orzo / barley instead of coffee beans.

    Decaffeinated coffee, as you probably know, are coffee beans which have gone through a process to remove the caffeine. They process often involves hot water and methylene chloride, of which trace amounts will end up in your coffee (it was recently banned for use in paint and paint strippers). The USDA requires that a minimum of 97% caffeine be extracted for coffee beans to be considered decaffeinated. Decaffeinated coffee will always have a small amount of caffeine in it. If you’re interested to see if the decaf coffee you drink uses the chemical process for decaffeination, check out this article here, which tested out some top decaf coffee brands as well as what to look for in labeling when buying decaf.

    Crushed barley is used much like coffee beans to attain a dark and bitter drink which assimilates coffee, although it has its own distinctive taste. It became popular during war times in Italy when coffee beans became too expensive. Unlike decaffeinated coffee, barley is completely caffeine free, but not suitable for those who can’t consume gluten.


The Italian coffee experience

You could parachute out of a plane and land just about anywhere in Italy and still be in sight of some place that sells coffee.

My happy face while trying the coffee at Sant’Eustachio Il Caffè, a historical cafe and roastery in Rome.

My happy face while trying the coffee at Sant’Eustachio Il Caffè, a historical cafe and roastery in Rome.

The Italian bar is a way of life here. “Bar” is a general term for any place that sells coffee. Often the name of the place has “bar” in the title, but this can also include any cafe or pasticceria that sells coffee. A bar usually has, what do you know, a bar with a rung at the bottom for standing comfortably with one foot propped up while you wait for, then down your coffee.

Anytime you see an old friend or need to meet up with a colleague, you head to the nearest bar, offer them a caffè, throw it back, and you’re each on your way. This can happen several times a day, because I don’t think I’ve met an Italian yet who stops at one coffee a day. It’s very different from the lingering 2 hour catch-up with friends or I’m-just-going-to-sit-here-and-use-the-free-wifi-on-my-computer-and-get-some-work-done experience in America. In fact, the very few times I’ve brought my computer and sat in a bar or pasticceria I felt very strange, and very millennial. Even if I linger over my coffee for more than say, 20 minutes, by the time I leave it’s a whole new crowd. The exception seems to be some of the older generation who will sit outside and people watch for hoursssss.

If you are looking for more of an American coffee shop type experience, there are a select few that are on the cutting edge, and these are the only ones that I don’t feel the oddball out if I linger too long or decide to bring my computer. You’ll find that the other young and international people who take their coffee seriously and felt more at home in a “coffee shop” type setting have gravitated to these places as well.

Then there are the restaurants, where you will always find caffè as your post-meal digestive, a must for many Italians, lunch or dinner!

For the best coffee around Florence, read this.

What are your favorite coffee drinks in Italy? Let me know in the comments below!


Classic Rhubarb Custard Pie

IMG_1860.jpg

Last updated July 31, 2024

Nothings says summer like a rhubarb pie. Better yet, a rhubarb CUSTARD pie.

Rhubarb is always one of the first garden plants to grow each spring in Michigan, announcing that after a long, cold winter summer is indeed coming and didn’t get lost along the way after all. Rhubarb likes to grow so extensively in its short season that you don’t know what to do with all of it, until it withers in the approach of hotter weather and leaves you already looking forward to next year’s crop. Unless, of course, you planned ahead and froze some. But frozen rhubarb will never be like fresh, so make all the pie and hand pie, crisp, cake, syrup, and camel hair soup you can! I mean, er, rhubarb sauce…not camel hair soup. Hehe, who’d call it that??

IMG_1835.jpg

Do you want to know something really sad? I’ve never seen rhubarb in Italy, at least not in Florence. So for my international friends, I’m sorry if your area fails you and doesn’t grow rhubarb so you aren’t able to make this recipe. If there is rhubarb in Florence though, someone please tell me where to find it? So far everyone I’ve asked just said, “…what’s that?” This just goes to show my ignorance. Before moving to Italy I was trying to bake with all of the ingredients that aren’t readily available here, or at least what I figured wouldn’t be readily available. I should have been in a baking frenzy with rhubarb instead of things like Oreos. Because, no rhubarb and Oreos everywhere. There are even Oreo donuts in the grocery store bakery section…I’ve come so close to trying them during various weak moments.

Wherever you are in the world, be sure to bake or eat a rhubarb pie at the next chance. You won’t regret it and might inspire you to move to a part of the world where rhubarb is grown.

This recipe is the old-fashioned classic from my mama. The crust is one of my favorite traditional pie crust recipes, simple and can be made ahead of time if needed. It uses butter instead of shortening, which in my mind is a bit of a compromise between shortening or lard (which most people and bakeries use to make tender and flaky crusts but it’s also horrendous for your health and has no taste if it’s not artificially flavored.) and oil, which my mom has always used because oil can actually be good for you, although it makes for the trickiest to handle and often um, hardier pie crusts. So I use butter, which tastes wonderful and makes the crust easy enough to work with, even if it’s not as healthy as oil.

This post may contain affiliate links. If you make a purchase using these links, Jennyblogs may receive a small commission, at no extra cost to you. This helps to support Jennyblogs. Where possible, links are prioritized to small businesses and ethically and responsibly made items. For further information see the privacy policy. Grazie!

Recipe from my Mama


Classic Rhubarb Custard Pie

Makes one 9in / 23cm pie, about 8 servings

Ingredients:

For the Crust

For the Rhubarb Custard Filling

  • 3 eggs

  • 3 Tbsp / 45g milk

  • 1 1/2 cups / 300g granulated sugar

  • 1/4 cup / 30g all-purpose flour

  • 3/4 tsp nutmeg

  • 4 cups fresh rhubarb, sliced into 1/2in / 1cm chunks

Directions:

Oven 400°F / 205°C. 8 or 9 inch pie dish. 

Make the Crust

IMG_4560.jpg
  1. Prepare pie crust per recipe instructions, refrigerate until needed.

Make the Rhubarb Custard Filling

  1. Blend eggs and milk together in a large bowl.

  2. Add the flour and nutmeg to the sugar then add to the egg mixture and beat well.

  3. Add in the rhubarb and mix to coat well.

  4. Pour into prepared pie crust and add top crust.

    For a classic top pie crust, place crust on top, cut off overhang, and crimp together the edges of the top and bottom crust to seal.

    For an interwoven lattice, start in the center of the pie and work outward, then repeat with the other half. Arrange half of the strips evenly spaced over the pie all in one direction, then flip every other strip back over itself, so half are now only covering half of the pie. Take a new strip and place it perpendicularly just in front of the folded strips. Unfold the folded strips so these ones now cover the new strip. The new strip should be under and over every other one. Working on that same half of the pie, fold back every other strip, all the ones that were NOT just folded. Take another new strip and place it evenly apart from the first perpendicular strip. Unfold the folded strips. Repeat folding back strips, placing new strip, and unfolding until you reach the edge of the pie. You may need to trim down the strips as you get closer to the edge. Repeat with other half of the pie.

    Sprinkle sugar on top, if desired.

  5. Bake pie in preheated oven for 50-60 minutes or until crust is golden brown and a knife inserted in center of pie confirms rhubarb is tender.

  6. Allow to cool completely before slicing and serving.

Jenny’s Notes:

  • If you make the crust and pie in the same day, you could make the filling while the crust is resting in the fridge for an hour or so before rolling out.

  • Instead of a traditional top pie crust or lattice you could add a streusel/crumble, delicious and definitely the easiest option of the three.

Rhubarb Custard Pie
Yield 8
Author
Prep time
1 H & 10 M
Cook time
1 Hour
Total time
2 H & 10 M

Rhubarb Custard Pie

Classic rhubarb custard pie recipe handed down from my mama. Homemade pie crust with the uniquely sweet and sour filling you can only get with rhubarb.
Cook modePrevent screen from turning off

Ingredients

For the Crust
For the Rhubarb Custard Filling

Instructions

Make the Crust
  1. Prepare pie crust per recipe instructions, refrigerate until needed.
Make the Rhubarb Custard Filling
  1. Oven 400°F / 205°C. 8 or 9 inch pie dish.
  2. Blend eggs and milk together in a large bowl.
  3. Add the flour and nutmeg to the sugar then add to the egg mixture and beat well.
  4. Add in the rhubarb and mix to coat well.
  5. Pour into prepared pie crust and add top crust.
  6. For a classic top pie crust, place crust on top, cut off overhang, and crimp together the edges of the top and bottom crust to seal. For an interwoven lattice, start in the center of the pie and work outward, then repeat with the other half. Arrange half of the strips evenly spaced over the pie all in one direction, then flip every other strip back over itself, so half are now only covering half of the pie. Take a new strip and place it perpendicularly just in front of the folded strips. Unfold the folded strips so these ones now cover the new strip. The new strip should be under and over every other one. Working on that same half of the pie, fold back every other strip, all the ones that were NOT just folded. Take another new strip and place it evenly apart from the first perpendicular strip. Unfold the folded strips. Repeat folding back strips, placing new strip, and unfolding until you reach the edge of the pie. You may need to trim down the strips as you get closer to the edge. Repeat with other half of the pie.
  7. Sprinkle sugar on top, if desired.
  8. Bake pie in preheated oven for 50-60 minutes or until crust is golden brown and a knife inserted in center of pie confirms rhubarb is tender.
  9. Allow to cool completely before slicing and serving.

Notes

If you make the crust and pie in the same day, you could make the filling while the crust is resting in the fridge for an hour or so before rolling out. Instead of a traditional top pie crust or lattice you could add a streusel/crumble, delicious and definitely the easiest option of the three.

Nutrition Facts

Calories

431.35

Fat

12.79 g

Sat. Fat

7.67 g

Carbs

74.08 g

Fiber

2.32 g

Net carbs

71.76 g

Sugar

38.25 g

Protein

6.18 g

Sodium

397.03 mg

Cholesterol

54.07 mg

Nutritional Information is approximate.

Rhubarb, custard, pie, all butter crust, oil pie crust, old fashioned
Dessert, Pie
American
Did you make this recipe?
Tag @jennyblogsandbakes on instagram and hashtag it #jennyblogs

Rhubarb Custard Pie made with an all oil crust


Food in Florence: Where to Find the Best Coffee

Italy is known for it’s coffee. Your coffee beverage of choice was probably invented in Italy. Cappuccino? Yep. (Caffè) Latte? Yes. Macchiato? You bet. And of course, the king of coffee in Italy, the espresso. It’s by far the most commonly consumed coffee, so much so that all you have to do is enter a bar and order a “caffè” or “caffè normale” (literally translated, normal coffee) and you will be served an espresso. It took me awhile to realize that I didn’t need to specify an espresso when I order because it’s a given; the Italians just ask for “un caffè.”

Duomo cappuccino art

Duomo cappuccino art

That said, it’s surprising how much bad coffee I’ve consumed in Italy. I believe a lot of it comes down to poorly sourced beans and/or over-roasted beans. (If beans have an oily appearance they have been roasted too long; they lost their oil!) Combine that with equipment that doesn’t get cleaned or wiped down enough and baristas who don’t have the passion to even perfect their cappuccino and you get a rather bitter experience. Don’t mind the pun. This list will help guide you to GOOD coffee in Florence so you don’t have to feel the burn from bad coffee. Again, I’m sorry for the pun. (Maybe not really.)

The places on this list range from a more traditional Italian coffee experience (downing an espresso quickly while standing at the bar or sitting) to the trendier locales with ample seating and ambience where people might come to study or work on their computer, which is essentially the American coffee shop experience. But no matter the style, the common denominator is the good coffee experience, whether sipped or thrown back. You might recognize some of these places from the Most Scrumptious Breakfast list, because good breakfasts and good coffee definitely have an overlap. But good coffee doesn’t always mean good pastries, and vice versa, hence the different posts.

To read more about the coffee drinks you’ll find in Italy, click here.

This post may contain affiliate links. If you make a purchase using these links, Jennyblogs may receive a small commission, at no extra cost to you. This helps to support Jennyblogs. Where possible, links are prioritized to small businesses and ethically and responsibly made items. For further information see the privacy policy. Grazie!


Where to Find the Best Coffee in Florence

In no particular order

  1. Melaleuca

    Lungarno delle Grazie, 18, right along the river not too far from Santa Croce

    Open 8:00am - 4:00pm Monday through Friday, 9:00am - 4:00pm Saturday and Sunday.

    A newer (established 2019) American/Australian Bistro Bakery right in the heart of Florence with beautiful views. It’s airy, it’s bright, and has a lovely ambiance. They partner with a local specialty coffee roaster, D612. Combine thoughtfully roasted beans with some baristas who know their stuff, you get a mean coffee. From flat whites to Matcha or Golden Lattes, I’ve never had a bad coffee from them. I also love their details, like the hand made pottery that the coffees are served in. Not to mention, it’s a comfortable international space if you just want a break from some of the Italian coffee culture/rules you may have been running in to. Everyone speaks English and sometimes you just miss being able to communicate easily. I worked here before having my son, the owners are friends of mine and lovely people! You may also notice they’re on my list for best breakfast, too!

  2. Ditta Artigianale

    Location 1: Via dei Neri, 30/32r, between the church of Santa Croce and Palazzo Vecchio Location 2: Via dello Sprone, 5r, very close to Palazzo Pitti

    Open 8:00am - 12:00am Monday through Friday, 9:00am - 12:00am Saturday and Sunday

    Ditta Artigianale was founded in 2013 by an award-winning barista and is considered by many the best coffee in Florence, and they are usually busy to show it. This has one of the closest vibes to an American coffee shop with the quality coffee, cool and informal atmosphere, and competent baristas. Many people come here to work as well as socialize, drink coffee, and eat. They have single-origin coffee choices and you can buy their whole beans or have them grind them for you to make coffee at home as well as a delicious cold brew.

  3. La Ménagère

    Via de’ Neri, 8, right in the center by San Lorenzo and the Mercato Centrale

    Open 8:00am - 2:30am every day

    A large caffè that serves coffee and food with different rooms on the main floor, basement, and even outside that is designed for lingering with friends or work. You can even buy botanicals or select house items, or listen to live music some evenings.

  4. Mercato Centrale

    Piazza del Mercato Centrale, Via dell’Ariento, near to the church of San Lorenzo

    Open 8:00am - 12:00am every day

    Up on the second floor of this historic wrought iron building you will find a large Italian-style food court. In the center there is a bar where you can order coffee, or you can find a place to sit and a waiter should eventually come to ask if you’d like something to drink, at no extra charge. It can get extremely busy during the lunch and dinner hours, so I would recommend going in the morning when it is calm or between 3:00pm and 7:30pm to avoid the crowds. Bonus: you can order a large (and maybe even an extra large?) cappuccino called a “cappuccione” for around 2euro (and maybe 3 for the extra large!)

  5. Coffee Mantra

    Borgo la Croce, 71r, near Piazza Beccaria on the east side of town in a very local area

    Open 7:00am - 7:00pm Monday through Saturday. Closed Sunday

    A new and hip little coffee place in the Sant’Ambrogio neighborhood. I recommend getting your drink to go (I believe they even do flat whites here) and take a stroll around the Sant’Ambrogio market around the corner or any of the antique markets nearby.

  6. Santarosa Bistrot

    Lungarno di Santa Rosa, on the south side of the river.

    Open 8:00am - Midnight weekdays, 10:00am - Midnight Saturday and Sunday

    A lovely caffe with lots of beautiful green surrounding. It creates a wonderful escape from the bustling city center and is one of my favorite places to catch up with friends over a nice cup of coffee or tea.

  7. La Cité

    Borgo S. Frediano, 20r, on the south side of the river not far from the church of Santo Spirito.

    Open 10:00am - 12:02am Monday through Saturday, 2:00pm - 9:00pm Sunday

    A two story cafe and book store, this is a great place to work on projects or find a private nook for deep conversations over a good cup of coffee. Very cozy and artsy.

  8. Chiaroscuro

    Via del Corso, 36r, between the Duomo and Palazzo Vecchio.

    Open 7:30am - 9:30pm Monday through Saturday, 8:00am - 9:30pm Sunday

    I always thought this cafe had a classy classic feel to it, great for meeting up with people or a quick coffee but not so much for using it as a place to work from. They have coffee sourced from around the world displayed on their wall and you can even choose which beans you want for your cup of coffee.

  9. Caffetteria Piansa

    Via Vincenzo Gioberti, 51r, just outside the city center on the east side.

    Open 7:00am - 7:30pm Monday through Saturday, closed Sunday

    Piansa roasts their own coffee and sells to other places around town. If you find any cafe that uses the Piansa beans, it’s probably going to be great! Here you can even get pour overs and buy Chemex and filters!


Overnight Bagels

Last Updated August 18, 2024

IMG_2103.jpg

Bagels. Who doesn’t love them? Especially toasted with cream cheese or butter melting on top. Everyone has their favorite bagel, where to get them and how to eat them, whether that’s the chewy and dense boiled variety or the slightly lighter and more modern steamed versions, plain or everything, toasted with cream cheese, eaten plain, or eaten as a sandwich.

One of my favorite bagel memories is from New York City where I spent two summers training with the American Ballet Theatre when I was a teenager. On the weekends my mom and I would go on adventures exploring the city, usually walking an average of 15 miles a day and thus needing sustenance. I remember particularly well one morning passing a bagel shop and a few minutes later exiting with a freshly toasted bagel smothered in cream cheese and wrapped in tinfoil. So simple, so inexpensive, and I still think of that bagel as one of the best I’ve ever had. So I guess you could say I’m a NYC bagel girl, but to be fair, I don’t think I’ve had any (at least not-from-a-hotel-breakfast-bar bagels) in any of the major cities famed for bagels, such as Philadelphia, Chicago, Boston, or Los Angeles. And I’ve been to all those cities! Too bad I didn’t know they had amazing bagels or I would’ve done a trial and comparison. Ah well, just have to go back I guess!

I am blogging this bagel recipe which involves an overnight ferment and boiling, because I think IT’S SO YUMMY. I’m not going to tout this recipe as the bagel recipe to end all bagel recipes, because frankly, I’m not into that kind of marketing and I believe there are other valid methods and types of bagel recipes out there. This recipe comes from Peter Reinhart’s book The Breadmaker’s Apprentice, and as he says, this is a bagel for the ages. And he knows what he’s talking about, so you should try this recipe. You can buy the cookbook by clinking on the link to the right!

Don’t let the overnight ferment or multi-step process scare you, it’s really quite fun and not nearly as tricky as I had always imagined making bagels to be. You will need to clear some space in your fridge and in your schedule, but if I can do it in my tiny Italian kitchen with my tiny toaster-sized oven, so can you, wherever you are baking! I recommend reading the recipe through once or twice before making a game plan. (As you should with every recipe!)

What follows is a slightly modified version of Peter Reinhart’s recipe. The ingredients are basically identical but the instructions I have rewritten in my own words and in places slightly changed or modified to accommodate tips and tricks that worked really well for me and might work for you, too!

parmesan, sesame, and everything bagels

parmesan, sesame, and everything bagels

Side note if you need bagels TODAY: While this recipe is called “Overnight Bagels”, it can also be made without the overnight ferment. I do recommend the overnight ferment for flavor and just because it’s nice to split up the multiple steps of bagel making, however…we might not always have the patience to wait that long for fresh, hot, chewy bagels…this has definitely happened to me during this 2020 quarantine. I wanted bagels today! Not tomorrow! And I hadn’t planned ahead.
So, instead of an overnight ferment, once the bagels are shaped, let them rise in a warm place for about an hour, or until noticeably swelled. Keep any eye on them as you don’t want them to overaise. This can cause them to deflate when they are boiled. Proceed with recipe as normal.

This post may contain affiliate links. If you make a purchase using these links, Jennyblogs may receive a small commission, at no extra cost to you. This helps to support Jennyblogs. Where possible, links are prioritized to small businesses and ethically and responsibly made items. For further information see the privacy policy. Grazie!


Overnight Bagels

Makes 12 big or 24 small bagels

Ingredients:

For the Sponge

  • 1 tsp / 3g instant yeast

  • 4 cups / 510g bread flour

  • 2 1/2 cups / 567g water

For the Dough

  • 1/2 tsp / 1.5g instant yeast

  • 3 3/4 cups / 482g bread flour

  • 2 3/4 tsp / 20g salt

  • 2 tsp / 9.5g malt powder OR flavoring of choice: 1 Tbsp / 14g dark or light malt syrup, honey, or dark or light brown sugar

For Boiling the Bagels

  • 1 Tbsp / 14g baking soda, optional, or malt syrup or honey

  • a large pot of water, the wider the pot the better

  • cornmeal or semolina, for dusting

Toppings, any or all of the following

  • sesame seeds

  • poppy seeds

  • salt flakes

  • rehydrated minced garlic

  • rehydrated minced onion

  • parmesan cheese

Directions:

DAY 1

Line 2 sheet pans with parchment paper and grease well.

Make the Sponge

  1. In the bowl of a stand mixer or large bowl, stir yeast into flour. Add water and stir just until a sticky dough has formed, similar to pancake batter.

  2. Cover bowl with plastic wrap and let sit at room temperature for about 2 hours, or until very bubbly and active. It should be about twice the size and collapse when bowl is tapped on countertop.

Make the Dough

  1. Once sponge is ready, add next measurement of yeast and mix on low speed with dough hook or by hand with a spoon. Next, add 3 cups / 383g of the next measurement of flour, salt, and malt powder / flavoring of choice. Stir on low speed for about 3 minutes, or with a spoon until a mostly homogeneous ball is formed. Slowly add remaining 3/4 cup / 99g flour to stiffen dough a bit.

    Knead dough on medium-low speed for about 6 minutes or turn dough out onto a lightly floured surface and knead by hand for about 10 minutes. Dough should be smooth and firm yet pliable, not sticky, with all flour worked in. If it seems too dry or there is excess flour throughout, add a few drops of water until desired consistency is reached. Likewise if it’s too sticky, add in a bit of flour until correct stiffness is reached. At this point the dough should pass the windowpane test. (Stretch a small piece of dough between your thumbs and forefingers; if enough gluten has developed through kneading the dough should stretch thin where you can see light coming through. If it breaks before you can stretch it thin, knead another few minutes and try again.)

Weigh and Shape Dough

IMG_2100.jpg
  1. Weigh dough and divide weight by the number of bagels you wish to make: If making mini bagels, divide weight by 24; if making regular bagels, divide weight by 12. This will give the goal weight for each dough ball you are about to make. For example, the weight of my dough the last time I made these was 1,566g. 1,566g divided by 12 for regular bagels = about 130g each. Or, 1,566g divided by 24 for mini bagels = about 65g each.

  2. Once you have a goal weight for the dough balls, divide dough in half, then keep dividing the halves and quarters until you have 12 or 24 dough chunks. Weigh each chunk and add or subtract a bit of dough until they are all within about 5g of the goal weight. Roll each dough chunk under your palm with a cupped hand in a circular motion, guiding with outer edge of your palm, until you have a nice ball. It works best to roll them on a surface with little to no flour. This way the dough sticks slightly to the surface as you move in a circular motion and pulls and creates surface tension.

  3. Place dough balls on a lightly floured surface and cover with a damp towel. Allow to rest for approximately 20 minutes.

  4. Shape each dough ball into bagel form by poking your thumb through the center of the ball and rotating your thumb around the inside of the hole or lassoing it a few times around your thumb, until the hole is about 2 1/2 in / 6 cm for regular bagels or 1 1/2 in / 4 cm for mini. Aim to stretch the bagel as evenly as possible, avoiding a thick and thin side so you won’t end up with lopsided bagels. Alternately, you can roll the doll ball into an 8 in / 20 cm long rope, wrap it around your knuckles with the seam on the under side, then rock the seam on the counter until sealed.

  5. Place shaped bagels onto greased baking sheets about 2 inches apart. Mist with spray oil or rub on oil, then slip each sheet into a clean, food-grade plastic bag or cover with plastic wrap.

  6. Place bagels in fridge to rise overnight. They are best if used the next day, but can be kept up to three days in the fridge.

DAY 2

Boil the Bagels

  1. Test to see if bagels are ready to be boiled by removing one carefully from fridge and placing in a bowl of cool or tepid water. If bagel floats within 10 seconds, it’s ready. Immediately return bagel to covered baking sheet in fridge while you ready the water.

  2. If bagel does not float within 10 seconds, either return it to the fridge and repeat float test every couple hours until bagels are ready, or remove both sheets of bagels from fridge and let raise at room temperature, repeating float test every 10 to 20 minutes until a bagel passes. Return them to the fridge once they are ready so they don’t over-rise. The stiffness of the dough, your house temperature, and your fridge temperature will all impact when the bagels are ready to be boiled.

  3. If your bagels have over-risen (you can tell if they collapse when you gently handle them or if they overly deflate when boiled) or they have stuck to the pan, transfer them as carefully as you can to another better-oiled parchment lined baking sheet. Let rise at room temperature for another 15-20 minutes or until they pass float test again. Return them to the fridge once they are ready.

  4. When bagels are just about ready, place the large pot of water on the stove and bring to a boil, then add baking soda, if using. Have a skimmer or slotted spoon ready nearby. Preheat oven to 500°F / 260°C and place two racks in the middle of the oven.

  5. Remove one sheet of bagels from fridge and gently slide 3-4 into boiling water, or however many can fit comfortably side to side. Boil for 30 seconds to 1 minute on one side, then flip each bagel and boil for another 30 seconds to 1 minute. Bagels boiled for 1 minute on each side will be chewier than those boiled for only 30 seconds on each side.

  6. While bagels are boiling, sprinkle the same parchment lined baking sheet with cornmeal or semolina.

  7. When it’s time to remove bagels, use the slotted spoon and place them back on the baking sheet now sprinkled with cornmeal. Add toppings immediately while the bagels are still wet. Repeat with second sheet of bagels.

Bake the Bagels

  1. Place both baking sheets of bagels in the preheated oven. Bake for 7 minutes, then switch the pans on the racks and rotate each 180 degrees to bake the bagels as evenly as possible.

  2. After you switch and rotate, lower oven temperature to 450°F / 232°C and bake for another 7-8 minutes, or until light golden brown.

  3. Remove from oven and allow bagels to cool for 15 minutes before devouring.

Jenny’s Notes:

  • To keep scale clean while weighing dough, place the now-empty bowl (no need to clean it) and press tare. You can also use a piece of plastic wrap over the scale and tare if needed.

  • I love lassoing the bagels while shaping them! Fast, fun, and effective. Not as big a fan of the rope and seal version, I thought it took longer and the finishing ring was not as symmetrical. Try out both versions to find which works best for you!

  • I found it best to make the dough in the evening and boil and bake the bagels in the morning or they over-rose, but I believe this is mostly due to my not-cold-enough fridge. If you have a cold and well functioning fridge, you should be fine to make and bake the bagels at your leisure!

  • Chewy bagels are my favorite, and thus I boil bagels for the full minute on each side. I have found, though, that beyond 1 minute on each side can cause the outside of the bagels to cook too much. This means when they are baked this outer baked “shell” doesn’t allow the bagels to reach their full rise and may result in flatter bagels.

  • When baking the bagels, know your oven. If you have hot spots or a small oven, you can choose to bake one sheet of bagels at a time. Since my oven is small, I baked the first sheet of bagels while I was boiling the second sheet, and simply rotated the pan 180 degrees after the first 7 minutes.

Overnight Bagels
Yield 12-24
Author
Prep time
1 H & 45 M
Cook time
15 Min
Inactive time
12 Hour
Total time
14 Hour

Overnight Bagels

A recipe from Peter Reinhart's "The Breadmaker's Apprentice." The bagels get an overnight ferment leading to increased umami flavor and are boiled for optimal chewiness.
Cook modePrevent screen from turning off

Ingredients

For the Sponge
For the Dough
For Boiling the Bagels
Toppings, any or all of the following

Instructions

DAY 1 Make the Sponge
  1. In the bowl of a stand mixer or large bowl, stir yeast into flour. Add water and stir just until a sticky dough has formed, similar to pancake batter.
  2. Cover bowl with plastic wrap and let sit at room temperature for about 2 hours, or until very bubbly and active. It should be about twice the size and collapse when bowl is tapped on countertop.
Make the Dough
  1. Once sponge is ready, add next measurement of yeast and mix on low speed with dough hook or by hand with a spoon. Next, add 3 cups / 383g of the next measurement of flour, salt, and malt powder / flavoring of choice. Stir on low speed for about 3 minutes, or with a spoon until a mostly homogeneous ball is formed. Slowly add remaining 3/4 cup / 99g flour to stiffen dough a bit.
  2. Knead dough on medium-low speed for about 6 minutes or turn dough out onto a lightly floured surface and knead by hand for about 10 minutes. Dough should be smooth and firm yet pliable, not sticky, with all flour worked in. If it seems too dry or there is excess flour throughout, add a few drops of water until desired consistency is reached. Likewise if it’s too sticky, add in a bit of flour until correct stiffness is reached. At this point the dough should pass the windowpane test. (Stretch a small piece of dough between your thumbs and forefingers; if enough gluten has developed through kneading the dough should stretch thin where you can see light coming through. If it breaks before you can stretch it thin, knead another few minutes and try again.)
Weigh and Shape the Dough
  1. Line 2 sheet pans with parchment paper and grease well.
  2. Weigh dough and divide weight by the number of bagels you wish to make: If making mini bagels, divide weight by 24; if making regular bagels, divide weight by 12. This will give the goal weight for each dough ball you are about to make. For example, the weight of my dough the last time I made these was 1,566g. 1,566g divided by 12 for regular bagels = about 130g each. Or, 1,566g divided by 24 for mini bagels = about 65g each.
  3. Once you have a goal weight for the dough balls, divide dough in half, then keep dividing the halves and quarters until you have 12 or 24 dough chunks. Weigh each chunk and add or subtract a bit of dough until they are all within about 5g of the goal weight. Roll each dough chunk under your palm with a cupped hand in a circular motion, guiding with outer edge of your palm, until you have a nice ball. It works best to roll them on a surface with little to no flour. This way the dough sticks slightly to the surface as you move in a circular motion and pulls and creates surface tension.
  4. Place dough balls on a lightly floured surface and cover with a damp towel. Allow to rest for approximately 20 minutes.
  5. Shape each dough ball into bagel form by poking your thumb through the center of the ball and rotating your thumb around the inside of the hole or lassoing it a few times around your thumb, until the hole is about 2 1/2 in / 6 cm for regular bagels or 1 1/2 in / 4 cm for mini. Aim to stretch the bagel as evenly as possible, avoiding a thick and thin side so you won’t end up with lopsided bagels. Alternately, you can roll the doll ball into an 8 in / 20 cm long rope, wrap it around your knuckles with the seam on the under side, then rock the seam on the counter until sealed.
  6. Place shaped bagels onto greased baking sheets about 2 inches apart. Mist with spray oil or rub on oil, then slip each sheet into a clean, food-grade plastic bag or cover with plastic wrap.
  7. Place bagels in fridge to rise overnight. They are best if used the next day, but can be kept up to three days in the fridge.
DAY 2 Boil the Bagels
  1. Test to see if bagels are ready to be boiled by removing one carefully from fridge and placing in a bowl of cool or tepid water. If bagel floats within 10 seconds, it’s ready. Immediately return bagel to covered baking sheet in fridge while you ready the water.
  2. If bagel does not float within 10 seconds, either return it to the fridge and repeat float test every couple hours until bagels are ready, or remove both sheets of bagels from fridge and let raise at room temperature, repeating float test every 10 to 20 minutes until a bagel passes. Return them to the fridge once they are ready so they don’t over-rise. The stiffness of the dough, your house temperature, and your fridge temperature will all impact when the bagels are ready to be boiled.
  3. If your bagels have over-risen (you can tell if they collapse when you gently handle them or if they overly deflate when boiled) or they have stuck to the pan, transfer them as carefully as you can to another better-oiled parchment lined baking sheet. Let rise at room temperature for another 15-20 minutes or until they pass float test again. Return them to the fridge once they are ready.
  4. When bagels are just about ready, place the large pot of water on the stove and bring to a boil, then add baking soda, if using. Have a skimmer or slotted spoon ready nearby. Preheat oven to 500°F / 260°C and place two racks in the middle of the oven.
  5. Remove one sheet of bagels from fridge and gently slide 3-4 into boiling water, or however many can fit comfortably side to side. Boil for 30 seconds to 1 minute on one side, then flip each bagel and boil for another 30 seconds to 1 minute. Bagels boiled for 1 minute on each side will be chewier than those boiled for only 30 seconds on each side.
  6. While bagels are boiling, sprinkle the same parchment lined baking sheet with cornmeal or semolina.
  7. When it’s time to remove bagels, use the slotted spoon and place them back on the baking sheet now sprinkled with cornmeal. Add toppings immediately while the bagels are still wet. Repeat with second sheet of bagels.
Bake the Bagels
  1. Place both baking sheets of bagels in the preheated oven. Bake for 7 minutes, then switch the pans on the racks and rotate each 180 degrees to bake the bagels as evenly as possible.
  2. After you switch and rotate, lower oven temperature to 450°F / 232°C and bake for another 7-8 minutes, or until light golden brown.
  3. Remove from oven and allow bagels to cool for 15 minutes before devouring.

Notes

  • To keep scale clean while weighing dough, place the now-empty bowl (no need to clean it) and press tare. You can also use a piece of plastic wrap over the scale and tare if needed.
  • I love lassoing the bagels while shaping them! Fast, fun, and effective. Not as big a fan of the rope and seal version, I thought it took longer and the finishing ring was not as symmetrical. Try out both versions to find which works best for you!
  • I found it best to make the dough in the evening and boil and bake the bagels in the morning or they over-rose, but I believe this is mostly due to my not-cold-enough fridge. If you have a cold and well functioning fridge, you should be fine to make and bake the bagels at your leisure!
  • Chewy bagels are my favorite, and thus I boil bagels for the full minute on each side. I have found, though, that beyond 1 minute on each side can cause the outside of the bagels to cook too much. This means when they are baked this outer baked “shell” doesn’t allow the bagels to reach their full rise and may result in flatter bagels.
  • When baking the bagels, know your oven. If you have hot spots or a small oven, you can choose to bake one sheet of bagels at a time. Since my oven is small, I baked the first sheet of bagels while I was boiling the second sheet, and simply rotated the pan 180 degrees after the first 7 minutes.


Nutrition Facts

Calories

303.74

Fat

1.50 g

Sat. Fat

0.22 g

Carbs

60.82 g

Fiber

2.14 g

Net carbs

58.68 g

Sugar

0.83 g

Protein

10.16 g

Sodium

1017.73 mg

Cholesterol

0.00 mg

Nutritional Info is Approximate. Based on 1 large bagel.

bagel, overnight bagels, everything, parmesan, sesame, poppyseed
bread, breakfast, brunch
Jewish-American
Did you make this recipe?
Tag @jennyblogsandbakes on instagram and hashtag it #jennyblogs

Food in Florence: Where to Eat the Most Scrumptious Breakfasts

Starting off a new Italy series all about Food in Florence that I’m calling…wait for it…Food in Florence! Yay, you guessed it!

Esselunga+Cappuccino.jpg

I’ve been getting enough requests this past year from friends and friends for friends visiting Florence that I think it’s time to start compiling some helpful and easily accessible lists and tips of what to do/where to eat in this adopted city of mine, Florence. Creating custom “to do” and “to eat” lists is not very time efficient I find…or maybe I just give an overwhelming amount of information…nah, that couldn’t possibly be it. :)

It’s great fun to create lists that help people get the most out of their time in Florence. My favorite way to see a new city is exploring and wandering without any tour guides (with certain exceptions), while having read up a ton beforehand and bookmarked things to see, places to shop, and foods to try and where to try them. The biggest problem I always run into while preparing for a trip is knowing which lists are authentic and whose opinion I should trust. The lists in this new “Food in Florence” series would have saved me quite a bit of time before I came to Florence for the first time. I hope they will be useful to you and help you decide where you want to dine around Florence without falling for the tourist traps, specifically in this list where you can find the most scrumptious breakfasts.

As a disclaimer, these lists will probably be ever evolving because 1. Florence has a million and one places to try, 2. New places are always opening, 3. I’ve only lived here just over 2 consecutive years and 4. I probably don’t eat out nearly as much as you would expect for someone who lives in Italy. (Whaaat I don’t eat pasta for lunch and pizza for dinner everyday?! Lame.) Just remember, I’m a real person with a real budget. :)

What is a typical Italian breakfast?

You’re going out to breakfast, but what can you expect to find on the menu? What do Italians typically eat for breakfast?

Italians don’t go to a sit-down type restaurant for breakfast, which is usually what entails if you go out to breakfast in America. Instead, most Italians have their favorite local bar that they go to several, if not every, morning of the week. A cappuccino is usually eaten with a pastry, and just as often eaten standing and chatting as it is sitting down and reading the morning newspaper. At just over 2euro for a cappuccino and pastry, it makes for a very affordable breakfast out. If there is a menu, it’s probably a coffee menu on the wall. The pastries are chosen through the display case. It’s common to ask what they’re filled with, if one is unsure. You can expect varying croissants and sugary puff pastries filled with the classics: cream, chocolate, Nutella, jam (usually apricot or blackberry) and apple, along with more specialty fillings that will vary by place, such as cream and orange, whole wheat with honey, pistachio, etc.

What is the best time to go out for breakfast?

The famed hot chocolate at Caffè Gilli

The famed hot chocolate at Caffè Gilli

Whatever time you want. Really. Most pasticcerie and bars open between 5:30-7:00am, but pastries will be served until they’re gone, which is often into the afternoon. Of course, some busy places will run out by noon, so my only word of advice would be to go before then. You can manage that, right?

Or, if you’re like me and like to eat right away, have some fruit and snacks to eat first thing in the morning, and then eat a leisurely second breakfast or elevensies at a caffè once you’re out and about.

You’ll find people eating breakfast anywhere from the early morning hours to late morning, and it is socially acceptable to eat a pastry and a cappuccino in the afternoon as a snack, or a cappuccino by itself, contrary to popular American belief. See #12 on this blog post if you want to know why. So have at it! Just don’t drink a cappuccino with any food item other than pastries/cookies, k? Cappuccino and pizza taste gross together anyway.

Breakfast Etiquette

Bottega di Pasticceria

Bottega di Pasticceria

As a general rule, it’s best to pay at the cash register before ordering your pastry and drink at the bar. Many places don’t care if you eat or pay first, even if they have signs up asking you to pay first, however…some places DO care and if you’re not familiar with that particular locale, pay first to be safe.

It’s also advisable to ask before you sit down as some places up-charge for the “sit-down service.” Ya know, paying up to twice the price for your drink for the luxury of sitting down and usually them bringing you your order. Don’t think that carrying your own drink to your table is going to get you any discounts. You’re really paying for occupying the table, the service I like to think of as bonus so you might as well enjoy it!

The only place on the list below that should have an up-charge is Gilli and possibly Bottega di Pasticceria. Since they are classy and all about the experience anyway, I think we can forgive them.

This post may contain affiliate links. If you make a purchase using these links, Jennyblogs may receive a small commission, at no extra cost to you. This helps to support Jennyblogs. Where possible, links are prioritized to small businesses and ethically and responsibly made items. For further information see the privacy policy. Grazie!


Where to Eat the Most Scrumptious Breakfasts

  1. La Ménagère

    Via de’ Neri, 8, right in the center by San Lorenzo and the Mercato Centrale

    Open 8:00am - 2:30am every day

    Large and uniquely beautiful space, each room is a little different. Very cool atmosphere. There is even an area where you can buy some merchandise and flowers. Lots of pretty plants! Indoor and outdoor seating. Great coffee. A bit on the pricier side.

  2. Santarosa Bistrot

    Lungarno di Santa Rosa, on the south side of the river.

    Open 8:00am - Midnight weekdays, 10:00am - Midnight Saturday and Sunday

    Beautiful outdoor caffe where you can choose to sit outside among the greenery or in the main area with the roof if it rains. So cozy. I love this place when I want to get away from the hectic city life for a moment.

  3. Caffetteria delle Oblate

    Via dell’Oriuolo, 26, in the center not far from the Duomo.

    Open 2:00pm - 7:00pm Monday, 9:00am - Midnight Tuesday through Friday, 10:00am - Midnight Saturday, closed on Sunday.

    An old convent turned library with a third story caffè, this place is super cool and has spectacular views of the Duomo to boot. You can sit in the caffetteria or take your food to any of the 4 sided terrace overlooking in the inner open courtyard. There are seats and tables on most sides, but they are often occupied with studying students. When this happens I usually just sit on the floor, no one will mind. Note, the caffetteria will charge you 10 cents per person who eats outside of the caffetteria area. I find this ironically humorous as most bars will charge you if you sit down IN their area, not if you take away. Italy, the land of inconsistency.

  4. Melaleuca

    Lungarno delle Grazie, 18, right along the river not too far from Santa Croce

    Open 8:00am - 4:00pm Monday through Friday, 9:00am - 4:00pm Saturday and Sunday.

    A newer (established 2019) American/Australian Bistro Bakery right in the heart of Florence with beautiful views. It’s airy, it’s bright, and has a lovely ambiance. While you won’t find typical Italian food here, you will find some of the best croissants and pastries in town (they have an in-house French baker), along with some other maybe more familiar desserts and brunch items. Think cinnamon rolls, banana bread, pumpkin bread, carrot cake, Guinness chocolate cake, and on and on. They have pancakes, they have eggs, and if you’re familiar with Australian cuisine, you might see some familiar items on their menu as well. Anything that can be house made IS house made, from buttermilk to kombucha, pickled vegetables, dips and spreads, drinks, almond milk, and almost literally everything else. It’s a comfortable space if you just want a break from some of the Italian eating culture/rules you may have been running in to! Everyone speaks English and sometimes you just miss being able to communicate easily. I worked here before having my son, the owners are friends of mine and lovely people! You may also notice they’re on my list for best coffee, too!

  5. Bottega di Pasticceria

    Lungarno Francesco Ferrucci, 9c, south of the river on the edge of the city center

    Open 7:00am - 10:00pm Tuesday through Sunday, closed Monday

    This is a lovely open two story caffe that has an elegant feel to it, although don’t feel as though you need to dress up! Certain parts of the second story floor are made of glass, a warning to those who are wearing dresses and skirts! ;)

  6. Caffetteria La Loggia

    Via Pietrapiana, 12, not far from the church of Santa Croce

    Open 7:00am - 8:30pm every day

    A small little place but popular with the locals and me! A good variety of pastries and coffee, they even have some specialty drinks such as Hazelnut or Pistachio Coffee, very sweet but interesting to try! If there are no available places to sit, you can always drink your coffee and eat your pastry standing up at the bar, like the Italians do, or go and sit in the nearby Piazza della Loggia which the city of Florence recently redid.

  7. Caffè Libertà

    Piazza della Libertà, 27r, at the top tip of the city center in Piazza della Libertà

    Open 5:00am - 9:30pm every day

    This caffe is home to probably some of my favorite pastries in all of Florence, and that’s just talking about the pastries. The desserts are mouth-watering as well. I personally recommend the apple filled pastry, but I know others who rave about the pistachio filled pastry. Indoor or outdoor seating.

  8. Caffè Pasticceria Serafini

    Via Gioberti, 168r, just outside the city center on the east side

    Open 7:00am - 9:00am Monday through Saturday, closed Sunday

    Serafini is located in a very local area and has wonderful pastries and desserts. It can get busy, but there is indoor and outdoor seating and always the option to eat at the bar or take away. They have a great chocolate and pear pastry.

  9. Caffè Michelangelo

    Via Ghibellina, 116r, in the center near to Santa Croce

    Open 6:00am - 8:00pm Monday through Saturday, closed Sunday

    Another great local caffè with yummy pastries and coffee. There are a couple of baristas here who can make a mean cappuccino.

  10. Caffè Gilli

    Via Roma, 1r, on Piazza della Repubblica

    Open 7:30am - Midnight every day

    Gilli is the oldest caffè in Florence, established more than 270 years ago by a Swiss family. Their hot chocolate is renowned and their sweets and chocolate beloved by many. Situated in a beautiful building with a large covered outdoor sitting area right on Piazza della Repubblica, this is the place to go if you’re looking for a high class and historic experience. Just remember you’ll be paying higher prices, i.e., a normal hot chocolate costs 3-3.50euro, Gilli will charge you somewhere around 7euro.


Caffetteria delle Oblate

Caffetteria delle Oblate

Buon Appetito!

Want to see some of your favorite spots added to the list? Let me know in the comments below!

Triple Dark Chocolate Cheesecake

Last Updated August 17, 2024

2019-05-26+17.58.07-2.jpg

After more than two years in Italy, I have finally made a cheesecake.

Proof that you don’t need a springform pan to bake a cheesecake

Proof that you don’t need a springform pan to bake a cheesecake

Cheesecakes are not hard to make, but the baking is important, probably the most important part, and can be tricky. Cheesecakes are usually baked at a slightly lower temperature, usually around 325°F, and just until the sides are set but the center is still jiggly. If the center sets, the cheesecake is over done, but if the center is too jiggly, then your cheesecake won’t set up in the fridge and you’ll end up with soup when you cut into it. You don’t want the cheesecake to crack, and some recipes will tell you to add a bain-marie (a hot water bath) to the oven to keep the atmosphere humid or to crack the oven door after you’ve turned it off so your cheesecake won’t cool down too quickly and yes, crack.

So when you live in Italy with strange ovens, you think twice before baking things when you can’t perfectly control the heat in your oven or where the heat is coming from. IF you’re able to tell the temperature of your oven at all. (I’m thinking of you, my oven two apartments ago. I DO NOT miss you!) Or if your oven is small and cooks things a lot quicker. Add on top of that the cream cheese here, “formaggio fresco” or literally translated fresh cheese, is…different. I’m not even sure what it is, it tastes similar to cream cheese in the States, but when you whip it it doesn’t become soupy like the American stuff, it becomes super creamy. Sometimes I think the American stuff is stickier too, maybe? Philadelphia brand is very popular here, and you can also get grocery store generic brand. But the cheesecakes I’ve eaten in restaurants or pastry shops? Always weird. They taste and look more like semi-freddo or a mousse. I therefore assumed when I made a cheesecake it would be weird like the other ones I’ve eaten here. So I never made one.

Along came Easter and I wanted to make a cheesecake. I didn’t even have a springform pan but found that pie dishes work pretty great as substitutes. And you know what? The cheesecake turned out delicious and not weird. And my husband and colleagues liked it so well I made the same one again and bought a springform pan. And if you know me, you know I rarely bake the same thing twice in a row, unless I’m perfecting a new recipe. I’m always on to the next recipe. But this recipe asked to be made again. And so I did. And now you can make it, too, weird cream cheese or normal cream cheese!

This post may contain affiliate links. If you make a purchase using these links, Jennyblogs may receive a small commission, at no extra cost to you. This helps to support Jennyblogs. Where possible, links are prioritized to small businesses and ethically and responsibly made items. For further information see the privacy policy. Grazie!

Recipe adapted from omgchocolatedesserts


Triple Dark Chocolate Cheesecake

Serves about 12

Ingredients:

For the Oreo Crust

Crushing Oreos the old-fashioned way…

Crushing Oreos the old-fashioned way…

  • 24 Oreos

  • 1/4 cup / 56g butter, melted

For the Filling

  • 7.5 oz / 225g dark chocolate, broken into small chunks

  • 24 oz (3 8 oz packages) / 675g cream cheese, room temperature

  • 1/2 cup + 2 Tbsp / 125g granulated sugar

  • 2 Tbsp / 14 g cocoa powder

  • 3 eggs

For the Ganache Topping

  • 3/4 cup / 175g heavy whipping cream

  • 6 oz / 180g dark chocolate, broken into small chunks

Directions:

Oven 350°F / 177°C. Grease an 8in - 9in / 20cm - 24cm springform pan.

Make the Oreo Crust

  1. Crush Oreos in a food processor or with a rolling pin.

  2. If using a food processor, pulse in melted butter until crumbs are evenly moistened. If crushing Oreos by hand, transfer to a bowl and stir in butter.

  3. Press mixture evenly into bottom of prepared springform pan and bake for 8 minutes.

  4. Remove from oven and let cool while you prepare filling.

Spreading cream cheese mixture over baked crust

Spreading cream cheese mixture over baked crust

Make the Filling

  1. In a double boiler or pan over low heat, melt chocolate, stirring constantly. Remove from heat when there are still small chunks of chocolate, and continue to stir until completely melted. This way the chocolate won’t overheat or burn. Let chocolate cool.

  2. In the bowl of a stand mixer or a large bowl with a handheld mixer, beat cream cheese and sugar on medium speed until smooth. Changing to low speed, carefully beat in cocoa powder so that it doesn’t “poof” everywhere. Every so often stop beating and scrape down the sides of the bowl well.

  3. Beat in eggs, one at a time, until smooth.

  4. Beat in melted and cooled chocolate.

  5. Pour mixture over crust, smoothing the top.

  6. Bake for 45 - 60 minutes, or until center is still slightly wiggly and the top looks dry.

  7. Turn oven off and crack open the door for about 10 minutes. Remove cheesecake from oven and place in fridge until completely cooled, 8 hours or overnight.

Make the Ganache Topping

  1. In a small pan place heavy cream and chocolate over low heat. Stir constantly until mixture is smooth and melted. Allow to cool slightly.

  2. Remove cheesecake from fridge and pour ganache evenly over top. Allow to set before running a dull knife around edge of cheesecake and releasing from springform pan. Alternately, if you don’t need to transport the cheesecake anywhere, you can remove the ring of the springform first and then pour the ganache over, using a spoon to guide the ganache toward the edges and allowing some to dribble down the sides.

Jenny’s Notes:

  • Not a dark chocolate fan? Try it out with milk chocolate or a mixture of milk and dark to create your preferred bitterness!

  • If you don’t own a double boiler, you can make a makeshift one by placing a small pan with an inch or so of water in the bottom and bring to a simmer. Place the chocolate in a bowl big enough that it can sit on top of the pan without touching the water. Stir constantly and proceed as in the recipe. This might take a touch more effort than just melting the chocolate in a pan, but it’s safer if you’re not used to melting chocolate so as not to burn it.

  • Powdered sugar can be substituted for the granulated, use 1 cup / 110g.

  • For cleaner slicing, try running your knife under hot water for a few seconds between slices.

Triple Dark Chocolate Cheesecake
Yield 12
Author
Prep time
1 Hour
Cook time
1 H & 8 M
Inactive time
8 Hour
Total time
10 H & 8 M

Triple Dark Chocolate Cheesecake

Oreo crust, creamy dark chocolate cheesecake filling, and a decadent dark chocolate ganache.
Cook modePrevent screen from turning off

Ingredients

For the Oreo Crust
For the Filling
For the Ganache Topping

Instructions

Make the Oreo Crust
  1. Preheat oven to 350°F / 177°C. Grease an 8in - 9in / 20cm - 24cm springform pan.
  2. Crush Oreos in a food processor or with a rolling pin.
  3. If using a food processor, pulse in melted butter until crumbs are evenly moistened. If crushing Oreos by hand, transfer to a bowl and stir in butter.
  4. Press mixture evenly into bottom of prepared springform pan and bake for 8 minutes.
  5. Remove from oven and let cool while you prepare filling.
Make the Filling
  1. In a double boiler or pan over low heat, melt chocolate, stirring constantly. Remove from heat when there are still small chunks of chocolate, and continue to stir until completely melted. This way the chocolate won’t overheat or burn. Let chocolate cool.
  2. In the bowl of a stand mixer or a large bowl with a handheld mixer, beat cream cheese and sugar on medium speed until smooth. Changing to low speed, carefully beat in cocoa powder so that it doesn’t “poof” everywhere. Every so often stop beating and scrape down the sides of the bowl well.
  3. Beat in eggs, one at a time, until smooth.
  4. Beat in melted and cooled chocolate.
  5. Pour mixture over crust, smoothing the top.
  6. Bake for 45 - 60 minutes, or until center is still slightly wiggly and the top looks dry.
  7. Turn oven off and crack open the door for about 10 minutes. Remove cheesecake from oven and place in fridge until completely cooled, 8 hours or overnight.
Make the Ganache Topping
  1. In a small pan place heavy cream and chocolate over low heat. Stir constantly until mixture is smooth and melted. Allow to cool slightly.
  2. Remove cheesecake from fridge and pour ganache evenly over top. Allow to set before running a dull knife around edge of cheesecake and releasing from springform pan. Alternately, if you don’t need to transport the cheesecake anywhere, you can remove the ring of the springform first and then pour the ganache over, using a spoon to guide the ganache toward the edges and allowing some to dribble down the sides.

Notes

Not a dark chocolate fan? Try it out with milk chocolate or a mixture of milk and dark to create your preferred bitterness! If you don’t own a double boiler, you can make a makeshift one by placing a small pan with an inch or so of water in the bottom and bring to a simmer. Place the chocolate in a bowl big enough that it can sit on top of the pan without touching the water. Stir constantly and proceed as in the recipe. This might take a touch more effort than just melting the chocolate in a pan, but it’s safer if you’re not used to melting chocolate so as not to burn it. Powdered sugar can be substituted for the granulated, use 1 cup / 110g. For cleaner slicing, try running your knife under hot water for a few seconds between slices.

Nutrition Facts

Calories

715.12

Fat

54.28 g

Sat. Fat

31.43 g

Carbs

52.73 g

Fiber

3.26 g

Net carbs

49.47 g

Sugar

39.29 g

Protein

7.29 g

Cholesterol

118.98 mg

Sodium

316.65 mg

Nutritional Information is Approximate.

triple dark chocolate cheesecake, decadent, creamy, rich, oreo crust, ganache
dessert
American
Did you make this recipe?
Tag @jennyblogsandbakes on instagram and hashtag it #jennyblogs
2019-04-24+19.00.29.jpg

Sicilian Almond Cookies - Paste di Mandorle

Last Updated August 16, 2024

2019-05-13+15.18.28.jpg

Paste di mandorle, or almond cookies, are one of the simplest and most delicious cookie recipes you could ask for, requiring only 4 ingredients and an overnight refrigeration (and even that is optional), so you can make the dough one day and bake the next. And because they only use almond flour, they are gluten-free friendly!

These cookies and many variations of them hail from Sicily, where the land is full of sunshine and Mediterranean breezes, charming towns, and has the perfect climate for some of the most succulent citrus fruits and almonds. Or so I’ve heard, I have yet to actually go there! The first time I found a bag of Sicilian almonds in Italy I snatched them up, hoping for a taste experience like never before. Basically setting myself up for disappointment. They were good, yes, but I think it would be best to eat them fresh, in Sicily. Until that day when I go to Sicily, I will content myself with tastes of their culture, like the occasional good arancini (fried balls of rice stuffed with cheese and veggies or meat) that you can find around Florence, granita (a slushy type drink), brioche stuffed with gelato, and cannoli. And of course, these almond cookies. And they’re so simple to make. Dangerous.

A Note on What You Call These Cookies in Italian

The original name of this post I had named as “Paste alle mandorle” but I believe that is used more to denote almond paste, or marzipan, so I’ve updated it to Paste di Mandorle.

While most translating apps will tell you “cookie/cookies” translates to “biscotto/biscotti”, it’s not a catch-all. For as often as I talk about, bake, and eat cookies, this word has always given me grief. If you want to get technical, and you know I do, “biscotti” can be broken down into two root words: “bis” meaning two or twice, and “cotti” meaning baked or cooked. Thus, biscotti actually refers to cookies that have been baked twice. In America, you probably are familiar with the word biscotti, meaning those long hard cookies often sold at coffee shops. Those are truly biscotti, because they’re twice baked. The whole dough is baked, then they’re sliced and baked again. So if you want to talk about cookies in Italian but you don’t want to talk about the twice-baked ones, what do you call them? There is no catch-all, but you have some options. You could simply call them “dolci” (sweets) or dolcetti (little sweets) which is always safe, or cookies made with butter, similar to what we know as shortbread, you could call “frolli”. Or, you can call them “paste” as I did in this post, which in the most general translation of the word means "doughs” or “pasticcini” which is similar. Just looking up this recipe in Italian, on the first page you will probably find them called paste, pasticcini, and biscotti.

Then don’t get me started on the Italian word for “cake” which is “torta”. That one IS a catch-all, but in a bad way, because then I’m calling desserts “cake” in Italian that are definitely not cake in English. They have no word for pie, so then if someone comes to your Thanksgiving dinner and asks what the pumpkin pie is, you might say “torta di zucca” or, pumpkin cake. Sigh. Pie, like Americans think of pie (apple pie, cherry pie) doesn’t exist in their traditional cuisine so it makes sense. But confusing for an American who wants to talk about it in Italian. Some desserts, like apple, are known enough now in Italy that you can refer to them by their English name, apple pie.

This post may contain affiliate links. If you make a purchase using these links, Jennyblogs may receive a small commission, at no extra cost to you. This helps to support Jennyblogs. Where possible, links are prioritized to small businesses and ethically and responsibly made items. For further information see the privacy policy. Grazie!

Original recipe adapted and translated from GialloZafferano


Sicilian Almond Cookies - Paste di Mandorle

Makes about 2 dozen cookies

2018-12-22 12.26.58.jpg

Ingredients:

  • 2 1/2 cups / 250g almond flour

  • 1 1/4 cups / 250g granulated sugar

  • 2 / 60g egg whites

  • 1/2 tsp almond extract

Garnishes (optional)

  • powdered sugar

  • whole, sliced, or slivered almonds

Directions:

Oven 350F / 180C

  1. In a medium bowl, combine the almond flour and the sugar.

  2. Mix in the egg whites and the almond extract until thoroughly combined. This can be done with a spoon, a hand mixer, stand mixer, or even in a food processor.

  3. Cover dough and place in fridge overnight or for at least 7 hours.

  4. Remove dough from fridge and roll into balls, then roll in powdered sugar. Flatten cookies a bit, as they will not spread much in the oven. Press in a few almond slices on top. Alternately, shape them as you wish, as they hold their shape well after the overnight refrigeration.

  5. Place cookies on a silpat or parchment covered baking sheet, leaving about 1” between cookies.

  6. Bake in preheated oven for 8-12 minutes, until just lightly golden. Be careful no to overbake, cookies should be crunchy on the outside and soft on the inside.

Jenny’s Notes:

  • If you have almonds and a method to grind them, such as a food processor, go ahead and make fresh almond flour! Be careful not to over grind, you don’t want the almonds to heat up and the oil to start to escape, resulting in almond butter.

  • If you prefer other extracts, go ahead and play around with other flavors; vanilla, orange, lemon, coconut, etc.

  • This recipe, if you go by weight instead of imperial measurements, is very easy to modify or double, triple, halve, etc.! You can see that the ratio of almond flour to sugar is 1:1: essentially all you have to do is mix together equal weights of almond flour and sugar, with just enough egg whites to bind them together easily and a touch of extract for flavor. Voila.

  • These cookies have many variants and shapes and are often piped with candied cherries on top. I’m not a huge candied fruit person, and so I found a simple recipe and omitted the piping for one of the simpler almond cookie methods, rolling in powdered sugar and decorating with almonds.

Sicilian Almond Cookies - Paste alle Mandorle
Yield 24
Author
Prep time
30 Min
Cook time
12 Min
Inactive time
7 Hour
Total time
7 H & 42 M

Sicilian Almond Cookies - Paste alle Mandorle

A classic Italian cookie originating in Sicily with a soft center and crunchy exterior. 4 ingredients and gluten-free.
Cook modePrevent screen from turning off

Ingredients

Garnishes (optional)

Instructions

  1. In a medium bowl, combine the almond flour and the sugar.
  2. Mix in the egg whites and the almond extract until thoroughly combined. This can be done with a spoon, a hand mixer, stand mixer, or even in a food processor.
  3. Cover dough and place in fridge overnight or for at least 7 hours.
  4. Remove dough from fridge and roll into balls, then roll in powdered sugar. Flatten cookies a bit, as they will not spread much in the oven. Press in a few almond slices on top. Alternately, shape them as you wish, as they hold their shape well after the overnight refrigeration.
  5. Place cookies on a silpat or parchment covered baking sheet, leaving about 1” between cookies.
  6. Bake in preheated oven for 8-12 minutes, until just lightly golden. Be careful no to overbake, cookies should be crunchy on the outside and soft on the inside.

Notes

If you have almonds and a method to grind them, such as a food processor, you can make fresh almond flour! Be careful not to over-grind, you don’t want the almonds to heat up and the oil to start to escape, resulting in almond butter. If you prefer other extracts, play around with other flavors; vanilla, orange, lemon, coconut, etc. This recipe, if you go by weight instead of imperial measurements, is very easy to modify or double, triple, halve, etc.! You can see that the ratio of almond flour to sugar is 1:1: essentially all you have to do is mix together equal weights of almond flour and sugar, with just enough egg whites to bind them together easily and a touch of extract for flavor. Voila. These cookies have many variants and shapes and are often piped with candied cherries on top. I’m not a huge candied fruit person, and so I found a simple recipe and omitted the piping for one of the simpler almond cookie methods, rolling in powdered sugar and decorating with almonds.

Nutrition Facts

Calories

110.04

Fat

5.24 g

Sat. Fat

0.40 g

Carbs

14.38 g

Fiber

1.31 g

Net carbs

13.07 g

Sugar

12.51 g

Protein

2.76 g

Cholesterol

0.00 mg

Nutritional information is approximate, based on 1 cookie.

gluten-free, Sicilian almond cookies, Paste alle Mandorle
dessert, cookies
Italian
Did you make this recipe?
Tag @jennyblogsandbakes on instagram and hashtag it #jennyblogs
2019-05-13+15.17.27-2.jpg

All About that Wheat Flour - FARINA part 2

2019-05-17+18.29.09-2.jpg

If you’re reading this, you have probably have some form of wheat flour in your home. Even the person nearest to you, who is most likely not reading this, probably has some kind of wheat flour in their home. It almost sounds funny to say wheat flour because it is universally known as just flour. Flour refers to wheat flour, and only the other types of flour need to differentiate themselves. Rice flour is no less a flour, but we need to say “rice” in front of “flour” otherwise it will be assumed we are talking about flour; that is, wheat flour.

All-purpose, bread, cake, pastry, self-raising, strong, durum, semolina, whole wheat, whole wheat pastry, and graham are just some of the names for wheat flour types…what do you always have on hand? Besides maybe the price and brand of your flour, what else do you know about the substance that goes into so many hundreds of recipes? Should you care? It may not make a life or death difference, but if you enjoy cooking and baking, or generally like learning, then learning to understand wheat flour varieties and how best to use them can take the food you make to a whole new level!

If you’d like to read Part 1 and learn how flour is used in Italy, click here.

This post may contain affiliate links. If you make a purchase using these links, Jennyblogs may receive a small commission, at no extra cost to you. This helps to support Jennyblogs. Where possible, links are prioritized to small businesses and ethically and responsibly made items. For further information see the privacy policy. Grazie!


The Six Categories of Wheat

In your American pantry you probably have an all-purpose flour, a bread flour, maybe a cake flour, maybe a self-raising, possibly a few others. If you know when and how to use these flours (or just follow a recipe), you might not need to know where or what kind of wheat is actually grown and ground to make these. But once you become familiar with the types of wheat, their properties and best uses, you can make more educated choices about your baking and end up with a superior result. Even the most nominal baker will eventually come across recipes that call for cake flour or bread flour, and knowing more about the wheat characteristics and which kinds are used to make these flours will help you understand if you can substitute say, all-purpose flour, and the results if you do so.

The first thing to know is that wheat can be defined by these six characteristics:

L to R: durum wheat (semola), soft wheat for sweets, soft wheat (manitoba) for bread

L to R: durum wheat (semola), soft wheat for sweets, soft wheat (manitoba) for bread

  • Soft wheat has a higher moisture content and less gluten, suitable for making cake and cookies and more delicate baked goods

  • Hard wheat has a lower moisture content and higher protein/gluten* content, usually between 12-14%, suitable for bread making

  • Red wheat has a slightly higher protein than white and a bolder taste

  • White wheat is milder in taste even if the color is not so different from red once milled into flour

  • Winter wheat is usually planted in the fall and harvested in the summer, with the exception of countries that have too harsh of winters, such as Canada where it is planted in the spring

  • Spring wheat is usually planted in the spring and harvested in the fall, with the exception of countries that have too hot and dry of summers, such as California in which case it is planted in the fall. You can read more about winter and spring wheat here.

*Many use the terms protein and gluten in wheat flour interchangeably. This is because gluten is a type of protein found in wheat, the kind that is “developed” when you knead bread and gives it the elastic/chewy quality. In most cases, the higher the protein content, the higher the gluten. It is important to note that all gluten is protein, but not all protein is gluten, as your celiac friends should be able to tell you. Also, all wheat contains gluten, but not all gluten comes from wheat. Make sense? You can read more here or here for better understanding gluten in the light of gluten allergies, or here for a good explanation of gluten. For my purposes today, and baking in general, if someone says a flour is high in protein, and someone else says a flour has a high gluten content, they mean the same thing. And they both mean the flour is good for bread making.

There are thousands of varieties of wheat grown around the world, but chaos can be brought to order with the following six principle categories, using the characteristics we reviewed above:

  1. Hard Red Winter Wheat (HRW)

  2. Hard Red Spring Wheat (HRS)

  3. Soft Red Winter Wheat (SRW)

  4. Hard White Wheat (HW)

  5. Soft White Wheat (SW)

  6. Durum Wheat (DW) is the hardest of all wheat, used for pasta making

The flour you buy from the store will most likely fall into one of these six categories. The bread flour in your pantry is most likely a hard red or white spring wheat; your cake flour is probably milled from a soft white wheat; all-purpose is usually a mixture of hard and soft wheat. You’d know now, for example, that baking a loaf of bread with all-purpose or cake flour will not yield a wonderfully chewy loaf like using bread flour would; they don’t have the gluten required to achieve the chewiness.

If you’d like to start experimenting with flour varieties, check your area for a local mill. If you live in the States and are not fortunate enough to have a mill near you, check out Bob’s Red Mill, in store or online. They have some clearly labeled high-quality flours. You could buy some of their whole-wheat hard red flour and whole-wheat hard white flour and make some simple bread loaves, trying the two wheat varieties side by side.

Happy baking!

Mixing flours

Mixing flours