Explore Italy: Siena

IMG_2267.JPG

Welcome back to the Explore Italy series!

More Explore Italy posts:

This post may contain affiliate links. If you make a purchase using these links, Jennyblogs may receive a small commission, at no extra cost to you. This helps to support Jennyblogs. For further information see the privacy policy. Grazie!


Piazza del Campo

Piazza del Campo

Siena in a nutshell

Location: Tuscany, Italy

Best known for: Its large central piazza, Piazza del Campo, where the “Palio” horse races are held

Days needed to explore: 1+ - Siena can be enjoyed in a day, but spending at least one night will allow you to explore it more fully

What to see and do:

Duomo of Siena

Duomo of Siena

  • Piazza del Campo

    The main piazza of Siena, large and beautiful, the heart of the city. The famous Palio horse races happen twice year here on July 2 and August 16. If you’re able to line up your visit on one of these days or even in the days leading up to the races, it’s quite exciting! I came on June 30 in 2018, and was able to feel the excitement in the air as everyone was getting ready for the races, and ran into a parade where one “contrada” or quartier of the city was singing and parading around their horse. There are 17 contrade in all, and thus 17 horses participate in the races. Each contrada has their own flag with an animal, from a panther to an owl, unicorn to dragon. It’s easy to understand which contrada you’re in as you wander around the city because there are their flags and colors everywhere!

  • Piazza del Duomo / Cathedral of Santa Maria Assunta

    Here you can hang out and enjoy the spectacular duomo from the piazza, or you can get a ticket to go inside. There are several areas you can visit that require different tickets, so if you want to visit more than one or two, I suggest you go for a combo ticket. You can visit inside the cathedral, the crypt, the Piccolomini Library, the baptistry, and the Opera del Duomo museum. Children up to 6 years of age and disabled persons with their escort enter for free. Price for cathedral and library is about 8.50euro, combo ticket to see all will run you closer to 20euro.

  • Basilica of San Domenico and the head of Saint Catherine

    Who is Saint Catherine and why do I want to see her head? Saint Catherine, or Catherine of Siena, was born in 1347 and one of 25 children (!). She dedicated her life to God at a young age, and grew to be a very influential figure in Italy and the Catholic church, being named the patron saint of Rome and even of Italy, alongside Francis of Assisi. In 1999 she was proclaimed the patron saint of Europe by Pope John Paul II. She was also one of the first two women to be named a doctor of the church. She died at just 33, and her popularity only grew after her death. While her body lies in Rome, her head is in a gilt bust of bronze in the Basilica of San Domenico. The church is free to enter, and yes, you can view her head. No pictures allowed, though!

  • Torre del Mangia

    This is right on Piazza del Campo, part of the town hall or “Palazzo Comunale” which, at least to my mind, is the quintessential photo of Siena and I’m sure you’ll recognize it immediately. I’m always happy to admire these things from the outside where it’s free, but you can also climb the tower and for the views. And exercise. 400 some steps!

    If you are an art person, you can visit the Civic Museum and the Torre del Mangia for a combined ticket of 13euro.

Basilica di San Domenico

Basilica di San Domenico

Established: The area we now know today as Siena was originally founded by a tribe of Etruscans called the Saina, who lived there from about 900-400 BC.

As legend goes, Siena as we know it was founded by brothers, Senius and Aschius, nephews of Romulus who, also according to legend, founded Rome. This tale explains why there are several statues of the she-wolf suckling these twin brothers, The Capitoline Wolf, around the city.

The site later became the home of a Roman town around 30 AD, known as Saena Julia. It did not thrive under Roman rule, being far from common trading routes. Eventually it was seized by the Lombards, who attributed to its flourishing, then it was seized by the Franks in 774 AD.

The Republic of Siena was created in the 12th century. It had its ups and downs, the rivalry between Siena and Florence is legendary, especially the few times Siena managed to beat Florence! The Republic of Siena survived half of its population being wiped out by the Black Death, rebuilding itself even to become one of the most important banking cities on the continent. However, Florence eventually won out, and Siena surrendered in 1555 to the Duchy of Florence allied by the Spanish. The Spanish king, being in debt to the Medici, ceded the city to their control. You just can’t get away from the Medici legacy!

Typical foods to try:

IMG_2276.JPG
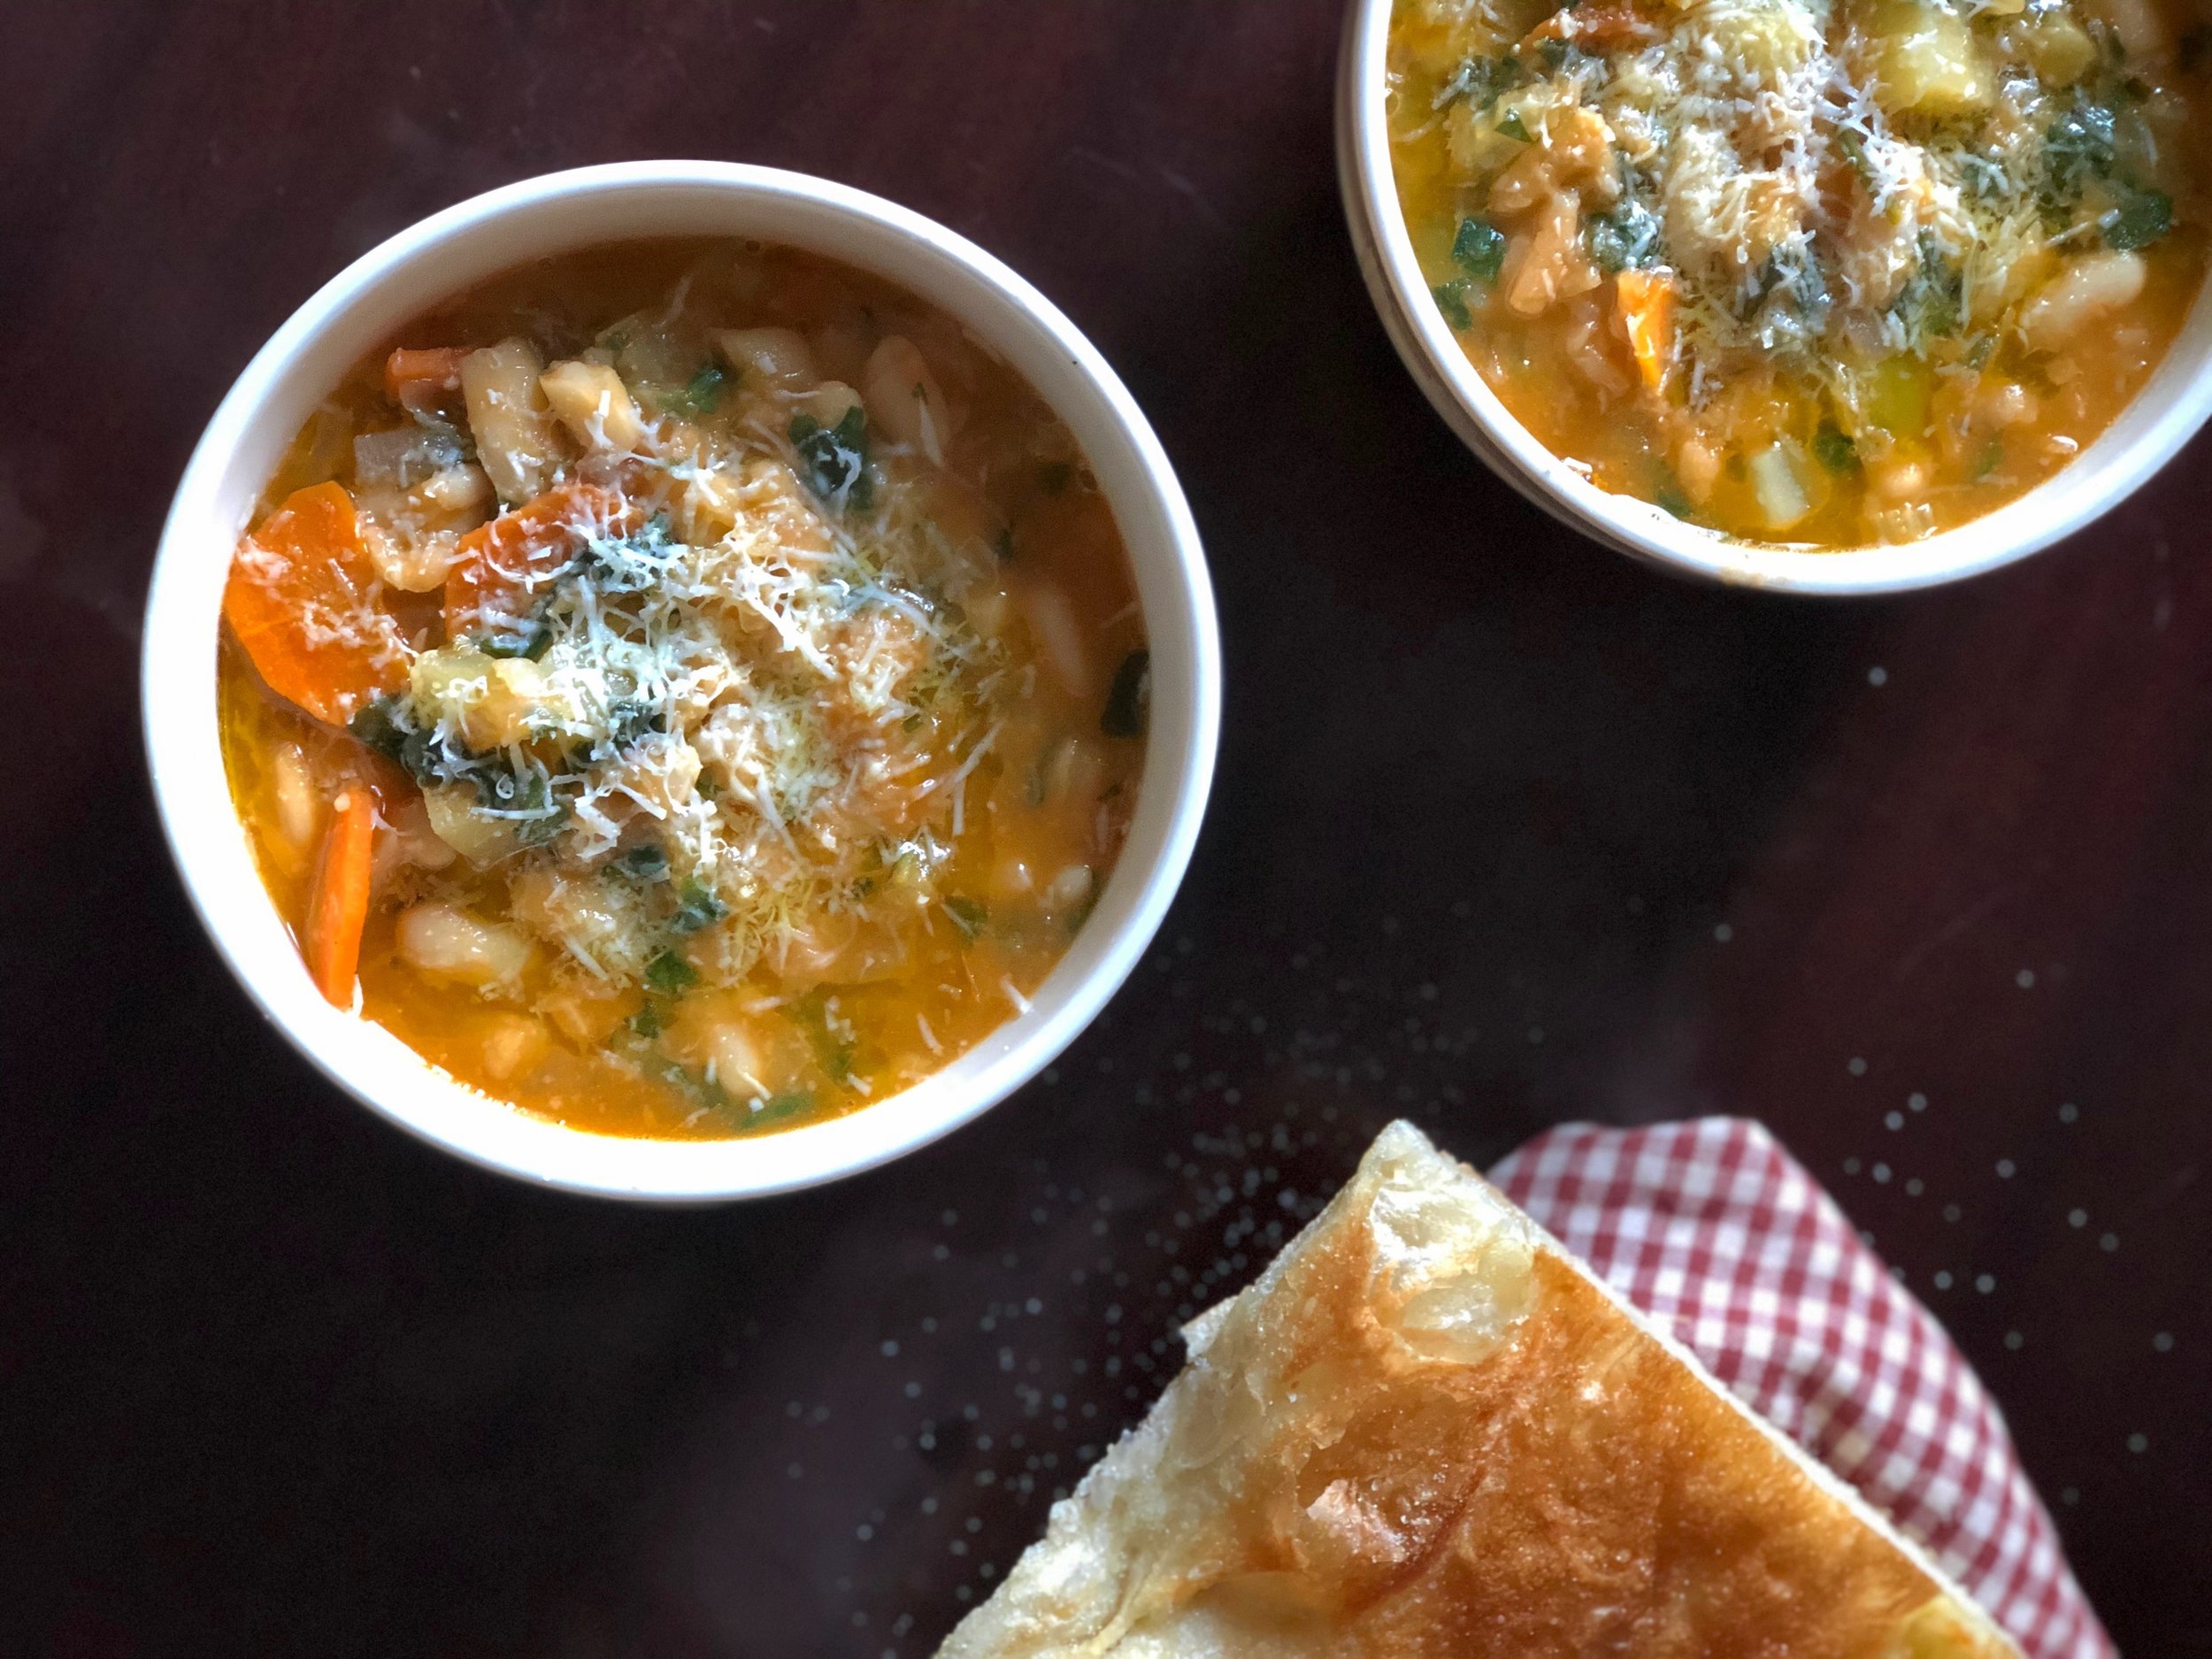
  • Ribollita (Tuscan bean, bread, and vegetable soup)

  • Crostini (slices of bread with differing toppings, served as an appetizer. One of the main Tuscan toppings is pureed liver. You could order the “crostini misti” which will get you a sampling of different crostini)

  • Pecorino e miele (pecorino cheese and honey, a divine appetizer)

  • Salumi (cold cuts, try a variety and especially some of the boar that comes from Siena’s hills)

  • Pici (pasta, like a thick spaghetti)

  • Cinta Senese (Siena’s pig)

  • Lepre (Hare)

  • Panforte (a chewy, nutty and fruity dessert)

  • Cantucci (twice baked cookies, what Americans often call biscotti)

  • All the wines, some of the most famous of Italian wines come from this area - Brunello di Montalcino, Chianti, Nobile di Montepulciano, Vernaccia di San Gimignano, Vinsanto

How to get there from Florence: *Please note that these methods of travel are written as things were before Covid-19. As things stand, some buses aren’t running, or running fewer per day. Many sites are not updated or timetables not available and ever changing, so I will not link to them here because they won’t be of any help.

You can arrive by bus, train, or car. Bus and train options have similar prices, ranging from 5-10euro for a one way.

  • Bus: There is a direct bus and a non-direct bus that makes stops in two towns before arriving in Siena. Both take off from the bus station behind the Santa Maria Novella train station, in Via Santa Caterina. The prices for the buses I believe are the same, so you might as well take the faster direct bus. Roughly two buses take off per hour, but it’s always best to get the schedule ahead of time, since weekends and holidays often have fewer buses running. Buy your tickets beforehand if possible. You can purchase them on the bus, but they will cost more.

    Likewise, there is also a Flixbus that takes off from a different area by the train station, near Villa Costanza. This may very well be a better option, since Flixbus is much easier to find times and tickets online, rather than the extraurbano buses that take off from Florence.

  • Train: Another good option is the train. Similar to the buses, there are direct and non-direct trains. Prices are all the same, as of 2020 9.50euro one way, so again, you might as well take the faster direct train, which takes about 1hr 30min.

    Regardless of whether you take a train or bus, always remember to validate your tickets, otherwise you will get fined if caught. For buses, the validation machine is on board. For trains, you’ll need to validate before getting on the train.

Siena is also easy to get to from San Gimignano by bus, or vice versa. It’s very possible to see both the cities in one day if you are short on time!

What I like about Siena

See here the various flags of the contrade waving!

See here the various flags of the contrade waving!

Siena was long a town I had heard of and imagined, and finally got to go in 2018. Aside from being bigger than expected, it’s very fun to explore and hilly! It boasts a beautiful duomo, the classic cobblestone streets and beautiful brick buildings, and the famous piazza, Piazza del Campo, where the “Palio” horse races happen.

Siena has delicious food, delicious wine (Chianti territory!), art, some shopping, and overall a general ambience to the city I really enjoy. It’s not too big, not too small, and is smack dab in the middle of beautiful Tuscan countryside.

It makes for a wonderful day trip from Florence, but also has enough to explore you may decide you want to stay a few nights here.

Personally I think Siena is small enough, even with a day trip, for you to see everything you need to see just by walking around without much of an agenda. Main points of interest you will probably come across even without a map, unless you’re me, then you can’t even find the main Duomo without walking up and down the hilly streets and somehow walking a large perimeter around it, but always just out of sight.


Sticky Sesame Tofu

Adjustments.jpeg

Last Updated August 10, 2024

Lightly pan-fried, crispy tofu nuggets tossed in a sweet and salty, sticky sesame sauce and served over rice. Extra delicious when served with hot pepper flakes, green onion, sesame seeds, and broccoli.

This Sticky Sesame Tofu is like Sesame Chicken and General Tso’s Chicken all wrapped up in one. Except it’s tofu, and not chicken, which makes it a vegan recipe. I’m not vegan, I just happen to love tofu. BUT this recipe can also be made with chicken! Simply pan fry it until cooked through, then proceed with the recipe as written.

Some notes about this recipe for making it in Italy vs. US:

  1. The tofu I would get in Italy, seems to come in 380g packages instead of the 400-450gish (14-16oz) like in the States, which means that recipe proportions will be a tiny bit different. The photos you see on this post are when I used the Italian 380g package of tofu, but I used to make half the sauce recipe as written below. If you are using a smaller than 380g block of tofu, you could consider cutting this recipe in half, to keep it more “sticky” and less saucy.

  2. Tofu in Italy also comes in a vacuum-packed container and not in water like in the States. This means the tofu starts out less watery and is easier to dry. Usually one heavy duty napkin or paper towel is sufficient for pressing.

This post may contain affiliate links. If you make a purchase using these links, Jennyblogs may receive a small commission, at no extra cost to you. This helps to support Jennyblogs. For further information see the privacy policy. Grazie!

Recipe by Jenny


Adjustments.jpeg

Sticky Sesame Tofu

Serves 3-4

Ingredients:

For the Crispy Tofu

  • 1 box / roughly 400g firm or extra firm tofu, drained

  • 1/2 cup / 60g cornstarch

  • 2 Tbsp / 28g peanut oil or other high-heat oil, plus more as needed

For the Sticky Sesame Sauce

  • 1/2 cup / 120g soy sauce or tamari

  • 6 Tbsp / 90g tomato purée

  • 6 Tbsp / 76g brown sugar, or 6 Tbsp / 120g maple syrup

  • 2 Tbsp / 30g rice vinegar

  • 2 tsp sriracha or 1 tsp red pepper flakes

  • 2 tsp freshly grated ginger or 1/4 tsp ground ginger

  • 2 tsp / 10g cooking oil

  • 4 cloves garlic, finely chopped

  • 2 tsp / 10g sesame oil

For Serving (optional):

  • rice

  • steamed broccoli

  • avocado, sesame seeds, sliced green onion, lime wedges, red pepper flakes, cilantro

Directions:

Make the Crispy Tofu

  1. Place tofu block between some paper towels and press to absorb extra water. Repeat until tofu feels dry and no more water comes out. You can also do this ahead of time by placing something heavy over the tofu and paper towels, such as a bowl or pot, and leave it for several minutes.

  2. Place corn starch in a medium bowl. Slice tofu into squares and toss in the corn starch until evenly coated.

    Pan fry:

  3. Heat oil in a large fry pan and add tofu. Fry for a few minutes until golden, then flip tofu over. You can do this with tongs, or simply sauté/flip the tofu. The second way is faster, but requires a bit more skill and you have less control over which sides of the tofu land down. Add more oil to the pan as needed to get a nice golden crust on the tofu. Remove from heat when done.

    OR Bake:

  4. Disperse tofu cubes evenly onto a parchment paper or silpat lined baking sheet. Bake in a preheated 400°F / 205°C for about 30 minutes, or until light golden and crispy. Ideally, flip tofu halfway through baking.

Make the Sticky Sesame Sauce:

  1. While tofu is frying or baking, prepare the sauce. In a bowl stir together soy sauce, tomato purée, brown sugar, rice vinegar, sriracha, and ginger.

  2. Heat cooking oil in a medium pan over medium-low heat. Add garlic and cook until just starting to turn golden, 1-2 minutes.

  3. Add soy sauce mixture and cook for 3-4 minutes, stirring occasionally, until sauce just starts to thicken. Stir in sesame oil.

  4. Add tofu to sauce and toss until evenly covered; serve immediately with rice, broccoli, and garnishes, if desired.

Jenny’s Notes:

  • For the sodium conscious, you may wish to use reduced-sodium soy sauce. If you only have regular soy sauce available, you can replace 1/2 of the soy sauce with water.

  • If you don’t have rice vinegar, use any vinegar you have on hand.

  • You can add more sriracha or red pepper flakes if you want it extra spicy, or omit if you don’t like spice.

  • If not serving all the tofu right away, it’s best to store it separately from the sauce if you wish to keep the tofu crispy.

Sticky Sesame Tofu
Yield 2-3
Author
Prep time
10 Min
Cook time
20 Min
Total time
30 Min

Sticky Sesame Tofu

Lightly pan-fried or baked, crispy tofu nuggets tossed in a sweet and salty, sticky sesame sauce and served over rice. Tastes like Sesame Chicken or General Tso's Chicken, but vegan!

Ingredients

For the Crispy Tofu
For the Sticky Sesame Sauce
For Serving (all optional):

Instructions

Make the Crispy Tofu
  1. Place tofu block between some paper towels and press to absorb extra water. Repeat until tofu feels dry and no more water comes out. You can also do this ahead of time by placing something heavy over the tofu and paper towels, such as a bowl or pot, and leave it for several minutes.
  2. Place corn starch in a medium bowl. Slice tofu into squares and toss in the corn starch until evenly coated.
  3. Pan fry:
  4. Heat oil in a large fry pan and add tofu. Fry for a few minutes until golden, then flip tofu over. You can do this with tongs, or simply sauté/flip the tofu. The second way is faster, but requires a bit more skill and you have less control over which sides of the tofu land down. Add more oil to the pan as needed to get a nice golden crust on the tofu. Remove from heat when done.
  5. OR Bake:
  6. Disperse tofu cubes evenly onto a parchment paper or silpat lined tray. Bake in a preheated 400°F / 205°C for about 30 minutes, or until light golden and crispy. Ideally, flip tofu halfway through baking.
Make the Sticky Sesame Sauce:
  1. While the tofu is frying, prepare the sauce. In a bowl stir together soy sauce, tomato purée, brown sugar, rice vinegar, sriracha, and ginger.
  2. Heat the cooking oil in a medium pan over medium-low heat. Add the garlic and cook until just starting to turn golden, 1-2 minutes.
  3. Add the soy sauce mixture and cook for 3-4 minutes, stirring occasionally, until sauce just starts to thicken. Stir in the sesame oil.
  4. Add tofu to the sauce and toss until evenly covered; serve immediately with rice, broccoli, and garnishes, if desired.

Notes

  • For the sodium conscious, you may wish to use reduced-sodium soy sauce. If you only have regular soy sauce available, you can replace 1/2 of the soy sauce with water.
  • If you don’t have rice vinegar, use any vinegar you have on hand.
  • You can add more sriracha or red pepper flakes if you want it extra spicy, or omit if you don’t like spice.
  • If not serving all the tofu right away, it’s best to store it separately from the sauce if you wish to keep the tofu crispy.

Nutrition Facts

Calories

529

Fat

23 g

Sat. Fat

3 g

Carbs

76 g

Fiber

4 g

Net carbs

71 g

Sugar

40 g

Protein

9 g

Sodium

3296 mg

Cholesterol

0 mg

Nutritional information is approximate. Based on 2 servings of tofu with sauce, not including rice or garnishes

vegan, sticky sesame sauce, tofu, Sesame chicken tofu, General Tso's chicken tofu, sweet and sour
Dinner, Main
Asian
Did you make this recipe?
Tag @jennyblogsandbakes on instagram and hashtag it #jennyblogs
IMG_3749.jpeg

Explore Italy: San Gimignano

New post series!

In honor of everyone’s favorite year ever, 2020, and all of our hopes and dreams being smashed, batted down, trampled on, and flippantly disposed of, I’m starting a new series on travel. If that seems uncorrelated or insensitive as I live in Italy and much of the world is still banned from entering the EU, allow me to explain.

Because traveling is severely diminished these days, vacations and adventures delayed, cancelled, or no longer optional due to income loss, I hoped to write some simple posts exploring my favorite cities in Italy to bring Italy to YOU. Of course a blog post will never come close to actually traveling, but maybe one of these posts will bring to light a city you’ve never been to and inspire you to start thinking about your next trip. Or cross it off your list, ha! It helps me, too, since I will not be taking any grand holidays this year. This is not all due to coronavirus, but also given we just moved apartments and we’ll be having a baby in September, it’s probably best to stay put for now and plan and prepare since we haven’t been able to do any of that yet! Ironically, I’d love to be in the US right now with my family, because having a baby is so much better with family around, ya know? But I’m not, so here’s a little trip down memory lane of some of the beautiful cities I have gotten to see in my time here in Italy!

Enjoy, and if you ever have any questions, you can always reach out to me! I love helping people when possible.

This post may contain affiliate links. If you make a purchase using these links, Jennyblogs may receive a small commission, at no extra cost to you. This helps to support Jennyblogs. For further information see the privacy policy. Grazie!


Piazza della Cisterna

Piazza della Cisterna

San Gimignano is a little walled town near Siena perched on one of the rolling hills of Tuscany famed for its medieval charm, beautiful views, wine, and one of the best gelato shops in Italy. That last one is reason enough for me to visit a place!

2018-06-30 13.21.07.jpg

San Gimignano in a nutshell

Location: Tuscany, Italy

Best known for: Its medieval charm, tall towers, and gelato

Days needed to explore: 1+ - makes for an excellent day trip

What to see and do:

  • Piazza della Cisterna

  • Climb the tallest tower, Torre Grossa, for a fee somewhere around 5euro I believe. It’s been standing since 1298, so super safe, right? No, I’m sure it’s fine, and the views are spectacular.

IMG_2253.JPG

Established: San Gimignano has a somewhat complex history with Etruscan roots, as testified by some of the Etruscan tombs you can still see today.

Two brothers who fled Rome built two towers, one which would eventually be called San Gimignano, and the city has been called so since at least 929 AD. It developed into a thriving city, until the plague of 1348 decimated two-thirds of its population and it submitted to Florentine dominance, never quite to return to its former independent glory. It is known for its fine towers, there were once 72, and today you can still admire 14 of them, which gives it a uniquely medieval skyline perched on its little hill. It has numerous examples of Romanesque and Gothic architecture.

Exploring off the beaten track

Exploring off the beaten track

Being quite small, it feels like there is one main street, a large principal piazza, and the rest little side streets to wander. This makes it a very easy day trip or possibly somewhere to stay and take a few breaths away from the larger cities. Personally, I really enjoyed San Gimignano as a day trip and didn’t feel the need to stay overnight or even all day. In fact, getting up early my husband and I saw San Gimignano and Siena all in one day and didn’t feel overly rushed. It’s very easy to go back and forth between Siena and San Gimignano by bus or car.

Places to eat:

  • Gelateria Dondoli. If you’re looking for the world’s best gelato, you’ve found it at Gelateria Dondoli, or so they say! I really don’t know how you decide these things, because there is an awful lot of gelato in the world, and good stuff at that, so how do you choose which is THE best?! Regardless, I had heard from people that it truly was delicious, so I went in with rather high expectations, even if I expected to be at least somewhat disappointed. Well, l will tell you, it was truly delicious gelato. Even for being hyped as the best, I didn’t leave scoffing one bit. So definitely stop and get at least one gelato. It’s found in Piazza della Cisterna. There will probably be a line, and don’t get confused by the other gelateria just on the other corner that has a large sign “World’s best gelato.” This can be very confusing for those looking for the real one, so follow the line if in doubt. They’re famous for a few flavors, including Crema di Santa Fina (cream, saffron, pine nuts), Champelmo (sparkling wine and grapefruit), and Vernaccia Sorbet (made with the famous Vernaccia wine). I particularly recommend the Champelmo and any flavor you normally like! I’ve purposefully gone away from the flavors they’re known for, to see if they put as much finesse into the lesser known flavors. And they did. YUM.

Typical foods to try:

  • Saffron - a spice, not a dish, but something San Gimignano is known for. Order dishes that feature “zafferano” or take some home with you!

  • Olive oil - San Gimignano produces a wonderful extra virgin olive oil. Another great product to take with you.

  • Wine - While you are here you should try the DOCG white wine for which San Gimignano is known: Vernaccia di San Gimignano. For more on this wine and where to have some tastings, check out this site.

How to get there from Florence:

Porta San Giovanni where the bus will drop you off

Porta San Giovanni where the bus will drop you off

  • By car: The quickest and maybe easiest way is by car.

  • By train: There is no direct train, so you’ll actually need to take a train to Poggibonsi from the main Santa Maria Novella train station, followed by a bus. Once you get to Poggibonsi you’ll get the 130 bus, San Gimignano-Siena line to Porta San Giovanni. Total time will be around 2 hours, depending on how quickly the bus comes. Train ride is about an hour, bus ride is about 20 minutes.

  • By bus: To get there you will need to get two buses. There is a bus station behind the Santa Maria Novella train station from which you can take a 131 Florence-Siena Busitalia bus to Poggibonsi, where you will transfer buses. Once at Poggibonsi take the 130 San Gimignano-Siena bus to Porta San Giovanni. Total time will be about 1hr 45minutes. First bus takes about 50 minutes, second bus will be around 25 minutes. Buses are my preferred method of travel to get to San Gimignano and also the cheapest. Tickets don’t need to be purchased in advance, but buses run about once every hour on weekdays, less on Saturday and much less on Sundays and holidays, so it’s best to check the schedules ahead of time.

Where to find bus schedules? As with many things in Italy, your safest bet is to go straight to the source to get correct information, in this case the bus station behind the train station in Via Santa Caterina da Siena. Maybe check out the station and get bus departures while you’re out exploring Florence. This way you will also know where to head the morning of your trip to San Gimignano, save some time and stress.

Why I like San Gimignano

While big cities may be more adrenaline inducing for the traveler with all the activity, abundance of restaurants and shops, and sites of interest, the lovely part of these tiny cities is that there isn’t really anything you need to see or do to check off your bucket list. This creates more of a stress free, wander as you will type of experience which I think is very refreshing after running around a city like Rome or Florence. You can put away your phone or map and just enjoy. No matter where you go, you will see ancient and beautiful Italian buildings, shutters, flowers, and local goods. It is very hard to get lost here. There a few museums, of course restaurants, and the main towers and piazzas that are hard to miss.

IMG_2257.JPG

Lemon Blondies

Last Updated September 6, 2024

These bars are like brownies but LEMON.

IMG_3410.jpg

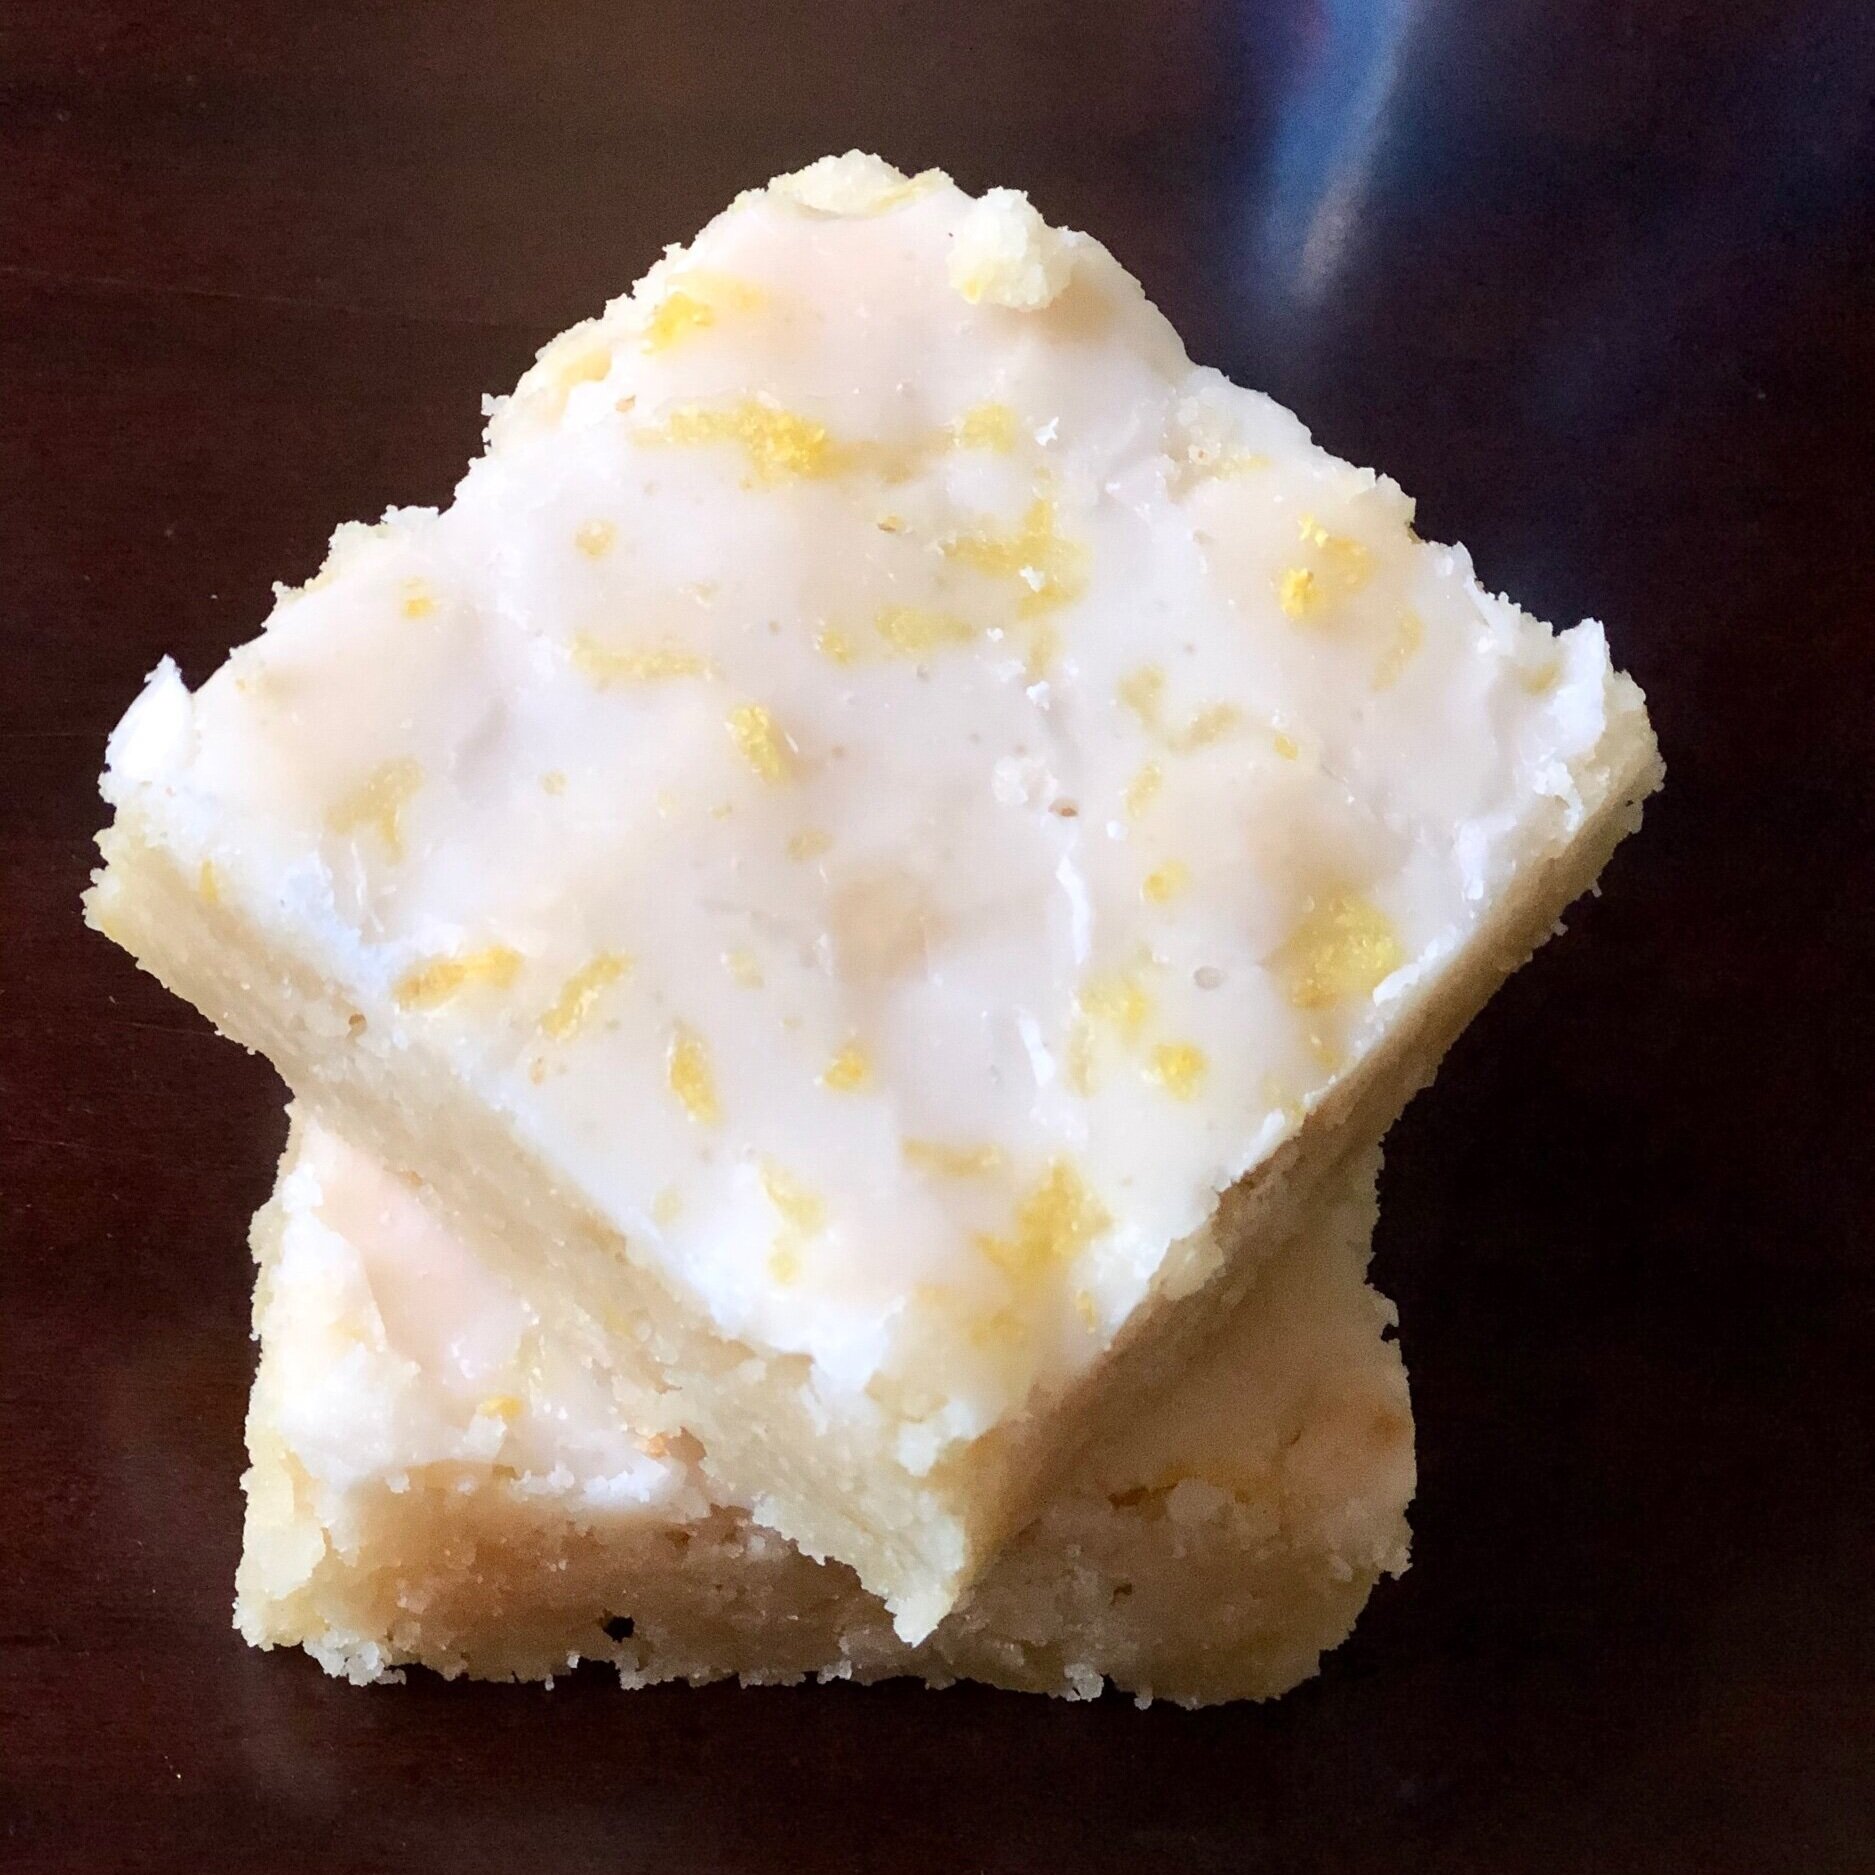
Chewy, sugary, zingy and bright lemony bar goodness. With a lemony glaze to boot! Some people call these lemon brownies, others lemon blondies. I couldn’t bring myself to say lemon brownies because they’re not chocolatey nor brown, so using the word “brownie” seemed to be sending the wrong signals. Blondie is much more accurate, although if you consider a blondie as having chocolate chips, you must take the notion out of your brain for a moment to fully understand and appreciate these beauties.

It’s really just a blondie recipe with lemon juice and zest added to it, with a wonderfully simple but tart lemon glaze! You can also add lemon extract for extra lemon flavor, but I don’t think they need it. I add more lemon juice than some, which has a more authentic lemon flavor anyway, yeah?

This post may contain affiliate links. If you make a purchase using these links, Jennyblogs may receive a small commission, at no extra cost to you. This helps to support Jennyblogs. For further information see the privacy policy. Grazie!

Recipe adapted from Sugar Spun Run


Lemon Blondies

Serves about 9

Adjustments.jpeg

Ingredients:

For the Lemon Blondies

  • 3/4 cup / 168g oil

  • 1 1/2 cups / 300g sugar

  • 1 egg + 1 egg yolk

  • 2 Tbsp lemon zest

  • 3 Tbsp / 42g lemon juice

  • 1/2 tsp vanilla extract

  • 2 1/2 cups / 300g all-purpose flour

  • 1 tsp / 3g cornstarch

  • 3/4 tsp salt

  • 1/4 tsp baking soda

For the Lemon Glaze

  • 3/4 cup / 94g powdered sugar

  • 1-2 Tbsp / 14-28g lemon juice

  • 1-2 tsp lemon zest, optional

Directions:

Make the Lemon Blondies

Preheat oven to 350°F / 177°C. Grease an 8x8 or 9x9inch / 20x20 or 23x23cm square baking pan.

  1. In a large bowl, mix together oil, sugar, egg and egg yolk, lemon zest, lemon juice, and vanilla.

  2. In another medium bowl, whisk together flour, cornstarch, salt, and baking soda.

  3. Add flour to lemon mixture and mix until combined. Dough will be thick.

  4. Scrape batter into prepared pan and spread in an even layer to the edges.

  5. Bake for 25-30 minutes, or until toothpick inserted near the center comes out mostly clean.

Adjustments.jpg

Make the Lemon Glaze

  1. In a small bowl, whisk together powdered sugar and enough lemon juice to make a drizzleable glaze. Pour over lemon blondies, spreading to edges with spatula, if necessary. Sprinkle lemon zest over top, if desired.

  2. Allow lemon blondies to cool completely before slicing and serving.

Jenny’s Notes:

  • I know it may be hard to resist cutting into these lemon blondies right away, but it’s best to wait until they are cooled to avoid them crumbling on you.

Lemon Blondies
Yield 9
Author
Prep time
20 Min
Cook time
30 Min
Total time
50 Min

Lemon Blondies

Chewy and dense like brownies, but lemon instead of chocolate with a zesty glaze!
Cook modePrevent screen from turning off

Ingredients

For the Lemon Blondies
For the Lemon Glaze

Instructions

Make the Lemon Blondies
  1. Preheat oven to 350°F / 177°C. Grease an 8x8 or 9x9inch / 20x20 or 23x23cm square baking pan.
  2. In a large bowl, mix together oil, sugar, egg and egg yolk, lemon zest, lemon juice, and vanilla.
  3. In another medium bowl, whisk together flour, cornstarch, salt, and baking soda.
  4. Add flour to lemon mixture and mix until combined. Dough will be thick.
  5. Scrape batter into prepared pan and spread in an even layer to the edges.
  6. Bake for 25-30 minutes, or until toothpick inserted near the center comes out mostly clean.
Make the Lemon Glaze
  1. In a small bowl, whisk together powdered sugar and enough lemon juice to make a drizzleable glaze. Pour over lemon blondies, spreading to edges with spatula, if necessary. Sprinkle lemon zest over top, if desired.
  2. Allow lemon blondies to cool completely before slicing and serving.

Notes

I know it may be hard to resist cutting into these lemon blondies right away, but it’s best to wait until they are cooled to avoid them crumbling on you.

Nutrition Facts

Calories

474.05

Fat

20.03 g

Sat. Fat

1.62 g

Carbs

70.33 g

Fiber

1.13 g

Net carbs

69.19 g

Sugar

43.82 g

Protein

4.50 g

Sodium

205.81 mg

Cholesterol

41.16 mg

Nutritional information is approximate. Based on 1 bar if sliced into 9 servings.

Lemon Blondies, Lemon Brownies, Lemon bars
dessert
American
Did you make this recipe?
Tag @jennyblogsandbakes on instagram and hashtag it #jennyblogs

Living in Italy: The Art of Grocery Shopping

Last Updated July 28, 2024

While I was originally going to include this segment on grocery shopping (yes, grocery shopping) as part of a different post, I realized I had enough to say on the subject to warrant its own post.

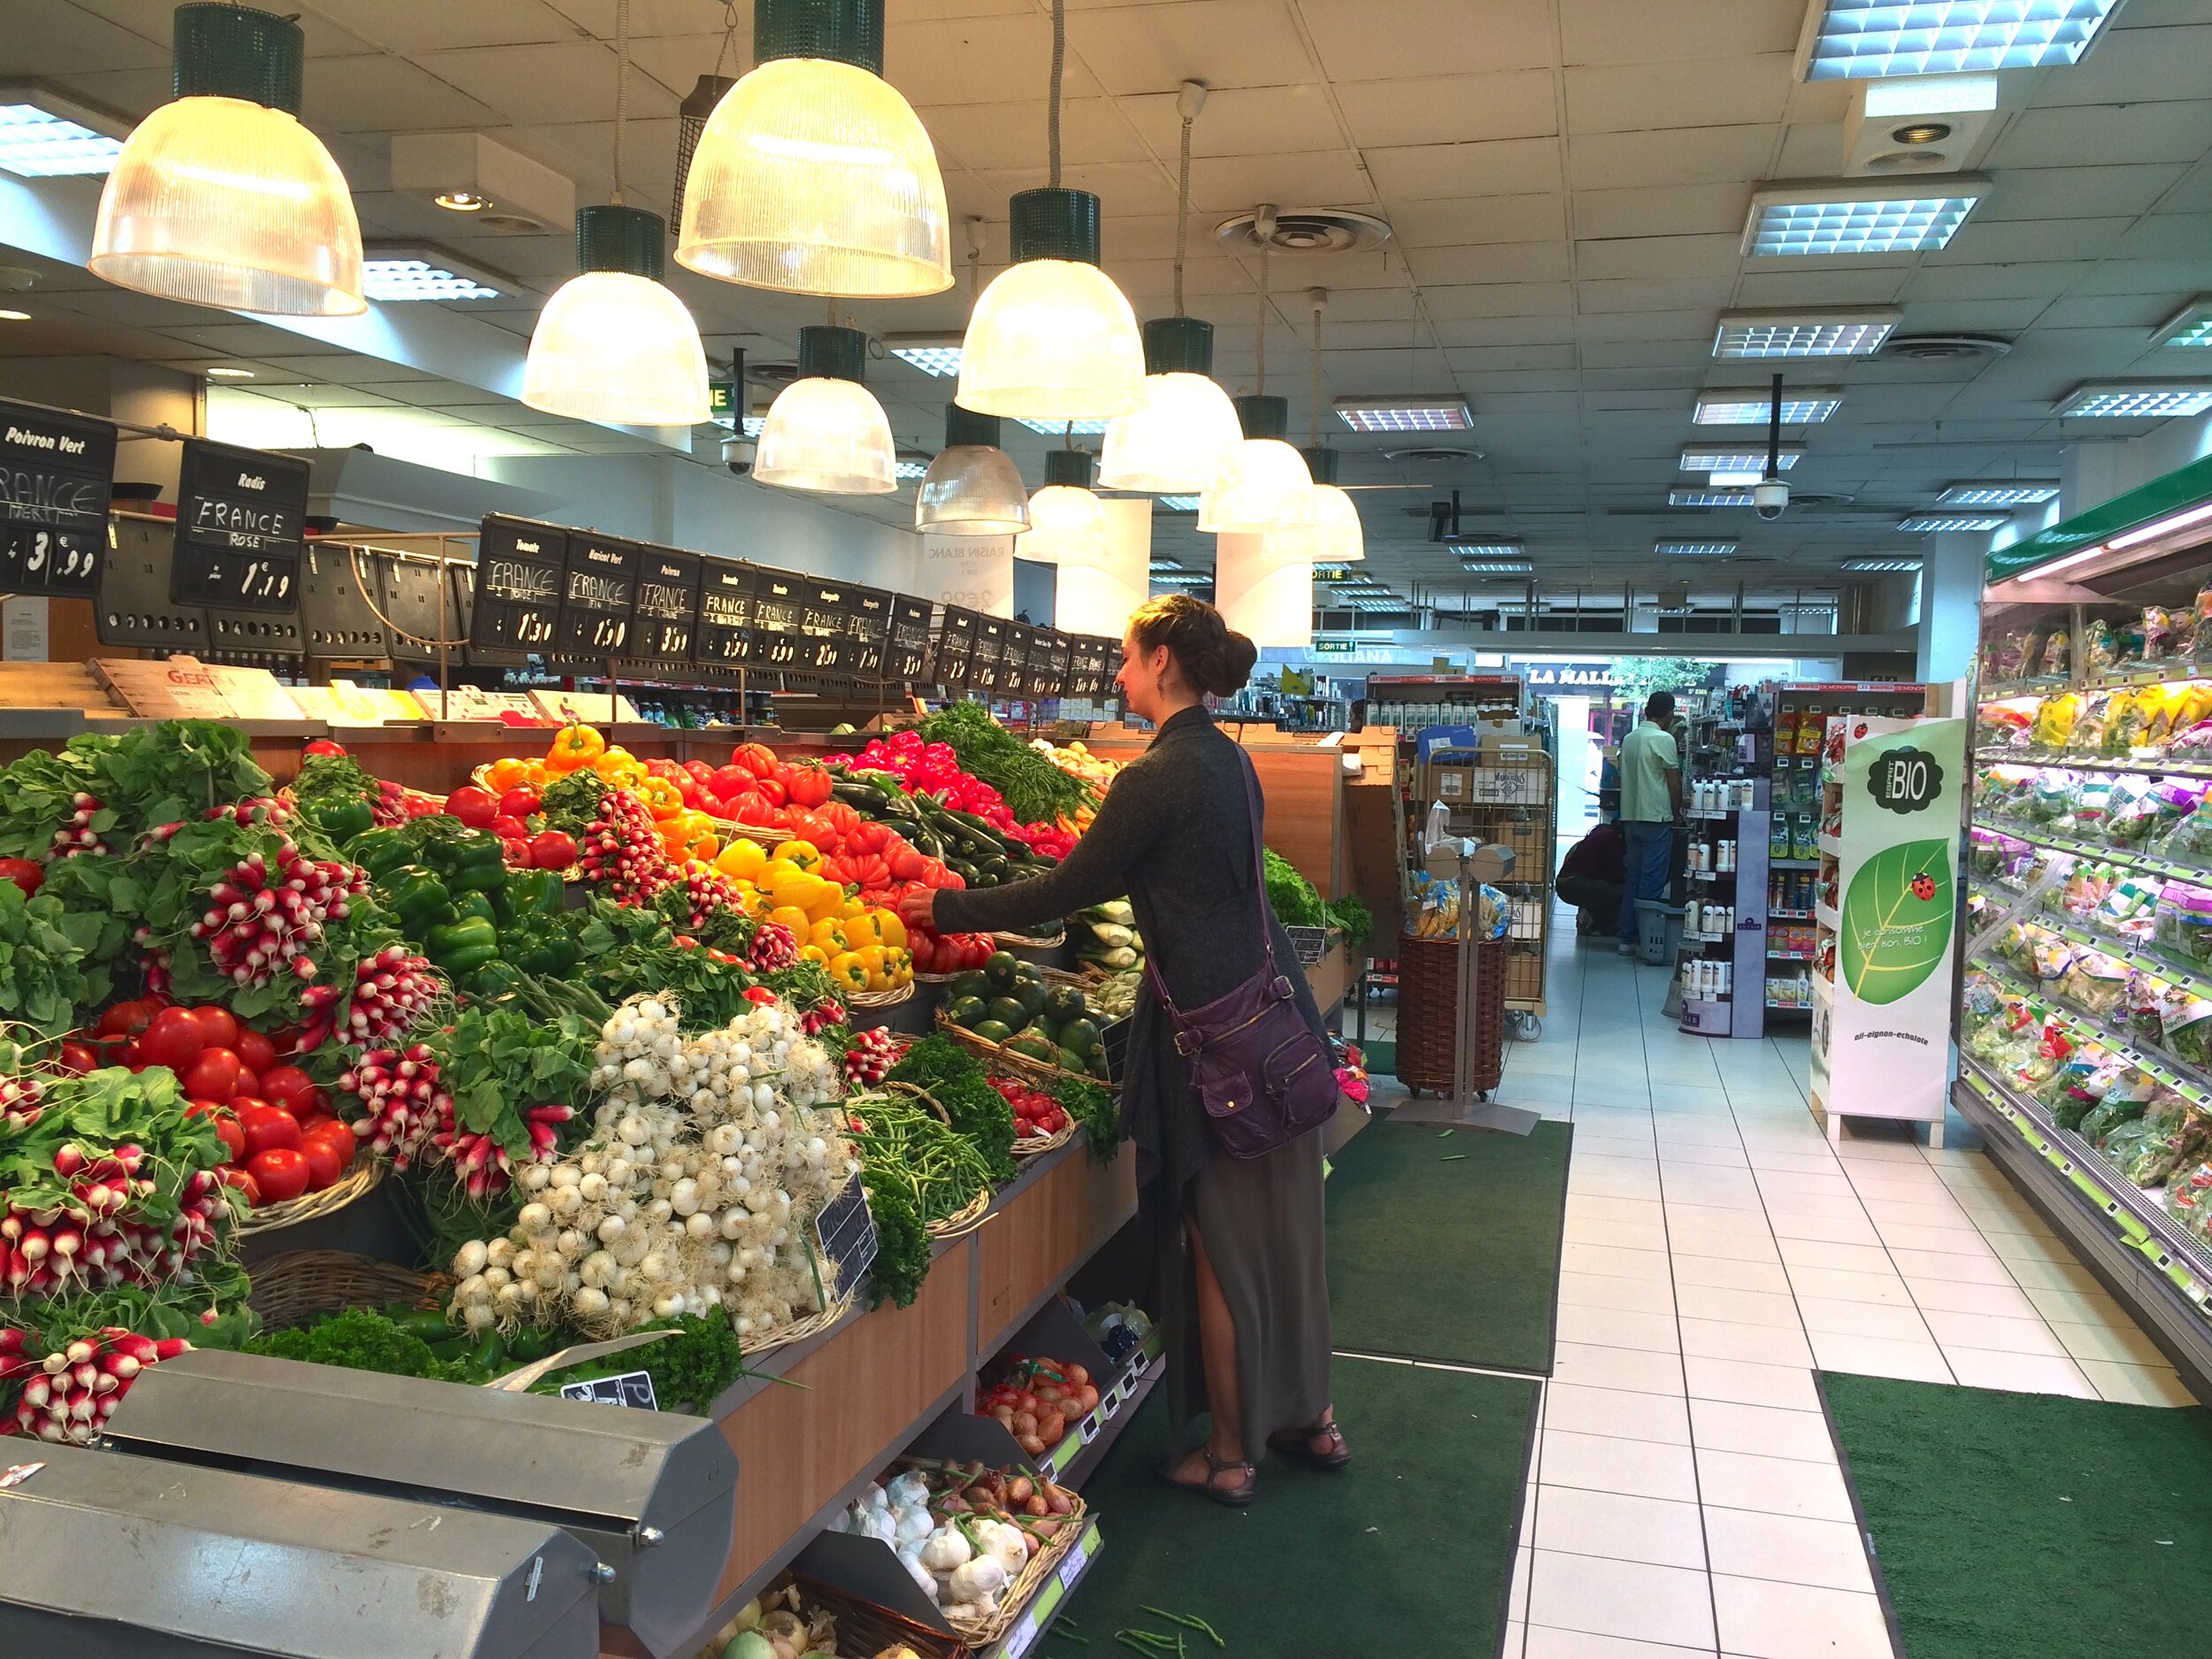
No gloves? Good eye, this photo was taken in France

No gloves? Good eye, this photo was taken in France

Why grocery shopping? If you think about it, it’s something that most human beings do on a weekly basis and we probably take if for granted. But when you’re in a new country or even a new city, these everyday errands can be invaluable in getting a glimpse into the new culture you’re in.

If you’ve moved to Italy for however long, sooner or later you are going to have to stop eating out all the time (you can’t live off margherita pizzas and gelato forever) and start cooking for yourself in your new (most likely fun-sized) kitchen.

If you’re looking for help on where to find specific ingredients in Italy, check out my post on Hard-to-Find Ingredients in Italy.

This post may contain affiliate links. If you make a purchase using these links, Jennyblogs may receive a small commission, at no extra cost to you. This helps to support Jennyblogs. Where possible, links are prioritized to mall businesses and ethically and responsibly made items. For further information see the privacy policy. Grazie!


The grocery stores

Supermarket prices are roughly the same in Italy as you would find in the US. So if you’re trying to create a budget before moving here, keep it the same. If you spend $50 a week on groceries, budget 50euro. Maybe 55 as a safety net for when you uh, buy the wrong products. Like when my friend and I bought laundry softener accidentally instead of detergent? Yeah. Our laundry smelled SO good. Can’t vouch for how clean it actually was, but dang. Fields of lavanda for days.

The four main grocery stores are Coop, Esselunga, Conad, Carrefour, and I prefer grocery shopping at them in that order. There are also some Pam’s in the city center which have fair prices, and Lidl which is the European equivalent (and I believe same owners) of Aldi. Conad and Carrefour tend to be the most expensive, and you will usually find them in the city center and out. If they’re in the center, they’ll probably be on the smaller side. Coop and Esselunga on the other hand, are usually only found outside city centers and tend to be larger, with parking more readily available, usually in the form of underground parking garages.

I believe all four have some kind of loyalty card, Carrefour is the only one I can’t say for sure.

  • Coop, as a cooperativo, you have to pay 25euro to get their card and benefit from exclusive sales, among other “advantages” that may or may not be useful to you.

  • Esselunga has their “Fidaty” card, which is free to get. For every item you buy you acquire points, sometimes on certain products you can get extra points. When you reach 3,000 points you can redeem your points for 27euro off groceries. Otherwise you can save your points and choose something from their prize catalog. (I know someone who saved up their points long enough and got a mini KitchenAid mixer.)

  • Conad has their Insieme card which is similar to Esselunga’s. Free to obtain and you start collecting points which goes towards prizes. I’ve never shopped enough to ever obtain enough points to do anything with at Conad, but since it’s free it doesn’t hurt whether you decide to get it or not.

The rhythm of grocery shopping

For many reasons, grocery shopping in Italy is not just a once-a-week excursion but a multiple-times-a-week lifestyle. Why?

  • Food is very much available seasonally, and when you’re getting the best and ripest of produce, it usually doesn’t last a week before going bad! You’ll find many Italians only buying what they need for a few days, ensuring they always have the freshest stuff on hand.

  • Others, like myself, walk to the grocery store and can only buy as much as can physically be carried. This necessitates shopping more frequently. You could also invest in a “nonna” cart, one of the bags on wheels that many nonne use for their shopping.

  • The elderly generations themselves also use a daily trip to the grocery store as exercise, and may also serve as their socializing for the day. The strict lockdown during coronavirus only allowed 1 member from each household to grocery shop once a week. I really don’t think that many people complied, as there wasn’t any good way to enforce this rule. In one instance, the police finally cited a man after he was caught at the grocery store for the thirteenth time that day. Yes, thirteenth.

Have an exit plan

As you embark to explore the wonders that Esselunga, Conad, Carrefour, or Coop have to offer, there's something you might want to know.  Some grocery stores have entrance and exit gates, and you can only exit if you have a receipt with a barcode.  You could flag down one of the employees near the self-checkout and they will let you out, but after my experience of getting trapped because I didn’t buy anything, (I just wanted to see what they had to offer!) I always made sure to buy at least a snack or drink, even if I was just going to the store to check to see if they had a certain item.  Maybe I’m the only one who scopes out grocery stores. Ah well. You’ve been warned.

Don’t touch the produce

Whether at an open market or the grocery store, the fruit and vegetables are not to be touched with your bare hands! Or you might get your hand slapped or verbally accosted by some nonna. Plastic bags and gloves are provided so you can rifle through for the best peaches without sullying them.

I do sometimes rebel, especially if I only need one or two things from the produce section and don’t want to waste a glove. Then I will be careful to eyeball the produce and only touch the fruit I buy. Hint: If you only need say, 3 apples, and do want to look them over before choosing them, use your empty bag as a makeshift glove to turn over some apples. Then when you’ve chosen your three, take your hand out of the bag and use your bare hand to touch only the three you want.

A lady once came up next to me to get some peaches and apologized as she chose some without a glove. I told her not to worry. In case she hadn’t noticed, I also was glove-less and clearly not about to rebuke her for a sin I was already committing. Two rebels in the store. Camaraderie.

Don’t forget the mercati

Speaking of produce, it’s much more enjoyable to have one or two days a week set aside for getting your fresh produce from an outdoor mercato. The produce is usually the freshest and you can develop relationships with your favorite vendors. Not only is it a much more rewarding experience to buy your produce from someone you know, you’re supporting local farms and hey, they just might start giving you some deals if they like you! Not to mention some of them have recommendations or recipes they’re willing to share!

I used to shop once a week at the Mercato di San Lorenzo when I lived closer to the center, and there was one dear old signore that I would often buy my produce from. He would frequently sneak some surprise pieces in my bag when he thought I wasn’t looking (it’s normal for the vendors to select the produce you want instead of you getting it yourself) and I would have to figure out what to do with them when I got home. That’s how I discovered khaki/persimmons, actually! I’m pretty sure he would always round the price down for me, but then again I’ll never really know because he lumped and weighed everything together, would think a moment, then tell me the price. The receipt only ever gave the total price, but a couple euros for several different kinds of deliciously ripe fruits and veggies didn’t seem a bad deal to me. Even if he was rounding the price up, I was blissfully ignorant and still consider it a great memory.

I also love the Mercato di Sant’Ambrogio. They have some unique stalls, and if you go on the right days you can even find scoby for sale to make your own kombucha or apple cider vinegar with the mother.

How to wait in line - “fare la fila”

Basically, if you’re not breathing down the person’s neck in front of you, you’re doing it wrong. If you’re not doing it right, you will get cut. Waiting in line is all a part of the Italian life. No one likes lines, no one wants to wait, and those who know how to queue in Italy know you might have to be pushy, aggressive, and perfect your evil eye.

You know you’re queueing with Italians and people who live in Italy when:

  1. You can smell what kind of shampoo the person in front of you uses, or lack thereof

  2. When you take a small step backwards you step on someone

  3. The line looks more like a mob than a line

  4. Someone comes to wait in line and stands next to you instead of behind you

  5. That same person shifts ever more forward every time the line moves up

  6. Someone asks if you’re in line, which is really just a lightly veiled threat meaning, “if you don’t keep your spot clearly, I will take your spot”

  7. Someone blatantly cuts the line

  8. When a cutter is called out, they will either act innocently as if they didn’t know or just completely ignore everyone and continue forward anyway. Either way.

  9. Someone genuinely asks where the end of the line is, because you never can tell

In my early days in Italy a lady once asked if I was waiting in line for bread. When I said I was, she then informed me I had best move up or the Italians will cut me. It was kind of her to instruct my green American self. I think? Or it was another manifestation of #6.

Grocery carts

Smaller grocery stores in the center might not have the big metal carts, but they will have the smaller plastic “baskets” on wheels.

At the larger stores you’ll find the metal carts which can be used with a coin deposit. Confession: I’ve only ever used a big cart once, at Lidl, because I had to in order to enter during the coronavirus lockdown. In my scramble to unlock a cart and not lose my place in line, I tried inserting a 20 cent piece. Hint, it didn’t work. However, 50 cent pieces and 1euro pieces do. I prefer to use the smaller rolling baskets as it keeps my shopping realistic. I walk to the grocery store so can only buy as much as I carry.

What to buy where

Over time you will develop your own favorite stores and where you can find certain products or find the best deals. My favorite store is Coop, and yet I often can’t find spicy peppers. No jalapeños, habaneros, nothing. (Italy never labels their peppers. They’re either sweet, spicy, or bell. Sigh.) Every store has their quirks. I also was convinced for years that sour cream hardly exists here. I could only find it at my local Esselunga in the tiny Mexican food section. It’s imported, expensive, and not refrigerated, which doesn’t set well with me. Just the other day, while strolling the refrigerated section at Coop, what did I see? Sour cream. Normal, not sour cream. Aside from these things, there are certain ingredients you just can’t find in any of these grocery stores, or at least if you do, you’ll be paying an arm and a leg. 5+euro for Skippy peanut butter, anyone?

Here are some hints to get you started:

  • Although some stores may have a small end cap or section dedicated to Asian, Mexican, or Arab foods, skip their higher prices and go to the sources themselves.

  • For Asian ingredients around Florence, there are numerous Asian grocers around the city to satisfy all your rice noodle, ramen, soy, rice vinegar, and coconut milk needs. And peanut butter. Random brands, but almost always cheaper.

  • For Mexican ingredients, head to Vivi Market in Florence. Although not an exhaustive source, they have a few shelves of tortillas, chips, sauces/salsas, and beans to get you by. They are also a reliable source of sweet potatoes and random American ingredients, like Reese’s, you may not find anywhere else. The downside to Vivi is their prices, they’re one of the more expensive Asian grocers.

  • For Arab food, head to any of the Arab butchers around the city. This is where you can find cheaper black beans, harissa, dates, peanut butter, and other specialty ingredients if you are familiar with Middle-Eastern/North African cuisine.

  • While Lidl might not have the biggest selection, they definitely have some of the cheapest options. I usually buy cheddar cheese, bretzels, hummus, maple syrup, and other random goodies that you can’t find in a normal Italian grocery store. They also have a little Greek section, so if you have a hankering for maybe not the best baklava, there you go. You’re welcome.

  • When it comes to buying meat, think of it the same way as the produce. The big grocery stores are the most convenient, but if you want the best quality, you might consider visiting your neighborhood butcher. Again, you’re supporting local, and being a regular customer might just get you some deals. Italy is more of a “I do you a favor, you do me a favor” type society, rather than the more American independent ideology.

Grocery bags

Every grocery bag at the grocery store will run you 5-10 cents a piece. They are usually biodegradable, but it’s a good way to save some pennies and the economy by bringing your own bags. I never go anywhere without a few plastic and reusable bags in my purse for when I need to unexpectedly pick up some things while out and about.


There you have it, more information than you probably ever needed to know about grocery shopping in Italy!

Chocolate No-Bake Cookies

Last Updated September 6, 2024

IMG_3299.jpg

Chocolate no-bake cookies are actually known as Chocolate Sand Dune Cookies around the Morris household, because no-bakes is not as fun, ya know? They’re well enough known that probably doesn’t matter, but as I grew up near the famous Sleeping Bear Sand Dunes, you will understand why, many years ago, my older brother decided to call these mounds of cookies “sand dunes”. Or rather “chocolate sand dunes” because these cookies are not the color of sand. The name stuck, and here we are today.

Chocolate sand dune cookies a.k.a. chocolate no-bake cookies, no matter what you call them, are delicious and just a little too easy to make.

They’re also made without any flour, so if you use certified GF oats, they are easily gluten-free. These cookies made a come back during the quarantine and the flour shortage! They can also be made with a milk-alternative and butter-alternative if you wish to have dairy-free cookies. They’re naturally egg-free!

What follows is the classic recipe I grew up making with my mom. Little did I know until I was a teenager and making no-bake cookies with a friend that the actual “original” recipe includes peanut butter. What?! You don’t put peanut butter into chocolate sand dune cookies! Actually you can, and it’s delicious. Peanut butter and chocolate together, hello. Of course it’s delicious.

However, this is not to disregard my mom’s classic recipe. While she loves chocolate and peanut butter, she doesn’t prefer them together. So she omitted the peanut butter and never looked back from making this pure chocolatey, fudgy version of no-bake cookies. Some of my family members still prefer them without the peanut butter, others prefer with. So if you or someone you know doesn’t like peanut butter with chocolate, or has a nut allergy, know you can omit the peanut butter and have an equally delicious cookie.

This post may contain affiliate links. If you make a purchase using these links, Jennyblogs may receive a small commission, at no extra cost to you. This helps to support Jennyblogs. For further information see the privacy policy. Grazie!

A recipe from my mama


Chocolate Sand Dune Cookies

Makes about 36 cookies

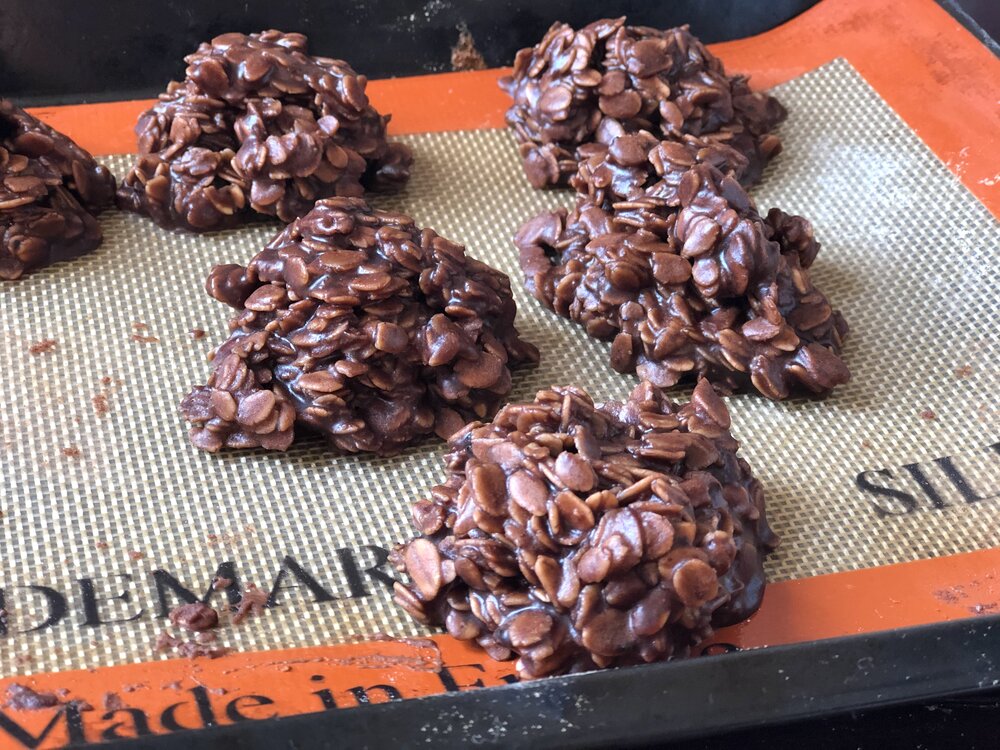
The pan was full at one point…

The pan was full at one point…

Ingredients:

  • 4 cups / 800g sugar

  • 1/2 cup / 50g cocoa powder

  • 1 cup / 237g milk

  • dash of salt

  • 1 cup / 225g butter (2 sticks)

  • 1/4-1 cup / 65g - 260g peanut butter, optional

  • 2 tsp / 10g vanilla extract

  • 5 1/2 cups / 495g quick oats

Directions

  1. In a large pot, stir together sugar, cocoa, milk, and salt; bring to a boil over medium heat. Boil for 2 minutes then remove from heat.

  2. Add butter, peanut butter, and vanilla; stir well.

  3. Add the oats and stir until all oats are coated. Let mixture sit for 8-10 minutes to thicken, stirring occasionally to check consistency.

  4. When mixture has thickened enough, spoon mounds onto wax paper or a clean counter. Allow to set and enjoy!

Jenny’s Notes:

  • Brown sugar can be used instead of white sugar, if you prefer.

  • I grew up baking with salted butter and this recipe reflects that with the dash of salt. Here in Europe and in most bakeries unsalted butter is used, so if that’s what you are using, simply add two dashes of salt if you wish!

  • You may notice the variance in the peanut butter measurement; use up to 1 cup for peanut butter lovers, or as little as 1/4 cup for just a hint.

  • Regular or crunchy peanut butter can be used, and it’s also fine to use natural peanut butter. People often don’t recommend using natural in recipes, but as I prefer not to buy the kinds with added sugars and hydrogenated oils, I usually use it anyway and have hardly met a recipe where you can’t successfully use the natural kind.

  • Quick or instant oats are my preferred kind of oats to use for chocolate sand dunes, but as you will notice from my photos that regular or rolled oats can also be used. Rolled oats give more of a bite to your cookies, and you will probably need to let the mixture sit a bit longer before spooning out the cookies so the oats have time to thicken up the mixture. If after 10-15 minutes your mixture still isn’t thickening up satisfactorily, you may need to add additional oats.

  • The above recipe makes about 36 cookies, great for sharing, large families, and parties. It can also easily be halved to make about 18 cookies, or even quartered to make 9. The photos on this post are from the 2 month lockdown in Italy when I decided that a quarter batch should suffice for 2 people who can’t leave the house.

Chocolate No-Bake Cookies
Yield 36
Author
Prep time
20 Min
Cook time
5 Min
Total time
25 Min

Chocolate No-Bake Cookies

Chocolate No-bakes are decadent mounds of chocolatey oat cookies made without flour, eggs, or an oven, which makes them ideal for summer baking and people with gluten or egg allergies.
Cook modePrevent screen from turning off

Ingredients

Instructions

  1. In a large pot, stir together sugar, cocoa, milk, and salt; bring to a boil over medium heat. Boil for 2 minutes then remove from heat.
  2. Add butter, peanut butter, and vanilla; stir well.
  3. Add the oats and stir until all oats are coated. Let mixture sit for 8-10 minutes to thicken, stirring occasionally to check consistency.
  4. When mixture has thickened enough, spoon mounds onto wax paper or a clean counter. Allow to set and enjoy!

Notes

Brown sugar can be used instead of white sugar, if you prefer.I grew up baking with salted butter and this recipe reflects that with the dash of salt. Here in Europe and in most bakeries unsalted butter is used, so if that’s what you are using, simply add two dashes of salt if you wish! You may notice the variance in the peanut butter measurement; use up to 1 cup for peanut butter lovers, or as little as 1/4 cup for just a hint. Regular or crunchy peanut butter can be used, and it’s also fine to use natural peanut butter. People often don’t recommend using natural in recipes, but as I prefer not to buy the kinds with added sugars and hydrogenated oils, I usually use it anyway and have hardly met a recipe where you can’t successfully use the natural kind. Quick or instant oats are my preferred kind of oats to use for chocolate sand dunes, but as you will notice from my photos that regular or rolled oats can also be used. Rolled oats give more of a bite to your cookies, and you will probably need to let the mixture sit a bit longer before spooning out the cookies so the oats have time to thicken up the mixture. If after 10-15 minutes your mixture still isn’t thickening up satisfactorily, you may need to add additional oats. The above recipe makes about 36 cookies, great for sharing, large families, and parties. It can also easily be halved to make about 18 cookies, or even quartered to make 9. The photos on this post are from the 2 month lockdown in Italy when I decided that a quarter batch should suffice for 2 people who can’t leave the house.

Nutrition Facts

Calories

192.48

Fat

9.10 g

Sat. Fat

4.01 g

Carbs

26.75 g

Fiber

0.92 g

Net carbs

25.83 g

Sugar

22.75 g

Protein

2.47 g

Sodium

89.28 mg

Cholesterol

13.96 mg

Nutritional information is approximate. Based on 1 cookie if using the full cup of peanut butter in the recipe.

no-bake cookies, chocolate, oats, no bake dessert, summer dessert, fudgy chocolate cookies, oat cookies, peanut butter
dessert
American
Did you make this recipe?
Tag @jennyblogsandbakes on instagram and hashtag it #jennyblogs
IMG_3302.jpg

White Bean Carrot Burgers

Last Updated September 4, 2024

Summer is almost upon us, and with the warm weather comes all the best summer foods. In America that usually means all the cookouts, potato salads, watermelon, lemonade, corn on the cob…

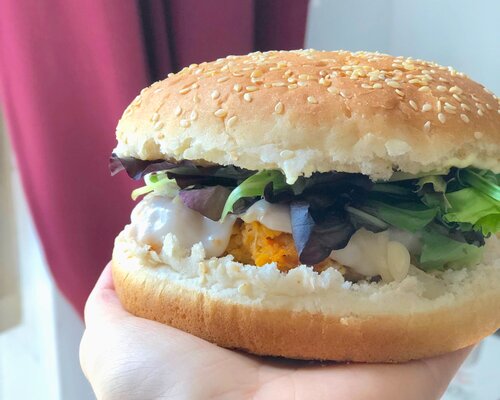
White Bean Burger with spring greens, pickled onions, and melted and caramelized goat cheese

White Bean Burger with spring greens, pickled onions, and melted and caramelized goat cheese

You know what the ironic part is? Growing up, or really until I moved to Italy, I wouldn’t have considered the classic American barbecue foods as personal favorites. At all. I could easily pass on hot dogs, hamburgers, potato salads, corn on the cob. I do love watermelon and lemonade, though! It wasn’t until being in Italy for awhile that I started to crave these American foods, especially in the summer. Nostalgia for the homeland. And that’s saying something, coming from the person that, as long as I wasn’t offending a host, would make myself a hamburger, but without the burger. Yes yes, I am aware that I’m weird. I love hamburger condiments!

Veggie burgers!

I’ve always loved veggie burgers. Give me all the fake meat, vegetable, or bean burgers! And condiments. Oh yes. (For my meat-loving friends, you would be proud to know that yesterday for the first time in my life, I ordered a non-vegetarian burger from a restaurant. I split it with my husband, but still. I enjoyed it, and more importantly, it was my idea!)

There are so many good veggie burgers out there, and I love how everyone and every restaurant seems to have their own take on them. So many different vegetables to choose from, and different ways to prepare them.

I recently had a hankering for some black bean burgers. Alas, I had no black beans, only white beans, and this was during the lockdown in Italy, so I couldn’t just walk to the store for some beans on a whim. White bean burgers it would have to be. I didn’t have a white bean burger recipe handy, but I tried the one i’m sharing with you today and found it very tasty!

It’s very simple, mostly white beans, carrots, onion, bread crumbs, and an egg to hold it together. It’s the perfect vessel for all your favorite condiments, or eaten as is, without a bun.

My one recommendation? Make these pickled onions to go with the White Bean Burgers! Did you know you can assemble pickled onions in less than 5 minutes with ingredients you most likely already have on hand, and you can use them after they’ve sat for only 30 minutes?! Seriously, too simple, you will never hesitate to add pickled veggies to your dishes again!

Pickled Onion

  • 1 red onion, thinly sliced

  • 2 Tbsp / 28g red wine vinegar

  • 2 Tbsp / 28g water

  • 1/2 tsp salt

  • 1/4 tsp sugar

  1. Mix all ingredients briefly, then let sit until needed, preferably 30+ minutes, swirling the onions in the vinegar mixture occasionally. Likewise, you can also cover and keep in the fridge for up to a week.

  2. This recipe is easily doubled, tripled, etc. for your needs. You can also use other types of onions, but red onions are the prettiest in my opinion!

That’s my one recommendation. Serve these burgers with pickled onions. If I were to give you more than one, I might suggest avocado, a fried egg, some sprouts, goat cheese…

This post may contain affiliate links. If you make a purchase using these links, Jennyblogs may receive a small commission, at no extra cost to you. This helps to support Jennyblogs. For further information see the privacy policy. Grazie!

Recipe adapted from Smitten Kitchen


White Bean Burgers

Serves 2-4

IMG_3356.jpg

Ingredients:

  • olive oil

  • 1 small onion, diced

  • 2 tsp / 10g tomato paste

  • 3/4 tsp salt

  • dash black pepper

  • 1/2 cup grated carrot, about 1 medium

  • 2 tsp / 10g apple cider vinegar

  • 1/4 cup / 25g breadcrumbs

  • 1 15oz can / 425g white beans such as cannellini, navy, etc., drained

  • 1 egg

  • burger buns, condiments, as desired

Directions:

IMG_3360.jpg
  1. Add a bit of olive oil to a large fry pan over low heat. Add the onion and cook until softened and starting to turn golden, about 8-10 minutes.

  2. Add tomato paste, salt, pepper, and carrots, stirring frequently, until carrots soften and start to turn golden, about another 8-10 minutes.

  3. Add vinegar and stir, using it to deglaze the pan and get off any bits stuck to the bottom. Once the vinegar is evaporated, turn off heat and scrape mixture into a medium bowl.

  4. Add breadcrumbs and white beans, mixing well and smashing the beans. Smash well or leave a bit chunky, as you wish. Taste and add more salt and pepper, as desired.

  5. Add the egg and mix well. The mixture should be soft but able to make a patty, but not soupy or crumbly. If the mixture seems too wet, add another 2 Tbsp or so of breadcrumbs and let mixture sit for a few minutes to allow the breadcrumbs to absorb some of the moisture.

  6. Heat 1-2 Tbsp olive in a large fry pan over medium heat. While the pan is heating up, shape up the bean mixture into about 4 medium patties. Fry however many patties can comfortably fit into the pan at one time, about 3-4 minutes on each side or until golden brown and firmed up.

  7. Serve immediately with buns and condiments.

Jenny’s Notes:

  • The bean mixture can be made a day or two in advance and stored in the fridge until ready to fry. The burgers can also be fried and frozen for quick meals.

  • To make these burgers vegan, you can try using a chia or flax egg instead of the regular egg. I haven’t personally tried this, but in theory it should work! Let me know if you do.

White Bean Carrot Burgers
Yield 2-4
Author
Prep time
10 Min
Cook time
30 Min
Total time
40 Min

White Bean Carrot Burgers

Easy to whip up white bean burgers with carrot, they pair perfectly with your favorite buns and condiments for a healthier cook out!
Cook modePrevent screen from turning off

Ingredients

Instructions

  1. Add a bit of olive oil to a large fry pan over low heat. Add the onion and cook until softened and starting to turn golden, about 8-10 minutes.
  2. Add tomato paste, salt, pepper, and carrots, stirring frequently, until carrots soften and start to turn golden, about another 8-10 minutes.
  3. Add vinegar and stir, using it to deglaze the pan and get off any bits stuck to the bottom. Once the vinegar is evaporated, turn off heat and scrape mixture into a medium bowl.
  4. Add breadcrumbs and white beans, mixing well and smashing the beans. Smash well or leave a bit chunky, as you wish. Taste and add more salt and pepper, as desired.
  5. Add the egg and mix well. The mixture should be soft but able to make a patty, but not soupy or crumbly. If the mixture seems too wet, add another 2 Tbsp or so of breadcrumbs and let mixture sit for a few minutes to allow the breadcrumbs to absorb some of the moisture.
  6. Heat 1-2 Tbsp olive in a large fry pan over medium heat. While the pan is heating up, shape up the bean mixture into about 4 medium patties. Fry however many patties can comfortably fit into the pan at one time, about 3-4 minutes on each side or until golden brown and firmed up.
  7. Serve immediately with buns and condiments.

Notes

  • The bean mixture can be made a day or two in advance and stored in the fridge until ready to fry. The burgers can also be fried and frozen for quick meals.
  • To make these burgers vegan, you can try using a chia or flax egg instead of the regular egg.

Nutrition Facts

Calories

469.92

Fat

10.68 g

Sat. Fat

2.08 g

Carbs

69.20 g

Fiber

15.37 g

Net carbs

53.83 g

Sugar

4.95 g

Protein

26.37 g

Sodium

1035.03 mg

Cholesterol

93.00 mg

Nutritional information is approximate. Based on 1 veggie burger if you make two larger patties, no bun or condiments.

vegetarian, veggie burger, white beans, white bean burger, healthy burgers, pickled onions
Vegetarian, sandwiches
American
Did you make this recipe?
Tag @jennyblogsandbakes on instagram and hashtag it #jennyblogs

Copycat Homemade Lipton Onion Dip

Last Updated September 4, 2024

What if I told you that there is a way to enjoy Onion Dip but with less guilt? No preservatives, corn syrup, caramel color, and other ingredients you’re not quite sure what they are?

Because there IS a way! And it’s very simple. Not that you get much simpler than mixing sour cream with a Lipton onion packet, but it’s pretty darn close.

For this recipe I use yogurt, as I do even if I mix a Lipton packet, because yogurt is actually good for you, sour cream is usually more found on diet naughty lists.

I first made this during lockdown, and while I couldn’t find beef broth granules, just “classic” powdered broth, it came out satisfactorily close to the real thing. As I was explaining on the Healthier Lipton Onion Dip post, I had inherited two Lipton onion mixes from a friend who moved away from Florence. My husband had never had such a thing before and requested it again. When he requested it a third time, I had to break it to him gently…”honey, there were only two packets, and I don’t think we can find Lipton around Florence.”

Since people requesting a specific food/dessert/recipe from me to make is like a love language for me, I was not about to let a request go unfulfilled. So I began a hunt for the necessary ingredients and a recipe to go off of that doesn’t just make bulk powdered onion mix (there are many of those but I don’t make Onion dip all THAT often) but just a recipe for the standard 16oz/two cups of dip.

Thanks to Daring Gourmet for providing just that! Recipe with a few of my usual tweaks below.

This post may contain affiliate links. If you make a purchase using these links, Jennyblogs may receive a small commission, at no extra cost to you. This helps to support Jennyblogs. For further information see the privacy policy. Grazie!


Copycat Lipton Onion Dip

Makes about 2 cups of dip

Ingredients:

  • 2-4 tsp beef broth granules

  • 2 Tbsp dried minced onions

  • 1 tsp onion powder

  • 1/4 tsp pepper

  • 1/8 tsp paprika

  • 16oz / 454g regular or Greek plain yogurt

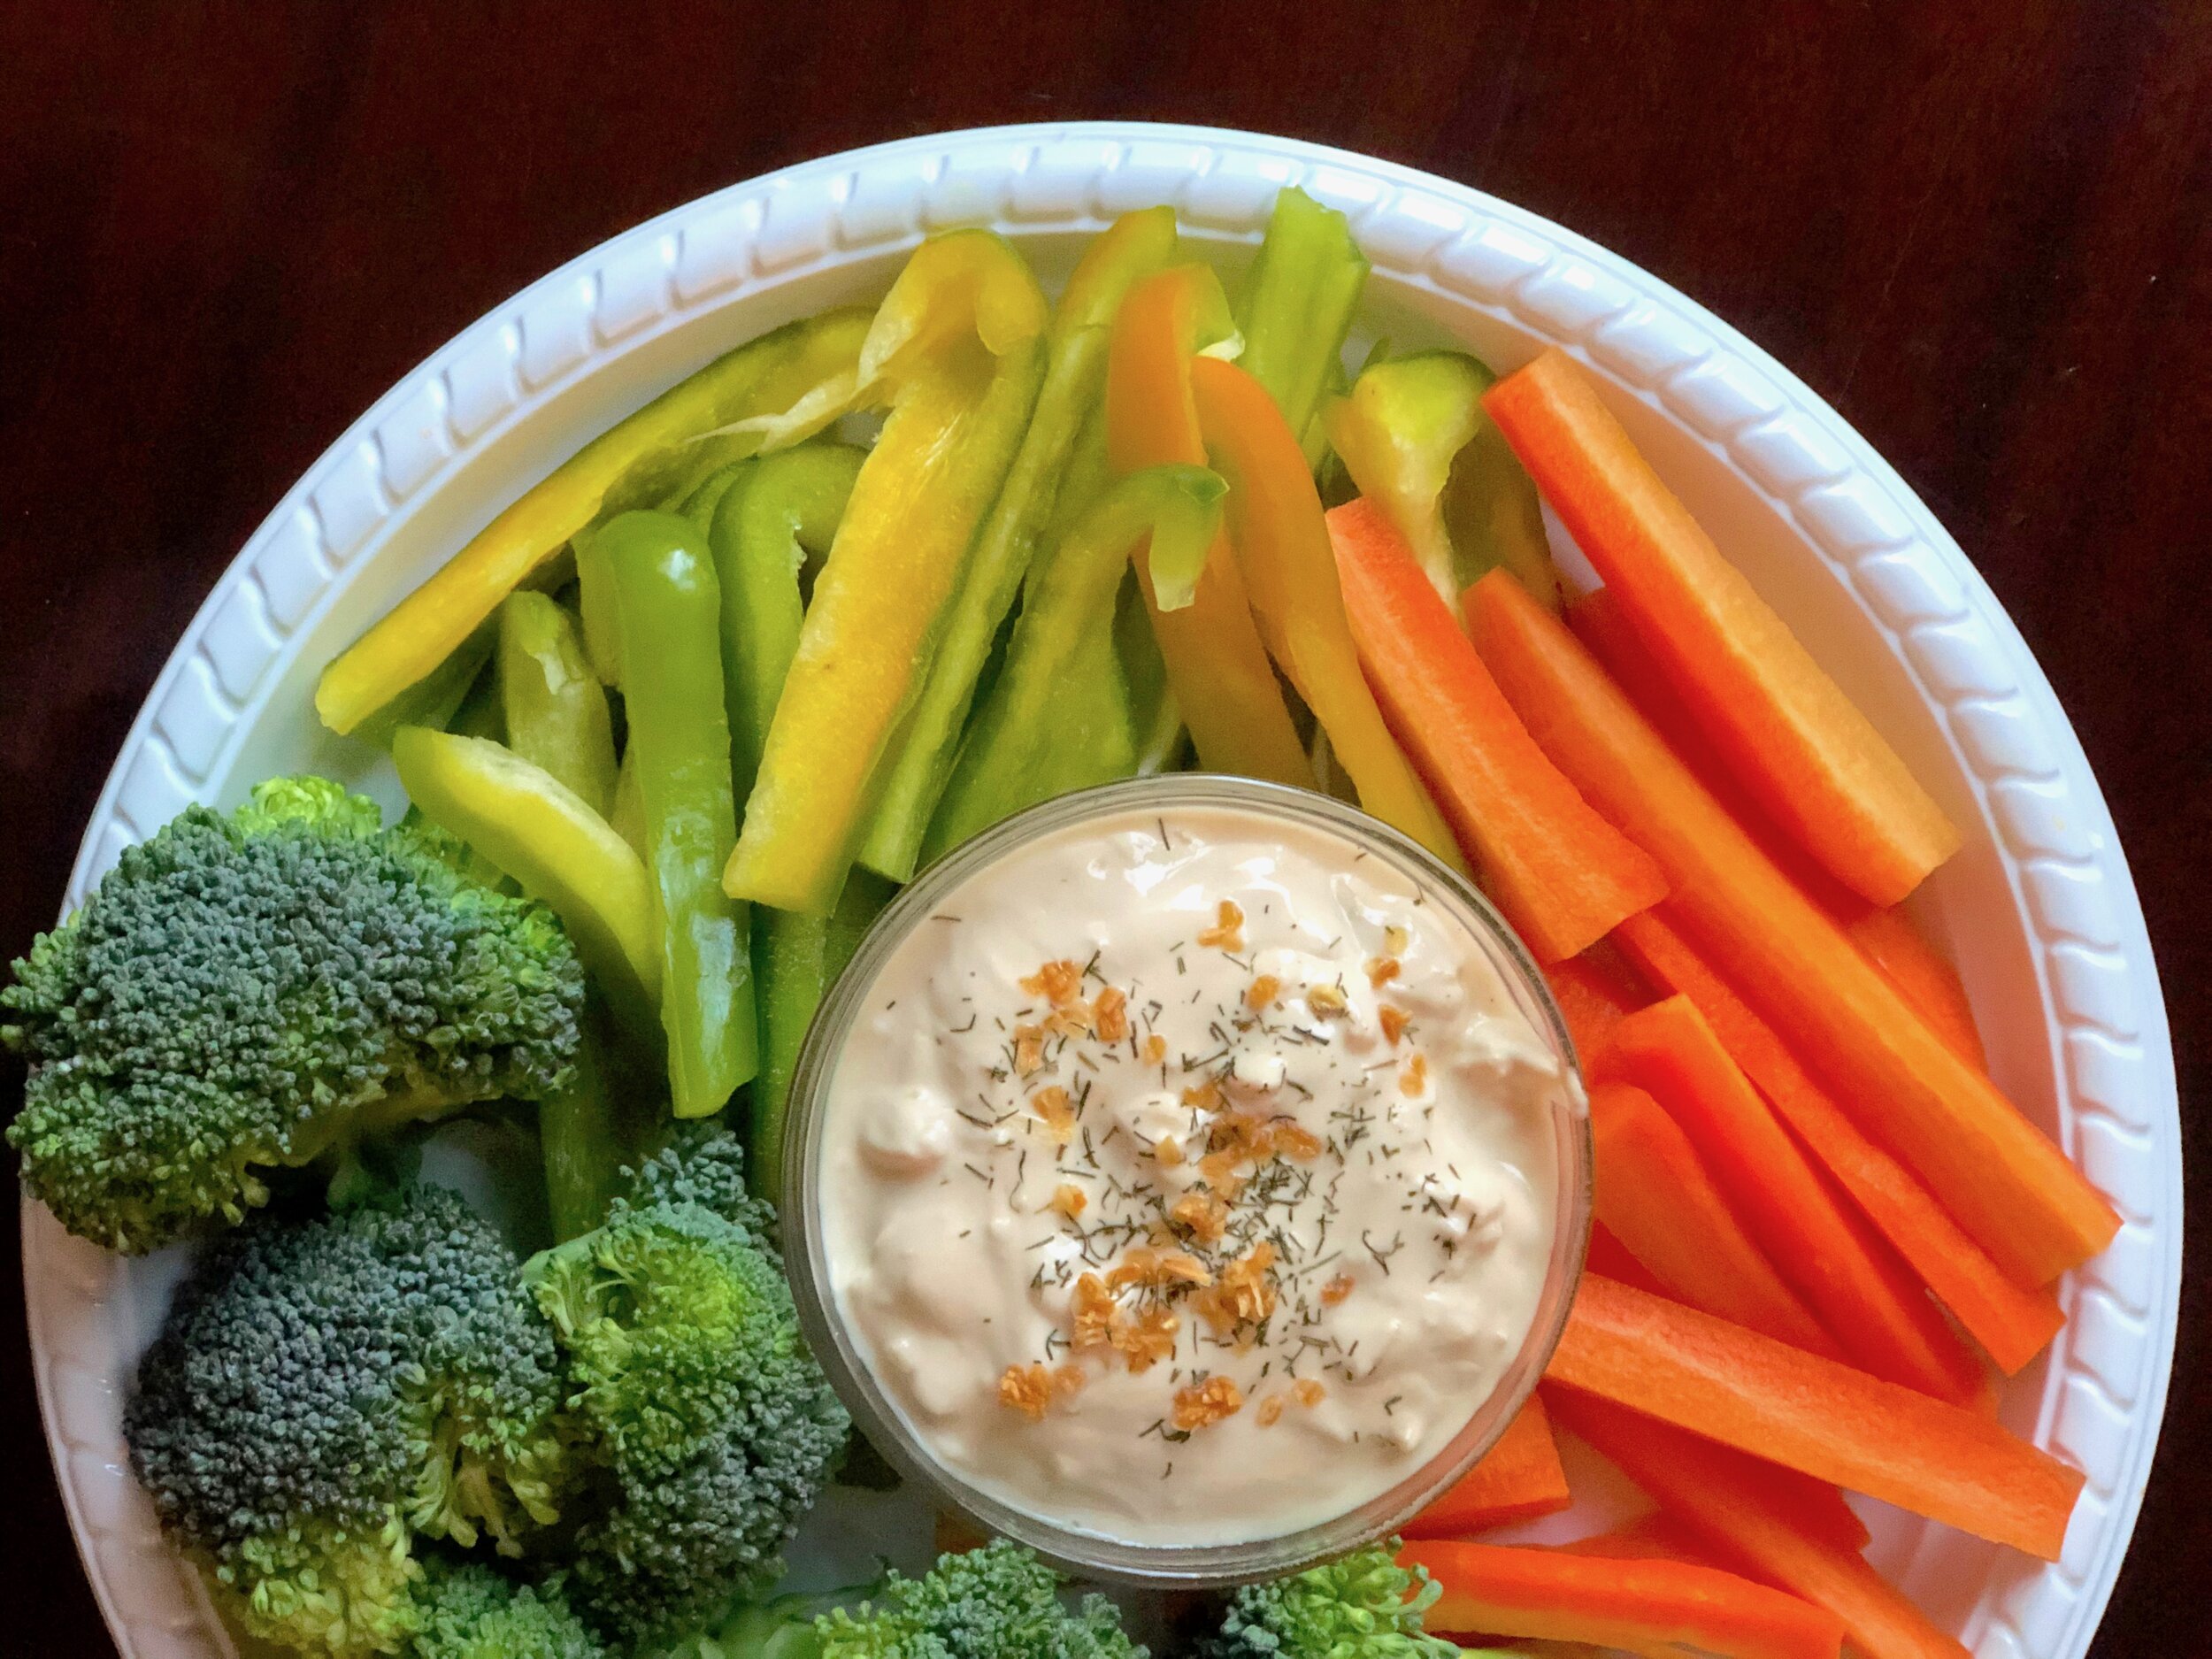
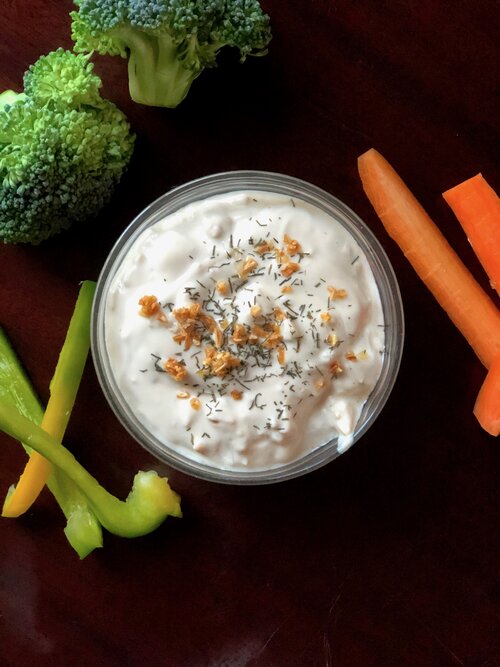
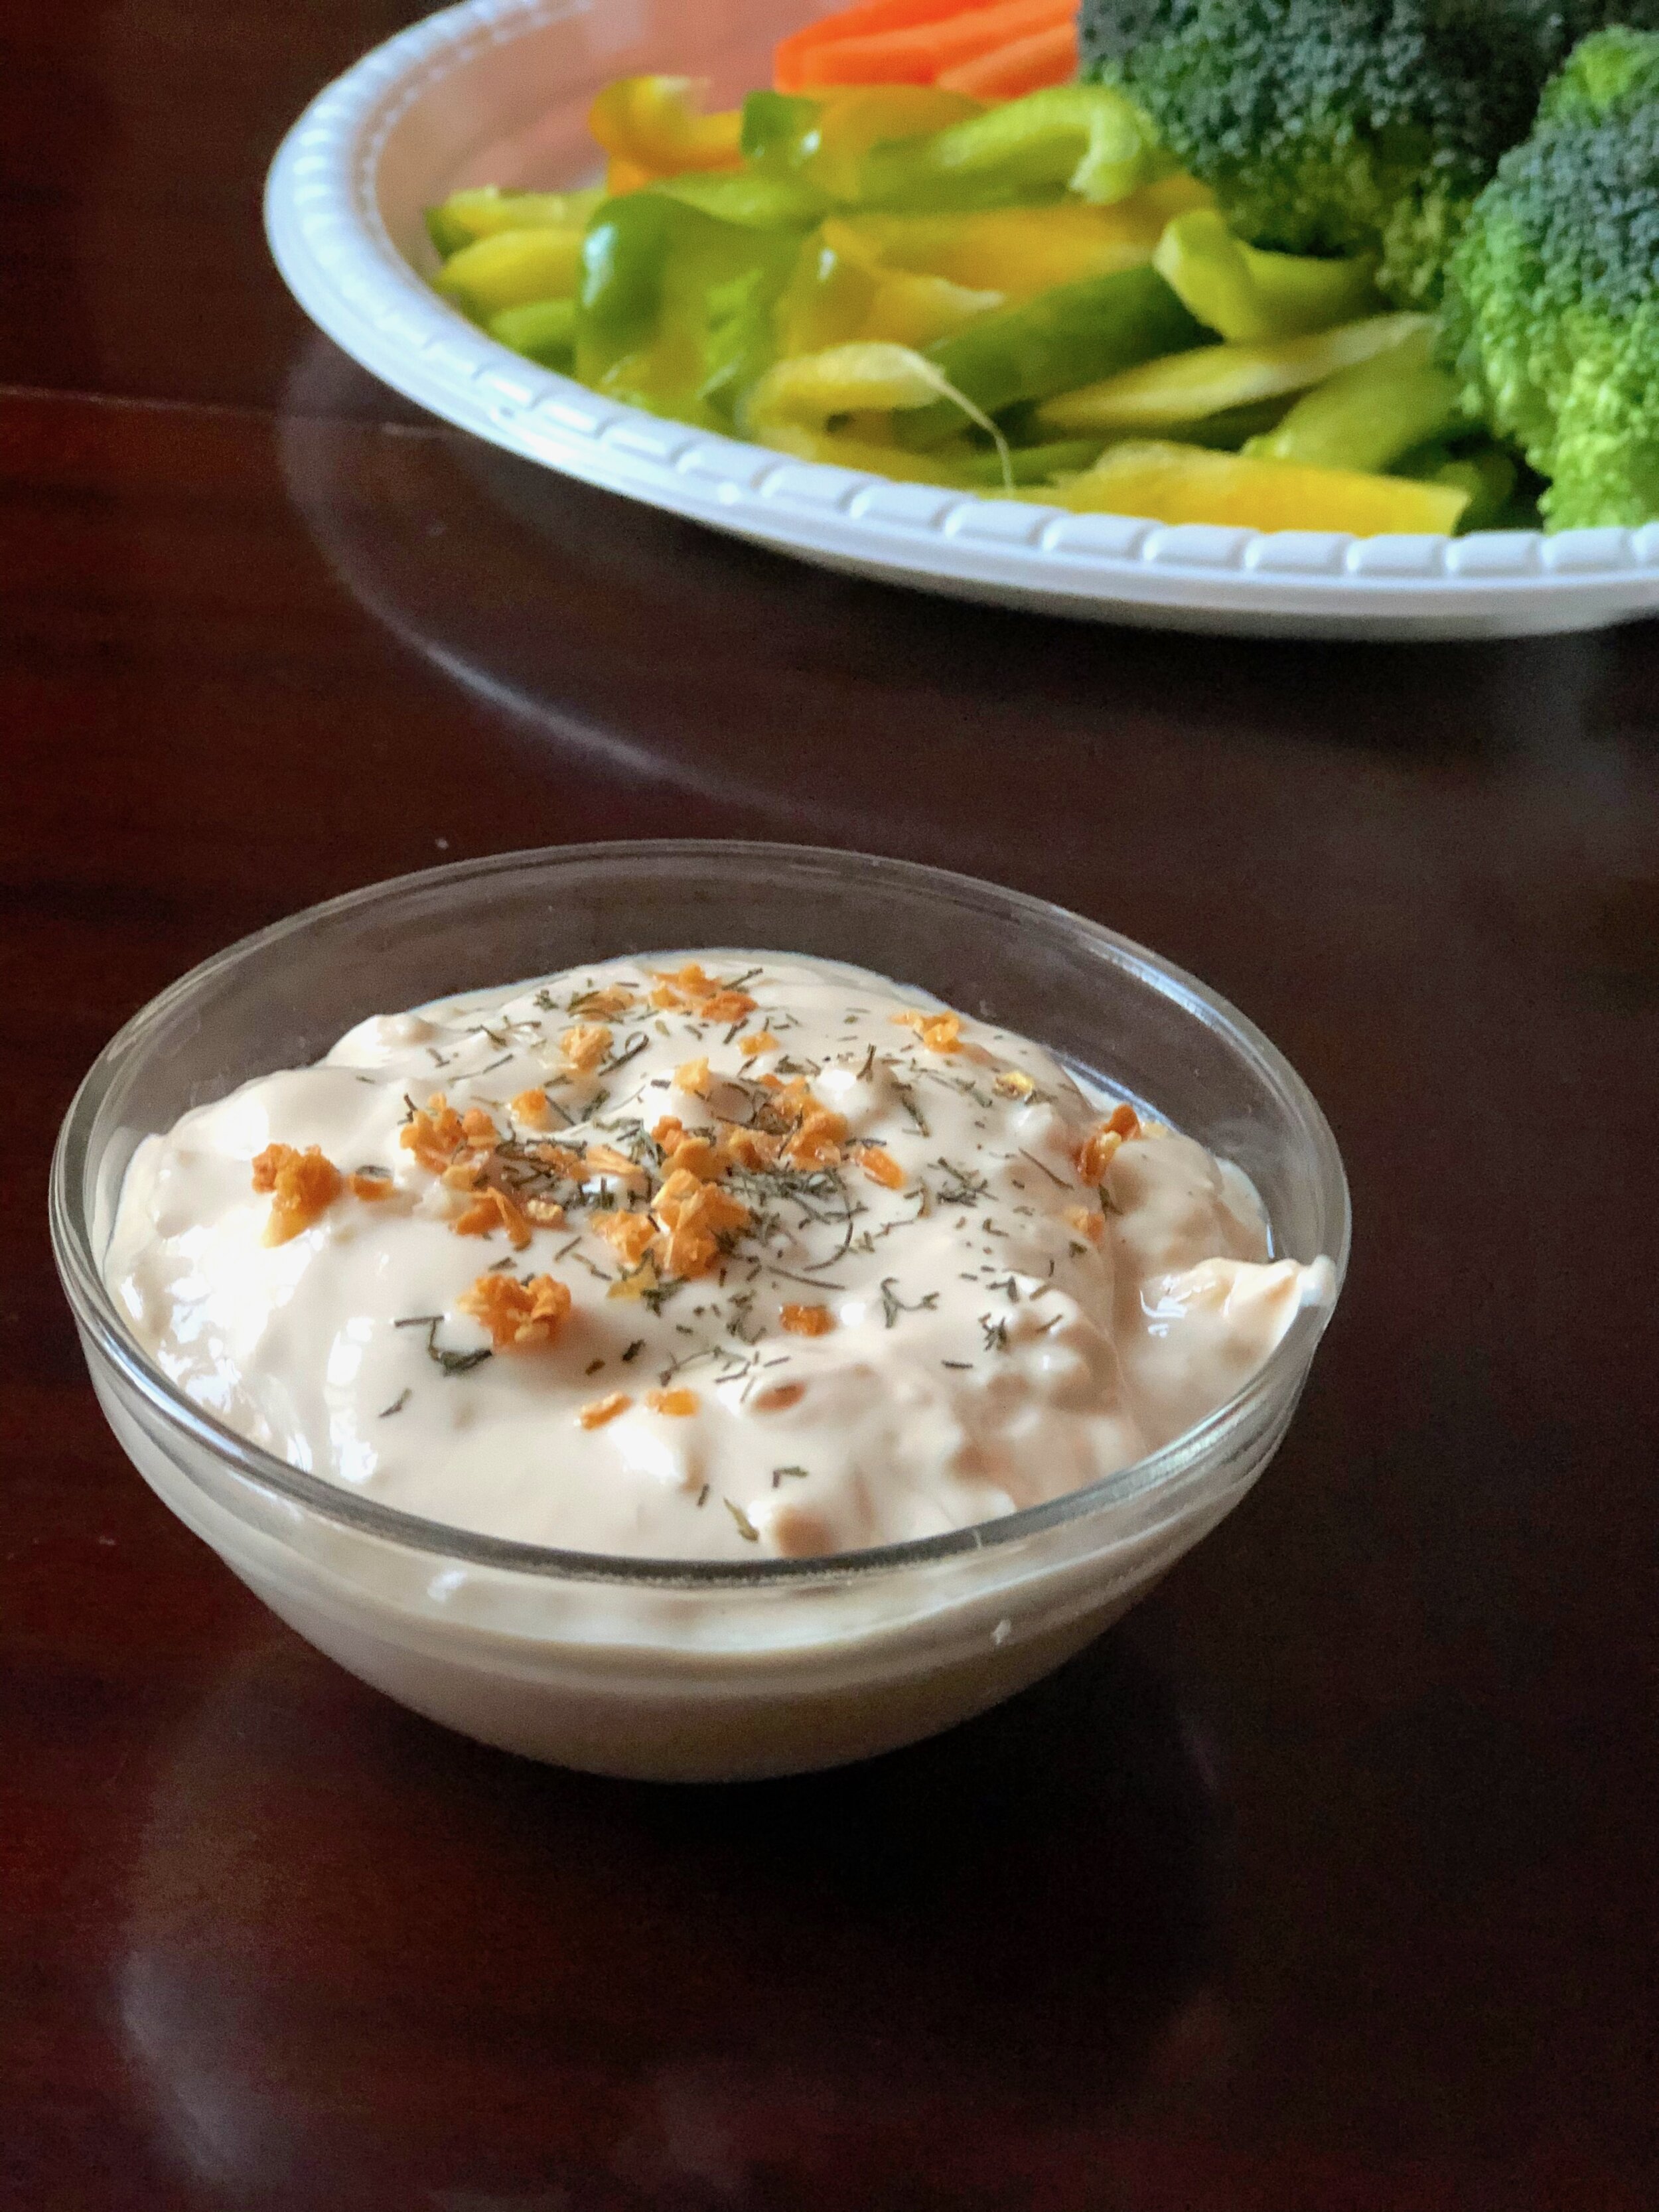
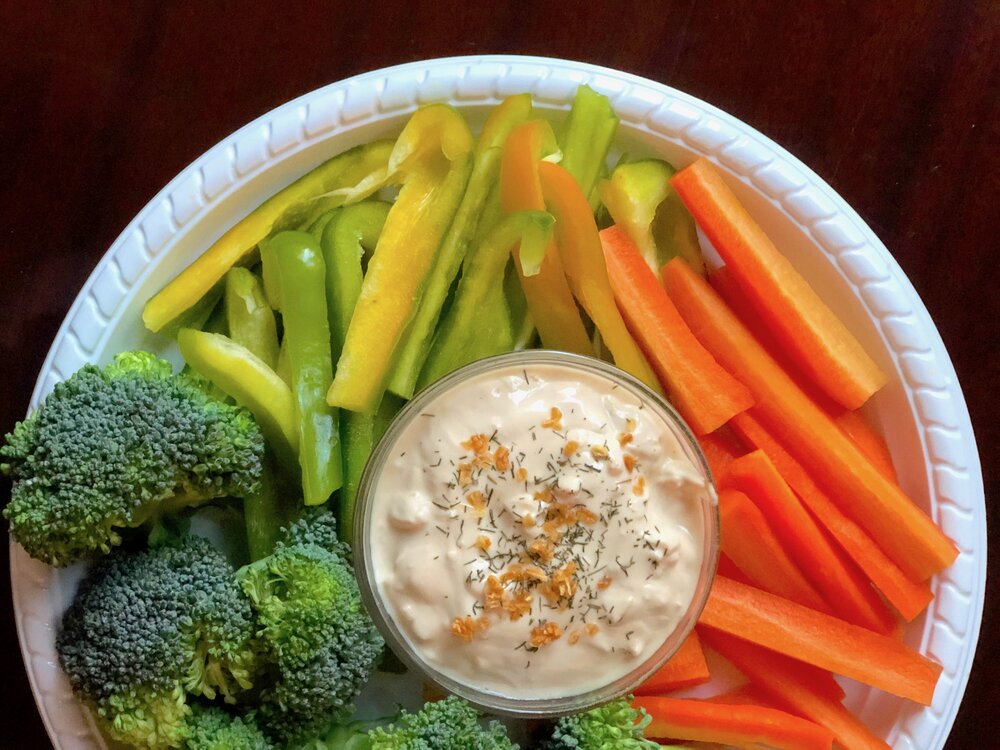
  • fresh or dried dill, more dried minced onions, for topping, optional

  • washed sliced veggies, potato chips, etc, for dipping

Directions:

  1. In a medium bowl, combine 2 tsp of broth granules with the rest of the spices.

  2. Stir in the yogurt and mix well. Taste; if you desire the dip to be saltier, add another teaspoon of broth granules and stir. Taste again, adding the last teaspoon of broth, if desired. Refrigerate for about two hours before serving.

  3. Top with dill and more onions, if desired, and serve with veggies, potato chips, pita, or whatever dippers you like!

Jenny’s Notes:

  • While beef broth is probably closest to the real taste, I have never found beef broth granules here in Italy and get away with using the “classic” broth flavor or even vegetable broth granules. It still tastes delicious! Check labels for MSG, it often gets sneaked into these types of things.

  • If using low-sodium broth granules you will be better able to control the sodium, and can even add a bit more broth for more flavor without the dip becoming too salty.

  • The refrigeration is not strictly necessary, but it gives some time for the flavors to meld and the onions to rehydrate a bit. If you simply can’t wait that long to dig in or need it ASAP for a party, go ahead and use it straight away.

  • 1/8 tsp celery seed, and 1/4 tsp dried parsley can also be added. I don’t usually add them just because I don’t have celery seed on hand here and don’t personally think dried parsley adds any kind of flavor value to dishes. It does add a touch of green, though!

Copycat Lipton Onion Dip
Yield 4
Author
Prep time
10 Min
Total time
10 Min

Copycat Lipton Onion Dip

Classic Lipton Onion Dip made from scratch, creating a delicious and nutritious snack to be served with veggies, potato chips, or your favorite dippers.
Cook modePrevent screen from turning off

Ingredients

Instructions

  1. In a medium bowl, combine 2 tsp of broth granules with the rest of the spices.
  2. Stir in the yogurt and mix well. Taste; if you desire the dip to be saltier, add another teaspoon of broth granules and stir. Taste again, adding the last teaspoon of broth, if desired. Refrigerate for about two hours before serving.
  3. Top with dill and more onions, if desired, and serve with veggies, potato chips, pita, or whatever dippers you like!

Notes

  • While beef broth is probably closest to the real taste, I have never found beef broth granules here in Italy and get away with using the “classic” broth flavor or even vegetable broth granules. It still tastes delicious! Check labels for MSG, it often gets sneaked into these types of things.
  • If using low-sodium broth granules you will be better able to control the sodium, and can even add a bit more broth for more flavor without the dip becoming too salty.
  • The refrigeration is not strictly necessary, but it gives some time for the flavors to meld and the onions to rehydrate a bit. If you simply can’t wait that long to dig in or need it ASAP for a party, go ahead and use it straight away.
  • 1/8 tsp celery seed, and 1/4 tsp dried parsley can also be added. I don’t usually add them just because I don’t have celery seed on hand here and don’t personally think dried parsley adds any kind of flavor value to dishes. It does add a touch of green, though!

Nutrition Facts

Calories

89.67

Fat

1.93 g

Sat. Fat

1.17 g

Carbs

11.95 g

Fiber

1.33 g

Net carbs

10.61 g

Sugar

9.31 g

Protein

6.84 g

Sodium

105.53 mg

Cholesterol

6.81 mg

Nutritional information is approximate. Based on 1/2 cup dip with 1 cup sliced veggies.

Lipton Onion soup mix, Lipton Onion dip, French onion dip, copycat Lipton onion dip, beef broth, yogurt, veggie dip
appetizer
American
Did you make this recipe?
Tag @jennyblogsandbakes on instagram and hashtag it #jennyblogs

Healthier Lipton Onion Dip

Last Updated September 3, 2024

IMG_3184.jpg

Lipton Onion Dip. Too easy to whip up, pop open a bag of potato chips, and have a summer favorite ready to rock and roll.

Unfortunately, it’s not very healthy. At all. Reading the ingredients usually leaves me wishing I hadn’t so I can enjoy my snacking in peace. Then the recipe on the side of the Lipton box has you mix it with a tub of sour cream and dip potato chips. Yum. But ouch.

I have actually eaten this very few times in my life, growing up in a “healthy” household (thankful for that!) usually meant if I was eating onion dip, someone else had made and brought it to a party. But recently, when a friend moved away from Florence and gave me a few boxes of stuff and food, I found myself with two packets of Lipton Onion soup/dip mix. Not part of my usual diet, but hey, I’m not one to turn my nose up at free food, being an overly-budget minded person. Plus, part of the fun of having a non-American husband is getting to share with him all the joys and junk foods of America that you just can’t find in the rest of the world. Heck, Lipton probably has some ingredients that are banned in the EU, haha! And you know what? He loved it. And requested it again.

How to healthify Lipton Onion dip? Not too hard. Doesn’t cure all the wonky ingredients, but let’s say we’re righting two of three wrongs. ;)

First, potato chips are delicious, but so are veggies dipped in onion dip! Honestly, if you are an onion dip lover, you’ve probably figured this out a long time ago.

Second easy way to healthify it? Use yogurt instead of sour cream. Regular and Greek both work, as the dip thickens as it sits. (Does anyone ever actually make it the full two hours it’s supposed to sit in the fridge before eating?) I might even like it better than sour cream! Not to mention that sour cream is usually only found in the tiny Mexican food section at my local grocery store. And not refrigerated. Weird.

If you’d like a completely guilt-free Onion Dip snacking experience, try out this Copycat Lipton Onion Dip, made from scratch!

This post may contain affiliate links. If you make a purchase using these links, Jennyblogs may receive a small commission, at no extra cost to you. This helps to support Jennyblogs. For further information see the privacy policy. Grazie!


Healthier Lipton Onion Dip

Makes about 2 cups of dip

IMG_3174.jpg

Ingredients:

  • 1 packet Lipton onion soup/dip

  • 16 oz / 454g plain Greek or regular yogurt

  • Washed and sliced veggies, carrots, celery, cucumber, broccoli, cauliflower, radishes, bell peppers, etc etc

  • Fresh or dried dill and onion powder, optional

Directions:

  1. Add Lipton onion dip to yogurt and mix well.

  2. Cover and refrigerate for at least 2 hours, to thicken and let flavors meld.

  3. Top with dill and a dash or two of onion powder, if desired, and serve with veggies. And maybe just one or two potato chips. :)

Healthier Lipton Onion Dip
Yield 2 cups dip
Author
Prep time
5 Min
Total time
5 Min

Healthier Lipton Onion Dip

A healthier version of the classic Lipton Onion dip, by mixing with yogurt instead of sour cream and using veggies instead of potato chips!
Cook modePrevent screen from turning off

Ingredients

Instructions

  1. Add Lipton onion dip to yogurt and mix well.
  2. Cover and refrigerate for at least 2 hours, to thicken and let flavors meld.
  3. Top with dill and a dash or two of onion powder, if desired, and serve with veggies. And maybe just one or two potato chips. :)

Nutrition Facts

Calories

112.03

Fat

1.92 g

Sat. Fat

1.16 g

Carbs

16.91 g

Fiber

1.72 g

Net carbs

15.19 g

Sugar

9.36 g

Protein

7.33 g

Sodium

873.86 mg

Cholesterol

6.81 mg

Nutritional information is approximate. Based on 4 servings of 1/2 cup dip with 1 cup of vegetables.

Lipton Onion soup dip, Onion dip, yogurt, onion, veggie dip, yogurt veggie dip, healthier lipton dip
Appetizers
American
Did you make this recipe?
Tag @jennyblogsandbakes on instagram and hashtag it #jennyblogs

Beurre Noisette (browned butter) Congo Bars

Last Updated September 3, 2024

With oats.

Adjustments.jpg

One of the best things to happen to the cookie world is browned butter, or beurre noisette as the French call it. It not only ups the baked cookie game, but it takes cookie dough to a whole new level.

Will someone please get browned butter cookie dough ice cream on the market? Thanks.

You can find my original recipe for Beurre Noisette Chocolate Chip Cookies right here, but you might want to stick around a little longer for today’s recipe because it’s essentially the same thing, just a different form and a little quicker to make. And cookies are already quick to make, so imagine that!

Why the name congo bars? I really have no idea. They’re just chocolate chip cookies in bar form. Therefore quicker to make but not necessarily superior to the classic cookie form. It’s really down to whatever tickles your fancy in that moment.

This recipe was born under full Italian lockdown. Ironically, you think I wouldn’t want to short cut a recipe with all the time I had on my hands, but you see, I have a very small oven. I can bake a max of 5-6 cookies a time, so that’s a long time to be waiting around to take cookies out of the oven, reload the tray, and repeat. Not to mention a higher electric bill.

So what did I do? I took my handy dandy Beurre Noisette Chocolate Chip Cookie recipe and adjusted it to fit in an 8x8in / 20x20cm square pan. So great. So delicious. And the timer only goes off once! A square baking dish is also a bit easier to wash than a large and cumbersome cookie sheet.

This recipe also features oats, and you can use the browned butter while it’s still melted if you want one more time-saving trick. While I do think it’s worth the time/planning ahead to brown the butter, allow it to cool, then whip it up as you normally would in a cookie recipe (so fluffy and so delicious), it’s not essential and can save you a lot of time if you don’t.

To learn how to make browned butter, see the original Beurre Noisette Chocolate Chip Cookie recipe.

This post may contain affiliate links. If you make a purchase using these links, Jennyblogs may receive a small commission, at no extra cost to you. This helps to support Jennyblogs. For further information see the privacy policy. Grazie!

A recipe by Jenny.


Beurre Noisette (browned butter) Congo Bars

Makes about 9 bars

Adjustments.jpg

Ingredients:

  • 1/2 cup / 113g butter, melted, browned, and cooled

  • 3/4 cup / brown sugar

  • 1 egg

  • 1 1/2 tsp vanilla extract

  • 1 cup / 120g all-purpose flour

  • 1/2 cup / 45g oats

  • 1/2 tsp baking powder

  • 1/2 tsp baking soda

  • 1/2 tsp salt

  • 6 oz / 170g (half a bag) chocolate chips

Directions:

Oven preheated to 350°F / 177°C. 8x8in / 20x20cm pan, greased.

  1. In a medium bowl, mix together melted and cooled browned butter, brown sugar, egg, and vanilla and smooth.

  2. Add in flour, oats, baking powder, baking soda, salt, and chocolate chips. Mix until well combined.

  3. Scrape dough into an even layer in the prepared pan and bake for 18-22 minutes, or until set and center no longer looks doughy.

Jenny’s Notes:

  • This recipe can easily be doubled and baked in a 9x13in / 23x33cm pan.

  • If you choose to whip your butter, cream first just the butter and sugar until light and fluffy, about 4-5 minutes. Then add in the rest of the wet ingredients and continue with recipe.

  • Before baking you can also sprinkle some flaked sea salt on top if you’re craving the sweet and salty!

Beurre Noisette (browned butter) Congo Bars
Yield 9
Author
Prep time
25 Min
Cook time
22 Min
Total time
47 Min

Beurre Noisette (browned butter) Congo Bars

All the goodness of browned butter chocolate chip cookies in a bar form!
Cook modePrevent screen from turning off

Ingredients

Instructions

  1. Oven preheated to 350°F / 177°C. 8x8in / 20x20cm pan, greased.
  2. In a medium bowl, mix together melted and cooled browned butter, brown sugar, egg, and vanilla and smooth.
  3. Add in flour, oats, baking powder, baking soda, salt, and chocolate chips. Mix until well combined.
  4. Scrape dough into an even layer in the prepared pan and bake for 18-22 minutes, or until set and center no longer looks doughy.

Notes

This recipe can easily be doubled and baked in a 9x13in / 23x33cm pan.If you choose to whip your butter, cream first just the butter and sugar until light and fluffy, about 4-5 minutes. Then add in the rest of the wet ingredients and continue with recipe. Before baking you can also sprinkle some flaked sea salt on top if you’re craving the sweet and salty!

Nutrition Facts

Calories

316.06

Fat

16.84 g

Sat. Fat

10.05 g

Carbs

40.76 g

Fiber

1.98 g

Net carbs

38.78 g

Sugar

25.25 g

Protein

3.65 g

Sodium

321.79 mg

Cholesterol

47.66 mg

Nutritional information is approximate. Based on 9 servings.

browned butter, chocolate chip cookies, congo bars, cookies
cookies, dessert
American
Did you make this recipe?
Tag @jennyblogsandbakes on instagram and hashtag it #jennyblogs

Italy Lockdown Update: May the 4th Be With You

It’s hard to believe it’s going on two months since I originally wrote about the coronavirus in Italy, and in turn pleading for my fellow Americans across the pond to take the virus seriously.

If you would like to read the original post on coronavirus in Italy, click here.

The husband spying on abandoned green houses because, apparently, we’ve been quarantined too long.

The husband spying on abandoned green houses because, apparently, we’ve been quarantined too long.

8 weeks and a day I since started quarantining. So much has changed since then. I had originally planned on updating my original blog on coronavirus periodically, but it really didn’t make sense to me when all TV channels, new sources, social media feeds, and conversations already revolved around this world pandemic. As it has affected everyone, and many in very real and very tragic ways, this makes sense, but I didn’t feel that my voice had anything important to add to the din. I had already given my two cents worth and given a little glimpse into the window of Italy when it became one of the worst hit countries after China before the rest of the world went under, too. Shortly after we were all in the same boat, anyway, under some kind of lockdown, travel restrictions, feeling the fear and uncertainty, wondering what is going to happen to our loved ones, our jobs, our economy, weddings, graduations, planned and saved for vacations…the list goes on and on.

However, although much still seems bleak, there is some light at the end of the tunnel, especially for those of us who have been living in Italy under one of the stricter lockdowns.

Today, May 4th, starts phase two. Many rejoice, as it feels like the first breath of fresh air (literally, for many!) in 8 long weeks stuck in small apartments. Maybe dark. Maybe all alone. Maybe with too many family members. Maybe without a balcony or any way to get some decent sunshine. Maybe struggling to get food on the table. But there is hope, the weather has turned warm and sunny, and the daily new cases and deaths have dramatically decreased in recent days.

At its worst, Italy saw 6,000+ new daily cases, and 900+ new daily deaths. Today, May 4th, there were only 1,221 new daily cases and 195 new daily deaths. For more information on the numbers in Italy, see here.

With the country slowly reopening I think many are waiting with baited breath…will it work? Or will there be a second wave? Especially in a country where people have been locked up for 8 weeks and maybe are overly zealous to get out? Hopefully, if we don’t let our guard down, everything will progress smoothly.

So, what does phase two in Italy look like? I’ll highlight here the most important updates, leaving out some of the nitty gritty boring stuff.

Italy Phase Two, May 4th

  • While the essential reasons for leaving home have basically stayed the same, Italians are now able to travel within their region instead of only within their city/neighborhood. Those essential reasons remain for work, health, and now necessary visits to family members, including boyfriends/girlfriends. Movement beyond your own region is consented for work, health, emergency reasons, and for returning home. (Some workers, students, etc. found themselves locked out of their own regions/unable to return home when the lockdown started. They are now finally able to go back home.)

  • The “autocertificazione” or self-certification is still required when you leave home, to justify your reason for being out. An updated version, the sixth edition I do believe, is available starting from today. With more shops opening, the necessary reasons stated above have also somehow been stretched to include errands to get any type of good used in every day life, newspapers, and of course still pharmacies and grocery shopping.

  • As of May 1st we are now allowed to walk/exercise freely, instead of having to stay within 200 meters of our home. This is my favorite, favorite, favorite part of phase two! One source said we could go as far as we can physically walk, but don’t try leaving your region. You must maintain 1 meter distance from other people (people who don’t live with you) and 2 meters if you are running, and you may not take public transportation to a certain area to exercise.

  • Too many people have tried to profit off the demand for masks, so the government has stepped in to cap surgical mask prices at 50 cents a piece. Masks are required if you leave home.

  • Masks must be worn on public transportation. This has already been in place in Florence for the past week or two, I believe. The exception is for those under age 6 and anyone who has a medical problem that would prevent them from wearing a mask.

  • Public parks and gardens will reopen.

  • Funerals will be allowed, with only family members of the first and second degree and a maximum of 15 people.

  • Restaurants will now be allowed to provide take-away instead of just home delivery. However the take-away food must be consumed at home or in the office, to avoid assemblies of people in front of buidlings, etc.

  • Industrial, construction, furnishings, and wholesale commerce can recommence.

  • Individual sports can restart, behind closed doors, not out in the open.

April 14th

In mid-April there was a very soft opening of a few types of shops. Cartolerie (paper and stationary type stores), kids’ clothing stores, and bookstores. Not essential, but it at least helps some store owners to be able to reopen but with very low risk of crowds.

I had an appointment this day, and was surprised to see how many people were out. They were clearly not all rushing to get fountain pens and stationary, but it’s also hard for me to blame people who have been cooped up for so long, if they’re at least respecting the distance…

Hoping and praying things can start going back to some semblance of normal!

Thanks for reading, and if you need me, I’ll be up in the Tuscan hills, walking as far as my legs will carry me…


Parmesan Pan-Fried Chicken

Adjustments.jpeg

Happy quarantine day I-don’t-know-what-number! 44? 46? Regardless, I think we’re all open to new dinner ideas at this point and really looking forward to being able to go to restaurants again.

One thing that has made this quarantine a little easier is having access to yummy food and snacks, so I don’t miss going out too much. I’m thankful for a space I can make and create food, grocery stores, and for my mom who taught me so much about being in the kitchen.

But. That doesn’t mean some nights I don’t miss the ease of take out, especially the pizzeria behind my house, or being able to sit down in a nice space and then people bring you whatever you choose to eat in exchange for some money. Restaurants are so cool, you guys.

That’s where today’s Parmesan Pan-Fried Chicken comes into play. It’s easy, ready in 10-15 minutes, and so delicious. It’s no fuss, because there is no egg or flour breading. This also makes for a lighter fried chicken, just a thin, flavorful crust and not nearly as much guilt as traditional fried chicken. And less dishes to wash! All you need are some chicken breasts, bread crumbs, oregano, garlic powder, salt, and parmesan cheese, plus a frying pan with a bit of butter.

I originally stumbled across this idea when making a chicken quinoa casserole, which uses a similar breading technique with the chicken: using simply a wet chicken breast before dipping in a breadcrumb mixture instead of the more common flour and egg battering. I thought, what happens if I do the same thing, but instead of putting it in the casserole, fry it in some butter? Well, this simple, delicious chicken was the result, and I’m happy to share the recipe with you today.

This post may contain affiliate links. If you make a purchase using these links, Jennyblogs may receive a small commission, at no extra cost to you. This helps to support Jennyblogs. Where possible, links are prioritized to small businesses and ethically and responsibly made items. For further information see the privacy policy. Grazie!

A recipe by Jenny


Parmesan Pan-Fried Chicken

Serves 4-6

Ingredients:

  • 4 uncooked boneless skinless chicken breasts, about 1.5 lbs / 680g

  • 1/2 cup / 62g bread crumbs

  • 1/4 cup / 25g grated parmesan cheese

  • 1/2 tsp dried oregano

  • 1/4 tsp garlic powder

  • 1/4 tsp salt

  • dash of pepper

  • 2 Tbsp butter

Directions:

Adjustments.jpeg
  1. Starting with one chicken breast, lay it flay on a cutting board. Slice horizontally starting from the thicker end, to end up with two thinner pieces of chicken breast. Repeat with remaining chicken breasts.

  2. In a medium bowl, mix together bread crumbs, cheese, garlic, oregano, salt and pepper.

  3. In a large frying pan, melt 2 Tbsp butter over medium-high heat. Wet a chicken breast with water and press one side, then the other, into the bread crumb mixture. You can use your fingers to press on more of the mixture on areas that get missed. Place coated chicken into frying pan. Repeat with remaining chicken.

  4. Cook on each side 5-7 minutes or until cooked through and golden brown. Internal temperature should read at least 165°F / 75°C. If the chicken starts to darken too quickly, lower the temperature.

Jenny’s Notes:

  • If your frying pan isn’t big enough to accomodate all of the chicken, you can cook it in batches, starting with less butter, and adding more between each batch of chicken.

  • Here in Italy I always buy meat from our butcher, who slices chicken breasts horizontally so they are twice as thin as the chicken breasts you get at the store. While you can choose to keep your chicken breasts whole and bread and fry them that way, keep in mind you will need to adjust the cooking time accordingly to cook the chicken through.

  • You can use more butter for richer fried chicken, or less, for an even lighter fried chicken.

Parmesan Pan-Fried Chicken
Yield 4-6
Author
Prep time
5 Min
Cook time
14 Min
Total time
19 Min

Parmesan Pan-Fried Chicken

The easiest fried chicken with no egg or flour battering, just wet the chicken and dip in spiced bread crumbs and parmesan cheese. Fry in butter and you have a crispy, delicious chicken ready in 15 minutes.
Cook modePrevent screen from turning off

Ingredients

Instructions

  1. In a medium bowl, mix together bread crumbs, cheese, garlic, oregano, salt and pepper.
  2. In a large frying pan, melt 2 Tbsp butter over medium-high heat. Wet a chicken breast with water and press one side, then the other, into the bread crumb mixture. You can use your fingers to press on more of the mixture on areas that get missed. Place coated chicken into frying pan. Repeat with remaining chicken.
  3. Cook on each side 5-7 minutes or until cooked through and golden brown. Internal temperature should read at least 165F / 75C. If the chicken starts to darken too quickly, lower the temperature.

Notes

If your frying pan isn’t big enough to accomodate all of the chicken, you can cook it in batches, starting with less butter, and adding more between each batch of chicken. Here in Italy I always buy meat from our butcher, who slices chicken breasts horizantally so they are twice as thin as the chicken breasts you get at the store. That said, I had to guess a bit at the quantity for the coating, as I’ve never made this with larger chicken breasts. I know how much I need to make for 3 thinner chicken breasts, but that’s not going to be helpful to many people. If you have leftover coating, you can store it in the fridge for up to 2 days, but I wouldn’t keep it much longer as raw chicken has touched it. You can use more butter for richer fried chicken, or less, for an even lighter fried chicken.

Nutrition Facts

Calories

337.55

Fat

12.62 g

Sat. Fat

6.01 g

Carbs

12.31 g

Fiber

0.80 g

Net carbs

11.51 g

Sugar

0.98 g

Protein

41.18 g

Sodium

506.17 mg

Cholesterol

122.64 mg

Nutritional information is approximate. Based on 4 servings.

chicken, pan fried, fried chicken, parmesan cheese, oregano, garlic, 15 minute dinners, quick dinners
dinner, poultry
American
Did you make this recipe?
Tag @jennyblogsandbakes on instagram and hashtag it #jennyblogs

Almond Poppy Seed Rolls

Last Updated August 30, 2024

Welcome back to quarantine snacks and meals!

Adjustments.jpg

Today we are making Almond Poppy Seed Rolls! Think cinnamon rolls, but instead of cinnamon, a sweet almond dough with little crunchy poppyseeds and a sticky glaze. It’s like a cross between almond poppyseed bread and cinnamon rolls.

If there’s one thing we are forced to be during this time, it’s creative. Lack of resources, lack of schedule, lack of really anything that resembles our normal life has led us to come up with some really great ideas. Sometimes useless, but great nonetheless. Homemade obstacle courses are trending, memes are at the top of their game, and random skills you never before dreamed of having suddenly manifest themselves.

Another way we have had to get creative is in our cooking and baking. Not everything is readily available, and even if it is, a quick run to the store is no longer a quick run to the store. For my Michigan peeps, you are probably now feeling the effects of the latest lockdown measures. Only a certain number of people are allowed in the store at a time, creating long lines outside. Welcome, friends. That’s been normal life in Italy since uhh do I rememer how long? I think going on six weeks. Some stores require you to have a cart (helps you keep your distance) and some stores take your temperature before you enter. (In Italy.)

In general, most of my baking, unless for a special occasion or holiday, is spur of the moment. And what I want to bake often corresponds with what I want to eat, what do you know? The problem with this, as mentioned above, is that if I’m missing an ingredient, that means either waiting until the next store run, making something else, or improvising. The latter usually wins out.

Take the other day, for example, when I really wanted to make (and eat) these lemon raspberry rolls. I knew I didn’t have any raspberries, so I figured I would make just lemon rolls. Not to be, as I found my last lemon had gone moldy, and I didn’t even have any lemon extract. Well. Plain rolls weren’t going to cut it. I could’ve made cinnamon rolls, but my husband doesn’t much care for cinnamon (gasp) and I didn’t think that I should be eating a whole pan of cinnamon rolls by myself. While in quarantine. And am supposed to stay within 200m of my abode for exercise.

I took stock of my cupboards to see what I could possibly use to make some kind of flavored, delicious roll. While I didn’t have lemon extract, I did find almond extract! I love almond, and, and POPPY SEEDS. Yes. Done.

If you happen to have ingredients for both, I would highly suggest making both. They are also freezer friendly; stick in the freezer before baking or even after, once they’ve cooled.

This post may contain affiliate links. If you make a purchase using these links, Jennyblogs may receive a small commission, at no extra cost to you. This helps to support Jennyblogs. For further information see the privacy policy. Grazie!

Recipe by Jenny


Almond Poppy Seed Rolls

Makes 9 rolls

Adjustments.jpeg

Ingredients:

For the Dough

  • 1/2 cup / 119g milk or water

  • 1/4 cup / 50g sugar

  • 2 1/4 tsp / 7g active dry yeast

  • 2 Tbsp / 28g oil

  • 1 egg

  • 3 Tbsp / 23g poppy seeds

  • 1/2 tsp almond extract

  • 1/4 tsp salt

  • 2 1/4 cups / 270g all-purpose flour + about 1/4 cup / 30g for kneading

For the Filling

  • 1/4 cup / 56g butter

  • 1/4 cup / 50g sugar

For the Glaze

  • 3/4 cup / 94g powdered sugar

  • 1-2 Tbsp / 14-28g milk

Directions:

Preheat oven to 400F / 205C. Grease an 8x8inch / 20x20cm square baking dish.

Make the Dough

  1. In a small saucepan over low heat, warm milk until it is about 100F / 38C.  Pour into a large bowl.  Add the sugar and yeast and allow to sit for 7-10 minutes.  The yeast should foam up a bit. 

  2. Add oil, eggs, poppy seeds, extract, and salt.  Add the 2 1/4 cups of flour and mix until combined. 

  3. Turn dough out onto a floured surface.  Knead for about 8-10 minutes, sprinkling more flour on your work surface as needed.   Dough should be soft and elastic by the end, so don't get too flour-happy. Alternately, you can use the bread hook on a stand mixer and knead for 8-10 minutes, adding in flour as needed. By the end the dough should stick only to the bottom of the pan, not the sides.

  4. Lightly grease or flour a large bowl (the bowl you mixed the dough in is fine) and place dough in the bowl.  Cover with a towel and place in a warm area to rise for about 1 1/2 hours or until doubled in size. 

Assemble the Rolls

  1. In a small saucepan melt butter for filling and let simmer until it starts to brown.  Remove from heat and cool.

  2. When the dough has risen, punch it down and turn out onto a lightly floured surface.  Knead for a minute, then roll into a generous rectangle, about 7x14inch / 18x36cm and roughly 1/4inch / 1/2cm thick.

  3. Spread cooled butter over dough almost to the edges, then sprinkle evenly with sugar.

  4. Starting from one of the longer sides, roll dough into a spiral, pinching the dough together at the end to seal it. 

  5. Cut the log into thirds, then each third into 3 slices.  Place the rolls in the prepared pan and cover lightly with plastic wrap or a damp towel.  Place in a warm area to rise for about an hour, or until puffed.

  6. Bake for 15-20 minutes, or until golden on top and centers no longer look doughy. Internal temperature should be about 195F / 90C.

Make the Glaze

  1. In a small bowl whisk together powdered sugar and1 Tbsp of milk.  It should be thin enough to drizzle but not too liquidy.  Add more milk as needed. 

  2. Drizzle warm rolls with glaze. 

Jenny's Notes:

  • If you don't have a thermometer handy to know what 100 degrees is, simply warm until the milk feels quite warm, but not hot.

  • You can freeze these rolls once you have sliced them and put them in the pan.  Once removed from the freezer allow to thaw and proceed as normal. 

  • When using a stand mixer to knead, I still recommend kneading it for a few minutes by hand afterwards. I find they are not always as thorough as kneading by hand and you want an even rise for your dough.  I often to do it all by hand just because it’s therapeutic!

Almond Poppy Seed Rolls
Yield 9 rolls
Author
Prep time
1 Hour
Cook time
20 Min
Total time
1 H & 20 M

Almond Poppy Seed Rolls

Soft, fluffy breakfast rolls reminiscent of cinnamon rolls but with an almond poppy seed dough, a sweet, gooey buttery filling, and a sweet glaze.
Cook modePrevent screen from turning off

Ingredients

For the Dough
For the Filling
For the Glaze

Instructions

Make the Dough
  1. In a small saucepan over low heat, warm milk until it is about 100F / 38C. Pour into a large bowl. Add the sugar and yeast and allow to sit for 7-10 minutes. The yeast should foam up a bit.
  2. Add oil, eggs, poppy seeds, extract, and salt. Add the 2 1/4 cups of flour and mix until combined.
  3. Turn dough out onto a floured surface. Knead for about 8-10 minutes, sprinkling more flour on your work surface as needed. Dough should be soft and elastic by the end, so don't get too flour-happy. Alternately, you can use the bread hook on a stand mixer and knead for 8-10 minutes, adding in flour as needed. By the end the dough should stick only to the bottom of the pan, not the sides.
  4. Lightly grease or flour a large bowl (the bowl you mixed the dough in is fine) and place dough in the bowl. Cover with a towel and place in a warm area to rise for about 1 1/2 hours or until doubled in size.
Assemble the Rolls
  1. Preheat oven to 400F / 205C. Grease an 8x8inch / 20x20cm square baking dish.
  2. In a small saucepan melt butter for filling and let simmer until it starts to brown. Remove from heat and cool.
  3. When the dough has risen, punch it down and turn out onto a lightly floured surface. Knead for a minute, then roll into a generous rectangle, about 7x14inch / 18x36cm and roughly 1/4inch / 1/2cm thick.
  4. Spread cooled butter over dough almost to the edges, then sprinkle evenly with sugar.
  5. Starting from one of the longer sides, roll dough into a spiral, pinching the dough together at the end to seal it.
  6. Cut the log into thirds, then each third into 3 slices. Place the rolls in the prepared pan and cover lightly with plastic wrap or a damp towel. Place in a warm area to rise for about an hour, or until puffed.
  7. Bake for 15-20 minutes, or until golden on top and centers no longer look doughy. Internal temperature should be about 195F / 90C.
Make the Glaze
  1. In a small bowl whisk together powdered sugar and1 Tbsp of milk. It should be thin enough to drizzle but not too liquidy. Add more milk as needed.
  2. Drizzle warm rolls with glaze.

Notes

If you don't have a thermometer handy to know what 100 degrees is, simply warm until the milk feels quite warm, but not hot. It'll be fine!You can freeze these rolls once you have sliced them and put them in the pan. Once removed from the freezer allow to thaw and proceed as normal. When using a stand mixer to knead, I still recommend kneading it for a few minutes by hand afterwards. I find they are not always as thorough as kneading by hand and you want an even rise for your dough.

Nutrition Facts

Calories

276.34

Fat

10.42 g

Sat. Fat

3.94 g

Carbs

40.79 g

Fiber

1.52 g

Net carbs

39.27 g

Sugar

15.97 g

Protein

5.19 g

Sodium

122.93 mg

Cholesterol

35.35 mg

Nutritional information is approximate. Based on 1 roll.

almond poppy seed, breakfast rolls, yeast, yeasted breads, enriched dough,glaze
Breakfast,Breads, Dessert
American
Did you make this recipe?
Tag @jennyblogsandbakes on instagram and hashtag it #jennyblogs
Adjustments.jpg

White Bean Potato Soup

Last Updated August 30, 2024

This soup is packed full. Packed full of flavor, packed full of vegetables and good stuff, and therefore packed full of nutrients. Did I mention it’s also vegan? Because it is, at least if you don’t sprinkle any of that wonderful cheese over the soup at the end.

Adjustments.jpeg

While I love beans, and I love potatoes, and just about everything else in this soup, I honestly wasn’t expecting it to be as good as it was. It is so full of flavor and so satisfying, and I didn’t even have any wine on hand to add!

This soup boasts, besides beans and potatoes, onions, carrots, garlic, kale, with a hint of rosemary, spice, and white wine to tie it all together.

While the main soup season might be coming to an end, I decided to finally post this recipe because

1. during these crazy coronavirus times it seems everyone and their brother are baking bread up the wazoo and revving their sourdough starters, at least judging by social media and the shortage of flours and yeast in the stores…and this soup pairs wonderfully with some good homebaked bread!!

2. this soup has many ingredients, but most are pantry staples which makes this ideal to whip up for dinner without having to go to the store. Even if you’re missing one or two things, this soup is so flavorful you can easily swap out vegetables or omit one with a still tasty result.

3. many of these ingredients are also cheap, which means you get a hardy meal for just a few dollars, which is helpful in these uncertain financial times

4. we’ve had an unusually cold few nights and days for April here in Florence, which made me think of this soup..

5. soups are so easy, and recipes like this are rewarding for my friends who may be deciding to expand their cooking skills with all the newfound time on their hands.

This post may contain affiliate links. If you make a purchase using these links, Jennyblogs may receive a small commission, at no extra cost to you. This helps to support Jennyblogs. For further information see the privacy policy. Grazie!

Recipe slightly adapted from Clever Eats


White Bean Potato Soup

Serves 4-6

Ingredients:

  • 1 Tbsp oil

  • 1 medium onion, diced

  • 1 stalk of celery, diced

  • 1 carrot, diced

  • 2 garlic cloves, minced

  • 2 15oz / 400g cans of white beans, drained (any kind, such as cannellini or navy)

  • 2 potatoes, cut into small chunks

  • 1 Tbsp / 16g tomato paste

  • 1/2 tsp dried rosemary or 1 Tbsp chopped fresh

  • 1/2 tsp sweet paprika

  • 1/4 tsp cayenne pepper, optional

  • 1/2 cup / 119g white wine, or more broth or water

  • 7oz / 200g fresh or frozen spinach or kale, lightly chopped

  • 2 cups / 474g vegetable broth

  • salt and pepper, to taste

  • extra virgin olive oil and parmesan or pecorino cheese, for finishing

Directions:

  1. In a large stockpot or dutch oven, heat oil over medium heat. Add onion, celery, and carrot and cook, stirring occasionaly, until onion begins to turn translucent.

  2. Add the garlic, then add the beans, potatoes, tomato paste, rosemary, paprika, and cayenne pepper. Cook for a minute or two, stirring frequently.

  3. Add the wine and stir until it is almost evaporated.

  4. Add kale, broth, and salt and pepper to taste.

  5. Raise heat and bring soup to a boil, then cover and reduce heat to low. Cook for about 15 minutes, or until potatoes are tender.

  6. Ladle soup into serving bowls, top with parmesan or pecorino cheese and drizzle with olive oil. Serve with warm, crusty bread. Buon appetito!

Adjustments.jpeg

Jenny’s Notes:

  • If you prefer to cook dry beans instead of using canned, as I do, a good rule of thumb is to take half the weight of called for canned beans and cook that amount of dry beans. Different dry beans absorb slightly different amounts of water, but generally speaking they double in weight when cooked. So if you need 800g as in this recipe, I would cook 400g of dry beans.

  • You can choose to peel your potatoes before chopping or leave skin on, either way is fine if you ask me! Leaving skin on is easier and more nutritious (more fiber!), just be sure to wash them well before using.

  • If you have a rosemary plant, you can also add a clean sprig straight to the soup, then remove when you are ready to serve the soup.

  • In a pinch, you can always just use water instead of broth, although you will lose some flavor depth. If you have any bouillon cubes, you can also dissolve those into the soup following the bouillon dosing instructions.

White Bean Potato Soup
Yield 4-6
Author
Prep time
15 Min
Cook time
35 Min
Total time
50 Min

White Bean Potato Soup

A hearty and nutritious soup bursting with flavor, featuring white beans, potato, kale, onion, garlic, carrots, and celery with a touch of rosemary and a splash of white wine.
Cook modePrevent screen from turning off

Ingredients

Instructions

  1. In a large stockpot or dutch oven, heat oil over medium heat. Add onion, celery, and carrot and cook, stirring occasionaly, until onion begins to turn translucent.
  2. Add the garlic, then add the beans, potatoes, tomato paste, rosemary, paprika, and cayenne pepper. Cook for a minute or two, stirring frequently.
  3. Add the wine and stir until it is almost evaporated.
  4. Add kale, broth, and salt and pepper to taste.
  5. Raise heat and bring soup to a boil, then cover and reduce heat to low. Cook for about 15 minutes, or until potatoes are tender.
  6. Ladle soup into serving bowls, top with parmesan or pecorino cheese and drizzle with olive oil. Serve with warm, crusty bread. Buon appetito!

Notes

If you prefer to cook dry beans instead of using canned, as I do, a good rule of thumb is to take half the weight of called for canned beans and cook that amount of dry beans. Different dry beans absorb slightly different amounts of water, but generally speaking they double in weight when cooked. So if you need 800g as in this recipe, I would cook 400g of dry beans. You can choose to peel your potatoes before chopping or leave skin on, either way is fine if you ask me! Leaving skin on is easier and more nutritious (more fiber!), just be sure to wash them well before using. If you have a rosemary plant, you can also add a clean sprig straight to the soup, then remove when you are ready to serve the soup.In a pinch, you can always just use water instead of broth, although you will lose some flavor depth. If you have any bouillon cubes, you can also dissolve those into the soup following the bouillon dosing instructions.

Nutrition Facts

Calories

426.89

Fat

8.57 g

Sat. Fat

1.21 g

Carbs

65.80 g

Fiber

14.44 g

Net carbs

51.36 g

Sugar

5.02 g

Protein

20.23 g

Sodium

542.01 mg

Cholesterol

1.07 mg

Nutritional information is approximate. Based on 4 servings and includes using wine and toppings.

white bean soup, potatoes, kale, spinach, vegan, healthy, vegetarian, carrots, white wine, spinach, celery, onion, garlic
Soup, Dinner
American
Did you make this recipe?
Tag @jennyblogsandbakes on instagram and hashtag it #jennyblogs

On Coronavirus: Don't Panic, Plan Ahead, Love Your Neighbors

Click here to read the May 4th update from Italy: Phase 2.

We can’t stop thinking about it. We can’t stop talking about it. It’s all you see on social media. We’re all obsessed. Say it with me now, Coronavirus! Or Covid-19. As you like.

IMG_3444.jpeg

First things first. I’m writing this article from my apartment, under quarantine, in Florence, Italy. I am in no way a medical professional nor in a leading position in government, and what I’ve written below are merely my experiences and observances. That said, I tend to take a humorous outlook on most things in life, but I also believe that serious things need to be given their due weight. This virus has shown itself to be serious, physically and economically.

This is not the end of the world. Panic is never the answer. But by planning ahead and taking precautionary measures you can do your part in helping your country, State or region, city, and community stop or at least quell the spread. By doing so, you could indirectly be saving lives, by not catching and spreading the virus, especially to those who have been shown to be most vulnerable, the elderly population and those with underlying health problems.

How it Began in Italy

Italy reported its first two cases of Covid-19 on January 30. Two Chinese tourists became ill and were quarantined in the Spallanzani hospital near Rome. They recovered and were discharged.

A period of calm ensued. I remember being grateful no more cases were reported, even though the two Chinese tourists had reportedly traveled to Florence, among other cities. Fast forward to February 21 (some articles I’m double checking as I write this say Feb 20), when a man checked himself into the hospital in Codogno (northern Italy) and became the third confirmed Covid-19 case in Italy. That same day, Italy reported 16 new cases in the Lombardy and Veneto regions and the first death. A red flag immediately was raised for me. From everything I’ve been reading about this virus, mostly from reports from China and the WHO, you don’t simply catch this virus and die in the same day. Which can only mean, this virus has been circulating in Italy for some time already. Who knows where those people have been? Whom they’ve been in contact with that can then become carriers. Silently circulating, and no one knew. In Codogno, while hospitals were already dealing with the seasonal flu cases, they noticed a high number of people with respiratory problems. These people were treated as though they had the flu, not coronavirus. They weren’t quarantined.

My husband and I’s anniversary was February 24 and my birthday was February 28, so we were talking about taking a weekend trip somewhere. Top contender was Brescia, which is a great base from which to take day trips. I really wanted to see Sirmione. (Google that one for the photos and it’ll be on your list, too.) As cases and deaths continued to increase, we put our plans on hold. Should we go? Shouldn’t we? We unanimously agreed not to go. We found some cheap tickets to Sicily, but didn’t buy them because then cases started popping up in Sicily, also. We decided to stay put. By the time my birthday came, we had already decided to limit our outings (which proved difficult because we had appointments almost every single day) and not go to restaurants. I really wanted sushi, though, so I made a reservation at my favorite sushi place, Aji Tei, for right when they opened at 7:30pm, hoping it would be less crowded. We had tried to make a reservation earlier in February but they were full up. Pages and pages of reservations. This place, unlike a lot of dining places in Italy, is not small. It has an ample dining room and a large covered garden out back. And it can be hard to get in. The whole time we were there it didn’t even get to 25% capacity. It was nice for us, but sad, knowing they and probably many restaurants were feeling the impact.

All this time, the attitude of many people I talked to were flippant, dismissive, or a bit surprised if I mentioned something about being careful. The virus was still largely in the northern Lombardy region and I think some people may have thought me mildly crazy. All the while many politicians, business owners, and residents were passionately encouragingly the world at large to “come to Italy!” It’s safe, Italy is as beautiful as ever! I understand many people live off tourism here and they don’t want the economy or their livelihood to hurt…but we’re also talking about people’s lives. How many times did I see people who had planned trips to Italy asking on some forum or facebook group, is Italy safe? Should we still come? And the overwhelming response was always YES. Come, don’t listen to the naysayers, Italy is safe, it’s just a cold guys COME ON. Not one that I saw encouraged them to do what they thought was best for their family or their peace of mind, or stopped to ask if maybe someone in their group was over 60 or had underlying health problems?

The grocery stores started to be hit all over the country. Pictures of empty shelves, and from parts of the country that didn’t even have confirmed cases yet. The big Esselunga in my neighborhood wasn’t too bad, emptier than I’ve ever seen it, but I was able to get everything I needed. The items that were most hit? Toilet paper, rice, pasta, water, sanitizer of any kind and…women’s razors? I might get quarantined, must have smooth legs!!! haha what? At one point the eggs were gone, and also the milk, but next time I went the milk was completely restocked. I have yet to find a bottle of hand sanitizer in a grocery store. The stores have done a really good job of staying on top of the demand, otherwise.

As the days went on and the number of cases continued to increase in an alarming manner, the leaders in government continued to attack the “fake news” and encourage tourists to come. For my news sources I read mostly BBC News, because I enjoy their straightforward, fact and quote based reporting without adding any drama, insinuations, or sensational statements. And for a few days, Italy all but disappeared from the coronavirus news. Where did Italy go? It’s quickly becoming one of the worst hit countries, and suddenly I can’t find anything out anymore? I would have to google things to find them out, and even then I would have to do so in English and Italian with different wordings before finally finding up to date articles.

As cases spiked to more than 5,800 and more than 230 deaths were reported, the Prime Minister Giuseppe Conte made the decision to quarantine 14 regions in the north on March 8. However, this news was leaked out before going into effect, and there was a mass exodus of thousands of people from the soon-to-be quarantined regions trying to get home and flee the lockdown. I watched in disbelief as these measures that are supposed to curb the outbreak are about to make things so. much. worse. I read about a BBC journalist who drove up to the quarantined north, a good 24 hrs after the new “no one enters, no one leaves” had been in effect. And there was nothing. No police, no checks, no barriers. The quarantine at that point seemed to be still a suggestion, or an idea. My disbelief grew. It was from that point that my husband and I decided to self-quarantine, because there were now thousands of people potentially and probably spreading the virus carelessly. I doubt anyone had the specific evil intent of escaping to spread the virus, but people who don’t have symptoms don’t know they’re spreading and don’t know the harm they’re doing. But that is how it will go. We are human, and our first instinct is to think of ourselves, and we will hurt others in our selfish wake.

Two days after the news broke about the north being quarantined, Prime Minister Conte put into quarantine ALL of Italy. Everyone seemed to wake up, and realize what many of us already had: to curb this pandemia, we must all do what we can and quarantine.

Can you imagine how different this might have gone if Italy had decided to quarantine and take these drastic measures two weeks ago? No one wanted to make that sacrifice. People continued to downplay the severity of the situation and now everyone is forced to make that sacrifice anyway. This way, because the virus has been allowed to spread for so long, it will take longer to get things under control. The economy will hurt more. It’s the unfortunate reality of the situation in Italy right now.

I’m not writing this to shame Italy and lament on the if-onlys. I am writing this so you can learn from Italy. Even if your leaders are not yet taking this as seriously as they should or the actions they should, you CAN. You can be the weirdo and not hug or kiss people, keep your distance while in public, go out as little as possible, wash your hands, all the things you’ve probably already heard a hundred times or more.

If you’ve read this far, thank you, and sorry for being long-winded. I know there are a thousand other articles and blogs on coronavirus you could be reading. Maybe you should be! But have pity, I’m quarantined at home in a small apartment; I have all the time in the world to be long-winded! :) Soon, that may be you, too. Get the good books, movies, and snacks, man.

What are the current restrictions in Italy?

Here’s a snapshot of our life right now. At first just some things were closed or restricted, then things got stricter and time extended, now basically everything is closed except grocery stores, pharmacies and banks.

  • Thursday, March 5, all schools and universities were closed across the country. Study-abroad students were sent home.

  • Suspended until April 3, roughly translated from a post from the Florence Mayor Dario Nardella:

    • Child Educational services and every didactic activity of every order and grade

    • Universities and all artistic, musical, and dance institutions

    • Professional regional and national master courses

    • Universities for the elderly

    • Drivings schools

    • Congress, conventions, reunions, meetings, and social events

    • Demonstrations, events, and shows of any nature

    • Cinema and theatre

    • Pubs, clubs, and similar locales

    • Dance schools

    • Game rooms, casinos, and bingo halls (nooooo not the bingoooo)

    • Museums and every cultural place, such as libraries, archives, archeological parks and areas, monumental complexes

    • School trips, outings, exchanges, guided tours, didactic outings

    • Staying in waiting rooms at hospitals or emergency rooms

    • Civil and religious ceremonies including funerals

    • Visits to nursing homes, rehabilitation centers, hospice, etc. are limited

    • All commercial activities except for the tabacchi, newspaper stands, pharmacies

    • All restaurants, bars, etc. except for home delivery

    • All salons, barbers, etc

At first the grocery stores were going to be closed on Saturday and Sunday , the two busiest days of the week. It was all over the news and I didn’t get it. How does that help? That takes the crowds from the weekends (I’m a weirdo and love grocery shopping but highly dislike going on Saturday and Sunday because it’s shoulder to shoulder) and forces them to go during the week. So now the week will be extra crowded? How does this help crowd control? They only allow so many people in the store at a time, but the lines outside? My husband went to the store today, and after being gone for an hour, came back empty handed. The line was so long he waited for a bit, then decided he didn’t want to be there for hours and hours. Then I remembered today is Friday. Everyone is stocking up for the weekend. Ohhhh snap. I googled to see if anything would be open tomorrow, and you know what? Grocery stores are now open on the weekends. But I had to google that to find out. We have the TV on quite a bit listening for updates, you think they could’ve squeezed that useful bit of information in there somewhere? On the bright side, maybe if I go tomorrow the stores will be empty because everyone still think the stores will be closed, like I did. If anyone can think of why closing grocery stores for two days was a good idea, please. Tell me why.

Beyond these measures, you’re basically not supposed to leave your home, and if you do, at least 1 meter (about 3 ft) between you and other people at all times. I am still a bit confused if I can go out for a walk or fresh air? If you have a dog, you can, but once the dog has done his business, back inside you go. I heard once on the TV no, don’t go outside unless it’s for emergencies or going to the store, and only the grocery store in your area. This upset people who like to go for runs and exercise outside. Then I heard you could go out for fresh air. Today I heard you can go out for a run/exercise, if you stay 1 meter away from others, of course. So tentatively, yes? And if you need to go anywhere outside your area, you must carry with you an official document stating who you are, where you live, and where you are going which had better be for work, medical reasons, or a necessary motive. If you are outside and stopped by police and they determine your reason isn’t valid or you’re lying (ie you say you have a doctor visit and they make you call your doctor who is unaware you have a visit), you will be fined up to 206euro or face up to 3 months in prison. It doesn’t matter if you’re walking or driving, bring this document with you. Only 1 person per family can go grocery shopping at a time. Max 2 people in a car, 1 driving and one in back. 3 people in car? Fined. If you know you are positive for Covid-19 and you leave your home anyway, you can face up to 12 years in jail for voluntary homicide.

If you live in Italy and are looking for the “autocertificazione coronavirus” document, they have the PDF you can download at the bottom of this article.

Italy is taking the situation very seriously. They were left with no choice. The hospitals in the north are at a breaking point, having to make the decision between who gets the ventilator and who doesn’t; literally, who lives and who dies. They are running out of room. As I write this, the numbers from today have come out, and they’re only getting worse. Just since yesterday, 2,547 new cases, 250 new deaths. During the worst of China’s outbreak, deaths never exceeded 150 in one day. Italy has more people dying in one day than China did on any given day. You see this is serious? You can see that if you live elsewhere, your country still has the chance to stall this? Or at least slow down the spread so that hospitals aren’t overloaded and doctors won’t have to make the moral choices they are being forced to here in Italy.

Just in the past couple days my homeland, USA, has greatly ramped up the closures, not to mention the whole world. Schools, dance studios, Broadway, events, sports…Though the US is nowhere near where Italy is outbreak wise, they are thankfully taking these hard steps as a prevention. I still see a lot of Americans on social media who are dismissive of this virus, and I wish they would look at Italy. Most Italians had that same attitude up until they were forced to completely switch gears. For some it was overnight, and it was a bit bizarre. Accept with grace that your leaders are trying to protect you. I just wish the US would up their testing game, so the virus doesn’t have a chance to circulate undetected for so long like it did in Italy.

If you’re one of my friends who thinks this coronavirus is manmade, leaked on purpose, a new weapon, the world trying to control you, etc etc. I hear you. But is posting all the articles demonstrating IT’S THE DEMOCRATS helping? Is it loving your neighbor? I don’t think it is. The best way we can go forward is to not panic, check your sources, take preventive measures even if they’re hard, and look after those who are maybe less privileged or are more vulnerable than you. If you know of an elderly person near you, make them a meal and deliver it to their doorstep. Or have groceries delivered to their door. Offer to go pick up their prescription for them. Don’t hoard food/products you don’t need. Know a family that has a lot of kids? Maybe bless them by having pizza delivered to their home, so the mom and dad can have a night off from cooking. By doing this you not only help people out, but you help support businesses that are struggling. I’m sure there a ton of different ways I haven’t even thought of that would be a great help. In this day and age with apps like Uber Eats, food and many other commodities are just a click away.

Oh, and can we all stop comparing this virus to common cold/influenza? Flu has been around for a long time, we have some immunities to it, and there are vaccines. This coronavirus is brand new and we just don’t know enough about it. If you try and compare flu data to coronavirus data, is that even fair? Coronavirus only has data from December, the flu has data up the wazoo. We already know this coronavirus is more deadly, so before you “pshaw” it and rattle of a recent year’s data from the flu, just realize we’re trying to keep Covid-19 from becoming rampant like the flu so it never has a chance to kill as many people as the flu, or worse. Currently in Italy, the mortality rate for the virus is 5.8%, where flu in the US has a mortality rate of about 0.1%. I would rather huddle at home and be proved wrong later that it wasn’t that serious, rather than disregard the precautions and later be proved wrong that it WAS that serious.

I’d love to end this with some encouragement like, we’ve got this, or we’re each stronger than we think, we can all be heroes…but you know what? You don’t have to look far to see that our base reaction has been protection of…self. Me. My needs. My comforts. I rejoice that I don’t have to put my faith in myself, humans, governments, or regulations. I rejoice in the Lord, who has the whole world and this situation in His control. I rejoice knowing that this world is not all there is. This life is not all I have. But while I’m here, I hope to be able to love my neighbor well and do my part because, in Jesus, I’ve been shown true selfless love.

One more thing. Toilet paper? Let’s all just calm down now. You know who you are. Leave some for your neighbors. Count your squares, people! Oh, and I hope you stocked up on Desitin as well if you actually plan to use that much toilet paper…

Other Useful Resources

For live cases worldwide and easy to look at statistics, check out this site.

For more info on cases in Italy, check out this page.

For all things Florence and other useful information on coronavirus if you’re in Italy, check out Girl in Florence!

If you’ve read this far and want to really understand why social distancing is a thing, check out this article full of graphs, maths, possible outcomes and general confirmation that this is serious stuff and must be acted on now.

My Favorite Scones

Last Updated August 30, 2024

Adjustments.jpeg

Happy 2020!
Once again heading into the Christmas season I went MIA from the blog, there’s just too much to be done, eaten, seen, and experienced!

I closed out 2019 by getting to show my husband America for the first time ever, and more importantly, my hometown! It was a blast traveling home for Christmas, and busy. Every year it seems to get a little bit harder to say goodbye.

2020 started out completely uneventful, we were flying somewhere over the Atlantic Ocean and we don’t know when or where we were when the new year happened. It just did. I think 2020 is going to be a good year, though, if nothing else, it’s a great number, right? Oh. Goodness. Ah, little did I know what a WILD year 2020 was going to be. LOLOLOLOL.

I was a bit nonplussed at the seeming coincidence of seeing photos of not one, not two, but several 20’s or Gatsby themed New Year’s parties. The movie came out several years ago, guys, why the big comeback? … It took seeing someone’s post on fb about entering the roaring 20’s again for it to click for me. I can’t help it, guys, I’m just not always the brightest bulb in the case.

However, our vision is 2020 and it is roaring and all those good things, so let’s get rolling. Rolling scones. I mean, these scones don’t have to be rolled, it just sounds like the band…;)

Now. This scone recipe is not just any recipe I am about to share with you, no no no. This is my favorite scone recipe, and I like/use several different scone recipes, so this is saying something.

Like these coconut scones, which are pretty darn delicious.
And these Orange Chocolate Chip Scones. YUM.

But. This scone recipe to beat all scone recipes (opinion) is so versatile, you can make just about any flavor you can think up! It’s also quite forgiving, which makes your scones turn out great every single time. Pictured are cranberry orange scones, but I will give you more flavor ideas and a launch pad to create your own flavors after the basic recipe!

I know, I know, calm down, this is all a lot to take in. The best scone recipe ever PLUS so many different flavors?? What is it, Christmas or something? No, but I decided to start the year off right with one of my favorites recipes (and I’m not even talking just in the scone category! Gasp.) and extending an olive branch for having ignored the inter webs for a bit longer than intended. (It was the eggnog, you guys!)

Ok, scones, let’s go!

This post may contain affiliate links. If you make a purchase using these links, Jennyblogs may receive a small commission, at no extra cost to you. This helps to support Jennyblogs. For further information see the privacy policy. Grazie!

Recipe adapted from allrecipes


My Favorite Scones

Makes 12 scones

Adjustments.jpeg

Ingredients:

For the Scones

  • 1 cup / 225g plain yogurt

  • 1 tsp baking soda

  • 4 cups / 480g all-purpose flour

  • 1 cup / 200g sugar

  • 2 tsp baking powder

  • 1 tsp salt

  • 3/4 cup / 169g oil

  • 1 egg

  • 1 cup flavorings, 1 tsp extract, 1 Tbsp zest, etc. (see below)

For the Glaze

  • 1 cup / 120g powdered sugar

  • 1-2 Tbsp / 15-30g milk

Directions:

Make the Scones

Oven 350°F / 177°C. Baking sheet lined with parchment paper or silpat.

  1. In a small bowl, combine yogurt and baking soda; set aside.

  2. In a large bowl, whisk together flour, sugar, baking powder, and salt.

  3. Add oil to flour mixture, mixing until coarse crumbs form.

  4. Stir in egg, yogurt mixture, and any add-ins just until barely moistened.

  5. Turn the dough out onto a generously floured surface. Knead briefly, about 4-8 turns, then press into an even 1-inch thick circle.

  6. Cut the circle into 12 triangular shaped scones, and place on prepared baking sheet.

  7. Bake for 12-15 minutes or until the centers look set, the scones have cracked slightly, and/or the bottoms or a light golden brown.

Make the Glaze

  1. Stir together powdered sugar and 1 Tbsp milk. Continue adding milk, a tsp at a time, until a thick but drizzleable glaze is achieved. Drizzle over cooled scones.

Scone Flavors:

Use one of these ideas (they’re all tried and true!) or create your own!

Adjustments.jpeg
  • Lemon Scones: 1 tsp lemon extract, 1 Tbsp lemon zest; use lemon juice to make the glaze. Use lemon yogurt if available.

  • Orange Coconut Scones: 1 tsp orange extract, 1 Tbsp orange zest, optional 1/2 tsp coconut extract, 3/4 cup coconut; use orange juice to make the glaze. Use orange or coconut yogurt if available.

  • Chocolate Chip Scones: 1 cup mini chocolate chips, 1 tsp vanilla extract. Make the simple glaze as in the basic recipe or melt more chocolate chips and drizzle over scones.

  • Chestnut Chocolate Chip Scones: 1 cup mini chocolate chips, 1 tsp vanilla extract, replace 1/4 cup of the yogurt with 1/4 cup chestnut purée. Glaze as in basic recipe.

  • Cherry Maple Scones: 1 cup dried cherries; use maple syrup to make the glaze.

  • Strawberry Scones: 1/2 cup diced fresh strawberries; use strawberry yogurt. Use basic glaze, sprinkle with demarara sugar before baking, or spread strawberry jam over the top while the scones are still warm.

  • Cranberry Orange Scones: 1 tsp orange extract, 1 Tbsp orange zest, 1 cup fresh (or frozen and thawed/drained) cranberries; use orange juice to make the glaze. Use orange yogurt if available.

  • Gingerbread Scones: replace 1/4 cup of the oil with 1/4 cup molasses, add 1 tsp cinnamon, 1 tsp ginger, 1/2 tsp cloves; use basic glaze or make a cream cheese drizzle by beating 4oz softened cream cheese with 1/4 cup powdered sugar until smooth, then adding milk 1 Tbsp at a time until mixture is thin enough to be drizzled.

Jenny’s Notes

  • In place of the plain yogurt you can also use sour cream or even mascarpone if you have leftovers from say, making tiramisu. You can also easily use Greek yogurt, or sweetened vanilla yogurt. If you use a sweetened yogurt, cut sugar in the recipe by 1/3 cup / 67g. You can also use a flavored yogurt to boost the scones flavor. For example, in the cranberry orange recipe above you could use orange yogurt.

  • If you accidentally make your glaze too thick or too thin, it’s a super easy fix. For a too-thick glaze, keep adding more milk (or whichever liquid you are using) gradually until desired consistency is achieved. Likewise, for a too-thin glaze, keeping adding a bit more powdered sugar until thick enough.

Favorite Scones
Yield 12
Author
Prep time
25 Min
Cook time
15 Min
Total time
40 Min

Favorite Scones

If I had to make one scone recipe for the rest of my life this, would be it: the perfect base to add any fill-ins and flavorings you wish. Perfectly moist, a sweet glaze, and pairs perfectly with a good book and a cup of tea!
Cook modePrevent screen from turning off

Ingredients

For the Scones
For the Glaze
Scone Flavor Ideas

Instructions

Make the Scones
  1. Oven 350°F / 177°C. Baking sheet lined with parchment paper or silpat.
  2. In a small bowl, combine yogurt and baking soda; set aside.
  3. In a large bowl, whisk together flour, sugar, baking powder, and salt.
  4. Add oil to flour mixture, mixing until coarse crumbs form.
  5. Stir in egg, yogurt mixture, and any add-ins just until barely moistened.
  6. Turn the dough out onto a generously floured surface. Knead briefly, about 4-8 turns, then press into an even 1-inch thick circle.
  7. Cut the circle into 12 triangular shaped scones, and place on prepared baking sheet.
  8. Bake for 12-15 minutes or until the centers look set, the scones have cracked slightly, and/or the bottoms or a light golden brown.
Make the Glaze
  1. Stir together powdered sugar and 1 Tbsp milk. Continue adding milk, a tsp at a time, until a thick but drizzleable glaze is achieved. Drizzle over cooled scones.

Notes

In place of the plain yogurt you can also use sour cream or even mascarpone if you have leftovers from say, making tiramisu. You can also easily use Greek yogurt, or sweetened vanilla yogurt. If you use a sweetened yogurt, cut sugar in the recipe by 1/3 cup / 67g. You can also use a flavored yogurt to boost the scones flavor. For example, in the cranberry orange recipe above you could use orange yogurt. If you accidentally make your glaze too thick or too thin, it’s a super easy fix. For a too-thick glaze, keep adding more milk (or whichever liquid you are using) gradually until desired consistency is achieved. Likewise, for a too-thin glaze, keeping adding a bit more powdered sugar until thick enough.

Nutrition Facts

Calories

397.79

Fat

15.22 g

Sat. Fat

1.33 g

Carbs

60.11 g

Fiber

1.47 g

Net carbs

58.64 g

Sugar

28.27 g

Protein

5.78 g

Sodium

401.65 mg

Cholesterol

16.82 mg

Nutritional information is approximate. Based on 12 servings of cranberry orange scones.

Best scone recipe, Scone base,
Breakfast, Brunch
British
Did you make this recipe?
Tag @jennyblogsandbakes on instagram and hashtag it #jennyblogs

Butternut Squash and Sage Pasta

Last Updated October 10, 2024

It’s fall and not only has the Charlie Brown Great Pumpkin arrived, but so have all the gourds!

Adjustments.jpeg

There are many types but the good news is they are all deliciou and are often quite interchangeable. Unless you’re making spaghetti squash. Then you need spaghetti squash.

In fact today’s recipe is, in a way, spaghetti squash. The principal difference is that instead of the noodles being spaghetti squash the actual spaghetti is covered in a wonderfully flavored, creamy, cheesy, butternut squash sauce! With sage, apple, onion, celery, and basically all of the best autumn flavors in one. Even just the first step of this dish, sautéeing onions in butter, made me so happy and nostalgic. Why? Because onions cooking in butter reminds me of my mom’s stuffing recipe. And it’s the best, obviously.

Making this pasta is quite simple, cooking some veggies on the stove and then blending them at the end. Finish some spaghetti in the sauce, sprinkle with Pecorino Romano cheese and you’ve got yourself a delectably seasonal meal!

I love it so much. In fact, it makes quite a bit of sauce so I am able to stick some in the fridge AND freezer! The quantity of sauce may vary slightly depending on how thick or thin you like your sauce and how exact you are with vegetable ingredients. I tend to be over-generous on portions.

This post may contain affiliate links. If you make a purchase using these links, Jennyblogs may receive a small commission, at no extra cost to you. This helps to support Jennyblogs. For further information see the privacy policy. Grazie!

Recipe adapted from Jake Cohen at the feedfeed


Butternut Squash and Sage Pasta

Serves 4-6 with leftover sauce for another meal

Ingredients:

  • 4 Tbsp / 56g butter

  • 1 medium onion, chopped

  • 1 1/2 pounds / 675g peeled and chopped butternut squash

  • 2-3 stalks celery, chopped

  • 1 apple, peeled and chopped

  • 1 generous Tbsp of chopped fresh sage

  • 3/4 cup / 178g milk

  • 1 lb / 500g spaghetti

  • 1/2 cup / 50g shredded parmigiano reggiano

  • 1/2 cup / 50g shredded fontal or other good melting cheese

  • 1/2 cup / 50g shredded pecorino romano, plus more for finishing

  • salt and pepper to taste


Directions:

Adjustments.jpeg
  1. In a large pan over medium heat, melt butter. Add onions, stirring occasionally, until mostly translucent, about 5 minutes.

  2. Add squash, celery, apple, and sage; continue to cook until things start to caramelize, about 5 minutes.

  3. Add milk. Stir and cover, allowing to cook until vegetables are tender, about 10 minutes. The milk may look a bit curdled, this is fine since everything will be blended in the end.

  4. While the vegetables are simmering, place a large pot of water over high heat. Just before boiling, generously salt the water. When water is boiling and salt has dissolved, add pasta and cook according to package directions.

  5. When vegetables are tender, blend with an immersion blender or transfer to a blender. Blend until smooth. If sauce is too thick to blend easily, thin out with some pasta water or milk. Return to pot and stir in all three cheeses; salt and pepper to taste.

  6. When pasta is cooked al dente, drain, reserving 2 cups / 474g of pasta water. Return pasta to pan and toss in desired quantity of sauce. If sauce is too thick, add some reserved pasta water and toss until desired consistency is reached, adding more pasta water as needed.

  7. Serve with a generous dusting of pecorino romano.

Jenny’s Notes:

  • This recipe makes a generous amount of sauce, so you can choose to refrigerate the leftovers (will probably be enough for another 1 lb / 550g package of pasta) for a few days or stick it in the freezer for a future quick dinner!

  • Cooking time for vegetables will depend on how large or small they are chopped, and may need slightly more or less time than stated.

  • Feel free to use other kinds of squash or even pumpkin. The other night when I made this the store had run out of Butternut so I selected another Tuscan variety and it was lovely! Keep in mind that different squashes may have different starch levels and may affect how thick or thin the sauce will end up, which you can adjust by adding pasta water at the end.

  • Play with the cheeses you use! Parmigiano reggiano, or parmesan, is a wonderfully nutty, aged cheese that you probably already have because it is amazing on almost everything. Fontal is an inexpensive but wonderful melting cheese which I generally have on hand, but you could also use gruyere, gouda, fontina, cheddar, etc. The one I recommend you splurge on would be the Pecorino Romano, which is an aged sheep’s milk cheese. There are many different varieties, those aged in walnut leaves or with truffles, young or aged, easily identified by the word “pecorino” usually followed by it’s defining factor. Pecorino Romano is one of the most exported cheeses from Italy and is aged a minimum of 5 months, giving it a wonderful sharp flavor that pairs so well with our velvety, squashy pasta today.

Butternut Squash and Sage Pasta
Yield 4-6 + extra sauce for another meal
Author
Cook time
40 Min
Total time
40 Min

Butternut Squash and Sage Pasta

A perfectly seasonal pasta with a creamy, cheesy butternut squash and sage sauce.
Cook modePrevent screen from turning off

Ingredients

Instructions

  1. In a large pan over medium heat, melt butter. Add onions, stirring occasionally, until mostly translucent, about 5 minutes.
  2. Add squash, celery, apple, and sage; continue to cook until things start to caramelize, about 5 minutes.
  3. Add milk. Stir and cover, allowing to cook until vegetables are tender, about 10 minutes. Note: The milk may look a bit curdled, which is fine since everything will be blended in the end.
  4. While the vegetables are simmering, place a large pot of water over high heat. Just before boiling, salt the water. When the water is boiling and salt has dissolved, add pasta and cook according to package directions.
  5. When the vegetables are tender, either blend with an immersion blender or transfer to a blender. Blend until smooth. Stir in the three cheeses and salt and pepper to taste.
  6. When the pasta is cooked al dente, drain, reserving 1 cup / 237g of pasta water. Return pasta to pan and toss in desired quantity of sauce. If the sauce is too thick, add reserved pasta water until desired consistency is reached.
  7. Serve with a generous dusting of pecorino romano.

Notes

  • This recipe makes a generous amount of sauce, so you can choose to refrigerate the leftovers for a few days or stick in the freezer for a future quick dinner!
  • Feel free to use other kinds of squash or even pumpkin! Just keep in mind that the different squashes may have different starch levels and may affect how thick or thin the sauce will end up, which you can adjust by adding the pasta water at the end.
  • Play with the cheeses you use! Parmigiano reggiano, or parmesan, is a wonderfully nutty, aged cheese that you probably already have because it is amazing on almost everything. Fontal is an inexpensive but wonderful melting cheese which I generally have on hand, but you could also use gruyere, gouda, fontina, cheddar, etc. The one I recommend you splurge on would be the Pecorino Romano, which is an aged sheep’s milk cheese. There are many different varieties, those aged in walnut leaves or with truffles, young or aged, easily identified by the word “pecorino” usually followed by it’s defining factor. Pecorino Romano is one of the most exported cheeses from Italy and is aged a minimum of 5 months, giving it a wonderful sharp flavor that pairs so well with this velvety, squashy pasta.

Nutrition Facts

Calories

375.87

Fat

23.82 g

Sat. Fat

14.35 g

Carbs

68.67 g

Fiber

8.85 g

Net carbs

59.83 g

Sugar

13.66 g

Protein

21.97 g

Sodium

691.50 mg

Cholesterol

66.70 mg

Nutritional information is approximate. Based on 4 servings.

pasta, fall recipe, butternut squash, sage, seasonal pasta, pecorino romano, butternut squash sauce
dinner, pasta
American
Did you make this recipe?
Tag @jennyblogsandbakes on instagram and hashtag it #jennyblogs
Adjustments.jpeg

Pumpkin Cheesecake Swirled Brownies

Last Updated August 29, 2024

IMG_1331.jpg

Happy October!

I realize I’m a tad bit late as it’s almost November, but I’ve been MIA here on the blog for the past 3 weeks. I flew to meet some of my family in Paris and IT WAS A DREAM. All the hugs and jokes, pastries, sight-seeing, adventures, and everything else that happens when in Paris with some Morris family. We fit right in, people kept mistaking us for Parisians with our striped shirts, berets, and flawless French while taking photos constantly. I should probably write a blog about it when I get back.

Just kidding, just kidding.

I already miss my family so much. Nothing like watching your family fly away and suddenly feeling like my 18-year-old self again watching my parents drive away after having helped me move to Mississippi. I miss Paris too. Another thing I really enjoyed was the real fall weather there. Paris weather is actually quite similar to my hometown in Traverse City, Michigan. Except that Paris isn’t under 2+ feet of snow for 4+ months…meanwhile I left Florence still reaching into the high 70’s and 80’s (Fahrenheit), and returned to the same temperatures. In Paris I actually needed the sweaters, coats, boots, and hot beverages and it felt so right. C’mon Firenze, you can do it! Chilly temperatures for some serious fall-ing.

Until Firenze decides to get its act together, these rich chocolate brownies with a spiced pumpkin cream cheese swirl can help out.

While I didn’t bake or blog in Paris (why would I bake when world-class pastries are so cheap and at my doorstep??) I did whip up some autumn and pumpkin goodies and took photos of the blog-worthy ones before coming because I planned ahead! One catch though, I meant to post this WHILE I was in Paris, but that just didn’t happen and I’m ok with it. I was eating pain au chocolat, chaussons aux pommes, and macarons.

This post may contain affiliate links. If you make a purchase using these links, Jennyblogs may receive a small commission, at no extra cost to you. This helps to support Jennyblogs. For further information see the privacy policy. Grazie!

A recipe by Jenny.


Pumpkin Cheesecake Swirled Brownies

Serves 9-12

Ingredients:

IMG_1341.jpg

For the Brownies

  • scant 1/2 cup / 85g oil

  • 1 cup / 200g sugar

  • 1 egg

  • 1 1/2 tsp vanilla extract

  • 1/3 cup / 33g unsweetened cocoa powder

  • 1/4 tsp salt

  • 1/2 cup / 60g all-purpose flour

For the Pumpkin Cheesecake Swirl

  • 4 oz / 115g cream cheese, softened

  • 1/4 cup / 60g pumpkin purée

  • 2 Tbsp / 25g sugar

  • 1/4 tsp cinnamon

  • dash of ginger

  • dash of nutmeg

  • dash of cloves

Directions

Make the Brownies

Oven 350°F / 177°C.  Lightly greased 8x8in / 20x20cm pan.

  1. In a large mixing bowl, combine oil and sugar.  Beat in egg and vanilla.  Add cocoa powder and salt.  Mix in flour until just combined. 

  2. Pour into prepared pan and smooth with a spatula.

Make the Pumpkin Cheesecake Swirl

  1. In a medium bowl, beat together cream cheese, pumpkin, sugar, and spices until smooth and creamy. This can be done with a spoon or in a stand mixer.

  2. Dollop pumpkin cheesecake by spoonful over brownie batter. Use a a knife or the edge of a spatula to smooth and swirl pumpkin cheesecake into brownie batter.

  3. Bake for 20-25 minutes or until toothpick inserted near the center comes out mostly clean.  Allow to cool.


Jenny’s Notes:

  • The brownie batter and cream cheese will be thick and may stick up in places where it has been swirled, that’s ok, just do your best to smooth it down so everything is mostly level.

Pumpkin Cheesecake Swirled Brownies
Yield 9
Author
Prep time
20 Min
Cook time
25 Min
Total time
45 Min

Pumpkin Cheesecake Swirled Brownies

Fudgy chocolate brownies with a spiced cream cheese swirl.
Cook modePrevent screen from turning off

Ingredients

For the Brownies
For the Pumpkin Cheesecake Swirl

Instructions

Make the Brownies
  1. Oven 350°F / 177°C. Lightly greased 8x8in / 20x20cm pan.
  2. In a large mixing bowl, combine oil and sugar. Beat in egg and vanilla.
  3. Add cocoa powder and salt. Mix in flour until just combined.
  4. Pour into prepared pan and smooth with a spatula.
Make the Pumpkin Cheesecake Swirl
  1. In a medium bowl, beat together cream cheese, pumpkin, sugar, and spices until smooth and creamy. This can be done with a spoon or in a stand mixer.
  2. Dollop pumpkin cheesecake by spoonful over brownie batter. Use a a knife or the edge of a spatula to smooth and swirl pumpkin cheesecake into brownie batter.
  3. Bake for 20-25 minutes or until toothpick inserted near the center comes out mostly clean. Allow to cool.

Notes

The brownie batter and cream cheese will be thick and may stick up in places where it has been swirled, that’s ok, just do your best to smooth it down so everything is mostly level.

Nutrition Facts

Calories

277.12

Fat

14.78 g

Sat. Fat

3.39 g

Carbs

28.67 g

Fiber

0.98 g

Net carbs

27.68 g

Sugar

25.76 g

Protein

2.30 g

Sodium

113.35 mg

Cholesterol

33.57 mg

Nutritional information is approximate. Based on 9 servings.

brownies, pumpkin spice, pumpkin cream cheese, fall recipe, cream cheese swirled brownies
dessert
American
Did you make this recipe?
Tag @jennyblogsandbakes on instagram and hashtag it #jennyblogs
IMG_1326.jpg

White Chocolate Cranberry Pumpkin Cookies

Last Updated August 29, 2024

public.jpg

Happy official fall and pumpkin season!!!

Starting off the season with soft, fluffy pumpkin cookies stuffed with white chocolate and cranberries with a hint of orange. These are lightly sweet which helps the white chocolate shine and offset the tartness of the cranberries. A bit of orange extract makes the whole combo into this deliciously bright fall offering.

Aside from the orange, these cookies are similar to my White Chocolate Cranberry Oatmeal Cookies. Same condiments, different cookie. One a light and fluffy ode to fall, another a chewy classic oatmeal cookie. Both scrumptious.

Before writing up this recipe I felt a twinge of pumpkin guilt. You know, the I’m making and sharing so many pumpkin recipes and desserts that maybe everyone is already sick of them except me? Then I remembered that I actually haven’t shared any truly fall recipes on the blog yet this year! I somehow managed to hold myself off until after the autumn solstice. That doesn’t mean I haven’t been baking fally things, uh uh no. I’ve already opened one of my precious cans of pumpkin from the States (what I did with the extra room in my baggage because a small can of pumpkin costs almost 5euro in Florence) and squeaked out a batch of these pumpkin cookies, brownies with a spiced pumpkin cream cheese swirl, and pumpkin streusel coffee cake. Fall, I welcome thee with open arms.

So, I hope wherever you are in the world, you share my love for autumnal things, and enjoy baking up these White Chocolate Cranberry Pumpkin Cookies, don a sweater and some cozy socks, and read a book with a nice mug of tea. Hopefully your weather allows for that.

This post may contain affiliate links. If you make a purchase using these links, Jennyblogs may receive a small commission, at no extra cost to you. This helps to support Jennyblogs. Where possible, links are prioritized to small businesses, and American companies and products made in the USA for American readers. For further information see the privacy policy. Grazie!


White Chocolate Cranberry Pumpkin Cookies

Makes about 2 dozen cookies

public.jpg

Ingredients:

  • 1 cup / 240g pumpkin purée

  • 1 1/4 cups / 250g sugar

  • 1 egg

  • scant 1/2 cup / 90g oil

  • 1 tsp vanilla extract

  • 1/4 tsp orange extract

  • 2 1/2 cups / 300g all-purpose flour

  • 1 tsp cinnamon

  • 1 tsp baking powder

  • 1 tsp baking soda

  • 1/2 tsp salt

  • 3/4 cup / 105g dried cranberries

  • 3/4 cup / 127g white chocolate chips

Directions:

Oven 350°F / 177°C. Baking sheet lined with parchment paper, silpat, or greased.

  1. Combine pumpkin, sugar, egg, oil, and extracts in a large bowl.

  2. In another medium bowl, whisk together flour, cinnamon, baking powder, baking soda, salt.

  3. Add dry ingredients, cranberries, and white chocolate chips to wet ingredients, stirring until evenly moistened.

  4. Drop by generous spoonful onto prepared baking sheet and bake for 9-12 minutes, or until bottom of cookies are golden brown and the center still looks a bit wet.


Jenny’s Notes:

  • I used half goji berries half cranberries last time and really liked it. Dried cranberries usually have loads of sugar and I liked that the goji berries were unsweetened.

White Chocolate Cranberry Pumpkin Cookies
Yield 24-26
Author
Prep time
25 Min
Cook time
12 Min
Total time
37 Min

White Chocolate Cranberry Pumpkin Cookies

Soft and fluffy pumpkin cookies loaded with mini white chocolate chips, dried cranberries, and goji berries with a hint of orange and cinnamon.
Cook modePrevent screen from turning off

Ingredients

Instructions

  1. Oven 350°F / 177°C. Baking sheet lined with parchment paper, silpat, or greased.
  2. Combine pumpkin, sugar, egg, oil, and extracts in a large bowl.
  3. In another medium bowl, whisk together flour, cinnamon, baking powder, baking soda, salt.
  4. Add dry ingredients, cranberries, and white chocolate chips to wet ingredients, stirring until evenly moistened.
  5. Drop by generous spoonful onto prepared baking sheet and bake for 9-12 minutes, or until bottom of cookies are golden brown and the center still looks a bit wet.

Notes

I used half goji berries half cranberries last time and really liked it. Dried cranberries are usually sweetened and I liked that the goji berries were unsweetened.

Nutrition Facts

Calories

168.23

Fat

5.85 g

Sat. Fat

1.37 g

Carbs

27.70 g

Fiber

0.93 g

Net carbs

26.77 g

Sugar

17.09 g

Protein

1.99 g

Sodium

130.03 mg

Cholesterol

8.86 mg

Nutritional information is approximate. Based on 24 servings.

cookies, pumpkin, white chocolate chips, cinnamon, orange, cranberry, goji berry, fall recipe
dessert
American
Did you make this recipe?
Tag @jennyblogsandbakes on instagram and hashtag it #jennyblogs
public.jpg

Fresh Mozzarella and Tomato Sandwich

Last Updated August 28, 2024

IMG_1268.jpg

Some of the best things in life are the simplest things. A simple gesture of love, a simple word of appreciation, a simple day off, a simple meal.

What is it that makes simple, special? The intent, or quality behind the simpleness. A simple gesture of love done with purity of heart, a simple word of appreciation that is genuine, a simple day off with no stress to go and be, a simple meal with quality ingredients.

It’s this last idea that I’m honing in on today. A meal so simple it almost seems boring. Until you eat it, and all you want for dinner is the same thing. And lunch again the next day. This happened to me this past week with a fresh mozzarella and tomato sandwich on focaccia.

You know when you’re so hungry and everything tastes extra amazing? Then it keeps coming to mind, even if it was a humble meal, until you eat it again? One time, I think it was last summer, I unexpectedly had to go into the city center and didn’t have time to eat lunch beforehand. I live about a half-hour bus ride outside of the center, then when you add in the time spent waiting for a bus, walking all around the center to accomplish errands, then waiting and getting a bus back home, simple 1 or 2 errand runs can easily end up being 3+ hour ventures. Having missed lunch and still needing to go to the other side of town, my husband and I decided to get a quick sandwich from a bar. This is a very common lunch, with all the bars (where you eat breakfast, lunch, get a coffee) replacing their morning pastries with fresh sandwiches starting around 10:30am. These are a hot option for Italians on lunch break or as a quick snack. There are usually two sizes, and they often have just 2-3 ingredients each. Probably a slice of meat and cheese, like mortadella (which is the cooked prosciutto/ham) and mozzarella, or tuna and boiled egg, prosciutto and cheese, etc. They’re simple, and maybe because I’m used to the super stuffed American sandwiches they seemed a bit measly to me. (But much more affordable and realistic for a lunch on the go, costing between 2.5-4euro usually, where an American sandwich would probably run you $6-10.) Until this particular day, and it suddenly became the best tasting sandwich ever. Fresh mozzarella and tomato with a bit of dried oregano sandwiched between two fluffy piece of salty, oily focaccia. I immediately wanted another. Alas we were already on the bus to the other side of town.

So the other day I was thinking, what’s for lunch? And this tomato and mozzarella sandwich kept haunting my thoughts. A run to the grocery store produced all the necessary missing ingredients, and within a matter of minutes I was devouring this dream of a sandwich. And it was so much better than I remembered. I had it again the next day for lunch. And maybe again tomorrow, using up the last of the cheese and tomatoes.

In fact, it’s very similar to caprese, it's simply in sandwich form without the fresh basil. To read up on using the best ingredients for caprese salad (that also apply to today’s sandwich), click here.

I feel weird calling this a recipe because it’s so simple, so I shall say, here is the recreation of the Italian bar Fresh Mozzarella and Tomato Sandwich!! Quality of ingredients is of utmost importance. Quantity and exact measurements are not.

This post may contain affiliate links. If you make a purchase using these links, Jennyblogs may receive a small commission, at no extra cost to you. This helps to support Jennyblogs. For further information see the privacy policy. Grazie!

Inspired by the Italian bar sandwiches


Fresh Mozzarella and Tomato Sandwich

Makes 2 sandwiches

IMG_1256.jpg

Ingredients:

  • 2 pieces of focaccia

  • 1 large heirloom tomato

  • 200g fresh mozzarella

  • dried oregano

  • extra virgin olive oil

Directions:

  1. Slice each focaccia to make halves for a sandwich.

  2. Core tomato and slice. Slice the mozzarella.

  3. Arrange tomato and mozzarella slices on two of the focaccia halves. Drizzle with extra virgin olive oil and sprinkle with oregano. Voila! Buon appetito.


Jenny’s Notes:

  • I used schiacciata the first time I made this (the Tuscan variant of focaccia, usually with a bit more oil that renders it crispier), but a slightly softer focaccia would be best for sandwiches, easier to slice and eat. Buy or make your own at home!

  • Other Italian bar sandwich ideas include: Prosciutto and asiago, mortadella and asiago, bresaola with arugula and gran padano, tuna with hard boiled eggs, mayo, and tomato, smoked salmon with arugula and mayo. Some of these ingredients might be harder to find outside of Italy, but if you live or visit here, these are great ideas for a quick lunch and readily found in grocery stores.

Fresh Mozzarella and Tomato Sandwich
Yield 2
Author
Prep time
10 Min
Total time
10 Min

Fresh Mozzarella and Tomato Sandwich

A sandwich inspired by the typical Italian bar: Thick slices of fresh mozzarella and heirloom tomatoes with a drizzle of extra virgin olive oil and a sprinkle of oregano stuffed between two soft slices of focaccia.
Cook modePrevent screen from turning off

Ingredients

Instructions

  1. Slice each focaccia to make halves for a sandwich.
  2. Core tomato and slice. Slice the mozzarella.
  3. Arrange tomato and mozzarella slices on two of the focaccia halves. Drizzle with extra virgin olive oil and sprinkle with oregano. Voila! Buon appetito.

Notes

I used schiacciata the first time I made this (the Tuscan variant of focaccia, usually with a bit more oil that renders it crispier), but a slightly softer focaccia would be best for sandwiches, easier to slice and eat. Buy or make your own at home! Other Italian bar sandwich ideas include: Prosciutto and asiago, mortadella and asiago, bresaola with arugula and gran padano, tuna with hard boiled eggs, mayo, and tomato, smoked salmon with arugula and mayo. Some of these ingredients might be harder to find outside of Italy, but if you live or visit here, these are great ideas for a quick lunch and readily found in grocery stores.

Nutrition Facts

Calories

462.69

Fat

29.57 g

Sat. Fat

12.13 g

Carbs

26.07 g

Fiber

2.33 g

Net carbs

23.74 g

Sugar

4.25 g

Protein

23.83 g

Sodium

834.01 mg

Cholesterol

64.09 mg

Nutritional information is approximate. Based on 2 servings.

sandwich, panino, mozzarella fresca, pomodoro cuore di bue, Italian recipe, oregano, extra virgin olive oil, mozzarella di bufala
lunch, sandwich
Italian
Did you make this recipe?
Tag @jennyblogsandbakes on instagram and hashtag it #jennyblogs