Best Natural Diaper Comparison
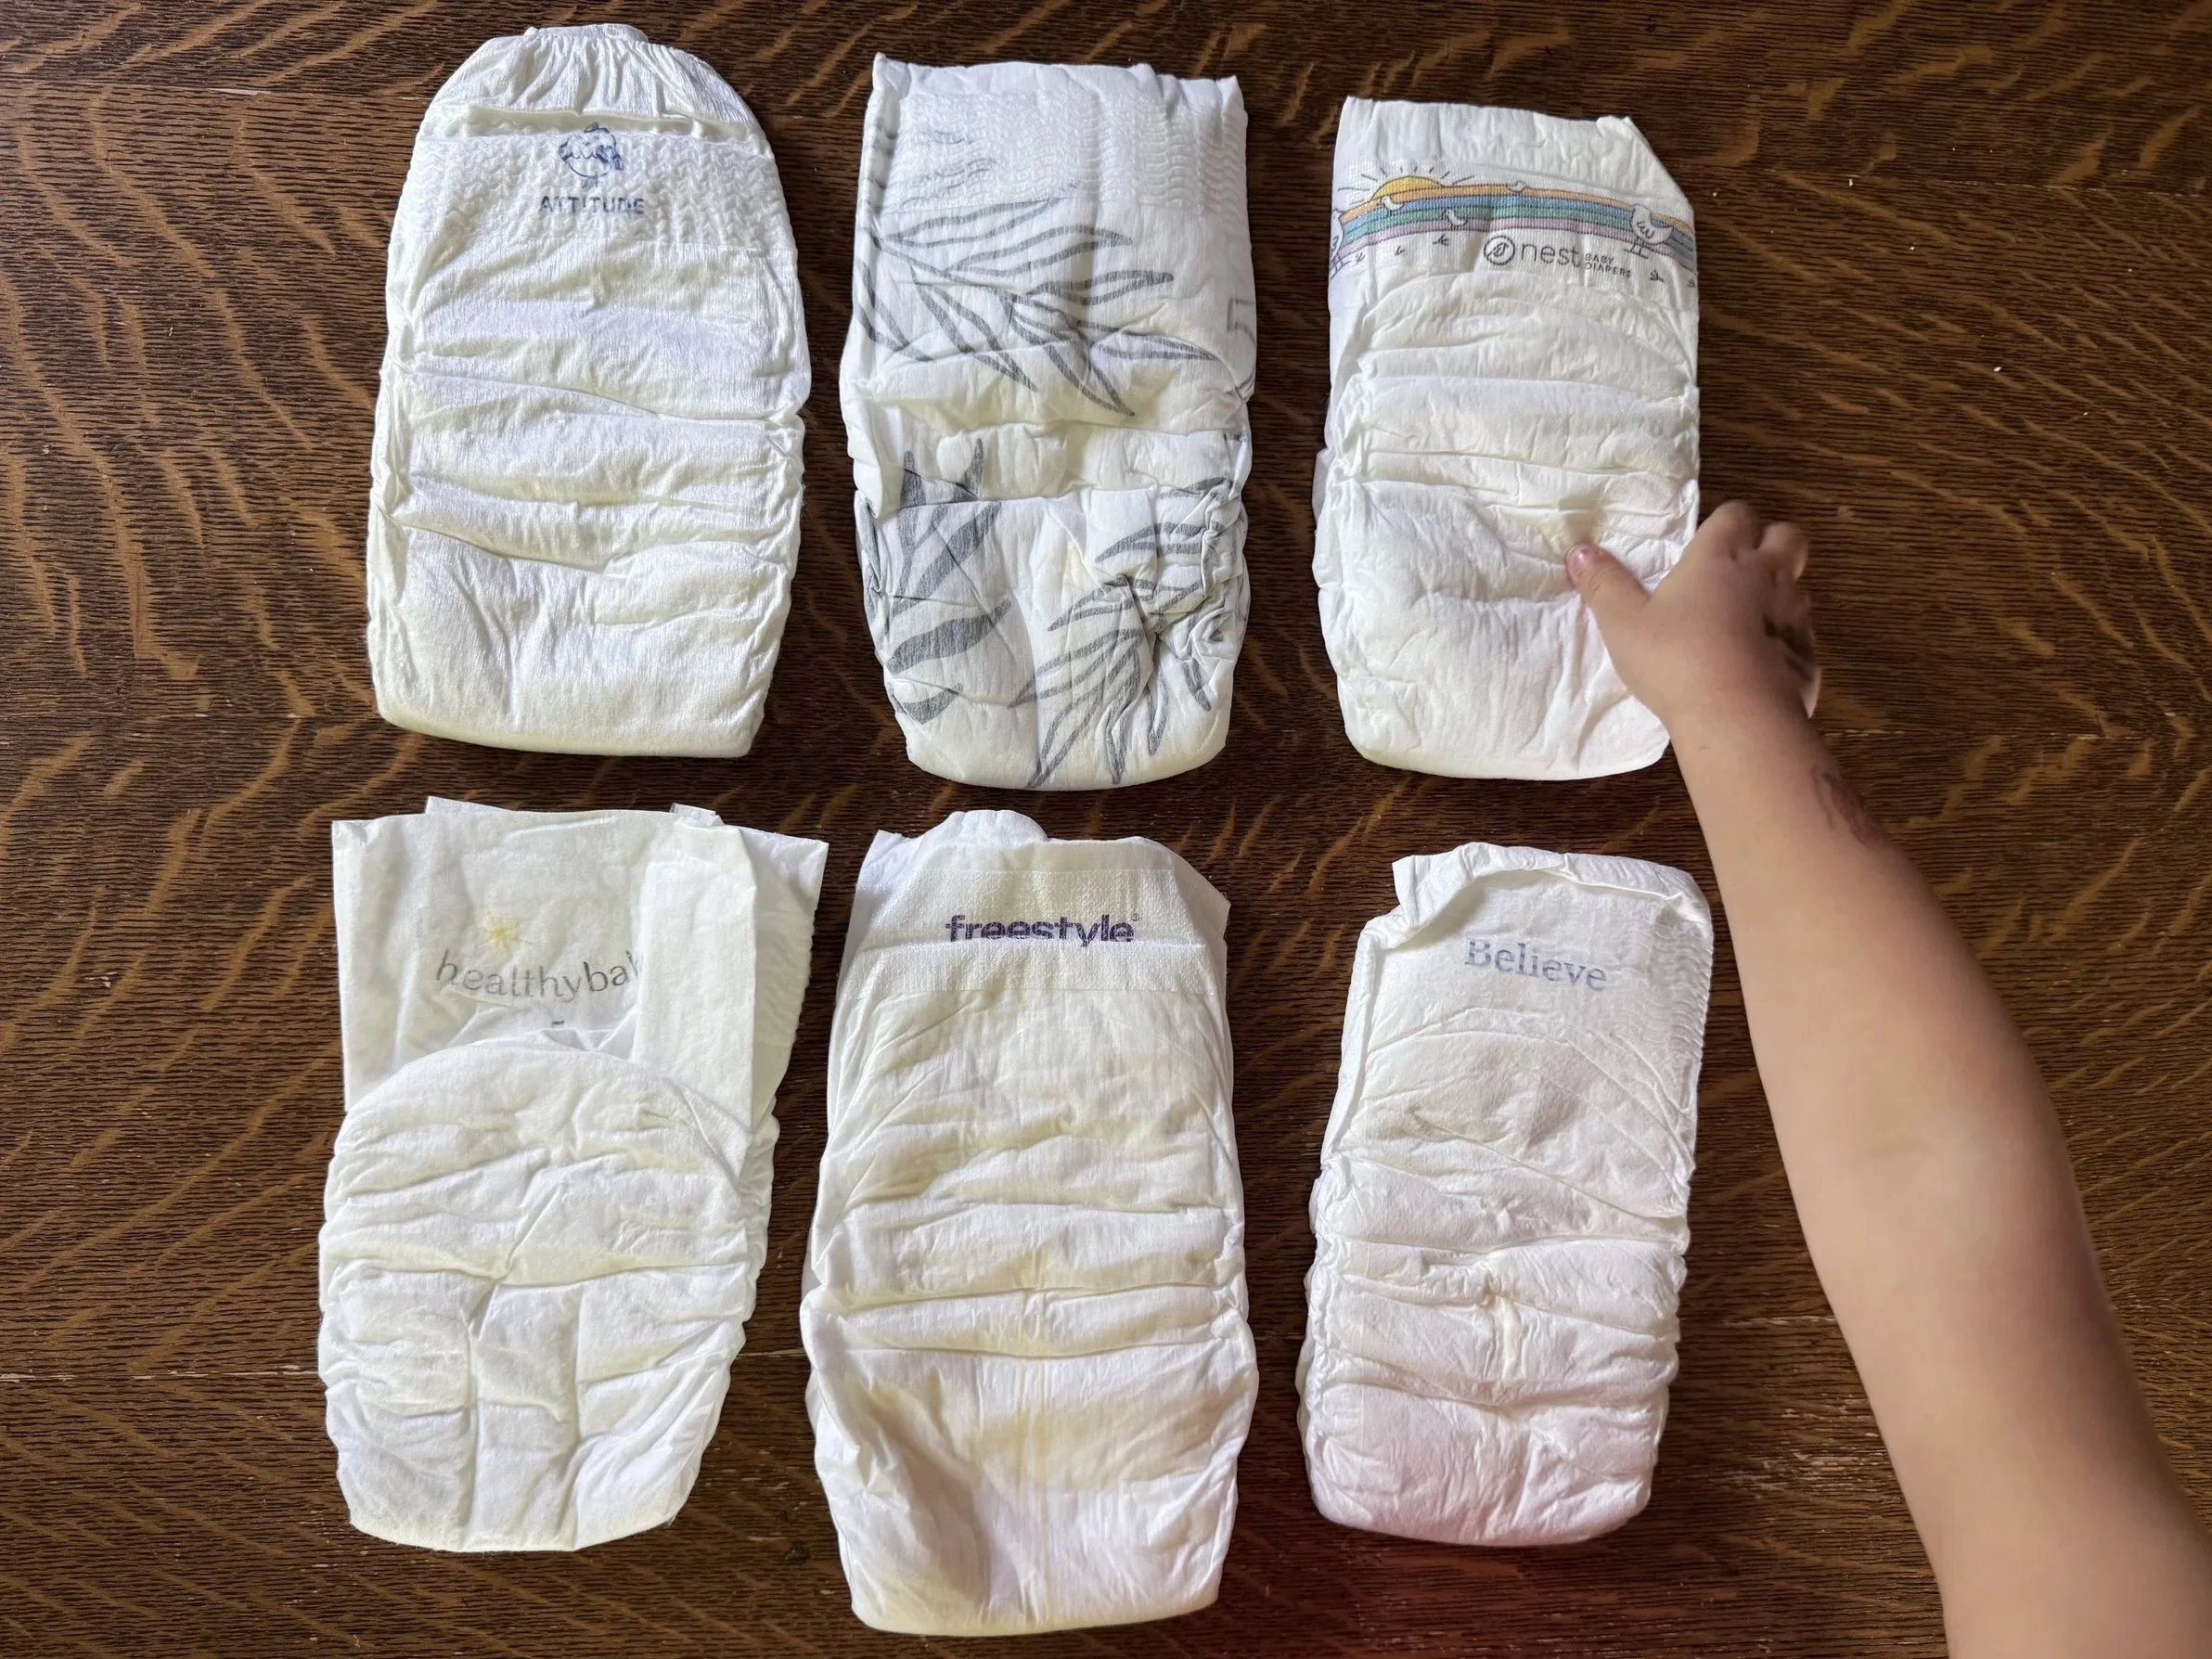
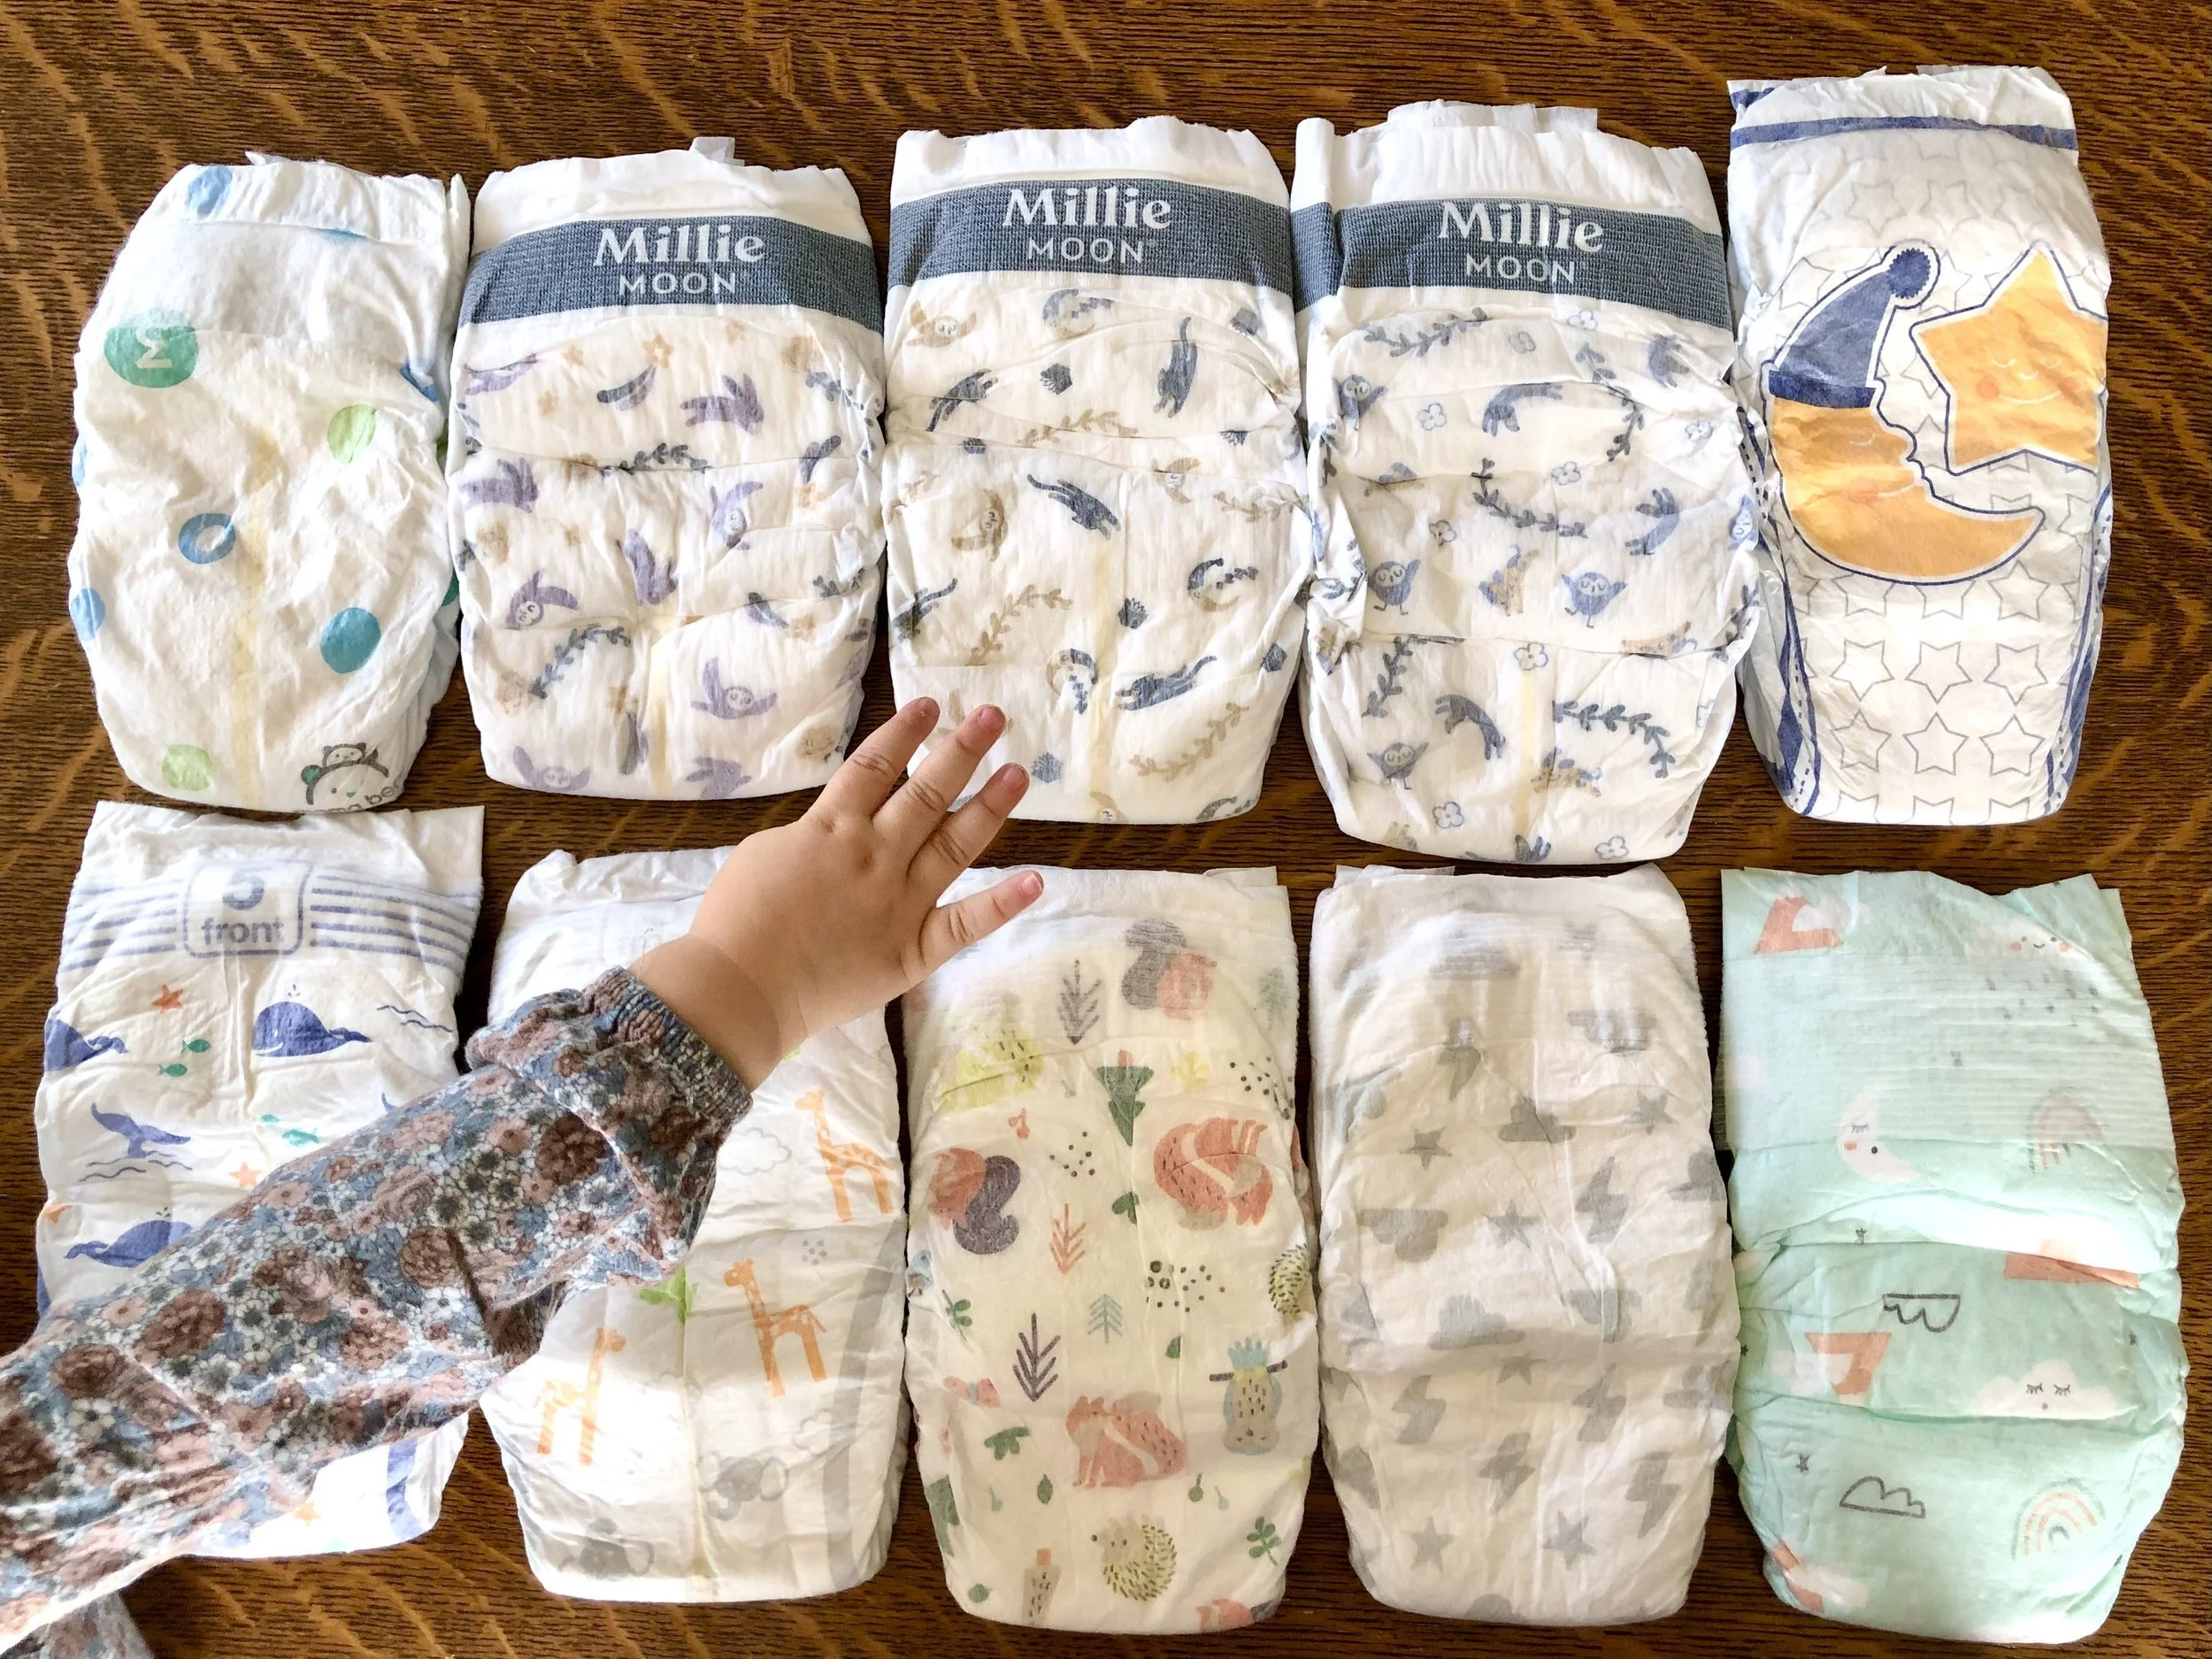
/A few of the natural diapers we have used
The diaper market is immense, and the marketing just as much so. For busy mamas, trying to determine which diapers are truly natural and not just green washed, fit in a budget, and also absorb decently, can feel overwhelming.
It can be difficult to cut through the noise of diaper marketing, but that’s where this post will hopefully help you find some natural diapers that will work for you and your family.
Almost every diaper on the market will use keywords like “breathable”, “hypoallergenic”,“dermatologist recommended”, “fragrance free”, “paraben free” etc. While this may feel reassuring, there’s so much more they could be saying that’s more important. If they don’t, then it probably means they aren’t actually creating as “clean” or “natural” diapers as they might want you to believe.
If you’re new to what makes a natural diaper truly better, below you’ll find some key terms to look for on packages when shopping for diapers.
If you’ve been using natural diapers for awhile but wonder if they are really what they say they are, keep reading.
Maybe you’re quite familiar with natural diapers, and just want to find some different ones that work better, or are easier on your budget.
Wherever you’re coming from, we’ve got you covered. More than 60 diapers and pull-ups have been tried, and only the most natural, totally chlorine free diapers have made it on this list.
Happy reading, and may your diapers never leak.
Things to Know When Shopping for Natural Diapers
Truly organic diapers do not exist. Any person, blog, or diaper package claiming “organic” diapers should immediately raise a red flag. There are many different layers and materials that go into building a diaper, and many of those are not made from materials that can be certifiably organic. Some diapers use organic cotton, like Healthy Baby diapers use 15% organic cotton, but the total amount of organic materials is usually minimal.
Bamboo diapers may or may not be as “eco-friendly” as they claim to be. Bamboo is grown easily enough with minimal herbicides and pesticides, however, it cannot be certifiably organic by the time it is made into a textile due to its processing. By the time it can be used as a textile in diapers, sheets, etc., it is basically a different product. Bamboo is processed into either bamboo viscose (rayon), or bamboo lyocell. Bamboo that is made into viscose uses carbon disulfide, caustic soda, and sulfuric acid in an open-loop system, which can leave traces of these chemicals on the finished product as well as release some into the environment, harming workers and surrounding communities. Bamboo that is made into lyocell uses non-toxic solvents in a closed-loop system, and produces a better, safer end product. I’ve noticed many diaper brands don’t openly talk about closed-loop or open-loop (Terra does, though!), but you can look for the type of bamboo material that is used to determine if the brand is as eco-friendly as they claim to be. If the brand doesn’t openly disclose their ingredients that is often a first warning sign, anyway.
100% biodegradable diapers do not exist (yet), to the best of my knowledge. Many eco-conscious diapers are partially biodegradable or compostable, but not completely. Ecoriginals are a committed diaper brand with a goal of reaching a 100% biodegradable diaper by 2027. I’m excited to see if they achieve this! Terra also claims to have a diaper made of biodegradable materials that composts in 6 months, but due to hygiene regulations it is not completely compostable.
Key Terms and Certifications to Look For on Diaper Packages
Lack of these terms does not necessarily mean that you should run away, but the more certifications a company has, the more easily trustworthy it is.
TCF (Totally Chlorine Free Diapers) - do not use chlorine at all, but instead use oxygen or ozone to whiten diapers. ECF (Elemental Chlorine Free) ECF diapers use a chlorine derivative called chlorine dioxide, which is not as clean as TCF diapers but less problematic than using elemental chlorine. Diapers are frequently bleached to create a clean, white look as well as increase absorption and comfort for baby. The process of bleaching using chlorine creates some hazards, however, including leaving behind traces of dioxins in diapers, increasing the risk for allergic reactions, and entering the environment where it can pose further risks. You can read here what the WHO says about dioxins. According to Consumer Reports, TCF diapers are most important for their lesser environmental impact. CR also does an excellent job of dissecting diapers and understanding what goes into them, you can read about that here.
Oeko-Tex Standard 100 - this is a certification for textiles that have been tested for harmful chemicals. According to Oeko-Tex, a tested and certified article is harmless to human health, every thread, button and accessory have been tested against a list of over 1,000 harmful substances, the more intensive the skin contact, the stricter the human ecology requirements and laboratory tests, they use globally standardized test criteria, they use certification that complies with international requirements and regulations, and they review their limit values for harmful substances at least once a year.
FSC or ISF certified - both point to generally the same goal: Forest Stewardship Council supports responsible forestry, similar to Institute for Sustainable Forestry who promote sustainable forest management. Having one of these marks on a diaper box indicate that the wood pulp materials in the diapers are responsibly sourced.
Third Party Lab Tested - products tested by independent, third party labs give a clear, unbiased picture as to their purity and if their products are what the brand is saying they are. This is a phrase that can be easily thrown around, so it’s helpful when brands say who tested their products, bonus points if they publish the findings.
Lists Ingredients - Another good sign, albeit not a certification, is when a brand lists ALL ingredients in their diapers. Bonus points if they explain why they use each ingredient and what role it plays.
Bonus Certifications
The following certifications might not pertain solely to diapers or how safe they are, but can point to a trustworthy, ethical, and responsible brand.
BCorp Certified - verified to meet social and environmental performance, transparency, and accountability.
Made in the USA - products made in the USA support local economies and help create jobs while often supporting stricter quality and safety controls as well as ethical labor practices. Items that are made outside of the USA can also certainly be high quality while supporting ethical practices and safe work conditions, you just have to be more mindful. For example, some good diapers on this list are made in Germany, Denmark, and elsewhere.
If diapers are made outside of the USA, you might see some of these certifications:
EDANA Stewardship Programme Standard
EWG Certified
Environmental Working Group is an independent, 501(c)(3) nonprofit organization with the goal of providing research on everything from individual ingredients to brands and products and how they impact our health and environment, so that people can make more informed choices of what they’re putting on and in their bodies. They’ve been accused of fear-mongering, but for the most part, are doing a great thing.
They have come up with a prestigious “EWG Verified” mark that only the highest quality and safest products can use. If you don’t want to do the research yourself, this is a great way to know you’re getting one of the safest products on the market.
Currently, there are THREE diaper brands that carry the “EWG Verified” mark:
Healthy Baby diapers (the first to achieve this mark!)
Enough with the chit-chat, let’s see which diapers made the cut.
Diaper are listed in alphabetical order.
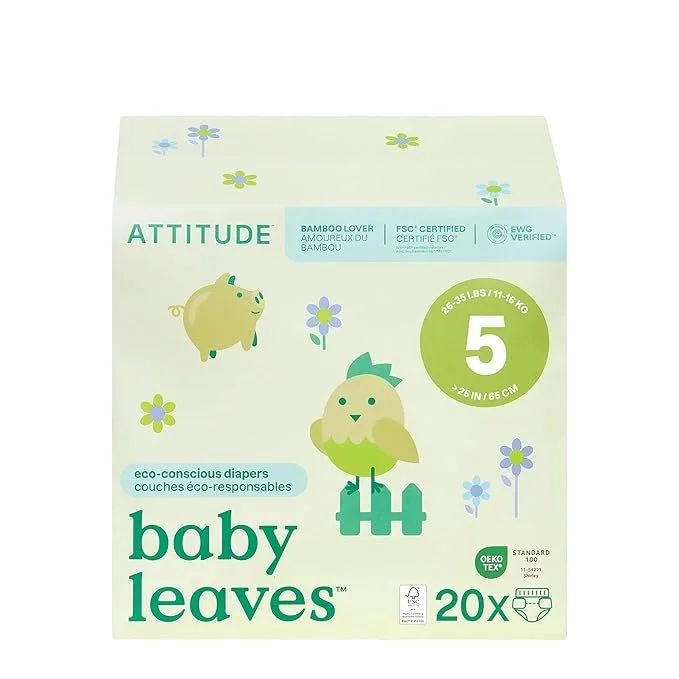
Attitude
Absorbency: 2/5
Softness: 3/5
Cheapest price at time of writing: $.95 per diaper (size 5)
Diaper Design: plain white (has a slight sheen) with “Attitude” written in blue on waistband
EWG certified - yes
TCF - yes
Oeko-Tex Standard 100 - yes
BCorp Certified - no
FSC or ISF certified - yes
List all diaper ingredients - yes
Where are these made - Canada
Other certifications -
To Note: I had high hopes for these diapers, as one of three verified by the EWG and really enjoying other products from this brand. Unfortunately they ended being some of the worst performing. They start disintegrating sometimes within just a few hours of wear, and always if worn overnight. Especially for the price, there are better natural diaper options out there.
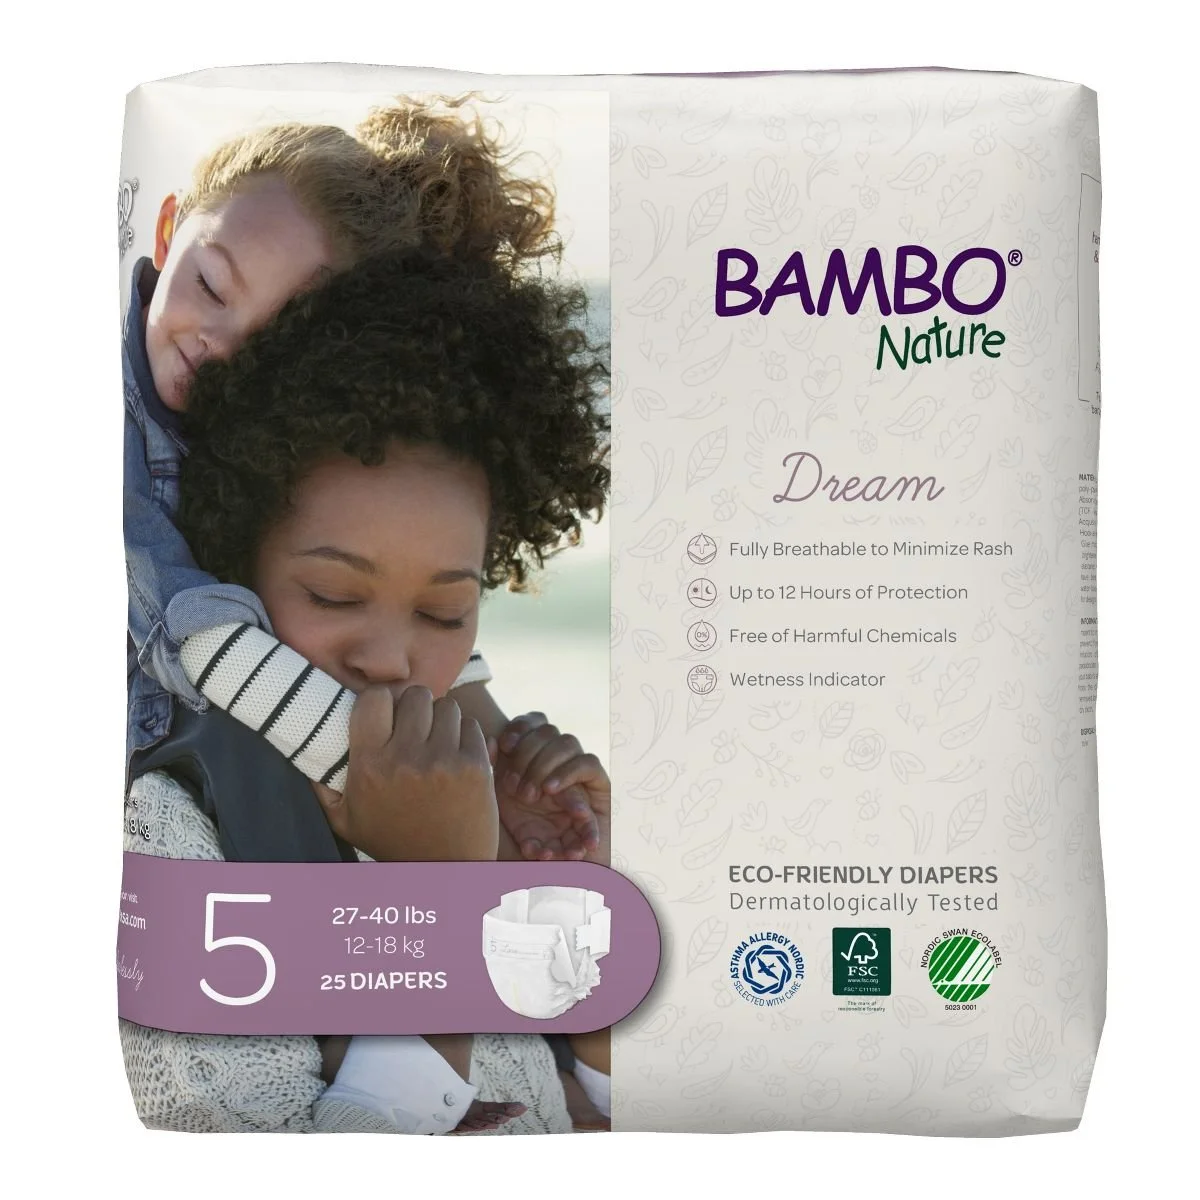
Bambo Nature
Absorbency: 4.5/5 These diapers are very absorbent, a good choice for daytime and even nighttime as long as baby isn’t too heavy of a wetter.
Softness: 4/5
Cheapest price at time of writing: $.50 per diaper (Target, size 5)
Diaper Design: white with “A love like no other” written across front of waistband
EWG certified - no
TCF - yes
Oeko-Tex Standard 100 - yes
BCorp Certified - no
FSC or ISF certified - yes
Lists all diaper ingredients - yes
Where are these made - Denmark
Other Certifications - Allergy Asthma Nordic, Nordic Swan Ecolabel
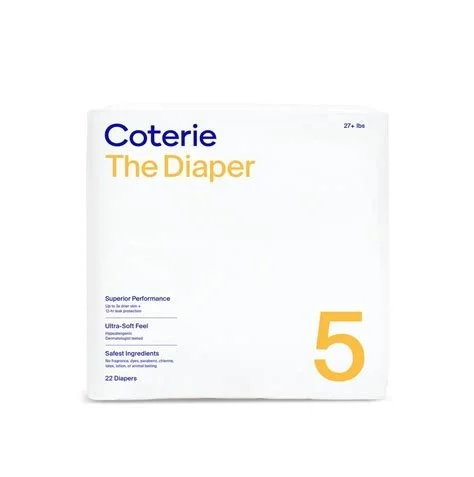
Coterie
Absorbency: 5/5 These things are amazing, for day and night.
Softness: 5/5
Cheapest price at time of writing: $.67 per diaper with subscription from Coterie (size 5)
Diaper Design: textured white with “Coterie” written across front of waistband
EWG certified - no
TCF - yes
Oeko-Tex Standard 100 - yes
BCorp Certified - no
FSC or ISF certified - yes
List all diaper ingredients - no
Where are these made - Canada, using globally sourced materials
Other certifications - EDANA Stewardship Programme Standard, vegan
To Note: These are my overall favorite diapers on this list, and even more, probably of all 65+ diapers I’ve tried. This list attests to the good options in the natural diaper industry, yet many just aren’t quite as good as say, beloved Pampers or Huggies. These are.
Coterie has slightly smaller size ranges in their smaller diapers, therefore their smallest sizes (N-4) fit smaller. For example, their size 1 fits 8-12lbs where a standard size 1 fits 8-14lbs
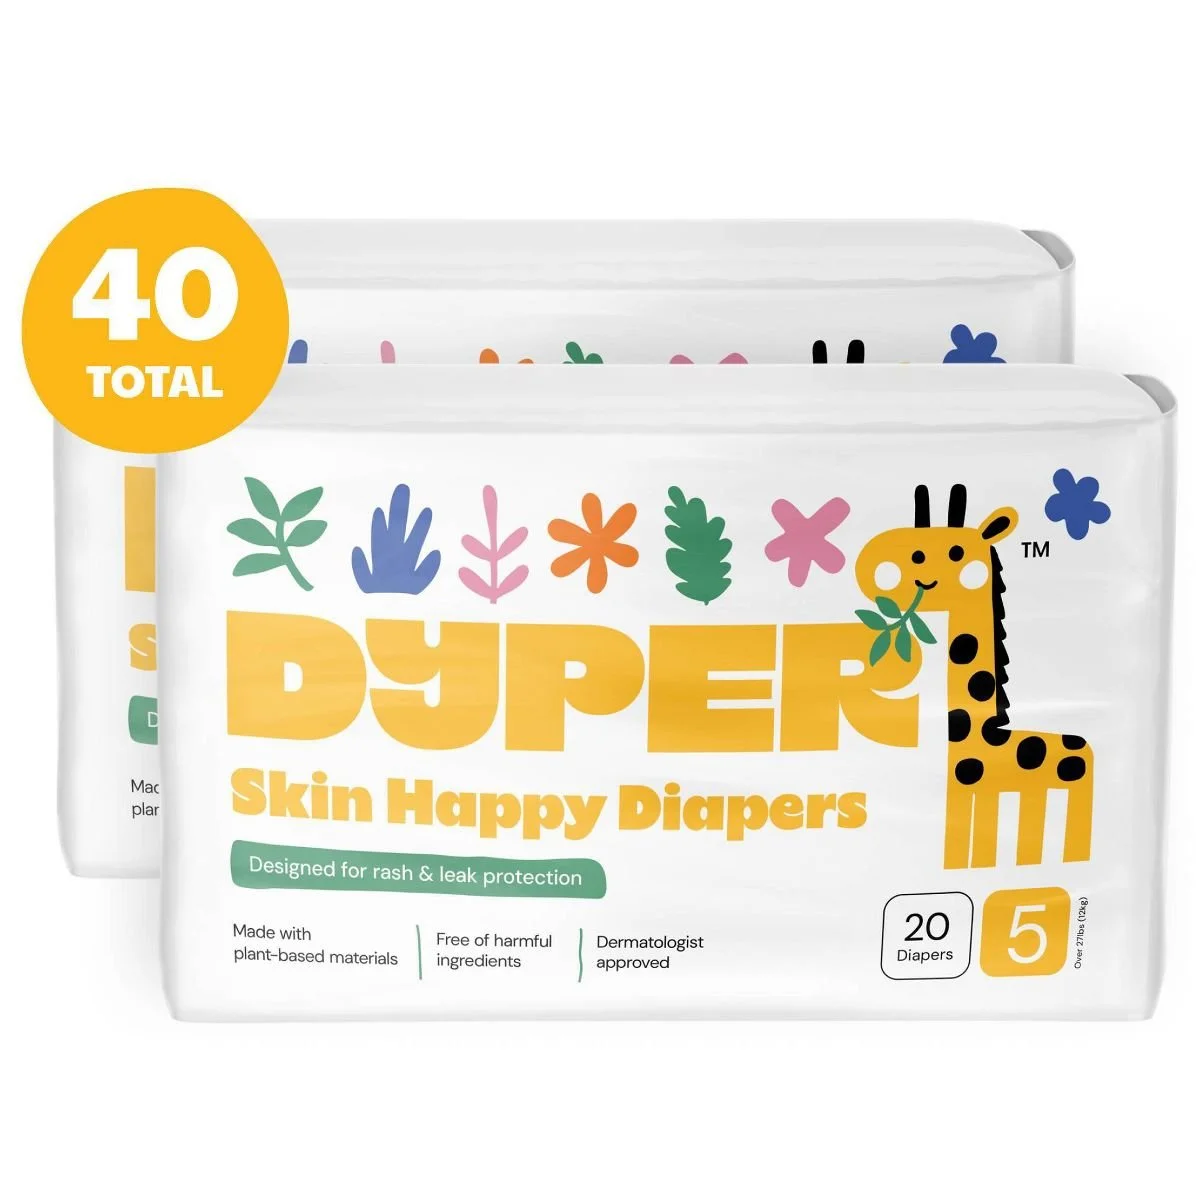
Dyper
Absorbency: 4/5
Softness: 5/5
Cheapest price at time of writing: $.87 per diaper (Target, size 5)
Diaper Design: white with “Dyper” in yellow written across front of waistband
EWG certified - no
TCF - no
Oeko-Tex Standard 100 - yes
BCorp Certified - yes
FSC or ISF certified - yes
List all diaper ingredients - yes
Where are these made - China, Mexico, US using globally sourced materials
Other Certifications - 5star Dermatest, USDA certified 55% biobased product
To Note: These bamboo diapers are made using the closed-loop system which make them a good bamboo choice
Dyper diapers are compostable when you sign up for their Redyper program, for $12.25 they pickup your dirty diapers and wipes; not available in all areas

EcoPeaCo. Bamboo diapers
Absorbency: 4/5
Softness: 3/5
Cheapest price at time of writing: $.73 per diaper (Target, size 5)
Diaper Design: white with “EcoPeaCo” written in gray across front of waistband
EWG certified - no
TCF - yes
Oeko-Tex Standard 100 - no
BCorp Certified - no
FSC or ISF certified - yes
List all diaper ingredients - yes
Where are these made - unknown, company is Canadian
Other certifications - Ecocert certified bamboo pulp, Leaping Bunny, 1% for the planet
To Note: 100% compostable packaging
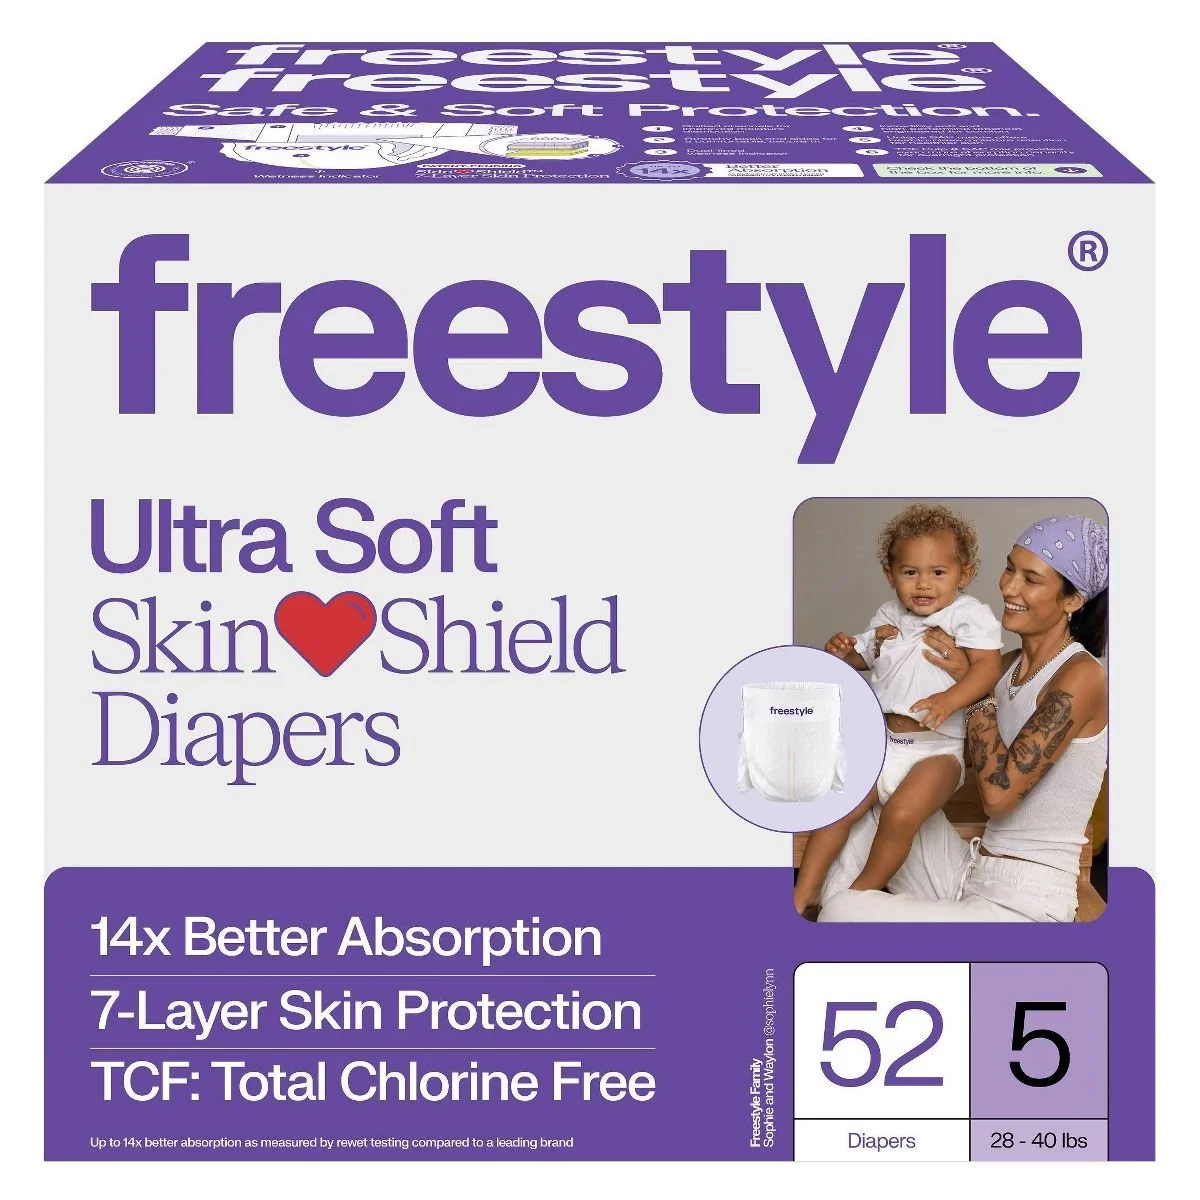
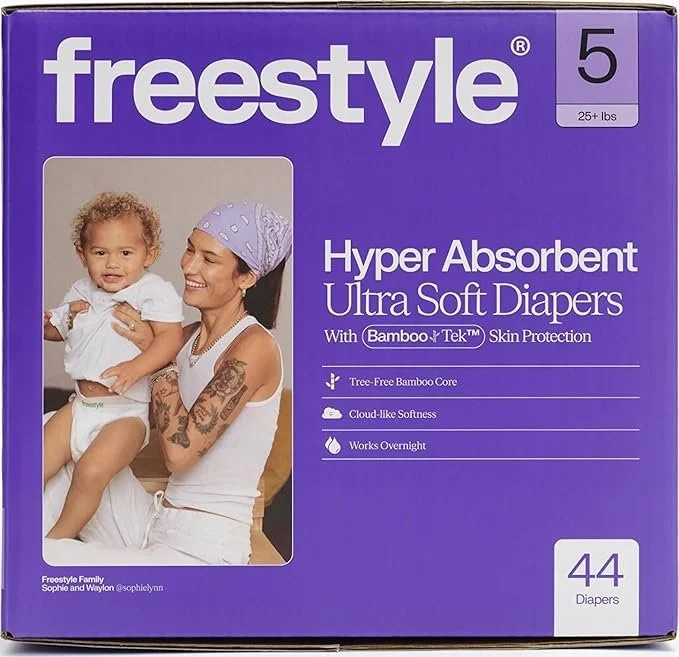
Freestyle SkinShield
Absorbency: 4.5/5
Softness: 4/5
Cheapest price at time of writing: $.48 (Target, size 5)
Diaper Design: white with “Freestyle” written in purple across front of waistband
EWG certified - yes
TCF - yes
Oeko-Tex Standard 100 - yes
BCorp Certified - no
FSC or ISF certified - yes
List all diaper ingredients - yes
Where are these made - unkown
Other certifications - Independent, third-party tested by Vartest and SGS Laboratories with published results
To Note: Freestyle makes two distinct types of diapers: their “SkinShield” made with TCF and FSC certified wood pulp and EWG certified; and their “BambooTek” which are environmentally friendly (closed loop), tree-free diapers. The SkinShield diapers are the ones tested here. The BambooTek diapers are not EWG certified, and also more expensive.
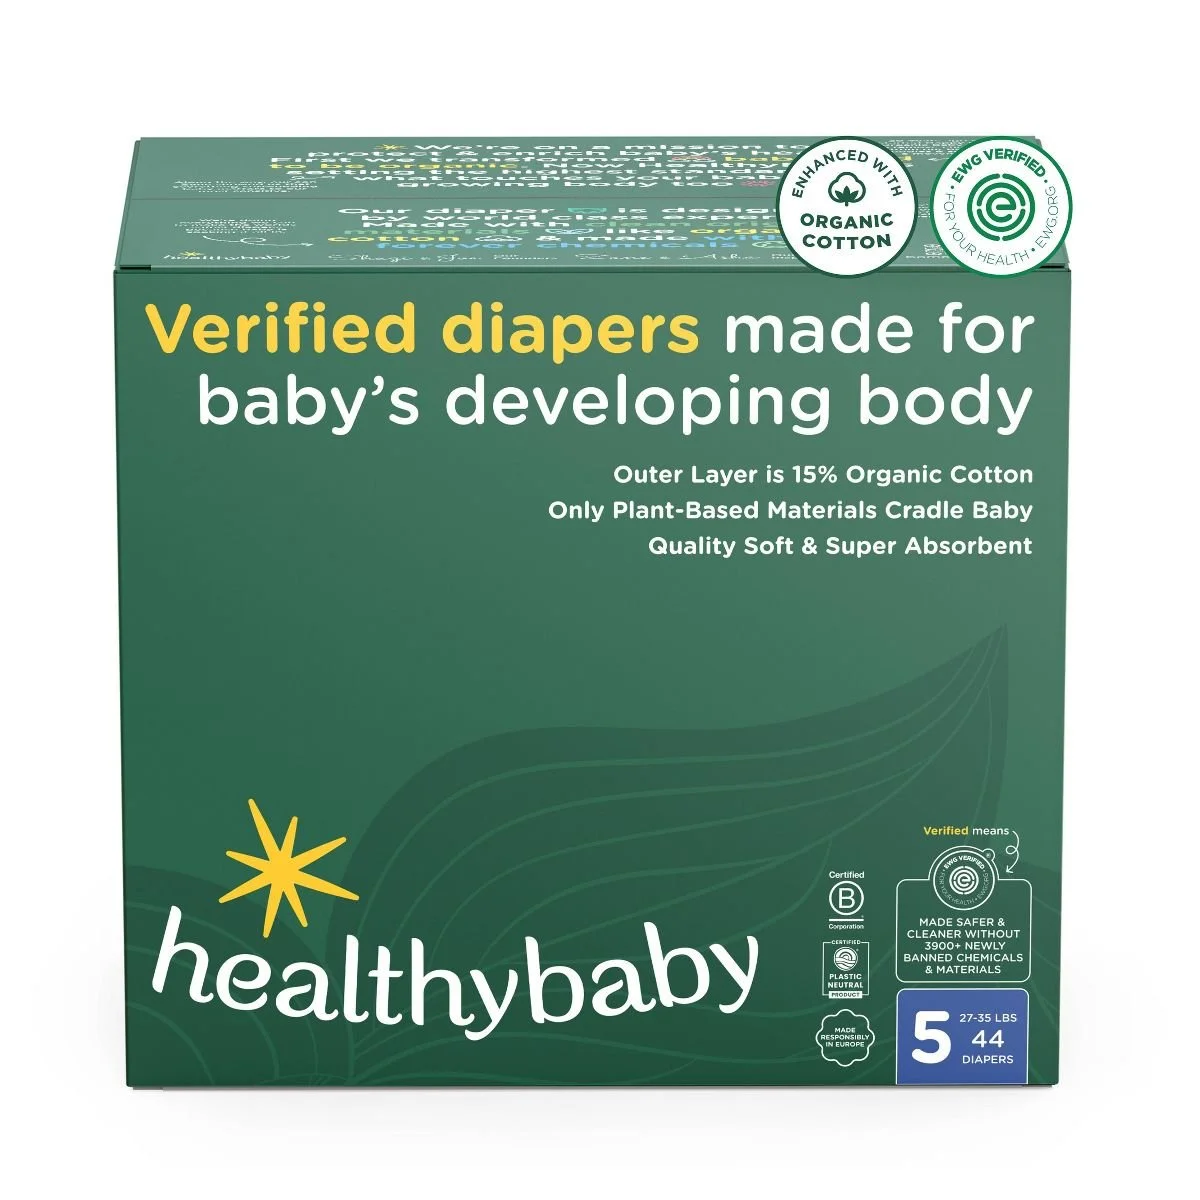
HealthyBaby
Absorbency: 4/5
Softness: 4/5
Cheapest price at time of writing: $.68 per diaper (Target, size 5)
Diaper Design: white with “Healthy Baby” written across back of waistband
EWG certified - yes
TCF - yes
Oeko-Tex Standard 100 - yes
BCorp Certified - yes
FSC or ISF certified - yes
List all diaper ingredients - yes, read here
Where are these made - made responsibly in Europe
Other certifications - EDANA Stewardship Programme Standard, HRIPT (Human Repeat Insult Patch Testing), Certified Plastic Neutral Product
To Note: Paper packaging
To Note: One weird quirk these have is tending to slide down, especially when pants are pulled down. Happens almost every time, no matter how tight the tabs are. Not a big deal (unless there’s a messy poo!) but worth mentioning all the same.
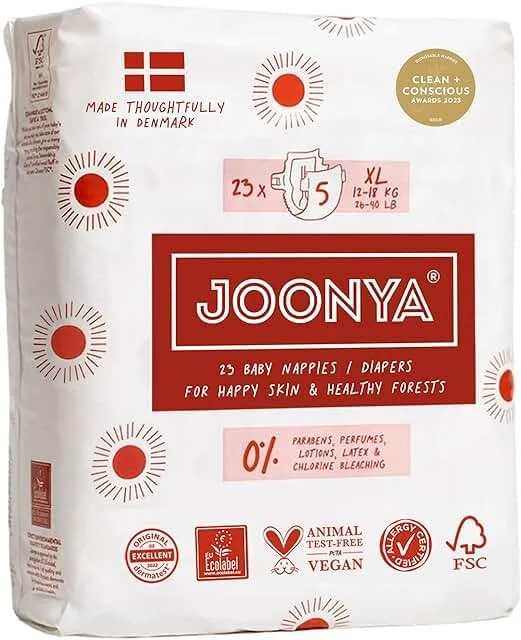
Joonya
Absorbency: 5/5 these are one of those wonderful kinds of diapers that holds their shape even when super full, no soggy crotch!
Softness: 4/5
Cheapest price at time of writing: $.57 per diaper with Joonya subscription (size 5)
Diaper Design: white with red sunshines all over
EWG certified - no
TCF - yes
Oeko-Tex Standard 100 - yes
BCorp Certified - no
FSC or ISF certified - yes
List all diaper ingredients - yes
Where are these made - Denmark
Other Certifications - Nordic Swan Ecolabel, Allergy Certified, EU Ecolabel, German Dermatest Seal, PETA-certified Vegan, and more Australian awards
To Note: Joonya sizing is different, so note carefully the weight on the sizes. Their sizes run almost a whole size smaller than standard US diaper sizes. Their sizes gradually get closer to US sizes the bigger you get, so that by the time you get to size 5, it’s almost the same as US sizing. Joonya 5 is 26-40lbs where typical US size 5 is 27+ lbs. We tried Joonya in size 5 and it felt pretty comparable to most size 5’s we’ve tried. They do not currently offer a size 6.
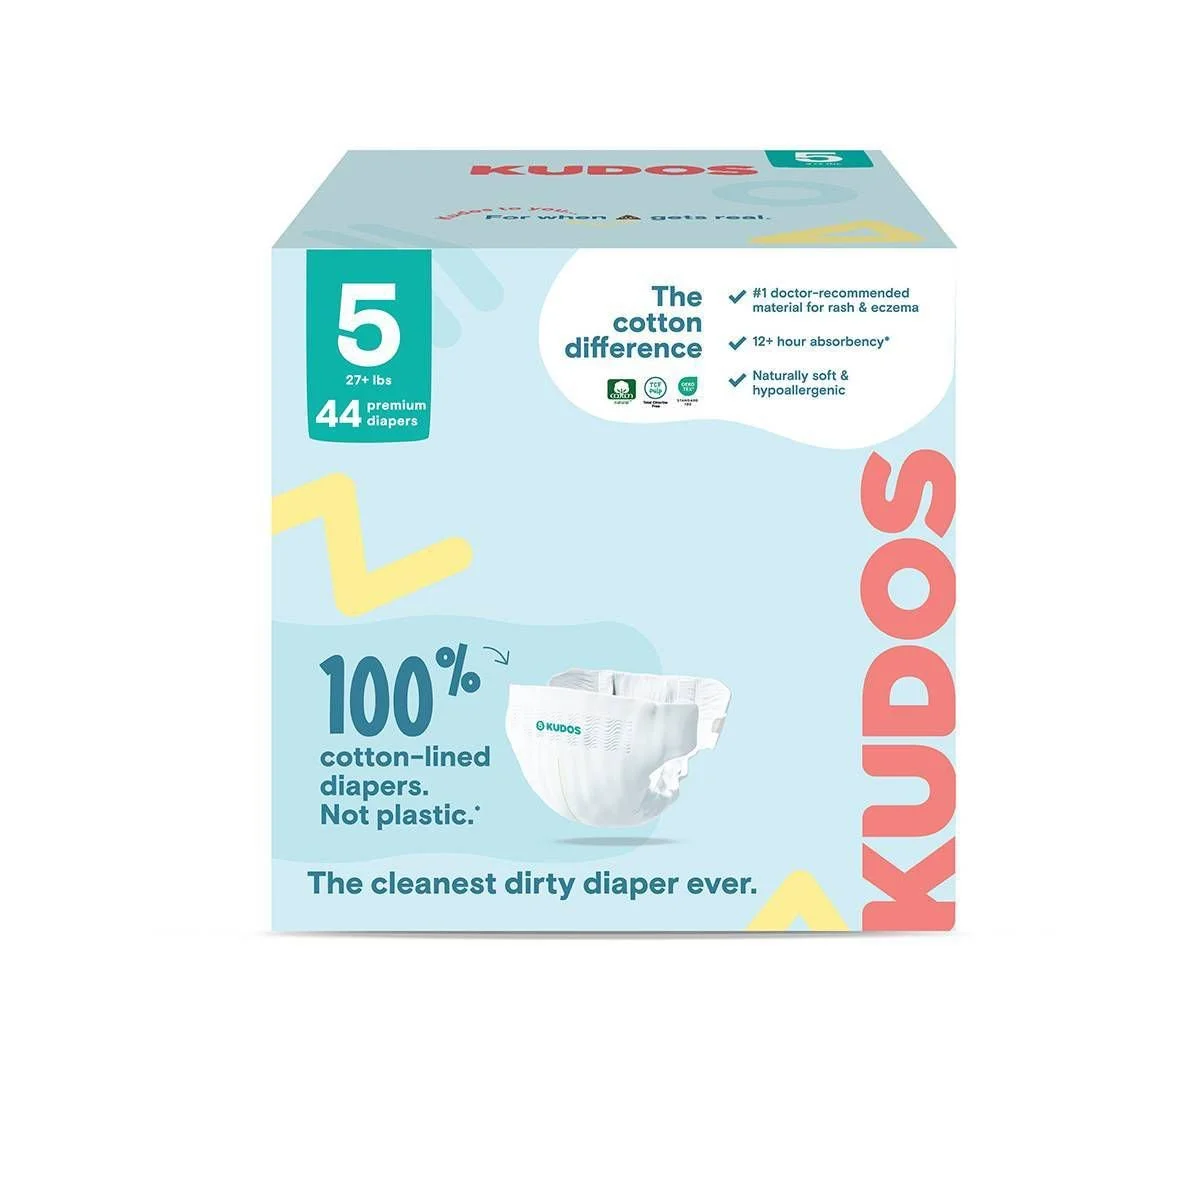
Kudos
Absorbency: 4/5 - more natural diapers often are not the most absorbent, but these are really quite decent
Softness: 4/5
Cheapest price at time of writing: $.68 per diaper (at Target)
Diaper Design: white with “Kudos” written across front of waistband
EWG certified - no
TCF - yes
Oeko-Tex Standard 100 - yes
BCorp Certified - no
FSC or ISF certified - yes
List all diaper ingredients - yes
Where are these made - Mexico
Other Certifications - True Cotton (cotton sourced from US)
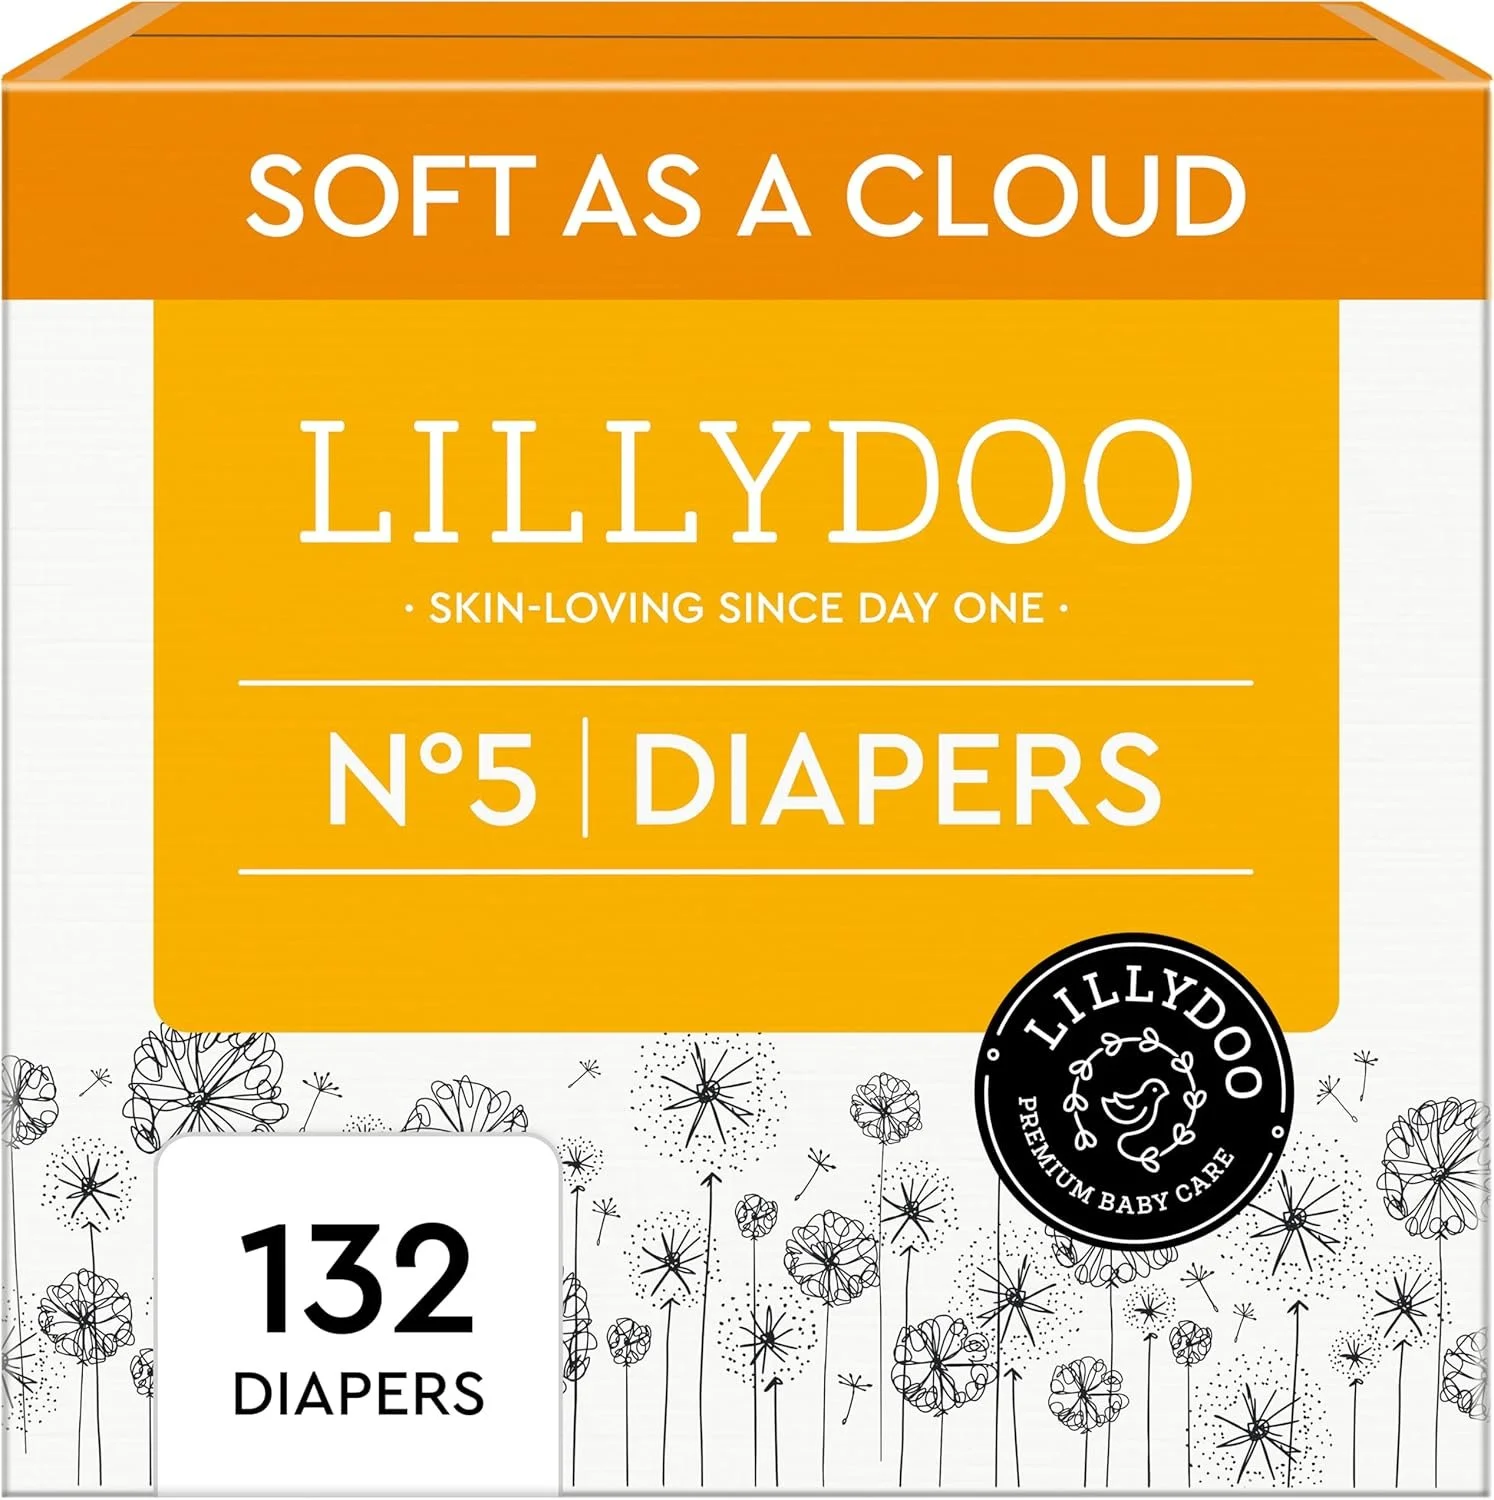
LillyDoo
Absorbency: 3/5 These have decent absorbency, although they do tend to sag in the crotch when getting full and overall, one of the lower performers on this list
Softness: 4/5 Pleasantly soft
Cheapest price at time of writing: $.48 per diaper (Amazon, size 5)
Diaper Design: white with dandelion seeds all over
EWG certified - no
TCF - yes
Oeko-Tex MADE IN GREEN - yes
BCorp Certified - no
FSC or ISF certified - no
List all diaper ingredients - yes
Where are these made - Europe
Other Certifications - PETA-certified vegan
To Note: Sizing runs a tad smaller than standard US diapers.
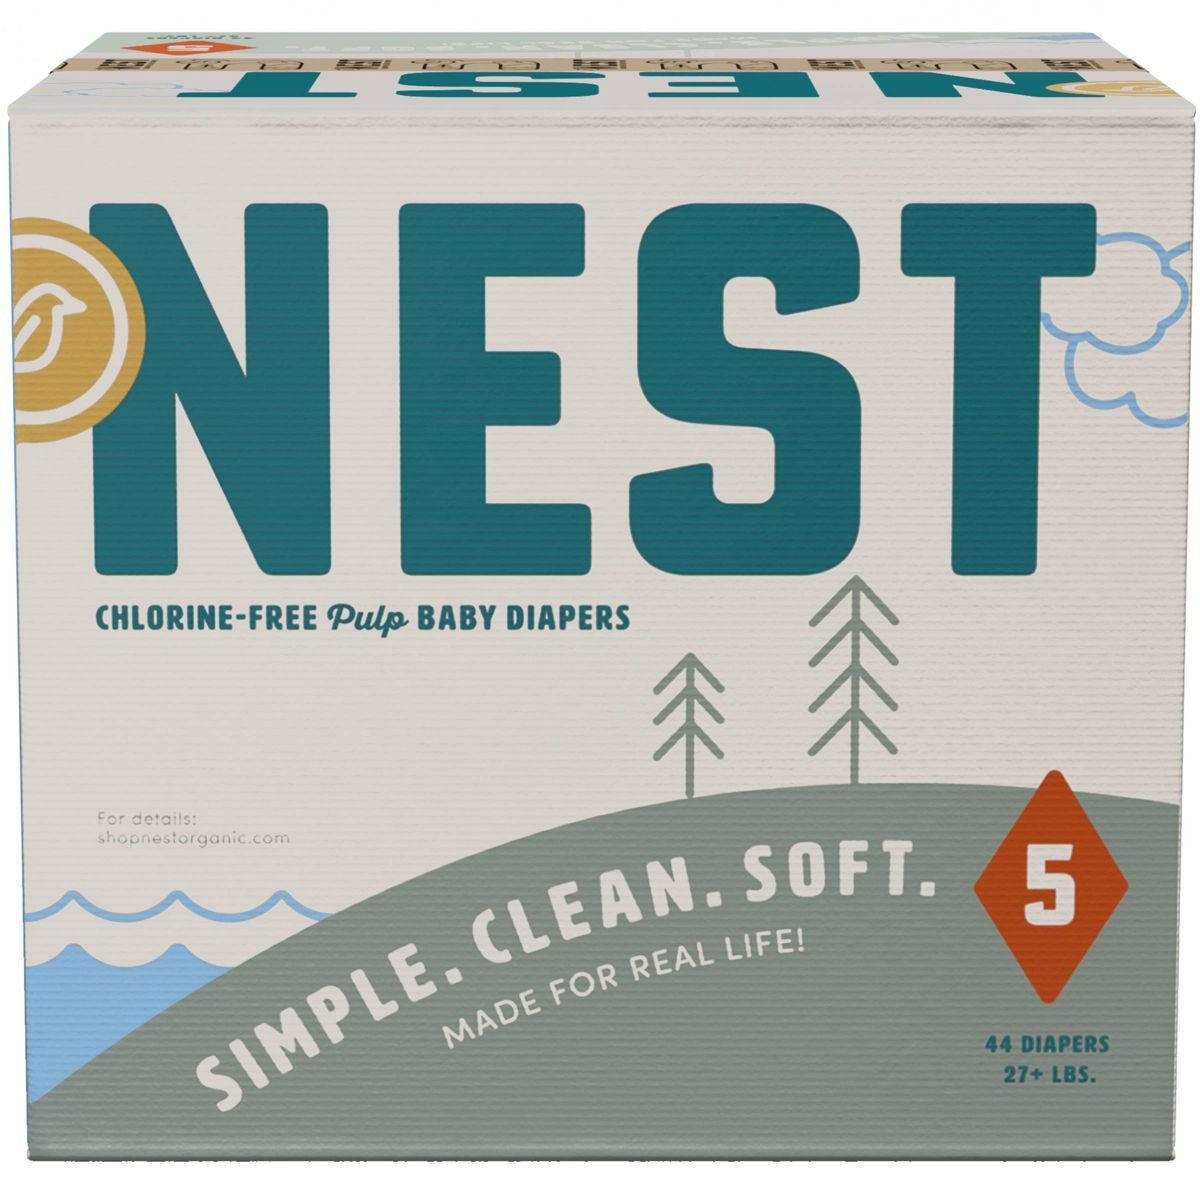
Nest
Absorbency: 4/5
Softness: 3/5
Cheapest price at time of writing: $.73 per diaper (Target, size 5)
Diaper Design: white with a rainbow across front of waistband
EWG certified - no
TCF - yes
Oeko-Tex Standard 100 - no
BCorp Certified - no
FSC or ISF certified - no
List all diaper ingredients - yes
Where are these made - unknown
To Note: These diapers look and act like many of the other diapers on this page, yet it is surprisingly hard to find information on them. The Nest website has lots of pretty words but they don’t show certifications to back up what they’re saying. I believe they’re relatively new (but again not much info there), and I’m hoping they will add more concrete information soon. Their diapers come in paper compostable packaging.
Parasol
Absorbency: 4/5
Softness: 3/5
Cheapest price at time of writing: $.67 per diaper (size 5, Target)
Diaper Design: white and black designs, such as black ferns or black sea turtles, pure white are also available
EWG certified - no
TCF - yes
Oeko-Tex Standard 100 - yes
BCorp Certified - no
FSC or ISF certified - yes
List all diaper ingredients - yes
Where are these made - China (This is one of the few diaper brands I had to reach out to in order to know where they are manufactured. It took a couple of tries, as initally I could only get through to the AI assistant who kept throwing a lot of buzzwords at me without ever answering my question. I wish they would be more transparent in this area and list it on their webisite. As is it felt like they were trying to conceal this fact.)
Other Certifications - Dermatest “Excellent”
To Note: Woman-owned
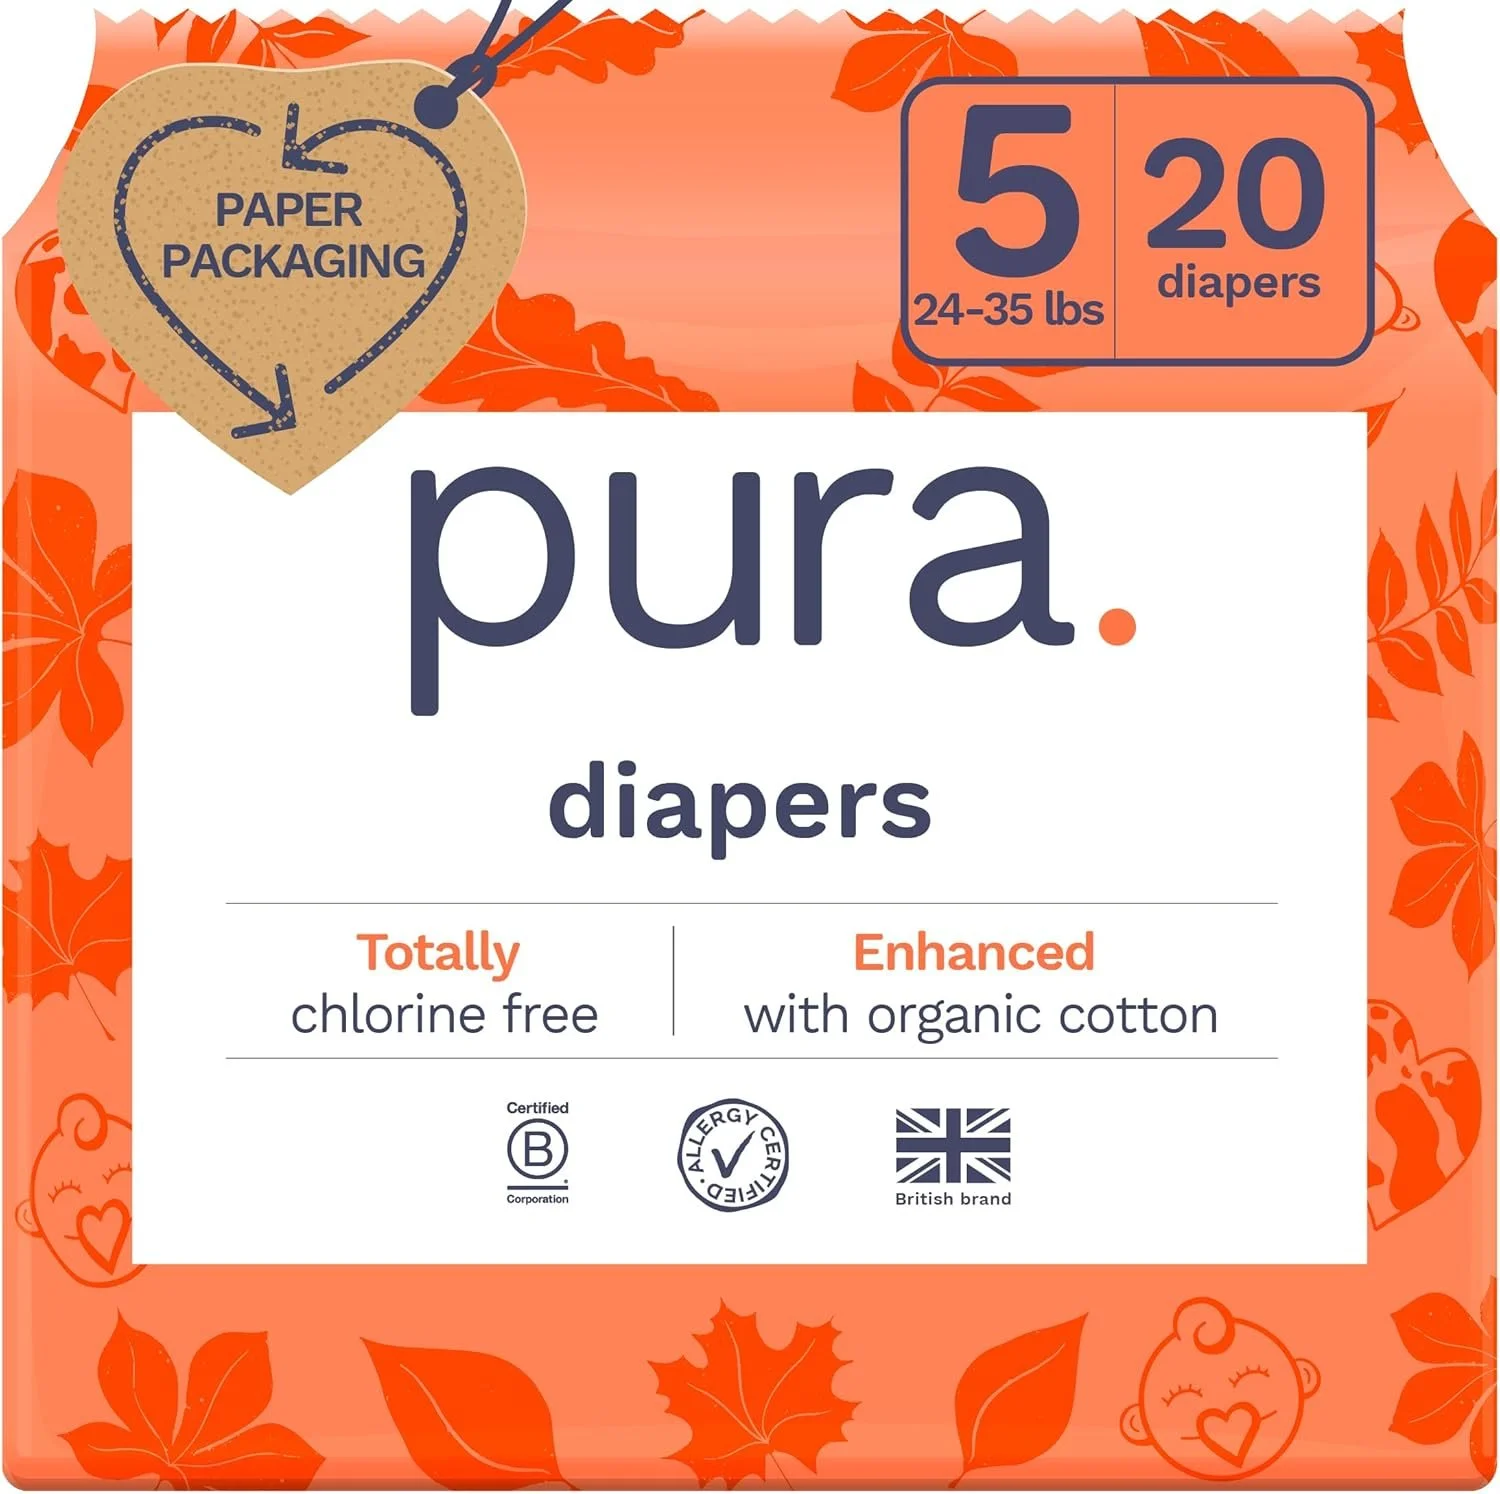
Pura
Absorbency: 2/5 - these quickly sag and leak if too full
Softness: 4/5
Cheapest price at time of writing: $.46 per diaper (on Amazon)
Diaper Design: white with orange designs all over
EWG certified - no (but their baby wipes are)
TCF - yes
Oeko-Tex Standard 100 - yes
BCorp Certified - yes
FSC or ISF certified - no
List all diaper ingredients - yes
Where are these made - Made in the EU
Other Certifications - Nordic Swan Eco Label, carbon neutral business, Allergy Certified, recyclable paper packaging
To Note: British brand
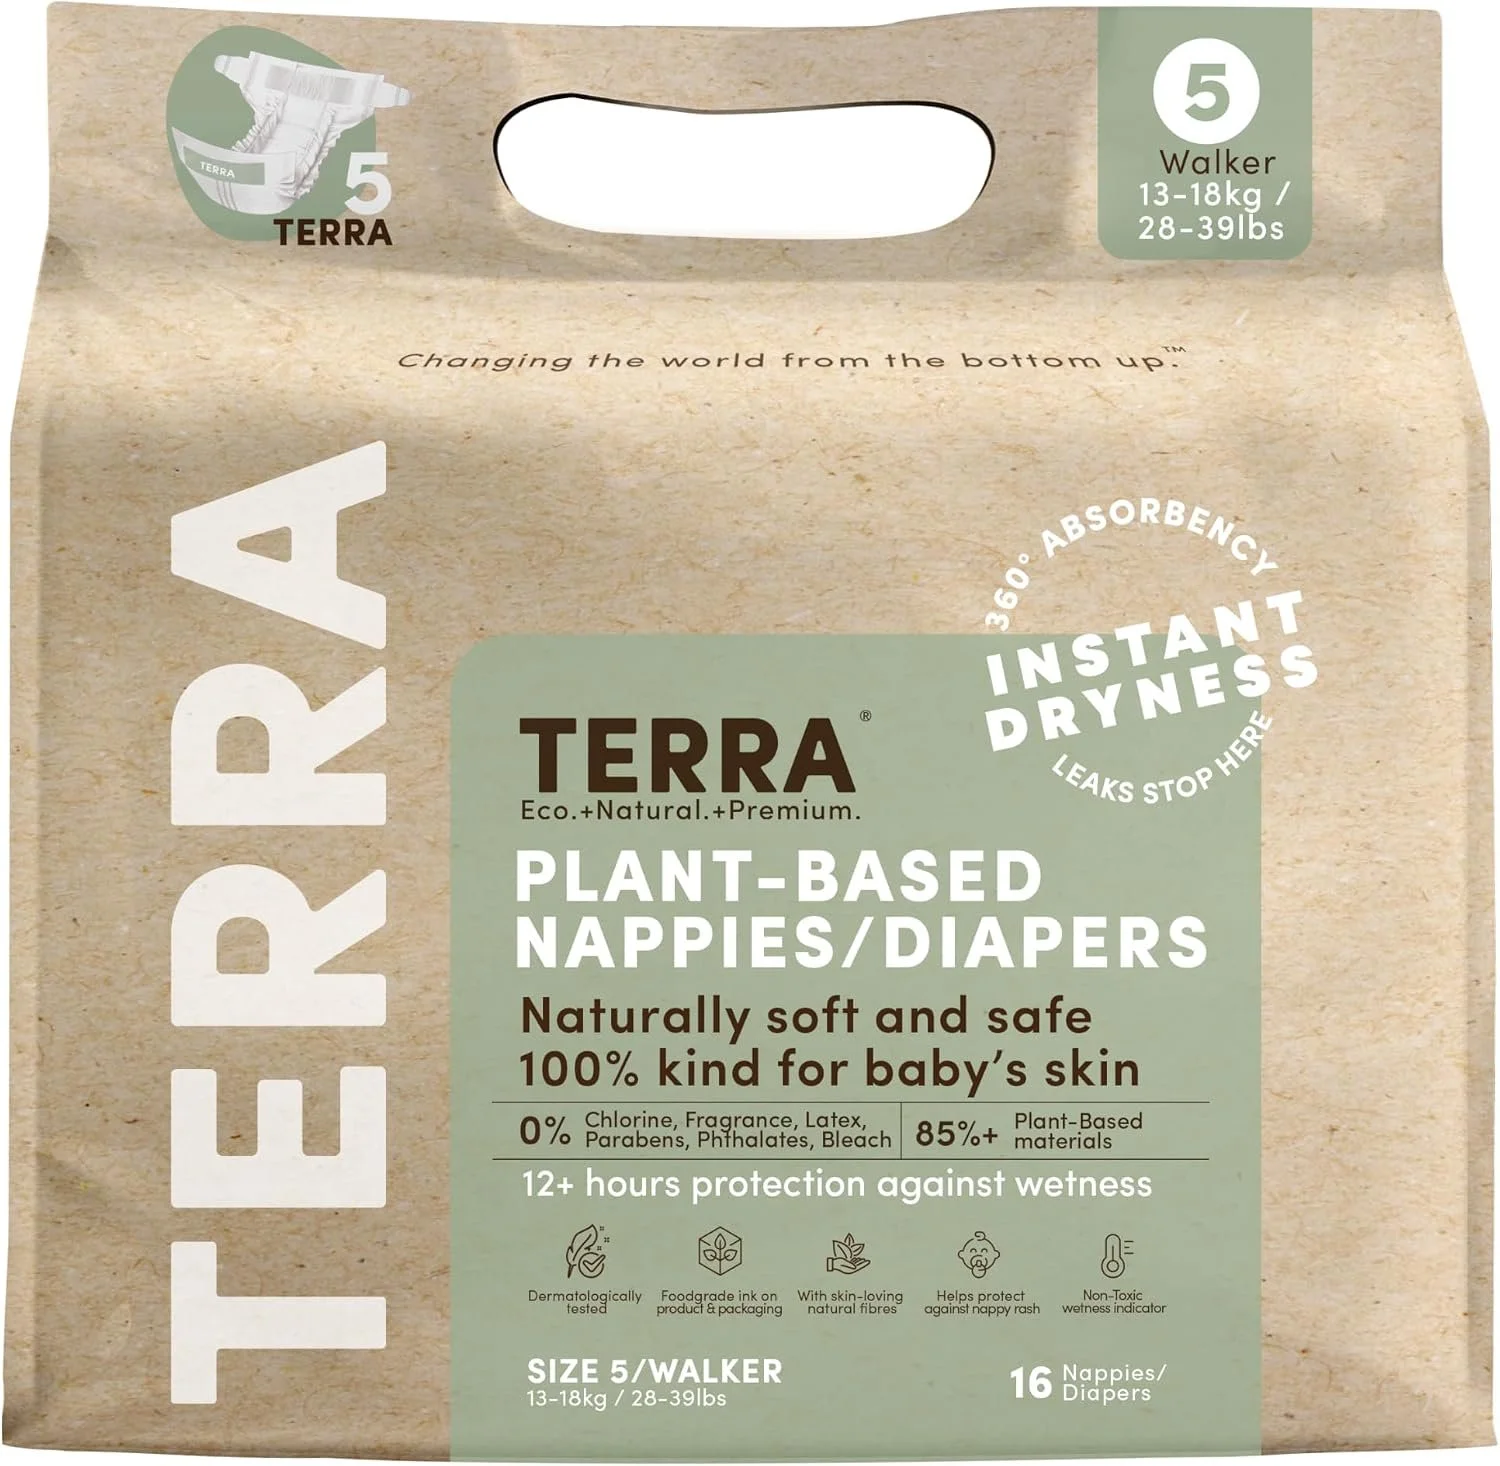
Terra
Absorbency: 3.5/5 - good absorbency but watch out for very soft poos
Softness: 4/5
Cheapest price at time of writing: $1.04 per diaper (on Amazon)
Diaper Design: white with green waistband with “Terra” written in white (food grade ink)
EWG certified - no
TCF - yes
Oeko-Tex Standard 100 - no
BCorp Certified - no
FSC or ISF certified - yes
List all diaper ingredients - yes
Where are these made -
Other Certifications - USDA certified biobased product, dermatologically rated “excellent”
To Note: Bamboo diapers made with a closed-loop systems for optimal sustainability. Their manufacturing runs on 100% renewable energy. They also claim their diapers are made from biodegradable materials and can compost in approximately 6 months. While not fully biodegradable due to hygiene regulations, they are a more eco-friendly choice. Packaging is paper and home-compostable
These next diapers I have not personally tried, but they appear to meet the criteria for this list:
BabyGanics
EcoBoom
Ecoriginals
Happy Little Camper
Manukind
Do you use diapers you thought were “natural” but didn’t see them on this list? It’s possible we’re not aware of them, but most often diaper brands are savvier in their marketing than they are their transparency in how natural their diapers truly are…Here’s a list of diapers that are often seen as natural or eco-friendly but don’t actually make the cut:
and most likely any other diaper that you would expect to see on this list but is not
Interestingly, some of these diapers previously would have made the list, but no longer do. For example, Honest diapers started out as TCF, but along the way they switched to ECF. I have only included TCF diapers on this list, therefore they no longer make the cut.
What are your favorite natural diapers? Any we should know about? Let us know in the comments!