Coffee Culture in Italy

Last Updated July 12, 2024

Coffee. caffè. قهوة. ቡና. koffie. kafe. սուրճ. קפה. kaffi. caife. café. コーヒー. кофе. 咖啡. káva. kahve. ყავა. coffi. καφές. kope. ikhofi. cà phê. کافی. കോഫി. kahvi. kape. kohvi. kafo. kaffe. కాఫీ. kafija. capulus. kahawa.

IMG_9451.jpg

More than 33 ways to say coffee in at least 37 different languages.  (Some overlap, i.e. café is Spanish, French, and Portugal.)  And even the ones that don’t share the Latin alphabet and I can’t even begin to sound out sound similar to the word “coffee.”  I know that because Google Translate and transliteration.  Amazing, isn’t it?  I mean, the languages, not Google Translate, but yeah, that’s pretty amazing also.  So many different cultures and people and centuries, and coffee is so important in so many of them.  Not least of all Italy, which is why I’m writing this post.  (Coffee in Italian is the second language written, “caffè,” and you will hear it and see it, ALOT.) 

In fact, Italy is the birthplace of many of the coffee drinks you drink today, including cappuccino, espresso, macchiato, and latte, although ordering them at Starbucks is going to get you something very different than what you would get in Italy.

So, what are the principal coffee drinks in Italy?

(You can find your own espresso depresso t-shirt on Amazon, yasssss)

This post may contain affiliate links. If you make a purchase using these links, Jennyblogs may receive a small commission, at no extra cost to you. This helps to support Jennyblogs. Where possible, links are prioritized to small businesses, and American companies and products made in the USA for American readers. For further information see the privacy policy. Grazie!


The drinks on a typical Italian coffee menu

Cappuccino

Cappuccino

  • Espresso - “Expressed”

    A strong shot of coffee and what is considered “normal coffee.” If you go into a bar and order a “caffè,” they will usually clarify by asking “caffè normale?” which of course, literally means normal coffee. It is drunk throughout the day at any time, and particularly after lunch and dinner to help digestion.

    You can order a “ristretto” (restricted) where the espresso shot is pulled early resulting in a shorter, stronger shot, or you can order a “lungo” (long) which is the opposite, a taller and waterier (is that a word?) shot of espresso.

    The name means “expressed” which could denote any or all of the three meanings of the word in English or Italian. First, the method in which espresso is made, where the steam “expresses” and pressures the coffee flavor into the water, second, that it is made quickly or “expressly,” and third, that it is made “expressly” for one person. This, however, still does not give you license to call it an “expresso,” mmk?

  • Macchiato - “Stained”

    You can order a macchiato two ways: A caffè macchiato or a latte macchiato. Caffè macchiato means “stained coffee” so you will get an espresso with a small dollop of milk, usually foamed. A latte macchiato means “stained milk” and will get you hot milk with some coffee served in a glass, with or without the foamy milk, depending on the different preparations.

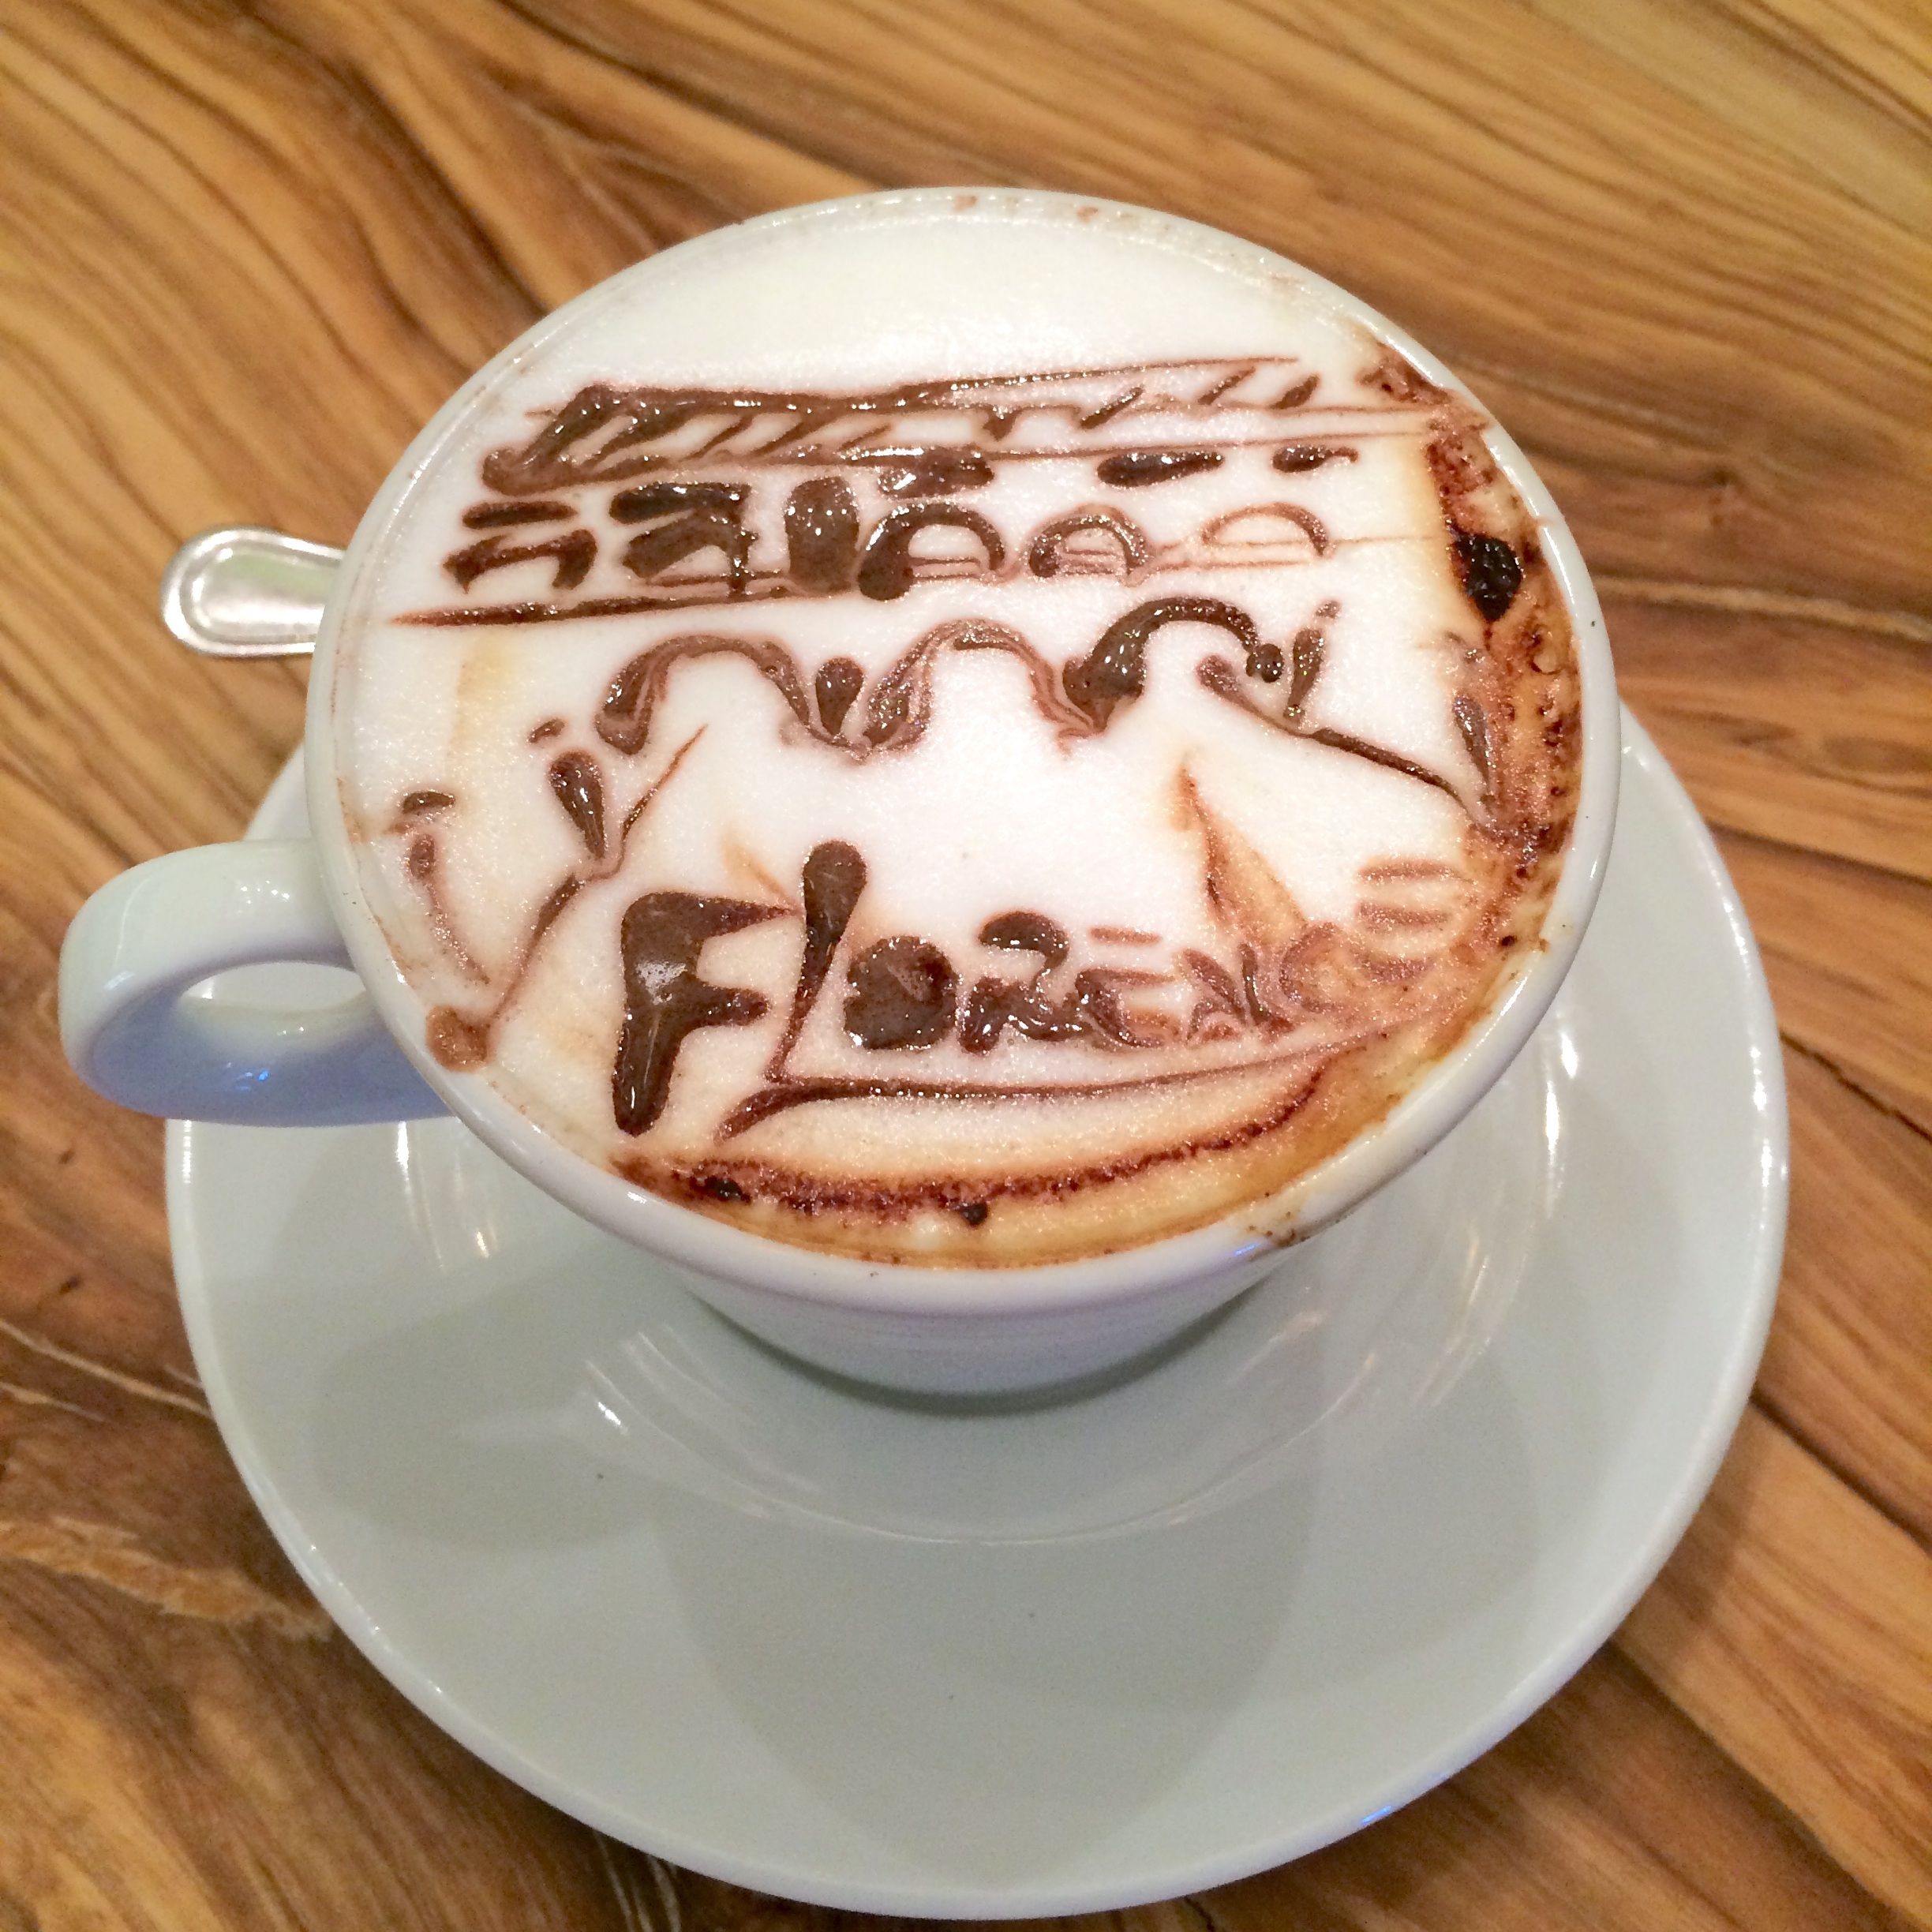
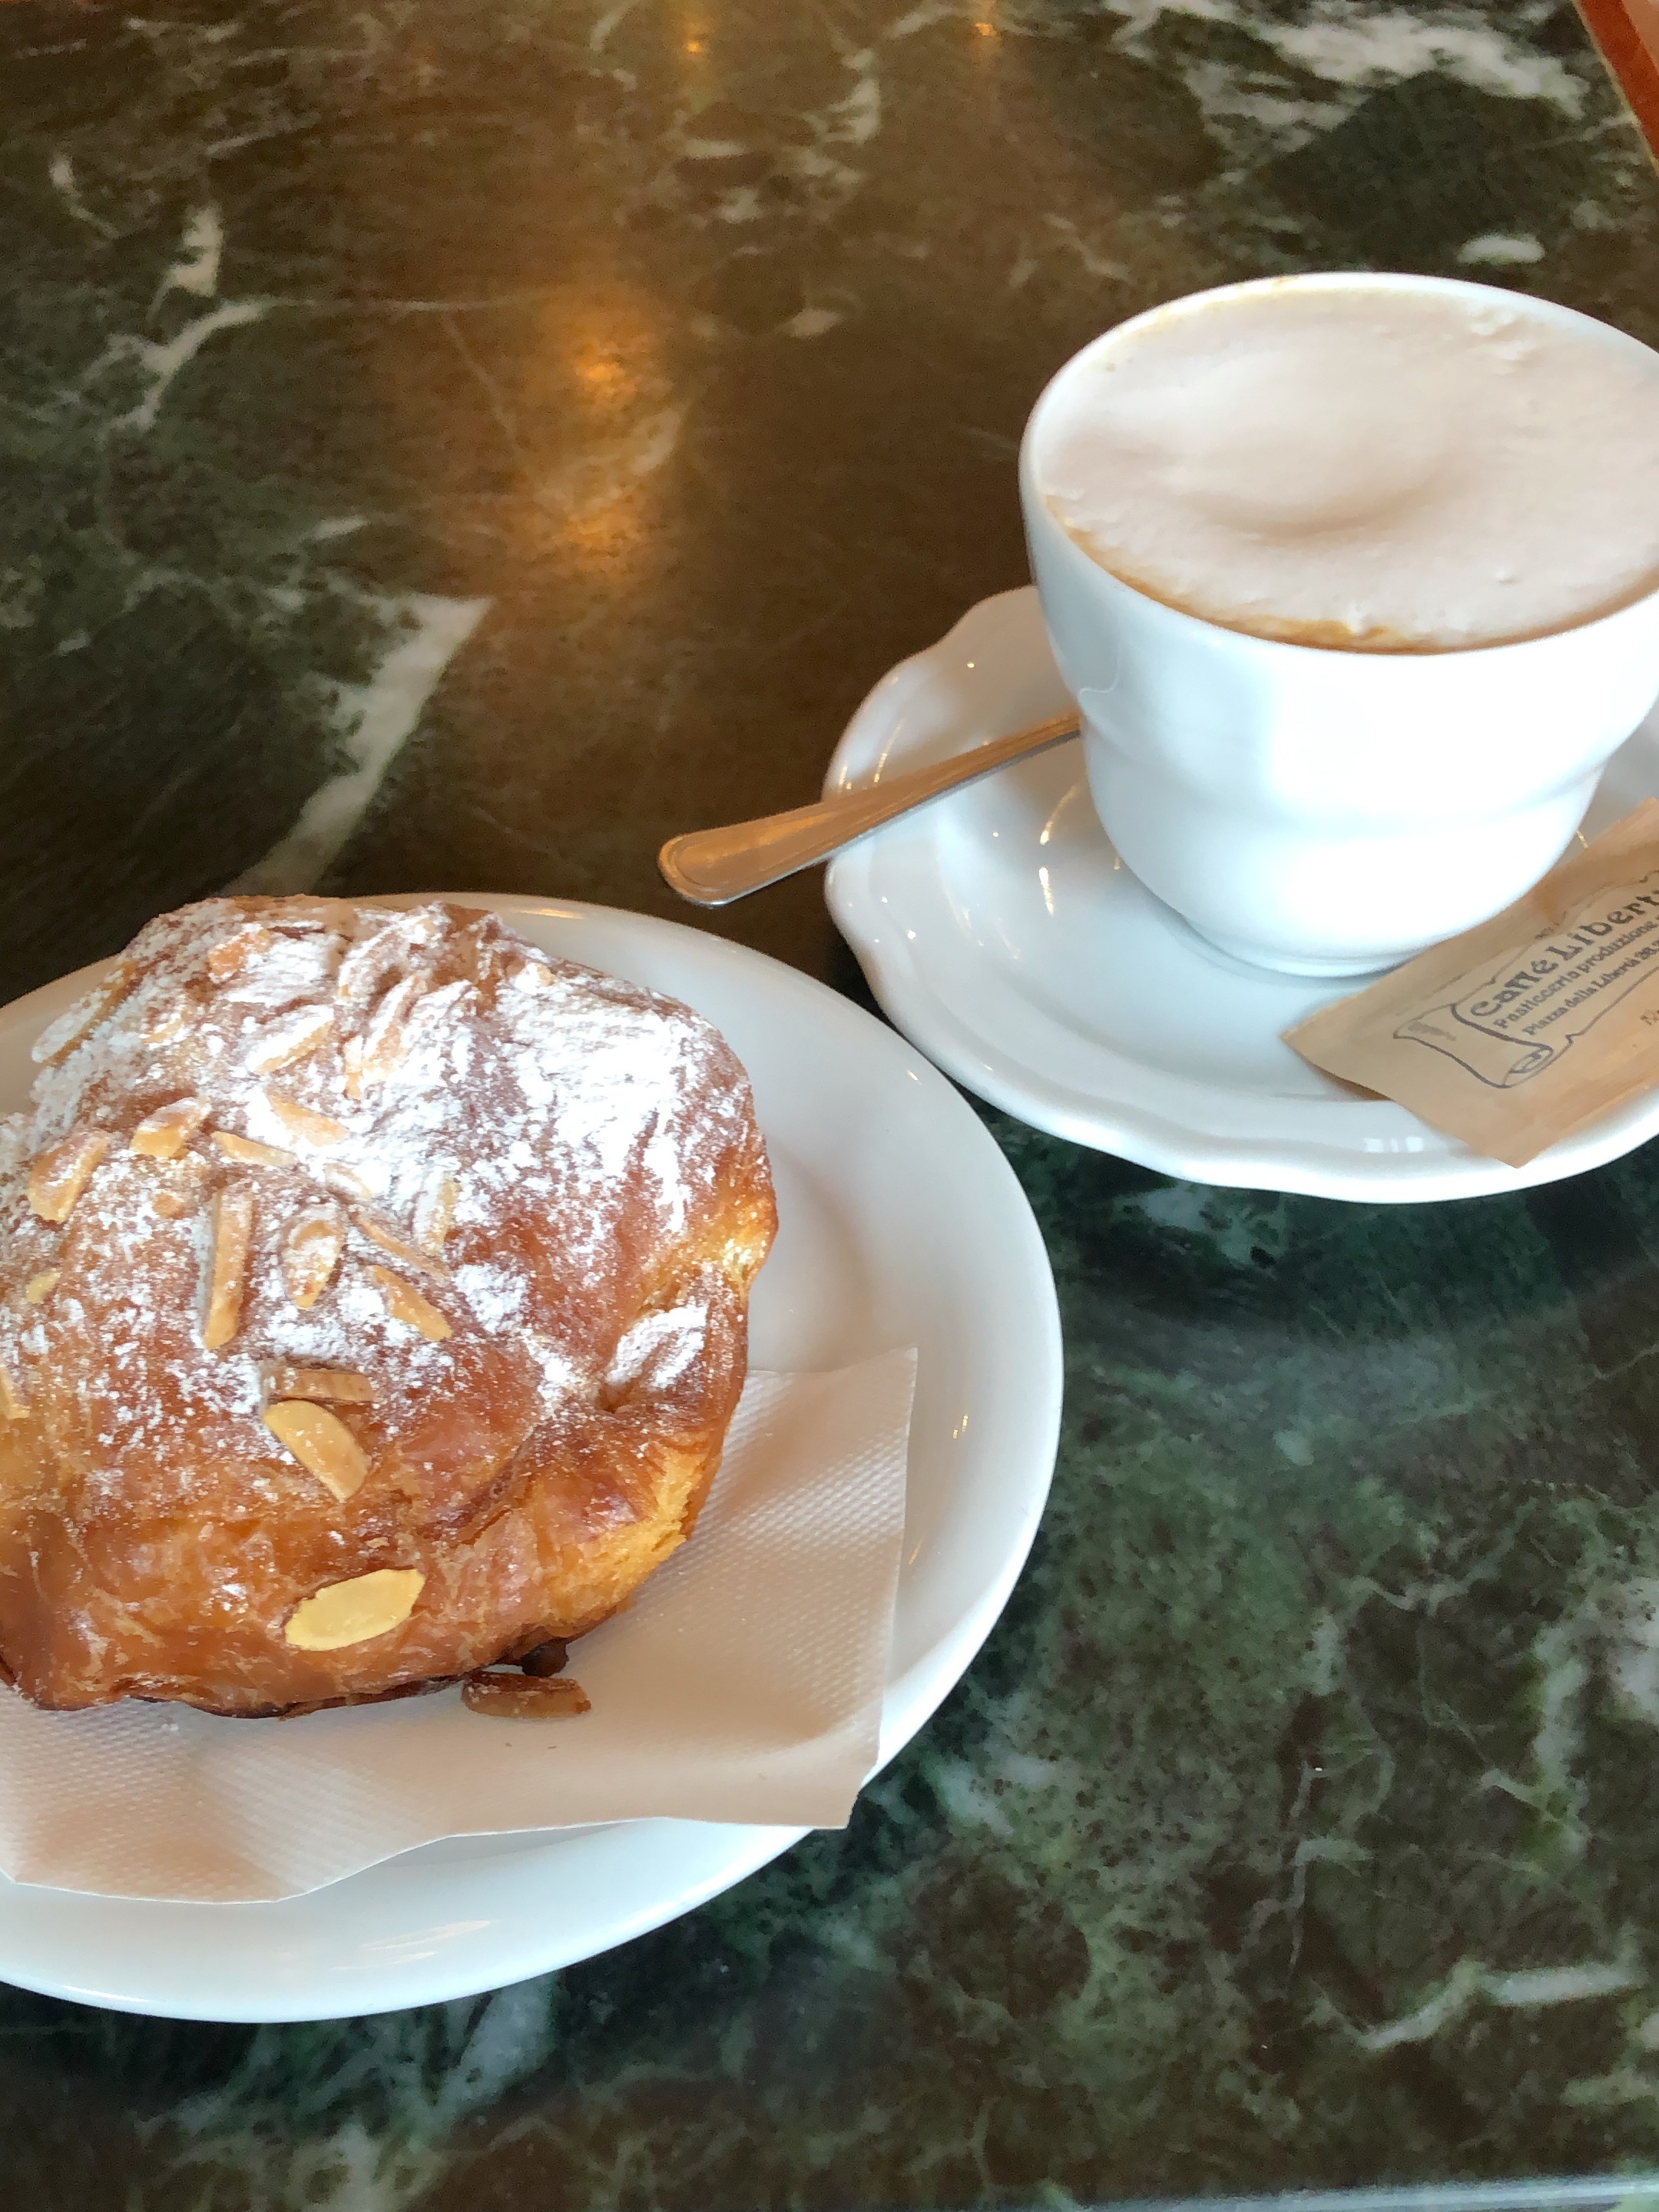
  • Cappuccino - “Little Hood”

    The Italian coffee of choice for breakfast (and mine!) and probably doesn’t need much intro. The cappuccino, also called cappuccio which means just “hood,” got its name from the color of the hood of the Capuchin monks which it apparently resembles. According to this site (in Italian) a cappuccino should be 25ml of coffee and 125ml of milk with lots of foam.

    Oh, and you might have heard that you should never drink a cappuccino in Italy after noon or you’ll get kicked out of the country? Not exactly true. It’s mostly because, according to most Italians, milk upsets digestion unless it is a part of the traditional cappuccino and pastry breakfast in which the milk acts as an element of the meal.  But consuming milk after a heavier lunch or dinner, especially at night, is too much.  As this Italian Mamma explains, “When the casein in milk combines with the hot coffee, given the high temperature, it combines with the tannic acids characteristic of the drink (or rather the coffee); this meeting then produces a chemical composition that weighs down the digestion.” I’m not here to vouch if this is sound science or not, just quoting so you can get an idea of the Italian thinking. If you choose to abide by this “rule,” drink your cappuccino by itself or with a cookie, pastry, or something small and light and far away from mealtimes, breakfast aside.

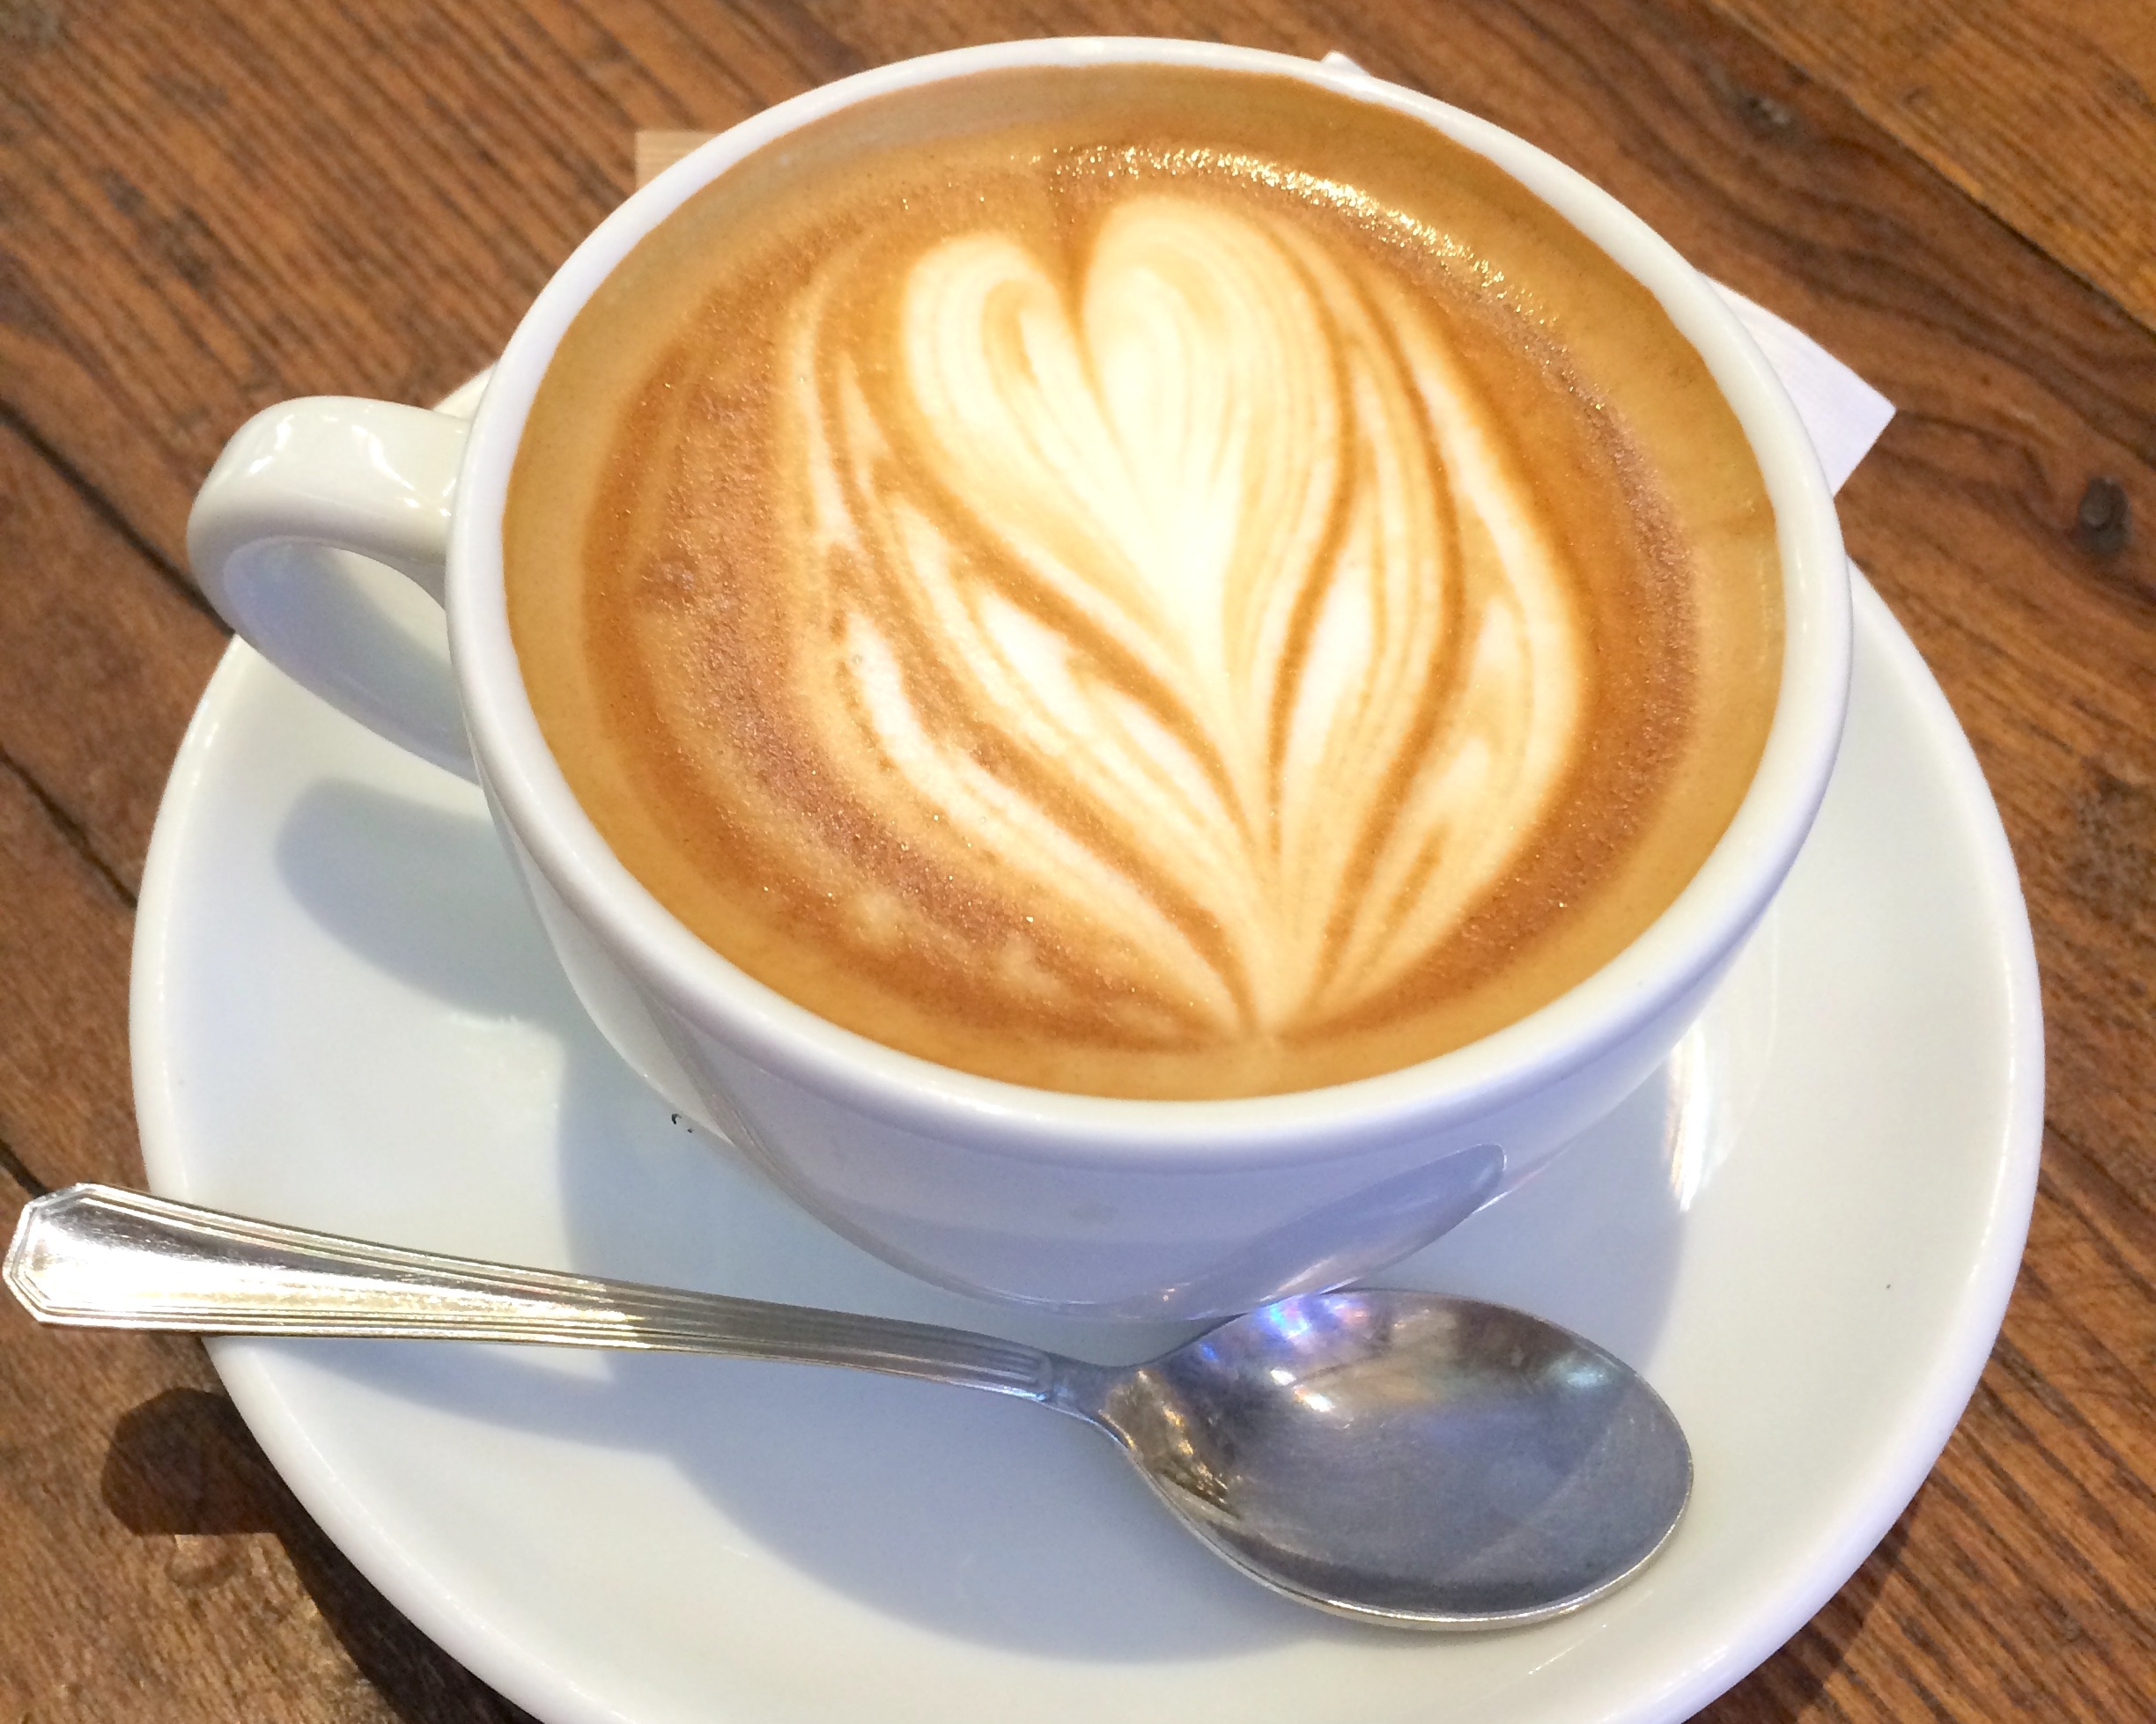
  • Caffè Latte - “Milk Coffee”

    Or caffellatte. In America we have long since dropped the “caffè” and simply order a latte. This strategy in Italy, however, will simply get you a glass of milk. A caffè latte is essentially a cappuccino without the foam.

  • Caffè Americano - “American Coffee”

    A larger cup of weaker coffee in comparison to the classic espresso.  The classic way to prepare a caffè americano in Italy is to add hot water to an espresso.  Yum.  Not.  There are a few places you can find that have drip “American” coffee and even a few who do pour overs. 

  • Caffè Corretto - “Corrected Coffee”

    Because, normal coffee is not correct. It must be corrected, and with a small amount of liquor. The type of alcohol used can vary depending on the region, but usually grappa is used, sometimes brandy, Sambuco, or l’anice, a type of anise liquor, or even Bailey’s.

  • Caffè al Ginseng - “Ginseng Coffee”

    This is definitely one you should try, delicious even if it is a bit pre-fab. It is usually a powder mix they add to a machine and dispense as ordered, so not fresh coffee, but it’s a pungent and sweet little drink that I unabashedly love. You can order an “alto” tall or “basso” short, depending on if you want it to be the equivalent to roughly a shot of espresso or double shot. The sugar usually lies at the bottom so you’ll want to stir it before consuming.

    Ginseng has long been a part of Chinese medicine and has become popular around the world where you can find it in just about any store’s health supplement section. It is supposed to have many health benefits, including being a powerful antioxidant reducing inflammation, benefiting brain function, benefiting against cancer, boosting the immune system, increasing energy, lowering blood sugar, and having aphrodisiacal qualities. However, many of these studies seem to prove only the “may benefit” or “could help” factors with nothing concrete.

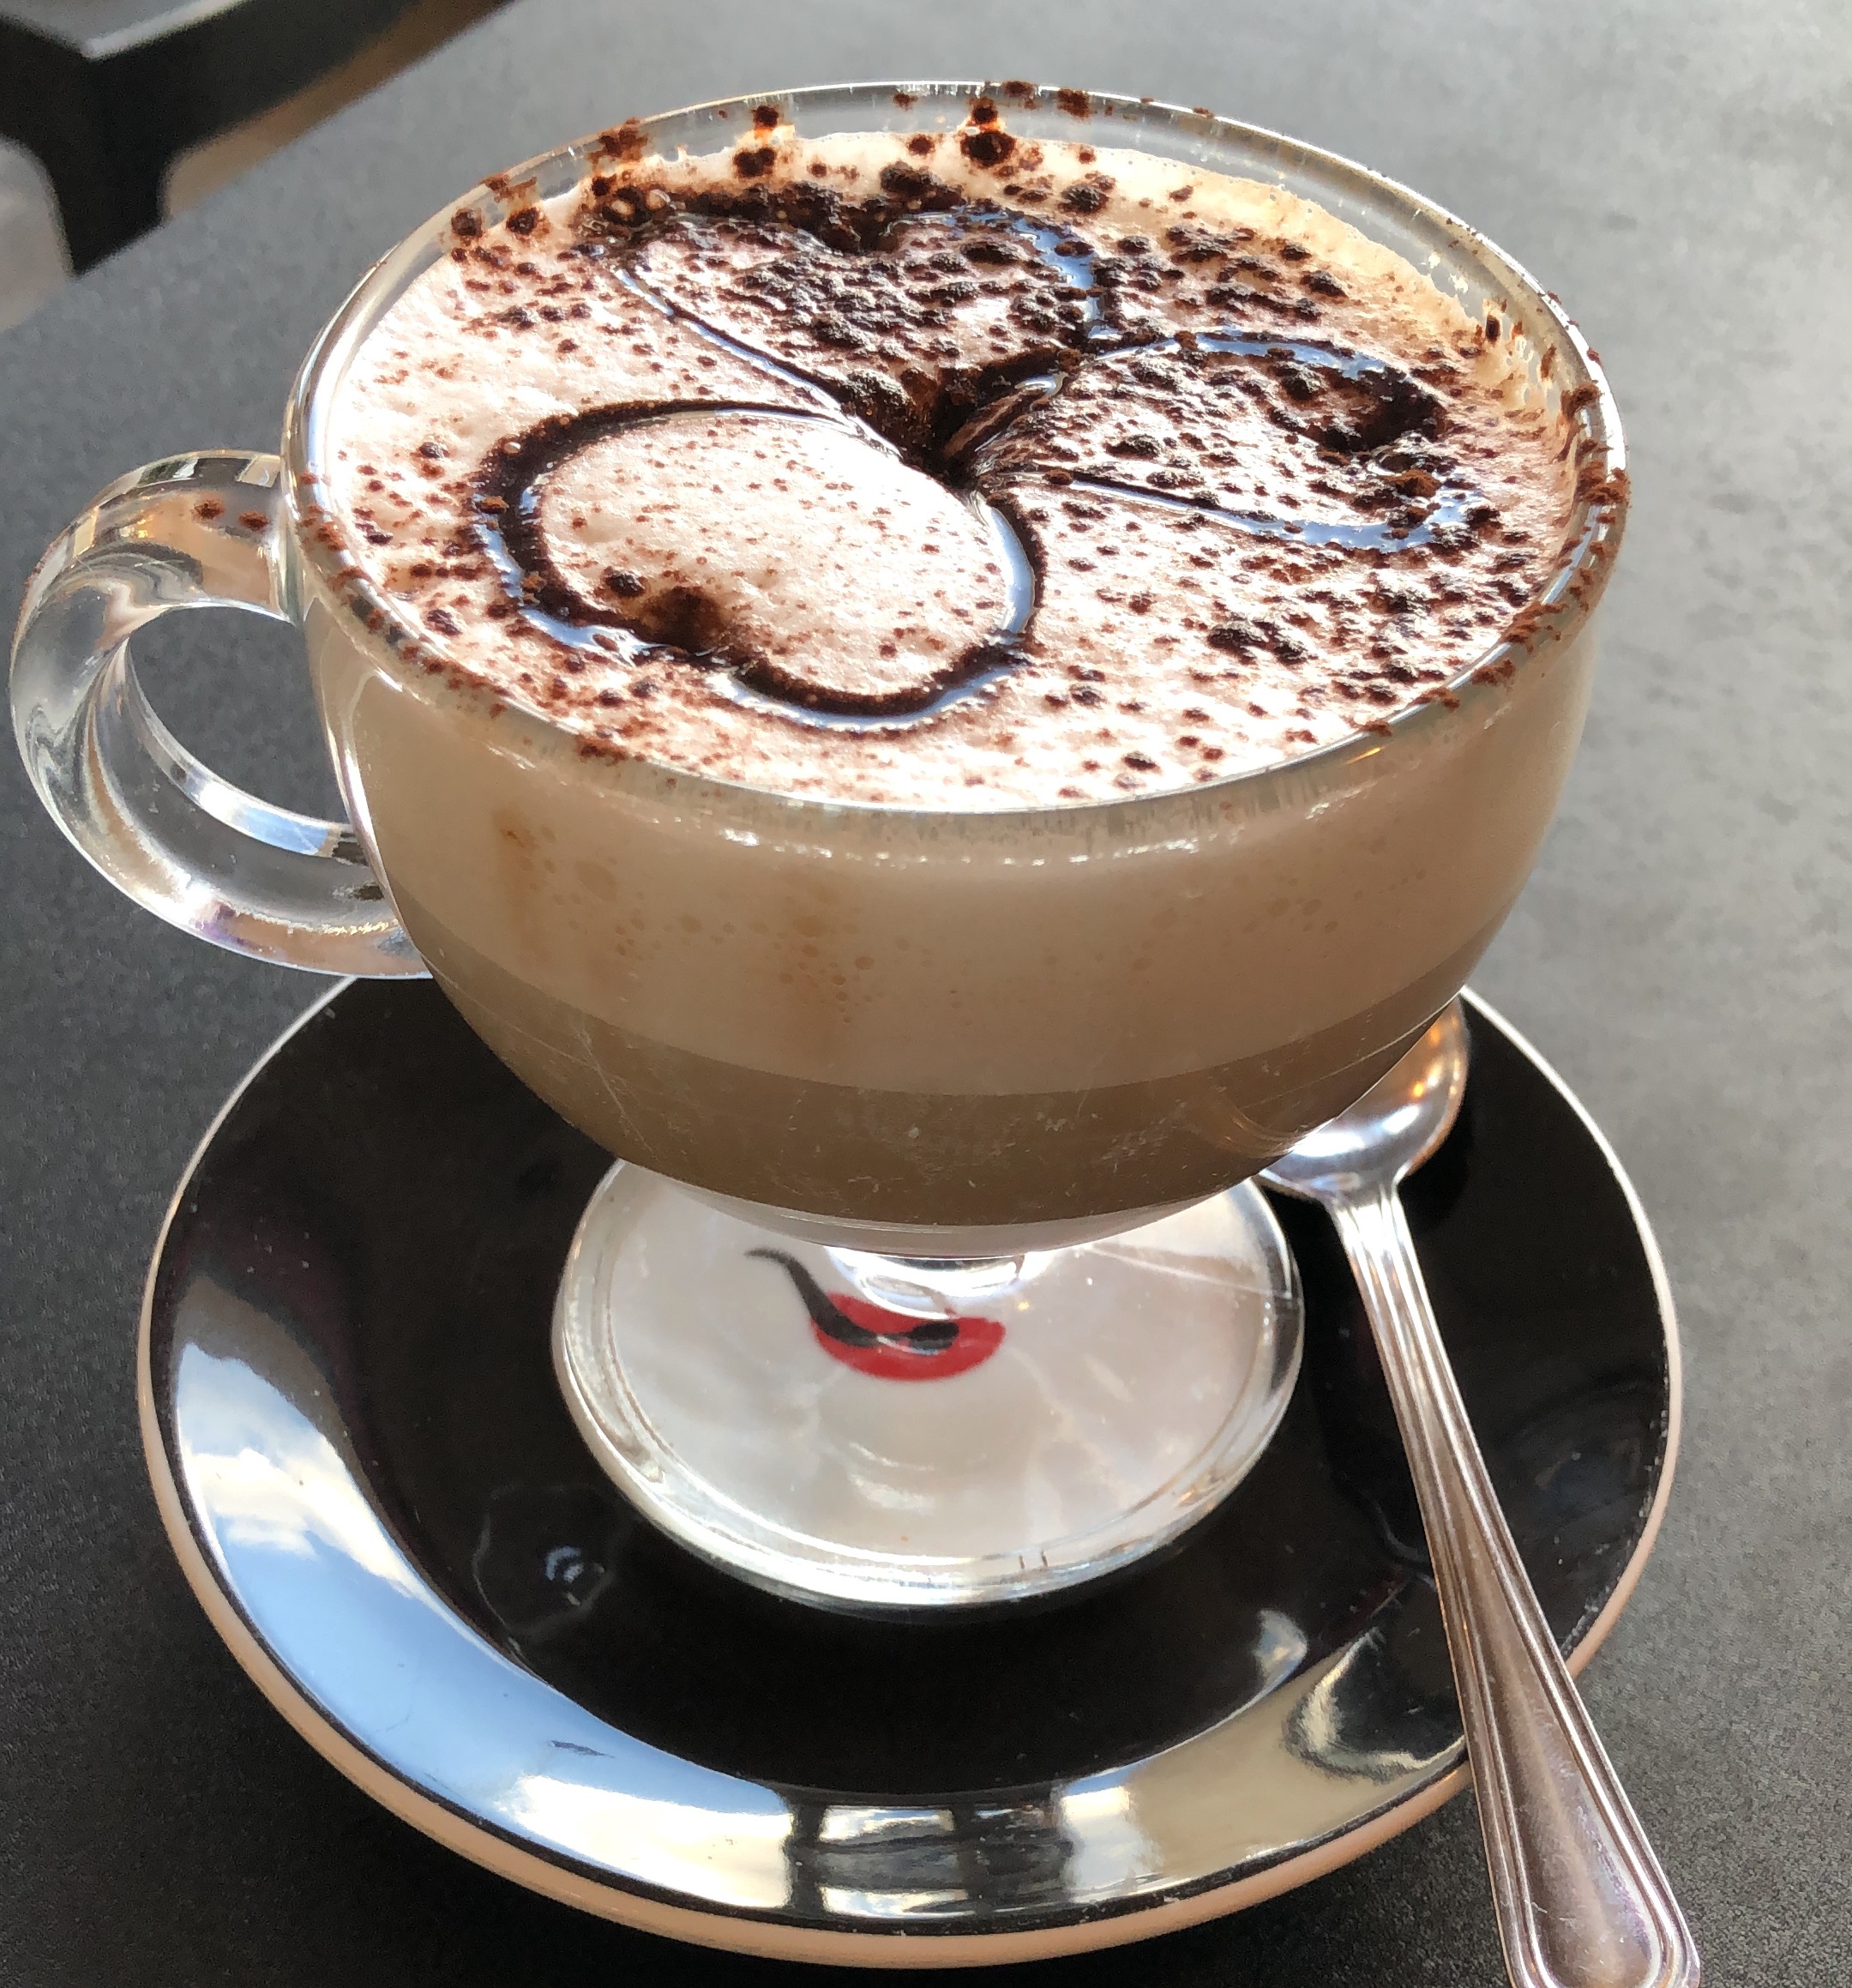
  • Marocchino - “Moroccan”

    Despite its name this drink was also invented in Italy, in Piemonte. At first glance it may seem just a cappuccino with cocoa, but it is much better than that. There are quite a few different preparations, but almost all include espresso, cocoa, and steamed milk served in a clear glass. Often the glass is first sprinkled with cocoa, then the espresso is added, then steamed milk and finally more cocoa. The official site of Illy (one of the top Italian coffee roasters, you’ve probably heard of them or seen their coffee in the States) gives the preparation for the Marocchino at home as thus: Place about 1 Tbsp / 10-15ml of hot chocolate in a glass, then prepare directly in the same cup about 2 Tbsp / 20-25ml of espresso, sprinkle with a thin layer of cocoa, then steam about 2 Tbsp / 25ml of milk and add to the glass over the cocoa.

  • Shakerato - “Shaken”

    Coffee shaken in a cocktail shaker with ice and if desired, sugar. The resulting refreshingly icy coffee with a bit of foam is usually served in a martini glass, sometimes a flute glass.

    I like this word because it is an English word that has been Italianified. I don’t think that’s even a word. “Sh” doesn’t exist in traditional Italian spelling, nor does “k.” They say a “sh” sound, but it is spelled with “sci” or “sce.” Essentially they took the word “shaker” and turned it into an Italian verb, shakerare, which means to shake drinks in a shaker. Then this drink’s name is the past tense, shakerato, meaning shaken. It makes me laugh, neither truly Italian or English!

  • Caffè d’Orzo - “Barley Coffee”

    For those who prefer decaffeinated drinks you have the choice between ordering your favorite coffee decaffeinated or with orzo / barley instead of coffee beans.

    Decaffeinated coffee, as you probably know, are coffee beans which have gone through a process to remove the caffeine. They process often involves hot water and methylene chloride, of which trace amounts will end up in your coffee (it was recently banned for use in paint and paint strippers). The USDA requires that a minimum of 97% caffeine be extracted for coffee beans to be considered decaffeinated. Decaffeinated coffee will always have a small amount of caffeine in it. If you’re interested to see if the decaf coffee you drink uses the chemical process for decaffeination, check out this article here, which tested out some top decaf coffee brands as well as what to look for in labeling when buying decaf.

    Crushed barley is used much like coffee beans to attain a dark and bitter drink which assimilates coffee, although it has its own distinctive taste. It became popular during war times in Italy when coffee beans became too expensive. Unlike decaffeinated coffee, barley is completely caffeine free, but not suitable for those who can’t consume gluten.


The Italian coffee experience

You could parachute out of a plane and land just about anywhere in Italy and still be in sight of some place that sells coffee.

My happy face while trying the coffee at Sant’Eustachio Il Caffè, a historical cafe and roastery in Rome.

My happy face while trying the coffee at Sant’Eustachio Il Caffè, a historical cafe and roastery in Rome.

The Italian bar is a way of life here. “Bar” is a general term for any place that sells coffee. Often the name of the place has “bar” in the title, but this can also include any cafe or pasticceria that sells coffee. A bar usually has, what do you know, a bar with a rung at the bottom for standing comfortably with one foot propped up while you wait for, then down your coffee.

Anytime you see an old friend or need to meet up with a colleague, you head to the nearest bar, offer them a caffè, throw it back, and you’re each on your way. This can happen several times a day, because I don’t think I’ve met an Italian yet who stops at one coffee a day. It’s very different from the lingering 2 hour catch-up with friends or I’m-just-going-to-sit-here-and-use-the-free-wifi-on-my-computer-and-get-some-work-done experience in America. In fact, the very few times I’ve brought my computer and sat in a bar or pasticceria I felt very strange, and very millennial. Even if I linger over my coffee for more than say, 20 minutes, by the time I leave it’s a whole new crowd. The exception seems to be some of the older generation who will sit outside and people watch for hoursssss.

If you are looking for more of an American coffee shop type experience, there are a select few that are on the cutting edge, and these are the only ones that I don’t feel the oddball out if I linger too long or decide to bring my computer. You’ll find that the other young and international people who take their coffee seriously and felt more at home in a “coffee shop” type setting have gravitated to these places as well.

Then there are the restaurants, where you will always find caffè as your post-meal digestive, a must for many Italians, lunch or dinner!

For the best coffee around Florence, read this.

What are your favorite coffee drinks in Italy? Let me know in the comments below!


Classic Rhubarb Custard Pie

IMG_1860.jpg

Last updated July 31, 2024

Nothings says summer like a rhubarb pie. Better yet, a rhubarb CUSTARD pie.

Rhubarb is always one of the first garden plants to grow each spring in Michigan, announcing that after a long, cold winter summer is indeed coming and didn’t get lost along the way after all. Rhubarb likes to grow so extensively in its short season that you don’t know what to do with all of it, until it withers in the approach of hotter weather and leaves you already looking forward to next year’s crop. Unless, of course, you planned ahead and froze some. But frozen rhubarb will never be like fresh, so make all the pie and hand pie, crisp, cake, syrup, and camel hair soup you can! I mean, er, rhubarb sauce…not camel hair soup. Hehe, who’d call it that??

IMG_1835.jpg

Do you want to know something really sad? I’ve never seen rhubarb in Italy, at least not in Florence. So for my international friends, I’m sorry if your area fails you and doesn’t grow rhubarb so you aren’t able to make this recipe. If there is rhubarb in Florence though, someone please tell me where to find it? So far everyone I’ve asked just said, “…what’s that?” This just goes to show my ignorance. Before moving to Italy I was trying to bake with all of the ingredients that aren’t readily available here, or at least what I figured wouldn’t be readily available. I should have been in a baking frenzy with rhubarb instead of things like Oreos. Because, no rhubarb and Oreos everywhere. There are even Oreo donuts in the grocery store bakery section…I’ve come so close to trying them during various weak moments.

Wherever you are in the world, be sure to bake or eat a rhubarb pie at the next chance. You won’t regret it and might inspire you to move to a part of the world where rhubarb is grown.

This recipe is the old-fashioned classic from my mama. The crust is one of my favorite traditional pie crust recipes, simple and can be made ahead of time if needed. It uses butter instead of shortening, which in my mind is a bit of a compromise between shortening or lard (which most people and bakeries use to make tender and flaky crusts but it’s also horrendous for your health and has no taste if it’s not artificially flavored.) and oil, which my mom has always used because oil can actually be good for you, although it makes for the trickiest to handle and often um, hardier pie crusts. So I use butter, which tastes wonderful and makes the crust easy enough to work with, even if it’s not as healthy as oil.

This post may contain affiliate links. If you make a purchase using these links, Jennyblogs may receive a small commission, at no extra cost to you. This helps to support Jennyblogs. Where possible, links are prioritized to mall businesses and ethically and responsibly made items. For further information see the privacy policy. Grazie!

Recipe from my Mama


Classic Rhubarb Custard Pie

Makes one 9in / 23cm pie, about 8 servings

Ingredients:

For the Crust

For the Rhubarb Custard Filling

  • 3 eggs

  • 3 Tbsp / 45g milk

  • 1 1/2 cups / 300g granulated sugar

  • 1/4 cup / 30g all-purpose flour

  • 3/4 tsp nutmeg

  • 4 cups fresh rhubarb, sliced into 1/2in / 1cm chunks

Directions:

Oven 400°F / 205°C. 8 or 9 inch pie dish. 

Make the Crust

IMG_4560.jpg
  1. Prepare pie crust per recipe instructions, refrigerate until needed.

Make the Rhubarb Custard Filling

  1. Blend eggs and milk together in a large bowl.

  2. Add the flour and nutmeg to the sugar then add to the egg mixture and beat well.

  3. Add in the rhubarb and mix to coat well.

  4. Pour into prepared pie crust and add top crust.

    For a classic top pie crust, place crust on top, cut off overhang, and crimp together the edges of the top and bottom crust to seal.

    For an interwoven lattice, start in the center of the pie and work outward, then repeat with the other half. Arrange half of the strips evenly spaced over the pie all in one direction, then flip every other strip back over itself, so half are now only covering half of the pie. Take a new strip and place it perpendicularly just in front of the folded strips. Unfold the folded strips so these ones now cover the new strip. The new strip should be under and over every other one. Working on that same half of the pie, fold back every other strip, all the ones that were NOT just folded. Take another new strip and place it evenly apart from the first perpendicular strip. Unfold the folded strips. Repeat folding back strips, placing new strip, and unfolding until you reach the edge of the pie. You may need to trim down the strips as you get closer to the edge. Repeat with other half of the pie.

    Sprinkle sugar on top, if desired.

  5. Bake pie in preheated oven for 50-60 minutes or until crust is golden brown and a knife inserted in center of pie confirms rhubarb is tender.

  6. Allow to cool completely before slicing and serving.

Jenny’s Notes:

  • If you make the crust and pie in the same day, you could make the filling while the crust is resting in the fridge for an hour or so before rolling out.

  • Instead of a traditional top pie crust or lattice you could add a streusel/crumble, delicious and definitely the easiest option of the three.

Rhubarb Custard Pie
Yield 8
Author
Prep time
1 H & 10 M
Cook time
1 Hour
Total time
2 H & 10 M

Rhubarb Custard Pie

Classic rhubarb custard pie recipe handed down from my mama. Homemade pie crust with the uniquely sweet and sour filling you can only get with rhubarb.
Cook modePrevent screen from turning off

Ingredients

For the Crust
For the Rhubarb Custard Filling

Instructions

Make the Crust
  1. Prepare pie crust per recipe instructions, refrigerate until needed.
Make the Rhubarb Custard Filling
  1. Oven 400°F / 205°C. 8 or 9 inch pie dish.
  2. Blend eggs and milk together in a large bowl.
  3. Add the flour and nutmeg to the sugar then add to the egg mixture and beat well.
  4. Add in the rhubarb and mix to coat well.
  5. Pour into prepared pie crust and add top crust.
  6. For a classic top pie crust, place crust on top, cut off overhang, and crimp together the edges of the top and bottom crust to seal. For an interwoven lattice, start in the center of the pie and work outward, then repeat with the other half. Arrange half of the strips evenly spaced over the pie all in one direction, then flip every other strip back over itself, so half are now only covering half of the pie. Take a new strip and place it perpendicularly just in front of the folded strips. Unfold the folded strips so these ones now cover the new strip. The new strip should be under and over every other one. Working on that same half of the pie, fold back every other strip, all the ones that were NOT just folded. Take another new strip and place it evenly apart from the first perpendicular strip. Unfold the folded strips. Repeat folding back strips, placing new strip, and unfolding until you reach the edge of the pie. You may need to trim down the strips as you get closer to the edge. Repeat with other half of the pie.
  7. Sprinkle sugar on top, if desired.
  8. Bake pie in preheated oven for 50-60 minutes or until crust is golden brown and a knife inserted in center of pie confirms rhubarb is tender.
  9. Allow to cool completely before slicing and serving.

Notes

If you make the crust and pie in the same day, you could make the filling while the crust is resting in the fridge for an hour or so before rolling out. Instead of a traditional top pie crust or lattice you could add a streusel/crumble, delicious and definitely the easiest option of the three.

Nutrition Facts

Calories

431.35

Fat

12.79 g

Sat. Fat

7.67 g

Carbs

74.08 g

Fiber

2.32 g

Net carbs

71.76 g

Sugar

38.25 g

Protein

6.18 g

Sodium

397.03 mg

Cholesterol

54.07 mg

Nutritional Information is approximate.

Rhubarb, custard, pie, all butter crust, oil pie crust, old fashioned
Dessert, Pie
American
Did you make this recipe?
Tag @jennyblogsandbakes on instagram and hashtag it #jennyblogs

Rhubarb Custard Pie made with an all oil crust


Food in Florence: Where to Find the Best Coffee

This post contains affiliate links. If you buy something using these links, Jennyblogs may receive a small commission, at no extra cost to you. This helps to support Jennyblogs. For further information see the privacy policy. Grazie!

Italy is known for it’s coffee. Your coffee beverage of choice was probably invented in Italy. Cappuccino? Yep. (Caffè) Latte? Yes. Macchiato? You bet. And of course, the king of coffee in Italy, the espresso. It’s by far the most commonly consumed coffee, so much so that all you have to do is enter a bar and order a “caffè” or “caffè normale” (literally translated, normal coffee) and you will be served an espresso. It took me awhile to realize that I didn’t need to specify an espresso when I order because it’s a given; the Italians just ask for “un caffè.”

Duomo cappuccino art

Duomo cappuccino art

That said, it’s surprising how much bad coffee I’ve consumed in Italy. I believe a lot of it comes down to poorly sourced beans and/or over-roasted beans. (If beans have an oily appearance they have been roasted too long; they lost their oil!) Combine that with equipment that doesn’t get cleaned or wiped down enough and baristas who don’t have the passion to even perfect their cappuccino and you get a rather bitter experience. Don’t mind the pun. This list will help guide you to GOOD coffee in Florence so you don’t have to feel the burn from bad coffee. Again, I’m sorry for the pun. (Maybe not really.)

The places on this list range from a more traditional Italian coffee experience (downing an espresso quickly while standing at the bar or sitting) to the trendier locales with ample seating and ambience where people might come to study or work on their computer, which is essentially the American coffee shop experience. But no matter the style, the common denominator is the good coffee experience, whether sipped or thrown back. You might recognize some of these places from the Most Scrumptious Breakfast list, because good breakfasts and good coffee definitely have an overlap. But good coffee doesn’t always mean good pastries, and vice versa, hence the different posts.

To read more about the coffee drinks you’ll find in Italy, click here.


Where to Find the Best Coffee in Florence

In no particular order

  1. Melaleuca

    Lungarno delle Grazie, 18, right along the river not too far from Santa Croce

    Open 8:00am - 4:00pm Monday through Friday, 9:00am - 4:00pm Saturday and Sunday.

    A newer (established 2019) American/Australian Bistro Bakery right in the heart of Florence with beautiful views. It’s airy, it’s bright, and has a lovely ambiance. They partner with a local specialty coffee roaster, D612. Combine thoughtfully roasted beans with some baristas who know their stuff, you get a mean coffee. From flat whites to Matcha or Golden Lattes, I’ve never had a bad coffee from them. I also love their details, like the hand made pottery that the coffees are served in. Not to mention, it’s a comfortable international space if you just want a break from some of the Italian coffee culture/rules you may have been running in to. Everyone speaks English and sometimes you just miss being able to communicate easily. I worked here before having my son, the owners are friends of mine and lovely people! You may also notice they’re on my list for best breakfast, too!

  2. Ditta Artigianale

    Location 1: Via dei Neri, 30/32r, between the church of Santa Croce and Palazzo Vecchio Location 2: Via dello Sprone, 5r, very close to Palazzo Pitti

    Open 8:00am - 12:00am Monday through Friday, 9:00am - 12:00am Saturday and Sunday

    Ditta Artigianale was founded in 2013 by an award-winning barista and is considered by many the best coffee in Florence, and they are usually busy to show it. This has one of the closest vibes to an American coffee shop with the quality coffee, cool and informal atmosphere, and competent baristas. Many people come here to work as well as socialize, drink coffee, and eat. They have single-origin coffee choices and you can buy their whole beans or have them grind them for you to make coffee at home as well as a delicious cold brew.

  3. La Ménagère

    Via de’ Neri, 8, right in the center by San Lorenzo and the Mercato Centrale

    Open 8:00am - 2:30am every day

    A large caffè that serves coffee and food with different rooms on the main floor, basement, and even outside that is designed for lingering with friends or work. You can even buy botanicals or select house items, or listen to live music some evenings.

  4. Mercato Centrale

    Piazza del Mercato Centrale, Via dell’Ariento, near to the church of San Lorenzo

    Open 8:00am - 12:00am every day

    Up on the second floor of this historic wrought iron building you will find a large Italian-style food court. In the center there is a bar where you can order coffee, or you can find a place to sit and a waiter should eventually come to ask if you’d like something to drink, at no extra charge. It can get extremely busy during the lunch and dinner hours, so I would recommend going in the morning when it is calm or between 3:00pm and 7:30pm to avoid the crowds. Bonus: you can order a large (and maybe even an extra large?) cappuccino called a “cappuccione” for around 2euro (and maybe 3 for the extra large!)

  5. Coffee Mantra

    Borgo la Croce, 71r, near Piazza Beccaria on the east side of town in a very local area

    Open 7:00am - 7:00pm Monday through Saturday. Closed Sunday

    A new and hip little coffee place in the Sant’Ambrogio neighborhood. I recommend getting your drink to go (I believe they even do flat whites here) and take a stroll around the Sant’Ambrogio market around the corner or any of the antique markets nearby.

  6. Santarosa Bistrot

    Lungarno di Santa Rosa, on the south side of the river.

    Open 8:00am - Midnight weekdays, 10:00am - Midnight Saturday and Sunday

    A lovely caffe with lots of beautiful green surrounding. It creates a wonderful escape from the bustling city center and is one of my favorite places to catch up with friends over a nice cup of coffee or tea.

  7. La Cité

    Borgo S. Frediano, 20r, on the south side of the river not far from the church of Santo Spirito.

    Open 10:00am - 12:02am Monday through Saturday, 2:00pm - 9:00pm Sunday

    A two story cafe and book store, this is a great place to work on projects or find a private nook for deep conversations over a good cup of coffee. Very cozy and artsy.

  8. Chiaroscuro

    Via del Corso, 36r, between the Duomo and Palazzo Vecchio.

    Open 7:30am - 9:30pm Monday through Saturday, 8:00am - 9:30pm Sunday

    I always thought this cafe had a classy classic feel to it, great for meeting up with people or a quick coffee but not so much for using it as a place to work from. They have coffee sourced from around the world displayed on their wall and you can even choose which beans you want for your cup of coffee.

  9. Caffetteria Piansa

    Via Vincenzo Gioberti, 51r, just outside the city center on the east side.

    Open 7:00am - 7:30pm Monday through Saturday, closed Sunday

    Piansa roasts their own coffee and sells to other places around town. If you find any cafe that uses the Piansa beans, it’s probably going to be great! Here you can even get pour overs and buy Chemex and filters!


Overnight Bagels

Last Updated August 18, 2024

IMG_2103.jpg

Bagels. Who doesn’t love them? Especially toasted with cream cheese or butter melting on top. Everyone has their favorite bagel, where to get them and how to eat them, whether that’s the chewy and dense boiled variety or the slightly lighter and more modern steamed versions, plain or everything, toasted with cream cheese, eaten plain, or eaten as a sandwich.

One of my favorite bagel memories is from New York City where I spent two summers training with the American Ballet Theatre when I was a teenager. On the weekends my mom and I would go on adventures exploring the city, usually walking an average of 15 miles a day and thus needing sustenance. I remember particularly well one morning passing a bagel shop and a few minutes later exiting with a freshly toasted bagel smothered in cream cheese and wrapped in tinfoil. So simple, so inexpensive, and I still think of that bagel as one of the best I’ve ever had. So I guess you could say I’m a NYC bagel girl, but to be fair, I don’t think I’ve had any (at least not-from-a-hotel-breakfast-bar bagels) in any of the major cities famed for bagels, such as Philadelphia, Chicago, Boston, or Los Angeles. And I’ve been to all those cities! Too bad I didn’t know they had amazing bagels or I would’ve done a trial and comparison. Ah well, just have to go back I guess!

I am blogging this bagel recipe which involves an overnight ferment and boiling, because I think IT’S SO YUMMY. I’m not going to tout this recipe as the bagel recipe to end all bagel recipes, because frankly, I’m not into that kind of marketing and I believe there are other valid methods and types of bagel recipes out there. This recipe comes from Peter Reinhart’s book The Breadmaker’s Apprentice, and as he says, this is a bagel for the ages. And he knows what he’s talking about, so you should try this recipe. You can buy the cookbook by clinking on the link to the right!

Don’t let the overnight ferment or multi-step process scare you, it’s really quite fun and not nearly as tricky as I had always imagined making bagels to be. You will need to clear some space in your fridge and in your schedule, but if I can do it in my tiny Italian kitchen with my tiny toaster-sized oven, so can you, wherever you are baking! I recommend reading the recipe through once or twice before making a game plan. (As you should with every recipe!)

What follows is a slightly modified version of Peter Reinhart’s recipe. The ingredients are basically identical but the instructions I have rewritten in my own words and in places slightly changed or modified to accommodate tips and tricks that worked really well for me and might work for you, too!

parmesan, sesame, and everything bagels

parmesan, sesame, and everything bagels

Side note if you need bagels TODAY: While this recipe is called “Overnight Bagels”, it can also be made without the overnight ferment. I do recommend the overnight ferment for flavor and just because it’s nice to split up the multiple steps of bagel making, however…we might not always have the patience to wait that long for fresh, hot, chewy bagels…this has definitely happened to me during this 2020 quarantine. I wanted bagels today! Not tomorrow! And I hadn’t planned ahead.
So, instead of an overnight ferment, once the bagels are shaped, let them rise in a warm place for about an hour, or until noticeably swelled. Keep any eye on them as you don’t want them to overaise. This can cause them to deflate when they are boiled. Proceed with recipe as normal.

This post may contain affiliate links. If you buy something using these links, Jennyblogs may receive a small commission, at no extra cost to you. This helps to support Jennyblogs. For further information see the privacy policy. Grazie!


Overnight Bagels

Makes 12 big or 24 small bagels

Ingredients:

For the Sponge

  • 1 tsp / 3g instant yeast

  • 4 cups / 510g bread flour

  • 2 1/2 cups / 567g water

For the Dough

  • 1/2 tsp / 1.5g instant yeast

  • 3 3/4 cups / 482g bread flour

  • 2 3/4 tsp / 20g salt

  • 2 tsp / 9.5g malt powder OR flavoring of choice: 1 Tbsp / 14g dark or light malt syrup, honey, or dark or light brown sugar

For Boiling the Bagels

  • 1 Tbsp / 14g baking soda, optional, or malt syrup or honey

  • a large pot of water, the wider the pot the better

  • cornmeal or semolina, for dusting

Toppings, any or all of the following

  • sesame seeds

  • poppy seeds

  • salt flakes

  • rehydrated minced garlic

  • rehydrated minced onion

  • parmesan cheese

Directions:

DAY 1

Line 2 sheet pans with parchment paper and grease well.

Make the Sponge

  1. In the bowl of a stand mixer or large bowl, stir yeast into flour. Add water and stir just until a sticky dough has formed, similar to pancake batter.

  2. Cover bowl with plastic wrap and let sit at room temperature for about 2 hours, or until very bubbly and active. It should be about twice the size and collapse when bowl is tapped on countertop.

Make the Dough

  1. Once sponge is ready, add next measurement of yeast and mix on low speed with dough hook or by hand with a spoon. Next, add 3 cups / 383g of the next measurement of flour, salt, and malt powder / flavoring of choice. Stir on low speed for about 3 minutes, or with a spoon until a mostly homogeneous ball is formed. Slowly add remaining 3/4 cup / 99g flour to stiffen dough a bit.

    Knead dough on medium-low speed for about 6 minutes or turn dough out onto a lightly floured surface and knead by hand for about 10 minutes. Dough should be smooth and firm yet pliable, not sticky, with all flour worked in. If it seems too dry or there is excess flour throughout, add a few drops of water until desired consistency is reached. Likewise if it’s too sticky, add in a bit of flour until correct stiffness is reached. At this point the dough should pass the windowpane test. (Stretch a small piece of dough between your thumbs and forefingers; if enough gluten has developed through kneading the dough should stretch thin where you can see light coming through. If it breaks before you can stretch it thin, knead another few minutes and try again.)

Weigh and Shape Dough

IMG_2100.jpg
  1. Weigh dough and divide weight by the number of bagels you wish to make: If making mini bagels, divide weight by 24; if making regular bagels, divide weight by 12. This will give the goal weight for each dough ball you are about to make. For example, the weight of my dough the last time I made these was 1,566g. 1,566g divided by 12 for regular bagels = about 130g each. Or, 1,566g divided by 24 for mini bagels = about 65g each.

  2. Once you have a goal weight for the dough balls, divide dough in half, then keep dividing the halves and quarters until you have 12 or 24 dough chunks. Weigh each chunk and add or subtract a bit of dough until they are all within about 5g of the goal weight. Roll each dough chunk under your palm with a cupped hand in a circular motion, guiding with outer edge of your palm, until you have a nice ball. It works best to roll them on a surface with little to no flour. This way the dough sticks slightly to the surface as you move in a circular motion and pulls and creates surface tension.

  3. Place dough balls on a lightly floured surface and cover with a damp towel. Allow to rest for approximately 20 minutes.

  4. Shape each dough ball into bagel form by poking your thumb through the center of the ball and rotating your thumb around the inside of the hole or lassoing it a few times around your thumb, until the hole is about 2 1/2 in / 6 cm for regular bagels or 1 1/2 in / 4 cm for mini. Aim to stretch the bagel as evenly as possible, avoiding a thick and thin side so you won’t end up with lopsided bagels. Alternately, you can roll the doll ball into an 8 in / 20 cm long rope, wrap it around your knuckles with the seam on the under side, then rock the seam on the counter until sealed.

  5. Place shaped bagels onto greased baking sheets about 2 inches apart. Mist with spray oil or rub on oil, then slip each sheet into a clean, food-grade plastic bag or cover with plastic wrap.

  6. Place bagels in fridge to rise overnight. They are best if used the next day, but can be kept up to three days in the fridge.

DAY 2

Boil the Bagels

  1. Test to see if bagels are ready to be boiled by removing one carefully from fridge and placing in a bowl of cool or tepid water. If bagel floats within 10 seconds, it’s ready. Immediately return bagel to covered baking sheet in fridge while you ready the water.

  2. If bagel does not float within 10 seconds, either return it to the fridge and repeat float test every couple hours until bagels are ready, or remove both sheets of bagels from fridge and let raise at room temperature, repeating float test every 10 to 20 minutes until a bagel passes. Return them to the fridge once they are ready so they don’t over-rise. The stiffness of the dough, your house temperature, and your fridge temperature will all impact when the bagels are ready to be boiled.

  3. If your bagels have over-risen (you can tell if they collapse when you gently handle them or if they overly deflate when boiled) or they have stuck to the pan, transfer them as carefully as you can to another better-oiled parchment lined baking sheet. Let rise at room temperature for another 15-20 minutes or until they pass float test again. Return them to the fridge once they are ready.

  4. When bagels are just about ready, place the large pot of water on the stove and bring to a boil, then add baking soda, if using. Have a skimmer or slotted spoon ready nearby. Preheat oven to 500°F / 260°C and place two racks in the middle of the oven.

  5. Remove one sheet of bagels from fridge and gently slide 3-4 into boiling water, or however many can fit comfortably side to side. Boil for 30 seconds to 1 minute on one side, then flip each bagel and boil for another 30 seconds to 1 minute. Bagels boiled for 1 minute on each side will be chewier than those boiled for only 30 seconds on each side.

  6. While bagels are boiling, sprinkle the same parchment lined baking sheet with cornmeal or semolina.

  7. When it’s time to remove bagels, use the slotted spoon and place them back on the baking sheet now sprinkled with cornmeal. Add toppings immediately while the bagels are still wet. Repeat with second sheet of bagels.

Bake the Bagels

  1. Place both baking sheets of bagels in the preheated oven. Bake for 7 minutes, then switch the pans on the racks and rotate each 180 degrees to bake the bagels as evenly as possible.

  2. After you switch and rotate, lower oven temperature to 450°F / 232°C and bake for another 7-8 minutes, or until light golden brown.

  3. Remove from oven and allow bagels to cool for 15 minutes before devouring.

Jenny’s Notes:

  • To keep scale clean while weighing dough, place the now-empty bowl (no need to clean it) and press tare. You can also use a piece of plastic wrap over the scale and tare if needed.

  • I love lassoing the bagels while shaping them! Fast, fun, and effective. Not as big a fan of the rope and seal version, I thought it took longer and the finishing ring was not as symmetrical. Try out both versions to find which works best for you!

  • I found it best to make the dough in the evening and boil and bake the bagels in the morning or they over-rose, but I believe this is mostly due to my not-cold-enough fridge. If you have a cold and well functioning fridge, you should be fine to make and bake the bagels at your leisure!

  • Chewy bagels are my favorite, and thus I boil bagels for the full minute on each side. I have found, though, that beyond 1 minute on each side can cause the outside of the bagels to cook too much. This means when they are baked this outer baked “shell” doesn’t allow the bagels to reach their full rise and may result in flatter bagels.

  • When baking the bagels, know your oven. If you have hot spots or a small oven, you can choose to bake one sheet of bagels at a time. Since my oven is small, I baked the first sheet of bagels while I was boiling the second sheet, and simply rotated the pan 180 degrees after the first 7 minutes.

Overnight Bagels
Yield 12-24
Author
Prep time
1 H & 45 M
Cook time
15 Min
Inactive time
12 Hour
Total time
14 Hour

Overnight Bagels

A recipe from Peter Reinhart's "The Breadmaker's Apprentice." The bagels get an overnight ferment leading to increased umami flavor and are boiled for optimal chewiness.
Cook modePrevent screen from turning off

Ingredients

For the Sponge
For the Dough
For Boiling the Bagels
Toppings, any or all of the following

Instructions

DAY 1 Make the Sponge
  1. In the bowl of a stand mixer or large bowl, stir yeast into flour. Add water and stir just until a sticky dough has formed, similar to pancake batter.
  2. Cover bowl with plastic wrap and let sit at room temperature for about 2 hours, or until very bubbly and active. It should be about twice the size and collapse when bowl is tapped on countertop.
Make the Dough
  1. Once sponge is ready, add next measurement of yeast and mix on low speed with dough hook or by hand with a spoon. Next, add 3 cups / 383g of the next measurement of flour, salt, and malt powder / flavoring of choice. Stir on low speed for about 3 minutes, or with a spoon until a mostly homogeneous ball is formed. Slowly add remaining 3/4 cup / 99g flour to stiffen dough a bit.
  2. Knead dough on medium-low speed for about 6 minutes or turn dough out onto a lightly floured surface and knead by hand for about 10 minutes. Dough should be smooth and firm yet pliable, not sticky, with all flour worked in. If it seems too dry or there is excess flour throughout, add a few drops of water until desired consistency is reached. Likewise if it’s too sticky, add in a bit of flour until correct stiffness is reached. At this point the dough should pass the windowpane test. (Stretch a small piece of dough between your thumbs and forefingers; if enough gluten has developed through kneading the dough should stretch thin where you can see light coming through. If it breaks before you can stretch it thin, knead another few minutes and try again.)
Weigh and Shape the Dough
  1. Line 2 sheet pans with parchment paper and grease well.
  2. Weigh dough and divide weight by the number of bagels you wish to make: If making mini bagels, divide weight by 24; if making regular bagels, divide weight by 12. This will give the goal weight for each dough ball you are about to make. For example, the weight of my dough the last time I made these was 1,566g. 1,566g divided by 12 for regular bagels = about 130g each. Or, 1,566g divided by 24 for mini bagels = about 65g each.
  3. Once you have a goal weight for the dough balls, divide dough in half, then keep dividing the halves and quarters until you have 12 or 24 dough chunks. Weigh each chunk and add or subtract a bit of dough until they are all within about 5g of the goal weight. Roll each dough chunk under your palm with a cupped hand in a circular motion, guiding with outer edge of your palm, until you have a nice ball. It works best to roll them on a surface with little to no flour. This way the dough sticks slightly to the surface as you move in a circular motion and pulls and creates surface tension.
  4. Place dough balls on a lightly floured surface and cover with a damp towel. Allow to rest for approximately 20 minutes.
  5. Shape each dough ball into bagel form by poking your thumb through the center of the ball and rotating your thumb around the inside of the hole or lassoing it a few times around your thumb, until the hole is about 2 1/2 in / 6 cm for regular bagels or 1 1/2 in / 4 cm for mini. Aim to stretch the bagel as evenly as possible, avoiding a thick and thin side so you won’t end up with lopsided bagels. Alternately, you can roll the doll ball into an 8 in / 20 cm long rope, wrap it around your knuckles with the seam on the under side, then rock the seam on the counter until sealed.
  6. Place shaped bagels onto greased baking sheets about 2 inches apart. Mist with spray oil or rub on oil, then slip each sheet into a clean, food-grade plastic bag or cover with plastic wrap.
  7. Place bagels in fridge to rise overnight. They are best if used the next day, but can be kept up to three days in the fridge.
DAY 2 Boil the Bagels
  1. Test to see if bagels are ready to be boiled by removing one carefully from fridge and placing in a bowl of cool or tepid water. If bagel floats within 10 seconds, it’s ready. Immediately return bagel to covered baking sheet in fridge while you ready the water.
  2. If bagel does not float within 10 seconds, either return it to the fridge and repeat float test every couple hours until bagels are ready, or remove both sheets of bagels from fridge and let raise at room temperature, repeating float test every 10 to 20 minutes until a bagel passes. Return them to the fridge once they are ready so they don’t over-rise. The stiffness of the dough, your house temperature, and your fridge temperature will all impact when the bagels are ready to be boiled.
  3. If your bagels have over-risen (you can tell if they collapse when you gently handle them or if they overly deflate when boiled) or they have stuck to the pan, transfer them as carefully as you can to another better-oiled parchment lined baking sheet. Let rise at room temperature for another 15-20 minutes or until they pass float test again. Return them to the fridge once they are ready.
  4. When bagels are just about ready, place the large pot of water on the stove and bring to a boil, then add baking soda, if using. Have a skimmer or slotted spoon ready nearby. Preheat oven to 500°F / 260°C and place two racks in the middle of the oven.
  5. Remove one sheet of bagels from fridge and gently slide 3-4 into boiling water, or however many can fit comfortably side to side. Boil for 30 seconds to 1 minute on one side, then flip each bagel and boil for another 30 seconds to 1 minute. Bagels boiled for 1 minute on each side will be chewier than those boiled for only 30 seconds on each side.
  6. While bagels are boiling, sprinkle the same parchment lined baking sheet with cornmeal or semolina.
  7. When it’s time to remove bagels, use the slotted spoon and place them back on the baking sheet now sprinkled with cornmeal. Add toppings immediately while the bagels are still wet. Repeat with second sheet of bagels.
Bake the Bagels
  1. Place both baking sheets of bagels in the preheated oven. Bake for 7 minutes, then switch the pans on the racks and rotate each 180 degrees to bake the bagels as evenly as possible.
  2. After you switch and rotate, lower oven temperature to 450°F / 232°C and bake for another 7-8 minutes, or until light golden brown.
  3. Remove from oven and allow bagels to cool for 15 minutes before devouring.

Notes

  • To keep scale clean while weighing dough, place the now-empty bowl (no need to clean it) and press tare. You can also use a piece of plastic wrap over the scale and tare if needed.
  • I love lassoing the bagels while shaping them! Fast, fun, and effective. Not as big a fan of the rope and seal version, I thought it took longer and the finishing ring was not as symmetrical. Try out both versions to find which works best for you!
  • I found it best to make the dough in the evening and boil and bake the bagels in the morning or they over-rose, but I believe this is mostly due to my not-cold-enough fridge. If you have a cold and well functioning fridge, you should be fine to make and bake the bagels at your leisure!
  • Chewy bagels are my favorite, and thus I boil bagels for the full minute on each side. I have found, though, that beyond 1 minute on each side can cause the outside of the bagels to cook too much. This means when they are baked this outer baked “shell” doesn’t allow the bagels to reach their full rise and may result in flatter bagels.
  • When baking the bagels, know your oven. If you have hot spots or a small oven, you can choose to bake one sheet of bagels at a time. Since my oven is small, I baked the first sheet of bagels while I was boiling the second sheet, and simply rotated the pan 180 degrees after the first 7 minutes.


Nutrition Facts

Calories

303.74

Fat

1.50 g

Sat. Fat

0.22 g

Carbs

60.82 g

Fiber

2.14 g

Net carbs

58.68 g

Sugar

0.83 g

Protein

10.16 g

Sodium

1017.73 mg

Cholesterol

0.00 mg

Nutritional Info is Approximate. Based on 1 large bagel.

bagel, overnight bagels, everything, parmesan, sesame, poppyseed
bread, breakfast, brunch
Jewish-American
Did you make this recipe?
Tag @jennyblogsandbakes on instagram and hashtag it #jennyblogs

Food in Florence: Where to Eat the Most Scrumptious Breakfasts

This post contains affiliate links. If you buy something using these links, Jennyblogs may receive a small commission, at no extra cost to you. This helps to support Jennyblogs. For further information see the privacy policy. Grazie!

Starting off a new Italy series all about Food in Florence that I’m calling…wait for it…Food in Florence! Yay, you guessed it!

Esselunga+Cappuccino.jpg

I’ve been getting enough requests this past year from friends and friends for friends visiting Florence that I think it’s time to start compiling some helpful and easily accessible lists and tips of what to do/where to eat in this adopted city of mine, Florence. Creating custom “to do” and “to eat” lists is not very time efficient I find…or maybe I just give an overwhelming amount of information…nah, that couldn’t possibly be it. :)

It’s great fun to create lists that help people get the most out of their time in Florence. My favorite way to see a new city is exploring and wandering without any tour guides (with certain exceptions), while having read up a ton beforehand and bookmarked things to see, places to shop, and foods to try and where to try them. The biggest problem I always run into while preparing for a trip is knowing which lists are authentic and whose opinion I should trust. The lists in this new “Food in Florence” series would have saved me quite a bit of time before I came to Florence for the first time. I hope they will be useful to you and help you decide where you want to dine around Florence without falling for the tourist traps, specifically in this list where you can find the most scrumptious breakfasts.

As a disclaimer, these lists will probably be ever evolving because 1. Florence has a million and one places to try, 2. New places are always opening, 3. I’ve only lived here just over 2 consecutive years and 4. I probably don’t eat out nearly as much as you would expect for someone who lives in Italy. (Whaaat I don’t eat pasta for lunch and pizza for dinner everyday?! Lame.) Just remember, I’m a real person with a real budget. :)

What is a typical Italian breakfast?

You’re going out to breakfast, but what can you expect to find on the menu? What do Italians typically eat for breakfast?

Italians don’t go to a sit-down type restaurant for breakfast, which is usually what entails if you go out to breakfast in America. Instead, most Italians have their favorite local bar that they go to several, if not every, morning of the week. A cappuccino is usually eaten with a pastry, and just as often eaten standing and chatting as it is sitting down and reading the morning newspaper. At just over 2euro for a cappuccino and pastry, it makes for a very affordable breakfast out. If there is a menu, it’s probably a coffee menu on the wall. The pastries are chosen through the display case. It’s common to ask what they’re filled with, if one is unsure. You can expect varying croissants and sugary puff pastries filled with the classics: cream, chocolate, Nutella, jam (usually apricot or blackberry) and apple, along with more specialty fillings that will vary by place, such as cream and orange, whole wheat with honey, pistachio, etc.

What is the best time to go out for breakfast?

The famed hot chocolate at Caffè Gilli

The famed hot chocolate at Caffè Gilli

Whatever time you want. Really. Most pasticcerie and bars open between 5:30-7:00am, but pastries will be served until they’re gone, which is often into the afternoon. Of course, some busy places will run out by noon, so my only word of advice would be to go before then. You can manage that, right?

Or, if you’re like me and like to eat right away, have some fruit and snacks to eat first thing in the morning, and then eat a leisurely second breakfast or elevensies at a caffè once you’re out and about.

You’ll find people eating breakfast anywhere from the early morning hours to late morning, and it is socially acceptable to eat a pastry and a cappuccino in the afternoon as a snack, or a cappuccino by itself, contrary to popular American belief. See #12 on this blog post if you want to know why. So have at it! Just don’t drink a cappuccino with any food item other than pastries/cookies, k? Cappuccino and pizza taste gross together anyway.

Breakfast Etiquette

Bottega di Pasticceria

Bottega di Pasticceria

As a general rule, it’s best to pay at the cash register before ordering your pastry and drink at the bar. Many places don’t care if you eat or pay first, even if they have signs up asking you to pay first, however…some places DO care and if you’re not familiar with that particular locale, pay first to be safe.

It’s also advisable to ask before you sit down as some places up-charge for the “sit-down service.” Ya know, paying up to twice the price for your drink for the luxury of sitting down and usually them bringing you your order. Don’t think that carrying your own drink to your table is going to get you any discounts. You’re really paying for occupying the table, the service I like to think of as bonus so you might as well enjoy it!

The only place on the list below that should have an up-charge is Gilli and possibly Bottega di Pasticceria. Since they are classy and all about the experience anyway, I think we can forgive them.


Where to Eat the Most Scrumptious Breakfasts

  1. La Ménagère

    Via de’ Neri, 8, right in the center by San Lorenzo and the Mercato Centrale

    Open 8:00am - 2:30am every day

    Large and uniquely beautiful space, each room is a little different. Very cool atmosphere. There is even an area where you can buy some merchandise and flowers. Lots of pretty plants! Indoor and outdoor seating. Great coffee. A bit on the pricier side.

  2. Santarosa Bistrot

    Lungarno di Santa Rosa, on the south side of the river.

    Open 8:00am - Midnight weekdays, 10:00am - Midnight Saturday and Sunday

    Beautiful outdoor caffe where you can choose to sit outside among the greenery or in the main area with the roof if it rains. So cozy. I love this place when I want to get away from the hectic city life for a moment.

  3. Caffetteria delle Oblate

    Via dell’Oriuolo, 26, in the center not far from the Duomo.

    Open 2:00pm - 7:00pm Monday, 9:00am - Midnight Tuesday through Friday, 10:00am - Midnight Saturday, closed on Sunday.

    An old convent turned library with a third story caffè, this place is super cool and has spectacular views of the Duomo to boot. You can sit in the caffetteria or take your food to any of the 4 sided terrace overlooking in the inner open courtyard. There are seats and tables on most sides, but they are often occupied with studying students. When this happens I usually just sit on the floor, no one will mind. Note, the caffetteria will charge you 10 cents per person who eats outside of the caffetteria area. I find this ironically humorous as most bars will charge you if you sit down IN their area, not if you take away. Italy, the land of inconsistency.

  4. Melaleuca

    Lungarno delle Grazie, 18, right along the river not too far from Santa Croce

    Open 8:00am - 4:00pm Monday through Friday, 9:00am - 4:00pm Saturday and Sunday.

    A newer (established 2019) American/Australian Bistro Bakery right in the heart of Florence with beautiful views. It’s airy, it’s bright, and has a lovely ambiance. While you won’t find typical Italian food here, you will find some of the best croissants and pastries in town (they have an in-house French baker), along with some other maybe more familiar desserts and brunch items. Think cinnamon rolls, banana bread, pumpkin bread, carrot cake, Guinness chocolate cake, and on and on. They have pancakes, they have eggs, and if you’re familiar with Australian cuisine, you might see some familiar items on their menu as well. Anything that can be house made IS house made, from buttermilk to kombucha, pickled vegetables, dips and spreads, drinks, almond milk, and almost literally everything else. It’s a comfortable space if you just want a break from some of the Italian eating culture/rules you may have been running in to! Everyone speaks English and sometimes you just miss being able to communicate easily. I worked here before having my son, the owners are friends of mine and lovely people! You may also notice they’re on my list for best coffee, too!

  5. Bottega di Pasticceria

    Lungarno Francesco Ferrucci, 9c, south of the river on the edge of the city center

    Open 7:00am - 10:00pm Tuesday through Sunday, closed Monday

    This is a lovely open two story caffe that has an elegant feel to it, although don’t feel as though you need to dress up! Certain parts of the second story floor are made of glass, a warning to those who are wearing dresses and skirts! ;)

  6. Caffetteria La Loggia

    Via Pietrapiana, 12, not far from the church of Santa Croce

    Open 7:00am - 8:30pm every day

    A small little place but popular with the locals and me! A good variety of pastries and coffee, they even have some specialty drinks such as Hazelnut or Pistachio Coffee, very sweet but interesting to try! If there are no available places to sit, you can always drink your coffee and eat your pastry standing up at the bar, like the Italians do, or go and sit in the nearby Piazza della Loggia which the city of Florence recently redid.

  7. Caffè Libertà

    Piazza della Libertà, 27r, at the top tip of the city center in Piazza della Libertà

    Open 5:00am - 9:30pm every day

    This caffe is home to probably some of my favorite pastries in all of Florence, and that’s just talking about the pastries. The desserts are mouth-watering as well. I personally recommend the apple filled pastry, but I know others who rave about the pistachio filled pastry. Indoor or outdoor seating.

  8. Caffè Pasticceria Serafini

    Via Gioberti, 168r, just outside the city center on the east side

    Open 7:00am - 9:00am Monday through Saturday, closed Sunday

    Serafini is located in a very local area and has wonderful pastries and desserts. It can get busy, but there is indoor and outdoor seating and always the option to eat at the bar or take away. They have a great chocolate and pear pastry.

  9. Caffè Michelangelo

    Via Ghibellina, 116r, in the center near to Santa Croce

    Open 6:00am - 8:00pm Monday through Saturday, closed Sunday

    Another great local caffè with yummy pastries and coffee. There are a couple of baristas here who can make a mean cappuccino.

  10. Caffè Gilli

    Via Roma, 1r, on Piazza della Repubblica

    Open 7:30am - Midnight every day

    Gilli is the oldest caffè in Florence, established more than 270 years ago by a Swiss family. Their hot chocolate is renowned and their sweets and chocolate beloved by many. Situated in a beautiful building with a large covered outdoor sitting area right on Piazza della Repubblica, this is the place to go if you’re looking for a high class and historic experience. Just remember you’ll be paying higher prices, i.e., a normal hot chocolate costs 3-3.50euro, Gilli will charge you somewhere around 7euro.


Caffetteria delle Oblate

Caffetteria delle Oblate

Buon Appetito!

Want to see some of your favorite spots added to the list? Let me know in the comments below!

Triple Dark Chocolate Cheesecake

Last Updated August 17, 2024

2019-05-26+17.58.07-2.jpg

This post contains affiliate links. If you buy something using these links, Jennyblogs may receive a small commission, at no extra cost to you. This helps to support Jennyblogs. For further information see the privacy policy. Grazie!

After more than two years in Italy, I have finally made a cheesecake.

Proof that you don’t need a springform pan to bake a cheesecake

Proof that you don’t need a springform pan to bake a cheesecake

Cheesecakes are not hard to make, but the baking is important, probably the most important part, and can be tricky. Cheesecakes are usually baked at a slightly lower temperature, usually around 325°F, and just until the sides are set but the center is still jiggly. If the center sets, the cheesecake is over done, but if the center is too jiggly, then your cheesecake won’t set up in the fridge and you’ll end up with soup when you cut into it. You don’t want the cheesecake to crack, and some recipes will tell you to add a bain-marie (a hot water bath) to the oven to keep the atmosphere humid or to crack the oven door after you’ve turned it off so your cheesecake won’t cool down too quickly and yes, crack.

So when you live in Italy with strange ovens, you think twice before baking things when you can’t perfectly control the heat in your oven or where the heat is coming from. IF you’re able to tell the temperature of your oven at all. (I’m thinking of you, my oven two apartments ago. I DO NOT miss you!) Or if your oven is small and cooks things a lot quicker. Add on top of that the cream cheese here, “formaggio fresco” or literally translated fresh cheese, is…different. I’m not even sure what it is, it tastes similar to cream cheese in the States, but when you whip it it doesn’t become soupy like the American stuff, it becomes super creamy. Sometimes I think the American stuff is stickier too, maybe? Philadelphia brand is very popular here, and you can also get grocery store generic brand. But the cheesecakes I’ve eaten in restaurants or pastry shops? Always weird. They taste and look more like semi-freddo or a mousse. I therefore assumed when I made a cheesecake it would be weird like the other ones I’ve eaten here. So I never made one.

Along came Easter and I wanted to make a cheesecake. I didn’t even have a springform pan but found that pie dishes work pretty great as substitutes. And you know what? The cheesecake turned out delicious and not weird. And my husband and colleagues liked it so well I made the same one again and bought a springform pan. And if you know me, you know I rarely bake the same thing twice in a row, unless I’m perfecting a new recipe. I’m always on to the next recipe. But this recipe asked to be made again. And so I did. And now you can make it, too, weird cream cheese or normal cream cheese!

Recipe adapted from omgchocolatedesserts


Triple Dark Chocolate Cheesecake

Serves about 12

Ingredients:

For the Oreo Crust

Crushing Oreos the old-fashioned way…

Crushing Oreos the old-fashioned way…

  • 24 Oreos

  • 1/4 cup / 56g butter, melted

For the Filling

  • 7.5 oz / 225g dark chocolate, broken into small chunks

  • 24 oz (3 8 oz packages) / 675g cream cheese, room temperature

  • 1/2 cup + 2 Tbsp / 125g granulated sugar

  • 2 Tbsp / 14 g cocoa powder

  • 3 eggs

For the Ganache Topping

  • 3/4 cup / 175g heavy whipping cream

  • 6 oz / 180g dark chocolate, broken into small chunks

Directions:

Oven 350°F / 177°C. Grease an 8in - 9in / 20cm - 24cm springform pan.

Make the Oreo Crust

  1. Crush Oreos in a food processor or with a rolling pin.

  2. If using a food processor, pulse in melted butter until crumbs are evenly moistened. If crushing Oreos by hand, transfer to a bowl and stir in butter.

  3. Press mixture evenly into bottom of prepared springform pan and bake for 8 minutes.

  4. Remove from oven and let cool while you prepare filling.

Spreading cream cheese mixture over baked crust

Spreading cream cheese mixture over baked crust

Make the Filling

  1. In a double boiler or pan over low heat, melt chocolate, stirring constantly. Remove from heat when there are still small chunks of chocolate, and continue to stir until completely melted. This way the chocolate won’t overheat or burn. Let chocolate cool.

  2. In the bowl of a stand mixer or a large bowl with a handheld mixer, beat cream cheese and sugar on medium speed until smooth. Changing to low speed, carefully beat in cocoa powder so that it doesn’t “poof” everywhere. Every so often stop beating and scrape down the sides of the bowl well.

  3. Beat in eggs, one at a time, until smooth.

  4. Beat in melted and cooled chocolate.

  5. Pour mixture over crust, smoothing the top.

  6. Bake for 45 - 60 minutes, or until center is still slightly wiggly and the top looks dry.

  7. Turn oven off and crack open the door for about 10 minutes. Remove cheesecake from oven and place in fridge until completely cooled, 8 hours or overnight.

Make the Ganache Topping

  1. In a small pan place heavy cream and chocolate over low heat. Stir constantly until mixture is smooth and melted. Allow to cool slightly.

  2. Remove cheesecake from fridge and pour ganache evenly over top. Allow to set before running a dull knife around edge of cheesecake and releasing from springform pan. Alternately, if you don’t need to transport the cheesecake anywhere, you can remove the ring of the springform first and then pour the ganache over, using a spoon to guide the ganache toward the edges and allowing some to dribble down the sides.

Jenny’s Notes:

  • Not a dark chocolate fan? Try it out with milk chocolate or a mixture of milk and dark to create your preferred bitterness!

  • If you don’t own a double boiler, you can make a makeshift one by placing a small pan with an inch or so of water in the bottom and bring to a simmer. Place the chocolate in a bowl big enough that it can sit on top of the pan without touching the water. Stir constantly and proceed as in the recipe. This might take a touch more effort than just melting the chocolate in a pan, but it’s safer if you’re not used to melting chocolate so as not to burn it.

  • Powdered sugar can be substituted for the granulated, use 1 cup / 110g.

  • For cleaner slicing, try running your knife under hot water for a few seconds between slices.

Triple Dark Chocolate Cheesecake
Yield 12
Author
Prep time
1 Hour
Cook time
1 H & 8 M
Inactive time
8 Hour
Total time
10 H & 8 M

Triple Dark Chocolate Cheesecake

Oreo crust, creamy dark chocolate cheesecake filling, and a decadent dark chocolate ganache.
Cook modePrevent screen from turning off

Ingredients

For the Oreo Crust
For the Filling
For the Ganache Topping

Instructions

Make the Oreo Crust
  1. Preheat oven to 350°F / 177°C. Grease an 8in - 9in / 20cm - 24cm springform pan.
  2. Crush Oreos in a food processor or with a rolling pin.
  3. If using a food processor, pulse in melted butter until crumbs are evenly moistened. If crushing Oreos by hand, transfer to a bowl and stir in butter.
  4. Press mixture evenly into bottom of prepared springform pan and bake for 8 minutes.
  5. Remove from oven and let cool while you prepare filling.
Make the Filling
  1. In a double boiler or pan over low heat, melt chocolate, stirring constantly. Remove from heat when there are still small chunks of chocolate, and continue to stir until completely melted. This way the chocolate won’t overheat or burn. Let chocolate cool.
  2. In the bowl of a stand mixer or a large bowl with a handheld mixer, beat cream cheese and sugar on medium speed until smooth. Changing to low speed, carefully beat in cocoa powder so that it doesn’t “poof” everywhere. Every so often stop beating and scrape down the sides of the bowl well.
  3. Beat in eggs, one at a time, until smooth.
  4. Beat in melted and cooled chocolate.
  5. Pour mixture over crust, smoothing the top.
  6. Bake for 45 - 60 minutes, or until center is still slightly wiggly and the top looks dry.
  7. Turn oven off and crack open the door for about 10 minutes. Remove cheesecake from oven and place in fridge until completely cooled, 8 hours or overnight.
Make the Ganache Topping
  1. In a small pan place heavy cream and chocolate over low heat. Stir constantly until mixture is smooth and melted. Allow to cool slightly.
  2. Remove cheesecake from fridge and pour ganache evenly over top. Allow to set before running a dull knife around edge of cheesecake and releasing from springform pan. Alternately, if you don’t need to transport the cheesecake anywhere, you can remove the ring of the springform first and then pour the ganache over, using a spoon to guide the ganache toward the edges and allowing some to dribble down the sides.

Notes

Not a dark chocolate fan? Try it out with milk chocolate or a mixture of milk and dark to create your preferred bitterness! If you don’t own a double boiler, you can make a makeshift one by placing a small pan with an inch or so of water in the bottom and bring to a simmer. Place the chocolate in a bowl big enough that it can sit on top of the pan without touching the water. Stir constantly and proceed as in the recipe. This might take a touch more effort than just melting the chocolate in a pan, but it’s safer if you’re not used to melting chocolate so as not to burn it. Powdered sugar can be substituted for the granulated, use 1 cup / 110g. For cleaner slicing, try running your knife under hot water for a few seconds between slices.

Nutrition Facts

Calories

715.12

Fat

54.28 g

Sat. Fat

31.43 g

Carbs

52.73 g

Fiber

3.26 g

Net carbs

49.47 g

Sugar

39.29 g

Protein

7.29 g

Cholesterol

118.98 mg

Sodium

316.65 mg

Nutritional Information is Approximate.

triple dark chocolate cheesecake, decadent, creamy, rich, oreo crust, ganache
dessert
American
Did you make this recipe?
Tag @jennyblogsandbakes on instagram and hashtag it #jennyblogs
2019-04-24+19.00.29.jpg

Sicilian Almond Cookies - Paste di Mandorle

Last Updated August 16, 2024

2019-05-13+15.18.28.jpg

Paste di mandorle, or almond cookies, are one of the simplest and most delicious cookie recipes you could ask for, requiring only 4 ingredients and an overnight refrigeration (and even that is optional), so you can make the dough one day and bake the next. And because they only use almond flour, they are gluten-free friendly!

These cookies and many variations of them hail from Sicily, where the land is full of sunshine and Mediterranean breezes, charming towns, and has the perfect climate for some of the most succulent citrus fruits and almonds. Or so I’ve heard, I have yet to actually go there! The first time I found a bag of Sicilian almonds in Italy I snatched them up, hoping for a taste experience like never before. Basically setting myself up for disappointment. They were good, yes, but I think it would be best to eat them fresh, in Sicily. Until that day when I go to Sicily, I will content myself with tastes of their culture, like the occasional good arancini (fried balls of rice stuffed with cheese and veggies or meat) that you can find around Florence, granita (a slushy type drink), brioche stuffed with gelato, and cannoli. And of course, these almond cookies. And they’re so simple to make. Dangerous.

A Note on What You Call These Cookies in Italian

The original name of this post I had named as “Paste alle mandorle” but I believe that is used more to denote almond paste, or marzipan, so I’ve updated it to Paste di Mandorle.

While most translating apps will tell you “cookie/cookies” translates to “biscotto/biscotti”, it’s not a catch-all. For as often as I talk about, bake, and eat cookies, this word has always given me grief. If you want to get technical, and you know I do, “biscotti” can be broken down into two root words: “bis” meaning two or twice, and “cotti” meaning baked or cooked. Thus, biscotti actually refers to cookies that have been baked twice. In America, you probably are familiar with the word biscotti, meaning those long hard cookies often sold at coffee shops. Those are truly biscotti, because they’re twice baked. The whole dough is baked, then they’re sliced and baked again. So if you want to talk about cookies in Italian but you don’t want to talk about the twice-baked ones, what do you call them? There is no catch-all, but you have some options. You could simply call them “dolci” (sweets) or dolcetti (little sweets) which is always safe, or cookies made with butter, similar to what we know as shortbread, you could call “frolli”. Or, you can call them “paste” as I did in this post, which in the most general translation of the word means "doughs” or “pasticcini” which is similar. Just looking up this recipe in Italian, on the first page you will probably find them called paste, pasticcini, and biscotti.

Then don’t get me started on the Italian word for “cake” which is “torta”. That one IS a catch-all, but in a bad way, because then I’m calling desserts “cake” in Italian that are definitely not cake in English. They have no word for pie, so then if someone comes to your Thanksgiving dinner and asks what the pumpkin pie is, you might say “torta di zucca” or, pumpkin cake. Sigh. Pie, like Americans think of pie (apple pie, cherry pie) doesn’t exist in their traditional cuisine so it makes sense. But confusing for an American who wants to talk about it in Italian. Some desserts, like apple, are known enough now in Italy that you can refer to them by their English name, apple pie.

This post may contain affiliate links. If you buy something using these links, Jennyblogs may receive a small commission, at no extra cost to you. This helps to support Jennyblogs. For further information see the privacy policy. Grazie!

Original recipe adapted and translated from GialloZafferano


Sicilian Almond Cookies - Paste di Mandorle

Makes about 2 dozen cookies

2018-12-22 12.26.58.jpg

Ingredients:

  • 2 1/2 cups / 250g almond flour

  • 1 1/4 cups / 250g granulated sugar

  • 2 / 60g egg whites

  • 1/2 tsp almond extract

Garnishes (optional)

  • powdered sugar

  • whole, sliced, or slivered almonds

Directions:

Oven 350F / 180C

  1. In a medium bowl, combine the almond flour and the sugar.

  2. Mix in the egg whites and the almond extract until thoroughly combined. This can be done with a spoon, a hand mixer, stand mixer, or even in a food processor.

  3. Cover dough and place in fridge overnight or for at least 7 hours.

  4. Remove dough from fridge and roll into balls, then roll in powdered sugar. Flatten cookies a bit, as they will not spread much in the oven. Press in a few almond slices on top. Alternately, shape them as you wish, as they hold their shape well after the overnight refrigeration.

  5. Place cookies on a silpat or parchment covered baking sheet, leaving about 1” between cookies.

  6. Bake in preheated oven for 8-12 minutes, until just lightly golden. Be careful no to overbake, cookies should be crunchy on the outside and soft on the inside.

Jenny’s Notes:

  • If you have almonds and a method to grind them, such as a food processor, go ahead and make fresh almond flour! Be careful not to over grind, you don’t want the almonds to heat up and the oil to start to escape, resulting in almond butter.

  • If you prefer other extracts, go ahead and play around with other flavors; vanilla, orange, lemon, coconut, etc.

  • This recipe, if you go by weight instead of imperial measurements, is very easy to modify or double, triple, halve, etc.! You can see that the ratio of almond flour to sugar is 1:1: essentially all you have to do is mix together equal weights of almond flour and sugar, with just enough egg whites to bind them together easily and a touch of extract for flavor. Voila.

  • These cookies have many variants and shapes and are often piped with candied cherries on top. I’m not a huge candied fruit person, and so I found a simple recipe and omitted the piping for one of the simpler almond cookie methods, rolling in powdered sugar and decorating with almonds.

Sicilian Almond Cookies - Paste alle Mandorle
Yield 24
Author
Prep time
30 Min
Cook time
12 Min
Inactive time
7 Hour
Total time
7 H & 42 M

Sicilian Almond Cookies - Paste alle Mandorle

A classic Italian cookie originating in Sicily with a soft center and crunchy exterior. 4 ingredients and gluten-free.
Cook modePrevent screen from turning off

Ingredients

Garnishes (optional)

Instructions

  1. In a medium bowl, combine the almond flour and the sugar.
  2. Mix in the egg whites and the almond extract until thoroughly combined. This can be done with a spoon, a hand mixer, stand mixer, or even in a food processor.
  3. Cover dough and place in fridge overnight or for at least 7 hours.
  4. Remove dough from fridge and roll into balls, then roll in powdered sugar. Flatten cookies a bit, as they will not spread much in the oven. Press in a few almond slices on top. Alternately, shape them as you wish, as they hold their shape well after the overnight refrigeration.
  5. Place cookies on a silpat or parchment covered baking sheet, leaving about 1” between cookies.
  6. Bake in preheated oven for 8-12 minutes, until just lightly golden. Be careful no to overbake, cookies should be crunchy on the outside and soft on the inside.

Notes

If you have almonds and a method to grind them, such as a food processor, you can make fresh almond flour! Be careful not to over-grind, you don’t want the almonds to heat up and the oil to start to escape, resulting in almond butter. If you prefer other extracts, play around with other flavors; vanilla, orange, lemon, coconut, etc. This recipe, if you go by weight instead of imperial measurements, is very easy to modify or double, triple, halve, etc.! You can see that the ratio of almond flour to sugar is 1:1: essentially all you have to do is mix together equal weights of almond flour and sugar, with just enough egg whites to bind them together easily and a touch of extract for flavor. Voila. These cookies have many variants and shapes and are often piped with candied cherries on top. I’m not a huge candied fruit person, and so I found a simple recipe and omitted the piping for one of the simpler almond cookie methods, rolling in powdered sugar and decorating with almonds.

Nutrition Facts

Calories

110.04

Fat

5.24 g

Sat. Fat

0.40 g

Carbs

14.38 g

Fiber

1.31 g

Net carbs

13.07 g

Sugar

12.51 g

Protein

2.76 g

Cholesterol

0.00 mg

Nutritional information is approximate, based on 1 cookie.

gluten-free, Sicilian almond cookies, Paste alle Mandorle
dessert, cookies
Italian
Did you make this recipe?
Tag @jennyblogsandbakes on instagram and hashtag it #jennyblogs
2019-05-13+15.17.27-2.jpg

All About that Wheat Flour - FARINA part 2

2019-05-17+18.29.09-2.jpg

This post contains affiliate links. If you buy something using these links, Jennyblogs may receive a small commission, at no extra cost to you. This helps to support Jennyblogs. For further information see the privacy policy. Grazie!

If you’re reading this, you have probably have some form of wheat flour in your home. Even the person nearest to you, who is most likely not reading this, probably has some kind of wheat flour in their home. It almost sounds funny to say wheat flour because it is universally known as just flour. Flour refers to wheat flour, and only the other types of flour need to differentiate themselves. Rice flour is no less a flour, but we need to say “rice” in front of “flour” otherwise it will be assumed we are talking about flour; that is, wheat flour.

All-purpose, bread, cake, pastry, self-raising, strong, durum, semolina, whole wheat, whole wheat pastry, and graham are just some of the names for wheat flour types…what do you always have on hand? Besides maybe the price and brand of your flour, what else do you know about the substance that goes into so many hundreds of recipes? Should you care? It may not make a life or death difference, but if you enjoy cooking and baking, or generally like learning, then learning to understand wheat flour varieties and how best to use them can take the food you make to a whole new level!

If you’d like to read Part 1 and learn how flour is used in Italy, click here.

The Six Categories of Wheat

In your American pantry you probably have an all-purpose flour, a bread flour, maybe a cake flour, maybe a self-raising, possibly a few others. If you know when and how to use these flours (or just follow a recipe), you might not need to know where or what kind of wheat is actually grown and ground to make these. But once you become familiar with the types of wheat, their properties and best uses, you can make more educated choices about your baking and end up with a superior result. Even the most nominal baker will eventually come across recipes that call for cake flour or bread flour, and knowing more about the wheat characteristics and which kinds are used to make these flours will help you understand if you can substitute say, all-purpose flour, and the results if you do so.

The first thing to know is that wheat can be defined by these six characteristics:

L to R: durum wheat (semola), soft wheat for sweets, soft wheat (manitoba) for bread

L to R: durum wheat (semola), soft wheat for sweets, soft wheat (manitoba) for bread

  • Soft wheat has a higher moisture content and less gluten, suitable for making cake and cookies and more delicate baked goods

  • Hard wheat has a lower moisture content and higher protein/gluten* content, usually between 12-14%, suitable for bread making

  • Red wheat has a slightly higher protein than white and a bolder taste

  • White wheat is milder in taste even if the color is not so different from red once milled into flour

  • Winter wheat is usually planted in the fall and harvested in the summer, with the exception of countries that have too harsh of winters, such as Canada where it is planted in the spring

  • Spring wheat is usually planted in the spring and harvested in the fall, with the exception of countries that have too hot and dry of summers, such as California in which case it is planted in the fall. You can read more about winter and spring wheat here.

*Many use the terms protein and gluten in wheat flour interchangeably. This is because gluten is a type of protein found in wheat, the kind that is “developed” when you knead bread and gives it the elastic/chewy quality. In most cases, the higher the protein content, the higher the gluten. It is important to note that all gluten is protein, but not all protein is gluten, as your celiac friends should be able to tell you. Also, all wheat contains gluten, but not all gluten comes from wheat. Make sense? You can read more here or here for better understanding gluten in the light of gluten allergies, or here for a good explanation of gluten. For my purposes today, and baking in general, if someone says a flour is high in protein, and someone else says a flour has a high gluten content, they mean the same thing. And they both mean the flour is good for bread making.

There are thousands of varieties of wheat grown around the world, but chaos can be brought to order with the following six principle categories, using the characteristics we reviewed above:

  1. Hard Red Winter Wheat (HRW)

  2. Hard Red Spring Wheat (HRS)

  3. Soft Red Winter Wheat (SRW)

  4. Hard White Wheat (HW)

  5. Soft White Wheat (SW)

  6. Durum Wheat (DW) is the hardest of all wheat, used for pasta making

The flour you buy from the store will most likely fall into one of these six categories. The bread flour in your pantry is most likely a hard red or white spring wheat; your cake flour is probably milled from a soft white wheat; all-purpose is usually a mixture of hard and soft wheat. You’d know now, for example, that baking a loaf of bread with all-purpose or cake flour will not yield a wonderfully chewy loaf like using bread flour would; they don’t have the gluten required to achieve the chewiness.

If you’d like to start experimenting with flour varieties, check your area for a local mill. If you live in the States and are not fortunate enough to have a mill near you, check out Bob’s Red Mill, in store or online. They have some clearly labeled high-quality flours. You could buy some of their whole-wheat hard red flour and whole-wheat hard white flour and make some simple bread loaves, trying the two wheat varieties side by side.

Happy baking!

Mixing flours

Mixing flours


Navigating the Italian Flour Section - FARINA part 1

IMG_0730.jpg

Last Updated June 30, 2024

Farina in Italia

You’ve recently moved to Italy, still walking around completely starry-eyed from the beauty of the country, and are about to go grocery shopping because you realize, unfortunately, you can’t order pizza every night. So you decide to make it at home, crust and all. (Sneaky, aren’t you?) When you arrive in the flour section, you realize that it’s going to be a touch more than just translating “flour” to “farina” and trying to figure out which ones are all-purpose, cake flour, and bread flour. Instead, you find not only types of flour, but numbers to boot. What does it all mean? How are you supposed to use flour in Italy?

Or maybe you’ve lived in Italy for awhile and have been experimenting with the different flours with results ranging from baked goods turning out great, turning out awful, or turning out…different. This was me the first year of my life in Italy. Add on top of that ovens that don’t have temperature gauges, are strange sizes, or only cook from the bottom, you get some interesting results. Can’t I just buy a dang bag of all-purpose flour without having to figure out all the factors in this Italy baking equation?!? No, Jenny. No you cannot.

After talking to people (is there therapy for bakers? Can that be a thing?) and other expats here, reading many articles online, and of course my own many trials and error, hopefully this post will help demystify the flour section a bit for you! Reading this blog post “All About That Wheat Flour”, which is part 2, on the six categories of wheat will also help you, as some of that will then be helpful to understand (or translate) in Italian. Let’s start with a quick Italian flour cheat sheet, then keep reading to understand the properties of the Italian flour better.

Where Can I Find Italian Flour in the USA?

For my American readers, I have linked several sites where you can find some Italian flours as talked about below for your baking adventures Stateside. I’ve gotten quite a few inquiries recently about where to find Italian flours in America, so I figured I’d compile some of my favorite sources right here where it’s convenient. I wish it was easier to find quality and cheap Italian flours in the States, but it’s rather tricky, honestly. Some come from Amazon, trusted and easy for shipping, but they don’t have the biggest variety so I’ve tried to include a variety of sites that combine brands I’ve used both here and in Italy, while also trying to find the better prices. If anyone has some good sources I’m not aware of, I’d love to hear and be able to share!

This post may contain affiliate links. If you buy something using these links, Jennyblogs may receive a small commission, at no extra cost to you. This helps to support Jennyblogs. For further information see the privacy policy. Grazie!

Italian Flour Baking Cheat Sheet

  • For cookies, bars, cakes/cupcakes, biscuits, scones, or anything that needs a tender crumb, use Farina di grano tenero, 00. This is your “cake flour.” Nobody wants a chewy cake.

    Antimo Caputo and also in a 55lb. bag

    Barilla

    La Molisana

    King Arthur 50lb bag of 00 - Wheat grown in America and non GMO

  • For bread, I recommend starting off with Farina di Manitoba, grano tenero, 0; this is similar to standard American bread flour. As you progress, you can start to add in Farina di grano duro, or Semola Rimacinata di grano duro. These flours will have a different feel and look to them as you knead your bread and in the final product, which is why I recommend starting out with just a small portion, around 25% of the total flour, in your recipes until you know how they act.

    Mulino Caputo

    Farina d’America

    Farina d’America - cheaper price, free shipping over $100

  • For every day needs you can buy one bag of Farina di grano tenero, 00 and one bag of Farina di Manitoba, grano tenero, 0 or Farina di grano duro and mix them together to make your own homemade all-purpose flour.

Farina Explained

Grano Duro and Grano Tenero

Hard wheat and soft wheat, or as they are known here in Italy, grano duro and grano tenero, will be written on just about every bag of standard flour.

Breads and pastas usually use grano duro, or hard wheat, because of the higher gluten content. Most sweets and cakes use soft flour or grano tenero. Keep in mind however that there are some breads made with soft flour, as you will find in the bakery section at your local grocery store, or a combo of both soft and hard flour.

Flour Grinds: 00, 0, 1, 2

This is pretty straightforward: The smaller the number, the finer the flour. And in your local grocery store, 00 and 0 will be the most common by far. They don’t have every variety of flour in every grind, so the work is mostly already done for you. If you know you want a soft/grano tenero, you’ll probably find only 0 and 00. You won’t have to decide between a soft/grano tenero 00, 0, 1, or 2.

Semola and Semola Rimacinata

Semola, also know as pasta flour or sometimes semolina in the States, comes from durum wheat and has a yellowish hue. It is usually grown in the spring and is the hardest of all wheat, which makes it ideal for pasta and bread making. In Italy it comes in two primary forms: Semola and Semola Rimacinata (reground, or twice ground, making it finer). Semola is used for eggless pasta and Semola Rimacinata is used for egg pasta.

Polselli Semola Rimacinata

La Molisana Semola Rimacinata

La Molisana Semola

Caputo Semola

Great River Milling Semolina (Semola in the States is usually called Semolina, I know, confusing.)

King Arthur Semolina

Farina di Manitoba

Named after the Canadian province of Manitoba, this is the “bread flour” of Italy. This one always threw me for a loop, because it is a grano tenero, yet has a high gluten content. Because of its unusual characteristics, it is often categorized as a “special” flour. It is often used in the fine grind of 0 and is great for breads that require long-leavening periods, such as French Baguettes, pizza, and breads that use natural yeast or madre lievito.

Mulino Caputo

Farina d’America

Farina d’America - cheaper price, free shipping over $100

Farina per Pizza, Pasta, etc.

Because Italy is the land of pizza, pasta, and bread, you will find plenty of bags of pre-mixed wheat varieties that are supposed to be perfect for rustic breads, or focaccia, or pizza, or pasta. I’ve never bought any of these because I’ve been preoccupied with figuring out how to use all the other flours, but I’m sure they’re great for their specific purposes!

Caputo “Chef’s Flour”

Caputo “Pizzeria”

Caputo Pasta Fresca e Gnocchi

Farina e Lievito

This would be the equivalent of the self-raising flour in the States. I don’t use this in the States nor in Italy, but I’ve read that it works well here! You could also make your own, adding 1 1/2 tsp of baking powder and 1/2 tsp salt per cup (120g) of flour. (I recommend using baking powder from the States as I’ve heard that the Italian baking powder/lievito in polvere does strange things.) I would use farina di grano tenero 00 if you’re planning on making biscuits or cookies.

Specialty Flours

There are also many specialty flours here to inspire your baking or aid your gluten-free needs. Some worth noting are saraceno (buckwheat), farina di riso (rice flour), farina di mais (cornmeal), farina d’avena (oat flour), teff, farina di ceci (chickpea/garbanzo bean flour), among others.

Happy baking and good luck with the farina Italiana and finicky ovens!


Mocha Punch

2018-12-29+15.42.50.jpg

Last Updated August 16, 2024

This post may contain affiliate links. If you buy something using these links, Jennyblogs may receive a small commission, at no extra cost to you. This helps to support Jennyblogs. For further information see the privacy policy. Grazie!

Mocha punch is exactly what it sounds like. Cold, creamy, sweet, chocolatey coffee served in a punch bowl with dollops of vanilla ice cream slowly melting into a dreamy, creamy puddle.

Punch might seem a thing do the past, but I really love punch. Classic punch to me is a bottle of cranberry raspberry juice combined with Sprite and some fruit-flavored sherbet dolloped in the lunch bowl. And I love it. It reminds me of Christmas time as a kid because that’s really the only time we’d make it. Then I was introduced to this Mocha Punch as a teenager, and the fruity punch got left behind. Everyone loves this coffee punch. It’s hard to put the ladle down.

It’s simple to make but it can steal the show, which makes it ideal for parties. Think holidays, birthday parties, baby showers, bridal showers, and on and on! Keep some empty milk jugs to store it in, and you have one easy and delicious thing done for your next gathering!

No mocha in Italy?

On entering any coffee shop in America, you’ll easily find mocha on the menu.

This is not the case in Italy. Italy may be the birthplace of coffee as we know it today, but that doesn’t mean that they own ALL the copyrights to the best coffee drinks. Cappuccino, espresso, macchiato….but Vanilla Latte and Mocha are not on the menu here, unless you go to one of the few “American” coffee shops, such as Arnold. First of all, if you order a latte you will get….milk. And if you order a mocha you will get…a withering stare. Not the end of the world, especially with all of the other types of coffee you can order, but sometimes I just want a mocha, ya know? I usually order my cappuccino with cocoa powder on top, but that’s not quite the same.

If I’ve learned anything living away from my home country, it’s that I will suddenly miss all the creature comforts of home, whether or not I appreciated or even liked them before. I do really like a good mocha. And somehow missing mochas has me thinking about this mocha punch, so here you go. The recipe for the best punch, that really keeps the party going!

Recipe adapted from a friend’s mama. :)


Mocha Punch

Serves about 20

Ingredients:

  • 3 quarts / 3 L freshly brewed strong coffee

  • 1 1/2 cups / 300g sugar

  • 2 quarts / 2 L milk

  • 3/4 cup / 240g chocolate syrup, try this homemade recipe!

  • 3 tsp vanilla extract

  • 1/2 gallon (8 cups) / 1 kg vanilla ice cream

Directions:

  1. Pour brewed coffee into a large pot, bowl, or other large container. Stir sugar into hot coffee until dissolved. Cool in fridge.

  2. Remove coffee from fridge and add milk, chocolate syrup, and vanilla and stir until well combined.

  3. Chill until cold or overnight.

  4. Just before serving, pour into serving container, mix briefly, and scoop ice cream into the punch, allowing the ice cream to melt for a few minutes before serving. (Skip this step if not serving as a punch.)

  5. Store in fridge.

Jenny’s Notes:

  • For an everyday mocha I reduce the sugar and milk, sometimes by up to half, as I usually drink my coffee black, and it makes it less indulgent.

  • You can substitute store-bought chocolate syrup for the homemade and use instant coffee instead of brewing, if you wish! I think the flavor will always be superior when you make things from scratch, or in this instance, use good, fresh coffee instead of instant!

  • Of course, you don’t have to use vanilla ice cream, you could use chocolate or moose tracks or hey, coffee ice cream!

  • When serving, you can choose to pour the whole recipe’s worth of punch into a punch bowl with ice cream, or, for smaller or longer parties, start with just a portion of the punch and ice cream, keeping the remainder in the fridge and freezer, respectively, so by the end the punch isn’t warm and the ice cream long melted.

  • This punch is easily stored in pitchers or empty milk jugs!

Mocha Punch
Yield 20
Author
Prep time
25 Min
Total time
25 Min

Mocha Punch

Sweet and creamy cold coffee punch with dollops of ice cream is great for gatherings and parties!
Cook modePrevent screen from turning off

Ingredients

Instructions

  1. Pour brewed coffee into a large pot, bowl, or other large container. Stir sugar into hot coffee until dissolved. Cool in fridge.
  2. Remove coffee from fridge and add milk, chocolate syrup, and vanilla and stir until well combined.
  3. Chill until cold or overnight.
  4. Just before serving, pour into serving container, mix briefly, and scoop ice cream into punch, allowing ice cream to melt for a few minutes before serving.
  5. Store in fridge.

Notes


  • You don’t have to use vanilla ice cream, you could use chocolate or moose tracks or heck, coffee ice cream! Whatever you like.
  • When serving, you can choose to pour the whole recipe’s worth of punch into a punch bowl with ice cream, or, for smaller or longer parties, start with just a portion of the punch and ice cream, keeping the remainder in the fridge and freezer, respectively, so by the end the punch isn’t warm and the ice cream long melted.
  • This punch is easily stored in pitchers or empty milk jugs!


Nutrition Facts

Calories

202.41

Fat

4.98 g

Sat. Fat

3.02 g

Carbs

33.94 g

Fiber

0.49 g

Net carbs

33.45 g

Sugar

26.31 g

Protein

5.27 g

Sodium

91.66 mg

Cholesterol

19.30 mg

Nutritional information is approximate. Calculated including vanilla ice cream

mocha, mocha punch, party coffee chocolate punch, iced coffee drink
drink
American
Did you make this recipe?
Tag @jennyblogsandbakes on instagram and hashtag it #jennyblogs
2018-12-29+15.44.21-2.jpg

Chocolate Sauce

Photo Public Domain https://creativecommons.org/licenses/by-sa/3.0/at/deed.en Permission: Sammlung J.P. Adlbrecht

Photo Public Domain https://creativecommons.org/licenses/by-sa/3.0/at/deed.en Permission: Sammlung J.P. Adlbrecht

Last Updated August 15, 2024

This post contains affiliate links. If you buy something using these links, Jennyblogs may receive a small commission, at no extra cost to you. This helps to support Jennyblogs. For further information see the privacy policy. Grazie!

Classic. Quintessential. Chocolatey. Good on everything, from your morning pancakes and coffee to ice cream and that cake you just made. Or ya know, by the spoonful. Just a spoonful of…I’ll let you sing the rest yourself. ;)

What is it? Chocolate Sauce! Or chocolate syrup, as you prefer. No more Hershey’s in a bottle, or going without if you live outside the USofA. It’s so easy you’ll wonder why you never made it before. No high fructose corn syrup involved!

Recipe from my Mama


Chocolate Sauce

Makes about 3/4 cup of sauce

Ingredients:

  • 3/4 cup / 150g sugar

  • 1/3 cup / 33g unsweetened cocoa powder

  • 1 Tbsp / 7.5g cornstarch

  • 1/2 cup / 118g water

  • 1 tsp vanilla

Directions:

  1. Combine sugar, cocoa, and cornstarch in a small saucepan.

  2. Add water and whisk until there are no cornstarch lumps.

  3. Cook over medium heat, stirring constantly, until mixture boils. Reduce heat to low and boil for 5 minutes, continuing to stir.

  4. Remove from heat and add vanilla. Cool.

  5. Store in an airtight container in the refrigerator.

Jenny’s Notes:

  • The better quality your cocoa powder the better your sauce will taste!

  • Keeps well in the fridge.

Chocolate Sauce
Yield 12
Author
Prep time
5 Min
Cook time
10 Min
Total time
15 Min

Chocolate Sauce

A basic chocolate sauce for ice cream topping, drizzling, mixing in coffee, and anything you need chocolate sauce for!
Cook modePrevent screen from turning off

Ingredients

Instructions

  1. Combine sugar, cocoa, and cornstarch in a small saucepan.
  2. Add water and whisk until there are no lumps.
  3. Cook over medium heat, stirring constantly, until mixture boils. Reduce heat to low and boil for 5 minutes, continuing to stir.
  4. Remove from heat and add vanilla. Cool.
  5. Store in an airtight container in the refrigerator.

Notes

The better quality your cocoa powder the better your sauce will taste! Keeps well in the fridge.

Nutrition Facts

Calories

63.04

Fat

0.27 g

Sat. Fat

0.00 g

Carbs

14.76 g

Fiber

0.56 g

Net carbs

14.21 g

Sugar

12.52 g

Protein

0.55 g

Sodium

0.61 mg

Cholesterol

0.00 mg

Nutritional information is approximate.

Hershey's chocolate sauce, ice cream topping, hot fudge sundae sauce, chocolate sauce
dessert, sauce, topping
American
Did you make this recipe?
Tag @jennyblogsandbakes on instagram and hashtag it #jennyblogs

Hard-to-Find Ingredients in Italy

If you’re planning on spending any amount of time in Italy in which you will want to cook, bake, or generally not always eat in restaurants (I know, it’s hard, but your bank account will thank you!), this list might come in handy.

1X9B0033 copy copia.jpg

Last Updated August 10, 2024

You might think that Italy will have everything you need, they bake and cook so it’s just a matter of translating, right? Yes...and no. It’s not as different as it could be, I can imagine living in China or the DRC would present a bigger challenge for finding and cooking with familiar ingredients and brands. But this is still a “foreign” country and will present its unique challenges. The best way to tackle these challenges is to meet them head on, and hopefully with the ones that are important to you in your suitcase!

What follows is a list of ingredients and items that could fall into these categories: nonexistent - expensive - elusive - and, - it’s just not the same. Compiled from my own experience and that of fellow expat friends, I hope you find it helpful, and, as always, let me know in the comments below what should be added or your own stories! I’m sure there are things I don’t even think about that others might really miss!

Some ingredients are carried in all main grocery stores and just located in strange places, some are only found in specialty stores, and others you might want to consider bringing with you. Little Ethnic stores are your friends! Of course, this list is not all-inclusive, I chose not to list most of the items that are “name brand” or not mainstream; i.e. your favorite brand of laundry detergent might not exist, but there are plenty of other detergents that do exactly the same thing, so I don’t have Arm & Hammer listed as non existent, or likewise, I won’t have Andes Mints baking bits listed because most people wouldn’t think of those let alone miss them. Make sense? Ok let’s get grocery shopping!

This post may contain affiliate links. If you make a purchase using these links, Jennyblogs may receive a small commission, at no extra cost to you. This helps to support Jennyblogs. Where possible, links are prioritized to small businesses and ethically and responsibly made items. For further information see the privacy policy. Grazie!

The “American” Section at Vivimarket…yes! Betty Crocker strawberry frosting, I have missed thee! Not.

The “American” Section at Vivimarket…yes! Betty Crocker strawberry frosting, I have missed thee! Not.

  • Asian Ingredients - Ingredienti Asiatici

    If you want spring roll wraps, soy sauce, canned coconut milk, sriracha, or anything that’s more Asian than Italian, chances are the prices will be high, if they carry it at all at the supermarket. The large Esselunga I shop at does have an Asian section (it’s a tiny end cap) but prices are usually 2-3x what you can find if you know where to look. Where is that? Any Asian grocer! The products are authentic, variety greater, and prices much better! You might even end up with food items (we hope they’re food?!) you’ve never seen before to try, and it might remain a mystery because the packages often lack any English, Italian, or even any Latin alphabet!

  • Apples - Mele

    I love apples. I don’t love apples in Italy. They are everywhere, but I can’t understand why they are gross. It can be apple season but when you bite into a beautiful apple you get a mouthful of pith. Blech. I grew up picking fresh apples every fall with my mom and siblings so maybe I’m just apple-spoiled? The only apples that I consistently like, crisp and sweet, are the Ambrosia apples. I’ve heard of a place not too far outside of Florence where you can go and pick fresh apples! The price is right, but you would need a car to get there.

  • Avocados - Avocado

    Avocados are found pretty easily, but they are expensive! They are usually between 3.50-6.50euro/kilo. And they’re not always the beloved Hass, often there is a smoother, greener variety that comes from Israel.

  • Baking Powder - Lievito in Polvere

    Baking powder doesn’t come in containers or tubs like it does in the States. You will usually find it in small packets (often with the artificial vanillin flavor) in the baking section. Rumor has it it doesn’t work well, causing desserts to rise too much too fast or not rising at all. Other times I’ve heard it works just fine. I haven’t personally tried it, as this is something I bring with me and a container lasts a long time! You could try the self-raising flour, I’ve read that works reliably well.

  • Baking Soda - Bicarbonato di Sodio

    This is cheap and sold in all grocery stores, it’s just not in the baking section like you’d think it would be. Look on the end caps in some stores by the Alka Seltzers or by the bottled water or soft drinks in others.

  • Black Beans - Fagioli Neri

    Don’t ask me why, but the black beans are not always with the other beans at Italian grocer stores. Sometimes they don’t carry them, sometimes they are in a “special” section maybe with other seeds and nuts. But they do exist! Beans are also another item you can usually find at the little Arab or Asian stores.

  • Buttermilk - Latticello

    I don’t think I’ve ever seen buttermilk in a store, but I also can’t say I’ve looked very hard because there are several handy and easy substitutes. Instead of buttermilk try this: mix 1 cup milk with 1 Tbsp vinegar or lemon juice, OR use plain kefir, which is readily available in Italian grocery stores.

  • Cabbage - Cavolo

    Italians love their cabbage, especially when their cavolo nero or black cabbage comes into season. Despite its name, black cabbage seems more similar to kale than it does the variety of cabbage we use in the States, that light green head of cabbage. If you have a hankering to make say, sauerkraut or pickled purple cabbage, what do you do? Scour your nearest grocery store, sometimes they do have the “regular” heads of cabbage! I have on occasion seen the purple cabbage, but because fruits and vegetables are still very much sold seasonably, you can’t count on them year round. The green cabbage I saw was called crauti, their name for sauerkraut; it’s also called cavolo cappuccio bianco.

  • Candy Bars and Candies - Barrette di Cioccolato e Caramelle

    You can find these here: Snickers, Mars, Twix, Kit Kat, Skittles (since 2018), M&M’s, Smarties (the Canadian M&M’s), Lindt, Bounty, Lion, Ferrero Rocher, and various other European varieties. Reese’s can be found at Vivimarket in Florence for a significant price. Update as of December 2020, Esselunga had packs of 2 Reese’s cups by the checkout lanes for 0.60cents.

  • Canned Pumpkin Purée - Zucca in Scatola

    In Italy, this is liquid gold. To find pumpkin, you are going to need to go to specialty stores. In Florence, I know of two places that carry it. One is ViviMarket, the other is Pegna. Both places will run you about 4.60-4.80euro per 15 oz. can. I know. Like I said, liquid gold. You can find fresh pumpkin in the store, but it is not pie pumpkin and will give you a different tasting pumpkin pie if you try and cook and purée it yourself. I know people who do this, up to you if you prefer the classic pumpkin pie taste or are up for a twist!

  • Cereals - Cereali

    I rarely eat cereal and I doubt you are coming to Italy dreaming about cereal, but one can’t help but notice that though cereal and granola is easily found, the selection is definitely smaller than that of an American grocery store. I’d say this is for the better, but just in case you’re a Lucky Charms or Fruit Loops die hard, realize they might not have your favorite cereal beyond the basics. There are rice krispies for making homemade granola bars, desserts, and Rice Krisipie Treats, just so you know. :)

  • Cheddar Cheese - Formaggio di Cheddar

    While I’m not a big cheddar cheese fan, leave it to being far from home that I start craving all the American foods I don’t normally eat. Cheddar can usually be found at Esselunga, 150g of slices for about 2euros. I’ve also discovered that Lidl has an even bigger container of sliced cheddar cheese for about the same price.

  • Chocolate Chips - Gocce di Cioccolato

    Regular-sized chocolate chips are not to be found, just mini. But there is something about chocolate chip cookies with mini chips that are just not the same. The minis are expensive, too, upwards of 2euro for 6 oz of chips/1 cup. Otherwise, you can buy a bar of chocolate for less and chop it yourself for custom chocolate chunks.

  • Cilantro - Coriandolo

    Fresh and dried parsley is everywhere, but cilantro? Not as much. I have found it sometimes in the grocery store in small packages, but you’ll have a much better chance if you head to any Asian grocer. And there are plenty, at least in Florence!

  • Dill - Aneto

    Dried dill can be hard to find here, but I can sometimes find fresh dill, usually in small plastic containers like the cilantro. But not always. So plan ahead if you want to make homemade pickles or add fresh dill to chicken or tuna salad, like I do. :)

  • Flour - Farina

    There is a plethora of flour here, no worries! The tricky part is figuring out which kind you need, because the types of flour go beyond just all-purpose, bread, and cake. I have a post dedicated to Italian flours and how they are best utilized that you can read here, but for now just a quick overview. First, there are the two kinds of (wheat) flours; hard wheat “grano duro” and soft wheat “grano tenero.” Hard wheat is mostly used for crusty bread, pizza, and pasta because it has a higher protein content, whereas the soft wheat is used for softer breads and desserts. Second, there is the grind of the flour noted by numbers: 00, 0, 1, and 2. 00 denotes the finest grind, 2 is the coarsest. Beyond this there are also all the specialty flours you can find, including: self-raising flour as mentioned above under baking powder, farina di manitoba which is closest to what we call bread flour, almond flour, chickpea flour, cornmeal, rice flour, and more.

  • Grape Juice - Succo d’Uva

    For all the juice variety you can find, only some grocery stores carry grape juice, and it’s only ever one type. Usually purple grape juice, I’ve never seen white and never 100% juice. It seems all their grape juice is made into wine, none leftover for juice, haha!

  • Gum - Gomma

    Yes, there is gum in Italy, but it’s a bit more expensive and not as good as American gum. Some of it is just gross, like licorice. If you like licorice, lucky you!

  • Hummus - Hummus

    Hummus can easily be made at home if you have a good blender or food processor, but sometimes the convenience of having a pre-made container of hummus is so nice. This is not a food I hunted down or even noticeably missed, but when I found some at Lidl it made me very happy and thought you might like to know that, too.

  • Hydrogen Peroxide - Perossido di Idrogeno/Acqua Ossigenata

    This is not food, but if you use it for disinfecting wounds, mouth wash, removing stains, or any of its numerous uses, it might be helpful for you to know that it is readily available here, but the packaging made it harder to locate. Its bottle is usually white, generic, and small, not the signature large brown plastic I’m used to buying in America. Search near the bandages and eye drops.

  • Maple Syrup - Sciroppo d’Acero

    Maple syrup costs a small fortune. It can be found in most grocery stores and also at Vivimarket in Florence. A small bottle, roughly 8 oz, will cost you about 4.50-7euro. Lidl has the cheapest price by far at less than 5euro for a bottle. This is the real stuff, pure maple syrup and not high fructose corn syrup, but I believe Vivimarket carries the Aunt Jemima (that name is changing!) stuff if you’re feeling nostalgic, but I think a bottle of that will cost you more than a pure bottle, almost 8 euro! Oh, the irony.

  • Marshmallows - Toffolette

    Marshmallows are available here, but don’t expect Jet-Puffed fluffy big white mallows. To be honest, I’ve never bought them, but I’ve always heard they are just plain weird with a texture like stale marshmallows.

  • Mexican Ingredients - Ingredienti Messicani

    Like the Asian ingredients, the Mexican ingredients can be found, but maybe less readily. There is a large Asian presence in Italy and no shortage of Asian grocers and restaurants, but the same cannot be said for Mexican. In Florence there seems to be a sad lack of burritos/tacos. My favorite is called Los Chicos, but you can also find Mexican at Tijuana, Eby’s, and I was surprised to see recently, at the American Diner on Via Nazionale. Otherwise you will have to find or make your own tortillas and sauces as best you can. Like the Asian section at the Esselunga I frequent, there is a small Mexican section with enchilada sauce, sour cream (it’s not refrigerated, I’m scared), corn and flour tortillas, and other miscellaneous. They recently stopped stocking the refried beans and that makes me sad. Coop also has a small Mexican food section, with refried beans! Otherwise Vivimarket even has a small Mexican food section.

  • Molasses - Melassa

    I have tried to ask at Coop and Esselunga for Molasses with varying responses. One lady was convinced they carried it only to find they don’t, and the other lady just looked at me like I was crazy. I am happy to report that it can be found at some specialty stores, for sure at NaturaSi. They are the WholeFoods of Italy, high prices and all, but a good place to check out for natural products and specialty items the mainstream stores might not carry!

  • Peanut Butter - Burro di Arachidi

    The main stores usually carry just Skippy, which costs almost 5 euro for a small bottle, or Calvé, a less expensive Dutch (?) brand. I’m happy to report, that after living in Italy for 5 years, I’ve found a natural peanut butter I truly like. It’s called “Fiorentini” and you can find it at Coop for 2.25 for a 350g jar. It has just peanuts, sunflower oil, and salt. Otherwise, the Chinese markets or Arab butchers, which carry more than just meat, have the Calvé or other brands you probably haven’t heard of but for much more manageable prices. If you’re interested in other nut butters, check out NaturaSi which has almond butter, peanut butter, and possibly some others. Pricey, but probably your best bet if you don’t want to grind your own.

  • Pecans - Noci Pecan

    I thought for a long time these were non-existent here, but they just like to hide. They are usually not with the other nuts like walnuts and almonds, but if your local grocery store carries them they might be by the “party aisle,” or near the soft drinks, drink mixes, peanuts, and party nut mixes. But be warned, an 80g bag will run you between 3 and 5 euro a bag. I splurged once and made a pecan pie for Thanksgiving….I spent 12euro just on the 2 cups (240g) of pecans. Ayayay.

  • Pinto Beans - Fagioli di pinto (?)

    Pinto beans aren’t to be found here, hence why I don’t even know what they’d be called. Not even in a special spot in the grocery store, like sometimes the black beans are. Nope. However, there is a variety of bean you can buy called “fagioli borlotti” that make a wonderful substitute for pinto beans. They are creamy colored and speckled with red, but cook up to be brown like pinto beans. More importantly, they are creamy and buttery, just like pinto beans, which make them wonderful to smash for refried beans or eat as is!

  • Pretzels - Salatini

    Similar to marshmallows, pretzels are available and stale tasting. These I did eat once, and haven’t again since. I bought them to make a pretzel crust for a pie, but after twirling around in my food processor for too long without breaking down, I realized these were not your ordinary pretzels. These are special stale pretzels best not used for crusts.

  • Salad Dressings - Condimenti per Insalata

    Salads here are dressed with olive oil, salt, and pepper, and sometimes balsamic vinegar. I’ve never turned back, it’s so simple and good. There are a select few salad dressing you can find in stores, like caeser, tzatziki, and some others, but you’re not going to find Italian (haha), thousand Island, Ranch, raspberry poppyseed, or any of those others. Just bring it with you if it’s important to you or make it from scratch. I never would’ve thought of this but I do have some friends that Ranch was CRUCIAL for.

  • Sour Cream - Panna Acida

    I haven’t tried this yet, I don’t normally eat sour cream and I’ve been won over to using plain yogurt as a healthier substitute. At Esselunga you may only find it if they have the non-refrigerated kind in the Mexican section. Otherwise Coop has some normal looking refrigerated sour cream.

  • Spices - Spezie

    Let’s talk about spices. When you think of Italian cooking, you can probably make a guess of which spices they will for sure have. Garlic, onion, parsley, oregano, basil, sage, bay leaf, cumin, turmeric, thyme, rosemary, pepper, nutmeg, cinnamon, ginger, paprika, marjoram, coriander, curry, and saffron are everywhere. Then there are whole cloves but no ground cloves. The first time I went to make a pumpkin pie I was trying to grate cloves with a cheese grater…kids, don’t try this at home. Other spices like adobe chili, or smoked chilis, or any ethnic spices that aren’t mainstream you will probably have to import yourself. Spices you can find, even if you have to hunt a bit, would include cardamom, garam masala, smoked paprika, and ground mustard. Mint you can find at the Arab butcher shops if you can’t find it at your local store.

  • Sweet Potatoes - Patate Dolci

    Sometimes I can find these at the grocery store, sometimes not. In more recent years it’s been more hit than miss, which is nice! A sure bet would be Vivimarket, which has them every time I have gone, and are usually grown in the US, yeah!

  • Vanilla Extract - Estratto di Vaniglia

    The REAL stuff, not imitation or vanillin like you find in every dessert here. And no, the real stuff doesn’t exist here. Either bring it with you or make your own! I usually bring a bottle with me to use while my homemade stuff is aging, it takes a minimum of 3 months for best flavor.

Always remember, even when you’re missing your creature comfort food, that it’s not so bad eating food like this…

Always remember, even when you’re missing your creature comfort food, that it’s not so bad eating food like this…

The Fluffiest Key Lime Pie with a Gingersnap Crust

2018-12-20 14.16.59.jpg

Fluffy? Isn’t key lime pie supposed to be creamy, custardy, silken? Yes! And this recipe is all of those things but with a special touch of fluffiness, thanks to our friends the egg whites. Whipped egg whites. It’s magical. And with Easter just around the corner, this is the perfect dessert to celebrate with! I even gave you two weeks time to plan ahead, aren't I nice?

I don’t know why I always want to make citrus desserts for Easter, maybe because it’s always in the spring. And in the spring everything is coming alive, the rebirth of nature, and calls for bright, happy citrus flavors. You can’t call citrus sad. And what is Easter but the celebration of the resurrection of Jesus, giving those who believe on Him new life? The celebration of rebirth. It all fits. Not to mention if you observe Lent, getting to eat what you gave up for 6 weeks is lovely.

And whether you have a big Easter meal planned or not, you’re going to want to make this pie. And if you’ve never made key lime pie before? This is not a bad place to start. Just be warned that other key lime pies after this one might be…tame.

This post may contain affiliate links. If you buy something using these links, Jennyblogs may receive a small commission, at no extra cost to you. This helps to support Jennyblogs. For further information see the privacy policy. Grazie!

Recipe adapted from the Williams-Sonoma cookbook Savoring America


The Fluffiest Key Lime Pie with a Gingersnap Crust

Serves 8-12

2018-12-20+14.27.07.jpg

Ingredients:

For the Gingersnap Crust

  • 28 gingersnaps broken into pieces, about 1 1/2in / 4cm in diameter (homemade or storebought)

  • 1/2 cup / 60g chopped pecans

  • 1 Tbsp / 15g chopped crystallized ginger

  • 1/8 tsp ground cinnamon

  • 1/4 cup / 57g butter, melted and cooled

For the Filling

  • 4 eggs, separated

  • 1/4 cup / 30g cornstarch

  • 1/2 cup / 100g sugar

  • 1 14oz can / 440g sweetened condensed milk, make it homemade here

  • 1/2 cup / 118g key lime juice

  • 2 Tbsp / 12g freshly grated key lime zest

  • 1/2 tsp cream of tartar

  • 1 tsp vanilla extract

For the Topping and Garnish

  • 1 cup / 237g heavy whipping cream

  • 1/3 cup / 42g confectioner’s sugar

  • 1/8 tsp almond extract

  • thin key lime slices or lime zest, optional

Directions:

Oven 350°F / 177°C. Lightly grease a 9in / 23cm pie dish.

Make the Gingersnap Crust

  1. In a food processor, combine the gingersnaps, pecans, ginger, and cinnamon. Pulse until everything is finely ground in crumbs. Add the butter and pulse briefly until the crumbs are evenly moistened.

  2. Press evenly into the bottom and up the sides of the prepared pie dish. Bake in the preheated oven for 10 minutes or until fragrant and lightly browned. (This can be hard to see because of the dark color of the gingersnaps.) Allow to cool.

Make the Filling

  1. In the bowl of a stand mixer fitted with the whisk attachment, beat 2 egg whites and the cream of tartar on high speed until soft peaks form and can hold their shape, about 1-2 minutes. Beat in the vanilla and scrape the egg whites into a small bowl; set aside.

  2. In the bowl of the stand mixer (no need to clean it), beat on medium-high speed the egg yolks, 2 remaining egg whites, cornstarch, sugar, and sweetened condensed milk until light and fluffy, about 5 minutes. Add lime juice and zest and beat until smooth.

  3. Gently fold 1/3 of the egg white mixture into the lime mixture to lighten. Add the rest of the egg whites and fold just until combined.

  4. Pour the filling into the cooled pie crust, smooth the top with a spatula. Bake until just firm, about 20 minutes. To test for firmness, jiggle the dish slightly. When the center jiggles just slightly, it’s ready.

  5. Cool completely, then cover and refrigerate for at least 4 hours or overnight.

Make the Topping

  1. In the bowl of a stand mixer, beat the heavy whipping cream on medium speed. As it starts to thicken (and will no longer splatter) increase the speed to high. Add the powdered sugar and almond extract. Continue beating until firm peaks form, about 2-4 minutes total.

  2. Spoon whipped cream over pie or use a piping bag and tips to decorate. Garnish with lime slices/and or zest. Serve immediately or refrigerate.

Jenny’s Notes:

  • The crust can be made without the pecans and/or ginger, if you’re like me and sometimes feel too lazy to chop things!

  • Freshly squeezed key lime juice is best, but if you’ve ever used real key limes you’ll know that getting half a cup can be a real labor of love. Those things can be tiny! Hand cramp hand cramp hand cramp. And just when you think you’re there, you realize you’ve only squeezed 1 Tbsp worth. So, I gladly buy bottled key lime juice.

  • If you can’t find fresh key limes or juice, use limes! And I suppose, lemons if you’re in a pinch. Lemon pies are good too! Same goes for the zest.

  • No food processor handy? Do it the old fashioned way and stick the cookies in a resealable plastic bag and whack and roll with a rolling pin. The pecans and ginger can be finely chopped by hand.

The Fluffiest Key Lime Pie with a Gingersnap Crust
Yield 8-12 servings
Author
Prep time
50 Min
Cook time
30 Min
Total time
1 H & 20 M

The Fluffiest Key Lime Pie with a Gingersnap Crust

Classic key lime pie with a twist. Tart filling made extra light and fluffy by whipping the egg whites, a spicy gingersnap crust, and fresh whipped cream.
Cook modePrevent screen from turning off

Ingredients

For the Gingersnap Crust
For the Filling
For the Topping and Garnish

Instructions

Make the Gingersnap Crust
  1. Oven 350°F / 177°C. Lightly greased 9in / 23cm pie dish.
  2. In a food processor, combine the gingersnaps, pecans, ginger, and cinnamon. Pulse until everything is finely ground in crumbs. Add the butter and pulse briefly until the crumbs are evenly moistened.
  3. Press evenly into the bottom and up the sides of the prepared pie dish. Bake in the preheated oven for 10 minutes or until fragrant and lightly browned. (This can be hard to see because of the dark color of the gingersnaps.) Allow to cool.
Make the Filling
  1. In the bowl of a stand mixer fitted with the whisk attachment, beat 2 egg whites and the cream of tartar on high speed until soft peaks form, about 1-2 minutes. Beat in the vanilla and scrape the egg whites into a small bowl; set aside.
  2. In the bowl of the stand mixer (don’t worry about cleaning it), beat on medium-high speed the egg yolks, 2 remaining egg whites, cornstarch, sugar, and sweetened condensed milk until light and fluffy, about 5 minutes. Add the lime juice and zest and beat until smooth.
  3. Gently fold 1/3 of the egg white mixture into the lime mixture to lighten. Add the rest of the egg whites and fold just until combined.
  4. Pour the filling into the cooled pie crust, smooth the top with a spatula. Bake until just firm, about 20 minutes. To test for firmness, jiggle the dish slightly. When the center jiggles just slightly, it’s ready.
  5. Cool completely, then cover and refrigerate for at least 4 hours or overnight.
Make the Topping
  1. In the bowl of a stand mixer, beat the heavy whipping cream on medium speed. As it starts to thicken (and will no longer splatter) increase the speed to high. Add the powdered sugar and almond extract. Continue beating until stiff peaks form, about 2-4 minutes total.
  2. Spoon whipped cream over pie or use a piping bag and tips to decorate. Garnish with lime slices/and or zest. Serve immediately or refrigerate.

Notes

The crust can be made without the pecans and/or ginger, if you’re like me and sometimes feel too lazy to chop things! Freshly squeezed key lime juice is best, but if you’ve ever used real key limes you’ll know that getting half a cup can be a real labor of love. Those things can be tiny! Hand cramp hand cramp hand cramp. And just when you think you’re there, you realize you’ve only squeezed 1 Tbsp worth. So, I gladly buy bottled key lime juice. If you can’t find fresh key limes or juice, use limes! And I suppose, lemons if you’re in a pinch. Lemon pies are good too! Same goes for the zest. No food processor handy? Do it the old fashioned way and stick the cookies in a resealable plastic bag and whack and roll with a rolling pin. The pecans and ginger can be finely chopped by hand.

Nutrition Facts

Calories

590.80

Fat

29.69 g

Sat. Fat

14.77 g

Carbs

76.33 g

Fiber

1.88 g

Net carbs

74.45 g

Sugar

55.81 g

Protein

8.28 g

Sodium

256.68 mg

Cholesterol

90.75 mg

Nutritional information is approximate. Based on 8 servings.

key lime pie, gingersnap crust, fluffy pie, whipped cream
Dessert, Pie
American
Did you make this recipe?
Tag @jennyblogsandbakes on instagram and hashtag it #jennyblogs
2018-12-20 14.14.52-2.jpg

Food in Florence: A Complete Guide to the Best Gelato

Last updated October 2, 2024

Gelateria dei Neri

This post may contains affiliate links. If you buy something using these links, Jennyblogs may receive a small commission, at no extra cost to you. This helps to support Jennyblogs. For further information see the privacy policy. Grazie!

Gelato at Festival.JPG

March is coming to a close, the weather has taken a turn for the warmer, the sun is making a regular appearance and so are the tourists, and most importantly, the gelato shops have reawakened from their winter slumber. I ate my first gelato of the season/2019 a couple weeks ago, and it was…good. I mean, it was amazing to eat gelato again, but it only ranked “good” because the actual gelato was a bit on the icy side. I’ve had gelato from that shop before and it was really good, we’ll just say they were having an off day. It’s possible my tongue is out of practice of eating gelato, I mean, you don’t become a sommelier by drinking wine “occasionally.” In the few weeks that have passed since that first gelato, I think it’s safe to say my tongue is back in practice.

In celebration of gelato and sunshine, I have compiled a list of some of the best gelaterie (gelato shops) in and around the Florence city center. The list is quite extensive but includes all of the gelato shops worth eating at. I’ll name some of my favorites, as well as favorites from various expat friends and locals, which will be noted with an asterisk (*). As you will see, taste in gelato can vary and very few people will nominate the same gelato shop as “Best in Florence,” hence the inclusive list with pointers to help you locate gelato that sounds interesting to you, whether it’s your first gelato ever or you are just looking to expand your gelato resumé! If you’ve had great gelato in Florence and think it should be on this list, let me know in the comments below!

Nota Bene: Anytime you see mountains of colorful gelato in the display case it is TO BE AVOIDED. At all costs. These places are meant to fool poor, unsuspecting tourists and line their owners’ pockets with money when they are essentially selling you sugary, artificially colored ice, lies, and sadness. You will find them grouped mainly around main attraction points; in Florence there are many near the Duomo, Palazzo Vecchio, Ponte Vecchio and in between. This bears repeating because these shops are still open, which means people are buying their “gelato,” and this makes me very sad. Also to avoid is the overpriced gelato, again, usually found near tourist areas. Even if the gelato is decent, I wouldn’t pay more than 3ish euro for the smallest size, no matter the city. At that point they are just capitalizing on your naiveté. The only gelato above 3euro on this list is Venchi, starting at 3.20, but they are a well known chocolatier and can get away with it I guess. Good gelato is often, but not always, in metal tubs with lids so that you can’t see any of the flavors, just the little signs placed by each lid. I say not all because just less than half of the gelaterie listed below keep their gelato in these tubs.

First Things First

Cup or cone? Small or extra large? Milkshake? All good things to have decided before hand so you can walk in and focus on what flavors you would like. A standard small cup or cone will get you 2 flavors, and sometimes you can choose up to 5 for extra large sizes! You can ask to try the flavors, if you are feeling absolutely stumped. I almost always go for a cone, and I will tell you why, besides being delicious. There is nothing to throw away at the end except for a napkin, therefore being more economically-friendly. You save using a cup and the little plastic spoon, although some places will stick a spoon in your cone, too. You could always tell them a spoon isn’t necessary, if you catch them in time. Bonus: If you sample a flavor, keep your spoon to use with your cone or cup! Also, if you don’t eat gluten, ask about the cones as some places use gluten-free cones. At the bottom you can find a glossary for gelato shop lingo and common flavors.

The best gelato in Florence in no particular order:

Gelato.jpg
  1. Gelateria dei Neri*

    One of my all time favorites, if you’ve read about any gelato in any guidebooks or blogs, you’ve probably seen Gelateria dei Neri pop up. And for good reason, it’s one of the best! They have a wide variety of flavors and also granita. There can be a line out the door at busy times, but no worries, it moves fast.

    Price: Starting at 1.80 for cup or cone

    Location: Via dei Neri 9, - City center, very close to the Church of Santa Croce

    Flavor to Try: Cremino alla nocciola (Think vanilla gelato with copious amounts of Nutella swirled in, a very rich flavor), Cremino al Pistacchio (similar to the Cremino alla Nocciola, but with a pistachio cream), Limone (lemon), or Burro di Caramello Salato (salted caramel).

  2. MySugar*

    Winner of the Gelato Festival in Florence in 2016, this is the new kid on the block, only open since 2015 and quickly winning over hearts. This is also one of my favorites and the favorite of my friend Madeline. I would say that they have the absolute best consistency of all gelato I have tried in Florence. Their assortment of flavors is somewhat modest, but what they do, they do with excellence.

    Price: Starting at 2.00 for a cup, 2.50 for a cone

    Location: Via de’ Ginori 49r, - City center, around the corner from the Mercato Centrale

    Flavor to try: Arachidi (peanut) or Limone

  3. La Carraia*

    I was introduced to this gelateria by my language partner as one of her favorites, and it quickly became one of mine as well. They have a great assortment of flavors.

    Price: Starting at 1.00 for a “taste” cone, standard cup or cone from 1.80

    Locations: Piazza Nazario Sauro 25r, at the end of the Carraia bridge, and Via de’ Benci 24r, very close to the Church of Santa Croce.

  4. Sangelato*

    This is the gelateria I go to most because it’s in my neighborhood! Still a 30 minute walk there, but that way you earn it, right? They have a selection of vegan flavors. Also to try are the crepes or Sicilian brioche stuffed with gelato! They have a great stracciatella (chocolate chip) and pistacchio!!

    Price: Starting at 1.90 for cup or cone

    Location: Via Marco Minghetti 17r, a bit out of the way on the east side of the city center, about a 15 minute bus ride from the center. Take the number 14A or 14B bus. This is very convenient if you have an airbnb on this side of town or staying at the Firenze Camping in Town, it’s on the way!

  5. Perché No*

    All-natural gelato and to boot they have several mousse flavors. Need I say more? This was the gelato shop of choice for my friend Hannah and I during our 2015 trip.

    Price: Starting at 2.50 for cup or cone

    Location: Via dei Tavolini 19r, between Palazzo Vecchio and the Duomo, right by the church of Orsanmichele.

  6. Grom

    By now Grom has become a recognizable international gelateria with locations well beyond its origin of Italy, including the USA, France, Japan, China, and more. I prefer to support small businesses when I can, not to mention the extra touch of love and care when the founder of a small business is present, but hey, Grom is delicious!

    Price: Starting at 2.60 for cup or cone

    Location: Via del Campanile 2, two steps away from the Duomo

  7. Cantina del Gelato

    This is the only gelateria where I have found a successful pumpkin flavor. A seasonal flavor to be sure, but their other flavors are often creative and delicious as well!

    Price: Starting at 1.00 for a one-flavor kiddy cone, 2.00 for standard cup or cone

    Location: There are two locations, one in Via de’ Bardi 31 on the south side of the Arno river very close to Ponte Vecchio, and the other near Piazza Beccaria in Borgo La Croce 30r on the east side of the city center.

  8. La Strega Nocciola

    I wasn’t originally a fan of this gelateria because their name means the hazelnut witch and their prices are on the more expensive end of gelato, 2.80 for a small. But good gelato is good gelato, and La Strega Nocciola has very good gelato, not to mention some unusual flavors: lavendar, white chocolate and cinnamon, etc.

    Price: Starting at 2.80 for cup or cone

    Location: There are 4 locations, the first in Via Ricasoli 16r, near the Duomo, the second in Via de’ Bardi 51r, on the south side of the Arno river very near to Ponte Vecchio, the third in Via dell’Olivuzzo 118, southwest of the city center near the Isolotto neighborhood, and the fourth in Piazza Giuseppe di Vittorio 3, even further southwest in Scandicci.

  9. Il Gelato di Filo*

    This gelateria will always hold a dear spot in my memory. It is conveniently located at the bottom of Piazzale Michelangelo, ya know, one of the most beautiful piazzas in Florence with its stunning vista of the city and also a sweat-inducing hike up to it? Yes. That one. This became the favorite gelato of my family and I when we visited in 2014, frequenting the shop multiple times in our 6 day tenure in Florence. We even had nicknames for the brother and sister who worked there. (We don’t actually know if they were related, but hey, it is part of our working theory.) We recommend either getting a gelato as an energy boost before you go up, or as a reward when you make it back down. Or, both before and after, because even that view will take it out of you. They also have some of the cheapest cones in Florence!

    Price: Starting at 1.50 for a cone, 2.00 for a cup.

    Location: Via San Miniato 5r, at the bottom of the side stairs (not the zig zag way up the front) up to Piazzale Michelangelo and San Miniato.

  10. Badiani*

    Badiani won the title in 2015 for the best gelato in Europe, and a year after opened a shop in London. Favorite shop of my friends the Pethtels, and lucky them, they live nearby! For the location being outside the city center I’d say they are a bit expensive, but they have a larger shop and indoor/outdoor seating, which is always a bonus.

    Price: Starting at 2.00 for a cup, 3.00 for a cone

    Location: Viale dei Mille 20r, outside the city center in the Campo di Marte neighborhood; about a 5 minute walk from the stadium or 10 minutes from the Campo di Marte train station.

  11. Venchi

    One of the best known Italian chocolate stores in Florence also has really yummy gelato! Their stores are generally a bit hectic, but busy because they are known and conveniently located. Their gelato is expensive, but worth the splurge for special occasions.

    Price: Starting at 3.20 for cup or cone. Prices may vary by location.

    Location: There are three locations, one at Piazza della Stazione 1 in the Santa Maria Novella train station, the second in Via Calzaiuoli 65r near the Duomo, and the third in Via Calimaruzza 18 near to Piazza della Signoria.

  12. Gelateria de’ Medici

    This gelateria has a wide selection of flavors and is open late, until midnight or 12:30am on Friday and Saturday.

    Price: Starting at 2.00 for a cone, 3.00 for a cup

    Location: There are two locations, one in Piazza Cesare Beccaria 7r on the eastern outskirts of the city center, and the second in Via dello Statuto 3/5r northwest of the city center.

  13. Il Procopio*

    This place is best suited to those who like “fantastic” flavors; those with lots of condiments such as chocolate and sauces and chunks of cake/cookies, etc. They have very few “pure” flavors, but I always see people walking around with the mango flavor, so it must be good! One of the favorites of the American blogger GirlinFlorence.

    Price: Starting from 2.20 for cup or cone

    Location: Via Pietrapiana 60/62r, not too far from the Church of Santa Croce; across from the Loggia del Pesce.

  14. Il Gelato di Cristian Beduschi

    On the first floor of the Mercato Centrale there is a wonderful gelato. They don’t have the widest selection of flavors, but you can also get chocolates, other desserts like tiramisù, and hot chocolate.

    Price: Starting at 2.80 for cup or cone

    Location: First floor ( aka second floor for Americans) of the Mercato Centrale on the same side as the pizza and pasta booths.

  15. Edoardo*

    Famous for their homemade cones and the scent that drifts well beyond their doors, Edoardo is the favorite gelateria of my friend Rachel. They are on the expensive side, but their gelato is organic and they have a good selection of vegan gelato and sorbet. Most of their flavors are beyond delicious, even if sometimes their menu can seem simple, but they have on occasion missed the mark with flavors and iciness. Beware, they often have a line, and in recent days they have implemented a number system. If you forget or don’t know to take a number, as was my experience, they may refuse to serve you. I waited 10 minutes in line and then they told me they can’t serve me unless I have a number, I wanted to make a humiliated beeline to the exit but my husband stood up for me and the customer whose turn it was graciously let me order anyway. I heard from other people after this incident that they still didn’t know about taking a number, so it very well may depend on if there’s a line and who’s working that day if they decide to implement the number system. Which is very…Italian. Anyway, you can find the numbers outside the door.

    Price: Starting from 2.80 for a cup, 3.50 for a cone, cash only

    Location: Piazza del Duomo 45r, two steps from the Duomo

    Flavor to try: Zabaione

  16. Vivoli

    Heralded as a historic gelateria and one of the most famous in Florence, Vivoli delivers delicious gelato and a cute locale. However, because of their fame they tend to have lines and are on the expensive side, not to mention no cones.

    Price: Starting at 2.00 for cup

    Location: Via Isole delle Stinche 7r, near to the Church of Santa Croce

  17. Sottozero

    Gelato places like these won’t usually find themselves in guidebooks or on blog reviews because they are not in the city center and don’t get the foot traffic of tourists. This one is popular with students because it’s very near the university and dorm housing, and should be with you too if you have an airbnb nearby!

    Price: Starting from 1.80 for cup or cone

    Location: Via Anton Francesco Doni 47r, west of the city center in the neighborhood of Novoli

    Flavor to try: Yogurt (sweetened with stevia!)

  18. Rivareno

    Gelato sourced from all-natural ingredients with interesting flavor combos.

    Price: Starting at 2.30 for cup or cone

    Location: Via Borgo degli Albizi 46r, not to far from the Duomo.

  19. Carapina

    This used to be one of my regular locations when I lived nearby, alas, no more.

    Price: Starting at 2.00 for a cone with one flavor, 2.50 for cup or cone with two flavors

    Location: Piazza Oberdan 2r, just east of the city center, but in the summer they also have a food truck down by the Arno!

  20. La Gelateria Il Sorriso

    Generous portions and lots of flavors, I believe this is also one of the few places that lets you put 3 flavors even in the smallest size cone or cup! Win.

    Price: Starting at 2.20 for cup or cone

    Location: Via Erbosa 70, a bit out of the way in the neighborhood of Gavinana southeast of the city center, but if you are staying in the area or just want to experience an Italian neighborhood with zero tourists, head on down there. Take the bus numbers 8, 23, 31, or 32 to get there from Piazza San Marco, about 20 minutes.

  21. La Caminia

    This gelateria really surprised me with their gelato. I walk by every once in awhile but had never gone in due to the generally bright color themes that usually denote a tourist trap. Then they made a special flavor in honor of the 200th(?) anniversary of the US consulate mission to Florence and I had to go try it. In doing so I discovered a wonderful new gelato stop with many flavors to choose from with even the simplest bursting with creamy flavor.

    Price: Starting at around 2.00 for cup or cone (I need to double check this)

    Location: Like Gelateria Il Sorriso above, La Caminia is found in the Gavinana neighborhood not far from the large Coop supermarket.

  22. Gelateria Santa Trinita

    Due to its location and overall appearance this place can sometimes be mistaken for “tourist” gelato. Fret not, not only is it uber-creamy, but it is decently priced with generous portions!

    Price: Starting at 2.20 for cup or cone

    Location: Piazza dei Frescobaldi, 8r, at the end of the Ponte Santa Trinita; one bridge over from Ponte Vecchio.

    Flavor to Try: They are known for their Sesamo Nero (Black Sesame), it’s subtle and nutty and mysterious.

  23. Gelateria della Passera

    Recommended especially for those who love fruit flavors!

    Price: Starting at 2.00 for two-flavor cup or cone

    Location: Via Toscanella 15r, on the south side of the Arno in the Santo Spirito neighborhood; very close to the Palazzo Pitti.

  24. Donamalina Cure Cioccolateria - Gelateria

    Another place a bit outside of the city center, but we have to cover all bases, don’t we? They have chocolate and confections, too!

    Price: Starting at 2.00 for cup or cone

    Location: Via Antonio Pacinotti 30r, bit north of the city center in the neighborhood of Le Cure.

  25. Le Botteghe di Leonardo*

    Natural gelato with a good selection of dairy-free, but their milk-based flavors are pretty great! Some even use latte di bufala, that is, water buffalo milk, and it’s extra creamy. Favorite of my friend, Brianna!

    Price: Starting at 2.60 for cup or cone

    Location: Via de’ Ginori 21r, very close to the Mercato Centrale.

    Flavor to try: Kabana (kiwi and banana), stracciatella

Gelato Lingo

sangelato.jpg

Alright, here is a simple formula for you if you’re feeling adventerous. First, pick what you would like, the size, and then decide which flavors you want. Most people working in gelato shops speak English, so if you have further questions feel free to ask! In fact, you might order in Italian but they will often reply back in English.

“I would like a…” “vorrei un/a…”

Cono = cone Coppetta = cup Frappé = milkshake Granita = type of slushy

Piccolo/a = small Medio/a = medium Grande = large

“With…and…” “Con…e…”

Cioccolato = chocolate Fondente = dark chocolate Stracciatella = chocolate chip

Nocciola = hazelnut Pistacchio = pistachio Arachidi = peanut

Gianduja = chocolate/hazelnut Crema = cream with eggs, similar to a custard

Fior di Latte = A creamy gelato base, the equivalent of vanilla in America, except it’s no vanilla

Zabaione = custard with wine, usually sweet marsala

Caffé = coffee Cocco = coconut Cocomero = watermelon Fragola = strawberry Limone = lemon

Arancia = orange Lampone = raspberry Melone = melon Mora = blackberry Pesca = peach

Pera = pear Pompelmo = grapefruit Amarena = sour cherry Frutti di Bosco = mixed berry

Example: “Buongiorno! Vorrei un cono piccolo con nocciola e pistacchio, grazie.” (Good morning/afternoon! I would like a small cone with hazelnut and pistachio, thank you.)

Or, “Buonasera, vorrei una coppetta media con limone e fragola.” (Good evening, I would like a medium cup with lemon and strawberry.)

Happy Gelato-ing!!!

Butternut Squash Risotto

IMG_2738.JPG

Last updated July 12, 2024

A simple, risotto bursting with flavor with butternut squash, bell pepper, and spinach.

The formula is straightforward and simple, not requiring wine or cheese as risotto traditionally does, which keeps it friendly for certain dietary restrictions. Wine and cheese can certainly be added though, fear not!

This post may contain affiliate links. If you buy something using these links, Jennyblogs may receive a small commission, at no extra cost to you. This helps to support Jennyblogs. For further information see the privacy policy. Grazie!


Butternut Squash Risotto

Serves 2-4

Ingredients:

  • 2 Tbsp / 28g oil

  • 2 cloves garlic, peeled and minced

  • 10 oz / 300g butternut squash, seeded, peeled and chopped small (or you could just say half of a small squash)

  • 1 medium onion, chopped

  • 1 large red bell pepper, seeded and chopped

  • 7 oz / 200g arborio rice

  • Parmigiano reggiano (parmesan) rind, optional

  • 1 pint / 500ml vegetable broth

  • about 3 oz / 100g spinach, chopped or whole

Directions:

IMG_2737.JPG
  1. In a large pan over medium-low heat, add oil and garlic and simmer until fragrant, about a minute.

  2. Add squash, onion, and bell pepper and cook until squash begins to soften.

  3. Add rice and stir around to toast, about 1-2 minutes.

  4. Add parmigiano reggiano rind, if using.

  5. Add stock and simmer for 15-20 minutes, stirring frequently. If rice starts to cook dry, add more water or stock as needed.

  6. Once the rice is cooked, the squash is tender, and the liquid is mostly absorbed (but not all!), add the spinach and stir until wilted. Remove any chunks of parmigiano reggiano rind before serving.

  7. Serve immediately.

Jenny’s Notes:

  • Risotto is a fairly quick, delicious, and versatile dish, great for colder months. Feel free to add or subtract vegetables to your liking. Any type of squash you like could be used, even fresh pumpkin!

  • If you like to ahem, cook with wine, and sometimes add it to your food even, feel free to add about 1/2 cup of red or white wine or dry white vermouth. Add it in after step 3, after you’ve toasted the rice and before the stock. Allow the wine to evaporate and absorb into the rice before continuing with stock.

  • When you’re in a pinch and don’t have risotto or arborio rice, you really could use any kind. Just keep an eye on the cooking instructions for the kind of rice you are using so you will have an idea how long it will take. Other kinds of rice won’t hold their “bite” as well and end up mushier.

  • If reheating leftovers, I would recommend adding in a touch more water or broth. The longer risotto sits the more liquid it will absorb, and may end up a bit dry.

Butternut Squash Risotto
Yield 2-4
Author
Prep time
15 Min
Cook time
30 Min
Total time
45 Min

Butternut Squash Risotto

Classic risotto with butternut squash, bell peppers, and spinach. Creamy and delicious, yet this particular risotto is dairy-free and alcohol-free

Ingredients

Instructions

  1. In a large pan over medium-low heat, add oil and garlic and simmer until fragrant, about a minute.
  2. Add squash, onion, and bell pepper and cook until squash begins to soften.
  3. Add rice and stir around to toast, about 1-2 minutes.
  4. Add parmigiano reggiano rind, if using.
  5. Add stock and simmer for 15-20 minutes, stirring frequently. If rice starts to cook dry, add more water or stock as needed.
  6. Once rice is cooked, the squash is tender, and the liquid is mostly absorbed (but not all!), add spinach and stir until wilted. Remove any chunks of parmigiano reggiano rind before serving.
  7. Serve immediately.

Notes

  • Risotto is a fairly quick, delicious, and versatile dish, great for colder months. Feel free to add or subtract  vegetables to your liking. Any type of  squash you like could be used, even fresh pumpkin!
  • If you like to ahem, cook with wine, and sometimes add it to your food even, feel free to add about 1/2 cup of red or white wine or dry white vermouth. Add it in after step 3, after you’ve toasted the  rice and before the stock. Allow the wine to evaporate and absorb into the  rice before continuing with stock.
  • When you’re in a pinch and don’t have risotto or arborio rice, you really could use any kind. Just keep an eye on the cooking instructions for the kind of rice you are using so you will have an idea how long it will take. Other kinds of rice won’t hold their “bite” as well and end up mushier.
  • If reheating leftovers, I would recommend adding in a touch more water or broth. The longer risotto sits the more liquid it will absorb, and may end up a bit dry.


Nutrition Facts

Calories

670.96

Fat

19.02 g

Sat. Fat

3.75 g

Carbs

111.23 g

Fiber

9.27 g

Net carbs

101.97 g

Sugar

11.24 g

Protein

16.05 g

Sodium

1232.89 mg

Cholesterol

10.2 mg

Nutritional information is approximate, based on 1 serving if recipe serves 2.

risotto, traditional, classic, alcohol free, dairy, free, butternut squash bell pepper and spinach risotto
dinner
American, Italian
Did you make this recipe?
Tag @jennyblogsandbakes on instagram and hashtag it #jennyblogs

Buying International Plane Tickets and Booking Accommodation

IMG_1508.jpg

This post contains affiliate links. If you buy something using these links, Jennyblogs may receive a small commission, at no extra cost to you. This helps to support Jennyblogs. For further information see the privacy policy. Grazie!

Airplane Tickets

Buy them on a Tuesday before 12pm EST, on a freshly restarted PC with your Google cookies wiped, a credit card that expires in no less than 2 years, in your pajamas, facing north. Just kidding.

I’m going to make this easy on you: There is no magic trick or gimmick for these things. There is a lot of information floating around about when to buy airline tickets.  Some true, some false.  For example, I've read that airlines put tickets on sale Monday evening, therefore you should buy tickets on Tuesday.  At least for international tickets, I've never seen that happen. I have noticed that flying on a Tuesday or Wednesday seems to be the cheapest, but that’s not the same thing and not always consistent.  A lot depends on timing, such as season and fuel prices, but it seems most is unpredictable and seemingly random. Then again, if it was predictable, I probably wouldn’t have been googling this subject myself once upon time, now would I?

Don’t despair, however, there are plenty of things you can do to find the best options out there, just keep in mind that “best” is relative. And, just as there is more than one way to frost a cake, what follows is one method of many for hunting down that cheap(ish) ticket. (If you want to know how crazy I can get about plane tickets, read this overly long blog post.)

First, some obvious things to keep in mind:

  1. Flying off season will usually yield cheaper results, sometimes significantly. But not always! It never hurts to check.

  2. Off season may vary depending on location. For example, traveling during the summer to Europe is going to be peak season, but that doesn’t mean Jun-Aug is the busiest the whole world round.

  3. The more flexible you are with your dates, the more likely you will be to find a cheaper ticket. Same goes with flexible departure/arrival airports. The only problem is, you can end up spending hours upon hours searching date and location possibilities. But hey, you’ll know you found the best combo!

  4. Watch out for overnight layovers. You might find cheaper flights that way, but in my experience I’d rather pay the few bucks more to avoid it. Anyway, if you keep looking, you can usually find the same or similar flight price without overnight layovers.

  5. Booking through third parties (i.e. Expedia rather than Delta) may yield cheaper results, but if you run into any problems, they have been known to be extremely unhelpful. (I also have never been able to do the 24 hour check-in online when I bought a ticket through a third party. I checked-in at the airport the day of and everything was fine, but still. Being told there was an error or your ticket can’t be found is not reassuring.) In fact, recently third parties are about the same price, if not more expensive, anyway.

Now that we’ve got those reminders down, here’s how I go about finding tickets:

About 4 months before your desired departure choose a site like Kayak.com where you can look at multiple prices at once (choose the +/- 3 days for both the departure and return dates, so you can see a whole week’s worth of prices around both dates).  Make a note of the dates and prices that work best for you, then check back about once a week to see how the prices are rising or dropping.  Kayak, among many other sites, allow you to create free notifications of certain travel dates. You’ll get an email if the prices drop, go up, or even if they’re holding steady. I would never trust completely to these notifications and still check manually, but they’re a helpful tool.

At 2-3 months before desired departure you should have a good idea of what the prices for your dates are doing, and what airlines are cheapest. Chances are the prices haven’t moved significantly, but if they have, especially up, don't worry. There's a good chance they'll drop again, just keep checking back. When you feel ready to buy (I think 2 months* before is a good balance), go ahead and check Kayak again and then go to the website of the airline with the best deal. If everything looks good, buy!

*It is possible to buy tickets sometimes even up to a week before departure with decent prices, but I bet you they were cheaper two months ago. It also makes me very nervous to wait that long, knowing the prices can go up very high.

Tada! There you have it. Nothing magical. But with this method I always feel confidant I got the best prices.

Other helpful hints:

  1. As of circa January 2018, the lowest fares between Europe and North America no longer include the first checked bag. The first checked bag is $50 each way, or you can pay a more expensive fare, such as $80 more total, and get the first bag free along with several other perks, like choosing your seat and being able to change your ticket. Not cool, you guys. Not cool.

  2. azair.eu is a helpful site for flights within Europe or Asia, with lots of filters so you can hone in on what you’re looking for.

  3. I advise against using the app “Hopper.” I added several of my upcoming flights over a period of time so it could keep track of them, letting me know the best time to buy. However, in all the flights and different locations and dates I added, I could find a much cheaper plane ticket myself every single time they notified me of the “best price", go ahead and buy. So, if you still like the app, just keep in mind you’re probably not actually getting the best price.

  4. CheapFareGuru.com used to be one of my go to sites. They were always the cheapest by a good bit. Their site is a bit sketchy looking, but I’ve bought tickets through them a couple times and never had problems (other than not being able to check-in online). I say “used to” because their flights don’t load for me anymore. I dunno.

Accommodation

As for hotels and airbnbs, all the cute and affordable ones book up quickly, so I would start looking at least 4 months in advance, especially for popular tourist destinations such as Rome, Paris, London, ya know, all the places you want to go.  

2015-09-08 22.59.28.jpg

Hotels vs. airbnb? Totally depends on what you’re looking for. I think booking an airbnb is much simpler, but I don’t think it’s always cheaper. Hotels need to stay in business and thus prices seem to have become more competent, so I would recommend looking at some hotel sites and compare them with airbnb before making a final decision.

A tip for lodging, especially if you are staying in an airbnb type place, before moving or touching anything, take pictures of the whole apartment.  That way, if your host decides to blame a broken outlet (or worse) on you after you've gone, you have proof to show them and the third party (such as airbnb) that that is how it was when you arrived.  

Do you have any tips or tricks for finding good plane tickets and accommodation? I’d love to hear them, share in the comments below!

Pumpkin Pudding

IMG_5018.JPG

Last updated August 14, 2024

Pumpkin Pudding is a classic, easy fall recipe in my family. It’s like pumpkin pie, but without all the fuss of the crust. This is great to make in the time leading up to Thanksgiving, because you’re not ruining your appetite for pumpkin pie (you can’t call it pie if it doesn’t have a crust, therefore, totally different) while not wasting time NOT eating pumpkin. Bonus that it’s incredibly easy to whip up.

Fall is coming fall is coming! I love the changing of seasons and the different nostalgias and expectations that come with each season. Living in Italy, the nostalgia is a little bit stronger. Autumn is still autumn, but the changes are a little less distinct, and the comfort of knowing where to pick out the best pumpkins and buy the best apple cider is not something that really exists here. Pumpkins will be few and far between, unless you’re lucky enough to stumble upon some markets that have the mini gourds; apple cider is practically nonexistent; trick-or-treating happens, but most Italians wear scary costumes instead of characters; the leaf change is not the brilliant red, orange, and yellows like in Michigan, but more of a subtle green-to-yellow with the occasional leaves fluttering down. Despite the differences with what I grew up with, there are still oodles of things I love to do to make my home fall-y and to welcome the chilly evenings. Lighting candles, brewing tea, pulling out the fuzzy socks and sweaters (even if I’d be sweating if I actually tried to wear them yet) and baking and eating lots of fall goodies that include pumpkin, cinnamon, spices, breads, soups, and all the hearty autumn recipes.

This post may contain affiliate links. If you buy something using these links, Jennyblogs may receive a small commission, at no extra cost to you. This helps to support Jennyblogs. For further information see the privacy policy. Grazie!

Recipe from my mama


Pumpkin Pudding

IMG_5023.JPG

Serves: 4-6

Ingredients:

  • 15 oz / 425g pumpkin purée

  • 2/3 cup / 132g sugar

  • 1/2 tsp / 2.5g salt

  • 1 tsp / 5g cinnamon

  • 1/2 tsp / 2.5g ginger

  • 1/4 tsp / 1g cloves

  • 1 cup / 237g milk of choice

Directions:

Oven 375°F / 190°C. Lightly grease an 8x8in / 20x20cm baking pan.

  1. Mix all ingredients in a bowl until smooth.

  2. Pour into prepared pan; bake for 20-25 minutes in preheated oven until edges are bubbling.

Jenny’s Notes:

  • To dress this lovely and simple dessert up you can top it with confectioner’s sugar or crumbled cookies such as shortbread or Nilla Wafers, or serve with ice cream and/or whipped cream.

  • This recipe is gluten free, vegan (if you use a milk substitute like coconut or almond), and probably many of the other diet fads that I can’t quite keep track of. Eat up!

Pumpkin Pudding
Yield 4-6
Author
Prep time
10 Min
Cook time
25 Min
Total time
35 Min

Pumpkin Pudding

Like pumpkin pie but without the hassle of the crust. Gluten-free and can easily be made vegan.
Cook modePrevent screen from turning off

Ingredients

Instructions

  1. Oven 375F / 190C. Lightly greased 8x8in / 20x20cm baking pan.
  2. Mix all ingredients in a bowl until smooth.
  3. Pour into prepared pan; bake for 20-25 minutes in preheated oven until edges are bubbling.

Notes

To dress this lovely and simple dessert up you can top it with confectioner’s sugar or crumbled cookies such as shortbread or Nilla Wafers, or serve with ice cream and/or whipped cream.This recipe is gluten free, vegan (if you use a milk substitute like coconut or almond), and probably many of the other diet fads that I can’t quite keep track of. Eat up!

Nutrition Facts

Calories

198.32

Fat

1.49 g

Sat. Fat

0.88 g

Carbs

45.81 g

Fiber

3.85 g

Net carbs

41.97 g

Sugar

36.49 g

Protein

3.31 g

Sodium

279.59 mg

Cholesterol

4.74 mg

Nutritional information is approximate. Based on 4 servings.

crustless pumpkin pie, no crust pumpkin pie, pumpkin pudding, pumpkin pie, Thanksgiving dessert, fall dessert, easy pumpkin dessert, vegan, gluten free
dessert
American
Did you make this recipe?
Tag @jennyblogsandbakes on instagram and hashtag it #jennyblogs
The slowly melting confectioner’s sugar…

The slowly melting confectioner’s sugar…


A Beginner's Guide to Italy: 20 1/2 Things the Guide Books Might Not Tell You

IMG_8572.jpg

This post may contain affiliate links. If you make a purchase using these links, Jennyblogs may receive a small commission, at no extra cost to you. This helps to support Jennyblogs. Where possible, links are prioritized to small businesses, and American companies and products made in the USA for American readers. For further information see the privacy policy. Grazie!

Welcome to my first "All Things Italy" post!  I'm glad you're here.  I'm glad to be here, too.  In fact, let's take a moment and be thankful to be on this earth.  Great.  It's good for the soul to be able to talk or write about things, and in this instance, hopefully helpful to whomever may come across this blog!  Whether you have been, are planning to, or are still dreaming of traveling to Italy, I hope my trial/error, observances, and gleanings from friends both national and international will be of use to you; or if nothing else, an insight into what the folks on the other side of the globe are up to, more than just the politics on the news.  

If you're anything like my mom and I while planning trips, you've probably read every edition from the last decade of The Backpacker's Guide, Rick Steves, Planet Earth, and Forbes, exhausted every airline website for cheap tickets, booked all your airbnb's, and compiled endless lists of what and how to pack, language cheat sheets, top sights to see in each city, foods not to miss, directions for the subway/train/bus to get from A to B, what NOT to wear, what souvenirs to buy, and a list of the local emergency phone numbers and services.  And if this not how you plan your travel experiences, well, let's just say you probably save a lot of time, spend more money, are less stressed, and might miss out on some of the little experiences.  But that's why I'm writing this, to share some of the things learned with endless hours of research, reading, traveling, and now living in Italy.  So if your brain is spinning with information and Rick Steves left you with some questions, hopefully this list will help you navigate smoothly in Italia by pointing out some of the little, albeit important things. 


1. First things first: 911 won't work in an emergency

You're in a foreign country and someone just stole your purse or you tripped down some stairs while staring at some ancient building.  What do you do?  

Call 112.  The European Union has a universal number of emergency (this is a great idea) however, it's taken some countries longer to adopt it than others, and in some provinces in Italy it still isn't completely integrated.  In these instances, it will connect you to the police emergency line, which in theory should be just as effective.  Thankfully I've never needed to call.  Listed below are all the emergency numbers in Italy that will connect you to specific departments:

IMG_2370.jpg
  • 112 for the general number of emergency or carabinieri (para-military) - for all emergencies or cases of danger, criminal activity, etc.

  • 113 for polizia di stato (state police) - crime, neighbors are making too much noise, the stoplight is broken, etc. (I know everyone keeps their eyes peeled for malfunctioning stoplights while on vacation.)

  • 114 emergenza infanzia (child emergency) - for young people until the age of 29 in peril, bullying, kidnap, etc. (I know, you had pictured a 2 year-old who accidentally drank some bleach, but instead it's a 29 year-old who says somebody's picking on him at the bar.)

  • 115 vigili del fuoco (Firefighters) - for FIRE!

  • 116 soccorso stradale/carro attrezzi (road rescue/tow truck) - for car troubles

  • 118 emergenza sanitaria/ambulanza (health emergency/ambulance) - for yes, any health emergency.

2. Theft is common

391 Louvre  JP.jpg

You've read it once, you've read it a million times.  Because it's true, and it does not discriminate.  It's happened to friends while I was with them, famous celebrities, and people I know have prevented it from happening. It almost happened to me once, too. Stay vigilant and smart about your belongings at all times and you should be fine.   

Women, across the body purses are wonderful, although be thoughtful of your strap.  If someone could tug your purse hard and break the strap, consider wearing something different.  The backpack purses are nice, too, but again you want to always be aware of them, periodically check to make sure your purses/bags are closed and stay closed.  Men, wherever it is that you keep your wallet that's hard to get.  

And those flesh colored under-the-clothes purses for your most preciouses and extra cash?  Don't bother.  Uncomfortable, lumpy, hot.  What if you don't want to leave valuables or cash in your hotel or apartment?  Let's put it this way:  You should really only have as much cash on you as you're going to use in a day or two, a credit card, and your passport, and all those things should stay on you.  Everything else probably shouldn't be with you on vacation, anyway.  

Be extra vigilant on buses, while dining (no purses on chairs), busy areas, and wherever there are begging gypsies, the more correct term being the Roma people.  They are easy to spot, dark skin and hair, usually have bright colors on, the women with long skirts and often heels, and layered shirts.  They have various tactics for getting money, shaking cups at you, laying on the street or feigning handicaps to evoke sympathy, or sometimes, downright stealing.  The Italians in general (around 80%) are unfavorable towards them, but they are humans and should be treated as such, even if they have lamentable habits.  But don't we all?

Keep these tips in mind and again, you should be fine! 

3. Those bracelets and trinkets offered to you for free are never free

Speaking of theft, the cons are not alway so obvious as purse snatching.  The tactics or objects vary by city, but a common one has to do with a bracelet. 

My first experience was in Rome, in Piazza del Popolo, where a seemingly friendly man approached me and insisted on tying a thread bracelet around my wrist.  I said no, thinking I would have to pay, but after he repeatedly insisted and wouldn't leave me alone, smiling all the while, I finally allowed him, partly so he would go away.  I told him numerous times I didn't want to pay for it, I didn't have coins to pay him, etc., but he continued to tie the bracelet, taking his sweet ol' time and complimenting me and my mom the whole time.  As soon as he finished I thanked him sincerely but he wasn't about to let us go.  He started out quietly, asking for anything, just a coin, 50 cents, 1 euro, but we repeatedly told him no, he had told us it was free.  Then he got angry and insisted I give the bracelet back, cursing and insulting us all the time it took me to unknot it. (Why did it have to be a TIE bracelet?!?) Then he sulked away.  

Similar things happen in Florence, but usually the bracelets are beads, and the person will be very cordial, shake your hand (in fact, they often grab your hand and won't let go) and ask you all kinds of information making small talk, but ending in asking for money: they need to eat, have to feed their babies, etc.  Of course, you feel bad taking the bracelet off and it makes it harder when they don't want to accept it back while pleading with you, so then you feel pressured to give them a euro or two.  All part of a tactic, and I'll tell you this from experience, it's usually best to avoid them if you don't want to give money and don't like saying no a million times.  

It's not fun to refuse, I feel bad for the situation so many of the immigrants are in, but I also don't like some of the tactics they use.  I know several people who have tried to help, stopped and talked long whiles with some of the people begging on the streets.  Then, the next day, they see them again, shaking their cup or sitting on the street, but they act like they don't know them.  Or, sitting by signs that say "Help, I'm hungry" and they refuse perfectly delicious food.  Unfortunately, drugs and alcohol play a big part and a few will even be up front about it if you ask them.  

4. Don't trust a restaurant that has "greeters" standing outside 

no Ameritalian food.jpg

You're tired, feet hurt, sunburned, and starving after spending the day sightseeing.  All you want is a nice sit down restaurant with a giant bowl of pasta and a glass of wine.  A smiling man in black with a red bow tie and apron smiles and greets you with a "Buonasera!" as you pass, then continues to offer you something to drink, pizza, pasta, or anything else you might like in fluent English, gesturing to the menu written neatly on a blackboard next to him, also in English with choice Italian words anyone would understand.  If anything like this happens to you, simply reply with "no grazie" or "no thank you" and walk away.  This is not a place that will give you authentic or even good Italian food.  If the greeter proceeds to advertise that none of their food is frozen or microwaved, please turn your walk into a sprint.  If the restaurant is in full view of a major landmark of that city, there's a good chance it's tourist food and the high prices reflect that.  You want to take your time strolling in some smaller streets, often away from the historic city centers and crowds, and find the places that have mostly Italians at them and might not seat a lot of people.  Stay away from catch phrases such as "authentic," "cucina Italiana," or anything that tries to indicate its Italian-ness; Authenticity doesn't need advertising.  

5. Water is not free

b142 Italian water.jpg

I'm not just talking about that bottle of water to carry around with you, any restaurant you go to you're going to have to pay for water.  Italians don't drink tap water or serve it in restaurants, and with good reason.  The water here is hard, very much so in Tuscany; I've seen the pebbles of calcium and who knows what else stuck in a friend's kitchen sink water filter after just a few hours and heard how the water will run gunky and brown at times.  Then think how old some of the pipes are under these ancient cities, and you can understand why the Italians consume so much bottled water.  If the idea of paying for water in restaurants seems ridiculous, as it did to me for so long, just make sure to drink plenty of (cheaper) water before and after the restaurant, and order a bottle of wine with your meal instead. :)

An exception to the rule would be the taps around the city, the water is usually pretty tasty from there and great to fill up water bottles.  Some are quite deluxe because they are connected to underground springs.  There's one in Piazza della Signoria where you can choose from natural or sparkling water.  ("Wis gas")

6. Expect a cover charge at most restaurants

Known as "Il coperto," this fee usually hovers between 1.50-2.50 euros per person, and covers that "free" bread they brought you at the beginning of the meal, napkins, silverware, and tablecloth.  If you notice on your bill that the "pane" or bread is listed separately from Il coperto, as I once noticed indignantly, that often happens when the bread is made in house, or "produzione propria."  Nothing is free in Italy, and if someone insists on giving you a gift, you should be highly suspicious.  (see #3 above) 

6 1/2. Really, it's not necessary to tip

I know, I know, if you're American, you're going to feel like a real jerk not leaving a tip.  Honestly, no one is going to think you are a tight wad.  There just isn't a tip culture here.  You can think of the money that went toward paying for the water and cover charge as your tip, if that makes you feel better.  If you really want to leave a tip because of exceptional service, leave a couple euros.  But don't feel guilty if you don't!

7. "To Go" and Doggy-bags aren't common  

Taking away and eating in are two very separate categories for the Italians.  Either you eat at a restaurant without taking home a doggy bag, or, for certain places, like bakeries and pizza places, you can get your food to go.  Even when the portions are large, like when one pizza is considered one serving, they don't ask for to-go boxes.  They eat the whole pizza.  Their dinners are usually long and sociable, with plenty of time for eating and digesting.  It always impresses me how even the kids and petite women can pack away a whole pizza.  Those who are watching their figure, however, usually leave the crust.  Of course, if you want a to-go box, go ahead and ask for it, just expect some weird looks and tinfoil instead of a box.  And coffee to go?  Better not, unless you're at a trendier, younger coffee place and not the typical Italian bar. Off the top of my head, the ones that offer to-go coffee as part of their service include Arnold's Coffee, Melaleuca, Ditta Artigianale

8. Coffee = Espresso

Espresso, or as they more commonly call it, "caffé normale," is the most common coffee beverage here, usually drunk at the counter in a matter of minutes.  If you prefer a touch of steamed milk in your espresso, order a "caffé macchiato." Don't forget to try a cappuccino in the country where it was christened, or my favorite sweet coffee, caffé al ginseng.  Really, it's sweet and delicious and nutty and ginseng supposedly has some health benefits.  If you really miss American coffee, order the americano, which is just water added to an espresso.  Drip coffee is becoming more of a thing here, and a select few places do a pretty decent Chemex or V60.  

Most of the typical coffee choices come unsweetened (I'm a fan).  Oh, and remember if you order a latte, you're just going to get a glass of milk.  (Latte means milk.)

9.  Ice? What's that? 

Ice isn't a given here, so if you can't stand drinking a soda without ice, you might want to request it.  If you are in a place used to dealing with tourists, then they might ask.  Otherwise, your soda/drink will *probably* come cold, but no ice.  Or maybe just cool.  Italians think abrupt temperature changes are unhealthy, so an ice cold beverage on a hot day? That's a no-no.  You might come down with a cold.  

10. The bar is not just a place for alcohol and adults

The word "bar" in Italian means much more than a place to congregate later in the evening and throw back a few drinks.  My friends and family may think I've turned into a lush for as often as I talk about "going to the bar."  It's true they serve alcohol any time of day, no one ever has to say "It's 5 O'clock somewhere," but bars are so much more than beer and mixed drinks. 

The bar is an integral way of life here.  You can find one just about on every corner, open from 6:00 or 7:00 in the morning where the Italians linger a few minutes to throw back an espresso, eat breakfast and sometimes their lunch break, discuss the latest soccer (calcio) match, read the newspaper, talk about the weather, gossip about the neighbors, and people-watch.  They might return several times throughout the day to the bar nearest their home or workplace, or the elderly generation might just sit and watch passers-by for hours.  Then, somewhere around 6:00pm, the bars magically turn into what I grew up knowing as a bar and they no longer serve coffee.  All around, bars are quite magical.  

11. Sitting down at a bar or cafe may double the price of your hot chocolate

There are three types of caffès here: The type that charges more if you sit down to enjoy your beverage, the type that charges more only if you order sitting down instead of first ordering at the bar, and the type that charges the same no matter what you do.  

If you're not sure, order at the bar and then, ideally after you've paid, ask if you may sit down.  That way they won't surprise charge you 5 euro for the hot chocolate you thought was 2.5.  This usually happens in more upscale locales rather than your humble local bar, but nevertheless, it's always better to ask and be safe than sorry.   

Another thing to note is that some bars and caffès don't care whether you pay as you order or after you've enjoyed your treats, while others require you to pay first and then show your receipt to the barista.  If the latter is the case, there will probably be a sign, so keep your eyes open, or, just ask.  (I'm a big fan of drawing as little attention to myself as I can, and prefer to observe how the locals do it or read signs before proceeding.)  

12. Italians will faint if you drink cappuccino after 12:00pm. Or will they?

2015-12-10 12.38.36.jpg

After reading in just about every guide book and blog that Italians will all but have a heart attack if you drink a cappuccino after noon, you can imagine my shock when one time my Italian language partner ordered a big ol' cappuccino at 4:00pm.  After scraping my eyebrows off the ceiling I asked her how she could betray her country like that (I'm sure I didn't phrase it that way) and she kindly explained to me the logistics. 

You see, drinking coffee with milk in it together with food is wonderful for breakfast, but for lunch and dinner, espresso is what you drink after the meal to help aid digestion.  Milk would upset your digestion with any meal heavier than breakfast, so that's why you should stay clear "after 12:00pm," or the usual cutoff for breakfast hours.  But.  If you are drinking the cappuccino in the afternoon at say, 4:00pm, or any time you're not eating food, you're in the clear.  At that point there is no food digesting to be messed up.  You'll only see the Italians fainting and throwing evil glares if you order a cappuccino with that pasta and truffles.  Seriously, they don't go together.  

13. You can drink anytime, anywhere

If you exit early in the morning, the evidence of last night's partying might not be swept away yet. Boxed wine, how classy.

If you exit early in the morning, the evidence of last night's partying might not be swept away yet. Boxed wine, how classy.

Yes, I'm talking about alcohol.  Due to open-container laws in the States, you have to think twice about where to pop open that beer.  There is no such law here, and you can take along that bottle of wine and wine glasses to any piazza, park, or romantic spot you'd like.  As I mentioned above, there is no 5 O'clock social rule here, and have seen people drinking beers before 9:00am while I'm still finishing my cappuccino, or opening bottles of wine at 11:00am for a little pre-lunch.

Drunkenness is frowned upon here, and so even while the land may be flowing with Chianti and Brunello di Montalcino, all but the younger generations know how to drink responsibly.  Drunkenness usually occurs on special occasions such as soccer matches and holidays.  If you stay out later at night, the sloshed you see are probably American students and the younger generation of Italians out partying and clubbing. 

14. Kids' menus aren't common

This one was brought to my attention by friends with kids.  After it was brought up, I realized how right they were.  It's rare that I've ever seen a kid's menu.  Children here usually eat whatever the parents eat, and once they are older, get their own plate.  Makes a lot of sense to me, rather than getting some completely non nutritious mac n' cheese or chicken tenders that they probably won't end up eating anyway.  

15. Don't touch the fruit!

Or a nonna might scold you.  My mom and I wouldn't know that by experience, nope.  Really, they're very touchy about their fruit.  Plastic gloves are provided in every grocery store and at markets, where the person at the stand might not let you touch the fruit at all but put the fruit and vegetables in bags himself as you point out what you want.  

One time while at the grocery store, I didn't want to waste a plastic glove to get just one apple, so I decided to sneak over and snatch an apple sans glove before a nonna saw me.  While I was standing there a woman came up next to me to get some peaches, and actually apologized to me that she wasn't using a glove.  She obviously hadn't noticed that I was in no place to judge, also without a glove.  Two rebels touching the fruit, lalala.   

16. Use free bathrooms when they are available to you

The free services of a restroom in your hotel, the bar where you just drank a cappuccino, or the restaurant you just ate in should all be utilized when possible.  The moment you step out the door of your hotel you will be at the mercy of the Italian city centers, where there are fewer public bathrooms than you'd like, hard to find when you need one, and consequently, if easily found or advertised, probably not free and more likely not sparkling clean.  Train stations and near popular tourist sites there are bound to be some but almost always at cost.  It will depend on which city you are in how much you might pay, I believe I've seen the bathrooms near the Florence train station cost 0.70-1.00 euro and smaller Tuscan cities such as Siena 0.50, whereas Rome will be 1.00 or 1.50, and Venice, the only place I was desperate enough to pay, and ended up paying 2. whole. euros.  I think it's low to make people pay for bathrooms, and as a rule, will suffer until seconds before wetting my pants until giving in to paying for a bathroom.  But Venice got the best of me.  Not to mention constantly looking at water.  Yikes.  

Refusing to pay for a toilet has led me to know where the nearest free bathrooms are around Florence.  As I mentioned above, you could just pop in the nearest bar or caffè, check to make sure they have a bathroom, and then order something so you can make use of their services.  However, if you weren't already planning on buying anything, well, it's basically the same thing as paying for the bathroom, now, isn't it?  So, for free bathrooms around Florence, go to

  1. Mercato Centrale, second floor (primo piano). Attention, the bathrooms on the ground floor are NOT free, but go up one flight and tada, free.

  2. Biblioteca Oblate in Via dell'Oriuolo (it's a bit of a maze in there, so after "browsing" for a few minutes, you might want to ask)

  3. Coin in Via dei Calzaiuoli, just south of the Duomo. I know for sure there are bathrooms on the top floor in the lingerie section, but I'm sure there are others if men don't want to pass through there.

  4. La Rinascente, off of Piazza della Reppublica. Again, I can vouch for the bathrooms on the top (home goods) floor, but not sure where the others in the building are located.

  5. Most of the larger grocery stores outside of the city center, such as Coop and Esselunga

Note: Because of the lack of free public restrooms many of the people who have lost some inhibition from alcohol after a certain time at night take to peeing on the streets.  If it hasn't rained recently, don't step in the puddles.  It's probably man or dog-made.  

Also note: European toilets frequently have two buttons, one big and one small.  If you're a man and only went #1, press the smaller.  It's a less potent flush, saving energy.  But if you went #2 or used toilet paper, please press the larger button.  Thank you and have a great day.

17. Public Transportation

I get conflicting feelings on this subject.  Speaking of Florence, the public transportation here is plentiful, but somewhat unreliable.  You can rent a car, take a bus, take a train, or rent a bike.  I mean, the buses are Mercedes Benz.  The only problem is they frequently don't come on time, at least judging by the paper schedules at each stop, and especially on Sunday or holidays.  Unless you're at a bus stop with an electronic screen, and then those are 85% of the time correct on predicting when the buses will show up.  But here's what you really need to know about buses and trains in Florence:

  • bus tickets as of July 1, 2018 cost 1.50 if bought ahead of time (available at any tabacchi, some pasticcerie, and train stations) and is valid 90 minutes. If you plan on traveling by bus frequently, you might consider getting a "carnet" of tickets for a slightly better deal. Check at the train station to see what your options are. There are usually machines and some teller windows dedicated to the bus line.

  • bus tickets can also be acquired by SMS for 1.80 if you have an Italian SIM card. Write "ataf" and send to 4880105.

  • as a last resort bus tickets can *usually* be bought aboard for 2.50. Sometimes the drivers run out.

  • once aboard any bus or before getting on your train, you must validate your ticket. There will be a yellow machine near the front of the bus to stamp it or the green machine near the front door if you have a bus pass to scan. For trains there are machines on the wall or posts, usually not on the platforms. This is important, because having an unvalidated ticket will result in a fine. It varies on the train, but the bus almost always results in a 50 euro fine.

18. Road rules are more like...guidelines

IMG_8535.jpg

This goes for driving, biking, or walking.  The lane lines are to be driven on, the blinker is all but nonexistent, and there are way too many one ways.  I have never driven here, only been passenger, and that's about the maximum of my ambitions.  Biking is also hazardous, because you can never predict what the cars will do, and even when the cars are stopped in traffic or at a light, the vespas are weaving in and out of the lanes to get to the front.  Compared to the US, driving in most other countries I've been to feels like Nascar.  

Thankfully I adore walking, but even as pedestrian your life is in peril wherever cars or bikes are present.  Just because it's a crosswalk doesn't mean the cars are going to stop and let you pass!  Just when you think you're safe on the sidewalk, there's a big van driving up onto the sidewalk to park.  Cars park on sidewalks, the sidewalks are full of tourists, and then you're forced to walk on the road.  Whatever it is you are doing, just be sure to have all senses on high alert! 

19. Either the weather or the weather app is very unreliable

This is mostly applicable to rain and bad weather.  All the days it says it's going to rain, sun.  And the days it's supposed to be sunny, random rainstorms.  You just can't win.  So, carry on with your vacation, learn to sing in the rain, and keep that umbrella nearby, just in case.  

20. Souvenirs

You probably don't need much help with this one, take one step into any city and you'll see a million things you want to take back with you.  (Will this city fit in my suitcase? How about this restaurant? No? I'll settle for the chef.)  But in case you're wondering, here are some things you shouldn't forget:

  • Wine - Chianti Classico, Super Chianti, Barolo, Brunello di Montalcino and Rosso di Montalcino, Vino Nobile di Montepulciano, Vin Santo, and so on and so forth)

  • Olive Oil - Tuscany is known for its oil with spicy notes. Honestly, the good stuff is like wine tasting, you can pull out all the different notes and flavor profile! If you come in October/November, lucky you! Be sure to grab a bottle of Nuovo Raccolto, the fresh harvest...sooooo goooood. If you want the king of Tuscan olive oils, grab a bottle of Laudemio.

  • Cheese - You want to get your hands on some Parmigiano Reggiano, aged anywhere between 8-120 months (the older it is the more crumbly and pronounced the taste will be, and also costly), Pecorino (sheep's milk cheese; there are many different varieties with various names but always starting with "pecorino", young, aged, aged in oak leaves, etc., but don't get too young or TSA won't let you bring it into the States), Caciocavallo young or aged, Gorgonzola for the blue cheese fans, Asiago young or aged, Provolone young or aged, or Taleggio. Indulge the younger varieties during your trip, take the aged back with you. Others to be enjoyed during your stay include fresh ricotta, mascarpone, mozzarella di bufala (on your pizza or just eat a big ball of it; yolo Italian edition!), and stracchino. There are many more, but those are some of the staples and favorites!

  • Truffles - Watch out for fake ones or oil that's just "essence." The real ones will be expensive, but if you don't want to spend 10-20 euros for a few tiny truffles try some truffle honey or the truffles in a jar that's mostly mushrooms, but still delicious.

  • Honey - There are many different varieties here, ranging from acacia to sunflower, chestnut to million flower. You can find smaller bottles at some markets, great for gifts! Just remember to pack in your checked bag.

  • Cookingware - For those who love to cook and bake, enter in any kitchen store and you'll be sure to find fun new gadgets to play with at home! Wander around some of the outdoor markets and you'll find fun things too, looong rolling pins for cheap, and beautiful artigianally crafted olive wood pieces.

  • Leather - So many leather stores around Florence! If you go around the San Lorenzo leather booths or near the bronze warthog, you can haggle the prices down. I recommend the purses, but you might want to splurge on that leather jacket you've been dreaming of for awhile, or maybe just a nice journal. Probably a more ethical option would be the leather school just behind the church of Santa Croce, "Scuola del cuoio", where you can not only buy leather goods but see the craft in process as the traditional methods are being handed down. Prices will be higher here, but so will the quality.

  • Scarves - Always a nice gift, and in Florence you can find copious quantities for good prices in the same area as all the leather booths. I love the wool ones for winter. You'll be great at haggling by the end of your trip!

  • Stationary - Florence has beautiful stationary if you or someone you know enjoys sending mail the good old fashioned way! Not to mention calendars, journals, booklets, bookmarks, etc. Pair it off with a feather quill and ink (can be found for 16 euro), and wax and stamps!


Whew, feel ready for Italy yet?  If you don't, that's ok.  Visiting any new country is always filled with adventure and mishap, but the more reading and researching you can do, the better.  You'll not only be prepared, but you'll probably save some money and enjoy things you otherwise might not have noticed!  

Until next time, fellow adventurers, I hope you found this article helpful!  And as always, if you have any questions, I would love to help!  You can find my contact by clicking on "contact" above, or simply leaving a comment below.

Cheesecake Thumbprint Cookies

Last Updated July 9, 2024

I like cookies.  I like cheesecake.  What happens when you put them together?  These Cheesecake Thumbprint Cookies! Think buttery Graham cracker cookies with a creamy, dreamy cheesecake center.

You know what's great about this recipe?  Besides being delicious, of course, is that it calls for one sleeve of graham crackers.  Boxes of Graham crackers usually come with 3 sleeves. Graham cracker crusts for pies usually call for 2 sleeves. What to do with the remaining sleeve if you don’t want to eat it? Make these Cheesecake Cookies! They look more time consuming to make than they really are, it's pretty straightforward.  So let's get to it! 

This post may contain affiliate links. If you make a purchase using these links, Jennyblogs may receive a small commission, at no extra cost to you. This helps to support Jennyblogs. Where possible, links are prioritized to small businesses, and American companies and products made in the USA for American readers. For further information see the privacy policy. Grazie!


Cheesecake Thumbprint Cookies

Makes about 20-24 cookies

Ingredients:

For the Graham Cookies

  • 1 1/4 cups / 135g (1 sleeve) finely crushed regular or any flavor graham crackers

  • 3/4 cup / 90g all-purpose flour

  • 1 1/2 teaspoons baking powder

  • 1/2 cup / 113g butter, softened, or 85g oil

  • 1/2 cup / 100g brown sugar

  • 1 egg white

For the Cheesecake Filling

  • 3 ounces / 85g cream cheese, softened

  • 1 egg yolk

  • 1/4 cup / 50g sugar

  • 1 teaspoon / 5g vanilla extract

  • 2 teaspoons lemon zest, optional

  • Powdered sugar or cocoa powder for sprinkling, optional

Directions:

Oven 350°F / 177°C.  Line a cookie sheet with parchment paper or silicone mat.  

Make the Graham Cookies

  1. In a large bowl, whisk together graham cracker crumbs, flour, and baking powder.  

  2. In the bowl of a stand mixer beat butter or oil with brown sugar. Beat in egg white. Add mixture to graham cracker mixture and mix until combined.  

  3. Using a spoon or small cookie scoop, scoop a generous tablespoon worth of dough onto prepared cookie sheet. If dough seems too soft to easily hold its shape, add a bit more flour. Repeat until all the dough has been scooped onto the cookie sheet, evenly spaced at least 1” apart. Gently roll each piece into a ball.

Make the Cheesecake Filling

  1. In the clean bowl of a stand mixer, beat cream cheese until smooth. Add sugar, egg yolk, vanilla, and zest; beat until smooth.

  2. Press your thumb into each cookie to make a deep well; fill with cream cheese mixture. 

  3. Bake 8-11 minutes or until the filling is just set.  

2017-12-19+13.08.33.jpg

Jenny's Notes:

  • Try these out with different flavors of graham crackers! I like making these with chocolate graham crackers, see picture!

  • Regular sugar can be substituted for the brown sugar with a slightly different texture for the cookie. Not bad, just slightly different. Or add a teaspoon or two of molasses to 1/2 cup regular sugar and mix before adding to the recipe.

  • You can fill the cookies right to the top with the cream cheese as the filling shouldn't do more than puff a bit in the oven.

Chocolate Cheesecake Cookies
Yield 20-24
Author
Prep time
45 Min
Cook time
11 Min
Total time
56 Min

Chocolate Cheesecake Cookies

Chocolate graham cracker thumbprint cookies filled with a cream cheese filling.

Ingredients

For the Graham Cookies
For the Cheesecake Filling

Instructions

Make the Graham Cookies
  1. Oven 350°F / 177°C. Line a cookie sheet with parchment or silicone mat.
  2. In a large bowl, whisk together graham cracker crumbs, flour, and baking powder.
  3. In the bowl of a stand mixer beat butter or oil with brown sugar. Beat in egg white. Add mixture to graham cracker mixture and mix until combined.
  4. Using a spoon or small cookie scoop, scoop a generous tablespoon worth of dough onto prepared cookie sheet. If dough seems too soft to easily hold its shape, add a bit more flour. Repeat until all the dough has been scooped onto the cookie sheet, evenly spaced at least 1” apart. Gently roll each piece into a ball.
Make the Cheesecake Filling
  1. In the clean bowl of a stand mixer, beat cream cheese until smooth. Add sugar, egg yolk, vanilla, and zest; beat until smooth.
  2. Press your thumb into each cookie to make a deep well; fill with cream cheese mixture.
  3. Bake 8-11 minutes or until the filling is just set.

Notes

  • Try these out with different flavors of graham crackers! I like making these with  chocolate graham crackers, see picture!
  • Regular  sugar can be substituted for the brown sugar with a slightly different texture for the  cookie. Not bad, just slightly different. Or add a teaspoon or two of molasses to 1/2 cup regular sugar and mix before adding to the recipe.
  • You can fill the  cookies right to the top with the cream cheese as the filling shouldn't do more than puff a bit in the oven.

Nutrition Facts

Calories

111.78

Fat

6.07 g

Sat. Fat

3.44 g

Carbs

13.46 g

Fiber

0.31 g

Net carbs

13.15 g

Sugar

8.41 g

Protein

1.29 g

Sodium

108.74 mg

Cholesterol

21.56 mg

Nutritional information is approximate, based on 1 cookie.

thumbprint cookies, cheesecake cookies, cheesecake, graham cracker cookies
dessert, cookies
American
Did you make this recipe?
Tag @jennyblogsandbakes on instagram and hashtag it #jennyblogs

Coming Soon to the Interwebs Near You: New and Improved JennyBlogs.com

This post contains affiliate links. If you buy something using these links, Jennyblogs may receive a small commission, at no extra cost to you. This helps to support Jennyblogs. For further information see the privacy policy. Grazie!

I'm updating the blog!  Soon to feature not only recipes and baking tips and random rants, but ALSO all the Italian stories of adventures and struggles, insights, and tips and tricks of survival! Yay! 

Ever wonder what it's actually like to live in Italy?  What you should pack for your Italian vacation?  What delicacies you shouldn't miss while here?  What it feels like to almost ask for something inappropriate instead of a canvas at your local art shop?  All that and more coming your way! 

Because, somebody has to chronicle all the crazy things that happen here. 

Having now spent roughly 20 months of my life in Italy, (is that all? it feels like way longer) some as tourist, some as student/missionary, some as vagabond, and soon to be worker, I've had my fair share of experiences and have gleaned plenty more from people who have lived here for wayyyy longer than I have, Italians and not.  Although I am still learning, I think it's about time to start getting some things off my shoulder.  I do not in any way confess to be an expert on any of the above categories, but if these new Italian posts serve in any way to entertain, enlighten, or help you in a future Italian vacation/study abroad/living experience, then that is all I could hope for.  

Please note, everyone's experience here will be slightly different, especially depending on the region and time of year you are here.  In the posts to come, I will try to accumulate general information about Italy, nevertheless, some of it will be Tuscan-specific and may not completely mirror your experiences because that is the region where I live and learned the culture, which will differ at times than say, Calabria or Milan.  And it will always come from an American perspective!  That said, here's to dispelling some of the over-exaggerated information peddled by Rick Steves and other guide book authors! ;) 

See you next time, alla prossima! 

1X9B0132 copy.jpg