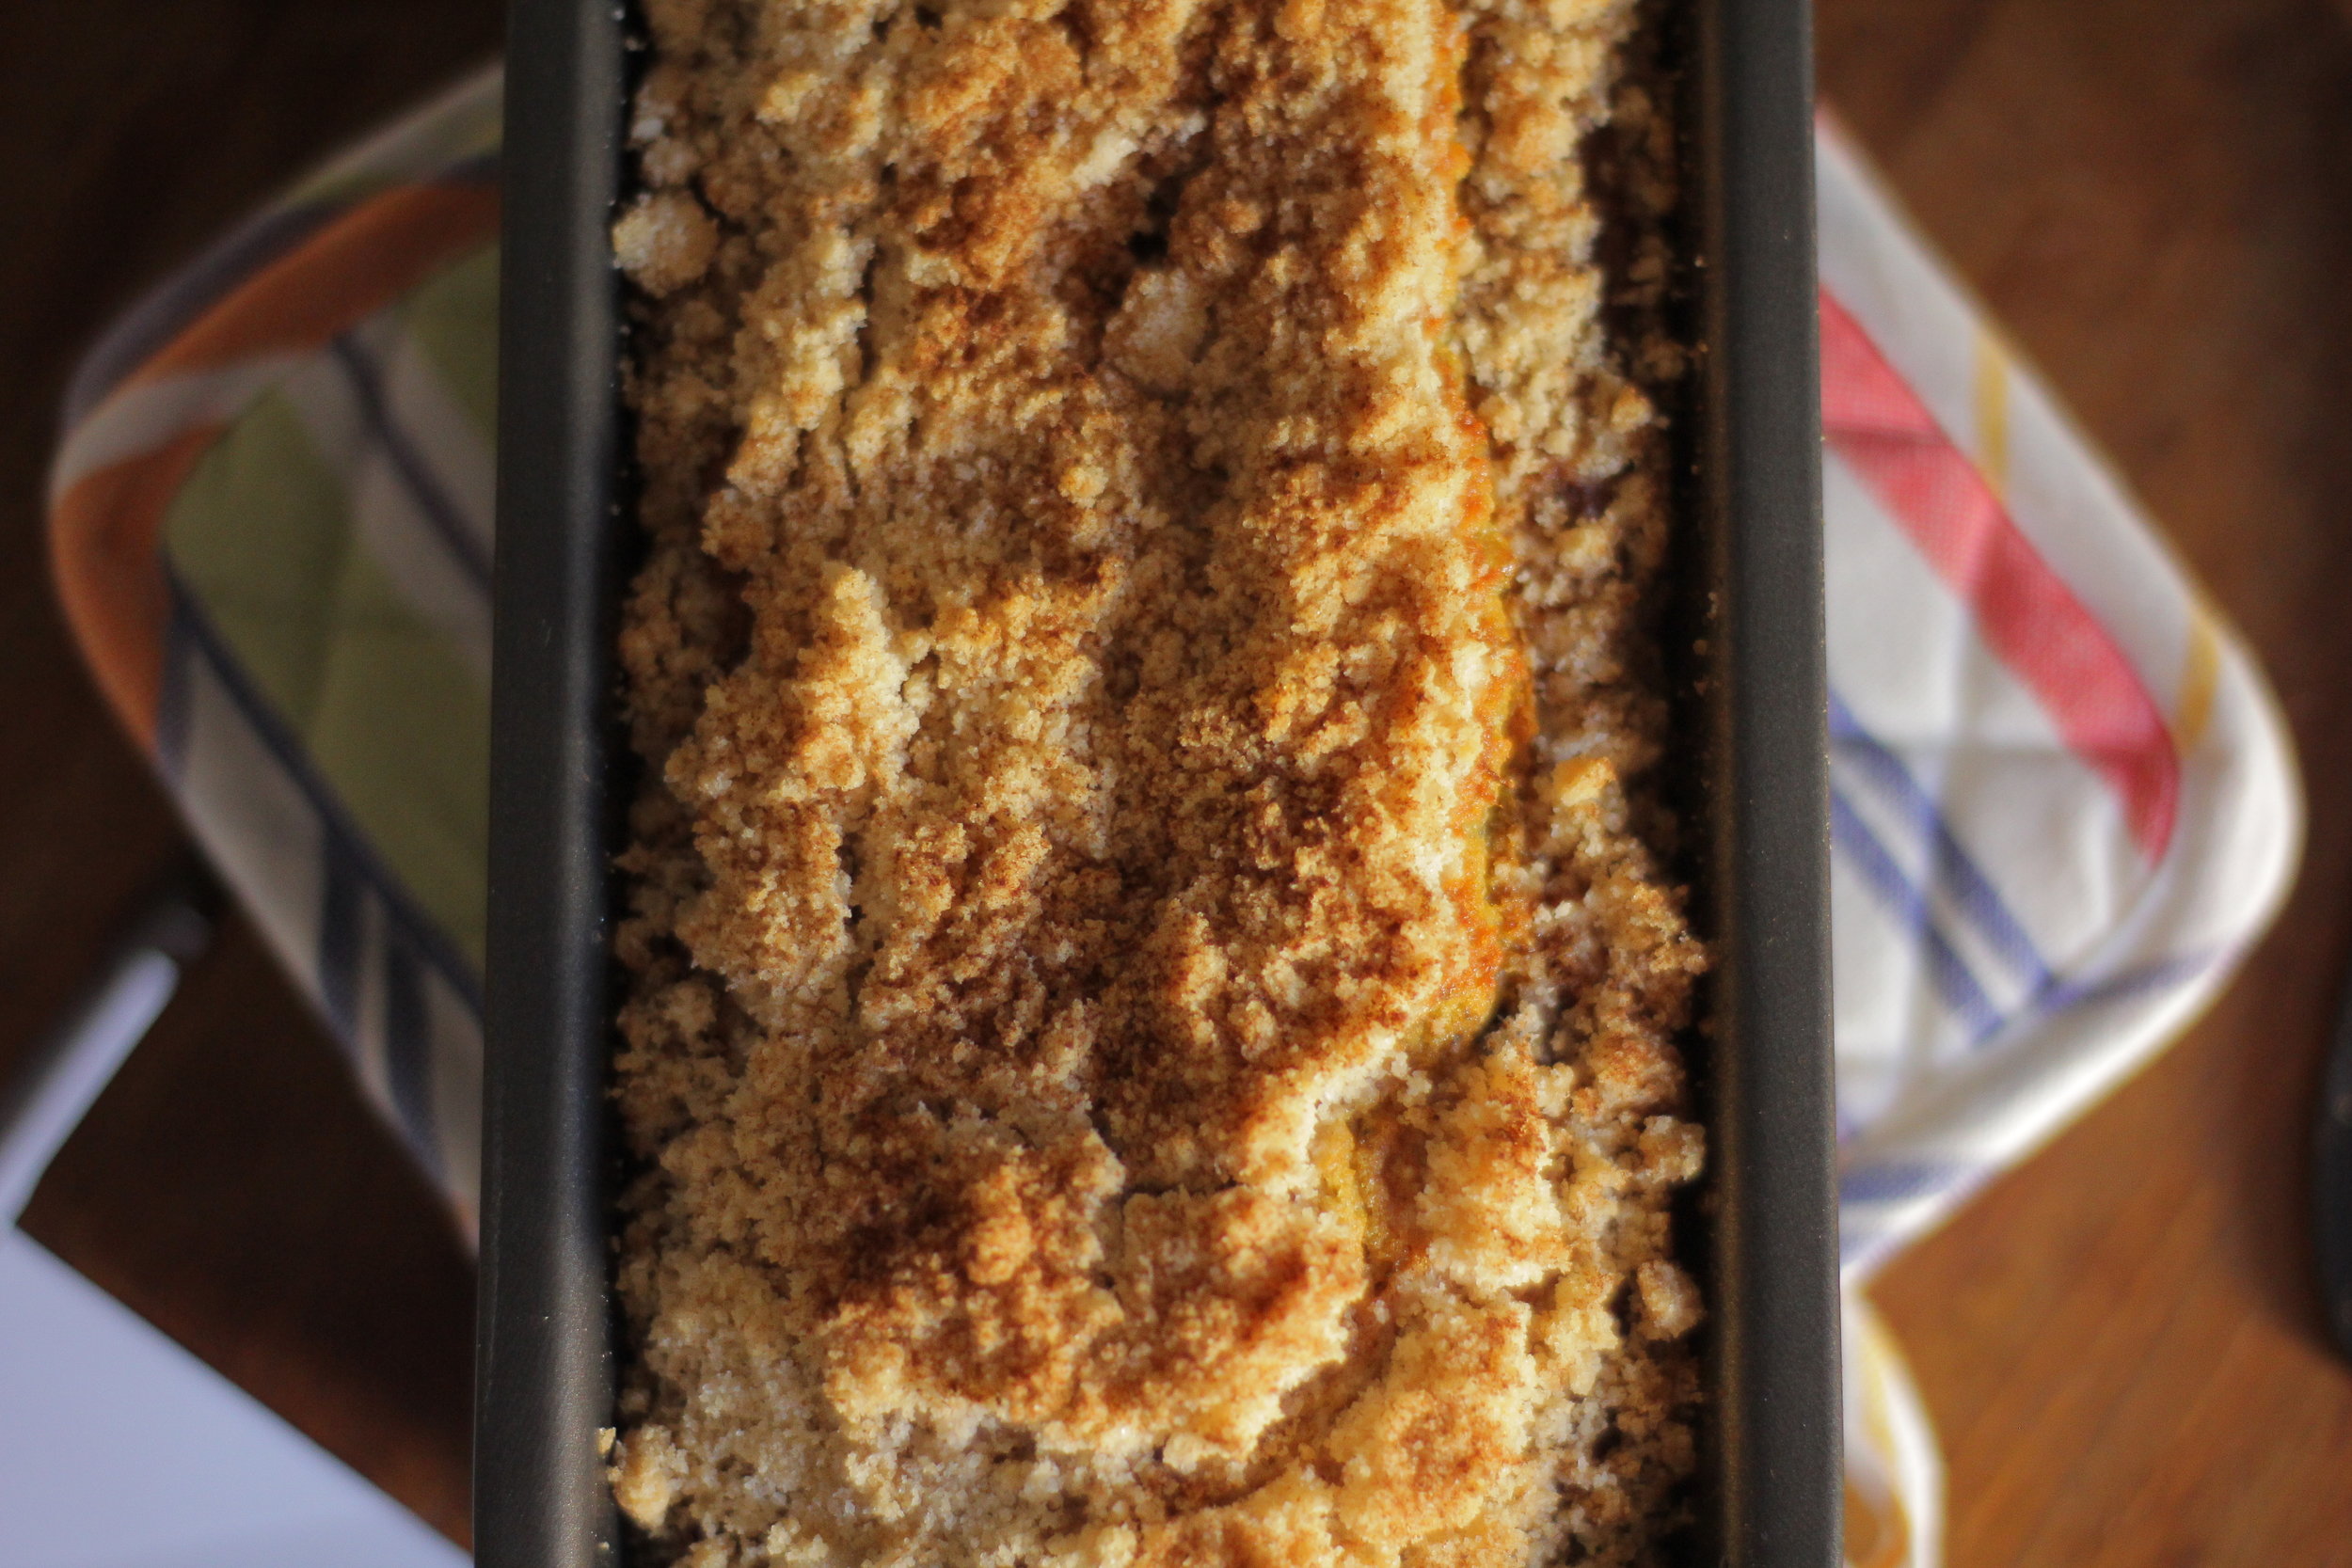
Whole Wheat Bread

Last Updated August 7, 2024

This post may contain affiliate links. If you make a purchase using these links, Jennyblogs may receive a small commission, at no extra cost to you. This helps to support Jennyblogs. For further information see the privacy policy. Grazie!

Simple, delicious, whole wheat bread. No batons, bread machines, or rocket scientists required. Actually, if you have a bread machine your bread making life is probably a lot simpler than mine. I enjoy working the bread with my own hands, though.  It's very therapeutic and gives you a nice upper body workout. Which means you could then eat more bread, yes?

Anyway, this is a simple, versatile bread, good for sandwiches, toast, and...bread.  

Recipe adapted from The Frugal Girl


Whole Wheat Bread

Makes 2 approx. 9in / 23cm loaves

Ingredients:

  • 1 1/2 Tbsp / 14g instant yeast

  • 2 1/2 tsp / 13g salt

  • 3 cups / 384g whole wheat flour

  • 2 3/4 cups / 330g all-purpose flour

  • 2 1/3 cups / 552g warm water (about 110°F / 43°C)

  • 1/4 cup / 80g maple syrup or honey

  • 1/4 cup / 56g oil or melted butter

Directions:

Oven 350°F / 177°C.  Grease 2 approx. 9x5in / 23x13cm bread pans. 

  1. Combine yeast, salt, 1 cup / 128g whole wheat flour, and 1 cup / 120g all-purpose flour in the bowl of a stand mixer on low speed, or mix by hand.  

  2. Add warm water, maple syrup, and oil.  Mix until ingredients are combined, then increase speed to medium, beating for 3 minutes, or vigorously by hand.  

  3. Add remaining whole wheat flour and all-purpose flour until a soft but kneadable dough is formed.  

  4. Switch to dough hook and knead for 5-7 minutes, turning out on to a lightly floured surface to knead for 1-2 minutes more, until dough looks smooth and elastic. Or, knead by hand on a lightly floured surface for about 10 minutes.  

  5. Grease a large bowl and place dough in it.  Flip the dough over once so that both sides are lightly greased.  Cover bowl with a clean towel and place in a warm place to rise until doubled in volume, about 45-60 minutes.  

  6. When dough has risen, punch down and knead on a lightly floured surface for 4-5 minutes.  

  7. Separate dough into two equal pieces.  Roll or press one piece out into a small rectangle.  It does not have to be exact or very big, the width of it should be a touch smaller than your bread pan, or 9 inches.  Starting from the short end, roll the dough up and place in your prepared pan.  Repeat with second piece.  

  8. Place towel back over loaves and let rise until doubled, about 30-45 minutes.  

  9. When loaves have risen, bake for about 30 minutes.  They should sound hollow when tapped on the bottom or internal temperature should read about 205°F / 96°C.  

  10. Cool in pans 10 minutes before removing and allowing to cool completely.  

Jenny's Notes:

  • If you use oil to make this bread, it will be dairy-free. If you use oil and maple syrup, it will also be vegan.

  • I have also made this bread with great success substituting part of the all-purpose flour with wheat germ. Gives it an extra nutty flavor profile.  

  • The rolling step creates surface tension in the bread, and therefore a prettier loaf.

Whole Wheat Bread
Yield 20
Author
Prep time
35 Min
Cook time
30 Min
Total time
1 H & 5 M

Whole Wheat Bread

Classic everyday whole wheat bread, great for sandwiches, toast, or anyway you like to eat bread!
Cook modePrevent screen from turning off

Ingredients

Instructions

  1. Oven 350°F / 177°C. Grease 2 approx. 9x5in / 23x13cm bread pans.
  2. Combine yeast, salt, 1 cup / 128g whole wheat flour, and 1 cup / 120g all-purpose flour in the bowl of a stand mixer on low speed, or mix by hand.
  3. Add warm water, maple syrup, and oil. Mix until ingredients are combined, then increase speed to medium, beating for 3 minutes, or vigorously by hand.
  4. Add remaining whole wheat flour and all-purpose flour until a soft but kneadable dough is formed.
  5. Switch to dough hook and knead for 5-7 minutes, turning out on to a lightly floured surface to knead for 1-2 minutes more, until dough looks smooth and elastic. Or, knead by hand on a lightly floured surface for about 10 minutes.
  6. Grease a large bowl and place dough in it. Flip the dough over once so that both sides are lightly greased. Cover bowl with a clean towel and place in a warm place to rise until doubled in volume, about 45-60 minutes.
  7. When dough has risen, punch down and knead on a lightly floured surface for 4-5 minutes.
  8. Separate dough into two equal pieces. Roll or press one piece out into a small rectangle. It does not have to be exact or very big, the width of it should be a touch smaller than your bread pan, or 9 inches. Starting from the short end, roll the dough up and place in your prepared pan. Repeat with second piece.
  9. Place towel back over loaves and let rise until doubled, about 30-45 minutes.
  10. When loaves have risen, bake for about 30 minutes. They should sound hollow when tapped on the bottom or the internal temperature should read about 205°F / 96°C.
  11. Cool in pans 10 minutes before removing and allowing to cool fully.

Notes

If you use oil to make this bread, it will be dairy-free. If you use oil and maple syrup, it will also be vegan. I have also made this bread with great success substituting part of the all-purpose flour with wheat germ. Gives it an extra nutty flavor profile. The rolling step creates surface tension in the bread, and therefore a prettier loaf.

Nutrition Facts

Calories

162.77

Fat

3.50 g

Sat. Fat

0.30 g

Carbs

29.38 g

Fiber

2.69 g

Net carbs

26.69 g

Sugar

2.54 g

Protein

4.53 g

Sodium

254.58 mg

Cholesterol

0.00 mg

Nutritional information is approximate and based on 1 slice from a 10-slice loaf.

vegan, dairy-free, whole wheat bread, wheat germ, honey, maple syrup, toast, french toast, whole wheat sandwich bread, homemade bread, loaves
Bread
American
Did you make this recipe?
Tag @jennyblogsandbakes on instagram and hashtag it #jennyblogs

Ratatouille

Last Updated August 7, 2024

Rat patootie.  Ratatouille.  Only one of my favorite Pixar films AND one of my favorite foods.  A cartoon that takes place in Paris, is all about cooking, French accents, chefs, crispy baguettes....ah yes.  Never fails to make me hungry for cheese, saffron, bread, and maybe some wine.  From the day I first saw it, in the theatre in New York City with my mom back in 2008, I wanted to make ratatouille.  I didn't know what it was before the movie, but Pixar animation made it look delicious.  

After some research and googling, I soon learned that there were many different versions of ratatouille, originally a hearty peasant dish from the region of Provence, France.  (Remember Igor's flashback to his mother's cooking and country home when he firsts tastes the ratatouille?) One source likened it to stew in America. What kind of stew you ask? This is exactly the point, as every region and cook in America has their own version of stew, and it can vary widely. Apparently this is also true of ratatouille.  

After making this many times over the years, I came down to two favorite recipes.  

One involved sautéing the eggplant first for 10 minutes with the spices, then adding it to the bottom of the baking dish. The remaining sliced vegetables were then layered over the eggplant, with a sprinkling of parmesan cheese between each layer of vegetables.

The second involved spreading a seasoned tomato sauce in the bottom of the baking dish and then alternating the vegetables around the dish in a pretty spiral, like it’s served in the film.

I could never decide which version I wanted to make, so finally I combined the two for the best of both worlds.  I omitted sautéing the eggplant, kept the tomato sauce on the bottom, and kept the cheese and the pretty spiral.

That combination is what follows.

Looking for an oval baking dish? I use this Le Creuset pan and couldn’t love it more for casseroles and baking! It’s prettier than a 9x13 rectangular pan and is so easy to clean, even the baked on cheese from this dish!

This post may contain affiliate links. If you make a purchase using these links, Jennyblogs may receive a small commission, at no extra cost to you. This helps to support Jennyblogs. For further information see the privacy policy. Grazie!


Ratatouille

Serves 4-6

Ingredients:

IMG_4690.JPG
  • 1 1/2 cups / 355g tomato purée or sauce (unseasoned)

  • 1/2 onion, finely chopped

  • 2 garlic cloves, minced

  • 1 tsp fresh oregano or 1/4 tsp dried

  • 1/4 tsp. crushed red pepper flakes

  • 2 Tbsp / 28g olive oil

  • 8 oz / 240g mushrooms, thinly sliced

  • 1 medium eggplant

  • 1 medium zucchini

  • 1 medium yellow squash

  • 1 bell pepper, optional

  • 1 cup / 110g shredded parmesan cheese

  • fresh or dried thyme

  • salt and pepper, to taste

Directions:

Oven 375°F / 177°C.  Ungreased oval baking dish, about 10in / 25cm long, or 9x13in / 23x33cm pan. 

  1. Add tomato purée to a small bowl.  Stir in onion, garlic, oregano, red pepper flakes, 1 tablespoon of oil, salt, and pepper.  Spread in the bottom of the baking dish.

  2. Layer sliced mushrooms over tomato sauce.

  3. Using a mandolin or by hand, slice eggplant, zucchini, yellow squash, and bell pepper into 1/4 inch slices.

  4. Working in concentric circles, alternate and arrange the vegetables over the mushrooms.  You may have a small handful of misfit vegetables left over.  Save for another use (stir fry!) or lift a layer of your vegetables in the pan and sneak the excess underneath where the eye can't see. 

  5. Drizzle vegetables with remaining tablespoon of oil, season with salt and pepper, and sprinkle cheese evenly over top.  Sprinkle thyme over cheese. 

  6. Bake for 45-55 minutes or until tomato sauce is bubbling around edges of the pan and vegetables are tender when pierced with a knife.  

  7. Eat as is, or served over quinoa, rice, couscous, or with some crusty French bread!

Jenny's Notes:

  • 1 6oz can / 170g tomato paste mixed with 3/4 cup / 170g water can be substituted for the tomato purée.

  • Sometimes I omit the red pepper flakes and use a spicy oil in place of the plain olive oil.

  • If you want to save time assembling the vegetables you can layer them instead of alternating and making circles. i.e. layer all the eggplant slices, then squash, zucchini, etc.  

  • You could add an extra layer of cheese between the mushrooms and vegetables.  

  • Feel free to add or substitute vegetables! 

Ratatouille
Yield 4-6 servings
Author
Prep time
40 Min
Cook time
55 Min
Total time
1 H & 35 M

Ratatouille

A classic French peasant dish made famous by the Pixar animated film "Ratatouille." This version has a tomato base, plenty of eggplant, zucchini, squash, and mushrooms, with thyme and parmesan cheese. Naturally gluten-free.
Cook modePrevent screen from turning off

Ingredients

Instructions

  1. Oven 375°F / 177°C. Ungreased oval baking dish, about 10in / 25cm long, or 9x13in / 23x33cm pan.
  2. Add tomato purée to a small bowl. Stir in onion, garlic, oregano, red pepper flakes, 1 tablespoon of oil, salt, and pepper. Spread in the bottom of the baking dish.
  3. Layer sliced mushrooms over tomato sauce.
  4. Using a mandolin or chopping by hand, slice eggplant, zucchini, yellow squash, and bell pepper into 1/4 inch slices.
  5. Working in concentric circles, alternate and arrange the vegetables over the mushrooms. You may have a small handful of misfit vegetables left over. Save for another use (stir fry!) or lift a layer of your vegetables in the pan and sneak the excess underneath where the eye can't see.
  6. Drizzle vegetables with remaining tablespoon of oil, season with salt and pepper, and sprinkle cheese evenly over top. Sprinkle thyme over cheese.
  7. Bake for 45-55 minutes or until tomato sauce is bubbling around edges of the pan and vegetables are tender when pierced with a knife.
  8. Eat as is, or served over quinoa, rice, couscous, or with some crusty French bread!

Notes

1 6oz can / 170g tomato paste mixed with 3/4 cup / 170g water can be substituted for the tomato purée.Sometimes I omit the red pepper flakes and use a spicy oil in place of the plain olive oil. If you want to save time assembling the vegetables you can layer them instead of alternating and making circles. i.e. layer all the eggplant slices, then squash, zucchini, etc. You could add an extra layer of cheese between the mushrooms and vegetables. Feel free to add or substitute vegetables!

Nutrition Facts

Calories

319.11

Fat

15.92 g

Sat. Fat

6.00 g

Carbs

33.75 g

Fiber

9.15 g

Net carbs

24.60 g

Sugar

15.12 g

Protein

16.35 g

Sodium

571.85 mg

Cholesterol

19.80 mg

Nutritional information is approximate and based on 4 servings.

ratatouille, Pixar Ratatouille, thyme, eggplant, zucchini, yellow squash, vegetables, healthy, gluten-free, parmesan cheese, tomato, mushrooms, peasant dish
Lunch, Dinner, Side Dish
French
Did you make this recipe?
Tag @jennyblogsandbakes on instagram and hashtag it #jennyblogs
IMG_4693.JPG

Cream Cheese Coffee Cake

Last Updated August 6, 2024

Cream Cheese Coffee Cake. Think a delicate crumb, super moist with swirls of cream cheese making the coffee cake even softer, and a sweet crumble on top.

Coffee cakes (and scones) often get a bad rap for being dry. No one likes to eat something that makes their mouth feel like it’s full of sawdust. There is no need to make dry baked goods when there are so many good recipes out there! A good example? This Cream Cheese Coffee Cake recipe. I already have a few favorite NOT dry recipes like this Cinnamon Streusel Coffee Cake, but today’s Cream Cheese Coffee Cake really uh, takes the cake on the moist scale. I apologize if you don’t like the word “moist”, but I struggle finding suitable synonyms that get the same point across. If you have any ideas, I’m open to suggestions so I don’t offend some people’s sensibilities. :)

Now, post Valentine's Day, or Galentine's Day, you may need to take a break from chocolate.  No wait, never mind, that's silly.  Chocolate is always necessary.  What was I thinking?  But I'm sure you already have plenty of chocolate on your hands (maybe literally, put that candy bar down and get busy making this coffee cake) in the form of heart boxes, Dove dark chocolate with those hidden messages, Hershey's kisses, or in my case, Toblerone.  So instead, let's make a very white dessert (or breakfast, hey) with a delicate crumb and cheesecake filling. Yes? Yes.

This post may contain affiliate links. If you make a purchase using these links, Jennyblogs may receive a small commission, at no extra cost to you. This helps to support Jennyblogs. Where possible, links are prioritized to mall businesses and ethically and responsibly made items. For further information see the privacy policy. Grazie!


Cream Cheese Coffee Cake

Serves 12-16

Ingredients:

For the Filling

  • 8 oz / 225g cream cheese, softened

  • 1/4 cup / 50g sugar

  • 1/2 tsp vanilla extract

  • 1 egg

For the Cake

  • 1 1/2 cups / 180g all-purpose flour

  • 1/2 tsp baking powder

  • 1/2 tsp baking soda

  • 1/2 tsp salt

  • 3 Tbsp / 42g oil

  • 1/2 cup / 100g sugar

  • 2 eggs

  • 1 tsp vanilla

  • 1/2 cup / 123g yogurt or sour cream

For the Streusel

  • 1/4 cup / 50g sugar

  • 1/4 cup / 30g all-purpose flour

  • 3 Tbsp / 42g cold butter, cubed

Directions:

Oven 350°F / 177°C.  Greased 8x8in / 20x20cm square baking pan.

For the Filling

  1. In the bowl of a stand mixer beat cream cheese until smooth, about 30 seconds. 

  2. Add sugar, vanilla, egg and beat on medium-low speed until combined.  Pour into another bowl and set aside. 

For the Cake

  1. In a medium bowl whisk together flour, baking powder, baking soda, and salt. 

  2. In the bowl of a stand mixer combine oil and sugar.  Beat in eggs one at a time.  Add vanilla. 

  3. Alternate adding the dry ingredients and yogurt to the oil and sugar mixture.  Dry, yogurt, dry, yogurt, dry.  Mix only until just combined after each addition. 

For the Streusel

  1. Combine sugar, flour, and butter in a small bowl with a pastry cutter, fork, or your hands until crumbles the size of pebbles appear.

Assembly

  1. Spread half of the cake batter in the bottom of prepared pan. 

  2. Pour and spread cream cheese filling evenly over batter; gently swirl.

  3. Spread remaining half of cake batter over cream cheese filling. 

  4. Evenly sprinkle streusel over the top.

  5. Bake for 20-25 minutes or until toothpick inserted near the center comes out mostly clean. 

Jenny's Notes:

  • Love coffee cake or serving at a party?  You can double this recipe and bake in a 9x13 inch pan.  Increase baking time to about 40 minutes.

Cream Cheese Coffee Cake
Yield 12-16 Servings
Author
Prep time
45 Min
Cook time
25 Min
Total time
1 H & 10 M

Cream Cheese Coffee Cake

Super moist coffee cake with a thick cream cheese swirl and delicate streusel topping.
Cook modePrevent screen from turning off

Ingredients

For the Filling
For the Cake
For the Streusel

Instructions

For the Filling
  1. In the bowl of a stand mixer beat cream cheese until smooth, about 30 seconds.
  2. Add sugar, vanilla, egg and beat on medium-low speed until combined. Pour into another bowl and set aside.
For the Cake
  1. In a medium bowl whisk together flour, baking powder, baking soda, and salt.
  2. In the bowl of a stand mixer combine oil and sugar. Beat in eggs one at a time. Add vanilla.
  3. Alternate adding the dry ingredients and yogurt to the oil and sugar mixture. Dry, yogurt, dry, yogurt, dry. Mix only until just combined after each addition.
For the Streusel
  1. Combine sugar, flour, and butter in a small bowl with a pastry cutter, fork, or your hands until crumbles the size of pebbles appear.
Assembly
  1. Oven 350°F / 177°C. Greased 8x8in / 20x20cm square baking pan.
  2. Spread half of the cake batter in the bottom of prepared pan.
  3. Pour and spread cream cheese filling evenly over batter; gently swirl.
  4. Spread remaining half of cake batter over cream cheese filling.
  5. Evenly sprinkle streusel over the top.
  6. Bake for 20-25 minutes or until toothpick inserted near the center comes out mostly clean.

Notes

Love coffee cake or serving at a party? You can double this recipe and bake in a 9x13 inch pan. Increase baking time to about 40 minutes.

Nutrition Facts

Calories

269.85

Fat

13.92 g

Sat. Fat

6.21 g

Carbs

31.96 g

Fiber

0.47 g

Net carbs

31.48 g

Sugar

18.21 g

Protein

4.58 g

Sodium

270.60 mg

Cholesterol

58.08 mg

Nutritional information is approximate and based on 12 servings.

cream cheese, coffee cake, streusel, cream cheese filling, swirl, moist
Breakfast, Dessert
American
Did you make this recipe?
Tag @jennyblogsandbakes on instagram and hashtag it #jennyblogs

Whole Wheat Peanut Butter Muffins

Do you like my snowman liners? :)

Do you like my snowman liners? :)

This post may contain affiliate links. If you buy something using these links, Jennyblogs may receive a small commission, at no extra cost to you. This helps to support Jennyblogs. For further information see the privacy policy. Grazie!

Muffins are great, aren’t they? So American and so versatile. They can be savory or sweet and just about any flavor you could desire. They can be calorie bombs or nutrition bombs. These Whole Wheat Peanut Butter Muffins are actually pretty good for you, considering how delicious they are.

The sugar content is low, only whole wheat flour is used, and they’re rich in peanut butter and chocolate!

Sometimes I think muffins don’t get the recognition they deserve. Each country has its specialty and maybe of all the things that my country could’ve invented I would’ve chosen croissants or pastries, but muffins have their place on the table for sure! I am not ashamed.

The world is a beautiful place full of diverse people, traditions, and food.  The beauty of the age we live in is how accessible it has become to travel.  You no longer have to rely on magazines and other people's experience, or weigh the cost of time it takes to get places and the chance of death as you voyage on a ship or whatnot.  Even if you remain right where you are, chances are the other people around you are coming and going.  The world is opening up more and more, we are no longer isolated from each other.  We are exposed to different ways of thinking, culture, languages, ideals.  Sometimes we agree, and sometimes we don't, and as long as we know how to do those two things humbly and lovingly, it can be a beautiful thing.  Even when it seems the disagreements outweigh the agreements, there will always be one thing we have in common: Food. 

Never underestimate the power of food.  We can thank France for flaky, buttery pastries, crepes, chocolate mousse, and baguettes, Italy for pizza, pasta, gelato, and panettone, Germany for pretzels and bratwurst, Greece for Gyros and tzatziki, the middle east for hummus, falafel, tabbouleh, baba ganoush, pita, and shawarma, Turkey for Turkish delight and baklava, Japan for sushi, China for wontons, spring rolls, and dumplings, Ireland for Shepherd's pie, Mexico for tacos, burritos, and enchiladas, Canada for Poutine, U.S. for macaroni and cheese, apple pie, s'mores, buffalo wings, jambalaya, annnnnnd muffins. 

Basically, while the French are making pastries, Americans are making muffins.  Hm.  That's fine.  Taking two days to make something does not necessarily mean it will be automatically better.  (In this case, however, I think it does.)  But we don't always have the luxury of taking two days to make pastries when the fancy strikes.  Life and work happens.  Enter the humble muffin.  Simple, humble, delicious, and quick to whip up.  It has its place in the kitchen.

They tend to get a bad rap for being high in calories, unhealthy, and associated with muffin tops.  I promise, their sole intent in life is not give you a muffin top.  Poor muffins.  I am here today to show you that muffins can be nutritious, not 500 calories a pop, and enjoyable to make.  I hope I don't have to tell you they are also enjoyable to eat.  Especially these ones. :)

Recipe adapted from Culinary Adventures in the Kitchen


Whole Wheat Peanut Butter Muffins

12-14 muffins

Ingredients:

  • 2 1/4 cups / 270g whole wheat or white whole wheat flour

  • 1 tsp baking soda

  • 1 tsp baking powder

  • 1/4 tsp salt

  • 3 Tbsp / 42g oil

  • 1/4 cup / 61g yogurt

  • 1/2 cup / 100g brown sugar

  • 3/4 cup / 195g peanut butter

  • 2 tsp vanilla extract

  • 2 eggs

  • 1 cup / 237g buttermilk

  • 1 cup / 175g chocolate chips

Directions:

Oven 375°F / 190°C.  Muffin tin lined with cupcake liners or greased.  You may need two pans.

  1. In a medium bowl, whisk together flour, baking soda, baking powder, and salt. 

  2. In the bowl of a stand mixer, combine oil, yogurt, and brown sugar.  Add peanut butter and mix until incorporated.  Add the eggs one at a time, scraping down sides of bowl as needed. 

  3. Add 1/3 of flour mixture to the stand mixer, mixing just until combined.  Add half of the buttermilk, again mixing until just combined.  Repeat with another third of the flour, the remaining half of the buttermilk, and finally the last third of flour.  Gently stir in 3/4 cup / 130g chocolate chips with a spoon or spatula. 

  4. Fill muffin cups 3/4 full, and sprinkle remaining 1/4 cup / 44g chocolate chips over the tops. 

  5. Bake until lightly golden around the edges and/or a toothpick inserted near the center comes out clean, about 16-18 minutes. 

Jenny's Notes:

  • Whole wheat flour is not necessarily healthier than white whole wheat flour, they are simply different kinds of wheat.  Whole wheat flour is a red wheat, which gives it the darker color and slightly heavier texture.  Think of it like a Granny Smith apple and a Macintosh Apple, they are different varieties of apple but equally nutritious for you. 

  • Using either plain yogurt or a sweetened yogurt like vanilla is fine in this recipe. 

  • These muffins are not overly sweet, (I think they're perfect for breakfast so you don't start your day with a sugar coma) so feel free to up the sugar if you prefer sweeter muffins. 

Whole Wheat Peanut Butter Muffins
Yield 12-14 Muffins
Author
Prep time
30 Min
Cook time
18 Min
Total time
48 Min

Whole Wheat Peanut Butter Muffins

Lightly sweet, whole wheat peanut butter muffins with a healthy sprinkling of chocolate chips.
Cook modePrevent screen from turning off

Ingredients

Instructions

  1. Oven 375°F / 190°C. Muffin tin lined with cupcake liners or greased. You may need two pans.
  2. In a medium bowl, whisk together flour, baking soda, baking powder, and salt.
  3. In the bowl of a stand mixer, combine oil, yogurt, and brown sugar. Add peanut butter and mix until incorporated. Add the eggs one at a time, scraping down sides of bowl as needed.
  4. Add 1/3 of flour mixture to the stand mixer, mixing just until combined. Add half of the buttermilk, again mixing until just combined. Repeat with another third of the flour, the remaining half of the buttermilk, and finally the last third of flour. Gently stir in 3/4 cup / 130g chocolate chips with a spoon or spatula.
  5. Fill muffin cups 3/4 full, and sprinkle remaining 1/4 cup / 44g chocolate chips over the tops.
  6. Bake until lightly golden around the edges and/or a toothpick inserted near the center comes out clean, about 16-18 minutes.

Notes

Whole wheat flour is not necessarily healthier than white whole wheat flour, they are simply different kinds of wheat. Whole wheat flour is a red wheat, which gives it the darker color and slightly heavier texture. Think of it like a Granny Smith apple and a Macintosh Apple, they are different varieties of apple but equally nutritious for you. Using either plain yogurt or a sweetened yogurt like vanilla is fine in this recipe. These muffins are not overly sweet, (I think they're perfect for breakfast so you don't start your day with a sugar coma) so feel free to up the sugar if you prefer sweeter muffins.

Nutrition Facts

Calories

329.90

Fat

17.53 g

Sat. Fat

4.88 g

Carbs

39.14 g

Fiber

4.20 g

Net carbs

34.95 g

Sugar

18.61 g

Protein

9.13 g

Sodium

328.68 mg

Cholesterol

32.10 mg

Nutritional information is approximate and based on 12 servings.

muffins,snack,nutritious, chocolate chips, whole wheat, dark chocolate, peanut butter, buttermilk,yogurt
Breakfast, Bread
American
Did you make this recipe?
Tag @jennyblogsandbakes on instagram and hashtag it #jennyblogs

Salted Chocolate Caramel Pretzel Bark

Last Updated August 6, 2024

Pretzels. Homemade caramel. Chocolate. And salted. This bark has only 5 ingredients, it’s super easy to make, and you keep going back for more.

Oh yes.  For the sugar lovers, sweets devotees, and when you want to whip up something delicious with precious little effort, this bark is it.  Some people even refer to it as crack bark. Maybe because you break, or crack it, at the end?  (Just kidding everyone, I know what they mean when they call it that.)  Plus all 5 ingredients are pretty easy to have on hand. 

Now, if this were Pinterest, you could call it "5 Ingredient Crack Bark."  Remember my thing with Pinterest names?  Yep.  Still there.  Keep it classy, people, keep it classy.  It already bothers me that this recipe has as many words in its title as it does ingredients.  If you have any better and more concise ideas for the title, please, let me know!

Slightly adapted from Where the Cookies Are

This post may contain affiliate links. If you buy something using these links, Jennyblogs may receive a small commission, at no extra cost to you. This helps to support Jennyblogs. For further information see the privacy policy. Grazie!


Salted Chocolate Caramel Pretzel Bark

Makes approximately one 11x17in / 28x43cm sheet of bark

Ingredients:

  • Enough mini pretzels to cover an approximately 11x17in / 28x43cm jelly roll pan, about half of a 15oz bag / 200g.

  • 1 cup / 226g butter

  • 1 cup / 200g brown sugar

  • 2 cups / 340g semi-sweet chocolate chips

  • coarse salt

Directions:

Oven 375°F / 190°C.  Line an approximately 11x17in / 28x43cm jelly roll pan with tinfoil. 

  1. Cover pan with an even layer of pretzels.

  2. In a medium saucepan over medium-low heat, combine butter and brown sugar.  Stir until mixture starts to simmer, then allow to cook, without stirring, until mixture turns a nice golden-brown.  This should take 3-5 minutes after the mixture has started to simmer. 

  3. Remove mixture from heat and immediately pour evenly over pretzels. 

  4. Place in the oven and bake for 6 minutes. 

  5. Remove from oven and immediately sprinkle chocolate chips over pretzels and caramel. 

  6. Wait a few minutes, then use a spatula to spread now melted chocolate chips over pretzels.  Sprinkle with salt. 

  7. Allow to cool completely before breaking into pieces.  You can place your pan in the fridge or freezer to speed up the process. 

Jenny's Notes:

  • Don't have tinfoil?  You can always use wax or parchment paper, but I would recommend greasing them beforehand as I have had the bark stick to both of those products. 

  • Want to go crazy?  Use any kind of chips in place of the semisweet chips, such as milk, peanut butter, bittersweet...or a combination! 

  • Once you have spread the melted chocolate, feel free to add some extra toppings if you wish.  Coconut, chopped peanuts, finely chopped coffee beans...

Salted Chocolate Caramel Pretzel Bark
Yield 12-15 servings
Author
Prep time
25 Min
Cook time
6 Min
Total time
31 Min

Salted Chocolate Caramel Pretzel Bark

Salty, crunchy, chocolatey, caramelly, and only 5 ingredients to whip up this addicting bark!
Cook modePrevent screen from turning off

Ingredients

Instructions

  1. Oven 375°F / 190°C. Line an approximately 11x17in / 28x43cm jelly roll pan with tinfoil.
  2. Cover pan with an even layer of pretzels.
  3. In a medium saucepan over medium-low heat, combine butter and brown sugar. Stir until mixture starts to simmer, then allow to cook, without stirring, until mixture turns a nice golden-brown. This should take 3-5 minutes after the mixture has started to simmer.
  4. Remove mixture from heat and immediately pour evenly over pretzels.
  5. Place in the oven and bake for 6 minutes.
  6. Remove from oven and immediately sprinkle chocolate chips over pretzels and caramel.
  7. Wait a few minutes, then use a spatula to spread now melted chocolate chips over pretzels. Sprinkle with salt.
  8. Allow to cool completely before breaking into pieces. You can place your pan in the fridge or freezer to speed up the process.

Notes

If you’re wondering what a jelly-roll pan is, it’s merely a baking sheet with about a 1in side around it, which in this case keeps the bark contained. Don't have tinfoil? You can always use wax or parchment paper, but I would recommend greasing them beforehand as I have had the bark stick to both of those products. Want to go crazy? Use any kind of chips in place of the semisweet chips, such as milk, peanut butter, bittersweet...or a combination! Once you have spread the melted chocolate, feel free to add some extra toppings if you wish. Coconut, chopped peanuts, finely chopped coffee beans...

Nutrition Facts

Calories

398.37

Fat

24.26 g

Sat. Fat

14.77 g

Carbs

47.86 g

Fiber

2.24 g

Net carbs

45.63 g

Sugar

31.99 g

Protein

3.04 g

Sodium

384.00 mg

Cholesterol

40.49 mg

Nutritional information is approximate and based on 12 servings.

salted caramel, salted chocolate, bark, butter, toffee, caramel, chocolate chips, crack bark
dessert, snack
American
Did you make this recipe?
Tag @jennyblogsandbakes on instagram and hashtag it #jennyblogs

Orange Chocolate Chip Scones

Last Updated August 5, 2024

Do you know what goes great with cold weather?  Hot beverages, like tea and coffee. 

And do you know which carbs goes best with tea and coffee? Scones. 

That's not to say that scones are dry and should only be served with hot liquids to help re-salivate your mouth. If that's your past experience, then you need to find a new scone recipe or scone baker. I like the sound of that. Scone baker. Sconed baker.  The scorned baker. Maybe not. Moving on. These scones are wonderful!! Light and flaky. Not too sweet, with a nice burst of citrusy orange that pairs beautifully with the bitterness of the chocolate.

January is for baking.  Not dieting.  (Whole30 I'm looking at you.  In a very kind way.  Maybe not.)  Particularly breads, scones, cookies...winter and carbs are good buddies.  Love handles are an awkward third wheel.  But we get to wear big cozy sweaters and sit by fireplaces if we want to. I love winter. I love baking. I love these scones. Without further ado….

This post may contain affiliate links. If you buy something using these links, Jennyblogs may receive a small commission, at no extra cost to you. This helps to support Jennyblogs. For further information see the privacy policy. Grazie!

Recipe adapted from Joy the Baker


Orange Chocolate Chip Scones

Makes about 12 scones

Ingredients:

  • 3 cups / 360g all-purpose flour

  • 1/4 cup / 50g sugar

  • 4 tsp orange zest

  • 4 1/2 tsp baking powder

  • 1/2 tsp baking soda

  • 1 tsp salt

  • scant 3/4 cup / 150g oil

  • 1 egg

  • 3/4 cup / 180g buttermilk

  • 1 cup / 170g chocolate chips or chunks

Directions:

Oven 425°F / 218°C.  Baking sheet lined with parchment paper.

2019-05-18%2B10.08.01-2.jpg
  1. In a large bowl whisk together flour, sugar, zest, baking powder, baking soda, and salt.  Add oil and mix until texture resembles coarse crumbs.

  2. Whisk together egg and buttermilk.  Add to dry mixture until evenly moistened but being careful not to overmix.  Fold in chocolate chips. 

  3. Turn dough out onto a lightly floured surface and knead for a few rounds, 12-14 times.  Roll or pat out into a rectangle of about 1-inch thickness.  Cut into 12 squares.

  4. Place on prepared baking sheet and bake for 12-15 minutes, until scones no longer look doughy in the center and the bottoms are a light golden brown.  

  5. Best served same day, with tea and coffee and butter and jam, if you wish.   


Jenny's Notes:

  • In place of chocolate chips you can also break up a chocolate bar. Last time I used a chocolate bar with hazelnuts in it for Orange Hazelnut Chocolate Chip Scones and it was scrumptious.

  • Scones are so great, and there are many different varieties and recipes for them.  As long as they aren't too dry, I think they all have merit.  In fact, I have several different scone recipes, this is just one of them.  They are similar, but with slight differences that make each one valuable.

Orange Chocolate Chip Scones
Yield 12 servings
Author
Prep time
25 Min
Cook time
15 Min
Total time
40 Min

Orange Chocolate Chip Scones

Light, moist, orange and chocolate chip scones.
Cook modePrevent screen from turning off

Ingredients

Instructions

  1. Oven 425°F / 218°C. Baking sheet lined with parchment paper.
  2. In a large bowl whisk together flour, sugar, zest, baking powder, baking soda, and salt. Add oil and mix until texture resembles coarse crumbs.
  3. Whisk together egg and buttermilk. Add to dry mixture until evenly moistened but being careful not to overmix. Fold in chocolate chips.
  4. Turn dough out onto a lightly floured surface and knead for a few rounds, 12-14 times. Roll or pat out into a rectangle of about 1-inch thickness. Cut into 12 squares.
  5. Place on prepared baking sheet and bake for 12-15 minutes, until scones no longer look doughy in the center and the bottoms are a light golden brown.
  6. Best served same day, with tea and coffee and butter and jam, if you wish.

Notes

In place of chocolate chips you can also break up a chocolate bar. Last time I used a chocolate bar with hazelnuts in it for Orange Hazelnut Chocolate Chip Scones and it was scrumptious.

Nutrition Facts

Calories

317.34

Fat

17.57 g

Sat. Fat

3.59 g

Carbs

37.50 g

Fiber

1.72 g

Net carbs

35.78 g

Sugar

12.69 g

Protein

4.72 g

Sodium

465.72 mg

Cholesterol

16.10 mg

Nutritional information is approximate and based on 12 servings.

Scones, quick bread, orange, chocolate
bread, breakfast
American, British
Did you make this recipe?
Tag @jennyblogsandbakes on instagram and hashtag it #jennyblogs

Healthy Chocolate Chip Cookie Pie

image.jpg

Last Updated August 5, 2024

Some people are adverse to the word healthy when it comes to desserts.  This recipe today is to help you see you don't need to be one of those people. 

Oh, but what I would give to have a little slice of this pie right now, healthy or not!  Actually, I wouldn't give much.  But that doesn't mean I don't want it.  Yes, Whole30January is still happening.  It has gotten easier in recent days...but you can ask my mom, who is doing it with me, if that's a true statement.  So here is yet another recipe you can make and eat in my stead.  Please, for my sanity.  Just don't tell me how delicious it is.  I like to ask the people around me who are eating delicious nonWhole30food to tell me how disgusting it is.  It almost makes me feel better.  Won't you be glad when Whole30January is over so you won't have to hear any more of my sardonic complaining? 

What do I mean when I say healthy? I mean, aside from the chocolate chips (which have some health benefits in and of themselves aside from the sugar), that you could eat this for breakfast, lunch, or dinner.

This recipe is naturally gluten-free, vegan, dairy-free, and nut free. Just keep in mind you may need to use certified ingredients, i.e. certified GF oats (even though oats are a gluten-free food, they are almost always processed in facilities that also process foods that contain gluten, and there is a high risk of cross-contamination) and check your other ingredients for stowaway unwanted allergens! Chocolate chips, as long as they are semi-sweet or dark chocolate, should not contain any dairy, yet I’ve seen brands that do contain dairy. Reading labels is very important for so many reasons!

Yes ok, on to this nutritious pie that somehow tastes like dessert!

This post may contain affiliate links. If you buy something using these links, Jennyblogs may receive a small commission, at no extra cost to you. This helps to support Jennyblogs. For further information see the privacy policy. Grazie!

Recipe adapted from Chocolate Covered Katie


Healthy Chocolate Chip Cookie Pie

12-16 servings

Ingredients:

  • 2 15oz cans / 500g cooked white beans (navy, great northern, cannellini) or garbanzo beans, drained and rinsed

  • 1 cup / 90g oats or 180g ground flax seeds

  • 1/4 cup / 63g applesauce

  • 3 Tbsp / 42g oil

  • 2 tsp vanilla extract

  • 1/2 tsp baking soda

  • 2 tsp baking powder

  • 1/2 tsp salt

  • 1/2 cup / 100g brown sugar

  • 3 tsp stevia powder

  • 1 cup / 170g chocolate chips or chunks, plus more for sprinkling

Directions:

image.jpg

Oven 350°F / 177°C.  Greased 8 - 9in / 20 - 23cm pie dish.

  1. Combine all ingredients except chocolate chips in a food processor and blend until smooth.  Stir in chocolate chips. 

  2. Scrape dough into prepared pan and sprinkle with additional chocolate chips. 

  3. Bake in oven for 30-35 minutes.  Allow to cool before slicing and serving. 

Jenny's Notes:

  • If you don’t have applesauce, you can use oil instead. That means you would be adding a total of 7 Tbsp / 98g oil, or a scant half cup.

  • I adapted this recipe from Chocolate Covered Katie.  She is very good about giving lots of options if you are gluten-free, vegan, have a nut allergy, etc.  I simply narrowed it down to my favorite combination of ingredients from her options, and preferred amount of sweetener so that it tastes like dessert without giving in to your sugar dragon too much. 

  • Feel free to add more sugar if you feel the need! 

  • If for whatever reason your batter comes out too thick or thin, (didn't drain the beans as much, the applesauce brand you use is soupier, etc.) you can add more oats or flax to thicken, or applesauce, maple syrup, or milk to thin. 

Healthy Chocolate Chip Cookie Pie
Yield 12-16
Author
Prep time
15 Min
Cook time
35 Min
Total time
50 Min

Healthy Chocolate Chip Cookie Pie

A healthy and somehow still delicious cookie pie that is gluten-free, dairy-free, nut-free, and vegan.
Cook modePrevent screen from turning off

Ingredients

Instructions

  1. Oven 350°F / 177°C. Greased 8 - 9in / 20 - 23cm pie dish.
  2. Combine all ingredients except chocolate chips in a food processor and blend until smooth. Stir in chocolate chips.
  3. Scrape dough into prepared pan and sprinkle with additional chocolate chips.
  4. Bake in oven for 30-35 minutes. Allow to cool before slicing and serving.

Notes

If you don’t have applesauce, you can use oil instead. That means you would be adding a total of 7 Tbsp / 98g oil, or a scant half cup. I adapted this recipe from Chocolate Covered Katie. She is very good about giving lots of options if you are gluten-free, vegan, have a nut allergy, etc. I simply narrowed it down to my favorite combination of ingredients from her options, and preferred amount of sweetener so that it tastes like dessert without giving in to your sugar dragon too much. Feel free to add more sugar if you feel the need! If for whatever reason your batter comes out too thick or thin, (didn't drain the beans as much, the applesauce brand you use is soupier, etc.) you can add more oats or flax to thicken, or applesauce, maple syrup, or milk to thin.

Nutrition Facts

Calories

280.72

Fat

10.08 g

Sat. Fat

3.02 g

Carbs

44.03 g

Fiber

7.02 g

Net carbs

37.01 g

Sugar

20.13 g

Protein

7.85 g

Sodium

533.19 mg

Cholesterol

0.00 mg

Nutritional information is approximate. Based on 12 servings.

vegan, dairy-free, gluten-free, nut-free, healthy, cookie pie,
dessert
American
Did you make this recipe?
Tag @jennyblogsandbakes on instagram and hashtag it #jennyblogs
image.jpg

Pumpkin Cinnamon Swirl Bread

Last Updated February 17, 2025

Pumpkin Bread. No, not that wonderful, dense, quick-bread pumpkin bread, but a light, yeasted bread made with PUMPKIN and spiced with nutmeg and ginger!!! And a beautiful cinnamon swirl. It makes a-may-zing toast. I may say that about all my bread recipes. But it’s the truth. And I love toast.

This may look beautiful with an impressive swirl, but it’s not as hard as it may look! It’s like making cinnamon rolls, but even easier, since after the dough gets rolled up, you just place it in a loaf pan instead of slicing.

This post may contain affiliate links. If you buy something using these links, Jennyblogs may receive a small commission, at no extra cost to you. This helps to support Jennyblogs. For further information see the privacy policy. Grazie!

Recipe adapted from Cooking Classy


Pumpkin Cinnamon Swirl Bread

Makes 1 loaf

Ingredients:

For the Bread

  • 2 1/4 tsp / 7g active dry yeast

  • 1/4 cup / 60g warm water, 110°F / 43°F

  • 1/4 cup / 50g + 1/2 tsp sugar

  • 1/4 cup / 60g warm milk, 110°F / 43°C

  • 2 Tbsp / 42g molasses

  • 3/4 tsp salt

  • 1 Tbsp / 14g oil

  • 1/4 tsp nutmeg

  • 1/4 tsp ginger

  • 1 egg

  • 1 cup / 246g pumpkin puree

  • 3 1/2 - 4 cups / 420g - 480g all-purpose flour

For the Cinnamon Swirl

  • 1 1/2 Tbsp / 21g butter, melted

  • 1/3 cup / 67g brown sugar

  • 2 tsp cinnamon

Directions:

Make the Bread

Oven 375°F / 190°C.  1 greased bread pan, approximately 9x5in / 23x13cm.

  1. In the bowl of a stand mixer combine yeast, water, and 1/2 tsp of sugar.  Allow to sit until yeast starts to bubble, about 5 minutes.

  2. Stir in the milk, molasses, remaining sugar, salt, oil, nutmeg, ginger, egg, and pumpkin until combined. 

  3. Switch to a dough hook and slowly add flour.  Continue adding flour until a soft, but not too sticky dough is achieved. 

  4. Turn dough out onto a lightly floured surface and knead for 1-2 minutes. 

  5. Place in an oiled bowl, flip so that both sides are oiled, and cover with a towel. Allow to rise in a warm place until doubled in size, about 1 hour. 

  6. While the bread is rising, whisk together brown sugar and cinnamon in a small bowl.  Set aside.

  7. When the bread is doubled in size, punch down and turn out onto a lightly floured surface.  Roll out into a rectangle, about 22x8in / 56x20cm. 

  8. Spread melted butter over dough, going within 1/2in / 1cm of edge.  Sprinkle cinnamon sugar mixture evenly over butter.

  9. Starting from one of the short sides (the approximate 8in / 20cm) roll dough into a loaf.  Place in prepared loaf pan seam side down. 

  10. Cover with a towel and let rise again until doubled in size, about 45 minutes. 

  11. Bake in preheated oven for 35-40 minutes, or until bread sounds hollow to the tap and an internal temperature reaches about 190°F / 88°C. 

Jenny's Notes:

  • If using instant yeast instead of instant active dry yeast, you can skip step 1. and add all the ingredients from step 1. and 2. together, then proceed to step 3. The reason for this is because active dry yeast is dried and needs to be reactivated in some warm liquid and a bit of sugar before adding to the rest of the ingredients. Instant yeast is ready to be added in without any extra prep.

  • This bread is delicious toasted!  And if you're really a pumpkin fan, might I mention pumpkin butter?

Pumpkin Cinnamon Swirl Bread
Yield 12-14
Author
Prep time
50 Min
Cook time
40 Min
Total time
1 H & 30 M

Pumpkin Cinnamon Swirl Bread

Light, yeasted pumpkin bread spiced with ginger and nutmeg with a beautiful cinnamon swirl.
Cook modePrevent screen from turning off

Ingredients

For the Bread
For the Cinnamon Swirl

Instructions

Make the Bread
  1. Oven 375°F / 190°C. 1 greased bread pan, approximately 9x5in / 23x13cm.
  2. In the bowl of a stand mixer combine yeast, water, and 1/2 tsp of sugar. Allow to sit until yeast starts to bubble, about 5 minutes.
  3. Stir in the milk, molasses, remaining sugar, salt, oil, nutmeg, ginger, egg, and pumpkin until combined.
  4. Switch to a dough hook and slowly add flour. Continue adding flour until a soft, but not too sticky dough is achieved.
  5. Turn dough out onto a lightly floured surface and knead for 1-2 minutes.
  6. Place in an oiled bowl, flip so that both sides are oiled, and cover with a towel. Allow to rise in a warm place until doubled in size, about 1 hour.
  7. While the bread is rising, whisk together brown sugar and cinnamon in a small bowl. Set aside.
  8. When the bread is doubled in size, punch down and turn out onto a lightly floured surface. Roll out into a rectangle, about 22x8in / 56x20cm.
  9. Spread melted butter over dough, going within 1/2in / 1cm of edge. Sprinkle cinnamon sugar mixture evenly over butter.
  10. Starting from one of the short sides (the approximate 8in / 20cm) roll dough into a loaf. Place in prepared loaf pan seam side down.
  11. Cover with a towel and let rise again until doubled in size, about 45 minutes.
  12. Bake in preheated oven for 35-40 minutes, or until bread sounds hollow to the tap and an internal temperature reaches about 190°F / 88°C.

Notes

If using instant yeast instead of instant active dry yeast, you can skip step 1. and add all the ingredients from step 1. and 2. together, then proceed to step 3. The reason for this is because active dry yeast is dried and needs to be reactivated in some warm liquid and a bit of sugar before adding to the rest of the ingredients. Instant yeast is ready to be added in without any extra prep.

Nutrition Facts

Calories

219.22

Fat

3.60 g

Sat. Fat

1.28 g

Carbs

41.35 g

Fiber

2.07 g

Net carbs

39.28 g

Sugar

9.02 g

Protein

5.33 g

Sodium

170.35 mg

Cholesterol

19.66 mg

Nutritional information is approximate and based on 12 servings.

yeasted bread, yeast, pumpkin puree, canned pumpkin, pumpkin bread, cinnamon swirl
bread, breakfast
American
Did you make this recipe?
Tag @jennyblogsandbakes on instagram and hashtag it #jennyblogs
What lurks in the darkness...

What lurks in the darkness...


Cinnamon Streusel Coffee Cake

Last Updated Septemer 6, 2024

IMG_4443.jpg

Last Updated August 4, 2024

Think of a delicately moist coffee cake with a cinnamon swirl and a crunchy, sweet streusel on top. That’s what we’re making today.

If the first thought that comes to your mind when you think of coffee cake is dry-crumbly-use-up-a-week's-worth-of-saliva-in-one-bite-cake, then think again.  No, no, no.  Coffee cake is supposed to be sweet, but not quite as sweet as regular cake, flavorful, and with a beautifully dense crumb.  That's fancy talk for moist.  But for the mental care of some readers who have an avid dislike for that term, I tried to avoid using it.  But I still did to explain myself.  Just can't win. 

Oh, and for some people who may be confused, there is (most often) no coffee involved in the batter.  The final product, however, pairs beautifully with a mug of coffee.  Hence the name.  (Speaking of words we don't like...mug?  No thanks.  It's like your mouth was too lazy to talk - "mmmm" - then made a huge effort and ended up with "ug."  Mmmmmmug.) 

On to more delicious sounding, looking, and tasting things!! 

This post may contain affiliate links. If you buy something using these links, Jennyblogs may receive a small commission, at no extra cost to you. This helps to support Jennyblogs. For further information see the privacy policy. Grazie!


Cinnamon Streusel Coffee Cake

Serves 9-12

Ingredients:

For the Cake

  • 1/2 cup / 112g oil

  • 1/2 cup / 100g sugar

  • 1/4 cup / 50g brown sugar

  • 1 1/4 tsp baking powder

  • 3/4 tsp salt

  • 1 tsp vanilla extract

  • 1 egg

  • 1/2 cup / 122g plain yogurt

  • 1/2 cup / 119g milk

  • 2 cups / 240g all-purpose flour

For the Cinnamon Swirl

  • 1/2 cup / 100g brown sugar

  • 2 1/2 tsp cinnamon

  • 1 tsp unsweetened cocoa powder

For the Streusel

  • 1/3 cup / 67g sugar

  • 1/4 cup / 30g all-purpose flour

  • 1/4 cup / 23g rolled oats

  • 1 tsp cinnamon

  • 2 Tbsp / 28g butter, melted

Directions:

Oven 350°F / 177°C.  Greased 8x8in / 20x20cm square baking pan, or 8in / 20cm round cake pan.

Make the Cake

  1. In the bowl of a stand mixer, beat oil, sugars, baking powder, salt, and vanilla until well combined.  Beat in egg. 

  2. In a separate small bowl mix together yogurt and milk. 

  3. Add a third of the flour to the oil mixture, mixing until almost combined.  Add half of the yogurt mixture.  Continue adding flour and yogurt mixture to oil mixture until everything is just combined. 

  4. Pour half of the batter into the prepared pan, spreading all the way to edges; set other half aside. 

Make the Cinnamon Swirl

  1. In a small bowl combine brown sugar, cinnamon, and cocoa powder. 

  2. Sprinkle evenly over batter in pan. 

  3. Pour remaining batter over cinnamon filling and use a spatula to gently spread to edges.

Make the Streusel

  1. In another small bowl, combine sugar, flour, oats, and cinnamon.  Add the melted butter and mix until crumbles form. 

  2. Evenly distribute crumble over batter in pan. 

  3. Bake for 40-45 minutes or until toothpick inserted in center comes out clean. 

Jenny's Notes:

  • Watch that bake time.  Toothpicks are your best friend.  I was testing this recipe using my Italian oven that didn't like to bake things on the bottom, so you may need less time.

  • REALLY like coffee cake?  Double this recipe and put in a 9x13 inch pan or two cake pans.  You can always freeze one pan!

  • Don't have plain yogurt on hand? You can also use sweetened yogurt and reduce sugar by 1/4 cup / 50g, or try Greek yogurt, fresh ricotta, sour cream, or mascarpone.  The dairy options are endless!!!!  I really liked fresh ricotta in this recipe. 

Cinnamon Streusel Coffee Cake
Yield 9-12 servings
Author
Prep time
30 Min
Cook time
45 Min
Total time
1 H & 15 M

Cinnamon Streusel Coffee Cake

Delicate, moist coffee cake with a cinnamon swirl and streusel to top it all off.
Cook modePrevent screen from turning off

Ingredients

For the Cake
For the Cinnamon Swirl
For the Streusel

Instructions

Make the Cake
  1. Oven 350°F / 177°C. Greased 8x8in / 20x20cm square baking pan, or 8in / 20cm round cake pan.
  2. In the bowl of a stand mixer, beat oil, sugars, baking powder, salt, and vanilla until well combined. Beat in egg.
  3. In a separate small bowl mix together yogurt and milk.
  4. Add a third of the flour to the oil mixture, mixing until almost combined. Add half of the yogurt mixture. Continue adding flour and yogurt mixture to oil mixture until everything is just combined.
  5. Pour half of the batter into the prepared pan, spreading all the way to edges; set other half aside.
Make the Cinnamon Swirl
  1. In a small bowl combine brown sugar, cinnamon, and cocoa powder.
  2. Sprinkle evenly over batter in pan.
  3. Pour remaining batter over cinnamon filling and use a spatula to gently spread to edges.
Make the Streusel
  1. In another small bowl, combine sugar, flour, oats, and cinnamon. Add the melted butter and mix until crumbles form.
  2. Evenly distribute crumble over batter in pan.
  3. Bake for 40-45 minutes or until toothpick inserted in center comes out clean.

Notes

  • Watch that bake time. Toothpicks are your best friend. I was testing this recipe using my Italian oven that didn't like to bake things on the bottom, so you may need less time.
  • REALLY like coffee cake? Double this recipe and put in a 9x13 inch pan or two cake pans. You can always freeze one pan!
  • Don't have plain yogurt on hand? You can also use sweetened yogurt and reduce sugar by 1/4 cup / 50g, or try Greek yogurt, fresh ricotta, sour cream, or mascarpone. The dairy options are endless!!!! I really liked fresh ricotta in this recipe.

Nutrition Facts

Calories

402.38

Fat

16.42 g

Sat. Fat

2.95 g

Carbs

59.80 g

Fiber

1.55 g

Net carbs

58.24 g

Sugar

35.85 g

Protein

5.08 g

Cholesterol

29.23 mg

Sodium

311.45 mg

Nutritional information is approximate and based on 9 servings.

coffee cake, cinnamon swirl, brunch, streusel topping
breakfast, cake, dessert
American
Did you make this recipe?
Tag @jennyblogsandbakes on instagram and hashtag it #jennyblogs

Homemade Snickers Bars

Last Updated October 25, 2024

Let’s make Snickers! 

If you just thought, "Why would I want to make Snickers when I can just buy them and save a whole lot of time?" I'm actually with you on that one. While I (and my famiy) are known for making just about anything homemade, I'm not normally the first one to jump on making things homemade that have already been perfected. Homemade Reese's?  Samoas? Oreos? Nah, I'll let Nabisco and the Girl Scout Foundation of America do that. I did make homemade Oreos once, but after a couple hours of work and ending up with less cookies than a package of Oreos that didn't even taste like an Oreo, I decided to be more discerning with such recipes in the future. They tasted good...but they were saving neither time nor money. The exception is, if you can make something that tastes like the original or better, even if it takes longer, because homemade means less chemicals and preservatives! Yay. 

That's where these Snickers come in. Delicious layers of milk chocolate, homemade nougat with marshmallow fluff, salty peanuts, and that decadent caramel layer.

And you know what? They’re not even as hard to make as you might think.

You can melt some chocolate in a pan? Yes you can. Boil a few ingredients together for a few minutes, without even needing a candy thermometer? Sure. Chop up some peanuts? Yep, just watch your fingers! And for the caramel layer, you have your pick between making a homemade caramel (also linked in the recipe), or simply unwrapping a bag of caramel squares and melting them with a bit of heavy cream. Then melt more chocolate, at which you will already be a pro. There you have it, homemade, can’t-keep-your-hands-off-of-them, Snickers bars.

This post may contain affiliate links. If you make a purchase using these links, Jennyblogs may receive a small commission, at no extra cost to you. This helps to support Jennyblogs. Where possible, links are prioritized to mall businesses and ethically and responsibly made items. For further information see the privacy policy. Grazie!

Recipe adapted from Brown Eyed Baker


Homemade Snickers Bars

Makes 42-48 small bars

Ingredients:

For the Top and Bottom Chocolate Layer

  • 2 1/2 cups / 425g milk chocolate chips (about 1 1/4 bags or 15oz)

For the Nougat Layer

  • 1/4 cup / 56g butter

  • 3/4 cup / 150g sugar

  • 1/4 cup / 59g milk

  • 1 1/2 cups / 128g marshmallow fluff

  • 1/4 cup / 65g creamy peanut butter

  • 1 tsp vanilla extract

  • 1 1/2 cups / 233g salted peanuts, roughly chopped

For the Caramel Layer

  • 1/2 batch caramel sauce, recipe found here

or

  • 14 oz / 396g caramel squares, unwrapped

  • 1/4 cup / 59g heavy whipping cream

Directions:

Lightly grease a 9x13in / 23x33cm pan and line with parchment paper.  Grease the parchment paper. 

Make the Bottom Chocolate Layer

  1. Place 1 1/4 cups / 213g of the milk chocolate chips in a small saucepan over low heat, stirring until melted.  Spread evenly in the bottom of the 9x13 pan.  Place in fridge or freezer to set until next layer is ready.

Make the Nougat Layer

  1. Melt butter in a medium saucepan over medium-low heat.  Add sugar and milk, stirring until dissolved.  Bring to a boil.  Reduce heat to low and simmer for 5 minutes, stirring occasionally. 

  2. Remove from heat and stir in marshmallow fluff, peanut butter, and vanilla until smooth.  Fold in peanuts.  Spread evenly over cooled chocolate in pan and return to fridge or freezer. 

Make the Caramel Layer

  1. Make a half batch of the caramel sauce as directed. 

or

  1. Melt caramel squares with heavy cream in a medium saucepan over low heat, stirring occasionally, until melted and smooth.  Once melted, cook for 4 more minutes, stirring frequently. 

  2. Pour caramel over cooled nougat layer and return to fridge or freezer.

Make the Top Chocolate Layer

  1. Melt the remaining 1 1/4 cups / 212g of milk chocolate chips in a small saucepan over low heat, stirring often.  Spread evenly over cooled caramel layer. 

  2. Place back in fridge or freezer until completely set, 10-30 minutes.

  3. Keep in pan or remove using parchment paper; slice and serve.

  4. Can be stored at room temperature for up to a week, two weeks in the fridge, or three months in the freezer. 

Jenny's Notes:

  • Really like peanut butter?  You can add 1/4 cup / 65g smooth peanut butter to each the top and bottom chocolate layer after melting the chocolate.  Or, use part peanut butter chips instead of all milk chocolate chips.  

  • Don't need a whole 9x13 pan of Snickers?  You can always halve this recipe and put everything in an 8x8 pan.  But since you're putting the time in, I would recommend making the whole 9x13 pan and simply freezing whatever you won't eat right away.   

  • The first greasing of the pan before you put in the parchment paper may seem redundant, but it helps the paper to stick to the pan and not move all over while you are trying to spread chocolate and such.  Ironic, though, isn't it?  Usually you grease something to help it move, not keep it in place.

Snickers Bars
Yield 42-48 small bars
Author
Prep time
30 Min
Cook time
45 Min
Total time
1 H & 15 M

Snickers Bars

Possibly better than the real thing, these homemade Snickers Bars are made with glorious layers of caramel, marshmallow-y nougat, and salty peanuts sandwiched between two layers of milk chocolate.
Cook modePrevent screen from turning off

Ingredients

For the Top and Bottom Chocolate Layer
For the Nougat Layer
For the Caramel Layer

Instructions

Make the Bottom Chocolate Layer
  1. Lightly grease a 9x13in / 23x33cm pan and line with parchment paper. Grease the parchment paper.
  2. Place 1 1/4 cups / 213g of the milk chocolate chips in a small saucepan over low heat, stirring until melted. Spread evenly in the bottom of the 9x13 pan. Place in fridge or freezer to set until next layer is ready.
Make the Nougat Layer
  1. Melt butter in a medium saucepan over medium-low heat. Add sugar and milk, stirring until dissolved. Bring to a boil. Reduce heat to low and simmer for 5 minutes, stirring occasionally.
  2. Remove from heat and stir in marshmallow fluff, peanut butter, and vanilla until smooth. Fold in peanuts. Spread evenly over cooled chocolate in pan and return to fridge or freezer.
Make the Caramel Layer
  1. Combine sugar, corn syrup, and water in a medium sauce over high heat. Allow to cook without stirring until the mixture turns a beautiful amber color. (If it turns an ugly amber color, I can't help ya. Just kidding. Proceed.) This could take anywhere from 10-20 minutes, depending on how hot your stove top cooks. Keep a watchful eye on it, as it goes fast from light golden, perfectly amber, to burnt.
  2. Remove from heat and carefully pour in cream, a little at a time, as it will bubble up and spatter at you. Stir until all the cream is mixed in.
  3. Attach a candy thermometer to the pan and return to the heat. Cook until mixture reaches 238 degrees Fahrenheit, about 2-5 minutes.
  4. Remove from heat and stir in salt. Stir in butter, one tablespoon at a time, until completely smooth. Transfer to a bowl and allow to cool completely before using. Spread over cooled nougat layer and return to fridge or freezer.
  5. OR
  6. Melt caramel squares with heavy cream in a medium saucepan over low heat, stirring occasionally, until melted and smooth. Once melted, cook for 4 more minutes, stirring frequently.
  7. Pour caramel over cooled nougat layer and return to fridge or freezer.
Make the Top Chocolate Layer
  1. Melt the remaining 1 1/4 cups / 212g of milk chocolate chips in a small saucepan over low heat, stirring often. Spread evenly over cooled caramel layer.
  2. Place back in fridge or freezer until completely set, 10-30 minutes.
  3. Keep in pan or remove using parchment paper; slice and serve.
  4. Can be stored at room temperature for up to a week, two weeks in the fridge, or three months in the freezer.

Notes

Really like peanut butter? You can add 1/4 cup / 65g smooth peanut butter to each the top and bottom chocolate layer after melting the chocolate. Or, use part peanut butter chips instead of all milk chocolate chips. Don't need a whole 9x13 pan of Snickers? You can always halve this recipe and put everything in an 8x8 pan. But since you're putting the time in, I would recommend making the whole 9x13 pan and simply freezing whatever you won't eat right away. The first greasing of the pan before you put in the parchment paper may seem redundant, but it helps the paper to stick to the pan and not move all over while you are trying to spread chocolate and such. Ironic, though, isn't it? Usually you grease something to help it move, not keep it in place.

Nutrition Facts

Calories

169.11

Fat

9.76 g

Sat. Fat

4.49 g

Carbs

18.93 g

Fiber

0.90 g

Net carbs

18.03 g

Sugar

16.15 g

Protein

2.67 g

Sodium

57.84 mg

Cholesterol

11.41 mg

Nutritional information is approximate. Based on 42 servings using the homemade caramel recipe.

homemade Snickers bars, nougat, homemade caramel, peanuts, Snickers
dessert, cookies and bars
American
Did you make this recipe?
Tag @jennyblogsandbakes on instagram and hashtag it #jennyblogs

Banana Chocolate Chip Cake with Peanut Butter Frosting

Last Updated August 4, 2024

It's almost Christmas!!!  The most wonderful time of the year, filled with family, friends, delicious food, and cheery music.  Wasn't that a wonderfully cliché sentence?  Yes, but we hope it's true.  I am fortunate enough to say that it is for me.  I love all my family, I love Christmas music (I can't always vouch for it all being "good" music, but it lifts your spirit and you can mindlessly sing along while wearing a Santa hat and elf socks without anyone thinking twice), and we have an abundance of delicious food.  So much food. 

What is one to do when they have been indundated with rich holiday food?  Take a break?  No fun.  Stand by the vegetable tray all night?  Nah, I hear the conversation can get a little heated with those peppers.  Chew gum?  No, you need a compromise.  Something that will satisfy, but not put you over like your great-aunt's cousin-once-removed on your dad's side triple chocolate cake with chocolate buttercream, ganache, whipped cream, sprinkles, drizzled with caramel and bonbons on top.  Something more like a fruit based cake.  Banana.  With chocolate chips, because it is Christmas, and peanut butter because that makes the whole thing.  The bow on top of the present.  The icing on the cake...so very literally. Plus protein. It’s basically a health food, you guys.

This post may contain affiliate links. If you buy something using these links, Jennyblogs may receive a small commission, at no extra cost to you. This helps to support Jennyblogs. For further information see the privacy policy. Grazie!

Recipe adapted from Handle the Heat


Banana Chocolate Chip Cake with Peanut Butter Frosting

Makes 12-16 servings

Ingredients:

For the Banana Chocolate Chip Cake

  • 2 1/2 cups / 300g all-purpose flour

  • 1 1/2 tsp baking powder

  • 3/4 baking soda

  • 1 tsp cinnamon

  • 1/2 tsp salt

  • 3/4 cup / 168g oil

  • 3/4 cup / 150g sugar

  • 1/2 cup / 100g brown sugar

  • 2 eggs

  • 1 tsp vanilla extract

  • 1/2 cup / 123g plain yogurt or sour cream

  • 4 overripe bananas, mashed, to get roughly 1 1/3 cups / 400g mashed banana

  • 1 cup / 170g mini chocolate chips

For the Peanut Butter Frosting

  • 1 cup / 226g unsalted butter (2 sticks, 8 oz), room temperature

  • 1 cup / 260g creamy peanut butter

  • 1 tsp vanilla extract

  • pinch of salt

  • 2 - 2 1/2 cups / 250-313g powdered sugar

Directions:

Oven preheated to 350°F / 177°C.  Grease and flour two 8 or 9in / 20 or 23cm round cake pans.

Make the Banana Chocolate Chip Cake

  1. In a medium bowl, whisk together flour, baking powder, baking soda, cinnamon, and salt.  Set aside.

  2. In the bowl of a stand mixer, beat together oil and sugars.  Add vanilla and eggs; beat well.

  3. Add 1/3 of the flour mixture to the egg mixture.  Mix in yogurt.  Add another third of flour mixture.  Add bananas.  Add final third of flour mixture.  Fold in chocolate chips.

  4. Pour and divide batter evenly between the two prepared pans. 

  5. Bake for 35-40 minutes, or until toothpick inserted in the center comes out clean.   Allow to cool for about 10 minutes in the pans before flipping out onto cooling racks to cool completely. 

Make the Peanut Butter Frosting

  1. In the bowl of a stand mixer, beat butter and peanut butter together until light and fluffy.  Add vanilla and salt.  Add 2 cups of powdered sugar; add more as needed until frosting is thick enough to spread. 

Assembly

  1. Center one cake layer upside down on a cake stand or plate.  Frost this layer within 1/4 inch of edge of cake. 

  2. Place second layer on top, and frost cake with remaining frosting.  Sprinkle with additional chocolate chips, if desired. 

Jenny's Notes:

  • I prefer to use organic yogurt instead of sour cream in recipes simply because it's healthier.  I don’t always have plain yogurt on hand, so in those cases I use vanilla yogurt and reduce the sugar in the recipe by 1/3-1/2 cup, depending on the amount of yogurt called for.  Feel free to use whatever you have on hand! 

Banana Chocolate Chip Cake with Peanut Butter Frosting
Yield 12-16
Author
Prep time
1 Hour
Cook time
40 Min
Total time
1 H & 40 M

Banana Chocolate Chip Cake with Peanut Butter Frosting

A tender banana cake speckled with chocolate chips topped with a creamy peanut butter frosting.
Cook modePrevent screen from turning off

Ingredients

For the Banana Chocolate Chip Cake
For the Peanut Butter Frosting

Instructions

Make the Banana Chocolate Chip Cake
  1. Oven preheated to 350°F / 177°C. Grease and flour two 8 or 9in / 20 or 23cm round cake pans.
  2. In a medium bowl, whisk together flour, baking powder, baking soda, cinnamon, and salt. Set aside.
  3. In the bowl of a stand mixer, beat together oil and sugars. Add vanilla and eggs; beat well.
  4. Add 1/3 of the flour mixture to the egg mixture. Mix in yogurt. Add another third of flour mixture. Add bananas. Add final third of flour mixture. Fold in chocolate chips.
  5. Pour and divide batter evenly between the two prepared pans.
  6. Bake for 35-40 minutes, or until toothpick inserted in the center comes out clean. Allow to cool for about 10 minutes in the pans before flipping out onto cooling racks to cool completely.
Make the Peanut Butter Frosting
  1. In the bowl of a stand mixer, beat butter and peanut butter together until light and fluffy. Add vanilla and salt. Add 2 cups of powdered sugar; add more as needed until frosting is thick enough to spread.
Assembly
  1. Center one cake layer upside down on a cake stand or plate. Frost this layer within 1/4 inch of edge of cake.
  2. Place second layer on top, and frost cake with remaining frosting. Sprinkle with additional chocolate chips, if desired.

Notes

I prefer to use organic yogurt instead of sour cream in recipes simply because it's healthier. I don’t always have plain yogurt on hand, so in those cases I use vanilla yogurt and reduce the sugar in the recipe by 1/3-1/2 cup, depending on the amount of yogurt called for. Feel free to use whatever you have on hand!

Nutrition Facts

Calories

785.39

Fat

45.52 g

Sat. Fat

15.55 g

Carbs

88.21 g

Fiber

3.37 g

Net carbs

84.84 g

Sugar

59.78 g

Protein

10.55 g

Sodium

386.82 mg

Cholesterol

75.36 mg

Nutritional information is approximate. Based on 12 servings using the full 2 1/2 cups of powdered sugar for the frosting.

Banana, cake, banana chocolate chip, chocolate chip cake, peanut butter, peanut butter frosting, banana cake, ripe banana recipe
Dessert, Cake
American
Did you make this recipe?
Tag @jennyblogsandbakes on instagram and hashtag it #jennyblogs

Peanut Butter Rice Krispie Treats

Last Updated July 20, 2024

What's peanut buttery, sweet, chewy, crispy, (aren't you so glad I didn't just spell that "krispy"?) easy to make, and makes you want more? 

This. Peanut Butter Rice Krispie Treats DELUXE.  Or....Reese's Loaf, as my brother affectionately called it the first time I made it. 

As if Rice Krispie Treats weren't delicious enough, we added peanut butter, Reese's, and mini marshmallows. Oh yes. OH YES.

This post may contain affiliate links. If you buy something using these links, Jennyblogs may receive a small commission, at no extra cost to you. This helps to support Jennyblogs. For further information see the privacy policy. Grazie!

Recipe adapted from Shugary Sweets


Peanut Butter Rice Krispie Treats

Makes about 16 squares, but hey, that all depends on who's slicing, doesn't it?

Ingredients:

  • 1/4 cup / 56g butter

  • 10 oz / 283g bag of marshmallows, regular or mini

  • 1/2 cup / 130g peanut butter

  • 5 cups / 140g Rice Krispie cereal

  • 1 1/4 cups / 70g mini marshmallows

  • 1 8 oz / 227g bag mini Reese's, miniatures, or regular, chopped

Directions:

  1. Prepare an 8 or 9in / 20 or 23cm square baking dish by greasing or lining with parchment paper.

  2. In a large pot over medium-low heat, melt butter and marshmallows.  Stir until melted and smooth. 

  3. Working quickly, remove from heat and stir in peanut butter, then Rice Krispies.  Gently fold in mini marshmallows. 

  4. Using a well greased hand or spatula, scrape Krispies out of the pan and into the baking dish, gently pressing into an even layer. 

  5. Top with mini Reese's and (try to) allow to set before slicing. 

Jenny's Notes:

  • Optional: For an even loafier loaf of Peanut Butter Rice Krispie Treats, melt a bag (about 10 oz) of peanut butter chips and spread on top of the Rice Krispies, right before adding the Mini Reese's on top.

  • Like super chewy Rice Krispie treats?  Increase the amount of marshmallows you use!

Peanut Butter Rice Krispie Treats
Yield 16 pieces
Author
Prep time
10 Min
Cook time
5 Min
Total time
15 Min

Peanut Butter Rice Krispie Treats

Deluxe peanut butter Rice Krispies treats amped up with Reese's peanut butter cups and chewy chunks of marshmallow.
Cook modePrevent screen from turning off

Ingredients

Instructions

  1. Prepare an 8 or 9 inch / 20 or 23 centimeter square baking dish by greasing or lining with parchment paper.
  2. In a large pot over medium-low heat, melt butter and marshmallows. Stir until melted and smooth.
  3. Working quickly, remove from heat and stir in peanut butter, then Rice Krispies. Gently fold in mini marshmallows.
  4. Using a well greased hand or spatula, carefully scrape Krispies out of pan and into baking dish, gently pressing into an even layer.
  5. Top with mini Reese's and (try to) allow to set before slicing.

Notes

Optional: For an even loafier loaf of Peanut Butter Rice Krispie Treats, melt a bag (about 10 oz) of peanut butter chips and spread on top of the Rice Krispies, right before adding the Mini Reese's on top.


Like super chewy Rice Krispie treats? Increase the amount of marshmallows you use!

Nutrition Facts

Calories

249.37

Fat

11.42 g

Sat. Fat

4.14 g

Carbs

35.18 g

Fiber

1.03 g

Net carbs

34.15 g

Sugar

20.78 g

Protein

4.25 g

Sodium

175.55 mg

Cholesterol

8.38 mg

Nutritional information is approximate. Based on 16 servings.

Rice Krispies, Rice Krispie Treats, peanut butter, deluxe rice krispies, Reeses, Reeses rice krispie treats, Fluffernutter rice krispie treats, peanut butter bars, marshmallows, peanut butter desserts
dessert, bars
American
Did you make this recipe?
Tag @jennyblogsandbakes on instagram and hashtag it #jennyblogs

November Newsletter: Homecoming!

Photo credit to Practical

Photo credit to Practical

Happy Thanksgiving!

Mosaico Church, my church family in Italy. Celebrating the 3rd Anniversary!

Mosaico Church, my church family in Italy. Celebrating the 3rd Anniversary!

I hope you all had a wonderful Thanksgiving, good time with family, and lots of delicious food to eat.  Christmas music has now been unleashed full force, and I hope we are all able to head into this season with joy in our hearts, thankfulness, and eager expectation to again remember the birth of our King, Christ Jesus.  

Gallery 4 Italy Ceasing Operations

Russian Academy of Art Bible study we host in our home!

Russian Academy of Art Bible study we host in our home!

In early November we received the news that the founder of Gallery 4 has chosen to suspend operations in Italy.  With the extreme difficulty in finding a space for the gallery we knew something needed to be done, but the news still came as a shock.  Although it is easy to look at the situation with disappointment and sadness, we trust that the Lord will have used our time here for the good of His kingdom and advancement of the Gospel, and will continue to use it in ways we may never fully realize.  Even though the original vision was not fully accomplished, we were still able to minister to people, host Bible studies, give out Bibles, and talk about Jesus with many.

I will forever see art in a new way thanks to art classes and all my cool artist friends.

I will forever see art in a new way thanks to art classes and all my cool artist friends.


Coming Home

In light of these recent events, I will be coming home from the mission field on December 5.  It truly grieves me to leave Florence, it is a magical city and I will greatly miss the friends and people I met here.  However, I am overjoyed to be able to be home for Christmas with family, friends, and church family, as I was not originally expecting to be able to do so.


Firenze is extra magical around Christmas time

Firenze is extra magical around Christmas time

Coming Weeks

The next few weeks will be spent getting my affairs in order, spending time with friends, and getting ready to come home.  I am so thankful for the time I was here and I would like to thank each of you from the bottom of my heart for supporting, praying, and encouraging me in this venture.  To God be the glory!

Prayer Requests:

  • Praise! For all the friends here that makes it so hard to leave. Although it is sad, I consider it a very great thing indeed to have such friends that makes saying goodbye so hard.

  • Praise! Being able to be home with family, friends, and church family for Christmas.

  • Prayer: For my remaining time here to be meaningful and for the glory of God.

  • Prayer: For the people here, whether friends or strangers, to continue to be exposed to the Gospel.

  • Prayer: For a smooth transition, closure, and safe trip home.

Grazie a tutti!!!


Caramel Toffee Cheesecake

DSC_0185.jpg

Last Updated: August 4, 2024

Happy Thanksgiving!  I am thankful for so many things.  One of those things is cheesecake. 

Especially a caramel cheesecake with a layer of chocolate between the crust and cheesecake, toffee bits, whipped cream, and more caramel drizzled on top. Yep, especially that.

I love the graham cracker crust because it stays together so well! The secret is to use toffee bits in the crust. Toffee is sticky and while the crust is baking all the little pieces melt a bit, fusing the graham cracker crust together into a beautiful, slightly crunchy mass. No crumbling graham cracker crusts today! I mean, I even pressed the crust all the way up the sides of the pan and it stayed even after taking off the spring form pan. Success.

You know how they say actions speak louder than words?  Well, instead of talking about how much I love cheesecake and how great this crust is, I'm going to share the recipe with you...that's an action, right?  Then in turn you can make it, and then you acted on your thankfulness too.  This is such a great plan, let's go! 

This post may contain affiliate links. If you buy something using these links, Jennyblogs may receive a small commission, at no extra cost to you. This helps to support Jennyblogs. For further information see the privacy policy. Grazie!

Recipe adapted from Yammie’s Noshery


Caramel Toffee Cheesecake

Serves about 16-20

Ingredients:

For the Toffee Crust

  • 3 cups / 255g crushed graham crackers, about 2 packages or 18 sheets

  • 1/2 cup / 85g toffee bits, plain or with chocolate (Heath Bits O Brickle)

  • 1/2 cup / 100g brown sugar

  • 1 cup / 226g butter, melted

  • 6 oz / 170g bitter-sweet chocolate, chopped

For the Filling

  • 3 8oz packages / 675g cream cheese, room temperature

  • 1 cup / 245g sour cream

  • 1 cup / 200g sugar

  • 1 Tbsp / 15g vanilla extract

  • 1/4 cup / 75g caramel sauce (To make homemade caramel, halve this recipe here)

  • 4 eggs, lightly beaten

For the Topping

  • 1 cup / 237g heavy whipping cream

  • 2 Tbsp / 40g maple syrup or sugar

  • 1/4 cup / 75g caramel sauce

  • 1/4 cup / 43g toffee bits

Directions:

Oven 300°F / 149°C.  10in / 26cm spring-form pan lined with parchment paper, bottom and sides.

Make the Toffee Crust

  1. Combine graham crackers, toffee, brown sugar, and butter.  Press firmly into the prepared spring-form pan, pressing all the way up the sides.  Sprinkle chopped chocolate evenly over bottom of crust. 

  2. Bake for 5 minutes or until chocolate is melted.  Remove from oven and spread chocolate evenly with a spatula.  Place crust in freezer while you make the filling.

Make the Filling

  1. In the bowl of a stand mixer, beat cream cheese, sour cream, and sugar on low-medium speed for a few minutes.  Add vanilla and caramel.  Beat in the eggs, one at a time, until just combined. 

  2. Pour over crust and bake for about 1 hour and 20 minutes, or until edges are set and center is still a bit jiggly when lightly shaken. 

  3. Turn off oven and crack open the door, leaving cheesecake to set for another 30 minutes.  Remove from oven and allow to cool for a further 30 minutes.

  4. Refrigerate until completely chilled, about 6 hours or overnight.

Make the Topping

  1. When cheesecake is ready, beat whipping cream in the bowl of a stand mixer until soft peaks form.  Add maple syrup and beat until stiff peaks form. 

  2. Pipe whipped cream onto cheesecake, or if you don't have piping bags or tips, simply spread it with a spatula. 

  3. Warm caramel in a small saucepan and drizzle all over the cheesecake with a spoon or spatula.  Sprinkle with toffee and chill until ready to serve.

Jenny's Notes:

  • Cheesecakes require a decent amount of beating, however, avoid beating on high speeds as you don't want to incorporate too much air into the batter. 

  • You can also use an 8in / 20cm spring-form pan + a 6in / 15cm spring-form pan to make this recipe. Or, instead of the 6 incher just stick any extra crust in the bottom of a square baking dish, top with lefotver filling and you have cheesecake bars! I have done the second option before. :) The bars will bake for less time than a spring-form pan.

Caramel Toffee Cheesecake
Yield 16-20 servings
Author
Prep time
1 Hour
Cook time
1 H & 55 M
Total time
2 H & 55 M

Caramel Toffee Cheesecake

Toffee graham gracker crust, a layer of dark chocolate, caramel cheesecake filling, and whipped cream, caramel, and more toffee bits on top.
Cook modePrevent screen from turning off

Ingredients

For the Toffee Crust
For the Filling
For the Topping

Instructions

  1. Oven 300°F / 149°C. 10in / 26cm spring-form pan lined with parchment paper, bottom and sides.
Make the Toffee Crust
  1. Combine graham crackers, toffee, brown sugar, and butter. Press firmly into the prepared spring-form pan, pressing all the way up the sides. Sprinkle chopped chocolate evenly over bottom of crust.
  2. Bake for 5 minutes or until chocolate is melted. Remove from oven and spread chocolate evenly with a spatula. Place crust in freezer while you make the filling.
Make the Filling
  1. In the bowl of a stand mixer, beat cream cheese, sour cream, and sugar on low-medium speed for a few minutes. Add vanilla and caramel. Beat in the eggs, one at a time, until just combined.
  2. Pour over crust and bake for about 1 hour and 20 minutes, or until edges are set and center is still a bit jiggly when lightly shaken.
  3. Turn off oven and crack open the door, leaving cheesecake to set for another 30 minutes. Remove from oven and allow to cool for a further 30 minutes.
  4. Refrigerate until completely chilled, about 6 hours or overnight.
Make the Topping
  1. When cheesecake is ready, beat whipping cream in the bowl of a stand mixer until soft peaks form. Add maple syrup and beat until stiff peaks form.
  2. Pipe whipped cream onto cheesecake, or if you don't have piping bags or tips, simply spread it with a spatula.
  3. Warm caramel in a small saucepan and drizzle all over the cheesecake with a spoon or spatula. Sprinkle with toffee and chill until ready to serve.

Notes

Cheesecakes require a decent amount of beating, however, avoid beating on high speeds as you don't want to incorporate too much air into the batter. You can also use an 8in / 20cm spring-form pan + a 6in / 15cm spring-form pan to make this recipe. Or, instead of the 6 incher just stick any extra crust in the bottom of a square baking dish, top with lefotver filling and you have cheesecake bars! I have done the second option before. :) The bars will bake for less time than a spring-form pan.

Nutrition Facts

Calories

619.24

Fat

42.95 g

Sat. Fat

25.01 g

Carbs

53.18 g

Fiber

0.90 g

Net carbs

52.27 g

Sugar

42.62 g

Protein

7.17 g

Sodium

376.36 mg

Cholesterol

156.01 mg

Nutritional information is approximate and based on 16 servings.

caramel, toffee crunch, Heath, Bits O Brickle, cheesecake, homemade caramel, chocolate, graham cracker crust
dessert
American
Did you make this recipe?
Tag @jennyblogsandbakes on instagram and hashtag it #jennyblogs

Pumpkin Coconut Energy Bars

One week until Thanksgiving!  'Tis the season for baking too much, cooking too much, and eating too much. 

Sometimes you don't want to wait until Thanksgiving for a slice of pumpkin pie, yet you don't want to ruin it, or sometimes you just want something of a lighter nature that you can feel good about eating.  The upcoming season of delicious foods and feasting does not mean that you should be eating plain lettuce, carrot sticks, and rutabaga all day to "save up" for the holidays.  In fact, if it's not delicious, then you shouldn't eat it.  I believe food is a good gift and should always be enjoyed, and never suffered through.  If it's not delicious, then something isn't being done right.  Nutritious can be delicious. But delicious does not always have to be nutritious.  Everything in moderation.

Now for something that falls into the three most important categories: Delicious, Nutritious, AND Festive. 

Namely, Pumpkin Coconut Energy Bars. They’re pumpkin spiced, vegan, dairy-free, and gluten-free (if you use gluten-free oats), so most everyone can enjoy them! They’re sweetened with dates which also makes them refined sugar free.

Eat them as dessert, snack, after-workout boost, or for on the go. By nature they’re a bit soft, so if you prefer them harder keep them in the fridge or freezer until you need a little nutritious pick-me-up.

This post may contain affiliate links. If you make a purchase using these links, Jennyblogs may receive a small commission, at no extra cost to you. This helps to support Jennyblogs. For further information see the privacy policy. Grazie!

Recipe adapted from Nutritionist in the Kitch


Pumpkin Coconut Energy Bars

Makes 8-10 Bars

Ingredients:

  • 1 cup / 160g pitted dates

  • 1/2 cup / 75g nuts of choice, raw and unsalted

  • 2 Tbsp / 24g pumpkin seeds or chia seeds

  • 2 Tbsp / 14g unsweetened shredded or flaked coconut

  • 1/4 cup / 23g oats

  • 1 tsp cinnamon

  • 1/4 tsp nutmeg

  • 1/4 tsp cloves

  • 1/4 tsp ginger

  • 1/4 cup / 60g pumpkin puree

Directions:

  1. Combine all ingredients in a food processor.  Blend for several minutes, until slightly chunky or completely smooth, as you wish.

  2. Line an 8x8in / 20x20cm square baking dish with parchment paper.  Lightly sprinkle with oats or coconut to prevent mixture from sticking too much.

  3. Scoop mixture into dish and carefully spread to the edges.  Use lightly oiled or wet hands to help this process.  Sprinkle with more coconut, pumpkin seeds, or both.

  4. Place in the freezer for a couple hours, then slice into bars.  Store in at room temperature, in the fridge, or in the freezer, depending on how firm you want the bars to be. 

Jenny's Notes:

  • I used a combination of almonds, pecans, hazelnuts, cashews, and Brazil nuts.  Why use only 1 or 2 varieties of nuts when you can use 5?? Haha

Pumpkin Coconut Energy Bars
Yield 8-10 servings
Author
Prep time
15 Min
Total time
15 Min

Pumpkin Coconut Energy Bars

No-bake pumpkin bars with plenty of fall spice, coconut, and pumpkin seeds. Vegan, gluten-free if using gluten-free oats, refined-sugar free, and dairy-free.
Cook modePrevent screen from turning off

Ingredients

Instructions

  1. Combine all ingredients in a food processor. Blend for several minutes, until slightly chunky or completely smooth, as you wish.
  2. Line an 8x8in / 20x20cm square baking dish with parchment paper. Lightly sprinkle with oats or coconut to prevent mixture from sticking too much.
  3. Scoop mixture into dish and carefully spread to the edges. Use lightly oiled or wet hands to help this process. Sprinkle with more coconut, pumpkin seeds, or both.
  4. Place in the freezer for a couple hours, then slice into bars. Store in at room temperature, in the fridge, or in the freezer, depending on how firm you want the bars to be.

Nutrition Facts

Calories

149.51

Fat

6.45 g

Sat. Fat

1.46 g

Carbs

22.40 g

Fiber

3.70 g

Net carbs

18.70 g

Sugar

13.99 g

Protein

3.46 g

Sodium

32.30 mg

Cholesterol

0.00 mg

Nutritional information is approximate and based on 8 servings.

pumpkin, pumpkin spice, fall recipe, no bake, vegan, dairy free, gluten free, refined sugar free, pumpkin seeds, raw, coconut
dessert, snack
American
Did you make this recipe?
Tag @jennyblogsandbakes on instagram and hashtag it #jennyblogs

Homemade Eggnog

Last Updated July 16, 2024

Do you know what 2 weeks from today is?  Yes, Thanksgiving!  A big feast requires lots of food, lots of planning, and of course lots of shopping, preparing, and cooking.  There are of course all the traditional dishes to make, but sometimes you want to throw in something new and delicious.  Since many of you, my smart friends, break out the eggnog for the first time on Thanksgiving, why not try making it homemade this year?  No high fructose corn syrup, artificial flavor, or "Holly"-ness about it. It's very simple to make, and can easily be doubled, tripled, or quadrupled (Hello, Morris family) to fit your needs. 'Tis the season to be jolly, not drink Hollynog.  

This post may contain affiliate links. If you make a purchase using these links, Jennyblogs may receive a small commission, at no extra cost to you. This helps to support Jennyblogs. Where possible, links are prioritized to small businesses, and American companies and products made in the USA for American readers. For further information see the privacy policy. Grazie!


Homemade Eggnog

Makes 8 Servings

Ingredients:

  • 4 eggs

  • 1/2 cup / 100g sugar

  • 2 tsp / 10g vanilla extract

  • 4 cups / 948g milk

  • 1/2 tsp nutmeg, plus more for sprinkling

  • 1/4 cup / 56g brandy, bourbon, or rum, optional

Directions: 

  1. In a large bowl, whisk together eggs and sugar until light in color and the sugar has dissolved. 

  2. Whisk in vanilla, nutmeg, milk, and alcohol.  Strain into a pitcher or serving dish of choice and chill until ready to serve. Sprinkle with additional nutmeg. 

Jenny's Notes:

  • Halve, double, or triple this recipe as needed.

  • So easy and delicious!  If you are worried about the raw eggs in this, simply use pasteurized eggs. 

  • If you are serving this to children and/or people who don't drink, obviously don't add any alcohol. What I like to do is add the alcohol to only half so everyone is happy, or let people add their own. But not the children.

  • Serve in a punch bowl with dollops of vanilla ice cream for an extra decadent treat! 


October Newsletter

Buon Novembre/Happy November!

It's so nice being back in Florence.  It feels like autumn, the leaves are falling, and the weather is truly starting to turn chilly.  Here's all that happened in October:

Mr. and Mrs. Jeffrey Morris in Poland, ME

Mr. and Mrs. Jeffrey Morris in Poland, ME

October 1-5 Jeffrey and Rachel Got Married.  Our family drove to Maine to celebrate the marriage of Jeffrey and his new wife, Rachel.  I love her so much and am glad she is now an official part of our family!  It was a beautiful ceremony, simple and intimate in a beautiful autumn setting.  We got to experience a real Maine lobster bake, stay in an inn on a lake, and stopped in Boston on the way home.  It was a great adventure.  

October 6-12 Soaked Up Some Good Time with Family and Friends, although time went by too quickly!  My family humored me and we celebrated Canadian Thanksgiving so I could at least be home for one holiday.    

October 13 I voted.  And that's all I'm going to say.  May the good Lord do as He pleases. 

October 13 I Flew Back to Italy, arriving on the 14th.  My two wonderful roommates, Vanessa and Silvia, had coordinated with Paul and Cody (Pastor of Mosaico, the church I'm a part of) to use his car to move all my belongings from Paul and Melinda's spare apartment.  What a relief to come home to that, especially since I didn't have so much as a hairbrush with me! 

October 17 I Started Attending Classes at the Russian Academy of Art, a requirement for having a student visa.  Paul and Melinda are also in the classes, which keeps things fun.  In the mornings we have 3 hours of painting and in the afternoon we have 2 1/2 hours of drawing.  The professors are all Russian and speak little to no English, and so we have translators for every class. Спасибо.  (Thank you)

Look, an almost still life!

Look, an almost still life!

I also really enjoy the other students.  I am used to artsy people and the world of dance, but all of a sudden I find myself thrown into a world of a different kind of art.  I find it all very fascinating and inspiring.  Vanessa and Silvia also attend the school, and so I frequently find myself amongst this group of friends.  They regularly whip out their sketch books and sketch anything that sits still for more than 5 minutes.  It's great fun, and I am learning to see things in a new light, about the composition, perspective, lighting, and pause, both in art works and real life.  I occasionally sketch outside of class too,  and frequently find myself thinking, "What is my life?"  Attending art classes in Florence, Italy, learning classical Russian techniques? Che figata/How cool!  The Russian Academy of Art attracts people from all over the world, and I now have friends from Chile, Argentina, France, China, Australia, Russia, Switzerland, Germany, and other places.  Some of their stories are fascinating and I am honored to know them. 

Vanessa, Silvia, and I host a Bible Study at our apartment for the other students of the Russian Art Academy who are interested.  Paul leads the study; we are in the book of Philippians.  It's a lovely Sunday evening, consisting of talking about Jesus, drinking tea, and eating cookies in our regal apartment.  

We Are Still in the Works for Gallery Space #5.  At the moment we are trying to project the cost of remodeling this space, (actually two spaces, one for the gallery and one next door for the studio) working with our business consultant, landlord, and architect. 

Prayer Requests:

  • Praise! I made it safely back to Florence and am loving my new apartment and roommates.

  • Praise! Art classes are going well, and many new friendships are being built through that.

  • Pray: For new friends and old, and relationships to continue to grow.

  • Pray: For Gallery Space #5. If this is the space the Lord has for us that things would continue to move forward and be within our budget.

  • Pray: For Christ's love and compassion to be made known in Italy, especially in this time of devastation with so many earthquakes.

Thank you to everyone who prays, supports, and reads these little (and sometimes not so little) updates!  I am so very thankful for you!

Blessed be His glorious name forever; may the whole earth be filled with His glory! - Psalm 72:19


Lemon Raspberry Sweet Rolls

Last Updated August 18, 2024

We all love a good cinnamon roll.  The soft dough, warm-gooey-buttery-cinnamon filling, topped with a sweet glaze or cream cheese icing.  The smell of fresh baked breads wafting from the kitchen and the warmth of bread in our tummy are especially comforting as the months turn colder. 

Today, however, we are not making cinnamon rolls (that's old hat :) but lemon raspberry rolls.  The tang of the lemon and raspberry paired with the sweet glaze is a match made for breakfast.  Or anytime. Pair it with a cup of tea or coffee and you have all the incentive you need to get out of bed in the morning!

This post may contain affiliate links. If you make a purchase using these links, Jennyblogs may receive a small commission, at no extra cost to you. This helps to support Jennyblogs. For further information see the privacy policy. Grazie!

Recipe adapted from Joy the Baker


Lemon Raspberry Sweet Rolls

Makes 12 regular rolls or 8 jumbo

Ingredients:

For the Dough

  • 1 cup / 237g warm milk (about 100°F / 38°C)

  • 1/2 cup / 100g sugar

  • 4 1/2 tsp / 14g active dry yeast

  • 1/4 cup / 56g oil

  • 2 eggs

  • Zest of 1 lemon

  • 1/2 tsp salt

  • 4 1/4 cups / 510g all-purpose flour + about 1/2 cup / 60g for kneading

For the Lemon Raspberry Filling

  • Generous 1 1/4 cups / 170g (1 6oz container) fresh or frozen raspberries (if using frozen do not thaw)

  • 1/2 cup / 100g sugar

  • Zest of 1 lemon

  • 1 tsp cornstarch

  • 1/4 cup / 56g butter

For the Glaze

  • 1 1/2 cups / 188g powdered sugar

  • 3 Tbsp / 42g lemon juice

Directions:

Preheat oven to 400°F / 205°C. Grease a 9x13inch / 23x33cm rectangular baking dish.

Make the Dough

  1. Pour milk into a large bowl. Add sugar and yeast and allow to sit for 7-10 minutes. Yeast should foam up a bit. 

  2. Add oil, eggs, zest, and salt. Add 4 1/4 cups of flour and mix until combined. 

  3. Flour a clean surface and turn out dough. Knead for about 8-10 minutes, sprinkling more flour on your work surface as needed. Dough should be soft and elastic by the end, so don't get too flour-happy. Alternately, knead in a stand mixer with dough hook attachment for 8-10 minutes, adding in flour as needed. The dough should stick only to bottom of bowl, not much to the sides.

  4. Lightly grease or flour a large bowl (the bowl you mixed the dough in is fine) and place dough in bowl. Cover and place in a warm area to rise for about 1 1/2 hours or until doubled in size. 

Make the Lemon Raspberry Filling

  1. In a small saucepan melt butter and let simmer until it starts to brown. Remove from heat and cool slightly. 

  2. In a medium bowl lightly mix raspberries with sugar, zest, and cornstarch.  It's okay if raspberries get a little crushed. 

Assemble the Rolls

  1. When dough has risen, punch it down and turn out onto a lightly floured surface. Knead for about a minute, then roll into a large rectangle, about 10x20inch / 25x50cm.   

  2. Spread cooled butter over dough almost to edges; sprinkle evenly with raspberry mixture. 

  3. Starting from one of the longer sides, roll dough up, pinching dough together at the end to seal it. 

  4. Slice into 12 even pieces, or 8 for jumbo sized. Place rolls in prepared pan and cover with plastic wrap. Place in a warm area to rise for about an hour, or until puffed.

  5. Bake for 20-22 minutes, until golden on top and centers no longer look doughy. Internal temperature should be about 185°F / 90°C of an outside roll.

Make the Glaze

  1. In a small bowl whisk together powdered sugar and lemon juice.  It should be thin enough to drizzle but not too liquidy. Add more powdered sugar or lemon juice as needed. 

  2. Drizzle warm rolls with glaze. 

Jenny's Notes:

  • If you don't have a thermometer handy to know what 100 degrees is, simply warm until milk feels quite warm, but not hot. 

  • You can freeze these rolls once you have sliced them and put them in the pan. Once removed from the freezer allow to thaw and proceed as normal. 

  • When using a stand mixer to knead, I still recommend kneading it for a few minutes by hand afterwards. I find they are not always as thorough as kneading by hand and you want an even rise for your dough.  I often to do it all by hand just because it’s therapeutic!

Lemon Raspberry Rolls
Yield 12
Author
Prep time
1 H & 10 M
Cook time
22 Min
Total time
1 H & 32 M

Lemon Raspberry Rolls

These bright breakfast rolls are like cinnamon rolls, but made with fresh lemon zest and raspberries instead!
Cook modePrevent screen from turning off

Ingredients

For the Dough
For the Lemon Raspberry Filling
For the Glaze

Instructions

Make the Dough
  1. In a small saucepan over low heat, warm milk until it is about 100F / 38C. Pour milk into a large bowl. Add the sugar and yeast and allow to sit for 7-10 minutes. The yeast should foam up a bit.
  2. Add oil, eggs, zest, and salt. Add the 4 1/4 cups of flour and mix until combined.
  3. Flour a clean surface and turn out dough. Knead for about 8-10 minutes, sprinkling more flour on your work surface as needed. Dough should be soft and elastic by the end, so don't get too flour-happy. Alternately, you can use the bread hook on a stand mixer and knead for 8-10 minutes, adding in flour as needed. The dough should stick only to the bottom of the pan, not the sides.
  4. Lightly grease or flour a large bowl (the bowl you mixed the dough in is fine) and place dough in the bowl. Cover with a towel and place in a warm area to rise for about 1 1/2 hours or until doubled in size.
Make the Lemon Raspberry Filling
  1. In a small saucepan melt the butter and let simmer until it starts to brown. Remove from heat and cool slightly.
  2. In a medium bowl lightly mix raspberries with sugar, zest, and cornstarch. It's okay if the raspberries get a little crushed.
Assemble and Bake the Rolls
  1. Preheat oven to 400F / 205C. Grease a 9x13inch / 23x33cm rectangular baking dish.
  2. When the dough has risen, punch it down and turn out onto a lightly floured surface. Knead for about a minute, then roll into a large rectangle, about 10x20inch / 25x50cm.
  3. Spread cooled butter over dough almost to the edges, then sprinkle evenly with raspberry mixture.
  4. Starting from one of the longer sides, roll dough into a spiral, pinching the dough together at the end to seal it.
  5. Cut the log in quarters, then each quarter into 3 slices. Place the rolls in the prepared pan and cover lightly with plastic wrap or a damp towel. Place in a warm area to rise for about an hour, or until puffed
  6. Bake for 20-22 minutes, until golden on top and centers no longer look doughy. Internal temperature should be about 195F / 90C.
Make the Glaze
  1. In a small bowl whisk together powdered sugar and lemon juice. It should be thin enough to drizzle but not too liquidy. Add more powdered sugar or lemon juice as needed.
  2. Drizzle warm rolls with glaze.

Notes

If you don't have a thermometer handy to know what 100 degrees is, simply warm until the milk feels quite warm, but not hot. It'll be fine!You can freeze these rolls once you have sliced them and put them in the pan. Once removed from the freezer allow to thaw and proceed as normal. When using a stand mixer to knead, I still recommend kneading it for a few minutes by hand afterwards. I find they are not always as thorough as kneading by hand and you want an even rise for your dough.

Nutrition Facts

Calories

355.58

Fat

6.43 g

Sat. Fat

0.88 g

Carbs

68.26 g

Fiber

2.37 g

Net carbs

65.89 g

Sugar

32.75 g

Protein

6.77 g

Sodium

121.93 mg

Cholesterol

32.58 mg

Nutritional information is approximate. Based on 1 roll.

Breakfast rolls, lemon raspberry
Breakfast, Dessert
American
Did you make this recipe?
Tag @jennyblogsandbakes on instagram and hashtag it #jennyblogs

White Chocolate Cranberry Oatmeal Cookies

"Delicious Oats.  Sweet Oats.  Lovely, crunchy oats!  Splendid Oats."  If you've ever seen the live-action talking horse Black Beauty, you'll know what I'm talking about.  If you haven't, then you probably think I'm crazy and really like oats. I'm not denying that. But if you fall into the latter category and have never seen Black Beauty, the I suggest you make these cookies, pop a large bowl of popcorn, and do yourself a favor and enjoy this classic. The stuff of childhood.   

We all love oatmeal cookies, yes? Probably also oatmeal cranberry cookies, those little tart chunks of cranberry amidst the chewy sweet oat cookie. Add white chocolate chips and you just took a classic to a whole new level!

This post may contain affiliate links. If you make a purchase using these links, Jennyblogs may receive a small commission, at no extra cost to you. This helps to support Jennyblogs. For further information see the privacy policy. Grazie!

A recipe by Jenny


White Chocolate Cranberry Oatmeal Cookies

Makes about 2 dozen cookies

Ingredients:

  • 1 3/4 cup / 210g all-purpose flour

  • 1 tsp salt

  • 1 tsp baking soda

  • 3/4 cup / 169g oil

  • 1 1/4 cups / 250g sugar

  • 2 eggs

  • 1 tsp vanilla extract

  • 3 cups / 270g rolled oats

  • 1 1/2 cups / 255g white chocolate chips

  • 1 1/2 cups / 225g dried cranberries

Directions:

Oven 350°F / 177°C. Ungreased or silpat lined baking sheet.

  1. In a medium bowl whisk together flour, salt, and baking soda. 

  2. In another large bowl combine oil, sugar, eggs and vanilla; mix well. 

  3. Add dry ingredients to wet ingredients and stir to combine.  Stir in oats, chips, and cranberries until evenly distributed. 

  4. Drop by spoonfuls onto baking sheet and bake for 7-9 minutes, until edges are set but centers are still soft and wet looking.  Allow to cool for a few minutes before removing from baking sheet.

Jenny's Notes:

  • Dried cherries are also a delicious combination with white chocolate.  And if you live in Traverse City, Michigan, it may be obligatory for you to try it at least once...;)

  • In Italy only mini chocolate chips exist, so although you may see mini in the photos feel free to use normal sized chips! Actually, I don’t know that I’ve seen mini white chocolate chips readily available in the States…?

White Chocolate Cranberry Oatmeal Cookies
Yield 24
Author
Prep time
20 Min
Cook time
9 Min
Total time
29 Min

White Chocolate Cranberry Oatmeal Cookies

Chewy oatmeal cookies with tart cranberries and sweet white chocolate chips.
Cook modePrevent screen from turning off

Ingredients

Instructions

  1. Oven 350°F / 177°C. Ungreased or silpat lined baking sheet.
  2. In a medium bowl whisk together flour, salt, and baking soda.
  3. In another large bowl combine oil, sugar, eggs and vanilla; mix well.
  4. Add dry ingredients to wet ingredients and stir to combine. Stir in oats, chips, and cranberries until evenly distributed.
  5. Drop by spoonfuls onto baking sheet and bake for 7-9 minutes, until edges are set but centers are still soft and wet looking. Allow to cool for a few minutes before removing from baking sheet.

Notes

Dried cherries are also a delicious combination with white chocolate.

Nutrition Facts

Calories

269.65

Fat

11.77 g

Sat. Fat

2.80 g

Carbs

38.82 g

Fiber

1.89 g

Net carbs

36.93 g

Sugar

23.64 g

Protein

3.55 g

Sodium

166.25 mg

Cholesterol

17.73 mg

Nutritional information is approximate and based on 24 servings of 1 cookie each.

oatmeal cookies, cranberry, white chocolate
dessert
American
Did you make this recipe?
Tag @jennyblogsandbakes on instagram and hashtag it #jennyblogs

Pumpkin Spice Energy Bites

Last Updated July 16, 2024

The great thing about these Pumpkin Spice Energy Bites is that they whip up so quick. In less than 15 minutes you can have delicious morsels easy to grab for a snack, pack for a quick lunch, or take on long car rides.  They're so easy to make you might spend more time assembling the ingredients, or mis en place, than making them!

These little balls of energy are all about that pumpkin and spice and everything nice, and health and wealth with all of that schmealth. Or something like that. These will not make you rich. Or give you schmealth. I would never wish schmealth on anyone. That sounds like some terrible disease. Nor will these actually bite you. You bite them. Nom nom nom.

 Now if I would stop rambling you probably could've had them already made...Scusami.

This post may contain affiliate links. If you make a purchase using these links, Jennyblogs may receive a small commission, at no extra cost to you. This helps to support Jennyblogs. Where possible, links are prioritized to small businesses, and American companies and products made in the USA for American readers. For further information see the privacy policy. Grazie!


Pumpkin Spice Energy Bites

Makes about 12-15 Bites

Ingredients:

  • 1 cup / 90g rolled oats

  • 1/4 cup / 65g peanut butter

  • 1/4 cup / 60g pumpkin purée

  • 1/4 cup 45g ground flax seeds or wheat germ

  • 1/4 cup / 45g mini chocolate chips

  • 3 Tbsp / 60g maple syrup or honey

  • 1 1/2 tsp cinnamon

  • 1 tsp vanilla extract

  • 1/4 tsp cloves

  • 1/4 tsp ginger

  • 1/4 tsp nutmeg

Directions:

  1. In a medium bowl combine all ingredients; mix well.

  2. Roll mixture into approximately 1 inch balls.  Place in a container and store in the refrigerator, or freeze for snacking at a later date. 

Jenny's Notes:

  • With these types of recipes you do not have to be overly exact in your measurements.  If the dough seems too soft, simply add more oats or flax.  Too crumbly and you can add any number of things, honey, maple syrup, peanut butter...the choice is yours to personalize as you wish!

  • To make these energy bites vegan, be sure to use maple syrup instead of honey. For gluten-free energy bites, make sure your oats are certified gluten-free. For dairy-free, ensure your chocolate chips are dairy-free.

Pumpkin Spice Energy Bites
Yield 12-15
Author
Prep time
15 Min
Total time
15 Min

Pumpkin Spice Energy Bites

A quick and versatile snack, on the go breakfast, or dessert full of pumpkin and fall spice that is easily made vegan, gluten-free, and dairy-free.
Cook modePrevent screen from turning off

Ingredients

Instructions

  1. In a medium bowl combine all ingredients; mix well.
  2. Roll mixture into approximately 1 inch balls. Place in a container and store in the refrigerator, or freeze for snacking at a later date.

Notes

With these types of recipes you do not have to be overly exact in your measurements. If the dough seems too soft, simply add more oats or flax. Too crumbly and you can add any number of things, honey, maple syrup, peanut butter...the choice is yours to personalize as you wish!To make these energy bites vegan, be sure to use maple syrup instead of honey. For gluten-free energy bites, make sure your oats are certified gluten-free. For dairy-free, ensure your chocolate chips are dairy-free.

Nutrition Facts

Calories

119.52

Fat

6.04 g

Sat. Fat

1.44 g

Carbs

14.60 g

Fiber

2.81 g

Net carbs

11.78 g

Sugar

5.77 g

Protein

3.37 g

Sodium

28.96 mg

Cholesterol

0.00 mg

Nutritional information is approximate. Based on 12 servings.

pumpkin spice, energy balls, vegan, gluten-free, dairy-free, fall recipe
snacks
American
Did you make this recipe?
Tag @jennyblogsandbakes on instagram and hashtag it #jennyblogs

Now that didn't hurt, did it?  Happy snacking!