Nutella-Filled Pillow Cookies

These are buttery sugar cookies with hints of almond and vanilla, stuffed with Nutella. The almond really compliments the Nutella! I guess hazelnuts and almonds make good company.

I first made these cookies over 10 years ago and they’re still a cookie I love to make. Because they’re cutouts, I tend to save them for special occasions, but the extra time is so worth it!

These cookies melt in your mouth and keep you going back for more, despite being a generous size to begin with! They’re also pretty little things, which makes them suitable for nice occasions, especially with a little dusting of powdered sugar or cocoa powder on top. You can use different shapes for different occasions, which makes these not only delicious and beautiful, but also versatile! These are always a winner.

This post may contain affiliate links. If you make a purchase using these links, Jennyblogs may receive a small commission, at no extra cost to you. This helps to support Jennyblogs. For further information see the privacy policy. Grazie!


Nutella-Filled Pillow Cookies

Makes about 12 large cookies

Ingredients:

  • 1 cup / 225g butter

  • 1/2 cup / 100g sugar

  • 1/2 cup / 100g brown sugar

  • 2 eggs

  • 1 Tbsp / 15g vanilla

  • 1/2 tsp almond extract

  • 3 cups / 360g flour

  • 1 Tbsp baking powder

  • 1/2 tsp salt

  • about 2/3 cup / 200g Nutella

  • powdered sugar and/or cocoa powder for dusting, optional

Directions:

Oven preheated to 375°F / 190°C. Ungreased cookie sheets.

  1. In the bowl of a stand mixer or with a handheld mixer, cream butter and sugar together until light and fluffy, about 5 minutes.

  2. Beat in eggs, one at a time. Stir in extracts.

  3. In a medium bowl, combine flour, baking powder, and salt with a whisk.

  4. Add dry ingredients to butter mixture, mix until thoroughly combined. If dough seems too wet, add a bit more flour until a thicker consistency is reached.

  5. Cover and place dough in refrigerator until chilled, at least 1 hour.

  6. Remove dough from fridge. Roll dough out onto a lightly floured surface to a thickness of about 1/4in / 1/2cm. Use a 3in / 7.5cm cookie cutter to cut the cookie dough. Re-roll and cut more.

  7. Place half of the cut out cookies onto a cookie sheet. Spoon or pipe about 2 tsp of Nutella onto the middle of the cookie. Place a second cookie on top, using fingers or a fork to seal edges together.

  8. Bake in preheated oven for 9-11 minutes, or until edges just barely start to turn golden. Allow cookies to cool for several minutes on the cookie sheet before transferring to cooling racks or the counter.

  9. When cookies are completely cool, dust with powdered sugar, if desired.

Jenny’s Notes:

  • Round or square cookie cutters work best for these pillow cookies, but any shape will do, as long as it has a large enough center area for the Nutella to be able to be sealed in. I like to do heart shapes for Valentine’s day, as pictured!

  • While these may have Nutella in the name, I’ve stuffed these with other things before that were also delicious! Small chocolates like Reese’s, Dove chocolates, etc. could be used. I once used these hazelnut chocolates that are common in Italy, Gianduja, and they were wondeful in these!

  • Don’t over bake! Not only can this lead to dry cookies, but it can affect the filling, as well.

Nutella-Filled Pillow Cookies
Yield 12 Large Cookies
Author
Prep time
45 Min
Cook time
11 Min
Inactive time
1 Hour
Total time
1 H & 56 M

Nutella-Filled Pillow Cookies

Buttery, melt-in-your-mouth sugar cookies with hint of vanilla and almond, stuffed with Nutella, and topped with a dusting of powdered sugar and cocoa powder.
Cook modePrevent screen from turning off

Ingredients

Instructions

  1. Oven preheated to 375°F / 190°C. Ungreased cookie sheets.
  2. In the bowl of a stand mixer or with a handheld mixer, cream butter and sugar together until light and fluffy, about 5 minutes.
  3. Beat in eggs, one at a time. Stir in extracts.
  4. In a medium bowl, combine flour, baking powder, and salt with a whisk.
  5. Add dry ingredients to butter mixture, mix until thoroughly combined. If dough seems too wet, add a bit more flour until a thicker consistency is reached.
  6. Cover and place dough in refrigerator until chilled, at least 1 hour.
  7. Remove dough from fridge. Roll dough out onto a lightly floured surface to a thickness of about 1/4in / 1/2cm. Use a 3in / 7.5cm cookie cutter to cut the cookie dough. Re-roll and cut more.
  8. Place half of the cut out cookies onto a cookie sheet. Spoon or pipe about 2 tsp of Nutella onto the middle of the cookie. Place a second cookie on top, using fingers or a fork to seal edges together.
  9. Bake in preheated oven for 9-11 minutes, or until edges just barely start to turn golden. Allow cookies to cool for several minutes on the cookie sheet before transferring to cooling racks or the counter.
  10. When cookies are completely cool, dust with powdered sugar, if desired.

Notes

  • Round or square cookie cutters work best for these pillow cookies, but any shape will do, as long as it has a large enough center area for the Nutella to be able to be sealed in. I like to do heart shapes for Valentine’s day, as pictured!
  • While these may have Nutella in the name, I’ve stuffed these with other things before that were also delicious! Small chocolates like Reese’s, Dove chocolates, etc. could be used. I once used these hazelnut chocolates that are common in Italy, Gianduja, and they were wondeful in these!
  • Don’t over bake! Not only can this lead to dry cookies, but it can affect the filling, as well.

Nutrition Facts

Calories

388.68

Fat

21.3 g

Sat. Fat

14.73 g

Carbs

48.95 g

Fiber

1.74 g

Net carbs

47.2 g

Sugar

18.17 g

Protein

5.22 g

Cholesterol

67.95 mg

Sodium

345.08 mg

Nutritional info is approximate, based on 1 cookie

Cookies, Nutella, Pillow Cookies, Cutout Cookies, Rolled Cookies, Sugar Cookies
dessert, cookies
American
Did you make this recipe?
Tag @jennyblogsandbakes on instagram and hashtag it #jennyblogs

Homemade Evaporated Milk

Last Updated July 31, 2024

Making evaporated milk at home is very simple to do. You only need one ingredient: milk!

The evaporated milk you buy from the store is simply milk that has had 60% of its water evaporated.You can make your own by simmering it on the stove until reduced by 60%, or a bit more than half. It takes a bit of time and diligence, half hour or so of simmering, and remembering it’s there so it doesn’t boil dry. And no. of course I’ve never done either of those things, nope. But really, it’s so simple to make you can hardly call this a “recipe”!

Now, knowing how to make evaporated milk is wonderful for various occasions, but it does have its cons. The most obvious being it takes time and is easy to forget simmering on the stove. Second, even when made correctly the milk can cook onto the bottom of the pan over the simmering period and is not the most fun to clean. Because of these drawbacks, I still do buy cans of evaporated milk at times!

On the flip side, the beauty of making your own evaporated milk is that you can personalize to your tastes or dietary needs. To make the closest to store-bought evaporated milk, use whole milk. Otherwise, you can use lower fat varieties or even any plant or nut milks you prefer!

The recipe as written below will give you the equivalent of 1 can of evaporated milk, or 1 1/2 cups. Adjust the recipe depending on how much you need!

Do you want to learn how to make homemade sweetened condensed milk, also? Click here for the recipe!

This post may contain affiliate links. If you make a purchase using these links, Jennyblogs may receive a small commission, at no extra cost to you. This helps to support Jennyblogs. Where possible, links are prioritized to small businesses and ethically and responsibly made items. For further information see the privacy policy. Grazie!Recipe by Jenny


Homemade Evaporated Milk

simmering milk

Makes 1 1/2 cups / 12 oz (355ml) of evaporated milk

Ingredients:

  • 3 1/4 cups / 770g milk

Directions:

  1. Place milk in wide pan over medium heat. When it starts to simmer, reduce heat to low.

  2. Simmer until reduced by just more than half, this can take anywhere from half an hour to an hour, all depending on the stove. Remove from heat and cool.

  3. Strain and store in refrigerator.

Jenny’s Notes:

Lightly golden, evaporated milk

  • Whole milk will get you the closest to store-bought evaporated milk, but the beauty of making your own is that you can use whatever kind of milk you please, whether a lower fat milk or a plant-based milk.

  • While eyeballing may be the easiest way to judge if it the milk has reduced by half, it’s not the most exact. Instead, try dipping a toothpick in the milk before simmering and making a mark on the toothpick where the milk comes up to. That way, as the milk simmers down, you can periodically dip the toothpick back in to see how close to half it is.

  • When milk is almost ready, it will take on a very light golden color as it reduces and caramelizes.

  • Mason jars make great storage containers!

Homemade Evaporated Milk
Yield 12 oz
Author
Prep time
2 Min
Cook time
45 Min
Total time
47 Min

Homemade Evaporated Milk

Making evaporated milk at home is as easy as simmering milk on the stove!
Cook modePrevent screen from turning off

Ingredients

Instructions

  1. Place milk in wide pan over medium heat. When it starts to simmer, reduce heat to low.
  2. Simmer until reduced by just more than half, this can take anywhere from half an hour to an hour, all depending on the stove. Remove from heat and cool.
  3. Strain and store in refrigerator.

Notes

  • Whole milk will get you the closest to store-bought evaporated milk, but the beauty of making your own is that you can use whatever kind of milk you please, whether a lower fat milk or a plant-based milk.
  • While eyeballing may be the easiest way to judge if it the milk has reduced by half, it’s not the most exact. Instead, try dipping a toothpick in the milk before simmering and making a mark on the toothpick where the milk comes up to. That way, as the milk simmers down, you can periodically dip the toothpick back in to see how close to half it is.
  • When milk is almost ready, it will take on a very light golden color as it reduces and caramelizes.


Nutrition Facts

Calories

39.65

Fat

2.11 g

Sat. Fat

1.23 g

Carbs

3.09 g

Fiber

0 g

Net carbs

3.09 g

Sugar

3.18 g

Protein

2.17 g

Sodium

25.11 mg

Cholesterol

7.93 mg

Nutritional info is approximate, based on 1 serving size of 2 Tbsp.

evaporated milk, dairy free evaporated milk, unsweetened condensed milk
beverage, baking
American
Did you make this recipe?
Tag @jennyblogsandbakes on instagram and hashtag it #jennyblogs

Finding "Premaman" Maternity Clothes in Italy

You’re pregnant, you’re excited, and now you have to figure out what to wear and what you’ll need!

For a first-time mamma, if you’re anything like me (ahem, overly detailed and analytical) even a seemingly simple task like picking out some maternity clothes can feel overwhelming and unnecessarily time consuming; even more so when you’re in a foreign country.

When will I actually need new clothes? Do I want over or under the bump pants? Is maternity underwear actually necessary? How much should I budget for clothes that may only get worn for 9 months, maybe less? How will I know what size bras to get, if my size is supposed to get bigger, but I don’t know how big?? Where do I find maternity clothes in Italy, anyway?

If this is your first pregnancy and would like some ideas on how to select maternity clothes, I will soon have an article for you!

If you’ve already been pregnant but this is your first baby in Italy, then you probably already know what you want, you just need to know where to find it!

Below you’ll find some of my favorite maternity choices in Italy!

This post may contain affiliate links. If you make a purchase using these links, Jennyblogs may receive a small commission, at no extra cost to you. This helps to support Jennyblogs. For further information see the privacy policy. Grazie!

shopping for maternity clothes in the time of covid: no tourists, no people


Where to Find Maternity Clothes

US Amazon Maternity

While this is primarily written with mamas in Italy at heart, many of these sites can be used by anyone in Europe, the US, or even beyond, since they are online sites with European or international shipping. Others are actually US based, but do offer international shipping. Maybe the most obvious is Amazon, which can be shopped in many countries, although their merchandise varies greatly from country to country.

These sites are listed roughly in order of ease of shopping and returning. While I try and indicate if shipping and returns are free, please check the site’s policy as it may have changed since this post was written.

  1. H&M Italy

    Yes, H&M has maternity wear! They have decent prices, although I’ve watched them go up since Covid, with inflation and H&M transitioning to more “sustainable” practices, but still definitely some of the lower priced items with decent quality.

    I highly recommend their maternity underwear and nursing bras, very comfortable and bits of lace so they still feel feminine.

    If you become a member you get free shipping for orders over €30 and free returns. Keep an eye out for sales which they have very frequently, the biggest sale usually being 30% off for Black Friday. The rest of the time they frequently have 15%, 20%, or 25% you can snag pretty easily. As a general rule, I don’t buy anything if it’s not on sale. The downside is their stock sells out very quickly, so if there is something you really really like, sometimes you just have to buy it, sale or not.

    The H&M store in Florence by Ponte Vecchio does not carry maternity, intimates, or children’s clothing in store.

  2. Zalando.it

    Zalando is great. It’s like an Amazon, but for clothing and accessories. My shopping experience in Italy took an uptick for the better when I discovered Zalando, pregnant or not. For the most part, Italy has great in-person shopping, but stores’ online presence and shopping is minimal. When there was something I needed but just couldn’t find, or couldn't get out much (due to Covid restrictions, having a newborn, etc.), I could almost always find something on Zalando. It has a vast selection of clothes, many top brands, and a section just for expecting moms and even baby clothing.

    They offer convenient shipping and returns, with most orders over €28.90 including free shipping. If your order is under or includes items coming from long distance, then shipping will be €4.95. Returns are free, simply take them to any PosteItaliane or even schedule a pick up at your house.

  3. Amazon.it

    Yes, Amazon, too! There is something about shopping for clothing on Amazon that I find very dissatisfying, but it’s always an option! I bought my first set of maternity underwear and nursing bras from Amazon. They were comfortable and definitely the least expensive option, but they didn’t last the longest, either. In short, if you have a limited budget like I did, they served their purpose well, but if you’re able, opt for higher quality if you can.

    Free shipping on orders over €35, and free returns most of the time, too, per usual Amazon standard.

  4. Seraphine

    This is a site based in the UK, and shopped at by royalty, as you can see on their site. Could be fun, wearing something that Kate Middleton also wore! Ultimately I have never boughten anything from them, even though they have some pieces I really like, since there was a small shipping cost, plus customs, and I had no idea what their clothes would fit like.

    Standard shipping to Italy is €4.95, plus potential customs fees, with free returns.

  5. Envie de Fraise

    This is a lovely French maternity brand that I bought my maternity dresses from.

    Free shipping to Italy for orders over €60, it looks as though returns may be at expense of customer, but I’m not sure. I actually exchanged 2 dresses for different sizes, and at the time I remember the returns being free. It may have changed, though. Their site looks as though it’s transitioning over to “vertbaudet”.

  6. Nothing Fits But

    I only just discovered this South Korean based brand in the past year, but they have some of the absolute loveliest dresses out there, that can easily be worn before and after maternity as well as during and for nursing. They are pricier with most dresses costing over $100, but they are light, and quality made. Wait for their sales and it won’t make as big of a dent. When I bought my dress, I found the one I wanted on sale, plus a matching dress for my daughter and a nursing/maternity sweater, plus shipping since I didn’t spend enough, and the total was still under $100. I got a pretty good deal!

    The US Amazon sells some Nothing Fits But dresses, although for a bit more money than the Nothing Fits But site. BUT Amazon offers free shipping and free returns, where Nothing Fits But does not until a much higher threshold. Reviews on their sizing was quite varied which left me uncertain what size I would like most, so I ended up ordering the two dresses I was eyeing from Amazon to figure out which size I was. At that point the same dress on Nothing Fits But went on sale, so I took advantage of Amazon’s generous return policy and returned both of the dresses, then bought the one I wanted on sale from Nothing Fits But.

    Free worldwide shipping on orders over $200USD, returns at cost of customer.

  7. Pink Blush Maternity

    Pink Blush has a wide assortment of maternity wear, from cute dresses to comfy sweaters. I’ve never bought anything from them, although I was tempted in Italy, but again I didn’t want to deal with not being able to do returns or pay potential customs fees.

    They have frequent sales, a generous 25% off your first order when you sign up for email, and a good Black Friday Sale.

    International shipping varies by order total, starting at $10.99. Customer is responsible for any customs once they arrive in Italy or destination country.

  8. HATCH Collection

    If you have a more generous budget for maternity wear, check out HATCH. Their prices are beyond my budget, but I’ve heard and read good things about them, and they certainly have some nice looking pieces!

    International shipping looks to be a flat rate of $50, customs to be paid by customer. International returns could be an option, they say to contact them for more info, but per any international return, it would probably be a good wait and costly.

  9. Stowaway Collection

    I came across this brand recently, a mother-daughter duo based in NYC. I haven’t ordered anything from them, but they have a lovely collection of very comfy, minimal looking dresses and pieces.

    They can ship internationally to Italy, with DHL, pricing determined by DHL.

  10. Bae the Label

    Another brand with sharp looking maternity clothes, not always an easy feat! They are an Australian brand, so even if you’re in the States you’ll be paying for international shipping.

    They offer free international shipping on orders over AUD$350, or a flat rate of $35 for anything less than that.

You may notice that this list is solidly online shopping. That’s because I never did find any maternity wear worth mentioning on this list in any stores around Florence. Of course, it also didn’t help that the peak time I was shopping for and needed maternity clothes was during the 2020 Covid lockdown. You could try La Rinascente in the center, off of Piazza della Repubblica, but their prices are usually higher since they stock a lot of designer brands.

If you know of any good “premaman” clothing stores around Florence, send me a message or leave a comment and I’d be happy to add it to this list!

Pregnancy Exercise: Walking in the Tuscan Hills once the covid mandate to stay home had been lifted


Herbed Six Cheese Pasta

Last Updated September 7, 2024

Why, when we make macaroni and cheese, do we usually just add one cheese? Because it’s easy, yes. But have you ever added 2, 3 or even 6 different cheeses to your pasta? Because it’s wonderful and the flavor profile explodes. In a good way.

Here is one of my cheesy pasta recipes, made with yes, 6 different cheeses! You can easily mix up which cheeses you use, with whatever you have on hand. It creates a unique but divine pasta every time. The herbs I added in with the inspiration from herb cream cheese that I sometimes like to put on my toasted bagels. MMMMMMmmmmmmmm.

Now, one of my first thoughts when I see a number of cheeses (especially 6!!) in a dish is that it’s probably a really rich, high fat dish. Good for special occasions, not so much a weeknight dinner. The best thing about this pasta, is that it doesn’t use any more cheese than a regular, homemade, stove top macaroni and cheese. Actually, it uses less than some recipes! I like to use about 2 cups of shredded cheese (equal to about 8oz of cheese) for 1lb of pasta. This recipe also uses a total of 2 cups of shredded cheese. No heavy whipping cream, no half & half, just milk. It’s not overly indulgent, like so many recipes can be, while still tasting indulgent!

This pasta is cheesy, creamy, smoky, and should be cooking on your stove and in your tummy ASAP! :)

This post may contain affiliate links. If you make a purchase using these links, Jennyblogs may receive a small commission, at no extra cost to you. This helps to support Jennyblogs. For further information see the privacy policy. Grazie!

Recipe by Jenny. Inspired by Inspired with a Twist


Herbed Six Cheese Pasta

Serves 4-6

Ingredients:

  • 1 lb. / 500g pasta of your choice

  • 4 Tbsp / 56g oil or butter

  • 2 cloves garlic, minced

  • 1/4 cup / 30g all-purpose flour

  • 2 cups / 474g milk

  • 1/2 tsp smoked paprika

  • 1/2 tsp chopped fresh basil

  • 1/2 tsp chopped fresh oregano

  • 1/4 tsp chopped fresh thyme

  • 1/4 tsp chopped fresh rosemary

  • 1/8 tsp nutmeg

  • 1/2 cup / 56g shredded sharp cheddar cheese

  • 1/2 cup / 56g shredded mozzarella cheese

  • 1/4 cup / 25g shredded asiago cheese

  • 1/4 cup / 25g shredded parmesan cheese

  • 1/4 cup / 28g shredded smoked gruyère cheese

  • 2 oz / 57g cream cheese

Directions:

  1. In a large pot bring a good quantity of water to boil. Just before the water boils, salt the water. Stir to dissolve salt, then add in pasta. Cook pasta to al dente according to package directions. Drain, reserving about 2 cups of pasta water.

  2. While pasta is cooking, heat oil or butter in a large pot over medium-low heat. Add garlic and stir, for about 1 minute, until fragrant.

  3. Add flour and stir with a whisk, until all the oil or butter has been absorbed by the flour. Stir for an extra few seconds, to toast the flour.

  4. Slowly add in milk, a bit at a time, stirring constantly. The mixture will thicken, then slowly thin out as you add more milk.

  5. When all the milk has been added and the mixture comes to a simmer, add in all the spices and herbs.

  6. Add in all of the cheese and stir until melted and smooth. Turn off heat. Salt and pepper to taste.

  7. Add cooked pasta to the sauce, along with 1 cup of reserved pasta water. Stir well. Add in more pasta water until desired consistency is reached. Sauce will continue to thicken as it cools and sits. Serve.

Jenny’s Notes:

  • The cheese options for this pasta really are endless, no need to feel confined by the exact cheeses I have written here. I use different ones all the time! Cheddars, mozzarellas, Monterey or Colby Jack, gruyere, gouda, smoked cheeses, havarti, provolone, taleggio, Swiss…think of your favorites! Another I love to add? A blue cheese, like Gorgonzola. Mmmmm. It’s like one of my favorite Italian pizzas, quattro formaggi, a pizza with four cheeses, one of which is Gorgonzola.

  • If you don’t have fresh herbs available to you, you can easily sub in dried. As a general rule of thumb, use 1/3 the amount of dried in place of fresh. In this recipe, because the measurements are already quite small, I usually end up going with “generous 1/8th teaspoon”, or “pinch of this”, and it turns out wonderful!

  • If you enjoy especially rich pasta, you can use half & half or some cream in with the milk. I usually use 2% milk, still creates a luscious, cheesy, pasta, but without being overly indulgent!

Herbed Six Cheese Pasta
Yield 6-8
Author
Prep time
10 Min
Cook time
20 Min
Total time
30 Min

Herbed Six Cheese Pasta

Creamy, smokey, cheesy pasta featuring 6 different cheeses with a sprinkling of fresh herbs and spices
Cook modePrevent screen from turning off

Ingredients

Instructions

  1. In a large pot bring a good quantity of water to boil. Just before the water boils, salt the water. Stir to dissolve salt, then add in pasta. Cook pasta to al dente according to package directions. Drain, reserving about 2 cups of pasta water.
  2. While pasta is cooking, heat oil or butter in a large pot over medium-low heat. Add garlic and stir, for about 1 minute, until fragrant.
  3. Add flour and stir with a whisk, until all the oil or butter has been absorbed by the flour. Stir for an extra few seconds, to toast the flour.
  4. Slowly add in milk, a bit at a time, stirring constantly. The mixture will thicken, then slowly thin out as you add more milk.
  5. When all the milk has been added and the mixture comes to a simmer, add in all the spices and herbs.
  6. Add in all of the cheese and stir until melted and smooth. Turn off heat. Salt and pepper to taste.
  7. Add cooked pasta to the sauce, along with 1 cup of reserved pasta water. Stir well. Add in more pasta water until desired consistency is reached. Sauce will continue to thicken as it cools and sits. Serve.

Notes

  • The cheese options for this pasta really are endless, no need to feel confined by the exact cheeses I have written here. I use different ones all the time! Cheddars, mozzarellas, Monterey or Colby Jack, gruyere, gouda, smoked cheeses, havarti, provolone, taleggio, Swiss…think of your favorites! Another I love to add? A blue cheese, like Gorgonzola. Mmmmm. It’s like one of my favorite Italian pizzas, quattro formaggi, a pizza with four cheeses, one of which is Gorgonzola.
  • If you don’t have fresh herbs available to you, you can easily sub in dried. As a general rule of thumb, use 1/3 the amount of dried in place of fresh. In this recipe, because the measurements are already quite small, I usually end up going with “generous 1/8th teaspoon”, or “pinch of this”, and it turns out wonderful!
  • If you enjoy especially rich pasta, you can use half & half or some cream in with the milk. I usually use 2% milk, still creates a luscious, cheesy, pasta, but without being overly indulgent!


Nutrition Facts

Calories

574

Fat

24 g

Sat. Fat

14 g

Carbs

66 g

Fiber

3 g

Net carbs

63 g

Sugar

7 g

Protein

23 g

Cholesterol

68 mg

Sodium

419 mg

Nutritional information is approximate, based on 6 servings.

Deluxe macaroni and cheese, best macaroni and cheese, six cheese pasta
Dinner, Pasta
American
Did you make this recipe?
Tag @jennyblogsandbakes on instagram and hashtag it #jennyblogs

Tofu and Broccoli Stir Fry

Last Updated September 7, 2024

This Tofu and Broccoli Stir Fry is deliciously salty, satisfying, and nutritious.

My family makes this recipe quite a bit, it’s quick and easy, providing protein and vegetables and a carb, if you serve it over rice.

If you’re watching your salt intake, you might prefer to use a low-sodium soy sauce and broth. Using low-sodium ingredients allows you to have more control over how salty your dish is, whether or not you actually may need low-sodium for health reasons.

This dish is also delicious meat-ified…by that I mean, with chicken instead of tofu. I’m not a vegetarian, and I love this recipe both ways. If making with chicken, you’ll want to cut it into cubes or bite-sized pieces. You can still coat the chicken in the cornstarch, and proceed with recipe as written. You’ll simply want to cook the chicken thoroughly, before adding in the garlic and ginger and finishing the stir fry. Voila! Meat-ified.

This post may contain affiliate links. If you make a purchase using these links, Jennyblogs may receive a small commission, at no extra cost to you. This helps to support Jennyblogs. For further information see the privacy policy. Grazie!


Tofu and Broccoli Stir Fry

Serves about 3-4

Ingredients:

  • 1 14oz / 400g container of extra-firm tofu

  • 2 Tbsp / 15g cornstarch

  • 1 cup / 237g vegetable or chicken broth

  • 3 Tbsp / 42g soy sauce

  • 2 tsp / 10g sugar

  • oil, for pan

  • 2 teaspoons grated fresh ginger

  • 2 garlic cloves, minced

  • 2 cups broccoli florets

Directions:

  1. Open and drain tofu. Wrap tightly in paper towels, place on a plate or cutting board, and place a weighted object on it, such as a bowl. Once the paper towel is soaked through, change them out for fresh paper towels. Repeat until paper towels remain mostly dry. Slice tofu into approx. 1/2” / 1cm cubes. Toss in a medium bowl with the cornstarch.

  2. Combine broth, soy sauce, and sugar; set aside.

  3. Generously drizzle an iron skillet or other non-stick pan with oil; place over medium-high heat.

  4. Fry tofu until golden brown and crispy, about 3-5 minutes. Flip the tofu, and fry other side until golden brown, another 3-5ish minutes.

  5. Lower heat to low; Add ginger and garlic and stir, until fragrant and sizzling, about a minute.

  6. Add in broth mixture and stir occasionally, until it starts to simmer.

  7. Add in broccoli, cover, and let sit for 2 minutes for “al dente” broccoli, or a couple more minutes for softer broccoli.

  8. Turn off heat and serve over rice.

Suggested toppings: red pepper flakes, sesame seeds, sliced green onions, etc.

Jenny’s Notes:

oven baked tofu

  • In an ideal world the tofu is prepared a bit in advance, so it has ample time to release as much water as possible. However, you can also wrap the tofu just 2x in paper towels. It only takes a couple minutes and still gets a good amount of water out. You may need more cornstarch in this case since the tofu will be moister, and that’s perfectly fine. Frying time may also take a few minutes longer, for the water to evaporate and get a proper crisp on the tofu.

  • If you prefer to bake tofu instead of frying: Prepare tofu as in step 1, than transfer onto a silpat or parchment paper lined cooking sheet. Bake in an oven preheated to 400°F / 205°C for 25-30 minutes, or until crisp and golden. Stir tofu once or twice during baking time. Add tofu into simmering sauce, let simmer for a few minutes, then add in broccoli to finish.

  • This is wonderful with red pepper flakes, sesame seeds, cilantro, and green onions sprinkled on top for garnish.

Tofu and Broccoli Stir Fry
Yield 3-4
Author
Prep time
20 Min
Cook time
15 Min
Total time
35 Min

Tofu and Broccoli Stir Fry

Crispy tofu with lightly crunchy broccoli in a salty stir fry sauce makes for a quick and satisfying dinner that is as good as take-out!
Cook modePrevent screen from turning off

Ingredients

Instructions

  1. Open and drain tofu. Wrap tightly in paper towels, place on a plate or cutting board, and place a weighted object on it, such as a bowl. Once the paper towel is soaked through, change them out for fresh paper towels. Repeat until paper towels remain mostly dry. Slice tofu into approx. 1/2” / 1cm cubes. Toss in a medium bowl with the cornstarch.
  2. Combine broth, soy sauce, and sugar; set aside.
  3. Generously drizzle an iron skillet or other non-stick pan with oil; place over medium-high heat.
  4. Fry tofu until golden brown and crispy, about 3-5 minutes. Flip the tofu, and fry other side until golden brown, another 3-5ish minutes.
  5. Lower heat to low; Add ginger and garlic and stir, until fragrant and sizzling, about a minute.
  6. Add in broth mixture and stir occasionally, until it starts to simmer.
  7. Add in broccoli, cover, and let sit for 2 minutes for “al dente” broccoli, or a couple more minutes for softer broccoli.
  8. Turn off heat and serve over rice.
  9. Suggested toppings: red pepper flakes, sesame seeds, sliced green onions, etc

Notes

  • In an ideal world the tofu is prepared a bit in advance, so it has ample time to release as much water as possible. However, you can also wrap the tofu just 2x in paper towels. It only takes a couple minutes and still gets a good amount of water out. You may need more cornstarch in this case since the tofu will be moister, and that’s perfectly fine. Frying time may also take a few minutes longer, for the water to evaporate and get a proper crisp on the tofu.
  • If you prefer to bake tofu instead of frying: Prepare tofu as in step 1, than transfer onto a silpat or parchment paper lined cooking sheet. Bake in an oven preheated to 400°F / 205°C for 25-30 minutes, or until crisp and golden. Stir tofu once or twice during baking time. Add tofu into simmering sauce, let simmer for a few minutes, then add in broccoli to finish.
  • This is wonderful with red pepper flakes, sesame seeds, cilantro, and green onions sprinkled on top for garnish.


Nutrition Facts

Calories

223

Fat

11 g

Sat. Fat

1 g

Carbs

16 g

Fiber

3 g

Net carbs

13 g

Sugar

2 g

Protein

16 g

Cholesterol

2 mg

Sodium

1322 mg

Nutritional information is approximate, based on 3 servings, not including rice or garnishes.

stir fry, tofu, broccoli, takeout, Chinese takeout, vegetarian dinner
dinner
Asian
Did you make this recipe?
Tag @jennyblogsandbakes on instagram and hashtag it #jennyblogs

Chocolate Chip Meringue Cookies

Last Updated September 7, 2024

As far as simple and delicious cookie recipes go, this is a good one to have on hand.

These cookies have only 4 ingredients, and are gluten-free, dairy-free (as long as your chocolate chips don’t contain dairy), and many other allergen and dietary needs friendly.

This is a recipe I’ve had around for ages, since I was a kid! I believe I originally got it from my cousin. I recently re-discovered these, they’re almost too easy to make, and a great way to use up extra egg whites. They’re easy enough kids can help or even make them by themselves, and with the chocolate chips, M&M’s, or other add ins, also very appealing to kids!

Are you ready for some of the easiest cookies you’ve made yet? Yeah, let’s go!

This post may contain affiliate links. If you make a purchase using these links, Jennyblogs may receive a small commission, at no extra cost to you. This helps to support Jennyblogs. For further information see the privacy policy. Grazie!

Recipe from my cousin


Chocolate Chip Meringue Cookies

M&M Meringue Cookies

Makes about 24 (about 1 1/2inch / 3cm) cookies

Ingredients:

  • 2 egg whites

  • 1 pinch of cream of tartar

  • 1/2 cup / 100g granulated sugar

  • 3/4 cup / 128g mini chocolate chips or other add-in of choice

Directions:

Oven preheated to 250°F / 121°C. Line a cookie sheet with a silpat or lightly grease.

  1. In the bowl of a stand mixer or with a hand-held electric mixer, beat egg whites and cream of tartar with whisk attachment until foamy.

  2. Add sugar and beat until stiff peaks form.

  3. Fold in chocolate chips with a spatula.

  4. Drop onto prepared cookie sheet and bake for about 30 minutes, or until set and just starting to turn a light golden color. Allow to cool slightly before removing from cookie sheet.

Jenny’s Notes:

  • Mini M&M’s are also a hit in these cookies! You can get creative, any kind of crushed candy or cookie like Oreo’s, or nuts, sprinkles, etc.

  • These cookies are best enjoyed within a day or two. They can be stored loosely covered at room temperature, but if you cover too tightly they turn soft and sticky even quicker.

Chocolate Chip Meringue Cookies
Yield 24
Author
Prep time
20 Min
Cook time
30 Min
Total time
50 Min

Chocolate Chip Meringue Cookies

4 ingredient meringue cookies with a slightly crunchy exterior and a soft, chewy inside, speckled with chocolate chips.
Cook modePrevent screen from turning off

Ingredients

Instructions

  1. Oven preheated to 250°F / 121°C. Line a cookie sheet with a silpat or lightly grease.
  2. In the bowl of a stand mixer or with a hand-held electric mixer, beat egg whites and cream of tartar with whisk attachment until foamy.
  3. Add sugar and beat until stiff peaks form.
  4. Fold in chocolate chips with a spatula.
  5. Drop onto prepared cookie sheet and bake for about 30 minutes, or until set and just starting to turn a light golden color. Allow to cool slightly before removing from cookie sheet.

Notes

  • Mini M&M’s are also a hit in these cookies! You can get creative, any kind of crushed candy or cookie like Oreo’s, or nuts, sprinkles, etc.
  • These cookies are best enjoyed within a day or two. They can be stored loosely covered at room temperature, but if you cover too tightly they turn soft and sticky even quicker.

Nutrition Facts

Calories

45.69

Fat

1.32 g

Sat. Fat

0.81 g

Carbs

8.05 g

Fiber

0.15 g

Net carbs

7.9 g

Sugar

7.7 g

Protein

0.54 g

Cholesterol

0.84 mg

Sodium

8.04 mg

Nutritional information is approximate. Based on 1 cookie from a 24-cookie batch.

meringue, egg whites, cookies, gluten-free, dairy-free
dessert, cookies
American
Did you make this recipe?
Tag @jennyblogsandbakes on instagram and hashtag it #jennyblogs

Oil Pie Crust

Last Updated July 31, 2024

Pie crusts are a baking staple, but one that can be intimidating, even if you’ve made them before. Once you master how to make crust, however, a whole world of baking and cooking opens up to you: sweet pies, savory pies, quiches, galettes, home-made pop tarts, etc.

The ingredients for pie crusts couldn’t be more simple. Flour, salt, fat, and water for a basic crust. They differ mostly in what kind of fat is used. Top choices are:

  • Lard - tends to be a more traditional choice, many family recipes handed down include lard. It’s supposed to make a very tender, melt-in-your mouth crust. I prefer to avoid it because of its health value, or lack thereof.

  • Shortening - one of the cheaper options, and is easier to work with, making it a good choice for those that want their crust to hold up and make designs or cutouts. Another I prefer to avoid because it is a very unhealthy fat.

  • Butter - usually touted for having the best flavor. Since butter easily melts while it’s being worked with, it can be slightly more finicky than the previous two to keep tender, and less reliable for designs and cutouts.

  • Oil - the trickiest to work with by far, few are the people I know who make oil crusts. Actually, my mom may be the only one I know who only makes oil crusts. It’s the healthiest option, as a lot of oils have good fats and you can choose which oil you want to use. I tend to go for a neutral flavored oil, like refined olive oil or peanut oil, but you could even go for extra virgin olive oil, especially if used for a savory pie! You can taste extra virgin olive oil, but yum! Oil crusts are almost useless when it comes to making designs and cutouts. With experience and patience you can get a lattice crust out of it, but if you go this route know it may not turn out and will look lovely and rustic.

Today we’re talking about oil crusts, the most fearful, yet arguably healthiest, of them all. While they can be notoriously tricky in my family to get a consistently tender crust, I’ve been working on my family’s recipe a lot over the past 2 years especially and have discovered a few tricks. I feel the recipe is just about foolproof, so I’ve decided to finally share it with you!

I’ll warn you, it is still not an “easy” pie crust to work with, but with a little patience, can yield a wonderful and very tender, melt-in-your-mouth crust. I’ll give you all the tricks and knowledge that I know of!

Flour Matters

What brand and what kind of flour you use DOES matter. While all-purpose flour is generally all-purpose, it’s helpful to know what the protein content is of the flour that you’re using. For pie crusts and other delicate baked goods, you may want to get some pastry flour for the best results.

For awhile there we were using Good & Gather’s organic all-purpose flour. Gradually, we both noticed our baked goods weren’t turning out like they used to. We kept chalking it up to bad baking days, or this or that. We finally came to the conclusion that the Good & Gather flour was always the common denominator in things turning out…with unusual results. We switched to King Arthur flours and all our recipes suddenly started turning out wonderfully.

Until the next few crusts we made. A little crusty. Tough. Then we realized, that’s because King Arthur’s all-purpose flour has a protein content of 11.7%. Some might say, a medium-strength bread flour. Bread flour’s have a higher protein content, which helps to develop gluten for bread. This is why bread’s are kneaded, to help develop that gluten. But you do NOT want gluten developing in a pie crust, which is why you mix minimally and use a low-protein flour. All-purpose flours are generally seen as well, all-purpose. High enough protein content to make decent breads, low enough to be able to still make cakes, cookies, etc. With King Arthur’s all-purpose flour having a higher than average protein content, this is why our crusts were turning out tough. For this reason, we now like to use Bob’s Red Mill pastry flour specifically for our pie crusts and those desserts of the most delicate nature.

Use Enough Oil

The single biggest difference between a potentially hard/crunchy crust, and a tender, melt-in-your-mouth crust? Making sure you are using sufficient fat, in this instance, oil. Once you add the oil, practically all the flour should be saturated. Like wet sand. Not some wet, a little dry. Not mostly dry. Well saturated. Which also means you may need less water. Adding less water can mean less mixing, which is another important aspect.

Don’t Over Mix

Never over-mix a pie crust once the water is added. Just a few turns with a spoon or spatula should suffice.

If Time, Let it Rest

Another trick is to let the dough rest before rolling it out. I’ve found success with two rests, if time allows. When you first add the water, let the mixture sit for a few minutes. Don’t mix the water in, just let it sit. Then gently mix. This gives the water more time to penetrate deep into the flour/oil, thus reducing the amount of time you may need to mix it.

A second rest, once you’ve gently mixed the dough, can be helpful. Form the dough into a ball, press into a disc, and wrap in plastic wrap. Let rest for anywhere from 10 minutes to overnight. The more time you give it, the more time the gluten has to relax and again, the water to absorb evenly throughout the dough. When you mix flour with water, gluten starts to form. This is good if you are making bread, helps give it a strong structure so it can rise, but bad if you are making crust. It will be tough. Neither of these rests are essential, but can be helpful, especially if you struggle with tough crusts.

How Do I Know How Much Water to Use?

The more you make this recipe the more you will become familiar with just how much water you need. The brand of flour you use, your kitchen, the temperature, humidity, elevation, season, etc. can all affect how much water you need. For example, in my kitchen, I almost always use exactly 5 Tbsp of water when I make this. However, in your kitchen, you may need 7. Somewhere else, maybe only 4. Each time you make your crust it becomes easier, knowing better how much water to add, what the consistency should look/feel like. Sometimes it can be hard to tell in the mixing stage, and despite your best guess, you may find your crust is too dry or too wet. That’s ok, just roll with it (aha literally), and make a note for next time. Once you’ve started rolling out your dough it’s too late to be adding more water, but you CAN add more flour while rolling it out if it’s a touch too wet. Carefully. Just enough at a time so that the dough isn’t sticking to the surface or the rolling pin. The first time making a recipe, especially a more technical one like a crust, is always the trickiest.

How Do You Transfer the Rolled Out Pie Dough into the Pie Plate?

It’s true, this step is more challenging when dealing with a more delicate oil pie crust, but certainly doable.

Option 1: First, I recommend rolling out the dough on a silpat, or even a large cutting board. Once it’s rolled to size, carefully slide a thin spatula under the edges of the dough, to ensure it hasn’t glued itself to the surface you rolled it out on. Place the pie plate upside down directly onto the crust, centered. Slide one hand under the silpat or cutting board, place the other hand on the bottom of the pie plate, and quickly flip all. Then gently peel off the silpat, or remove the cutting board. Some flour may go flying, but this is the way I’ve had most consistent success keeping an intact oil pie crust.

Option 2: Fold the dough in half once it’s been rolled out, then transfer it to one side of the pie plate. Unfold the crust, and adjust/repair as needed. With an oil crust, it’s common for it to “crack” where you folded it, but that’s easily repaired if it’s a bottom crust.

Option 3: Starting at one end of the rolled out dough, carefully and loosely roll the dough around the rolling pin. Slide it over to the pie plate, and unroll.

Some of these tips are repeated in the “Jenny’s Notes” section immediately following the recipe, so you can reference them should you choose to print the recipe. :)

This post may contain affiliate links. If you make a purchase using these links, Jennyblogs may receive a small commission, at no extra cost to you. This helps to support Jennyblogs. Where possible, links are prioritized to small businesses, and American companies and products made in the USA for American readers. For further information see the privacy policy. Grazie!

Recipe from my mom


Oil Pie Crust

Makes 1 top and 1 bottom crust for a standard 8 inch / 20cm pie

Ingredients:

  • 3 3/4 cup / 450g all-purpose flour

  • 1 tsp / 5g salt

  • 3/4 cup / 168g neutral-flavored oil

  • 5-7 Tbsp / 70-98g ice water

Directions:

  1. In a large bowl, whisk together flour and salt.

  2. Stir in oil until flour is evenly moistened. It should look like wet sand with very little to no dry flour in the bottom of the bowl.

  3. Take your ice water and start by measuring 5 Tbsp / 70g evenly over flour mixture. Gently stir until just moistened. Be very careful not to over mix. If there is still a lot of drier oil mixture at the bottom of the bowl and it can’t be formed into a ball without crumbling, add more water, 1 Tbsp at a time, mixing until just combined.

  4. Divide dough into two equal pieces.

  5. On a generously floured surface, (a silpat makes for easy transfer to pie plate) roll out one half of the dough into a circle about 2 inches / 5cm larger than your pie plate.

  6. Carefully transfer dough to pie plate and press in.

  7. Repeat the rolling out process for the other half of dough. Add your pie filling and transfer top crust over pie. Trim any excess overhang from top and bottom crusts.

  8. Fold edge of top crust under edge of bottom crust, pressing and sealing together. Crimp with fingers or press with a fork. Use a knife or fork to poke some vent holes into the top.

  9. Bake according to pie recipe.

Jenny’s Notes:

  • To help ensure you don’t over-mix the dough when you add the water, you can allow the crust to sit for a few minutes after you sprinkle over the 5 Tbsp of water, BEFORE mixing. Optional, but helpful.

  • Another optional, but helpful tip to ensure a tender crust: After the water has been gently mixed in, gently form dough into a ball, then flatten into a disc and wrap in plastic film. Place in refrigerator for anywhere from 10-30+ minutes, even overnight. The more time it sits the more the moisture from the water will evenly distribute throughout the dough, simultaneously allowing any gluten that formed while mixing the dough a chance to “relax”, thus creating a more tender crust.

  • While rolling out the dough, occasionally turn it OR run a thin spatula underneath the dough, to ensure it is not glueing itself to the surface you are rolling it out on. If needed, sprinkle more flour underneath.

  • To easily see if you’ve rolled the pie crust out into a large enough circle, flip your pie plate upside down and hover it over the dough. You should be able to see about 2 inches / 5cm extending beyond the edges of your pie plate in all directions.

Oil Pie Crust
Yield 8
Author
Prep time
15 Min
Total time
15 Min

Oil Pie Crust

A 100% oil pie crust that is flaky, tender, and simple to make. Learn how to make one of the trickiest, yet healthiest pie crusts out there with this recipe, following the tips and tricks!
Cook modePrevent screen from turning off

Ingredients

Instructions

  1. In a large bowl, whisk together flour and salt.
  2. Stir in oil until flour is evenly moistened. It should look like wet sand with very little to no dry flour in the bottom of the bowl.
  3. Take your ice water and start by measuring 5 Tbsp / 70g evenly over flour mixture. Gently stir until just moistened. Be very careful not to over mix. If there is still a lot of drier oil mixture at the bottom of the bowl and it can’t be formed into a ball without crumbling, add more water, 1 Tbsp at a time, mixing until just combined.
  4. Divide dough into two equal pieces.
  5. On a generously floured surface, (a silpat makes for easy transfer to pie plate) roll out one half of the dough into a circle about 2 inches / 5cm larger than your pie plate.
  6. Carefully transfer dough to pie plate and press in.
  7. Repeat the rolling out process for the other half of dough. Add your pie filling and transfer top crust over pie. Trim any excess overhang from top and bottom crusts.
  8. Fold edge of top crust under edge of bottom crust, pressing and sealing together. Crimp with fingers or press with a fork. Use a knife or fork to poke some vent holes into the top.
  9. Bake according to pie recipe.

Notes

  • To help ensure you don’t over-mix the dough when you add the water, you can allow the crust to sit for a few minutes after you sprinkle over the 5 Tbsp of water, BEFORE mixing. Optional, but helpful.
  • Another optional, but helpful tip to ensure a tender crust: After the water has been gently mixed in, gently form dough into a ball, then flatten into a disc and wrap in plastic film. Place in refrigerator for anywhere from 10-30+ minutes, even overnight. The more time it sits the more the moisture from the water will evenly distribute throughout the dough, simultaneously allowing any gluten that formed while mixing the dough a chance to “relax”, thus creating a more tender crust.
  • While rolling out the dough, occasionally turn it OR run a thin spatula underneath the dough, to ensure it is not glueing itself to the surface you are rolling it out on. If needed, sprinkle more flour underneath.
  • To easily see if you’ve rolled the pie crust out into a large enough circle, flip your pie plate upside down and hover it over the dough. You should be able to see about 2 inches / 5cm extending beyond the edges of your pie plate in all directions.


Nutrition Facts

Calories

398.92

Fat

21.57 g

Sat. Fat

1.64 g

Carbs

44.71 g

Fiber

1.58 g

Net carbs

43.13 g

Sugar

0.16 g

Protein

6.05 g

Sodium

292.42 mg

Cholesterol

0 mg

Nutritional information is approximate. Based on 8 servings.

homemade oil pie crust recipe
Dessert, Dinner, Breakfast
American
Did you make this recipe?
Tag @jennyblogsandbakes on instagram and hashtag it #jennyblogs

Homemade Chocolate Pudding

Everybody needs a good, quick, chocolate pudding recipe!

This recipe is almost as fast as the instant box kind, but much healthier! Well, as healthy as chocolate pudding can be. :) All it requires is a few ingredients whisked together, heated on the stove, then left to set up in the fridge. Easy peasy!

Because it’s so quick and easy, the original name of this recipe is “Hasty Chocolate Pudding”. I use this recipe in place of instant chocolate pudding when called for in recipes, in popsicles, as a filling for cupcakes, and when anyone just wants a bowl of chocolate pudding!

This post may contain affiliate links. If you make a purchase using these links, Jennyblogs may receive a small commission, at no extra cost to you. This helps to support Jennyblogs. For further information see the privacy policy. Grazie!

Recipe adapted from All Recipes


Homemade Chocolate Pudding

Makes about 2 cups of pudding

Ingredients:

  • 1/2 cup / 100g granulated sugar

  • 1/3 cup / 33g unsweetened cocoa powder

  • 3 Tbsp / 27g corn starch

  • 2 cups / 474g milk

  • 2 tsp / 10g vanilla extract

Directions:

  1. In a medium pot, whisk together sugar, cocoa powder, and corn starch until no lumps remain.

  2. Slowly add in milk, whisking well to get a smooth mixture.

  3. Place mixture over medium heat and whisk constantly, until mixture thickens and begins to simmer.

  4. Remove from heat and stir in vanilla extract

  5. Transfer pudding to a heat-proof bowl, and allow to cool slightly, whisking now and then to avoid the “skin” forming. When pudding is cooler, place a piece of plastic wrap directly onto pudding.

  6. Refrigerate until set.

Jenny’s Notes:

  • “heat-proof” just means a bowl that is safe to handle hot food; one that won’t break (certain glass bowls), or won’t leak dangerous chemicals into your food (plastic), or in any other way form a peril if you pour hot liquid into it. :)

  • Placing the plastic wrap directly onto the pudding prevents that “skin” from forming as the pudding cools. Because I don’t enjoy using plastic in general and especially when coming into contact with hot food, I try to wait for the pudding to cool before placing it on. This also ensures the plastic wrap won’t melt, as it could if you put it on immediately after taking it off the heat.

The plastic wrap placed directly on the pudding to prevent a skin from forming

chocolate pudding, chocolate cream, no bake
dessert
American
Yield: 4
Author:
Homemade Chocolate Pudding

Homemade Chocolate Pudding

Chocolate pudding can be made at home with just 5 ingredients and a stovetop. It couldn't be easier and it's all natural!
Prep time: 5 MinCook time: 10 MinInactive time: 1 HourTotal time: 1 H & 15 M

Ingredients

Instructions

  1. In a medium pot, whisk together sugar, cocoa powder, and corn starch until no lumps remain.
  2. Slowly add in milk, whisking well to get a smooth mixture.
  3. Place mixture over medium heat and whisk constantly, until mixture thickens and begins to simmer.
  4. Remove from heat and stir in vanilla extract
  5. Transfer pudding to a heat-proof bowl, and allow to cool slightly, whisking now and then to avoid the “skin” forming. When pudding is cooler, place a piece of plastic wrap directly onto pudding.
  6. Refrigerate until set.

Notes

  • “heat-proof” just means a bowl that is safe to handle hot food; one that won’t break (certain glass bowls), or won’t leak dangerous chemicals into your food (plastic), or in any other way form a peril if you pour hot liquid into it. :)
  • Placing the plastic wrap directly onto the pudding prevents that “skin” from forming as the pudding cools. Because I don’t enjoy using plastic in general and especially when coming into contact with hot food, I try to wait for the pudding to cool before placing it on. This also ensures the plastic wrap won’t melt, as it could if you put it on immediately after taking it off the heat.


Nutrition Facts

Calories

214.7

Fat

4.96 g

Sat. Fat

2.85 g

Carbs

40.48 g

Fiber

2.71 g

Net carbs

37.79 g

Sugar

31.21 g

Protein

5.42 g

Sodium

48.84 mg

Cholesterol

14.64 mg

Nutritional information is approximate; based on four 1/2 cup servings.

Did you make this recipe?
Tag @jennyblogsandbakes on instagram and hashtag it #jennyblogs

Jenny's Favorite Cinnamon Rolls

Last updated: June 4, 2024

With all the cinnamon roll recipes out there, how do you pick which one to make? Which one do you adopt as your cinnamon roll recipe?

I’ve made my fair share of cinnamon roll recipes, and I’ve yet to meet a bad one. Some are better than others, but I’ve been waiting to meet the recipe that stood out from the rest.

Lightning struck when I tried this recipe from King Arthur, “Perfectly Pillowy Cinnamon Rolls”. I had met the one! As the title suggests, these rolls are pillowy, luxurious, and everything you could want from a cinnamon roll.

What makes a good cinnamon roll recipe?

The thing that really makes one cinnamon roll stand out from another is the actual dough.

Filling and frosting are easily adjusted, so once you find a cinnamon roll with a soft, fluffy, and luscious dough, you can always adjust filling and frosting according to your taste.

What makes this recipe so special?

Speaking of customizing, how about for those who do and do not want frosting? And those who can’t wait to dig in. :)

  1. This cinnamon roll dough is just the best. Why? It utilizes the tangzhong technique (see below). This creates softer, pillowy bread that stays fresher for longer!

  2. This recipe also allows you to customize your icing: do your prefer plain icing or cream cheese icing? This recipe gives an easy access to either one. Plus, if you use buttermilk in the frosting, it’s the touch that sweet icing has been missing.

  3. You can customize the richness of these rolls!

    For richer rolls:

    • Add extra cinnamon to the filling

    • Drizzle each roll with 1 tsp of milk or heavy cream before baking for extra gooey rolls

    • Cover rolls with tinfoil for the first half of baking (baking time may need to be adjusted)

    • brush the rolls with melted butter when they come out of the oven, before icing

What is Tangzhong?

This recipe utilizes tangzhong in the dough, an Asian bread method that involves cooking some of the milk and flour to create a thick paste before adding it in with the rest of the ingredients. In essence, it creates a softer bread that retains its moisture for longer. Cinnamon rolls are usually best consumed the same day they are baked, but when you use this simple tangzhong method, they are still pretty darn soft and luscious even a day or two later! If you’re interested in learning more of the science-y stuff behind how and why tangzhong works, King Arthur themselves wrote this handy article on it.

While you might be thinking that cinnamon rolls are already a multi-step process and don’t need another one, may I say, what’s one more? Tangzhong DOES create an extra step, but it’s very simple. It involves 2 ingredients and takes less than 5 minutes for cinnamon rolls that stay fresh for hours, even days longer than standard cinnamon rolls. I think it’s totally worth it!

I heart King Arthur, now you heart King Arthur, we all heart King Arthur!

I originally kept this recipe largely the same with just a few minor tweaks to King Arthur’s recipe, but I’ve continued to make adjustments to streamline the recipe. Beyond that, there are a few customizable elements depending on just how rich and luscious you like your cinnamon rolls. Some of these are things I gathered from cinnamon roll recipes I’ve made in the past; others are little tricks I’ve seen bakeries use. Put them all together to make your ultimate cinnamon roll.

Create New Flavors

Lime Rolls: Trying to take photos on my laundry rack outside…our apartment in Incisa Valdarno had very poor lighting for any kind of photography.

This recipe is also a wonderful base to change up the flavors, you don’t always have to stick with cinnamon rolls. I’ve used this recipe to make Lime Rolls (think lime dough with a sweet lime filling and zingy lime icing), and they were WONDERFUL. I’ve also made Lemon Rolls, and am thinking about making Orange Rolls next time. Yum!

Enough about the tangzhong and how wonderful this recipe is and how many different things you can do with it, I like the recipe to speak for itself. :)

This post may contain affiliate links. If you make a purchase using these links, Jennyblogs may receive a small commission, at no extra cost to you. This helps to support Jennyblogs. For further information see the privacy policy. Grazie!

Recipe adapted from King Arthur


Cinnamon Rolls

Makes 12 large cinnamon rolls

Ingredients

For the Tangzhong:

  • 3/4 cup / 170g milk

  • 5 Tbsp / 40g bread flour

For the Dough:

  • 1 cup / 237g milk

  • 3 3/4 cup / 450g bread flour

  • 1 1/2 tsp / 9g salt

  • 3 Tbsp / 37g sugar

  • 1 Tbsp / 9g instant yeast

  • 6 Tbsp / 85g softened butter

  • 1/2 cup / about 100g sourdough discard, optional

For the Filling:

  • 2 Tbsp / 28g softened butter

  • 3/4 cup / 150g brown sugar

  • 4 1/2 tsp / 12g cinnamon

For the Icing:

  • 2 1/4 cup / 280g powdered sugar

  • 4 oz / 113g cream cheese, softened, optional

  • 2 Tbsp / 28g butter, melted

  • 1 tsp / 5g vanilla extract

  • 2-3 Tbsp milk, heavy cream, or buttermilk

Directions

Oven 375°F / 190°C 9x13inch / 23x33cm rectangle baking dish, lightly greased, OR jelly roll pan or cookie sheet lined with parchment paper or silicone baking mat

Make the Tangzhong:

  1. In a small pan, whisk flour and milk together until no lumps remain. Place over medium heat and cook, stirring often, until thickened into a paste-like texture. This could take just a couple minutes or more, depending on your burner.

  2. Set aside for a moment to cool.

Make the Dough:

  1. Add all dough ingredients to the bowl of a stand mixer or other large bowl. Add in the warm (but not too hot) tangzhong. If using sourdough discard, you may find you need a small additional amount of flour to make the dough not overly sticky.

  2. Knead with the dough attachment in the stand mixer for about 10 minutes or longer by hand, until dough is elastic and passes the window pane test.

  3. Shape dough into a ball and place in a lightly oiled bowl and cover. Let rise in a warm place for 1 - 1.5 hours, or until roughly doubled in size.

Make the Filling:

  1. When the dough has risen, punch down and dump out onto a floured surface. Roll the dough into a roughly 10x12in / 25x30cm rectangle, about 0.5in / 1.25cm thick. Do your best to roll or pat into a rectangle and not an oval.

  2. Evenly spread butter over dough, leaving about 0.5in / 1.25cm uncovered along the edge of one of the long sides. Sprinkle brown sugar and cinnamon evenly over butter. Press gently into dough. Carefully roll the dough up, starting with the opposite long side. Use the uncovered edge to help seal the roll; you can gently roll it back and forth with the seam down to help seal it.

  3. Using a sharp serrated knife or dental floss, cut the roll into 12 pieces. Place each piece in prepared baking dish, or free standing on a cookie sheet or jelly roll pan, spaced evenly apart.

  4. Lightly cover the rolls and let rise in a warm place until risen and puffy, about 30-60 minutes. Partway through this time, preheat your oven to 375°/190°C.

  5. Bake rolls for about 14-18 minutes or until internal temperature of an outer roll reads 185°F / 85°C.

  6. Allow rolls to cool for at least 10 minutes before icing.

Make the Icing:

  1. In a medium bowl or the bowl of a stand mixer fitted with the paddle, mix all icing ingredients together except milk until smooth. Add milk, 1 Tbsp at a time, until desired icing consistency is reached.

  2. Spread icing evenly over rolls.

Jenny’s Notes

  1. When making bread, you are often instructed to add warm (about 110°F / 43°C) liquids to your dough. This helps to activate the yeast and thus rise your dough. If you add cold liquids your yeast may remain dormant and not do much. In this recipe, the milk doesn’t have to be warm, you can add it cold since it will offset the heat from the tangzhong that was cooked. Don’t add the tangzhong straight from the hot stove into the bowl with your yeast and other ingredients, as the heat could kill the yeast, but the time it takes to assemble the other dough ingredients in the bowl should be sufficient time for the tangzhong to cool down. Then the cold milk helps, too.

  2. The best way to ensure properly cooked cinnamon rolls (or anything!) is by taking an internal temperature. One of top used kitchen tools is my Thermapen, and I highly recommend one to you. You can find similar on Amazon.

  3. My favorite icing for cinnamon rolls is cream cheese. Either way you go, I highly recommend using buttermilk in the icing rather than milk. The tang offsets the very sweet icing really, really well.

  4. The window pane test, which is my go-to for kneaded doughs, is essentially taking a small chunk of dough and stretching it into an even little square, then stretching the dough until it is very thin. If the dough begins to break, not enough gluten has developed and needs to be kneaded more. A dough that has been sufficiently kneaded will stretch very thin, thin enough you could almost see through it, and, if held up to a window, can see light through it, hence the name of this technique.

  5. To facilitate cutting the rolls evenly, I like to use a knife or the floss to make marks in the dough before actually cutting. I start by making a mark in the middle, then another mark in the middle of each half, then marking each quarter into 3. If you want to be really precise, use a measuring tape in front of your roll. :)

  6. If you saw dental floss as a choice for cutting the roll and think that’s crazy, trust! It gives you a clean cut and is satisfying to use. Slide the floss under the roll where you want to cut, then pull the ends of the floss up and around the roll, pulling in opposite directions to slice the roll.

  7. If you don’t have dental floss or a sharp enough knife to cut the rolls without squishing them, you can put the rolls in the freezer for about 30 minutes until the dough is firmed up. This makes the cutting process neater and easier if you don’t have ideal tools at hand. You will then have to give a little more time in the rising process since the dough is cold.

  8. Inevitably your cut rolls with will vary slightly in size, the ones from the middle being more generous than the ones from the end. To ensure the most even baking, place the larger rolls on the outside or corners of your pan, the smaller ones toward the center.

  9. If making free standing cinnamon rolls, you’ll want to tuck the ends of the rolls underneath themselves, so you don’t have tails when they rise and are baked.

  10. I had never made free standing cinnamon rolls or any kind of roll like this until I found this recipe. It gives a little more freedom in what you can use in the baking process and I love that. You will have more perfectly shaped rolls, but baking together in a rectangle dish is easier if you want to freeze or transport the rolls.

  11. How to tell if your dough is risen enough, but not over risen? When gently pressed with a finger, the dough should slowly spring back. If it springs back immediately, it hasn’t risen enough. If it doesn’t spring back at all, it could be over-risen.

  12. These rolls freeze well! You have two options:

    1. Freeze once rolls are sliced and in their rectangle pan. Cover tightly and freeze. When ready to use, allow to come to room temperature and rise until puffy, continuing from step 5 in the “Make the Filling” section.

    2. Freeze once rolls are baked and cooled. Frosting is best done once rolls have come to room temperature (or even been warmed in the oven for a bit)

Jenny's Favorite Cinnamon Rolls
Yield 12
Author
Prep time
50 Min
Cook time
18 Min
Inactive time
2 H & 30 M
Total time
3 H & 38 M

Jenny's Favorite Cinnamon Rolls

Classic cinnamon rolls are taken to the next level with the use of the tangzhong technique. This creates extra fluffy, pillowy soft rolls that stay softer for longer. With a traditional cinnamon filling and customizable frosting, these too can become your favorite cinnamon rolls!

Ingredients

For the Tangzhong:
For the Dough:
For the Filling:
For the Icing:

Instructions

Make the Tangzhong:
  1. In a small pan, whisk flour and milk together until no lumps remain. Place over medium heat and cook, stirring often, until thickened into a paste-like texture. This could take just a couple minutes or more, depending on your burner.
  2. Set aside for a moment to cool.
Make the Dough:
  1. Add all dough ingredients to the bowl of a stand mixer or other large bowl. Add in the warm (but not too hot) tangzhong.
  2. Knead with the dough attachment in the stand mixer for about 10 minutes or longer by hand, until dough is elastic and passes the window pane test.
  3. Shape dough into a ball and place in a lightly oiled bowl and cover. Let rise in a warm place for 1 - 1.5 hours, or until roughly doubled in size.
Make the Filling:
  1. Oven 375°F / 190°C 9x13inch / 23x33cm rectangle baking dish, lightly greased, OR jelly roll pan or cookie sheet lined with parchment paper or silicone baking mat
  2. Combine all filling ingredients together in a small bowl, until a wet sand texture is achieved.
  3. When the dough has risen, punch down and dump out onto a floured surface. Roll the dough into a roughly 10x12in / 25x30cm rectangle, about 0.5in / 1.25cm thick. Do your best to roll or pat into a rectangle and not an oval.
  4. Evenly sprinkle filling over dough, leaving about 0.5in / 1.25cm uncovered along the edge of one of the long sides. Carefully roll the dough up, starting with the opposite long side. Use the uncovered edge to help seal the roll; you can gently roll it back and forth with the seam down to help seal it.
  5. Using a sharp serrated knife or dental floss, cut the roll into 12 pieces. Place each piece in the prepared pan, or free standing on a cookie sheet, spaced evenly apart.
  6. Lightly cover the rolls and let rise in a warm place until risen and puffy, about 30-60 minutes. Partway through this time you’ll want to preheat your oven to 375°/190°C.
  7. Bake rolls for about 14-18 minutes or until internal temperature of an outer roll reads 190°F / 88°C.
  8. Allow rolls to cool for about 10 minutes before icing.
Make the Icing:
  1. In a medium bowl or the bowl of a stand mixer fitted with the paddle, mix all icing ingredients together except milk until smooth. Add milk, 1 Tbsp at a time, until desired icing consistency is reached.
  2. Spread icing evenly over rolls.

Notes

  1. When making bread, you are often instructed to add warm (about 110°F / 43°C) liquids to your dough. This helps to activate the yeast and thus rise your dough. If you add cold liquids your yeast may remain dormant and not do much. In this recipe, you may notice the milk doesn’t have to be warm. In fact, you can add it cold since it will offset the heat from the tangzhong that was cooked. I wouldn’t add the tangzhong straight from the hot stove into the bowl with your yeast and other ingredients, as the heat could kill the yeast, but the time it takes to assemble the other dough ingredients in the bowl should be sufficient time for the tangzhong to cool down. Then the cold milk helps, too.
  2. The best way to ensure properly cooked cinnamon rolls (or anything!) is by taking an internal temperature. One of top used kitchen tools is my Thermapen, and I highly recommend one to you. You can find similar on Amazon.
  3. My favorite icing for cinnamon rolls is cream cheese, however this makes them that much richer and heavier, so I tend to go back and forth between making the icing with and without the cream cheese. Either way you go, I highly recommend using buttermilk in the icing rather than milk. The tang offsets the very sweet icing really, really well.
  4. The window pane test, which is my go-to for kneaded doughs, is essentially taking a small chunk of dough and stretching it into an even little square, then stretching the dough until it is very thin. If the dough begins to break, not enough gluten has developed and needs to be kneaded more. A dough that has been sufficiently kneaded will stretch very thin, thin enough you could almost see through it, and, if held up to a window, can see light through it, hence the name of this technique.
  5. To facilitate cutting the rolls evenly, I like to use a knife or the floss to make marks in the dough before actually cutting. I start by making a mark in the middle, then another mark in the middle of each half, then marking each quarter into 3. If you want to be really precise, use a measuring tape in front of your roll. :)
  6. If you saw dental floss as a choice for cutting the roll and think that’s crazy, trust! It actually gives you the cleanest cut and is satisfying to use. Slide the floss under the roll where you want to cut, then pull the ends of the floss up and around the roll, pulling in opposite directions to slice the roll.
  7. If you don’t have dental floss or a sharp enough knife to cut the rolls without squishing them, you can put the rolls in to the freezer for about 30 minutes until the dough is firmed up. This makes the cutting process neater and easier if you don’t have ideal tools at hand. You will then have to give a little more time in the rising process since the dough is cold.
  8. If you want extra gooey, rich cinnamon rolls:
  • Before baking, pour about 1 tsp of heavy cream over each roll.
  • After baking, brush rolls with 2 Tbsp of melted butter immediately after they come out of the oven. Then continue with cooling and icing.
  1. Inevitably your cut rolls with will vary slightly in size, the ones from the middle being more generous than the ones from the end. To ensure the most even baking, place the larger rolls on the outside or corners of your pan, the smaller ones toward the center.
  2. If making free standing cinnamon rolls, you’ll want to tuck the ends of the rolls underneath themselves, so you don’t have tails when they rise and are baked.
  3. I had never made free standing cinnamon rolls or any kind of roll like this until I found this recipe. It gives a little more freedom in what you can use in the baking process and I love that. You will have more perfectly shaped rolls, but baking together in a rectangle dish is easier if you want to freeze or transport the rolls.
  4. How to tell if your dough is risen enough, but not over risen? When gently pressed with a finger, the dough should slowly spring back. If it springs back immediately, it hasn’t risen enough. If it doesn’t spring back at all, it could be over-risen.
  5. These rolls freeze well! You have two options:
  6. Freeze once rolls are sliced and in their rectangle pan. Cover tightly and freeze. When ready to use, allow to come to room temperature and rise until puffy, continuing from step 5 in the “Make the Filling” section.
  7. Freeze once rolls are baked and cooled. Frosting is best done once rolls have come to room temperature (or even been warmed in the oven for a bit)


Nutrition Facts

Calories

459.97

Fat

15.91 g

Sat. Fat

9.5 g

Carbs

71.85 g

Fiber

1.8 g

Net carbs

70.06 g

Sugar

37.68 g

Protein

7.43 g

Sodium

416.6 mg

Cholesterol

42.79 mg

Nutritional information is approximate, based on 1 cinnamon roll with cream cheese frosting.

best ever cinnamon rolls, king arthur, cream cheese frosting, sourdough discard recipe
breakfast, bread
American
Did you make this recipe?
Tag @jennyblogsandbakes on instagram and hashtag it #jennyblogs

Cinnamon Rolls Pre-Icing


Chicken Fricassée

Last Updated September 7, 2024

Chicken fricassée is a French chicken stew, consisting of browned chicken and vegetables in a creamy mushroom sauce.

It starts with a simple pan fry of chicken in a skillet with butter, until they’re nice and brown. The chicken is removed from the pan so you can cook onions, carrots, mushrooms, garlic, and a bit of thyme. Flour, chicken broth, and white wine are added to make a slightly thick, hearty sauce. Finally, cream (or milk if you prefer a lighter or less expensive version) and a splash of lemon juice are added at the end to turn the sauce into a creamy, velvety wonder, perfect for serving over mashed potatoes.

The whole thing can be cooked on the stove or it can also be finished in the oven. It goes a little quicker on the stove, my preferred version. My mom, on the other hand, prefers to finish hers in the oven. She likes the hands-free time while it’s in the oven to clean up the kitchen, which is also useful!

This makes for a convenient rotation to weeknight dinners since most of the ingredients I always have on hand, save for the mushrooms. This can be made without the mushrooms if you so prefer, but honestly it’s one of my favorite parts so I make sure to add mushrooms to my grocery list!

I’m not normally a meat, carrot, and potato kind of girl, but ever since I first made this a few years ago it’s become a part of our regular dinner rotation, it’s so delicious and satisfying.

This post may contain affiliate links. If you make a purchase using these links, Jennyblogs may receive a small commission, at no extra cost to you. This helps to support Jennyblogs. For further information see the privacy policy. Grazie!

Recipe adapted from The Toasty Kitchen


Chicken Fricassée

Serves about 4

Ingredients:

Chicken fricassée over mashed potatoes

  • 2 Tbsp / 28g butter

  • 1 lb / 454g uncooked chicken breasts

  • 2-3 carrots, sliced into half moons

  • 1 onion, diced medium

  • 8 oz / 227g white button mushrooms, sliced

  • 2 cloves garlic, minced

  • 1/2 tsp dried thyme

  • 2 Tbsp / 15g flour

  • 1/2 cup / 119g dry white wine

  • 1 cup / 237g chicken broth

  • 1/2 cup / 119g heavy cream, half & half, or milk

  • 2 Tbsp / 28g fresh lemon juice

  • salt and pepper

Directions:

  1. Take the chicken breasts and lay them on a cutting board. Slice each chicken breast horizontally into two thinner breasts, slicing parallel to the cutting board. It’s like butterflying, but cut all the way through so you have two separate pieces.

  2. Heat the butter in a large pan or cast iron skillet over medium heat. Add all the pieces of chicken, and cook for a few minutes on each side until internal temperature reaches 165° / 74°C. Remove chicken from pan and set aside.

  3. Add carrots and onion to hot pan and cook several minutes, until starting to soften.

  4. Add mushrooms and cook for another few minutes, until mushrooms are cooked and have mostly released their water.

  5. Add garlic and thyme, cook for just another minute.

  6. Add flour and stir to coat all vegetables, cook another minute or so.

  7. Add the white wine to deglaze the pan.

  8. When the wine is almost evaporated, add the chicken broth; stir until sauce is smooth and slightly thickened.

  9. Remove pan from heat and stir in cream and lemon juice; season with salt and pepper to taste.

  10. Add chicken breasts back into sauce; serve. Goes great with mashed potatoes.

Jenny’s Notes:

  • Step 1 could be optional, you can keep your chicken breasts whole if you wish. I like cutting my chicken breasts into thinner pieces before cooking since a whole chicken breast is usually much bigger than a serving, and it takes longer to cook. Our butcher in Italy always cut our chicken breasts like this and I loved it, thinner pieces of meat that are done cooking in a matter of minutes.

  • If you prefer, bone-in chicken (legs, thighs, etc.) can be used. Adjust cooking time accordingly to ensure chicken is cooked through (165°F / 74°C)

  • I have made this before without the wine, and it was still wonderful. So if you don’t have any on hand or just prefer to cook without it, omit the wine with no worries.

  • To finish this dish in the oven, you’ll want to make the whole thing in a pan that is able to go into the oven, such as a cast iron skillet. Follow recipe as written up through step 8. Add chicken back into the pan (without adding cream or lemon juice) and place in an oven preheated to 350°F / 177°C. Bake uncovered for 35-45 minutes, or until sauce is bubbly. Remove from oven and stir in cream and lemon juice.

  • If you choose to finish in the oven, you can focus more on browning the chicken in the pan in step 2 rather than cooking it through, since it will be baked in the oven. Just make sure the chicken is fully cooked before you take it out of the oven at the end!

Chicken Fricassée
Yield 4
Author
Prep time
15 Min
Cook time
35 Min
Total time
50 Min

Chicken Fricassée

French chicken stew with carrots, onion, and mushrooms in a creamy white wine sauce
Cook modePrevent screen from turning off

Ingredients

Instructions

  1. Take the chicken breasts and lay them on a cutting board. Slice each chicken breast horizontally into two thinner breasts, slicing parallel to the cutting board. It’s like butterflying, but cut all the way through so you have two separate pieces.
  2. Heat the butter in a large pan or cast iron skillet over medium heat. Add all the pieces of chicken, and cook for a few minutes on each side until internal temperature reaches 165° / 74°C. Remove chicken from pan and set aside.
  3. Add carrots and onion to hot pan and cook several minutes, until starting to soften.
  4. Add mushrooms and cook for another few minutes, until mushrooms are cooked and have mostly released their water.
  5. Add garlic and thyme, cook for just another minute.
  6. Add flour and stir to coat all vegetables, cook another minute or so.
  7. Add the white wine to deglaze the pan.
  8. When the wine is almost evaporated, add the chicken broth; stir until sauce is smooth and slightly thickened.
  9. Remove pan from heat and stir in cream and lemon juice; season with salt and pepper to taste.
  10. Add chicken breasts back into sauce; serve. Goes great with mashed potatoes.

Notes

  • Step 1 could be optional, you can keep your chicken breasts whole if you wish. I like cutting my chicken breasts into thinner pieces before cooking since a whole chicken breast is usually much bigger than a serving, and it takes longer to cook. Our butcher in Italy always cut our chicken breasts like this and I loved it, thinner pieces of meat that are done cooking in a matter of minutes.
  • If you prefer, bone-in chicken (legs, thighs, etc.) can be used. Adjust cooking time accordingly to ensure chicken is cooked through (165°F / 74°C)
  • I have made this before without the wine, and it was still wonderful. So if you don’t have any on hand or just prefer to cook without it, omit the wine with no worries.
  • To finish this dish in the oven, you’ll want to make the whole thing in a pan that is able to go into the oven, such as a cast iron skillet. Follow recipe as written up through step 8. Add chicken back into the pan (without adding cream or lemon juice) and place in an oven preheated to 350°F / 177°C. Bake uncovered for 35-45 minutes, or until sauce is bubbly. Remove from oven and stir in cream and lemon juice.
  • If you choose to finish in the oven, you can focus more on browning the chicken in the pan in step 2 rather than cooking it through, since it will be baked in the oven. Just make sure the chicken is fully cooked before you take it out of the oven at the end!


Nutrition Facts

Calories

304.93

Fat

12.69 g

Sat. Fat

6.48 g

Carbs

14.38 g

Fiber

2.31 g

Net carbs

12.05 g

Sugar

6.12 g

Protein

28.4 g

Cholesterol

99.61 mg

Sodium

494.26 mg

Nutritional Information is approximate. Based on 4 servings, using heavy cream

chicken breasts, chicken stew, french chicken dish, chicken fricassée, carrots, onions, mushrooms, white wine sauce
Dinner
French
Did you make this recipe?
Tag @jennyblogsandbakes on instagram and hashtag it #jennyblogs

The Birth Story of Elyas

Last updated July 23, 2024

This is the story of how my first born, Elyas, was born in Italy.

It’s taken me a long time to write this, Elyas (pronounced like Elliott, just with an s at the end) just turned 21 months old. He’ll probably be closer to 2 by the time I finish this. Update: Elyas turns 2 tomorrow, and it seems a fitting time to share this.

I’m not entirely sure why, but a birth story feels so intimate that it can be hard to write it out in such a public space like the internet. It’s ironic, though, because ever since finding out I was pregnant with Elyas I can’t get enough of birth stories! Each is so different and so unique. Especially since my firstborn was born in a foreign-to-me country, I scoured the internet for other American, or really any, birth stories from Italy. I found a handful and yet I was always left with more questions. This is a big part of why I’m sharing mine on here, so that other women giving birth in Italy might find this and have one more experience to draw from. Or for anyone who’s curious what it’s like to have a baby in Italy.

It’s long. But so is labor, so it’s fitting, I think.

If you want to read about what it’s like to be pregnant in Italy, click here.

Here goes….


September 17th, 2020

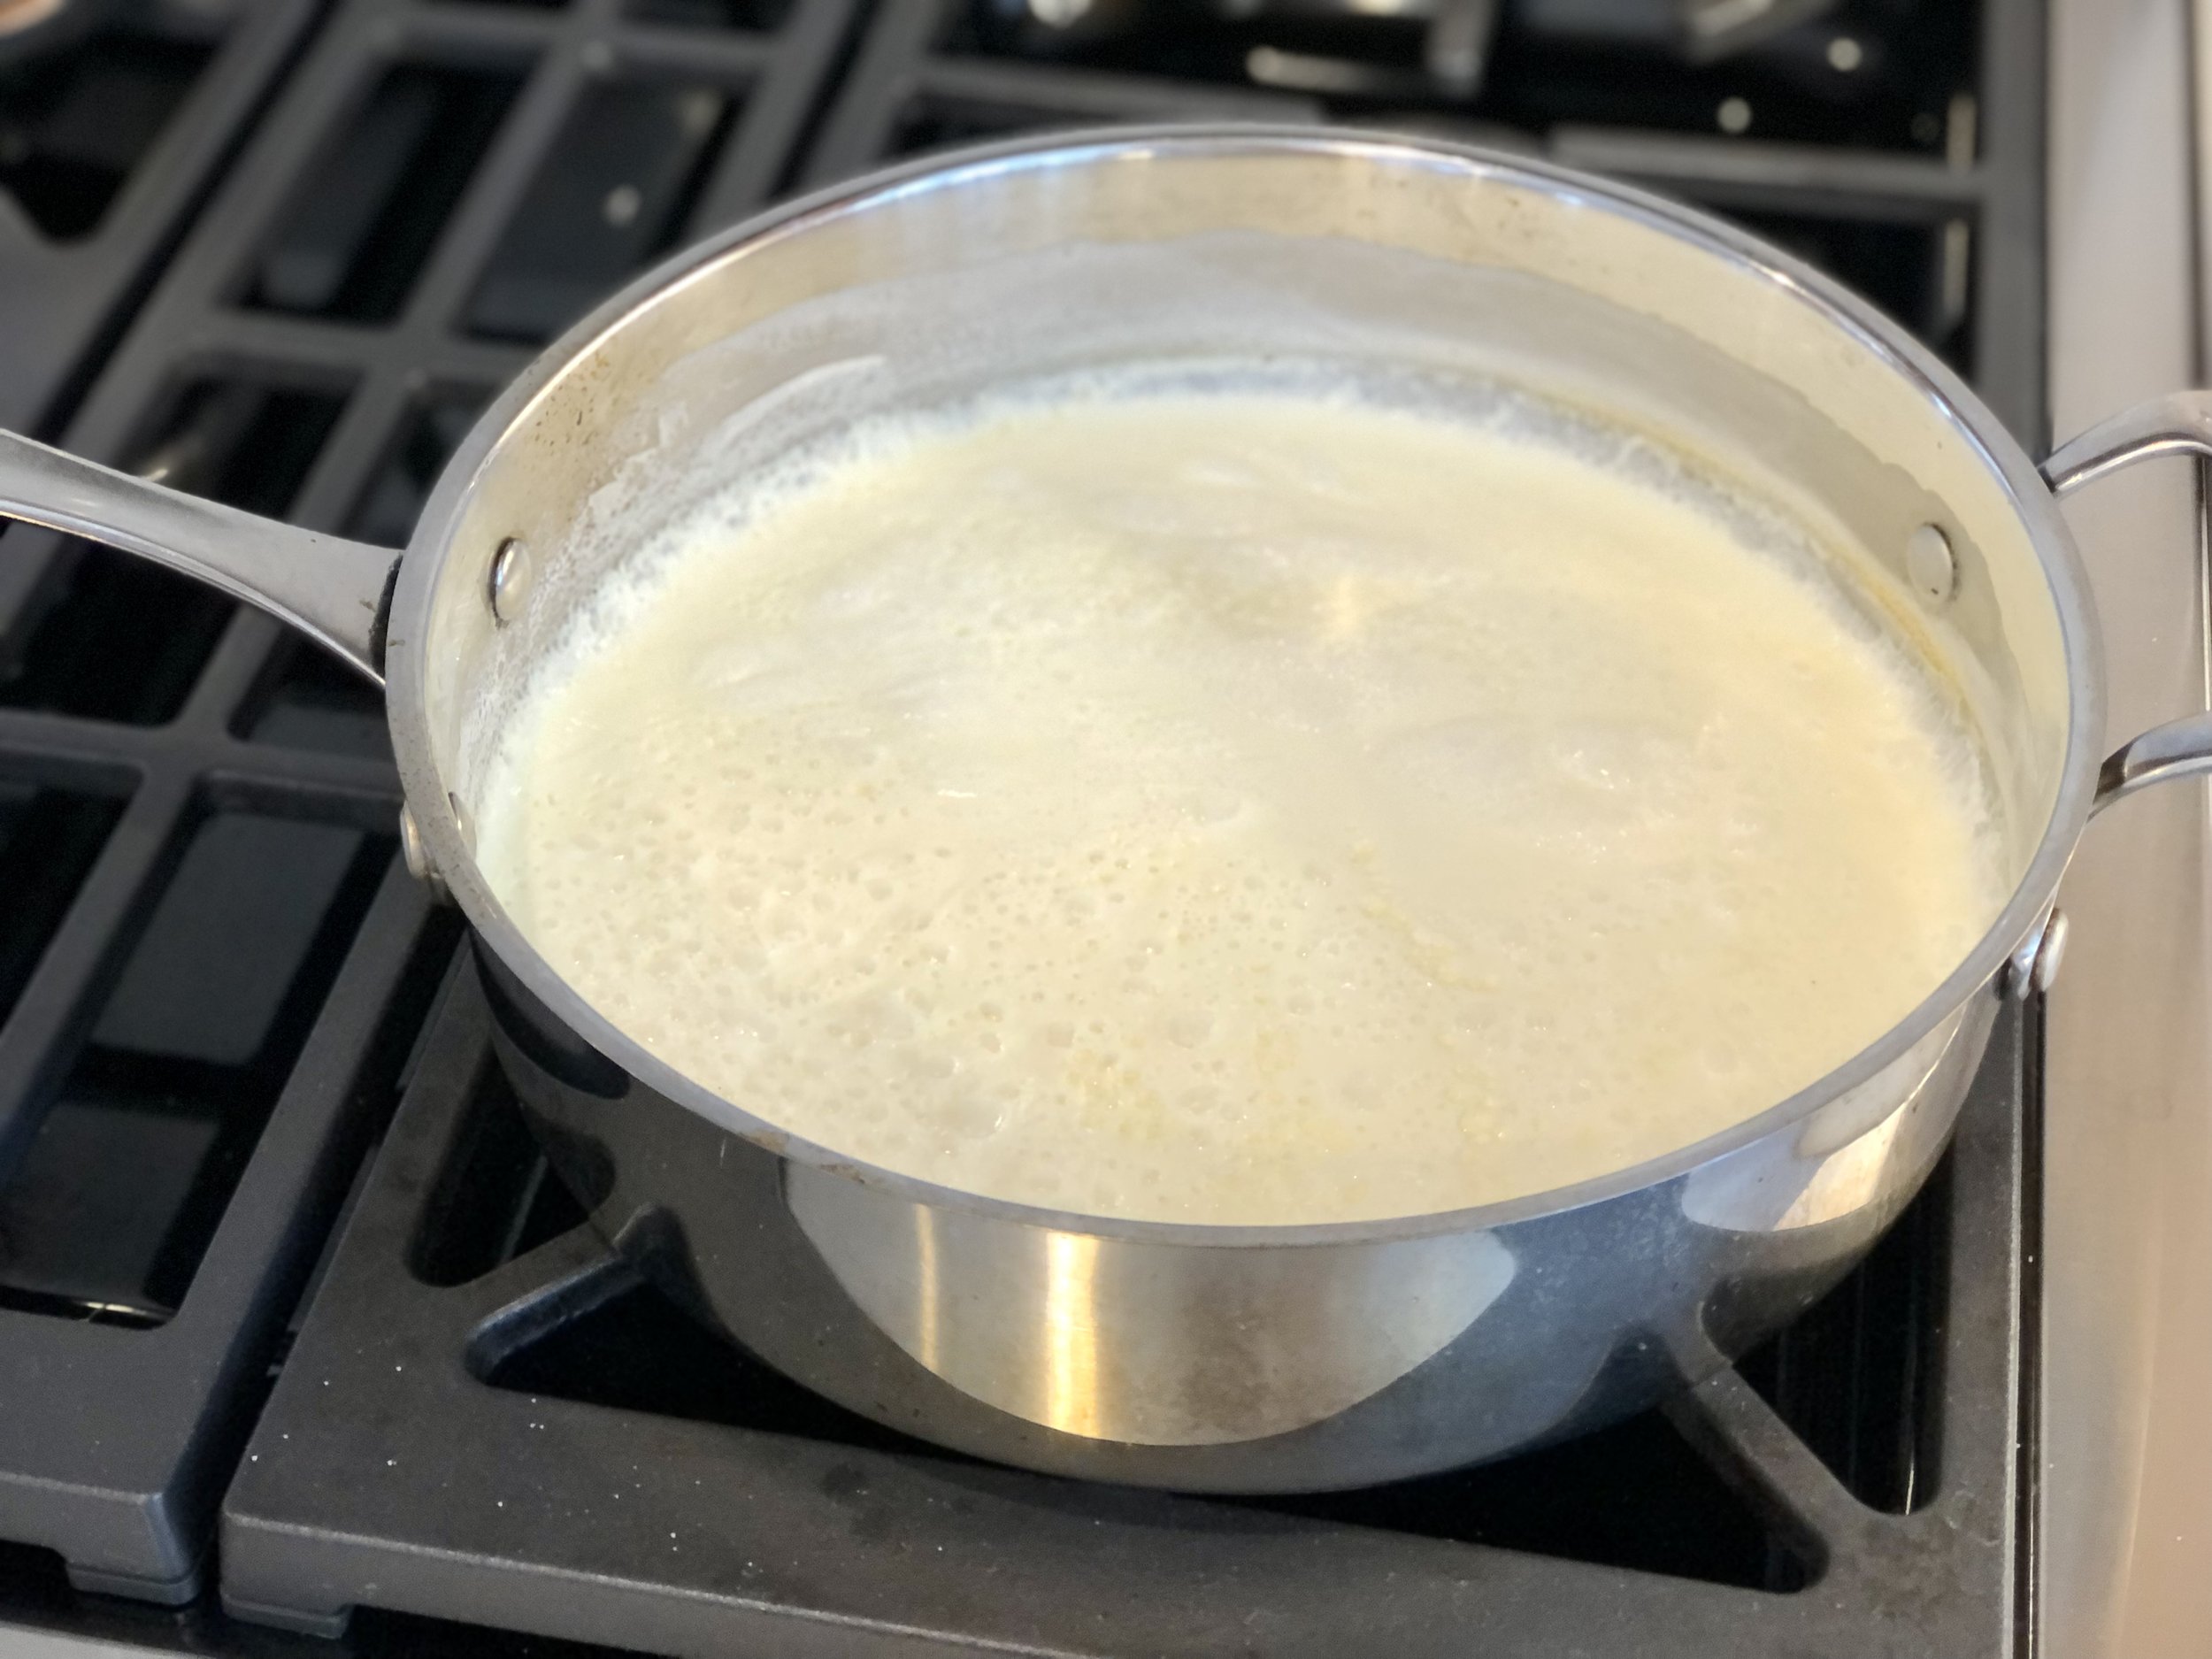
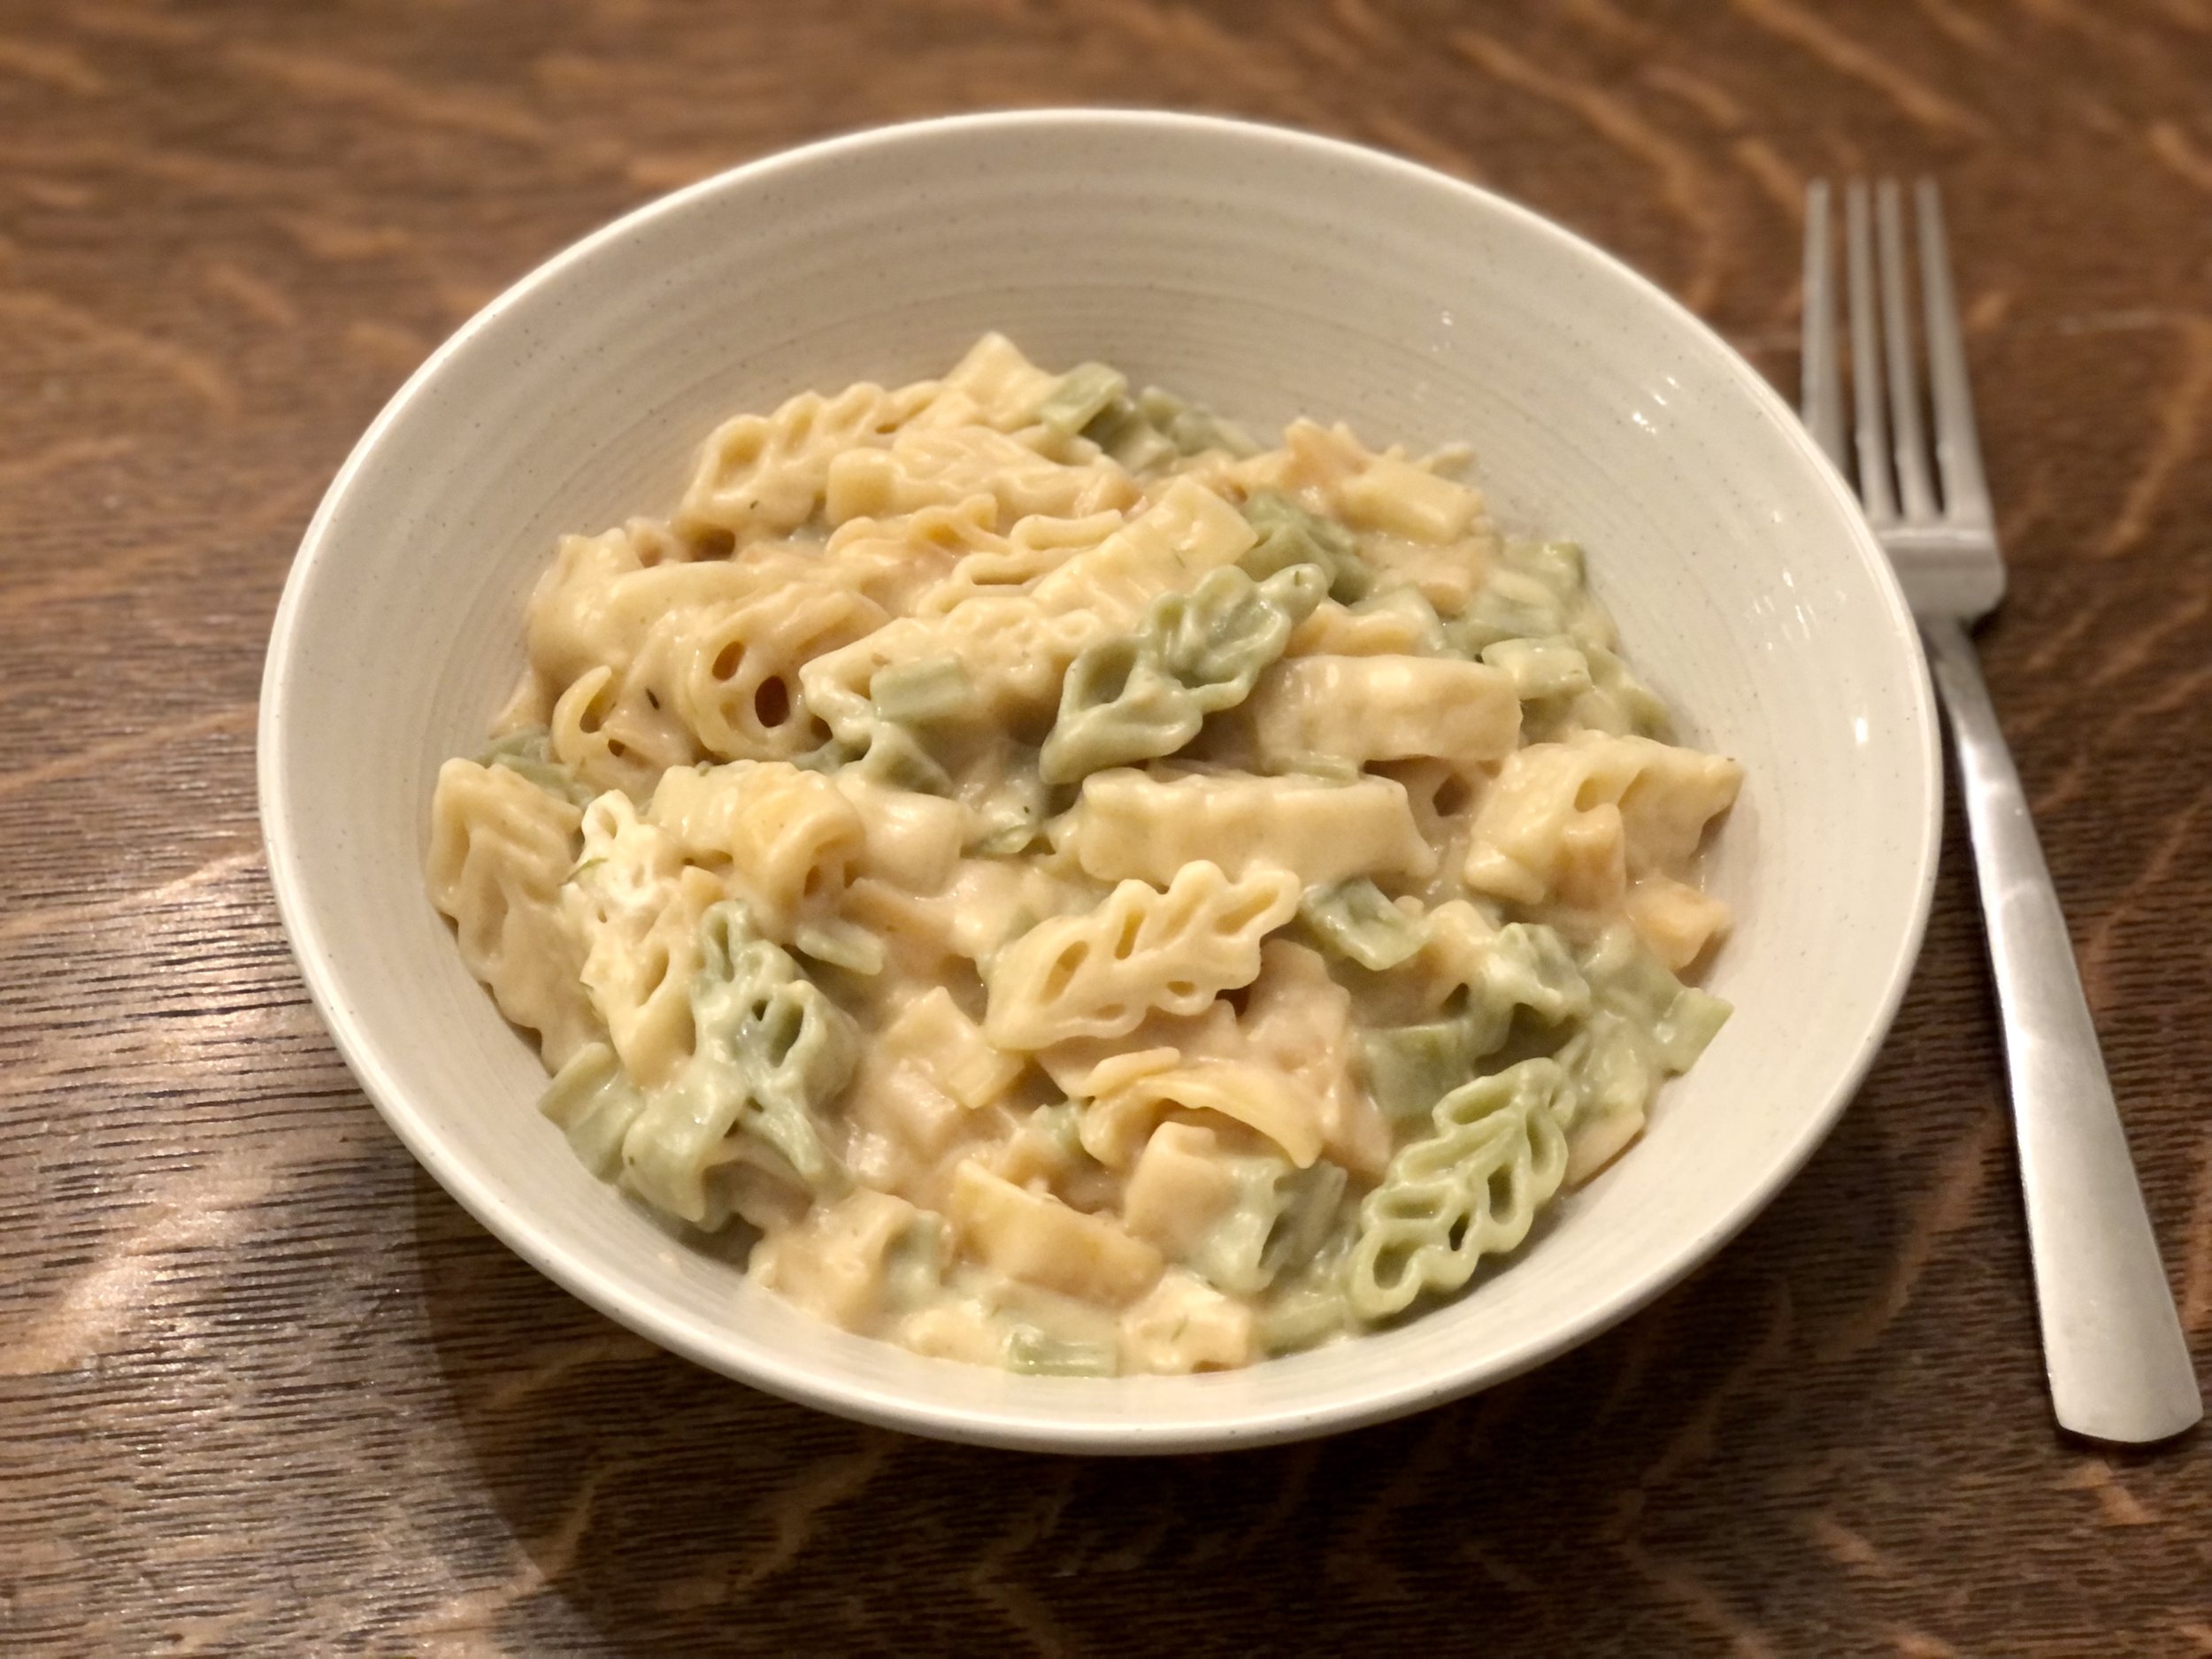
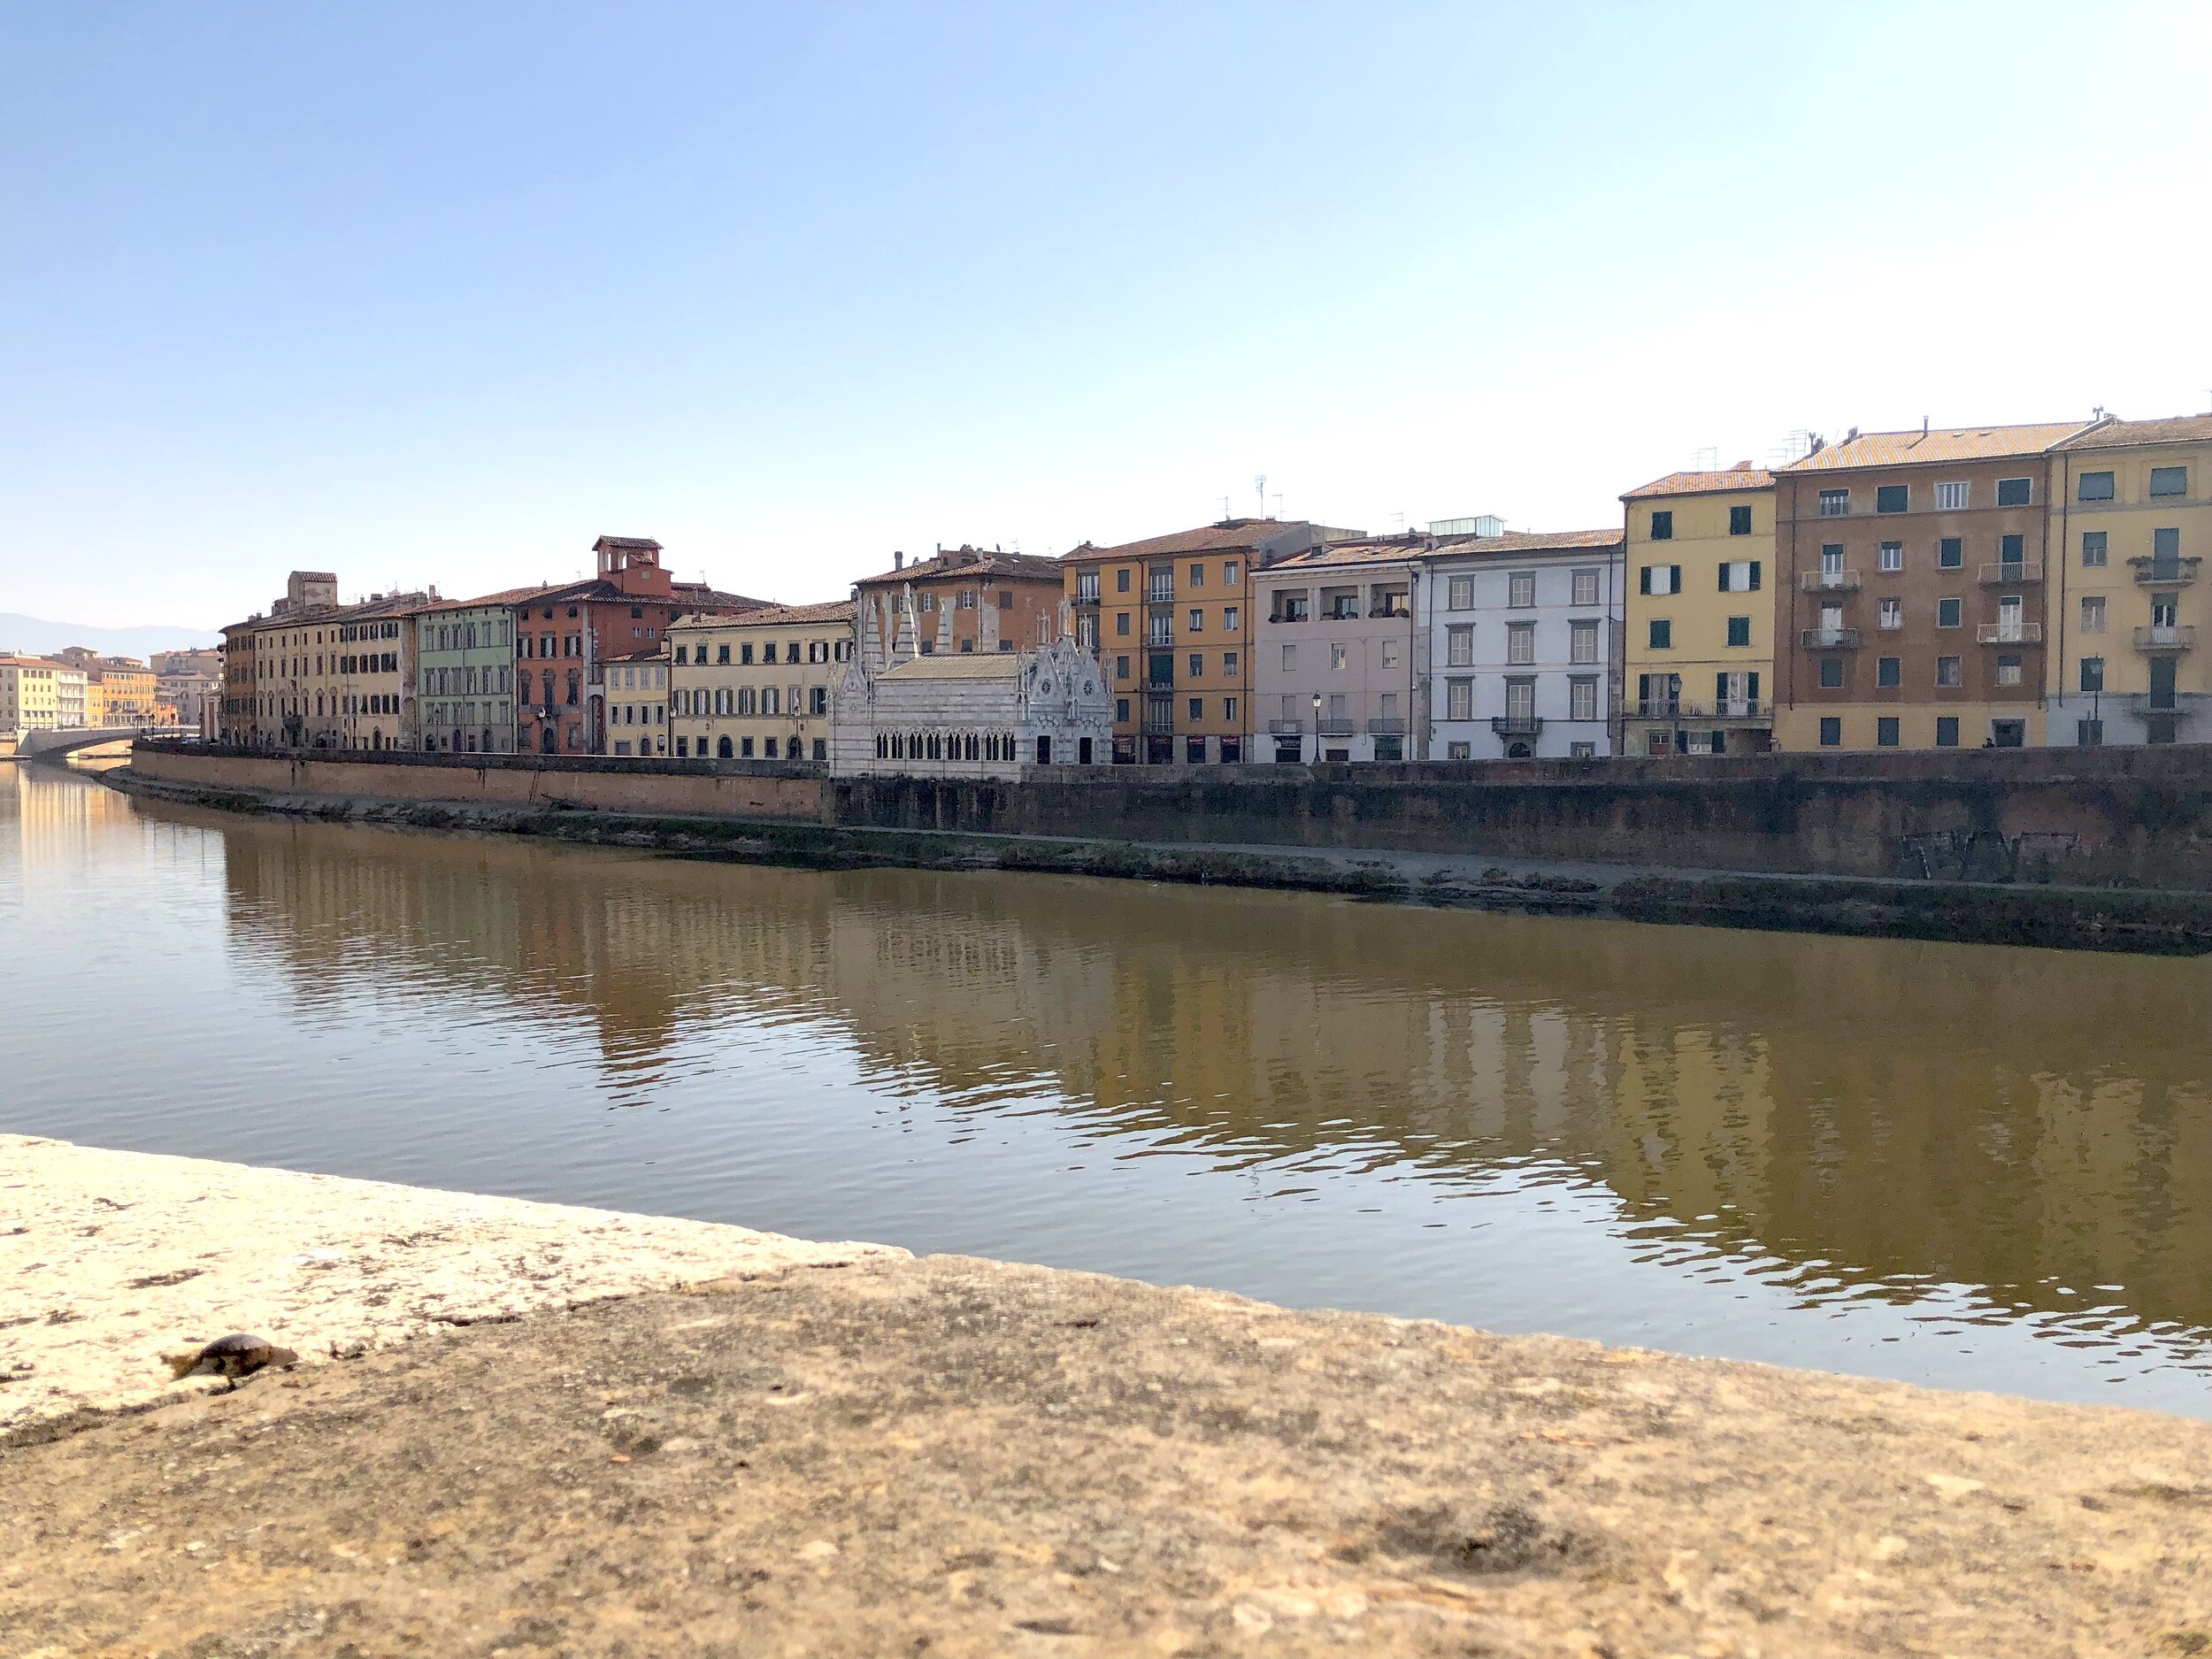
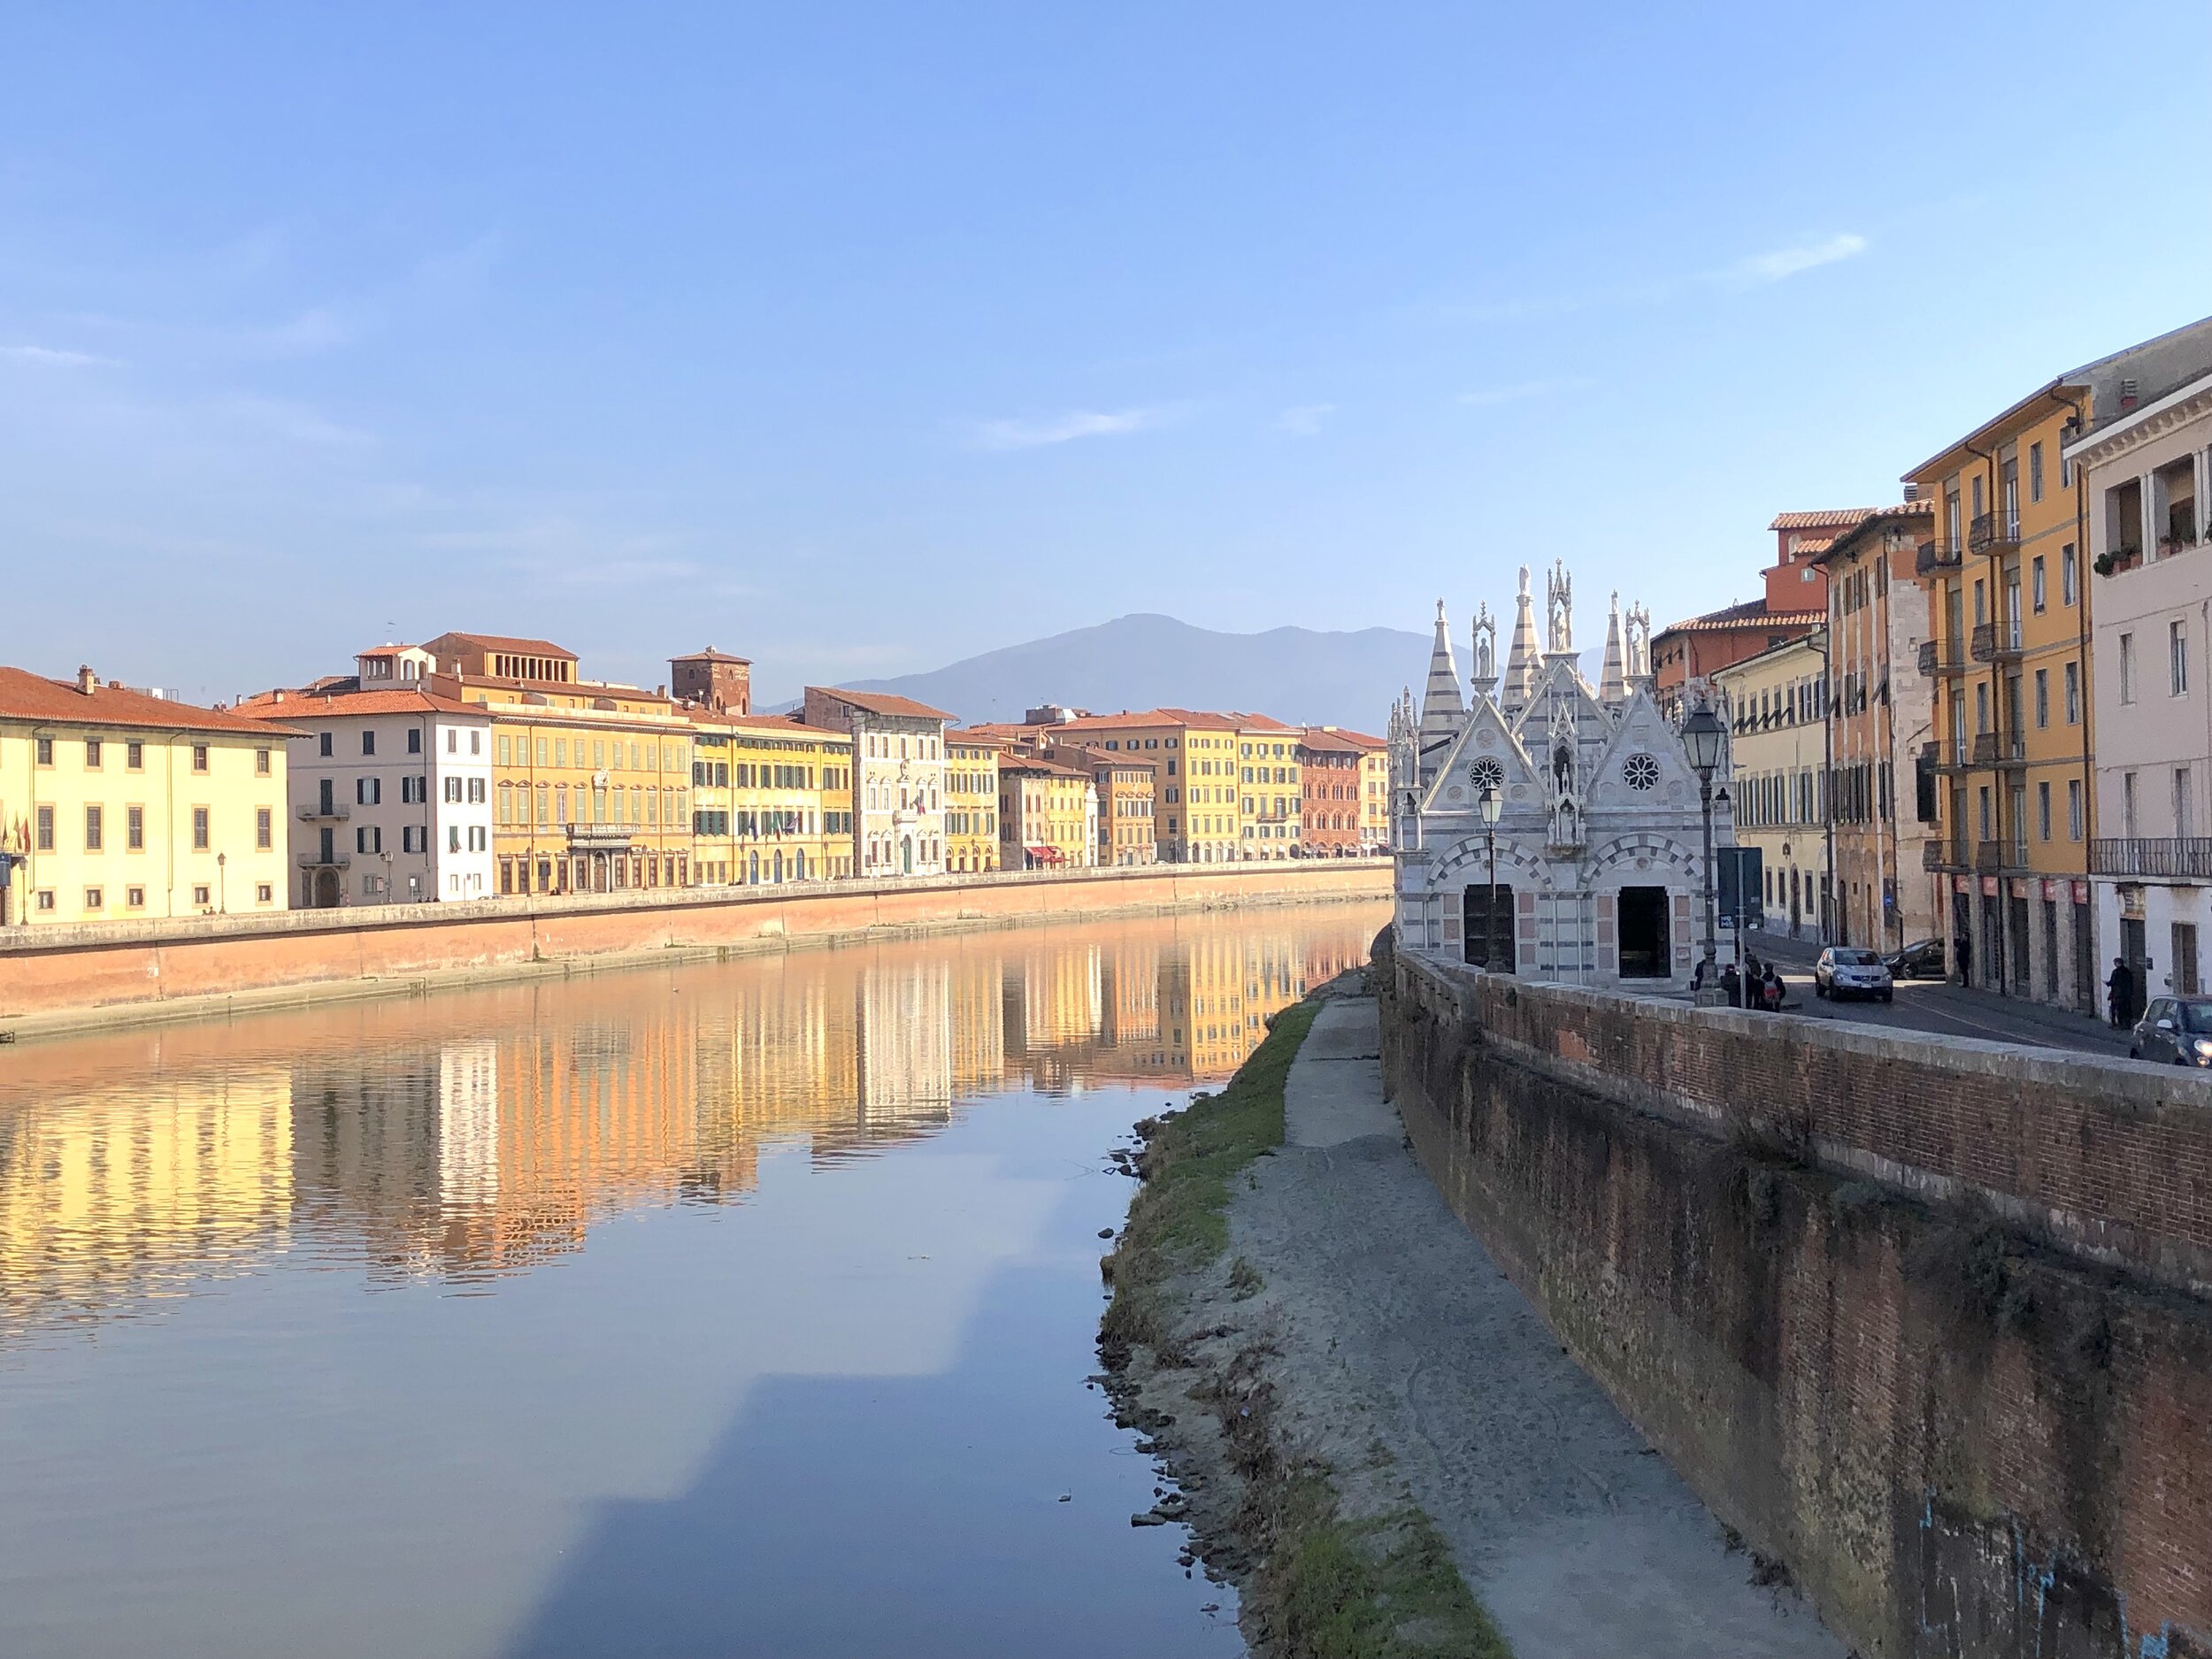
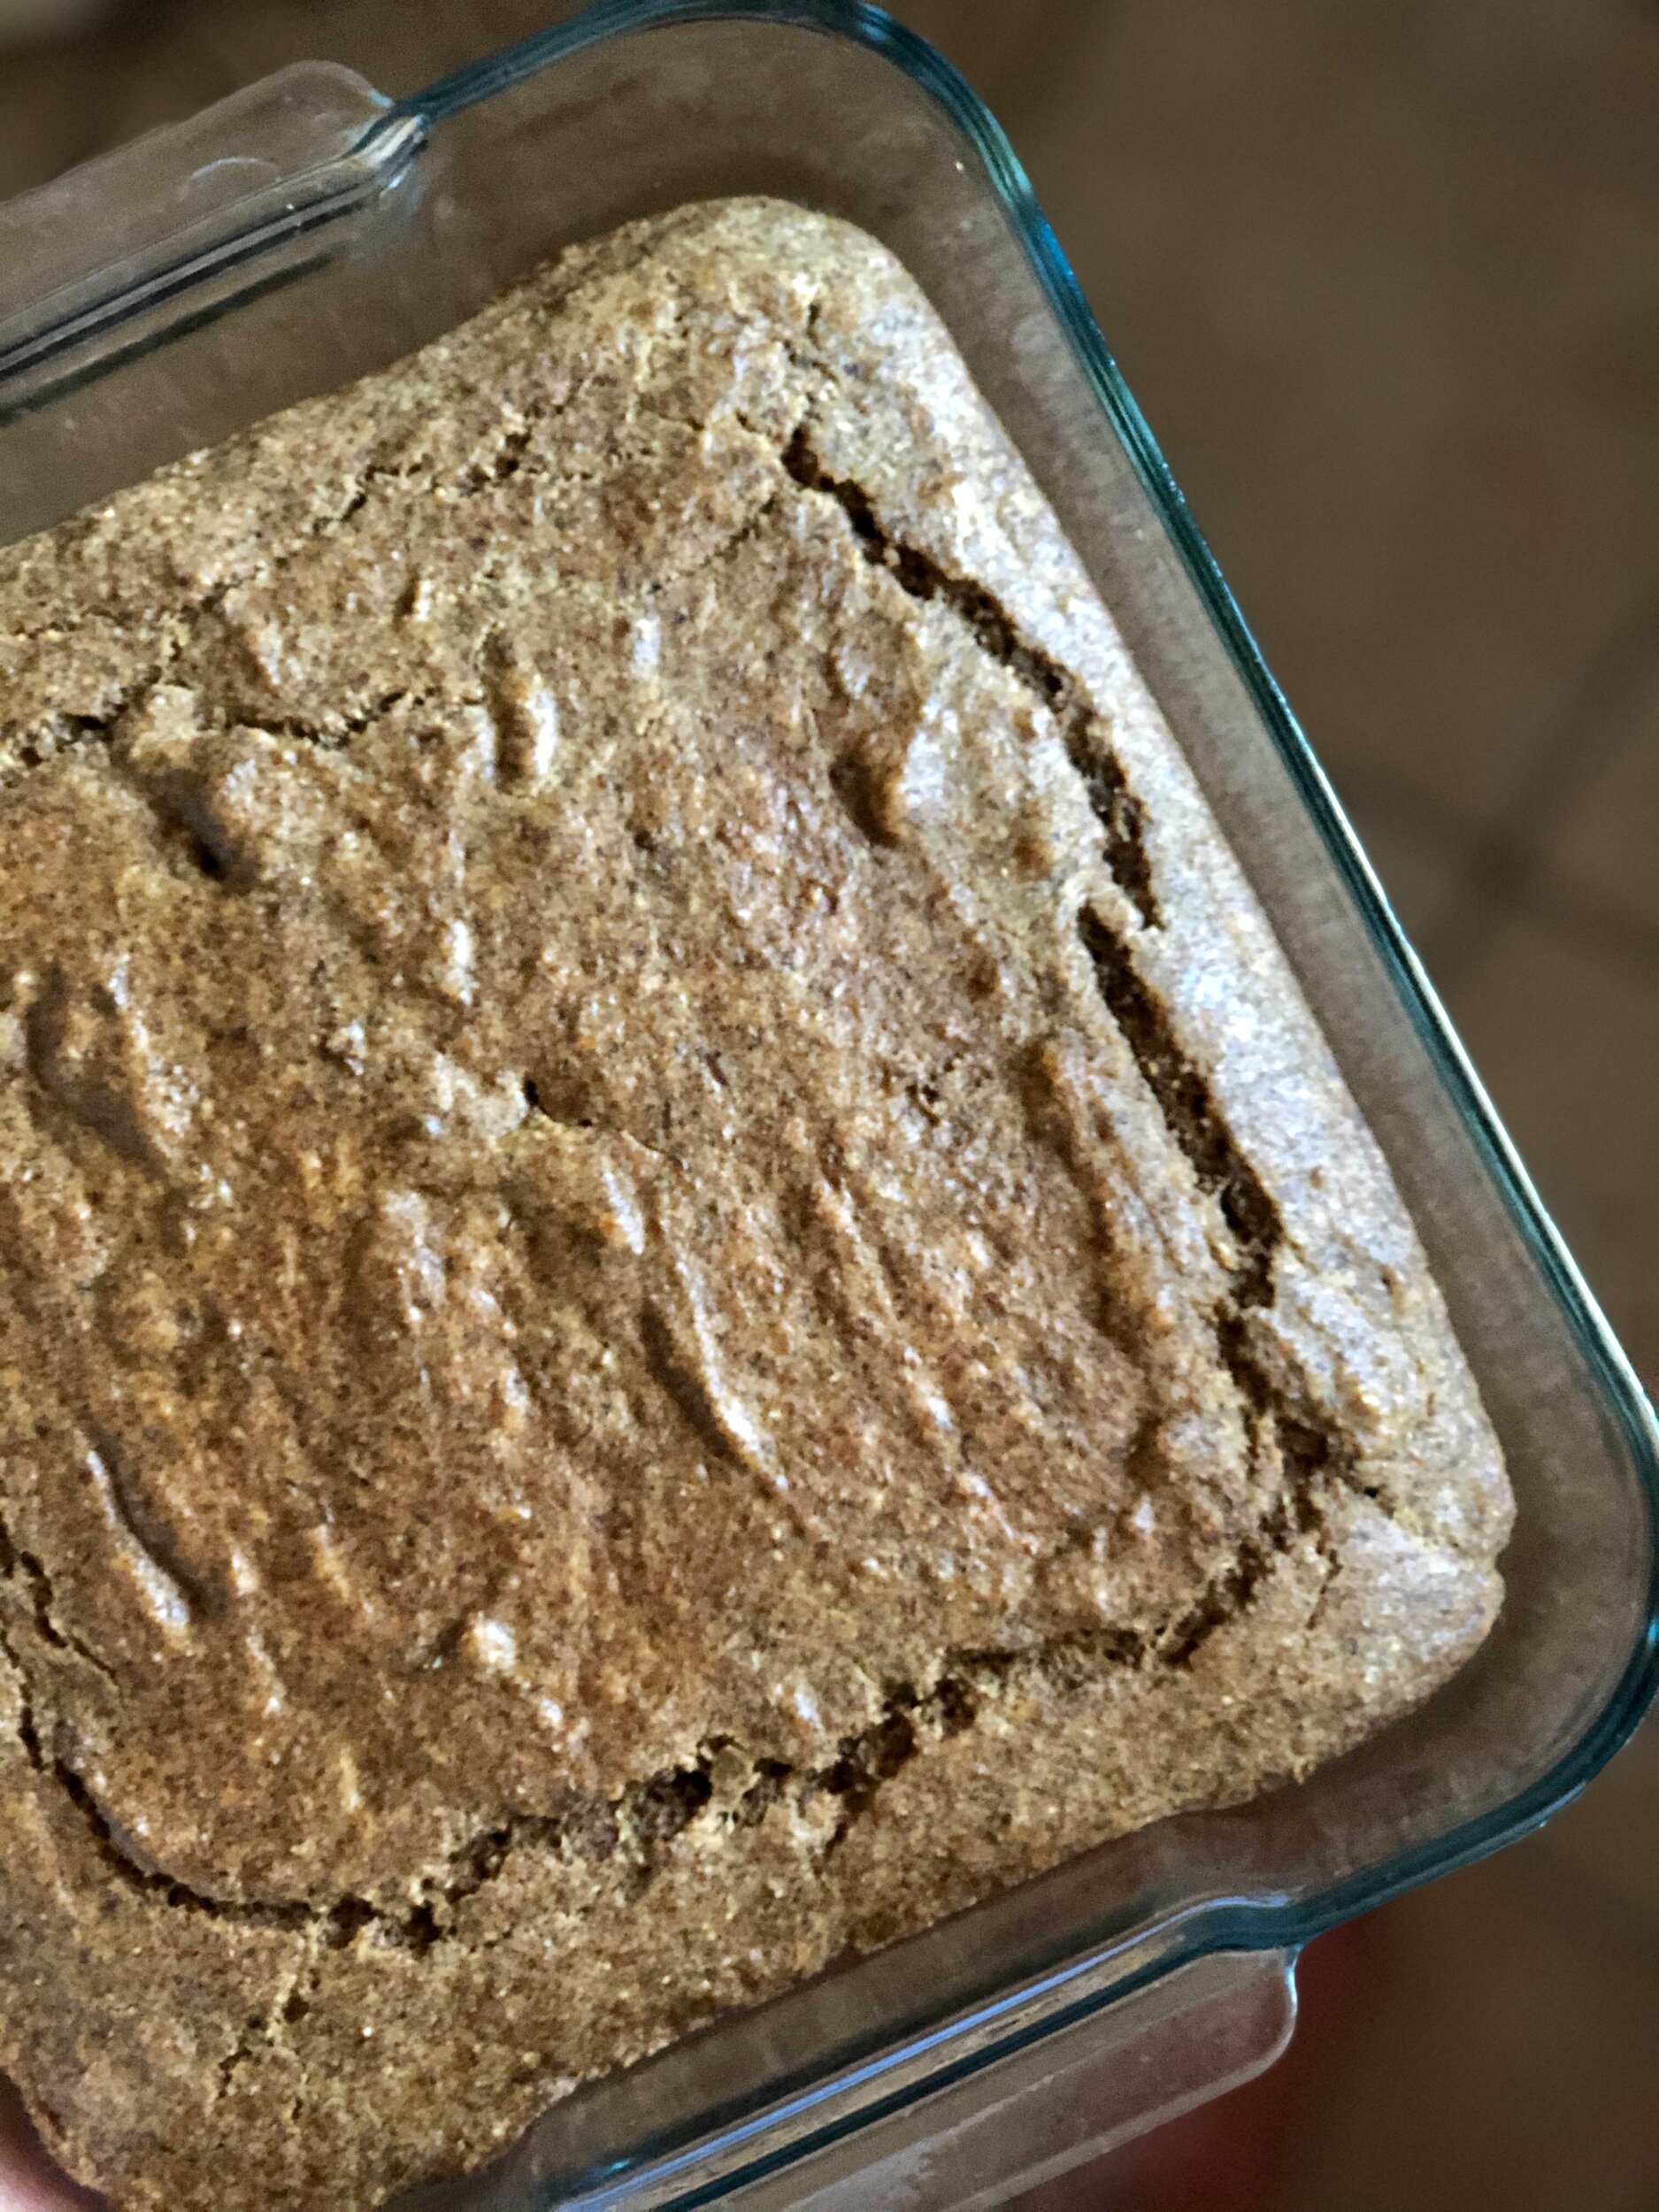
In a land, far far away, across the ocean, in a small town called Incisa, it was the day before Elyas was born. I was 40+3 weeks pregnant and had a sudden burst of energy (hind sight, that should’ve been telling, ha). The weather had recently “cooled” a bit, going from high 90’s and 100’s every day to mid 90’s. I had big plans for the day like cleaning, cooking, and personal care. I really wanted to make this eggplant parmesan recipe that supposedly makes women go into labor (I didn’t actually believe it, but it sounded fun and I like eggplant parmesan). In the end it took so long and I was on my feet for so long (4+ hours in the kitchen) that I figured I could do the other plans tomorrow.

Jenny’s note to self #1: never do tomorrow what you can do today while pregnant, especially at the end, because tomorrow is not promised you!!

Later that evening…

My husband and I went for a walk after sunset when it was cooler, then came back to feast on the really delicious eggplant parmesan. I called my mom, but she didn’t answer. This is unusual. Suddenly I felt lonely, as if something was going to happen. I decided to call my brother, who also didn’t respond. This isn’t as unusual, so I decided to call one of my best friends. Something was up with her phone, so she couldn’t talk. So there I sat, feeling forlorn. My mom ended up calling me back and we talked late, until almost 1am my time. We joked, as we did almost every day, that maybe I was in labor, as I had started having regular Braxton Hicks. I laughed it off, only learning later my mom actually did think I was in labor. I snuck another couple mouthfuls of eggplant parmesan and went off to bed.

If you’d like to make that eggplant parmesan recipe, which I really do recommend, click here! Pregnancy not required. ;)

That night…

I hadn’t been laying there too long when what was inexplicably a real contraction came on. After another very real contraction less than 20 minutes later, I decided I should try out my contraction timer. My husband was already asleep, so I lay there hoping to go to sleep myself. Every time I’d start drifting off to sleep a contraction would ruin it, coming every 12 minutes or less. After awhile I decided to text my mom, knowing she was still awake. She counseled me to try and get some sleep if I could. I kept trying but to no avail. One contraction came on so hard I suddenly understood why so many women panic. If I tried to get up or move, they came on every few minutes and I had to breathe through them, paralyzed. All of that talk of early labor being “a great time to shower” seemed complete nonsense now, how could women shower like this?? I could barely make it to the bathroom, so I gave up on the shower idea. I finally woke my husband around 5am, tossed my cookies around 5:30am, all the while contractions were coming every 3-5 minutes or less. We decided it was time to go to the hospital.

6:30am The ambulance comes

Having no car, our ride to the hospital was an ambulance. This isn’t unusual in Italy, and was exactly what my midwife told us to do. We called 118 (Italy’s 911) for an ambulance. Three men and a woman showed up in the bedroom, all seemingly clueless as to the proceedings of labor and probably terrified that birth was imminent. They helped me onto the stretcher and off we went at 6:50am. The woman kept asking me for all my information, which always seemed perfectly timed with a contraction…I still don’t understand why she didn’t ask my husband who was right there, haha. Labor and paperwork while riding on a bumpy stretcher under a crinkly silver blanket. On an ambulance with the siren blaring. Lovely. I was hoping we could speed down the highway incognito.

7:10am the ambulance breaks down

Yes it did. And I wasn’t surprised. Because, Italy, and also because I had noticed the siren kept going out. The paramedics informed us something was wrong (ambulance overheated) and pulled over into the nearest gas station so a different ambulance could come and get us.

At this point my mom, who was following my location on Find a Friend, was semi-freaking out, convinced the ambulance had to pull over because the baby was being born. bahahaha I’m sorry mom, for all I put you through.

7:45am arrival at the hospital

After a very long 30 minutes, the new ambulance pulled up and we were transferred over. Finally, we arrived at the hospital. Being wheeled through the hospital, still on the stretcher under the crinkly silver thing and seeing everything go by sideways is very disorienting. We arrived at the maternity ward, and I was taken into one of the exam rooms I had just been in earlier that week. Husband wasn’t allowed in.

More paperwork, sitting in a chair across from a midwife at a computer. Breathing through contractions, thinking how bizarre this is, with no smile or acknowledgement that hey, you’re in labor; no “congratulations”, or even “are you ready?”. Business as usual. Then I was hooked up to a fetal monitoring device. Baby wasn’t moving as much as they would’ve liked, and I ended up being hooked up to the monitor, sitting in a chair for 1 1/2 hours. They checked on me every half hour or so and brought me cookies once, to try and get baby to move more. Baby was moving some, I wasn’t concerned, but I guess they were a bit. The midwife examined me, confirmed that my waters had indeed already broken (that trickle since yesterday afternoon wasn’t incontinence as I had marked it off as) and I was dilated to 4-5cm. I was given the good news I would be admitted to a labor and delivery room. It was now 9:45am.

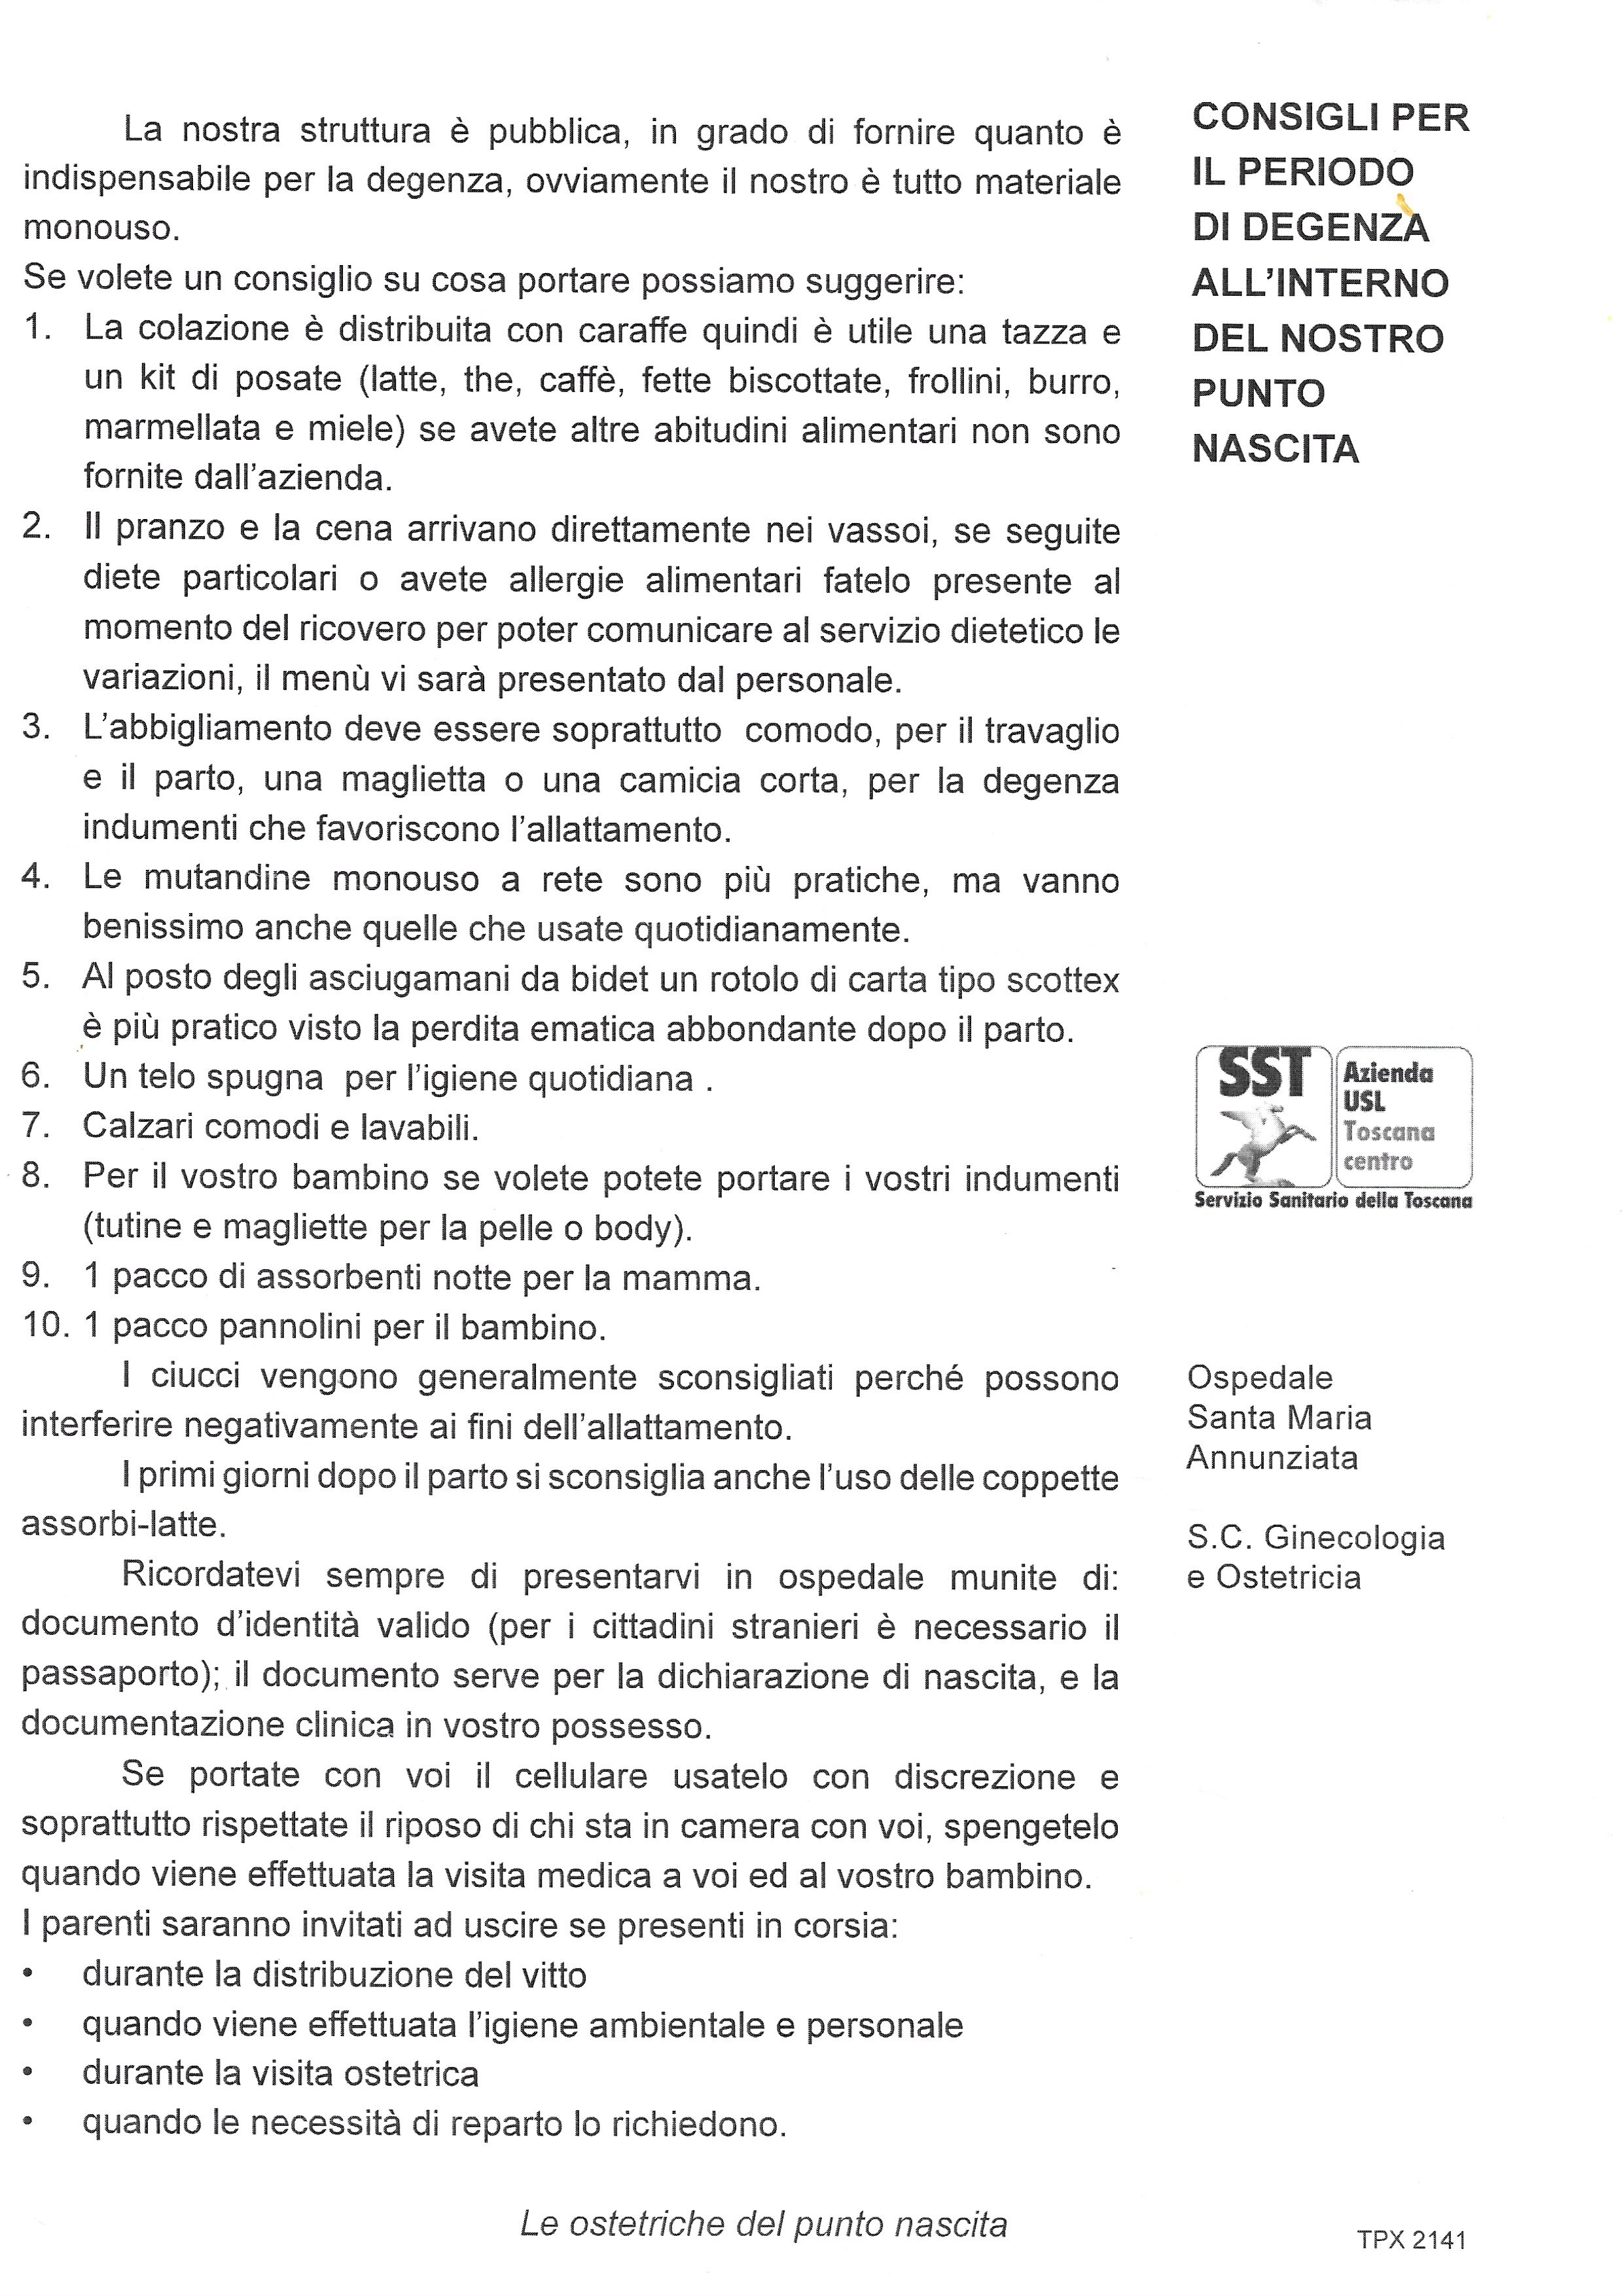
In Italy, or at least in Florence, you’re only admitted to your own labor and delivery room if you’re at least 3cm dilated. Anything less and you’ll either be encouraged to return home or have to labor in your hospital room, where no one is allowed in with you. Most public hospitals rooms are shared, and it was my great hope to NOT arrive less than 3cm dilated so as not to have to labor alone. Ospedale Santa Maria Annunziata, where I gave birth, had 3 occupants per room. Another, a bit more infamous hospital for birth, Ospedale San Giovanni di Dio, had up to 6 occupants per room.

To the Labor and Delivery Room!

My husband and I were briefly taken to my room, so I could drop off my stuff. I was the first one in this shared room. I changed into a cruddy nightgown and socks, no hospital gowns are provided in Italy, at least for labor. The midwife chided me because I put on socks instead of shoes, something about “that’s not sanitary”, but I was not about to labor and give birth IN SHOES so she let it drop.

Just kidding, let’s wait in the hallway for a bit

We were finally taken back to the labor and delivery ward, just to be told we had to wait. My room was still being cleaned. There was a little bench in the hallway, where we stayed and watched numerous nurses and maintenance people walk by. Very relaxing and great for having a baby. I jest.

Labor and Delivery Room

Finally, the room was ready and in we went. It was a comfortable, if bare bones room. I enjoyed the birthing ball, something I had always wanted to try. The midwife was nice enough and helpful, bringing a hot water bottle which felt excellent on my lower back, I was experiencing some intense back labor. She even brought a scarf and did Rebozo. My least favorite was having to walk down the hallway every hour or two to the bathroom, it took so long having to pause and breathe through all the contractions, and something about the bathroom always brought on the harder more frequent ones and I would get stuck in there forever. The midwife at least once had to knock and make sure I was ok…Yes, I’m fine, just hanging on to the sink for dear life!

Labor was hard, and though I felt prepared and well read, nothing can really prepare you for the actual thing.

At noon I was still at 4cm with a contraction.

By 2pm I was 6cm, 8cm during a contraction.

Pitocin or water breaking?

When 6pm rolled around and I was still at 6cm, the midwife started to put the pressure on. My water had now been broken for more than 24hrs and I was becoming higher risk. They were going to give me a round of antibiotics, and the midwife gave me the choice of completely rupturing the membranes (as she explained, baby’s head no longer having the buoyancy of the water would put more pressure on the cervix and thus hopefully speed labor up) or administering pitocin. I chose the rupturing membranes option, thinking it would be more natural. The midwife then strongly recommended I go with the pitocin. Why she even gave me the choice in the first place beats me, when she apparently wasn’t actually going to let me choose anyway. I conceded to the pitocin, on one condition: that I be given time to get my labor progressing more quickly on my own, by moving around as much as I could. She agreed. It was 6:00pm, she gave me until 6:30pm.

Having not slept at all for a day, a night, and now into another day, and the last meal I had my body kindly evicted, I didn’t have much energy. I had laid down and attempted to nap during the afternoon but was not successful, contractions were too much. Now the clock was ticking and I had half an hour to get this party started, so you better believe I got up and started dancing, and jiggling, and moving any which way I could. The contractions came on hard and fast, often bringing me to my knees, the back labor was getting worse and worse. But I danced. For the love of my baby I danced, rocked, swayed, and am generally content that my husband is not the type to whip out a camera to capture moments that would probably forever haunt me. Hahaha.

Water breaks

At 6:30pm with a satisfying Hollywood SPLAT, my water fully broke. I DID IT. I didn’t have to get pitocin! From then on my labor sped up, those contractions kept roaring on. Often people talk about contractions as waves, and how you should ride them. If that’s the metaphor, then the waves were crashing all around me and I could barely keep my head above water, let alone ride them. It was especially frustrating when a contraction would come on, and I would feel it peak, then instead of receding the pain would remain. I was hooked up to a monitor most of the time and could see when and how strong contractions were. I realized that even though the contraction would end, the pain was not. Then another contraction would come on. I later learned this is what you call back labor. And it’s pretty awful. I had to be in a very specific position on my hands and knees to keep the pain at a level where I didn’t want to jump out of my own skin. But I kept my eyes on the prize. Soon, there will be a baby! Every contraction is one contraction closer to meeting my baby.

Oh, and while I’m talking about things that are awful in labor, let me mention the drip I was hooked up to for the antibiotics. It had a very short line, so that whenever I dropped to my hands and knees for a contraction, I could only use one hand to support me, I had to keep my other hand in the air so the line wouldn’t jab the needle deeper down into my arm. Ouch.

Shift Change

8pm brought a shift change for the midwives. There was now a student midwife and a new midwife who I jokingly referred to as “my angel” afterwards. She was very kind and helped me so much when I felt tired and stuck at the end of labor. I had now been at the hospital for over 12 hours and things weren’t getting any easier. The student midwife was sweet and helpful, too. She was down on her hands and knees with me, encouraging me and chatting with me.

So…I push now?

It never became abundantly clear to me when it was time to push. I had always heard, oh, don’t worry, YOU WILL KNOW. A few contractions I started to feel pushy. This was probably around 8:30pmish. Then I’d have a few I didn’t. I don’t recall them ever checking me and letting me know I was fully dilated, but I must have been or I can’t imagine they’d let me push. I was pushing without much success, or so it felt. After awhile the midwife had me get into a standing position with my husband on one side of the bed and me on the other, criss-cross arms and holding hands, giving him my full weight during a contraction while bearing down and pushing. Using gravity and my husband’s muscles to speed things along.

Baby’s in distress

At some during pushing, baby started showing signs of distress. I went from making slow, but steady progress to being gently but urgently encouraged to get that baby out. I appreciate that the midwives didn’t make me feel panicky, but I also felt the gravity of the situation.

Having pity on my shaky and exhausted state, they suggested I lay on my side on the bed to deliver baby.

I had read one account of an American woman giving birth at this same hospital, and she was made to change rooms just before baby was born, a.k.a. when walking feels impossible. She had to be practically carried, because apparently at that time you delivered in a different room than you labored in. I was very thankful to find that I was not made to change rooms.

Every time the midwives would tell me what progress I was making, I inevitably ended discouraged. “We can see baby’s head!!!” And I’m thinking, “what?! You can only JUST now see baby’s head? I was convinced the head was almost out!”

The ring of fire is a very real thing. And what I didn’t realize is that contractions become a bit more spaced out while pushing, so wherever baby is when a contraction stops, there he stays until the next one a few minutes later, half out or head out or wherever. Like I said, ring of fire. I felt exceptionally lucid during this point, thinking “huh. So this is the ring of fire. Well here I am, living the ring of fire until the next contraction. So this is what women talk about” and wishing I was more out of it like some women recount being.

9:52pm Elyas Zakariah is born

After roughly 1hr15min of pushing, my baby BOY was born! We chose not to find out the sex, so he was a joyous surprise.

My husband bawled. He later told me he cried half because he was overjoyed and half because he was relieved for me, that it was over and the baby and I were ok.

I was too exuberant to cry, our baby boy was here, and I DID IT!! There is no feeling in the world like those first few moments after your baby is born. Joy. Love. Relief. Pride. Gratitude. I was smitten. My little buddy boy.


Now that same little baby is turning two. My heart and brain don’t quite know how to reconcile that with the all too recent memory of my sweet and funny newborn baby boy. Babies don’t keep and time is a thief.

Here’s to you, Elyas, my boy. The one who first made me a mamma. ❤️ Happy 2nd birthday.

Rhubarb Oat Bars

Last Updated September 7, 2024

Are you taking advantage of this rhubarb season? I hope you are, I know I am, more so than ever, as I’ve missed living in a country where people use, let alone have heard of, rhubarb.

I don’t know about you, but when rhubarb season starts I usually think of pies as the first thing to make. Then, after a few rhubarb and rhubarb custard pies, I might want to make some ahem…I’m not sure what normal people call it, maybe rhubarb soup? I grew up calling it camel hair soup. (We’re so normal you can’t stand it.) After camel hair soup, then maybe some rhubarb hand pies made with puff pastry.

All of those things are delicious, but sometimes with rhubarb season being so short I don’t end up getting beyond the “classics.” This year I’ve been expanding my horizons a bit, and if you’d like to go beyond the rhubarb pies and crisps, here are some buttery rhubarb oat bars to try!

It’s a buttery crust, sticky and gooey strawberry rhubarb filling with a hint of nutmeg, and a buttery oat crumble on top.

Yes please.

I don’t think I need to go on much further, so here’s the recipe! Anyway, I better stop writing before rhubarb season is over, haha.

This post may contain affiliate links. If you make a purchase using these links, Jennyblogs may receive a small commission, at no extra cost to you. This helps to support Jennyblogs. For further information see the privacy policy. Grazie!

Recipe adapted from Curly Girl Kitchen


Rhubarb Oat Bars

Serves about 9-12

Ingredients

For the Crust and Topping

  • 1 1/2 cups / 180g flour

  • 1 cup / 90g rolled oats

  • 1 cup / 226g cold butter, cubed

  • 1/2 cup / 100g brown sugar

  • 1 tsp baking powder

  • 1/2 tsp salt

For the Rhubarb Filling

  • 1 lb / 454g (about 3 1/2 cups) rhubarb, cut into approx. 1/2” slices

  • 1/2 cup / 100g sugar

  • 6 Tbsp / 45g flour

  • 1/2 cup / 160g strawberry jam

  • 1 Tbsp / 15g lemon juice

  • 1 tsp / 5g vanilla extract

  • 1/4 tsp nutmeg

  • 1/4 tsp baking soda

Directions:

Oven preheated to 350F / 177C. Lightly grease an 8x8in / 20x20cm square baking dish.

Make the Crust and Topping

  1. In a food processor, blend all crust/topping ingredients together until the texture is like coarse pebbles. Alternately, you can mix by hand or with a fork or pastry cutter.

  2. Take half the mixture and press into the prepared baking dish. Reserve other half for topping.

  3. Bake for 15 minutes.

Meanwhile, Make the Rhubarb Filling

  1. In a large bowl, combine all filling ingredients. Mix together well.

  2. When the crust is done baking, pour filling over crust.

  3. Bake for 30 minutes.

  4. When the filling is done baking, crumble the remaining topping over filling and bake for another 20-25 minutes, or until top is light golden-brown.

  5. Allow to cool completely before cutting and serving. (The refrigerator can help speed up this process.)

Jenny’s Notes:

  • If you don’t have rolled oats, instant oats can be used.

  • The strawberry jam could be switched out for a different flavor of jam!

  • If you can’t wait to dig into your freshly baked bars, you can always go at it with a spoon! It will be more like a crumble when it’s still warm, but hey, is that a bad thing?

Rhubarb Oat Bars
Yield 9-12
Author
Prep time
20 Min
Cook time
1 H & 5 M
Total time
1 H & 25 M

Rhubarb Oat Bars

Buttery, crumbly oat bars with a sweet rhubarb and strawberry filling
Cook modePrevent screen from turning off

Ingredients

For the Crust and Topping
For the Rhubarb Filling

Instructions

Make the Crust and Topping
  1. Oven preheated to 350F / 177C. Lightly grease an 8x8in / 20x20cm square baking dish.
  2. In a food processor, blend all crust/topping ingredients together until the texture is like coarse pebbles. Alternately, you can mix by hand or with a fork or pastry cutter.
  3. Take half the mixture and press into the prepared baking dish. Reserve other half for topping.
  4. Bake for 15 minutes.
Meanwhile, Make the Rhubarb Filling
  1. In a large bowl, combine all filling ingredients. Mix together well.
  2. When the crust is done baking, pour filling over crust.
  3. Bake for 30 minutes.
  4. When the filling is done baking, crumble the remaining topping over filling and bake for another 20-25 minutes, or until top is light golden-brown.
  5. Allow to cool completely before cutting and serving. (The refrigerator can help speed up this process.)

Notes

  • If you don’t have rolled oats, instant oats can be used.
  • The strawberry jam could be switched out for a different flavor of jam!
  • If you can’t wait to dig into your freshly baked bars, you can always go at it with a spoon! It will be more like a crumble when it’s still warm, but hey, is that a bad thing?

Nutrition Facts

Calories

463.59

Fat

21.47 g

Sat. Fat

13.15 g

Carbs

64.53 g

Fiber

2.75 g

Net carbs

61.8 g

Sugar

32.96 g

Protein

4.61 g

Cholesterol

54.23 mg

Sodium

393.23 mg

Nutritional Information is approximate.

rhubarb, oat bars, oaty bars, crumble
dessert
American
Did you make this recipe?
Tag @jennyblogsandbakes on instagram and hashtag it #jennyblogs

24 Hour Sourdough Pizza Dough

Last Updated: June 5, 2024

Sourdough pizza!

My absolute favorite pizza dough recipe, and definitely worth the time to plan a day (or 2) ahead. At first glance the recipe might seem complicated (it is a 2 day recipe, after all), but it really is very simple, with no more than 1-2 minutes of kneading involved. With sourdough, time is your friend and does most of the work for you.

If you’ve ever made homemade pizza dough and wondered why it’s “good” but missing out on that chewy, wonderful crust texture that you get from the best pizzerias, this recipe will have you wondering no more. It’s chewy and flavorful and will have you whipping pizzas out of your home oven that taste about as close to your Italian vacation as can be possible! Which leads me to ask…

How’s it going? With your sourdough starter, I mean.

Margherita Pizza

If you weren’t already dabbling in sourdough before 2020, everyone and their brother started a sourdough starter during all of the stay-home business and many varying lockdowns, ammiright?

Did your starter get off to success, or did it dwindle, never making it to its full, goopy, bubbly glory? Perhaps it’s sitting, forgotten, in the back of your fridge. Perhaps you’re a sourdough baking fiend, whipping out the loaves and baguettes like nobody’s business.

Or, just maybe, you’re like me, your friendly sourdough-user-but-not-an-expert, keeping the starter alive and using it occasionally but mostly as discard to flavor/boost other recipes. If this sounds familiar, then this recipe is perfect for you. Not too hard, I’ll try not to give you too much theory (yes, I do know some!), and, as long as you have a not-dead starter, basically foolproof.

Not convinced yet? This is the single pizza recipe I make most, by far, even though it takes 24+ hours, because it is that good and that simple. Actually, if I make pizza, I don’t even think about which crust I should make. I just make this one. Day 1 is really just stirring 3 ingredients together. That’s it.

Some Sourdough Tips

Did I mention I have experience but am not an expert on sourdough? Yes, so what follows is my experience and some of the most helpful sourdough tips I’ve learned over the past 5 years dabbling, that may help you too.

master of disguise: Arugula Pizza

Keep in mind that sourdough is highly individual. Meaning, the time you give it, how active it is, the temperature of your house, types of flour you use, etc. will all affect your starter and your end product. For example, I’ve started sourdough starter on two separate continents with results that varied quite a bit. I’ve made this recipe several times with both my Italian and American starter. To be honest I always had more success with my American starter, it feels invincible where my Italian one always needed some tender care and coaxing. But maybe I subconsciously gave my Italian starter too much free reign thinking that it ought to know what to do, being Italian in the land of pizza, after all. Anyway, here goes nothing:

  1. When making sourdough breads, most recipes will assume or instruct you to have an active/ripe (freshly fed) starter. This means you probably fed your starter at least once the day before starting the recipe, and you’re not just taking your starter straight out of the fridge to start the recipe. Recipes that use NOT refreshed starters will often call themselves discard this or discard that.

    I USUALLY use my starter straight out of the fridge for this recipe. In fact, there may be a note somewhere with this recipe that says you can use your starter straight out of the fridge, making this not such a guilty confession. That’s another great thing about this recipe. And it turns out great. I will mention, though, that sometimes my Italian starter would yield a less fluffy crust, and I found more success if it was recently refreshed.

  2. I once read that it’s actually very hard to kill a (well-established) sourdough starter if it’s kept in the fridge. This relieved a great amount of guilt for me, as, if more than 1 week passed since I had last fed my starter, I had this constant nagging that every day more that passed my starter was dying and suffering. And while the sourdough starters of one person (me) are hardly a vast study, I would say this has turned out true. Even 1 month+ in the fridge and after just one feed it bounced back and was lively. Nice.

  3. Keep in mind the word “recipe” when associated with “sourdough” should be used loosely. Formula might be a better word. The beauty, and frustrating part of sourdough is that it IS so variable. If something isn’t going right, in this recipe or any other with sourdough, go back to your starter, your little living friend. My two biggest mistakes with sourdough starter have been not giving a new starter enough time to get established, and not giving the dough enough time to rise/proof. It can feel strange to let dough rise for so many hours rather than the typical 1-2 hours with instant yeast if that’s what you’re used to!

While the following recipe uses both volume and weight measurements as is usual on this blog, I would encourage you in all baking but especially with sourdough to use a scale. It makes everything easier, creates less dishes to wash, and is quicker and more accurate. When you’re working with sourdough it really does make most sense to use a scale. Scales are not expensive and you don’t need a top of the line one to do the job! You can get a handy little one for as little as $9.99 on Amazon.

If you’re wanting to get more serious about your baking and invest in a slightly larger scale, this is the one I just started using, and am really liking it so far. It’s very similar to the type of scale I would use when working at bakeries or La Pasta Fresca in Florence.

The Difference between “Sourdough Starter” and “Levain”

If these two terms confuse you, hopefully this explanation will help you.

Sourdough starter is your flour and water mixture that you keep in the fridge and feed.

Levain refers to the usually first part of a sourdough recipe where you add sourdough starter with more flour and water, that will end up as part of your bread product. Another way you can think of it, the levain is built from the starter and will always end up baked.

This post may contain affiliate links. If you make a purchase using these links, Jennyblogs may receive a small commission, at no extra cost to you. This helps to support Jennyblogs. For further information see the privacy policy. Grazie!

Recipe lightly adapted from Ken Forkish’s “The Elements of Pizza”


24+hr Levain Pizza Dough

Makes 2 large, 3 medium, or 5 small pizzas

Ingredients:

Day 1

  • 50g (2 Tbsp + 1 tsp) sourdough starter

  • 100g (1/3 cup + 4 tsp) water

  • 100g (3/4 cup + 2 tsp) bread flour or all-purpose flour

Day 2

  • 225g (scant 1 cup) water

  • 14g (2 1/2 tsp) salt

  • 250g (All of the levain [sourdough]) from day 1

  • 375g (scant 3 cups) all-purpose flour

Directions:

Day 1

  1. The evening before you intend to make pizzas, mix together in a medium bowl the sourdough starter, warm (100°F / 38°C) water, and flour.

  2. Cover the bowl and let it sit out on the countertop overnight.

Day 2

  1. Roughly 12 hours later, your starter from the day before should be bubbly, goopy, and active.

  2. Pour warm (90-95°F / 32°-38°C) water into a large bowl, add salt, and stir until salt has dissolved.

  3. Mix in all of the levain started the previous evening; it may not completely mix in, that’s ok. You can use a spoon or your hand with a “pincer” like motion, like a crab, helping the levain to break up into the water.

  4. Add flour and stir, with a spoon or by hand, just until dough forms into a mostly uniform mass. Continue for about 30 seconds, a shaggy looking dough ball is ok. Target dough temperature is 80°F / 27°C.

  5. Let dough rest for 20 minutes.

  6. Knead dough for 30 seconds - 1 minute on a lightly floured surface, dough should become very smooth and uniform. Shape into a ball and place seam side down into a lightly greased bowl; cover.

  7. Let dough rest at room temperature for about 3 hours.

  8. Turn dough out onto lightly floured surface and shape into desired number of balls (2 for larger pizzas, 3 for medium, or 5 for small), using a scale for consistency. Place shaped dough balls seam side down onto a lightly floured sheet tray, parchment paper, or silpat, keeping space between. Lightly flour tops and cover with plastic wrap; let rest for another 5 hours.

    After the 5 hours, the dough balls can either be refrigerated and used to make pizzas the next day (day 3), or continue and make pizzas!

Make Pizzas

  1. If you have a pizza stone, place it on the middle rack of your oven before preheating.

  2. Preheat oven to 550°F / 288°C or the max of your oven.

  3. Roll with a rolling pin or toss a pizza dough ball to desired size, using lightly floured or oiled hands. Place dough round on parchment paper to easily transfer on and off the pizza stone.

  4. Bake about 5-7 minutes for small pizzas, 6-9 for medium, or 8-12 for large pizzas, using your eyes to test for readiness more than time.

Jenny’s Notes:

  • While I include the original temperature notes for ingredients from Ken Forkish’s original recipe, I will confess I don’t always take the time to measure or check them as I make this often enough in roughly the same environment/temperature house that I just go with it. It’s very educational to do so with new recipes and in new environments, and helps when sharing a sourdough recipe to keep the recipe as consistent as possible, keeping some of the factors (like temperature) the same.

  • The 8 hour rise time on day 2 as a mass, then as dough balls, (steps 7 and 8) doesn’t have to be precise, if you need to shape the dough after 2 hours, that’s perfectly fine, you just want a total time of about 8 hours, so you could rest the dough for 2 hours, shape, then rest for 6 hours.

  • If you refrigerate your dough and use it to make pizzas on what would be day 3, take dough out of the fridge about an hour before making/baking pizzas. In a pinch I’ve used the dough straight out of the fridge, but the dough will rise better and be fluffier if you don’t go cold turkey, heh.

  • If you’ve never used your oven at its maximum temperature and think that’s crazy, just keep in mind that pizzas made in wood burning pizza ovens like they are in Italy, are baked at temperatures of up to 900°F / 485°C, so your home oven at its max isn’t even going to get near the burst of heat that make the best pizzas!

24 Hour Levain Pizza Dough
Yield 3-5 pizzas
Author
Prep time
35 Min
Cook time
25 Min
Inactive time
20 H & 20 M
Total time
21 H & 20 M

24 Hour Levain Pizza Dough

Homemade sourdough pizza crust in just 24 hours, with time doing most of the work for you!

Ingredients

Day 1
Day 2

Instructions

Day 1
  1. The evening before you intend to make pizzas, mix together in a medium bowl the sourdough starter, warm (100°F / 38°C) water, and flour.
  2. Cover the bowl and let it sit out on the countertop overnight.
Day 2
  1. Roughly 12 hours later, your starter from the day before should be bubbly, goopy, and active.
  2. Pour warm (90-95°F / 32°-38°C) water into a large bowl, add salt, and stir until salt has dissolved.
  3. Mix in all of the levain started the previous evening; it may not completely mix in, that’s ok. You can use a spoon or your hand with a “pincer” like motion, like a crab, helping the levain to break up into the water.
  4. Add flour and stir, with a spoon or by hand, just until dough forms into a mostly uniform mass. Continue for about 30 seconds, a shaggy looking dough ball is ok. Target dough temperature is 80°F / 27°C.
  5. Let dough rest for 20 minutes.
  6. Knead dough for 30 seconds - 1 minute on a lightly floured surface, dough should become very smooth and uniform. Shape into a ball and place seam side down into a lightly greased bowl; cover.
  7. Let dough rest at room temperature for about 3 hours.
  8. Turn dough out onto lightly floured surface and shape into desired number of balls (2 for larger pizzas, 3 for medium, or 5 for small), using a scale for consistency. Place shaped dough balls seam side down onto a lightly floured sheet tray, parchment paper, or silpat, keeping space between. Lightly flour tops and cover with plastic wrap; let rest for another 5 hours.
  9. After the 5 hours, the dough balls can either be refrigerated and used to make pizzas the next day (day 3), or continue and make pizzas!
Make Pizzas
  1. If you have a pizza stone, place it on the middle rack of your oven before preheating oven.
  2. Preheat oven to 550°F / 288°C or the max of your oven.
  3. Roll with a rolling pin or toss a pizza dough ball to desired size, using lightly floured hands. Place dough round on parchment paper to easily transfer on and off the pizza stone.
  4. Bake about 5-7 minutes for small pizzas, 6-9 for medium, or 8-12 for large pizzas, using your eyes to test for readiness more than time.

Notes

  • While I include the original temperature notes for ingredients from Ken Forkish’s original recipe, I will confess I don’t always take the time to measure or check them as I make this often enough in roughly the same environment/temperature house that I just go with it. It’s very educational to do so with new recipes and in new environments, and helps when sharing a sourdough recipe to keep the recipe as consistent as possible, keeping some of the factors (like temperature) the same.
  • The 8 hour rise time on day 2 as a mass, then as dough balls, (steps 7 and 8) doesn’t have to be precise, if you need to shape the dough after 2 hours, that’s perfectly fine, you just want a total time of about 8 hours, so you could rest the dough for 2 hours, shape, then rest for 6 hours.
  • If you refrigerate your dough and use it to make pizzas on what would be day 3, take dough out of the fridge about an hour before making/baking pizzas. In a pinch I’ve used the dough straight out of the fridge, but the dough will rise better and be fluffier if you don’t go cold turkey, heh.
  • If you’ve never used your oven at its maximum temperature and think that’s crazy, just keep in mind that pizzas made in wood burning pizza ovens like they are in Italy, are baked at temperatures of up to 900°F / 485°C, so your home oven at its max isn’t even going to get near the burst of heat that make the best pizzas!


Nutrition Facts

Calories

591.5

Fat

1.59 g

Sat. Fat

0.24 g

Carbs

124.01 g

Fiber

4.39 g

Net carbs

119.62 g

Sugar

0.43 g

Protein

16.78 g

Sodium

1817.54 mg

Cholesterol

0 mg

Nutritional information is approximate. Based on 1 pizza dough ball if you make 3 medium sized dough balls.

pizza dough, levain, sourdough starter, homemade pizza, sourdough pizza
dinner
Italian, American
Did you make this recipe?
Tag @jennyblogsandbakes on instagram and hashtag it #jennyblogs

Slata Tounsia - Tunisian Salad

Last updated October 2, 2024

Slata Tounsia, or Tunisian Salad, also called Salade Tunisienne, is a summertime classic in Tunisia.

Unlike most American salads that involve lettuce, there is no lettuce to be seen here, just tomato, cucumber, onion, apple, jalapeno peppers and a bright dressing that brings it all together and makes it irresistible. It’s simple, yet delicious.

It can be served as is as a side dish, or as it would be served traditionally, with tuna and hard boiled eggs, and olives, making it a well-rounded meal. I’m partial to the full-meal version, although my mom would probably be making fun of me since every time I call her and she asks what we’re having for dinner tuna, eggs, or both are probably involved. Hey, they’re good for you! Very mediterranean, you find lots of eggs and tuna in Italy as well.

The most classic version of the salad doesn’t include apple, even though many in Tunisia add it. We always add it because it gives such a happy and sweet element to the salad. I thought it sounded a bit strange at first, but it works really well.

Onion breath and how to avoid the worst of it

If you, like me, love onion but are hesitant to eat it raw if you have to go out in public anytime after, you know….”heyyyyyy guysssss I just ate onion!” you’ll be happy to hear that the dressing helps to cut the strength of the onion. Yes, you’ll still have some onion breath afterwards, but the vinegar and lemon in the dressing do wonders. If you really can’t deal with the onion breath, you can try soaking the onions for a few hours or overnight in the dressing (essentially making pickled onions) to cut their oniony strength even more. This salad I probably ate several times a week last summer when I was pregnant. I craved it but couldn’t deal with the onion breath afterwards, made me gag, haha, so we would leave the onions in the dressing for at least a few hours before finishing the salad.

To further reduce the after effects, I’m just going to go ahead and share some other ideas that I gathered off the internets and found to help. Nothing is foolproof, but it does help.

  1. Brush your teeth. This might seem obvious, but the sooner you can brush your teeth after eating onions or other insulting foods the better.

  2. Floss your teeth. Yep, just like brushing, get out all the stuff from the cracks for the cleanest and best chance at a fresh tasting mouth.

  3. Swish mouthwash.

  4. Chew gum.

  5. Eat other fruits, vegetables, and bread afterwards.

  6. Drink lots of water. I find lemon water to be especially pleasant and offsets the onion taste nicely.

  7. Drink milk. Kinda like when you eat spicy food, drinking milk can help flush out the taste/spice faster.

While it might be overkill to do all, my comfy little routine became brushing and flossing immediately after, drinking lemon water a few times, and chewing gum and rebrushing teeth as needed.

Anyway where were we? Oh yes, making slata tounsia. Enough villainizing the onions, who are friends.

Recipe from the husband


Slata Tounsia - Tunisian Salad

Serves 2 as a main dish or 3-4 as a side

Ingredients:

  • 2 tsp / 10g apple cider vinegar

  • juice from 1/2 a lemon

  • 1 tsp dried mint

  • 1 red onion, diced small

  • 2 cucumbers, diced small

  • 2 tomatoes, diced small

  • 1 apple, peeled if desired and diced small, optional

  • 8 jalapeño peppers, seeds removed and diced small

  • salt to taste

  • extra virgin olive oil, for drizzling

  • tuna, hard-boiled eggs, olives, for serving, optional

Directions:

IMG_3408.jpeg
  1. In a large bowl combine vinegar, lemon, and dried mint. Add the onion and mix to coat evenly. Allow to sit while you chop the rest of the vegetables and fruit.

  2. Add cucumbers, tomatoes, apple, jalapeño peppers, and salt to taste to the bowl with the onions. Taste, adding more salt as needed.

  3. To serve, drizzle with olive oil and arrange tuna and sliced hard-boiled eggs on top.

Jenny’s Notes:

  • While red onion is the best in this salad (and the prettiest!), other types of onions work as well.

  • red wine vinegar, white wine vinegar, or your favorite vinegar could be used in place of apple cider vinegar.

  • 8 jalapeño peppers might seem like a lot, but as long as you’re careful to remove all the seeds the salad will have a light kick but should not be overly spicy. Since peppers can vary in spiciness even if they’re the same variety, it’s always smart to have tasted/used the peppers before consuming them raw so you know what you’re getting yourself into. That said, you could use other types of peppers, spicier varieties if you’re brave or milder if spicy isn’t your thing.

Slata Tounsia
Yield 2-4
Author
Prep time
30 Min
Total time
30 Min

Slata Tounsia

A classic Tunisian summer salad made of cucumber, tomato, hot peppers, onion, and sometimes apple with a bright and simple dressing served with hard boiled eggs, tuna, and olives.
Cook modePrevent screen from turning off

Ingredients

Instructions

  1. In a large bowl combine vinegar, lemon, and dried mint. Add the onion and mix to coat evenly. Allow to sit while you chop the rest of the vegetables and fruit.
  2. Add cucumber, tomatoes, apple, jalapeño peppers, and salt to taste to the bowl with the onions. Taste, adding more salt as needed.
  3. To serve, drizzle with olive oil and arrange tuna and sliced hard-boiled eggs on top.

Notes

  • While red onion is the best in this salad (and the prettiest!), other types of onions work as well.
  • red wine vinegar, white wine vinegar, or your favorite vinegar could be used in place of apple cider vinegar.
  • 8 jalapeño peppers might seem like a lot, but as long as you’re careful to remove all the seeds the salad will have a light kick but should not be overly spicy. Since peppers can vary in spiciness even if they’re the same variety, it’s always smart to have tasted/used the peppers before consuming them raw so you know what you’re getting yourself into. That said, you could use other types of peppers, spicier varieties if you’re brave or milder if spicy isn’t your thing.

Nutrition Facts

Calories

183.34

Fat

7.96 g

Sat. Fat

1.13 g

Carbs

28.25 g

Fiber

6.65 g

Net carbs

21.61 g

Sugar

17.75 g

Protein

3.27 g

Sodium

111.39 mg

Cholesterol

1.86 mg

Nutritional info is approximate. Based on 2 servings that includes apple. Not including tuna, eggs, and olives.

Mediterranean cuisine, Tunisian dish, summer salad, slata tounsia, salade tunisienne
salad, side dish, main dish
Tunisian, Mediterranean
Did you make this recipe?
Tag @jennyblogsandbakes on instagram and hashtag it #jennyblogs

Explore Italy: Naples

Bella Napoli, the city famous for its pizza, mafia, poverty, trash, and charm! Maybe not all of those words jive together, but I can honestly say that Naples was one of the dirtiest cities I have been to while also being completely charming. If you can get past the chaos and unkept streets, Naples has a lot to offer, not to mention the surrounding area!

Naples in a nutshell

Location: Campania, Italy

Best known for: world-class pizza

Days needed to explore: 2-3+ - to explore just Naples, you could get a nice idea in 2-3 days, but because the surrounding area has so much to explore Naples would be an ideal place to stay a week or more and use it as a base. It’s a very affordable city which makes this easier to do!

What to see and do:

Within Naples

  • Quartieri Spagnoli (Spanish Quarters) - the famous residential area immediately recognizable by the close-set buildings and narrow streets, filled with locals and small shops

  • Duomo - also known as the Cattedrale di Santa Maria Assunta, this is another stunning duomo to see inside and out, even if it doesn’t quite have the impressive surroundings that draw attention to it like, say, the Duomo of Florence or Milan

  • Piazza del Plebiscito and the Palazzo Reale - The large square and palace that is an icon of Naples (Palazzo Reale paid entrance)

  • Napoli Sotterranea (Naples underground) - explore the bowels of the city by guided tour, where you can see Greek and Roman influence and see where many Neapolitans took cover during World War II bombings (paid entrance)

  • Museo Cappella Sansevero e Cristo Velato (Sansevero Chapel Museum and the Veiled Christ) - see the Veiled Christ and wonder just how one goes about carving a veil, the church, and some of the other strange sights this chapel holds. Some of the old rumors are a bit unsettling. Read more here

  • Spaccanapoli - the heart of the old city with many churches and interesting sights, the street that runs between the Spanish Quarter and the Forcella quarter

  • Walk the Petraio - walk up this stone path in the Vomero area, mostly steps, that leads to some spectacular views of Naples and the Bay. If you don’t prefer to walk there is always the funicular!

  • Castello dell’Ovo - fortress right on the Bay with two towers

Surrounding Naples

  • Reggia di Caserta (Royal Palace of Caserta) - the Versailles of southern Italy (paid entrance)

  • Pompeii - ruins of a city wiped out by the explosion of Mount Vesuvius in 79 AD

  • Herculaneum - another town near to Pompeii that was destroyed but well preserved by the volcano ash in 79 AD

  • Mount Vesuvio - The volcano responsible for all the destruction - you can hike around and on it, all the way up to the “Gran Cono”. And yes, it’s still active, but the last eruption was in 1944.

  • Sorrento - a coastal town, you might have heard some songs about it

  • Positano - another coastal town not far from Sorrento

  • Amalfi Coast - the famous coast with viewsssss and winding roads

  • Capri - the island of rugged beauty with upscale shopping and hotels

  • Ischia - volcanic island with hot springs

  • Procida - Naples’ third colorful island sandwiched between Ischia and Capri

Established: founded by the ancient Greeks

Places to eat:

  • Pizzeria Vincenzo Costa Napoli

  • L’Antica Pizzeria Da Michele

  • Gino e Toto Sorbillo - pizzeria

  • Mennella il Gelato

  • Pizzeria Salvo

Typical foods to try:

  • pizza

  • pizza fritta (fried pizza)

  • mozzarella di bufala - water buffalo mozzarella, the best mozzarella you will probably ever eat

  • babà - pastries soaked in alcohol, often rum

  • struffoli - little fried sweets topped with honey and sprinkles

  • sfogliatelle - pastries with an orange scented ricotta filling. There are two types, regular (shortcrust) and “curly” (flaky and crunchy)

IMG_6485.jpeg

Why I like Naples

It took me awhile to get to Naples. While I’ve long heard about the pizza, the mozzarella di bufala, I’ve also heard that Naples isn’t all that great. It’s a world of its own in Italy, with a dialect that even other Italians can’t understand. People either seem to love it or hate it. Those who love it usually reference the hospitality of the people, the delicious cuisine, and the beauty of the natural surroundings. Those who don’t favor Naples tend to say it’s dirty and unsafe with not much to see.

When we had an opportunity to go to Naples this past April, (read: a “necessary” reason as all of Italy was in a red zone lockdown and you could only leave your house with such), we jumped on it. I mean, worst case scenario it’s an ugly city but we’ll be eating amazing pizza, right? Well, we had a blast. After 4 days I was sad to leave, even though we were traveling with our 6 month old son and Naples’ streets are most definitely not stroller friendly. Word to the wise, if you’re traveling with a young child in Naples (or really anywhere in Italy), baby carriers are your best friends!

There’s nothing like being thrown into the different world that is Naples like stepping out of the train station and immediately witnessing a love triangle showdown by the man who didn’t realize he was in a love triangle. Yelling on the phone, accusing his lady of being with another man. Whatever she may have said to deny it, he continued to stand there on the street corner, yelling into his phone that he can see her walking hand in hand with some other guy, while completely oblivious to the rest of the world still moving around him. Welcome to Naples! Aside from masks, you’d never know Covid was a thing, let alone in a red zone.

We stayed in a lovely Airbnb not too far from the train station. Not the loveliest area, even for Naples, but I didn’t feel it was a dangerous area. The Airbnb was on the first floor (American second floor) with an elevator. Except, the elevator was so small I had to retract the stroller handle to the shortest level, suck in my stomach, and hover over the stroller to get the door closed. My husband (M) took the stairs and met us at the top, only to find the way the door opened onto the landing made it impossible to wheel out. One person had to hold the door and stand back while the other lifted the stroller out and over the steps. Every other time it was much easier for M to just carry the stroller down the steps. While the elevator wasn’t baby friendly, our host had a pack n play all set up for us!

We spent as much time exploring as we could (and eating pizza), putting it under the category of “we’re taking a walk, exercise is necessary” while still being respectful of the rules. I can also tell you by the groups of old men chatting in the piazzas and people everywhere, most certainly not everyone was out with an “essential” reason. Ha. No museums or attractions were open, but we enjoyed our strolls and getting glimpses of the culture and city life. I took hardly any photos, so as not to draw attention to myself as a tourist. Every time I wanted a photo I would pretend I was taking a photo of the baby. “Hey, Elyas! Look at mommy!” :) Not that it probably did much good, all you had to do was watch us try to cross the street to realize we weren’t locals. There was one time I don’t know that we would’ve been able to cross if it wasn’t for the obviously local young woman who barely looked up as she pushed her toddler in a stroller out into the street while texting with one hand. All the cars dutifully stopped, and we dashed along after her.

We had been warned to avoid Spaccanapoli and the Spanish Quarter, as those were the most dangerous parts of town. Mugging and pickpocketing are supposed to be big here. I was even reading this blog from a girl who used to live in Naples who suggested “when you get mugged, keep a 10euro note in your front pocket to throw at them so you can run away safely.” Not if you get mugged…when. Hahaha. Ironically those are places you should definitely see, and we stumbled across both of them. Naples might feel rough around the edges, but as long as you use some common sense and are aware of your belongings, you should be fine. Like any big city. The Spanish Quarter was actually one of my favorite parts, I think we were the only non-residents during our stroll there, and got a unique glance of life there without tourists; the little shops with lines out the door for daily purchases, people reading newspapers on benches, birds singing from their cages on the balconies.

We tried to go up towards Castel Sant’Elmo to see some views, but that didn’t go as planned. With the uphill trek, mostly stairs and us having a stroller, we opted for the funicular. We got our tickets and went up the escalator to wait, only to find we had to pass through turnstiles that the stroller most definitely didn’t fit through. Thankfully some spunky teenager saw us struggling and came over to help us haul the baby and stroller over the turnstile. Did I mention we were trying to stay inconspicuous? We looked around, panting, and…oh no. What turnstiles did we go through? Now we’re in this closed off area that we can only get this…train thing from, the area for the funicular is over there, through those other turnstiles…we were amusingly mortified and mutually agreed there was no way we were lifting the stroller back over the turnstiles to go lift it over the other turnstiles…we were stuck taking the mysterious train to a mysterious destination. It was like an above ground subway, but you had to wait for some doors to open to access the platform. We got on, and got off at the first possible stop. We were…way outside the city in some nondescript area. We took one bus back towards the center but next Google maps was telling us to take the metro, and we couldn’t find an elevator down to the metro station. We decided to walk the hour back to the apartment rather than deal with all the stairs and the stroller. The hour turned into two, with Naples not being that easy to navigate apparently. Sometimes there was no sidewalk, drivers are crazy, and Google Maps led us down all the routes with major staircases. The whole thing was ridiculous and had us laughing.

I think one of my favorite moments was trying to cross at a major intersection. Despite the crosswalk light being green, there was a wall of cars and vespas turning left. When there seemed to be a let up, all of us pedestrians started to cross. Another wave of vehicles was coming, and when a man on a Vespa saw us with the baby in the carrier, he stopped and even held out his hand to stop the car that was turning beside him. He looked at the car and pointed at us, like, “Stop! Look, don’t you see there’s a baby crossing??” And that warmed my heart, that even strangers were looking out for my son.

I didn’t hear as much of the dialect as I was expecting, but when I did, it made me really happy. It’s so fun, and even though I speak Italian, I only understood a few words here and there. I didn’t even know that the guy who was making our fried pizza asked me if I wanted some cracked pepper. What?? Pepe. Oh er, yes please! I hadn’t felt like such a tourist in a long time! I can’t wait to go back and make a fool of myself again.

I guess I should say something about the pizza. When you eat pizza in Italy, you know you’ve found something special, as long as you don’t find yourself in a tourist trap restaurant. But then you eat pizza in Napoli, and just when you thought it couldn’t get any better, your mouth explodes. The creamy mozzarella, the fresh tomato sauce that tastes like the tomatoes are still growing on the vine, and the chewy, fluffy, but not overly so, crust that may leave you speechless, having nothing to do with your mouth being full.

Overall, Napoli is a city to be enjoyed without hurry and loved with all of its chaos and rugged beauty.


Crispy Gnocchi with Brussels Sprouts

Made with pumpkin gnocchi

Made with pumpkin gnocchi

Last Updated August 10, 2024

Think gnocchi with crispy sides, tender browned brussels sprouts with crispy edges, with a browned butter sauce and a bright hint of lemon.

I found this recipe thanks to New York Times’ Instagram account, and after the first OH YEAH THIS IS GOOD trial run I’ve made it several times since. It’s easy, the ingredient list isn’t scary long, and it has brussels sprouts so it’s totally healthy, right? Maybe not, but it’s rich and satisfying so you don’t need to eat a huge serving.

It starts with cooking and crisping up those little sprouts, then you trade out the sprouts to brown the gnocchi, then add butter, honey, lemon and a bit of red pepper flake spice and cook until the butter browns (when it smells like heaven); add the sprouts back in and grate a little parmesan cheese on top. Easy and impressive!

Brussels sprouts

Brussels sprouts often get a bad rap and I know people who will only eat them if they’re served with plenty of bacon. While I’m sure there do exist those people who truly dislike the sprouts, I believe that most people who claim to not like them just haven’t eaten them properly prepared. There’s nothing worse than limp or soggy brussels sprouts. Never ever boil them, yeah? They’re at their most delicious if they are pan fried or oven baked. Crispy brussels sprouts: yummy. Soggy brussels sprouts: yucky. If you or someone you know is a brussels sprout skeptic, this recipe may just be the one to win you over!

That said, if you are one of the true dislikers, you can switch out the brussels sprouts for other veggies like broccoli, cauliflower, cabbage, kale, or any of those cruciferous types.

Adaptations from the original recipe

While New York Times might think this recipe serves 4 people, I pretty consistently ate this in 2-3 sittings. Ahem. I added in the “3” part just to be generous.

I reduced the butter from 6 Tbsp to 4 Tbsp. 6 was just…a lot. You’re more than welcome to use that much if you’re looking for a very rich dish, but I think 4 was plenty, you could probably even get away with 2-3 Tbsp.

The original recipe calls for pan frying the brussels sprouts, but no matter how many times I’ve tried, it always took much longer for the brussels to cook than the specified 5-8 minutes. I would say up to 15-20 is closer. I’m sure part of it is that I don’t have a cast iron skillet. Otherwise, it can be more time efficient to roast the brussels sprouts in the oven while you’re preparing the gnocchi.

I reduced and changed the lemon aspect of the recipe. NYT says to peel thick strips of lemon zest, then chop, ending with about 2 tsp of zest. I personally found the lemon a little overpowering this way, so I compromised and was happy with the following adaptations: zesting a lemon with a regular zester, which creates a finer zest, and using only about 1/2-1 tsp of the finer zest, OR skipping the zest and adding in a splash of fresh lemon juice at the end. Either way gets you there a bit quicker and easier. One of my least favorite tasks in the kitchen is zesting citrus so sometimes I opt for a splash of lemon juice when I just don’t want to zest, ya know?

If you noticed I listed 1 lb of brussels sprouts as 500g, which are not equal weights. That’s because brussels sprouts often come in 500g packages in Italy. Since a pound is really only 454g, I rounded up for practicality’s sake. Yes, it bothers me to do so but I think it’s for the best, ahem. :)

This post may contain affiliate links. If you make a purchase using these links, Jennyblogs may receive a small commission, at no extra cost to you. This helps to support Jennyblogs. For further information see the privacy policy. Grazie!

Recipe adapted from New York Times


Crispy Gnocchi with Brussels Sprouts

Serves 2-3

Ingredients

  • 1/4 cup / 56g olive oil

  • 1 lb / 500g brussels sprouts

  • salt and pepper, to taste

  • 1/2 tsp lemon zest

  • 1/2 tsp red pepper flakes

  • 18 oz / 500g package of gnocchi

  • 4 Tbsp / 56g butter

  • 1/2 tsp honey

  • grated parmesan cheese, for serving

Directions:

  1. Clean and chop off the ends of the brussels sprouts, and any brown leaves. Slice into halves, or quarters if particularly large.

  2. Cook the brussels sprouts OPTION 1, SKILLET:

    Heat 3 Tbsp / 42g of the oil in a large skillet over medium heat. Add brussels sprouts in an even layer, sprinkle with 1/2 tsp salt and some pepper. Sprinkle over lemon zest and cook for 10-15 minutes, stirring occasionally, or until sprouts are crispy and a nice golden brown.

    Add the red pepper flakes and stir, cook for another 3-4 minutes or until sprouts are crisp and tender.

    Transfer to a plate or bowl while you cook the gnocchi.

    OPTION 2, OVEN:

    Preheat oven to 450°F / 232°C.

    Toss the brussels sprouts with 3 Tbsp of oil, 1/2 tsp salt, some pepper, lemon zest, and red pepper to evenly coat; spread in an even layer on a baking sheet lined with parchment paper.

    Roast in the oven for about 15 minutes, or until crispy, golden, and tender. While roasting, prepare gnocchi.

  3. Add the remaining 1 tbsp / 14g of oil to a skillet over medium-high heat. Add gnocchi in an even layer and cook without stirring, 3-4 minutes or until golden brown underneath.

  4. Add butter and honey, season with salt and pepper. Cook until butter has melted and starts to turn golden brown and nutty smelling, this can take several minutes.

  5. Add the brussels sprouts to the skillet and cook just until everything is warmed through.

  6. Remove from heat and serve with a sprinkling of parmesan cheese.

Jenny’s Notes:

  • Use just 2 Tbsp / 28g butter for an even lighter version of this

  • Butter can go quickly from perfectly browned and nutty to burnt, so keep a close eye on it!

  • Whether you buy a package of gnocchi or make your own, different flavors are delicious in this recipe. Pictured in this post (first and last) are some pumpkin gnocchi, so good!

Crispy Gnocchi and Brussels Sprouts
Yield 2-3
Author
Cook time
40 Min
Total time
40 Min

Crispy Gnocchi and Brussels Sprouts

Crispy, pan-fried gnocchi and roasted brussels sprouts with parmesan cheese, a hint of lemon, spice, and honey.
Cook modePrevent screen from turning off

Ingredients

Instructions

  1. Clean and chop off the ends of the brussels sprouts, and any brown leaves. Slice into halves, or quarters if they’re particularly large.
  2. Cook the brussels sprouts OPTION 1, SKILLET:
  3. Heat 3 Tbsp / 42g of the oil in a large skillet over medium heat. Add brussels sprouts in an even layer, sprinkle with 1/2 tsp salt and some pepper. Sprinkle over lemon zest and cook for 10-15 minutes, stirring occasionally, or until sprouts are crispy and a nice golden brown.
  4. Add the red pepper flakes and stir, cook for another 3-4 minutes or until sprouts are crisp and tender.
  5. Transfer to a plate or bowl while you cook the gnocchi.
  6. OPTION 2, OVEN:
  7. Preheat oven to 450°F / 232°C.
  8. Toss the brussels sprouts with 3 Tbsp of oil, 1/2 tsp salt, some pepper, lemon zest, and red pepper to evenly coat; spread in an even layer on a baking sheet lined with parchment paper. Roast in the oven for about 15 minutes, or until crispy, golden, and tender. While roasting, prepare gnocchi.
  9. Add the remaining 1 tbsp / 14g of oil to a skillet over medium-high heat. Add gnocchi in an even layer and cook without stirring, 3-4 minutes or until golden brown underneath.
  10. Add butter and honey, season with salt and pepper. Cook until butter has melted and starts to turn golden brown and nutty smelling, this can take several minutes.
  11. Add the brussels sprouts to the skillet and cook just until everything is warmed through.
  12. Remove from heat and serve with a sprinkling of parmesan cheese.

Notes

  • Use just 2 Tbsp / 28g butter for the lightest version of this!
  • Butter can go quickly from perfectly browned and nutty to burnt, so keep a close eye on it!
  • Whether you buy a package of gnocchi or make your own, different flavors are delicious in this recipe! Pictured are some pumpkin gnocchi, so good!


Nutrition Facts

Calories

705.17

Fat

37.14 g

Sat. Fat

13.14 g

Carbs

81.25 g

Fiber

7.83 g

Net carbs

73.42 g

Sugar

4.94 g

Protein

15.02 g

Sodium

307.61 mg

Cholesterol

90.46 mg

Nutritional info is approximate. Based on 3 servings

gnocchi, easy dinner, comfort food, brussels sprouts
dinner
American
Did you make this recipe?
Tag @jennyblogsandbakes on instagram and hashtag it #jennyblogs

Explore Italy: Pisa

2019-03-03 10.23.46.jpg

Pisa is a rather plain city with the exception of the Leaning Tower of Pisa and the surrounding piazza and Duomo. Tourists throng there, so you’d think it would be a top pick on an Italian vacation, yet people I talk to would always say that Pisa is boring. So is it worth going? Yes and no. Pisa may not be the most exciting of Italian cities, but it does have its few magnificent things to see. If it’s your first time in Italy, I wouldn’t recommend Pisa as a top pick, but it’s worth seeing at some point and easy to get to.

Pisa in a nutshell

Location: Tuscany, Italy

Best known for: The Leaning Tower of Pisa

Days needed to explore: 1+ - while you can easily see all Pisa has to offer in one day (hint, it’s all in one spot), I’m never going to discourage someone from making a smaller city a home base for doing other day trips. That said, if you’re spending one or more nights in Pisa just to discover Pisa better, I would encourage you to consider other cities instead, but that’s definitely your prerogative!

What to see and do:

  • La Piazza dei Miracoli (Square of Miracles) - within this expansive piazza you will find the top attractions of Pisa: The Leaning Tower, the Duomo, the Baptistry, and the Camposanto Monumentale

  • La Torre Pendente di Pisa (Leaning Tower of Pisa) - The famous tower, choose your side to take a picture, either “holding it up” or “pushing it over” (paid entrance to climb)

  • Il Duomo di Santa Maria Assunta

  • Il Battistero (The Baptistry) - The largest baptistry in Italy (paid entrance)

  • Camposanto Monumentale - considered a holy place because here the crusaders brought holy earth from Golgotha (where Jesus was crucified), just outside the city of Jerusalem. There are many of the most illustrious of Pisa buried here.

  • Stroll along the Arno River

  • Walk down Borgo Stretto and Borgo Largo or “Il Borgo” as the Pisani call it; the main street of the historic Pisa center. Shopping and eating a plenty!

  • Enjoy the night life; Pisa is a young university town with plenty of energy in the evening/night hours

Established: Unknown - it could be by the Greeks, could be the Ligurians; Roman and Etruscan traces have been confirmed. Some say it was most probably founded by the Etruscans.

Typical foods to try: Much of the Cucina Pisana is very similar to the rest of Tuscany. Many typical dishes are simple, nutritious, and what we now call “poor” dishes; whatever can be grown or hunted in the area. Here are some ideas:

  • Bordatino alla pisana - a type of bean minestrone with black cabbage and maybe a bit of lard or prosciutto; a winter dish

  • Pallette - a type of polenta usually served with with a meat ragù; another dish best eaten in the winter months, from September on

  • Pappa al pomodoro - a thick tomato basil bread soup, very traditionally Tuscan. While the description might sound strange, this is one of my favorites! In fact, you can make it easily yourself, find the recipe here.

  • Pasta e ceci - pasta with chickpeas

  • Trippa pisana - a cow’s third stomach (these typical plates are just making you die to come to Pisa, aren’t they??) Don’t be fooled by the ick factor, I’ve tried both trippa and its Florentine cousin, lampredotto, and they’re both surprisingly delicious if you can get over what you’re eating!

  • Dishes featuring seafood - a personal favorite is baccalà, or salted cod

  • Cantuccini col Vin Santo - Cantuccini cookies (like what Americans call biscotti) served with “holy wine”

Why I like Pisa

Don’t get the idea from my frank assessment of Pisa that I’m not a fan. On the contrary, I had a blast in Pisa and would gladly go again. Traveling is more about the company you have than the places you see.

Pisa is about an hour train ride from Florence and the ticket costs less than 10euro. It’s one of the easiest day trips you could ask for. Pisa itself isn’t hard to navigate, once you exit the train station the walk to the Piazza dei Miracoli and main sights is about a half hour pretty much straight north. Or “that way” if directions aren’t your thing.

My husband and I went in March and stayed overnight. Our cheap hotel with the stinky bathroom is not one I’d recommend, but it added to the character of our trip. Moral of the story, if you use Booking.com, make sure to read ALL fine print and read lots of reviews, especially the negative ones, before booking. They always appear nicer on the internet. I would’ve just as soon done Pisa in a day trip, but my husband and I had been talking about going for long enough that we decided we might as well make an overnighter of it. Despite it being the low season, there were still plenty of crowds. They were all concentrated at the Leaning Tower, as you can see from some of the photos, the rest of Pisa is quite tranquil during the day, but by night the city comes alive with locals and students out for a dinner or drinks and a good time. My idea of a good time is gelato, so we hunted down a gelateria. It took a surprisingly long time to find one open for being a student and tourist town, every single gelateria was closed. Sure, like I said March is the low season but usually gelato shops close around January/February, not ALL of them in March when Jenny wants a gelato. We did eventually find one open, Gelateria de’ Coltelli, and it was good! I recommend it.

Pisa was also my first experience with Indian food. I know a lot of people who love Indian food, so I suggested we try one of the numerous Indian restaurants we had passed. Really, so many Indian restaurants in Pisa. I’ve since discovered I love Indian food but that was a very bad introduction. Despite asking numerous times, water wasn’t brought to our table until after our meal was served. So thirsty, pant pant. We were charged for two bottles of water, despite only having one. Then there was this weird green mango appetizer that was so incredibly sour and the pits about took my tooth out. Then we were brought two dishes when we had ordered three, and one wasn’t even what we ordered. Indian food in Pisa? Ummmm I’ll wager any of the others would be better?? Haha! The whole experience was very amusing and a very memorable meal. Makes me laugh to this day.

The Piazza dei Miracoli is really very stunning, I wasn’t expecting to like it as much as I did. Pictures don’t do it justice!

While Pisa is no Paris or Rome, it’s still a fun stop!


Flax Bread

Updated May 27, 2024

This easy, no-knead flax bread is a unicorn of a recipe. It’s friendly to so many different special diets, including gluten-free, dairy-free, sugar-free, paleo, candida, and keto, and yet somehow is not only edible, but quite tasty.

I came across this recipe because I was determined to find a palatable bread for my husband who was eating a very restricted diet for a few months. The bread couldn’t contain gluten, yeast, sugar of any kind, or dairy. It’s already challenging to make a good gluten-free bread. But a bread without yeast? That’s tricky. Then throw in the dairy and sugar part and whew. Slim pickings. I tried a few recipes that I immediately discarded, but in the end I found this flax bread winner which contains none of the above.

Keep in mind with the above restrictions, you’re not going to get a bread that’s crusty and artisanal and really anything like what you might imagine when you think of typical bread. But when your diet is restricted, and you come across a recipe like this, it’s absolutely heavenly.

The original recipe was called Focaccia Flax Bread but I couldn’t quite bring myself to call it focaccia, since it’s so far from the real thing. It’s low, so similar in height to focaccia, but it’s also not really a flat bread. Maybe we can just call it a low bread?? Needless to say, I went with simple “flax bread”.

It also happens to be fabulously easy, which is a bonus. In less than 30 minutes you can have this bread hot out of the oven!

The flour in this bread is flax meal, although you can mix it up and use other GF flours, as well; the leavening is baking powder (use baking powder without cornstarch to be paleo-friendly), the fat is coconut oil or really any non-dairy fat you choose. There’s also optional xylitol as a sweetener, which before this recipe I had never used. Sometimes I add it, sometimes I don’t, but I’ve found I rather enjoy using xylitol. It wasn’t as expensive as I had anticipated, it looks very similar to granulated sugar, it doesn’t have a weird taste to it like some sugar substitutes can, and it doesn’t feel as evil as say, aspartame.

If you’re a normal carb-ivore, I won’t try and sell this bread to you as “OMG you’ll never eat real bread again!” because that’s just silly. If you can eat real bread, eat real bread! I’m a normal carb-ivore and I find this bread tasty, but it certainly won’t replace my love of baguettes. But if you’re not able to eat normal bread, whether for a short time or indefinitely, I really hope this recipe brings some tastiness into your life!

This post may contain affiliate links. If you make a purchase using these links, Jennyblogs may receive a small commission, at no extra cost to you. This helps to support Jennyblogs. For further information see the privacy policy. Grazie!

Recipe adapted from whole new mom


Flax Bread

Serves 8

Ingredients:

  • 1 cup / 180g flax meal

  • 1 1/2 tsp baking powder

  • 1 tsp - 1 Tbsp / 5-15g xylitol, optional

  • 2 eggs

  • 1/2 cup / 119g water

  • 1/3 cup / 74g coconut oil, melted

Directions:

Preheat oven to 350°F / 177°C. Grease an 8x8in / 20x20cm square pan or 8in / 20cm round cake pan.

  1. In a medium bowl, combine flax meal, baking powder, and xylitol, if using.

  2. In a small bowl, lightly beat eggs. Add eggs to dry mixture along with water and coconut oil; mix until well combined.

  3. Let sit for a few minutes to thicken up slightly, then pour and spread into prepared pan.

  4. Bake for about 20 minutes or until turning golden-brown and bread is springy to the touch.

Jenny’s Notes:

  • To make this bread paleo, use baking powder that doesn’t include cornstarch in it.

  • You can make your own flax meal by grinding flax seeds in a food processor or coffee/spice grinder. Quick and easy! I do this every time.

  • Other GF flours can be substituted for part of the flaxmeal. I like to substitute about 25% (so 1/4 cup in this recipe) of the flax meal for buckwheat flour.

  • Really any fat can be used instead of coconut oil, choose your preference!

Flax Bread
Yield 8
Author
Prep time
7 Min
Cook time
20 Min
Inactive time
3 Min
Total time
30 Min

Flax Bread

A versatile flatbread made with ground flax seeds that suits a variety of special dietary needs, including gluten-free, dairy-free, sugar-free, yeast-free, keto, paleo, and candida diet friendly.

Ingredients

Instructions

  1. Preheat oven to 350°F / 177°C. Grease an 8x8in / 20x20cm square pan or 8in / 20cm round cake pan.
  2. In a medium bowl, combine flax meal, baking powder, and xylitol, if using.
  3. In a small bowl, lightly beat eggs. Add eggs to dry mixture along with water and coconut oil; mix until well combined.
  4. Let sit for a few minutes to thicken up slightly, then pour and spread into prepared pan.
  5. Bake for about 20 minutes or until turning golden-brown and bread is springy to the touch.

Notes

  • To make this bread paleo, use baking powder that doesn’t include cornstarch in it.
  • You can make your own flax meal by grinding flax seeds in a food processor or coffee/spice grinder. Quick and easy! I do this every time.
  • Other GF flours can be substituted for part of the flaxmeal. I like to substitute about 25% (so 1/4 cup in this recipe) of the flax meal for buckwheat flour.
  • Really any fat can be used instead of coconut oil, choose your preference!

Nutrition Facts

Calories

228.14

Fat

19.84 g

Sat. Fat

8.84 g

Carbs

8.54 g

Fiber

6.16 g

Net carbs

2.38 g

Sugar

0.40 g

Protein

5.69 g

Sodium

116.69 mg

Cholesterol

46.50 mg

Nutritional info is approximate. Based on 1 serving if recipe is made with 1 Tbsp of xylitol.

gluten free, dairy free, flaxmeal bread, candida diet friendly, sugar free, yeast free, flatbread, flaxbread focaccia, paleo, keto
bread, special diets
American
Did you make this recipe?
Tag @jennyblogsandbakes on instagram and hashtag it #jennyblogs

Explore Italy: Cinque Terre

Overlooking Vernazza

Overlooking Vernazza

One of the most beautiful natural spots in Italy, arguably on Earth, with the crowds to show for it. Cinque Terre is a must-see, made up of 5 little colorful towns perched on the Ligurian Sea with hiking trails connecting each of the villages.

Cinque Terre in a nutshell:

Location: Liguria, Italy

Best known for: 5 seaside towns with VIEWS of the Mediterranean and hiking trails that connect the towns

Days needed to explore: 1+ - It’s no secret that Cinque Terre is easily seen in a day, the towns are small and there are plenty of trains connecting each of them if you don’t want to hike the trails. You can comfortably see 2-3 of the villages in a day, some might say if you’ve seen one you’ve seen them all. I disagree, as I think they each hold their charm, and would encourage you to spend at least one night in Cinque Terre. This is the only way you will see Cinque Terre without the throngs of people. Even if you take the first train in and the last train out, that’s the plan of every other day-tripper. Given the tiny size of the towns and their immense popularity, it can be difficult to secure lodging. While I would recommend finding a B&B within any of the five towns if possible, Monterosso, Vernazza, Corniglia, Manarola, or Riomaggiore, another option would be to find a place in La Spezia, which is very near to Cinque Terre and the main hub from which to get to Cinque Terre.

What to see and do: The five towns and the hikes in between each! Listed below are the five towns, in order from the direction of La Spezia/Porto Venere towards Levanto, and the hiking trails in between. Cinque Terre and surrounding area is a national park and a UNESCO World Heritage site. If you choose to hike, most paths are free, but the two most popular ones require a Cinque Terre Card.

12km / 7.5mile (5hr) hiking trail from Portovenere to the first town, Riomaggiore

  • Riomaggiore

    1.5km / 1mile (30min) hiking trail (Via dell’Amore)

  • Manarola

    3.5km / 2.25mile (2hr) hiking trail

  • Corniglia

    4 km / 2.5mile (1.5-2hr) hiking trail (requires the Cinque Terre Card)

  • Vernazza

    3.5km / 2.25mile (1.5hr) hiking trail (requires the Cinque Terre Card)

  • Monterosso al Mare

    8km / 5mile (3hr) hiking trail from the last town, Monterosso, to Levanto

Established: Cinque Terre is first mentioned in documents from the 11th century. Monterosso and Vernazza were the first settled towns of the five.

Places to eat:

  • Gelateria Vernazza - Naturally, I don’t have real restaurant recommendations, just gelato. The best gelato between the five villages that I’ve had is in Vernazza. The gelateria is not hard to find as it’s on the main street heading down from the train station.

Typical foods to try:

  • Seafood is the shining star!

  • Trofie al pesto - pasta

  • Focaccia - apparently, a typical breakfast around here is focaccia dipped in cappuccino. I haven’t tried and can’t say I’ve seen anyone do it…but hey, if salty coffee is your thing, go for it!

  • Schiacchetrà - wine of Cinque Terre

More about Cinque Terre

Trains and stuff

Once you start getting into the logistics of how to get to Cinque Terre and move around once you’re there, it can seem confusing at first. Train? Which one? Buses? Boats? While getting to Cinque Terre isn’t as easy as hopping on one train, it really isn’t difficult, either. Once you have your train to La Spezia Centrale (which you could buy in advance or not) you can easily wait until you arrive at La Spezia to buy the Cinque Terre Card. Or you can buy it online here. You can get a 1, 2, or 3 day pass. From La Spezia you get the train that stops at all five towns. If you’re coming from La Spezia, you’ll get the train towards Levanto. Easy peasy. Just don’t forget to validate your train card before getting on the train the first time.

Cinque Terre Cards and hiking

There are two different cards you can get for Cinque Terre. The train card, and the trekking card.

  1. The train card includes unlimited rides on the regional Cinque Terre trains, shuttle buses, wifi, trekking, and free use of restrooms.

  2. The trekking card includes everything but the trains. If you only plan on taking the train once or twice, this might save you money. Otherwise it’s a better deal to get the train card.

A single train ride without the train card will cost you about 4 euros. Using the restroom without a card will cost 1 euro.

The only scenario I can think of where you probably wouldn’t need either card is if you plan on seeing 3 or less towns and only do the free hikes…and stay at least one night…even then I don’t know that that would work, as the paths are often closed so you’d have to plan carefully.

If you didn’t get a Cinque Terre Card or lost it, don’t fret. There is a little outstation shortly into the two paid hikes; they will ask to see your card or you can buy one from them, same price.

You can check ahead of time on this site to see which paths are open at the time of your trip, I’ve personally never been when all four of the hikes between the villages were open. There are alternative routes, all of which are free, even if the main ones are closed, but I don’t have personal experience with those. The whole area has 48 paths, but the main ones are those which go between the towns.

If you plan on hiking, make sure you have proper foot wear. Flip-flops aren’t allowed. I definitely wore sandals before I knew of these rules without any problems. I did the Vernazza-Corniglia hike shortly after it had rained once. Having been a professional ballerina I could say I have decent balance, but I was surprised at how slippery the trail was in certain areas. Steps and rocky areas were a bit scary. I had sneakers on and was still walking very slowly and hanging on to anything I could.

Swimming

If you plan on swimming, Monterosso has the largest sandy beach and sea access, with many umbrellas and chairs you can rent. That’s how beaches usually work in Italy; you rent a spot with an umbrella which usually comes with 2-3 reclinable beach chairs which is yours for the day. If you want more chairs or shade or have more than 3-4 people, you’ll probably need to rent more than one spot. Free beaches where you can just spread a beach towel are not the norm and hard to find in Italy.

Vernazza has a small harbor with water access, you can go swimming and it’s free.

Corniglia has no immediate beach or water access, but there are beaches not too far. One is known to be a nudist beach.

Manarola has some deep water swimming, accessible by ladder for the more adventurous.

Riomaggiore has a rocky beach close by.

For more details and directions, see here.

Why I like Cinque Terre

I’ve been to Cinque Terre a few times, a couple times by train, once by car; a couple times in the summer, once in the fall; a couple times as a day trip, once overnight. It never gets old. My favorite town is probably Vernazza, but I’ve also spent more time there than some of the others.

The first time I went was in 2014 with my family. We went for a day, the whole trip immaculately planned out, as my mom and I were the ones behind the trip planning. We had chosen to go to Cinque Terre because, well, all you need to see is one photo and you’re sold, plus my dad loves the outdoors so we figured this would be “his” part of the trip. We planned to take an early train in, start by exploring Vernazza, hike from Vernazza to Corniglia, eat dinner in Corniglia, then take the last train from Corniglia back to La Spezia and finally Florence, our home base. Everything went great, until the end. We made it to Corniglia, but had a bit less time than originally planned, so decided to get a quick aperitivo instead of dinner. We figured we had about an hour to order and enjoy some beverages, before making our way to the train station. We looked on Google Maps, the train station was just around the corner from where we were, all we need is 20 minutes to get there and get the train, with plenty of time to spare, right? Next thing we know, we have 15 minutes before the train leaves. Well golly, we better get up, tear our eyeballs away from the magnificent Mediterranean, and trot our little tushies to the train station. What we didn’t realize, was that the train station was wayyyyyyyyyyy downnnnnnnnnn a hill, many, many, many, stories of zig-zagging stairs, then a long sidewalk to the actual train platform. Google Maps, without landscape mode, did not portray the descent. I believe it’s now more appropriately called the “cliff staircase”. We zigged and zagged as fast as we could; we saw our train pull up. Did I mention this was the last train of the night, so if we missed it, we’d be forced to try and find lodging in the popular and tiny Corniglia, in August? As comfy as Italian sidewalks are, we didn’t want to sleep outside so we went faster. My dad and brother got ahead of my mom and I; they got to the train. There was a crowd of people coming from the train, including some goats. I managed to leap onto the train as I heard the door start to beep, about to close; I was holding the train doors open with the weight of my body, while we were all shouting for my mom to hurry up, give it all she’s worth, “just jump over the goats already!!!” as she was politely letting them go by, and the train is seconds from departing. She made it, the doors closed a second later, and all was well. Except for the stress that probably took a few years off our lives. We still laugh about the Corniglia train station and steps to this day. Heed this anecdote.

The next trip I took to Cinque Terre was with friends, in a car. I got to enjoy the ride, but I can tell you finding parking can be an ordeal. This time we started at Monterosso al Mare and hiked to Vernazza. There was an elderly woman trying to do the hike, I remember passing them and my party being quite worried about her. But you know what? She made it! We were all very proud. Halfway between Monterosso and Vernazza there was a man making and selling fresh orange juice. If ever there was a genius business move, this was it. It was hot and there is nothing else to eat or drink except for what you carry on the 2-3 hour hike.

Most recently I went to Cinque Terre in October 2019. My family came over to visit, and we all had such fond memories that we had to go to Cinque Terre again. While autumn can be more unpredictable with weather and the trails are more likely to be closed, I think this was my favorite trip. The moody sea and slightly lesser crowds, not to mention this was my first time staying the night. It’s so wonderful once the day-trippers go home! And sleeping with the sound of the sea, mmmm. Having more time, we explored more up and around the towns beside just seeing the main areas and hiking. Lots of stairs, hardly any people, and lots of cool houses and areas with views of the sea, showing just how high you’ve climbed up among the dwellings!

Corniglia

Corniglia


Paste di Pistacchio Siciliane - Sicilian Pistachio Cookies

Last Updated September 7, 2024

Paste di Pistacchio, or Pistachio cookies, hail from the beautiful island of Sicily. They have a delightfully crisp outer shell and a chewy, soft center.

Two years ago I put up the recipe for Paste di Mandorle, or Sicilian Almond Cookies, and it has become one of the top recipes on this site.

It’s not hard to figure out why…with only 4 ingredients that get mixed together in a bowl with a spoon, rolled in powdered sugar and baked, it really doesn’t get much easier than this. No fancy equipment. Not to mention with the almonds there are more nutritional benefits to these than your average cookie. Or at least, that’s what I tell myself when I’m going for my fifth cookie. They’re also gluten-free and dairy-free friendly.

Sometimes great ideas pop into my head. Sometimes really awful ones, too, but I try to only filter the good ones here onto this blog, k? One day, I saw a half bag of pistachios in my cupboard. The first half had been ground into pistachio flour to make this Pistachio Cake with Honey Vanilla Buttercream for Christmas. Then I had an idea, what if I take the Paste di Mandorle recipe and replace part of the almond flour with pistachio flour?? So I did. And this recipe was born.

After the fact when all the cookies had been gobbled up within a couple hours, I wondered if maybe this recipe wasn’t original to me? It seemed too easy for no one else to have thought of this. Turns out these are definitely already a thing. Sicily is known not just for their almonds but also for their pistachios, especially the area of Bronte. Naturally, these pistachio cookies are a classic right alongside the almond ones.

The original Paste di Pistacchio Siciliane

The original recipe itself has a few variations, as I will list below. You can choose to implement any of the following as per your taste, or just follow the main recipe below, which is my favorite way of making it. Any way you go, you will have a scrumptious cookie that is not only unbelievably easy, but also an authentic Italian sweet!

  • Grind your own flour vs storebought flour. Some will instruct to grind your own almonds and pistachios. This not only gives you fresh nut flour, but it allows you to control how fine you grind it. Some advise against buying almond flour or pistachio flour from the store because it’s too thin. However, if you don’t have a food processor, spice grinder, coffee grinder or any other tool that will get the job done, I have used store bought flour and it turned out fine. No pun intended. ;)

  • Honey. I’d say most of the recipes claiming to be the original I’ve seen call for adding a bit of honey, anywhere from 10-20g. Honestly I don’t, but it would be easy to add if you truly want as close to the original as possible. If adding honey, use a bit less of the cane sugar.

  • Powdered sugar. Some recipes call for using powdered, others granulated. Others call for granulated but have you grind the sugar with the nuts, so you end up with powdered sugar anyway. I generally use granulated sugar and don’t grind, because I grind the nuts in a small electric coffee grinder and there isn’t room for the sugar. Either way you will have great results.

  • Cookie shape. The cookies can be shaped into the classic S shape (Roll dough into logs about the width of a finger, then slice into pieces about the length of half of an index finger, roll in powdered sugar, and use your fingers to shape into the S), ovals, or simply round cookies. I chose the round shape for the recipe below, as it’s the simplest. If you’d like to see the S shape, check out the pictures in this recipe.

  • Dough resting/refrigeration. Some will instruct to let the dough rest after you’ve shaped it so it will be less sticky. As with the almond cookies, if you’ve glanced or made that recipe, the refrigeration or resting is not strictly necessary. It allows the dough to dry out a bit, which means they retain their shapes better when baked. But if you’re going for the round or oval shape, there’s not much need.

This post may contain affiliate links. If you make a purchase using these links, Jennyblogs may receive a small commission, at no extra cost to you. This helps to support Jennyblogs. For further information see the privacy policy. Grazie!

Here is one of the recipes I referenced in Italian and also gives a good visual of the “S” shaped cookie.


Paste di Pistacchio Siciliane - Sicilian Pistachio Cookies

Makes about 2 dozen cookies

Ingredients:

  • 125g whole unsalted almonds or almond flour

  • 125g whole unsalted pistachios or pistachio flour

  • 250g granulated sugar (or 230g granulated sugar and 20g honey)

  • 2 / 60g egg whites

  • pinch of salt

  • powdered sugar, for rolling, optional

Directions:

Preheat oven to 350°F / 180°C.

  1. Using a food processor, spice grinder, or coffee grinder, grind the nuts until coarse. Small chunks are ok.

  2. Mix all ingredients together, and form into balls or desired shape. Roll in powder sugar, if desired.

  3. Place evenly spaced on ungreased cookie sheets. At this point cookies can be covered and refrigerated overnight or baked immediately.

  4. Bake in preheated oven for about 8-12 minutes, or until cookies just start to turn golden.

Jenny’s Notes:

  • If working with a food processor or other tool large enough, you can grind the nuts with the sugar, creating powdered sugar in the process, as some recipes call for.

  • If the dough is too sticky, you can let it sit for an hour or refrigerate for several hours to let it thicken/dry out a bit.

  • This recipe is also delicious using all pistachio flour!

Paste di Pistacchio Siciliane - Sicilian Pistachio Cookies
Yield 24
Author
Prep time
15 Min
Cook time
12 Min
Total time
27 Min

Paste di Pistacchio Siciliane - Sicilian Pistachio Cookies

Traditional Sicilian sweets with a delightfully crunchy outside and chewy inside. Made with just 4-5 ingredients and naturally gluten-free and dairy-free.
Cook modePrevent screen from turning off

Ingredients

Instructions

  1. Preheat oven to 350°F / 180°C.
  2. Using a food processor, spice grinder, or coffee grinder, grind the nuts until coarse. Small chunks are ok.
  3. Mix all ingredients together, and form into balls or desired shape. Roll in powder sugar, if desired.
  4. Place evenly spaced on ungreased cookie sheets. At this point cookies can be covered and refrigerated overnight or baked immediately.
  5. Bake in preheated oven for about 8-12 minutes, or until cookies just start to turn golden.

Notes

  • If working with a food processor or other tool large enough, you can grind the nuts with the sugar, creating powdered sugar in the process, as some Italian versions call for.
  • If the dough is too sticky, you can let it sit for an hour or refrigerate for several hours to let it thicken/dry out a bit.
  • This recipe is also delicious using all pistachio flour!


Nutrition Facts

Calories

108.15

Fat

5.13 g

Sat. Fat

0.51 g

Carbs

14.12 g

Fiber

1.10 g

Net carbs

13.02 g

Sugar

12.21 g

Protein

2.73 g

Cholesterol

0.00 mg

Sodium

36.38 mg

Nutritional information is approximate. Based on 1 cookie rolled in powdered sugar.

Italian dessert, Italian cookie, Sicilian dessert, Sicilian recipe, authentic Italian recipe, original Sicilian dessert recipe, pistachio, almond, gluten free, dairy free
dessert, cookies
Italian
Did you make this recipe?
Tag @jennyblogsandbakes on instagram and hashtag it #jennyblogs