Simple Thai Noodles

IMG_0875.jpg

Some nights you get caught unprepared and need something quick to whip up for dinner. Or maybe that’s every night? I know Sunday food prepping is all the rage, and it’s a really great idea…if you’re only feeding yourself or a small family, and not taking into account the unexpected that happens. Even if you’re the most organized person cooking just for yourself, those nights are going to spring up on you when you want something quick and easy, delicious, and you have all the ingredients on hand. This recipe for Simple Thai Noodles falls in that category.

Sesame oil might not be in everyone’s pantry, but if you invest in a bottle, it can last you months, depending on how often you make Asian or other dishes that often call for sesame oil. It really is worth it, if you try and substitute another oil it won’t be the same. It lends such a nutty depth to dishes!

I actually have several versions of lo mein, Thai noodles, fried rice, etc. and even a couple more waiting to be tried that all have in common varying quantities and varieties of green onion, sesame oil, soy sauce, ginger, peanuts or peanut butter, and a sweet and a spicy element. Each with their merits, and the occasions for which I like to make them. If you can’t tell, I love Asian dishes, whether they’re authentic or simply inspired by Asian flavors.

This pasta is kept in my repertoire for its simplicity while still retaining all the delicious flavors, and now you can make it too, whether you’re in a pinch for a quick dinner, or not! No one said you have to make it only when in a pinch. :)

This post may contain affiliate links. If you make a purchase using these links, Jennyblogs may receive a small commission, at no extra cost to you. This helps to support Jennyblogs. Where possible, links are prioritized to small businesses and ethically and responsibly made items. For further information see the privacy policy. Grazie!

Recipe adapted from A Small Snippet


Simple Thai Noodles

Serves 4-6

IMG_0878.jpg

Ingredients:

  • 16 oz / 500g linguine or spaghetti

  • 2 Tbsp / 28g olive oil, or oil of choice

  • 1/4 cup / 54g sesame oil

  • about 1 Tbsp / 5g red pepper flakes

  • 3 Tbsp / 63g honey

  • 3 Tbsp / 45g soy sauce

  • cilantro, chopped peanuts, chopped green onions, julienned carrots, sesame seeds, or your choice of toppings

Directions:

  1. Bring a large pot of water to boil, adding salt just before it boils. Cook pasta according to directions on box; drain, and return to pot.

  2. While the pasta is cooking, whisk together the oils, red pepper flakes, honey, and soy sauce in a small bowl.

  3. When the pasta is done and drained, add the sauce to the noodles and toss to coat well.

  4. Serve immediately, adding toppings of choice.

Jenny’s Notes:

  • You can adjust the amount of red pepper flakes to suit your spicy preference. 1 Tbsp, as in the recipe, results in reasonably spicy, but not overwhelming. Also, you could use a spicy oil if you have some on hand instead of the red pepper flakes.

  • For a stronger sesame taste, use all sesame oil instead of olive oil. (6 Tbsp / 84g total of sesame oil.)

  • Feel free to add veggies or a protein, if you desire. For veggies, chop small and sauté in a pan with a bit of oil for a few minutes or until tender, toss in when you add the sauce. Cook your protein and slice as desired, add at the end on top of plates of pasta or mix in with sauce.

Simple Thai Noodles
Yield 4-6 servings
Author
Prep time
10 Min
Cook time
10 Min
Total time
20 Min

Simple Thai Noodles

The simplest Thai noodles using only 6 pantry ingredients for a quick and easy dinner! Sweet, savory, and irresistible.
Cook modePrevent screen from turning off

Ingredients

Instructions

  1. Bring a large pot of water to boil, adding salt just before it boils. Cook pasta according to directions on box; drain, and return to pot.
  2. While the pasta is cooking, whisk together the oils, red pepper flakes, honey, and soy sauce in a small bowl.
  3. When the pasta is done and drained, add the sauce to the noodles and toss to coat well.
  4. Serve immediately, adding toppings of choice.

Notes

  • You can adjust the amount of red pepper flakes to suit your spicy preference. 1 Tbsp, as in the recipe, results in reasonably spicy, but not overwhelming. Also, you could use a spicy oil if you have some on hand instead of the red pepper flakes.
  • For a stronger sesame taste, use all sesame oil instead of olive oil. (6 Tbsp / 84g total of sesame oil.)
  • Feel free to add veggies or a protein, if you desire. For veggies, chop small and sauté in a pan with a bit of oil for a few minutes or until tender, toss in when you add the sauce. Cook your protein and slice as desired, add at the end on top of plates of pasta or mix in with sauce.

Nutrition Facts

Calories

676.11

Fat

23.63 g

Sat. Fat

3.4 g

Carbs

99.87 g

Fiber

4.71 g

Net carbs

95.17 g

Sugar

16.33 g

Protein

16.89 g

Sodium

794.7 mg

Cholesterol

0 mg

Nutritional info is approximate, based on 4 servings including toppings.

6 ingredients, 20 minute dinner, pasta, Thai Noodles
Dinner, Pasta
American
Did you make this recipe?
Tag @jennyblogsandbakes on instagram and hashtag it #jennyblogs
IMG_0876.jpg

Food in Florence: Where to Find the Best Eats

Choosing where to eat in a new city is always one of the hardest decisions. Especially if that city is half way across the world and you don’t get over there every day.

Fiesole+pasta.jpg

This is important because I essentially love traveling for two principle reasons: The culture and the food. But how to find, say, good Belgian waffles and frites in Bruges, Belgium, or croissants and baguettes in Paris, France, or pizza and mozzarella di bufala in Napoli, Italy, when most of the places you see are screaming “tourist trap!”?

Unless you are fortunate enough to know some locals, you are completely left to yourselves, aside, of course, from the hundreds of books and online guides touting the 10 best places to eat. The overwhelming part for me is weighing through the endless sites and opinions, some of which are good, and an amazing number of which are not at all reliable. So here I’m just going to throw myself in the mix, as a local in Florence, with some of my favorite places to eat, namely lunch and dinner!

Lunch and Dinner in Italy

First, a few quick notes about lunch and dinner in Italy.

Sit-down lunchtime is roughly from 12:00pm - 3:00pm, with the peak being 1:00pm - 2:00pm. If you go before or after these hours, chances are the restaurant will be closed or not serving lunch anymore.

If you find yourself in need of a snack before lunchtime hits, pop into any bar and pick up a quick sandwich. If I eat a late breakfast at a bar I often notice quite a few local workers who pop in for a sandwich starting as early as 10:00am. These sandwiches are pre-made (but should be made that same day!) in the display case and slowly replace the pastries as the morning wears on. You can get a large or small, and they are usually simple with just 2-3 ingredients on a focaccia type bread. You could try a mozzarella, tomato, and lettuce, or prosciutto and tomato, or mortadella (Italian equivalent of bologna) and cheese, or bresaola (prosciutto made with beef instead of pork), arugula, and grana padano, etc.

Dinnertime in Italy generally starts from 7:30pm and can linger on until 11 or later, especially in the summer when that is when it finally cools down. Most restaurants don’t even open until 7:30pm for the dinner shift. It’s rare to find a restaurant that doesn’t close between the lunch and dinner shifts, as you’ll be able to see from the opening hours below.

Remember, if you sit down in a restaurant there will almost always be a “coperto” or cover charge, usually about 1.50 - 2euro per person, which cover the cost of napkins, bread, etc. And you have to pay for water, even if it’s tap water that comes in a refillable bottle. For more dining and Italy tips take a look at this list.

Hours may vary. You can make reservations on quandoo.it or thefork.it or by calling the restaurant directly.

This post may contain affiliate links. If you make a purchase using these links, Jennyblogs may receive a small commission, at no extra cost to you. This helps to support Jennyblogs. Where possible, links are prioritized to small businesses and ethically and responsibly made items. For further information see the privacy policy. Grazie!


Where to Find the Best Eats In Florence

In no particular order

  1. Simbiosi Organic

    Via de’ Ginori, 56r, 58r/60r (two locations), near to San Lorenzo.

    Simbiosi has two different locations around the corner from each other. The original location is an organic pizzeria, with great decor: exposed bricks and chandeliers! The second location features organic pasta and other dishes, and both locations have a nice selection of organic beer and wine. Oh, and the food is really good, especially the pizza. They appreciate reservations.

  2. Osteria Cinghiale Bianco

    Borgo San Jacop, 43, just a bit away from the Santa Trinita bridge in a lovely neighborhood south of the center.

    Lovely local place with delicious typical Tuscan food and wine, housed in the bottom of a tower from 300 a.d.! I would highly recommend reservations, even if during the “off” season (which hardly seems to exist in Florence anymore) or you may not get in.

  3. Enoteca Fuori Porta

    Via del Monte alle Croci, 10, on the way to Piazzale Michelangelo.

    This is a cute little wine shop with great meat and cheese plates and, of course, wine. Great for a snack, a light meal, or just a drink. Indoor and outdoor seating and conveniently located on the way to Piazzale Michelangelo (a nice uphill hike to get the views) for a snack after all that exertion. ;)

  4. All’antico Vinaio

    Via dei Neri, 76, between Palazzo Vecchio and the church of Santa Croce.

    This is the most famous sandwich place in Florence, and have had lines since the first time I went in 2014. They have since expanded to at least 3 locations all on the same street near each other, two for sandwiches and one Osteria. I recommend going before or after prime lunch time to avoid the long lines; I’ve never been for dinner so can’t vouch for what the lines are like. Take your sandwich to go and sit on the steps of a church or piazza to enjoy your food. Keep in mind that if you don’t eat or don’t like pork, your pickings will be slim. They usually have turkey, sometimes bresaola (the beef equivalent of prosciutto), or you could always get some of the vegetable toppings with cheese and call it a day if you’re vegetarian.

  5. Antica Panineria

    Via Faenza, 53. Between the train station and San Lorenzo.

    Another delicious and cheap focaccia sandwich place. Located not too far from the train station, this makes for a convenient lunch on the train, or there is a nice area outside to sit! Unlike All’Antico Vinaio here there are is usually no or a very short line which is convenient for a quicker meal.

  6. Gustapizza

    Via Maggio, 46r, south of the river.

    Decent prices and just really good pizza. This is considered by some the best pizza in Florence. In my personal opinion, as they’ve become well known and busy, their quality control has dropped a bit. Obviously, they still made this list, but maybe instead of THE best they are one of the best. How’s that? They’re small and often full but even if Italy doesn’t have much of a “to go” culture, pizza is always acceptable to get to go. In fact, if they’re full up, take your pizza a few steps away and sit and eat on the steps of the church of Santo Spirito or in the piazza.

  7. Mercato Centrale

    Piazza del Mercato Centrale, Via dell’Ariento, near to the church of San Lorenzo

    On the second floor is the Italian style food court, except everything is made fresh and on the spot. This is great for larger groups because there is something to please everyone, but be warned, it can get crazy up here even if there are hundreds of tables; it’s popular! So aim for a bit before or after lunch or dinner, if you can. There’s pasta, pizza, sushi, hamburgers, steak, vegan, seafood, various typical Florentine options, and more. My only word of warning is that not every stall is made equally. I personally recommend the pizza (that fluffy Neopolitan crust, oh man!), the seafood fresh or fried, the famous Florentine steak (bistecca fiorentina, one of the best), gelato, bread or desserts from the French stall “Bedu,” and vegan. They also have large TVs setup so you can watch the soccer matches, although that also means many seats will be occupied by people who aren’t even eating during those times. Rude. ;)

  8. Da Nerbone

    Piazza del Mercato Centrale, near to the church of San Lorenzo

    This is a very busy, very delicious, traditional Tuscan food stand on the ground floor of the Mercato Centrale among all the farmer’s market stands. They usually have a long line but it moves fast enough. The hard part is getting a seat, so have someone ordering and picking up the food, another scouting and claiming a table! The seating is quite tight but for a taste of scrumptious Florentine comfort food, it’s worth it. I love the Lampredotto (very typical Florentine, I’m gonna go ahead and let you google that one), any of the pasta dishes, and the beef cheek called “stracotto.” And I don’t even hardly eat beef! Comfort food at it’s greatest.

  9. Pizzeria Orto del Cigno

    Via di Varlungo, 27, on the east side of the city center not far from Tuscany Hall.

    A pizzeria that feels like home, because they serve large pizzas that everyone can eat a slice from American style, instead of the individual pizzas. You can get each pizza with 2 or 3 of the topping options, so you can try more! I absolutely fell in love with the parmigiana…definitely one of the top 5 pizzas I’ve ever eaten!

    I recommend taking a stroll from the city center along the river going east, the sidewalk eventually turns into a peaceful reprieve from the touristy center, with nature and the river on your right and locals jogging past. About a 45 minute walk and the pizzeria will be on your left.

  10. Aji Tei

    Viale Spartaco Lavagnini, 20A, not far from the tip of the city center, Piazza Libertà.

    My favorite sushi in Florence, and that’s saying something because there are a ton of Japanese restaurants around. I know of very few sushi places in Italy that are not the “all you can eat” formula, but have you ever not wanted to eat all you can of sushi? Their menu is extensive (sushi, sashimi, special rolls, fried stuff, hot and cold plates) and the “all you can eat” includes everythinggggg except drinks, I think it even includes dessert. The price is higher, 29euro a head for dinner, but if you break down how many rolls of sushi I can consume, it turns out to be a pretty good deal. Unlike some sushi places, their price is the same for lunch and dinner. Oh, and the ambience is super cool. I recommend asking to eat in the garden if there is space. Even in the off season this place fills up quickly so I recommend making a reservation.

  11. Ristorante Giapponese Rakutei

    Via della Casaccia, 19-21-23, on the east side of the city center.

    I just mentioned my favorite sushi above, but this place is also really good and much more conveniently located for where I live, and also for those of you who are staying on the east side of town or at the campground. “All you can eat” once again! Take bus 14 to get here and get off at the “casaccia” bus stop. Their prices are a bit lower, and you can take advantage of the lunch hour and pay 14euro for all you can eat, otherwise it’s 24euro drinks excluded for dinner.

  12. PassaGuai

    Borgo San Frediano, 44r, on the south side of the river near to the church of Santo Spirito.

    This was one of the favorite places my family ate at during our vacation here in 2014, a cool little spot with absolutely delicious sandwiches for 4euro. It’s now evolved into a restaurant with an emphasis on meat and fish, but still the same owners and quality food.

  13. Le Sorgenti

    Via Chiara, 6r, right by the Mercato Centrale.

    One of my favorite Chinese places, although there are so many and quite a few of them are delicious! Order lots of small plates and share, they’re reasonably priced. I recommend the taglierini alla griglia (basically grilled lo mein) and the branzino alla griglia (grilled sea bass). YUM.

  14. Los Chicos

    Via dei Benci, 15r, near to the church of Santa Croce.

    Florence has a sadly lacking Mexican food scene. This place, however, can get a you a nice burrito or taco! The tacos are 3euro each, and you can get a burrito starting at 5euro. Choose your protein then add all the condiments and veggies you like. Oh, and don’t forget margaritas!

  15. Ararat Ristorante Armeno

    Borgo la Croce, 32r, near to Sant’Ambrogio on the east side of the center.

    I had never had Armenian food until I ate here, but I can now say I’m a fan! Their food is well-executed with lots of meat and vegetables. The flatbread is DELICIOUS. It’s also a really pretty place, golden silverware, anyone?

  16. Avanti - Pizza & Grill - Ristorante Arabo

    Via S. Pier Maggiore, 6r, close to the Santa Maria Nuova hospital.

    The menu is a mix of pizza and Iraqi food, and although I can’t speak for the pizza, I haven’t eaten anything short of scrumptious from the Iraqi section. And why would you need a pizza if you have such Arab goodness in front of you?

  17. Rosticceria Tavola Marrochina

    Piazza del Mercato Centrale, 11, directly opposite the Mercato Centrale on the parking lot side. Beware of the pinpoint on google maps because it isn’t on the right street, even if the address itself seems to be correct.

    This is a little hole in the wall restaurant owned and run by a Moroccan family. The seating can be a bit tight and the ambiance not the best, but the food is delicious and the prices decent. In short, this is not the place to bring to impress, but if you’re familiar with Morocco and wanting a taste, this is a great casual place to go. Lunchtime is best, as the options get slimmer the longer the evening wears on. My favorites are couscous (of course, and you can get a “small” plate for around 4euro), the harira soup, msemmen (thin, crispy bread often filled with cheese, harissa, and boiled eggs or cheese and honey), and the mint tea.

  18. Foody Farm

    Lungargno Corsini, 2A, on the river not far from Palazzo Strozzi.

    When Foody Farm first opened I didn’t care to go just because of the name…too many cliché ideas in a title for me. Then they moved to their current location on the Arno and by then I had heard enough good things to want to go. When I finally went the old saying “don’t judge a book by its cover” came to mind. The service was friendly and the menu fun. They offer both a normal menu and one made up of pictures so you can see what each dish looks like. Their wine menu was made up of a collage of wine labels so they are more easily recognizable. What’s more, most of their menu is able to be ordered in half or full portions, so everyone can easily order two dishes getting to try more! I loved the whole experience and thought the food was delicious and creatively served.

  19. Pizzeria La Luna

    Via Vincenzo Gioberti, 93r, just outside the city center near to Piazza Beccaria

    A delightful pizza place I stumbled upon by accident one night when I was far from home but needing nourishment. Although I have passed this pizzeria many, many times, it never struck me as a “must try” and I was pleasantly surprised when the pizza was absolutely delicious. I’ve only ever gotten the pizza to go, but it seems to get pretty busy so if you’d like to sit down I would go with a reservation! They offer gluten-free pizza.

  20. Le Follie di Romualdo

    Via di San Niccolò, 39r, south of the city center on the way to Piazzale Michelangelo.Romualdo is a well-known “pizzaiuolo” (pizza maker) around Florence and beyond, his being named among the top 20 best pizzas in the world by the New York Times and has received twice the highest acknowledgment from the best pizza guide Pizzerie D’Italia del Gambero Rosso. All that to say, you’ll eat some really, really good pizza here. The other food is good, too! During the summer he has a popup pizza place near the river. This location is on the newer side, the location where I was introduced to Romualdo’s was further away from the center, much bigger, and always bustling. I liked the old location better even if the new location is nice and easier to get to; their menu seemed to shrink and it was emptier. To be fair, I’ve only been to the new location once and that was towards the end of October, the pizza was still delicious and the wines great.

  21. Koto Ramen

    Via Giuseppe Verdi, 42r, close to Santa Croce, and Borgo San Frediano, 41r, not far from the Ponte alla Carraia.

    If you’re craving some good ramen this is a good place to come! The menu is not overly extensive, but what they do, they do well with fresh ingredients and vibrant flavors. They have some good gyoza and appetizers, really all you need to supplement a large bowl of ramen.

Now I’m hungry…ah well off to eat some homemade vegan sloppy joes, it’ll be just as good. I hope.


More Ideas

This is a list of places that I would like to try one day, either that I’ve heard good things about or they just looked really interesting walking by! If you try any of them before me, let me know in the comments below how you liked it!

  1. Adagio

  2. Cacio Vino Trallalla

  3. Gucci Osteria da Massimo Bottura

  4. Ristorante Sultan (Turkish food)

  5. Royal India (Indian food)


Where are your favorite places to eat around Florence, what have I missed? Have you tried any of the places on here? Tell me about it in the comments below! I always love hearing your thoughts and experiences!

Strawberry Shortcake

Last Updated August 18, 2024

Strawberry shortcake is a summer classic. All you need are juicy, ripe strawberries, shortcakes, which are really just biscuits with a bit of sugar added to them, and whipped cream. If you decided on adding some vanilla ice cream to the mix I don’t think anyone would be mad about it. I certainly wouldn’t be. Did I mention they’re really simple to make?

public.jpg

It’s so simple because the strawberries are the shining star and don’t need much dressing up. If you try and make this when strawberries are out of season, even if you can find them in the grocery store, it just won’t be the same. This is a dessert that calls for strawberries ripened under the summer sun, bursting with flavor.

Do you want to know a secret? Strawberry shortcakes will reach the pinnacle of their goodness if you are able to pick the strawberries yourself! Not only will you be the one choosing the juiciest berries, but you’ll KNOW they’re as fresh as they come! Plus, you’ll taste the fruits of your own hard work and it makes it that much sweeter. Literally. I loved going strawberry picking with my mom as a kid. Strawberry season in Michigan is always in beginning to mid summer, usually end of June or early July, and we’d come home with baskets full. Then I’d help my mom hull and slice them, keeping some for eating, some for making strawberry shortcake and other desserts, and some for freezing and making jam.

Eat strawberry shortcake for dessert, or breakfast, snack, lunch, and dinner. I mean, biscuits and fruit sounds like a balanced and great way to start off the morning! Plus you’ll want to eat them as much as you can while the strawberry season lasts. A great thing about these is that you can add as little or as much sugar as you want! See notes at bottom of recipe for some ideas.

This post may contain affiliate links. If you make a purchase using these links, Jennyblogs may receive a small commission, at no extra cost to you. This helps to support Jennyblogs. Where possible, links are prioritized to small businesses and ethically and responsibly made items. For further information see the privacy policy. Grazie!

Recipe from my mama with tweaks from moi.


Strawberry Shortcake

Serves: 8-10

Ingredients:

public.jpg

For the Macerated Strawberries

  • 4-5 cups strawberries, washed, hulled, and sliced

  • 3-4 Tbsp / 35-50g sugar or to taste

For the Shortcakes

  • 2 cups / 240g all-purpose flour

  • 1/4 cup / 50g sugar

  • 4 tsp / 19g baking powder

  • 1/2 tsp / 2g salt

  • 1/2 cup / 113g cold butter or scant 1/2 cup / 100g oil

  • 2/3 cup / 158g cold milk or buttermilk

For the Whipped Cream

  • 1 cup / 237g heavy whipping cream

  • 3-4 Tbsp / 35-50g sugar or to taste

  • 1 tsp / 4g vanilla extract

Directions:

Oven 450°F / 232°C. Have ready an ungreased baking sheet.

Make the Macerated Strawberries

  1. Place strawberries in a bowl, add sugar, and mash them a bit or a lot, as desired, with a fork or masher. Place in fridge while you prepare shortcakes.

Make the Shortcakes

  1. In a large bowl whisk together flour, sugar, baking powder, and salt.

  2. Cut in butter or oil until mixture resembles coarse crumbs.

  3. Make a well in center of flour mixture and pour in milk. Mix just until most of the flour is moistened, then turn mixture out onto a floured surface.

  4. Knead lightly, up to 10-12 times, until you have a soft but not too sticky dough. Don’t overwork or biscuits will be tough.

  5. Gently pat dough out into a circle about 1in / 2.5cm thick, checking to make sure underneath is still floured well and dough isn’t sticking.

  6. Using a biscuit cutter or a round glass 2-3in / 5-7cm in diameter, cut out as many biscuits as you can. Place biscuits on baking sheet. Collect dough scraps and reshape into a ball. Repeat patting into a circle and cutting until dough is used up, probably 2-3 times at most, depending on size of biscuit cutter.

  7. Bake biscuits in preheated oven for 10-12 minutes, or until risen and lightly golden brown.

Make the Whipped Cream

  1. In the bowl of a stand mixer fitted with whisk attachment or with a hand mixer, whip heavy cream until soft peaks form.

  2. Add sugar and vanilla and continue whipping until stiff peaks form.

Assembly

Slice biscuits open and spoon over strawberries and whipped cream.

Jenny’s Notes:

  • The sugar mixed in with the strawberries is traditional but not absolutely necessary. Although it helps soften the strawberries to lose their juice and create more of a soft sauce, I like it also without adding any sugar, because everything else in this recipe is already a bit sweet.

  • The biscuit dough might seem too soft at first, but the moment the baking powder starts working and it hits the floured surface it should become very manageable. Just be careful not to over work it, a little bit goes a long way.

  • When cutting biscuits, cut straight down, no twisting, or this can seal the edges and prevent a good rise. You can dip the biscuit cutter in some flour to help prevent any sticking.

  • If you place the biscuits next to each other on the baking sheet they can help each other “climb” up and achieve a nicer rise! I know this feels counterintuitive as so often things are supposed to be “spaced evenly apart”, but give it a try!

Strawberry Shortcake
Yield 8-10 servings
Author
Prep time
40 Min
Cook time
12 Min
Total time
52 Min

Strawberry Shortcake

Classic strawberry shortcake recipe handed down from my mama. Homemade biscuits, juicy strawberries, and fresh whipped cream assembled together in a summery dessert.
Cook modePrevent screen from turning off

Ingredients

For the Macerated Strawberries
For the Shortcakes
For the Whipped Cream

Instructions

Make the Macerated Strawberries
  1. Place strawberries in a bowl, add sugar, and mash them a bit or a lot, as desired, with a fork or masher. Place in fridge while you prepare the shortcakes.
Make the Shortcakes
  1. Preheat oven to 450°F / 232°C. Have ready an ungreased baking sheet.
  2. In a large bowl whisk together flour, sugar, baking powder, and salt.
  3. Cut in butter or oil until mixture resembles coarse crumbs.
  4. Make a well in center of flour mixture and pour in milk. Mix just until most of the flour is moistened, then turn mixture out onto a floured surface.
  5. Knead lightly, up to 10-12 times, until you have a soft but not too sticky dough. Don’t overwork or biscuits will be tough.
  6. Gently pat dough out into a circle about 1in / 2.5cm thick, checking to make sure underneath is still floured well and dough isn’t sticking.
  7. Using a biscuit cutter or a round glass 2-3in / 5-7cm in diameter, cut out as many biscuits as you can. Place biscuits on baking sheet. Collect dough scraps and reshape into a ball. Repeat patting into a circle and cutting until dough is used up, probably 2-3 times at most, depending on size of biscuit cutter.
  8. Bake biscuits in preheated oven for 10-12 minutes, or until risen and lightly golden brown.
Make the Whipped Cream
  1. In the bowl of a stand mixer fitted with whisk attachment or with a hand mixer, whip heavy cream until soft peaks form.
  2. Add sugar and vanilla and continue whipping until stiff peaks form.
Assembly
  1. Slice biscuits open and spoon over strawberries and whipped cream!

Notes

The sugar mixed in with the strawberries is traditional but not absolutely necessary. Although it helps soften the strawberries to lose their juice and create more of a soft sauce, I like it also without adding any sugar, because everything else in this recipe is already a bit sweet.The biscuit dough might seem too soft at first, but the moment the baking powder starts working and it hits the floured surface it should become very workable. Just be careful not to over work it, a little bit goes a long way.When cutting the biscuits, cut straight down, no twisting, or this can seal the edges and prevent a good rise. You can dip the biscuit cutter in some flour to help prevent any sticking. If you place the biscuits next to each other on the baking sheet they can help each other “climb” up and achieve a nicer rise!

Nutrition Facts

Calories

436.99

Fat

24.15 g

Sat. Fat

7.94 g

Carbs

51.65 g

Fiber

2.77 g

Net carbs

48.88 g

Sugar

24.49 g

Protein

5.28 g

Sodium

368.72 mg

Cholesterol

35.06 mg

Nutritional Information is approximate.

strawberry shortcakes, summer dessert, best traditional classic strawberry shortcake
dessert
American
Did you make this recipe?
Tag @jennyblogsandbakes on instagram and hashtag it #jennyblogs
public.jpg

Coffee Culture in Italy

Last Updated July 12, 2024

Coffee. caffè. قهوة. ቡና. koffie. kafe. սուրճ. קפה. kaffi. caife. café. コーヒー. кофе. 咖啡. káva. kahve. ყავა. coffi. καφές. kope. ikhofi. cà phê. کافی. കോഫി. kahvi. kape. kohvi. kafo. kaffe. కాఫీ. kafija. capulus. kahawa.

IMG_9451.jpg

More than 33 ways to say coffee in at least 37 different languages.  (Some overlap, i.e. café is Spanish, French, and Portugal.)  And even the ones that don’t share the Latin alphabet and I can’t even begin to sound out sound similar to the word “coffee.”  I know that because Google Translate and transliteration.  Amazing, isn’t it?  I mean, the languages, not Google Translate, but yeah, that’s pretty amazing also.  So many different cultures and people and centuries, and coffee is so important in so many of them.  Not least of all Italy, which is why I’m writing this post.  (Coffee in Italian is the second language written, “caffè,” and you will hear it and see it, ALOT.) 

In fact, Italy is the birthplace of many of the coffee drinks you drink today, including cappuccino, espresso, macchiato, and latte, although ordering them at Starbucks is going to get you something very different than what you would get in Italy.

So, what are the principal coffee drinks in Italy?

(You can find your own espresso depresso t-shirt on Amazon, yasssss)

This post may contain affiliate links. If you make a purchase using these links, Jennyblogs may receive a small commission, at no extra cost to you. This helps to support Jennyblogs. Where possible, links are prioritized to small businesses and ethically and responsibly made items. For further information see the privacy policy. Grazie!


The drinks on a typical Italian coffee menu

Cappuccino

Cappuccino

  • Espresso - “Expressed”

    A strong shot of coffee and what is considered “normal coffee.” If you go into a bar and order a “caffè,” they will usually clarify by asking “caffè normale?” which of course, literally means normal coffee. It is drunk throughout the day at any time, and particularly after lunch and dinner to help digestion.

    You can order a “ristretto” (restricted) where the espresso shot is pulled early resulting in a shorter, stronger shot, or you can order a “lungo” (long) which is the opposite, a taller and waterier (is that a word?) shot of espresso.

    The name means “expressed” which could denote any or all of the three meanings of the word in English or Italian. First, the method in which espresso is made, where the steam “expresses” and pressures the coffee flavor into the water, second, that it is made quickly or “expressly,” and third, that it is made “expressly” for one person. This, however, still does not give you license to call it an “expresso,” mmk?

  • Macchiato - “Stained”

    You can order a macchiato two ways: A caffè macchiato or a latte macchiato. Caffè macchiato means “stained coffee” so you will get an espresso with a small dollop of milk, usually foamed. A latte macchiato means “stained milk” and will get you hot milk with some coffee served in a glass, with or without the foamy milk, depending on the different preparations.

  • Cappuccino - “Little Hood”

    The Italian coffee of choice for breakfast (and mine!) and probably doesn’t need much intro. The cappuccino, also called cappuccio which means just “hood,” got its name from the color of the hood of the Capuchin monks which it apparently resembles. According to this site (in Italian) a cappuccino should be 25ml of coffee and 125ml of milk with lots of foam.

    Oh, and you might have heard that you should never drink a cappuccino in Italy after noon or you’ll get kicked out of the country? Not exactly true. It’s mostly because, according to most Italians, milk upsets digestion unless it is a part of the traditional cappuccino and pastry breakfast in which the milk acts as an element of the meal.  But consuming milk after a heavier lunch or dinner, especially at night, is too much.  As this Italian Mamma explains, “When the casein in milk combines with the hot coffee, given the high temperature, it combines with the tannic acids characteristic of the drink (or rather the coffee); this meeting then produces a chemical composition that weighs down the digestion.” I’m not here to vouch if this is sound science or not, just quoting so you can get an idea of the Italian thinking. If you choose to abide by this “rule,” drink your cappuccino by itself or with a cookie, pastry, or something small and light and far away from mealtimes, breakfast aside.

  • Caffè Latte - “Milk Coffee”

    Or caffellatte. In America we have long since dropped the “caffè” and simply order a latte. This strategy in Italy, however, will simply get you a glass of milk. A caffè latte is essentially a cappuccino without the foam.

  • Caffè Americano - “American Coffee”

    A larger cup of weaker coffee in comparison to the classic espresso.  The classic way to prepare a caffè americano in Italy is to add hot water to an espresso.  Yum.  Not.  There are a few places you can find that have drip “American” coffee and even a few who do pour overs. 

  • Caffè Corretto - “Corrected Coffee”

    Because, normal coffee is not correct. It must be corrected, and with a small amount of liquor. The type of alcohol used can vary depending on the region, but usually grappa is used, sometimes brandy, Sambuco, or l’anice, a type of anise liquor, or even Bailey’s.

  • Caffè al Ginseng - “Ginseng Coffee”

    This is definitely one you should try, delicious even if it is a bit pre-fab. It is usually a powder mix they add to a machine and dispense as ordered, so not fresh coffee, but it’s a pungent and sweet little drink that I unabashedly love. You can order an “alto” tall or “basso” short, depending on if you want it to be the equivalent to roughly a shot of espresso or double shot. The sugar usually lies at the bottom so you’ll want to stir it before consuming.

    Ginseng has long been a part of Chinese medicine and has become popular around the world where you can find it in just about any store’s health supplement section. It is supposed to have many health benefits, including being a powerful antioxidant reducing inflammation, benefiting brain function, benefiting against cancer, boosting the immune system, increasing energy, lowering blood sugar, and having aphrodisiacal qualities. However, many of these studies seem to prove only the “may benefit” or “could help” factors with nothing concrete.

  • Marocchino - “Moroccan”

    Despite its name this drink was also invented in Italy, in Piemonte. At first glance it may seem just a cappuccino with cocoa, but it is much better than that. There are quite a few different preparations, but almost all include espresso, cocoa, and steamed milk served in a clear glass. Often the glass is first sprinkled with cocoa, then the espresso is added, then steamed milk and finally more cocoa. The official site of Illy (one of the top Italian coffee roasters, you’ve probably heard of them or seen their coffee in the States) gives the preparation for the Marocchino at home as thus: Place about 1 Tbsp / 10-15ml of hot chocolate in a glass, then prepare directly in the same cup about 2 Tbsp / 20-25ml of espresso, sprinkle with a thin layer of cocoa, then steam about 2 Tbsp / 25ml of milk and add to the glass over the cocoa.

  • Shakerato - “Shaken”

    Coffee shaken in a cocktail shaker with ice and if desired, sugar. The resulting refreshingly icy coffee with a bit of foam is usually served in a martini glass, sometimes a flute glass.

    I like this word because it is an English word that has been Italianified. I don’t think that’s even a word. “Sh” doesn’t exist in traditional Italian spelling, nor does “k.” They say a “sh” sound, but it is spelled with “sci” or “sce.” Essentially they took the word “shaker” and turned it into an Italian verb, shakerare, which means to shake drinks in a shaker. Then this drink’s name is the past tense, shakerato, meaning shaken. It makes me laugh, neither truly Italian or English!

  • Caffè d’Orzo - “Barley Coffee”

    For those who prefer decaffeinated drinks you have the choice between ordering your favorite coffee decaffeinated or with orzo / barley instead of coffee beans.

    Decaffeinated coffee, as you probably know, are coffee beans which have gone through a process to remove the caffeine. They process often involves hot water and methylene chloride, of which trace amounts will end up in your coffee (it was recently banned for use in paint and paint strippers). The USDA requires that a minimum of 97% caffeine be extracted for coffee beans to be considered decaffeinated. Decaffeinated coffee will always have a small amount of caffeine in it. If you’re interested to see if the decaf coffee you drink uses the chemical process for decaffeination, check out this article here, which tested out some top decaf coffee brands as well as what to look for in labeling when buying decaf.

    Crushed barley is used much like coffee beans to attain a dark and bitter drink which assimilates coffee, although it has its own distinctive taste. It became popular during war times in Italy when coffee beans became too expensive. Unlike decaffeinated coffee, barley is completely caffeine free, but not suitable for those who can’t consume gluten.


The Italian coffee experience

You could parachute out of a plane and land just about anywhere in Italy and still be in sight of some place that sells coffee.

My happy face while trying the coffee at Sant’Eustachio Il Caffè, a historical cafe and roastery in Rome.

My happy face while trying the coffee at Sant’Eustachio Il Caffè, a historical cafe and roastery in Rome.

The Italian bar is a way of life here. “Bar” is a general term for any place that sells coffee. Often the name of the place has “bar” in the title, but this can also include any cafe or pasticceria that sells coffee. A bar usually has, what do you know, a bar with a rung at the bottom for standing comfortably with one foot propped up while you wait for, then down your coffee.

Anytime you see an old friend or need to meet up with a colleague, you head to the nearest bar, offer them a caffè, throw it back, and you’re each on your way. This can happen several times a day, because I don’t think I’ve met an Italian yet who stops at one coffee a day. It’s very different from the lingering 2 hour catch-up with friends or I’m-just-going-to-sit-here-and-use-the-free-wifi-on-my-computer-and-get-some-work-done experience in America. In fact, the very few times I’ve brought my computer and sat in a bar or pasticceria I felt very strange, and very millennial. Even if I linger over my coffee for more than say, 20 minutes, by the time I leave it’s a whole new crowd. The exception seems to be some of the older generation who will sit outside and people watch for hoursssss.

If you are looking for more of an American coffee shop type experience, there are a select few that are on the cutting edge, and these are the only ones that I don’t feel the oddball out if I linger too long or decide to bring my computer. You’ll find that the other young and international people who take their coffee seriously and felt more at home in a “coffee shop” type setting have gravitated to these places as well.

Then there are the restaurants, where you will always find caffè as your post-meal digestive, a must for many Italians, lunch or dinner!

For the best coffee around Florence, read this.

What are your favorite coffee drinks in Italy? Let me know in the comments below!


Classic Rhubarb Custard Pie

IMG_1860.jpg

Last updated July 31, 2024

Nothings says summer like a rhubarb pie. Better yet, a rhubarb CUSTARD pie.

Rhubarb is always one of the first garden plants to grow each spring in Michigan, announcing that after a long, cold winter summer is indeed coming and didn’t get lost along the way after all. Rhubarb likes to grow so extensively in its short season that you don’t know what to do with all of it, until it withers in the approach of hotter weather and leaves you already looking forward to next year’s crop. Unless, of course, you planned ahead and froze some. But frozen rhubarb will never be like fresh, so make all the pie and hand pie, crisp, cake, syrup, and camel hair soup you can! I mean, er, rhubarb sauce…not camel hair soup. Hehe, who’d call it that??

IMG_1835.jpg

Do you want to know something really sad? I’ve never seen rhubarb in Italy, at least not in Florence. So for my international friends, I’m sorry if your area fails you and doesn’t grow rhubarb so you aren’t able to make this recipe. If there is rhubarb in Florence though, someone please tell me where to find it? So far everyone I’ve asked just said, “…what’s that?” This just goes to show my ignorance. Before moving to Italy I was trying to bake with all of the ingredients that aren’t readily available here, or at least what I figured wouldn’t be readily available. I should have been in a baking frenzy with rhubarb instead of things like Oreos. Because, no rhubarb and Oreos everywhere. There are even Oreo donuts in the grocery store bakery section…I’ve come so close to trying them during various weak moments.

Wherever you are in the world, be sure to bake or eat a rhubarb pie at the next chance. You won’t regret it and might inspire you to move to a part of the world where rhubarb is grown.

This recipe is the old-fashioned classic from my mama. The crust is one of my favorite traditional pie crust recipes, simple and can be made ahead of time if needed. It uses butter instead of shortening, which in my mind is a bit of a compromise between shortening or lard (which most people and bakeries use to make tender and flaky crusts but it’s also horrendous for your health and has no taste if it’s not artificially flavored.) and oil, which my mom has always used because oil can actually be good for you, although it makes for the trickiest to handle and often um, hardier pie crusts. So I use butter, which tastes wonderful and makes the crust easy enough to work with, even if it’s not as healthy as oil.

This post may contain affiliate links. If you make a purchase using these links, Jennyblogs may receive a small commission, at no extra cost to you. This helps to support Jennyblogs. Where possible, links are prioritized to small businesses and ethically and responsibly made items. For further information see the privacy policy. Grazie!

Recipe from my Mama


Classic Rhubarb Custard Pie

Makes one 9in / 23cm pie, about 8 servings

Ingredients:

For the Crust

For the Rhubarb Custard Filling

  • 3 eggs

  • 3 Tbsp / 45g milk

  • 1 1/2 cups / 300g granulated sugar

  • 1/4 cup / 30g all-purpose flour

  • 3/4 tsp nutmeg

  • 4 cups fresh rhubarb, sliced into 1/2in / 1cm chunks

Directions:

Oven 400°F / 205°C. 8 or 9 inch pie dish. 

Make the Crust

IMG_4560.jpg
  1. Prepare pie crust per recipe instructions, refrigerate until needed.

Make the Rhubarb Custard Filling

  1. Blend eggs and milk together in a large bowl.

  2. Add the flour and nutmeg to the sugar then add to the egg mixture and beat well.

  3. Add in the rhubarb and mix to coat well.

  4. Pour into prepared pie crust and add top crust.

    For a classic top pie crust, place crust on top, cut off overhang, and crimp together the edges of the top and bottom crust to seal.

    For an interwoven lattice, start in the center of the pie and work outward, then repeat with the other half. Arrange half of the strips evenly spaced over the pie all in one direction, then flip every other strip back over itself, so half are now only covering half of the pie. Take a new strip and place it perpendicularly just in front of the folded strips. Unfold the folded strips so these ones now cover the new strip. The new strip should be under and over every other one. Working on that same half of the pie, fold back every other strip, all the ones that were NOT just folded. Take another new strip and place it evenly apart from the first perpendicular strip. Unfold the folded strips. Repeat folding back strips, placing new strip, and unfolding until you reach the edge of the pie. You may need to trim down the strips as you get closer to the edge. Repeat with other half of the pie.

    Sprinkle sugar on top, if desired.

  5. Bake pie in preheated oven for 50-60 minutes or until crust is golden brown and a knife inserted in center of pie confirms rhubarb is tender.

  6. Allow to cool completely before slicing and serving.

Jenny’s Notes:

  • If you make the crust and pie in the same day, you could make the filling while the crust is resting in the fridge for an hour or so before rolling out.

  • Instead of a traditional top pie crust or lattice you could add a streusel/crumble, delicious and definitely the easiest option of the three.

Rhubarb Custard Pie
Yield 8
Author
Prep time
1 H & 10 M
Cook time
1 Hour
Total time
2 H & 10 M

Rhubarb Custard Pie

Classic rhubarb custard pie recipe handed down from my mama. Homemade pie crust with the uniquely sweet and sour filling you can only get with rhubarb.
Cook modePrevent screen from turning off

Ingredients

For the Crust
For the Rhubarb Custard Filling

Instructions

Make the Crust
  1. Prepare pie crust per recipe instructions, refrigerate until needed.
Make the Rhubarb Custard Filling
  1. Oven 400°F / 205°C. 8 or 9 inch pie dish.
  2. Blend eggs and milk together in a large bowl.
  3. Add the flour and nutmeg to the sugar then add to the egg mixture and beat well.
  4. Add in the rhubarb and mix to coat well.
  5. Pour into prepared pie crust and add top crust.
  6. For a classic top pie crust, place crust on top, cut off overhang, and crimp together the edges of the top and bottom crust to seal. For an interwoven lattice, start in the center of the pie and work outward, then repeat with the other half. Arrange half of the strips evenly spaced over the pie all in one direction, then flip every other strip back over itself, so half are now only covering half of the pie. Take a new strip and place it perpendicularly just in front of the folded strips. Unfold the folded strips so these ones now cover the new strip. The new strip should be under and over every other one. Working on that same half of the pie, fold back every other strip, all the ones that were NOT just folded. Take another new strip and place it evenly apart from the first perpendicular strip. Unfold the folded strips. Repeat folding back strips, placing new strip, and unfolding until you reach the edge of the pie. You may need to trim down the strips as you get closer to the edge. Repeat with other half of the pie.
  7. Sprinkle sugar on top, if desired.
  8. Bake pie in preheated oven for 50-60 minutes or until crust is golden brown and a knife inserted in center of pie confirms rhubarb is tender.
  9. Allow to cool completely before slicing and serving.

Notes

If you make the crust and pie in the same day, you could make the filling while the crust is resting in the fridge for an hour or so before rolling out. Instead of a traditional top pie crust or lattice you could add a streusel/crumble, delicious and definitely the easiest option of the three.

Nutrition Facts

Calories

431.35

Fat

12.79 g

Sat. Fat

7.67 g

Carbs

74.08 g

Fiber

2.32 g

Net carbs

71.76 g

Sugar

38.25 g

Protein

6.18 g

Sodium

397.03 mg

Cholesterol

54.07 mg

Nutritional Information is approximate.

Rhubarb, custard, pie, all butter crust, oil pie crust, old fashioned
Dessert, Pie
American
Did you make this recipe?
Tag @jennyblogsandbakes on instagram and hashtag it #jennyblogs

Rhubarb Custard Pie made with an all oil crust


Food in Florence: Where to Find the Best Coffee

Italy is known for it’s coffee. Your coffee beverage of choice was probably invented in Italy. Cappuccino? Yep. (Caffè) Latte? Yes. Macchiato? You bet. And of course, the king of coffee in Italy, the espresso. It’s by far the most commonly consumed coffee, so much so that all you have to do is enter a bar and order a “caffè” or “caffè normale” (literally translated, normal coffee) and you will be served an espresso. It took me awhile to realize that I didn’t need to specify an espresso when I order because it’s a given; the Italians just ask for “un caffè.”

Duomo cappuccino art

Duomo cappuccino art

That said, it’s surprising how much bad coffee I’ve consumed in Italy. I believe a lot of it comes down to poorly sourced beans and/or over-roasted beans. (If beans have an oily appearance they have been roasted too long; they lost their oil!) Combine that with equipment that doesn’t get cleaned or wiped down enough and baristas who don’t have the passion to even perfect their cappuccino and you get a rather bitter experience. Don’t mind the pun. This list will help guide you to GOOD coffee in Florence so you don’t have to feel the burn from bad coffee. Again, I’m sorry for the pun. (Maybe not really.)

The places on this list range from a more traditional Italian coffee experience (downing an espresso quickly while standing at the bar or sitting) to the trendier locales with ample seating and ambience where people might come to study or work on their computer, which is essentially the American coffee shop experience. But no matter the style, the common denominator is the good coffee experience, whether sipped or thrown back. You might recognize some of these places from the Most Scrumptious Breakfast list, because good breakfasts and good coffee definitely have an overlap. But good coffee doesn’t always mean good pastries, and vice versa, hence the different posts.

To read more about the coffee drinks you’ll find in Italy, click here.

This post may contain affiliate links. If you make a purchase using these links, Jennyblogs may receive a small commission, at no extra cost to you. This helps to support Jennyblogs. Where possible, links are prioritized to small businesses and ethically and responsibly made items. For further information see the privacy policy. Grazie!


Where to Find the Best Coffee in Florence

In no particular order

  1. Melaleuca

    Lungarno delle Grazie, 18, right along the river not too far from Santa Croce

    Open 8:00am - 4:00pm Monday through Friday, 9:00am - 4:00pm Saturday and Sunday.

    A newer (established 2019) American/Australian Bistro Bakery right in the heart of Florence with beautiful views. It’s airy, it’s bright, and has a lovely ambiance. They partner with a local specialty coffee roaster, D612. Combine thoughtfully roasted beans with some baristas who know their stuff, you get a mean coffee. From flat whites to Matcha or Golden Lattes, I’ve never had a bad coffee from them. I also love their details, like the hand made pottery that the coffees are served in. Not to mention, it’s a comfortable international space if you just want a break from some of the Italian coffee culture/rules you may have been running in to. Everyone speaks English and sometimes you just miss being able to communicate easily. I worked here before having my son, the owners are friends of mine and lovely people! You may also notice they’re on my list for best breakfast, too!

  2. Ditta Artigianale

    Location 1: Via dei Neri, 30/32r, between the church of Santa Croce and Palazzo Vecchio Location 2: Via dello Sprone, 5r, very close to Palazzo Pitti

    Open 8:00am - 12:00am Monday through Friday, 9:00am - 12:00am Saturday and Sunday

    Ditta Artigianale was founded in 2013 by an award-winning barista and is considered by many the best coffee in Florence, and they are usually busy to show it. This has one of the closest vibes to an American coffee shop with the quality coffee, cool and informal atmosphere, and competent baristas. Many people come here to work as well as socialize, drink coffee, and eat. They have single-origin coffee choices and you can buy their whole beans or have them grind them for you to make coffee at home as well as a delicious cold brew.

  3. La Ménagère

    Via de’ Neri, 8, right in the center by San Lorenzo and the Mercato Centrale

    Open 8:00am - 2:30am every day

    A large caffè that serves coffee and food with different rooms on the main floor, basement, and even outside that is designed for lingering with friends or work. You can even buy botanicals or select house items, or listen to live music some evenings.

  4. Mercato Centrale

    Piazza del Mercato Centrale, Via dell’Ariento, near to the church of San Lorenzo

    Open 8:00am - 12:00am every day

    Up on the second floor of this historic wrought iron building you will find a large Italian-style food court. In the center there is a bar where you can order coffee, or you can find a place to sit and a waiter should eventually come to ask if you’d like something to drink, at no extra charge. It can get extremely busy during the lunch and dinner hours, so I would recommend going in the morning when it is calm or between 3:00pm and 7:30pm to avoid the crowds. Bonus: you can order a large (and maybe even an extra large?) cappuccino called a “cappuccione” for around 2euro (and maybe 3 for the extra large!)

  5. Coffee Mantra

    Borgo la Croce, 71r, near Piazza Beccaria on the east side of town in a very local area

    Open 7:00am - 7:00pm Monday through Saturday. Closed Sunday

    A new and hip little coffee place in the Sant’Ambrogio neighborhood. I recommend getting your drink to go (I believe they even do flat whites here) and take a stroll around the Sant’Ambrogio market around the corner or any of the antique markets nearby.

  6. Santarosa Bistrot

    Lungarno di Santa Rosa, on the south side of the river.

    Open 8:00am - Midnight weekdays, 10:00am - Midnight Saturday and Sunday

    A lovely caffe with lots of beautiful green surrounding. It creates a wonderful escape from the bustling city center and is one of my favorite places to catch up with friends over a nice cup of coffee or tea.

  7. La Cité

    Borgo S. Frediano, 20r, on the south side of the river not far from the church of Santo Spirito.

    Open 10:00am - 12:02am Monday through Saturday, 2:00pm - 9:00pm Sunday

    A two story cafe and book store, this is a great place to work on projects or find a private nook for deep conversations over a good cup of coffee. Very cozy and artsy.

  8. Chiaroscuro

    Via del Corso, 36r, between the Duomo and Palazzo Vecchio.

    Open 7:30am - 9:30pm Monday through Saturday, 8:00am - 9:30pm Sunday

    I always thought this cafe had a classy classic feel to it, great for meeting up with people or a quick coffee but not so much for using it as a place to work from. They have coffee sourced from around the world displayed on their wall and you can even choose which beans you want for your cup of coffee.

  9. Caffetteria Piansa

    Via Vincenzo Gioberti, 51r, just outside the city center on the east side.

    Open 7:00am - 7:30pm Monday through Saturday, closed Sunday

    Piansa roasts their own coffee and sells to other places around town. If you find any cafe that uses the Piansa beans, it’s probably going to be great! Here you can even get pour overs and buy Chemex and filters!


Overnight Bagels

Last Updated August 18, 2024

IMG_2103.jpg

Bagels. Who doesn’t love them? Especially toasted with cream cheese or butter melting on top. Everyone has their favorite bagel, where to get them and how to eat them, whether that’s the chewy and dense boiled variety or the slightly lighter and more modern steamed versions, plain or everything, toasted with cream cheese, eaten plain, or eaten as a sandwich.

One of my favorite bagel memories is from New York City where I spent two summers training with the American Ballet Theatre when I was a teenager. On the weekends my mom and I would go on adventures exploring the city, usually walking an average of 15 miles a day and thus needing sustenance. I remember particularly well one morning passing a bagel shop and a few minutes later exiting with a freshly toasted bagel smothered in cream cheese and wrapped in tinfoil. So simple, so inexpensive, and I still think of that bagel as one of the best I’ve ever had. So I guess you could say I’m a NYC bagel girl, but to be fair, I don’t think I’ve had any (at least not-from-a-hotel-breakfast-bar bagels) in any of the major cities famed for bagels, such as Philadelphia, Chicago, Boston, or Los Angeles. And I’ve been to all those cities! Too bad I didn’t know they had amazing bagels or I would’ve done a trial and comparison. Ah well, just have to go back I guess!

I am blogging this bagel recipe which involves an overnight ferment and boiling, because I think IT’S SO YUMMY. I’m not going to tout this recipe as the bagel recipe to end all bagel recipes, because frankly, I’m not into that kind of marketing and I believe there are other valid methods and types of bagel recipes out there. This recipe comes from Peter Reinhart’s book The Breadmaker’s Apprentice, and as he says, this is a bagel for the ages. And he knows what he’s talking about, so you should try this recipe. You can buy the cookbook by clinking on the link to the right!

Don’t let the overnight ferment or multi-step process scare you, it’s really quite fun and not nearly as tricky as I had always imagined making bagels to be. You will need to clear some space in your fridge and in your schedule, but if I can do it in my tiny Italian kitchen with my tiny toaster-sized oven, so can you, wherever you are baking! I recommend reading the recipe through once or twice before making a game plan. (As you should with every recipe!)

What follows is a slightly modified version of Peter Reinhart’s recipe. The ingredients are basically identical but the instructions I have rewritten in my own words and in places slightly changed or modified to accommodate tips and tricks that worked really well for me and might work for you, too!

parmesan, sesame, and everything bagels

parmesan, sesame, and everything bagels

Side note if you need bagels TODAY: While this recipe is called “Overnight Bagels”, it can also be made without the overnight ferment. I do recommend the overnight ferment for flavor and just because it’s nice to split up the multiple steps of bagel making, however…we might not always have the patience to wait that long for fresh, hot, chewy bagels…this has definitely happened to me during this 2020 quarantine. I wanted bagels today! Not tomorrow! And I hadn’t planned ahead.
So, instead of an overnight ferment, once the bagels are shaped, let them rise in a warm place for about an hour, or until noticeably swelled. Keep any eye on them as you don’t want them to overaise. This can cause them to deflate when they are boiled. Proceed with recipe as normal.

This post may contain affiliate links. If you make a purchase using these links, Jennyblogs may receive a small commission, at no extra cost to you. This helps to support Jennyblogs. Where possible, links are prioritized to small businesses and ethically and responsibly made items. For further information see the privacy policy. Grazie!


Overnight Bagels

Makes 12 big or 24 small bagels

Ingredients:

For the Sponge

  • 1 tsp / 3g instant yeast

  • 4 cups / 510g bread flour

  • 2 1/2 cups / 567g water

For the Dough

  • 1/2 tsp / 1.5g instant yeast

  • 3 3/4 cups / 482g bread flour

  • 2 3/4 tsp / 20g salt

  • 2 tsp / 9.5g malt powder OR flavoring of choice: 1 Tbsp / 14g dark or light malt syrup, honey, or dark or light brown sugar

For Boiling the Bagels

  • 1 Tbsp / 14g baking soda, optional, or malt syrup or honey

  • a large pot of water, the wider the pot the better

  • cornmeal or semolina, for dusting

Toppings, any or all of the following

  • sesame seeds

  • poppy seeds

  • salt flakes

  • rehydrated minced garlic

  • rehydrated minced onion

  • parmesan cheese

Directions:

DAY 1

Line 2 sheet pans with parchment paper and grease well.

Make the Sponge

  1. In the bowl of a stand mixer or large bowl, stir yeast into flour. Add water and stir just until a sticky dough has formed, similar to pancake batter.

  2. Cover bowl with plastic wrap and let sit at room temperature for about 2 hours, or until very bubbly and active. It should be about twice the size and collapse when bowl is tapped on countertop.

Make the Dough

  1. Once sponge is ready, add next measurement of yeast and mix on low speed with dough hook or by hand with a spoon. Next, add 3 cups / 383g of the next measurement of flour, salt, and malt powder / flavoring of choice. Stir on low speed for about 3 minutes, or with a spoon until a mostly homogeneous ball is formed. Slowly add remaining 3/4 cup / 99g flour to stiffen dough a bit.

    Knead dough on medium-low speed for about 6 minutes or turn dough out onto a lightly floured surface and knead by hand for about 10 minutes. Dough should be smooth and firm yet pliable, not sticky, with all flour worked in. If it seems too dry or there is excess flour throughout, add a few drops of water until desired consistency is reached. Likewise if it’s too sticky, add in a bit of flour until correct stiffness is reached. At this point the dough should pass the windowpane test. (Stretch a small piece of dough between your thumbs and forefingers; if enough gluten has developed through kneading the dough should stretch thin where you can see light coming through. If it breaks before you can stretch it thin, knead another few minutes and try again.)

Weigh and Shape Dough

IMG_2100.jpg
  1. Weigh dough and divide weight by the number of bagels you wish to make: If making mini bagels, divide weight by 24; if making regular bagels, divide weight by 12. This will give the goal weight for each dough ball you are about to make. For example, the weight of my dough the last time I made these was 1,566g. 1,566g divided by 12 for regular bagels = about 130g each. Or, 1,566g divided by 24 for mini bagels = about 65g each.

  2. Once you have a goal weight for the dough balls, divide dough in half, then keep dividing the halves and quarters until you have 12 or 24 dough chunks. Weigh each chunk and add or subtract a bit of dough until they are all within about 5g of the goal weight. Roll each dough chunk under your palm with a cupped hand in a circular motion, guiding with outer edge of your palm, until you have a nice ball. It works best to roll them on a surface with little to no flour. This way the dough sticks slightly to the surface as you move in a circular motion and pulls and creates surface tension.

  3. Place dough balls on a lightly floured surface and cover with a damp towel. Allow to rest for approximately 20 minutes.

  4. Shape each dough ball into bagel form by poking your thumb through the center of the ball and rotating your thumb around the inside of the hole or lassoing it a few times around your thumb, until the hole is about 2 1/2 in / 6 cm for regular bagels or 1 1/2 in / 4 cm for mini. Aim to stretch the bagel as evenly as possible, avoiding a thick and thin side so you won’t end up with lopsided bagels. Alternately, you can roll the doll ball into an 8 in / 20 cm long rope, wrap it around your knuckles with the seam on the under side, then rock the seam on the counter until sealed.

  5. Place shaped bagels onto greased baking sheets about 2 inches apart. Mist with spray oil or rub on oil, then slip each sheet into a clean, food-grade plastic bag or cover with plastic wrap.

  6. Place bagels in fridge to rise overnight. They are best if used the next day, but can be kept up to three days in the fridge.

DAY 2

Boil the Bagels

  1. Test to see if bagels are ready to be boiled by removing one carefully from fridge and placing in a bowl of cool or tepid water. If bagel floats within 10 seconds, it’s ready. Immediately return bagel to covered baking sheet in fridge while you ready the water.

  2. If bagel does not float within 10 seconds, either return it to the fridge and repeat float test every couple hours until bagels are ready, or remove both sheets of bagels from fridge and let raise at room temperature, repeating float test every 10 to 20 minutes until a bagel passes. Return them to the fridge once they are ready so they don’t over-rise. The stiffness of the dough, your house temperature, and your fridge temperature will all impact when the bagels are ready to be boiled.

  3. If your bagels have over-risen (you can tell if they collapse when you gently handle them or if they overly deflate when boiled) or they have stuck to the pan, transfer them as carefully as you can to another better-oiled parchment lined baking sheet. Let rise at room temperature for another 15-20 minutes or until they pass float test again. Return them to the fridge once they are ready.

  4. When bagels are just about ready, place the large pot of water on the stove and bring to a boil, then add baking soda, if using. Have a skimmer or slotted spoon ready nearby. Preheat oven to 500°F / 260°C and place two racks in the middle of the oven.

  5. Remove one sheet of bagels from fridge and gently slide 3-4 into boiling water, or however many can fit comfortably side to side. Boil for 30 seconds to 1 minute on one side, then flip each bagel and boil for another 30 seconds to 1 minute. Bagels boiled for 1 minute on each side will be chewier than those boiled for only 30 seconds on each side.

  6. While bagels are boiling, sprinkle the same parchment lined baking sheet with cornmeal or semolina.

  7. When it’s time to remove bagels, use the slotted spoon and place them back on the baking sheet now sprinkled with cornmeal. Add toppings immediately while the bagels are still wet. Repeat with second sheet of bagels.

Bake the Bagels

  1. Place both baking sheets of bagels in the preheated oven. Bake for 7 minutes, then switch the pans on the racks and rotate each 180 degrees to bake the bagels as evenly as possible.

  2. After you switch and rotate, lower oven temperature to 450°F / 232°C and bake for another 7-8 minutes, or until light golden brown.

  3. Remove from oven and allow bagels to cool for 15 minutes before devouring.

Jenny’s Notes:

  • To keep scale clean while weighing dough, place the now-empty bowl (no need to clean it) and press tare. You can also use a piece of plastic wrap over the scale and tare if needed.

  • I love lassoing the bagels while shaping them! Fast, fun, and effective. Not as big a fan of the rope and seal version, I thought it took longer and the finishing ring was not as symmetrical. Try out both versions to find which works best for you!

  • I found it best to make the dough in the evening and boil and bake the bagels in the morning or they over-rose, but I believe this is mostly due to my not-cold-enough fridge. If you have a cold and well functioning fridge, you should be fine to make and bake the bagels at your leisure!

  • Chewy bagels are my favorite, and thus I boil bagels for the full minute on each side. I have found, though, that beyond 1 minute on each side can cause the outside of the bagels to cook too much. This means when they are baked this outer baked “shell” doesn’t allow the bagels to reach their full rise and may result in flatter bagels.

  • When baking the bagels, know your oven. If you have hot spots or a small oven, you can choose to bake one sheet of bagels at a time. Since my oven is small, I baked the first sheet of bagels while I was boiling the second sheet, and simply rotated the pan 180 degrees after the first 7 minutes.

Overnight Bagels
Yield 12-24
Author
Prep time
1 H & 45 M
Cook time
15 Min
Inactive time
12 Hour
Total time
14 Hour

Overnight Bagels

A recipe from Peter Reinhart's "The Breadmaker's Apprentice." The bagels get an overnight ferment leading to increased umami flavor and are boiled for optimal chewiness.
Cook modePrevent screen from turning off

Ingredients

For the Sponge
For the Dough
For Boiling the Bagels
Toppings, any or all of the following

Instructions

DAY 1 Make the Sponge
  1. In the bowl of a stand mixer or large bowl, stir yeast into flour. Add water and stir just until a sticky dough has formed, similar to pancake batter.
  2. Cover bowl with plastic wrap and let sit at room temperature for about 2 hours, or until very bubbly and active. It should be about twice the size and collapse when bowl is tapped on countertop.
Make the Dough
  1. Once sponge is ready, add next measurement of yeast and mix on low speed with dough hook or by hand with a spoon. Next, add 3 cups / 383g of the next measurement of flour, salt, and malt powder / flavoring of choice. Stir on low speed for about 3 minutes, or with a spoon until a mostly homogeneous ball is formed. Slowly add remaining 3/4 cup / 99g flour to stiffen dough a bit.
  2. Knead dough on medium-low speed for about 6 minutes or turn dough out onto a lightly floured surface and knead by hand for about 10 minutes. Dough should be smooth and firm yet pliable, not sticky, with all flour worked in. If it seems too dry or there is excess flour throughout, add a few drops of water until desired consistency is reached. Likewise if it’s too sticky, add in a bit of flour until correct stiffness is reached. At this point the dough should pass the windowpane test. (Stretch a small piece of dough between your thumbs and forefingers; if enough gluten has developed through kneading the dough should stretch thin where you can see light coming through. If it breaks before you can stretch it thin, knead another few minutes and try again.)
Weigh and Shape the Dough
  1. Line 2 sheet pans with parchment paper and grease well.
  2. Weigh dough and divide weight by the number of bagels you wish to make: If making mini bagels, divide weight by 24; if making regular bagels, divide weight by 12. This will give the goal weight for each dough ball you are about to make. For example, the weight of my dough the last time I made these was 1,566g. 1,566g divided by 12 for regular bagels = about 130g each. Or, 1,566g divided by 24 for mini bagels = about 65g each.
  3. Once you have a goal weight for the dough balls, divide dough in half, then keep dividing the halves and quarters until you have 12 or 24 dough chunks. Weigh each chunk and add or subtract a bit of dough until they are all within about 5g of the goal weight. Roll each dough chunk under your palm with a cupped hand in a circular motion, guiding with outer edge of your palm, until you have a nice ball. It works best to roll them on a surface with little to no flour. This way the dough sticks slightly to the surface as you move in a circular motion and pulls and creates surface tension.
  4. Place dough balls on a lightly floured surface and cover with a damp towel. Allow to rest for approximately 20 minutes.
  5. Shape each dough ball into bagel form by poking your thumb through the center of the ball and rotating your thumb around the inside of the hole or lassoing it a few times around your thumb, until the hole is about 2 1/2 in / 6 cm for regular bagels or 1 1/2 in / 4 cm for mini. Aim to stretch the bagel as evenly as possible, avoiding a thick and thin side so you won’t end up with lopsided bagels. Alternately, you can roll the doll ball into an 8 in / 20 cm long rope, wrap it around your knuckles with the seam on the under side, then rock the seam on the counter until sealed.
  6. Place shaped bagels onto greased baking sheets about 2 inches apart. Mist with spray oil or rub on oil, then slip each sheet into a clean, food-grade plastic bag or cover with plastic wrap.
  7. Place bagels in fridge to rise overnight. They are best if used the next day, but can be kept up to three days in the fridge.
DAY 2 Boil the Bagels
  1. Test to see if bagels are ready to be boiled by removing one carefully from fridge and placing in a bowl of cool or tepid water. If bagel floats within 10 seconds, it’s ready. Immediately return bagel to covered baking sheet in fridge while you ready the water.
  2. If bagel does not float within 10 seconds, either return it to the fridge and repeat float test every couple hours until bagels are ready, or remove both sheets of bagels from fridge and let raise at room temperature, repeating float test every 10 to 20 minutes until a bagel passes. Return them to the fridge once they are ready so they don’t over-rise. The stiffness of the dough, your house temperature, and your fridge temperature will all impact when the bagels are ready to be boiled.
  3. If your bagels have over-risen (you can tell if they collapse when you gently handle them or if they overly deflate when boiled) or they have stuck to the pan, transfer them as carefully as you can to another better-oiled parchment lined baking sheet. Let rise at room temperature for another 15-20 minutes or until they pass float test again. Return them to the fridge once they are ready.
  4. When bagels are just about ready, place the large pot of water on the stove and bring to a boil, then add baking soda, if using. Have a skimmer or slotted spoon ready nearby. Preheat oven to 500°F / 260°C and place two racks in the middle of the oven.
  5. Remove one sheet of bagels from fridge and gently slide 3-4 into boiling water, or however many can fit comfortably side to side. Boil for 30 seconds to 1 minute on one side, then flip each bagel and boil for another 30 seconds to 1 minute. Bagels boiled for 1 minute on each side will be chewier than those boiled for only 30 seconds on each side.
  6. While bagels are boiling, sprinkle the same parchment lined baking sheet with cornmeal or semolina.
  7. When it’s time to remove bagels, use the slotted spoon and place them back on the baking sheet now sprinkled with cornmeal. Add toppings immediately while the bagels are still wet. Repeat with second sheet of bagels.
Bake the Bagels
  1. Place both baking sheets of bagels in the preheated oven. Bake for 7 minutes, then switch the pans on the racks and rotate each 180 degrees to bake the bagels as evenly as possible.
  2. After you switch and rotate, lower oven temperature to 450°F / 232°C and bake for another 7-8 minutes, or until light golden brown.
  3. Remove from oven and allow bagels to cool for 15 minutes before devouring.

Notes

  • To keep scale clean while weighing dough, place the now-empty bowl (no need to clean it) and press tare. You can also use a piece of plastic wrap over the scale and tare if needed.
  • I love lassoing the bagels while shaping them! Fast, fun, and effective. Not as big a fan of the rope and seal version, I thought it took longer and the finishing ring was not as symmetrical. Try out both versions to find which works best for you!
  • I found it best to make the dough in the evening and boil and bake the bagels in the morning or they over-rose, but I believe this is mostly due to my not-cold-enough fridge. If you have a cold and well functioning fridge, you should be fine to make and bake the bagels at your leisure!
  • Chewy bagels are my favorite, and thus I boil bagels for the full minute on each side. I have found, though, that beyond 1 minute on each side can cause the outside of the bagels to cook too much. This means when they are baked this outer baked “shell” doesn’t allow the bagels to reach their full rise and may result in flatter bagels.
  • When baking the bagels, know your oven. If you have hot spots or a small oven, you can choose to bake one sheet of bagels at a time. Since my oven is small, I baked the first sheet of bagels while I was boiling the second sheet, and simply rotated the pan 180 degrees after the first 7 minutes.


Nutrition Facts

Calories

303.74

Fat

1.50 g

Sat. Fat

0.22 g

Carbs

60.82 g

Fiber

2.14 g

Net carbs

58.68 g

Sugar

0.83 g

Protein

10.16 g

Sodium

1017.73 mg

Cholesterol

0.00 mg

Nutritional Info is Approximate. Based on 1 large bagel.

bagel, overnight bagels, everything, parmesan, sesame, poppyseed
bread, breakfast, brunch
Jewish-American
Did you make this recipe?
Tag @jennyblogsandbakes on instagram and hashtag it #jennyblogs

Food in Florence: Where to Eat the Most Scrumptious Breakfasts

Starting off a new Italy series all about Food in Florence that I’m calling…wait for it…Food in Florence! Yay, you guessed it!

Esselunga+Cappuccino.jpg

I’ve been getting enough requests this past year from friends and friends for friends visiting Florence that I think it’s time to start compiling some helpful and easily accessible lists and tips of what to do/where to eat in this adopted city of mine, Florence. Creating custom “to do” and “to eat” lists is not very time efficient I find…or maybe I just give an overwhelming amount of information…nah, that couldn’t possibly be it. :)

It’s great fun to create lists that help people get the most out of their time in Florence. My favorite way to see a new city is exploring and wandering without any tour guides (with certain exceptions), while having read up a ton beforehand and bookmarked things to see, places to shop, and foods to try and where to try them. The biggest problem I always run into while preparing for a trip is knowing which lists are authentic and whose opinion I should trust. The lists in this new “Food in Florence” series would have saved me quite a bit of time before I came to Florence for the first time. I hope they will be useful to you and help you decide where you want to dine around Florence without falling for the tourist traps, specifically in this list where you can find the most scrumptious breakfasts.

As a disclaimer, these lists will probably be ever evolving because 1. Florence has a million and one places to try, 2. New places are always opening, 3. I’ve only lived here just over 2 consecutive years and 4. I probably don’t eat out nearly as much as you would expect for someone who lives in Italy. (Whaaat I don’t eat pasta for lunch and pizza for dinner everyday?! Lame.) Just remember, I’m a real person with a real budget. :)

What is a typical Italian breakfast?

You’re going out to breakfast, but what can you expect to find on the menu? What do Italians typically eat for breakfast?

Italians don’t go to a sit-down type restaurant for breakfast, which is usually what entails if you go out to breakfast in America. Instead, most Italians have their favorite local bar that they go to several, if not every, morning of the week. A cappuccino is usually eaten with a pastry, and just as often eaten standing and chatting as it is sitting down and reading the morning newspaper. At just over 2euro for a cappuccino and pastry, it makes for a very affordable breakfast out. If there is a menu, it’s probably a coffee menu on the wall. The pastries are chosen through the display case. It’s common to ask what they’re filled with, if one is unsure. You can expect varying croissants and sugary puff pastries filled with the classics: cream, chocolate, Nutella, jam (usually apricot or blackberry) and apple, along with more specialty fillings that will vary by place, such as cream and orange, whole wheat with honey, pistachio, etc.

What is the best time to go out for breakfast?

The famed hot chocolate at Caffè Gilli

The famed hot chocolate at Caffè Gilli

Whatever time you want. Really. Most pasticcerie and bars open between 5:30-7:00am, but pastries will be served until they’re gone, which is often into the afternoon. Of course, some busy places will run out by noon, so my only word of advice would be to go before then. You can manage that, right?

Or, if you’re like me and like to eat right away, have some fruit and snacks to eat first thing in the morning, and then eat a leisurely second breakfast or elevensies at a caffè once you’re out and about.

You’ll find people eating breakfast anywhere from the early morning hours to late morning, and it is socially acceptable to eat a pastry and a cappuccino in the afternoon as a snack, or a cappuccino by itself, contrary to popular American belief. See #12 on this blog post if you want to know why. So have at it! Just don’t drink a cappuccino with any food item other than pastries/cookies, k? Cappuccino and pizza taste gross together anyway.

Breakfast Etiquette

Bottega di Pasticceria

Bottega di Pasticceria

As a general rule, it’s best to pay at the cash register before ordering your pastry and drink at the bar. Many places don’t care if you eat or pay first, even if they have signs up asking you to pay first, however…some places DO care and if you’re not familiar with that particular locale, pay first to be safe.

It’s also advisable to ask before you sit down as some places up-charge for the “sit-down service.” Ya know, paying up to twice the price for your drink for the luxury of sitting down and usually them bringing you your order. Don’t think that carrying your own drink to your table is going to get you any discounts. You’re really paying for occupying the table, the service I like to think of as bonus so you might as well enjoy it!

The only place on the list below that should have an up-charge is Gilli and possibly Bottega di Pasticceria. Since they are classy and all about the experience anyway, I think we can forgive them.

This post may contain affiliate links. If you make a purchase using these links, Jennyblogs may receive a small commission, at no extra cost to you. This helps to support Jennyblogs. Where possible, links are prioritized to small businesses and ethically and responsibly made items. For further information see the privacy policy. Grazie!


Where to Eat the Most Scrumptious Breakfasts

  1. La Ménagère

    Via de’ Neri, 8, right in the center by San Lorenzo and the Mercato Centrale

    Open 8:00am - 2:30am every day

    Large and uniquely beautiful space, each room is a little different. Very cool atmosphere. There is even an area where you can buy some merchandise and flowers. Lots of pretty plants! Indoor and outdoor seating. Great coffee. A bit on the pricier side.

  2. Santarosa Bistrot

    Lungarno di Santa Rosa, on the south side of the river.

    Open 8:00am - Midnight weekdays, 10:00am - Midnight Saturday and Sunday

    Beautiful outdoor caffe where you can choose to sit outside among the greenery or in the main area with the roof if it rains. So cozy. I love this place when I want to get away from the hectic city life for a moment.

  3. Caffetteria delle Oblate

    Via dell’Oriuolo, 26, in the center not far from the Duomo.

    Open 2:00pm - 7:00pm Monday, 9:00am - Midnight Tuesday through Friday, 10:00am - Midnight Saturday, closed on Sunday.

    An old convent turned library with a third story caffè, this place is super cool and has spectacular views of the Duomo to boot. You can sit in the caffetteria or take your food to any of the 4 sided terrace overlooking in the inner open courtyard. There are seats and tables on most sides, but they are often occupied with studying students. When this happens I usually just sit on the floor, no one will mind. Note, the caffetteria will charge you 10 cents per person who eats outside of the caffetteria area. I find this ironically humorous as most bars will charge you if you sit down IN their area, not if you take away. Italy, the land of inconsistency.

  4. Melaleuca

    Lungarno delle Grazie, 18, right along the river not too far from Santa Croce

    Open 8:00am - 4:00pm Monday through Friday, 9:00am - 4:00pm Saturday and Sunday.

    A newer (established 2019) American/Australian Bistro Bakery right in the heart of Florence with beautiful views. It’s airy, it’s bright, and has a lovely ambiance. While you won’t find typical Italian food here, you will find some of the best croissants and pastries in town (they have an in-house French baker), along with some other maybe more familiar desserts and brunch items. Think cinnamon rolls, banana bread, pumpkin bread, carrot cake, Guinness chocolate cake, and on and on. They have pancakes, they have eggs, and if you’re familiar with Australian cuisine, you might see some familiar items on their menu as well. Anything that can be house made IS house made, from buttermilk to kombucha, pickled vegetables, dips and spreads, drinks, almond milk, and almost literally everything else. It’s a comfortable space if you just want a break from some of the Italian eating culture/rules you may have been running in to! Everyone speaks English and sometimes you just miss being able to communicate easily. I worked here before having my son, the owners are friends of mine and lovely people! You may also notice they’re on my list for best coffee, too!

  5. Bottega di Pasticceria

    Lungarno Francesco Ferrucci, 9c, south of the river on the edge of the city center

    Open 7:00am - 10:00pm Tuesday through Sunday, closed Monday

    This is a lovely open two story caffe that has an elegant feel to it, although don’t feel as though you need to dress up! Certain parts of the second story floor are made of glass, a warning to those who are wearing dresses and skirts! ;)

  6. Caffetteria La Loggia

    Via Pietrapiana, 12, not far from the church of Santa Croce

    Open 7:00am - 8:30pm every day

    A small little place but popular with the locals and me! A good variety of pastries and coffee, they even have some specialty drinks such as Hazelnut or Pistachio Coffee, very sweet but interesting to try! If there are no available places to sit, you can always drink your coffee and eat your pastry standing up at the bar, like the Italians do, or go and sit in the nearby Piazza della Loggia which the city of Florence recently redid.

  7. Caffè Libertà

    Piazza della Libertà, 27r, at the top tip of the city center in Piazza della Libertà

    Open 5:00am - 9:30pm every day

    This caffe is home to probably some of my favorite pastries in all of Florence, and that’s just talking about the pastries. The desserts are mouth-watering as well. I personally recommend the apple filled pastry, but I know others who rave about the pistachio filled pastry. Indoor or outdoor seating.

  8. Caffè Pasticceria Serafini

    Via Gioberti, 168r, just outside the city center on the east side

    Open 7:00am - 9:00am Monday through Saturday, closed Sunday

    Serafini is located in a very local area and has wonderful pastries and desserts. It can get busy, but there is indoor and outdoor seating and always the option to eat at the bar or take away. They have a great chocolate and pear pastry.

  9. Caffè Michelangelo

    Via Ghibellina, 116r, in the center near to Santa Croce

    Open 6:00am - 8:00pm Monday through Saturday, closed Sunday

    Another great local caffè with yummy pastries and coffee. There are a couple of baristas here who can make a mean cappuccino.

  10. Caffè Gilli

    Via Roma, 1r, on Piazza della Repubblica

    Open 7:30am - Midnight every day

    Gilli is the oldest caffè in Florence, established more than 270 years ago by a Swiss family. Their hot chocolate is renowned and their sweets and chocolate beloved by many. Situated in a beautiful building with a large covered outdoor sitting area right on Piazza della Repubblica, this is the place to go if you’re looking for a high class and historic experience. Just remember you’ll be paying higher prices, i.e., a normal hot chocolate costs 3-3.50euro, Gilli will charge you somewhere around 7euro.


Caffetteria delle Oblate

Caffetteria delle Oblate

Buon Appetito!

Want to see some of your favorite spots added to the list? Let me know in the comments below!

Triple Dark Chocolate Cheesecake

Last Updated August 17, 2024

2019-05-26+17.58.07-2.jpg

After more than two years in Italy, I have finally made a cheesecake.

Proof that you don’t need a springform pan to bake a cheesecake

Proof that you don’t need a springform pan to bake a cheesecake

Cheesecakes are not hard to make, but the baking is important, probably the most important part, and can be tricky. Cheesecakes are usually baked at a slightly lower temperature, usually around 325°F, and just until the sides are set but the center is still jiggly. If the center sets, the cheesecake is over done, but if the center is too jiggly, then your cheesecake won’t set up in the fridge and you’ll end up with soup when you cut into it. You don’t want the cheesecake to crack, and some recipes will tell you to add a bain-marie (a hot water bath) to the oven to keep the atmosphere humid or to crack the oven door after you’ve turned it off so your cheesecake won’t cool down too quickly and yes, crack.

So when you live in Italy with strange ovens, you think twice before baking things when you can’t perfectly control the heat in your oven or where the heat is coming from. IF you’re able to tell the temperature of your oven at all. (I’m thinking of you, my oven two apartments ago. I DO NOT miss you!) Or if your oven is small and cooks things a lot quicker. Add on top of that the cream cheese here, “formaggio fresco” or literally translated fresh cheese, is…different. I’m not even sure what it is, it tastes similar to cream cheese in the States, but when you whip it it doesn’t become soupy like the American stuff, it becomes super creamy. Sometimes I think the American stuff is stickier too, maybe? Philadelphia brand is very popular here, and you can also get grocery store generic brand. But the cheesecakes I’ve eaten in restaurants or pastry shops? Always weird. They taste and look more like semi-freddo or a mousse. I therefore assumed when I made a cheesecake it would be weird like the other ones I’ve eaten here. So I never made one.

Along came Easter and I wanted to make a cheesecake. I didn’t even have a springform pan but found that pie dishes work pretty great as substitutes. And you know what? The cheesecake turned out delicious and not weird. And my husband and colleagues liked it so well I made the same one again and bought a springform pan. And if you know me, you know I rarely bake the same thing twice in a row, unless I’m perfecting a new recipe. I’m always on to the next recipe. But this recipe asked to be made again. And so I did. And now you can make it, too, weird cream cheese or normal cream cheese!

This post may contain affiliate links. If you make a purchase using these links, Jennyblogs may receive a small commission, at no extra cost to you. This helps to support Jennyblogs. Where possible, links are prioritized to small businesses and ethically and responsibly made items. For further information see the privacy policy. Grazie!

Recipe adapted from omgchocolatedesserts


Triple Dark Chocolate Cheesecake

Serves about 12

Ingredients:

For the Oreo Crust

Crushing Oreos the old-fashioned way…

Crushing Oreos the old-fashioned way…

  • 24 Oreos

  • 1/4 cup / 56g butter, melted

For the Filling

  • 7.5 oz / 225g dark chocolate, broken into small chunks

  • 24 oz (3 8 oz packages) / 675g cream cheese, room temperature

  • 1/2 cup + 2 Tbsp / 125g granulated sugar

  • 2 Tbsp / 14 g cocoa powder

  • 3 eggs

For the Ganache Topping

  • 3/4 cup / 175g heavy whipping cream

  • 6 oz / 180g dark chocolate, broken into small chunks

Directions:

Oven 350°F / 177°C. Grease an 8in - 9in / 20cm - 24cm springform pan.

Make the Oreo Crust

  1. Crush Oreos in a food processor or with a rolling pin.

  2. If using a food processor, pulse in melted butter until crumbs are evenly moistened. If crushing Oreos by hand, transfer to a bowl and stir in butter.

  3. Press mixture evenly into bottom of prepared springform pan and bake for 8 minutes.

  4. Remove from oven and let cool while you prepare filling.

Spreading cream cheese mixture over baked crust

Spreading cream cheese mixture over baked crust

Make the Filling

  1. In a double boiler or pan over low heat, melt chocolate, stirring constantly. Remove from heat when there are still small chunks of chocolate, and continue to stir until completely melted. This way the chocolate won’t overheat or burn. Let chocolate cool.

  2. In the bowl of a stand mixer or a large bowl with a handheld mixer, beat cream cheese and sugar on medium speed until smooth. Changing to low speed, carefully beat in cocoa powder so that it doesn’t “poof” everywhere. Every so often stop beating and scrape down the sides of the bowl well.

  3. Beat in eggs, one at a time, until smooth.

  4. Beat in melted and cooled chocolate.

  5. Pour mixture over crust, smoothing the top.

  6. Bake for 45 - 60 minutes, or until center is still slightly wiggly and the top looks dry.

  7. Turn oven off and crack open the door for about 10 minutes. Remove cheesecake from oven and place in fridge until completely cooled, 8 hours or overnight.

Make the Ganache Topping

  1. In a small pan place heavy cream and chocolate over low heat. Stir constantly until mixture is smooth and melted. Allow to cool slightly.

  2. Remove cheesecake from fridge and pour ganache evenly over top. Allow to set before running a dull knife around edge of cheesecake and releasing from springform pan. Alternately, if you don’t need to transport the cheesecake anywhere, you can remove the ring of the springform first and then pour the ganache over, using a spoon to guide the ganache toward the edges and allowing some to dribble down the sides.

Jenny’s Notes:

  • Not a dark chocolate fan? Try it out with milk chocolate or a mixture of milk and dark to create your preferred bitterness!

  • If you don’t own a double boiler, you can make a makeshift one by placing a small pan with an inch or so of water in the bottom and bring to a simmer. Place the chocolate in a bowl big enough that it can sit on top of the pan without touching the water. Stir constantly and proceed as in the recipe. This might take a touch more effort than just melting the chocolate in a pan, but it’s safer if you’re not used to melting chocolate so as not to burn it.

  • Powdered sugar can be substituted for the granulated, use 1 cup / 110g.

  • For cleaner slicing, try running your knife under hot water for a few seconds between slices.

Triple Dark Chocolate Cheesecake
Yield 12
Author
Prep time
1 Hour
Cook time
1 H & 8 M
Inactive time
8 Hour
Total time
10 H & 8 M

Triple Dark Chocolate Cheesecake

Oreo crust, creamy dark chocolate cheesecake filling, and a decadent dark chocolate ganache.
Cook modePrevent screen from turning off

Ingredients

For the Oreo Crust
For the Filling
For the Ganache Topping

Instructions

Make the Oreo Crust
  1. Preheat oven to 350°F / 177°C. Grease an 8in - 9in / 20cm - 24cm springform pan.
  2. Crush Oreos in a food processor or with a rolling pin.
  3. If using a food processor, pulse in melted butter until crumbs are evenly moistened. If crushing Oreos by hand, transfer to a bowl and stir in butter.
  4. Press mixture evenly into bottom of prepared springform pan and bake for 8 minutes.
  5. Remove from oven and let cool while you prepare filling.
Make the Filling
  1. In a double boiler or pan over low heat, melt chocolate, stirring constantly. Remove from heat when there are still small chunks of chocolate, and continue to stir until completely melted. This way the chocolate won’t overheat or burn. Let chocolate cool.
  2. In the bowl of a stand mixer or a large bowl with a handheld mixer, beat cream cheese and sugar on medium speed until smooth. Changing to low speed, carefully beat in cocoa powder so that it doesn’t “poof” everywhere. Every so often stop beating and scrape down the sides of the bowl well.
  3. Beat in eggs, one at a time, until smooth.
  4. Beat in melted and cooled chocolate.
  5. Pour mixture over crust, smoothing the top.
  6. Bake for 45 - 60 minutes, or until center is still slightly wiggly and the top looks dry.
  7. Turn oven off and crack open the door for about 10 minutes. Remove cheesecake from oven and place in fridge until completely cooled, 8 hours or overnight.
Make the Ganache Topping
  1. In a small pan place heavy cream and chocolate over low heat. Stir constantly until mixture is smooth and melted. Allow to cool slightly.
  2. Remove cheesecake from fridge and pour ganache evenly over top. Allow to set before running a dull knife around edge of cheesecake and releasing from springform pan. Alternately, if you don’t need to transport the cheesecake anywhere, you can remove the ring of the springform first and then pour the ganache over, using a spoon to guide the ganache toward the edges and allowing some to dribble down the sides.

Notes

Not a dark chocolate fan? Try it out with milk chocolate or a mixture of milk and dark to create your preferred bitterness! If you don’t own a double boiler, you can make a makeshift one by placing a small pan with an inch or so of water in the bottom and bring to a simmer. Place the chocolate in a bowl big enough that it can sit on top of the pan without touching the water. Stir constantly and proceed as in the recipe. This might take a touch more effort than just melting the chocolate in a pan, but it’s safer if you’re not used to melting chocolate so as not to burn it. Powdered sugar can be substituted for the granulated, use 1 cup / 110g. For cleaner slicing, try running your knife under hot water for a few seconds between slices.

Nutrition Facts

Calories

715.12

Fat

54.28 g

Sat. Fat

31.43 g

Carbs

52.73 g

Fiber

3.26 g

Net carbs

49.47 g

Sugar

39.29 g

Protein

7.29 g

Cholesterol

118.98 mg

Sodium

316.65 mg

Nutritional Information is Approximate.

triple dark chocolate cheesecake, decadent, creamy, rich, oreo crust, ganache
dessert
American
Did you make this recipe?
Tag @jennyblogsandbakes on instagram and hashtag it #jennyblogs
2019-04-24+19.00.29.jpg

Sicilian Almond Cookies - Paste di Mandorle

Last Updated August 16, 2024

2019-05-13+15.18.28.jpg

Paste di mandorle, or almond cookies, are one of the simplest and most delicious cookie recipes you could ask for, requiring only 4 ingredients and an overnight refrigeration (and even that is optional), so you can make the dough one day and bake the next. And because they only use almond flour, they are gluten-free friendly!

These cookies and many variations of them hail from Sicily, where the land is full of sunshine and Mediterranean breezes, charming towns, and has the perfect climate for some of the most succulent citrus fruits and almonds. Or so I’ve heard, I have yet to actually go there! The first time I found a bag of Sicilian almonds in Italy I snatched them up, hoping for a taste experience like never before. Basically setting myself up for disappointment. They were good, yes, but I think it would be best to eat them fresh, in Sicily. Until that day when I go to Sicily, I will content myself with tastes of their culture, like the occasional good arancini (fried balls of rice stuffed with cheese and veggies or meat) that you can find around Florence, granita (a slushy type drink), brioche stuffed with gelato, and cannoli. And of course, these almond cookies. And they’re so simple to make. Dangerous.

A Note on What You Call These Cookies in Italian

The original name of this post I had named as “Paste alle mandorle” but I believe that is used more to denote almond paste, or marzipan, so I’ve updated it to Paste di Mandorle.

While most translating apps will tell you “cookie/cookies” translates to “biscotto/biscotti”, it’s not a catch-all. For as often as I talk about, bake, and eat cookies, this word has always given me grief. If you want to get technical, and you know I do, “biscotti” can be broken down into two root words: “bis” meaning two or twice, and “cotti” meaning baked or cooked. Thus, biscotti actually refers to cookies that have been baked twice. In America, you probably are familiar with the word biscotti, meaning those long hard cookies often sold at coffee shops. Those are truly biscotti, because they’re twice baked. The whole dough is baked, then they’re sliced and baked again. So if you want to talk about cookies in Italian but you don’t want to talk about the twice-baked ones, what do you call them? There is no catch-all, but you have some options. You could simply call them “dolci” (sweets) or dolcetti (little sweets) which is always safe, or cookies made with butter, similar to what we know as shortbread, you could call “frolli”. Or, you can call them “paste” as I did in this post, which in the most general translation of the word means "doughs” or “pasticcini” which is similar. Just looking up this recipe in Italian, on the first page you will probably find them called paste, pasticcini, and biscotti.

Then don’t get me started on the Italian word for “cake” which is “torta”. That one IS a catch-all, but in a bad way, because then I’m calling desserts “cake” in Italian that are definitely not cake in English. They have no word for pie, so then if someone comes to your Thanksgiving dinner and asks what the pumpkin pie is, you might say “torta di zucca” or, pumpkin cake. Sigh. Pie, like Americans think of pie (apple pie, cherry pie) doesn’t exist in their traditional cuisine so it makes sense. But confusing for an American who wants to talk about it in Italian. Some desserts, like apple, are known enough now in Italy that you can refer to them by their English name, apple pie.

This post may contain affiliate links. If you make a purchase using these links, Jennyblogs may receive a small commission, at no extra cost to you. This helps to support Jennyblogs. Where possible, links are prioritized to small businesses and ethically and responsibly made items. For further information see the privacy policy. Grazie!

Original recipe adapted and translated from GialloZafferano


Sicilian Almond Cookies - Paste di Mandorle

Makes about 2 dozen cookies

2018-12-22 12.26.58.jpg

Ingredients:

  • 2 1/2 cups / 250g almond flour

  • 1 1/4 cups / 250g granulated sugar

  • 2 / 60g egg whites

  • 1/2 tsp almond extract

Garnishes (optional)

  • powdered sugar

  • whole, sliced, or slivered almonds

Directions:

Oven 350F / 180C

  1. In a medium bowl, combine the almond flour and the sugar.

  2. Mix in the egg whites and the almond extract until thoroughly combined. This can be done with a spoon, a hand mixer, stand mixer, or even in a food processor.

  3. Cover dough and place in fridge overnight or for at least 7 hours.

  4. Remove dough from fridge and roll into balls, then roll in powdered sugar. Flatten cookies a bit, as they will not spread much in the oven. Press in a few almond slices on top. Alternately, shape them as you wish, as they hold their shape well after the overnight refrigeration.

  5. Place cookies on a silpat or parchment covered baking sheet, leaving about 1” between cookies.

  6. Bake in preheated oven for 8-12 minutes, until just lightly golden. Be careful no to overbake, cookies should be crunchy on the outside and soft on the inside.

Jenny’s Notes:

  • If you have almonds and a method to grind them, such as a food processor, go ahead and make fresh almond flour! Be careful not to over grind, you don’t want the almonds to heat up and the oil to start to escape, resulting in almond butter.

  • If you prefer other extracts, go ahead and play around with other flavors; vanilla, orange, lemon, coconut, etc.

  • This recipe, if you go by weight instead of imperial measurements, is very easy to modify or double, triple, halve, etc.! You can see that the ratio of almond flour to sugar is 1:1: essentially all you have to do is mix together equal weights of almond flour and sugar, with just enough egg whites to bind them together easily and a touch of extract for flavor. Voila.

  • These cookies have many variants and shapes and are often piped with candied cherries on top. I’m not a huge candied fruit person, and so I found a simple recipe and omitted the piping for one of the simpler almond cookie methods, rolling in powdered sugar and decorating with almonds.

Sicilian Almond Cookies - Paste alle Mandorle
Yield 24
Author
Prep time
30 Min
Cook time
12 Min
Inactive time
7 Hour
Total time
7 H & 42 M

Sicilian Almond Cookies - Paste alle Mandorle

A classic Italian cookie originating in Sicily with a soft center and crunchy exterior. 4 ingredients and gluten-free.
Cook modePrevent screen from turning off

Ingredients

Garnishes (optional)

Instructions

  1. In a medium bowl, combine the almond flour and the sugar.
  2. Mix in the egg whites and the almond extract until thoroughly combined. This can be done with a spoon, a hand mixer, stand mixer, or even in a food processor.
  3. Cover dough and place in fridge overnight or for at least 7 hours.
  4. Remove dough from fridge and roll into balls, then roll in powdered sugar. Flatten cookies a bit, as they will not spread much in the oven. Press in a few almond slices on top. Alternately, shape them as you wish, as they hold their shape well after the overnight refrigeration.
  5. Place cookies on a silpat or parchment covered baking sheet, leaving about 1” between cookies.
  6. Bake in preheated oven for 8-12 minutes, until just lightly golden. Be careful no to overbake, cookies should be crunchy on the outside and soft on the inside.

Notes

If you have almonds and a method to grind them, such as a food processor, you can make fresh almond flour! Be careful not to over-grind, you don’t want the almonds to heat up and the oil to start to escape, resulting in almond butter. If you prefer other extracts, play around with other flavors; vanilla, orange, lemon, coconut, etc. This recipe, if you go by weight instead of imperial measurements, is very easy to modify or double, triple, halve, etc.! You can see that the ratio of almond flour to sugar is 1:1: essentially all you have to do is mix together equal weights of almond flour and sugar, with just enough egg whites to bind them together easily and a touch of extract for flavor. Voila. These cookies have many variants and shapes and are often piped with candied cherries on top. I’m not a huge candied fruit person, and so I found a simple recipe and omitted the piping for one of the simpler almond cookie methods, rolling in powdered sugar and decorating with almonds.

Nutrition Facts

Calories

110.04

Fat

5.24 g

Sat. Fat

0.40 g

Carbs

14.38 g

Fiber

1.31 g

Net carbs

13.07 g

Sugar

12.51 g

Protein

2.76 g

Cholesterol

0.00 mg

Nutritional information is approximate, based on 1 cookie.

gluten-free, Sicilian almond cookies, Paste alle Mandorle
dessert, cookies
Italian
Did you make this recipe?
Tag @jennyblogsandbakes on instagram and hashtag it #jennyblogs
2019-05-13+15.17.27-2.jpg

All About that Wheat Flour - FARINA part 2

2019-05-17+18.29.09-2.jpg

If you’re reading this, you have probably have some form of wheat flour in your home. Even the person nearest to you, who is most likely not reading this, probably has some kind of wheat flour in their home. It almost sounds funny to say wheat flour because it is universally known as just flour. Flour refers to wheat flour, and only the other types of flour need to differentiate themselves. Rice flour is no less a flour, but we need to say “rice” in front of “flour” otherwise it will be assumed we are talking about flour; that is, wheat flour.

All-purpose, bread, cake, pastry, self-raising, strong, durum, semolina, whole wheat, whole wheat pastry, and graham are just some of the names for wheat flour types…what do you always have on hand? Besides maybe the price and brand of your flour, what else do you know about the substance that goes into so many hundreds of recipes? Should you care? It may not make a life or death difference, but if you enjoy cooking and baking, or generally like learning, then learning to understand wheat flour varieties and how best to use them can take the food you make to a whole new level!

If you’d like to read Part 1 and learn how flour is used in Italy, click here.

This post may contain affiliate links. If you make a purchase using these links, Jennyblogs may receive a small commission, at no extra cost to you. This helps to support Jennyblogs. Where possible, links are prioritized to small businesses and ethically and responsibly made items. For further information see the privacy policy. Grazie!


The Six Categories of Wheat

In your American pantry you probably have an all-purpose flour, a bread flour, maybe a cake flour, maybe a self-raising, possibly a few others. If you know when and how to use these flours (or just follow a recipe), you might not need to know where or what kind of wheat is actually grown and ground to make these. But once you become familiar with the types of wheat, their properties and best uses, you can make more educated choices about your baking and end up with a superior result. Even the most nominal baker will eventually come across recipes that call for cake flour or bread flour, and knowing more about the wheat characteristics and which kinds are used to make these flours will help you understand if you can substitute say, all-purpose flour, and the results if you do so.

The first thing to know is that wheat can be defined by these six characteristics:

L to R: durum wheat (semola), soft wheat for sweets, soft wheat (manitoba) for bread

L to R: durum wheat (semola), soft wheat for sweets, soft wheat (manitoba) for bread

  • Soft wheat has a higher moisture content and less gluten, suitable for making cake and cookies and more delicate baked goods

  • Hard wheat has a lower moisture content and higher protein/gluten* content, usually between 12-14%, suitable for bread making

  • Red wheat has a slightly higher protein than white and a bolder taste

  • White wheat is milder in taste even if the color is not so different from red once milled into flour

  • Winter wheat is usually planted in the fall and harvested in the summer, with the exception of countries that have too harsh of winters, such as Canada where it is planted in the spring

  • Spring wheat is usually planted in the spring and harvested in the fall, with the exception of countries that have too hot and dry of summers, such as California in which case it is planted in the fall. You can read more about winter and spring wheat here.

*Many use the terms protein and gluten in wheat flour interchangeably. This is because gluten is a type of protein found in wheat, the kind that is “developed” when you knead bread and gives it the elastic/chewy quality. In most cases, the higher the protein content, the higher the gluten. It is important to note that all gluten is protein, but not all protein is gluten, as your celiac friends should be able to tell you. Also, all wheat contains gluten, but not all gluten comes from wheat. Make sense? You can read more here or here for better understanding gluten in the light of gluten allergies, or here for a good explanation of gluten. For my purposes today, and baking in general, if someone says a flour is high in protein, and someone else says a flour has a high gluten content, they mean the same thing. And they both mean the flour is good for bread making.

There are thousands of varieties of wheat grown around the world, but chaos can be brought to order with the following six principle categories, using the characteristics we reviewed above:

  1. Hard Red Winter Wheat (HRW)

  2. Hard Red Spring Wheat (HRS)

  3. Soft Red Winter Wheat (SRW)

  4. Hard White Wheat (HW)

  5. Soft White Wheat (SW)

  6. Durum Wheat (DW) is the hardest of all wheat, used for pasta making

The flour you buy from the store will most likely fall into one of these six categories. The bread flour in your pantry is most likely a hard red or white spring wheat; your cake flour is probably milled from a soft white wheat; all-purpose is usually a mixture of hard and soft wheat. You’d know now, for example, that baking a loaf of bread with all-purpose or cake flour will not yield a wonderfully chewy loaf like using bread flour would; they don’t have the gluten required to achieve the chewiness.

If you’d like to start experimenting with flour varieties, check your area for a local mill. If you live in the States and are not fortunate enough to have a mill near you, check out Bob’s Red Mill, in store or online. They have some clearly labeled high-quality flours. You could buy some of their whole-wheat hard red flour and whole-wheat hard white flour and make some simple bread loaves, trying the two wheat varieties side by side.

Happy baking!

Mixing flours

Mixing flours

Navigating the Italian Flour Section - FARINA part 1

Last Updated April 4, 2025

IMG_0730.jpg

Farina in Italia

You’ve recently moved to Italy, still walking around completely starry-eyed from the beauty of the country, and are about to go grocery shopping because you realize, unfortunately, you can’t order pizza every night. So you decide to make it at home, crust and all. (Sneaky, aren’t you?) When you arrive in the flour section, you realize that it’s going to be a touch more than just translating “flour” to “farina” and trying to figure out which ones are all-purpose, cake flour, and bread flour. Instead, you find not only types of flour, but numbers to boot. What does it all mean? How are you supposed to use flour in Italy?

Or maybe you’ve lived in Italy for awhile and have been experimenting with the different flours with results ranging from baked goods turning out great, turning out awful, or turning out…different. This was me the first year of my life in Italy. Add on top of that ovens that don’t have temperature gauges, are strange sizes, or only cook from the bottom, you get some interesting results. Can’t I just buy a dang bag of all-purpose flour without having to figure out all the factors in this Italy baking equation?!? No, Jenny. No you cannot.

After talking to people (is there therapy for bakers? Can that be a thing?) and other expats here, reading many articles online, and of course my own many trials and error, hopefully this post will help demystify the flour section a bit for you! Reading this blog post “All About That Wheat Flour”, which is part 2, on the six categories of wheat will also help you, as some of that will then be helpful to understand (or translate) in Italian. Let’s start with a quick Italian flour cheat sheet, then keep reading to understand the properties of the Italian flour better.

Where Can I Find Italian Flour in the USA?

For my American readers, I have linked several sites below where you can find some Italian flours as talked about below for your baking adventures Stateside. I’ve gotten quite a few inquiries recently about where to find Italian flours in America, so I figured I’d compile some of my favorite sources right here where it’s convenient. I wish it was easier to find quality and cheap Italian flours in the States, but it’s rather tricky, honestly. Some come from Amazon, trusted and easy for shipping, but they don’t have the biggest variety so I’ve tried to include a variety of sites that combine brands I’ve used both here and in Italy, while also trying to find the better prices. If anyone has some good sources I’m not aware of, I’d love to hear and be able to share! Please note that prices tend to fluctuate.

This post may contain affiliate links. If you make a purchase using these links, Jennyblogs may receive a small commission, at no extra cost to you. This helps to support Jennyblogs. Where possible, links are prioritized to small businesses and ethically and responsibly made items. For further information see the privacy policy. Grazie!


Italian Flour Baking Cheat Sheet

  • For cookies, bars, cakes/cupcakes, biscuits, scones, or anything that needs a tender crumb, use Farina di grano tenero, 00. This is your “cake flour” but is used for a wide variety of things including pizza and pasta.

    Antimo Caputo and also in a 55lb. bag

    Barilla

    La Molisana

    Molino Grassi Organic

    Polselli Organic 11 lbs

    King Arthur 50lb bag of 00 - Wheat grown in America and non GMO

  • For bread, I recommend starting off with Farina di Manitoba, grano tenero, 0; this is similar to standard American bread flour. As you progress, you can start to add in Farina di grano duro, or Semola Rimacinata di grano duro. These flours will have a different feel and look to them as you knead your bread and in the final product, which is why I recommend starting out with just a small portion, around 25% or less of the total flour, in your recipes until you know how they act.

    Mulino Caputo

    Farina d’America

    Farina d’America - cheaper price, free shipping over $100

  • For every day needs you can buy one bag of Farina di grano tenero, 00 and one bag of Farina di Manitoba, grano tenero, 0 or Farina di grano duro and mix them together to make your own homemade all-purpose flour.

Farina Explained

Grano Duro and Grano Tenero

Hard wheat and soft wheat, or as they are known here in Italy, grano duro and grano tenero, will be written on just about every bag of standard flour.

Breads and pastas usually use grano duro, or hard wheat, because of the higher gluten content. Most sweets and cakes use soft flour or grano tenero. Keep in mind however that there are some breads made with soft flour, as you will find in the bakery section at your local grocery store, or a combo of both soft and hard flour.

Flour Grinds: 00, 0, 1, 2

This is pretty straightforward: The smaller the number, the finer the flour. And in your local grocery store, 00 and 0 will be the most common by far. They don’t have every variety of flour in every grind, so the work is mostly already done for you. If you know you want a soft/grano tenero, you’ll probably find only 0 and 00. You won’t have to decide between a soft/grano tenero 00, 0, 1, or 2.

Semola and Semola Rimacinata

Semola, also know as pasta flour or sometimes semolina in the States, comes from durum wheat and has a yellowish hue. It is usually grown in the spring and is the hardest of all wheat, which makes it ideal for pasta and bread making. In Italy it comes in two primary forms: Semola and Semola Rimacinata (reground, or twice ground, making it finer). Semola is used for eggless pasta and Semola Rimacinata is used for egg pasta.

Polselli Semola Rimacinata

La Molisana Semola Rimacinata

La Molisana Semola

Caputo Semola

Great River Milling Semolina (Semola in the States is usually called Semolina, I know, confusing.)

King Arthur Semolina

Farina di Manitoba

Named after the Canadian province of Manitoba, this is the “bread flour” of Italy. This one always threw me for a loop, because it is a grano tenero, yet has a high gluten content. Because of its unusual characteristics, it is often categorized as a “special” flour. It is often used in the fine grind of 0 and is great for breads that require long-leavening periods, such as French Baguettes, pizza, and breads that use natural yeast or madre lievito.

Mulino Caputo

Farina d’America

Farina d’America - cheaper price, free shipping over $100

Manitaly

Farina per Pizza, Pasta, etc.

Because Italy is the land of pizza, pasta, and bread, you will find plenty of bags of pre-mixed wheat varieties that are supposed to be perfect for rustic breads, or focaccia, or pizza, or pasta. I’ve never bought any of these because I’ve been preoccupied with figuring out how to use all the other flours, but I’m sure they’re great for their specific purposes!

Caputo “Chef’s Flour”

Caputo “Pizzeria”

Caputo Pasta Fresca e Gnocchi

Farina e Lievito

This would be the equivalent of the self-raising flour in the States. I don’t use this in the States nor in Italy, but I’ve read that it works well here! You could also make your own, adding 1 1/2 tsp of baking powder and 1/2 tsp salt per cup (120g) of flour. (I recommend using baking powder from the States as I’ve heard that the Italian baking powder/lievito in polvere does strange things.) I would use farina di grano tenero 00 if you’re planning on making biscuits or cookies.

Specialty Flours

There are also many specialty flours here to inspire your baking or aid your gluten-free needs. Some worth noting are saraceno (buckwheat), farina di riso (rice flour), farina di mais (cornmeal), farina d’avena (oat flour), teff, farina di ceci (chickpea/garbanzo bean flour), among others.

Happy baking and good luck with the farina Italiana and finicky ovens!


Mocha Punch

2018-12-29+15.42.50.jpg

Last Updated August 16, 2024

Mocha punch is exactly what it sounds like. Cold, creamy, sweet, chocolatey coffee served in a punch bowl with dollops of vanilla ice cream slowly melting into a dreamy, creamy puddle.

Punch might seem a thing do the past, but I really love punch. Classic punch to me is a bottle of cranberry raspberry juice combined with Sprite and some fruit-flavored sherbet dolloped in the lunch bowl. And I love it. It reminds me of Christmas time as a kid because that’s really the only time we’d make it. Then I was introduced to this Mocha Punch as a teenager, and the fruity punch got left behind. Everyone loves this coffee punch. It’s hard to put the ladle down.

It’s simple to make but it can steal the show, which makes it ideal for parties. Think holidays, birthday parties, baby showers, bridal showers, and on and on! Keep some empty milk jugs to store it in, and you have one easy and delicious thing done for your next gathering!

No mocha in Italy?

On entering any coffee shop in America, you’ll easily find mocha on the menu.

This is not the case in Italy. Italy may be the birthplace of coffee as we know it today, but that doesn’t mean that they own ALL the copyrights to the best coffee drinks. Cappuccino, espresso, macchiato….but Vanilla Latte and Mocha are not on the menu here, unless you go to one of the few “American” coffee shops, such as Arnold. First of all, if you order a latte you will get….milk. And if you order a mocha you will get…a withering stare. Not the end of the world, especially with all of the other types of coffee you can order, but sometimes I just want a mocha, ya know? I usually order my cappuccino with cocoa powder on top, but that’s not quite the same.

If I’ve learned anything living away from my home country, it’s that I will suddenly miss all the creature comforts of home, whether or not I appreciated or even liked them before. I do really like a good mocha. And somehow missing mochas has me thinking about this mocha punch, so here you go. The recipe for the best punch, that really keeps the party going!

This post may contain affiliate links. If you make a purchase using these links, Jennyblogs may receive a small commission, at no extra cost to you. This helps to support Jennyblogs. Where possible, links are prioritized to small businesses and ethically and responsibly made items. For further information see the privacy policy. Grazie!

Recipe adapted from a friend’s mama. :)


Mocha Punch

Serves about 20

Ingredients:

  • 3 quarts / 3 L freshly brewed strong coffee

  • 1 1/2 cups / 300g sugar

  • 2 quarts / 2 L milk

  • 3/4 cup / 240g chocolate syrup, try this homemade recipe!

  • 3 tsp vanilla extract

  • 1/2 gallon (8 cups) / 1 kg vanilla ice cream

Directions:

  1. Pour brewed coffee into a large pot, bowl, or other large container. Stir sugar into hot coffee until dissolved. Cool in fridge.

  2. Remove coffee from fridge and add milk, chocolate syrup, and vanilla and stir until well combined.

  3. Chill until cold or overnight.

  4. Just before serving, pour into serving container, mix briefly, and scoop ice cream into the punch, allowing the ice cream to melt for a few minutes before serving. (Skip this step if not serving as a punch.)

  5. Store in fridge.

Jenny’s Notes:

  • For an everyday mocha I reduce the sugar and milk, sometimes by up to half, as I usually drink my coffee black, and it makes it less indulgent.

  • You can substitute store-bought chocolate syrup for the homemade and use instant coffee instead of brewing, if you wish! I think the flavor will always be superior when you make things from scratch, or in this instance, use good, fresh coffee instead of instant!

  • Of course, you don’t have to use vanilla ice cream, you could use chocolate or moose tracks or hey, coffee ice cream!

  • When serving, you can choose to pour the whole recipe’s worth of punch into a punch bowl with ice cream, or, for smaller or longer parties, start with just a portion of the punch and ice cream, keeping the remainder in the fridge and freezer, respectively, so by the end the punch isn’t warm and the ice cream long melted.

  • This punch is easily stored in pitchers or empty milk jugs!

Mocha Punch
Yield 20
Author
Prep time
25 Min
Total time
25 Min

Mocha Punch

Sweet and creamy cold coffee punch with dollops of ice cream is great for gatherings and parties!
Cook modePrevent screen from turning off

Ingredients

Instructions

  1. Pour brewed coffee into a large pot, bowl, or other large container. Stir sugar into hot coffee until dissolved. Cool in fridge.
  2. Remove coffee from fridge and add milk, chocolate syrup, and vanilla and stir until well combined.
  3. Chill until cold or overnight.
  4. Just before serving, pour into serving container, mix briefly, and scoop ice cream into punch, allowing ice cream to melt for a few minutes before serving.
  5. Store in fridge.

Notes


  • You don’t have to use vanilla ice cream, you could use chocolate or moose tracks or heck, coffee ice cream! Whatever you like.
  • When serving, you can choose to pour the whole recipe’s worth of punch into a punch bowl with ice cream, or, for smaller or longer parties, start with just a portion of the punch and ice cream, keeping the remainder in the fridge and freezer, respectively, so by the end the punch isn’t warm and the ice cream long melted.
  • This punch is easily stored in pitchers or empty milk jugs!


Nutrition Facts

Calories

202.41

Fat

4.98 g

Sat. Fat

3.02 g

Carbs

33.94 g

Fiber

0.49 g

Net carbs

33.45 g

Sugar

26.31 g

Protein

5.27 g

Sodium

91.66 mg

Cholesterol

19.30 mg

Nutritional information is approximate. Calculated including vanilla ice cream

mocha, mocha punch, party coffee chocolate punch, iced coffee drink
drink
American
Did you make this recipe?
Tag @jennyblogsandbakes on instagram and hashtag it #jennyblogs
2018-12-29+15.44.21-2.jpg

Chocolate Sauce

Photo Public Domain https://creativecommons.org/licenses/by-sa/3.0/at/deed.en Permission: Sammlung J.P. Adlbrecht

Photo Public Domain https://creativecommons.org/licenses/by-sa/3.0/at/deed.en Permission: Sammlung J.P. Adlbrecht

Last Updated August 15, 2024

Classic. Quintessential. Chocolatey. Good on everything, from your morning pancakes and coffee to ice cream and that cake you just made. Or ya know, by the spoonful. Just a spoonful of…I’ll let you sing the rest yourself. ;)

What is it? Chocolate Sauce! Or chocolate syrup, as you prefer. No more Hershey’s in a bottle, or going without if you live outside the USofA. It’s so easy you’ll wonder why you never made it before. No high fructose corn syrup involved!

This post may contain affiliate links. If you make a purchase using these links, Jennyblogs may receive a small commission, at no extra cost to you. This helps to support Jennyblogs. Where possible, links are prioritized to small businesses and ethically and responsibly made items. For further information see the privacy policy. Grazie!

Recipe from my Mama


Chocolate Sauce

Makes about 3/4 cup of sauce

Ingredients:

  • 3/4 cup / 150g sugar

  • 1/3 cup / 33g unsweetened cocoa powder

  • 1 Tbsp / 7.5g cornstarch

  • 1/2 cup / 118g water

  • 1 tsp vanilla

Directions:

  1. Combine sugar, cocoa, and cornstarch in a small saucepan.

  2. Add water and whisk until there are no cornstarch lumps.

  3. Cook over medium heat, stirring constantly, until mixture boils. Reduce heat to low and boil for 5 minutes, continuing to stir.

  4. Remove from heat and add vanilla. Cool.

  5. Store in an airtight container in the refrigerator.

Jenny’s Notes:

  • The better quality your cocoa powder the better your sauce will taste!

  • Keeps well in the fridge.

Chocolate Sauce
Yield 12
Author
Prep time
5 Min
Cook time
10 Min
Total time
15 Min

Chocolate Sauce

A basic chocolate sauce for ice cream topping, drizzling, mixing in coffee, and anything you need chocolate sauce for!
Cook modePrevent screen from turning off

Ingredients

Instructions

  1. Combine sugar, cocoa, and cornstarch in a small saucepan.
  2. Add water and whisk until there are no lumps.
  3. Cook over medium heat, stirring constantly, until mixture boils. Reduce heat to low and boil for 5 minutes, continuing to stir.
  4. Remove from heat and add vanilla. Cool.
  5. Store in an airtight container in the refrigerator.

Notes

The better quality your cocoa powder the better your sauce will taste! Keeps well in the fridge.

Nutrition Facts

Calories

63.04

Fat

0.27 g

Sat. Fat

0.00 g

Carbs

14.76 g

Fiber

0.56 g

Net carbs

14.21 g

Sugar

12.52 g

Protein

0.55 g

Sodium

0.61 mg

Cholesterol

0.00 mg

Nutritional information is approximate.

Hershey's chocolate sauce, ice cream topping, hot fudge sundae sauce, chocolate sauce
dessert, sauce, topping
American
Did you make this recipe?
Tag @jennyblogsandbakes on instagram and hashtag it #jennyblogs

Hard-to-Find Ingredients in Italy

If you’re planning on spending any amount of time in Italy in which you will want to cook, bake, or generally not always eat in restaurants (I know, it’s hard, but your bank account will thank you!), this list might come in handy.

1X9B0033 copy copia.jpg

Last Updated August 10, 2024

You might think that Italy will have everything you need, they bake and cook so it’s just a matter of translating, right? Yes...and no. It’s not as different as it could be, I can imagine living in China or the DRC would present a bigger challenge for finding and cooking with familiar ingredients and brands. But this is still a “foreign” country and will present its unique challenges. The best way to tackle these challenges is to meet them head on, and hopefully with the ones that are important to you in your suitcase!

What follows is a list of ingredients and items that could fall into these categories: nonexistent - expensive - elusive - and, - it’s just not the same. Compiled from my own experience and that of fellow expat friends, I hope you find it helpful, and, as always, let me know in the comments below what should be added or your own stories! I’m sure there are things I don’t even think about that others might really miss!

Some ingredients are carried in all main grocery stores and just located in strange places, some are only found in specialty stores, and others you might want to consider bringing with you. Little Ethnic stores are your friends! Of course, this list is not all-inclusive, I chose not to list most of the items that are “name brand” or not mainstream; i.e. your favorite brand of laundry detergent might not exist, but there are plenty of other detergents that do exactly the same thing, so I don’t have Arm & Hammer listed as non existent, or likewise, I won’t have Andes Mints baking bits listed because most people wouldn’t think of those let alone miss them. Make sense? Ok let’s get grocery shopping!

This post may contain affiliate links. If you make a purchase using these links, Jennyblogs may receive a small commission, at no extra cost to you. This helps to support Jennyblogs. Where possible, links are prioritized to small businesses and ethically and responsibly made items. For further information see the privacy policy. Grazie!

The “American” Section at Vivimarket…yes! Betty Crocker strawberry frosting, I have missed thee! Not.

The “American” Section at Vivimarket…yes! Betty Crocker strawberry frosting, I have missed thee! Not.

  • Asian Ingredients - Ingredienti Asiatici

    If you want spring roll wraps, soy sauce, canned coconut milk, sriracha, or anything that’s more Asian than Italian, chances are the prices will be high, if they carry it at all at the supermarket. The large Esselunga I shop at does have an Asian section (it’s a tiny end cap) but prices are usually 2-3x what you can find if you know where to look. Where is that? Any Asian grocer! The products are authentic, variety greater, and prices much better! You might even end up with food items (we hope they’re food?!) you’ve never seen before to try, and it might remain a mystery because the packages often lack any English, Italian, or even any Latin alphabet!

  • Apples - Mele

    I love apples. I don’t love apples in Italy. They are everywhere, but I can’t understand why they are gross. It can be apple season but when you bite into a beautiful apple you get a mouthful of pith. Blech. I grew up picking fresh apples every fall with my mom and siblings so maybe I’m just apple-spoiled? The only apples that I consistently like, crisp and sweet, are the Ambrosia apples. I’ve heard of a place not too far outside of Florence where you can go and pick fresh apples! The price is right, but you would need a car to get there.

  • Avocados - Avocado

    Avocados are found pretty easily, but they are expensive! They are usually between 3.50-6.50euro/kilo. And they’re not always the beloved Hass, often there is a smoother, greener variety that comes from Israel.

  • Baking Powder - Lievito in Polvere

    Baking powder doesn’t come in containers or tubs like it does in the States. You will usually find it in small packets (often with the artificial vanillin flavor) in the baking section. Rumor has it it doesn’t work well, causing desserts to rise too much too fast or not rising at all. Other times I’ve heard it works just fine. I haven’t personally tried it, as this is something I bring with me and a container lasts a long time! You could try the self-raising flour, I’ve read that works reliably well.

  • Baking Soda - Bicarbonato di Sodio

    This is cheap and sold in all grocery stores, it’s just not in the baking section like you’d think it would be. Look on the end caps in some stores by the Alka Seltzers or by the bottled water or soft drinks in others.

  • Black Beans - Fagioli Neri

    Don’t ask me why, but the black beans are not always with the other beans at Italian grocer stores. Sometimes they don’t carry them, sometimes they are in a “special” section maybe with other seeds and nuts. But they do exist! Beans are also another item you can usually find at the little Arab or Asian stores.

  • Buttermilk - Latticello

    I don’t think I’ve ever seen buttermilk in a store, but I also can’t say I’ve looked very hard because there are several handy and easy substitutes. Instead of buttermilk try this: mix 1 cup milk with 1 Tbsp vinegar or lemon juice, OR use plain kefir, which is readily available in Italian grocery stores.

  • Cabbage - Cavolo

    Italians love their cabbage, especially when their cavolo nero or black cabbage comes into season. Despite its name, black cabbage seems more similar to kale than it does the variety of cabbage we use in the States, that light green head of cabbage. If you have a hankering to make say, sauerkraut or pickled purple cabbage, what do you do? Scour your nearest grocery store, sometimes they do have the “regular” heads of cabbage! I have on occasion seen the purple cabbage, but because fruits and vegetables are still very much sold seasonably, you can’t count on them year round. The green cabbage I saw was called crauti, their name for sauerkraut; it’s also called cavolo cappuccio bianco.

  • Candy Bars and Candies - Barrette di Cioccolato e Caramelle

    You can find these here: Snickers, Mars, Twix, Kit Kat, Skittles (since 2018), M&M’s, Smarties (the Canadian M&M’s), Lindt, Bounty, Lion, Ferrero Rocher, and various other European varieties. Reese’s can be found at Vivimarket in Florence for a significant price. Update as of December 2020, Esselunga had packs of 2 Reese’s cups by the checkout lanes for 0.60cents.

  • Canned Pumpkin Purée - Zucca in Scatola

    In Italy, this is liquid gold. To find pumpkin, you are going to need to go to specialty stores. In Florence, I know of two places that carry it. One is ViviMarket, the other is Pegna. Both places will run you about 4.60-4.80euro per 15 oz. can. I know. Like I said, liquid gold. You can find fresh pumpkin in the store, but it is not pie pumpkin and will give you a different tasting pumpkin pie if you try and cook and purée it yourself. I know people who do this, up to you if you prefer the classic pumpkin pie taste or are up for a twist!

  • Cereals - Cereali

    I rarely eat cereal and I doubt you are coming to Italy dreaming about cereal, but one can’t help but notice that though cereal and granola is easily found, the selection is definitely smaller than that of an American grocery store. I’d say this is for the better, but just in case you’re a Lucky Charms or Fruit Loops die hard, realize they might not have your favorite cereal beyond the basics. There are rice krispies for making homemade granola bars, desserts, and Rice Krisipie Treats, just so you know. :)

  • Cheddar Cheese - Formaggio di Cheddar

    While I’m not a big cheddar cheese fan, leave it to being far from home that I start craving all the American foods I don’t normally eat. Cheddar can usually be found at Esselunga, 150g of slices for about 2euros. I’ve also discovered that Lidl has an even bigger container of sliced cheddar cheese for about the same price.

  • Chocolate Chips - Gocce di Cioccolato

    Regular-sized chocolate chips are not to be found, just mini. But there is something about chocolate chip cookies with mini chips that are just not the same. The minis are expensive, too, upwards of 2euro for 6 oz of chips/1 cup. Otherwise, you can buy a bar of chocolate for less and chop it yourself for custom chocolate chunks.

  • Cilantro - Coriandolo

    Fresh and dried parsley is everywhere, but cilantro? Not as much. I have found it sometimes in the grocery store in small packages, but you’ll have a much better chance if you head to any Asian grocer. And there are plenty, at least in Florence!

  • Dill - Aneto

    Dried dill can be hard to find here, but I can sometimes find fresh dill, usually in small plastic containers like the cilantro. But not always. So plan ahead if you want to make homemade pickles or add fresh dill to chicken or tuna salad, like I do. :)

  • Flour - Farina

    There is a plethora of flour here, no worries! The tricky part is figuring out which kind you need, because the types of flour go beyond just all-purpose, bread, and cake. I have a post dedicated to Italian flours and how they are best utilized that you can read here, but for now just a quick overview. First, there are the two kinds of (wheat) flours; hard wheat “grano duro” and soft wheat “grano tenero.” Hard wheat is mostly used for crusty bread, pizza, and pasta because it has a higher protein content, whereas the soft wheat is used for softer breads and desserts. Second, there is the grind of the flour noted by numbers: 00, 0, 1, and 2. 00 denotes the finest grind, 2 is the coarsest. Beyond this there are also all the specialty flours you can find, including: self-raising flour as mentioned above under baking powder, farina di manitoba which is closest to what we call bread flour, almond flour, chickpea flour, cornmeal, rice flour, and more.

  • Grape Juice - Succo d’Uva

    For all the juice variety you can find, only some grocery stores carry grape juice, and it’s only ever one type. Usually purple grape juice, I’ve never seen white and never 100% juice. It seems all their grape juice is made into wine, none leftover for juice, haha!

  • Gum - Gomma

    Yes, there is gum in Italy, but it’s a bit more expensive and not as good as American gum. Some of it is just gross, like licorice. If you like licorice, lucky you!

  • Hummus - Hummus

    Hummus can easily be made at home if you have a good blender or food processor, but sometimes the convenience of having a pre-made container of hummus is so nice. This is not a food I hunted down or even noticeably missed, but when I found some at Lidl it made me very happy and thought you might like to know that, too.

  • Hydrogen Peroxide - Perossido di Idrogeno/Acqua Ossigenata

    This is not food, but if you use it for disinfecting wounds, mouth wash, removing stains, or any of its numerous uses, it might be helpful for you to know that it is readily available here, but the packaging made it harder to locate. Its bottle is usually white, generic, and small, not the signature large brown plastic I’m used to buying in America. Search near the bandages and eye drops.

  • Maple Syrup - Sciroppo d’Acero

    Maple syrup costs a small fortune. It can be found in most grocery stores and also at Vivimarket in Florence. A small bottle, roughly 8 oz, will cost you about 4.50-7euro. Lidl has the cheapest price by far at less than 5euro for a bottle. This is the real stuff, pure maple syrup and not high fructose corn syrup, but I believe Vivimarket carries the Aunt Jemima (that name is changing!) stuff if you’re feeling nostalgic, but I think a bottle of that will cost you more than a pure bottle, almost 8 euro! Oh, the irony.

  • Marshmallows - Toffolette

    Marshmallows are available here, but don’t expect Jet-Puffed fluffy big white mallows. To be honest, I’ve never bought them, but I’ve always heard they are just plain weird with a texture like stale marshmallows.

  • Mexican Ingredients - Ingredienti Messicani

    Like the Asian ingredients, the Mexican ingredients can be found, but maybe less readily. There is a large Asian presence in Italy and no shortage of Asian grocers and restaurants, but the same cannot be said for Mexican. In Florence there seems to be a sad lack of burritos/tacos. My favorite is called Los Chicos, but you can also find Mexican at Tijuana, Eby’s, and I was surprised to see recently, at the American Diner on Via Nazionale. Otherwise you will have to find or make your own tortillas and sauces as best you can. Like the Asian section at the Esselunga I frequent, there is a small Mexican section with enchilada sauce, sour cream (it’s not refrigerated, I’m scared), corn and flour tortillas, and other miscellaneous. They recently stopped stocking the refried beans and that makes me sad. Coop also has a small Mexican food section, with refried beans! Otherwise Vivimarket even has a small Mexican food section.

  • Molasses - Melassa

    I have tried to ask at Coop and Esselunga for Molasses with varying responses. One lady was convinced they carried it only to find they don’t, and the other lady just looked at me like I was crazy. I am happy to report that it can be found at some specialty stores, for sure at NaturaSi. They are the WholeFoods of Italy, high prices and all, but a good place to check out for natural products and specialty items the mainstream stores might not carry!

  • Peanut Butter - Burro di Arachidi

    The main stores usually carry just Skippy, which costs almost 5 euro for a small bottle, or Calvé, a less expensive Dutch (?) brand. I’m happy to report, that after living in Italy for 5 years, I’ve found a natural peanut butter I truly like. It’s called “Fiorentini” and you can find it at Coop for 2.25 for a 350g jar. It has just peanuts, sunflower oil, and salt. Otherwise, the Chinese markets or Arab butchers, which carry more than just meat, have the Calvé or other brands you probably haven’t heard of but for much more manageable prices. If you’re interested in other nut butters, check out NaturaSi which has almond butter, peanut butter, and possibly some others. Pricey, but probably your best bet if you don’t want to grind your own.

  • Pecans - Noci Pecan

    I thought for a long time these were non-existent here, but they just like to hide. They are usually not with the other nuts like walnuts and almonds, but if your local grocery store carries them they might be by the “party aisle,” or near the soft drinks, drink mixes, peanuts, and party nut mixes. But be warned, an 80g bag will run you between 3 and 5 euro a bag. I splurged once and made a pecan pie for Thanksgiving….I spent 12euro just on the 2 cups (240g) of pecans. Ayayay.

  • Pinto Beans - Fagioli di pinto (?)

    Pinto beans aren’t to be found here, hence why I don’t even know what they’d be called. Not even in a special spot in the grocery store, like sometimes the black beans are. Nope. However, there is a variety of bean you can buy called “fagioli borlotti” that make a wonderful substitute for pinto beans. They are creamy colored and speckled with red, but cook up to be brown like pinto beans. More importantly, they are creamy and buttery, just like pinto beans, which make them wonderful to smash for refried beans or eat as is!

  • Pretzels - Salatini

    Similar to marshmallows, pretzels are available and stale tasting. These I did eat once, and haven’t again since. I bought them to make a pretzel crust for a pie, but after twirling around in my food processor for too long without breaking down, I realized these were not your ordinary pretzels. These are special stale pretzels best not used for crusts.

  • Salad Dressings - Condimenti per Insalata

    Salads here are dressed with olive oil, salt, and pepper, and sometimes balsamic vinegar. I’ve never turned back, it’s so simple and good. There are a select few salad dressing you can find in stores, like caeser, tzatziki, and some others, but you’re not going to find Italian (haha), thousand Island, Ranch, raspberry poppyseed, or any of those others. Just bring it with you if it’s important to you or make it from scratch. I never would’ve thought of this but I do have some friends that Ranch was CRUCIAL for.

  • Sour Cream - Panna Acida

    I haven’t tried this yet, I don’t normally eat sour cream and I’ve been won over to using plain yogurt as a healthier substitute. At Esselunga you may only find it if they have the non-refrigerated kind in the Mexican section. Otherwise Coop has some normal looking refrigerated sour cream.

  • Spices - Spezie

    Let’s talk about spices. When you think of Italian cooking, you can probably make a guess of which spices they will for sure have. Garlic, onion, parsley, oregano, basil, sage, bay leaf, cumin, turmeric, thyme, rosemary, pepper, nutmeg, cinnamon, ginger, paprika, marjoram, coriander, curry, and saffron are everywhere. Then there are whole cloves but no ground cloves. The first time I went to make a pumpkin pie I was trying to grate cloves with a cheese grater…kids, don’t try this at home. Other spices like adobe chili, or smoked chilis, or any ethnic spices that aren’t mainstream you will probably have to import yourself. Spices you can find, even if you have to hunt a bit, would include cardamom, garam masala, smoked paprika, and ground mustard. Mint you can find at the Arab butcher shops if you can’t find it at your local store.

  • Sweet Potatoes - Patate Dolci

    Sometimes I can find these at the grocery store, sometimes not. In more recent years it’s been more hit than miss, which is nice! A sure bet would be Vivimarket, which has them every time I have gone, and are usually grown in the US, yeah!

  • Vanilla Extract - Estratto di Vaniglia

    The REAL stuff, not imitation or vanillin like you find in every dessert here. And no, the real stuff doesn’t exist here. Either bring it with you or make your own! I usually bring a bottle with me to use while my homemade stuff is aging, it takes a minimum of 3 months for best flavor.

Always remember, even when you’re missing your creature comfort food, that it’s not so bad eating food like this…

Always remember, even when you’re missing your creature comfort food, that it’s not so bad eating food like this…

The Fluffiest Key Lime Pie with a Gingersnap Crust

2018-12-20 14.16.59.jpg

Fluffy? Isn’t key lime pie supposed to be creamy, custardy, silken? Yes! And this recipe is all of those things but with a special touch of fluffiness, thanks to our friends the egg whites. Whipped egg whites. It’s magical. And with Easter just around the corner, this is the perfect dessert to celebrate with! I even gave you two weeks time to plan ahead, aren't I nice?

I don’t know why I always want to make citrus desserts for Easter, maybe because it’s always in the spring. And in the spring everything is coming alive, the rebirth of nature, and calls for bright, happy citrus flavors. You can’t call citrus sad. And what is Easter but the celebration of the resurrection of Jesus, giving those who believe on Him new life? The celebration of rebirth. It all fits. Not to mention if you observe Lent, getting to eat what you gave up for 6 weeks is lovely.

And whether you have a big Easter meal planned or not, you’re going to want to make this pie. And if you’ve never made key lime pie before? This is not a bad place to start. Just be warned that other key lime pies after this one might be…tame.

This post may contain affiliate links. If you make a purchase using these links, Jennyblogs may receive a small commission, at no extra cost to you. This helps to support Jennyblogs. Where possible, links are prioritized to small businesses and ethically and responsibly made items. For further information see the privacy policy. Grazie!

Recipe adapted from the Williams-Sonoma cookbook Savoring America


The Fluffiest Key Lime Pie with a Gingersnap Crust

Serves 8-12

2018-12-20+14.27.07.jpg

Ingredients:

For the Gingersnap Crust

  • 28 gingersnaps broken into pieces, about 1 1/2in / 4cm in diameter (homemade or storebought)

  • 1/2 cup / 60g chopped pecans

  • 1 Tbsp / 15g chopped crystallized ginger

  • 1/8 tsp ground cinnamon

  • 1/4 cup / 57g butter, melted and cooled

For the Filling

  • 4 eggs, separated

  • 1/4 cup / 30g cornstarch

  • 1/2 cup / 100g sugar

  • 1 14oz can / 440g sweetened condensed milk, make it homemade here

  • 1/2 cup / 118g key lime juice

  • 2 Tbsp / 12g freshly grated key lime zest

  • 1/2 tsp cream of tartar

  • 1 tsp vanilla extract

For the Topping and Garnish

  • 1 cup / 237g heavy whipping cream

  • 1/3 cup / 42g confectioner’s sugar

  • 1/8 tsp almond extract

  • thin key lime slices or lime zest, optional

Directions:

Oven 350°F / 177°C. Lightly grease a 9in / 23cm pie dish.

Make the Gingersnap Crust

  1. In a food processor, combine the gingersnaps, pecans, ginger, and cinnamon. Pulse until everything is finely ground in crumbs. Add the butter and pulse briefly until the crumbs are evenly moistened.

  2. Press evenly into the bottom and up the sides of the prepared pie dish. Bake in the preheated oven for 10 minutes or until fragrant and lightly browned. (This can be hard to see because of the dark color of the gingersnaps.) Allow to cool.

Make the Filling

  1. In the bowl of a stand mixer fitted with the whisk attachment, beat 2 egg whites and the cream of tartar on high speed until soft peaks form and can hold their shape, about 1-2 minutes. Beat in the vanilla and scrape the egg whites into a small bowl; set aside.

  2. In the bowl of the stand mixer (no need to clean it), beat on medium-high speed the egg yolks, 2 remaining egg whites, cornstarch, sugar, and sweetened condensed milk until light and fluffy, about 5 minutes. Add lime juice and zest and beat until smooth.

  3. Gently fold 1/3 of the egg white mixture into the lime mixture to lighten. Add the rest of the egg whites and fold just until combined.

  4. Pour the filling into the cooled pie crust, smooth the top with a spatula. Bake until just firm, about 20 minutes. To test for firmness, jiggle the dish slightly. When the center jiggles just slightly, it’s ready.

  5. Cool completely, then cover and refrigerate for at least 4 hours or overnight.

Make the Topping

  1. In the bowl of a stand mixer, beat the heavy whipping cream on medium speed. As it starts to thicken (and will no longer splatter) increase the speed to high. Add the powdered sugar and almond extract. Continue beating until firm peaks form, about 2-4 minutes total.

  2. Spoon whipped cream over pie or use a piping bag and tips to decorate. Garnish with lime slices/and or zest. Serve immediately or refrigerate.

Jenny’s Notes:

  • The crust can be made without the pecans and/or ginger, if you’re like me and sometimes feel too lazy to chop things!

  • Freshly squeezed key lime juice is best, but if you’ve ever used real key limes you’ll know that getting half a cup can be a real labor of love. Those things can be tiny! Hand cramp hand cramp hand cramp. And just when you think you’re there, you realize you’ve only squeezed 1 Tbsp worth. So, I gladly buy bottled key lime juice.

  • If you can’t find fresh key limes or juice, use limes! And I suppose, lemons if you’re in a pinch. Lemon pies are good too! Same goes for the zest.

  • No food processor handy? Do it the old fashioned way and stick the cookies in a resealable plastic bag and whack and roll with a rolling pin. The pecans and ginger can be finely chopped by hand.

The Fluffiest Key Lime Pie with a Gingersnap Crust
Yield 8-12 servings
Author
Prep time
50 Min
Cook time
30 Min
Total time
1 H & 20 M

The Fluffiest Key Lime Pie with a Gingersnap Crust

Classic key lime pie with a twist. Tart filling made extra light and fluffy by whipping the egg whites, a spicy gingersnap crust, and fresh whipped cream.
Cook modePrevent screen from turning off

Ingredients

For the Gingersnap Crust
For the Filling
For the Topping and Garnish

Instructions

Make the Gingersnap Crust
  1. Oven 350°F / 177°C. Lightly greased 9in / 23cm pie dish.
  2. In a food processor, combine the gingersnaps, pecans, ginger, and cinnamon. Pulse until everything is finely ground in crumbs. Add the butter and pulse briefly until the crumbs are evenly moistened.
  3. Press evenly into the bottom and up the sides of the prepared pie dish. Bake in the preheated oven for 10 minutes or until fragrant and lightly browned. (This can be hard to see because of the dark color of the gingersnaps.) Allow to cool.
Make the Filling
  1. In the bowl of a stand mixer fitted with the whisk attachment, beat 2 egg whites and the cream of tartar on high speed until soft peaks form, about 1-2 minutes. Beat in the vanilla and scrape the egg whites into a small bowl; set aside.
  2. In the bowl of the stand mixer (don’t worry about cleaning it), beat on medium-high speed the egg yolks, 2 remaining egg whites, cornstarch, sugar, and sweetened condensed milk until light and fluffy, about 5 minutes. Add the lime juice and zest and beat until smooth.
  3. Gently fold 1/3 of the egg white mixture into the lime mixture to lighten. Add the rest of the egg whites and fold just until combined.
  4. Pour the filling into the cooled pie crust, smooth the top with a spatula. Bake until just firm, about 20 minutes. To test for firmness, jiggle the dish slightly. When the center jiggles just slightly, it’s ready.
  5. Cool completely, then cover and refrigerate for at least 4 hours or overnight.
Make the Topping
  1. In the bowl of a stand mixer, beat the heavy whipping cream on medium speed. As it starts to thicken (and will no longer splatter) increase the speed to high. Add the powdered sugar and almond extract. Continue beating until stiff peaks form, about 2-4 minutes total.
  2. Spoon whipped cream over pie or use a piping bag and tips to decorate. Garnish with lime slices/and or zest. Serve immediately or refrigerate.

Notes

The crust can be made without the pecans and/or ginger, if you’re like me and sometimes feel too lazy to chop things! Freshly squeezed key lime juice is best, but if you’ve ever used real key limes you’ll know that getting half a cup can be a real labor of love. Those things can be tiny! Hand cramp hand cramp hand cramp. And just when you think you’re there, you realize you’ve only squeezed 1 Tbsp worth. So, I gladly buy bottled key lime juice. If you can’t find fresh key limes or juice, use limes! And I suppose, lemons if you’re in a pinch. Lemon pies are good too! Same goes for the zest. No food processor handy? Do it the old fashioned way and stick the cookies in a resealable plastic bag and whack and roll with a rolling pin. The pecans and ginger can be finely chopped by hand.

Nutrition Facts

Calories

590.80

Fat

29.69 g

Sat. Fat

14.77 g

Carbs

76.33 g

Fiber

1.88 g

Net carbs

74.45 g

Sugar

55.81 g

Protein

8.28 g

Sodium

256.68 mg

Cholesterol

90.75 mg

Nutritional information is approximate. Based on 8 servings.

key lime pie, gingersnap crust, fluffy pie, whipped cream
Dessert, Pie
American
Did you make this recipe?
Tag @jennyblogsandbakes on instagram and hashtag it #jennyblogs
2018-12-20 14.14.52-2.jpg

Food in Florence: A Complete Guide to the Best Gelato

Last updated October 2, 2024

Gelateria dei Neri

Gelato at Festival.JPG

March is coming to a close, the weather has taken a turn for the warmer, the sun is making a regular appearance and so are the tourists, and most importantly, the gelato shops have reawakened from their winter slumber. I ate my first gelato of the season/2019 a couple weeks ago, and it was…good. I mean, it was amazing to eat gelato again, but it only ranked “good” because the actual gelato was a bit on the icy side. I’ve had gelato from that shop before and it was really good, we’ll just say they were having an off day. It’s possible my tongue is out of practice of eating gelato, I mean, you don’t become a sommelier by drinking wine “occasionally.” In the few weeks that have passed since that first gelato, I think it’s safe to say my tongue is back in practice.

In celebration of gelato and sunshine, I have compiled a list of some of the best gelaterie (gelato shops) in and around the Florence city center. The list is quite extensive but includes all of the gelato shops worth eating at. I’ll name some of my favorites, as well as favorites from various expat friends and locals, which will be noted with an asterisk (*). As you will see, taste in gelato can vary and very few people will nominate the same gelato shop as “Best in Florence,” hence the inclusive list with pointers to help you locate gelato that sounds interesting to you, whether it’s your first gelato ever or you are just looking to expand your gelato resumé! If you’ve had great gelato in Florence and think it should be on this list, let me know in the comments below!

Nota Bene: Anytime you see mountains of colorful gelato in the display case it is TO BE AVOIDED. At all costs. These places are meant to fool poor, unsuspecting tourists and line their owners’ pockets with money when they are essentially selling you sugary, artificially colored ice, lies, and sadness. You will find them grouped mainly around main attraction points; in Florence there are many near the Duomo, Palazzo Vecchio, Ponte Vecchio and in between. This bears repeating because these shops are still open, which means people are buying their “gelato,” and this makes me very sad. Also to avoid is the overpriced gelato, again, usually found near tourist areas. Even if the gelato is decent, I wouldn’t pay more than 3ish euro for the smallest size, no matter the city. At that point they are just capitalizing on your naiveté. The only gelato above 3euro on this list is Venchi, starting at 3.20, but they are a well known chocolatier and can get away with it I guess. Good gelato is often, but not always, in metal tubs with lids so that you can’t see any of the flavors, just the little signs placed by each lid. I say not all because just less than half of the gelaterie listed below keep their gelato in these tubs.

First Things First

Cup or cone? Small or extra large? Milkshake? All good things to have decided before hand so you can walk in and focus on what flavors you would like. A standard small cup or cone will get you 2 flavors, and sometimes you can choose up to 5 for extra large sizes! You can ask to try the flavors, if you are feeling absolutely stumped. I almost always go for a cone, and I will tell you why, besides being delicious. There is nothing to throw away at the end except for a napkin, therefore being more economically-friendly. You save using a cup and the little plastic spoon, although some places will stick a spoon in your cone, too. You could always tell them a spoon isn’t necessary, if you catch them in time. Bonus: If you sample a flavor, keep your spoon to use with your cone or cup! Also, if you don’t eat gluten, ask about the cones as some places use gluten-free cones. At the bottom you can find a glossary for gelato shop lingo and common flavors.

This post may contain affiliate links. If you make a purchase using these links, Jennyblogs may receive a small commission, at no extra cost to you. This helps to support Jennyblogs. Where possible, links are prioritized to small businesses and ethically and responsibly made items. For further information see the privacy policy. Grazie!

The best gelato in Florence in no particular order:

Gelato.jpg
  1. Gelateria dei Neri*

    One of my all time favorites, if you’ve read about any gelato in any guidebooks or blogs, you’ve probably seen Gelateria dei Neri pop up. And for good reason, it’s one of the best! They have a wide variety of flavors and also granita. There can be a line out the door at busy times, but no worries, it moves fast.

    Price: Starting at 1.80 for cup or cone

    Location: Via dei Neri 9, - City center, very close to the Church of Santa Croce

    Flavor to Try: Cremino alla nocciola (Think vanilla gelato with copious amounts of Nutella swirled in, a very rich flavor), Cremino al Pistacchio (similar to the Cremino alla Nocciola, but with a pistachio cream), Limone (lemon), or Burro di Caramello Salato (salted caramel).

  2. MySugar*

    Winner of the Gelato Festival in Florence in 2016, this is the new kid on the block, only open since 2015 and quickly winning over hearts. This is also one of my favorites and the favorite of my friend Madeline. I would say that they have the absolute best consistency of all gelato I have tried in Florence. Their assortment of flavors is somewhat modest, but what they do, they do with excellence.

    Price: Starting at 2.00 for a cup, 2.50 for a cone

    Location: Via de’ Ginori 49r, - City center, around the corner from the Mercato Centrale

    Flavor to try: Arachidi (peanut) or Limone

  3. La Carraia*

    I was introduced to this gelateria by my language partner as one of her favorites, and it quickly became one of mine as well. They have a great assortment of flavors.

    Price: Starting at 1.00 for a “taste” cone, standard cup or cone from 1.80

    Locations: Piazza Nazario Sauro 25r, at the end of the Carraia bridge, and Via de’ Benci 24r, very close to the Church of Santa Croce.

  4. Sangelato*

    This is the gelateria I go to most because it’s in my neighborhood! Still a 30 minute walk there, but that way you earn it, right? They have a selection of vegan flavors. Also to try are the crepes or Sicilian brioche stuffed with gelato! They have a great stracciatella (chocolate chip) and pistacchio!!

    Price: Starting at 1.90 for cup or cone

    Location: Via Marco Minghetti 17r, a bit out of the way on the east side of the city center, about a 15 minute bus ride from the center. Take the number 14A or 14B bus. This is very convenient if you have an airbnb on this side of town or staying at the Firenze Camping in Town, it’s on the way!

  5. Perché No*

    All-natural gelato and to boot they have several mousse flavors. Need I say more? This was the gelato shop of choice for my friend Hannah and I during our 2015 trip.

    Price: Starting at 2.50 for cup or cone

    Location: Via dei Tavolini 19r, between Palazzo Vecchio and the Duomo, right by the church of Orsanmichele.

  6. Grom

    By now Grom has become a recognizable international gelateria with locations well beyond its origin of Italy, including the USA, France, Japan, China, and more. I prefer to support small businesses when I can, not to mention the extra touch of love and care when the founder of a small business is present, but hey, Grom is delicious!

    Price: Starting at 2.60 for cup or cone

    Location: Via del Campanile 2, two steps away from the Duomo
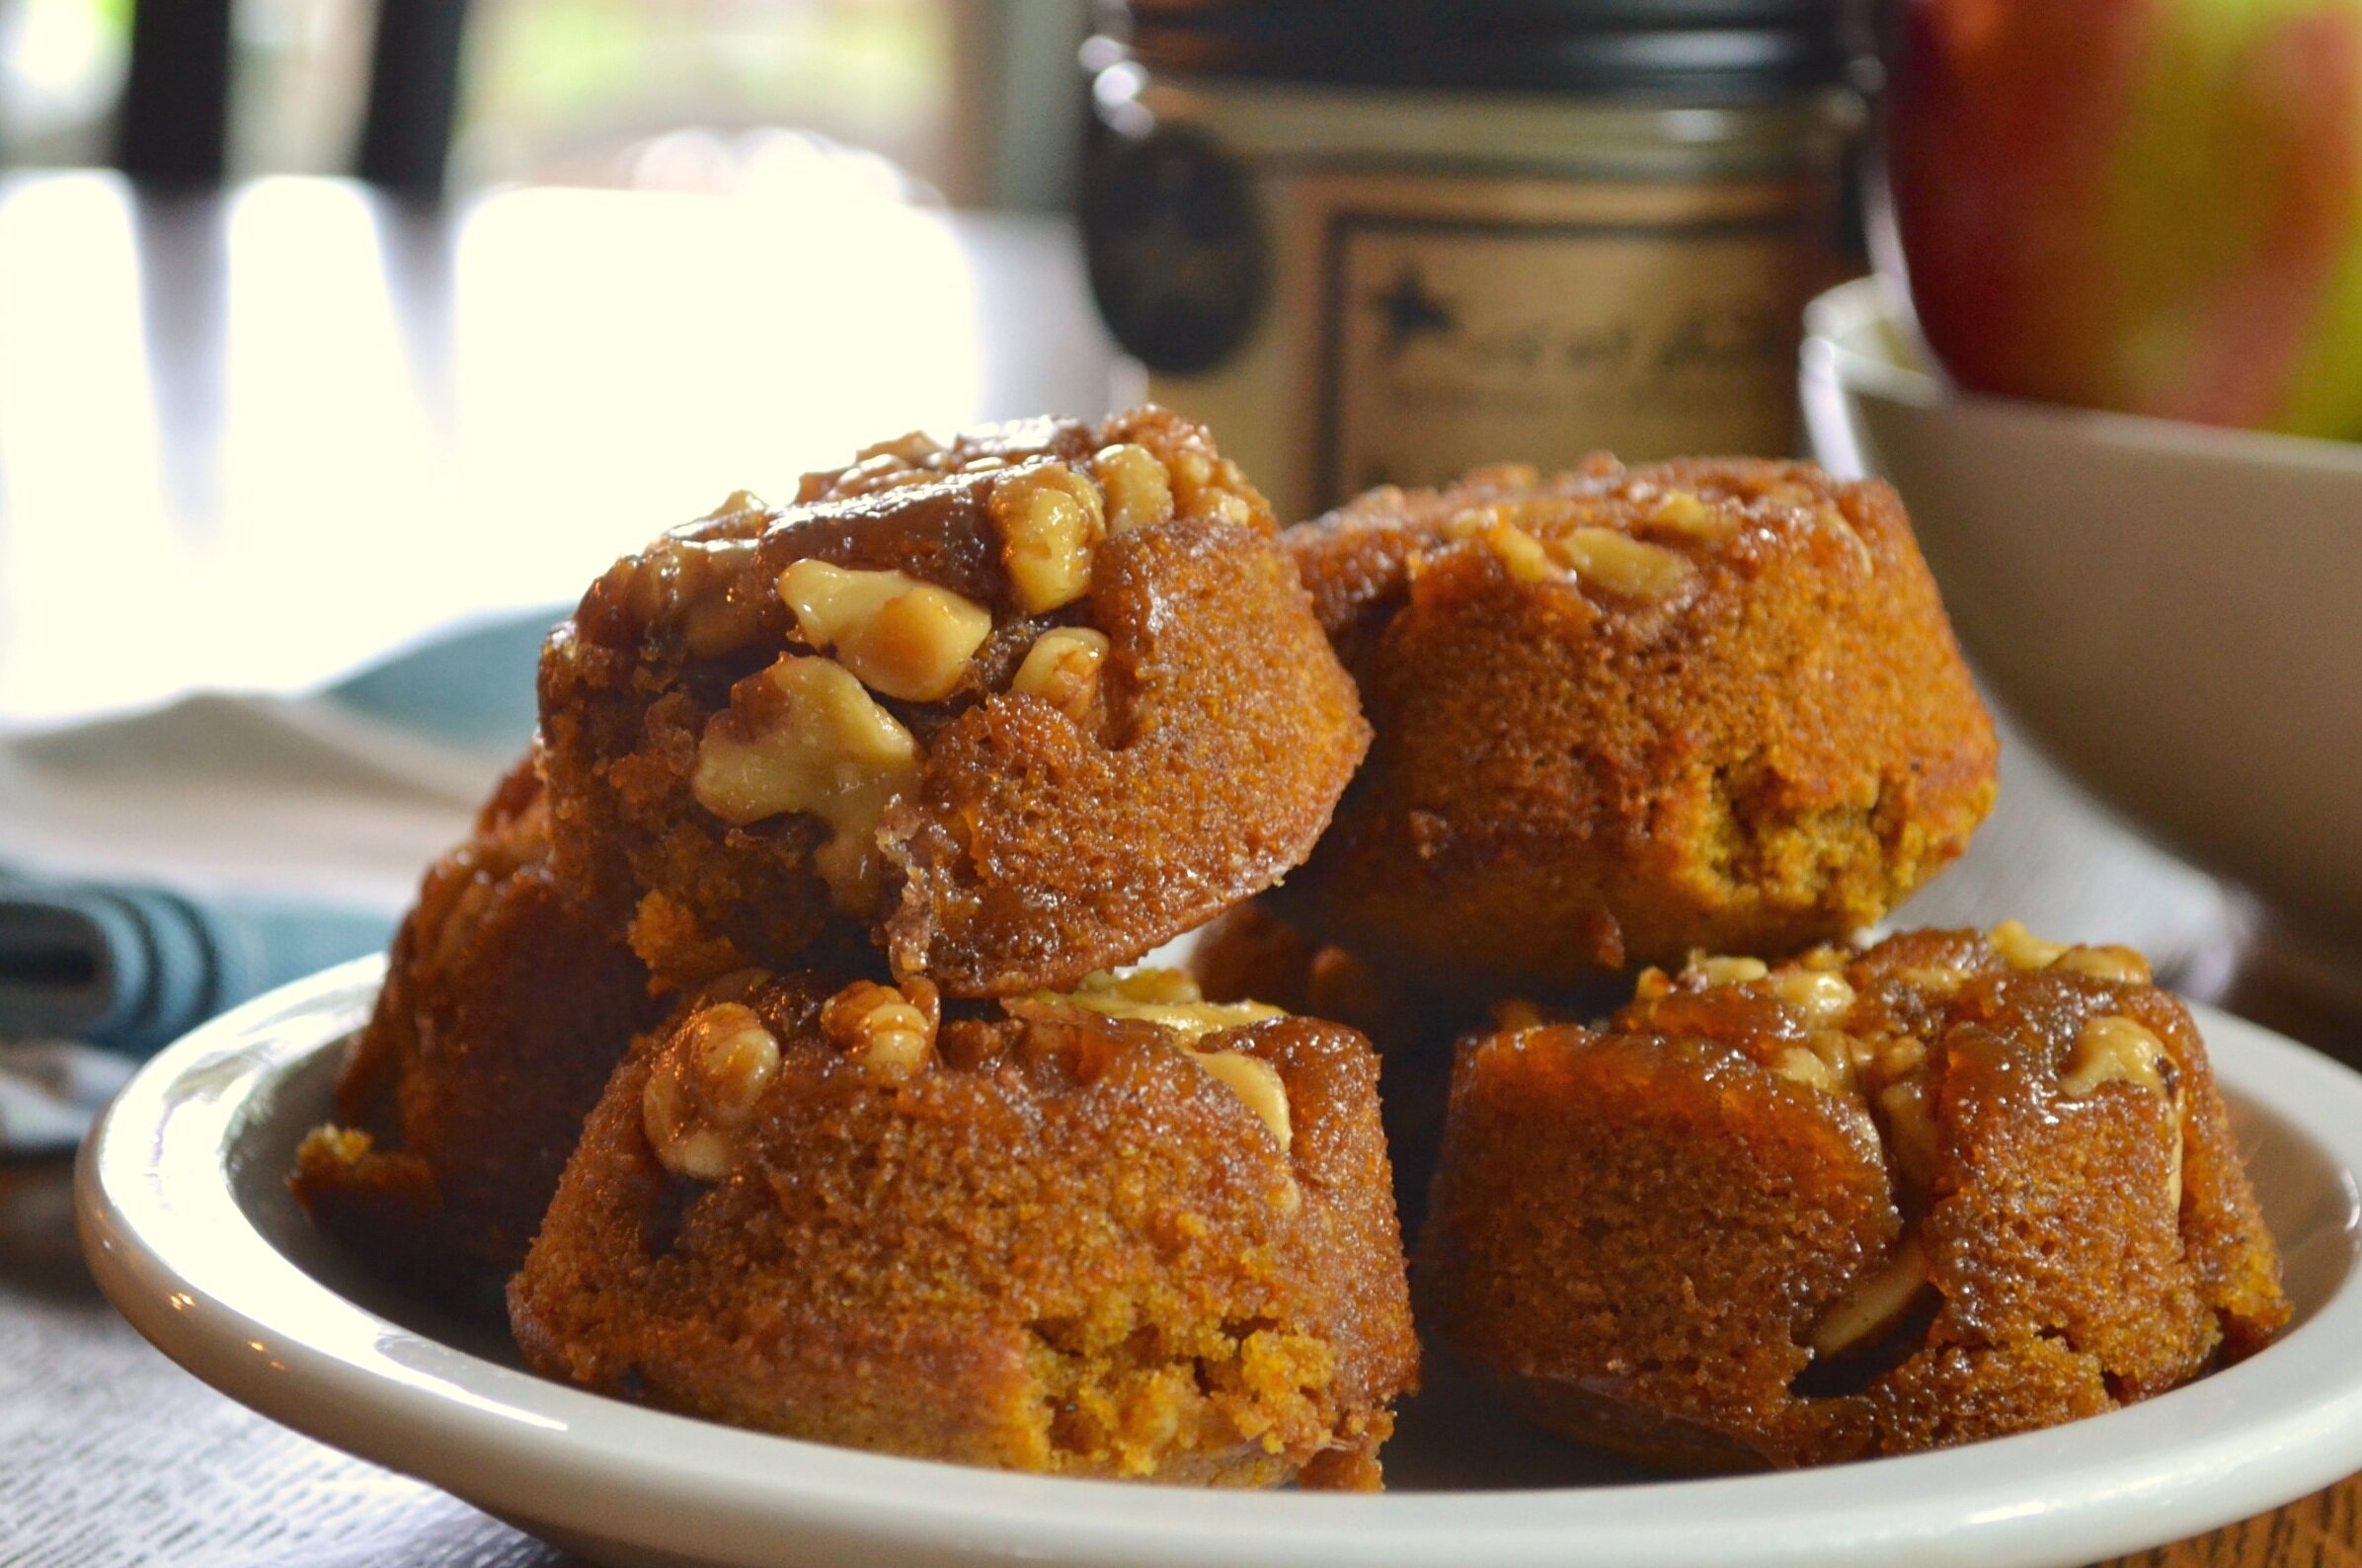
  7. Cantina del Gelato

    This is the only gelateria where I have found a successful pumpkin flavor. A seasonal flavor to be sure, but their other flavors are often creative and delicious as well!

    Price: Starting at 1.00 for a one-flavor kiddy cone, 2.00 for standard cup or cone

    Location: There are two locations, one in Via de’ Bardi 31 on the south side of the Arno river very close to Ponte Vecchio, and the other near Piazza Beccaria in Borgo La Croce 30r on the east side of the city center.

  8. La Strega Nocciola

    I wasn’t originally a fan of this gelateria because their name means the hazelnut witch and their prices are on the more expensive end of gelato, 2.80 for a small. But good gelato is good gelato, and La Strega Nocciola has very good gelato, not to mention some unusual flavors: lavendar, white chocolate and cinnamon, etc.

    Price: Starting at 2.80 for cup or cone

    Location: There are 4 locations, the first in Via Ricasoli 16r, near the Duomo, the second in Via de’ Bardi 51r, on the south side of the Arno river very near to Ponte Vecchio, the third in Via dell’Olivuzzo 118, southwest of the city center near the Isolotto neighborhood, and the fourth in Piazza Giuseppe di Vittorio 3, even further southwest in Scandicci.
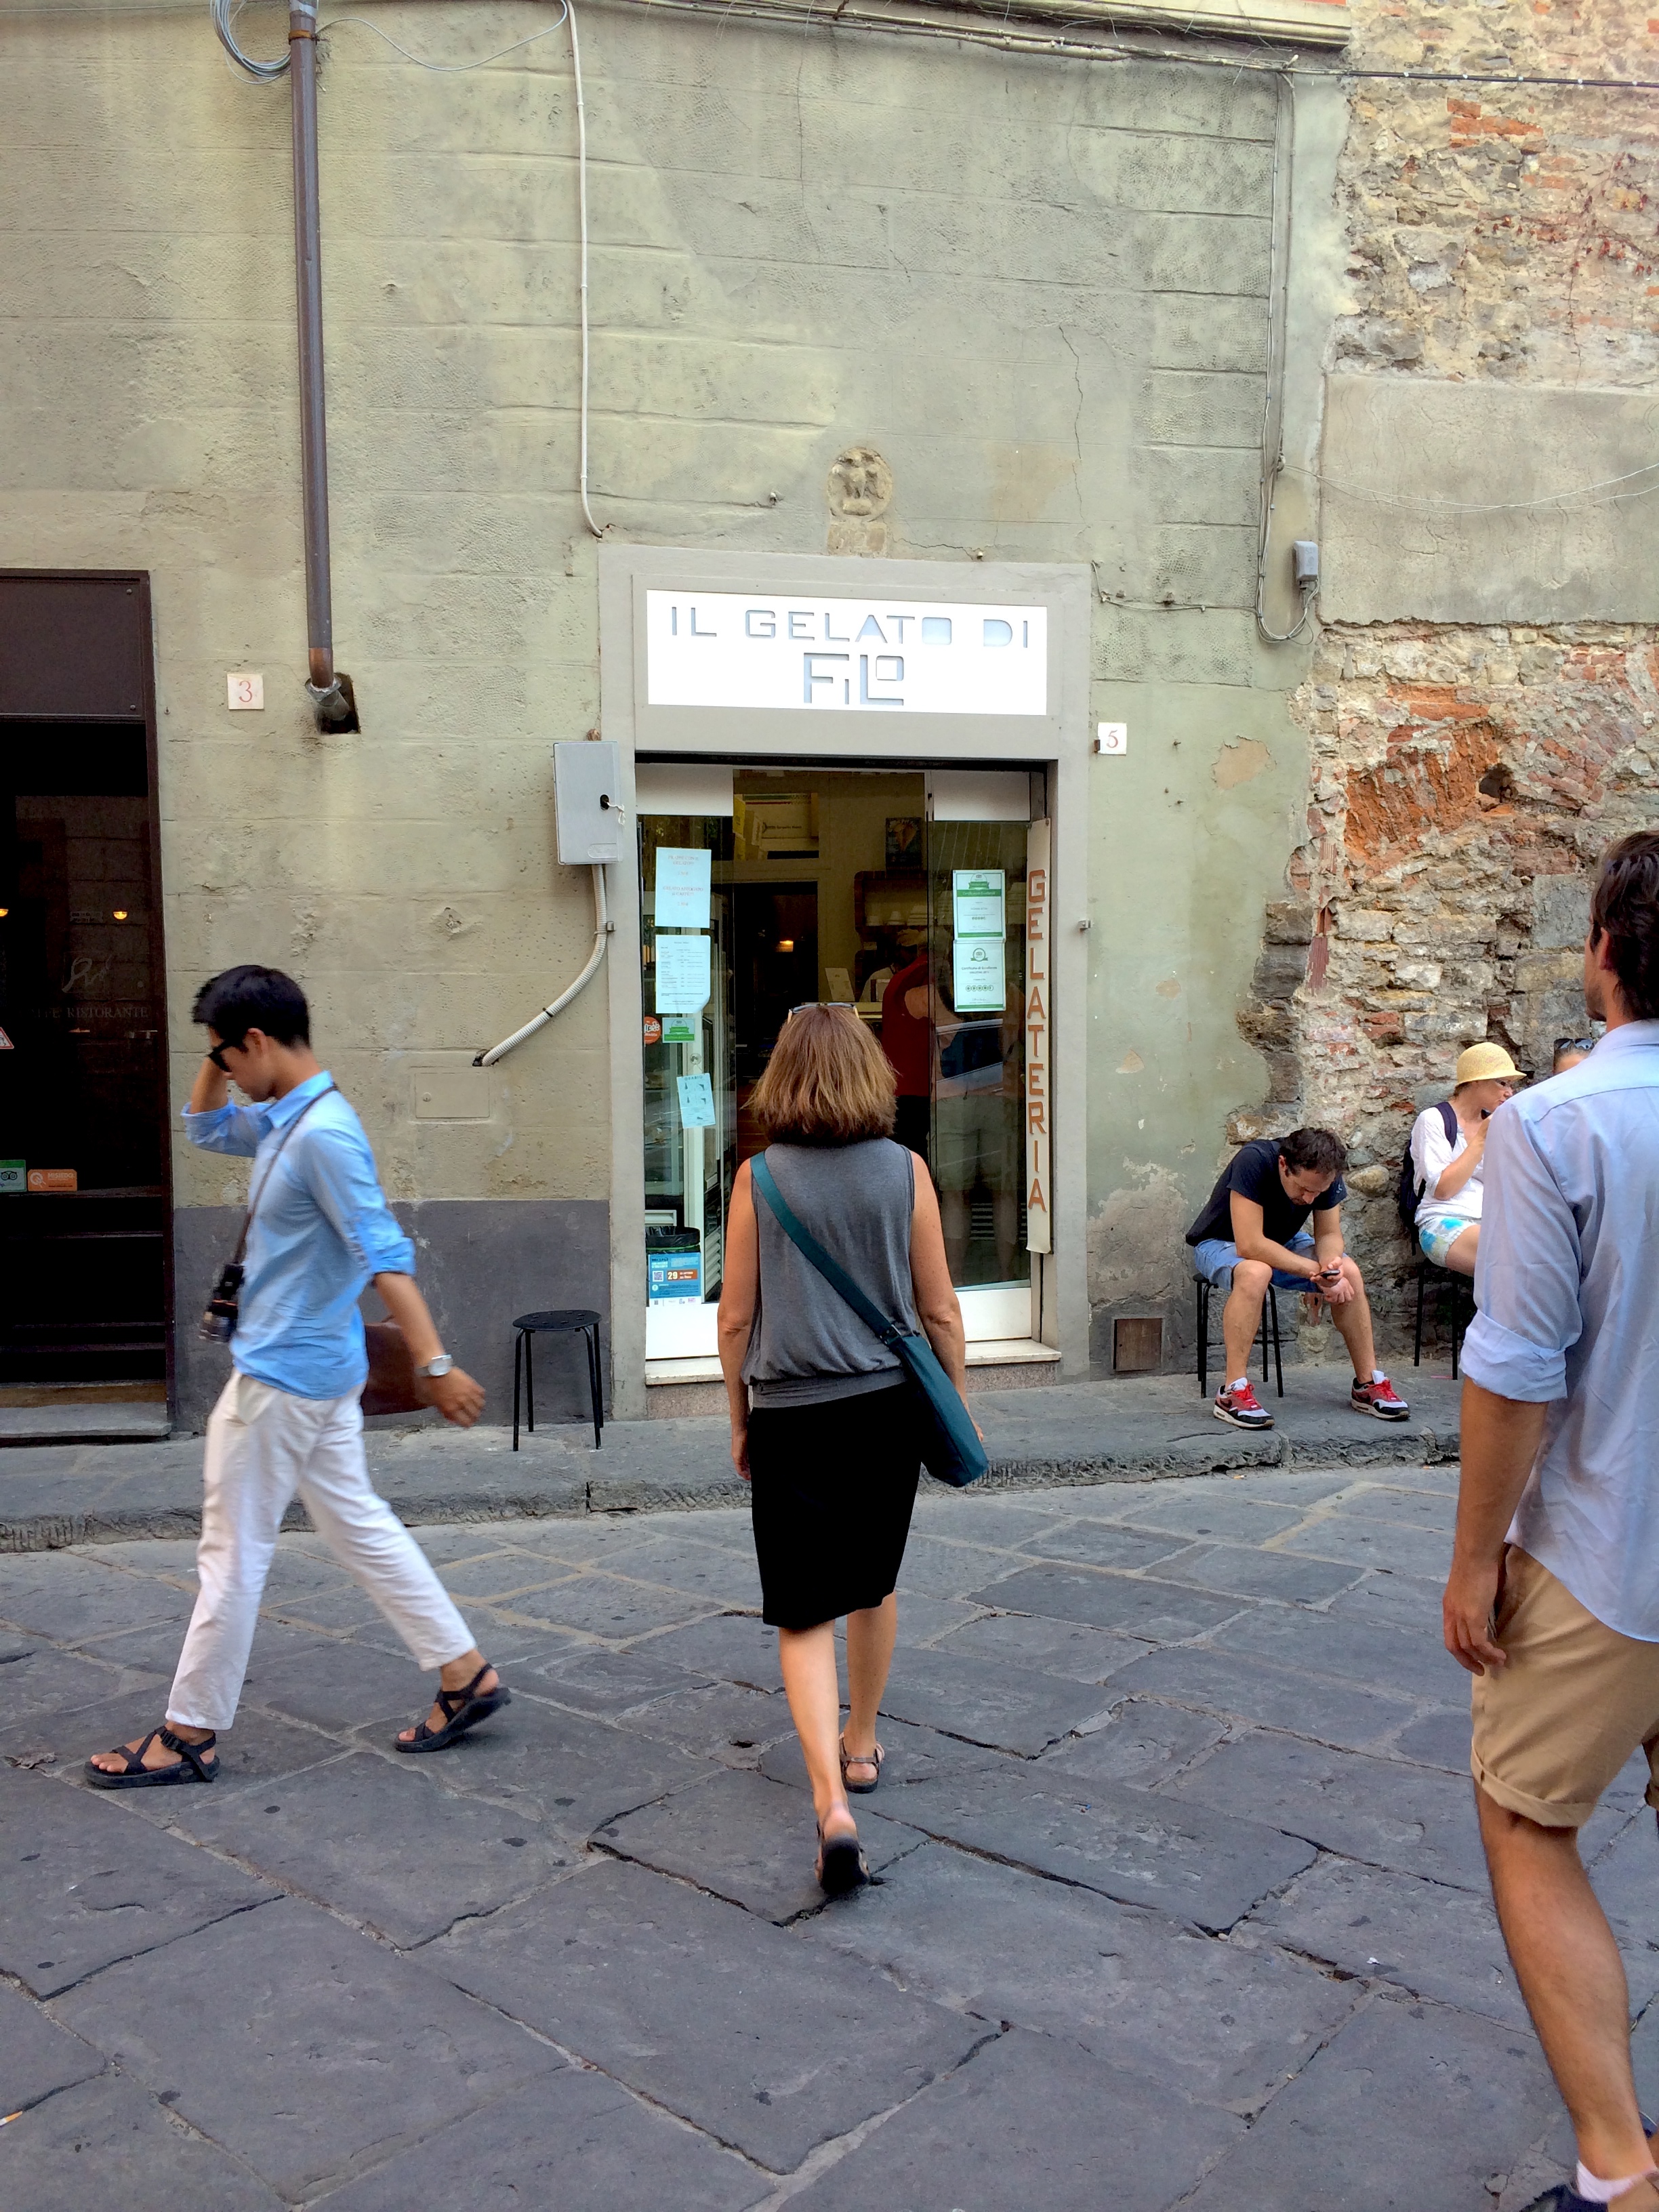
  9. Il Gelato di Filo*

    This gelateria will always hold a dear spot in my memory. It is conveniently located at the bottom of Piazzale Michelangelo, ya know, one of the most beautiful piazzas in Florence with its stunning vista of the city and also a sweat-inducing hike up to it? Yes. That one. This became the favorite gelato of my family and I when we visited in 2014, frequenting the shop multiple times in our 6 day tenure in Florence. We even had nicknames for the brother and sister who worked there. (We don’t actually know if they were related, but hey, it is part of our working theory.) We recommend either getting a gelato as an energy boost before you go up, or as a reward when you make it back down. Or, both before and after, because even that view will take it out of you. They also have some of the cheapest cones in Florence!

    Price: Starting at 1.50 for a cone, 2.00 for a cup.

    Location: Via San Miniato 5r, at the bottom of the side stairs (not the zig zag way up the front) up to Piazzale Michelangelo and San Miniato.

  10. Badiani*

    Badiani won the title in 2015 for the best gelato in Europe, and a year after opened a shop in London. Favorite shop of my friends the Pethtels, and lucky them, they live nearby! For the location being outside the city center I’d say they are a bit expensive, but they have a larger shop and indoor/outdoor seating, which is always a bonus.

    Price: Starting at 2.00 for a cup, 3.00 for a cone

    Location: Viale dei Mille 20r, outside the city center in the Campo di Marte neighborhood; about a 5 minute walk from the stadium or 10 minutes from the Campo di Marte train station.

  11. Venchi

    One of the best known Italian chocolate stores in Florence also has really yummy gelato! Their stores are generally a bit hectic, but busy because they are known and conveniently located. Their gelato is expensive, but worth the splurge for special occasions.

    Price: Starting at 3.20 for cup or cone. Prices may vary by location.

    Location: There are three locations, one at Piazza della Stazione 1 in the Santa Maria Novella train station, the second in Via Calzaiuoli 65r near the Duomo, and the third in Via Calimaruzza 18 near to Piazza della Signoria.

  12. Gelateria de’ Medici

    This gelateria has a wide selection of flavors and is open late, until midnight or 12:30am on Friday and Saturday.

    Price: Starting at 2.00 for a cone, 3.00 for a cup

    Location: There are two locations, one in Piazza Cesare Beccaria 7r on the eastern outskirts of the city center, and the second in Via dello Statuto 3/5r northwest of the city center.

  13. Il Procopio*

    This place is best suited to those who like “fantastic” flavors; those with lots of condiments such as chocolate and sauces and chunks of cake/cookies, etc. They have very few “pure” flavors, but I always see people walking around with the mango flavor, so it must be good! One of the favorites of the American blogger GirlinFlorence.

    Price: Starting from 2.20 for cup or cone

    Location: Via Pietrapiana 60/62r, not too far from the Church of Santa Croce; across from the Loggia del Pesce.

  14. Il Gelato di Cristian Beduschi

    On the first floor of the Mercato Centrale there is a wonderful gelato. They don’t have the widest selection of flavors, but you can also get chocolates, other desserts like tiramisù, and hot chocolate.

    Price: Starting at 2.80 for cup or cone

    Location: First floor ( aka second floor for Americans) of the Mercato Centrale on the same side as the pizza and pasta booths.

  15. Edoardo*

    Famous for their homemade cones and the scent that drifts well beyond their doors, Edoardo is the favorite gelateria of my friend Rachel. They are on the expensive side, but their gelato is organic and they have a good selection of vegan gelato and sorbet. Most of their flavors are beyond delicious, even if sometimes their menu can seem simple, but they have on occasion missed the mark with flavors and iciness. Beware, they often have a line, and in recent days they have implemented a number system. If you forget or don’t know to take a number, as was my experience, they may refuse to serve you. I waited 10 minutes in line and then they told me they can’t serve me unless I have a number, I wanted to make a humiliated beeline to the exit but my husband stood up for me and the customer whose turn it was graciously let me order anyway. I heard from other people after this incident that they still didn’t know about taking a number, so it very well may depend on if there’s a line and who’s working that day if they decide to implement the number system. Which is very…Italian. Anyway, you can find the numbers outside the door.

    Price: Starting from 2.80 for a cup, 3.50 for a cone, cash only

    Location: Piazza del Duomo 45r, two steps from the Duomo

    Flavor to try: Zabaione

  16. Vivoli

    Heralded as a historic gelateria and one of the most famous in Florence, Vivoli delivers delicious gelato and a cute locale. However, because of their fame they tend to have lines and are on the expensive side, not to mention no cones.

    Price: Starting at 2.00 for cup

    Location: Via Isole delle Stinche 7r, near to the Church of Santa Croce

  17. Sottozero

    Gelato places like these won’t usually find themselves in guidebooks or on blog reviews because they are not in the city center and don’t get the foot traffic of tourists. This one is popular with students because it’s very near the university and dorm housing, and should be with you too if you have an airbnb nearby!

    Price: Starting from 1.80 for cup or cone

    Location: Via Anton Francesco Doni 47r, west of the city center in the neighborhood of Novoli

    Flavor to try: Yogurt (sweetened with stevia!)

  18. Rivareno

    Gelato sourced from all-natural ingredients with interesting flavor combos.

    Price: Starting at 2.30 for cup or cone

    Location: Via Borgo degli Albizi 46r, not to far from the Duomo.

  19. Carapina

    This used to be one of my regular locations when I lived nearby, alas, no more.

    Price: Starting at 2.00 for a cone with one flavor, 2.50 for cup or cone with two flavors

    Location: Piazza Oberdan 2r, just east of the city center, but in the summer they also have a food truck down by the Arno!

  20. La Gelateria Il Sorriso

    Generous portions and lots of flavors, I believe this is also one of the few places that lets you put 3 flavors even in the smallest size cone or cup! Win.

    Price: Starting at 2.20 for cup or cone

    Location: Via Erbosa 70, a bit out of the way in the neighborhood of Gavinana southeast of the city center, but if you are staying in the area or just want to experience an Italian neighborhood with zero tourists, head on down there. Take the bus numbers 8, 23, 31, or 32 to get there from Piazza San Marco, about 20 minutes.

  21. La Caminia

    This gelateria really surprised me with their gelato. I walk by every once in awhile but had never gone in due to the generally bright color themes that usually denote a tourist trap. Then they made a special flavor in honor of the 200th(?) anniversary of the US consulate mission to Florence and I had to go try it. In doing so I discovered a wonderful new gelato stop with many flavors to choose from with even the simplest bursting with creamy flavor.

    Price: Starting at around 2.00 for cup or cone (I need to double check this)

    Location: Like Gelateria Il Sorriso above, La Caminia is found in the Gavinana neighborhood not far from the large Coop supermarket.

  22. Gelateria Santa Trinita

    Due to its location and overall appearance this place can sometimes be mistaken for “tourist” gelato. Fret not, not only is it uber-creamy, but it is decently priced with generous portions!

    Price: Starting at 2.20 for cup or cone

    Location: Piazza dei Frescobaldi, 8r, at the end of the Ponte Santa Trinita; one bridge over from Ponte Vecchio.

    Flavor to Try: They are known for their Sesamo Nero (Black Sesame), it’s subtle and nutty and mysterious.

  23. Gelateria della Passera

    Recommended especially for those who love fruit flavors!

    Price: Starting at 2.00 for two-flavor cup or cone

    Location: Via Toscanella 15r, on the south side of the Arno in the Santo Spirito neighborhood; very close to the Palazzo Pitti.

  24. Donamalina Cure Cioccolateria - Gelateria

    Another place a bit outside of the city center, but we have to cover all bases, don’t we? They have chocolate and confections, too!

    Price: Starting at 2.00 for cup or cone

    Location: Via Antonio Pacinotti 30r, bit north of the city center in the neighborhood of Le Cure.

  25. Le Botteghe di Leonardo*

    Natural gelato with a good selection of dairy-free, but their milk-based flavors are pretty great! Some even use latte di bufala, that is, water buffalo milk, and it’s extra creamy. Favorite of my friend, Brianna!

    Price: Starting at 2.60 for cup or cone

    Location: Via de’ Ginori 21r, very close to the Mercato Centrale.

    Flavor to try: Kabana (kiwi and banana), stracciatella

Gelato Lingo

sangelato.jpg

Alright, here is a simple formula for you if you’re feeling adventerous. First, pick what you would like, the size, and then decide which flavors you want. Most people working in gelato shops speak English, so if you have further questions feel free to ask! In fact, you might order in Italian but they will often reply back in English.

“I would like a…” “vorrei un/a…”

Cono = cone Coppetta = cup Frappé = milkshake Granita = type of slushy

Piccolo/a = small Medio/a = medium Grande = large

“With…and…” “Con…e…”

Cioccolato = chocolate Fondente = dark chocolate Stracciatella = chocolate chip

Nocciola = hazelnut Pistacchio = pistachio Arachidi = peanut

Gianduja = chocolate/hazelnut Crema = cream with eggs, similar to a custard

Fior di Latte = A creamy gelato base, the equivalent of vanilla in America, except it’s no vanilla

Zabaione = custard with wine, usually sweet marsala

Caffé = coffee Cocco = coconut Cocomero = watermelon Fragola = strawberry Limone = lemon

Arancia = orange Lampone = raspberry Melone = melon Mora = blackberry Pesca = peach

Pera = pear Pompelmo = grapefruit Amarena = sour cherry Frutti di Bosco = mixed berry

Example: “Buongiorno! Vorrei un cono piccolo con nocciola e pistacchio, grazie.” (Good morning/afternoon! I would like a small cone with hazelnut and pistachio, thank you.)

Or, “Buonasera, vorrei una coppetta media con limone e fragola.” (Good evening, I would like a medium cup with lemon and strawberry.)

Happy Gelato-ing!!!

Butternut Squash Risotto

IMG_2738.JPG

Last updated July 12, 2024

A simple, risotto bursting with flavor with butternut squash, bell pepper, and spinach.

The formula is straightforward and simple, not requiring wine or cheese as risotto traditionally does, which keeps it friendly for certain dietary restrictions. Wine and cheese can certainly be added though, fear not!

This post may contain affiliate links. If you make a purchase using these links, Jennyblogs may receive a small commission, at no extra cost to you. This helps to support Jennyblogs. Where possible, links are prioritized to small businesses and ethically and responsibly made items. For further information see the privacy policy. Grazie!


Butternut Squash Risotto

Serves 2-4

Ingredients:

  • 2 Tbsp / 28g oil

  • 2 cloves garlic, peeled and minced

  • 10 oz / 300g butternut squash, seeded, peeled and chopped small (or you could just say half of a small squash)

  • 1 medium onion, chopped

  • 1 large red bell pepper, seeded and chopped

  • 7 oz / 200g arborio rice

  • Parmigiano reggiano (parmesan) rind, optional

  • 1 pint / 500ml vegetable broth

  • about 3 oz / 100g spinach, chopped or whole

Directions:

IMG_2737.JPG
  1. In a large pan over medium-low heat, add oil and garlic and simmer until fragrant, about a minute.

  2. Add squash, onion, and bell pepper and cook until squash begins to soften.

  3. Add rice and stir around to toast, about 1-2 minutes.

  4. Add parmigiano reggiano rind, if using.

  5. Add stock and simmer for 15-20 minutes, stirring frequently. If rice starts to cook dry, add more water or stock as needed.

  6. Once the rice is cooked, the squash is tender, and the liquid is mostly absorbed (but not all!), add the spinach and stir until wilted. Remove any chunks of parmigiano reggiano rind before serving.

  7. Serve immediately.

Jenny’s Notes:

  • Risotto is a fairly quick, delicious, and versatile dish, great for colder months. Feel free to add or subtract vegetables to your liking. Any type of squash you like could be used, even fresh pumpkin!

  • If you like to ahem, cook with wine, and sometimes add it to your food even, feel free to add about 1/2 cup of red or white wine or dry white vermouth. Add it in after step 3, after you’ve toasted the rice and before the stock. Allow the wine to evaporate and absorb into the rice before continuing with stock.

  • When you’re in a pinch and don’t have risotto or arborio rice, you really could use any kind. Just keep an eye on the cooking instructions for the kind of rice you are using so you will have an idea how long it will take. Other kinds of rice won’t hold their “bite” as well and end up mushier.

  • If reheating leftovers, I would recommend adding in a touch more water or broth. The longer risotto sits the more liquid it will absorb, and may end up a bit dry.

Butternut Squash Risotto
Yield 2-4
Author
Prep time
15 Min
Cook time
30 Min
Total time
45 Min

Butternut Squash Risotto

Classic risotto with butternut squash, bell peppers, and spinach. Creamy and delicious, yet this particular risotto is dairy-free and alcohol-free

Ingredients

Instructions

  1. In a large pan over medium-low heat, add oil and garlic and simmer until fragrant, about a minute.
  2. Add squash, onion, and bell pepper and cook until squash begins to soften.
  3. Add rice and stir around to toast, about 1-2 minutes.
  4. Add parmigiano reggiano rind, if using.
  5. Add stock and simmer for 15-20 minutes, stirring frequently. If rice starts to cook dry, add more water or stock as needed.
  6. Once rice is cooked, the squash is tender, and the liquid is mostly absorbed (but not all!), add spinach and stir until wilted. Remove any chunks of parmigiano reggiano rind before serving.
  7. Serve immediately.

Notes

  • Risotto is a fairly quick, delicious, and versatile dish, great for colder months. Feel free to add or subtract  vegetables to your liking. Any type of  squash you like could be used, even fresh pumpkin!
  • If you like to ahem, cook with wine, and sometimes add it to your food even, feel free to add about 1/2 cup of red or white wine or dry white vermouth. Add it in after step 3, after you’ve toasted the  rice and before the stock. Allow the wine to evaporate and absorb into the  rice before continuing with stock.
  • When you’re in a pinch and don’t have risotto or arborio rice, you really could use any kind. Just keep an eye on the cooking instructions for the kind of rice you are using so you will have an idea how long it will take. Other kinds of rice won’t hold their “bite” as well and end up mushier.
  • If reheating leftovers, I would recommend adding in a touch more water or broth. The longer risotto sits the more liquid it will absorb, and may end up a bit dry.


Nutrition Facts

Calories

670.96

Fat

19.02 g

Sat. Fat

3.75 g

Carbs

111.23 g

Fiber

9.27 g

Net carbs

101.97 g

Sugar

11.24 g

Protein

16.05 g

Sodium

1232.89 mg

Cholesterol

10.2 mg

Nutritional information is approximate, based on 1 serving if recipe serves 2.

risotto, traditional, classic, alcohol free, dairy, free, butternut squash bell pepper and spinach risotto
dinner
American, Italian
Did you make this recipe?
Tag @jennyblogsandbakes on instagram and hashtag it #jennyblogs

Buying International Plane Tickets and Booking Accommodation

IMG_1508.jpg

This post contains affiliate links. If you buy something using these links, Jennyblogs may receive a small commission, at no extra cost to you. This helps to support Jennyblogs. For further information see the privacy policy. Grazie!

Airplane Tickets

Buy them on a Tuesday before 12pm EST, on a freshly restarted PC with your Google cookies wiped, a credit card that expires in no less than 2 years, in your pajamas, facing north. Just kidding.

I’m going to make this easy on you: There is no magic trick or gimmick for these things. There is a lot of information floating around about when to buy airline tickets.  Some true, some false.  For example, I've read that airlines put tickets on sale Monday evening, therefore you should buy tickets on Tuesday.  At least for international tickets, I've never seen that happen. I have noticed that flying on a Tuesday or Wednesday seems to be the cheapest, but that’s not the same thing and not always consistent.  A lot depends on timing, such as season and fuel prices, but it seems most is unpredictable and seemingly random. Then again, if it was predictable, I probably wouldn’t have been googling this subject myself once upon time, now would I?

Don’t despair, however, there are plenty of things you can do to find the best options out there, just keep in mind that “best” is relative. And, just as there is more than one way to frost a cake, what follows is one method of many for hunting down that cheap(ish) ticket. (If you want to know how crazy I can get about plane tickets, read this overly long blog post.)

First, some obvious things to keep in mind:

  1. Flying off season will usually yield cheaper results, sometimes significantly. But not always! It never hurts to check.

  2. Off season may vary depending on location. For example, traveling during the summer to Europe is going to be peak season, but that doesn’t mean Jun-Aug is the busiest the whole world round.

  3. The more flexible you are with your dates, the more likely you will be to find a cheaper ticket. Same goes with flexible departure/arrival airports. The only problem is, you can end up spending hours upon hours searching date and location possibilities. But hey, you’ll know you found the best combo!

  4. Watch out for overnight layovers. You might find cheaper flights that way, but in my experience I’d rather pay the few bucks more to avoid it. Anyway, if you keep looking, you can usually find the same or similar flight price without overnight layovers.

  5. Booking through third parties (i.e. Expedia rather than Delta) may yield cheaper results, but if you run into any problems, they have been known to be extremely unhelpful. (I also have never been able to do the 24 hour check-in online when I bought a ticket through a third party. I checked-in at the airport the day of and everything was fine, but still. Being told there was an error or your ticket can’t be found is not reassuring.) In fact, recently third parties are about the same price, if not more expensive, anyway.

Now that we’ve got those reminders down, here’s how I go about finding tickets:

About 4 months before your desired departure choose a site like Kayak.com where you can look at multiple prices at once (choose the +/- 3 days for both the departure and return dates, so you can see a whole week’s worth of prices around both dates).  Make a note of the dates and prices that work best for you, then check back about once a week to see how the prices are rising or dropping.  Kayak, among many other sites, allow you to create free notifications of certain travel dates. You’ll get an email if the prices drop, go up, or even if they’re holding steady. I would never trust completely to these notifications and still check manually, but they’re a helpful tool.

At 2-3 months before desired departure you should have a good idea of what the prices for your dates are doing, and what airlines are cheapest. Chances are the prices haven’t moved significantly, but if they have, especially up, don't worry. There's a good chance they'll drop again, just keep checking back. When you feel ready to buy (I think 2 months* before is a good balance), go ahead and check Kayak again and then go to the website of the airline with the best deal. If everything looks good, buy!

*It is possible to buy tickets sometimes even up to a week before departure with decent prices, but I bet you they were cheaper two months ago. It also makes me very nervous to wait that long, knowing the prices can go up very high.

Tada! There you have it. Nothing magical. But with this method I always feel confidant I got the best prices.

Other helpful hints:

  1. As of circa January 2018, the lowest fares between Europe and North America no longer include the first checked bag. The first checked bag is $50 each way, or you can pay a more expensive fare, such as $80 more total, and get the first bag free along with several other perks, like choosing your seat and being able to change your ticket. Not cool, you guys. Not cool.

  2. azair.eu is a helpful site for flights within Europe or Asia, with lots of filters so you can hone in on what you’re looking for.

  3. I advise against using the app “Hopper.” I added several of my upcoming flights over a period of time so it could keep track of them, letting me know the best time to buy. However, in all the flights and different locations and dates I added, I could find a much cheaper plane ticket myself every single time they notified me of the “best price", go ahead and buy. So, if you still like the app, just keep in mind you’re probably not actually getting the best price.

  4. CheapFareGuru.com used to be one of my go to sites. They were always the cheapest by a good bit. Their site is a bit sketchy looking, but I’ve bought tickets through them a couple times and never had problems (other than not being able to check-in online). I say “used to” because their flights don’t load for me anymore. I dunno.

Accommodation

As for hotels and airbnbs, all the cute and affordable ones book up quickly, so I would start looking at least 4 months in advance, especially for popular tourist destinations such as Rome, Paris, London, ya know, all the places you want to go.  

2015-09-08 22.59.28.jpg

Hotels vs. airbnb? Totally depends on what you’re looking for. I think booking an airbnb is much simpler, but I don’t think it’s always cheaper. Hotels need to stay in business and thus prices seem to have become more competent, so I would recommend looking at some hotel sites and compare them with airbnb before making a final decision.

A tip for lodging, especially if you are staying in an airbnb type place, before moving or touching anything, take pictures of the whole apartment.  That way, if your host decides to blame a broken outlet (or worse) on you after you've gone, you have proof to show them and the third party (such as airbnb) that that is how it was when you arrived.  

Do you have any tips or tricks for finding good plane tickets and accommodation? I’d love to hear them, share in the comments below!

Pumpkin Pudding

IMG_5018.JPG

Last updated August 14, 2024

Pumpkin Pudding is a classic, easy fall recipe in my family. It’s like pumpkin pie, but without all the fuss of the crust. This is great to make in the time leading up to Thanksgiving, because you’re not ruining your appetite for pumpkin pie (you can’t call it pie if it doesn’t have a crust, therefore, totally different) while not wasting time NOT eating pumpkin. Bonus that it’s incredibly easy to whip up.

Fall is coming fall is coming! I love the changing of seasons and the different nostalgias and expectations that come with each season. Living in Italy, the nostalgia is a little bit stronger. Autumn is still autumn, but the changes are a little less distinct, and the comfort of knowing where to pick out the best pumpkins and buy the best apple cider is not something that really exists here. Pumpkins will be few and far between, unless you’re lucky enough to stumble upon some markets that have the mini gourds; apple cider is practically nonexistent; trick-or-treating happens, but most Italians wear scary costumes instead of characters; the leaf change is not the brilliant red, orange, and yellows like in Michigan, but more of a subtle green-to-yellow with the occasional leaves fluttering down. Despite the differences with what I grew up with, there are still oodles of things I love to do to make my home fall-y and to welcome the chilly evenings. Lighting candles, brewing tea, pulling out the fuzzy socks and sweaters (even if I’d be sweating if I actually tried to wear them yet) and baking and eating lots of fall goodies that include pumpkin, cinnamon, spices, breads, soups, and all the hearty autumn recipes.

This post may contain affiliate links. If you make a purchase using these links, Jennyblogs may receive a small commission, at no extra cost to you. This helps to support Jennyblogs. Where possible, links are prioritized to small businesses and ethically and responsibly made items. For further information see the privacy policy. Grazie!

Recipe from my mama


Pumpkin Pudding

IMG_5023.JPG

Serves: 4-6

Ingredients:

  • 15 oz / 425g pumpkin purée

  • 2/3 cup / 132g sugar

  • 1/2 tsp / 2.5g salt

  • 1 tsp / 5g cinnamon

  • 1/2 tsp / 2.5g ginger

  • 1/4 tsp / 1g cloves

  • 1 cup / 237g milk of choice

Directions:

Oven 375°F / 190°C. Lightly grease an 8x8in / 20x20cm baking pan.

  1. Mix all ingredients in a bowl until smooth.

  2. Pour into prepared pan; bake for 20-25 minutes in preheated oven until edges are bubbling.

Jenny’s Notes:

  • To dress this lovely and simple dessert up you can top it with confectioner’s sugar or crumbled cookies such as shortbread or Nilla Wafers, or serve with ice cream and/or whipped cream.

  • This recipe is gluten free, vegan (if you use a milk substitute like coconut or almond), and probably many of the other diet fads that I can’t quite keep track of. Eat up!

Pumpkin Pudding
Yield 4-6
Author
Prep time
10 Min
Cook time
25 Min
Total time
35 Min

Pumpkin Pudding

Like pumpkin pie but without the hassle of the crust. Gluten-free and can easily be made vegan.
Cook modePrevent screen from turning off

Ingredients

Instructions

  1. Oven 375F / 190C. Lightly greased 8x8in / 20x20cm baking pan.
  2. Mix all ingredients in a bowl until smooth.
  3. Pour into prepared pan; bake for 20-25 minutes in preheated oven until edges are bubbling.

Notes

To dress this lovely and simple dessert up you can top it with confectioner’s sugar or crumbled cookies such as shortbread or Nilla Wafers, or serve with ice cream and/or whipped cream.This recipe is gluten free, vegan (if you use a milk substitute like coconut or almond), and probably many of the other diet fads that I can’t quite keep track of. Eat up!

Nutrition Facts

Calories

198.32

Fat

1.49 g

Sat. Fat

0.88 g

Carbs

45.81 g

Fiber

3.85 g

Net carbs

41.97 g

Sugar

36.49 g

Protein

3.31 g

Sodium

279.59 mg

Cholesterol

4.74 mg

Nutritional information is approximate. Based on 4 servings.

crustless pumpkin pie, no crust pumpkin pie, pumpkin pudding, pumpkin pie, Thanksgiving dessert, fall dessert, easy pumpkin dessert, vegan, gluten free
dessert
American
Did you make this recipe?
Tag @jennyblogsandbakes on instagram and hashtag it #jennyblogs
The slowly melting confectioner’s sugar…

The slowly melting confectioner’s sugar…