Healthier Lipton Onion Dip

Last Updated September 3, 2024

IMG_3184.jpg

Lipton Onion Dip. Too easy to whip up, pop open a bag of potato chips, and have a summer favorite ready to rock and roll.

Unfortunately, it’s not very healthy. At all. Reading the ingredients usually leaves me wishing I hadn’t so I can enjoy my snacking in peace. Then the recipe on the side of the Lipton box has you mix it with a tub of sour cream and dip potato chips. Yum. But ouch.

I have actually eaten this very few times in my life, growing up in a “healthy” household (thankful for that!) usually meant if I was eating onion dip, someone else had made and brought it to a party. But recently, when a friend moved away from Florence and gave me a few boxes of stuff and food, I found myself with two packets of Lipton Onion soup/dip mix. Not part of my usual diet, but hey, I’m not one to turn my nose up at free food, being an overly-budget minded person. Plus, part of the fun of having a non-American husband is getting to share with him all the joys and junk foods of America that you just can’t find in the rest of the world. Heck, Lipton probably has some ingredients that are banned in the EU, haha! And you know what? He loved it. And requested it again.

How to healthify Lipton Onion dip? Not too hard. Doesn’t cure all the wonky ingredients, but let’s say we’re righting two of three wrongs. ;)

First, potato chips are delicious, but so are veggies dipped in onion dip! Honestly, if you are an onion dip lover, you’ve probably figured this out a long time ago.

Second easy way to healthify it? Use yogurt instead of sour cream. Regular and Greek both work, as the dip thickens as it sits. (Does anyone ever actually make it the full two hours it’s supposed to sit in the fridge before eating?) I might even like it better than sour cream! Not to mention that sour cream is usually only found in the tiny Mexican food section at my local grocery store. And not refrigerated. Weird.

If you’d like a completely guilt-free Onion Dip snacking experience, try out this Copycat Lipton Onion Dip, made from scratch!

This post may contain affiliate links. If you make a purchase using these links, Jennyblogs may receive a small commission, at no extra cost to you. This helps to support Jennyblogs. Where possible, links are prioritized to small businesses and ethically and responsibly made items. For further information see the privacy policy. Grazie!


Healthier Lipton Onion Dip

Makes about 2 cups of dip

IMG_3174.jpg

Ingredients:

  • 1 packet Lipton onion soup/dip

  • 16 oz / 454g plain Greek or regular yogurt

  • Washed and sliced veggies, carrots, celery, cucumber, broccoli, cauliflower, radishes, bell peppers, etc etc

  • Fresh or dried dill and onion powder, optional

Directions:

  1. Add Lipton onion dip to yogurt and mix well.

  2. Cover and refrigerate for at least 2 hours, to thicken and let flavors meld.

  3. Top with dill and a dash or two of onion powder, if desired, and serve with veggies. And maybe just one or two potato chips. :)

Healthier Lipton Onion Dip
Yield 2 cups dip
Author
Prep time
5 Min
Total time
5 Min

Healthier Lipton Onion Dip

A healthier version of the classic Lipton Onion dip, by mixing with yogurt instead of sour cream and using veggies instead of potato chips!
Cook modePrevent screen from turning off

Ingredients

Instructions

  1. Add Lipton onion dip to yogurt and mix well.
  2. Cover and refrigerate for at least 2 hours, to thicken and let flavors meld.
  3. Top with dill and a dash or two of onion powder, if desired, and serve with veggies. And maybe just one or two potato chips. :)

Nutrition Facts

Calories

112.03

Fat

1.92 g

Sat. Fat

1.16 g

Carbs

16.91 g

Fiber

1.72 g

Net carbs

15.19 g

Sugar

9.36 g

Protein

7.33 g

Sodium

873.86 mg

Cholesterol

6.81 mg

Nutritional information is approximate. Based on 4 servings of 1/2 cup dip with 1 cup of vegetables.

Lipton Onion soup dip, Onion dip, yogurt, onion, veggie dip, yogurt veggie dip, healthier lipton dip
Appetizers
American
Did you make this recipe?
Tag @jennyblogsandbakes on instagram and hashtag it #jennyblogs

Beurre Noisette (browned butter) Congo Bars

Last Updated September 3, 2024

With oats.

Adjustments.jpg

One of the best things to happen to the cookie world is browned butter, or beurre noisette as the French call it. It not only ups the baked cookie game, but it takes cookie dough to a whole new level.

Will someone please get browned butter cookie dough ice cream on the market? Thanks.

You can find my original recipe for Beurre Noisette Chocolate Chip Cookies right here, but you might want to stick around a little longer for today’s recipe because it’s essentially the same thing, just a different form and a little quicker to make. And cookies are already quick to make, so imagine that!

Why the name congo bars? I really have no idea. They’re just chocolate chip cookies in bar form. Therefore quicker to make but not necessarily superior to the classic cookie form. It’s really down to whatever tickles your fancy in that moment.

This recipe was born under full Italian lockdown. Ironically, you think I wouldn’t want to short cut a recipe with all the time I had on my hands, but you see, I have a very small oven. I can bake a max of 5-6 cookies a time, so that’s a long time to be waiting around to take cookies out of the oven, reload the tray, and repeat. Not to mention a higher electric bill.

So what did I do? I took my handy dandy Beurre Noisette Chocolate Chip Cookie recipe and adjusted it to fit in an 8x8in / 20x20cm square pan. So great. So delicious. And the timer only goes off once! A square baking dish is also a bit easier to wash than a large and cumbersome cookie sheet.

This recipe also features oats, and you can use the browned butter while it’s still melted if you want one more time-saving trick. While I do think it’s worth the time/planning ahead to brown the butter, allow it to cool, then whip it up as you normally would in a cookie recipe (so fluffy and so delicious), it’s not essential and can save you a lot of time if you don’t.

To learn how to make browned butter, see the original Beurre Noisette Chocolate Chip Cookie recipe.

This post may contain affiliate links. If you make a purchase using these links, Jennyblogs may receive a small commission, at no extra cost to you. This helps to support Jennyblogs. Where possible, links are prioritized to small businesses and ethically and responsibly made items. For further information see the privacy policy. Grazie!

A recipe by Jenny


Beurre Noisette (browned butter) Congo Bars

Makes about 9 bars

Adjustments.jpg

Ingredients:

  • 1/2 cup / 113g butter, melted, browned, and cooled

  • 3/4 cup / brown sugar

  • 1 egg

  • 1 1/2 tsp vanilla extract

  • 1 cup / 120g all-purpose flour

  • 1/2 cup / 45g oats

  • 1/2 tsp baking powder

  • 1/2 tsp baking soda

  • 1/2 tsp salt

  • 6 oz / 170g (half a bag) chocolate chips

Directions:

Oven preheated to 350°F / 177°C. 8x8in / 20x20cm pan, greased.

  1. In a medium bowl, mix together melted and cooled browned butter, brown sugar, egg, and vanilla and smooth.

  2. Add in flour, oats, baking powder, baking soda, salt, and chocolate chips. Mix until well combined.

  3. Scrape dough into an even layer in the prepared pan and bake for 18-22 minutes, or until set and center no longer looks doughy.

Jenny’s Notes:

  • This recipe can easily be doubled and baked in a 9x13in / 23x33cm pan.

  • If you choose to whip your butter, cream first just the butter and sugar until light and fluffy, about 4-5 minutes. Then add in the rest of the wet ingredients and continue with recipe.

  • Before baking you can also sprinkle some flaked sea salt on top if you’re craving the sweet and salty!

Beurre Noisette (browned butter) Congo Bars
Yield 9
Author
Prep time
25 Min
Cook time
22 Min
Total time
47 Min

Beurre Noisette (browned butter) Congo Bars

All the goodness of browned butter chocolate chip cookies in a bar form!
Cook modePrevent screen from turning off

Ingredients

Instructions

  1. Oven preheated to 350°F / 177°C. 8x8in / 20x20cm pan, greased.
  2. In a medium bowl, mix together melted and cooled browned butter, brown sugar, egg, and vanilla and smooth.
  3. Add in flour, oats, baking powder, baking soda, salt, and chocolate chips. Mix until well combined.
  4. Scrape dough into an even layer in the prepared pan and bake for 18-22 minutes, or until set and center no longer looks doughy.

Notes

This recipe can easily be doubled and baked in a 9x13in / 23x33cm pan.If you choose to whip your butter, cream first just the butter and sugar until light and fluffy, about 4-5 minutes. Then add in the rest of the wet ingredients and continue with recipe. Before baking you can also sprinkle some flaked sea salt on top if you’re craving the sweet and salty!

Nutrition Facts

Calories

316.06

Fat

16.84 g

Sat. Fat

10.05 g

Carbs

40.76 g

Fiber

1.98 g

Net carbs

38.78 g

Sugar

25.25 g

Protein

3.65 g

Sodium

321.79 mg

Cholesterol

47.66 mg

Nutritional information is approximate. Based on 9 servings.

browned butter, chocolate chip cookies, congo bars, cookies
cookies, dessert
American
Did you make this recipe?
Tag @jennyblogsandbakes on instagram and hashtag it #jennyblogs

Italy Lockdown Update: May the 4th Be With You

It’s hard to believe it’s going on two months since I originally wrote about the coronavirus in Italy, and in turn pleading for my fellow Americans across the pond to take the virus seriously.

If you would like to read the original post on coronavirus in Italy, click here.

The husband spying on abandoned green houses because, apparently, we’ve been quarantined too long.

The husband spying on abandoned green houses because, apparently, we’ve been quarantined too long.

8 weeks and a day I since started quarantining. So much has changed since then. I had originally planned on updating my original blog on coronavirus periodically, but it really didn’t make sense to me when all TV channels, new sources, social media feeds, and conversations already revolved around this world pandemic. As it has affected everyone, and many in very real and very tragic ways, this makes sense, but I didn’t feel that my voice had anything important to add to the din. I had already given my two cents worth and given a little glimpse into the window of Italy when it became one of the worst hit countries after China before the rest of the world went under, too. Shortly after we were all in the same boat, anyway, under some kind of lockdown, travel restrictions, feeling the fear and uncertainty, wondering what is going to happen to our loved ones, our jobs, our economy, weddings, graduations, planned and saved for vacations…the list goes on and on.

However, although much still seems bleak, there is some light at the end of the tunnel, especially for those of us who have been living in Italy under one of the stricter lockdowns.

Today, May 4th, starts phase two. Many rejoice, as it feels like the first breath of fresh air (literally, for many!) in 8 long weeks stuck in small apartments. Maybe dark. Maybe all alone. Maybe with too many family members. Maybe without a balcony or any way to get some decent sunshine. Maybe struggling to get food on the table. But there is hope, the weather has turned warm and sunny, and the daily new cases and deaths have dramatically decreased in recent days.

At its worst, Italy saw 6,000+ new daily cases, and 900+ new daily deaths. Today, May 4th, there were only 1,221 new daily cases and 195 new daily deaths. For more information on the numbers in Italy, see here.

With the country slowly reopening I think many are waiting with baited breath…will it work? Or will there be a second wave? Especially in a country where people have been locked up for 8 weeks and maybe are overly zealous to get out? Hopefully, if we don’t let our guard down, everything will progress smoothly.

So, what does phase two in Italy look like? I’ll highlight here the most important updates, leaving out some of the nitty gritty boring stuff.

Italy Phase Two, May 4th

  • While the essential reasons for leaving home have basically stayed the same, Italians are now able to travel within their region instead of only within their city/neighborhood. Those essential reasons remain for work, health, and now necessary visits to family members, including boyfriends/girlfriends. Movement beyond your own region is consented for work, health, emergency reasons, and for returning home. (Some workers, students, etc. found themselves locked out of their own regions/unable to return home when the lockdown started. They are now finally able to go back home.)

  • The “autocertificazione” or self-certification is still required when you leave home, to justify your reason for being out. An updated version, the sixth edition I do believe, is available starting from today. With more shops opening, the necessary reasons stated above have also somehow been stretched to include errands to get any type of good used in every day life, newspapers, and of course still pharmacies and grocery shopping.

  • As of May 1st we are now allowed to walk/exercise freely, instead of having to stay within 200 meters of our home. This is my favorite, favorite, favorite part of phase two! One source said we could go as far as we can physically walk, but don’t try leaving your region. You must maintain 1 meter distance from other people (people who don’t live with you) and 2 meters if you are running, and you may not take public transportation to a certain area to exercise.

  • Too many people have tried to profit off the demand for masks, so the government has stepped in to cap surgical mask prices at 50 cents a piece. Masks are required if you leave home.

  • Masks must be worn on public transportation. This has already been in place in Florence for the past week or two, I believe. The exception is for those under age 6 and anyone who has a medical problem that would prevent them from wearing a mask.

  • Public parks and gardens will reopen.

  • Funerals will be allowed, with only family members of the first and second degree and a maximum of 15 people.

  • Restaurants will now be allowed to provide take-away instead of just home delivery. However the take-away food must be consumed at home or in the office, to avoid assemblies of people in front of buidlings, etc.

  • Industrial, construction, furnishings, and wholesale commerce can recommence.

  • Individual sports can restart, behind closed doors, not out in the open.

April 14th

In mid-April there was a very soft opening of a few types of shops. Cartolerie (paper and stationary type stores), kids’ clothing stores, and bookstores. Not essential, but it at least helps some store owners to be able to reopen but with very low risk of crowds.

I had an appointment this day, and was surprised to see how many people were out. They were clearly not all rushing to get fountain pens and stationary, but it’s also hard for me to blame people who have been cooped up for so long, if they’re at least respecting the distance…

Hoping and praying things can start going back to some semblance of normal!

Thanks for reading, and if you need me, I’ll be up in the Tuscan hills, walking as far as my legs will carry me…


Parmesan Pan-Fried Chicken

Adjustments.jpeg

Happy quarantine day I-don’t-know-what-number! 44? 46? Regardless, I think we’re all open to new dinner ideas at this point and really looking forward to being able to go to restaurants again.

One thing that has made this quarantine a little easier is having access to yummy food and snacks, so I don’t miss going out too much. I’m thankful for a space I can make and create food, grocery stores, and for my mom who taught me so much about being in the kitchen.

But. That doesn’t mean some nights I don’t miss the ease of take out, especially the pizzeria behind my house, or being able to sit down in a nice space and then people bring you whatever you choose to eat in exchange for some money. Restaurants are so cool, you guys.

That’s where today’s Parmesan Pan-Fried Chicken comes into play. It’s easy, ready in 10-15 minutes, and so delicious. It’s no fuss, because there is no egg or flour breading. This also makes for a lighter fried chicken, just a thin, flavorful crust and not nearly as much guilt as traditional fried chicken. And less dishes to wash! All you need are some chicken breasts, bread crumbs, oregano, garlic powder, salt, and parmesan cheese, plus a frying pan with a bit of butter.

I originally stumbled across this idea when making a chicken quinoa casserole, which uses a similar breading technique with the chicken: using simply a wet chicken breast before dipping in a breadcrumb mixture instead of the more common flour and egg battering. I thought, what happens if I do the same thing, but instead of putting it in the casserole, fry it in some butter? Well, this simple, delicious chicken was the result, and I’m happy to share the recipe with you today.

This post may contain affiliate links. If you make a purchase using these links, Jennyblogs may receive a small commission, at no extra cost to you. This helps to support Jennyblogs. Where possible, links are prioritized to small businesses and ethically and responsibly made items. For further information see the privacy policy. Grazie!

A recipe by Jenny


Parmesan Pan-Fried Chicken

Serves 4-6

Ingredients:

  • 4 uncooked boneless skinless chicken breasts, about 1.5 lbs / 680g

  • 1/2 cup / 62g bread crumbs

  • 1/4 cup / 25g grated parmesan cheese

  • 1/2 tsp dried oregano

  • 1/4 tsp garlic powder

  • 1/4 tsp salt

  • dash of pepper

  • 2 Tbsp butter

Directions:

Adjustments.jpeg
  1. Starting with one chicken breast, lay it flay on a cutting board. Slice horizontally starting from the thicker end, to end up with two thinner pieces of chicken breast. Repeat with remaining chicken breasts.

  2. In a medium bowl, mix together bread crumbs, cheese, garlic, oregano, salt and pepper.

  3. In a large frying pan, melt 2 Tbsp butter over medium-high heat. Wet a chicken breast with water and press one side, then the other, into the bread crumb mixture. You can use your fingers to press on more of the mixture on areas that get missed. Place coated chicken into frying pan. Repeat with remaining chicken.

  4. Cook on each side 5-7 minutes or until cooked through and golden brown. Internal temperature should read at least 165°F / 75°C. If the chicken starts to darken too quickly, lower the temperature.

Jenny’s Notes:

  • If your frying pan isn’t big enough to accomodate all of the chicken, you can cook it in batches, starting with less butter, and adding more between each batch of chicken.

  • Here in Italy I always buy meat from our butcher, who slices chicken breasts horizontally so they are twice as thin as the chicken breasts you get at the store. While you can choose to keep your chicken breasts whole and bread and fry them that way, keep in mind you will need to adjust the cooking time accordingly to cook the chicken through.

  • You can use more butter for richer fried chicken, or less, for an even lighter fried chicken.

Parmesan Pan-Fried Chicken
Yield 4-6
Author
Prep time
5 Min
Cook time
14 Min
Total time
19 Min

Parmesan Pan-Fried Chicken

The easiest fried chicken with no egg or flour battering, just wet the chicken and dip in spiced bread crumbs and parmesan cheese. Fry in butter and you have a crispy, delicious chicken ready in 15 minutes.
Cook modePrevent screen from turning off

Ingredients

Instructions

  1. In a medium bowl, mix together bread crumbs, cheese, garlic, oregano, salt and pepper.
  2. In a large frying pan, melt 2 Tbsp butter over medium-high heat. Wet a chicken breast with water and press one side, then the other, into the bread crumb mixture. You can use your fingers to press on more of the mixture on areas that get missed. Place coated chicken into frying pan. Repeat with remaining chicken.
  3. Cook on each side 5-7 minutes or until cooked through and golden brown. Internal temperature should read at least 165F / 75C. If the chicken starts to darken too quickly, lower the temperature.

Notes

If your frying pan isn’t big enough to accomodate all of the chicken, you can cook it in batches, starting with less butter, and adding more between each batch of chicken. Here in Italy I always buy meat from our butcher, who slices chicken breasts horizantally so they are twice as thin as the chicken breasts you get at the store. That said, I had to guess a bit at the quantity for the coating, as I’ve never made this with larger chicken breasts. I know how much I need to make for 3 thinner chicken breasts, but that’s not going to be helpful to many people. If you have leftover coating, you can store it in the fridge for up to 2 days, but I wouldn’t keep it much longer as raw chicken has touched it. You can use more butter for richer fried chicken, or less, for an even lighter fried chicken.

Nutrition Facts

Calories

337.55

Fat

12.62 g

Sat. Fat

6.01 g

Carbs

12.31 g

Fiber

0.80 g

Net carbs

11.51 g

Sugar

0.98 g

Protein

41.18 g

Sodium

506.17 mg

Cholesterol

122.64 mg

Nutritional information is approximate. Based on 4 servings.

chicken, pan fried, fried chicken, parmesan cheese, oregano, garlic, 15 minute dinners, quick dinners
dinner, poultry
American
Did you make this recipe?
Tag @jennyblogsandbakes on instagram and hashtag it #jennyblogs

Almond Poppy Seed Sweet Rolls

Last Updated October 27, 2024

Welcome back to quarantine snacks and meals!

Adjustments.jpg

Today we are making Almond Poppy Seed Rolls! Think cinnamon rolls, but instead of cinnamon, a sweet almond dough with little crunchy poppyseeds and a sticky glaze. It’s like a cross between almond poppyseed bread and cinnamon rolls.

If there’s one thing we are forced to be during this time, it’s creative. Lack of resources, lack of schedule, lack of really anything that resembles our normal life has led us to come up with some really great ideas. Sometimes useless, but great nonetheless. Homemade obstacle courses are trending, memes are at the top of their game, and random skills you never before dreamed of having suddenly manifest themselves.

Another way we have had to get creative is in our cooking and baking. Not everything is readily available, and even if it is, a quick run to the store is no longer a quick run to the store. For my Michigan peeps, you are probably now feeling the effects of the latest lockdown measures. Only a certain number of people are allowed in the store at a time, creating long lines outside. Welcome, friends. That’s been normal life in Italy since uhh do I rememer how long? I think going on six weeks. Some stores require you to have a cart (helps you keep your distance) and some stores take your temperature before you enter. (In Italy.)

In general, most of my baking, unless for a special occasion or holiday, is spur of the moment. And what I want to bake often corresponds with what I want to eat, what do you know? The problem with this, as mentioned above, is that if I’m missing an ingredient, that means either waiting until the next store run, making something else, or improvising. The latter usually wins out.

Take the other day, for example, when I really wanted to make (and eat) these lemon raspberry rolls. I knew I didn’t have any raspberries, so I figured I would make just lemon rolls. Not to be, as I found my last lemon had gone moldy, and I didn’t even have any lemon extract. Well. Plain rolls weren’t going to cut it. I could’ve made cinnamon rolls, but my husband doesn’t much care for cinnamon (gasp) and I didn’t think that I should be eating a whole pan of cinnamon rolls by myself. While in quarantine. And am supposed to stay within 200m of my abode for exercise.

I took stock of my cupboards to see what I could possibly use to make some kind of flavored, delicious roll. While I didn’t have lemon extract, I did find almond extract! I love almond, and, and POPPY SEEDS. Yes. Done.

If you happen to have ingredients for both, I would highly suggest making both. They are also freezer friendly; stick in the freezer before baking or even after, once they’ve cooled.

This post may contain affiliate links. If you make a purchase using these links, Jennyblogs may receive a small commission, at no extra cost to you. This helps to support Jennyblogs. Where possible, links are prioritized to small businesses and ethically and responsibly made items. For further information see the privacy policy. Grazie!

Recipe by Jenny


Almond Poppy Seed Sweet Rolls

Makes 9 rolls

Adjustments.jpeg

Ingredients:

For the Dough

  • 1/2 cup / 119g milk or water

  • 1/4 cup / 50g sugar

  • 2 1/4 tsp / 7g active dry yeast

  • 2 Tbsp / 28g oil

  • 1 egg

  • 3 Tbsp / 23g poppy seeds

  • 1/2 tsp almond extract

  • 1/4 tsp salt

  • 2 1/4 cups / 270g all-purpose flour + about 1/4 cup / 30g for kneading

For the Filling

  • 1/4 cup / 56g butter

  • 1/4 cup / 50g sugar

For the Glaze

  • 3/4 cup / 94g powdered sugar

  • 1-2 Tbsp / 14-28g milk

Directions:

Preheat oven to 400F / 205C. Grease an 8x8inch / 20x20cm square baking dish.

Make the Dough

  1. In a small saucepan over low heat, warm milk until it is about 100F / 38C.  Pour into a large bowl.  Add the sugar and yeast and allow to sit for 7-10 minutes.  The yeast should foam up a bit. 

  2. Add oil, eggs, poppy seeds, extract, and salt.  Add the 2 1/4 cups of flour and mix until combined. 

  3. Turn dough out onto a floured surface.  Knead for about 8-10 minutes, sprinkling more flour on your work surface as needed.   Dough should be soft and elastic by the end, so don't get too flour-happy. Alternately, you can use the bread hook on a stand mixer and knead for 8-10 minutes, adding in flour as needed. By the end the dough should stick only to the bottom of the pan, not the sides.

  4. Lightly grease or flour a large bowl (the bowl you mixed the dough in is fine) and place dough in the bowl.  Cover with a towel and place in a warm area to rise for about 1 1/2 hours or until doubled in size. 

Assemble the Rolls

  1. In a small saucepan melt butter for filling and let simmer until it starts to brown.  Remove from heat and cool.

  2. When the dough has risen, punch it down and turn out onto a lightly floured surface.  Knead for a minute, then roll into a generous rectangle, about 7x14inch / 18x36cm and roughly 1/4inch / 1/2cm thick.

  3. Spread cooled butter over dough almost to the edges, then sprinkle evenly with sugar.

  4. Starting from one of the longer sides, roll dough into a spiral, pinching the dough together at the end to seal it. 

  5. Cut the log into thirds, then each third into 3 slices.  Place the rolls in the prepared pan and cover lightly with plastic wrap or a damp towel.  Place in a warm area to rise for about an hour, or until puffed.

  6. Bake for 15-20 minutes, or until golden on top and centers no longer look doughy. Internal temperature should be about 195F / 90C.

Make the Glaze

  1. In a small bowl whisk together powdered sugar and1 Tbsp of milk.  It should be thin enough to drizzle but not too liquidy.  Add more milk as needed. 

  2. Drizzle warm rolls with glaze. 

Jenny's Notes:

  • If you don't have a thermometer handy to know what 100 degrees is, simply warm until the milk feels quite warm, but not hot.

  • You can freeze these rolls once you have sliced them and put them in the pan.  Once removed from the freezer allow to thaw and proceed as normal. 

  • When using a stand mixer to knead, I still recommend kneading it for a few minutes by hand afterwards. I find they are not always as thorough as kneading by hand and you want an even rise for your dough.  I often to do it all by hand just because it’s therapeutic!

Almond Poppy Seed Rolls
Yield 9 rolls
Author
Prep time
1 Hour
Cook time
20 Min
Total time
1 H & 20 M

Almond Poppy Seed Rolls

Soft, fluffy breakfast rolls reminiscent of cinnamon rolls but with an almond poppy seed dough, a sweet, gooey buttery filling, and a sweet glaze.
Cook modePrevent screen from turning off

Ingredients

For the Dough
For the Filling
For the Glaze

Instructions

Make the Dough
  1. In a small saucepan over low heat, warm milk until it is about 100F / 38C. Pour into a large bowl. Add the sugar and yeast and allow to sit for 7-10 minutes. The yeast should foam up a bit.
  2. Add oil, eggs, poppy seeds, extract, and salt. Add the 2 1/4 cups of flour and mix until combined.
  3. Turn dough out onto a floured surface. Knead for about 8-10 minutes, sprinkling more flour on your work surface as needed. Dough should be soft and elastic by the end, so don't get too flour-happy. Alternately, you can use the bread hook on a stand mixer and knead for 8-10 minutes, adding in flour as needed. By the end the dough should stick only to the bottom of the pan, not the sides.
  4. Lightly grease or flour a large bowl (the bowl you mixed the dough in is fine) and place dough in the bowl. Cover with a towel and place in a warm area to rise for about 1 1/2 hours or until doubled in size.
Assemble the Rolls
  1. Preheat oven to 400F / 205C. Grease an 8x8inch / 20x20cm square baking dish.
  2. In a small saucepan melt butter for filling and let simmer until it starts to brown. Remove from heat and cool.
  3. When the dough has risen, punch it down and turn out onto a lightly floured surface. Knead for a minute, then roll into a generous rectangle, about 7x14inch / 18x36cm and roughly 1/4inch / 1/2cm thick.
  4. Spread cooled butter over dough almost to the edges, then sprinkle evenly with sugar.
  5. Starting from one of the longer sides, roll dough into a spiral, pinching the dough together at the end to seal it.
  6. Cut the log into thirds, then each third into 3 slices. Place the rolls in the prepared pan and cover lightly with plastic wrap or a damp towel. Place in a warm area to rise for about an hour, or until puffed.
  7. Bake for 15-20 minutes, or until golden on top and centers no longer look doughy. Internal temperature should be about 195F / 90C.
Make the Glaze
  1. In a small bowl whisk together powdered sugar and1 Tbsp of milk. It should be thin enough to drizzle but not too liquidy. Add more milk as needed.
  2. Drizzle warm rolls with glaze.

Notes

If you don't have a thermometer handy to know what 100 degrees is, simply warm until the milk feels quite warm, but not hot. It'll be fine!You can freeze these rolls once you have sliced them and put them in the pan. Once removed from the freezer allow to thaw and proceed as normal. When using a stand mixer to knead, I still recommend kneading it for a few minutes by hand afterwards. I find they are not always as thorough as kneading by hand and you want an even rise for your dough.

Nutrition Facts

Calories

276.34

Fat

10.42 g

Sat. Fat

3.94 g

Carbs

40.79 g

Fiber

1.52 g

Net carbs

39.27 g

Sugar

15.97 g

Protein

5.19 g

Sodium

122.93 mg

Cholesterol

35.35 mg

Nutritional information is approximate. Based on 1 roll.

almond poppy seed, breakfast rolls, yeast, yeasted breads, enriched dough,glaze
Breakfast,Breads, Dessert
American
Did you make this recipe?
Tag @jennyblogsandbakes on instagram and hashtag it #jennyblogs
Adjustments.jpg

White Bean Potato Soup

Last Updated August 30, 2024

This soup is packed full. Packed full of flavor, packed full of vegetables and good stuff, and therefore packed full of nutrients. Did I mention it’s also vegan? Because it is, at least if you don’t sprinkle any of that wonderful cheese over the soup at the end.

Adjustments.jpeg

While I love beans, and I love potatoes, and just about everything else in this soup, I honestly wasn’t expecting it to be as good as it was. It is so full of flavor and so satisfying, and I didn’t even have any wine on hand to add!

This soup boasts, besides beans and potatoes, onions, carrots, garlic, kale, with a hint of rosemary, spice, and white wine to tie it all together.

While the main soup season might be coming to an end, I decided to finally post this recipe because

1. during these crazy coronavirus times it seems everyone and their brother are baking bread up the wazoo and revving their sourdough starters, at least judging by social media and the shortage of flours and yeast in the stores…and this soup pairs wonderfully with some good homebaked bread!!

2. this soup has many ingredients, but most are pantry staples which makes this ideal to whip up for dinner without having to go to the store. Even if you’re missing one or two things, this soup is so flavorful you can easily swap out vegetables or omit one with a still tasty result.

3. many of these ingredients are also cheap, which means you get a hardy meal for just a few dollars, which is helpful in these uncertain financial times

4. we’ve had an unusually cold few nights and days for April here in Florence, which made me think of this soup..

5. soups are so easy, and recipes like this are rewarding for my friends who may be deciding to expand their cooking skills with all the newfound time on their hands.

This post may contain affiliate links. If you make a purchase using these links, Jennyblogs may receive a small commission, at no extra cost to you. This helps to support Jennyblogs. Where possible, links are prioritized to small businesses and ethically and responsibly made items. For further information see the privacy policy. Grazie!

Recipe slightly adapted from Clever Eats


White Bean Potato Soup

Serves 4-6

Ingredients:

  • 1 Tbsp oil

  • 1 medium onion, diced

  • 1 stalk of celery, diced

  • 1 carrot, diced

  • 2 garlic cloves, minced

  • 2 15oz / 400g cans of white beans, drained (any kind, such as cannellini or navy)

  • 2 potatoes, cut into small chunks

  • 1 Tbsp / 16g tomato paste

  • 1/2 tsp dried rosemary or 1 Tbsp chopped fresh

  • 1/2 tsp sweet paprika

  • 1/4 tsp cayenne pepper, optional

  • 1/2 cup / 119g white wine, or more broth or water

  • 7oz / 200g fresh or frozen spinach or kale, lightly chopped

  • 2 cups / 474g vegetable broth

  • salt and pepper, to taste

  • extra virgin olive oil and parmesan or pecorino cheese, for finishing

Directions:

  1. In a large stockpot or dutch oven, heat oil over medium heat. Add onion, celery, and carrot and cook, stirring occasionaly, until onion begins to turn translucent.

  2. Add the garlic, then add the beans, potatoes, tomato paste, rosemary, paprika, and cayenne pepper. Cook for a minute or two, stirring frequently.

  3. Add the wine and stir until it is almost evaporated.

  4. Add kale, broth, and salt and pepper to taste.

  5. Raise heat and bring soup to a boil, then cover and reduce heat to low. Cook for about 15 minutes, or until potatoes are tender.

  6. Ladle soup into serving bowls, top with parmesan or pecorino cheese and drizzle with olive oil. Serve with warm, crusty bread. Buon appetito!

Adjustments.jpeg

Jenny’s Notes:

  • If you prefer to cook dry beans instead of using canned, as I do, a good rule of thumb is to take half the weight of called for canned beans and cook that amount of dry beans. Different dry beans absorb slightly different amounts of water, but generally speaking they double in weight when cooked. So if you need 800g as in this recipe, I would cook 400g of dry beans.

  • You can choose to peel your potatoes before chopping or leave skin on, either way is fine if you ask me! Leaving skin on is easier and more nutritious (more fiber!), just be sure to wash them well before using.

  • If you have a rosemary plant, you can also add a clean sprig straight to the soup, then remove when you are ready to serve the soup.

  • In a pinch, you can always just use water instead of broth, although you will lose some flavor depth. If you have any bouillon cubes, you can also dissolve those into the soup following the bouillon dosing instructions.

White Bean Potato Soup
Yield 4-6
Author
Prep time
15 Min
Cook time
35 Min
Total time
50 Min

White Bean Potato Soup

A hearty and nutritious soup bursting with flavor, featuring white beans, potato, kale, onion, garlic, carrots, and celery with a touch of rosemary and a splash of white wine.
Cook modePrevent screen from turning off

Ingredients

Instructions

  1. In a large stockpot or dutch oven, heat oil over medium heat. Add onion, celery, and carrot and cook, stirring occasionaly, until onion begins to turn translucent.
  2. Add the garlic, then add the beans, potatoes, tomato paste, rosemary, paprika, and cayenne pepper. Cook for a minute or two, stirring frequently.
  3. Add the wine and stir until it is almost evaporated.
  4. Add kale, broth, and salt and pepper to taste.
  5. Raise heat and bring soup to a boil, then cover and reduce heat to low. Cook for about 15 minutes, or until potatoes are tender.
  6. Ladle soup into serving bowls, top with parmesan or pecorino cheese and drizzle with olive oil. Serve with warm, crusty bread. Buon appetito!

Notes

If you prefer to cook dry beans instead of using canned, as I do, a good rule of thumb is to take half the weight of called for canned beans and cook that amount of dry beans. Different dry beans absorb slightly different amounts of water, but generally speaking they double in weight when cooked. So if you need 800g as in this recipe, I would cook 400g of dry beans. You can choose to peel your potatoes before chopping or leave skin on, either way is fine if you ask me! Leaving skin on is easier and more nutritious (more fiber!), just be sure to wash them well before using. If you have a rosemary plant, you can also add a clean sprig straight to the soup, then remove when you are ready to serve the soup.In a pinch, you can always just use water instead of broth, although you will lose some flavor depth. If you have any bouillon cubes, you can also dissolve those into the soup following the bouillon dosing instructions.

Nutrition Facts

Calories

426.89

Fat

8.57 g

Sat. Fat

1.21 g

Carbs

65.80 g

Fiber

14.44 g

Net carbs

51.36 g

Sugar

5.02 g

Protein

20.23 g

Sodium

542.01 mg

Cholesterol

1.07 mg

Nutritional information is approximate. Based on 4 servings and includes using wine and toppings.

white bean soup, potatoes, kale, spinach, vegan, healthy, vegetarian, carrots, white wine, spinach, celery, onion, garlic
Soup, Dinner
American
Did you make this recipe?
Tag @jennyblogsandbakes on instagram and hashtag it #jennyblogs

On Coronavirus: Don't Panic, Plan Ahead, Love Your Neighbors

Click here to read the May 4th update from Italy: Phase 2.

We can’t stop thinking about it. We can’t stop talking about it. It’s all you see on social media. We’re all obsessed. Say it with me now, Coronavirus! Or Covid-19. As you like.

IMG_3444.jpeg

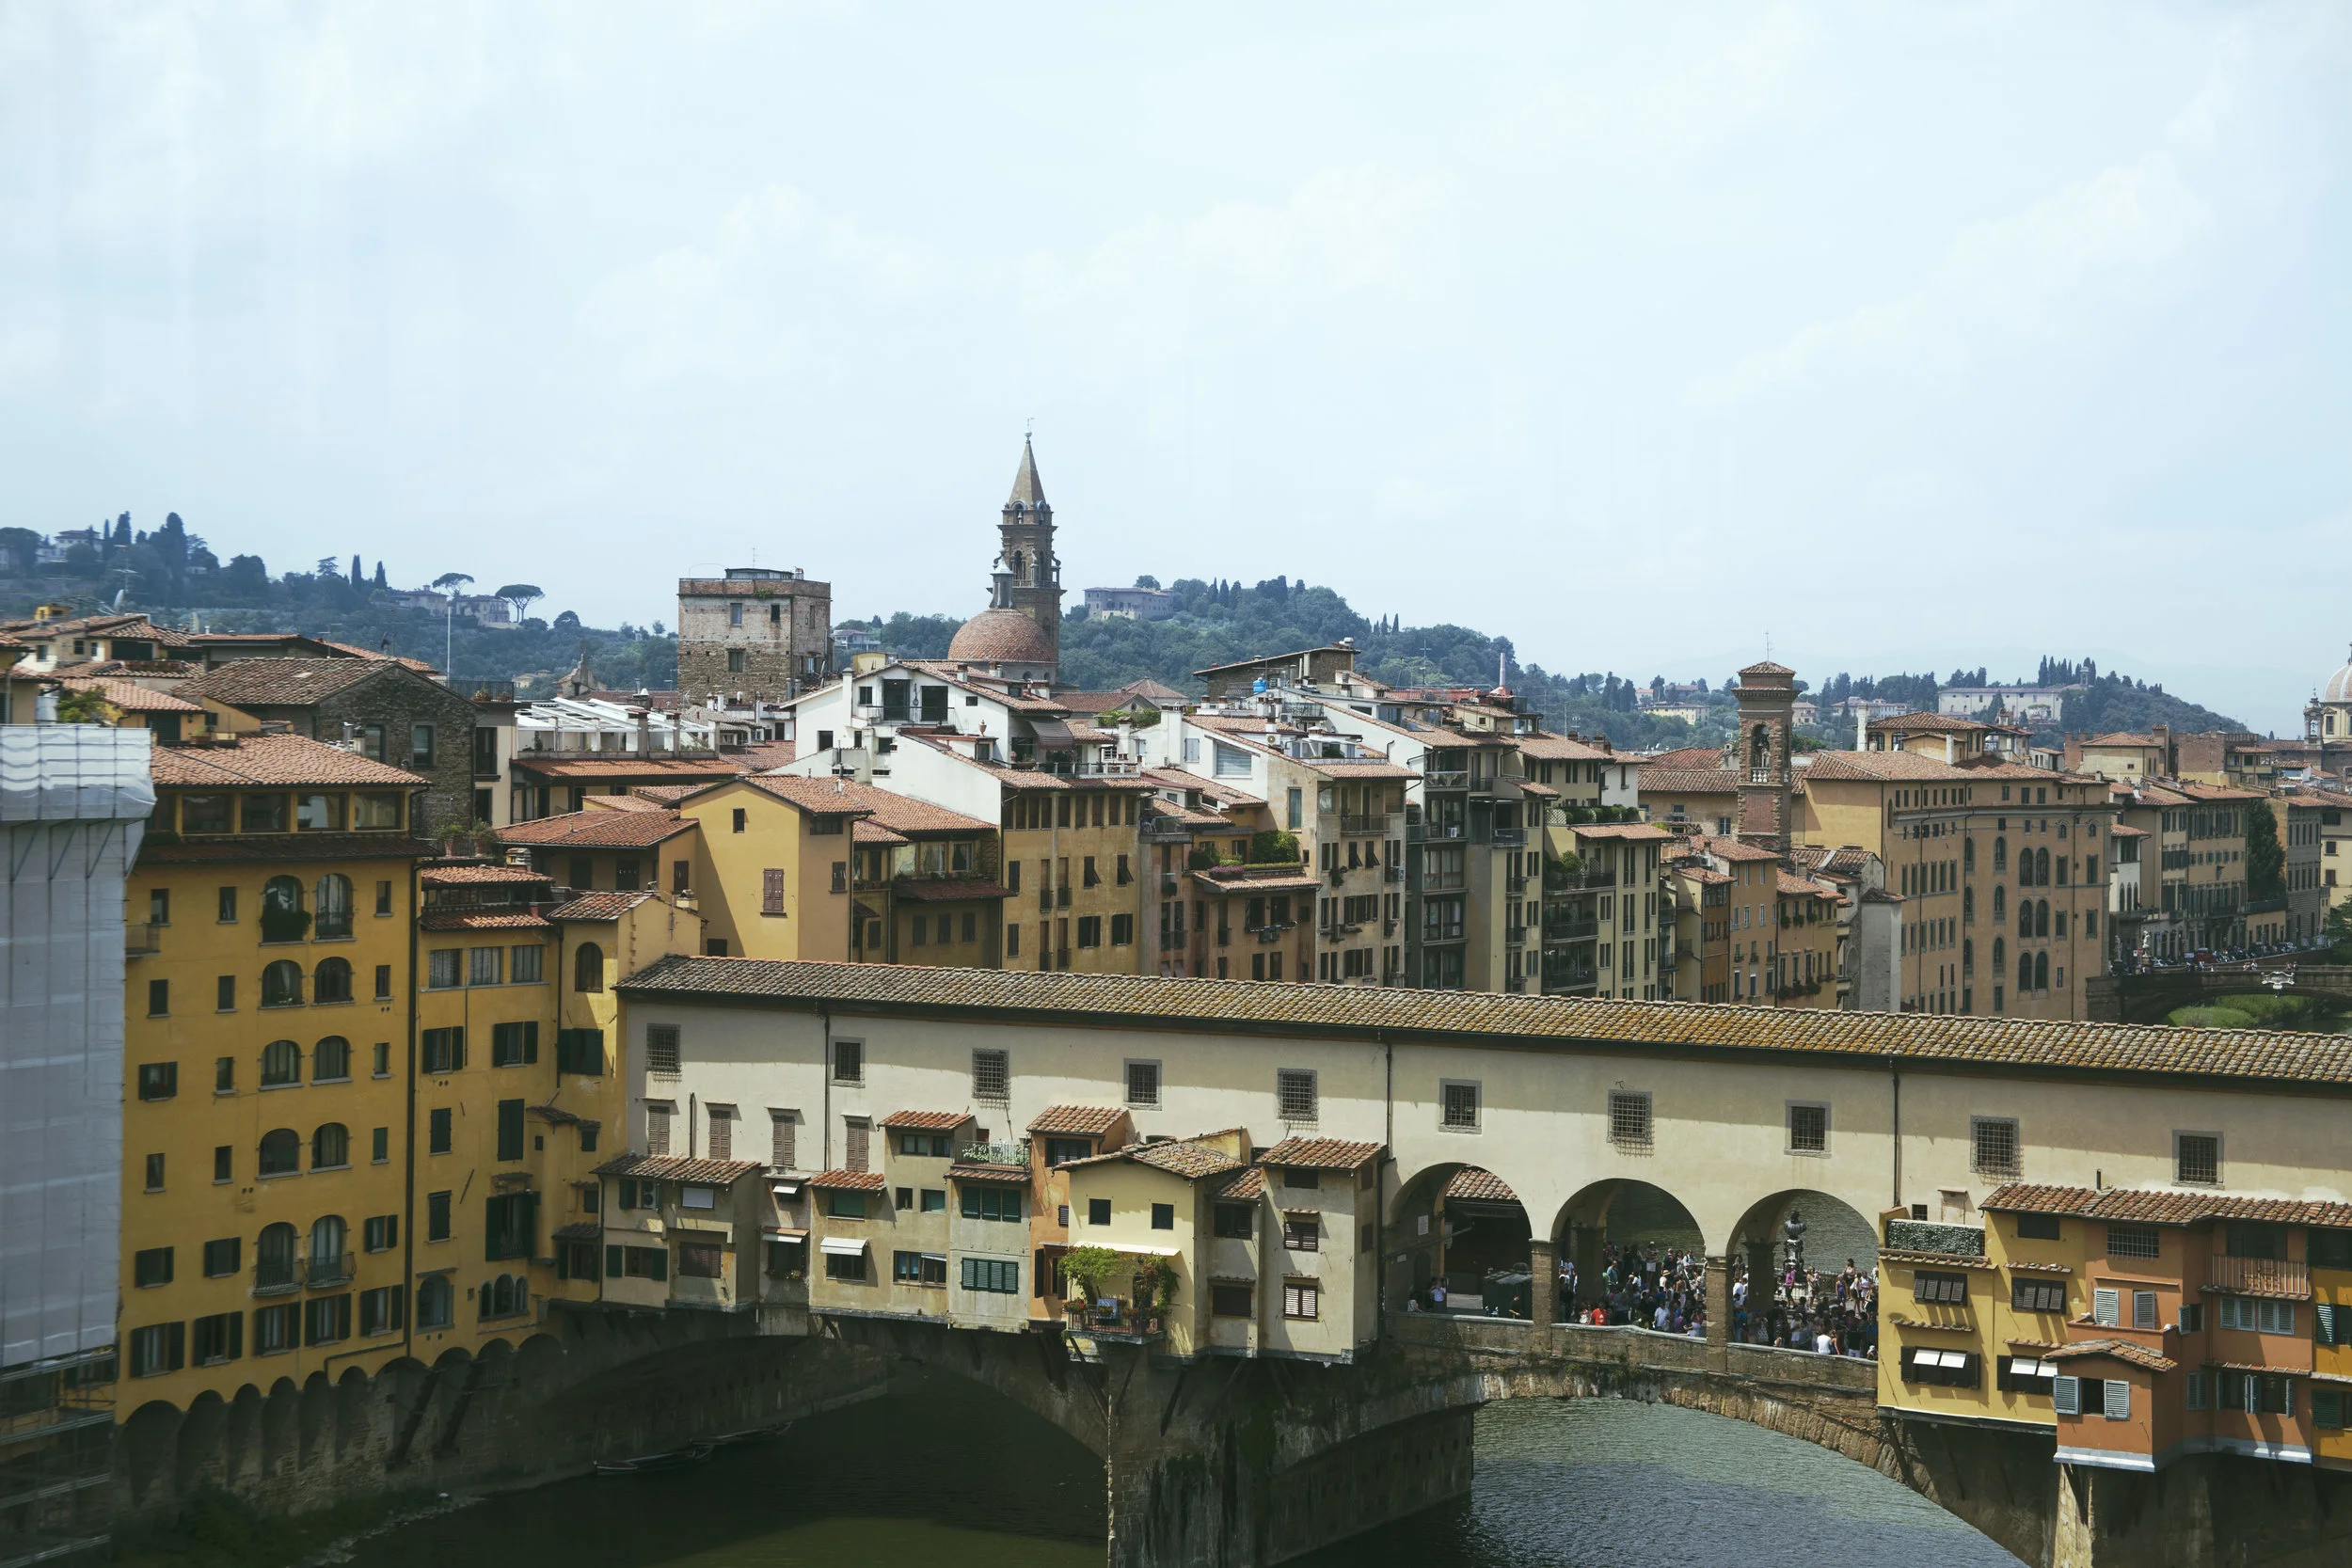
First things first. I’m writing this article from my apartment, under quarantine, in Florence, Italy. I am in no way a medical professional nor in a leading position in government, and what I’ve written below are merely my experiences and observances. That said, I tend to take a humorous outlook on most things in life, but I also believe that serious things need to be given their due weight. This virus has shown itself to be serious, physically and economically.

This is not the end of the world. Panic is never the answer. But by planning ahead and taking precautionary measures you can do your part in helping your country, State or region, city, and community stop or at least quell the spread. By doing so, you could indirectly be saving lives, by not catching and spreading the virus, especially to those who have been shown to be most vulnerable, the elderly population and those with underlying health problems.

How it Began in Italy

Italy reported its first two cases of Covid-19 on January 30. Two Chinese tourists became ill and were quarantined in the Spallanzani hospital near Rome. They recovered and were discharged.

A period of calm ensued. I remember being grateful no more cases were reported, even though the two Chinese tourists had reportedly traveled to Florence, among other cities. Fast forward to February 21 (some articles I’m double checking as I write this say Feb 20), when a man checked himself into the hospital in Codogno (northern Italy) and became the third confirmed Covid-19 case in Italy. That same day, Italy reported 16 new cases in the Lombardy and Veneto regions and the first death. A red flag immediately was raised for me. From everything I’ve been reading about this virus, mostly from reports from China and the WHO, you don’t simply catch this virus and die in the same day. Which can only mean, this virus has been circulating in Italy for some time already. Who knows where those people have been? Whom they’ve been in contact with that can then become carriers. Silently circulating, and no one knew. In Codogno, while hospitals were already dealing with the seasonal flu cases, they noticed a high number of people with respiratory problems. These people were treated as though they had the flu, not coronavirus. They weren’t quarantined.

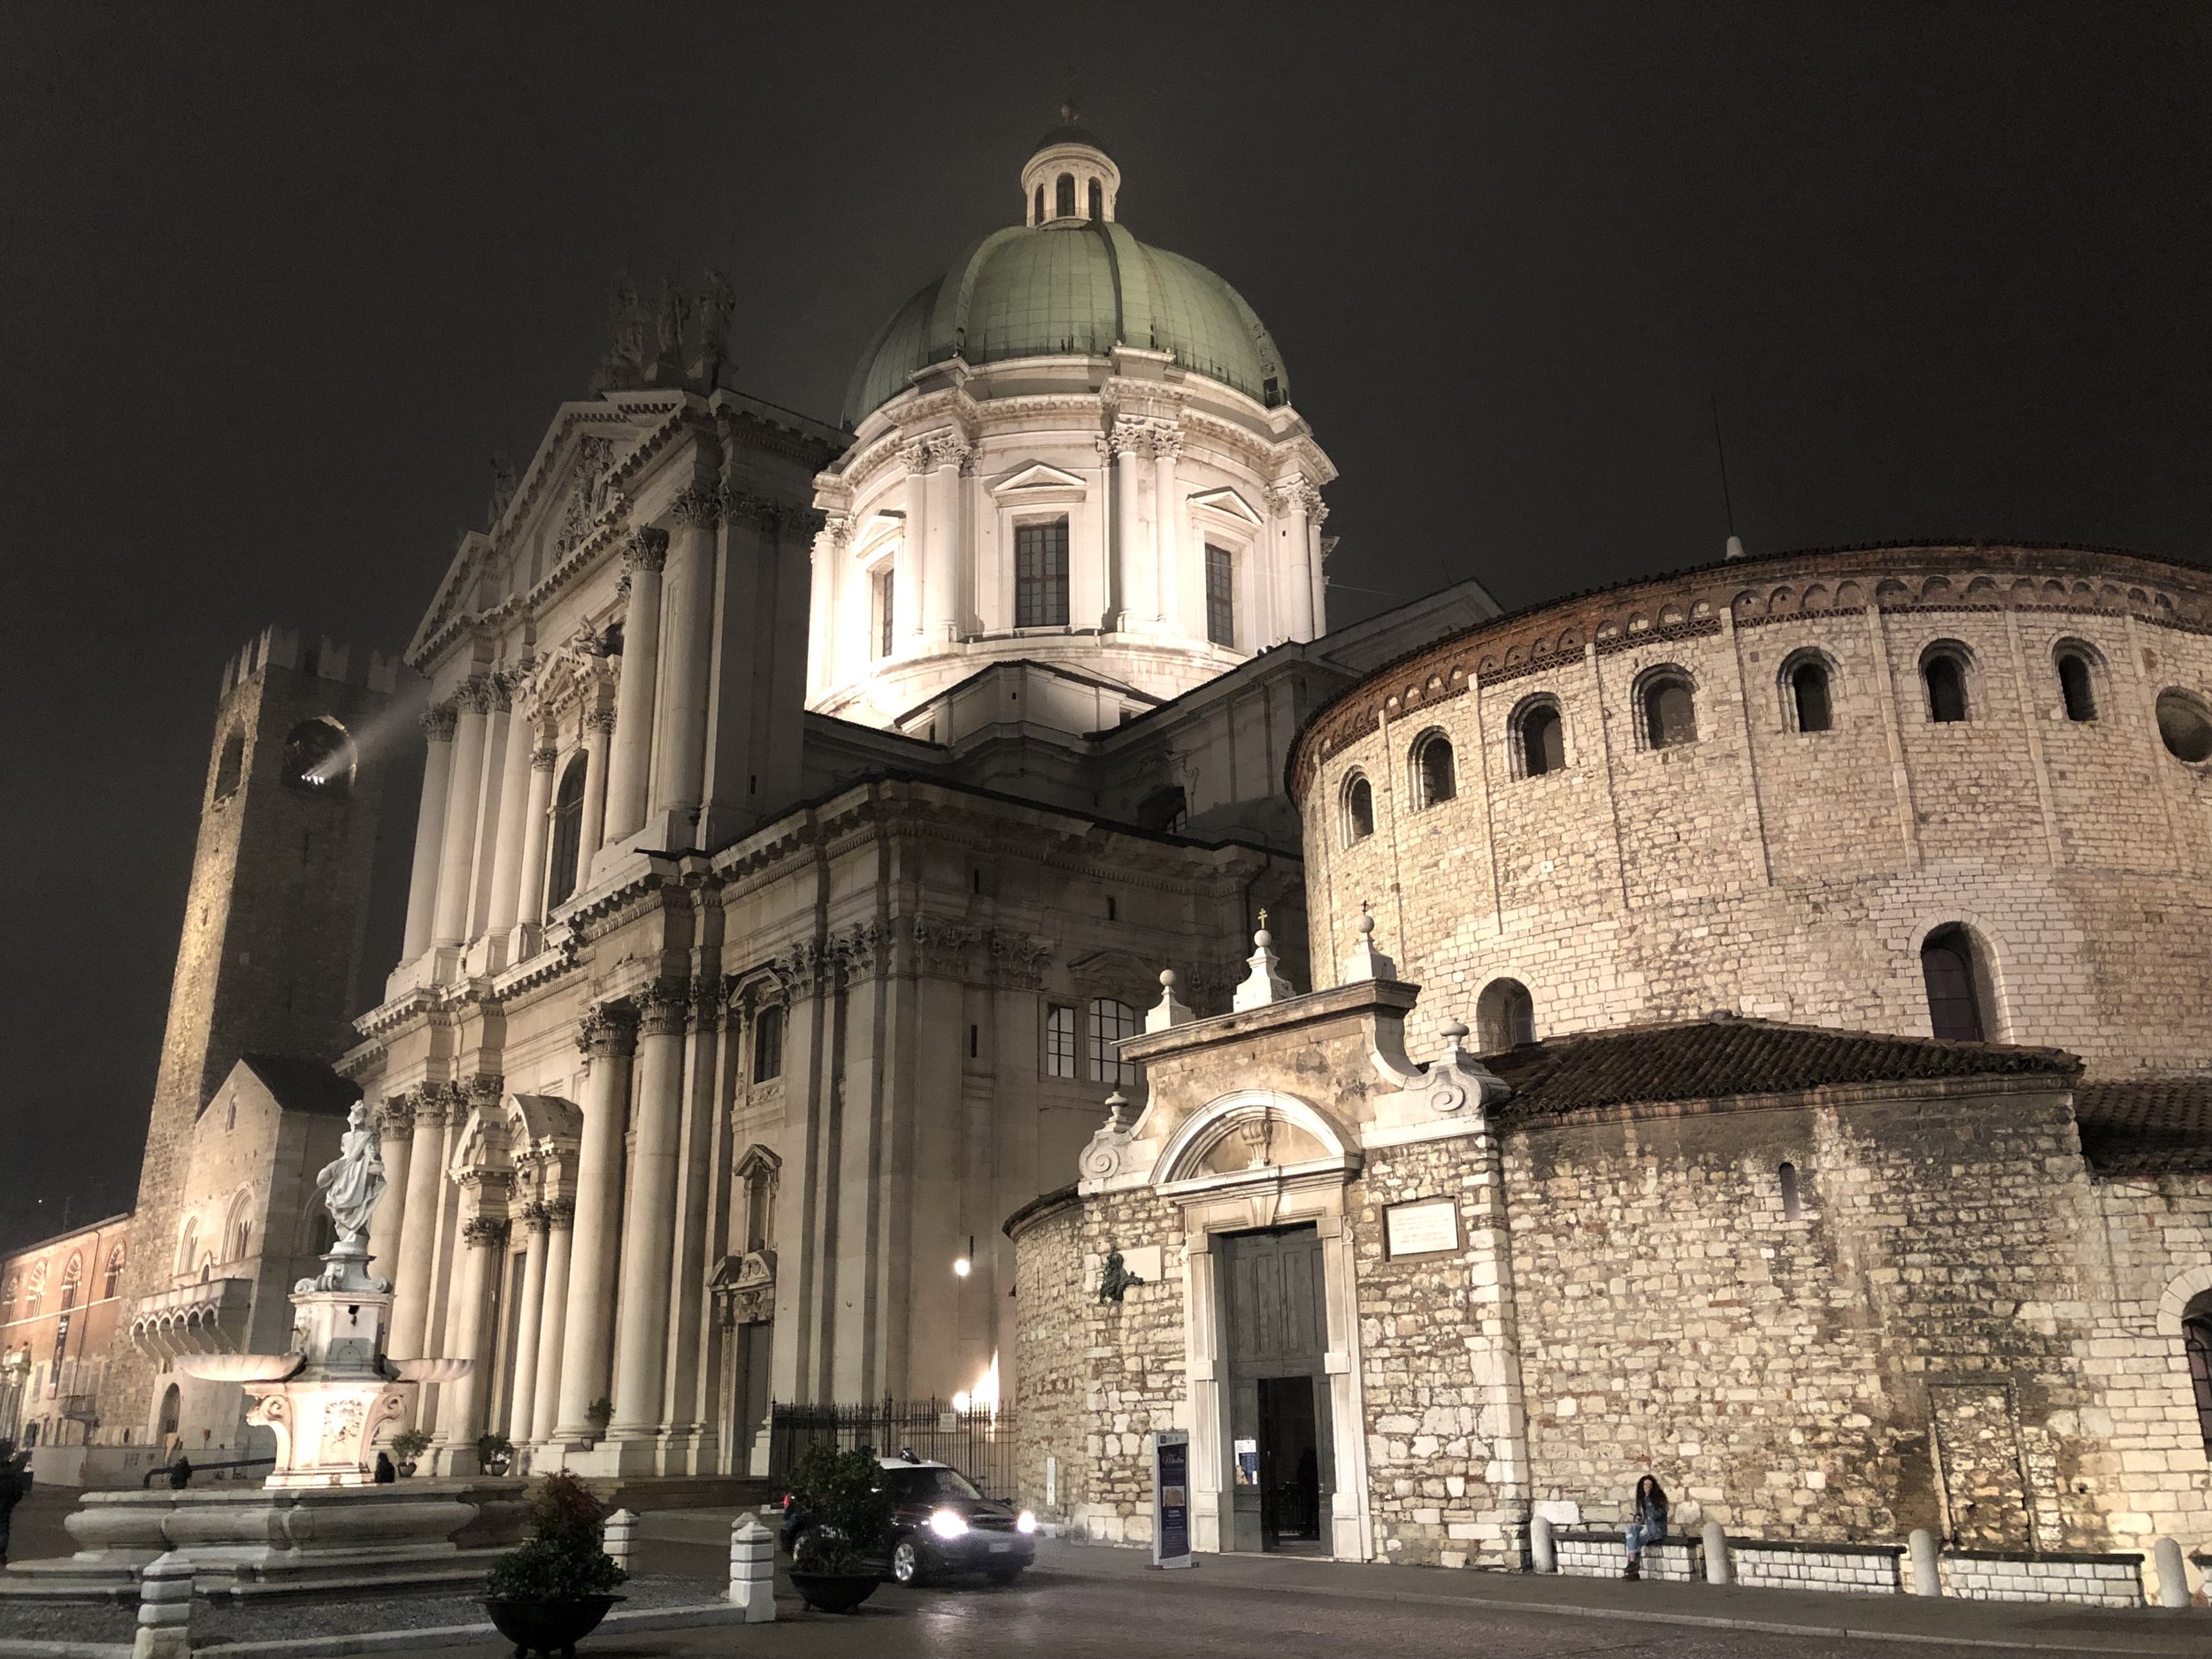
My husband and I’s anniversary was February 24 and my birthday was February 28, so we were talking about taking a weekend trip somewhere. Top contender was Brescia, which is a great base from which to take day trips. I really wanted to see Sirmione. (Google that one for the photos and it’ll be on your list, too.) As cases and deaths continued to increase, we put our plans on hold. Should we go? Shouldn’t we? We unanimously agreed not to go. We found some cheap tickets to Sicily, but didn’t buy them because then cases started popping up in Sicily, also. We decided to stay put. By the time my birthday came, we had already decided to limit our outings (which proved difficult because we had appointments almost every single day) and not go to restaurants. I really wanted sushi, though, so I made a reservation at my favorite sushi place, Aji Tei, for right when they opened at 7:30pm, hoping it would be less crowded. We had tried to make a reservation earlier in February but they were full up. Pages and pages of reservations. This place, unlike a lot of dining places in Italy, is not small. It has an ample dining room and a large covered garden out back. And it can be hard to get in. The whole time we were there it didn’t even get to 25% capacity. It was nice for us, but sad, knowing they and probably many restaurants were feeling the impact.

All this time, the attitude of many people I talked to were flippant, dismissive, or a bit surprised if I mentioned something about being careful. The virus was still largely in the northern Lombardy region and I think some people may have thought me mildly crazy. All the while many politicians, business owners, and residents were passionately encouragingly the world at large to “come to Italy!” It’s safe, Italy is as beautiful as ever! I understand many people live off tourism here and they don’t want the economy or their livelihood to hurt…but we’re also talking about people’s lives. How many times did I see people who had planned trips to Italy asking on some forum or facebook group, is Italy safe? Should we still come? And the overwhelming response was always YES. Come, don’t listen to the naysayers, Italy is safe, it’s just a cold guys COME ON. Not one that I saw encouraged them to do what they thought was best for their family or their peace of mind, or stopped to ask if maybe someone in their group was over 60 or had underlying health problems?

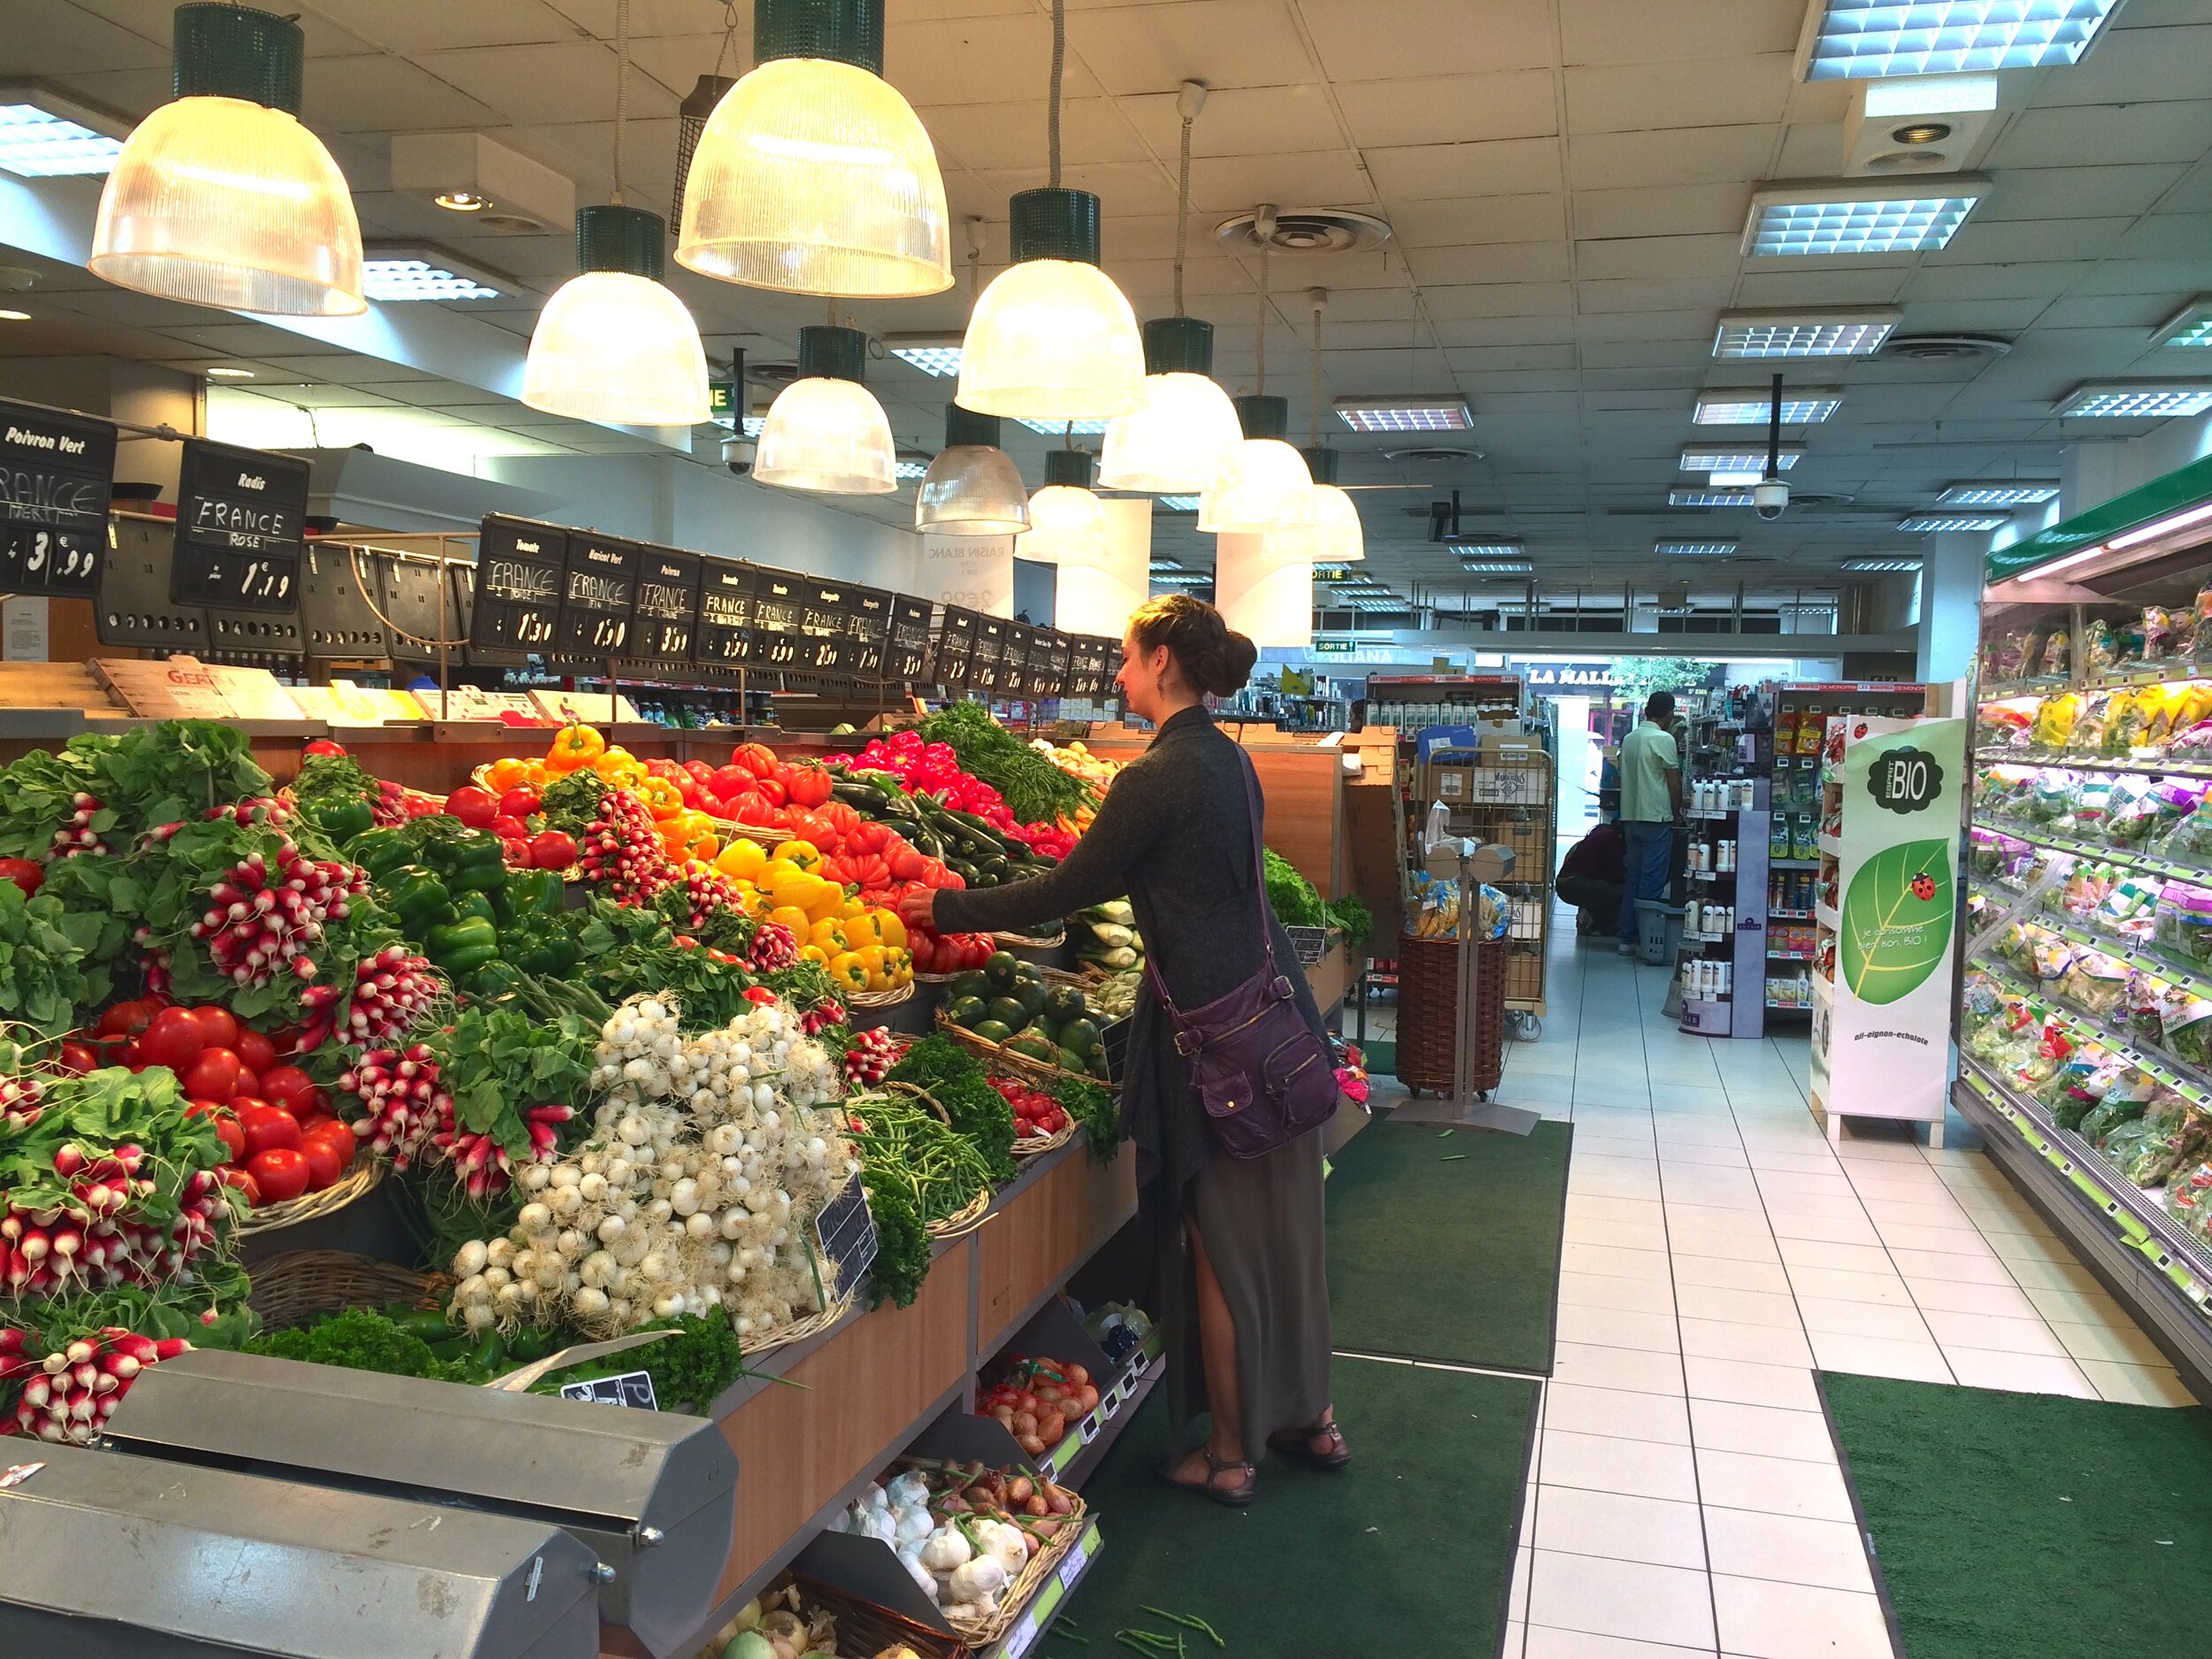
The grocery stores started to be hit all over the country. Pictures of empty shelves, and from parts of the country that didn’t even have confirmed cases yet. The big Esselunga in my neighborhood wasn’t too bad, emptier than I’ve ever seen it, but I was able to get everything I needed. The items that were most hit? Toilet paper, rice, pasta, water, sanitizer of any kind and…women’s razors? I might get quarantined, must have smooth legs!!! haha what? At one point the eggs were gone, and also the milk, but next time I went the milk was completely restocked. I have yet to find a bottle of hand sanitizer in a grocery store. The stores have done a really good job of staying on top of the demand, otherwise.

As the days went on and the number of cases continued to increase in an alarming manner, the leaders in government continued to attack the “fake news” and encourage tourists to come. For my news sources I read mostly BBC News, because I enjoy their straightforward, fact and quote based reporting without adding any drama, insinuations, or sensational statements. And for a few days, Italy all but disappeared from the coronavirus news. Where did Italy go? It’s quickly becoming one of the worst hit countries, and suddenly I can’t find anything out anymore? I would have to google things to find them out, and even then I would have to do so in English and Italian with different wordings before finally finding up to date articles.

As cases spiked to more than 5,800 and more than 230 deaths were reported, the Prime Minister Giuseppe Conte made the decision to quarantine 14 regions in the north on March 8. However, this news was leaked out before going into effect, and there was a mass exodus of thousands of people from the soon-to-be quarantined regions trying to get home and flee the lockdown. I watched in disbelief as these measures that are supposed to curb the outbreak are about to make things so. much. worse. I read about a BBC journalist who drove up to the quarantined north, a good 24 hrs after the new “no one enters, no one leaves” had been in effect. And there was nothing. No police, no checks, no barriers. The quarantine at that point seemed to be still a suggestion, or an idea. My disbelief grew. It was from that point that my husband and I decided to self-quarantine, because there were now thousands of people potentially and probably spreading the virus carelessly. I doubt anyone had the specific evil intent of escaping to spread the virus, but people who don’t have symptoms don’t know they’re spreading and don’t know the harm they’re doing. But that is how it will go. We are human, and our first instinct is to think of ourselves, and we will hurt others in our selfish wake.

Two days after the news broke about the north being quarantined, Prime Minister Conte put into quarantine ALL of Italy. Everyone seemed to wake up, and realize what many of us already had: to curb this pandemia, we must all do what we can and quarantine.

Can you imagine how different this might have gone if Italy had decided to quarantine and take these drastic measures two weeks ago? No one wanted to make that sacrifice. People continued to downplay the severity of the situation and now everyone is forced to make that sacrifice anyway. This way, because the virus has been allowed to spread for so long, it will take longer to get things under control. The economy will hurt more. It’s the unfortunate reality of the situation in Italy right now.

I’m not writing this to shame Italy and lament on the if-onlys. I am writing this so you can learn from Italy. Even if your leaders are not yet taking this as seriously as they should or the actions they should, you CAN. You can be the weirdo and not hug or kiss people, keep your distance while in public, go out as little as possible, wash your hands, all the things you’ve probably already heard a hundred times or more.

If you’ve read this far, thank you, and sorry for being long-winded. I know there are a thousand other articles and blogs on coronavirus you could be reading. Maybe you should be! But have pity, I’m quarantined at home in a small apartment; I have all the time in the world to be long-winded! :) Soon, that may be you, too. Get the good books, movies, and snacks, man.

What are the current restrictions in Italy?

Here’s a snapshot of our life right now. At first just some things were closed or restricted, then things got stricter and time extended, now basically everything is closed except grocery stores, pharmacies and banks.

  • Thursday, March 5, all schools and universities were closed across the country. Study-abroad students were sent home.

  • Suspended until April 3, roughly translated from a post from the Florence Mayor Dario Nardella:

    • Child Educational services and every didactic activity of every order and grade

    • Universities and all artistic, musical, and dance institutions

    • Professional regional and national master courses

    • Universities for the elderly

    • Drivings schools

    • Congress, conventions, reunions, meetings, and social events

    • Demonstrations, events, and shows of any nature

    • Cinema and theatre

    • Pubs, clubs, and similar locales

    • Dance schools

    • Game rooms, casinos, and bingo halls (nooooo not the bingoooo)

    • Museums and every cultural place, such as libraries, archives, archeological parks and areas, monumental complexes

    • School trips, outings, exchanges, guided tours, didactic outings

    • Staying in waiting rooms at hospitals or emergency rooms

    • Civil and religious ceremonies including funerals

    • Visits to nursing homes, rehabilitation centers, hospice, etc. are limited

    • All commercial activities except for the tabacchi, newspaper stands, pharmacies

    • All restaurants, bars, etc. except for home delivery

    • All salons, barbers, etc

At first the grocery stores were going to be closed on Saturday and Sunday , the two busiest days of the week. It was all over the news and I didn’t get it. How does that help? That takes the crowds from the weekends (I’m a weirdo and love grocery shopping but highly dislike going on Saturday and Sunday because it’s shoulder to shoulder) and forces them to go during the week. So now the week will be extra crowded? How does this help crowd control? They only allow so many people in the store at a time, but the lines outside? My husband went to the store today, and after being gone for an hour, came back empty handed. The line was so long he waited for a bit, then decided he didn’t want to be there for hours and hours. Then I remembered today is Friday. Everyone is stocking up for the weekend. Ohhhh snap. I googled to see if anything would be open tomorrow, and you know what? Grocery stores are now open on the weekends. But I had to google that to find out. We have the TV on quite a bit listening for updates, you think they could’ve squeezed that useful bit of information in there somewhere? On the bright side, maybe if I go tomorrow the stores will be empty because everyone still think the stores will be closed, like I did. If anyone can think of why closing grocery stores for two days was a good idea, please. Tell me why.

Beyond these measures, you’re basically not supposed to leave your home, and if you do, at least 1 meter (about 3 ft) between you and other people at all times. I am still a bit confused if I can go out for a walk or fresh air? If you have a dog, you can, but once the dog has done his business, back inside you go. I heard once on the TV no, don’t go outside unless it’s for emergencies or going to the store, and only the grocery store in your area. This upset people who like to go for runs and exercise outside. Then I heard you could go out for fresh air. Today I heard you can go out for a run/exercise, if you stay 1 meter away from others, of course. So tentatively, yes? And if you need to go anywhere outside your area, you must carry with you an official document stating who you are, where you live, and where you are going which had better be for work, medical reasons, or a necessary motive. If you are outside and stopped by police and they determine your reason isn’t valid or you’re lying (ie you say you have a doctor visit and they make you call your doctor who is unaware you have a visit), you will be fined up to 206euro or face up to 3 months in prison. It doesn’t matter if you’re walking or driving, bring this document with you. Only 1 person per family can go grocery shopping at a time. Max 2 people in a car, 1 driving and one in back. 3 people in car? Fined. If you know you are positive for Covid-19 and you leave your home anyway, you can face up to 12 years in jail for voluntary homicide.

If you live in Italy and are looking for the “autocertificazione coronavirus” document, they have the PDF you can download at the bottom of this article.

Italy is taking the situation very seriously. They were left with no choice. The hospitals in the north are at a breaking point, having to make the decision between who gets the ventilator and who doesn’t; literally, who lives and who dies. They are running out of room. As I write this, the numbers from today have come out, and they’re only getting worse. Just since yesterday, 2,547 new cases, 250 new deaths. During the worst of China’s outbreak, deaths never exceeded 150 in one day. Italy has more people dying in one day than China did on any given day. You see this is serious? You can see that if you live elsewhere, your country still has the chance to stall this? Or at least slow down the spread so that hospitals aren’t overloaded and doctors won’t have to make the moral choices they are being forced to here in Italy.

Just in the past couple days my homeland, USA, has greatly ramped up the closures, not to mention the whole world. Schools, dance studios, Broadway, events, sports…Though the US is nowhere near where Italy is outbreak wise, they are thankfully taking these hard steps as a prevention. I still see a lot of Americans on social media who are dismissive of this virus, and I wish they would look at Italy. Most Italians had that same attitude up until they were forced to completely switch gears. For some it was overnight, and it was a bit bizarre. Accept with grace that your leaders are trying to protect you. I just wish the US would up their testing game, so the virus doesn’t have a chance to circulate undetected for so long like it did in Italy.

If you’re one of my friends who thinks this coronavirus is manmade, leaked on purpose, a new weapon, the world trying to control you, etc etc. I hear you. But is posting all the articles demonstrating IT’S THE DEMOCRATS helping? Is it loving your neighbor? I don’t think it is. The best way we can go forward is to not panic, check your sources, take preventive measures even if they’re hard, and look after those who are maybe less privileged or are more vulnerable than you. If you know of an elderly person near you, make them a meal and deliver it to their doorstep. Or have groceries delivered to their door. Offer to go pick up their prescription for them. Don’t hoard food/products you don’t need. Know a family that has a lot of kids? Maybe bless them by having pizza delivered to their home, so the mom and dad can have a night off from cooking. By doing this you not only help people out, but you help support businesses that are struggling. I’m sure there a ton of different ways I haven’t even thought of that would be a great help. In this day and age with apps like Uber Eats, food and many other commodities are just a click away.

Oh, and can we all stop comparing this virus to common cold/influenza? Flu has been around for a long time, we have some immunities to it, and there are vaccines. This coronavirus is brand new and we just don’t know enough about it. If you try and compare flu data to coronavirus data, is that even fair? Coronavirus only has data from December, the flu has data up the wazoo. We already know this coronavirus is more deadly, so before you “pshaw” it and rattle of a recent year’s data from the flu, just realize we’re trying to keep Covid-19 from becoming rampant like the flu so it never has a chance to kill as many people as the flu, or worse. Currently in Italy, the mortality rate for the virus is 5.8%, where flu in the US has a mortality rate of about 0.1%. I would rather huddle at home and be proved wrong later that it wasn’t that serious, rather than disregard the precautions and later be proved wrong that it WAS that serious.

I’d love to end this with some encouragement like, we’ve got this, or we’re each stronger than we think, we can all be heroes…but you know what? You don’t have to look far to see that our base reaction has been protection of…self. Me. My needs. My comforts. I rejoice that I don’t have to put my faith in myself, humans, governments, or regulations. I rejoice in the Lord, who has the whole world and this situation in His control. I rejoice knowing that this world is not all there is. This life is not all I have. But while I’m here, I hope to be able to love my neighbor well and do my part because, in Jesus, I’ve been shown true selfless love.

One more thing. Toilet paper? Let’s all just calm down now. You know who you are. Leave some for your neighbors. Count your squares, people! Oh, and I hope you stocked up on Desitin as well if you actually plan to use that much toilet paper…

Other Useful Resources

For live cases worldwide and easy to look at statistics, check out this site.

For more info on cases in Italy, check out this page.

For all things Florence and other useful information on coronavirus if you’re in Italy, check out Girl in Florence!

If you’ve read this far and want to really understand why social distancing is a thing, check out this article full of graphs, maths, possible outcomes and general confirmation that this is serious stuff and must be acted on now.
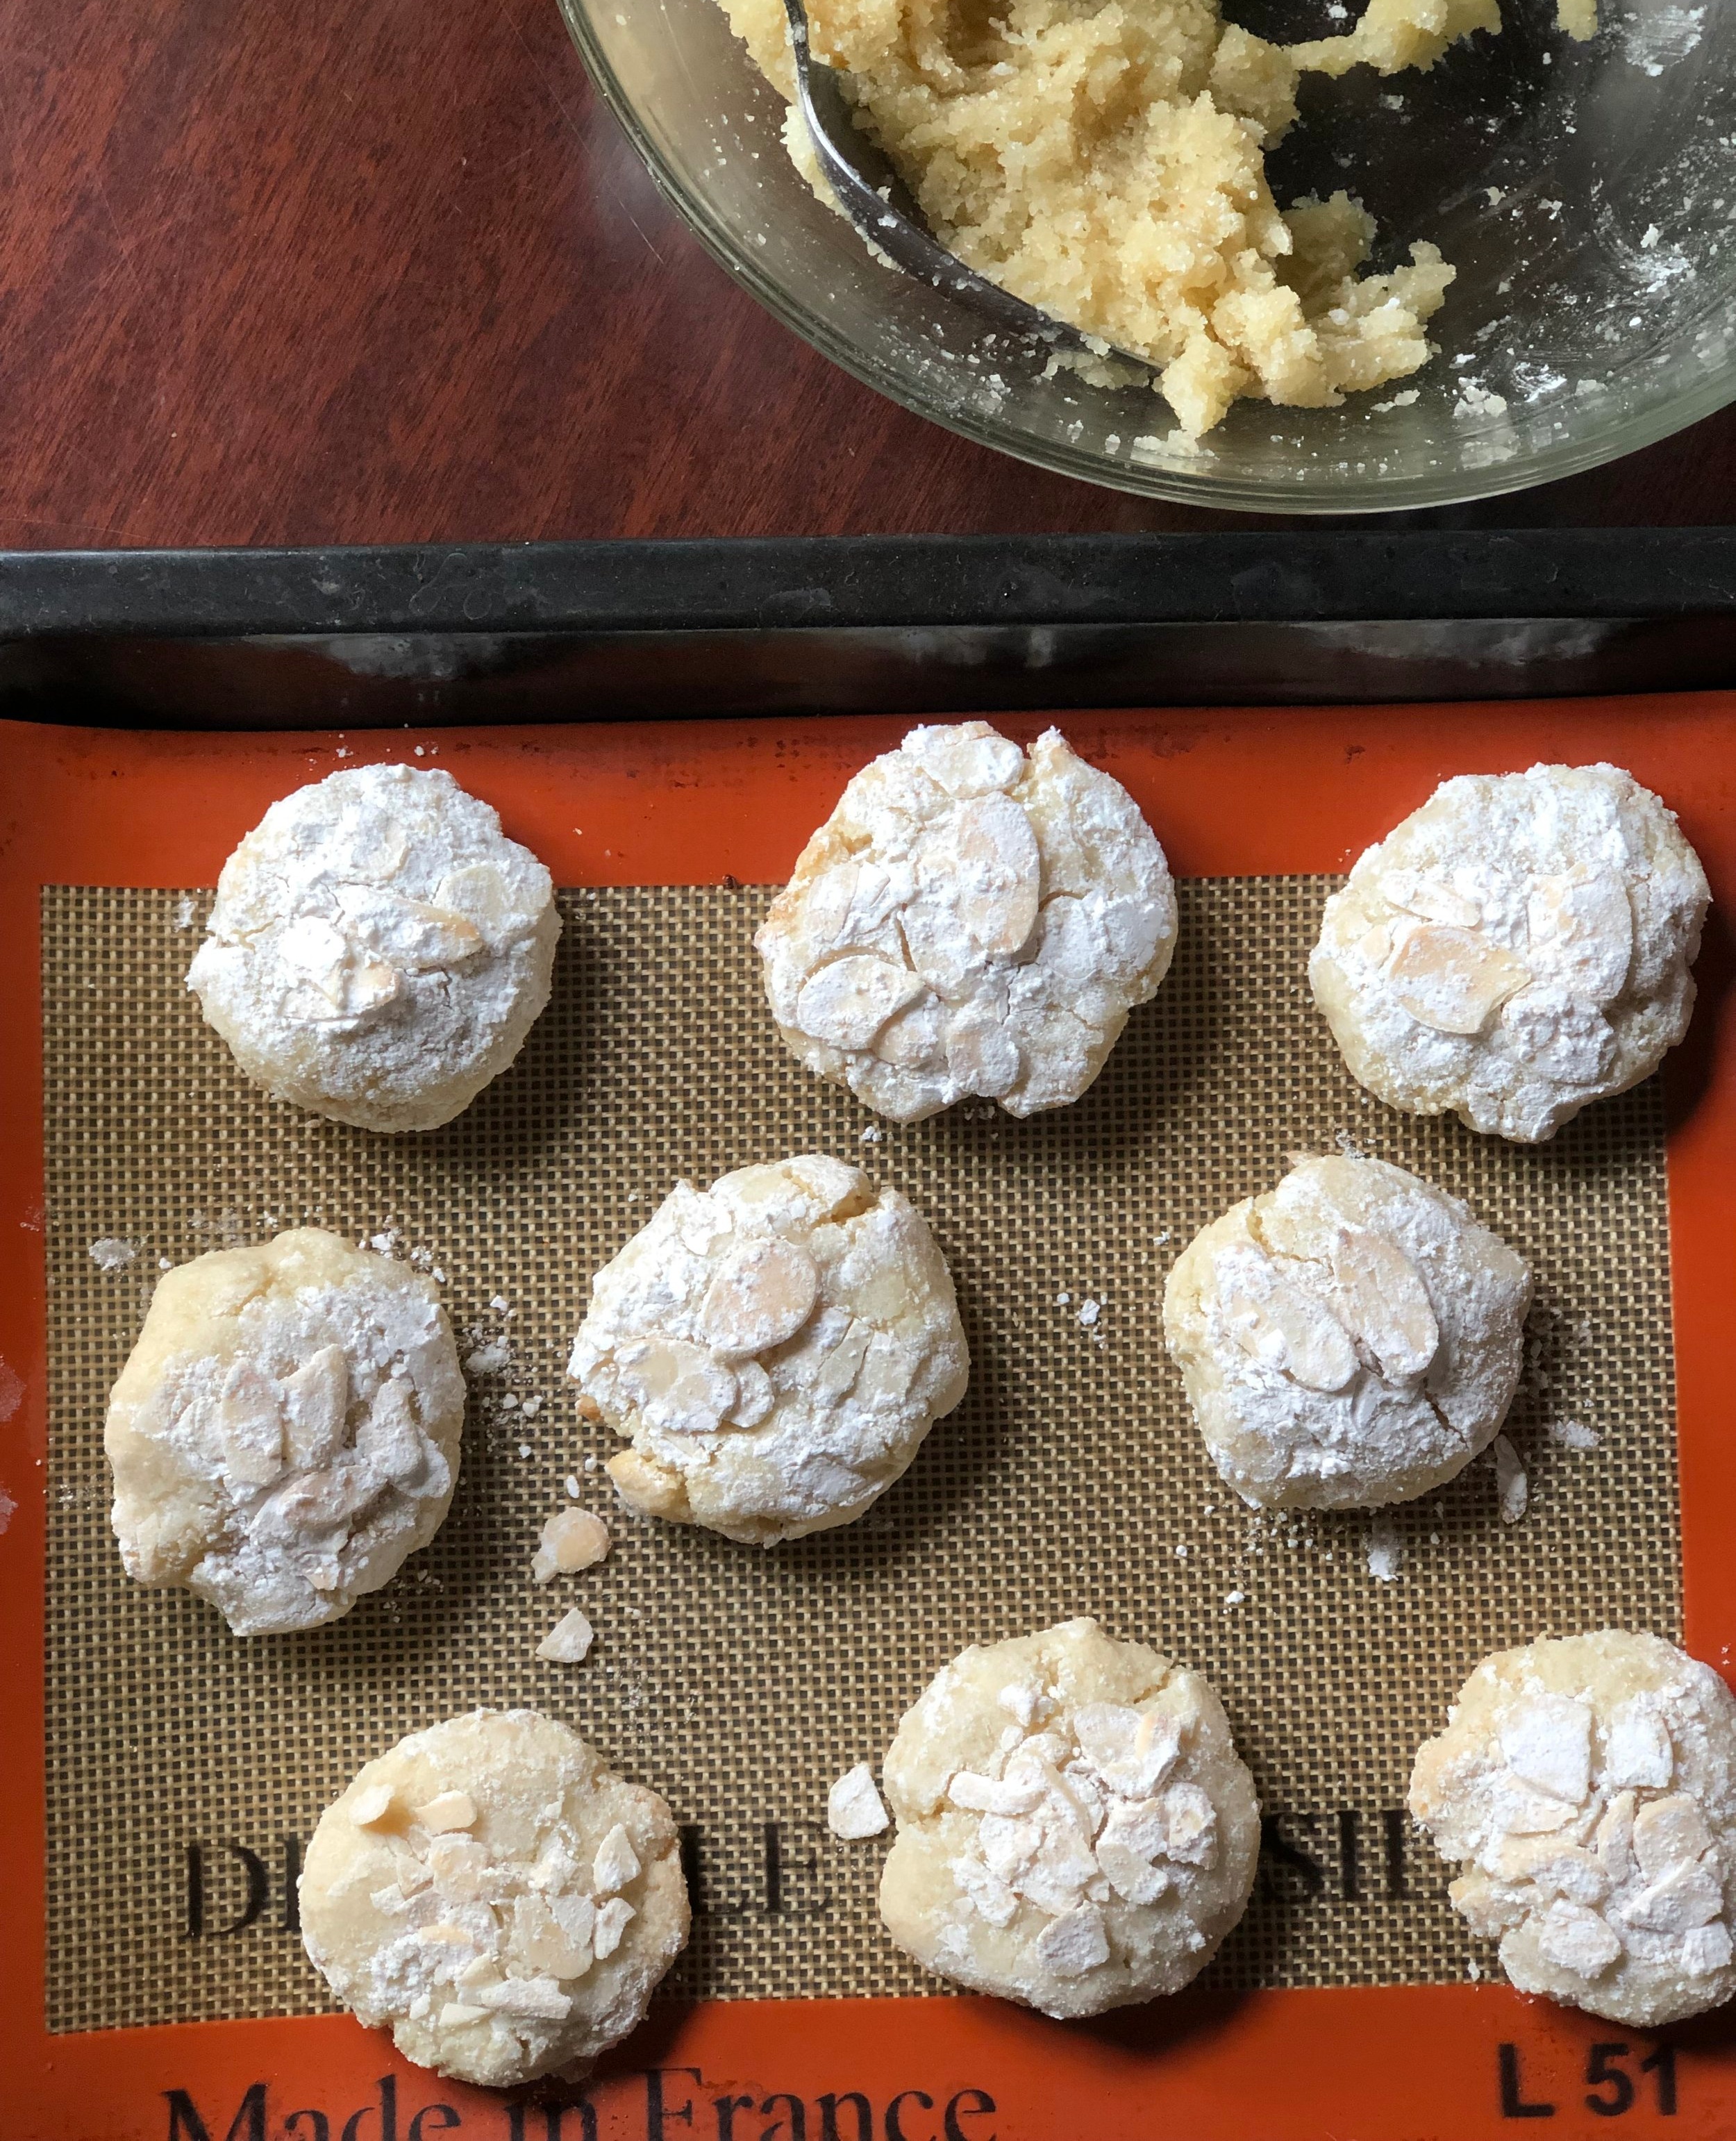
My Favorite Scones

Last Updated August 30, 2024

Adjustments.jpeg

Happy 2020!
Once again heading into the Christmas season I went MIA from the blog, there’s just too much to be done, eaten, seen, and experienced!

I closed out 2019 by getting to show my husband America for the first time ever, and more importantly, my hometown! It was a blast traveling home for Christmas, and busy. Every year it seems to get a little bit harder to say goodbye.

2020 started out completely uneventful, we were flying somewhere over the Atlantic Ocean and we don’t know when or where we were when the new year happened. It just did. I think 2020 is going to be a good year, though, if nothing else, it’s a great number, right? Oh. Goodness. Ah, little did I know what a WILD year 2020 was going to be. LOLOLOLOL.

I was a bit nonplussed at the seeming coincidence of seeing photos of not one, not two, but several 20’s or Gatsby themed New Year’s parties. The movie came out several years ago, guys, why the big comeback? … It took seeing someone’s post on fb about entering the roaring 20’s again for it to click for me. I can’t help it, guys, I’m just not always the brightest bulb in the case.

However, our vision is 2020 and it is roaring and all those good things, so let’s get rolling. Rolling scones. I mean, these scones don’t have to be rolled, it just sounds like the band…;)

Now. This scone recipe is not just any recipe I am about to share with you, no no no. This is my favorite scone recipe, and I like/use several different scone recipes, so this is saying something.

Like these coconut scones, which are pretty darn delicious.
And these Orange Chocolate Chip Scones. YUM.

But. This scone recipe to beat all scone recipes (opinion) is so versatile, you can make just about any flavor you can think up! It’s also quite forgiving, which makes your scones turn out great every single time. Pictured are cranberry orange scones, but I will give you more flavor ideas and a launch pad to create your own flavors after the basic recipe!

I know, I know, calm down, this is all a lot to take in. The best scone recipe ever PLUS so many different flavors?? What is it, Christmas or something? No, but I decided to start the year off right with one of my favorites recipes (and I’m not even talking just in the scone category! Gasp.) and extending an olive branch for having ignored the inter webs for a bit longer than intended. (It was the eggnog, you guys!)

Ok, scones, let’s go!

This post may contain affiliate links. If you make a purchase using these links, Jennyblogs may receive a small commission, at no extra cost to you. This helps to support Jennyblogs. Where possible, links are prioritized to small businesses and ethically and responsibly made items. For further information see the privacy policy. Grazie!

Recipe adapted from allrecipes


My Favorite Scones

Makes 12 scones

Adjustments.jpeg

Ingredients:

For the Scones

  • 1 cup / 225g plain yogurt

  • 1 tsp baking soda

  • 4 cups / 480g all-purpose flour

  • 1 cup / 200g sugar

  • 2 tsp baking powder

  • 1 tsp salt

  • 3/4 cup / 169g oil

  • 1 egg

  • 1 cup flavorings, 1 tsp extract, 1 Tbsp zest, etc. (see below)

For the Glaze

  • 1 cup / 120g powdered sugar

  • 1-2 Tbsp / 15-30g milk

Directions:

Make the Scones

Oven 350°F / 177°C. Baking sheet lined with parchment paper or silpat.

  1. In a small bowl, combine yogurt and baking soda; set aside.

  2. In a large bowl, whisk together flour, sugar, baking powder, and salt.

  3. Add oil to flour mixture, mixing until coarse crumbs form.

  4. Stir in egg, yogurt mixture, and any add-ins just until barely moistened.

  5. Turn the dough out onto a generously floured surface. Knead briefly, about 4-8 turns, then press into an even 1-inch thick circle.

  6. Cut the circle into 12 triangular shaped scones, and place on prepared baking sheet.

  7. Bake for 12-15 minutes or until the centers look set, the scones have cracked slightly, and/or the bottoms or a light golden brown.

Make the Glaze

  1. Stir together powdered sugar and 1 Tbsp milk. Continue adding milk, a tsp at a time, until a thick but drizzleable glaze is achieved. Drizzle over cooled scones.

Scone Flavors:

Use one of these ideas (they’re all tried and true!) or create your own!

Adjustments.jpeg
  • Lemon Scones: 1 tsp lemon extract, 1 Tbsp lemon zest; use lemon juice to make the glaze. Use lemon yogurt if available.

  • Orange Coconut Scones: 1 tsp orange extract, 1 Tbsp orange zest, optional 1/2 tsp coconut extract, 3/4 cup coconut; use orange juice to make the glaze. Use orange or coconut yogurt if available.

  • Chocolate Chip Scones: 1 cup mini chocolate chips, 1 tsp vanilla extract. Make the simple glaze as in the basic recipe or melt more chocolate chips and drizzle over scones.

  • Chestnut Chocolate Chip Scones: 1 cup mini chocolate chips, 1 tsp vanilla extract, replace 1/4 cup of the yogurt with 1/4 cup chestnut purée. Glaze as in basic recipe.

  • Cherry Maple Scones: 1 cup dried cherries; use maple syrup to make the glaze.

  • Strawberry Scones: 1/2 cup diced fresh strawberries; use strawberry yogurt. Use basic glaze, sprinkle with demarara sugar before baking, or spread strawberry jam over the top while the scones are still warm.

  • Cranberry Orange Scones: 1 tsp orange extract, 1 Tbsp orange zest, 1 cup fresh (or frozen and thawed/drained) cranberries; use orange juice to make the glaze. Use orange yogurt if available.

  • Gingerbread Scones: replace 1/4 cup of the oil with 1/4 cup molasses, add 1 tsp cinnamon, 1 tsp ginger, 1/2 tsp cloves; use basic glaze or make a cream cheese drizzle by beating 4oz softened cream cheese with 1/4 cup powdered sugar until smooth, then adding milk 1 Tbsp at a time until mixture is thin enough to be drizzled.

Jenny’s Notes

  • In place of the plain yogurt you can also use sour cream or even mascarpone if you have leftovers from say, making tiramisu. You can also easily use Greek yogurt, or sweetened vanilla yogurt. If you use a sweetened yogurt, cut sugar in the recipe by 1/3 cup / 67g. You can also use a flavored yogurt to boost the scones flavor. For example, in the cranberry orange recipe above you could use orange yogurt.

  • If you accidentally make your glaze too thick or too thin, it’s a super easy fix. For a too-thick glaze, keep adding more milk (or whichever liquid you are using) gradually until desired consistency is achieved. Likewise, for a too-thin glaze, keeping adding a bit more powdered sugar until thick enough.

Favorite Scones
Yield 12
Author
Prep time
25 Min
Cook time
15 Min
Total time
40 Min

Favorite Scones

If I had to make one scone recipe for the rest of my life this, would be it: the perfect base to add any fill-ins and flavorings you wish. Perfectly moist, a sweet glaze, and pairs perfectly with a good book and a cup of tea!
Cook modePrevent screen from turning off

Ingredients

For the Scones
For the Glaze
Scone Flavor Ideas

Instructions

Make the Scones
  1. Oven 350°F / 177°C. Baking sheet lined with parchment paper or silpat.
  2. In a small bowl, combine yogurt and baking soda; set aside.
  3. In a large bowl, whisk together flour, sugar, baking powder, and salt.
  4. Add oil to flour mixture, mixing until coarse crumbs form.
  5. Stir in egg, yogurt mixture, and any add-ins just until barely moistened.
  6. Turn the dough out onto a generously floured surface. Knead briefly, about 4-8 turns, then press into an even 1-inch thick circle.
  7. Cut the circle into 12 triangular shaped scones, and place on prepared baking sheet.
  8. Bake for 12-15 minutes or until the centers look set, the scones have cracked slightly, and/or the bottoms or a light golden brown.
Make the Glaze
  1. Stir together powdered sugar and 1 Tbsp milk. Continue adding milk, a tsp at a time, until a thick but drizzleable glaze is achieved. Drizzle over cooled scones.

Notes

In place of the plain yogurt you can also use sour cream or even mascarpone if you have leftovers from say, making tiramisu. You can also easily use Greek yogurt, or sweetened vanilla yogurt. If you use a sweetened yogurt, cut sugar in the recipe by 1/3 cup / 67g. You can also use a flavored yogurt to boost the scones flavor. For example, in the cranberry orange recipe above you could use orange yogurt. If you accidentally make your glaze too thick or too thin, it’s a super easy fix. For a too-thick glaze, keep adding more milk (or whichever liquid you are using) gradually until desired consistency is achieved. Likewise, for a too-thin glaze, keeping adding a bit more powdered sugar until thick enough.

Nutrition Facts

Calories

397.79

Fat

15.22 g

Sat. Fat

1.33 g

Carbs

60.11 g

Fiber

1.47 g

Net carbs

58.64 g

Sugar

28.27 g

Protein

5.78 g

Sodium

401.65 mg

Cholesterol

16.82 mg

Nutritional information is approximate. Based on 12 servings of cranberry orange scones.

Best scone recipe, Scone base,
Breakfast, Brunch
British
Did you make this recipe?
Tag @jennyblogsandbakes on instagram and hashtag it #jennyblogs

Butternut Squash and Sage Pasta

Last Updated October 10, 2024

It’s fall and not only has the Charlie Brown Great Pumpkin arrived, but so have all the gourds!

Adjustments.jpeg

There are many types but the good news is they are all deliciou and are often quite interchangeable. Unless you’re making spaghetti squash. Then you need spaghetti squash.

In fact today’s recipe is, in a way, spaghetti squash. The principal difference is that instead of the noodles being spaghetti squash the actual spaghetti is covered in a wonderfully flavored, creamy, cheesy, butternut squash sauce! With sage, apple, onion, celery, and basically all of the best autumn flavors in one. Even just the first step of this dish, sautéeing onions in butter, made me so happy and nostalgic. Why? Because onions cooking in butter reminds me of my mom’s stuffing recipe. And it’s the best, obviously.

Making this pasta is quite simple, cooking some veggies on the stove and then blending them at the end. Finish some spaghetti in the sauce, sprinkle with Pecorino Romano cheese and you’ve got yourself a delectably seasonal meal!

I love it so much. In fact, it makes quite a bit of sauce so I am able to stick some in the fridge AND freezer! The quantity of sauce may vary slightly depending on how thick or thin you like your sauce and how exact you are with vegetable ingredients. I tend to be over-generous on portions.

This post may contain affiliate links. If you make a purchase using these links, Jennyblogs may receive a small commission, at no extra cost to you. This helps to support Jennyblogs. Where possible, links are prioritized to small businesses and ethically and responsibly made items. For further information see the privacy policy. Grazie!

Recipe adapted from Jake Cohen at the feedfeed


Butternut Squash and Sage Pasta

Serves 4-6 with leftover sauce for another meal

Ingredients:

  • 4 Tbsp / 56g butter

  • 1 medium onion, chopped

  • 1 1/2 pounds / 675g peeled and chopped butternut squash

  • 2-3 stalks celery, chopped

  • 1 apple, peeled and chopped

  • 1 generous Tbsp of chopped fresh sage

  • 3/4 cup / 178g milk

  • 1 lb / 500g spaghetti

  • 1/2 cup / 50g shredded parmigiano reggiano

  • 1/2 cup / 50g shredded fontal or other good melting cheese

  • 1/2 cup / 50g shredded pecorino romano, plus more for finishing

  • salt and pepper to taste


Directions:

Adjustments.jpeg
  1. In a large pan over medium heat, melt butter. Add onions, stirring occasionally, until mostly translucent, about 5 minutes.

  2. Add squash, celery, apple, and sage; continue to cook until things start to caramelize, about 5 minutes.

  3. Add milk. Stir and cover, allowing to cook until vegetables are tender, about 10 minutes. The milk may look a bit curdled, this is fine since everything will be blended in the end.

  4. While the vegetables are simmering, place a large pot of water over high heat. Just before boiling, generously salt the water. When water is boiling and salt has dissolved, add pasta and cook according to package directions.

  5. When vegetables are tender, blend with an immersion blender or transfer to a blender. Blend until smooth. If sauce is too thick to blend easily, thin out with some pasta water or milk. Return to pot and stir in all three cheeses; salt and pepper to taste.

  6. When pasta is cooked al dente, drain, reserving 2 cups / 474g of pasta water. Return pasta to pan and toss in desired quantity of sauce. If sauce is too thick, add some reserved pasta water and toss until desired consistency is reached, adding more pasta water as needed.

  7. Serve with a generous dusting of pecorino romano.

Jenny’s Notes:

  • This recipe makes a generous amount of sauce, so you can choose to refrigerate the leftovers (will probably be enough for another 1 lb / 550g package of pasta) for a few days or stick it in the freezer for a future quick dinner!

  • Cooking time for vegetables will depend on how large or small they are chopped, and may need slightly more or less time than stated.

  • Feel free to use other kinds of squash or even pumpkin. The other night when I made this the store had run out of Butternut so I selected another Tuscan variety and it was lovely! Keep in mind that different squashes may have different starch levels and may affect how thick or thin the sauce will end up, which you can adjust by adding pasta water at the end.

  • Play with the cheeses you use! Parmigiano reggiano, or parmesan, is a wonderfully nutty, aged cheese that you probably already have because it is amazing on almost everything. Fontal is an inexpensive but wonderful melting cheese which I generally have on hand, but you could also use gruyere, gouda, fontina, cheddar, etc. The one I recommend you splurge on would be the Pecorino Romano, which is an aged sheep’s milk cheese. There are many different varieties, those aged in walnut leaves or with truffles, young or aged, easily identified by the word “pecorino” usually followed by it’s defining factor. Pecorino Romano is one of the most exported cheeses from Italy and is aged a minimum of 5 months, giving it a wonderful sharp flavor that pairs so well with our velvety, squashy pasta today.

Butternut Squash and Sage Pasta
Yield 4-6 + extra sauce for another meal
Author
Cook time
40 Min
Total time
40 Min

Butternut Squash and Sage Pasta

A perfectly seasonal pasta with a creamy, cheesy butternut squash and sage sauce.
Cook modePrevent screen from turning off

Ingredients

Instructions

  1. In a large pan over medium heat, melt butter. Add onions, stirring occasionally, until mostly translucent, about 5 minutes.
  2. Add squash, celery, apple, and sage; continue to cook until things start to caramelize, about 5 minutes.
  3. Add milk. Stir and cover, allowing to cook until vegetables are tender, about 10 minutes. Note: The milk may look a bit curdled, which is fine since everything will be blended in the end.
  4. While the vegetables are simmering, place a large pot of water over high heat. Just before boiling, salt the water. When the water is boiling and salt has dissolved, add pasta and cook according to package directions.
  5. When the vegetables are tender, either blend with an immersion blender or transfer to a blender. Blend until smooth. Stir in the three cheeses and salt and pepper to taste.
  6. When the pasta is cooked al dente, drain, reserving 1 cup / 237g of pasta water. Return pasta to pan and toss in desired quantity of sauce. If the sauce is too thick, add reserved pasta water until desired consistency is reached.
  7. Serve with a generous dusting of pecorino romano.

Notes

  • This recipe makes a generous amount of sauce, so you can choose to refrigerate the leftovers for a few days or stick in the freezer for a future quick dinner!
  • Feel free to use other kinds of squash or even pumpkin! Just keep in mind that the different squashes may have different starch levels and may affect how thick or thin the sauce will end up, which you can adjust by adding the pasta water at the end.
  • Play with the cheeses you use! Parmigiano reggiano, or parmesan, is a wonderfully nutty, aged cheese that you probably already have because it is amazing on almost everything. Fontal is an inexpensive but wonderful melting cheese which I generally have on hand, but you could also use gruyere, gouda, fontina, cheddar, etc. The one I recommend you splurge on would be the Pecorino Romano, which is an aged sheep’s milk cheese. There are many different varieties, those aged in walnut leaves or with truffles, young or aged, easily identified by the word “pecorino” usually followed by it’s defining factor. Pecorino Romano is one of the most exported cheeses from Italy and is aged a minimum of 5 months, giving it a wonderful sharp flavor that pairs so well with this velvety, squashy pasta.

Nutrition Facts

Calories

375.87

Fat

23.82 g

Sat. Fat

14.35 g

Carbs

68.67 g

Fiber

8.85 g

Net carbs

59.83 g

Sugar

13.66 g

Protein

21.97 g

Sodium

691.50 mg

Cholesterol

66.70 mg

Nutritional information is approximate. Based on 4 servings.

pasta, fall recipe, butternut squash, sage, seasonal pasta, pecorino romano, butternut squash sauce
dinner, pasta
American
Did you make this recipe?
Tag @jennyblogsandbakes on instagram and hashtag it #jennyblogs
Adjustments.jpeg

Pumpkin Cheesecake Swirled Brownies

Last Updated August 29, 2024

IMG_1331.jpg

Happy October!

I realize I’m a tad bit late as it’s almost November, but I’ve been MIA here on the blog for the past 3 weeks. I flew to meet some of my family in Paris and IT WAS A DREAM. All the hugs and jokes, pastries, sight-seeing, adventures, and everything else that happens when in Paris with some Morris family. We fit right in, people kept mistaking us for Parisians with our striped shirts, berets, and flawless French while taking photos constantly. I should probably write a blog about it when I get back.

Just kidding, just kidding.

I already miss my family so much. Nothing like watching your family fly away and suddenly feeling like my 18-year-old self again watching my parents drive away after having helped me move to Mississippi. I miss Paris too. Another thing I really enjoyed was the real fall weather there. Paris weather is actually quite similar to my hometown in Traverse City, Michigan. Except that Paris isn’t under 2+ feet of snow for 4+ months…meanwhile I left Florence still reaching into the high 70’s and 80’s (Fahrenheit), and returned to the same temperatures. In Paris I actually needed the sweaters, coats, boots, and hot beverages and it felt so right. C’mon Firenze, you can do it! Chilly temperatures for some serious fall-ing.

Until Firenze decides to get its act together, these rich chocolate brownies with a spiced pumpkin cream cheese swirl can help out.

While I didn’t bake or blog in Paris (why would I bake when world-class pastries are so cheap and at my doorstep??) I did whip up some autumn and pumpkin goodies and took photos of the blog-worthy ones before coming because I planned ahead! One catch though, I meant to post this WHILE I was in Paris, but that just didn’t happen and I’m ok with it. I was eating pain au chocolat, chaussons aux pommes, and macarons.

This post may contain affiliate links. If you make a purchase using these links, Jennyblogs may receive a small commission, at no extra cost to you. This helps to support Jennyblogs. Where possible, links are prioritized to small businesses and ethically and responsibly made items. For further information see the privacy policy. Grazie!

A recipe by Jenny.


Pumpkin Cheesecake Swirled Brownies

Serves 9-12

Ingredients:

IMG_1341.jpg

For the Brownies

  • scant 1/2 cup / 85g oil

  • 1 cup / 200g sugar

  • 1 egg

  • 1 1/2 tsp vanilla extract

  • 1/3 cup / 33g unsweetened cocoa powder

  • 1/4 tsp salt

  • 1/2 cup / 60g all-purpose flour

For the Pumpkin Cheesecake Swirl

  • 4 oz / 115g cream cheese, softened

  • 1/4 cup / 60g pumpkin purée

  • 2 Tbsp / 25g sugar

  • 1/4 tsp cinnamon

  • dash of ginger

  • dash of nutmeg

  • dash of cloves

Directions

Make the Brownies

Oven 350°F / 177°C.  Lightly greased 8x8in / 20x20cm pan.

  1. In a large mixing bowl, combine oil and sugar.  Beat in egg and vanilla.  Add cocoa powder and salt.  Mix in flour until just combined. 

  2. Pour into prepared pan and smooth with a spatula.

Make the Pumpkin Cheesecake Swirl

  1. In a medium bowl, beat together cream cheese, pumpkin, sugar, and spices until smooth and creamy. This can be done with a spoon or in a stand mixer.

  2. Dollop pumpkin cheesecake by spoonful over brownie batter. Use a a knife or the edge of a spatula to smooth and swirl pumpkin cheesecake into brownie batter.

  3. Bake for 20-25 minutes or until toothpick inserted near the center comes out mostly clean.  Allow to cool.


Jenny’s Notes:

  • The brownie batter and cream cheese will be thick and may stick up in places where it has been swirled, that’s ok, just do your best to smooth it down so everything is mostly level.

Pumpkin Cheesecake Swirled Brownies
Yield 9
Author
Prep time
20 Min
Cook time
25 Min
Total time
45 Min

Pumpkin Cheesecake Swirled Brownies

Fudgy chocolate brownies with a spiced cream cheese swirl.
Cook modePrevent screen from turning off

Ingredients

For the Brownies
For the Pumpkin Cheesecake Swirl

Instructions

Make the Brownies
  1. Oven 350°F / 177°C. Lightly greased 8x8in / 20x20cm pan.
  2. In a large mixing bowl, combine oil and sugar. Beat in egg and vanilla.
  3. Add cocoa powder and salt. Mix in flour until just combined.
  4. Pour into prepared pan and smooth with a spatula.
Make the Pumpkin Cheesecake Swirl
  1. In a medium bowl, beat together cream cheese, pumpkin, sugar, and spices until smooth and creamy. This can be done with a spoon or in a stand mixer.
  2. Dollop pumpkin cheesecake by spoonful over brownie batter. Use a a knife or the edge of a spatula to smooth and swirl pumpkin cheesecake into brownie batter.
  3. Bake for 20-25 minutes or until toothpick inserted near the center comes out mostly clean. Allow to cool.

Notes

The brownie batter and cream cheese will be thick and may stick up in places where it has been swirled, that’s ok, just do your best to smooth it down so everything is mostly level.

Nutrition Facts

Calories

277.12

Fat

14.78 g

Sat. Fat

3.39 g

Carbs

28.67 g

Fiber

0.98 g

Net carbs

27.68 g

Sugar

25.76 g

Protein

2.30 g

Sodium

113.35 mg

Cholesterol

33.57 mg

Nutritional information is approximate. Based on 9 servings.

brownies, pumpkin spice, pumpkin cream cheese, fall recipe, cream cheese swirled brownies
dessert
American
Did you make this recipe?
Tag @jennyblogsandbakes on instagram and hashtag it #jennyblogs
IMG_1326.jpg

White Chocolate Cranberry Pumpkin Cookies

Last Updated August 29, 2024

public.jpg

Happy official fall and pumpkin season!!!

Starting off the season with soft, fluffy pumpkin cookies stuffed with white chocolate and cranberries with a hint of orange. These are lightly sweet which helps the white chocolate shine and offset the tartness of the cranberries. A bit of orange extract makes the whole combo into this deliciously bright fall offering.

Aside from the orange, these cookies are similar to my White Chocolate Cranberry Oatmeal Cookies. Same condiments, different cookie. One a light and fluffy ode to fall, another a chewy classic oatmeal cookie. Both scrumptious.

Before writing up this recipe I felt a twinge of pumpkin guilt. You know, the I’m making and sharing so many pumpkin recipes and desserts that maybe everyone is already sick of them except me? Then I remembered that I actually haven’t shared any truly fall recipes on the blog yet this year! I somehow managed to hold myself off until after the autumn solstice. That doesn’t mean I haven’t been baking fally things, uh uh no. I’ve already opened one of my precious cans of pumpkin from the States (what I did with the extra room in my baggage because a small can of pumpkin costs almost 5euro in Florence) and squeaked out a batch of these pumpkin cookies, brownies with a spiced pumpkin cream cheese swirl, and pumpkin streusel coffee cake. Fall, I welcome thee with open arms.

So, I hope wherever you are in the world, you share my love for autumnal things, and enjoy baking up these White Chocolate Cranberry Pumpkin Cookies, don a sweater and some cozy socks, and read a book with a nice mug of tea. Hopefully your weather allows for that.

This post may contain affiliate links. If you make a purchase using these links, Jennyblogs may receive a small commission, at no extra cost to you. This helps to support Jennyblogs. Where possible, links are prioritized to small businesses and ethically and responsibly made items. For further information see the privacy policy. Grazie!


White Chocolate Cranberry Pumpkin Cookies

Makes about 2 dozen cookies

public.jpg

Ingredients:

  • 1 cup / 240g pumpkin purée

  • 1 1/4 cups / 250g sugar

  • 1 egg

  • scant 1/2 cup / 90g oil

  • 1 tsp vanilla extract

  • 1/4 tsp orange extract

  • 2 1/2 cups / 300g all-purpose flour

  • 1 tsp cinnamon

  • 1 tsp baking powder

  • 1 tsp baking soda

  • 1/2 tsp salt

  • 3/4 cup / 105g dried cranberries

  • 3/4 cup / 127g white chocolate chips

Directions:

Oven 350°F / 177°C. Baking sheet lined with parchment paper, silpat, or greased.

  1. Combine pumpkin, sugar, egg, oil, and extracts in a large bowl.

  2. In another medium bowl, whisk together flour, cinnamon, baking powder, baking soda, salt.

  3. Add dry ingredients, cranberries, and white chocolate chips to wet ingredients, stirring until evenly moistened.

  4. Drop by generous spoonful onto prepared baking sheet and bake for 9-12 minutes, or until bottom of cookies are golden brown and the center still looks a bit wet.


Jenny’s Notes:

  • I used half goji berries half cranberries last time and really liked it. Dried cranberries usually have loads of sugar and I liked that the goji berries were unsweetened.

White Chocolate Cranberry Pumpkin Cookies
Yield 24-26
Author
Prep time
25 Min
Cook time
12 Min
Total time
37 Min

White Chocolate Cranberry Pumpkin Cookies

Soft and fluffy pumpkin cookies loaded with mini white chocolate chips, dried cranberries, and goji berries with a hint of orange and cinnamon.
Cook modePrevent screen from turning off

Ingredients

Instructions

  1. Oven 350°F / 177°C. Baking sheet lined with parchment paper, silpat, or greased.
  2. Combine pumpkin, sugar, egg, oil, and extracts in a large bowl.
  3. In another medium bowl, whisk together flour, cinnamon, baking powder, baking soda, salt.
  4. Add dry ingredients, cranberries, and white chocolate chips to wet ingredients, stirring until evenly moistened.
  5. Drop by generous spoonful onto prepared baking sheet and bake for 9-12 minutes, or until bottom of cookies are golden brown and the center still looks a bit wet.

Notes

I used half goji berries half cranberries last time and really liked it. Dried cranberries are usually sweetened and I liked that the goji berries were unsweetened.

Nutrition Facts

Calories

168.23

Fat

5.85 g

Sat. Fat

1.37 g

Carbs

27.70 g

Fiber

0.93 g

Net carbs

26.77 g

Sugar

17.09 g

Protein

1.99 g

Sodium

130.03 mg

Cholesterol

8.86 mg

Nutritional information is approximate. Based on 24 servings.

cookies, pumpkin, white chocolate chips, cinnamon, orange, cranberry, goji berry, fall recipe
dessert
American
Did you make this recipe?
Tag @jennyblogsandbakes on instagram and hashtag it #jennyblogs
public.jpg

Fresh Mozzarella and Tomato Sandwich

Last Updated August 28, 2024

IMG_1268.jpg

Some of the best things in life are the simplest things. A simple gesture of love, a simple word of appreciation, a simple day off, a simple meal.

What is it that makes simple, special? The intent, or quality behind the simpleness. A simple gesture of love done with purity of heart, a simple word of appreciation that is genuine, a simple day off with no stress to go and be, a simple meal with quality ingredients.

It’s this last idea that I’m honing in on today. A meal so simple it almost seems boring. Until you eat it, and all you want for dinner is the same thing. And lunch again the next day. This happened to me this past week with a fresh mozzarella and tomato sandwich on focaccia.

You know when you’re so hungry and everything tastes extra amazing? Then it keeps coming to mind, even if it was a humble meal, until you eat it again? One time, I think it was last summer, I unexpectedly had to go into the city center and didn’t have time to eat lunch beforehand. I live about a half-hour bus ride outside of the center, then when you add in the time spent waiting for a bus, walking all around the center to accomplish errands, then waiting and getting a bus back home, simple 1 or 2 errand runs can easily end up being 3+ hour ventures. Having missed lunch and still needing to go to the other side of town, my husband and I decided to get a quick sandwich from a bar. This is a very common lunch, with all the bars (where you eat breakfast, lunch, get a coffee) replacing their morning pastries with fresh sandwiches starting around 10:30am. These are a hot option for Italians on lunch break or as a quick snack. There are usually two sizes, and they often have just 2-3 ingredients each. Probably a slice of meat and cheese, like mortadella (which is the cooked prosciutto/ham) and mozzarella, or tuna and boiled egg, prosciutto and cheese, etc. They’re simple, and maybe because I’m used to the super stuffed American sandwiches they seemed a bit measly to me. (But much more affordable and realistic for a lunch on the go, costing between 2.5-4euro usually, where an American sandwich would probably run you $6-10.) Until this particular day, and it suddenly became the best tasting sandwich ever. Fresh mozzarella and tomato with a bit of dried oregano sandwiched between two fluffy piece of salty, oily focaccia. I immediately wanted another. Alas we were already on the bus to the other side of town.

So the other day I was thinking, what’s for lunch? And this tomato and mozzarella sandwich kept haunting my thoughts. A run to the grocery store produced all the necessary missing ingredients, and within a matter of minutes I was devouring this dream of a sandwich. And it was so much better than I remembered. I had it again the next day for lunch. And maybe again tomorrow, using up the last of the cheese and tomatoes.

In fact, it’s very similar to caprese, it's simply in sandwich form without the fresh basil. To read up on using the best ingredients for caprese salad (that also apply to today’s sandwich), click here.

I feel weird calling this a recipe because it’s so simple, so I shall say, here is the recreation of the Italian bar Fresh Mozzarella and Tomato Sandwich!! Quality of ingredients is of utmost importance. Quantity and exact measurements are not.

This post may contain affiliate links. If you make a purchase using these links, Jennyblogs may receive a small commission, at no extra cost to you. This helps to support Jennyblogs. Where possible, links are prioritized to small businesses and ethically and responsibly made items. For further information see the privacy policy. Grazie!

Inspired by the Italian bar sandwiches


Fresh Mozzarella and Tomato Sandwich

Makes 2 sandwiches

IMG_1256.jpg

Ingredients:

  • 2 pieces of focaccia

  • 1 large heirloom tomato

  • 200g fresh mozzarella

  • dried oregano

  • extra virgin olive oil

Directions:

  1. Slice each focaccia to make halves for a sandwich.

  2. Core tomato and slice. Slice the mozzarella.

  3. Arrange tomato and mozzarella slices on two of the focaccia halves. Drizzle with extra virgin olive oil and sprinkle with oregano. Voila! Buon appetito.


Jenny’s Notes:

  • I used schiacciata the first time I made this (the Tuscan variant of focaccia, usually with a bit more oil that renders it crispier), but a slightly softer focaccia would be best for sandwiches, easier to slice and eat. Buy or make your own at home!

  • Other Italian bar sandwich ideas include: Prosciutto and asiago, mortadella and asiago, bresaola with arugula and gran padano, tuna with hard boiled eggs, mayo, and tomato, smoked salmon with arugula and mayo. Some of these ingredients might be harder to find outside of Italy, but if you live or visit here, these are great ideas for a quick lunch and readily found in grocery stores.

Fresh Mozzarella and Tomato Sandwich
Yield 2
Author
Prep time
10 Min
Total time
10 Min

Fresh Mozzarella and Tomato Sandwich

A sandwich inspired by the typical Italian bar: Thick slices of fresh mozzarella and heirloom tomatoes with a drizzle of extra virgin olive oil and a sprinkle of oregano stuffed between two soft slices of focaccia.
Cook modePrevent screen from turning off

Ingredients

Instructions

  1. Slice each focaccia to make halves for a sandwich.
  2. Core tomato and slice. Slice the mozzarella.
  3. Arrange tomato and mozzarella slices on two of the focaccia halves. Drizzle with extra virgin olive oil and sprinkle with oregano. Voila! Buon appetito.

Notes

I used schiacciata the first time I made this (the Tuscan variant of focaccia, usually with a bit more oil that renders it crispier), but a slightly softer focaccia would be best for sandwiches, easier to slice and eat. Buy or make your own at home! Other Italian bar sandwich ideas include: Prosciutto and asiago, mortadella and asiago, bresaola with arugula and gran padano, tuna with hard boiled eggs, mayo, and tomato, smoked salmon with arugula and mayo. Some of these ingredients might be harder to find outside of Italy, but if you live or visit here, these are great ideas for a quick lunch and readily found in grocery stores.

Nutrition Facts

Calories

462.69

Fat

29.57 g

Sat. Fat

12.13 g

Carbs

26.07 g

Fiber

2.33 g

Net carbs

23.74 g

Sugar

4.25 g

Protein

23.83 g

Sodium

834.01 mg

Cholesterol

64.09 mg

Nutritional information is approximate. Based on 2 servings.

sandwich, panino, mozzarella fresca, pomodoro cuore di bue, Italian recipe, oregano, extra virgin olive oil, mozzarella di bufala
lunch, sandwich
Italian
Did you make this recipe?
Tag @jennyblogsandbakes on instagram and hashtag it #jennyblogs

Caprese Risotto

Last updated August 28, 2024

IMG_0975.jpg

You know risotto, right? That creamy Italian rice dish, usually cooked with a splash of wine? And you also know Caprese salad, the traditional Italian salad consisting of just tomatoes, mozzarella, and basil? (I gave you a nice preface to today’s recipe by sharing the recipe for Insalata Caprese Tradizionale last month on the blog.) Do you know what happens when you combine these two ideas into one dish?

You get a delicious creamy, rice dish with flavors of tomatoes, mozzarella, and basil! Risotto is usually a pretty hearty, comforting dish, better for cooler months, but this one has delicate summer flavors so you can have a risotto for every season. Because It’s mid September, my family back home in Michigan has been wearing jackets and pants for weeks, meanwhile it’s still in the mid 30’sC / 90’sF here in Florence. I’m dreaming of cooler weather, breaking out the sweaters and cozy socks, lighting candles, and making hearty chilis, soups, and everything pumpkin spice and nice. And risotto. So I compromise with a taste of summer, the remnants of summer Italian produce, and a comforting cooler month recipe.

This Caprese Risotto is a bit of a mix between Italian and American cuisines. It’s a risotto and involves all the ingredients from Caprese, but that doesn’t necessarily make it Italian. It’s one of those dishes stuck in the in between, and that’s ok. If it’s anything, it’s American. And I thought I should let you know that, so I don’t give you the false impression that I’m giving you some nonna’s recipe passed down for generations. Nope, this is me being American, taking one thing and combining it with another to create something that doesn’t fall into any category really. That’s one of my pet peeves actually, when I see recipes labeled Italian this or Tuscan that…just because something has oregano, basil, sun-dried tomatoes, or parmesan, does not make it Italian. Especially if it’s a meat, usually chicken is what I see, mixed with pasta. That’s a big no-no in Italy. Pasta is a primo piatto, or first course, and chicken and proteins are always a secondo piatto. You will also never find chicken on pizza. Or pineapple. This doesn’t mean to say you can’t do these things, of course you can, but just keep in mind that it is not Italian. After that, call it as you wish. Oh, and hand me a nice slice of pizza with pineapple, ya? Thanks.

Back to this summery risotto. When I first was making this I wanted to make sure the tomato flavor was closer to a fresh, sun-ripened tomato as it would be for Caprese, and not pungent and salty/sweet like we associate with a lot of canned tomato soups. I love tomato soup, just not the flavor that I was going for here. By using fresh tomatoes and getting saltiness from just the low-sodium broth, this turned out quite nicely. Add the creamy, pull-apart cheesiness from the mozzarella and the sweet, nutty basil, you’ve got a winner summer dinner! If you like, although not traditional to the Italian Caprese salad, add a drizzle of balsamic vinegar at the end. This dish isn’t traditional, so I feel ok about adding it. ;)

Bonus, this dish is also effortlessly gluten-free.

This post may contain affiliate links. If you make a purchase using these links, Jennyblogs may receive a small commission, at no extra cost to you. This helps to support Jennyblogs. Where possible, links are prioritized to small businesses and ethically and responsibly made items. For further information see the privacy policy. Grazie!


Caprese Risotto

Serves 4-6

IMG_0980.jpg

Ingredients:

  • 6 cups / 1,422g low-sodium vegetable broth

  • 2 Tbsp / 28g olive oil

  • 1/2 onion, diced

  • 3 cloves garlic, minced

  • 1 1/2 cups / 278g arborio rice, uncooked

  • 1/2 cup / 119g white wine, optional

  • 3 medium tomatoes, chopped

  • 1/2 cup cherry tomatoes, halved or quartered

  • Parmigiano reggiano (parmesan) rind, optional

  • 1 1/2 tsp fresh oregano, or 1/2 tsp dried

  • about 16 fresh basil leaves, sliced into ribbons

  • 1/2 cup / 50g grated parmigiano reggiano

  • 200g fresh mozzarella, sliced into chunks

  • extra virgin olive oil, more cherry tomatoes, basil leaves for garnishing, and balsamic vinegar if desired

Directions:

  1. Heat broth in a pan over low heat.

  2. In a large pot, heat oil over medium heat. Add onions and simmer for a few minutes, until starting to turn translucent.

  3. Add garlic and rice, stirring occasionally, until rice is toasted and just starting to turn translucent on the edges; about 3-4 minutes.

  4. Add the wine slowly, stirring all the while, until mostly absorbed by the rice.

  5. Add all of the tomatoes, stir until heated through. Add parmigiano reggiano rind, if using.

  6. Begin adding heated broth to the rice mixture, 1/2 cup / 119g at a time, stirring and allowing broth to be mostly absorbed before adding the next bit. As you near the end of the broth, start checking the rice every minute or two. When it looks cooked and is al dente when tasted, remove from heat. You may not need all the broth, but make sure it’s not too dry or thick. You’ll want to pull it from the heat when it still looks a bit soupy, as it will continue to cook and absorb liquid. (Thick, moundable risotto is a technically overcooked risotto. It should lazily settle back into the plate if you try and mound it.)

  7. Add oregano, basil, parmigiano, and mozzarella. Stir until parmigiano is melted and mozzarella is stringy. Remove any chunks of parmigiano reggiano rind before serving.

  8. Spoon risotto onto plates, drizzle with olive oil and garnish with cherry tomatoes and basil leaves. Drizzle with a bit of balsamic, if desired. Serve immediately.


Jenny’s Notes:

  • In a pinch you can use a 14.5oz / 411g can of diced tomatoes instead of the 3 medium tomatoes. Fresh tomatoes will always be better but sometimes you gotta do what you gotta do!

  • If using wine, try using a dry white wine, nothing too aged or overpowering, as this is a risotto with more delicate, summery flavors. Think Pinot Blanc, Gewurztraminer, a young Riesling, etc. Whichever wine you use in your cooking should ideally be served with the meal. Because of this, it is mistaken to use the “cheap” wines in cooking and then bring out the nice stuff for the meal. Remember, you’re cooking out (most of) the alcohol, not the flavor.

    In fact, because of the delicate flavors of this risotto I don’t always add wine, but it’s up to you if you do! Wine is traditional in risotto. :)

  • If you have only bouillon cubes or normal-sodium broth on hand, you can substitute part water for the broth to keep the sodium levels down. I recommend using 4 cups / 948g worth of broth/bouillon broth and 2 cups / 474g water.

  • Using heated broth speeds up the cooking time so you’re not waiting for the broth to simmer and be absorbed between each addition. I have, however, made risotto many a time before I learned this trick, and although it takes a bit longer to cook when adding cold or room temp broth, it won’t in any way ruin your risotto.

  • Parmigiano Reggiano (parmesan cheese) is another ingredient typically used in risotto. It’s not used in caprese but it lends a cheesy hand to the mozzarella which is quite mild.

  • Another idea I’m drooling over right now, would be to add a nice portion of burrata on top of the plated risotto right before serving. Burrata is very similar to mozzarella, except it’s softer. It usually comes in round form, and the moment you cut into it the super soft, creamy center oozes out. Oh yes. Oh yes please.

    If you don’t live in Italy chances are burrata and even fresh mozzarella will cost you, so you may opt for one or the other in this recipe. If your budget allows, go for both!! Here in Italy fresh mozzarella can be found easily for 2-3euro a pound.

Caprese Risotto
Yield 4-6 servings
Author
Prep time
45 Min
Total time
45 Min

Caprese Risotto

Creamy risotto playing off the classic Italian summer dish of caprese; tomatoes, fresh mozzarella, fresh basil, parmesan cheese and a hint of oregano.
Cook modePrevent screen from turning off

Ingredients

Instructions

  1. Heat broth in a pan over low heat.
  2. In a large pot, heat oil over medium heat. Add onions and simmer for a few minutes, until starting to turn translucent.
  3. Add garlic and rice, stirring occasionally, until rice is toasted and just starting to turn translucent on the edges; about 3-4 minutes.
  4. Add the wine slowly, stirring all the while, until mostly absorbed by the rice.
  5. Add all of the tomatoes, stir until heated through.
  6. Begin adding heated broth to the rice mixture, 1/2 cup / 119g at a time, stirring and allowing the broth to be mostly absorbed before adding the next bit. Keep an eye on the rice; when it starts to look cooked and is al dente when tasted, remove from the heat. You may or may not need all the broth, but make sure it’s not too dry or thick. You’ll want to pull it from the heat when it still looks a bit soupy, as it will continue to cook and absorb liquid. (A thick, moundable risotto is a technically overcooked risotto. A correctly cooked risotto should lazily settle back into the plate if you try and mound it.)
  7. Add oregano, basil, parmigiano, and mozzarella. Stir until parmigiano is melted and mozzarella is stringy.
  8. Spoon risotto into plates, drizzle with olive oil and garnish with cherry tomatoes and basil leaves. Drizzle with a bit of balsamic, if desired. Serve immediately.

Notes

In a pinch you can use a 14.5oz / 411g can of diced tomatoes instead of the 3 medium tomatoes. Fresh tomatoes will always be better but sometimes you gotta do what you gotta do! If using wine, try using a light white wine, nothing too aged or overpowering, as this is a risotto with more delicate, summery flavors. Think Pinot Blanc, Gewurztraminer, a young Riesling, etc. Whichever wine you use in your cooking should ideally be served with the meal. Because of this, it is mistaken to use the “cheap” wines in cooking and then bring out the nice stuff for the meal. Remember, you’re cooking out (most of) the alcohol, not the flavor. In fact, because of the delicate flavors of this risotto I don’t add wine, but it’s up to you if you do! Wine is traditional in risotto so you may think me odd that I don’t add it. :)If you have only bouillon cubes or normal-sodium broth on hand, you can substitute part water for the broth to keep the sodium levels down. I recommend using 4 cups / 948g worth of broth/bouillon broth and 2 cups / 474g water. Using heated broth speeds up the cooking time so you’re not waiting for the broth to simmer and be absorbed between each addition. I have, however, made risotto many a time before I learned this trick, and although it takes a bit longer to cook when adding cold or room temp broth, it won’t in any way ruin your risotto. Another idea would be to add a nice portion of burrata on top of the plated risotto right before serving. Burrata is very similar to mozzarella, except it’s softer. It usually comes in round form, and the moment you cut into it the super soft, creamy center oozes out.

Nutrition Facts

Calories

423.93

Fat

21.69 g

Sat. Fat

8.54 g

Carbs

36.34 g

Fiber

2.31 g

Net carbs

34.03 g

Sugar

7.25 g

Protein

16.20 g

Sodium

714.71 mg

Cholesterol

42.80 mg

Nutritional information is approximate and based on 4 servings.

gluten-free caprese, risotto, rice, tomatoes, fresh basil, fresh mozzarella, parmesan cheese, parmigiano reggiano, burrata, Italian recipe, oregano, extra virgin olive oil, balsamic vinegar, white wine, which wine to use in risotto
dinner, vegetarian
Italian, American
IMG_0982.jpg

Jeannie's Healthy Breakfast Cookies

Last Updated August 28, 2024

2019-02-17+15.32.23.jpg

What could be better than a cookie? How about a cookie that’s packed with nutrients and can be eaten anytime, especially for breakfast, guilt free?

I love cookies. They are my go-to when I want to whip up something with limited time, or don’t have much energy for other more entailed desserts. I’m sure this has NOTHING to do with the fact that cookies are also one of my favorite things to eat. It ends up turning into a win-win-win situation because I’m having fun, being productive, get to eat some of the ingredients while baking, get to eat some dough while baking, and BONUS if there is enough dough to actually be baked into cookies! So many wins.

I have to bring up the negative, however, to classic cookie baking. They’re kinda calorific and not very good for you. I’m all for eating cookies for breakfast, but that usually goes along with a sugar crash later on. What to do?

Bake healthy cookies! They have to be delicious of course, and not gross. I have just the recipe for you, made up by my mom many years ago when we needed a portable nutritious breakfast for a trip. This recipe has been in my recipe box ever since as “Jean’s breakfast cookies”, made with many adjustments because the add ins are very versatile depending on your tastes. My mom likes to be called Jeannie (not by her kids of course) so I adapted the title accordingly.

One thing this recipe is not is a taste-alike recipe to say, chocolate chip cookies with a surprise twist that it’s healthy. Nope, these cookies have a satisfyingly healthy look and taste and are upfront about it from the get go. They get positive feedback and recipe requests wherever they go!

The recipe that follows is just one version of many, many possibilities. Just keep in mind that major adjustments may need other adjustments. For example, if you don’t have any honey or maple syrup on hand for the sweetener, you could use raw or regular cane sugar. Substituting a liquid for a dry ingredient, however, will mean you may need more liquid from elsewhere. Maybe add another egg, a bit more oil, or even water until you get a cookie dough consistency once again. Other ideas to make the recipe your own:

  • Use any kind of flour you wish instead of wheat flour. Oat flour, almond flour, coconut flour…I often use wheat germ in place of part of the flour or flaxmeal, usually 1/4 cup.

  • If you want these cookies to be gluten-free, ensure that your oats are gluten-free, and use a gluten-free flour.

  • Change up the spices. Sometimes towards fall I also add a bit of ginger, nutmeg, and cloves. Cardamom is also nice.

  • Beyond dried fruit and walnuts, get creative with your add-ins! Just try not to go too far beyond 1 cup, otherwise there might not be enough dough to hold everything together. In the photos on this post I used dried apples, dried cranberries, and walnuts. I’ve also added various combinations of dried cherries, prunes, dried apricots, raisins, dates, dried figs, dried pears, fresh apples, grated coconut, pecans, hazelnuts, dark chocolate, crystallized ginger, and anything else I had on hand!

This post may contain affiliate links. If you make a purchase using these links, Jennyblogs may receive a small commission, at no extra cost to you. This helps to support Jennyblogs. Where possible, links are prioritized to small businesses and ethically and responsibly made items. For further information see the privacy policy. Grazie!

Recipe adapted from my mama


Jeannie’s Healthy Breakfast Cookies

Makes about 18-22 cookies

Ingredients:

2019-02-17 14.45.17.jpg
  • 1/2 cup / 112g olive or coconut oil

  • generous 1/3 cup / 120g maple syrup or honey

  • 2 eggs

  • 1 tsp vanilla extract

  • 1 cup / 120g all-purpose or whole wheat flour

  • 1 1/2 cups / 135g rolled oats

  • 1/2 cup / 90g flaxmeal

  • 1/2 tsp baking soda

  • 1/2 tsp salt

  • 1/8 tsp cinnamon

  • 3/4 cup / 105g nuts, roughly chopped

  • 1/2 apple, diced

  • 1/4 cup / 50g dried fruit, chopped if necessary

Directions:

Oven 375°F / 190°C. Baking sheet lined with silpat or parchment paper.

  1. In a large bowl combine wet ingredients: oil, maple syrup, eggs, and vanilla; beat with a spoon until smooth.

  2. In another medium bowl whisk together dry ingredients: flour, oats, flaxmeal, baking soda, salt, and cinnamon.

  3. Add dry ingredients, nuts, apple, and dried fruit to wet ingredients, mix until well combined.

  4. Spoon generous tablespoons of dough onto prepared baking sheet and flatten slightly as they won’t spread much, leaving at least 1 inch between cookies. Bake for 8-10 minutes or until edges turn lightly golden brown and centers are no longer doughy.

Jenny’s Notes:

  • you can make flaxmeal at home by simply processing some flaxseeds in a coffee or spice grinder.

  • olive oil has a rather strong taste so if you prefer to avoid that, try going with the coconut oil option or even a neutral oil like peanut oil.

  • 3 egg whites can be substituted for the 2 eggs for cholesterol-conscience people.

Jeannie's Breakfast Cookies
Yield 12-16 cookies
Author
Prep time
20 Min
Cook time
10 Min
Total time
30 Min

Jeannie's Breakfast Cookies

Healthy cookies packed with nutritious ingredients that make for a great breakfast or anytime snack. Dairy-free, refined sugar-free, and can easily be made gluten-free.
Cook modePrevent screen from turning off

Ingredients

Instructions

  1. Oven 375°F / 190°C. Baking sheet lined with silpat or parchment paper.
  2. In a large bowl combine wet ingredients: oil, maple syrup, eggs, and vanilla; beat with a spoon until smooth.
  3. In another medium bowl whisk together dry ingredients: flour, oats, flaxmeal, baking soda, salt, and cinnamon.
  4. Add dry ingredients, nuts, apple, and dried fruit to wet ingredients, mix until well combined.
  5. Spoon generous tablespoons of dough onto prepared baking sheet and flatten slightly as they won’t spread much, leaving at least 1 inch between cookies. Bake for 8-10 minutes or until edges turn lightly golden brown and centers are no longer doughy.

Notes

you can make flaxmeal at home by simply processing some flaxseeds in a coffee or spice grinder.olive oil has a rather strong taste so if you prefer to avoid that, try going with the coconut oil option or even a neutral oil like peanut oil. 3 egg whites can be substituted for the 2 eggs for cholesterol-conscience people.

Nutrition Facts

Calories

265.40

Fat

15.87 g

Sat. Fat

2.49 g

Carbs

27.23 g

Fiber

3.34 g

Net carbs

23.89 g

Sugar

9.53 g

Protein

5.72 g

Sodium

188.36 mg

Cholesterol

31.00 mg

Nutritional information is approximate and based on 12 servings.

healthy, nutritious, cookies, gluten-free, dairy-free, refined sugar-free, dried fruit, apple, fall spices, oats, nuts, coconut, portable
breakfast, dessert, snack
American
Did you make this recipe?
Tag @jennyblogsandbakes on instagram and hashtag it #jennyblogs
2019-02-17+15.36.02.jpg

Basic Butter Pie Crust

IMG_4560.jpg

Last updated June 24, 2024

Everybody needs a basic butter pie crust. A recipe that’s easy to make, reliable, and goes with all your baking ideas. Oh, and dinner too! Dinner is important.

Like last night. I decided I wanted to make a quiche for dinner, and it was SO nice to be able to pull up this recipe and be able to whip it out, knowing it would turn out, not shrink, and be flaky but sturdy enough to hold a whopping load of eggs, milk, and veggies.

This crust is your easy buttery friend. If you bake things that need crusts a lot, like quiche, pies, pot pies, homemade poptarts, etc. you’ll have this recipe memorized in no time and can whip it up on command!

I like butter because it tastes the best and is the healthier option when looking at lard and shortening. My mom always uses oil, but oil makes for a finicky and tough crust if you don’t handle it just so. For all the tricks to make a tender, melt-in-your-mouth, oil pie crust, here’s my family’s recipe I’ve spun into a fool-proof recipe!

This butter crust is only flour, salt, butter, and water. If you’ve been burned by crusts in the past (or you’ve burned them, heheh) because they shrink, fall apart, or are tough, despair not, my friend! I think we’ve all been there, maybe on repeat and it can be very frustrating. Along with the recipe I’m also going to share with you all the tips and tricks I’ve learned to get a fool-proof pie crust every time!

Plan Ahead

If you normally eat dinner at 6:30pm and it’s now 6:21pm, I’m sorry but your pie crust will be compromised. Pie crusts need time if they’re going to be the flaky, tasty, shapely vessels for filling that we want them to be!

For this crust you need about 1 hour minimum, plus more if you need to blind-bake it.

It can be made up to 2-3 days ahead of time and kept in the fridge. It also freezes beautifully. Either way, you can store it as a block of dough or even already prepared in the pie dish.

Tips for a Flaky Crust

  • What brand and what kind of flour you use DOES matter. While all-purpose flour is generally all-purpose, it’s helpful to know what the protein content is of the flour that you’re using. For  pie  crusts and other delicate baked goods, you may want to get some pastry flour for the best results.

    For awhile my mom and I were using Good & Gather’s organic all-purpose flour. Gradually, we both noticed our baked goods weren’t turning out like they used to. We kept chalking it up to bad baking days, or this or that. We finally came to the conclusion that the Good & Gather flour was always the common denominator in things turning out…with unusual results. We switched to King Arthur flours and all our recipes suddenly started turning out wonderfully.

    Until the next few  crusts we made. A little crusty. Tough. Then we realized, that’s because King Arthur’s all-purpose flour has a protein content of 11.7%. Some might say, a medium-strength  bread flour. Bread flour’s have a higher protein content, which helps to develop gluten for  bread. This is why bread’s are kneaded, to help develop that gluten. But you do NOT want gluten developing in a  pie  crust, which is why you mix minimally and use a low-protein flour. All-purpose flours are generally seen as well, all-purpose. High enough protein content to make decent breads, low enough to be able to still make cakes, cookies, etc. With King Arthur’s all-purpose flour having a higher than average protein content, this is why our  crusts were turning out tough. For this reason, we now like to use Bob’s Red Mill pastry flour specifically for our  pie crusts and those desserts of the most delicate nature.

  • When cutting up the cold butter, the chunks don’t have to be super small. 1/2” chunks are great, and try to keep them all the same size so smaller chunks don’t melt while you’re still squishing the bigger chunks.

  • When crumbling the butter, less is always more. You may be tempted to really integrate the butter, but this is more likely to cause the butter to melt and result in a tough crust. Leave chunks of butter, really, it’ll turn out great!

  • Make sure your butter is cold and stays cold while you’re making the dough. If your house is warm or even hot like my house in the summertime, then you will probably need to stick your butter back in the fridge or freezer after you cut it into small pieces. If you do this first, you can then weigh your flour, salt, and prepare your ice water while it’s chilling.

  • If your cold butter softens up too much while crumbling it into the flour mixture, it’s best to stick it back into the fridge/freezer for a few minutes before adding the ice water.

  • Another note on the ice water, you can also just stick some water in the freezer, but this requires a bit of planning so it’s cold enough when you go to make the crust. I often do this because I have only one ice tray and don’t always have ice ready…especially in the summer. Sometimes an iced beverage takes preference over a crust, haha.

How to Avoid a Shrinking Crust

If your crust is shrinking, most likely it didn’t rest long enough in the fridge. While you are mixing the dough it is inevitable that a bit of gluten builds up, which is a very elastic-like substance. This is good when making bread, bad when making flaky pie crust. The dough needs to rest so that the gluten strands have time to relax. If the gluten strands didn’t have adequate time to relax they will shrink back on themselves, hence the shrinking crust.

If your crust is still shrinking, try to use a ceramic or metal pie dish instead of slippery glass. I LOVE my Emile Henry ceramic pie dish. French baking ware like Emile Henry and Le Creuset are pricey but so worth it!

You can also try using pie weights if you are blind-baking, or dry beans if you have those on hand. Simply line the inside of your prepared crust with parchment paper and add the pie weights or dry beans. Bake as directed.

Still shrinking? Bake at low temperatures, like 325°F - 350°F / 163°C - 177°C.

Freeze the prepared crust for at least one hour or even overnight.

Make sure your crust reaches high enough that it rests on the lip of the pie dish, not beyond or too short, but just resting on the edge. It also helps to cut off the extra pie crust while leaving an overhang of about 1/2” all the way around. Tuck this overhang under and crimp the edge, or use a fork. The thicker crust edge not only gives you more to work with while crimping, it is also less likely to shrink down.

This post may contain affiliate links. If you make a purchase using these links, Jennyblogs may receive a small commission, at no extra cost to you. This helps to support Jennyblogs. Where possible, links are prioritized to small businesses and ethically and responsibly made items. For further information see the privacy policy. Grazie!


Basic Butter Pie Crust

Makes 1 bottom pie crust. For a bottom and top crust, double this recipe.

Ingredients:

IMG_4558.JPG
  • 1 1/3 cup / 160g all-purpose flour

  • 1/2 tsp / 2.5g salt

  • 4 Tbsp / 56g butter, cold, cut into equally-sized 1/2” chunks

  • 4-6 Tbsp / 59 - 89g ice water

Directions:

Oven 425°F / 220°C. Ungreased 8 - 9in / 20 - 23cm pie dish.

  1. In a medium bowl whisk together flour and salt.  Blend in cold butter using a pastry cutter, fork, or your hands.  You want the butter to end up in pieces, no smaller than peas. 

  2. Add the ice water, starting with 4 Tbsp / 59g, mixing as little as possible.  The dough should be able to hold together in a ball, without being too dry or too wet, but still a bit shaggy looking.  Add more water if necessary, 1 tablespoon at a time.  

  3. Place dough on a piece of plastic wrap, shape into a disc, and wrap tightly.  Place in fridge for 1 - 48 hours.  

  4. After the crust has rested, roll into a circle on a lightly floured surface or silpat.  Roll a few times with your rolling pin in one direction before turning the crust 45° (quarter turn) and continuing with a few more rolls.  Periodically check under the crust to make sure it isn’t sticking and sprinkling more flour if needed. Continue like this until your crust is nicely round and roughly 2in / 5cm larger than your pie dish.

  5. Carefully transfer crust to pie dish (this is easier if using a silpat), trim the excess overhang to within about 1/2” of the edge of pie dish if necessary, and fold the ends under. Crimp as desired, or press with a fork.  Prick the bottom of the crust with a fork.  The crust can also be refrigerated or even frozen at this point, if needed.  

  6. If blind baking, bake in preheated oven for 10-12 minutes, or until crust is lightly golden-brown.  Cool completely.  Otherwise fill and proceed according to your recipe.


Jenny’s Notes:

  • You can also use a food processor, pulsing in the butter until it has the desired consistency.  Just be sure to remove the dough from the food processor and mix in the water with a fork or pastry cutter so you don't overwork the dough.  You want to work it as little as possible once you add the water. The liquid helps to awaken the gluten, and the more you work it and the gluten strands develop, the tougher your crust will be.  The minimum of 1 hour rest in the fridge allows what gluten inevitably developed to relax.  

  • If you are having problems with a shrinking crust, try using a metal or ceramic pie dish and allowing the crust more time to rest before baking.  You can also try using pie weights and baking at a lower temperature.

  • I have made this pie several times over the past year, and have always needed all 6 tablespoons of water, possibly because it was always during the dry winter.  If you live in a really dry climate, you might need up to 7.  Just be aware, an overly wet crust is more likely to glue itself to the pan during baking.   

Basic Butter Pie Crust
Yield 8 Servings
Author
Prep time
15 Min
Inactive time
1 Hour
Total time
1 H & 15 M

Basic Butter Pie Crust

An everyday all-butter pie crust that is easy, flaky, reliable, and can be made ahead. Great for all your pie crust needs.

Ingredients

Instructions

  1. Oven 425°F / 220°C. Ungreased 8 - 9in / 20 - 23cm pie dish.
  2. In a medium bowl whisk together flour and salt. Blend in cold butter using a pastry cutter, fork, or your hands. You want the butter to end up in pieces, no smaller than peas.
  3. Add the ice water, starting with 4 Tbsp / 59g, mixing as little as possible. The dough should be able to hold together in a ball, without being too dry or too wet, but still a bit shaggy looking. Add more water if necessary, 1 tablespoon at a time.
  4. Place dough on a piece of plastic wrap, shape into a disc, and wrap tightly. Place in fridge for 1 - 48 hours.
  5. After the crust has rested, roll into a circle on a lightly floured surface or silpat. Roll a few times with your rolling pin in one direction before turning the crust 45° (quarter turn) and continuing with a few more rolls. Periodically check under the crust to make sure it isn’t sticking and sprinkling more flour if needed. Continue like this until your crust is nicely round and roughly 2in / 5cm larger than your pie dish.
  6. Carefully transfer crust to pie dish (this is easier if using a silpat), trim the excess overhang to within about 1/2” of the edge of pie dish if necessary, and fold the ends under. Crimp as desired, or press with a fork. Prick the bottom of the crust with a fork. The crust can also be refrigerated or even frozen at this point, if needed.
  7. If blind baking, bake in preheated oven for 10-12 minutes, or until crust is lightly golden-brown. Cool completely. Otherwise fill and proceed according to your recipe.

Notes

You can also use a food processor, pulsing in the butter until it has the desired consistency. Just be sure to remove the dough from the food processor and mix in the water with a fork or pastry cutter so you don't overwork the dough. You want to work it as little as possible once you add the water. The liquid helps to awaken the gluten, and the more you work it and the gluten strands develop, the tougher your crust will be. The minimum of 1 hour rest in the fridge allows what gluten inevitably developed to relax. If you are having problems with a shrinking crust, try using a metal or ceramic pie dish and allowing the crust more time to rest before baking. You can also try using pie weights and baking at a lower temperature. I have made this pie several times over the past year, and have always needed all 6 tablespoons of water, possibly because it was always during the dry winter. If you live in a really dry climate, you might need up to 7. Just be aware, an overly wet crust is more likely to glue itself to the pan during baking.

Nutrition Facts

Calories

122.99

Fat

5.87 g

Sat. Fat

3.63 g

Carbs

15.27 g

Fiber

0.54 g

Net carbs

14.73 g

Sugar

0.06 g

Protein

2.13 g

Sodium

192.78 mg

Cholesterol

15.05 mg

Nutritional information is approximate and based on 8 servings.

easy crust, best crust recipe, all-butter crust, pie crust, crust for quiche, flaky crust, tender crust, butter
dessert, dinner
American
Did you make this recipe?
Tag @jennyblogsandbakes on instagram and hashtag it #jennyblogs
IMG_4555.JPG

Italian Holidays

Italy, the land of pizza, wine, many hand gestures and many holidays. As you may have guessed from the title, this post is covering the holidays in Italy and why you should care.

The Beach at Viareggio. Most Italian beaches are not free, you have to rent an umbrella and a couple chairs, usually around 30euro per day.

The Beach at Viareggio. Most Italian beaches are not free, you have to rent an umbrella and a couple chairs, usually around 30euro per day.

Italy is a predominantly Catholic country and home to Papa, or the pope. Well, technically the Vatican which is in and of itself a country is home to the Papa, but the Vatican is in Italy, so, same thing. There are many holidays celebrated in Italy to commemorate different saints and events in the Bible. Some seem to based more on folklore than actual fact, but they are celebrated with gusto and nonetheless an important part of the culture here.

Whether or not you celebrate them, these holidays will still have an effect upon your life if you travel or live in Italy. If you’ve planned a trip or traveled to Italy, you may have read about or experienced the infamous Ferragosto, the holiday on August 15th where all the Italians escape seaside for vacation. Even though everything closes down like it’s Christmas, the “ferie” or holidays actually start usually towards the end of July and finish the beginning of September. This means having to plan very carefully when you grocery shop, shop, get public transport, go the gym, eat out, go to the doctor, and everything else that includes hours of business. Make sure to tell all your appliances and A/C not to break during August. If they do, and you know that if they do they will during this month, sorry ‘bout ya. The plumber is at the beach. So is the electrician. Also the tabaccheria where you buy bus tickets, your local coffee place, and the doctor who was supposed to perform your surgery. Ah well.

City centers mostly stay open for tourism, but neighborhoods around that don’t get many tourists will almost achieve ghost town status. It’s quite peaceful, actually, until I start missing the pizza from my local pizzeria. Come backkkkk!! I’m hungry!! Ah well, #firstworldproblems.

Another good thing to note is that all Sundays are considered giorni festivi, or treated like holidays. This means that every Sunday there will be fewer buses and shops will probably close earlier, if they were open in the first place.

What about the rest of the holidays? What are they about? Are they a big enough deal to close schools down, or mere formalities?

The following list includes all the major holidays in Italy that usually affect business hours, schools, and public transport, if not all three. This way we can plan our lives in Italy accordingly and not have to wonder why there are witches and stockings everywhere in the stores in January and not October! I say we because this list is as much a refresher for me as it is for you; I’m fairly certain I end up asking or Googling every year the same holidays because I just can’t keep them all straight! :)

TThis post may contain affiliate links. If you make a purchase using these links, Jennyblogs may receive a small commission, at no extra cost to you. This helps to support Jennyblogs. Where possible, links are prioritized to small businesses and ethically and responsibly made items. For further information see the privacy policy. Grazie!


Italian Holidays

  1. January 1 - Capodanno / New Year’s Day

    Yes, even in Italy the New Year happens, albeit 6 hours ahead of the EST.

  2. January 6 - Befana o Epifania / Befana or Epiphany

    The day in which the wise men visited Jesus according to the Catholic tradition, hence the word epiphany. If you count from Christmas Day you’ll notice that there are twelve days between it and January 6, which is where the Twelve Days of Christmas originated.

    It’s also called Befana in Italy after the old woman who gets on her broom and flies to deliver little gifts to good children who have left out stockings on the night between the 5th and 6th of January. Naughty children will wake up to coal, garlic, or possibly a stick. Children often leave out fruit or treats for Befana and maybe even a glass of wine (ohhh, Santa is jealous). This is similar to the Babbo Natale/Santa Clause tradition, although Befana has been a part of the Italian culture longer than Babbo Natale even.

    As one story goes the three wise men are traveling to find baby Jesus in Bethlehem and find themselves in need of direction. They ask an old woman, Befana, who indicates to them the way. (Another version says she didn’t know the way but instead offered them food and a place to stay for the night.) They are so grateful to her that they invite her to come along. Despite their insistence, she refuses. After they depart she regrets staying behind, and attempts to find them, bringing with her a large bag of sweets. She is not successful and gives out the sweets to every child she meets in the hopes that one of them will be Jesus.

    Another, darker version recounts Befana as a mother whose child dies. Her grief turns to madness and she goes to offer baby Jesus gifts to make him happy, thinking that he is her son. Jesus in turn gives her the gift of being the mother to all children in Italy, and she goes around giving gifts to them.

    You will notice the stores full of witches and pre-filled stockings leading up to this day. The day of Befana usually involves many excited children, parades, and women who dress up like the old, sooty Befana. In Florence there is a parade with the magi coming to see baby Jesus, Mary and Joseph in the nativity setup in front of the Duomo.

    This holiday ensures that the Italian children also get their moment of realization when they find out that Befana is not in fact real, haha!

    This holiday usually signals the end of the Christmas festivities, with school starting shortly after.

  3. February/March - Carnevale

    Carnevale is like a much happier Halloween. It’s a festivity that usually takes place over a period of days, usually in Catholic countries. People dress up, there are parades, and also special sweets and food before the Lenten season begins.

    If you’ve been to Venice you probably noticed how many shops sport costumes and masks for Carnevale. In fact, Venice is among the cities most renowned in Italy (and the world) for their Carnevale festivities, along with Viareggio, Cento, Ivrea, Acireale.

  4. March/April - Pasqua e Pasquetta / Easter and Easter Monday

    Similar to the US, Good Friday-Easter Sunday are usually government holidays. Easter Monday, or Pasquetta is also a holiday in Italy remembering the women who met the angel at the empty tomb of Jesus, usually spent with family and friends, probably eating.

  5. April 25 - Anniversario della Liberazione d’Italia / Anniversary of the Liberation of Italy

    An important day in Italian history when it was freed from fascist control and Nazi occupation.

  6. May 1 - La Festa dei Lavoratori / Worker’s Day

    The day that the 8-hour work day became law, first in Chicago, Illinois. This law soon spread to other states and is now celebrated by many countries around the world. Ironically, although it originated in America we now celebrate this achievement in September, and we know it as Labor Day.

  7. June 2 - La Festa della Repubblica / Day of the Republic

    A day to celebrate the birth of the Italian Republic after the institutional referendum in 1946 following World War II.

  8. June 24 - San Giovanni / St. John the Baptist

    Each city in Italy has a patron saint and celebrates on different days. John the Baptist is the patron saint of Florence, and is celebrated with fochi d’artificio or fireworks, parades, and the final match of calcio storico Fiorentino, a type of historic soccer/rugby.

    Most shops around Florence close in the evening if not the whole day.

  9. August 15 - Ferragosto o Assunzione di Maria Virgine / August Holidays or the Ascension of Virgin Mary

    The holiday we discussed in the beginning. It originates from the Roman Empire when Caeser Augustus was emperor in the year 18 a.d. when he designated the August holidays, “Feriae Augusti” in Latin.

    This is also the day that the Catholic church says the Virgin Mary ascended into heaven.

    In reality, these holidays stretch anywhere from end of July to early September, with most businesses choosing 2-4 weeks within this period to close up shop and head to the coast. So while the towns might be quiet, the beaches are crazy. The actual day of August 15th pretty much everything is closed, so this is a day best used for taking a stroll, a picnic, or staying at home.

  10. October 31 - Halloween

    While this is not an Italian holiday, it is an American one and thus becoming quite popular in Italy. Italians don’t tend to dress up as much as they go all out with makeup, the more gruesome and scary the better. All the pretty costumes are saved for Carnevale closer to springtime. The exception would be the expat’s children and a select few Italian children who dress up and go from store to store to trick-or-treat.

    This one does not affect schools, transport or business hours.

  11. November 1 - Tutti i Santi / All Saints Day

    Just as it sounds, this is a day celebrating all saints. And there are a lot of them.

  12. December 8 - Immacolata Concezione / Immaculate Conception

    The day in 1854 in which Mary was declared by Pope Pio IX to have been sinless from the time of her birth until the conception of Jesus. This day deals with the dogma of original sin, and not, as I had originally understood, the day in which the angel appeared to Mary to announce to her that she would give birth to Jesus. That doesn’t work out very well on the calendar anyway if we celebrate Jesus’ birth on December 25th…not that Jesus was born on December 25th in the first place.

  13. December 24, 25 - Vigilia di Natale, Natale / Christmas Eve, Christmas Day

    The best days of the year celebrating Jesus’ birth!

  14. December 26 - Santo Stefano / Saint Stephan

    A day to commemorate the Saint Stephan. Being so soon after Christmas it all seems to just blend together!

  15. December 31 - Ultimo Giorno dell’Anno / New Year’s Eve

    I experienced my first New Year’s Eve in Florence, and wanting to make a fun night of it, went with my husband to the Duomo where there were large crowds and we were hoping to find a countdown. There was no official countdown whatsoever, and several different groups of people seemed to announce it at different times depending on when their phones/watches changed. I kept asking, was that it? Is that the New Year? Needless to say, it was a bit anticlimactic with a lot of chaos. Everyone had open bottles and glasses of beer and wine, and it was sloshing everywhere. Don’t wear nice clothes out in public on New Year’s Eve. Lots of noise, major smooching, and the firecrackers are awful. People like to set them off at random, even the week before and after, and it can be frightening and hurts my ears! If you can’t tell, I have since decided to spend New Year’s Eve (at least in Italy) inside with a nice movie and food and not in the city center! But to each his own! The next day there are bottles and trash strewn everywhere, between little rivers of red wine. Just not a fan of drunkenness and the various aftereffects.


Christmas time is magical around Florence

Christmas time is magical around Florence

There we are, a (hopefully) comprehensive list of the major holidays in Italy. If I missed any, let me know in the comments below. Or if you’ve had any funny run-ins or fond memories celebrating any of these holidays, I’d love to hear about it! Until next time!

Insalata Caprese Tradizionale - Traditional Caprese Salad

Last Updated August 26, 2024

IMG_0994.jpg

Insalata Caprese, often just referred to as Caprese, is by now known the world over and has been adapted into many different dishes and styles. In today’s post we are going to cover the traditional Italian Insalata Caprese, unaltered and in its purest form. How the Italians make it. Leave aside the Caprese grilled cheeses and Caprese pasta for just one second.

Insalata Caprese (EEN-sah-lah-ta cuh-PRAY-zay), or Caprese Salad is an Italian dish consisting of merely 5 ingredients: fresh mozzarella, fresh tomatoes, fresh basil, extra virgin olive oil, and a touch of salt, maybe pepper. Oregano is also added sometimes. That’s it, simple and fresh.

Because there are so few ingredients, no cooking required, and little spice, the quality and freshness of the ingredients are of upmost importance. This is one of the golden rules of the Italian kitchen. In fact, I would say that any caprese salad you’ve eaten in the States is probably a far cry from the shining beacon that it is here in Italy. This is not through any fault of your own, but Italy has certain protected regions and methods for making foods, with rigorous control checks and rules, which holds the product to high standards.

You may be familiar with some of these rules, especially if you seen some Italian wine bottles. You might have noticed special seals that read DOC or DOCG (Denominazione di Origine Controllata or Denominazione di Origine Controllata Garantita), which basically act as a quality seal. One such wine, considered one of the kings of Italian wine, Brunello di Montalcino, will always have the DOCG seal because it can only be grown in the Montalcino region near Siena which has ideal soil and climate for this particular wine. If it doesn’t have the seal, don’t buy it. Hazelnuts, mozzarella, how to make a Neopolitan pizza, and many other food items and processes, sometimes connected to a specific region, are protected by law in Italy.

I just mentioned mozzarella, so you may be understanding how I managed to go on that long spiel and still connect it to today’s subject matter. :) Suffice to say, Italian mozzarella, the good stuff, is in a class of its own.

That’s the beauty of Italian summers, where lunches are made up of ripe tomatoes, a slab of cheese, a drizzle of olive oil. Maybe with a hunk of fresh, salty focaccia. Or maybe just prosciutto and melon.

But maybe you aren’t IN Italy, and you’re wondering how you can make the best Insalata Caprese possible? Let’s dissect the ingredients real quick before getting into the recipe.

Suggestions for selecting ingredients for the Insalata Caprese

  • Tomatoes. You want the freshest, tastiest tomatoes available. The most widely used in Italy would probably be the tomato variety “cuore di bue” or literally, “ox heart,” which originated in America. There are two prinicipal varieties of cuore di bue, Arawak and Albenga. These tomatoes are ideal for salads because they have a thin skin, great flavor, and very few seeds and water inside. They are not usually very round, but fall into the ugly tomato category with lots of ridges. As they say, the uglier the tomato, the more delicious it will be. If you can’t get your hands on a cuore di bue, use your favorite, fresh tomatoes. In the States I often go for an heirloom tomato.

  • Mozzarella. You’ll want the freshest mozzarella possible, which might not be that easy to find unless you know a cheese producer. Traditionally the mozzarella di fiordilatte is used (normal cow’s milk mozzarella), but if you want to up your game, go for the more expensive mozzarella di bufala (buffalo mozzarella) which can also be protected by one of the laws we were talking about above, this time the DOP.

  • Basil. Fresh basil, torn into pieces if desired and ideally added just before serving so it can’t even think about wilting. I mention torn, not sliced, because Italians have this thing against cutting basil with a knife, or it touching metal for that matter.

  • Extra Virgin Olive Oil. I cannot stress enough to you the importance of having a good bottle of olive oil on hand. In Italy there are usually two kinds of olive oil, those used for cooking, and those use for drizzling just before serving. Select your oil carefully, paying attention to where it is produced, when, and when it expires. Olive oil generally has a best if used by date of two years from being bottled. So if you find a bottle that expires in a year or less, you know that bottle has already been sitting on the shelf for too long and is best used for cooking. Also pay attention to wording like “produced in” or “bottled in.” The latter may mean that olives were brought in from elsewhere and merely bottled in Italy so they could write that on the bottle. No really, there are so many shady practices when it comes to olive oil, it can be hard to decipher the great ones, especially when dealing with imported bottles. My mom used to order bottles straight from Italy to get some of the high quality stuff. Basically, you don’t want to pay less than $15 for a bottle in the States. Frantoio Franci and Laudemia are two very high quality brands. If you know your EVOO’s, select a light and fruity oil.

  • Salt and Pepper. Usually just the tomatoes are salted, and pepper is completely optional.

  • Oregano. Oregano is also optional, but a bit of fresh or dried is a nice touch!

This post may contain affiliate links. If you make a purchase using these links, Jennyblogs may receive a small commission, at no extra cost to you. This helps to support Jennyblogs. Where possible, links are prioritized to small businesses and ethically and responsibly made items. For further information see the privacy policy. Grazie!


Insalata Caprese Tradizionale

IMG_1002.jpg

Serves 2

Ingredients:

  • about 1/2lb / 200g fresh mozzarella

  • 2 medium tomatoes

  • a few fresh basil leaves, whole or torn into pieces

  • extra virgin olive oil, for drizzling

  • salt and pepper, to taste

  • fresh or dried oregano, optional

Directions:

  1. Slice the mozzarella and the tomatoes into equally sized slices and place on a plate.

  2. Drizzly lightly with olive oil and sprinkle tomatoes with salt. Sprinkle with a bit of pepper, if desired.

  3. Garnish with basil leaves and oregano; serve.

Jenny’s Notes:

  • It may seem strange, but some recommend to serve the mozzarella at room temperature. If the mozzarella is cut while cold it may lose more water, interacting with and changing the flavor of the tomatoes. If the mozzarella is losing lots of liquid regardless, it may not be as fresh as desired.

  • You can use a paper towel on both the mozzarella and tomatoes to absorb any excess liquid, dabbing or letting them sit on the paper towel if they are very wet.

  • Contrary to American belief, Caprese Salad does not traditionally have balsamic vinegar. Nor mayonnaise, olives, eggs, or other non-Italian inventions.

Traditional Caprese Salad
Yield 2
Author
Prep time
5 Min
Total time
5 Min

Traditional Caprese Salad

This classic Caprese Insalata is bursting with summer flavors. Tomatoes, fresh mozzarella, basil, and extra virgin olive oil, just as the Italians would make it.
Cook modePrevent screen from turning off

Ingredients

Instructions

  1. Slice mozzarella and tomatoes into equally sized slices and place on a plate.
  2. Drizzly lightly with olive oil and sprinkle tomatoes with salt. Sprinkle with a bit of pepper, if desired.
  3. Garnish with basil leaves and oregano; serve.

Notes

  • It may seem strange, but some recommend to serve the mozzarella at room temperature. If the mozzarella is cut while cold it may lose more water, interacting with and changing the flavor of the tomatoes. If the mozzarella is losing lots of liquid regardless, it may not be as fresh as desired.
  • You can use a paper towel on both the mozzarella and tomatoes to absorb any excess liquid, dabbing or letting them sit on the paper towel if they are very wet.
  • Contrary to American belief, Caprese Salad does not traditionally have balsamic vinegar. Nor mayonnaise, olives, eggs, or other non-Italian inventions.

Nutrition Facts

Calories

326.94

Fat

25.15 g

Sat. Fat

11.64 g

Carbs

7.00 g

Fiber

1.73 g

Net carbs

5.27 g

Sugar

4.09 g

Protein

19.14 g

Sodium

663.60 mg

Cholesterol

64.09 mg

Nutritional information is approximate and based on 2 servings.

Gluten-free, tomatoes, fresh mozzarella, mozzarella di bufala, extra virgin olive oil, fresh basil, fresh oregano, Italian recipe, real italian caprese salad, traditional caprese, authentic italian caprese, how to make the best caprese
Side, Lunch
Italian
Did you make this recipe?
Tag @jennyblogsandbakes on instagram and hashtag it #jennyblogs
IMG_0996.jpg

Resources and Tricks for Learning Italian

Photo Credit to Practical

Photo Credit to Practical

Learning a second language (or third or fourth or twelfth) can be challenging, enjoyable, frustrating, rewarding, and just plain ol’ take a lot of your brain power, thoughts, and time.

If you weren’t lucky enough to grow up immersed in a bi or multilingual family, then you can hop on the struggle boat with the rest of us while learning another language.

If you’re reading this, you’re probably studying or thinking about starting to learn a new language, maybe Italian, and I commend you! Or, maybe you are curious as to what it might take, or are looking for resources for someone else. Whatever brings you, I’m glad you’re here, and I hope this post might help you or a friend out.

When it comes to learning a language, you will be most successful if you are fully immersed. You’ve probably heard this before, but it bears repeating because it’s true.

If you aren’t immersed, don’t despair. Taking a trip to a country that speaks your desired language or finding a friend, community, or group in your city or online that you can practice with can make a big difference! Even if these are not possible for you, there are still ways to learn a language successfully.

I for one will do everything in my power to search and learn things for free. I don’t want to pay for courses, tutors, programs, books, more books, some more books, and a couple more programs if I don’t need to. (Yes, you can say it, I’m a tightwad.:) Those are all helpful and good things, and if you have the resources to do those things, go for it! But there is more to the equation than just “intensive Italian school = Italian fluency.”

There is a principal ingredient you need to learn Italian or any language: drive. The drive, desire, patience, and determination to learn and work through the moments of frustration and plateaus. If you have the drive but don’t live in Italy, you will still make good progress. On the other hand, if you move to Italy and have no great desire to learn Italian, you will probably pick up very little Italian. It still surprises me how many people I meet who have lived in Italy for years and still can only speak very basic Italian. Some people learn quicker than others and the younger you are the easier it is, but still. You’re only doing yourself a favor if you learn the language and it’s respectful of the culture you are now in. I know it’s way easier to live with and hang out with your culture and every once in awhile order a gelato in Italian…but if you want to learn, get comfortable being outside of your comfort zone.

This may leave you asking, “How long does it take to learn Italian?” I asked people I met and friends this a lot my first year in Italy, those who weren’t native Italian-speakers. Almost everyone responded with “about a year.” Knowing various nationalities who speak varying levels of Italian, I would like to amend the 1 year guideline so you don’t feel too much pressure or behind. You will probably have learned Italian fairly well after 1 year IF you are immersed in the culture and also consistently speaking with others in Italian. If you have Italian friends, live with an Italian roommate, work in an Italian setting, study at an Italian school, or date/marry an Italian speaker, this 1 year guideline could very well be true for you. Otherwise, expect longer and no shame! As long as you are learning new words and concepts and they stay with you, you are on the right track.

Enough philosophy-ing and let’s get to these resources, most of which are free, or if they’re not, I truly think they’re worth it! Keep in mind that the more resources and ways you can expose yourself to a language, the more success you will have. Try not to ever get stuck using just one, i.e. Duolingo or the back of Rick Steve’s Travel Guide. :)

This post may contain affiliate links. If you make a purchase using these links, Jennyblogs may receive a small commission, at no extra cost to you. This helps to support Jennyblogs. Where possible, links are prioritized to small businesses and ethically and responsibly made items. For further information see the privacy policy. Grazie!


Resources and Tricks for Learning Italian

This Italian Verb Drills book

One of my best friends went to Italy as an au pair and she used this book while learning with her Italian family. Shortly after she got back I went to Italy, and she passed it on to me.

It’s not overly complex because it only covers verb forms, but it’s the simplicity of its layout I think that makes it so useful. And once you understand the verbs, it’s like a door opens for understanding the language.

Honestly, if you were to take just one of the suggestions from this post to add to your current learning methods, I would probably recommend this one.

Pros: Easy to use, excellent for learning verbs, a main component of any language. It’s also pretty cheap. You can also find French, German, Latin, Spanish Verb Drills easily on Amazon.

Cons: Not free, and will only help with verbs and not other aspects of the language.

Duolingo

If learning a language has ever been on your radar, you’ve probably used or at least heard of Duolingo.

Pros: Has a free version, tons of languages to choose from, easy to use, fun, and accessible. You can use it on your computer or download the app on your phone to use anywhere, anytime.

Cons: New words aren’t always easy to remember, and there is no way to go back and easily reference what you’ve learned without doing the lessons over again. They recommend you write down the words you’ve remember after each lesson, but I think they could also provide a list of things learned for each section/level.

I also think they could explain concepts better. While you can often click on words or phrases which opens up a discussion board, that becomes quite entailed to do so every time especially since anyone can comment on the message boards and they can be quite long. For example, I’d rather have someone explain to me that when “a” and “an” in Italian (un/una) is in front of a masculine word that starts with a vowel, it remains separate from the word, but when it’s in front of a feminine word that starts with a vowel, it is separated by an apostrophe.

Un amico (masculine) - or - un’amica (feminine).

Otherwise in Duolingo they would just give me sentences that include this idea, but without actually explaining it. It’s up to you, as the learner, to notice that, hey, why do un and una sometimes stay separate and sometimes are separated by an apostrophe? See what I mean? If not, don’t worry, suffice to say that Duolingo as your only learning source will only get you so far.

Babbel

Another online resource similar to Duolingo. Trying new programs and keeping a variety may be more fun and thus make you more likely to want to practice every day instead of the “I should….” Plus every program has their unique approach and you might learn some words you wouldn’t with other programs.

Pros: Free, easy to use, plenty of languages to choose from.

Cons: To get the full experience you will have to pay, but even just using the free part is worthwhile!

Translator App

Having a trusty translator app on your phone can help you learn, too! Anytime you’re practicing, even if you’re just thinking through things, there will probably be words that come up that you don’t know what they mean or you’re saying or thinking a sentence and missing a word. Pop out your phone to translate throughout the day.

iTranslator is my favorite translator probably. It’s simple and I like that when you translate a word, below it often gives you all the person tenses (if it’s a verb) or all the different synonyms or similar words if it’s a noun or adjective.

Google Translate App is another good one. It’s a bit snazzier, you can even scan a chunk of text and it will translate it on your screen so you don’t have to type anything in, although it doesn’t always work super great.

A word to the wise, don’t trust a translator 100%, especially for longer sentences or paragraphs. It’s a computer and doing its best, but it can’t really know exactly what you’re after. Then add in all the dialects, slang, phrases that don’t translate well, and words that just may not exist in that language and well, just realize it’s not going to be perfect. Always run by new words with a native speaker if you can, especially if you have any doubts.

Coffeebreak Italian

This is a podcast where you get to listen to a man with a lovely Scottish accent while learning Italian. They also have several other languages, I recently started Coffeebreak French to brush up for my impending trip to Paris. Eeeeeee!!

Pros: Listening to a language is SO important, and what better way than to have it clearly explained to you through a hands off podcast? Great for when you’re driving, making dinner, or anytime!

Cons: No visuals, so you can’t see how words are written, which isn’t helpful for my visual learning friends. It can also get annoying to have to keep backing up if you missed something.

Italian Books

If you take a trip to Italy or can find some ones that interest you on Amazon, reading books in Italian is a great way to learn. I suggest reading children’s books (seriously, baby animal and counting books are wonderful for beginners!) and books you are familiar with unless you have a pretty good handle on Italian.

Pros: Reading is good for you, and reading in Italian is also so good for you! If you read adult books it can actually be quite difficult and you will quickly find out how many words you have to learn, but on the upside books contain so many words (no, really Jenny?) that you will see certain words over and over again, thus emblazing them upon your memory.

Cons: There is a special verb tense for writing in Italian. It’s not usually spoken so you really only learn it by reading. However, if you are an avid reader just beware that those verbs won’t serve you in everyday conversations.

Write

I recommend keeping a small notebook handy with you, maybe in your car or purse, to write down all the new words you learn. Writing things down help to cement them in your memory, even if you never reference back to them. And when you can’t remember that word you learned yesterday, you have it handy!

You can also try journaling or writing out your calendar in Italian.

Netflix

Now you can Netflix and chill and be “studying”…yesssss. If you have Netflix (or even Hulu or other paid prescriptions, but I’m not sure on the others) go into the settings on your profile and change your language preference to Italian. Now all the films that are available in Italian or with Italian subtitles will show up on this account. The selection will be different, so you probably want to keep at least one other profile with English or your native language. Similar to reading books, I recommend starting with movies or shows you are familiar with. Watching them in Italian the first time may crack you up, but it will help you understand them better. Disney was my best friend when I started watching films in Italian. I actually went to the Italian grocery store once when they had a sale on Disney movies for 5-7euro each…research, ya know? ;)

Language Tandem Partner

Having a language tandem partner ( a person with which you exchange languages, i.e. I, an American, might meet up with an Italian where we would spend time speaking in both English and Italian) is super helpful. You get to hear a native speaker and listen, I mean, pick up on their accent, and ask all the questions you want while practicing your language in real time.

If you happen to live in Italy, there are Facebook groups called AEGEE and Language Exchange that you can join. Depending on what city you live in, you will join your respective city’s group. I’m a part of AEGEE - Firenze and Language Exchange in Florence - Language Tandem. Usually you post in the group introducing yourself, English or Italian is best so everyone can understand, and ask if someone would like to meet up with you. I specified that I wanted to meet up with a woman, because I don’t love meeting up with strange men, ya know? Then you’ll probably get several messages from people who saw your post and would like to meet up with you. I still got WAY more men messaging me than women, even some offering me romantic sunsets and rides on their vespa…tempting, but no. Then you choose who you want to meet up with! The AEGEE group also offers free courses in various languages and organized events or trips.

Pros: Free and a good way to make new friends. Plus you get to learn all the best spots to eat and drink around the city, from a local!

Cons: This may only work if you live in Italy or can find someone who speaks Italian in your area. Also can be quite intimidating the first few times, especially for uh, introverts. But I wouldn’t know by experience, nope!

Think in Italian

This isn’t a resource as much as it is a suggestion. As you go throughout your day, try thinking in Italian! This is best done after you have a decent base, but you’ll soon find words you don’t know and become curious how to say them. As I hinted above, use a translator app to learn new words throughout your day. For a bonus, put sticky notes around the house with new words or phrases, or ones that you’re having a hard time learning.


Are you learning or have you learned a second+ language? What really helped you learn? I’d love to hear about it in the comments below!

Strawberry Nutella Coconut Milkshake

Last Updated August 24, 2024

IMG_0952.jpg

Buon Ferragosto!

Also known as the day where everything is closed and I feel slightly trapped. Hmmm the gelato place is closed so I’ll just run to the store and pick up some…oh wait, all the grocery stores are closed. Ok, well maybe I’ll go browse some shops, oh wait, all closed. I’ll go walk around in the center for a bit…nope, hardly any buses running today to get to the center. Even if I could find a bus, all the places I could buy a ticket are closed. Ok, so I’ll walk to the gym to work out and enjoy some air conditioning. Ah, closed. So, I hunker down and eat whatever food is in the house, try to stay cool. Actually we’ve come to a bit of a cool spell, today only has a high of 90°F. I’ll take it!

I actually planned ahead this year and went grocery shopping last night. I got fruit and veggies for lunch and dinner today, but why didn’t I get better snackies? But then I remembered that I have a good stash of gelato in the freezer, and made me think of this delectable milkshake I made a few weeks ago.

So with all this time on my hands, I shall be milkshaking and sharing this milkshake with you! What’s so great about this milkshake?

It’s a Strawberry Nutella Coconut Milkshake. That’s such a long name, and kinda going against my own rule of not listing every ingredient in the title, but otherwise I didn’t quite know how to get the dream across, ya know?

How about this: Strawnutelloco Milkshake. Stranucoco Milkshake. Conuterry. Strawconutella. Regardless, this milkshake tastes like a chocolate covered strawberry rolled in coconut with a hint of hazelnut.

I have a confession to make. I originally made this milkshake to try and hide this not-awesome gelato I bought. There was a sale on a brand I had never tried before at the grocery store, and they had coconut and I love coconut but it just did not end well. Icy and so much coconut it was chewy. I didn’t want to waste it, but I also didn’t necessarily want to force myself to eat gelato?

Enter the milkshake idea. I had strawberries, Nutella, and milk, and this beautiful combo was born. The copious amounts of coconut from the gelato still rendered my milkshake a bit chewy, but if you have a GOOD brand of coconut ice cream, or even vanilla ice cream with a bit of flaked coconut and maybe a drop of coconut extract or two thrown in, you’ve got yourself the perfect summer day’s treat.

So thank you, gelato brand that shall remain unnamed, for the not delicious gelato that prompted me to create a delicious milkshake.

This post may contain affiliate links. If you make a purchase using these links, Jennyblogs may receive a small commission, at no extra cost to you. This helps to support Jennyblogs. Where possible, links are prioritized to small businesses and ethically and responsibly made items. For further information see the privacy policy. Grazie!


Strawberry Nutella Coconut Milkshake

Serves 2

IMG_0947.jpg

Ingredients:

  • 2 cups coconut ice cream, slightly softened

  • 1/2 cup milk, any variety

  • 1/2 cup hulled strawberries, fresh or frozen

  • 2 heaping Tbsp Nutella

  • Dash of vanilla extract, optional

  • Whipped cream, optional

Directions:

  1. Add all ingredients except whipped cream to a blender and blend until smooth. Check consistency and add more milk if desired.

  2. Spoon into 2 glasses and top with whipped cream. Serve immediately.

Jenny’s Notes:

  • Don’t have coconut ice cream but still want that coconut taste? Substitute chocolate or vanilla ice cream and add a bit of flaked coconut and a drop or two of coconut extract.

  • For creamier shakes, use whole milk.

  • For thinner shakes you can sip, add more milk. For thicker, spoonable shakes, add less milk. Some blenders don’t blend thicker shakes well, so if yours is having problems, either wait a minute or two for the ice cream to soften a bit more before continuing to blend, or add a touch more milk.

  • To make fresh whipped cream, whip about 1/4 cup / 60g heavy whipping cream with 1 Tbsp / 14g sugar in the bowl of a stand mixer fitted with whisk attachment, or with a handheld mixer. This makes about 1/2 cup fresh whipped cream. Store in fridge, best if used within a few days.

Strawberry Nutella Coconut Milkshake
Yield 2 Servings
Author
Prep time
5 Min
Total time
5 Min

Strawberry Nutella Coconut Milkshake

Thick and creamy milkshake with coconut ice cream, Nutella, strawberries and whipped cream on top.
Cook modePrevent screen from turning off

Ingredients

Instructions

  1. Add all ingredients except whipped cream to a blender and blend until smooth. Check consistency and add more milk if desired.
  2. Spoon into 2 glasses and top with whipped cream. Serve immediately.

Notes

  • Don’t have coconut ice cream but still want that coconut taste? Substitute chocolate or vanilla ice cream and add a bit of flaked coconut and a drop or two of coconut extract.
  • For creamier shakes, use whole milk.
  • For thinner shakes you can sip, add more milk. For thicker, spoonable shakes, add less milk. Some blenders don’t blend thicker shakes well, so if yours is having problems, either wait a minute or two for the ice cream to soften a bit more before continuing to blend, or add a touch more milk.
  • To make fresh whipped cream, whip about 1/4 cup / 60g heavy whipping cream with 1 Tbsp / 14g sugar in the bowl of a stand mixer fitted with whisk attachment, or with a handheld mixer. This makes about 1/2 cup fresh whipped cream. Store in fridge, best if used within a few days.

Nutrition Facts

Calories

440.85

Fat

23.21 g

Sat. Fat

19.31 g

Carbs

54.51 g

Fiber

3.87 g

Net carbs

50.64 g

Sugar

40.58 g

Protein

6.95 g

Sodium

49.23 mg

Cholesterol

9.42 mg

Nutritional information is approximate and based on 2 servings and includes whipped cream.

milkshake, milk, strawberry, Nutella, coconut, ice cream, vanilla, fresh whipped cream, dessert, summer
Dessert, Beverage
American
Did you make this recipe?
Tag @jennyblogsandbakes on instagram and hashtag it #jennyblogs
IMG_0943.jpg

Tzatziki Cucumber Salad

Last Updated August 24, 2024

IMG_0863.jpg

Fresh, cool, crunchy, creamy, and delicious Tzatziki, which is basically a Greek cucumber salad made with thick, strained yogurt, and seasoned with dill and garlic. Uh, yum, right? If you’ve ever had tzatziki, you know what I’m talking about!

It’s funny because I’ve known about tzatziki for a long time, enjoying it at restaurants and such, that wonderful Greek yogurt sauce dip wonder. I’ve seen several cucumber salad recipes around this summer on some of my favorite recipe sites like foodgawker; German cucumber salads, normal cucumber salads, and others. It got me hungry, so I decided to make my own. And let me tell you, I got right on it because zero cooking or baking in a recipe is a wonderful thing when the summer here in Florence has been between 90-106°F / 32-41°C since June.

I noticed most of the recipes I came across used sour cream, but I used plain greek yogurt because it’s more nutritious. Once I found a nice balance between the flavors, I wrote down the recipe and decided to share it with you guys! Then I recalled that tzatziki has very similar flavors, and although I’ve never made it nor even looked up a recipe, my curiosity got the best of me to see just how similar they would be. What do you know, I basically made tzatziki and didn’t even know it! So much for making an original recipe, haha!

So what I’m sharing with you today is my accidental take on tzatziki, similarly enough to be called so, but not THE original. If you make the changes listed below, however, you can have yourself a delicious and authentic Greek tzatziki!

What are the differences from a traditional tzatziki and the one you see below?

  • The cucumber is usually grated and drained (either by squeezing or letting sit in cheese cloth over a bowl overnight) instead of sliced. I also use more cucumber to make a creamy salad rather than a dip that features cucumber. if you want to make real tzatziki, use a half of a large cucumber or a smallish one.

  • Traditional would have more yogurt so again, more of a sauce or dip rather than a salad. For real tzatziki, double the yogurt to 1 1/2 cups / 340g.

  • For the acidic element, I used lemon juice, but vinegar of some sort is usually called for. I’ve read in Greece they most often use red wine vinegar.

  • I added more fresh dill! Because I love dill. If you think about it, this is like a creamy dill pickle dip. It has the cucumbers, the garlic, the dill….no wonder I like it so well! For original tzatziki, use about 1 Tbsp chopped.

If you eliminate the cucumbers (or shred them like the traditional way), it makes an excellent and much healthier alternative to most veggie dips. I might even like it better than Ranch!

This post may contain affiliate links. If you make a purchase using these links, Jennyblogs may receive a small commission, at no extra cost to you. This helps to support Jennyblogs. Where possible, links are prioritized to small businesses and ethically and responsibly made items. For further information see the privacy policy. Grazie!


Tzatziki Cucumber Salad

Serves about 2

IMG_0852.jpg

Ingredients:

  • 3/4 cup / 170g plain greek yogurt or dairy-free yogurt of choice

  • generous 2 Tbsp chopped fresh dill

  • 2 tsp / 10g lemon juice

  • 2 garlic cloves, minced, or 1/4 tsp garlic powder

  • salt and pepper, to taste

  • 1 large cucumber, chopped with skin/seeds removed, as desired

  • extra virgin olive oil, for drizzling, optional

Directions:

  1. In a medium bowl combine yogurt, dill, lemon juice, garlic powder, salt and pepper.

  2. If serving immediately, add cucumber and stir to coat; drizzle with olive oil. Otherwise, refrigerate until ready to serve, adding cucumber and drizzling with oil at the last minute.

Jenny’s Notes:

  • For optimal creaminess, I would use full fat greek yogurt. If you are vegan or dairy-free, use a thick/Greek dairy-free yogurt alternative!

  • In an ideal world the dressing would be made a day ahead of time and the cucumber added just before serving. This helps the flavors meld together and cuts the sharpness of the garlic a bit, without the cucumber sitting in the dressing for a day and losing its liquid. However, this makes a great last minute dish and it tastes just fine if eaten right away!

Tzatziki Cucumber Salad
Yield 2
Author
Prep time
10 Min
Total time
10 Min

Tzatziki Cucumber Salad

Creamy salad form of the classic Tzatziki sauce: Cucumbers, Greek yogurt, lemon juice, garlic, and fresh dill.
Cook modePrevent screen from turning off

Ingredients

Instructions

  1. In a medium bowl combine yogurt, dill, lemon juice, garlic powder, salt and pepper.
  2. If serving immediately, add cucumber and stir to coat; drizzle with olive oil. Otherwise, refrigerate until ready to serve, adding cucumber and drizzling with oil at the last minute.

Notes

  • For optimal creaminess, I would use full fat greek yogurt. If you are vegan or dairy-free, use a thick/Greek dairy-free yogurt alternative!
  • In an ideal world the dressing would be made a day ahead of time and the cucumber added just before serving. This helps the flavors meld together and cuts the sharpness of the garlic a bit, without the cucumber sitting in the dressing for a day and losing its liquid. However, this makes a great last minute dish and it tastes just fine if eaten right away!

Nutrition Facts

Calories

123.72

Fat

7.21 g

Sat. Fat

1.05 g

Carbs

5.89 g

Fiber

0.61 g

Net carbs

5.28 g

Sugar

3.78 g

Protein

9.30 g

Sodium

181.86 mg

Cholesterol

4.25 mg

Nutritional information is approximate.

vegan, vegetarian, dairy-free, gluten-free, veggie dip, cucumber, garlic, fresh dill, Greek yogurt, Ranch substitute
Side dish, lunch, sauces and condiments
Greek
Did you make this recipe?
Tag @jennyblogsandbakes on instagram and hashtag it #jennyblogs
IMG_0856.jpg