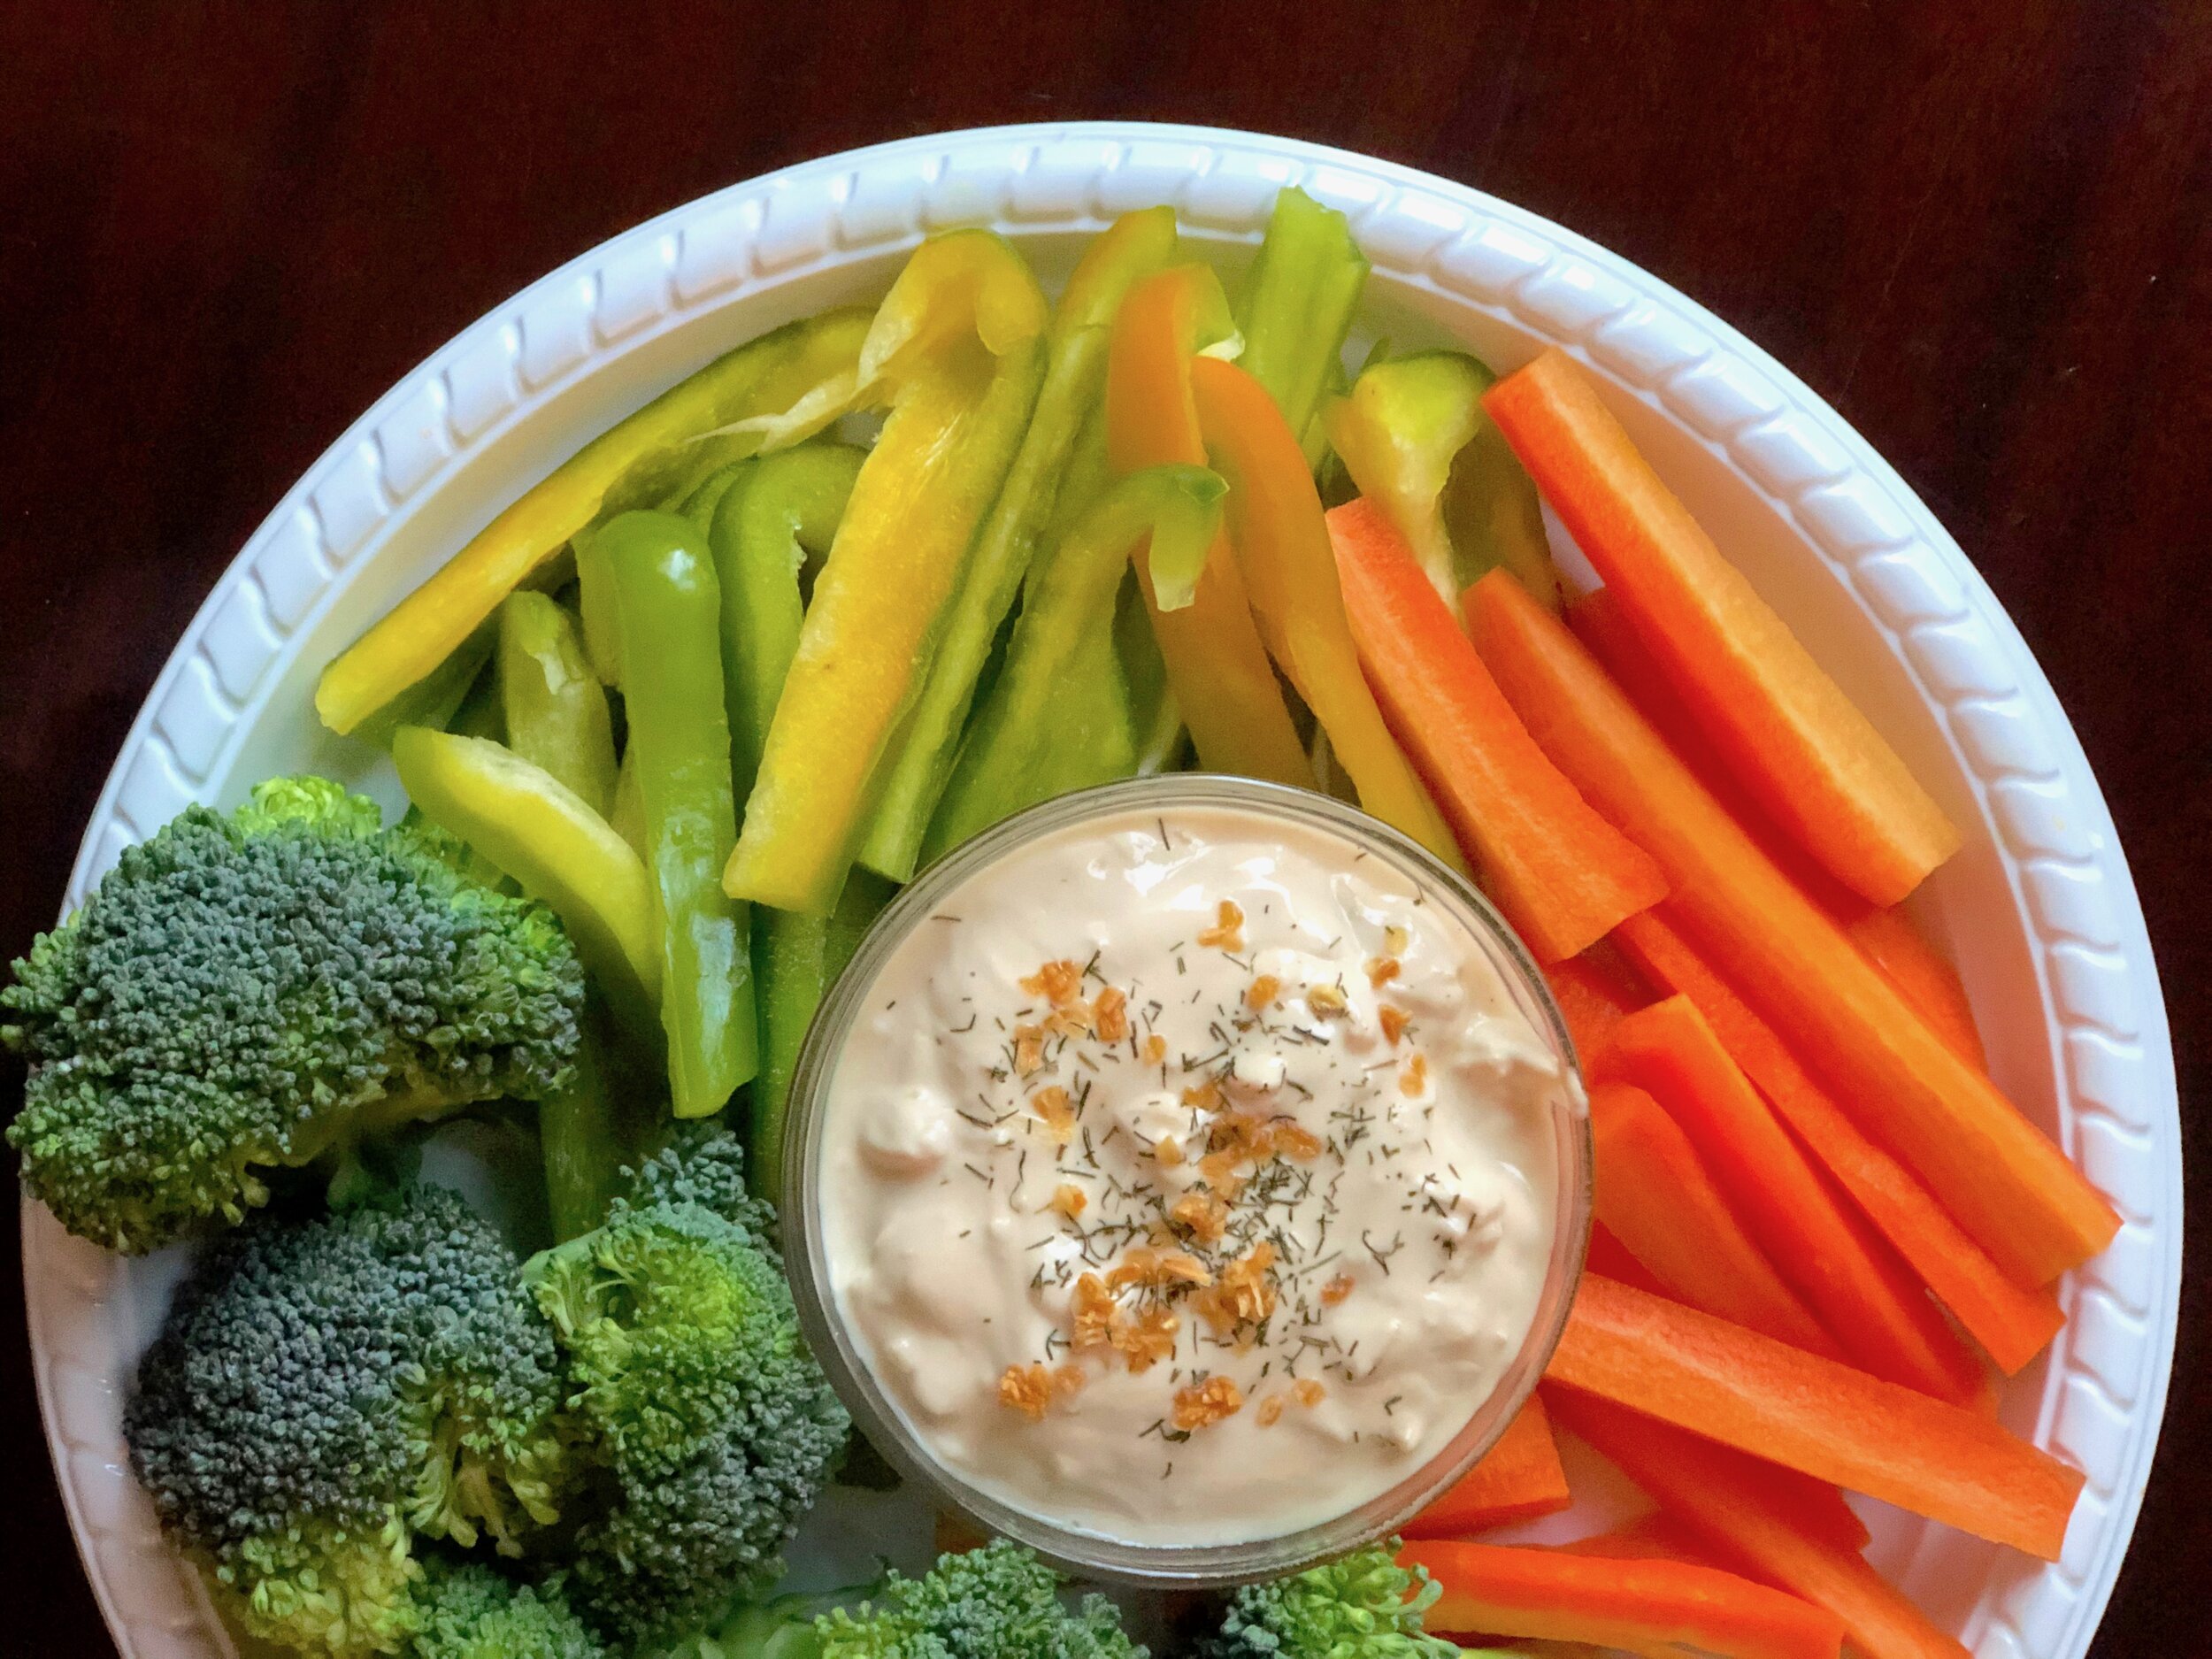
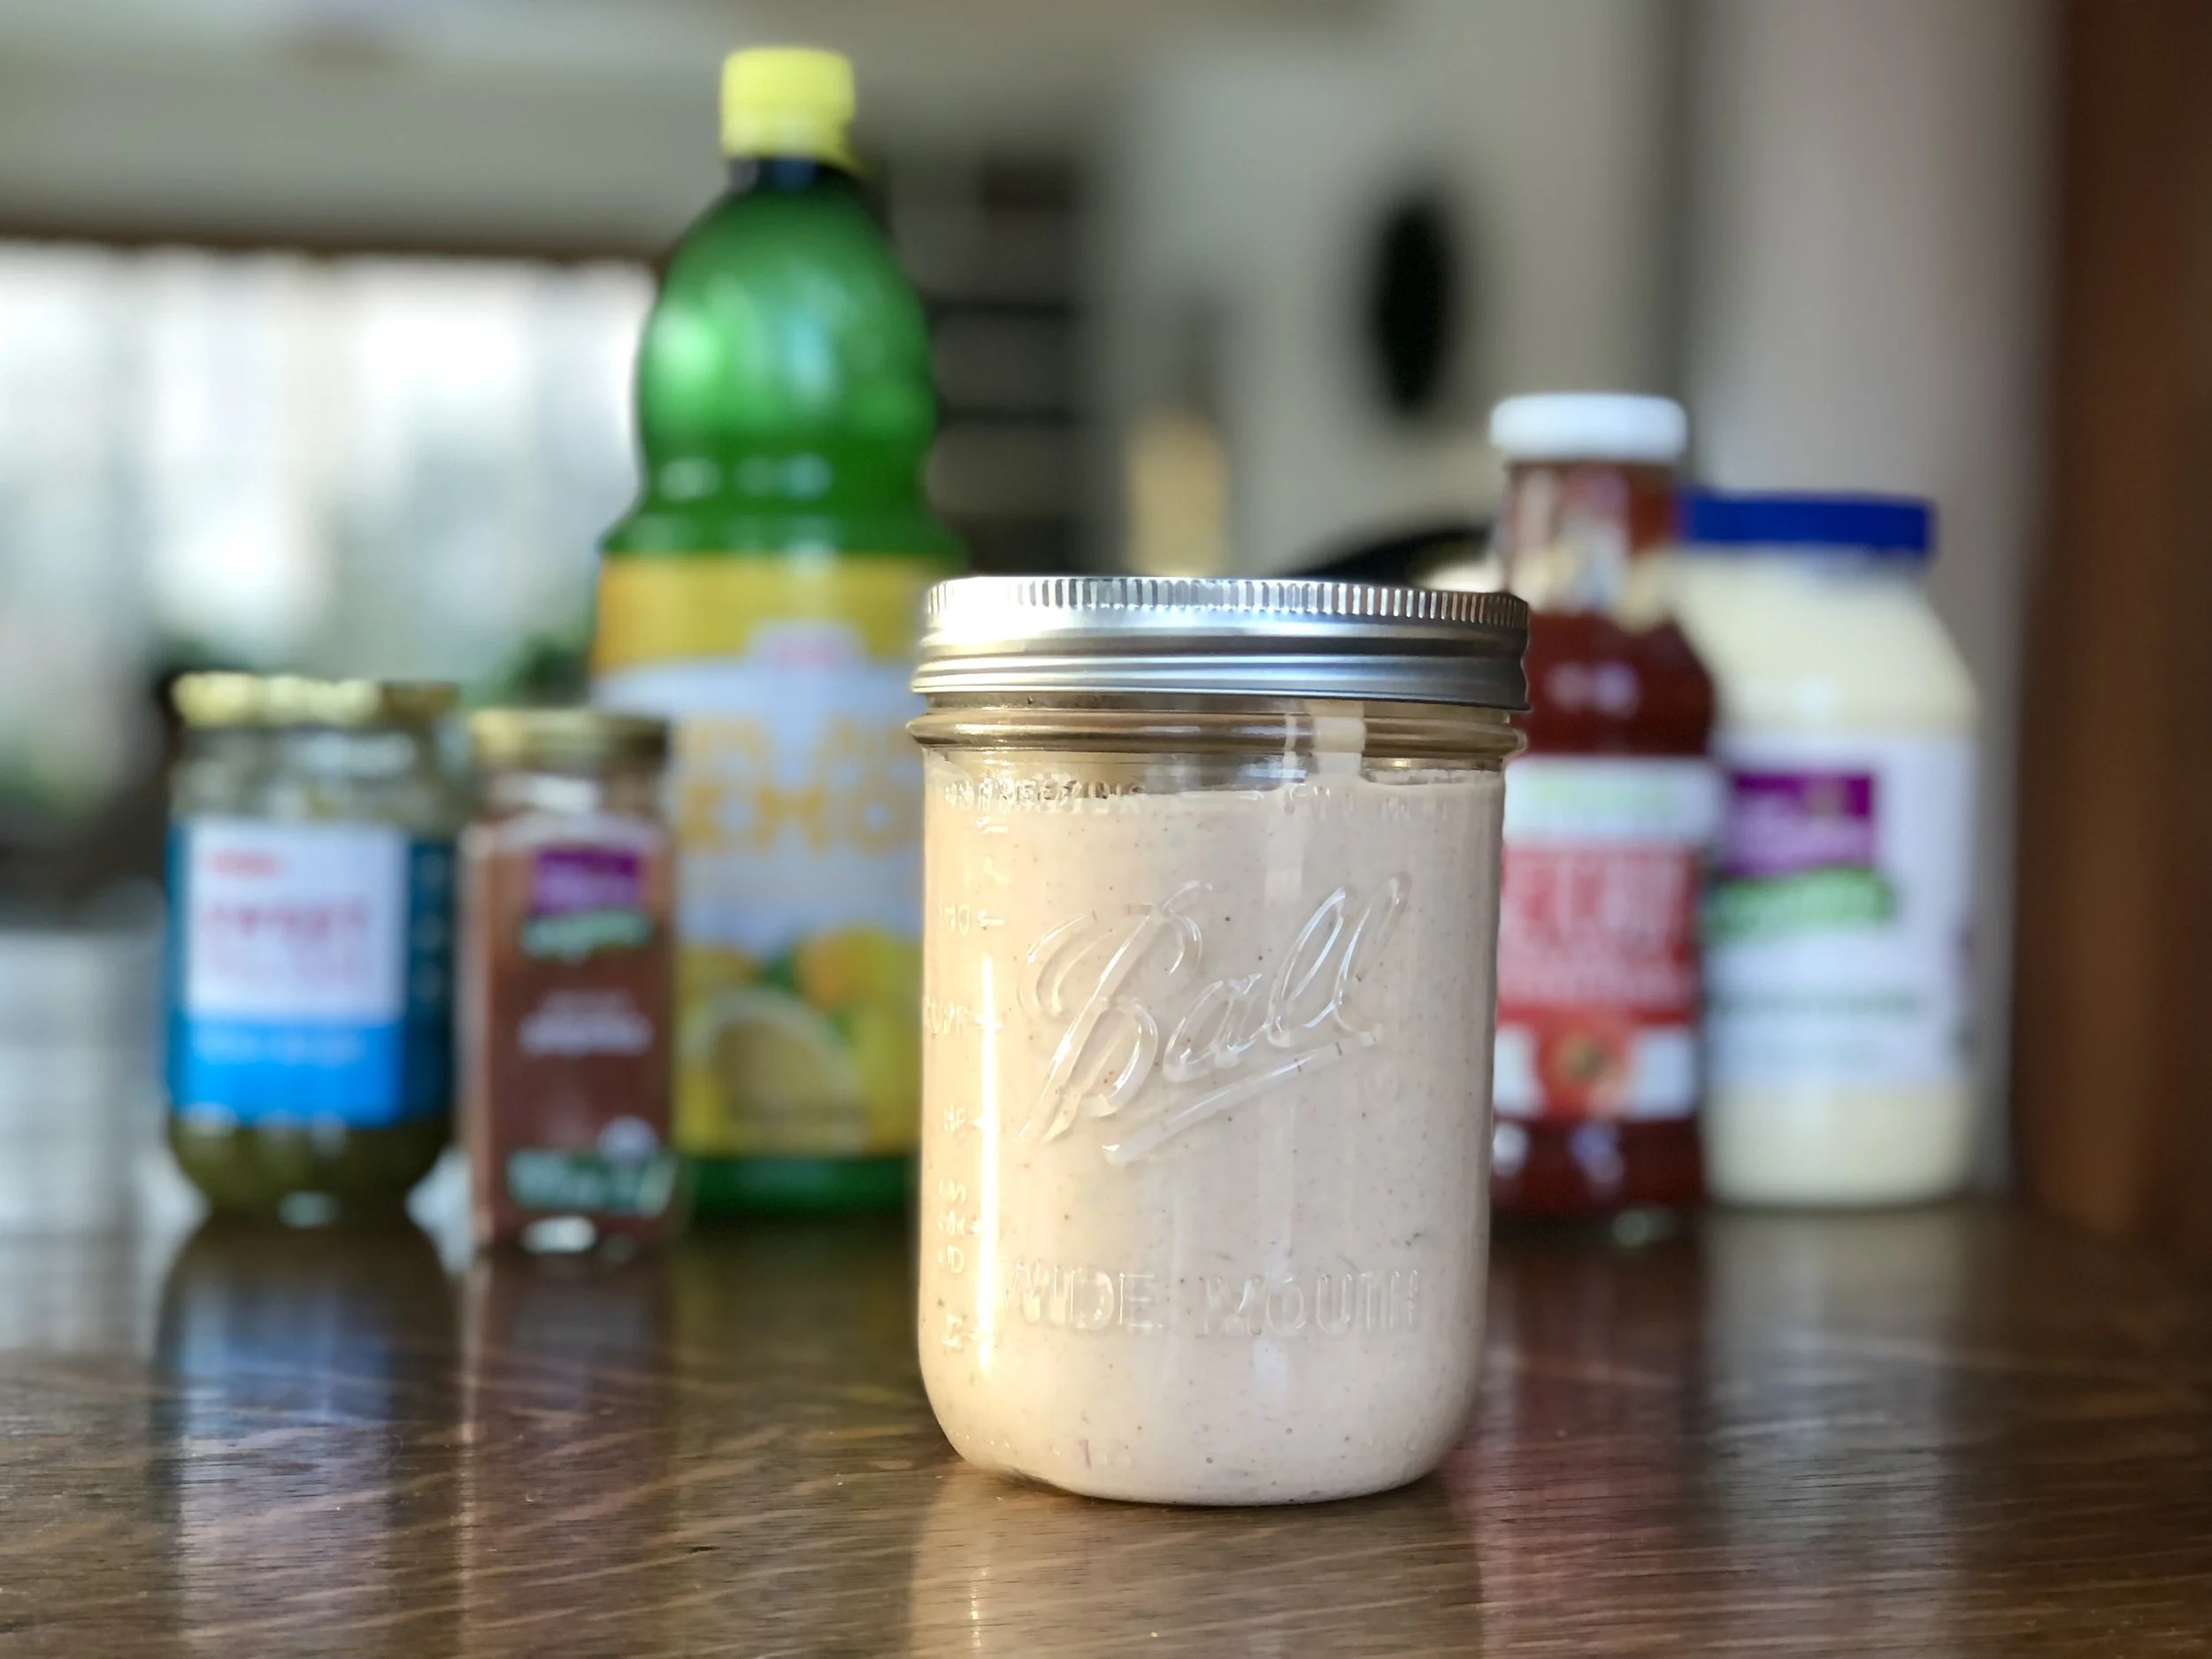
Copycat Homemade Lipton Onion Dip

Last Updated September 4, 2024

What if I told you that there is a way to enjoy Onion Dip but with less guilt? No preservatives, corn syrup, caramel color, and other ingredients you’re not quite sure what they are?

Because there IS a way! And it’s very simple. Not that you get much simpler than mixing sour cream with a Lipton onion packet, but it’s pretty darn close.

For this recipe I use yogurt, as I do even if I mix a Lipton packet, because yogurt is actually good for you, sour cream is usually more found on diet naughty lists.

I first made this during lockdown, and while I couldn’t find beef broth granules, just “classic” powdered broth, it came out satisfactorily close to the real thing. As I was explaining on the Healthier Lipton Onion Dip post, I had inherited two Lipton onion mixes from a friend who moved away from Florence. My husband had never had such a thing before and requested it again. When he requested it a third time, I had to break it to him gently…”honey, there were only two packets, and I don’t think we can find Lipton around Florence.”

Since people requesting a specific food/dessert/recipe from me to make is like a love language for me, I was not about to let a request go unfulfilled. So I began a hunt for the necessary ingredients and a recipe to go off of that doesn’t just make bulk powdered onion mix (there are many of those but I don’t make Onion dip all THAT often) but just a recipe for the standard 16oz/two cups of dip.

Thanks to Daring Gourmet for providing just that! Recipe with a few of my usual tweaks below.

This post may contain affiliate links. If you make a purchase using these links, Jennyblogs may receive a small commission, at no extra cost to you. This helps to support Jennyblogs. For further information see the privacy policy. Grazie!


Copycat Lipton Onion Dip

Makes about 2 cups of dip

Ingredients:

  • 2-4 tsp beef broth granules

  • 2 Tbsp dried minced onions

  • 1 tsp onion powder

  • 1/4 tsp pepper

  • 1/8 tsp paprika

  • 16oz / 454g regular or Greek plain yogurt

  • fresh or dried dill, more dried minced onions, for topping, optional

  • washed sliced veggies, potato chips, etc, for dipping

Directions:

  1. In a medium bowl, combine 2 tsp of broth granules with the rest of the spices.

  2. Stir in the yogurt and mix well. Taste; if you desire the dip to be saltier, add another teaspoon of broth granules and stir. Taste again, adding the last teaspoon of broth, if desired. Refrigerate for about two hours before serving.

  3. Top with dill and more onions, if desired, and serve with veggies, potato chips, pita, or whatever dippers you like!

Jenny’s Notes:

  • While beef broth is probably closest to the real taste, I have never found beef broth granules here in Italy and get away with using the “classic” broth flavor or even vegetable broth granules. It still tastes delicious! Check labels for MSG, it often gets sneaked into these types of things.

  • If using low-sodium broth granules you will be better able to control the sodium, and can even add a bit more broth for more flavor without the dip becoming too salty.

  • The refrigeration is not strictly necessary, but it gives some time for the flavors to meld and the onions to rehydrate a bit. If you simply can’t wait that long to dig in or need it ASAP for a party, go ahead and use it straight away.

  • 1/8 tsp celery seed, and 1/4 tsp dried parsley can also be added. I don’t usually add them just because I don’t have celery seed on hand here and don’t personally think dried parsley adds any kind of flavor value to dishes. It does add a touch of green, though!
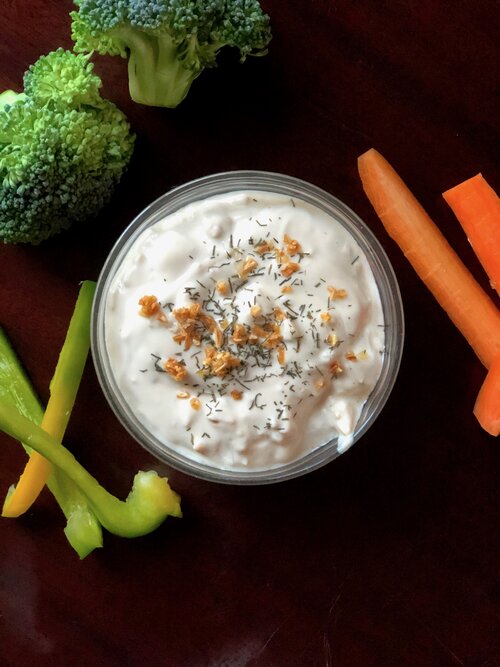
Copycat Lipton Onion Dip
Yield 4
Author
Prep time
10 Min
Total time
10 Min

Copycat Lipton Onion Dip

Classic Lipton Onion Dip made from scratch, creating a delicious and nutritious snack to be served with veggies, potato chips, or your favorite dippers.
Cook modePrevent screen from turning off

Ingredients

Instructions

  1. In a medium bowl, combine 2 tsp of broth granules with the rest of the spices.
  2. Stir in the yogurt and mix well. Taste; if you desire the dip to be saltier, add another teaspoon of broth granules and stir. Taste again, adding the last teaspoon of broth, if desired. Refrigerate for about two hours before serving.
  3. Top with dill and more onions, if desired, and serve with veggies, potato chips, pita, or whatever dippers you like!

Notes

  • While beef broth is probably closest to the real taste, I have never found beef broth granules here in Italy and get away with using the “classic” broth flavor or even vegetable broth granules. It still tastes delicious! Check labels for MSG, it often gets sneaked into these types of things.
  • If using low-sodium broth granules you will be better able to control the sodium, and can even add a bit more broth for more flavor without the dip becoming too salty.
  • The refrigeration is not strictly necessary, but it gives some time for the flavors to meld and the onions to rehydrate a bit. If you simply can’t wait that long to dig in or need it ASAP for a party, go ahead and use it straight away.
  • 1/8 tsp celery seed, and 1/4 tsp dried parsley can also be added. I don’t usually add them just because I don’t have celery seed on hand here and don’t personally think dried parsley adds any kind of flavor value to dishes. It does add a touch of green, though!

Nutrition Facts

Calories

89.67

Fat

1.93 g

Sat. Fat

1.17 g

Carbs

11.95 g

Fiber

1.33 g

Net carbs

10.61 g

Sugar

9.31 g

Protein

6.84 g

Sodium

105.53 mg

Cholesterol

6.81 mg

Nutritional information is approximate. Based on 1/2 cup dip with 1 cup sliced veggies.

Lipton Onion soup mix, Lipton Onion dip, French onion dip, copycat Lipton onion dip, beef broth, yogurt, veggie dip
appetizer
American
Did you make this recipe?
Tag @jennyblogsandbakes on instagram and hashtag it #jennyblogs

Beurre Noisette (browned butter) Congo Bars

Last Updated September 3, 2024

With oats.

Adjustments.jpg

One of the best things to happen to the cookie world is browned butter, or beurre noisette as the French call it. It not only ups the baked cookie game, but it takes cookie dough to a whole new level.

Will someone please get browned butter cookie dough ice cream on the market? Thanks.

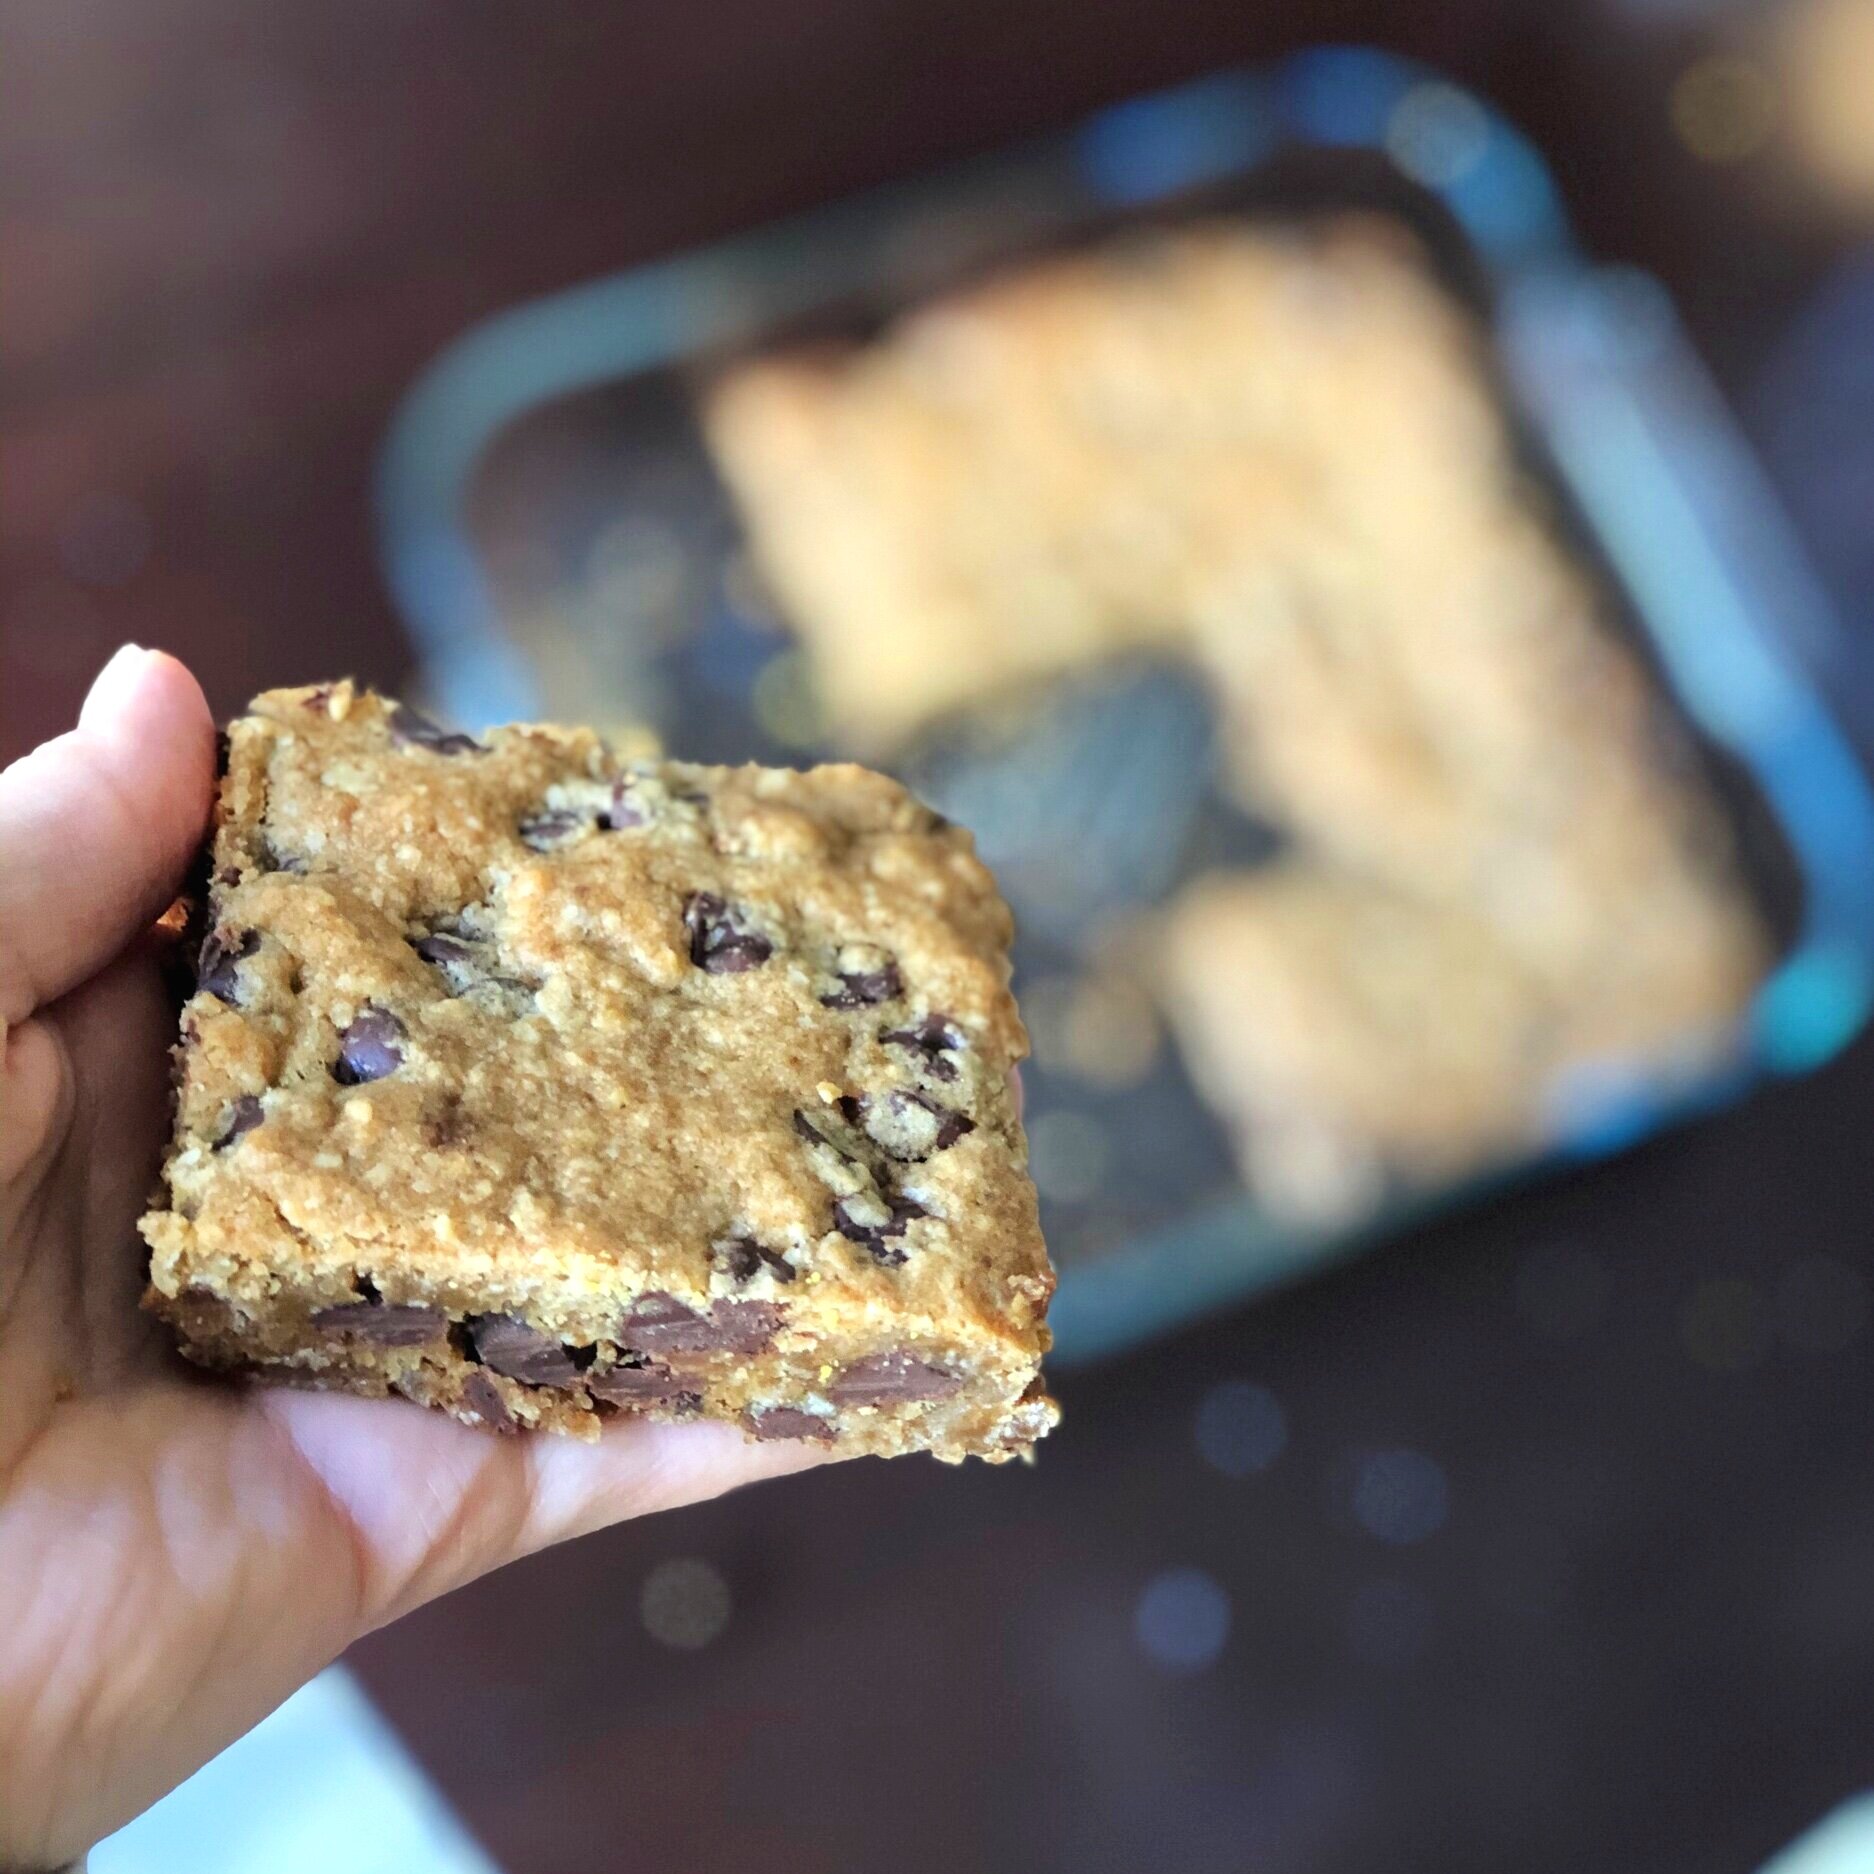
You can find my original recipe for Beurre Noisette Chocolate Chip Cookies right here, but you might want to stick around a little longer for today’s recipe because it’s essentially the same thing, just a different form and a little quicker to make. And cookies are already quick to make, so imagine that!

Why the name congo bars? I really have no idea. They’re just chocolate chip cookies in bar form. Therefore quicker to make but not necessarily superior to the classic cookie form. It’s really down to whatever tickles your fancy in that moment.

This recipe was born under full Italian lockdown. Ironically, you think I wouldn’t want to short cut a recipe with all the time I had on my hands, but you see, I have a very small oven. I can bake a max of 5-6 cookies a time, so that’s a long time to be waiting around to take cookies out of the oven, reload the tray, and repeat. Not to mention a higher electric bill.

So what did I do? I took my handy dandy Beurre Noisette Chocolate Chip Cookie recipe and adjusted it to fit in an 8x8in / 20x20cm square pan. So great. So delicious. And the timer only goes off once! A square baking dish is also a bit easier to wash than a large and cumbersome cookie sheet.

This recipe also features oats, and you can use the browned butter while it’s still melted if you want one more time-saving trick. While I do think it’s worth the time/planning ahead to brown the butter, allow it to cool, then whip it up as you normally would in a cookie recipe (so fluffy and so delicious), it’s not essential and can save you a lot of time if you don’t.

To learn how to make browned butter, see the original Beurre Noisette Chocolate Chip Cookie recipe.

This post may contain affiliate links. If you make a purchase using these links, Jennyblogs may receive a small commission, at no extra cost to you. This helps to support Jennyblogs. For further information see the privacy policy. Grazie!

A recipe by Jenny


Beurre Noisette (browned butter) Congo Bars

Makes about 9 bars

Adjustments.jpg

Ingredients:

  • 1/2 cup / 113g butter, melted, browned, and cooled

  • 3/4 cup / brown sugar

  • 1 egg

  • 1 1/2 tsp vanilla extract

  • 1 cup / 120g all-purpose flour

  • 1/2 cup / 45g oats

  • 1/2 tsp baking powder

  • 1/2 tsp baking soda

  • 1/2 tsp salt

  • 6 oz / 170g (half a bag) chocolate chips

Directions:

Oven preheated to 350°F / 177°C. 8x8in / 20x20cm pan, greased.

  1. In a medium bowl, mix together melted and cooled browned butter, brown sugar, egg, and vanilla and smooth.

  2. Add in flour, oats, baking powder, baking soda, salt, and chocolate chips. Mix until well combined.

  3. Scrape dough into an even layer in the prepared pan and bake for 18-22 minutes, or until set and center no longer looks doughy.

Jenny’s Notes:

  • This recipe can easily be doubled and baked in a 9x13in / 23x33cm pan.

  • If you choose to whip your butter, cream first just the butter and sugar until light and fluffy, about 4-5 minutes. Then add in the rest of the wet ingredients and continue with recipe.

  • Before baking you can also sprinkle some flaked sea salt on top if you’re craving the sweet and salty!

Beurre Noisette (browned butter) Congo Bars
Yield 9
Author
Prep time
25 Min
Cook time
22 Min
Total time
47 Min

Beurre Noisette (browned butter) Congo Bars

All the goodness of browned butter chocolate chip cookies in a bar form!
Cook modePrevent screen from turning off

Ingredients

Instructions

  1. Oven preheated to 350°F / 177°C. 8x8in / 20x20cm pan, greased.
  2. In a medium bowl, mix together melted and cooled browned butter, brown sugar, egg, and vanilla and smooth.
  3. Add in flour, oats, baking powder, baking soda, salt, and chocolate chips. Mix until well combined.
  4. Scrape dough into an even layer in the prepared pan and bake for 18-22 minutes, or until set and center no longer looks doughy.

Notes

This recipe can easily be doubled and baked in a 9x13in / 23x33cm pan.If you choose to whip your butter, cream first just the butter and sugar until light and fluffy, about 4-5 minutes. Then add in the rest of the wet ingredients and continue with recipe. Before baking you can also sprinkle some flaked sea salt on top if you’re craving the sweet and salty!

Nutrition Facts

Calories

316.06

Fat

16.84 g

Sat. Fat

10.05 g

Carbs

40.76 g

Fiber

1.98 g

Net carbs

38.78 g

Sugar

25.25 g

Protein

3.65 g

Sodium

321.79 mg

Cholesterol

47.66 mg

Nutritional information is approximate. Based on 9 servings.

browned butter, chocolate chip cookies, congo bars, cookies
cookies, dessert
American
Did you make this recipe?
Tag @jennyblogsandbakes on instagram and hashtag it #jennyblogs

Parmesan Pan-Fried Chicken

Adjustments.jpeg

Happy quarantine day I-don’t-know-what-number! 44? 46? Regardless, I think we’re all open to new dinner ideas at this point and really looking forward to being able to go to restaurants again.

One thing that has made this quarantine a little easier is having access to yummy food and snacks, so I don’t miss going out too much. I’m thankful for a space I can make and create food, grocery stores, and for my mom who taught me so much about being in the kitchen.

But. That doesn’t mean some nights I don’t miss the ease of take out, especially the pizzeria behind my house, or being able to sit down in a nice space and then people bring you whatever you choose to eat in exchange for some money. Restaurants are so cool, you guys.

That’s where today’s Parmesan Pan-Fried Chicken comes into play. It’s easy, ready in 10-15 minutes, and so delicious. It’s no fuss, because there is no egg or flour breading. This also makes for a lighter fried chicken, just a thin, flavorful crust and not nearly as much guilt as traditional fried chicken. And less dishes to wash! All you need are some chicken breasts, bread crumbs, oregano, garlic powder, salt, and parmesan cheese, plus a frying pan with a bit of butter.

I originally stumbled across this idea when making a chicken quinoa casserole, which uses a similar breading technique with the chicken: using simply a wet chicken breast before dipping in a breadcrumb mixture instead of the more common flour and egg battering. I thought, what happens if I do the same thing, but instead of putting it in the casserole, fry it in some butter? Well, this simple, delicious chicken was the result, and I’m happy to share the recipe with you today.

This post may contain affiliate links. If you make a purchase using these links, Jennyblogs may receive a small commission, at no extra cost to you. This helps to support Jennyblogs. Where possible, links are prioritized to small businesses and ethically and responsibly made items. For further information see the privacy policy. Grazie!

A recipe by Jenny


Parmesan Pan-Fried Chicken

Serves 4-6

Ingredients:

  • 4 uncooked boneless skinless chicken breasts, about 1.5 lbs / 680g

  • 1/2 cup / 62g bread crumbs

  • 1/4 cup / 25g grated parmesan cheese

  • 1/2 tsp dried oregano

  • 1/4 tsp garlic powder

  • 1/4 tsp salt

  • dash of pepper

  • 2 Tbsp butter

Directions:

Adjustments.jpeg
  1. Starting with one chicken breast, lay it flay on a cutting board. Slice horizontally starting from the thicker end, to end up with two thinner pieces of chicken breast. Repeat with remaining chicken breasts.

  2. In a medium bowl, mix together bread crumbs, cheese, garlic, oregano, salt and pepper.

  3. In a large frying pan, melt 2 Tbsp butter over medium-high heat. Wet a chicken breast with water and press one side, then the other, into the bread crumb mixture. You can use your fingers to press on more of the mixture on areas that get missed. Place coated chicken into frying pan. Repeat with remaining chicken.

  4. Cook on each side 5-7 minutes or until cooked through and golden brown. Internal temperature should read at least 165°F / 75°C. If the chicken starts to darken too quickly, lower the temperature.

Jenny’s Notes:

  • If your frying pan isn’t big enough to accomodate all of the chicken, you can cook it in batches, starting with less butter, and adding more between each batch of chicken.

  • Here in Italy I always buy meat from our butcher, who slices chicken breasts horizontally so they are twice as thin as the chicken breasts you get at the store. While you can choose to keep your chicken breasts whole and bread and fry them that way, keep in mind you will need to adjust the cooking time accordingly to cook the chicken through.

  • You can use more butter for richer fried chicken, or less, for an even lighter fried chicken.

Parmesan Pan-Fried Chicken
Yield 4-6
Author
Prep time
5 Min
Cook time
14 Min
Total time
19 Min

Parmesan Pan-Fried Chicken

The easiest fried chicken with no egg or flour battering, just wet the chicken and dip in spiced bread crumbs and parmesan cheese. Fry in butter and you have a crispy, delicious chicken ready in 15 minutes.
Cook modePrevent screen from turning off

Ingredients

Instructions

  1. In a medium bowl, mix together bread crumbs, cheese, garlic, oregano, salt and pepper.
  2. In a large frying pan, melt 2 Tbsp butter over medium-high heat. Wet a chicken breast with water and press one side, then the other, into the bread crumb mixture. You can use your fingers to press on more of the mixture on areas that get missed. Place coated chicken into frying pan. Repeat with remaining chicken.
  3. Cook on each side 5-7 minutes or until cooked through and golden brown. Internal temperature should read at least 165F / 75C. If the chicken starts to darken too quickly, lower the temperature.

Notes

If your frying pan isn’t big enough to accomodate all of the chicken, you can cook it in batches, starting with less butter, and adding more between each batch of chicken. Here in Italy I always buy meat from our butcher, who slices chicken breasts horizantally so they are twice as thin as the chicken breasts you get at the store. That said, I had to guess a bit at the quantity for the coating, as I’ve never made this with larger chicken breasts. I know how much I need to make for 3 thinner chicken breasts, but that’s not going to be helpful to many people. If you have leftover coating, you can store it in the fridge for up to 2 days, but I wouldn’t keep it much longer as raw chicken has touched it. You can use more butter for richer fried chicken, or less, for an even lighter fried chicken.

Nutrition Facts

Calories

337.55

Fat

12.62 g

Sat. Fat

6.01 g

Carbs

12.31 g

Fiber

0.80 g

Net carbs

11.51 g

Sugar

0.98 g

Protein

41.18 g

Sodium

506.17 mg

Cholesterol

122.64 mg

Nutritional information is approximate. Based on 4 servings.

chicken, pan fried, fried chicken, parmesan cheese, oregano, garlic, 15 minute dinners, quick dinners
dinner, poultry
American
Did you make this recipe?
Tag @jennyblogsandbakes on instagram and hashtag it #jennyblogs

Almond Poppy Seed Sweet Rolls

Last Updated October 27, 2024

Welcome back to quarantine snacks and meals!

Adjustments.jpg

Today we are making Almond Poppy Seed Rolls! Think cinnamon rolls, but instead of cinnamon, a sweet almond dough with little crunchy poppyseeds and a sticky glaze. It’s like a cross between almond poppyseed bread and cinnamon rolls.

If there’s one thing we are forced to be during this time, it’s creative. Lack of resources, lack of schedule, lack of really anything that resembles our normal life has led us to come up with some really great ideas. Sometimes useless, but great nonetheless. Homemade obstacle courses are trending, memes are at the top of their game, and random skills you never before dreamed of having suddenly manifest themselves.

Another way we have had to get creative is in our cooking and baking. Not everything is readily available, and even if it is, a quick run to the store is no longer a quick run to the store. For my Michigan peeps, you are probably now feeling the effects of the latest lockdown measures. Only a certain number of people are allowed in the store at a time, creating long lines outside. Welcome, friends. That’s been normal life in Italy since uhh do I rememer how long? I think going on six weeks. Some stores require you to have a cart (helps you keep your distance) and some stores take your temperature before you enter. (In Italy.)

In general, most of my baking, unless for a special occasion or holiday, is spur of the moment. And what I want to bake often corresponds with what I want to eat, what do you know? The problem with this, as mentioned above, is that if I’m missing an ingredient, that means either waiting until the next store run, making something else, or improvising. The latter usually wins out.

Take the other day, for example, when I really wanted to make (and eat) these lemon raspberry rolls. I knew I didn’t have any raspberries, so I figured I would make just lemon rolls. Not to be, as I found my last lemon had gone moldy, and I didn’t even have any lemon extract. Well. Plain rolls weren’t going to cut it. I could’ve made cinnamon rolls, but my husband doesn’t much care for cinnamon (gasp) and I didn’t think that I should be eating a whole pan of cinnamon rolls by myself. While in quarantine. And am supposed to stay within 200m of my abode for exercise.

I took stock of my cupboards to see what I could possibly use to make some kind of flavored, delicious roll. While I didn’t have lemon extract, I did find almond extract! I love almond, and, and POPPY SEEDS. Yes. Done.

If you happen to have ingredients for both, I would highly suggest making both. They are also freezer friendly; stick in the freezer before baking or even after, once they’ve cooled.

This post may contain affiliate links. If you make a purchase using these links, Jennyblogs may receive a small commission, at no extra cost to you. This helps to support Jennyblogs. For further information see the privacy policy. Grazie!

Recipe by Jenny


Almond Poppy Seed Sweet Rolls

Makes 9 rolls

Adjustments.jpeg

Ingredients:

For the Dough

  • 1/2 cup / 119g milk or water

  • 1/4 cup / 50g sugar

  • 2 1/4 tsp / 7g active dry yeast

  • 2 Tbsp / 28g oil

  • 1 egg

  • 3 Tbsp / 23g poppy seeds

  • 1/2 tsp almond extract

  • 1/4 tsp salt

  • 2 1/4 cups / 270g all-purpose flour + about 1/4 cup / 30g for kneading

For the Filling

  • 1/4 cup / 56g butter

  • 1/4 cup / 50g sugar

For the Glaze

  • 3/4 cup / 94g powdered sugar

  • 1-2 Tbsp / 14-28g milk

Directions:

Preheat oven to 400F / 205C. Grease an 8x8inch / 20x20cm square baking dish.

Make the Dough

  1. In a small saucepan over low heat, warm milk until it is about 100F / 38C.  Pour into a large bowl.  Add the sugar and yeast and allow to sit for 7-10 minutes.  The yeast should foam up a bit. 

  2. Add oil, eggs, poppy seeds, extract, and salt.  Add the 2 1/4 cups of flour and mix until combined. 

  3. Turn dough out onto a floured surface.  Knead for about 8-10 minutes, sprinkling more flour on your work surface as needed.   Dough should be soft and elastic by the end, so don't get too flour-happy. Alternately, you can use the bread hook on a stand mixer and knead for 8-10 minutes, adding in flour as needed. By the end the dough should stick only to the bottom of the pan, not the sides.

  4. Lightly grease or flour a large bowl (the bowl you mixed the dough in is fine) and place dough in the bowl.  Cover with a towel and place in a warm area to rise for about 1 1/2 hours or until doubled in size. 

Assemble the Rolls

  1. In a small saucepan melt butter for filling and let simmer until it starts to brown.  Remove from heat and cool.

  2. When the dough has risen, punch it down and turn out onto a lightly floured surface.  Knead for a minute, then roll into a generous rectangle, about 7x14inch / 18x36cm and roughly 1/4inch / 1/2cm thick.

  3. Spread cooled butter over dough almost to the edges, then sprinkle evenly with sugar.

  4. Starting from one of the longer sides, roll dough into a spiral, pinching the dough together at the end to seal it. 

  5. Cut the log into thirds, then each third into 3 slices.  Place the rolls in the prepared pan and cover lightly with plastic wrap or a damp towel.  Place in a warm area to rise for about an hour, or until puffed.

  6. Bake for 15-20 minutes, or until golden on top and centers no longer look doughy. Internal temperature should be about 195F / 90C.

Make the Glaze

  1. In a small bowl whisk together powdered sugar and1 Tbsp of milk.  It should be thin enough to drizzle but not too liquidy.  Add more milk as needed. 

  2. Drizzle warm rolls with glaze. 

Jenny's Notes:

  • If you don't have a thermometer handy to know what 100 degrees is, simply warm until the milk feels quite warm, but not hot.

  • You can freeze these rolls once you have sliced them and put them in the pan.  Once removed from the freezer allow to thaw and proceed as normal. 

  • When using a stand mixer to knead, I still recommend kneading it for a few minutes by hand afterwards. I find they are not always as thorough as kneading by hand and you want an even rise for your dough.  I often to do it all by hand just because it’s therapeutic!

Almond Poppy Seed Rolls
Yield 9 rolls
Author
Prep time
1 Hour
Cook time
20 Min
Total time
1 H & 20 M

Almond Poppy Seed Rolls

Soft, fluffy breakfast rolls reminiscent of cinnamon rolls but with an almond poppy seed dough, a sweet, gooey buttery filling, and a sweet glaze.
Cook modePrevent screen from turning off

Ingredients

For the Dough
For the Filling
For the Glaze

Instructions

Make the Dough
  1. In a small saucepan over low heat, warm milk until it is about 100F / 38C. Pour into a large bowl. Add the sugar and yeast and allow to sit for 7-10 minutes. The yeast should foam up a bit.
  2. Add oil, eggs, poppy seeds, extract, and salt. Add the 2 1/4 cups of flour and mix until combined.
  3. Turn dough out onto a floured surface. Knead for about 8-10 minutes, sprinkling more flour on your work surface as needed. Dough should be soft and elastic by the end, so don't get too flour-happy. Alternately, you can use the bread hook on a stand mixer and knead for 8-10 minutes, adding in flour as needed. By the end the dough should stick only to the bottom of the pan, not the sides.
  4. Lightly grease or flour a large bowl (the bowl you mixed the dough in is fine) and place dough in the bowl. Cover with a towel and place in a warm area to rise for about 1 1/2 hours or until doubled in size.
Assemble the Rolls
  1. Preheat oven to 400F / 205C. Grease an 8x8inch / 20x20cm square baking dish.
  2. In a small saucepan melt butter for filling and let simmer until it starts to brown. Remove from heat and cool.
  3. When the dough has risen, punch it down and turn out onto a lightly floured surface. Knead for a minute, then roll into a generous rectangle, about 7x14inch / 18x36cm and roughly 1/4inch / 1/2cm thick.
  4. Spread cooled butter over dough almost to the edges, then sprinkle evenly with sugar.
  5. Starting from one of the longer sides, roll dough into a spiral, pinching the dough together at the end to seal it.
  6. Cut the log into thirds, then each third into 3 slices. Place the rolls in the prepared pan and cover lightly with plastic wrap or a damp towel. Place in a warm area to rise for about an hour, or until puffed.
  7. Bake for 15-20 minutes, or until golden on top and centers no longer look doughy. Internal temperature should be about 195F / 90C.
Make the Glaze
  1. In a small bowl whisk together powdered sugar and1 Tbsp of milk. It should be thin enough to drizzle but not too liquidy. Add more milk as needed.
  2. Drizzle warm rolls with glaze.

Notes

If you don't have a thermometer handy to know what 100 degrees is, simply warm until the milk feels quite warm, but not hot. It'll be fine!You can freeze these rolls once you have sliced them and put them in the pan. Once removed from the freezer allow to thaw and proceed as normal. When using a stand mixer to knead, I still recommend kneading it for a few minutes by hand afterwards. I find they are not always as thorough as kneading by hand and you want an even rise for your dough.

Nutrition Facts

Calories

276.34

Fat

10.42 g

Sat. Fat

3.94 g

Carbs

40.79 g

Fiber

1.52 g

Net carbs

39.27 g

Sugar

15.97 g

Protein

5.19 g

Sodium

122.93 mg

Cholesterol

35.35 mg

Nutritional information is approximate. Based on 1 roll.

almond poppy seed, breakfast rolls, yeast, yeasted breads, enriched dough,glaze
Breakfast,Breads, Dessert
American
Did you make this recipe?
Tag @jennyblogsandbakes on instagram and hashtag it #jennyblogs
Adjustments.jpg

White Bean Potato Soup

Last Updated August 30, 2024

This soup is packed full. Packed full of flavor, packed full of vegetables and good stuff, and therefore packed full of nutrients. Did I mention it’s also vegan? Because it is, at least if you don’t sprinkle any of that wonderful cheese over the soup at the end.

Adjustments.jpeg

While I love beans, and I love potatoes, and just about everything else in this soup, I honestly wasn’t expecting it to be as good as it was. It is so full of flavor and so satisfying, and I didn’t even have any wine on hand to add!

This soup boasts, besides beans and potatoes, onions, carrots, garlic, kale, with a hint of rosemary, spice, and white wine to tie it all together.

While the main soup season might be coming to an end, I decided to finally post this recipe because

1. during these crazy coronavirus times it seems everyone and their brother are baking bread up the wazoo and revving their sourdough starters, at least judging by social media and the shortage of flours and yeast in the stores…and this soup pairs wonderfully with some good homebaked bread!!

2. this soup has many ingredients, but most are pantry staples which makes this ideal to whip up for dinner without having to go to the store. Even if you’re missing one or two things, this soup is so flavorful you can easily swap out vegetables or omit one with a still tasty result.

3. many of these ingredients are also cheap, which means you get a hardy meal for just a few dollars, which is helpful in these uncertain financial times

4. we’ve had an unusually cold few nights and days for April here in Florence, which made me think of this soup..

5. soups are so easy, and recipes like this are rewarding for my friends who may be deciding to expand their cooking skills with all the newfound time on their hands.

This post may contain affiliate links. If you make a purchase using these links, Jennyblogs may receive a small commission, at no extra cost to you. This helps to support Jennyblogs. For further information see the privacy policy. Grazie!

Recipe slightly adapted from Clever Eats


White Bean Potato Soup

Serves 4-6

Ingredients:

  • 1 Tbsp oil

  • 1 medium onion, diced

  • 1 stalk of celery, diced

  • 1 carrot, diced

  • 2 garlic cloves, minced

  • 2 15oz / 400g cans of white beans, drained (any kind, such as cannellini or navy)

  • 2 potatoes, cut into small chunks

  • 1 Tbsp / 16g tomato paste

  • 1/2 tsp dried rosemary or 1 Tbsp chopped fresh

  • 1/2 tsp sweet paprika

  • 1/4 tsp cayenne pepper, optional

  • 1/2 cup / 119g white wine, or more broth or water

  • 7oz / 200g fresh or frozen spinach or kale, lightly chopped

  • 2 cups / 474g vegetable broth

  • salt and pepper, to taste

  • extra virgin olive oil and parmesan or pecorino cheese, for finishing

Directions:

  1. In a large stockpot or dutch oven, heat oil over medium heat. Add onion, celery, and carrot and cook, stirring occasionaly, until onion begins to turn translucent.

  2. Add the garlic, then add the beans, potatoes, tomato paste, rosemary, paprika, and cayenne pepper. Cook for a minute or two, stirring frequently.

  3. Add the wine and stir until it is almost evaporated.

  4. Add kale, broth, and salt and pepper to taste.

  5. Raise heat and bring soup to a boil, then cover and reduce heat to low. Cook for about 15 minutes, or until potatoes are tender.

  6. Ladle soup into serving bowls, top with parmesan or pecorino cheese and drizzle with olive oil. Serve with warm, crusty bread. Buon appetito!

Adjustments.jpeg

Jenny’s Notes:

  • If you prefer to cook dry beans instead of using canned, as I do, a good rule of thumb is to take half the weight of called for canned beans and cook that amount of dry beans. Different dry beans absorb slightly different amounts of water, but generally speaking they double in weight when cooked. So if you need 800g as in this recipe, I would cook 400g of dry beans.

  • You can choose to peel your potatoes before chopping or leave skin on, either way is fine if you ask me! Leaving skin on is easier and more nutritious (more fiber!), just be sure to wash them well before using.

  • If you have a rosemary plant, you can also add a clean sprig straight to the soup, then remove when you are ready to serve the soup.

  • In a pinch, you can always just use water instead of broth, although you will lose some flavor depth. If you have any bouillon cubes, you can also dissolve those into the soup following the bouillon dosing instructions.

White Bean Potato Soup
Yield 4-6
Author
Prep time
15 Min
Cook time
35 Min
Total time
50 Min

White Bean Potato Soup

A hearty and nutritious soup bursting with flavor, featuring white beans, potato, kale, onion, garlic, carrots, and celery with a touch of rosemary and a splash of white wine.
Cook modePrevent screen from turning off

Ingredients

Instructions

  1. In a large stockpot or dutch oven, heat oil over medium heat. Add onion, celery, and carrot and cook, stirring occasionaly, until onion begins to turn translucent.
  2. Add the garlic, then add the beans, potatoes, tomato paste, rosemary, paprika, and cayenne pepper. Cook for a minute or two, stirring frequently.
  3. Add the wine and stir until it is almost evaporated.
  4. Add kale, broth, and salt and pepper to taste.
  5. Raise heat and bring soup to a boil, then cover and reduce heat to low. Cook for about 15 minutes, or until potatoes are tender.
  6. Ladle soup into serving bowls, top with parmesan or pecorino cheese and drizzle with olive oil. Serve with warm, crusty bread. Buon appetito!

Notes

If you prefer to cook dry beans instead of using canned, as I do, a good rule of thumb is to take half the weight of called for canned beans and cook that amount of dry beans. Different dry beans absorb slightly different amounts of water, but generally speaking they double in weight when cooked. So if you need 800g as in this recipe, I would cook 400g of dry beans. You can choose to peel your potatoes before chopping or leave skin on, either way is fine if you ask me! Leaving skin on is easier and more nutritious (more fiber!), just be sure to wash them well before using. If you have a rosemary plant, you can also add a clean sprig straight to the soup, then remove when you are ready to serve the soup.In a pinch, you can always just use water instead of broth, although you will lose some flavor depth. If you have any bouillon cubes, you can also dissolve those into the soup following the bouillon dosing instructions.

Nutrition Facts

Calories

426.89

Fat

8.57 g

Sat. Fat

1.21 g

Carbs

65.80 g

Fiber

14.44 g

Net carbs

51.36 g

Sugar

5.02 g

Protein

20.23 g

Sodium

542.01 mg

Cholesterol

1.07 mg

Nutritional information is approximate. Based on 4 servings and includes using wine and toppings.

white bean soup, potatoes, kale, spinach, vegan, healthy, vegetarian, carrots, white wine, spinach, celery, onion, garlic
Soup, Dinner
American
Did you make this recipe?
Tag @jennyblogsandbakes on instagram and hashtag it #jennyblogs

Butternut Squash and Sage Pasta

Last Updated October 10, 2024

It’s fall and not only has the Charlie Brown Great Pumpkin arrived, but so have all the gourds!

Adjustments.jpeg

There are many types but the good news is they are all deliciou and are often quite interchangeable. Unless you’re making spaghetti squash. Then you need spaghetti squash.

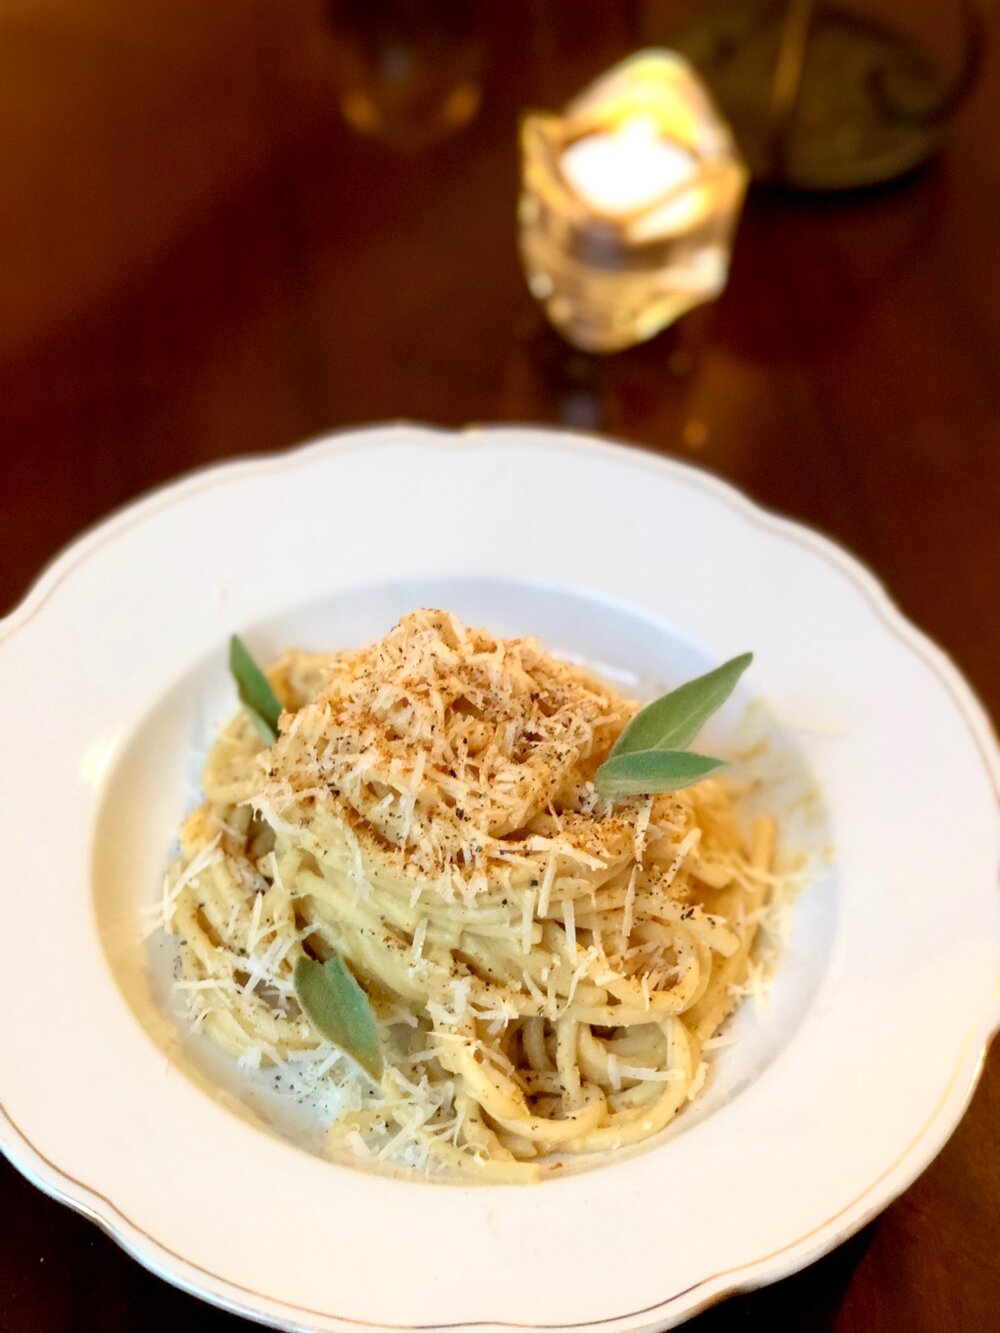
In fact today’s recipe is, in a way, spaghetti squash. The principal difference is that instead of the noodles being spaghetti squash the actual spaghetti is covered in a wonderfully flavored, creamy, cheesy, butternut squash sauce! With sage, apple, onion, celery, and basically all of the best autumn flavors in one. Even just the first step of this dish, sautéeing onions in butter, made me so happy and nostalgic. Why? Because onions cooking in butter reminds me of my mom’s stuffing recipe. And it’s the best, obviously.

Making this pasta is quite simple, cooking some veggies on the stove and then blending them at the end. Finish some spaghetti in the sauce, sprinkle with Pecorino Romano cheese and you’ve got yourself a delectably seasonal meal!

I love it so much. In fact, it makes quite a bit of sauce so I am able to stick some in the fridge AND freezer! The quantity of sauce may vary slightly depending on how thick or thin you like your sauce and how exact you are with vegetable ingredients. I tend to be over-generous on portions.

This post may contain affiliate links. If you make a purchase using these links, Jennyblogs may receive a small commission, at no extra cost to you. This helps to support Jennyblogs. For further information see the privacy policy. Grazie!

Recipe adapted from Jake Cohen at the feedfeed


Butternut Squash and Sage Pasta

Serves 4-6 with leftover sauce for another meal

Ingredients:

  • 4 Tbsp / 56g butter

  • 1 medium onion, chopped

  • 1 1/2 pounds / 675g peeled and chopped butternut squash

  • 2-3 stalks celery, chopped

  • 1 apple, peeled and chopped

  • 1 generous Tbsp of chopped fresh sage

  • 3/4 cup / 178g milk

  • 1 lb / 500g spaghetti

  • 1/2 cup / 50g shredded parmigiano reggiano

  • 1/2 cup / 50g shredded fontal or other good melting cheese

  • 1/2 cup / 50g shredded pecorino romano, plus more for finishing

  • salt and pepper to taste


Directions:

Adjustments.jpeg
  1. In a large pan over medium heat, melt butter. Add onions, stirring occasionally, until mostly translucent, about 5 minutes.

  2. Add squash, celery, apple, and sage; continue to cook until things start to caramelize, about 5 minutes.

  3. Add milk. Stir and cover, allowing to cook until vegetables are tender, about 10 minutes. The milk may look a bit curdled, this is fine since everything will be blended in the end.

  4. While the vegetables are simmering, place a large pot of water over high heat. Just before boiling, generously salt the water. When water is boiling and salt has dissolved, add pasta and cook according to package directions.

  5. When vegetables are tender, blend with an immersion blender or transfer to a blender. Blend until smooth. If sauce is too thick to blend easily, thin out with some pasta water or milk. Return to pot and stir in all three cheeses; salt and pepper to taste.

  6. When pasta is cooked al dente, drain, reserving 2 cups / 474g of pasta water. Return pasta to pan and toss in desired quantity of sauce. If sauce is too thick, add some reserved pasta water and toss until desired consistency is reached, adding more pasta water as needed.

  7. Serve with a generous dusting of pecorino romano.

Jenny’s Notes:

  • This recipe makes a generous amount of sauce, so you can choose to refrigerate the leftovers (will probably be enough for another 1 lb / 550g package of pasta) for a few days or stick it in the freezer for a future quick dinner!

  • Cooking time for vegetables will depend on how large or small they are chopped, and may need slightly more or less time than stated.

  • Feel free to use other kinds of squash or even pumpkin. The other night when I made this the store had run out of Butternut so I selected another Tuscan variety and it was lovely! Keep in mind that different squashes may have different starch levels and may affect how thick or thin the sauce will end up, which you can adjust by adding pasta water at the end.

  • Play with the cheeses you use! Parmigiano reggiano, or parmesan, is a wonderfully nutty, aged cheese that you probably already have because it is amazing on almost everything. Fontal is an inexpensive but wonderful melting cheese which I generally have on hand, but you could also use gruyere, gouda, fontina, cheddar, etc. The one I recommend you splurge on would be the Pecorino Romano, which is an aged sheep’s milk cheese. There are many different varieties, those aged in walnut leaves or with truffles, young or aged, easily identified by the word “pecorino” usually followed by it’s defining factor. Pecorino Romano is one of the most exported cheeses from Italy and is aged a minimum of 5 months, giving it a wonderful sharp flavor that pairs so well with our velvety, squashy pasta today.

Butternut Squash and Sage Pasta
Yield 4-6 + extra sauce for another meal
Author
Cook time
40 Min
Total time
40 Min

Butternut Squash and Sage Pasta

A perfectly seasonal pasta with a creamy, cheesy butternut squash and sage sauce.
Cook modePrevent screen from turning off

Ingredients

Instructions

  1. In a large pan over medium heat, melt butter. Add onions, stirring occasionally, until mostly translucent, about 5 minutes.
  2. Add squash, celery, apple, and sage; continue to cook until things start to caramelize, about 5 minutes.
  3. Add milk. Stir and cover, allowing to cook until vegetables are tender, about 10 minutes. Note: The milk may look a bit curdled, which is fine since everything will be blended in the end.
  4. While the vegetables are simmering, place a large pot of water over high heat. Just before boiling, salt the water. When the water is boiling and salt has dissolved, add pasta and cook according to package directions.
  5. When the vegetables are tender, either blend with an immersion blender or transfer to a blender. Blend until smooth. Stir in the three cheeses and salt and pepper to taste.
  6. When the pasta is cooked al dente, drain, reserving 1 cup / 237g of pasta water. Return pasta to pan and toss in desired quantity of sauce. If the sauce is too thick, add reserved pasta water until desired consistency is reached.
  7. Serve with a generous dusting of pecorino romano.

Notes

  • This recipe makes a generous amount of sauce, so you can choose to refrigerate the leftovers for a few days or stick in the freezer for a future quick dinner!
  • Feel free to use other kinds of squash or even pumpkin! Just keep in mind that the different squashes may have different starch levels and may affect how thick or thin the sauce will end up, which you can adjust by adding the pasta water at the end.
  • Play with the cheeses you use! Parmigiano reggiano, or parmesan, is a wonderfully nutty, aged cheese that you probably already have because it is amazing on almost everything. Fontal is an inexpensive but wonderful melting cheese which I generally have on hand, but you could also use gruyere, gouda, fontina, cheddar, etc. The one I recommend you splurge on would be the Pecorino Romano, which is an aged sheep’s milk cheese. There are many different varieties, those aged in walnut leaves or with truffles, young or aged, easily identified by the word “pecorino” usually followed by it’s defining factor. Pecorino Romano is one of the most exported cheeses from Italy and is aged a minimum of 5 months, giving it a wonderful sharp flavor that pairs so well with this velvety, squashy pasta.

Nutrition Facts

Calories

375.87

Fat

23.82 g

Sat. Fat

14.35 g

Carbs

68.67 g

Fiber

8.85 g

Net carbs

59.83 g

Sugar

13.66 g

Protein

21.97 g

Sodium

691.50 mg

Cholesterol

66.70 mg

Nutritional information is approximate. Based on 4 servings.

pasta, fall recipe, butternut squash, sage, seasonal pasta, pecorino romano, butternut squash sauce
dinner, pasta
American
Did you make this recipe?
Tag @jennyblogsandbakes on instagram and hashtag it #jennyblogs
Adjustments.jpeg

Pumpkin Cheesecake Swirled Brownies

Last Updated August 29, 2024

IMG_1331.jpg

Happy October!

I realize I’m a tad bit late as it’s almost November, but I’ve been MIA here on the blog for the past 3 weeks. I flew to meet some of my family in Paris and IT WAS A DREAM. All the hugs and jokes, pastries, sight-seeing, adventures, and everything else that happens when in Paris with some Morris family. We fit right in, people kept mistaking us for Parisians with our striped shirts, berets, and flawless French while taking photos constantly. I should probably write a blog about it when I get back.

Just kidding, just kidding.

I already miss my family so much. Nothing like watching your family fly away and suddenly feeling like my 18-year-old self again watching my parents drive away after having helped me move to Mississippi. I miss Paris too. Another thing I really enjoyed was the real fall weather there. Paris weather is actually quite similar to my hometown in Traverse City, Michigan. Except that Paris isn’t under 2+ feet of snow for 4+ months…meanwhile I left Florence still reaching into the high 70’s and 80’s (Fahrenheit), and returned to the same temperatures. In Paris I actually needed the sweaters, coats, boots, and hot beverages and it felt so right. C’mon Firenze, you can do it! Chilly temperatures for some serious fall-ing.

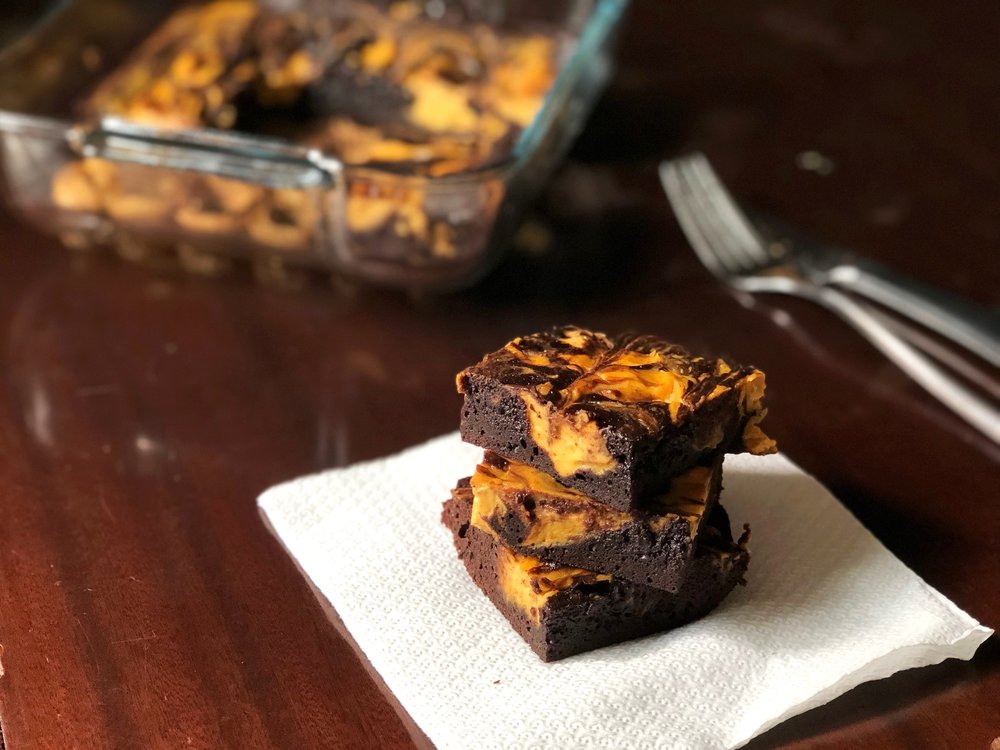
Until Firenze decides to get its act together, these rich chocolate brownies with a spiced pumpkin cream cheese swirl can help out.

While I didn’t bake or blog in Paris (why would I bake when world-class pastries are so cheap and at my doorstep??) I did whip up some autumn and pumpkin goodies and took photos of the blog-worthy ones before coming because I planned ahead! One catch though, I meant to post this WHILE I was in Paris, but that just didn’t happen and I’m ok with it. I was eating pain au chocolat, chaussons aux pommes, and macarons.

This post may contain affiliate links. If you make a purchase using these links, Jennyblogs may receive a small commission, at no extra cost to you. This helps to support Jennyblogs. For further information see the privacy policy. Grazie!

A recipe by Jenny.


Pumpkin Cheesecake Swirled Brownies

Serves 9-12

Ingredients:

IMG_1341.jpg

For the Brownies

  • scant 1/2 cup / 85g oil

  • 1 cup / 200g sugar

  • 1 egg

  • 1 1/2 tsp vanilla extract

  • 1/3 cup / 33g unsweetened cocoa powder

  • 1/4 tsp salt

  • 1/2 cup / 60g all-purpose flour

For the Pumpkin Cheesecake Swirl

  • 4 oz / 115g cream cheese, softened

  • 1/4 cup / 60g pumpkin purée

  • 2 Tbsp / 25g sugar

  • 1/4 tsp cinnamon

  • dash of ginger

  • dash of nutmeg

  • dash of cloves

Directions

Make the Brownies

Oven 350°F / 177°C.  Lightly greased 8x8in / 20x20cm pan.

  1. In a large mixing bowl, combine oil and sugar.  Beat in egg and vanilla.  Add cocoa powder and salt.  Mix in flour until just combined. 

  2. Pour into prepared pan and smooth with a spatula.

Make the Pumpkin Cheesecake Swirl

  1. In a medium bowl, beat together cream cheese, pumpkin, sugar, and spices until smooth and creamy. This can be done with a spoon or in a stand mixer.

  2. Dollop pumpkin cheesecake by spoonful over brownie batter. Use a a knife or the edge of a spatula to smooth and swirl pumpkin cheesecake into brownie batter.

  3. Bake for 20-25 minutes or until toothpick inserted near the center comes out mostly clean.  Allow to cool.


Jenny’s Notes:

  • The brownie batter and cream cheese will be thick and may stick up in places where it has been swirled, that’s ok, just do your best to smooth it down so everything is mostly level.

Pumpkin Cheesecake Swirled Brownies
Yield 9
Author
Prep time
20 Min
Cook time
25 Min
Total time
45 Min

Pumpkin Cheesecake Swirled Brownies

Fudgy chocolate brownies with a spiced cream cheese swirl.
Cook modePrevent screen from turning off

Ingredients

For the Brownies
For the Pumpkin Cheesecake Swirl

Instructions

Make the Brownies
  1. Oven 350°F / 177°C. Lightly greased 8x8in / 20x20cm pan.
  2. In a large mixing bowl, combine oil and sugar. Beat in egg and vanilla.
  3. Add cocoa powder and salt. Mix in flour until just combined.
  4. Pour into prepared pan and smooth with a spatula.
Make the Pumpkin Cheesecake Swirl
  1. In a medium bowl, beat together cream cheese, pumpkin, sugar, and spices until smooth and creamy. This can be done with a spoon or in a stand mixer.
  2. Dollop pumpkin cheesecake by spoonful over brownie batter. Use a a knife or the edge of a spatula to smooth and swirl pumpkin cheesecake into brownie batter.
  3. Bake for 20-25 minutes or until toothpick inserted near the center comes out mostly clean. Allow to cool.

Notes

The brownie batter and cream cheese will be thick and may stick up in places where it has been swirled, that’s ok, just do your best to smooth it down so everything is mostly level.

Nutrition Facts

Calories

277.12

Fat

14.78 g

Sat. Fat

3.39 g

Carbs

28.67 g

Fiber

0.98 g

Net carbs

27.68 g

Sugar

25.76 g

Protein

2.30 g

Sodium

113.35 mg

Cholesterol

33.57 mg

Nutritional information is approximate. Based on 9 servings.

brownies, pumpkin spice, pumpkin cream cheese, fall recipe, cream cheese swirled brownies
dessert
American
Did you make this recipe?
Tag @jennyblogsandbakes on instagram and hashtag it #jennyblogs
IMG_1326.jpg

White Chocolate Cranberry Pumpkin Cookies

Last Updated August 29, 2024

public.jpg

Happy official fall and pumpkin season!!!

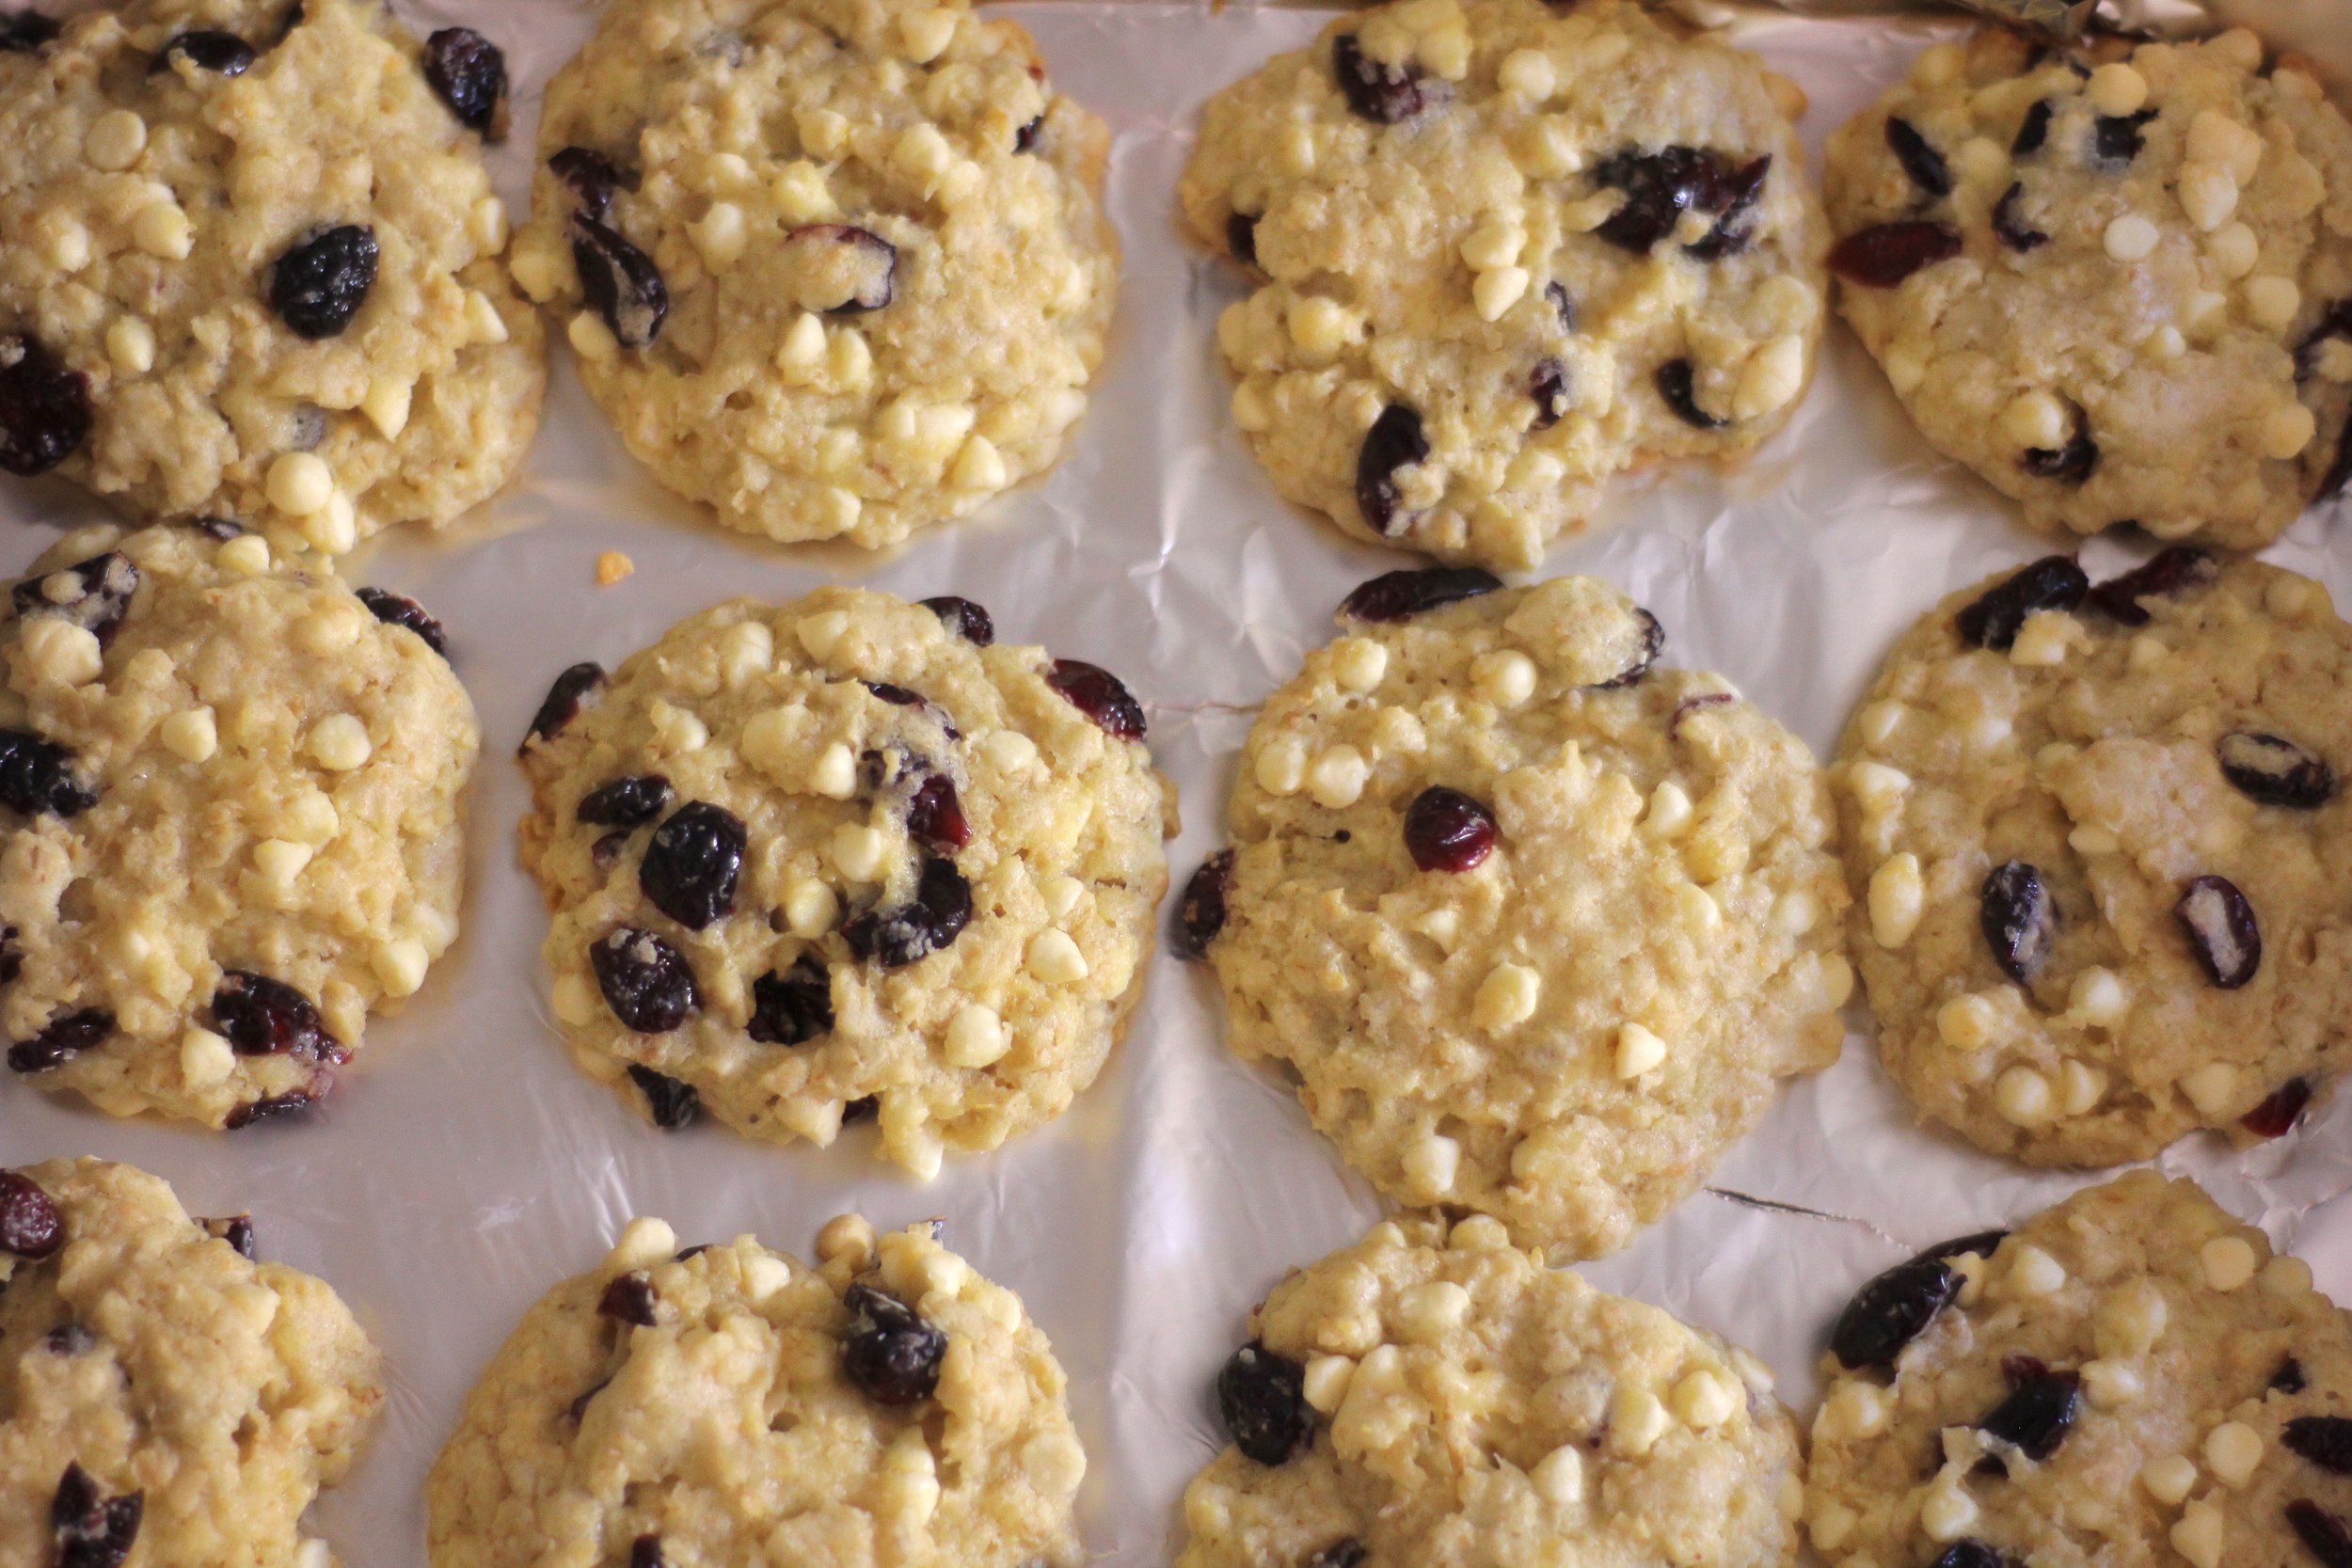
Starting off the season with soft, fluffy pumpkin cookies stuffed with white chocolate and cranberries with a hint of orange. These are lightly sweet which helps the white chocolate shine and offset the tartness of the cranberries. A bit of orange extract makes the whole combo into this deliciously bright fall offering.
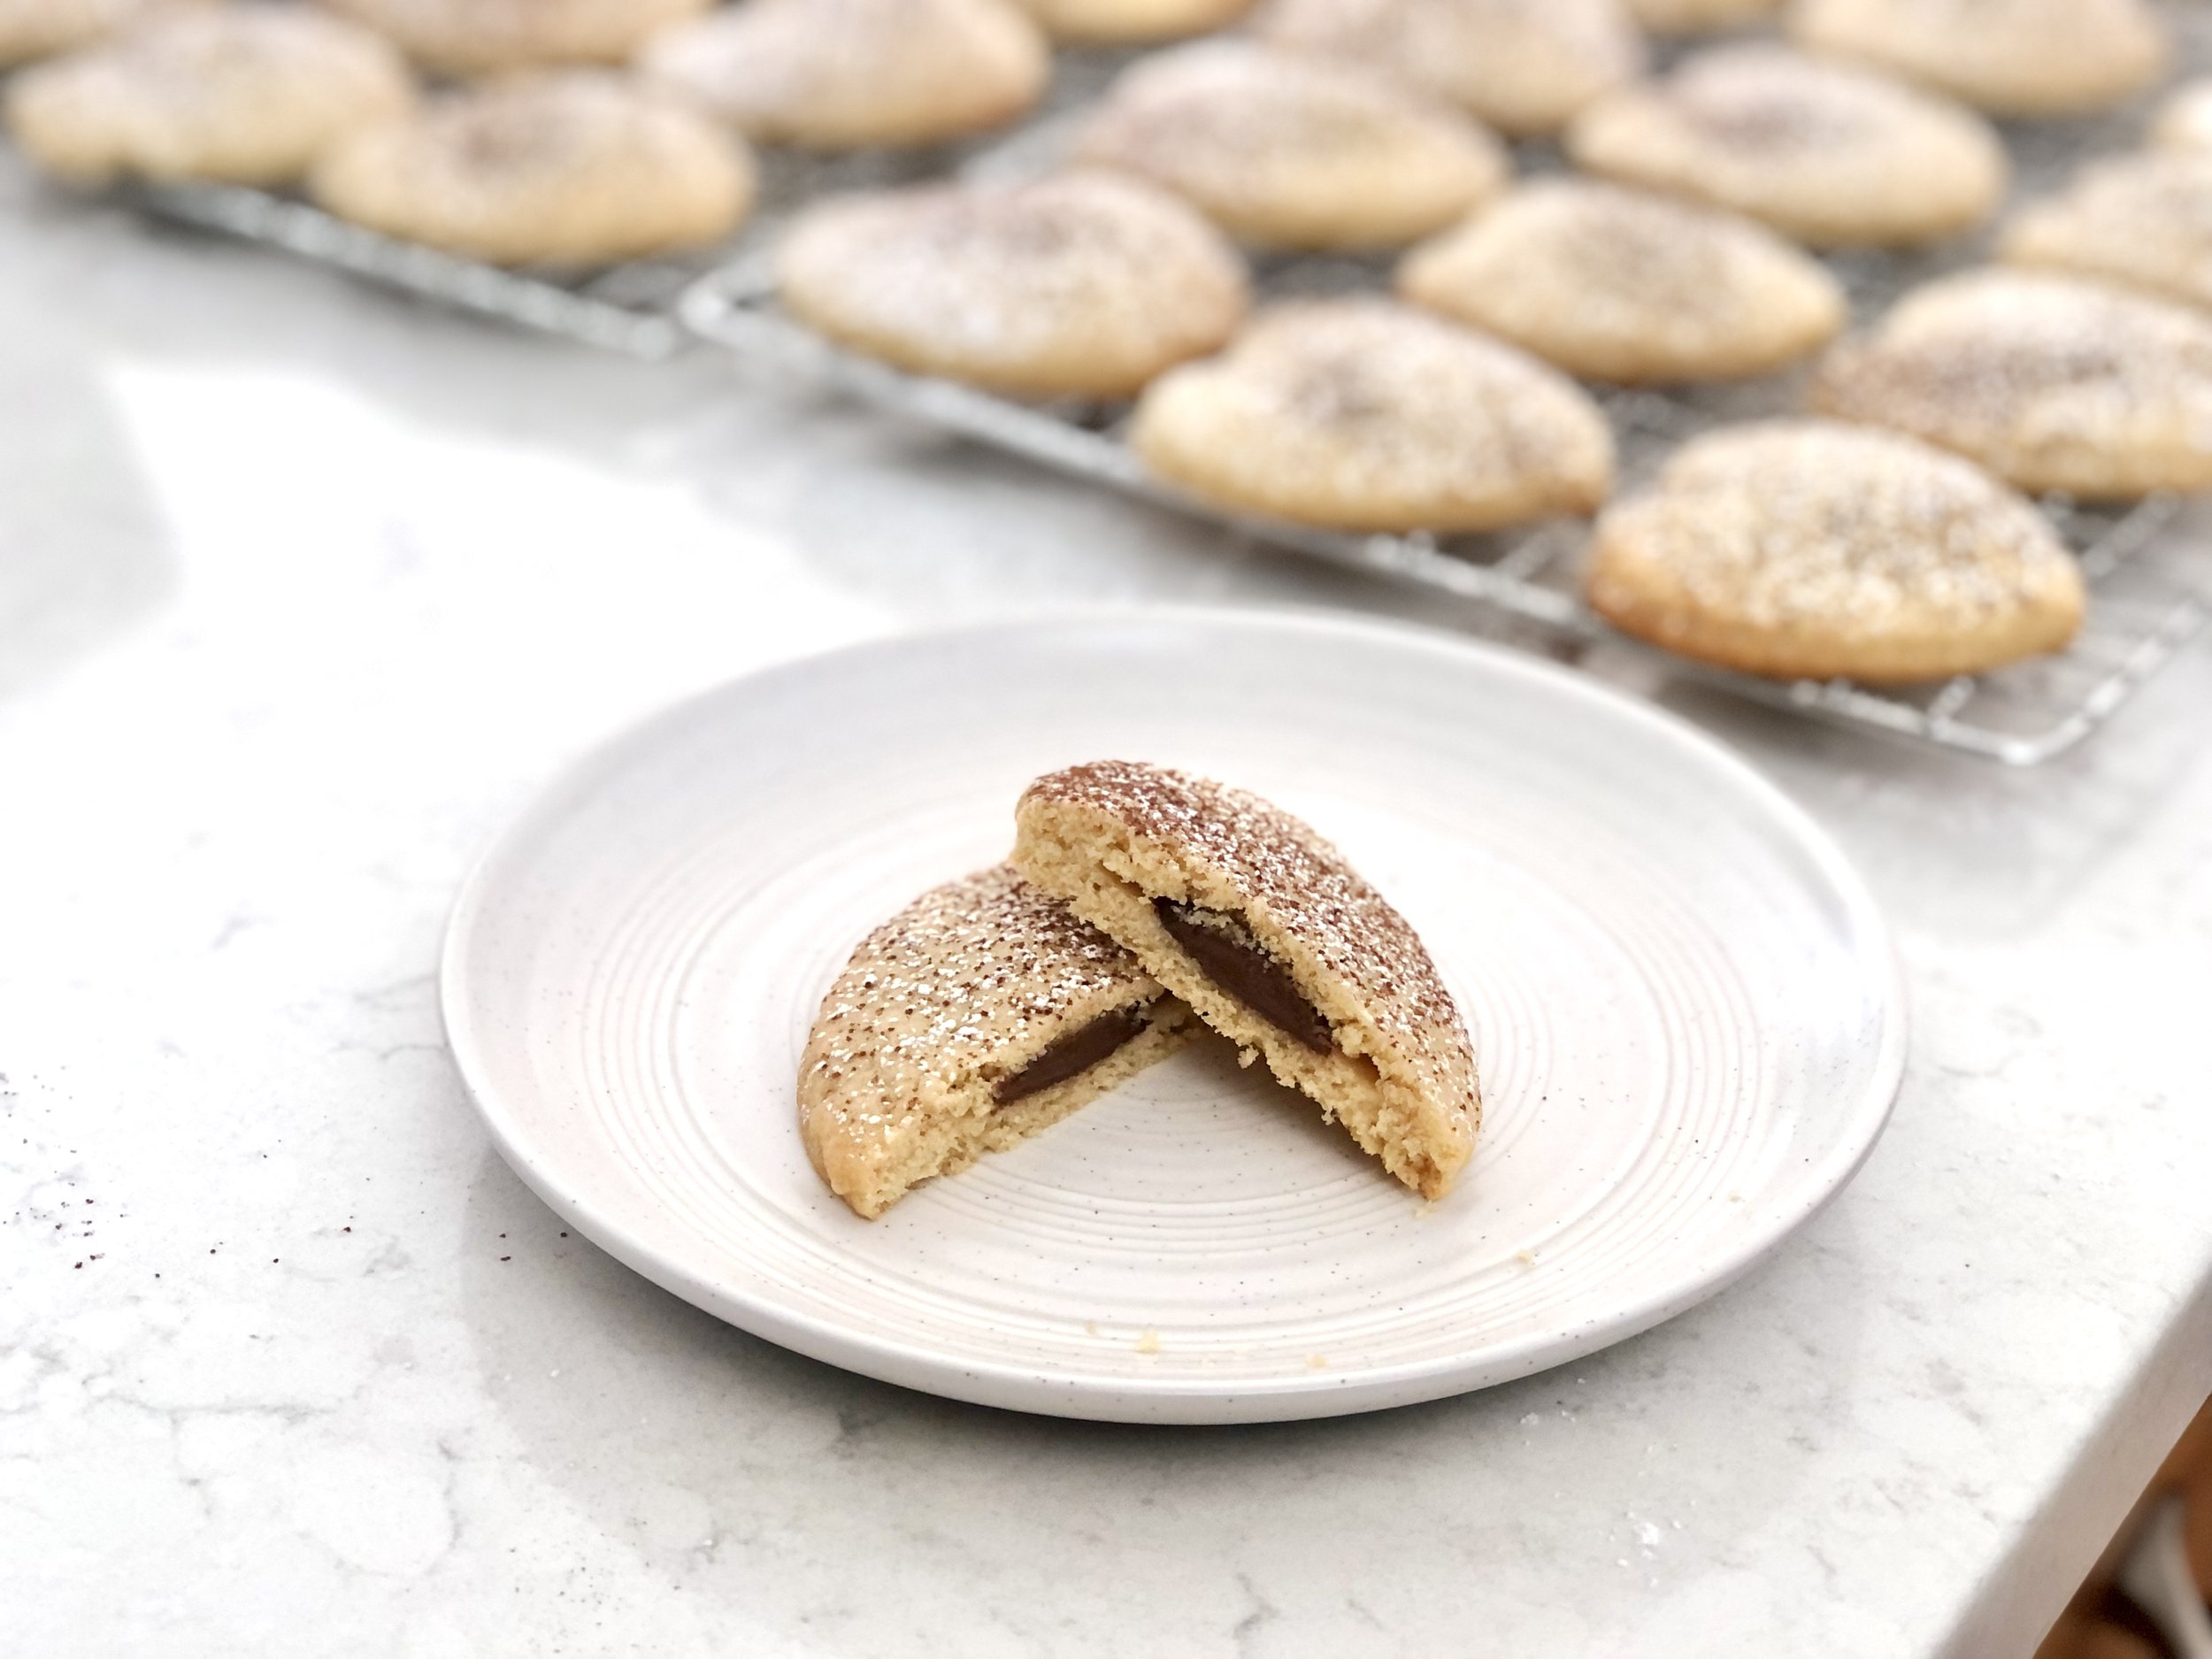
Aside from the orange, these cookies are similar to my White Chocolate Cranberry Oatmeal Cookies. Same condiments, different cookie. One a light and fluffy ode to fall, another a chewy classic oatmeal cookie. Both scrumptious.

Before writing up this recipe I felt a twinge of pumpkin guilt. You know, the I’m making and sharing so many pumpkin recipes and desserts that maybe everyone is already sick of them except me? Then I remembered that I actually haven’t shared any truly fall recipes on the blog yet this year! I somehow managed to hold myself off until after the autumn solstice. That doesn’t mean I haven’t been baking fally things, uh uh no. I’ve already opened one of my precious cans of pumpkin from the States (what I did with the extra room in my baggage because a small can of pumpkin costs almost 5euro in Florence) and squeaked out a batch of these pumpkin cookies, brownies with a spiced pumpkin cream cheese swirl, and pumpkin streusel coffee cake. Fall, I welcome thee with open arms.

So, I hope wherever you are in the world, you share my love for autumnal things, and enjoy baking up these White Chocolate Cranberry Pumpkin Cookies, don a sweater and some cozy socks, and read a book with a nice mug of tea. Hopefully your weather allows for that.

This post may contain affiliate links. If you make a purchase using these links, Jennyblogs may receive a small commission, at no extra cost to you. This helps to support Jennyblogs. Where possible, links are prioritized to small businesses, and American companies and products made in the USA for American readers. For further information see the privacy policy. Grazie!


White Chocolate Cranberry Pumpkin Cookies

Makes about 2 dozen cookies

public.jpg

Ingredients:

  • 1 cup / 240g pumpkin purée

  • 1 1/4 cups / 250g sugar

  • 1 egg

  • scant 1/2 cup / 90g oil

  • 1 tsp vanilla extract

  • 1/4 tsp orange extract

  • 2 1/2 cups / 300g all-purpose flour

  • 1 tsp cinnamon

  • 1 tsp baking powder

  • 1 tsp baking soda

  • 1/2 tsp salt

  • 3/4 cup / 105g dried cranberries

  • 3/4 cup / 127g white chocolate chips

Directions:

Oven 350°F / 177°C. Baking sheet lined with parchment paper, silpat, or greased.

  1. Combine pumpkin, sugar, egg, oil, and extracts in a large bowl.

  2. In another medium bowl, whisk together flour, cinnamon, baking powder, baking soda, salt.

  3. Add dry ingredients, cranberries, and white chocolate chips to wet ingredients, stirring until evenly moistened.

  4. Drop by generous spoonful onto prepared baking sheet and bake for 9-12 minutes, or until bottom of cookies are golden brown and the center still looks a bit wet.


Jenny’s Notes:

  • I used half goji berries half cranberries last time and really liked it. Dried cranberries usually have loads of sugar and I liked that the goji berries were unsweetened.

White Chocolate Cranberry Pumpkin Cookies
Yield 24-26
Author
Prep time
25 Min
Cook time
12 Min
Total time
37 Min

White Chocolate Cranberry Pumpkin Cookies

Soft and fluffy pumpkin cookies loaded with mini white chocolate chips, dried cranberries, and goji berries with a hint of orange and cinnamon.
Cook modePrevent screen from turning off

Ingredients

Instructions

  1. Oven 350°F / 177°C. Baking sheet lined with parchment paper, silpat, or greased.
  2. Combine pumpkin, sugar, egg, oil, and extracts in a large bowl.
  3. In another medium bowl, whisk together flour, cinnamon, baking powder, baking soda, salt.
  4. Add dry ingredients, cranberries, and white chocolate chips to wet ingredients, stirring until evenly moistened.
  5. Drop by generous spoonful onto prepared baking sheet and bake for 9-12 minutes, or until bottom of cookies are golden brown and the center still looks a bit wet.

Notes

I used half goji berries half cranberries last time and really liked it. Dried cranberries are usually sweetened and I liked that the goji berries were unsweetened.

Nutrition Facts

Calories

168.23

Fat

5.85 g

Sat. Fat

1.37 g

Carbs

27.70 g

Fiber

0.93 g

Net carbs

26.77 g

Sugar

17.09 g

Protein

1.99 g

Sodium

130.03 mg

Cholesterol

8.86 mg

Nutritional information is approximate. Based on 24 servings.

cookies, pumpkin, white chocolate chips, cinnamon, orange, cranberry, goji berry, fall recipe
dessert
American
Did you make this recipe?
Tag @jennyblogsandbakes on instagram and hashtag it #jennyblogs
public.jpg

Strawberry Nutella Coconut Milkshake

Last Updated August 24, 2024

This post may contain affiliate links. If you make a purchase using these links, Jennyblogs may receive a small commission, at no extra cost to you. This helps to support Jennyblogs. Where possible, links are prioritized to small businesses and ethically and responsibly made items. For further information see the privacy policy. Grazie!

IMG_0952.jpg

Buon Ferragosto!

Also known as the day where everything is closed and I feel slightly trapped. Hmmm the gelato place is closed so I’ll just run to the store and pick up some…oh wait, all the grocery stores are closed. Ok, well maybe I’ll go browse some shops, oh wait, all closed. I’ll go walk around in the center for a bit…nope, hardly any buses running today to get to the center. Even if I could find a bus, all the places I could buy a ticket are closed. Ok, so I’ll walk to the gym to work out and enjoy some air conditioning. Ah, closed. So, I hunker down and eat whatever food is in the house, try to stay cool. Actually we’ve come to a bit of a cool spell, today only has a high of 90°F. I’ll take it!

I actually planned ahead this year and went grocery shopping last night. I got fruit and veggies for lunch and dinner today, but why didn’t I get better snackies? But then I remembered that I have a good stash of gelato in the freezer, and made me think of this delectable milkshake I made a few weeks ago.

So with all this time on my hands, I shall be milkshaking and sharing this milkshake with you! What’s so great about this milkshake?

It’s a Strawberry Nutella Coconut Milkshake. That’s such a long name, and kinda going against my own rule of not listing every ingredient in the title, but otherwise I didn’t quite know how to get the dream across, ya know?

How about this: Strawnutelloco Milkshake. Stranucoco Milkshake. Conuterry. Strawconutella. Regardless, this milkshake tastes like a chocolate covered strawberry rolled in coconut with a hint of hazelnut.

I have a confession to make. I originally made this milkshake to try and hide this not-awesome gelato I bought. There was a sale on a brand I had never tried before at the grocery store, and they had coconut and I love coconut but it just did not end well. Icy and so much coconut it was chewy. I didn’t want to waste it, but I also didn’t necessarily want to force myself to eat gelato?

Enter the milkshake idea. I had strawberries, Nutella, and milk, and this beautiful combo was born. The copious amounts of coconut from the gelato still rendered my milkshake a bit chewy, but if you have a GOOD brand of coconut ice cream, or even vanilla ice cream with a bit of flaked coconut and maybe a drop of coconut extract or two thrown in, you’ve got yourself the perfect summer day’s treat.

So thank you, gelato brand that shall remain unnamed, for the not delicious gelato that prompted me to create a delicious milkshake.


Strawberry Nutella Coconut Milkshake

Serves 2

IMG_0947.jpg

Ingredients:

  • 2 cups coconut ice cream, slightly softened

  • 1/2 cup milk, any variety

  • 1/2 cup hulled strawberries, fresh or frozen

  • 2 heaping Tbsp Nutella

  • Dash of vanilla extract, optional

  • Whipped cream, optional

Directions:

  1. Add all ingredients except whipped cream to a blender and blend until smooth. Check consistency and add more milk if desired.

  2. Spoon into 2 glasses and top with whipped cream. Serve immediately.

Jenny’s Notes:

  • Don’t have coconut ice cream but still want that coconut taste? Substitute chocolate or vanilla ice cream and add a bit of flaked coconut and a drop or two of coconut extract.

  • For creamier shakes, use whole milk.

  • For thinner shakes you can sip, add more milk. For thicker, spoonable shakes, add less milk. Some blenders don’t blend thicker shakes well, so if yours is having problems, either wait a minute or two for the ice cream to soften a bit more before continuing to blend, or add a touch more milk.

  • To make fresh whipped cream, whip about 1/4 cup / 60g heavy whipping cream with 1 Tbsp / 14g sugar in the bowl of a stand mixer fitted with whisk attachment, or with a handheld mixer. This makes about 1/2 cup fresh whipped cream. Store in fridge, best if used within a few days.

Strawberry Nutella Coconut Milkshake
Yield 2 Servings
Author
Prep time
5 Min
Total time
5 Min

Strawberry Nutella Coconut Milkshake

Thick and creamy milkshake with coconut ice cream, Nutella, strawberries and whipped cream on top.
Cook modePrevent screen from turning off

Ingredients

Instructions

  1. Add all ingredients except whipped cream to a blender and blend until smooth. Check consistency and add more milk if desired.
  2. Spoon into 2 glasses and top with whipped cream. Serve immediately.

Notes

  • Don’t have coconut ice cream but still want that coconut taste? Substitute chocolate or vanilla ice cream and add a bit of flaked coconut and a drop or two of coconut extract.
  • For creamier shakes, use whole milk.
  • For thinner shakes you can sip, add more milk. For thicker, spoonable shakes, add less milk. Some blenders don’t blend thicker shakes well, so if yours is having problems, either wait a minute or two for the ice cream to soften a bit more before continuing to blend, or add a touch more milk.
  • To make fresh whipped cream, whip about 1/4 cup / 60g heavy whipping cream with 1 Tbsp / 14g sugar in the bowl of a stand mixer fitted with whisk attachment, or with a handheld mixer. This makes about 1/2 cup fresh whipped cream. Store in fridge, best if used within a few days.

Nutrition Facts

Calories

440.85

Fat

23.21 g

Sat. Fat

19.31 g

Carbs

54.51 g

Fiber

3.87 g

Net carbs

50.64 g

Sugar

40.58 g

Protein

6.95 g

Sodium

49.23 mg

Cholesterol

9.42 mg

Nutritional information is approximate and based on 2 servings and includes whipped cream.

milkshake, milk, strawberry, Nutella, coconut, ice cream, vanilla, fresh whipped cream, dessert, summer
Dessert, Beverage
American
Did you make this recipe?
Tag @jennyblogsandbakes on instagram and hashtag it #jennyblogs
IMG_0943.jpg

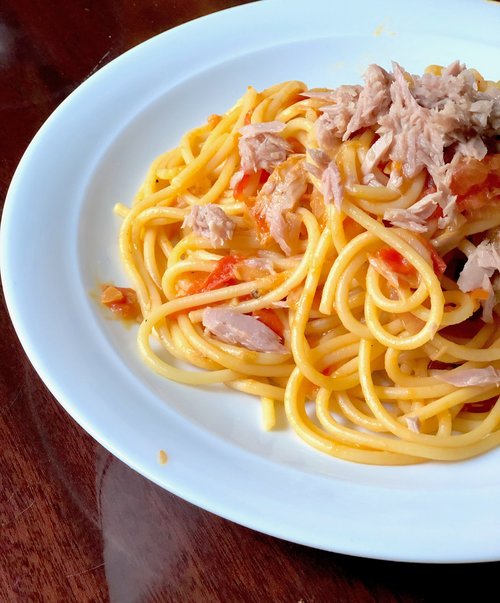
Spaghetti with Tuna - Spaghetti al Tonno

Last Updated August 20, 2024

IMG_0896.jpg

Spaghetti with tuna; It’s like spaghetti, but instead of meatballs you add tuna to the tomato sauce!

Now, that might sound kinda weird at first to my American friends, just like Italians think we’re weird for putting meatballs on our spaghetti in the first place. But let me tell you. It’s really delicious and I find it strangely comforting. Italian comfort food.

If you haven’t noticed, July is pasta month here at Jennyblogs! What, you couldn’t tell from the 1 other pasta recipe I’ve posted so far this month that this whole month is going to be pasta? I’m so offended. (I’m just kidding you guyssss.) But now you know! So be sure to stay tuned (you can sign up for updates) for the rest of the month where I will share with you various recipes, some Italian, some American, and last week was Thai inspired! Everyone should have some quick and delicious pasta recipes in their repertoire that don’t need store-bought sauce! Homemade is always better, if you can manage it. That way you control exactly what goes into your and your loved ones bodies. No more excess sugar, preservatives, and high levels of salt and fat that can be hidden away in the store-bought jars of sauce.

Today, a recipe for Italian spaghetti al tonno, or spaghetti with tuna. Homemade sauce and all this can be on your table in less than 45 minutes!

This post may contain affiliate links. If you buy something using these links, Jennyblogs may receive a small commission, at no extra cost to you. This helps to support Jennyblogs. For further information see the privacy policy. Grazie!

Recipe by my husband, the pasta master


Spaghetti with Tuna - Spaghetti al Tonno

Serves 6-8

IMG_0899.jpg

Ingredients:

  • 1 lb. / 500g spaghetti

  • 2 Tbsp / 28g oil

  • 1/2 onion, chopped

  • 3 tomatoes, diced

  • 1 clove garlic, minced

  • 1 Tbsp / 14g tomato paste

  • 1/2 tsp / 2.5g ground turmeric

  • salt and pepper, to taste

  • 5 oz / 148g can of tuna, drained

Directions:

  1. Heat a large pot of water over high heat, adding salt just before it boils. Cook pasta al dente according to directions and drain.

  2. Meanwhile, while the pasta is cooking, heat oil in a large sauté pan over medium-low heat. Add the onion and cook until just fragrant and translucent, about 1-2 minutes.

  3. Add the tomatoes and simmer for about 10-15 minutes, or until they are pretty well broken down. If the sauce becomes too thick or starts to stick, add a bit of water.

  4. Add the garlic, tomato paste, turmeric, salt and pepper, and a small chunk of tuna*; simmer for another few minutes.

  5. Add the cooked pasta to the sauce, toss and stir to coat pasta. At this point you can either add the rest of the tuna and stir, or plate the pasta and add the tuna on top.

  6. Serve and eat!


Jenny’s Notes:

  • As with any pasta recipe, you don’t have to use spaghetti or the type called for. Use your favorite kind or whatever you think would go best with the sauce you’re making.

  • If you prefer a stronger tuna taste, you can use the liquid from the tuna can instead of water to keep the sauce from getting too thick while simmering. It doesn’t matter if it is packed in water or oil.

  • Add just a bit of tuna to flavor the sauce instead of the whole can because it doesn’t need to be cooked. The rest will be added in at the end.

  • In a pinch you can use a 15oz can of diced tomatoes instead of fresh.

Spaghetti with Tuna - Spaghetti al Tonno
Yield 6-8 servings
Author
Prep time
25 Min
Cook time
15 Min
Total time
40 Min

Spaghetti with Tuna - Spaghetti al Tonno

A classic Italian pasta dish with spaghetti, homemade tomato sauce, and tuna.
Cook modePrevent screen from turning off

Ingredients

Instructions

  1. Heat a large pot of water over high heat, adding salt just before it boils. Cook pasta al dente according to directions and drain.
  2. Meanwhile, while the pasta is cooking, heat oil in a large sauté pan over medium-low heat. Add the onion and cook until just fragrant and translucent, about 1-2 minutes.
  3. Add the tomatoes and simmer for about 10-15 minutes, or until they are pretty well broken down. If the sauce becomes too thick or starts to stick, add a bit of water.
  4. Add the garlic, tomato paste, turmeric, salt and pepper, and a small chunk of tuna*; simmer for another few minutes.
  5. Add the cooked pasta to the sauce, toss and stir to coat pasta. At this point you can either add the rest of the tuna and stir, or plate the pasta and add the tuna on top.
  6. Serve and eat!

Notes

  • As with any pasta recipe, you don’t have to use spaghetti or the type called for. Use your favorite kind or whatever you think would go best with the sauce you’re making.
  • If you prefer a stronger tuna taste, you can use the liquid from the tuna can instead of water to keep the sauce from getting too thick while simmering. It doesn’t matter if it is packed in water or oil.
  • Add just a bit of tuna to flavor the sauce instead of the whole can because it doesn’t need to be cooked. The rest will be added in at the end.
  • In a pinch you can use a 15oz can of diced tomatoes instead of fresh.

Nutrition Facts

Calories

216.63

Fat

6.08 g

Sat. Fat

0.62 g

Carbs

29.31 g

Fiber

2.14 g

Net carbs

27.17 g

Sugar

3.19 g

Protein

11.05 g

Sodium

151.14 mg

Cholesterol

10.36 mg

Nutritional Information is approximate.

spaghetti al tonno, tuna spaghetti, pasta, classic Italian recipe
pasta, dinner
Italian
Did you make this recipe?
Tag @jennyblogsandbakes on instagram and hashtag it #jennyblogs
IMG_0897.jpg

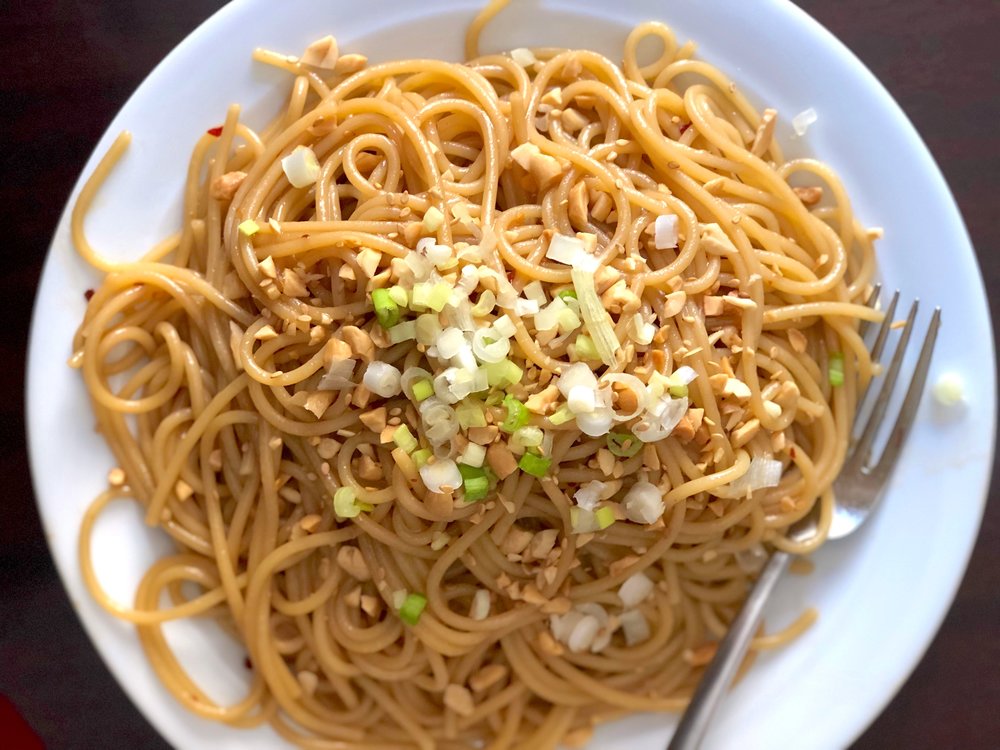
Simple Thai Noodles

IMG_0875.jpg

Some nights you get caught unprepared and need something quick to whip up for dinner. Or maybe that’s every night? I know Sunday food prepping is all the rage, and it’s a really great idea…if you’re only feeding yourself or a small family, and not taking into account the unexpected that happens. Even if you’re the most organized person cooking just for yourself, those nights are going to spring up on you when you want something quick and easy, delicious, and you have all the ingredients on hand. This recipe for Simple Thai Noodles falls in that category.

Sesame oil might not be in everyone’s pantry, but if you invest in a bottle, it can last you months, depending on how often you make Asian or other dishes that often call for sesame oil. It really is worth it, if you try and substitute another oil it won’t be the same. It lends such a nutty depth to dishes!

I actually have several versions of lo mein, Thai noodles, fried rice, etc. and even a couple more waiting to be tried that all have in common varying quantities and varieties of green onion, sesame oil, soy sauce, ginger, peanuts or peanut butter, and a sweet and a spicy element. Each with their merits, and the occasions for which I like to make them. If you can’t tell, I love Asian dishes, whether they’re authentic or simply inspired by Asian flavors.

This pasta is kept in my repertoire for its simplicity while still retaining all the delicious flavors, and now you can make it too, whether you’re in a pinch for a quick dinner, or not! No one said you have to make it only when in a pinch. :)

This post may contain affiliate links. If you buy something using these links, Jennyblogs may receive a small commission, at no extra cost to you. This helps to support Jennyblogs. For further information see the privacy policy. Grazie!

Recipe adapted from A Small Snippet


Simple Thai Noodles

Serves 4-6

IMG_0878.jpg

Ingredients:

  • 16 oz / 500g linguine or spaghetti

  • 2 Tbsp / 28g olive oil, or oil of choice

  • 1/4 cup / 54g sesame oil

  • about 1 Tbsp / 5g red pepper flakes

  • 3 Tbsp / 63g honey

  • 3 Tbsp / 45g soy sauce

  • cilantro, chopped peanuts, chopped green onions, julienned carrots, sesame seeds, or your choice of toppings

Directions:

  1. Bring a large pot of water to boil, adding salt just before it boils. Cook pasta according to directions on box; drain, and return to pot.

  2. While the pasta is cooking, whisk together the oils, red pepper flakes, honey, and soy sauce in a small bowl.

  3. When the pasta is done and drained, add the sauce to the noodles and toss to coat well.

  4. Serve immediately, adding toppings of choice.

Jenny’s Notes:

  • You can adjust the amount of red pepper flakes to suit your spicy preference. 1 Tbsp, as in the recipe, results in reasonably spicy, but not overwhelming. Also, you could use a spicy oil if you have some on hand instead of the red pepper flakes.

  • For a stronger sesame taste, use all sesame oil instead of olive oil. (6 Tbsp / 84g total of sesame oil.)

  • Feel free to add veggies or a protein, if you desire. For veggies, chop small and sauté in a pan with a bit of oil for a few minutes or until tender, toss in when you add the sauce. Cook your protein and slice as desired, add at the end on top of plates of pasta or mix in with sauce.

Simple Thai Noodles
Yield 4-6 servings
Author
Prep time
10 Min
Cook time
10 Min
Total time
20 Min

Simple Thai Noodles

The simplest Thai noodles using only 6 pantry ingredients for a quick and easy dinner! Sweet, savory, and irresistible.
Cook modePrevent screen from turning off

Ingredients

Instructions

  1. Bring a large pot of water to boil, adding salt just before it boils. Cook pasta according to directions on box; drain, and return to pot.
  2. While the pasta is cooking, whisk together the oils, red pepper flakes, honey, and soy sauce in a small bowl.
  3. When the pasta is done and drained, add the sauce to the noodles and toss to coat well.
  4. Serve immediately, adding toppings of choice.

Notes

  • You can adjust the amount of red pepper flakes to suit your spicy preference. 1 Tbsp, as in the recipe, results in reasonably spicy, but not overwhelming. Also, you could use a spicy oil if you have some on hand instead of the red pepper flakes.
  • For a stronger sesame taste, use all sesame oil instead of olive oil. (6 Tbsp / 84g total of sesame oil.)
  • Feel free to add veggies or a protein, if you desire. For veggies, chop small and sauté in a pan with a bit of oil for a few minutes or until tender, toss in when you add the sauce. Cook your protein and slice as desired, add at the end on top of plates of pasta or mix in with sauce.

Nutrition Facts

Calories

676.11

Fat

23.63 g

Sat. Fat

3.4 g

Carbs

99.87 g

Fiber

4.71 g

Net carbs

95.17 g

Sugar

16.33 g

Protein

16.89 g

Sodium

794.7 mg

Cholesterol

0 mg

Nutritional info is approximate, based on 4 servings including toppings.

6 ingredients, 20 minute dinner, pasta, Thai Noodles
Dinner, Pasta
American
Did you make this recipe?
Tag @jennyblogsandbakes on instagram and hashtag it #jennyblogs
IMG_0876.jpg

Strawberry Shortcake

Last Updated August 18, 2024

This post may contain affiliate links. If you buy something using these links, Jennyblogs may receive a small commission, at no extra cost to you. This helps to support Jennyblogs. For further information see the privacy policy. Grazie!

Strawberry shortcake is a summer classic. All you need are juicy, ripe strawberries, shortcakes, which are really just biscuits with a bit of sugar added to them, and whipped cream. If you decided on adding some vanilla ice cream to the mix I don’t think anyone would be mad about it. I certainly wouldn’t be. Did I mention they’re really simple to make?

public.jpg

It’s so simple because the strawberries are the shining star and don’t need much dressing up. If you try and make this when strawberries are out of season, even if you can find them in the grocery store, it just won’t be the same. This is a dessert that calls for strawberries ripened under the summer sun, bursting with flavor.

Do you want to know a secret? Strawberry shortcakes will reach the pinnacle of their goodness if you are able to pick the strawberries yourself! Not only will you be the one choosing the juiciest berries, but you’ll KNOW they’re as fresh as they come! Plus, you’ll taste the fruits of your own hard work and it makes it that much sweeter. Literally. I loved going strawberry picking with my mom as a kid. Strawberry season in Michigan is always in beginning to mid summer, usually end of June or early July, and we’d come home with baskets full. Then I’d help my mom hull and slice them, keeping some for eating, some for making strawberry shortcake and other desserts, and some for freezing and making jam.

Eat strawberry shortcake for dessert, or breakfast, snack, lunch, and dinner. I mean, biscuits and fruit sounds like a balanced and great way to start off the morning! Plus you’ll want to eat them as much as you can while the strawberry season lasts. A great thing about these is that you can add as little or as much sugar as you want! See notes at bottom of recipe for some ideas.

Recipe from my mama with tweaks from moi.


Strawberry Shortcake

Serves: 8-10

Ingredients:

public.jpg

For the Macerated Strawberries

  • 4-5 cups strawberries, washed, hulled, and sliced

  • 3-4 Tbsp / 35-50g sugar or to taste

For the Shortcakes

  • 2 cups / 240g all-purpose flour

  • 1/4 cup / 50g sugar

  • 4 tsp / 19g baking powder

  • 1/2 tsp / 2g salt

  • 1/2 cup / 113g cold butter or scant 1/2 cup / 100g oil

  • 2/3 cup / 158g cold milk or buttermilk

For the Whipped Cream

  • 1 cup / 237g heavy whipping cream

  • 3-4 Tbsp / 35-50g sugar or to taste

  • 1 tsp / 4g vanilla extract

Directions:

Oven 450°F / 232°C. Have ready an ungreased baking sheet.

Make the Macerated Strawberries

  1. Place strawberries in a bowl, add sugar, and mash them a bit or a lot, as desired, with a fork or masher. Place in fridge while you prepare shortcakes.

Make the Shortcakes

  1. In a large bowl whisk together flour, sugar, baking powder, and salt.

  2. Cut in butter or oil until mixture resembles coarse crumbs.

  3. Make a well in center of flour mixture and pour in milk. Mix just until most of the flour is moistened, then turn mixture out onto a floured surface.

  4. Knead lightly, up to 10-12 times, until you have a soft but not too sticky dough. Don’t overwork or biscuits will be tough.

  5. Gently pat dough out into a circle about 1in / 2.5cm thick, checking to make sure underneath is still floured well and dough isn’t sticking.

  6. Using a biscuit cutter or a round glass 2-3in / 5-7cm in diameter, cut out as many biscuits as you can. Place biscuits on baking sheet. Collect dough scraps and reshape into a ball. Repeat patting into a circle and cutting until dough is used up, probably 2-3 times at most, depending on size of biscuit cutter.

  7. Bake biscuits in preheated oven for 10-12 minutes, or until risen and lightly golden brown.

Make the Whipped Cream

  1. In the bowl of a stand mixer fitted with whisk attachment or with a hand mixer, whip heavy cream until soft peaks form.

  2. Add sugar and vanilla and continue whipping until stiff peaks form.

Assembly

Slice biscuits open and spoon over strawberries and whipped cream.

Jenny’s Notes:

  • The sugar mixed in with the strawberries is traditional but not absolutely necessary. Although it helps soften the strawberries to lose their juice and create more of a soft sauce, I like it also without adding any sugar, because everything else in this recipe is already a bit sweet.

  • The biscuit dough might seem too soft at first, but the moment the baking powder starts working and it hits the floured surface it should become very manageable. Just be careful not to over work it, a little bit goes a long way.

  • When cutting biscuits, cut straight down, no twisting, or this can seal the edges and prevent a good rise. You can dip the biscuit cutter in some flour to help prevent any sticking.

  • If you place the biscuits next to each other on the baking sheet they can help each other “climb” up and achieve a nicer rise! I know this feels counterintuitive as so often things are supposed to be “spaced evenly apart”, but give it a try!

Strawberry Shortcake
Yield 8-10 servings
Author
Prep time
40 Min
Cook time
12 Min
Total time
52 Min

Strawberry Shortcake

Classic strawberry shortcake recipe handed down from my mama. Homemade biscuits, juicy strawberries, and fresh whipped cream assembled together in a summery dessert.
Cook modePrevent screen from turning off

Ingredients

For the Macerated Strawberries
For the Shortcakes
For the Whipped Cream

Instructions

Make the Macerated Strawberries
  1. Place strawberries in a bowl, add sugar, and mash them a bit or a lot, as desired, with a fork or masher. Place in fridge while you prepare the shortcakes.
Make the Shortcakes
  1. Preheat oven to 450°F / 232°C. Have ready an ungreased baking sheet.
  2. In a large bowl whisk together flour, sugar, baking powder, and salt.
  3. Cut in butter or oil until mixture resembles coarse crumbs.
  4. Make a well in center of flour mixture and pour in milk. Mix just until most of the flour is moistened, then turn mixture out onto a floured surface.
  5. Knead lightly, up to 10-12 times, until you have a soft but not too sticky dough. Don’t overwork or biscuits will be tough.
  6. Gently pat dough out into a circle about 1in / 2.5cm thick, checking to make sure underneath is still floured well and dough isn’t sticking.
  7. Using a biscuit cutter or a round glass 2-3in / 5-7cm in diameter, cut out as many biscuits as you can. Place biscuits on baking sheet. Collect dough scraps and reshape into a ball. Repeat patting into a circle and cutting until dough is used up, probably 2-3 times at most, depending on size of biscuit cutter.
  8. Bake biscuits in preheated oven for 10-12 minutes, or until risen and lightly golden brown.
Make the Whipped Cream
  1. In the bowl of a stand mixer fitted with whisk attachment or with a hand mixer, whip heavy cream until soft peaks form.
  2. Add sugar and vanilla and continue whipping until stiff peaks form.
Assembly
  1. Slice biscuits open and spoon over strawberries and whipped cream!

Notes

The sugar mixed in with the strawberries is traditional but not absolutely necessary. Although it helps soften the strawberries to lose their juice and create more of a soft sauce, I like it also without adding any sugar, because everything else in this recipe is already a bit sweet.The biscuit dough might seem too soft at first, but the moment the baking powder starts working and it hits the floured surface it should become very workable. Just be careful not to over work it, a little bit goes a long way.When cutting the biscuits, cut straight down, no twisting, or this can seal the edges and prevent a good rise. You can dip the biscuit cutter in some flour to help prevent any sticking. If you place the biscuits next to each other on the baking sheet they can help each other “climb” up and achieve a nicer rise!

Nutrition Facts

Calories

436.99

Fat

24.15 g

Sat. Fat

7.94 g

Carbs

51.65 g

Fiber

2.77 g

Net carbs

48.88 g

Sugar

24.49 g

Protein

5.28 g

Sodium

368.72 mg

Cholesterol

35.06 mg

Nutritional Information is approximate.

strawberry shortcakes, summer dessert, best traditional classic strawberry shortcake
dessert
American
Did you make this recipe?
Tag @jennyblogsandbakes on instagram and hashtag it #jennyblogs
public.jpg

Classic Rhubarb Custard Pie

IMG_1860.jpg

Last updated July 31, 2024

Nothings says summer like a rhubarb pie. Better yet, a rhubarb CUSTARD pie.

Rhubarb is always one of the first garden plants to grow each spring in Michigan, announcing that after a long, cold winter summer is indeed coming and didn’t get lost along the way after all. Rhubarb likes to grow so extensively in its short season that you don’t know what to do with all of it, until it withers in the approach of hotter weather and leaves you already looking forward to next year’s crop. Unless, of course, you planned ahead and froze some. But frozen rhubarb will never be like fresh, so make all the pie and hand pie, crisp, cake, syrup, and camel hair soup you can! I mean, er, rhubarb sauce…not camel hair soup. Hehe, who’d call it that??

IMG_1835.jpg

Do you want to know something really sad? I’ve never seen rhubarb in Italy, at least not in Florence. So for my international friends, I’m sorry if your area fails you and doesn’t grow rhubarb so you aren’t able to make this recipe. If there is rhubarb in Florence though, someone please tell me where to find it? So far everyone I’ve asked just said, “…what’s that?” This just goes to show my ignorance. Before moving to Italy I was trying to bake with all of the ingredients that aren’t readily available here, or at least what I figured wouldn’t be readily available. I should have been in a baking frenzy with rhubarb instead of things like Oreos. Because, no rhubarb and Oreos everywhere. There are even Oreo donuts in the grocery store bakery section…I’ve come so close to trying them during various weak moments.

Wherever you are in the world, be sure to bake or eat a rhubarb pie at the next chance. You won’t regret it and might inspire you to move to a part of the world where rhubarb is grown.

This recipe is the old-fashioned classic from my mama. The crust is one of my favorite traditional pie crust recipes, simple and can be made ahead of time if needed. It uses butter instead of shortening, which in my mind is a bit of a compromise between shortening or lard (which most people and bakeries use to make tender and flaky crusts but it’s also horrendous for your health and has no taste if it’s not artificially flavored.) and oil, which my mom has always used because oil can actually be good for you, although it makes for the trickiest to handle and often um, hardier pie crusts. So I use butter, which tastes wonderful and makes the crust easy enough to work with, even if it’s not as healthy as oil.

This post may contain affiliate links. If you make a purchase using these links, Jennyblogs may receive a small commission, at no extra cost to you. This helps to support Jennyblogs. Where possible, links are prioritized to mall businesses and ethically and responsibly made items. For further information see the privacy policy. Grazie!

Recipe from my Mama


Classic Rhubarb Custard Pie

Makes one 9in / 23cm pie, about 8 servings

Ingredients:

For the Crust

For the Rhubarb Custard Filling

  • 3 eggs

  • 3 Tbsp / 45g milk

  • 1 1/2 cups / 300g granulated sugar

  • 1/4 cup / 30g all-purpose flour

  • 3/4 tsp nutmeg

  • 4 cups fresh rhubarb, sliced into 1/2in / 1cm chunks

Directions:

Oven 400°F / 205°C. 8 or 9 inch pie dish. 

Make the Crust

IMG_4560.jpg
  1. Prepare pie crust per recipe instructions, refrigerate until needed.

Make the Rhubarb Custard Filling

  1. Blend eggs and milk together in a large bowl.

  2. Add the flour and nutmeg to the sugar then add to the egg mixture and beat well.

  3. Add in the rhubarb and mix to coat well.

  4. Pour into prepared pie crust and add top crust.

    For a classic top pie crust, place crust on top, cut off overhang, and crimp together the edges of the top and bottom crust to seal.

    For an interwoven lattice, start in the center of the pie and work outward, then repeat with the other half. Arrange half of the strips evenly spaced over the pie all in one direction, then flip every other strip back over itself, so half are now only covering half of the pie. Take a new strip and place it perpendicularly just in front of the folded strips. Unfold the folded strips so these ones now cover the new strip. The new strip should be under and over every other one. Working on that same half of the pie, fold back every other strip, all the ones that were NOT just folded. Take another new strip and place it evenly apart from the first perpendicular strip. Unfold the folded strips. Repeat folding back strips, placing new strip, and unfolding until you reach the edge of the pie. You may need to trim down the strips as you get closer to the edge. Repeat with other half of the pie.

    Sprinkle sugar on top, if desired.

  5. Bake pie in preheated oven for 50-60 minutes or until crust is golden brown and a knife inserted in center of pie confirms rhubarb is tender.

  6. Allow to cool completely before slicing and serving.

Jenny’s Notes:

  • If you make the crust and pie in the same day, you could make the filling while the crust is resting in the fridge for an hour or so before rolling out.

  • Instead of a traditional top pie crust or lattice you could add a streusel/crumble, delicious and definitely the easiest option of the three.

Rhubarb Custard Pie
Yield 8
Author
Prep time
1 H & 10 M
Cook time
1 Hour
Total time
2 H & 10 M

Rhubarb Custard Pie

Classic rhubarb custard pie recipe handed down from my mama. Homemade pie crust with the uniquely sweet and sour filling you can only get with rhubarb.
Cook modePrevent screen from turning off

Ingredients

For the Crust
For the Rhubarb Custard Filling

Instructions

Make the Crust
  1. Prepare pie crust per recipe instructions, refrigerate until needed.
Make the Rhubarb Custard Filling
  1. Oven 400°F / 205°C. 8 or 9 inch pie dish.
  2. Blend eggs and milk together in a large bowl.
  3. Add the flour and nutmeg to the sugar then add to the egg mixture and beat well.
  4. Add in the rhubarb and mix to coat well.
  5. Pour into prepared pie crust and add top crust.
  6. For a classic top pie crust, place crust on top, cut off overhang, and crimp together the edges of the top and bottom crust to seal. For an interwoven lattice, start in the center of the pie and work outward, then repeat with the other half. Arrange half of the strips evenly spaced over the pie all in one direction, then flip every other strip back over itself, so half are now only covering half of the pie. Take a new strip and place it perpendicularly just in front of the folded strips. Unfold the folded strips so these ones now cover the new strip. The new strip should be under and over every other one. Working on that same half of the pie, fold back every other strip, all the ones that were NOT just folded. Take another new strip and place it evenly apart from the first perpendicular strip. Unfold the folded strips. Repeat folding back strips, placing new strip, and unfolding until you reach the edge of the pie. You may need to trim down the strips as you get closer to the edge. Repeat with other half of the pie.
  7. Sprinkle sugar on top, if desired.
  8. Bake pie in preheated oven for 50-60 minutes or until crust is golden brown and a knife inserted in center of pie confirms rhubarb is tender.
  9. Allow to cool completely before slicing and serving.

Notes

If you make the crust and pie in the same day, you could make the filling while the crust is resting in the fridge for an hour or so before rolling out. Instead of a traditional top pie crust or lattice you could add a streusel/crumble, delicious and definitely the easiest option of the three.

Nutrition Facts

Calories

431.35

Fat

12.79 g

Sat. Fat

7.67 g

Carbs

74.08 g

Fiber

2.32 g

Net carbs

71.76 g

Sugar

38.25 g

Protein

6.18 g

Sodium

397.03 mg

Cholesterol

54.07 mg

Nutritional Information is approximate.

Rhubarb, custard, pie, all butter crust, oil pie crust, old fashioned
Dessert, Pie
American
Did you make this recipe?
Tag @jennyblogsandbakes on instagram and hashtag it #jennyblogs

Rhubarb Custard Pie made with an all oil crust


Overnight Bagels

Last Updated August 18, 2024

IMG_2103.jpg

Bagels. Who doesn’t love them? Especially toasted with cream cheese or butter melting on top. Everyone has their favorite bagel, where to get them and how to eat them, whether that’s the chewy and dense boiled variety or the slightly lighter and more modern steamed versions, plain or everything, toasted with cream cheese, eaten plain, or eaten as a sandwich.

One of my favorite bagel memories is from New York City where I spent two summers training with the American Ballet Theatre when I was a teenager. On the weekends my mom and I would go on adventures exploring the city, usually walking an average of 15 miles a day and thus needing sustenance. I remember particularly well one morning passing a bagel shop and a few minutes later exiting with a freshly toasted bagel smothered in cream cheese and wrapped in tinfoil. So simple, so inexpensive, and I still think of that bagel as one of the best I’ve ever had. So I guess you could say I’m a NYC bagel girl, but to be fair, I don’t think I’ve had any (at least not-from-a-hotel-breakfast-bar bagels) in any of the major cities famed for bagels, such as Philadelphia, Chicago, Boston, or Los Angeles. And I’ve been to all those cities! Too bad I didn’t know they had amazing bagels or I would’ve done a trial and comparison. Ah well, just have to go back I guess!

I am blogging this bagel recipe which involves an overnight ferment and boiling, because I think IT’S SO YUMMY. I’m not going to tout this recipe as the bagel recipe to end all bagel recipes, because frankly, I’m not into that kind of marketing and I believe there are other valid methods and types of bagel recipes out there. This recipe comes from Peter Reinhart’s book The Breadmaker’s Apprentice, and as he says, this is a bagel for the ages. And he knows what he’s talking about, so you should try this recipe. You can buy the cookbook by clinking on the link to the right!

Don’t let the overnight ferment or multi-step process scare you, it’s really quite fun and not nearly as tricky as I had always imagined making bagels to be. You will need to clear some space in your fridge and in your schedule, but if I can do it in my tiny Italian kitchen with my tiny toaster-sized oven, so can you, wherever you are baking! I recommend reading the recipe through once or twice before making a game plan. (As you should with every recipe!)

What follows is a slightly modified version of Peter Reinhart’s recipe. The ingredients are basically identical but the instructions I have rewritten in my own words and in places slightly changed or modified to accommodate tips and tricks that worked really well for me and might work for you, too!

parmesan, sesame, and everything bagels

parmesan, sesame, and everything bagels

Side note if you need bagels TODAY: While this recipe is called “Overnight Bagels”, it can also be made without the overnight ferment. I do recommend the overnight ferment for flavor and just because it’s nice to split up the multiple steps of bagel making, however…we might not always have the patience to wait that long for fresh, hot, chewy bagels…this has definitely happened to me during this 2020 quarantine. I wanted bagels today! Not tomorrow! And I hadn’t planned ahead.
So, instead of an overnight ferment, once the bagels are shaped, let them rise in a warm place for about an hour, or until noticeably swelled. Keep any eye on them as you don’t want them to overaise. This can cause them to deflate when they are boiled. Proceed with recipe as normal.

This post may contain affiliate links. If you buy something using these links, Jennyblogs may receive a small commission, at no extra cost to you. This helps to support Jennyblogs. For further information see the privacy policy. Grazie!


Overnight Bagels

Makes 12 big or 24 small bagels

Ingredients:

For the Sponge

  • 1 tsp / 3g instant yeast

  • 4 cups / 510g bread flour

  • 2 1/2 cups / 567g water

For the Dough

  • 1/2 tsp / 1.5g instant yeast

  • 3 3/4 cups / 482g bread flour

  • 2 3/4 tsp / 20g salt

  • 2 tsp / 9.5g malt powder OR flavoring of choice: 1 Tbsp / 14g dark or light malt syrup, honey, or dark or light brown sugar

For Boiling the Bagels

  • 1 Tbsp / 14g baking soda, optional, or malt syrup or honey

  • a large pot of water, the wider the pot the better

  • cornmeal or semolina, for dusting

Toppings, any or all of the following

  • sesame seeds

  • poppy seeds

  • salt flakes

  • rehydrated minced garlic

  • rehydrated minced onion

  • parmesan cheese

Directions:

DAY 1

Line 2 sheet pans with parchment paper and grease well.

Make the Sponge

  1. In the bowl of a stand mixer or large bowl, stir yeast into flour. Add water and stir just until a sticky dough has formed, similar to pancake batter.

  2. Cover bowl with plastic wrap and let sit at room temperature for about 2 hours, or until very bubbly and active. It should be about twice the size and collapse when bowl is tapped on countertop.

Make the Dough

  1. Once sponge is ready, add next measurement of yeast and mix on low speed with dough hook or by hand with a spoon. Next, add 3 cups / 383g of the next measurement of flour, salt, and malt powder / flavoring of choice. Stir on low speed for about 3 minutes, or with a spoon until a mostly homogeneous ball is formed. Slowly add remaining 3/4 cup / 99g flour to stiffen dough a bit.

    Knead dough on medium-low speed for about 6 minutes or turn dough out onto a lightly floured surface and knead by hand for about 10 minutes. Dough should be smooth and firm yet pliable, not sticky, with all flour worked in. If it seems too dry or there is excess flour throughout, add a few drops of water until desired consistency is reached. Likewise if it’s too sticky, add in a bit of flour until correct stiffness is reached. At this point the dough should pass the windowpane test. (Stretch a small piece of dough between your thumbs and forefingers; if enough gluten has developed through kneading the dough should stretch thin where you can see light coming through. If it breaks before you can stretch it thin, knead another few minutes and try again.)

Weigh and Shape Dough

IMG_2100.jpg
  1. Weigh dough and divide weight by the number of bagels you wish to make: If making mini bagels, divide weight by 24; if making regular bagels, divide weight by 12. This will give the goal weight for each dough ball you are about to make. For example, the weight of my dough the last time I made these was 1,566g. 1,566g divided by 12 for regular bagels = about 130g each. Or, 1,566g divided by 24 for mini bagels = about 65g each.

  2. Once you have a goal weight for the dough balls, divide dough in half, then keep dividing the halves and quarters until you have 12 or 24 dough chunks. Weigh each chunk and add or subtract a bit of dough until they are all within about 5g of the goal weight. Roll each dough chunk under your palm with a cupped hand in a circular motion, guiding with outer edge of your palm, until you have a nice ball. It works best to roll them on a surface with little to no flour. This way the dough sticks slightly to the surface as you move in a circular motion and pulls and creates surface tension.

  3. Place dough balls on a lightly floured surface and cover with a damp towel. Allow to rest for approximately 20 minutes.

  4. Shape each dough ball into bagel form by poking your thumb through the center of the ball and rotating your thumb around the inside of the hole or lassoing it a few times around your thumb, until the hole is about 2 1/2 in / 6 cm for regular bagels or 1 1/2 in / 4 cm for mini. Aim to stretch the bagel as evenly as possible, avoiding a thick and thin side so you won’t end up with lopsided bagels. Alternately, you can roll the doll ball into an 8 in / 20 cm long rope, wrap it around your knuckles with the seam on the under side, then rock the seam on the counter until sealed.

  5. Place shaped bagels onto greased baking sheets about 2 inches apart. Mist with spray oil or rub on oil, then slip each sheet into a clean, food-grade plastic bag or cover with plastic wrap.

  6. Place bagels in fridge to rise overnight. They are best if used the next day, but can be kept up to three days in the fridge.

DAY 2

Boil the Bagels

  1. Test to see if bagels are ready to be boiled by removing one carefully from fridge and placing in a bowl of cool or tepid water. If bagel floats within 10 seconds, it’s ready. Immediately return bagel to covered baking sheet in fridge while you ready the water.

  2. If bagel does not float within 10 seconds, either return it to the fridge and repeat float test every couple hours until bagels are ready, or remove both sheets of bagels from fridge and let raise at room temperature, repeating float test every 10 to 20 minutes until a bagel passes. Return them to the fridge once they are ready so they don’t over-rise. The stiffness of the dough, your house temperature, and your fridge temperature will all impact when the bagels are ready to be boiled.

  3. If your bagels have over-risen (you can tell if they collapse when you gently handle them or if they overly deflate when boiled) or they have stuck to the pan, transfer them as carefully as you can to another better-oiled parchment lined baking sheet. Let rise at room temperature for another 15-20 minutes or until they pass float test again. Return them to the fridge once they are ready.

  4. When bagels are just about ready, place the large pot of water on the stove and bring to a boil, then add baking soda, if using. Have a skimmer or slotted spoon ready nearby. Preheat oven to 500°F / 260°C and place two racks in the middle of the oven.

  5. Remove one sheet of bagels from fridge and gently slide 3-4 into boiling water, or however many can fit comfortably side to side. Boil for 30 seconds to 1 minute on one side, then flip each bagel and boil for another 30 seconds to 1 minute. Bagels boiled for 1 minute on each side will be chewier than those boiled for only 30 seconds on each side.

  6. While bagels are boiling, sprinkle the same parchment lined baking sheet with cornmeal or semolina.

  7. When it’s time to remove bagels, use the slotted spoon and place them back on the baking sheet now sprinkled with cornmeal. Add toppings immediately while the bagels are still wet. Repeat with second sheet of bagels.

Bake the Bagels

  1. Place both baking sheets of bagels in the preheated oven. Bake for 7 minutes, then switch the pans on the racks and rotate each 180 degrees to bake the bagels as evenly as possible.

  2. After you switch and rotate, lower oven temperature to 450°F / 232°C and bake for another 7-8 minutes, or until light golden brown.

  3. Remove from oven and allow bagels to cool for 15 minutes before devouring.

Jenny’s Notes:

  • To keep scale clean while weighing dough, place the now-empty bowl (no need to clean it) and press tare. You can also use a piece of plastic wrap over the scale and tare if needed.

  • I love lassoing the bagels while shaping them! Fast, fun, and effective. Not as big a fan of the rope and seal version, I thought it took longer and the finishing ring was not as symmetrical. Try out both versions to find which works best for you!

  • I found it best to make the dough in the evening and boil and bake the bagels in the morning or they over-rose, but I believe this is mostly due to my not-cold-enough fridge. If you have a cold and well functioning fridge, you should be fine to make and bake the bagels at your leisure!

  • Chewy bagels are my favorite, and thus I boil bagels for the full minute on each side. I have found, though, that beyond 1 minute on each side can cause the outside of the bagels to cook too much. This means when they are baked this outer baked “shell” doesn’t allow the bagels to reach their full rise and may result in flatter bagels.

  • When baking the bagels, know your oven. If you have hot spots or a small oven, you can choose to bake one sheet of bagels at a time. Since my oven is small, I baked the first sheet of bagels while I was boiling the second sheet, and simply rotated the pan 180 degrees after the first 7 minutes.

Overnight Bagels
Yield 12-24
Author
Prep time
1 H & 45 M
Cook time
15 Min
Inactive time
12 Hour
Total time
14 Hour

Overnight Bagels

A recipe from Peter Reinhart's "The Breadmaker's Apprentice." The bagels get an overnight ferment leading to increased umami flavor and are boiled for optimal chewiness.
Cook modePrevent screen from turning off

Ingredients

For the Sponge
For the Dough
For Boiling the Bagels
Toppings, any or all of the following

Instructions

DAY 1 Make the Sponge
  1. In the bowl of a stand mixer or large bowl, stir yeast into flour. Add water and stir just until a sticky dough has formed, similar to pancake batter.
  2. Cover bowl with plastic wrap and let sit at room temperature for about 2 hours, or until very bubbly and active. It should be about twice the size and collapse when bowl is tapped on countertop.
Make the Dough
  1. Once sponge is ready, add next measurement of yeast and mix on low speed with dough hook or by hand with a spoon. Next, add 3 cups / 383g of the next measurement of flour, salt, and malt powder / flavoring of choice. Stir on low speed for about 3 minutes, or with a spoon until a mostly homogeneous ball is formed. Slowly add remaining 3/4 cup / 99g flour to stiffen dough a bit.
  2. Knead dough on medium-low speed for about 6 minutes or turn dough out onto a lightly floured surface and knead by hand for about 10 minutes. Dough should be smooth and firm yet pliable, not sticky, with all flour worked in. If it seems too dry or there is excess flour throughout, add a few drops of water until desired consistency is reached. Likewise if it’s too sticky, add in a bit of flour until correct stiffness is reached. At this point the dough should pass the windowpane test. (Stretch a small piece of dough between your thumbs and forefingers; if enough gluten has developed through kneading the dough should stretch thin where you can see light coming through. If it breaks before you can stretch it thin, knead another few minutes and try again.)
Weigh and Shape the Dough
  1. Line 2 sheet pans with parchment paper and grease well.
  2. Weigh dough and divide weight by the number of bagels you wish to make: If making mini bagels, divide weight by 24; if making regular bagels, divide weight by 12. This will give the goal weight for each dough ball you are about to make. For example, the weight of my dough the last time I made these was 1,566g. 1,566g divided by 12 for regular bagels = about 130g each. Or, 1,566g divided by 24 for mini bagels = about 65g each.
  3. Once you have a goal weight for the dough balls, divide dough in half, then keep dividing the halves and quarters until you have 12 or 24 dough chunks. Weigh each chunk and add or subtract a bit of dough until they are all within about 5g of the goal weight. Roll each dough chunk under your palm with a cupped hand in a circular motion, guiding with outer edge of your palm, until you have a nice ball. It works best to roll them on a surface with little to no flour. This way the dough sticks slightly to the surface as you move in a circular motion and pulls and creates surface tension.
  4. Place dough balls on a lightly floured surface and cover with a damp towel. Allow to rest for approximately 20 minutes.
  5. Shape each dough ball into bagel form by poking your thumb through the center of the ball and rotating your thumb around the inside of the hole or lassoing it a few times around your thumb, until the hole is about 2 1/2 in / 6 cm for regular bagels or 1 1/2 in / 4 cm for mini. Aim to stretch the bagel as evenly as possible, avoiding a thick and thin side so you won’t end up with lopsided bagels. Alternately, you can roll the doll ball into an 8 in / 20 cm long rope, wrap it around your knuckles with the seam on the under side, then rock the seam on the counter until sealed.
  6. Place shaped bagels onto greased baking sheets about 2 inches apart. Mist with spray oil or rub on oil, then slip each sheet into a clean, food-grade plastic bag or cover with plastic wrap.
  7. Place bagels in fridge to rise overnight. They are best if used the next day, but can be kept up to three days in the fridge.
DAY 2 Boil the Bagels
  1. Test to see if bagels are ready to be boiled by removing one carefully from fridge and placing in a bowl of cool or tepid water. If bagel floats within 10 seconds, it’s ready. Immediately return bagel to covered baking sheet in fridge while you ready the water.
  2. If bagel does not float within 10 seconds, either return it to the fridge and repeat float test every couple hours until bagels are ready, or remove both sheets of bagels from fridge and let raise at room temperature, repeating float test every 10 to 20 minutes until a bagel passes. Return them to the fridge once they are ready so they don’t over-rise. The stiffness of the dough, your house temperature, and your fridge temperature will all impact when the bagels are ready to be boiled.
  3. If your bagels have over-risen (you can tell if they collapse when you gently handle them or if they overly deflate when boiled) or they have stuck to the pan, transfer them as carefully as you can to another better-oiled parchment lined baking sheet. Let rise at room temperature for another 15-20 minutes or until they pass float test again. Return them to the fridge once they are ready.
  4. When bagels are just about ready, place the large pot of water on the stove and bring to a boil, then add baking soda, if using. Have a skimmer or slotted spoon ready nearby. Preheat oven to 500°F / 260°C and place two racks in the middle of the oven.
  5. Remove one sheet of bagels from fridge and gently slide 3-4 into boiling water, or however many can fit comfortably side to side. Boil for 30 seconds to 1 minute on one side, then flip each bagel and boil for another 30 seconds to 1 minute. Bagels boiled for 1 minute on each side will be chewier than those boiled for only 30 seconds on each side.
  6. While bagels are boiling, sprinkle the same parchment lined baking sheet with cornmeal or semolina.
  7. When it’s time to remove bagels, use the slotted spoon and place them back on the baking sheet now sprinkled with cornmeal. Add toppings immediately while the bagels are still wet. Repeat with second sheet of bagels.
Bake the Bagels
  1. Place both baking sheets of bagels in the preheated oven. Bake for 7 minutes, then switch the pans on the racks and rotate each 180 degrees to bake the bagels as evenly as possible.
  2. After you switch and rotate, lower oven temperature to 450°F / 232°C and bake for another 7-8 minutes, or until light golden brown.
  3. Remove from oven and allow bagels to cool for 15 minutes before devouring.

Notes

  • To keep scale clean while weighing dough, place the now-empty bowl (no need to clean it) and press tare. You can also use a piece of plastic wrap over the scale and tare if needed.
  • I love lassoing the bagels while shaping them! Fast, fun, and effective. Not as big a fan of the rope and seal version, I thought it took longer and the finishing ring was not as symmetrical. Try out both versions to find which works best for you!
  • I found it best to make the dough in the evening and boil and bake the bagels in the morning or they over-rose, but I believe this is mostly due to my not-cold-enough fridge. If you have a cold and well functioning fridge, you should be fine to make and bake the bagels at your leisure!
  • Chewy bagels are my favorite, and thus I boil bagels for the full minute on each side. I have found, though, that beyond 1 minute on each side can cause the outside of the bagels to cook too much. This means when they are baked this outer baked “shell” doesn’t allow the bagels to reach their full rise and may result in flatter bagels.
  • When baking the bagels, know your oven. If you have hot spots or a small oven, you can choose to bake one sheet of bagels at a time. Since my oven is small, I baked the first sheet of bagels while I was boiling the second sheet, and simply rotated the pan 180 degrees after the first 7 minutes.


Nutrition Facts

Calories

303.74

Fat

1.50 g

Sat. Fat

0.22 g

Carbs

60.82 g

Fiber

2.14 g

Net carbs

58.68 g

Sugar

0.83 g

Protein

10.16 g

Sodium

1017.73 mg

Cholesterol

0.00 mg

Nutritional Info is Approximate. Based on 1 large bagel.

bagel, overnight bagels, everything, parmesan, sesame, poppyseed
bread, breakfast, brunch
Jewish-American
Did you make this recipe?
Tag @jennyblogsandbakes on instagram and hashtag it #jennyblogs

Triple Dark Chocolate Cheesecake

Last Updated August 17, 2024

2019-05-26+17.58.07-2.jpg

This post contains affiliate links. If you buy something using these links, Jennyblogs may receive a small commission, at no extra cost to you. This helps to support Jennyblogs. For further information see the privacy policy. Grazie!

After more than two years in Italy, I have finally made a cheesecake.

Proof that you don’t need a springform pan to bake a cheesecake

Proof that you don’t need a springform pan to bake a cheesecake

Cheesecakes are not hard to make, but the baking is important, probably the most important part, and can be tricky. Cheesecakes are usually baked at a slightly lower temperature, usually around 325°F, and just until the sides are set but the center is still jiggly. If the center sets, the cheesecake is over done, but if the center is too jiggly, then your cheesecake won’t set up in the fridge and you’ll end up with soup when you cut into it. You don’t want the cheesecake to crack, and some recipes will tell you to add a bain-marie (a hot water bath) to the oven to keep the atmosphere humid or to crack the oven door after you’ve turned it off so your cheesecake won’t cool down too quickly and yes, crack.

So when you live in Italy with strange ovens, you think twice before baking things when you can’t perfectly control the heat in your oven or where the heat is coming from. IF you’re able to tell the temperature of your oven at all. (I’m thinking of you, my oven two apartments ago. I DO NOT miss you!) Or if your oven is small and cooks things a lot quicker. Add on top of that the cream cheese here, “formaggio fresco” or literally translated fresh cheese, is…different. I’m not even sure what it is, it tastes similar to cream cheese in the States, but when you whip it it doesn’t become soupy like the American stuff, it becomes super creamy. Sometimes I think the American stuff is stickier too, maybe? Philadelphia brand is very popular here, and you can also get grocery store generic brand. But the cheesecakes I’ve eaten in restaurants or pastry shops? Always weird. They taste and look more like semi-freddo or a mousse. I therefore assumed when I made a cheesecake it would be weird like the other ones I’ve eaten here. So I never made one.

Along came Easter and I wanted to make a cheesecake. I didn’t even have a springform pan but found that pie dishes work pretty great as substitutes. And you know what? The cheesecake turned out delicious and not weird. And my husband and colleagues liked it so well I made the same one again and bought a springform pan. And if you know me, you know I rarely bake the same thing twice in a row, unless I’m perfecting a new recipe. I’m always on to the next recipe. But this recipe asked to be made again. And so I did. And now you can make it, too, weird cream cheese or normal cream cheese!

Recipe adapted from omgchocolatedesserts


Triple Dark Chocolate Cheesecake

Serves about 12

Ingredients:

For the Oreo Crust

Crushing Oreos the old-fashioned way…

Crushing Oreos the old-fashioned way…

  • 24 Oreos

  • 1/4 cup / 56g butter, melted

For the Filling

  • 7.5 oz / 225g dark chocolate, broken into small chunks

  • 24 oz (3 8 oz packages) / 675g cream cheese, room temperature

  • 1/2 cup + 2 Tbsp / 125g granulated sugar

  • 2 Tbsp / 14 g cocoa powder

  • 3 eggs

For the Ganache Topping

  • 3/4 cup / 175g heavy whipping cream

  • 6 oz / 180g dark chocolate, broken into small chunks

Directions:

Oven 350°F / 177°C. Grease an 8in - 9in / 20cm - 24cm springform pan.

Make the Oreo Crust

  1. Crush Oreos in a food processor or with a rolling pin.

  2. If using a food processor, pulse in melted butter until crumbs are evenly moistened. If crushing Oreos by hand, transfer to a bowl and stir in butter.

  3. Press mixture evenly into bottom of prepared springform pan and bake for 8 minutes.

  4. Remove from oven and let cool while you prepare filling.

Spreading cream cheese mixture over baked crust

Spreading cream cheese mixture over baked crust

Make the Filling

  1. In a double boiler or pan over low heat, melt chocolate, stirring constantly. Remove from heat when there are still small chunks of chocolate, and continue to stir until completely melted. This way the chocolate won’t overheat or burn. Let chocolate cool.

  2. In the bowl of a stand mixer or a large bowl with a handheld mixer, beat cream cheese and sugar on medium speed until smooth. Changing to low speed, carefully beat in cocoa powder so that it doesn’t “poof” everywhere. Every so often stop beating and scrape down the sides of the bowl well.

  3. Beat in eggs, one at a time, until smooth.

  4. Beat in melted and cooled chocolate.

  5. Pour mixture over crust, smoothing the top.

  6. Bake for 45 - 60 minutes, or until center is still slightly wiggly and the top looks dry.

  7. Turn oven off and crack open the door for about 10 minutes. Remove cheesecake from oven and place in fridge until completely cooled, 8 hours or overnight.

Make the Ganache Topping

  1. In a small pan place heavy cream and chocolate over low heat. Stir constantly until mixture is smooth and melted. Allow to cool slightly.

  2. Remove cheesecake from fridge and pour ganache evenly over top. Allow to set before running a dull knife around edge of cheesecake and releasing from springform pan. Alternately, if you don’t need to transport the cheesecake anywhere, you can remove the ring of the springform first and then pour the ganache over, using a spoon to guide the ganache toward the edges and allowing some to dribble down the sides.

Jenny’s Notes:

  • Not a dark chocolate fan? Try it out with milk chocolate or a mixture of milk and dark to create your preferred bitterness!

  • If you don’t own a double boiler, you can make a makeshift one by placing a small pan with an inch or so of water in the bottom and bring to a simmer. Place the chocolate in a bowl big enough that it can sit on top of the pan without touching the water. Stir constantly and proceed as in the recipe. This might take a touch more effort than just melting the chocolate in a pan, but it’s safer if you’re not used to melting chocolate so as not to burn it.

  • Powdered sugar can be substituted for the granulated, use 1 cup / 110g.

  • For cleaner slicing, try running your knife under hot water for a few seconds between slices.

Triple Dark Chocolate Cheesecake
Yield 12
Author
Prep time
1 Hour
Cook time
1 H & 8 M
Inactive time
8 Hour
Total time
10 H & 8 M

Triple Dark Chocolate Cheesecake

Oreo crust, creamy dark chocolate cheesecake filling, and a decadent dark chocolate ganache.
Cook modePrevent screen from turning off

Ingredients

For the Oreo Crust
For the Filling
For the Ganache Topping

Instructions

Make the Oreo Crust
  1. Preheat oven to 350°F / 177°C. Grease an 8in - 9in / 20cm - 24cm springform pan.
  2. Crush Oreos in a food processor or with a rolling pin.
  3. If using a food processor, pulse in melted butter until crumbs are evenly moistened. If crushing Oreos by hand, transfer to a bowl and stir in butter.
  4. Press mixture evenly into bottom of prepared springform pan and bake for 8 minutes.
  5. Remove from oven and let cool while you prepare filling.
Make the Filling
  1. In a double boiler or pan over low heat, melt chocolate, stirring constantly. Remove from heat when there are still small chunks of chocolate, and continue to stir until completely melted. This way the chocolate won’t overheat or burn. Let chocolate cool.
  2. In the bowl of a stand mixer or a large bowl with a handheld mixer, beat cream cheese and sugar on medium speed until smooth. Changing to low speed, carefully beat in cocoa powder so that it doesn’t “poof” everywhere. Every so often stop beating and scrape down the sides of the bowl well.
  3. Beat in eggs, one at a time, until smooth.
  4. Beat in melted and cooled chocolate.
  5. Pour mixture over crust, smoothing the top.
  6. Bake for 45 - 60 minutes, or until center is still slightly wiggly and the top looks dry.
  7. Turn oven off and crack open the door for about 10 minutes. Remove cheesecake from oven and place in fridge until completely cooled, 8 hours or overnight.
Make the Ganache Topping
  1. In a small pan place heavy cream and chocolate over low heat. Stir constantly until mixture is smooth and melted. Allow to cool slightly.
  2. Remove cheesecake from fridge and pour ganache evenly over top. Allow to set before running a dull knife around edge of cheesecake and releasing from springform pan. Alternately, if you don’t need to transport the cheesecake anywhere, you can remove the ring of the springform first and then pour the ganache over, using a spoon to guide the ganache toward the edges and allowing some to dribble down the sides.

Notes

Not a dark chocolate fan? Try it out with milk chocolate or a mixture of milk and dark to create your preferred bitterness! If you don’t own a double boiler, you can make a makeshift one by placing a small pan with an inch or so of water in the bottom and bring to a simmer. Place the chocolate in a bowl big enough that it can sit on top of the pan without touching the water. Stir constantly and proceed as in the recipe. This might take a touch more effort than just melting the chocolate in a pan, but it’s safer if you’re not used to melting chocolate so as not to burn it. Powdered sugar can be substituted for the granulated, use 1 cup / 110g. For cleaner slicing, try running your knife under hot water for a few seconds between slices.

Nutrition Facts

Calories

715.12

Fat

54.28 g

Sat. Fat

31.43 g

Carbs

52.73 g

Fiber

3.26 g

Net carbs

49.47 g

Sugar

39.29 g

Protein

7.29 g

Cholesterol

118.98 mg

Sodium

316.65 mg

Nutritional Information is Approximate.

triple dark chocolate cheesecake, decadent, creamy, rich, oreo crust, ganache
dessert
American
Did you make this recipe?
Tag @jennyblogsandbakes on instagram and hashtag it #jennyblogs
2019-04-24+19.00.29.jpg

Sicilian Almond Cookies - Paste di Mandorle

Last Updated August 16, 2024

2019-05-13+15.18.28.jpg

Paste di mandorle, or almond cookies, are one of the simplest and most delicious cookie recipes you could ask for, requiring only 4 ingredients and an overnight refrigeration (and even that is optional), so you can make the dough one day and bake the next. And because they only use almond flour, they are gluten-free friendly!

These cookies and many variations of them hail from Sicily, where the land is full of sunshine and Mediterranean breezes, charming towns, and has the perfect climate for some of the most succulent citrus fruits and almonds. Or so I’ve heard, I have yet to actually go there! The first time I found a bag of Sicilian almonds in Italy I snatched them up, hoping for a taste experience like never before. Basically setting myself up for disappointment. They were good, yes, but I think it would be best to eat them fresh, in Sicily. Until that day when I go to Sicily, I will content myself with tastes of their culture, like the occasional good arancini (fried balls of rice stuffed with cheese and veggies or meat) that you can find around Florence, granita (a slushy type drink), brioche stuffed with gelato, and cannoli. And of course, these almond cookies. And they’re so simple to make. Dangerous.

A Note on What You Call These Cookies in Italian

The original name of this post I had named as “Paste alle mandorle” but I believe that is used more to denote almond paste, or marzipan, so I’ve updated it to Paste di Mandorle.

While most translating apps will tell you “cookie/cookies” translates to “biscotto/biscotti”, it’s not a catch-all. For as often as I talk about, bake, and eat cookies, this word has always given me grief. If you want to get technical, and you know I do, “biscotti” can be broken down into two root words: “bis” meaning two or twice, and “cotti” meaning baked or cooked. Thus, biscotti actually refers to cookies that have been baked twice. In America, you probably are familiar with the word biscotti, meaning those long hard cookies often sold at coffee shops. Those are truly biscotti, because they’re twice baked. The whole dough is baked, then they’re sliced and baked again. So if you want to talk about cookies in Italian but you don’t want to talk about the twice-baked ones, what do you call them? There is no catch-all, but you have some options. You could simply call them “dolci” (sweets) or dolcetti (little sweets) which is always safe, or cookies made with butter, similar to what we know as shortbread, you could call “frolli”. Or, you can call them “paste” as I did in this post, which in the most general translation of the word means "doughs” or “pasticcini” which is similar. Just looking up this recipe in Italian, on the first page you will probably find them called paste, pasticcini, and biscotti.

Then don’t get me started on the Italian word for “cake” which is “torta”. That one IS a catch-all, but in a bad way, because then I’m calling desserts “cake” in Italian that are definitely not cake in English. They have no word for pie, so then if someone comes to your Thanksgiving dinner and asks what the pumpkin pie is, you might say “torta di zucca” or, pumpkin cake. Sigh. Pie, like Americans think of pie (apple pie, cherry pie) doesn’t exist in their traditional cuisine so it makes sense. But confusing for an American who wants to talk about it in Italian. Some desserts, like apple, are known enough now in Italy that you can refer to them by their English name, apple pie.

This post may contain affiliate links. If you buy something using these links, Jennyblogs may receive a small commission, at no extra cost to you. This helps to support Jennyblogs. For further information see the privacy policy. Grazie!

Original recipe adapted and translated from GialloZafferano


Sicilian Almond Cookies - Paste di Mandorle

Makes about 2 dozen cookies

2018-12-22 12.26.58.jpg

Ingredients:

  • 2 1/2 cups / 250g almond flour

  • 1 1/4 cups / 250g granulated sugar

  • 2 / 60g egg whites

  • 1/2 tsp almond extract

Garnishes (optional)

  • powdered sugar

  • whole, sliced, or slivered almonds

Directions:

Oven 350F / 180C

  1. In a medium bowl, combine the almond flour and the sugar.

  2. Mix in the egg whites and the almond extract until thoroughly combined. This can be done with a spoon, a hand mixer, stand mixer, or even in a food processor.

  3. Cover dough and place in fridge overnight or for at least 7 hours.

  4. Remove dough from fridge and roll into balls, then roll in powdered sugar. Flatten cookies a bit, as they will not spread much in the oven. Press in a few almond slices on top. Alternately, shape them as you wish, as they hold their shape well after the overnight refrigeration.

  5. Place cookies on a silpat or parchment covered baking sheet, leaving about 1” between cookies.

  6. Bake in preheated oven for 8-12 minutes, until just lightly golden. Be careful no to overbake, cookies should be crunchy on the outside and soft on the inside.

Jenny’s Notes:

  • If you have almonds and a method to grind them, such as a food processor, go ahead and make fresh almond flour! Be careful not to over grind, you don’t want the almonds to heat up and the oil to start to escape, resulting in almond butter.

  • If you prefer other extracts, go ahead and play around with other flavors; vanilla, orange, lemon, coconut, etc.

  • This recipe, if you go by weight instead of imperial measurements, is very easy to modify or double, triple, halve, etc.! You can see that the ratio of almond flour to sugar is 1:1: essentially all you have to do is mix together equal weights of almond flour and sugar, with just enough egg whites to bind them together easily and a touch of extract for flavor. Voila.

  • These cookies have many variants and shapes and are often piped with candied cherries on top. I’m not a huge candied fruit person, and so I found a simple recipe and omitted the piping for one of the simpler almond cookie methods, rolling in powdered sugar and decorating with almonds.

Sicilian Almond Cookies - Paste alle Mandorle
Yield 24
Author
Prep time
30 Min
Cook time
12 Min
Inactive time
7 Hour
Total time
7 H & 42 M

Sicilian Almond Cookies - Paste alle Mandorle

A classic Italian cookie originating in Sicily with a soft center and crunchy exterior. 4 ingredients and gluten-free.
Cook modePrevent screen from turning off

Ingredients

Garnishes (optional)

Instructions

  1. In a medium bowl, combine the almond flour and the sugar.
  2. Mix in the egg whites and the almond extract until thoroughly combined. This can be done with a spoon, a hand mixer, stand mixer, or even in a food processor.
  3. Cover dough and place in fridge overnight or for at least 7 hours.
  4. Remove dough from fridge and roll into balls, then roll in powdered sugar. Flatten cookies a bit, as they will not spread much in the oven. Press in a few almond slices on top. Alternately, shape them as you wish, as they hold their shape well after the overnight refrigeration.
  5. Place cookies on a silpat or parchment covered baking sheet, leaving about 1” between cookies.
  6. Bake in preheated oven for 8-12 minutes, until just lightly golden. Be careful no to overbake, cookies should be crunchy on the outside and soft on the inside.

Notes

If you have almonds and a method to grind them, such as a food processor, you can make fresh almond flour! Be careful not to over-grind, you don’t want the almonds to heat up and the oil to start to escape, resulting in almond butter. If you prefer other extracts, play around with other flavors; vanilla, orange, lemon, coconut, etc. This recipe, if you go by weight instead of imperial measurements, is very easy to modify or double, triple, halve, etc.! You can see that the ratio of almond flour to sugar is 1:1: essentially all you have to do is mix together equal weights of almond flour and sugar, with just enough egg whites to bind them together easily and a touch of extract for flavor. Voila. These cookies have many variants and shapes and are often piped with candied cherries on top. I’m not a huge candied fruit person, and so I found a simple recipe and omitted the piping for one of the simpler almond cookie methods, rolling in powdered sugar and decorating with almonds.

Nutrition Facts

Calories

110.04

Fat

5.24 g

Sat. Fat

0.40 g

Carbs

14.38 g

Fiber

1.31 g

Net carbs

13.07 g

Sugar

12.51 g

Protein

2.76 g

Cholesterol

0.00 mg

Nutritional information is approximate, based on 1 cookie.

gluten-free, Sicilian almond cookies, Paste alle Mandorle
dessert, cookies
Italian
Did you make this recipe?
Tag @jennyblogsandbakes on instagram and hashtag it #jennyblogs
2019-05-13+15.17.27-2.jpg

Mocha Punch

2018-12-29+15.42.50.jpg

Last Updated August 16, 2024

This post may contain affiliate links. If you buy something using these links, Jennyblogs may receive a small commission, at no extra cost to you. This helps to support Jennyblogs. For further information see the privacy policy. Grazie!

Mocha punch is exactly what it sounds like. Cold, creamy, sweet, chocolatey coffee served in a punch bowl with dollops of vanilla ice cream slowly melting into a dreamy, creamy puddle.

Punch might seem a thing do the past, but I really love punch. Classic punch to me is a bottle of cranberry raspberry juice combined with Sprite and some fruit-flavored sherbet dolloped in the lunch bowl. And I love it. It reminds me of Christmas time as a kid because that’s really the only time we’d make it. Then I was introduced to this Mocha Punch as a teenager, and the fruity punch got left behind. Everyone loves this coffee punch. It’s hard to put the ladle down.

It’s simple to make but it can steal the show, which makes it ideal for parties. Think holidays, birthday parties, baby showers, bridal showers, and on and on! Keep some empty milk jugs to store it in, and you have one easy and delicious thing done for your next gathering!

No mocha in Italy?

On entering any coffee shop in America, you’ll easily find mocha on the menu.

This is not the case in Italy. Italy may be the birthplace of coffee as we know it today, but that doesn’t mean that they own ALL the copyrights to the best coffee drinks. Cappuccino, espresso, macchiato….but Vanilla Latte and Mocha are not on the menu here, unless you go to one of the few “American” coffee shops, such as Arnold. First of all, if you order a latte you will get….milk. And if you order a mocha you will get…a withering stare. Not the end of the world, especially with all of the other types of coffee you can order, but sometimes I just want a mocha, ya know? I usually order my cappuccino with cocoa powder on top, but that’s not quite the same.

If I’ve learned anything living away from my home country, it’s that I will suddenly miss all the creature comforts of home, whether or not I appreciated or even liked them before. I do really like a good mocha. And somehow missing mochas has me thinking about this mocha punch, so here you go. The recipe for the best punch, that really keeps the party going!

Recipe adapted from a friend’s mama. :)


Mocha Punch

Serves about 20

Ingredients:

  • 3 quarts / 3 L freshly brewed strong coffee

  • 1 1/2 cups / 300g sugar

  • 2 quarts / 2 L milk

  • 3/4 cup / 240g chocolate syrup, try this homemade recipe!

  • 3 tsp vanilla extract

  • 1/2 gallon (8 cups) / 1 kg vanilla ice cream

Directions:

  1. Pour brewed coffee into a large pot, bowl, or other large container. Stir sugar into hot coffee until dissolved. Cool in fridge.

  2. Remove coffee from fridge and add milk, chocolate syrup, and vanilla and stir until well combined.

  3. Chill until cold or overnight.

  4. Just before serving, pour into serving container, mix briefly, and scoop ice cream into the punch, allowing the ice cream to melt for a few minutes before serving. (Skip this step if not serving as a punch.)

  5. Store in fridge.

Jenny’s Notes:

  • For an everyday mocha I reduce the sugar and milk, sometimes by up to half, as I usually drink my coffee black, and it makes it less indulgent.

  • You can substitute store-bought chocolate syrup for the homemade and use instant coffee instead of brewing, if you wish! I think the flavor will always be superior when you make things from scratch, or in this instance, use good, fresh coffee instead of instant!

  • Of course, you don’t have to use vanilla ice cream, you could use chocolate or moose tracks or hey, coffee ice cream!

  • When serving, you can choose to pour the whole recipe’s worth of punch into a punch bowl with ice cream, or, for smaller or longer parties, start with just a portion of the punch and ice cream, keeping the remainder in the fridge and freezer, respectively, so by the end the punch isn’t warm and the ice cream long melted.

  • This punch is easily stored in pitchers or empty milk jugs!

Mocha Punch
Yield 20
Author
Prep time
25 Min
Total time
25 Min

Mocha Punch

Sweet and creamy cold coffee punch with dollops of ice cream is great for gatherings and parties!
Cook modePrevent screen from turning off

Ingredients

Instructions

  1. Pour brewed coffee into a large pot, bowl, or other large container. Stir sugar into hot coffee until dissolved. Cool in fridge.
  2. Remove coffee from fridge and add milk, chocolate syrup, and vanilla and stir until well combined.
  3. Chill until cold or overnight.
  4. Just before serving, pour into serving container, mix briefly, and scoop ice cream into punch, allowing ice cream to melt for a few minutes before serving.
  5. Store in fridge.

Notes


  • You don’t have to use vanilla ice cream, you could use chocolate or moose tracks or heck, coffee ice cream! Whatever you like.
  • When serving, you can choose to pour the whole recipe’s worth of punch into a punch bowl with ice cream, or, for smaller or longer parties, start with just a portion of the punch and ice cream, keeping the remainder in the fridge and freezer, respectively, so by the end the punch isn’t warm and the ice cream long melted.
  • This punch is easily stored in pitchers or empty milk jugs!


Nutrition Facts

Calories

202.41

Fat

4.98 g

Sat. Fat

3.02 g

Carbs

33.94 g

Fiber

0.49 g

Net carbs

33.45 g

Sugar

26.31 g

Protein

5.27 g

Sodium

91.66 mg

Cholesterol

19.30 mg

Nutritional information is approximate. Calculated including vanilla ice cream

mocha, mocha punch, party coffee chocolate punch, iced coffee drink
drink
American
Did you make this recipe?
Tag @jennyblogsandbakes on instagram and hashtag it #jennyblogs
2018-12-29+15.44.21-2.jpg

Chocolate Sauce

Photo Public Domain https://creativecommons.org/licenses/by-sa/3.0/at/deed.en Permission: Sammlung J.P. Adlbrecht

Photo Public Domain https://creativecommons.org/licenses/by-sa/3.0/at/deed.en Permission: Sammlung J.P. Adlbrecht

Last Updated August 15, 2024

This post contains affiliate links. If you buy something using these links, Jennyblogs may receive a small commission, at no extra cost to you. This helps to support Jennyblogs. For further information see the privacy policy. Grazie!

Classic. Quintessential. Chocolatey. Good on everything, from your morning pancakes and coffee to ice cream and that cake you just made. Or ya know, by the spoonful. Just a spoonful of…I’ll let you sing the rest yourself. ;)

What is it? Chocolate Sauce! Or chocolate syrup, as you prefer. No more Hershey’s in a bottle, or going without if you live outside the USofA. It’s so easy you’ll wonder why you never made it before. No high fructose corn syrup involved!

Recipe from my Mama


Chocolate Sauce

Makes about 3/4 cup of sauce

Ingredients:

  • 3/4 cup / 150g sugar

  • 1/3 cup / 33g unsweetened cocoa powder

  • 1 Tbsp / 7.5g cornstarch

  • 1/2 cup / 118g water

  • 1 tsp vanilla

Directions:

  1. Combine sugar, cocoa, and cornstarch in a small saucepan.

  2. Add water and whisk until there are no cornstarch lumps.

  3. Cook over medium heat, stirring constantly, until mixture boils. Reduce heat to low and boil for 5 minutes, continuing to stir.

  4. Remove from heat and add vanilla. Cool.

  5. Store in an airtight container in the refrigerator.

Jenny’s Notes:

  • The better quality your cocoa powder the better your sauce will taste!

  • Keeps well in the fridge.

Chocolate Sauce
Yield 12
Author
Prep time
5 Min
Cook time
10 Min
Total time
15 Min

Chocolate Sauce

A basic chocolate sauce for ice cream topping, drizzling, mixing in coffee, and anything you need chocolate sauce for!
Cook modePrevent screen from turning off

Ingredients

Instructions

  1. Combine sugar, cocoa, and cornstarch in a small saucepan.
  2. Add water and whisk until there are no lumps.
  3. Cook over medium heat, stirring constantly, until mixture boils. Reduce heat to low and boil for 5 minutes, continuing to stir.
  4. Remove from heat and add vanilla. Cool.
  5. Store in an airtight container in the refrigerator.

Notes

The better quality your cocoa powder the better your sauce will taste! Keeps well in the fridge.

Nutrition Facts

Calories

63.04

Fat

0.27 g

Sat. Fat

0.00 g

Carbs

14.76 g

Fiber

0.56 g

Net carbs

14.21 g

Sugar

12.52 g

Protein

0.55 g

Sodium

0.61 mg

Cholesterol

0.00 mg

Nutritional information is approximate.

Hershey's chocolate sauce, ice cream topping, hot fudge sundae sauce, chocolate sauce
dessert, sauce, topping
American
Did you make this recipe?
Tag @jennyblogsandbakes on instagram and hashtag it #jennyblogs

The Fluffiest Key Lime Pie with a Gingersnap Crust

2018-12-20 14.16.59.jpg

Fluffy? Isn’t key lime pie supposed to be creamy, custardy, silken? Yes! And this recipe is all of those things but with a special touch of fluffiness, thanks to our friends the egg whites. Whipped egg whites. It’s magical. And with Easter just around the corner, this is the perfect dessert to celebrate with! I even gave you two weeks time to plan ahead, aren't I nice?

I don’t know why I always want to make citrus desserts for Easter, maybe because it’s always in the spring. And in the spring everything is coming alive, the rebirth of nature, and calls for bright, happy citrus flavors. You can’t call citrus sad. And what is Easter but the celebration of the resurrection of Jesus, giving those who believe on Him new life? The celebration of rebirth. It all fits. Not to mention if you observe Lent, getting to eat what you gave up for 6 weeks is lovely.

And whether you have a big Easter meal planned or not, you’re going to want to make this pie. And if you’ve never made key lime pie before? This is not a bad place to start. Just be warned that other key lime pies after this one might be…tame.

This post may contain affiliate links. If you buy something using these links, Jennyblogs may receive a small commission, at no extra cost to you. This helps to support Jennyblogs. For further information see the privacy policy. Grazie!

Recipe adapted from the Williams-Sonoma cookbook Savoring America


The Fluffiest Key Lime Pie with a Gingersnap Crust

Serves 8-12

2018-12-20+14.27.07.jpg

Ingredients:

For the Gingersnap Crust

  • 28 gingersnaps broken into pieces, about 1 1/2in / 4cm in diameter (homemade or storebought)

  • 1/2 cup / 60g chopped pecans

  • 1 Tbsp / 15g chopped crystallized ginger

  • 1/8 tsp ground cinnamon

  • 1/4 cup / 57g butter, melted and cooled

For the Filling

  • 4 eggs, separated

  • 1/4 cup / 30g cornstarch

  • 1/2 cup / 100g sugar

  • 1 14oz can / 440g sweetened condensed milk, make it homemade here

  • 1/2 cup / 118g key lime juice

  • 2 Tbsp / 12g freshly grated key lime zest

  • 1/2 tsp cream of tartar

  • 1 tsp vanilla extract

For the Topping and Garnish

  • 1 cup / 237g heavy whipping cream

  • 1/3 cup / 42g confectioner’s sugar

  • 1/8 tsp almond extract

  • thin key lime slices or lime zest, optional

Directions:

Oven 350°F / 177°C. Lightly grease a 9in / 23cm pie dish.

Make the Gingersnap Crust

  1. In a food processor, combine the gingersnaps, pecans, ginger, and cinnamon. Pulse until everything is finely ground in crumbs. Add the butter and pulse briefly until the crumbs are evenly moistened.

  2. Press evenly into the bottom and up the sides of the prepared pie dish. Bake in the preheated oven for 10 minutes or until fragrant and lightly browned. (This can be hard to see because of the dark color of the gingersnaps.) Allow to cool.

Make the Filling

  1. In the bowl of a stand mixer fitted with the whisk attachment, beat 2 egg whites and the cream of tartar on high speed until soft peaks form and can hold their shape, about 1-2 minutes. Beat in the vanilla and scrape the egg whites into a small bowl; set aside.

  2. In the bowl of the stand mixer (no need to clean it), beat on medium-high speed the egg yolks, 2 remaining egg whites, cornstarch, sugar, and sweetened condensed milk until light and fluffy, about 5 minutes. Add lime juice and zest and beat until smooth.

  3. Gently fold 1/3 of the egg white mixture into the lime mixture to lighten. Add the rest of the egg whites and fold just until combined.

  4. Pour the filling into the cooled pie crust, smooth the top with a spatula. Bake until just firm, about 20 minutes. To test for firmness, jiggle the dish slightly. When the center jiggles just slightly, it’s ready.

  5. Cool completely, then cover and refrigerate for at least 4 hours or overnight.

Make the Topping

  1. In the bowl of a stand mixer, beat the heavy whipping cream on medium speed. As it starts to thicken (and will no longer splatter) increase the speed to high. Add the powdered sugar and almond extract. Continue beating until firm peaks form, about 2-4 minutes total.

  2. Spoon whipped cream over pie or use a piping bag and tips to decorate. Garnish with lime slices/and or zest. Serve immediately or refrigerate.

Jenny’s Notes:

  • The crust can be made without the pecans and/or ginger, if you’re like me and sometimes feel too lazy to chop things!

  • Freshly squeezed key lime juice is best, but if you’ve ever used real key limes you’ll know that getting half a cup can be a real labor of love. Those things can be tiny! Hand cramp hand cramp hand cramp. And just when you think you’re there, you realize you’ve only squeezed 1 Tbsp worth. So, I gladly buy bottled key lime juice.

  • If you can’t find fresh key limes or juice, use limes! And I suppose, lemons if you’re in a pinch. Lemon pies are good too! Same goes for the zest.

  • No food processor handy? Do it the old fashioned way and stick the cookies in a resealable plastic bag and whack and roll with a rolling pin. The pecans and ginger can be finely chopped by hand.

The Fluffiest Key Lime Pie with a Gingersnap Crust
Yield 8-12 servings
Author
Prep time
50 Min
Cook time
30 Min
Total time
1 H & 20 M

The Fluffiest Key Lime Pie with a Gingersnap Crust

Classic key lime pie with a twist. Tart filling made extra light and fluffy by whipping the egg whites, a spicy gingersnap crust, and fresh whipped cream.
Cook modePrevent screen from turning off

Ingredients

For the Gingersnap Crust
For the Filling
For the Topping and Garnish

Instructions

Make the Gingersnap Crust
  1. Oven 350°F / 177°C. Lightly greased 9in / 23cm pie dish.
  2. In a food processor, combine the gingersnaps, pecans, ginger, and cinnamon. Pulse until everything is finely ground in crumbs. Add the butter and pulse briefly until the crumbs are evenly moistened.
  3. Press evenly into the bottom and up the sides of the prepared pie dish. Bake in the preheated oven for 10 minutes or until fragrant and lightly browned. (This can be hard to see because of the dark color of the gingersnaps.) Allow to cool.
Make the Filling
  1. In the bowl of a stand mixer fitted with the whisk attachment, beat 2 egg whites and the cream of tartar on high speed until soft peaks form, about 1-2 minutes. Beat in the vanilla and scrape the egg whites into a small bowl; set aside.
  2. In the bowl of the stand mixer (don’t worry about cleaning it), beat on medium-high speed the egg yolks, 2 remaining egg whites, cornstarch, sugar, and sweetened condensed milk until light and fluffy, about 5 minutes. Add the lime juice and zest and beat until smooth.
  3. Gently fold 1/3 of the egg white mixture into the lime mixture to lighten. Add the rest of the egg whites and fold just until combined.
  4. Pour the filling into the cooled pie crust, smooth the top with a spatula. Bake until just firm, about 20 minutes. To test for firmness, jiggle the dish slightly. When the center jiggles just slightly, it’s ready.
  5. Cool completely, then cover and refrigerate for at least 4 hours or overnight.
Make the Topping
  1. In the bowl of a stand mixer, beat the heavy whipping cream on medium speed. As it starts to thicken (and will no longer splatter) increase the speed to high. Add the powdered sugar and almond extract. Continue beating until stiff peaks form, about 2-4 minutes total.
  2. Spoon whipped cream over pie or use a piping bag and tips to decorate. Garnish with lime slices/and or zest. Serve immediately or refrigerate.

Notes

The crust can be made without the pecans and/or ginger, if you’re like me and sometimes feel too lazy to chop things! Freshly squeezed key lime juice is best, but if you’ve ever used real key limes you’ll know that getting half a cup can be a real labor of love. Those things can be tiny! Hand cramp hand cramp hand cramp. And just when you think you’re there, you realize you’ve only squeezed 1 Tbsp worth. So, I gladly buy bottled key lime juice. If you can’t find fresh key limes or juice, use limes! And I suppose, lemons if you’re in a pinch. Lemon pies are good too! Same goes for the zest. No food processor handy? Do it the old fashioned way and stick the cookies in a resealable plastic bag and whack and roll with a rolling pin. The pecans and ginger can be finely chopped by hand.

Nutrition Facts

Calories

590.80

Fat

29.69 g

Sat. Fat

14.77 g

Carbs

76.33 g

Fiber

1.88 g

Net carbs

74.45 g

Sugar

55.81 g

Protein

8.28 g

Sodium

256.68 mg

Cholesterol

90.75 mg

Nutritional information is approximate. Based on 8 servings.

key lime pie, gingersnap crust, fluffy pie, whipped cream
Dessert, Pie
American
Did you make this recipe?
Tag @jennyblogsandbakes on instagram and hashtag it #jennyblogs
2018-12-20 14.14.52-2.jpg

Pumpkin Pudding

IMG_5018.JPG

Last updated August 14, 2024

Pumpkin Pudding is a classic, easy fall recipe in my family. It’s like pumpkin pie, but without all the fuss of the crust. This is great to make in the time leading up to Thanksgiving, because you’re not ruining your appetite for pumpkin pie (you can’t call it pie if it doesn’t have a crust, therefore, totally different) while not wasting time NOT eating pumpkin. Bonus that it’s incredibly easy to whip up.

Fall is coming fall is coming! I love the changing of seasons and the different nostalgias and expectations that come with each season. Living in Italy, the nostalgia is a little bit stronger. Autumn is still autumn, but the changes are a little less distinct, and the comfort of knowing where to pick out the best pumpkins and buy the best apple cider is not something that really exists here. Pumpkins will be few and far between, unless you’re lucky enough to stumble upon some markets that have the mini gourds; apple cider is practically nonexistent; trick-or-treating happens, but most Italians wear scary costumes instead of characters; the leaf change is not the brilliant red, orange, and yellows like in Michigan, but more of a subtle green-to-yellow with the occasional leaves fluttering down. Despite the differences with what I grew up with, there are still oodles of things I love to do to make my home fall-y and to welcome the chilly evenings. Lighting candles, brewing tea, pulling out the fuzzy socks and sweaters (even if I’d be sweating if I actually tried to wear them yet) and baking and eating lots of fall goodies that include pumpkin, cinnamon, spices, breads, soups, and all the hearty autumn recipes.

This post may contain affiliate links. If you buy something using these links, Jennyblogs may receive a small commission, at no extra cost to you. This helps to support Jennyblogs. For further information see the privacy policy. Grazie!

Recipe from my mama


Pumpkin Pudding

IMG_5023.JPG

Serves: 4-6

Ingredients:

  • 15 oz / 425g pumpkin purée

  • 2/3 cup / 132g sugar

  • 1/2 tsp / 2.5g salt

  • 1 tsp / 5g cinnamon

  • 1/2 tsp / 2.5g ginger

  • 1/4 tsp / 1g cloves

  • 1 cup / 237g milk of choice

Directions:

Oven 375°F / 190°C. Lightly grease an 8x8in / 20x20cm baking pan.

  1. Mix all ingredients in a bowl until smooth.

  2. Pour into prepared pan; bake for 20-25 minutes in preheated oven until edges are bubbling.

Jenny’s Notes:

  • To dress this lovely and simple dessert up you can top it with confectioner’s sugar or crumbled cookies such as shortbread or Nilla Wafers, or serve with ice cream and/or whipped cream.

  • This recipe is gluten free, vegan (if you use a milk substitute like coconut or almond), and probably many of the other diet fads that I can’t quite keep track of. Eat up!

Pumpkin Pudding
Yield 4-6
Author
Prep time
10 Min
Cook time
25 Min
Total time
35 Min

Pumpkin Pudding

Like pumpkin pie but without the hassle of the crust. Gluten-free and can easily be made vegan.
Cook modePrevent screen from turning off

Ingredients

Instructions

  1. Oven 375F / 190C. Lightly greased 8x8in / 20x20cm baking pan.
  2. Mix all ingredients in a bowl until smooth.
  3. Pour into prepared pan; bake for 20-25 minutes in preheated oven until edges are bubbling.

Notes

To dress this lovely and simple dessert up you can top it with confectioner’s sugar or crumbled cookies such as shortbread or Nilla Wafers, or serve with ice cream and/or whipped cream.This recipe is gluten free, vegan (if you use a milk substitute like coconut or almond), and probably many of the other diet fads that I can’t quite keep track of. Eat up!

Nutrition Facts

Calories

198.32

Fat

1.49 g

Sat. Fat

0.88 g

Carbs

45.81 g

Fiber

3.85 g

Net carbs

41.97 g

Sugar

36.49 g

Protein

3.31 g

Sodium

279.59 mg

Cholesterol

4.74 mg

Nutritional information is approximate. Based on 4 servings.

crustless pumpkin pie, no crust pumpkin pie, pumpkin pudding, pumpkin pie, Thanksgiving dessert, fall dessert, easy pumpkin dessert, vegan, gluten free
dessert
American
Did you make this recipe?
Tag @jennyblogsandbakes on instagram and hashtag it #jennyblogs
The slowly melting confectioner’s sugar…

The slowly melting confectioner’s sugar…