Ganache Coconut Cream Pie Bars

Last Updated October 8, 2024

Oh my gosh! Ganache. Yes, coconut cream pie is delicious.  So are Almond Joys and Mounds.  So why not put them together, add a shortbread crust, put them in the slightly less formidable to cut bar form instead of pie, and voila: Ganache Coconut Cream Pie Bars. 

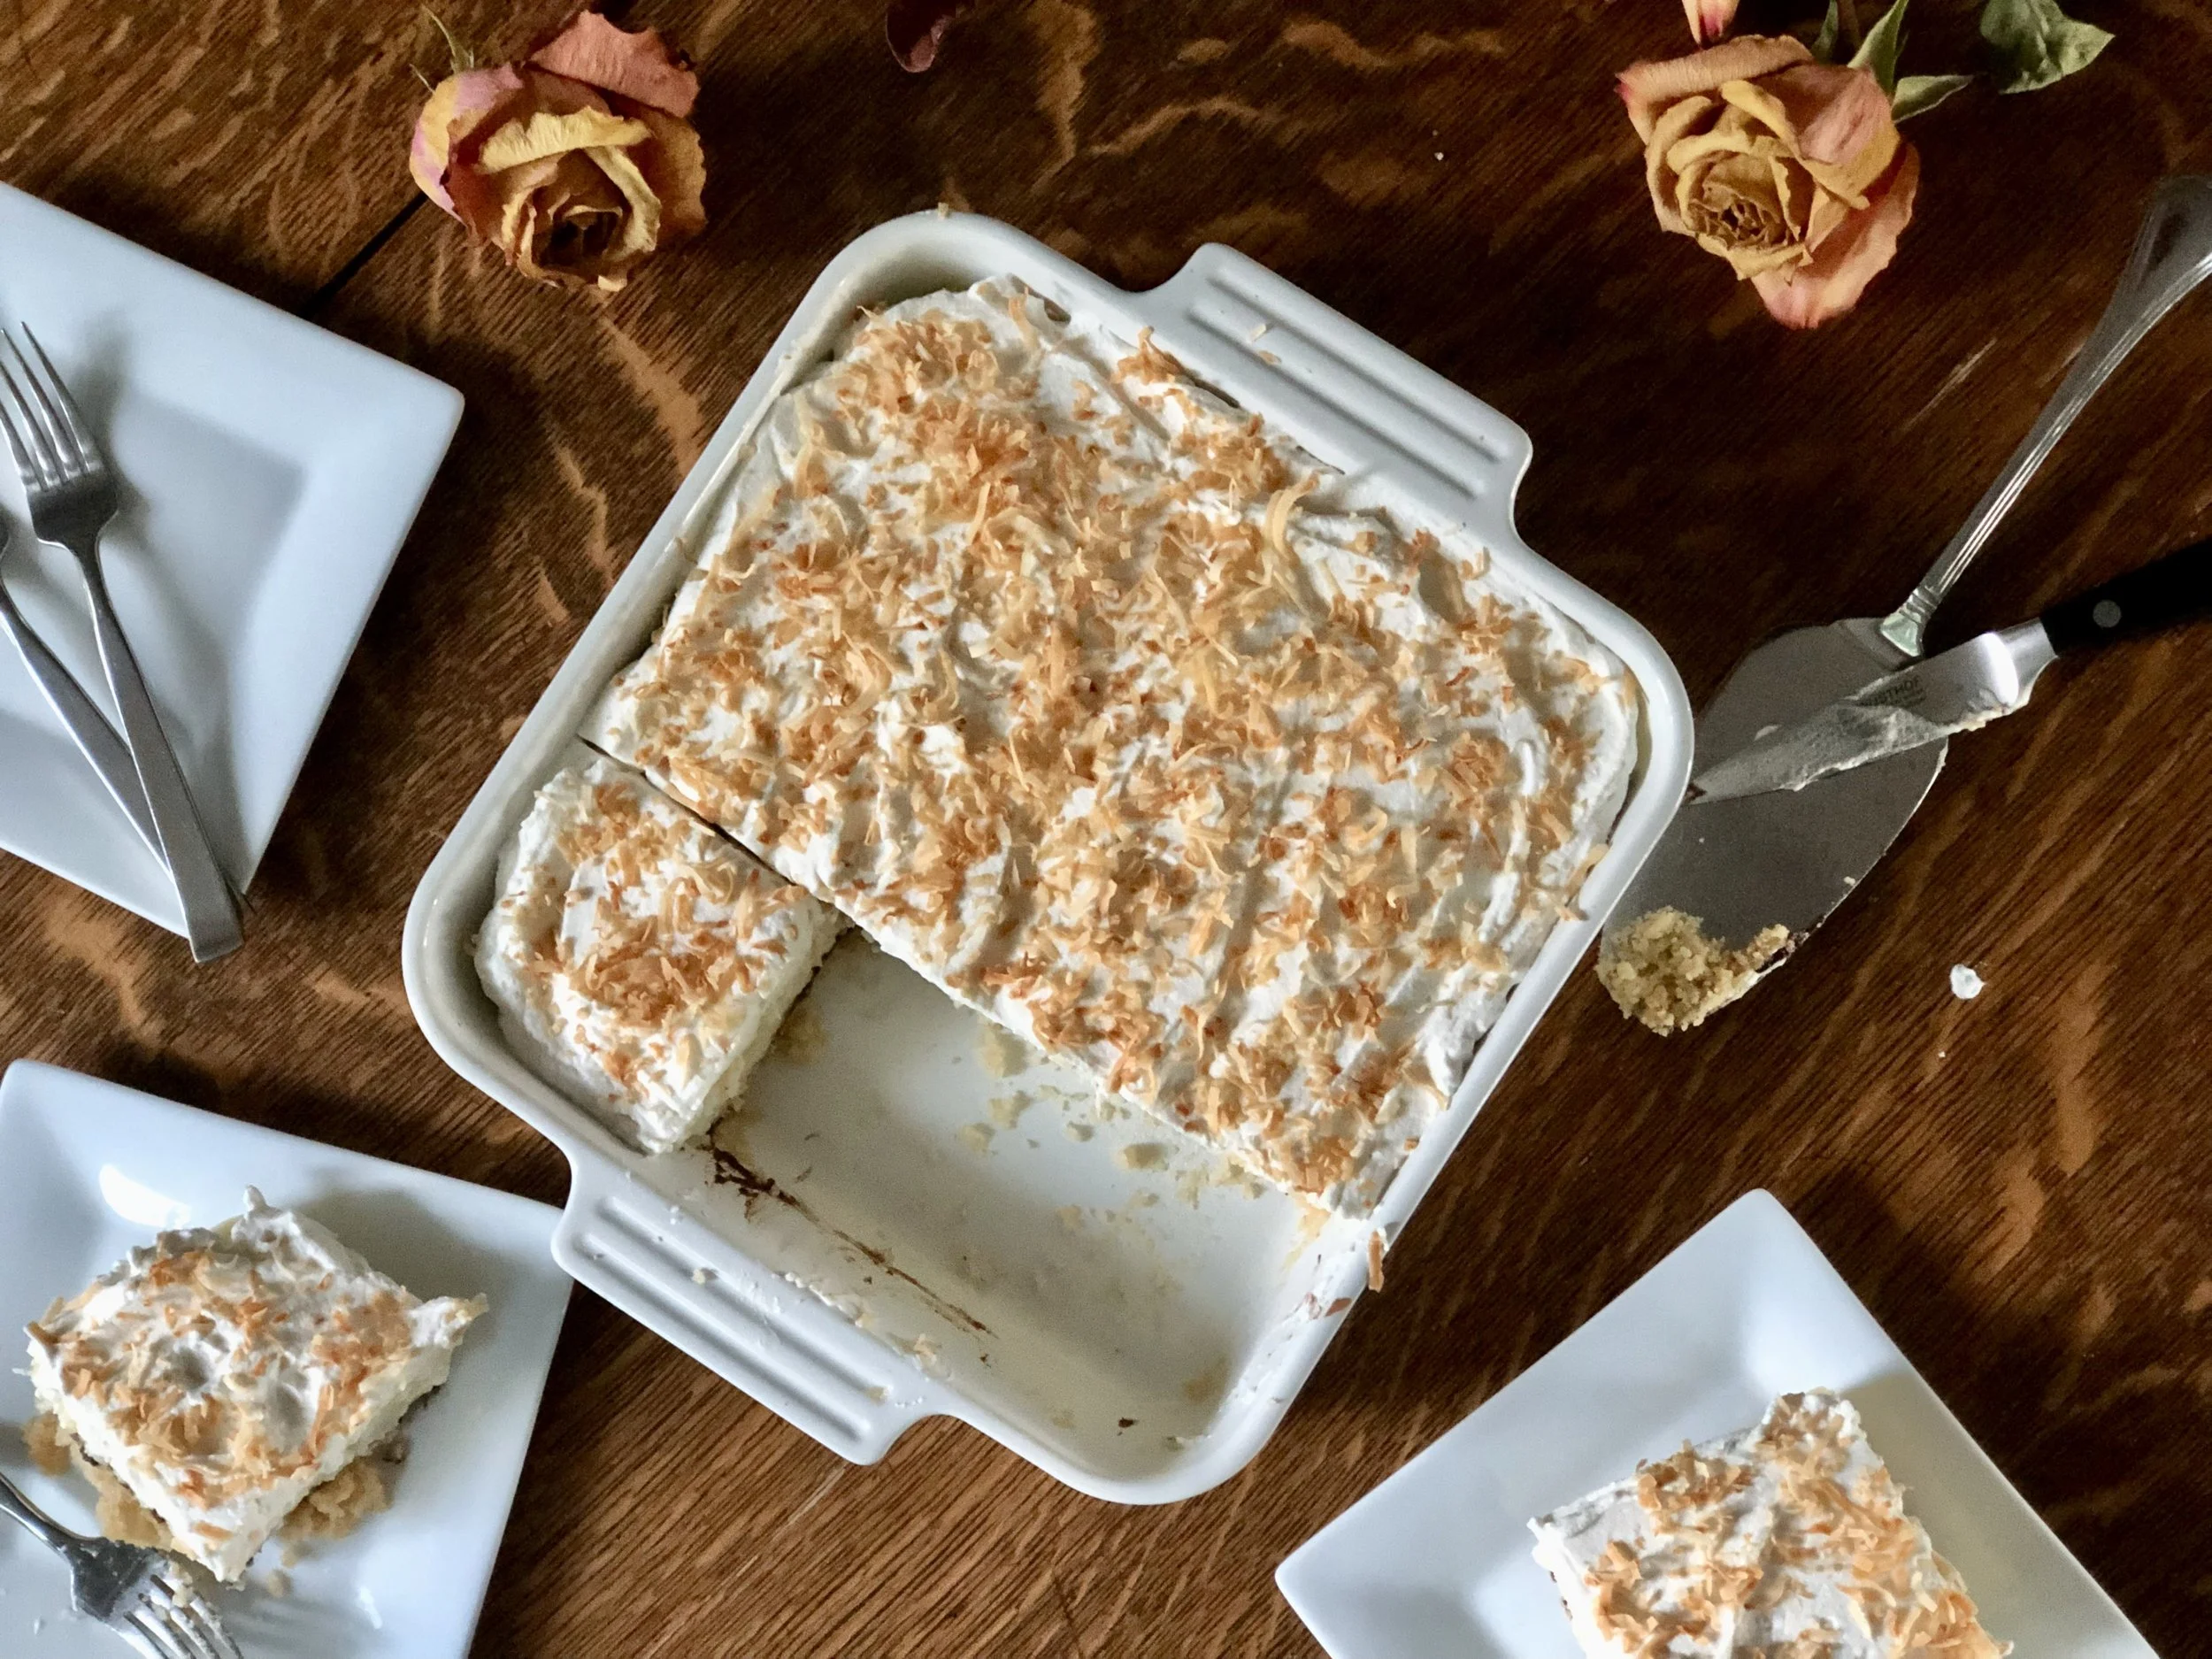
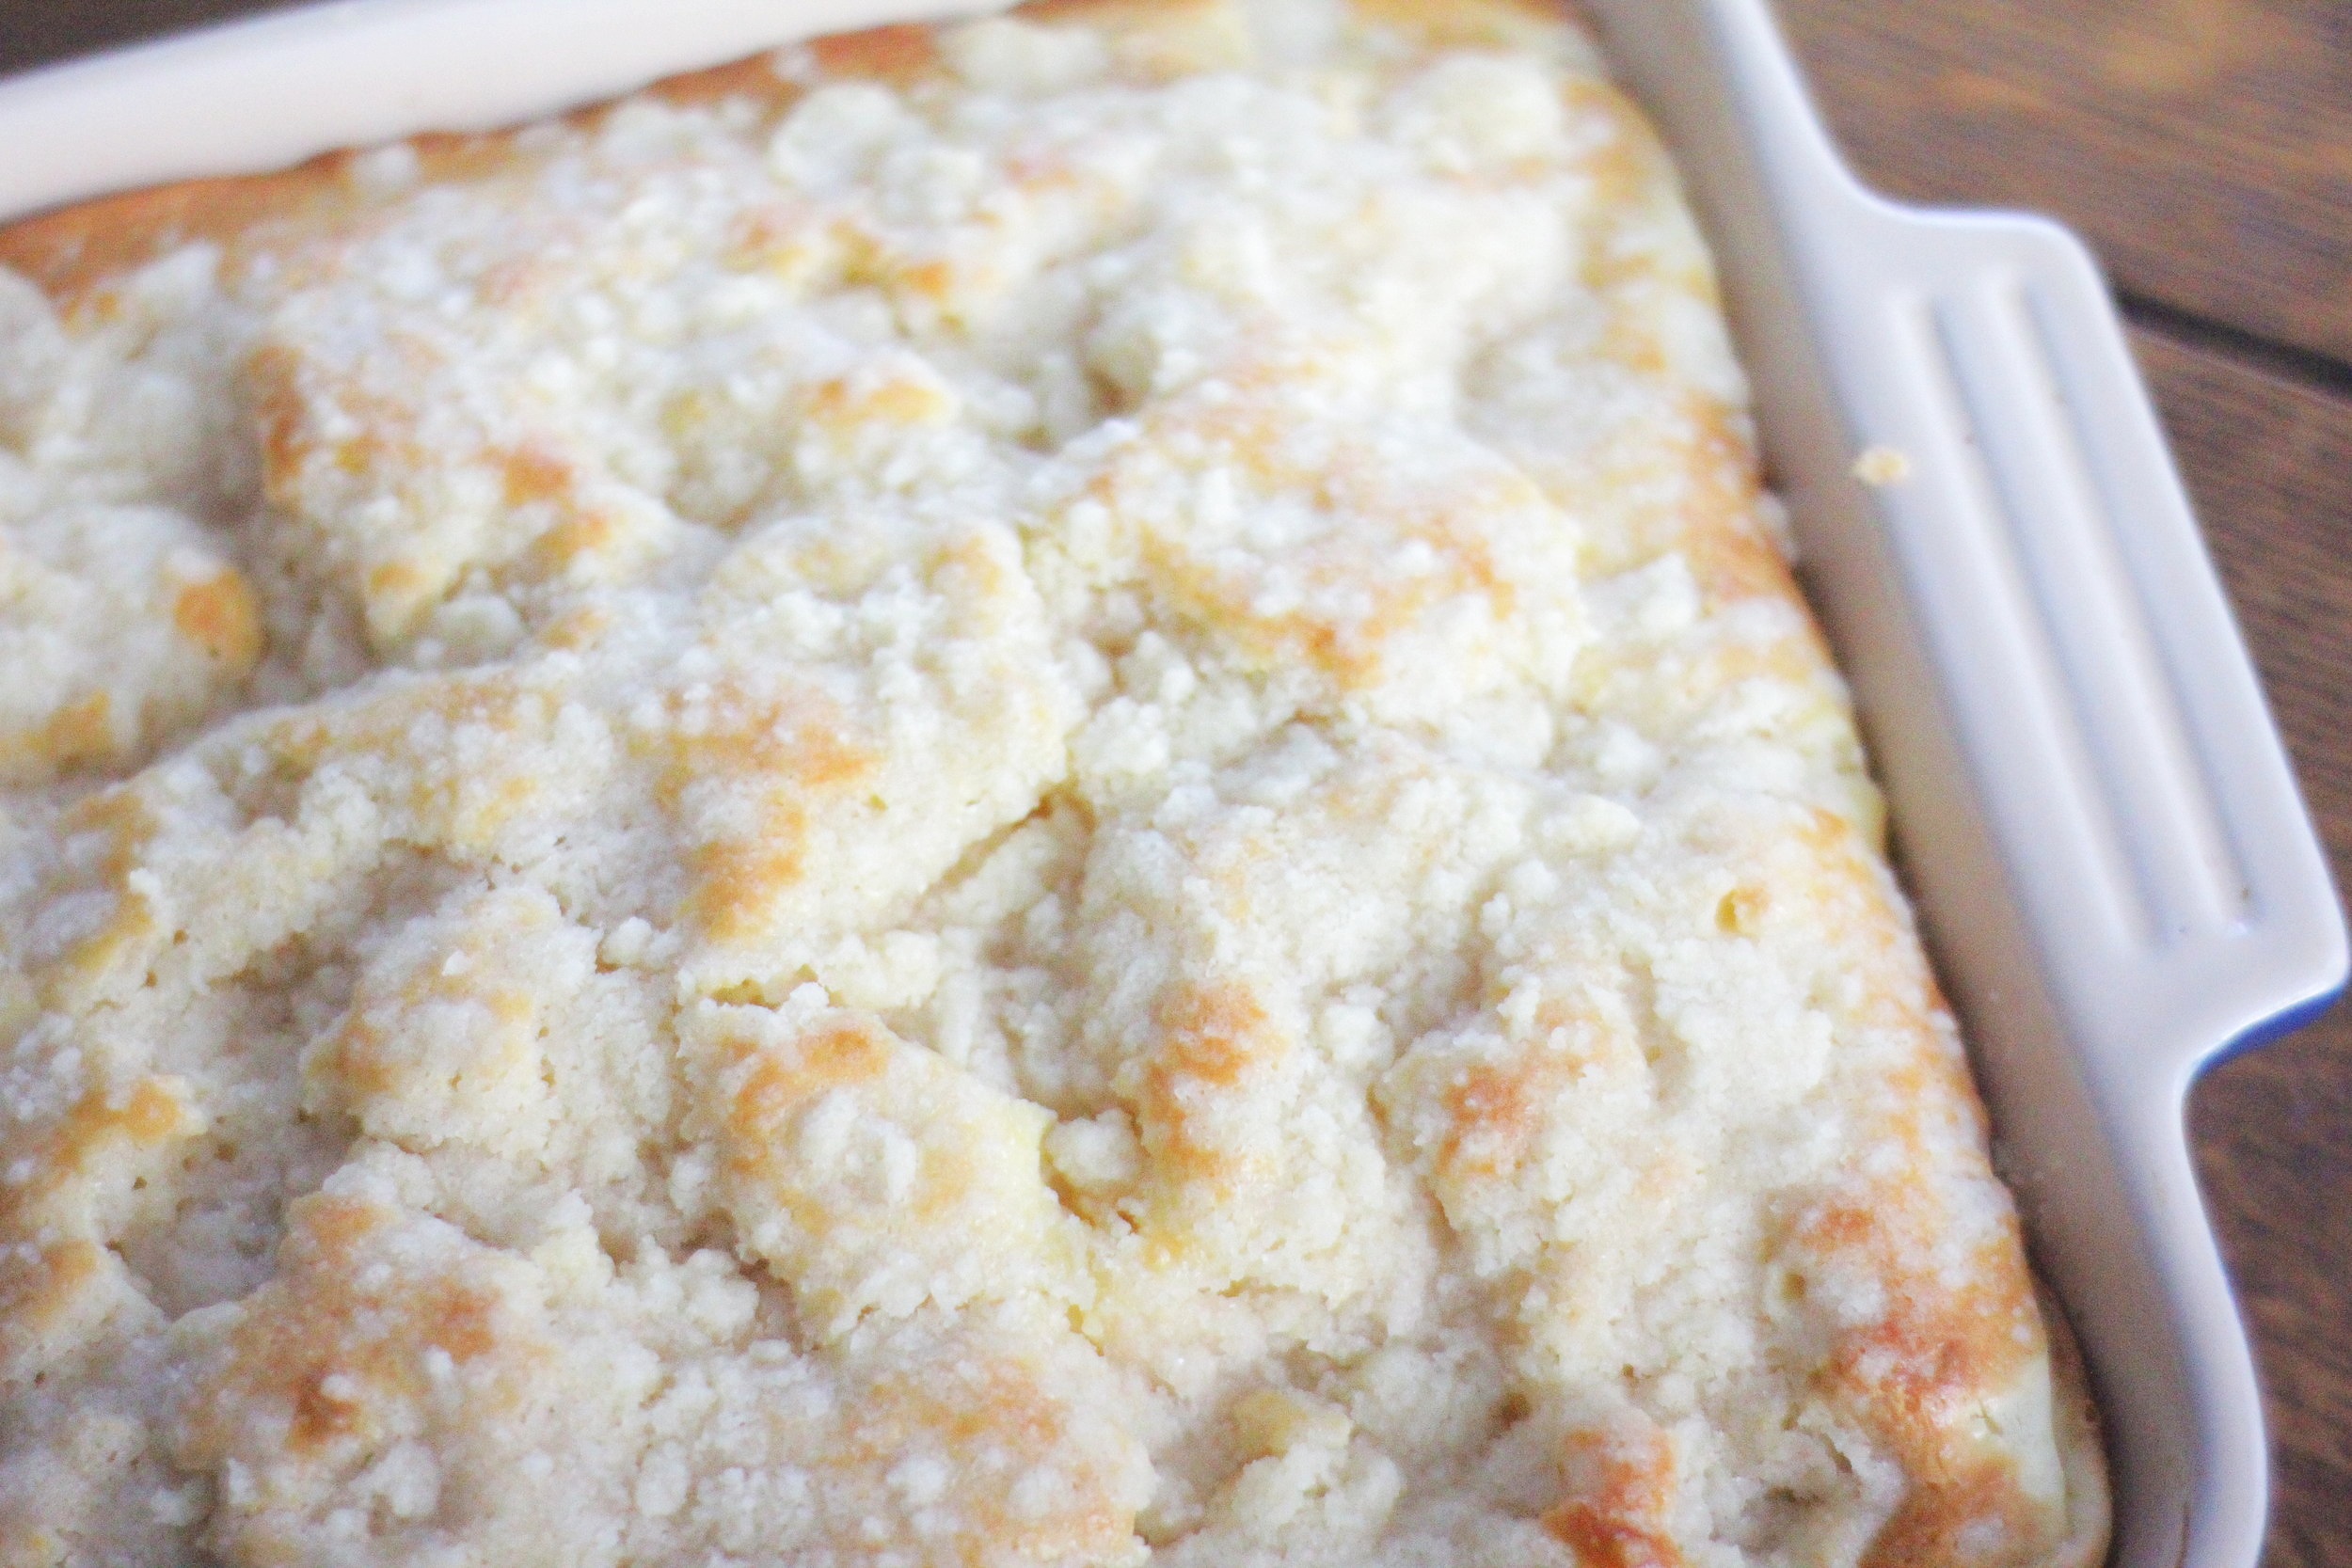
These bars are slightly involved, but the end product is very worthwhile.  Not to mention, you can make an 8x8 pan worth of bars, or 9x13!  I almost always go the 9x13 route.  This has become a favorite for Christmas, my mom's birthday, and just about any occasion that a little creamy coconut and chocolate is welcome.  As what seems to be turning into a trend, I failed to get any kind of decent photo of the inside, so for now, (or maybe forever...once these are cut into you'll understand why photos never get taken) please enjoy the photos of the whipped cream and toasted coconut topping.  If you'd like an idea of what bliss you're getting in to, take a peak over at Willow Bird Baking, from whom I adapted the recipe, and see her beautiful photos! 


Ganache Coconut Cream Pie Bars

Makes about 20 servings

Ingredients:

For the Shortbread Crust

  • 1 cup (2 sticks) / 226g cold butter

  • 2 cups / 240g all-purpose flour

  • 1/2 cup / 100g sugar

For the Ganache

  • 1/4 cup + 2 Tbsp / 87g heavy whipping cream

  • 6 oz (1 cup) / 175g bittersweet or semisweet chocolate, chopped, or chips

For the Coconut Cream Filling

  • 6 cups / 1,422g unsweetened coconut milk or milk of choice

  • 4 eggs

  • 1 1/2 cups / 300g sugar

  • 2/3 cup / 73g cornstarch

  • 1/2 tsp / 2.5g salt

  • 1 1/2 cups / 150g flaked unsweetened coconut

  • 1/2 tsp / 2.5g coconut extract

  • 1/2 tsp / 2.5g vanilla extract

For the Whipped Cream Topping

  • 2 cups / 464g heavy whipping cream

  • 1/2 cup / 100g sugar

  • 1 tsp / 5g vanilla extract

  • 1/2 cup / 50g flaked unsweetened coconut, toasted (see below)

Directions:

Oven 350°F / 177°C.  Ungreased 9x13in / 23x33cm baking dish.

Make the Shortbread Crust

  1. Cut the butter into flour and sugar using a fork, pastry cutter, or in a food processor.  Once the mixture resembles coarse sand and the butter chunks are no larger than small peas, press mixture evenly into bottom prepared pan. 

  2. Bake for 18-22 minutes until lightly golden-brown.  Set aside to cool.  Leave oven on for toasting the coconut.

Make the Ganache

  1. While the crust is baking, prepare the ganache.  Place the chocolate in a medium bowl and the cream in a small saucepan.  Over medium-low heat, bring the cream to a simmer.  You can also use the microwave, 30 seconds-1 minute or until cream is just simmering, but not boiling.  

  2. Pour the cream over the chocolate and let sit for 1-2 minutes to melt the chocolate.  Whisk until completely smooth.  

  3. Once the crust is finished and partly cooled, pour ganache evenly over crust.  Place in fridge to set.   

Toast the Coconut

Place the 1/2 cup coconut for the topping in a shallow baking dish.  Place in oven and stir every 1-2 minutes, making sure it doesn't over-brown, for a total of 5-10 minutes.  Remove and let cool.

Make the Coconut Cream Filling

  1. Combine milk, eggs, sugar, cornstarch, and salt in a large saucepan. 

  2. Place over medium heat, whisking constantly, until mixture begins to thicken and comes to a boil.  This can take anywhere from 15-35 minutes, depending on your stove.

  3. Once thickened, remove from heat and stir in coconut and both extracts.  

  4. Remove crust from fridge and pour filling over crust.  Place back in fridge to set, 2-4 hours.  

Make the Whipped Cream Topping

  1. Whip the cream and sugar in the bowl of a stand mixer or with a handheld mixer until stiff peaks form.

  2. Spoon over chilled bars, or pipe.  Finish with toasted coconut.  Store in fridge.  

Jenny's Notes:

  • Because the ganache in this recipe is not decorative, you can easily substitute coconut milk or another kind for the heavy whipping cream. I prefer using coconut milk, reducing the amount of fat/calories. Save those for when you need the high-shine perfect ganache!

  • If you only have sweetened coconut milk or sweetened flaked coconut on hand, go ahead and use those. Simply reduce the sugar by about 1/4-1/2 cup / 50-100g in the filling, if you wish. I prefer to have unsweetened coconut on hand so I can control how much sugar I'm adding to breakfasts, desserts, etc., plus I like the smaller size of flaked and grated coconut vs. shredded.

  • For toasting coconut, and every use really, I highly recommend Le Creuset pans. My toasted coconut used to always come out in various shades, but since using Le Creuset it always turns out a beautiful even, golden-brown. They conduct heat evenly and beautifully.

  • If a 9x13 pan of coconut cream heaven seems daunting to you, it's super easy to halve this recipe for a 8x8 or 9x9in pan!

  • These bars should ideally be eaten within 3-4 days. Otherwise the whipped cream starts to separate and the crust gets soggy.

Ganache Coconut Cream Pie Bars
Yield 20
Author
Prep time
1 H & 45 M
Cook time
32 Min
Total time
2 H & 17 M

Ganache Coconut Cream Pie Bars

Shortbread crust, a thin layer of ganache, classic coconut cream pie filling, all topped with fresh whipped cream and toasted coconut.
Cook modePrevent screen from turning off

Ingredients

For the Shortbread Crust
For the Ganache
For the Coconut Cream Filling
For the Whipped Cream Topping

Instructions

Make the Shortbread Crust
  1. Oven 350°F / 177°C. Ungreased 9x13in / 23x33cm baking dish.
  2. Cut the butter into flour and sugar using a fork, pastry cutter, or in a food processor. Once the mixture resembles coarse sand and the butter chunks are no larger than small peas, press mixture evenly into bottom prepared pan.
  3. Bake for 18-22 minutes until lightly golden-brown. Set aside to cool. Leave oven on for toasting the coconut.
Make the Ganache
  1. While the crust is baking, prepare the ganache. Place the chocolate in a medium bowl and the cream in a small saucepan. Over medium-low heat, bring the cream to a simmer. You can also use the microwave, 30 seconds-1 minute or until cream is just simmering, but not boiling.
  2. Pour the cream over the chocolate and let sit for 1-2 minutes to melt the chocolate. Whisk until completely smooth.
  3. Once the crust is finished and partly cooled, pour ganache evenly over crust. Place in fridge to set.
Toast the Coconut
  1. Place the 1/2 cup coconut for the topping in a shallow baking dish. Place in oven and stir every 1-2 minutes, making sure it doesn't over-brown, for a total of 5-10 minutes. Remove and let cool.
Make the Coconut Cream Filling
  1. Combine milk, eggs, sugar, cornstarch, and salt in a large saucepan.
  2. Place over medium heat, whisking constantly, until mixture begins to thicken and comes to a boil. This can take anywhere from 15-35 minutes, depending on your stove.
  3. Once thickened, remove from heat and stir in coconut and vanilla extracts.
  4. Remove crust from fridge and pour filling over crust. Place back in fridge to set, 2-4 hours.
Make the Whipped Cream Topping
  1. Whip the cream and sugar in the bowl of a stand mixer or with a handheld mixer until stiff peaks form.
  2. Spoon over chilled bars, or pipe. Finish with toasted coconut. Store in fridge.

Notes

Because the ganache in this recipe is not decorative, you can easily substitute coconut milk or another kind for the heavy whipping cream. I prefer using coconut milk, reducing the amount of fat/calories. Save those for when you need the high-shine perfect ganache!If you only have sweetened coconut milk or sweetened flaked coconut on hand, go ahead and use those. Simply reduce the sugar by about 1/4-1/2 cup / 50-100g in the filling, if you wish. I prefer to have unsweetened coconut on hand so I can control how much sugar I'm adding to breakfasts, desserts, etc., plus I like the smaller size of flaked and grated coconut vs. shredded.For toasting coconut, and every use really, I highly recommend Le Creuset pans. My toasted coconut used to always come out in various shades, but since using Le Creuset it always turns out a beautiful even, golden-brown. They conduct heat evenly and beautifully.If a 9x13 pan of cream coconut heaven seems daunting to you, it's super easy to halve this recipe for an 8x8 or 9x9in pan!These bars should ideally be eaten within 3-4 days. Otherwise the whipped cream starts to separate and the crust gets soggy.

Nutrition Facts

Calories

446.04

Fat

30.59 g

Sat. Fat

21.07 g

Carbs

41.54 g

Fiber

2.52 g

Net carbs

39.02 g

Sugar

26.41 g

Protein

4.58 g

Sodium

152.00 mg

Cholesterol

92.63 mg

Nutritional information is approximate. Based on 20 servings.

Coconut Cream pie, bars, shortbread, chocolate ganache, fresh whipped cream, toasted coconut
Dessert, Pie, bars
American
Did you make this recipe?
Tag @jennyblogsandbakes on instagram and hashtag it #jennyblogs

Classic Tiramisù: The Real Deal.

IMG_4530.jpg

As in, I could just copy and paste the original recipe in Italian, and we could all follow the pretty pictures to make it.  That doesn't sound very reliable to me, so I shall do my best to translate it.  Maybe also not very reliable. My point is, this is a good, sound, Italian written recipe of Tiramisù.  Raw eggs, real mascarpone (pronounced mas-car-pohn-AY no matter what those chefs on Food Network say.  I cry a little on the inside when people insist on saying mars-cah-pone.  There is no R before the C. Mas-car-pone is acceptable, as that would be how to say it in English.  But deep down we all want to be a bit more Italian, no?) no cream cheese involved.  It's so simple, and the ingredients are few. Mascarpone can be quite expensive in the States, which is why many substitute cream cheese, but it is so worth the splurge.  If you do feel the need to use cream cheese, (I don't know, maybe your 3 year-old wants tiramisù for a birthday party of 50??) then maybe don't call it tiramisù, call it something else.  Tiramigiù, maybe.  :)

Just like any replication, it will never be as good as in the place where it was founded and crafted and came to fame.  Some of the best mascarpone will be found here in Italy, and at much cheaper costs.  In fact, it's cheaper than cream cheese. Even if you take the exact same method and make mascarpone in another country, those cows will be different cows, who eat different sustenance, and produce milk that tastes different .  Not to mention if the first time you ever tried tiramisù was on your first trip to Italy, surrounded by cobblestone streets, freshly hung laundry on the corner, magnificent old buildings, and the too-loud Italian conversations and even louder hand gestures whirling about, that is something very hard to replicate in anywhere but Italy.  

That said, this is the best recipe for Tiramisù I have yet found.  No, it's not from a wonderful Italian nonna (grandma) I know from down the street or a recipe handed down for generations in one of my friend's families, but I did listen to a podcast once in Italian where a girl was making tiramisù with a nonna and it was essentially the same as the one I'm about to share with you. That counts, right? Ok, andiamo! (Let's go!) 

This post may contain affiliate links. If you make a purchase using these links, Jennyblogs may receive a small commission, at no extra cost to you. This helps to support Jennyblogs. Where possible, links are prioritized to small businesses and ethically and responsibly made items. For further information see the privacy policy. Grazie!

Original recipe in Italian or English, with video and step by step photos, on GialloZafferano.


Tiramisù

Serves 12-15

Ingredients:

  • 220g / about 4 medium eggs, as fresh as you can get them

  • 100g / 1/2 cup sugar

  • 500g mascarpone

  • 300g / about 1 medium package Savoiardi (lady fingers)

  • 300g / 1 1/4 cup brewed coffee from a Moka pot or very strong coffee, sweetened to taste and cooled

  • Cocoa powder for dusting the top

Directions:

IMG_4520.JPG
  1. Separate the egg yolks from the whites, placing the yolks in the bowl of a stand mixer and setting aside the egg whites, or placing them in two medium bowls if you plan on using an electric hand mixer. 

  2. Beat the yolks, slowly adding half the sugar.  

  3. When the mixture becomes light and frothy, beat in the mascarpone, a little at a time.  Once all the mascarpone is beat in, you should have a dense and creamy mixture.  

  4. Clean the beaters well or transfer mascarpone mixture to another bowl and clean the stand mixer bowl and beater.  Beat the egg whites, slowly adding in the rest of the sugar.  Beat until stiff peaks form.

  5. Add one spoonful of the beaten whites to the mascarpone mixture, stirring energetically with a spatula, to begin to lighten it.  Then continue adding the egg whites, folding in delicately one spoonful at a time, until all has been incorporated. 

  6. In a 30x20cm / 8x11in pan, spoon about 1/3 of the cream mixture into the bottom and spread evenly.  Place your cold coffee in a shallow bowl or dish.  Dip your savoiardi in the coffee for a few seconds and place in rows over the cream until an even layer has been established.  

  7. Spoon another third of cream evenly over the savoiardi and repeat another layer of coffee soaked savoiardi.  Top with the remaining cream and smooth evenly.  

  8. Dust with cocoa powder using a sieve and refrigerate for a few hours before serving.             

Buon Appetito!

Jenny's Notes:

IMG_4524.jpg
  • Most grocery stores and supermarkets carry mascarpone and lady fingers in the States, mascarpone being with the cheese or special cheese, lady fingers are in the "imported" section in my local grocery store.

  • Remember that in order to beat egg whites there must not be any trace of egg yolk or grease or they won't beat up properly.

  • One way to tell if your egg whites have been properly beaten is to hold the bowl upside down. The egg whites shouldn't move. Of course, at this point you should already be confident that your whites are stiff enough so you don't end up with, um, egg whites everywhere. It is possible to overbeat egg whites, so don't over do it or they become dry.

  • The Italians making this recipe said they added only 1 tsp of sugar to the coffee, I don't usually add any. If you prefer sweeter desserts, you may decide to add more.

  • If you don't have a 30x20cm / 8x11in pan on hand, you can use a 9x13in. Or halve the recipe and use an 8x8in / 20x20cm or 9x9in.

  • When dipping the Savoiardi I found 4-5 seconds to be ideal. Any less and the coffee didn't soak all the way through, any more and the cookies became over-saturated and broke. When you start running out of coffee you may need to dip one side of the cookie and then the other to get an even soak.

  • Some say it's almost a sin if you cut into the tiramisù if it has been in the fridge for any less than 24 hours. I think it's optimal after just a few hours, and best if eaten within a few days.

  • Can be frozen for up to 2 weeks.

Classic Tiramisù
Yield 12-15
Author
Prep time
45 Min
Total time
45 Min

Classic Tiramisù

Recipe for the classic Italian tiramisù with savoiardi (ladyfingers), mascarpone, raw eggs, and not too much sugar. Translated from Italian.
Cook modePrevent screen from turning off

Ingredients

Instructions

  1. Separate the egg yolks from the whites, placing the yolks in the bowl of a stand mixer and setting aside the egg whites, or placing them in two medium bowls if you plan on using an electric hand mixer.
  2. Beat the yolks, slowly adding half the sugar.
  3. When the mixture becomes light and frothy, beat in the mascarpone, a little at a time. Once all the mascarpone is beat in, you should have a dense and creamy mixture.
  4. Clean the beaters well or transfer mascarpone mixture to another bowl and clean the stand mixer bowl and beater. Beat the egg whites, slowly adding in the rest of the sugar. Beat until stiff peaks form.
  5. Add one spoonful of the beaten whites to the mascarpone mixture, stirring energetically with a spatula, to begin to lighten it. Then continue adding the egg whites, folding in delicately one spoonful at a time, until all has been incorporated.
  6. In a 30x20cm / 8x11in pan, spoon about 1/3 of the cream mixture into the bottom and spread evenly. Place your cold coffee in a shallow bowl or dish. Dip your savoiardi in the coffee for a few seconds and place in rows over the cream until an even layer has been established.
  7. Spoon another third of cream evenly over the savoiardi and repeat another layer of coffee soaked savoiardi. Top with the remaining cream and smooth evenly.
  8. Dust with cocoa powder using a sieve and refrigerate for a few hours before serving.

Notes

Remember that in order to beat egg whites there must not be any trace of egg yolk or grease or they won't beat up properly. One way to tell if your egg whites have been properly beaten is to hold the bowl upside down. The egg whites shouldn't move. Of course, at this point you should already be confident that your whites are stiff enough so you don't end up with, um, egg whites everywhere. It is possible to overbeat egg whites, so don't over do it or they become dry.The Italians making this recipe said they added only 1 tsp of sugar to the coffee, I don't usually add any. If you prefer sweeter desserts, you may decide to add more.If you don't have a 30x20cm / 8x11in pan on hand, you can use a 9x13in. Or halve the recipe and use an 8x8in / 20x20cm or 9x9in.When dipping the Savoiardi I found 4-5 seconds to be ideal. Any less and the coffee didn't soak all the way through, any more and the cookies became over-saturated and broke. When you start running out of coffee you may need to dip one side of the cookie and then the other to get an even soak.Some say it's almost a sin if you cut into the tiramisù if it has been in the fridge for any less than 24 hours. I think it's optimal after just a few hours, and best if eaten within a few days.Can be frozen for up to 2 weeks.

Nutrition Facts

Calories

327.99

Fat

20.59 g

Sat. Fat

11.84 g

Carbs

9.97 g

Fiber

0.08 g

Net carbs

9.88 g

Sugar

9.38 g

Protein

3.90 g

Sodium

202.45 mg

Cholesterol

111.33 mg

Nutritional information is approximate. Based on 12 servings.

authentic tiramisu, Italian tiramisu, real tiramisu, original tiramisu,
Dessert
Italian
Did you make this recipe?
Tag @jenevamorris on instagram and hashtag it #jennyblogs
I have somehow never managed to get a photo after it has been dug into. And I couldn't take photos before, because, well, Christmas and other events. "Who broke into the dessert early?!?!" I never would've hear the end of it.

I have somehow never managed to get a photo after it has been dug into. And I couldn't take photos before, because, well, Christmas and other events. "Who broke into the dessert early?!?!" I never would've hear the end of it.


Cinnamon Raisin Swirl Bread

IMG_4773.jpg

Last Updated August 13, 2024

Nothing is quite as satisfying to make as homemade bread. From the relaxing kneading of the dough, to the mouth-watering aroma that fills the house as the bread bakes, to slicing into a fresh loaf, it’s one of the simple pleasures of life.

Add in a cinnamon raisin swirl and it can be hard to imagine it getting much better. This bread makes for wonderful eating plain, and even better toast. Use it for French Toast or however you best like to use bread!

Note: I used sourdough starter to make the loaves in the pictures. I didn't leave enough time for rising, and thus you can see you the crumb is rather tight and dense. Delicious nonetheless, but know that if you use instant yeast (or sourdough and allow for proper proofing) your loaves should be taller! 

This post may contain affiliate links. If you buy something using these links, Jennyblogs may receive a small commission, at no extra cost to you. This helps to support Jennyblogs. For further information see the privacy policy. Grazie!

Recipe adapted from The Kitchn


Cinnamon Raisin Swirl Bread

Makes 2 9-inch loaves

IMG_4782.JPG

Ingredients:

  • 1 cup / 150g raisins

  • 1 cup / 237g hot water

  • 1 Tbsp / 10g active dry or instant yeast

  • 1 cup / 237g milk

  • 4 Tbsp / 56g melted butter or oil

  • 2 tsp / 9g salt

  • 5 1/2 - 6 cups / 660 - 720g all-purpose flour

  • 1/2 cup / 100g sugar

  • 1 1/2 Tbsp / 12g cinnamon

  • 1 egg

  • 2 tsp / 9g water

Directions:

Oven 375°F / 190°C.  2 greased loaf pans, approximately 9 x 5in / 23 x 13cm.  

IMG_4778.jpg
  1. Place raisins in a small bowl with the hot water and let plump for at least 10 minutes.  

  2. Drain water from raisins into the bowl of a stand mixer or large bowl.  Set raisins aside.  Sprinkle yeast over the water.  If you're using active dry, let the yeast sit for a few minutes until it starts to foam; if you're using instant, proceed to the next step. 

  3. Add milk, butter, and salt to yeast mixture and stir well.  Add 5 cups / 600g of flour, mixing to incorporate. 

  4. Switch to the dough hook or knead by hand on a lightly floured surface for 8 - 10 minutes, adding more flour as necessary.  At the end, test to see if your dough is ready by performing the window pane test (see notes.)  If not, continue to knead dough until it passes.  

  5. Toss raisins with a bit of flour to absorb any residual water.  Add to your dough, and knead until evenly distributed.  If using a stand mixer, you may find this easier to do by hand.  

  6. Place the dough in a large oiled bowl, cover, and place in a warm place to rise until doubled in size, about 1 hour.  

  7. Meanwhile, combine the sugar with the cinnamon in a small bowl.  

  8. Beat the egg with the 2 tsp water in another small bowl. 

  9. When the dough has risen, punch it down and divide into two equal pieces.  Starting with one half, roll dough into a rectangle about 9in / 23cm wide and at least 18in / 46cm long. 

  10. Brush the dough evenly with some of the egg wash, leaving one narrow end dry; sprinkle with half of the cinnamon sugar mixture.  Starting from the opposite short end, roll dough up and pinch the seam to seal. 

  11. Transfer to the loaf pan, placing seam side down.  Repeat with other half of dough.  

  12. Cover and let rise until doubled in size, about 30-45 minutes.   

  13. Bake in preheated oven for 30-40 minutes or until golden brown and internal temperature reads 185 - 190°F / 85-88°C. 

  14. Let bread cool 10 minutes before removing from pans and allowing to cool completely.

Jenny's Notes:

  • If the dough shrinks back on you as you're rolling it out, let it rest for a few minutes and try again.  

  • If you have leftover egg wash and cinnamon sugar, you can brush the top of the loaves with the egg wash and sprinkle with cinnamon sugar before baking.  

  • Loaves can be frozen for later enjoyment.

Cinnamon Raisin Swirl Bread
Yield 24
Author
Prep time
1 Hour
Cook time
40 Min
Total time
1 H & 40 M

Cinnamon Raisin Swirl Bread

Enriched white bread with swirls of cinnamon and plump raisins throughout.
Cook modePrevent screen from turning off

Ingredients

Instructions

  1. Oven 375°F / 190°C. Grease 2 loaf pans, approximately 9 x 5in / 23 x 13cm.
  2. Place the raisins in a small bowl with the hot water and let plump for at least 10 minutes.
  3. Drain the water from the raisins into the bowl of a stand mixer or large bowl. Set the raisins aside. Sprinkle the yeast over the water. If you're using active dry, let the yeast sit for a few minutes until it starts to foam, if you're using instant, go ahead and proceed to the next step.
  4. Add the milk, butter, and salt to the yeast mixture and stir well. Add 5 cups / 600g of flour, mixing to incorporate. Switch to the dough hook or knead by hand on a lightly floured surface for 8 - 10 minutes, adding more flour as necessary. At the end, test to see if your dough is ready by performing the window pane test (see notes.) If not, continue to knead the dough until it passes.
  5. Toss the raisins with a bit of flour to absorb any residual water. Add to your dough, and knead until evenly distributed. If using a stand mixer, you may find this easier to do by hand.
  6. Place the dough in a large oiled bowl, cover, and place in a warm place to rise until doubled in size, about 1 hour.
  7. Meanwhile, combine the sugar with the cinnamon in a small bowl.
  8. Beat the egg with 2 tsp water in another small bowl.
  9. When the dough has risen, punch it down and divide into two equal pieces. Starting with one half, roll dough into a rectangle about 9in / 23cm wide and at least 18in / 46cm long.
  10. Brush the dough evenly with some of the egg wash, leaving one short end free, and sprinkle with half of the cinnamon sugar mixture. Starting from the opposite short end, roll the dough up and pinch the seam to seal.
  11. Transfer to the loaf pan, placing seam side down. Repeat with other half of dough.
  12. Cover and let rise until doubled in size, about 30-45 minutes.
  13. Bake in preheated oven for 30-40 minutes or until golden brown and internal temperature reads 185 - 190°F / 85-88°C.
  14. Let bread cool 10 minutes in pans before removing and allowing to cool completely.

Notes

If the dough shrinks back on you as you're rolling it out, let it rest for a few minutes and try again. If you have leftover egg wash and cinnamon sugar, you can brush the top of the loaves with the egg wash and sprinkle with cinnamon sugar before baking. Loaves can be frozen for later enjoyment! If you really dig raisins, add more than 1 cup! Just be aware, though, if you start to add too many (I would imagine more than 2 cups) then they could start to weigh down your dough, not allowing for a full rise.

Nutrition Facts

Calories

171.35

Fat

2.64 g

Sat. Fat

1.44 g

Carbs

33.09 g

Fiber

1.42 g

Net carbs

31.67 g

Sugar

7.96 g

Protein

4.10 g

Sodium

218.89 mg

Cholesterol

13.56 mg

Nutritional information is approximate. Based on 24 servings or 12 servings per loaf.

cinnamon raisin bread, cinnamon raisin swirl bread, cinnamon toast,
Bread, Breakfast, Brunch
American
Did you make this recipe?
Tag @jennyblogsandbakes on instagram and hashtag it #jennyblogs
IMG_4777.jpg

Caramel Cream Pie

2017-12-23+15.32.59.jpg

Last Updated August 13, 2024

Caramel cream pie is a pie that you should be adding to your pie repertoire ASAP. A homemade buttery pie crust, with a light, creamy, caramel-y filling, topped with more whipped cream and more caramel. Decadent and oh so worth it.

Homemade pies can sometimes feel intimidating, but this one really is not hard to make! You can make your own homemade caramel (I have a recipe for that here, also linked below), or you can rely on a good ol’ can of dulce de leche for absolute ease. I’ve made this pie with both options and it’s absolutely delicious either way.

This post may contain affiliate links. If you buy something using these links, Jennyblogs may receive a small commission, at no extra cost to you. This helps to support Jennyblogs. For further information see the privacy policy. Grazie!

Recipe adapted from Shugary Sweets


Caramel Cream Pie

2017-12-23+15.34.15.jpg

Serves 8-12

Ingredients:

For the Crust

  • 1 1/3 cup / 160g all-purpose flour

  • 1/2 tsp / 2.5g salt

  • 4 Tbsp / 56g butter, cold, cut into small pieces

  • 4-6 Tbsp / 59 - 89g ice water

For the Caramel Cream filling and topping

  • 1 14oz can / 380g dulche de leche, your favorite caramel, or 1/2 recipe of this Caramel Sauce

  • 8 oz / 225g cream cheese, room temperature

  • 2 1/2 cups / 605g heavy whipping cream

  • 1/4 cup / 50g sugar

Directions:

Make the Crust

Oven 425°F / 220°C. Ungreased 8 - 9in / 20 - 23cm pie dish. 

IMG_4555.JPG
  1. In a medium bowl whisk together flour and salt.  Blend in cold butter using a pastry cutter, fork, or your hands.  You want the butter to end up in small pieces, like peas. 

  2. Add the ice water, starting with 4 Tbsp / 59g, mixing as little as possible.  The dough should be able to hold together in a ball, without being too dry and shaggy or too wet.  Add more water if necessary, 1 tablespoon at a time.  

  3. Place dough on a piece of plastic wrap, shape into a disc, and wrap tightly.  Place in the fridge for 1 - 48 hours.  

  4. After the crust has rested, roll into a circle on a lightly floured surface or silpat.  Roll a few times with your rolling pin in one direction before turning the crust 45° (quarter turn) and continuing with a few more rolls.  Periodically check under the crust to make sure it isn’t sticking and sprinkling more flour if needed. Continue like this until your crust is nicely round and roughly 2in / 5cm larger than your pie dish.  

  5. Carefully transfer crust to pie dish (this is easier if using a silpat), trim the excess overhang if necessary, and fold the ends under. Crimp as desired, or press with a fork.  Prick the bottom of the crust with a fork.  The crust can also be refrigerated at this point, if needed.  

  6. Bake in preheated oven for 10-12 minutes, or until crust is lightly golden-brown.  Cool completely.  

Make the Caramel Cream filling and topping

  1. In the bowl of a stand mixer, beat cream cheese with 1/2 cup / 120g caramel.  Set aside.

  2. In the clean bowl of a stand mixer, beat whipping cream and sugar until stiff peaks form.  Reserve 1/2 cup for the topping.  Fold the remaining whipped cream into cream cheese mixture, about a quarter at a time.  

  3. Reserve 1-2 tablespoons of the remaining caramel for the topping.  Spread the rest into the bottom of the crust.  Spread cream cheese mixture over caramel.  

  4. Top pie with reserved 1/2 cup whipped cream and caramel, using a spoon or piping desired.

Jenny's Notes:

  • For the crust, you can also use a food processor, pulsing in the butter until it has the desired consistency.  Just be sure to remove the dough from the food processor and mix in the water with a fork or pastry cutter so you don't overwork the dough.  You want to work it as little as possible once you add the water. The liquid helps to awaken the gluten, and the more you work it and the gluten strands develop, the tougher your crust will be.  The minimum of 1 hour rest in the fridge allows what gluten inevitably developed to relax.  

  • If you are having problems with a shrinking crust, try using a metal or ceramic pie dish and allowing the crust more time to rest before baking.  

  • I have made this pie several times over the past year, and have always needed all 6 tablespoons of water, possibly because it was always during the dry winter.  If you live in a really dry climate, you might need up to 7.  Just be aware, an overly wet crust is more likely to glue itself to the pan during baking.   

Caramel Cream Pie
Yield 8-12 servings
Author
Prep time
1 Hour
Cook time
12 Min
Total time
1 H & 12 M

Caramel Cream Pie

Flaky, buttery crust, whipped caramel filling, and fresh whipped cream with caramel drizzled on top.
Cook modePrevent screen from turning off

Ingredients

For the Crust
For the Caramel Cream filling and topping

Instructions

Make the Crust
  1. Oven 425°F / 220°C. Ungreased 8 - 9in / 20 - 23cm pie dish.
  2. In a medium bowl whisk together flour and salt. Blend in cold butter using a pastry cutter, fork, or your hands. You want the butter to end up in small pieces, like peas.
  3. Add the ice water, starting with 4 Tbsp / 59g, mixing as little as possible. The dough should be able to hold together in a ball, without being too dry and shaggy or too wet. Add more water if necessary, 1 tablespoon at a time.
  4. Place dough on a piece of plastic wrap, shape into a disc, and wrap tightly. Place in the fridge for 1 - 48 hours.
  5. After the crust has rested, roll into a circle on a lightly floured surface or silpat. Roll a few times with your rolling pin in one direction before turning the crust 45° (quarter turn) and continuing with a few more rolls. Periodically check under the crust to make sure it isn’t sticking and sprinkling more flour if needed. Continue like this until your crust is nicely round and roughly 2in / 5cm larger than your pie dish.
  6. Carefully transfer crust to pie dish (this is easier if using a silpat), trim the excess overhang if necessary, and fold the ends under. Crimp as desired, or press with a fork. Prick the bottom of the crust with a fork. The crust can also be refrigerated at this point, if needed.
  7. Bake in preheated oven for 10-12 minutes, or until crust is lightly golden-brown. Cool completely.
Make the Caramel Cream filling and topping
  1. In the bowl of a stand mixer, beat cream cheese with 1/2 cup / 120g caramel. Set aside.
  2. In the clean bowl of a stand mixer, beat whipping cream and sugar until stiff peaks form. Reserve 1/2 cup for the topping. Fold the remaining whipped cream into cream cheese mixture, about a quarter at a time.
  3. Reserve 1-2 tablespoons of the remaining caramel for the topping. Spread the rest into the bottom of the crust. Spread cream cheese mixture over caramel.
  4. Top pie with reserved 1/2 cup whipped cream and caramel, using a spoon or piping desired.

Notes

For the crust, you can also use a food processor, pulsing in the butter until it has the desired consistency. Just be sure to remove the dough from the food processor and mix in the water with a fork or pastry cutter so you don't overwork the dough. You want to work it as little as possible once you add the water. The liquid helps to awaken the gluten, and the more you work it and the gluten strands develop, the tougher your crust will be. The minimum of 1 hour rest in the fridge allows what gluten inevitably developed to relax. If you are having problems with a shrinking crust, try using a metal or ceramic pie dish and allowing the crust more time to rest before baking. I have made this pie several times over the past year, and have always needed all 6 tablespoons of water, possibly because it was always during the dry winter. If you live in a really dry climate, you might need up to 7. Just be aware, an overly wet crust is more likely to glue itself to the pan during baking.

Nutrition Facts

Calories

652.74

Fat

42.84 g

Sat. Fat

26.73 g

Carbs

56.39 g

Fiber

0.54 g

Net carbs

55.85 g

Sugar

40.81 g

Protein

6.75 g

Sodium

437.41 mg

Cholesterol

128.91 mg

Nutritional information is approximate. Based on 8 servings.

caramel cream pie, butter crust, fresh whipped cream, dulche de leche
Dessert, Pie
American
Did you make this recipe?
Tag @jennyblogsandbakes on instagram and hashtag it #jennyblogs
And yet, for as many times as I've made this pie, I've yet to get a photo of it sliced. Oh well, there's butter, caramel, and whipped cream, what more do you need to know?

And yet, for as many times as I've made this pie, I've yet to get a photo of it sliced. Oh well, there's butter, caramel, and whipped cream, what more do you need to know?


Fresh Peach Cobbler

IMG_4958.jpg

Last Updated August 11, 2024

I was really tempted to write, The BEST peach cobbler, because, I've never met a better one, but titles with such descriptives usually drive me away.  I try to call it like it is, and this is a peach cobbler, if I know anything. I get a bit tired of seeing THE BEST everything, ya know? Only one can be right, and the rest are...full of themselves? Fudging? Just trying to get more clicks? All of the above?  

However, in my opinion, this is the best.  Why?  Because it's my mom's peach cobbler.  If you have the privilege of knowing my mom, then I need go no further.  However, if you don't, all you need to know is, she's the greatest, and she knows her way around the kitchen.  I think mom's are born knowing stuff like this.  

Summer is all about picking the fresh produce, eating it, baking with it, and canning with it so you can enjoy the bounty of summer even in the winter months.  Of course, nothing beats fresh food, so I think making as many fruity and vegetable-y dishes as you and your family and friends and neighbors and dog and strangers walking by can eat.  

As a last adieu to summer, before the recipes start reflecting fall, here is the recipe for The. Best. Peach Cobbler.  In all its simplicity and flavors of summer.  

Tips for Blanching Peaches

The amount of time needed to blanch peaches largely depends on how ripe your fruit is. The more ripe, the less time it will need to be blanched.

  • For very ripe, even over-ripe peaches, blanch for 30-45 seconds. For more perfectly ripe peaches, about 1 minute is good.

  • Sightly under-ripe peaches, 1-2 minutes. Keep in mind that under-ripe peaches, no matter how well you blanch them, will be hard to peel.

A successful peach blanching has the peach skins slopping off easily, without the peach itself having gotten too mushy.

The best method for peeling and slicing blanched peaches that I learned from my mom is as follows: Slice peach in half, you can use your knife to gently pry one half of the peach off the pit. Then peel/slop off skin. Continue to slice into wedges. A ripe peach should come off the pit easily, but if it doesn’t, you can cut it into quarters while still attached to the pit. Smaller pieces will be easier to pry of the pit, if necessary.

This post may contain affiliate links. If you buy something using these links, Jennyblogs may receive a small commission, at no extra cost to you. This helps to support Jennyblogs. For further information see the privacy policy. Grazie!

Recipe from my mama, who has made this since I can remember.


Peach Cobbler

Serves about 6 

IMG_4943.jpg

Ingredients:

  • 4 large ripe peaches

  • 1/8 tsp nutmeg, for sprinkling, optional

  • 1 1/4 cups / 250g sugar

  • 3 Tbsp / 42g oil

  • 1/2 cup / 119g milk

  • 1 cup / 120g all-purpose flour

  • 1 tsp / 5g baking powder

  • dash of salt

  • 1 tsp / 3g cornstarch

  • 1 cup / 237g boiling water

Directions:

Oven 375°F / 190°C.     Ungreased 8x8in / 20x20cm baking dish.

Blanch the Peaches

IMG_4959.jpg
  1. Place a large pot of water on the stove and bring to a boil.  While waiting for water to boil, prepare a large bowl of cold/ice water.  

  2. Once water is boiling, carefully place all peaches into the water and blanch (cook briefly in boiling water) for about 1 minute.  Remove from water with a slotted spoon or tongs and immediately dunk in ice water to stop the cooking.  

  3. Peel and slice peaches; place in bottom of baking dish. Sprinkle with nutmeg.

Make the Cobbler

  1. In the bowl of a stand mixer, combine oil and  3/4 cup / 150g of the sugar.  Add milk, flour, baking powder, and salt.  Mix well. Mixture will be thin. Dollop the batter by spoonful over the peaches.

  2. In a small bowl, mix together the remaining 1/2 cup / 100g sugar with cornstarch.  Sprinkle evenly over batter in the baking dish.  

  3. Finally, pour boiling water over top.  Bake for 45-60 minutes, or until the sides are bubbling and the cobbler topping no longer looks doughy.  

  4. Serve warm with a dollop of vanilla ice cream, if desired.

IMG_4941.jpg

Jenny's Notes:

  • The amount of time needed to blanch peaches depends largely on how ripe they are. Very ripe peaches need just 30-45 seconds, perfectly ripe peaches need around 1 minute.

  • This recipe is adapted for a 8x8in pan, perfect for a small crowd. Or 1 person. But this is easily doubled for a 9x13in, and then there's enough to go around. Yay! If doubling, blanch the peaches in two batches if you don’t have a big enough pan.

  • Skin not coming easily off your peaches? Could be they weren't quite ripe enough. If they're mushy, could be your peaches were overripe or blanched slightly too long.

  • Have a different favorite fruit? Go ahead and use it in place of the peaches! This cobbler is very versatile.

  • You can use butter in place of oil. I learned from my mom to often use oil in the place of butter simply because of the healthier mono and poly unsaturated fats, versus the mostly saturated fats in butter. Just be aware of what kind of oil you use if you decide to go the "healthier" route, as not all oils are made equally.

Peach Cobbler
Yield 6 servings
Author
Prep time
45 Min
Cook time
1 Hour
Total time
1 H & 45 M

Peach Cobbler

A classic summer dessert bursting with fresh peaches and topped with a soft and sugary-crusted cobbler topping, all with a hint of nutmeg.
Cook modePrevent screen from turning off

Ingredients

Instructions

Blanch the Peaches
  1. Place a large pot of water on the stove and bring to a boil. While waiting for water to boil, prepare a large bowl of cold/ice water.
  2. Once water is boiling, carefully place all peaches into the water and blanch (cook briefly in boiling water) for about 1 minute. Remove from water with a slotted spoon or tongs and immediately dunk in ice water to stop the cooking.
  3. Peel and slice peaches; place in bottom of baking dish. Sprinkle with nutmeg.
Make the Cobbler
  1. In the bowl of a stand mixer, combine oil and 3/4 cup / 150g of the sugar. Add milk, flour, baking powder, and salt. Mix well. Mixture will be thin. Dollop the batter by spoonful over the peaches.
  2. In a small bowl, mix together the remaining 1/2 cup / 100g sugar with cornstarch. Sprinkle evenly over batter in the baking dish.
  3. Finally, pour boiling water over top. Bake for 45-60 minutes, or until the sides are bubbling and the cobbler topping no longer looks doughy.
  4. Serve warm with a dollop of vanilla ice cream, if desired.

Notes

  • The amount of time needed to blanch peaches depends largely on how ripe they are. Very ripe peaches need just 30-45 seconds, perfectly ripe peaches need around 1 minute.
  • This recipe is adapted for a 8x8in pan, perfect for a small crowd. Or 1 person. But this is easily doubled for a 9x13in, and then there's enough to go around. Yay! If doubling, blanch the peaches in two batches if you don’t have a big enough pan.
  • Skin not coming easily off your peaches? Could be they weren't quite ripe enough. If they're mushy, could be your peaches were overripe or blanched slightly too long.
  • Have a different favorite fruit? Go ahead and use it in place of the peaches! This cobbler is very versatile.
  • You can use butter in place of oil. I learned from my mom to often use oil in the place of butter simply because of the healthier mono and poly unsaturated fats, versus the mostly saturated fats in butter. Just be aware of what kind of oil you use if you decide to go the "healthier" route, as not all oils are made equally.

Nutrition Facts

Calories

352.11

Fat

7.68 g

Sat. Fat

0.63 g

Carbs

69.73 g

Fiber

2.30 g

Net carbs

67.43 g

Sugar

52.46 g

Protein

3.80 g

Sodium

125.34 mg

Cholesterol

0.99 mg

Nutritional information is approximate. Based on 6 servings.

peach cobbler, recipe, fresh peaches, the best peach cobbler, summer dessert, how to make peach cobbler, old-fashioned cobbler
Dessert
American
Did you make this recipe?
Tag @jennyblogsandbakes on instagram and hashtag it #jennyblogs
IMG_4952.jpg

Chocolate Chip Brioche Rolls

But why are they so golden? Many thanks to butter and egg wash.

But why are they so golden? Many thanks to butter and egg wash.

Last Updated August 11, 2024

I've been thinking about you a lot recently.  How sweet you are, how tender you are, how you like to butter me up. Yeah, you're a little soft, but I love that about you. I wake up in the morning hoping you'll want to meet me for coffee. Will you, brioche? Please say yes. Before life hardens you and you become like a rock. But if not, how about your friend? He looks yummy, too - Oh hey. Welcome to my blog! Yep, I'm writing a recipe about brioche, mmm hmmm. No, I was not talking to the brioche. Just eating. Nom nom nom. See? Delicious. Yep. Believe me and make these, and you'll be talking to your brioche, too.  

Brioche is a yeasted, enriched bread or bun. By enriched I mean, rich in butter, with help from sugar and eggs.  The amount of butter in the recipe for brioche must be equal to or more than 20% of the flour weight, but can go up to 100%.  I like to think of brioche in three categories, as called by Peter Reinhart: 

  1. Poor man's brioche - consisting of at least 20% butter

  2. Middle-class brioche - consisting of around 50% butter

  3. Rich man's brioche - consisting of 50-80% butter, or on rare occasion, more!

To find the butter percentage, divide the weight of the butter by the weight of the flour and multiply by 100.  

Butter weight / flour weight x 100 = Butter percentage

For example, let's take the recipe below, which calls for 6 Tbsp butter or 85g by weight, divided by 2 1/2 cups flour or 300g by weight, which equals 0.28.  Multiply 0.28 by 100 and you get 28.  Thus the butter percentage is 28 percent in this recipe.  Poor man's brioche!  

85 / 300 x 100 = 28

If the words ratio, weight, percentage make you glaze over, stay with me. It can be confusing at first, but understanding these concepts can really enhance your baking experience. Think of it as the key that unlocks all recipes and links them together. Instead of blindly following a recipe, always secretly wondering what will happen if you omit an egg, use baking soda instead of baking powder, add less flour or sugar than called for, formulas such as this can help you compare recipes across the board. You’ll start to notice similarities, how textures are affected by the ratio of liquids to flour, fat to flour, etc. Ok, so baking soda vs. baking powder is more in the realm of science, but also helpful! Science and math, who knew?

Are we done yet? No, on to the poor man's brioche!

This post may contain affiliate links. If you make a purchase using these links, Jennyblogs may receive a small commission, at no extra cost to you. This helps to support Jennyblogs. Where possible, links are prioritized to small businesses and ethically and responsibly made items. For further information see the privacy policy. Grazie!

Recipe adapted from Soup Addict


Chocolate Chip Brioche Rolls

Makes 12 rolls

Ingredients:

IMG_4887.jpg
  • 2 1/2 cups / 300g all-purpose flour

  • 2 tsp / 6g instant yeast

  • 1/3 / 67g cup sugar

  • 1 1/2 tsp / 11g salt

  • 1/2 cup / 118g milk

  • 1/2 cup / 118g buttermilk or sour milk

  • 6 Tbsp / 85g butter, room temperature

  • 2 eggs

  • 1 1/3 cup / 234g chocolate chips or chunks

Directions:

Oven 350°F / 177°C.  Line a baking sheet with parchment paper or silicone mat.

  1. In the bowl of a stand mixer fitted with the paddle, mix together flour, yeast, sugar, and salt.  

  2. In a small saucepan heat milk and buttermilk until about 105°F / 40°C.  Add to flour mixture and mix until well combined.  

  3. With the mixer running, add butter and allow to mix until fully immersed.  Add 1 egg.  

  4. Switch to the dough hook and knead on medium speed for 6-8 minutes, until the dough no longer sticks to the sides of the bowl and starts to make a slapping sound against the bowl.  If the dough is still clinging to the sides, add a touch more flour until it no longer sticks.  

  5. Mix in chocolate chips just long enough to incorporate.  

  6. Transfer dough to a large oiled bowl.  Flip dough so that both sides are now oiled.  Cover with a towel or plastic wrap and allow to ferment in a warm place for about 1 1/2 hours, or until doubled in size.   

  7. Place dough on a lightly floured surface and divide into 12 equal pieces.  Roll each piece into a ball and place evenly spaced on the prepared baking sheet.  

  8. Beat second egg with 1 tablespoon of water. Use a pastry brush or your fingers to brush each dough well with egg wash. Cover with a towel or plastic wrap and allow to rise for about 1 hour, or until puffed.  

  9. Bake for 25-30 minutes, or until golden brown and internal temperature reads about 180°F / 82°C.  

Jenny's Notes:

  • If you don’t have buttermilk or sour milk, you can make your own sour milk by adding 1 Tbsp lemon juice or vinegar per 1 cup milk.

  • After you've made the dough, you can place the dough in the fridge before the first or second ferment. That way the ferment will happen slowly in the fridge, and you can shape or bake the rolls the next day.  Allow the dough to come to room temperature before rolling or baking, then continue as instructed.

  • Use any leftover egg wash for another baking venture or omelette!

Chocolate Chip Brioche Rolls
Yield 12
Author
Prep time
55 Min
Cook time
30 Min
Total time
1 H & 25 M

Chocolate Chip Brioche Rolls

Buttery, soft, sweet, enriched brioche rolls speckled with chocolate chips.
Cook modePrevent screen from turning off

Ingredients

Instructions

  1. Oven 350°F / 177°C. Line a baking sheet with parchment paper or silicone mat.
  2. In the bowl of a stand mixer fitted with the paddle, mix together flour, yeast, sugar, and salt.
  3. In a small saucepan heat milk and buttermilk until about 105°F / 40°C. Add to flour mixture and mix until well combined.
  4. With the mixer running, add butter and allow to mix until fully immersed. Add 1 egg.
  5. Switch to the dough hook and knead on medium speed for 6-8 minutes, until the dough no longer sticks to the sides of the bowl and starts to make a slapping sound against the bowl. If the dough is still clinging to the sides, add a touch more flour until it no longer sticks.
  6. Mix in chocolate chips just long enough to incorporate.
  7. Transfer dough to a large oiled bowl. Flip the dough so that both sides are now oiled. Cover with a towel or plastic wrap and allow to ferment in a warm place for about 1 1/2 hours, or until doubled in size.
  8. Place dough on a lightly floured surface and divide into 12 equal pieces. Roll each piece into a ball and place evenly spaced on the prepared baking sheet.
  9. Beat the second egg with 1 tablespoon of water. Use a pastry brush or your fingers to brush each dough well with egg wash. Cover with a towel or plastic wrap and allow to rise for about 1 hour, or until puffed.
  10. Bake for 25-30 minutes, or until golden brown and internal temperature reads about 180°F / 82°C.

Notes

If you don’t have buttermilk or sour milk, you can make your own sour milk by adding 1 Tbsp lemon juice or vinegar per 1 cup milk. After you've made the dough, you can place the dough in the fridge before the first or second ferment. That way the ferment will happen slowly in the fridge, and you can shape or bake the rolls the next day. Allow the dough to come to room temperature before rolling or baking, then continue as instructed.Use any leftover egg wash for another baking venture or omelette!

Nutrition Facts

Calories

265.01

Fat

12.95 g

Sat. Fat

7.58 g

Carbs

34.61 g

Fiber

1.96 g

Net carbs

32.65 g

Sugar

13.04 g

Protein

5.38 g

Sodium

439.38 mg

Cholesterol

47.41 mg

Nutritional information is approximate.

brioche, brioche rolls, poor man's brioche, recipe, chocolate chip brioche, butter
Bread, Breakfast
French
Did you make this recipe?
Tag @jennyblogsandbakes on instagram and hashtag it #jennyblogs
IMG_4900.jpg

Pinwheels 3 Ways: Avocado Veggie - Buffalo Chicken - Thanksgiving

From top to bottom: Thanksgiving, Veggie, Buffalo Chicken

Last Updated August 11, 2024

Pinwheels. Also known as veggie rolls, veggie wraps, or veggie roll-ups, (but that just makes me think of fruit roll-ups, yuck. No offense to my fruit roll-up loving friends. Actually, every once in a blue moon I see a fruit roll up and think, hey, that sounds good right about now. Then I walk on. That's the end of the story.)  Or you could just call these tortilla/veggie/cream cheese concoctions for what they are; delicious. That would be fine. And the truth.  

Pinwheels make for a great snack or appetizer, or lunch because it can be hard to stop eating these! They're also very portable, quick, and simple to make, which make them ideal for parties, potlucks, lunch at the office, etc.  

The formula is very easy to get the hang of, think tortillas, cream cheese, and your flavors. Deli meat is easy to roll and adds some protein. Chopped, sliced, or grated veggies, raw or cooked, add some nutrients. Other kinds of cheese are tasty. Spices and herbs add flavor. Tuna and sliced hardboiled eggs could be a very European take on these. The options are endless, feel free to create your own!

Following are some of my favorite pinwheel flavors: Fresh Veggie and Avocado, Buffalo Chicken, and Turkey Cranberry a.k.a. Thanksgiving.  

This post may contain affiliate links. If you buy something using these links, Jennyblogs may receive a small commission, at no extra cost to you. This helps to support Jennyblogs. For further information see the privacy policy. Grazie!

Recipes by Jenny


Avocado Veggie Pinwheels

Makes about 24 pinwheels

Ingredients: 

Hmm, these photos could use improving upon…

Hmm, these photos could use improving upon…

  • 4 8-inch or 6 6-inch flour tortillas

  • 8 oz / 225g cream cheese, softened

  • 1/3 cup shredded carrots, or about 1-2 small carrots

  • 1/3 chopped spinach or broccoli

  • 1 bunch green onions, chopped

  • 1/4 tsp garlic powder

  • 1/4 tsp dill weed

  • salt and pepper, to taste

  • 1/2 cup guacamole

Directions:

  1. In a medium bowl, mix together cream cheese, carrots, spinach, green onions, garlic powder, dill weed, and salt and pepper.  

  2. Distribute evenly over tortillas, spreading almost to the edges.  Spread a thick layer of guacamole over cream cheese mixture.  Roll up tightly.  

  3. Trim edges and slice into approximately 1 inch slices.  Serve or chill until it's par-tay time.  

Avocado Veggie Pinwheels
Yield 24
Author
Prep time
25 Min
Total time
25 Min

Avocado Veggie Pinwheels

Tortillas slathered with seasoned cream cheese, avocado, and veggies, rolled up and sliced.
Cook modePrevent screen from turning off

Ingredients

Instructions

  1. In a medium bowl, mix together cream cheese, carrots, spinach, green onions, garlic powder, dill weed, and salt and pepper.
  2. Distribute evenly over tortillas, spreading almost to edges. Spread a thick layer of guacamole over cream cheese mixture. Roll up tightly.
  3. Trim edges and slice into approximately 1 inch slices. Chill until ready to serve.

Notes

All quantities are very approximate. You could double basically any ingredient you want to have more filling, less filling, more flavor, less flavor. The tortilla is your playground.

Nutrition Facts

Calories

68.72

Fat

4.49 g

Sat. Fat

2.11 g

Carbs

5.73 g

Fiber

0.61 g

Net carbs

5.05 g

Sugar

0.50 g

Protein

1.52 g

Sodium

104.65 mg

Cholesterol

9.47 mg

Nutritional information is approximate, based on 1 pinwheel.

pinwheels, roll ups, veggie rolls, veggie wraps, avocado, buffalo chicken pinwheels, Thanksgiving pinwheels, vegetable wraps, cranberry sauce, appetizer, finger food, snack
American
Did you make this recipe?
Tag @jennyblogsandbakes on instagram and hashtag it #jennyblogs

Buffalo Chicken Pinwheels

Makes about 24 pinwheels

Ingredients:

  • 4 8-inch or 6 6-inch flour tortillas

  • 8 oz / 225g cream cheese, softened

  • 1/3 cup / 80g Frank's hot sauce

  • 1/2 cup cooked chopped or shredded chicken

  • 1 bunch green onions, chopped

  • 1/4 cup blue cheese, crumbled, optional

Directions:

  1. In a medium bowl, mix together cream cheese, hot sauce, chicken, green onion, and blue cheese.

  2. Distribute evenly over tortillas, spreading almost to the edges.  Roll up tightly.  

  3. Trim edges and slice into approximately 1 inch slices.  Serve or chill until it's par-tay time.   

Buffalo Chicken Pinwheels
Yield 24
Author
Prep time
15 Min
Total time
15 Min

Buffalo Chicken Pinwheels

Tortillas slathered in Frank's hot sauce and cream cheese with chicken and green onions, rolled, and sliced for bite size hot wing pinwheels.
Cook modePrevent screen from turning off

Ingredients

Instructions

  1. In a medium bowl, mix together cream cheese, hot sauce, chicken, green onion, and blue cheese.
  2. Distribute evenly over tortillas, spreading almost to the edges. Roll up tightly.
  3. Trim edges and slice into approximately 1 inch slices. Chill until ready to serve.

Notes

All quantities are approximate. You could double basically any ingredient you want to have more filling, less filling, more flavor, less flavor. I often use canned chicken for the buffalo chicken. Pinwheels aren't exactly a showcase of your cooking/baking skills, anyway, so I like to keep things chop, chop. (Literally)

Nutrition Facts

Calories

74.28

Fat

4.60 g

Sat. Fat

2.40 g

Carbs

5.20 g

Fiber

0.30 g

Net carbs

4.90 g

Sugar

0.42 g

Protein

3.02 g

Sodium

177.01 mg

Cholesterol

14.74 mg

Nutritional information is approximate. Based on one pinwheel; includes blue cheese.

pinwheel, veggie roll up, veggie wrap, buffalo chicken, blue cheese, buffalo chicken wrap, buffalo chicken pinwheel, canned chicken
snack, appetizer
American
Did you make this recipe?
Tag @jennyblogsandbakes on instagram and hashtag it #jennyblogs

Thanksgiving Pinwheels

Makes about 24 Pinwheels

Ingredients:

  • 4 8-inch or 6 6-inch flour tortillas

  • 8 oz / 225g cream cheese, softened

  • 1/2 cup cranberry sauce

  • 8 oz sliced deli turkey (or leftover Turkey!)

  • 1/3 cup chopped spinach, optional

Directions:

  1. In a medium bowl mix together cream cheese, cranberry sauce, and spinach.  Distribute evenly over tortillas, spreading almost to the edges.  

  2. Layer turkey slices over cream cheese mixture.  Roll up tightly.  

  3. Trim edges and slice into approximately 1 inch slices.  Serve or chill until it's par-tay time.  

Thanksgiving Pinwheels
Yield 24
Author
Prep time
15 Min
Total time
15 Min

Thanksgiving Pinwheels

Tortilla spread with cream cheese, cranberry sauce, and turkey, rolled and sliced for a nostalgic bite-sized taste of Thanksgiving.
Cook modePrevent screen from turning off

Ingredients

Instructions

  1. In a medium bowl mix together cream cheese, cranberry sauce, and spinach. Distribute evenly over tortillas, spreading almost to the edges.
  2. Layer turkey slices over cream cheese mixture. Roll up tightly.
  3. Trim edges and slice into approximately 1 inch slices. Chill until ready to serve.

Notes

All quantities are approximate. You could double basically any ingredient you want to have more filling, less filling, more flavor, less flavor. Like I said, the tortilla is your playground. I like the spinach, it gives it a nice punch of color. It also makes the roll versatile for Christmas, beautiful red and green!

Nutrition Facts

Calories

79.26

Fat

4.10 g

Sat. Fat

2.05 g

Carbs

8.14 g

Fiber

0.39 g

Net carbs

7.75 g

Sugar

2.56 g

Protein

2.63 g

Sodium

182.60 mg

Cholesterol

14.67 mg

Nutritional information is approximate. Based on one pinwheel; Includes spinach.

pinwheels, veggie roll ups, Thanksgiving, cream cheese, Thanksgiving pinwheel, Thanksgiving wrap, turkey, cranberry sauce, spinach
snack, appetizer
American
Did you make this recipe?
Tag @jennyblogsandbakes on instagram and hashtag it #jennyblogs

Jenny's Notes:

  • All quantities are approximate.  You could double basically any ingredient you want to have more filling, less filling, more flavor, less flavor.  Like I said, the tortilla is your playground.  

  • I like the spinach in the Thanksgiving roll, it gives it a nice punch of color.  It also makes the roll versatile for Christmas, beautiful red and green! 

  • I usually use canned chicken for the buffalo chicken. Pinwheels aren't exactly a showcase of your cooking/baking skills, anyway, so I like to keep things easy.  


Semlor (Swedish Cardamom Buns)

Last Updated August 11, 2024

Semlor are yeasted Swedish sweet buns filled with marzipan and whipped cream with hints of cardamom.

These buns, as I've read, are traditionally associated with Lent and eaten on Shrove Tuesday, or Fat Tuesday. You could think of them as the equivalent to Polish paczki. If you're thinking, "Wow, thanks, that helps me so much - WHAT is a paczki??" It's similar to a jelly filled doughnut (but better!!) traditionally eaten on Shrove Tuesday and pronounced poonch-key or pawnch-key (it’s much debated). There is quite a large Polish population near where I grew up, including an annual Polka Fest! Plenty of polka-ing and beer to go around. Anyway, Semlor are also eaten in various forms and under other names in other Nordic countries such as Finland, Estonia, Norway, Denmark, Lithuania, Latvia, Iceland, and the Faroe Islands.

This post may contain affiliate links. If you buy something using these links, Jennyblogs may receive a small commission, at no extra cost to you. This helps to support Jennyblogs. For further information see the privacy policy. Grazie!

Recipe adapted from LondonEats


Semlor

Makes 10 buns

Ingredients:

For the Cardamom Buns

  • 1 cup / 237g milk

  • 7 Tbsp / 100g butter

  • 2 tsp / 6.3g instant yeast

  • 1/4 tsp / 1g salt

  • 1/3 cup / 40g sugar

  • 1/2 tsp / 1g ground cardamom

  • 2 eggs

  • 3 1/2 cups / 450g all-purpose flour or bread flour

  • 1 tsp / 5g water, milk, or heavy cream

For the Marzipan Filling

  • insides of the buns

  • 7 oz / 200g marzipan (make your own marzipan here!)

  • generous 3/4 cup / 195g milk

  • generous 3/4 cup / 195g heavy whipping cream

  • powdered sugar, for dusting

Directions:

Make the Cardamom Buns

Oven 390°F / 200°C. 2 baking sheets lined with parchment paper or silpat.

  1. Place milk in a small saucepan and heat until milk just begins to simmer.  Remove from heat and add butter, stirring to melt.  Once butter is completely melted and integrated, allow mixture to sit until lukewarm.  

  2. Place milk mixture, yeast, salt, sugar, cardamom, and 1 egg in the bowl of a stand mixer fitted with a paddle.  Beat until all ingredients are incorporated.  Switch to the dough hook and add flour slowly on medium-low speed until a soft dough forms.  Continue to beat for several minutes on medium speed.  You should hear the dough slapping the sides of the bowl, sticking only to the bottom.  If the dough is sticking to the sides, add flour gradually until dough no longer sticks.  

  3. Turn out onto a lightly floured surface and knead 1-2 minutes more.  Divide dough into 10 equal portions and roll into balls.  Place evenly prepared baking sheets. Cover with a cloth and let rise in a warm place until doubled in size, about 1 hour.   

  4. Beat the second egg with the water and use a pastry brush or your hands to evenly brush the buns.

  5. Bake for about 15 minutes until golden brown or when internal temperature registers 185-190°F / 85-88°C.  

  6. Transfer buns to a cooling rack, cover with a towel, and allow to cool.  

Make the Marzipan Filling

Your filling may look like baby spit-up, too. And that's ok.

Your filling may look like baby spit-up, too. And that's ok.

  1. Once the buns are cool enough to handle, cut out a lid from the top using a small serrated knife. Set the lids aside.  Using a fork, scoop out the inside of each bun and place in a medium bowl.  Crumble/tear with your fingers as best you can.  Add marzipan and milk and work into a smooth paste using your hands or a fork.  

  2. In the bowl of a stand mixer fitted with the whisk attachment, whip the cream until stiff peaks from.  

Assembly

  1. Fill the buns evenly with the marzipan mixture. Pipe whipped cream over the filling using a large star tip (1M) or a spoon.  

  2. Place the tops on the whipped cream, then dust tops with powdered sugar using a small sieve.  

Jenny's Notes:

  • I always knead my dough by hand for a bit after kneading it in a machine. The machine doesn't always do a perfect job and I've had instances before where I kneaded solely in the machine and had a strange dough rise as a result. A few rounds of kneading by hand fixed the problem; the yeast hadn't been distributed evenly when kneaded only by machine.

  • If you have a scale you can ensure your buns will be all the same size. Weigh the dough mass, then divide this number by 10. This will give you an idea how much each of the 10 buns should weigh. You don't have to be exact down to the gram, of course, but I would stay within 5 or so grams of this number. Divide the dough mass in 2, then divide each half into 5 equal parts. Then weigh each piece to see how accurate your eye was.

  • When you "crumble" the filling into pieces you may notice the dough is moist and hard to crumble, but tear it as best you can into small chunks. When you add the milk and marzipan the pieces will absorb the liquid and eventually come together into a smoothish mass.

  • I made my own marzipan for this recipe and used rose water. Rose is a very strong flavor, so go light, but I thought it made for a very unique pairing with almond and cardamom and very "European" tasting. Or, leave out the rose if you're skeptical and you'll still have a lovely cardamom/almond combination.

  • "Semlor" is plural, so if you would like to eat only one bun, ask for a "Semla."

Semlor (Swedish Cardamom Buns)
Yield 10
Author
Prep time
1 H & 20 M
Cook time
15 Min
Inactive time
1 Hour
Total time
2 H & 35 M

Semlor (Swedish Cardamom Buns)

Sweet, yeasted cardamom buns with a creamy marzipan filling and whipped cream topping.
Cook modePrevent screen from turning off

Ingredients

For the Cardamom Buns
For the Marzipan Filling

Instructions

Make the Cardamom Buns
  1. Oven 390°F / 200°C. 2 baking sheets lined with parchment paper or silpat.
  2. Place milk in a small saucepan and heat until milk just begins to simmer. Remove from heat and add butter, stirring to melt. Once butter is completely melted and integrated, allow mixture to sit until lukewarm.
  3. Place milk mixture, yeast, salt, sugar, cardamom, and 1 egg in the bowl of a stand mixer fitted with a paddle. Beat until all ingredients are incorporated. Switch to the dough hook and add flour slowly on medium-low speed until a soft dough forms. Continue to beat for several minutes on medium speed. You should hear the dough slapping the sides of the bowl, sticking only to the bottom. If the dough is sticking to the sides, add flour gradually until dough no longer sticks.
  4. Turn out onto a lightly floured surface and knead 1-2 minutes more. Divide dough into 10 equal portions and roll into balls. Place evenly prepared baking sheets. Cover with a cloth and let rise in a warm place until doubled in size, about 1 hour.
  5. Beat the second egg with the water and use a pastry brush or your hands to evenly brush the buns.
  6. Bake for about 15 minutes until golden brown or when internal temperature registers 185-190°F / 85-88°C.
  7. Transfer buns to a cooling rack, cover with a towel, and allow to cool.
Make the Marzipan Filling
  1. Once the buns are cool enough to handle, cut out a lid from the top using a small serrated knife. Set the lids aside. Using a fork, scoop out the inside of each bun and place in a medium bowl. Crumble/tear with your fingers as best you can. Add marzipan and milk and work into a smooth paste using your hands or a fork.
  2. In the bowl of a stand mixer fitted with the whisk attachment, whip the cream until stiff peaks from.
Assembly
  1. Fill the buns evenly with the marzipan mixture. Pipe whipped cream over the filling using a large star tip (1M) or a spoon.
  2. Place the tops on the whipped cream, then dust tops with powdered sugar using a small sieve.

Notes

I always knead my dough by hand for a bit after kneading it in a machine. The machine doesn't always do a perfect job and I've had instances before where I kneaded solely in the machine and had a strange dough rise as a result. A few rounds of kneading by hand fixed the problem; the yeast hadn't been distributed evenly when kneaded only by machine.If you have a scale you can ensure your buns will be all the same size. Weigh the dough mass, then divide this number by 10. This will give you an idea how much each of the 10 buns should weigh. You don't have to be exact down to the gram, of course, but I would stay within 5 or so grams of this number. Divide the dough mass in 2, then divide each half into 5 equal parts. Then weigh each piece to see how accurate your eye was.When you "crumble" the filling into pieces you may notice the dough is moist and hard to crumble, but tear it as best you can into small chunks. When you add the milk and marzipan the pieces will absorb the liquid and eventually come together into a smoothish mass.I made my own marzipan for this recipe and used rose water. Rose is a very strong flavor, so go light, but I thought it made for a very unique pairing with almond and cardamom and very "European" tasting. Or, leave out the rose if you're skeptical and you'll still have a lovely cardamom/almond combination.

Nutrition Facts

Calories

436.24

Fat

19.78 g

Sat. Fat

10.76 g

Carbs

56.25 g

Fiber

1.82 g

Net carbs

54.43 g

Sugar

18.41 g

Protein

9.08 g

Sodium

149.19 mg

Cholesterol

84.19 mg

Nutritional information is approximate. Based on one semla.

semla,semlor,cardamom buns,marzipan filling,swedish buns, yeasted bread, sweet buns
bread, breakfast, dessert
Nordic
Did you make this recipe?
Tag @jennyblogsandbakes on instagram and hashtag it #jennyblogs

Refrigerator Dill Pickles

Last Updated August 11, 2024

Summertime calls for watermelon, lemonade, ice cream, swimming, and cook outs.  And every quintessential cookout will have something to cook outside, usually meat and vegetables in some form.  (I know we're all thinking hamburgers, bratwursts, and hotdogs, but hey, there are some other weird traditions out there, too.)  And if you're cooking out, you're going to need buns and condiments.  And the best condiment award goes to....pickles!!

Not only does it have the best taste (opinion), but it stands alone.  As in, if you eat a pickle, no one will think twice.  But if we see you munching on a romaine lettuce leaf or slurping on a spoonful of ketchup, well, you might get some stares.  Of course, this is coming from someone who doesn't like hamburgers and once ate a romaine sandwich.  As in, onion, ketchup, mustard, and pickles sandwiched between to Romaine lettuce leaves.  Mmmmm.  Yeah, it was weird.  But I was so hungry, and hamburgers were the only option, I rather enjoyed it.  That's now on the worldwide webs.  Maybe I should change my heading to be: "Jenny, the girl who eats condiments like a main dish." Don't worry I won't, only you, my seven followers, are now privy to this information.  Haha.  

Back to pickles.  Now that we have remembered how great pickles are, did you know they are super easy to make at home?  Yes they are, and now you know that too.  Boil some water, throw some ingredients in a jar, chop up some cucumbers, stick them in the fridge, and voila!  Pickles.  

This post may contain affiliate links. If you buy something using these links, Jennyblogs may receive a small commission, at no extra cost to you. This helps to support Jennyblogs. For further information see the privacy policy. Grazie!

Recipe adapted from my mama


Refrigerator Dill Pickles

Makes about 24 spears/servings

Ingredients:

  • 3 1/2 cups / 830g water

  • 1 1/4 cups / 296g white vinegar

  • 1 Tbsp / 12g sugar

  • 1 Tbsp / 17g salt

  • 1 tsp / 2g turmeric, optional

  • 4 cups or about 2-3 large cucumbers, cut into slices, spears, or shape of choice

  • 2 cloves garlic

  • 2 heads fresh dill

  • 1 tsp red chili flakes, mustard seeds, or celery seeds, optional

Directions:

  1. Stir together water, vinegar, sugar, and salt in a large saucepan.  Place over medium-high heat and bring to a boil.  Remove from heat and allow to cool completely. 

  2. In a large glass jar or container, 4-quart or larger, arrange garlic, dill, cucumbers, and any spices you choose to use.  Pour the cooled liquid over the cucumbers, discarding or saving any leftover for another use.  Top with lid, sealing well, and refrigerate.  

  3. They will start to taste pickle-y the next day, but for optimum flavor refrigerate at least 3 days before consuming.  

Jenny's Notes:

  • I recommend making this recipe once as is to get an idea of the flavor profile, then play around to make it your own!

    1) If you like more bread & butter or sweet style pickles, up the sugar

    2) If you love dill, use more dill

    3) Add sliced onions or bell peppers

    4) Add more red pepper flakes or other hot pepper for more spice

    5) Really, add whatever suits your fancy. The garden is your playground.

  • The turmeric is for color, not so much flavor, to get that idyllic yellow pickle.  However, if you could care less about having a yellow pickle or don’t enjoy turmeric, leave it out!  I for one don't think the turmeric is very obvious in this recipe, but it's detectable if you really think about it.  

Refrigerator Dill Pickles
Yield 24
Author
Prep time
15 Min
Cook time
10 Min
Inactive time
72 Hour
Total time
72 H & 25 M

Refrigerator Dill Pickles

Classic dill pickles made in your refrigerator in just 3 days.
Cook modePrevent screen from turning off

Ingredients

Instructions

  1. Stir together water, vinegar, sugar, and salt in a large saucepan. Place over medium-high heat and bring to a boil. Remove from heat and allow to cool completely.
  2. In a large glass jar or container, 4-quart or larger, arrange garlic, dill, cucumbers, and any spices you choose to use. Pour the cooled liquid over the cucumbers, discarding or saving any leftover for another use. Top with lid, sealing well, and refrigerate.
  3. They will start to taste pickley the next day, but for optimum flavor refrigerate at least 3 days before consuming.

Notes

I recommend making this recipe once as is to get an idea of the flavor profile, then play around to make it your own! 1) If you like more bread & butter or sweet style pickles, up the sugar2) If you love dill, use more dill3) Add sliced onions or bell peppers4) Add more red pepper flakes or other hot pepper for more spice5) Really, add whatever suits your fancy. The garden is your playground.The turmeric is for color, not so much flavor, to get that idyllic yellow pickle. However, if you could care less about having a yellow pickle or don’t enjoy turmeric, leave it out! I for one don't think the turmeric is very obvious in this recipe, but it's detectable if you really think about it.

Nutrition Facts

Calories

10.04

Fat

0.04 g

Sat. Fat

0.01 g

Carbs

1.91 g

Fiber

0.20 g

Net carbs

1.72 g

Sugar

1.09 g

Protein

0.25 g

Sodium

276.95 mg

Cholesterol

0.00 mg

Nutritional information is approximate. Based on one pickle spear.

dill pickles, refrigerator pickles, homemade pickles
condiment, snack
American
Did you make this recipe?
Tag @jennyblogsandbakes on instagram and hashtag it #jennyblogs

Pistachio Cake with Honey Vanilla Buttercream

Last Updated August 10, 2024

Pistachios remind me of Christmas.  In fact, just this morning I had my first pang of "I miss Christmas," which usually hits me around July.  My family rarely eats/buys/uses pistachios, but we always have bowls of them out for Christmas.  It's tradition.  Beyond that, I never thought too much of cooking or baking with them because they were only ever around when we were already over inundated with food.  And yes, they are expensive and you may have to shell them.  

Then I went to Europe where pistachio gelato is the best flavor and the line up of pastries always includes pistachio right next to the chocolate and vanilla.  Pistachio was this flavor, this nut, that I had not tapped into.  And I've only just started.  Oh the thrills!  This cake was a light bulb of "What have I been missing out on!?" My poor family and friends, all these years and I didn't make this for them.  How selfish of me.  Selfish no more, here is the recipe so you can revel in the glory with me!

This cake is fluffy, light, with a wonderful, nutty pistachio flavor that is not overbearing. It has a slight elegance to it, something about being more than 2 layers and the white frosting.

The cake ingredients are fairly standard aside from the pistachios. If you have pistachio flour ready-made available to you, you can save yourself step. Maybe try Amazon, you can find anything online these days! If not, pistachios should be readily available, and you can make pistachio flour yourself by grinding them for a few seconds in a food processor. I don’t have a food processor in Italy, so I get by with an electric coffee grinder which works great!

The frosting is a light and creamy, not-too-sweet cooked frosting. Ever since the first time I’ve made a cooked frosting, the raves come pouring in about how it’s the best frosting they’ve ever eaten. Between cooked frostings and Italian meringue buttercream, I’ve rarely looked back at the traditional American buttercream that is mostly sugar. It has its place, but it seems the general consensus between anyone who has tried some of my cakes and cupcakes that a not-too-sweet frosting is GREATLY appreciated. Give the cooked frosting below a try and see if you don’t fall in love with it!

This post may contain affiliate links. If you buy something using these links, Jennyblogs may receive a small commission, at no extra cost to you. This helps to support Jennyblogs. For further information see the privacy policy. Grazie!

Recipe adapted from Joanne eats well with others


Pistachio Cake with Honey Vanilla Buttercream

Makes 1 three layer 6-inch round cake. Serves about 8

Ingredients:

For the Pistachio Cake

  • 1/2 cup / 63g shelled pistachios

  • 1 1/4 cups / 164g cake flour

  • scant 1/2 cup / 47g all-purpose flour

  • 1 1/2 tsp / 7g baking powder

  • 1/2 tsp / 2.5g baking soda

  • 1/2 tsp / 2.5g salt

  • scant 1/2 cup / 100g oil

  • 3/4 cup / 150g sugar

  • 1 1/2 tsp / 7g vanilla extract

  • 1 egg

  • 3/4 cup / 178g ice water

  • 1 egg white

  • 1/4 tsp cream of tartar

For the Honey Vanilla Buttercream

  • 3/4 cup / 150g sugar

  • 3 Tbsp / 20g all-purpose flour

  • 3/4 cup / 178g milk

  • 3 Tbsp / 44g heavy whipping cream

  • 3/4 cup / 170g butter, cubed

  • 1 tsp / 5g vanilla extract

  • 2 Tbsp / 42g honey

Directions:

Oven 350°F / 177°C.  Grease and line the bottoms of three 6-inch cake rounds with parchment paper.

Make the Pistachio Cake

  1. Place the pistachios in a food processor and pulse until coarsely chopped.  Set aside 2 tablespoons.  Continue to pulse remaining pistachios until finely ground, like flour in texture.  

  2. In a medium bowl, whisk together pistachio flour, cake flour, all-purpose flour, baking powder, baking soda, and salt.  

  3. In a normal bowl or bowl of a stand mixer, beat together oil, sugar, and vanilla.  Add egg and beat until just combined.  

  4. With the mixer on low, add the pistachio flour mixture to the batter in three additions, alternating with the ice water, beginning and ending with pistachio flour mixture.  After each addition mix until just combined.  

  5. In another medium bowl, beat the egg white with cream of tartar until soft peaks form, about 3-4 minutes.  Gently fold the egg white into the cake batter, starting with just a spoonful to lighten the batter, then continue on with the rest.  

  6. Pour batter into prepared cake pans and bake for 25-30 minutes, or until toothpick inserted in center comes out clean.  Allow cakes to cool in pans for 10 minutes, then flip onto a wire rack to cool completely while you make the buttercream.  Remove parchment paper from bottoms.  

Make the Honey Vanilla Buttercream

  1. In a medium saucepan, whisk together sugar and flour.  Add milk and cream and place over medium heat, stirring frequently, until mixture boils and thickens, about 5-10 minutes.  

  2. Once thickened, pour mixture into a bowl of a stand mixer.  Beat on high until cool, 8-10 minutes.  Reduce speed to medium low and add butter, piece by piece, until fully incorporated.  Increase speed and beat a few minutes, until light and fluffy.  Beat in vanilla and honey.  

Assembly

Use a serrated knife to level off the top of the cakes.  Cut off just as much as necessary to make the top of the cake level and flat.  If you prefer domed cakes, leave one layer uncut for the top. Place one leveled layer on desired serving plate, cut side down.  Generously spread frosting over top and place second layer on top, again cut side down.  Top with more frosting.  Finish with top layer, domed side up if desired.  Frost the whole cake.  Top with remaining 2 tablespoons chopped pistachios.   

Jenny's Notes:

  • For an 8 - 9in / 20-23cm 3 layer cake, double this recipe.  

  • If your buttercream seems too thin or soupy after you've added the butter, stick it in the fridge for a few minutes, then rewhip.  Most likely it has not cooled down enough to stabilize.

  • These layers are not overly thick, so don't worry if the amount of batter in the pans seems low or they don't rise very high, you still made it right! Once all three layers are stacked on top of one another, it makes for a nicely high, but not towering, 6 inch round cake.

  • If you don’t have 3 6-inch pans, it is easier to split the batter in two and bake in two pans, instead of 3. You then have the option of making a two layer cake, or cutting each layer in two for a four layer cake.  

Pistachio Cake with Honey Vanilla Buttercream
Yield 8 servings
Author
Prep time
1 H & 25 M
Cook time
30 Min
Total time
1 H & 55 M

Pistachio Cake with Honey Vanilla Buttercream

3 layer moist pistachio cake with a light and fluffy cooked honey vanilla buttercream frosting.
Cook modePrevent screen from turning off

Ingredients

For the Pistachio Cake
For the Honey Vanilla Buttercream

Instructions

Make the Pistachio Cake
  1. Oven 350°F / 177°C. Grease and line the bottoms of three 6-inch cake rounds with parchment paper.
  2. Place the pistachios in a food processor and pulse until coarsely chopped. Set aside 2 tablespoons. Continue to pulse remaining pistachios until finely ground, like flour in texture.
  3. In a medium bowl, whisk together pistachio flour, cake flour, all-purpose flour, baking powder, baking soda, and salt.
  4. In a normal bowl or bowl of a stand mixer, beat together oil, sugar, and vanilla. Add egg and beat until just combined.
  5. With the mixer on low, add the pistachio flour mixture to the batter in three additions, alternating with the ice water, beginning and ending with pistachio flour mixture. After each addition mix until just combined.
  6. In another medium bowl, beat the egg white with cream of tartar until soft peaks form, about 3-4 minutes. Gently fold the egg white into the cake batter, starting with just a spoonful to lighten the batter, then continue on with the rest.
  7. Pour batter into prepared cake pans and bake for 25-30 minutes, or until toothpick inserted in center comes out clean. Allow cakes to cool in pans for 10 minutes, then flip onto a wire rack to cool completely while you make the buttercream. Remove parchment paper from bottoms.
Make the Honey Vanilla Buttercream
  1. In a medium saucepan, whisk together sugar and flour. Add milk and cream and place over medium heat, stirring frequently, until mixture boils and thickens, about 5-10 minutes.
  2. Once thickened, pour mixture into a bowl of a stand mixer. Beat on high until cool, 8-10 minutes. Reduce speed to medium low and add butter, piece by piece, until fully incorporated. Increase speed and beat a few minutes, until light and fluffy. Beat in vanilla and honey.
Assembly
  1. Use a serrated knife to level off the top of the cakes. Cut off just as much as necessary to make the top of the cake level and flat. If you prefer domed cakes, leave one layer uncut for the top. Place one leveled layer on desired serving plate, cut side down. Generously spread frosting over top and place second layer on top, again cut side down. Top with more frosting. Finish with top layer, domed side up if desired. Frost the whole cake. Top with remaining 2 tablespoons chopped pistachios.

Notes

For an 8 - 9in / 20-23cm 3 layer cake, double this recipe. If your buttercream seems too thin or soupy after you've added the butter, stick it in the fridge for a few minutes, then rewhip. Most likely it has not cooled down enough to stabilize.


These layers are not overly thick, so don't worry if the amount of batter in the pans seems low or they don't rise very high, you still made it right! Once all three layers are stacked on top of one another, it makes for a nicely high, but not towering, 6 inch round cake.


If you don’t have three 6-inch pans, it is easier to split the batter in two and bake in two pans, instead of 3. You then have the option of making a two layer cake, or cutting each layer in two for a four layer cake.  

Nutrition Facts

Calories

619.89

Fat

36.67 g

Sat. Fat

13.98 g

Carbs

68.16 g

Fiber

1.40 g

Net carbs

66.76 g

Sugar

42.85 g

Protein

6.57 g

Sodium

500.72 mg

Cholesterol

77.11 mg

Nutritional information is approximate. Based on 8 servings.

cake,layer cake,pistachio flour,pistachio,roux,cooked frosting,buttercream,honey vanilla
dessert, cake
American
Did you make this recipe?
Tag @jennyblogsandbakes on instagram and hashtag it #jennyblogs

Very Chocolate Cherry Brownies

Last Updated August 10, 2024

This post contains affiliate links. If you buy something using these links, Jennyblogs may receive a small commission, at no extra cost to you. This helps to support Jennyblogs. For further information see the privacy policy. Grazie!

We bakers like to stick to the four main food groups: Chocolate, chooooocolate, chocolat, and cioccolato.  Although we no longer believe, as the Aztecs did, that chocolate is a gift from the gods nor do we throw away the golden goblet once the chocolate drink has been consumed (haven't you heard about recycling?! Sheesh), we'll take it for its taste and possible health properties.  I say possible because it hasn't been scientifically proven yet.  But we know in our hearts, right?  So, let's make some Very Chooooocolate brownies.  And throw in some cherries because it's just about cherry season and I grew up in a cherry town.  National Cherry Festival, anyone?  


Double Chocolate Cherry Brownies

Makes about 9-12 brownies

Ingredients:

  • 6 Tbsp / 85g butter

  • 1 1/3 cup / 225g chopped bittersweet or semisweet chocolate bar, or chips

  • 3/4 cup / 150g sugar

  • 1 tsp / 5g vanilla extract

  • 2 eggs

  • 1/3 cup / 40g all-purpose flour

  • 2/3 cup / 115g bittersweet or semisweet chocolate chips

  • generous 1/2 cup / 110g dried cherries

Directions:

Oven 350°F / 177°C.  Grease an 8x8in / 20x20cm square pan.

  1. Melt the butter in a medium saucepan over low heat.  Add the chocolate and stir continuously until the chocolate is melted and the mixture is smooth. 

  2. Remove from the heat and add sugar and vanilla.  Beat in the eggs, one at a time.  

  3. Add the flour and stir vigorously for about a minute, until the batter turns from grainy to glossy, and starts to pull away from the edges of the pan.  Add chocolate chips and cherries.

  4. Pour into prepared pan and bake for 25-30 minutes, or until center isn't quite set or a toothpick inserted near the center comes out mostly clean.  

Jenny's Notes:

  • If using semisweet chocolate I prefer to reduce the sugar to 125g or about a generous 1/2 cup. 

  • Don't over-bake brownies!  In my opinion, brownies are always better off on the dense, slightly under-baked side than dry or crispy.  

  • Nut fan?  Add 1/2 cup walnut, pecans, or your nut of choice! 

Double Chocolate Cherry Brownies
Yield 9-12 servings
Author
Prep time
20 Min
Cook time
30 Min
Total time
50 Min

Double Chocolate Cherry Brownies

Dense, fudgy, double chocolate brownies loaded with chocolate chunks and tart dried cherries.
Cook modePrevent screen from turning off

Ingredients

Instructions

  1. Oven 350°F / 177°C. Grease an 8x8in / 20x20cm square pan.
  2. Melt the butter in a medium saucepan over low heat. Add the chocolate and stir continuously until the chocolate is melted and the mixture is smooth.
  3. Remove from the heat and add sugar and vanilla. Beat in the eggs, one at a time.
  4. Add the flour and stir vigorously for about a minute, until the batter turns from grainy to glossy, and starts to pull away from the edges of the pan. Add chocolate chips and cherries.
  5. Pour into prepared pan and bake for 25-30 minutes, or until center isn't quite set or a toothpick inserted near the center comes out mostly clean.

Notes

If using semisweet chocolate I prefer to reduce the sugar to 125g or about a generous 1/2 cup. Don't over-bake brownies! Brownies are always better off on the dense, slightly under-baked side than dry or crispy. Nut fan? Add 1/2 cup walnut, pecans, or your nut of choice!

Nutrition Facts

Calories

387.92

Fat

20.18 g

Sat. Fat

11.93 g

Carbs

54.18 g

Fiber

2.66 g

Net carbs

51.53 g

Sugar

45.56 g

Protein

3.67 g

Sodium

82.56 mg

Cholesterol

61.64 mg

Nutritional information is approximate. Based on 9 servings.

dried cherry brownies, double chocolate cherry brownies, fudgy dense chocolate brownies, chocolate chip brownies, best ever brownies, favorite brownies
dessert
American
Did you make this recipe?
Tag @jennyblogsandbakes on instagram and hashtag it #jennyblogs

Chia Persimmon Pudding

Last Updated August 10, 2024

This post contains affiliate links. If you buy something using these links, Jennyblogs may receive a small commission, at no extra cost to you. This helps to support Jennyblogs. For further information see the privacy policy. Grazie!

I had never eaten a persimmon before living in Italy.  I probably couldn't have even picked it out from a line up of fruit.  But if you asked me, of course I would want to try a persimmon!  I had heard good things about them, especially the elusive "persimmon pudding."  

I used to go the market several times a week for my fruit and vegetables, one of my favorite weekly errands.  It was a large market, the ground floor of the Mercato Centrale if you’ve been there, with lots of vendors, but there was this dear old man that always had the best tomatoes and lettuce.  He would say "Ciao, bella," shake my hand, and always round the price down for me.  He also had this habit of sneaking in a fruit or vegetable that I hadn't ordered.  Whether that was a sweet gesture or a marketing strategy, I may never know.  One day, after getting my usual tomatoes, I arrived home to find this strange object that looked curiously like an orange tomato, but was most definitely not.  So....squishy and lacking that earthy, pungent, tomato vine smell.  After a little research, I found I had in my possession a kaki!  Okay, now what is a kaki?  

After a little more research, I found that kaki is what the Italians call persimmons. Sweet, mysterious persimmons.  Now...how to eat it?  I quickly realized they are like jelly on the inside when ripe, and it's only the skin that holds it together.  If that skin breaks, you have a real mess if you weren't prepared with a bowl or your mouth beneath it.  I ate that first one in hurry, before it all dripped from my hands onto the floor. 

From then on I bought them in packs and beautiful things happened, including various versions of persimmon pudding.  Below is a raw and vegan version of the Persimmon Pudding.  Makes for a great dessert, snack, or breakfast!  Kaki on.  

Recipe adapted from Blissful Basil.


Chia Persimmon Pudding

Serves 4

Ingredients:

For the Chia Pudding Layer

  • 2 cups / 474g unsweetened coconut milk or milk of choice

  • generous 1/2 cup / 90g chia seeds

  • 3 Tbsp / 60g maple syrup or honey

  • 2 tsp / 9g vanilla extract

  • 1/2 tsp / 1g cinnamon

  • pinch of cardamom

For the Persimmon Pudding Layer

  • 3 ripe persimmons

  • 1/4 tsp cinnamon

Directions:

*Note: Make the Chia Pudding the day before you want to eat the pudding, as it takes at least 8 hours to set up.  

You’ll need 4 small (about 12 oz), clear glasses or bowls.

Make the Chia Pudding

  1. In a medium bowl whisk together milk, chia seeds, maple syrup, vanilla, cinnamon, and cardamom.  

  2. Cover and refrigerate overnight or at least 8 hours.  

Make the Persimmon Pudding

  1. Remove the stems from the persimmons and place in a food processor or blender.  Add the cinnamon and blend until smooth.  

  2. Spoon about scant 1/4 cup Persimmon Pudding into the bottom of each glass.  Top with a scant 1/4 cup Chia Pudding.  Repeat layers until both puddings are gone.  Should make three layers of each, or 6 layers total in each glass. Top with additional cinnamon, if desired.

Jenny's Notes:

  • You'll want your persimmons to be very ripe and very soft all the way through; they should be bursting when you try to remove the stems.

  • Persimmons are a great source of vitamin A, vitamin C, and high in fiber.  

Chia Persimmon Pudding
Yield 4
Author
Prep time
15 Min
Inactive time
8 Hour
Total time
8 H & 15 M

Chia Persimmon Pudding

Layers of spiced coconut milk chia pudding and juicy persimmons are a simple, vegan, dairy-free, gluten, raw, etc. dessert, breakfast, or snack.
Cook modePrevent screen from turning off

Ingredients

For the Chia Pudding Layer
For the Persimmon Pudding Layer

Instructions

Make the Chia Pudding
  1. *Note: Make the Chia Pudding the day before you want to eat the pudding, as it takes at least 8 hours to set up.
  2. In a medium bowl whisk together milk, chia seeds, maple syrup, vanilla, cinnamon, and cardamom.
  3. Cover and refrigerate overnight or at least 8 hours.
Make the Persimmon Pudding
  1. You’ll need 4 small (about 12 oz), clear glasses or bowls.
  2. Remove the stems from the persimmons and place in a food processor or blender. Add the cinnamon and blend until smooth.
  3. Spoon about scant 1/4 cup Persimmon Pudding into the bottom of each glass. Top with a scant 1/4 cup Chia Pudding. Repeat layers until both puddings are gone. Should make three layers of each, or 6 layers total in each glass. Top with additional cinnamon, if desired.

Notes

You'll want your persimmons to be very ripe and very soft all the way through; they should be bursting when you try to remove the stems.

Nutrition Facts

Calories

266.73

Fat

9.61 g

Sat. Fat

2.90 g

Carbs

43.72 g

Fiber

12.46 g

Net carbs

35.76 g

Sugar

25.11 g

Protein

4.73 g

Sodium

12.43 mg

Cholesterol

0.00 mg

Nutritional information is approximate.

vegan, raw, no bake, chia pudding, persimmon pudding, dairy free, gluten free, refined sugar free
dessert, pudding
American
Did you make this recipe?
Tag @jennyblogsandbakes on instagram and hashtag it #jennyblogs

Enjoy your Kaki Pudding!

Homemade Marzipan

Last Updated: August 10, 2024

Marzipan!  That weird almond dessert that no one seems to really talk about in America, but people rave about in Europe. It really should catch on in the US, because:

  1. It tastes like almonds and is delicious

  2. It's easy to make

  3. It's fun to work with and versatile

 It can be used as filling or toppings of baked goods, and it can also be colored and molded into shapes or rolled out and used to cover cakes in a fondant fashion. Fondant has it's place, but I would rather eat a marzipan covered cake any day over a fondant cake.  

marzipan.jpg

You may have seen almond paste sold in stores, and although almond paste and marzipan are made from the same ingredients, they are not usually equal. This depends on what part of the world you call home.  In many European countries the terms marzipan and almond paste are interchangeable, in other parts, such as the US, they are different products. If they are different, as in the US, marzipan is smoother, sweeter, made with egg whites and sometimes rose water, whereas almond pasted is less sweet and has a coarser texture.  When I first started dabbling in marzipan, I used almond paste as a base to make marzipan, but now I prefer to make it from scratch.

It's so simple, as you can see for yourself!

This post may contains affiliate links. If you buy something using these links, Jennyblogs may receive a small commission, at no extra cost to you. This helps to support Jennyblogs. For further information see the privacy policy. Grazie!

Recipe adapted from La Cuochina Sopraffina


Marzipan

Makes about 280g of marzipan, or about 10 oz. 

Ingredients:

  • 125g / 1 1/3 cup almond flour or almonds

  • 125g / 1 cup powdered sugar

  • 1 egg white (about 30g)

  • 6 drops almond extract

  • 3 drops rose water, optional

Directions:

  1. If using whole almonds, place in a food processor and process until finely ground.   

  2. Process almond flour, powdered sugar, egg white, almond extract, and rose water until a thick dough forms.  If the consistency is too thin, add more powdered sugar.  

  3. Turn marzipan out onto a surface lightly dusted with powdered sugar, knead for a few seconds.  Wrap tightly in plastic wrap and refrigerate until needed, or freeze.  

Jenny's Notes:

  • This recipe is very simple to adjust to the amount you need, especially if you scale/weigh your ingredients.  As you may have noticed, the almond flour to powdered sugar is a 1:1 ratio.  

  • If you are worried about eating or serving raw egg whites, be sure to buy pasteurized egg whites from the store.   

Homemade Marzipan
Yield 10
Author
Prep time
10 Min
Total time
10 Min

Homemade Marzipan

Marzipan is a versatile and tasty European almond sweet, often paired with chocolate, molded into fruit shapes, or used to cover cakes in place of fondant. Gluten and dairy free.
Cook modePrevent screen from turning off

Ingredients

Instructions

  1. If using whole almonds, place in a food processor and process until finely ground.
  2. Process almond flour, powdered sugar, egg white, almond extract, and rose water until a thick dough forms. If the consistency is too thin, add more powdered sugar.
  3. Turn marzipan out onto a surface lightly dusted with powdered sugar, knead for a few seconds. Wrap tightly in plastic wrap and refrigerate until needed, or freeze.

Notes

This recipe is very simple to adjust to the amount you need, especially if you scale/weigh your ingredients. As you may have noticed, the almond flour to powdered sugar is a 1:1 ratio. If you are worried about eating or serving raw egg whites, be sure to buy pasteurized egg whites from the store.

Nutrition Facts

Calories

131.15

Fat

7.44 g

Sat. Fat

0.57 g

Carbs

14.21 g

Fiber

1.86 g

Net carbs

12.35 g

Sugar

11.43 g

Protein

3.51 g

Sodium

6.80 mg

Cholesterol

0.00 mg

Nutritional information is approximate. Based on 10 servings.

marzipan, almond paste, European sweets, marzipan fruit, fondant, gluten-free, dairy-free, raw
dessert
European
Did you make this recipe?
Tag @jennyblogsandbakes on instagram and hashtag it #jennyblogs

Lemon Cream Tart

Last Updated January 3, 2025

I've been on a French kick recently. This past Christmas I was gifted "The Art of French Classics" by Jacquy Pfeiffer. At first glance it seemed detailed, confusing, and lengthy. Second glance didn't get much better. This was not the type of book you would use to whip up a batch of cookies or bake a cake for dessert tonight. No, this book was going to require time, diligence, patience, determination, and careful reading.  

I decided to dissect this book by my favorite method: list making. Simple and efficient. I started employing this method when I was 13. My mom had bought me a cake mix cookbook by Betty Crocker, and I was thrilled to have my own cookbook to go through and cook all on my own.  Most of those recipes I would shudder at now (they're not completely from scratch, haha!!), but I wanted to make everything in there. Well, almost. Which is where the list came in. I wrote down every recipe I wanted to make, referencing the page numbers. When I had made a recipe, I would put a check mark by it. Much easier to glance at one page (or two or three, there were too many recipes I wanted to make!) than to go through the book every time. And oh so satisfying to make that little check mark. But, I am a nerd when it comes to baking, so you can take this as more of an anecdote than a recommendation.  :)

After initially being intimidated from reading “The Art of French Pastry” and applying my list method, I realized it wouldn’t be so difficult to make a lot of these recipes, after all. Some recipes, yes, which include making puff pastry, choux pastry, and various pastry creams and caramel all for one magnificent cake, but if French cuisine was easy we would all be making cream puffs, croissants, and eclairs everyday now, wouldn’t we? But to my pleasant surprise many of the recipes were quite manageable. This book helps you master some basic techniques that then become easier because you use them often for many of the recipes.

One of the simpler, but nonetheless delicious recipes from the cookbook is this Lemon Cream Tart. Everyone should have a good lemon tart in their repertoire. Someone once asked me, after learning I liked to bake, if I could make a good lemon tart. I had made good lemon tarts before, but sometimes I lack confidence that even if I like something, will it live up to other people's tastes buds? Until I find the recipe, that is. Then I know the search is over, although I will always be open to trying new things. I hung on to my current lemon tart recipe, but I felt like I could do better. A recipe that would be reliable, and deliver that over-the-top creamy, lemony zing. I found it in this recipe, oh yes.  

You’ll notice in my photos that the lemon tart is decorated with meringues and candied orange peels. The recipe does not include those because I feel that for the time spent making them, they don’t add significantly to the eating experience and are more for the wow factor. Don’t get me wrong, they’re yummy, but meringues do require a certain technique (mine unfortunately cracked a bit) and candying orange peel requires 10 days. So. I more than encourage you to get the book and try out those recipes yourselves, and especially the others, like the croissants, palmiers (my absolute favorite recipe from the cookbook), the brioche variations, eclairs, and on and on! Or, if all this seems a bit ambitious to you, gift the book to your favorite baking enthusiast and have them make them for you. :)

A quick tip when approaching seemingly complicated recipes like this one: break it down. Although this recipe may seem lengthy and entailed, it's actually simpler than it seems, especially if you separate it into a "crust" day and a "filling" day.  

This post may contain affiliate links. If you make a purchase using these links, Jennyblogs may receive a small commission, at no extra cost to you. This helps to support Jennyblogs. Where possible, links are prioritized to small businesses and ethically and responsibly made items. For further information see the privacy policy. Grazie!

Recipe adapted from “The Art of French Pastry” by Jacquy Pfeiffer.


*Note:  Make the pâte sablée at least one day ahead as it needs to rest overnight in the refrigerator; two nights is ideal.    

Lemon Cream Tart

Serves 8-12

Ingredients:

For the Pâte Sablée

  • 6 Tbsp / 97g butter

  • 1/4 tsp / 1g salt

  • 1 cup + 1 Tbsp / 145g all-purpose flour

  • 3 Tbsp / 18g almond flour

  • 1/2 cup / 55g powdered sugar

  • 1/4 tsp / 1g vanilla extract

  • 2 egg yolks

For the Lemon Cream

  • 1 cup / 200g sugar, divided

  • 5/8 cup / 140g lemon juice

  • pinch of salt

  • 3 eggs + 1 yolk

  • zest of half a lemon

  • 14 Tbsp / 192g butter, softened and cut into cubes

  • candied lemon peel, toasted nuts, or meringues for decoration, optional

Directions:

DAY 1:

Make the Pâte Sablée (2-3 days ahead of time you actually want the tart finished)

  1. In the bowl of a stand mixer, add butter, sea salt, and all-purpos flour. Mix on low speed just until crumbly.  Over-mixing will activate gluten in flour and make for a tougher crust. Add almond flour and powdered sugar, mixing until just combined.  Add vanilla and egg yolks on medium speed until just combined.  

  2. Scrape dough out onto a sheet of plastic wrap. Press into a 1/2 inch rectangle and wrap airtight in the plastic. Refrigerate overnight.  

ay 2:

Roll out Pâte Sablée

  1. Very lightly grease a tart pan with softened butter. You should barely see the butter on the pan.  If it is over-greased the dough may slip down the side as it is baking.  

  2. Remove dough from fridge, unwrap from plastic wrap, and place on a lightly floured surface.  For easier transportation to tart pan, you can roll it out on a floured silpat or piece of parchment paper.  

  3. Tap dough with a rolling pin to make sure it's pliable.  If at any point dough seems too stiff or cold, or cracks as you roll it out, let it rest at room temperature for a few minutes before continuing. Roll dough 3 times in one direction, then make a quarter turn. Periodically check to make sure your dough isn't sticking to the surface.  If it is, use a thin spatula to peel it off and re-flour the surface underneath.  Repeat rolling 3 times and making quarter turns until you have an evenly rolled out, 1/4" thick round of dough.

  4. At this point your dough should be larger than your tart pan.  Carefully transfer dough to pan. You can do this by gently wrapping the dough around the rolling pin, then unrolling it over the pan. Press dough into the pan, paying careful attention to the corners and being careful not to stretch or tear the dough to do so.  Use a knife to trim away any extra dough.  Refrigerate the tart shell uncovered for at least one hour, or preferably overnight.  

Day 2, 1 hour later ~ OR ~ Day 3:

  1. Preheat oven to 325°F / 160°C.  

  2. Remove crust from fridge and dock (poke holes in) bottom with a fork. This will allow steam to escape evenly during baking.  

  3. Line the shell with parchment paper or cheesecloth and pie weights, dry beans, or rice.

  4. Bake for 15 minutes, then remove parchment paper and pie weights. Bake for an additional 5-15 minutes, or until crust begins to evenly color and turn golden. Allow to cool.

Make the Lemon Cream

  1. In a small bowl, combine 1/2 cup / 100g of the sugar with lemon juice and salt; whisk until sugar and salt have dissolved.  

  2. In a medium bowl, combine remaining 1/2 cup / 200g of sugar with egg yolks and whisk for 30 seconds. Whisk the first lemon juice mixture into this mixture and add zest.  

  3. Create a water bath by simmering 1 inch of water in a medium saucepan over low heat.  Place bowl with lemon mixture over saucepan, making sure the bottom of the bowl isn't touching the water; whisk constantly so eggs don't scramble. Attach a digital thermometer to the bowl and continue to whisk until mixture reaches 176-179.6°F / 80-82°C.  

  4. Remove from heat and strain into a bowl through a fine-meshed sieve. Use a spatula to push mixture through strainer, if necessary. Transfer thermometer to the new bowl.  Allow mixture to cool to 140°F / 60°C, about 5 minutes.  

  5. At this point pour mixture into a blender, or leave in bowl if using an immersion blender. Add half of the butter and blend, then add second half of the butter and blend for an additional 30 seconds or so, until mixture is completely smooth.  

  6. Pour lemon cream filling into baked crust and allow to set for at least 2 hours in refrigerator. Decorate as desired, dust with powdered sugar, or leave as is. 

Buon Appetit!

Jenny's Notes:

  • The unbaked pâte sablée will keep well covered in the fridge for up to a week, or a month in the freezer.  

Lemon Cream Tart
Yield 8-12
Author
Prep time
1 H & 10 M
Cook time
30 Min
Inactive time
15 Hour
Total time
16 H & 40 M

Lemon Cream Tart

Lemony, creamy, zingy tart with a perfect butter tart crust from Jacquy Pfeiffer's "The Art of French Pastry."
Cook modePrevent screen from turning off

Ingredients

For the Pâte Sablée
For the Lemon Cream Filling

Instructions

Make the Pâte Sablée (2-3 Days Ahead of time)
  1. In the bowl of a stand mixer, add butter, sea salt, and all-purpos flour. Mix on low speed just until crumbly. Over-mixing will activate gluten in flour and make for a tougher crust. Add almond flour and powdered sugar, mixing until just combined. Add vanilla and egg yolks on medium speed until just combined.
  2. Scrape dough out onto a sheet of plastic wrap. Press into a 1/2 inch rectangle and wrap airtight in the plastic. Refrigerate overnight.
The next day:
  1. Very lightly grease a tart pan with softened butter. You should barely see the butter on the pan. If it is over-greased the dough may slip down the side as it is baking.
  2. Remove dough from fridge, unwrap from plastic wrap, and place on a lightly floured surface. For easier transportation to tart pan, you can roll it out on a floured silpat or piece of parchment paper.
  3. Tap dough with a rolling pin to make sure it's pliable. If at any point dough seems too stiff or cold, or cracks as you roll it out, let it rest at room temperature for a few minutes before continuing. Roll dough 3 times in one direction, then make a quarter turn. Periodically check to make sure your dough isn't sticking to the surface. If it is, use a thin spatula to peel it off and re-flour the surface underneath. Repeat rolling 3 times and making quarter turns until you have an evenly rolled out, 1/4" thick round of dough.
  4. At this point your dough should be larger than your tart pan. Carefully transfer dough to pan. You can do this by gently wrapping the dough around the rolling pin, then unrolling it over the pan. Press dough into the pan, paying careful attention to the corners and being careful not to stretch or tear the dough to do so. Use a knife to trim away any extra dough. Refrigerate the tart shell uncovered for at least one hour, or preferably overnight.
An hour later or the next day:
  1. Preheat oven to 325°F / 160°C.
  2. Remove crust from fridge and dock (poke holes in) bottom with a fork. This will allow steam to escape evenly during baking.
  3. Line the shell with parchment paper or cheesecloth and pie weights, dry beans, or rice.
  4. Bake for 15 minutes, then remove parchment paper and pie weights. Bake for an additional 5-15 minutes, or until crust begins to evenly color and turn golden. Allow to cool.
Make the Lemon Cream
  1. In a small bowl, combine 1/2 cup / 100g of the sugar with lemon juice and salt; whisk until sugar and salt have dissolved.
  2. In a medium bowl, combine remaining 1/2 cup / 200g of sugar with egg yolks and whisk for 30 seconds. Whisk the first lemon juice mixture into this mixture and add zest.
  3. Create a water bath by simmering 1 inch of water in a medium saucepan over low heat. Place lemon mixture over saucepan, making sure the bottom of the bowl isn't touching the water; whisk constantly so eggs don't scramble. Attach a digital thermometer to the bowl and continue to whisk until mixture reaches 176-179.6°F / 80-82°C.
  4. Remove from heat and strain into a bowl through a fine-meshed sieve. Use a spatula to push mixture through strainer, if necessary. Transfer thermometer to the new bowl. Allow mixture to cool to 140°F / 60°C, about 5 minutes.
  5. At this point pour mixture into a blender, or leave in bowl if using an immersion blender. Add half of the butter and blend, then add second half of the butter and blend for an additional 30 seconds or so, until mixture is completely smooth.
  6. Pour lemon cream filling into baked crust and allow to set for at least 2 hours in refrigerator. Decorate as desired, dust with powdered sugar, or leave as is.

Notes

The unbaked pâte sablée will keep well covered in the fridge for up to a week, or a month in the freezer.  

Nutrition Facts

Calories

496.27

Fat

33.28 g

Sat. Fat

19.43 g

Carbs

38.08 g

Fiber

0.79 g

Net carbs

37.28 g

Sugar

8.06 g

Protein

4.42 g

Sodium

311.86 mg

Cholesterol

197.83 mg

Nutritional information is approximate. Based on 1 serving if sliced into 8 pieces.

lemon tart, lemon cream, lemon curd, french tart, dessert, lemon bars, Jacquy Pfeiffer
dessert
French
Did you make this recipe?
Tag @jennyblogsandbakes on instagram and hashtag it #jennyblogs
IMG_4714.jpg

Coconut Scones

Last Updated August 9, 2024

This post may contain affiliate links. If you buy something using these links, Jennyblogs may receive a small commission, at no extra cost to you. This helps to support Jennyblogs. For further information see the privacy policy. Grazie!

Scones come in all different shapes and sizes.  Whether they're flat or fluffy, dry or moist, sweet or savory, round, square, or triangular.  I've never had the honor to eat a real British or Scottish scone, but I have a few favorite recipes that I only hope the real thing could live up to.  

This particular recipe is not too sweet, with only a 1/4 cup sugar aside from the glaze, and lovely with a cup of tea or coffee, although drinking liquids with them isn’t necessary because they are moist enough by themselves.  I always think bright citrus flavors are marvelous in scones, but you can never go wrong with coconut.

If you’re familiar with making biscuits, this recipe is very similar to a biscuit recipe. In fact, you may be wondering what the difference is between a biscuit and a scone. The main differences that I’ve understood, is that scones are a bit drier than biscuits, and biscuits have more acidity and are considered “flaky” where scones might be more described as “crumbly.” This also appears to be much debated, with everyone having their own opinion. I, for one, want my scones to be just as moist and flaky/crumbly as my biscuits. Plus, biscuits are usually just buttery, maybe flavored with some cheese or herbs, or with a touch of sugar to be served as stawberry shortcakes. Scones? So many flavors!

Recipe adapted from Food Network.


Coconut Scones

Makes about 20

Ingredients:

For the Scones

  • 4 1/4 cups / 510g all-purpose flour

  • 2 Tbsp / 30g baking powder

  • 1 tsp / 5g salt

  • 1/4 cup / 50g sugar, plus more for sprinkling

  • 2 cups / 160g shredded unsweetened coconut

  • 1 1/2 cups / 339g butter, cubed, or 1 1/4 cups / 277g oil

  • 1 cup / 237g unsweetened coconut milk

  • 4 eggs, lightly beaten

  • 1 tsp / 5g coconut extract

  • 2 cups / 250g pecans, finely chopped, plus more for sprinkling, optional

For the Glaze

  • 1 cup / 125g powdered sugar

  • 2-3 Tbsp / 30-45g unsweetened coconut milk

  • 1/4 tsp / 1g coconut extract

  • 1/4 tsp / 1g vanilla extract

Directions:

Oven 400°F / 205°C.  Line 2 baking sheets with parchment paper.

Make the Scones

  1. In the bowl of a stand mixer, combine flour, baking powder, salt, sugar, and coconut.  Add the butter or oil, and beat until mixture is coarse and crumbly.  

  2. In another bowl, whisk together milk, eggs, and coconut extract.  Stir into dry ingredients just until moistened.  Do not over mix.  Gently stir in pecans.  

  3. Scoop dough onto prepared baking pans into approximately 3 in / 7cm mounds, leaving enough space between scones so that they can brown evenly, about 2 in / 5cm.  Sprinkle with extra sugar and pecans, if desired.   

  4. Bake for 13-16 minutes, until starting to turn golden and the center no longer feels doughy to the touch.  

Make the Glaze

  1. In a small bowl whisk together powdered sugar, extracts, and 2 tablespoons of milk.  Add more milk to get a drizzling consistency, if needed.  

  2. Drizzle over scones while they are still warm.  

Jenny's Notes:

  • When you first add the liquid into the flour mixture, you may notice the dough seems too wet/soupy. Let it sit just for a minute or two (great time to prepare your pans), and it will magically thicken. My biscuit recipe is like this too. I always think it’s too wet when I first stop mixing, but then it ends up being fine.

  • You might notice I don't always give the weight for measurements less than 1 tsp and never for eggs.  Unless a recipe needs to be very exact (such as plenty of French classics), I find eggs don't need to be weighed.  A little less or extra egg in a recipe like this one is not going to make a world of difference, and the 1/4 of an egg you had to remove to get an exact weight would probably go to waste.  That’s a shame, so I always round the egg measurements or weight to the nearest whole egg.  As far as the teaspoon measurements, I find scales tend to be less precise than an actual teaspoon, unless you have one of those smaller and more precise (to the nearest .001g) scales.

  • Some family members of mine don't appreciate nuts in their baked goods, so I omit the nuts in the batter and sprinkle some on half of the scones.  

  • An ice cream/cupcake scoop works great to transfer the dough onto the baking sheets.  

  • Don't have coconut milk?  Use any kind of milk you have on hand! 

Coconut Scones
Yield about 20 scones
Author
Prep time
25 Min
Cook time
16 Min
Total time
41 Min

Coconut Scones

Moist coconut scones with a coconut glaze and pecans.
Cook modePrevent screen from turning off

Ingredients

For the Scones
For the Glaze

Instructions

Make the Scones
  1. Oven 400°F / 205°C. Line 2 baking sheets with parchment paper.
  2. In the bowl of a stand mixer, combine flour, baking powder, salt, sugar, and coconut. Add the butter or oil, and beat until mixture is coarse and crumbly.
  3. In another bowl, whisk together milk, eggs, and coconut extract. Stir into dry ingredients just until moistened. Do not over mix. Gently stir in pecans.
  4. Scoop dough onto prepared baking pans into approximately 3 in / 7cm mounds, leaving enough space between scones so that they can brown evenly, about 2 in / 5cm. Sprinkle with extra sugar and pecans, if desired.
  5. Bake for 13-16 minutes, until starting to turn golden and the center no longer feels doughy to the touch.
Make the Glaze
  1. In a small bowl whisk together powdered sugar, extracts, and 2 tablespoons of milk. Add more milk to get a drizzling consistency, if needed.
  2. Drizzle over scones while they are still warm.

Notes

When you first add the liquid into the flour mixture, you may notice the dough seems too wet/soupy. Let it sit just for a minute or two (great time to prepare your pans), and it should thicken.


Some family members of mine don't appreciate nuts in their baked goods, so I omit the nuts in the batter and sprinkle some on half of the scones. An ice cream scoop works great to transfer the dough onto the baking sheets. Don't have coconut milk? Use any kind of milk you have on hand!

Nutrition Facts

Calories

410.68

Fat

29.69 g

Sat. Fat

14.90 g

Carbs

33.36 g

Fiber

3.25 g

Net carbs

30.11 g

Sugar

9.93 g

Protein

5.89 g

Sodium

384.66 mg

Cholesterol

73.64 mg

Nutritional information is approximate. Based on 20 servings and includes pecans.

coconut scones, moist scones, pecan, coconut, coconut glaze, scones,
breakfast, bread
American
Did you make this recipe?
Tag @jennyblogsandbakes on instagram and hashtag it #jennyblogs

Quinoa Coconut Date Rolls

IMG_4728.jpg

Last Updated August 8, 2024

These little morsels are so named because they are rolled, and no, these will not get you a date nor would I suggest bringing them on a first date.  Not because these aren't scrummy (that’s scrumptious and yummy combined), but because "healthy" baking should always be treated warily.  You must already have a well established relationship with that person, preferably have treated them to some normal sugary delicious desserts so that they understand that you understand what a dessert "should" be, and can trust your taste buds when you then try to sell them on your spinach-spirolina-turmeric-kale-ginger-wasabi-moringa bars that are also dairy-free and refined-sugar free.  Whew, I'm out of breath.  But that relationship is important.  So if I've never eaten anything that you've made before, know that I might distrust you at first, in the most genial way possible.  And you should distrust me, until I gain your trust.  

Also understand what your taste preferences are, and if you don't like healthy desserts, well then, may I ask why are you reading this particular recipe? May I kindly redirect you to this decadent Peanut Butter Brownie Trifle?  Or if you don't like dates, we might have a problem.  But if you like healthy desserts, or are exploring in this arena, then you probably know what you're getting yourself into.  The quinoa provides protein and grains, the almonds provide good fats and more protein, while the dates give sweetness and carbs and coconut brings flavor to the party. 

So now, using your own best judgment, allow me to introduce my friends, the Quinoa Coconut Date Rolls.

This post may contain affiliate links. If you buy something using these links, Jennyblogs may receive a small commission, at no extra cost to you. This helps to support Jennyblogs. For further information see the privacy policy. Grazie!

Recipe adapted from Skinny Ms.


Quinoa Coconut Date Rolls

Makes about 10-12 rolls

Ingredients:

  • 1/3 cup / 60g dry quinoa

  • 2/3 cup / 158g water

  • 1 cup / 160g pitted dates

  • 1/2 cup / 70g almonds

  • 1/3 cup / 33g grated unsweetened coconut, plus more for rolling

  • 2-3 tsp / 10-15g water

  • 1/4 cup / 42g chocolate chips, optional

Directions:

  1. Combine quinoa and water in a small saucepan over medium heat.  Bring to a boil and reduce heat.  Cover and simmer for 10-15 minutes, until all the water is absorbed.  Set aside to cool completely.  If you already have quinoa made, you'll need about 1 cup.  

  2. Place dates in a food processor and blend until they stick together in a ball.  Add the almonds, coconut, and quinoa; pulse until well combined.  Add water, if necessary, until the mixture holds together.  Shape into balls or roll.  Place extra coconut on a plate and roll the rolls around until completely covered in coconut.  

  3. *Optional:  Heat chocolate chips over a double boiler or in the microwave for 30 second bursts, until melted.  Drizzle chocolate over rolls.

  4. Store in an airtight container for up to a week, or freeze.  

Jenny's Notes:

  • For a chunkier roll, process for a shorter period of time.  

  • These rolls are also delicious if you add a 1/2 tsp of cinnamon. They could become autumnal if you add cinnamon along with a dash of nutmeg, cloves, and ginger. Yum!  

Quinoa Coconut Date Rolls (Vegan)
Yield 10-12 rolls
Author
Prep time
25 Min
Cook time
15 Min
Total time
40 Min

Quinoa Coconut Date Rolls (Vegan)

Nutritious Lara-bar like rolls made with quinoa, dates, coconut, and almonds with optional chocolate drizzle. Great for breakfast, snacks, on the go, and after workouts!
Cook modePrevent screen from turning off

Ingredients

Instructions

  1. Combine quinoa and water in a small saucepan over medium heat. Bring to a boil and reduce heat. Cover and simmer for 10-15 minutes, until all the water is absorbed. Set aside to cool completely. If you already have quinoa made, you'll need about 1 cup.
  2. Place dates in a food processor and blend until they stick together in a ball. Add the almonds, coconut, and quinoa; pulse until well combined. Add water, if necessary, until the mixture holds together. Shape into balls or roll. Place extra coconut on a plate and roll the rolls around until completely covered in coconut.
  3. *Optional: Heat chocolate chips over a double boiler or in the microwave for 30 second bursts, until melted. Drizzle chocolate over rolls.
  4. Store in an airtight container for up to a week, or freeze.

Notes

For a chunkier roll, process for a shorter period of time. These rolls are also delicious if you add a 1/2 tsp of cinnamon. They could become autumnal if you add cinnamon along with a dash of nutmeg, cloves, and ginger. Yum!

Nutrition Facts

Calories

151.00

Fat

7.49 g

Sat. Fat

2.97 g

Carbs

20.79 g

Fiber

3.25 g

Net carbs

17.54 g

Sugar

13.01 g

Protein

3.11 g

Sodium

37.86 mg

Cholesterol

0.00 mg

Nutritional information is approximate. Based on 10 servings and includes chocolate drizzle.

quinoa, coconut, almonds, gluten-free, vegan, dairy-free, refined sugar-free, vegetarian, healthy, nutritious, clean eating, egg-free
snack, breakfast
American
Did you make this recipe?
Tag @jennyblogsandbakes on instagram and hashtag it #jennyblogs

Tourte Milanese

Last Updated August 8, 2024

Tourte Milanese, also known as Tourte Milanaise.  No, the second version does not include mayonnaise.  Part of the family en croute, or encased in dough.  Who doesn't want to eat food, soup, and anything edible wrapped in flaky, buttery dough? In this case, roasted peppers, herbed scrambled eggs, cheese, spinach, and meat.

The green from the spinach, the white (ish) from the eggs, and the red from the roasted peppers is supposed to be an ode to the Italian flag. You can use whichever kind of sweet peppers you like, and as you can see from my photos, I used multi-colored peppers that time!

This tourte is a showstopper piece for sure. You will feel quite accomplished pulling this out of the oven, and taking your first bite into the explosion of hot, flaky layers, melty cheese, herbs, sweet peppers, smoky meat, and garlicky spinach. It may look intimidating, but you can adjust this recipe to how much time and effort you want to put into it. For example, you can make your own puff pastry, or you can pick it up at the store. You could roast your own peppers, or buy a jar of already roasted peppers. I enjoy making everything as home-made and from scratch as possible, but sometimes life just doesn’t allow that. 

I recommend reading through the recipe once or twice and taking a peek at my notes at the bottom to make your game plan.  For example, if you’re making your own puff pastry, that in and of itself can easily be a two day recipe, so you'll want to make that a day ahead, or way ahead, and freeze it until you have the urge to make a recipe like this.  

Want some inspiration?  Watch this fun video of Julia Child and Michel Richard making Puff Pastry and Tourte Milanese!

This post may contain affiliate links. If you buy something using these links, Jennyblogs may receive a small commission, at no extra cost to you. This helps to support Jennyblogs. For further information see the privacy policy. Grazie!


Tourte Milanese

Serves 8-12

Ingredients:

For the Crust

  • 1 lb. / 450g puff pastry, home-made or store bought

  • Egg wash made from 1 egg beaten with 1 Tbsp water

For the Eggs

  • 10 eggs

  • 1 Tbsp chopped fresh chives or green onion

  • 1 Tbsp chopped fresh parsley or basil

  • 2 tsp snipped fresh tarragon or fresh oregano

  • salt and ground pepper, to taste

  • 3 Tbsp / 42g butter

For the Rest of the Filling

  • 6 large red bell peppers (or use a 16oz jar or two of roasted red peppers)

  • 1 1/2 lbs / 680g spinach

  • 1 Tbsp / 14g olive oil

  • 1 Tbsp / 14g butter

  • 2 garlic cloves, peeled and minced

  • salt and pepper, to taste

  • 1/4 tsp grated nutmeg

  • 8 oz / 225g Swiss cheese

  • 8 oz / 225g smoked turkey or ham

  • about 1/2 cup each of bread crumbs and shredded parmesan cheese, optional

Directions:

Generously grease an 8in / 20cm springform pan.  

Make the Crust

  1. Cut off 1/4 of the puff pastry, cover, and set aside.

  2. Roll out the remaining pastry to roughly 1/8'‘. If working with store-bought, you may have two squares that you will have to press together at the edges as close to a square as you can for rolling out. Be sure to roll it thin enough so it will have a chance to be baked all the way through in the oven.  It should be big enough to cover the bottom and sides of your springform pan with an overhang.  Carefully press into pan, being sure to press all the way into the corners.  Cover and refrigerate.

  3. Roll out the remaining 1/4 of puff pastry until it is roughly 1/8" thick. Again, you may have to cut and press together to get as close to a square as you can before rolling out. Cut out an 8 in / 20cm circle, using an 8 in / 20cm pie plate or cake tin as a template.  Place on a plate or baking sheet, cover, and refrigerate.  

Make the Eggs

  1. Whisk eggs, herbs, salt and pepper together.  Melt butter in a skillet over low heat and pour in eggs.  Gently stir, continuously moving the setting eggs towards the center and allowing runny eggs to reach the bottom of the pan.  When the whole mixture has started to thicken, but still a bit runny, remove from heat and pour onto a plate. Cover and refrigerate and until ready to use.  

Roast the Peppers

Skip this step if you bought roasted red peppers.  

Method 1: Place peppers over an open flame on your stove top until blackened.  Flip and allow second side to roast.  Repeat until all peppers have been roasted.  

Method 2: Place all peppers onto a tinfoil lined sheet pan.  Place under broiler in your oven, checking every few minutes, until peppers are blackened.  Turn peppers over and roast second side.  

Once peppers have been roasted, place in an airtight container or ziploc bag for about 20 minutes.

Remove peppers and rub the skin off.  Cut out the stems and slice from top to bottom, laying them flat.  Remove seeds and trim away any inside veins.  

Place peppers on a plate lined with paper towels to absorb any excess liquid, cover, and refrigerate.

Blanch and Sauté the Spinach

  1. Bring a large amount of salted water to a boil.  Add spinach and blanch for 1 minute.  Drain in a colander and rinse in cold water to stop it from cooking.  Press the spinach to remove excess liquid.  

  2. Place oil, butter, and garlic in a large frying pan over medium heat.  When garlic starts to sizzle, add blanched spinach and sauté for 3 minutes.  Season with salt, pepper, and nutmeg.  Remove from heat and transfer spinach to a plate lined with paper towels.  Cover and refrigerate until needed.  

Assemble the Tourte

Preheat oven to 350°F / 177°C.  

Remove the pastry lined pan from the fridge, along with your eggs, peppers, spinach, cheese, and turkey/ham.  Layer your ingredients in this order, laying them flat and spreading to the edge:

  1. Bread crumbs and grated parmesan, optional

  2. Half of eggs

  3. Half of spinach

  4. Half of turkey/ham

  5. Half of cheese

  6. All the peppers

  7. Other half of cheese

  8. Other half of turkey/ham

  9. Other half of spinach

  10. Other half of eggs

Trim the pastry overhang to within 1 in / 2.5cm of the pan. Brush the inner side of with egg wash and fold over filling. Brush the other side with more egg wash. 

Remove the round pastry top from fridge, re-rolling if it has shrunk any. Place over the folded edges of the tourte, pressing down to seal. Brush with more egg wash. Cut a vent in the center of the dough, or use a knife to trace a design. Or, you can cut out shapes from the puff pastry scraps to decorate the top. Brush shapes with more egg wash.

Optional: Chill assembled tourte in fridge for 30 minutes or more prior to baking. It will require more baking time if chilled.

Place tourte on a tinfoil lined baking sheet and bake for 1 hour 10 minutes - 1 hour 30 minutes, or until pastry is puffed and a deep golden brown.  

Cool for 30 minutes before releasing from pan and serving.

To reheat leftovers, place in an oven preheated to 350°F / 177°C for 20-30 minutes. 

Jenny's Notes:

The recipe above is pretty traditional, however, it can easily be adjusted to your tastes.  

No soggy bottoms here!

No soggy bottoms here!

  • Can be assembled a day ahead.  

  • Store-bought puff pastry is usually pre-rolled quite thin, so as you roll it out it will get even thinner. When I made my own, and as you can see in the video of Julia Child and Michel Richard, homemade is more delicate to roll out and won’t get as thin, more like 1/4”.

  • Before layering in the filling, I suggest sprinkling the bottom with a grated hard cheese, such as parmesan, or bread crumbs, to avoid the soggy-bottom syndrome. I did a combo of cheese and bread crumbs.

  • For the herbed scrambled eggs, chives, parsley, and tarragon combo is more traditional, but I prefer green onion, basil, and oregano.

  • Feel free to use whichever color peppers you like! I roasted multi-colored mini sweet peppers in these photos.

  • Instead of using paper towels to absorb extra liquid from the spinach and peppers, you can also place them in a strainer over a bowl.

  • 1 1/2 lbs of spinach may seem outrageous, but it really cooks down. I have used a scant pound before when that’s all I had, but the spinach is surprisingly delicious and I wouldn’t modify the recipe down if I had a choice.

  • Play around with cheeses! You'll want softer cheeses, ones that melt well. Think cheddar, gruyère, havarti, gouda, brie...I enjoy half Swiss and half dill havarti, or another favorite is smoked gruyère.

  • When I made homemade puff pastry, this tourte required the longer bake time. With store-bought pastry it often only requires the lower end of the baking time. But again, this will also vary depending on your oven.

Tourte Milanese
Yield 8-12 Servings
Author
Prep time
1 H & 30 M
Cook time
1 H & 30 M
Inactive time
30 Min
Total time
3 H & 30 M

Tourte Milanese

Layers of turkey, cheese, spinach, roasted red peppers, and eggs encased in flaky puff pastry.
Cook modePrevent screen from turning off

Ingredients

For the Crust
For the Eggs
For the Rest of the Filling

Instructions

Make the Crust
  1. Generously grease an 8in / 20cm springform pan.
  2. Cut off 1/4 of the puff pastry, cover, and set aside.
  3. Roll out the remaining pastry to roughly 1/8'‘. If working with store-bought, you may have two squares that you will have to press together at the edges as close to a square as you can for rolling out. Be sure to roll it thin enough so it will have a chance to be baked all the way through in the oven. It should be big enough to cover the bottom and sides of your springform pan with an overhang. Carefully press into pan, being sure to press all the way into the corners. Cover and refrigerate.
  4. Roll out the remaining 1/4 of puff pastry until it is roughly 1/8" thick. Again, you may have to cut and press together to get as close to a square as you can before rolling out. Cut out an 8 in / 20cm circle, using an 8 in / 20cm pie plate or cake tin as a template. Place on a plate or baking sheet, cover, and refrigerate.
Make the Eggs
  1. Whisk eggs, herbs, salt and pepper together. Melt butter in a skillet over low heat and pour in eggs. Gently stir, continuously moving the setting eggs towards the center and allowing runny eggs to reach the bottom of the pan. When the whole mixture has started to thicken, but still a bit runny, remove from heat and pour onto a plate. Cover and refrigerate and until ready to use.
Roast the Peppers
  1. Skip this step if you bought roasted red peppers.
  2. Method 1: Place peppers over an open flame on your stove top until blackened. Flip and allow second side to roast. Repeat until all peppers have been roasted.
  3. Method 2: Place all peppers onto a tinfoil lined sheet pan. Place under broiler in your oven, checking every few minutes, until peppers are blackened. Turn peppers over and roast second side.
  4. Once peppers have been roasted, place in an airtight container or ziploc bag for about 20 minutes to steam.
  5. Remove peppers and rub the skin off. Cut out the stems and slice from top to bottom, laying them flat. Remove seeds and trim away any inside veins.
  6. Place peppers on a plate lined with paper towels to absorb any excess liquid, cover, and refrigerate.
Blanch and Sauté the Spinach
  1. Bring a large amount of salted water to a boil. Add spinach and blanch for 1 minute. Drain in a colander and rinse in cold water to stop it from cooking. Press the spinach to remove excess liquid.
  2. Place oil, butter, and garlic in a large frying pan over medium heat. When garlic starts to sizzle, add blanched spinach and sauté for 3 minutes. Season with salt, pepper, and nutmeg. Remove from heat and transfer spinach to a plate lined with paper towels. Cover and refrigerate until needed.
Assemble the Tourte
  1. Preheat oven to 350°F / 177°C.
  2. Remove the pastry lined pan from the fridge, along with your eggs, peppers, spinach, cheese, and turkey/ham. Layer your ingredients in this order, laying them flat and spreading to the edge:
  3. Bread crumbs and grated parmesan, optional
  4. Half of eggs
  5. Half of spinach
  6. Half of turkey/ham
  7. Half of cheese
  8. All the peppers
  9. Other half of cheese
  10. Other half of turkey/ham
  11. Other half of spinach
  12. Other half of eggs
  13. Trim the pastry overhang to within 1 in / 2.5cm of the pan. Brush the inner side with egg wash and fold over filling. Brush the other side with more egg wash.
  14. Remove the round pastry top from fridge, re-rolling if it has shrunk any. Place over the folded edges of the tourte, pressing down to seal it. Brush with more egg wash. Cut a vent in the center of the dough, or use a knife to trace a design. Or, you can cut out shapes form the puff pastry scraps and decorate the top. Brush shapes with more egg wash.
  15. Optional: Chill assembled tourte in fridge for 30 minutes or more prior to baking. It will require more baking time if chilled.
  16. Place tourte on a tinfoil lined baking sheet and bake for 1 hour 10 minutes - 1 hour 30 minutes, or until pastry is puffed and a deep golden brown.
  17. Cool for 30 minutes before releasing from pan and serving.
  18. Can be assembled a day ahead.
  19. To reheat leftovers, place in an oven preheated to 350°F / 177°C for 20-30 minutes.

Notes

The recipe above is pretty traditional, however, it can easily be adjusted to your tastes.  

  • Can be assembled a day ahead.  
  • Store-bought puff pastry is usually pre-rolled quite thin, so as you roll it out it will get even thinner. When I made my own, and as you can see in the video of Julia Child and Michel Richard, homemade is more delicate to roll out and won’t get as thin, more like 1/4”.
  • Before layering in the filling, I suggest sprinkling the bottom with a grated hard cheese, such as parmesan, or bread crumbs, to avoid the soggy-bottom syndrome. I did a combo of cheese and bread crumbs.
  • For the herbed scrambled eggs, chives, parsley, and tarragon combo is more traditional, but I prefer green onion, basil, and oregano.
  • Feel free to use whichever color peppers you like! I roasted multi-colored mini sweet peppers in these photos.
  • Instead of using paper towels to absorb extra liquid from the spinach and peppers, you can also place them in a strainer over a bowl.
  • 1 1/2 lbs of spinach may seem outrageous, but it really cooks down. I have used a scant pound before when that’s all I had, but the spinach is surprisingly delicious and I wouldn’t modify the recipe down if I had a choice.
  • Play around with cheeses! You'll want softer cheeses, ones that melt well. Think cheddar, gruyère, havarti, gouda, brie...I enjoy half Swiss and half dill havarti, or another favorite is smoked gruyère.
  • When I made homemade puff pastry, this tourte required the longer bake time. With store-bought pastry it often only requires the lower end of the baking time. But again, this will also vary depending on your oven.

Nutrition Facts

Calories

686.27

Fat

45.9 g

Sat. Fat

16.93 g

Carbs

42.33 g

Fiber

5.69 g

Net carbs

36.63 g

Sugar

6.64 g

Protein

28.54 g

Sodium

494.18 mg

Cholesterol

281.18 mg

Nutritional information is approximate and based on 8 servings, including bread crumbs and parmesan.

Tourte Milanese, Julia Child, Michel Richard, spinach, roasted red peppers, en croute, scrambled eggs, cheese, puff pastry,turkey, Italian flag
breakfast, dinner
Italian, French
Did you make this recipe?
Tag @jennyblogsandbakes on instagram and hashtag it #jennyblogs

How to Blog - By Someone Who Doesn't Know How

Photo Credit: Hannah Kelsey

Photo Credit: Hannah Kelsey

Last updated October 13, 2024

This post may contain affiliate links. If you make a purchase using these links, Jennyblogs may receive a small commission, at no extra cost to you. This helps to support Jennyblogs. Where possible, links are prioritized to small businesses, and American companies and products made in the USA for American readers. For further information see the privacy policy. Grazie!

Oh hey there. It's nice to see you here. Looks like someone is curious about how to become a STAR blogger. Beyond viral. Basically means you're in the hall of fame for bloggers. I can assure you, you have come to the right place. In this humble post I will show you how to:

  1. Create interesting content

  2. Improve your writing

  3. Up the game on humor

  4. Get Your Point Across, Be Understood Really Well, Be Clear

  5. Take super-awesome-stunning-great photos

  6. Edit photos and choose filters

  7. Increase your intelligence

Don't have a blog? No worries, number 7 still applies. If you are thinking about starting a blog, I can help you.  

First, you'll need a blog. We could make really extensive pro and con lists about all of the pros and cons about where to get a website, but hey, time is precious, right? I'll save you the trouble: Get Squarespace. There, no time wasted, no stress in having to make a decision, no taking into consideration what some of your specific needs might be. Next, you'll want to pick out a name for your blog and get a domain to match. Just like you wouldn't go out the door with your cell phone cover not matching your pillowcase, you need a good name and domain to match.  What's a domain? Idunnaknow. Probably means you have dominion over your blog, and no one else.  Mwahahaha. Because if they don't match, your name might lose syncretism with your domain, and the domain might decide it wants dominion and take over.  Thankfully it hasn't happened to me yet, but I thought I should warn you.  

So now you have a website and your domain. Now what? I'll be using a new baking post, a recipe and photos for Malted Chocolate Chip Cookies, to help demonstrate some of the techniques and strategies listed below. 

Create Interesting Content

To have a star blog, you need to have interesting stuff to write about. For example, if you collect baseball cards, like animals, try the samples at Sam's Club on a regular basis, watch a ton of movies...There's also an appalling lack of political opinions out there. Especially long rants, judgy articles, and arguments. So you might want to consider putting yours out there, fill the gap, ya know. Oh, and I almost forgot, baking blogs. There aren't very many of those, either, that's why I decided to blog n' bake. That and the baking/cooking section on Pinterest is a little lackluster.

Once you've found your niche, it's time to let the pen fly! Or fingers, as you'd say in this day and age. Always, always, ALWAYS start your blog out with a personal story or anecdote. Make it at least 7 paragraphs long (the number of completion), and if you can start to weave in your actual content or recipe towards the end, that's toooootally cool. Bonus if you can include an anecdote within the anecdote, or tie in 3 other stories during your main content.  The more the merrier!  This would also be a great spot to include your dog/cat's cute behavior for the last two weeks.  Keep your main content to a minimum, people's attention spans are rather short these days, and this is your blog, so you need to make sure you get your moment.  Include your opinion, your take, and advice on everything.  And be super transparent about everything, no walls.  Why else would people be reading your blog?  

Improve You're writing

Whilst blogging, you got to be ready to let your ideas fly.  Don't let grammer, spelling; and punk-you-a-shun get in you"re way.  There more like guidelines anyways.  If your bad at spelling or grammar doesn't come naturalmenty to you, don't use spell check and be like all those spelling bee medalists out there; no! You be you.  You do you.  If you spelled environment enviermant, leave it.  Empowerment to bad spellers everywhere.  Chances are people won't notice.  And time is money, people!  

Up the Game on Humor

Tell jokes.  Even if no one laughs in real life, or you forget the punch line.  Quote Parks and Rec and SNL constantly.  Give it the Girl Scout try.  No one was ever born funny, after all.  

Get Your Point Across, Be Understood Really Well, Be Clear

Don't be afraid to repeat yourself, be redundant, quote multiple sources to make just one point, or say the same thing twice. USE ALL CAPS FOR EMPHASIS as OFTEN as you WANT, and/or use BOLD or italic font.  Then you can step back and enjoy your blog for what it is, a piece of art, rather than just blah, blah, blah.  

Don't be afraid of clichés, catch-phrases, and idioms.  They always help to make your writing really clear and concise.  Otherwise your point might be like looking for a needle in a haystack.  Stay away from euphemisms.  

Avoid big words.  Lots of little words make so much more sense.  The extraneity of lengthy words then becomes superfluous.

Take Super-awesome-stunning-great Photos

Now.  I know all your blogging friends have fancy-smchancy cameras that you're not allowed to touch, but I'm here to tell you that you can do better.  Why spend thousands of dollars when your iPhone 4 takes photos?  No reason, that's why.  No need to lug around a camera bag, buy and change out lens', or learn what all those little black buttons mean when you have everything you need in an iPhone.  Not to mention Beyonce's latest album and Snapchat.  

When your friends get to talking, you can just bring out your IDK to their ISO, your amateur to their aperture, your Boca Burger to their Bokeh.  

Multiple shots were taken in this exhibit to be examples, and show the transition from "follow camera techniques boring" to "create your own inspired masterpieces."

Multiple shots were taken in this exhibit to be examples, and show the transition from "follow camera techniques boring" to "create your own inspired masterpieces."

For lighting, direct sunlight or a bare bulb lit directly overhead your subject is fine.  A dark, rainy day works well, or better yet, night.  When working with humans or animals, you can best light their face by shining a light straight on, directly in front of their face.  Gently remind them to keep their eyes open.  A spray bottle can be used to gently mist their face and keep their eyes from drying out.  If no light source is available, flash is always a viable option.

Trying to find a "studio." Up against a wall, tight, uninspired...

Trying to find a "studio." Up against a wall, tight, uninspired...

When choosing a location, the messier the better.  Some may choose to have a special window, area, or even studio where they take their photos and do "sessions," but I believe this natural lighting and set-up area produces, stiff, unnatural, and  sterile photos.  You and your subject need inspiration, room to breathe.  In a corner, on the floor, or the front seat of your car is fine.  When the inspiration hits, you need to be ready with your phone held high, face close to the screen, and finger poised to snap the moment, soon to be forever encapsulated on your blog.  I recommend keeping your phone out at all times, taking photos at will.  Even if you don't remember the moment because you were so busy "capturing" it, you'll always have the photo.  And we all know that's more important than the actual experience in the long run.   

Blurry hand, bodies...this photo speaks of movement and life.

Blurry hand, bodies...this photo speaks of movement and life.

Having a background and props is essential.  What that background is and what those props are, less so.  No need for a plain wall behind.  To have chaos in your photo is to have life.  To create an au naturel photo that doesn't look "staged" or "set up" I like to grab the 12-56 objects in closest range to me and set them up haphazardly around the subject.  I then choose my angle, and snap.  Yes, one snap.  No multiple shots, re-angling, re-staging.  It is what it is, and that's how it's meant to be.  Animals, babies, blurry hands, and half-eaten pizza all help to liven up the photo.  

In the culmination of this art spread, please notice the parallelism, rhythm, and flow within. The echoes of the greens, connections between the browns, the cylinders. The keys seem to say, "choose your path" while though the pile of succulent cooki…

In the culmination of this art spread, please notice the parallelism, rhythm, and flow within. The echoes of the greens, connections between the browns, the cylinders. The keys seem to say, "choose your path" while though the pile of succulent cookies seems to beckon and say, "we offer life, sweet life, and money" you see the healthy apple is also saying, "eat of me!" Meanwhile, the beano reminds us that the remedy lies within, that life is time, take of yourself, and keep a dream journal.

Everyone will be jealous.

Edit Photos and Choose Filters  

Here's how to take your photos to the next level.  You'll first need a photo editing program.  Higher end programs like PaintShop Pro, Final Cut, and Photo are ideal.  Then, modify away.  As a general rule, I think photos always look pro when you really crank the structure, saturation, and ombre.  If you have a ton of photos to share with the world and are short on time, filters are your friends.  X-Pro II, Lo-Fi, and Nashville are go to's.  

Increase Your Intelligence.

If you have made it this far, you have already acquired much intelligence along the way, all that stated above.  I have so much more I wish to impart to you, my young padowan, but I must first see how you bear up under this already great load.  So be free, conquer the world, and let your dreams take flight.  Remember as you soar high, to take others with you under your wing.  

Two more things before we part ways: One, this blog is completely facetious.  Happy April Fool's Day!  Don't take a word of it seriously.  Don't believe me?  Ask any of my seven followers.  Second, the cookies in the photos exhibited above are, despite the photos, really yummy. Find the recipe here!


New York Times Chocolate Chip Cookies

Last Updated October 25, 2024

IMG_4755.jpg

This post may contain affiliate links. If you make a purchase using these links, Jennyblogs may receive a small commission, at no extra cost to you. This helps to support Jennyblogs. For further information see the privacy policy. Grazie!

Going back to the classics. American classics. Chocolate chip cookies. And not just any chocolate chip cookies, chocolate chip cookies the NY Times way. Want me to say chocolate chip cookies one more time? Chocolate. Chip. Cookies.  

Why do we need one more chocolate chip cookie recipe floating around?  

When it comes to the kitchen, I'm not one much for routine. I like to explore, to try and constantly better what it is in my power to improve. And as I am constantly learning about foods and why ingredients act the way they do, the more I can apply that to recipes. When you have a classic such as chocolate chip cookies (yes, chocolate chip cookies) it may seem unnecessary to improve upon it. Chances are, even if your recipe isn't that great, they probably will taste great anyway. They're pretty hard to mess up. That's also why there are so many chocolate chip cookie recipes out there. People are satisfied with "good" when they don't know they're missing out on "great".  

I have three recipes for chocolate chip cookies that I love, including the one I am about to share with you. The other two include a classic recipe a.k.a. my mom’s famous chocolate chip cookies, and one with browned butter. You can find that one here. I'm sure there are more out there that are wonderful. But for now, I share with you another truly good recipe.  Courtesy of the NY Times, they knew what they were doing with this one.

The recipe includes bread flour and cake flour, lending a wonderful chew and delicate crumb, respectively.

Then there is the long refrigeration, which allows all the ingredients to marry and the flavor to concentrate as the dough dries out ever so slightly.

When the cookies are finally baked, the sugar is able to crystallize easier resulting in beautiful golden edges with a center still soft, and an extra caramel nutty flavor.

Even if the refrigeration has to be skipped due to a time constraint, the cookies will still turn out delicious, although I would urge you to try the refrigeration for yourself to taste that extra special result!

Recipe adapted from the NY Times


New York Times Chocolate Chip Cookies

Makes about 40-70 cookies, depending on size.

Ingredients:

  • 220g / 2 cups cake flour

  • 200g / 1 2/3 cup bread flour

  • 6g / 1 1/4 tsp baking soda

  • 6g / 1 1/4 tsp baking powder

  • 5g / 1 tsp salt

  • 283g / 1 1/4 cups unsalted butter

  • 250g / 1 1/4 cups light brown sugar

  • 225g / 1 generous cup granulated sugar

  • 2 eggs

  • 9g / 2 tsp vanilla extract

  • 566g / 20 oz. 60% bittersweet chocolate chips or chunks

Directions:

  1. Whisk together cake flour, bread flour, baking soda, baking powder, and salt.  

  2. In the bowl of a stand mixer, cream butter and sugars together until light and fluffy, about 5 minutes. Add eggs one at a time, beating well after each addition. Add vanilla.  

  3. Add dry ingredients, mixing until just combined. Carefully incorporate chocolate chips by hand using a spoon, as a stand mixer can crush chocolate chips.

  4. Cover with plastic wrap and refrigerate dough for 24 - 72 hours. 

  5. When ready to bake, preheat oven to 350°F / 177°C. Scoop cold dough out onto cookie sheets in 1" balls, or desired size. Sprinkle with a touch of sea salt, if desired.  Bake for 8-10 minutes, or until edges turn a nice golden brown and centers still look a bit soft.  

Jenny's Notes:

  • Why bread and cake flour?  Bread flour has a higher gluten content and lends more crisp and chew to the cookies.  Cake flour is finer and lends a delicate crumb.  

  • If you need these cookies the same day you are making the cookies, the refrigeration is not absolutely essential.  When you place a dough in the fridge, the moisture in the dough is able to be evenly absorbed, then after a time begins to dry out, concentrating the flavors.  Then, when you bake the cookies, the sugar is able to caramelize better.  That is the beautiful golden brown color you see, and nutty flavor you taste.  Also, a cold or refrigerated dough won't spread as much.    

NY Times Chocolate Chip Cookies
Yield 40-70 cookies
Author
Prep time
30 Min
Cook time
20 Min
Inactive time
24 Hour
Total time
24 H & 50 M

NY Times Chocolate Chip Cookies

Chocolate Chip Cookies get a remix with bread flour, cake flour, and the magic trick of refrigeration, resulting in nothing short of amazing cookies.
Cook modePrevent screen from turning off

Ingredients

Instructions

  1. Whisk together cake flour, bread flour, baking soda, baking powder, and salt.
  2. In the bowl of a stand mixer, cream butter and sugars together until light and fluffy, about 5 minutes. Add eggs one at a time, beating well after each addition. Add vanilla.
  3. Add dry ingredients, mixing until just combined. Carefully incorporate chocolate chips. You may want to use a spoon as a stand mixer can crush the chocolate chips.
  4. Cover with plastic wrap and refrigerate dough for 24-72 hours.
  5. When ready to bake, preheat oven to 350°F / 177°C. Scoop cold dough out onto cookie sheets in 1" balls, or desired size. Sprinkle with a touch of sea salt, if you like. Bake for 8-10 minutes, or until edges turn a nice golden brown and centers still look a bit soft.

Notes

Why bread and cake flour? Bread flour has a higher gluten content and lends more crisp and chew to the cookies. Cake flour is finer and lends a delicate crumb. If you need these cookies the same day you are making the cookies, the refrigeration is not absolutely essential. When you place a dough in the fridge, the moisture in the dough is able to be evenly absorbed, then after a time begins to dry out, concentrating the flavors. Then, when you bake the cookies, the sugar is able to caramelize better. That is the beautiful golden brown color you see, and nutty flavor you taste. Also, a cold or refrigerated dough won't spread as much.

Nutrition Facts

Calories

235.01

Fat

13.56 g

Sat. Fat

8.26 g

Carbs

24.83 g

Fiber

2.61 g

Net carbs

22.22 g

Sugar

11.36 g

Protein

3.66 g

Sodium

122.36 mg

Cholesterol

24.84 mg

Nutritional information is approximate. Based on 1 cookie from a 40-cookie batch.

chocolate chips, bread flour, cake flour, NY Times, cookies
Dessert
American
Did you make this recipe?
Tag @jennyblogsandbakes on instagram and hashtag it #jennyblogs

Buttermilk Bread

Last Updated August 7, 2024

This post may contain affiliate links. If you make a purchase using these links, Jennyblogs may receive a small commission, at no extra cost to you. This helps to support Jennyblogs. For further information see the privacy policy. Grazie!

What’s the first thing that comes to mind when someone says, "Buttermilk"?  

For me, that would be buttermilk pancakes. The lightest and fluffiest of all pancakes. If you live in the south, maybe that's buttermilk biscuits. Maybe your favorite cake recipe or scone recipe calls for buttermilk. Whatever it may be, these delectable food items all have one thing in common: Their light crumb, a.k.a. fluffiness. The high acidity in the buttermilk reacts with the leavening agent, like baking soda, thus creating a beautiful rise, and a nice, light product.  

I don't often have buttermilk on hand; I find it much easier to make my own as I always have milk and lemon juice/vinegar on hand. Lemon juice or vinegar are both very acidic and will have a similar effect on the leavening agent. However, there is something so satisfying about using true buttermilk in a recipe. After all, Milk and Lemon Juice Pancakes don't sound nearly as appealing as Buttermilk pancakes.   

So, a trip to the store, a carton of buttermilk bought, pancakes made and eaten.  Now, there is only 7/8 of a carton of buttermilk left in your fridge.  The likelihood of making 7 or more batches of buttermilk pancakes before the buttermilk goes bad is, well, not likely.  (But if you do, let me know, I’ll come live at your house!)  

The question remains, what I can do with the rest of this buttermilk without being wasteful?  Make buttermilk bread! (Another side note, if you like to drink buttermilk straight, well then.  You just can't relate with our buttermilk overload predicament, can you?)  The fluffiness factor we were talking about earlier still plays a role in this bread.  So fluffy.  Makes great toast.  And did I mention french toast?  Now you can serve buttermilk french toast! Oh yes. Full circle, baby. Actually, I don't really know where the circle started, so it's hard to tell if we actually came full circle...

On to the recipe! 

Recipe adapted from Jane's Sweets and Baking Journal


Buttermilk Bread

Makes 2 approx. 9x5 inch loaves

Ingredients:

  • 5-6 cups / 620-740g all-purpose flour

  • 1 Tbsp / 9g instant yeast

  • 2 tsp / 10g salt

  • 2 cups / 474g buttermilk

  • 1 Tbsp / 20g maple syrup or honey

  • 2 Tbsp / 28g oil or melted butter

Directions:

Oven 375°F / 190°C.  Grease two approx. 9x5in / 24x13cm loaf pans.

  1. In a large bowl or bowl of a stand mixer fitted with the paddle attachment, place 5 cups of flour, yeast, and salt. Mix together. Add buttermilk, maple syrup, and oil, mixing well.  Switch to the dough hook if using a stand mixer.  

  2. Knead in the stand mixer or by hand on a lightly floured surface, until a smooth dough is formed, adding more flour as needed. This should take about 5-7 minutes with a stand mixer, 10 minutes by hand. If using a stand mixer, still knead a few rounds on a lightly floured surface at the end.

  3. Lightly grease a bowl and place your dough in it, flipping once so that all the dough is lightly coated in oil. Cover with a clean towel or plastic wrap and place in a warm place to rise until doubled in volume, about one hour.  

  4. When bread has risen, punch or press down to degas it. Dump back onto your floured surface and divide the dough into two even pieces, using a scale for accuracy.  

  5. Starting with one half, form dough into a ball by flattening in a small square, then folding 3-4 times to create a ball, stretching as you do to create some tension. Move to a part of your work surface that has minimal flour. Place the ball between your two floured hands, loosely cupped. Move the ball between your hands in a circular motion while gently pulling the dough in a downward action. The bottom of the dough should stick to your surface a bit, and as you gently stretch it down in a circular motion you are creating surface tension. If the dough starts to tear lighten up on the pressure; the dough should look taught and smooth.  The surface tension will create a nice crust for your dough. This is called shaping a "Boule." If you're as confused as I would be reading this for the first time, this demonstration from King Arthur Flour is very helpful, the technique we're going for is shown starting at about 0:30.  

  6. Repeat with other half of dough.  Place towel or plastic wrap over the two boules and let rest for 15 minutes.

  7. Shape each round into a loaf and place in prepared pans.  Place back in a warm place to double, about 1 hour.  Preheat your oven towards the end of this time.  

  8. When dough has risen for the second time and the oven is hot, spray the inside walls of your oven with water to create steam.  A spray bottle works well.  Place loaves in oven and bake for 25-30 minutes, or until internal temperature reads 200-210°F / 93-99°C.  Allow to cool in pans for 10 minutes, then remove and transfer to a wire rack.  

Buttermilk Bread
Yield 20
Author
Prep time
40 Min
Cook time
30 Min
Total time
1 H & 10 M

Buttermilk Bread

A soft white bread made extra fluffy with the use of buttermilk. Great for toast and french toast.
Cook modePrevent screen from turning off

Ingredients

Instructions

  1. Oven 375°F / 190°C. Grease two approx. 9x5in / 24x13cm loaf pans.
  2. In a large bowl or bowl of a stand mixer fitted with the paddle attachment, place 5 cups of flour, yeast, and salt. Mix together. Add buttermilk, maple syrup, and oil, mixing well. Switch to the dough hook if using a stand mixer.
  3. Knead in the stand mixer or by hand on a lightly floured surface, until a smooth dough is formed, adding more flour as needed. This should take about 5-7 minutes with a stand mixer, 10 minutes by hand. If using a stand mixer, still knead a few rounds on a lightly floured surface at the end.
  4. Lightly grease a bowl and place your dough in it, flipping once so that all the dough is lightly coated in oil. Cover with a clean towel or plastic wrap and place in a warm place to rise until doubled in volume, about one hour.
  5. When bread has risen, punch or press down to degas it. Dump back onto your floured surface and divide the dough into two even pieces, using a scale for accuracy.
  6. Starting with one half, form dough into a ball by flattening in a small square, then folding 3-4 times to create a ball, stretching as you do to create some tension. Move to a part of your work surface that has minimal flour. Place the ball between your two floured hands, loosely cupped. Move the ball between your hands in a circular motion while gently pulling the dough in a downward action. The bottom of the dough should stick to your surface a bit, and as you gently stretch it down in a circular motion you are creating surface tension. If the dough starts to tear lighten up on the pressure; the dough should look taught and smooth. The surface tension will create a nice crust for your dough. This is called shaping a "Boule." If you're as confused as I would be reading this for the first time, this demonstration from King Arthur Flour is very helpful, the technique we're going for is shown starting at about 0:30.
  7. Repeat with other half of dough. Place towel or plastic wrap over the two boules and let rest for 15 minutes.
  8. Shape each round into a loaf and place in prepared pans. Place back in a warm place to double, about 1 hour. Preheat your oven towards the end of this time.
  9. When dough has risen for the second time and the oven is hot, spray the inside walls of your oven with water to create steam. A spray bottle works well. Place loaves in oven and bake for 25-30 minutes, or until internal temperature reads 200-210°F / 93-99°C. Allow to cool in pans for 10 minutes, then remove and transfer to a wire rack.

Nutrition Facts

Calories

161.19

Fat

2.00 g

Sat. Fat

0.28 g

Carbs

30.42 g

Fiber

1.12 g

Net carbs

29.30 g

Sugar

2.10 g

Protein

4.79 g

Sodium

239.83 mg

Cholesterol

0.95 mg

Nutritional information is approximate and based on 1 slice from 20 servings.

bread, white bread, carbs, buttermilk, toast, french toast bread
Bread
American
Did you make this recipe?
Tag @jennyblogsandbakes on instagram and hashtag it #jennyblogs