Momsy's Pancakes

7CCA3EAB-FC24-468B-AC50-AD97ADBD242E.jpg

Last Updated September 8, 2024

As the weather cools down, what could possibly be better than flipping some fresh, hot pancakes off the griddle?

Well, let’s be honest, whether the weather is heating up, cooling down, stagnant, or generally doing its weather-pattern-season thingy, are pancakes ever not a good idea?

Thought not.

Breakfast, lunch, dinner. Summer. Winter. Inside. Outside. Buttermilk. Pumpkin. Lemon poppyseed. There is always room for a plate of pancakes at the table!

Growing up I can’t say we had a family tradition of eating pancakes on a specific day of the week. It was more of a, whenever the fancy hits you. My mom would make a up a large batch of homemade dry pancake mix (you can get that recipe here), then tape instructions to the jar of how much wet ingredients to add, to be whipped up at a moment’s notice. My dad makes maple syrup every spring and there are always quarts of the liquid gold in the pantry, so we were always pancake ready.
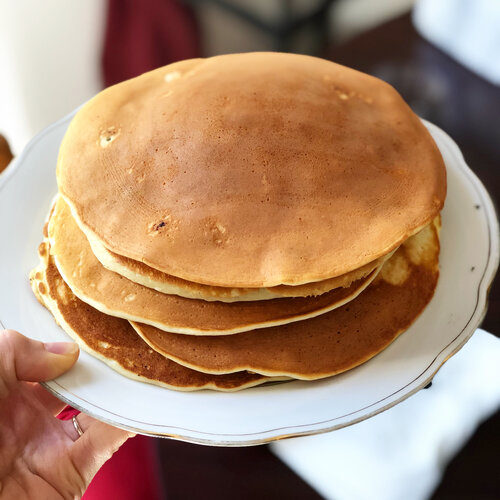
When my nieces and nephews were younger they spent a lot of time at our house, and pancakes were a regular deal. Especially my oldest niece, Gwen, could pack them away! From the time she was a toddler she would eat more than anyone, a stack of 4 or more. It was actually amazing she could fit that many in her tiny body. Realize that we make big pancakes, the size of your face or a large dinner plate. I usually eat 2. The first time I ate pancakes at a friend’s house when I was little the mom seemed surprised I only wanted two. I realized why when two itty bitty pancakes arrived in front of me. Oh. I’ll take 8 more, please. Plus, my friend’s mom made them with chocolate chips and my mom usually didn’t let us, too much sugar. ;)

The pancake recipe below is my mom’s basic recipe, it’s wonderful as-is for a buttermilk pancake, or a base for any add-ins you want, whether that be chocolate chip, raspberry, gingerbread, apple-cinnamon, or whatever your taste-buds can dream up!

This post may contain affiliate links. If you make a purchase using these links, Jennyblogs may receive a small commission, at no extra cost to you. This helps to support Jennyblogs. Where possible, links are prioritized to small businesses and ethically and responsibly made items. For further information see the privacy policy. Grazie!

Recipe from my mama


Buttermilk Pancakes

Serves 1-2

Ingredients:

  • 1 cup / 120g flour

  • 2 1/2 tsp baking powder

  • 2 1/2 tsp sugar

  • 1/2 tsp salt

  • 1 cup / 237g buttermilk

  • 1 egg

  • 2 Tbsp / 28g oil

  • up to 1 cup / 250g sourdough discard, optional

Directions:

Preheat a lightly greased griddle or large pan over medium heat (375°F / 290°C if using an electric griddle.)

  1. In a medium bowl whisk together flour, baking powder, sugar, and salt.

  2. In another bowl, combine buttermilk, egg, oil, and sourdough discard, if using. Add to dry ingredients and mix until just moistened. Lumps are ok as long as they’re not too big.

  3. Pour pancake batter to desired size (or shape!) on hot griddle, repeat as you have room, but making sure to leave about an inch / 2cm between pancakes. Flip after a couple minutes or a when the edges look dry and the bubbles towards the middle pop but don’t immediately fill in. Cook for a few minutes on the second side, until golden. Repeat until batter is gone.

  4. Serve hot with butter and maple syrup, or your favorite toppings such as peanut butter, honey, powdered sugar, jams, fruit, Nutella, etc.

Jenny’s Notes:

IMG_3216.jpg
  • Pancakes are easy, quick, and delicious, and also very easy to fit to your dietary needs and choices. With the exception of the baking powder, every ingredient can be substituted or even omitted at times. Even then, some use baking soda instead of baking powder or a combo of the two. Just don’t do more than one, maybe two substitutions at a time without risking the quality of your pancakes. So don’t be frying’ up flour, water and baking powder, okayyyy?

    - Replace flour with a gluten-free flour or flour of your choice. My mom likes grinding oats in a food processor to make oat flour pancakes. I also like substituting part of the flour with buckwheat.
    - Omit sugar if desired. I used to not eat sugar during the week and simply left out the sugar so I could still enjoy pancakes. I recommend leaving it in, though, as it rounds out the flavor of the pancake, especially if you use toppings that aren’t as sweet as maple syrup.
    - If you don’t have buttermilk, you can make it at home by adding 1 Tbsp / 14g vinegar or lemon juice to a 1 cup measure and filling up to the 1 cup mark (223g) with milk. You can also use plain ol’ water in a pinch, or alternative milks as desired!
    - If you don’t have or don’t eat eggs, try using a flax egg, or you can also leave the egg out.
    - For the oil, use whichever oil you prefer. A neutral baking oil is best for a classic pancake taste, but that doesn’t mean you can’t use olive or coconut oil if that’s what you prefer. Or even melted butter. Also, the oil can be left out if need be.
Fluffy Buttermilk Pancakes
Yield 1-2
Author
Prep time
5 Min
Cook time
10 Min
Total time
15 Min

Fluffy Buttermilk Pancakes

Classic, fluffy, buttermilk pancakes hot off the griddle in 15 minutes! Plus substitutions to make delicious pancakes for your dietary needs.
Cook modePrevent screen from turning off

Ingredients

Instructions

  1. Preheat a lightly greased griddle or large pan over medium heat (375°F / 290°C if using an electric griddle.)
  2. In a medium bowl whisk together flour, baking powder, sugar, and salt.
  3. In another bowl, combine buttermilk, egg, and oil. Add to dry ingredients and mix until just moistened. Lumps are ok as long as they’re not too big.
  4. Pour pancake batter to desired size (or shape!) on hot griddle, repeat as you have room, but making sure to leave about an inch / 2cm between pancakes. Flip after a couple minutes or a when the edges look dry and the bubbles towards the middle pop but don’t immediately fill in. Cook for a few minutes on the second side, until golden. Repeat until batter is gone.
  5. Serve hot with butter and maple syrup, or your favorite toppings such as peanut butter, honey, powdered sugar, jams, fruit, Nutella, etc.

Notes

  • Pancakes are easy, quick, and delicious, and also very easy to fit to your dietary needs and choices. With the exception of the baking powder, every ingredient can be substituted or even omitted at times. Even then, some use baking soda instead of baking powder or a combo of the two. Just don’t do more than one, maybe two substitutions at a time without risking the quality of your pancakes. So don’t be frying’ up flour, water and baking powder, okayyyy?

- Replace flour with a gluten-free flour or flour of your choice. My mom likes grinding oats in a food processor to make oat flour pancakes. I also like substituting part of the flour with buckwheat.

- Omit sugar if desired. I used to not eat sugar during the week and simply left out the sugar so I could still enjoy pancakes. I recommend leaving it in, though, as it rounds out the flavor of the pancake, especially if you use toppings that aren’t as sweet as maple syrup.

- If you don’t have buttermilk, you can make it at home by adding 1 Tbsp / 14g vinegar or lemon juice to a 1 cup measure and filling up to the 1 cup mark (223g) with milk. You can also use plain ol’ water in a pinch, or alternative milks as desired!

- If you don’t have or don’t eat eggs, try using a flax egg, or you can also leave the egg out.

- For the oil, use whichever oil you prefer. A neutral baking oil is best for a classic pancake taste, but that doesn’t mean you can’t use olive or coconut oil if that’s what you prefer. Or even melted butter. Also, the oil can be left out if need be.

Nutrition Facts

Calories

448.68

Fat

18.02 g

Sat. Fat

2.44 g

Carbs

58.48 g

Fiber

1.63 g

Net carbs

56.85 g

Sugar

11.17 g

Protein

13.26 g

Cholesterol

97.74 mg

Sodium

1452.78 mg

Nutritional information is approximate, based on 2 servings.

buttermilk pancakes, homemade pancakes recipe, hot cakes, griddle cakes, best
breakfast
American
Did you make this recipe?
Tag @jennyblogsandbakes on instagram and hashtag it #jennyblogs

Greek Pasta Salad

IMG_3827.jpg

It’s August. It’s hot. I’ve already made all the different classic versions of pasta salad and have moved on to making up my own versions. Hot dishes are out when hot weather is in!

Well, most of the time. I say this a bit sheepishly as I’m about to eat a big plate of aglio, olio, peperoncino pasta. That’s not only hot, it’s also lightly spicy. It’s about 100°F out and no, we don’t have air conditioning. Sometimes you just know what you want to eat (especially as a pregnant person) and that’s ok. At least, that’s what I keep telling myself. :D

I’ve also been really into Greek everything. I’ve been making lots of Greek wraps, Greek salads, learned what a traditional Greek salad is, and made a 7+ layer Greek dip! I’ll have a recipe up for the Greek dip soon, it’s very easy to whip up and nutritious to boot! And if you hadn’t already noticed, today’s recipe is a Greek pasta salad! I actually saw a similar idea to this on Instagram recently and decided I needed to eat that. I noticed the recipe used a dressing with ingredients similar to what we’d call Italian dressing in America (oil, vinegar, basil, oregano, garlic, etc) and I decided I wanted to try a hummus dressing. And it was delicious! Hummus mixed with some plain yogurt makes for a creamy and wonderful twist to this pasta salad. You can make homemade hummus, or use whatever brand and flavor you prefer!

Enjoy, my friends, and stay cool!

This post may contain affiliate links. If you make a purchase using these links, Jennyblogs may receive a small commission, at no extra cost to you. This helps to support Jennyblogs. Where possible, links are prioritized to small businesses and ethically and responsibly made items. For further information see the privacy policy. Grazie!

A recipe by Jenny Nicole


Greek Pasta Salad

Serves 3-4

Adjustments.jpeg

Ingredients:

  • 8oz / 250g short pasta of choice, fusilli, penne, shells, etc.

  • 3/4 cup / 185g plain yogurt

  • 3/4 cup / 185g hummus, flavor of choice

  • 1 Tbsp / 14g red wine vinegar

  • 1/4 tsp dried oregano

  • 1/4 tsp dried basil

  • 1 cucumber, diced

  • 1/2 red or green bell pepper, diced

  • 1/2 cup / 90g pitted kalamata olives, sliced if large

  • 1 cup / 150g cherry tomatoes, halved or quartered

  • 2/3 cup / 100g crumbled feta cheese

  • salt and pepper, to taste

  • drizzle of extra virgin olive oil, for finishing

Directions:

  1. Cook pasta one minute less than according to directions, nicely al dente, drain and rinse in cold water to stop pasta from continuing to cook. Cool in fridge while you make dressing.

  2. In a large bowl, stir together yogurt, hummus, vinegar, and spices.

  3. Add pasta, all the chopped vegetables, and cheese; stir until everything is evenly coated in dressing. Taste and add salt and pepper, as needed.

  4. Refrigerate until chilled, at least 2 hours. The longer the pasta sits the more the flavors will meld and the sauce be absorbed by the pasta, creating the ideal pasta salad! Just before serving, drizzle with olive oil.

Jenny’s Notes:

  • If you have fresh herbs on hand, you can use about 1 tsp each of finely chopped fresh basil and fresh oregano!

  • The quantity of vegetables is really up to you and easy to adjust in simple recipes like this, measurements are approximate.

  • While you might think Greek yogurt would be better adapted to this “Greek” pasta salad, plain/soupier yogurt actually works better because as the pasta sits, it absorbs the dressing. If you use already thick Greek yogurt, the dressing will probably end up too thick. If Greek yogurt is all you have, you can simply add a few tablespoons of water or milk to thin up the dressing to your liking. This can also be done if you make/buy a particularly thick brand of hummus, or just want the dressing thinner anyway!

  • The photos you see in this post I actually used a gluten-free penne pasta made from red lentils and brown rice. I had never tried it before but it is an excellent pasta, I would never have known it’s gluten-free. Probably also because it was made by my favorite pasta brand here in Italy, Rummo. If you live here or can find it in the States, I highly recommend it! Although I think I’ve only seen it at World Market for way more than I pay here in Italy. Bummer.

Greek Pasta Salad
Yield 3-4
Author
Prep time
20 Min
Cook time
20 Min
Total time
40 Min

Greek Pasta Salad

A twist on the classic pasta salad with a creamy, herbed hummus dressing, vegetables, and Feta cheese.
Cook modePrevent screen from turning off

Ingredients

Instructions

  1. Cook pasta one minute less than according to directions, nicely al dente, drain and rinse in cold water to stop it from continuing to cook. Cool in fridge while you make dressing.
  2. In a large bowl, stir together yogurt, hummus, vinegar, and spices.
  3. Add pasta, all the chopped vegetables, and cheese; stir until everything is evenly coated in dressing.
  4. Refrigerate until chilled, at least 2 hours. The longer the pasta sits the more the flavors will meld and the sauce be absorbed by the pasta, creating the ideal pasta salad! Just before serving, drizzle with olive oil.

Notes

If you have fresh herbs on hand, use about 1 tsp each of finely chopped fresh basil and fresh oregano! The quantity of vegetables is really up to you and easy to adjust in simple recipes like this, measurements are approximate. While you might think Greek yogurt would be better adapted to this “Greek” pasta salad, plain/soupier yogurt actually works better because as the pasta sits, it absorbs the dressing. If you use already thick Greek yogurt, the dressing will probably end up too thick. If Greek yogurt is all you have, you can simply add a few tablespoons of water or milk to thin up the dressing to your liking. This can also be done if you make/buy a particularly thick brand of hummus, or just want the dressing thinner anyway!

Nutrition Facts

Calories

486.29

Fat

26.16 g

Sat. Fat

8.20 g

Carbs

46.18 g

Fiber

7.25 g

Net carbs

38.93 g

Sugar

8.71 g

Protein

18.81 g

Sodium

779.53 mg

Cholesterol

33.37 mg

Nutritional information is approximate; based on 3 servings.
Pasta salad, cold pasta, summer pasta, summer dish, Greek, hummus dressing
Pasta, Side dish
American
Did you make this recipe?
Tag @jennyblogsandbakes on instagram and hashtag it #jennyblogs
IMG_3831.jpg

Double Chocolate Zucchini Bread

Last Updated August 30, 2024

IMG_3532.jpg

It’s zucchini season!

Don’t ask me why, but I am always surprised when summer rolls around and so do all the mountains of ripe zucchini…I associate zucchini with fall and winter dishes. Why? No idea. Especially when I look back over my childhood, and my mom almost always had zucchini growing in her garden (they would get huge and there would be so many, who wants zucchini???) Ah, the things we take for granted! Summer dinners would often see zucchini battered in flour and fried up over the griddle.

Now that I live in Italy, I always see the zucchini blossoms battered and fried. It’s a favorite appetizer in restaurants come summer. In fact, more often than not zucchini are sold with the blossoms still attached. Or you can buy just the blossoms. I rarely batter and fry things at home and haven’t bothered to discover other ways of using them, so I have to be careful because the blossoms go moldy much quicker than the zucchini itself! The zucchini are also quite small and light in color, at least compared to the monster dark green baseball bats that used to grow in my mom’s garden.

With the abundance of zucchini around, or any produce, I tend to start looking for new ways to cook them or improving current recipes. While I love zucchini in a stir-fry, with pasta, in risotto, pan-fried like my mama’s, etc., I wanted something different. Zucchini bread came to mind. But not just classic zucchini bread. I wanted chocolate zucchini bread. Double chocolate zucchini bread.

Thus this recipe was born, and if you’re at the point where you’re getting sick of all the zucchini, this is the recipe for you. You won’t even know there is zucchini in it. It’s chocolatey, fudgy, not overly sweet, and just exactly what I was wanting.

Aside from having vegetables in it, it doesn’t have much oil, using half yogurt or applesauce instead, keeping the calories and fat content down. If you’re concerned about cholesterol, you can also use egg whites instead of the whole egg! See notes below recipe for more ideas to customize this bread to your tastes and needs.

Use up sourdough discard

Another great thing about this recipe? You can use up some sourdough discard that may be lurking in your fridge. No need to feed it or for it to be active at all, just make sure it hasn’t gone bad! Sometimes my discard sits up to 2-3 weeks in my fridge before I get to it. The longer it sits the more sour it will taste/smell, but even using a 3 week old discard I couldn’t have told you there was any in this zucchini bread! It can help bulk up recipes like this and add a little fermented nutrition!

This post may contain affiliate links. If you make a purchase using these links, Jennyblogs may receive a small commission, at no extra cost to you. This helps to support Jennyblogs. Where possible, links are prioritized to small businesses and ethically and responsibly made items. For further information see the privacy policy. Grazie!

Recipe adapted from my mama’s classic zucchini bread


Double Chocolate Zucchini Bread

Makes 1 loaf

IMG_3541.jpg

Ingredients:

  • 1/2 cup / 100g sugar

  • 1/4 cup / 56g oil

  • 1/4 cup / 60g plain yogurt or applesauce

  • 1 egg or 2 egg whites

  • 1 tsp / 5g vanilla extract

  • about 1/2 cup / 100g sourdough discard, optional

  • 1 1/2 cups / 250g grated zucchini (about 2 medium)

  • 1 cup / 120g all-purpose flour

  • 1/2 cup / 50g cocoa powder

  • 1 tsp baking soda

  • 1/2 tsp salt

  • 1/4 tsp baking powder

  • 1 cup / 170g chocolate chips

Directions:

Preheat oven to 350°F / 177°C. Grease 1 9x5inch / 23x13cm bread pan or line with parchment paper.

  1. In a large bowl, beat together sugar, oil, yogurt, egg, vanilla, and sourdough discard, if using. Stir in zucchini.

  2. In a separate bowl, whisk together flour, cocoa, baking soda, salt, and baking powder.

  3. Fold dry ingredients and chocolate chips into wet ingredients until just combined. Reserve a handful of chocolate chips for sprinkling on top, if you wish.

  4. Pour into prepared bread pan, sprinkle with remaining chocolate chips, and bake in preheated oven for 40-45 minutes or until toothpick inserted in the center comes out mostly clean. A few moist crumbs clinging to the toothpick is a good sign the bread is done but still moist! Allow to bread to cool before removing from pan and serving.

Jenny’s Notes:

  • If you desire a sweeter bread, you can up the sugar to 1 cup / 200g.

  • I know not everyone has plain yogurt on hand, so if you have French Vanilla or another flavor you wouldn’t mind mixing with chocolate, use that! Flavored yogurt has added sugar, so if that is important to you to keep the sugar down, simply reduce the sugar from 1/2 cup / 100g to a scant 1/2 cup / 80-90g.

  • Zucchini quantity can be played with! My mom’s original recipe calls for 1 cup, but here I’ve increased it to 1 1/2 cups. If you can’t detect the veggies, why not add more so you get maximum nutrition? On that note, measuring grated, sliced, or cubed veggies by weight is always a bit tricky. From my research, the average medium zucchini weighs about 5oz or 140g, so if you’re buying zucchini specifically for this recipe, you’ll probably want to get 2, making a bit more than 1 1/2 cups, but that’s ok! I would use it all. Or just get one zucchini that’s a bit bigger. However you please, as I said it’s flexible! And I just way over-analyzed that for you. You’re welcome.

Double Chocolate Zucchini Bread
Yield 1 loaf
Author
Prep time
20 Min
Cook time
45 Min
Total time
1 H & 5 M

Double Chocolate Zucchini Bread

Fudgy, chocolatey zucchini bread loaded with chocolate chips. A sneaky way to get in more vegetables and you can even use up some sourdough discard with this recipe!
Cook modePrevent screen from turning off

Ingredients

Instructions

  1. Preheat oven to 350°F / 177°C. Grease 1 9x5inch / 23x13cm bread pan or line with parchment paper.
  2. In a large bowl, beat together sugar, oil, yogurt, egg, vanilla, and sourdough discard, if using. Stir in zucchini.
  3. In a separate bowl, whisk together flour, cocoa, baking soda, salt, and baking powder.
  4. Fold dry ingredients and chocolate chips into wet ingredients until just combined. Reserve a handful of chocolate chips for sprinkling on top, if you wish.
  5. Pour into prepared bread pan, sprinkle with remaining chocolate chips, and bake in preheated oven for 40-45 minutes or until toothpick inserted in the center comes out mostly clean. A few moist crumbs clinging to the toothpick is a good sign the bread is done but still moist! Allow to bread to cool before removing from pan and serving.

Notes

If you desire a sweeter bread, you can up the sugar to 1 cup / 200g.I know not everyone has plain yogurt on hand, so if you have French Vanilla or another flavor you wouldn’t mind mixing with chocolate, use that! Flavored yogurt has added sugar, so if that is important to you to keep the sugar down, simply reduce the sugar from 1/2 cup / 100g to a scant 1/2 cup / 80-90g. Zucchini quantity can be played with! My mom’s original recipe calls for 1 cup, but here I’ve increased it to 1 1/2 cups. If you can’t detect the veggies, why not add more so you get maximum nutrition? On that note, measuring grated, sliced, or cubed veggies by weight is always a bit tricky. From my research, the average medium zucchini weighs about 5oz or 140g, so if you’re buying zucchini specifically for this recipe, you’ll probably want to get 2, making a bit more than 1 1/2 cups, but that’s ok! I would use it all. Or just get one zucchini that’s a bit bigger. However you please, as I said it’s flexible! And I just way over-analyzed that for you. You’re welcome.

Nutrition Facts

Calories

277.93

Fat

13.31 g

Sat. Fat

4.04 g

Carbs

38.03 g

Fiber

2.86 g

Net carbs

35.17 g

Sugar

22.45 g

Protein

4.65 g

Sodium

291.43 mg

Cholesterol

21.07 mg

Nutritional information is approximate; based on roughly 9 slices from 1 loaf. Does not include using sourdough discard.

zucchini bread, quick bread, sourdough discard, low fat recipe, double chocolate zucchini bread
bread, dessert
American
Did you make this recipe?
Tag @jennyblogsandbakes on instagram and hashtag it #jennyblogs
A zucchini lurking in the background, for proof there truly is zucchini in this bread

A zucchini lurking in the background, for proof there truly is zucchini in this bread


Sticky Sesame Tofu

Adjustments.jpeg

Last Updated August 10, 2024

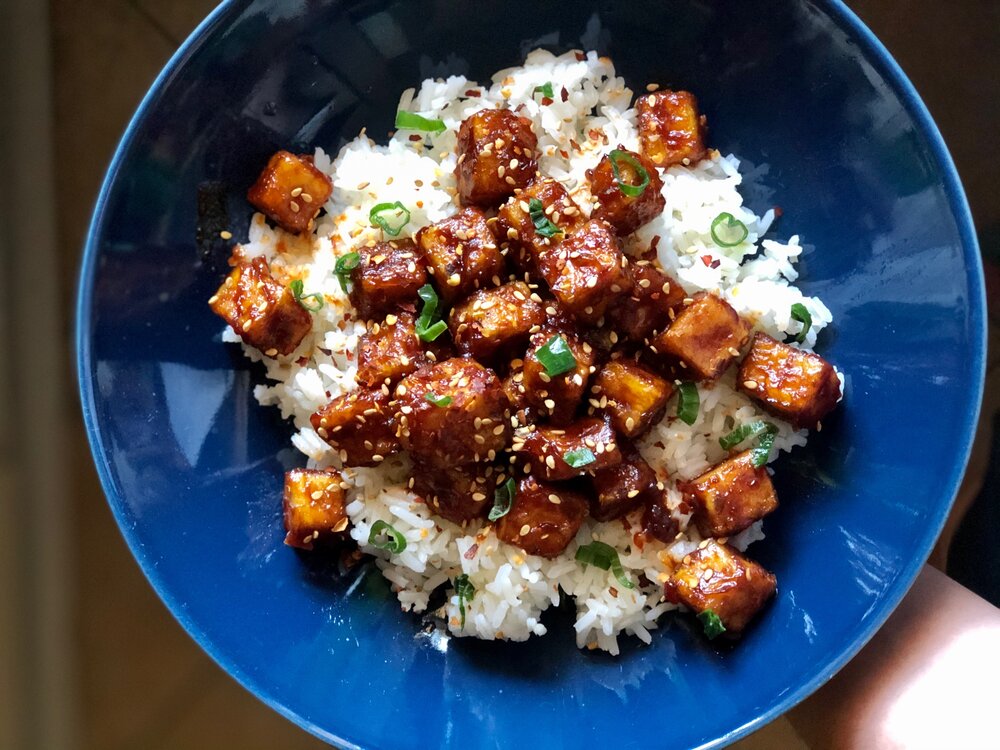
Lightly pan-fried, crispy tofu nuggets tossed in a sweet and salty, sticky sesame sauce and served over rice. Extra delicious when served with hot pepper flakes, green onion, sesame seeds, and broccoli.

This Sticky Sesame Tofu is like Sesame Chicken and General Tso’s Chicken all wrapped up in one. Except it’s tofu, and not chicken, which makes it a vegan recipe. I’m not vegan, I just happen to love tofu. BUT this recipe can also be made with chicken! Simply pan fry it until cooked through, then proceed with the recipe as written.

Some notes about this recipe for making it in Italy vs. US:

  1. The tofu I would get in Italy, seems to come in 380g packages instead of the 400-450gish (14-16oz) like in the States, which means that recipe proportions will be a tiny bit different. The photos you see on this post are when I used the Italian 380g package of tofu, but I used to make half the sauce recipe as written below. If you are using a smaller than 380g block of tofu, you could consider cutting this recipe in half, to keep it more “sticky” and less saucy.

  2. Tofu in Italy also comes in a vacuum-packed container and not in water like in the States. This means the tofu starts out less watery and is easier to dry. Usually one heavy duty napkin or paper towel is sufficient for pressing.

This post may contain affiliate links. If you make a purchase using these links, Jennyblogs may receive a small commission, at no extra cost to you. This helps to support Jennyblogs. Where possible, links are prioritized to small businesses and ethically and responsibly made items. For further information see the privacy policy. Grazie!

Recipe by Jenny


Adjustments.jpeg

Sticky Sesame Tofu

Serves 3-4

Ingredients:

For the Crispy Tofu

  • 1 box / roughly 400g firm or extra firm tofu, drained

  • 1/2 cup / 60g cornstarch

  • 2 Tbsp / 28g peanut oil or other high-heat oil, plus more as needed

For the Sticky Sesame Sauce

  • 1/2 cup / 120g soy sauce or tamari

  • 6 Tbsp / 90g tomato purée

  • 6 Tbsp / 76g brown sugar, or 6 Tbsp / 120g maple syrup

  • 2 Tbsp / 30g rice vinegar

  • 2 tsp sriracha or 1 tsp red pepper flakes

  • 2 tsp freshly grated ginger or 1/4 tsp ground ginger

  • 2 tsp / 10g cooking oil

  • 4 cloves garlic, finely chopped

  • 2 tsp / 10g sesame oil

For Serving (optional):

  • rice

  • steamed broccoli

  • avocado, sesame seeds, sliced green onion, lime wedges, red pepper flakes, cilantro

Directions:

Make the Crispy Tofu

  1. Place tofu block between some paper towels and press to absorb extra water. Repeat until tofu feels dry and no more water comes out. You can also do this ahead of time by placing something heavy over the tofu and paper towels, such as a bowl or pot, and leave it for several minutes.

  2. Place corn starch in a medium bowl. Slice tofu into squares and toss in the corn starch until evenly coated.

    Pan fry:

  3. Heat oil in a large fry pan and add tofu. Fry for a few minutes until golden, then flip tofu over. You can do this with tongs, or simply sauté/flip the tofu. The second way is faster, but requires a bit more skill and you have less control over which sides of the tofu land down. Add more oil to the pan as needed to get a nice golden crust on the tofu. Remove from heat when done.

    OR Bake:

  4. Disperse tofu cubes evenly onto a parchment paper or silpat lined baking sheet. Bake in a preheated 400°F / 205°C for about 30 minutes, or until light golden and crispy. Ideally, flip tofu halfway through baking.

Make the Sticky Sesame Sauce:

  1. While tofu is frying or baking, prepare the sauce. In a bowl stir together soy sauce, tomato purée, brown sugar, rice vinegar, sriracha, and ginger.

  2. Heat cooking oil in a medium pan over medium-low heat. Add garlic and cook until just starting to turn golden, 1-2 minutes.

  3. Add soy sauce mixture and cook for 3-4 minutes, stirring occasionally, until sauce just starts to thicken. Stir in sesame oil.

  4. Add tofu to sauce and toss until evenly covered; serve immediately with rice, broccoli, and garnishes, if desired.

Jenny’s Notes:

  • For the sodium conscious, you may wish to use reduced-sodium soy sauce. If you only have regular soy sauce available, you can replace 1/2 of the soy sauce with water.

  • If you don’t have rice vinegar, use any vinegar you have on hand.

  • You can add more sriracha or red pepper flakes if you want it extra spicy, or omit if you don’t like spice.

  • If not serving all the tofu right away, it’s best to store it separately from the sauce if you wish to keep the tofu crispy.

Sticky Sesame Tofu
Yield 2-3
Author
Prep time
10 Min
Cook time
20 Min
Total time
30 Min

Sticky Sesame Tofu

Lightly pan-fried or baked, crispy tofu nuggets tossed in a sweet and salty, sticky sesame sauce and served over rice. Tastes like Sesame Chicken or General Tso's Chicken, but vegan!

Ingredients

For the Crispy Tofu
For the Sticky Sesame Sauce
For Serving (all optional):

Instructions

Make the Crispy Tofu
  1. Place tofu block between some paper towels and press to absorb extra water. Repeat until tofu feels dry and no more water comes out. You can also do this ahead of time by placing something heavy over the tofu and paper towels, such as a bowl or pot, and leave it for several minutes.
  2. Place corn starch in a medium bowl. Slice tofu into squares and toss in the corn starch until evenly coated.
  3. Pan fry:
  4. Heat oil in a large fry pan and add tofu. Fry for a few minutes until golden, then flip tofu over. You can do this with tongs, or simply sauté/flip the tofu. The second way is faster, but requires a bit more skill and you have less control over which sides of the tofu land down. Add more oil to the pan as needed to get a nice golden crust on the tofu. Remove from heat when done.
  5. OR Bake:
  6. Disperse tofu cubes evenly onto a parchment paper or silpat lined tray. Bake in a preheated 400°F / 205°C for about 30 minutes, or until light golden and crispy. Ideally, flip tofu halfway through baking.
Make the Sticky Sesame Sauce:
  1. While the tofu is frying, prepare the sauce. In a bowl stir together soy sauce, tomato purée, brown sugar, rice vinegar, sriracha, and ginger.
  2. Heat the cooking oil in a medium pan over medium-low heat. Add the garlic and cook until just starting to turn golden, 1-2 minutes.
  3. Add the soy sauce mixture and cook for 3-4 minutes, stirring occasionally, until sauce just starts to thicken. Stir in the sesame oil.
  4. Add tofu to the sauce and toss until evenly covered; serve immediately with rice, broccoli, and garnishes, if desired.

Notes

  • For the sodium conscious, you may wish to use reduced-sodium soy sauce. If you only have regular soy sauce available, you can replace 1/2 of the soy sauce with water.
  • If you don’t have rice vinegar, use any vinegar you have on hand.
  • You can add more sriracha or red pepper flakes if you want it extra spicy, or omit if you don’t like spice.
  • If not serving all the tofu right away, it’s best to store it separately from the sauce if you wish to keep the tofu crispy.

Nutrition Facts

Calories

529

Fat

23 g

Sat. Fat

3 g

Carbs

76 g

Fiber

4 g

Net carbs

71 g

Sugar

40 g

Protein

9 g

Sodium

3296 mg

Cholesterol

0 mg

Nutritional information is approximate. Based on 2 servings of tofu with sauce, not including rice or garnishes

vegan, sticky sesame sauce, tofu, Sesame chicken tofu, General Tso's chicken tofu, sweet and sour
Dinner, Main
Asian
Did you make this recipe?
Tag @jennyblogsandbakes on instagram and hashtag it #jennyblogs
IMG_3749.jpeg

Lemon Blondies

Last Updated September 6, 2024

These bars are like brownies but LEMON.

IMG_3410.jpg

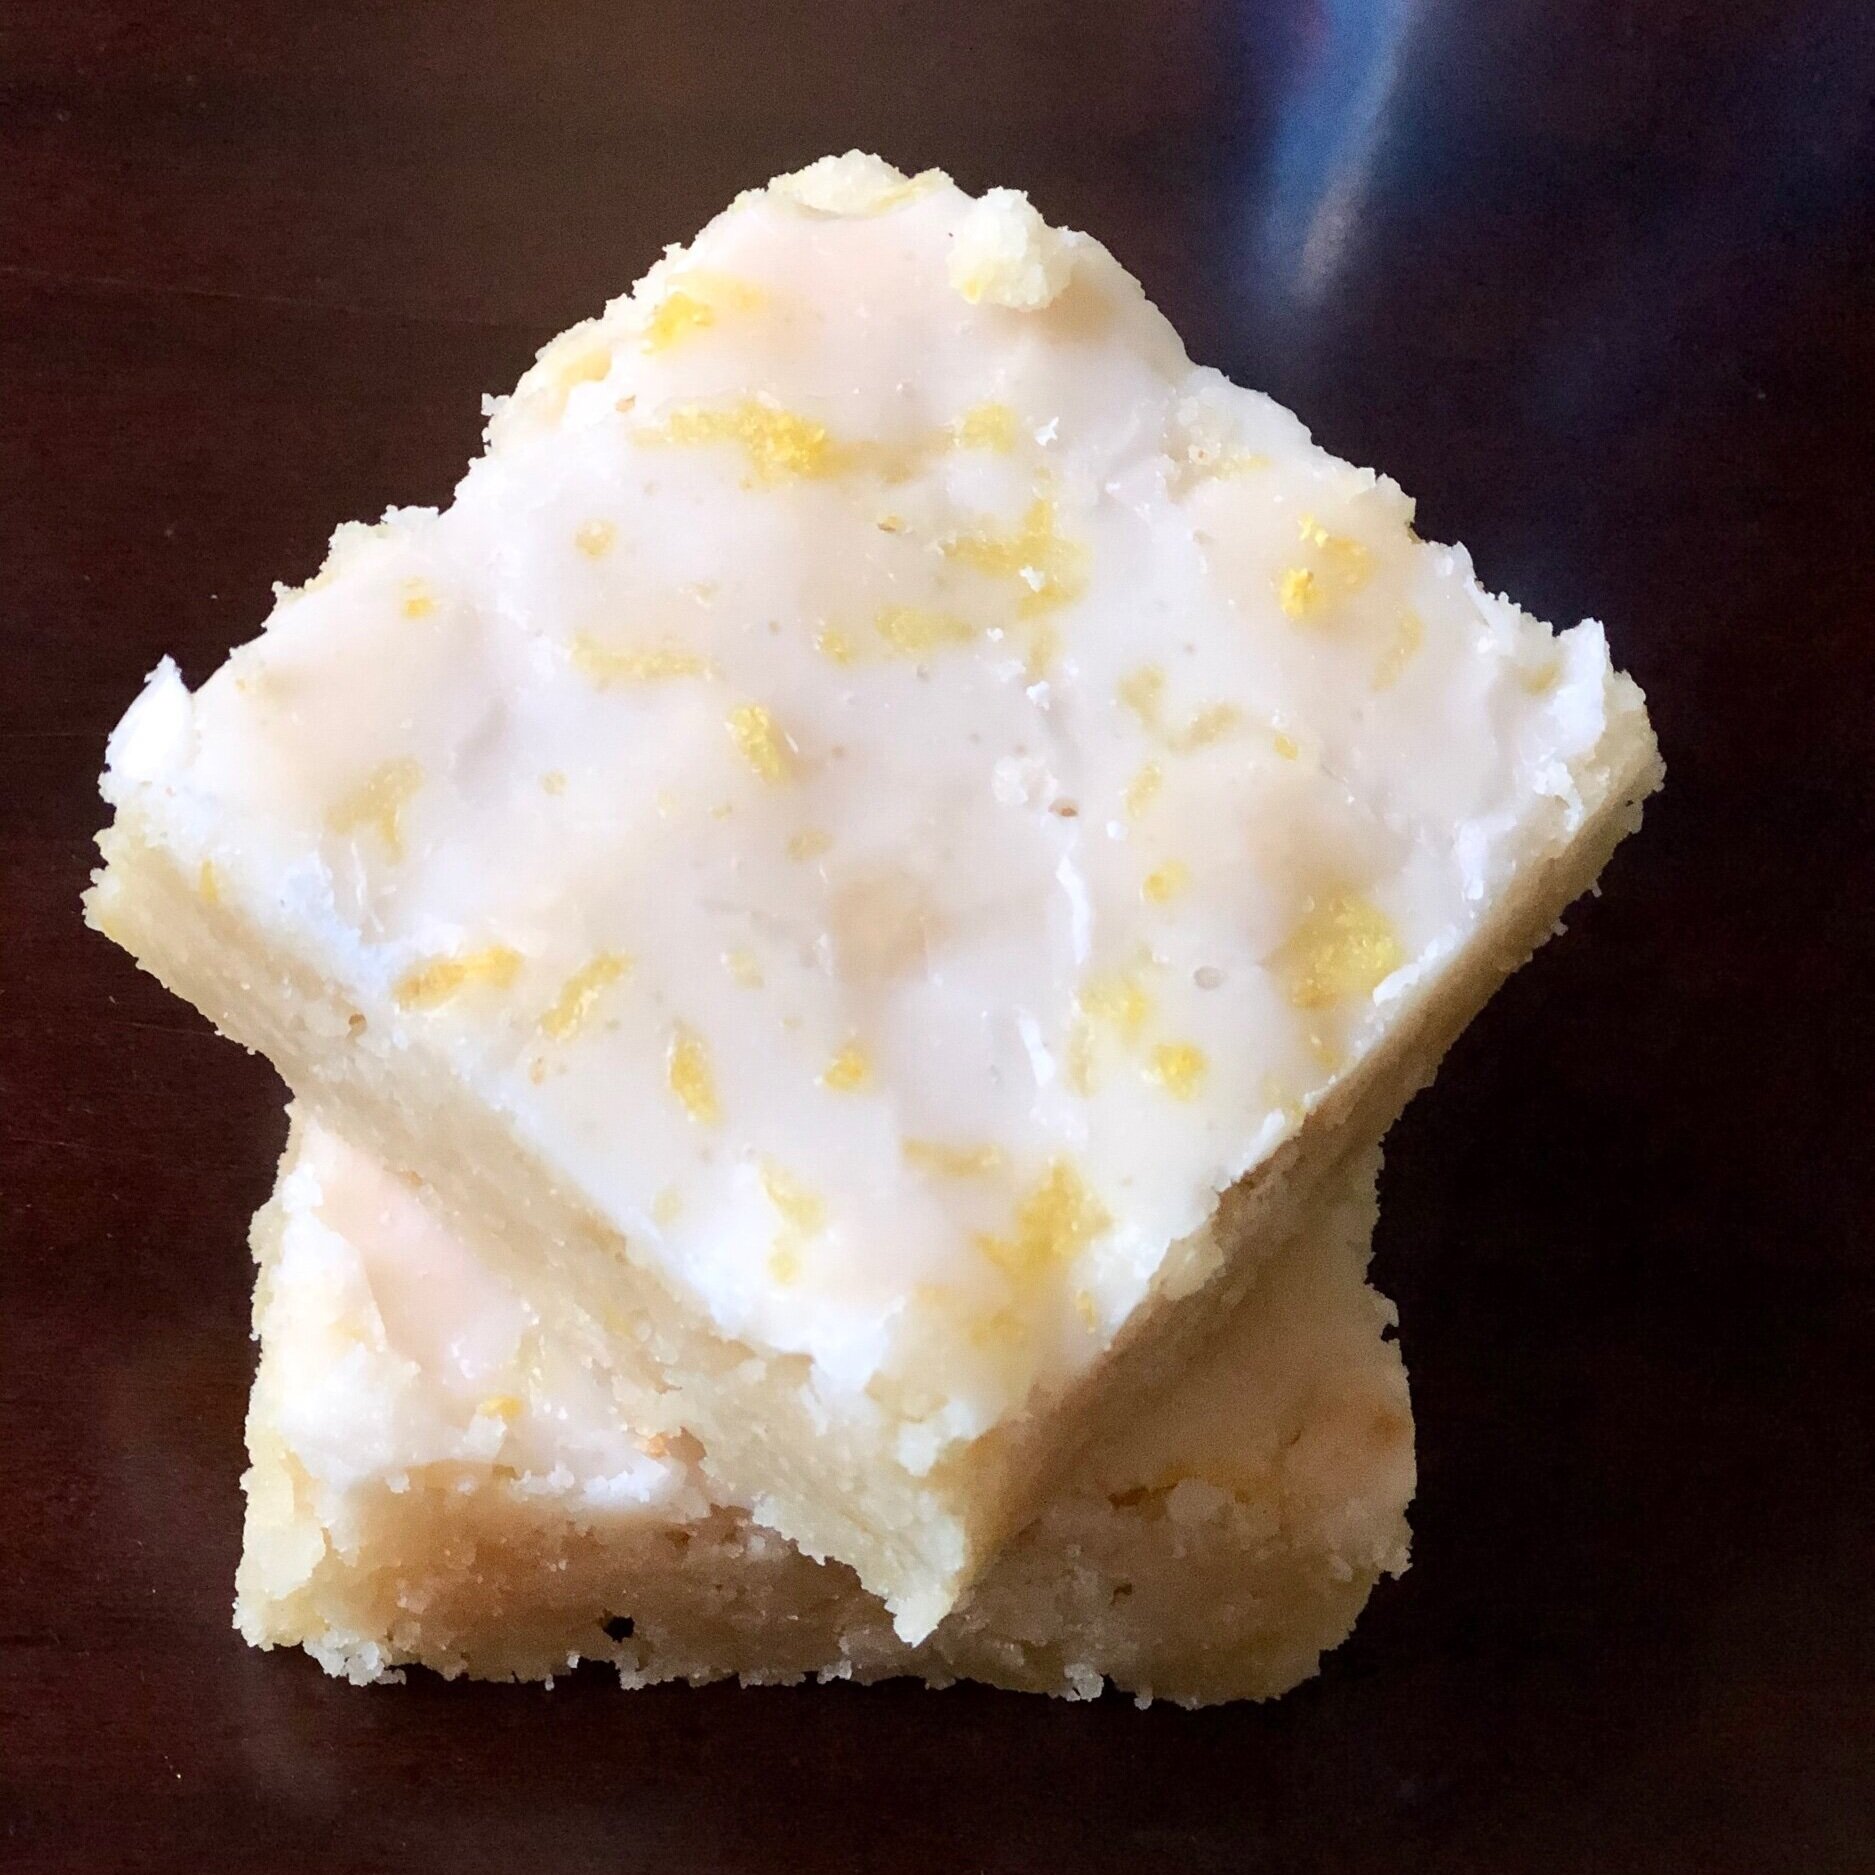
Chewy, sugary, zingy and bright lemony bar goodness. With a lemony glaze to boot! Some people call these lemon brownies, others lemon blondies. I couldn’t bring myself to say lemon brownies because they’re not chocolatey nor brown, so using the word “brownie” seemed to be sending the wrong signals. Blondie is much more accurate, although if you consider a blondie as having chocolate chips, you must take the notion out of your brain for a moment to fully understand and appreciate these beauties.

It’s really just a blondie recipe with lemon juice and zest added to it, with a wonderfully simple but tart lemon glaze! You can also add lemon extract for extra lemon flavor, but I don’t think they need it. I add more lemon juice than some, which has a more authentic lemon flavor anyway, yeah?

This post may contain affiliate links. If you make a purchase using these links, Jennyblogs may receive a small commission, at no extra cost to you. This helps to support Jennyblogs. Where possible, links are prioritized to small businesses and ethically and responsibly made items. For further information see the privacy policy. Grazie!

Recipe adapted from Sugar Spun Run


Lemon Blondies

Serves about 9

Adjustments.jpeg

Ingredients:

For the Lemon Blondies

  • 3/4 cup / 168g oil

  • 1 1/2 cups / 300g sugar

  • 1 egg + 1 egg yolk

  • 2 Tbsp lemon zest

  • 3 Tbsp / 42g lemon juice

  • 1/2 tsp vanilla extract

  • 2 1/2 cups / 300g all-purpose flour

  • 1 tsp / 3g cornstarch

  • 3/4 tsp salt

  • 1/4 tsp baking soda

For the Lemon Glaze

  • 3/4 cup / 94g powdered sugar

  • 1-2 Tbsp / 14-28g lemon juice

  • 1-2 tsp lemon zest, optional

Directions:

Make the Lemon Blondies

Preheat oven to 350°F / 177°C. Grease an 8x8 or 9x9inch / 20x20 or 23x23cm square baking pan.

  1. In a large bowl, mix together oil, sugar, egg and egg yolk, lemon zest, lemon juice, and vanilla.

  2. In another medium bowl, whisk together flour, cornstarch, salt, and baking soda.

  3. Add flour to lemon mixture and mix until combined. Dough will be thick.

  4. Scrape batter into prepared pan and spread in an even layer to the edges.

  5. Bake for 25-30 minutes, or until toothpick inserted near the center comes out mostly clean.

Adjustments.jpg

Make the Lemon Glaze

  1. In a small bowl, whisk together powdered sugar and enough lemon juice to make a drizzleable glaze. Pour over lemon blondies, spreading to edges with spatula, if necessary. Sprinkle lemon zest over top, if desired.

  2. Allow lemon blondies to cool completely before slicing and serving.

Jenny’s Notes:

  • I know it may be hard to resist cutting into these lemon blondies right away, but it’s best to wait until they are cooled to avoid them crumbling on you.

Lemon Blondies
Yield 9
Author
Prep time
20 Min
Cook time
30 Min
Total time
50 Min

Lemon Blondies

Chewy and dense like brownies, but lemon instead of chocolate with a zesty glaze!
Cook modePrevent screen from turning off

Ingredients

For the Lemon Blondies
For the Lemon Glaze

Instructions

Make the Lemon Blondies
  1. Preheat oven to 350°F / 177°C. Grease an 8x8 or 9x9inch / 20x20 or 23x23cm square baking pan.
  2. In a large bowl, mix together oil, sugar, egg and egg yolk, lemon zest, lemon juice, and vanilla.
  3. In another medium bowl, whisk together flour, cornstarch, salt, and baking soda.
  4. Add flour to lemon mixture and mix until combined. Dough will be thick.
  5. Scrape batter into prepared pan and spread in an even layer to the edges.
  6. Bake for 25-30 minutes, or until toothpick inserted near the center comes out mostly clean.
Make the Lemon Glaze
  1. In a small bowl, whisk together powdered sugar and enough lemon juice to make a drizzleable glaze. Pour over lemon blondies, spreading to edges with spatula, if necessary. Sprinkle lemon zest over top, if desired.
  2. Allow lemon blondies to cool completely before slicing and serving.

Notes

I know it may be hard to resist cutting into these lemon blondies right away, but it’s best to wait until they are cooled to avoid them crumbling on you.

Nutrition Facts

Calories

474.05

Fat

20.03 g

Sat. Fat

1.62 g

Carbs

70.33 g

Fiber

1.13 g

Net carbs

69.19 g

Sugar

43.82 g

Protein

4.50 g

Sodium

205.81 mg

Cholesterol

41.16 mg

Nutritional information is approximate. Based on 1 bar if sliced into 9 servings.

Lemon Blondies, Lemon Brownies, Lemon bars
dessert
American
Did you make this recipe?
Tag @jennyblogsandbakes on instagram and hashtag it #jennyblogs

Chocolate No-Bake Cookies

Last Updated September 6, 2024

IMG_3299.jpg

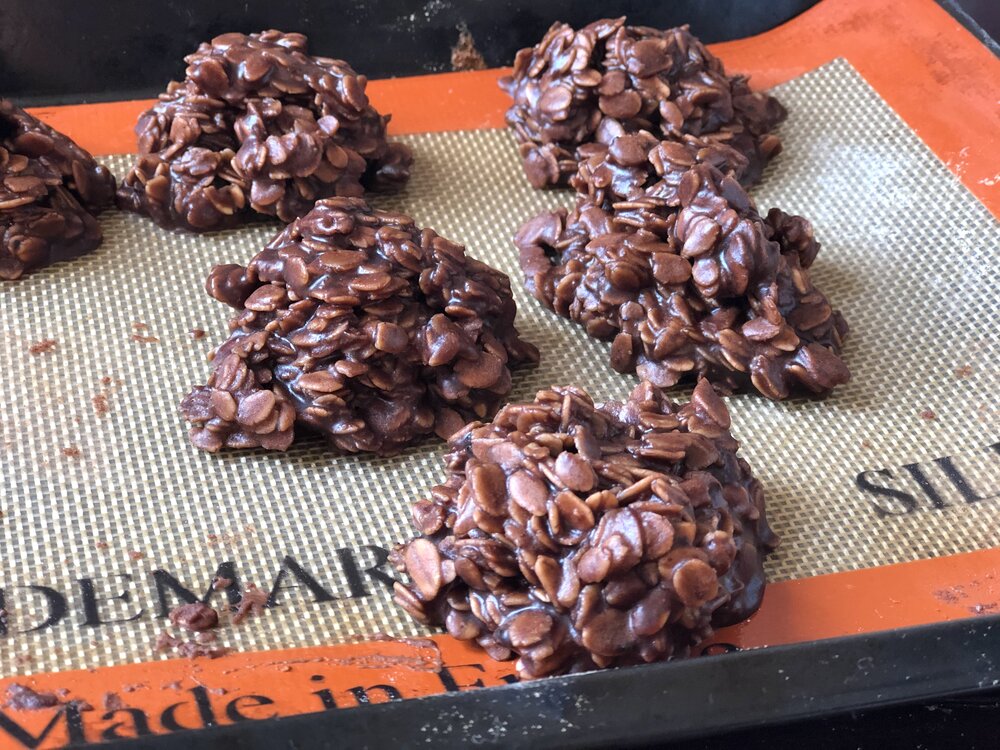
Chocolate no-bake cookies are actually known as Chocolate Sand Dune Cookies around the Morris household, because no-bakes is not as fun, ya know? They’re well enough known that probably doesn’t matter, but as I grew up near the famous Sleeping Bear Sand Dunes, you will understand why, many years ago, my older brother decided to call these mounds of cookies “sand dunes”. Or rather “chocolate sand dunes” because these cookies are not the color of sand. The name stuck, and here we are today.

Chocolate sand dune cookies a.k.a. chocolate no-bake cookies, no matter what you call them, are delicious and just a little too easy to make.

They’re also made without any flour, so if you use certified GF oats, they are easily gluten-free. These cookies made a come back during the quarantine and the flour shortage! They can also be made with a milk-alternative and butter-alternative if you wish to have dairy-free cookies. They’re naturally egg-free!

What follows is the classic recipe I grew up making with my mom. Little did I know until I was a teenager and making no-bake cookies with a friend that the actual “original” recipe includes peanut butter. What?! You don’t put peanut butter into chocolate sand dune cookies! Actually you can, and it’s delicious. Peanut butter and chocolate together, hello. Of course it’s delicious.

However, this is not to disregard my mom’s classic recipe. While she loves chocolate and peanut butter, she doesn’t prefer them together. So she omitted the peanut butter and never looked back from making this pure chocolatey, fudgy version of no-bake cookies. Some of my family members still prefer them without the peanut butter, others prefer with. So if you or someone you know doesn’t like peanut butter with chocolate, or has a nut allergy, know you can omit the peanut butter and have an equally delicious cookie.

This post may contain affiliate links. If you make a purchase using these links, Jennyblogs may receive a small commission, at no extra cost to you. This helps to support Jennyblogs. Where possible, links are prioritized to small businesses and ethically and responsibly made items. For further information see the privacy policy. Grazie!

A recipe from my mama


Chocolate Sand Dune Cookies

Makes about 36 cookies

The pan was full at one point…

The pan was full at one point…

Ingredients:

  • 4 cups / 800g sugar

  • 1/2 cup / 50g cocoa powder

  • 1 cup / 237g milk

  • dash of salt

  • 1 cup / 225g butter (2 sticks)

  • 1/4-1 cup / 65g - 260g peanut butter, optional

  • 2 tsp / 10g vanilla extract

  • 5 1/2 cups / 495g quick oats

Directions

  1. In a large pot, stir together sugar, cocoa, milk, and salt; bring to a boil over medium heat. Boil for 2 minutes then remove from heat.

  2. Add butter, peanut butter, and vanilla; stir well.

  3. Add the oats and stir until all oats are coated. Let mixture sit for 8-10 minutes to thicken, stirring occasionally to check consistency.

  4. When mixture has thickened enough, spoon mounds onto wax paper or a clean counter. Allow to set and enjoy!

Jenny’s Notes:

  • Brown sugar can be used instead of white sugar, if you prefer.

  • I grew up baking with salted butter and this recipe reflects that with the dash of salt. Here in Europe and in most bakeries unsalted butter is used, so if that’s what you are using, simply add two dashes of salt if you wish!

  • You may notice the variance in the peanut butter measurement; use up to 1 cup for peanut butter lovers, or as little as 1/4 cup for just a hint.

  • Regular or crunchy peanut butter can be used, and it’s also fine to use natural peanut butter. People often don’t recommend using natural in recipes, but as I prefer not to buy the kinds with added sugars and hydrogenated oils, I usually use it anyway and have hardly met a recipe where you can’t successfully use the natural kind.

  • Quick or instant oats are my preferred kind of oats to use for chocolate sand dunes, but as you will notice from my photos that regular or rolled oats can also be used. Rolled oats give more of a bite to your cookies, and you will probably need to let the mixture sit a bit longer before spooning out the cookies so the oats have time to thicken up the mixture. If after 10-15 minutes your mixture still isn’t thickening up satisfactorily, you may need to add additional oats.

  • The above recipe makes about 36 cookies, great for sharing, large families, and parties. It can also easily be halved to make about 18 cookies, or even quartered to make 9. The photos on this post are from the 2 month lockdown in Italy when I decided that a quarter batch should suffice for 2 people who can’t leave the house.

Chocolate No-Bake Cookies
Yield 36
Author
Prep time
20 Min
Cook time
5 Min
Total time
25 Min

Chocolate No-Bake Cookies

Chocolate No-bakes are decadent mounds of chocolatey oat cookies made without flour, eggs, or an oven, which makes them ideal for summer baking and people with gluten or egg allergies.
Cook modePrevent screen from turning off

Ingredients

Instructions

  1. In a large pot, stir together sugar, cocoa, milk, and salt; bring to a boil over medium heat. Boil for 2 minutes then remove from heat.
  2. Add butter, peanut butter, and vanilla; stir well.
  3. Add the oats and stir until all oats are coated. Let mixture sit for 8-10 minutes to thicken, stirring occasionally to check consistency.
  4. When mixture has thickened enough, spoon mounds onto wax paper or a clean counter. Allow to set and enjoy!

Notes

Brown sugar can be used instead of white sugar, if you prefer.I grew up baking with salted butter and this recipe reflects that with the dash of salt. Here in Europe and in most bakeries unsalted butter is used, so if that’s what you are using, simply add two dashes of salt if you wish! You may notice the variance in the peanut butter measurement; use up to 1 cup for peanut butter lovers, or as little as 1/4 cup for just a hint. Regular or crunchy peanut butter can be used, and it’s also fine to use natural peanut butter. People often don’t recommend using natural in recipes, but as I prefer not to buy the kinds with added sugars and hydrogenated oils, I usually use it anyway and have hardly met a recipe where you can’t successfully use the natural kind. Quick or instant oats are my preferred kind of oats to use for chocolate sand dunes, but as you will notice from my photos that regular or rolled oats can also be used. Rolled oats give more of a bite to your cookies, and you will probably need to let the mixture sit a bit longer before spooning out the cookies so the oats have time to thicken up the mixture. If after 10-15 minutes your mixture still isn’t thickening up satisfactorily, you may need to add additional oats. The above recipe makes about 36 cookies, great for sharing, large families, and parties. It can also easily be halved to make about 18 cookies, or even quartered to make 9. The photos on this post are from the 2 month lockdown in Italy when I decided that a quarter batch should suffice for 2 people who can’t leave the house.

Nutrition Facts

Calories

192.48

Fat

9.10 g

Sat. Fat

4.01 g

Carbs

26.75 g

Fiber

0.92 g

Net carbs

25.83 g

Sugar

22.75 g

Protein

2.47 g

Sodium

89.28 mg

Cholesterol

13.96 mg

Nutritional information is approximate. Based on 1 cookie if using the full cup of peanut butter in the recipe.

no-bake cookies, chocolate, oats, no bake dessert, summer dessert, fudgy chocolate cookies, oat cookies, peanut butter
dessert
American
Did you make this recipe?
Tag @jennyblogsandbakes on instagram and hashtag it #jennyblogs
IMG_3302.jpg

White Bean Carrot Burgers

Last Updated September 4, 2024

Summer is almost upon us, and with the warm weather comes all the best summer foods. In America that usually means all the cookouts, potato salads, watermelon, lemonade, corn on the cob…

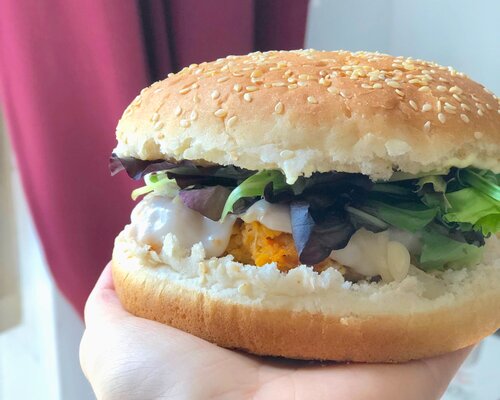
White Bean Burger with spring greens, pickled onions, and melted and caramelized goat cheese

White Bean Burger with spring greens, pickled onions, and melted and caramelized goat cheese

You know what the ironic part is? Growing up, or really until I moved to Italy, I wouldn’t have considered the classic American barbecue foods as personal favorites. At all. I could easily pass on hot dogs, hamburgers, potato salads, corn on the cob. I do love watermelon and lemonade, though! It wasn’t until being in Italy for awhile that I started to crave these American foods, especially in the summer. Nostalgia for the homeland. And that’s saying something, coming from the person that, as long as I wasn’t offending a host, would make myself a hamburger, but without the burger. Yes yes, I am aware that I’m weird. I love hamburger condiments!

Veggie burgers!

I’ve always loved veggie burgers. Give me all the fake meat, vegetable, or bean burgers! And condiments. Oh yes. (For my meat-loving friends, you would be proud to know that yesterday for the first time in my life, I ordered a non-vegetarian burger from a restaurant. I split it with my husband, but still. I enjoyed it, and more importantly, it was my idea!)

There are so many good veggie burgers out there, and I love how everyone and every restaurant seems to have their own take on them. So many different vegetables to choose from, and different ways to prepare them.

I recently had a hankering for some black bean burgers. Alas, I had no black beans, only white beans, and this was during the lockdown in Italy, so I couldn’t just walk to the store for some beans on a whim. White bean burgers it would have to be. I didn’t have a white bean burger recipe handy, but I tried the one i’m sharing with you today and found it very tasty!

It’s very simple, mostly white beans, carrots, onion, bread crumbs, and an egg to hold it together. It’s the perfect vessel for all your favorite condiments, or eaten as is, without a bun.

My one recommendation? Make these pickled onions to go with the White Bean Burgers! Did you know you can assemble pickled onions in less than 5 minutes with ingredients you most likely already have on hand, and you can use them after they’ve sat for only 30 minutes?! Seriously, too simple, you will never hesitate to add pickled veggies to your dishes again!

Pickled Onion

  • 1 red onion, thinly sliced

  • 2 Tbsp / 28g red wine vinegar

  • 2 Tbsp / 28g water

  • 1/2 tsp salt

  • 1/4 tsp sugar

  1. Mix all ingredients briefly, then let sit until needed, preferably 30+ minutes, swirling the onions in the vinegar mixture occasionally. Likewise, you can also cover and keep in the fridge for up to a week.

  2. This recipe is easily doubled, tripled, etc. for your needs. You can also use other types of onions, but red onions are the prettiest in my opinion!

That’s my one recommendation. Serve these burgers with pickled onions. If I were to give you more than one, I might suggest avocado, a fried egg, some sprouts, goat cheese…

This post may contain affiliate links. If you make a purchase using these links, Jennyblogs may receive a small commission, at no extra cost to you. This helps to support Jennyblogs. Where possible, links are prioritized to small businesses and ethically and responsibly made items. For further information see the privacy policy. Grazie!

Recipe adapted from Smitten Kitchen


White Bean Burgers

Serves 2-4

IMG_3356.jpg

Ingredients:

  • olive oil

  • 1 small onion, diced

  • 2 tsp / 10g tomato paste

  • 3/4 tsp salt

  • dash black pepper

  • 1/2 cup grated carrot, about 1 medium

  • 2 tsp / 10g apple cider vinegar

  • 1/4 cup / 25g breadcrumbs

  • 1 15oz can / 425g white beans such as cannellini, navy, etc., drained

  • 1 egg

  • burger buns, condiments, as desired

Directions:

IMG_3360.jpg
  1. Add a bit of olive oil to a large fry pan over low heat. Add the onion and cook until softened and starting to turn golden, about 8-10 minutes.

  2. Add tomato paste, salt, pepper, and carrots, stirring frequently, until carrots soften and start to turn golden, about another 8-10 minutes.

  3. Add vinegar and stir, using it to deglaze the pan and get off any bits stuck to the bottom. Once the vinegar is evaporated, turn off heat and scrape mixture into a medium bowl.

  4. Add breadcrumbs and white beans, mixing well and smashing the beans. Smash well or leave a bit chunky, as you wish. Taste and add more salt and pepper, as desired.

  5. Add the egg and mix well. The mixture should be soft but able to make a patty, but not soupy or crumbly. If the mixture seems too wet, add another 2 Tbsp or so of breadcrumbs and let mixture sit for a few minutes to allow the breadcrumbs to absorb some of the moisture.

  6. Heat 1-2 Tbsp olive in a large fry pan over medium heat. While the pan is heating up, shape up the bean mixture into about 4 medium patties. Fry however many patties can comfortably fit into the pan at one time, about 3-4 minutes on each side or until golden brown and firmed up.

  7. Serve immediately with buns and condiments.

Jenny’s Notes:

  • The bean mixture can be made a day or two in advance and stored in the fridge until ready to fry. The burgers can also be fried and frozen for quick meals.

  • To make these burgers vegan, you can try using a chia or flax egg instead of the regular egg. I haven’t personally tried this, but in theory it should work! Let me know if you do.

White Bean Carrot Burgers
Yield 2-4
Author
Prep time
10 Min
Cook time
30 Min
Total time
40 Min

White Bean Carrot Burgers

Easy to whip up white bean burgers with carrot, they pair perfectly with your favorite buns and condiments for a healthier cook out!
Cook modePrevent screen from turning off

Ingredients

Instructions

  1. Add a bit of olive oil to a large fry pan over low heat. Add the onion and cook until softened and starting to turn golden, about 8-10 minutes.
  2. Add tomato paste, salt, pepper, and carrots, stirring frequently, until carrots soften and start to turn golden, about another 8-10 minutes.
  3. Add vinegar and stir, using it to deglaze the pan and get off any bits stuck to the bottom. Once the vinegar is evaporated, turn off heat and scrape mixture into a medium bowl.
  4. Add breadcrumbs and white beans, mixing well and smashing the beans. Smash well or leave a bit chunky, as you wish. Taste and add more salt and pepper, as desired.
  5. Add the egg and mix well. The mixture should be soft but able to make a patty, but not soupy or crumbly. If the mixture seems too wet, add another 2 Tbsp or so of breadcrumbs and let mixture sit for a few minutes to allow the breadcrumbs to absorb some of the moisture.
  6. Heat 1-2 Tbsp olive in a large fry pan over medium heat. While the pan is heating up, shape up the bean mixture into about 4 medium patties. Fry however many patties can comfortably fit into the pan at one time, about 3-4 minutes on each side or until golden brown and firmed up.
  7. Serve immediately with buns and condiments.

Notes

  • The bean mixture can be made a day or two in advance and stored in the fridge until ready to fry. The burgers can also be fried and frozen for quick meals.
  • To make these burgers vegan, you can try using a chia or flax egg instead of the regular egg.

Nutrition Facts

Calories

469.92

Fat

10.68 g

Sat. Fat

2.08 g

Carbs

69.20 g

Fiber

15.37 g

Net carbs

53.83 g

Sugar

4.95 g

Protein

26.37 g

Sodium

1035.03 mg

Cholesterol

93.00 mg

Nutritional information is approximate. Based on 1 veggie burger if you make two larger patties, no bun or condiments.

vegetarian, veggie burger, white beans, white bean burger, healthy burgers, pickled onions
Vegetarian, sandwiches
American
Did you make this recipe?
Tag @jennyblogsandbakes on instagram and hashtag it #jennyblogs

Copycat Homemade Lipton Onion Dip

Last Updated September 4, 2024

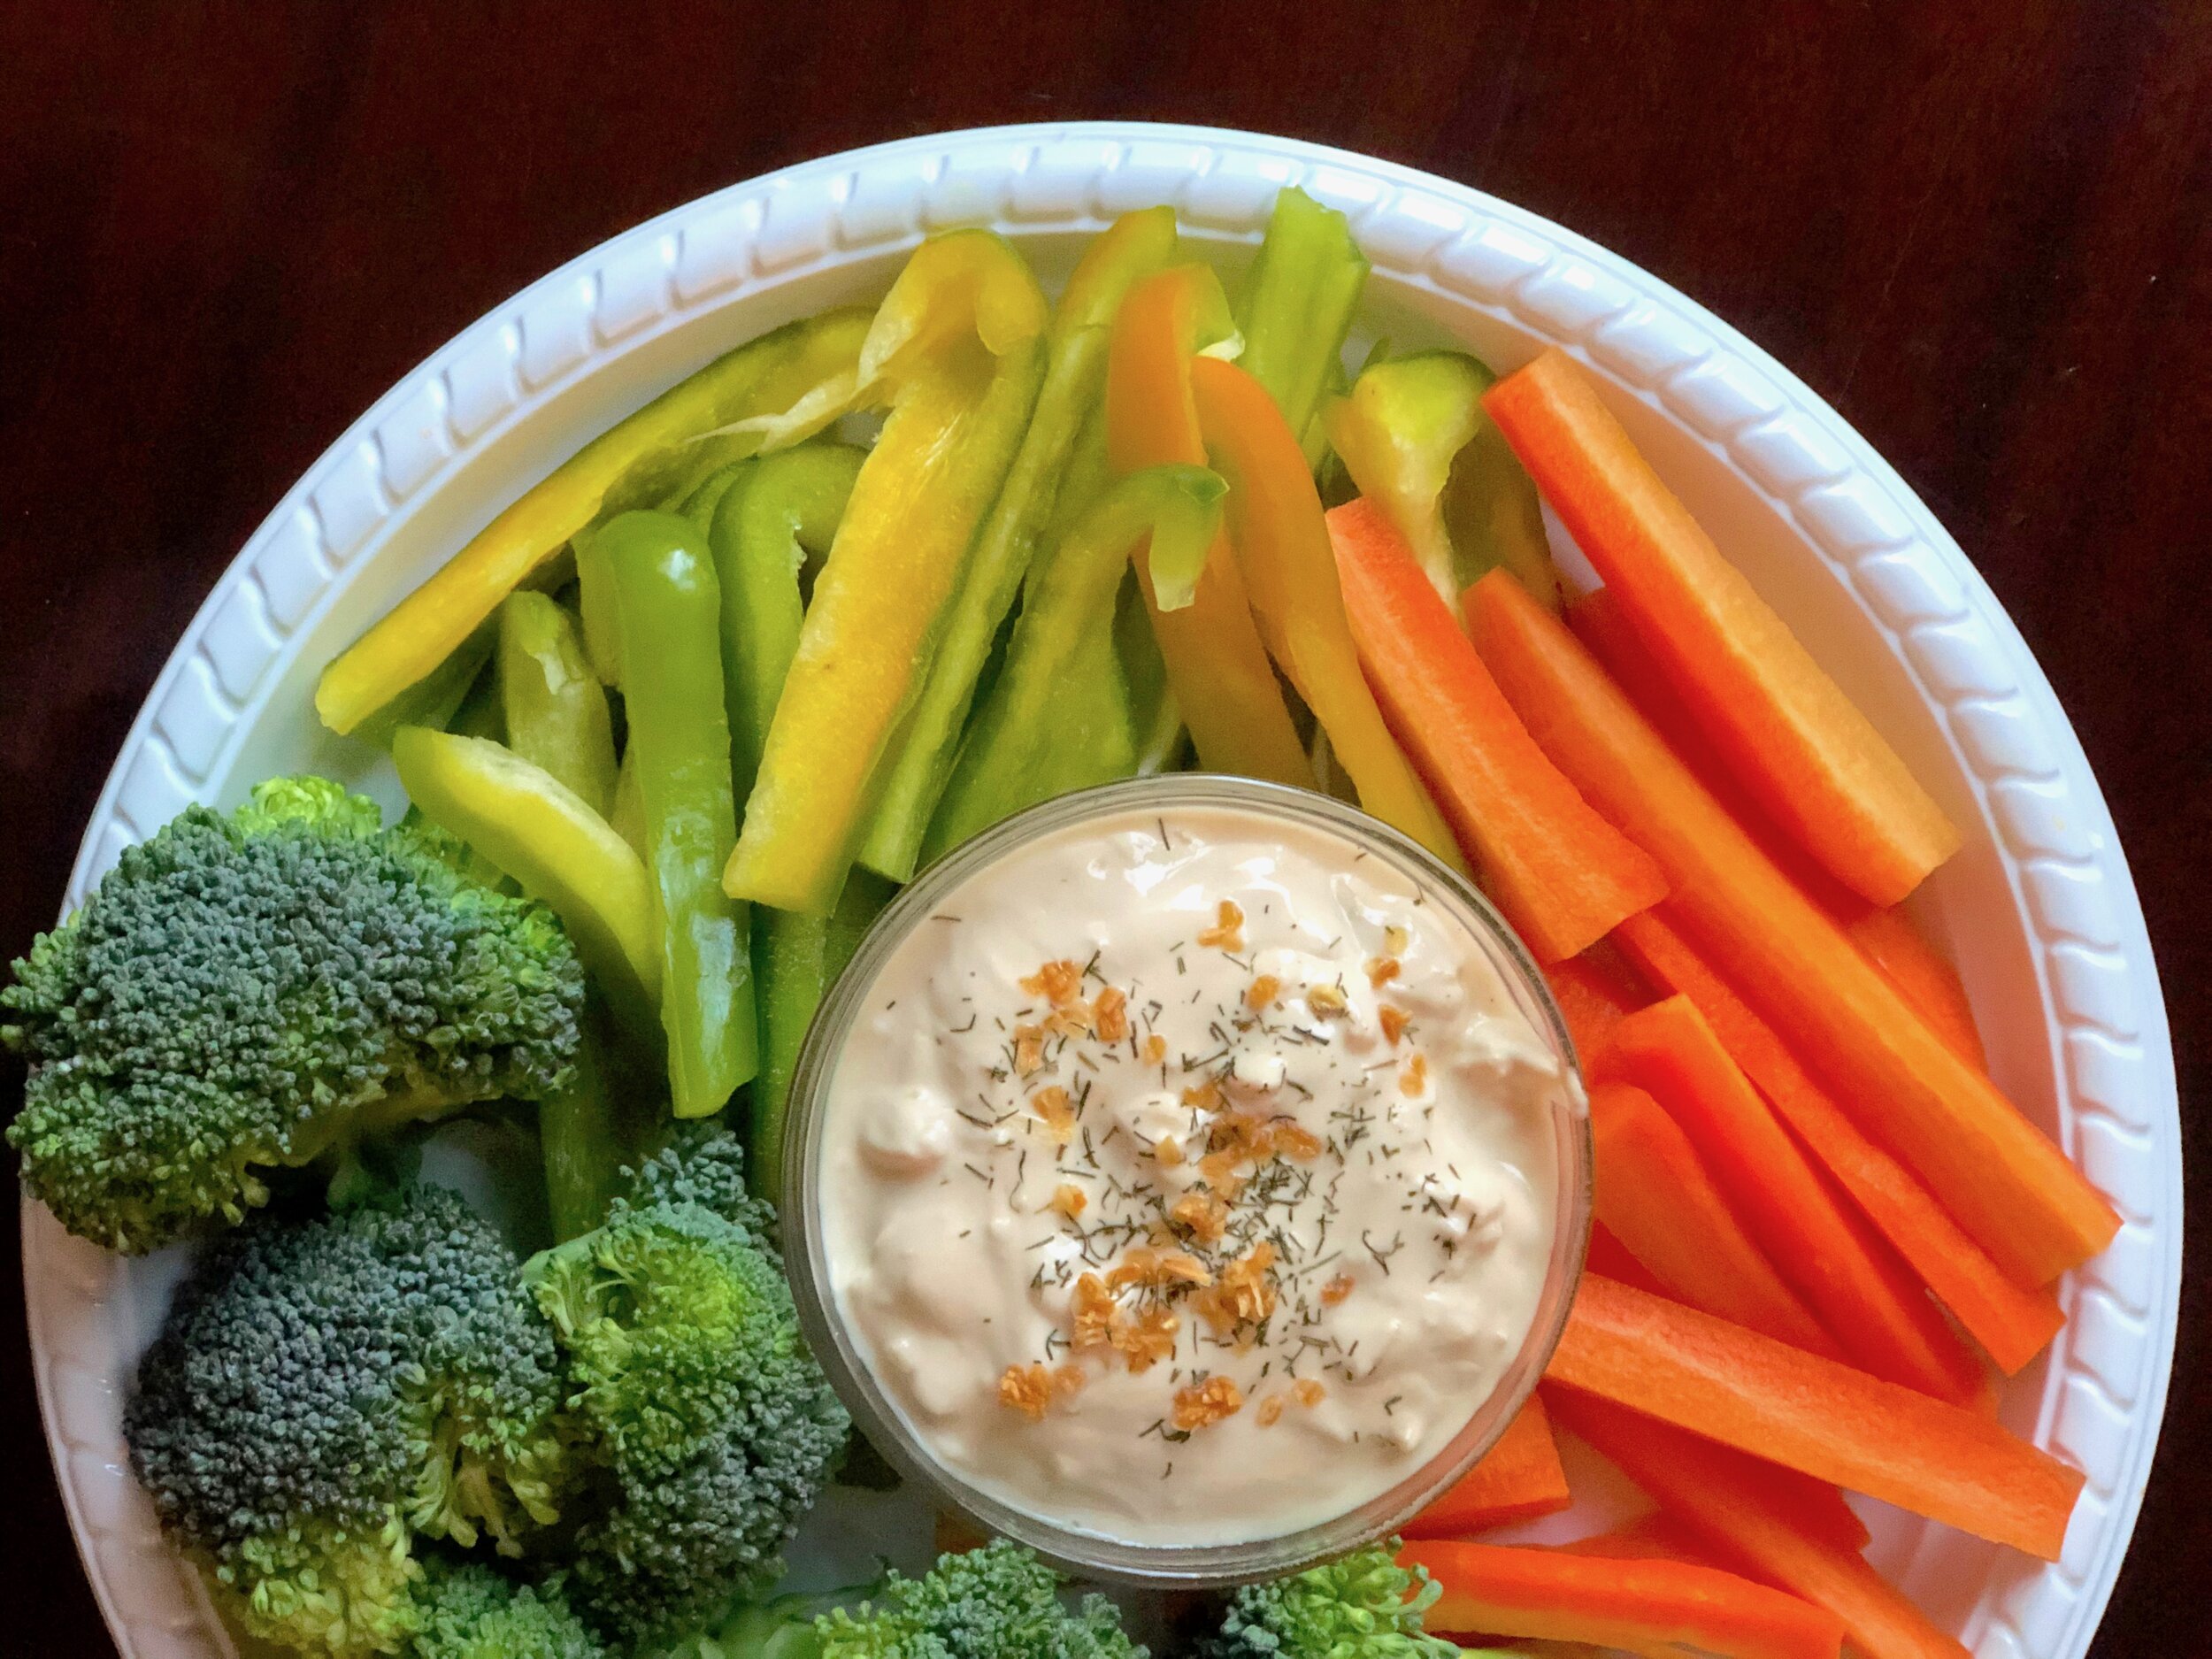
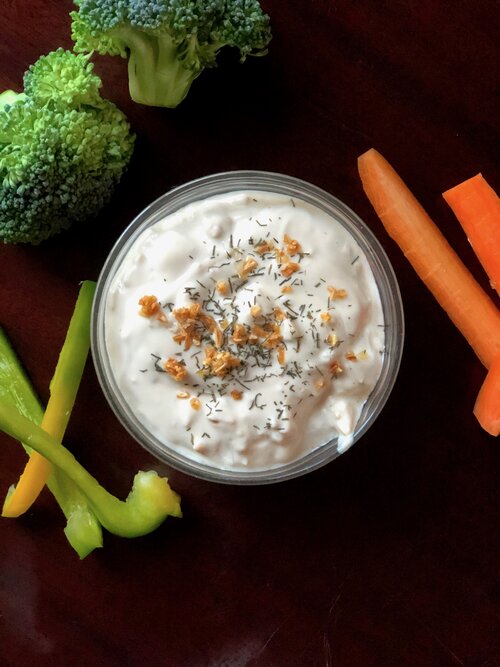
What if I told you that there is a way to enjoy Onion Dip but with less guilt? No preservatives, corn syrup, caramel color, and other ingredients you’re not quite sure what they are?

Because there IS a way! And it’s very simple. Not that you get much simpler than mixing sour cream with a Lipton onion packet, but it’s pretty darn close.

For this recipe I use yogurt, as I do even if I mix a Lipton packet, because yogurt is actually good for you, sour cream is usually more found on diet naughty lists.

I first made this during lockdown, and while I couldn’t find beef broth granules, just “classic” powdered broth, it came out satisfactorily close to the real thing. As I was explaining on the Healthier Lipton Onion Dip post, I had inherited two Lipton onion mixes from a friend who moved away from Florence. My husband had never had such a thing before and requested it again. When he requested it a third time, I had to break it to him gently…”honey, there were only two packets, and I don’t think we can find Lipton around Florence.”

Since people requesting a specific food/dessert/recipe from me to make is like a love language for me, I was not about to let a request go unfulfilled. So I began a hunt for the necessary ingredients and a recipe to go off of that doesn’t just make bulk powdered onion mix (there are many of those but I don’t make Onion dip all THAT often) but just a recipe for the standard 16oz/two cups of dip.

Thanks to Daring Gourmet for providing just that! Recipe with a few of my usual tweaks below.

This post may contain affiliate links. If you make a purchase using these links, Jennyblogs may receive a small commission, at no extra cost to you. This helps to support Jennyblogs. Where possible, links are prioritized to small businesses and ethically and responsibly made items. For further information see the privacy policy. Grazie!


Copycat Lipton Onion Dip

Makes about 2 cups of dip

Ingredients:

  • 2-4 tsp beef broth granules

  • 2 Tbsp dried minced onions

  • 1 tsp onion powder

  • 1/4 tsp pepper

  • 1/8 tsp paprika

  • 16oz / 454g regular or Greek plain yogurt

  • fresh or dried dill, more dried minced onions, for topping, optional

  • washed sliced veggies, potato chips, etc, for dipping

Directions:

  1. In a medium bowl, combine 2 tsp of broth granules with the rest of the spices.

  2. Stir in the yogurt and mix well. Taste; if you desire the dip to be saltier, add another teaspoon of broth granules and stir. Taste again, adding the last teaspoon of broth, if desired. Refrigerate for about two hours before serving.

  3. Top with dill and more onions, if desired, and serve with veggies, potato chips, pita, or whatever dippers you like!

Jenny’s Notes:

  • While beef broth is probably closest to the real taste, I have never found beef broth granules here in Italy and get away with using the “classic” broth flavor or even vegetable broth granules. It still tastes delicious! Check labels for MSG, it often gets sneaked into these types of things.

  • If using low-sodium broth granules you will be better able to control the sodium, and can even add a bit more broth for more flavor without the dip becoming too salty.

  • The refrigeration is not strictly necessary, but it gives some time for the flavors to meld and the onions to rehydrate a bit. If you simply can’t wait that long to dig in or need it ASAP for a party, go ahead and use it straight away.

  • 1/8 tsp celery seed, and 1/4 tsp dried parsley can also be added. I don’t usually add them just because I don’t have celery seed on hand here and don’t personally think dried parsley adds any kind of flavor value to dishes. It does add a touch of green, though!

Copycat Lipton Onion Dip
Yield 4
Author
Prep time
10 Min
Total time
10 Min

Copycat Lipton Onion Dip

Classic Lipton Onion Dip made from scratch, creating a delicious and nutritious snack to be served with veggies, potato chips, or your favorite dippers.
Cook modePrevent screen from turning off

Ingredients

Instructions

  1. In a medium bowl, combine 2 tsp of broth granules with the rest of the spices.
  2. Stir in the yogurt and mix well. Taste; if you desire the dip to be saltier, add another teaspoon of broth granules and stir. Taste again, adding the last teaspoon of broth, if desired. Refrigerate for about two hours before serving.
  3. Top with dill and more onions, if desired, and serve with veggies, potato chips, pita, or whatever dippers you like!

Notes

  • While beef broth is probably closest to the real taste, I have never found beef broth granules here in Italy and get away with using the “classic” broth flavor or even vegetable broth granules. It still tastes delicious! Check labels for MSG, it often gets sneaked into these types of things.
  • If using low-sodium broth granules you will be better able to control the sodium, and can even add a bit more broth for more flavor without the dip becoming too salty.
  • The refrigeration is not strictly necessary, but it gives some time for the flavors to meld and the onions to rehydrate a bit. If you simply can’t wait that long to dig in or need it ASAP for a party, go ahead and use it straight away.
  • 1/8 tsp celery seed, and 1/4 tsp dried parsley can also be added. I don’t usually add them just because I don’t have celery seed on hand here and don’t personally think dried parsley adds any kind of flavor value to dishes. It does add a touch of green, though!

Nutrition Facts

Calories

89.67

Fat

1.93 g

Sat. Fat

1.17 g

Carbs

11.95 g

Fiber

1.33 g

Net carbs

10.61 g

Sugar

9.31 g

Protein

6.84 g

Sodium

105.53 mg

Cholesterol

6.81 mg

Nutritional information is approximate. Based on 1/2 cup dip with 1 cup sliced veggies.

Lipton Onion soup mix, Lipton Onion dip, French onion dip, copycat Lipton onion dip, beef broth, yogurt, veggie dip
appetizer
American
Did you make this recipe?
Tag @jennyblogsandbakes on instagram and hashtag it #jennyblogs

Beurre Noisette (browned butter) Congo Bars

Last Updated September 3, 2024

With oats.

Adjustments.jpg

One of the best things to happen to the cookie world is browned butter, or beurre noisette as the French call it. It not only ups the baked cookie game, but it takes cookie dough to a whole new level.

Will someone please get browned butter cookie dough ice cream on the market? Thanks.

You can find my original recipe for Beurre Noisette Chocolate Chip Cookies right here, but you might want to stick around a little longer for today’s recipe because it’s essentially the same thing, just a different form and a little quicker to make. And cookies are already quick to make, so imagine that!

Why the name congo bars? I really have no idea. They’re just chocolate chip cookies in bar form. Therefore quicker to make but not necessarily superior to the classic cookie form. It’s really down to whatever tickles your fancy in that moment.

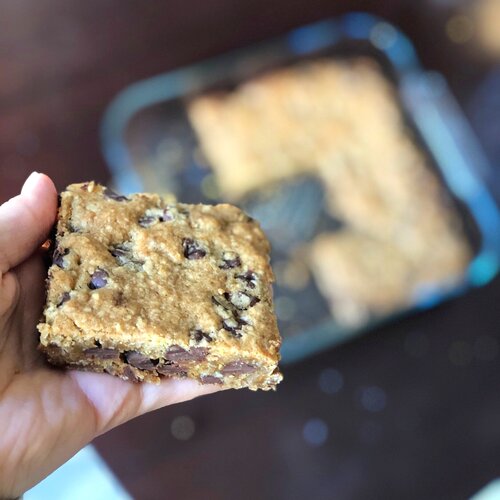
This recipe was born under full Italian lockdown. Ironically, you think I wouldn’t want to short cut a recipe with all the time I had on my hands, but you see, I have a very small oven. I can bake a max of 5-6 cookies a time, so that’s a long time to be waiting around to take cookies out of the oven, reload the tray, and repeat. Not to mention a higher electric bill.

So what did I do? I took my handy dandy Beurre Noisette Chocolate Chip Cookie recipe and adjusted it to fit in an 8x8in / 20x20cm square pan. So great. So delicious. And the timer only goes off once! A square baking dish is also a bit easier to wash than a large and cumbersome cookie sheet.

This recipe also features oats, and you can use the browned butter while it’s still melted if you want one more time-saving trick. While I do think it’s worth the time/planning ahead to brown the butter, allow it to cool, then whip it up as you normally would in a cookie recipe (so fluffy and so delicious), it’s not essential and can save you a lot of time if you don’t.

To learn how to make browned butter, see the original Beurre Noisette Chocolate Chip Cookie recipe.

This post may contain affiliate links. If you make a purchase using these links, Jennyblogs may receive a small commission, at no extra cost to you. This helps to support Jennyblogs. Where possible, links are prioritized to small businesses and ethically and responsibly made items. For further information see the privacy policy. Grazie!

A recipe by Jenny


Beurre Noisette (browned butter) Congo Bars

Makes about 9 bars

Adjustments.jpg

Ingredients:

  • 1/2 cup / 113g butter, melted, browned, and cooled

  • 3/4 cup / brown sugar

  • 1 egg

  • 1 1/2 tsp vanilla extract

  • 1 cup / 120g all-purpose flour

  • 1/2 cup / 45g oats

  • 1/2 tsp baking powder

  • 1/2 tsp baking soda

  • 1/2 tsp salt

  • 6 oz / 170g (half a bag) chocolate chips

Directions:

Oven preheated to 350°F / 177°C. 8x8in / 20x20cm pan, greased.

  1. In a medium bowl, mix together melted and cooled browned butter, brown sugar, egg, and vanilla and smooth.

  2. Add in flour, oats, baking powder, baking soda, salt, and chocolate chips. Mix until well combined.

  3. Scrape dough into an even layer in the prepared pan and bake for 18-22 minutes, or until set and center no longer looks doughy.

Jenny’s Notes:

  • This recipe can easily be doubled and baked in a 9x13in / 23x33cm pan.

  • If you choose to whip your butter, cream first just the butter and sugar until light and fluffy, about 4-5 minutes. Then add in the rest of the wet ingredients and continue with recipe.

  • Before baking you can also sprinkle some flaked sea salt on top if you’re craving the sweet and salty!

Beurre Noisette (browned butter) Congo Bars
Yield 9
Author
Prep time
25 Min
Cook time
22 Min
Total time
47 Min

Beurre Noisette (browned butter) Congo Bars

All the goodness of browned butter chocolate chip cookies in a bar form!
Cook modePrevent screen from turning off

Ingredients

Instructions

  1. Oven preheated to 350°F / 177°C. 8x8in / 20x20cm pan, greased.
  2. In a medium bowl, mix together melted and cooled browned butter, brown sugar, egg, and vanilla and smooth.
  3. Add in flour, oats, baking powder, baking soda, salt, and chocolate chips. Mix until well combined.
  4. Scrape dough into an even layer in the prepared pan and bake for 18-22 minutes, or until set and center no longer looks doughy.

Notes

This recipe can easily be doubled and baked in a 9x13in / 23x33cm pan.If you choose to whip your butter, cream first just the butter and sugar until light and fluffy, about 4-5 minutes. Then add in the rest of the wet ingredients and continue with recipe. Before baking you can also sprinkle some flaked sea salt on top if you’re craving the sweet and salty!

Nutrition Facts

Calories

316.06

Fat

16.84 g

Sat. Fat

10.05 g

Carbs

40.76 g

Fiber

1.98 g

Net carbs

38.78 g

Sugar

25.25 g

Protein

3.65 g

Sodium

321.79 mg

Cholesterol

47.66 mg

Nutritional information is approximate. Based on 9 servings.

browned butter, chocolate chip cookies, congo bars, cookies
cookies, dessert
American
Did you make this recipe?
Tag @jennyblogsandbakes on instagram and hashtag it #jennyblogs

Parmesan Pan-Fried Chicken

Adjustments.jpeg

Happy quarantine day I-don’t-know-what-number! 44? 46? Regardless, I think we’re all open to new dinner ideas at this point and really looking forward to being able to go to restaurants again.

One thing that has made this quarantine a little easier is having access to yummy food and snacks, so I don’t miss going out too much. I’m thankful for a space I can make and create food, grocery stores, and for my mom who taught me so much about being in the kitchen.

But. That doesn’t mean some nights I don’t miss the ease of take out, especially the pizzeria behind my house, or being able to sit down in a nice space and then people bring you whatever you choose to eat in exchange for some money. Restaurants are so cool, you guys.

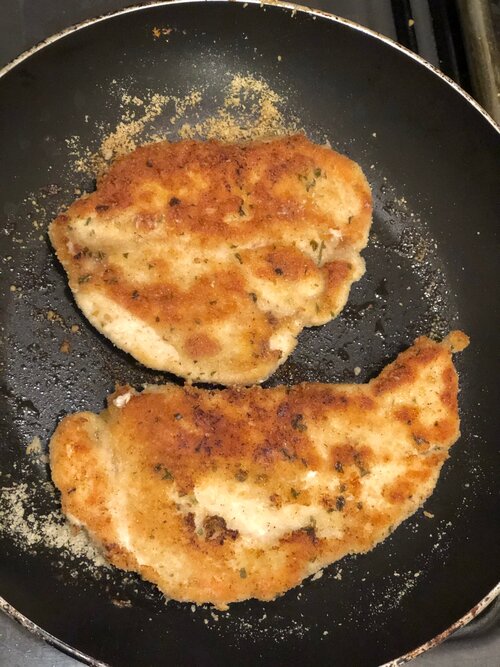
That’s where today’s Parmesan Pan-Fried Chicken comes into play. It’s easy, ready in 10-15 minutes, and so delicious. It’s no fuss, because there is no egg or flour breading. This also makes for a lighter fried chicken, just a thin, flavorful crust and not nearly as much guilt as traditional fried chicken. And less dishes to wash! All you need are some chicken breasts, bread crumbs, oregano, garlic powder, salt, and parmesan cheese, plus a frying pan with a bit of butter.

I originally stumbled across this idea when making a chicken quinoa casserole, which uses a similar breading technique with the chicken: using simply a wet chicken breast before dipping in a breadcrumb mixture instead of the more common flour and egg battering. I thought, what happens if I do the same thing, but instead of putting it in the casserole, fry it in some butter? Well, this simple, delicious chicken was the result, and I’m happy to share the recipe with you today.

This post may contain affiliate links. If you make a purchase using these links, Jennyblogs may receive a small commission, at no extra cost to you. This helps to support Jennyblogs. Where possible, links are prioritized to small businesses and ethically and responsibly made items. For further information see the privacy policy. Grazie!

A recipe by Jenny


Parmesan Pan-Fried Chicken

Serves 4-6

Ingredients:

  • 4 uncooked boneless skinless chicken breasts, about 1.5 lbs / 680g

  • 1/2 cup / 62g bread crumbs

  • 1/4 cup / 25g grated parmesan cheese

  • 1/2 tsp dried oregano

  • 1/4 tsp garlic powder

  • 1/4 tsp salt

  • dash of pepper

  • 2 Tbsp butter

Directions:

Adjustments.jpeg
  1. Starting with one chicken breast, lay it flay on a cutting board. Slice horizontally starting from the thicker end, to end up with two thinner pieces of chicken breast. Repeat with remaining chicken breasts.

  2. In a medium bowl, mix together bread crumbs, cheese, garlic, oregano, salt and pepper.

  3. In a large frying pan, melt 2 Tbsp butter over medium-high heat. Wet a chicken breast with water and press one side, then the other, into the bread crumb mixture. You can use your fingers to press on more of the mixture on areas that get missed. Place coated chicken into frying pan. Repeat with remaining chicken.

  4. Cook on each side 5-7 minutes or until cooked through and golden brown. Internal temperature should read at least 165°F / 75°C. If the chicken starts to darken too quickly, lower the temperature.

Jenny’s Notes:

  • If your frying pan isn’t big enough to accomodate all of the chicken, you can cook it in batches, starting with less butter, and adding more between each batch of chicken.

  • Here in Italy I always buy meat from our butcher, who slices chicken breasts horizontally so they are twice as thin as the chicken breasts you get at the store. While you can choose to keep your chicken breasts whole and bread and fry them that way, keep in mind you will need to adjust the cooking time accordingly to cook the chicken through.

  • You can use more butter for richer fried chicken, or less, for an even lighter fried chicken.

Parmesan Pan-Fried Chicken
Yield 4-6
Author
Prep time
5 Min
Cook time
14 Min
Total time
19 Min

Parmesan Pan-Fried Chicken

The easiest fried chicken with no egg or flour battering, just wet the chicken and dip in spiced bread crumbs and parmesan cheese. Fry in butter and you have a crispy, delicious chicken ready in 15 minutes.
Cook modePrevent screen from turning off

Ingredients

Instructions

  1. In a medium bowl, mix together bread crumbs, cheese, garlic, oregano, salt and pepper.
  2. In a large frying pan, melt 2 Tbsp butter over medium-high heat. Wet a chicken breast with water and press one side, then the other, into the bread crumb mixture. You can use your fingers to press on more of the mixture on areas that get missed. Place coated chicken into frying pan. Repeat with remaining chicken.
  3. Cook on each side 5-7 minutes or until cooked through and golden brown. Internal temperature should read at least 165F / 75C. If the chicken starts to darken too quickly, lower the temperature.

Notes

If your frying pan isn’t big enough to accomodate all of the chicken, you can cook it in batches, starting with less butter, and adding more between each batch of chicken. Here in Italy I always buy meat from our butcher, who slices chicken breasts horizantally so they are twice as thin as the chicken breasts you get at the store. That said, I had to guess a bit at the quantity for the coating, as I’ve never made this with larger chicken breasts. I know how much I need to make for 3 thinner chicken breasts, but that’s not going to be helpful to many people. If you have leftover coating, you can store it in the fridge for up to 2 days, but I wouldn’t keep it much longer as raw chicken has touched it. You can use more butter for richer fried chicken, or less, for an even lighter fried chicken.

Nutrition Facts

Calories

337.55

Fat

12.62 g

Sat. Fat

6.01 g

Carbs

12.31 g

Fiber

0.80 g

Net carbs

11.51 g

Sugar

0.98 g

Protein

41.18 g

Sodium

506.17 mg

Cholesterol

122.64 mg

Nutritional information is approximate. Based on 4 servings.

chicken, pan fried, fried chicken, parmesan cheese, oregano, garlic, 15 minute dinners, quick dinners
dinner, poultry
American
Did you make this recipe?
Tag @jennyblogsandbakes on instagram and hashtag it #jennyblogs

Almond Poppy Seed Sweet Rolls

Last Updated October 27, 2024

Welcome back to quarantine snacks and meals!

Adjustments.jpg

Today we are making Almond Poppy Seed Rolls! Think cinnamon rolls, but instead of cinnamon, a sweet almond dough with little crunchy poppyseeds and a sticky glaze. It’s like a cross between almond poppyseed bread and cinnamon rolls.

If there’s one thing we are forced to be during this time, it’s creative. Lack of resources, lack of schedule, lack of really anything that resembles our normal life has led us to come up with some really great ideas. Sometimes useless, but great nonetheless. Homemade obstacle courses are trending, memes are at the top of their game, and random skills you never before dreamed of having suddenly manifest themselves.

Another way we have had to get creative is in our cooking and baking. Not everything is readily available, and even if it is, a quick run to the store is no longer a quick run to the store. For my Michigan peeps, you are probably now feeling the effects of the latest lockdown measures. Only a certain number of people are allowed in the store at a time, creating long lines outside. Welcome, friends. That’s been normal life in Italy since uhh do I rememer how long? I think going on six weeks. Some stores require you to have a cart (helps you keep your distance) and some stores take your temperature before you enter. (In Italy.)

In general, most of my baking, unless for a special occasion or holiday, is spur of the moment. And what I want to bake often corresponds with what I want to eat, what do you know? The problem with this, as mentioned above, is that if I’m missing an ingredient, that means either waiting until the next store run, making something else, or improvising. The latter usually wins out.

Take the other day, for example, when I really wanted to make (and eat) these lemon raspberry rolls. I knew I didn’t have any raspberries, so I figured I would make just lemon rolls. Not to be, as I found my last lemon had gone moldy, and I didn’t even have any lemon extract. Well. Plain rolls weren’t going to cut it. I could’ve made cinnamon rolls, but my husband doesn’t much care for cinnamon (gasp) and I didn’t think that I should be eating a whole pan of cinnamon rolls by myself. While in quarantine. And am supposed to stay within 200m of my abode for exercise.

I took stock of my cupboards to see what I could possibly use to make some kind of flavored, delicious roll. While I didn’t have lemon extract, I did find almond extract! I love almond, and, and POPPY SEEDS. Yes. Done.

If you happen to have ingredients for both, I would highly suggest making both. They are also freezer friendly; stick in the freezer before baking or even after, once they’ve cooled.

This post may contain affiliate links. If you make a purchase using these links, Jennyblogs may receive a small commission, at no extra cost to you. This helps to support Jennyblogs. Where possible, links are prioritized to small businesses and ethically and responsibly made items. For further information see the privacy policy. Grazie!

Recipe by Jenny


Almond Poppy Seed Sweet Rolls

Makes 9 rolls

Adjustments.jpeg

Ingredients:

For the Dough

  • 1/2 cup / 119g milk or water

  • 1/4 cup / 50g sugar

  • 2 1/4 tsp / 7g active dry yeast

  • 2 Tbsp / 28g oil

  • 1 egg

  • 3 Tbsp / 23g poppy seeds

  • 1/2 tsp almond extract

  • 1/4 tsp salt

  • 2 1/4 cups / 270g all-purpose flour + about 1/4 cup / 30g for kneading

For the Filling

  • 1/4 cup / 56g butter

  • 1/4 cup / 50g sugar

For the Glaze

  • 3/4 cup / 94g powdered sugar

  • 1-2 Tbsp / 14-28g milk

Directions:

Preheat oven to 400F / 205C. Grease an 8x8inch / 20x20cm square baking dish.

Make the Dough

  1. In a small saucepan over low heat, warm milk until it is about 100F / 38C.  Pour into a large bowl.  Add the sugar and yeast and allow to sit for 7-10 minutes.  The yeast should foam up a bit. 

  2. Add oil, eggs, poppy seeds, extract, and salt.  Add the 2 1/4 cups of flour and mix until combined. 

  3. Turn dough out onto a floured surface.  Knead for about 8-10 minutes, sprinkling more flour on your work surface as needed.   Dough should be soft and elastic by the end, so don't get too flour-happy. Alternately, you can use the bread hook on a stand mixer and knead for 8-10 minutes, adding in flour as needed. By the end the dough should stick only to the bottom of the pan, not the sides.

  4. Lightly grease or flour a large bowl (the bowl you mixed the dough in is fine) and place dough in the bowl.  Cover with a towel and place in a warm area to rise for about 1 1/2 hours or until doubled in size. 

Assemble the Rolls

  1. In a small saucepan melt butter for filling and let simmer until it starts to brown.  Remove from heat and cool.

  2. When the dough has risen, punch it down and turn out onto a lightly floured surface.  Knead for a minute, then roll into a generous rectangle, about 7x14inch / 18x36cm and roughly 1/4inch / 1/2cm thick.

  3. Spread cooled butter over dough almost to the edges, then sprinkle evenly with sugar.

  4. Starting from one of the longer sides, roll dough into a spiral, pinching the dough together at the end to seal it. 

  5. Cut the log into thirds, then each third into 3 slices.  Place the rolls in the prepared pan and cover lightly with plastic wrap or a damp towel.  Place in a warm area to rise for about an hour, or until puffed.

  6. Bake for 15-20 minutes, or until golden on top and centers no longer look doughy. Internal temperature should be about 195F / 90C.

Make the Glaze

  1. In a small bowl whisk together powdered sugar and1 Tbsp of milk.  It should be thin enough to drizzle but not too liquidy.  Add more milk as needed. 

  2. Drizzle warm rolls with glaze. 

Jenny's Notes:

  • If you don't have a thermometer handy to know what 100 degrees is, simply warm until the milk feels quite warm, but not hot.

  • You can freeze these rolls once you have sliced them and put them in the pan.  Once removed from the freezer allow to thaw and proceed as normal. 

  • When using a stand mixer to knead, I still recommend kneading it for a few minutes by hand afterwards. I find they are not always as thorough as kneading by hand and you want an even rise for your dough.  I often to do it all by hand just because it’s therapeutic!

Almond Poppy Seed Rolls
Yield 9 rolls
Author
Prep time
1 Hour
Cook time
20 Min
Total time
1 H & 20 M

Almond Poppy Seed Rolls

Soft, fluffy breakfast rolls reminiscent of cinnamon rolls but with an almond poppy seed dough, a sweet, gooey buttery filling, and a sweet glaze.
Cook modePrevent screen from turning off

Ingredients

For the Dough
For the Filling
For the Glaze

Instructions

Make the Dough
  1. In a small saucepan over low heat, warm milk until it is about 100F / 38C. Pour into a large bowl. Add the sugar and yeast and allow to sit for 7-10 minutes. The yeast should foam up a bit.
  2. Add oil, eggs, poppy seeds, extract, and salt. Add the 2 1/4 cups of flour and mix until combined.
  3. Turn dough out onto a floured surface. Knead for about 8-10 minutes, sprinkling more flour on your work surface as needed. Dough should be soft and elastic by the end, so don't get too flour-happy. Alternately, you can use the bread hook on a stand mixer and knead for 8-10 minutes, adding in flour as needed. By the end the dough should stick only to the bottom of the pan, not the sides.
  4. Lightly grease or flour a large bowl (the bowl you mixed the dough in is fine) and place dough in the bowl. Cover with a towel and place in a warm area to rise for about 1 1/2 hours or until doubled in size.
Assemble the Rolls
  1. Preheat oven to 400F / 205C. Grease an 8x8inch / 20x20cm square baking dish.
  2. In a small saucepan melt butter for filling and let simmer until it starts to brown. Remove from heat and cool.
  3. When the dough has risen, punch it down and turn out onto a lightly floured surface. Knead for a minute, then roll into a generous rectangle, about 7x14inch / 18x36cm and roughly 1/4inch / 1/2cm thick.
  4. Spread cooled butter over dough almost to the edges, then sprinkle evenly with sugar.
  5. Starting from one of the longer sides, roll dough into a spiral, pinching the dough together at the end to seal it.
  6. Cut the log into thirds, then each third into 3 slices. Place the rolls in the prepared pan and cover lightly with plastic wrap or a damp towel. Place in a warm area to rise for about an hour, or until puffed.
  7. Bake for 15-20 minutes, or until golden on top and centers no longer look doughy. Internal temperature should be about 195F / 90C.
Make the Glaze
  1. In a small bowl whisk together powdered sugar and1 Tbsp of milk. It should be thin enough to drizzle but not too liquidy. Add more milk as needed.
  2. Drizzle warm rolls with glaze.

Notes

If you don't have a thermometer handy to know what 100 degrees is, simply warm until the milk feels quite warm, but not hot. It'll be fine!You can freeze these rolls once you have sliced them and put them in the pan. Once removed from the freezer allow to thaw and proceed as normal. When using a stand mixer to knead, I still recommend kneading it for a few minutes by hand afterwards. I find they are not always as thorough as kneading by hand and you want an even rise for your dough.

Nutrition Facts

Calories

276.34

Fat

10.42 g

Sat. Fat

3.94 g

Carbs

40.79 g

Fiber

1.52 g

Net carbs

39.27 g

Sugar

15.97 g

Protein

5.19 g

Sodium

122.93 mg

Cholesterol

35.35 mg

Nutritional information is approximate. Based on 1 roll.

almond poppy seed, breakfast rolls, yeast, yeasted breads, enriched dough,glaze
Breakfast,Breads, Dessert
American
Did you make this recipe?
Tag @jennyblogsandbakes on instagram and hashtag it #jennyblogs
Adjustments.jpg

White Bean Potato Soup

Last Updated August 30, 2024

This soup is packed full. Packed full of flavor, packed full of vegetables and good stuff, and therefore packed full of nutrients. Did I mention it’s also vegan? Because it is, at least if you don’t sprinkle any of that wonderful cheese over the soup at the end.

Adjustments.jpeg

While I love beans, and I love potatoes, and just about everything else in this soup, I honestly wasn’t expecting it to be as good as it was. It is so full of flavor and so satisfying, and I didn’t even have any wine on hand to add!

This soup boasts, besides beans and potatoes, onions, carrots, garlic, kale, with a hint of rosemary, spice, and white wine to tie it all together.

While the main soup season might be coming to an end, I decided to finally post this recipe because

1. during these crazy coronavirus times it seems everyone and their brother are baking bread up the wazoo and revving their sourdough starters, at least judging by social media and the shortage of flours and yeast in the stores…and this soup pairs wonderfully with some good homebaked bread!!

2. this soup has many ingredients, but most are pantry staples which makes this ideal to whip up for dinner without having to go to the store. Even if you’re missing one or two things, this soup is so flavorful you can easily swap out vegetables or omit one with a still tasty result.

3. many of these ingredients are also cheap, which means you get a hardy meal for just a few dollars, which is helpful in these uncertain financial times

4. we’ve had an unusually cold few nights and days for April here in Florence, which made me think of this soup..

5. soups are so easy, and recipes like this are rewarding for my friends who may be deciding to expand their cooking skills with all the newfound time on their hands.

This post may contain affiliate links. If you make a purchase using these links, Jennyblogs may receive a small commission, at no extra cost to you. This helps to support Jennyblogs. Where possible, links are prioritized to small businesses and ethically and responsibly made items. For further information see the privacy policy. Grazie!

Recipe slightly adapted from Clever Eats


White Bean Potato Soup

Serves 4-6

Ingredients:

  • 1 Tbsp oil

  • 1 medium onion, diced

  • 1 stalk of celery, diced

  • 1 carrot, diced

  • 2 garlic cloves, minced

  • 2 15oz / 400g cans of white beans, drained (any kind, such as cannellini or navy)

  • 2 potatoes, cut into small chunks

  • 1 Tbsp / 16g tomato paste

  • 1/2 tsp dried rosemary or 1 Tbsp chopped fresh

  • 1/2 tsp sweet paprika

  • 1/4 tsp cayenne pepper, optional

  • 1/2 cup / 119g white wine, or more broth or water

  • 7oz / 200g fresh or frozen spinach or kale, lightly chopped

  • 2 cups / 474g vegetable broth

  • salt and pepper, to taste

  • extra virgin olive oil and parmesan or pecorino cheese, for finishing

Directions:

  1. In a large stockpot or dutch oven, heat oil over medium heat. Add onion, celery, and carrot and cook, stirring occasionaly, until onion begins to turn translucent.

  2. Add the garlic, then add the beans, potatoes, tomato paste, rosemary, paprika, and cayenne pepper. Cook for a minute or two, stirring frequently.

  3. Add the wine and stir until it is almost evaporated.

  4. Add kale, broth, and salt and pepper to taste.

  5. Raise heat and bring soup to a boil, then cover and reduce heat to low. Cook for about 15 minutes, or until potatoes are tender.

  6. Ladle soup into serving bowls, top with parmesan or pecorino cheese and drizzle with olive oil. Serve with warm, crusty bread. Buon appetito!

Adjustments.jpeg

Jenny’s Notes:

  • If you prefer to cook dry beans instead of using canned, as I do, a good rule of thumb is to take half the weight of called for canned beans and cook that amount of dry beans. Different dry beans absorb slightly different amounts of water, but generally speaking they double in weight when cooked. So if you need 800g as in this recipe, I would cook 400g of dry beans.

  • You can choose to peel your potatoes before chopping or leave skin on, either way is fine if you ask me! Leaving skin on is easier and more nutritious (more fiber!), just be sure to wash them well before using.

  • If you have a rosemary plant, you can also add a clean sprig straight to the soup, then remove when you are ready to serve the soup.

  • In a pinch, you can always just use water instead of broth, although you will lose some flavor depth. If you have any bouillon cubes, you can also dissolve those into the soup following the bouillon dosing instructions.

White Bean Potato Soup
Yield 4-6
Author
Prep time
15 Min
Cook time
35 Min
Total time
50 Min

White Bean Potato Soup

A hearty and nutritious soup bursting with flavor, featuring white beans, potato, kale, onion, garlic, carrots, and celery with a touch of rosemary and a splash of white wine.
Cook modePrevent screen from turning off

Ingredients

Instructions

  1. In a large stockpot or dutch oven, heat oil over medium heat. Add onion, celery, and carrot and cook, stirring occasionaly, until onion begins to turn translucent.
  2. Add the garlic, then add the beans, potatoes, tomato paste, rosemary, paprika, and cayenne pepper. Cook for a minute or two, stirring frequently.
  3. Add the wine and stir until it is almost evaporated.
  4. Add kale, broth, and salt and pepper to taste.
  5. Raise heat and bring soup to a boil, then cover and reduce heat to low. Cook for about 15 minutes, or until potatoes are tender.
  6. Ladle soup into serving bowls, top with parmesan or pecorino cheese and drizzle with olive oil. Serve with warm, crusty bread. Buon appetito!

Notes

If you prefer to cook dry beans instead of using canned, as I do, a good rule of thumb is to take half the weight of called for canned beans and cook that amount of dry beans. Different dry beans absorb slightly different amounts of water, but generally speaking they double in weight when cooked. So if you need 800g as in this recipe, I would cook 400g of dry beans. You can choose to peel your potatoes before chopping or leave skin on, either way is fine if you ask me! Leaving skin on is easier and more nutritious (more fiber!), just be sure to wash them well before using. If you have a rosemary plant, you can also add a clean sprig straight to the soup, then remove when you are ready to serve the soup.In a pinch, you can always just use water instead of broth, although you will lose some flavor depth. If you have any bouillon cubes, you can also dissolve those into the soup following the bouillon dosing instructions.

Nutrition Facts

Calories

426.89

Fat

8.57 g

Sat. Fat

1.21 g

Carbs

65.80 g

Fiber

14.44 g

Net carbs

51.36 g

Sugar

5.02 g

Protein

20.23 g

Sodium

542.01 mg

Cholesterol

1.07 mg

Nutritional information is approximate. Based on 4 servings and includes using wine and toppings.

white bean soup, potatoes, kale, spinach, vegan, healthy, vegetarian, carrots, white wine, spinach, celery, onion, garlic
Soup, Dinner
American
Did you make this recipe?
Tag @jennyblogsandbakes on instagram and hashtag it #jennyblogs

Butternut Squash and Sage Pasta

Last Updated October 10, 2024

It’s fall and not only has the Charlie Brown Great Pumpkin arrived, but so have all the gourds!

Adjustments.jpeg

There are many types but the good news is they are all deliciou and are often quite interchangeable. Unless you’re making spaghetti squash. Then you need spaghetti squash.

In fact today’s recipe is, in a way, spaghetti squash. The principal difference is that instead of the noodles being spaghetti squash the actual spaghetti is covered in a wonderfully flavored, creamy, cheesy, butternut squash sauce! With sage, apple, onion, celery, and basically all of the best autumn flavors in one. Even just the first step of this dish, sautéeing onions in butter, made me so happy and nostalgic. Why? Because onions cooking in butter reminds me of my mom’s stuffing recipe. And it’s the best, obviously.

Making this pasta is quite simple, cooking some veggies on the stove and then blending them at the end. Finish some spaghetti in the sauce, sprinkle with Pecorino Romano cheese and you’ve got yourself a delectably seasonal meal!

I love it so much. In fact, it makes quite a bit of sauce so I am able to stick some in the fridge AND freezer! The quantity of sauce may vary slightly depending on how thick or thin you like your sauce and how exact you are with vegetable ingredients. I tend to be over-generous on portions.

This post may contain affiliate links. If you make a purchase using these links, Jennyblogs may receive a small commission, at no extra cost to you. This helps to support Jennyblogs. Where possible, links are prioritized to small businesses and ethically and responsibly made items. For further information see the privacy policy. Grazie!

Recipe adapted from Jake Cohen at the feedfeed


Butternut Squash and Sage Pasta

Serves 4-6 with leftover sauce for another meal

Ingredients:

  • 4 Tbsp / 56g butter

  • 1 medium onion, chopped

  • 1 1/2 pounds / 675g peeled and chopped butternut squash

  • 2-3 stalks celery, chopped

  • 1 apple, peeled and chopped

  • 1 generous Tbsp of chopped fresh sage

  • 3/4 cup / 178g milk

  • 1 lb / 500g spaghetti

  • 1/2 cup / 50g shredded parmigiano reggiano

  • 1/2 cup / 50g shredded fontal or other good melting cheese

  • 1/2 cup / 50g shredded pecorino romano, plus more for finishing

  • salt and pepper to taste


Directions:

Adjustments.jpeg
  1. In a large pan over medium heat, melt butter. Add onions, stirring occasionally, until mostly translucent, about 5 minutes.

  2. Add squash, celery, apple, and sage; continue to cook until things start to caramelize, about 5 minutes.

  3. Add milk. Stir and cover, allowing to cook until vegetables are tender, about 10 minutes. The milk may look a bit curdled, this is fine since everything will be blended in the end.

  4. While the vegetables are simmering, place a large pot of water over high heat. Just before boiling, generously salt the water. When water is boiling and salt has dissolved, add pasta and cook according to package directions.

  5. When vegetables are tender, blend with an immersion blender or transfer to a blender. Blend until smooth. If sauce is too thick to blend easily, thin out with some pasta water or milk. Return to pot and stir in all three cheeses; salt and pepper to taste.

  6. When pasta is cooked al dente, drain, reserving 2 cups / 474g of pasta water. Return pasta to pan and toss in desired quantity of sauce. If sauce is too thick, add some reserved pasta water and toss until desired consistency is reached, adding more pasta water as needed.

  7. Serve with a generous dusting of pecorino romano.

Jenny’s Notes:

  • This recipe makes a generous amount of sauce, so you can choose to refrigerate the leftovers (will probably be enough for another 1 lb / 550g package of pasta) for a few days or stick it in the freezer for a future quick dinner!

  • Cooking time for vegetables will depend on how large or small they are chopped, and may need slightly more or less time than stated.

  • Feel free to use other kinds of squash or even pumpkin. The other night when I made this the store had run out of Butternut so I selected another Tuscan variety and it was lovely! Keep in mind that different squashes may have different starch levels and may affect how thick or thin the sauce will end up, which you can adjust by adding pasta water at the end.

  • Play with the cheeses you use! Parmigiano reggiano, or parmesan, is a wonderfully nutty, aged cheese that you probably already have because it is amazing on almost everything. Fontal is an inexpensive but wonderful melting cheese which I generally have on hand, but you could also use gruyere, gouda, fontina, cheddar, etc. The one I recommend you splurge on would be the Pecorino Romano, which is an aged sheep’s milk cheese. There are many different varieties, those aged in walnut leaves or with truffles, young or aged, easily identified by the word “pecorino” usually followed by it’s defining factor. Pecorino Romano is one of the most exported cheeses from Italy and is aged a minimum of 5 months, giving it a wonderful sharp flavor that pairs so well with our velvety, squashy pasta today.

Butternut Squash and Sage Pasta
Yield 4-6 + extra sauce for another meal
Author
Cook time
40 Min
Total time
40 Min

Butternut Squash and Sage Pasta

A perfectly seasonal pasta with a creamy, cheesy butternut squash and sage sauce.
Cook modePrevent screen from turning off

Ingredients

Instructions

  1. In a large pan over medium heat, melt butter. Add onions, stirring occasionally, until mostly translucent, about 5 minutes.
  2. Add squash, celery, apple, and sage; continue to cook until things start to caramelize, about 5 minutes.
  3. Add milk. Stir and cover, allowing to cook until vegetables are tender, about 10 minutes. Note: The milk may look a bit curdled, which is fine since everything will be blended in the end.
  4. While the vegetables are simmering, place a large pot of water over high heat. Just before boiling, salt the water. When the water is boiling and salt has dissolved, add pasta and cook according to package directions.
  5. When the vegetables are tender, either blend with an immersion blender or transfer to a blender. Blend until smooth. Stir in the three cheeses and salt and pepper to taste.
  6. When the pasta is cooked al dente, drain, reserving 1 cup / 237g of pasta water. Return pasta to pan and toss in desired quantity of sauce. If the sauce is too thick, add reserved pasta water until desired consistency is reached.
  7. Serve with a generous dusting of pecorino romano.

Notes

  • This recipe makes a generous amount of sauce, so you can choose to refrigerate the leftovers for a few days or stick in the freezer for a future quick dinner!
  • Feel free to use other kinds of squash or even pumpkin! Just keep in mind that the different squashes may have different starch levels and may affect how thick or thin the sauce will end up, which you can adjust by adding the pasta water at the end.
  • Play with the cheeses you use! Parmigiano reggiano, or parmesan, is a wonderfully nutty, aged cheese that you probably already have because it is amazing on almost everything. Fontal is an inexpensive but wonderful melting cheese which I generally have on hand, but you could also use gruyere, gouda, fontina, cheddar, etc. The one I recommend you splurge on would be the Pecorino Romano, which is an aged sheep’s milk cheese. There are many different varieties, those aged in walnut leaves or with truffles, young or aged, easily identified by the word “pecorino” usually followed by it’s defining factor. Pecorino Romano is one of the most exported cheeses from Italy and is aged a minimum of 5 months, giving it a wonderful sharp flavor that pairs so well with this velvety, squashy pasta.

Nutrition Facts

Calories

375.87

Fat

23.82 g

Sat. Fat

14.35 g

Carbs

68.67 g

Fiber

8.85 g

Net carbs

59.83 g

Sugar

13.66 g

Protein

21.97 g

Sodium

691.50 mg

Cholesterol

66.70 mg

Nutritional information is approximate. Based on 4 servings.

pasta, fall recipe, butternut squash, sage, seasonal pasta, pecorino romano, butternut squash sauce
dinner, pasta
American
Did you make this recipe?
Tag @jennyblogsandbakes on instagram and hashtag it #jennyblogs
Adjustments.jpeg

Pumpkin Cheesecake Swirled Brownies

Last Updated August 29, 2024

IMG_1331.jpg

Happy October!

I realize I’m a tad bit late as it’s almost November, but I’ve been MIA here on the blog for the past 3 weeks. I flew to meet some of my family in Paris and IT WAS A DREAM. All the hugs and jokes, pastries, sight-seeing, adventures, and everything else that happens when in Paris with some Morris family. We fit right in, people kept mistaking us for Parisians with our striped shirts, berets, and flawless French while taking photos constantly. I should probably write a blog about it when I get back.

Just kidding, just kidding.

I already miss my family so much. Nothing like watching your family fly away and suddenly feeling like my 18-year-old self again watching my parents drive away after having helped me move to Mississippi. I miss Paris too. Another thing I really enjoyed was the real fall weather there. Paris weather is actually quite similar to my hometown in Traverse City, Michigan. Except that Paris isn’t under 2+ feet of snow for 4+ months…meanwhile I left Florence still reaching into the high 70’s and 80’s (Fahrenheit), and returned to the same temperatures. In Paris I actually needed the sweaters, coats, boots, and hot beverages and it felt so right. C’mon Firenze, you can do it! Chilly temperatures for some serious fall-ing.

Until Firenze decides to get its act together, these rich chocolate brownies with a spiced pumpkin cream cheese swirl can help out.

While I didn’t bake or blog in Paris (why would I bake when world-class pastries are so cheap and at my doorstep??) I did whip up some autumn and pumpkin goodies and took photos of the blog-worthy ones before coming because I planned ahead! One catch though, I meant to post this WHILE I was in Paris, but that just didn’t happen and I’m ok with it. I was eating pain au chocolat, chaussons aux pommes, and macarons.

This post may contain affiliate links. If you make a purchase using these links, Jennyblogs may receive a small commission, at no extra cost to you. This helps to support Jennyblogs. Where possible, links are prioritized to small businesses and ethically and responsibly made items. For further information see the privacy policy. Grazie!

A recipe by Jenny.


Pumpkin Cheesecake Swirled Brownies

Serves 9-12

Ingredients:

IMG_1341.jpg

For the Brownies

  • scant 1/2 cup / 85g oil

  • 1 cup / 200g sugar

  • 1 egg

  • 1 1/2 tsp vanilla extract

  • 1/3 cup / 33g unsweetened cocoa powder

  • 1/4 tsp salt

  • 1/2 cup / 60g all-purpose flour

For the Pumpkin Cheesecake Swirl

  • 4 oz / 115g cream cheese, softened

  • 1/4 cup / 60g pumpkin purée

  • 2 Tbsp / 25g sugar

  • 1/4 tsp cinnamon

  • dash of ginger

  • dash of nutmeg

  • dash of cloves

Directions

Make the Brownies

Oven 350°F / 177°C.  Lightly greased 8x8in / 20x20cm pan.

  1. In a large mixing bowl, combine oil and sugar.  Beat in egg and vanilla.  Add cocoa powder and salt.  Mix in flour until just combined. 

  2. Pour into prepared pan and smooth with a spatula.

Make the Pumpkin Cheesecake Swirl

  1. In a medium bowl, beat together cream cheese, pumpkin, sugar, and spices until smooth and creamy. This can be done with a spoon or in a stand mixer.

  2. Dollop pumpkin cheesecake by spoonful over brownie batter. Use a a knife or the edge of a spatula to smooth and swirl pumpkin cheesecake into brownie batter.

  3. Bake for 20-25 minutes or until toothpick inserted near the center comes out mostly clean.  Allow to cool.


Jenny’s Notes:

  • The brownie batter and cream cheese will be thick and may stick up in places where it has been swirled, that’s ok, just do your best to smooth it down so everything is mostly level.

Pumpkin Cheesecake Swirled Brownies
Yield 9
Author
Prep time
20 Min
Cook time
25 Min
Total time
45 Min

Pumpkin Cheesecake Swirled Brownies

Fudgy chocolate brownies with a spiced cream cheese swirl.
Cook modePrevent screen from turning off

Ingredients

For the Brownies
For the Pumpkin Cheesecake Swirl

Instructions

Make the Brownies
  1. Oven 350°F / 177°C. Lightly greased 8x8in / 20x20cm pan.
  2. In a large mixing bowl, combine oil and sugar. Beat in egg and vanilla.
  3. Add cocoa powder and salt. Mix in flour until just combined.
  4. Pour into prepared pan and smooth with a spatula.
Make the Pumpkin Cheesecake Swirl
  1. In a medium bowl, beat together cream cheese, pumpkin, sugar, and spices until smooth and creamy. This can be done with a spoon or in a stand mixer.
  2. Dollop pumpkin cheesecake by spoonful over brownie batter. Use a a knife or the edge of a spatula to smooth and swirl pumpkin cheesecake into brownie batter.
  3. Bake for 20-25 minutes or until toothpick inserted near the center comes out mostly clean. Allow to cool.

Notes

The brownie batter and cream cheese will be thick and may stick up in places where it has been swirled, that’s ok, just do your best to smooth it down so everything is mostly level.

Nutrition Facts

Calories

277.12

Fat

14.78 g

Sat. Fat

3.39 g

Carbs

28.67 g

Fiber

0.98 g

Net carbs

27.68 g

Sugar

25.76 g

Protein

2.30 g

Sodium

113.35 mg

Cholesterol

33.57 mg

Nutritional information is approximate. Based on 9 servings.
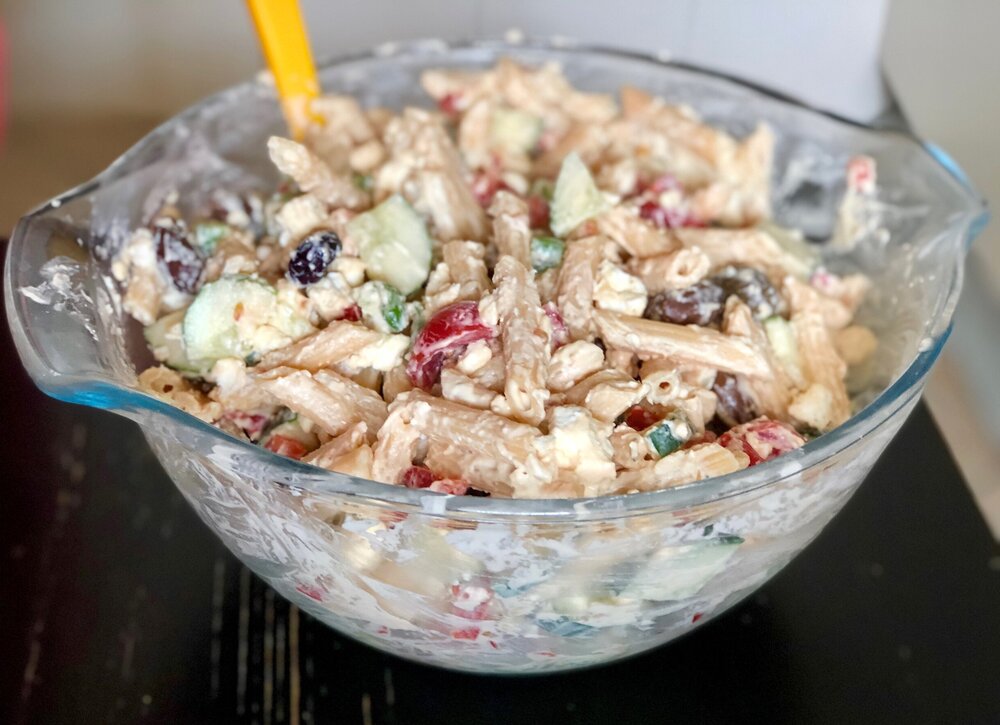
brownies, pumpkin spice, pumpkin cream cheese, fall recipe, cream cheese swirled brownies
dessert
American
Did you make this recipe?
Tag @jennyblogsandbakes on instagram and hashtag it #jennyblogs
IMG_1326.jpg

White Chocolate Cranberry Pumpkin Cookies

Last Updated August 29, 2024

public.jpg

Happy official fall and pumpkin season!!!

Starting off the season with soft, fluffy pumpkin cookies stuffed with white chocolate and cranberries with a hint of orange. These are lightly sweet which helps the white chocolate shine and offset the tartness of the cranberries. A bit of orange extract makes the whole combo into this deliciously bright fall offering.

Aside from the orange, these cookies are similar to my White Chocolate Cranberry Oatmeal Cookies. Same condiments, different cookie. One a light and fluffy ode to fall, another a chewy classic oatmeal cookie. Both scrumptious.

Before writing up this recipe I felt a twinge of pumpkin guilt. You know, the I’m making and sharing so many pumpkin recipes and desserts that maybe everyone is already sick of them except me? Then I remembered that I actually haven’t shared any truly fall recipes on the blog yet this year! I somehow managed to hold myself off until after the autumn solstice. That doesn’t mean I haven’t been baking fally things, uh uh no. I’ve already opened one of my precious cans of pumpkin from the States (what I did with the extra room in my baggage because a small can of pumpkin costs almost 5euro in Florence) and squeaked out a batch of these pumpkin cookies, brownies with a spiced pumpkin cream cheese swirl, and pumpkin streusel coffee cake. Fall, I welcome thee with open arms.

So, I hope wherever you are in the world, you share my love for autumnal things, and enjoy baking up these White Chocolate Cranberry Pumpkin Cookies, don a sweater and some cozy socks, and read a book with a nice mug of tea. Hopefully your weather allows for that.

This post may contain affiliate links. If you make a purchase using these links, Jennyblogs may receive a small commission, at no extra cost to you. This helps to support Jennyblogs. Where possible, links are prioritized to small businesses and ethically and responsibly made items. For further information see the privacy policy. Grazie!


White Chocolate Cranberry Pumpkin Cookies

Makes about 2 dozen cookies

public.jpg

Ingredients:

  • 1 cup / 240g pumpkin purée

  • 1 1/4 cups / 250g sugar

  • 1 egg

  • scant 1/2 cup / 90g oil

  • 1 tsp vanilla extract

  • 1/4 tsp orange extract

  • 2 1/2 cups / 300g all-purpose flour

  • 1 tsp cinnamon

  • 1 tsp baking powder

  • 1 tsp baking soda

  • 1/2 tsp salt

  • 3/4 cup / 105g dried cranberries

  • 3/4 cup / 127g white chocolate chips

Directions:

Oven 350°F / 177°C. Baking sheet lined with parchment paper, silpat, or greased.

  1. Combine pumpkin, sugar, egg, oil, and extracts in a large bowl.

  2. In another medium bowl, whisk together flour, cinnamon, baking powder, baking soda, salt.

  3. Add dry ingredients, cranberries, and white chocolate chips to wet ingredients, stirring until evenly moistened.

  4. Drop by generous spoonful onto prepared baking sheet and bake for 9-12 minutes, or until bottom of cookies are golden brown and the center still looks a bit wet.


Jenny’s Notes:

  • I used half goji berries half cranberries last time and really liked it. Dried cranberries usually have loads of sugar and I liked that the goji berries were unsweetened.

White Chocolate Cranberry Pumpkin Cookies
Yield 24-26
Author
Prep time
25 Min
Cook time
12 Min
Total time
37 Min

White Chocolate Cranberry Pumpkin Cookies

Soft and fluffy pumpkin cookies loaded with mini white chocolate chips, dried cranberries, and goji berries with a hint of orange and cinnamon.
Cook modePrevent screen from turning off

Ingredients

Instructions

  1. Oven 350°F / 177°C. Baking sheet lined with parchment paper, silpat, or greased.
  2. Combine pumpkin, sugar, egg, oil, and extracts in a large bowl.
  3. In another medium bowl, whisk together flour, cinnamon, baking powder, baking soda, salt.
  4. Add dry ingredients, cranberries, and white chocolate chips to wet ingredients, stirring until evenly moistened.
  5. Drop by generous spoonful onto prepared baking sheet and bake for 9-12 minutes, or until bottom of cookies are golden brown and the center still looks a bit wet.

Notes

I used half goji berries half cranberries last time and really liked it. Dried cranberries are usually sweetened and I liked that the goji berries were unsweetened.

Nutrition Facts

Calories

168.23

Fat

5.85 g

Sat. Fat

1.37 g

Carbs

27.70 g

Fiber

0.93 g

Net carbs

26.77 g

Sugar

17.09 g

Protein

1.99 g

Sodium

130.03 mg

Cholesterol

8.86 mg

Nutritional information is approximate. Based on 24 servings.

cookies, pumpkin, white chocolate chips, cinnamon, orange, cranberry, goji berry, fall recipe
dessert
American
Did you make this recipe?
Tag @jennyblogsandbakes on instagram and hashtag it #jennyblogs
public.jpg

Strawberry Nutella Coconut Milkshake

Last Updated August 24, 2024

IMG_0952.jpg

Buon Ferragosto!

Also known as the day where everything is closed and I feel slightly trapped. Hmmm the gelato place is closed so I’ll just run to the store and pick up some…oh wait, all the grocery stores are closed. Ok, well maybe I’ll go browse some shops, oh wait, all closed. I’ll go walk around in the center for a bit…nope, hardly any buses running today to get to the center. Even if I could find a bus, all the places I could buy a ticket are closed. Ok, so I’ll walk to the gym to work out and enjoy some air conditioning. Ah, closed. So, I hunker down and eat whatever food is in the house, try to stay cool. Actually we’ve come to a bit of a cool spell, today only has a high of 90°F. I’ll take it!

I actually planned ahead this year and went grocery shopping last night. I got fruit and veggies for lunch and dinner today, but why didn’t I get better snackies? But then I remembered that I have a good stash of gelato in the freezer, and made me think of this delectable milkshake I made a few weeks ago.

So with all this time on my hands, I shall be milkshaking and sharing this milkshake with you! What’s so great about this milkshake?

It’s a Strawberry Nutella Coconut Milkshake. That’s such a long name, and kinda going against my own rule of not listing every ingredient in the title, but otherwise I didn’t quite know how to get the dream across, ya know?

How about this: Strawnutelloco Milkshake. Stranucoco Milkshake. Conuterry. Strawconutella. Regardless, this milkshake tastes like a chocolate covered strawberry rolled in coconut with a hint of hazelnut.

I have a confession to make. I originally made this milkshake to try and hide this not-awesome gelato I bought. There was a sale on a brand I had never tried before at the grocery store, and they had coconut and I love coconut but it just did not end well. Icy and so much coconut it was chewy. I didn’t want to waste it, but I also didn’t necessarily want to force myself to eat gelato?

Enter the milkshake idea. I had strawberries, Nutella, and milk, and this beautiful combo was born. The copious amounts of coconut from the gelato still rendered my milkshake a bit chewy, but if you have a GOOD brand of coconut ice cream, or even vanilla ice cream with a bit of flaked coconut and maybe a drop of coconut extract or two thrown in, you’ve got yourself the perfect summer day’s treat.

So thank you, gelato brand that shall remain unnamed, for the not delicious gelato that prompted me to create a delicious milkshake.

This post may contain affiliate links. If you make a purchase using these links, Jennyblogs may receive a small commission, at no extra cost to you. This helps to support Jennyblogs. Where possible, links are prioritized to small businesses and ethically and responsibly made items. For further information see the privacy policy. Grazie!


Strawberry Nutella Coconut Milkshake

Serves 2

IMG_0947.jpg

Ingredients:

  • 2 cups coconut ice cream, slightly softened

  • 1/2 cup milk, any variety

  • 1/2 cup hulled strawberries, fresh or frozen

  • 2 heaping Tbsp Nutella

  • Dash of vanilla extract, optional

  • Whipped cream, optional

Directions:

  1. Add all ingredients except whipped cream to a blender and blend until smooth. Check consistency and add more milk if desired.

  2. Spoon into 2 glasses and top with whipped cream. Serve immediately.

Jenny’s Notes:

  • Don’t have coconut ice cream but still want that coconut taste? Substitute chocolate or vanilla ice cream and add a bit of flaked coconut and a drop or two of coconut extract.

  • For creamier shakes, use whole milk.

  • For thinner shakes you can sip, add more milk. For thicker, spoonable shakes, add less milk. Some blenders don’t blend thicker shakes well, so if yours is having problems, either wait a minute or two for the ice cream to soften a bit more before continuing to blend, or add a touch more milk.

  • To make fresh whipped cream, whip about 1/4 cup / 60g heavy whipping cream with 1 Tbsp / 14g sugar in the bowl of a stand mixer fitted with whisk attachment, or with a handheld mixer. This makes about 1/2 cup fresh whipped cream. Store in fridge, best if used within a few days.

Strawberry Nutella Coconut Milkshake
Yield 2 Servings
Author
Prep time
5 Min
Total time
5 Min

Strawberry Nutella Coconut Milkshake

Thick and creamy milkshake with coconut ice cream, Nutella, strawberries and whipped cream on top.
Cook modePrevent screen from turning off

Ingredients

Instructions

  1. Add all ingredients except whipped cream to a blender and blend until smooth. Check consistency and add more milk if desired.
  2. Spoon into 2 glasses and top with whipped cream. Serve immediately.

Notes

  • Don’t have coconut ice cream but still want that coconut taste? Substitute chocolate or vanilla ice cream and add a bit of flaked coconut and a drop or two of coconut extract.
  • For creamier shakes, use whole milk.
  • For thinner shakes you can sip, add more milk. For thicker, spoonable shakes, add less milk. Some blenders don’t blend thicker shakes well, so if yours is having problems, either wait a minute or two for the ice cream to soften a bit more before continuing to blend, or add a touch more milk.
  • To make fresh whipped cream, whip about 1/4 cup / 60g heavy whipping cream with 1 Tbsp / 14g sugar in the bowl of a stand mixer fitted with whisk attachment, or with a handheld mixer. This makes about 1/2 cup fresh whipped cream. Store in fridge, best if used within a few days.

Nutrition Facts

Calories

440.85

Fat

23.21 g

Sat. Fat

19.31 g

Carbs

54.51 g

Fiber

3.87 g

Net carbs

50.64 g

Sugar

40.58 g

Protein

6.95 g

Sodium

49.23 mg

Cholesterol

9.42 mg

Nutritional information is approximate and based on 2 servings and includes whipped cream.

milkshake, milk, strawberry, Nutella, coconut, ice cream, vanilla, fresh whipped cream, dessert, summer
Dessert, Beverage
American
Did you make this recipe?
Tag @jennyblogsandbakes on instagram and hashtag it #jennyblogs
IMG_0943.jpg

Spaghetti with Tuna - Spaghetti al Tonno

Last Updated August 20, 2024

IMG_0896.jpg

Spaghetti with tuna; It’s like spaghetti, but instead of meatballs you add tuna to the tomato sauce!

Now, that might sound kinda weird at first to my American friends, just like Italians think we’re weird for putting meatballs on our spaghetti in the first place. But let me tell you. It’s really delicious and I find it strangely comforting. Italian comfort food.

If you haven’t noticed, July is pasta month here at Jennyblogs! What, you couldn’t tell from the 1 other pasta recipe I’ve posted so far this month that this whole month is going to be pasta? I’m so offended. (I’m just kidding you guyssss.) But now you know! So be sure to stay tuned (you can sign up for updates) for the rest of the month where I will share with you various recipes, some Italian, some American, and last week was Thai inspired! Everyone should have some quick and delicious pasta recipes in their repertoire that don’t need store-bought sauce! Homemade is always better, if you can manage it. That way you control exactly what goes into your and your loved ones bodies. No more excess sugar, preservatives, and high levels of salt and fat that can be hidden away in the store-bought jars of sauce.

Today, a recipe for Italian spaghetti al tonno, or spaghetti with tuna. Homemade sauce and all this can be on your table in less than 45 minutes!

This post may contain affiliate links. If you make a purchase using these links, Jennyblogs may receive a small commission, at no extra cost to you. This helps to support Jennyblogs. Where possible, links are prioritized to small businesses and ethically and responsibly made items. For further information see the privacy policy. Grazie!

Recipe from a pasta chef


Spaghetti with Tuna - Spaghetti al Tonno

Serves 6-8

IMG_0899.jpg

Ingredients:

  • 1 lb. / 500g spaghetti

  • 2 Tbsp / 28g oil

  • 1/2 onion, chopped

  • 3 tomatoes, diced

  • 1 clove garlic, minced

  • 1 Tbsp / 14g tomato paste

  • 1/2 tsp / 2.5g ground turmeric

  • salt and pepper, to taste

  • 5 oz / 148g can of tuna, drained

Directions:

  1. Heat a large pot of water over high heat, adding salt just before it boils. Cook pasta al dente according to directions and drain.

  2. Meanwhile, while the pasta is cooking, heat oil in a large sauté pan over medium-low heat. Add the onion and cook until just fragrant and translucent, about 1-2 minutes.

  3. Add the tomatoes and simmer for about 10-15 minutes, or until they are pretty well broken down. If the sauce becomes too thick or starts to stick, add a bit of water.

  4. Add the garlic, tomato paste, turmeric, salt and pepper, and a small chunk of tuna*; simmer for another few minutes.

  5. Add the cooked pasta to the sauce, toss and stir to coat pasta. At this point you can either add the rest of the tuna and stir, or plate the pasta and add the tuna on top.

  6. Serve and eat!


Jenny’s Notes:

  • As with any pasta recipe, you don’t have to use spaghetti or the type called for. Use your favorite kind or whatever you think would go best with the sauce you’re making.

  • If you prefer a stronger tuna taste, you can use the liquid from the tuna can instead of water to keep the sauce from getting too thick while simmering. It doesn’t matter if it is packed in water or oil.

  • Add just a bit of tuna to flavor the sauce instead of the whole can because it doesn’t need to be cooked. The rest will be added in at the end.

  • In a pinch you can use a 15oz can of diced tomatoes instead of fresh.

Spaghetti with Tuna - Spaghetti al Tonno
Yield 6-8 servings
Author
Prep time
25 Min
Cook time
15 Min
Total time
40 Min

Spaghetti with Tuna - Spaghetti al Tonno

A classic Italian pasta dish with spaghetti, homemade tomato sauce, and tuna.
Cook modePrevent screen from turning off

Ingredients

Instructions

  1. Heat a large pot of water over high heat, adding salt just before it boils. Cook pasta al dente according to directions and drain.
  2. Meanwhile, while the pasta is cooking, heat oil in a large sauté pan over medium-low heat. Add the onion and cook until just fragrant and translucent, about 1-2 minutes.
  3. Add the tomatoes and simmer for about 10-15 minutes, or until they are pretty well broken down. If the sauce becomes too thick or starts to stick, add a bit of water.
  4. Add the garlic, tomato paste, turmeric, salt and pepper, and a small chunk of tuna*; simmer for another few minutes.
  5. Add the cooked pasta to the sauce, toss and stir to coat pasta. At this point you can either add the rest of the tuna and stir, or plate the pasta and add the tuna on top.
  6. Serve and eat!

Notes

  • As with any pasta recipe, you don’t have to use spaghetti or the type called for. Use your favorite kind or whatever you think would go best with the sauce you’re making.
  • If you prefer a stronger tuna taste, you can use the liquid from the tuna can instead of water to keep the sauce from getting too thick while simmering. It doesn’t matter if it is packed in water or oil.
  • Add just a bit of tuna to flavor the sauce instead of the whole can because it doesn’t need to be cooked. The rest will be added in at the end.
  • In a pinch you can use a 15oz can of diced tomatoes instead of fresh.

Nutrition Facts

Calories

216.63

Fat

6.08 g

Sat. Fat

0.62 g

Carbs

29.31 g

Fiber

2.14 g

Net carbs

27.17 g

Sugar

3.19 g

Protein

11.05 g

Sodium

151.14 mg

Cholesterol

10.36 mg

Nutritional Information is approximate.

spaghetti al tonno, tuna spaghetti, pasta, classic Italian recipe
pasta, dinner
Italian
Did you make this recipe?
Tag @jennyblogsandbakes on instagram and hashtag it #jennyblogs
IMG_0897.jpg

Simple Thai Noodles

IMG_0875.jpg

Some nights you get caught unprepared and need something quick to whip up for dinner. Or maybe that’s every night? I know Sunday food prepping is all the rage, and it’s a really great idea…if you’re only feeding yourself or a small family, and not taking into account the unexpected that happens. Even if you’re the most organized person cooking just for yourself, those nights are going to spring up on you when you want something quick and easy, delicious, and you have all the ingredients on hand. This recipe for Simple Thai Noodles falls in that category.

Sesame oil might not be in everyone’s pantry, but if you invest in a bottle, it can last you months, depending on how often you make Asian or other dishes that often call for sesame oil. It really is worth it, if you try and substitute another oil it won’t be the same. It lends such a nutty depth to dishes!

I actually have several versions of lo mein, Thai noodles, fried rice, etc. and even a couple more waiting to be tried that all have in common varying quantities and varieties of green onion, sesame oil, soy sauce, ginger, peanuts or peanut butter, and a sweet and a spicy element. Each with their merits, and the occasions for which I like to make them. If you can’t tell, I love Asian dishes, whether they’re authentic or simply inspired by Asian flavors.

This pasta is kept in my repertoire for its simplicity while still retaining all the delicious flavors, and now you can make it too, whether you’re in a pinch for a quick dinner, or not! No one said you have to make it only when in a pinch. :)

This post may contain affiliate links. If you make a purchase using these links, Jennyblogs may receive a small commission, at no extra cost to you. This helps to support Jennyblogs. Where possible, links are prioritized to small businesses and ethically and responsibly made items. For further information see the privacy policy. Grazie!

Recipe adapted from A Small Snippet


Simple Thai Noodles

Serves 4-6

IMG_0878.jpg

Ingredients:

  • 16 oz / 500g linguine or spaghetti

  • 2 Tbsp / 28g olive oil, or oil of choice

  • 1/4 cup / 54g sesame oil

  • about 1 Tbsp / 5g red pepper flakes

  • 3 Tbsp / 63g honey

  • 3 Tbsp / 45g soy sauce

  • cilantro, chopped peanuts, chopped green onions, julienned carrots, sesame seeds, or your choice of toppings

Directions:

  1. Bring a large pot of water to boil, adding salt just before it boils. Cook pasta according to directions on box; drain, and return to pot.

  2. While the pasta is cooking, whisk together the oils, red pepper flakes, honey, and soy sauce in a small bowl.

  3. When the pasta is done and drained, add the sauce to the noodles and toss to coat well.

  4. Serve immediately, adding toppings of choice.

Jenny’s Notes:

  • You can adjust the amount of red pepper flakes to suit your spicy preference. 1 Tbsp, as in the recipe, results in reasonably spicy, but not overwhelming. Also, you could use a spicy oil if you have some on hand instead of the red pepper flakes.

  • For a stronger sesame taste, use all sesame oil instead of olive oil. (6 Tbsp / 84g total of sesame oil.)

  • Feel free to add veggies or a protein, if you desire. For veggies, chop small and sauté in a pan with a bit of oil for a few minutes or until tender, toss in when you add the sauce. Cook your protein and slice as desired, add at the end on top of plates of pasta or mix in with sauce.

Simple Thai Noodles
Yield 4-6 servings
Author
Prep time
10 Min
Cook time
10 Min
Total time
20 Min

Simple Thai Noodles

The simplest Thai noodles using only 6 pantry ingredients for a quick and easy dinner! Sweet, savory, and irresistible.
Cook modePrevent screen from turning off

Ingredients

Instructions

  1. Bring a large pot of water to boil, adding salt just before it boils. Cook pasta according to directions on box; drain, and return to pot.
  2. While the pasta is cooking, whisk together the oils, red pepper flakes, honey, and soy sauce in a small bowl.
  3. When the pasta is done and drained, add the sauce to the noodles and toss to coat well.
  4. Serve immediately, adding toppings of choice.

Notes

  • You can adjust the amount of red pepper flakes to suit your spicy preference. 1 Tbsp, as in the recipe, results in reasonably spicy, but not overwhelming. Also, you could use a spicy oil if you have some on hand instead of the red pepper flakes.
  • For a stronger sesame taste, use all sesame oil instead of olive oil. (6 Tbsp / 84g total of sesame oil.)
  • Feel free to add veggies or a protein, if you desire. For veggies, chop small and sauté in a pan with a bit of oil for a few minutes or until tender, toss in when you add the sauce. Cook your protein and slice as desired, add at the end on top of plates of pasta or mix in with sauce.

Nutrition Facts

Calories

676.11

Fat

23.63 g

Sat. Fat

3.4 g

Carbs

99.87 g

Fiber

4.71 g

Net carbs

95.17 g

Sugar

16.33 g

Protein

16.89 g

Sodium

794.7 mg

Cholesterol

0 mg

Nutritional info is approximate, based on 4 servings including toppings.

6 ingredients, 20 minute dinner, pasta, Thai Noodles
Dinner, Pasta
American
Did you make this recipe?
Tag @jennyblogsandbakes on instagram and hashtag it #jennyblogs
IMG_0876.jpg

Strawberry Shortcake

Last Updated August 18, 2024

Strawberry shortcake is a summer classic. All you need are juicy, ripe strawberries, shortcakes, which are really just biscuits with a bit of sugar added to them, and whipped cream. If you decided on adding some vanilla ice cream to the mix I don’t think anyone would be mad about it. I certainly wouldn’t be. Did I mention they’re really simple to make?

public.jpg

It’s so simple because the strawberries are the shining star and don’t need much dressing up. If you try and make this when strawberries are out of season, even if you can find them in the grocery store, it just won’t be the same. This is a dessert that calls for strawberries ripened under the summer sun, bursting with flavor.

Do you want to know a secret? Strawberry shortcakes will reach the pinnacle of their goodness if you are able to pick the strawberries yourself! Not only will you be the one choosing the juiciest berries, but you’ll KNOW they’re as fresh as they come! Plus, you’ll taste the fruits of your own hard work and it makes it that much sweeter. Literally. I loved going strawberry picking with my mom as a kid. Strawberry season in Michigan is always in beginning to mid summer, usually end of June or early July, and we’d come home with baskets full. Then I’d help my mom hull and slice them, keeping some for eating, some for making strawberry shortcake and other desserts, and some for freezing and making jam.

Eat strawberry shortcake for dessert, or breakfast, snack, lunch, and dinner. I mean, biscuits and fruit sounds like a balanced and great way to start off the morning! Plus you’ll want to eat them as much as you can while the strawberry season lasts. A great thing about these is that you can add as little or as much sugar as you want! See notes at bottom of recipe for some ideas.

This post may contain affiliate links. If you make a purchase using these links, Jennyblogs may receive a small commission, at no extra cost to you. This helps to support Jennyblogs. Where possible, links are prioritized to small businesses and ethically and responsibly made items. For further information see the privacy policy. Grazie!

Recipe from my mama with tweaks from moi.


Strawberry Shortcake

Serves: 8-10

Ingredients:

public.jpg

For the Macerated Strawberries

  • 4-5 cups strawberries, washed, hulled, and sliced

  • 3-4 Tbsp / 35-50g sugar or to taste

For the Shortcakes

  • 2 cups / 240g all-purpose flour

  • 1/4 cup / 50g sugar

  • 4 tsp / 19g baking powder

  • 1/2 tsp / 2g salt

  • 1/2 cup / 113g cold butter or scant 1/2 cup / 100g oil

  • 2/3 cup / 158g cold milk or buttermilk

For the Whipped Cream

  • 1 cup / 237g heavy whipping cream

  • 3-4 Tbsp / 35-50g sugar or to taste

  • 1 tsp / 4g vanilla extract

Directions:

Oven 450°F / 232°C. Have ready an ungreased baking sheet.

Make the Macerated Strawberries

  1. Place strawberries in a bowl, add sugar, and mash them a bit or a lot, as desired, with a fork or masher. Place in fridge while you prepare shortcakes.

Make the Shortcakes

  1. In a large bowl whisk together flour, sugar, baking powder, and salt.

  2. Cut in butter or oil until mixture resembles coarse crumbs.

  3. Make a well in center of flour mixture and pour in milk. Mix just until most of the flour is moistened, then turn mixture out onto a floured surface.

  4. Knead lightly, up to 10-12 times, until you have a soft but not too sticky dough. Don’t overwork or biscuits will be tough.

  5. Gently pat dough out into a circle about 1in / 2.5cm thick, checking to make sure underneath is still floured well and dough isn’t sticking.

  6. Using a biscuit cutter or a round glass 2-3in / 5-7cm in diameter, cut out as many biscuits as you can. Place biscuits on baking sheet. Collect dough scraps and reshape into a ball. Repeat patting into a circle and cutting until dough is used up, probably 2-3 times at most, depending on size of biscuit cutter.

  7. Bake biscuits in preheated oven for 10-12 minutes, or until risen and lightly golden brown.

Make the Whipped Cream

  1. In the bowl of a stand mixer fitted with whisk attachment or with a hand mixer, whip heavy cream until soft peaks form.

  2. Add sugar and vanilla and continue whipping until stiff peaks form.

Assembly

Slice biscuits open and spoon over strawberries and whipped cream.

Jenny’s Notes:

  • The sugar mixed in with the strawberries is traditional but not absolutely necessary. Although it helps soften the strawberries to lose their juice and create more of a soft sauce, I like it also without adding any sugar, because everything else in this recipe is already a bit sweet.

  • The biscuit dough might seem too soft at first, but the moment the baking powder starts working and it hits the floured surface it should become very manageable. Just be careful not to over work it, a little bit goes a long way.

  • When cutting biscuits, cut straight down, no twisting, or this can seal the edges and prevent a good rise. You can dip the biscuit cutter in some flour to help prevent any sticking.

  • If you place the biscuits next to each other on the baking sheet they can help each other “climb” up and achieve a nicer rise! I know this feels counterintuitive as so often things are supposed to be “spaced evenly apart”, but give it a try!

Strawberry Shortcake
Yield 8-10 servings
Author
Prep time
40 Min
Cook time
12 Min
Total time
52 Min

Strawberry Shortcake

Classic strawberry shortcake recipe handed down from my mama. Homemade biscuits, juicy strawberries, and fresh whipped cream assembled together in a summery dessert.
Cook modePrevent screen from turning off

Ingredients

For the Macerated Strawberries
For the Shortcakes
For the Whipped Cream

Instructions

Make the Macerated Strawberries
  1. Place strawberries in a bowl, add sugar, and mash them a bit or a lot, as desired, with a fork or masher. Place in fridge while you prepare the shortcakes.
Make the Shortcakes
  1. Preheat oven to 450°F / 232°C. Have ready an ungreased baking sheet.
  2. In a large bowl whisk together flour, sugar, baking powder, and salt.
  3. Cut in butter or oil until mixture resembles coarse crumbs.
  4. Make a well in center of flour mixture and pour in milk. Mix just until most of the flour is moistened, then turn mixture out onto a floured surface.
  5. Knead lightly, up to 10-12 times, until you have a soft but not too sticky dough. Don’t overwork or biscuits will be tough.
  6. Gently pat dough out into a circle about 1in / 2.5cm thick, checking to make sure underneath is still floured well and dough isn’t sticking.
  7. Using a biscuit cutter or a round glass 2-3in / 5-7cm in diameter, cut out as many biscuits as you can. Place biscuits on baking sheet. Collect dough scraps and reshape into a ball. Repeat patting into a circle and cutting until dough is used up, probably 2-3 times at most, depending on size of biscuit cutter.
  8. Bake biscuits in preheated oven for 10-12 minutes, or until risen and lightly golden brown.
Make the Whipped Cream
  1. In the bowl of a stand mixer fitted with whisk attachment or with a hand mixer, whip heavy cream until soft peaks form.
  2. Add sugar and vanilla and continue whipping until stiff peaks form.
Assembly
  1. Slice biscuits open and spoon over strawberries and whipped cream!

Notes

The sugar mixed in with the strawberries is traditional but not absolutely necessary. Although it helps soften the strawberries to lose their juice and create more of a soft sauce, I like it also without adding any sugar, because everything else in this recipe is already a bit sweet.The biscuit dough might seem too soft at first, but the moment the baking powder starts working and it hits the floured surface it should become very workable. Just be careful not to over work it, a little bit goes a long way.When cutting the biscuits, cut straight down, no twisting, or this can seal the edges and prevent a good rise. You can dip the biscuit cutter in some flour to help prevent any sticking. If you place the biscuits next to each other on the baking sheet they can help each other “climb” up and achieve a nicer rise!

Nutrition Facts

Calories

436.99

Fat

24.15 g

Sat. Fat

7.94 g

Carbs

51.65 g

Fiber

2.77 g

Net carbs

48.88 g

Sugar

24.49 g

Protein

5.28 g

Sodium

368.72 mg

Cholesterol

35.06 mg

Nutritional Information is approximate.

strawberry shortcakes, summer dessert, best traditional classic strawberry shortcake
dessert
American
Did you make this recipe?
Tag @jennyblogsandbakes on instagram and hashtag it #jennyblogs
public.jpg

Classic Rhubarb Custard Pie

IMG_1860.jpg

Last updated July 31, 2024

Nothings says summer like a rhubarb pie. Better yet, a rhubarb CUSTARD pie.

Rhubarb is always one of the first garden plants to grow each spring in Michigan, announcing that after a long, cold winter summer is indeed coming and didn’t get lost along the way after all. Rhubarb likes to grow so extensively in its short season that you don’t know what to do with all of it, until it withers in the approach of hotter weather and leaves you already looking forward to next year’s crop. Unless, of course, you planned ahead and froze some. But frozen rhubarb will never be like fresh, so make all the pie and hand pie, crisp, cake, syrup, and camel hair soup you can! I mean, er, rhubarb sauce…not camel hair soup. Hehe, who’d call it that??

IMG_1835.jpg

Do you want to know something really sad? I’ve never seen rhubarb in Italy, at least not in Florence. So for my international friends, I’m sorry if your area fails you and doesn’t grow rhubarb so you aren’t able to make this recipe. If there is rhubarb in Florence though, someone please tell me where to find it? So far everyone I’ve asked just said, “…what’s that?” This just goes to show my ignorance. Before moving to Italy I was trying to bake with all of the ingredients that aren’t readily available here, or at least what I figured wouldn’t be readily available. I should have been in a baking frenzy with rhubarb instead of things like Oreos. Because, no rhubarb and Oreos everywhere. There are even Oreo donuts in the grocery store bakery section…I’ve come so close to trying them during various weak moments.

Wherever you are in the world, be sure to bake or eat a rhubarb pie at the next chance. You won’t regret it and might inspire you to move to a part of the world where rhubarb is grown.

This recipe is the old-fashioned classic from my mama. The crust is one of my favorite traditional pie crust recipes, simple and can be made ahead of time if needed. It uses butter instead of shortening, which in my mind is a bit of a compromise between shortening or lard (which most people and bakeries use to make tender and flaky crusts but it’s also horrendous for your health and has no taste if it’s not artificially flavored.) and oil, which my mom has always used because oil can actually be good for you, although it makes for the trickiest to handle and often um, hardier pie crusts. So I use butter, which tastes wonderful and makes the crust easy enough to work with, even if it’s not as healthy as oil.

This post may contain affiliate links. If you make a purchase using these links, Jennyblogs may receive a small commission, at no extra cost to you. This helps to support Jennyblogs. Where possible, links are prioritized to small businesses and ethically and responsibly made items. For further information see the privacy policy. Grazie!

Recipe from my Mama


Classic Rhubarb Custard Pie

Makes one 9in / 23cm pie, about 8 servings

Ingredients:

For the Crust

For the Rhubarb Custard Filling

  • 3 eggs

  • 3 Tbsp / 45g milk

  • 1 1/2 cups / 300g granulated sugar

  • 1/4 cup / 30g all-purpose flour

  • 3/4 tsp nutmeg

  • 4 cups fresh rhubarb, sliced into 1/2in / 1cm chunks

Directions:

Oven 400°F / 205°C. 8 or 9 inch pie dish. 

Make the Crust

IMG_4560.jpg
  1. Prepare pie crust per recipe instructions, refrigerate until needed.

Make the Rhubarb Custard Filling

  1. Blend eggs and milk together in a large bowl.

  2. Add the flour and nutmeg to the sugar then add to the egg mixture and beat well.

  3. Add in the rhubarb and mix to coat well.

  4. Pour into prepared pie crust and add top crust.

    For a classic top pie crust, place crust on top, cut off overhang, and crimp together the edges of the top and bottom crust to seal.

    For an interwoven lattice, start in the center of the pie and work outward, then repeat with the other half. Arrange half of the strips evenly spaced over the pie all in one direction, then flip every other strip back over itself, so half are now only covering half of the pie. Take a new strip and place it perpendicularly just in front of the folded strips. Unfold the folded strips so these ones now cover the new strip. The new strip should be under and over every other one. Working on that same half of the pie, fold back every other strip, all the ones that were NOT just folded. Take another new strip and place it evenly apart from the first perpendicular strip. Unfold the folded strips. Repeat folding back strips, placing new strip, and unfolding until you reach the edge of the pie. You may need to trim down the strips as you get closer to the edge. Repeat with other half of the pie.

    Sprinkle sugar on top, if desired.

  5. Bake pie in preheated oven for 50-60 minutes or until crust is golden brown and a knife inserted in center of pie confirms rhubarb is tender.

  6. Allow to cool completely before slicing and serving.

Jenny’s Notes:

  • If you make the crust and pie in the same day, you could make the filling while the crust is resting in the fridge for an hour or so before rolling out.

  • Instead of a traditional top pie crust or lattice you could add a streusel/crumble, delicious and definitely the easiest option of the three.

Rhubarb Custard Pie
Yield 8
Author
Prep time
1 H & 10 M
Cook time
1 Hour
Total time
2 H & 10 M

Rhubarb Custard Pie

Classic rhubarb custard pie recipe handed down from my mama. Homemade pie crust with the uniquely sweet and sour filling you can only get with rhubarb.
Cook modePrevent screen from turning off

Ingredients

For the Crust
For the Rhubarb Custard Filling

Instructions

Make the Crust
  1. Prepare pie crust per recipe instructions, refrigerate until needed.
Make the Rhubarb Custard Filling
  1. Oven 400°F / 205°C. 8 or 9 inch pie dish.
  2. Blend eggs and milk together in a large bowl.
  3. Add the flour and nutmeg to the sugar then add to the egg mixture and beat well.
  4. Add in the rhubarb and mix to coat well.
  5. Pour into prepared pie crust and add top crust.
  6. For a classic top pie crust, place crust on top, cut off overhang, and crimp together the edges of the top and bottom crust to seal. For an interwoven lattice, start in the center of the pie and work outward, then repeat with the other half. Arrange half of the strips evenly spaced over the pie all in one direction, then flip every other strip back over itself, so half are now only covering half of the pie. Take a new strip and place it perpendicularly just in front of the folded strips. Unfold the folded strips so these ones now cover the new strip. The new strip should be under and over every other one. Working on that same half of the pie, fold back every other strip, all the ones that were NOT just folded. Take another new strip and place it evenly apart from the first perpendicular strip. Unfold the folded strips. Repeat folding back strips, placing new strip, and unfolding until you reach the edge of the pie. You may need to trim down the strips as you get closer to the edge. Repeat with other half of the pie.
  7. Sprinkle sugar on top, if desired.
  8. Bake pie in preheated oven for 50-60 minutes or until crust is golden brown and a knife inserted in center of pie confirms rhubarb is tender.
  9. Allow to cool completely before slicing and serving.

Notes

If you make the crust and pie in the same day, you could make the filling while the crust is resting in the fridge for an hour or so before rolling out. Instead of a traditional top pie crust or lattice you could add a streusel/crumble, delicious and definitely the easiest option of the three.

Nutrition Facts

Calories

431.35

Fat

12.79 g

Sat. Fat

7.67 g

Carbs

74.08 g

Fiber

2.32 g

Net carbs

71.76 g

Sugar

38.25 g

Protein

6.18 g

Sodium

397.03 mg

Cholesterol

54.07 mg

Nutritional Information is approximate.

Rhubarb, custard, pie, all butter crust, oil pie crust, old fashioned
Dessert, Pie
American
Did you make this recipe?
Tag @jennyblogsandbakes on instagram and hashtag it #jennyblogs

Rhubarb Custard Pie made with an all oil crust